Community Brag Posts

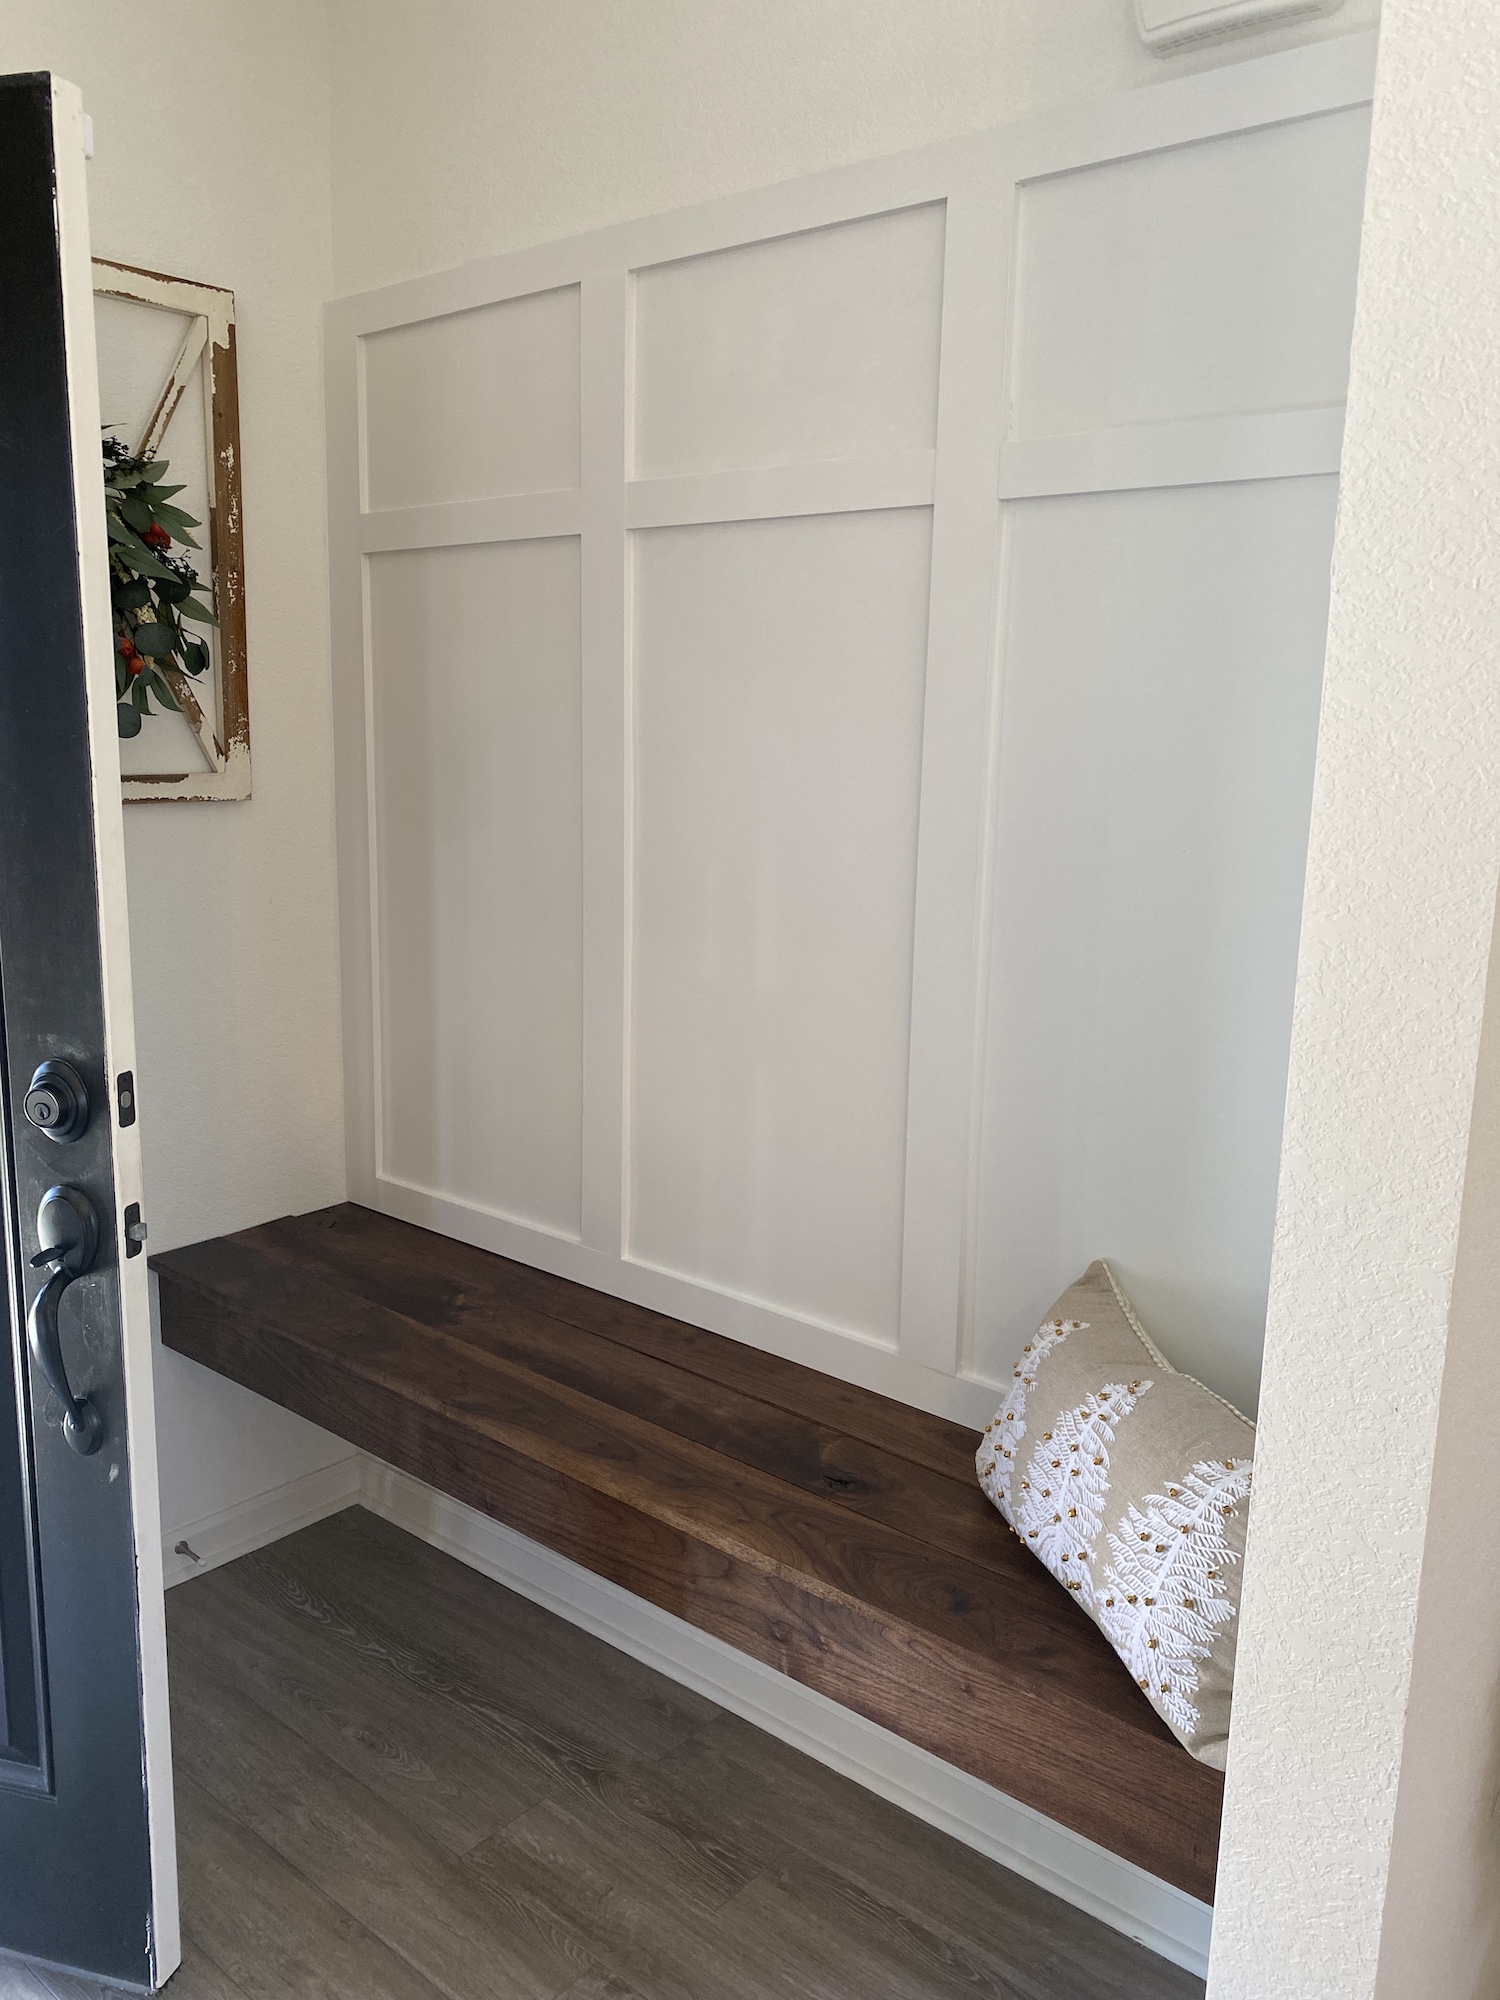
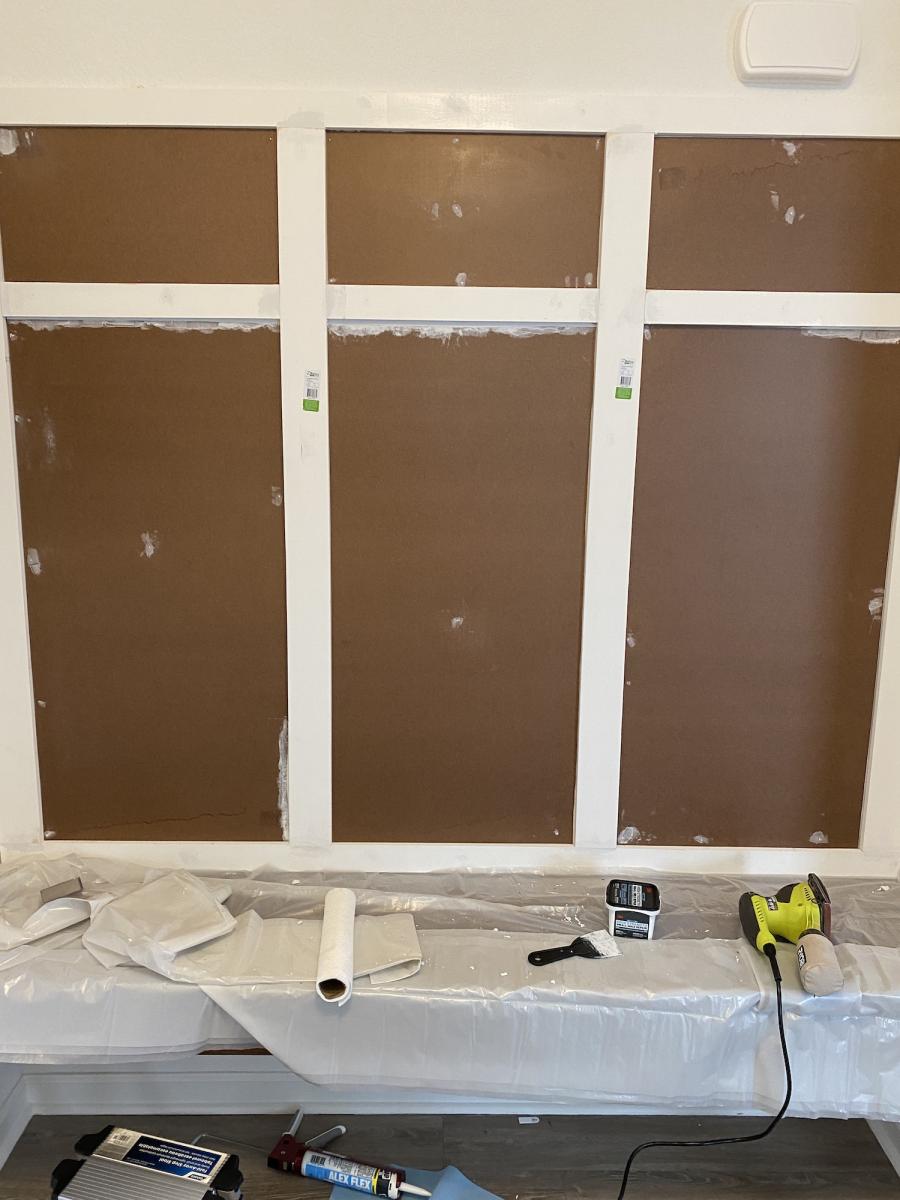
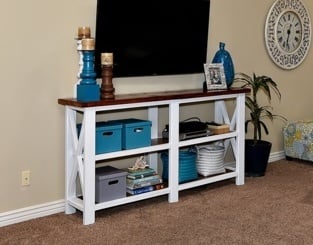
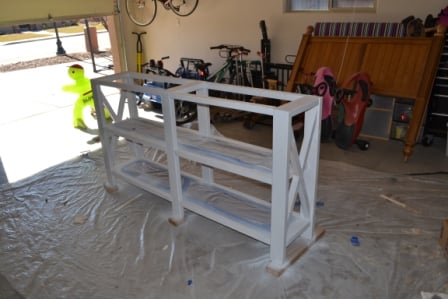
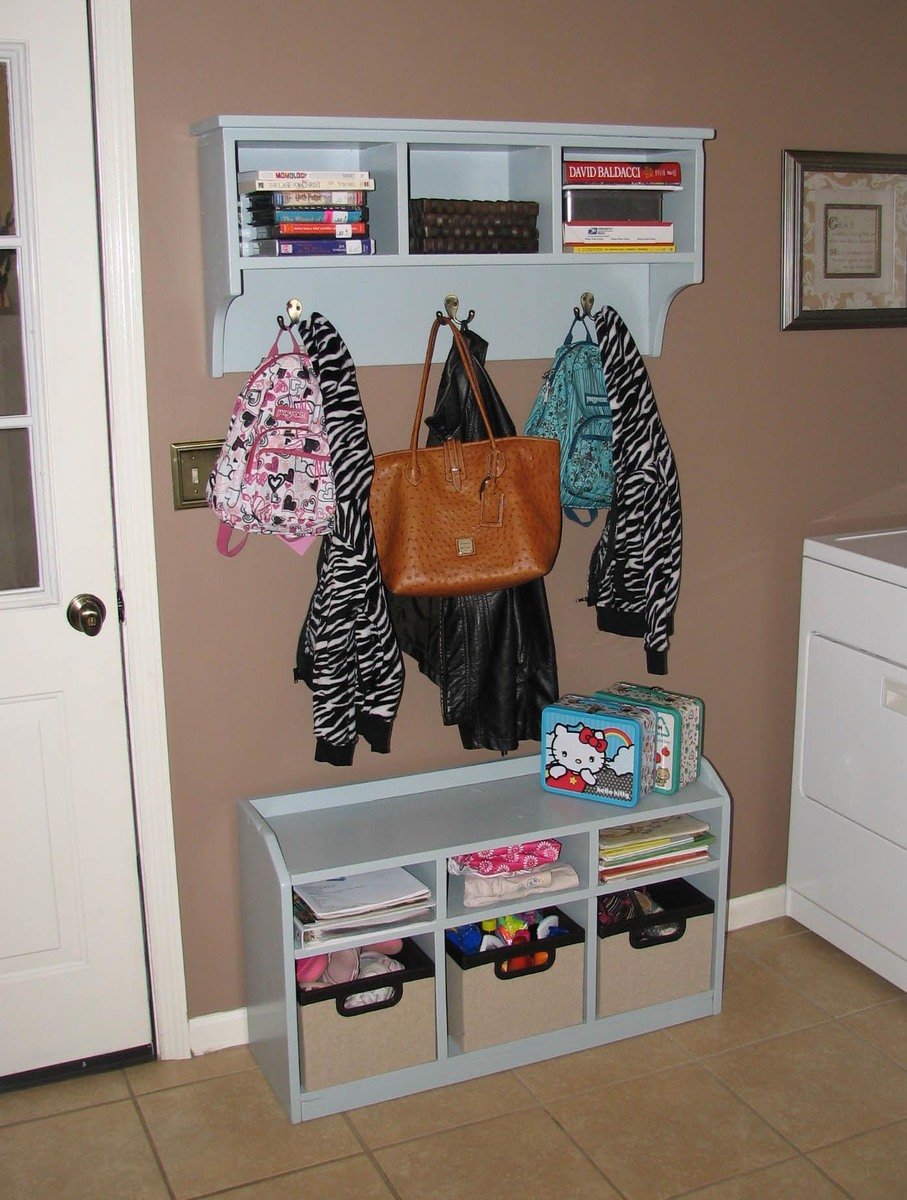
Cubby Bench and Storage Shelf w/ Hooks

Submitted by vpihoney on Thu, 05/05/2011 - 10:56

This was my first build! I first stumbled upon plans for the cubby bench while Googling storage options =)

I combined plans from the Perfect Cubby Bench and Entryway Storage Shelf with Coat Hooks. I made slight changes to the dimensions; most of them were intentional. Both are only 36" which is perfect for my small space which doubles as the back-door entryway and laundry room. It manages the abundance of clutter created by a two kids and my husband.

I have shopped and shopped for the perfect entryway solution for this small space. Never have I found one until I came across the plans on this website.

Thank you, Ana! You've given me an excuse to start building...I had all the tools...just needed the motivation =) Now I have a ton of plans to get me started!

From a stay-at-home mom only one year into the job, I have discovered a new sense of personal enjoyment! The crafting, cooking, etc. is great and all, but this is my kinda thing!

Estimated Cost
$60-70
Estimated Time Investment
Day Project (6-9 Hours)
Finish Used
Flint Smoke, Eggshell finish, by Home Depot. I used a primer first.
Recommended Skill Level
Starter Project

bar stool

Submitted by Kris60 on Fri, 07/05/2013 - 18:12

Our Vintage bar stools that are not complete yet.

Estimated Time Investment
Afternoon Project (3-6 Hours)
Finish Used
n/a
Recommended Skill Level
Beginner

Floating Bench (Walnut bench Board and Batten Wall)

Submitted by Anonymous (not verified) on Thu, 12/30/2021 - 06:25

Followed the instructions in the original blog. I would like to thank Ana for the blog. It was the inspiration I needed. This project was challenging for a rookie like myself. The plan is basically the same as the original post from Ana.

Materials:
4" Vertical MDF primed boards
3" Horizontal MDF primed boards
Our wall has texture so we had to use tempered board to make it nice and smooth.
Half inch plywood for under the bench seat.
2x4 for the bench frame
I ordered furniture quality Black American Walnut from a sawmill for the floating bench (not cheap but worth it). I stained it with one coat of Watco Black Walnut just for protection (took 10 minutes to do super easy) let it dry for 24 hours at least.

Challenges:
1. The wall on the right side of the bench did not have a stud just a corner stud, I was not going to risk this bench support so I put the bench support on the one corner stud and installed a hidden strong tie: https://www.homedepot.com/p/Simpson-Strong-Tie-CF-4-15-16-in-x-6-in-Con…
This provided the support that the missing stud would've. Now the bench is structurally sound.
2. Walnut uneven cuts from the sawmill, I had to use a plane to bring the planks closer together didn't want huge gaps.
3. Outlet in the way. City code mandates to remove outlet leaving access to it. We decided to build above the outlet making the bench a bit higher than we wanted it but still worked out, now we still have an accessible outlet under the bench.

Comments

Leaning Ladder Wall Bookshelf

Submitted by Liz Miller on Thu, 01/25/2018 - 07:02

My dining room has no storage and I've been trying to find a place to store all of my bowls, serving dishes, etc; for some time now. I saw a leaning ladder shelf system at Crate and Barrel that I fell in love with but it was $500 which was out of the question. Last summer I built Ana's outdoor couches with absolutely zero experience and they came out great, so I decided to take a chance and try something else. This was my first time using a circular saw, and also my first time using a Kreg Jig! Honestly, halfway through this project I was concerned I bit of more than I could chew but I stayed calm and just kept following the plans. I'm so thrilled with how they came out! I ened up using a scrap piece of the 1 X 12 board for the "desk" piece to make the center a little bigger since I wanted it to serve as a serving board of sorts. I reenforced it with a support board since it was a little longer than the original plan called for.  I am beyond thrilled with how this came out, I honestly like it better than the one I saw at C&B since it's custom to my space! This was so easy if I could do it, anyone can. My total cost came to about $130. Not too shabby for a knock off! I'm already on to my next project. I don't think I can buy "factory" furniture again now how much better cost and quality I can get doing it myself! Thanks Ana!

Built from Plan(s)
Estimated Cost
$130
Estimated Time Investment
Weekend Project (10-20 Hours)
Finish Used
I used Minewax Charcoal, at first I thought it was too dark but I've come to like the dark color with the grain showing through. I only did one coat.
Recommended Skill Level
Beginner

Homemade Home Office with Peninsula Desk

Thank you Ana for so many amazing plans and shelf help that helped me get this monster built! Now my husband has a nice office where he can work from home. I was so impressed with how easy it was to make the plans in shelf help and how quickly it all arrived. (I can’t link the drawer slide trick plans, but they were key and I based the middle table off of the foldable farmhouse idea)

Comments

Kitchen Tower Cabinet

This is our first Ana White project and we're pretty happy with the results. We modified the plans a bit to use 1/4" plywood for the sides instead of the heavy 3/4" ply. Specifically built for our kitchen since we couldn't find one that we really liked or could afford. Pottery Barn seriously sells this for $1200?!?! Score!

Estimated Cost
$70 + finishing
Estimated Time Investment
Weekend Project (10-20 Hours)
Finish Used
DIY chalk paint and wax - distressed.
Recommended Skill Level
Intermediate

Narrow Farmhouse Table

Submitted by tfox on Tue, 05/31/2011 - 19:49

This is my take on Ana's Narrow Farmhouse Table project. I plan on adding a bench to one side and random color matched chairs to the other.

Built from Plan(s)
Estimated Cost
$100
Estimated Time Investment
Weekend Project (10-20 Hours)
Finish Used
Minwax Special Walnut stain with six coats of Wipe-On Poly. Finished with steel wool to knock down shine of poly.
Recommended Skill Level
Intermediate

Simple Daybed/Farmhouse-Bed-Hybrid

Submitted by uli on Mon, 06/06/2011 - 08:05

I needed a bed for my guestroom and decided to build a mixture of the simple daybed and the farmhouse bed. The back and the front rail are attached with bed brackets for easy disassembling.

Estimated Cost
175 $
Estimated Time Investment
Day Project (6-9 Hours)
Finish Used
Acrylic paint in antique white
Recommended Skill Level
Beginner

Comments

Guest (not verified)

Tue, 06/21/2011 - 09:42

Dear Uli, I love the daybed you created and I'm planning to build my own next week for our guest bedroom, which doubles as my project room. Could you tell me what height you made the bed? It looks lower than the average headboard height, but higher than the average footboard height. I'd like to make mine close to your, which I think is just perfect.

Thanks,
Sara

In reply to by Guest (not verified)

uli

Tue, 06/21/2011 - 13:30

Thx :-) I've made the panels 19,5" high, and the legs measure 31,5". On top of the panels I screwed and glued a timber, which is a little bit thicker than a 2x4. So the overall height is 33,5". If you like I could send you my sketchup file.

Uli :-)

Guest (not verified)

Tue, 06/21/2011 - 19:42

Thanks Uli,

Those dimensions will be a big help. I've constructed more than 30 pieces now, thanks to Ana, so it's no big deal for me to design my own plans and dimensions now. I'm hoping to complete this project before my sister comes out for a visit. Wish me luck!

Sara

Miss Martina (not verified)

Fri, 08/19/2011 - 23:58

Hi, Uli! Do you think you could please help me out by sharing your sketchup notes for the "Farmhouse-Daybed-Hybrid"? This would really help me to get a handle on building this project.
Thank you from Martina.
P.S.-Though we now live near Palm Springs, California, we lived in Sachsenhausen for nearly 2 years & office was in Wiesbaden. Though I prefer the climate here, I still miss Germany.

Rockin'Robin

Wed, 06/20/2012 - 21:00

Dear Uli,

I am brand spanking new here on Ana-white and I love, love, love your daybed. I would like to give it a go for my daughters. Is it possible to get your sketch up notes? This will be my first build and I am so nervous about trying something without having a plan in front of me. My email is [email protected]
Blessings, Robin

Guest (not verified)

Wed, 09/14/2011 - 07:56

I would LOVE it if you could send me your sketchup file too. I want to build this for my guest room.

Helleni (not verified)

Wed, 08/31/2011 - 14:27

I would love to make this for my son's room. I am a beginner, can you provide the file for me to look at too?

Guest (not verified)

Fri, 09/23/2011 - 12:39

Uli,

I absolutely love this daybed and have been searching for such a bed, even to buy, but have found nothing. My husband is super handy and loves wood-working, so I think I am going to put him up to the task! :) Could you e-mail me your sketch-up file as well? My e-mail is [email protected].

Also, is there room to put a trundle underneath...this is a must-have for us. Do you happen to have any plans for a trundle? If not, hopefully my husband can come up with something for that!

Thanks so much for sharing your great idea and plans!
Amy

Siobhan (not verified)

Tue, 11/08/2011 - 17:56

Hi Uli,

Would you email me the plans for this bed please? It's perfect and exactly what I have been looking for!

Thanks so much,
Siobhan

kharrel

Wed, 12/28/2011 - 20:50

Hi Siobhan, I was wondering if you could possibly send me the plans for this bed in a Word document or through email. I tried to access the plans you attached above but my computer wouldn't allow me to open it. Also, I saw where someone else asked if a trundle would work with this bed and if you had plans for that, if so I would love to see if we can try to tackle that project as well. My email address is [email protected]. Thank you so much!...you have inspired me!!!!

Cheri (not verified)

Mon, 01/02/2012 - 09:58

I LOVE this bed. Would you mind sending me your sketch up and plans as well? Thanks so much and have a blessed and happy new year!

Jenny Briggs (not verified)

Mon, 01/30/2012 - 06:12

Hi, your bed is beautiful, could you please send me your dimensions, I would like to attempt, making this but kinda do an L, with a twin, and then a toddler mattress, at the head, the smaller mattress, would be like the short side of the L! Very new to this, but I would like to give it a go!

Guest (not verified)

Sat, 02/04/2012 - 09:35

Uli,

I love this so much and as others have said...it is the exact height I think I would need. This is my first solo project (without help from the man in my life) and i would love all the help I can get. Could you send me your plans for the hybrid? email address is [email protected]

Thanks much,
Raven

RachaelA (not verified)

Thu, 04/12/2012 - 10:31

Do you have a mertials list you used to buy the wood, etc for this bed. We are wanting to build a similar bed and add a trundle drawer underneath. Any guidance you can provide would be great!

Rach

RachaelA (not verified)

Fri, 04/27/2012 - 10:54

We figured it out and added one more layer to the project. We are combining the simple daybed, farmhouse daybed and trundle. So far so good.

Kris Frye

Wed, 02/25/2015 - 20:15

That's exactly what I want to do. I cannot download Google SketchUp, (It requires Windows 7 or newer. I am still running XP.) so I cannot access the plans provided. Could you please share yours? I also need the bed to accommodate XL twin mattresses (upper and lower beds). I could make those adjustments to your plans if need be.

Judith (not verified)

Wed, 05/09/2012 - 01:39

Hi Uli, I just love your bed, I'm new to building your own furniture but since I saw your bed I wanted to build it so I'm doing it. So far I have made the laterals and the back panels and now I'm putting it all together. I have some questions and maybe you can help me... you used bed brackets for the back panel, how did you put these so that they won't be seen? did you put them in the top and bottom of the panel?

Thank you very much

Judith

kad050209 (not verified)

Thu, 06/28/2012 - 10:14

Hey! I love the way you used the farmhouse bed for this daybed. It's perfect for what I'm looking for. I wanted to make my daughter the farmhouse bed but, we always wanted a daybed at the same time. This is perfect. Do you have any plans you can share with me so I can start making this? Thanks! [email protected] is my email if needed

SerinaDee (not verified)

Tue, 07/17/2012 - 10:26

I absolutely LOVE this bed and it is exactly what I want. I know many people have asked for the sketches, sooooo if anyone has received them, could they please forward them on to me??? (of Uli, if you see this and you have them) I would greatly appreciate it. You should definitely post this as a plan post because I'm sure many others would love it!

my email is [email protected]

THanks so much in advance!!! :) :) :)

Jason Lebo (not verified)

Thu, 07/19/2012 - 12:58

Hi Uli,

Outstanding work. I am going t make this for my 2 year old son. Quick Question.

I am confused about how to attach the posts to the panels for the head board. I assume you drill in from the far left and right of the posts? Do you use wood putty to hide the holes later? Could you use pocket holes? Or would that not be as structurally sound. Any advise would be appreciated.

From the instructions:

Now attatch the 4x4 posts to the panels. Make sure you pre drill half way through the post and use the 4 1/2" screws. Line the top edges of the panel and the post, keeping everything square as shown. Screw into the panel where it is sandwich 3 boards thick. Put at least 6 screws in each post.

Renee Glaze (not verified)

Fri, 10/12/2012 - 20:37

Can you send me a copy of the plans for the daybed. Does it have a regular mattress or just covered foam. Thank you

Val Manchuk

Sun, 04/07/2013 - 10:27

This is a great idea for a spare bed in our home office. Under bed drawers would be a good place for oir storage, too.

josie.a.richard

Sun, 09/28/2014 - 06:43

I LOVE this. Could i please get a copy of your sketch/plan? I am very new to this, and I don't think I could recreate one myself just yet!

Thanks

J

Garden/Storage Shed

Submitted by Smokeydog on Mon, 08/03/2015 - 06:48

Building a storage shed was quite a jump for me but because of the confidence and experience I gained from Ana's  site I decided to give it a shot.  I acquired the plans online. It has 8 foot high walls and 3 feet of "attic space".  The shed is 8'x12'.  I used cement board lap siding.  It took about seven weeks to finish working a few hours here and there.  I really like it.  Even has a little window flower box.

Estimated Cost
2100.00
Estimated Time Investment
Week Long Project (20 Hours or More)
Finish Used
Benjamin Moore Paint
Recommended Skill Level
Intermediate

Comments

Rustic X Kitchen Island

Submitted by Anonymous (not verified) on Thu, 04/21/2022 - 12:06

Used Ana's plans with a little modification.
I built 2 different sizes and donated to our church for their fellowship hall.

Comments

Kentwood Bookshelf

Submitted by worrow on Tue, 08/11/2015 - 17:33

I loved this from Ana's site so much we tacked one. Please note I glued, screwed and dowel ed the holes. I hate kreg jigs. We also made ours taller to add an extra shelf.

Estimated Cost
$90.

Provincial stain and triple coat poly
Estimated Time Investment
Weekend Project (10-20 Hours)
Finish Used
3m triple coat in 1 semi gloss not pictured. My image is stain at this point
Recommended Skill Level
Beginner

Comments

Fancy x farmhouse table... my version!

My version is a 7' table. I made the distance between legs 60" with a 8" overhang on each side. The stain is Olympic Driftwood. I also added 1 x 2 pcs on the ends for a more finished look & to secure the 2 x10's. One last thing, I used a router to round out all the outer edges of the table top and the legs.

Highly recommend....

I used some T braces/plates on the bottom of the table to connect legs with 60" pcs. Otherwise there is nothing to keep the legs square with the table.

Love the look...thanks so much for the plan!

Other notes: I used treated lumber so it's VERY heavy.

Built from Plan(s)
Estimated Cost
$130 ($100 lumber, $30 stain)
Estimated Time Investment
Day Project (6-9 Hours)
Finish Used
Olympic Driftwood
Recommended Skill Level
Intermediate

Comments

stepdiva

Sat, 08/30/2014 - 19:33

hi there..your table is great! can i ask if u think there is enough room at ends of table for a chair with the 8 inch overhangs that u did? i would like to do the same. thanks so much!!!
Tanya

Just one of many Honey to Do projects

Submitted by Anonymous (not verified) on Tue, 04/26/2022 - 04:53

My wife wanted a patio set and I initially made a set using pallets but I knew I could make a better one so after seeing one Ana made on Pinterest I went to work. I have now painted it white and my wife will be make the cushions for it as I made it a little wider than the actual plans called for.

Comments

Easy Build Wood Headboard, Cal King

Submitted by carlynoel on Sun, 08/11/2013 - 18:05

This was my first project and I loved every second of it. I did the whole thing by myself (with the "help" of my two-year-old) and I'm 5 months pregnant! THAT is how easy it is.

Estimated Cost
80 bucks
Estimated Time Investment
Weekend Project (10-20 Hours)
Finish Used
I distressed it a little before staining so it didn't look too brand new. I filled a sock with bolts and screws and beat it up and scratched it with a steak knife to make fake cracks.I did one coat of Minwax Jacobean and it was really blotchy. I should've conditioned my wood, so I lightly sanded the whole thing and added a second coat and it evened out the blotchiness a lot, but it did turn out darker than I wanted. I added only one coat of Minwax Polycrylic Finish in satin because I wanted it to look rustic and not glossy. The cutting and assembly only took about 4-6 hours. The staining and sanding and distressing and finishing took a couple days.
Recommended Skill Level
Starter Project

Comments

yurra-bazain

Sun, 08/11/2013 - 20:41

How awesome is that? =D It looks gorgeous, and I applaud you for tackling it with your 2 year old and baby on the way. =D When I was pregnant, the only thing I considered doing was putting furniture together. Now that I've built furniture, I now realize how much harder it was to follow the assembly directions than it is to make your own assembly directions. Keep it up!

Pallet laundry bin

Submitted by LARMO on Fri, 07/20/2018 - 18:09

Built for our laundry room with pallets radiator cover  and casters attached to bottom all purchase from a local thrift store, with matching recycle bin.

Estimated Cost
$20
Finish Used
Natural
Recommended Skill Level
Beginner

Bedroom Dresser

First time using drawer slides, and what a learning curve it was! The color is Varathane Weathered Wood Accelerator. This piece is huge and heavy! Absolutely love it and rebuilding other bedroom pieces to match this color. I also built a matching dresser which is taller and much more narrow. It can be found here: http://www.ana-white.com/2018/08/DIY_furniture/tall-bedroom-dresser

Estimated Cost
$200-$250
Estimated Time Investment
Weekend Project (10-20 Hours)
Finish Used
Varathane Weathered Wood Accelerator, Varathane Poly
Recommended Skill Level
Advanced

Comments

Modified Rustic X Coffee Table

Submitted by PamC03 on Sun, 10/18/2015 - 22:28

As a beginner at woodwork, this table was pretty easy to make. The instructions were easy to follow. I modified the table by adding 2x6 planks on the bottom and changing up the "X" design. The angles are tricky to get right, but i used scrap wood until i got the perfect angles then used my 2x2's for the final cuts. I also changed the finished dimensions of the table to fit in the room I was making it for, so this table was quite a bit wider than the original. It took me about a day and a half/two days to fully build and then I finished slowly over the rest of the week by staining and using a satin poly finish (I gave the top 4 coats so it took a little longer than normal). I'm so happy with the finished table I've already bought the wood to make another smaller one!

Built from Plan(s)
Estimated Cost
$70 for wood and hardware
Estimated Time Investment
Weekend Project (10-20 Hours)
Finish Used
Varathane Early American w/ Satin Poly
Recommended Skill Level
Beginner

Comments

Audrey Wright

Thu, 10/22/2015 - 05:02

For a beginner, you'd done a great job. I'm a beginner too and I can hardly do this in two days.. 

Farmhouse Bed

I built this bed as a modified farmhouse bed. I chose to have a solid wood headboard instead of having a slotted look as it fit better in the decor of our home. I purchased a bed rail kit from Rockler so that I could remove the rails without removing any screws. (http://www.rockler.com/product.cfm?page=5783) It was a relatively easy project considering my skill set was very low when starting! http://www.lifewithfingerprints.com/2010/09/labor-of-love.html

Built from Plan(s)
Estimated Cost
$110
Estimated Time Investment
Weekend Project (10-20 Hours)
Finish Used
I used a satin black paint finish with a polyacrylic coating.
Recommended Skill Level
Beginner

Comments