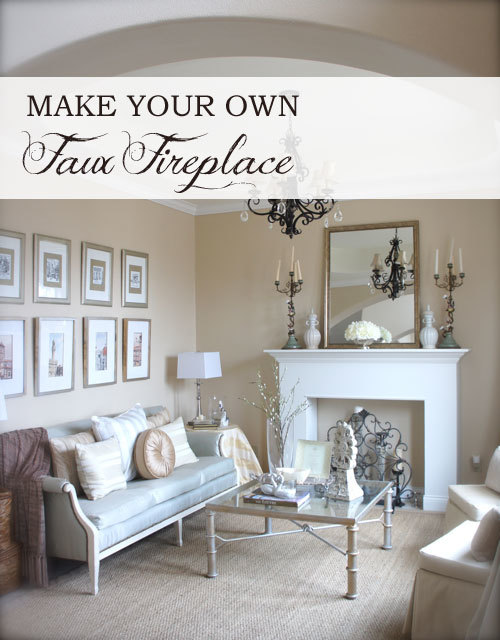
Home is Where the HEARTH is (Faux Fireplace)
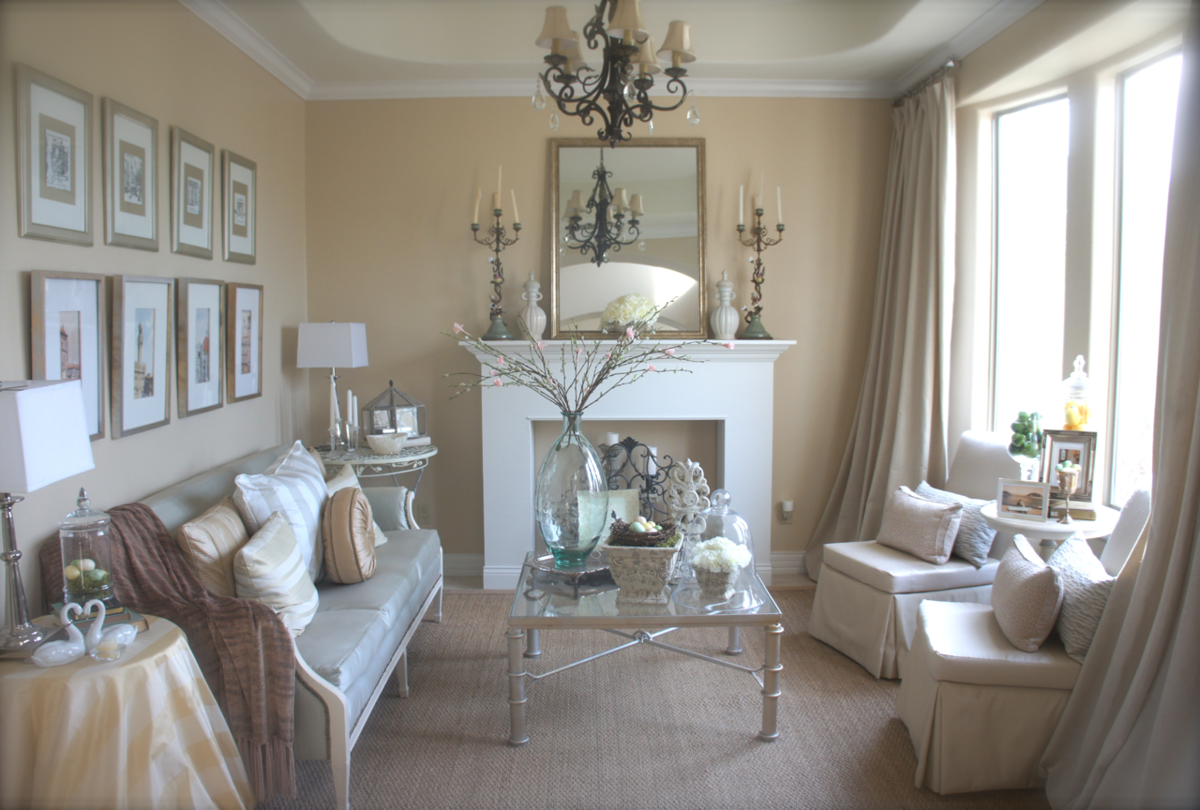
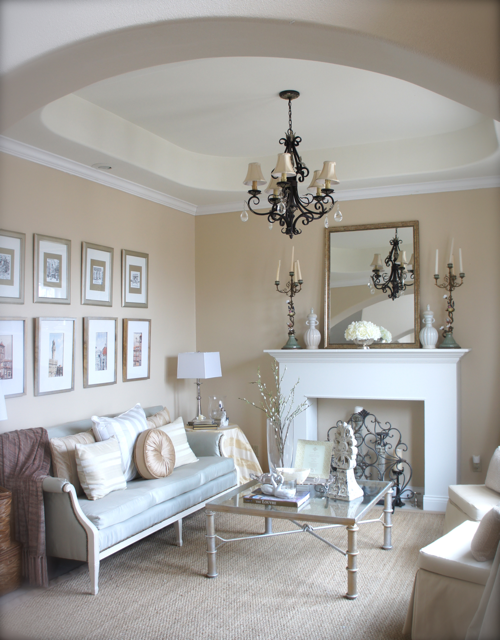
Only about a month before Ana published her Christmas plan for a faux fireplace, the hubby and I built one of our own out of a sheet of quality plywood, 1x12's, crown moulding, and a little trim. Originally we simply wanted a place to hang our stockings over the holiday season, but now our HUGE faux fireplace is the HEART(H) of our home. 
Built from Plan(s)
Estimated Cost
$150
Estimated Time Investment
Weekend Project (10-20 Hours)
Finish Used
We just primed and painted white! So easy :o)
Recommended Skill Level
Intermediate


Comments
Pug Bug (not verified)
Fri, 07/08/2011 - 15:22
Gorgeous!!!
Wow...that's gorgeous! Nice attention to detail, too! Just a suggestion...have you considered painting the inset of the "fireplace" black? I painted the inset of my fireplace with a flat black paint and it made ALL the difference in the world. Just something to consider. Either way, job well done!
In reply to Gorgeous!!! by Pug Bug (not verified)
cbeach1717
Mon, 07/11/2011 - 08:28
Thanks!
Thanks so much! Would you believe that I am not as brave as I would like to be when it comes to painting anything black? We are planning to have faux logs made and stacked in the faux fireplace! We think that will do the "trick"--pardon the pun :o) Thanks again!
jharm
Tue, 07/12/2011 - 13:06
faux marbling
Have you considered trying a faux marble paint treatment? Or, marble-look wallpaper might be a little more fail safe and could even be applied in squares like marble tiles.
I love the proportions you chose. I think a foundation would really sell it, and would increase the safety if using candles.
Guest (not verified)
Wed, 09/28/2011 - 06:22
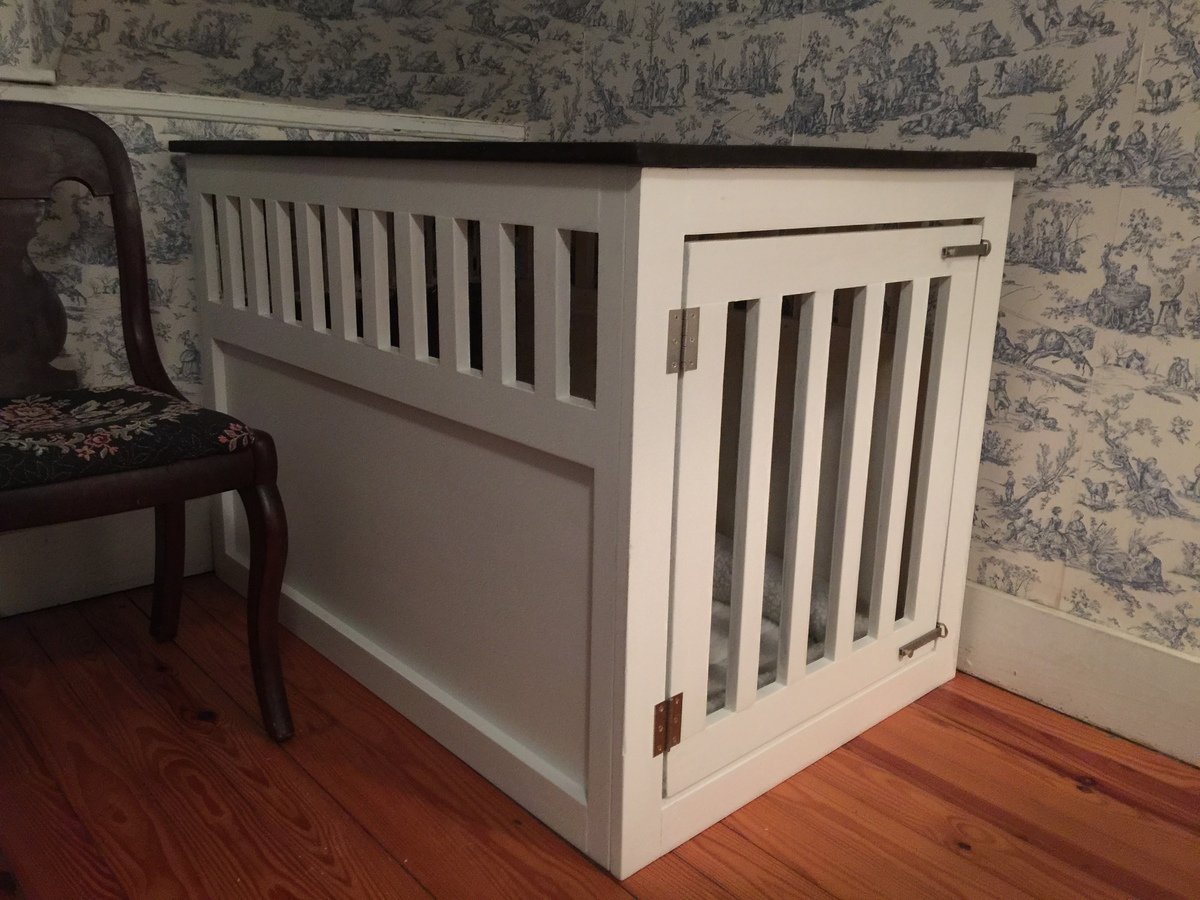
How deep is your fireplace?
How deep is your fireplace?
Allison Byles (not verified)
Thu, 10/27/2011 - 10:07
Plans
Do you have the plans for your fireplace? Love your design and clean lines, I am planning to make one!
Guest (not verified)
Fri, 11/25/2011 - 13:22
Love this fireplace, very
Love this fireplace, very beautiful but very disappointed that there isn't any plans and just pictures lol a little bit of a tease.
cbeach1717
Sun, 02/26/2012 - 04:44
Project Plan
Hello Everyone,
I am so sorry I have not responded sooner, but I wasn't even aware that there were any recent comments on this post :o)
Now that I do know, I just wanted to let you know that I will try to get something drawn up and post it here. I am not entirely well suited for design drawing software, but maybe you all wouldn't mind if I literally draw them out for you and post pictures of those drawings, yes?
Thanks for your kind comments, and I promise to have something soon! This project really is so simple, I just know you'll love the finished product :o)
Wendy T (not verified)
Thu, 06/21/2012 - 09:01
Please post drawings for this
Please post drawings for this with dimentions!
In reply to Please post drawings for this by Wendy T (not verified)
cbeach1717
Mon, 06/25/2012 - 06:17
Hello Everyone, I apologize
Hello Everyone,
I apologize for the delay, but we have been out of the country for six months and don't have any way of knowing the dimensions of the faux fireplace without measuring it personally. But we will be home within the next few weeks and I will try to measure and draw up some simple plans for those of you would like to see them.
Thanks :o)
srush (not verified)
Thu, 10/11/2012 - 10:35
Paint Color
Hi!
I love this room, do you know who makes the paint and what the color is called?
Thanks so much! Great job on the fireplace!
srush (not verified)
Thu, 10/11/2012 - 10:36
Paint Color
Hi!
I love this room, do you know who makes the paint and what the color is called?
Thanks so much! Great job on the fireplace!
paul smith
Wed, 02/05/2014 - 07:34
I've seen lot's of same
I've seen lot's of same concept. But this one has its own unique looks makes me inspired.