Community Brag Posts
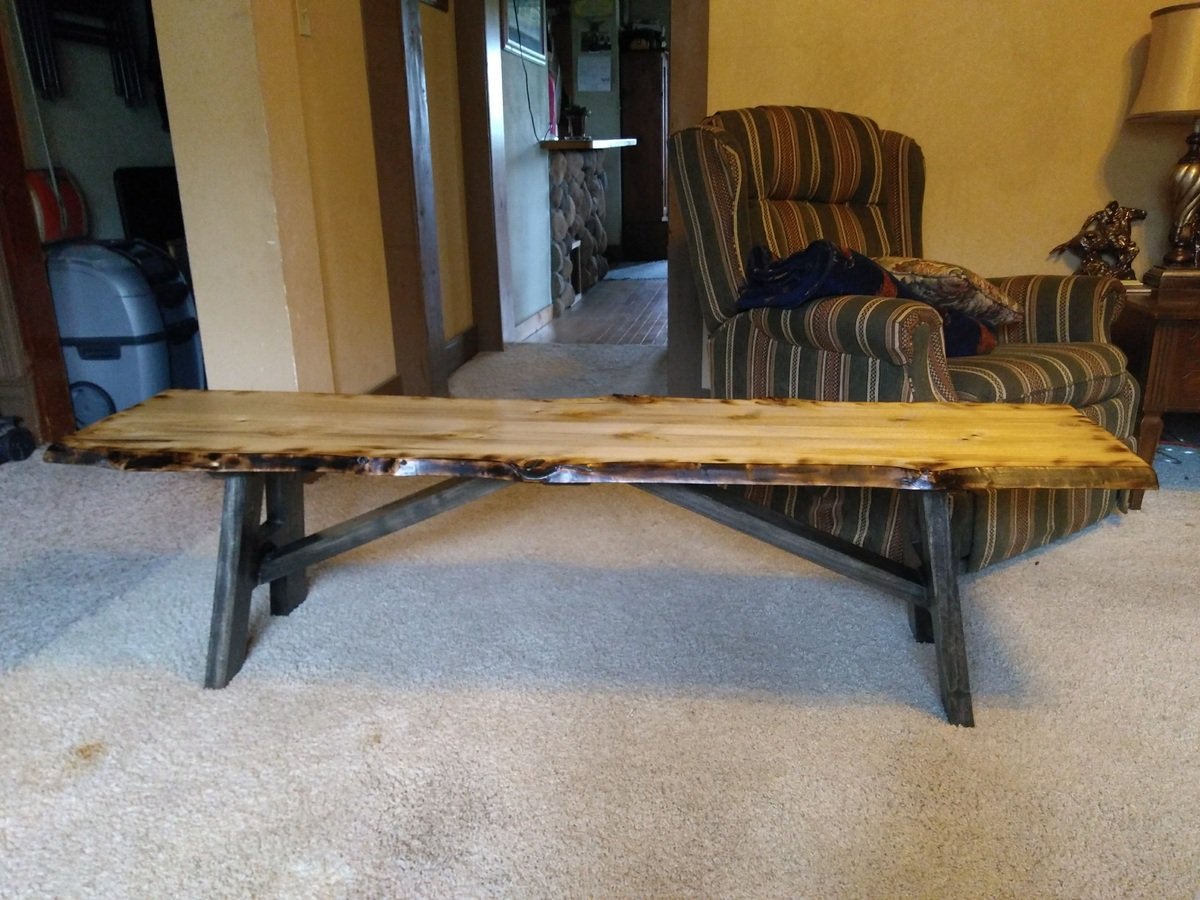
torched table
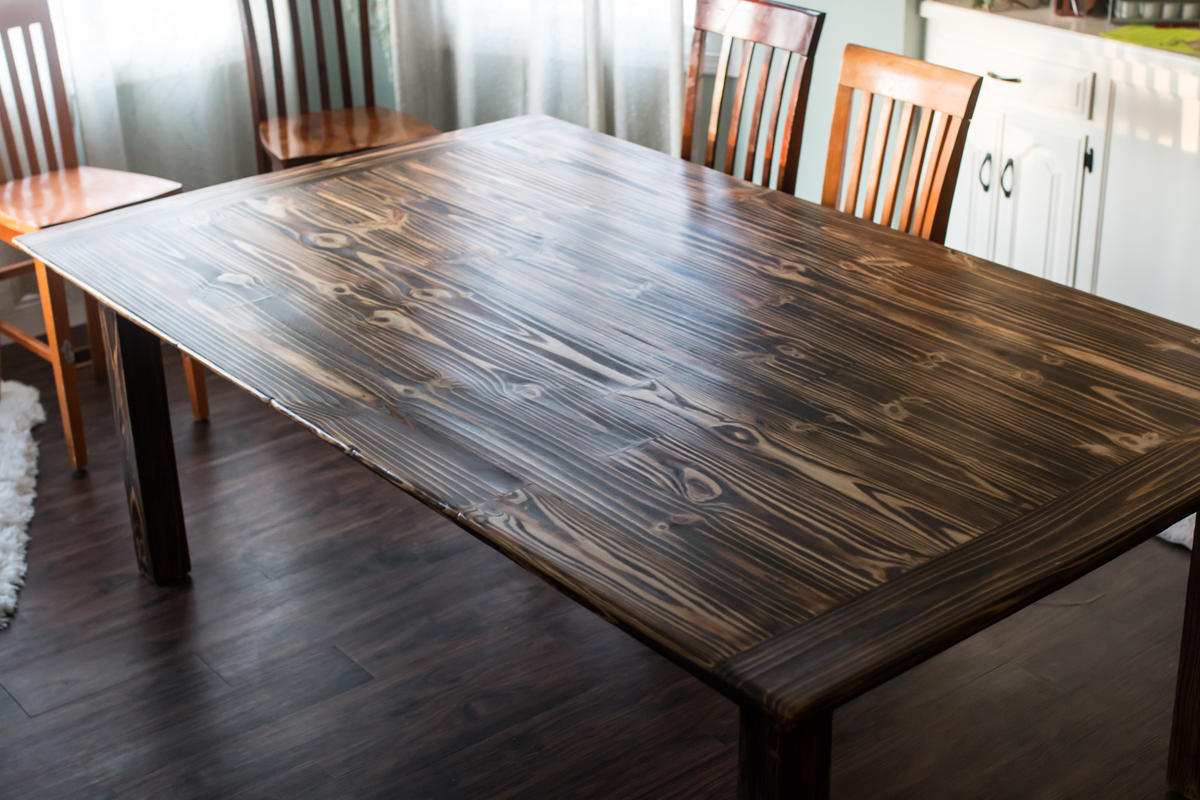
My wife and I saw a large table and chairs at a local antique store priced at $1000...
It was nice and probably worth what they were asking, but after a failed attempt to negotiate the price down to a more reasonable number, I decided to build a table. I was in the thinking stage when it hit. I've been wanting to tear down this random privacy fence in the back yard ever since we moved in a few years ago and so...... a table was born from an old fence..
You cant tell in the pictures but this table seats 12 comfortably. ( 4 on each side and 2 on each end). it is 7' by 4'
Estimated Cost
I visited the store to determine cost even though I made mine from an old fence. I believe you could make this table for well under $200 ( that's for a huge table)
Estimated Time Investment
Weekend Project (10-20 Hours)
Finish Used
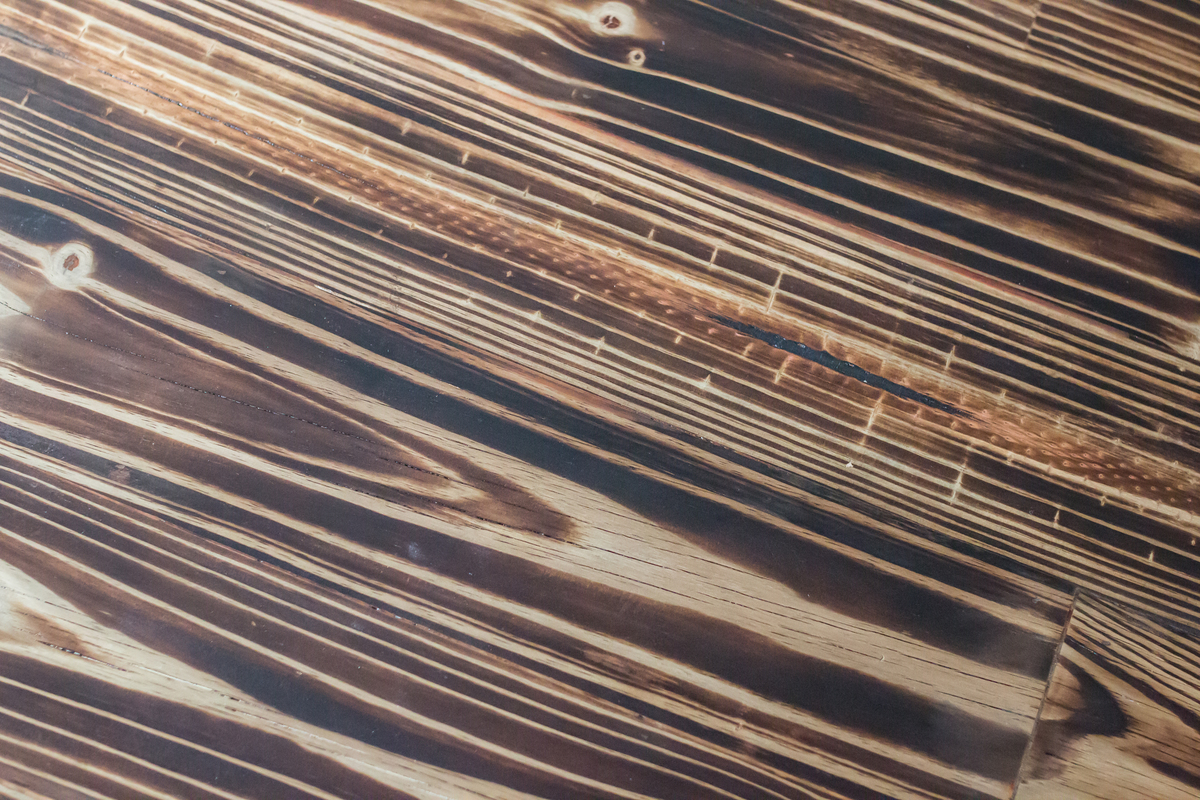
blow torch and polyurethane
run torch over your assembled table about 2-3 inches above surface and keep it moving, try on a test board first you catch on quick. Do all your sanding before the torch no sanding after torch before poly.
after torching, put first coat of poly. light scuff before second/third coat.. thats it.
run torch over your assembled table about 2-3 inches above surface and keep it moving, try on a test board first you catch on quick. Do all your sanding before the torch no sanding after torch before poly.
after torching, put first coat of poly. light scuff before second/third coat.. thats it.
Recommended Skill Level
Beginner
Comments

Mon, 02/02/2015 - 04:49
construction
4x4 fence post legs notched to hold 2x4 frame topped with a 3/4 in plywood. ( necessary since many boards were cupped or bowed, needed to have something to glue to.)
fence boards werent long enough for length of table so they were staggered as pictured. I had to do alot of planing and run all the fence planks though a table saw to square them as much as I could. ( also not as necessary if you buy wood from your local hardware store.)
The frame has 3 cross braces, and corner braces all the way around. plywood screwed to bracing/frame
planks laid out on plywood and glued plus brad nailed to hold them while glue dried.
routered edges of table top and started sanding, LOts of sanding , belt sanding with 80 grit then orbital sander stepping up to eventual 400 grit. I then cut skirts for the top of the legs 3 and 1/2 in skirts to cover screw holes. and a 1 in skirt to cover the rough edge of the plywood, ( both plywood and table top have a 2 in and 3in overhang respectively. Once everything was sanded to suit. I torched it and hit it with poly..
Mon, 02/02/2015 - 11:07
Beautiful!
Love that is was repurposed from an old fence and the finish is amazing! Thanks for sharing!
Tue, 02/03/2015 - 08:34
BEAUTIFUL FINISH
This table is absolutely beautiful!! I am thinking of doing something similar but on a slightly smaller scale. Would you be able to post your plans? I'd love to see the brace work on the bottom/sides of the piece.
Also, how difficult was it to work the blowtorch? Any tips on what I should do (or not do) when trying it out on my own?
Thanks for the post!
Tue, 02/03/2015 - 15:21
Great Job!
Your project came out great! The wood grain is so prominent. My guess is that torching accentuates the wood grain so that it stands out more. Excellent stuff.
Tue, 02/10/2015 - 21:10
torching
just try torching on a test piece first, it was suprisingly easy to do.
Plans...... I didn't make any. ( booo ) I used a 2x4 frame and 45 degree corner braces with 3 cross members. since most of the wood was extremely weathered, there was a lot of planing and sanding to do. Even then I put down a piece of plywood as an underlay for the planks to glue to. I punched the planks down with brad nails to allow the glue to dry because the planks took some effort to keep them flat. I have since built a matching coffee table 4' by 4' with yellow pine from the lumber yard, Not nearly as much work to put together since all the boards were reasonable straight/flat.
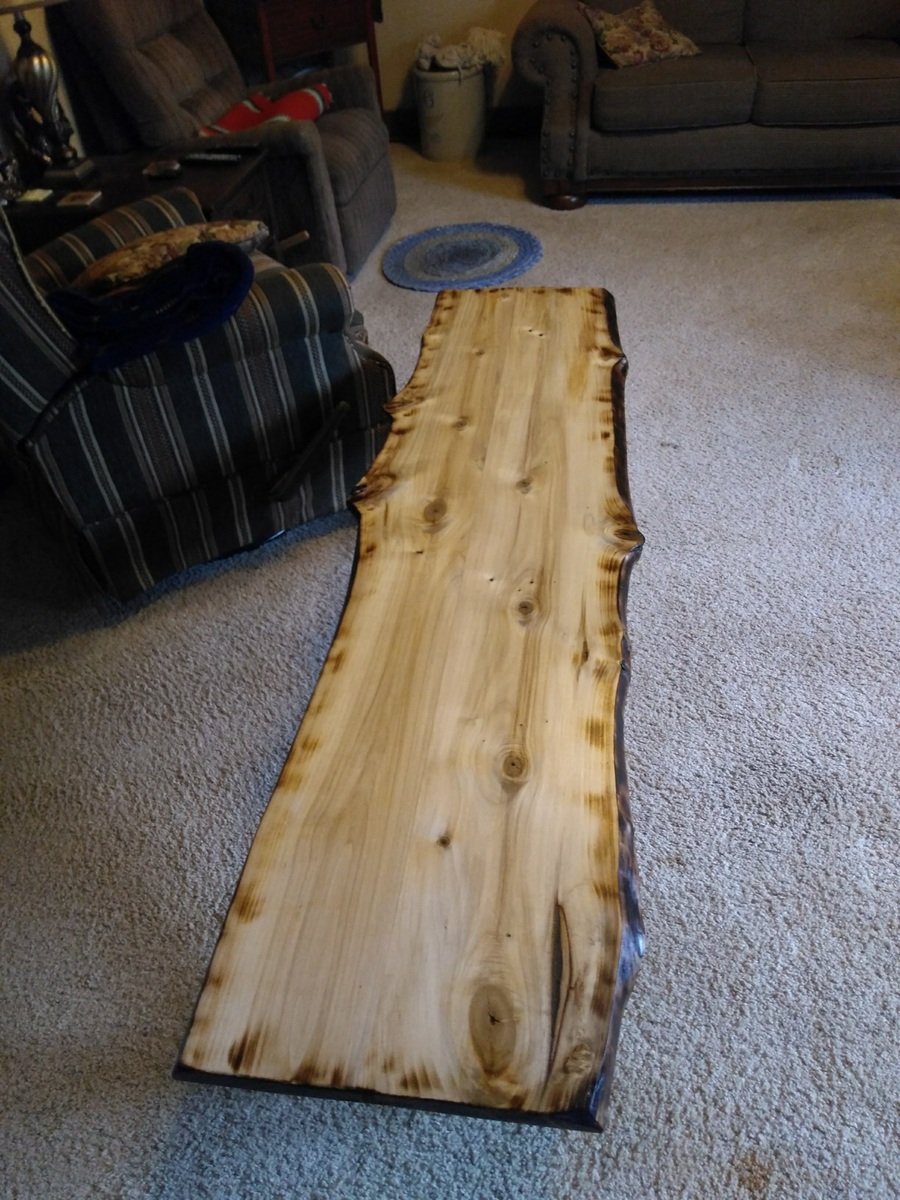
Sawhorse "bench" coffee table
Great project with super clear instructions! Love the look of the sawhorse legs and had just completed a live edge table top, so merged the two for this coffee table.
Built from Plan(s)
Estimated Time Investment
Afternoon Project (3-6 Hours)
Finish Used
Satin lacquer over all, ebony stain on legs.
Recommended Skill Level
Intermediate
2 X 4 Adirondack Chair Season
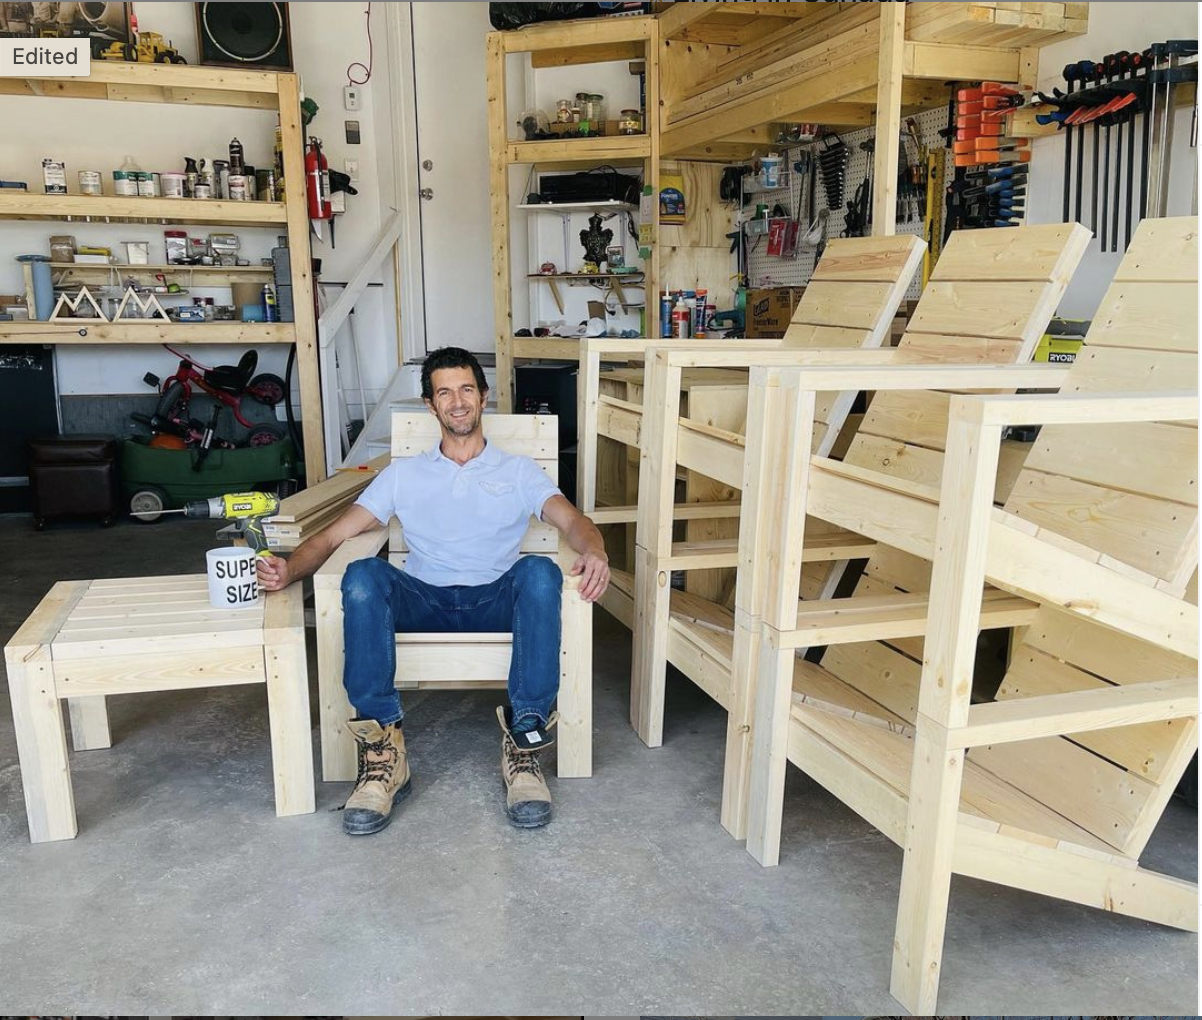
2 X 4 Adirondack Chair Season
I'm so tired but i can't stop doing this chairs.
It's fun and gives me satisfaction when it's done
Here is just part of the orders that i got this week.
I'm taking a break, having coffee and resting a bit. Much more sets to do
Thanks Ana White for this beautiful chair plan
Estimated Cost
50/60 Canadian dollar
Estimated Time Investment
An Hour or Two (0-2 Hours)
Finish Used
Behr waterproof stain and sealer
Recommended Skill Level
Beginner
Comments
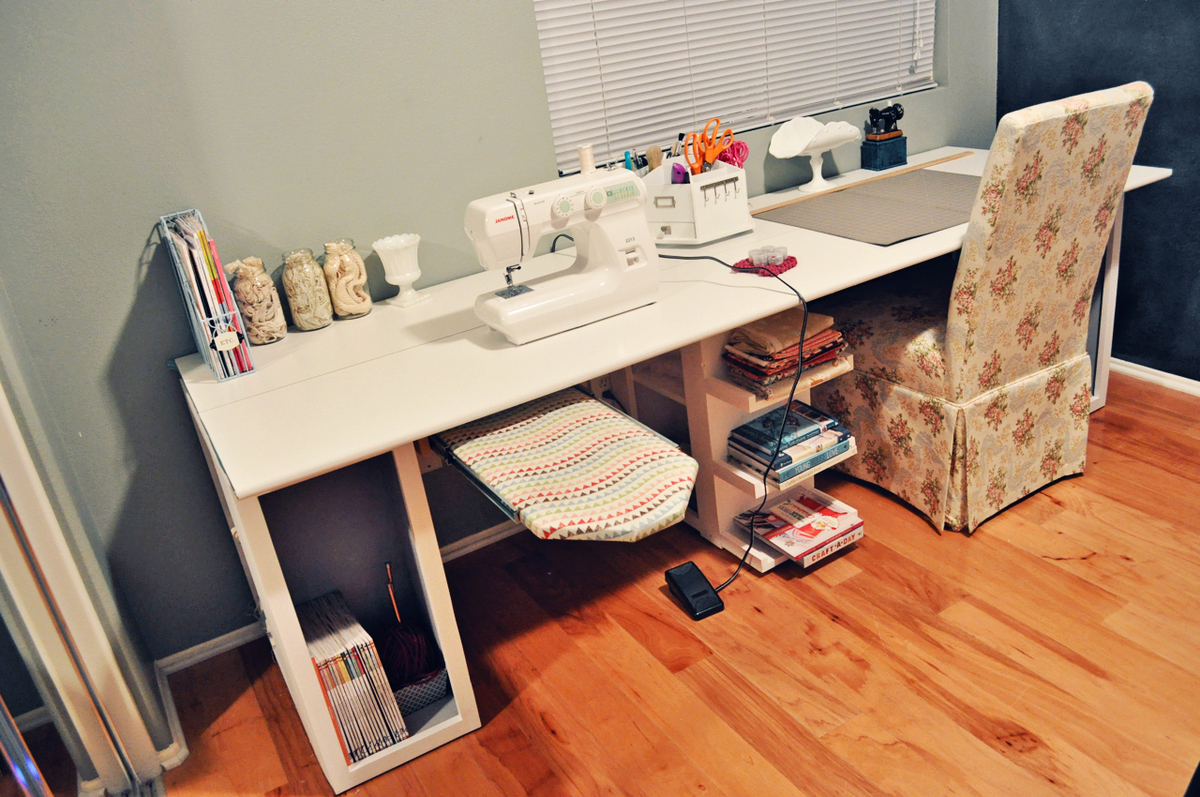
Modern Craft Table with Pull Out Ironing Table [Modified]

The craft table was based on the Modern Craft Table plans and heavily modified to be at regular seating height. We also added a pull-out iron table based on plans from Made by Marzipan. The pictures are kinda deceiving, but the ironing table does push all the way back in the table and it only juts out just to show it :) Check out our blog post for more:
http://tonyandkristine.blogspot.com/2013/03/diy-craft-table.html
Built from Plan(s)
Estimated Cost
Appx $150
Estimated Time Investment
Week Long Project (20 Hours or More)
Finish Used
behr latex paint in dove white and the interior base of shelves were painted in ASCP paris grey.
Recommended Skill Level
Beginner
Rolling Cart with Casters
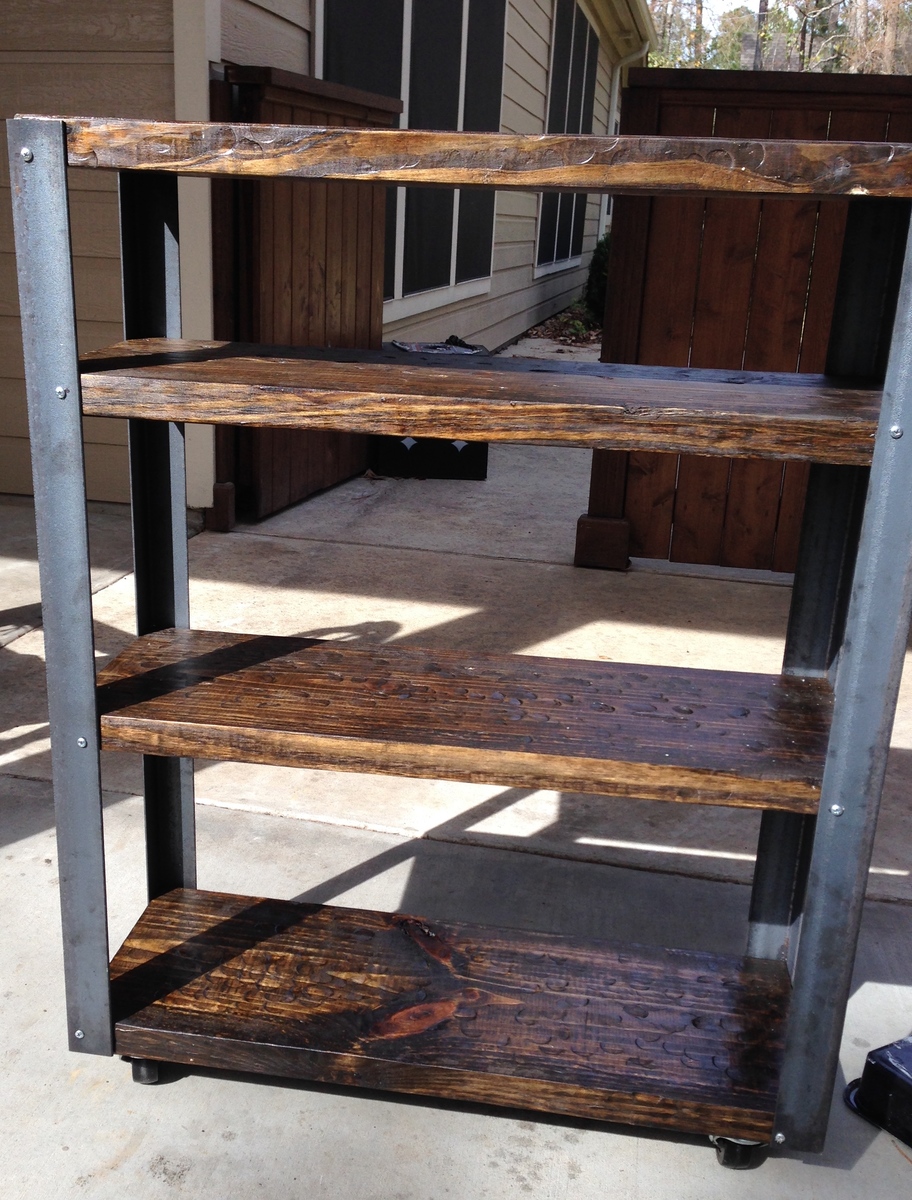
I LOVED this plan for a cart. I was looking for a cart to hold my heavy mixer and be able to roll in and out of my pantry. In addition to Ana's plans, I enlisted my 3 sons to hammer the wood to make it look rustic. Instead of aluminum angles, I used steel angles and I used a 36 inch height to accommodate more shelves. This is one SOLID cart. I absolutely love it! Thank you for the inspiration!

Built from Plan(s)
Estimated Cost
$100
Estimated Time Investment
Afternoon Project (3-6 Hours)
Finish Used
Minwax Stain-Espresso (Home Depot)
Polyurethane Sealant
Polyurethane Sealant
Recommended Skill Level
Beginner
Custom X Cross Box Craft Desk
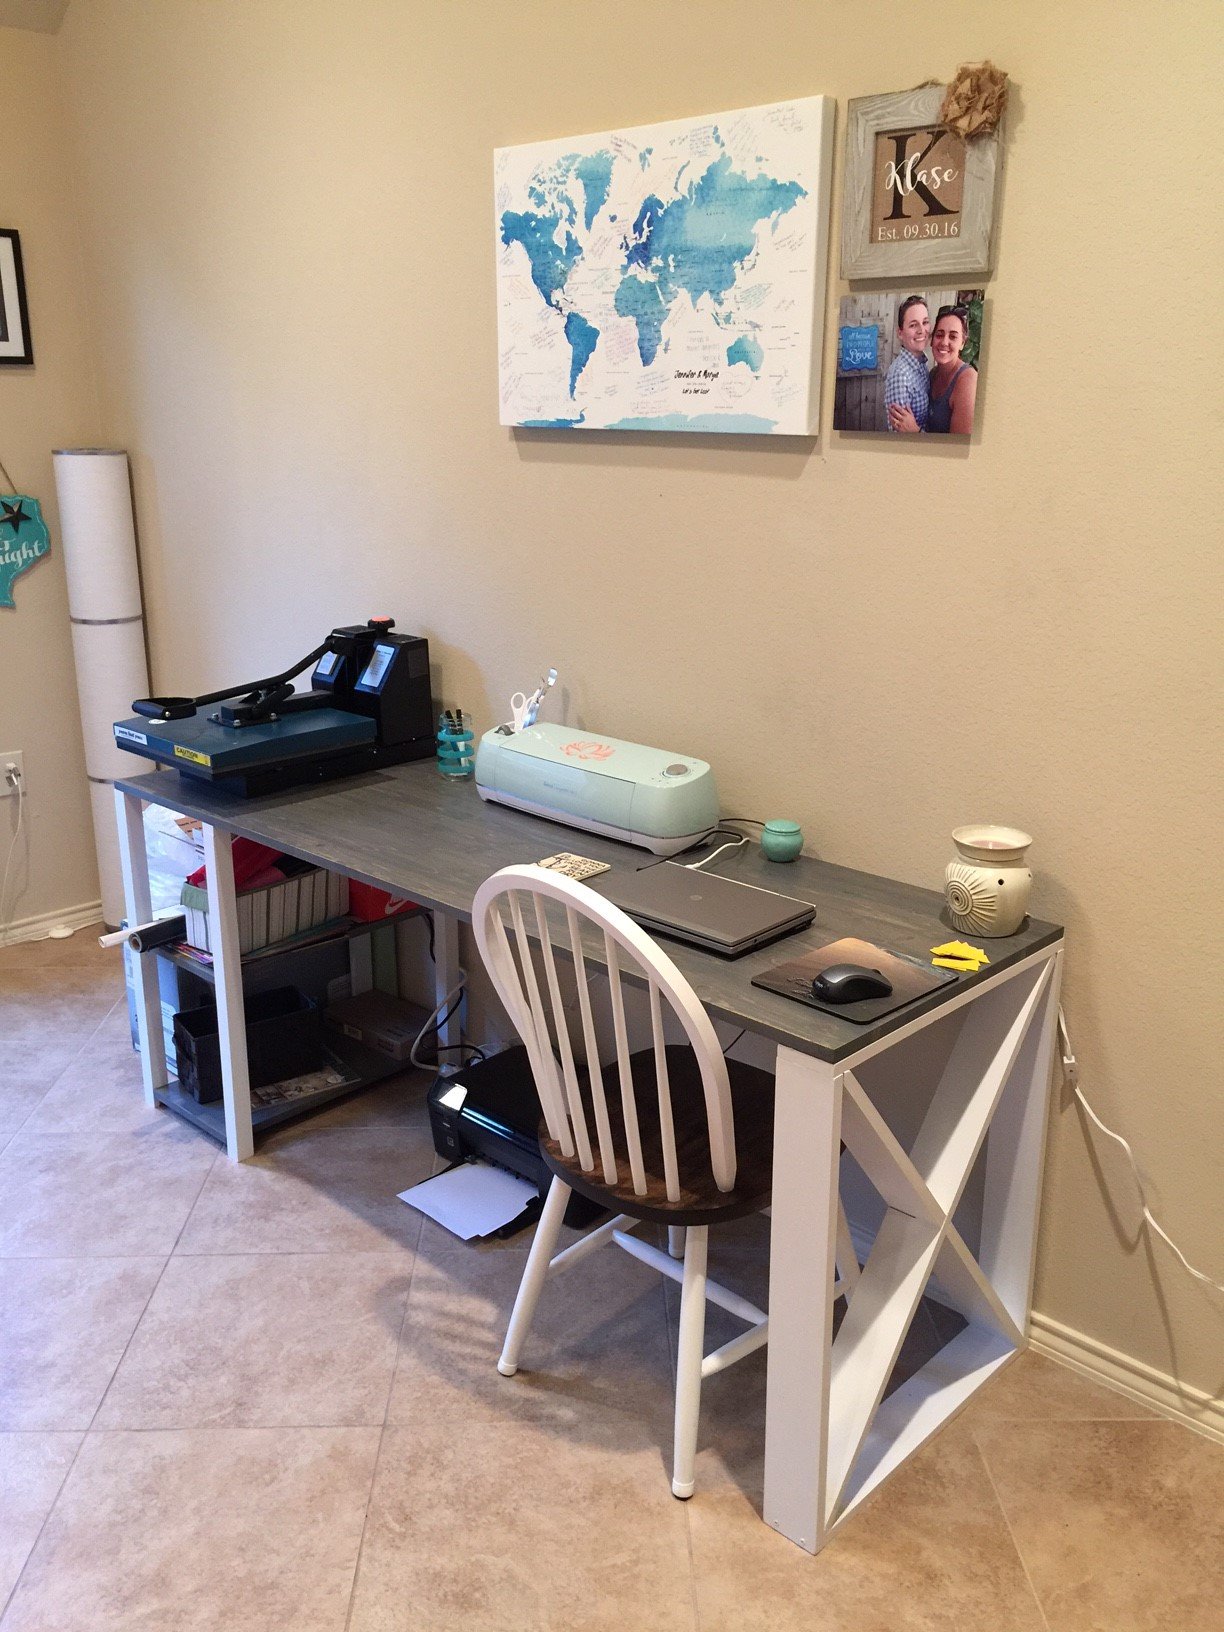
DIY Craft Desk.
I built this desk for my wife to give her more space to create her crafts. I meshed a couple designs that I had researched to give her a unique design. This project took me 1 week to complete by only working on it in the evenings but it could be done faster if you have more time available than I did!
Materials Needed:
2 - 6 foot 1x4" pine or Poplar wood
1- 8 foot 1x4 pine or Poplar wood
4- 2x2" pine wood 29" long
2- 1x2" pine wood 24" long
1- 12"x48" pine board (pre cut craft wood in Lowe's)
1- 24"x 72" pine board (pre cut craft wood in Lowe's)
Box of 1 1/2" wood screws
Wood glue
Wood stain and/or paint
8- 1" corner braces
1). Cut the 12"x48" craft board in half (2- 12"x24"boards.)This will be your shelves. Sand all of the wood prior to staining.
2.) Stain shelves and desk top. We used two coats of gray stain. Finish with one coat of Polyacrylic. Sand. Then one more coat of polyacrylic.
3.) Cut the 1"x2" trim to 2- 24" long strips.
4.) Attach the 2x2" posts to the 1x2" trim with wood glue and wood screws. You will end up with an upside down U shape. This trim piece will give added support for desk top. Do this twice and then Paint your posts.
5.) Mark where you want your shelves on the posts and screw in your corner braces to hold the shelves up. I placed the shelf inside the posts to give me 12" of width for baskets. Screw your braces onto your shelf and then attach to the posts. I recommend doing the bottom shelf first so it stabilizes the posts.
6.) Do the same thing with the top shelf. Mark where you want them and attach with corner braces.
7.) Moving on to the cross box base.... Build the 4 sides of the box first with the 1"x4" boards. This desk is 24" deep and 29" tall. Use wood glue and wood screws to assemble. I predrilled the holes then, placed glue on then screwed together.
8.) Make sure your top 1x4" is the full depth of the desk so the weight of the desk top is spread evenly on box.
9.) I used this guide for the interior cross pieces. http://sawdustgirl.com/x-leg-office-desk/#aa
10.) Paint your cross base.
11.) Attach desk top to bases with wood glue and wood screws and you are all set!
It was a fun project! - Jen
Estimated Cost
$150
Estimated Time Investment
Week Long Project (20 Hours or More)
Finish Used
2 coats of Minwax Classic Grey Wood Stain and I used white oil based paint on the bases mostly because I already had a can of it.
Recommended Skill Level
Intermediate
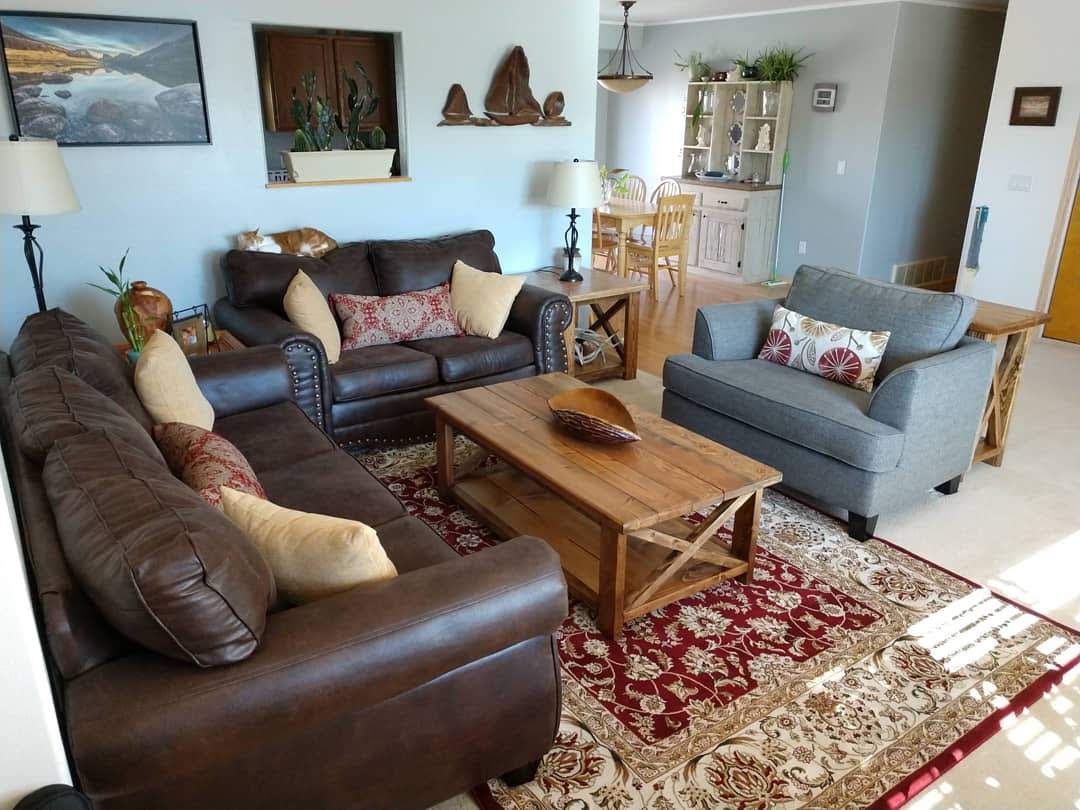
Rustic X living room
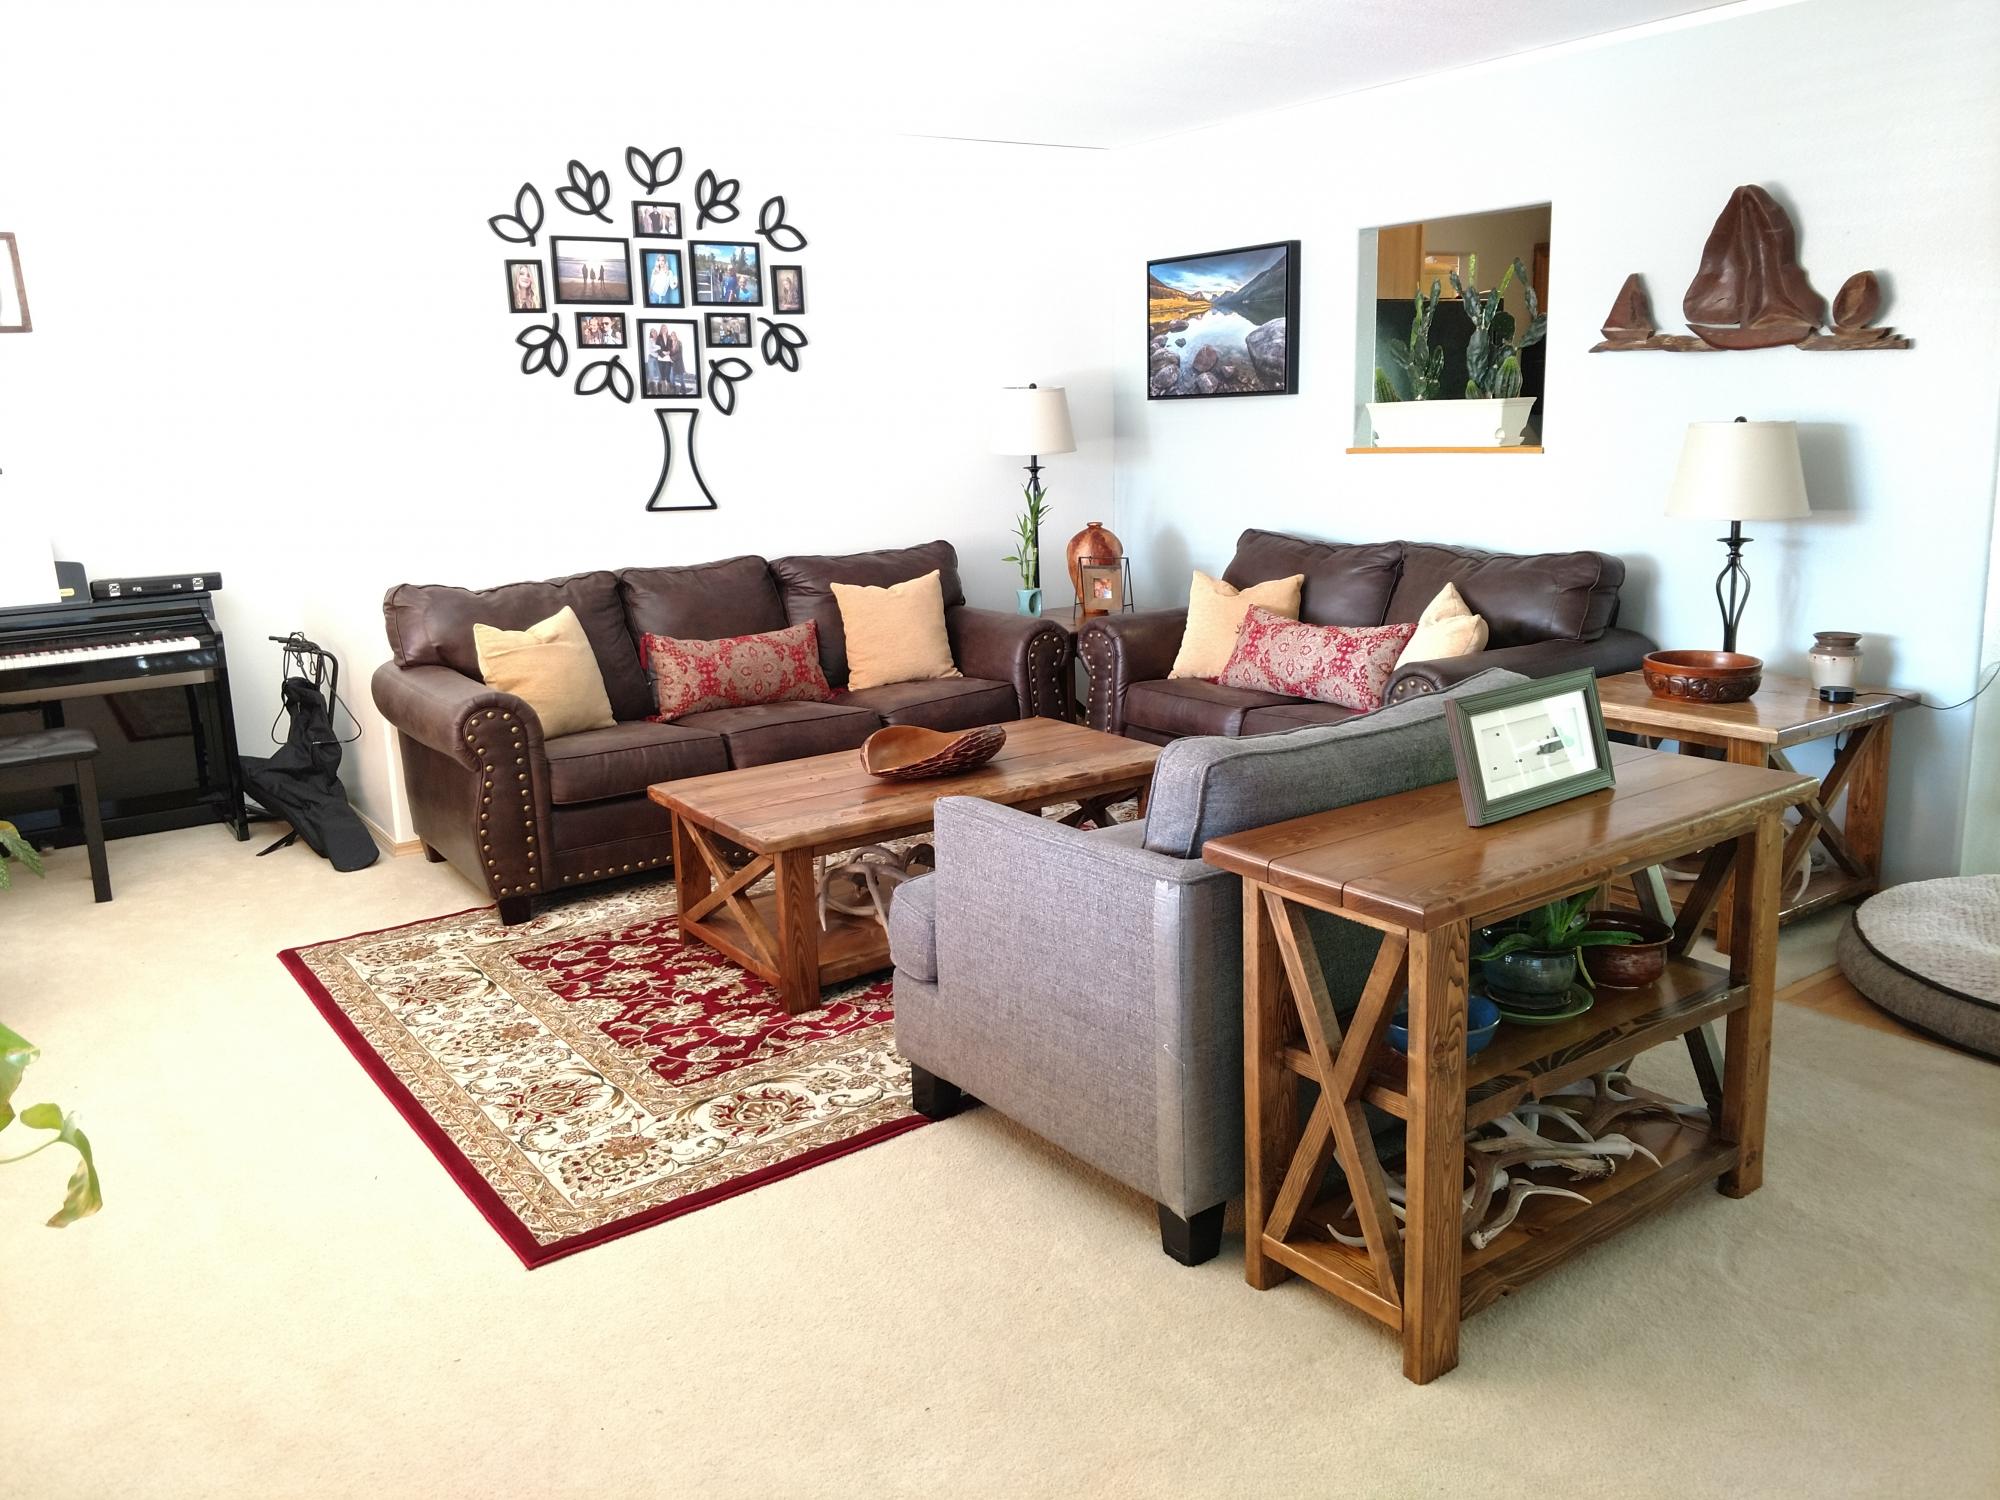
This is the first Ana White project I have done. They are beautiful! I normally use reclaimed lumber, but made an exception and used dimensional lumber for these.
Built from Plan(s)
Estimated Cost
$400
Estimated Time Investment
Week Long Project (20 Hours or More)
Recommended Skill Level
Beginner
Comments
Mon, 04/26/2021 - 11:47
Wonderful job!
What a beautiful space you've created, thank you for sharing!
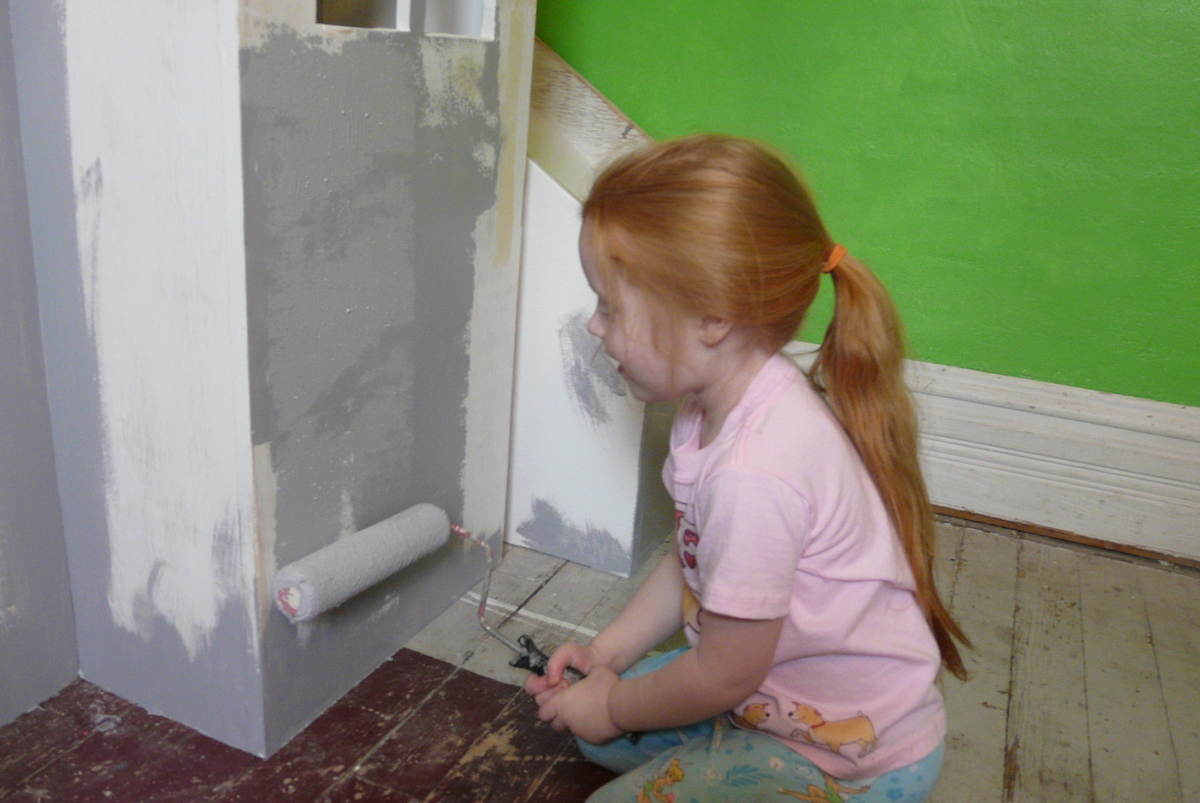
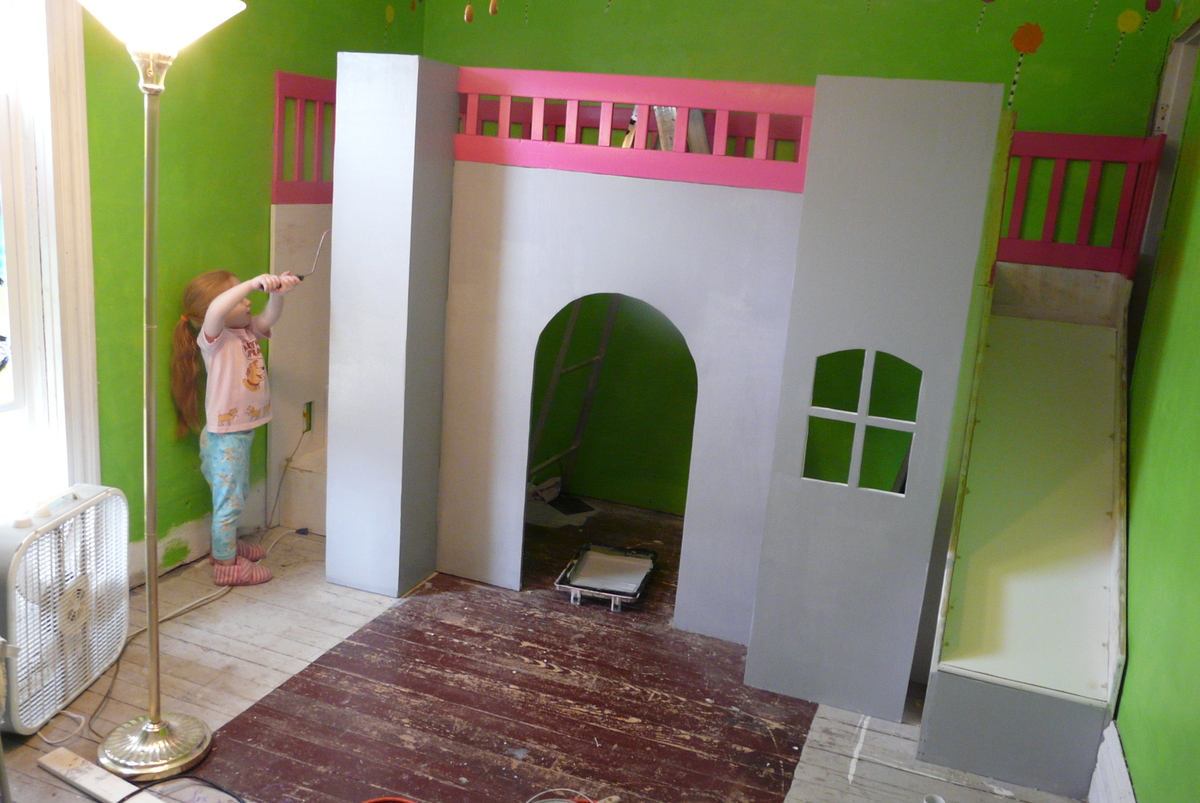
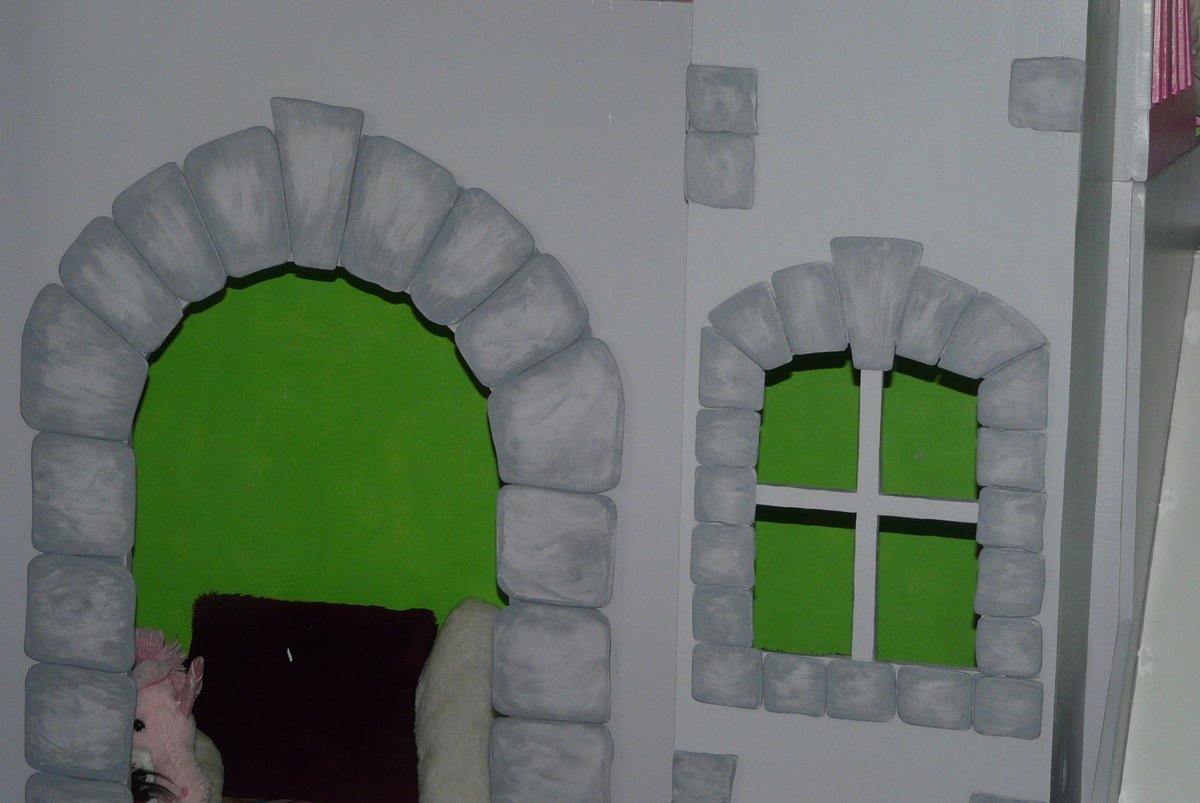
Millicent's castle!
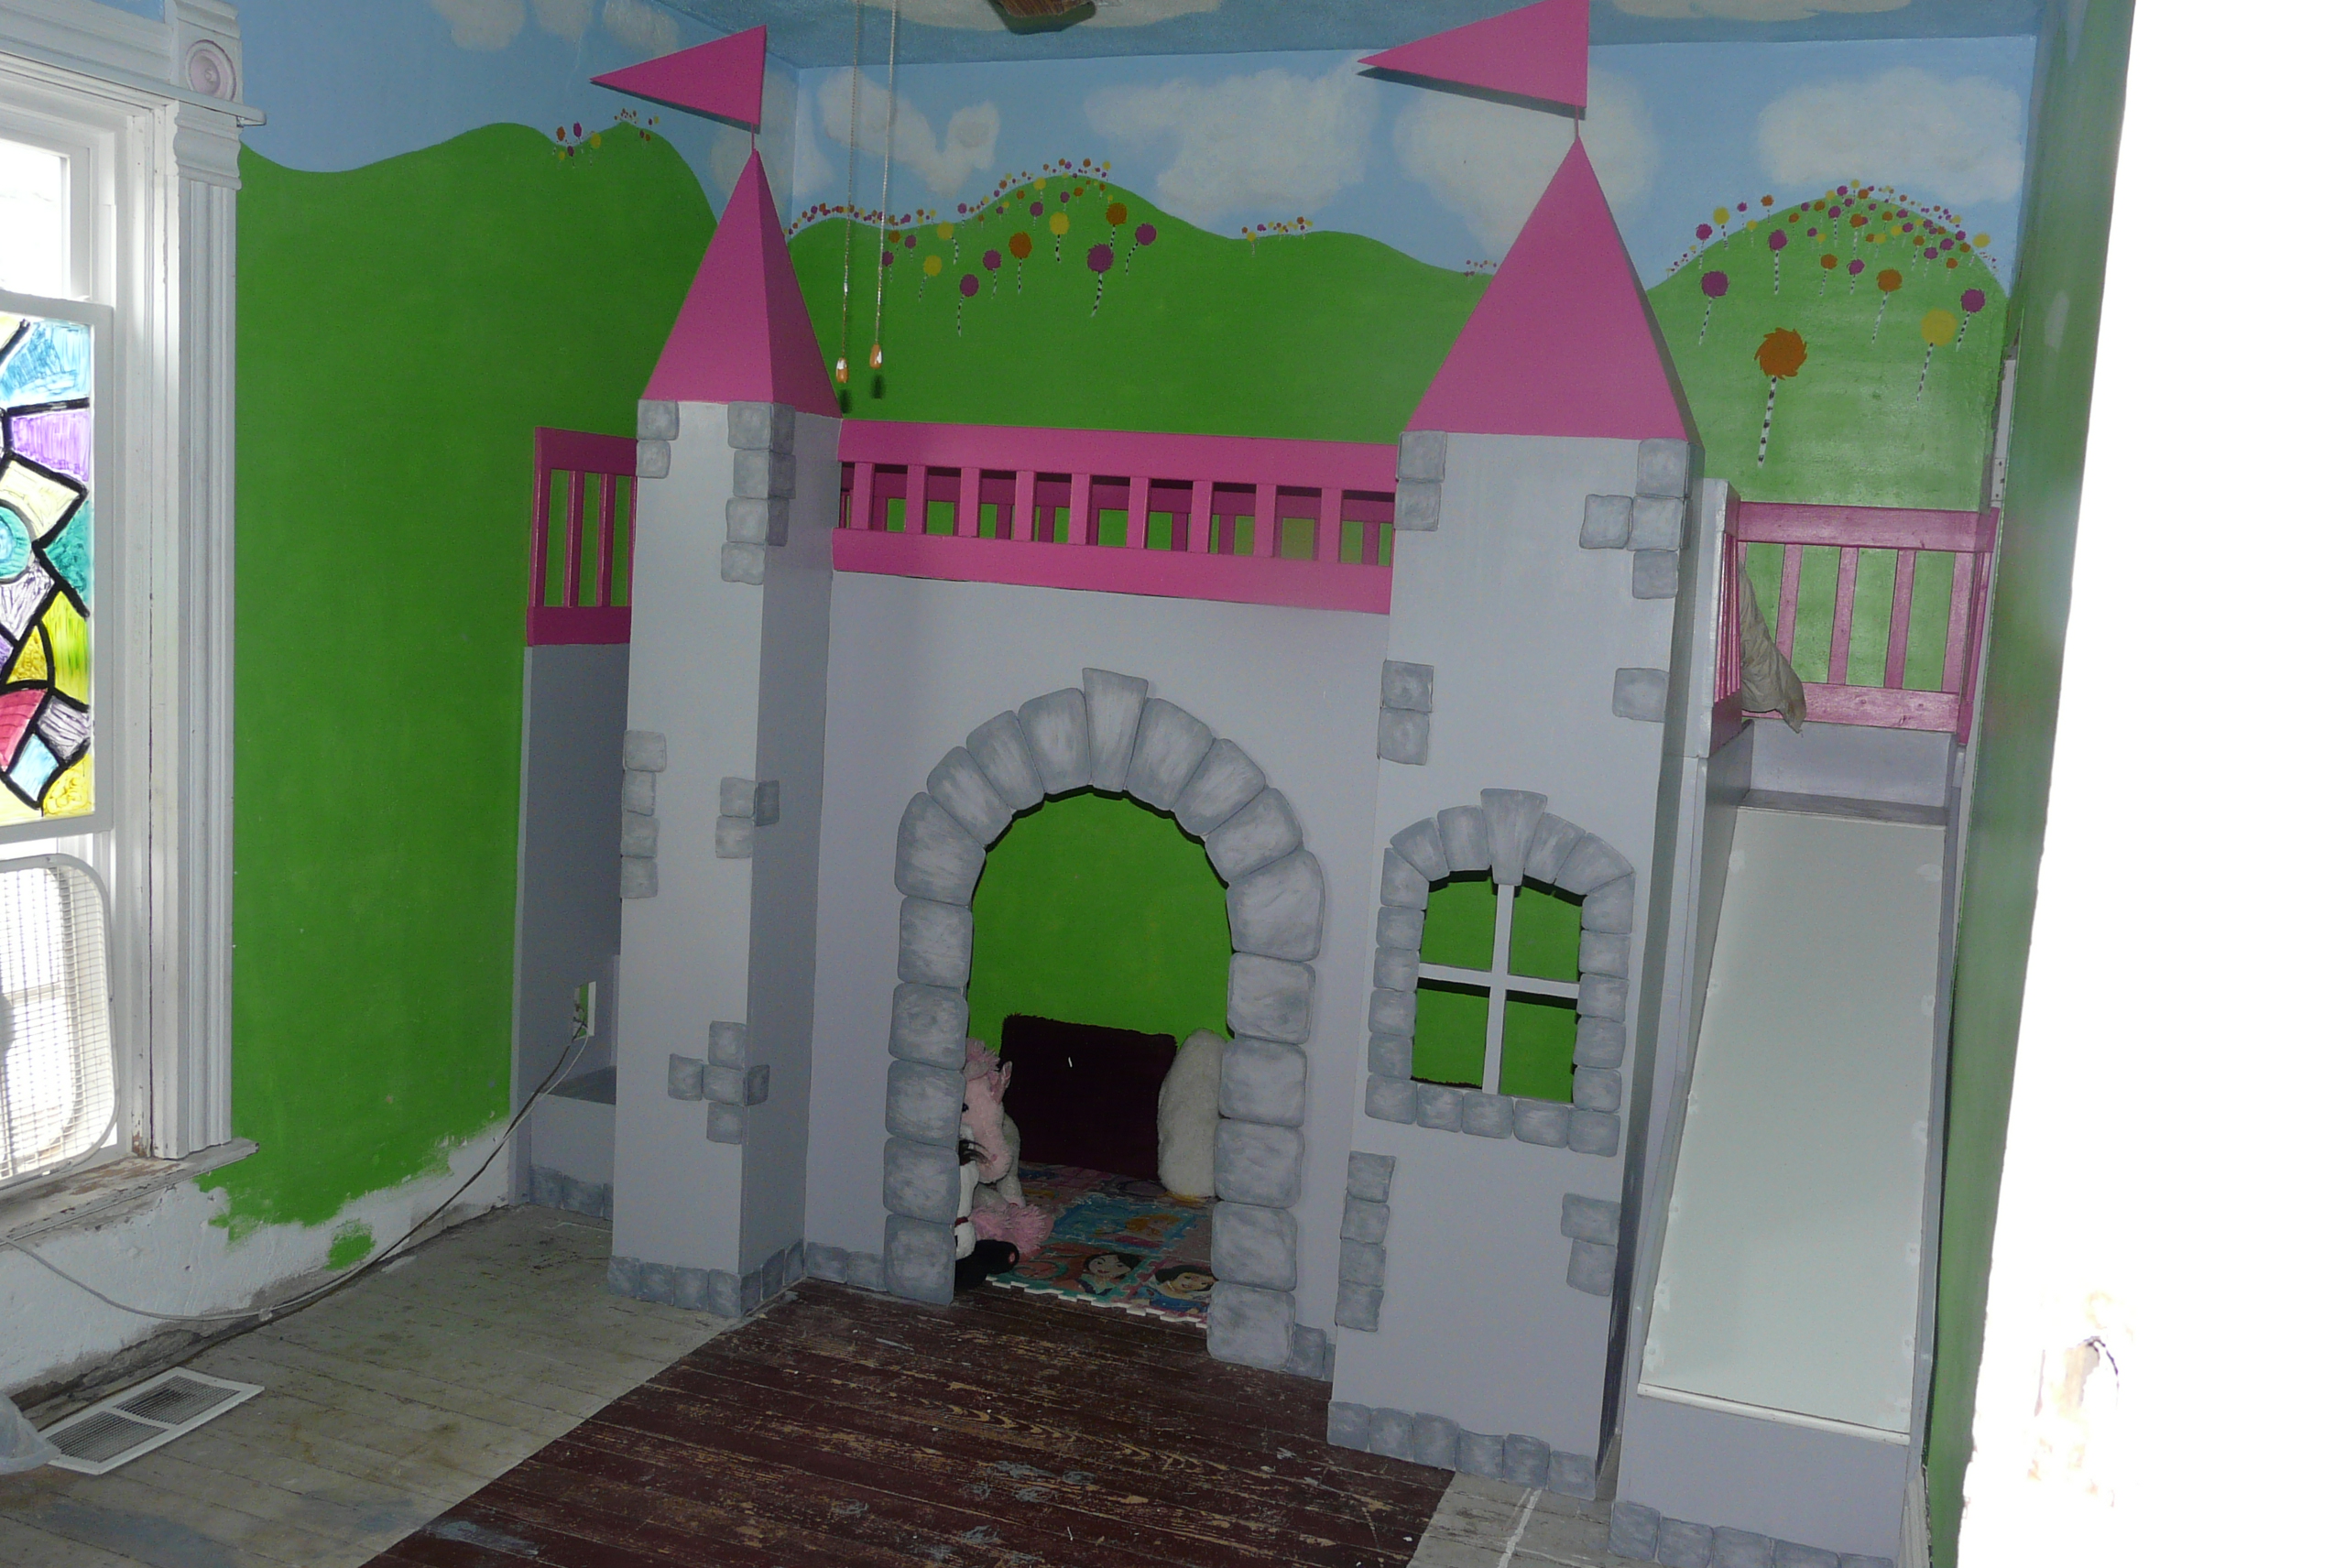
I found the plans for this bed on this site and was sooooo happy. i was looking for a unique bed for my daughter. I had searched beds for girls and cam across castle beds. I found some pretty extravagant beds costing $20,000 by personal designers and then I found beds from $1,000 to $5,000 buy it and put it together and THEN I found this plan. People asked me if I had experience in building anything. The answer was no BUT I CAN do it!. Plus the plans were very easy to read and understand! My daughter is beyond excited! She can hardly contain herself! THANK YOU!
Recommended Skill Level
Beginner
Comments

Wed, 03/27/2013 - 16:48
Amazing!
You did an amazing job on the castle! Truly outstanding. Absolutely love the painted details on the castle. And the mural! Wow! Its so great your daughter got to participate too. She'll remember this when she's all grown up. Congrats on a fabulous project! :)

Sat, 03/30/2013 - 15:36
Fantastic job!
You did a fantastic job! I love the detail you added! I'm so glad the plans were easy to understand :)
Living Room Library

Our kids love our new library! We have lots of books but few places to store them (one grandma is a reading teacher and the other works in a library).
Our alcove is 11' wide and the long shelves are 10' long. The short shelves are 2' long. The antique church pew in the center is 5' wide. I put the bottom shelves just below the outlets so we have an iPad charging station.
Built from Plan(s)
Estimated Time Investment
Weekend Project (10-20 Hours)
Finish Used
Linseed oil
Recommended Skill Level
Beginner
My little greenhouse
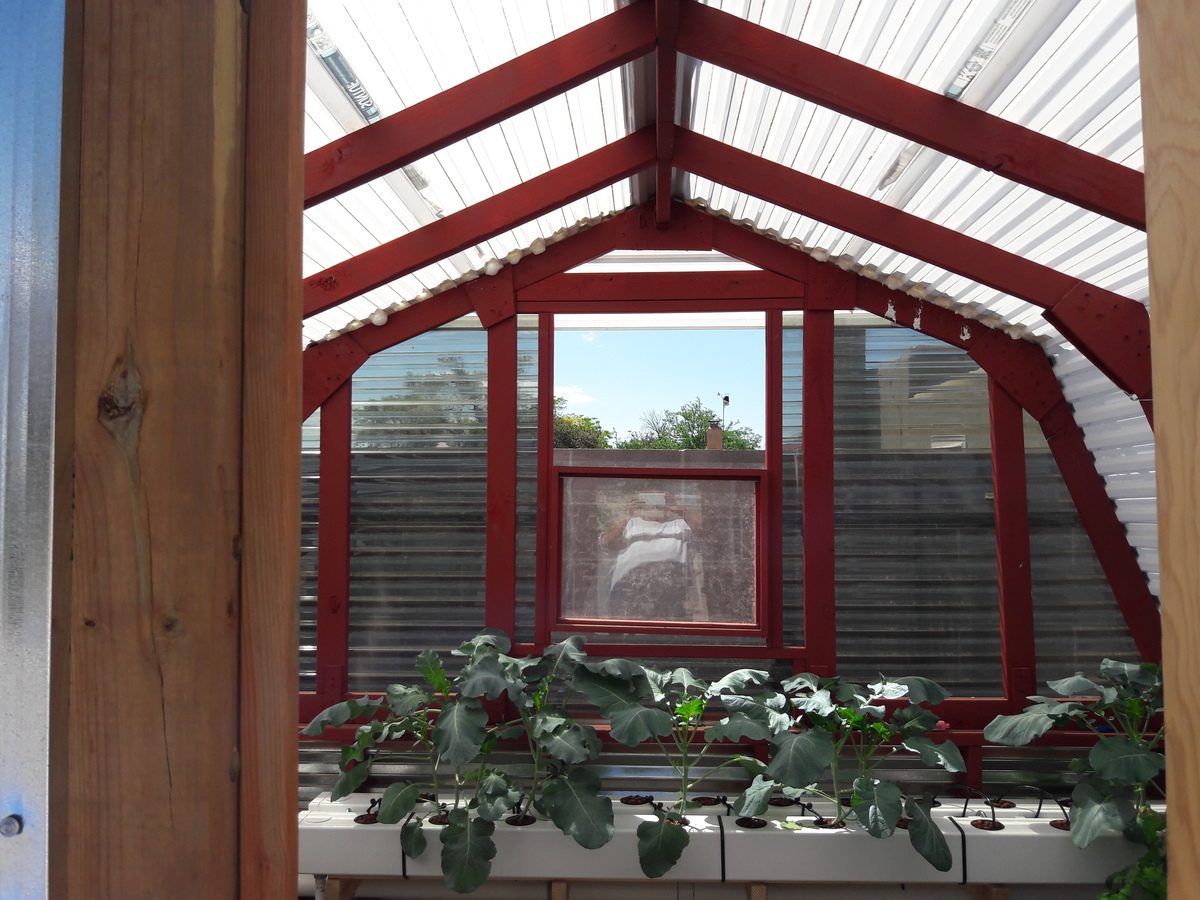
I built this project 8x10 and made the back wall exactly like the front wall and just added diy windows for air circulation. I live in the desert so I did not use clear panels I used white panels for sides and top and tinted panels for front and back so that my plants would not get scorched. I am running a hydroponic system and could not be happier with the results for a first time gardener! I built it completely by myself in about a month, I do have a full time job and kids that need to be taken to practice and lessons after school.
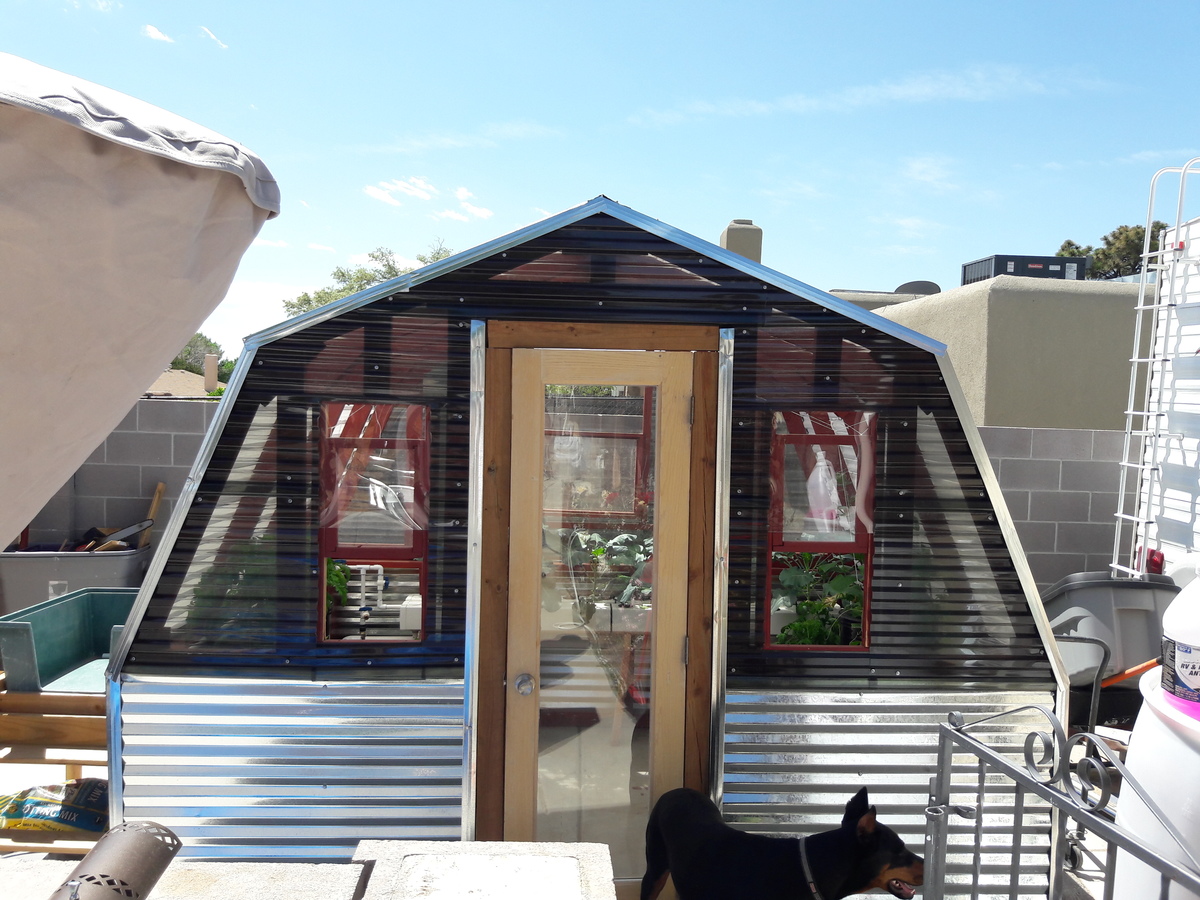
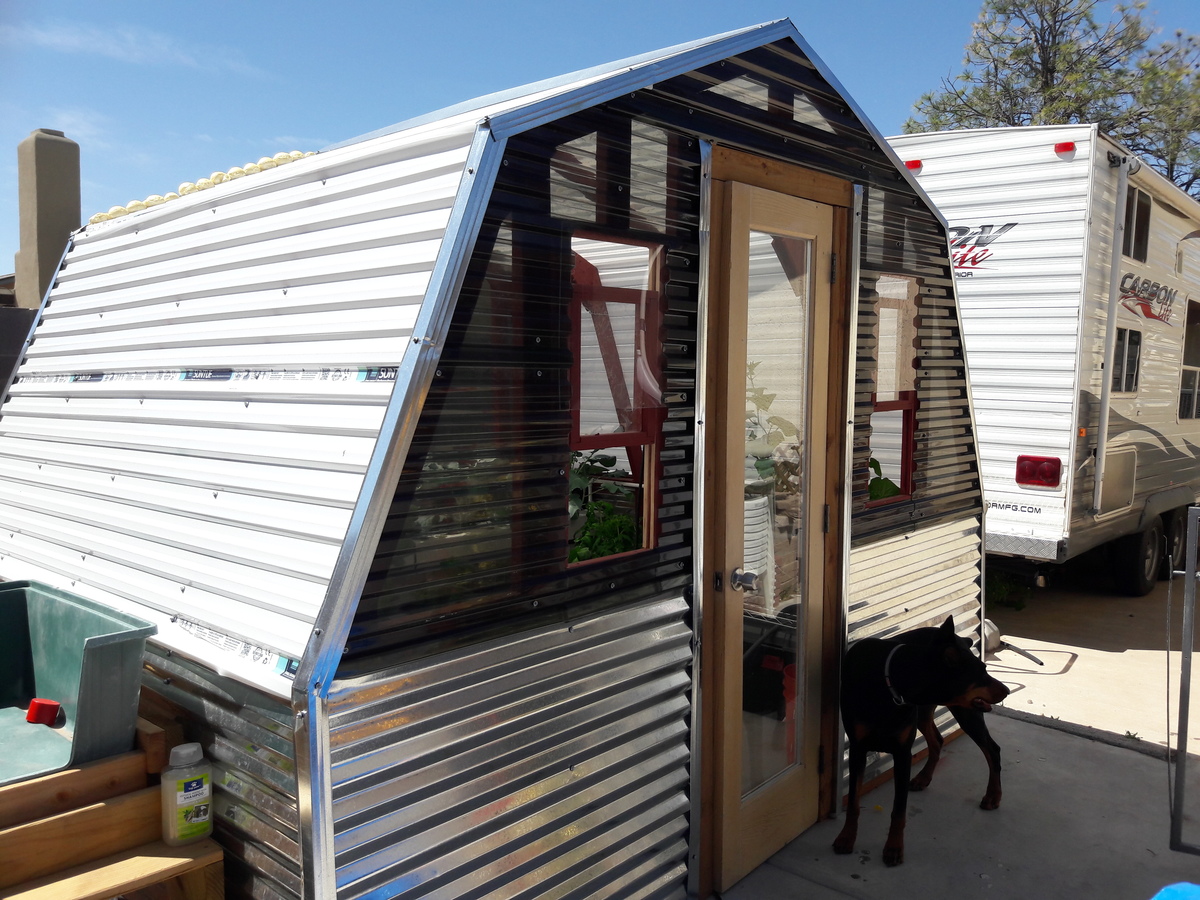
Estimated Cost
Lost track, around $600
Recommended Skill Level
Beginner
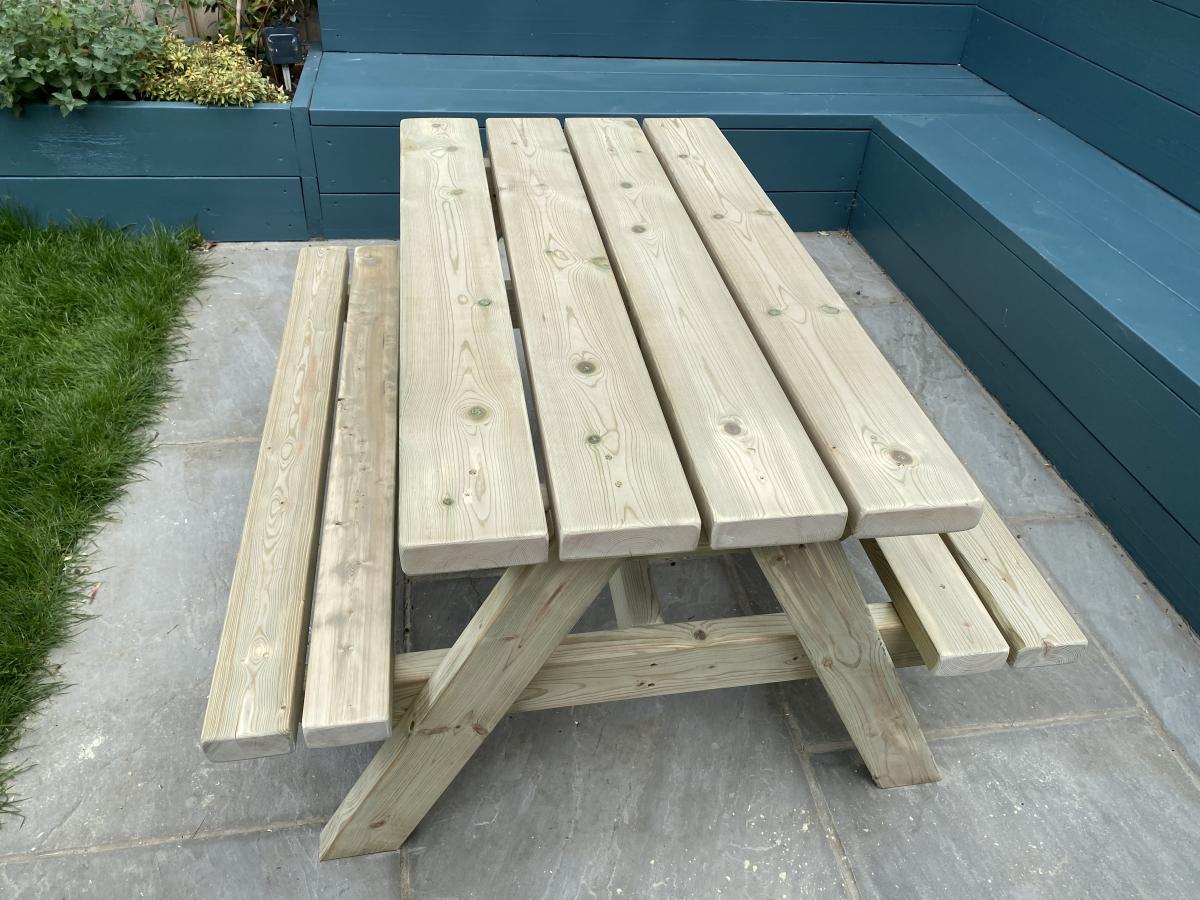
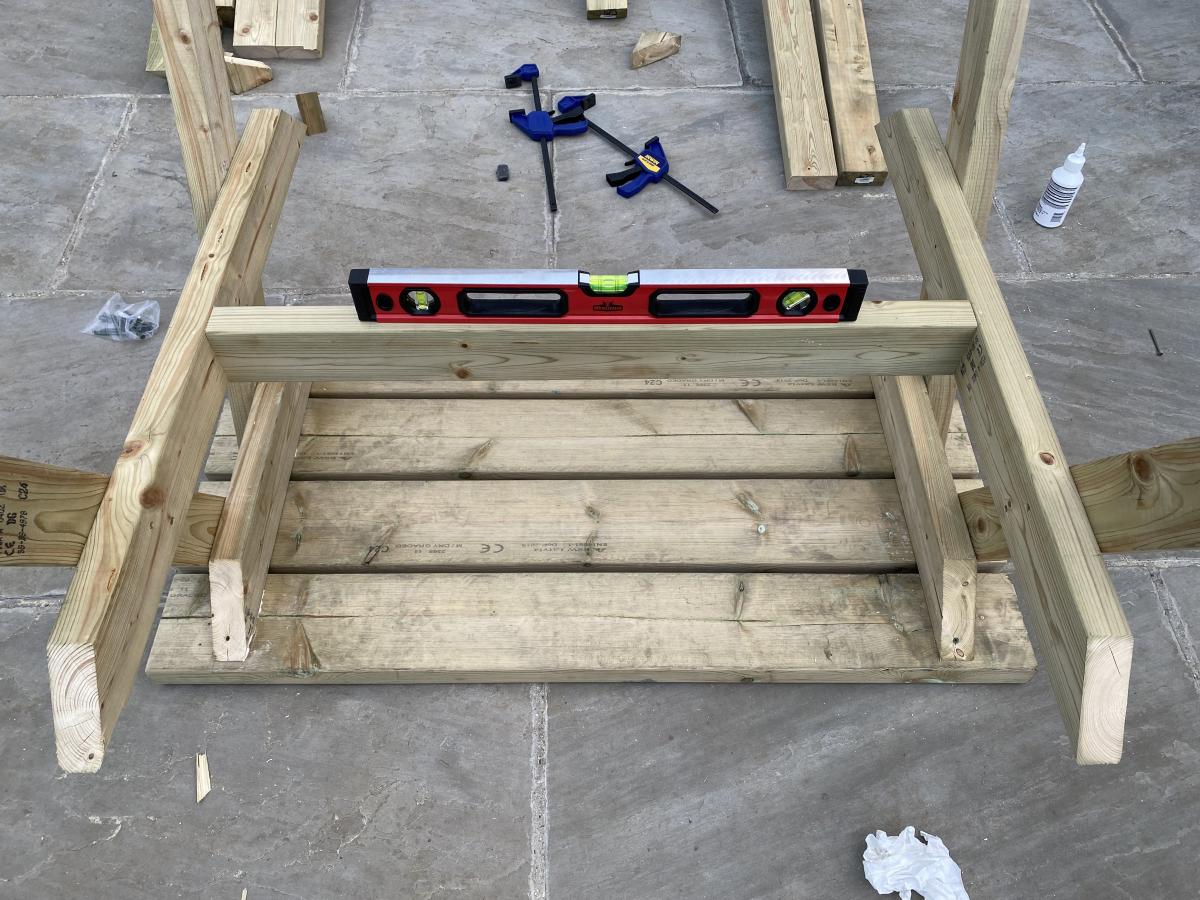
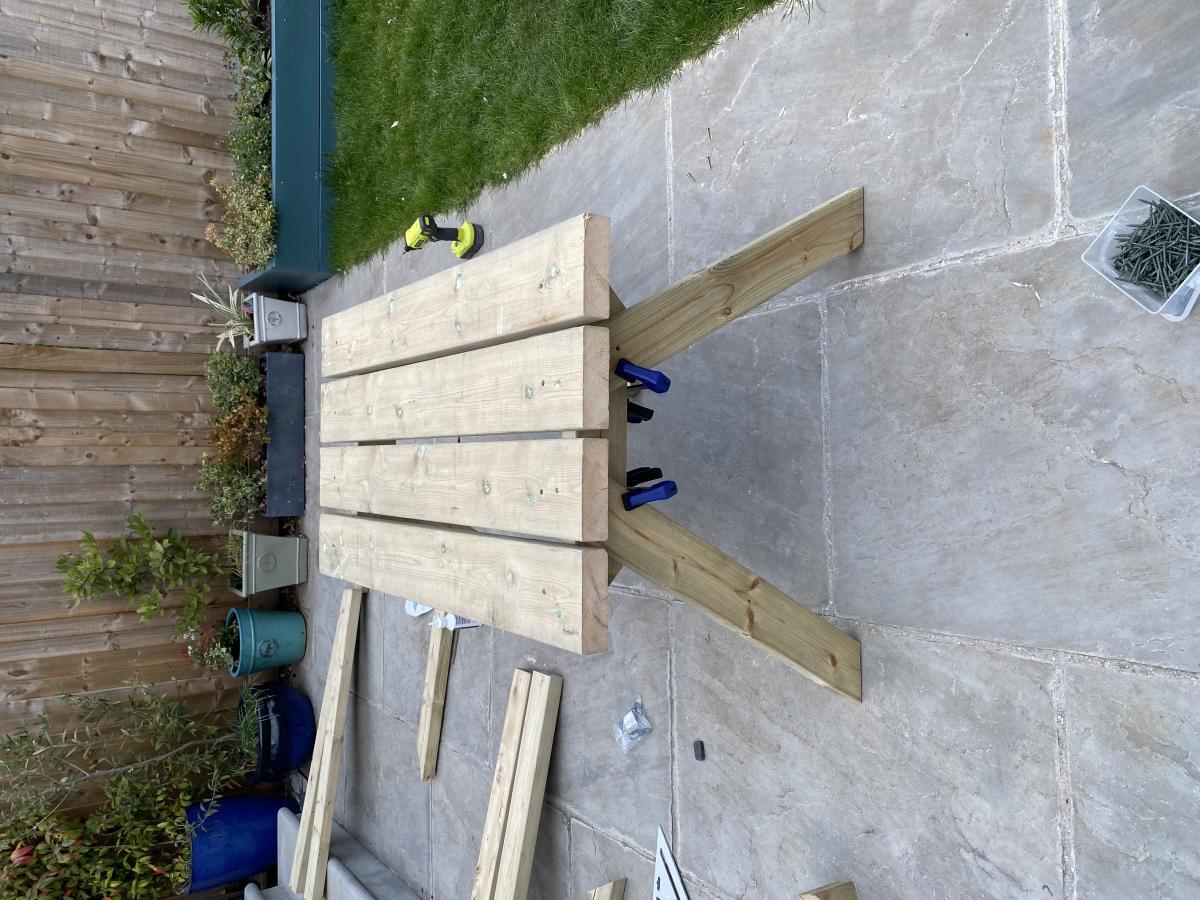
Big kids picnic table
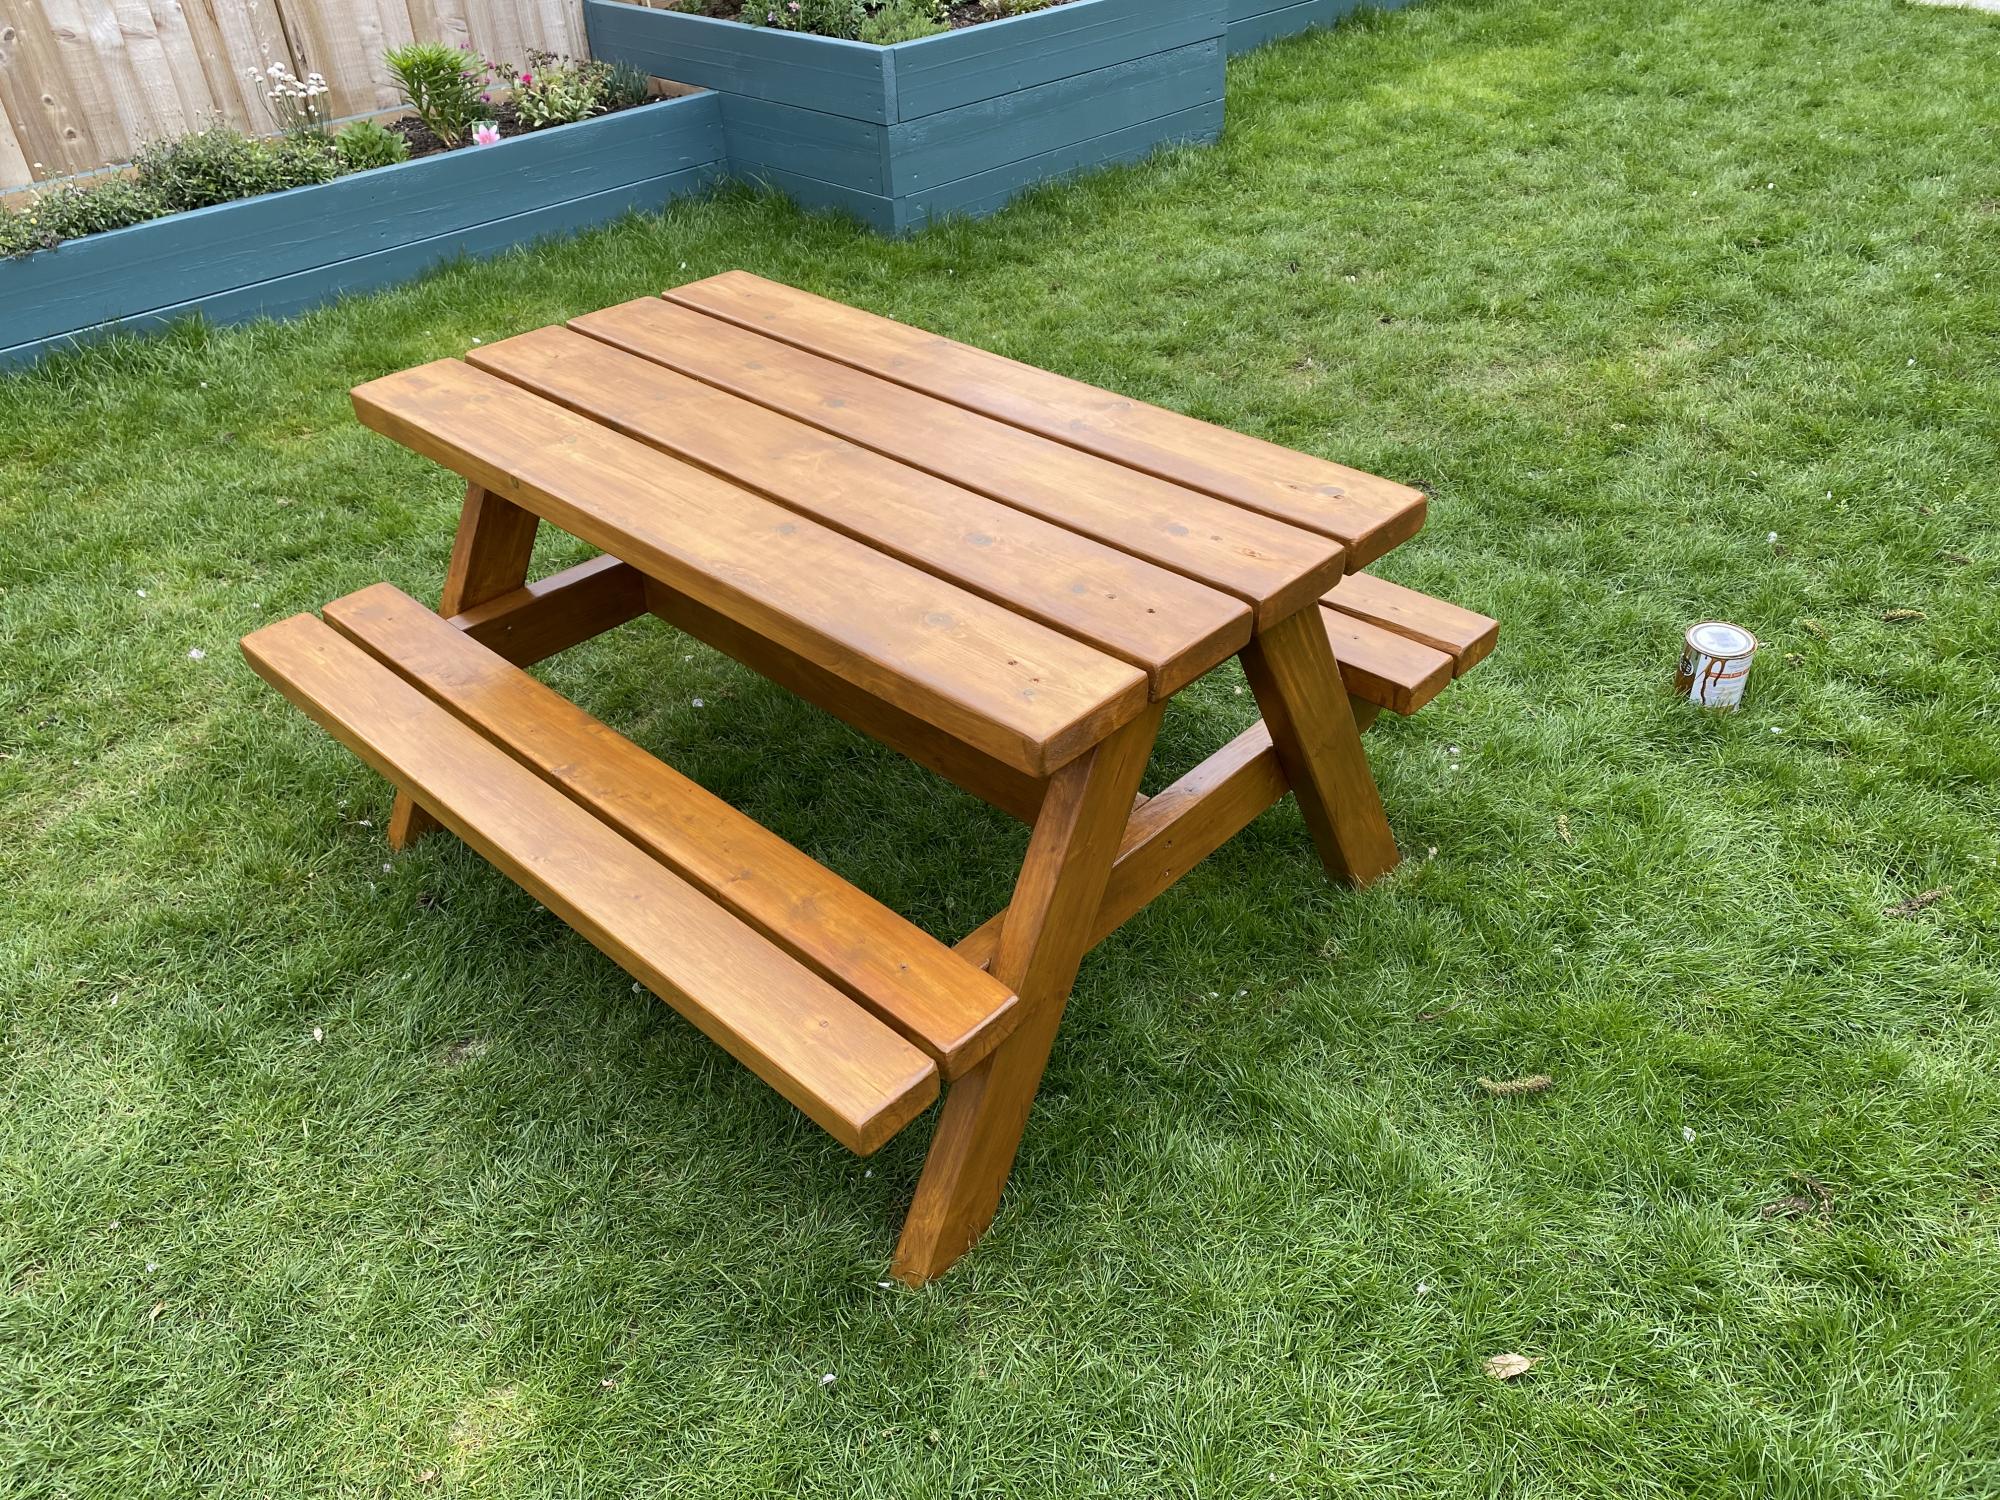
Hello from London, UK.
Used 120grit sandpaper and stained with Ronseal 10 Year Exterior Satin Woodstain 750ml Natural Oak
Built from Plan(s)
Estimated Cost
£120
Estimated Time Investment
Day Project (6-9 Hours)
Finish Used
Ronseal 10 Year Exterior Satin Woodstain 750ml Natural Oak
Recommended Skill Level
Beginner
Comments
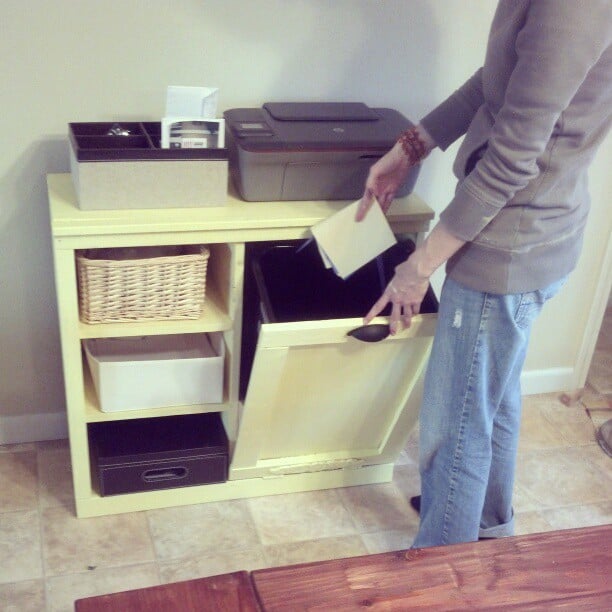
Recycling Center
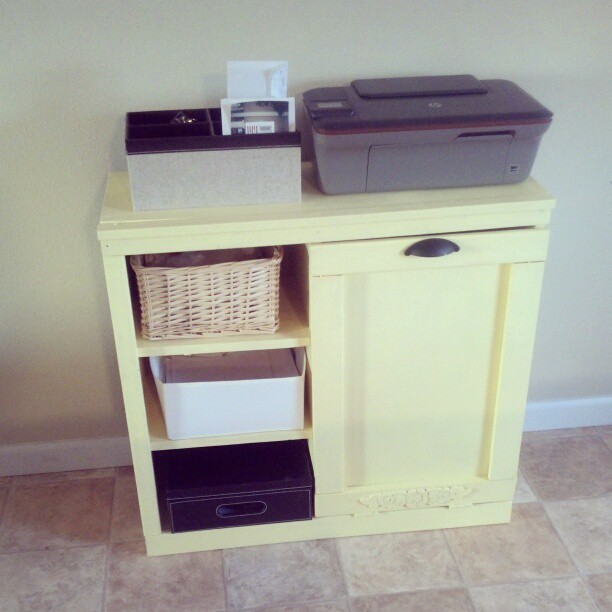
Well...this was pretty much all done by me.
I am really not liking how many bad boards there are at the store. It takes forever to find a decent board. I had some of my x12s measuring closer to 11 (yes I know they aren't 12 inches).
The door is a little wonky but if it bothers me too much I will just replace it with a curtain on a tension rod.
I love the yellow and I am very proud of myself :)
I didn't have a Kreg jig (too expensive for us right now) but it would definitely have been helpful...
Built from Plan(s)
Estimated Cost
100
Estimated Time Investment
Day Project (6-9 Hours)
Finish Used
I can't remember the exact color...yellow in Valspar satin.
Handpainted with brush
Handpainted with brush
Recommended Skill Level
Intermediate
Comments
Sun, 03/31/2013 - 07:44
Agreed!!!
I run into that problem as well!!! And with two kiddos at my hip it gets more annoying to sift thru 5 boards before a good one comes up. But it's all worth it. I made this as well and and the magnetic closure made all the difference. This is really nice by the way. The color is fab!
simple changing table
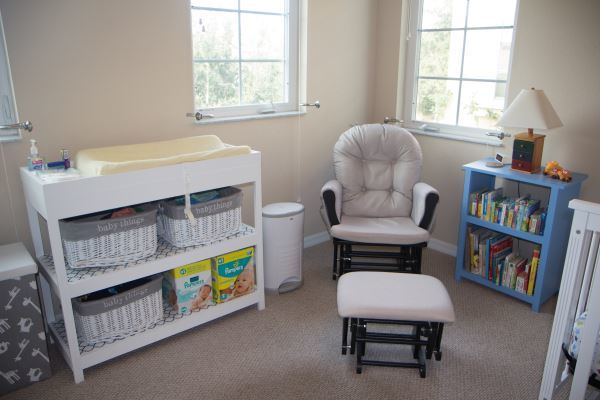
I built this before my son was born to use as a changing table in his room. I used leftover plywood from another project which made it a cheap build. It is super sturdy and has plenty of storage on the top to hold wipes, diapers, and creams. I used shelf lining and bought cute baskets to complete the look.
Recommended Skill Level
Beginner
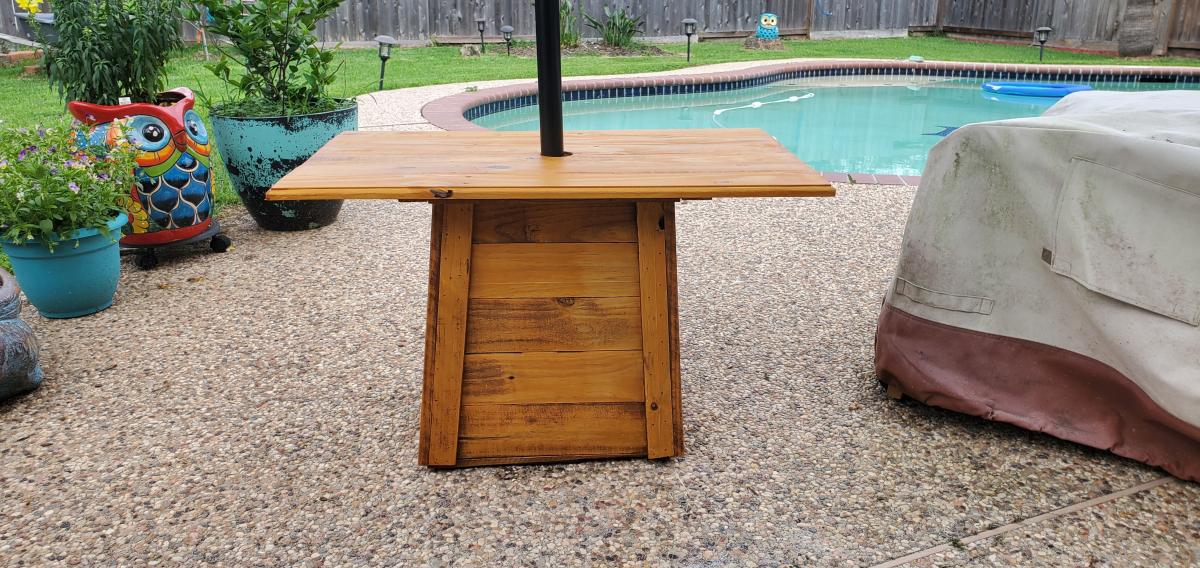
Flipped Cedar Planter
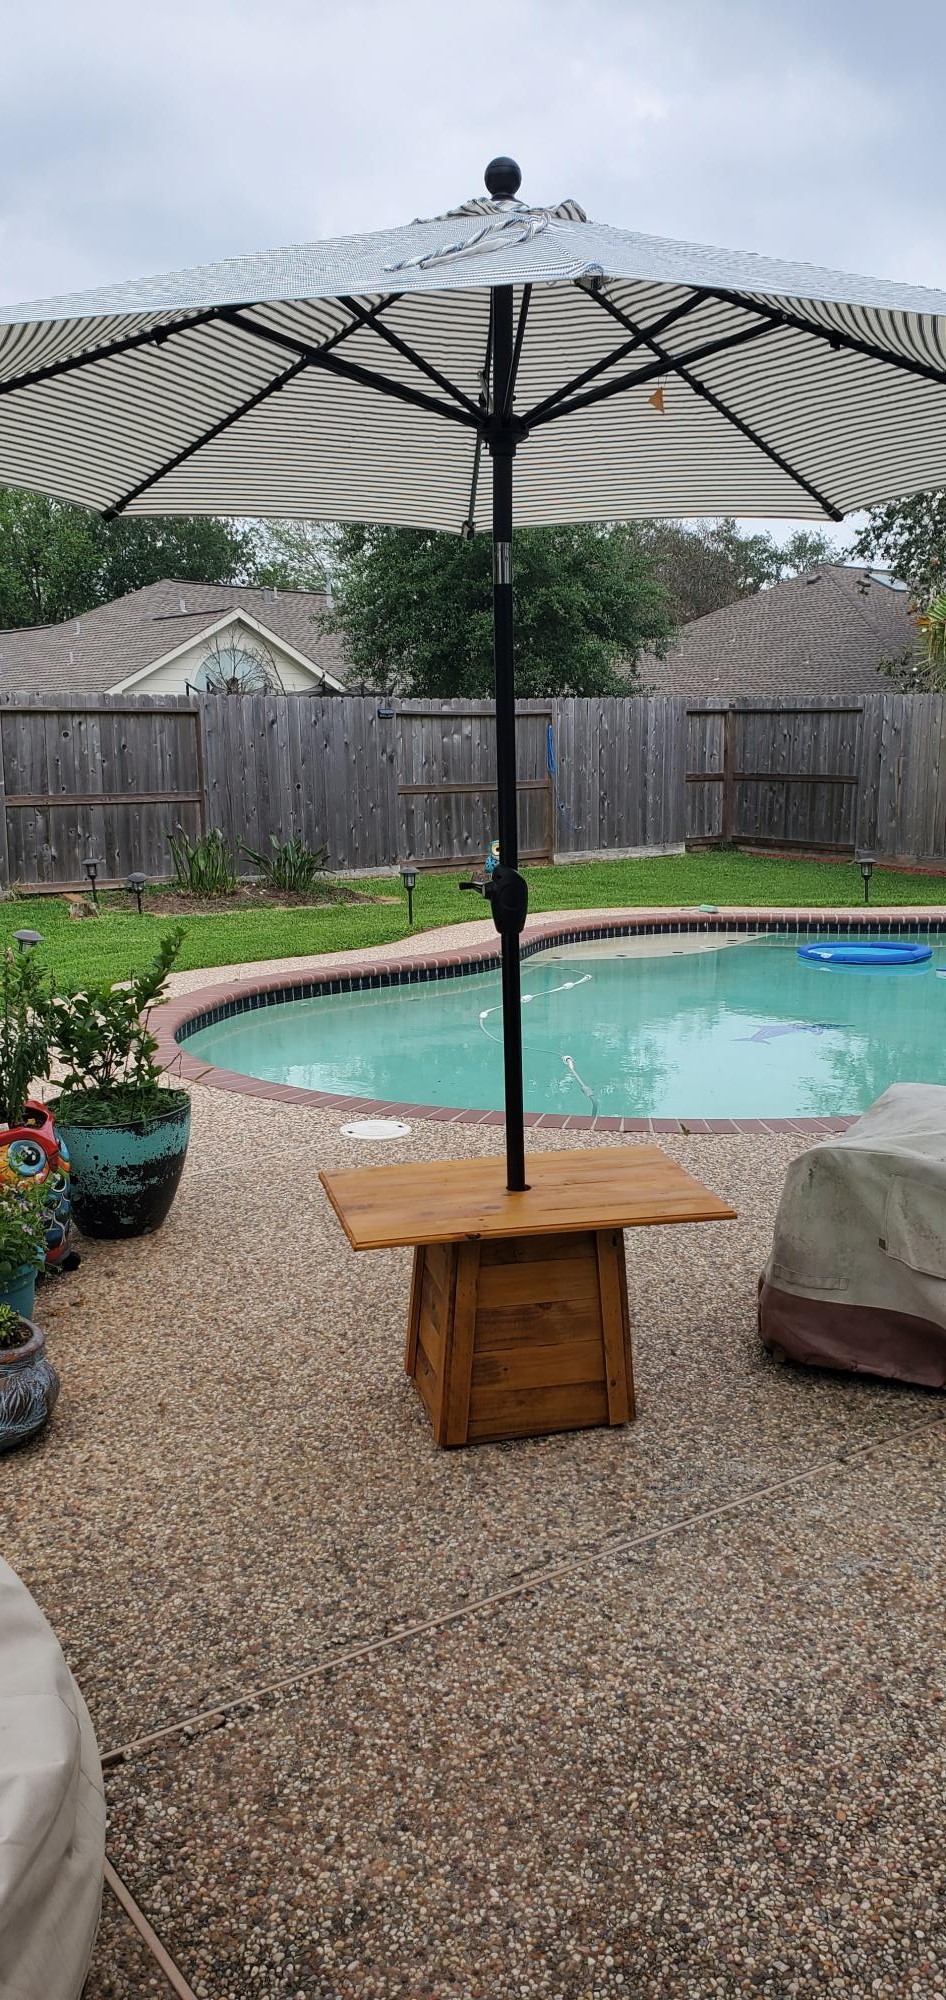
I used the Ana's Cedar Planter plans and flipped it, placed a bucket with cement inside to support umbrella and made a simple table top for drinks. Hope you like it ✌🏾
Built from Plan(s)
Estimated Time Investment
Day Project (6-9 Hours)
Recommended Skill Level
Beginner

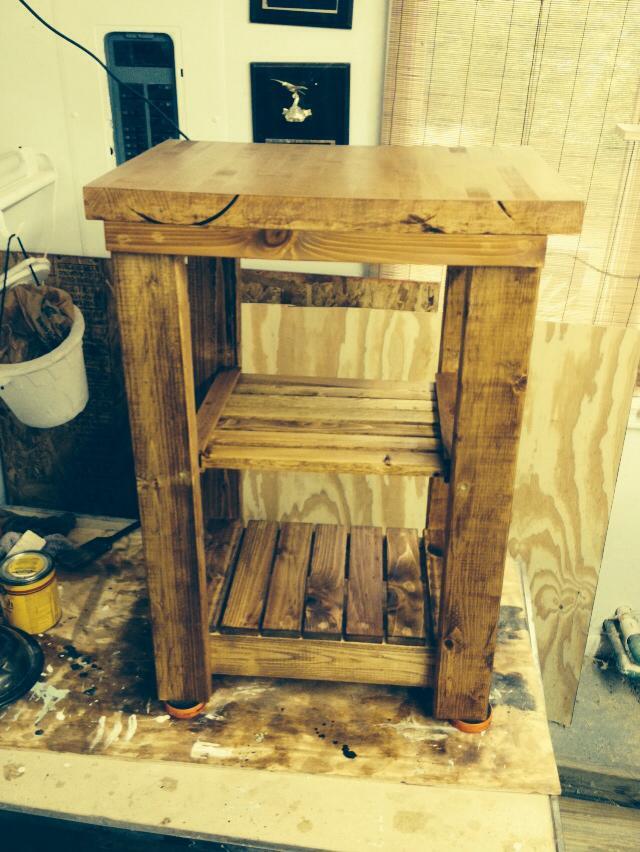
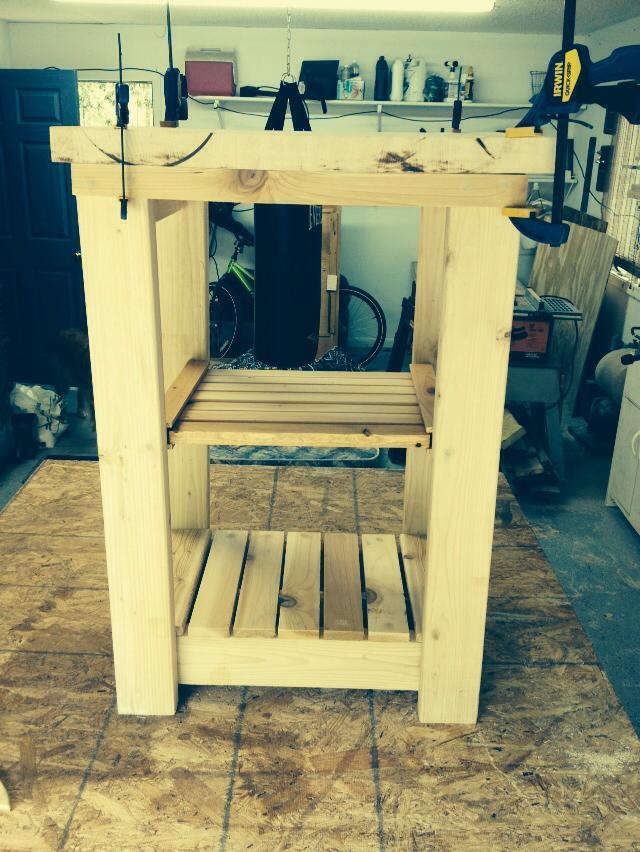
Rustic small rolling kitchen island
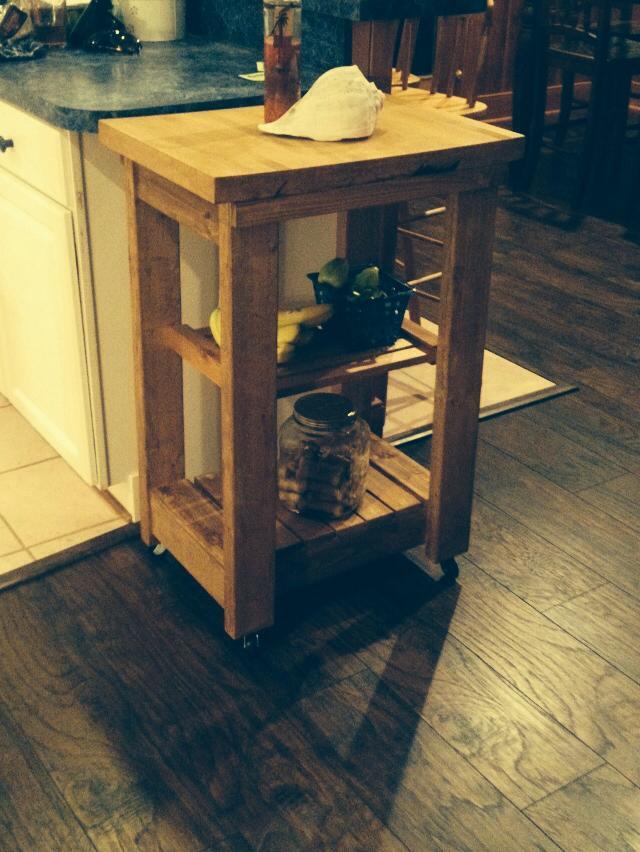
I modified this plan to use wood that I had and also a piece of kitchen counter top that was left over from my daughters new house.
Built from Plan(s)
Estimated Cost
Scraps
Estimated Time Investment
Weekend Project (10-20 Hours)
Finish Used
Golden Oak
Recommended Skill Level
Intermediate
Comments


Ana's Outdoor Sofa
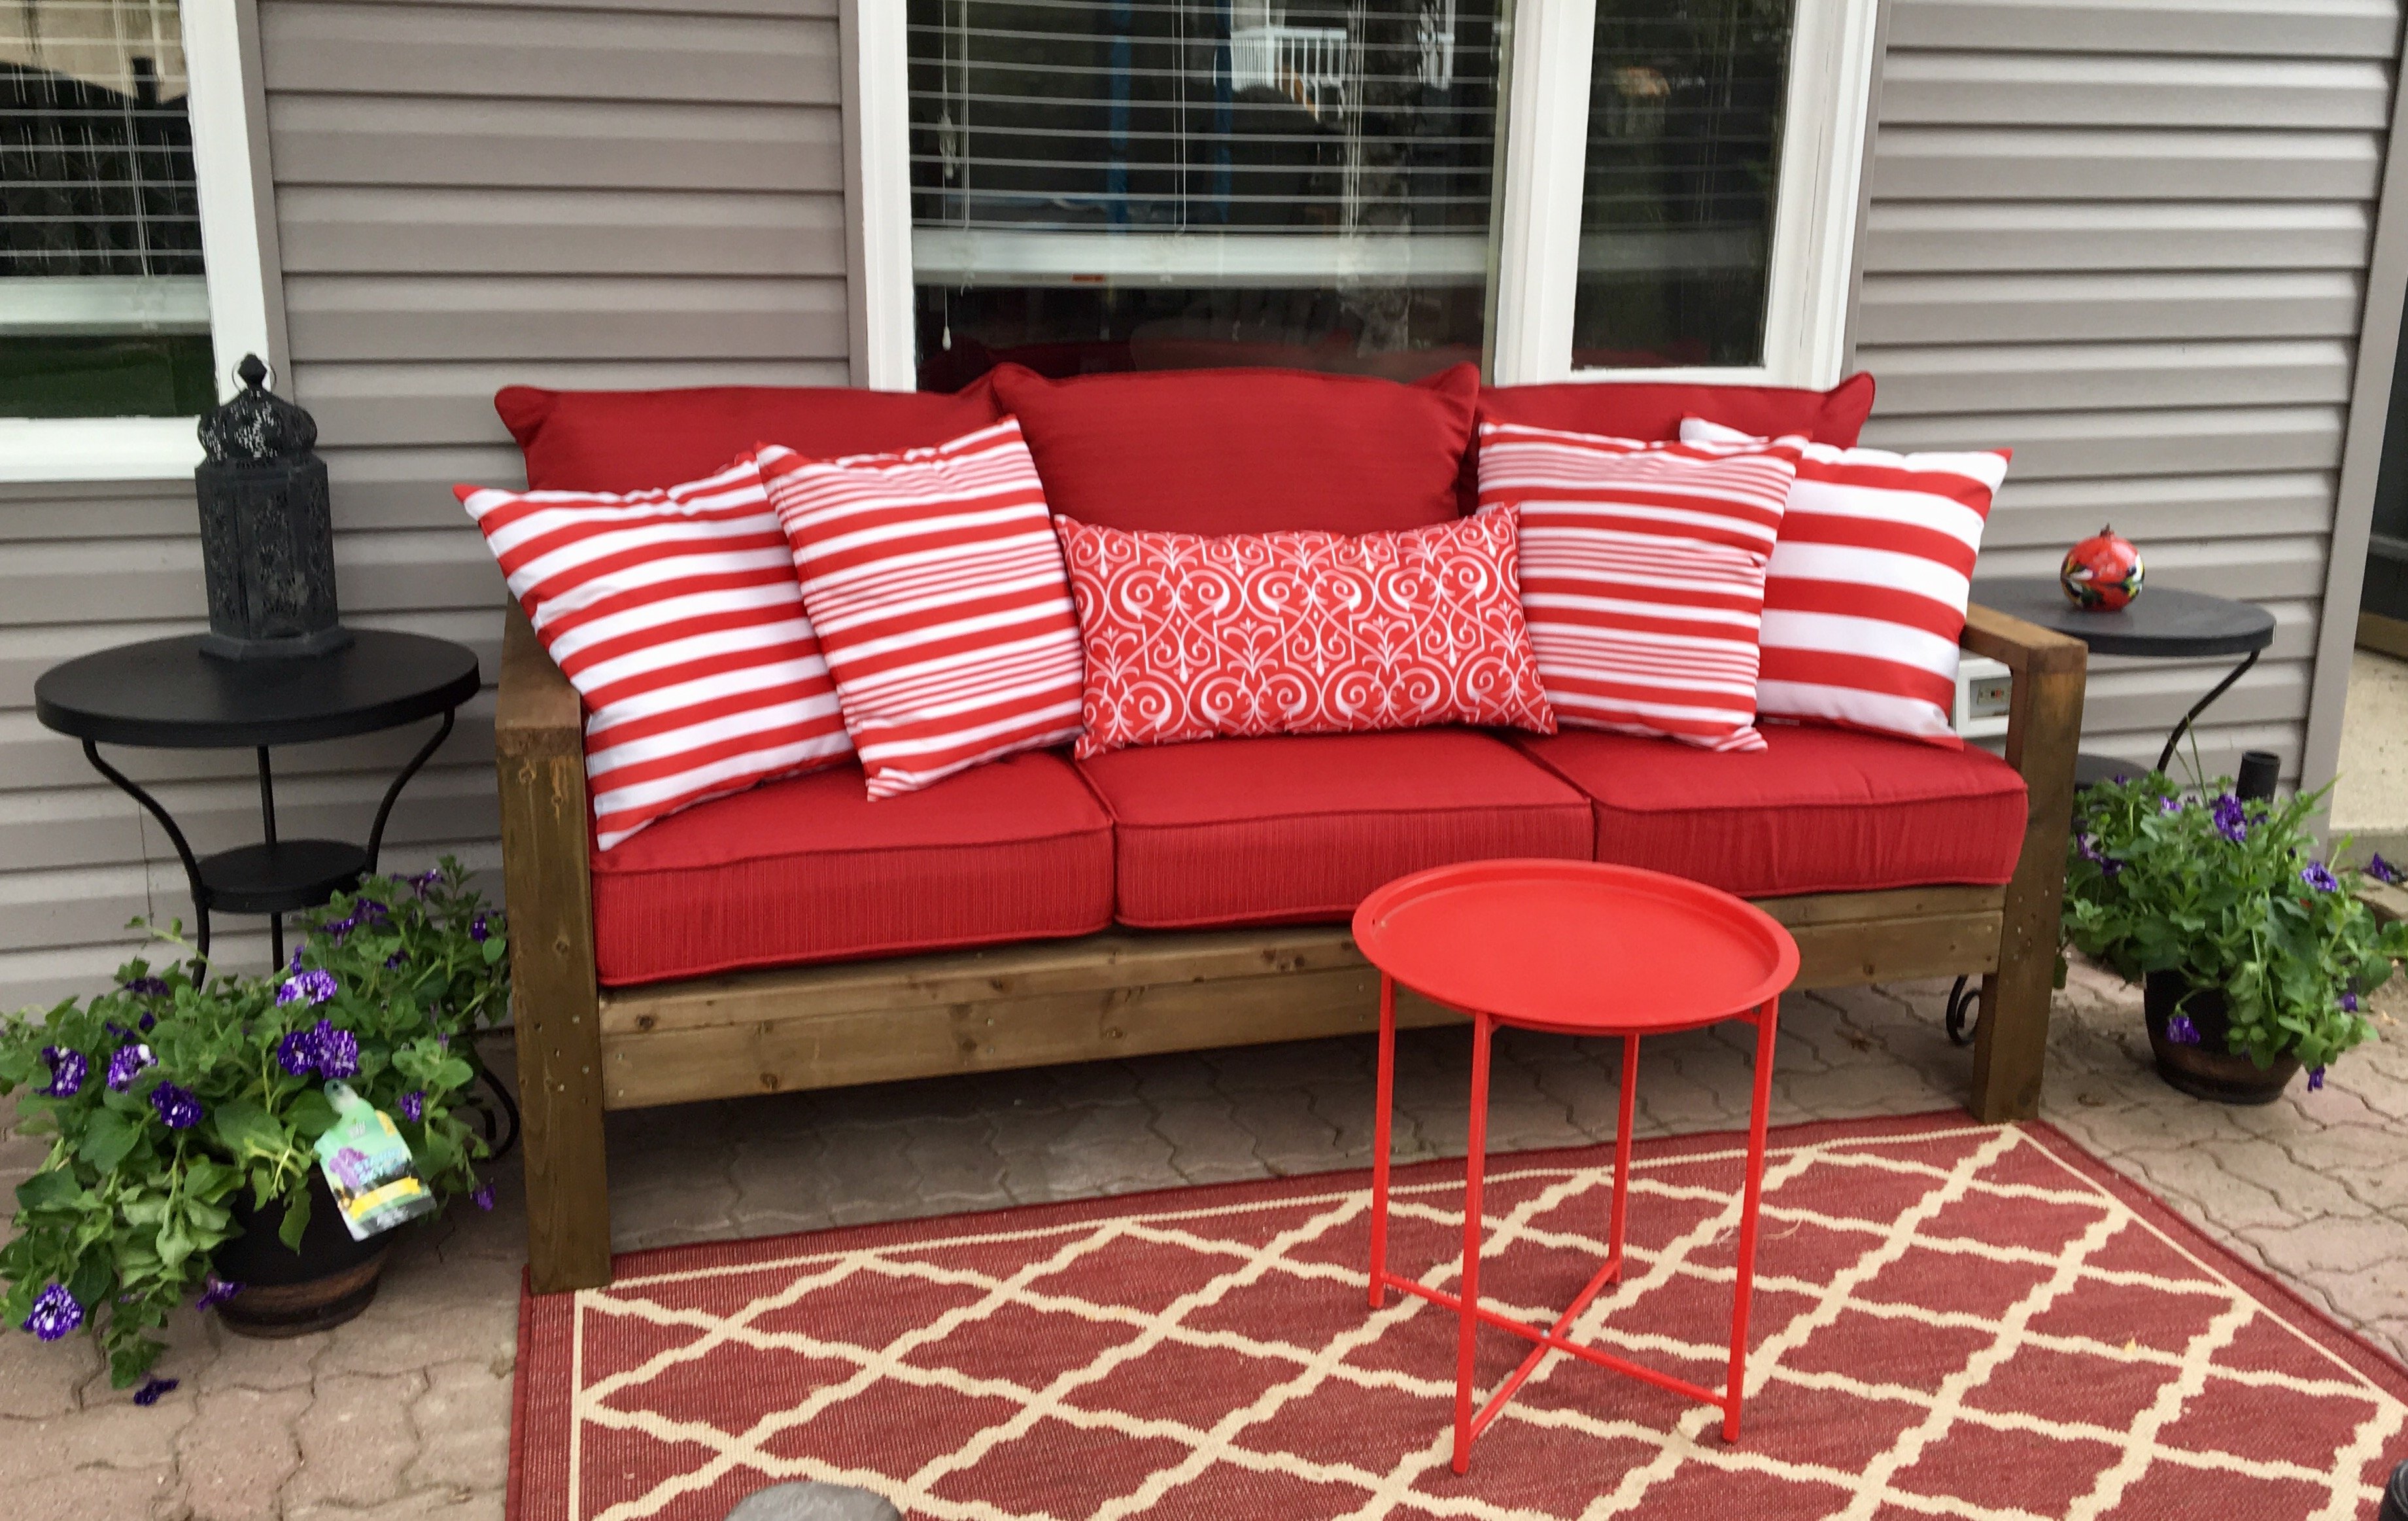
We used Anna's outdoor Sofa plans, which were very easy to read. For wood, we kept costs low by using pressure treated wood, and staining it with Minwax Colonial Walnut stain. We did use the lumber cutting service at Home Depot- only $15 for the cuts, and it made the project time very quick. The cushions were from Lowes, and throw pillows were purchased the previous season at Homesense. We are so happy with how it turned out. Thanks, Anna!
Built from Plan(s)
Estimated Cost
$95 for wood, including cuts done by Home Depot
Screws and wood glue $15
Lowes cushions $ 200
Stain $0 (used for previous project)
Total cost $310 CDN
Screws and wood glue $15
Lowes cushions $ 200
Stain $0 (used for previous project)
Total cost $310 CDN
Estimated Time Investment
Afternoon Project (3-6 Hours)
Finish Used
Minwax Colonial Walnut
Recommended Skill Level
Starter Project
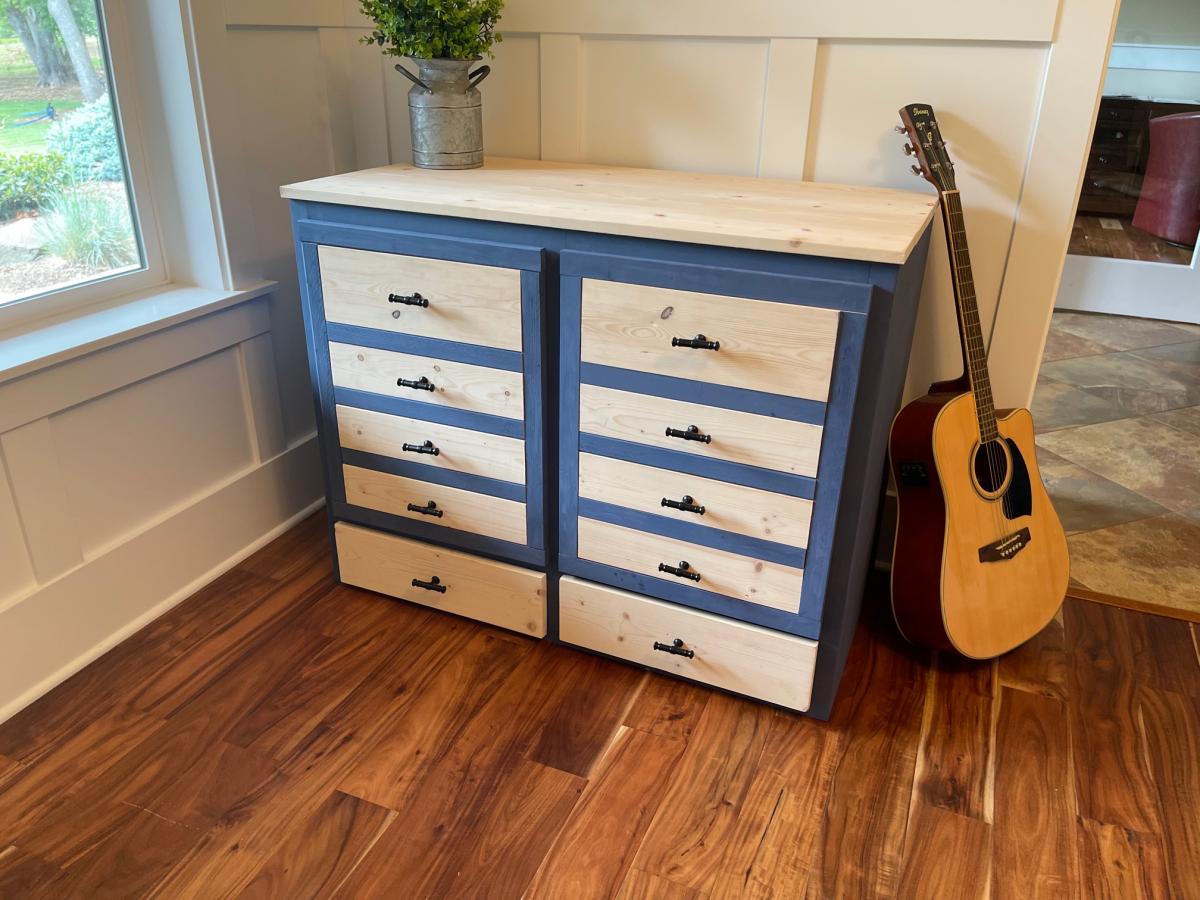
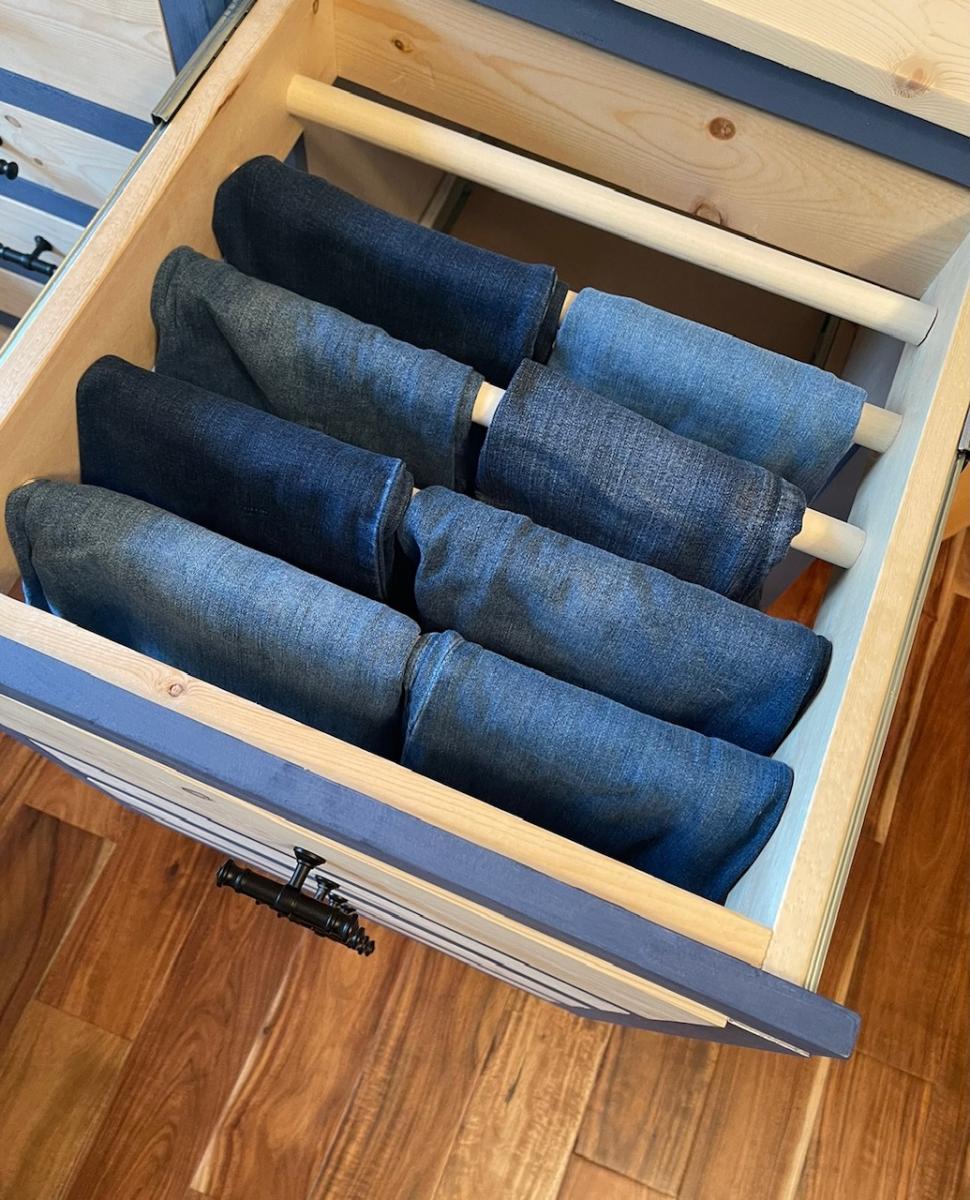
Apothecary Jeans Dresser
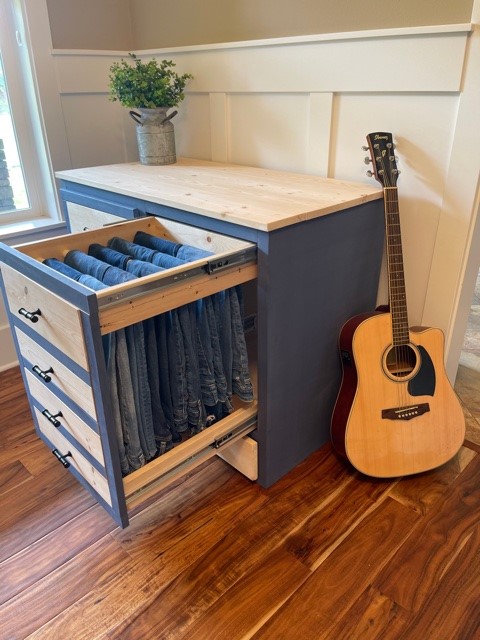
I used Shelf Help for the plywood pieces and a mash up of Ana's plans for the rest. I shared a video on my family page for steps used here https://www.youtube.com/watch?v=urFoX5j4J0s
Built from Plan(s)
Estimated Cost
250
Estimated Time Investment
Weekend Project (10-20 Hours)
Recommended Skill Level
Beginner
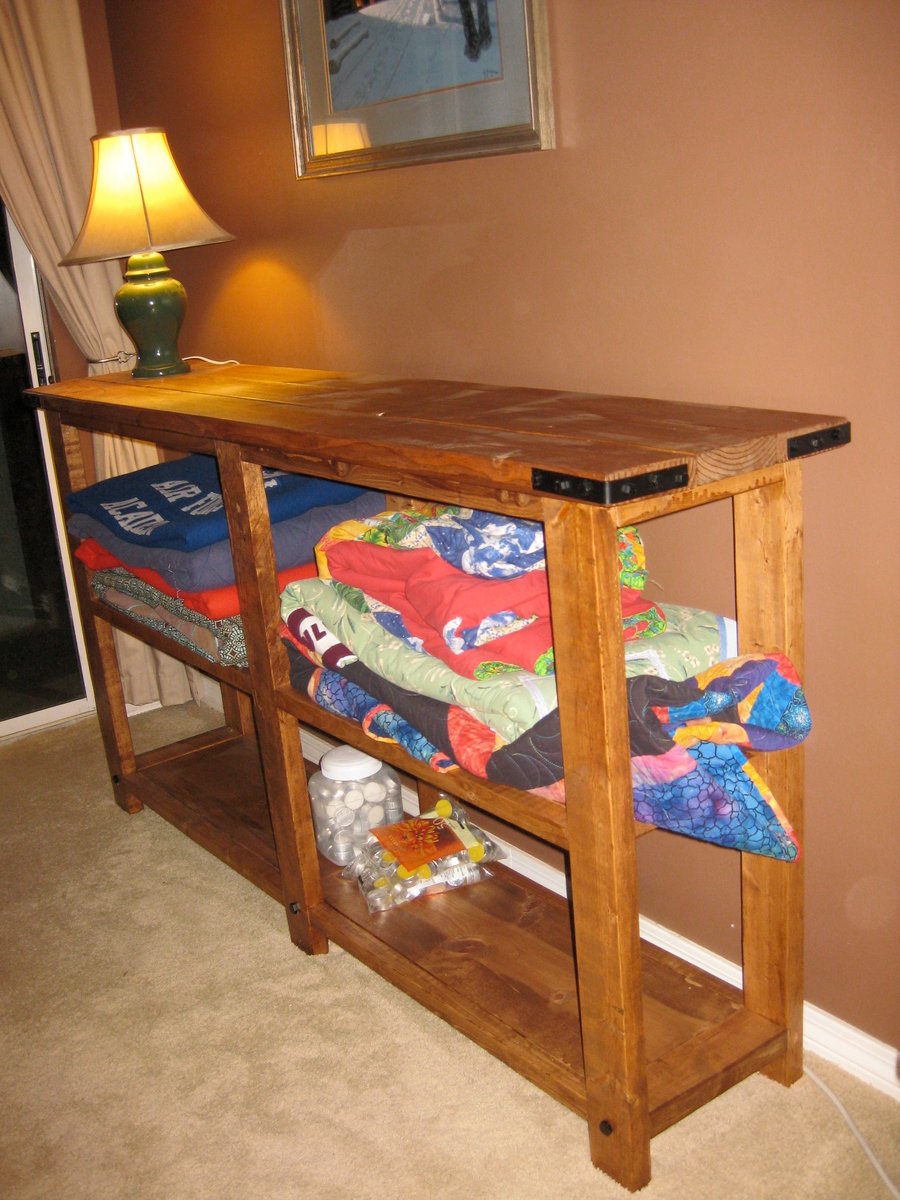
Rustic X console (modified)
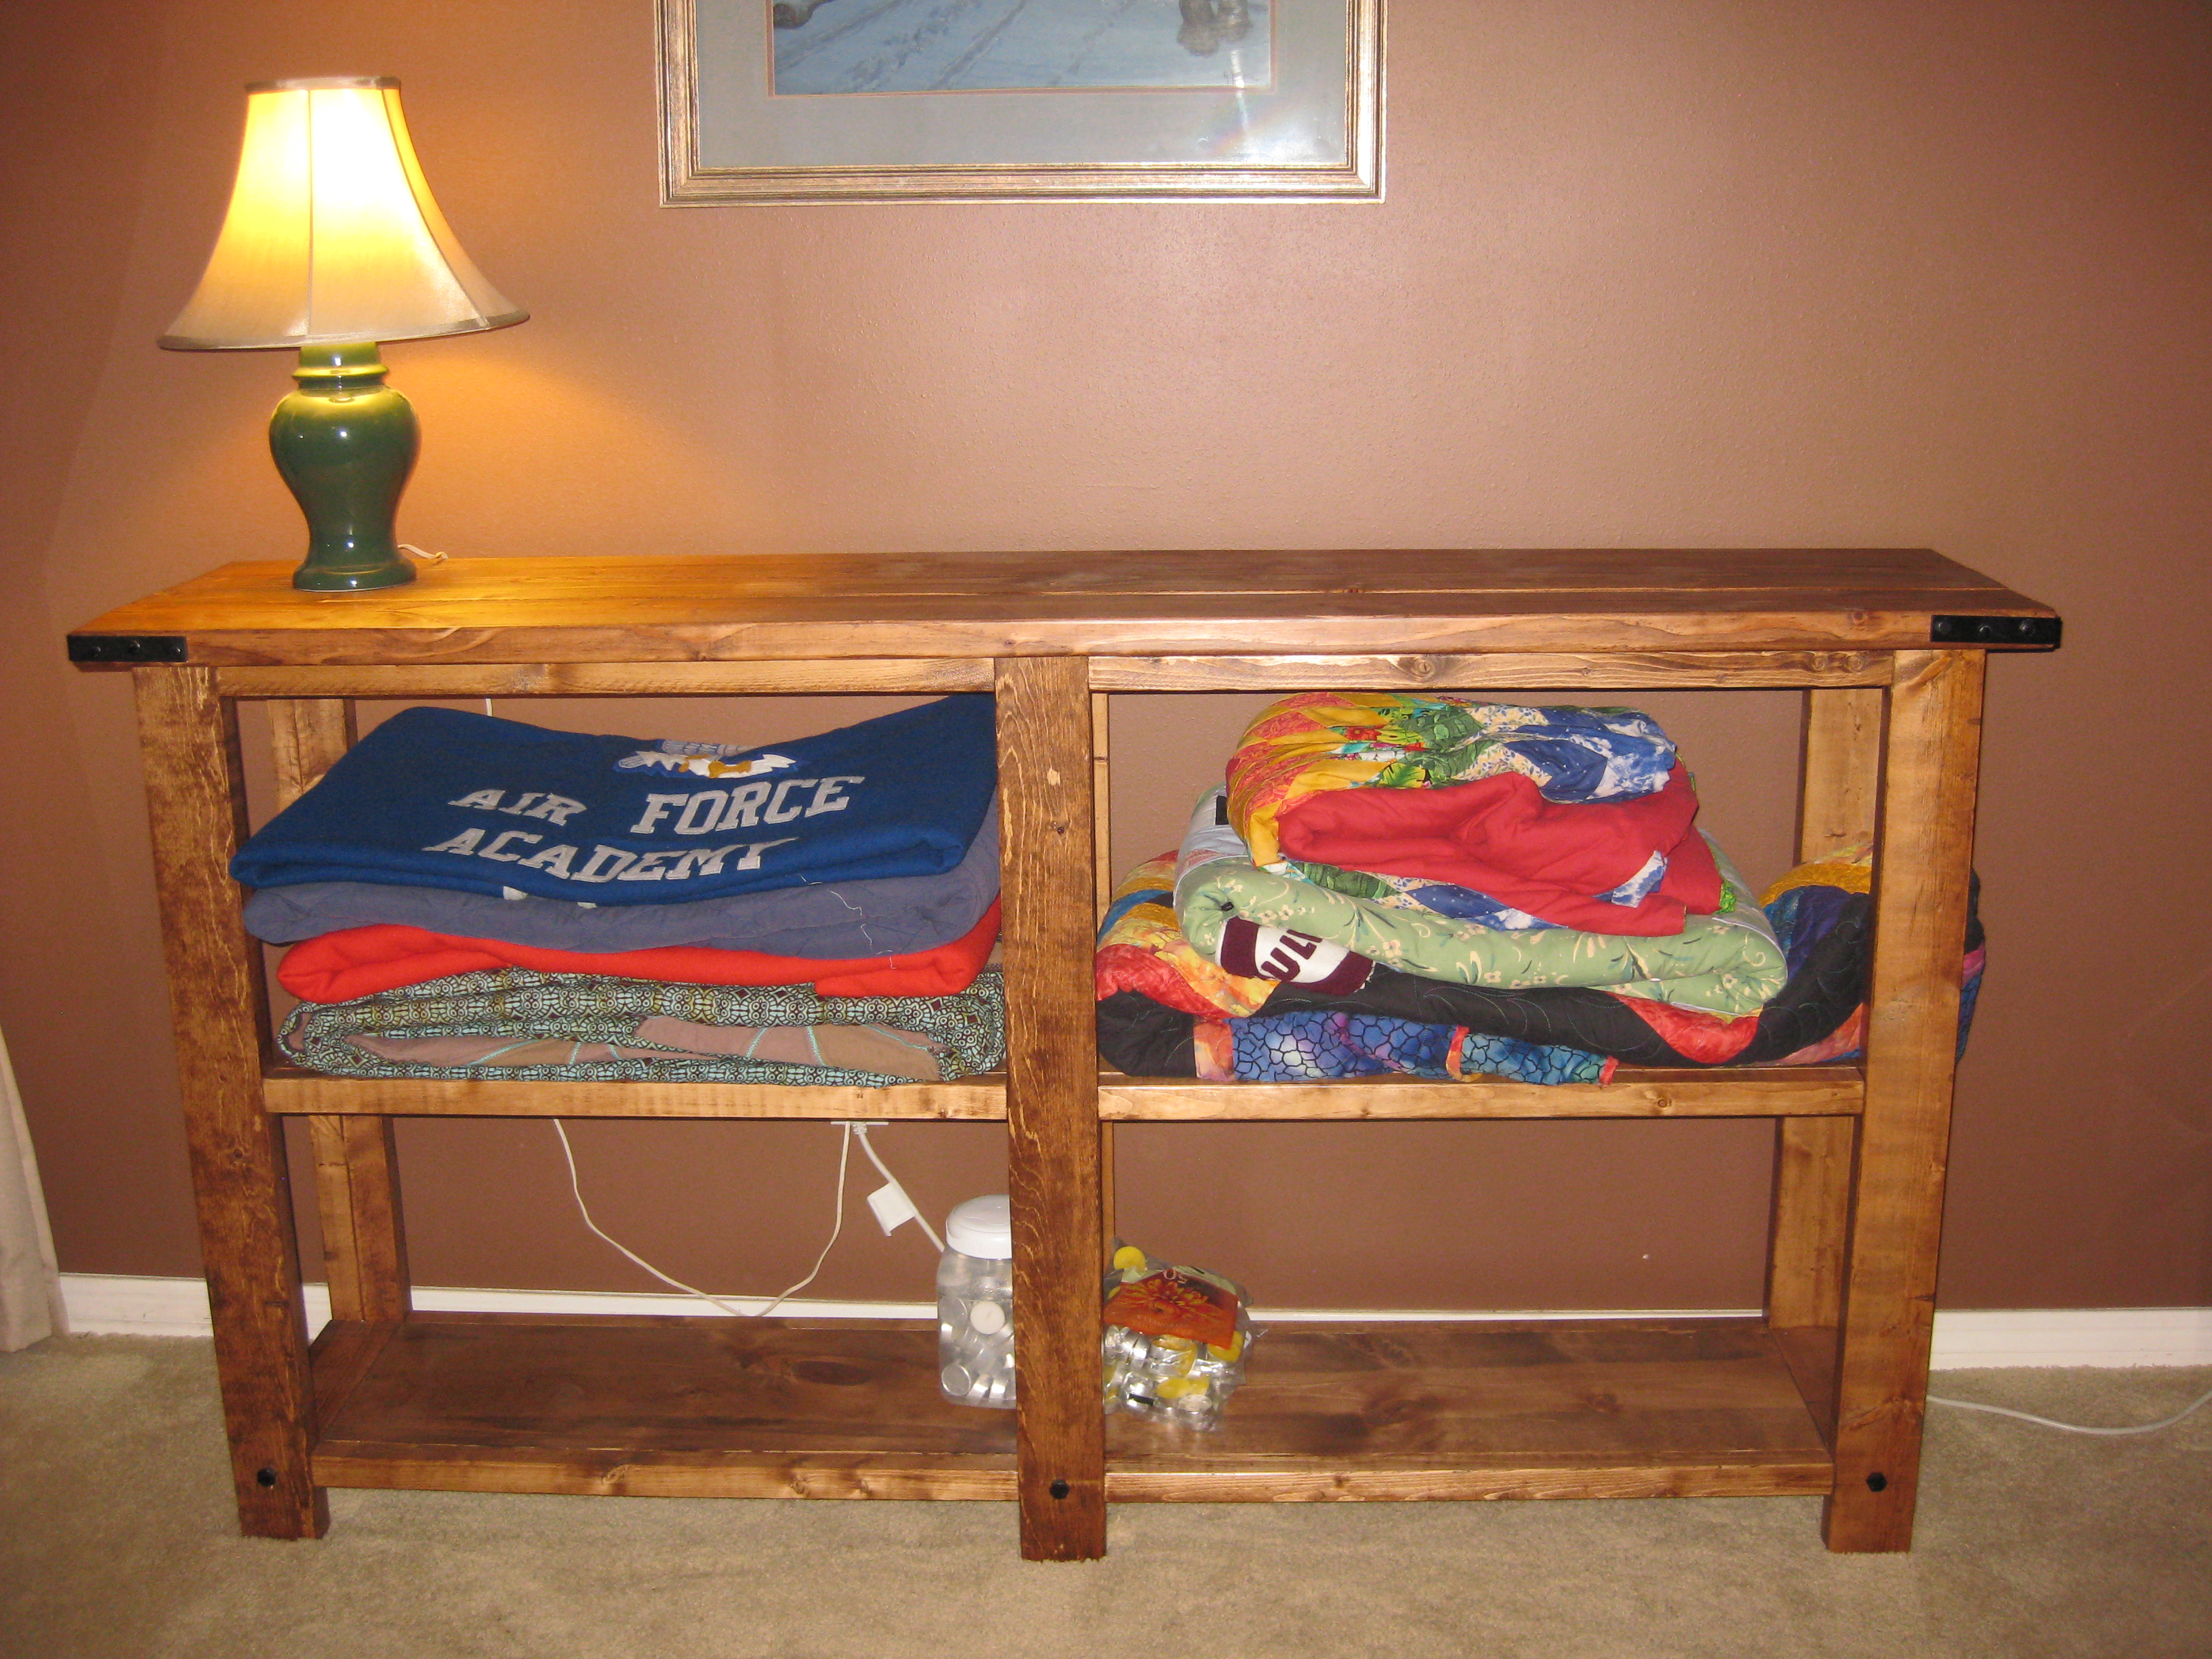
This was my first Ana White project! I didn't do the x's on the ends, obviously, and it's both taller and wider than the plans in order to fill up the giant space along our back wall. I notice the glue blobs that didn't stain, and the decorative hardware was trickier than I expected, but it was fun to build... and totally functional :)
Built from Plan(s)
Estimated Cost
$120
Estimated Time Investment
Weekend Project (10-20 Hours)
Finish Used
Minwax Early American
Recommended Skill Level
Starter Project
American flag rustic coffee table
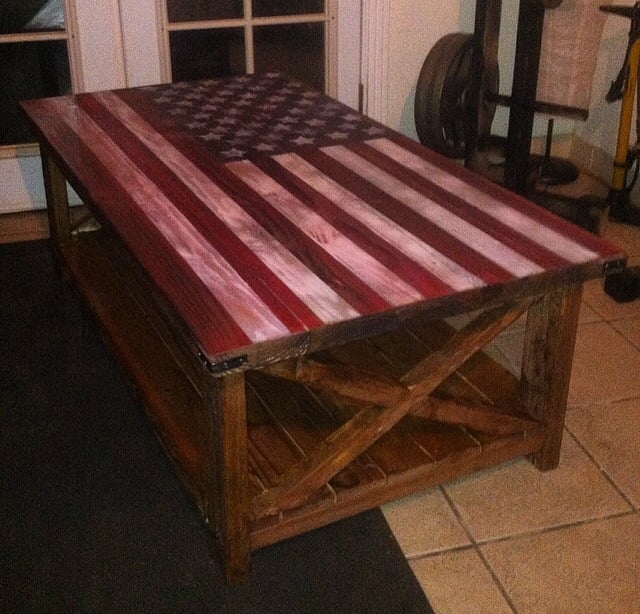
Thanks so much for the plan!
Built from Plan(s)
Estimated Time Investment
Weekend Project (10-20 Hours)
Recommended Skill Level
Beginner
Comments
Fri, 02/20/2015 - 09:35
American Flag paint
This looks INCREDIBLE!!!!! I was hoping you could possibly share how you painted on the American Flag, and gave it the rustic look to match the coffee table? I'm new to this site, so I'm not sure if you can reply directly to this comment or not. If you can't, would you mind emailing me at [email protected]?
Thank you so much!
Wed, 10/07/2015 - 13:59
Painting the flag
Hi. I love this coffee table. I have read through all the directions. I have one quick question. After I have built the coffee table and then oxidize the wood, do I then paint the flag with regular red white and blue paint and then seal it with the wax? Thank you
Comments
Pam the Goatherd
Fri, 03/22/2013 - 08:19
This is soooooo beautiful!
This is soooooo beautiful!
aharford
Sun, 03/24/2013 - 17:00
How to
How did you make this?