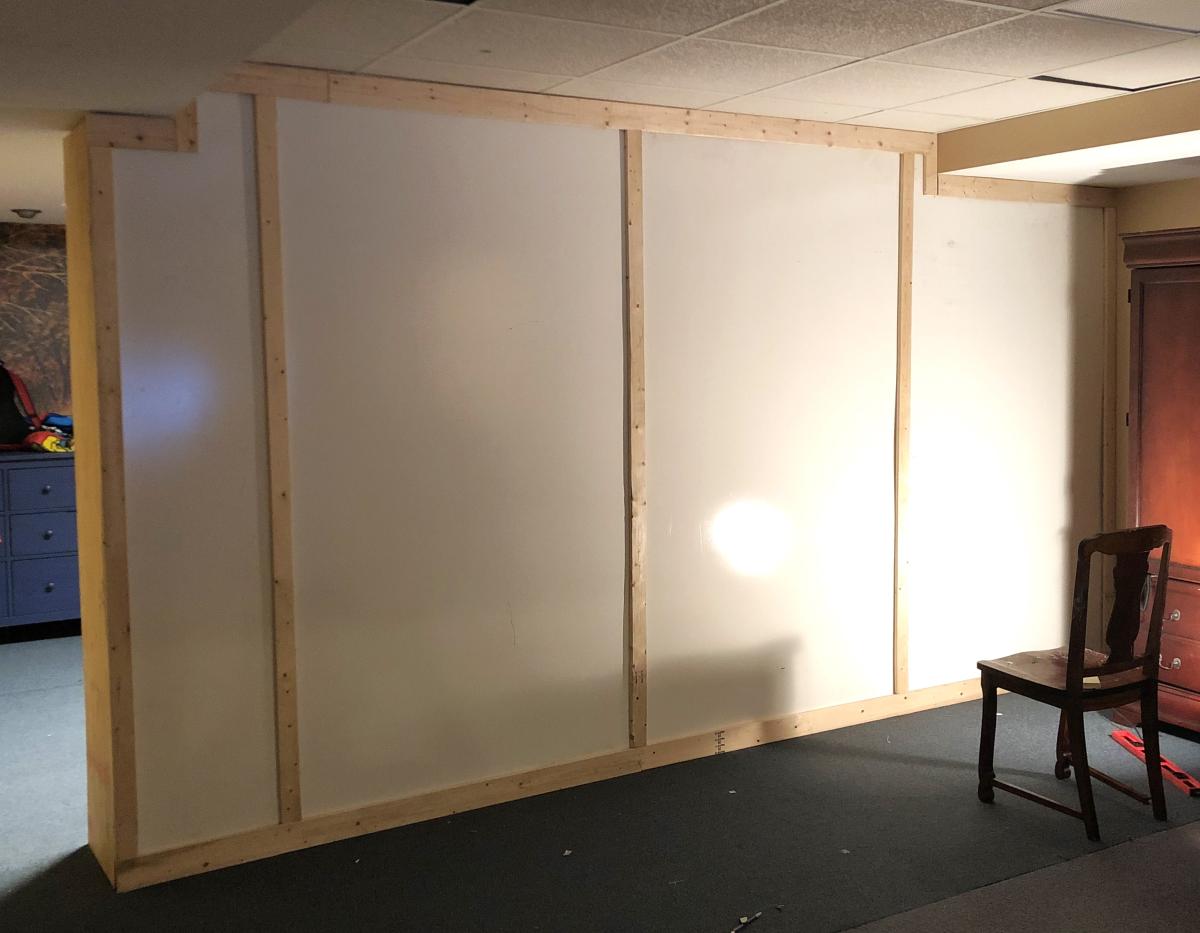
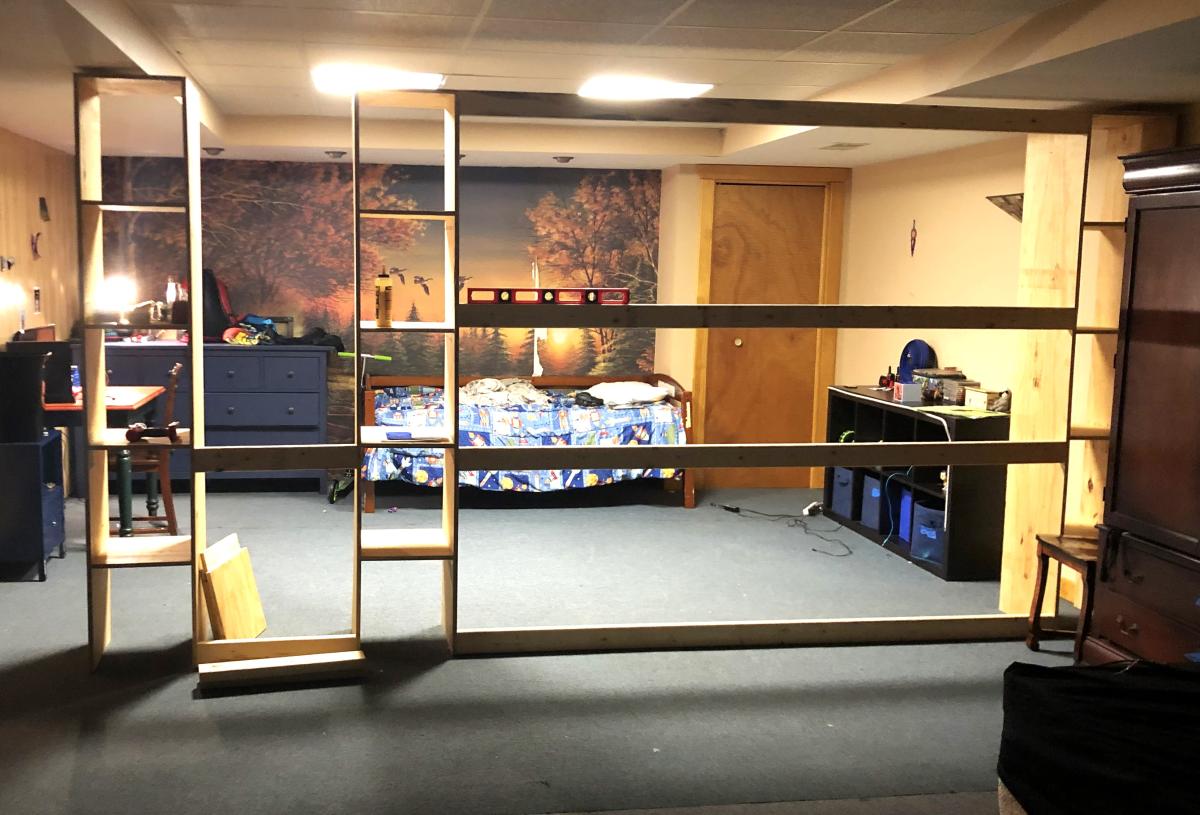
Room Divider Wall with Built-in Storage
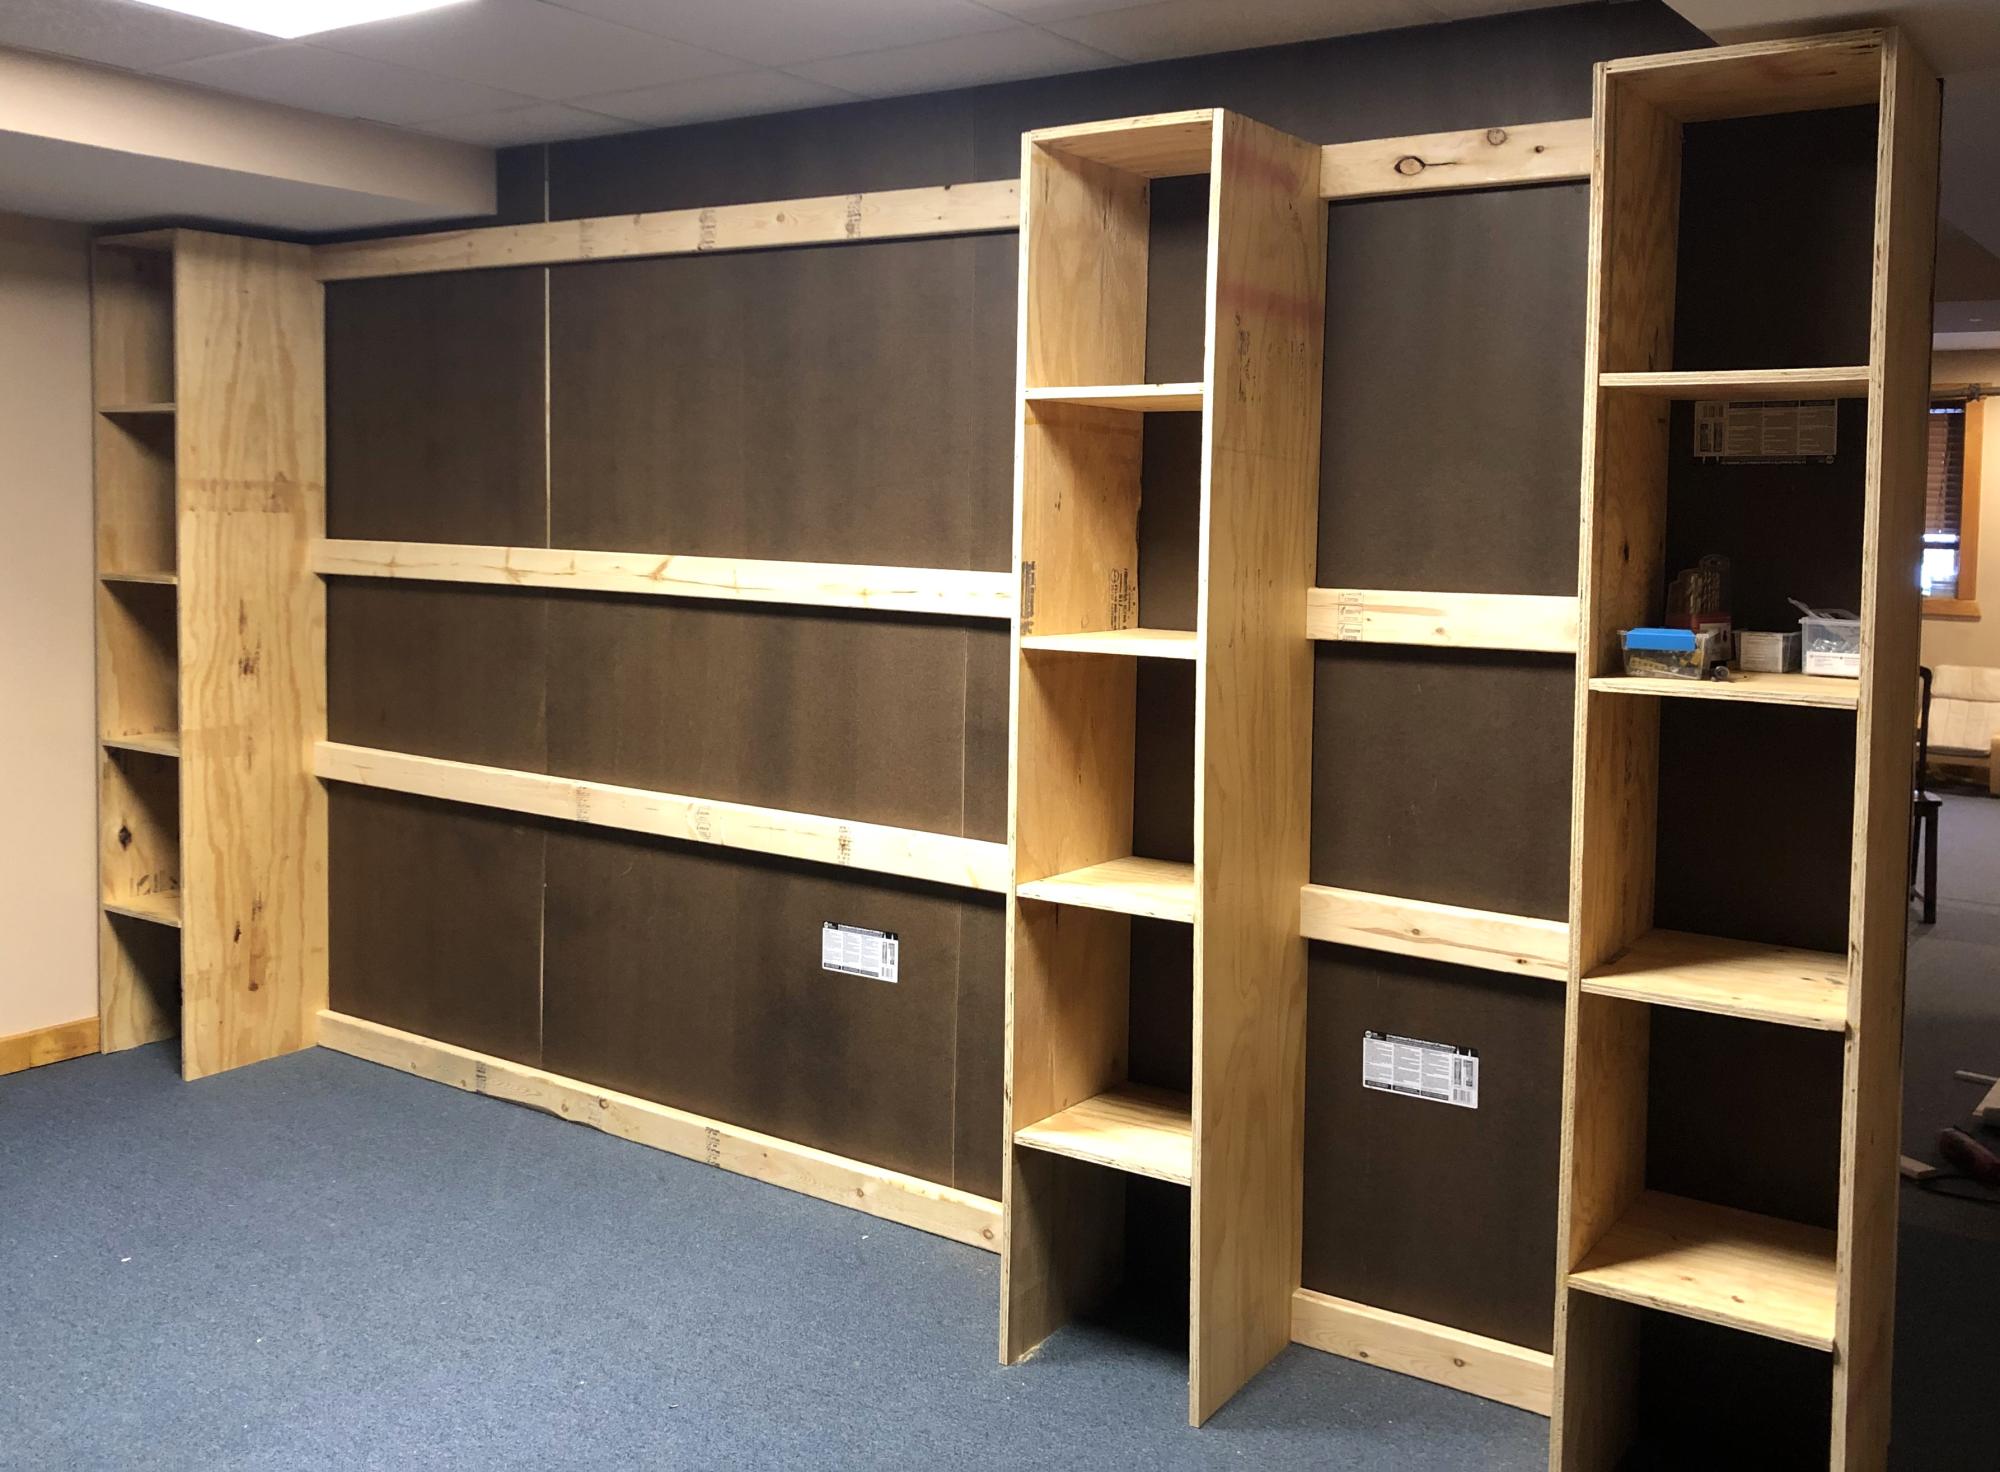
Modified the wall divider closet plan into a wall to serve as an extra bedroom in my basement. The inner wall was subsequently painted.
Grace LeBlanc
Built from Plan(s)
Modified the wall divider closet plan into a wall to serve as an extra bedroom in my basement. The inner wall was subsequently painted.
Grace LeBlanc
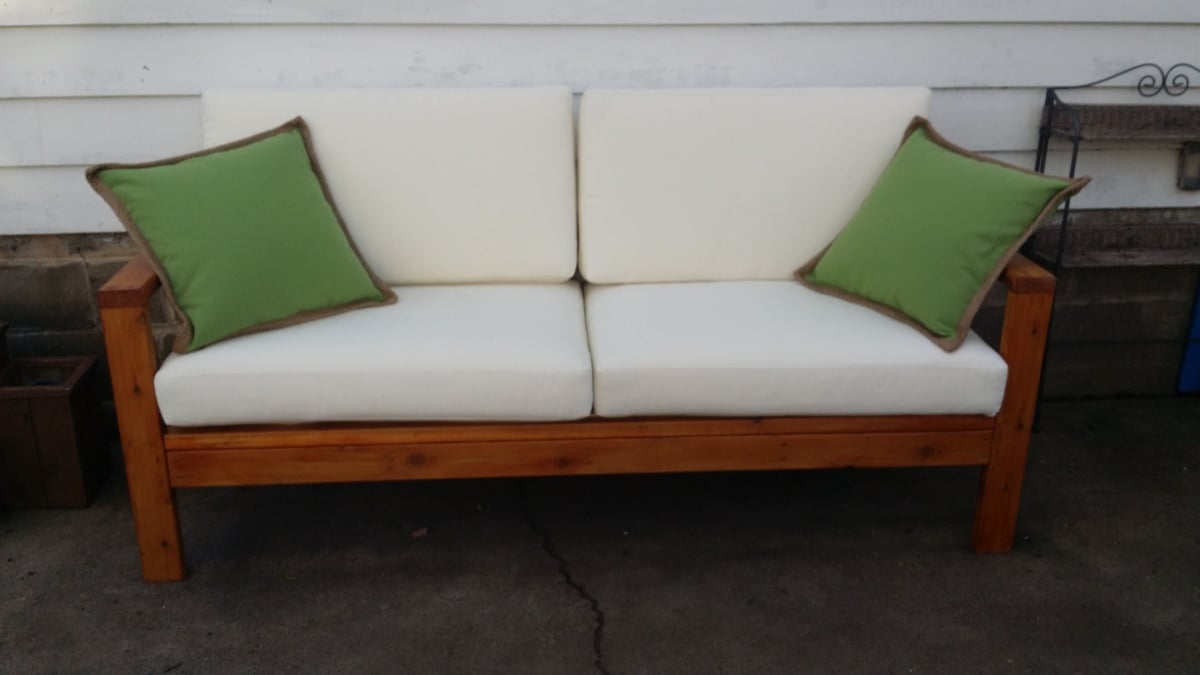
Easy to build 2-3 hours. Weather proofed because did not want grey cedar in a few years. Liked the color of weather proofing but color continued to leak off. Polyed and sanding eventually stopped the leaking if colors. Scored pottery barn cushions 50% in the winter + 15% new email customer. Still $150... bought some pillows from pottery barn on sale for another $60. All in all looks awesome! VERY easy build. The rest ($$) is what hurts... Test any weatherproof in you use first before using.

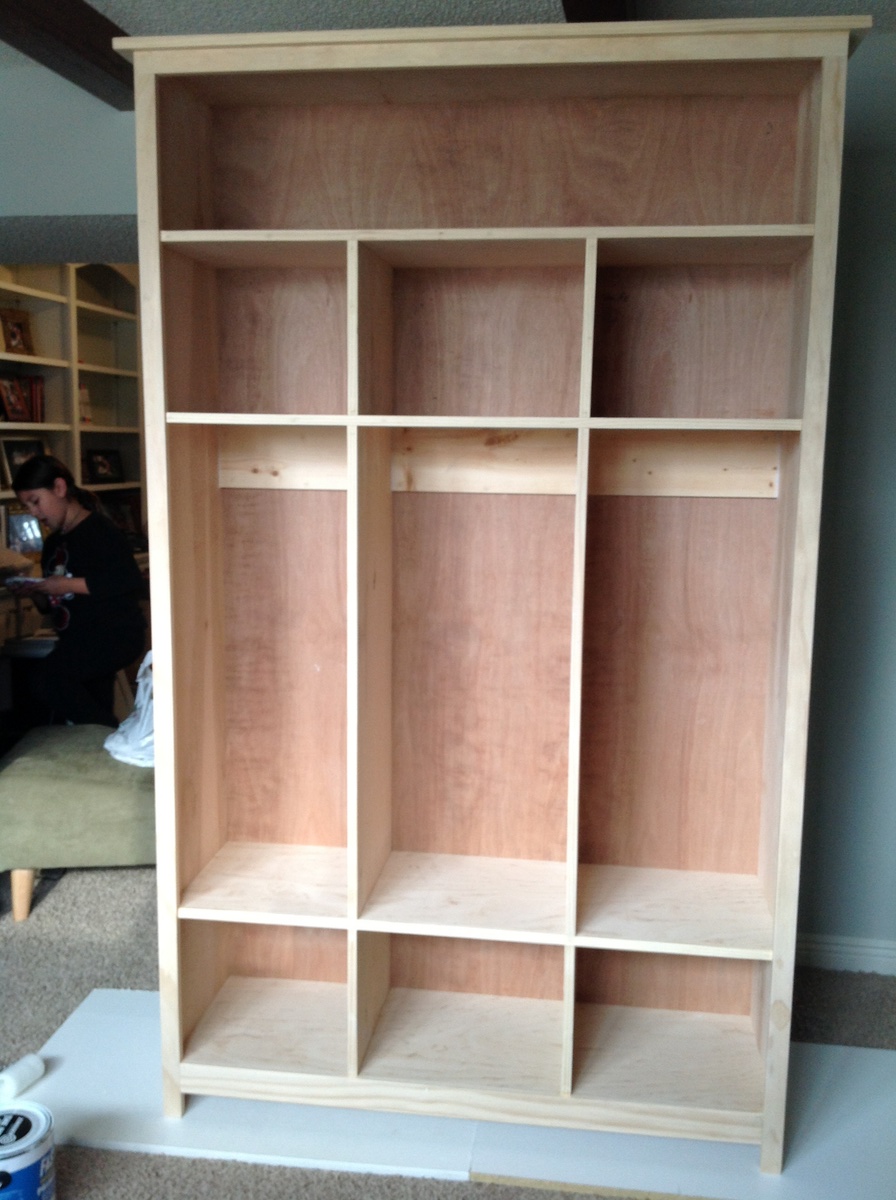
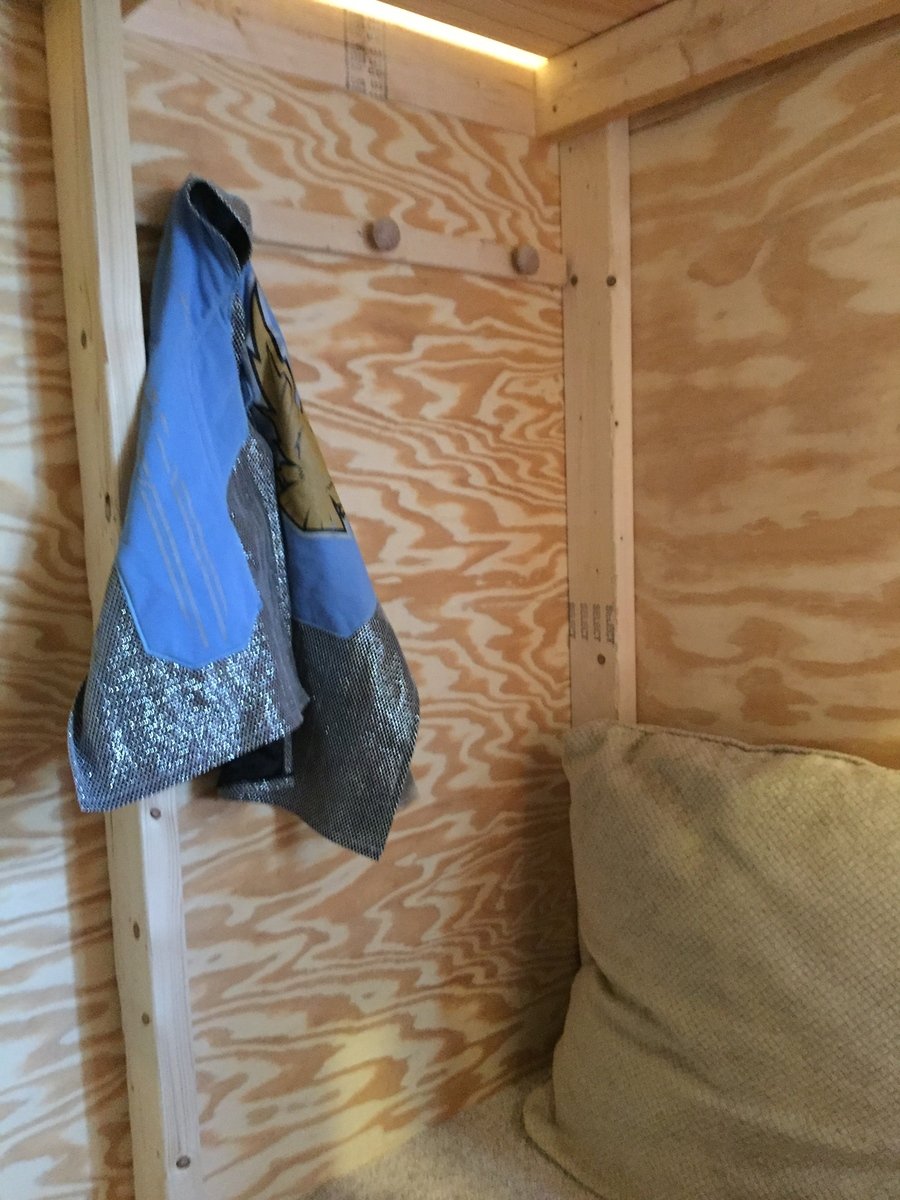
I have been waiting a long time to have this amazing piece of storage. The size is what was intimidating to me but it was easy to build. This project is perfect for a beginner . Make sure you have an extra set of hands due to the size otherwise this was easy and straight forward to build. I love the storage it offers to keep my Minnesota winter gear organized. The kids have a place for all of their snow pants, boots, coats etc.
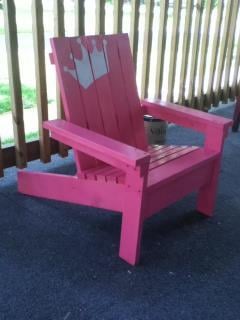
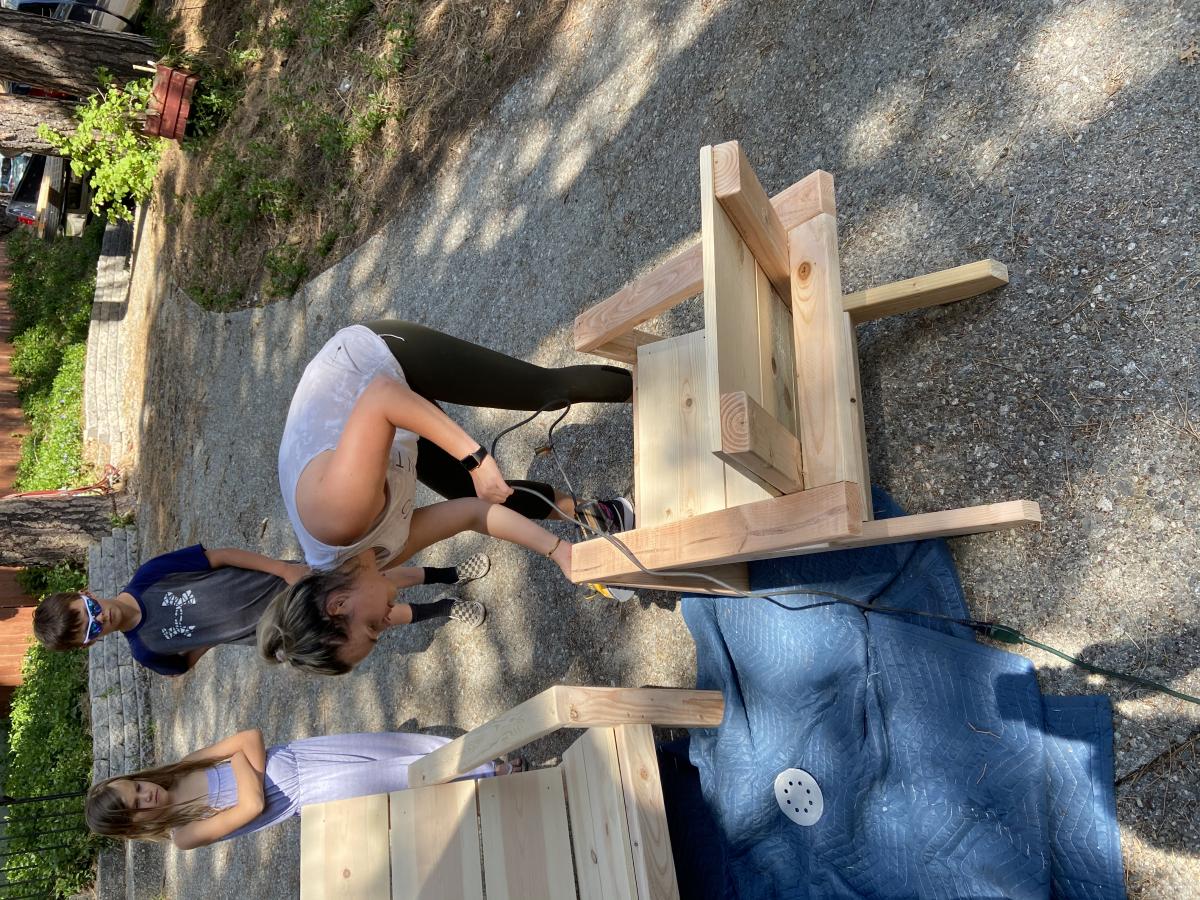
This was my first Ana White project. A kid size Adirondack chair fit for a princess :). The cost was around $25. I finished it in a weekend, but that was trying to fit it in between laundry, dishes, and taking care of kids. It was easy to do and I learned a lot.
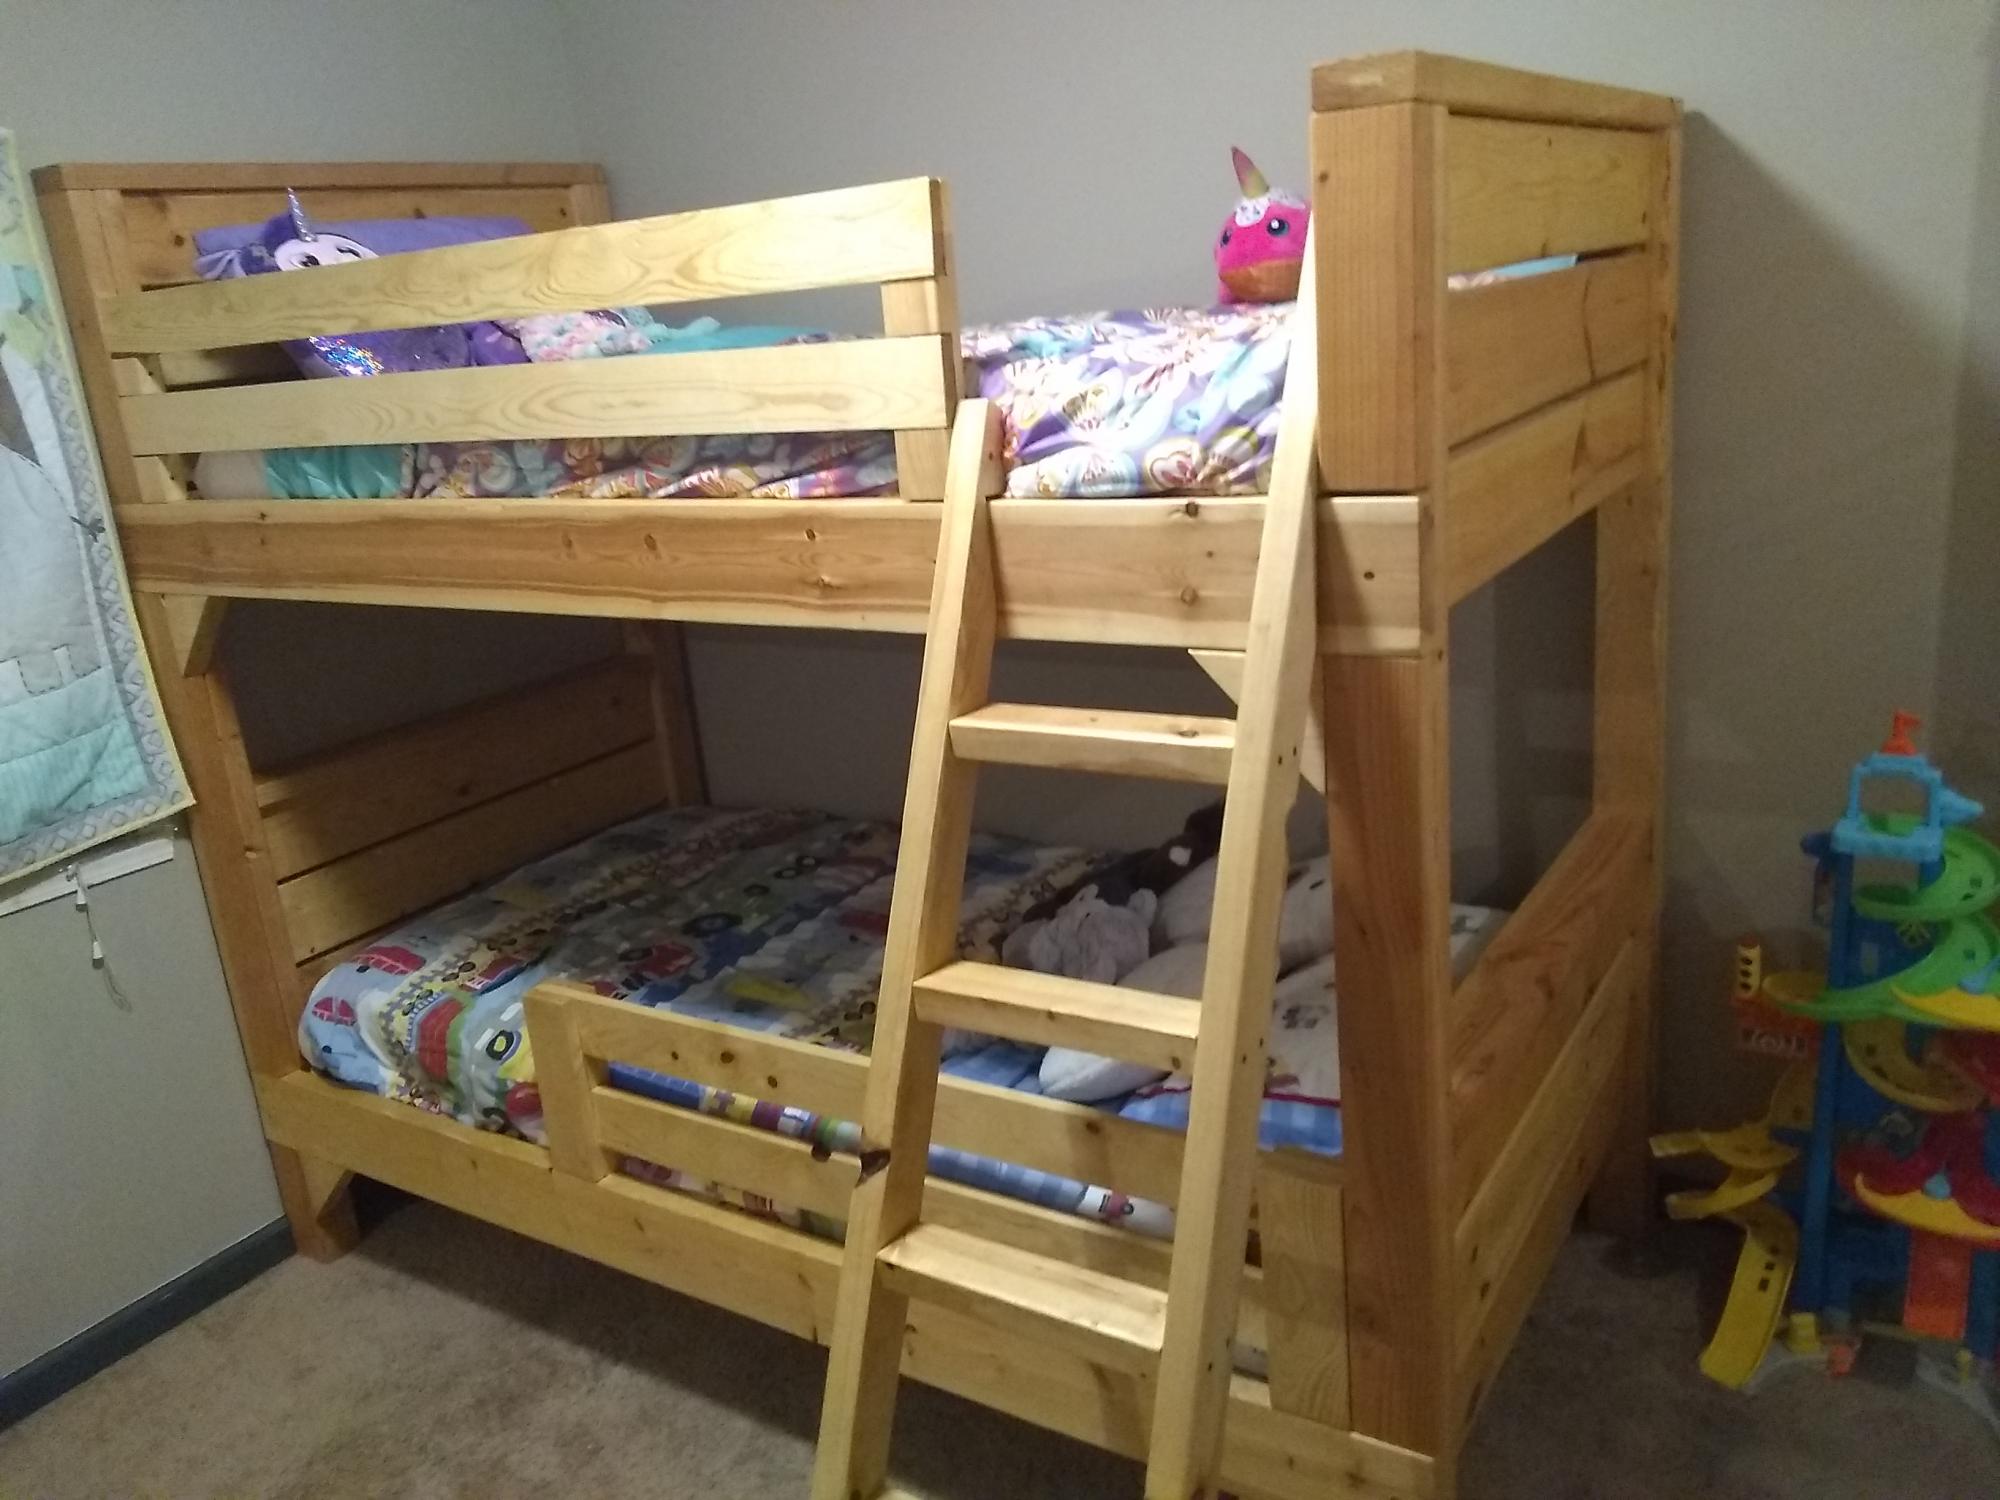
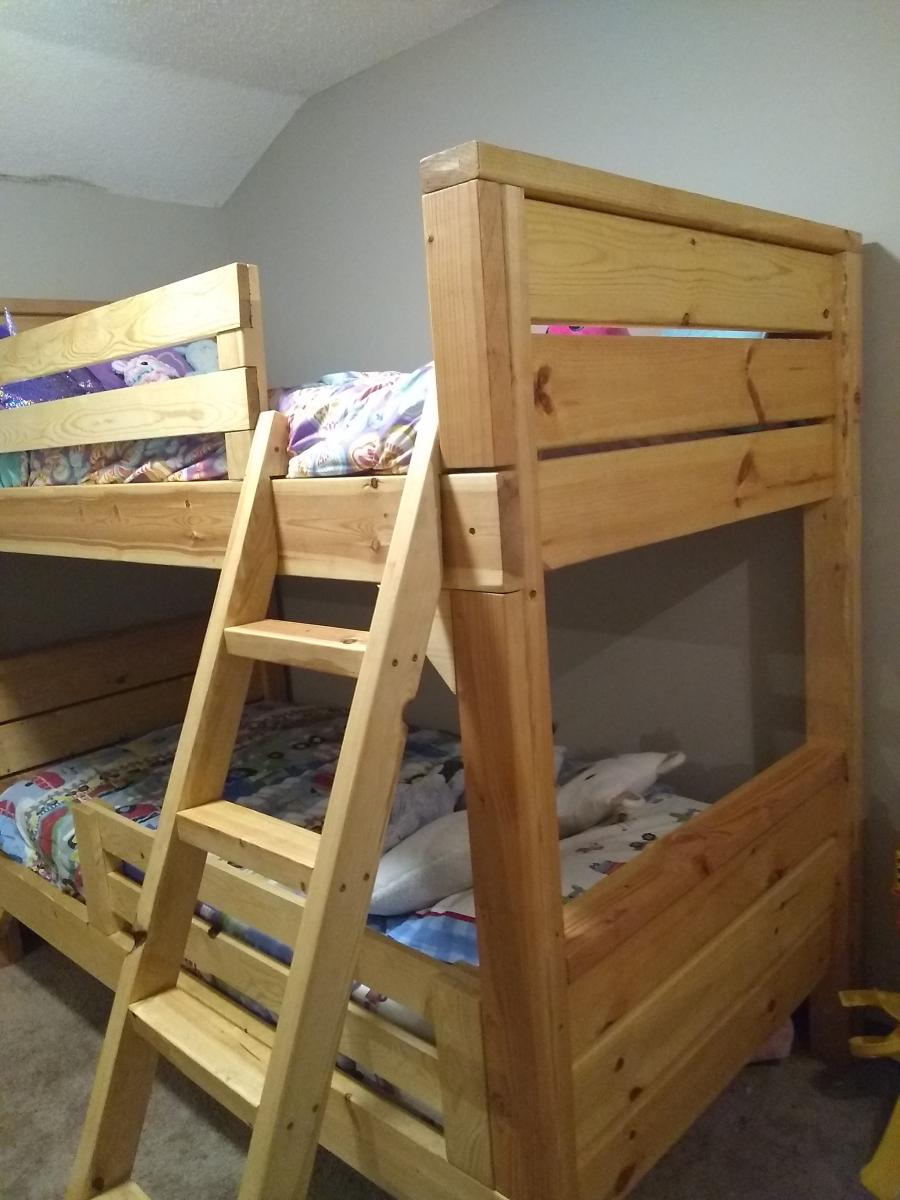
I built this bunk bed from the plans here on Anna white, I love this site. I think it came out really good. It took a little longer than expected because I sanded every piece down, every corner, every side, every end, because it's for my kids.
I devised the ladder myself for my situation and modified the rails I found as well.
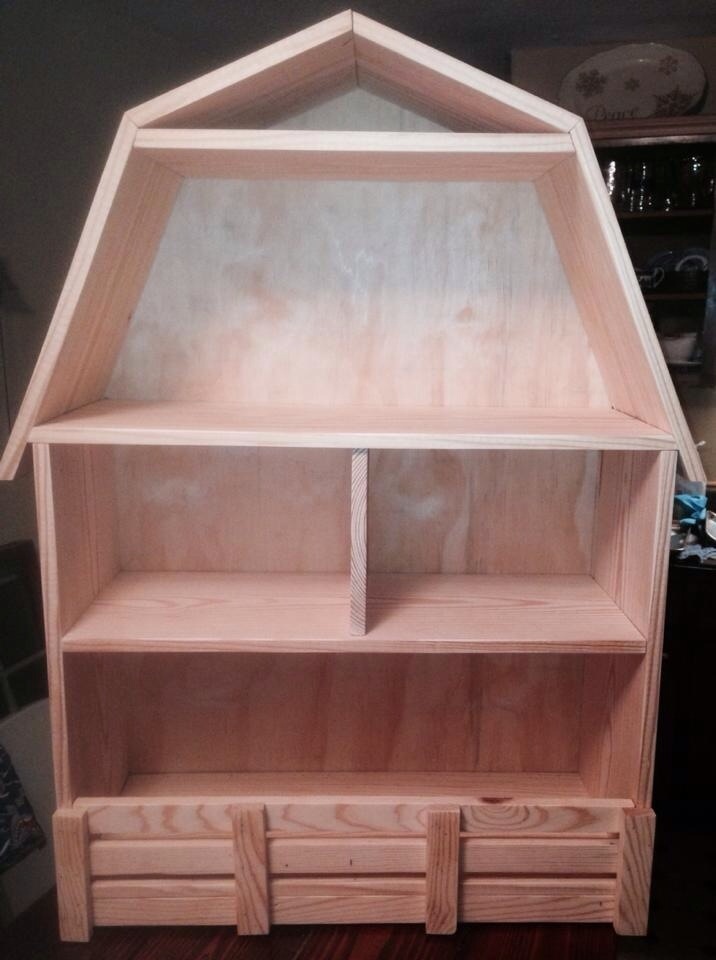
I built this for a friend's daughter who collects the Tractor Supply farm animals. This is the first time I have cut on angles to make the roof. The directions say built it from bottom to top but I found it easier to start for the top and work down. Then attach the whole roof where it marched on the barn... Hope this helps. I did not finish it cause the friend wanted to stain it herself...

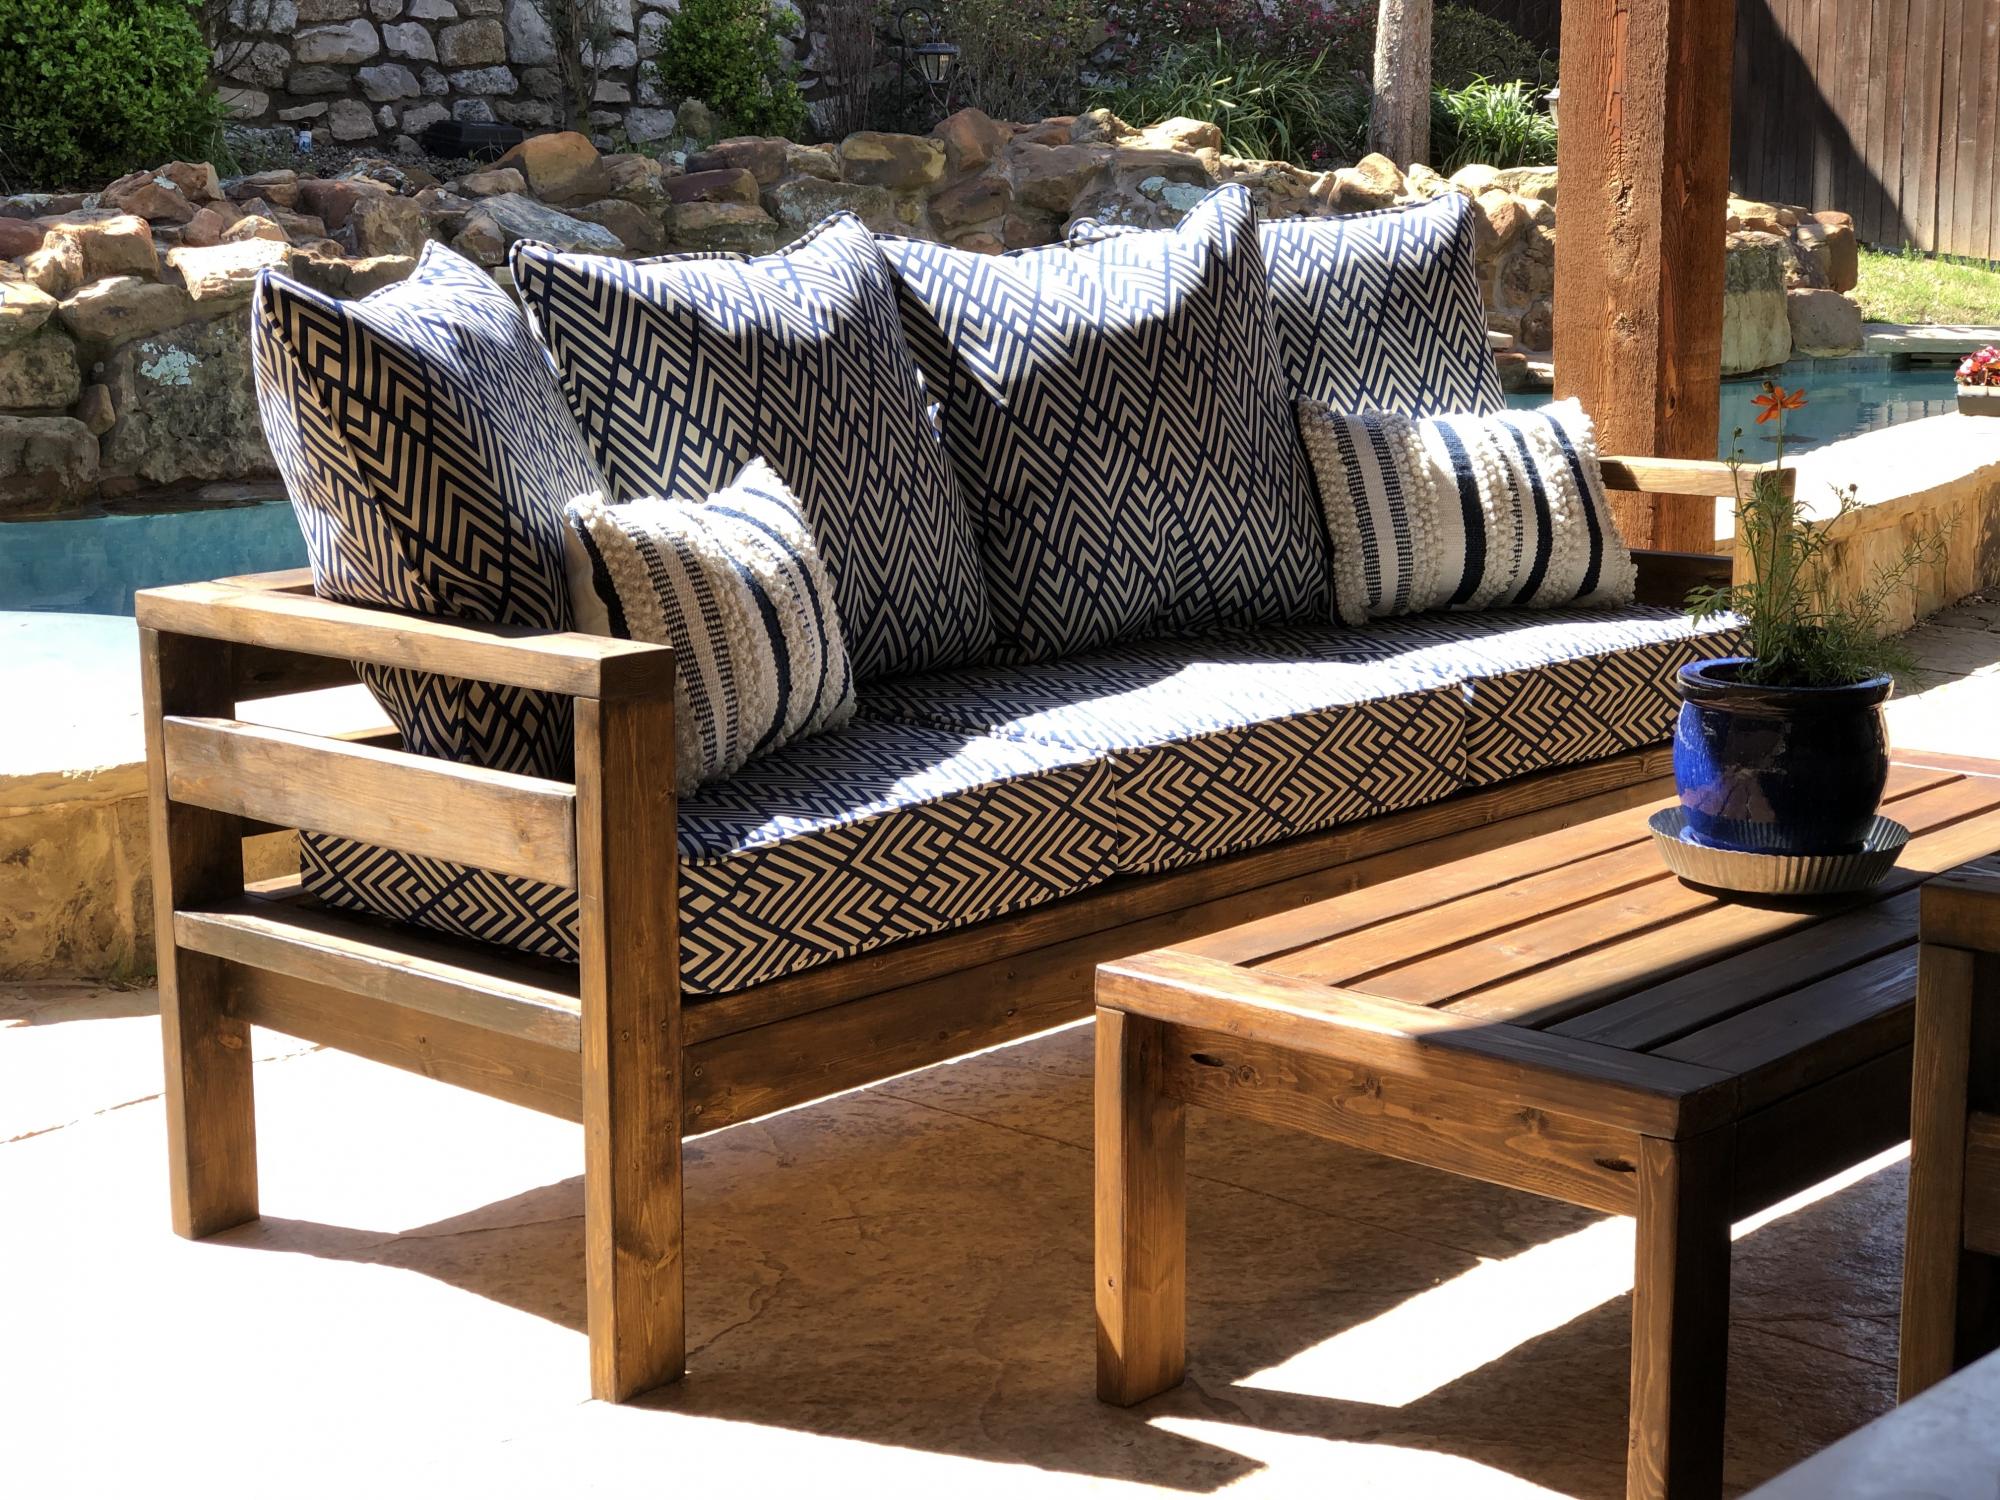
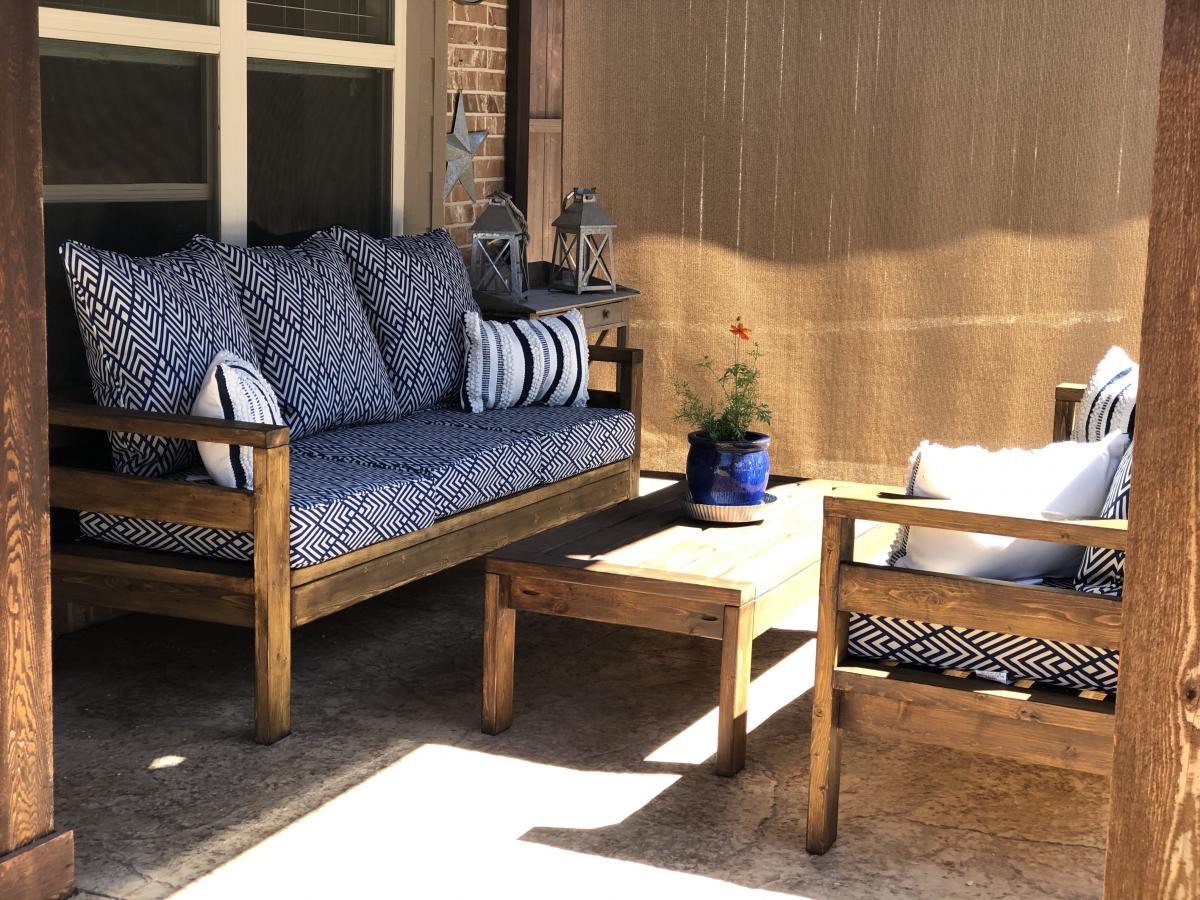
We LOVE our new patio set! Total cost of 2 sofas, coffee table and cushions: $530
Cushions B&G Retro Diamonds Deep Seat cushion set purchased from Walmart.
Thanks for sharing the plans!
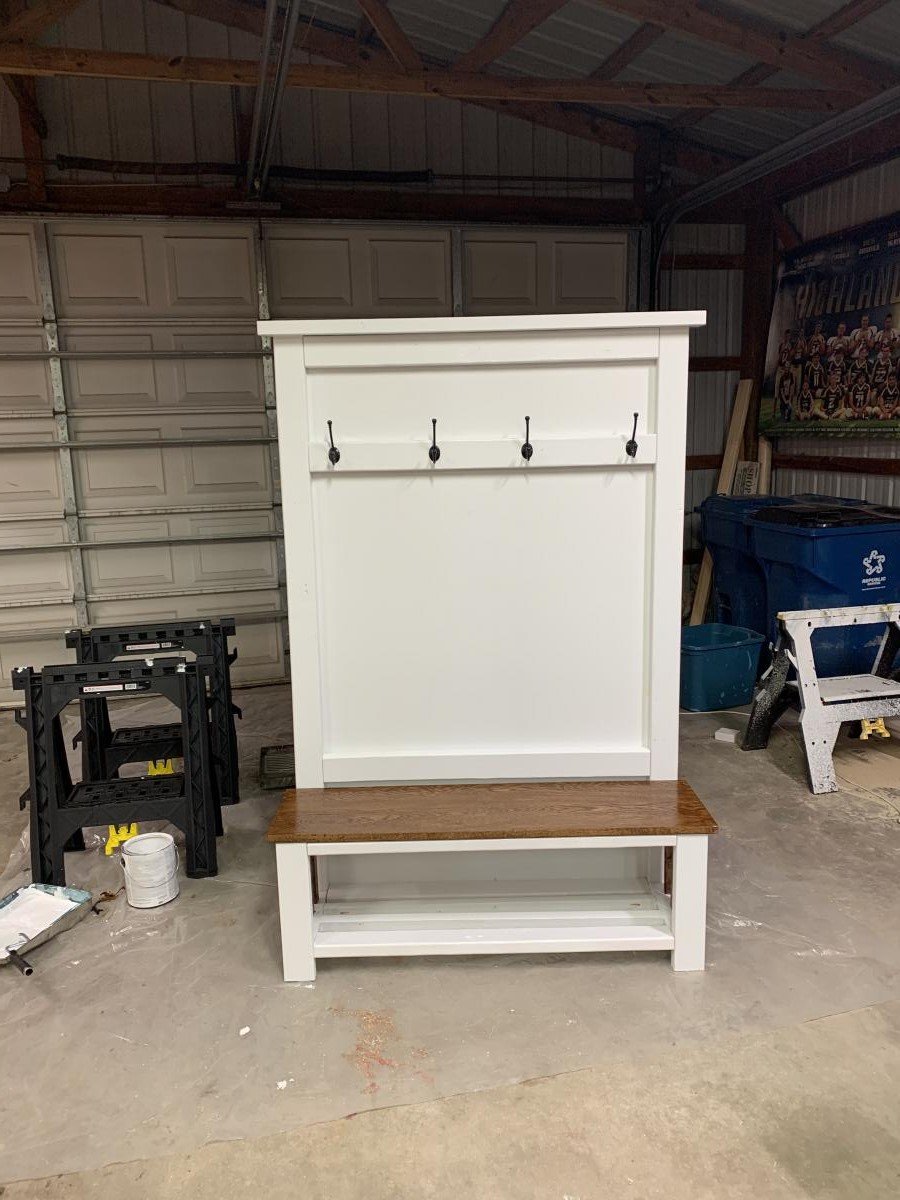
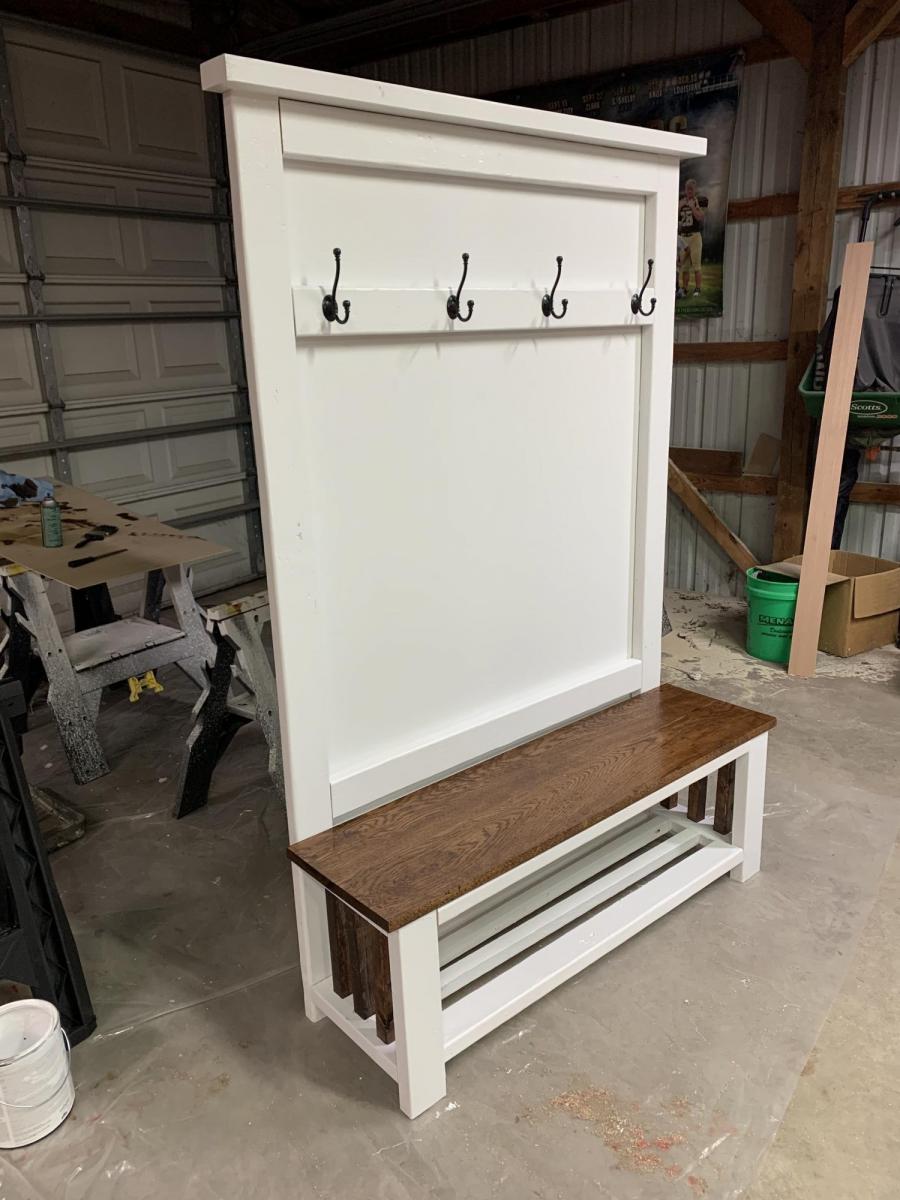
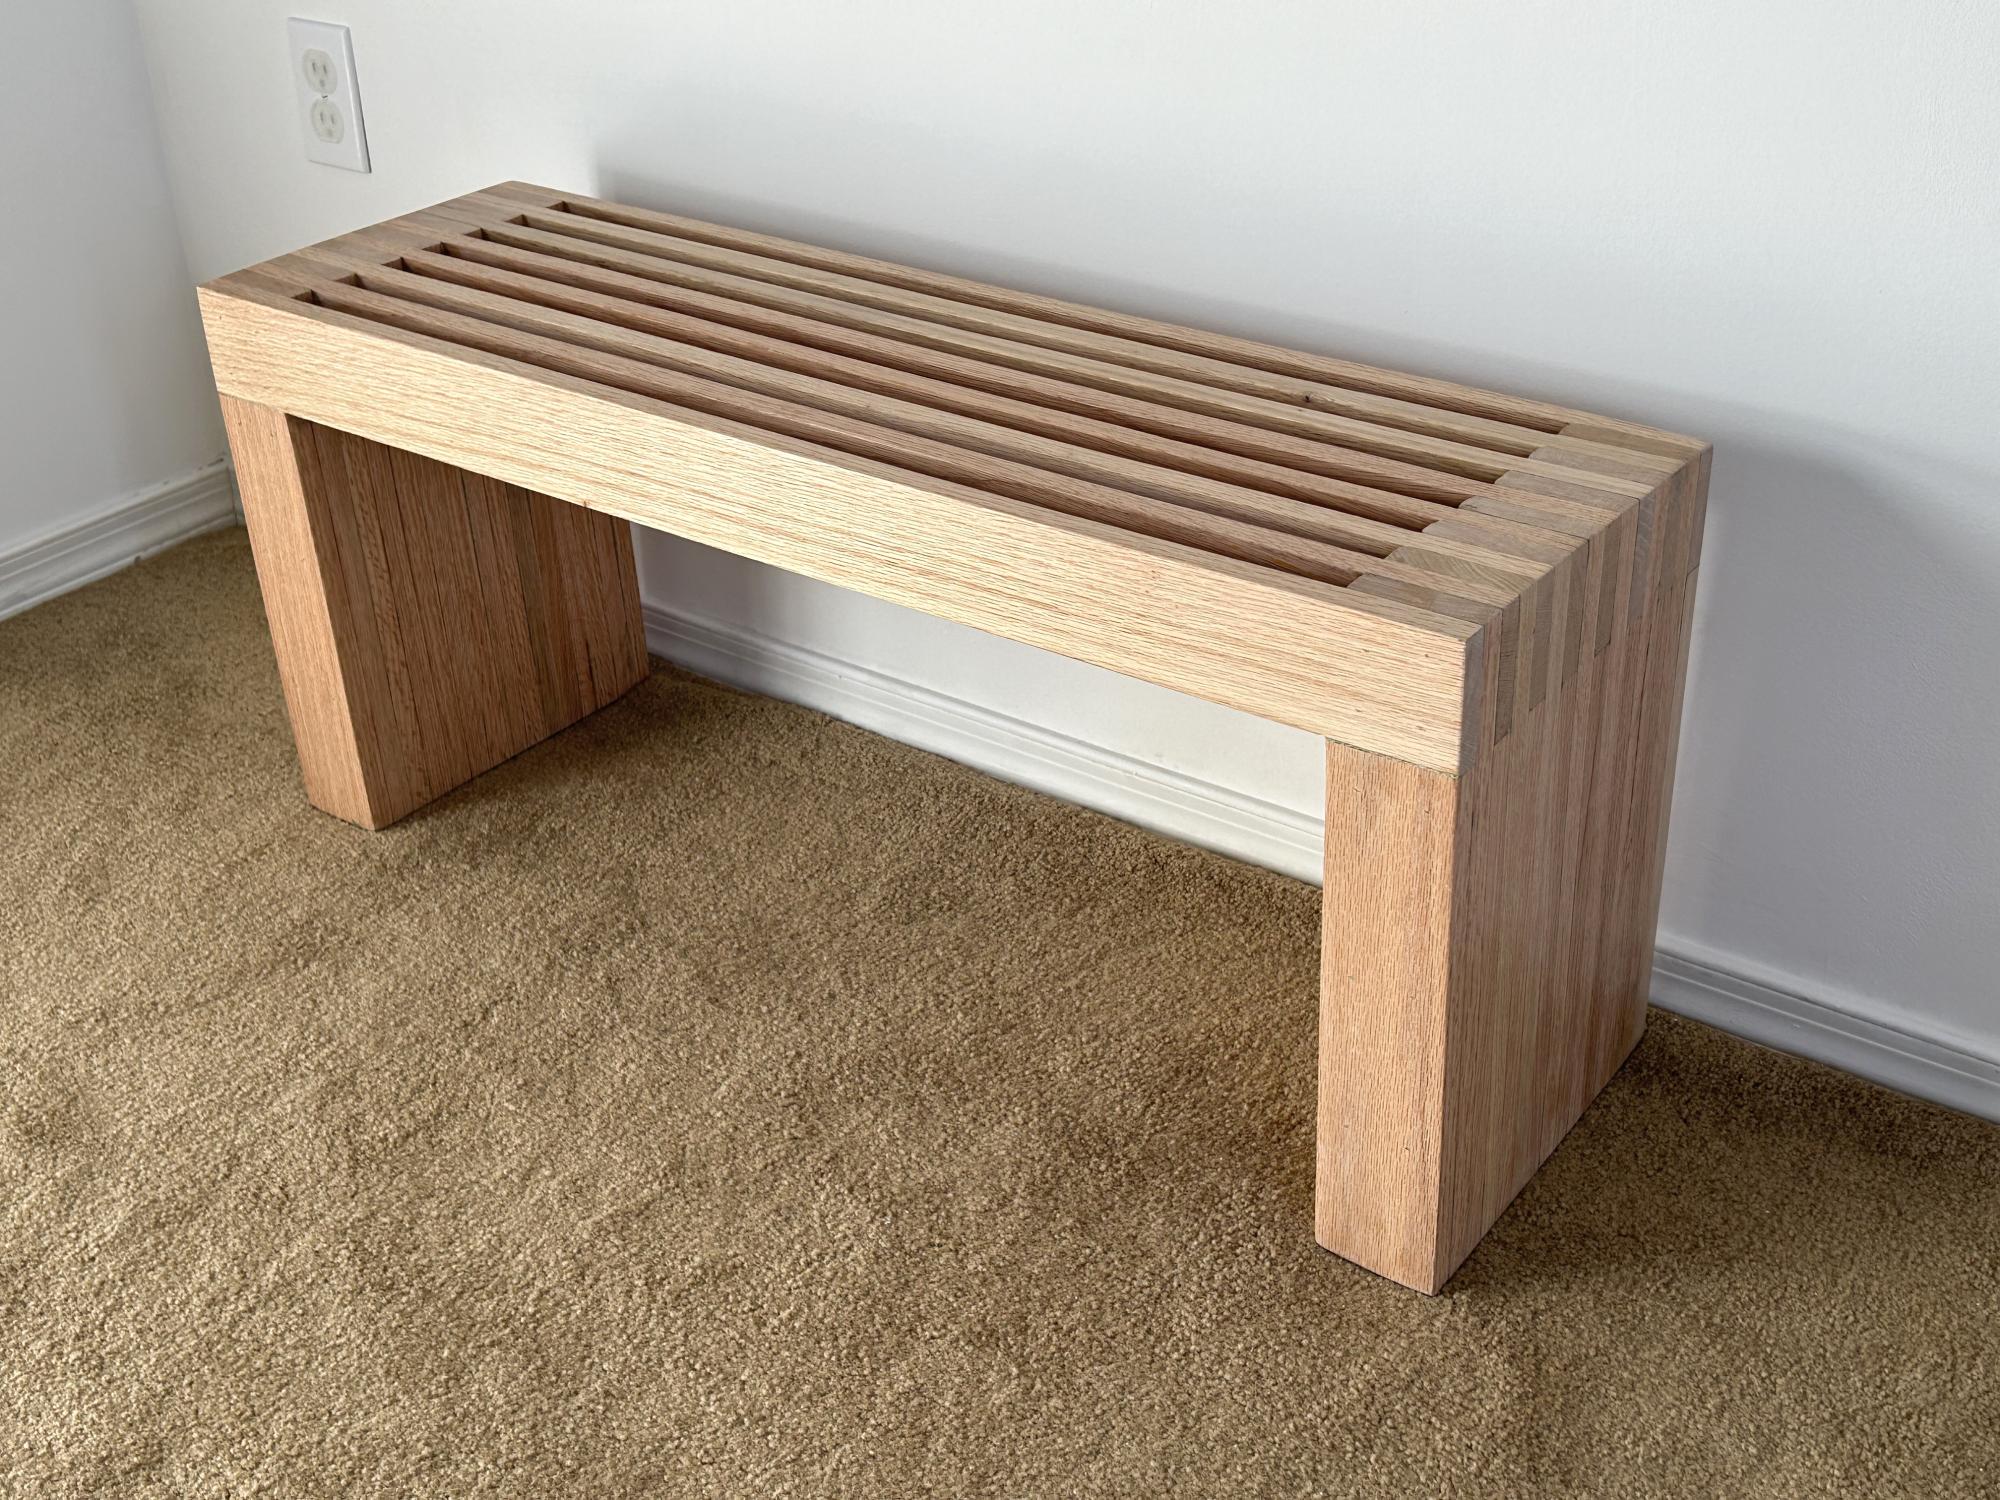
I followed the Rustic X Hall Tree plans almost entirely. I chose to replace the “X” with vertical posts, though I may use the X in a future project. The bench top is two 1” thick oak boards milled at my farm. Love the contrast of the white and stained oak. The plans were perfect!
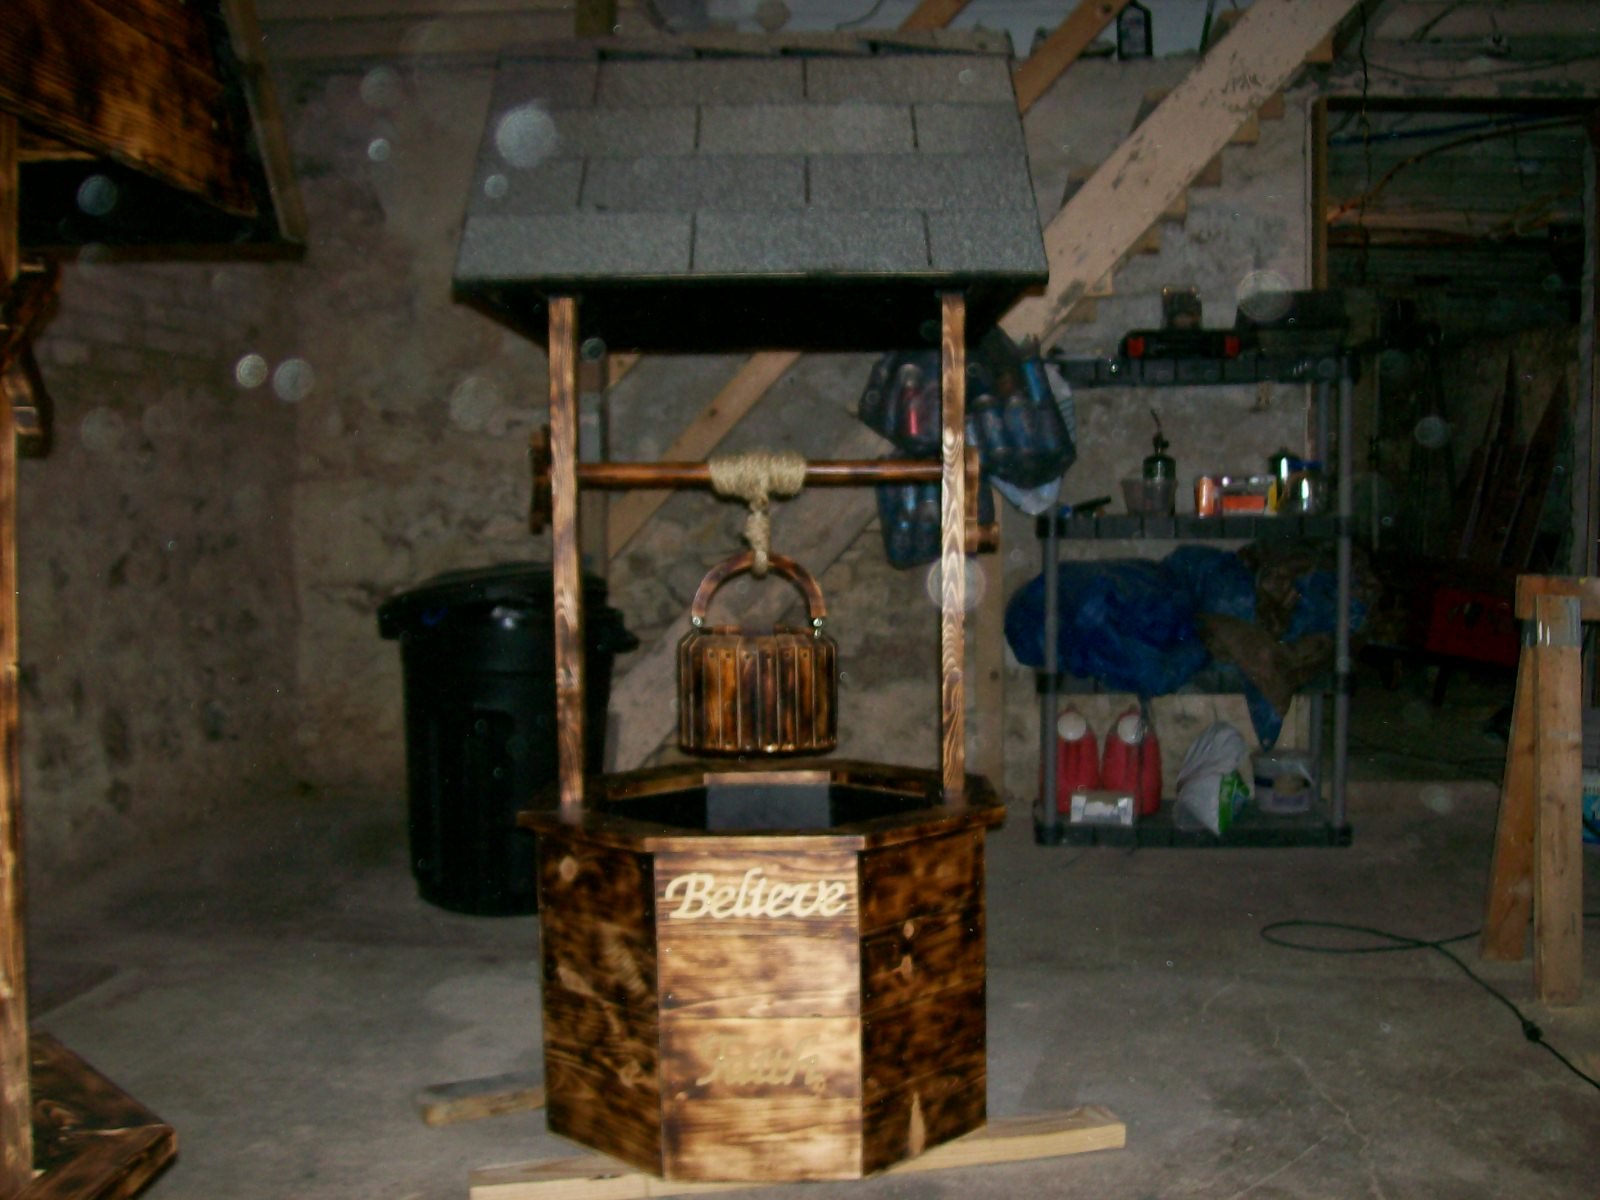
Started these wishing wells as only having fun and for family it seems now that it is going to be a little more than I thought now taking orders from family friends


In reply to Wishing wells by Jason48
Tue, 11/19/2019 - 07:33
I love the wishing wells, but I can;t find a plan. My mom has wanted one of these forever! She now has stage 4 squamous cell carcinoma Stage 4 and I would love to build her one before it is too late.
Fri, 04/04/2014 - 08:49
Good or bad? I can't imagine anyone would say anything bad! This is awesome! Looks great!
In reply to Good or bad? I can't imagine by stacynabby
Tue, 04/15/2014 - 07:23
Thank you for the compliment
Fri, 04/03/2020 - 17:24
Can I ask where you got this plan from.Would love to make one.
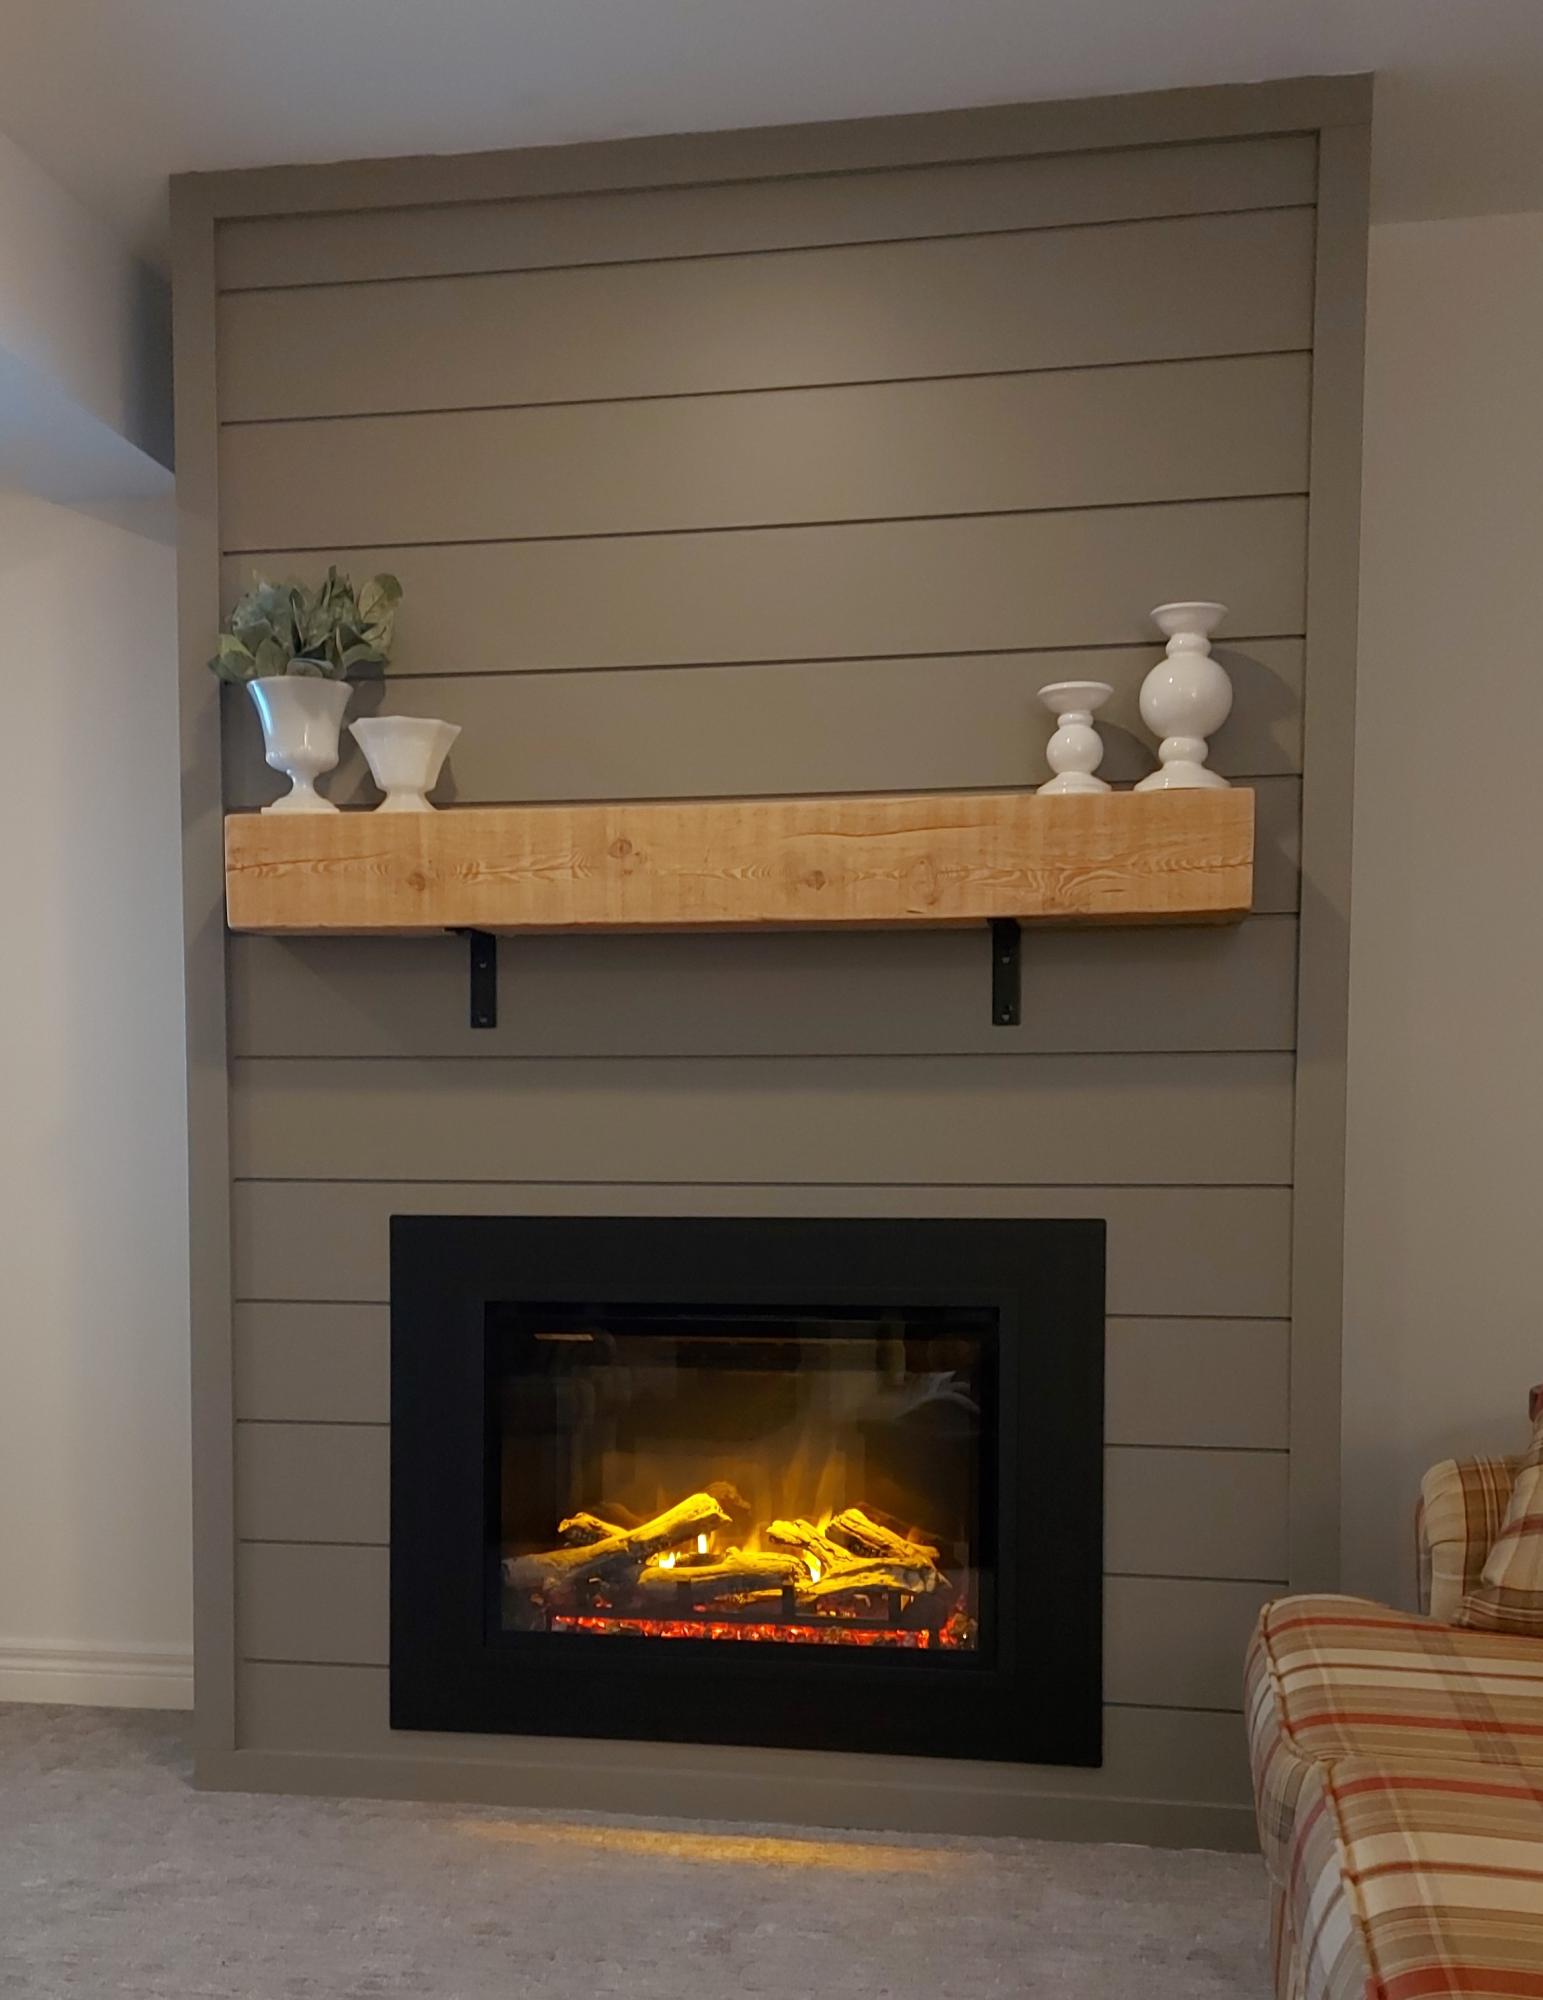
We built this fireplace where nothing existed before. The instructional video was very helpful. We are so proud of how it turned out.
Jim and Susie Jacob
Wed, 02/28/2024 - 19:20
Hello! I’m wondering if you think this could be built as a temporary piece that could be moved? I live in apartment and wouldn’t want to leave something like this behind after spending time and money to build it. Maybe if I built in some removable access panels (a few of the slats?) to be able to attach it to studs (and later remove it) after building the entire piece. Thoughts? TIA!
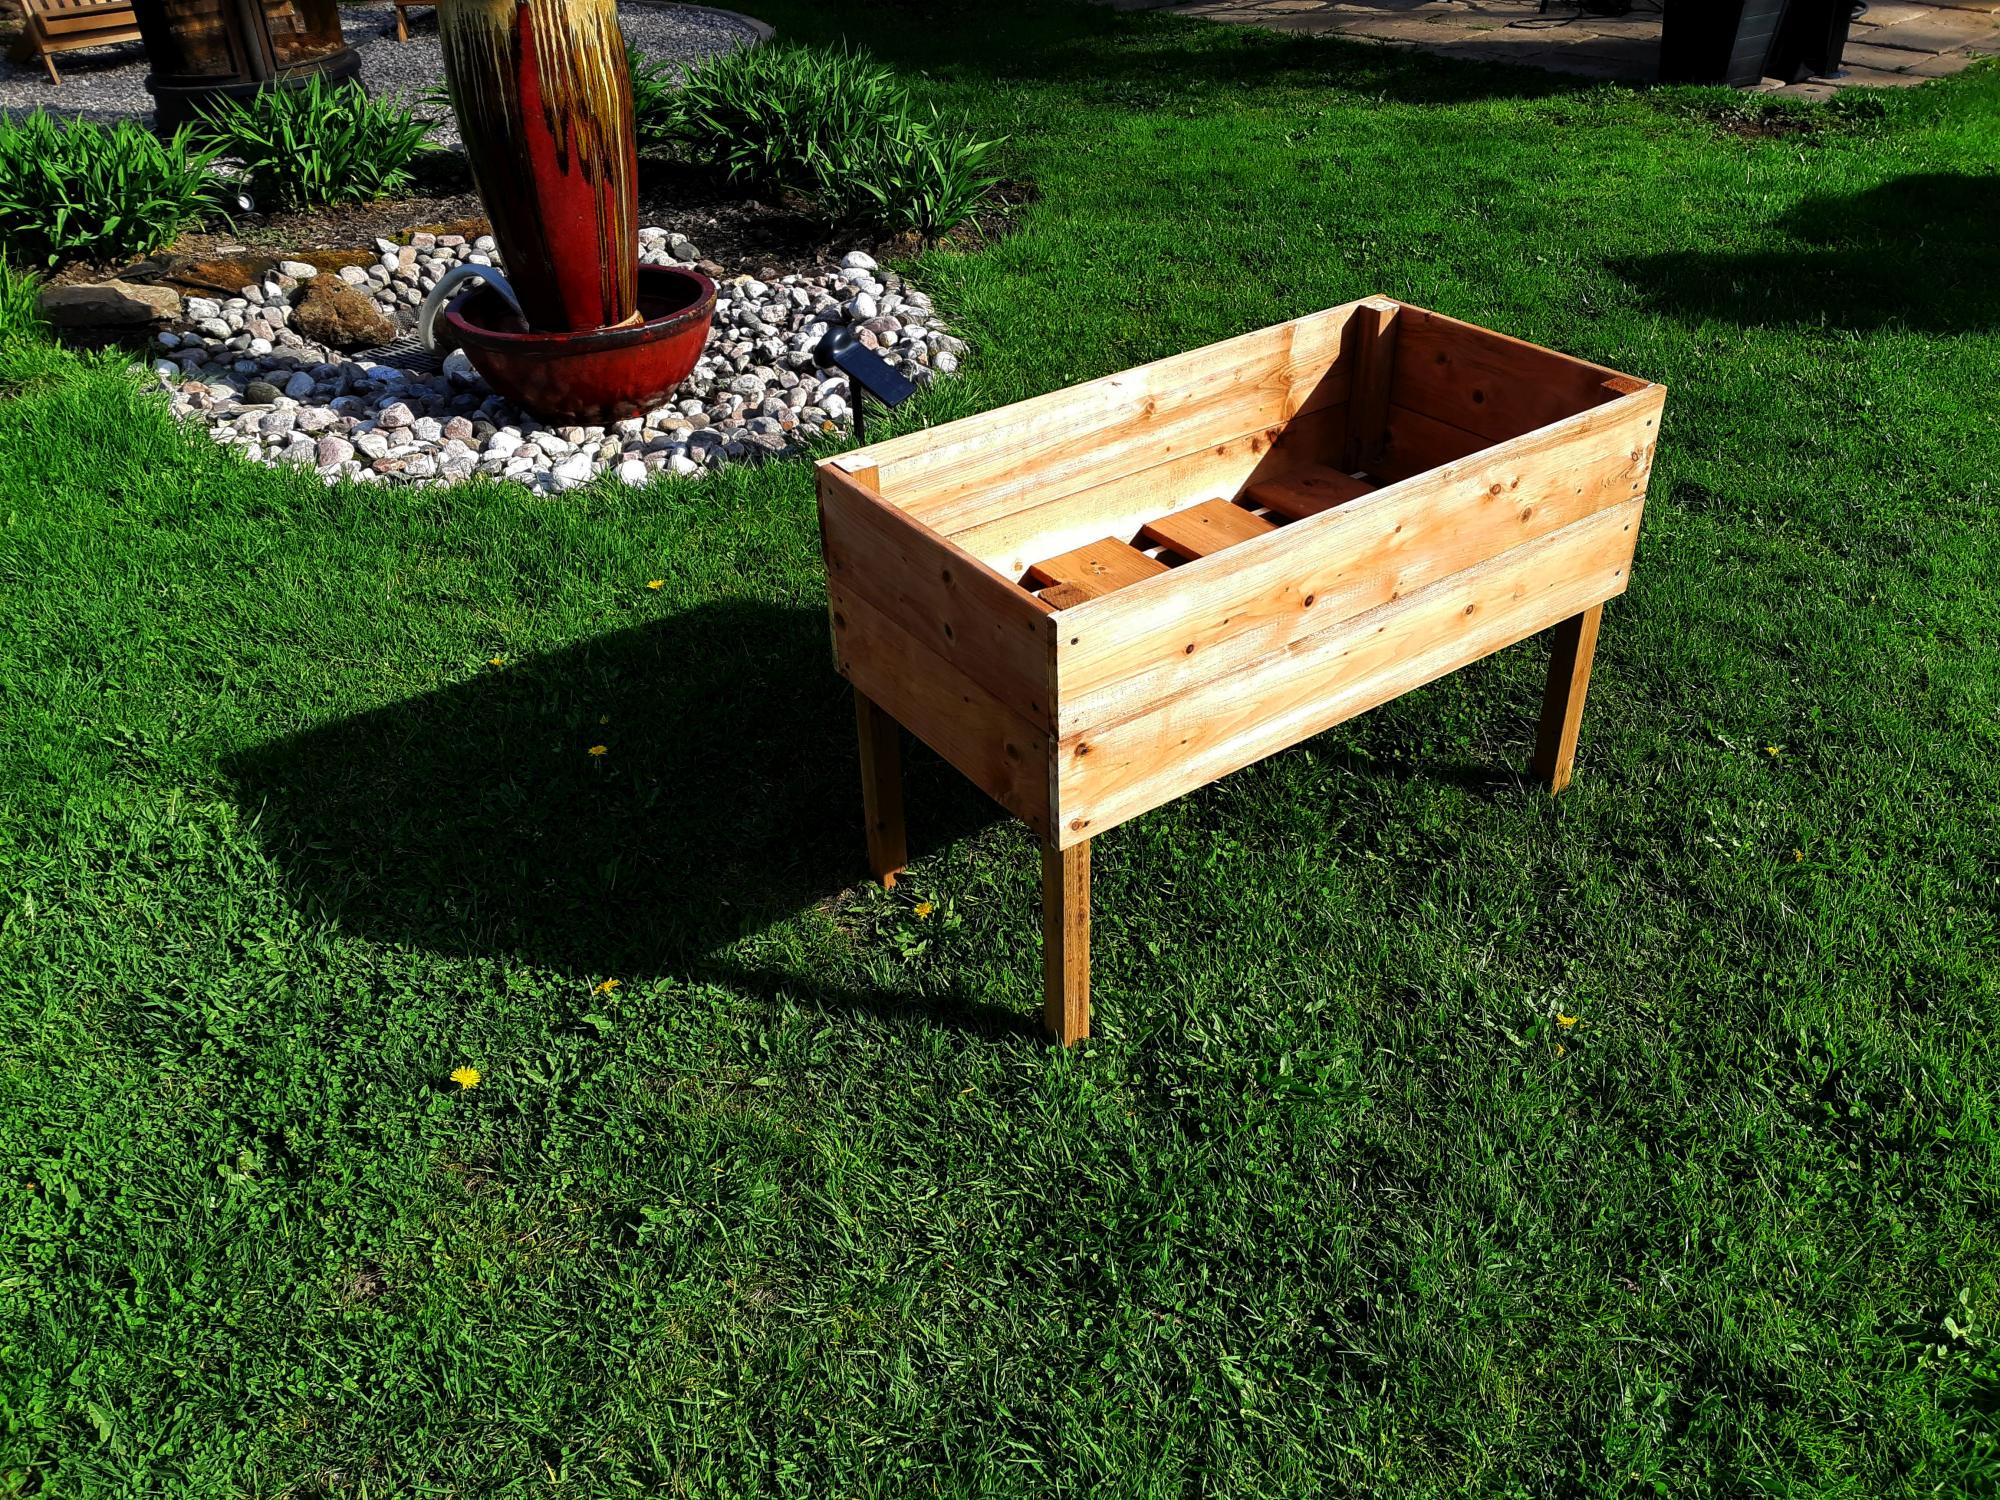
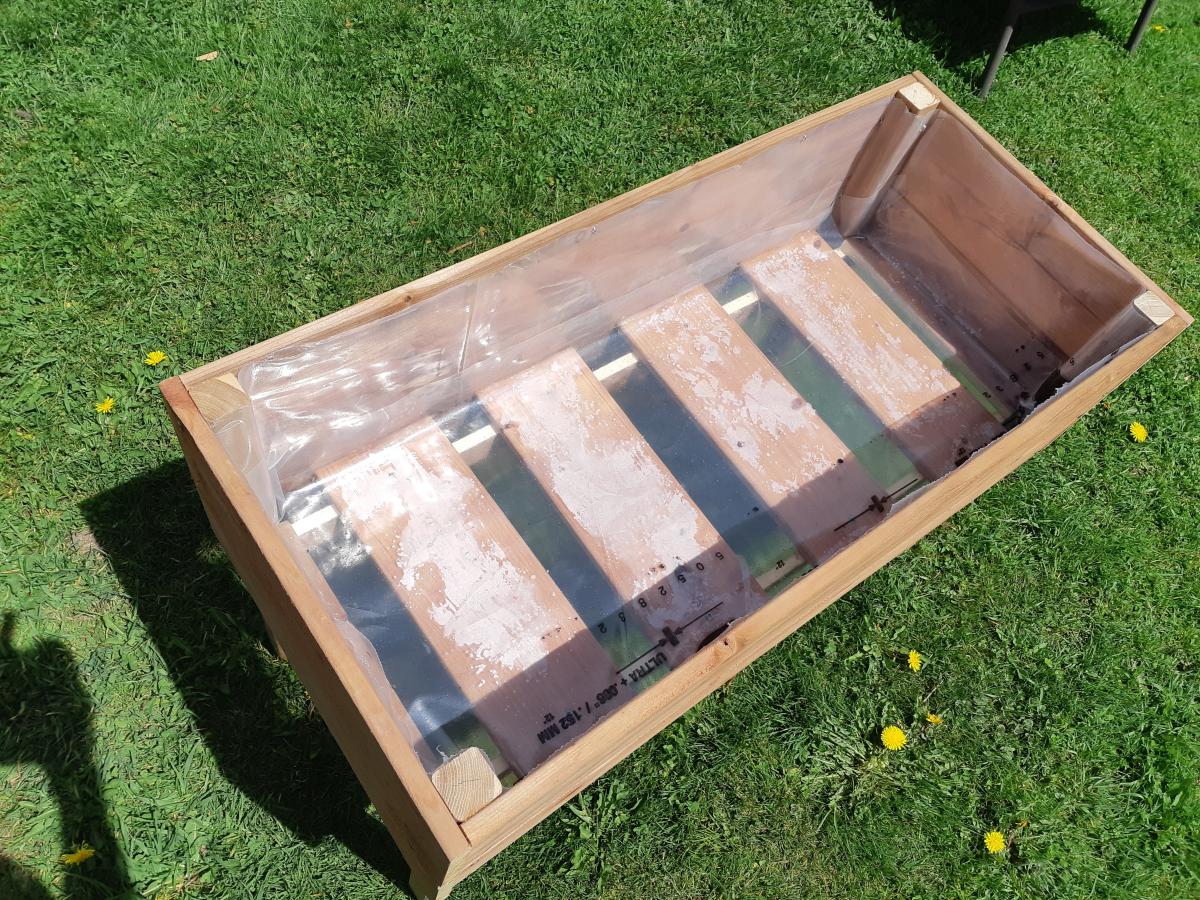
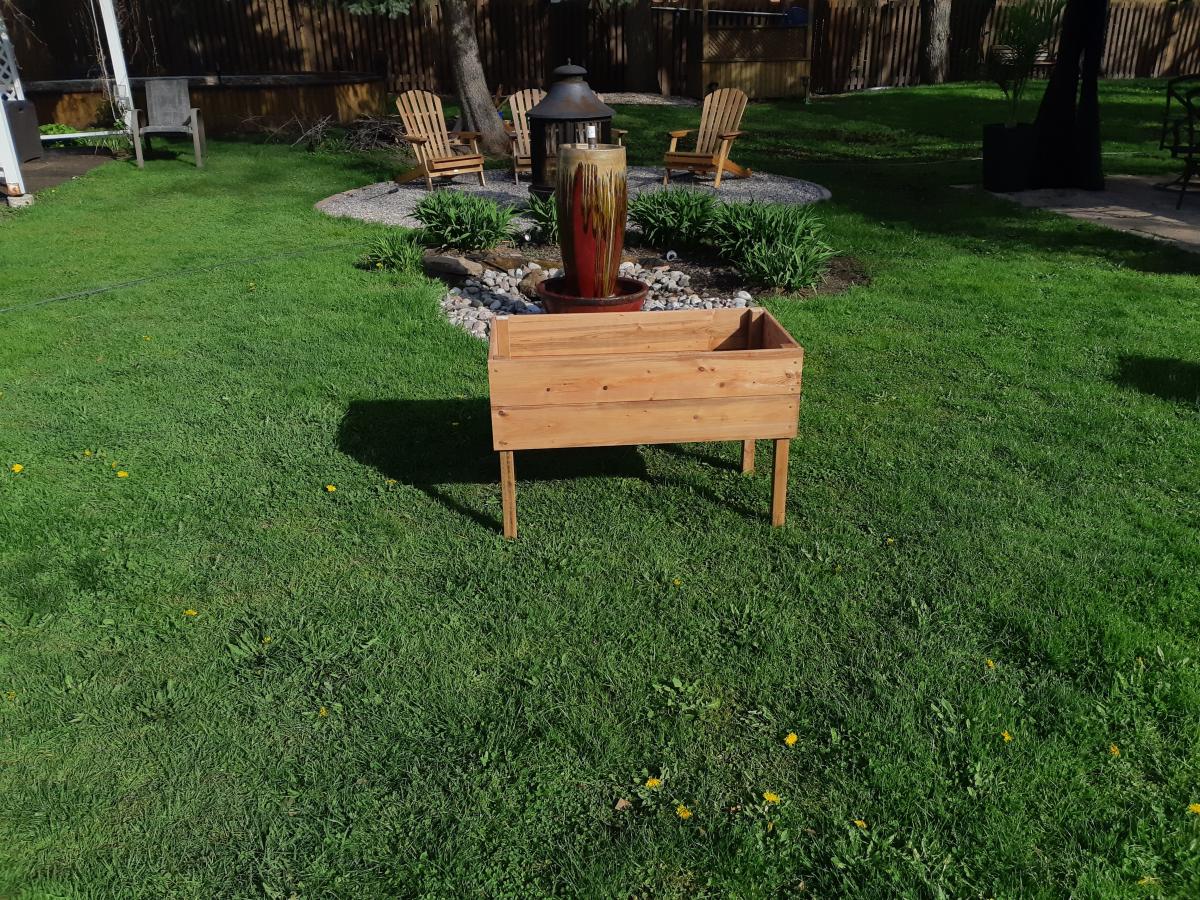
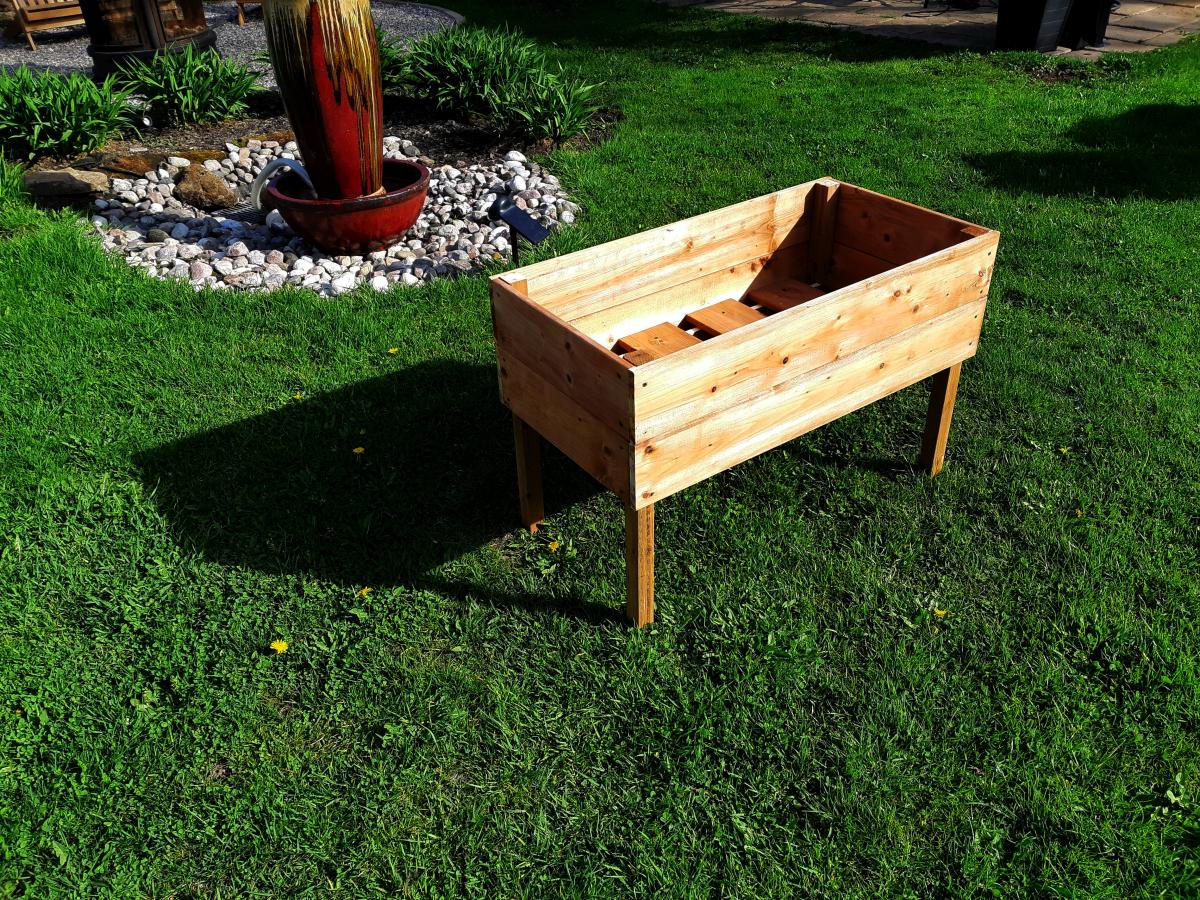
Not much to say apart that some internal measures were different (!?) and that I used treated wood and covered everything with recyclable plastic.
Oh yeah, of course.... Thank you Ana!!
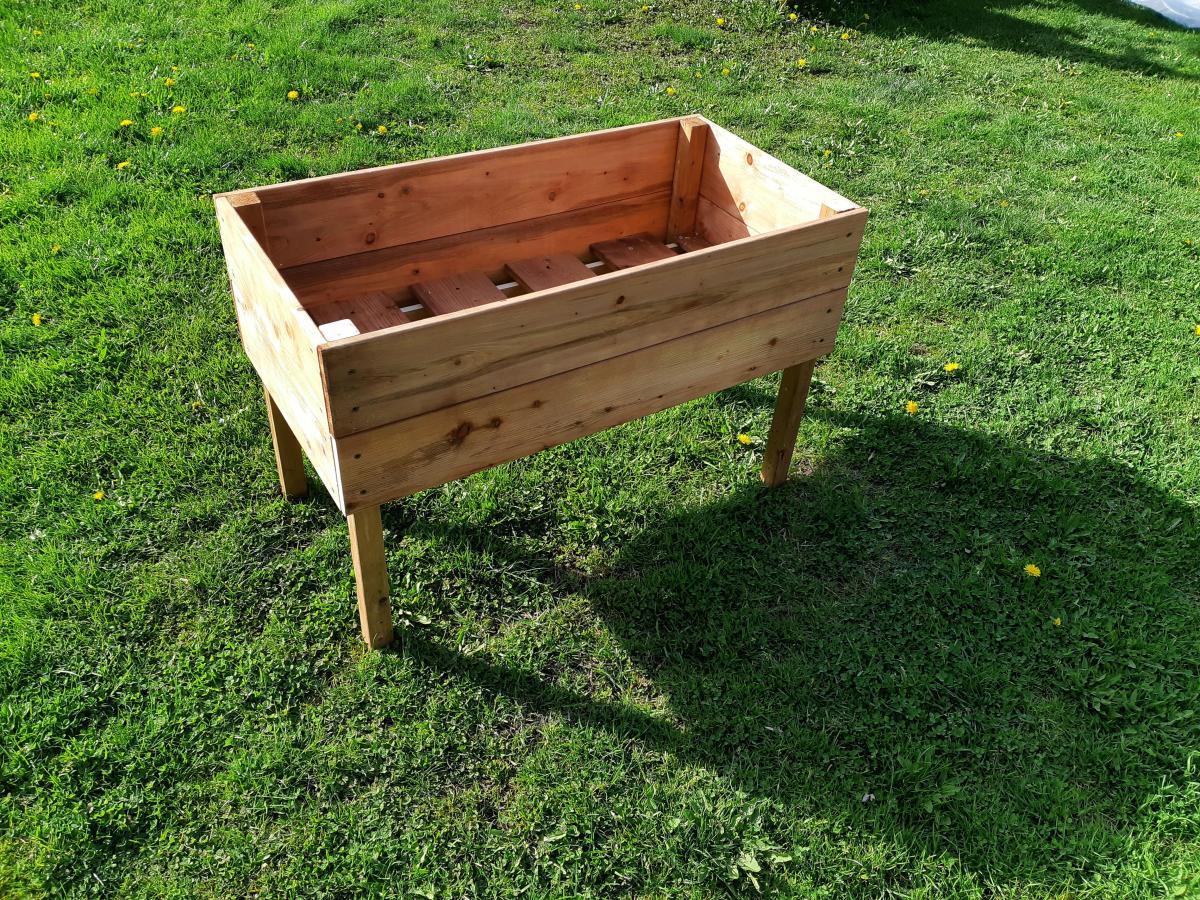
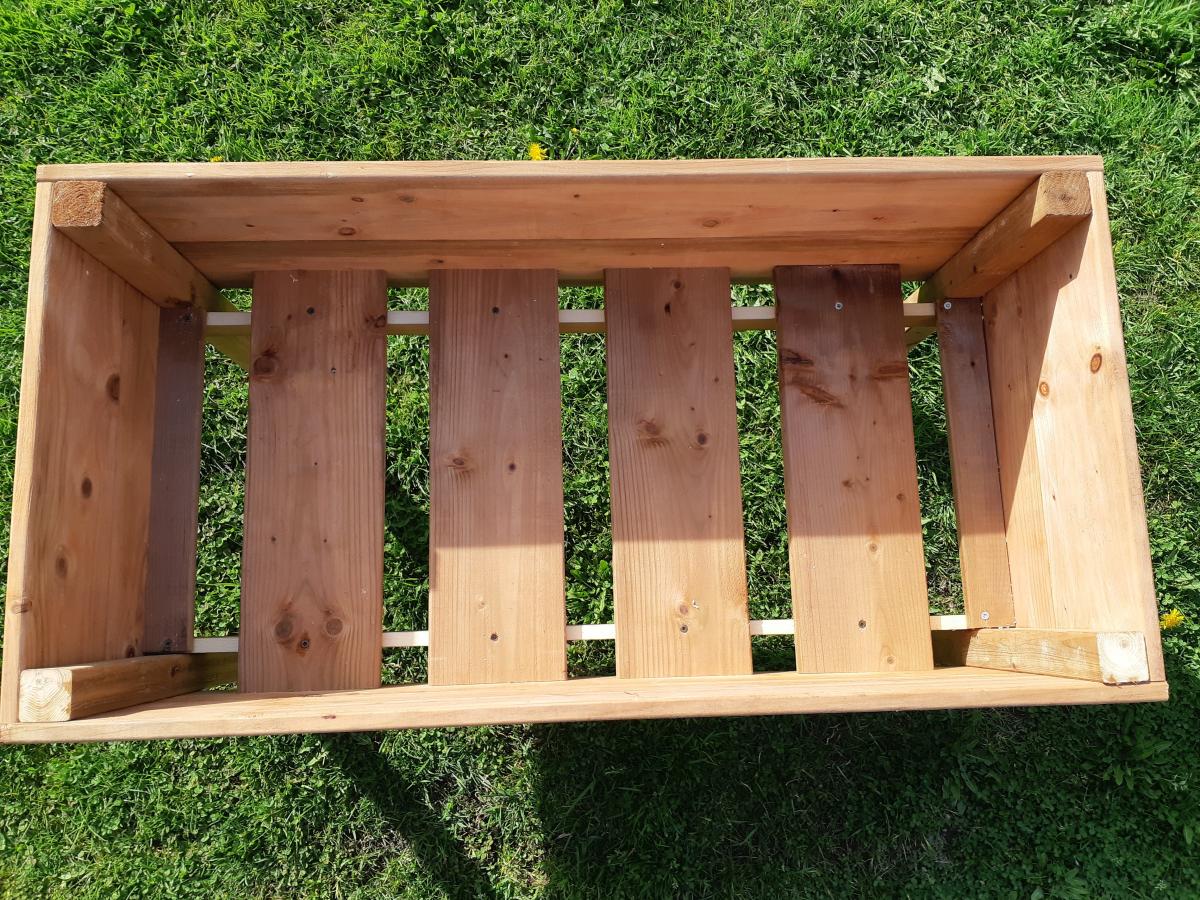
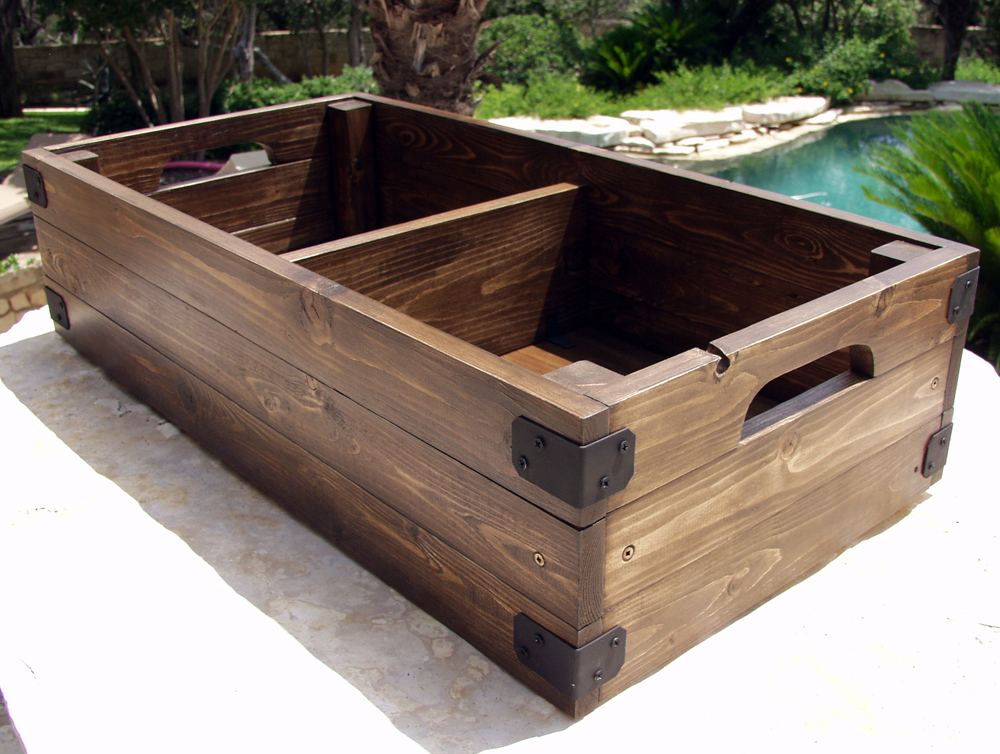
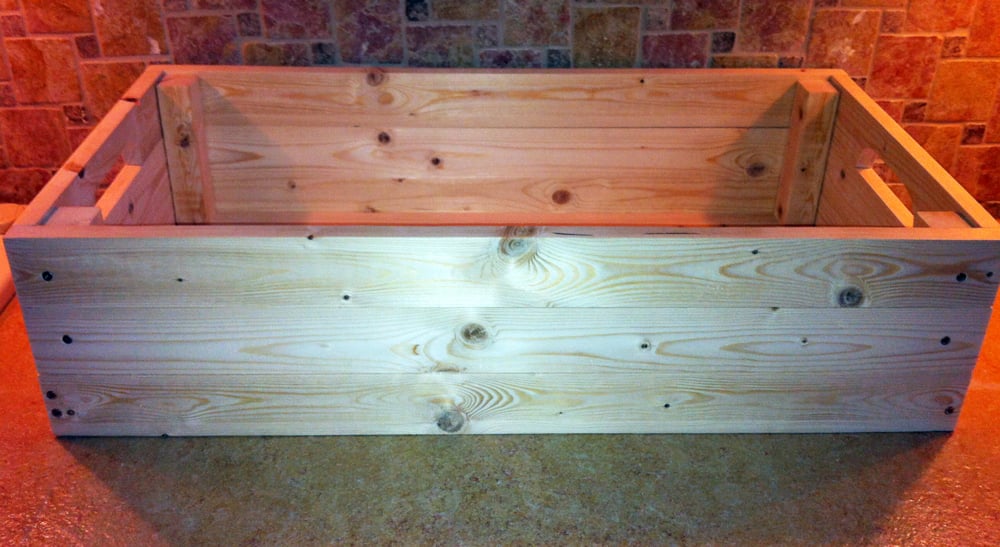
I needed a large box to use at the base of my stairs for shoe storage, so this is it! I made 2 compartments, and put handles on the side for easy moving. Being solid wood, this thing is heavy and a lot larger than it looks.
I wanted to do Bri-wax as a test on a smaller project before possibly messing up a larger one. Bri-wax advised me to wait a week to let the stain 'cure' prior to using the product. The stain was beautiful prior to using Bri-wax, but didn't look nearly as good when the wax took off some of the stain and kind of changed the color. I love the look of the Bri-wax finish, but probably won't be using it again (unless the finish has been cured for a long time). Bri-wax also told me not to use it over varnish or poly, as it would damage that surface. I would be interested in hearing from you guys who have used it successfully on top of other finishes.
Sat, 07/14/2012 - 21:00
Hello Joni,
I've used Briwax over a clear, satin poly finish without any damage, though typically, I apply a 100% Briwax finish on the majority of my pieces as I prefer the natural finish and find it's complimentary to the reclaimed wood I use.
Simply a personal preference.
Looking at your other projects want to commend you on your table too. Nice color distinction and accents. Very nice!
Mike
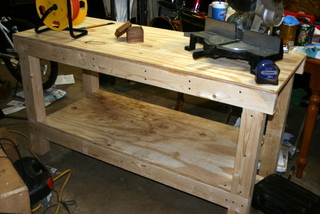
I have been wanting to build a workbench but just hadn't decided on a plan. I stumbled across one here and decided to go for it. It was easy to build, easy to follow the plans. I had fun building it and I'm super happy with out well it came out. This is my first big project and it's only my 3rd thing I've made.
The only deviation from the plan that I did was that I used 3/4" plywood for both shelves instead of just one. And I only did this so that I wouldn't have to buy a second piece of plywood. And I used 3" screws on the whole thing.
Also... I cut 3" off the height so that I could add wheels and it be the same height.
$18 - 2"x4"s
$ 7 - screws
$24 - Plywood
So about $49
The wheels... well... if you go to Lowes... I spent $30 including the bolts. Then I went to Harbor Freight and got some different ones for under $20. So I'd shop around on that. Or... you don't need them if you don't want them.
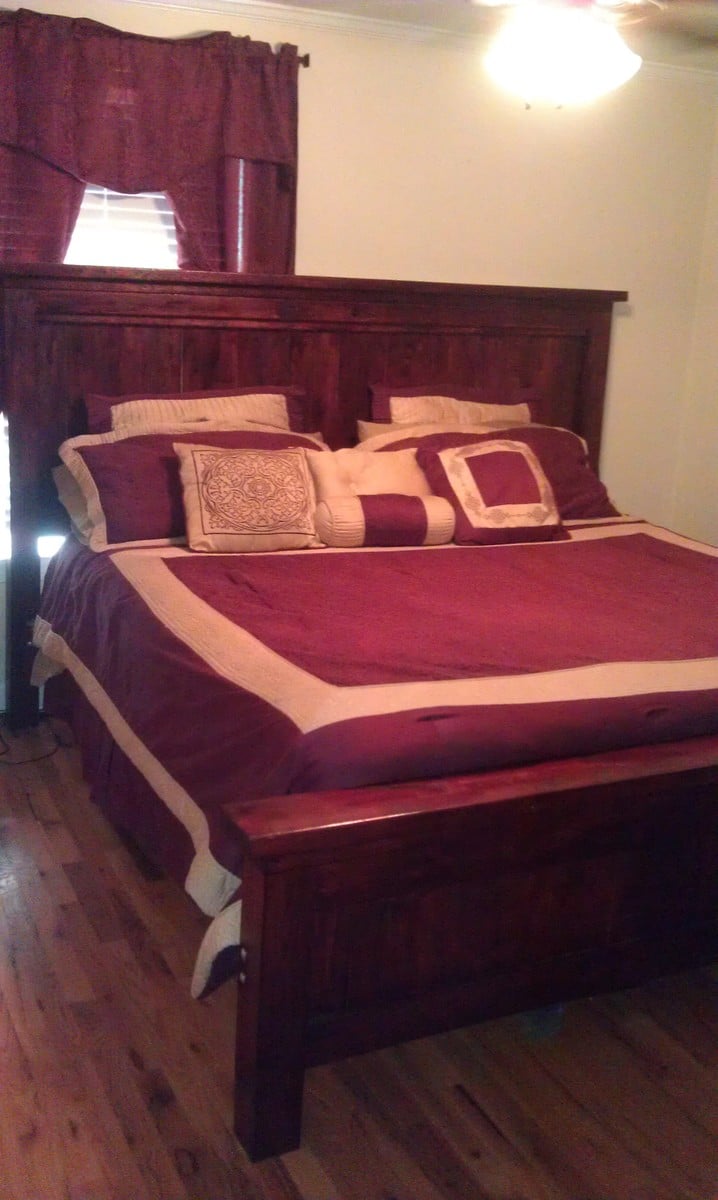
We have been sleeping on a inexpensive platform bed for the last 7 years and after falling in love with this website (thank you Ana, I am constantly bragging and showing your website to others) I decided to build us a farmhouse bed as my first project. I started this project back in October 2011....yes it took much longer than expected, but I have 2 kids a husband (so make that 3), a full time career in the military and a house to maintain. That and we got the news I am pregnant back in Nov!!! The head board and foot board did not take long and luckily we had a very mild winter here in NC (boo to no snow though). I decided to save some work and money by reusing the slats and hardware from my old bed to avoid buying more wood or having to get a box spring for our mattress. Unfortunately, that was my huge delay, I cut and stained my sideboards, bought what I thought would be great bed brackets and found myself with a space that was to wide for the slats and on top of that my husband managed to loose one of my brackets. Needless to say, months of sleeping on a mattress on the floor with my head board and foot board on either wall mocking us every night due to my overwhelming frustration and fear of having a colossal headboard fall on me while trying to work. I called upon the assistance of a good friend of mine (Christie you are amazing!!) to come over while my husband was out of town in May (I figured this would be a good time to surprise him, plus keep his opinions from making things take longer). So lots of how the heck are we going to do this and finding out the bed frame brackets I purchased were not as strong as they appeared (they broke!!). We got some new wood for the sides and some long bolts to get everything together and worked a whole Saturday to get it complete. Added a few L brackets to get rid of the wobble and its sturdy as a rock! It may have its flaws, but I love it and don't regret any of the time and stress it took to build it. I now have a beautiful comfortable bed to sleep in every night to patiently wait for my third little girl to arrive. It should last us for a very long time especially since I made sure that it could come apart and go back together for any future moves the military may take us.
I cannot wait to start my next project.....and hopefully it wont take as long this time ;).
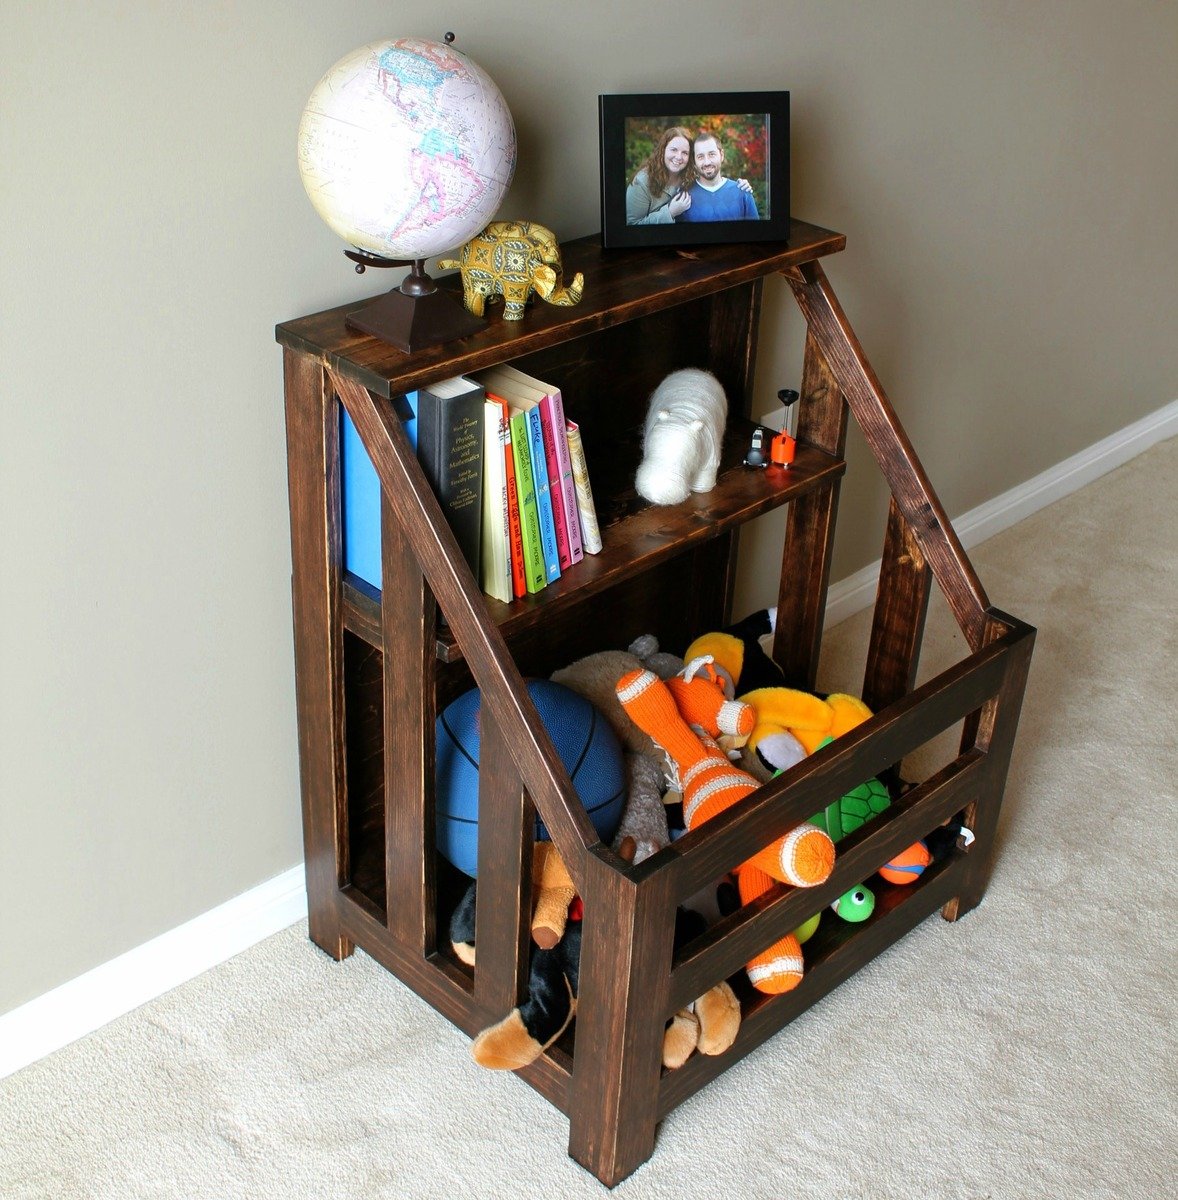
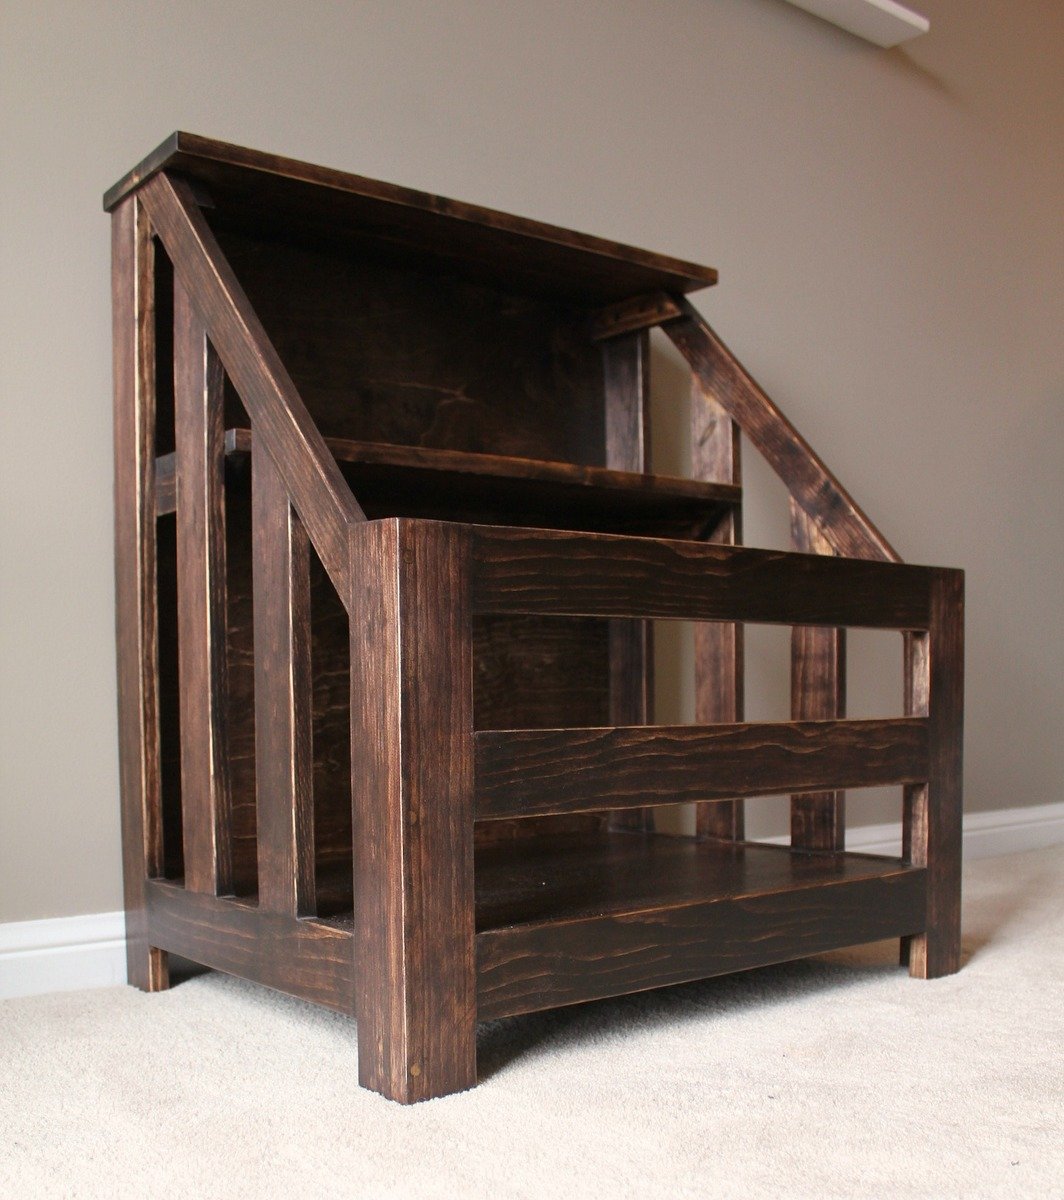
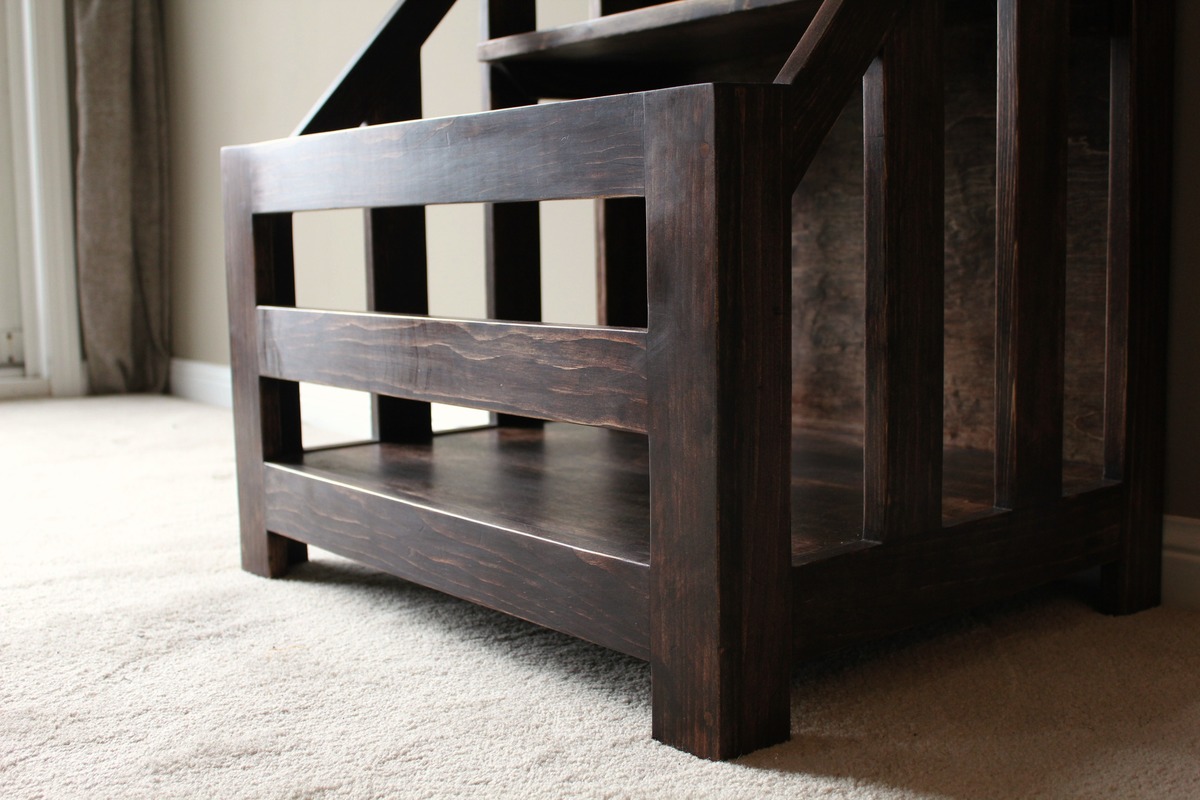
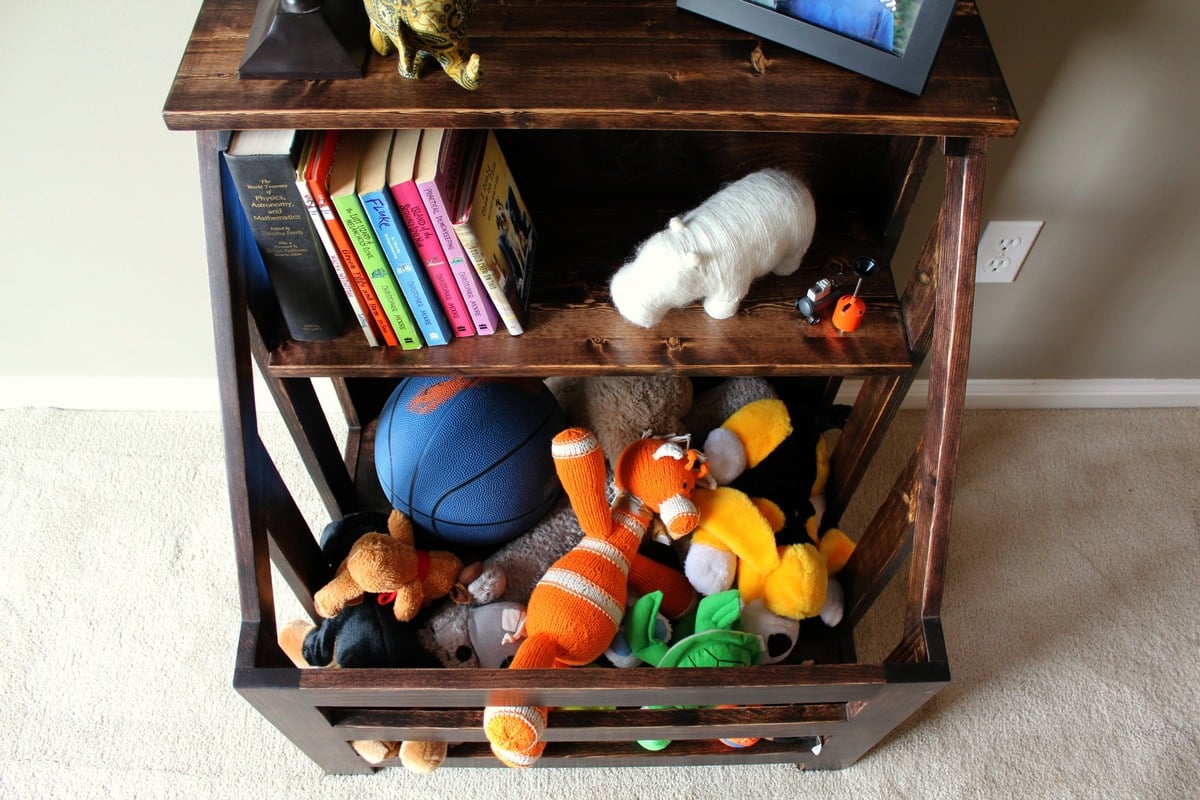
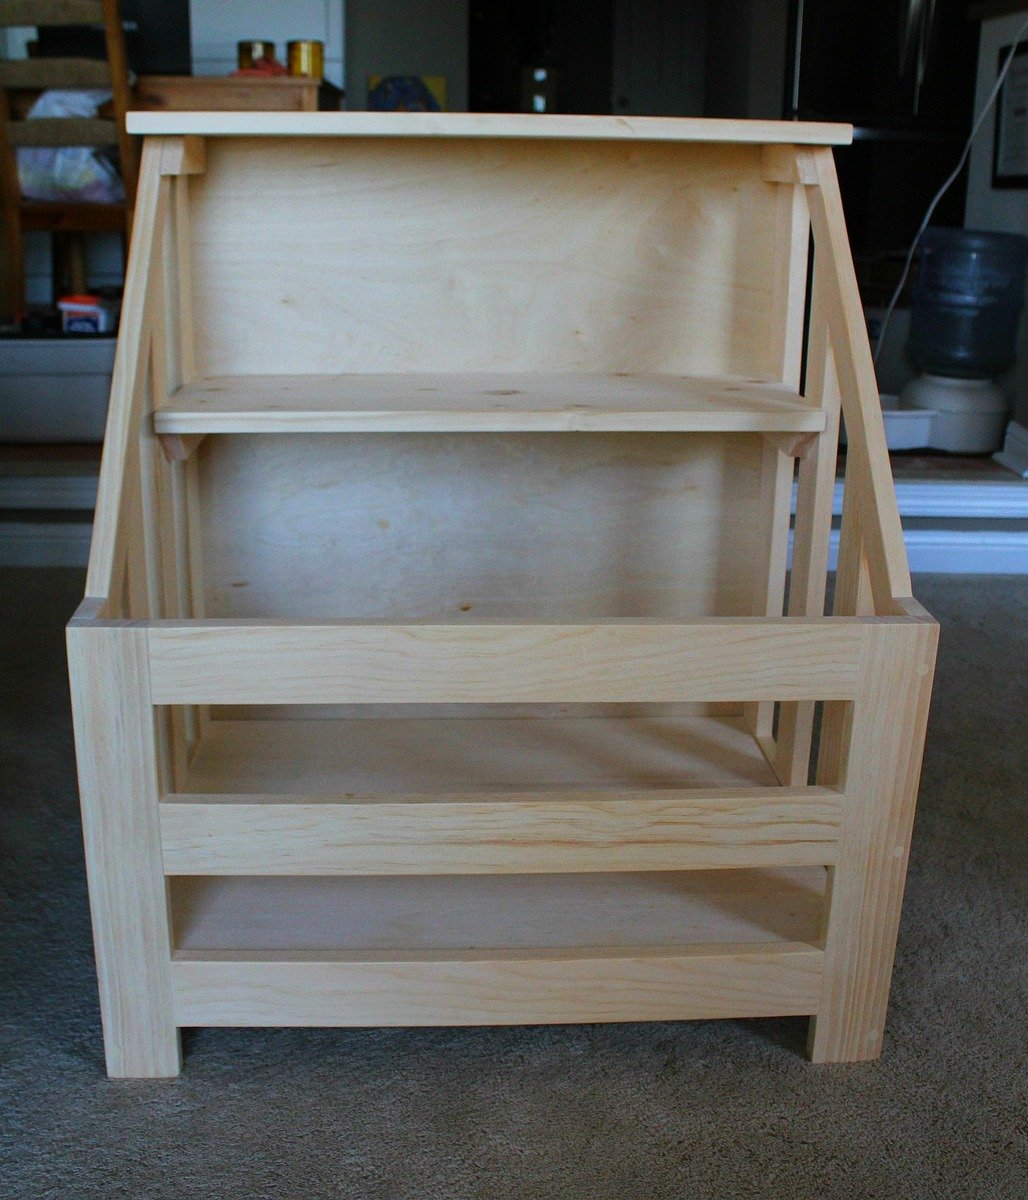
We built this bookshelf/toybox for our cousin's daughter - as a 1st birthday present. Overall, the project only took a weekend (including staining and waxing), and the cuts and assembly are pretty straight forward.
We wanted it to be larger than the one in the plans, so it took some time to figure out the dimensions before we started cutting. There was a bit of, "What do you think of this height?" and, "Is this too wide?"
My husband and I have built quite a few projects together so this one was fairly low on the difficulty scale. As long as you are comfortable with a mitre saw, you can do it. The kreg jig made it easier to drill pocket holes, but even with only different-sized drill bits and a steady hand you can make them.
This is one of my favourite builds - maybe because it was a gift for the sweetest little girl. Plus others have shown interest in it, so I might just have to start a side business!
More details on what we did can be found at:
http://turtlesandtails.blogspot.ca/2014/05/child-sized-bookshelf-toybox…
Wed, 09/10/2014 - 08:13
I was thinking the same thing when I saw the original design. I like it but the dementions are quite a bit smaller than I want to make for the toy box gift that I want. I am doing the same thing. It will be a 1st birthday present for a little girl I am thinking of making it 36 wide and at least 36 high and 24 deep. What would the dementions be and how much would that change the side angle cuts?

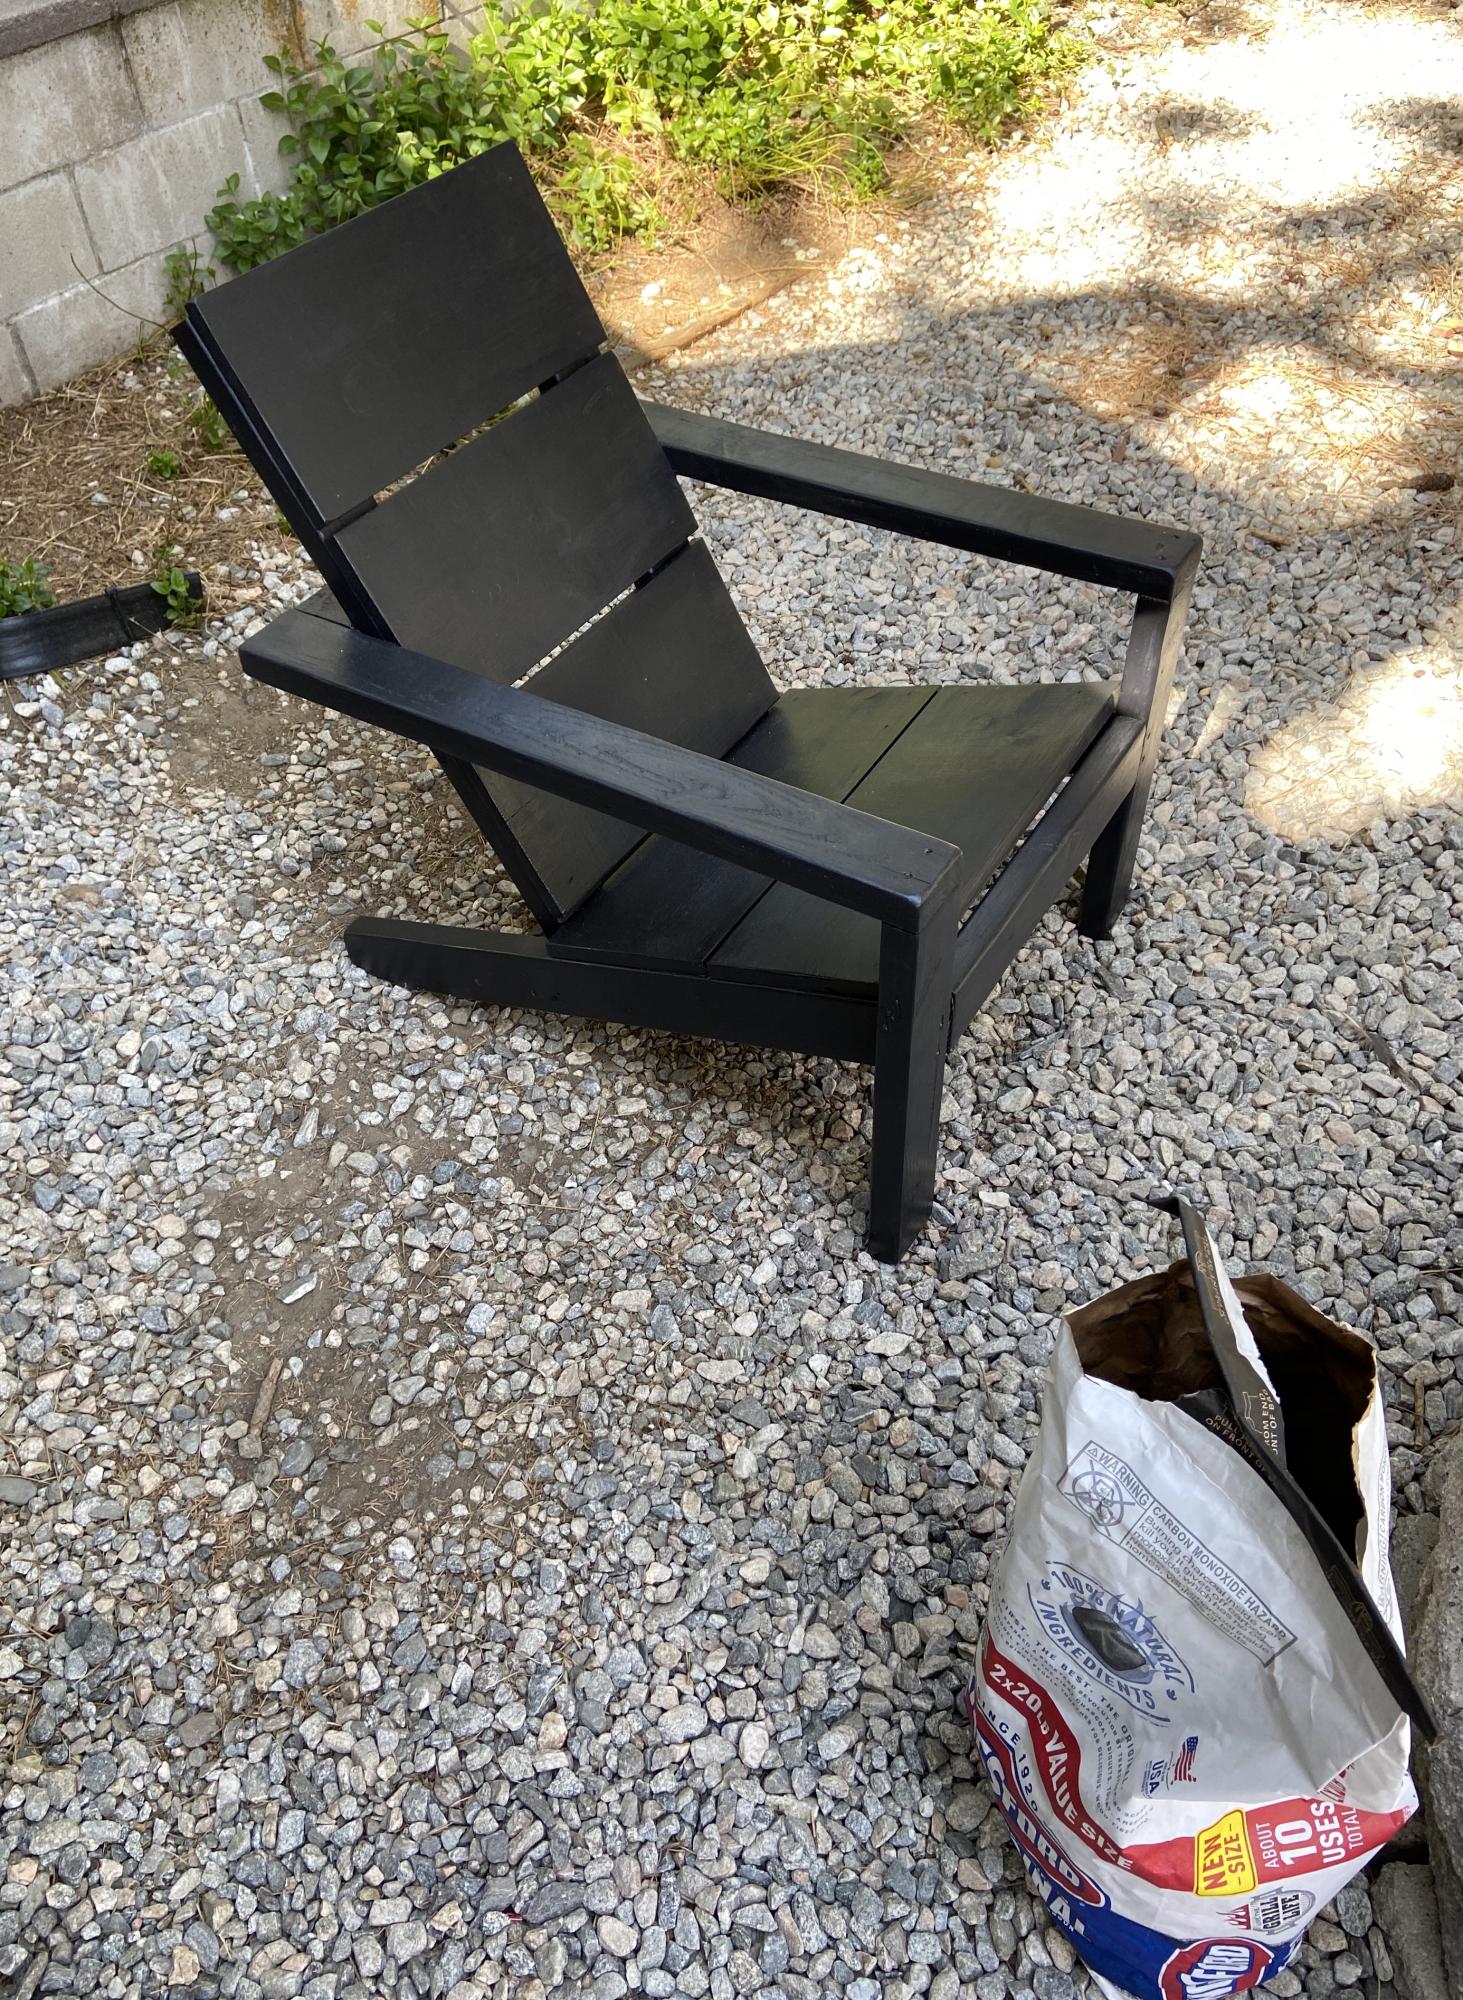
I made these modern Adirondack chairs for our business in Anchorage. GREAT and easy to build design by Ana - we upgraded the arms to tapered 2x6 and they're awesome!


I turned some old oak shelves that I got from an estate sale into a 3' wide Scandinavian slat bench.
Pat Besong
My daughter and my first project .. thank you for the easy plans and YouTube tutorials! Onward and upward ...
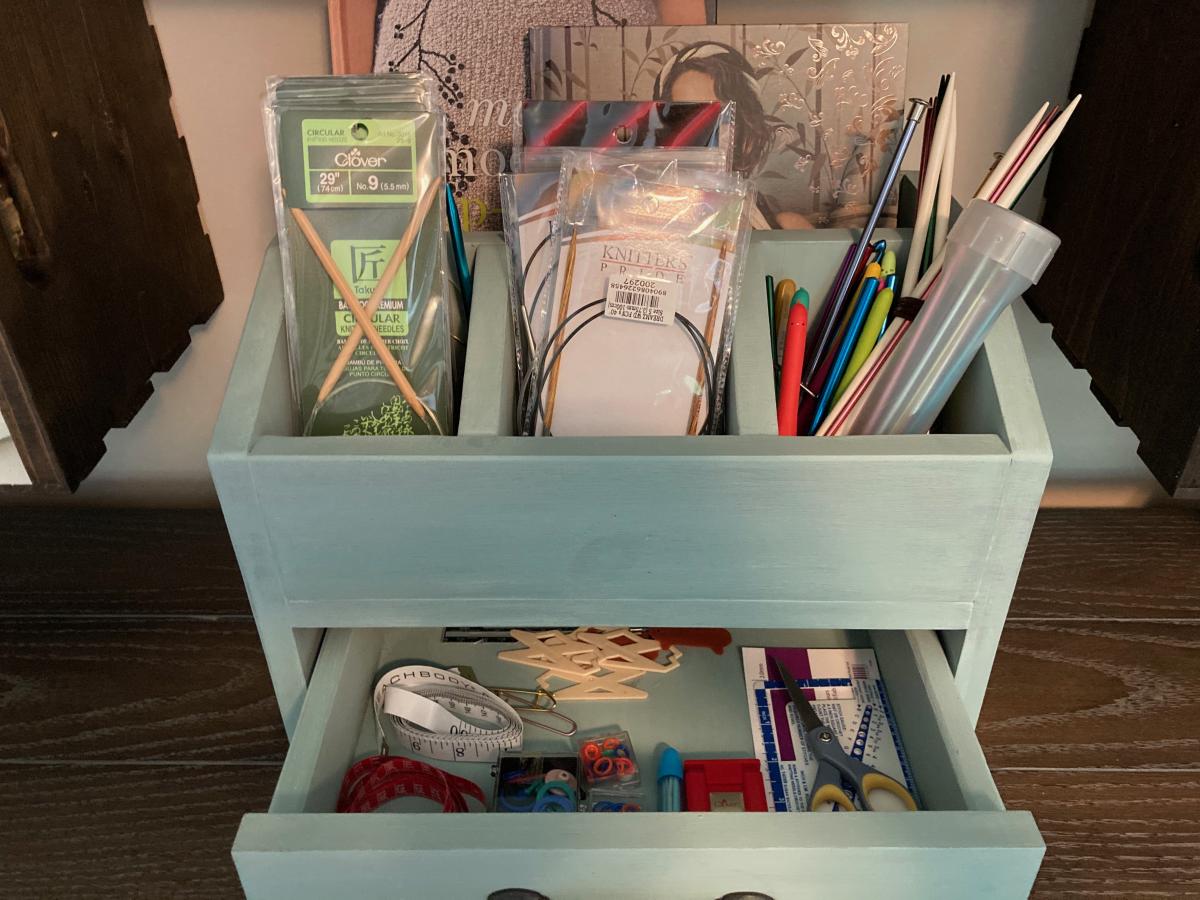
I used Ana and Jaime's desk organizer plans to build this, but I'm using it in my craft room instead for my needles/hooks/small accessories. This plan was part of Ana's Handbuilt Holiday plans found here: https://ana-white.com/woodworking-projects/desktop-office-or-vanity-bea…
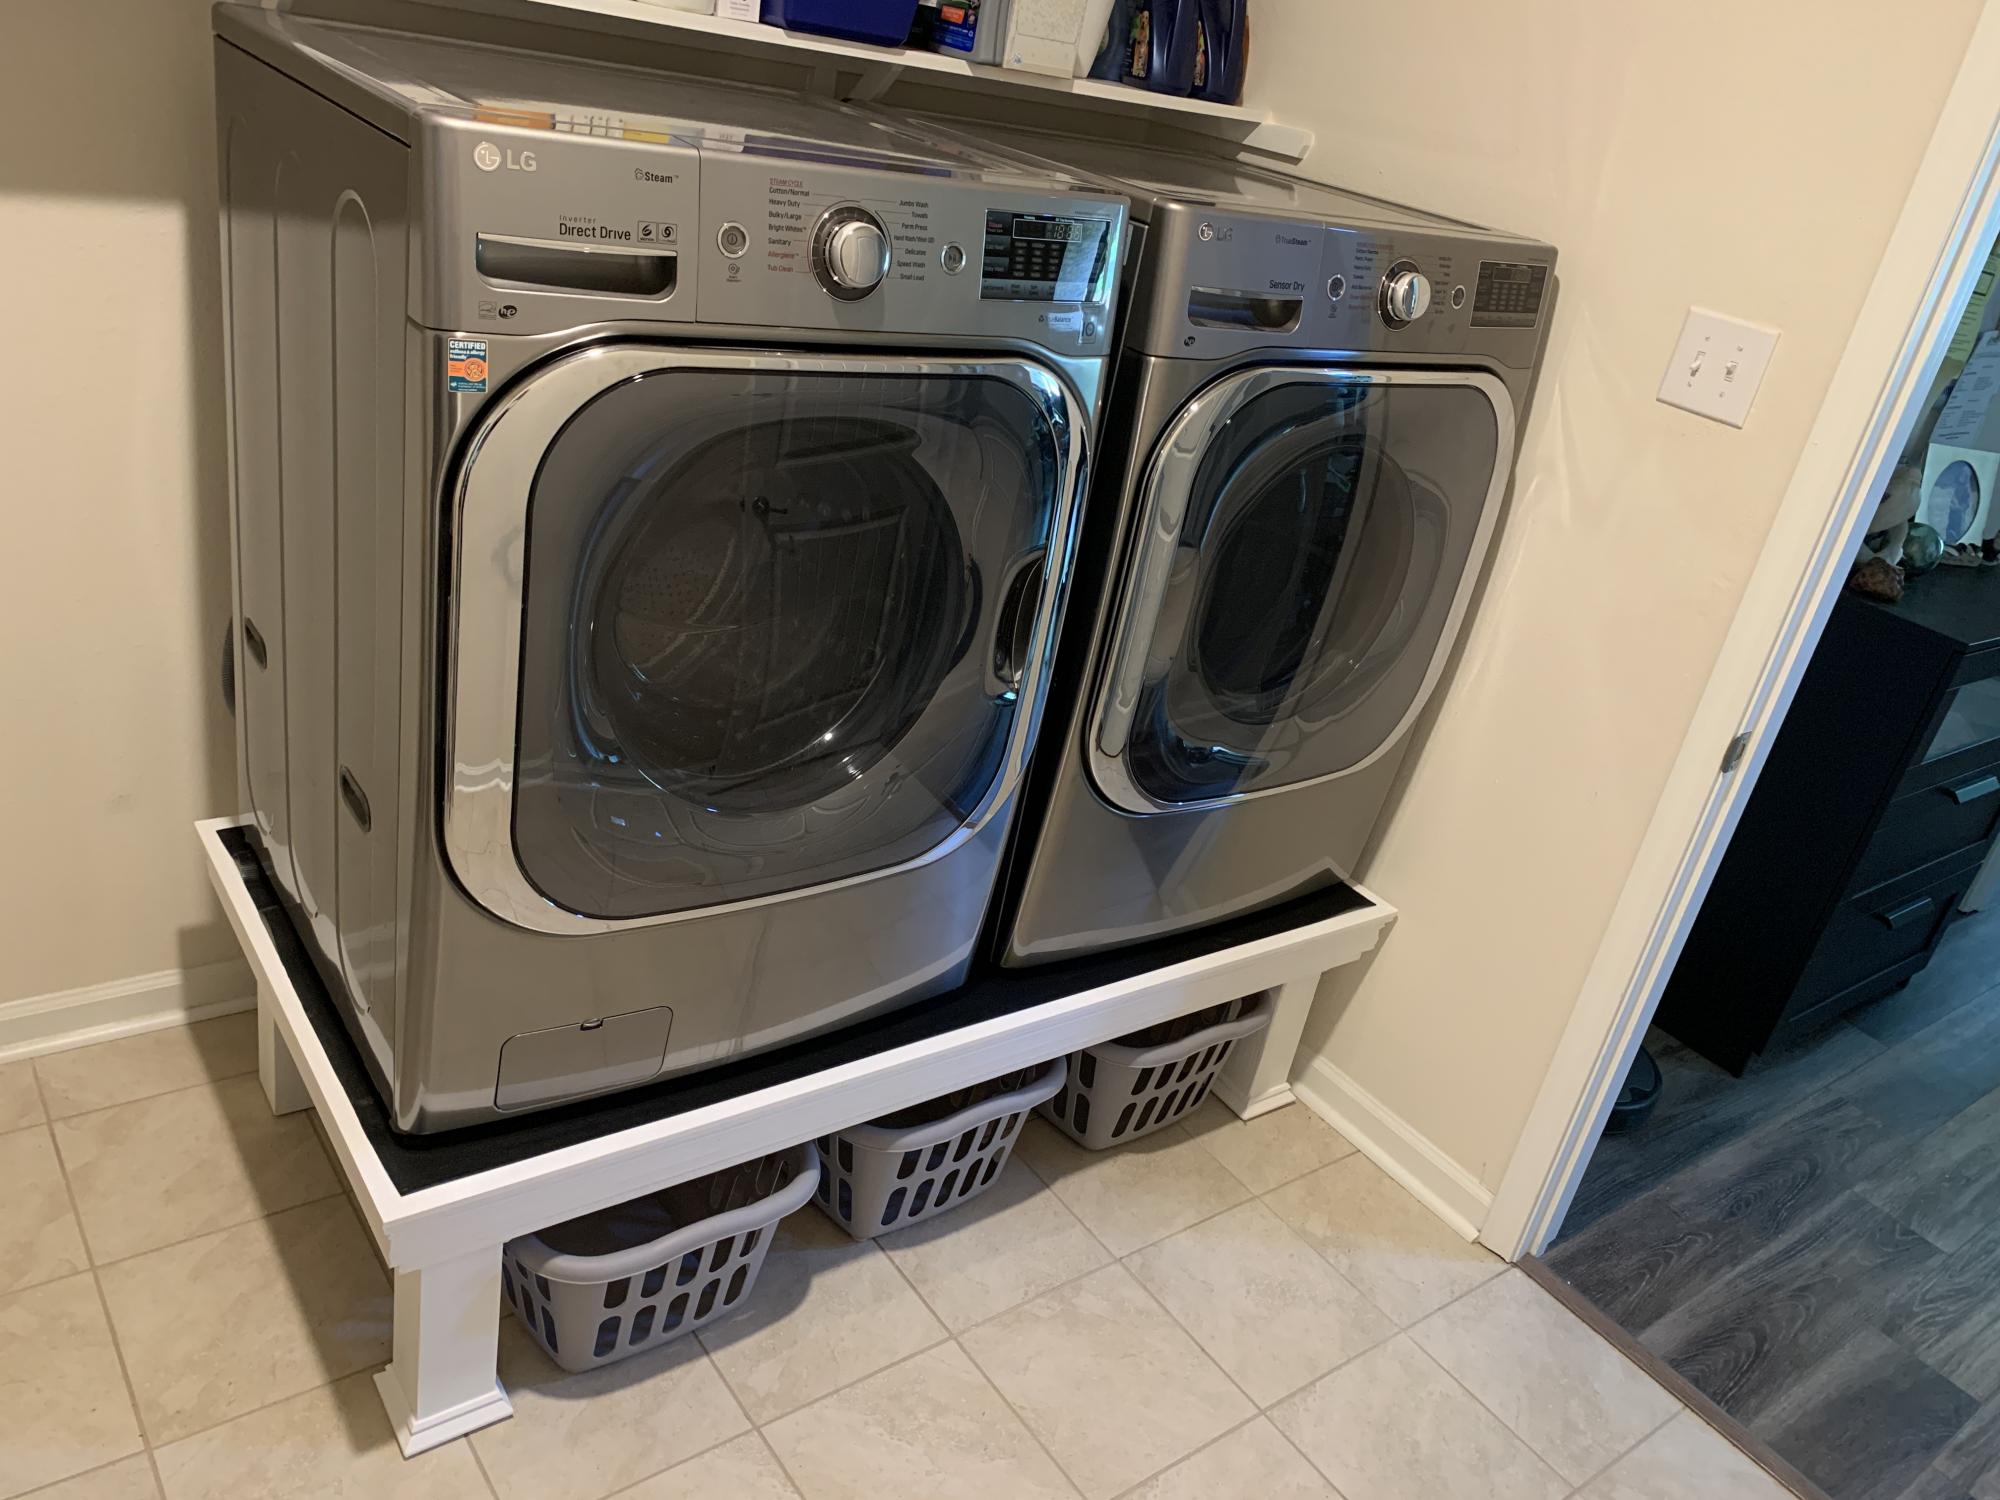
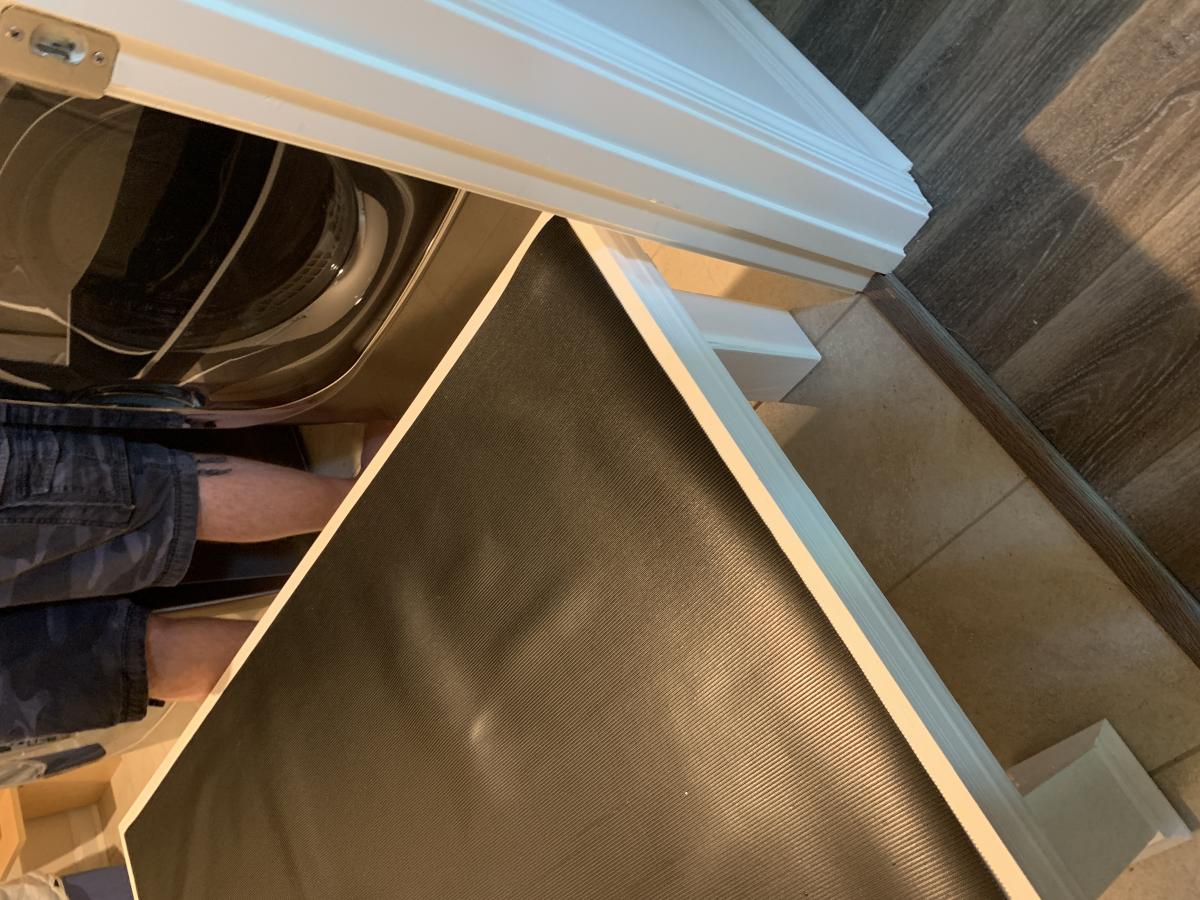
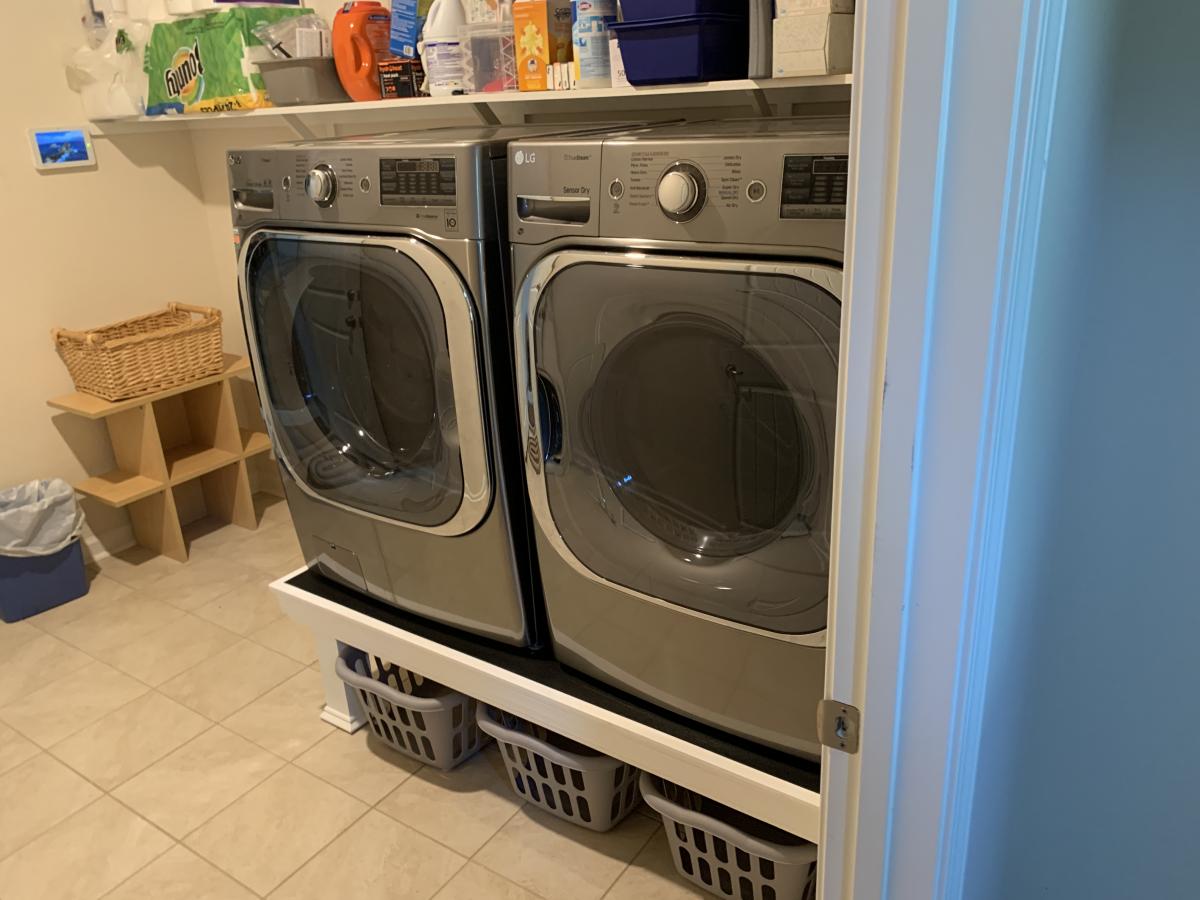
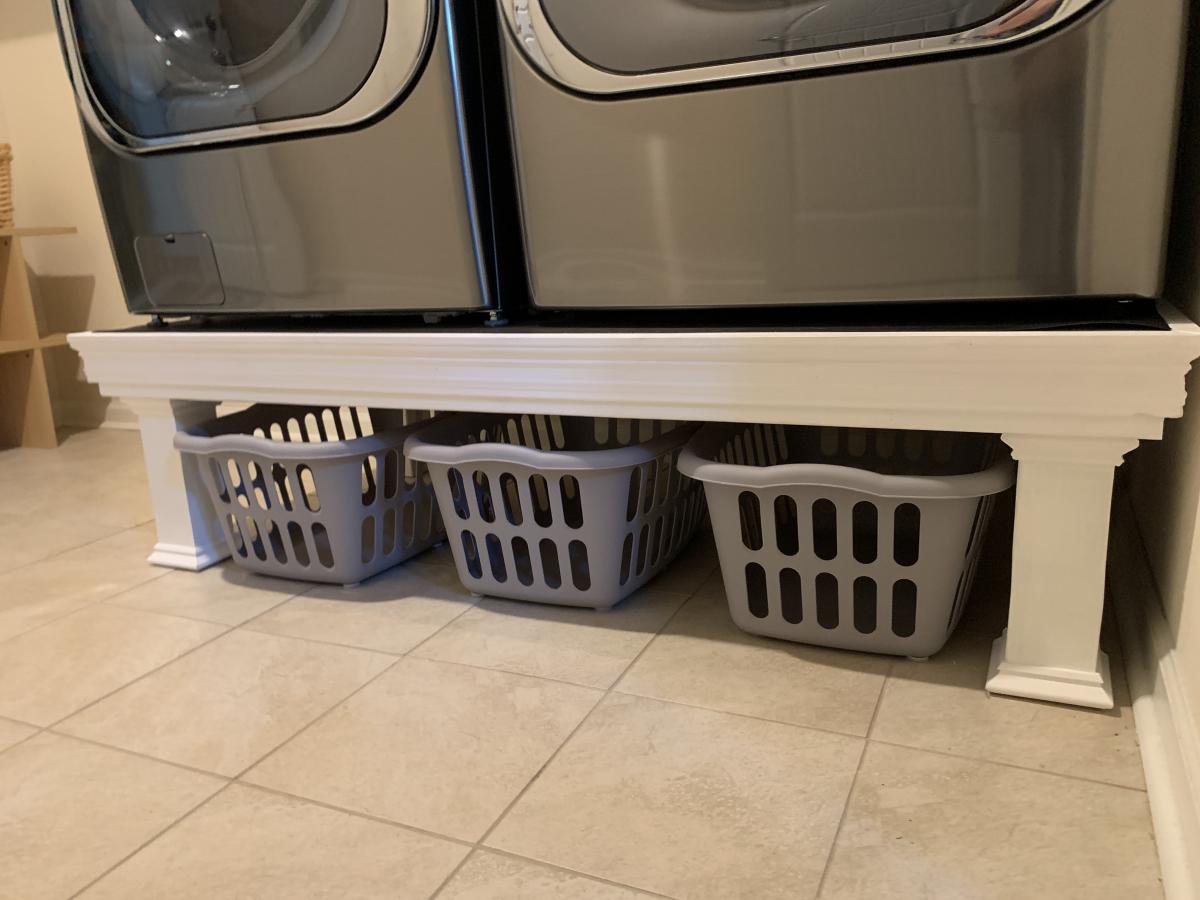
This was quick build. First time for us using trim, so we wasted a few feet getting the angles right. We attached the legs directly to the frame, and did not use the metal brackets. We also did not build the floor frame. We measured how high/wide the laundry baskets ($3/piece at Target!) were, and made it to fit them. We added a piece of rubber mat to the top (bought at Lowe's). A few weeks later we helped our daughter and son in law build one for their new house!


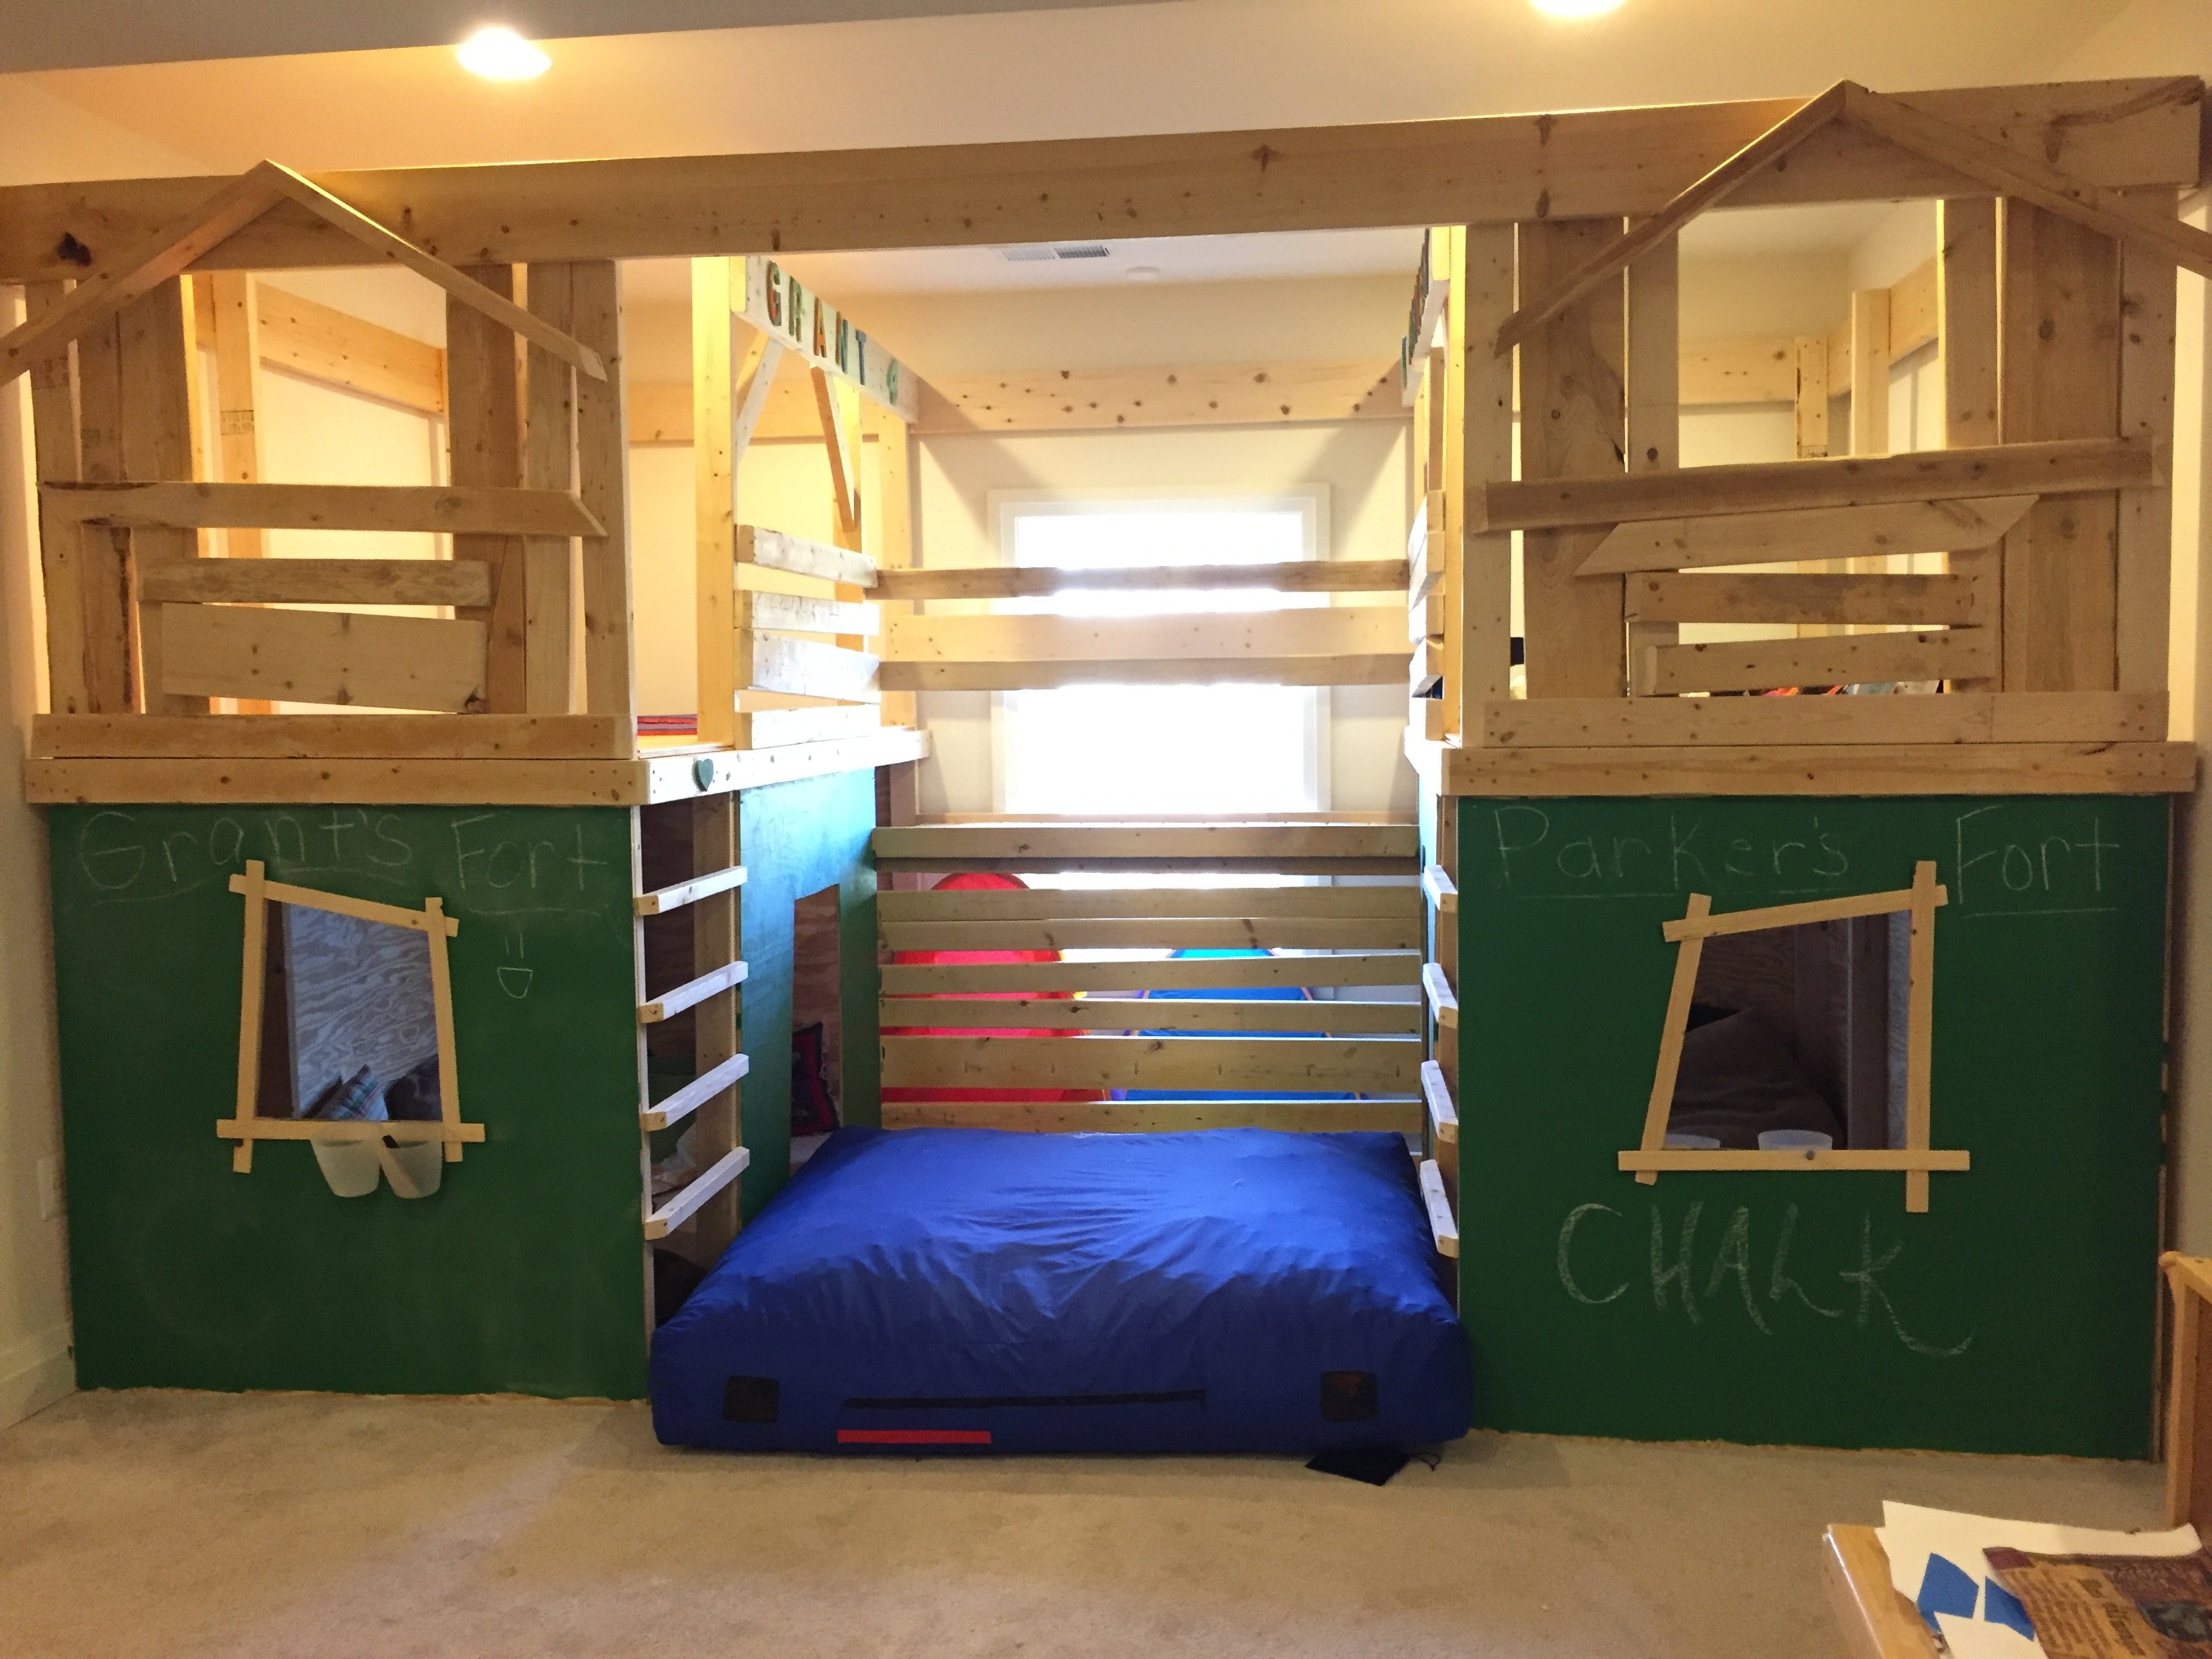
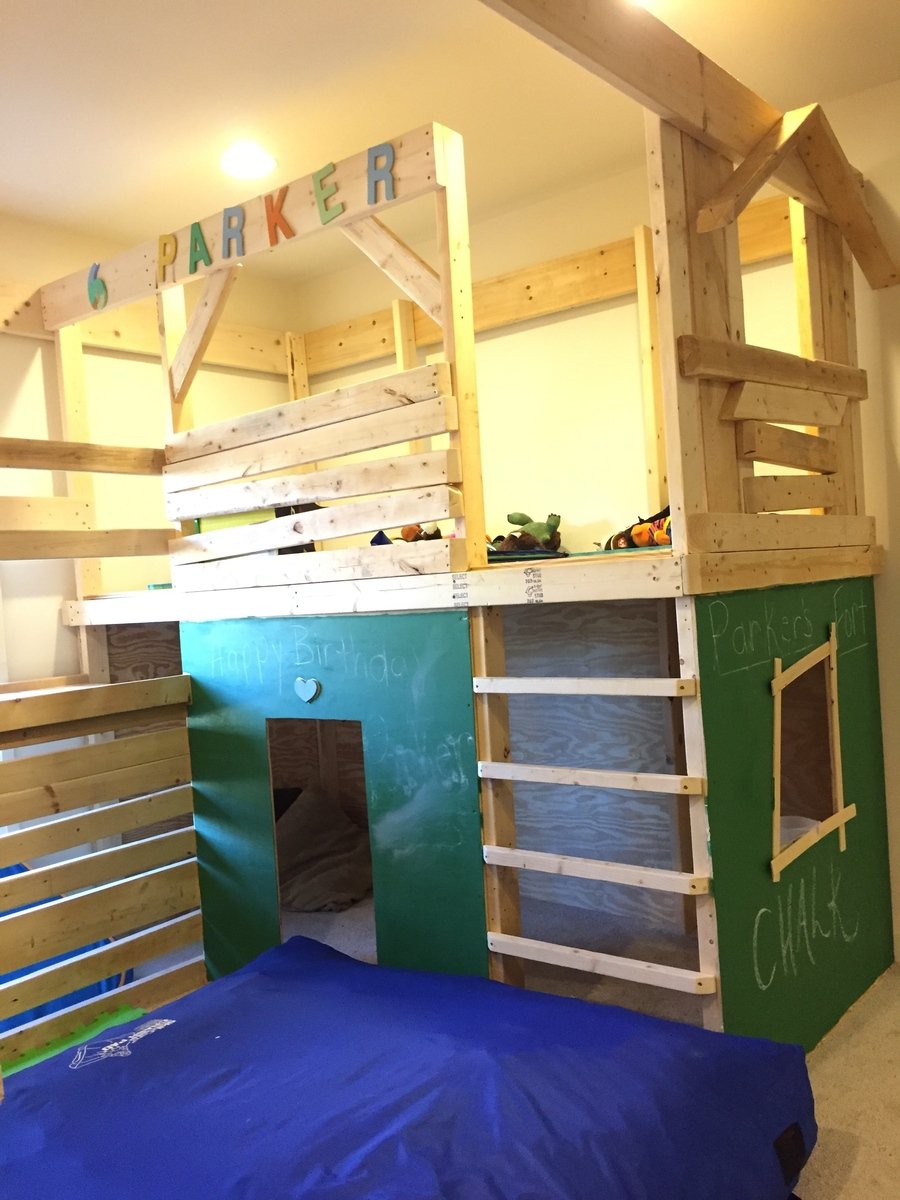
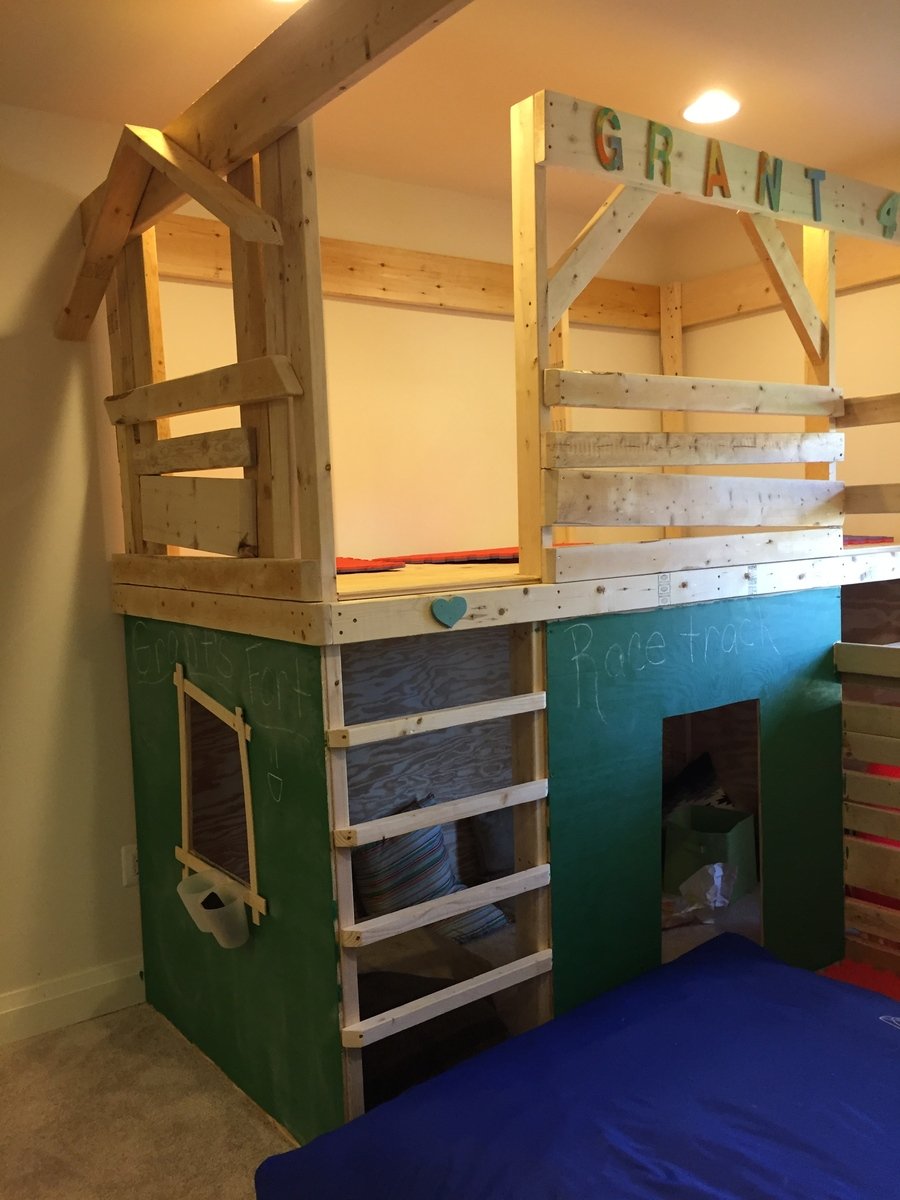
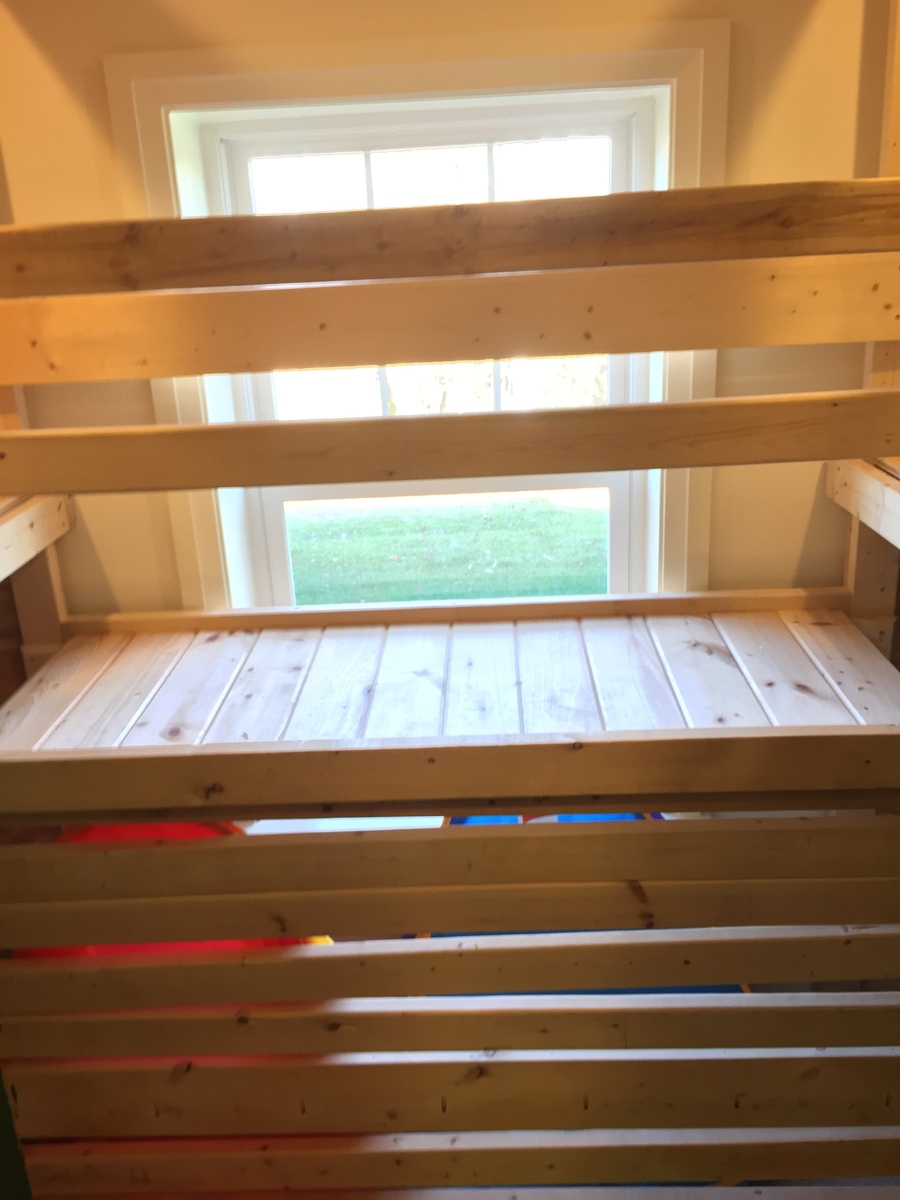
I built this project by myself. My husband helped move the large pieces when I connected them, so one person really can tackle this project! I had a combination of scrap wood from new home construction on hand and store bought lumber. Most of my time was spent sanding, sanding, and more sanding, especially with the construciton grade lumber. Yes, it was worth it! I used tongue and groove wood for upper level flooring and bridge. It really made it easier to put the floors together. I connected all the tongue and groove pieces with a snug fit and used my brad nailer to secure it down on the perimeter of the floor. Therefore, not every peice had to be screwed down.


Comments
Ana White Admin
Mon, 09/18/2023 - 15:34
Great solution!
Looks like the perfect plan for the space, great build!