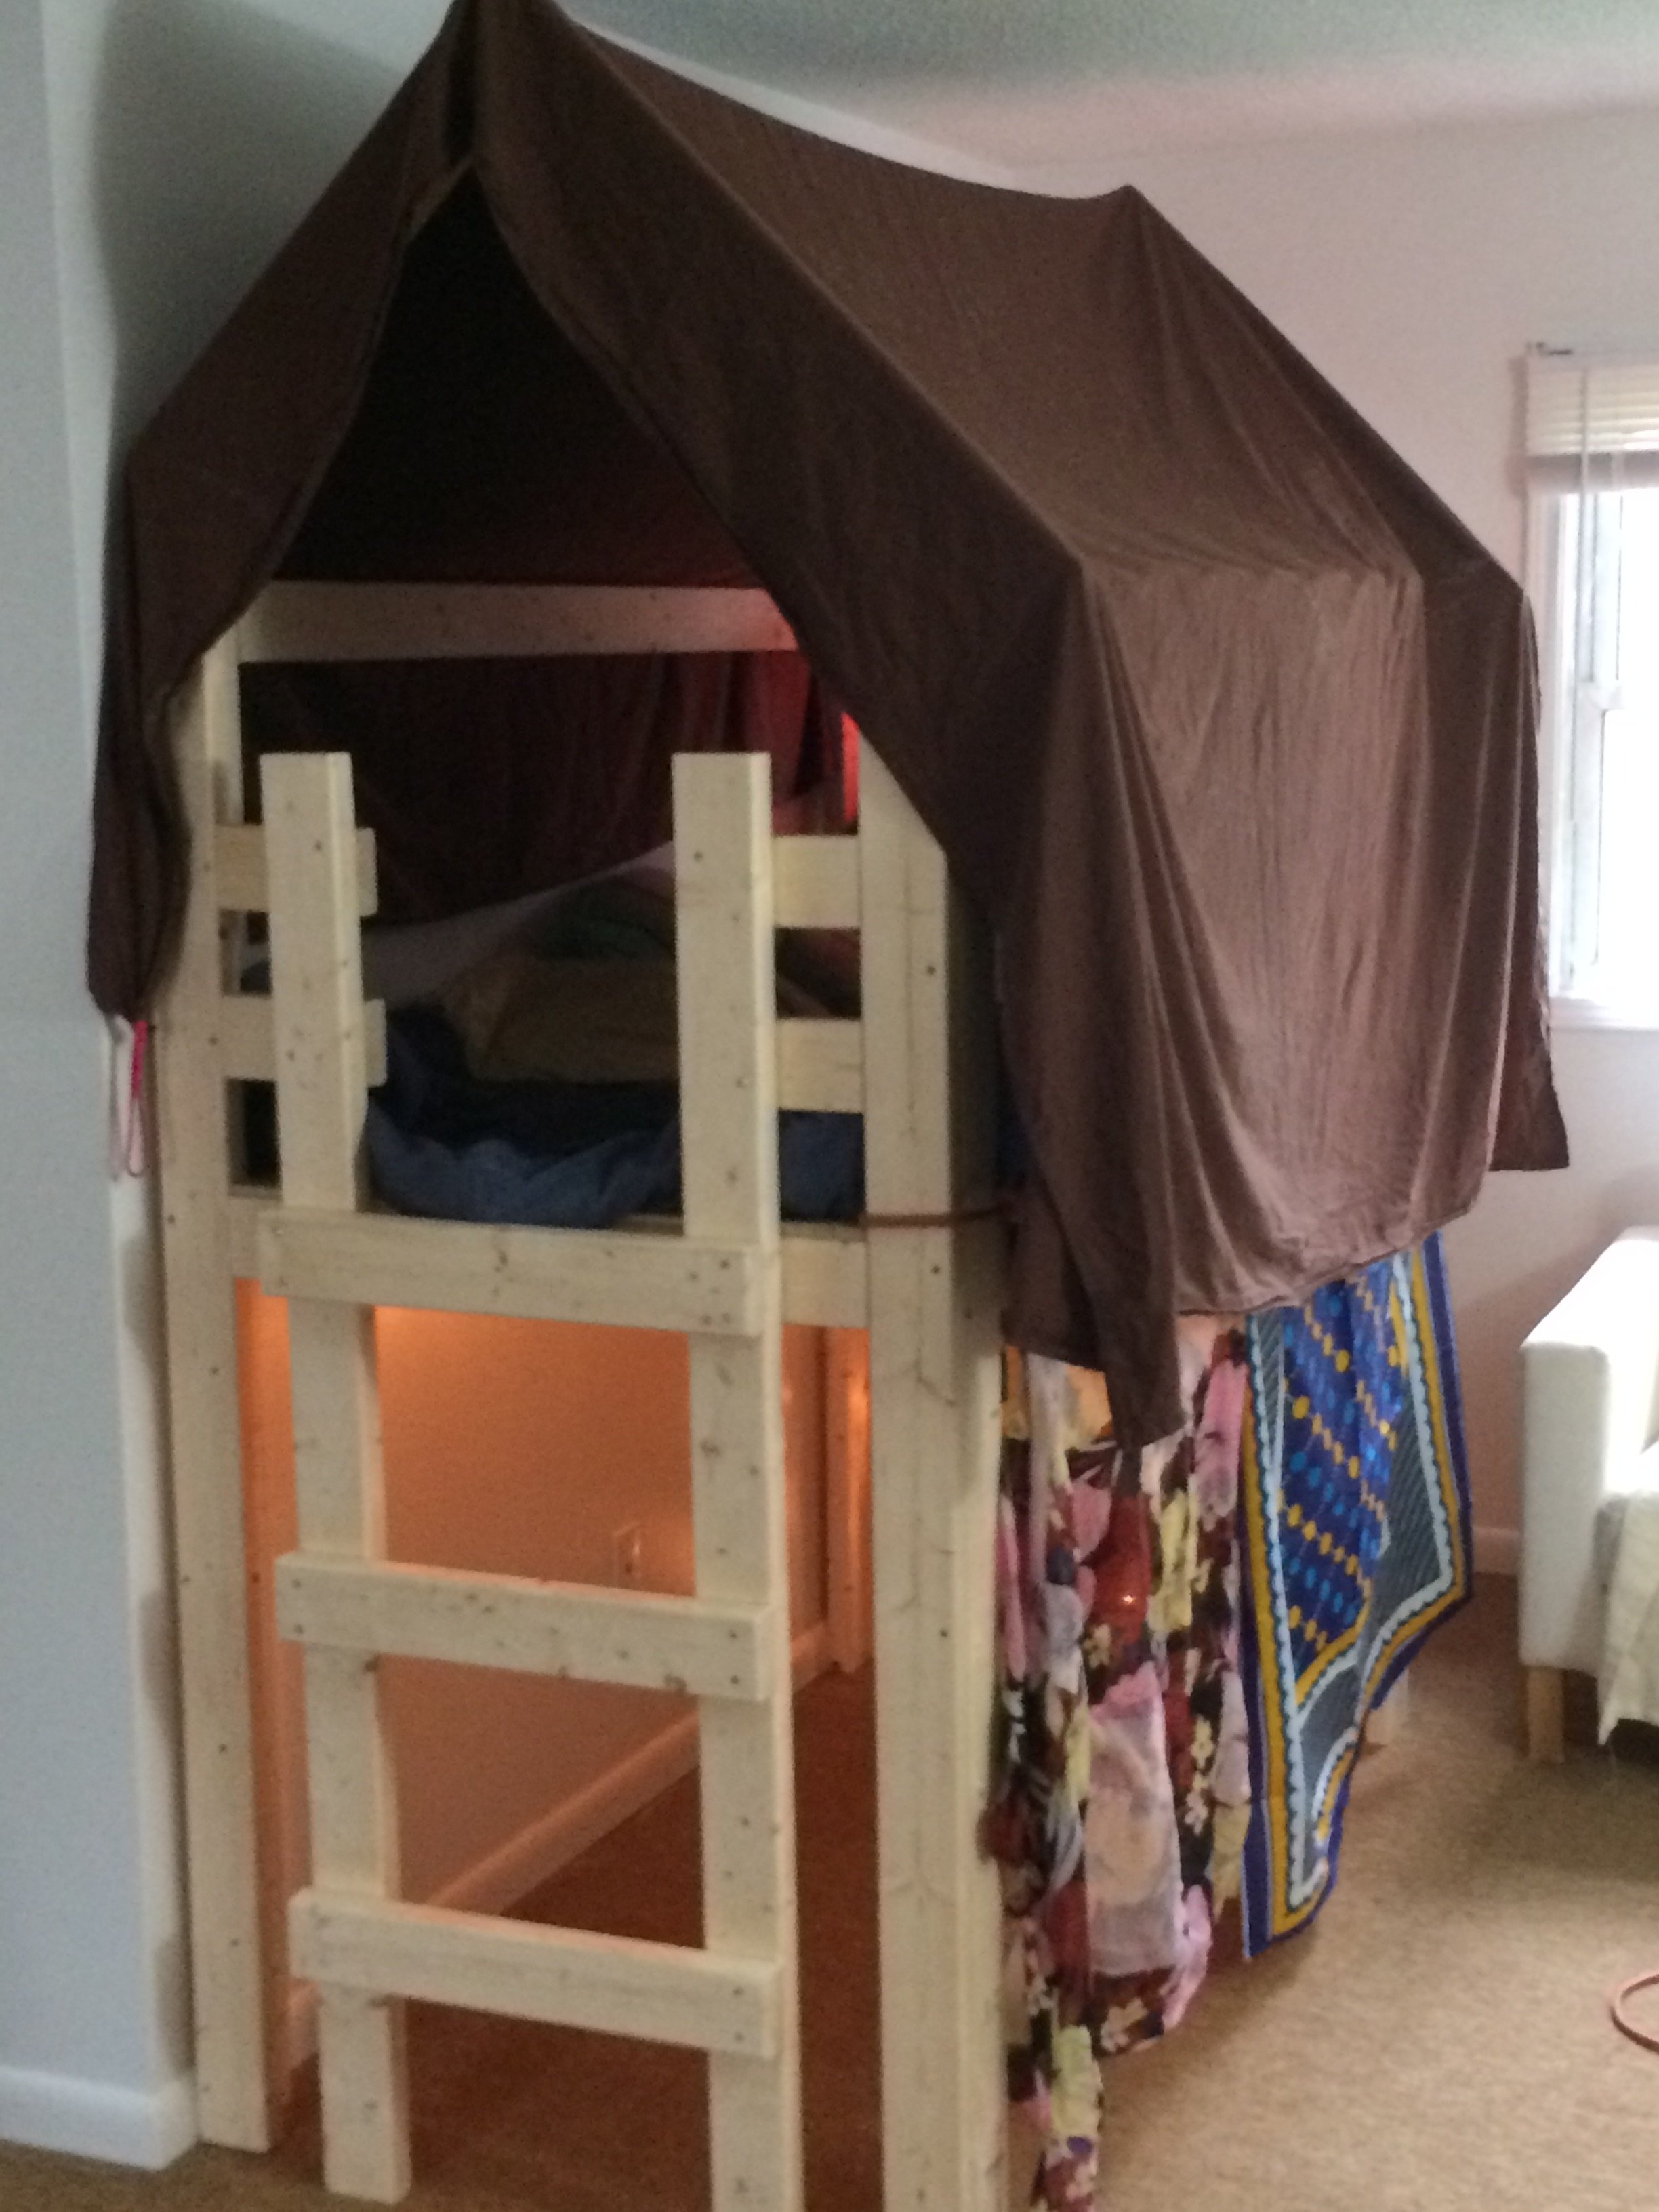
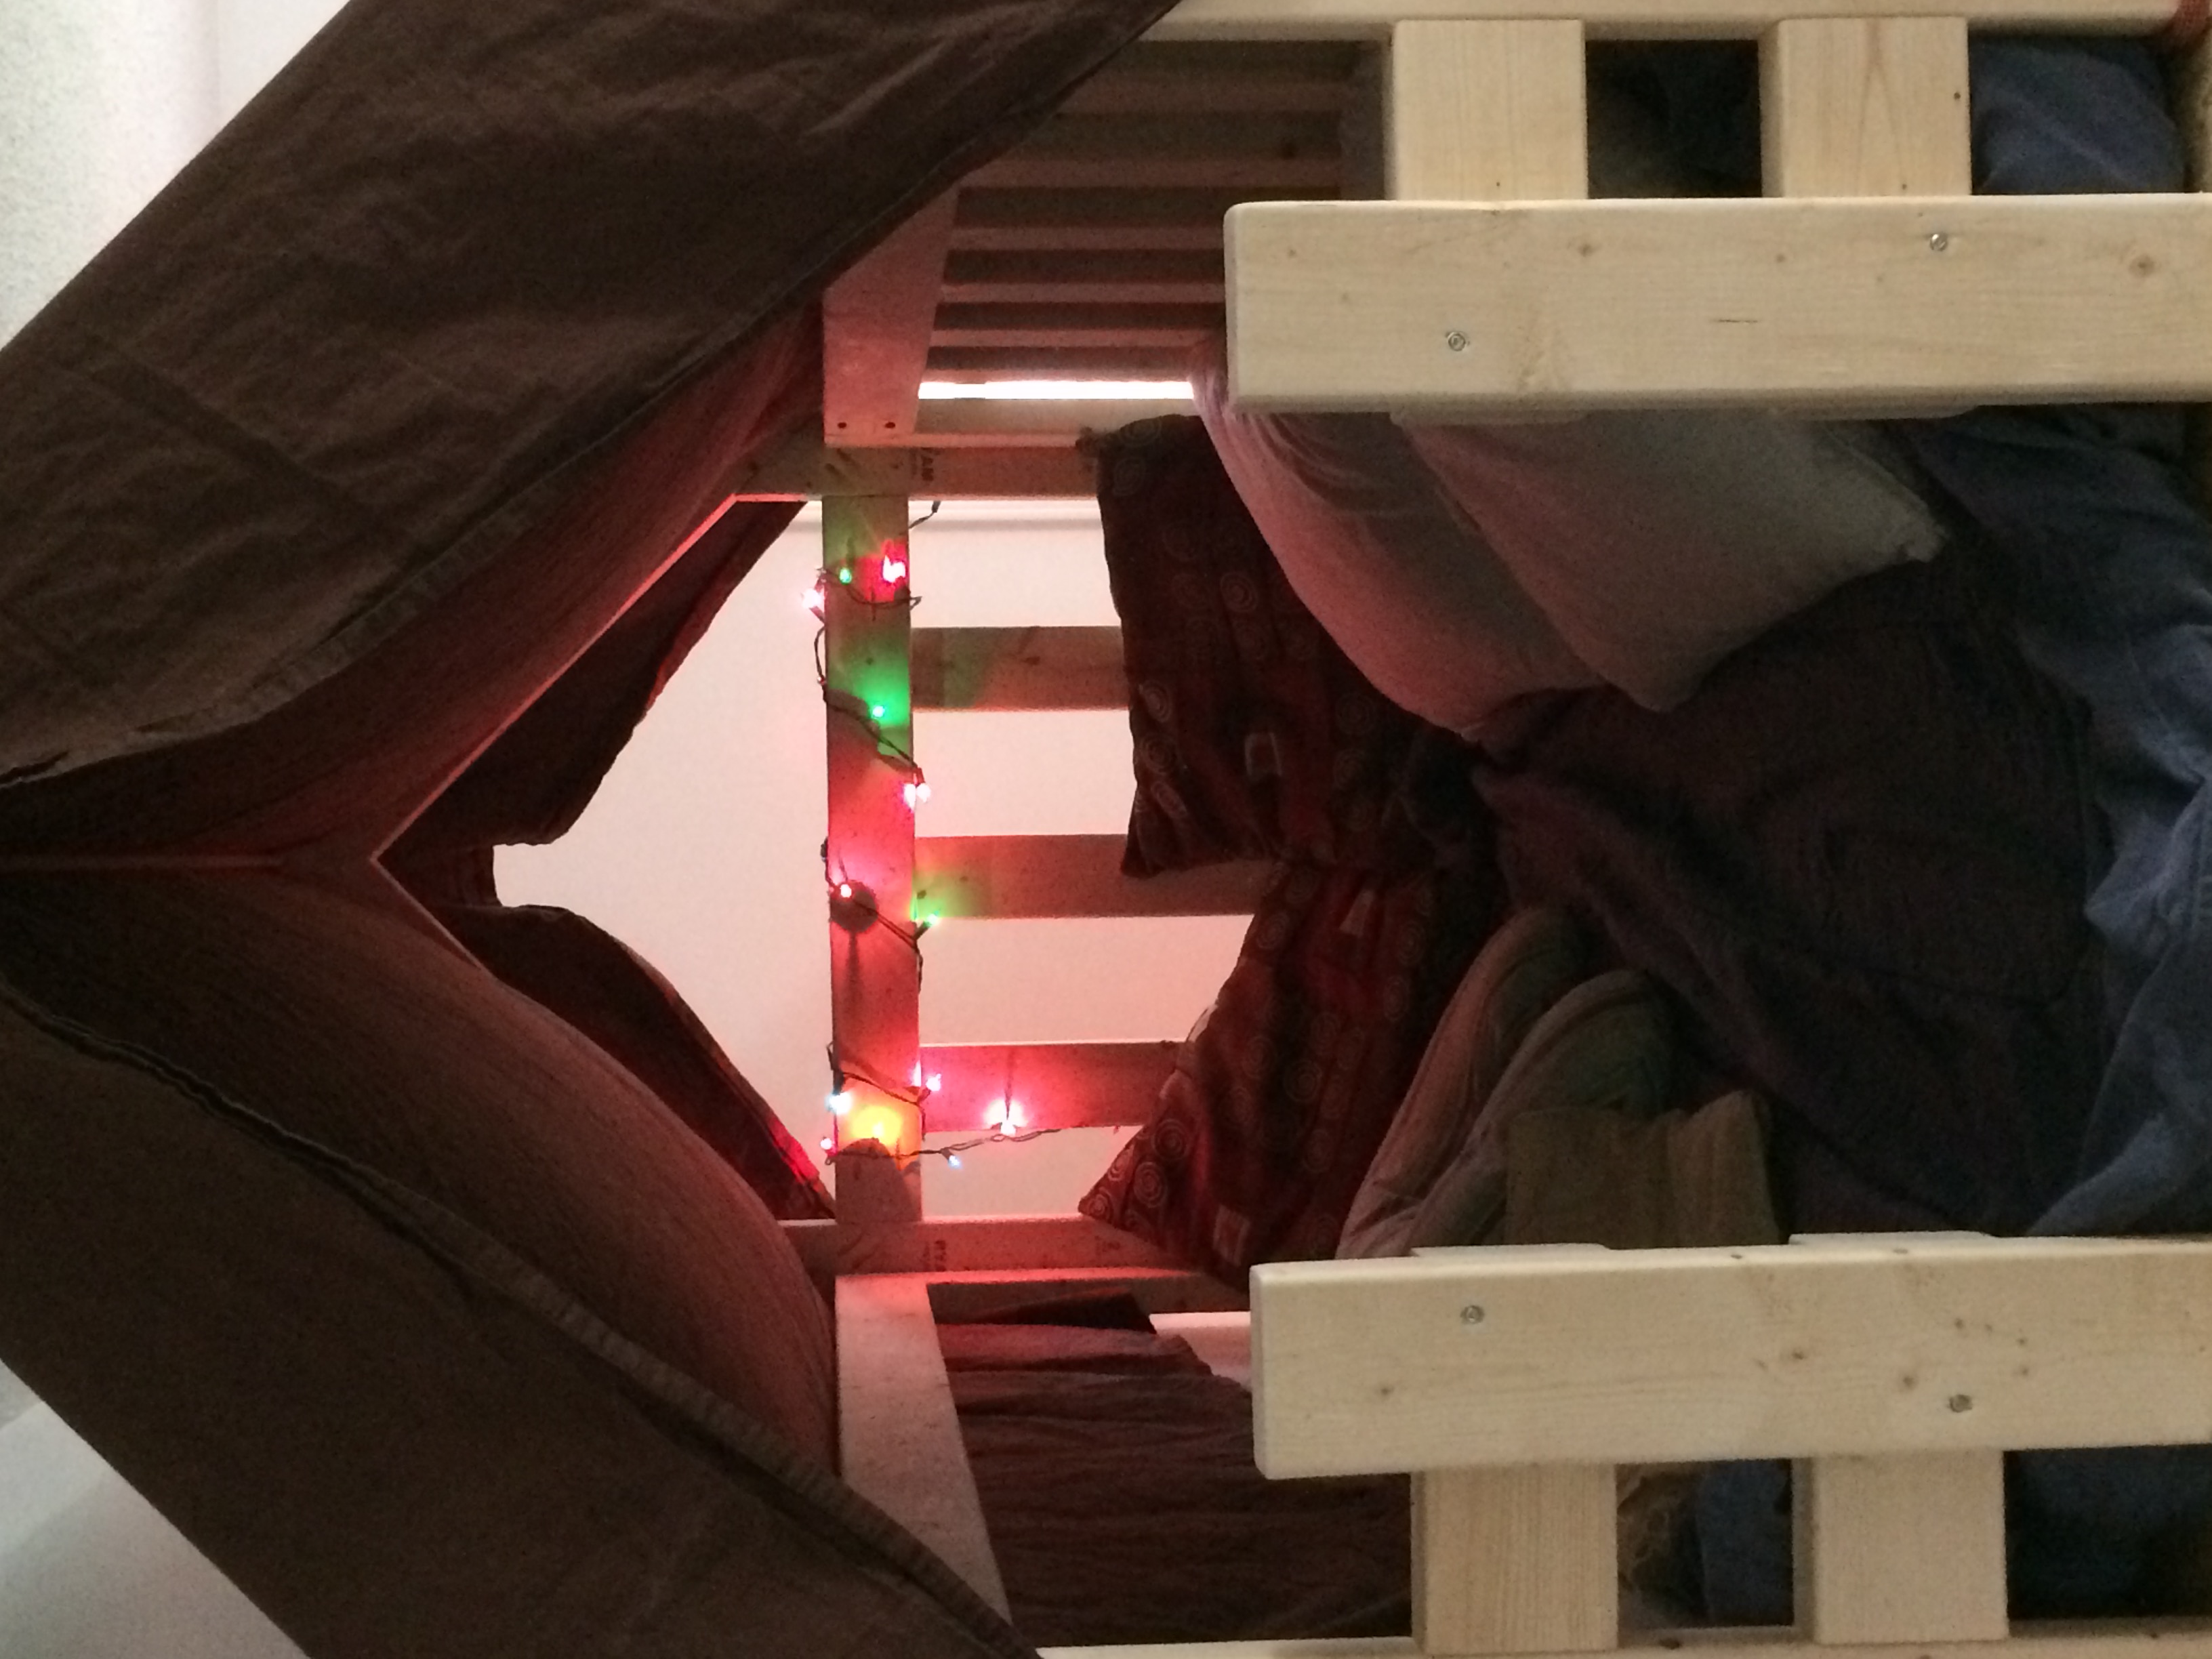
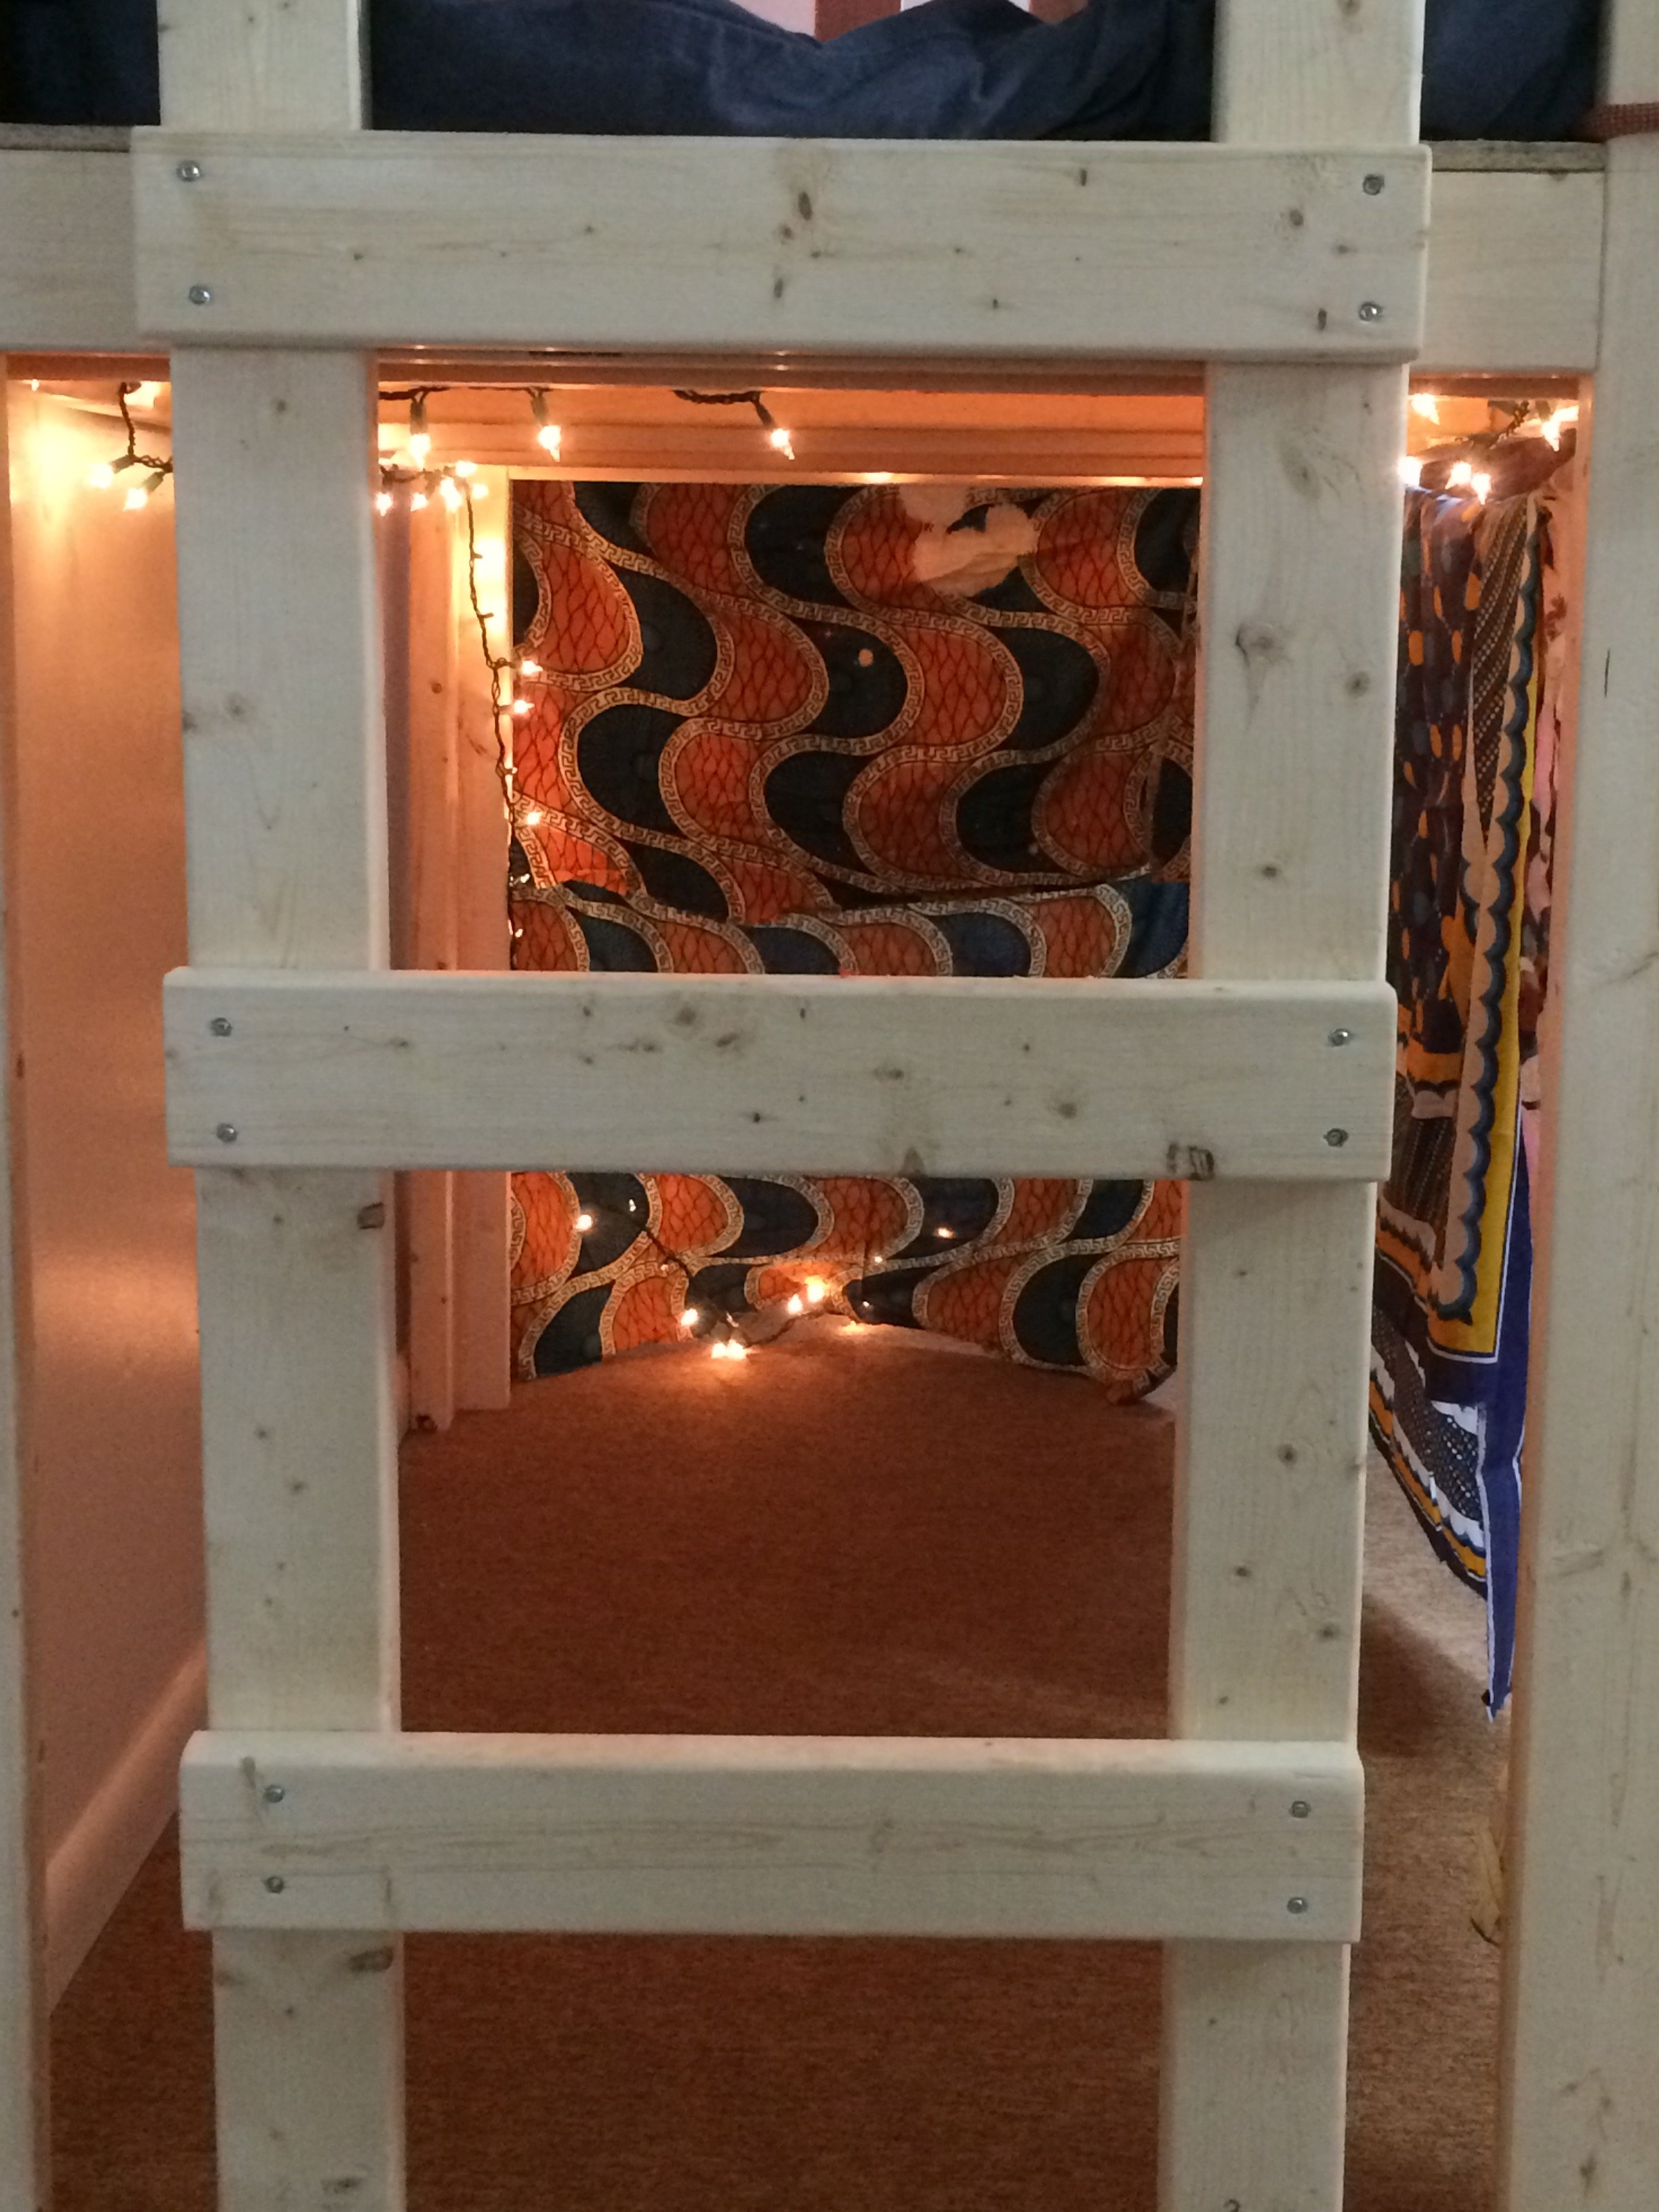
Over Bed Indoor Playhouse (loft)
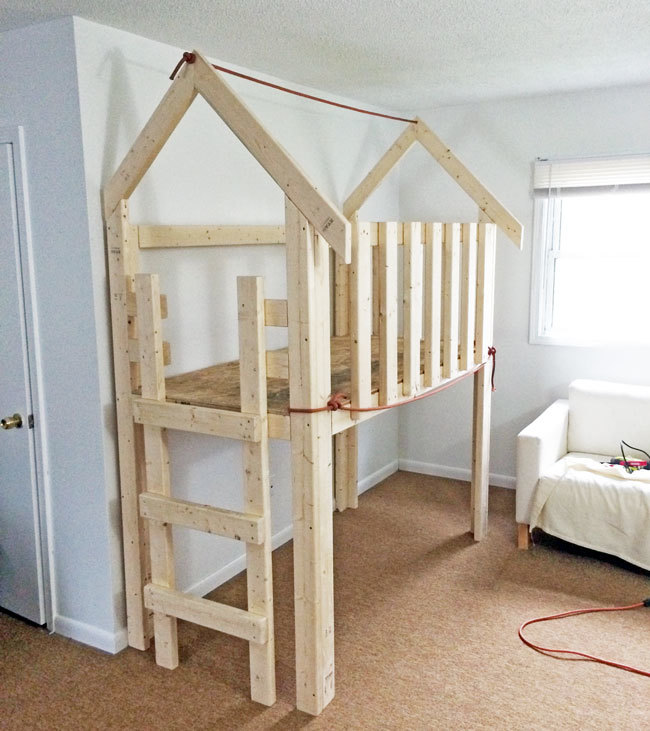
Simple project. Only took 3-4 hours. The kids love it!
Built from Plan(s)
Recommended Skill Level
Beginner
Simple project. Only took 3-4 hours. The kids love it!

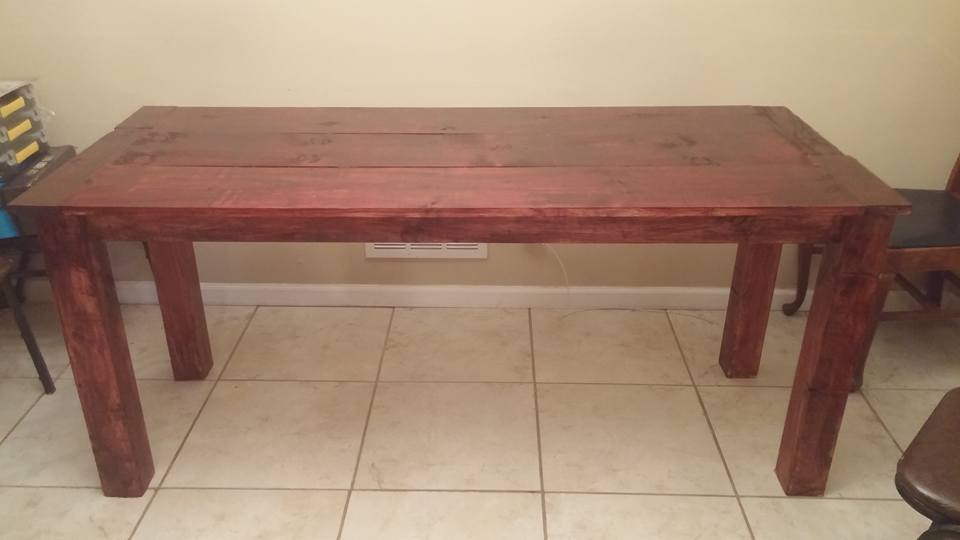
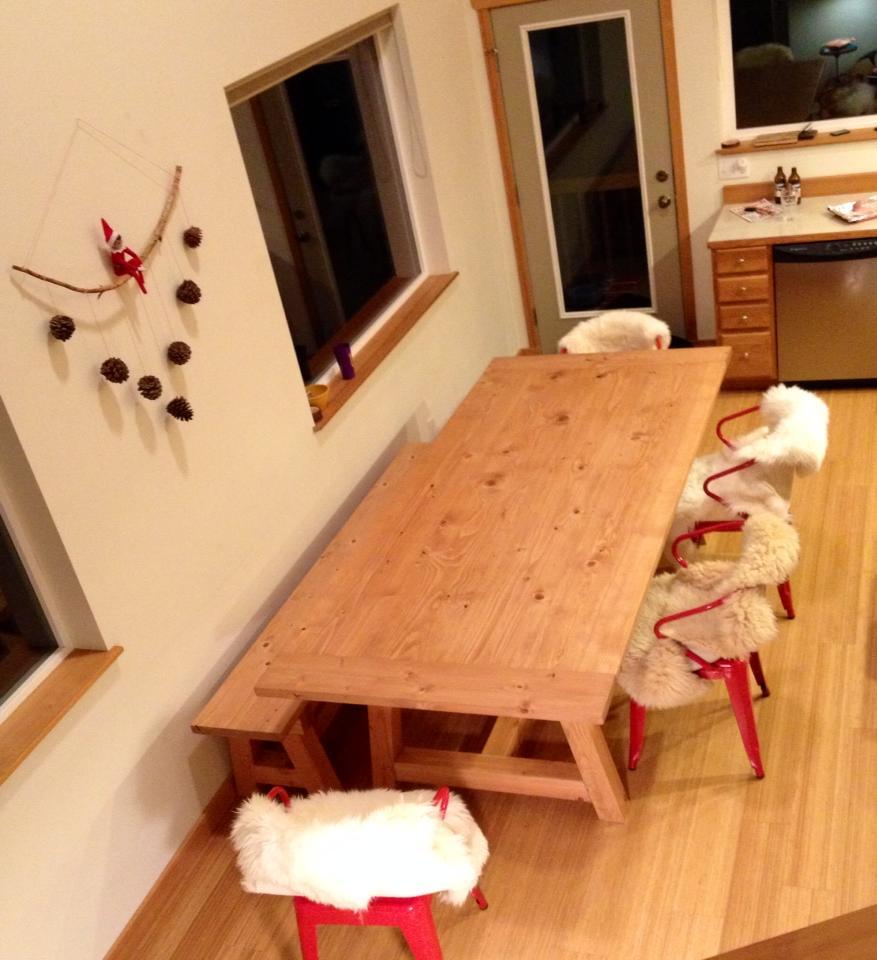
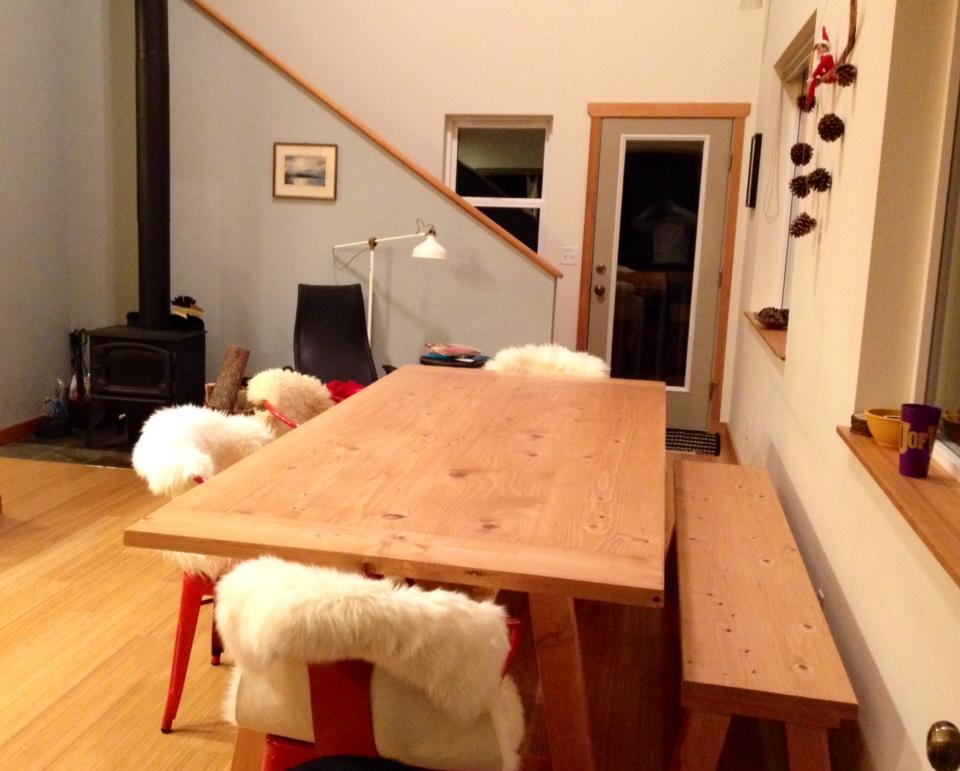
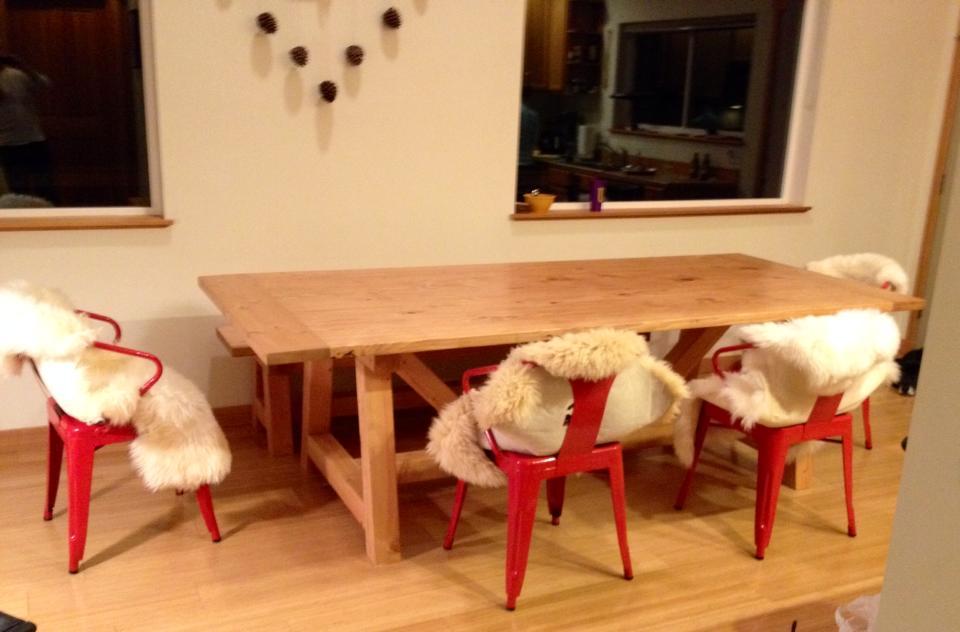
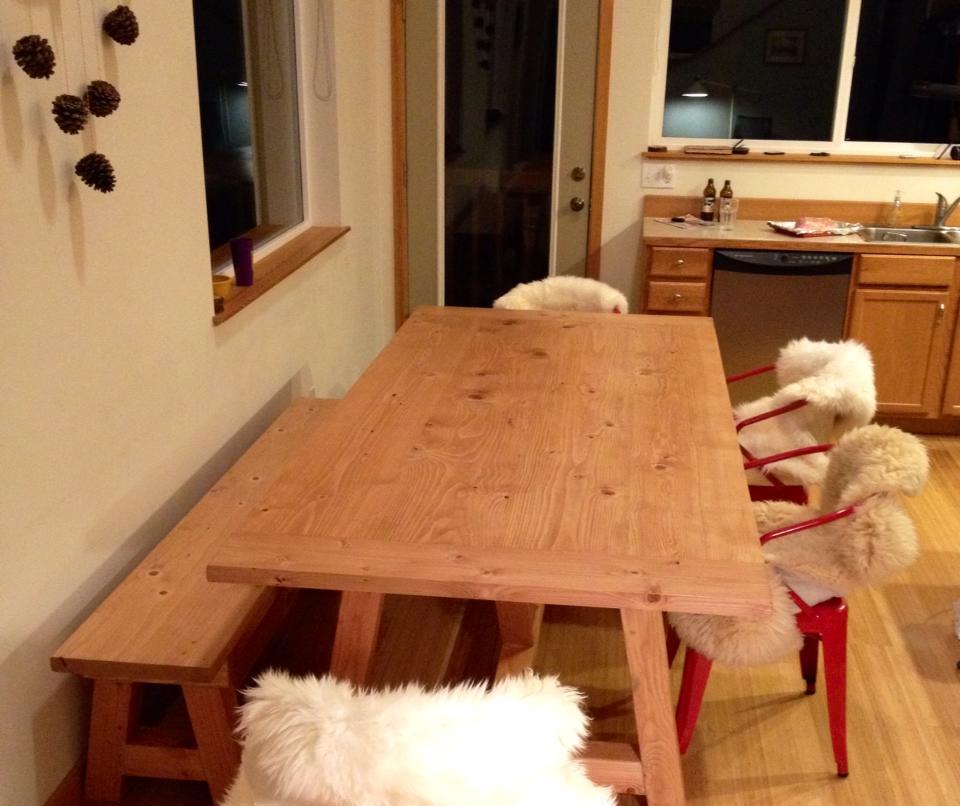
Love this table!

Sat, 01/05/2019 - 14:27
WOW! This is gorgeous! What a beautiful setting! Thank you for building and sharing!
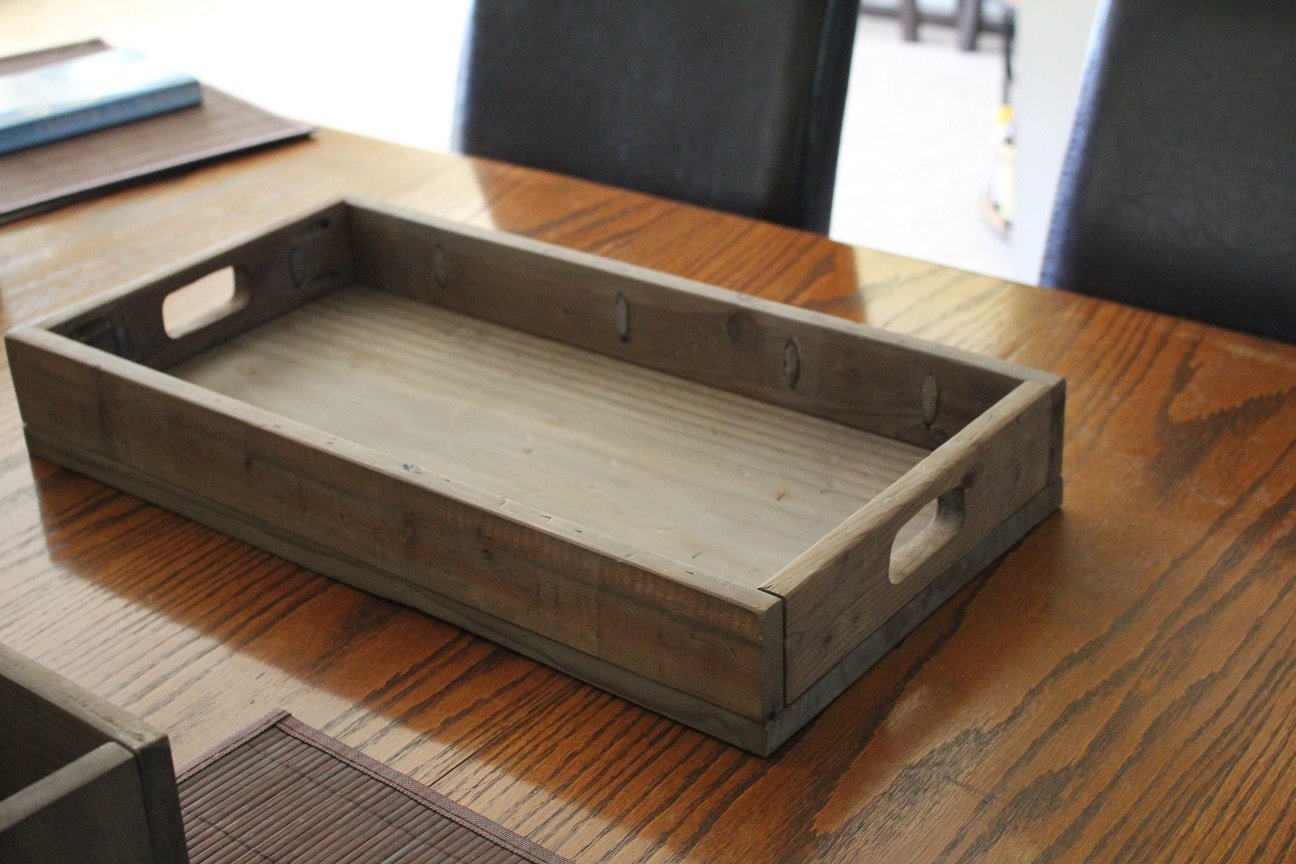
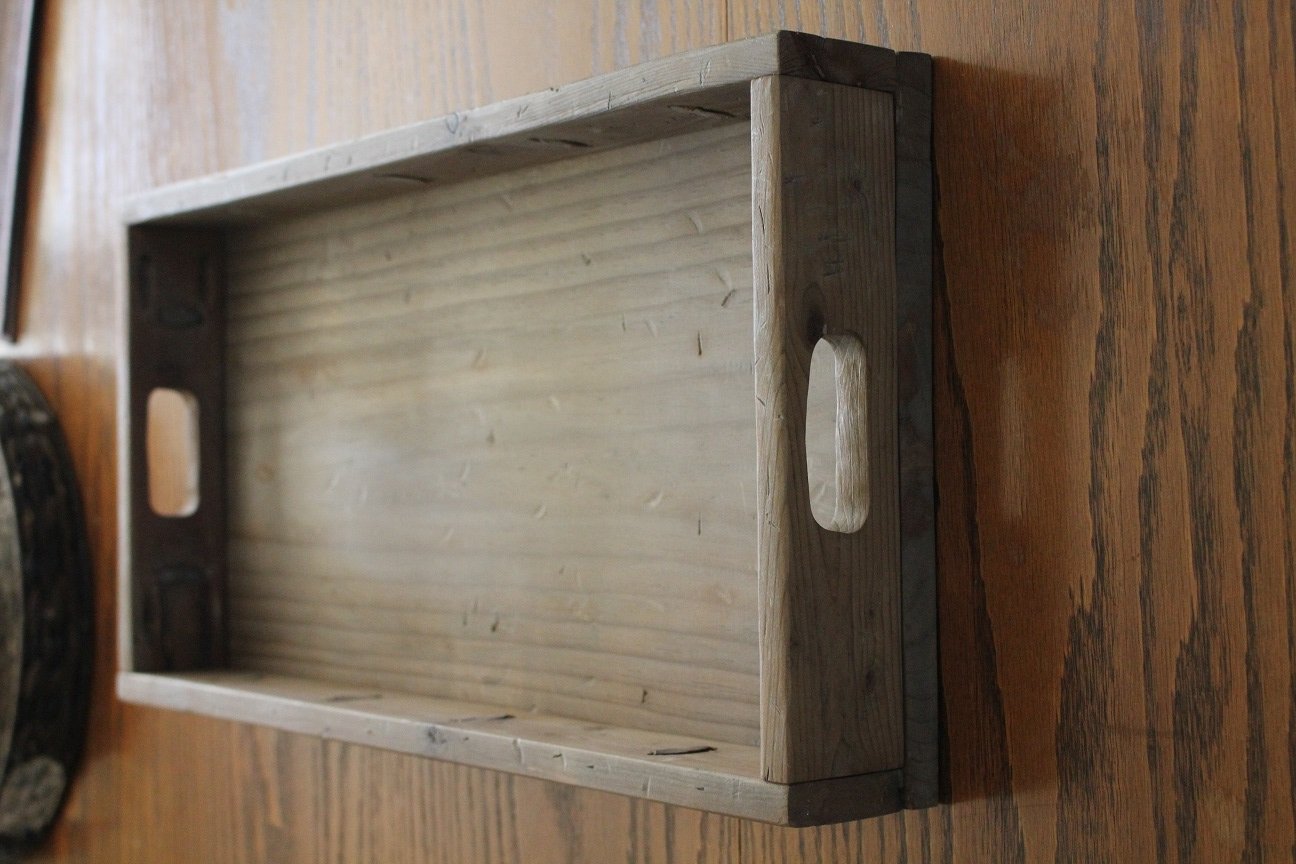
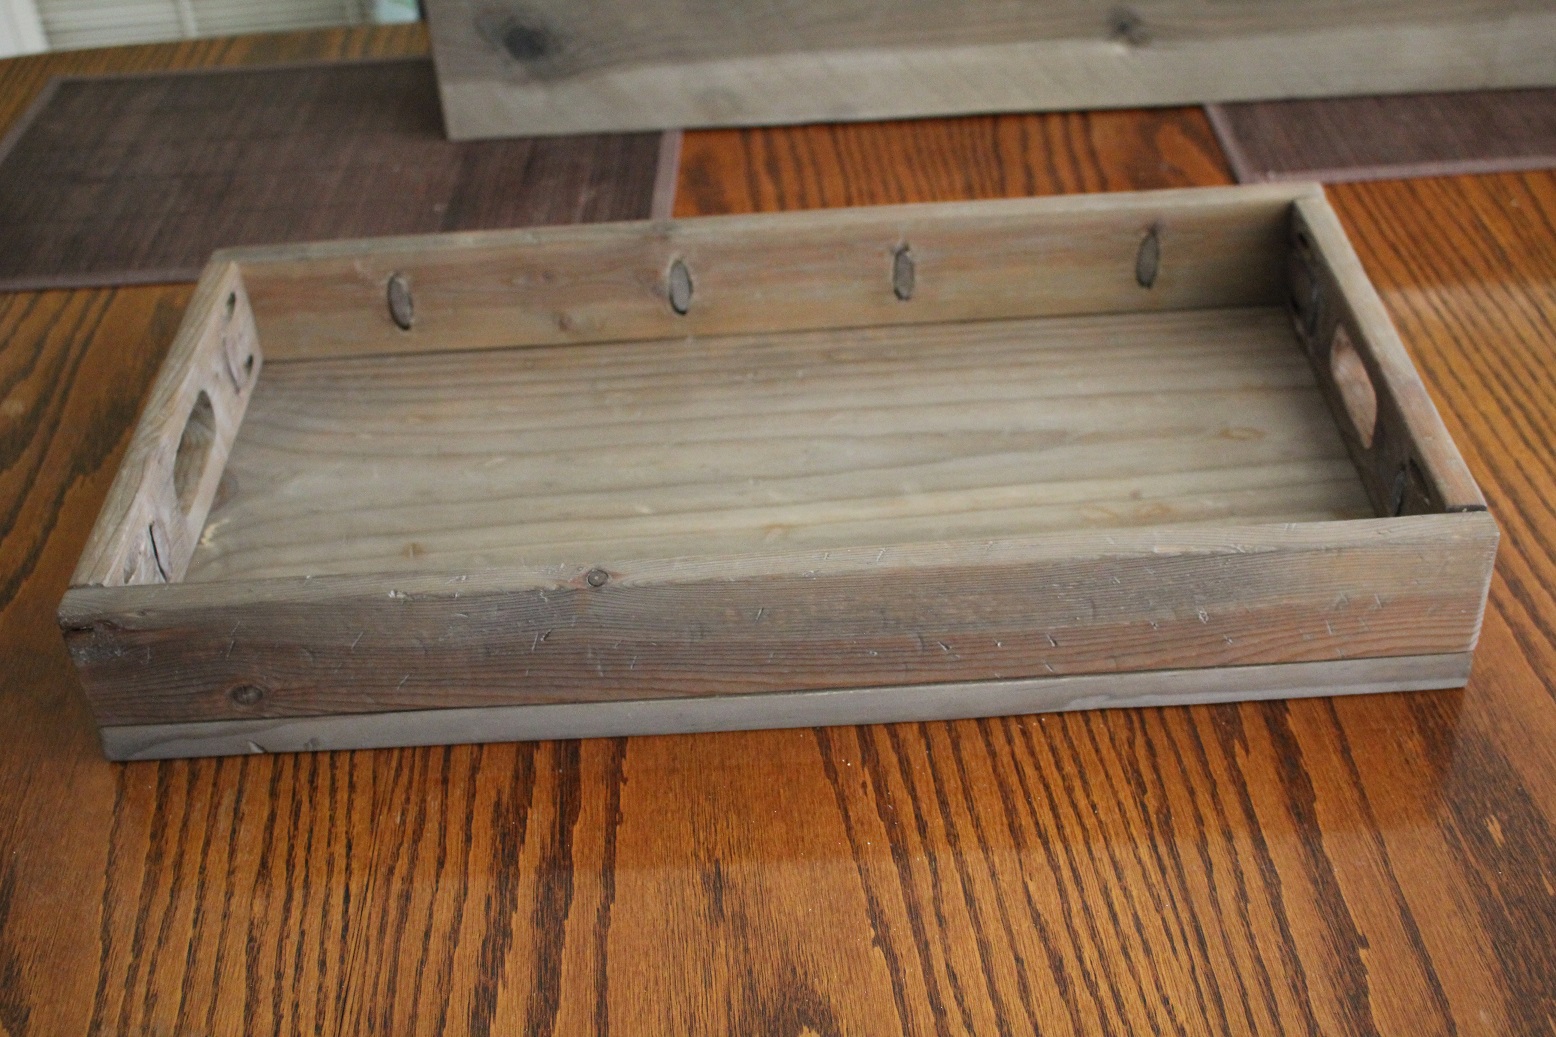
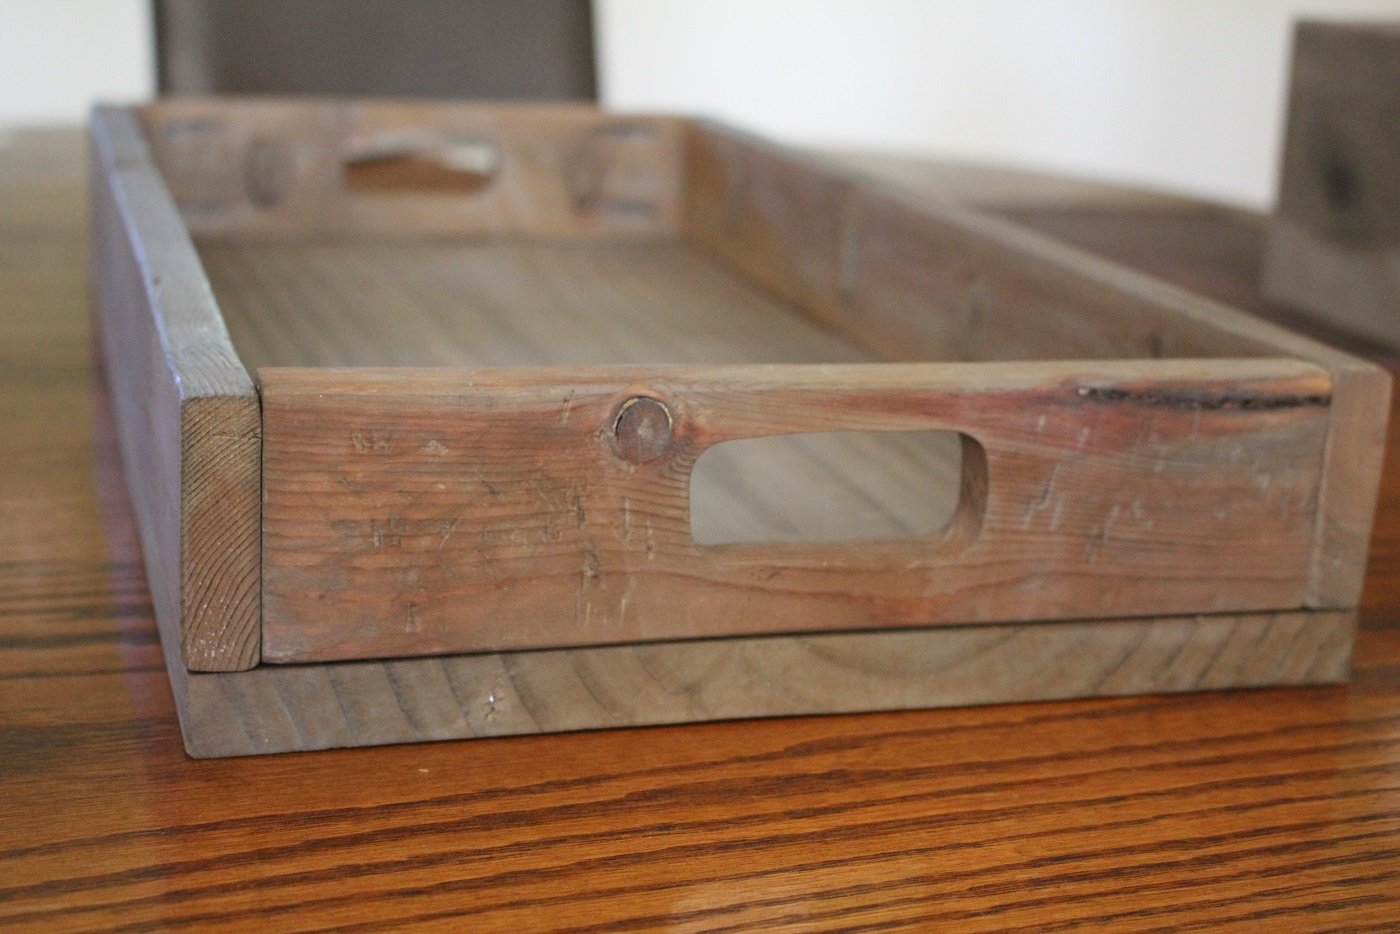
Used scrap pine sitting around- a 1x10 and 1x3's. Most time consuming part was cutting out the hand holds. Wanted a rustic look, so I weathered the boards by first beating them with hammer, screwdriver and crowbar, then with tea and steel wool vinegar "stain" to age the boards. One coat of poly on top. Made the plugs with dowels, adds to the rustic look.
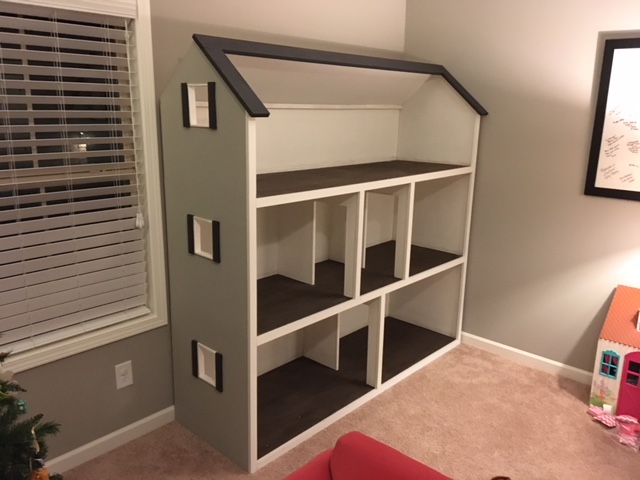
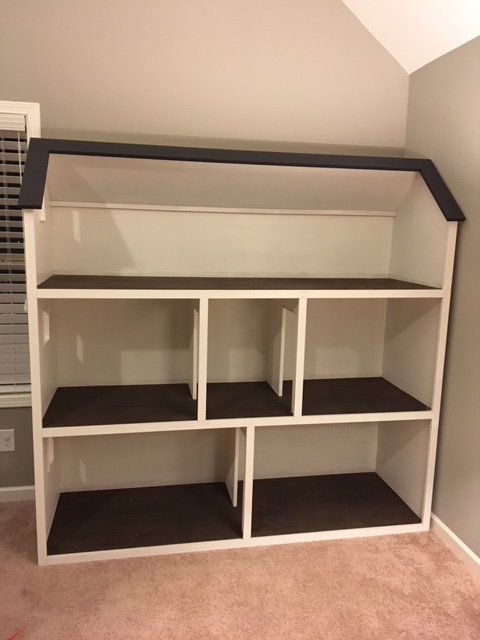
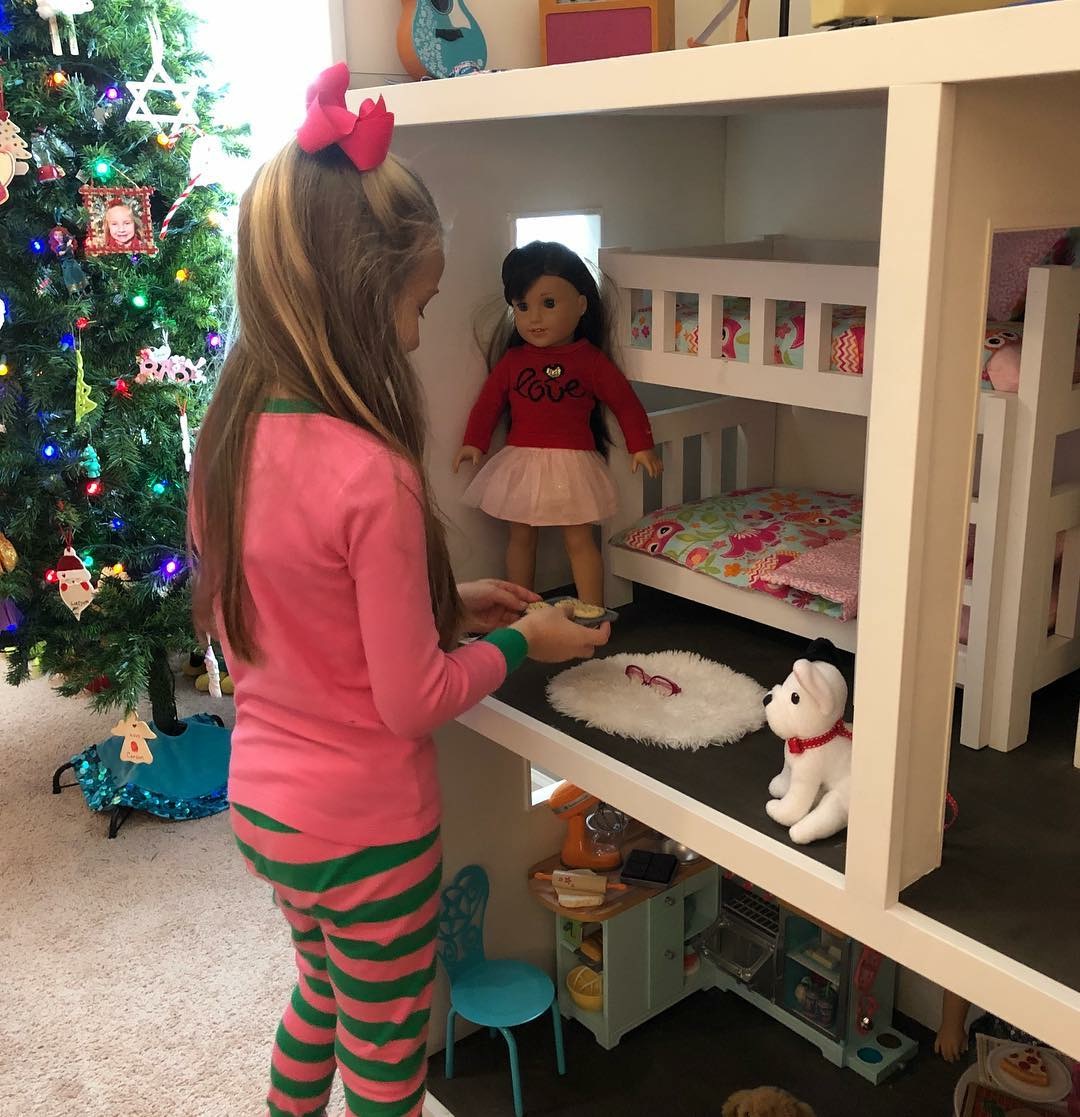
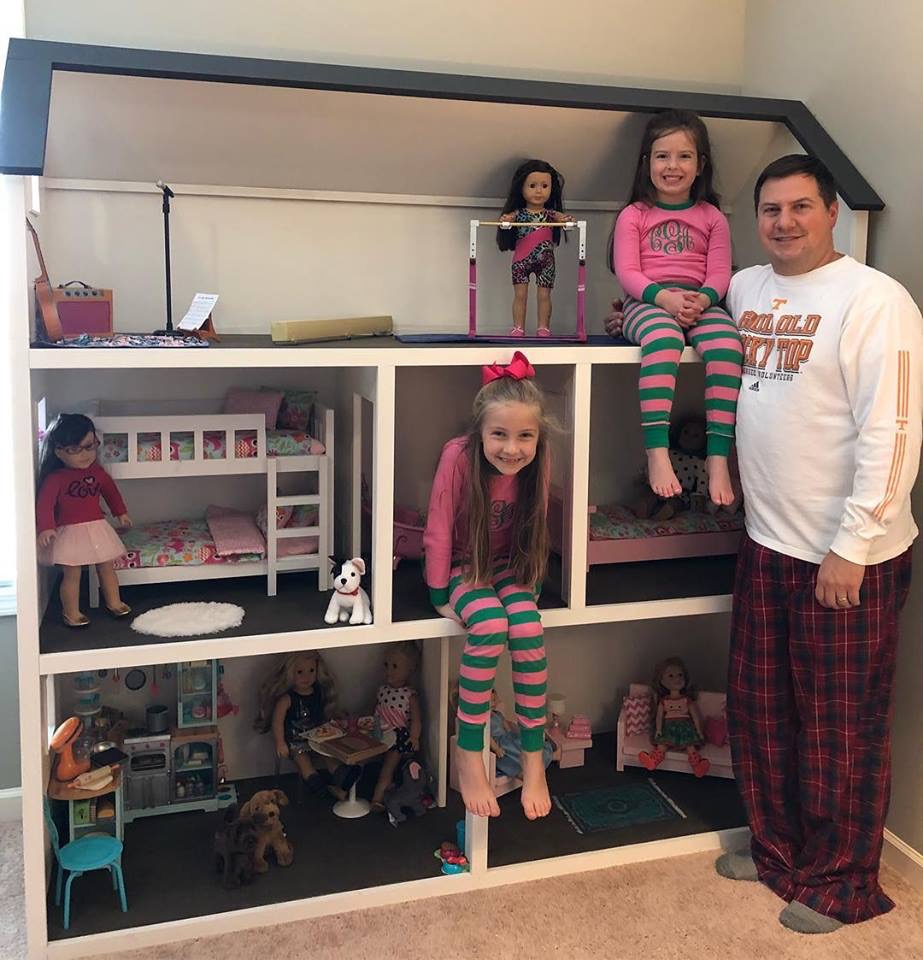
I've been building Ana White American Girl doll furniture for my two daughters for the last three years, culminating with my biggest build of all - a modified version of Ana's dollhouse.
My wife kept telling me it would end up being huge, and she was right. The great news is that it doubles as storage when the girls aren't playing! 2 Bedrooms, kitchen, living room, bathroom, and upstairs bonus room for dance and gymnastics. 78" tall x 76" wide, mounted to the wall studs for safety. Lots of joy in our home on Christmas day. Thanks Ana!
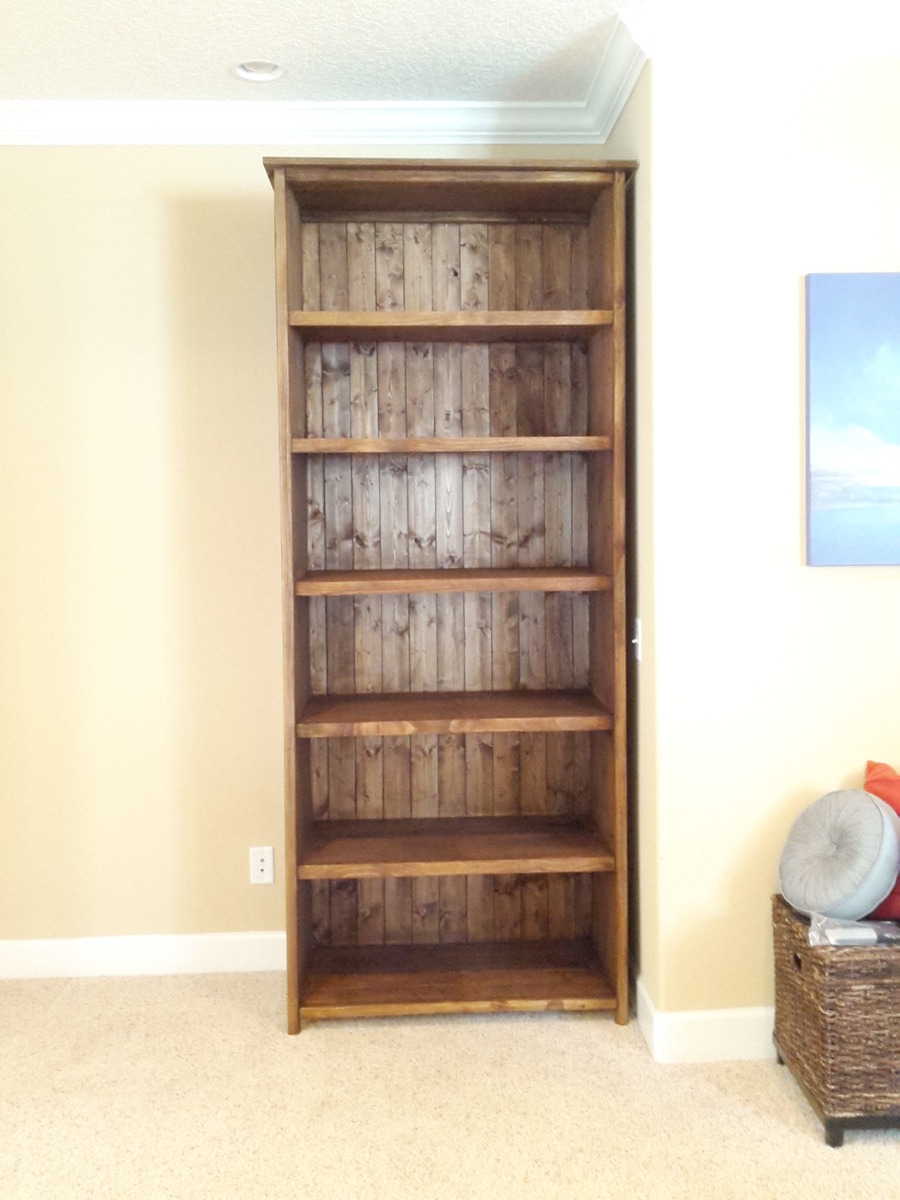
My wife loved the original kentwood plan, but wanted it....bigger. So it is 96 inches tall in total, and for the sides and shelves i used 1x16 project board from Lowes. This means that the shelves and sides are cedar, while the remainder is pine. Turned out fantastic and she loves it. I am currently building a second one to match.
Estimated time: 12 hours.
Found this on the website and had to build it. Turned out perfectly.

$
Sat, 02/13/2016 - 05:04
Your console looks wider than some of the others and exactly what I am looking for. Can you provide the dimensions of your console; including the dimensions of the doors? Where did you find your hardware. Thx.
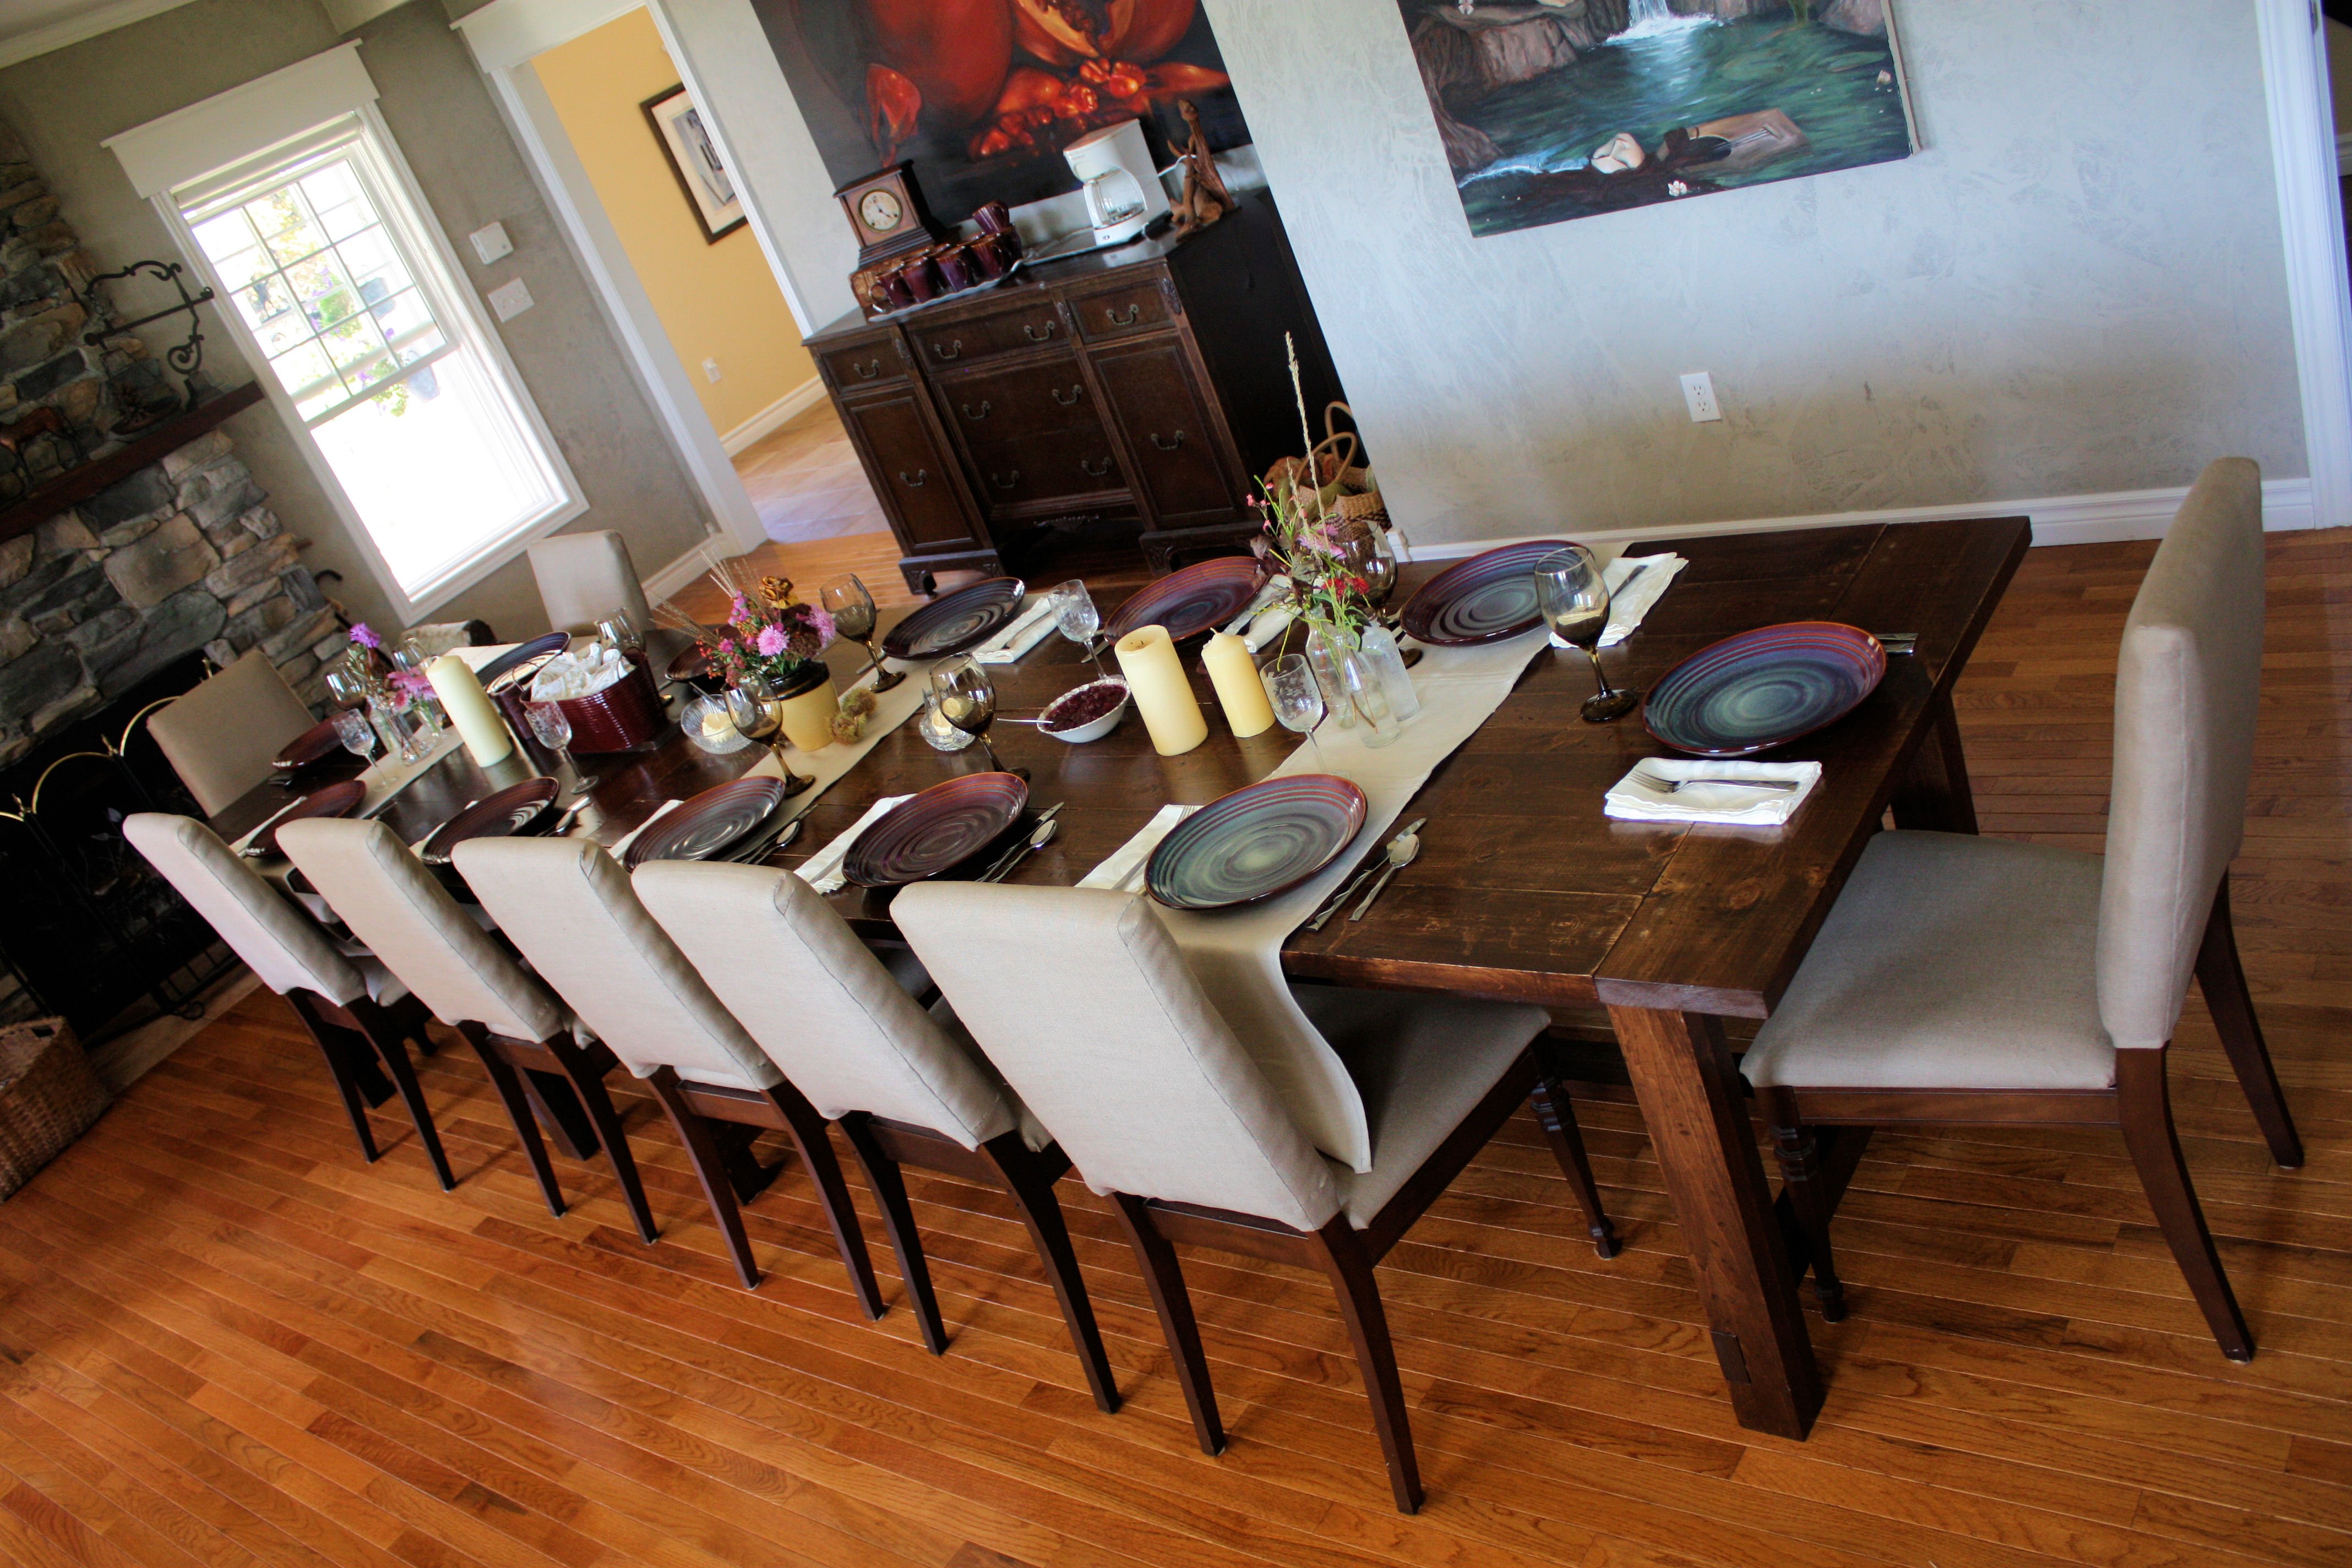
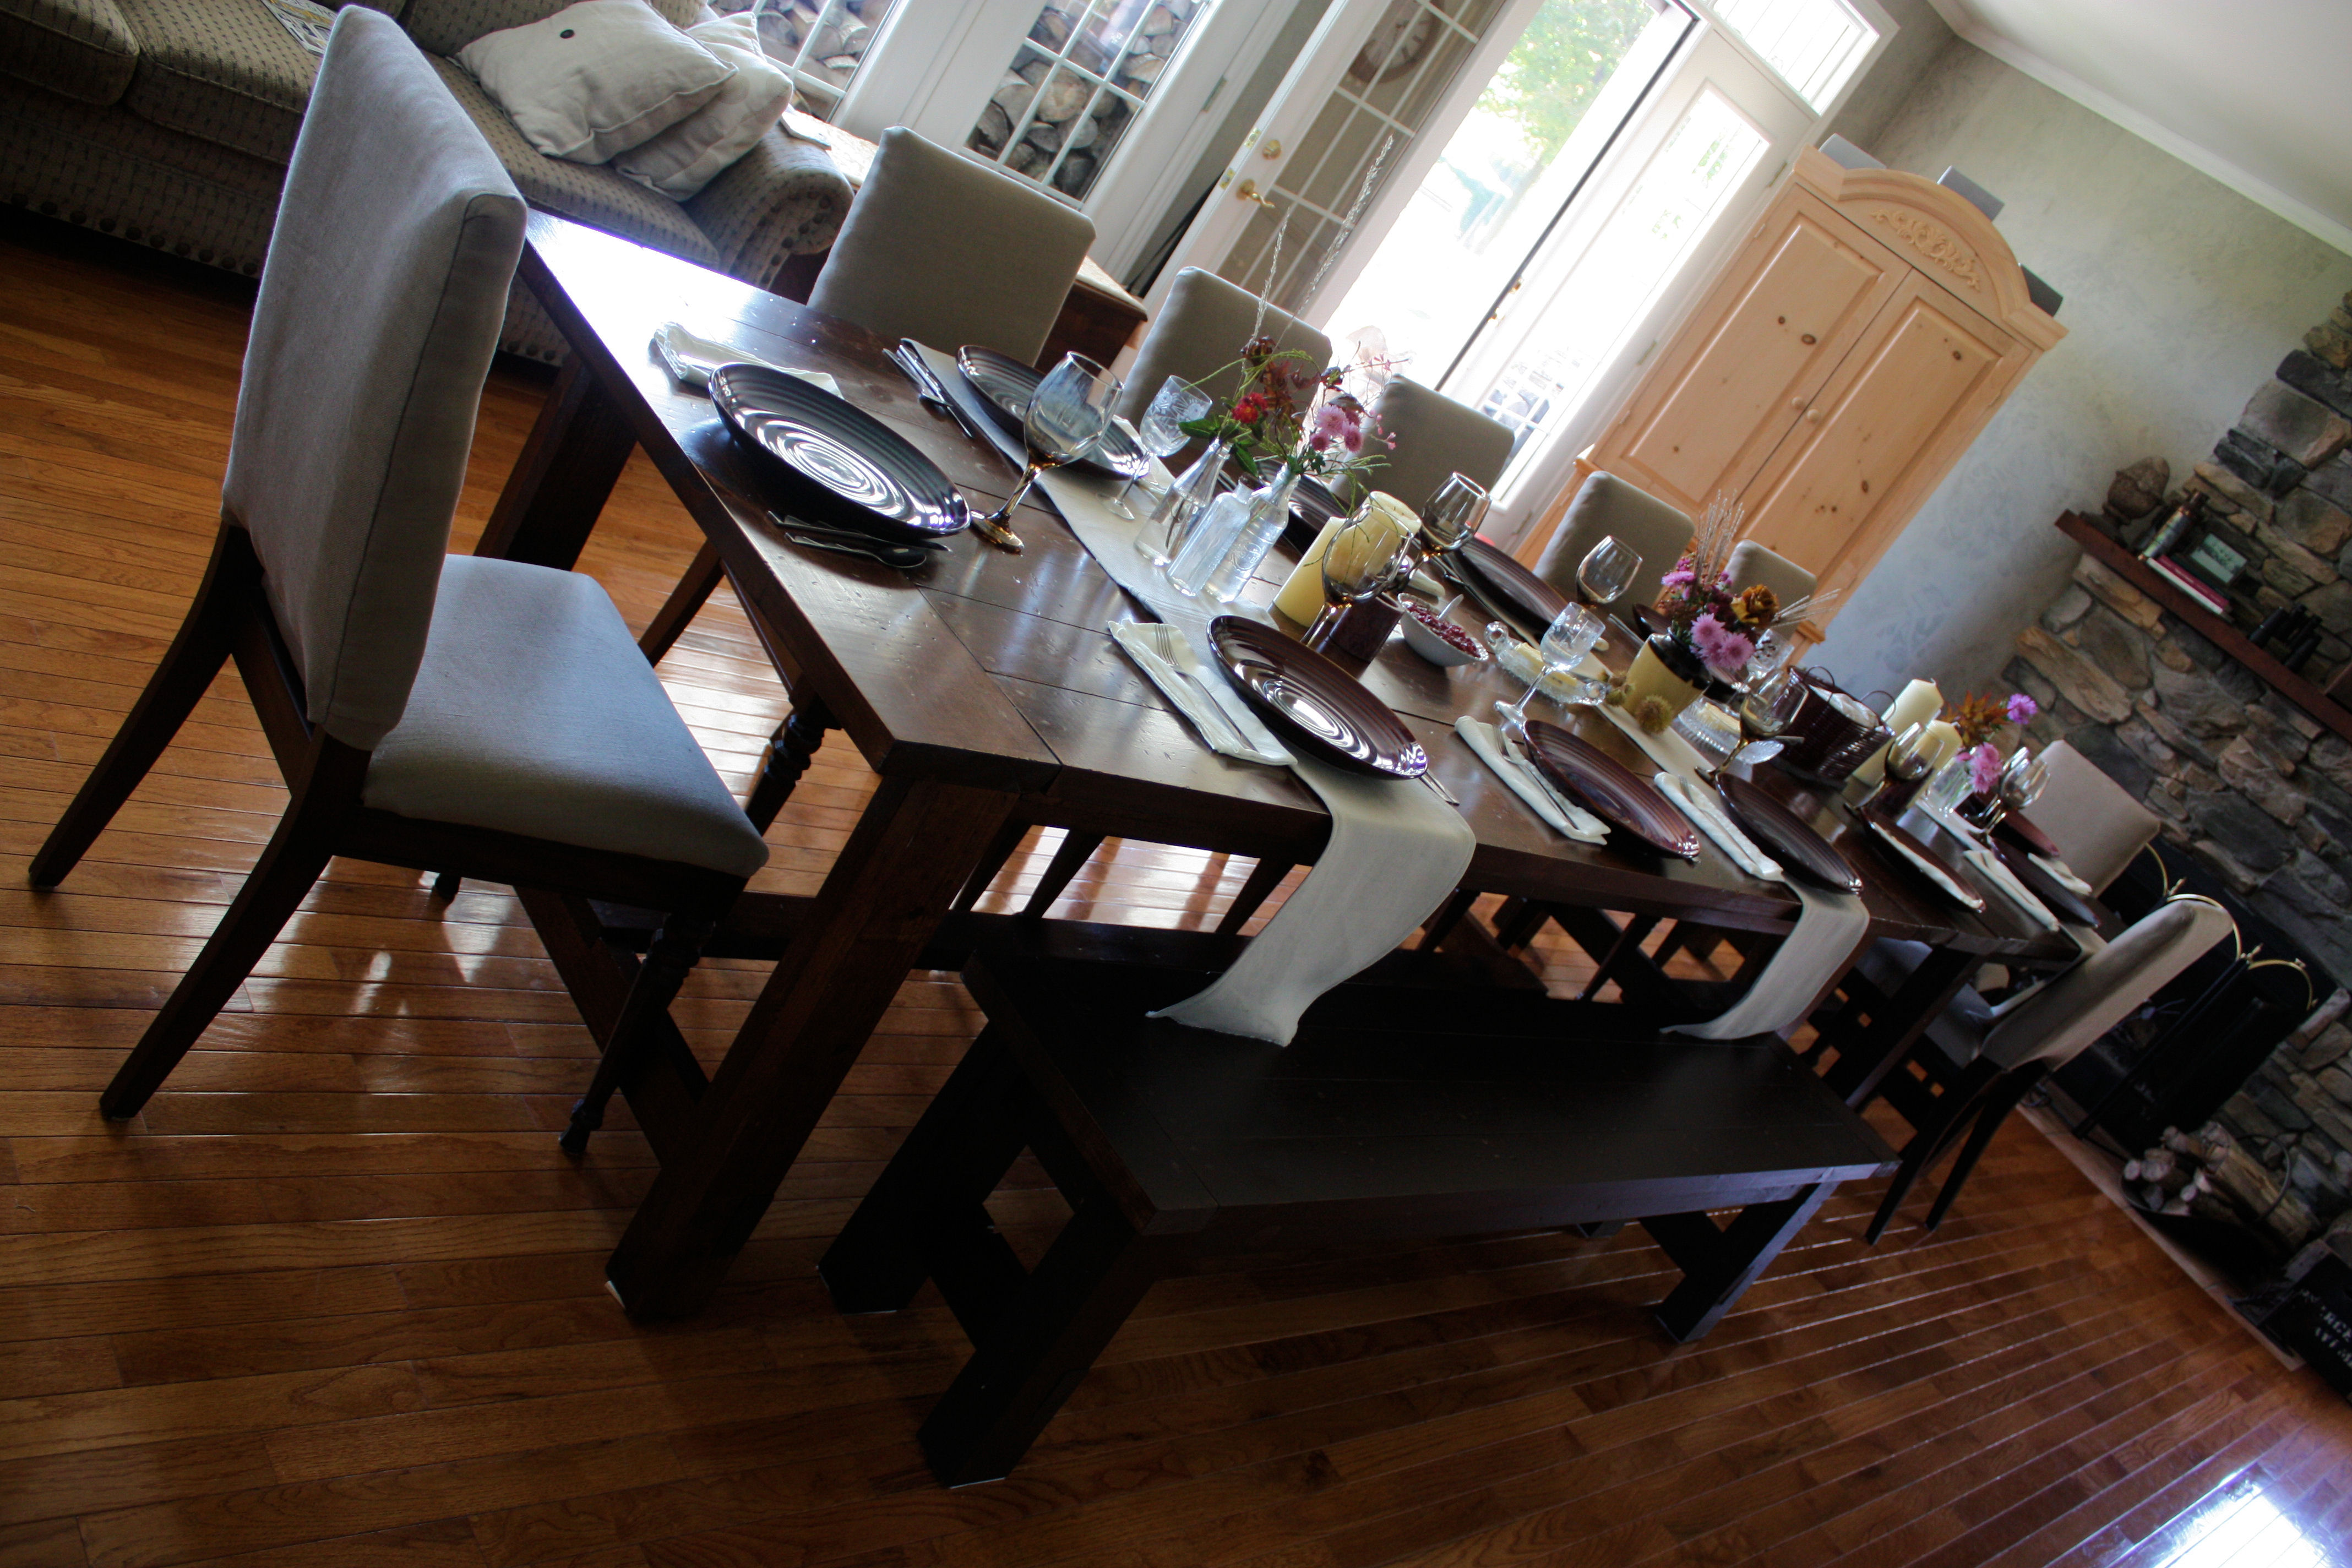
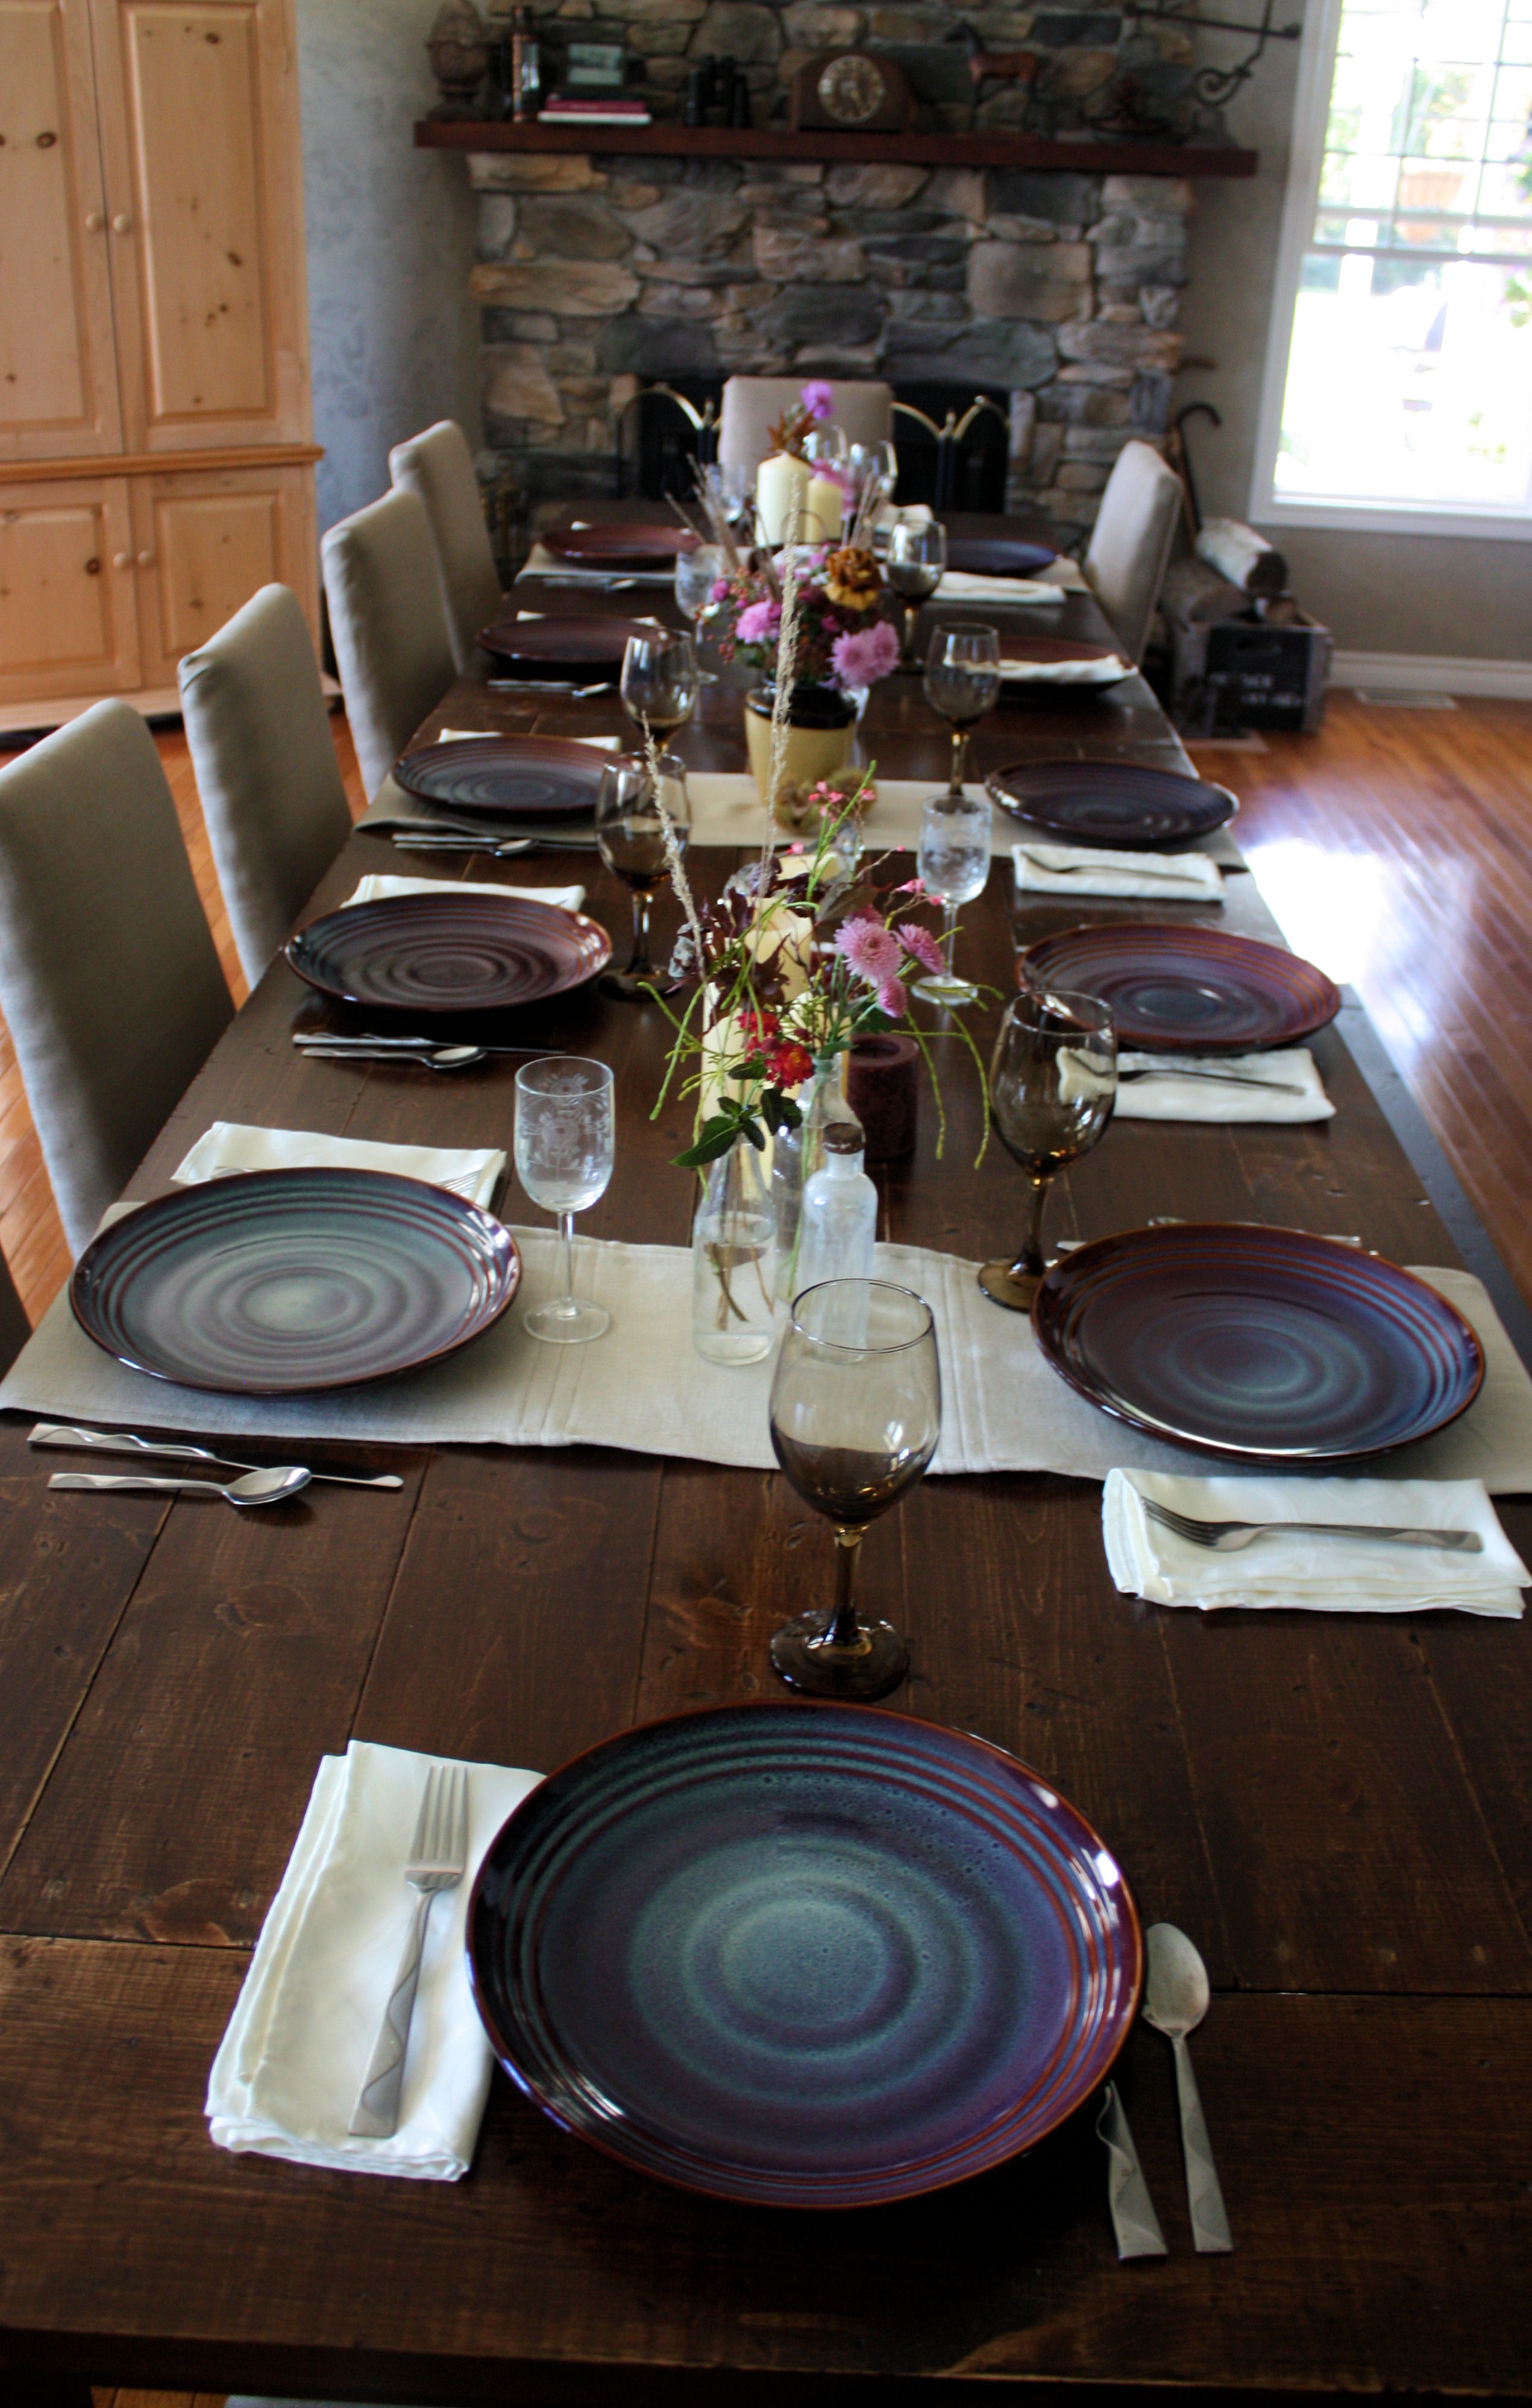
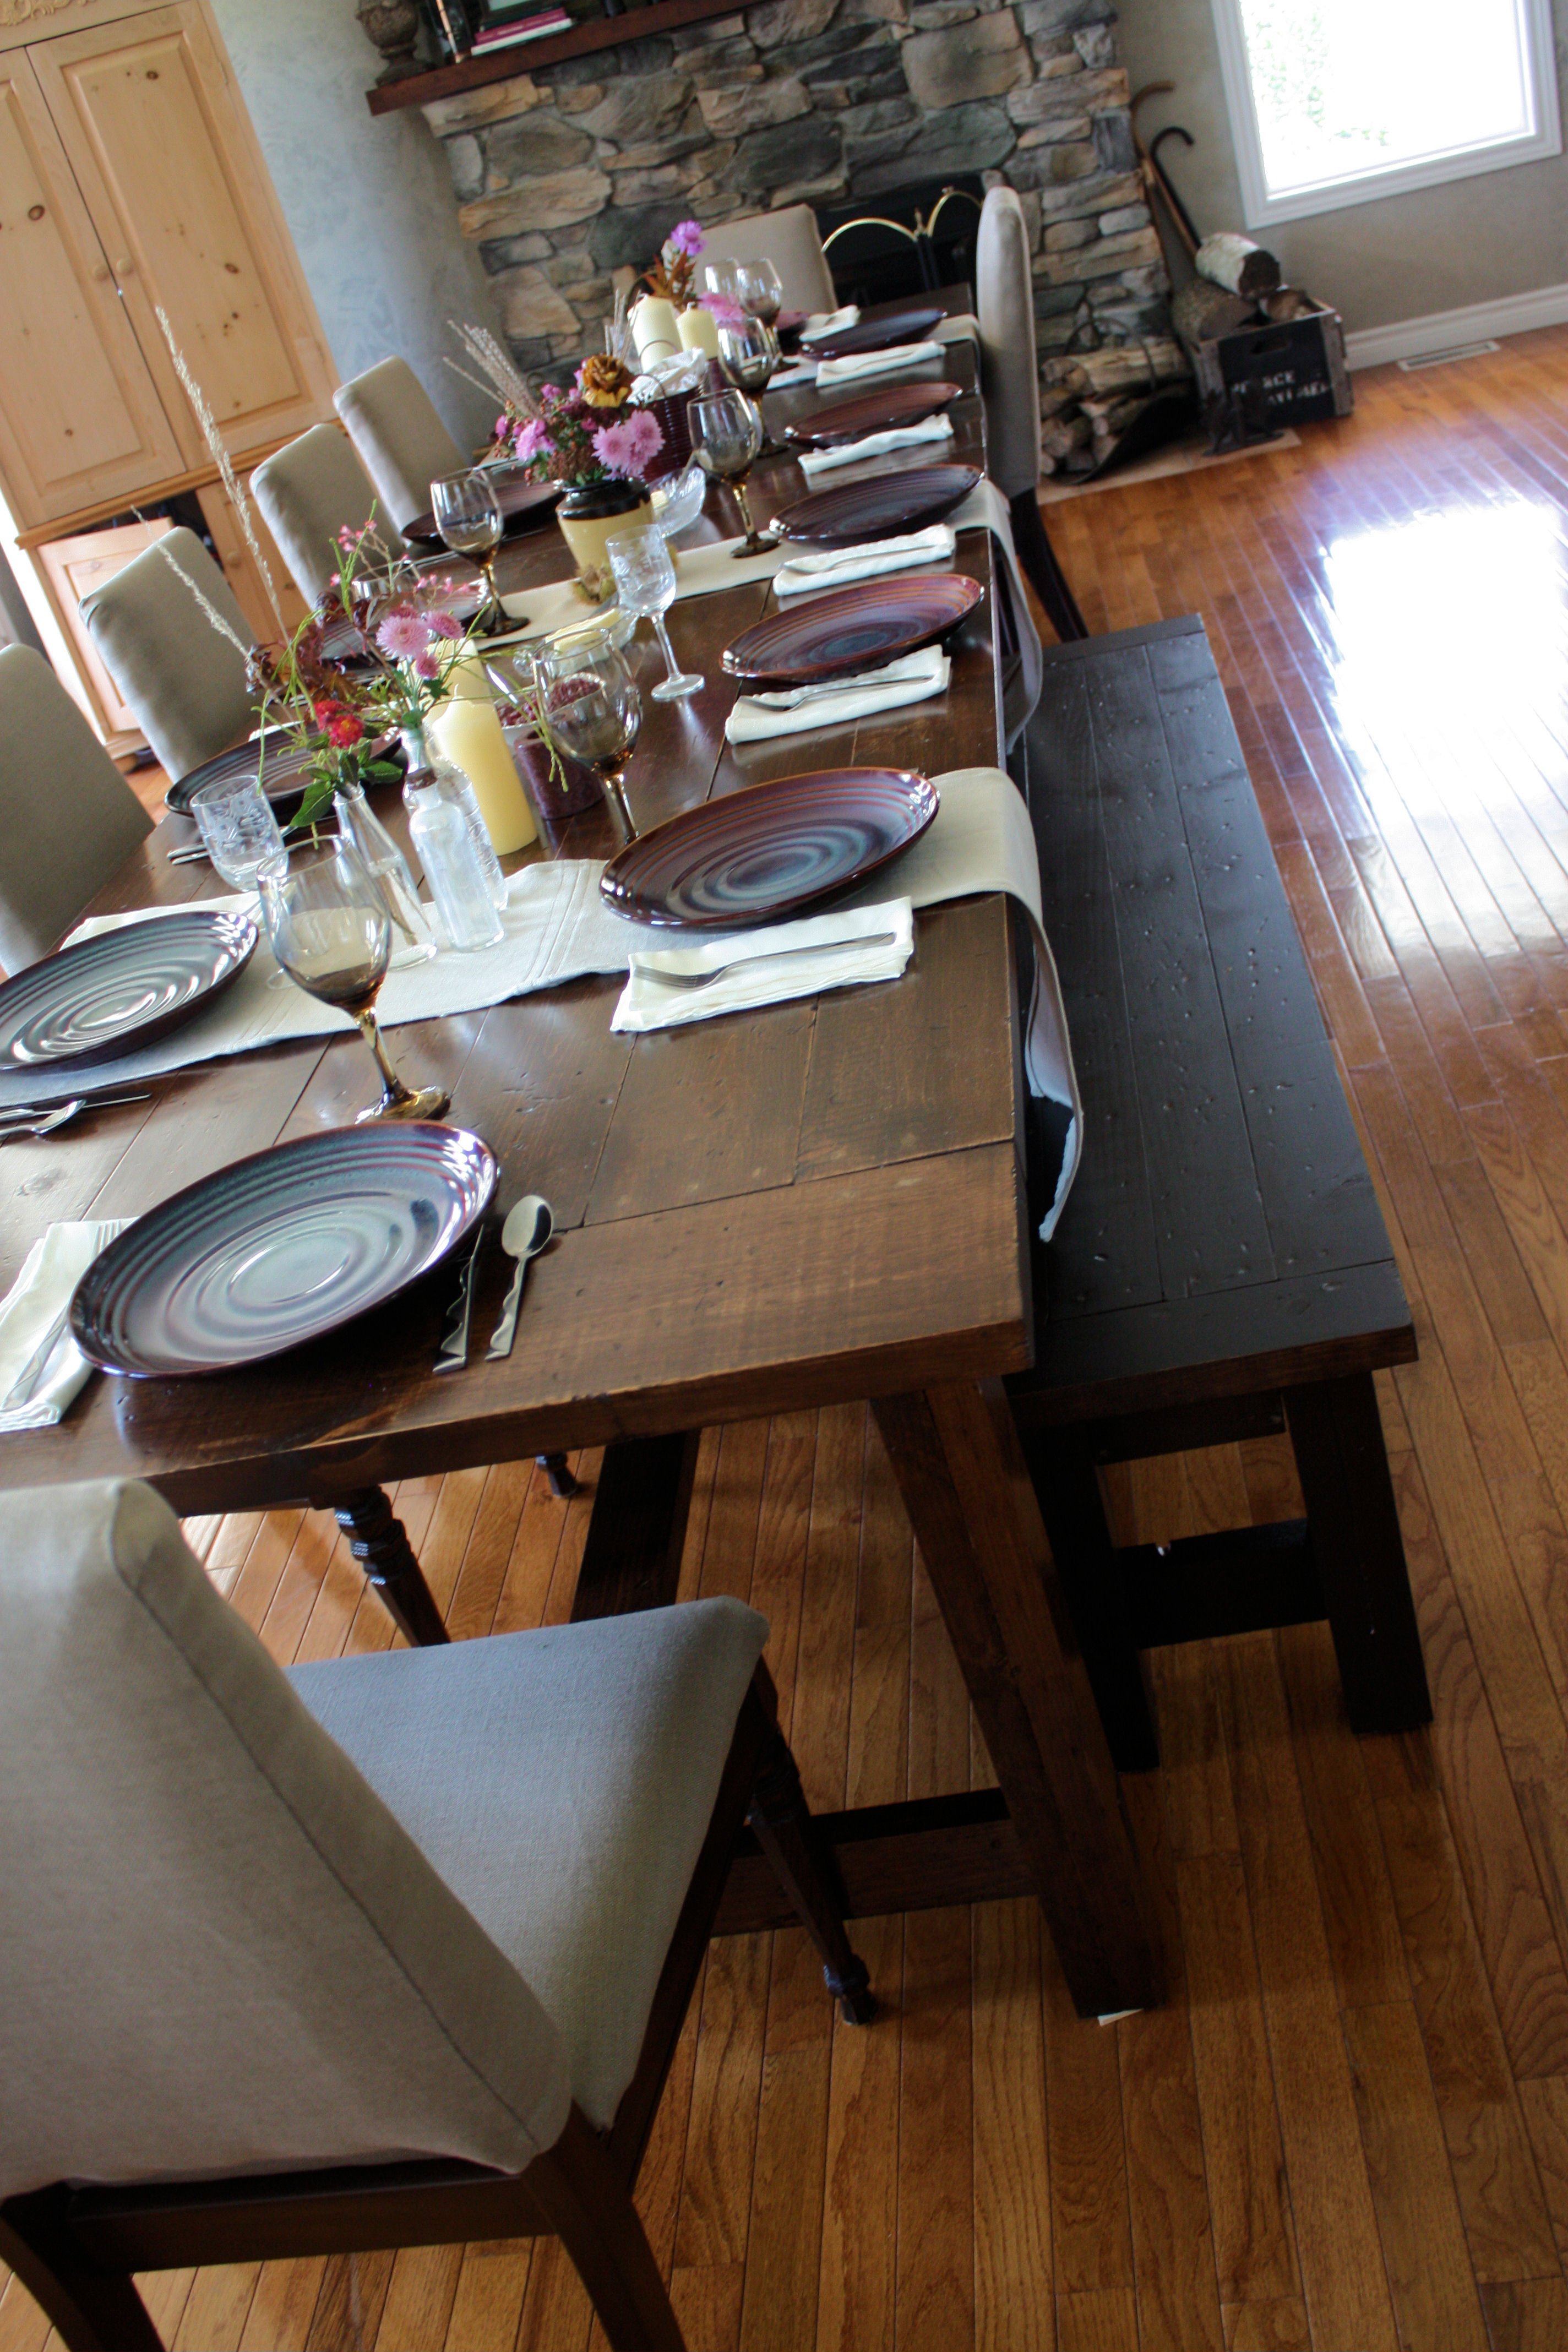
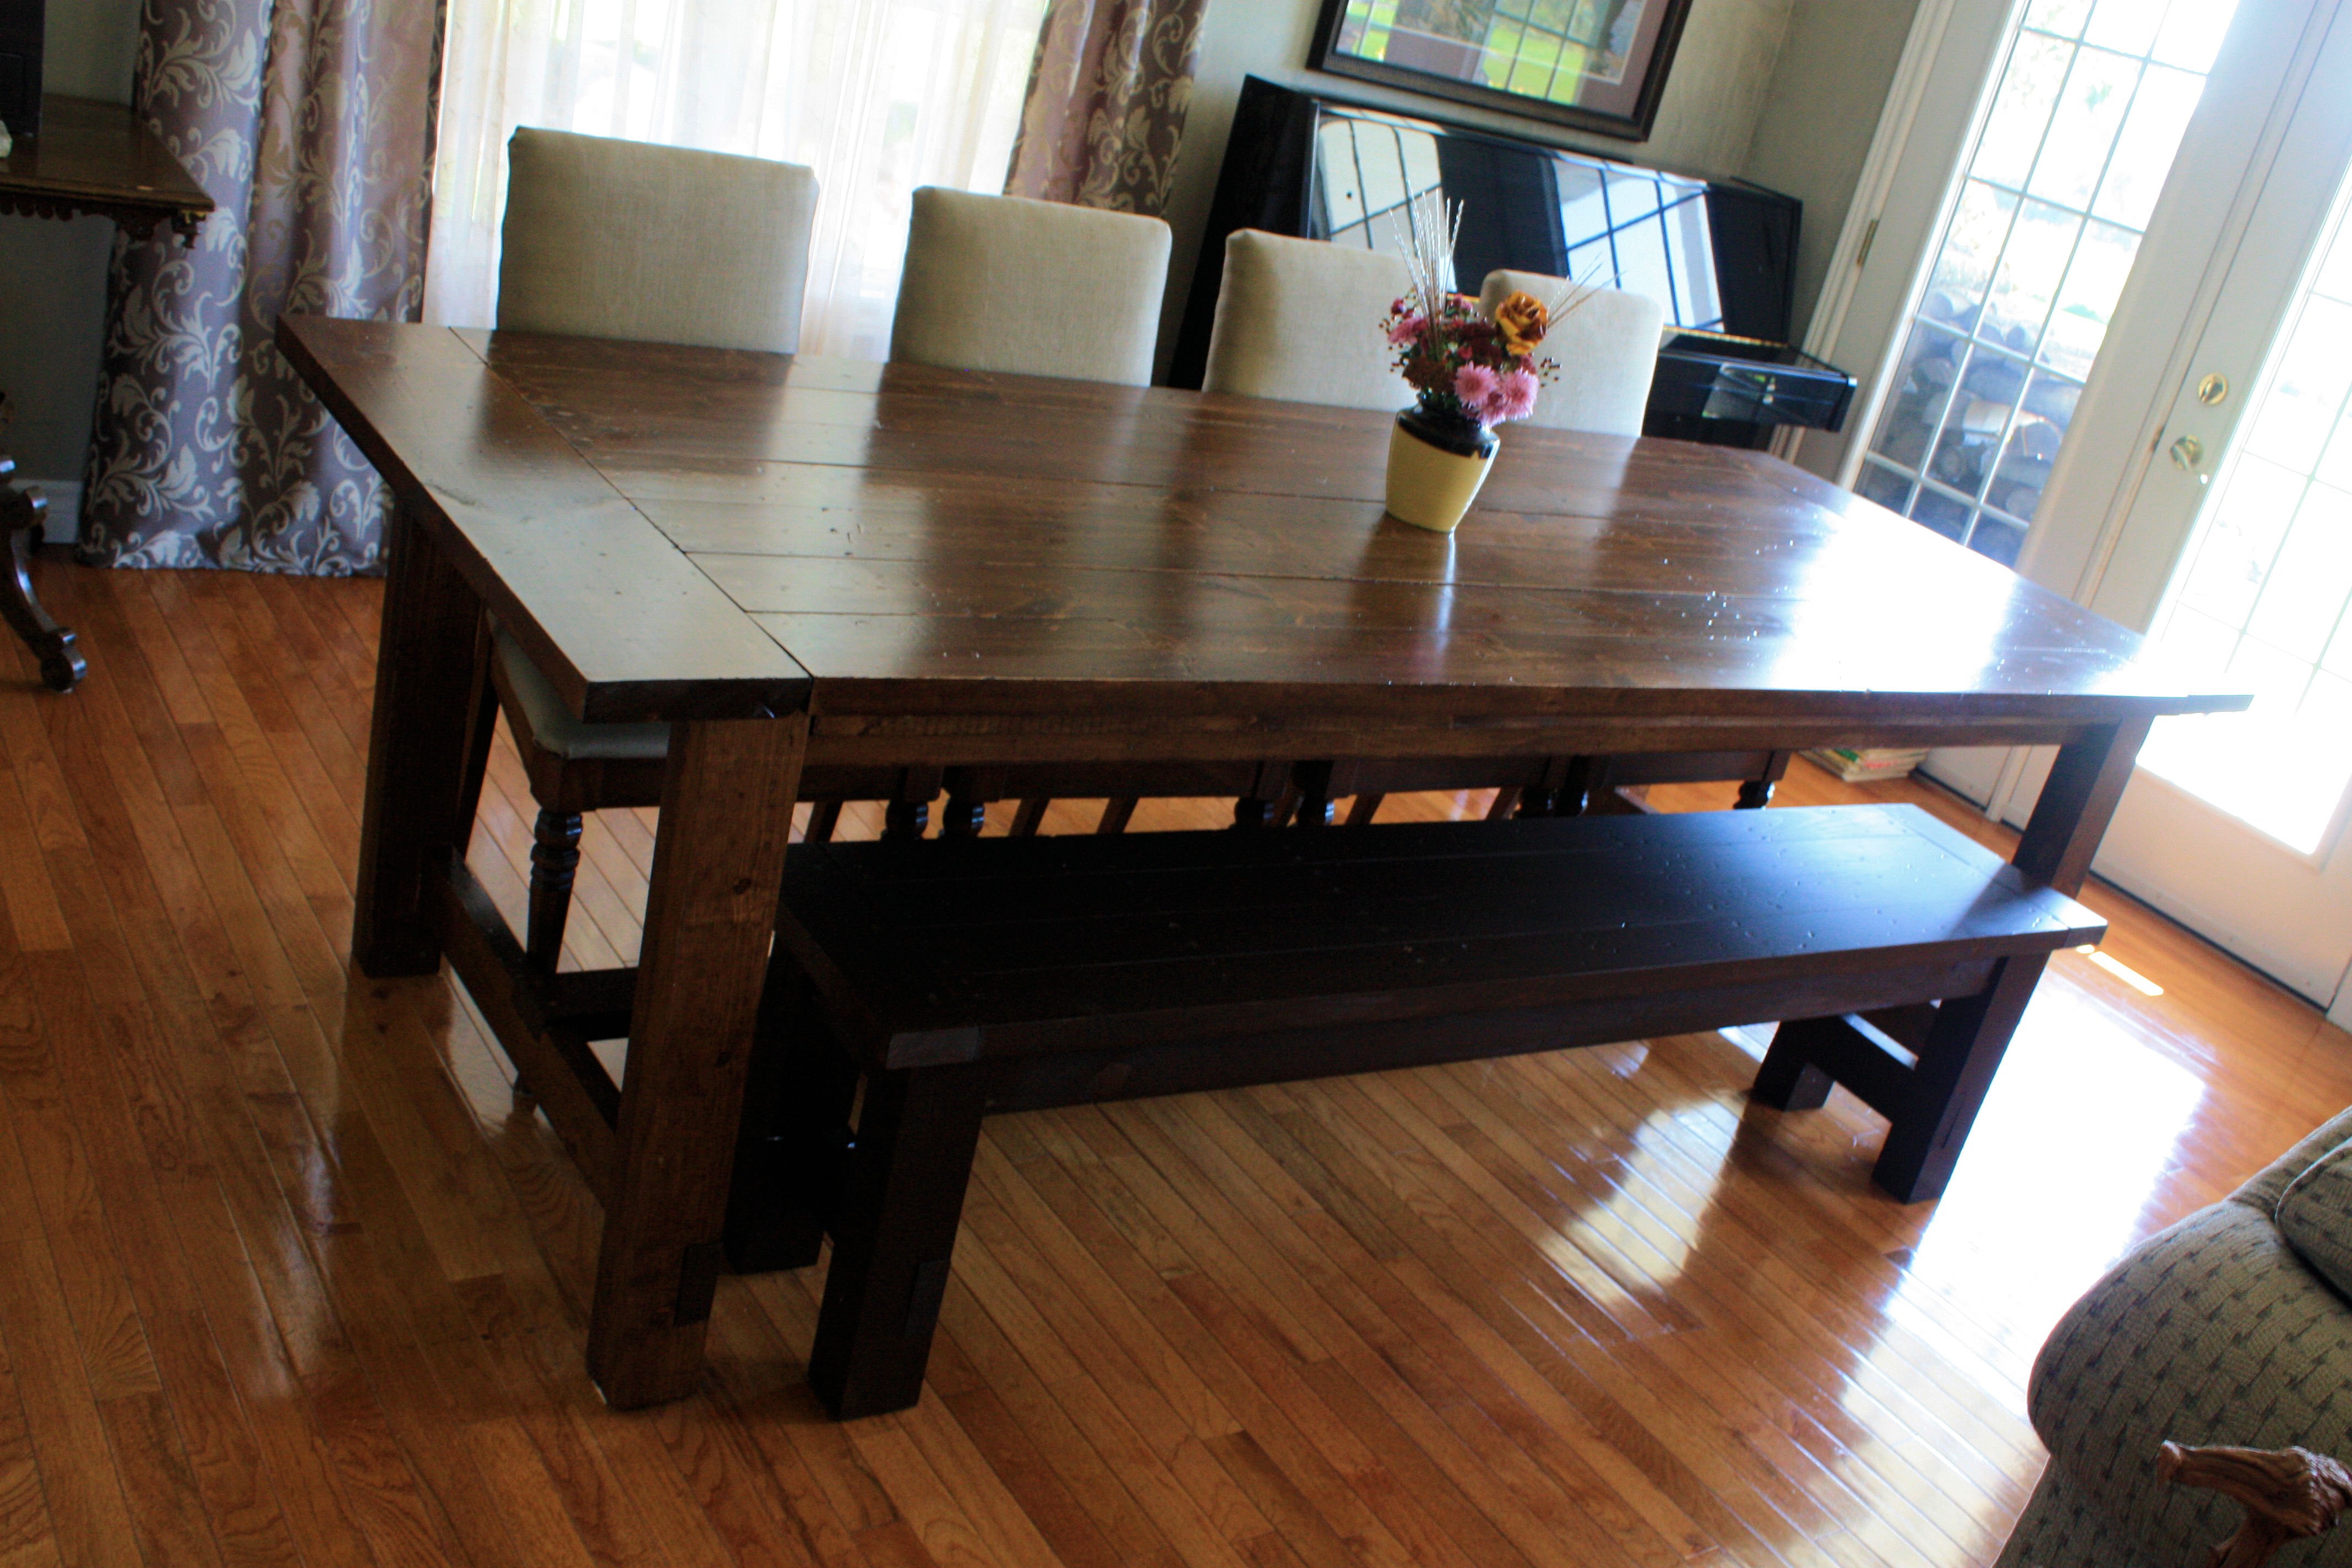
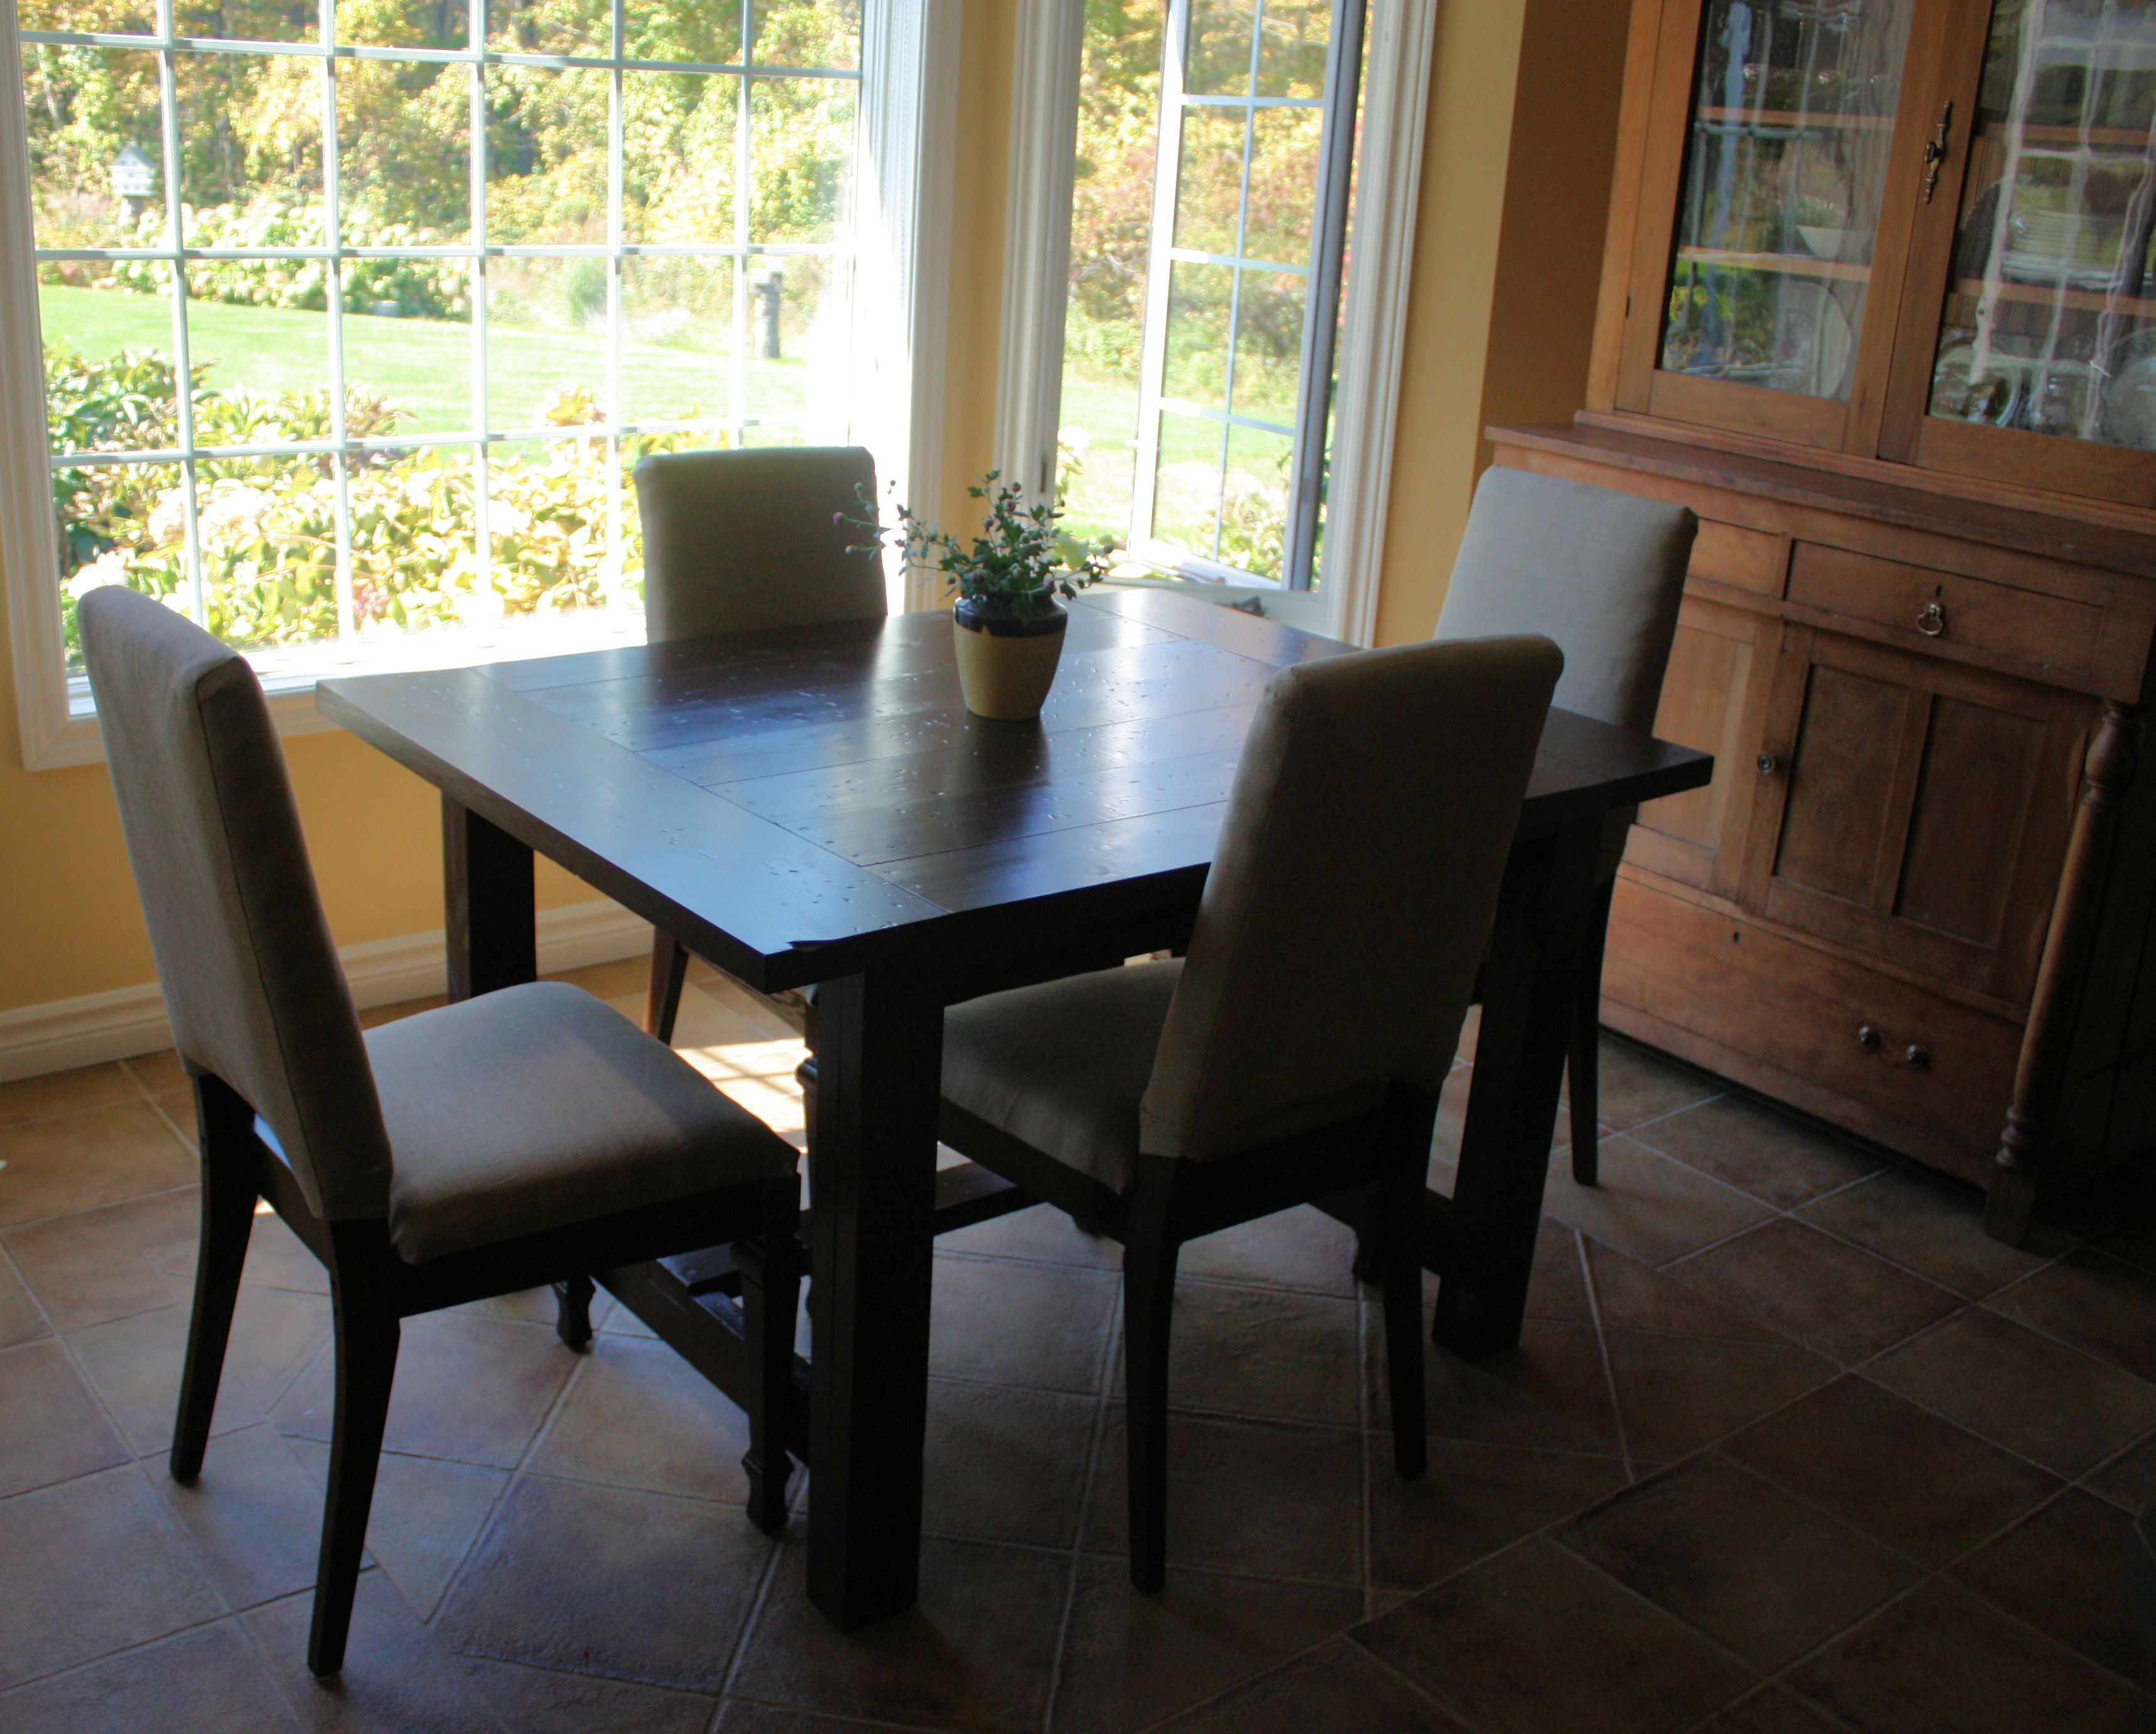
I worked on both the kitchen table, the dining table as well as the bench seat and all eight parson chairs together, so it took over a week to make this. I think if you were just doing the table you would be looking at a weekend project. Go hard or go home, unless you are home...
The kitchen table was just a case of shortening Ana's plan to about four feet. I made a quick and dirty table leaf to attach the two tables. For more info see my blog. There is also info on making those Parsons chairs too.
My Blog: http://landlocked-art.blogspot.com/2011/10/farmhouse-dining-table-and-b…
Tue, 10/11/2011 - 09:41
Great job! You did a fantastic job and I love the chairs a bunch bunch bunch!
Fri, 10/14/2011 - 07:27
Hey Indiana,
Thanks! You can find out how to make those chairs yourself here:
http://landlocked-art.blogspot.com/2011/10/build-your-own-parson-ish-ch…
Sun, 10/16/2011 - 19:06
What color did you use for the stain and what was your finishing process?
Tue, 11/08/2011 - 16:07
Your table is absolutely beautiful! May I ask where you got your beautiful tableware??
Sun, 01/08/2012 - 18:22
Very nice! What kind of wood is that and would you mind sharing the stain color?
Tue, 08/25/2015 - 17:01
Love the idea and plan on borrowing it, but we were just curious how do you make the leaf that connects them?
Another question, when you made the breakfast table, did you cut the table top pieces to 48" or did you cut them 36" and made the whole table 4 ft with the end pieces added? Also, for the breakfast table, would it seat 6 people comfortably? Thanks and what a wonderful job!

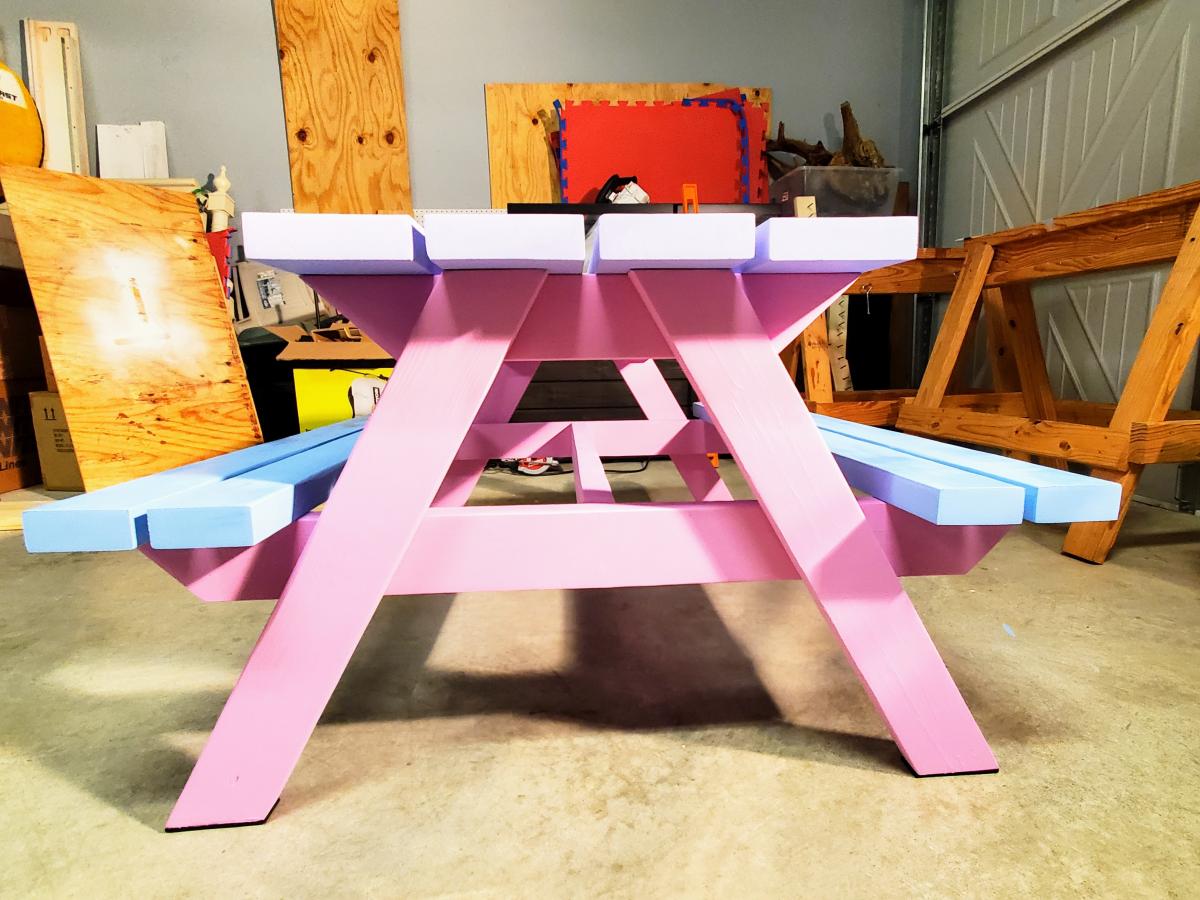
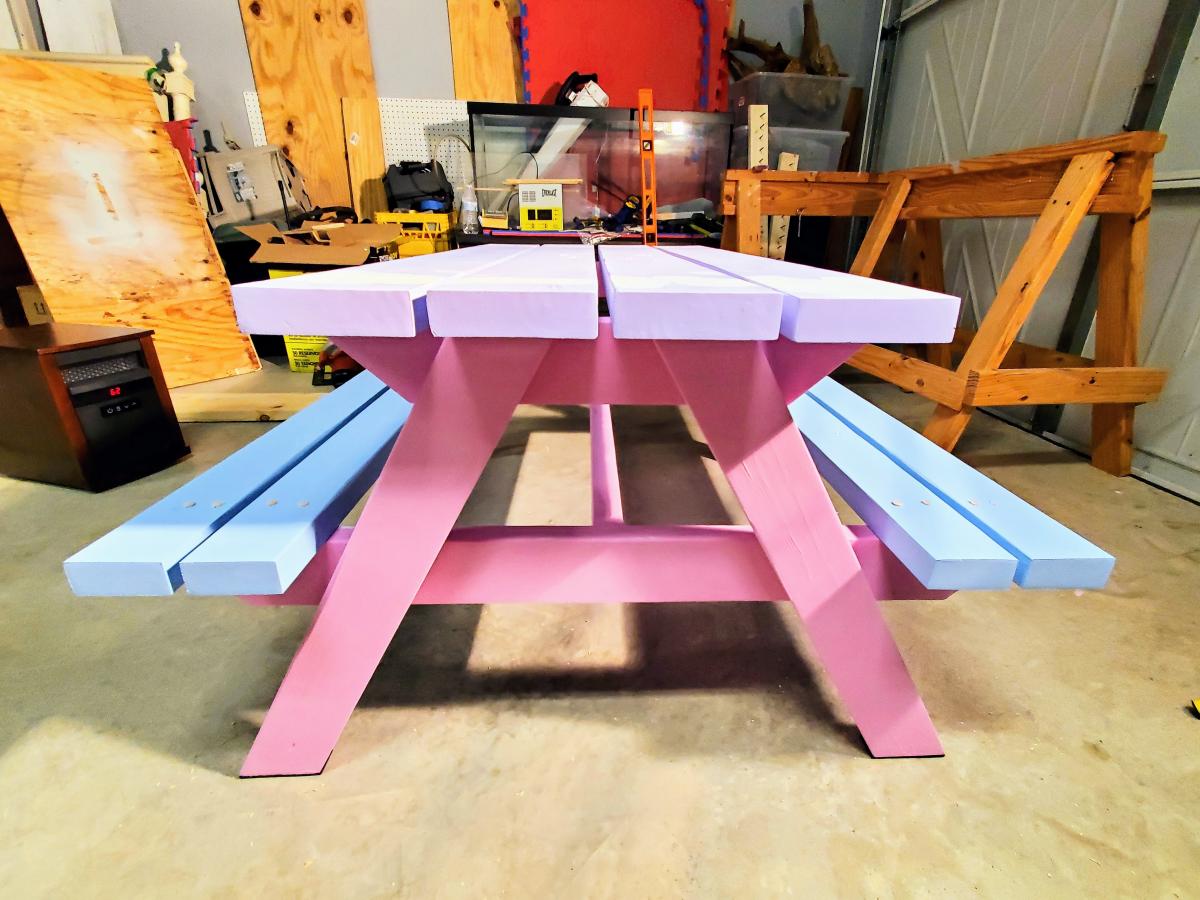
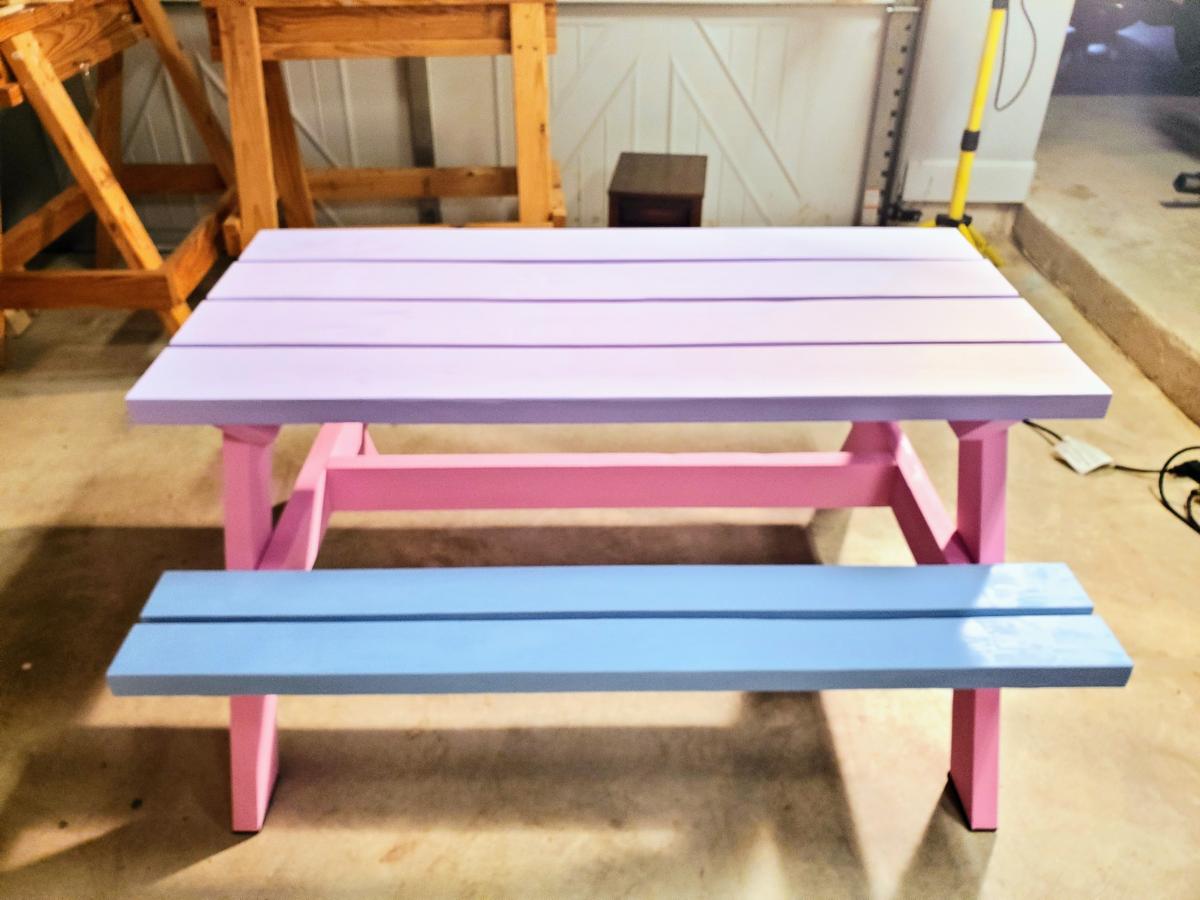
Table was a little tricky for me and the wood kept splitting and the legs didn't seem very sturdy. The wood I have isn't the straightest so that gave me some trouble. Changed the dimensions of the table to 24" x 36" and used a lodge pole pine board so the top is a solid piece instead of the 1x8's keep the junk from collecting between the slats. The chair was pretty easy to build and my kids just love it. Thinking I will paint the table and chairs a high gloss white so it is scrub able and look good in our house.
Sun, 07/17/2022 - 08:12
I lost my stackable chairs plan and I can't find it on your website now. Can you repost? Thanks!
Fun and easy project!
Great plans; thanks Ana . . .
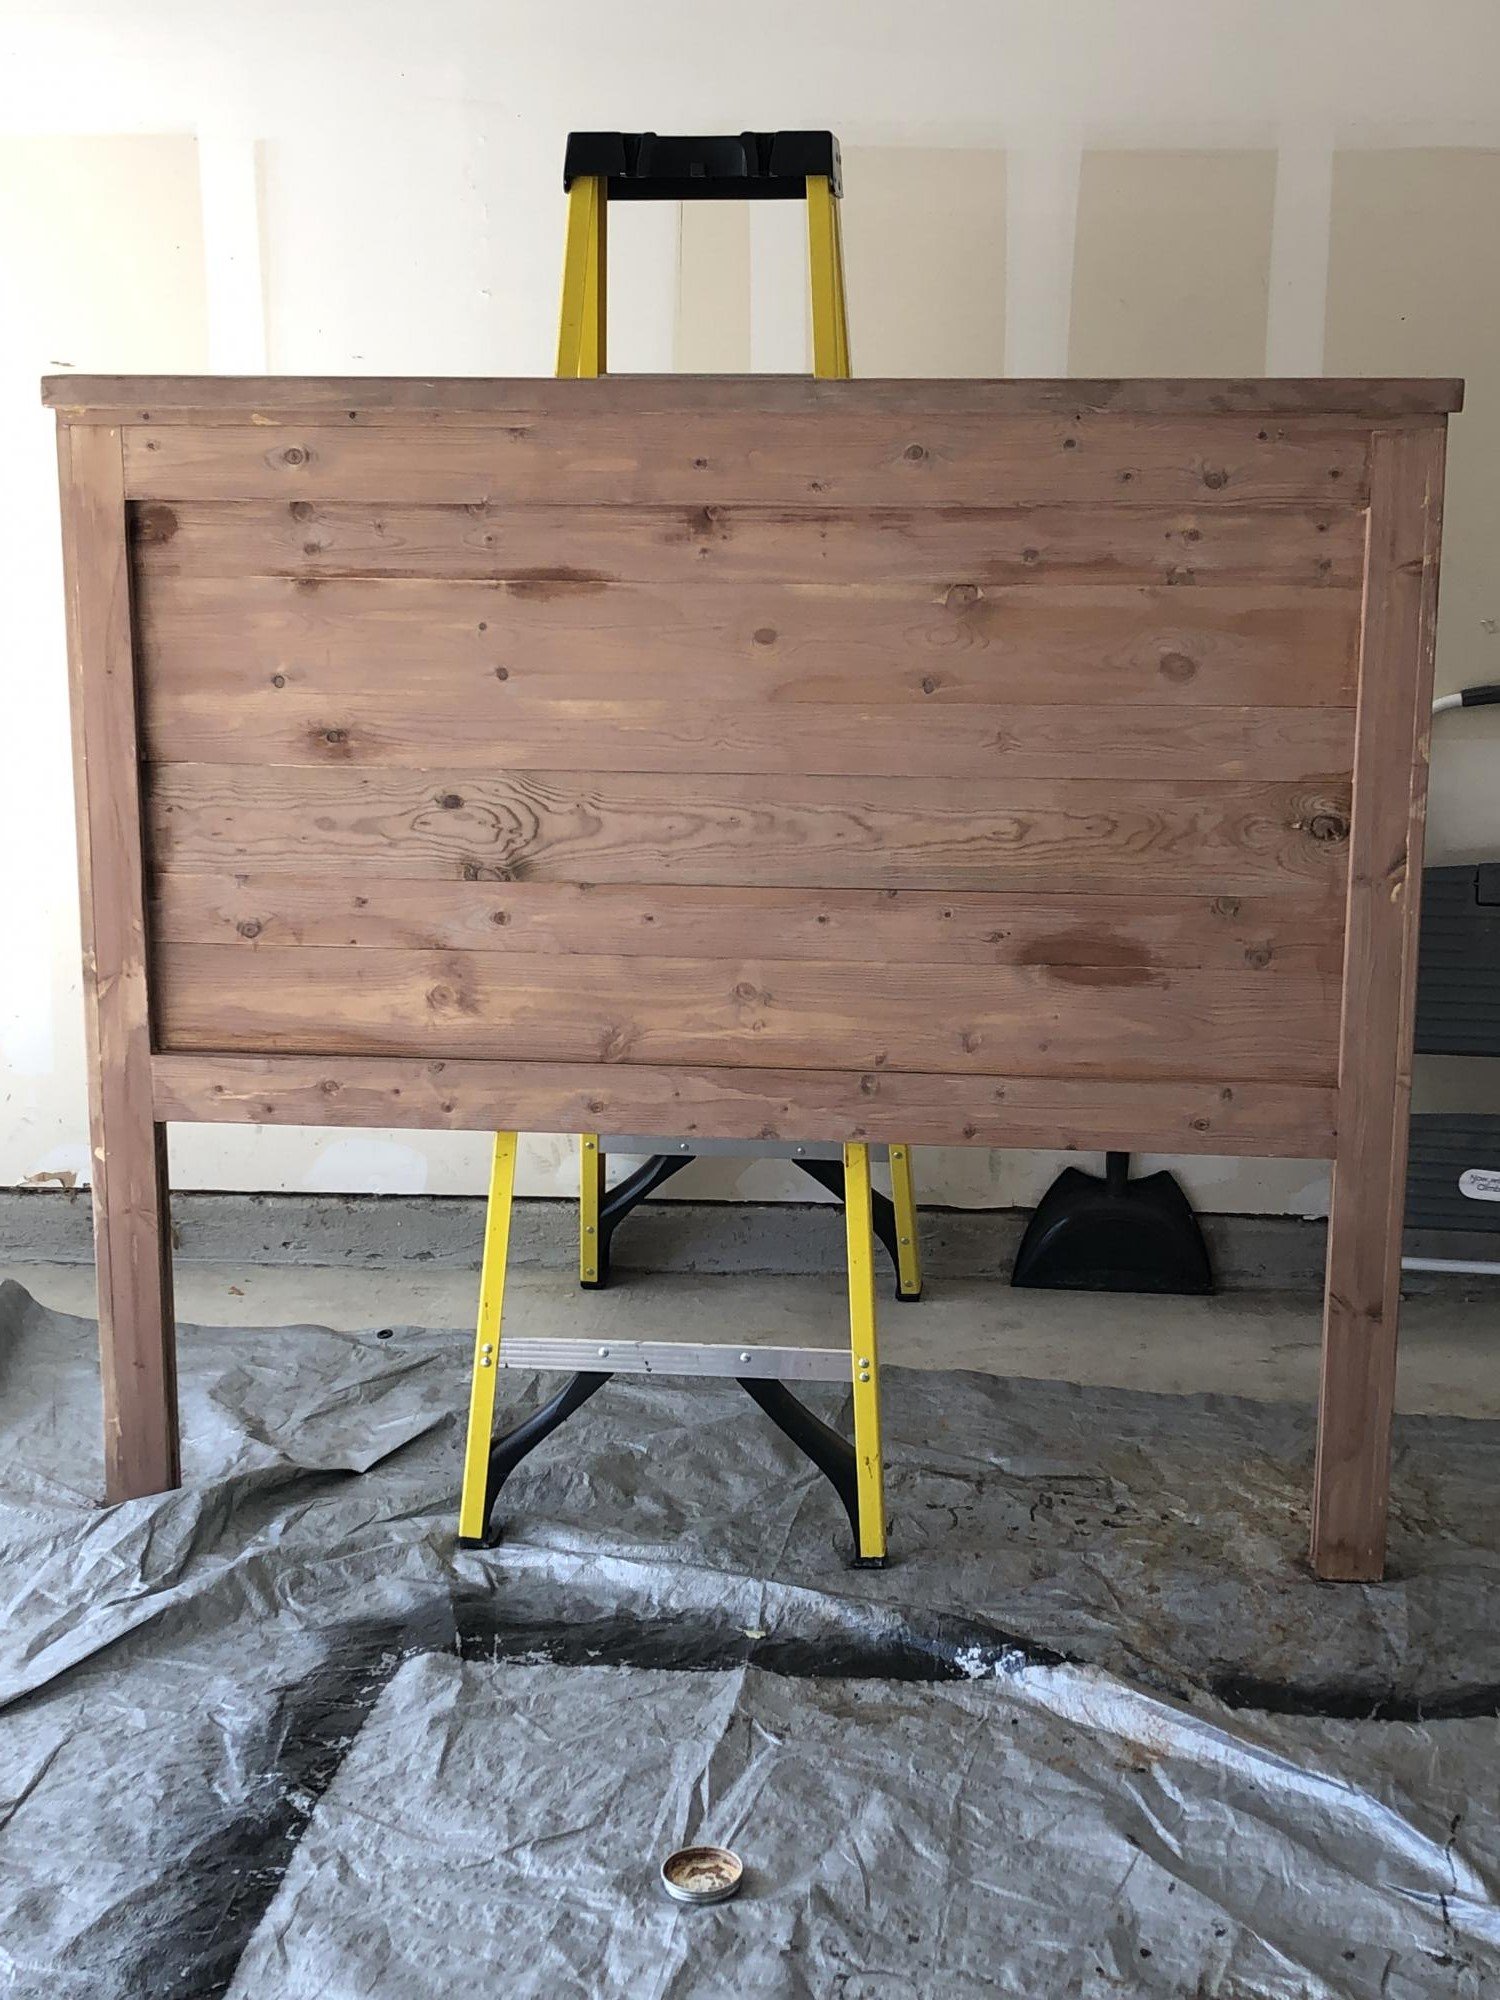
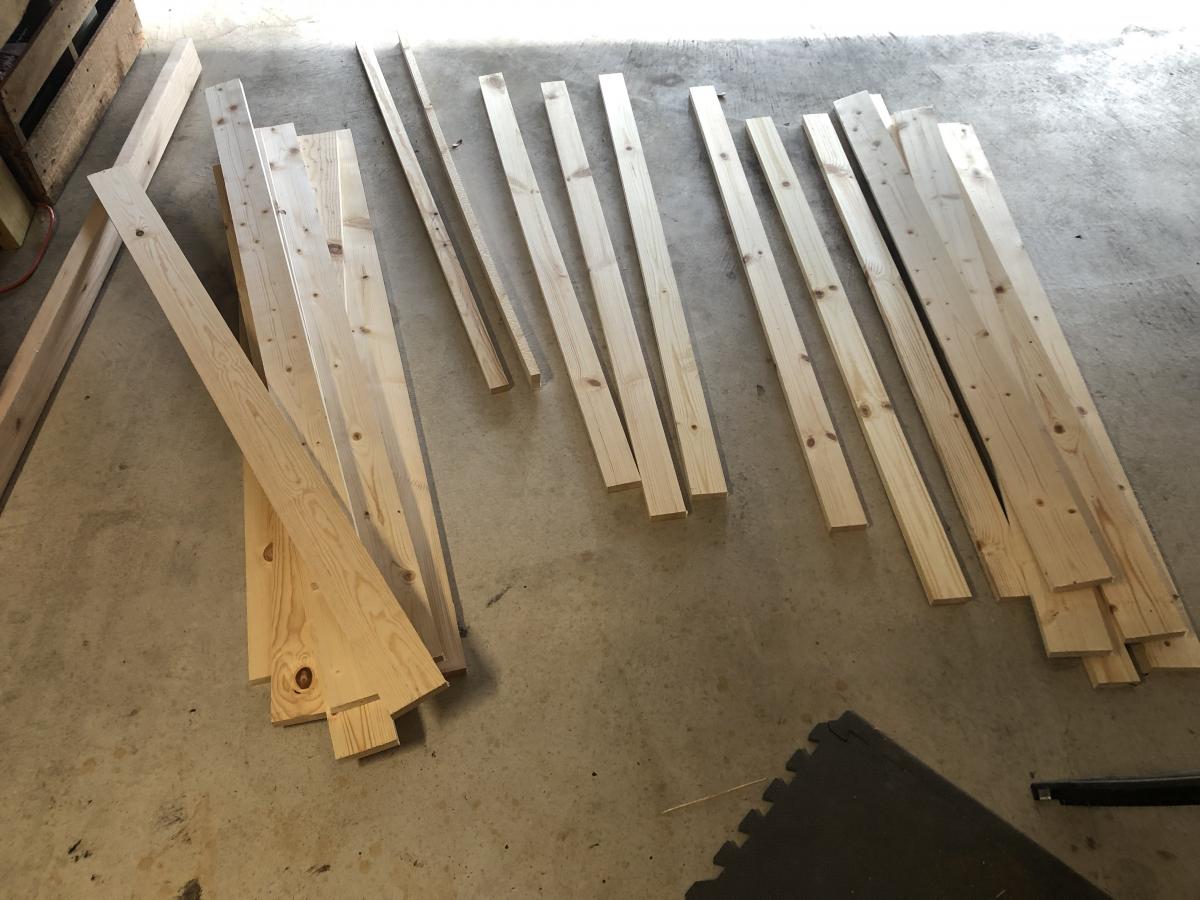
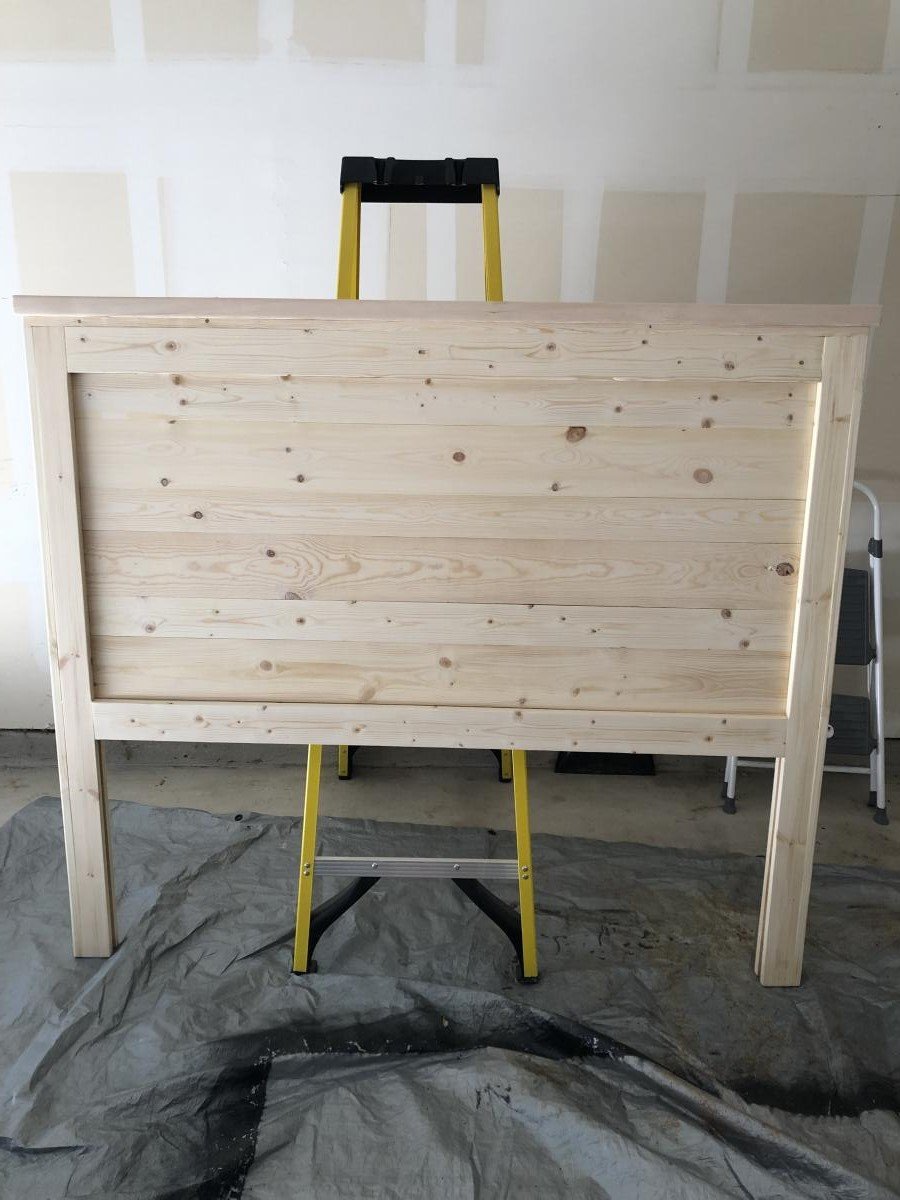
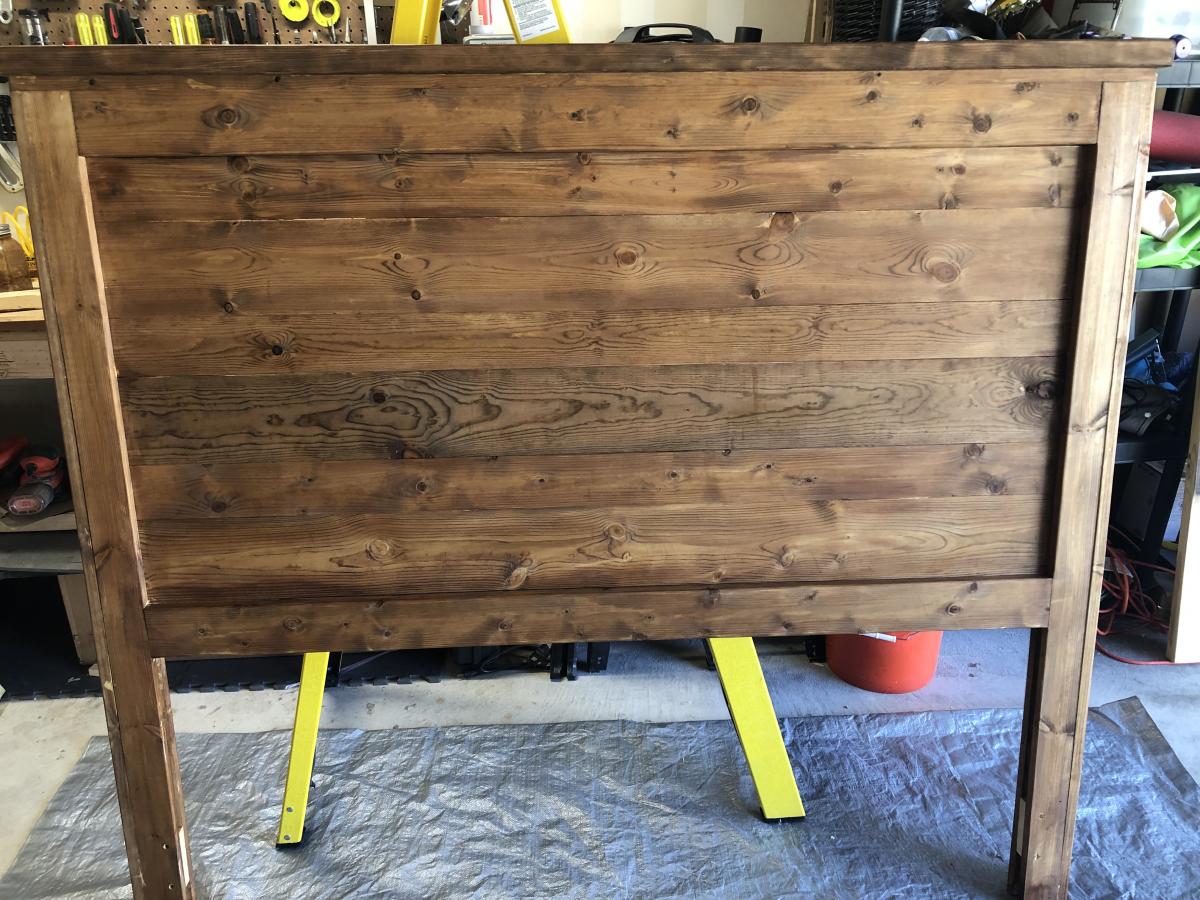
The plans for this headboard are great. Very easy to follow and the cut list is spot on. I used some choice pine from Lowe’s ($63) and then used the vinegar with steel wool mixture to age the wood. That’s where this piece is at right now. Trying to decide if I want to leave it or put a light satin clear coat.
Thank you for the plans!!
OK.....I added 2 more pics. I added 1 coat of Satin Clear Poly witch gave it a richer look.


This was my first "big" project. I built it for Thanksgiving. I recently bought a home, and everyone wanted to have Thanksgiving at my new home I had no table, so I built one. Can't wait to start my next project. Love the site!

This was my second solo project. I built it for my mom's kitchen to replace her old kitchen table. I absolutely love how it turned out. It is big and functional. Come see how I built it on my blog.

seven years ago we built this bed. It takes the place of needing a dresser. See more on my Instagram account.
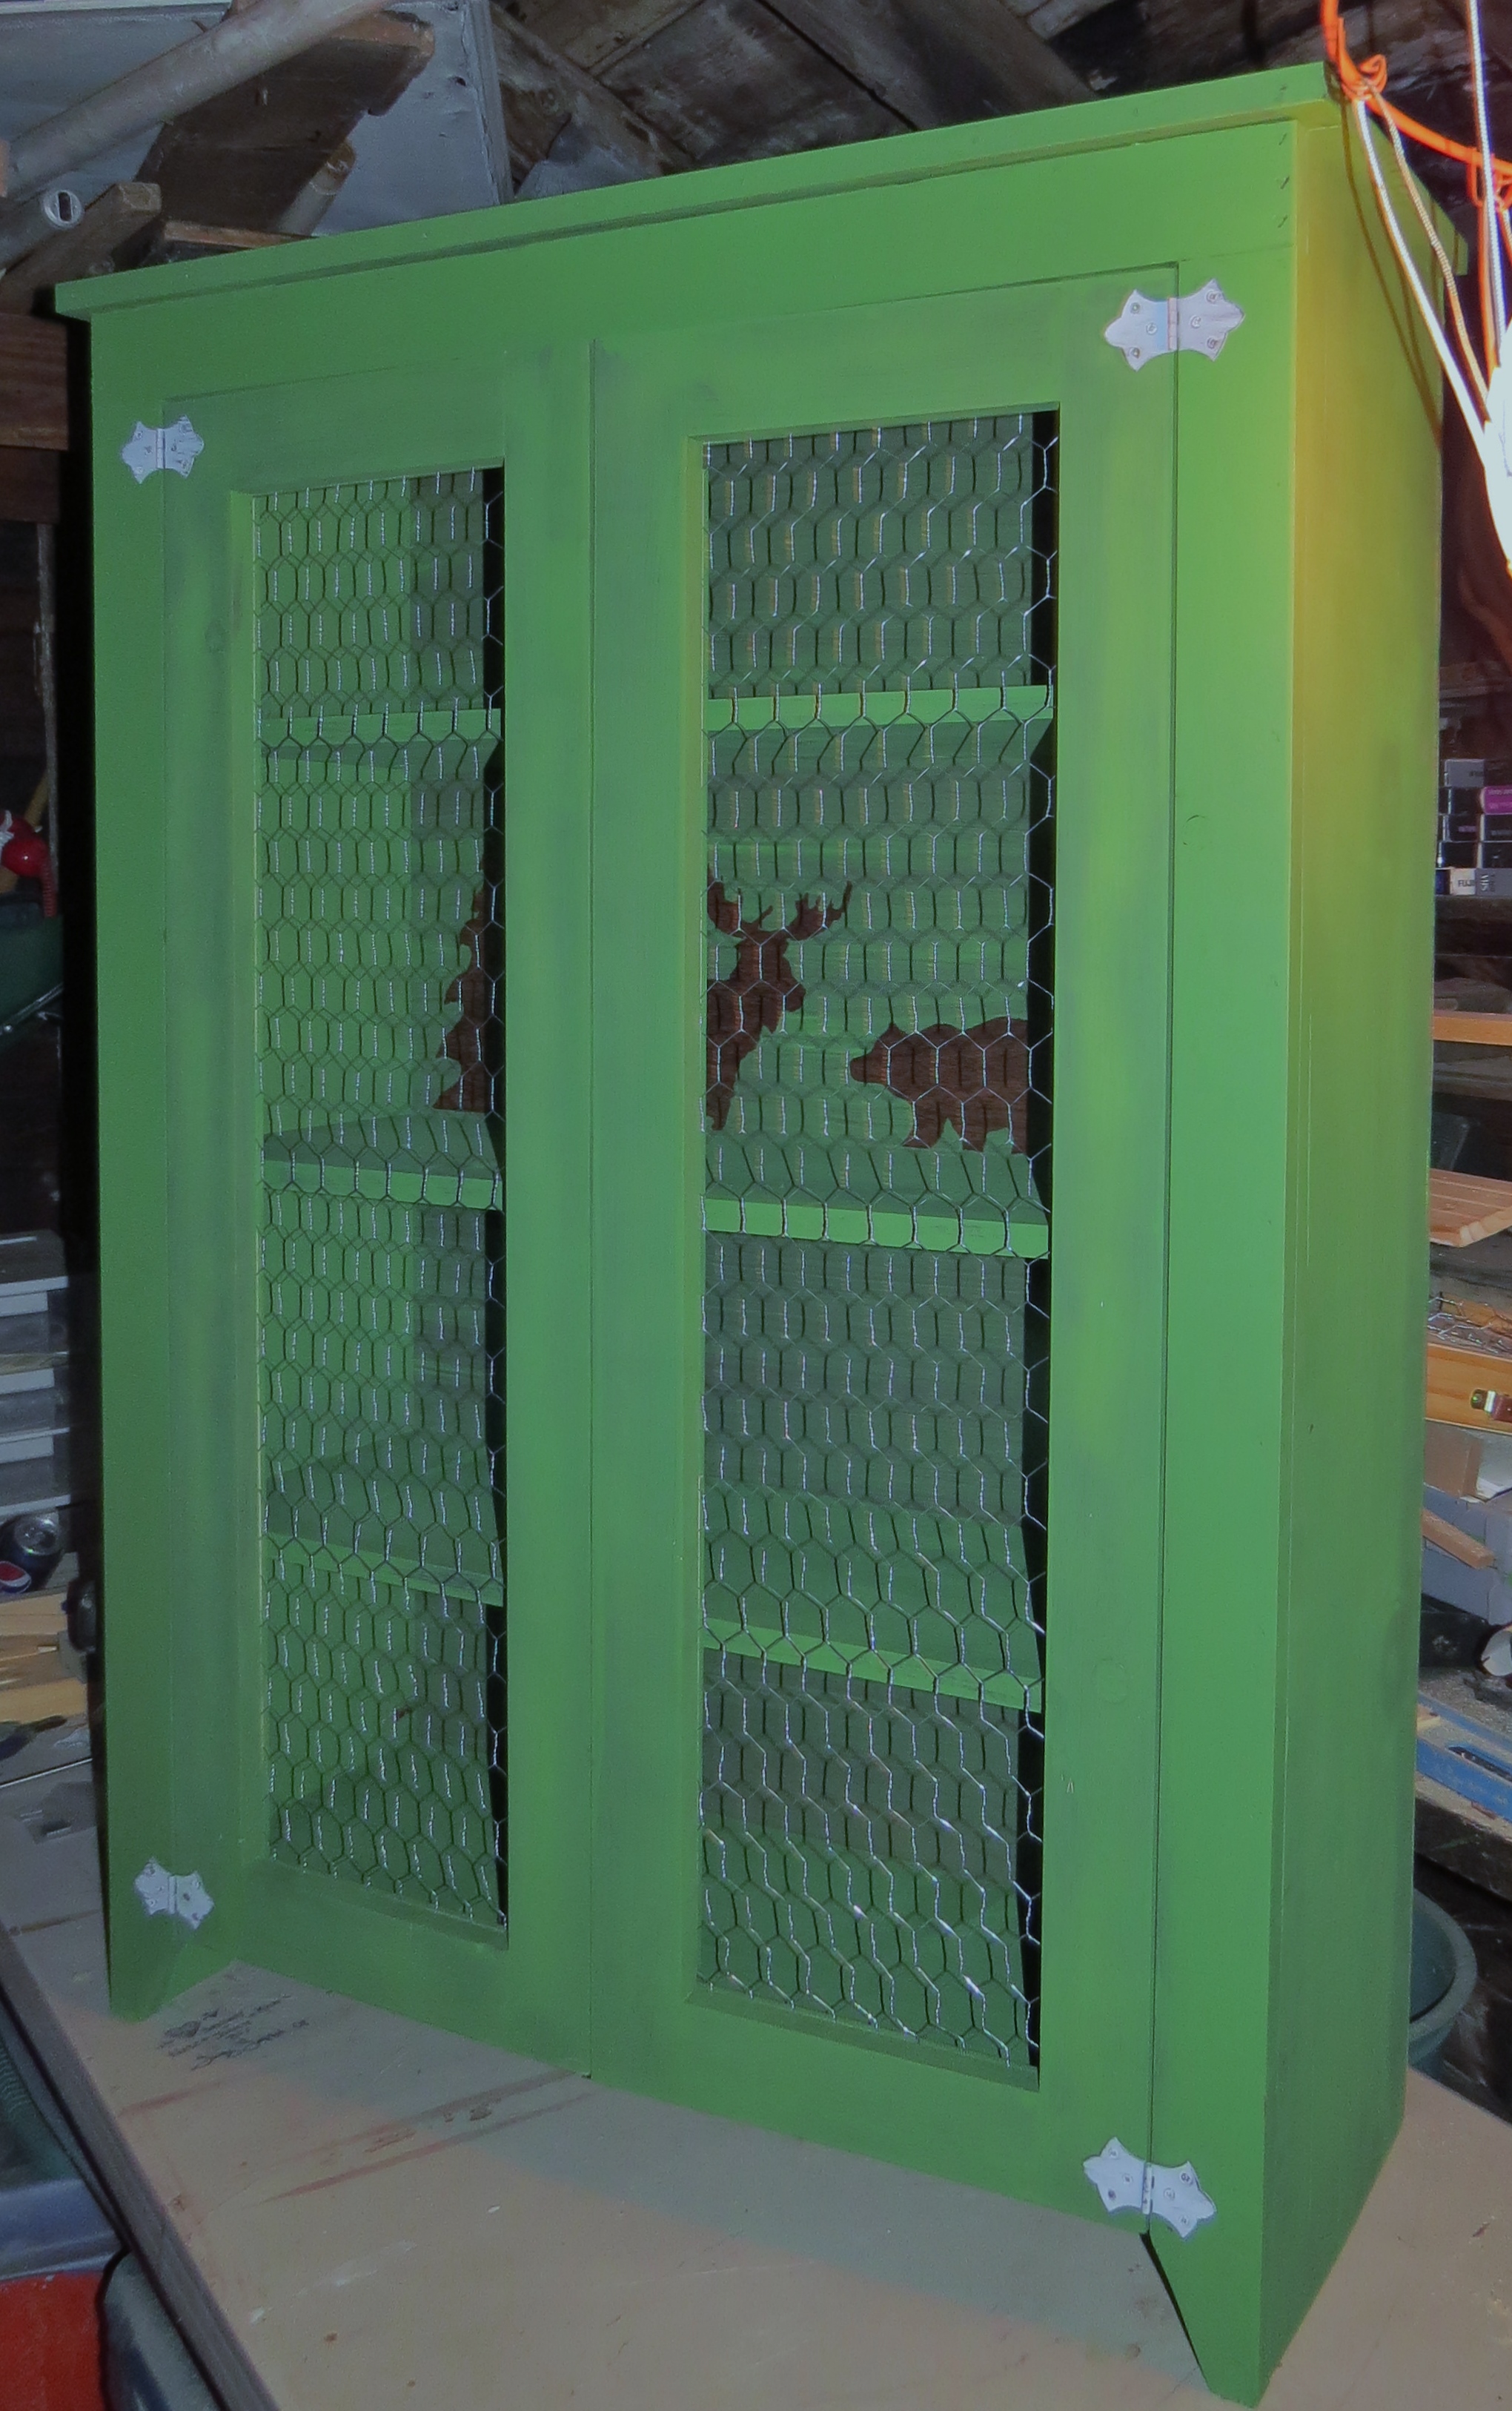
My mom as always wanted a jelly cabinet and there's one for sale at a local antique barn so when I saw the plans I knew exactly what I could get her for Christmas. The plan measurement's were a little off so I ran it through Google sketch-up to get the exact cuts I'd need and to play around a little with the plans. I used chicken wire for the doors and they came out better than expected. For a finishing touch, my mom loves black bears and moose, so I decided to include them in the final design. I went with free drawing them on contact paper and cutting them out and using them as a stencil, I love how they look. Overall it was a fun project. I just need to distress it a little and seal it with poly and it should be better well done.


Sat, 11/23/2013 - 16:29
I couldn't get the link to work in the actual form, but it's Patrick's Jelly Cupboard ... http://ana-white.com/2011/12/plans/patrick039s-jelly-cupbard
We ended up going with 4 2x12's for the table top and used 2x6's for the bread boards.
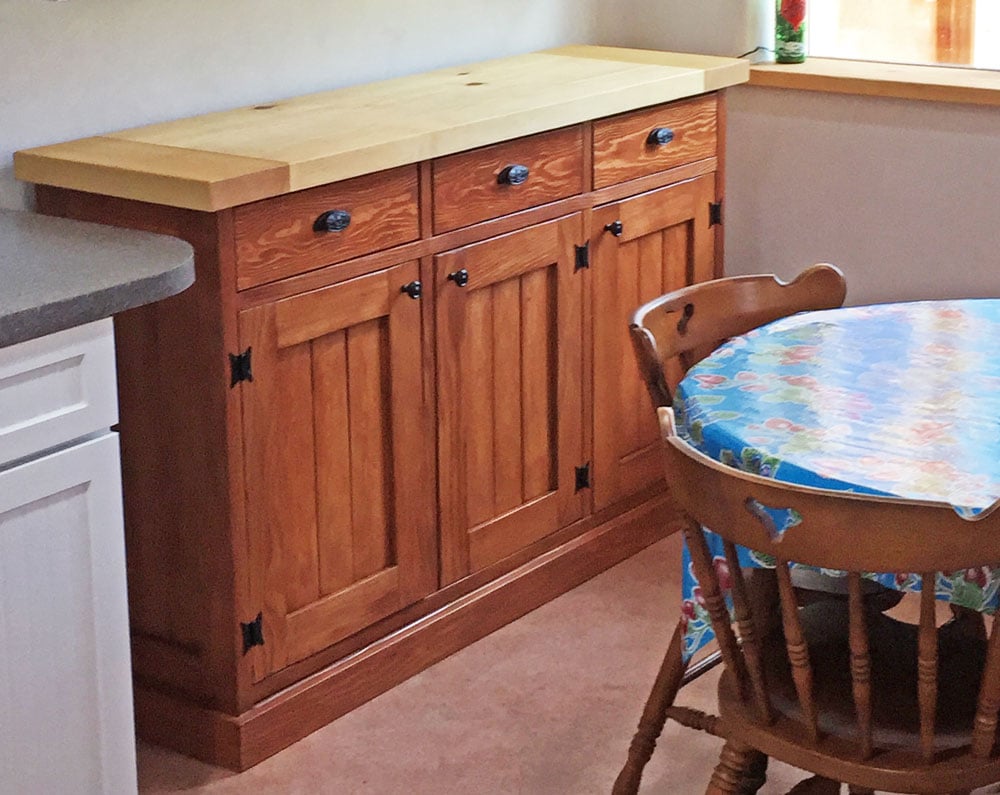
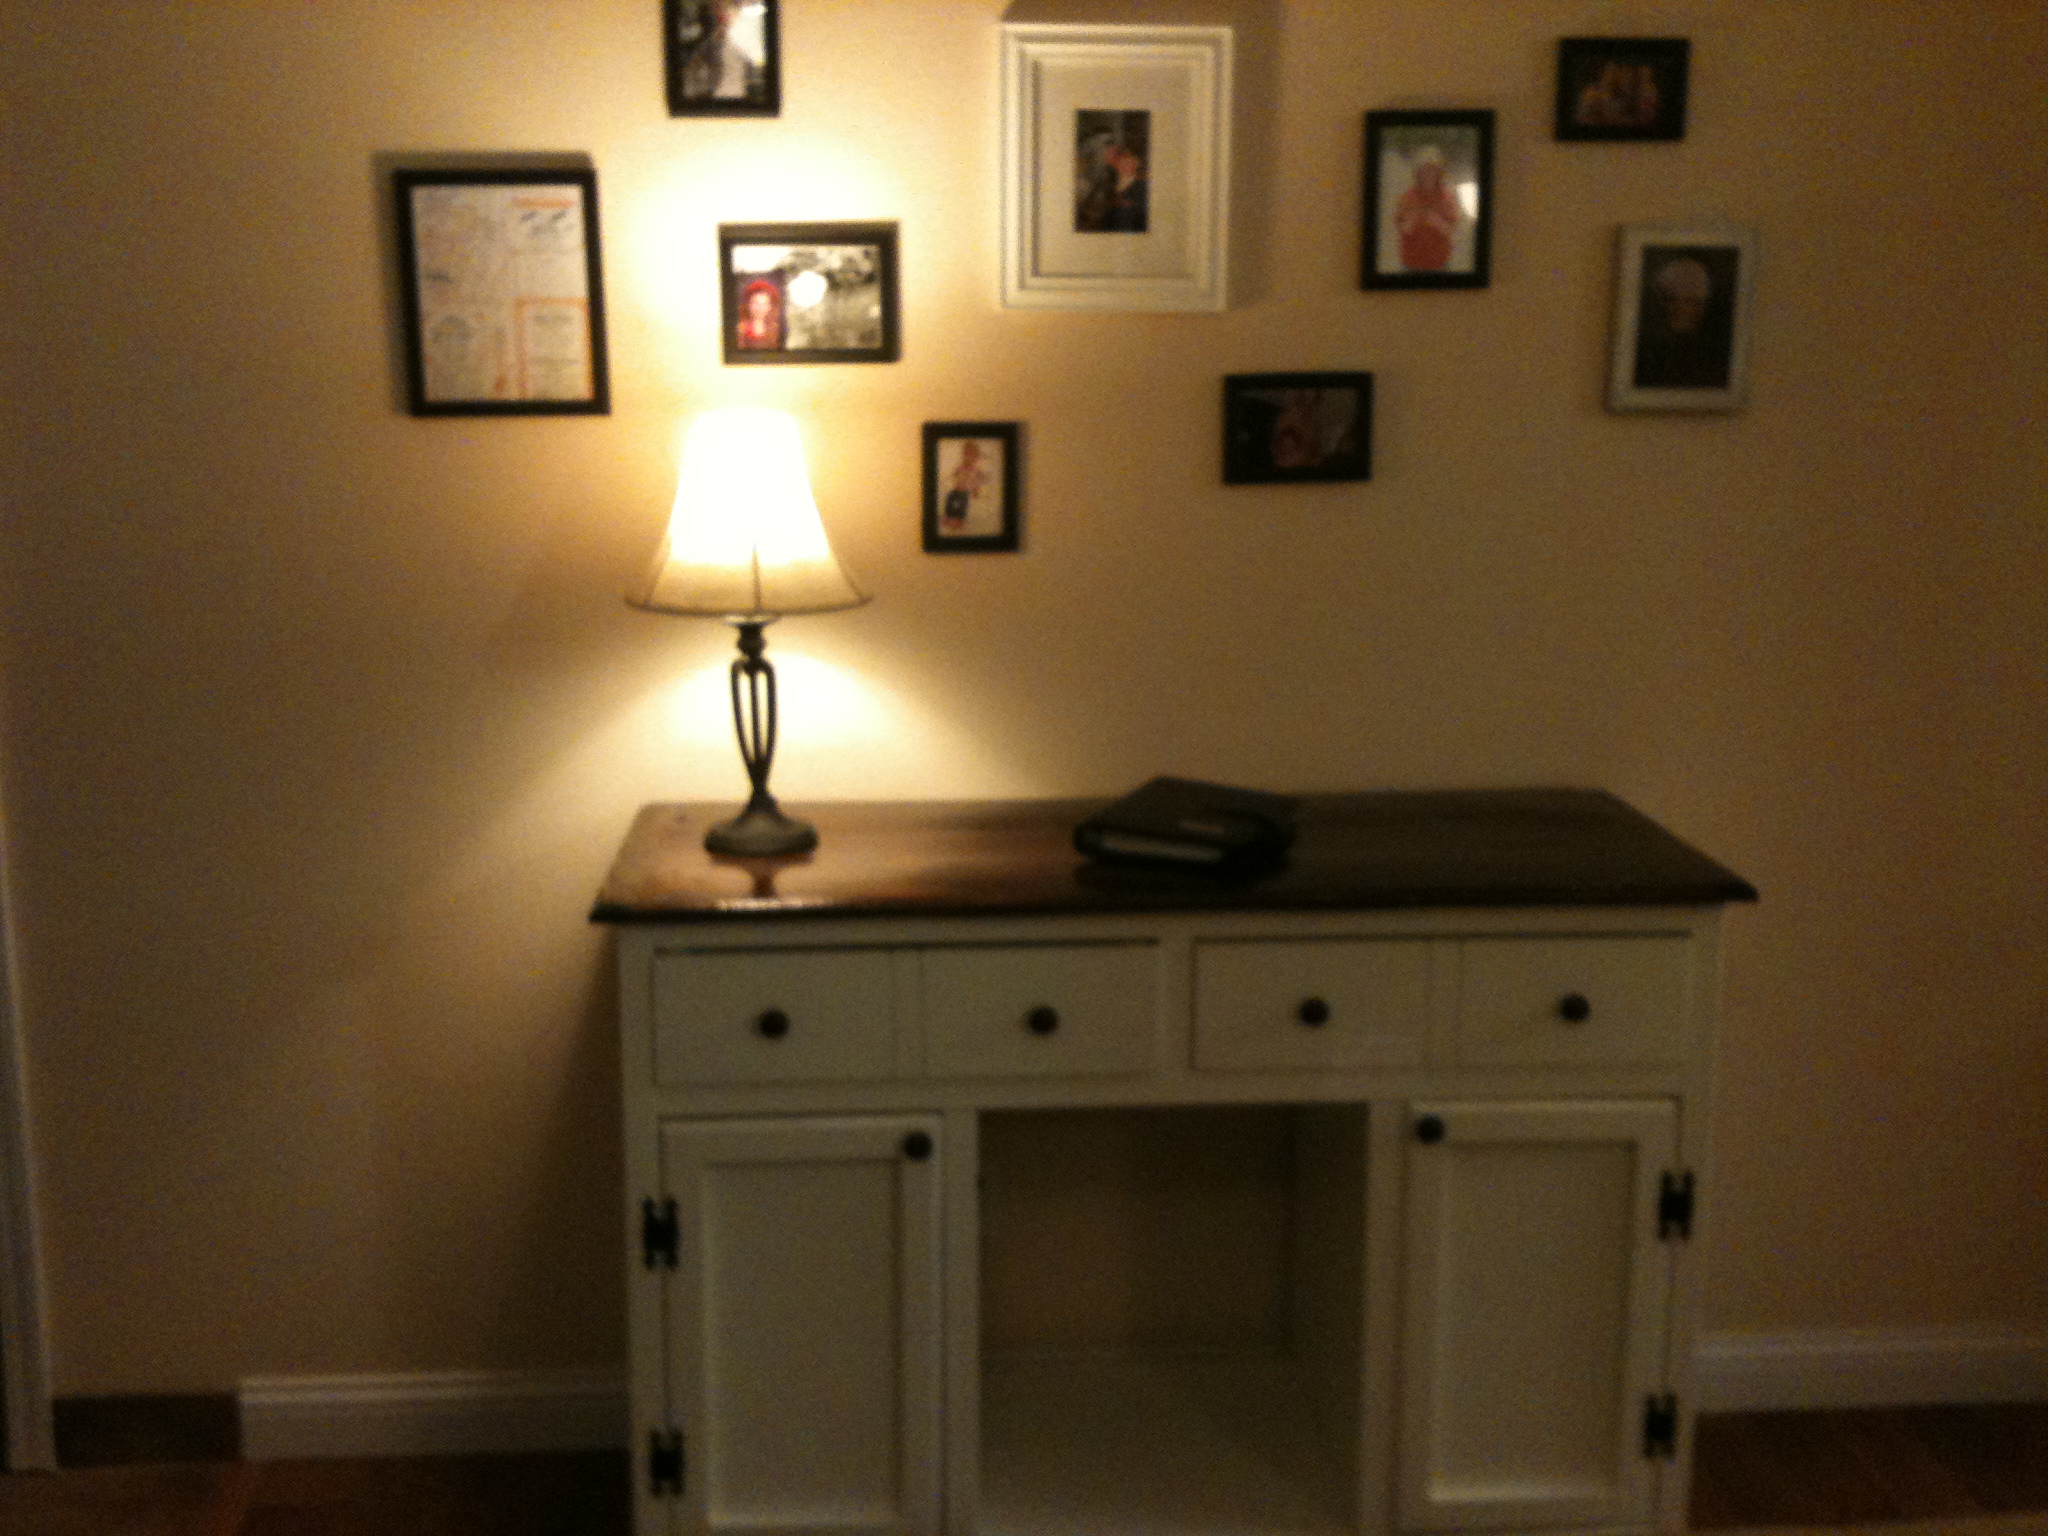
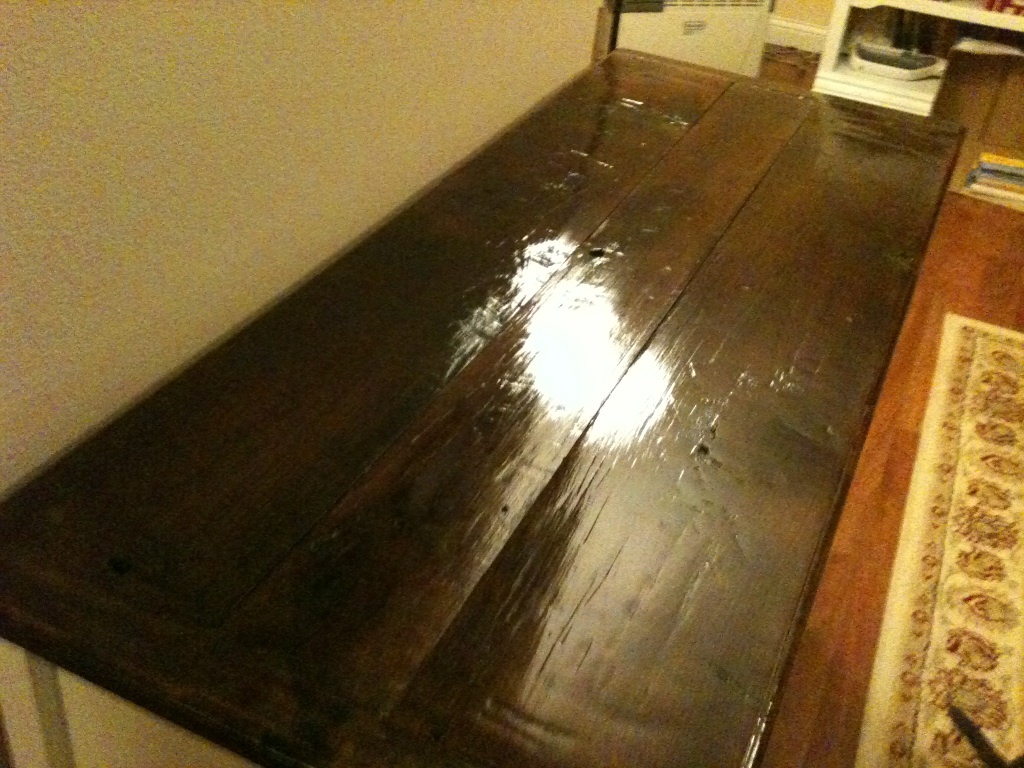
I've wanted a console table for a long time. My husband finally made me one! We liked the salsa console table, but it wasn't quite what we were looking for. He modified the farmhouse bedside table plan to get exactly what we were wanting. The top is made from reclaimed oak, stained to match the farmhouse dining table he made me in August.

Sat, 01/21/2012 - 12:08
Very nice job! I love the glossy top and the kitten is adorable!
Sun, 01/22/2012 - 16:44
Your console is just perfect !
Il love the old stylish wood with white paint...
So perfectly vintage !
Sun, 01/22/2012 - 17:41
The table top is 47 1/2" long and 19 1/4" wide. The base is 46" long, 17 1/2" deep and 33 1/4" tall.
Sat, 09/15/2012 - 18:56
I was curious on what wood you used for the top. I seen you said reclaimed oak but I can't get 19 1/4 with 3 pieces. Could you tell me what the width of the pieces are? Btw, I love the dark glossy top with the off-white finish. Looks great.
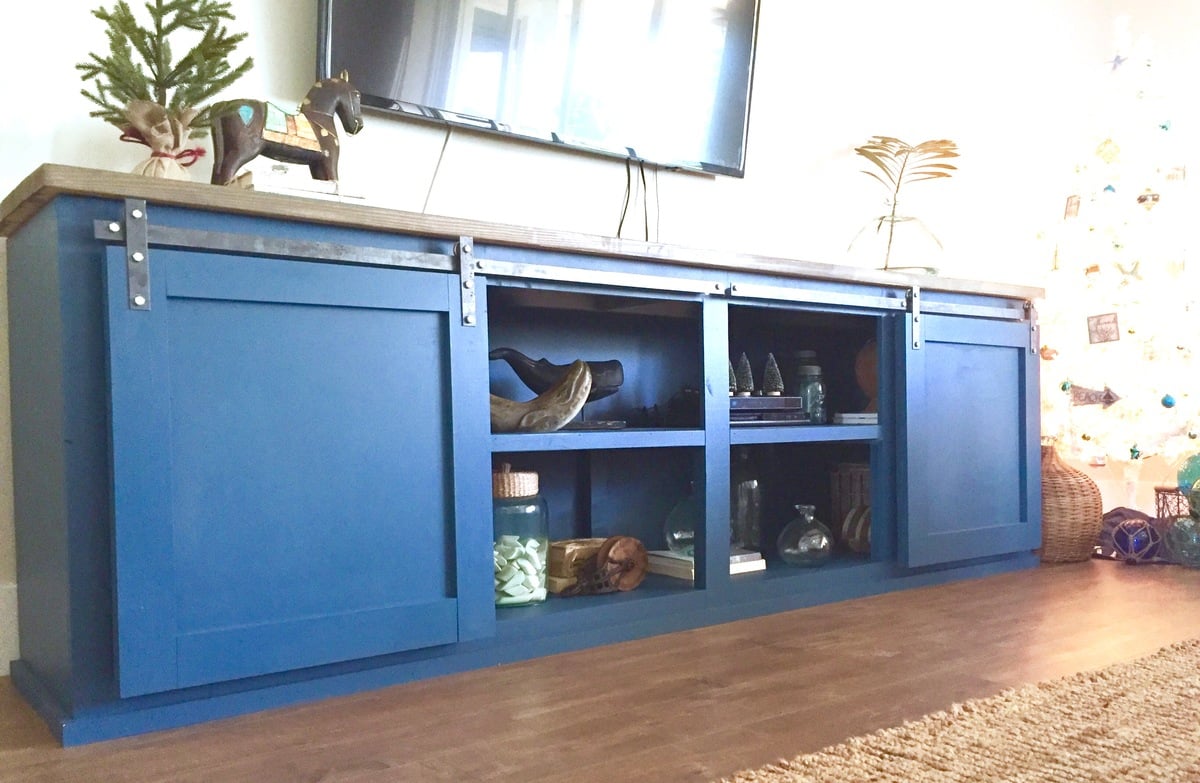
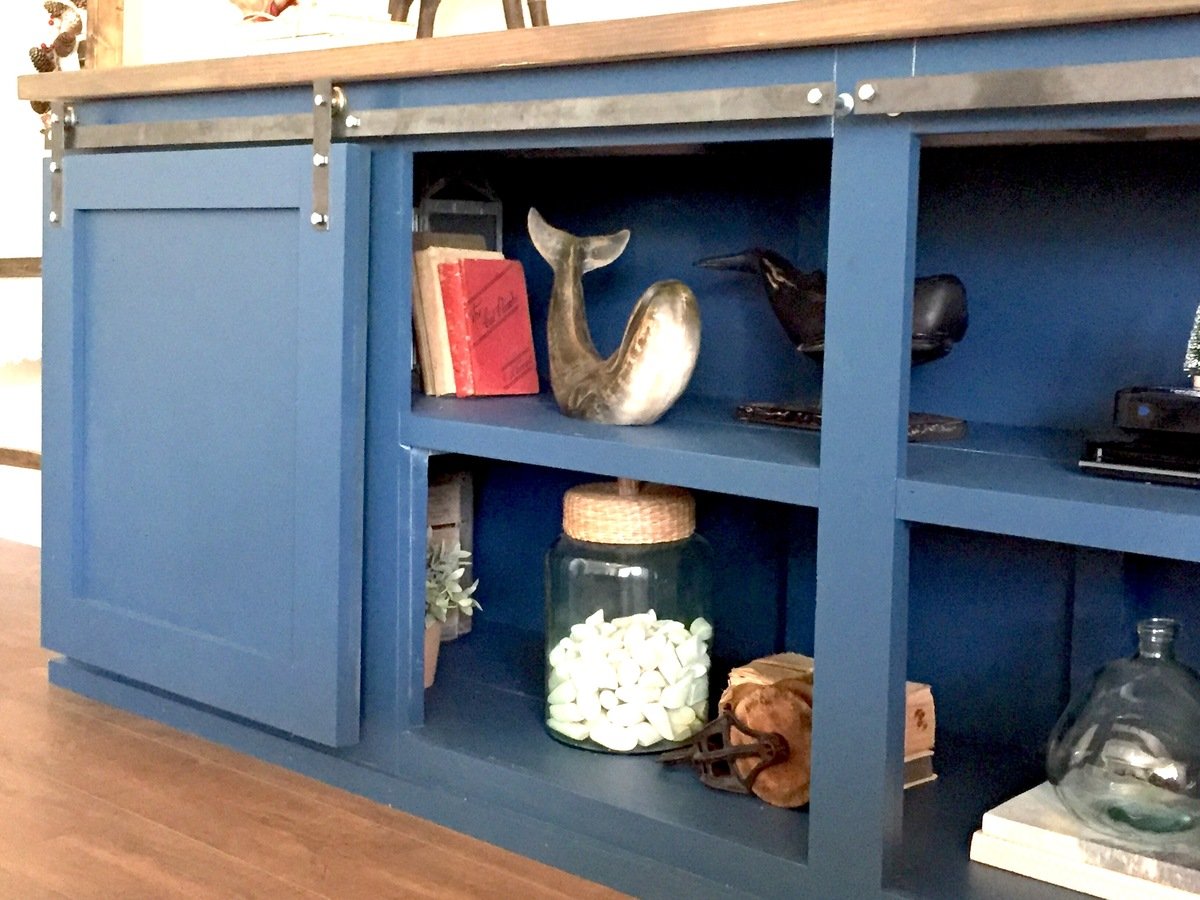
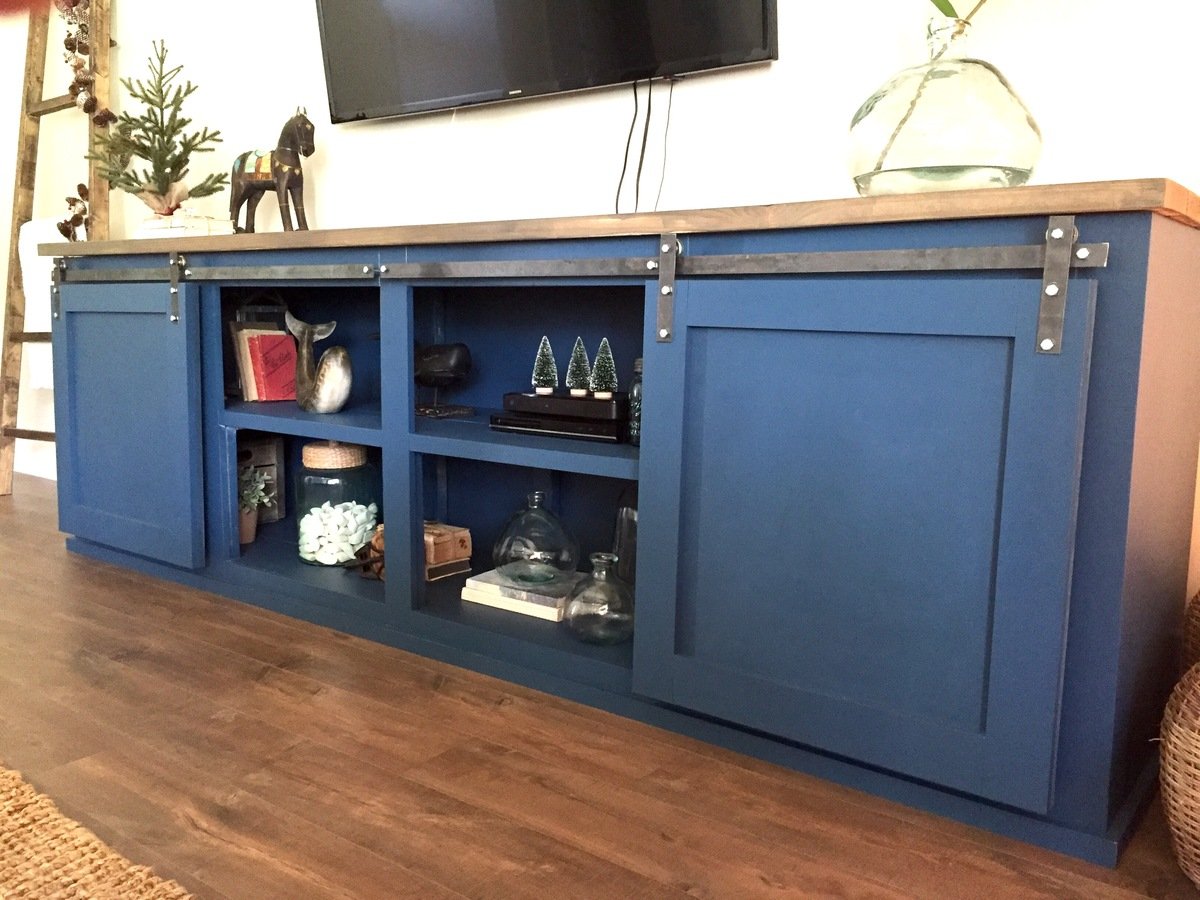
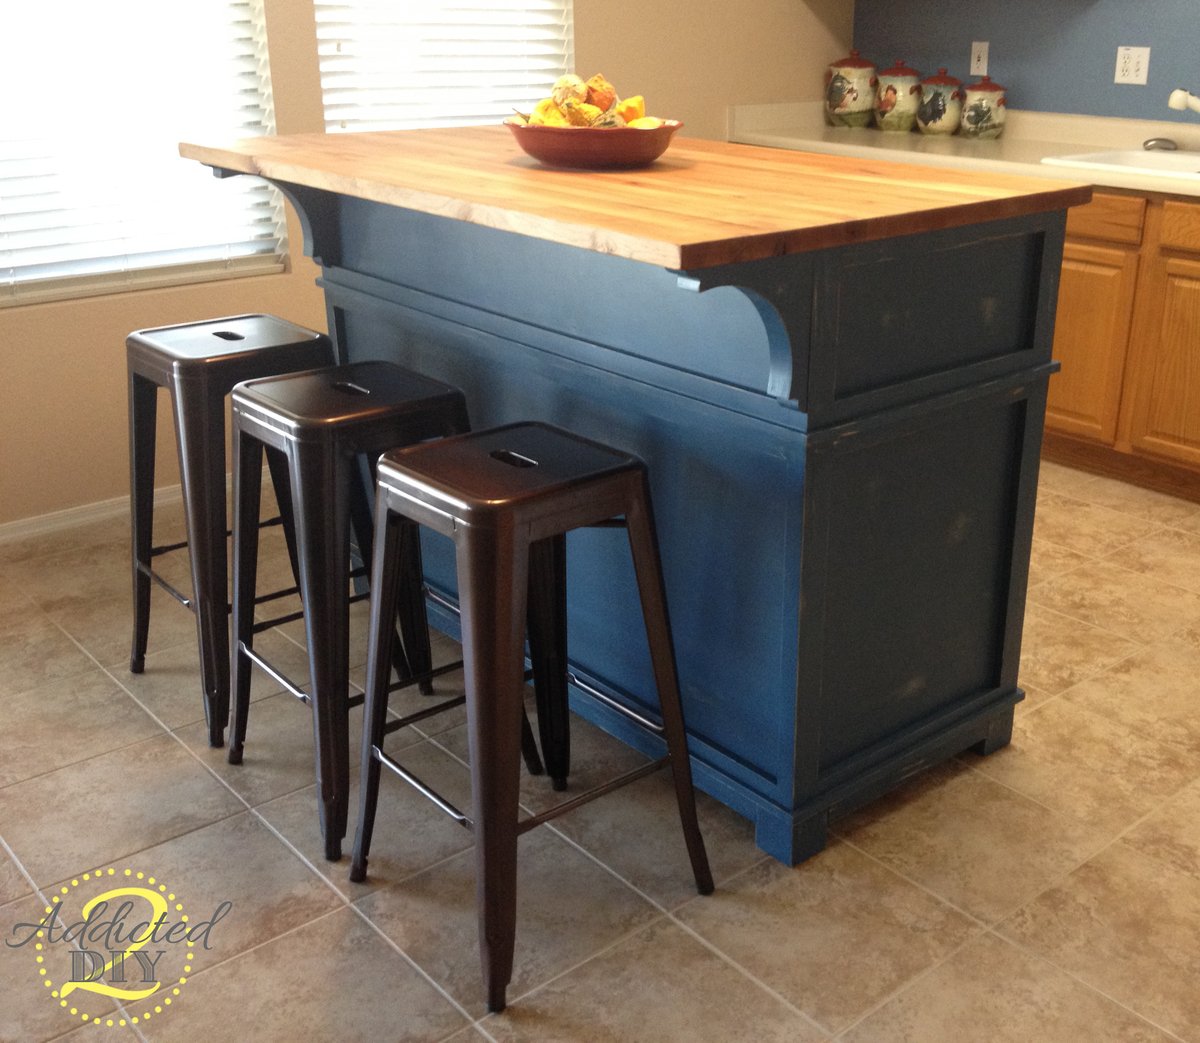
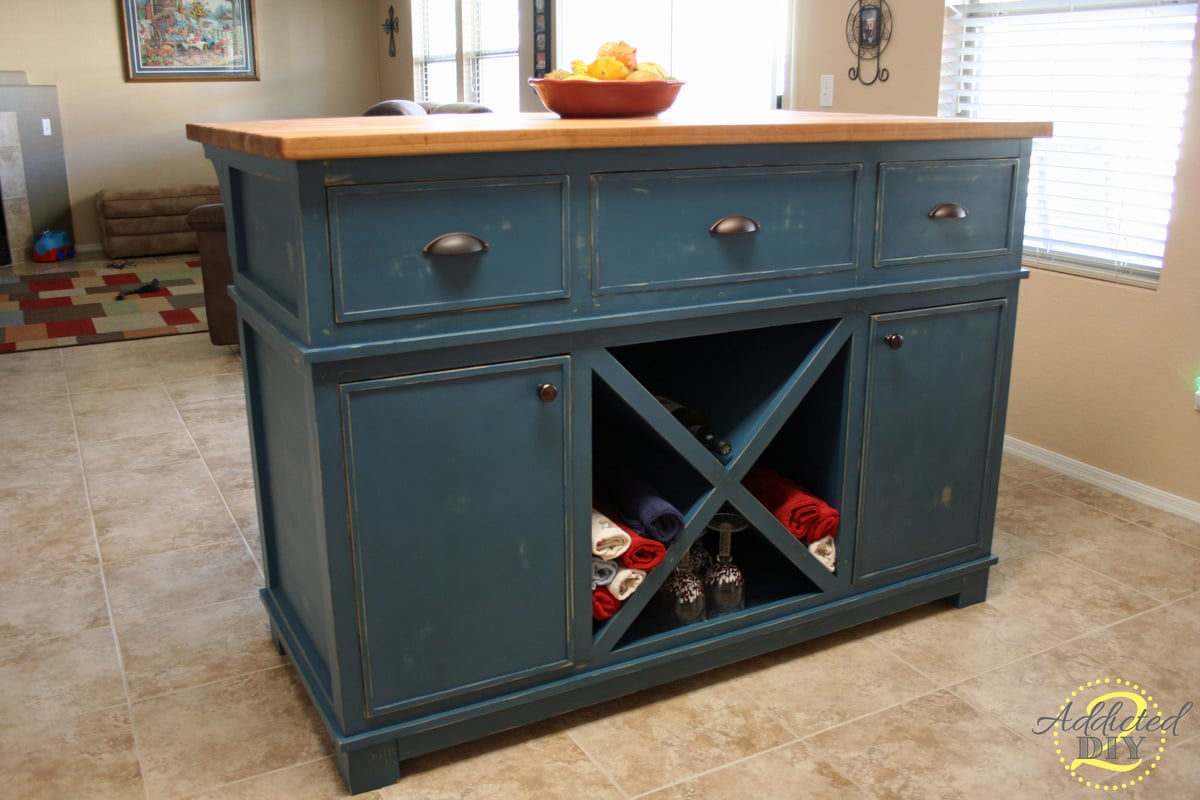
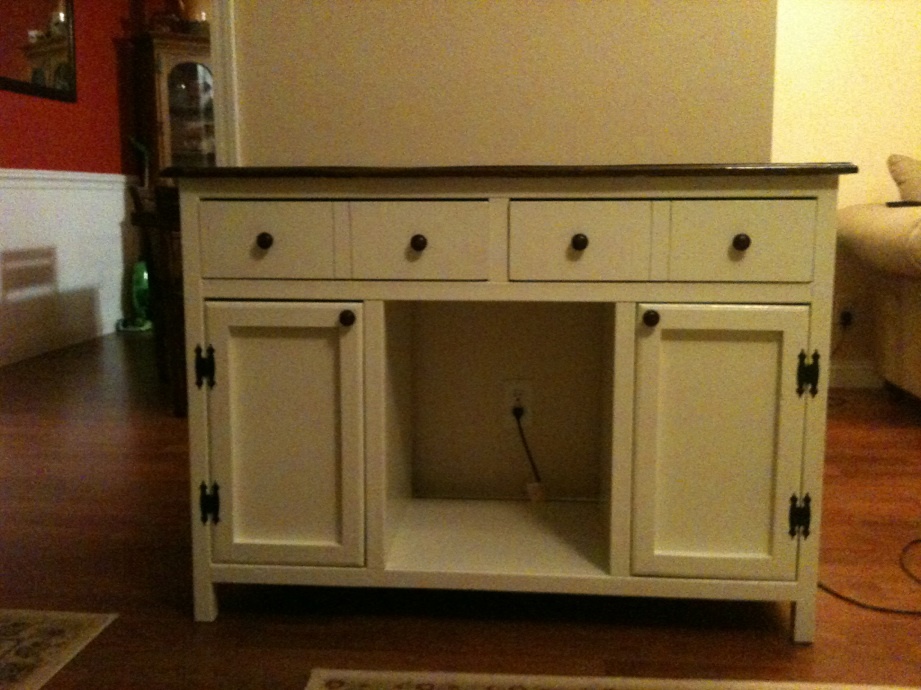
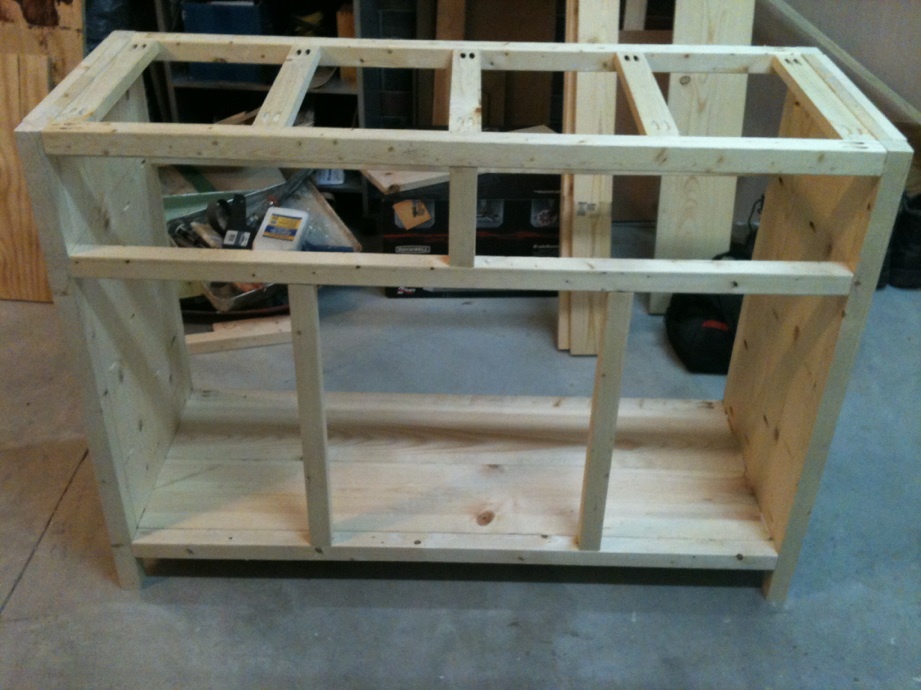
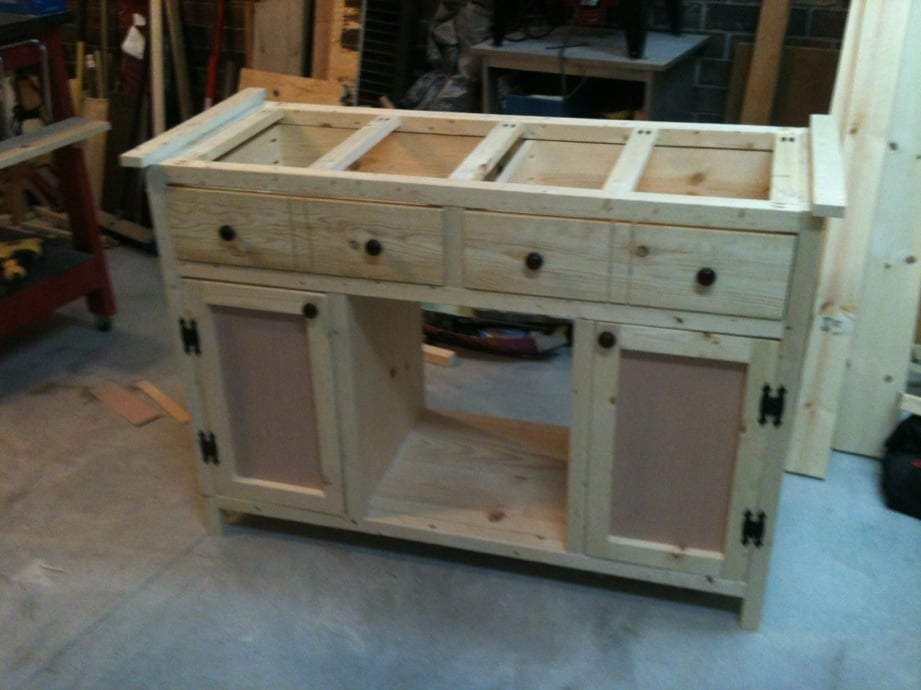
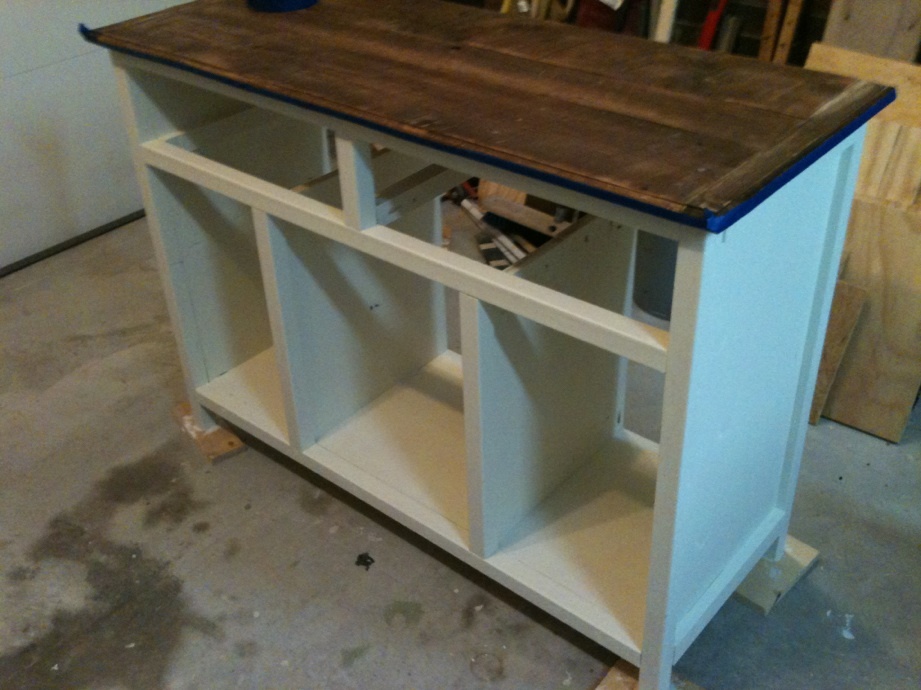
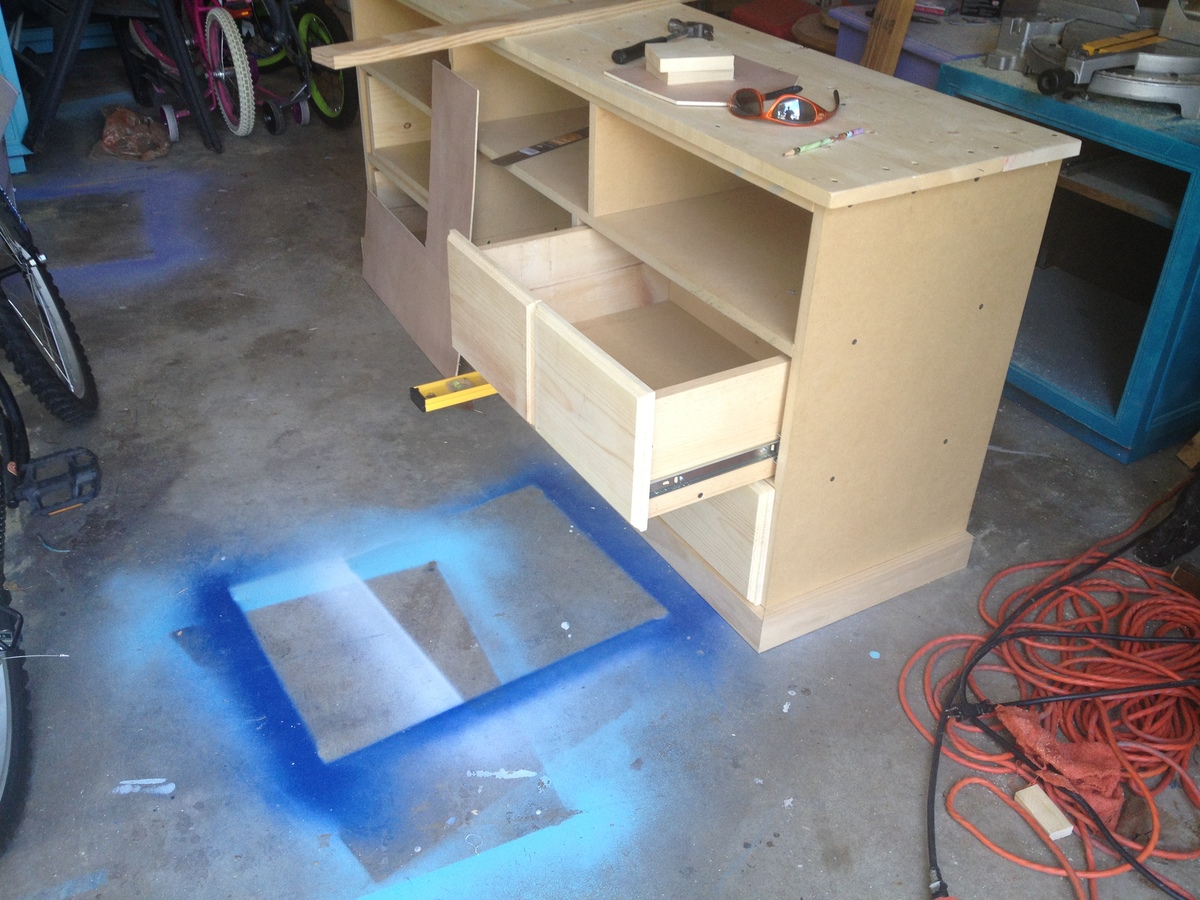
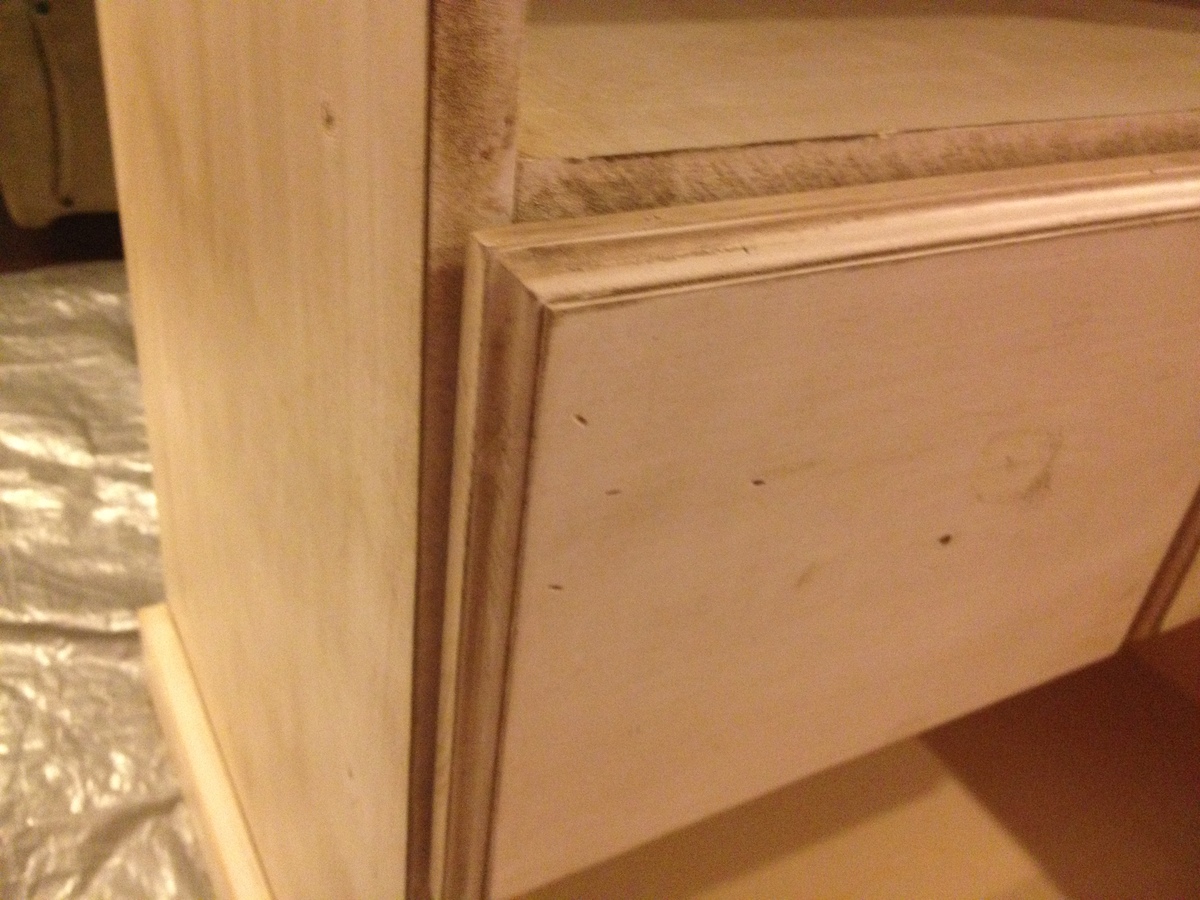
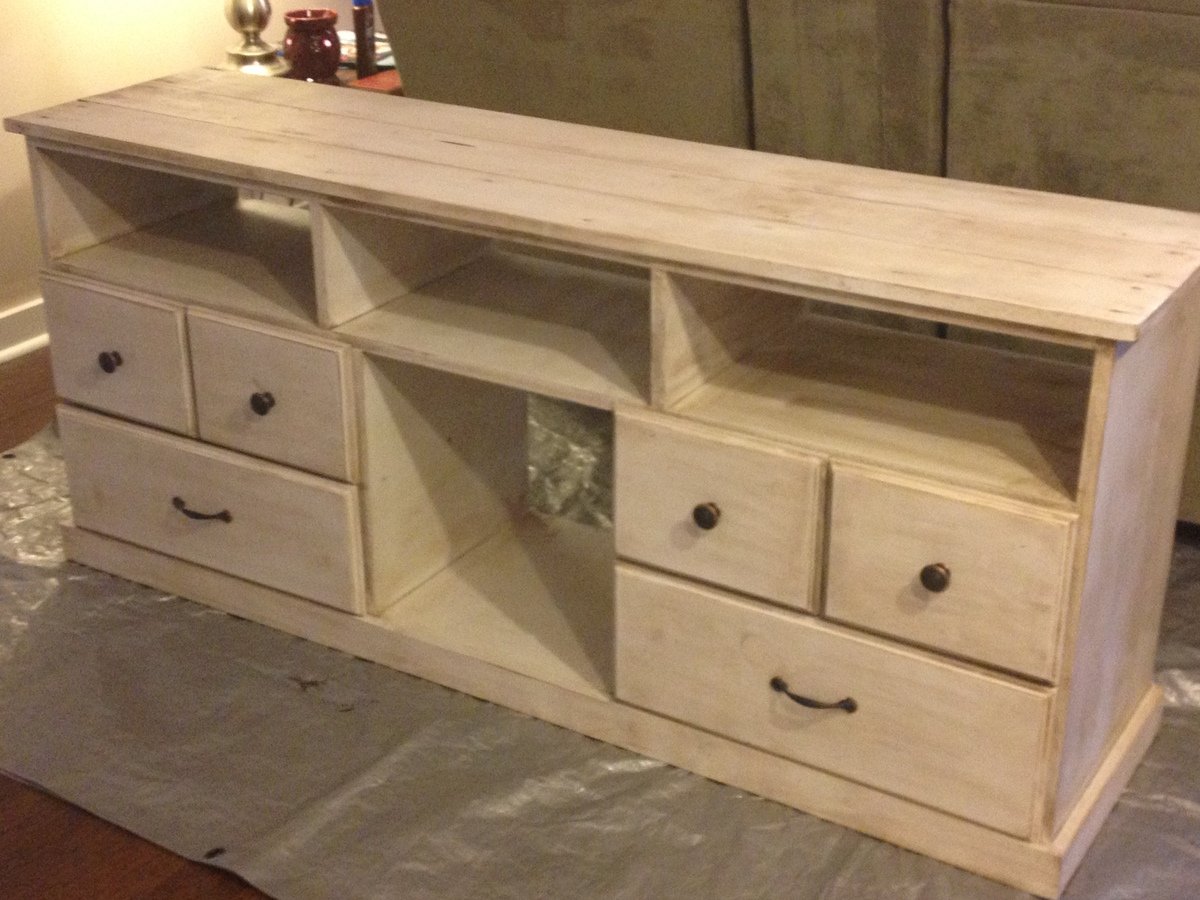
I really wanted a new entertainment center but could not find one in the stores that I liked and looked to be made of good quality. I liked the Apothecary Console but needed to make a few adjustments to the plan, which is why I marked my project at an intermediate level.
I built this about a year ago and love it as much today as I did the day I finished it. I have had a ton of compliments on it and many are impressed when I tell them I made it myself.


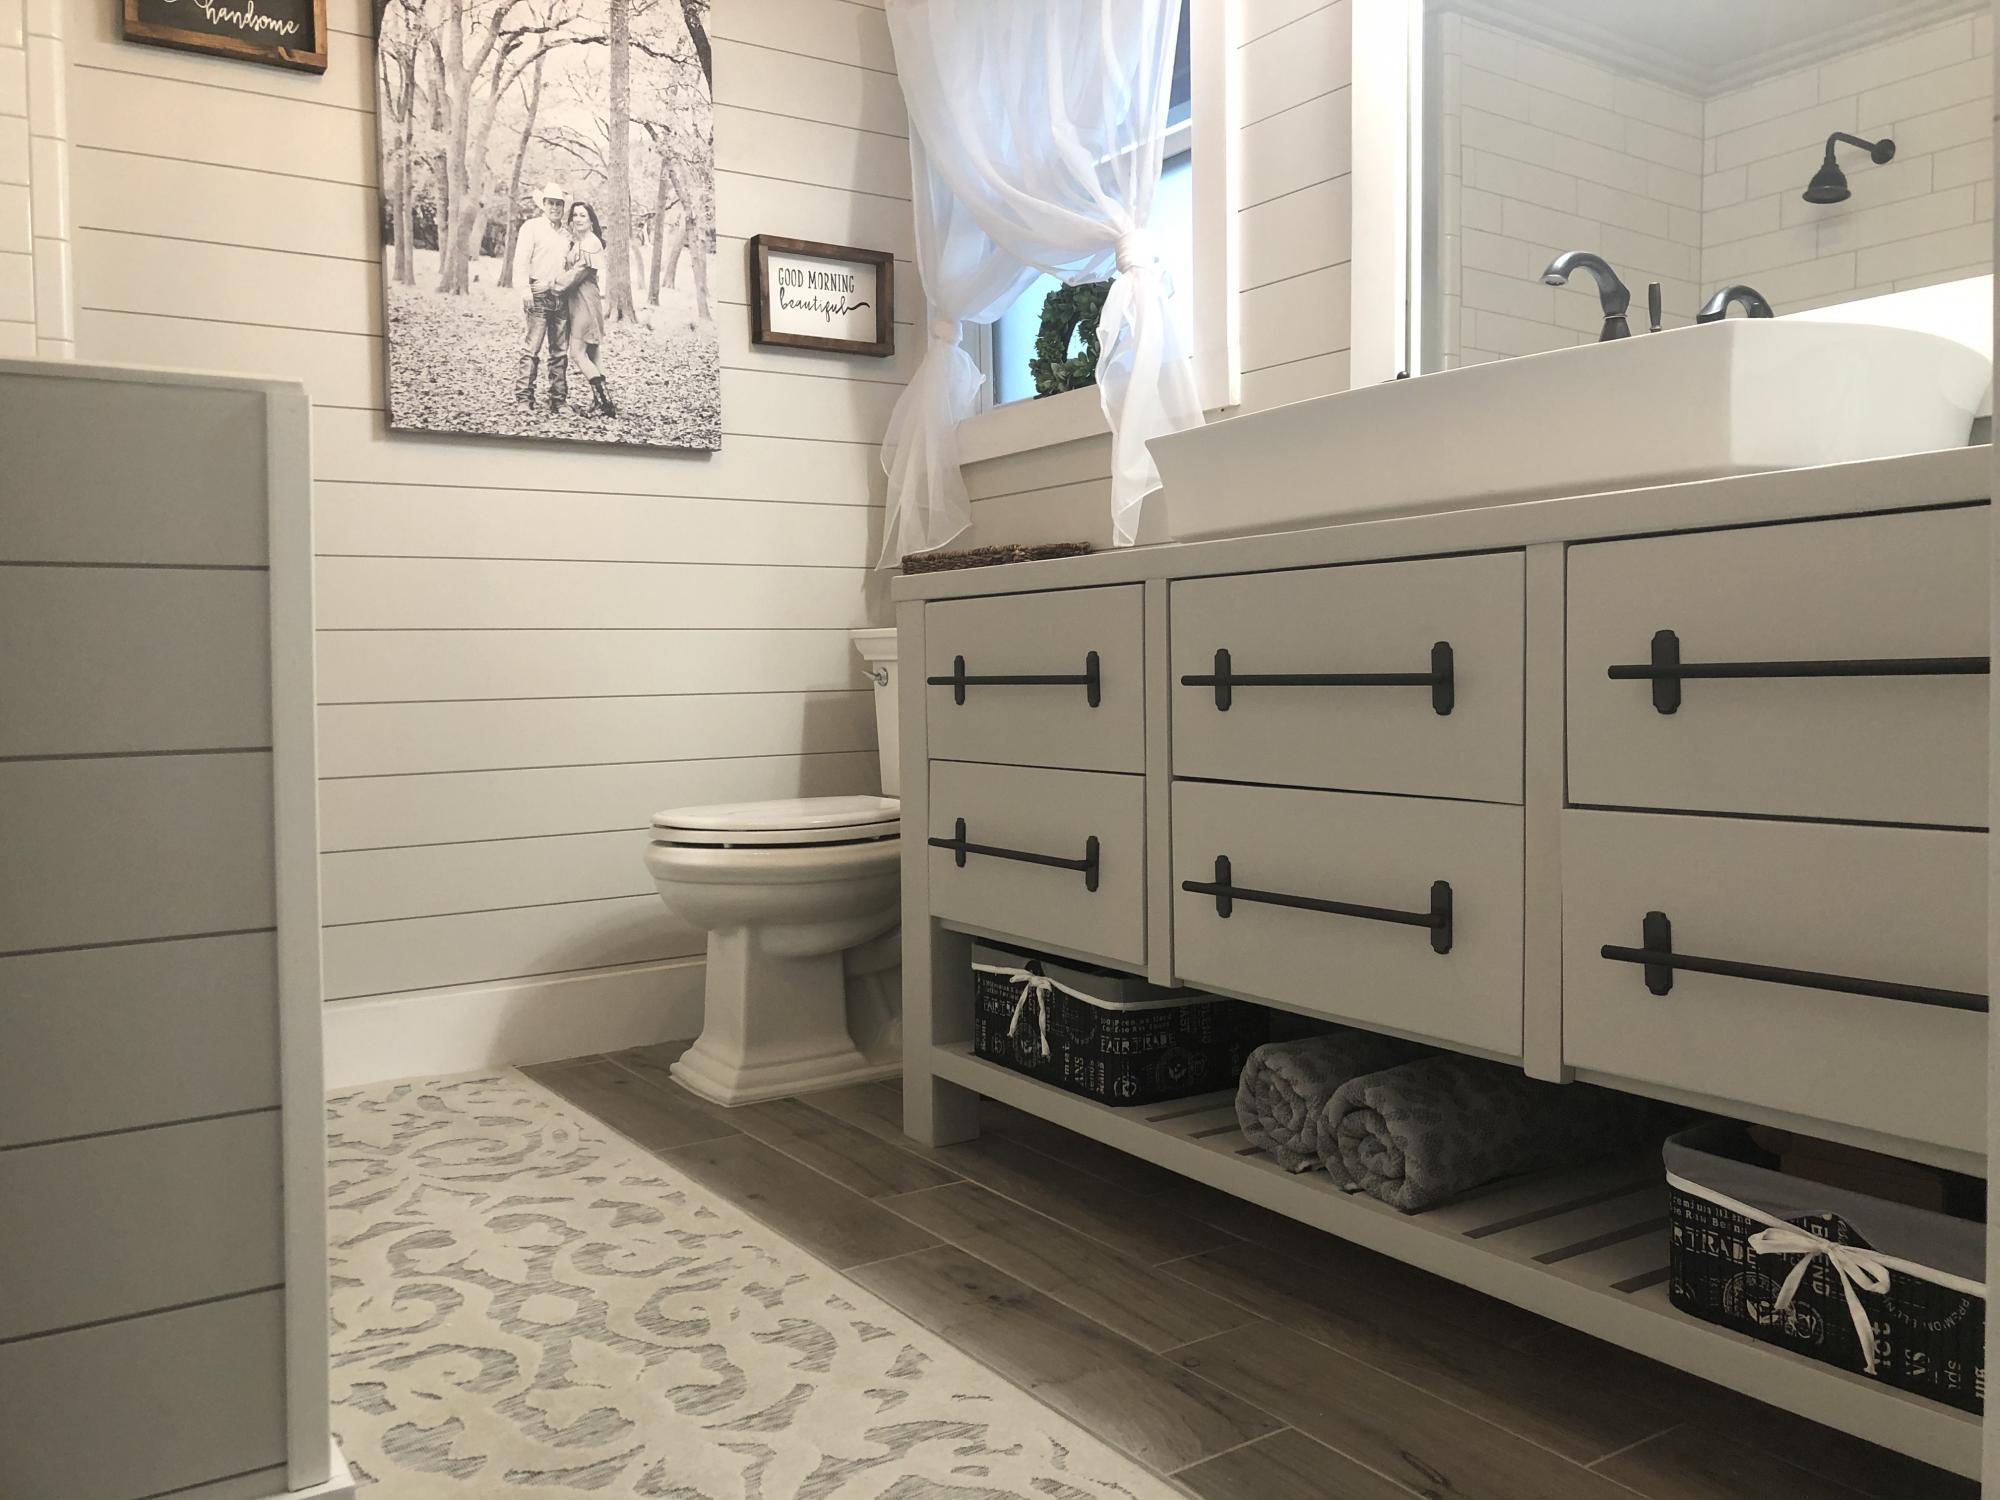
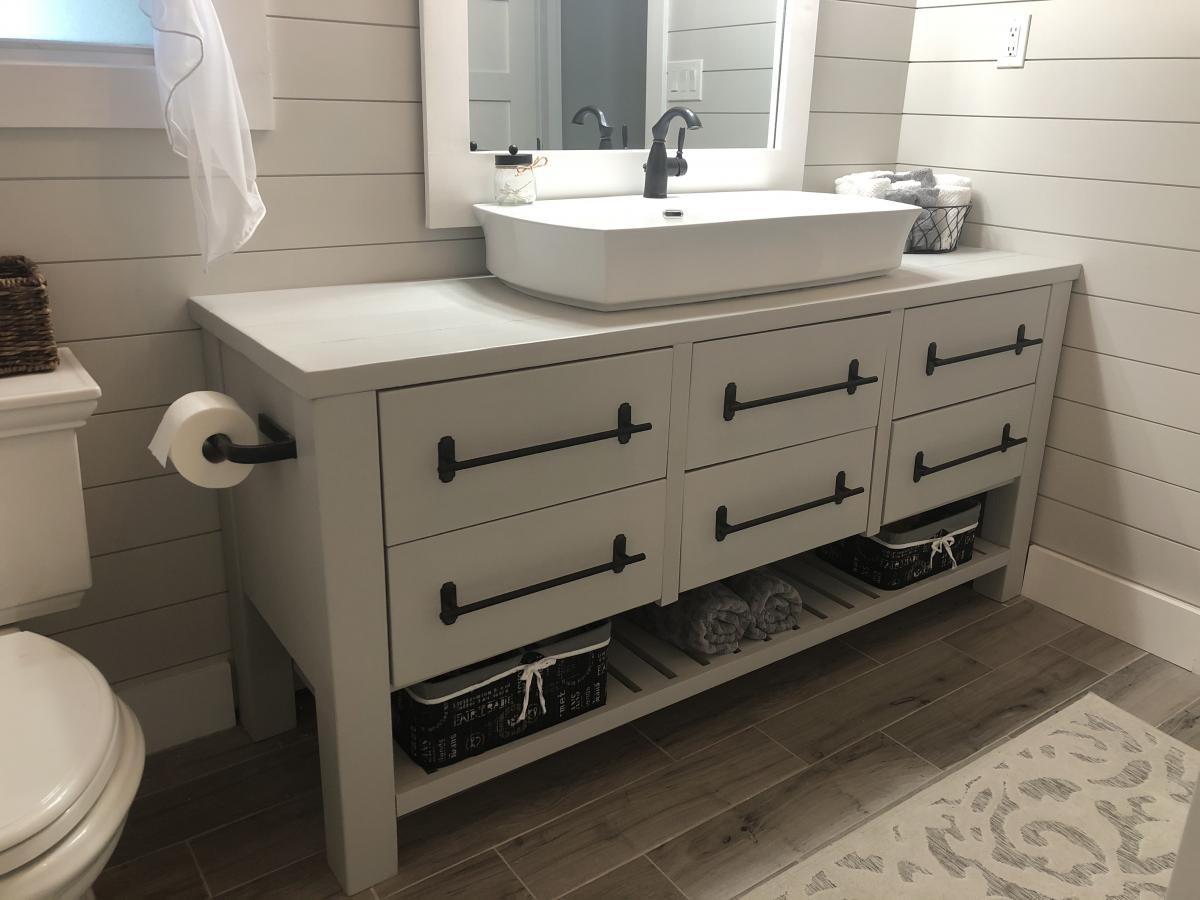
My master bathroom was my first DIY remodel. I took this room down to the studs and built it back up. I struggled to find the perfect vanity that felt strong and sturdy and could not find one. I needed a wide vanity to accommodate this 3 foot wide vessel sink. I found Ana White and this plan online and fell in love! This was my first build and I’ve become addicted to wood working since. As my first build, this took me most of a day to build and assemble drawers. Sanded and painted with a flat finish! I love it! Thank you Ana!

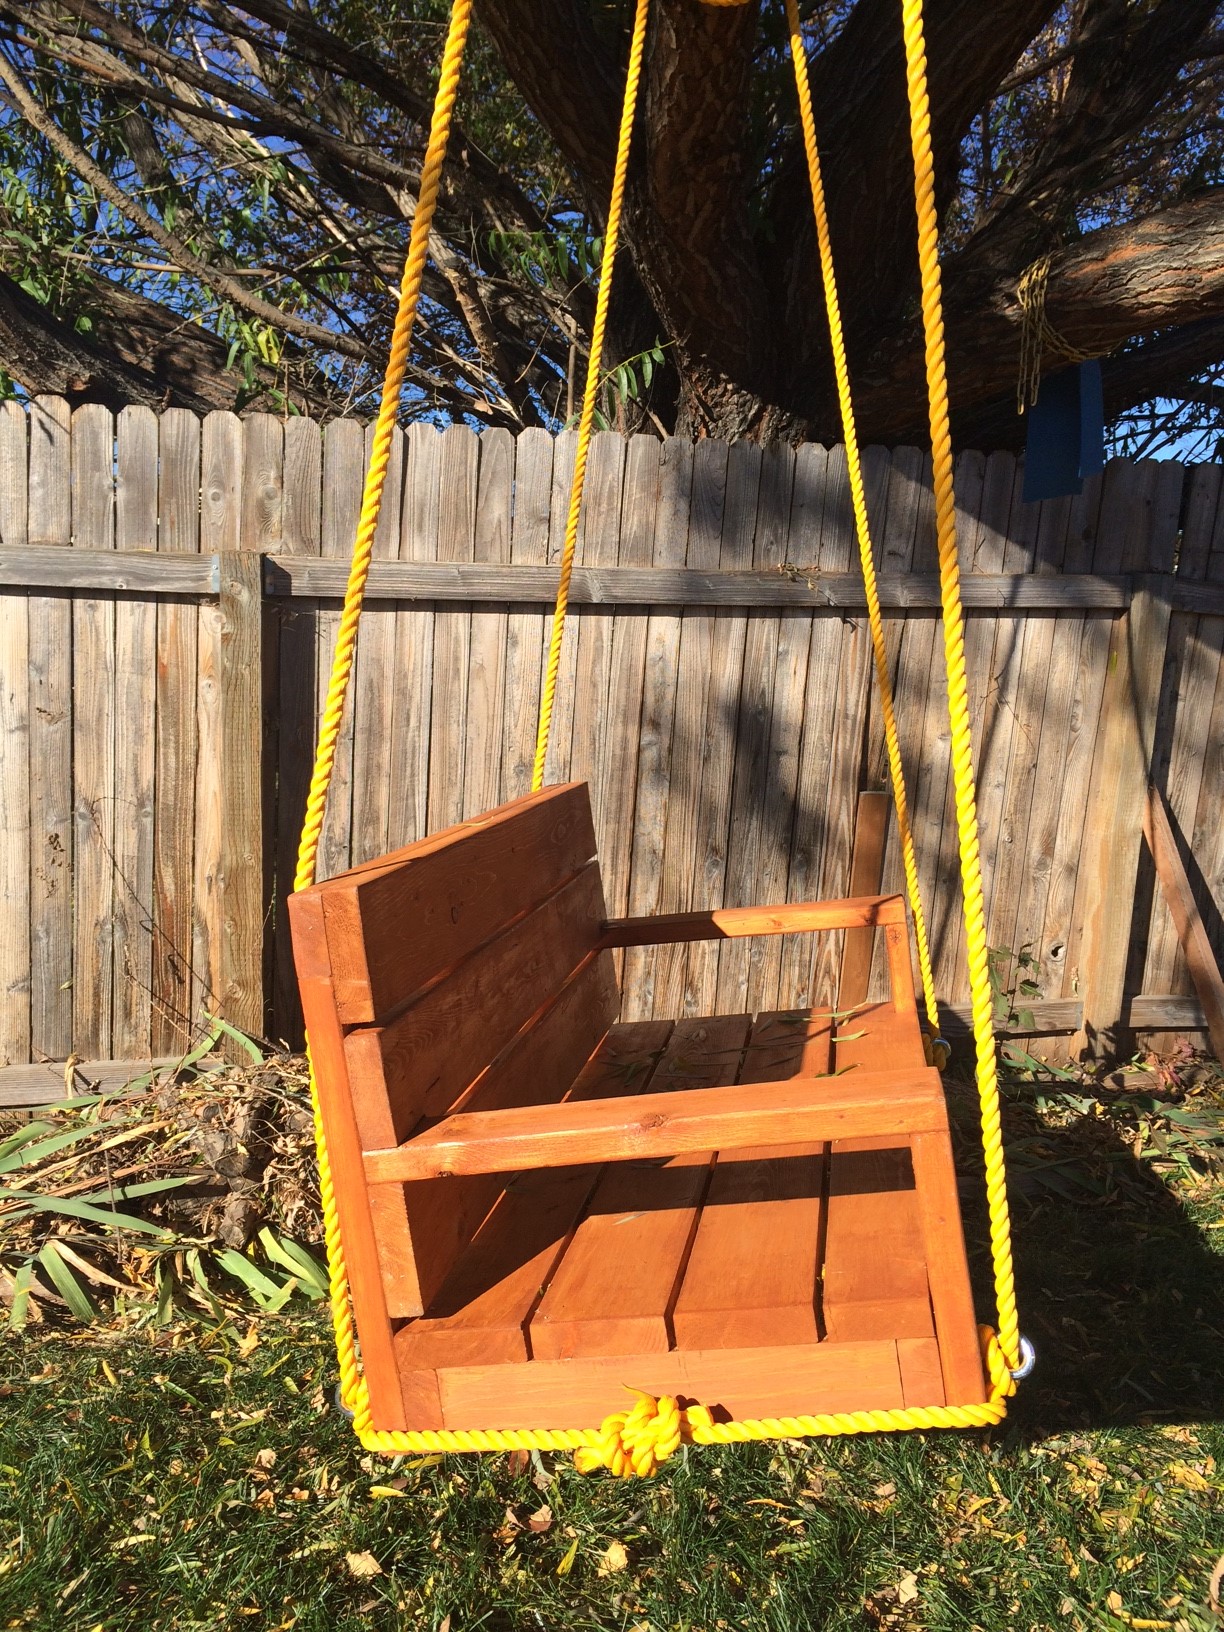
I work for a large manufacturing company that frequently has 'desirable trash'. Found 3 beautiful, heavy-duty pallets with beautiful wood on them. Took them home, took them apart, and got to work. The wife had been wanting a swing out near our children's playset so she could sit and watch them. Used Kreg pocket holes for everything that I could so as to hide as much hardware as possible.
*Side note regarding why I did the rope the way I did - the original post had mentions of it being a bit tipsy (particularly with little ones!). With this design, there's no flip front or back and the rope only gets tighter the more weight that is applied.