Community Brag Posts

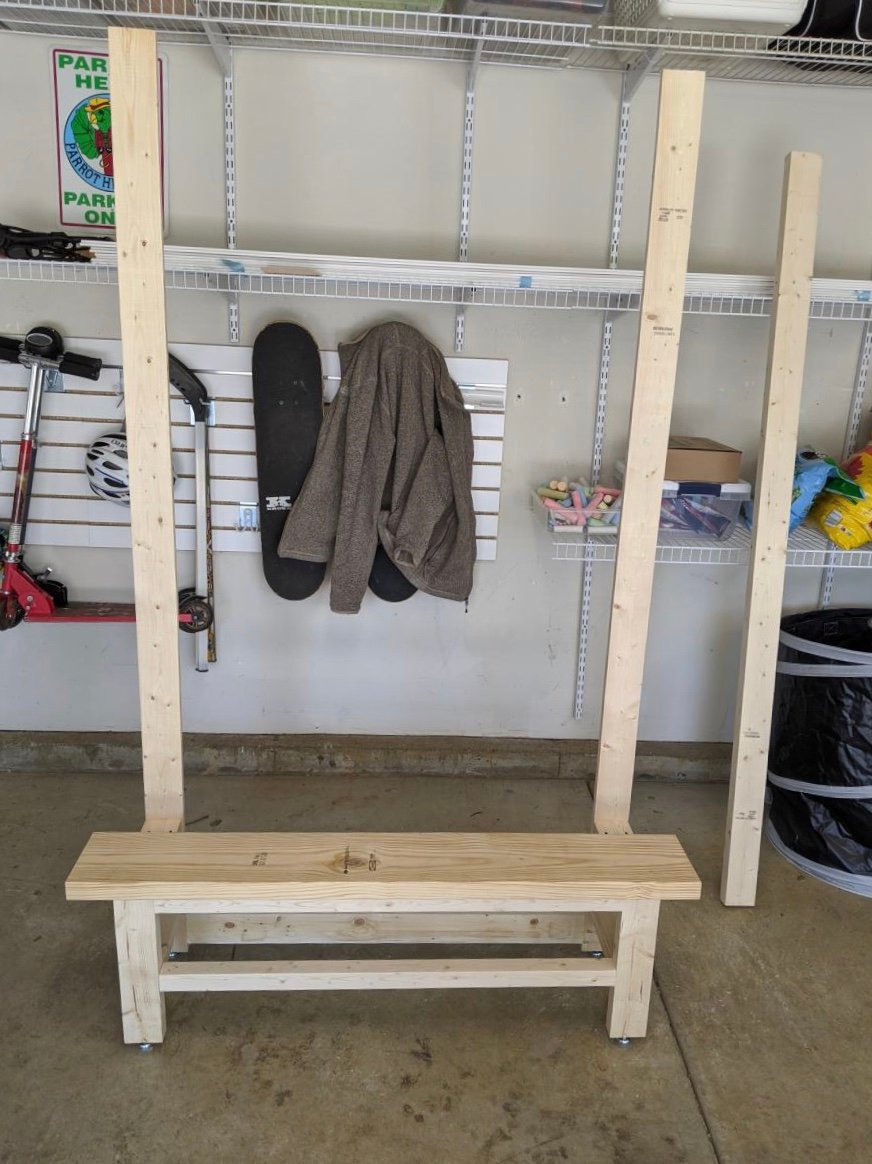
Rustic X Hall Tree - With Some Changes

Submitted by jman11 on Fri, 05/15/2020 - 14:50

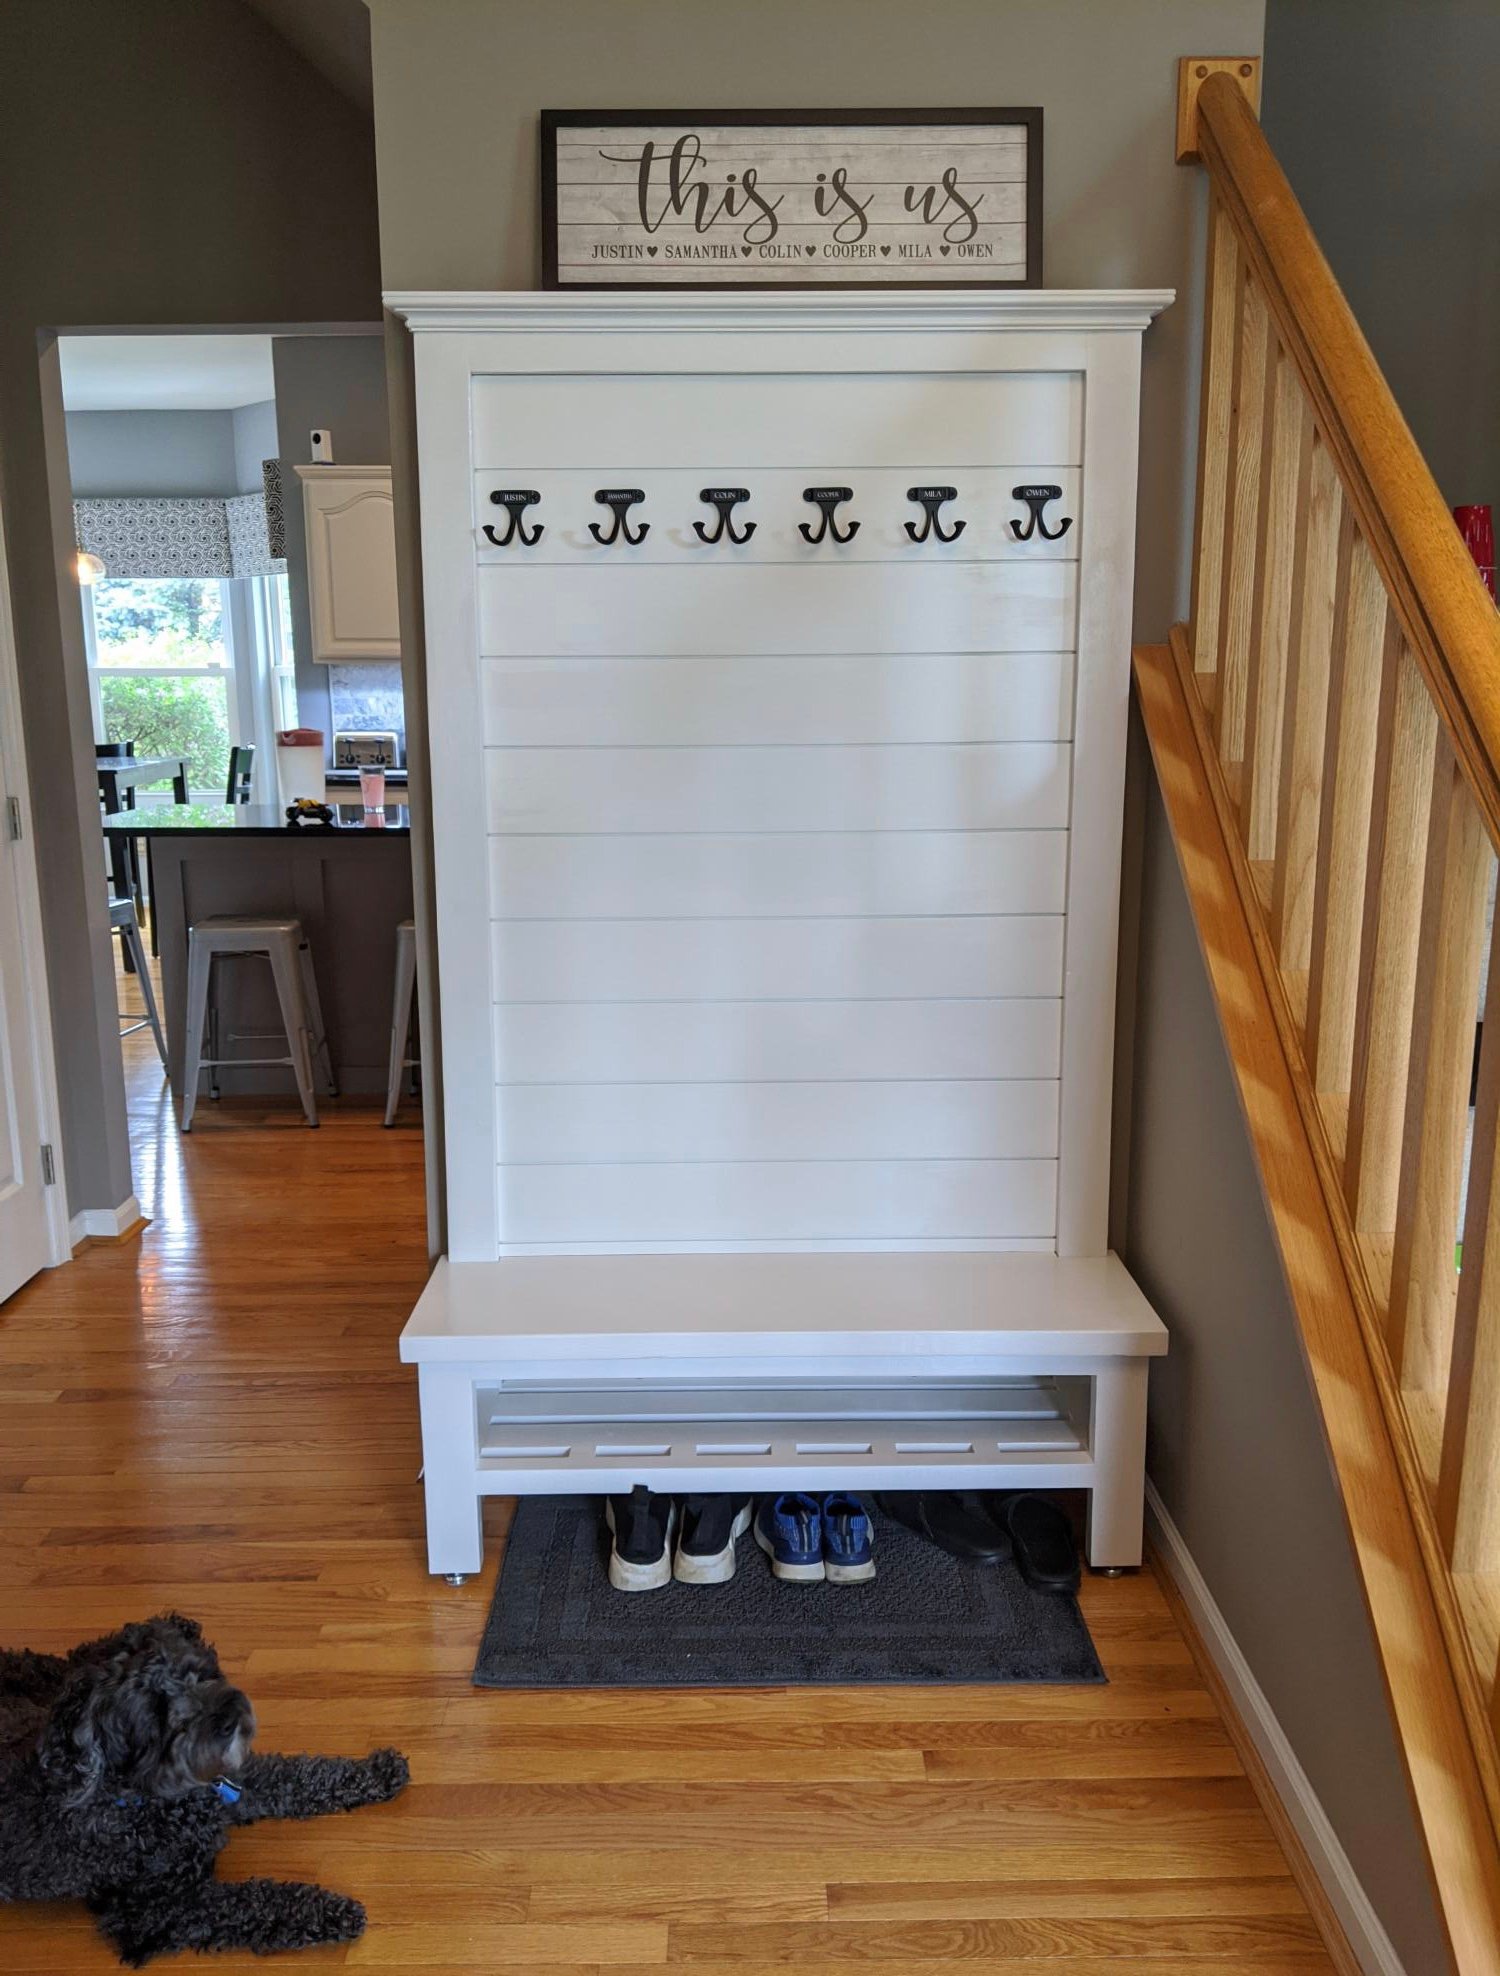
This is a great design! I made a few changes to suit our needs: 1. Raised the shoe shelf so shoes can also be kept on the floor 2. Added a few spacer blocks on the shoe shelf to prevent the 1x1 from spinning since there's only enough room for one pocket screw per side. 3. Cut a rabbet in the back of the tall 2x4s to accept the tongue and groove shiplap 4. Used tongue and groove shiplap (pre-painted white from Lowes) 5. Topped with crown molding 6. 6 hooks so everyone has their own hook (although I can see this getting very crowded in the winter) The wife loves it and got me a lot of brownie points right around Mother's Day!

Built from Plan(s)
Estimated Cost
$200
Estimated Time Investment
Week Long Project (20 Hours or More)
Finish Used
Indoor/Outdoor Acrylic Satin Finish, Polycrylic clear coat.
Recommended Skill Level
Intermediate

Red Oak Truss Table

Submitted by Anonymous (not verified) on Sun, 01/14/2024 - 19:03

Used red oak lumber with ash grey rubio monocoat. The tabletop is 90"x40" and I made the base 64" long in order to place a chair at each end of the table.

Ashely Shook


Built from Plan(s)

Workbench and Hutch with modifications

I decided to do some modifications to the original plans to make it more like the Pottery Barn original. I made the legs 4x4s like the original, as well as the horizontal bases of the legs. The major change that this entailed was in the bottom shelf. I notched the edges of the 1x12 so that it would fit flush, then connected it to the legs with pocket screws. The lowered ledge on the table top is two 2x4s on the bottom, a 2x4 on the front and back, and a 2x6 cut to size for the ends. I then attached it using pocket screws on the front, and just 2.5 inch screws from the back. The rest is pretty much the same as the plans. For the back of the hutch, I used 1x4 carsiding to give it a more finished look. It only cost a couple cents more for each 8 foot piece.

Estimated Cost
$150
Estimated Time Investment
Week Long Project (20 Hours or More)
Finish Used
Minwax wipe on poly
Recommended Skill Level
Intermediate

Comments

Getting Started, slow on posting

Submitted by pondrider on Fri, 04/25/2014 - 09:42

Thanks to our daughter who gave me plans from Pintrest for the popular locker. This is my first project in a long time. It has been followed by a few projects which have been inspired by plans or skills from the site.

Thanks

Recommended Skill Level
Starter Project

Rustic X coffee table

This table was very easy to build. A little bigger than I expected. You can fit storage cubes in it perfectly. 

Built from Plan(s)
Estimated Cost
$70
Estimated Time Investment
Day Project (6-9 Hours)
Finish Used
Stain and chalk paint
Recommended Skill Level
Beginner

Small Day bed

My niece is here for the summer! We needed a guest bed fast, that didn't take up an entire room! She chose this day bed!

Her bed is in the computer room, so there isn't enough room for a twin size bed. I modified the plans to fit a standard crib mattress. Now, when she isn't using the day bed, it doubles as a lounging spot to read. It is soooo cute!

For the storage baskets, I cut shipping boxes to size and mod podged fabric to them, and added some cute little knobs.

Built from Plan(s)
Estimated Time Investment
Afternoon Project (3-6 Hours)
Finish Used
Early American by Rustoleum followed by 2 coats of satin poly
Recommended Skill Level
Beginner

Comments

Easy Built in Triple Bunk Bed Plans

The Basic Process - Triple Bunk Bed Plans

More info on these Triple Bunk Bed Plans on my blog: http://myhomedonemyway.blogspot.com/2013/03/triple-bunk-bed-finished.ht…)

1. Build the Bed Frames: (I will explain the process for one bed...do it three times if you want three beds)

2. Add Side Supports: ( Also do this step three times for three beds. We did it later but would be easier to do now)

3. Add Roll Guard: (do twice...once for each top bunk. We did this later but can be done now)

4. Build Ladder:

5. Paint desired color (you don't have to paint the sides that will be screwed into the wall).

6. Install into the wall in desired bedroom

7. Add Supports (do three times for three beds)

8. Add Plywood (do three times for three beds) 9. Finish


Estimated Cost
$150
Estimated Time Investment
Day Project (6-9 Hours)
Finish Used
White Paint
Recommended Skill Level
Starter Project

Comments

Bar Height Table and Chairs

Decided to use mortise and tenon on the chairs to make for a clean look since I was staining and not painting.  I did use a lot of pocket holes on the table.

Built from Plan(s)
Estimated Time Investment
Week Long Project (20 Hours or More)
Finish Used
American Walnut and Dark Walnut. Oil Based Poly and Furniture Wax
Recommended Skill Level
Beginner

Small Cedar Shed

Submitted by Anonymous (not verified) on Wed, 05/20/2020 - 14:42

We needed a small shed to hold shovels and rakes along with a few other garden implements. This cedar shed has worked out perfectly. We made a few tiny modifications including a small shelf and plywood floor. Thanks for the excellent plans, as always.

Built from Plan(s)
Estimated Cost
$250 Canadian
Estimated Time Investment
Weekend Project (10-20 Hours)
Finish Used
We have not yet stained the shed but that will happen during the coming weekend.
Recommended Skill Level
Intermediate

Sam's New Loft Bed

Submitted by blouden on Fri, 07/13/2012 - 23:18

Built my daughter the day bed, and my son needed his own bed. But with a 2 bedroom house they have to share a room for now. So I seen the loft bed and well this is what I came up with. I stained it cherry, and routed the edges to give it a little touch.

Built from Plan(s)
Estimated Cost
$80
Estimated Time Investment
Week Long Project (20 Hours or More)
Finish Used
Cherry Stain
Recommended Skill Level
Intermediate

Comments

TommyHawk

Fri, 12/20/2013 - 07:57

This looks great! I like the way you kept it simple yet more rustic type appeal without adding the top board (laying flat).

TommyHawk

Fri, 12/20/2013 - 07:57

This looks great! I like the way you kept it simple yet more rustic type appeal without adding the top board (laying flat).

TV Stand Table

Submitted by Anonymous (not verified) on Tue, 08/02/2016 - 10:00

This was a super fun project and didn't cost much at all.

Estimated Cost
$75
Estimated Time Investment
Weekend Project (10-20 Hours)
Finish Used
Mixture of Grey and Brown stain with a poxy coating
Recommended Skill Level
Intermediate

Comments

Potting Table

Started with Ana's basic plan/dimensions. Changed the back legs to 1x6, added aa 2nd shelf and storage closet to hang hand tools/gloves.

Built from Plan(s)
Estimated Cost
$125
Estimated Time Investment
Day Project (6-9 Hours)
Finish Used
Minwax/Helmsman Semi-Gloss Spar Urethane
Recommended Skill Level
Beginner

$10 Shelves

Submitted by mgesinel on Tue, 07/17/2012 - 11:36

As soon as I saw this I had to try it! So cheap and so easy! Makes for a fun piece of art work/ practical storage for books.

Estimated Cost
$10 per shelf
Estimated Time Investment
Afternoon Project (3-6 Hours)
Recommended Skill Level
Starter Project

Blue big kids picnic table

Submitted by Anonymous (not verified) on Fri, 08/05/2016 - 23:25

I primed and painted all of the boards before I cut them. Then I just had to do some touch up when I was done. This is my first woodworking project and the instructions were clear and easy to follow. I already have my next Ana White project picked out.

Built from Plan(s)
Estimated Cost
$100
Estimated Time Investment
Day Project (6-9 Hours)
Finish Used
Primer and paint
Recommended Skill Level
Starter Project

Bed for teen boy

Submitted by Anonymous (not verified) on Sun, 05/24/2020 - 21:54

Went shopping Saturday, worked a few hours, then worked most of the day Sunday. Our boy is in heaven and everyone else wants one now.

Built from Plan(s)
Estimated Cost
$150-$175
Estimated Time Investment
Weekend Project (10-20 Hours)
Finish Used
Weathered look, the same brand as recommended.
Recommended Skill Level
Intermediate

Table for 12!

Submitted by Anonymous (not verified) on Tue, 02/06/2024 - 09:07

My wife wanted a table to seat 12 and she liked the looks of the 4x4 Truss Beam Table from Ana White.

So we modified the plans, our table is 54 inches wide (not 37) and 98 inches long (instead of 87). The legs are 4x6 not 4x4. The lower center beam is 4x6. The plans call for 2x4 aprons ending at the legs, we used 4x4 aprons and extended them beyond the legs to within 3 inches of the end of the table. Finally, we laid the tabletop across the table with a combination of 2x8, 2x10, and 2x12 boards.
We built this all with cedar. The cost is a little over $1,100 for materials.

Dan Clark

Built from Plan(s)

Outdoor Patio Table

Submitted by stephanief on Wed, 07/18/2012 - 18:29

I built this outdoor patio table in about a weeks time working on and off. There are mistakes, it's uneven in places and it is not perfect! That being said, the plans for this are very forgiving and nobody would ever know without looking for these things.

You can get the breakdown on the build, the finish I used, chair solutions and other suggestions here:

http://legosecretagent.blogspot.com/2012/07/outdoor-patio-table.html

This beautiful table only cost around $60 total to build!

Built from Plan(s)
Estimated Cost
$60
Estimated Time Investment
Weekend Project (10-20 Hours)
Finish Used
Minwax, specifics at http://legosecretagent.blogspot.com/2012/07/outdoor-patio-table.html
Recommended Skill Level
Beginner

Kitchen Island

Submitted by Anonymous (not verified) on Wed, 08/10/2016 - 07:59

I created a different top out various size select pine boards joined by biscuits and glue and then added utensil hooks on both ends and a bottle opener

Estimated Cost
$80
Estimated Time Investment
Weekend Project (10-20 Hours)
Finish Used
Gunstock stain and satin polyurethane
Recommended Skill Level
Intermediate
Back