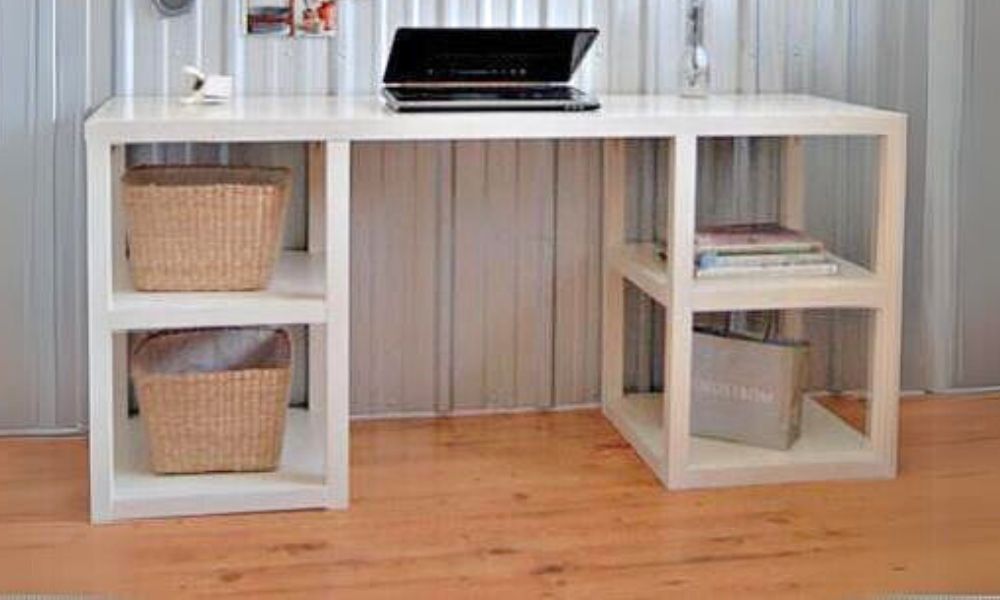
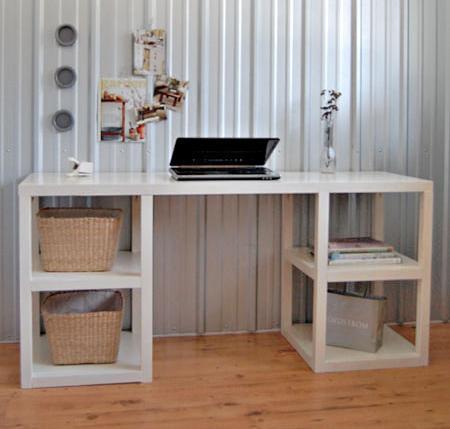
Build your own desk with free plans by Ana-White.com
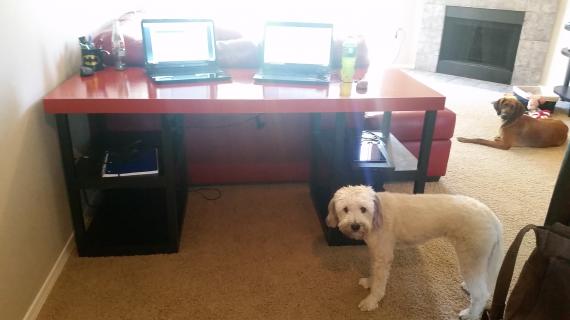
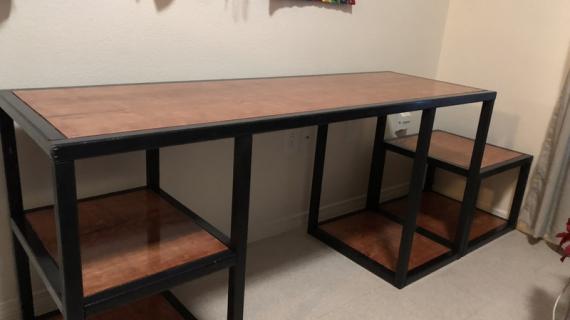
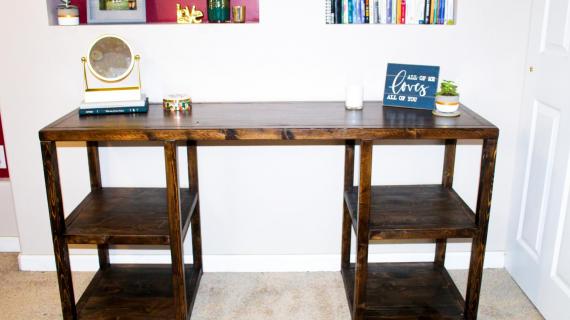
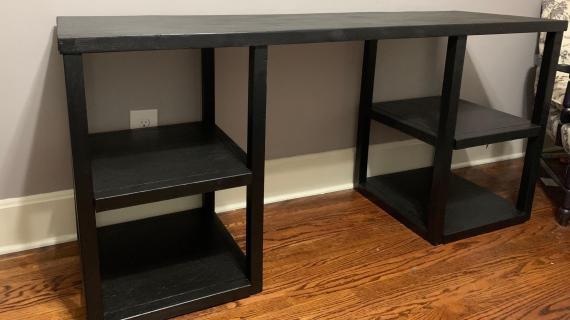
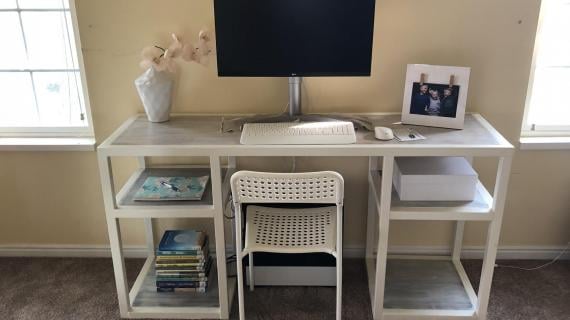
This desk features a modern, parsons style design, with large roomy shelves. Step by step plans include detailed diagrams, shopping and cut list, and lots of reader submitted photos.
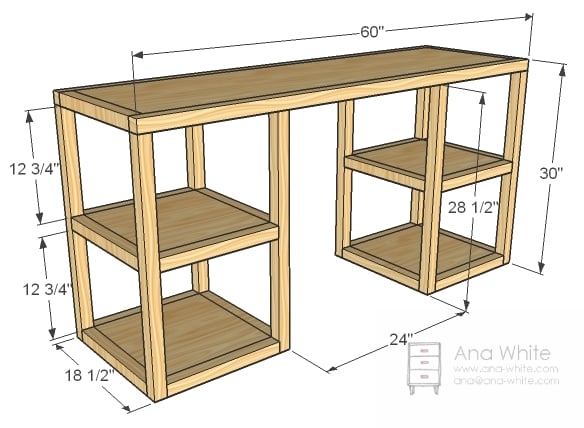
Preparation
- 1 - 4x8 Sheet of 3/4″ thick MDF or Plywood, ripped into three 15 1/2″ widths x 8 feet long
- 7 - 2×2 boards, 8′ long
- 1-1/4″ and 2-1/2" pocket hole screws
- paint and finishing supplies
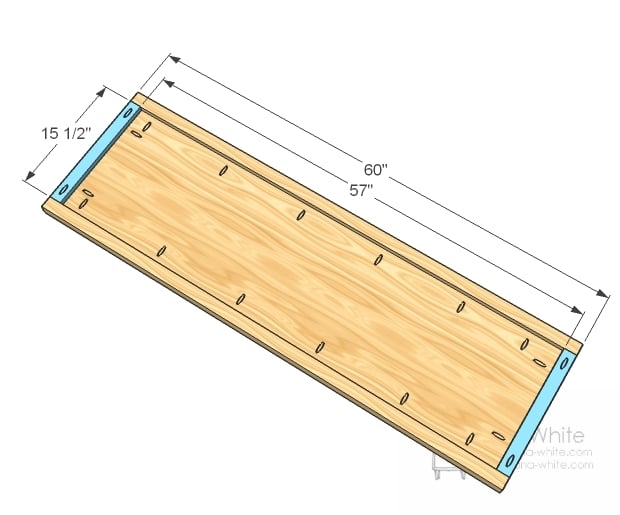
- 1 – 1×16 @ 57″ (desk top)
- 4 – 1×16 @ 15″ (Shelves)
- 10 – 2×2 @ 15 1/2″ (Trim perpendicular to desktop)
- 8 – 2×2 @ 15″ (Trim parallel to desktop)
- 8 – 2×2 @ 28 1/2″ (Legs)
- 2 – 2×2 @ 60″ (Desktop Side Trim)
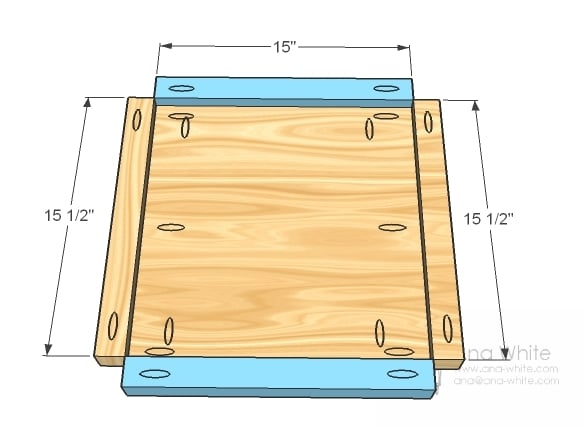
Pocket Holes - Go through the entire set of instructions and drill all pocket holes first. Basically, you need pocket holes on both ends of all the 15″ and 15 1/2″ 2x2s, one pocket hole on the tops of each leg, and then pocket holes on all sides of the shelves and desktop. Remember to set your jig for 1-1/2″ thickness for 2x2s and 3/4″ thickness for the MDF or plywood panels.
For long term durability and more professional results, I recommend using a pocket hole joinery system for wood joints. Here is a video with tips for using a pocket hole jig:
Instructions
Step 1
Shelf Trim
With the tops flush, glue and screw the shelves to the trim as shown above. Use 1 1/4″ pocket hole screws. Drill pocket holes set for 3/4″ stock. Make sure you have already drilled one pocket hole in each end of all of the 2×2 trim pieces. The pocket holes in the 2x2s need to be for 1 1/2″ thick stock. Build four of these.
Step 2
Legs
Mark legs for the center shelf. Then glue and screw through the pocket holes into the legs. Remember – the tops of the legs should each have a single pocket hole to attach the top. If you don’t have a right angle drill, resist the urge to place the pocket hole on the inside where it won’t be seen – you also won’t be able to get your drill in there. Build two of these.
Step 3
Step 4
After dry, sand well with 120 grit sandpaper.
Remove any sanding residue with a vacuum followed by wiping down with a damp, lint free cloth.







Comments
Tracyann George (not verified)
Sun, 10/17/2010 - 20:02
What Kreg Jig Did you get and
What Kreg Jig Did you get and where? Was it in Fbks? We could us this on some many things like tables and chairs and such. Looks like a nifty thing. What else have you used it on? Thanks
Ana White (not verified)
Sun, 10/17/2010 - 20:09
Tracyann, the Kreg Jig is for
Tracyann, the Kreg Jig is for sale at Lowes, at least in the smaller size. I highly recommend the full size jig - totally worth it!
andjarnic (not verified)
Sun, 10/17/2010 - 20:17
Kreg Jig at Lowes plus most
Kreg Jig at Lowes plus most 50 to 100 pack of screws 1 1/4" to 2 1/2" long can be found there. I also picked up an extra drill bit, and the bits to use on the screws there. They also have various clamps, wood plugs, etc. You can find it online there as well.
@Ana, for MDF, do you do any sort of sanding, or just apply a couple coats of primer (I use Killz or 123.. not sure if that is any good)? I have 4 sheets of 3/4" MDF and trying to figure out what to do with it. I was going to use it for the beds, but bought 1x12x8' pine boards instead. I am wondering if I can use the MDF for closet organizer sides, book shelfs, etc.. but fear that a closet or book shelf with a side of 4' to 8' in length will eventually sag. Any way to avoid MDF sagging? Like 1x2 trim, 1/4" plywood back panels, and such?
The desk looks great. I bought a gallon of polyurethane, semi-gloss. I am hoping a coat or two of that on MDF/Pine/Plywood will give it a nice shine and some extra strength.
Kev (not verified)
Sun, 10/17/2010 - 22:19
#Correction add an 'r' to
#Correction add an 'r' to first image
Faith (not verified)
Mon, 10/18/2010 - 01:37
OK. I'm in love. Would this
OK. I'm in love. Would this work with a depth of 12 or 13"? I would love for this to be my entryway table!
Mary Anne (not verified)
Mon, 10/18/2010 - 02:07
I love it! It seems that you
I love it! It seems that you could make 3 desks out of one sheet of plywood, right? Of course as you have said previously the strips would be slightly less than 16" due to the width of the saw blade...
These last three plans have been brilliantly simple. THANK YOU!
Sophie (not verified)
Mon, 10/18/2010 - 02:21
is there any way possible to
is there any way possible to make this without the kreg jig?
papabear
Thu, 07/31/2014 - 01:55
yes thee is
you can use 2 "screws and counter sink them . then use filler in the hole
laura lehman (not verified)
Mon, 10/18/2010 - 03:09
This desk is really
This desk is really cool....but what I want to comment on is the awesome metal wall you have. Did you use the basic roofing material? It'd be useful in a "kids" room. Not only is it very durable and cleanable....you could put up posters with magnets! I've got to do that. Are the ridges troublesome? Well done!
Lauren (not verified)
Mon, 10/18/2010 - 03:26
I love love love this, Ana!
I love love love this, Ana!
Ana White (not verified)
Mon, 10/18/2010 - 06:32
LOL see what happens when
LOL see what happens when there is no spell check! I can't spell :)
Ana White (not verified)
Mon, 10/18/2010 - 06:45
Hi Andjarnic, I sand with 120
Hi Andjarnic, I sand with 120 grit sandpaper and prime with Kilz too. Then just brush on paint. I have personally had great experience with MDF.
The best way to reinforce MDF is with face frame (trim on the front edge) and plywood on the back, or building a box under the MDF. Check out the Sagulator online for a calculator for saggage. I like to use MDF on lower use painted projects. It works well for sides of bookcases, shelves, and would be great in a closet. Consider this - most closet organizers are made of particle board! And most furniture these days is made of MDF - even the spendy stuff!
Ana White (not verified)
Mon, 10/18/2010 - 06:47
Faith, it would! If you used
Faith, it would! If you used a 1x12 instead of 1x16s, then all you would have to do is cut your perpendicular trim to 11 1/2" long instead of 15 1/2" long. Part of the "look" for this piece is the towers are square though, so you may consider making the shelves 12" x 11 1/2" squares to keep the consistency there.
Ana White (not verified)
Mon, 10/18/2010 - 06:49
Maryanne, you can get three
Maryanne, you can get three 1x16s out of a single sheet, but you need 120 plus inches of 1x16, so you would end up with just enough for two desks. Does that make sense? You are right about the saw blade.
Ana White (not verified)
Mon, 10/18/2010 - 06:52
Sophie, it can be done
Sophie, it can be done http://ana-white.com/2010/10/parsons-style-bookshelf.html but the Kreg Jig just makes things so much easier. Not impossible without though! Check the link out. It's the same type of construction. Hope this helps! Ana
Ana White (not verified)
Mon, 10/18/2010 - 06:53
Laura, you are so smart. I
Laura, you are so smart. I tried to sneak that one by you :) I'll post the how too this week. It's awesome, like a giant stylish fridge for keeping all your ideas and notes handy :) And looks so good!
Ana White (not verified)
Mon, 10/18/2010 - 06:54
Thank you Lauren!
Thank you Lauren!
Dennis (not verified)
Mon, 10/18/2010 - 07:30
Hi Ana, I am a woodworking
Hi Ana,
I am a woodworking instructor and I am really happy to see you promoting self made furniture. I don't believe in stereotypes where furniture making is predominantly done by men. In fact, the Shaker tradition have many women furniture craftsman / woodworker.
My biggest concern is safety on power tool usage. Woodworking bookstand even shows (ex:Norm Abrahm and the American Woodworker by Scott Philips) only conveys the message to follow instruction given by the manufacturer. The problem is that the instructions do no explain safety.
I have been a woodworker for over 15 years and worked in the industry for another 12 years. I strongly encourage your sybscribers to take one class in power tool (circular saws and especially tablesaw usage at a local community college/ park-recreational class. Sawstop makes a real safe tablesaw for those who wants to get into making furniture regularly. However, even that saw will not explain tablesaw kickback prevention. Books do not explain enough. My shop is called The Wood Works Furniture Design Studio, Corona in California.
Kristen (not verified)
Mon, 10/18/2010 - 08:01
I really like that you even
I really like that you even put the placement of the pocket holes on the plans! Fantastic idea.
Haley (not verified)
Mon, 10/18/2010 - 10:16
Hi Ana! Love the desk, but
Hi Ana! Love the desk, but love the wall even more. I have been thinking about a similar treatment in our basement. Would you share a picture that shows how you finished the edges? Did you use trim? Thanks!
April McCoid (not verified)
Mon, 10/18/2010 - 15:11
I was wondering the same
I was wondering the same thing about that amazing wall. I can't wait to see your tutorial on this! Ana, you're awesome!
Cecek (not verified)
Mon, 10/18/2010 - 15:46
Laura and Ana- The whole
Laura and Ana-
The whole while I'm looking at this desk thinking, "ok, what about that wall!!!??" Love love love. Can't wait to see what Miss Ana's brilliant mind came up with!!!
Love, Peace and Elbow Grease,
Cease
Katie (not verified)
Mon, 10/18/2010 - 16:58
Ana, you are awesome! How
Ana, you are awesome! How cool are you posting so much info on pocket holes! Thanks so much. You have openned a whole new world to me.
livelybrowsers (not verified)
Tue, 10/19/2010 - 08:33
Thanks for good stuff
Thanks for good stuff
zerodtkjoe (not verified)
Tue, 10/19/2010 - 21:00
Thanks for the info
Thanks for the info
Ang (not verified)
Wed, 10/20/2010 - 10:55
I Love it! I tackled this
I Love it! I tackled this same desk about a month ago after some inspiration from your site and having built a cameron bookshelf and a rustic bench. With those projects successful I figured I could attempt creating some plans myself. It turned out great but having made my shelves a little smaller, I wish I had waited and thought it through a little more so that my 12x12 scrapbooking papers would fit on the shelves! haha. oops. lesson learned. I do not have a kreg jig so I just used a few little angle brackets to hold my shelves in too! Also made myself a shorter, scaled down version for a printer table! Love the open storage that I can reach from all sides!! Great desk to have!
Hannah (not verified)
Wed, 10/20/2010 - 17:35
I just stumbled upon this
I just stumbled upon this site and I'm already in love. I want to start building this desk now! However, I live in an apartment. Is building this desk conducive to apartment living? I think I would have enough floor space but the mess and noise is what I'm worried about. What do you think?
AshleyOh7 (not verified)
Thu, 10/21/2010 - 10:23
LOVE! I really like the
LOVE! I really like the openness of the bottom- perfect for easily accessable storage. And it doesn't look like the piece would weigh down smaller spaces like chunkier desks might. Thanks!!
karen (not verified)
Fri, 10/22/2010 - 23:43
would this work with just one
would this work with just one set of shelves? I love the desk, but 60" is just too long for my space.
Josh (not verified)
Sun, 10/24/2010 - 11:53
Is there any way you could
Is there any way you could post the sketchup files?
Ana White (not verified)
Sun, 10/24/2010 - 19:04
Karen, that is a fabulous
Karen, that is a fabulous idea! It would! Might change the styling a little, but would definitely work.
Jessica (not verified)
Wed, 10/27/2010 - 10:47
I love this desk! I'm
I love this desk! I'm wondering if you could make it lengthier for a dual desk? Any advice on that?
Heidi (not verified)
Thu, 01/13/2011 - 12:31
Just about to order my KREG
Just about to order my KREG JIG, but the screws come in 'course' and 'fine'. Which do you use? Love the plan. It will be my FIRST!
kevinestaples (not verified)
Tue, 01/18/2011 - 12:10
Ana - I love everything...but
Ana - I love everything...but in case you are looking for a challenge...what about a treadmill desk (it's the new thing here in the corporate world)
Kevin
Constance (not verified)
Mon, 01/24/2011 - 03:42
Love this desk. We want
Love this desk. We want something counter top height so that we can sit at it with bar stools. Do you think it would be stable enough if we added another row of cubbies underneath to raise it up? Thanks for all of the great plans.
ErinK. (not verified)
Mon, 01/24/2011 - 07:58
I am loving this desk. Would
I am loving this desk. Would it be possible to make it taller? I would love this in my breakfast area for my computer and command station...but would need to be counter height (since I never get to sit when in the kitchen area!)
In reply to I am loving this desk. Would by ErinK. (not verified)
emmarosemc
Tue, 05/17/2011 - 13:17
YUP!
Sure can, you could add another shelf too.
All you do to make it taller is add length to the legs. so those 4 2x2's instead of cutting them at 28.5 inches youd cut them at whatever height you want.
emmarosemc
Wed, 06/08/2011 - 08:50
So i have all our towers
So i have all our towers built, 3 each and 1 of those is custom to fit the husbands pc, but i have a question about the desktop.
FIrst off did you screw the 2x2's around the desktop into the legs or into the MDF board?
Will I need additional support for a stretch of desktop thats 96.5" long?
swhatley42
Fri, 01/31/2014 - 13:33
Did you find that you needed
Did you find that you needed additional support for the length of 96.5"?
swhatley42
Fri, 01/31/2014 - 13:34
Did you find that you needed
Did you find that you needed additional support for the length of 96.5"?
swhatley42
Fri, 01/31/2014 - 13:35
longer length
Did you find that you needed additional support for the length of 96.5"?
Jkp39
Mon, 08/22/2011 - 21:23
2 inch pocket screws vs 1 1/4?
I see that the 1 1/4 are to attach the MDF to the trim, but nothing in the plans mention where to use the 2 inch pocket screws? Am I correct to assume they are to attach the 2x2 to the 2x2?
Thanks!
dukes77
Tue, 02/04/2014 - 20:30
the finish
I am sorry to say that I know nothing about anything, but I was just wondering if it is normal to apply satin polyurethane to paint? I am about to make this desk and some book shelves and am looking for a really super shiny finish. Is this a good way to achieve a smooth and shiny finish?
gmur589
Wed, 04/29/2015 - 13:36
What to consider when making it longer?
Hello! I love this design and actually want it to be double the length. What would I have to consider when building it at that length in regards to weight load on top of the table? Do I need a support in the middle to make sure nothing bends/snaps the table if there is every too much stuff on the middle of the table? or will the plywood hold? Thanks!
In reply to What to consider when making it longer? by gmur589
Ana White
Thu, 04/30/2015 - 11:00
Take a look at thishttp://ana
Take a look at this
http://ana-white.com/2014/02/supersized-parsons-tower-desk
katymac
Tue, 03/08/2016 - 18:17
Is this desk quite sturdy?
Hi Ana,
I was wondering about how sturdy this desk is, especially if I make it longer (77") and deeper (37"). The sturdiness is necessary because it is going to be a recording studio desk for my boyfriend so will hold lots of equipment. I saw that a previous person extended the desk by adding a second set of shelves - unfortunately my boyfriend is insistent on lots of leg room (so demanding!). I have managed to convince him to make the side shelves 20" per side, so that will provide a little extra support. What do you think? Mostly, I'm worried about sturdiness and also the desk top sagging. Any advice would be appreciated!!
katymac
Tue, 03/08/2016 - 18:36
ps - love your site and plans
ps - love your site and plans!! I have tried a few and they are great :)
Beablessed96
Wed, 08/26/2020 - 16:52
Ove ths desk need the plan please
I love this desk can I get the plans for it?
mawiggins
Sat, 08/29/2020 - 08:07
Desk in time for at home learning
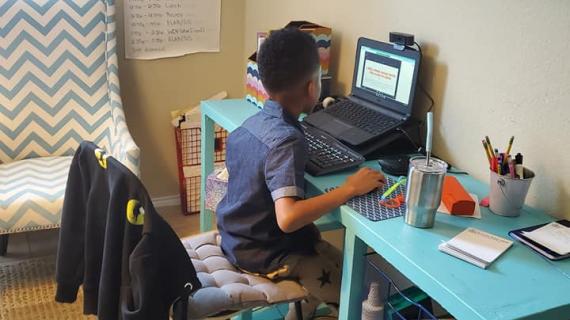
Used this plan to build a desk for my son. Due to covid we are having school at home and this desk was so wonderful considering the shortage of desk right now. This was a great project!
Quazyguy00
Mon, 08/31/2020 - 18:34
Thoughts on the shelves
Great plan. I am using legs from this with the L shaped desk for my daughter. One question though...Is the glue what is really holding the shelves together? It seems like the pocket screws in the plywood would be way too close to the edge of the 2x2 to provide much support.