
Hi everyone and Happy Friday!!!!
I promised you we'd get to a tutorial on how Brook finished the Drawer Base for her Barn Play Table, didn't I? With the help of our friends at Minwax, Brook used two different stains to bring out the wood and details in this simple project. I'd love to see this stain on a Farmhouse Table!
Here's from Brook:
Sometimes you want a certain look for your furniture but can't find the exact stain to achieve your finish goals. So what do you do? Use two different stains! For my daughter's little play table I wanted a rustic look that would complement her play barn but not be super dark.
I started with Minwax Wood Finish in Pecan and then used it also in Espresso to enhance the corners and really help bring out the details. It was really very simple and I'm going to show you how you can get the same great look!
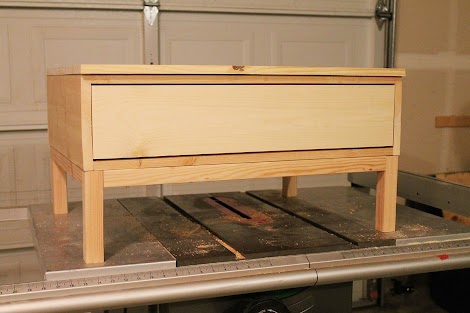
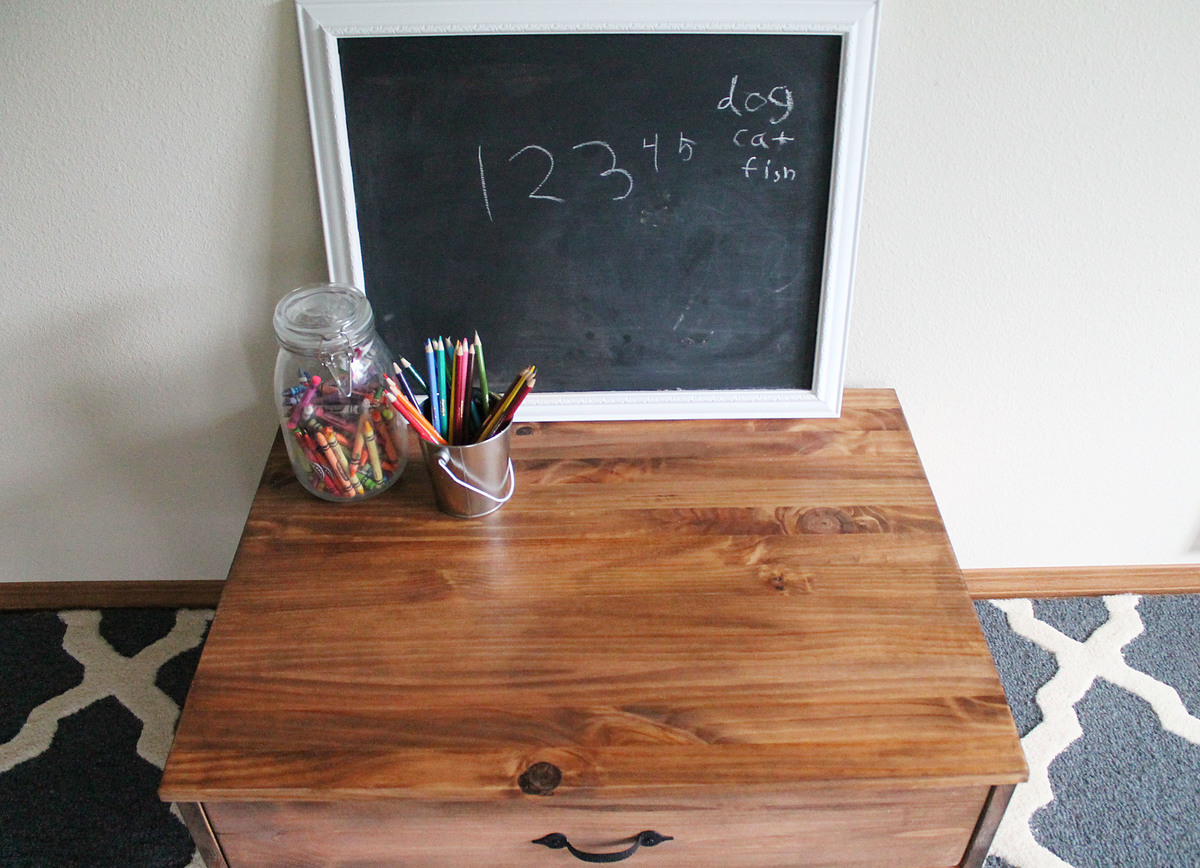
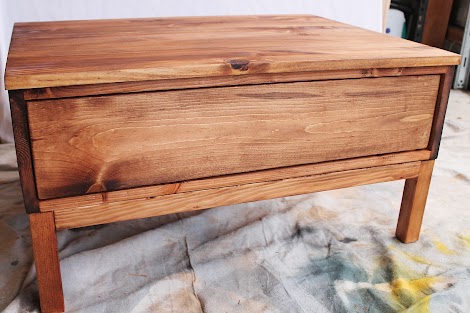
Before

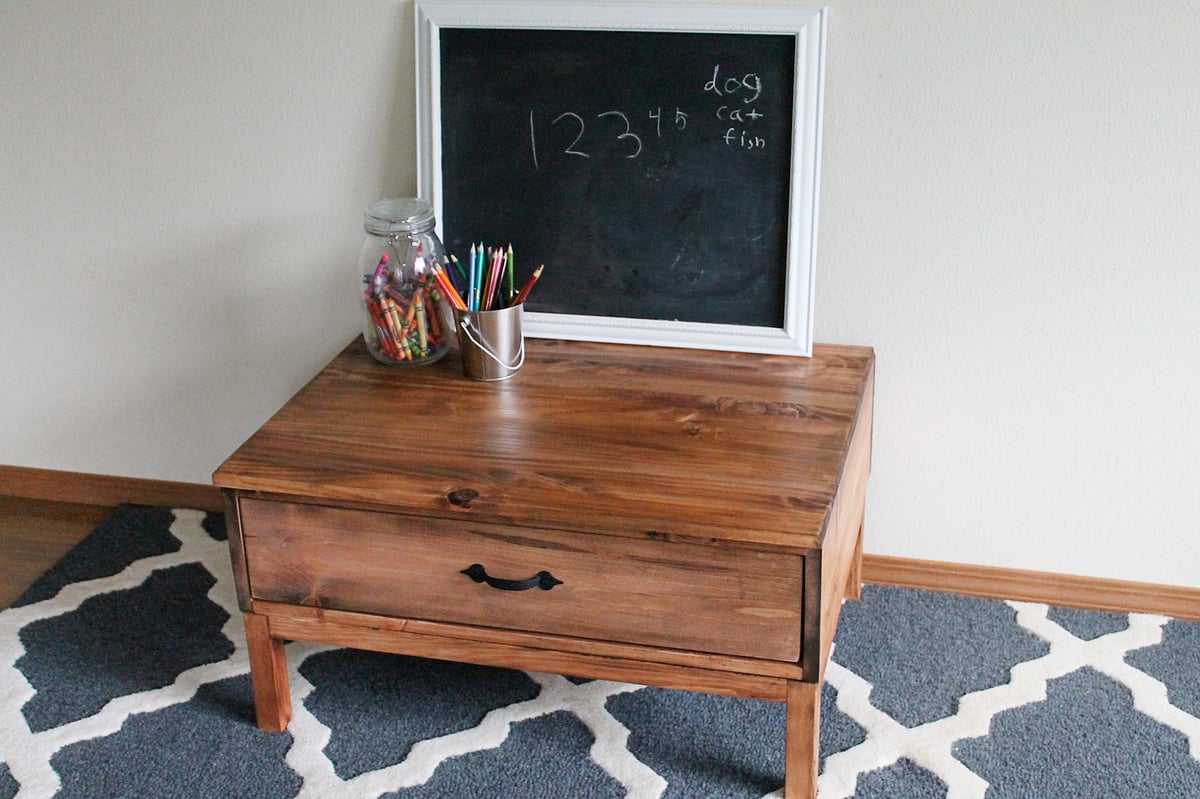
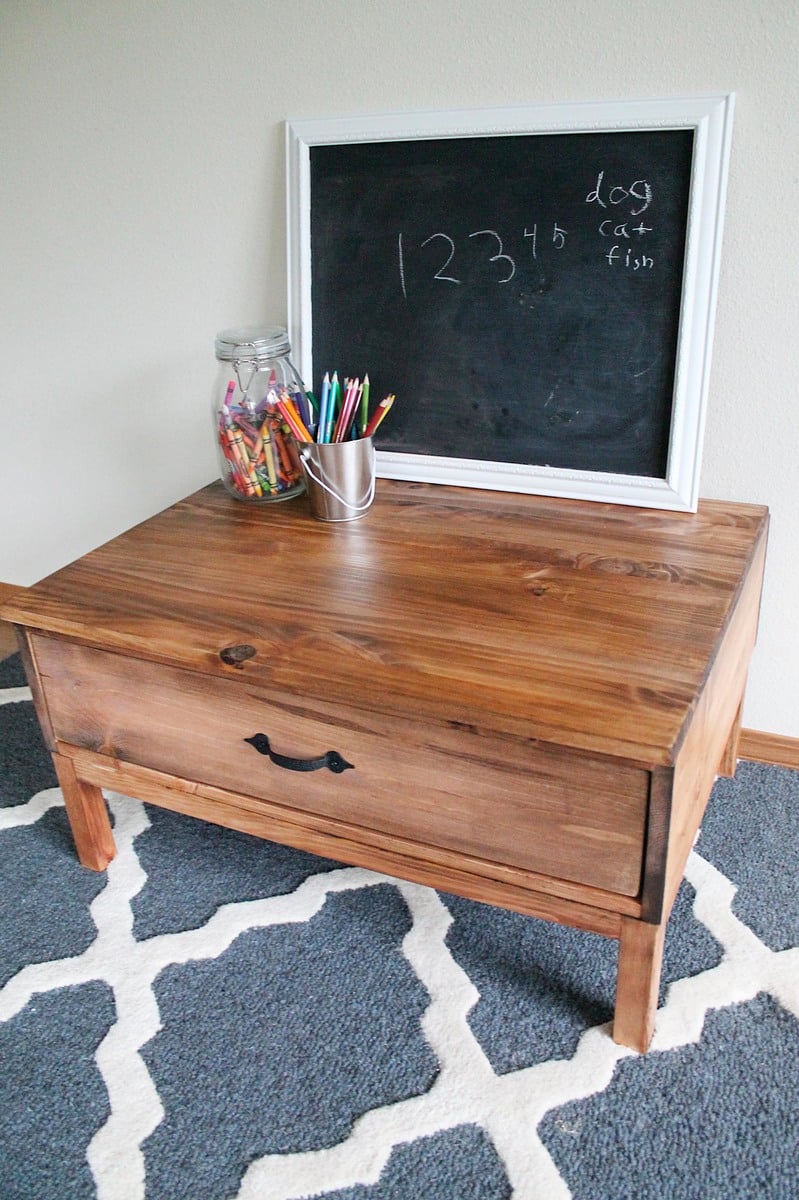
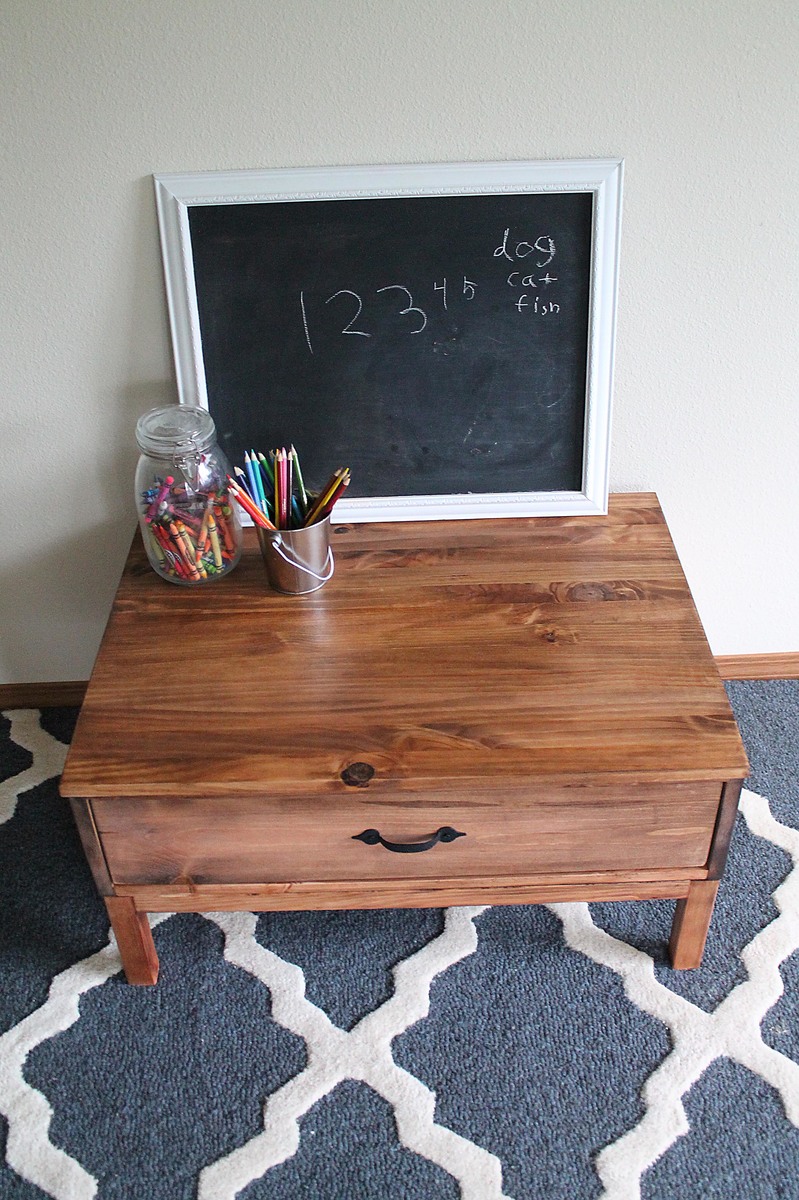
After!
This amazing stain tutorial was put together by Brook from Being Brook. Please take a second to go visit Brook now and check out more photos and details on this project.
Sand Paper in varying grits
220 Grit Sanding Block
Rags
Gloves
Minwax Stainable Wood Filler
Minwax Pre-Stain Wood Conditioner
Minwax Wood Finish (Oil Based Stain) in Pecan and Espresso
Minwax Polycrylic in clear satin
Prepare Your Project
We are starting with a newly built project, built from pine. Always do a sample first to ensure you love the stain color on your wood - wood can vary even in the same species.
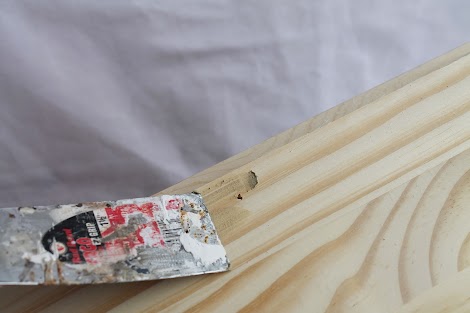
After you finish building your project use Minwax Stainable Wood filler to fill in any screw or pocket holes. Let the wood filler dry completely before applying stain over it. Depending on the size of the hole, will give you a good idea of how long it needs to dry. One reason why I love working with Minwax Stainable Wood Filler so much is that it accepts their stain well.

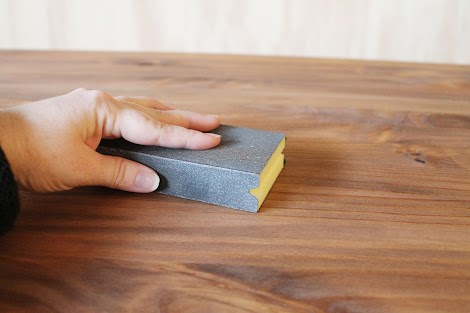
Sand your project. I started out with a belt sander and sanded the lumber before building and then moved to medium sandpaper on a little hand sander and then finished with a sanding block of 220 grit sandpaper.
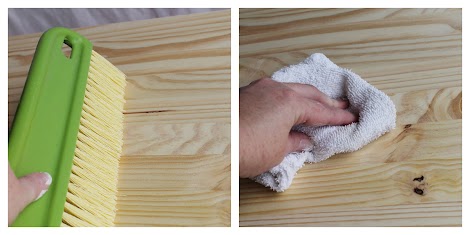
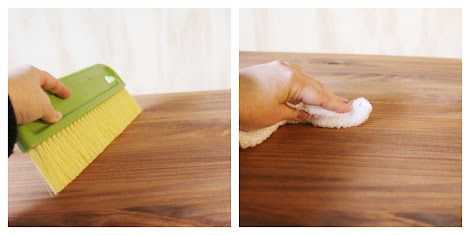
Brush off all sanding residue. Use a damp rag to get any remaining residue.
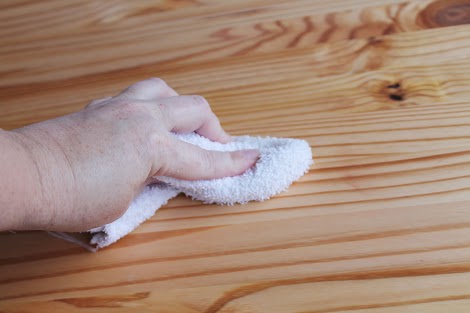
Step 2: Apply Minwax Pre-Stain Wood Conditioner to help the stain penetrate the wood evenly and reduce the effect of wood grain raising.
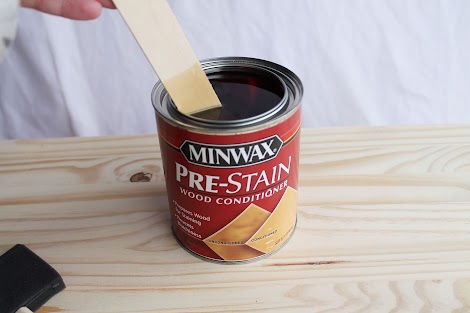
I always recommend gently stirring the product before applying, to get everything up from the bottom of the can.
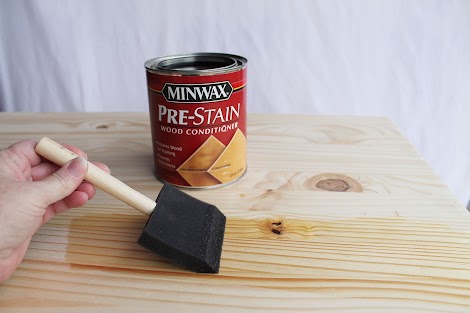
Apply Minwax Pre-Stain Wood Conditioner to your project with a foam brush or rag, allowing it to penetrate for about 5 to 15 minutes. Wipe off any excess wood conditioner with a clean cloth and apply stain within 2 hours.
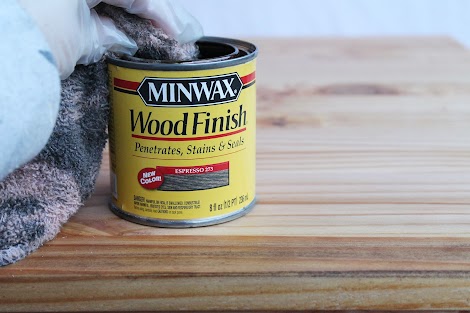
Step 3: Stain
In this step, I apply Minwax Wood Finish, oil based stain to entire project to achieve the desired stain color.
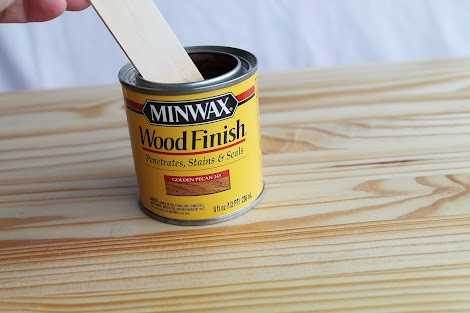
Carefully stir the stain. Use a scrap piece of wood or inconspicuous area to test your stain and verify that it's the color you want.
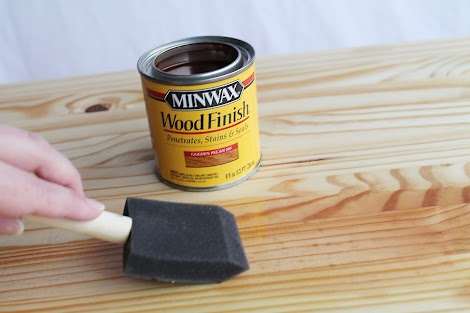
Apply stain using a Minwax Wood Finish Stain brush (recommended) or foam brush following in the direction of the wood grain.
Let the stain penetrate the piece for 5-15 minutes and wipe excess stain off with a rag. The longer the stain penetrates the wood the darker it will be. Just don't let the excess stain dry on the wood!
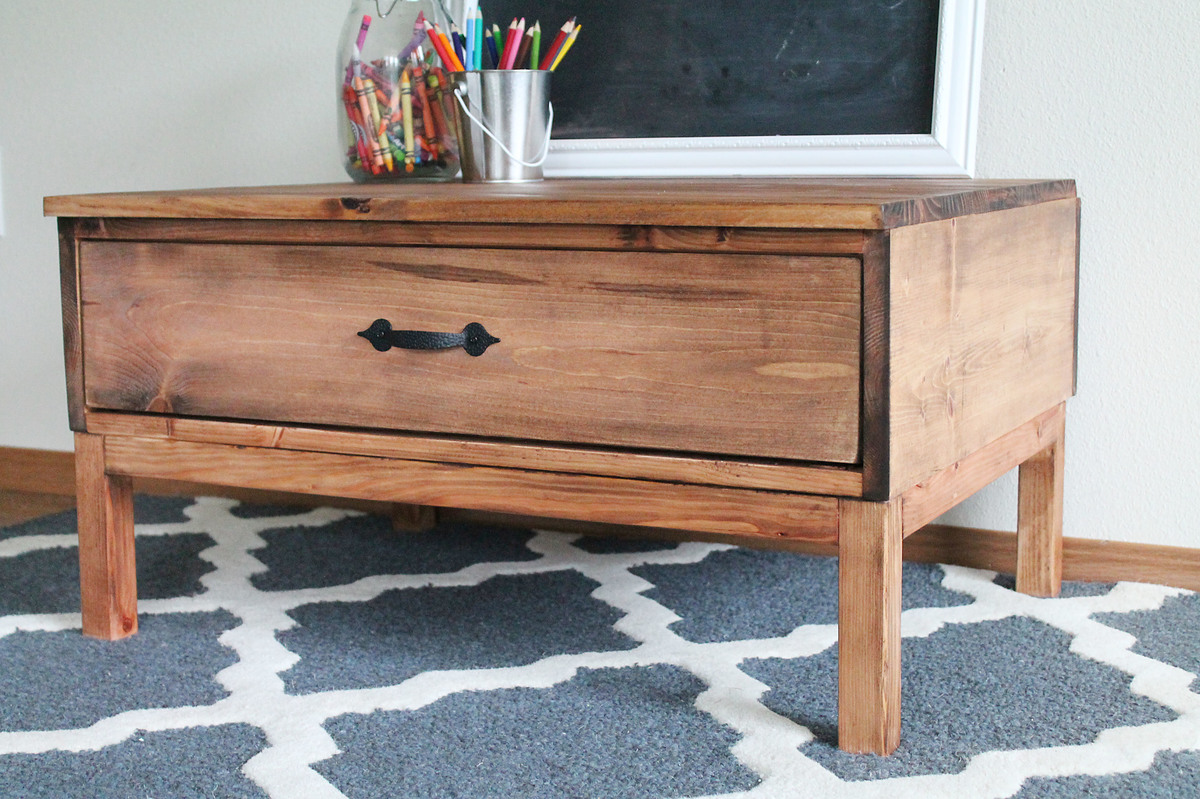
After letting the pecan stain dry about 6 hours I was ready to apply my second color of stain. I chose Minwax Wood Finish again, only this time in in Espresso.

Gently stir the stain.
Dip a rag into the stain. I would wear gloves because this part is a little messy!
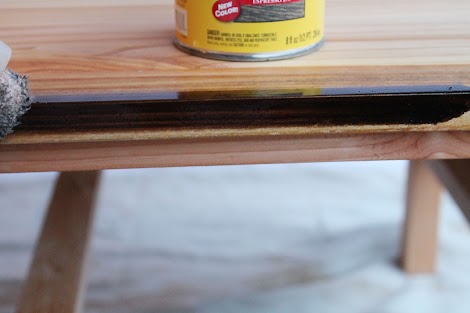
Wipe stain on project concentrating on edges and crevices.
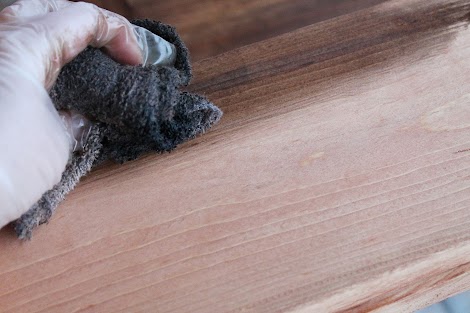
Immediately wipe stain off. I didn't let it soak in at all because I just wanted a little extra color. I love how the darker stain really brought out the details on my furniture piece. Continue doing the same for the whole project until you have just the color you want.
When you are happy with the look of your stained project, be sure to let it dry a fully 24 hours before applying the top coat to protect it.
Step 4: Apply Minwax Polycrylic
It's time to protect your beautiful finish and project! The stain will make the wood beautiful, but the top coat will make it last and easy to wipe clean.
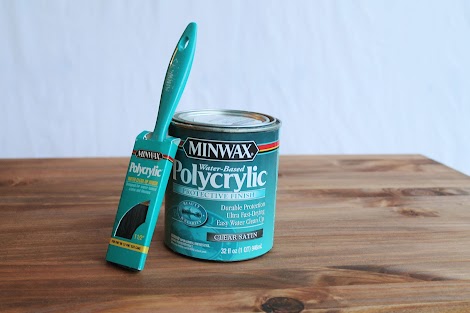
I love using Minwax Water Based Polycrylic because it is easy to apply, easy to clean up, and dries clear. You will need to use a synthetic brush for the water based polycrylic.
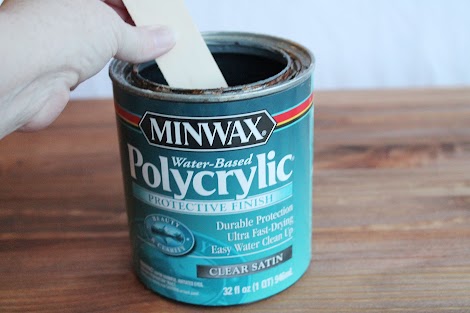
Carefully mix Minwax Polycrylic, don't shake! It will look milky in the can but will dry clear.
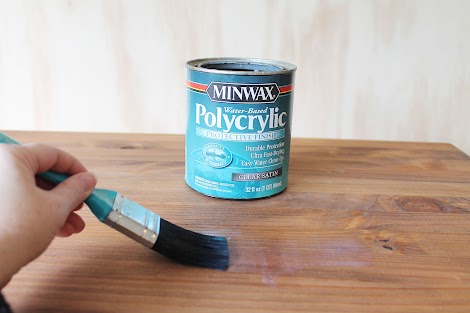
Use the Minwax Water Based Polycrylic brush to apply a thin coat of Polycrylic. Brush in one direction following the wood grain. Be careful not to overbrush.
Let Minwax Polycrylic dry at least 2 hours and then lightly sand with 220 grit sandpaper to help second coat of Minwax Polycrylic adhere and ensure a nice even finish.
Remove all dust.
Apply second coat and a third coat of Minwax Polycrylic in the same way you did the first and second, sanding lightly between coats. After your project dries for 24 hours it's ready to use!
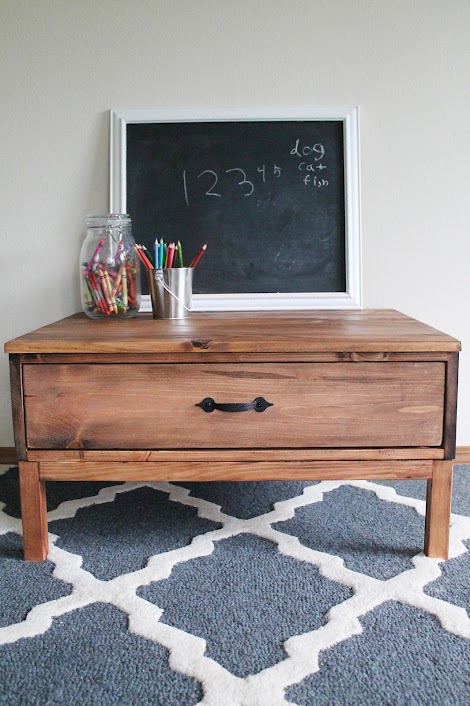
Isn't it beautiful how the two stain tones made this project so beautiful?
Don't forget to clean your brushes and store in original packaging for reuse!
Comments
Ben @ The Hous… (not verified)
Fri, 12/14/2012 - 12:12
Great finish!
jenhandley (not verified)
Sat, 12/15/2012 - 10:45
beautiful!
Brook@BeingBrook (not verified)
Sat, 12/15/2012 - 12:19
Rug
Carrie Bledsoe (not verified)
Mon, 12/17/2012 - 09:03
You did wonders with this
paintguy
Mon, 05/06/2013 - 07:28
What wonderful results.
kongk
Tue, 05/21/2013 - 03:47
This is actually the kind of
kongk
Tue, 05/21/2013 - 04:32
I am very enjoyed for this
Mathus
Tue, 06/04/2013 - 03:16
Awesome things here
Mathus
Tue, 06/04/2013 - 03:17
Awesome things here
jacsonbill
Sun, 06/30/2013 - 00:39
click here
andrewwhite865
Wed, 11/06/2013 - 02:27
really beautifully designed
andrewwhite865
Wed, 11/06/2013 - 02:28
really beautifully designed
stevenorwood1963
Thu, 12/26/2013 - 10:38
Looks Great
milkyways
Wed, 06/25/2014 - 03:56
Thanks for this great
AngelaAVarela
Tue, 10/21/2014 - 03:54
It is beautiful!
It is beautiful!