
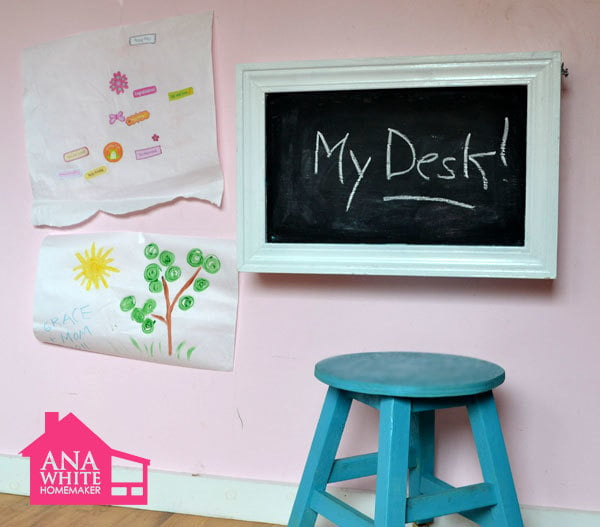

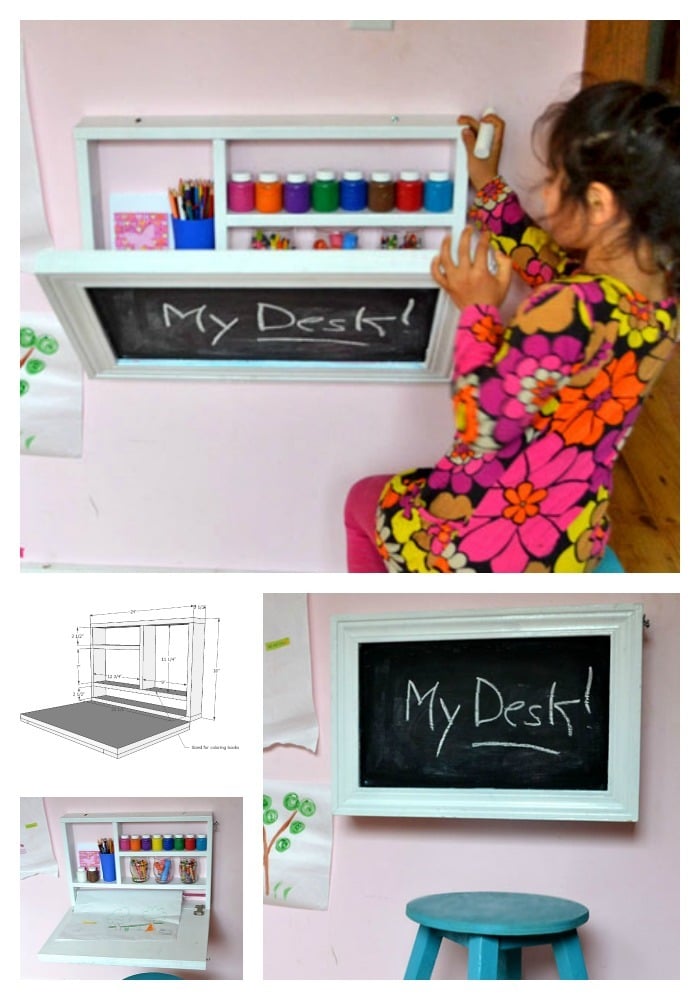
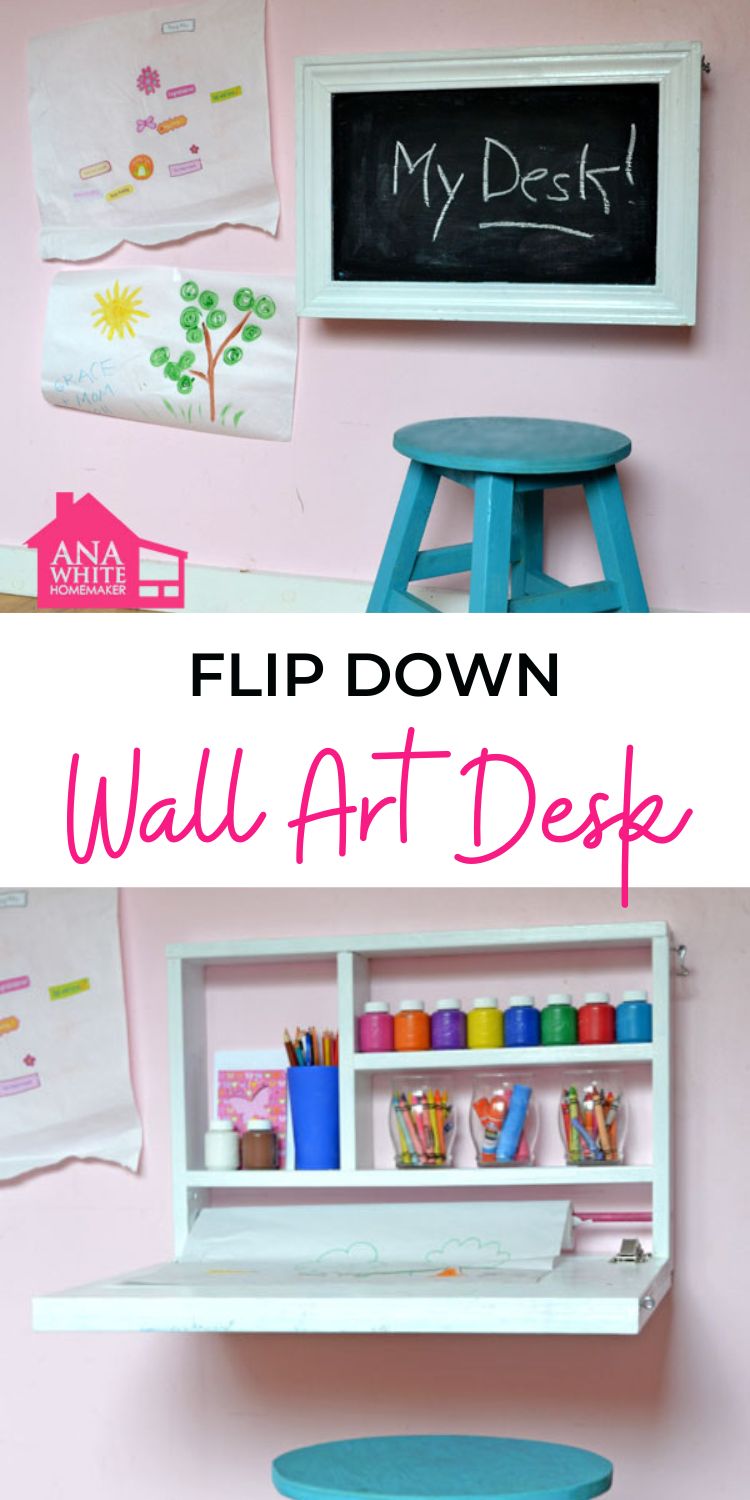
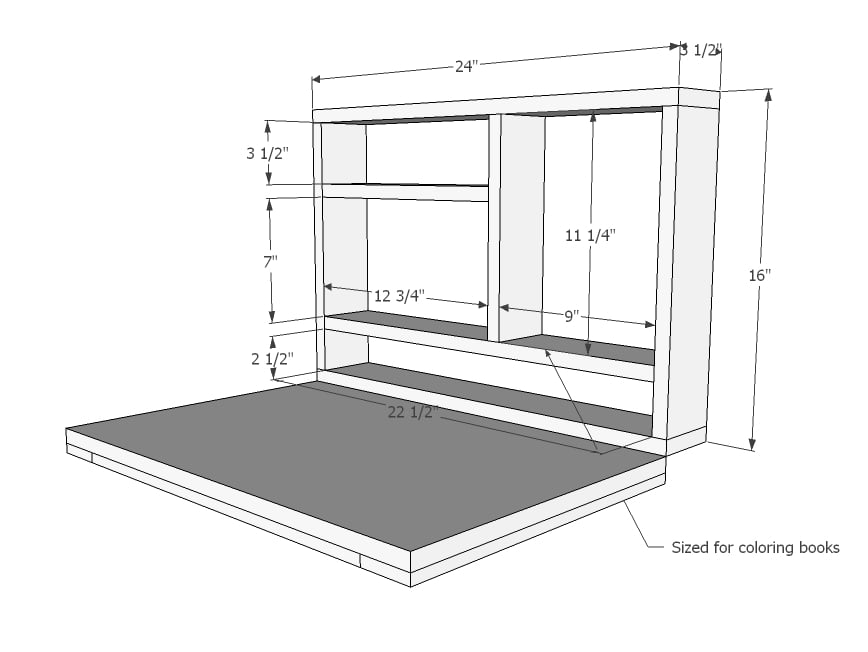
This do it yourself kids desk folds up to become a wall chalkboard! Stores art supplies and even a paper roll holder! Super easy step by step instructions to DIY your own!

Perfect for an Kid's Art Desk
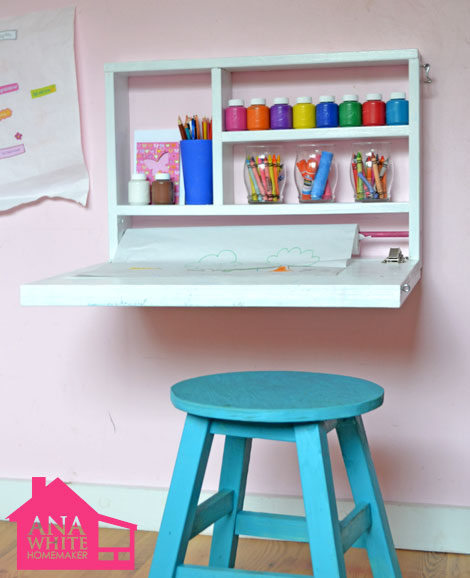
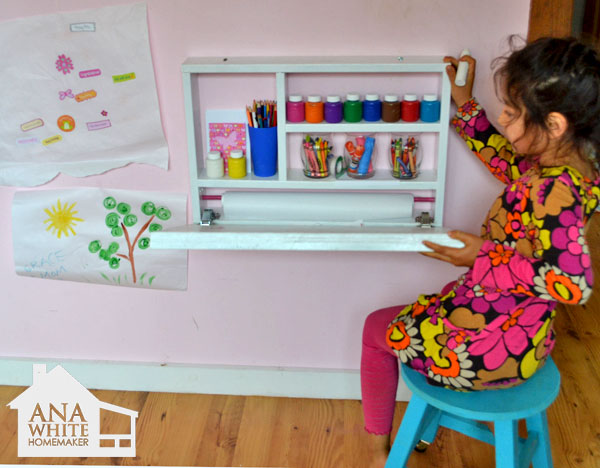
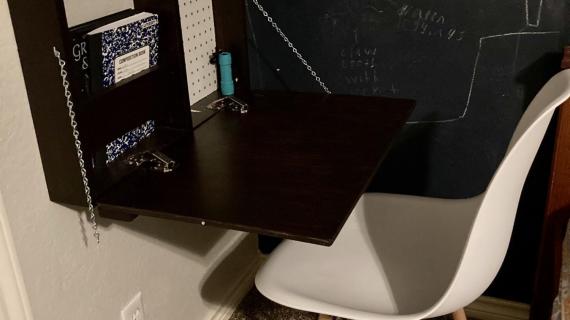
It's just right in size for an art station! I love that art supplies are all kept right where they are used.
Tiny Space Solution
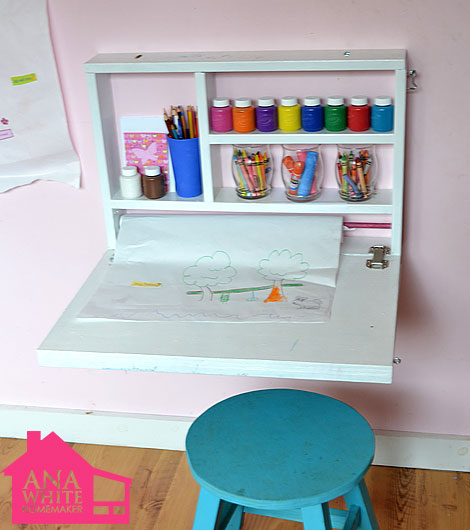
Storage Too!

Easy Systems

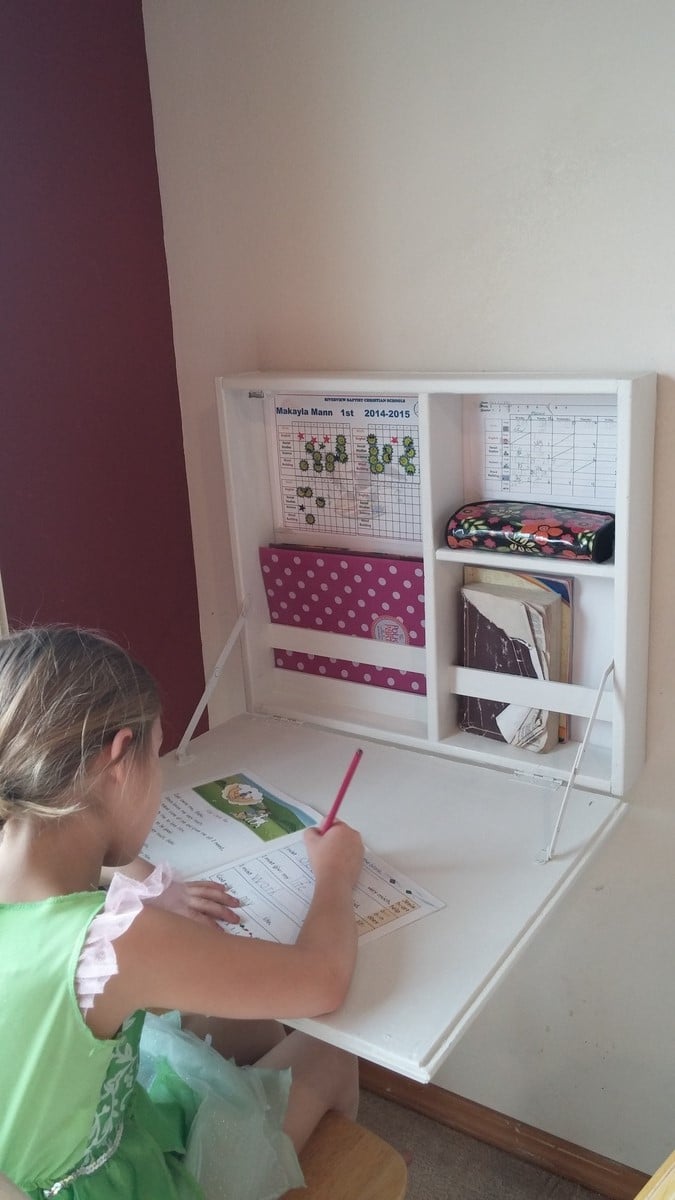
Mount at Any Height
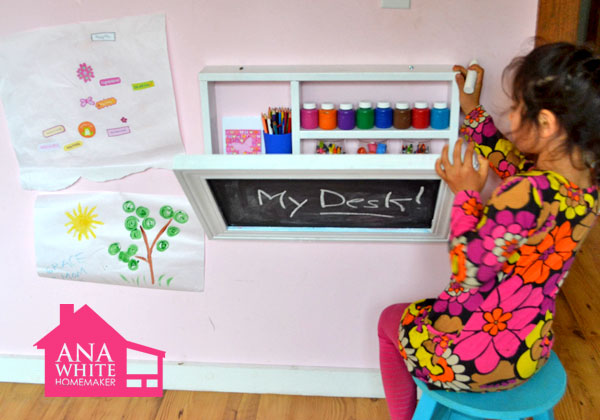
Easy to Use
Support Brackets
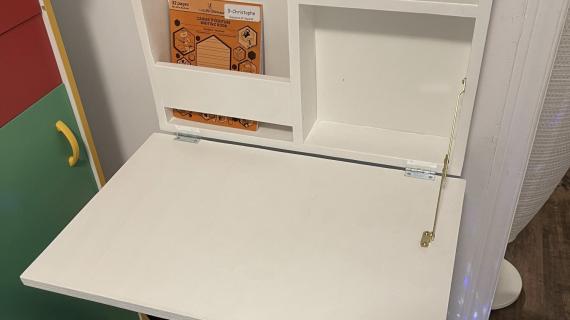
You can use a wire and chain as a support (as I did) mounted on the exterior, or you can use a support hinge bracket as done below. NOTE: You may need to adjust the shelving inside the cabinet to give room for the support hinge to close. I suggest purchasing your hardware BEFORE building and adjusting your shelf locations to fit.
Pin For Later!
Preparation
- 1 - piece 3/4" plywood 16" x 24"
- 1 - 1x4 @ 10 feet long
- 1 set hinge supports or wire or chain (see comments)
- 1 set basic hinges
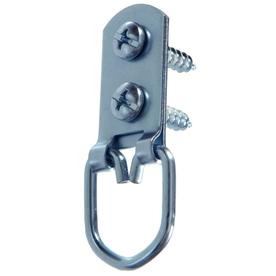
- 3 D ring hangers
- Chalkboard paint (optional)
- Moulding or trim (optional)
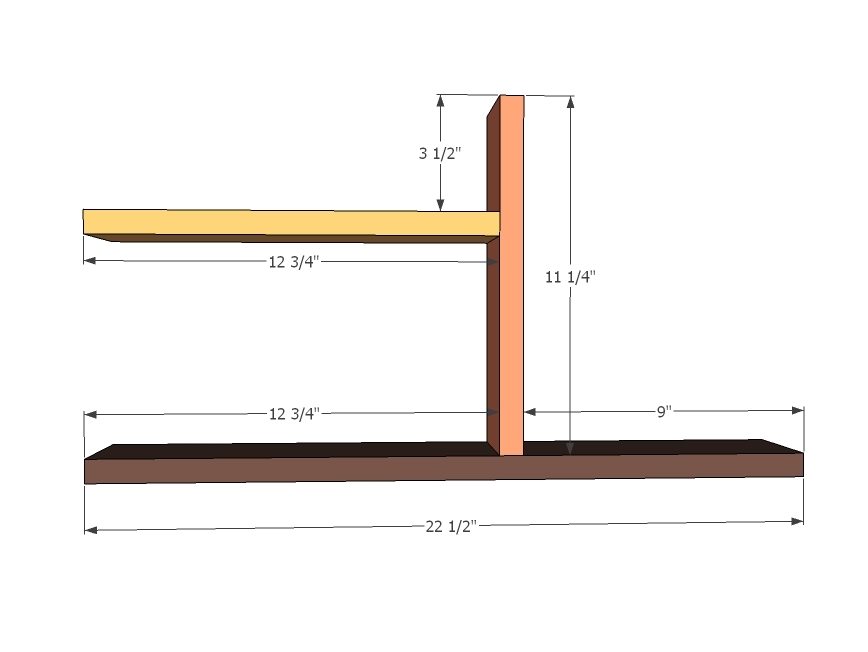
1 - 1x4 @ 11 1/4"
1 - 1x4 @ 12 3/4"
2 - 1x4 @ 14 1/2"
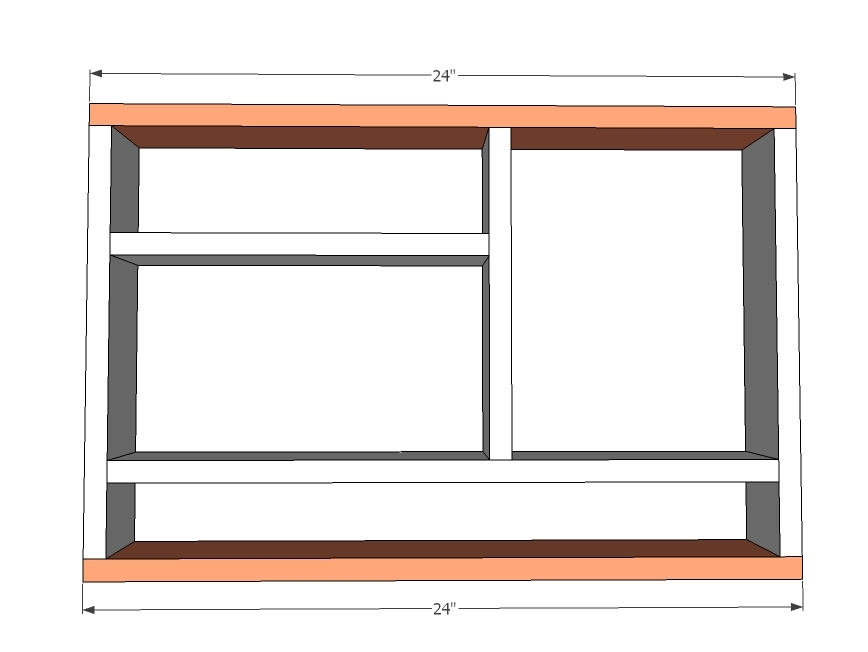
2 - 1x4 @ 24"
1 - 3/4" Plywood @ 24" x 16"
1/2" dowel, 30" long (optional for the paper roll)


Please read through the entire plan and all comments before beginning this project. It is also advisable to review the Getting Started Section. Take all necessary precautions to build safely and smartly. Work on a clean level surface, free of imperfections or debris. Always use straight boards. Check for square after each step. Always predrill holes before attaching with screws. Use glue with finish nails for a stronger hold. Wipe excess glue off bare wood for stained projects, as dried glue will not take stain. Be safe, have fun, and ask for help if you need it. Good luck!
Instructions
Step 1
I built this project with 2" finish nails, but you can also use screws or the Kreg Jig.
Please read all comments when installing the hinge supports - per reader comments, depending on your hinge supports, you may need to add extra clearance for the supports.
Step 2

Mark joints and attach in place.
Step 3
Now the top and bottom. Drill 1/2" diameter holes for paper roll here. Leave dowel long so you can roll the outside ends to roll up the craft roll.
Step 4

You do not have to put the trim on, I did because my chalkboard edges were so ugly! I used window casing, but you can use anything. Attach the top with simple hinges on the bottom.
Step 5
Step 6
It is always recommended to apply a test coat on a hidden area or scrap piece to ensure color evenness and adhesion. Use primer or wood conditioner as needed.

Comments
Tsu Dho Nimh
Fri, 02/22/2013 - 08:41
Cut list is WRONG!
You are missing the 1x4 for the inner horizontal shelf ...
DomesticDiva11
Thu, 04/18/2013 - 13:45
How long does this take to
How long does this take to make?
kongk
Tue, 05/21/2013 - 05:53
Generally I do not read
Generally I do not read article on blogs, however I wish to say that this write-up very forced me to check out and do so! Your writing taste has been amazed me. Thanks, very great post.
W3BZ Advice
Al Lulu
Fri, 06/07/2013 - 16:06
Dumb screw question
Ana, because I love your plans I went out and bought a kreg jig.
So here is my dumb question. The plan calls for 2 inch nails but if I use a crate chick and use 2 inch pocket screws it goes right through both boards. What size Kreg screws and I supposed to use for this plan? I finished it with 2 inch Phillips and that was fine. Had to make some adjustments since not everything lined up the way I wanted.
But since you love the Kreg can you tell me the screw answer?
clloyd7
Fri, 01/30/2015 - 22:23
Pocket Hole Screws
I realize this thread is old, but I figured I'd answer in case anyone else was looking for the answer to this question. Pocket hole screws are sized based upon the material thickness the screw will be used in. The screw length to material thickness charts are typically on the Kreg screw boxes. If not, your pocket hole jig set should have included a list.
For reference, you can find the information and a handy illustration here: http://www.kregtool.com/files/newsletters/kregplus/Images/february12/se…
Al Lulu
Fri, 06/07/2013 - 16:07
Crate chick was autocorrect
Crate chick was autocorrect for Kreg Jig.
KELLY JONES
Sat, 12/07/2013 - 21:56
MISSED SOMETHING
Hi Ana,
I am in love with this design and I have bought all the materials to make two of them for the children I nanny for. After sitting down to make sure I had all my material before jumping in I realized i was missing the 22 ½ inch 1x4 that is need to make the shelf above the paper roll. After looking back I noticed that it is also missing in the cut list. So I was not sure if somewhere I missed something while reading. Any help would be FANTASTIC!!
nettibug60
Sun, 03/01/2015 - 21:03
Flip Down Desk
I have home-schooled mine as well as other peoples children. We had desks similar to this in our former home and are making these for our current home. We had a couple questions. We noticed on the cut list, it did not include the board at the bottom just above the dowel for paper. This bring about another question, if a person puts in this board/shelf (which we did put in), there would be no room for the hinge you are suggesting. Can you tell me how we can have the shelf, dowel for paper and use that hinge?
LanaiLynne
Tue, 05/12/2015 - 15:18
Kids' Art Desk
I just came across this on a search for something similar in which to keep my MANY herbal supplements and night-time meds -- thanks so very much! I plan to add shelves inside to best-fit my bottles, and will make it taller overall to hold more of the same!
I will leave upper shelves open -- that is, the desk/counter surface will only cover the lower portion of the unit ... to reduce weight, primarily, though I will also use exposed shelves for knick-knack display.
I tend to clutter my kitchen counters with supplements because I want to be close to the refrig in case I need more liquid mid-swallow! Any time I can go vertical for storage, count me in! Thanks for posting this.
konadreamer
Wed, 06/29/2016 - 17:48
Cut list missing a piece...
Aloha Ana,
I built this desk this weekend and the cut list was short one piece...luckily I had some extra 1 x 4 laying around! Might be good to adjust the PDF for future builders.
The 22 1/2 " length of the 1x4 was missing.
Ktapcoup
Mon, 02/19/2018 - 05:17
Attaching to wall
Confidently safely attach the shelving part to the wall? Did you use brackets underneath? Thank you.
Ktapcoup
Mon, 02/19/2018 - 05:18
That was supposed to say,
That was supposed to say, "how did you safely..."