Community Brag Posts
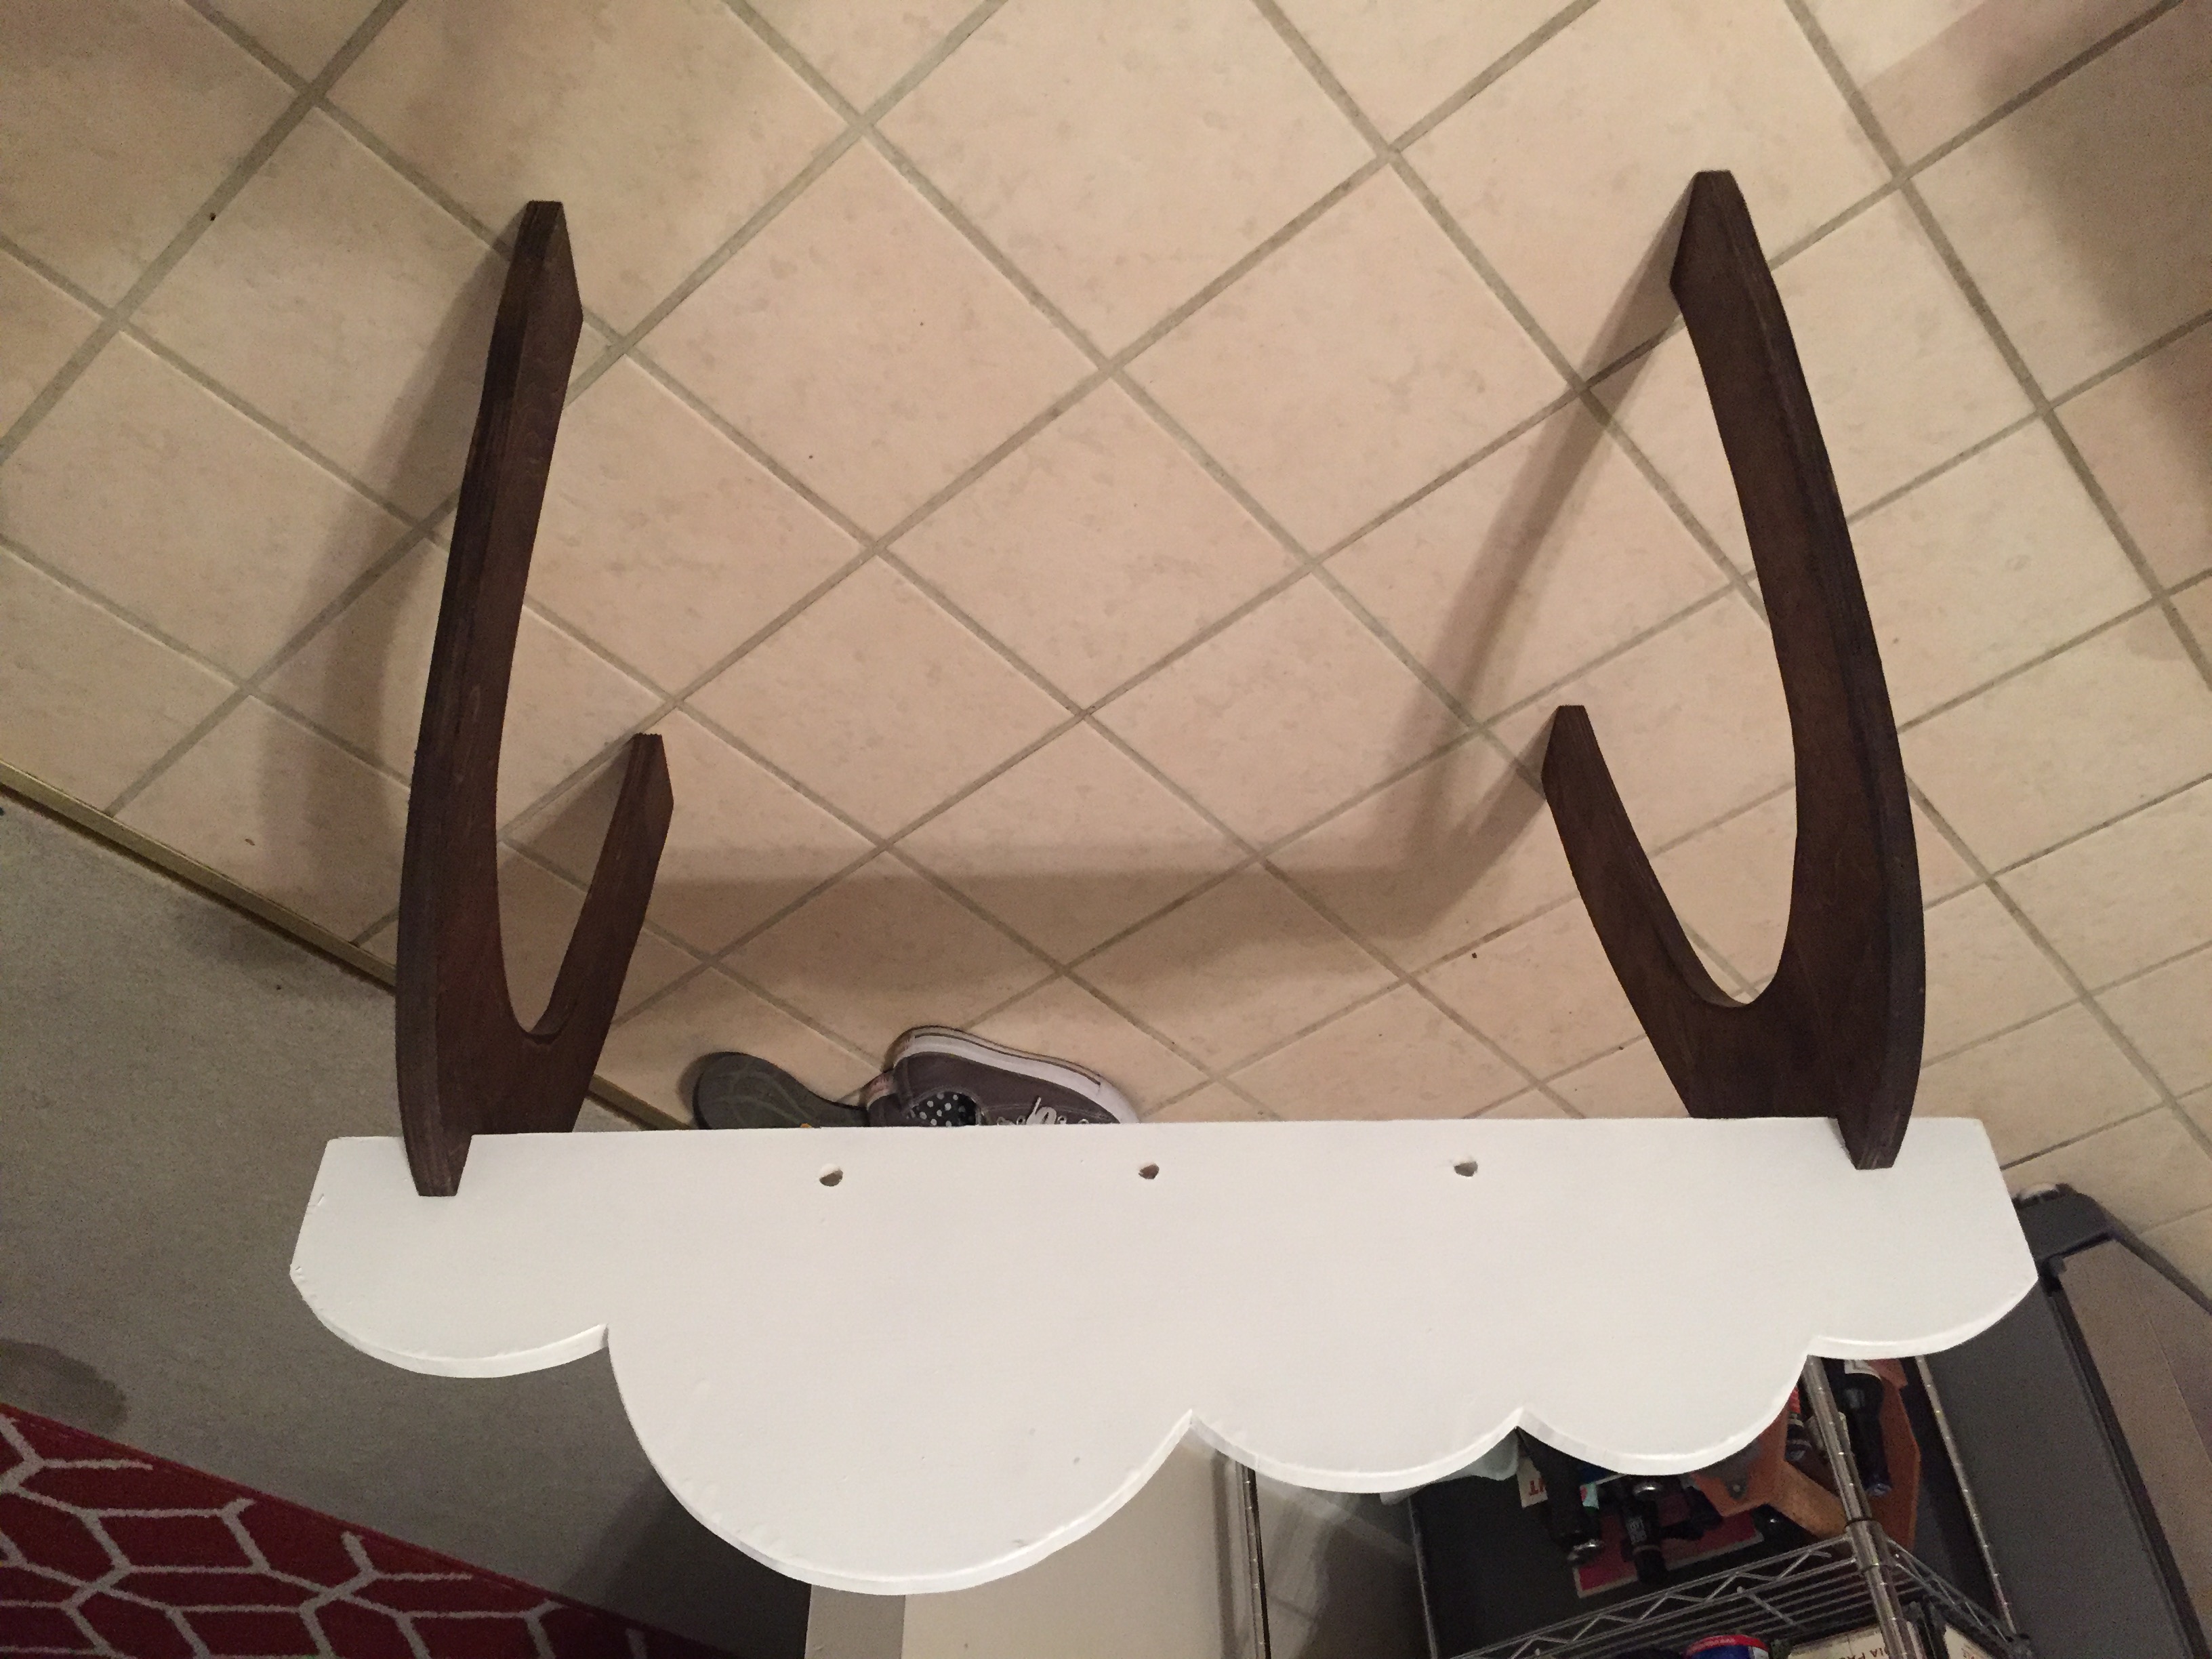
Cloud Baby Gym
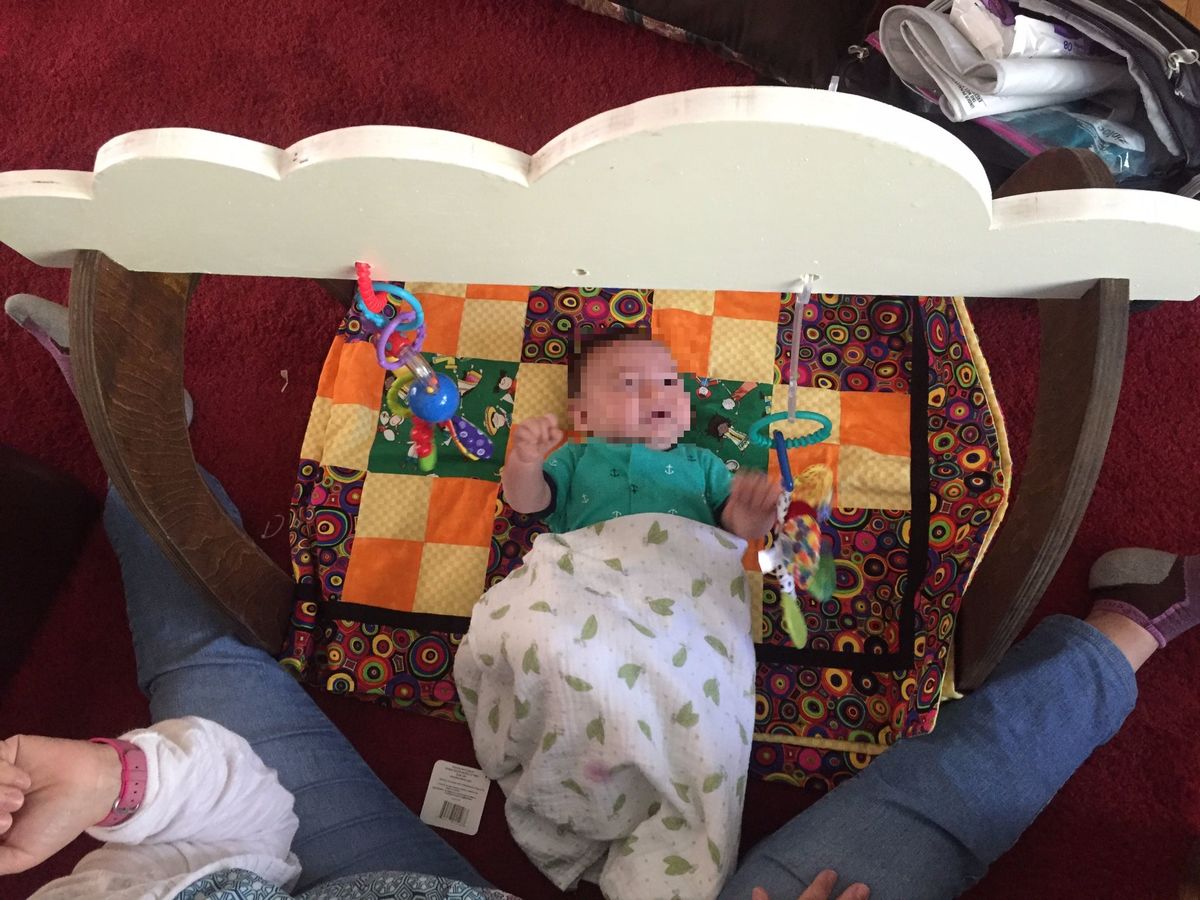
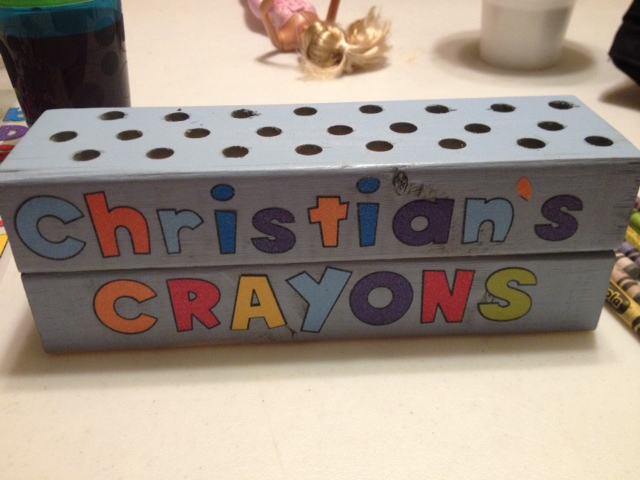
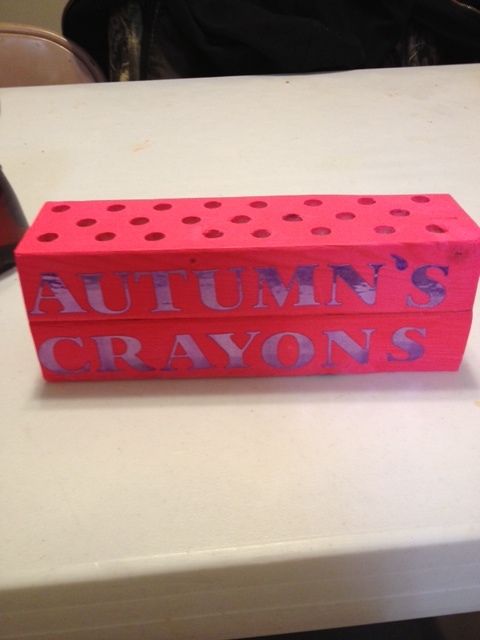
I based the side pieces on Ana's plan's measurements, but I was inspired by a different baby gym I had seen to make the top piece look like clouds. I also wanted the pieces to be able to disassemble. Instead of screwing the three pieces together, I cut notches with a band saw (could also use a jigsaw) so that they would fit together but still feel sturdy. I recommend drilling the toy holes close to the bottom edge so that this is compatible with store-bought toys.
Built from Plan(s)
Estimated Time Investment
Day Project (6-9 Hours)
Finish Used
Watco Danish oil in dark walnut & white spray paint
Recommended Skill Level
Beginner
Farmhouse storage bed
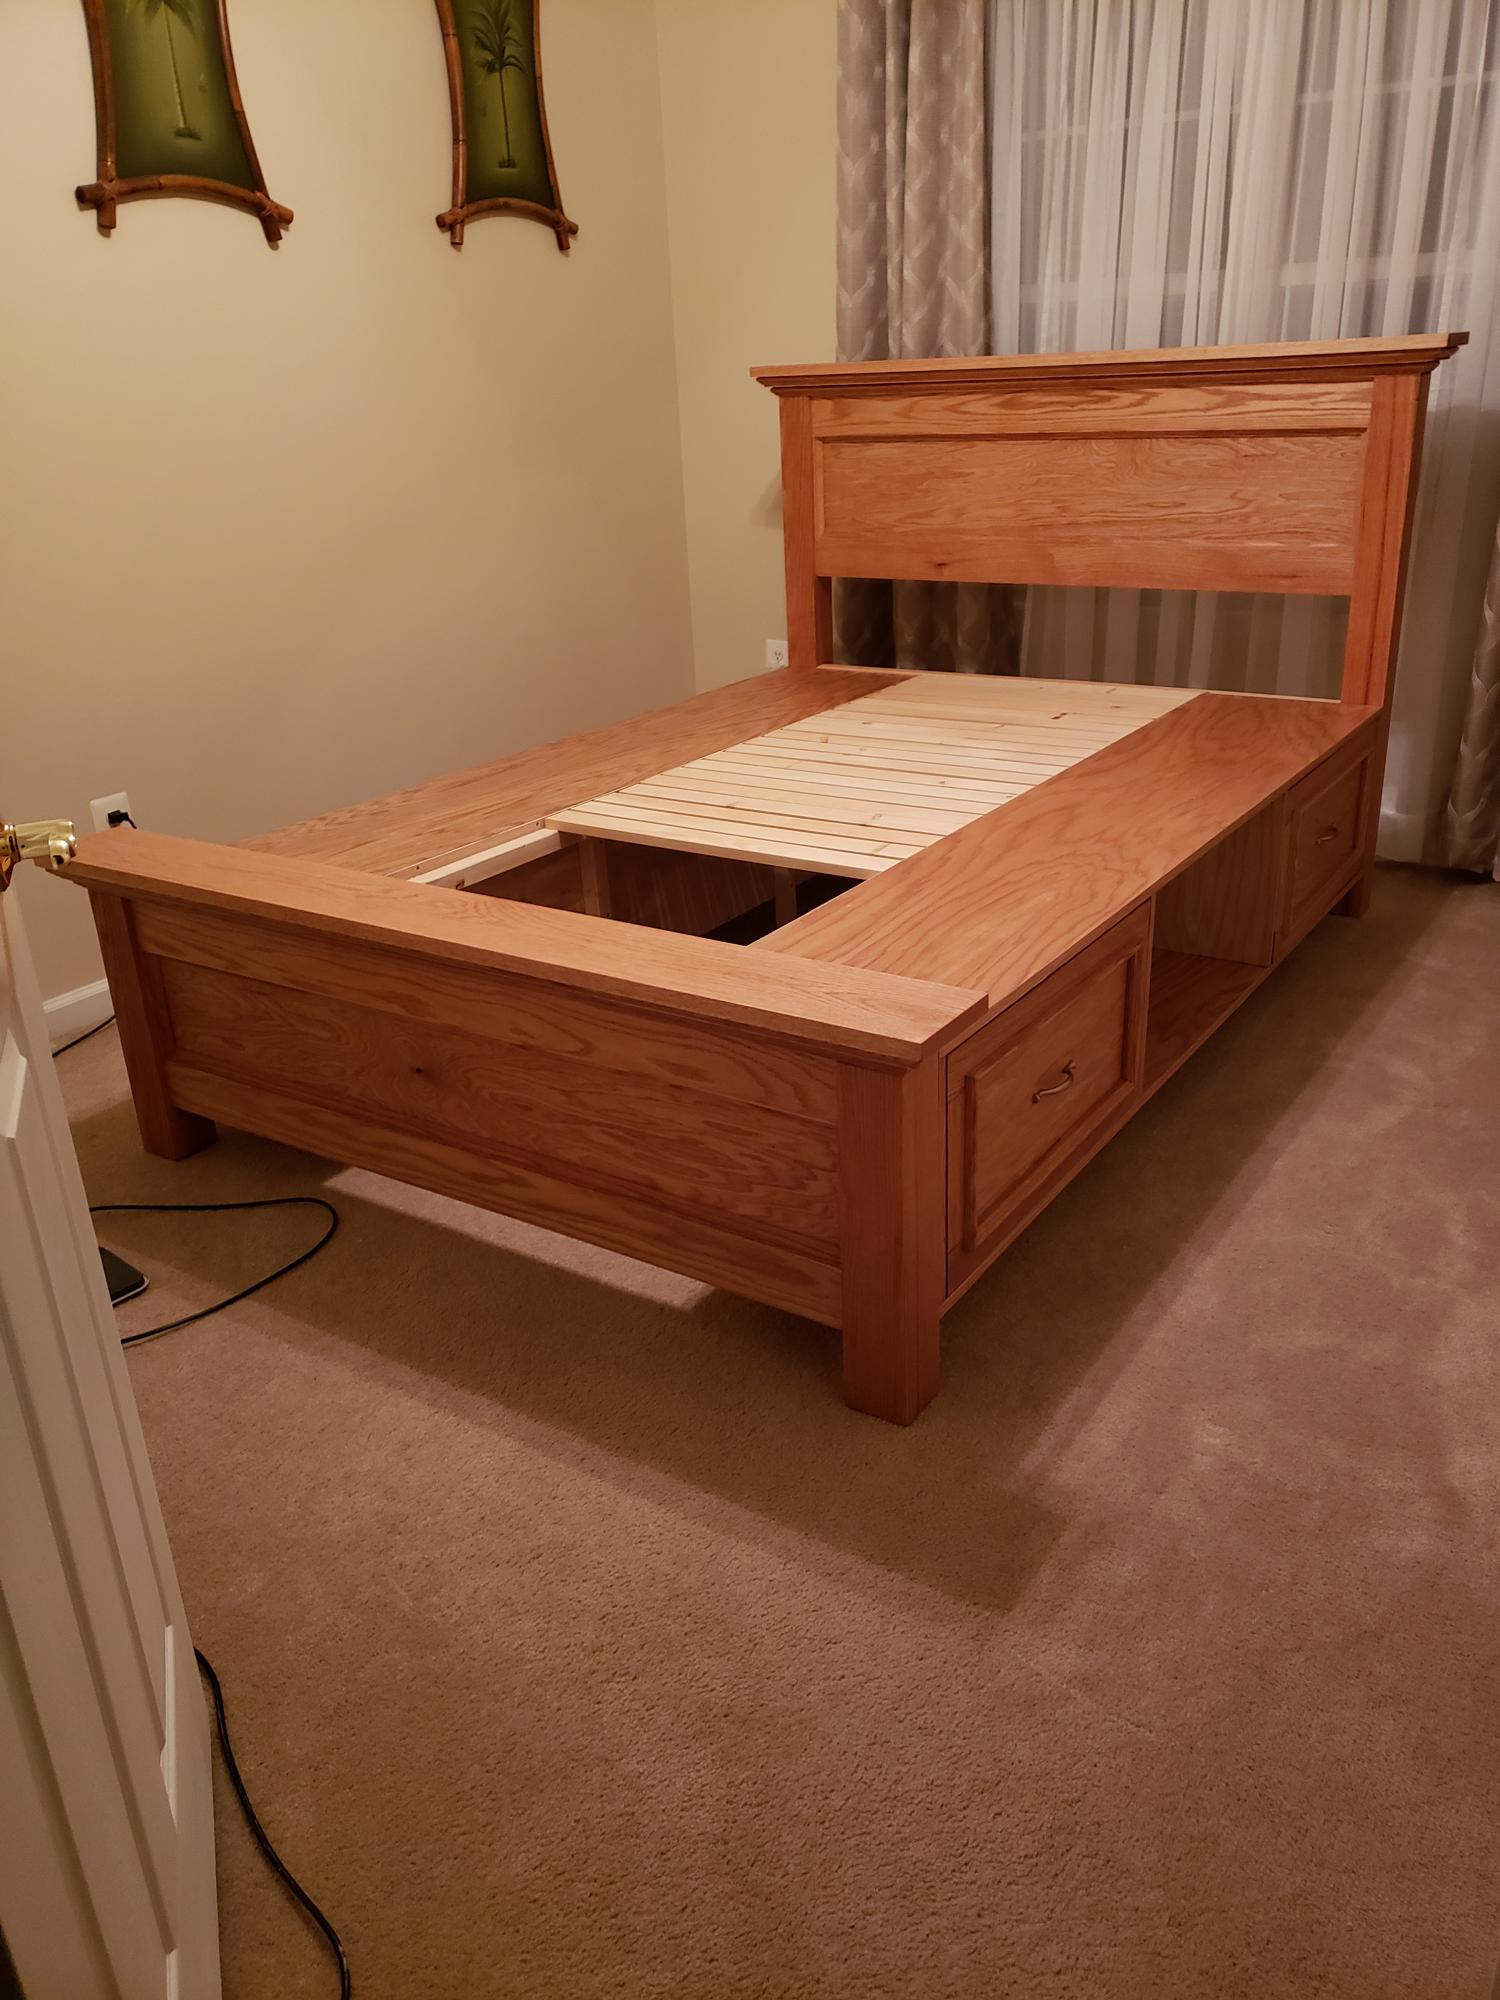
I used the plans for the queen farmhouse storage bed. I left the middle sections open on each side for guest towels
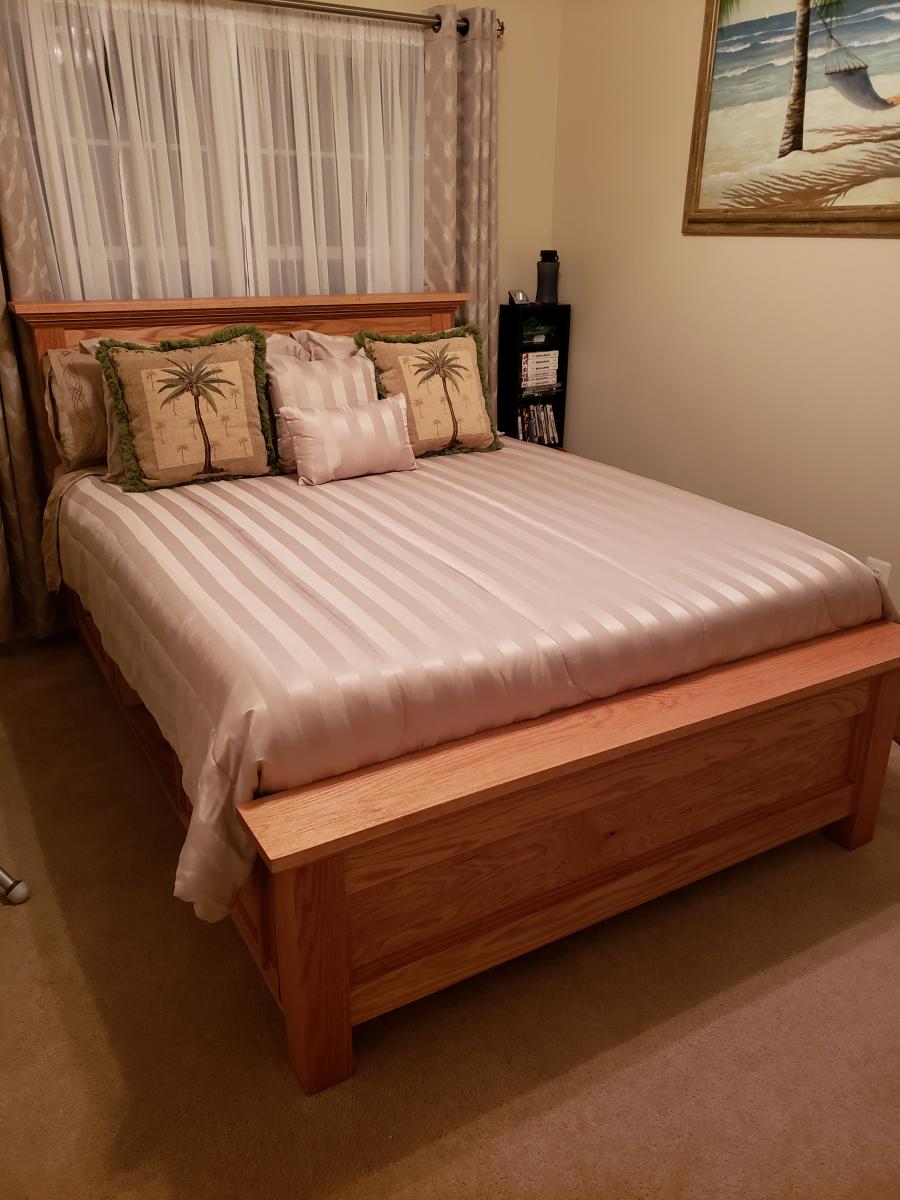
Built from Plan(s)
Finish Used
Minwax Wood Finish - Golden Pecan
DIY Wood Nightstand
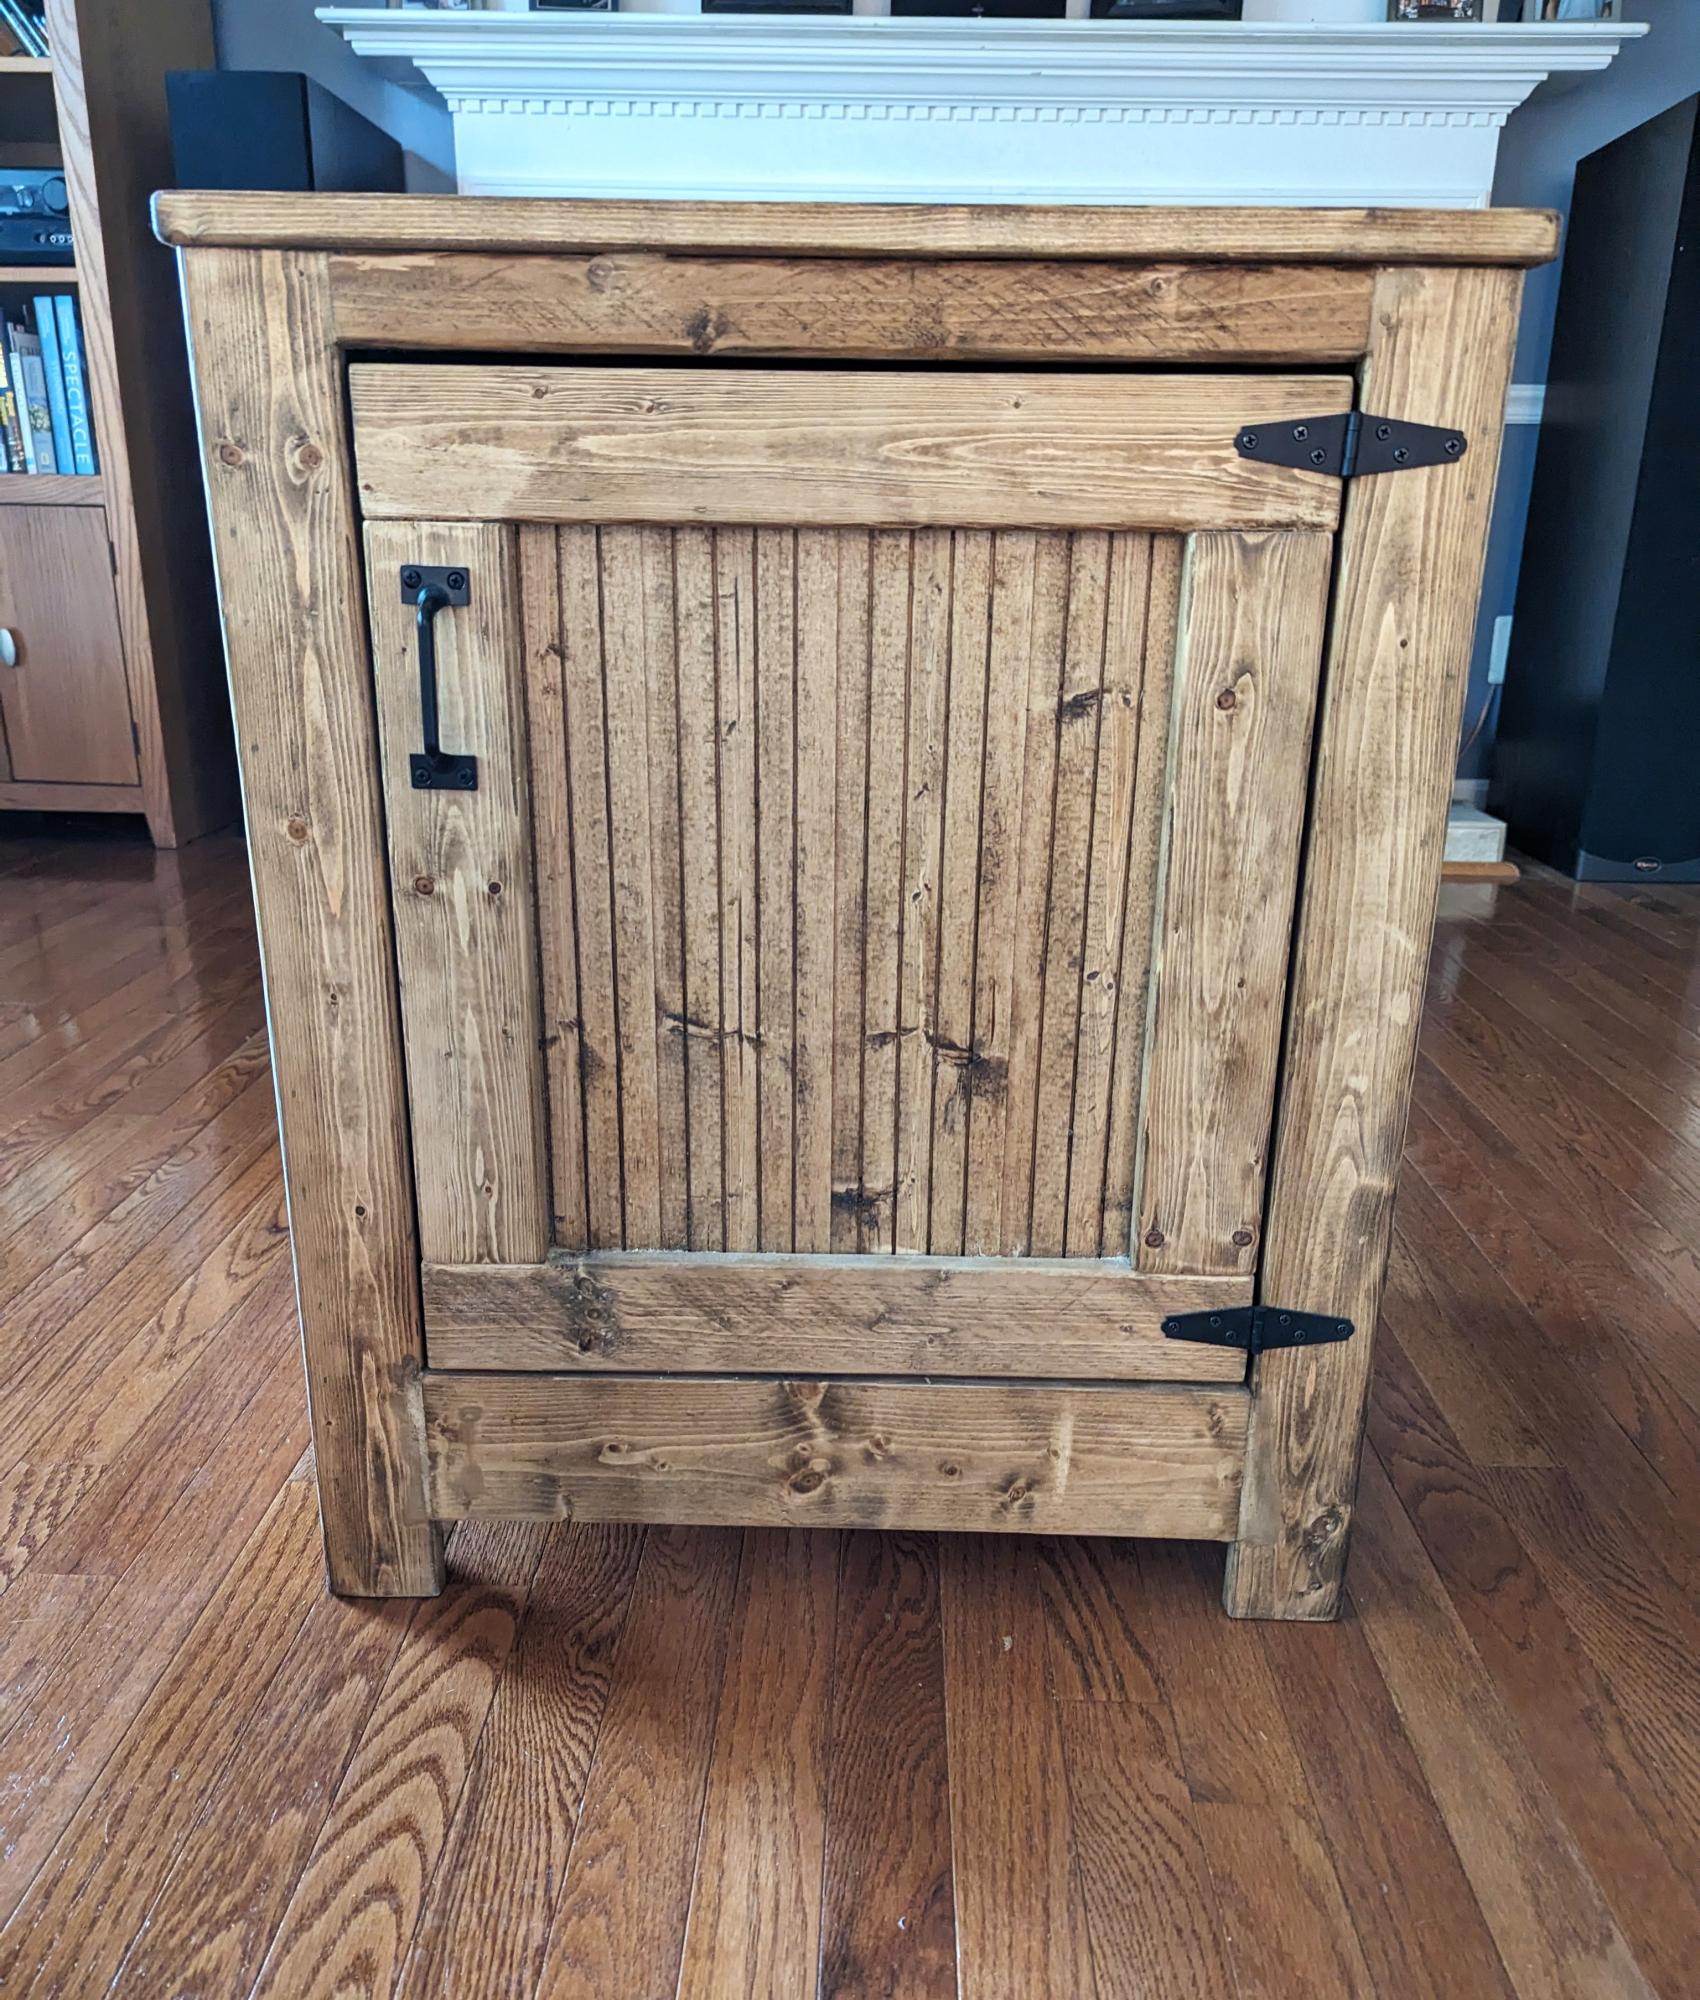
Kentwood Nightstand
Bonnie Jerry
Built from Plan(s)
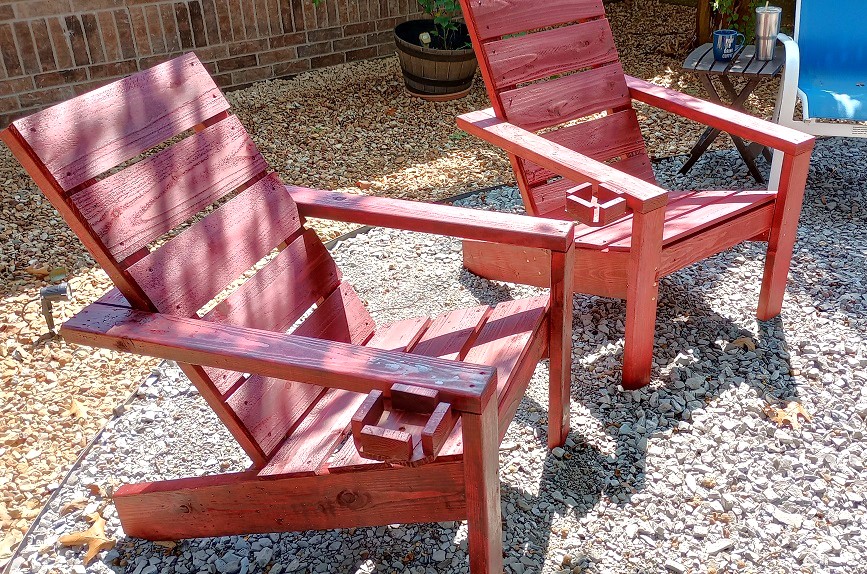
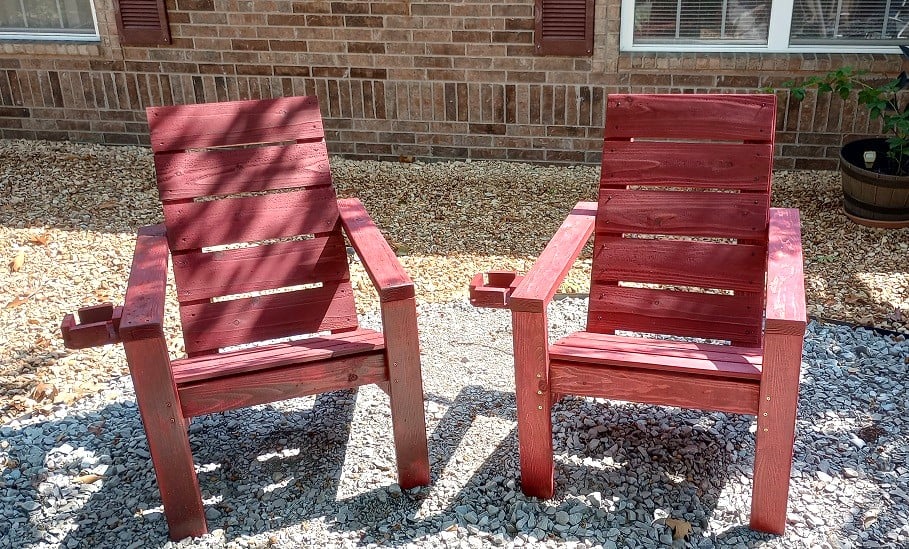
Simple Adirondack Chair
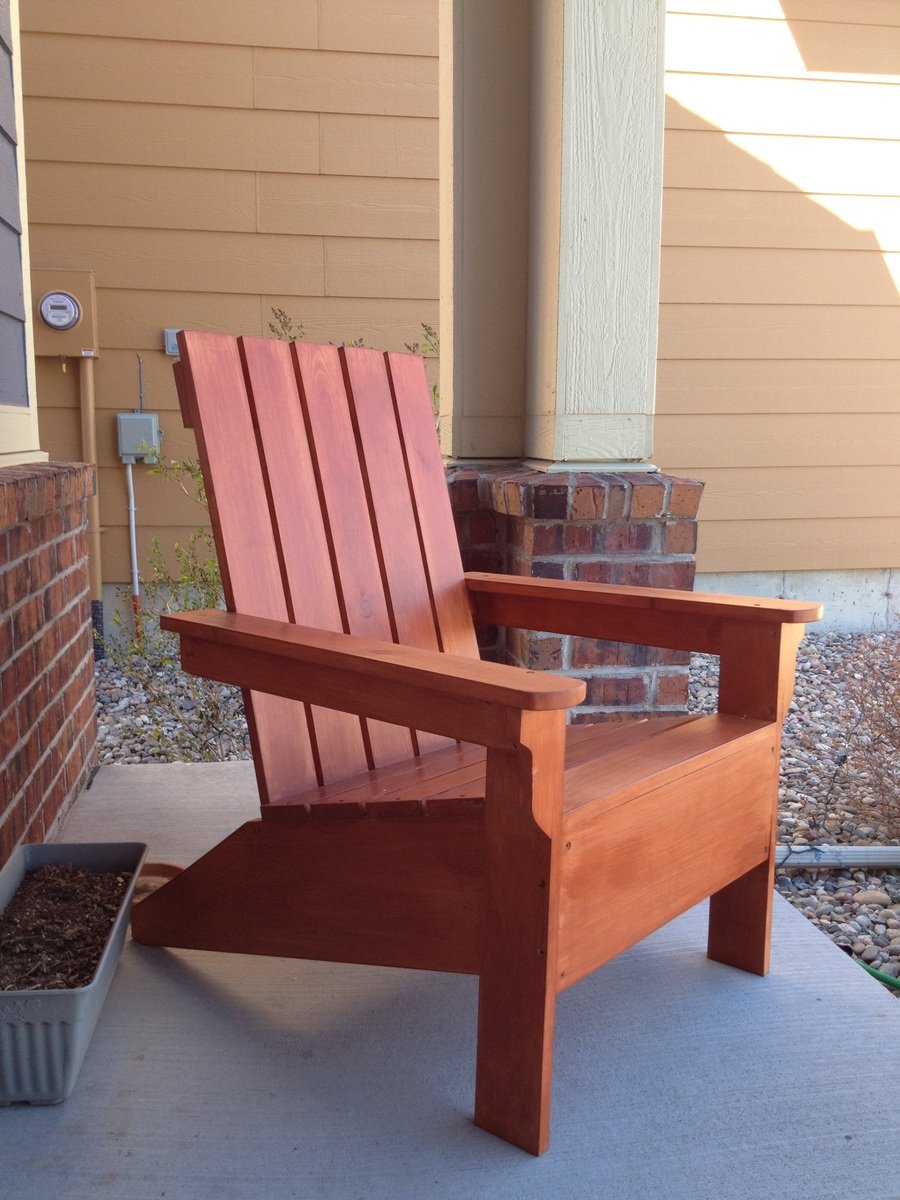
Stuck to the plans exactly how Ana laid out for me and it was quite amazing how well and easily it comes together. If I learned one thing from this project it was to always stain the wood before you put a project together haha, what a pain it was to stain in between all those slates. I am planning on building a few more with some variations and some ottomans. Pictures to follow if it is a success.
Built from Plan(s)
Estimated Cost
$70
Estimated Time Investment
Afternoon Project (3-6 Hours)
Finish Used
Used a Redwood premixed stain from Lowes. When mixed with the pine it turned a little more orange than I was hoping.
Recommended Skill Level
Beginner
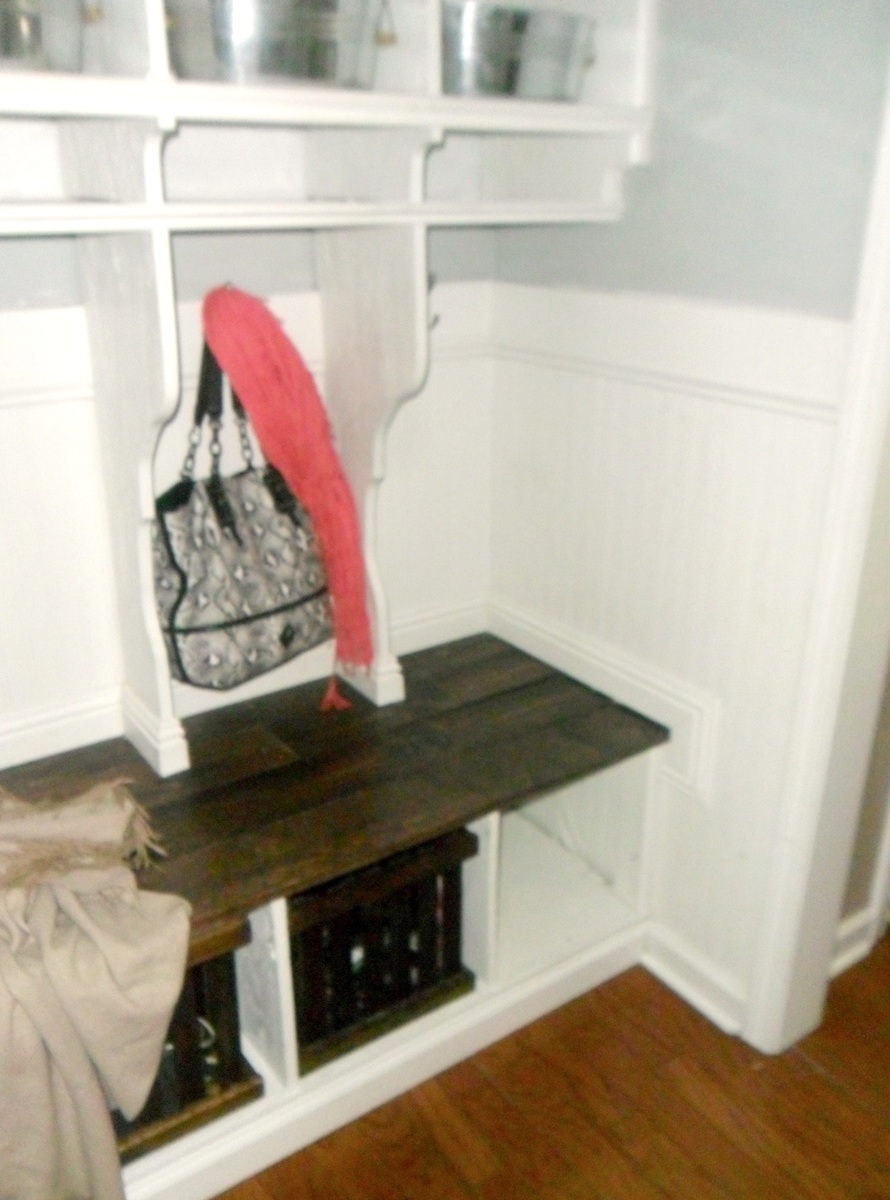
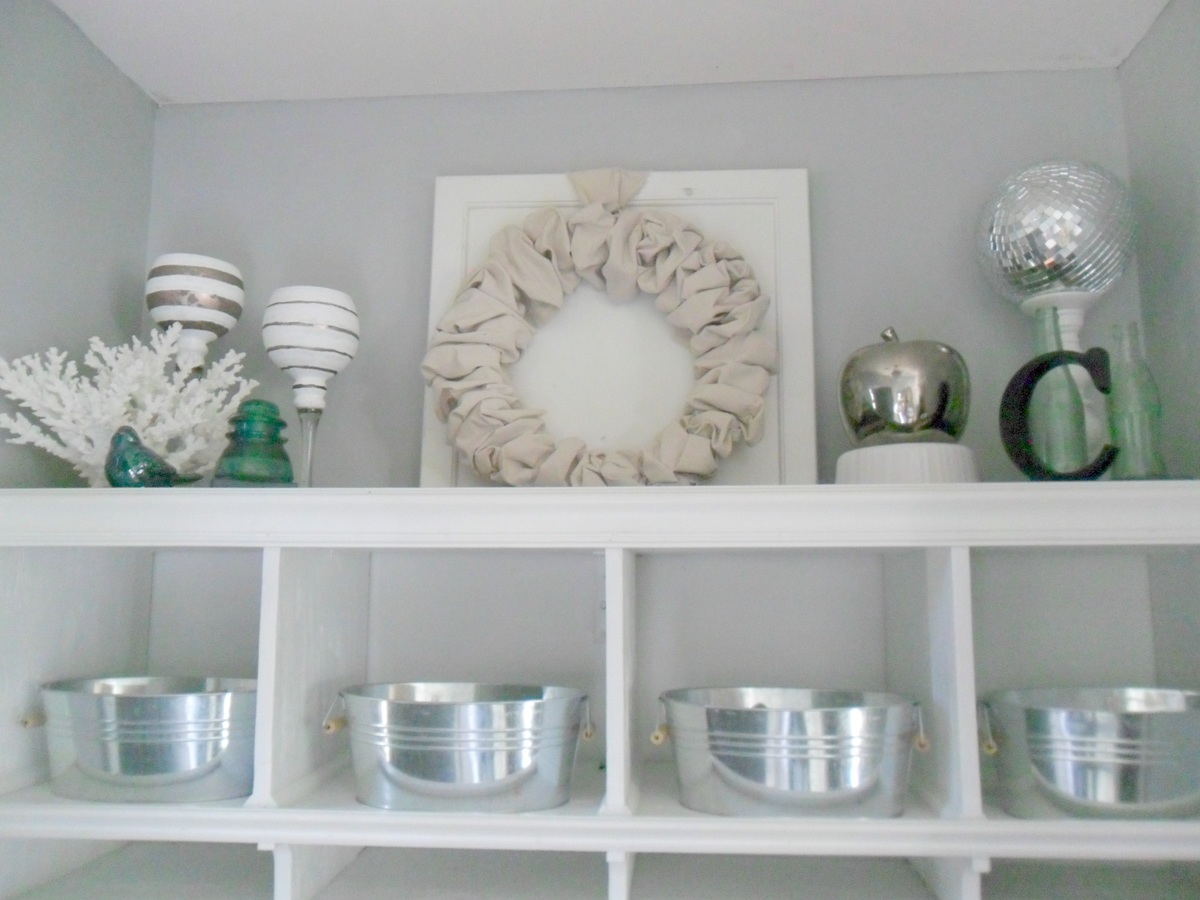
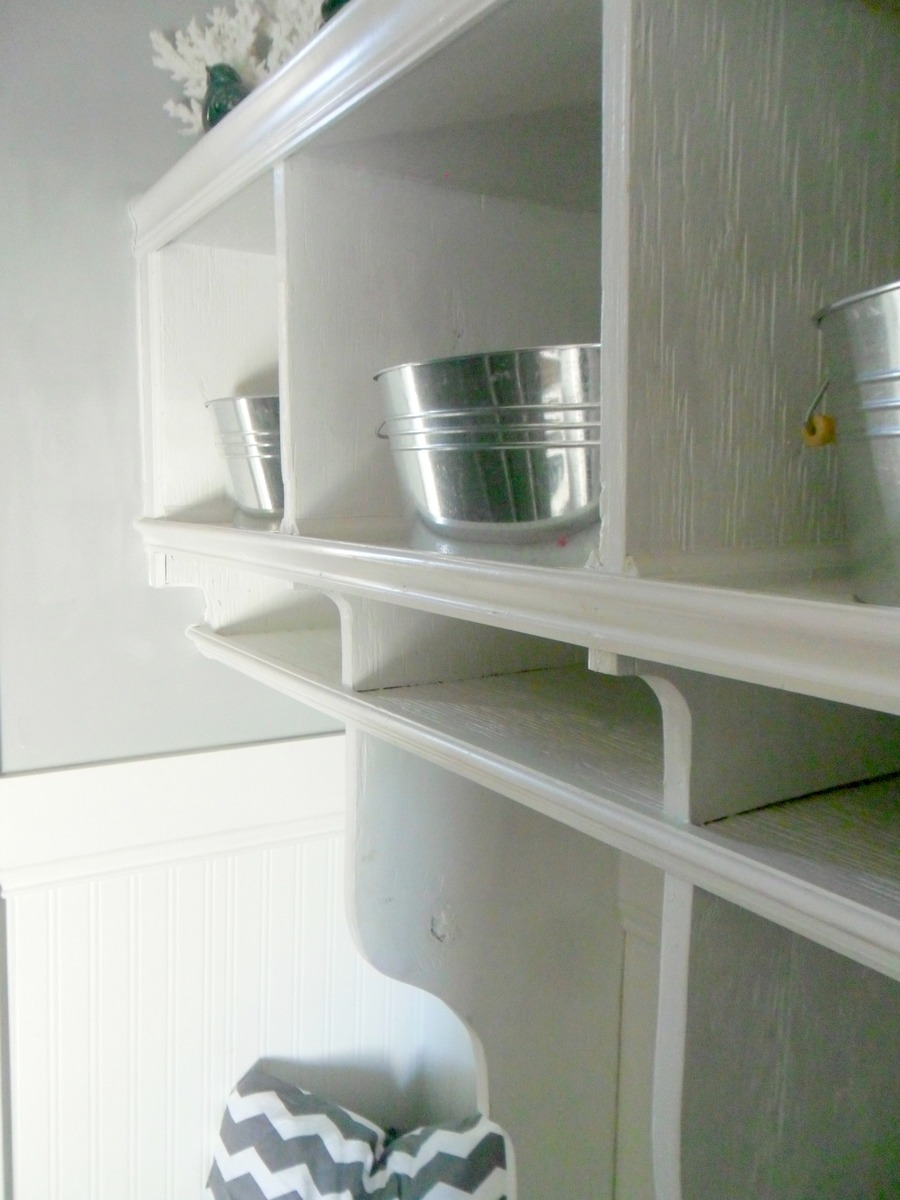
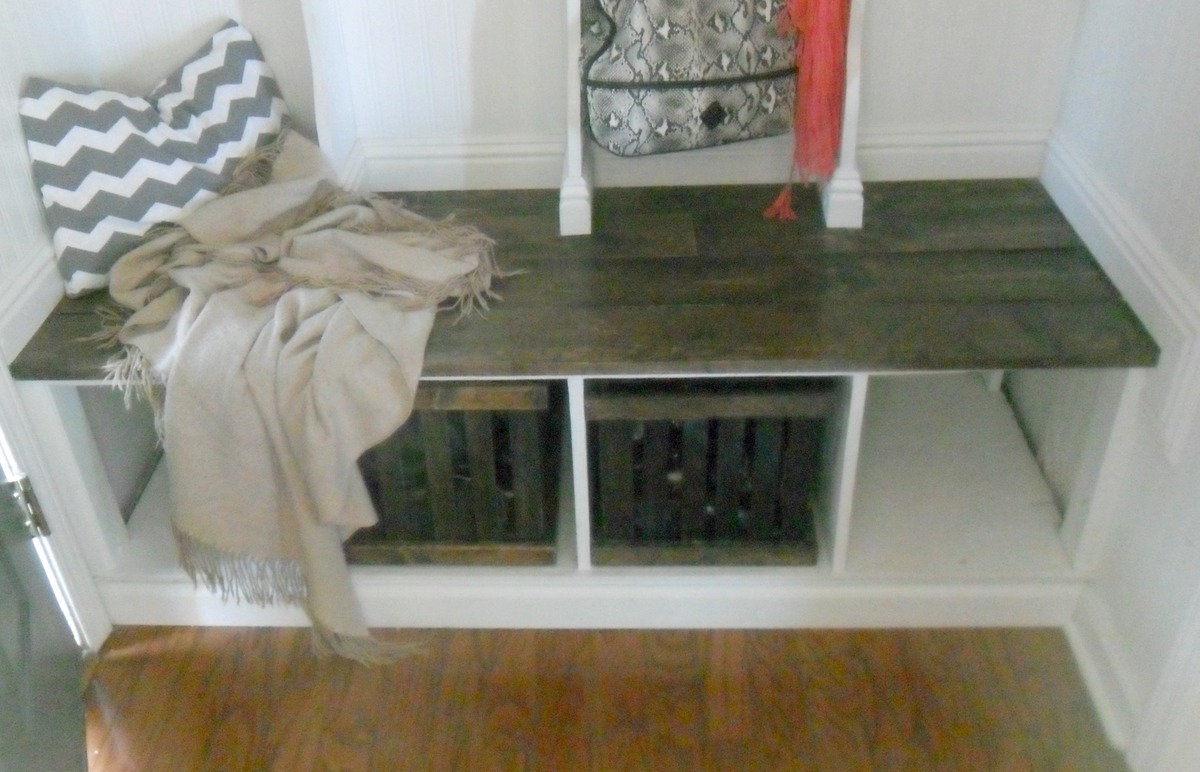
Diy mudroom entryway
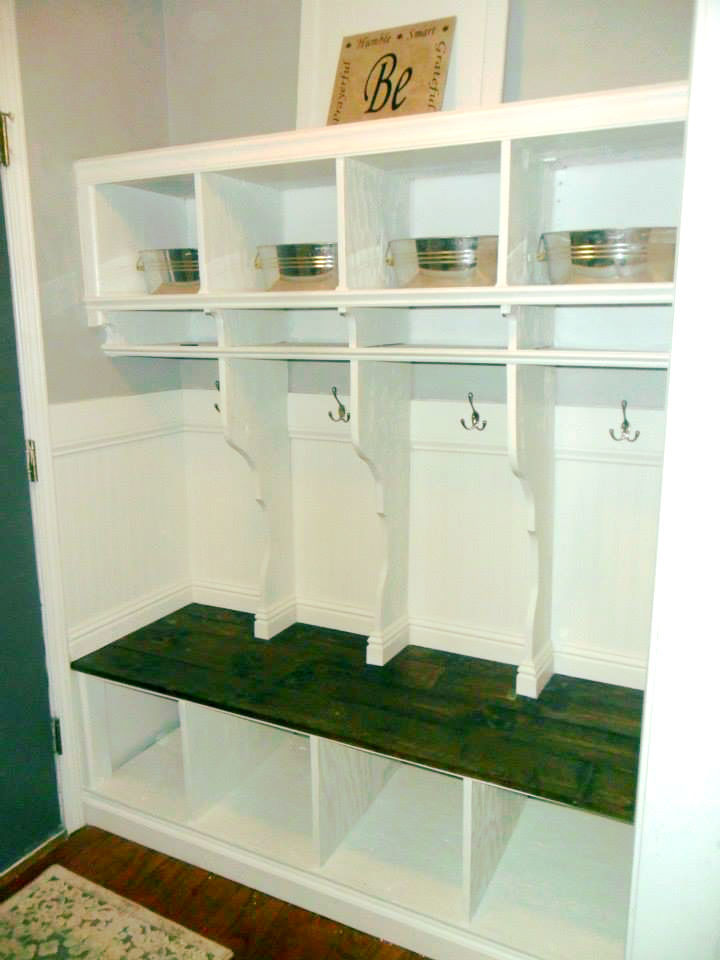
This was my very first building project. I needed a place for my kids to store their things as they went in and out of the house. I happened to have a perfect place to add built ins just inside my front door. Our house is pretty small and there wasn't much room anywhere else. It took me quite awhile, but I was able to learn from reading several Ana White plans and then I designed this myself. I learned how to use Google sketch-up in order to design it. I hope you enjoy checking it out!

Estimated Cost
150-ish
Estimated Time Investment
Week Long Project (20 Hours or More)
Finish Used
Generic white paint from Walmart, Gloss finish. Three coats. Minwax Dark Walnut stain for Bench. MInwax Polycrilic as a top coat for the bench.
Recommended Skill Level
Intermediate
Comments
Wed, 01/29/2014 - 20:06
Great job!
I love the details used. Especially the seating area color choice, buckets for storage and extra shelf...what do you plan on using the smaller shelves above the hooks to store? One small suggestion, you might consider adding extra hooks on the side panels. I did this on my project and I think we've used every hook we have LOL! Fantastic job!!

In reply to Great job! by tommybo76
Thu, 01/30/2014 - 16:20
Thank you so much! You are
Thank you so much! You are right, that is something I actually have plans to do. We can always use more hooks! The smaller slots are for school papers. My kids each have a section (I have four kids). They are to take out any papers that they need me to see and place them in the homework slot...I will then either return it to the slot or trash it, if need by. I also use it to put anything I find laying around the house that belongs in their bookbags or that needs to go to school in (library books, etc). You can see the whole tutorial, if you're interested, here: http://www.home-heart-and-hands.blogspot.com/2014/01/diy-mudroom-and-ent...
Thu, 01/30/2014 - 13:26
Thank you!
Thank you so much! You are right, that is something I actually have plans to do. We can always use more hooks! The smaller slots are for school papers. My kids each have a section (I have four kids). They are to take out any papers that they need me to see and place them in the homework slot...I will then either return it to the slot or trash it, if need by. I also use it to put anything I find laying around the house that belongs in their bookbags or that needs to go to school in (library books, etc). You can see the whole tutorial, if you're interested, here: http://www.home-heart-and-hands.blogspot.com/2014/01/diy-mudroom-and-en…
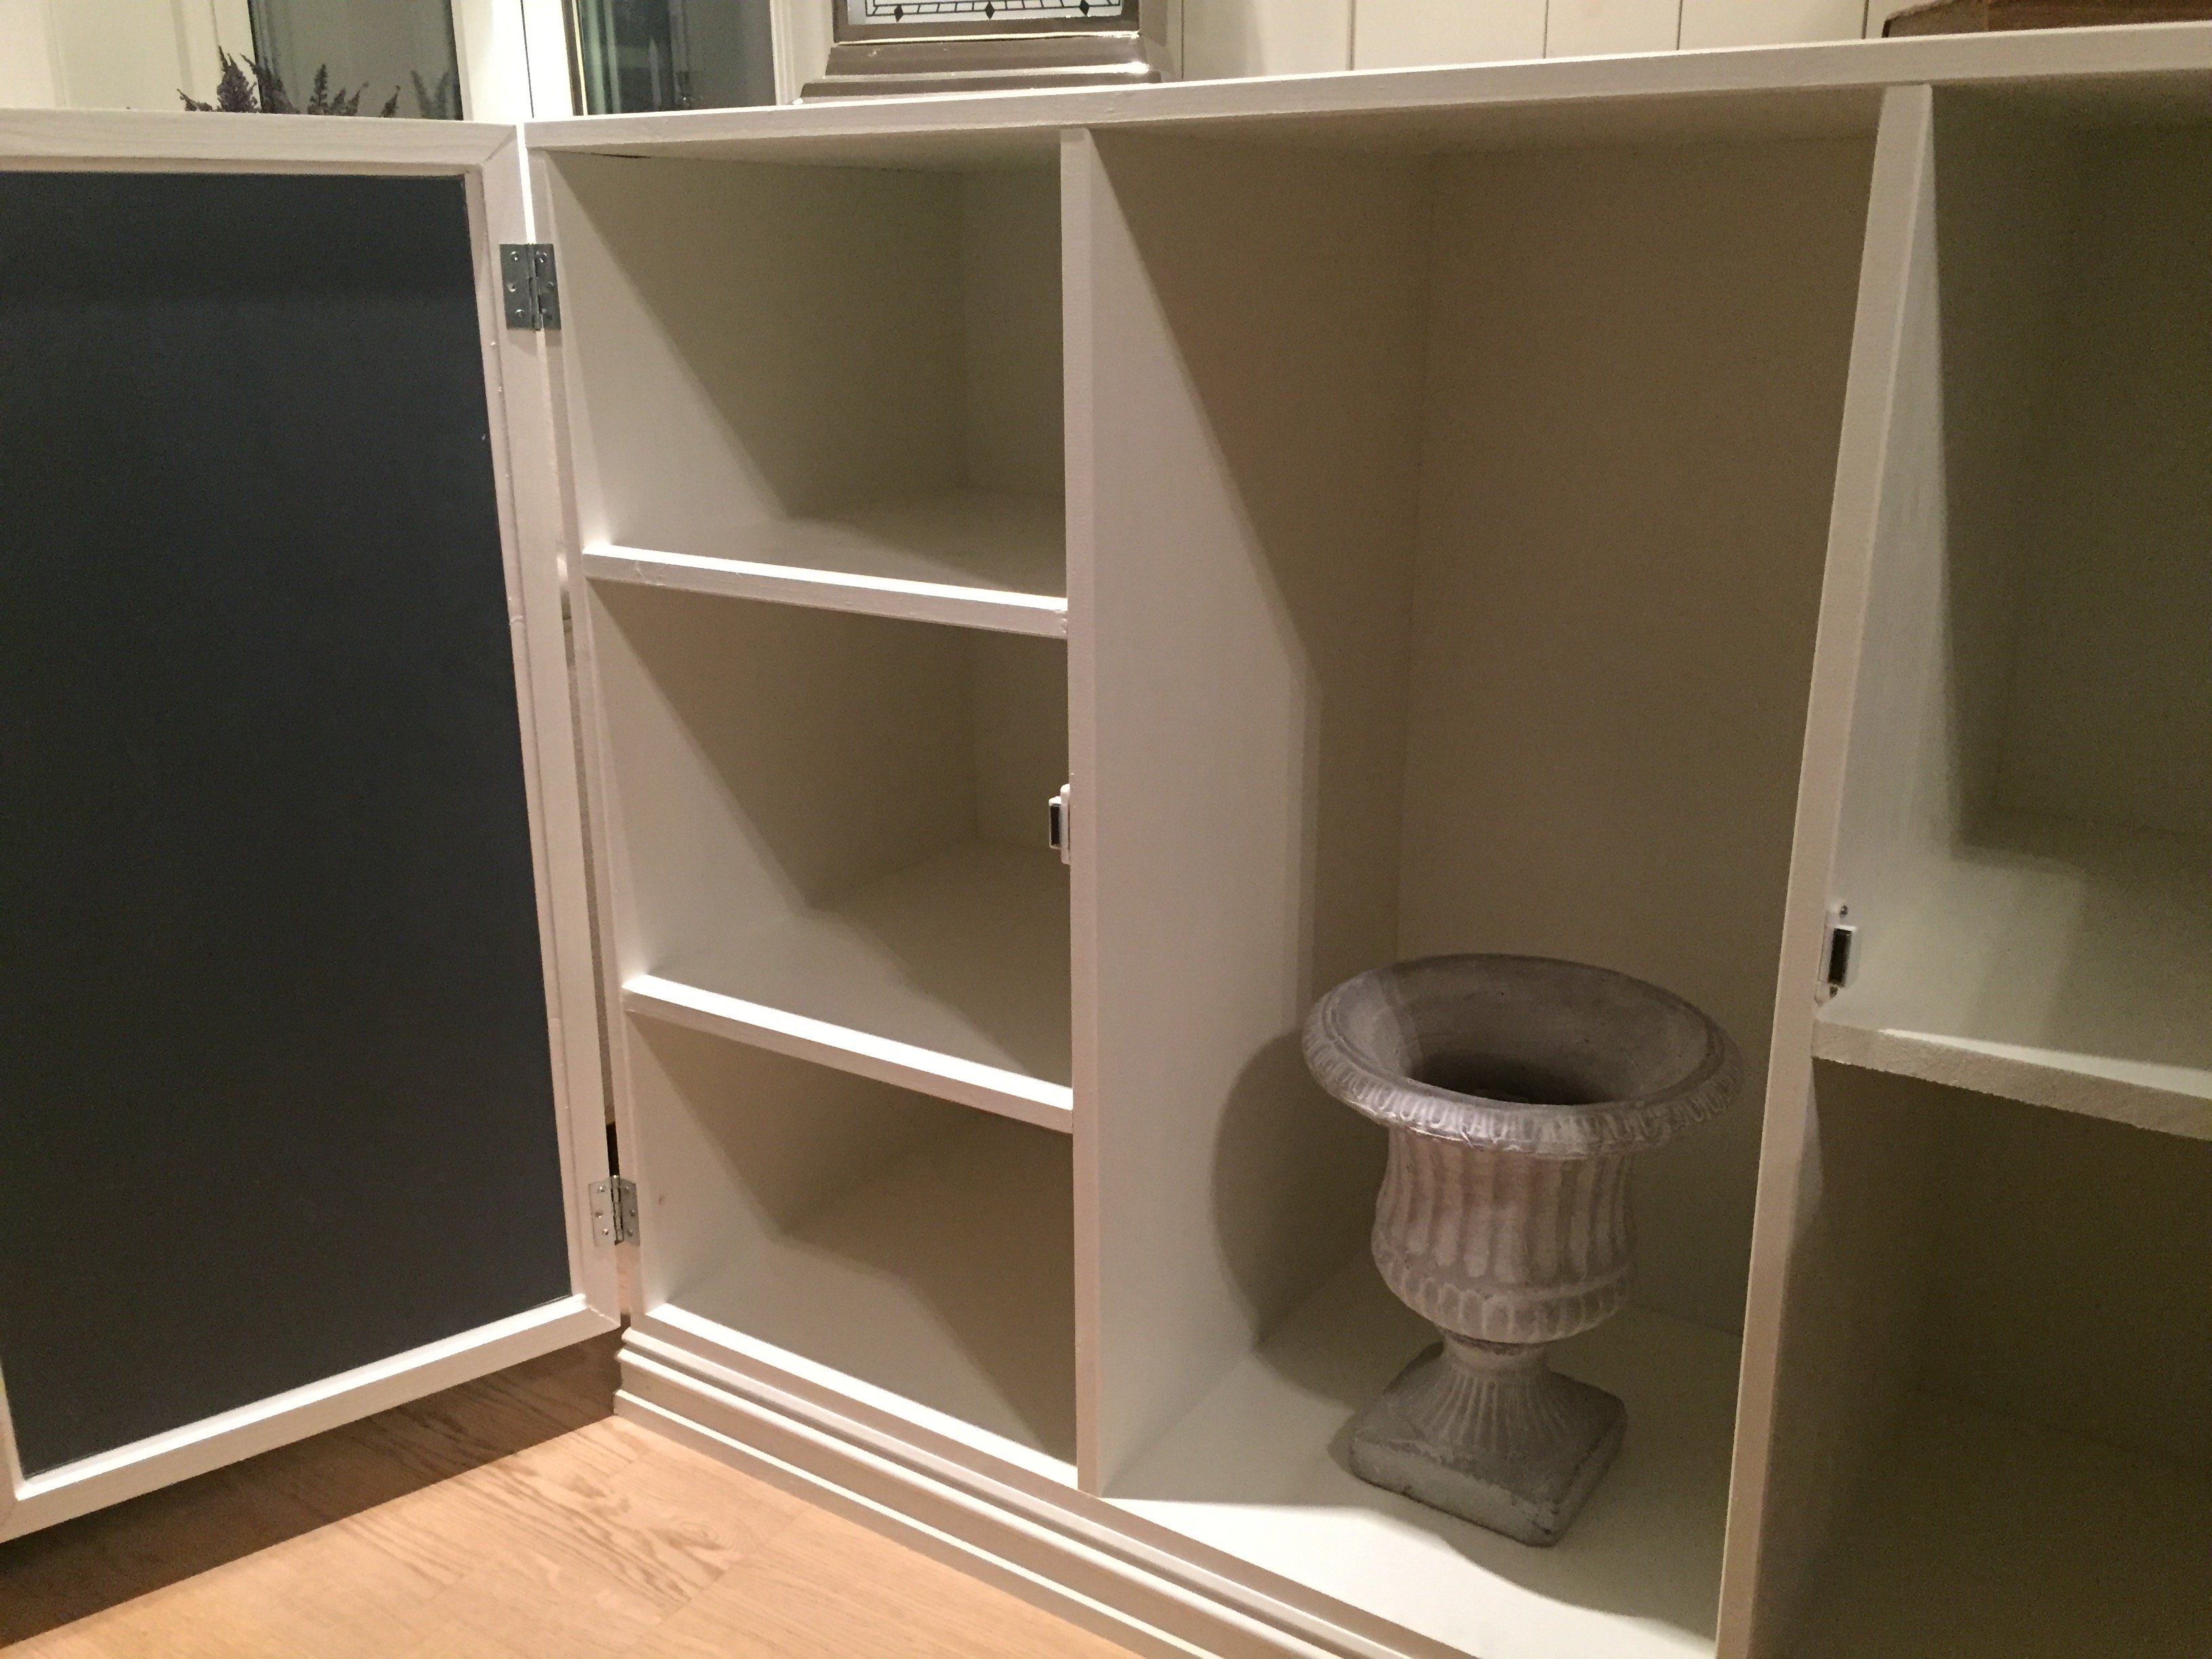
Mirrored console
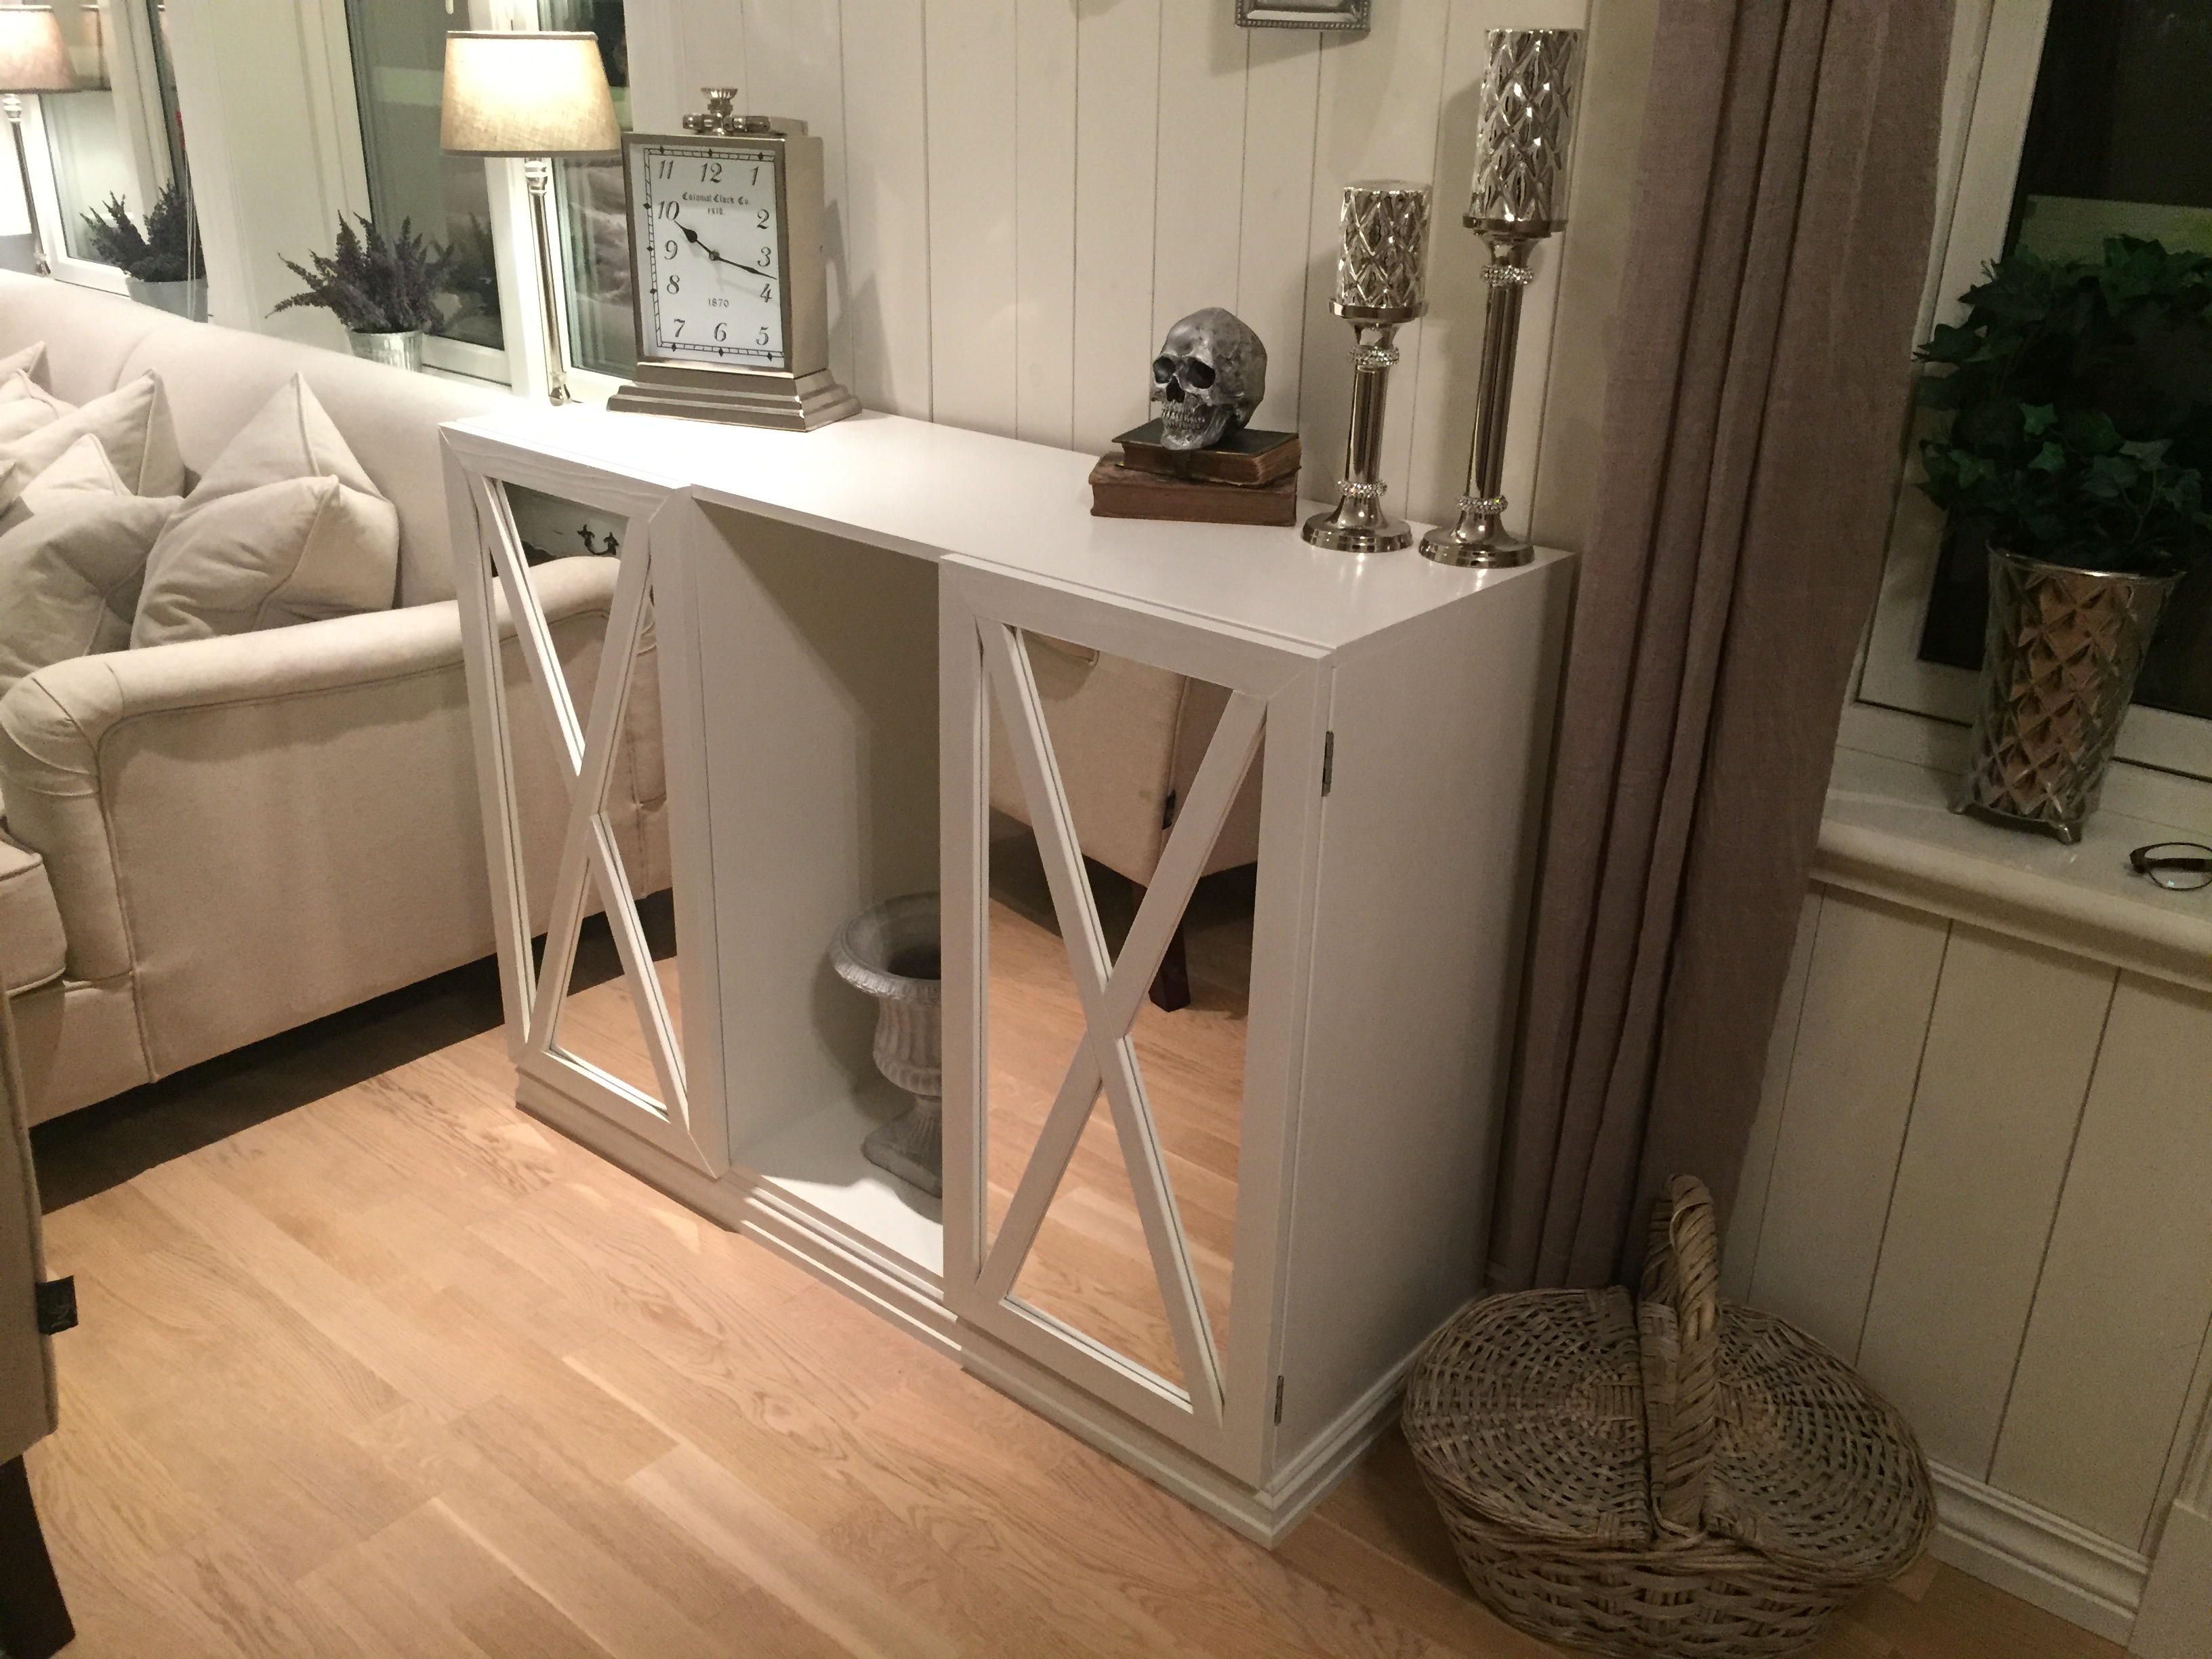
My own take on a mirrored console
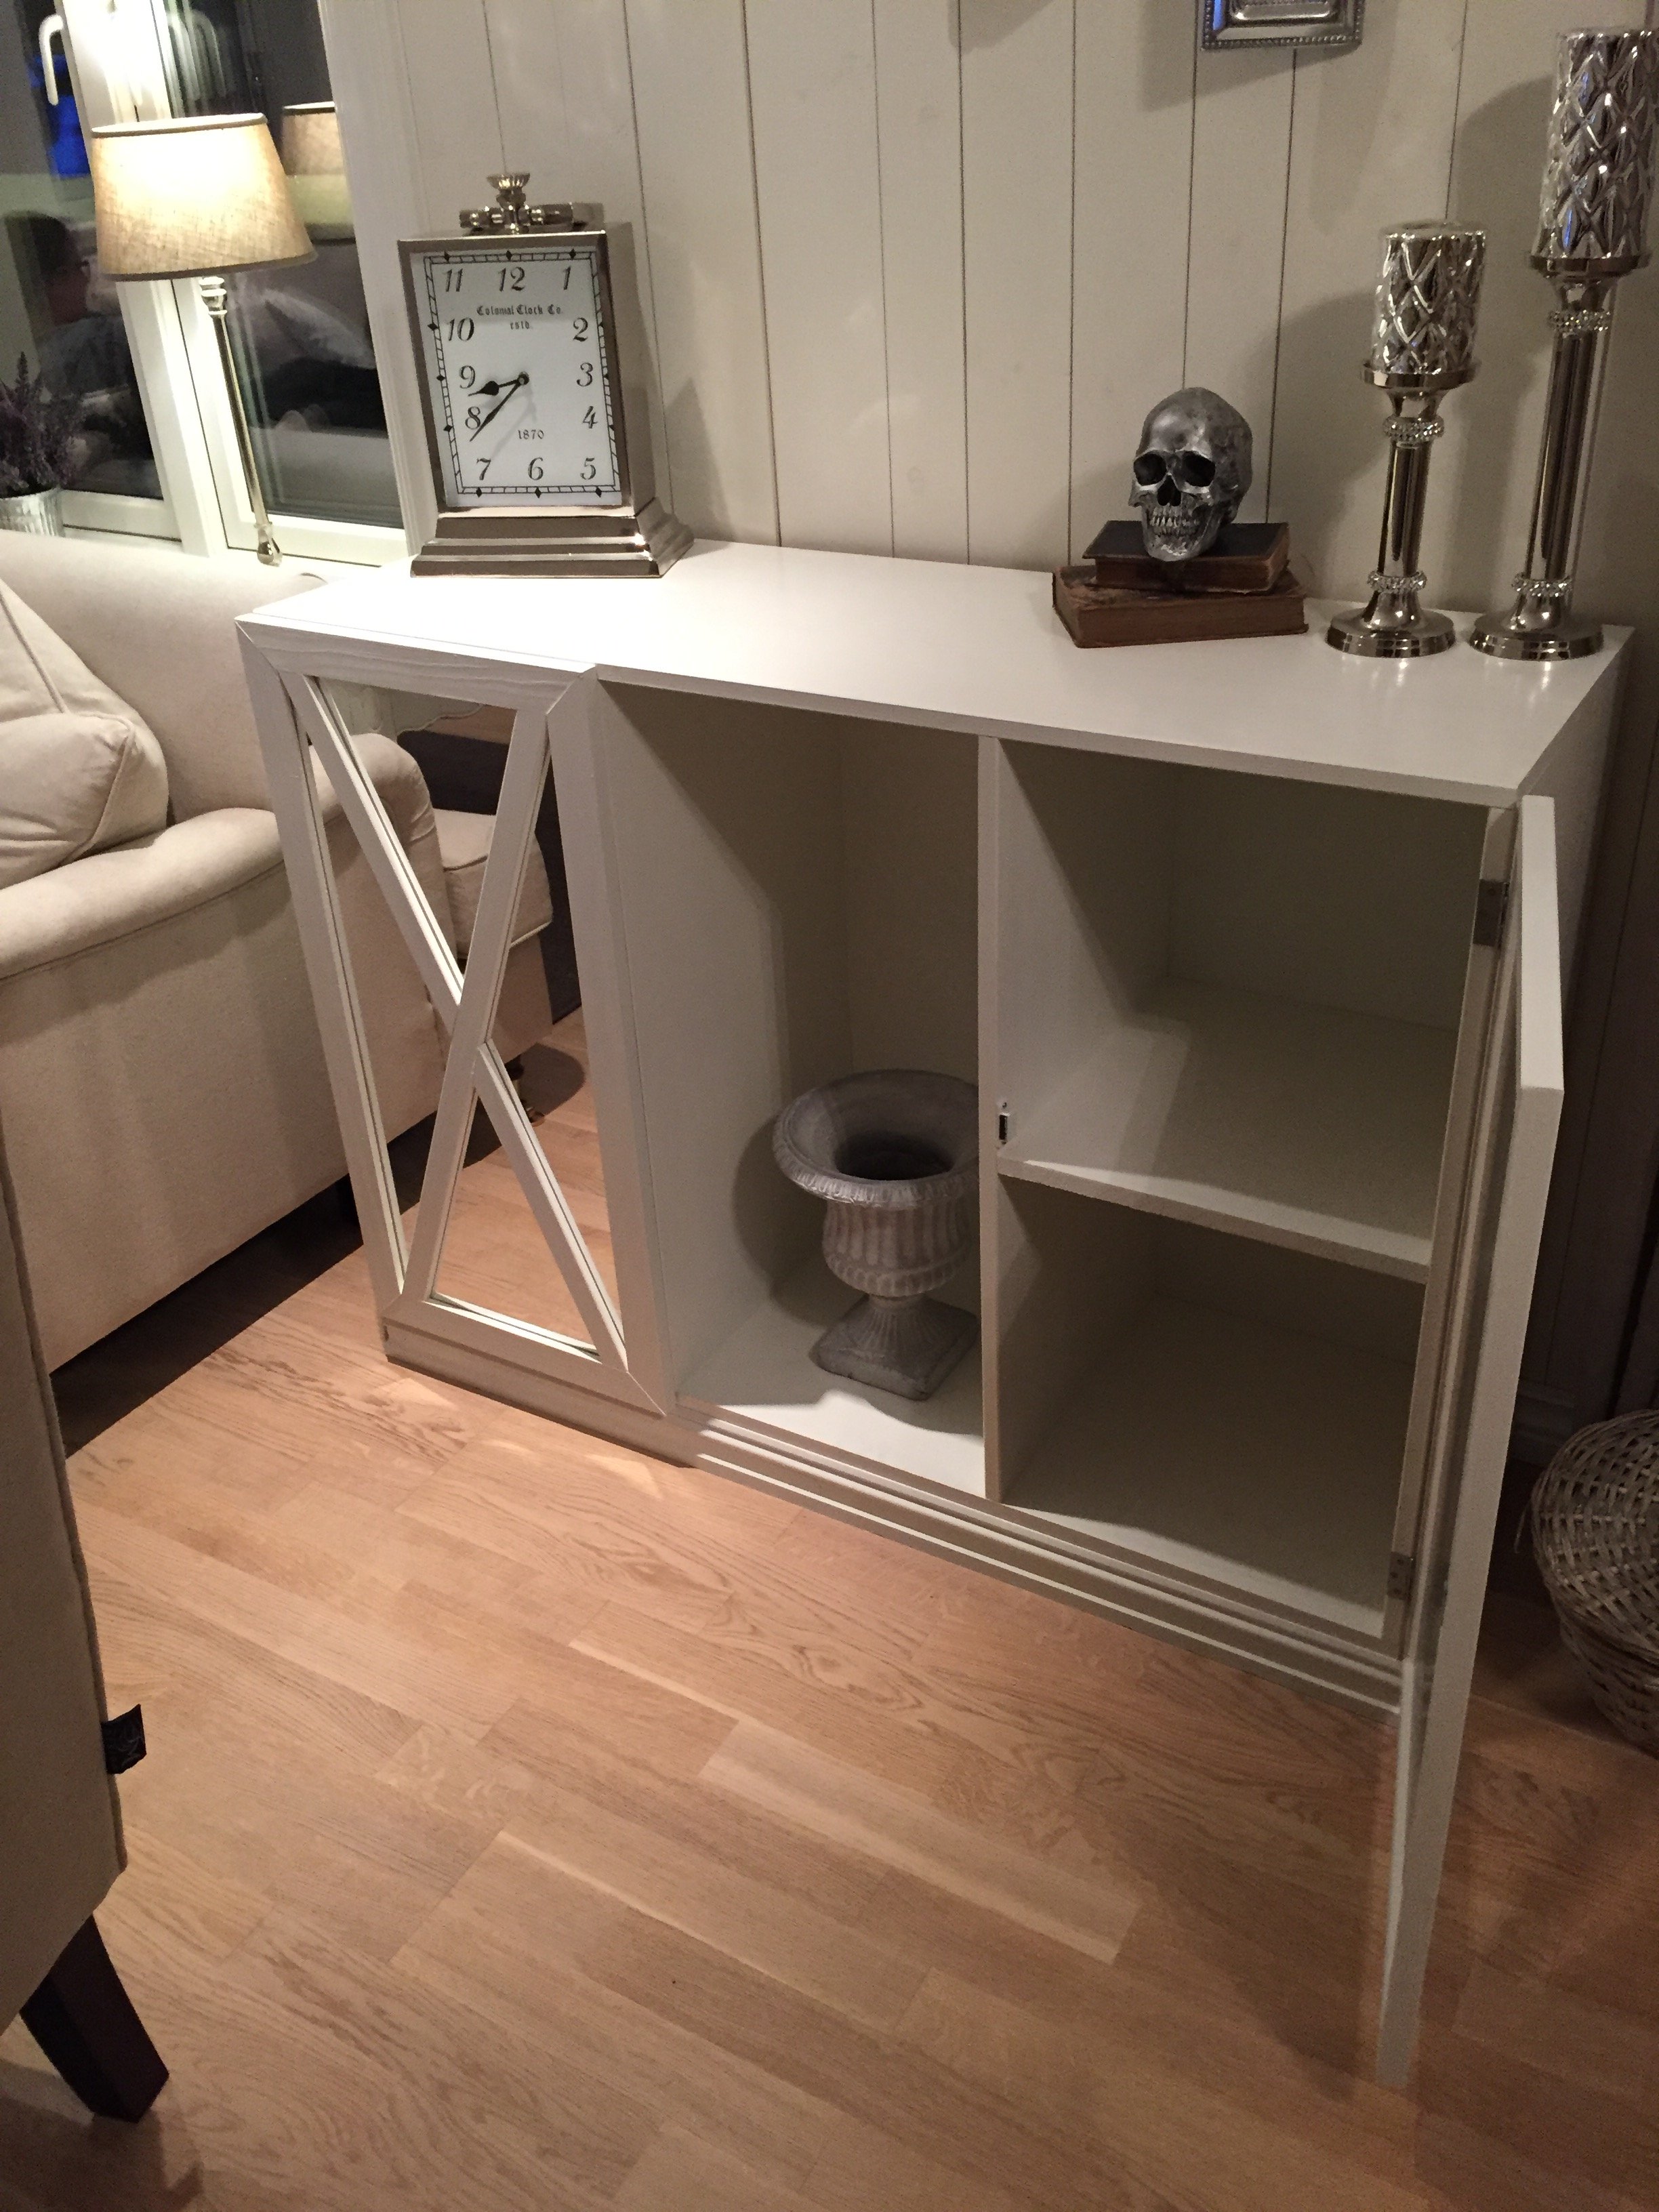

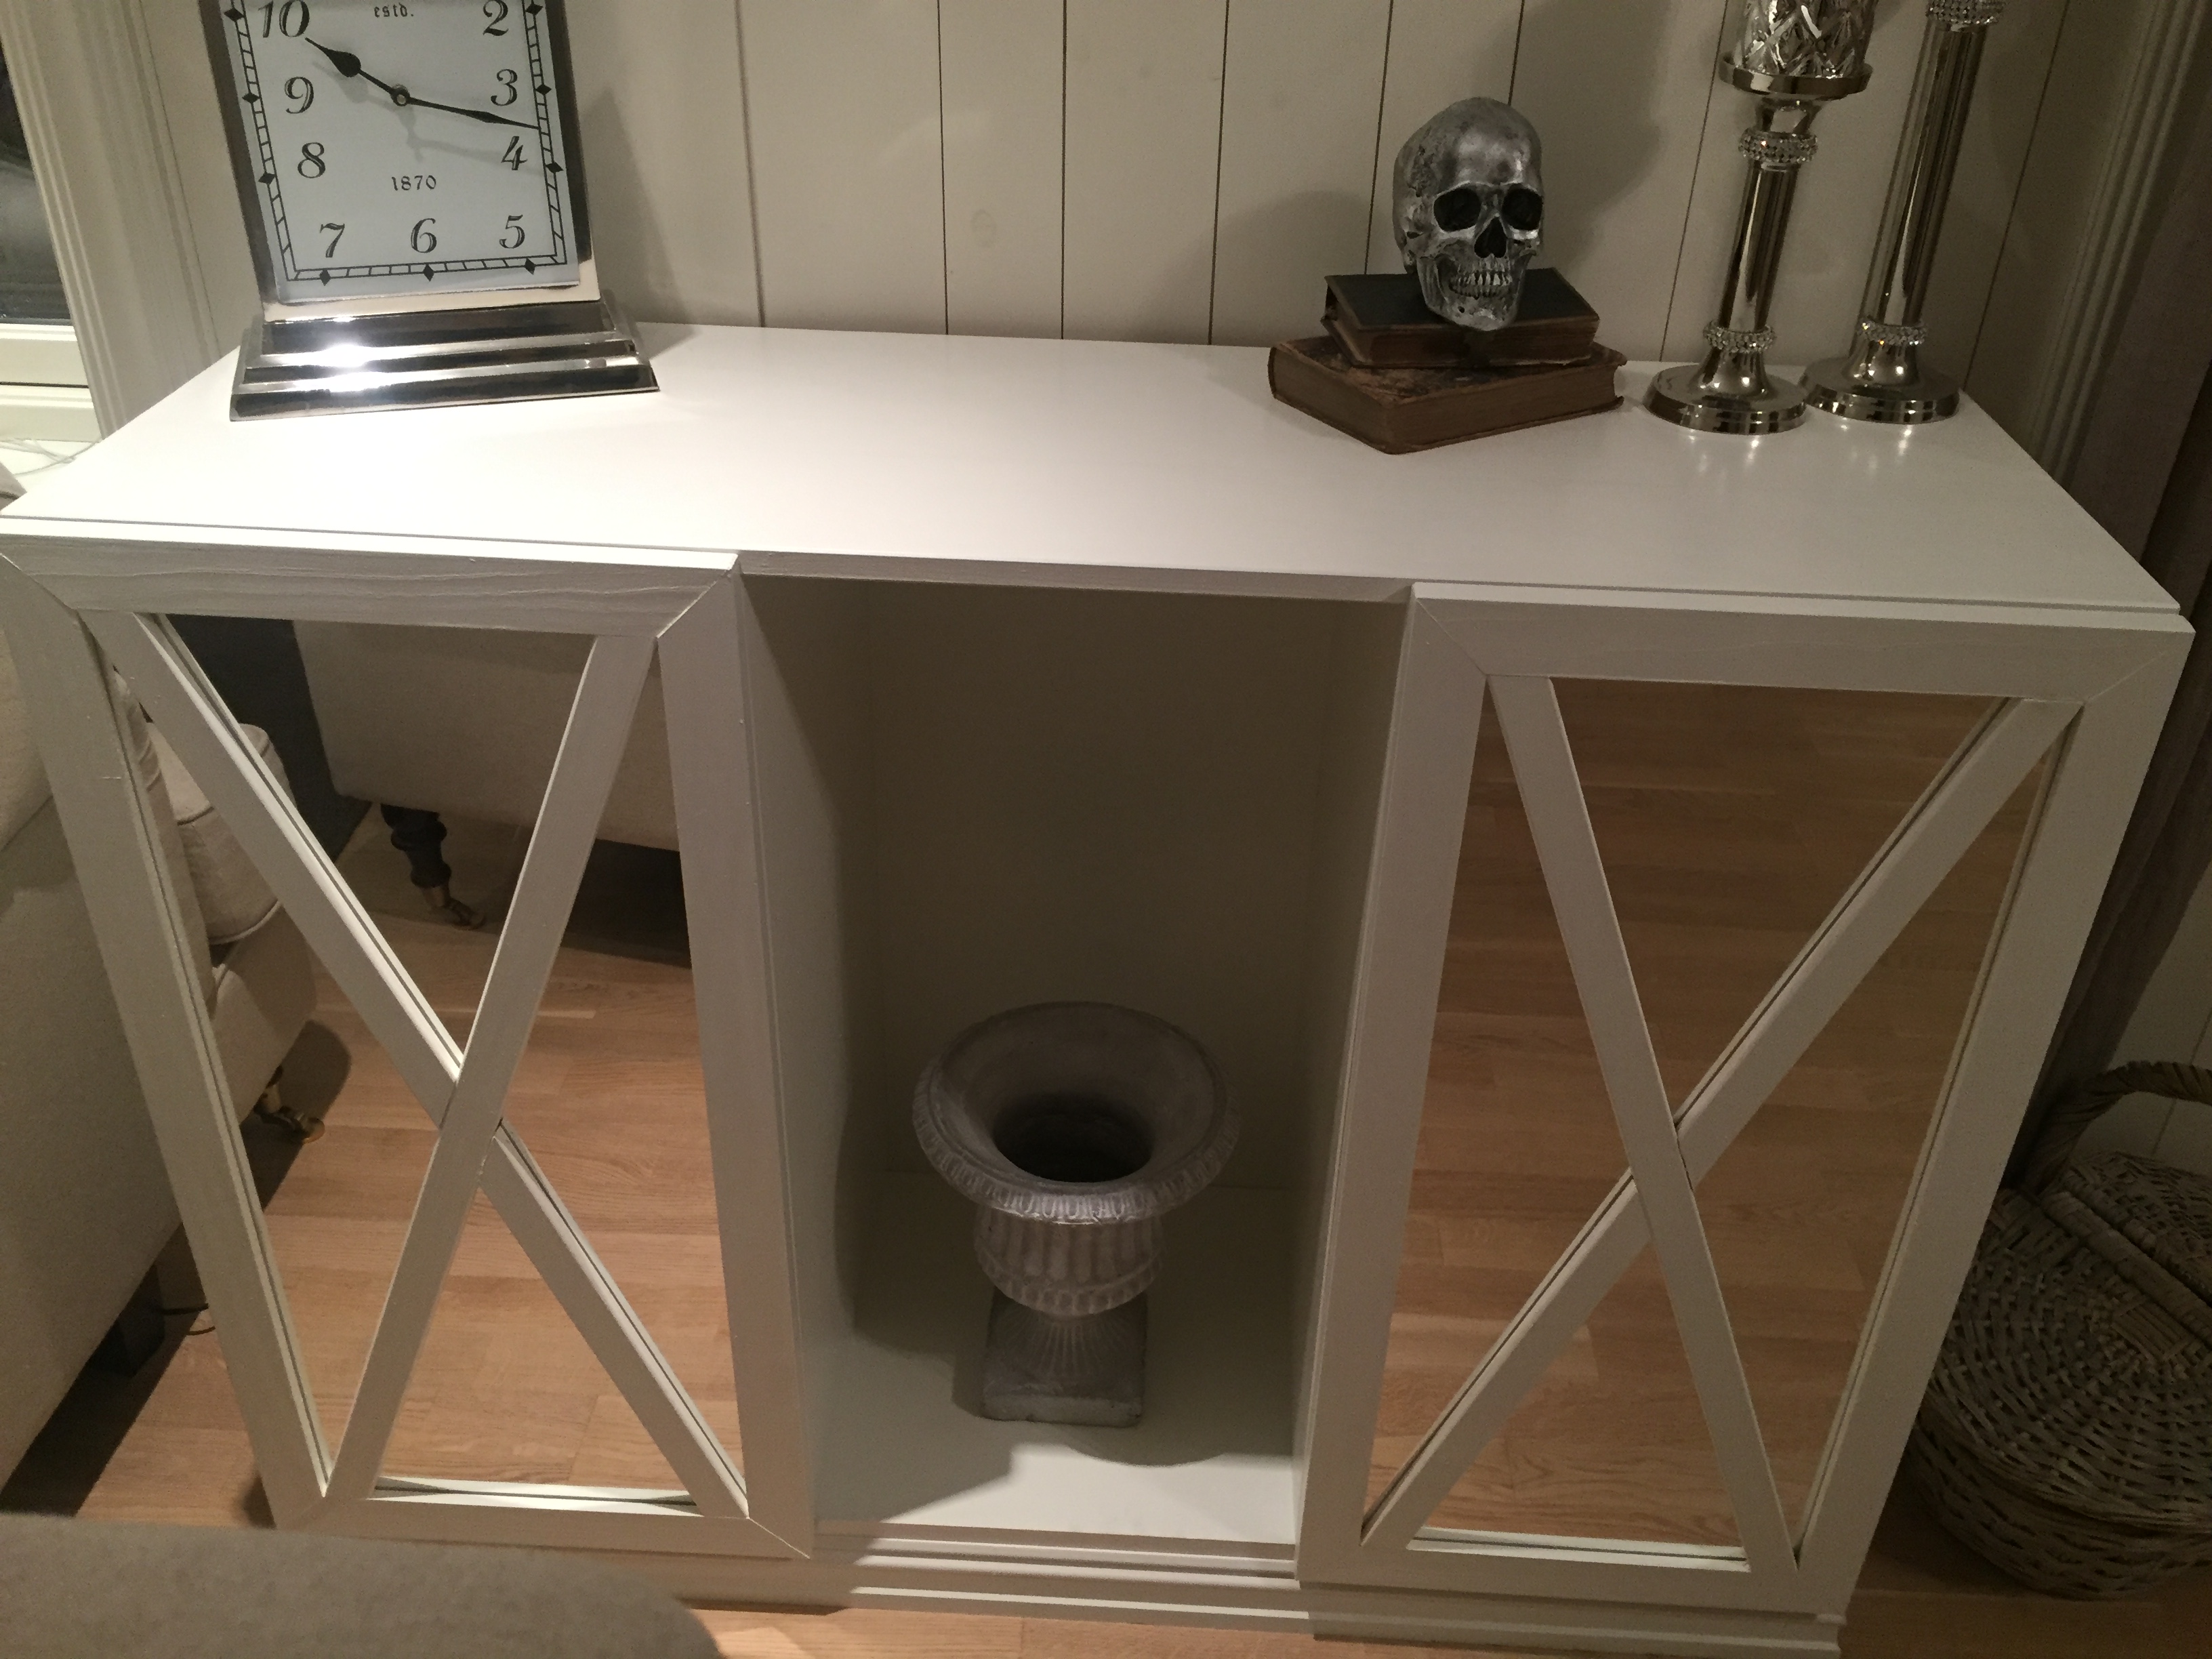
Built from Plan(s)
Estimated Time Investment
Week Long Project (20 Hours or More)
Recommended Skill Level
Beginner
Bens table and chairs
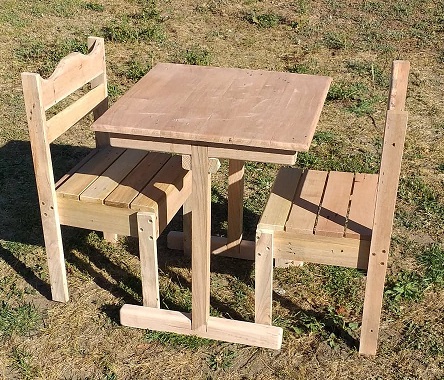
I took your plan for the Clara table to make Ben's table. I used your sizing but made Ben's table with pedestal legs. I then used your $4 chair plan as well.
Most of the timbers you use we in Australia consider exotic timber.
I used eucalypts. Tasmanian Oak for the table legs and Red Ironbark for the rest.
Built from Plan(s)
Estimated Time Investment
Week Long Project (20 Hours or More)
Finish Used
Lacquer
Adirondack Chair Modified
Modified Essential Adirondack Chair
I modified the basic design by making the seat 3 inches higher and 1 inch wider to better accommodate my senior body.
I also used cedar fence boards for the seat and back instead of 1x10s, and added clunky cup holders.
I used Barn Red stain and Thompson's Water Seal for the finish.
Brad Tom

Built from Plan(s)
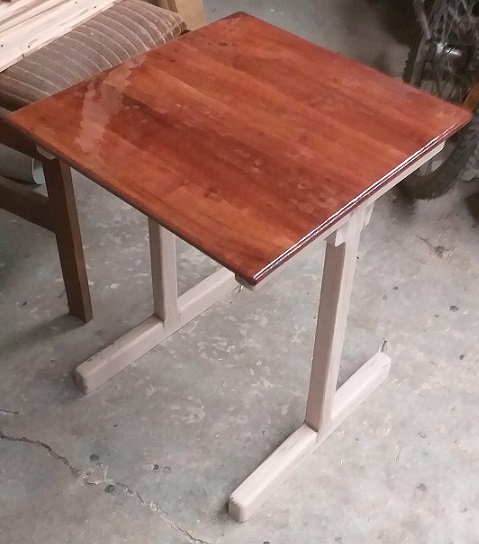
Indoor Outdoor Side Table

Used the table and cutout logo's and put back into the table using luan scraps. ;0)
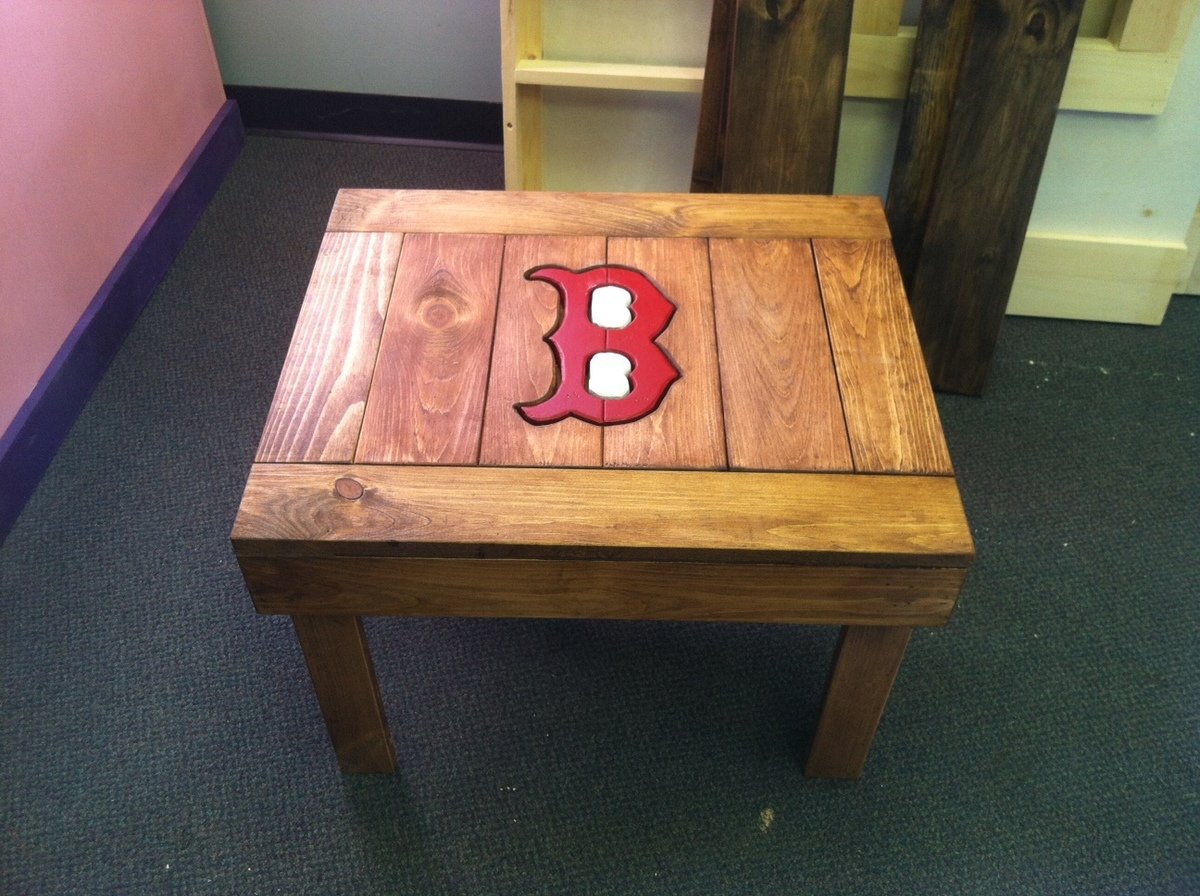
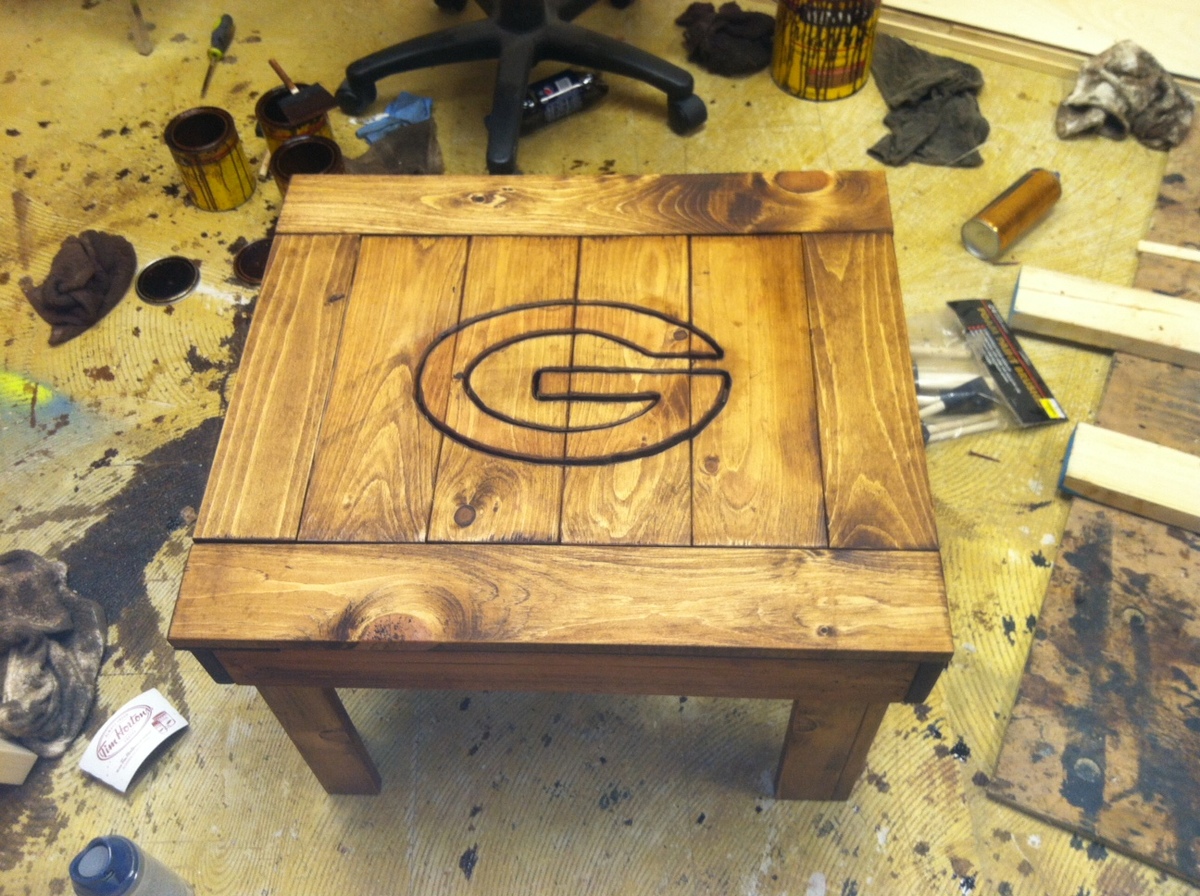
Built from Plan(s)
Estimated Cost
50
Estimated Time Investment
Day Project (6-9 Hours)
Finish Used
Stain Chesnut English
Weather sealer
polycrilic
Weather sealer
polycrilic
Recommended Skill Level
Intermediate
Comments
Fri, 04/20/2012 - 18:53
How exactly did you get the
How exactly did you get the logos on the table? They look carved or burnt...they are really awesome!
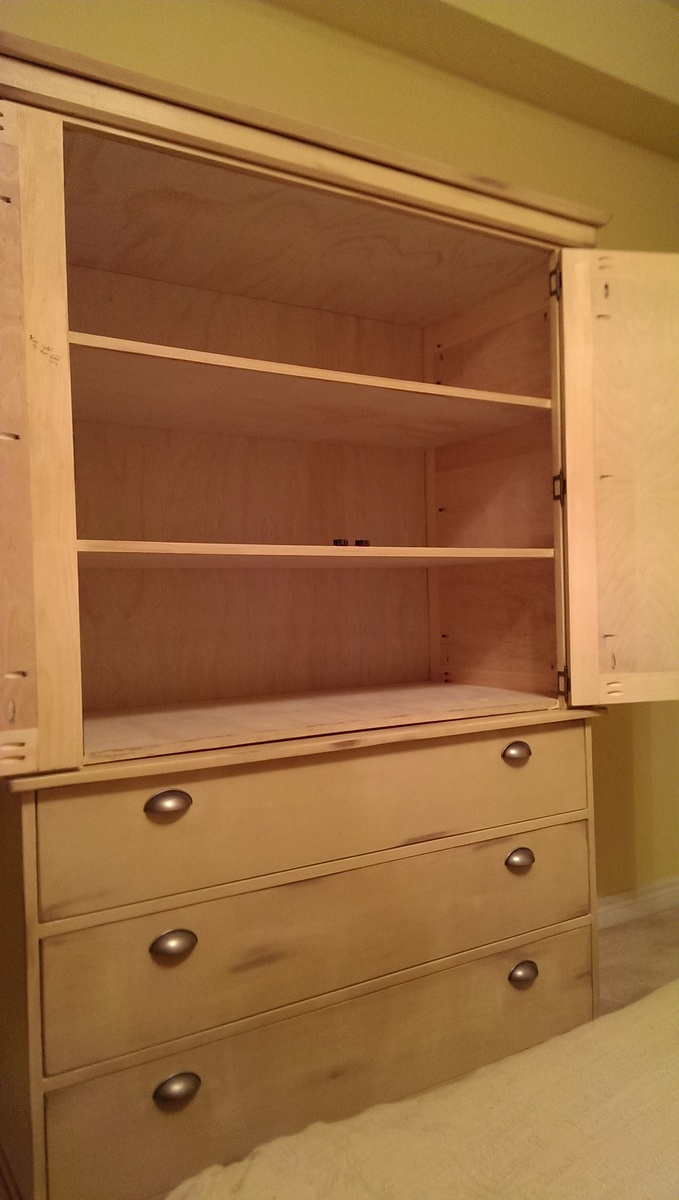
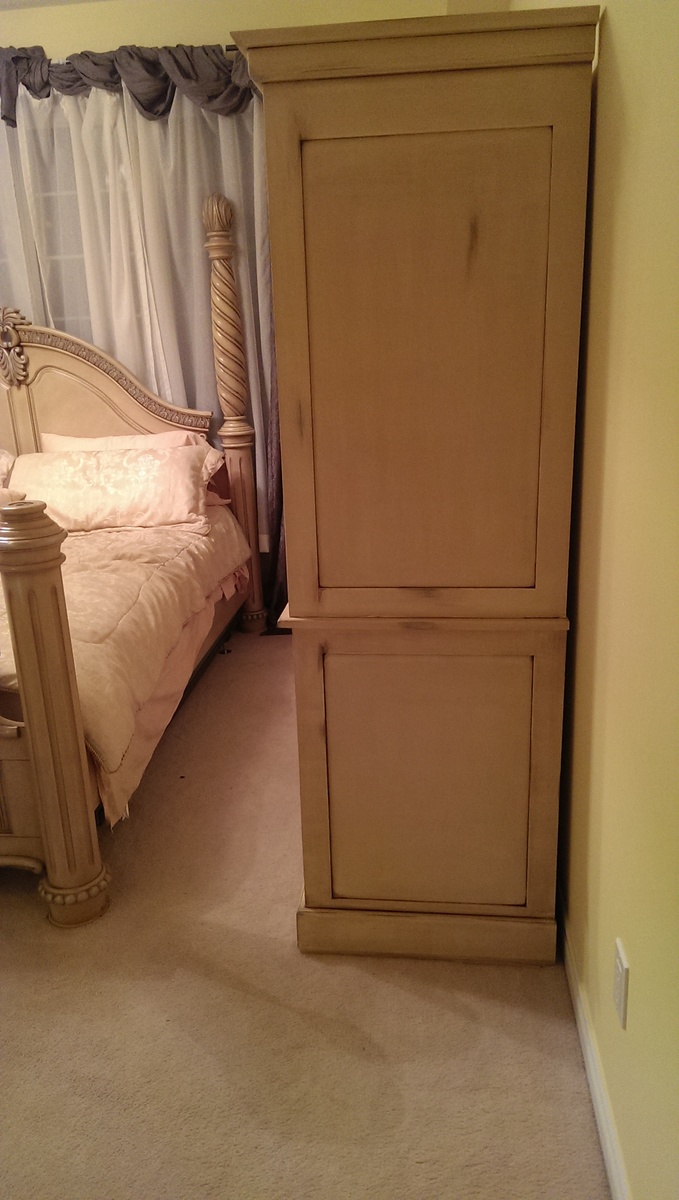
Antique Armoir
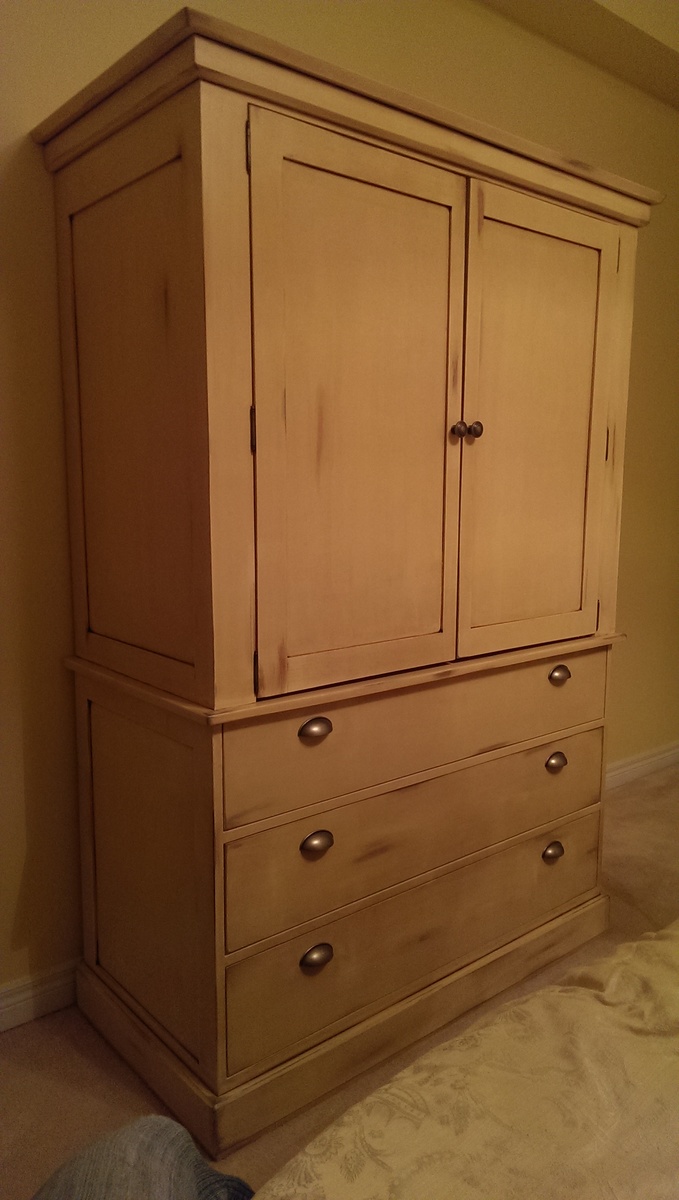
This is the first furniture project I have built from a plan found on-line - at Ana's Website. The plan was very easy to follow and I thoroughly enjoyed building this piece of furniture. I made some alterations to the upper cabinet as per shelving. I used an antique finish to match my bed. The match and design is perfect!

Estimated Time Investment
Week Long Project (20 Hours or More)
Finish Used
Behr primer and paint in one. Oil based walnut antique gel. Silver acrylic paint. Water based satin finish varethane.
Recommended Skill Level
Intermediate
Comments
Mon, 02/03/2014 - 08:38
Great Match
This piece looks like it belongs with the rest of your bedroom set. Great work.
Hutch with cabinet
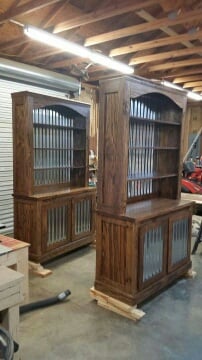
I saw this on Shanty2Chic and loved the plan. I had a friend that wanted me to build her two of these with tin in the door and back. The tin was a challenge but it all worked out. She loves them. Thank you for the plans. I could not have done this without them.
Built from Plan(s)
Estimated Cost
150.00 each
Estimated Time Investment
Week Long Project (20 Hours or More)
Finish Used
Special Walnut Minwax
PolyWipe
PolyWipe
Recommended Skill Level
Advanced
Storage/Toy Box

Storage box made from left over 1 by 4 and plywood from recent projects and a top I made for another cabinet but didn't use. All I bought was two 1 by 4s for the top trim and the hinges.


Built from Plan(s)
Estimated Time Investment
Day Project (6-9 Hours)
Finish Used
White satin paint and Sherwin Williams Foggy Day gray paint for top.
Recommended Skill Level
Beginner
Rustic tables
My first build! Didn't want the X's so I put a straight piece on each end.
Built from Plan(s)
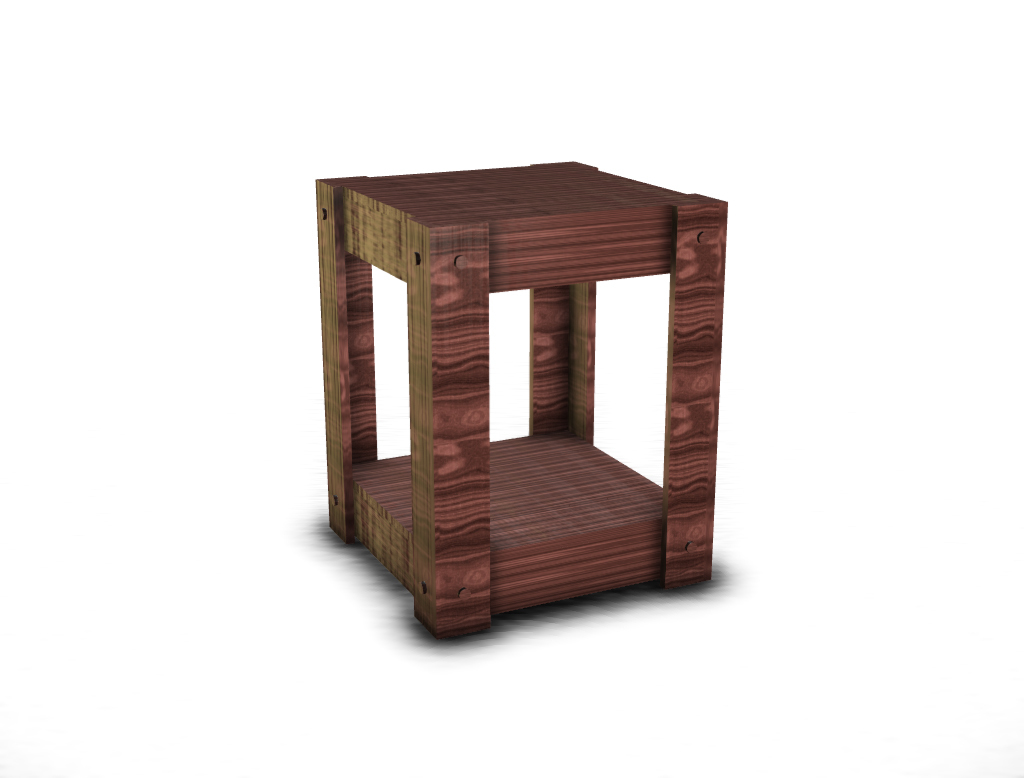
End table made from pallets (plans included)
Building an outside side table out of scrap pallets.
Video of the build:
https://www.youtube.com/watch?v=kVAYXVGiL_8
Drawing File
https://googledrive.com/host/0B21TbB8gGNQbX2dlNGdxR0NuOE0/end_table.pdf
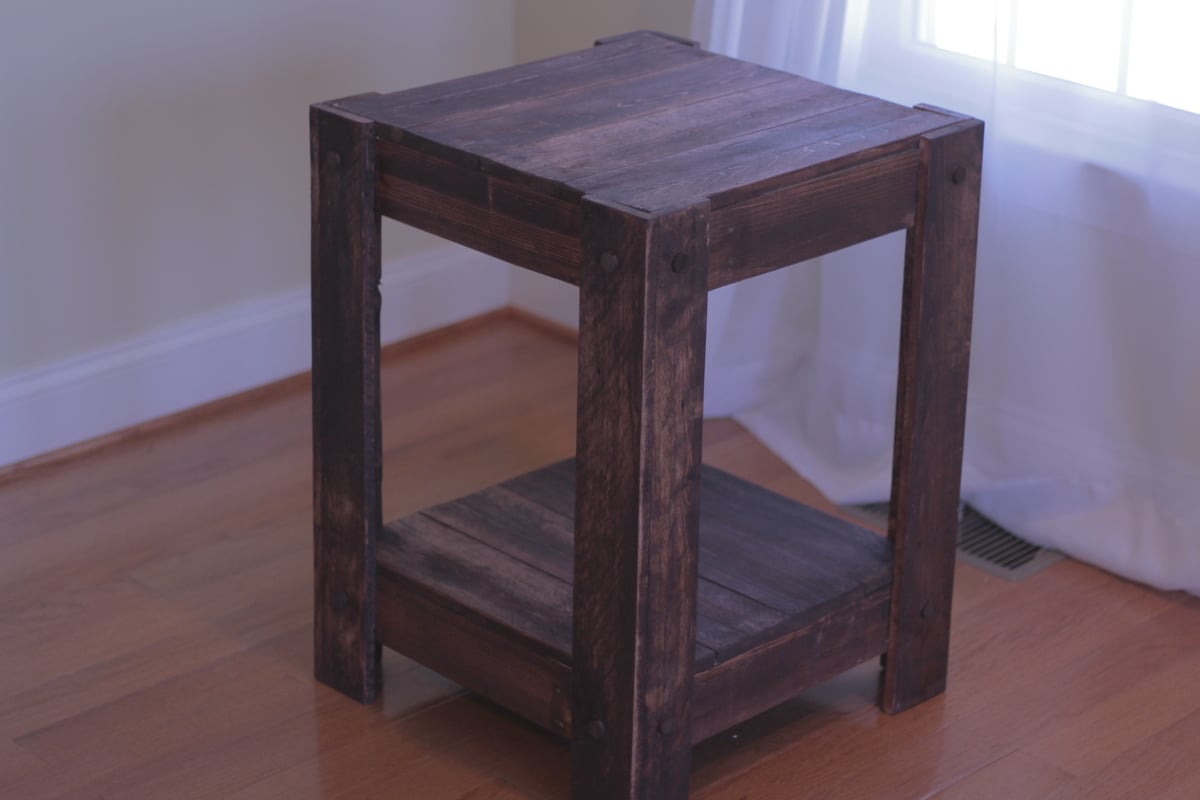
Estimated Cost
$5 for stain and nails - free pallets
Estimated Time Investment
Day Project (6-9 Hours)
Finish Used
Red Oak
Recommended Skill Level
Starter Project
Modular Play Kitchen
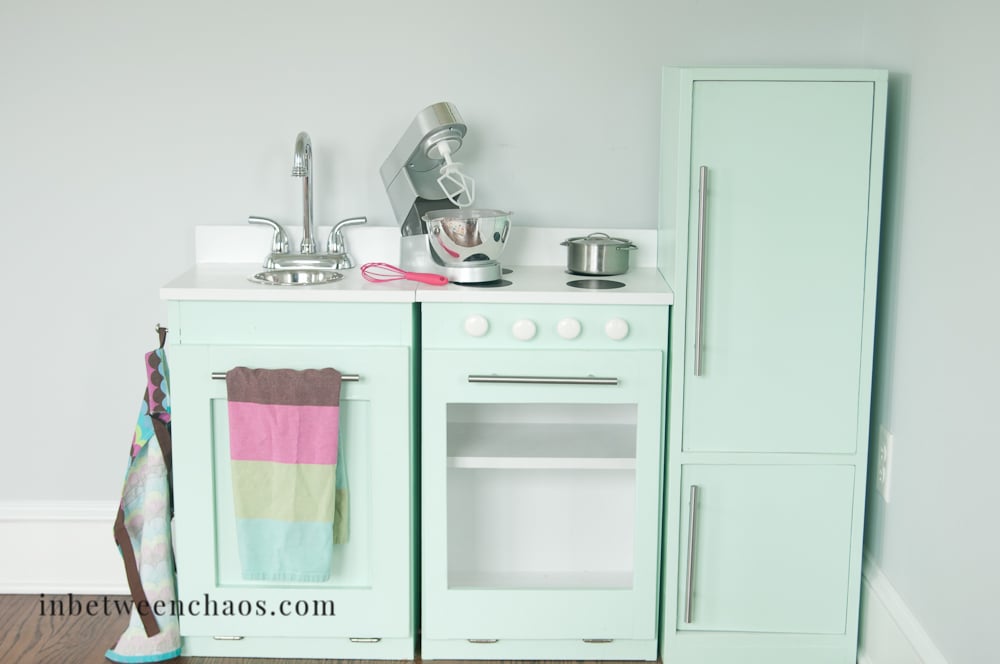
I made this for my 3 kids for Christmas and I'm so glad I did! They have gotten so much use out of it and love to move it around to set up different "houses" and restuarants. Thanks so much for these plans! I made the pieces a little taller, and use the play stove as the sink base too so that it could double as a dishwasher :)
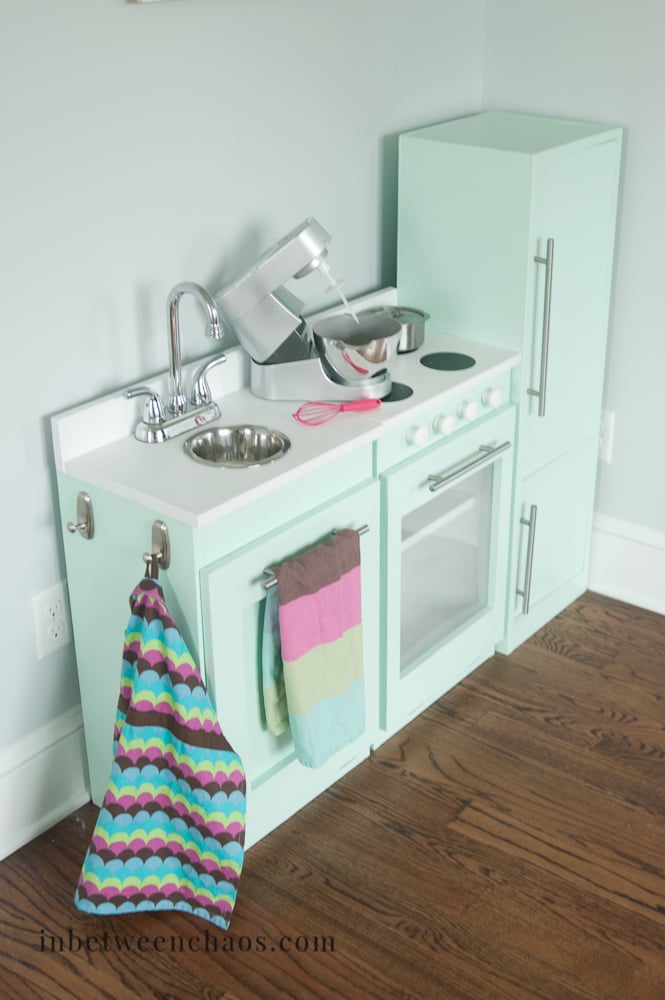
Built from Plan(s)
Estimated Time Investment
Weekend Project (10-20 Hours)
Finish Used
Color Bay by Pantone
Recommended Skill Level
Beginner
Rustic X Coffee Table
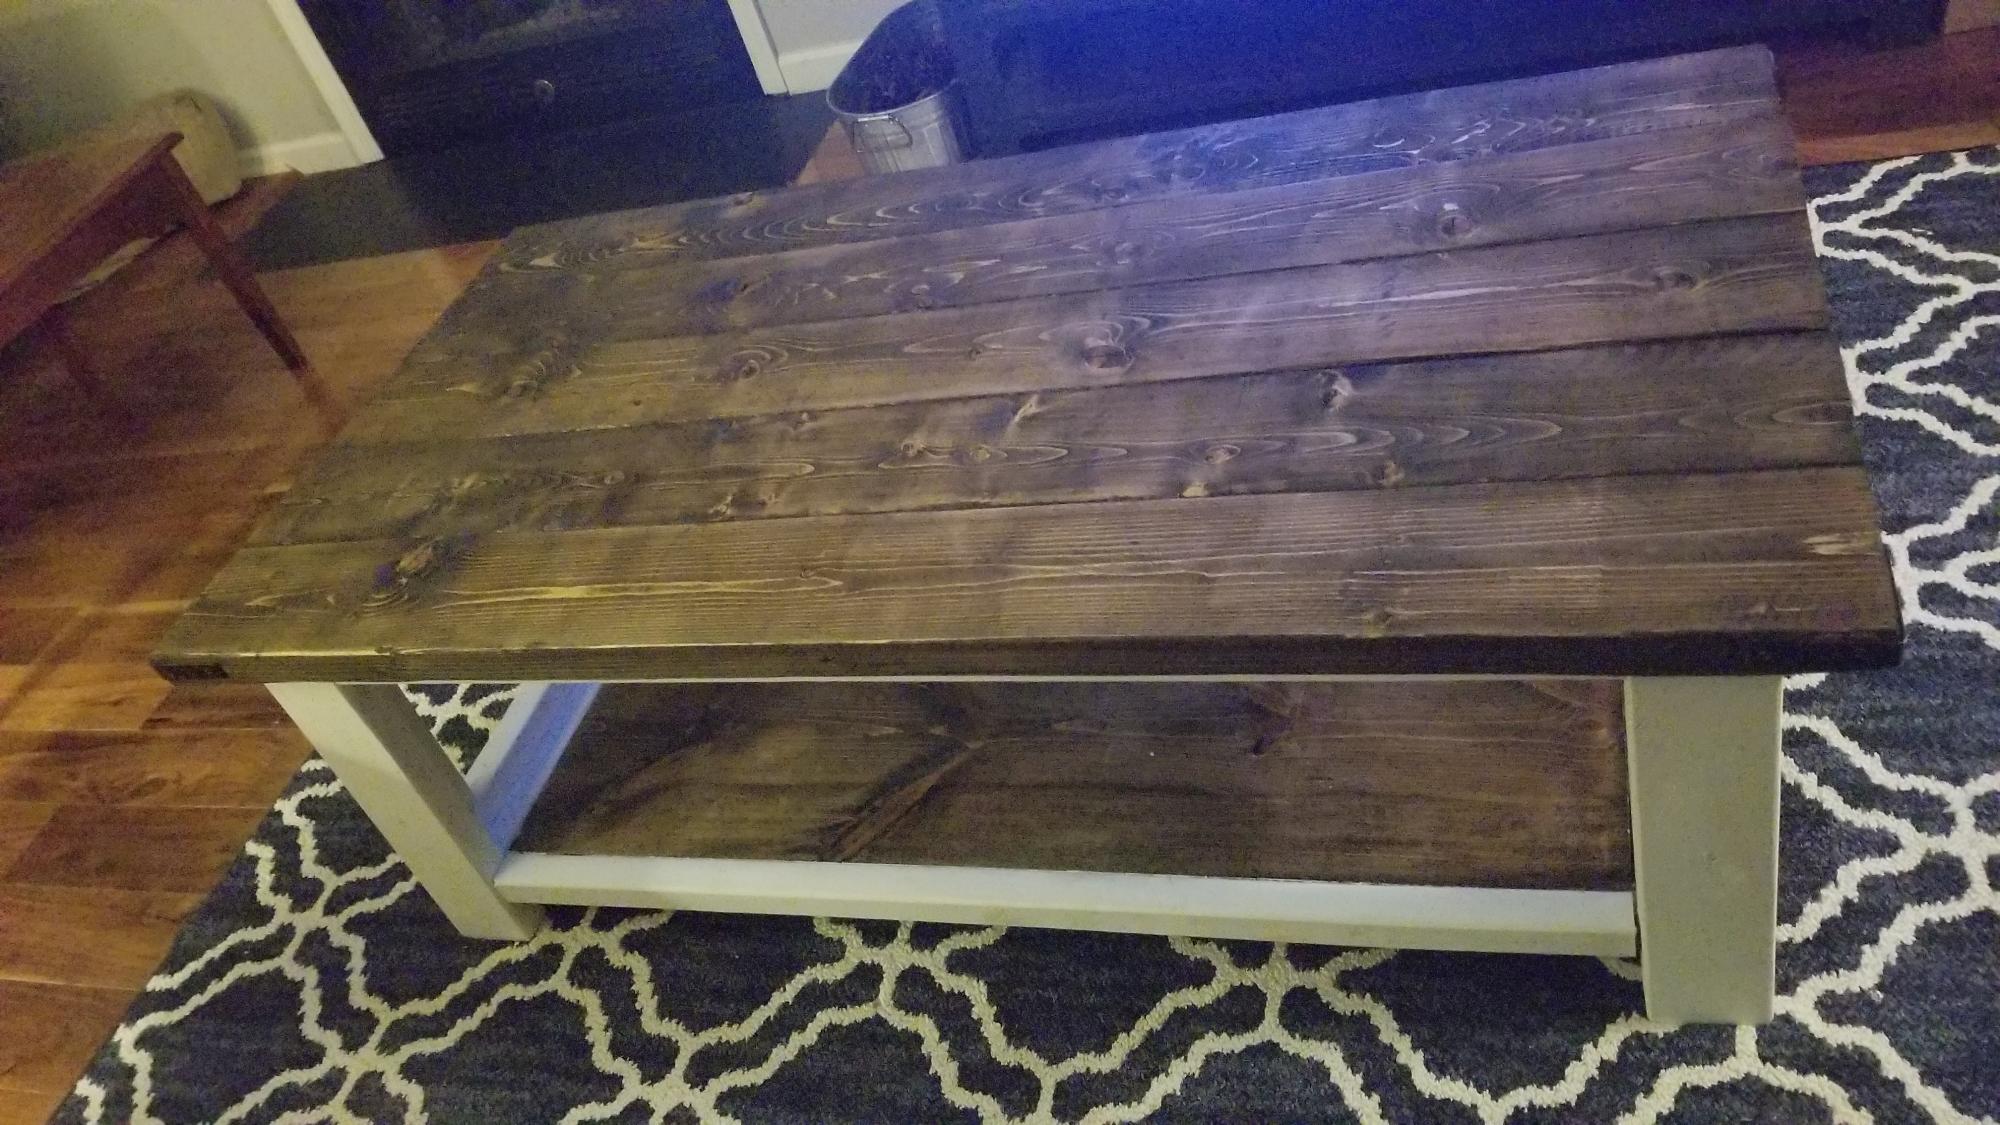
I'm really bad at making the X's, so I just added some straight pieces for decoration.
Built from Plan(s)
Estimated Cost
$64
Estimated Time Investment
Day Project (6-9 Hours)
Finish Used
Dark Walnut stain and white chalk paint
Recommended Skill Level
Intermediate
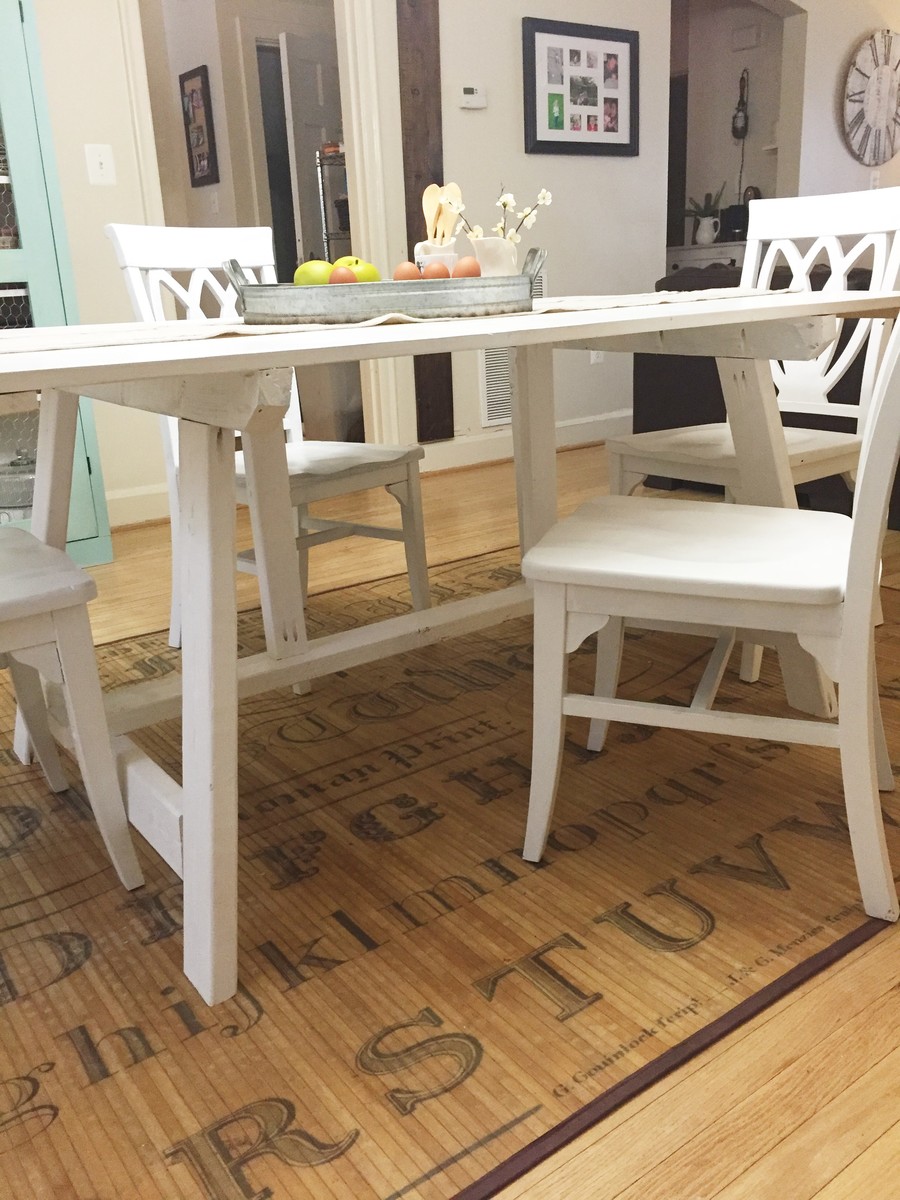
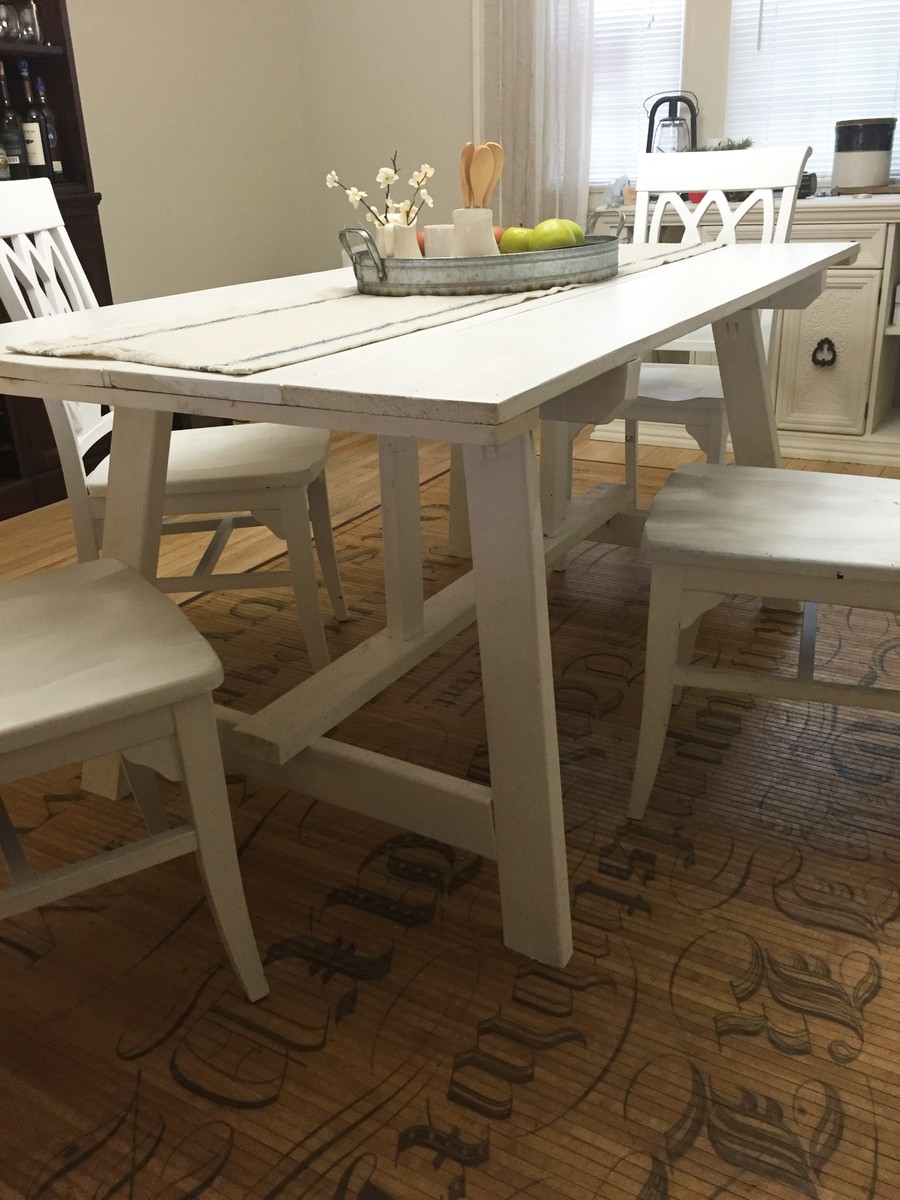
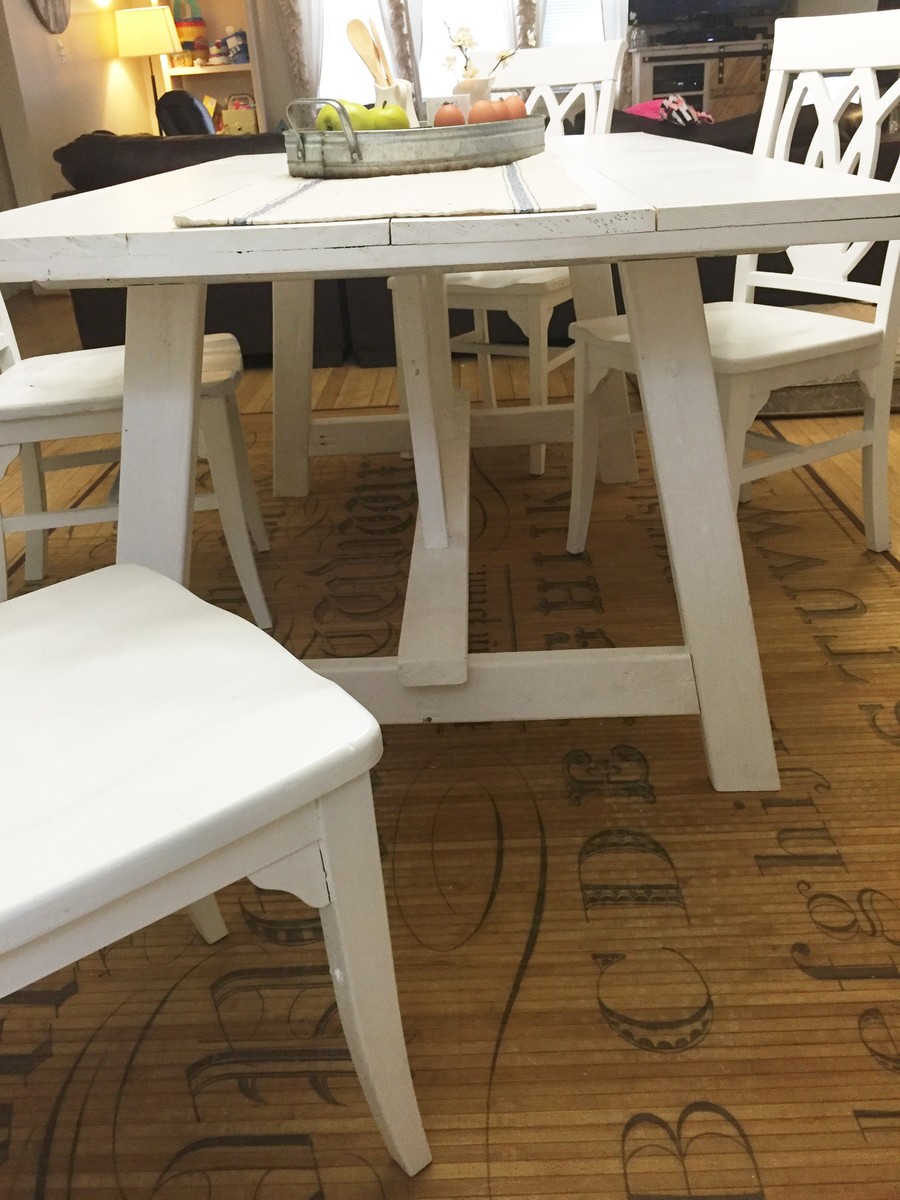
Modified Husky Farmhouse Table
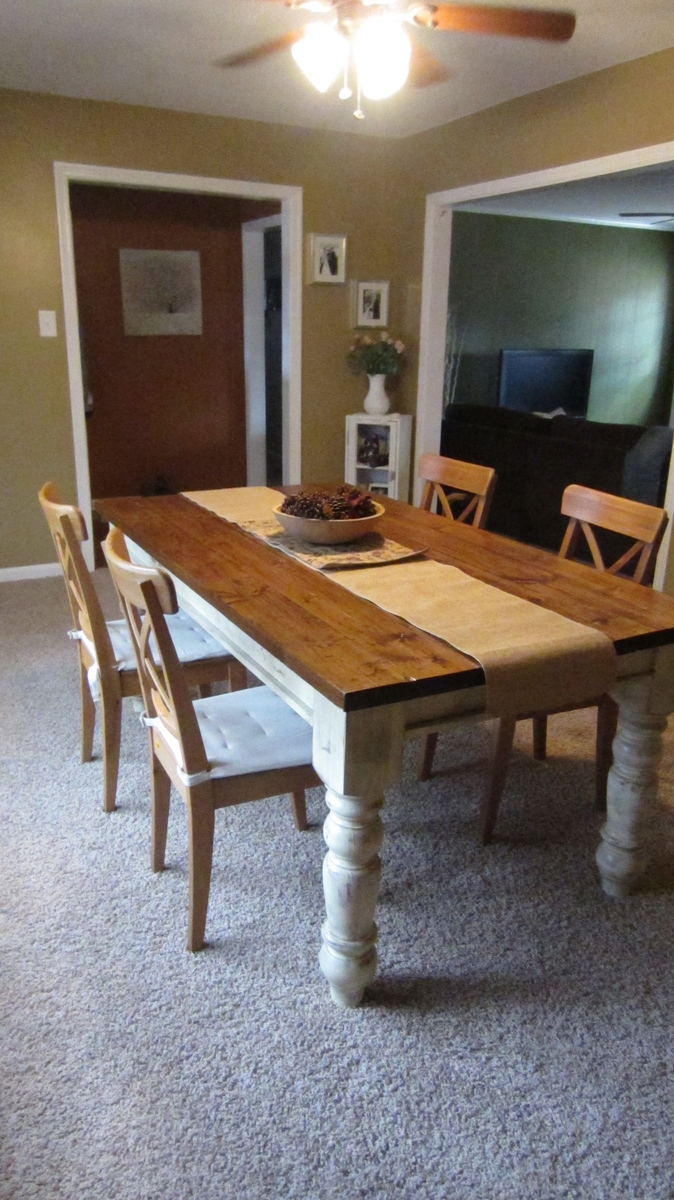
My husband Chris and I have been planning for a few years now to build a farmhouse table for our home. Every year for christmas my mother-in-love (mother in law) gifts us a "must have" tool. We like to think of it as her investing in our home and quality time together. Last year she gave us the Kreg gig, holy cow, that sure is a must have!!! :) This year we received a hand sander. Needless to say we were motivated to start our farmhouse table journey.
We loved the table Ana built for her sister, so we followed the plans almost to a tee. We ordered the turned legs from Georgia. Let me also add that we try to buy everything we possibly can that is made in america, from paintbrushes on. I encourage everyone to take the a few seconds to look and spend an extra dollar or two to support america's economy.
The only modification we did to the plan was add a small strip of wood to the base layer for just a little extra touch of character. :)
Estimated Time Investment
Week Long Project (20 Hours or More)
Finish Used
Table top- miniwax wood conditioner, Early American stain, and helmsman spar urethane.
Base- early american stain for base layer, Old Fashion Milk Paint in Buttermilk, and spray on polycrylic.
We live in a small town and were not able to find gel stain anywhere. We could have ordered it online, however we adamant about using our snow days to work on this project. This made a difference as far as how the milk paint chipped on the legs. I had to hand sand to get the rustic look, however it still looks fabulous. :)
Recommended Skill Level
Intermediate
Comments

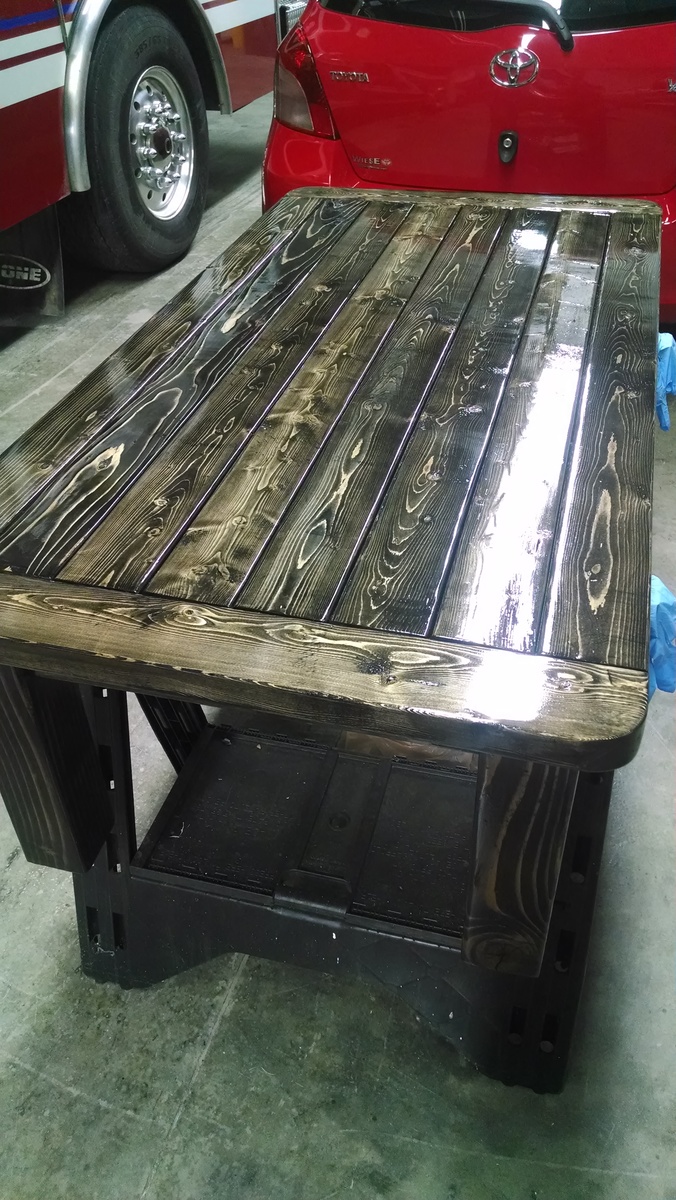
Combination Workstation
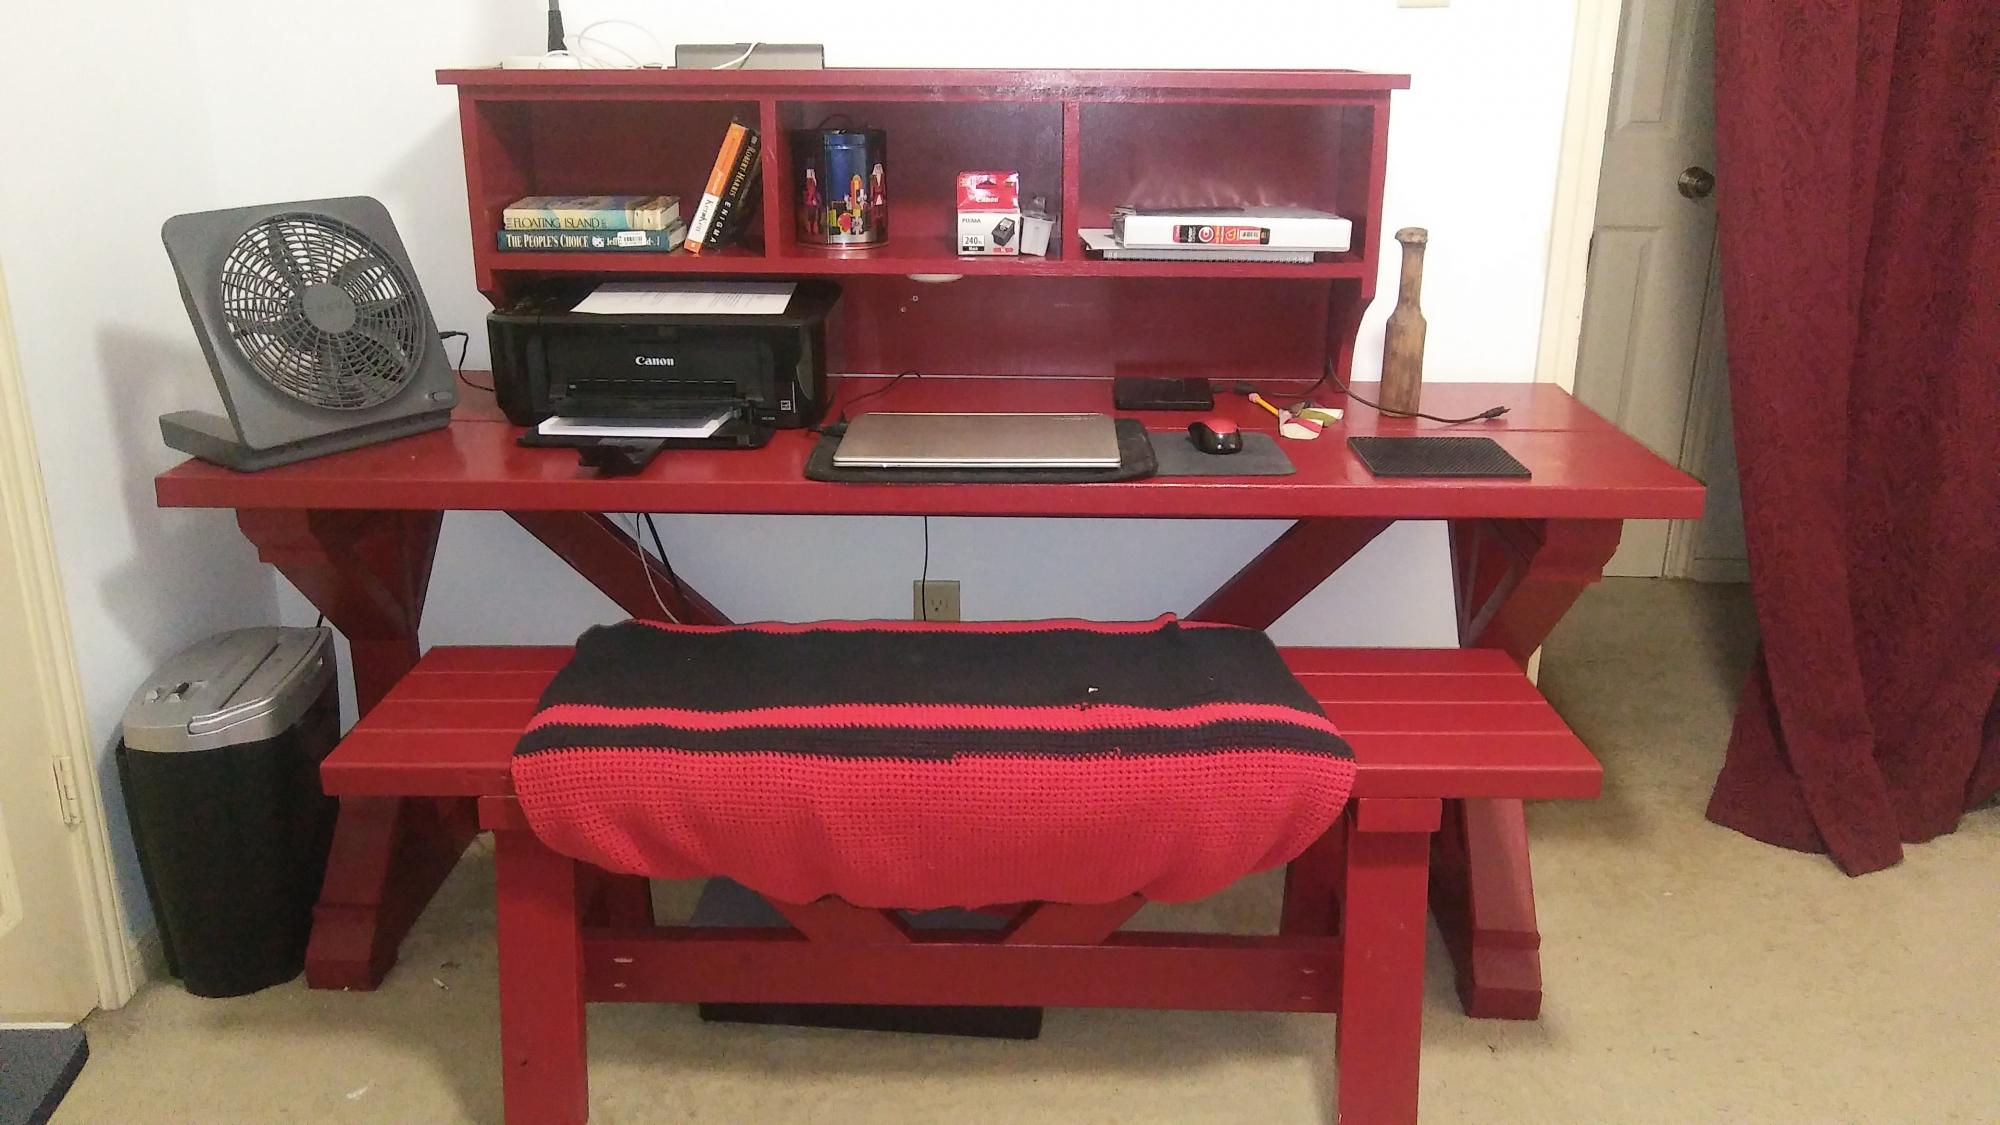
Combined a few of your plans to make my wife a Workstation. Plans were easy to follow and there were no dimension errors.
Estimated Cost
200.00
Estimated Time Investment
Week Long Project (20 Hours or More)
Finish Used
Combo semi gloss paint and primer
Recommended Skill Level
Intermediate
Comments
Lucky_Photo
Mon, 01/27/2014 - 20:25
Stain
This looks really good! What type of stain is this? What was the process if it was different from the "normal' method of applying stain?
will
Wed, 01/29/2014 - 06:36
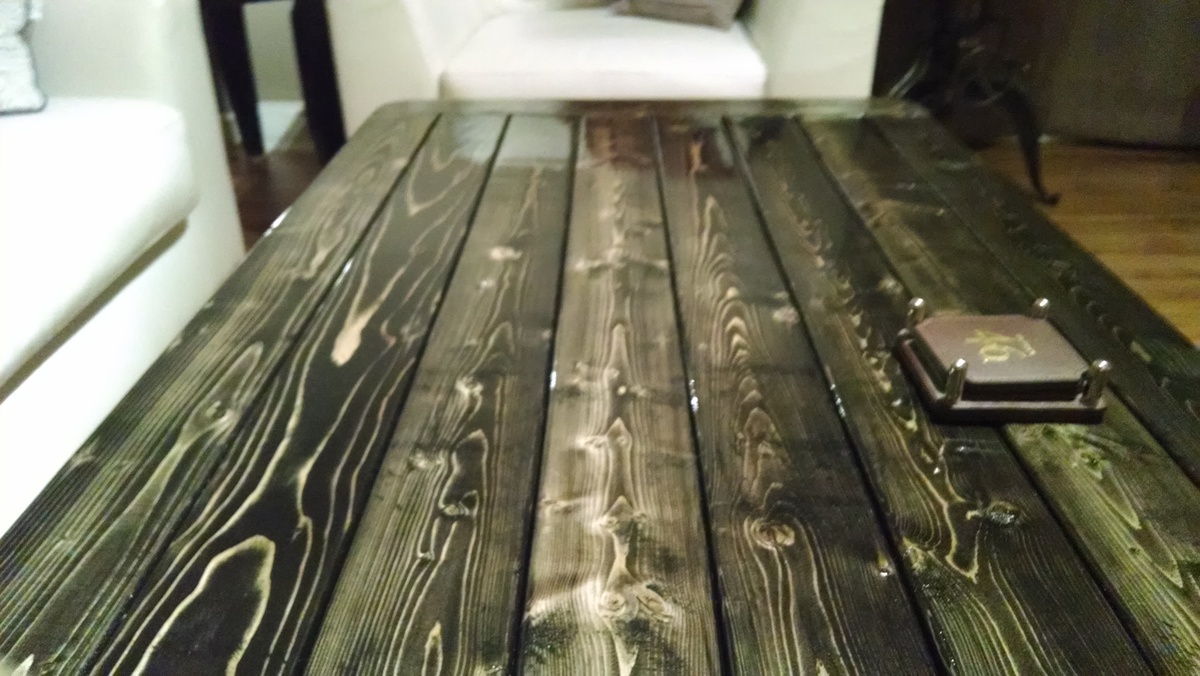
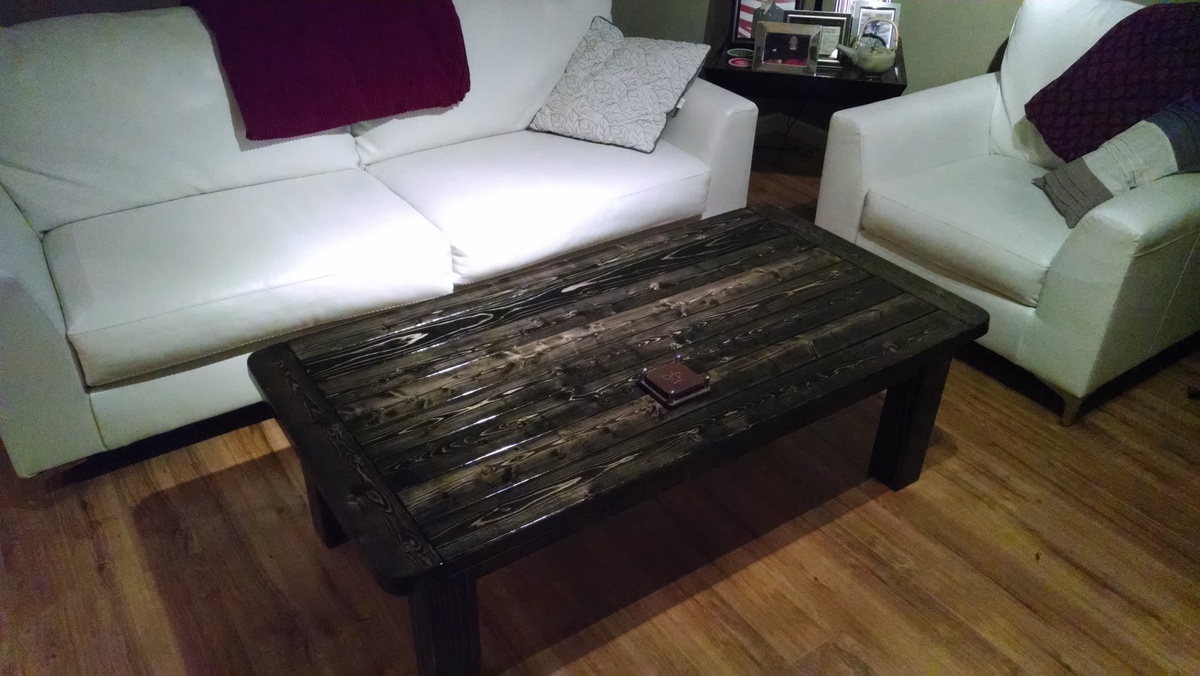
I used the Minwax poly/stain
I used the Minwax poly/stain mix. Two coats of black and then two additional coats of clear gloss poly over that. It was meant for a friend, but I liked it so much in my living room... Well, lets just say I have to build her another one.
will
Wed, 01/29/2014 - 06:37
Oh yeah, I also rounded the
Oh yeah, I also rounded the edges of the corners to avoid keep from bruising my shins everytime I walked into it.
strouse6
Thu, 02/27/2014 - 14:12
stain
Looks amazing - can't buy that look at any store. Oil based poly?