Rustic Modern Outhouse

Used your plans to build this at our camper on an old farmstead in SD - Kelly Amundson Bowne Facebook Community

Built from Plan(s)
Seasonal And Holiday
Used your plans to build this at our camper on an old farmstead in SD - Kelly Amundson Bowne Facebook Community

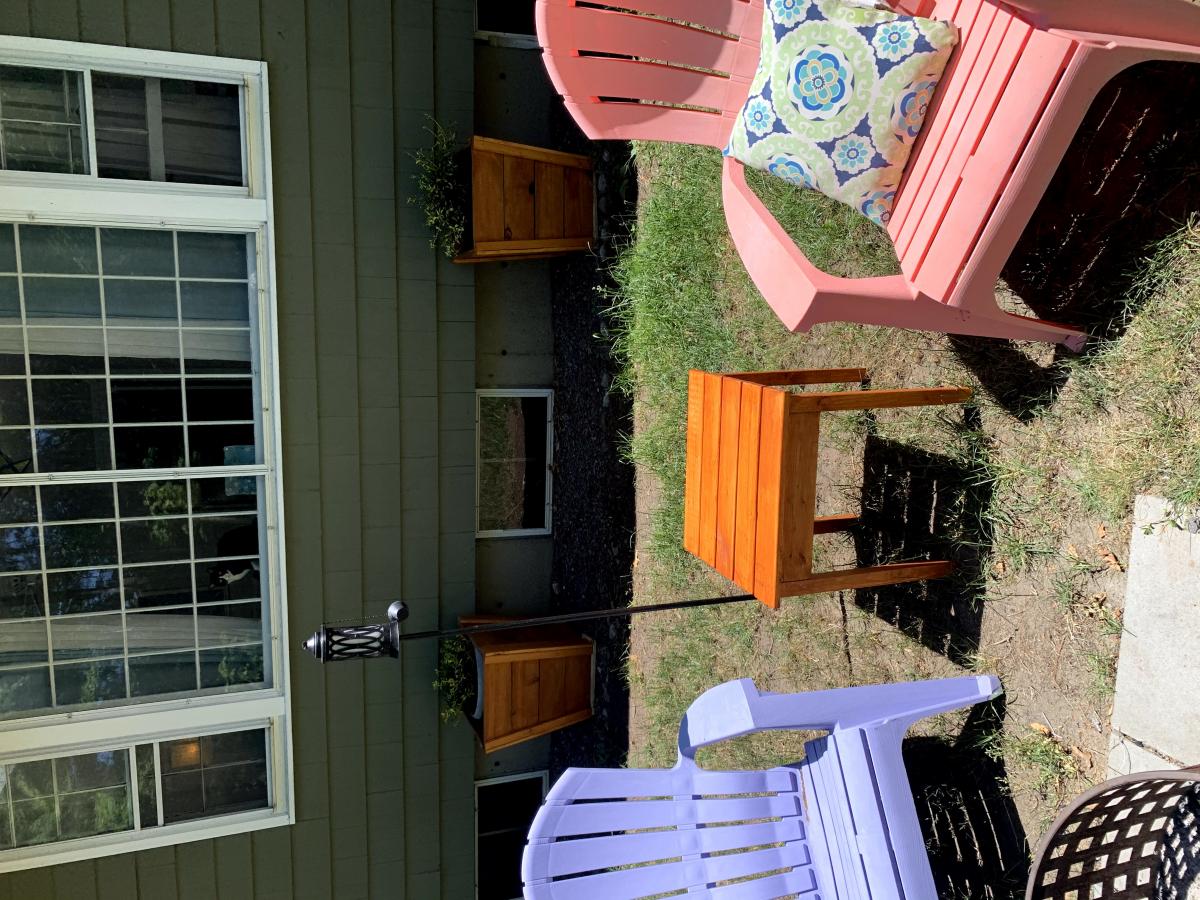
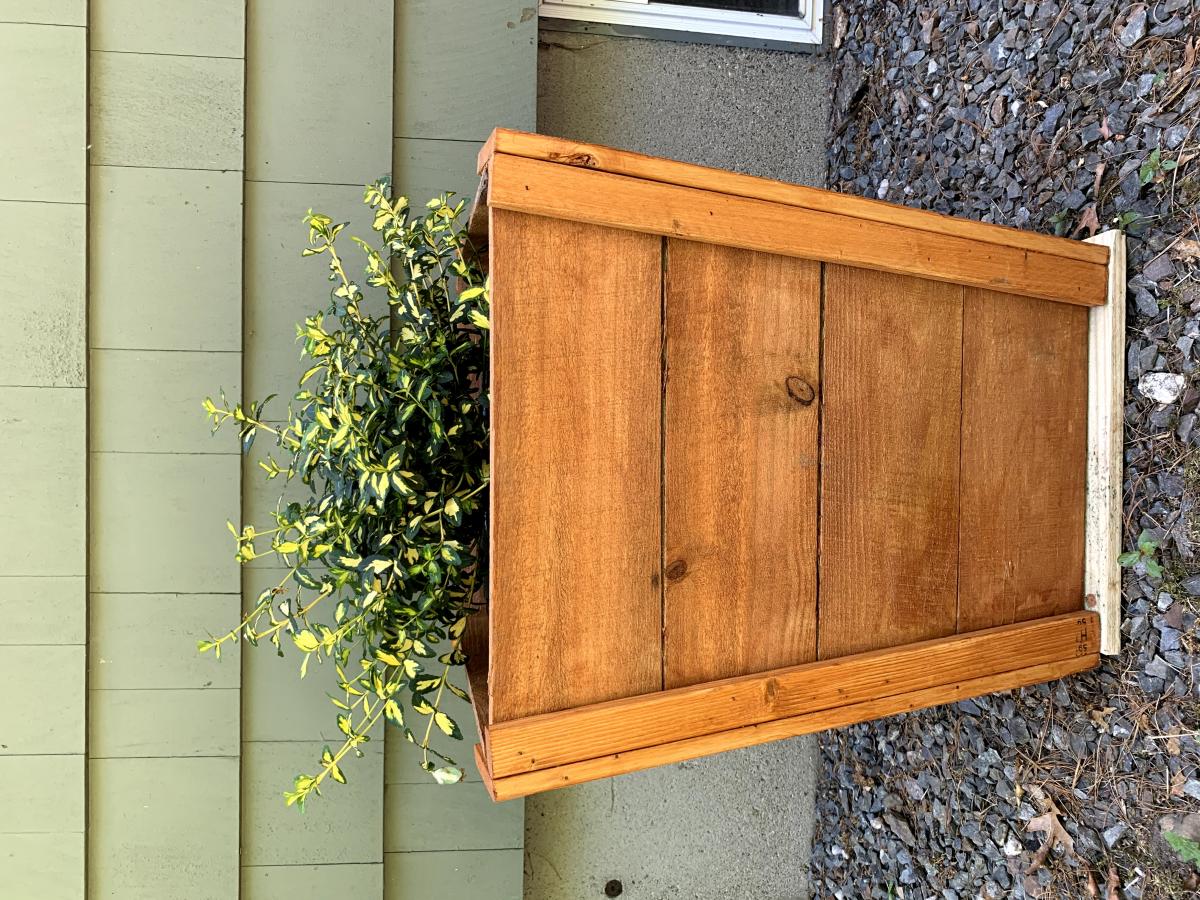
Privacy planter which I made in one day! - Jo Anne Harris McNamara on Facebook Community


I meant to send this a while ago but your shelf help now when it was still shipping wood helped me build this entire built in (both bookshelves and the window seat) while I was pregnant with our second kid. I have a ton of videos of me sanding and priming. I had to hire someone to do the spray finish because I got sick but it wrapped up when I was 34 wks pregnant. I know you stopped shipping the shelf help now stuff but I really loved it and am sad you're no longer doing that. It was a great service. Anyways, I wanted to share with you. - Sam Elliott

Deep Seat Cushion Modern Outdoor Chair
Thank you for the plan. I love my new Outdoor Chair.


We built the queen-sized farmhouse bed and LOVE it! Thank you so very much for the no-none sense, easy-to-follow plans. I am 59 y/o and was able to build it almost all by myself because your plans made it just that easy.
Next we will be doing the shiplap fireplace in our bedroom. Thanks, again, for the inspiration and excellent plans. - Moriah
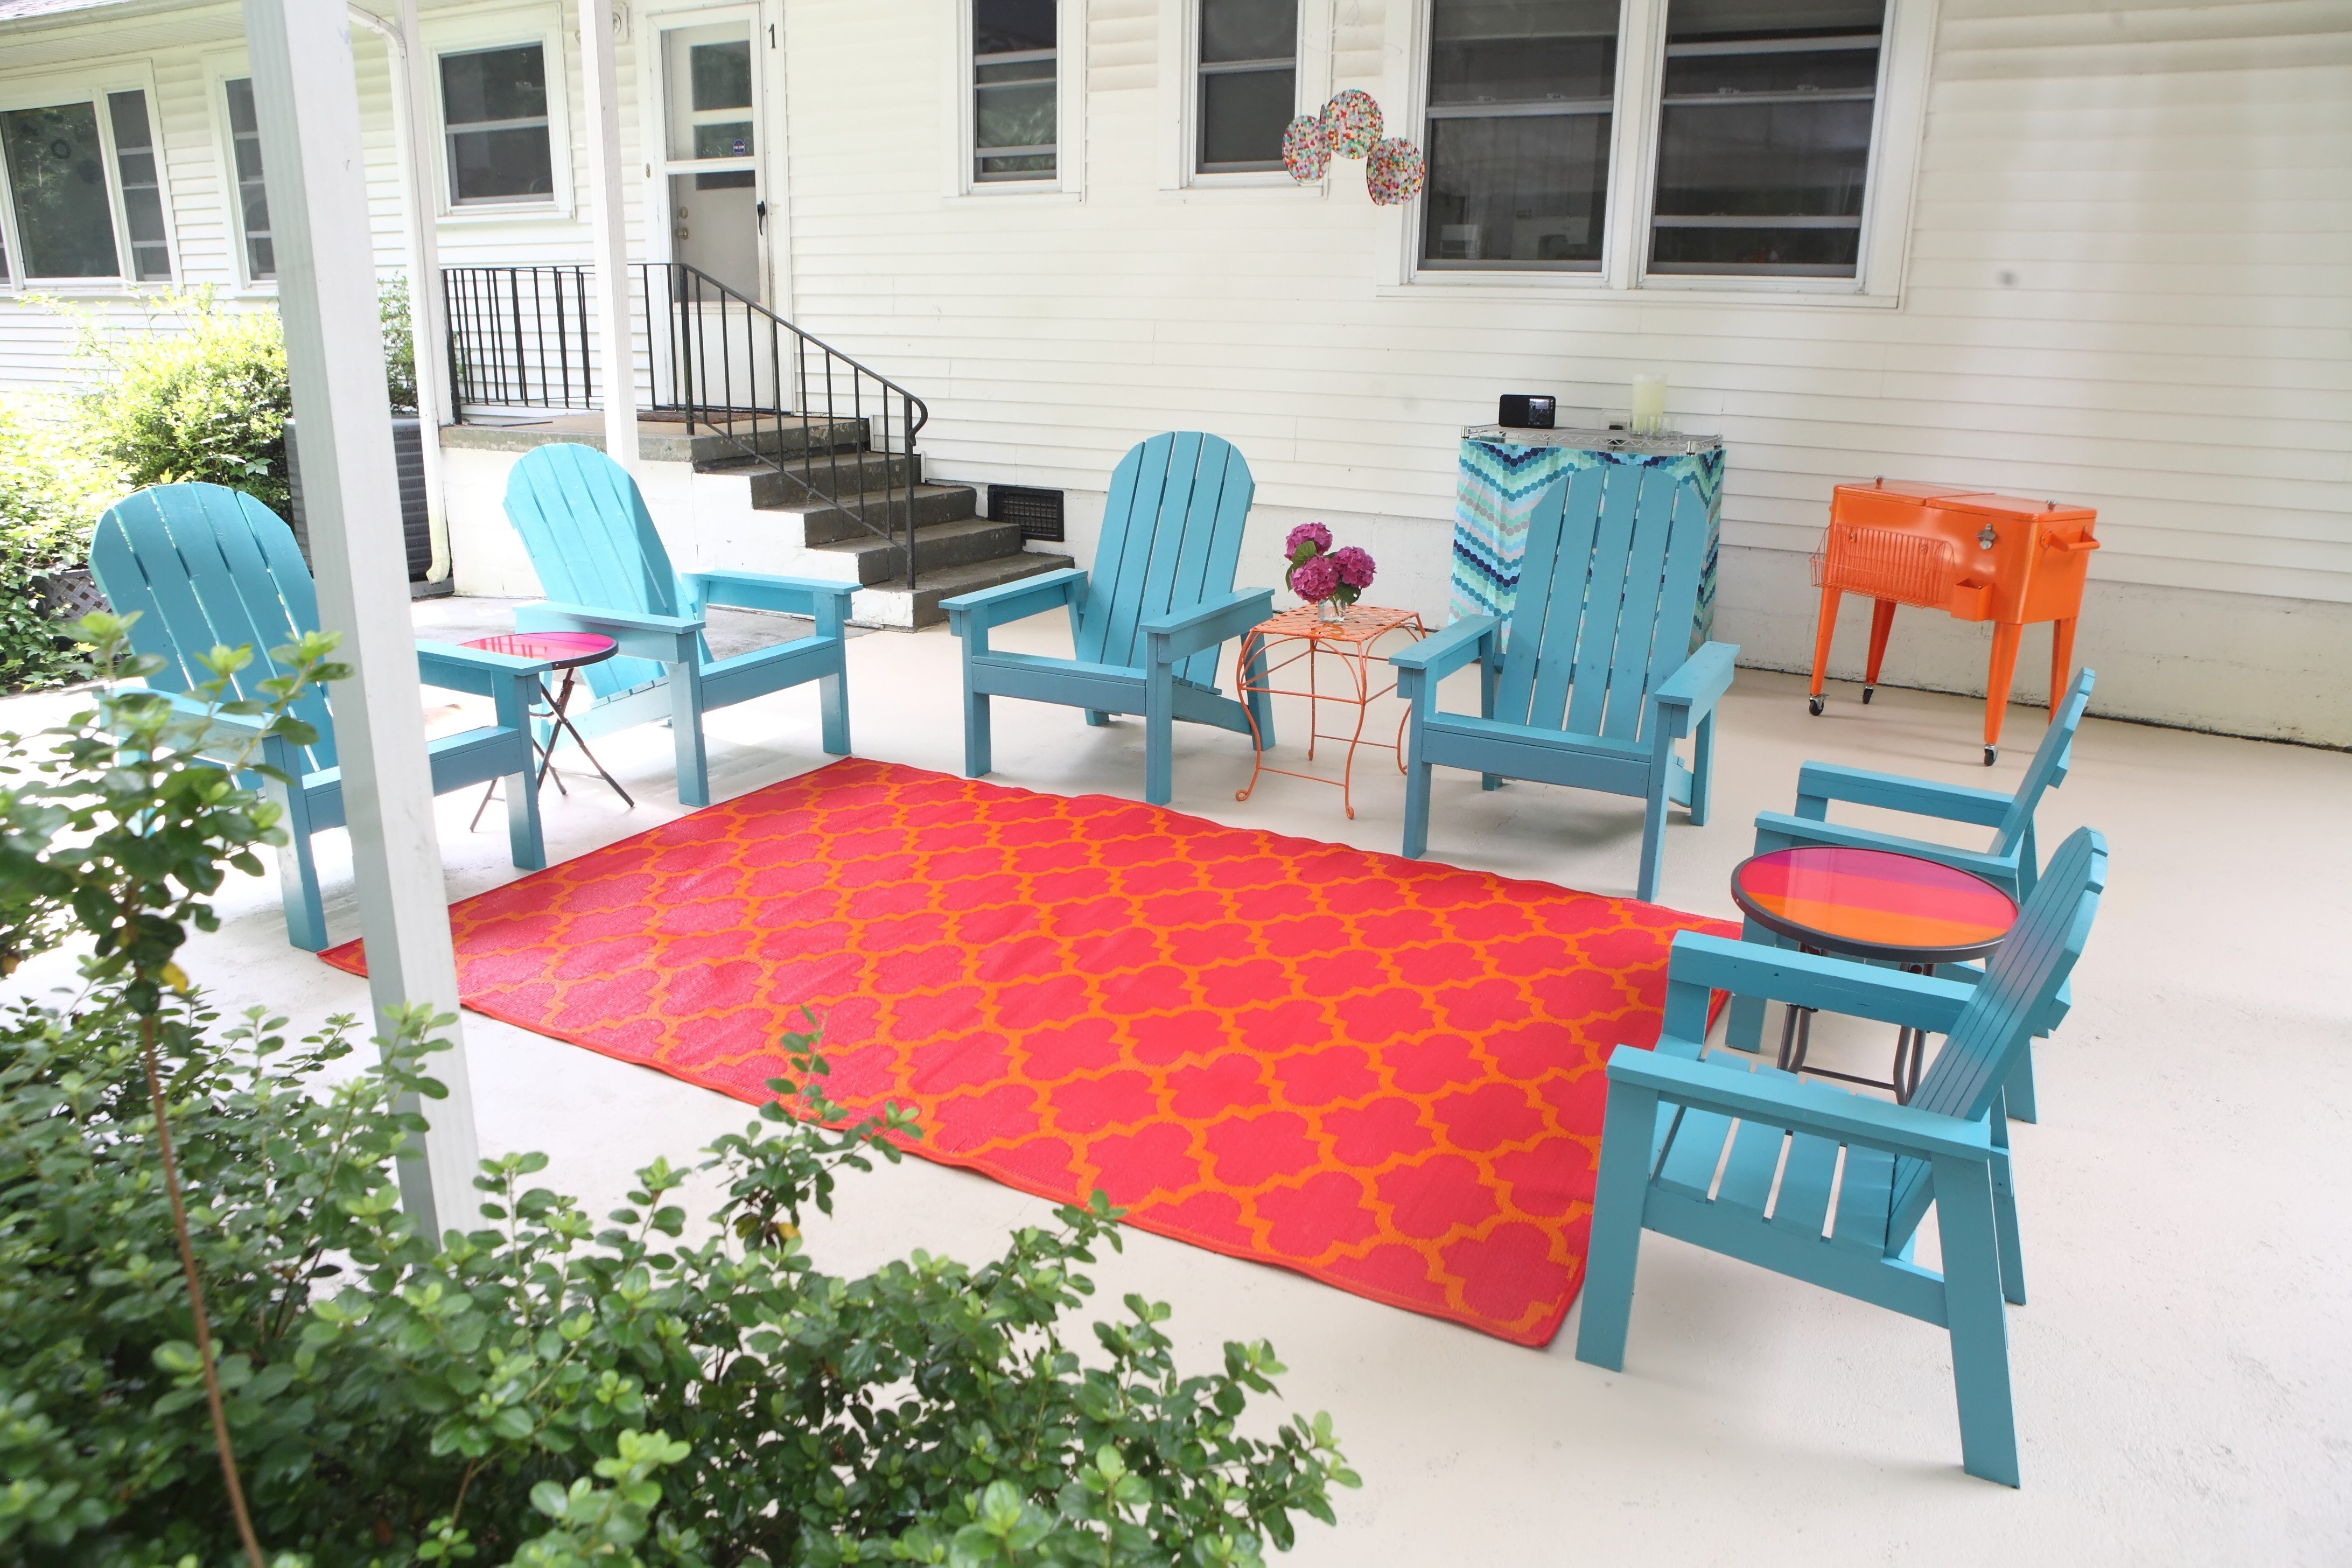
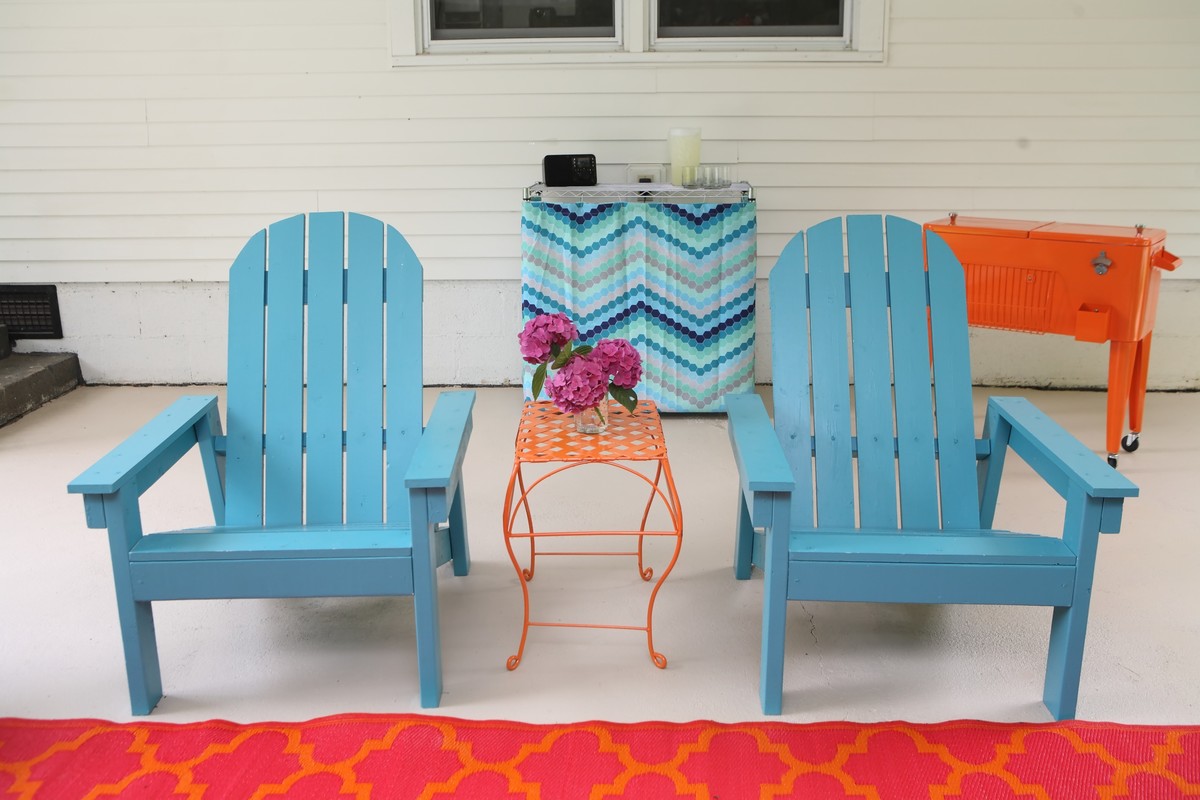
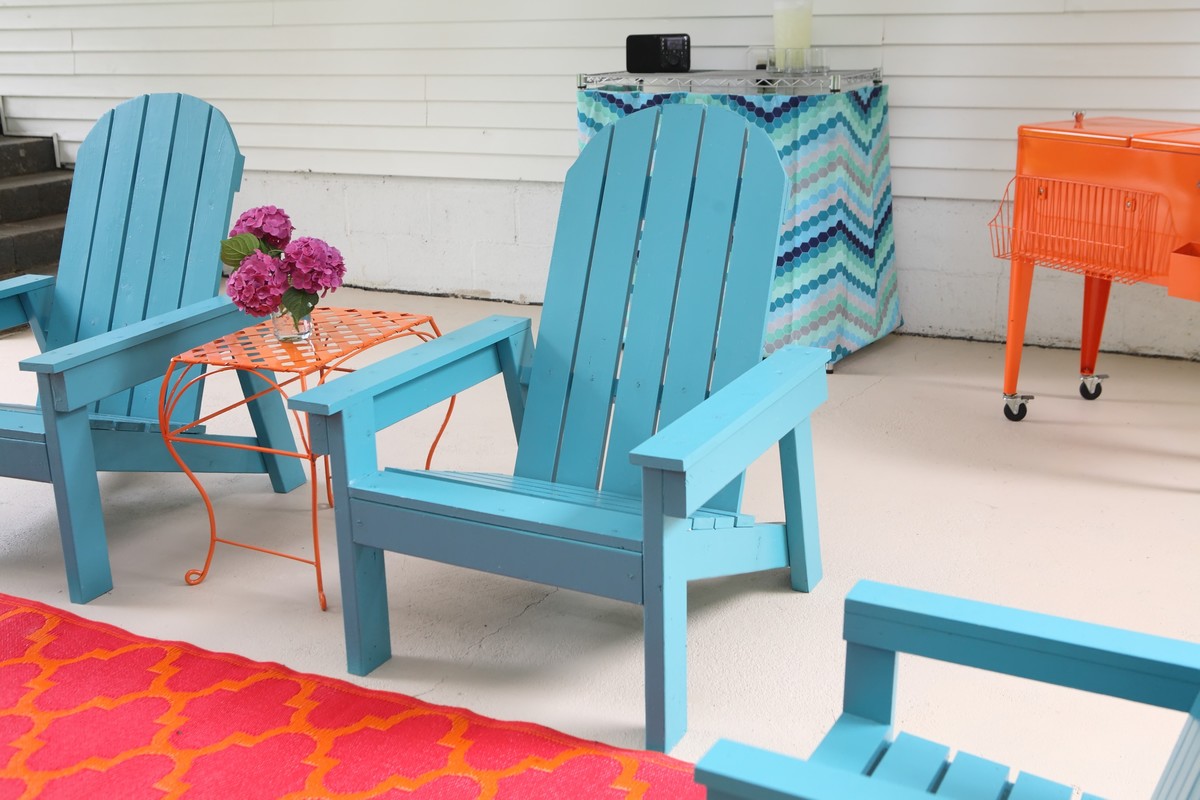
I pulled up the ancient green carpet on our patio, gave away our old cheap rusted table and chairs, and built four adult-sized Adirondack chairs from the Home Depot DIH plans and two child-sized ones from the plans in Ana's book. All are painted in Olympic's Schooner. This took forever, but I love the result! A friend dubbed it "the partio." :)
Sat, 07/27/2013 - 13:47
This is absolutely beautiful! Love your color combination. Great job!
Sat, 07/27/2013 - 14:08
This is awesome. Colors you choose is really good. http://www.assignmentshelptutors.com

I’ve been separated for 3 years, after a 28 year marriage. One of the things that has gotten me through is learning how to use power tools. They have been so empowering for me. Holidays look very different, as the family I once hosted now doesn’t come around. Kids are grown. So holiday traditions have changed into building days—power tool therapy.
My new house didn’t have outdoor furniture. Instead of spending thousands on furniture, I decided I would try to build my own. So, this year between Easter weekend and the Fourth of July, I have built 2 chairs, 2 side tables, and two ottomans.
Side note: I have rheumatoid arthritis. I’ve had it for 40 years and this is my way of staying active. Thanks Ana for making this achievable! - Cheryl Lynn Facebook Community


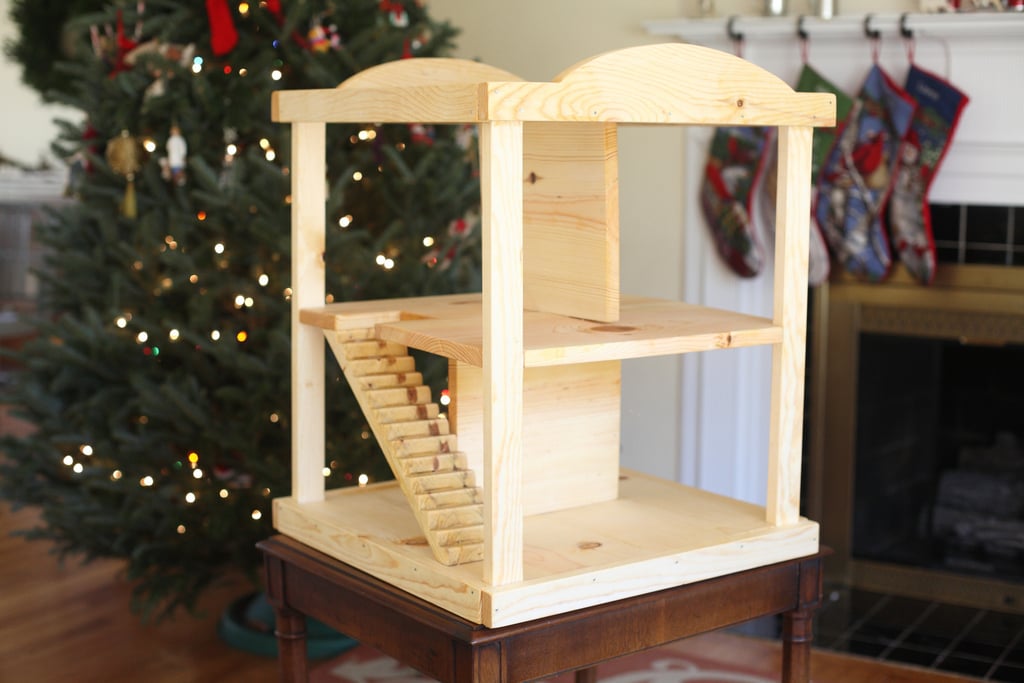
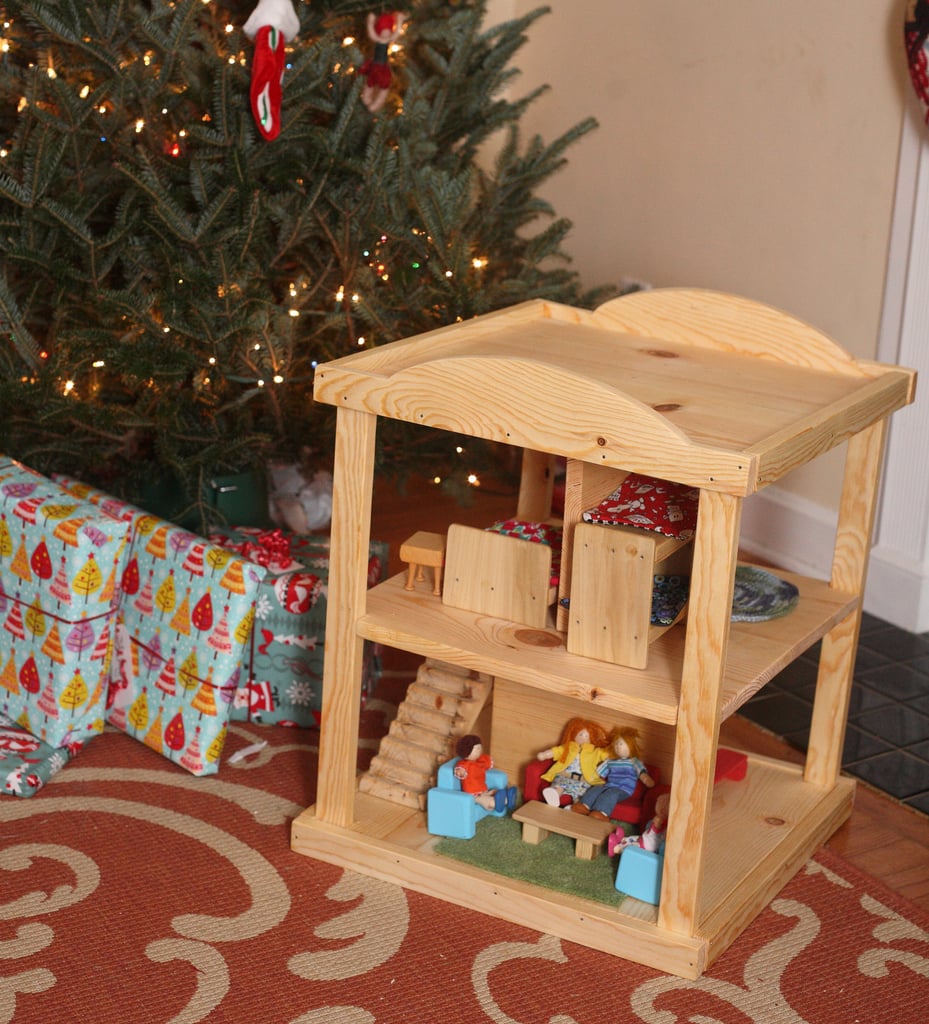
I combined my favorite elements from three of Ana's dollhouse plans to make this dollhouse for my kids. My favorite part is the stairs, which I cut from a 2x4 with a miter saw. I made this project from start to finish in one day while the grandparents took the kids, and it was ready for Christmas morning! I made simple furniture for it, too, which you can see in the second picture.
Wed, 02/11/2015 - 06:35
Is there any way you could email me the plans you used for the furniture? or just individual pictures of the furniture? [email protected] (you may wanna copy and paste that people always get it wrong, haha).
I LOVE THIS
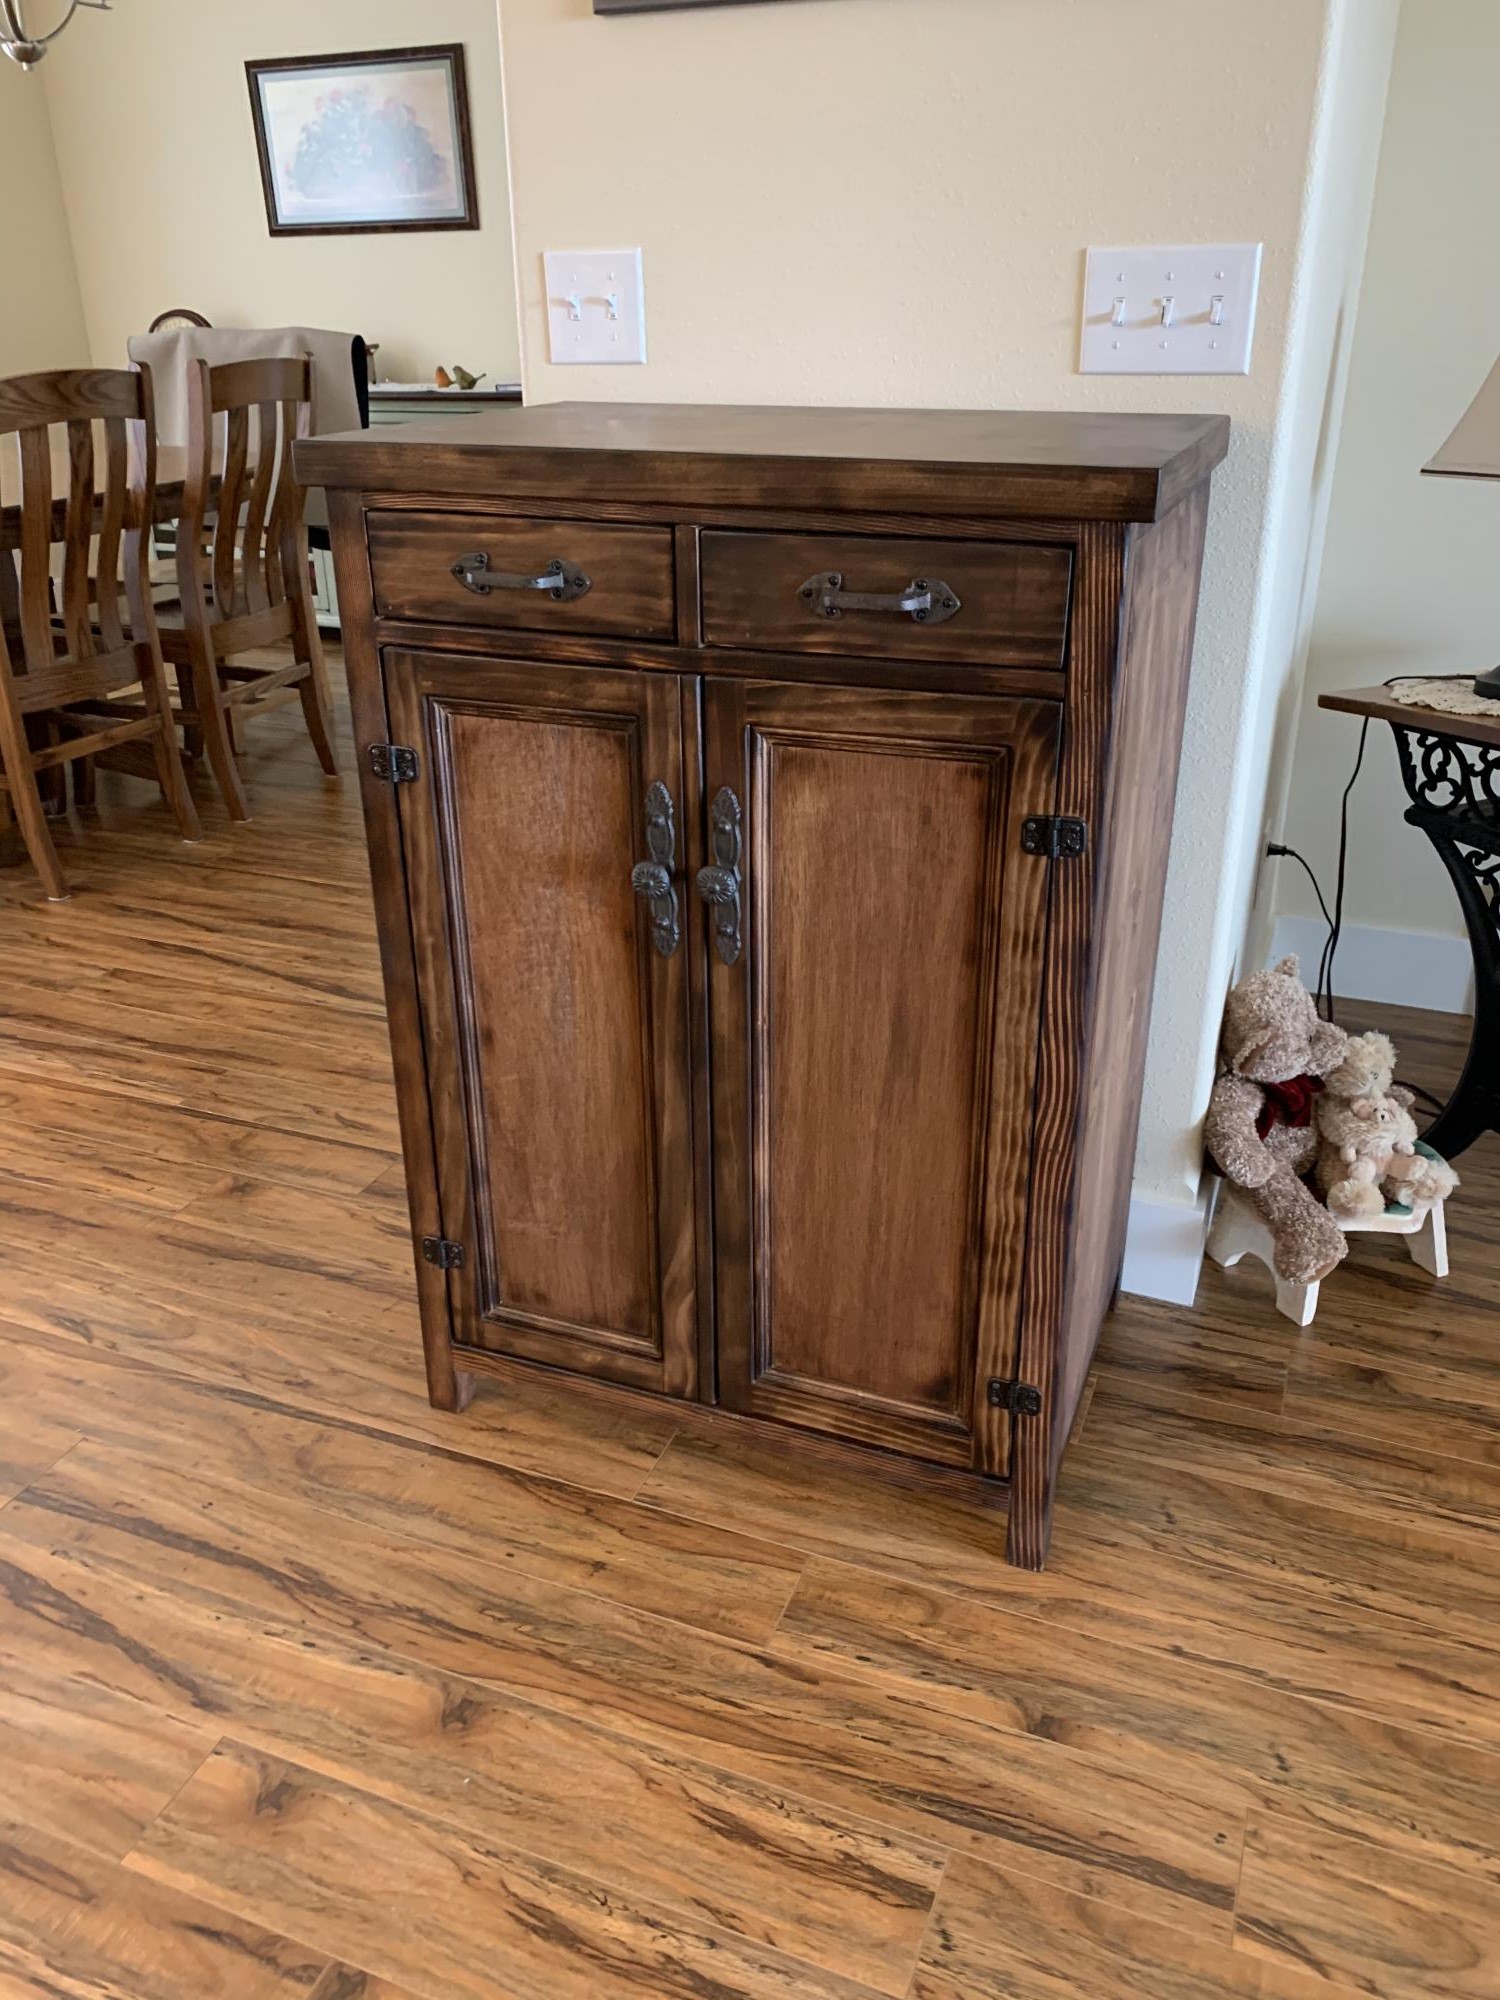
I modified the Hemnes Linen Cabinet plans to fit this space. Instead of painting, I burned and stained the cabinet before applying polyurethane.

I use the essential wood outdoor chair frame and made it to fit the cushions I bought. The cushions are the $19.98 ones from Walmart and so I resize the chair slightly so they fit well. The frames. Cost about 30 $35 for each chair and the cushions were at right of the $20 mark for each chair. - Randall
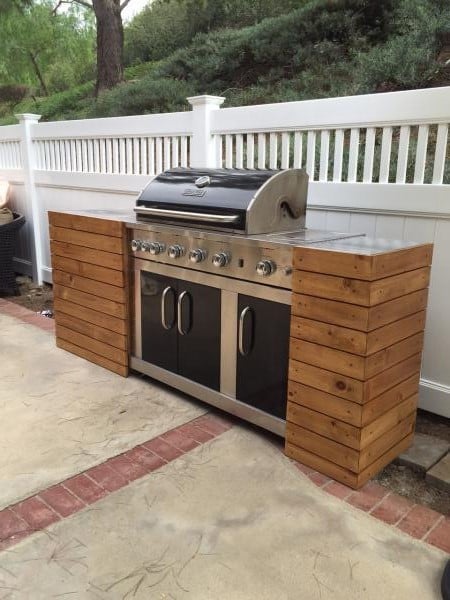
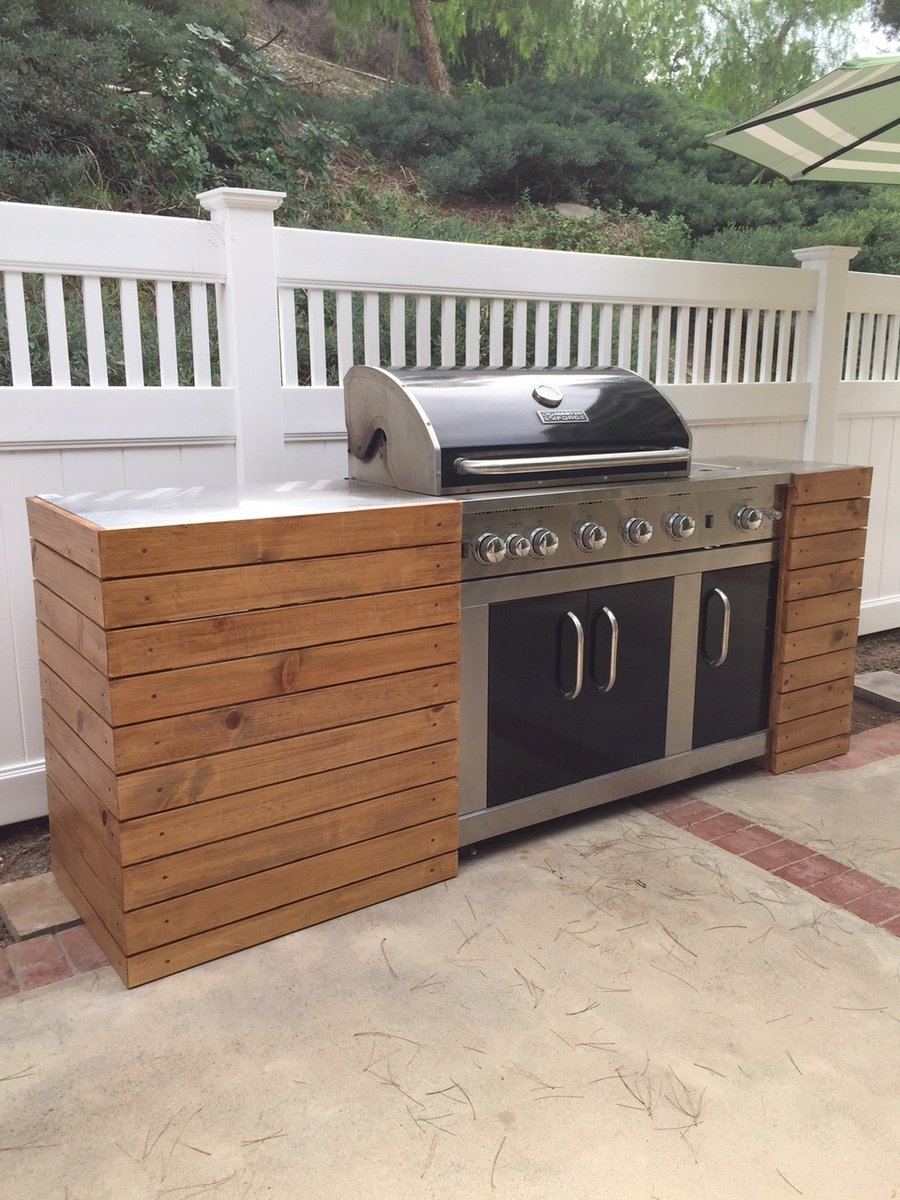
This was just a standard BBQ with an attached folding table. I used a combo of Ana's plans to add a little character and style to the BBQ and it made a huge difference in not only the BBQ, but also the backyard.
Mon, 05/23/2016 - 12:29
Hello: Very interested in which plans you used to build the BBQ Built In. Thank you.
Wed, 06/08/2016 - 09:22
Hello dbryant1977, please share the plans. Also, what's brand/model of BBQ? Very nice.
Thu, 04/09/2020 - 18:27
This is my guess on the plans used! https://www.ana-white.com/woodworking-projects/diy-grill-island-featuri…
Fri, 08/30/2019 - 09:50
Are there plans for this project or at least some pictures from while you were building it?
Thu, 04/09/2020 - 18:27
This is my guess on the plans used! https://www.ana-white.com/woodworking-projects/diy-grill-island-featuri…
Wed, 04/22/2020 - 15:52
Can you provide us with the plans for this? I would love to build one.

Mon, 03/04/2024 - 14:49
Hello: Very interested in which plans you used to build the BBQ Built In. Thank you.
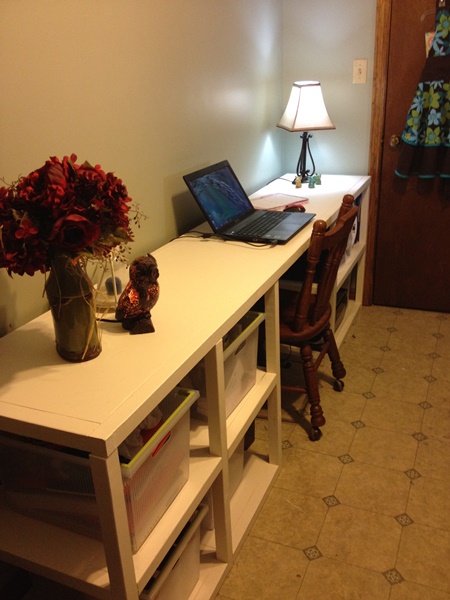
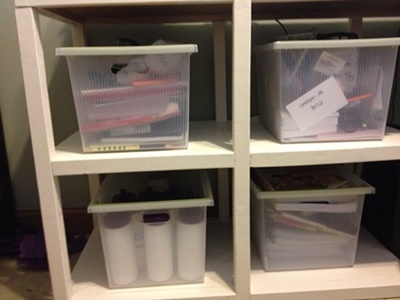
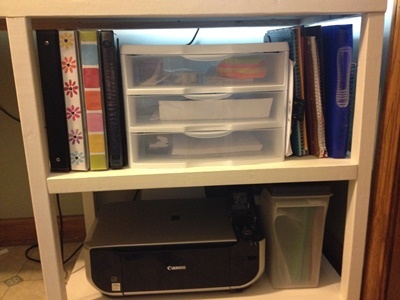
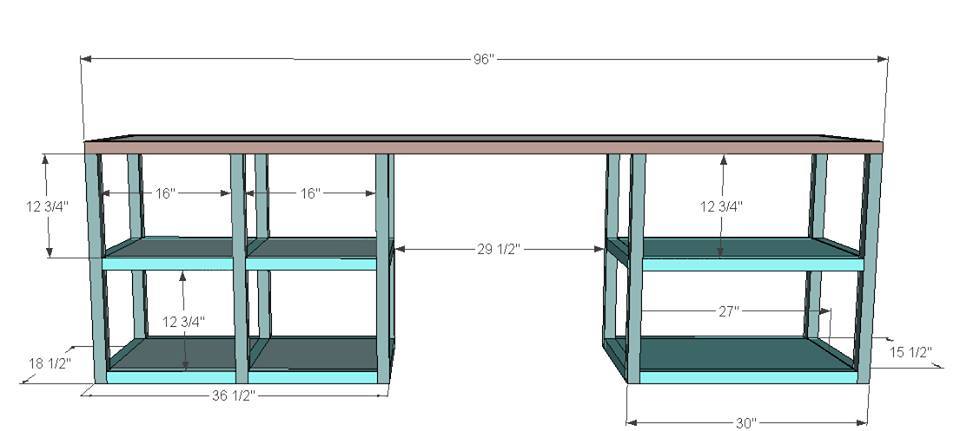
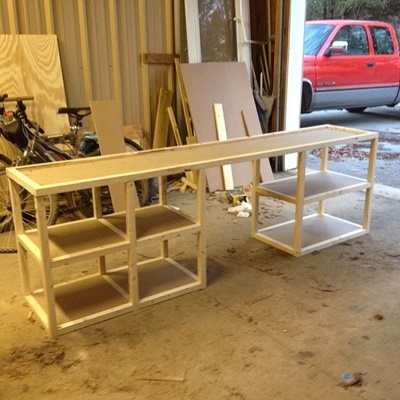
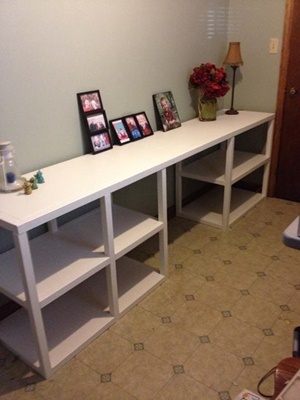
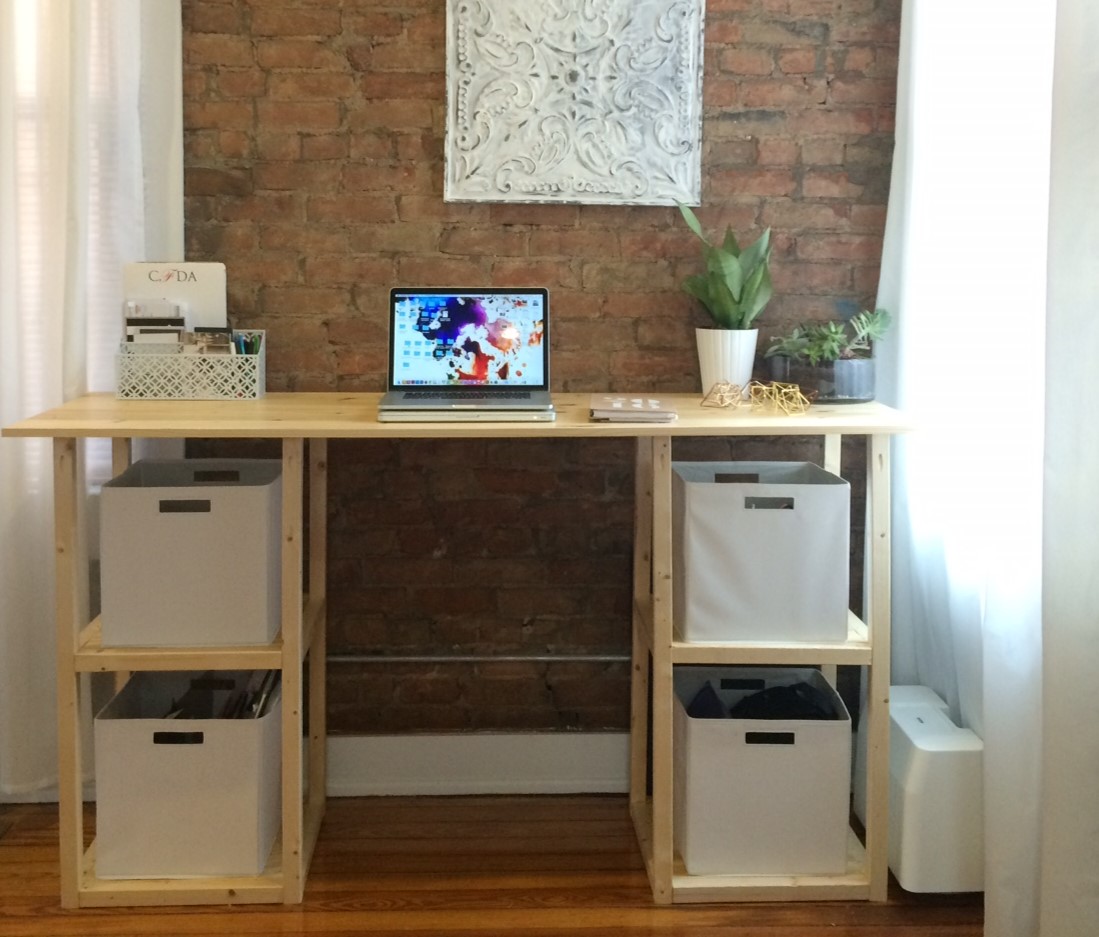
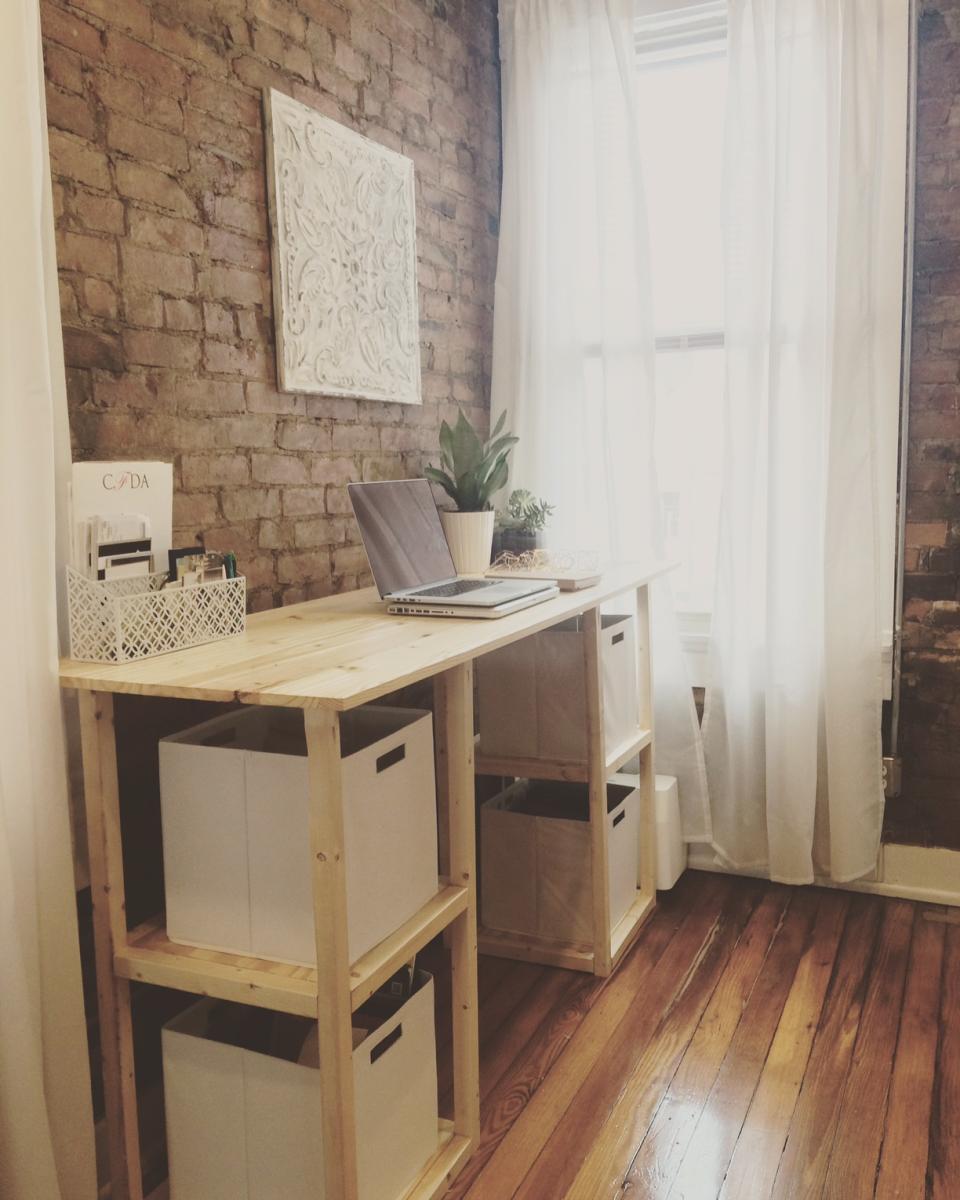
I needed a desk that served not only as a space to work, but something that had good storage and didn't take up way to much floor space.I looked and looked and couldn't find anything I loved until I ran across the Parson's Tower Desk plans on Ana-white.com. The depth of the desk was perfect, but I needed more storage, so I decided to play in with sketchup and see if I couldn't make it more of what I needed.
I ended up with a supersized Parson's Tower Desk!
It has four smaller cubbies to the left side and 2 wider shelves to the right side.
You can see a front view and all the pictures at the blog post!

I cant thank you enough for your plans! I’ll tag you when I put the vivarium on it! It’ll look really cool. - Gunnar Montana


Fri, 03/07/2025 - 11:41
You will have to forgive me, but what is a vivarium? It looks like it is for snakes but I'm not sure. It's a stupid question, but if you don't ask, how are you going to find out?

In reply to What is a vivariun? by oldest lady 67
Tue, 03/11/2025 - 09:55
I asked myself the same question! I googled it and found this.
Dictionary
Definitions from Oxford Languages · Learn more
vi·var·i·um
/vīˈverēəm/
noun
an enclosure, container, or structure adapted or prepared for keeping animals under seminatural conditions for observation or study or as pets; an aquarium or terrarium.
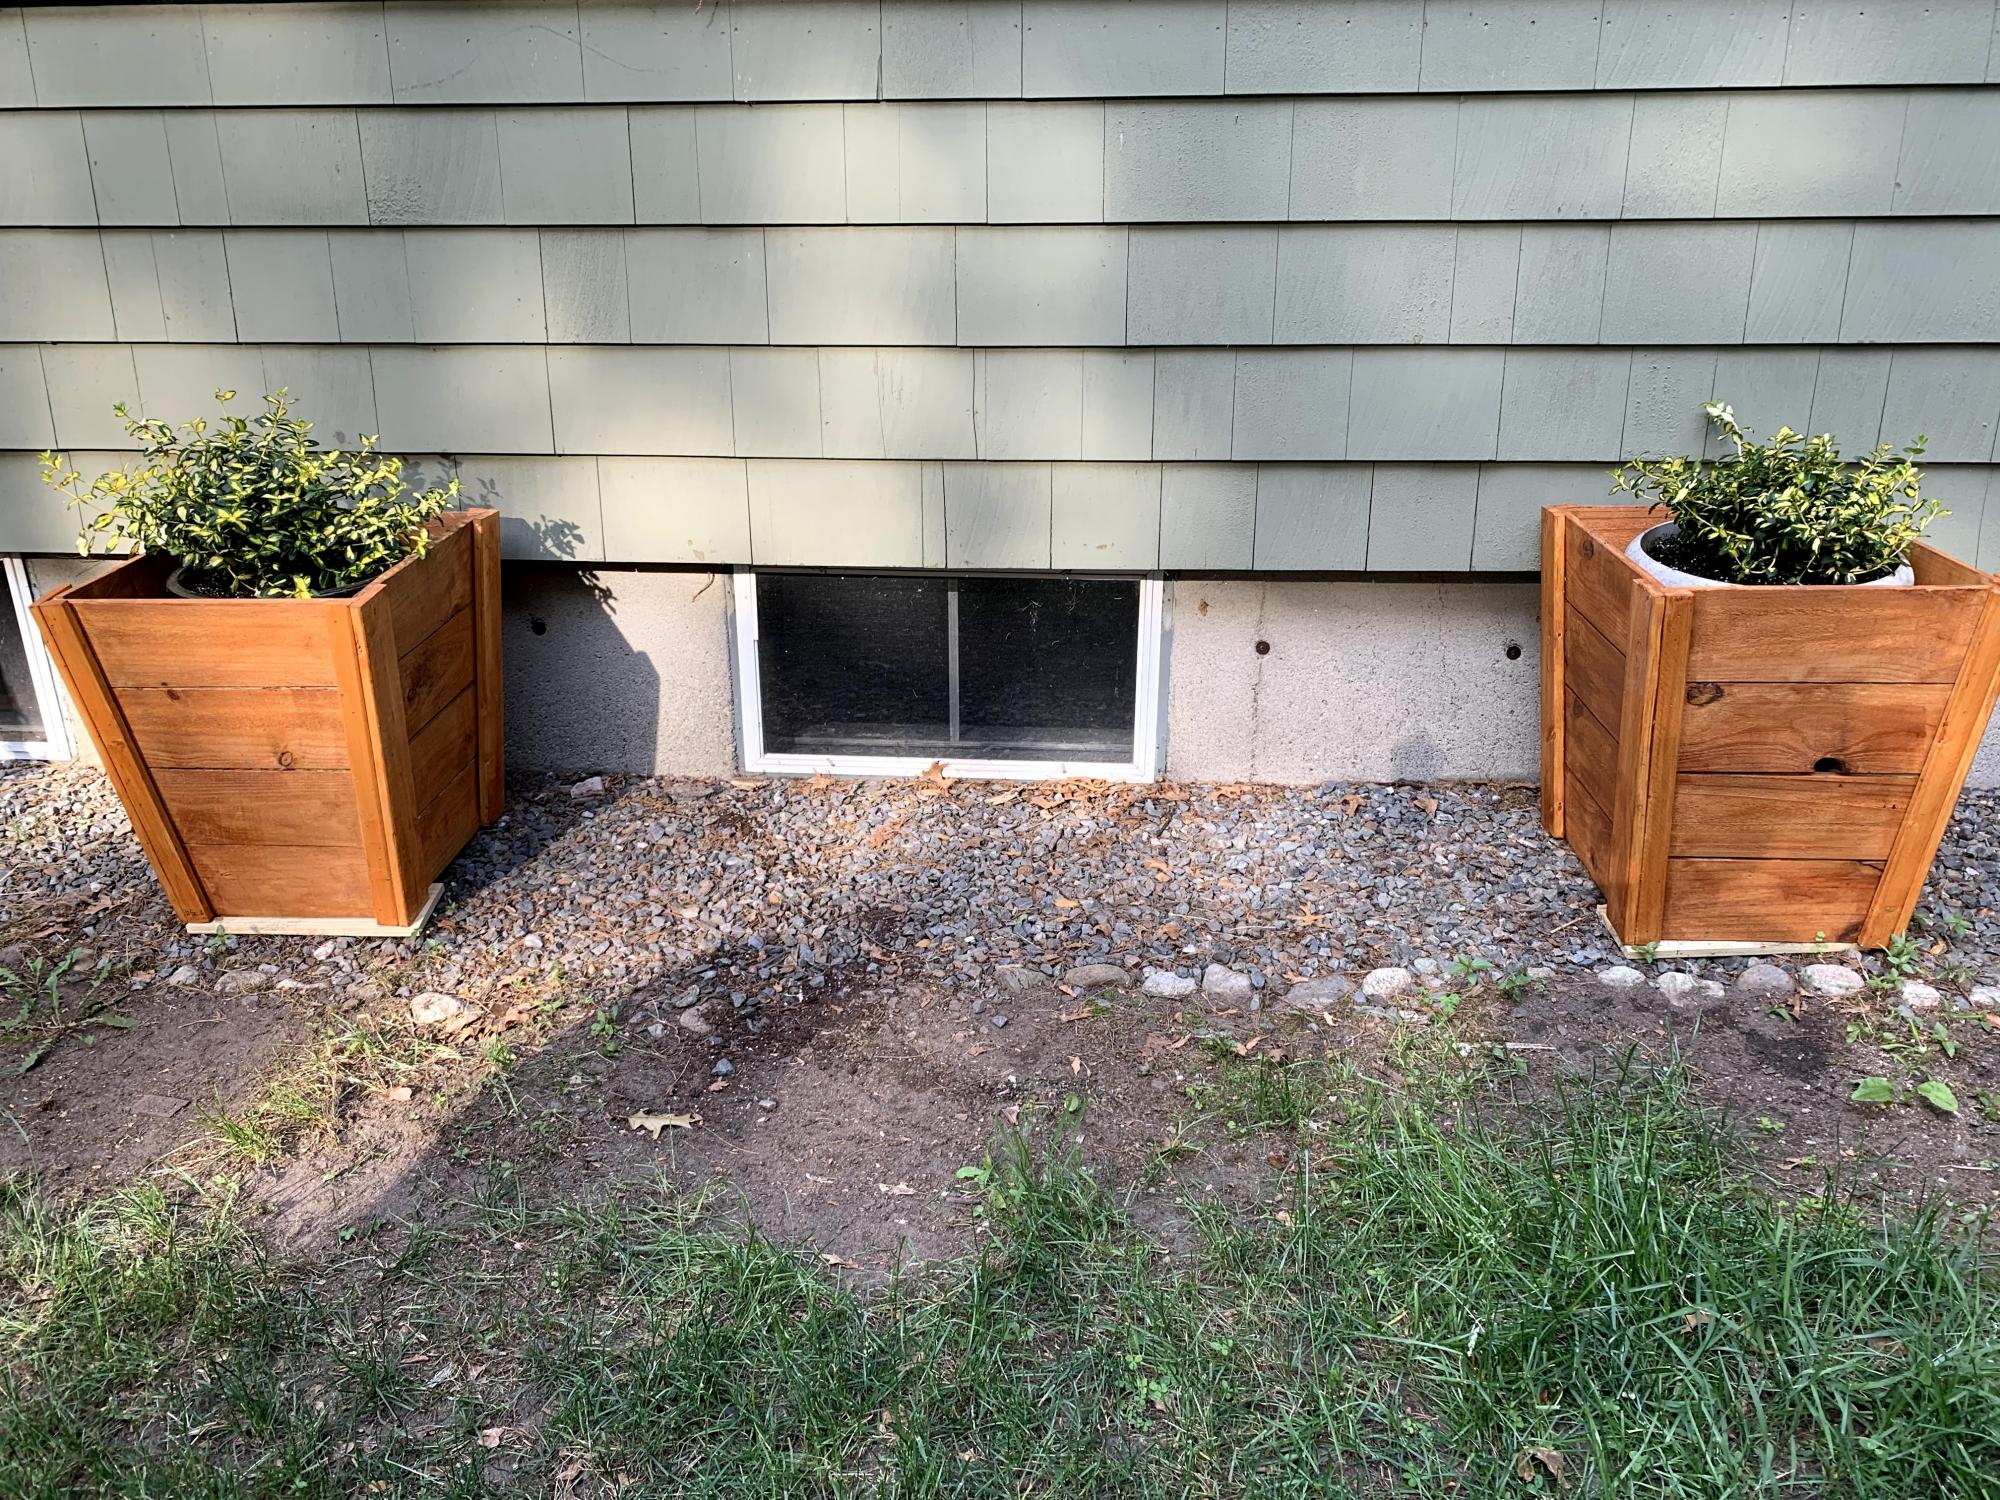
Made the tall planters to her exact measurements. Used fence pickets but stained them with an orange cedar stain. Put 'em near the fire bowl (and near a quickly made set of AW's Adirondack side tables). Took me a full day to measure, cut, nail and stain. I'm a novice so, this project challenged and pleased me! #speedsquareangles
I loved the simplicity and shelving of the Parson Tower desk plans but I really wanted a standing work station. I made it taller (approx. 40 in tall) and I made the desktop longer and wider (approx. 72 x 24in) and I LOVE it!
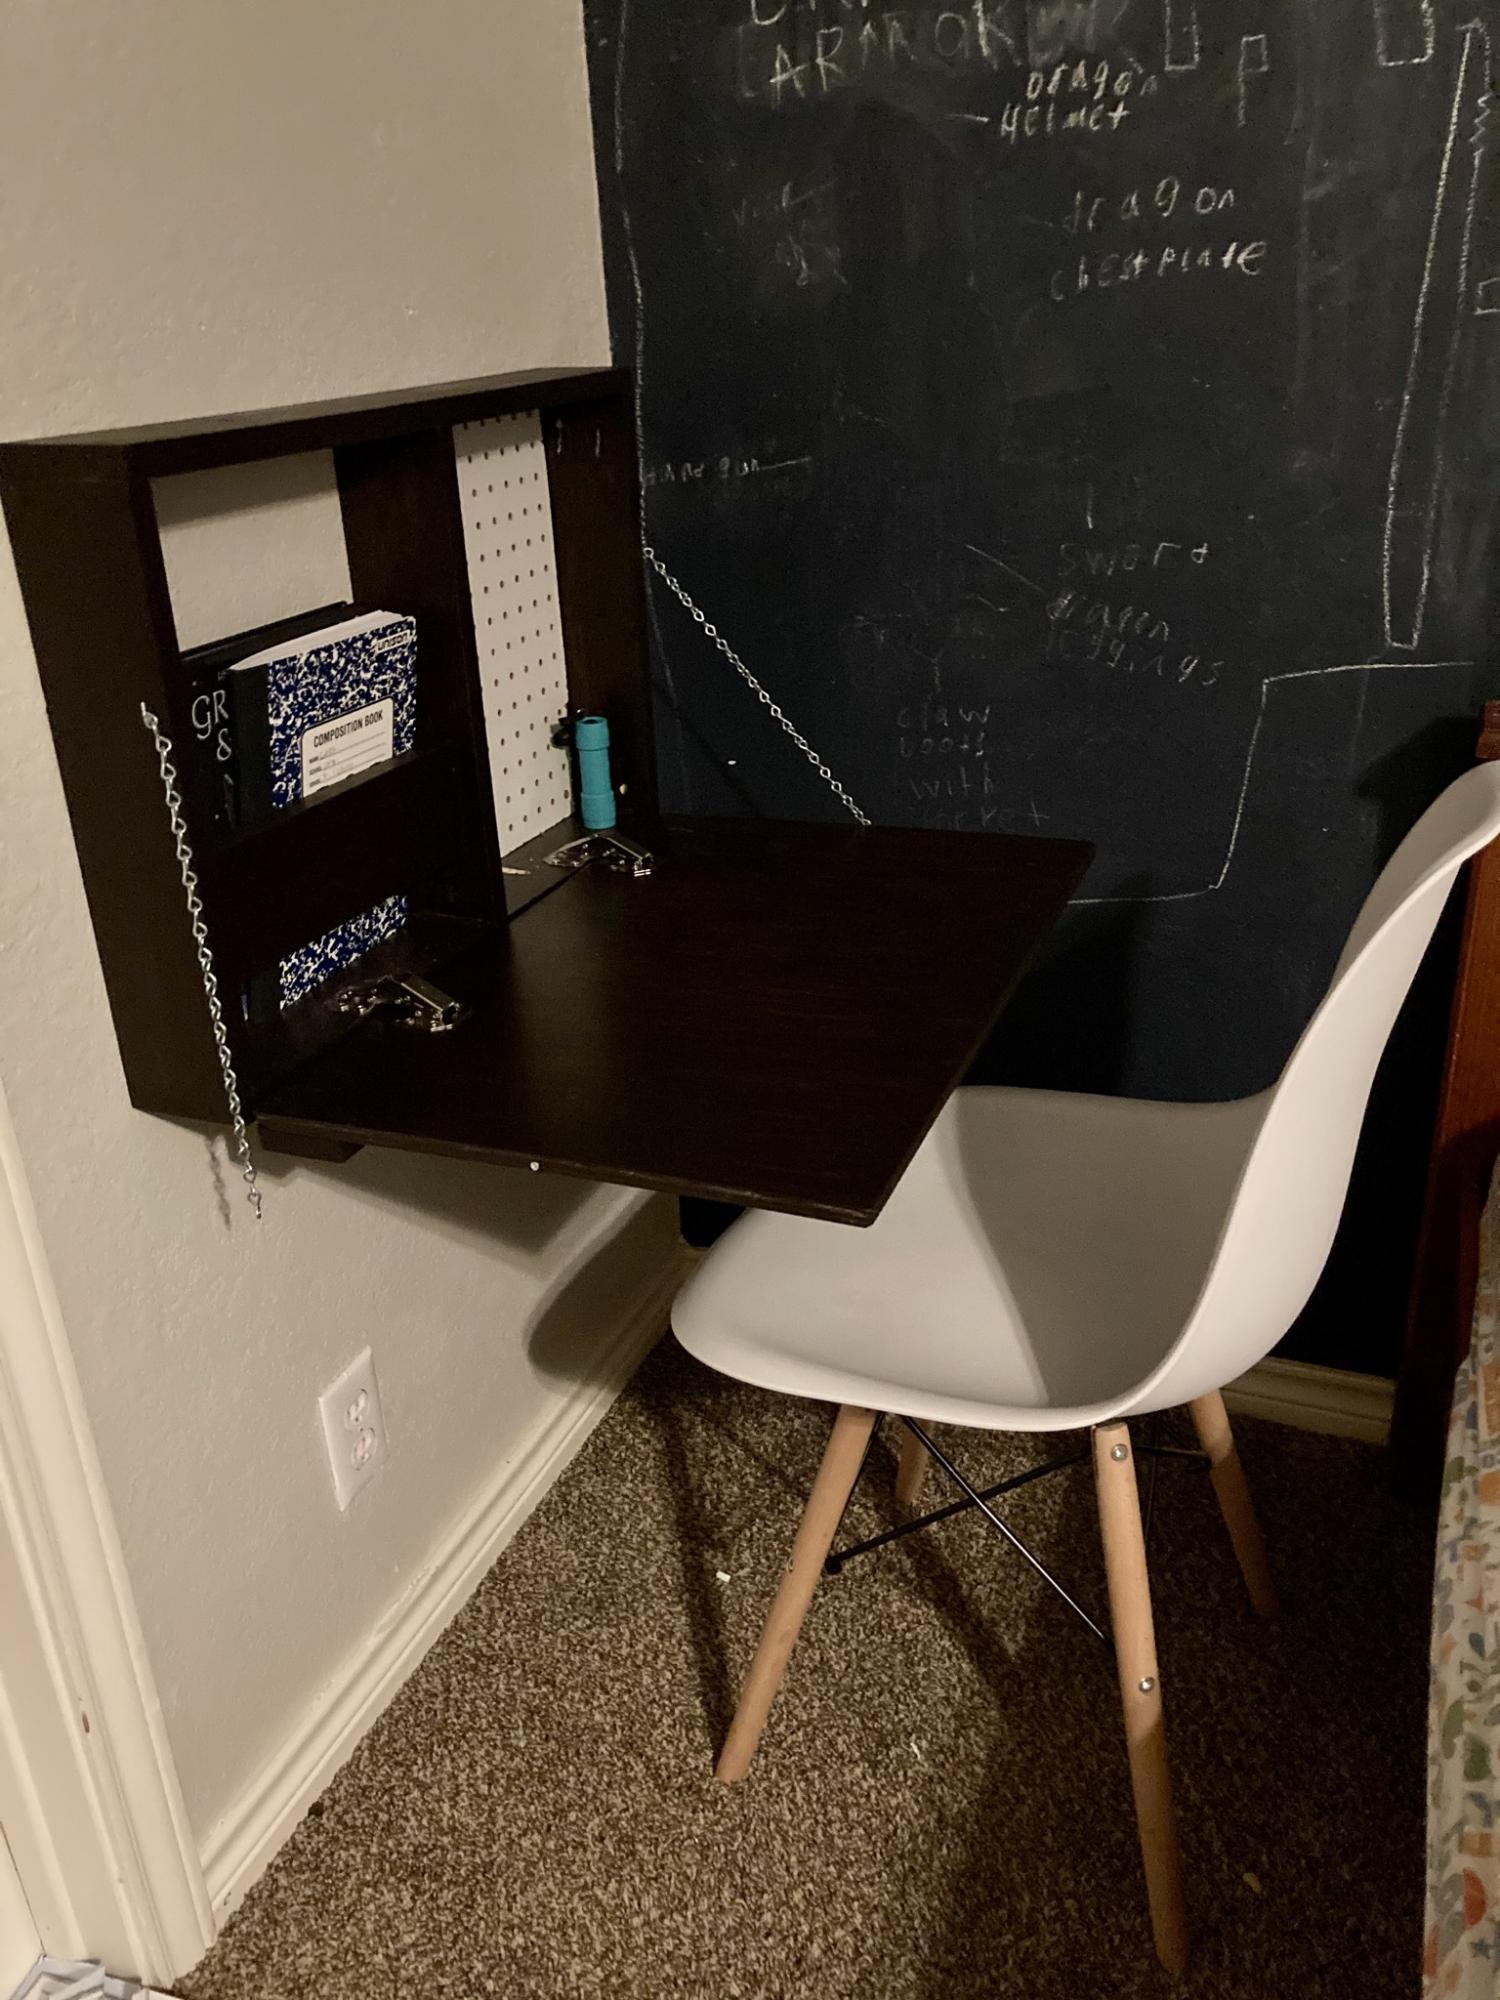
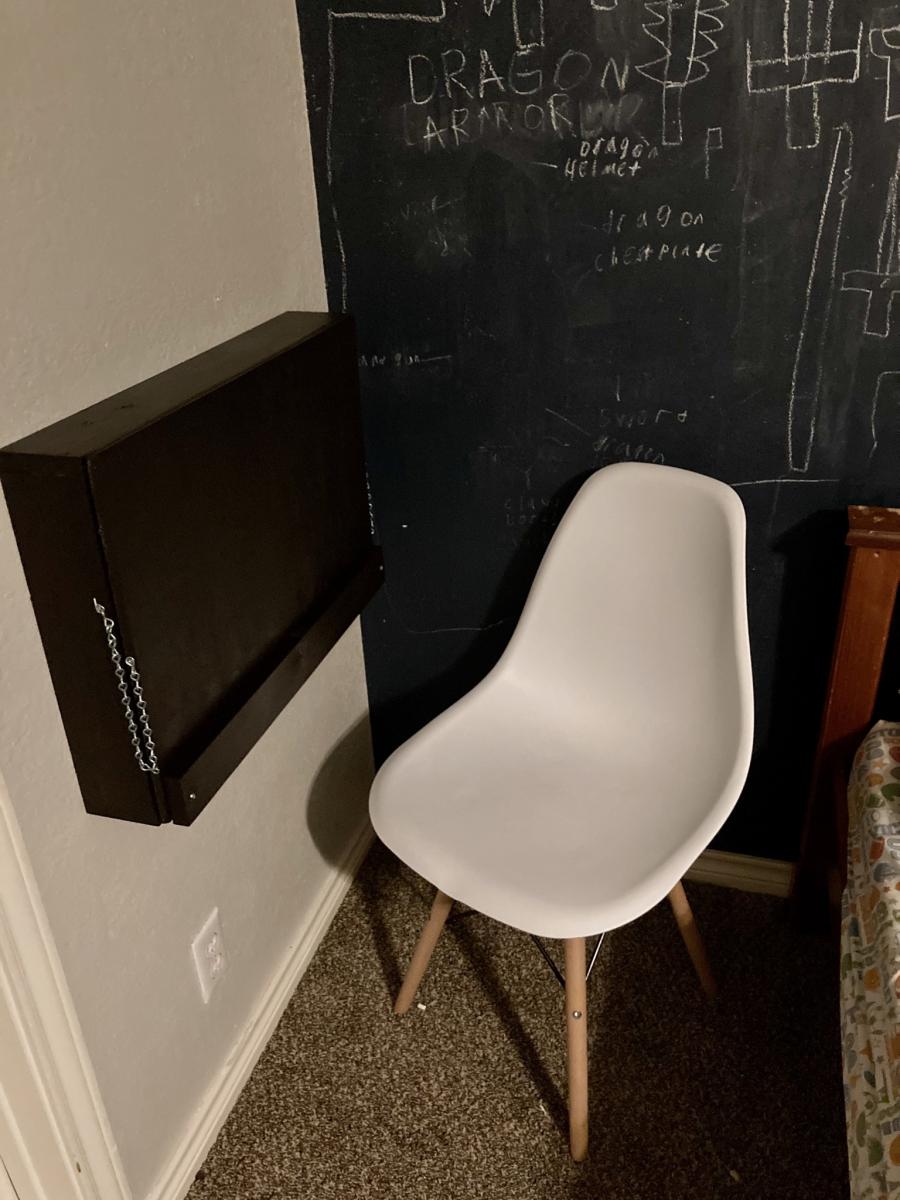
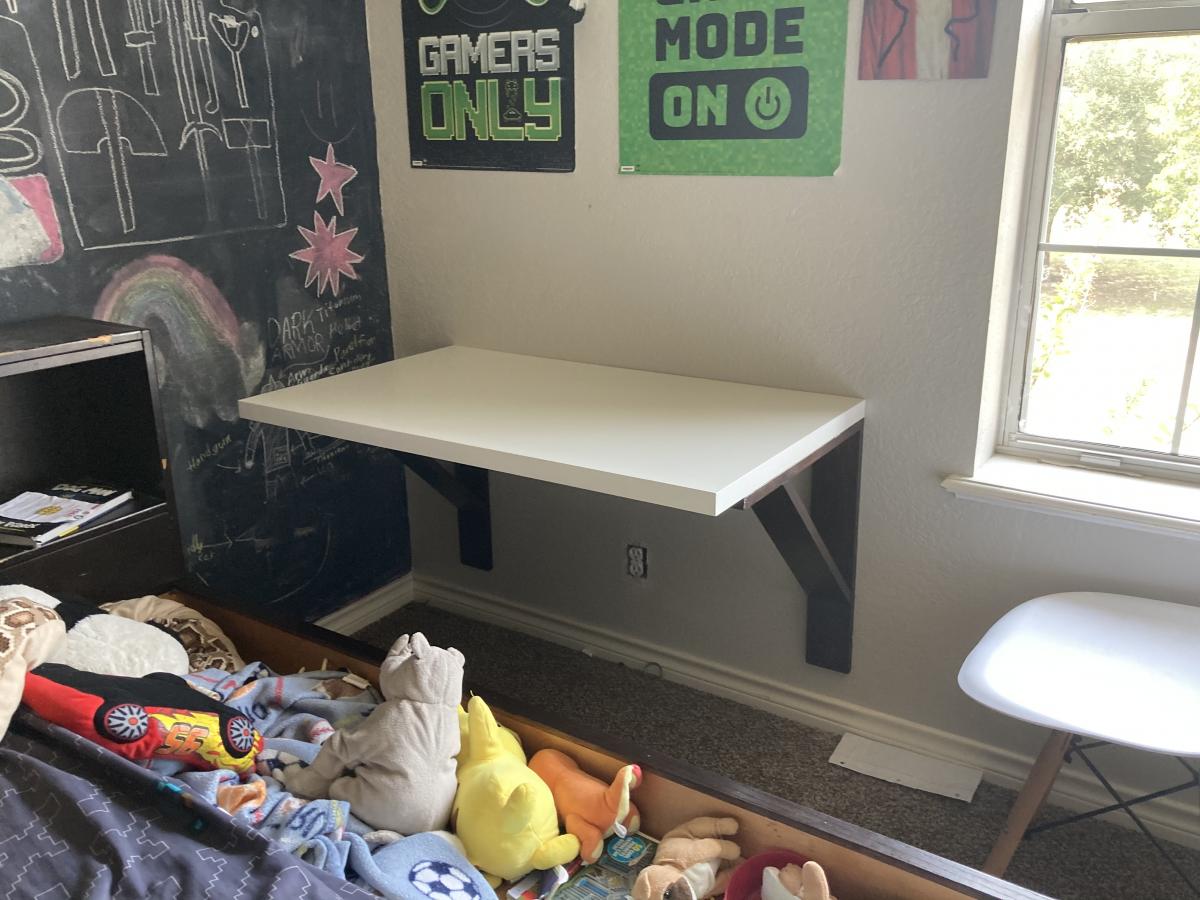
I am brand new at building but my big boys requested desks in their room for distance learning. One fell in love with the flip down wall art desk and this is our take on it. The other wanted a bigger surface, so we used an IKEA desk top and built our own brackets. The boys loved being part of the building. I put all the right angles together with a Kreg jig, and attached everything directly to studs in the wall (I don’t trust my boys not to be rough on them).


Super happy with how this turned out … transformed my bedroom! Modified plans to add support under the fireplace since it is so wide (and to give additional attachment points for the shiplap. Thanks for the inspiration! - https://www.instagram.com/jaxbeachboymom/

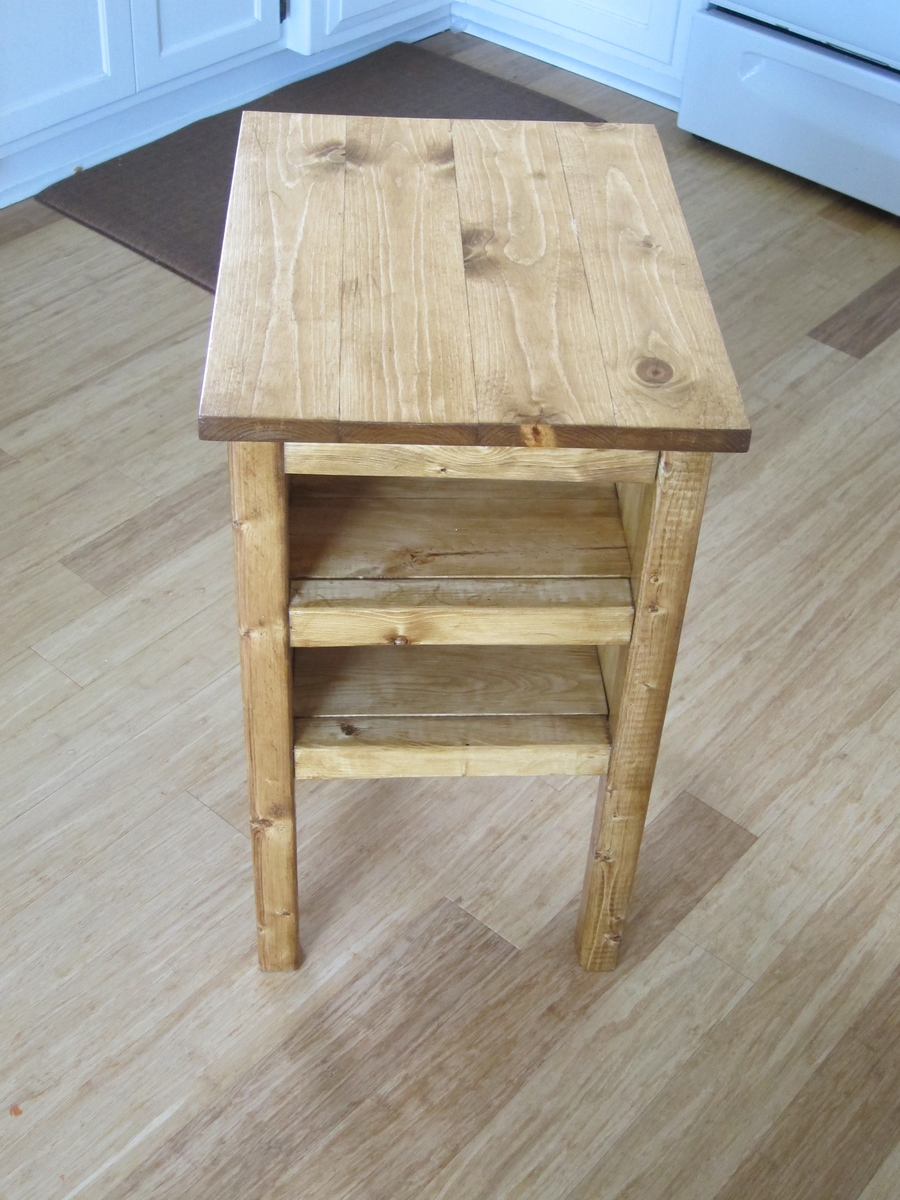
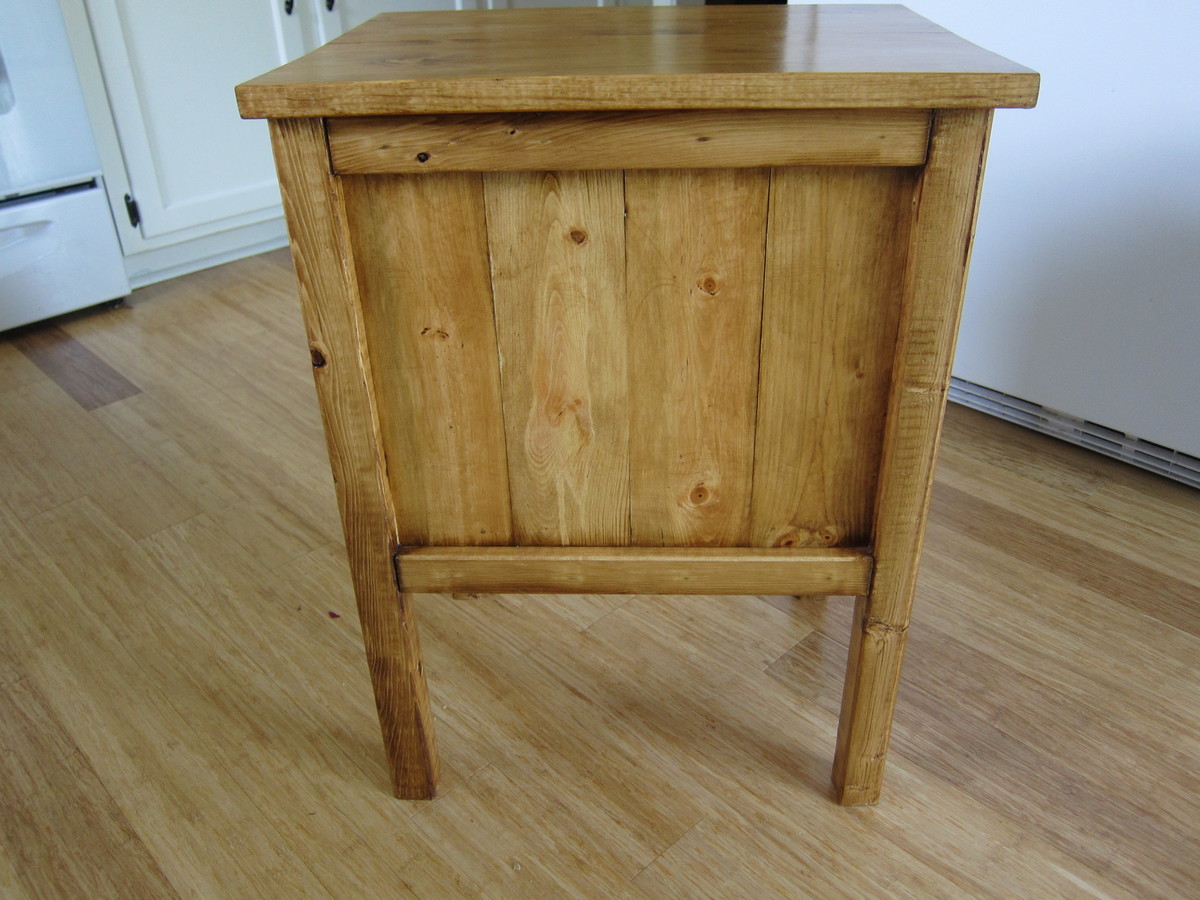
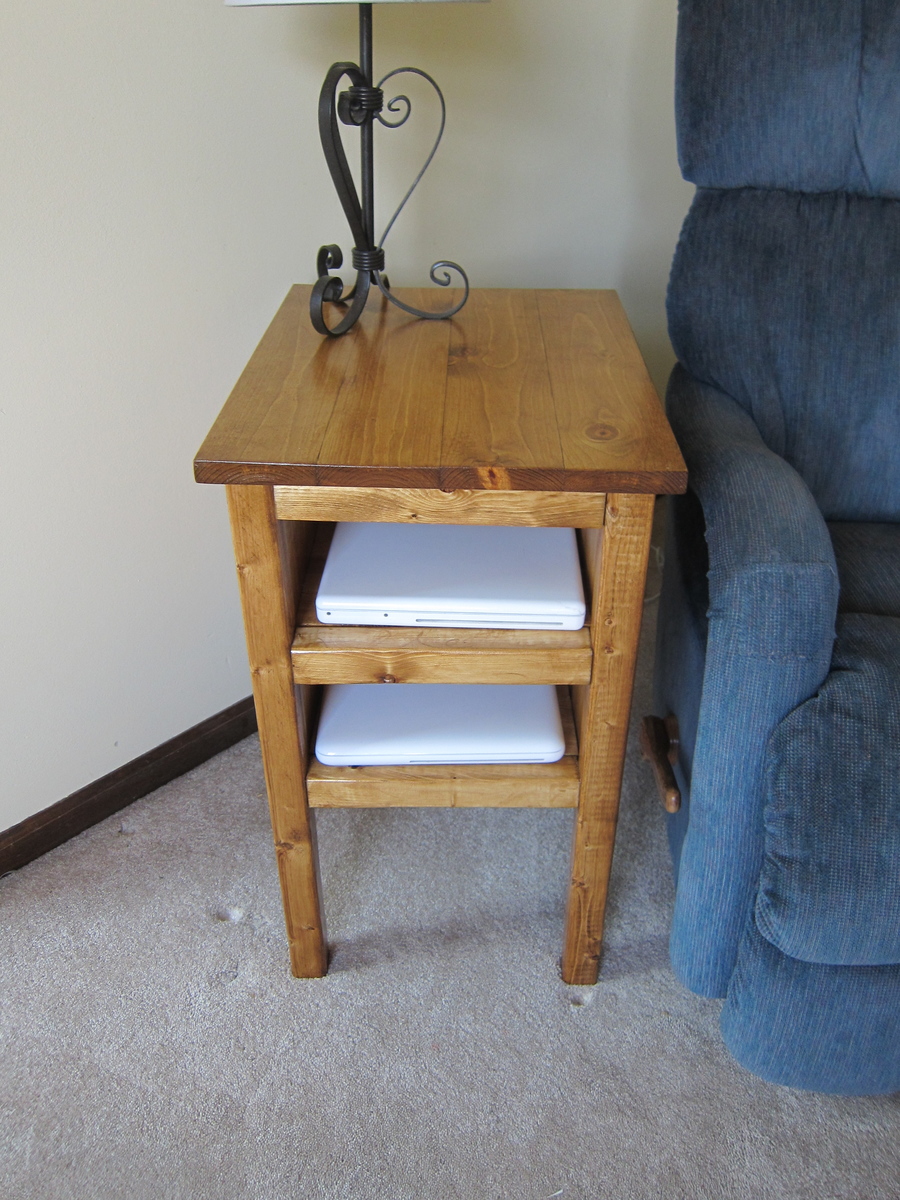
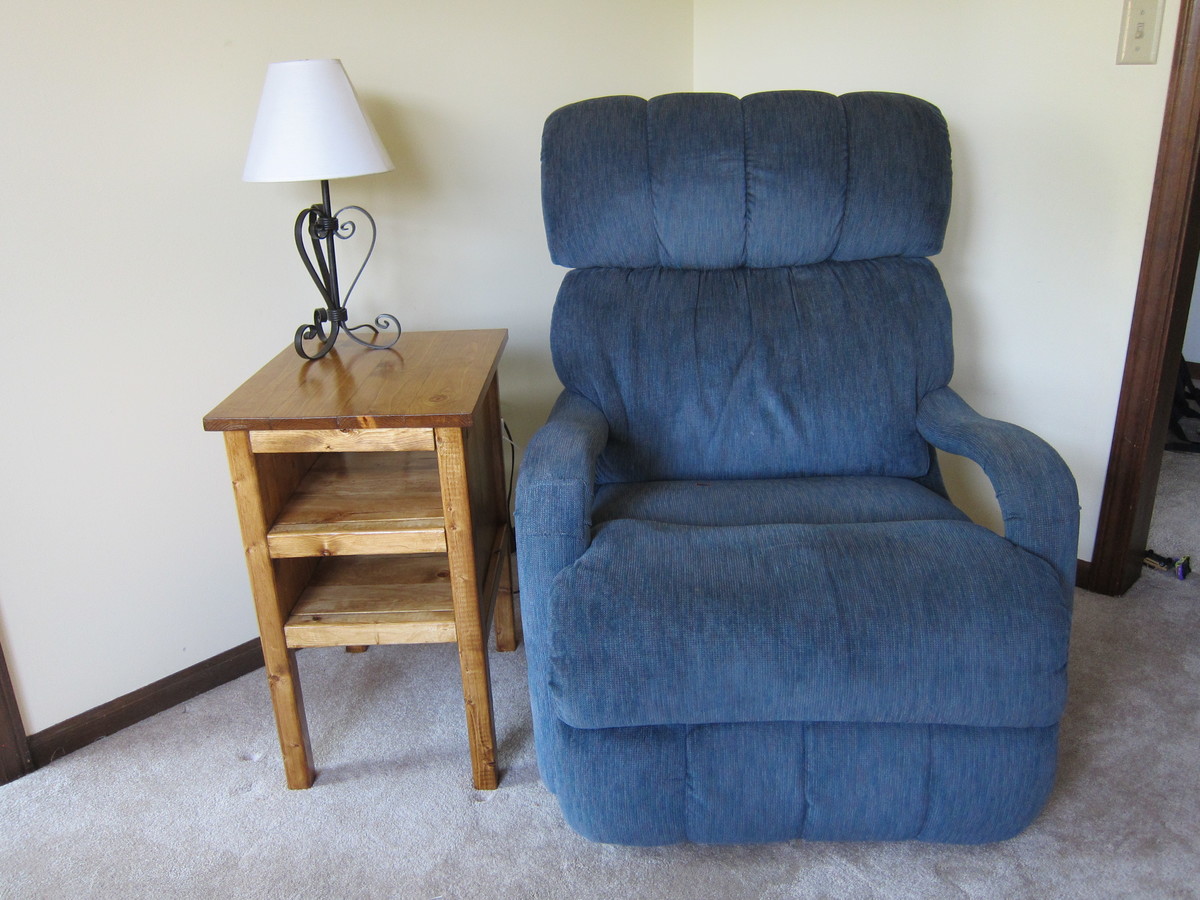
This is a variation on the tidy up end table. The dimensions for the tidy up end table were too big for my space, so I made it a little smaller and added an extra shelf to store our laptop computers. This makes it easier to charge our laptops and keep them out of the way. It took me a little longer than it should have because I had a 3 year old and a 5 year old "helping" me.

Thu, 11/14/2013 - 21:33
What a good idea, adding an extra shelf to tuck the laptops away for charging! Looks great!
Val
artsybuildinglady.blogspot.ca
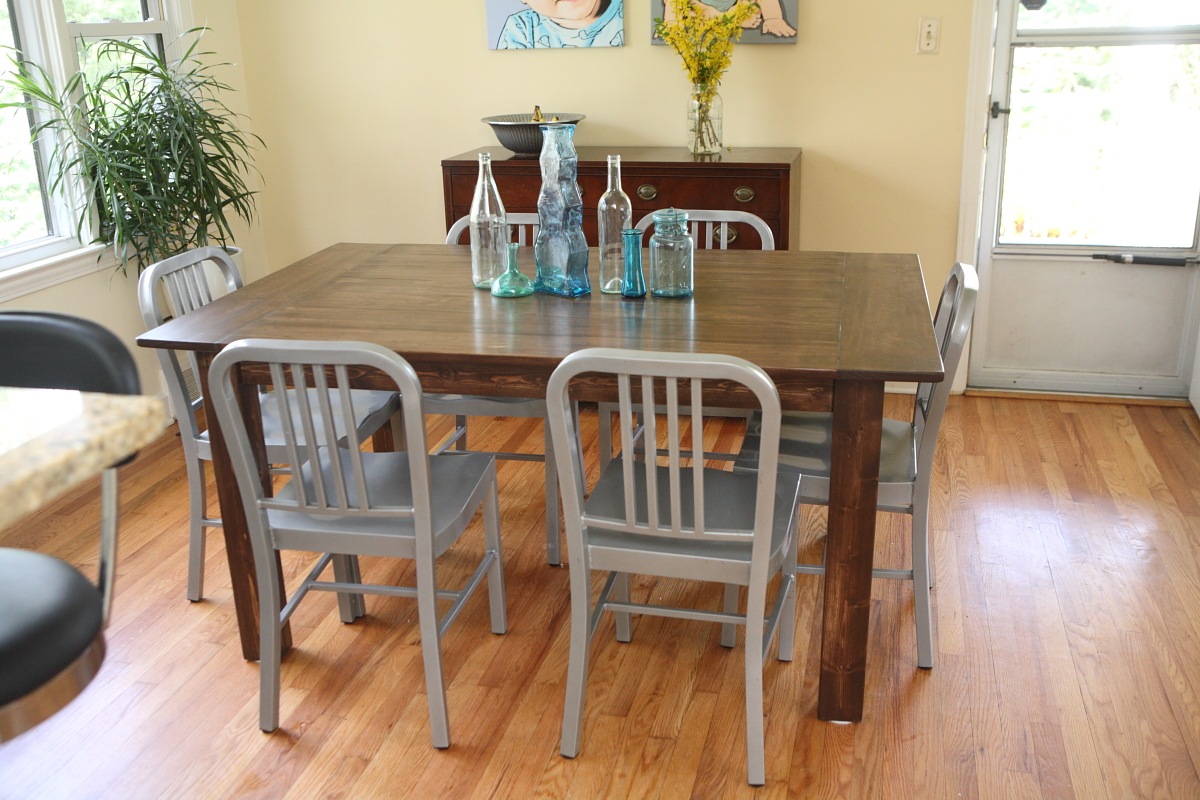
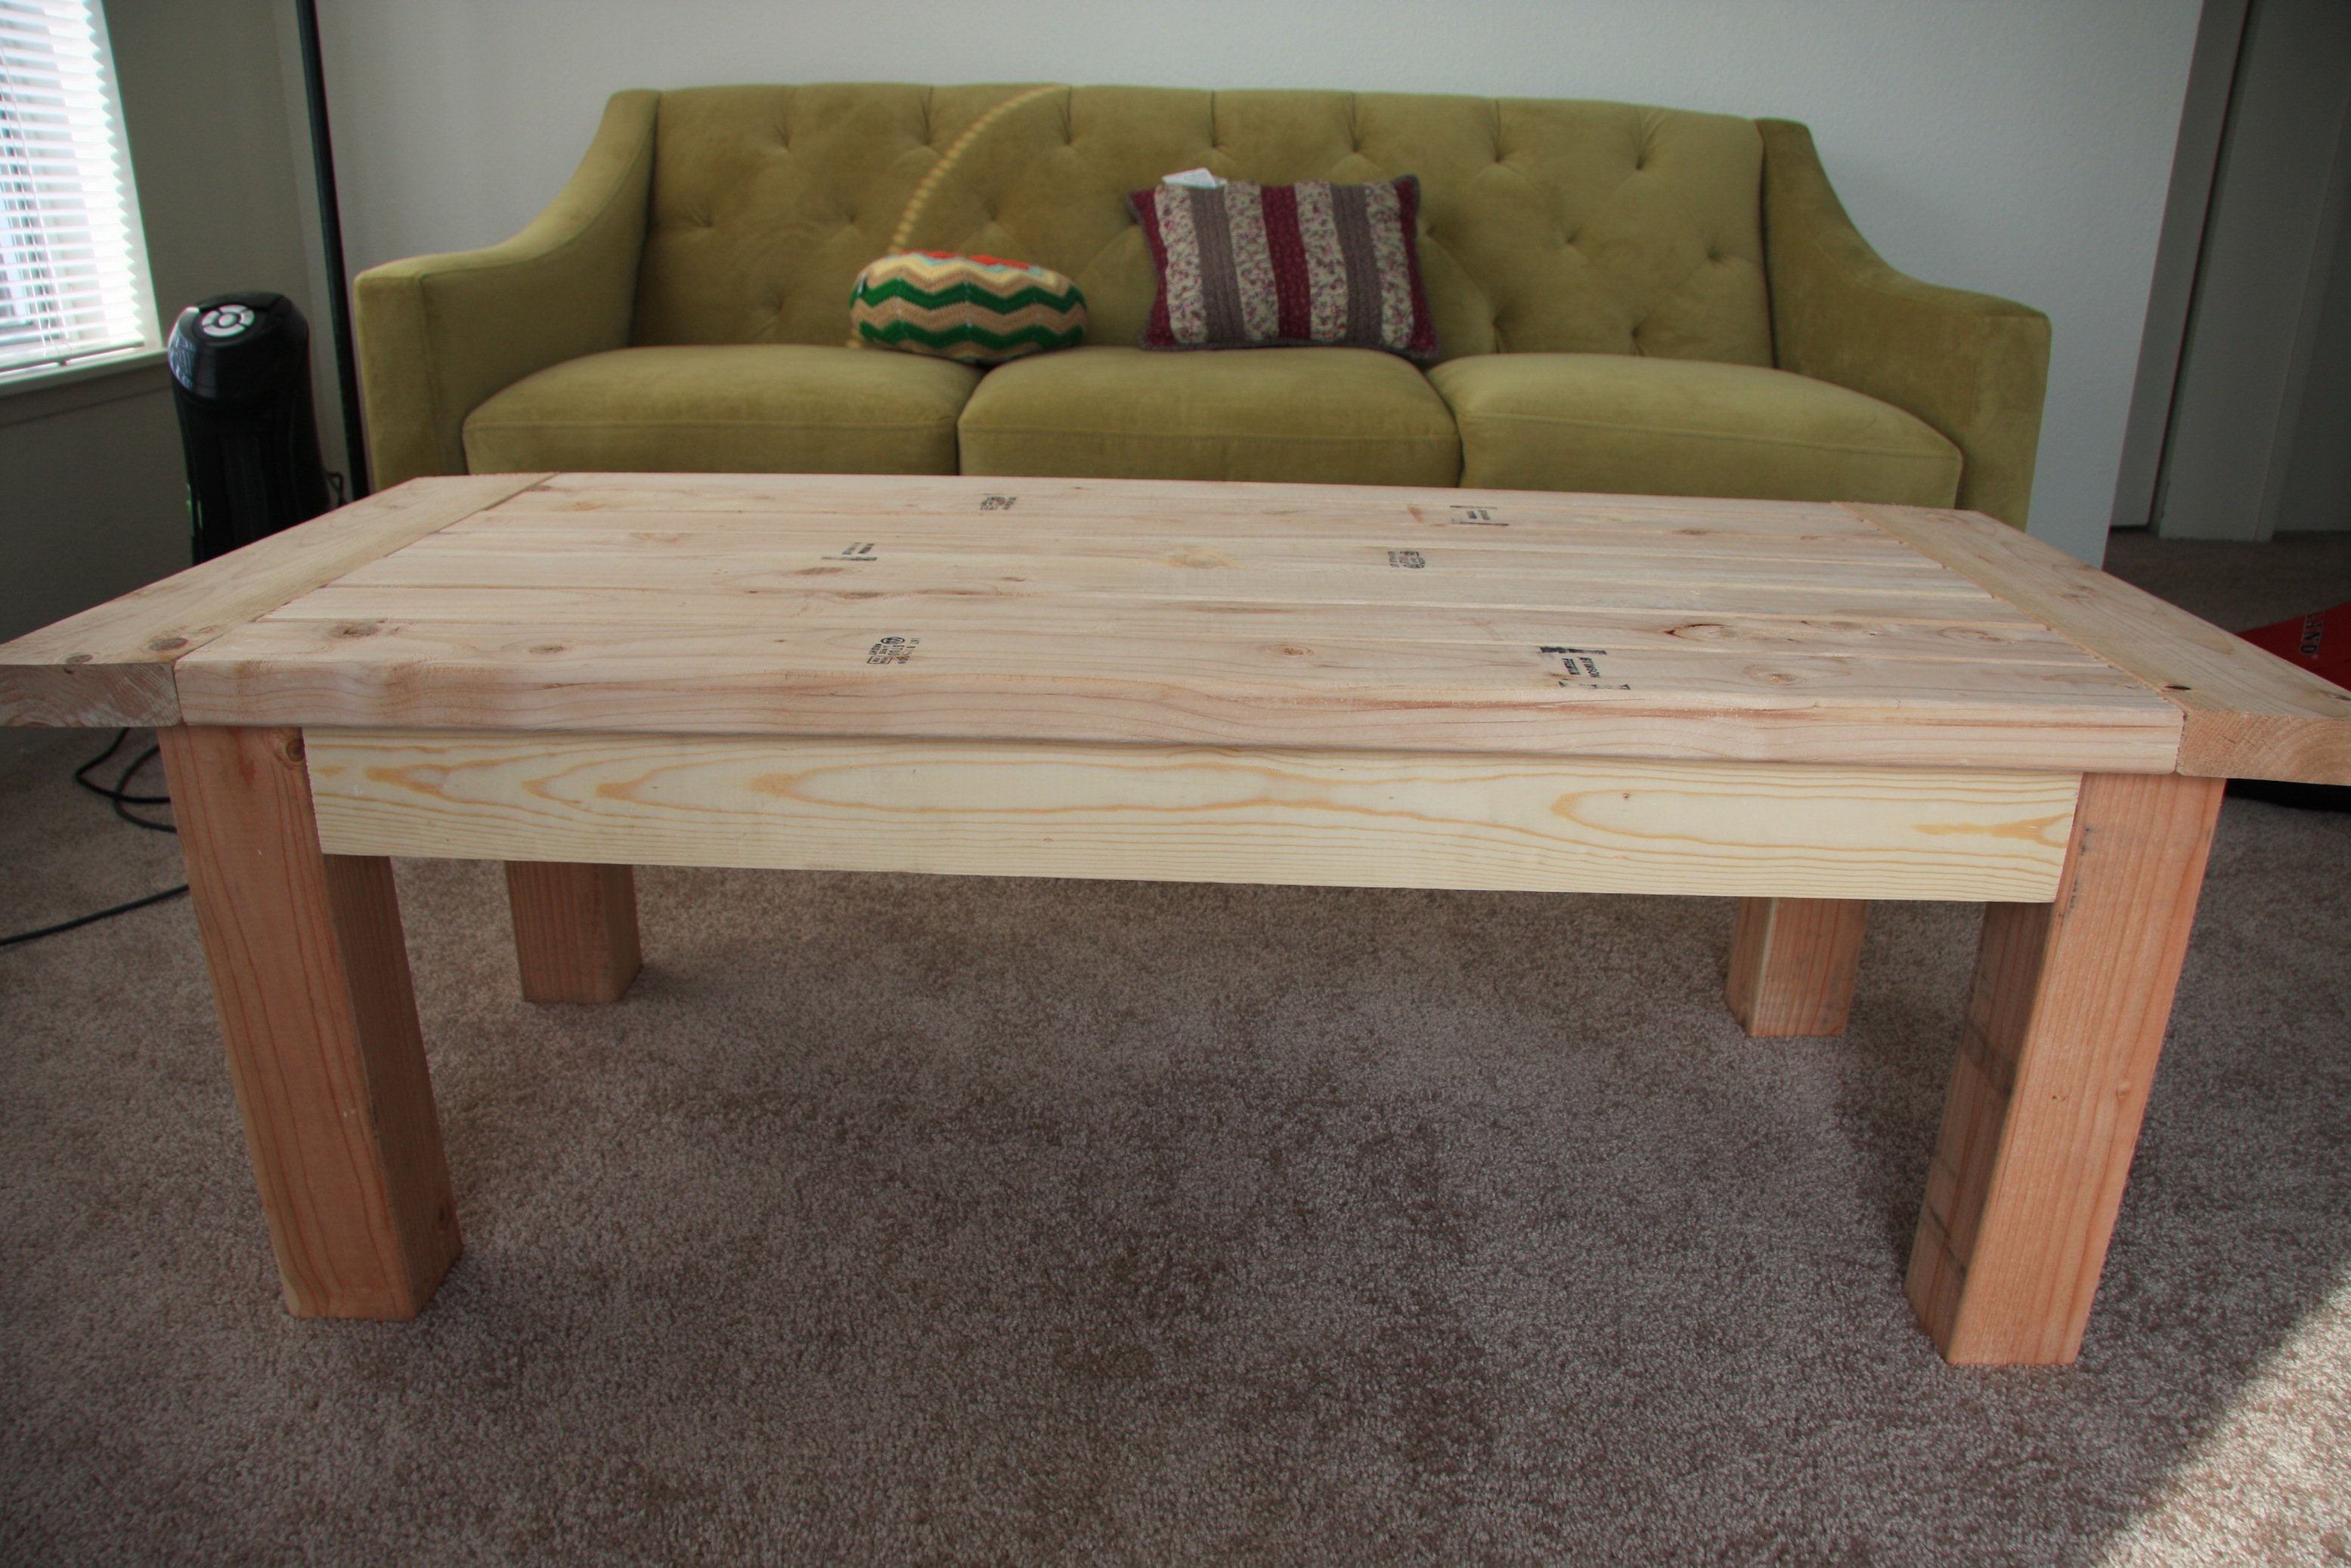
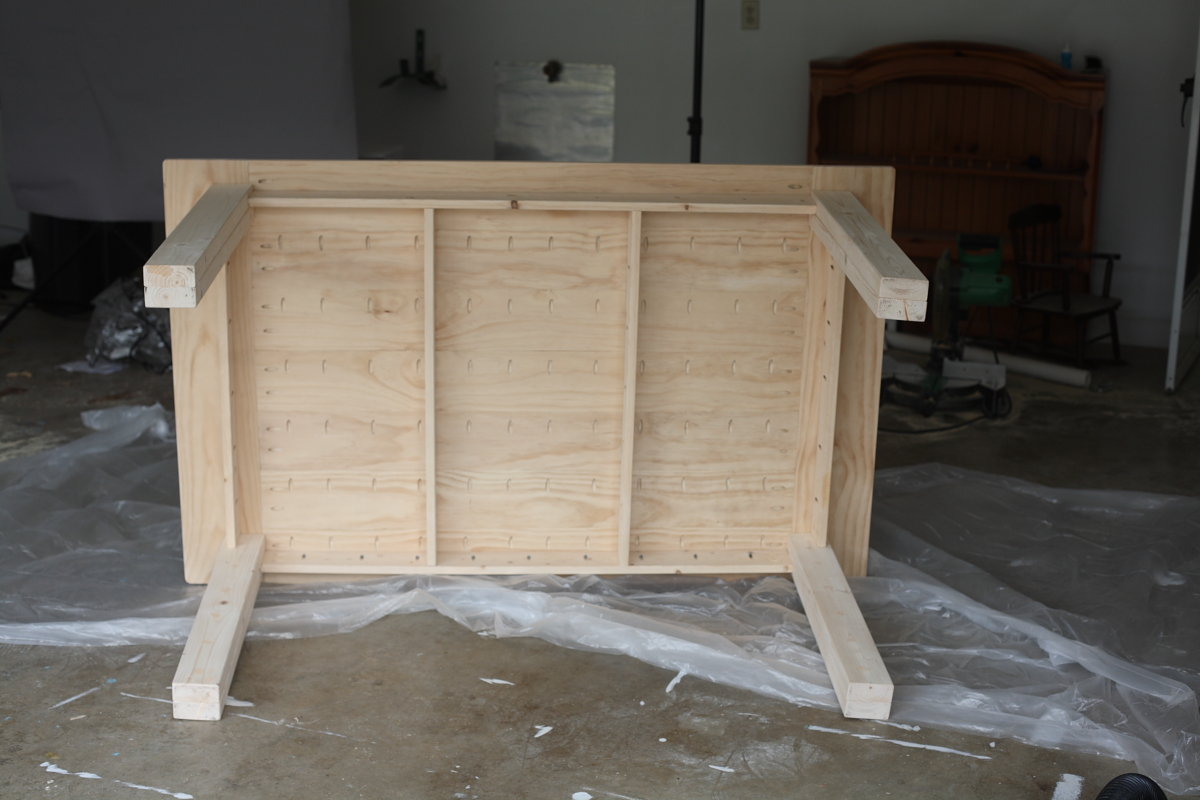
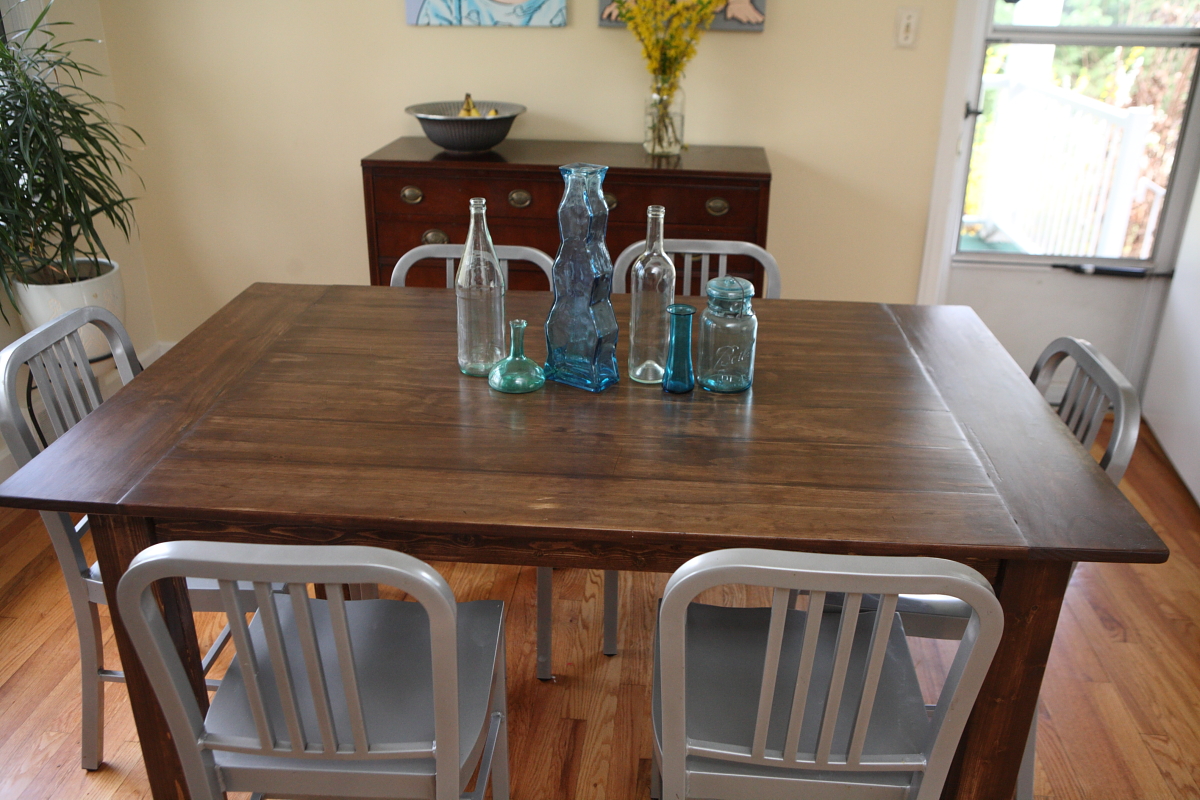
I used the basic construction of the turned leg coffee table, but used 2x4s screwed together for the legs, added a couple of supports, and made the dimensions larger (38.5" x 62" for a dining table that seats 6). I used pocket holes for all the joints and it came together pretty easily. (One day, though, I am going to build a project without drastically altering the plans. One day.)
Sun, 07/22/2012 - 02:00
Where are those chairs from??
Ps. The room looks great.
Tue, 08/21/2012 - 05:29
The chairs are from Overstock. Here's the link:
http://www.overstock.com/Home-Garden/Steel-Silvertone-Side-Chair-Set-of…
Thanks!
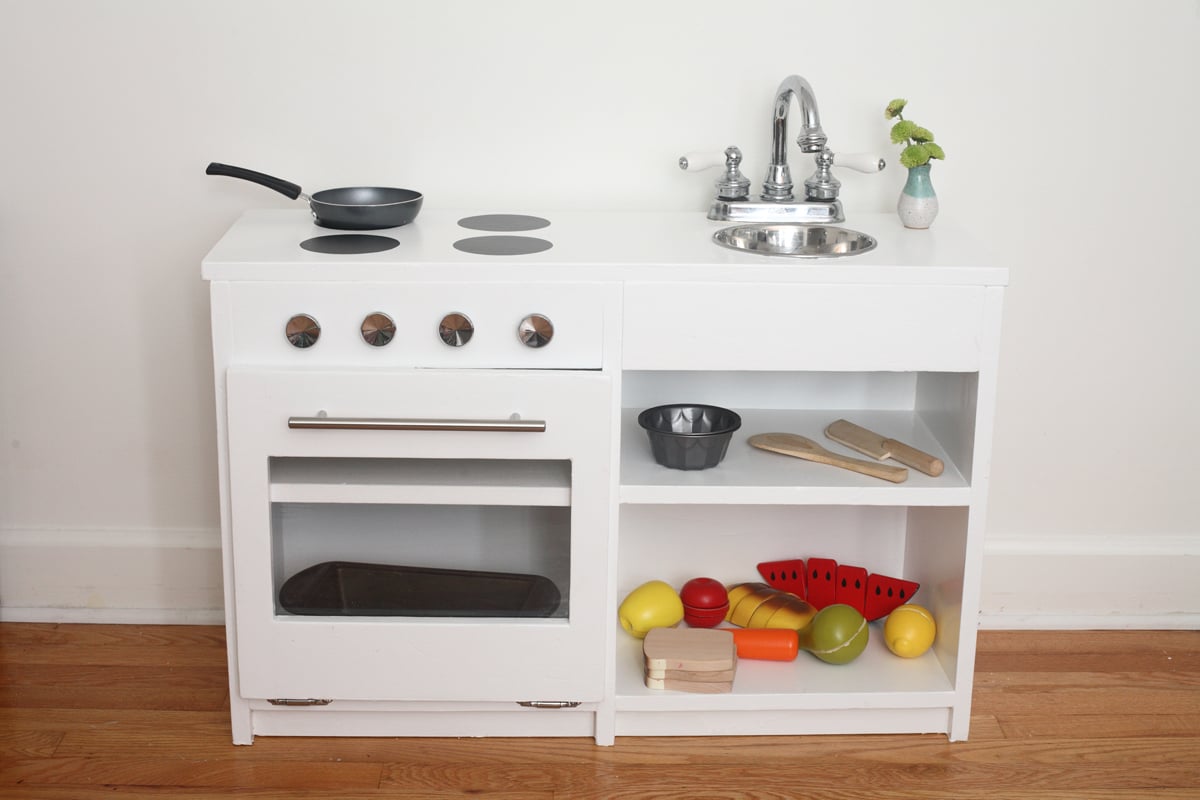
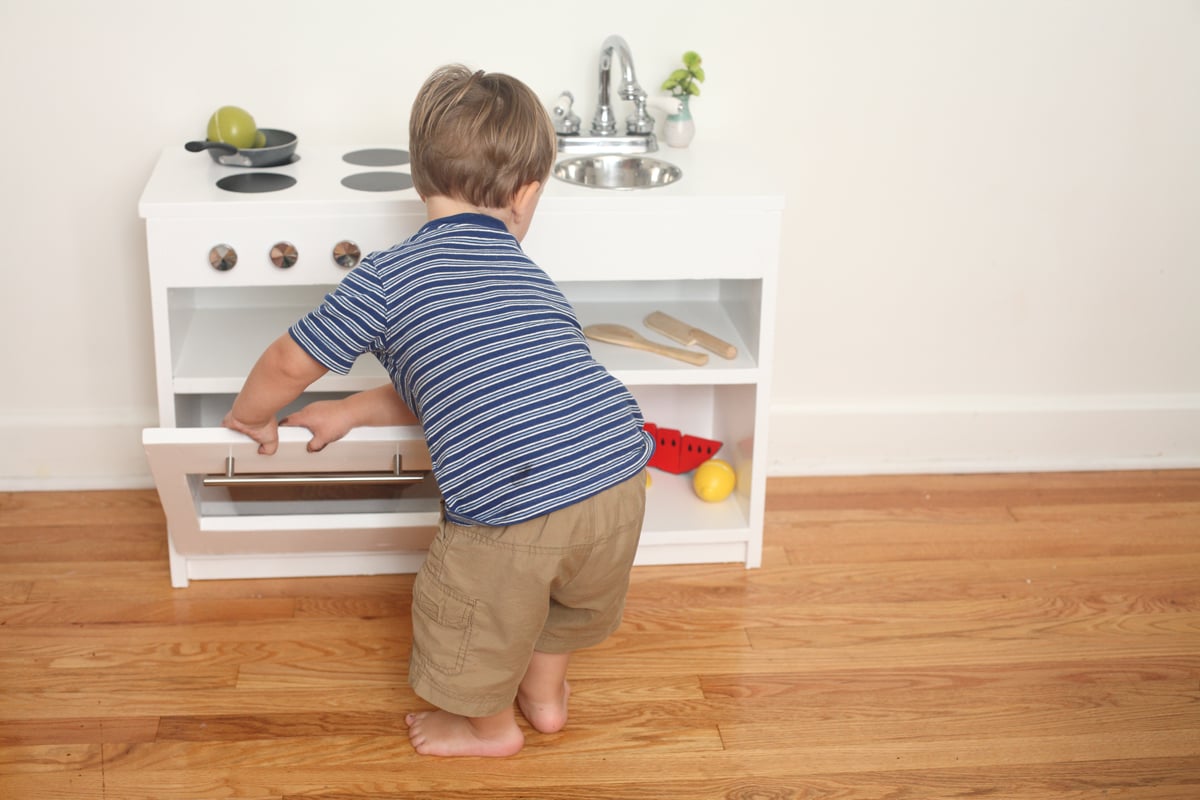
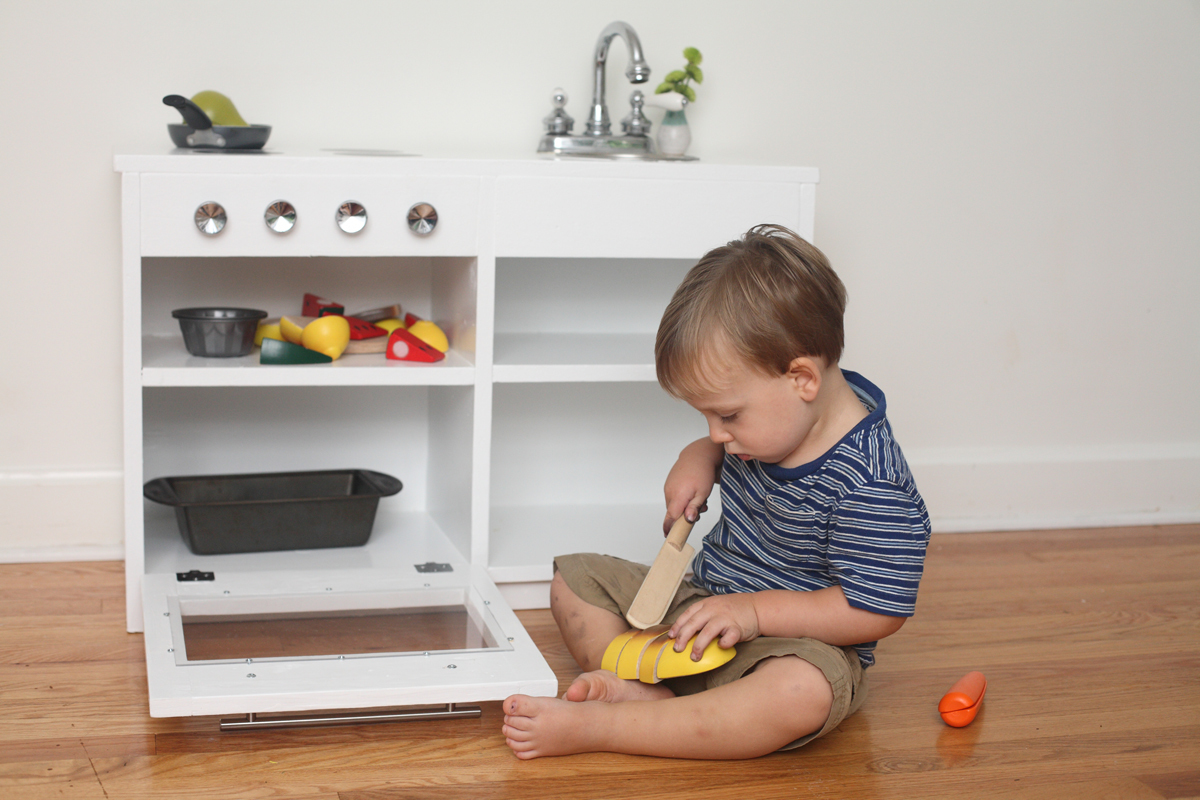
I combined the play sink and play stove into a one-piece kitchen by having them share a side. I found a bathroom faucet at my local Habitat ReStore for $15 (and that included a sink I didn't even need!). Time investment does not include painting. Here's my cost breakdown. Lumber: $25 (I used some scraps.) Faucet: $15 Dog bowl: $7 Hardware: $13 Primer and paint: $19 Screws: $4 Sandpaper: $5 Plexiglass: $3 Prepping dinner while my toddler works in his play kitchen beside me: Priceless.
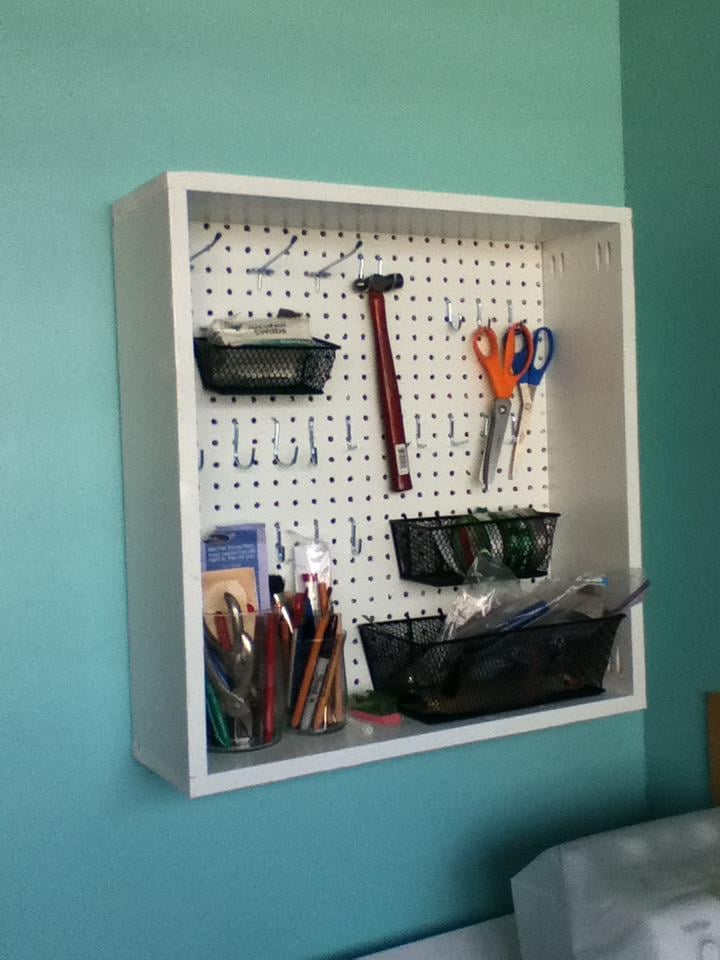
I have been needing to create more storage, while organizing my craft/spare bedroom. I had a piece of pegboard, and got some inspiration while pouring over Pinterest.
I decided to venture out and try something really new to me - routing. Bear in mind I only have a Dremel with the cheap router attachment - not the routing table thing. I'm happy to say it came out great! I have more pictures i'll upload soon of the actual routing. I did craft up a jig of sorts to keep my routing line (or whatever its called) straight. I did run into some math errors, which resulting in me having to cut things down a couple times. But now I know how things work when piecing together routed frames.
I had 2 pieces of 1x12x36. To keep the routing lines as even as possible, I did the the routing before I cut the pieces.
I used my Kreg Jig to join the sides. I assembled by attaching the 2 sides and the bottom. Then slide the pegboard in, and attached the top piece. Then since my routing line was a bit wider that the pegboard, I used caulk in the back to fill it in, keeping the pegboard nice and tight.
I plan to add doors to the cabinet at a later date. Right now it definitely fills my needs!