Wood Adirondack Chairs
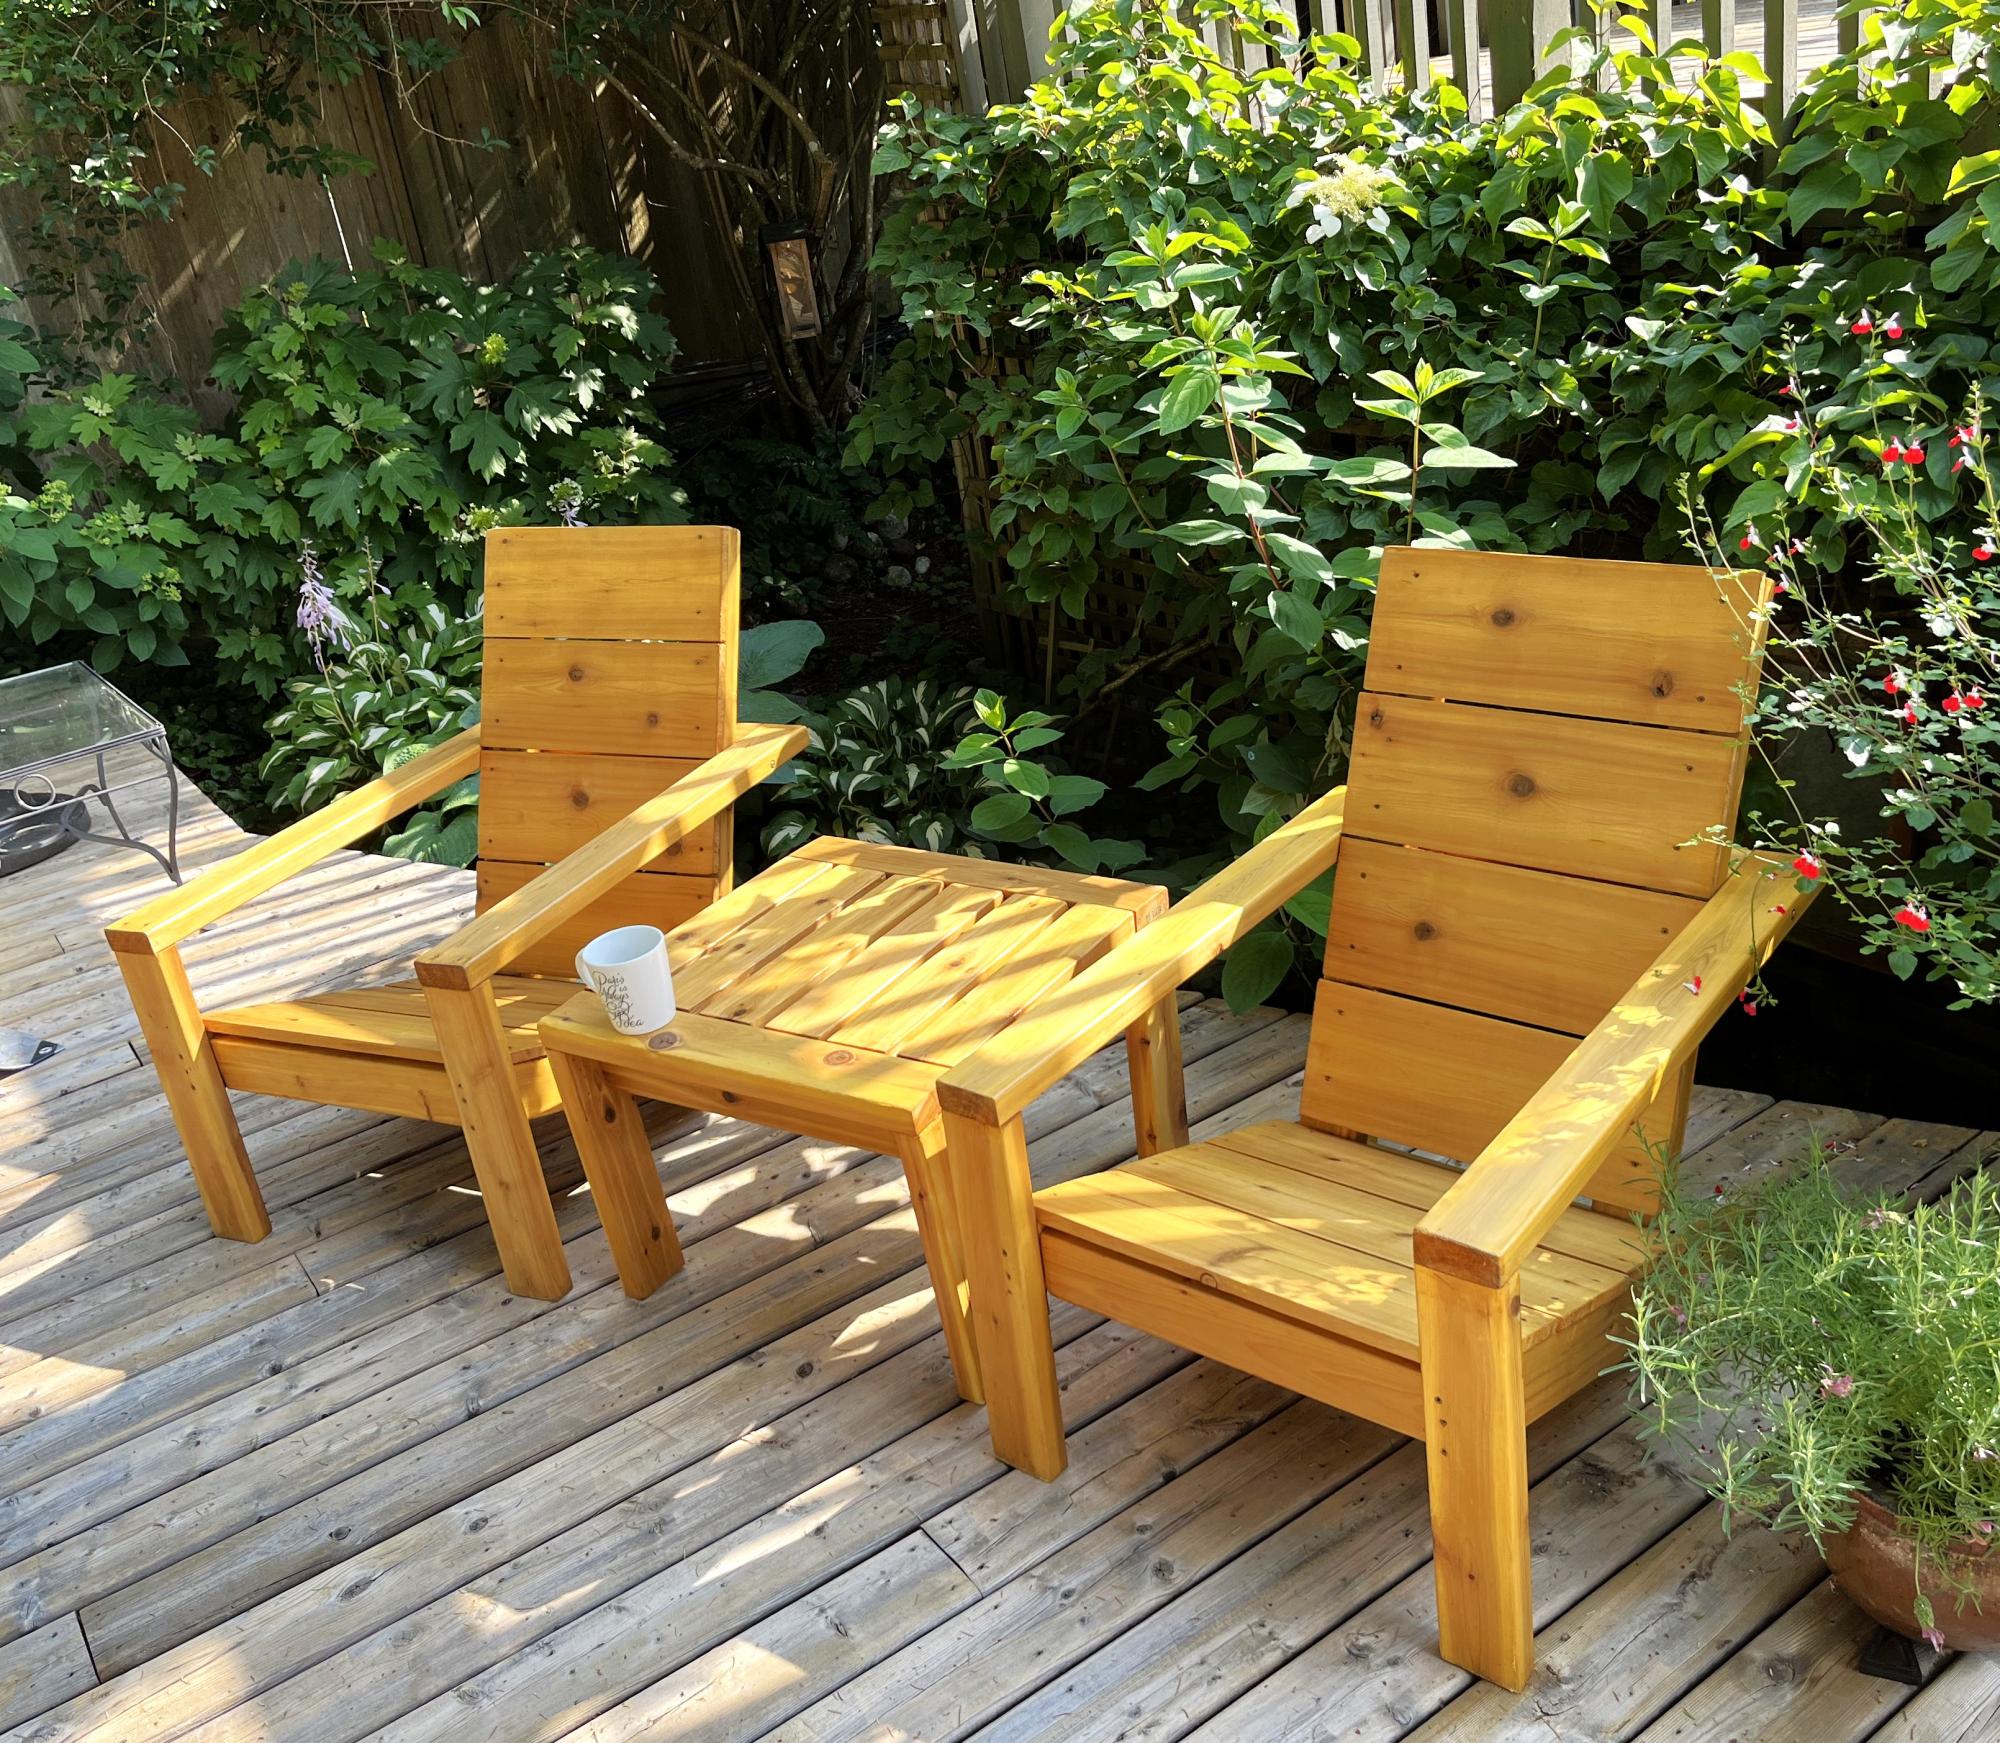
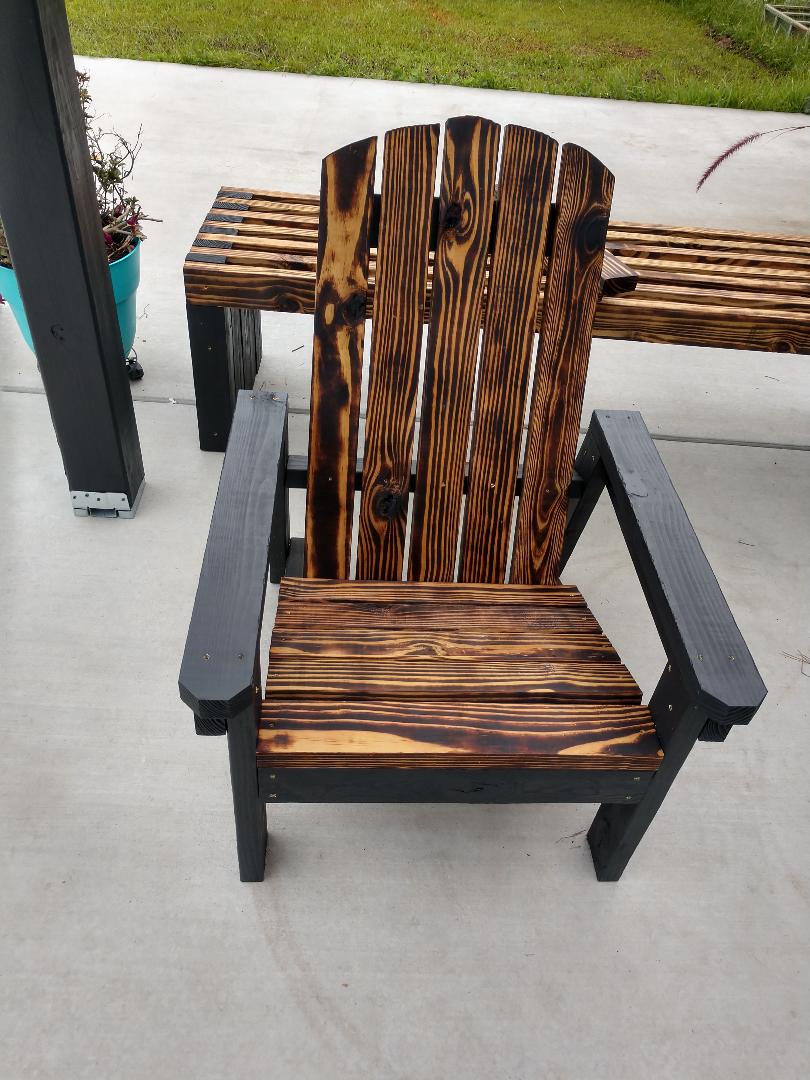
I added a 6 inch lag screw to support the arm in case someone sat on the arm. I also added small metal brackets hidden to help secure the leg strength.
Matt
Built from Plan(s)
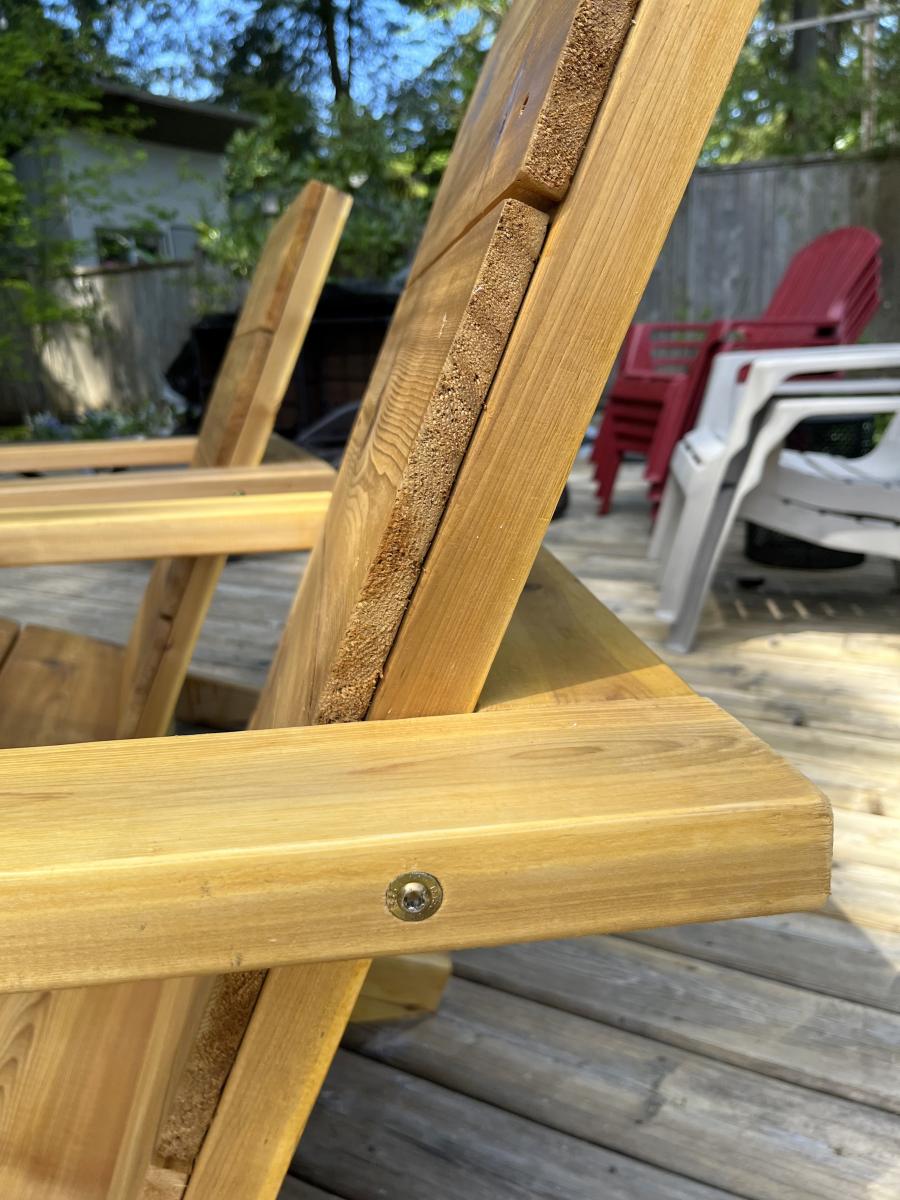
I added a 6 inch lag screw to support the arm in case someone sat on the arm. I also added small metal brackets hidden to help secure the leg strength.
Matt
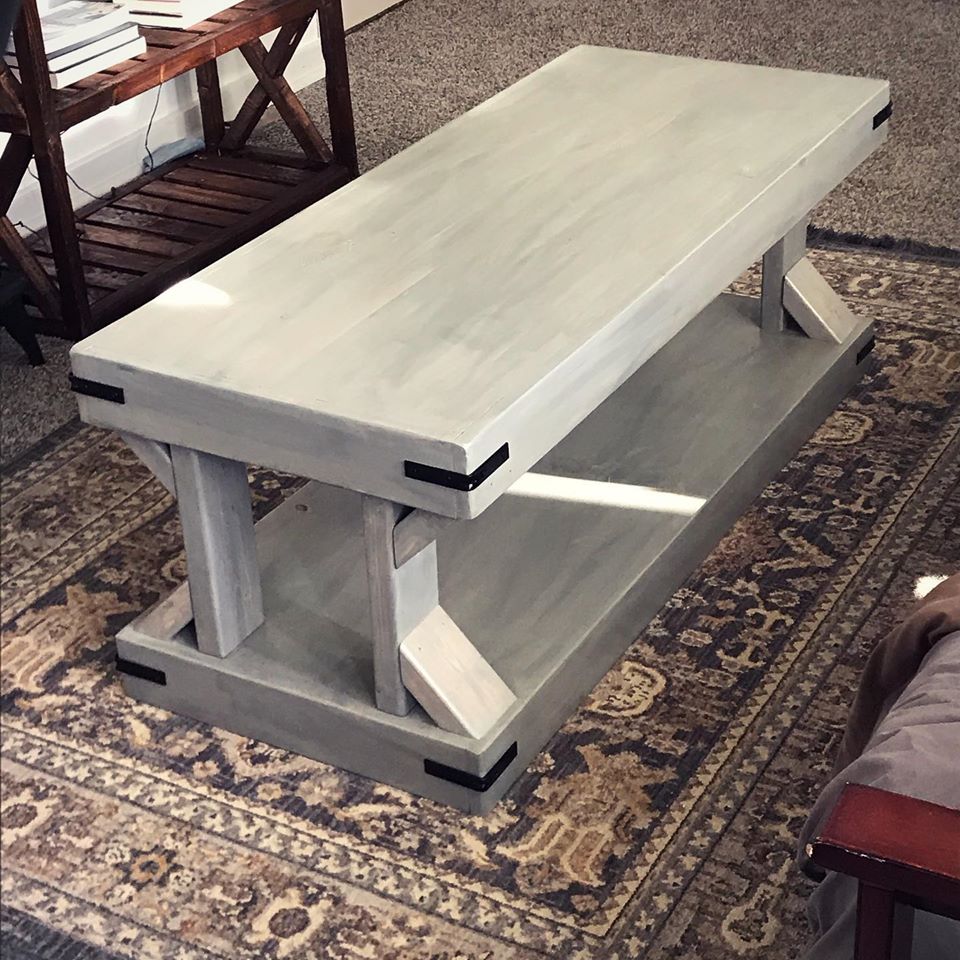
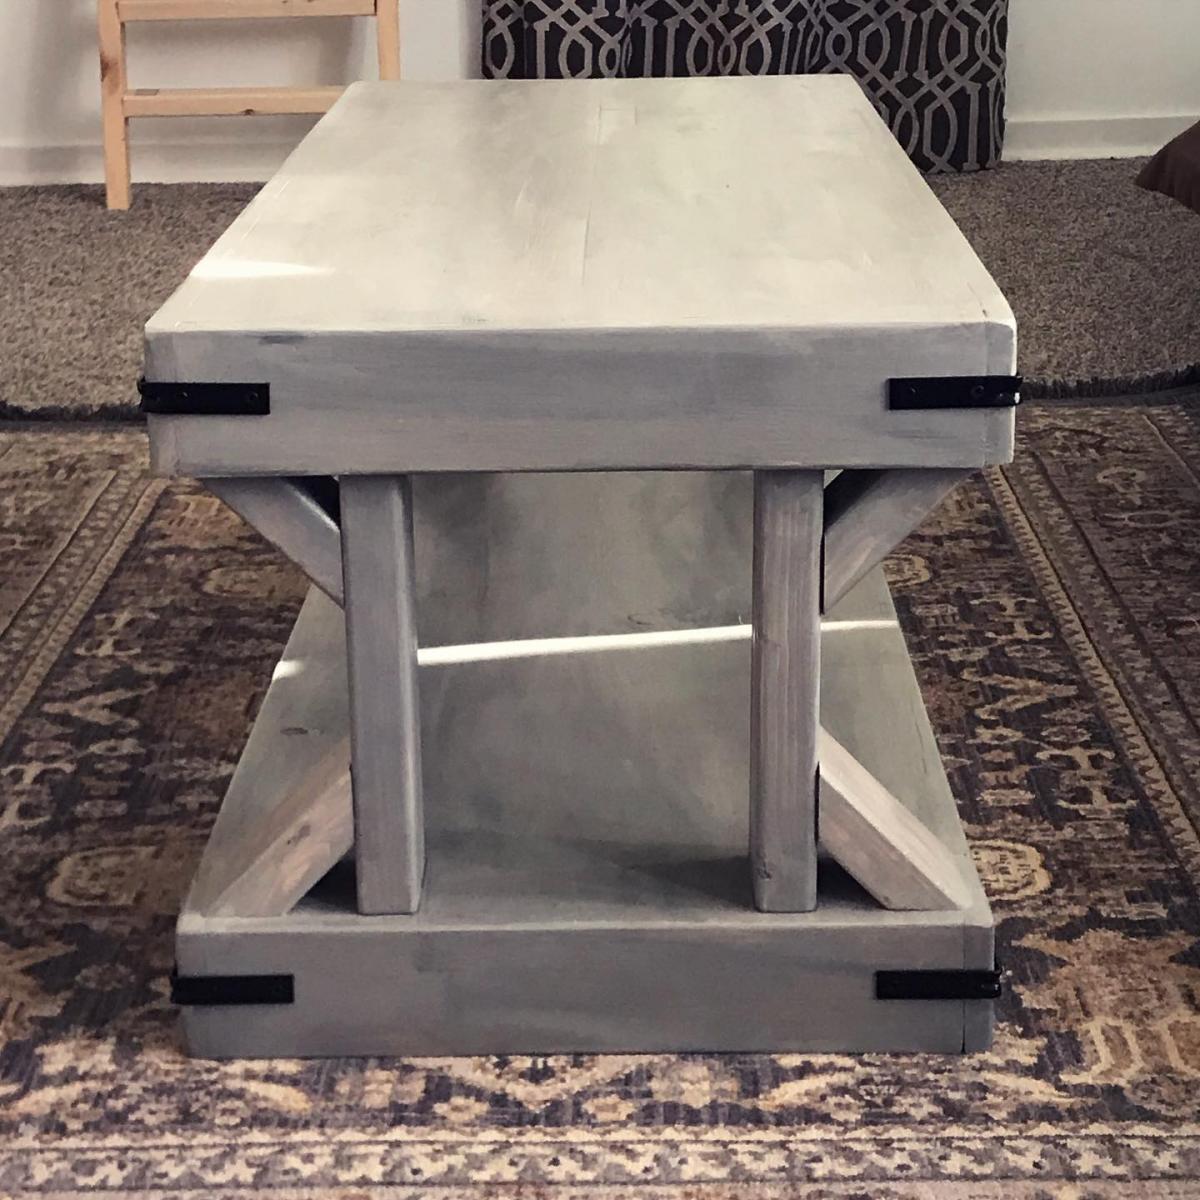
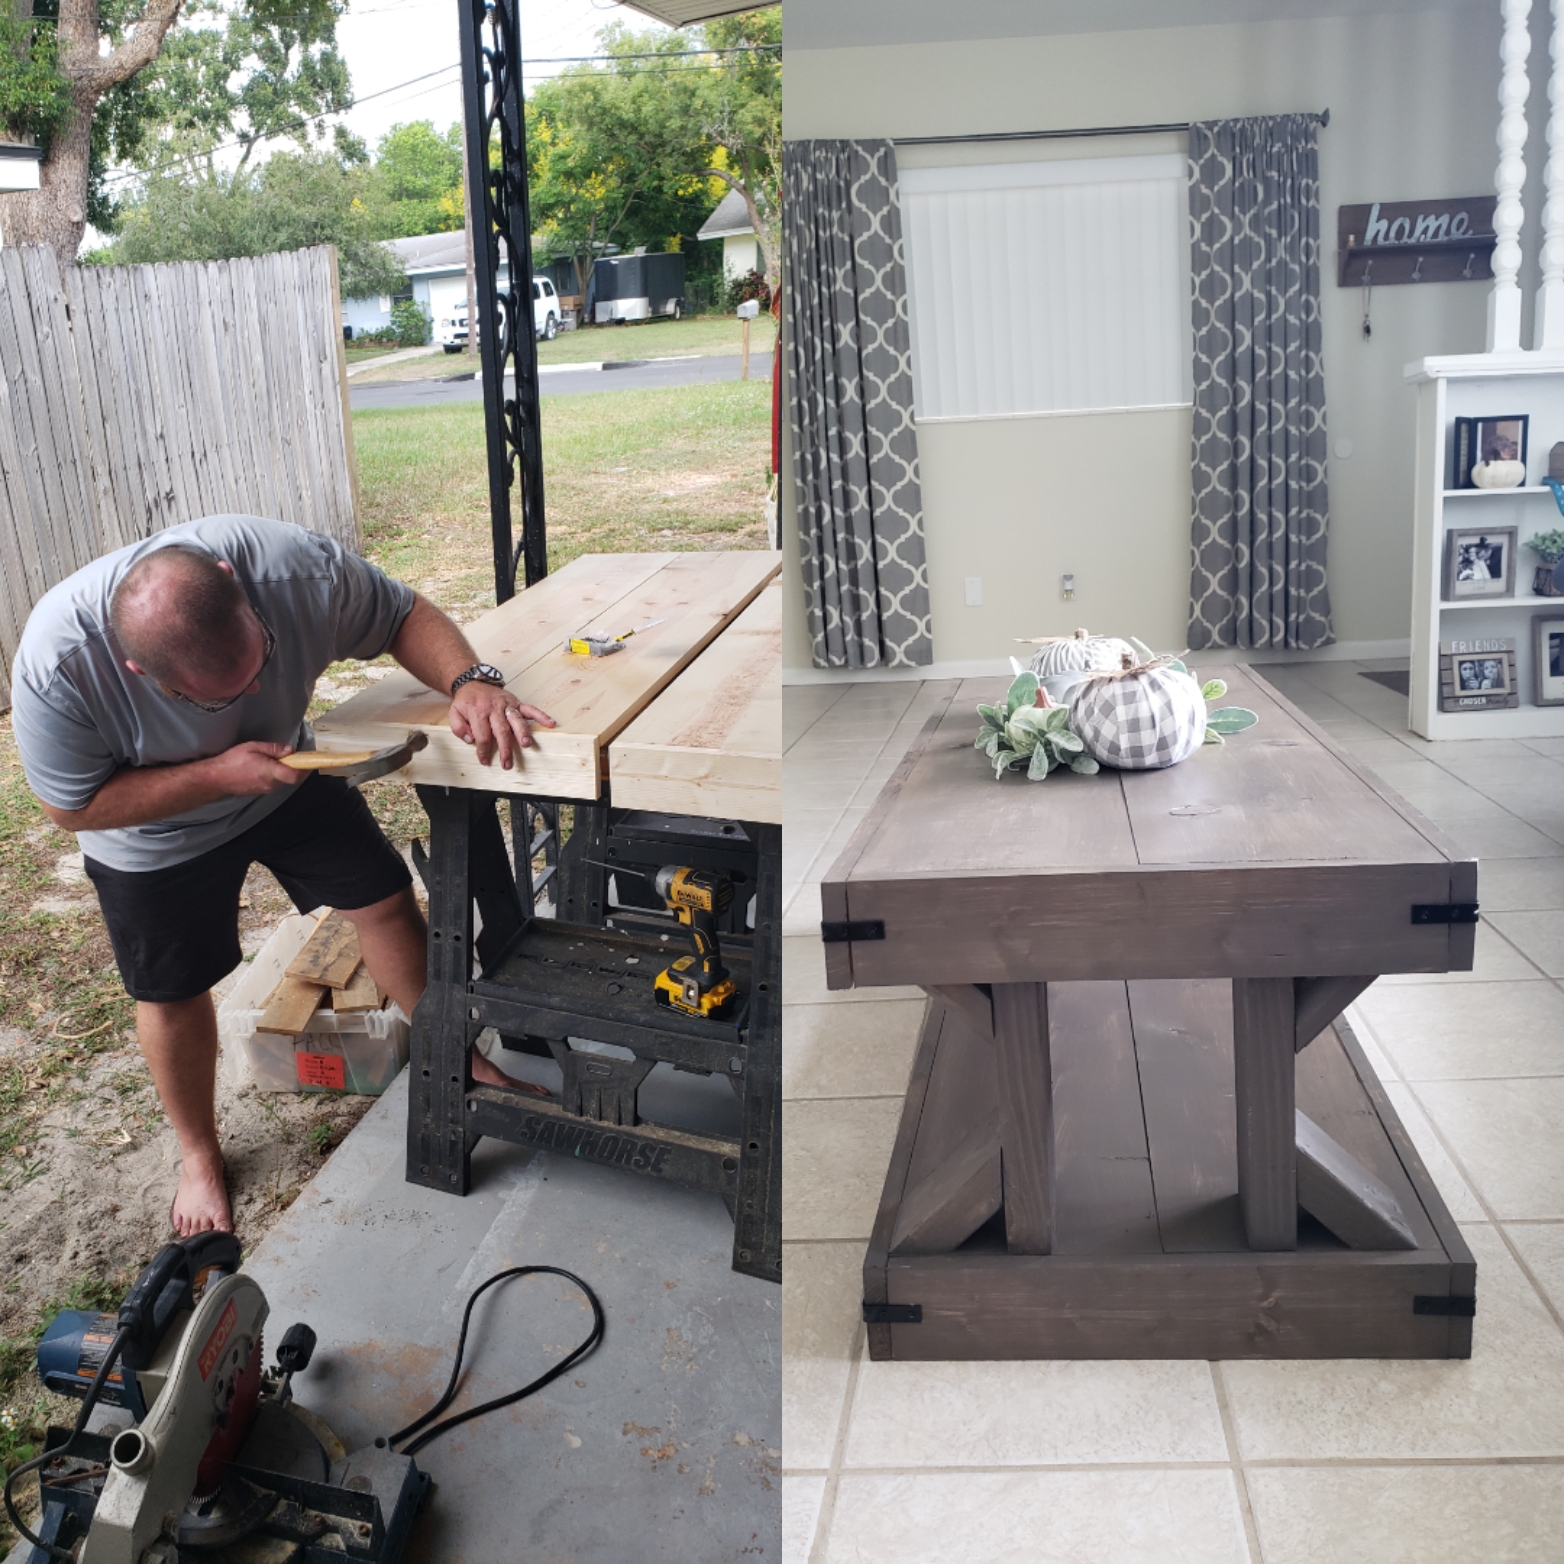
I built this coffee table with off the shelf lumber and finished with Varathane Sun Bleached and Weathered Gray Stains, and Minwax satin polyurethane. I applied a fairly even coat of the Sunbleached Stain and added a few streaks of the weathered gray. I used 1 ¼" pocket screws instead of the brad nails. I used a hammer and a couple of finishing nails for the braces.

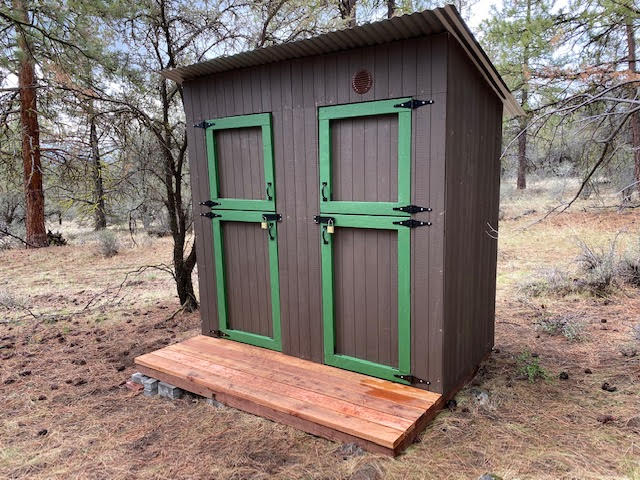
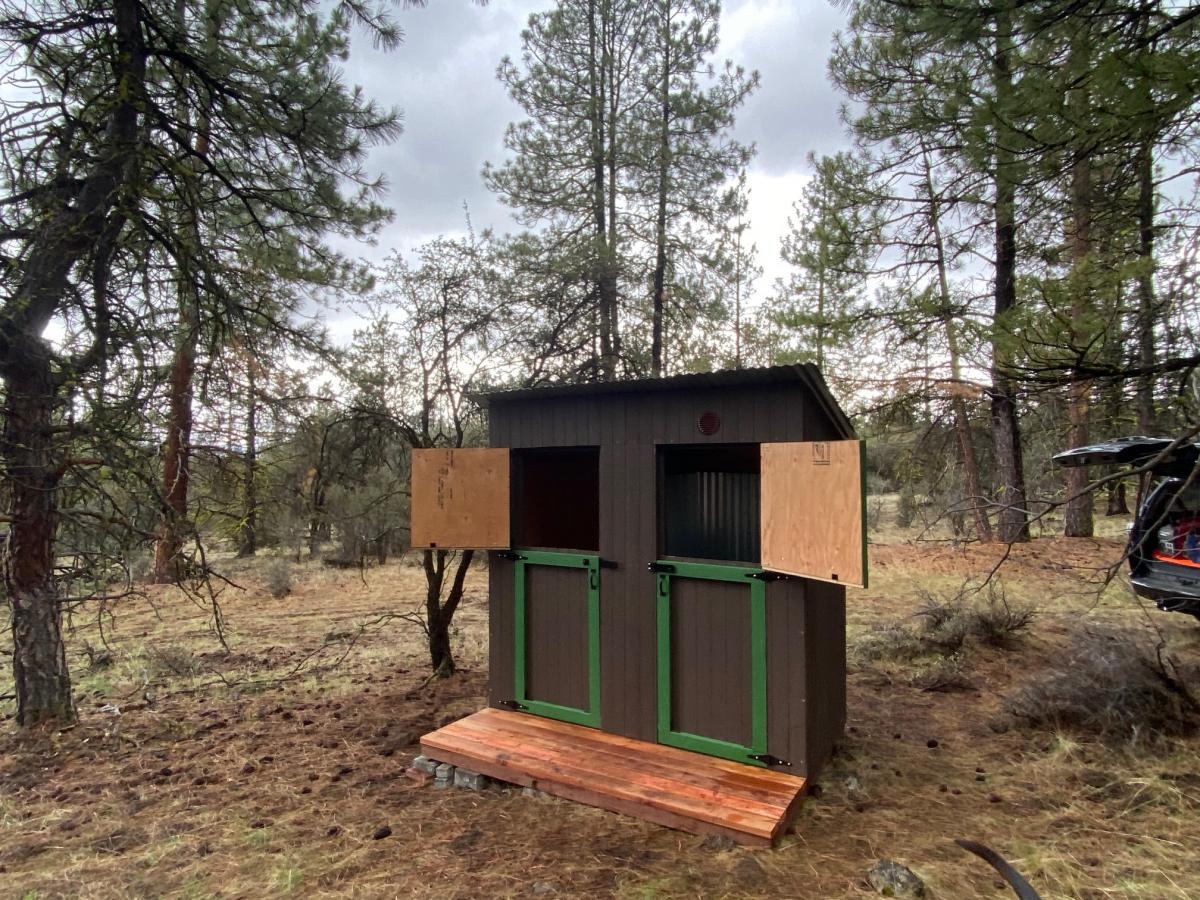
I used your simple outhouse plans and modified the roof with clear corrugated plastic roofing for maximum light inside. I used the leftovers to line the hole and direct everything into the hole so no smelly wood. I also used wood from free pallets for door and inside trim to keep cost down.
I have to credit to “Girl in the woods” from youtube that mentioned you Ana, and for the roof idea. Your plans were easy to follow and I’m so proud of my first build.


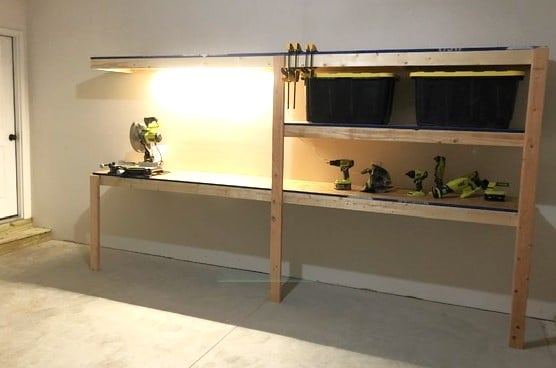
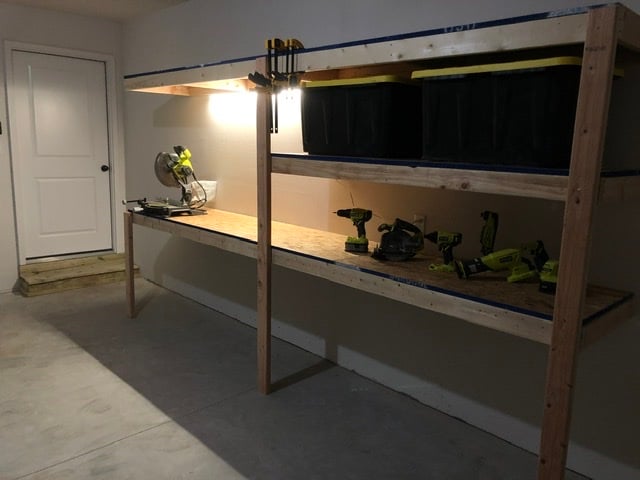
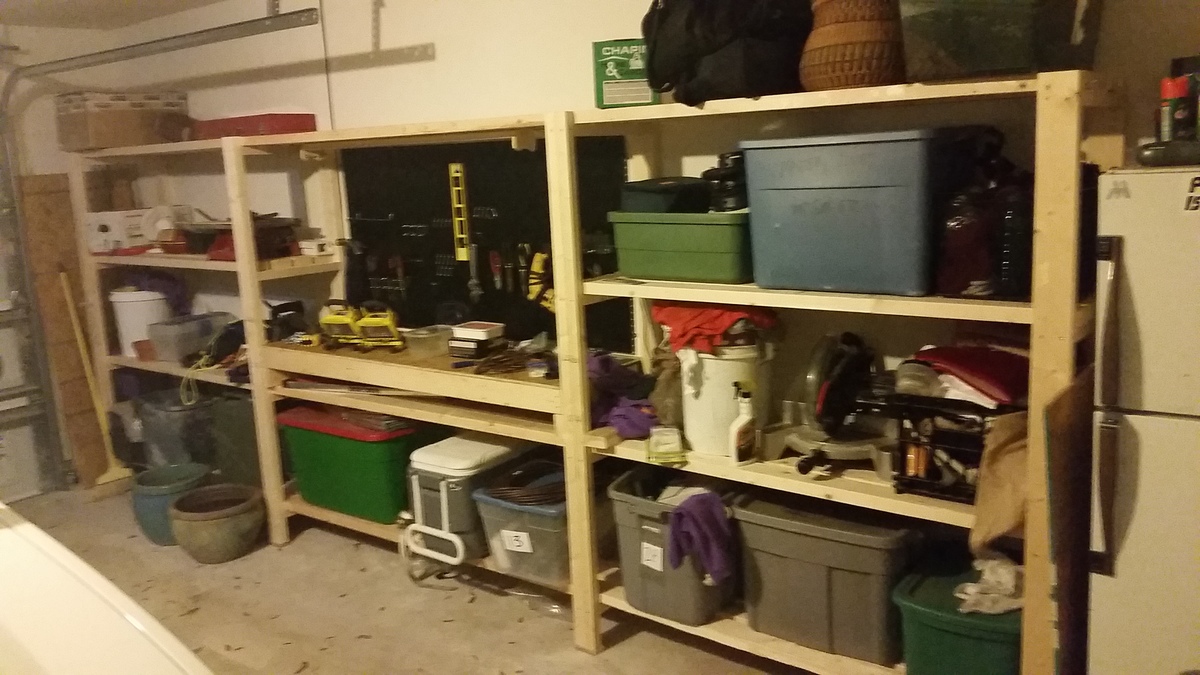
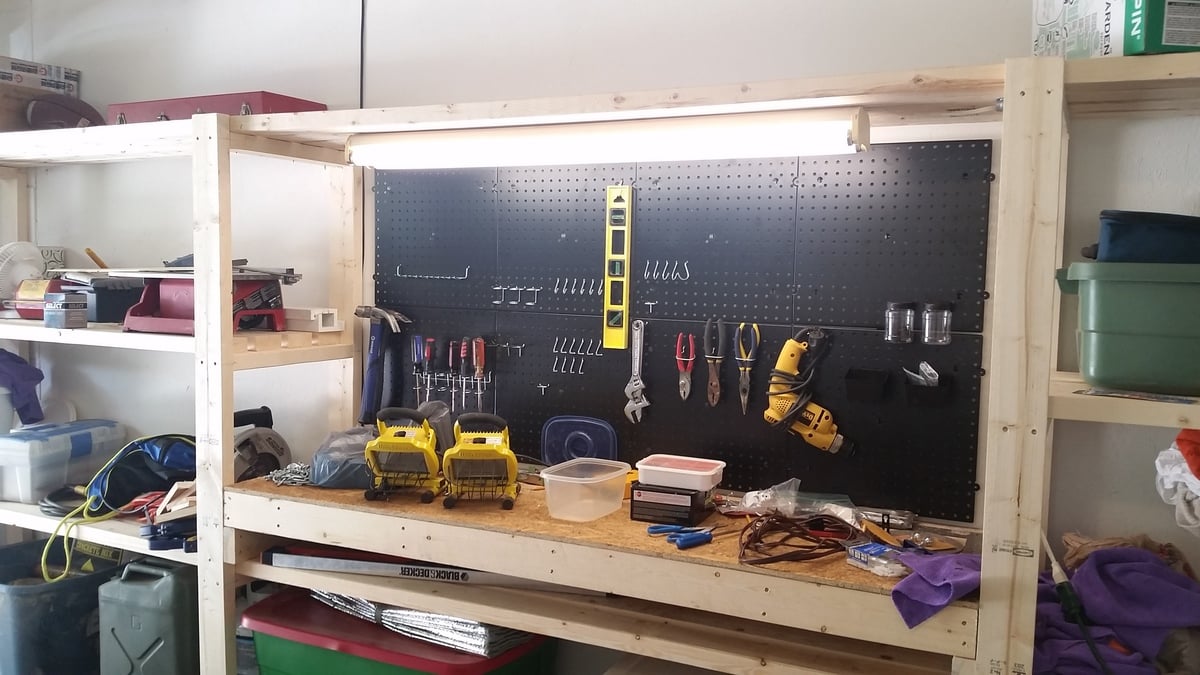
I used Ana’s plans for the garage shelves, but modified them to include a work bench. A lot of you tubers have done this, built a combination work bench and shelving, but I built nearly everything according to Ana’s plans. 12 feet long, 24 inches deep. I got some LED lights (two 1600 lumen strip lights) from menards that really brighten up my entire garage and make the work bench more useful. The one thing I really wanted was to not have a supporting pillar on the work bench to keep it open, and I loved how it turned out. I went for 3/4 plywood, mostly to have a stronger work surface, and I’m glad I did. I have since added a supporting 2x6 off of the study to support the top shelf above the bench and its strong enough to do pull-ups off of, and I have reinforced the support leg under the bench with a cross bar. Thanks for the great plans!!

Really enjoy your site and the inspiration it gives - thank you Ana.
Love the modern farmhouse take on the console and coffee tables. I mitred the table-top corner joints, hand planed the tops for a more 'contemporary' feel on this one (but love the rustic look too), and used pocket holes for the table top joints and extra stability in the legs. I finished these in Warm Graphite and beeswaxed them, all made from FSC pine, and will be moving on to 100% reclaimed pine for the next iteration (which is what I normally build with).
I make my pieces in the UK, where we can't get close to your timber prices unfortunately! Thanks again for the inspiration.


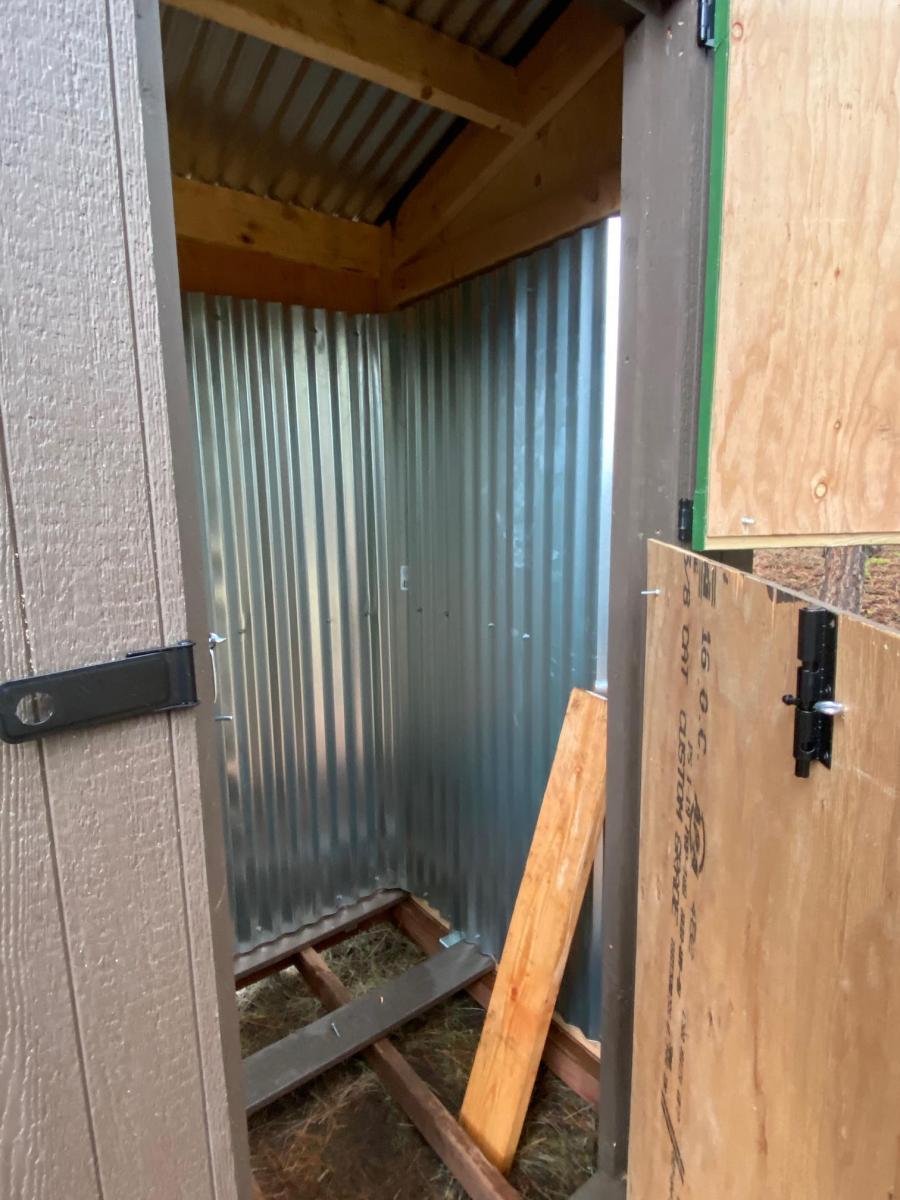
I built an an outhouse for my camping property in the PNW. The plans were great and easy to follow.
I did take the liberty of extending the the front wall to 8' still using the 15 degree roof line. I also wanted the option to shower during extending camping trips so I extended the floor and added one more back and side wall to create a shower house. With this design, I basically duplicated the side and back wall. Since I am in the middle of the woods, the Dutch doors were a last minute embellishment that I'm glad that I implemented in order to take advantage of the view!
For the shower, I used composite decking with 1/2" gaps for drainage and lined the inside with 6' lengths of corrugated metal roofing.
One additional note: I did build this on my back patio over a couple of weekends since my property is a fairly long drive from my home and about 2 hours round trip from the nearest hardware store. It broke down easily in about 30 minutes with 2 people and fit perfectly in the back of a full size pick up truck for the trip.
In summary, great plans and I love this site. Much appreciated and happy building!

Thu, 04/29/2021 - 16:44
Thank you so much for sharing, what a great addition to your property!
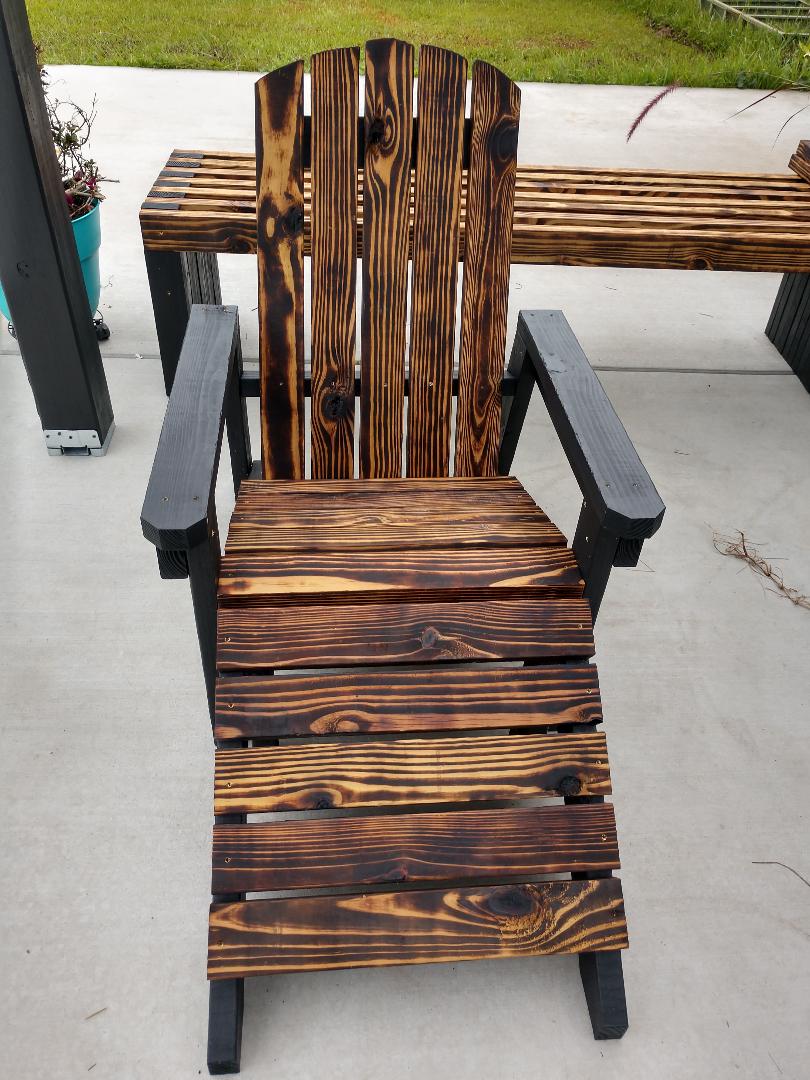
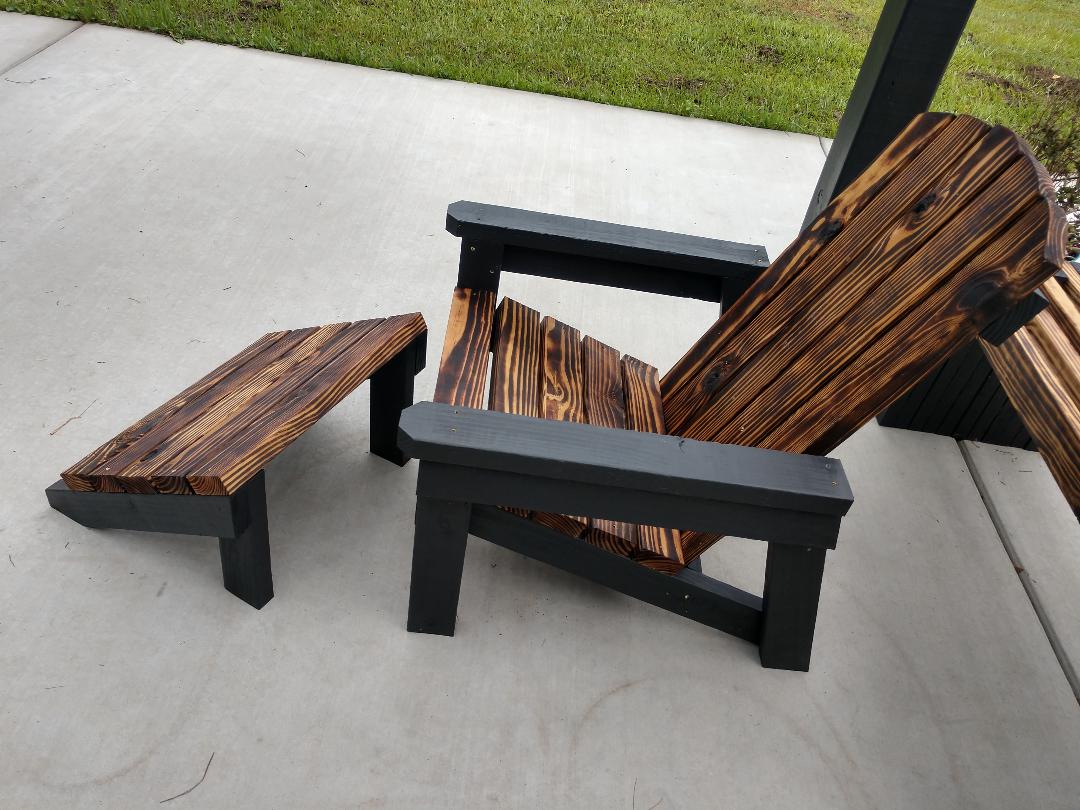
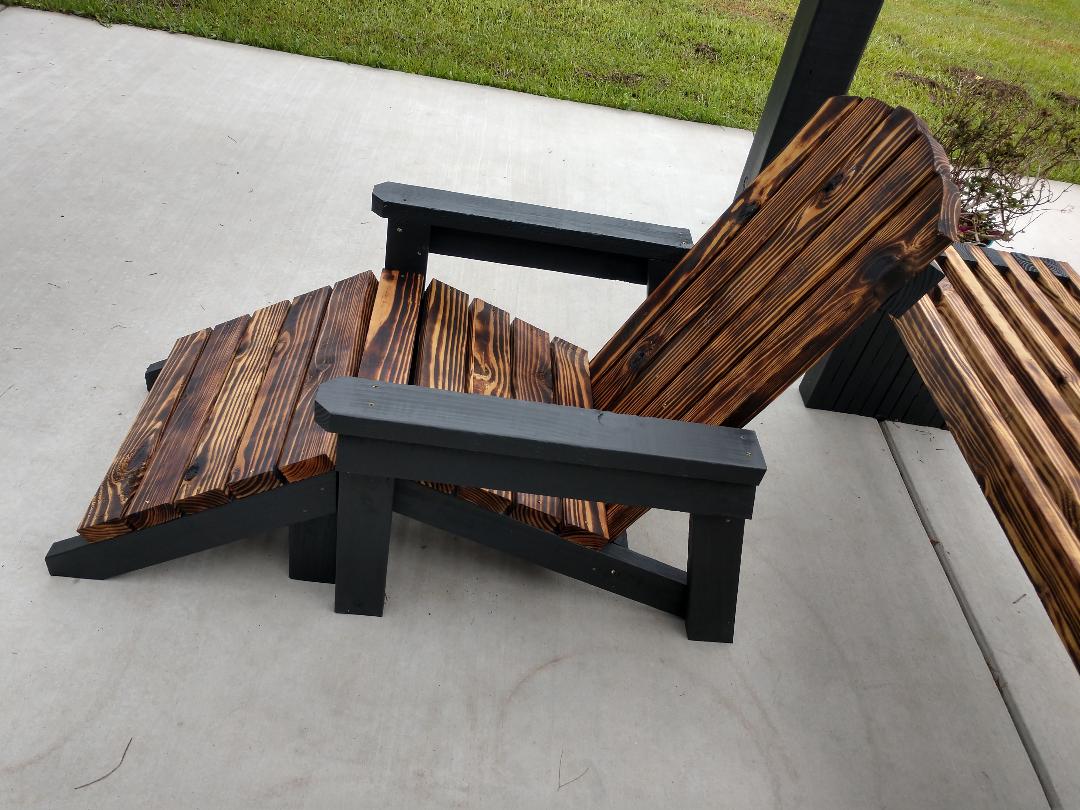
Very easy instructions. I love the way they turned out. I used all 2x4's that I had left over from another project. I burned the top pieces and painted all other pieces. Love your easy instructions. My first time making furniture.
Thanks
Yvette


I used Ana’s desktop plan to build this desk. I purchased black metal desk legs and added the bottom shelf.
My first project! A friend of my husband's came to visit for a weekend and was nice enough to show me how to use my handy dandy new air nailer. We had the bench put together in 15 minutes! And so began a beautiful friendship with furniture building...

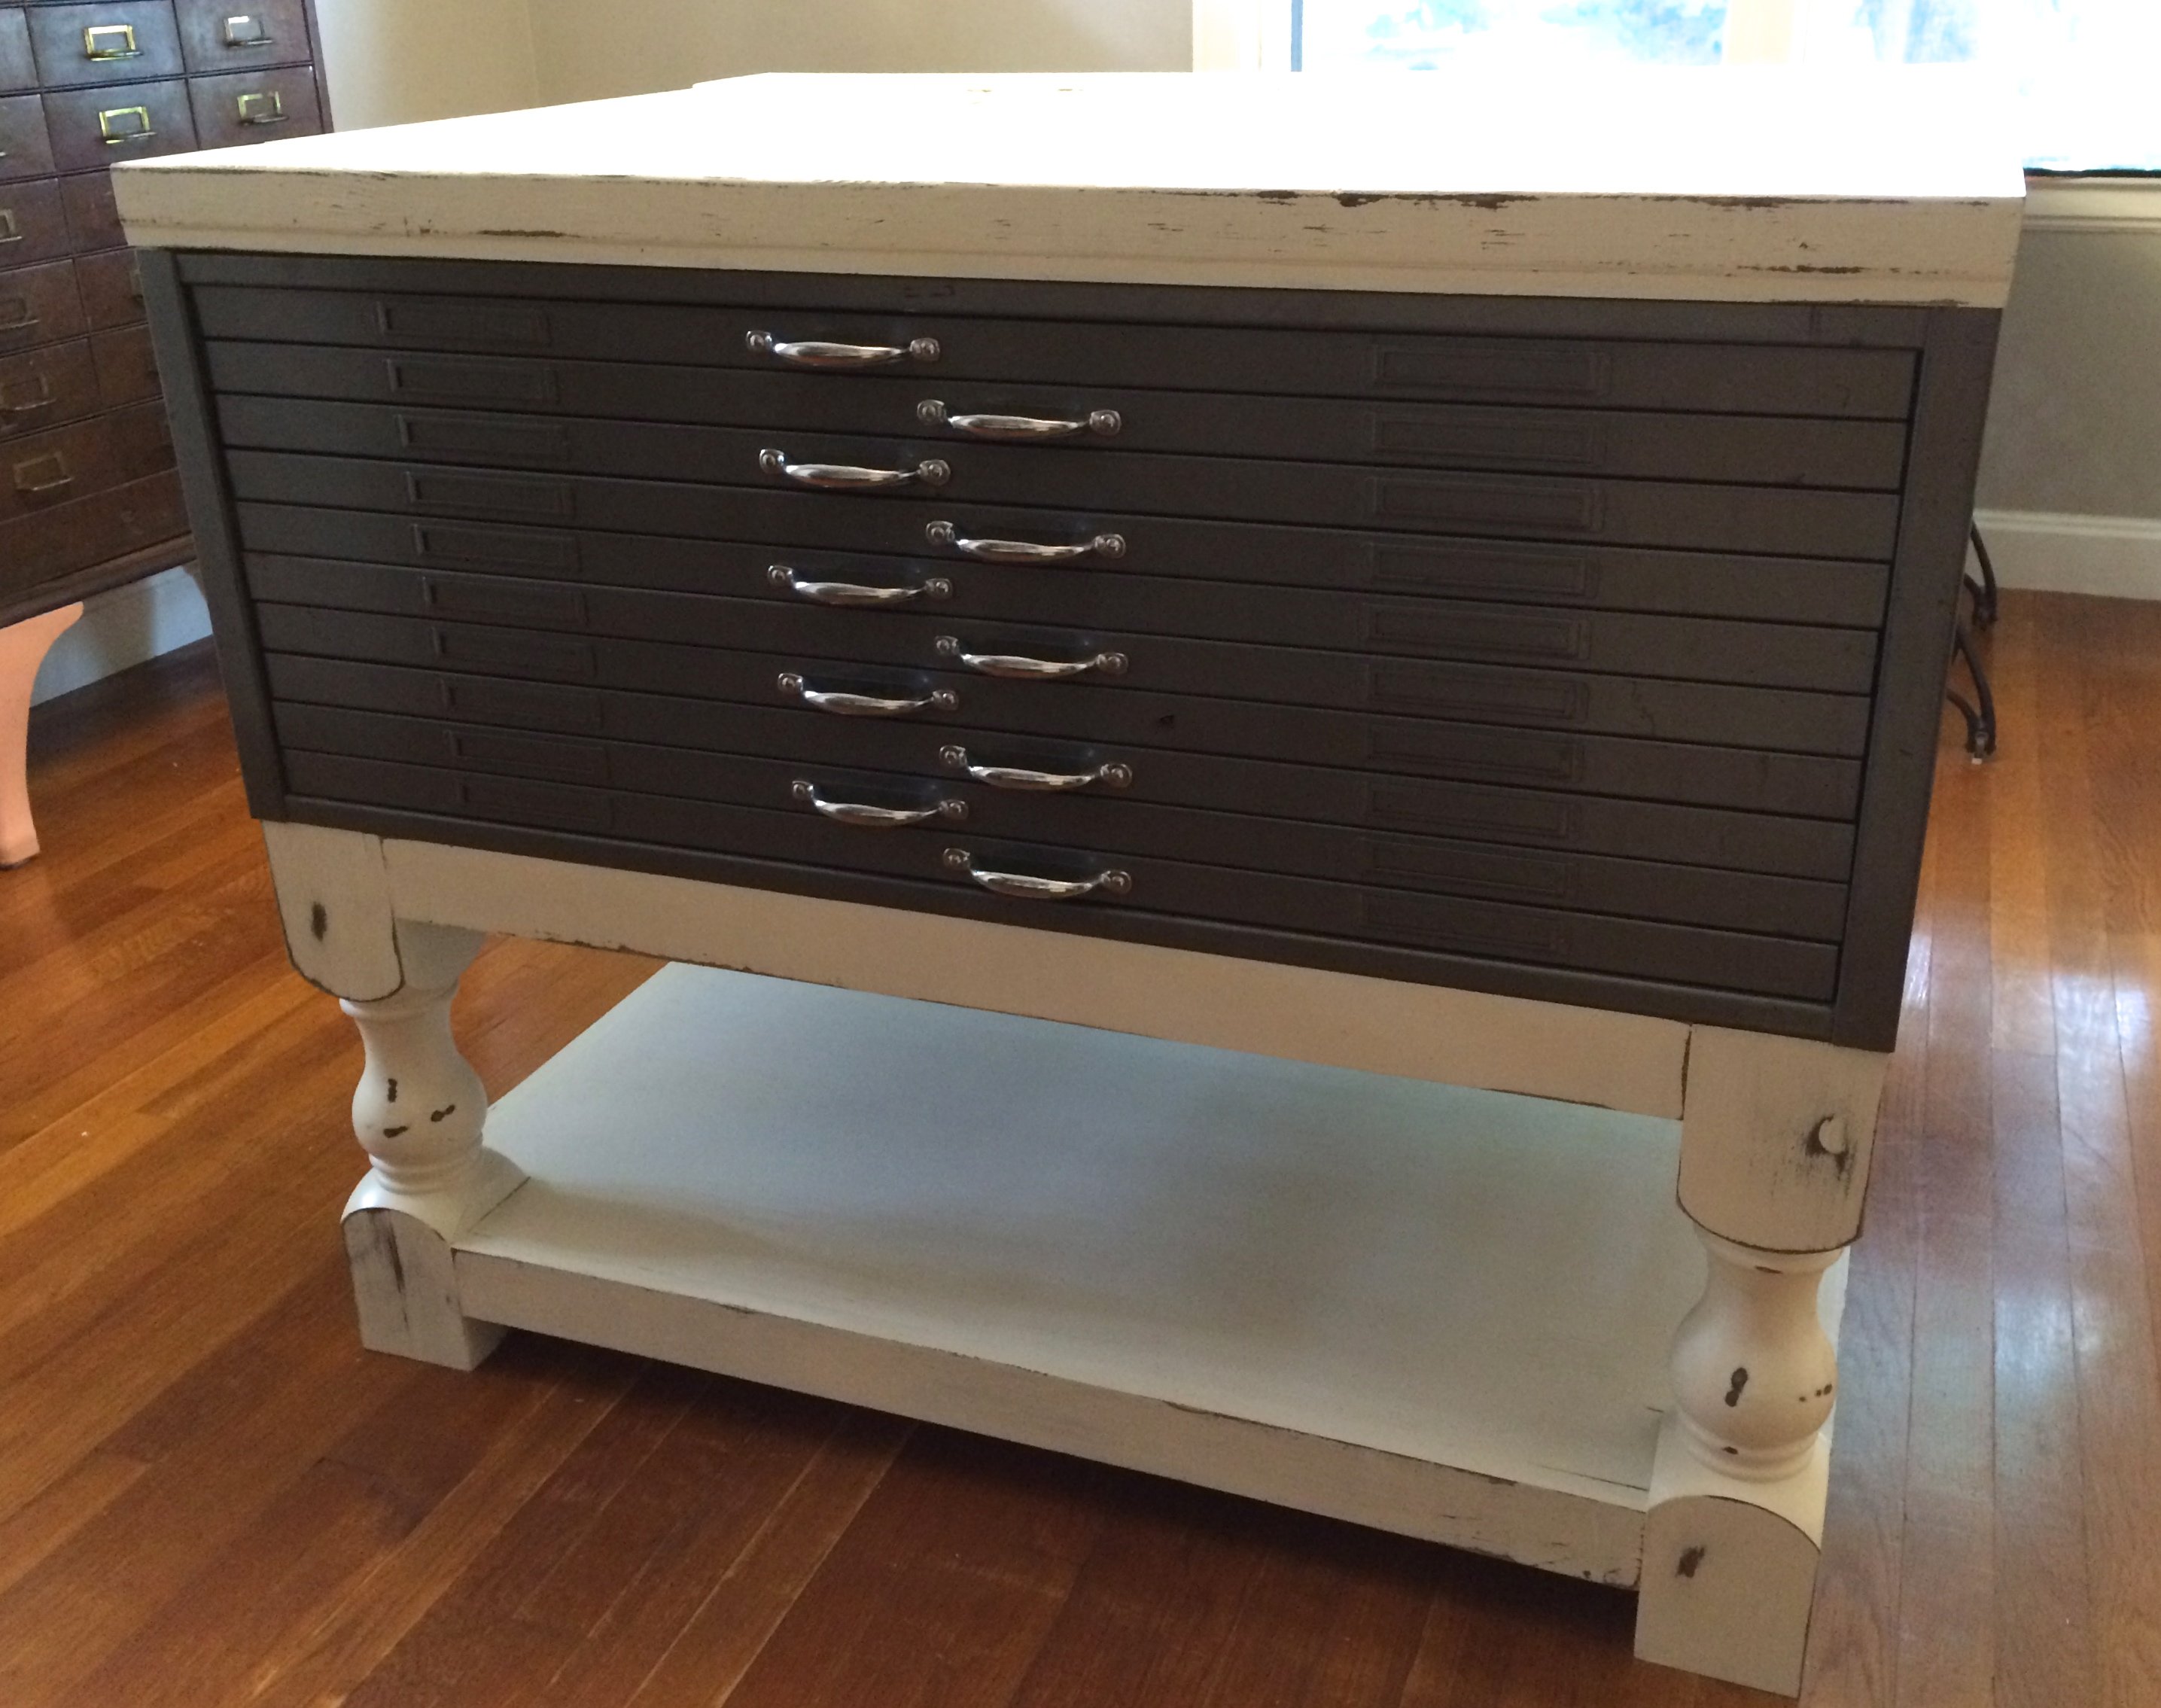
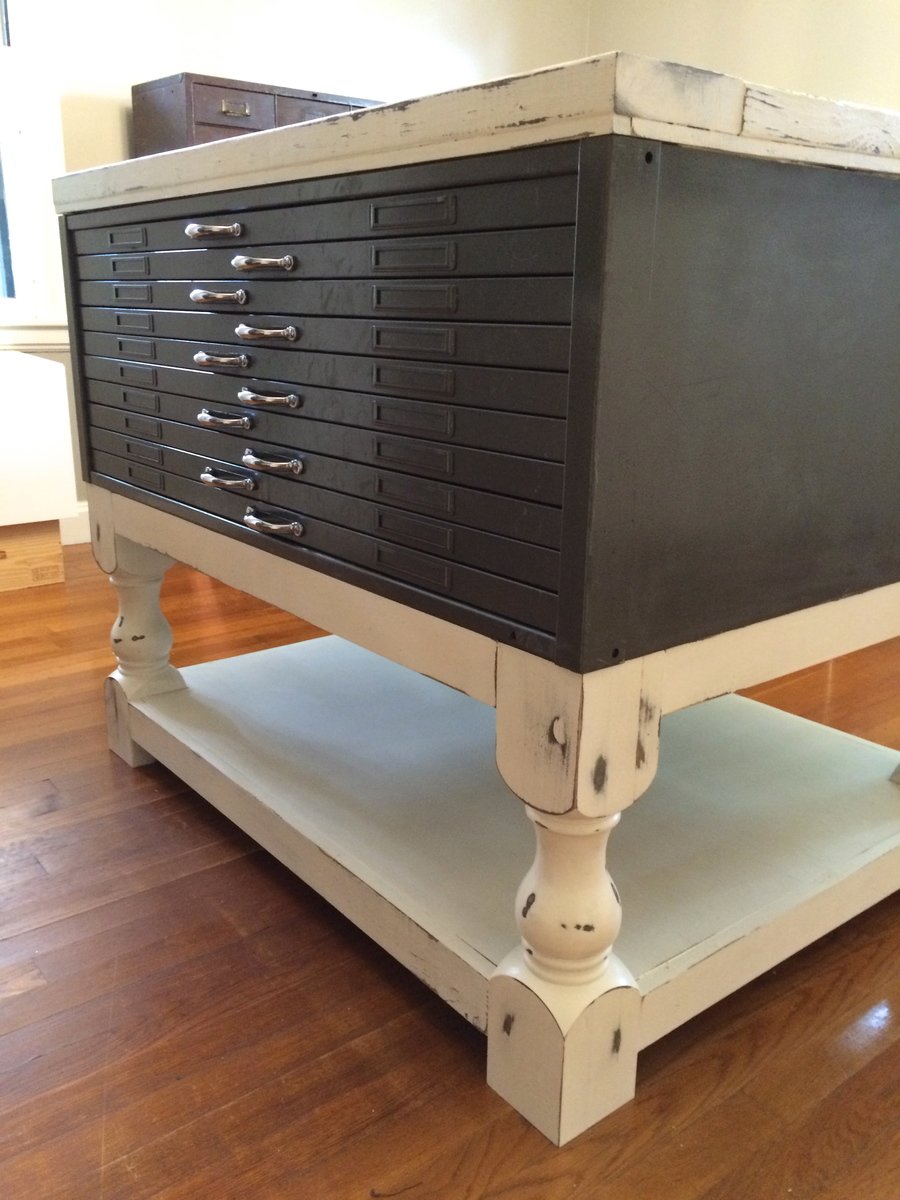
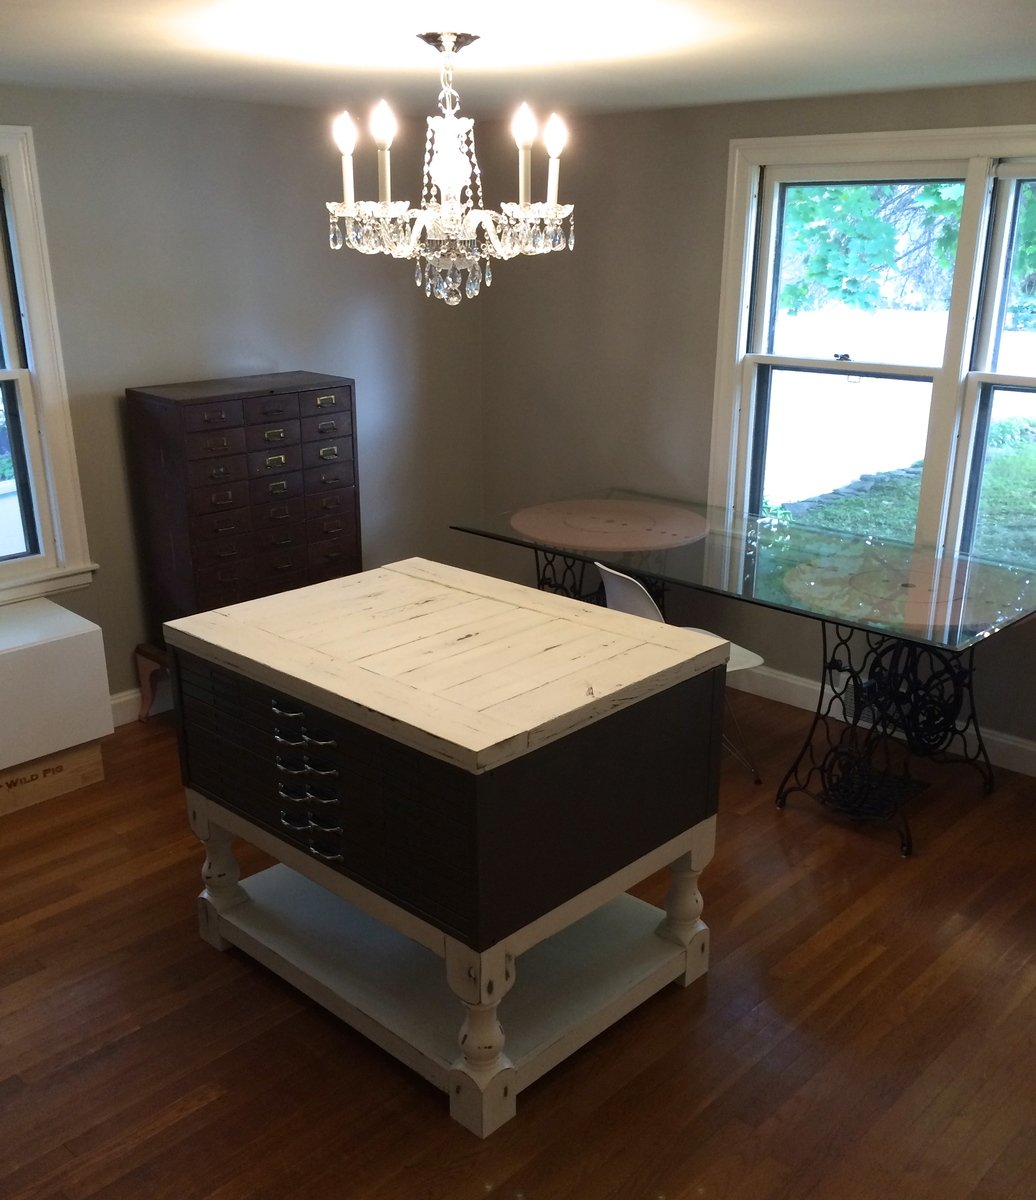
I found this fabulous vintage metal flat file cabinet at an antique store (Hunt & Gather Vintage Market, in Princeton, MA), but it didn't have a base or a top, so I went searching online for something that I could build. The Corona Coffee Table plans were going to be perfect! I just had to make a few adjustments:
LOVE how this table turned out! It's counter-height and the perfect centerpiece for my craft room.
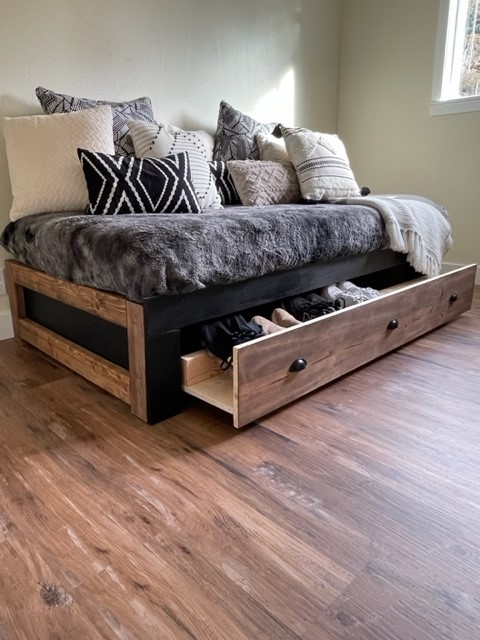
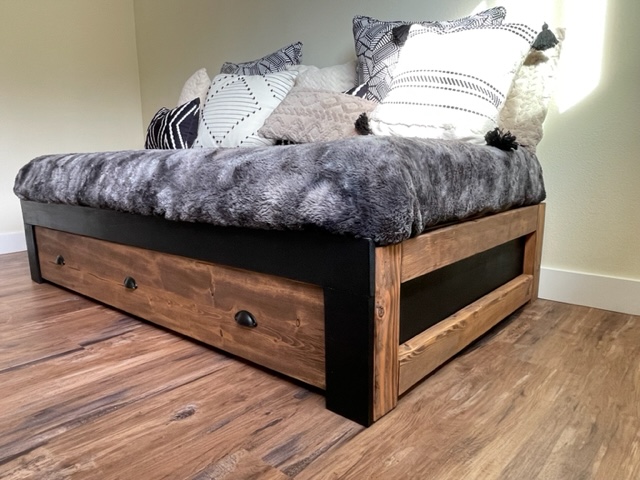
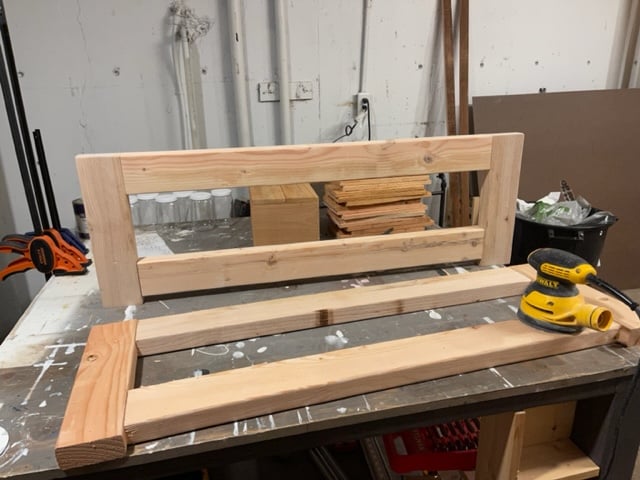
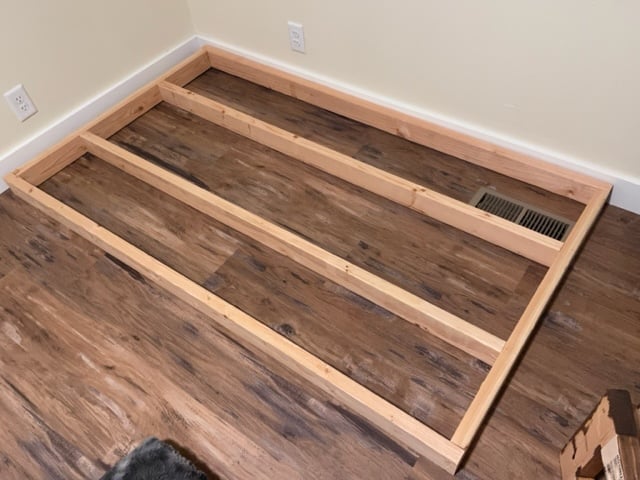
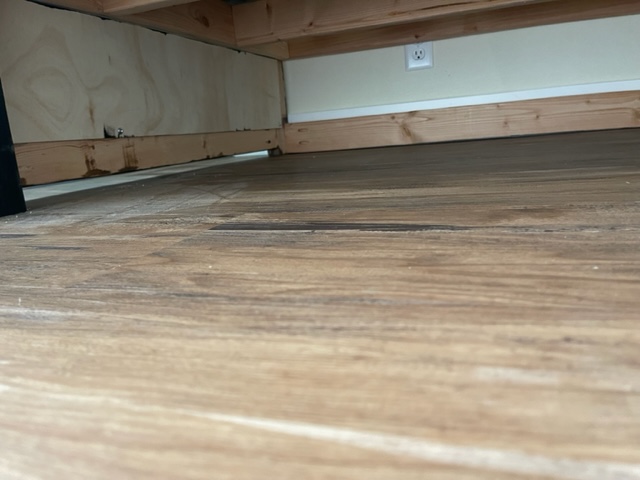
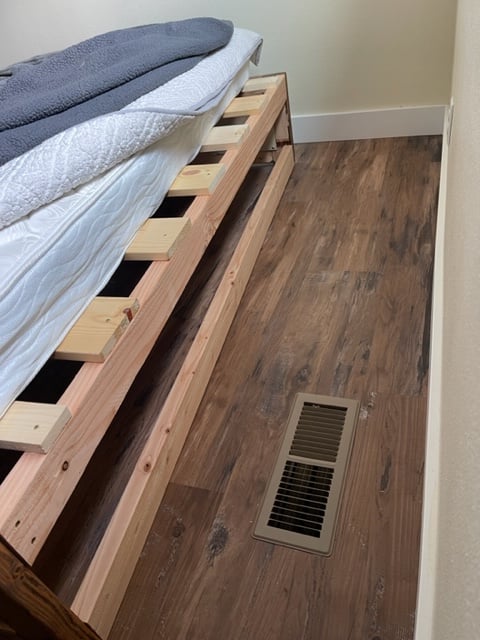
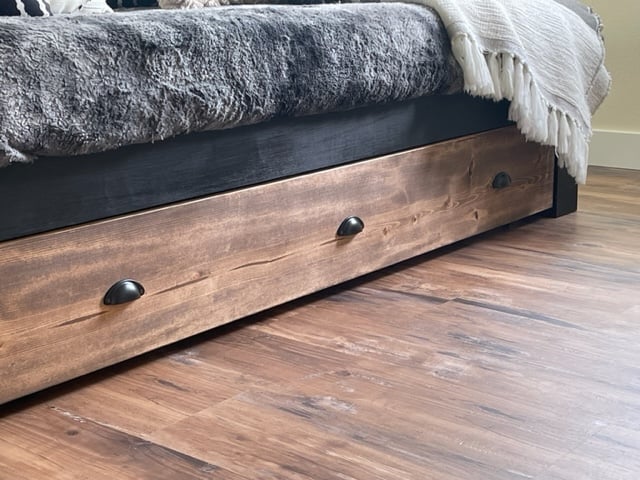
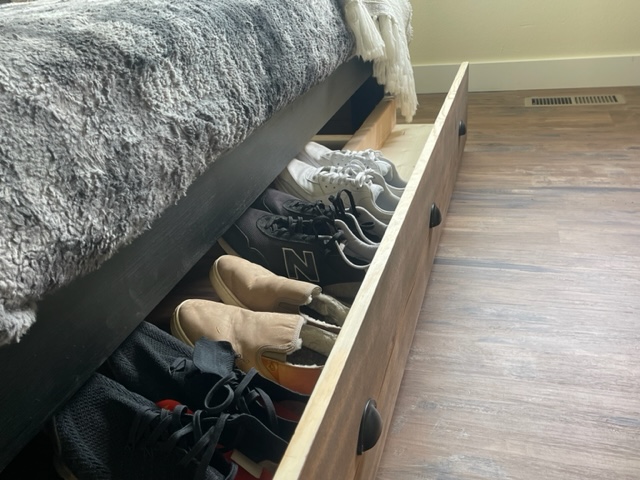
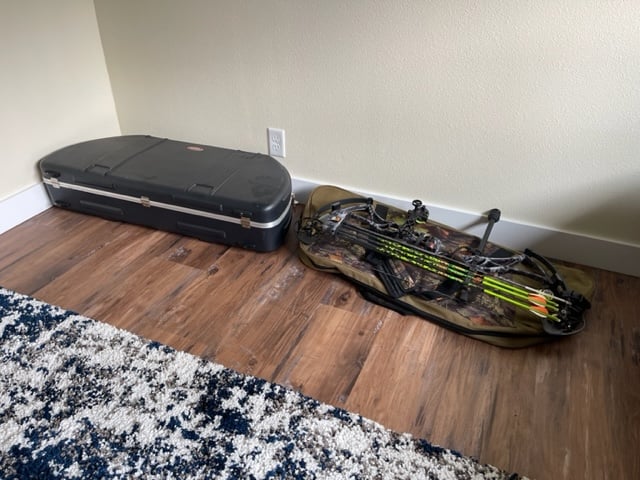
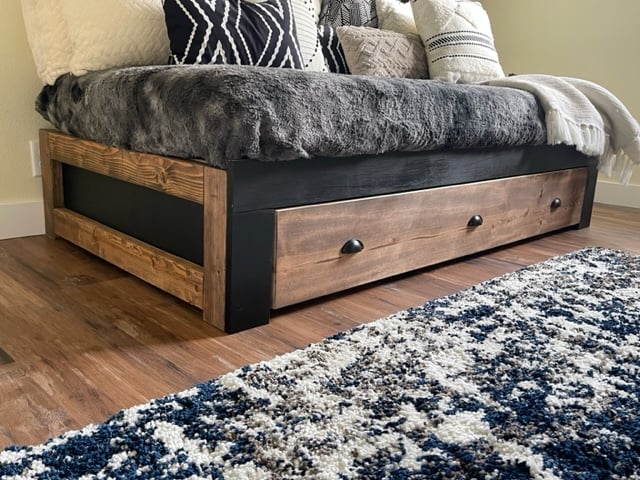
We had some bulky items that needed to be stored. So I came up with dimensions for a low platform bed so the bows could slide under. I decided to build a faux drawer to conceal the bulky items and added shoe storage into the faux trundle drawer. Of course I used one of Ana's plans for the basic idea and modified from there!

This plan is exactly what I needed for my workspace. I ended up adding some slat wall pieces and cabinets above from cubicles in an old office nearby that closed down for a tool wall and storage. I left the right opening empty due to how unlevel my floors are. I may close it in later with drawers or cabinets, but it will be my sitting workspace for now. I trimmed out the edge with 1x2s and painted and stained everything for aesthetics.
Mon, 03/06/2023 - 17:36
WOW, this looks so good! Thank you for sharing your amazing work.
My husband and I have enjoyed building this coffee table together. This is our 2nd Ana white build together. So glad we found this website. Thank you for creating these step by step plans, we're excited to build more beautiful furniture for our home.

Tue, 10/01/2019 - 21:02
Amazing! So excited to see your coffee table build!
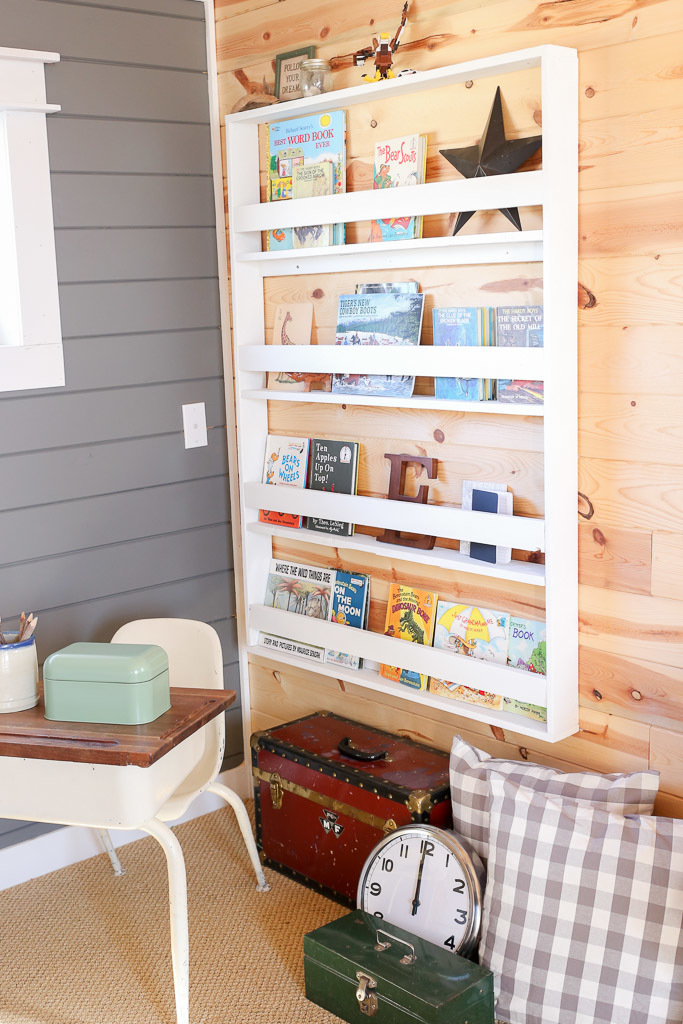
I built this book rack using scrap wood and modified plans from the Full Length Plate Rack. It was a really straightforward build, and functions very well as vertical storage that takes up little space. I predrilled, screwed and glued all of the joints, vs. stapling.

I built a big kids see saw using 2x6's all around with a 2x8 seat. The center post is 30"h.


Super excited to be in this group! I’ve been building since 2022 from Ana’s plans. This is my fall project which is now living beside our fire pit. Next up- queen bed for my son! - Carla Hudecki on Facebook Community

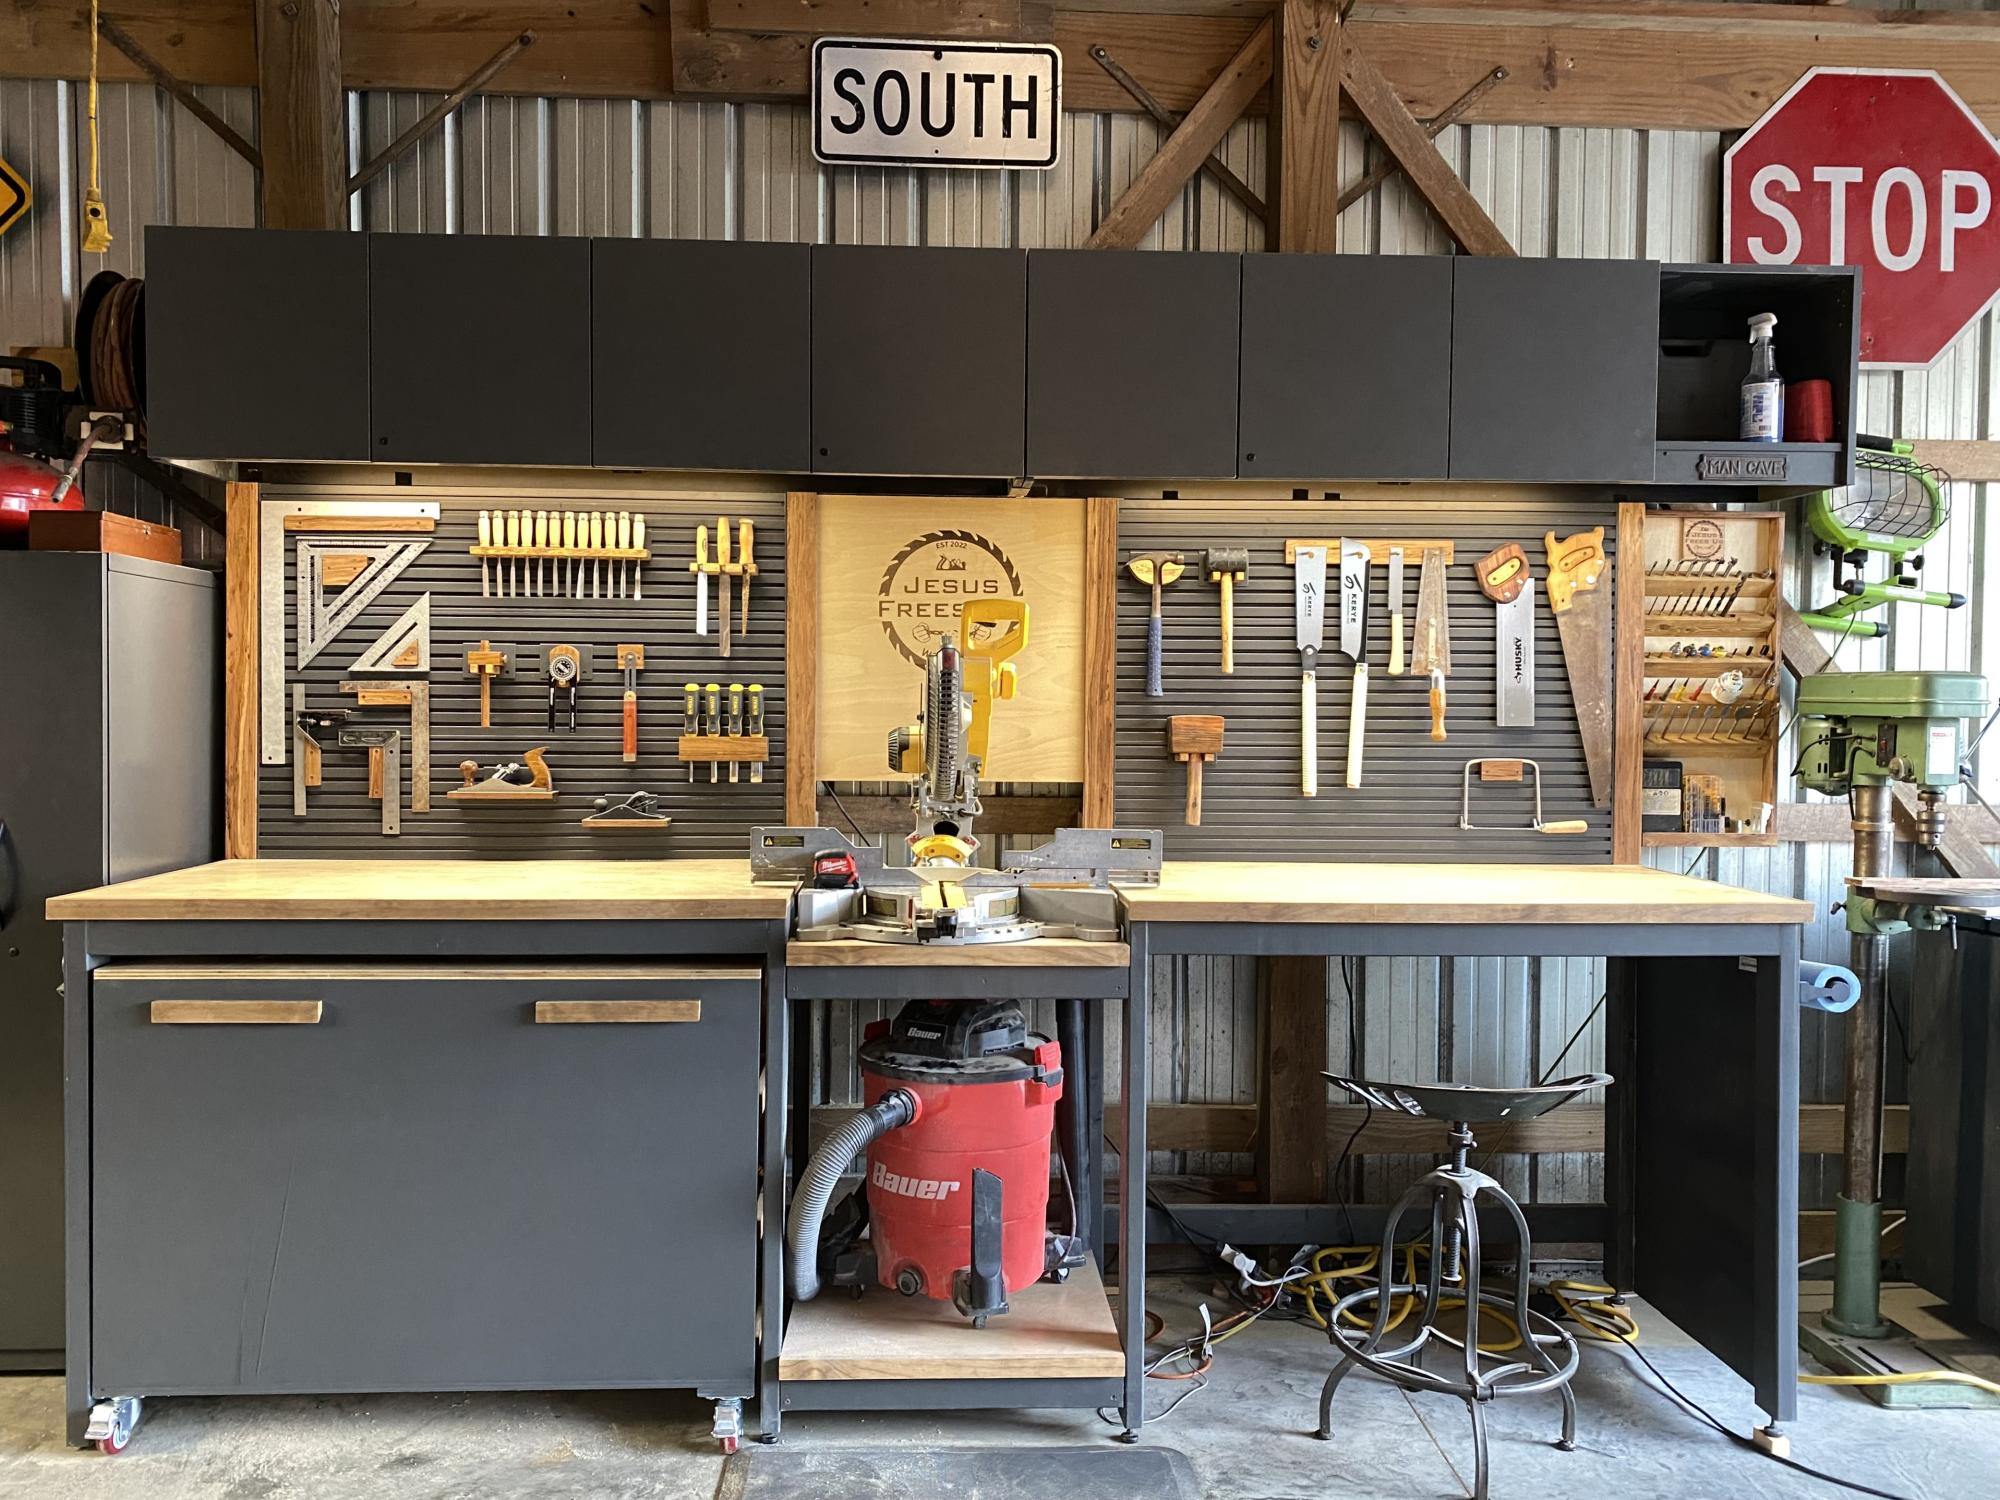
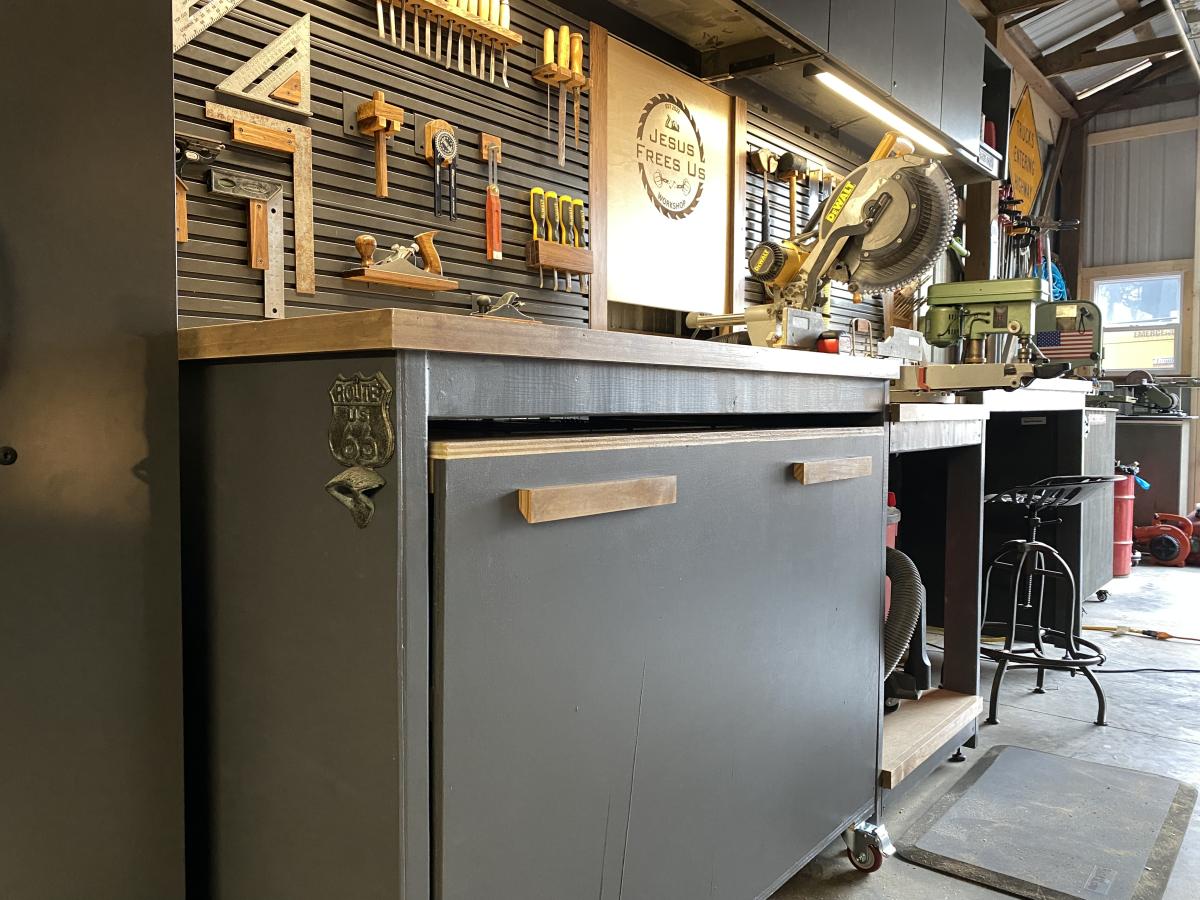
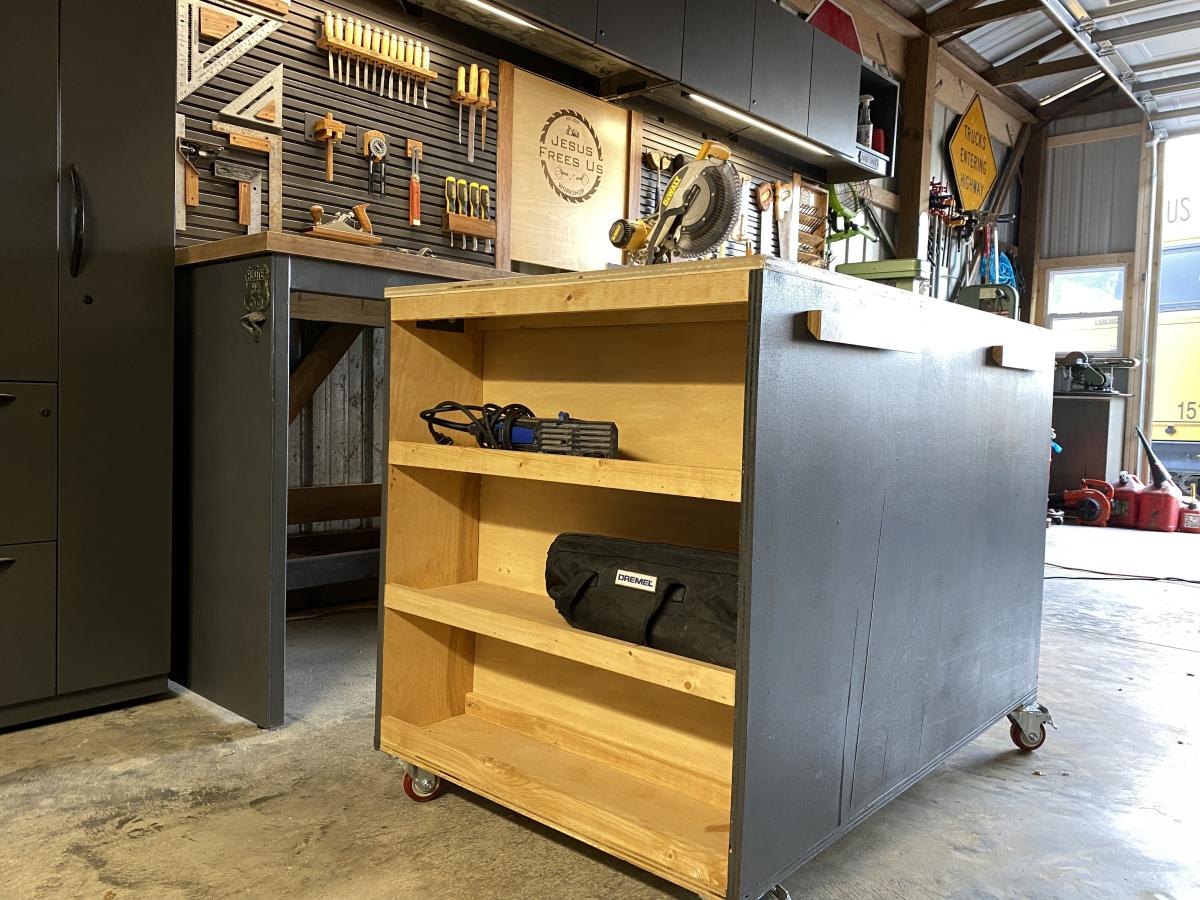
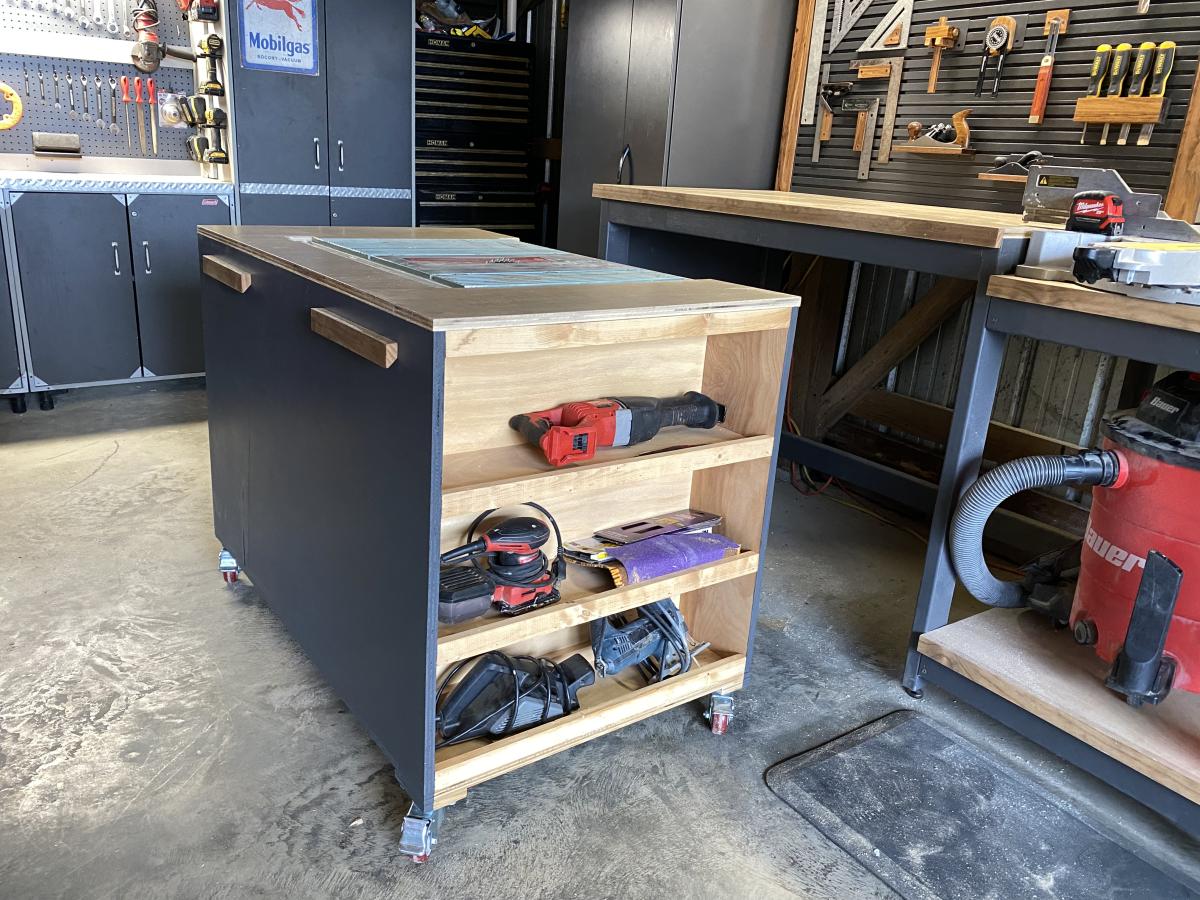
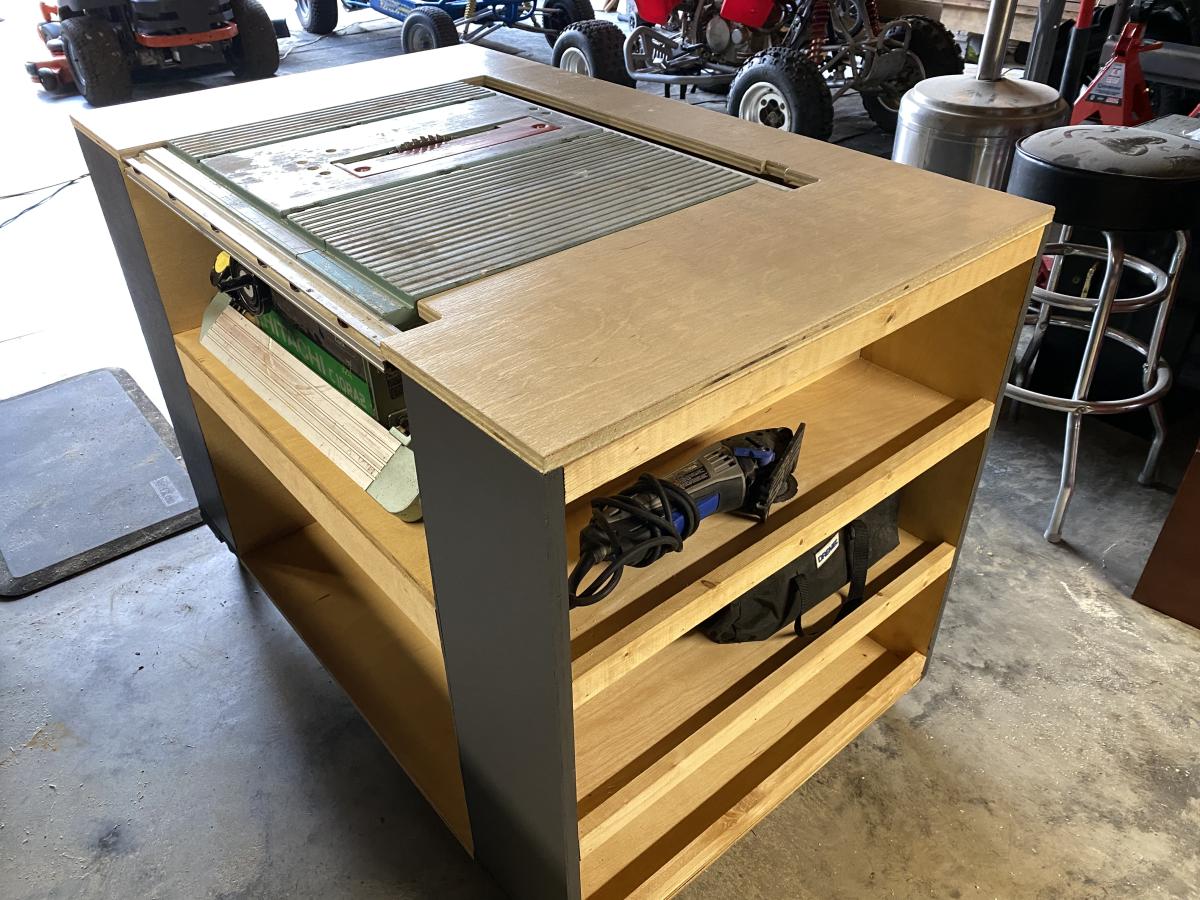
Used part of the Ultimate Roll Away Workbench with Miter Saw Stand to just build one of the roll-away workbenches to work with my miter saw and table saw. I'm very happy with how it turned out.


Sun, 04/28/2024 - 12:57
Hi, I am planning on getingt a dewalt 10 inch table saw as well. I am wondering what you did to adapt it for extending the rails with the fence? Curious if there were more photos. I would very much like to adapt my station to be similar to yours. Thanks. .

Decided to build this nesting chair for setting around the camp fire. I modified several plans to get the fit I needed. The legs are built from 3/4 select pine and the slats are from cedar fence pickets. Finally got to use my new planer for this project. - Roger Clark, Minnesota

Sat, 06/21/2025 - 09:42
Please share your plans with this chair, I’ve made several of these and for the life of me I hate them
The curve is wrong. It hurts my back and I’m always tipping over.
Please, please please share your plans
[email protected]
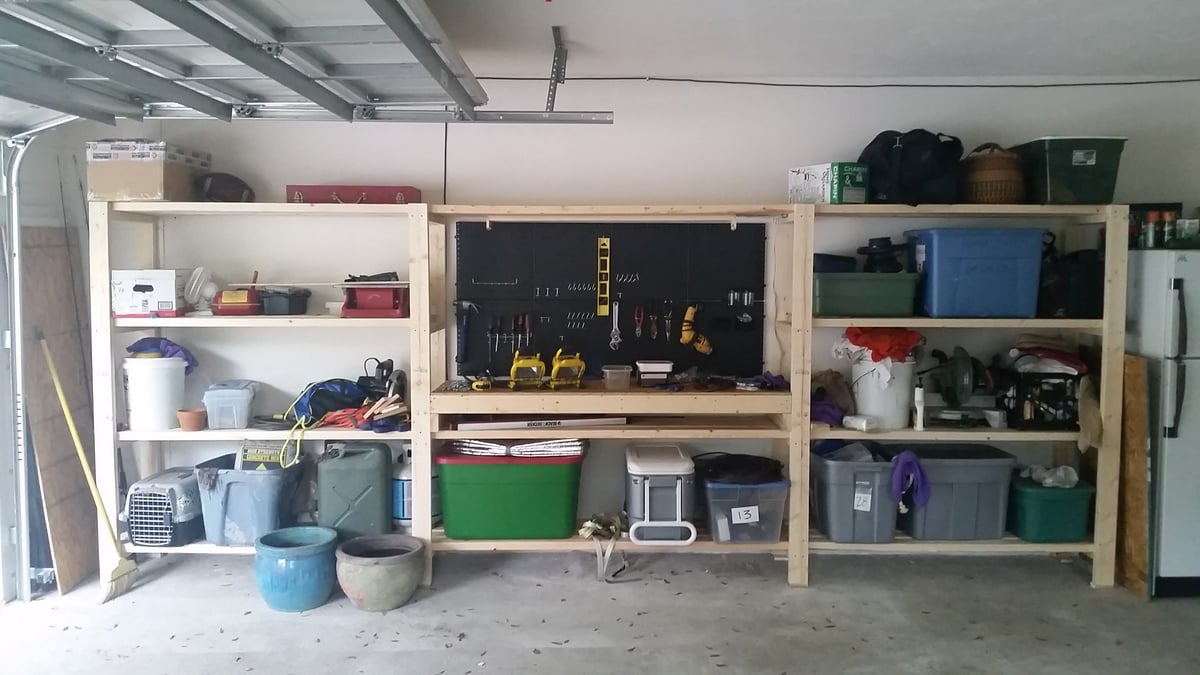
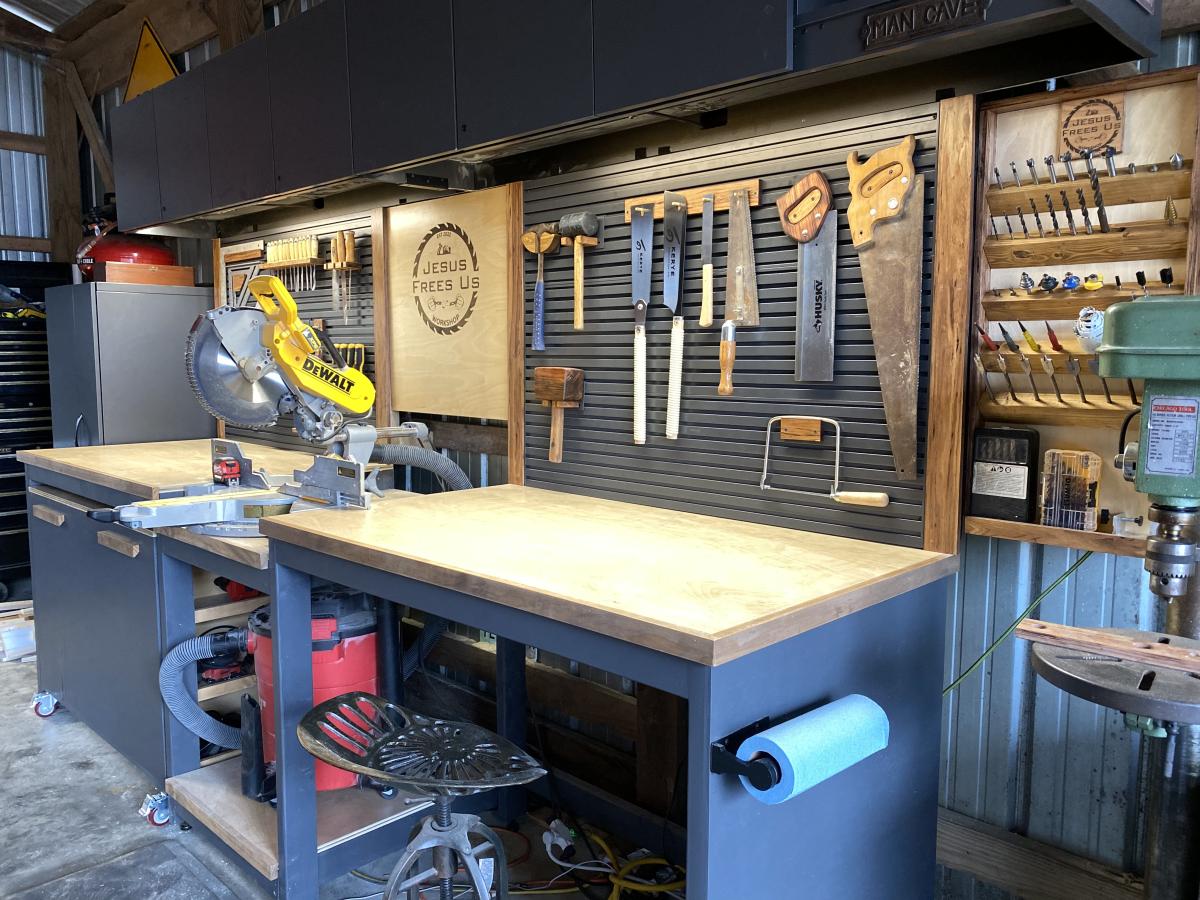
Great plans allow for versatility and easy customization. Put the whole thing together in a day w/ one other person. My set up is 16' long - 5' on the side shelves and 6' for the workbench. Added a pegboard and fluorescent light under the top middle shelves. I'm also designing a slim drawer to go under the workbencheck area. Thanks a bunch!
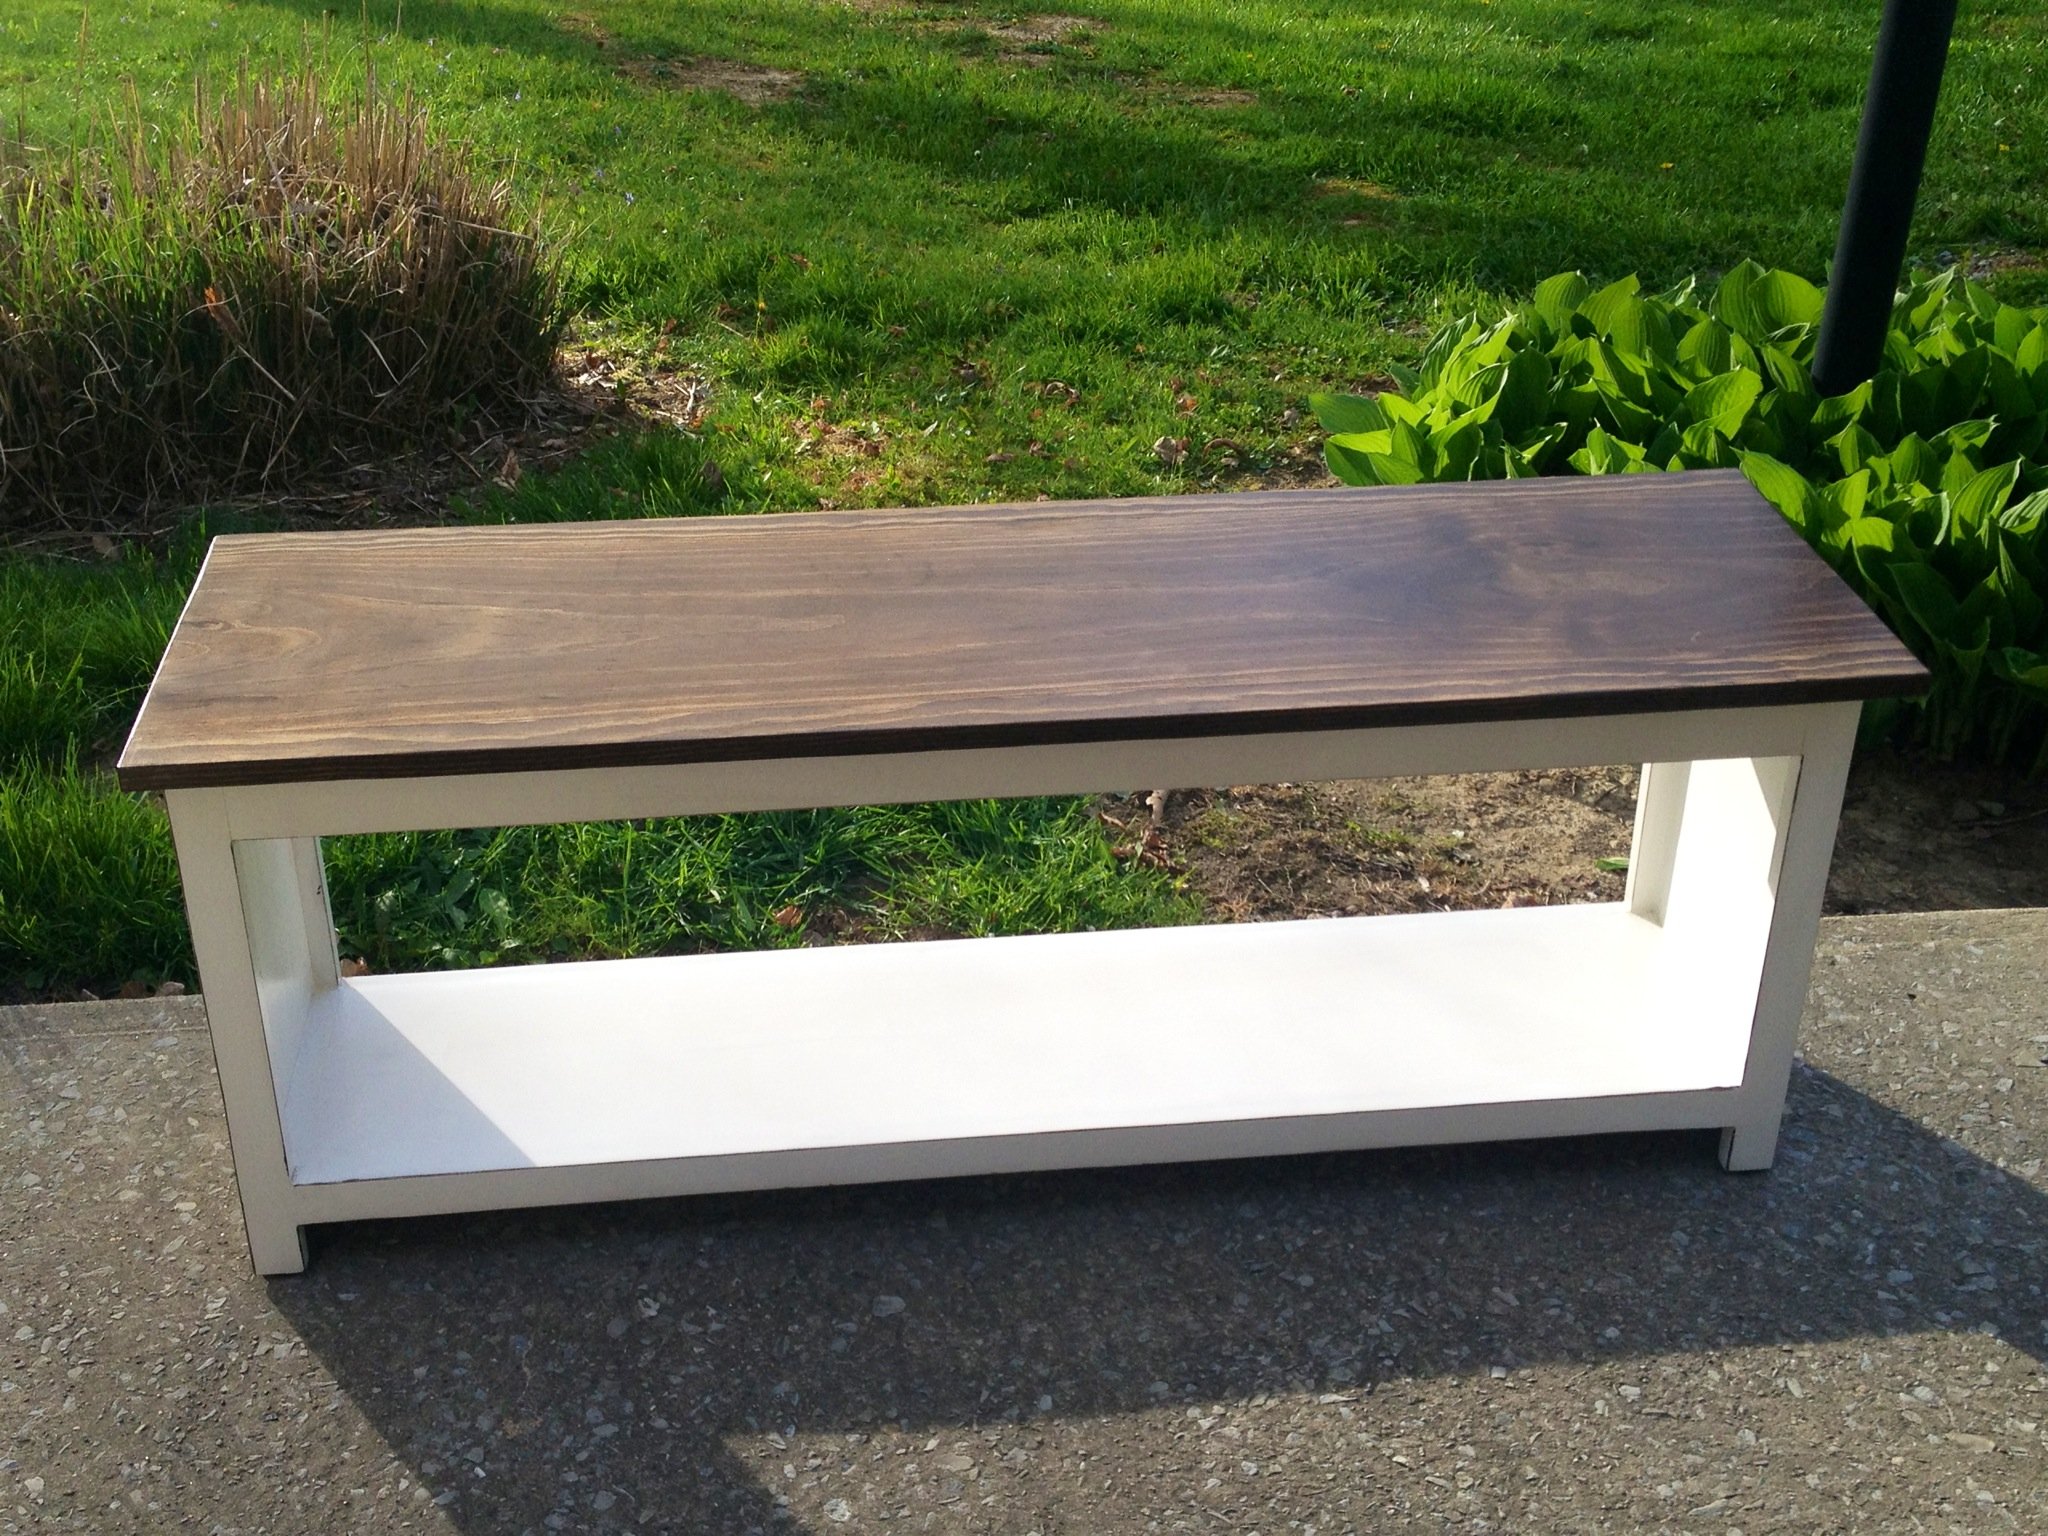
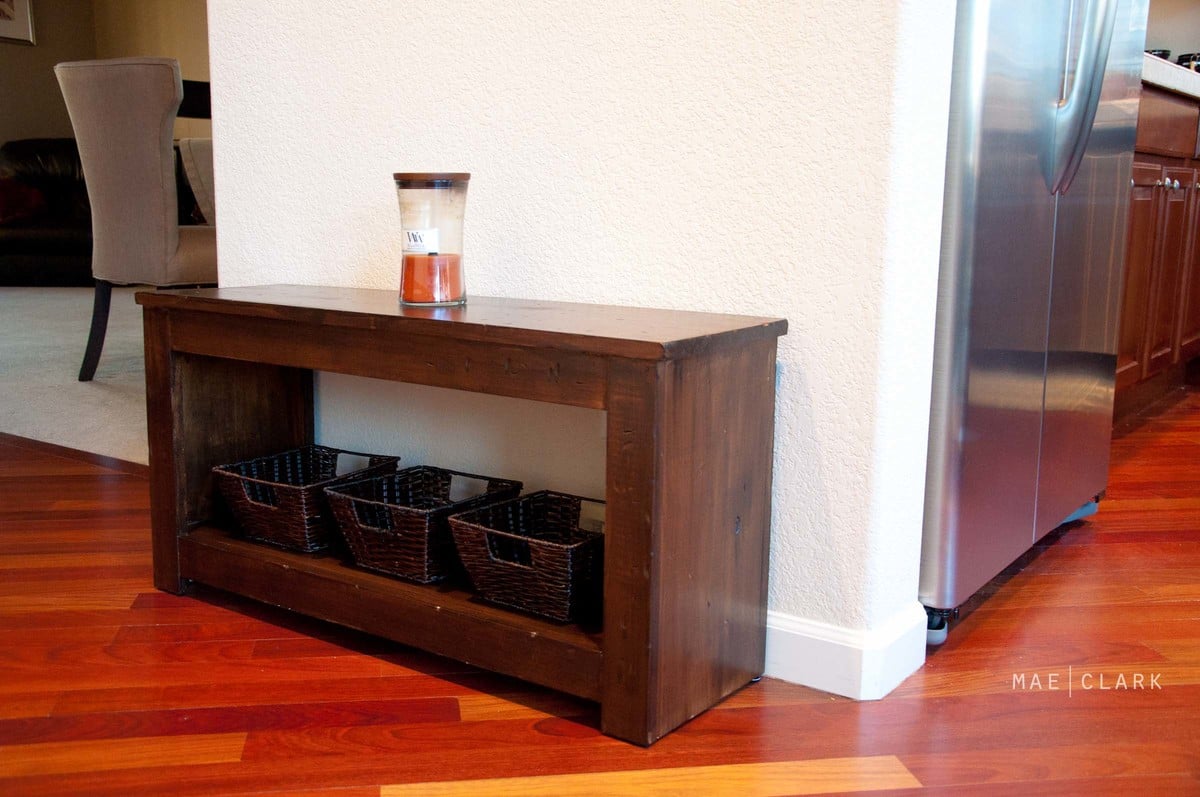
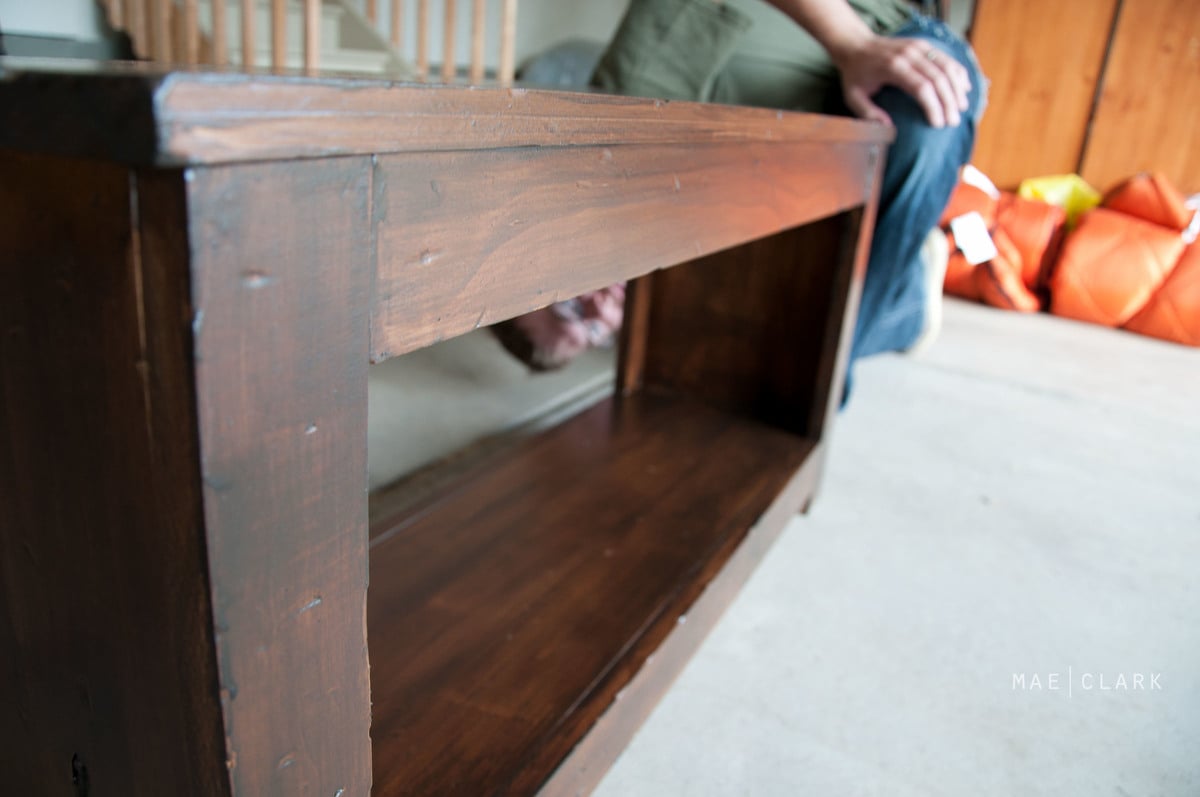
I modified these plans just a bit. I added 10 inches to make it 48 inches across. I also used a 1x3 on the top face frame instead of a 1x2. The plan calls for just a 1x12 on the top but I wanted it to be wider so I used my Kreg Jig to add two 1x2's to make the top 15 inches deep. I planned on staining the whole thing but made a few errors and had to paint the bottom as it is more forgiving. I loved how Brooke used the coffee staining technique but didn't like the way it was turning out so I just went with distressing the edges and staining the top like she did on her coffee table with the stain I had on hand. It took only a few hours to make the bench and about 3 days to finish it as I worked in the evenings after work.
Sun, 08/11/2013 - 18:53
I love how the white paint and dark wood look. I like the extra width, and the light distressing looks great.
