Community Brag Posts

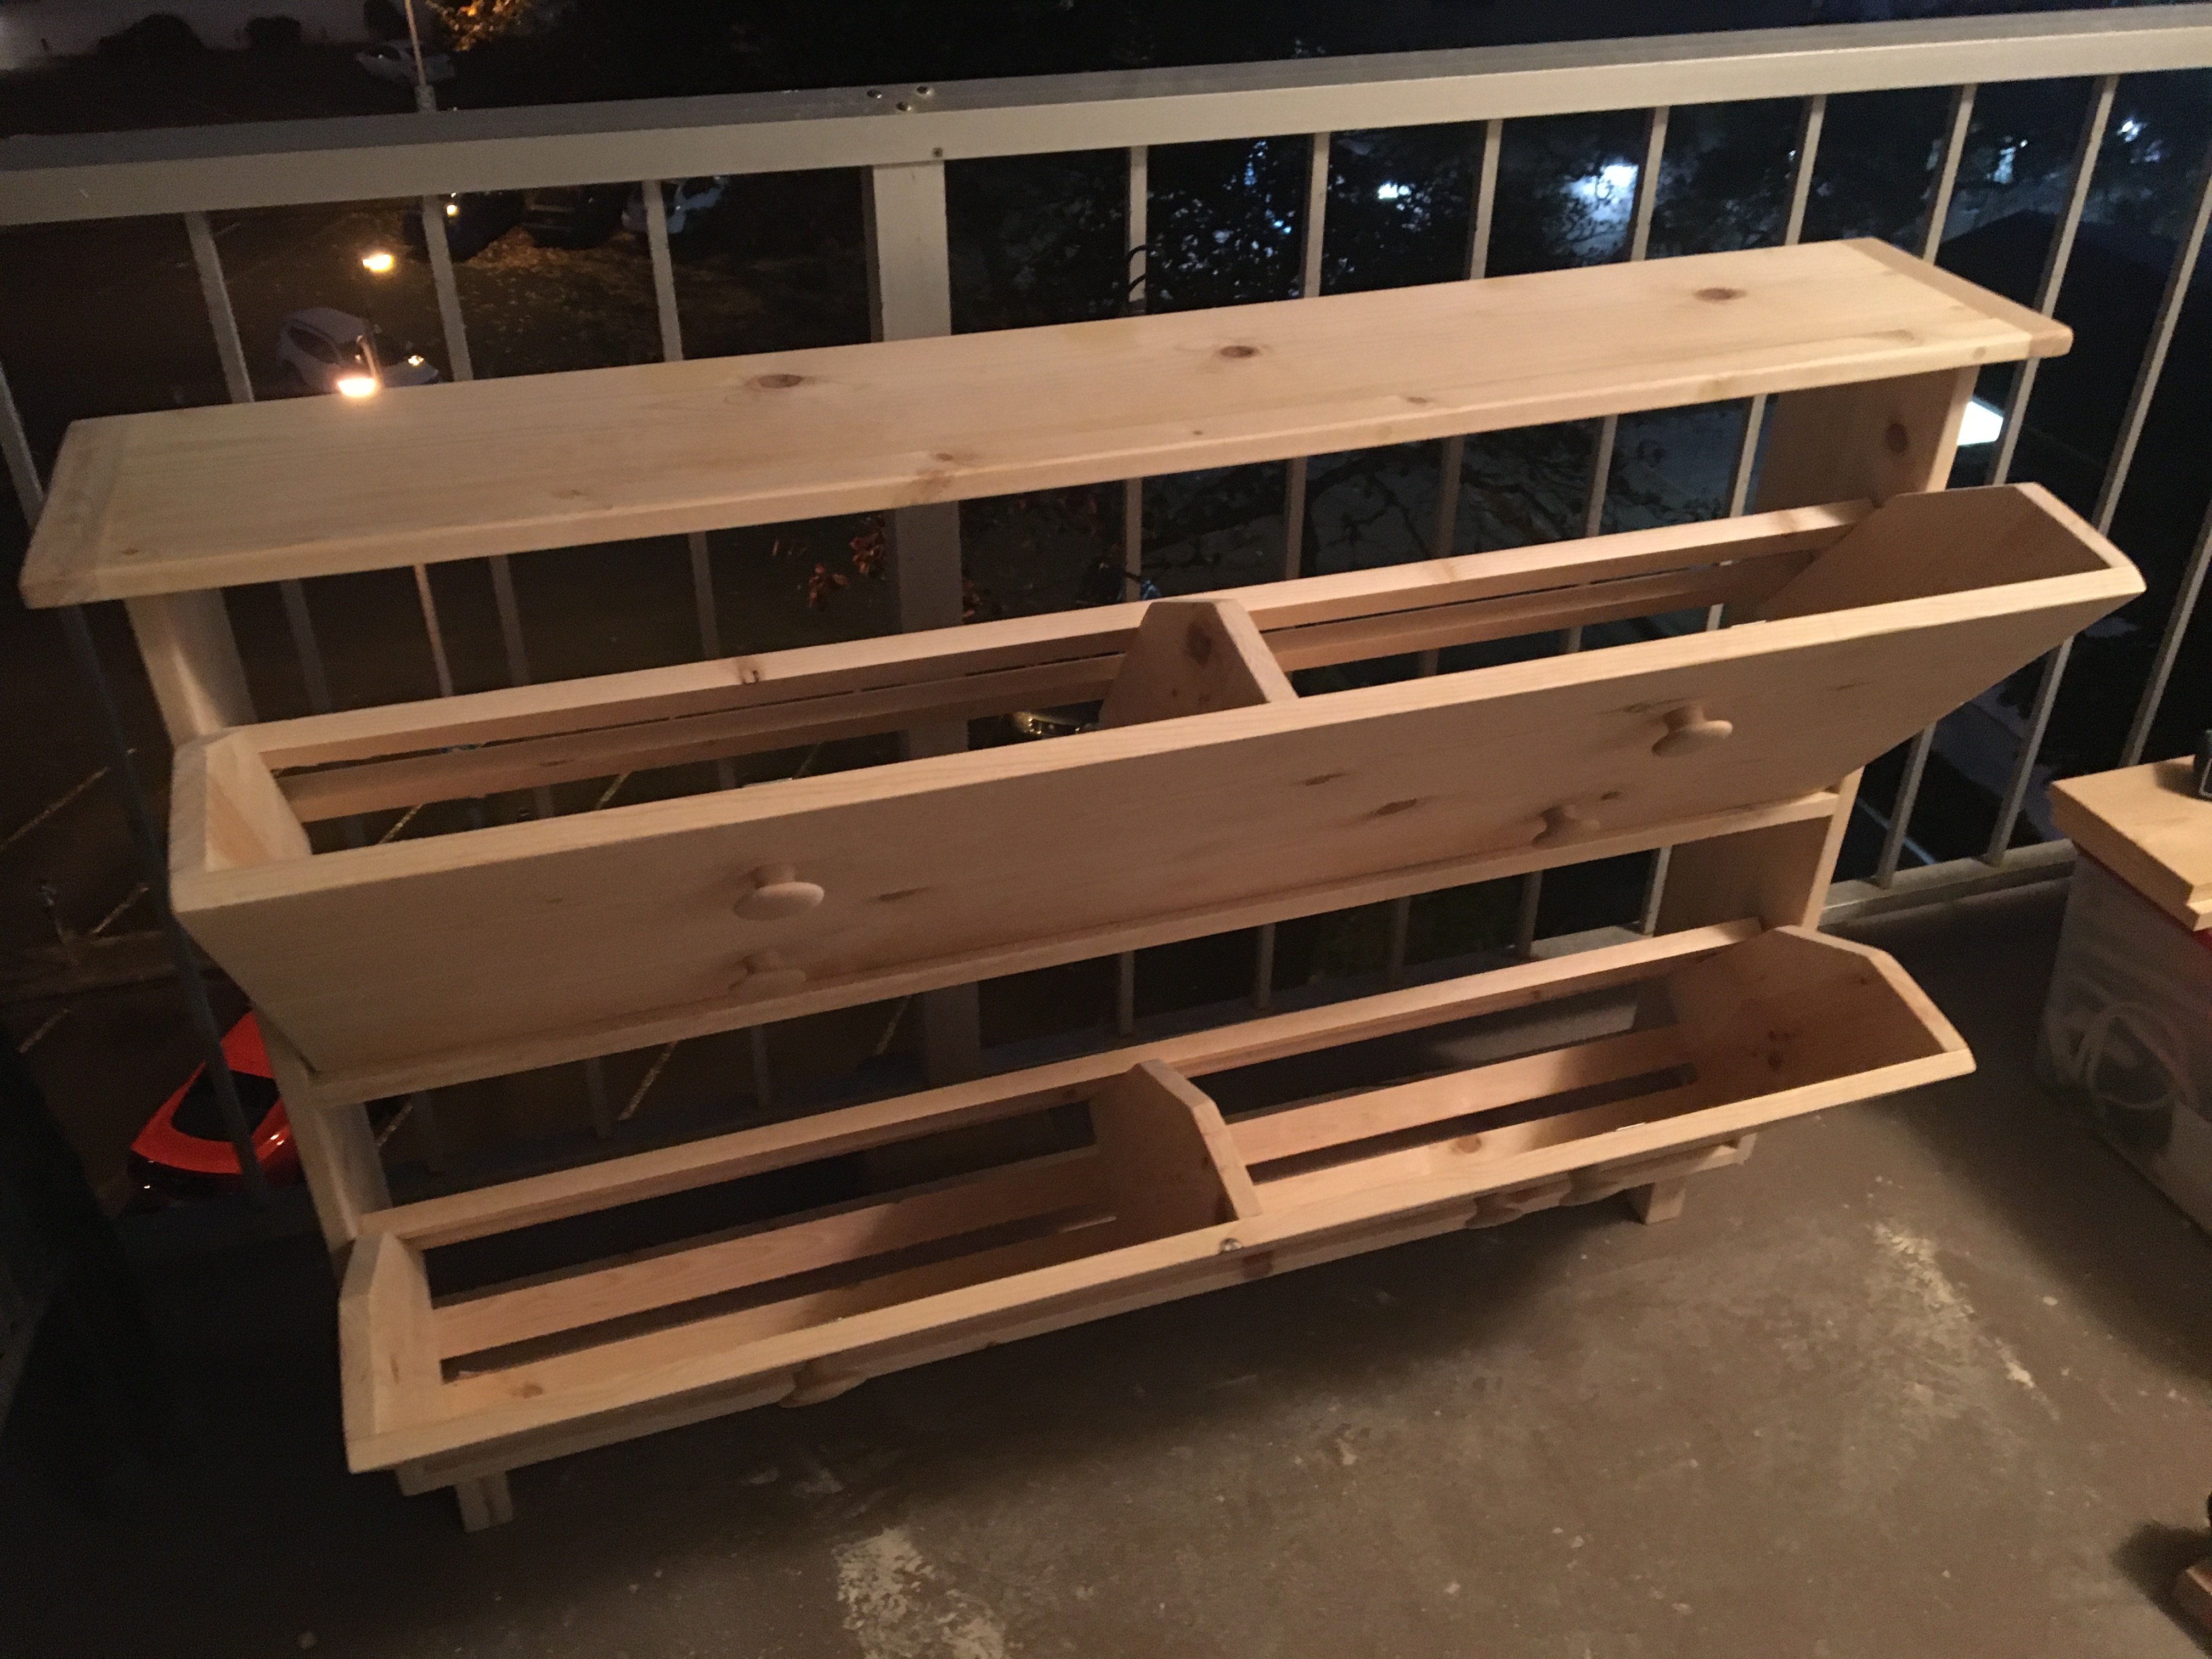
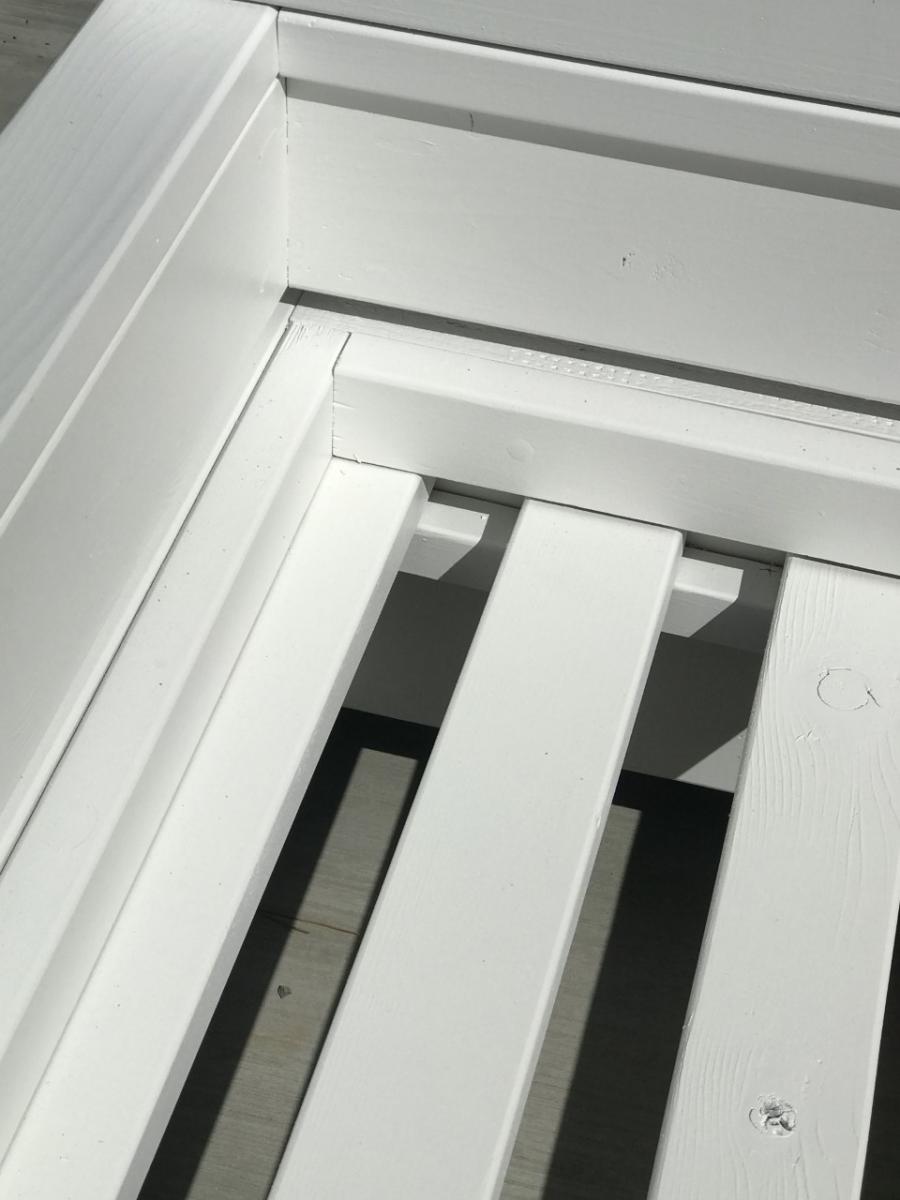
Providence Bench for my Front Porch

Submitted by kerrbear on Wed, 09/26/2012 - 10:30

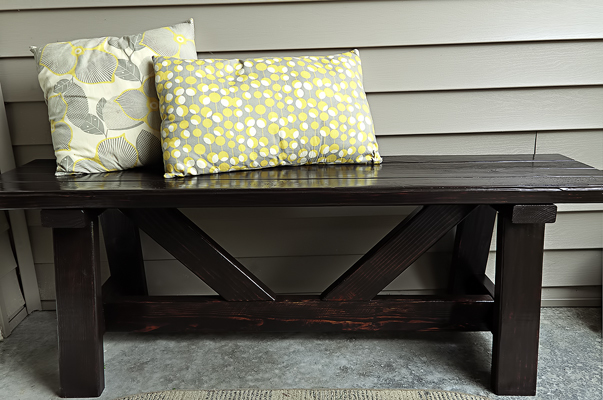
This project was quick and simple. Just keep in mind and pay attention to the plans where they state "bevel" or "miter". There is a difference!

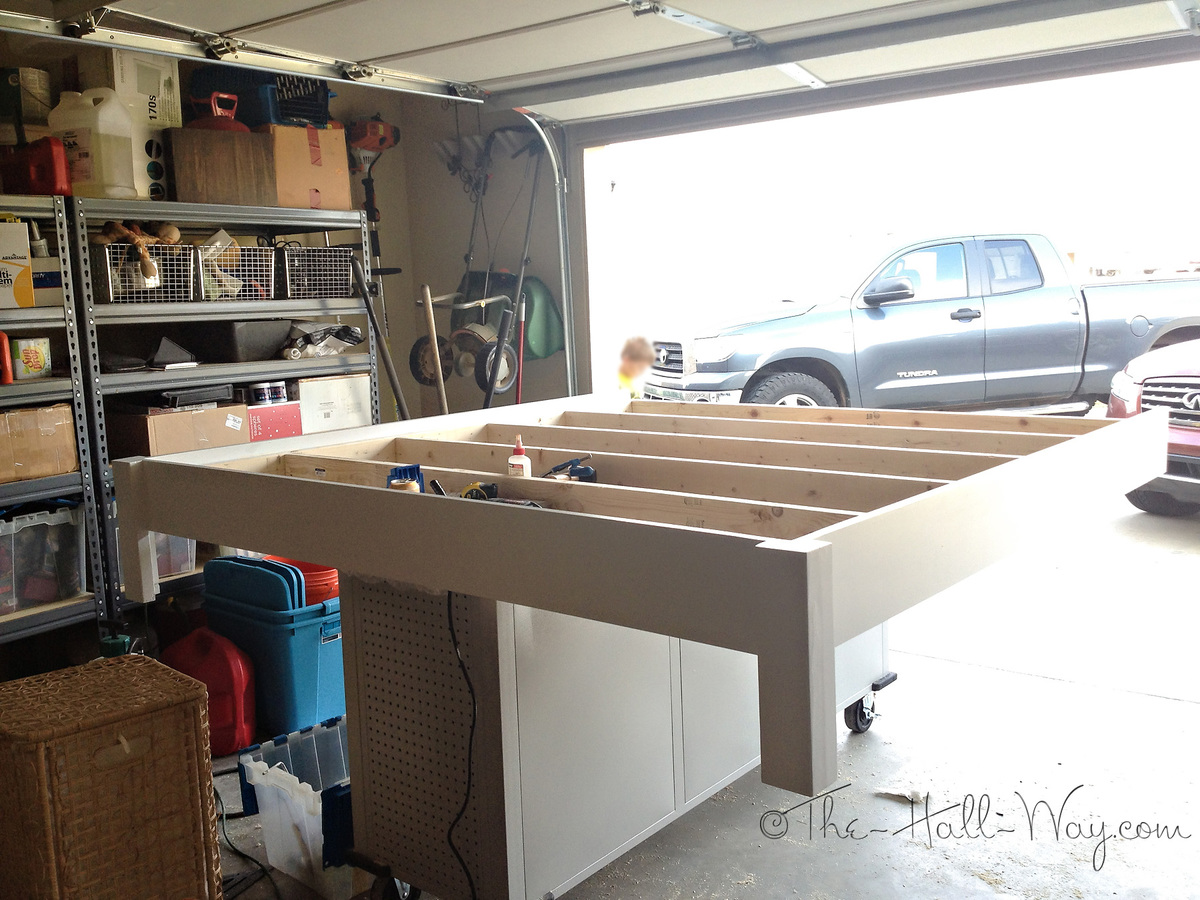
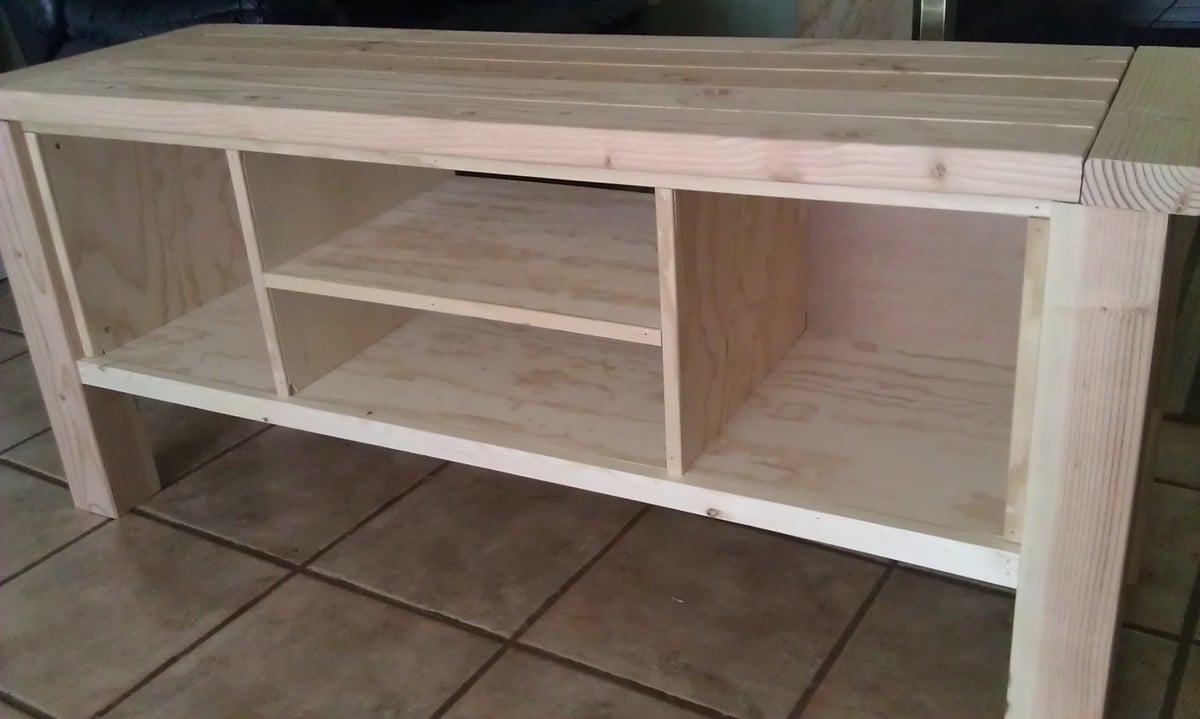
This project was free to me as we have a huge amount of 2x4 studs left over in our garage from a previous project so I should be able to do the table and another bench for free as well.

It went together within a few hours as the cuts are easy.

Working on the camp loft bed now with some mods to add a stationary bed beneath and more height for my girls room.

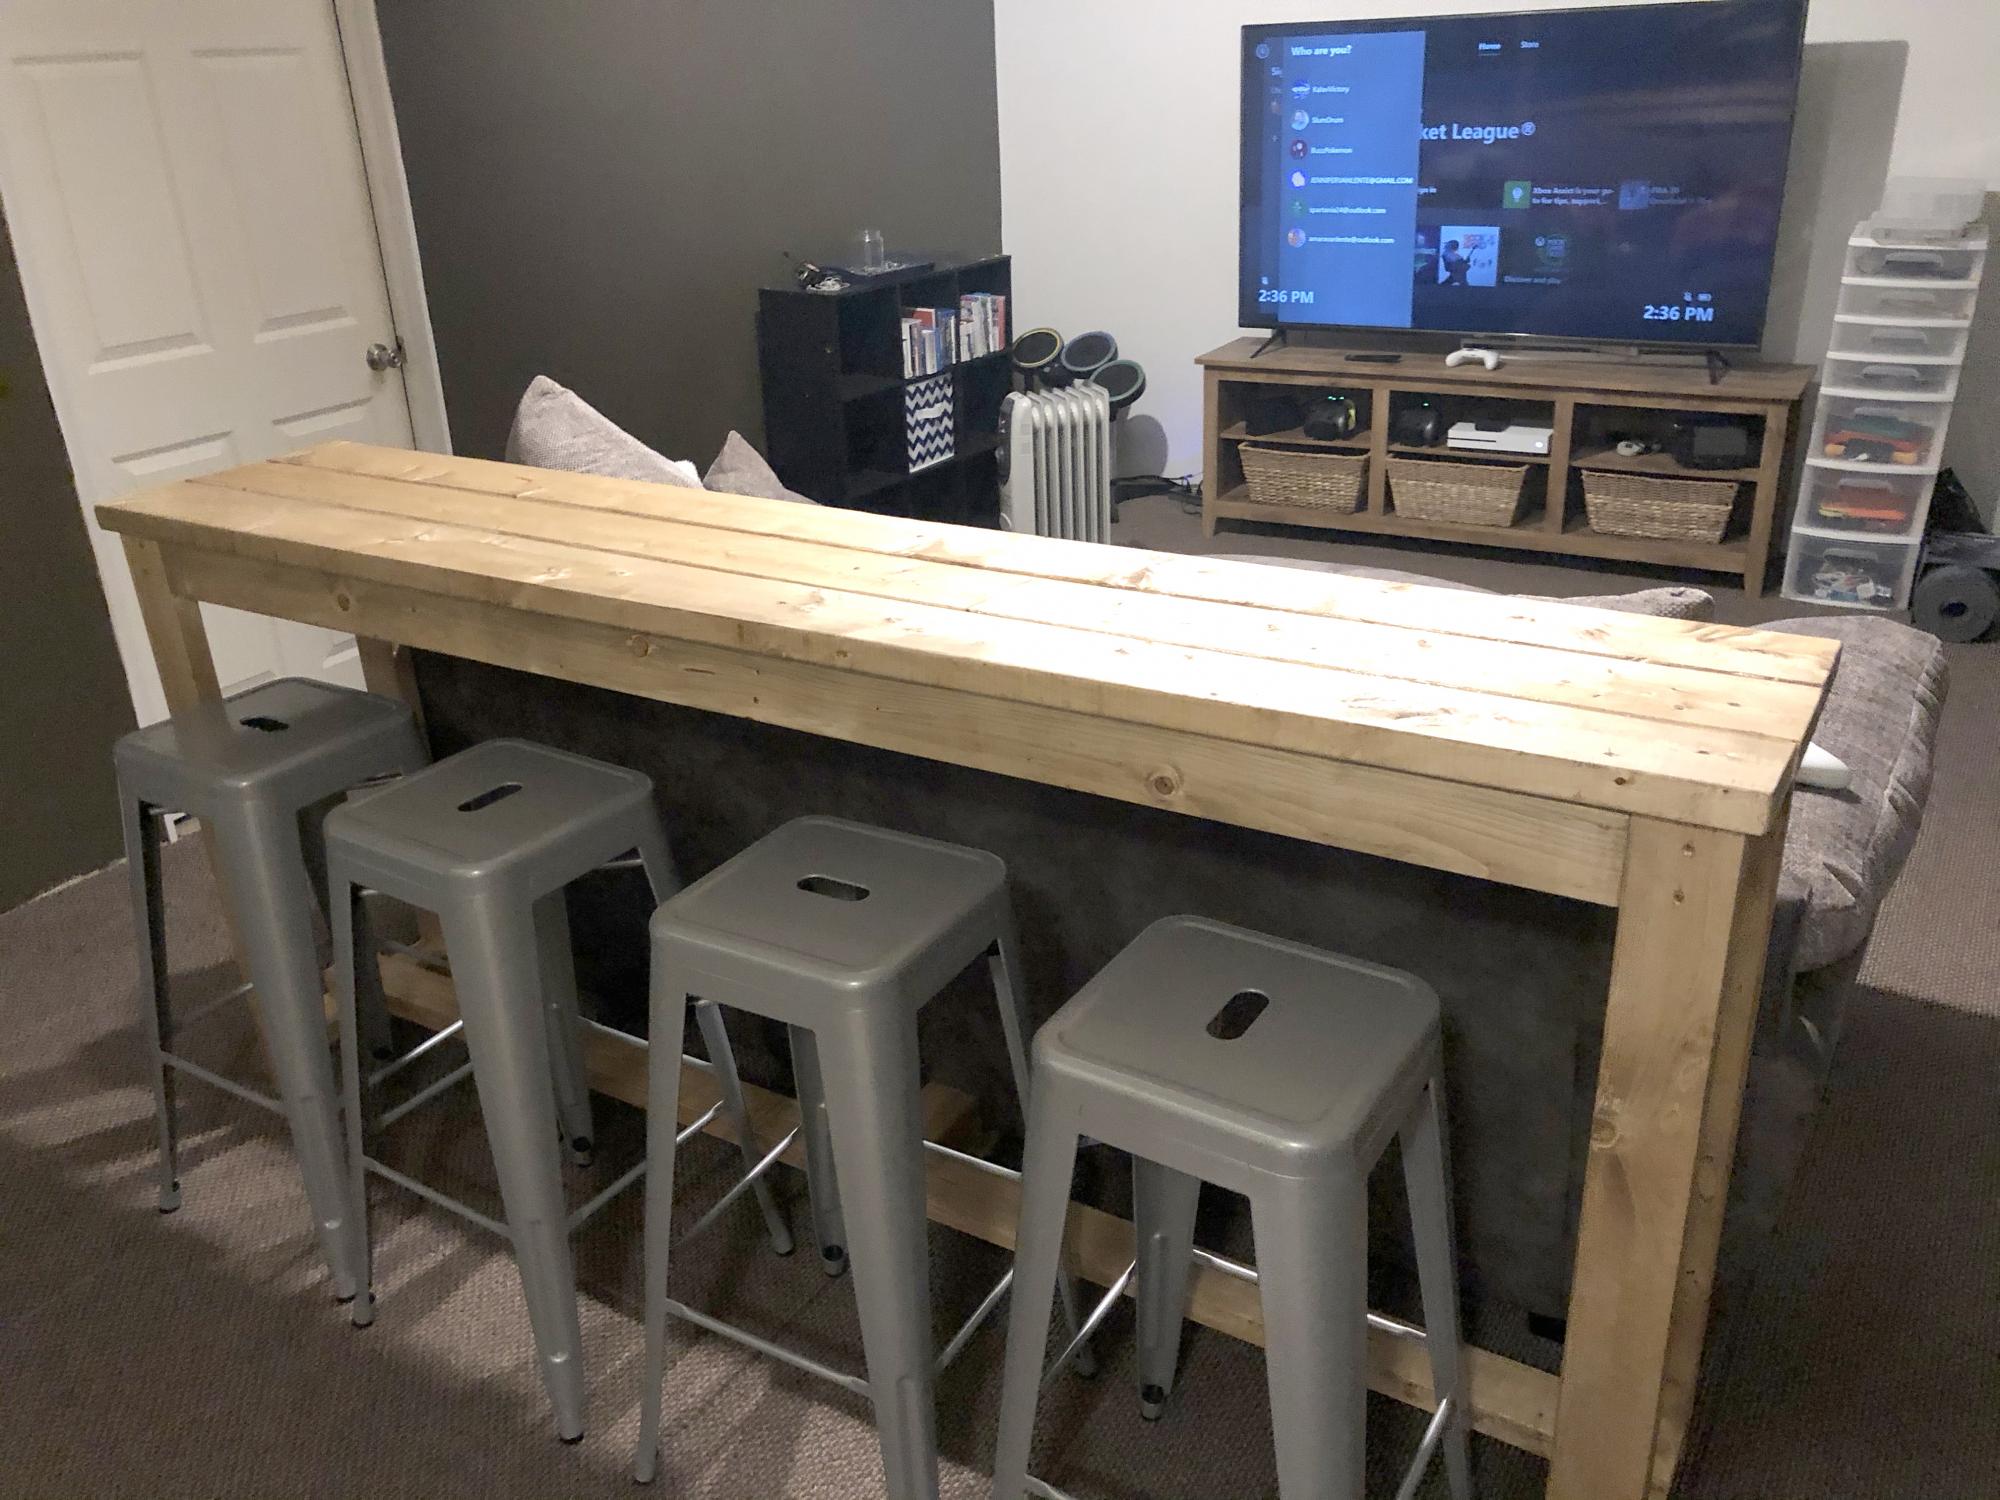
Overall great build.

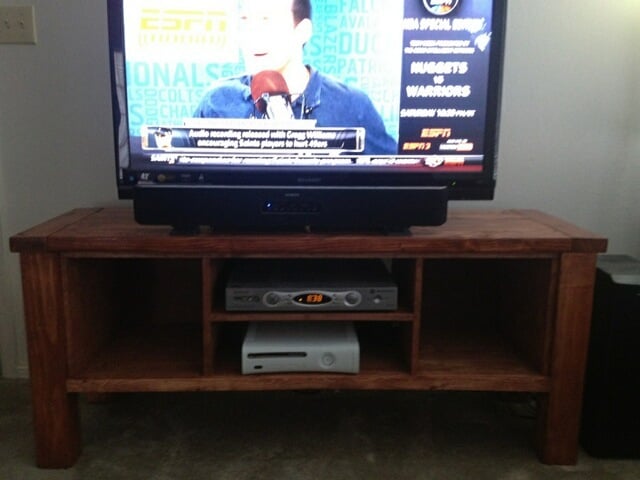
I stained it with one coat of Kona. I did let the stain sit and barely wiped it off that is why it ended up being very dark which is the look I was going for. I then finished it off with 4 coats of polycrylic clear in high gloss which dries very fast and does not yellow.

Estimated Cost
$10.00 - 2x4's here are about $1.54 each
Estimated Time Investment
Afternoon Project (3-6 Hours)
Finish Used
1 coat of Rustoleum Ultimate wood stain in Kona. This is the best stain ever for dry time (its not clean like gel stain though so it is runny and can get messy just an fyi)
It dries within an hour! And only needs one coat!

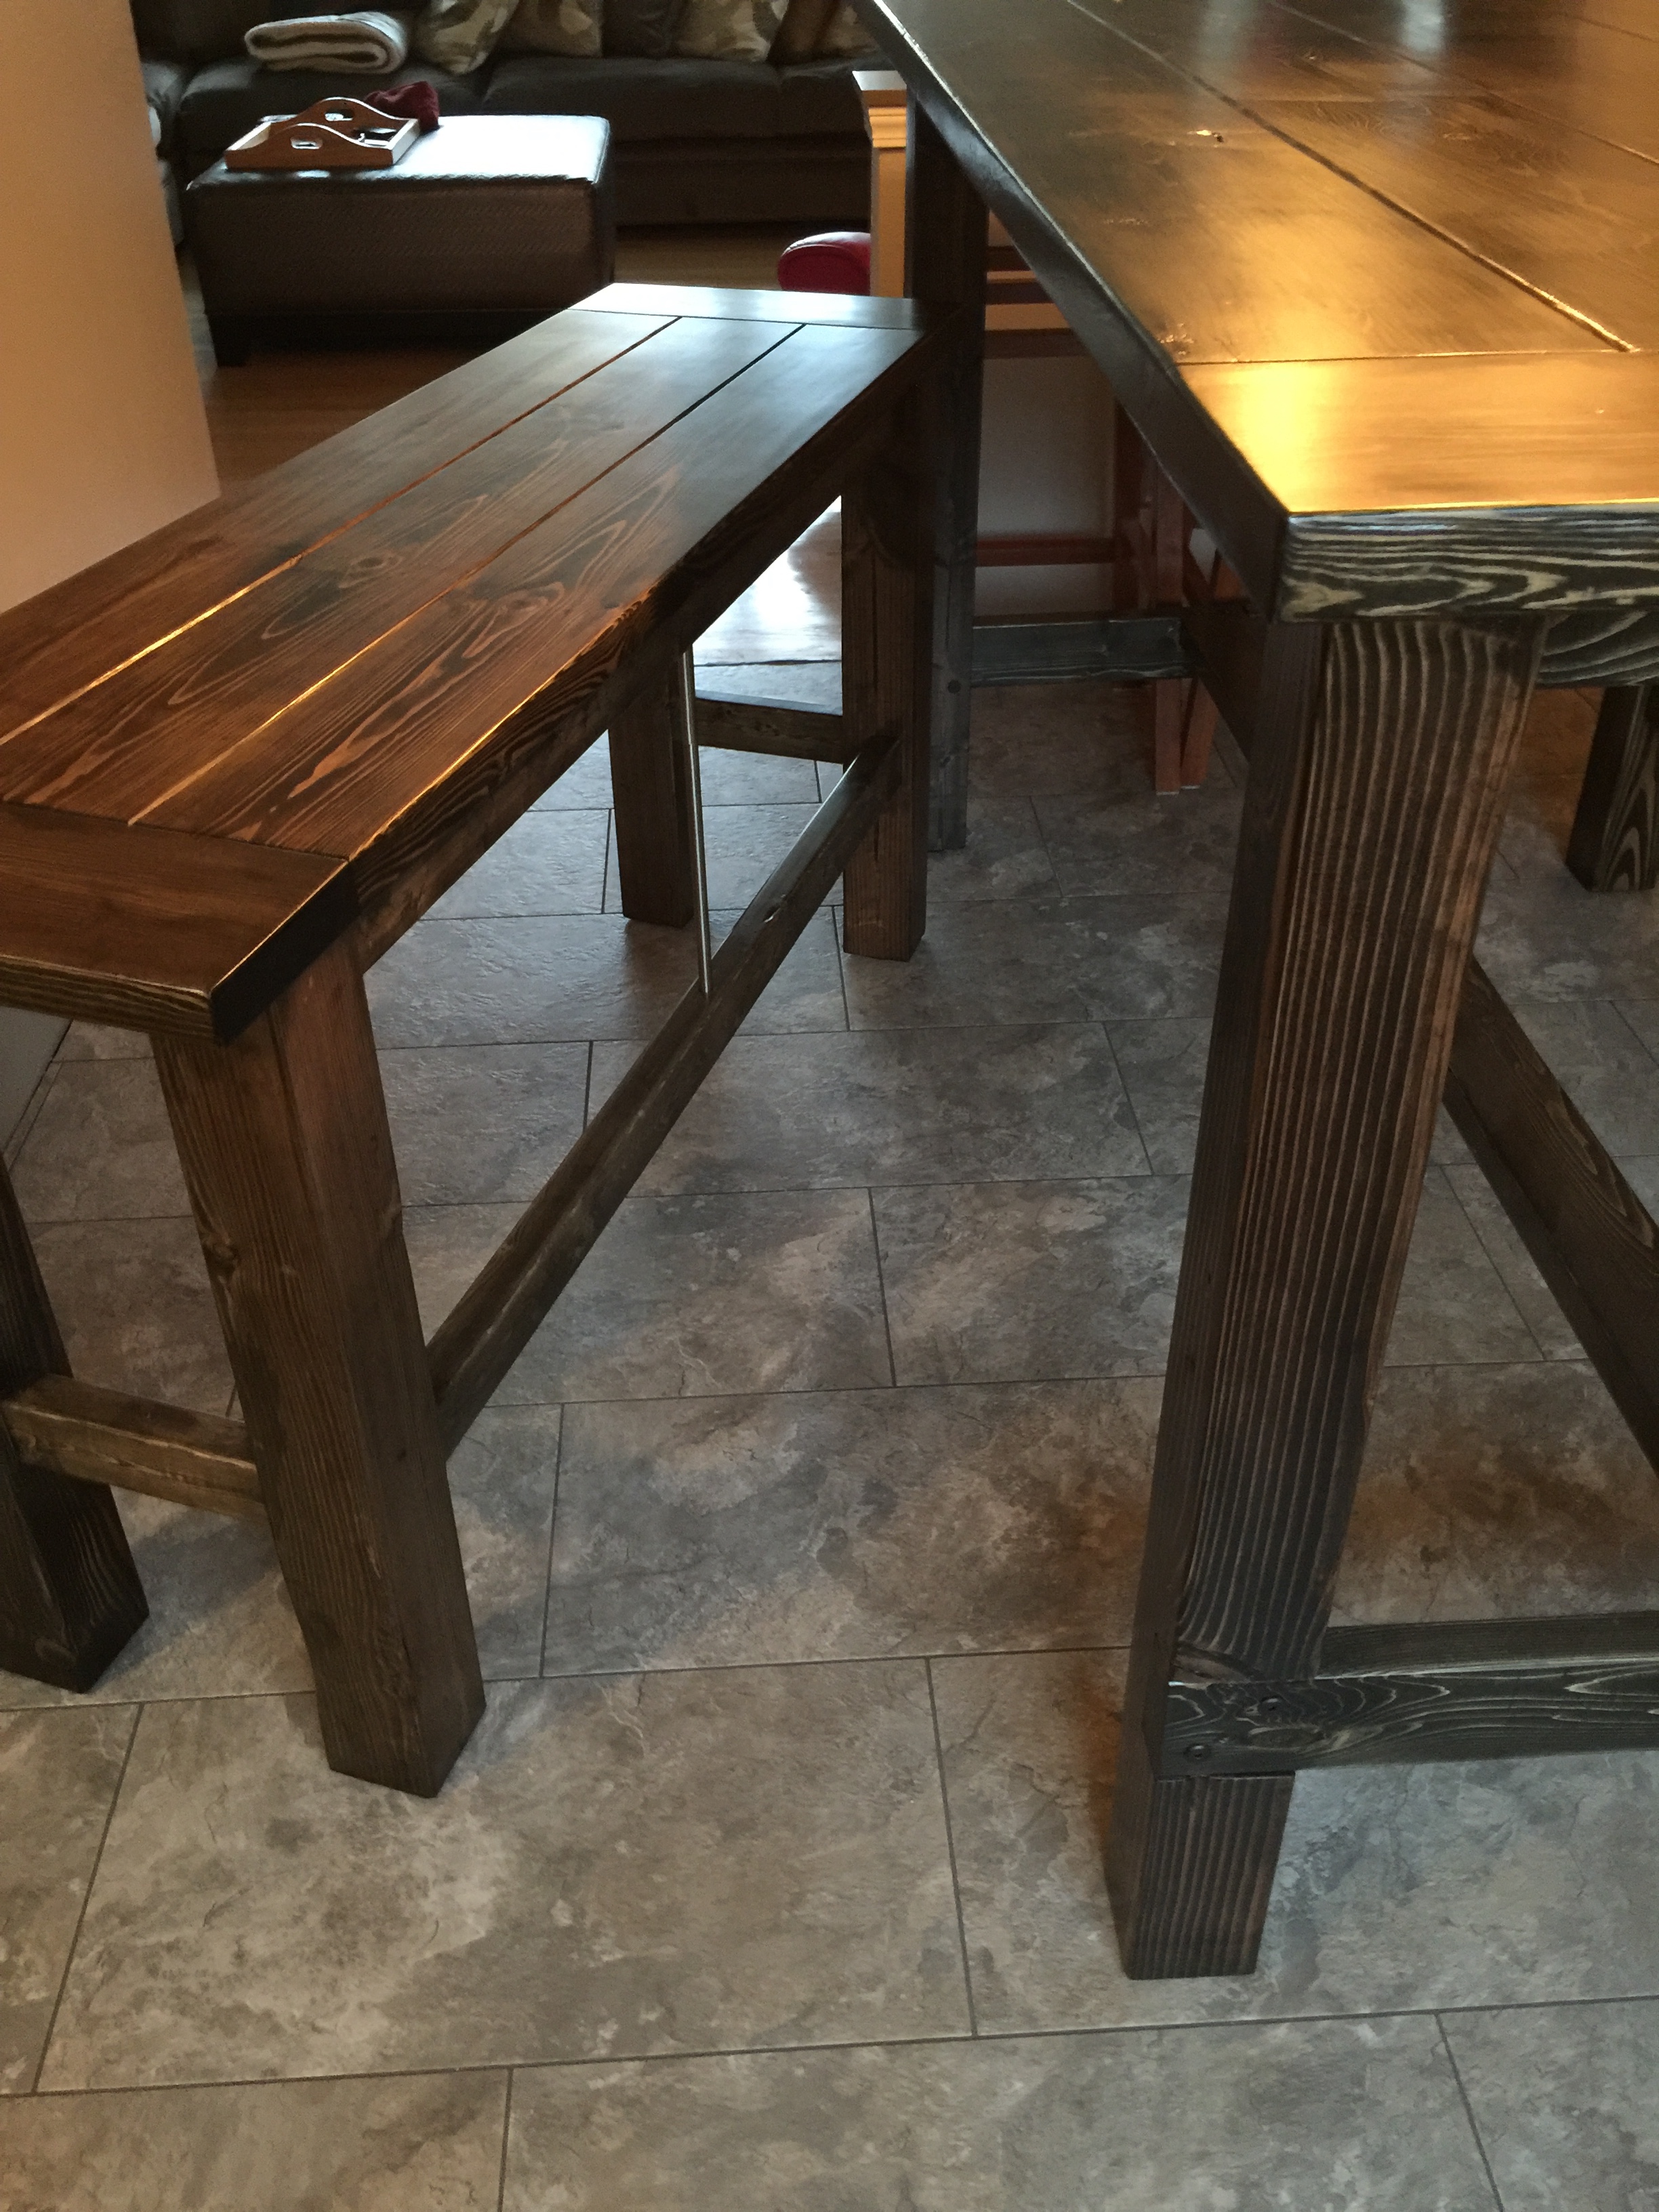
Finished it with 4 coats of Minwax polycrylic clear gloss. Its ultra fast drying and water based for easy clean up. Comes in matte, satin, and gloss.
Recommended Skill Level
Beginner

Comments

Jamie Hynes (not verified)

Sun, 11/04/2012 - 14:15

Hi - would it be possible to get these plans also? Thx so much, it looks like a fun project with fast results. jamie

Vicki G. (not verified)

Fri, 11/23/2012 - 10:49

There is a clickable link above where it says "Blog Link: Build a Providence Bench"

Bar Height Farmhouse Table / Benches

Submitted by Anonymous (not verified) on Tue, 11/15/2016 - 12:07

I wanted to say thank you for the inspiration.

I took the general idea, made it bar height and my own preferred size and beefed it up by doweling together the top pieces.

Given the size, I made the top removable with threaded inserts as well as the removable support beams below.

For the benches, I wanted something sturdy and a look that was similar to the table.  I added in a nickel support rod for the foot rest for both strength and a nice look.

All in all this project took a lot of time, probably more so with my perfectionist ways and wanting to  make the finish perfectly smooth.  It's like glass, which I just love against the dents and dings of the wood.

Some of the challenges were wood that warped.  After putting together the bench tops, the wood warped quite a bit, nothing that a few clamps couldn't undo but a pain nonetheless.

Using black stain really brought out a nice look and I'm taking that same look to the new trim and door that are going into the dining area as well.


I've not seen a bar height (not counter height) table in a full dining table size before, it's what I wanted and I couldn't be happier with the results.   Was it worth all of the time?   That's hard to say, I really love it, but it took a long time to get it to be exactly what I wanted it to be.

Thanks!


Estimated Cost
$180 in lumber, $200 for stain/poly/sandpaper/steel wool/Kreg jig/screws. $20 for furniture screws that look sharp and allow the table base to be easily disassembled. Another $20 for threaded inserts and machine bolts to hold the top to the base.
Estimated Time Investment
Week Long Project (20 Hours or More)
Finish Used
Ebony Minwax oil based stain and Satin Poly.
Pre-stain, one coat of stain, wipe after 5 min, three coats of poly using steel wool (00) between each coat.
Recommended Skill Level
Intermediate

My Mom's King Fancy Farmhouse Bed

Submitted by thehallway on Fri, 10/26/2012 - 08:28

I built this bed for my parent's guest room at my sister's house. It is very similar to a bed mom had been wanting. They wanted a king size so I had to do some modifications to the original plan - primarily adding 16" to all width measurements. I also used 10 - 1x8s for the headboard panels. That made the panels slightly too wide, so I had to rip a little bit off the 2 end panels.

The hardest part of the project was getting it in her house! The legs made it about 1/4" too wide to fit it thru the door. We were about to remove the legs (which would have been a disaster since they were glued, screwed and painted on) when we finally figured out the right angle to squeeze it in. I had to touch up the paint in a few spots once we got it in position, but that was much better than having to remove legs and put them back on. We still need to get plywood for the mattress to sit on and I'm going to add a middle leg for extra support since it's a king. I will probably eventually build nightstands to go with it. Overall, I'm pretty happy with how it turned out since this is my largest and "fanciest" project so far.

Estimated Cost
~$250
Estimated Time Investment
Weekend Project (10-20 Hours)
Finish Used
Valspar Satin Latex Enamel in White
Recommended Skill Level
Intermediate

Comments

bran2511

Tue, 04/09/2013 - 12:41

I really love this bed, however, being military we move quite often. Is there a way that you would recommend I could alter it so that it can be broken down a little to make it easier for moving? Thank you much :D

bran2511

Tue, 04/09/2013 - 12:41

I really love this bed, however, being military we move quite often. Is there a way that you would recommend I could alter it so that it can be broken down a little to make it easier for moving? Thank you much :D

jlouki01

Sat, 08/24/2013 - 18:31

I just posted a brag post with this bed in black. I will see if I can upload a photo of how I built this bed for very easy break down. I looked at all the brackets etc.. with this being built out of pine I was not 100% confident in the Rockler / Wood craft brackets. I used a forstner bit and a 4.5" bolt with some washers.

Garden Enclosure

This was a fun project.  The plans are written so that many of the boards don't need to be cut.  It's made from cedar that (thank goodness) was on sale.  I made the raised beds twice as deep as was called for in the plans because I wanted to minimize bending while I garden.  That added to the cost of the lumber and the soil.  I also like the way it looks.


I found it helpful to measure and cut the boards as I went.  This was crucial for fitting the door.  The most difficult part for us was working with the hardware cloth and trying to make it as smooth as possible.


It has been effective keeping deer and rabbits out of the garden.  Things that can fly in are another issue.  

Built from Plan(s)
Estimated Cost
>$500
Estimated Time Investment
Week Long Project (20 Hours or More)
Finish Used
None
Recommended Skill Level
Intermediate
Seasonal And Holiday

Shoe cabinet!

Submitted by JMasters on Thu, 01/26/2017 - 13:43

Created my own version out this plan. 

Built from Plan(s)
Estimated Cost
$80
Estimated Time Investment
Weekend Project (10-20 Hours)
Recommended Skill Level
Intermediate

Modern Loveseat and Couch

Submitted by Anonymous (not verified) on Sun, 09/26/2021 - 12:00

We were looking for outdoor furniture big enough for our whole family and friends but everything we looked at was over $5000 and really not well made. Ana to the rescue.
We built 2 loveseats and created a couch by doubling the dimensions.
We built the whole thing out of redwood so total wood was about $1000
The cushions were from Overstock and Lowes, approx $300.
There was a too much wiggle room with the cushions so we made a built-in frame to hold them in place. If we built another I would have cut the width down slightly.
We placed a 4X4 and another 2X4 on top of the back to provide more support.
All in all, love the way it turned out.

Seasonal And Holiday

Raised Planter Stand

Submitted by Anonymous (not verified) on Sun, 04/30/2023 - 13:02

Created the stand for the raised planter using 2X2 assembled using dowels. Painted the stand mixing black with a bit of white to simulate metal. The actually plastic window box fits within a wood open box with mitered corners fir clean log. Bottom of the stand provides a shelf using (9) 2X2s with a dado placed on either end to fit on the runners of the stand.

Built from Plan(s)

Comments

Growth Chart Ruler

This was a super easy project and I like the way it turned out. I just got a 1x6 board in pine (that cost about $3.50) sanded it, stained it and marked all the inches with a pencil. I then used a painter's pen in black along with my square to get all the lines straight. Then I used some stencils to do the numbers - also with the painter's pen. The whole project took probably an hour to do (besides waiting for the stain to dry).

Estimated Time Investment
An Hour or Two (0-2 Hours)
Finish Used
Minwax Golden Oak - 2 coats.
Recommended Skill Level
Beginner

Nathan's Montreal Canadians bed

Submitted by Corinne67 on Fri, 01/06/2012 - 16:04

Our nephew Nathan really wanted a captain's bed like his friend. We built him one even better for Christmas this year. I couldn't find one plan with everything we wanted to I used the plans for the Storage Daybed for the base, and used the plans for the Cozy Corner twin bed collection wide bookcase unit. We combined both the headboard and sideboard into one unit (by extending the top to the short end) giving him an L shaped headboard for all his hockey stuff :) The only thing we messed up on was the height of the bookcase. He wanted it higher so it's on blocks for now to raise it. My sister did all the final painting to match his room and it looks AWESOME!!!

Steve had everything cut at work and we put it together in one 12 hour day! Nathan LOVES his new bed. Thank you Ana!

Estimated Cost
about $125
Estimated Time Investment
Weekend Project (10-20 Hours)
Finish Used
Nathan is a HUGE Montreal Canadian's fan. He applied 2 coats of wood primer, then his mom, my sister did the finishing paint with the official Montreal Canadians colours to match his room. A couple of little touch ups to be done but it looks great.
Recommended Skill Level
Beginner

Comments

Lou-Anne (not verified)

Fri, 01/06/2012 - 21:24

The colors are the official Montreal Canadiens hockey team's colors, My son is a HUGE fan! Nathan LOVES his bed. and it is very solid.

Guest (not verified)

Fri, 01/06/2012 - 20:29

Ummm... The bookcases were too short because you didn't take the mattress height into account. Looks really good though.

Easy to Build Workbench

Submitted by Anonymous (not verified) on Thu, 08/17/2023 - 13:40

Easy to build workbench. I added an extra 2 1/2 inches (width) to the top plywood cut. This gave me a 1 1/4" lip to the front and back sides. I wanted to be able to clamp on all sides of the bench. Also added casters since I wanted to use this as an outdoor table for entertaining if needed and to simply have mobility with the bench. So far I love it!

Tryde Media Center

Submitted by kendaves on Thu, 04/05/2012 - 21:24

I had just built the Tryde Side Table and it was so easy I gave a shot at this project. Took about 4 hours to build and is a really sturdy, good looking entertainment center. The only thing that I did not like that I would change is an overlap of the tabletop in the front. There is an overlap on both ends but not in the front. Other than that, I really like the outcome.

Estimated Cost
$75 - $100
Estimated Time Investment
Afternoon Project (3-6 Hours)
Finish Used
Natural Stain
Recommended Skill Level
Intermediate

Basement Sofa Table Bar

Submitted by advanlente on Sat, 03/28/2020 - 12:04

My husband and I had been looking at many different stores to try and find a bar table for behind our new couch in our basement. We wanted something that people could eat and drink at when we entertained and/or be able to sit at and play video games. I should have known we were better off to build our own rather than look in a store. It was only $30 in lumber and took 3 hours to build. And another project in the books!

Estimated Cost
$30
Estimated Time Investment
Afternoon Project (3-6 Hours)

Comments

megs502

Fri, 04/03/2020 - 11:03

do you have the plans for this? i've been looking and looking for what i needed and this is it!!

mferrara

Sat, 04/04/2020 - 05:39

Hi - exactly what I've been searching for....do you have plans available? Please and thank you!

beckaroo

Tue, 06/02/2020 - 23:04

Hello,
I would also love to see the plans for this sofa bar table.
Thank you
Becky

Farm house entertainment center

Submitted by LPJunky on Sun, 05/24/2020 - 22:36

My one of my first projects. Followed the plans here, https://www.ana-white.com/woodworking-projects/grandy-barn-door-console

Doors are 1x4 frame on 1/2” plywood and got the hardware from amazon

WINSOON 8FT Antique Double Sliding Barn Door Hardware Roller Track Kit Black, 4-18FT for Choose https://www.amazon.com/dp/B014SMIWTQ/ref=cm_sw_r_cp_api_i_bH1YEb890KWDF

A little beefy but worked. Had to trim the track a little bit to fit the build.

Also added hdmi/coax ports for easy plug ins. And an hdmi splitter since our tv only had 2 inputs.

Overall very happy with the outcome on this one

Estimated Cost
300
Estimated Time Investment
Weekend Project (10-20 Hours)
Recommended Skill Level
Intermediate

Garden bed with folding screens

Submitted by Kate_14 on Wed, 05/27/2020 - 09:39

I added folding screens to my garden bed to prevent my dog to go in it. It can also discourage hares, cats and other animals. The folding screens make it easy to work in your garden.

Estimated Time Investment
Day Project (6-9 Hours)
Finish Used
None
Recommended Skill Level
Beginner

RH Inspired Shanty Hutch & Sideboard + glass doors

Submitted by mandi10uga on Fri, 09/09/2016 - 10:50

This was my first woodworking project ever - and am thrilled!! Thank you Ana-White.com!! I needed a beautiful china cabinet for a fraction of the retail cost. Once I found plans on this website, I bought some power tools and got started! I only worked a couple of hours each weekend so it took a while to finish.


I modified the Shanty sideboard and Shanty hutch plans in a few ways: Shorter overall width to more comfortably fit my dining room, shorter height (which I now regret), fewer shelves in the hutch, different method to attach shelves, and added glass doors to the hutch. My shelves were not perfectly flush with the cabinet walls (oops) so I couldn't use pocket holes to attach them. Because I detest traditional shelving hardware, I just secured 1/2-in quarter round to the walls and rested the shelves on that.


For the glass hutch doors, I built frames similar to the sideboard doors' frames -- two frames for each door, for a total of 8 frames. On 4 frames, I used a rabbit router bit to create an inset for the glass I bought and had cut at Lowe's. I secured the glass with glazier's points and silicon caulk, then attached an un-routered frame to the back of each door with screws. I chose to keep the screws on the back visible and accessible so that I could easily replace the glass if needed without destroying the door.

Built from Plan(s)
Estimated Cost
$630 plus $70 for fancy door knobs
Estimated Time Investment
Week Long Project (20 Hours or More)
Finish Used
Followed Ana-White staining tutorial and used Minwax Weathered Oak (1st coat) and Minwax Special Walnut (2nd coat). Used matte polyurethane clear coat.
Recommended Skill Level
Intermediate

Comments

Outdoor bistro table and tall backed stools

I build the bar table with an x-base and created some stools using part of the plan. We really wanted backs on the stools so I made them up!

Estimated Time Investment
Afternoon Project (3-6 Hours)
Finish Used
Primed and painted white, sealed against the weather.
Recommended Skill Level
Beginner

Comments

spiceylg

Tue, 11/13/2012 - 05:39

That build came out really nice, but the scenic background, wow!!!!

Jake

Wed, 11/14/2012 - 18:16

Hard to believe that you are a beginner. Fantastic work. Keep it up and the whole home will be furnished.

dallynd

Sat, 04/13/2013 - 13:47

I'd love some information on the backs. My husband has a bad back and it's a necessity, but I'm a beginner and not sure how you did it/

Pull-out Shelves

Stationary shelves are such a hassle, especially in a deep pantry cabinet! Now I can actually SEE the contents of my pantry cabinet. Thanks for the inspiration and tutorial to get it done!

Estimated Cost
$50 for 5 shelves & framing, new hinges.
Estimated Time Investment
Day Project (6-9 Hours)

Comments

pallet wood covered sand box

Submitted by Anonymous (not verified) on Tue, 02/21/2017 - 12:29

I used the same plans as posted but I tweaked them to work for the pallet wood that I ripped and sanded and stained with outdoor polyurethane. I also moved the short boards in so the box is smaller and added beams to support the bench separate. Because of Florida bugs and ants I also screwed a painting tarp to the bottom and punctured it several times for drainage to try and prevent bugs and weeds. The plans were so simple and I had so much fun making this.

Built from Plan(s)
Estimated Cost
50$
Estimated Time Investment
Week Long Project (20 Hours or More)
Finish Used
Just sanded and clear satin polyurethane outdoors coating. The product will look different depending on the pallet wood used.
Recommended Skill Level
Beginner