Pantry Shelves
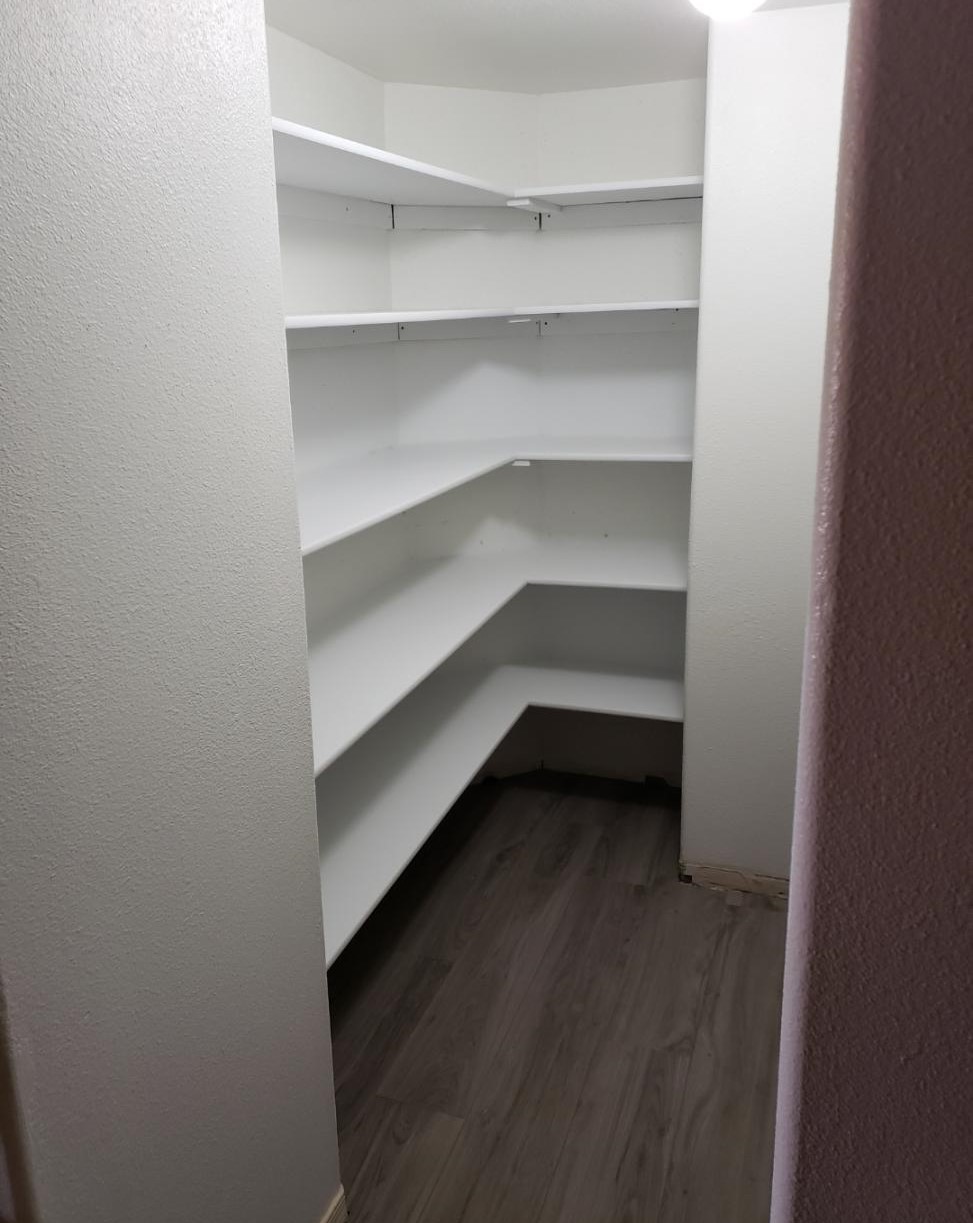
We enclosed an unused wet bar and then I built the shelves to make it into a pantry.
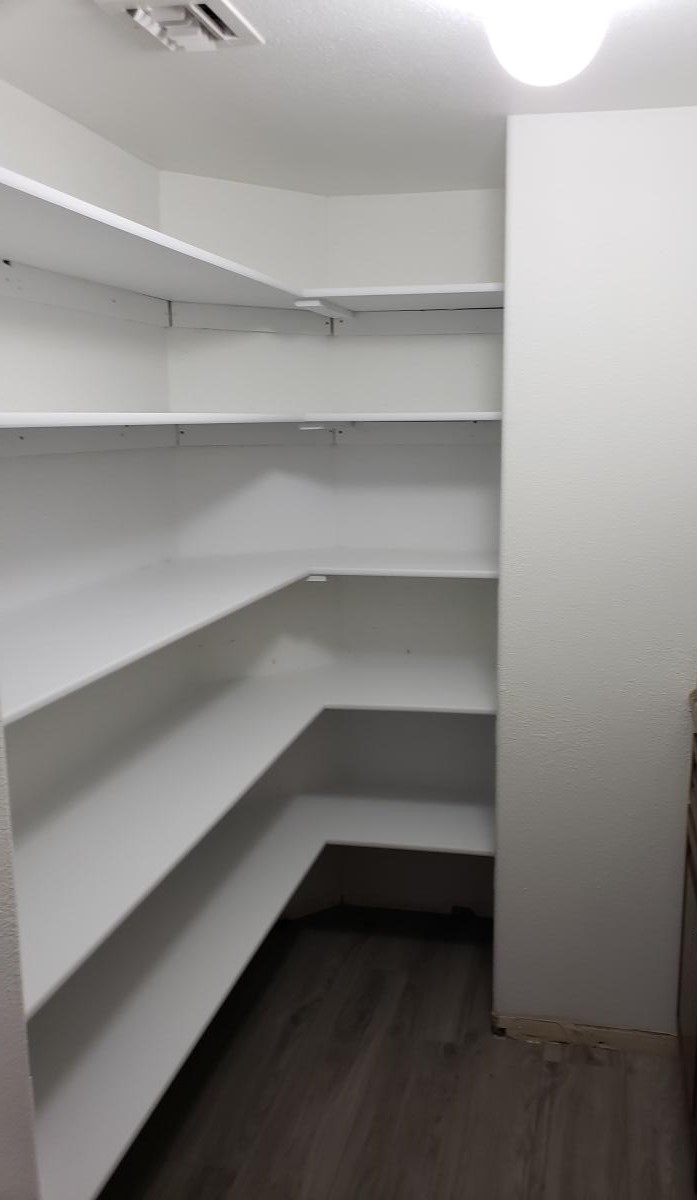
Built from Plan(s)
We enclosed an unused wet bar and then I built the shelves to make it into a pantry.
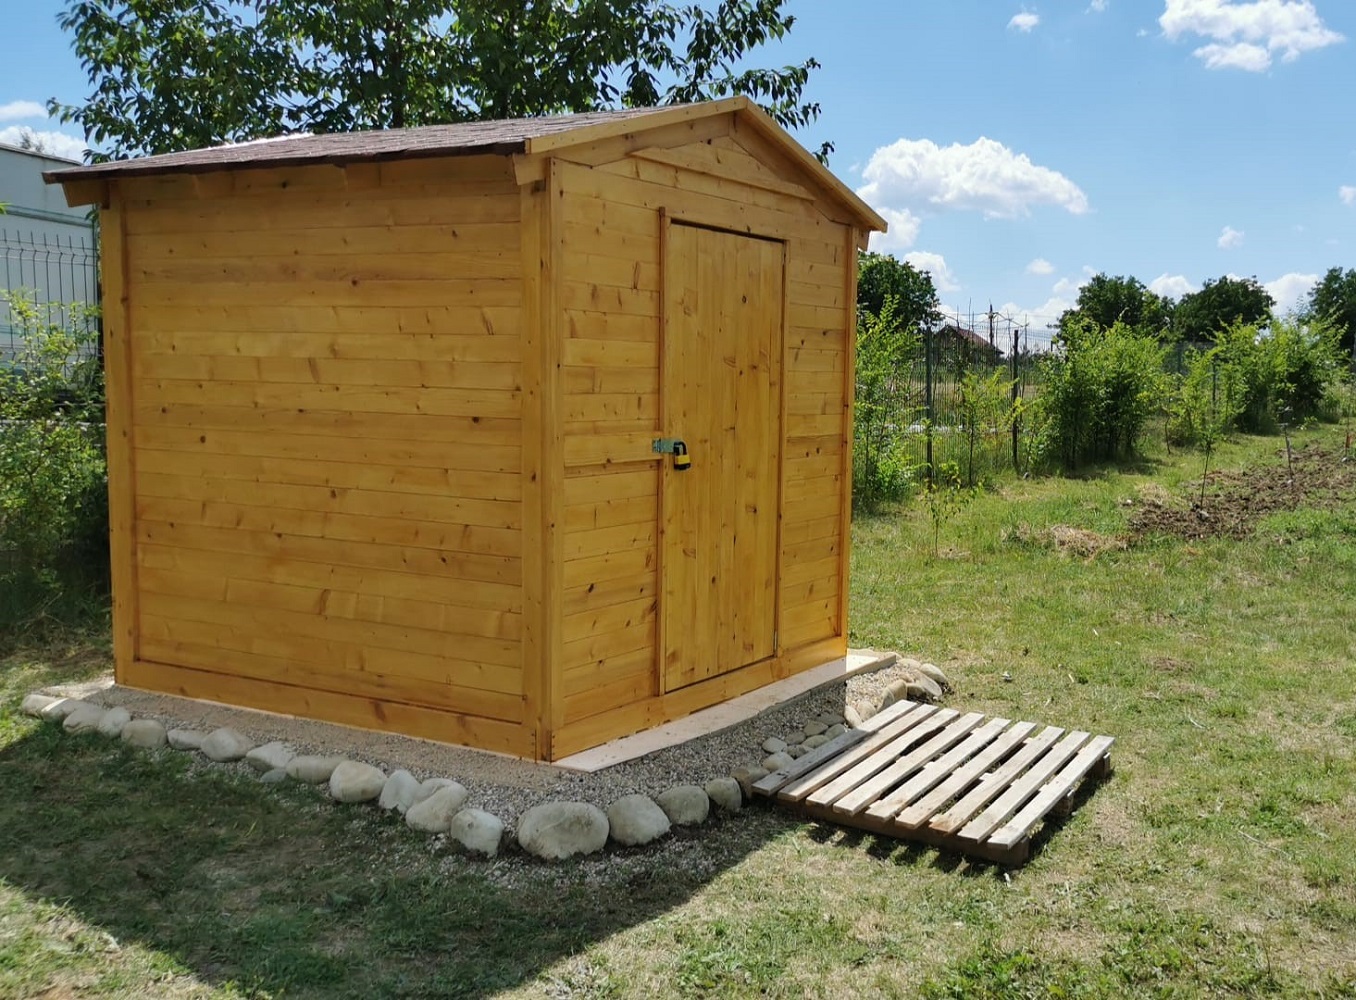
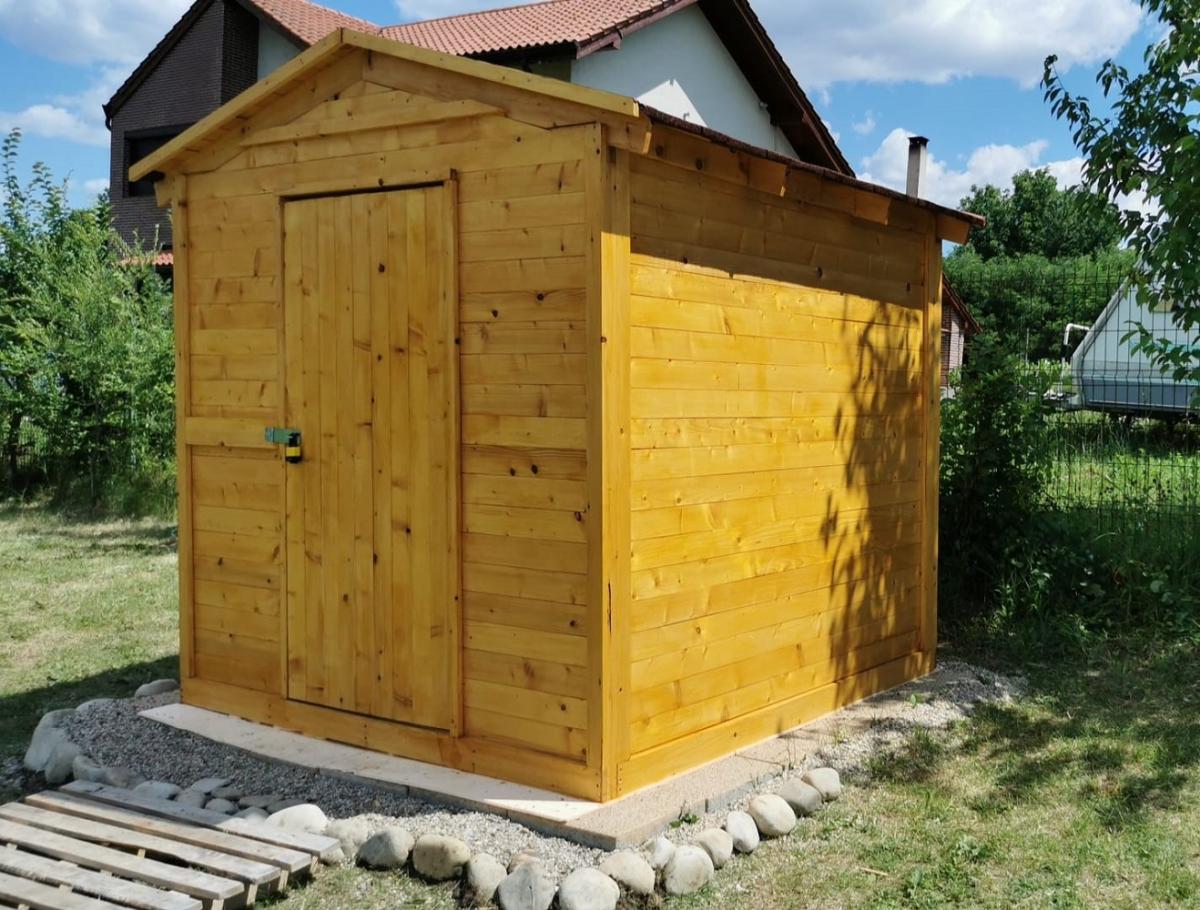
Our last project was building a tiny garden tools storage shed. We used only 1 x 4 boards. We don't have any plans, but you can watch the entire building process on our YouTube channel. We are very proud of the way the project turned out.
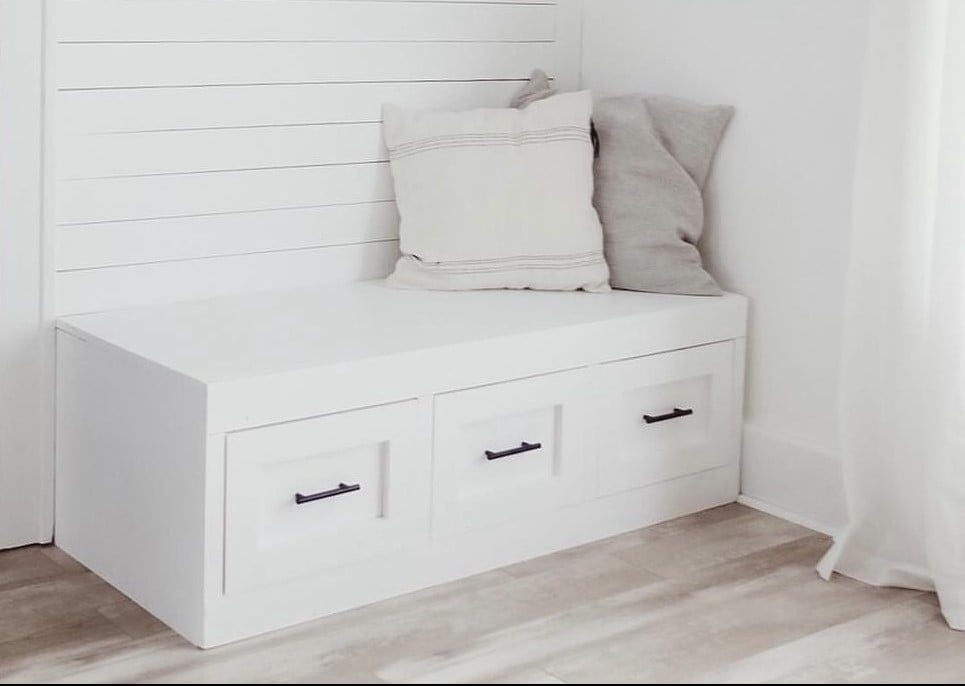
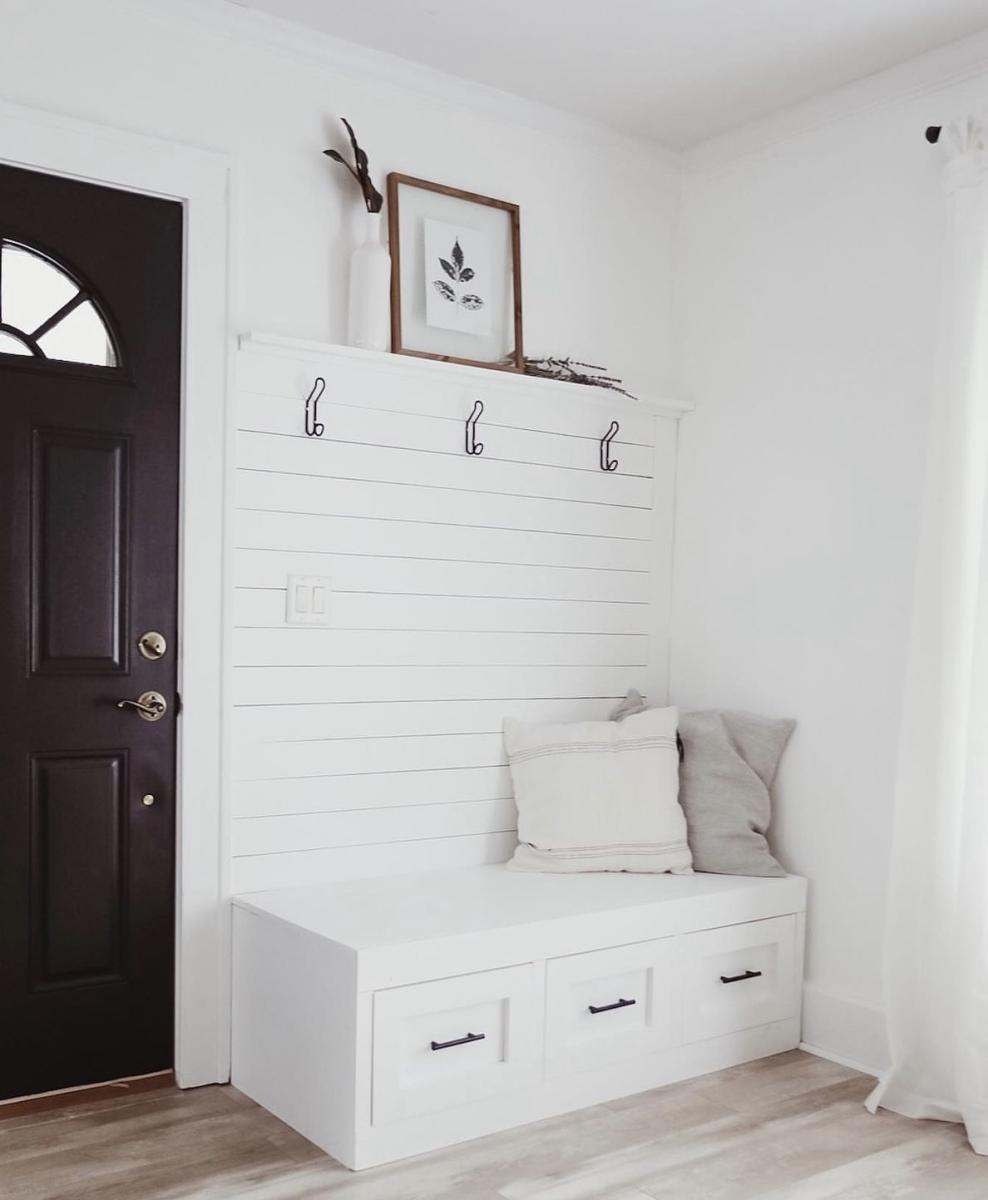
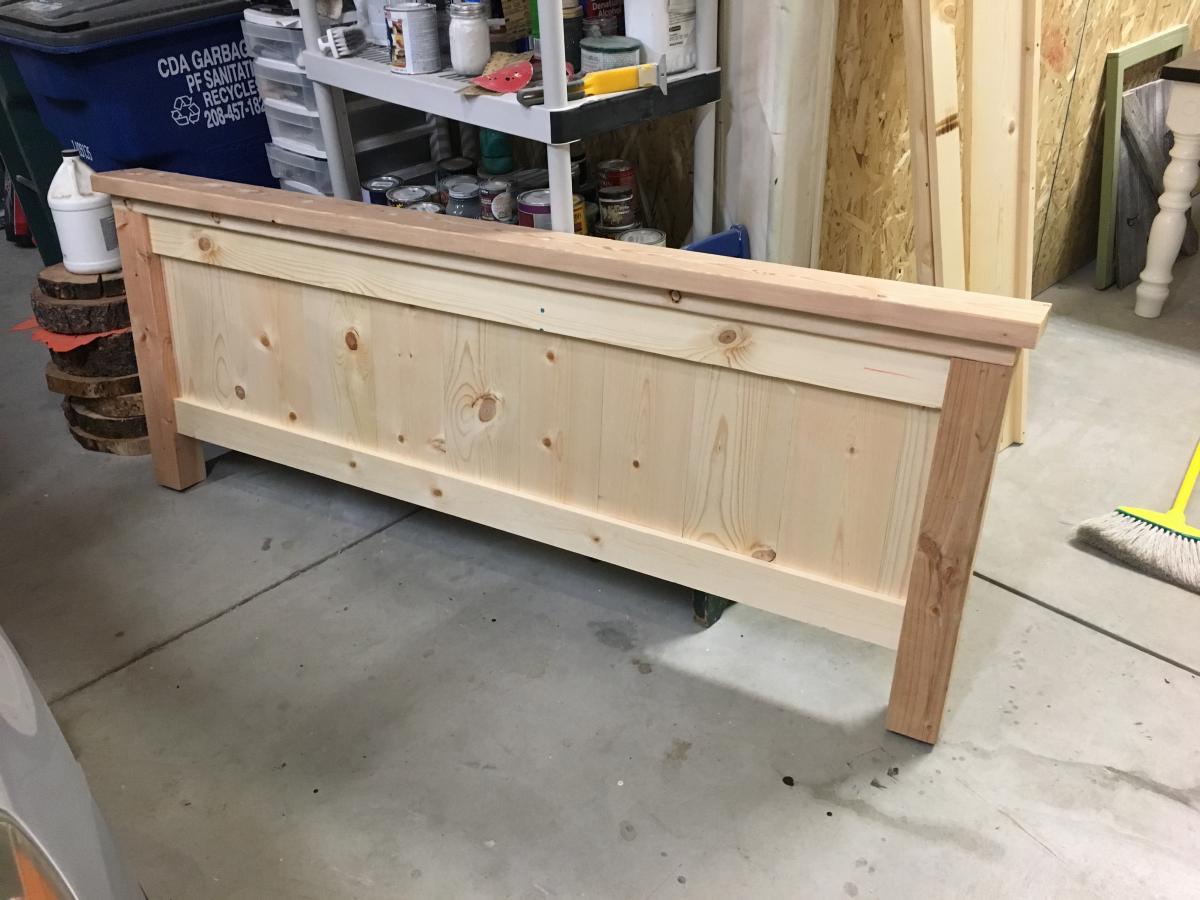
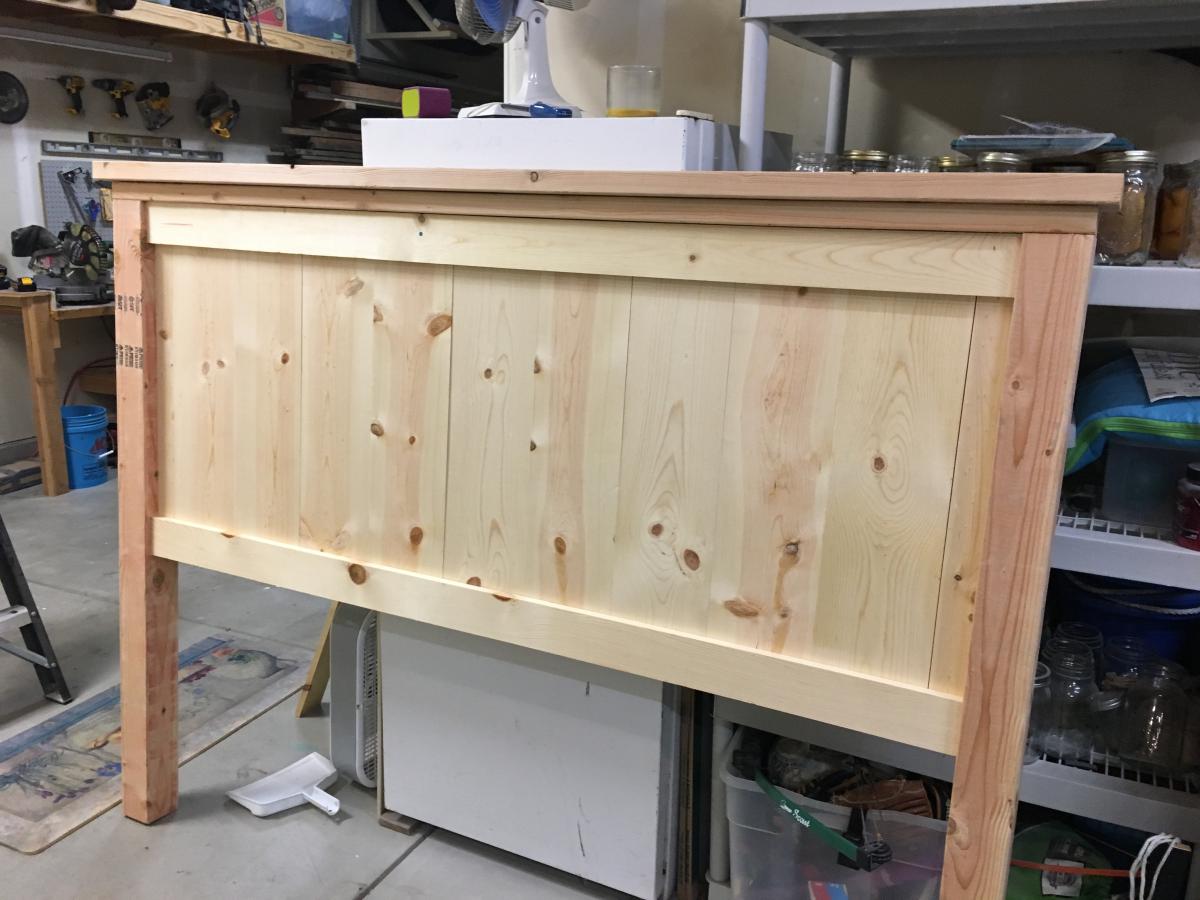
Second wood-working project to go with our shiplap wall. Pretty happy with how it turned out!
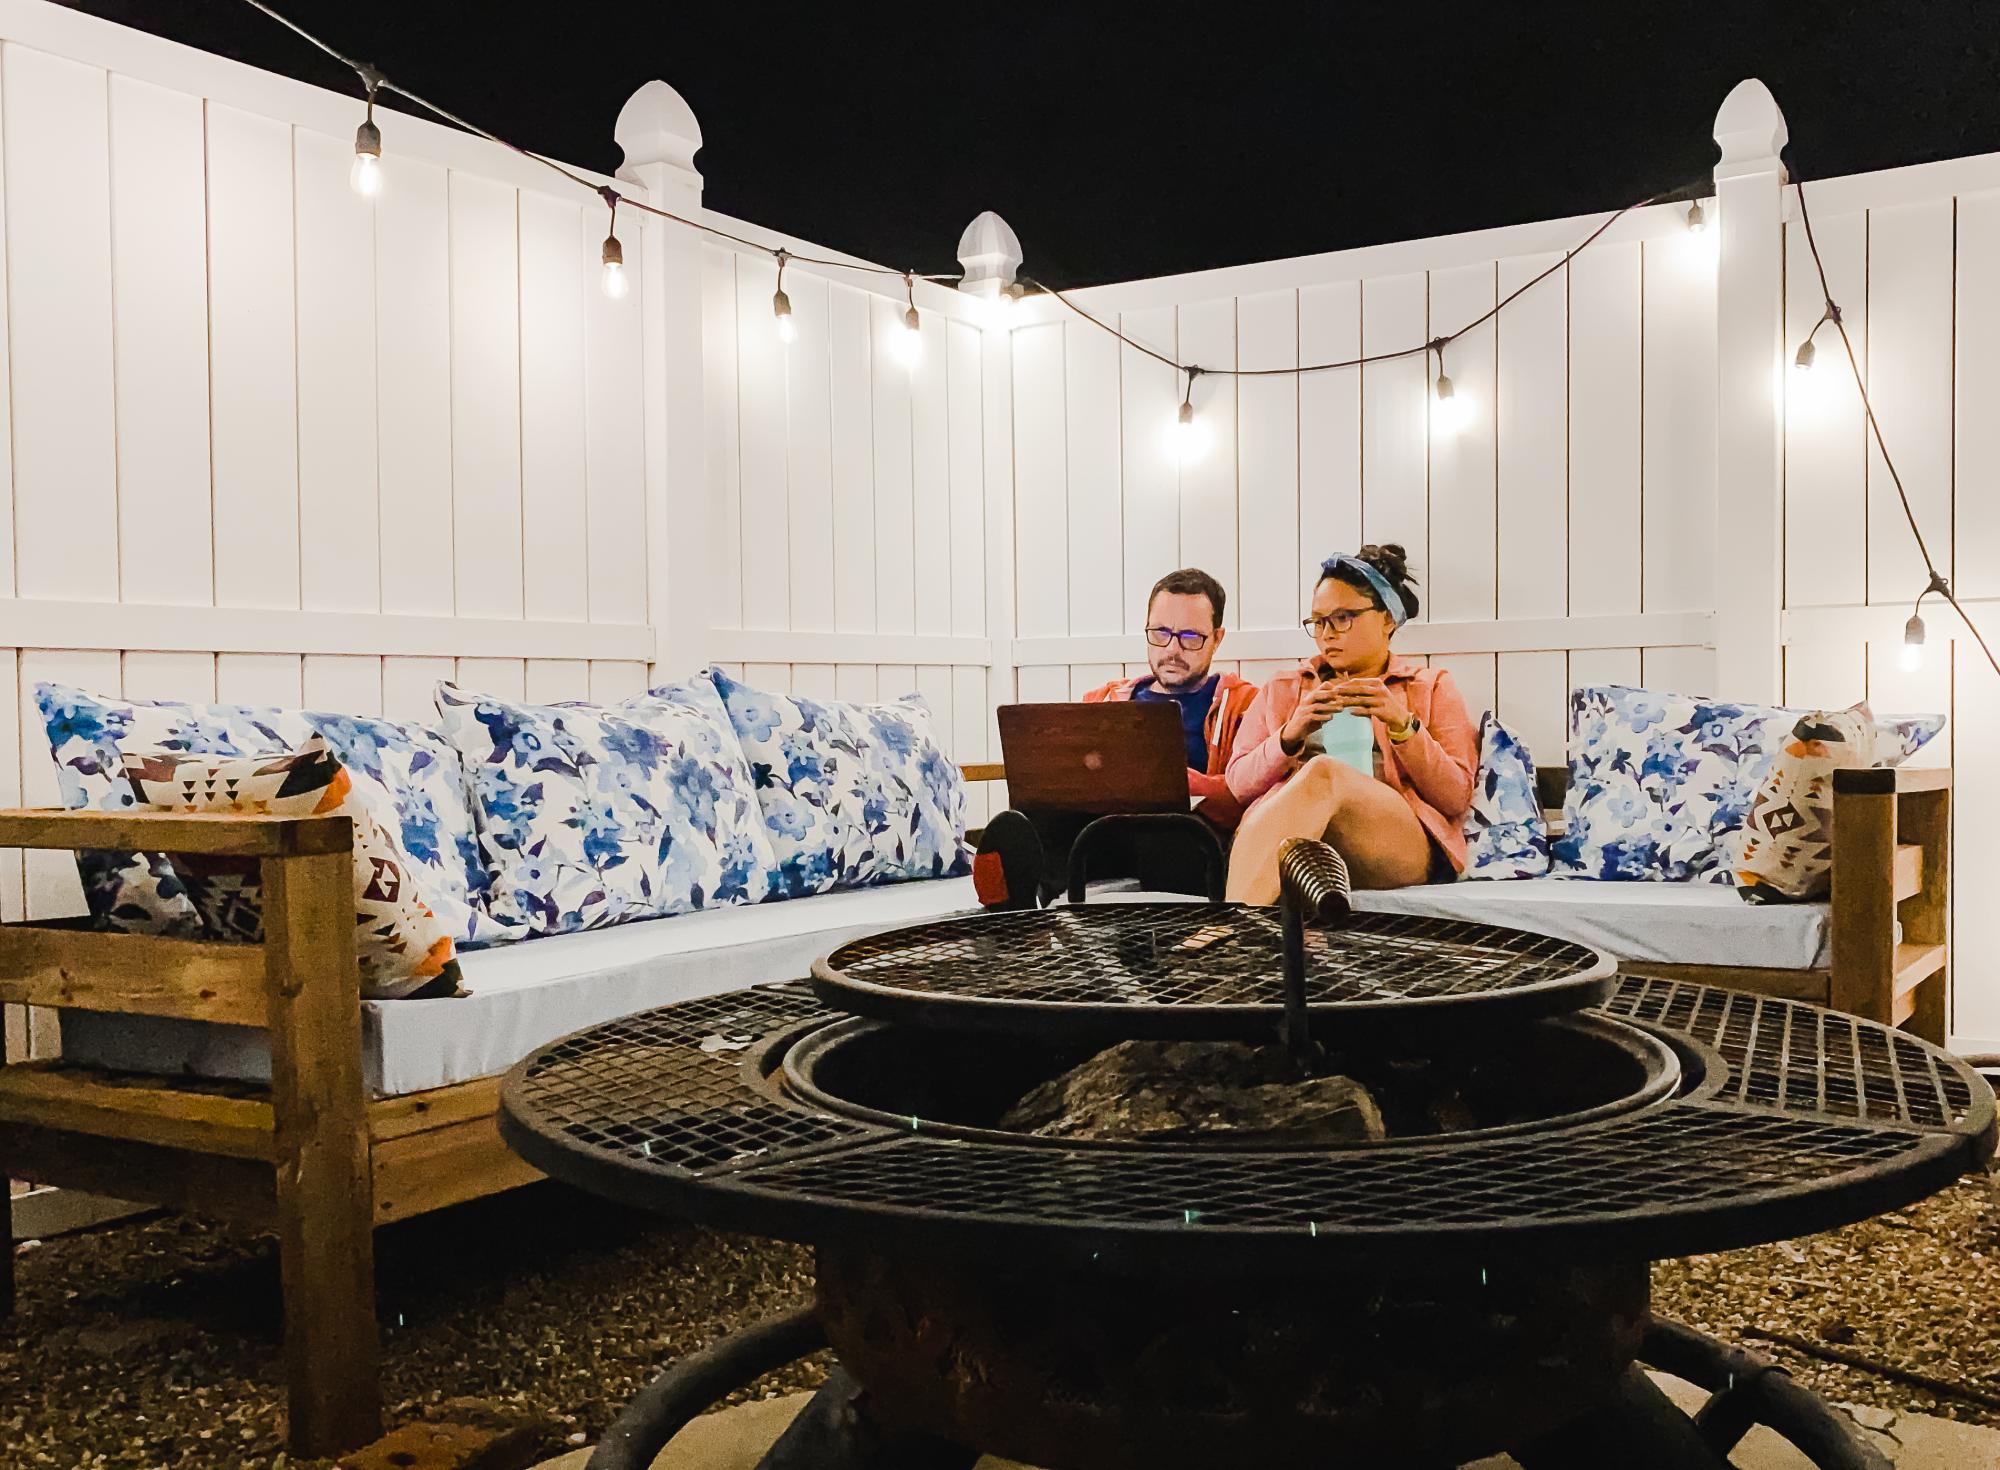
We have been looking for a deal on an outdoor sectional for a whole year. Nothing. The cheapest we could find was $899 for one that was much smaller than this one and with thinner cushions. So we upped and drove to the lumber yard and purchased the lumber on the list and got to building. The total cost of lumber was $200, the Spax screws we already had on hand. We used pocket holes for the joints. The wife made the cushions herself. She had most of the fabric on hand, we just had to buy 3 yards for the back cushions, which are made of standard size pillows. They have been sprayed with fabric protectant for outdoor use (I think she used the Scotch brand). The seat cushions are 5 inches thick (they are wrapped in silk film to protect them from getting soaked when it rains or when someone who just got out of the pool sits on them), around $100 for both. It took her a couple of days to sew the box cushion covers.

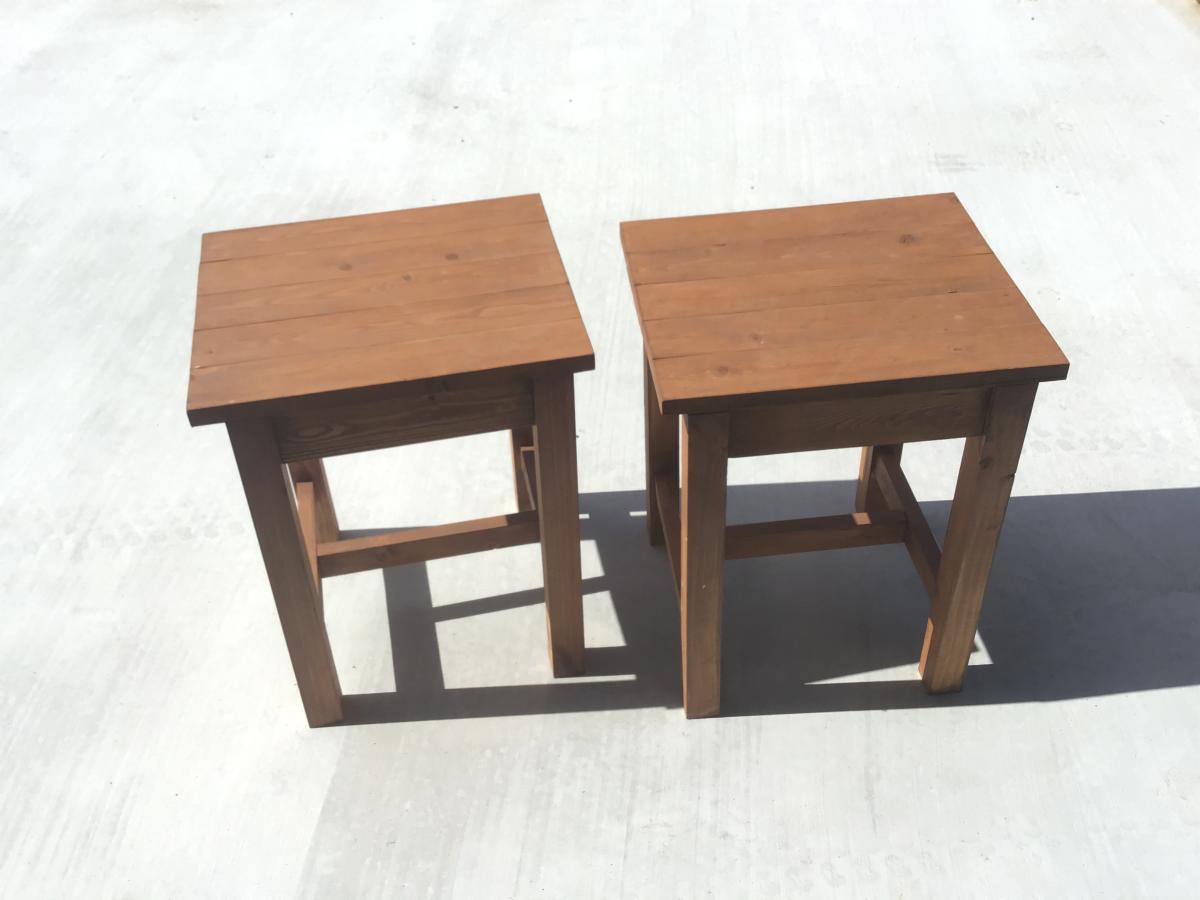
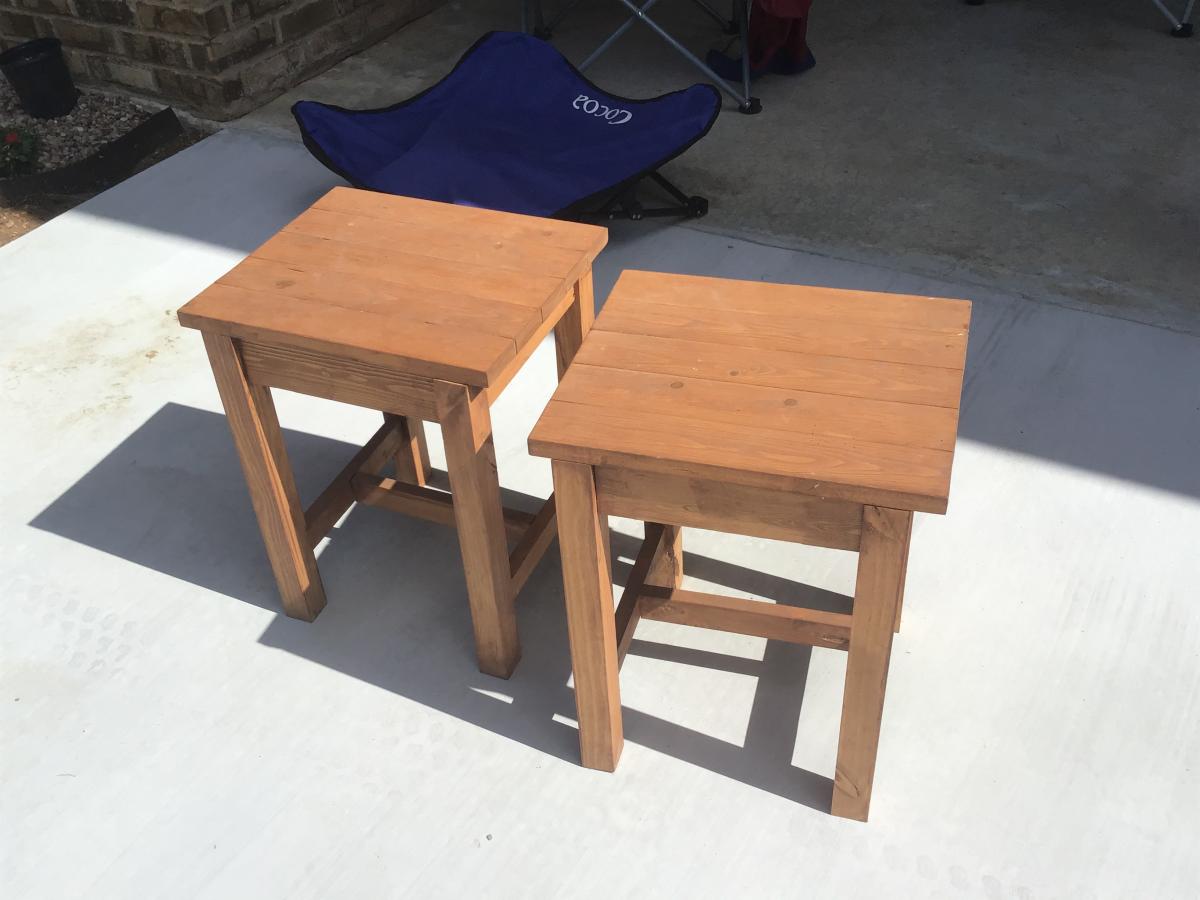
My first wood project.........

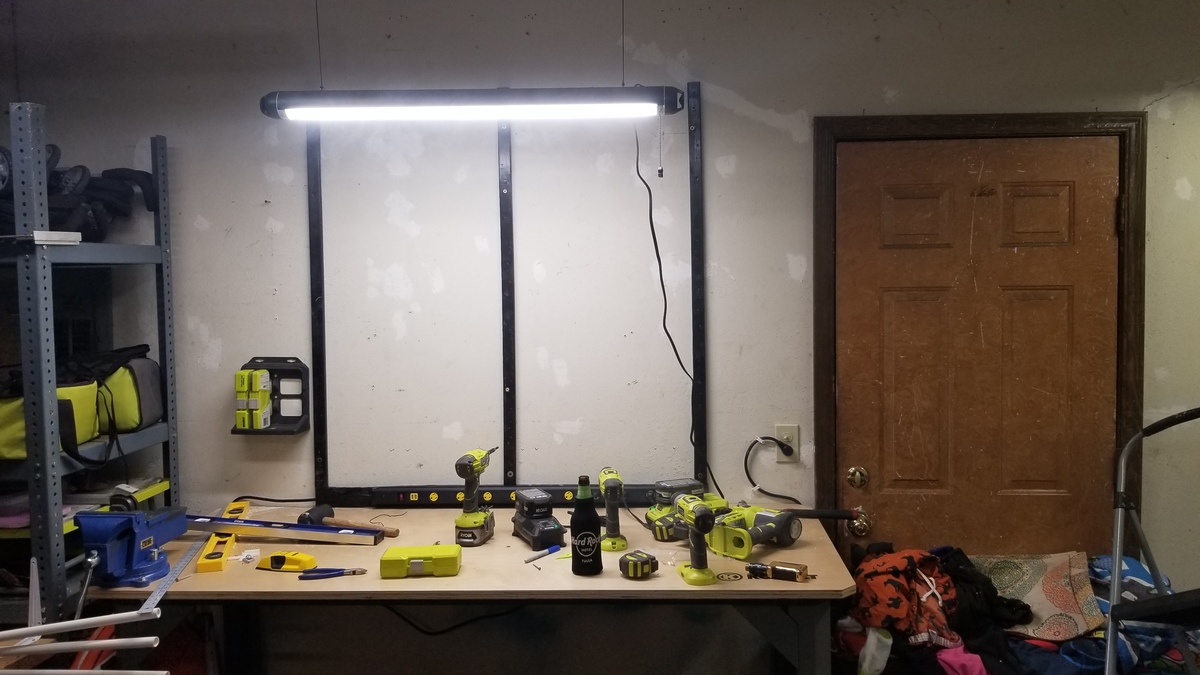
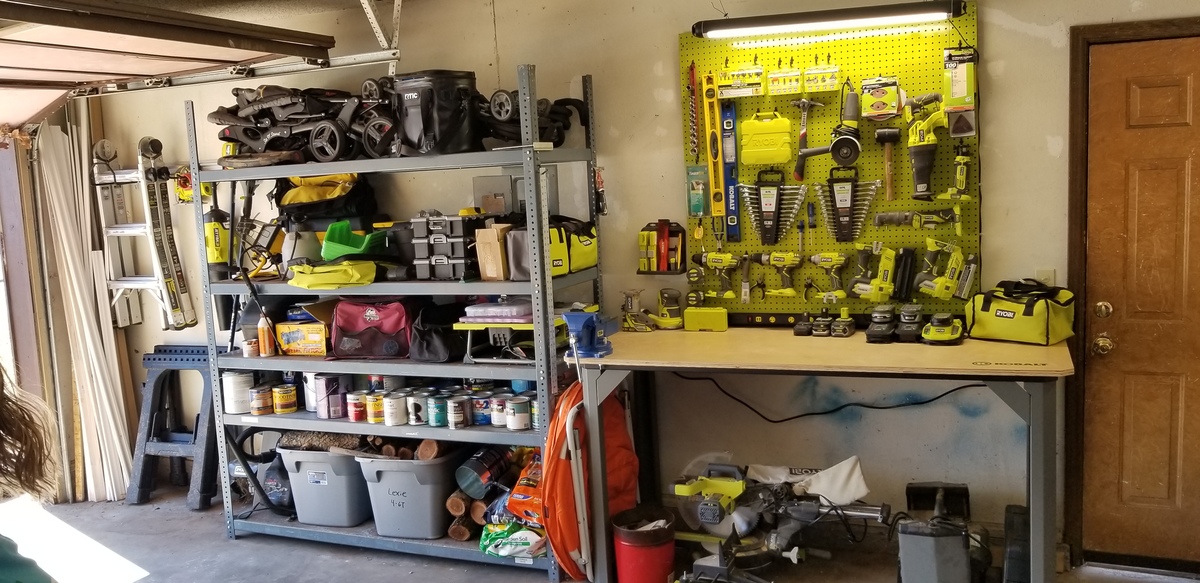
I modified this plan so I could have 4 total work areas. Total Size: 48" x 96"

Tue, 09/08/2020 - 19:42
Is there anyway you can share these plans with me!? I drew out some plans for an identical table but I think my cuts may be off! It would be so helpful.
Fri, 11/06/2020 - 12:47
Is there a full update post with instructions for the table shown?
Tue, 12/20/2022 - 22:03
LOVE this! Just what I'm looking for! Can you tell me what you used for the top?
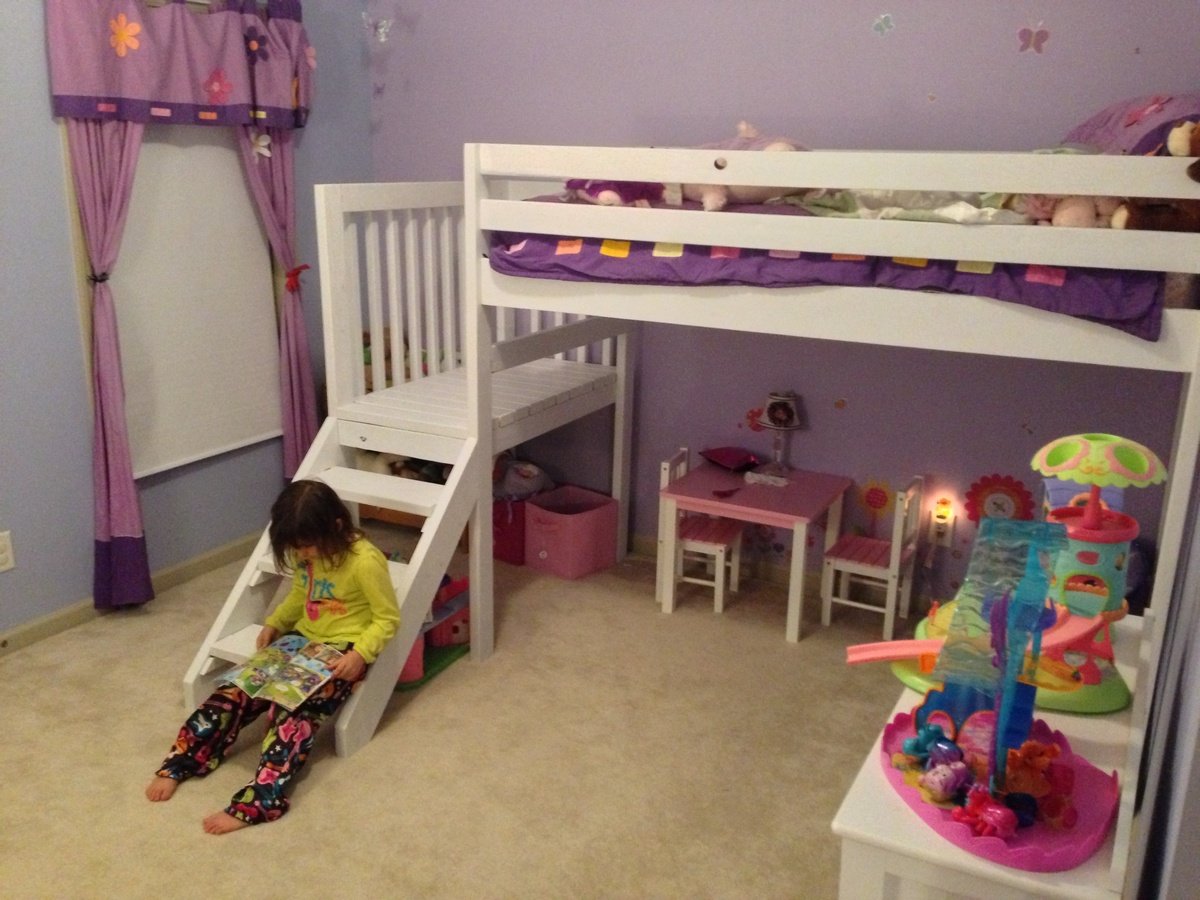
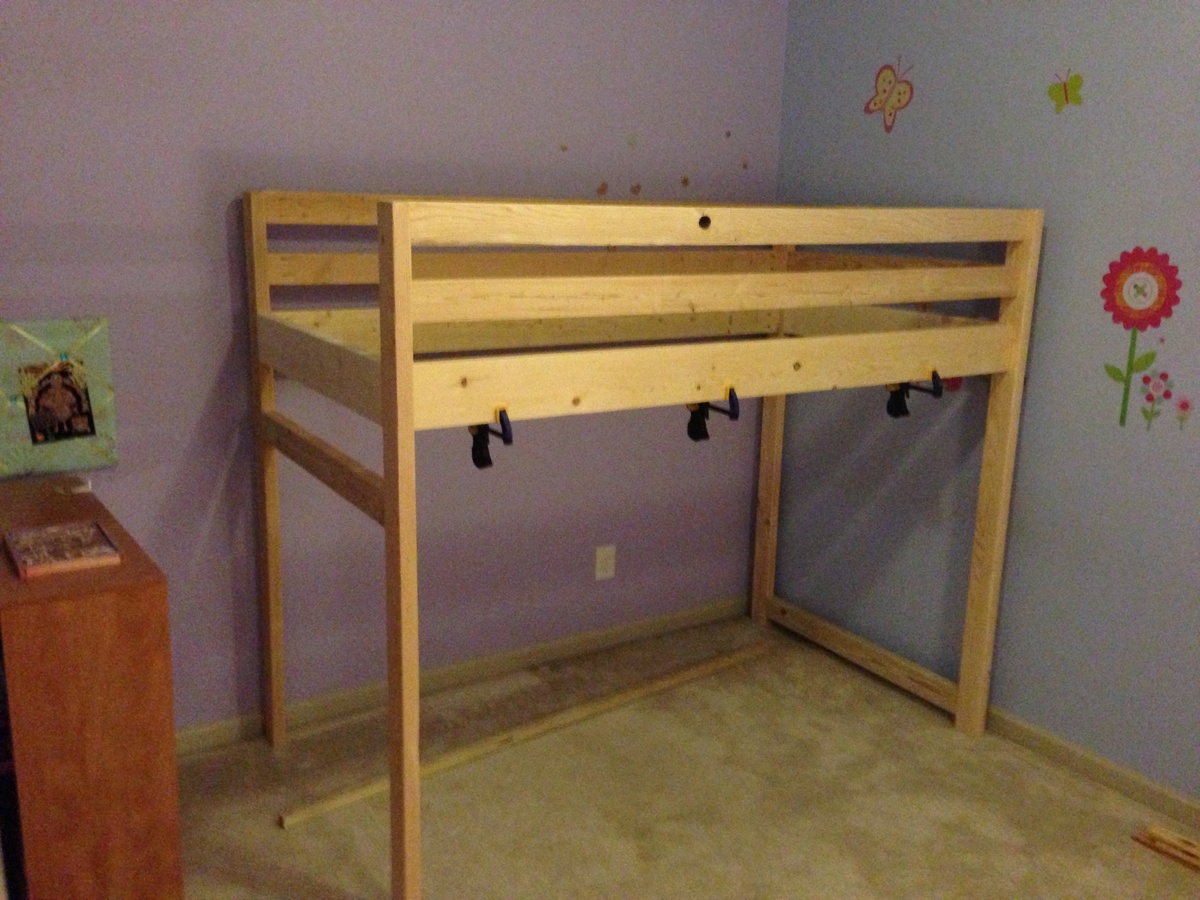
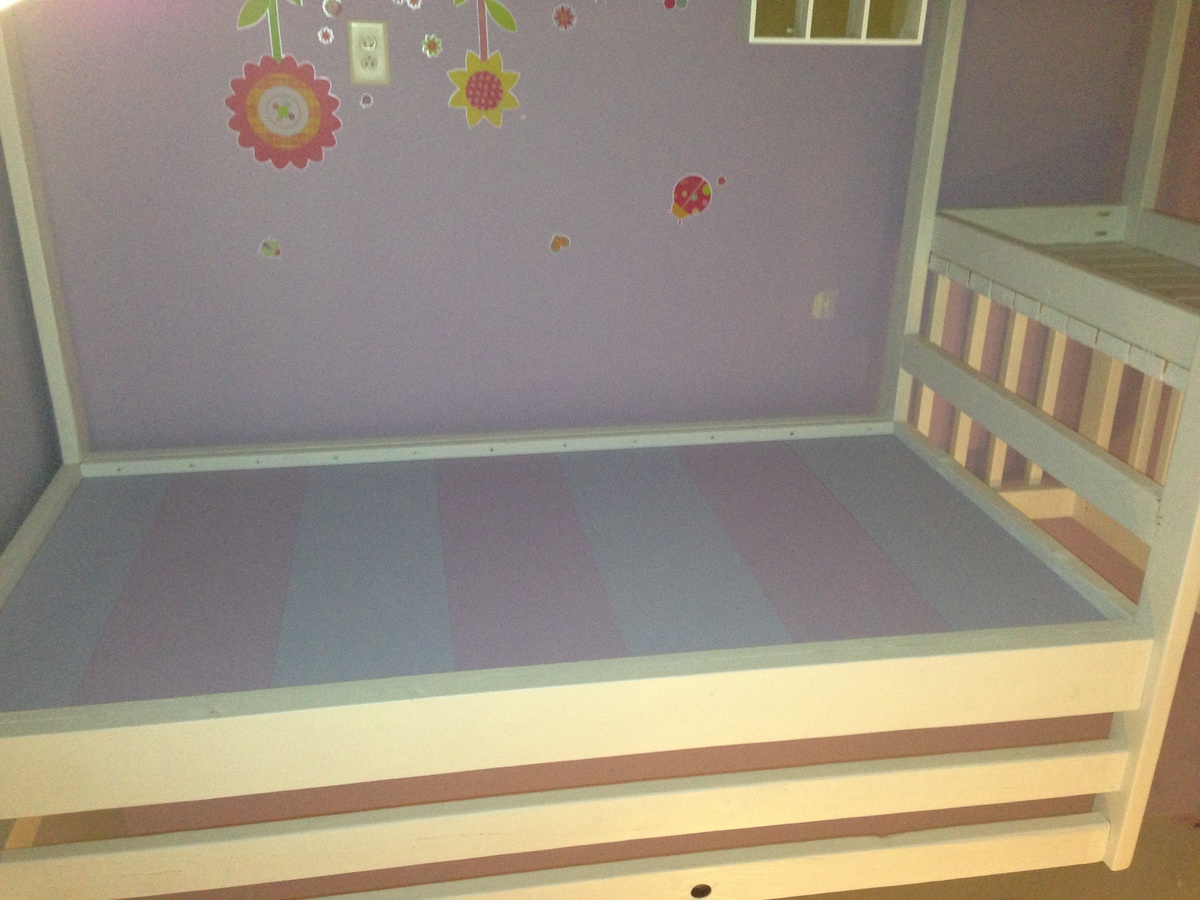
It was time for my son to move to a big bed. So he got his sister's bed and she got a new loft bed. From the pictures on your website, she just loved this bed. I was able to throw it together and get it painted in a weekend and she was sleeping in it by Monday night. I added the rails because we weren't able to set it in a corner, and now that it is Xmas time we strung lights on them. We painted it white. For the mattress support I used 3/4" slats of MDF and used left over paint from her walls to paint the exposed side. Over all it was a pretty simple project, gives her more room and my daughter loves it.

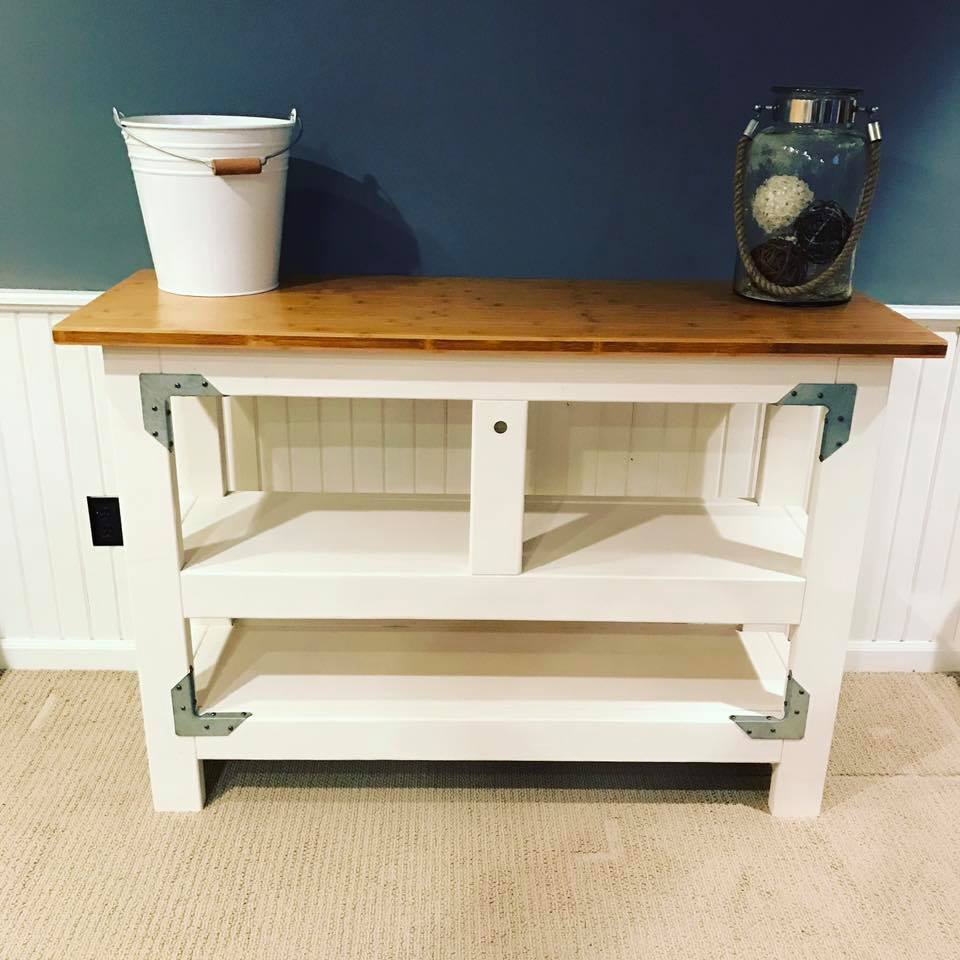
I borrowed a few ideas from multiple plans to make this prep station for a kitchen with very few countertops. I really like the strong tie hardware and I purchased a bamboo benchtop from Home Depot to finish it off.
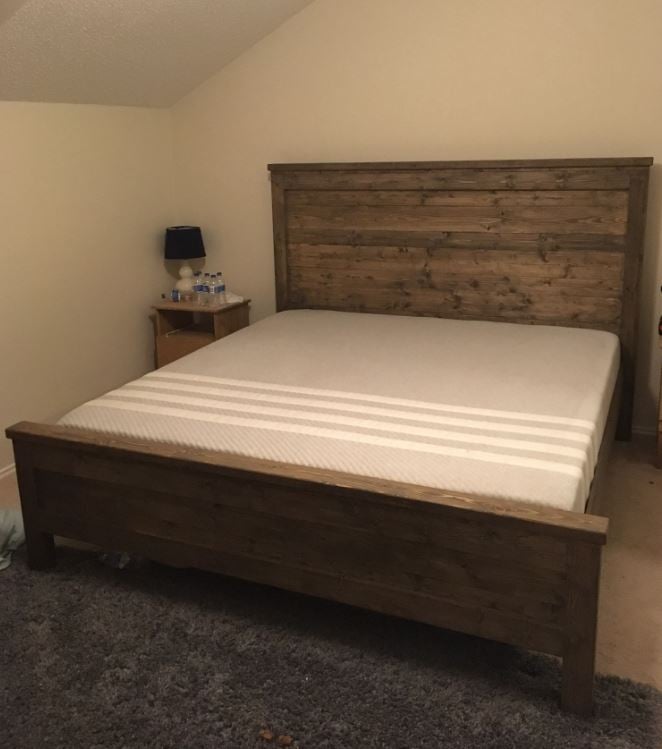
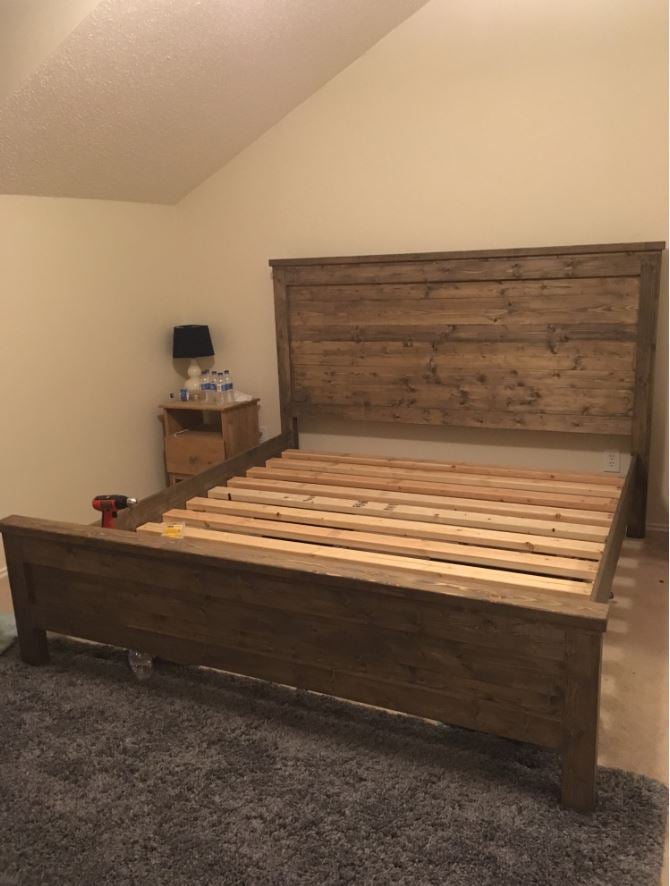
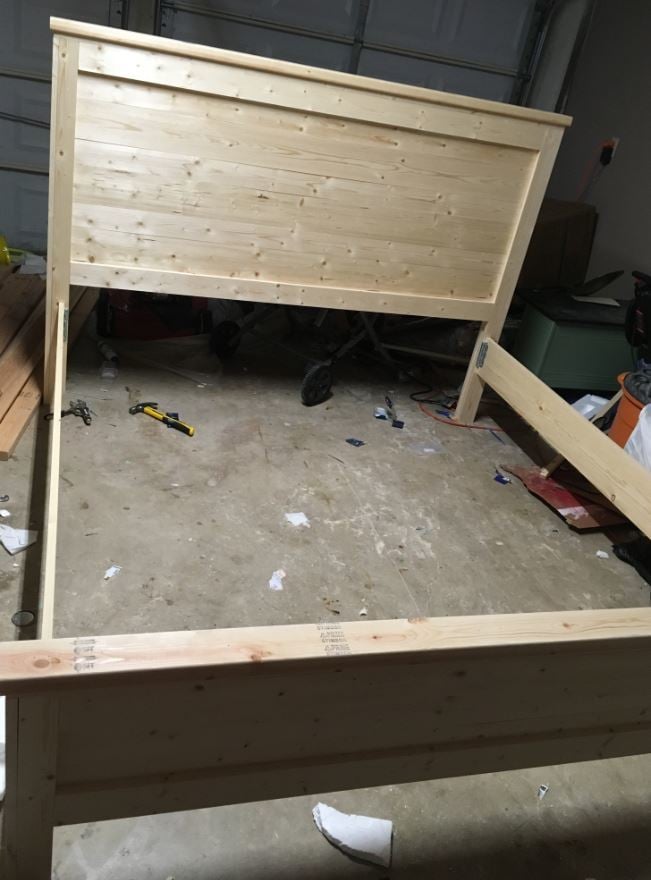
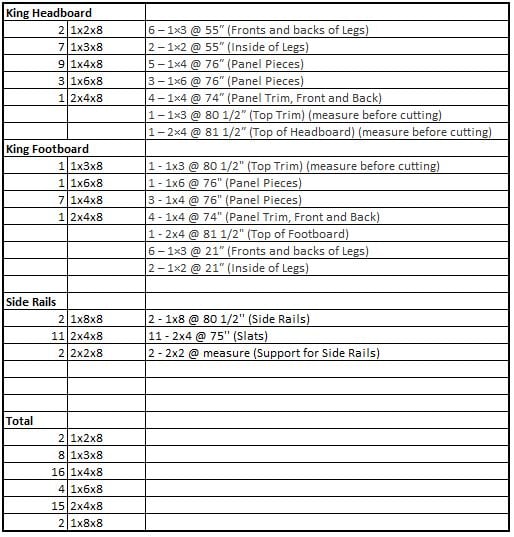
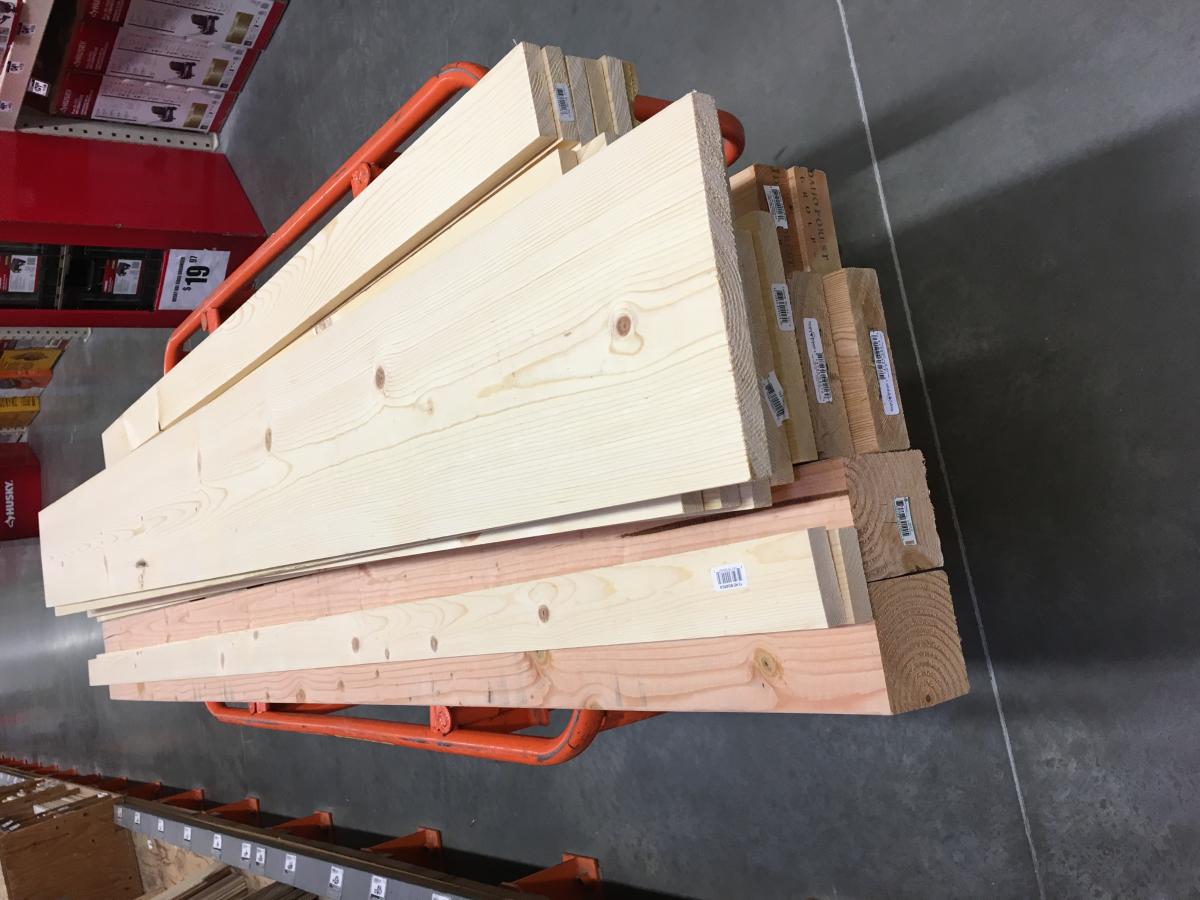
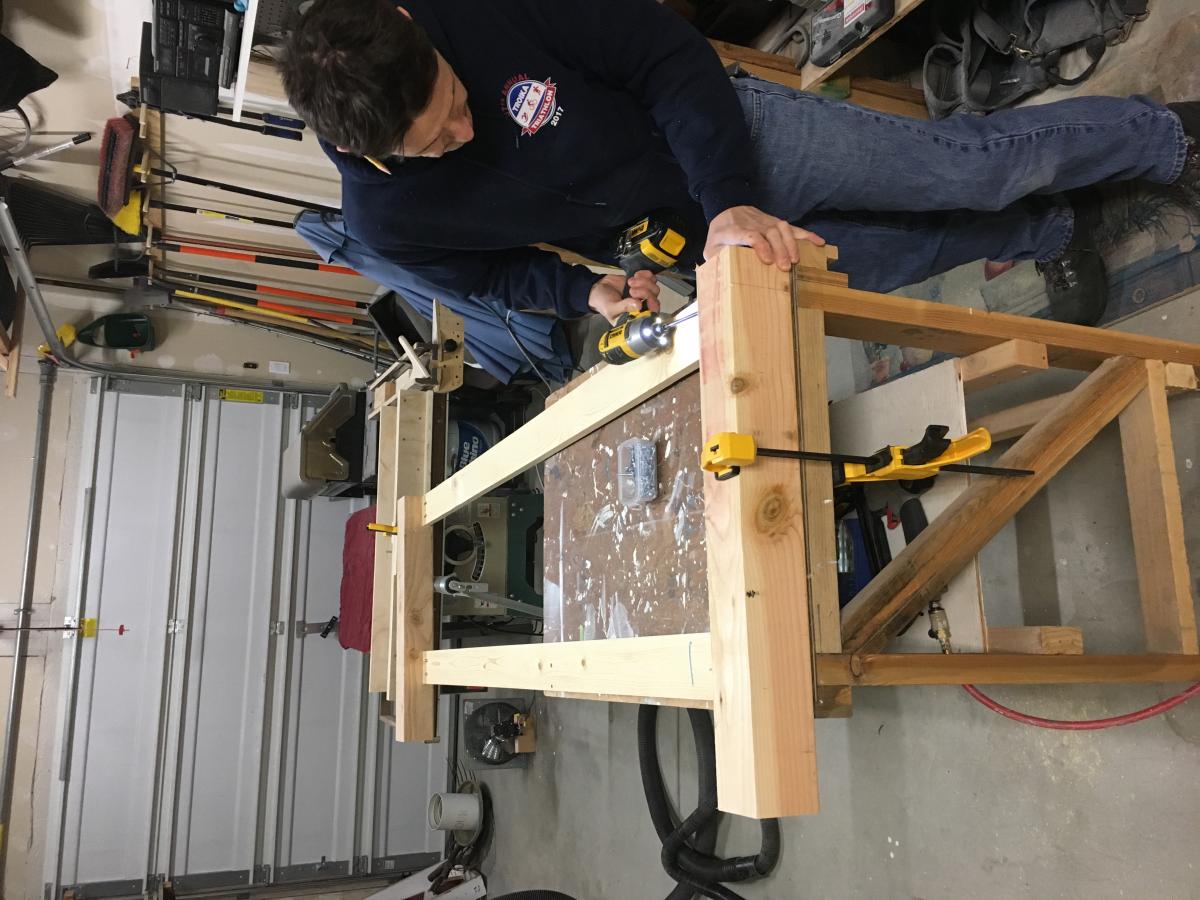
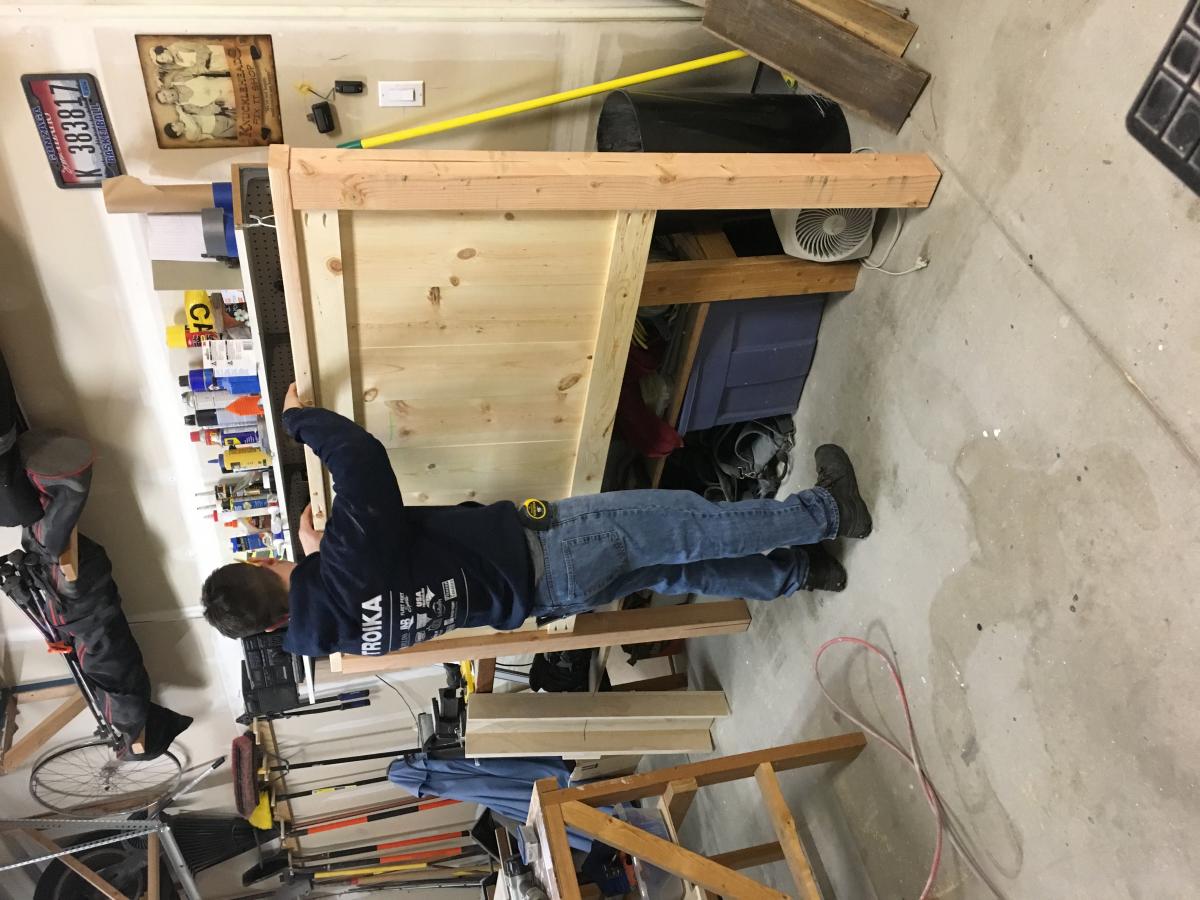
First of all, thank you to the site for this plan. The headboard specs were spot on. I was interested in making a footboard as well, and you actually will end up with a few scrap pieces that will help you build the footboard (the 1x3's and 1x2's). My footboard ended up being about 23 1/4" high. For reference, the mattress in the photo is 10". I included a picture of the total boards you will need to buy to do the headboard, footboard, and side rails (I used 8 inch boards for the side rails, not 10 inch, but those could be interchanged). One thing to note is the plan calls for pocket hole screws but these are not necessary. I used 2" brad nails, 1 1/4" brad nails, and 2" screws (for the slats and the support rails on the slats. You could use 2 1/2 inch for the slats but the support rails need 2".). Not included in the picture I included is another 2x4x8 that I bought that I placed three scrap 4x4 posts that I had under the middle of the slats for extra support. I also bought steel bed rail fasteners ($11.30 from Amazon) to attach the side rails to the headboard and footboard. They worked great and the bed is extremely sturdy. Can't budge it at all. I used the common whitewood boards from Home Depot, which are all the correct width - the fur boards are cheaper but are not the correct width, you would need to adjust the plans if you were to use those. Overall I am very pleased with the bed. Please ignore the half dozen water bottles in the photo.
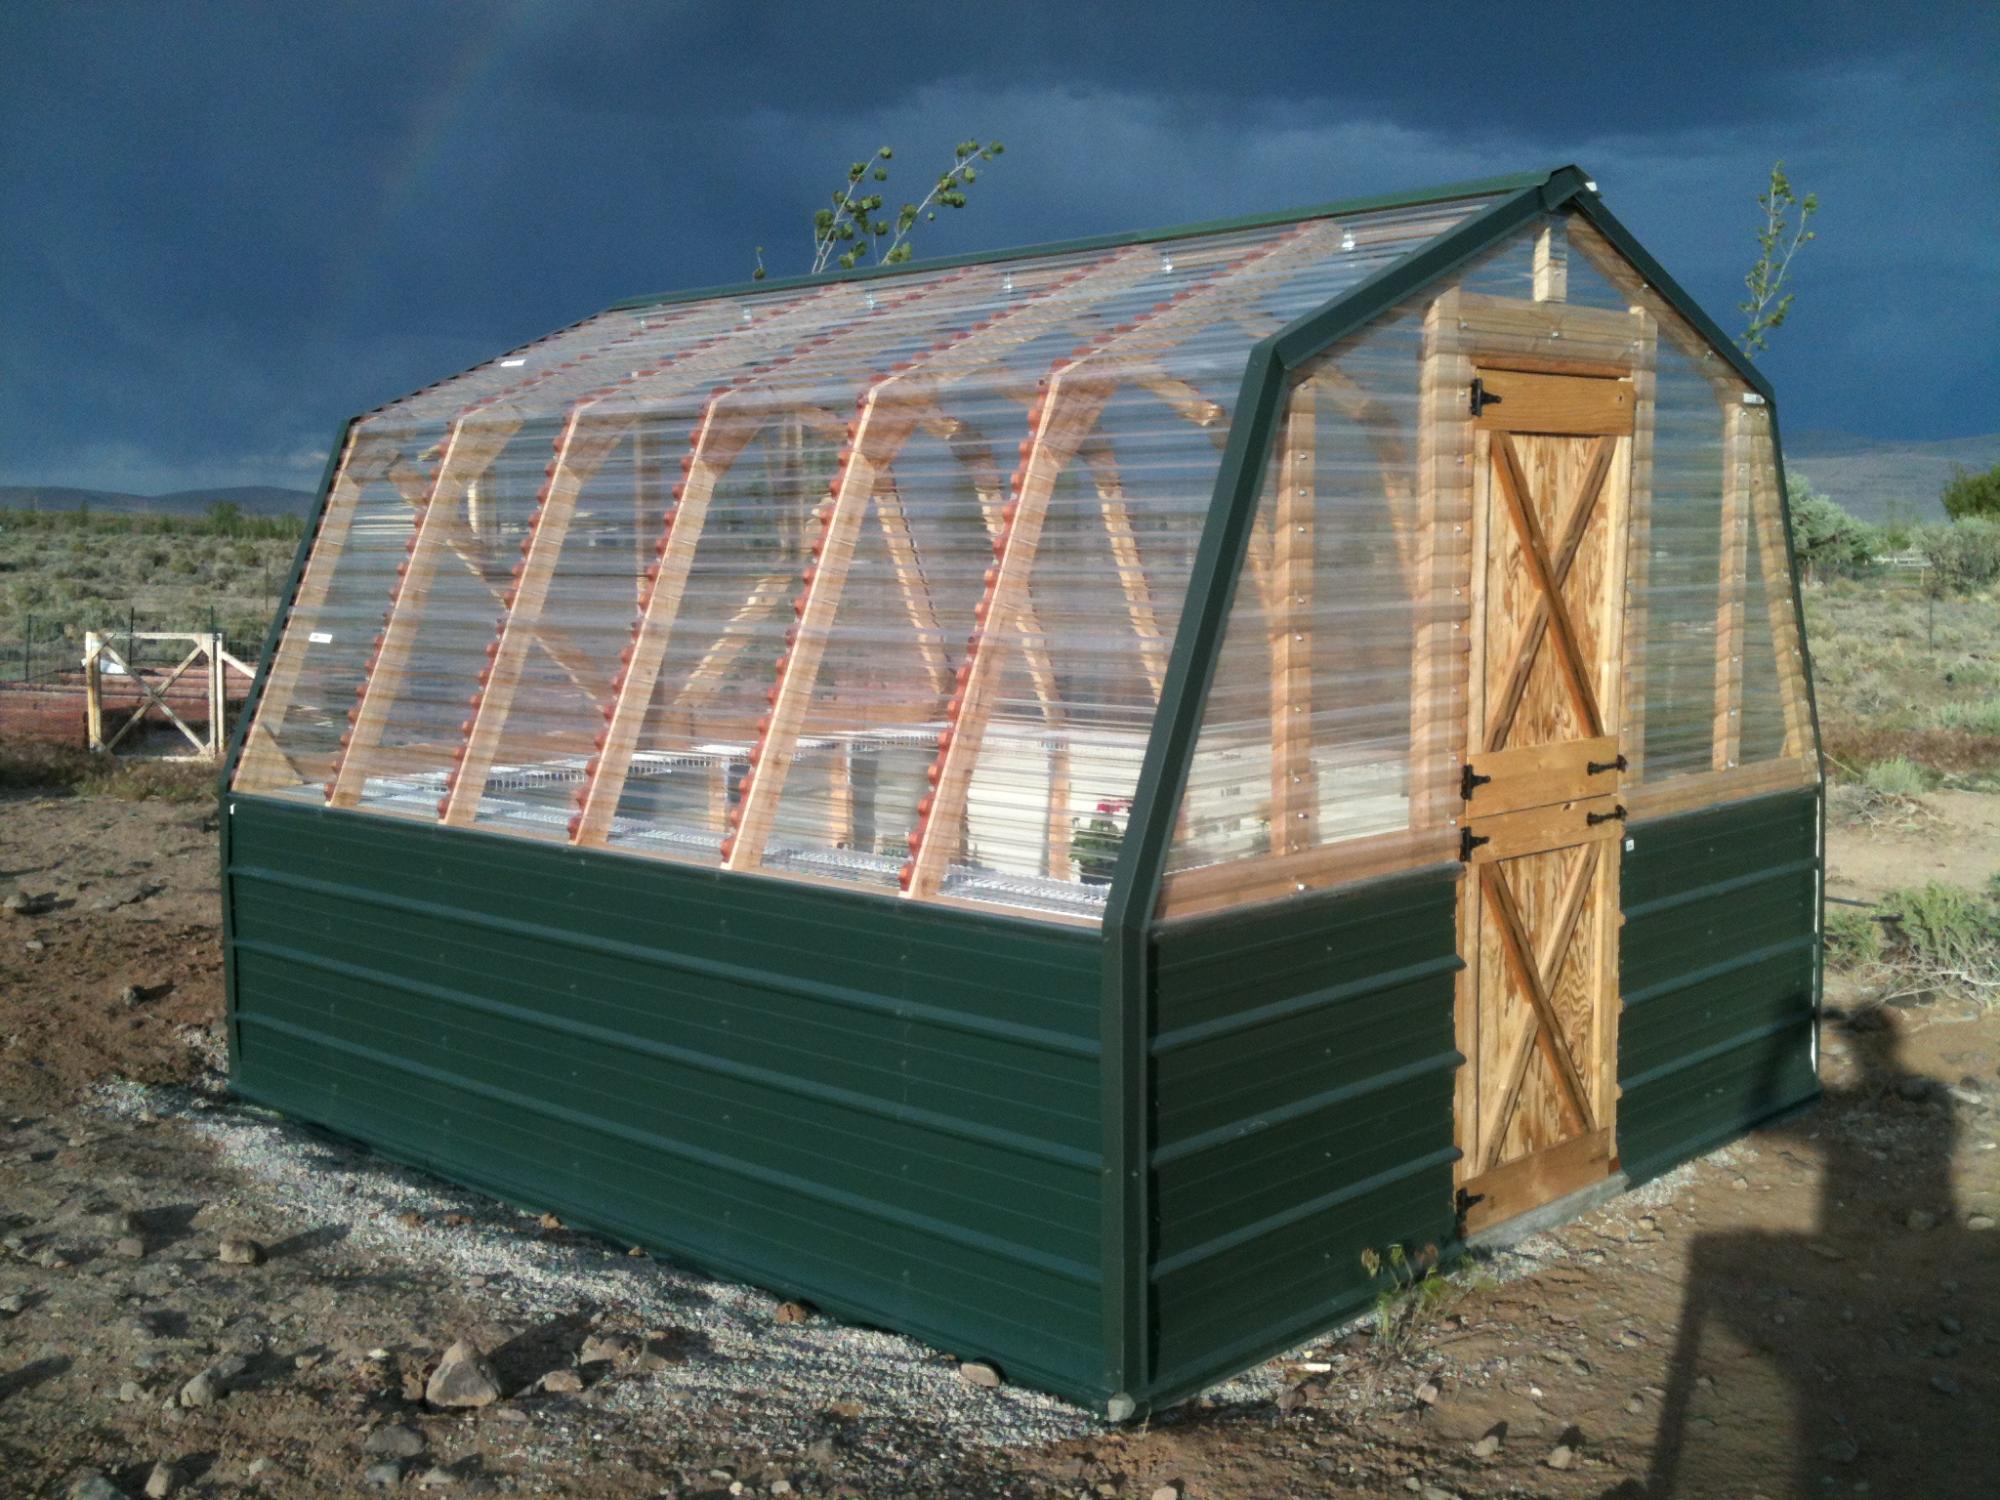
We built the first one about 8 years ago, and then the wind flipped it over and scattered it all over the back part of the property. I then dug footings and anchored the second one down; I was able to save the Dutch Door I made for the first one. Thanks for the plans!!!
Fri, 04/08/2022 - 10:35
That's not going anywhere! Thanks for sharing, it looks amazing!

I’ve been working on building up to this playhouse for a while. Just got the doors on and am pretty pleased with what’s my first project of any size. Built on top of a modified version of the playhouse deck with a to be added (hopefully) swing in front. Color selection by the end customer (who’s 8). Modified to add 12 inches for a 5’ doorway. Thankfully I caught that at the last minute for the kiddo. Still a menace if I forget to duck. But super roomy once inside.
Sun, 06/12/2022 - 09:04
Love the shades of blue, thank you for sharing your awesome creation!

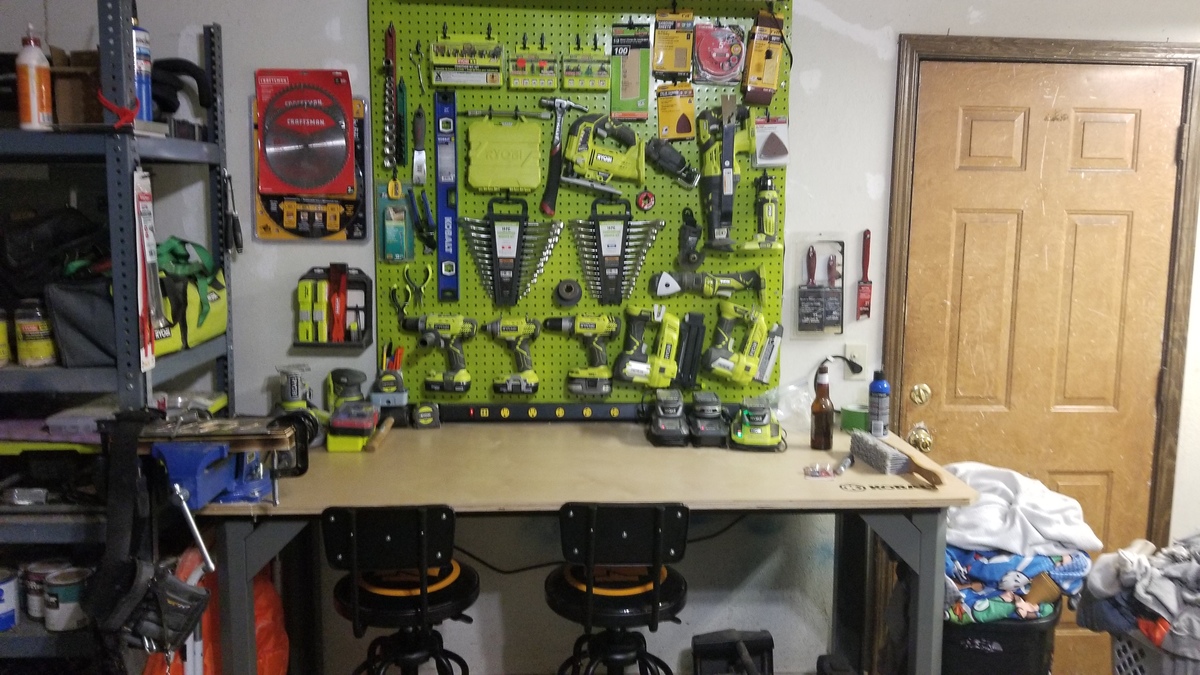
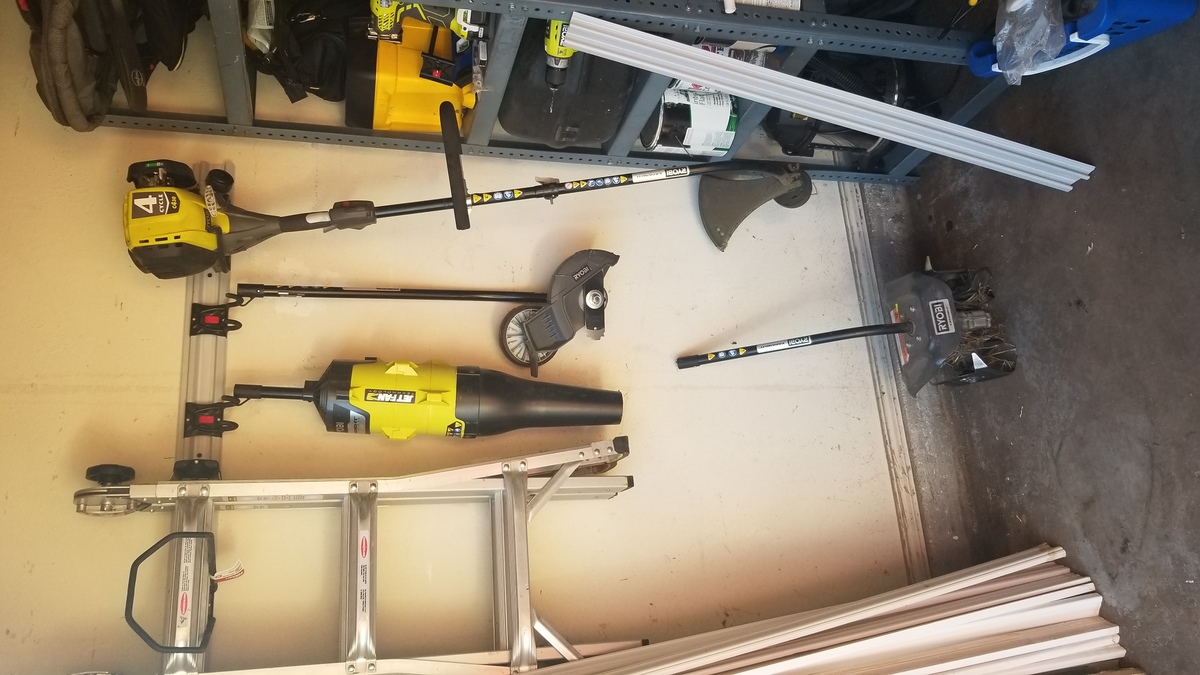
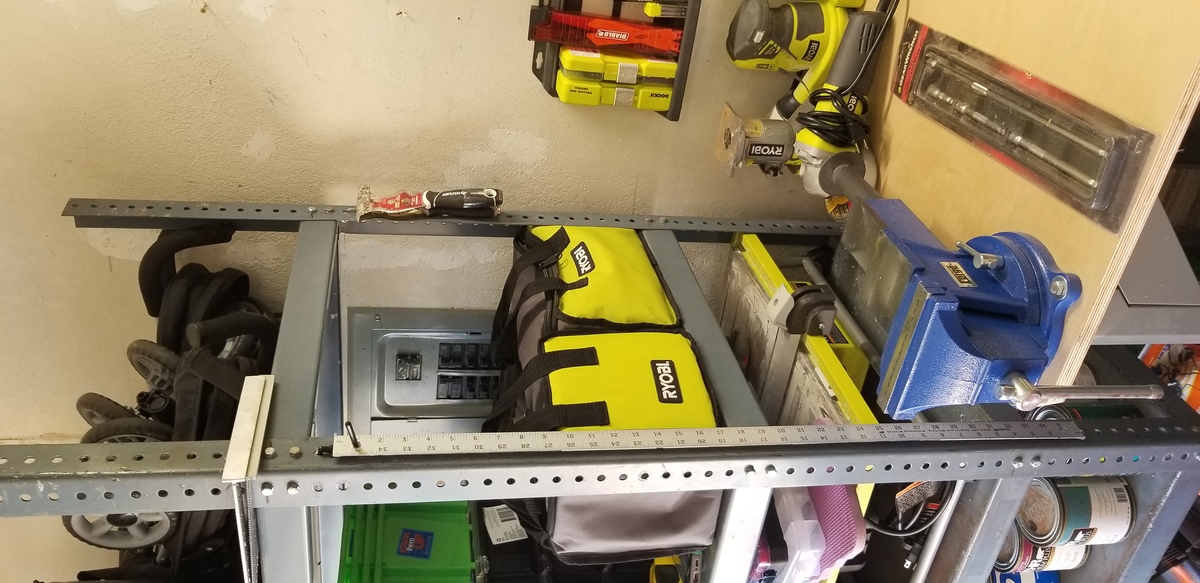
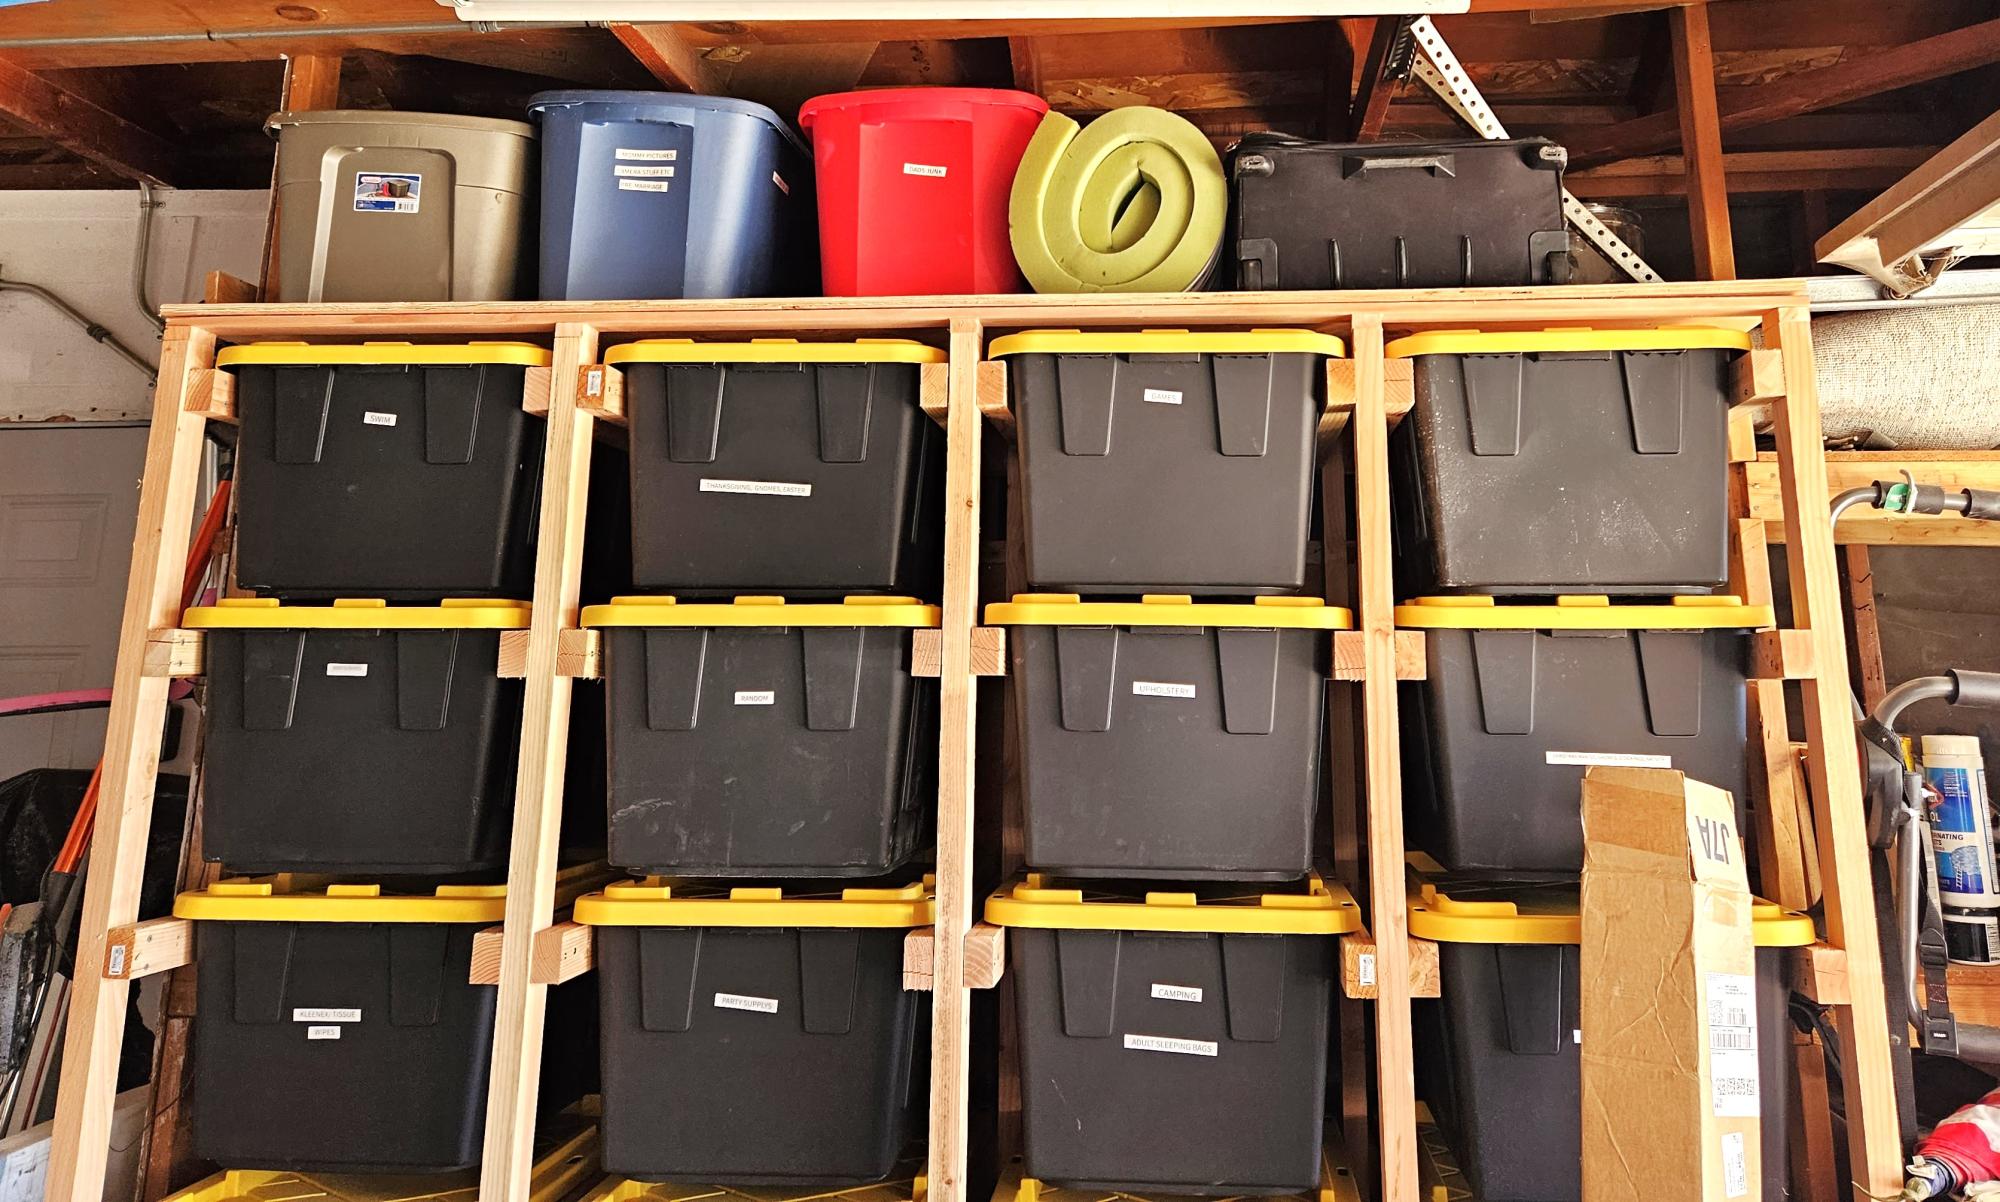
Needed to do a little spring cleaning in the garage and organization.
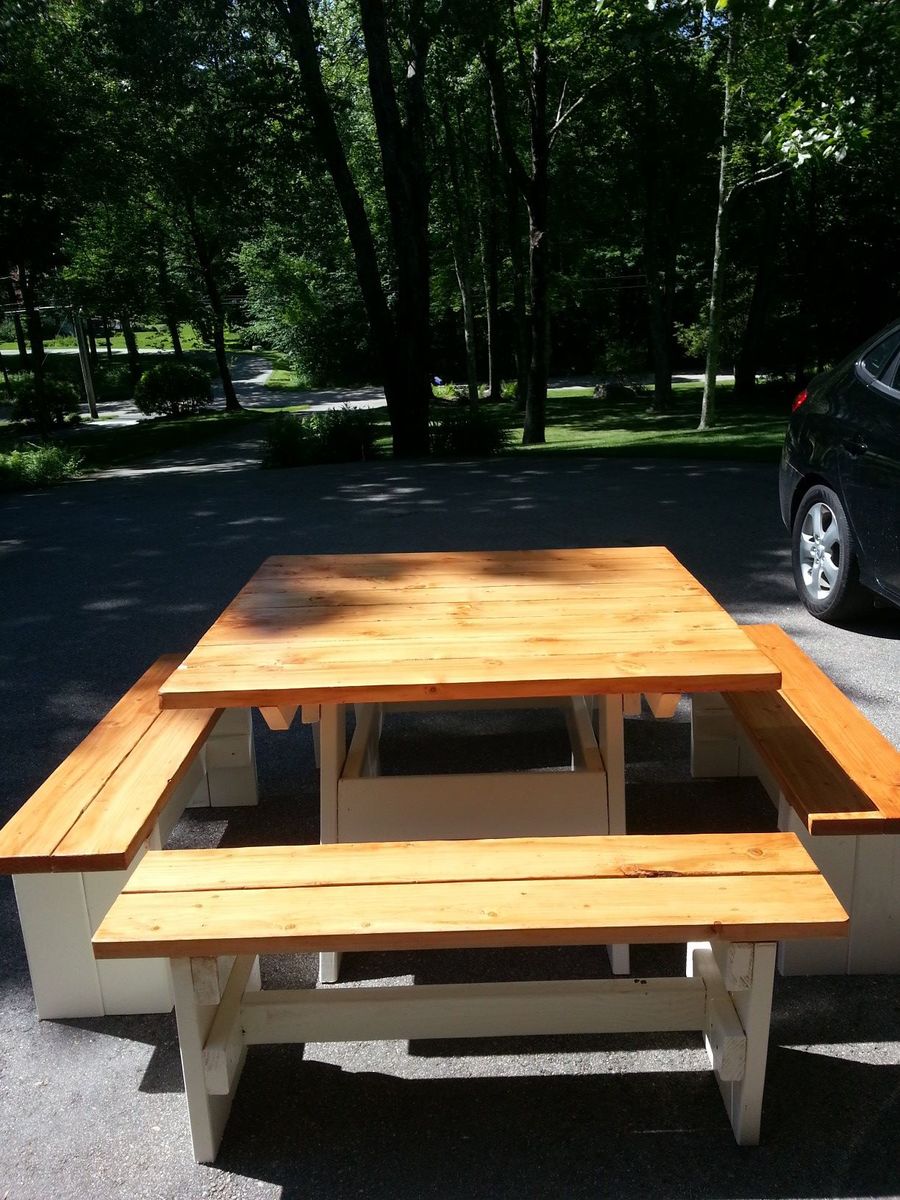
Picnic table and benches from an original (as far as I know) design I copied from my father-in-law. It is roughly 4'x4' and can comfortably seat 8 people, and is very sturdy.
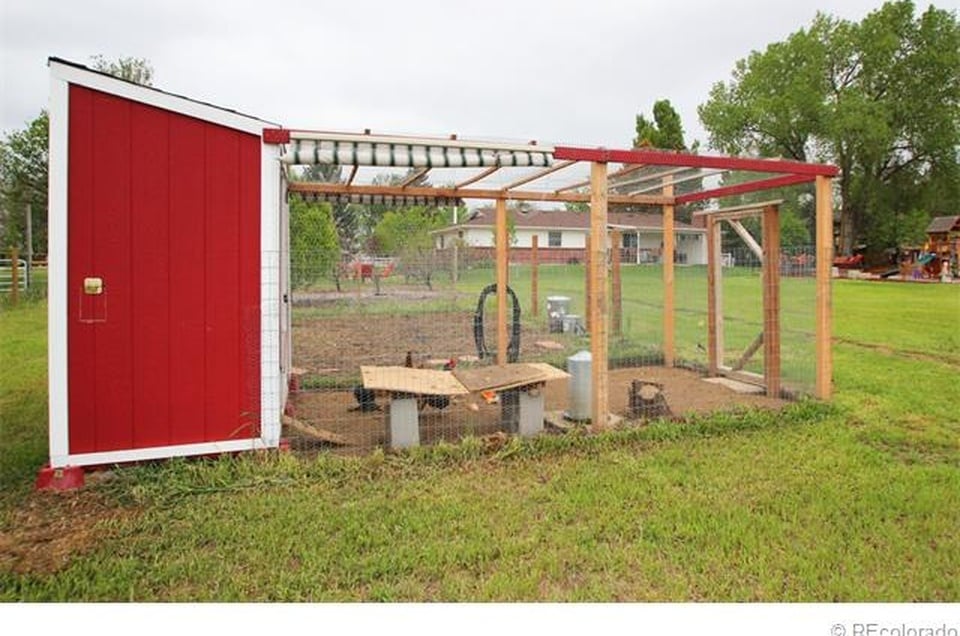
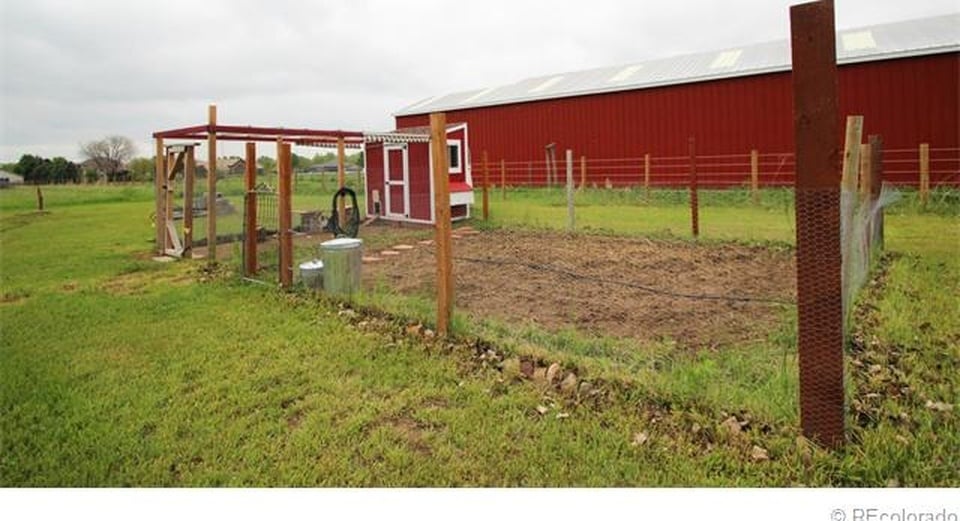
It took a while to come together and made several modifications but it is a great coop and was a major selling point of the house when we were relocated. I had added a main tray under the roosts and a door to srape the poop out. This made keeping the coop clean very easy.

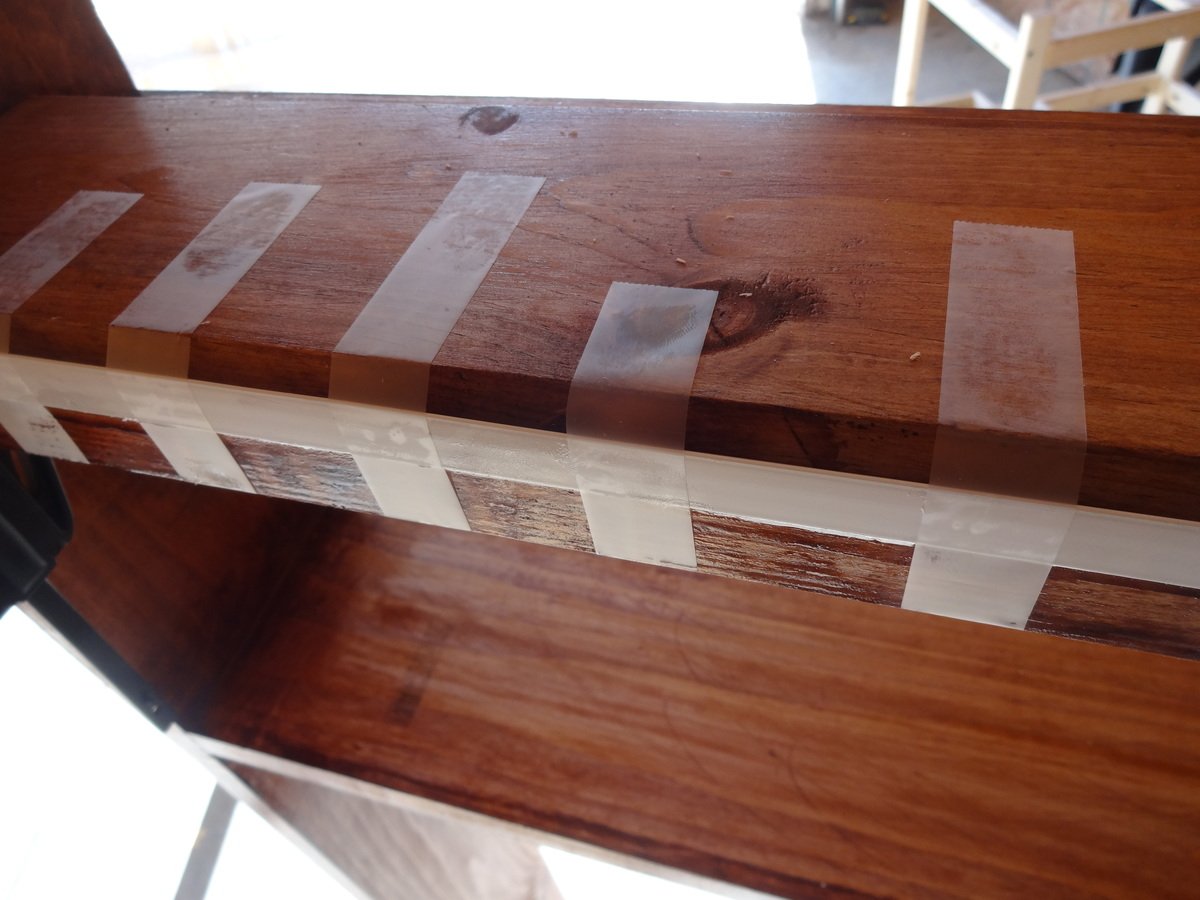
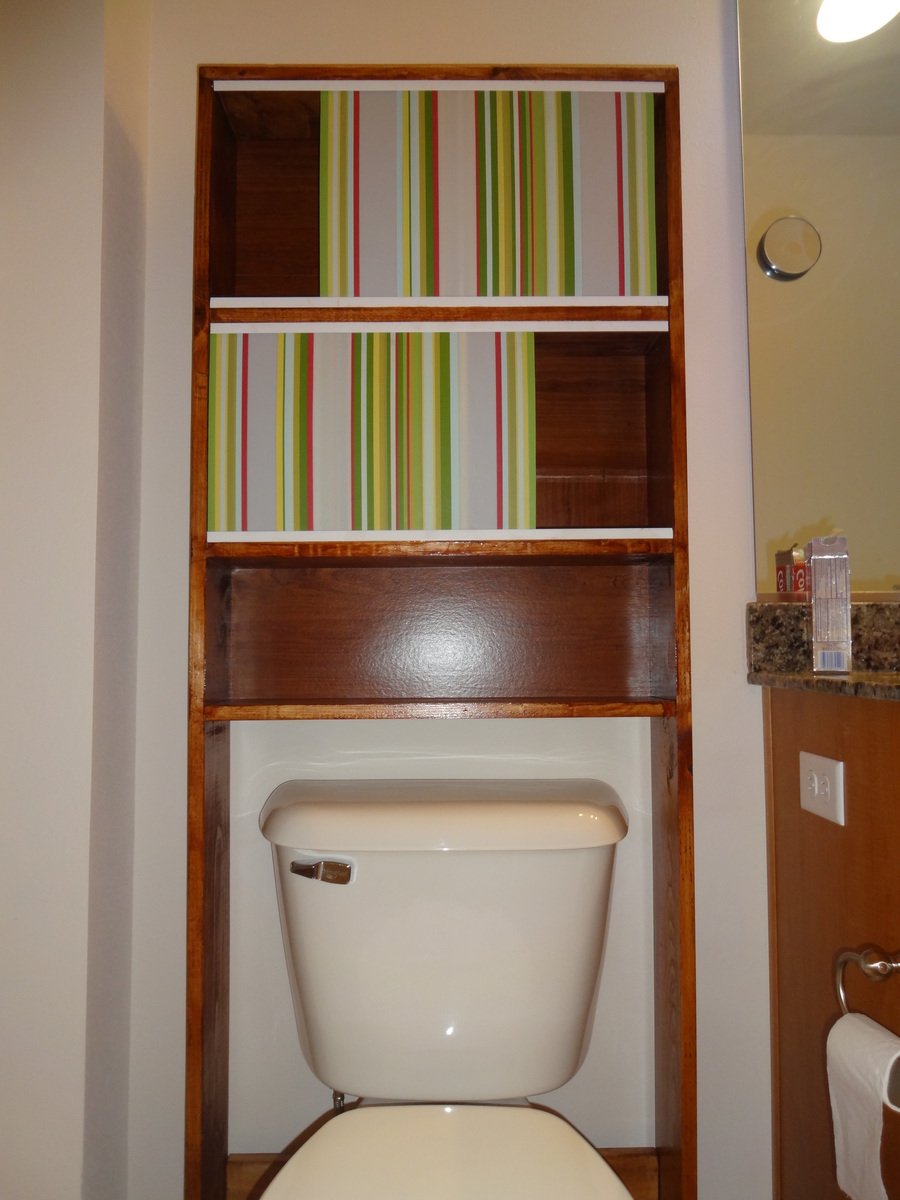
I recently discovered your blog and got really inspired. After building a couple of beginner projects following your plans, i started to think about making something that can be used as medicine cabinet and does not take much space. Came up with the idea for this over the toilet storage rack.
My goal was to recycle/reuse some of the stuff that was sitting in my garage.
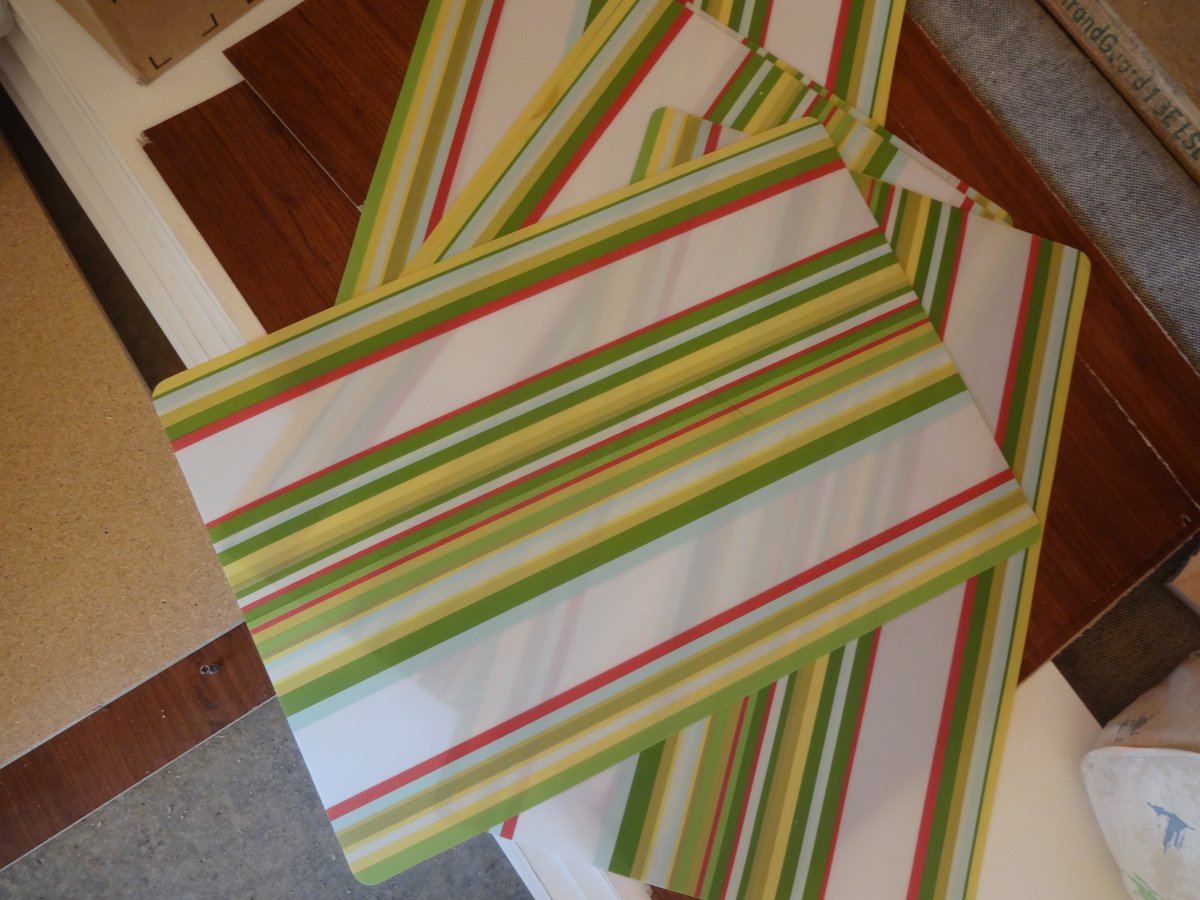
Started with building a frame using 1x6s (24 inch for shelves and 72 inch height). Used plastic table mats were used as sliding windows. Found a PVC trim (8 ft) for $2 at lowes that has been used as the rails/track for the windows. The back is piece of cardbord that was scrap from an old broken ikea bookshelf.
I am pretty happy that i recycled some stuff and made this in less than $15.


Tue, 12/01/2020 - 14:20
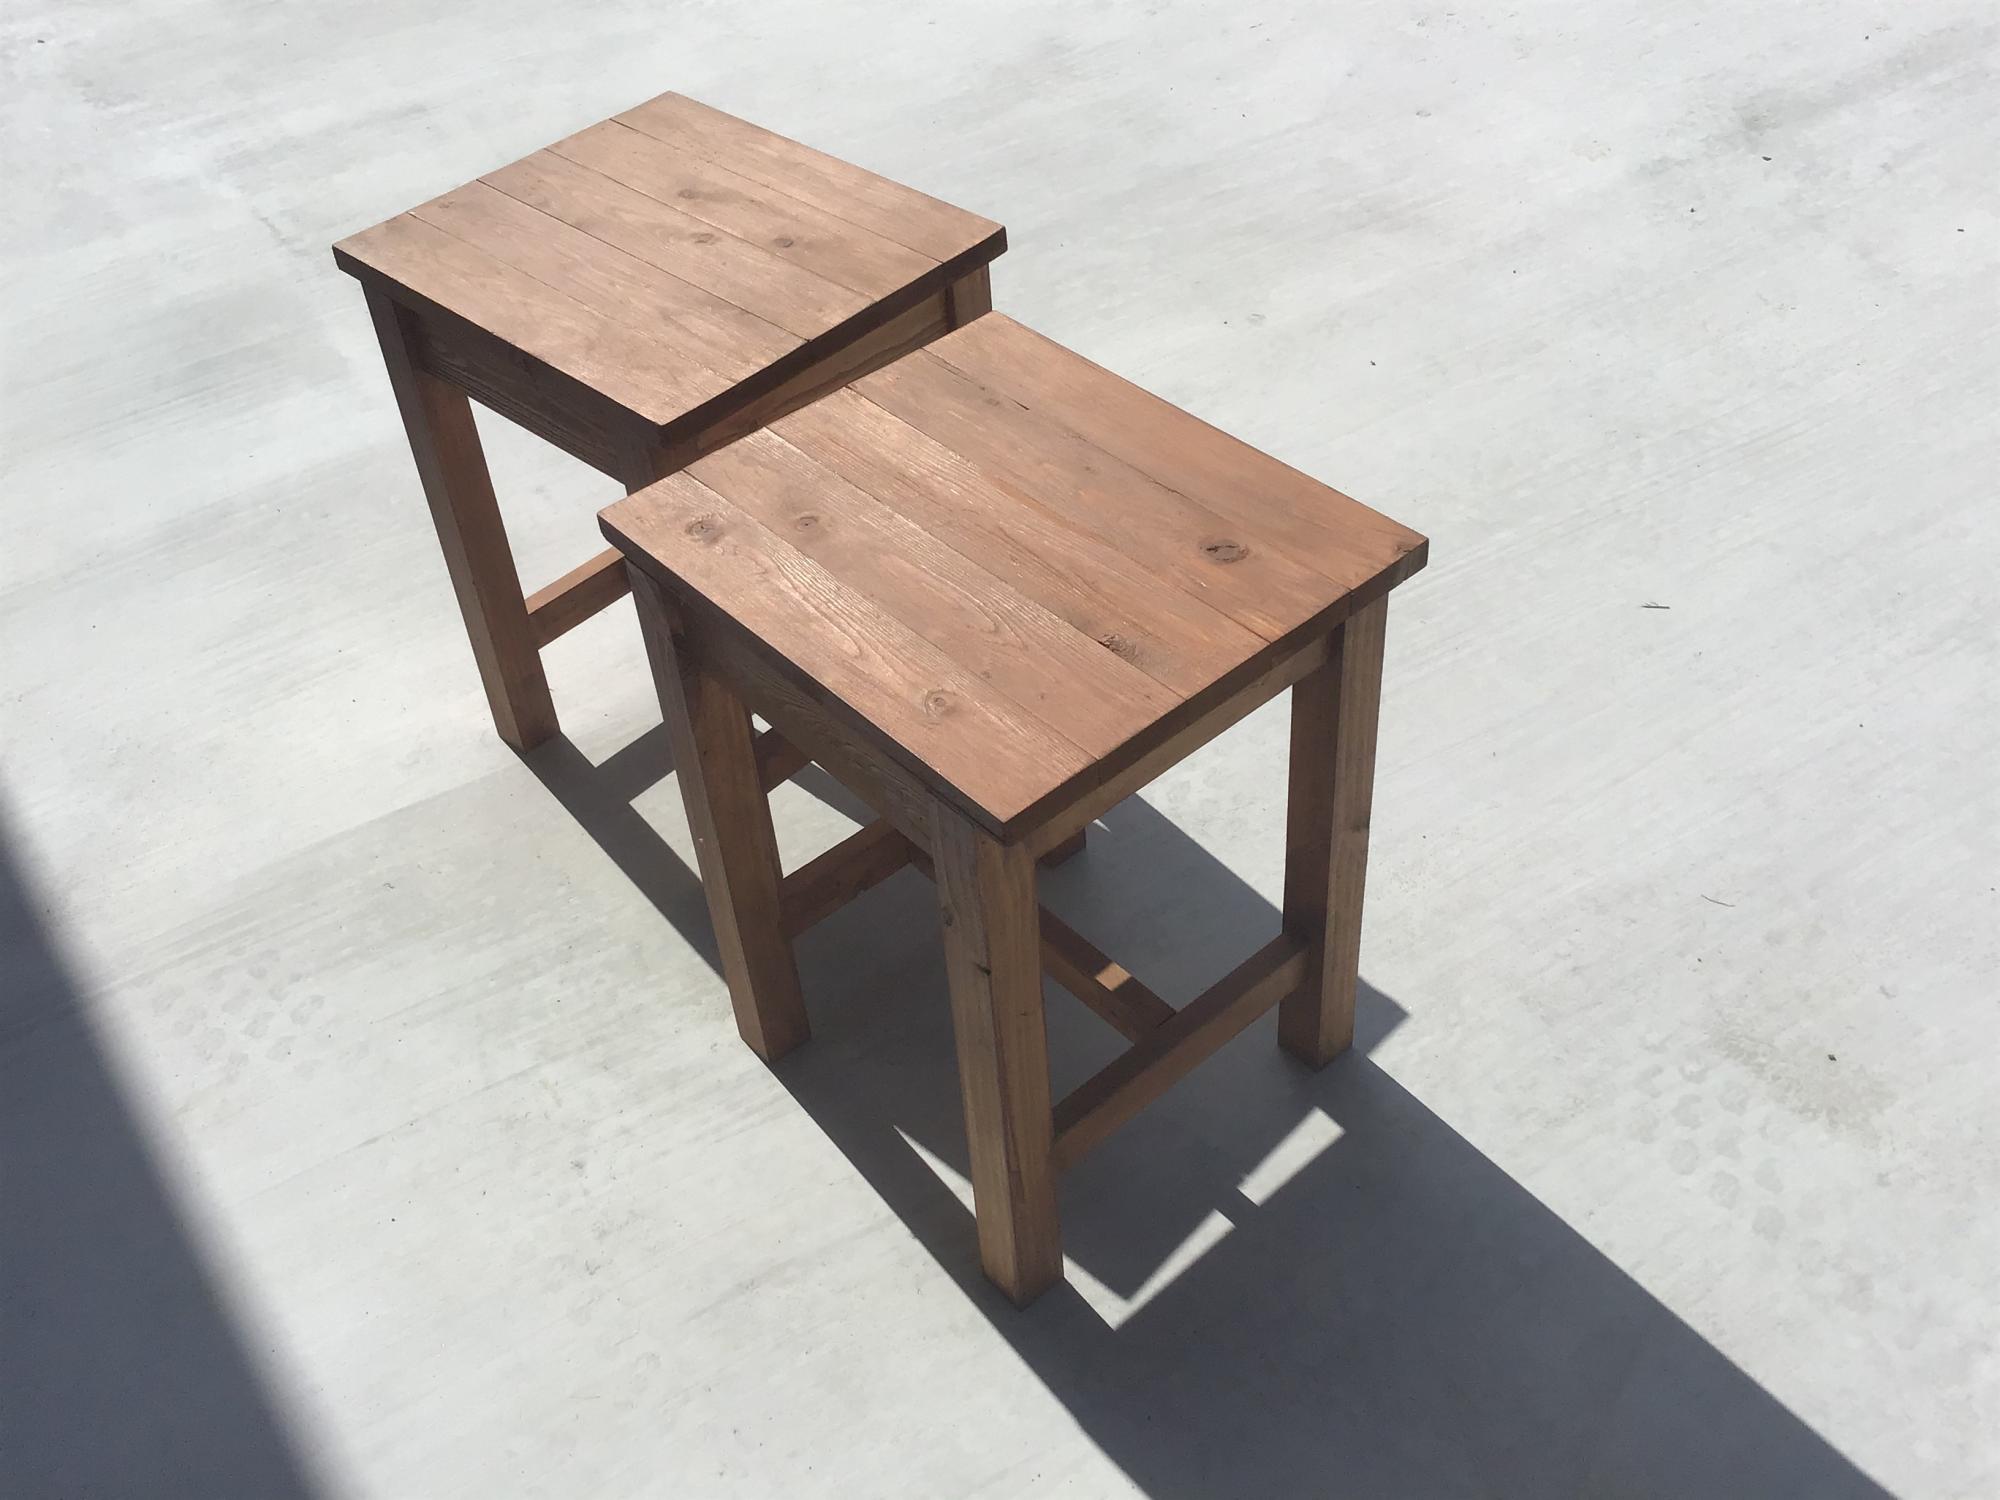
Did you do anything to the bottoms of the legs to prevent wet floors from wicking into the wood? I am wanting to build something similar to replace a particle board cabinet-in-a-box because the particle board did soak up water and get ruined. What I'd REALLY like are metal end caps with an adjustable foot (like you put at the bottom of a table leg) but I can't find a combination of the two anywhere.
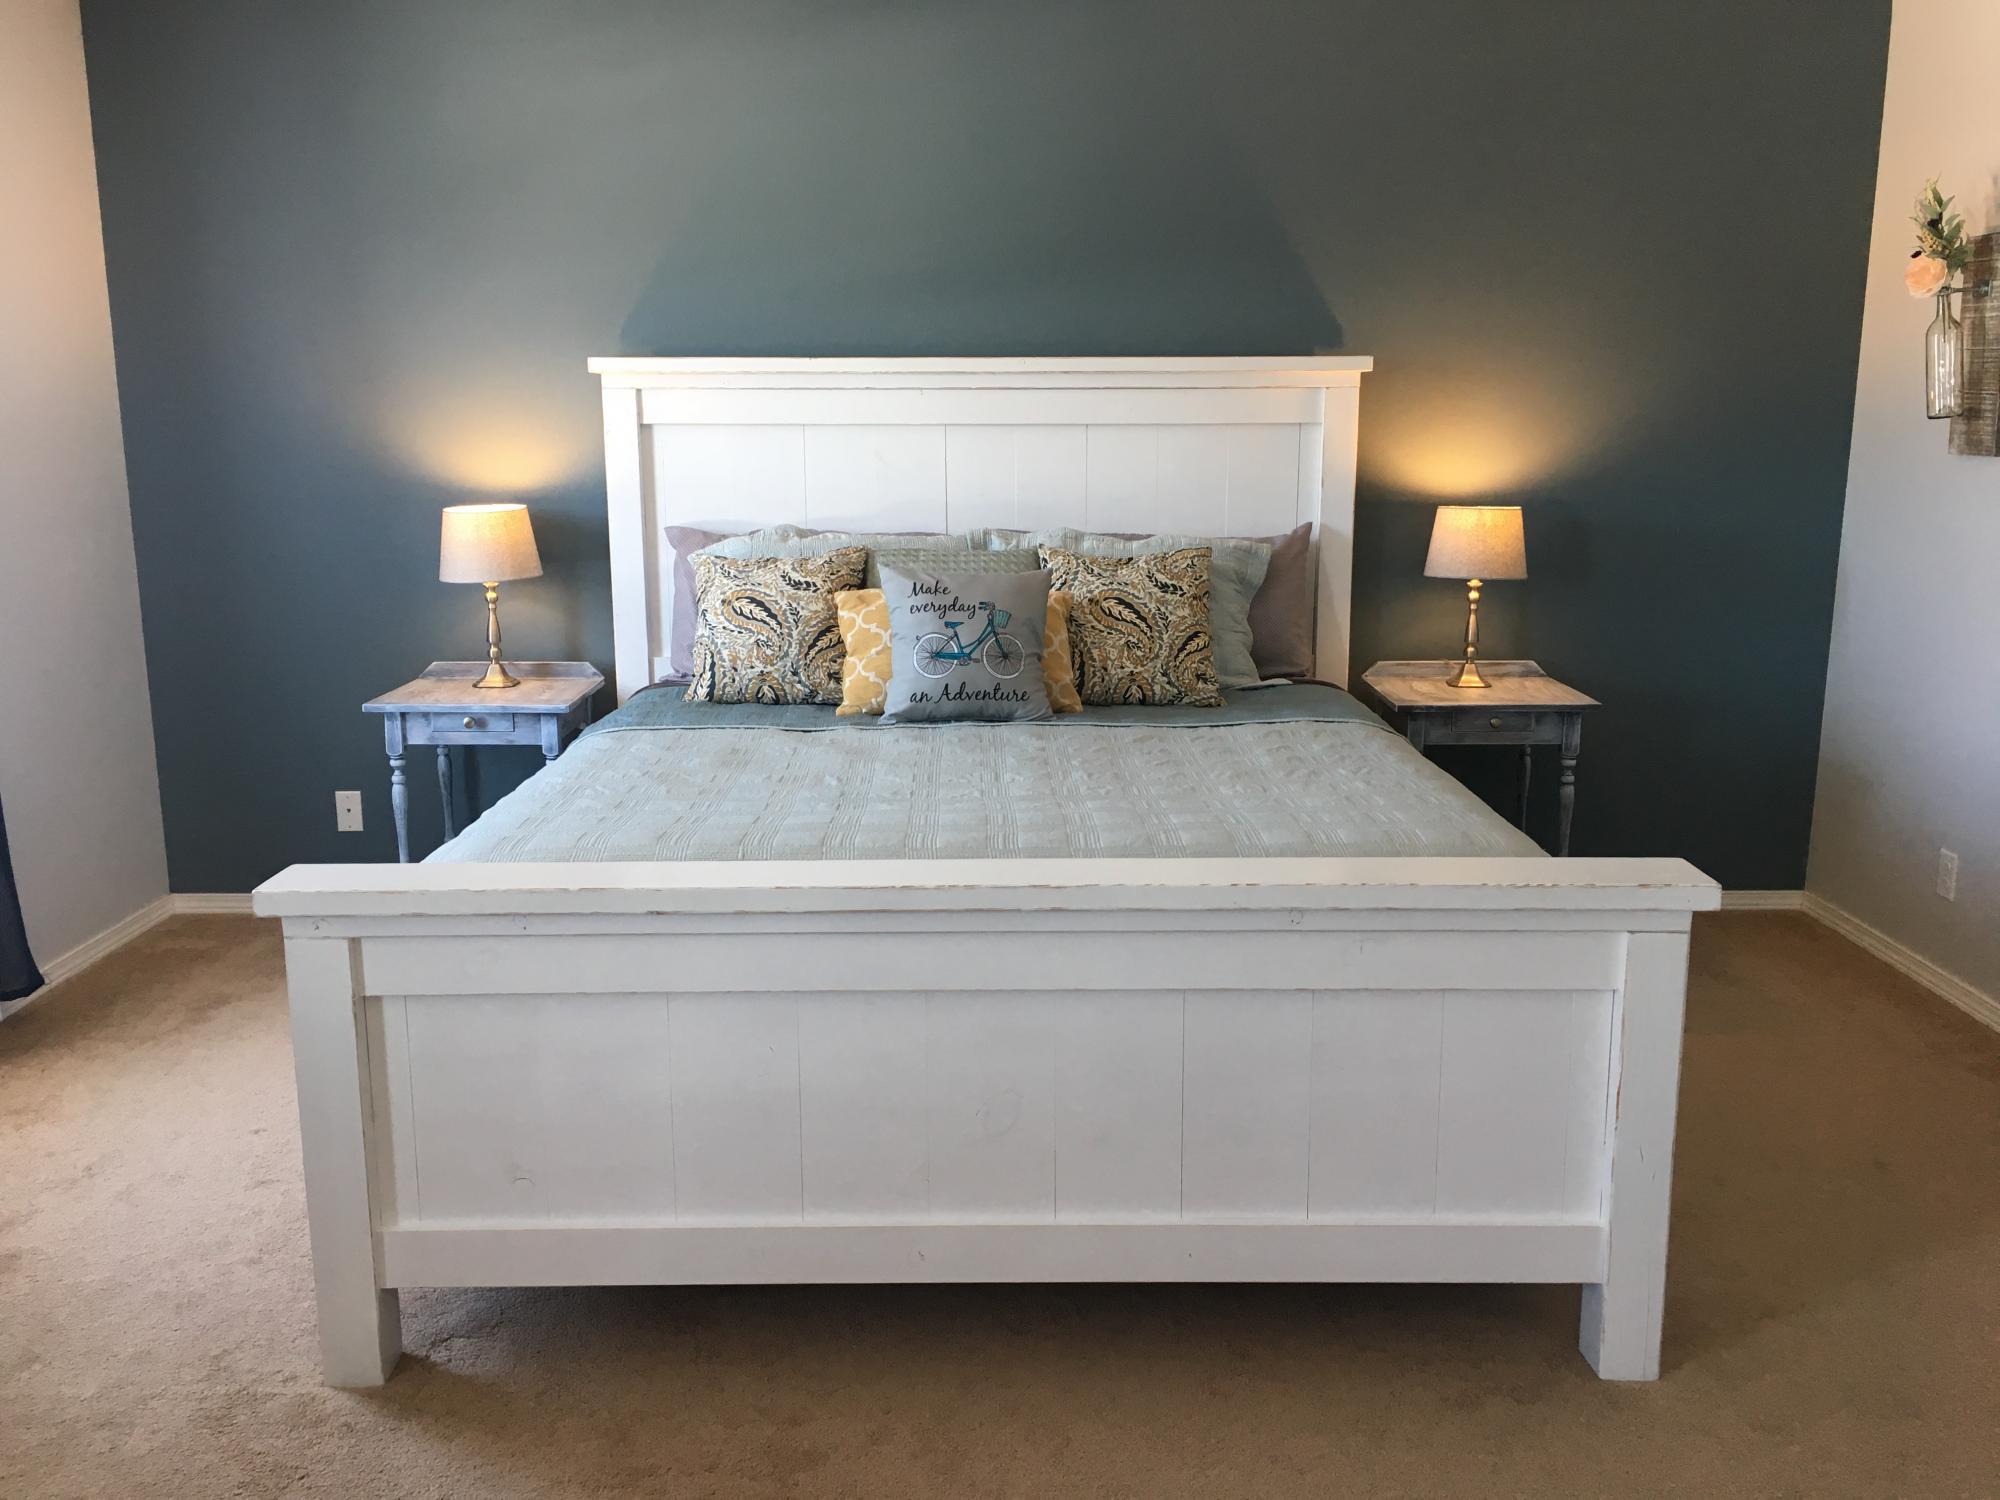
Fun weekend project to build together. We are loving the fresh look to our master bedroom.
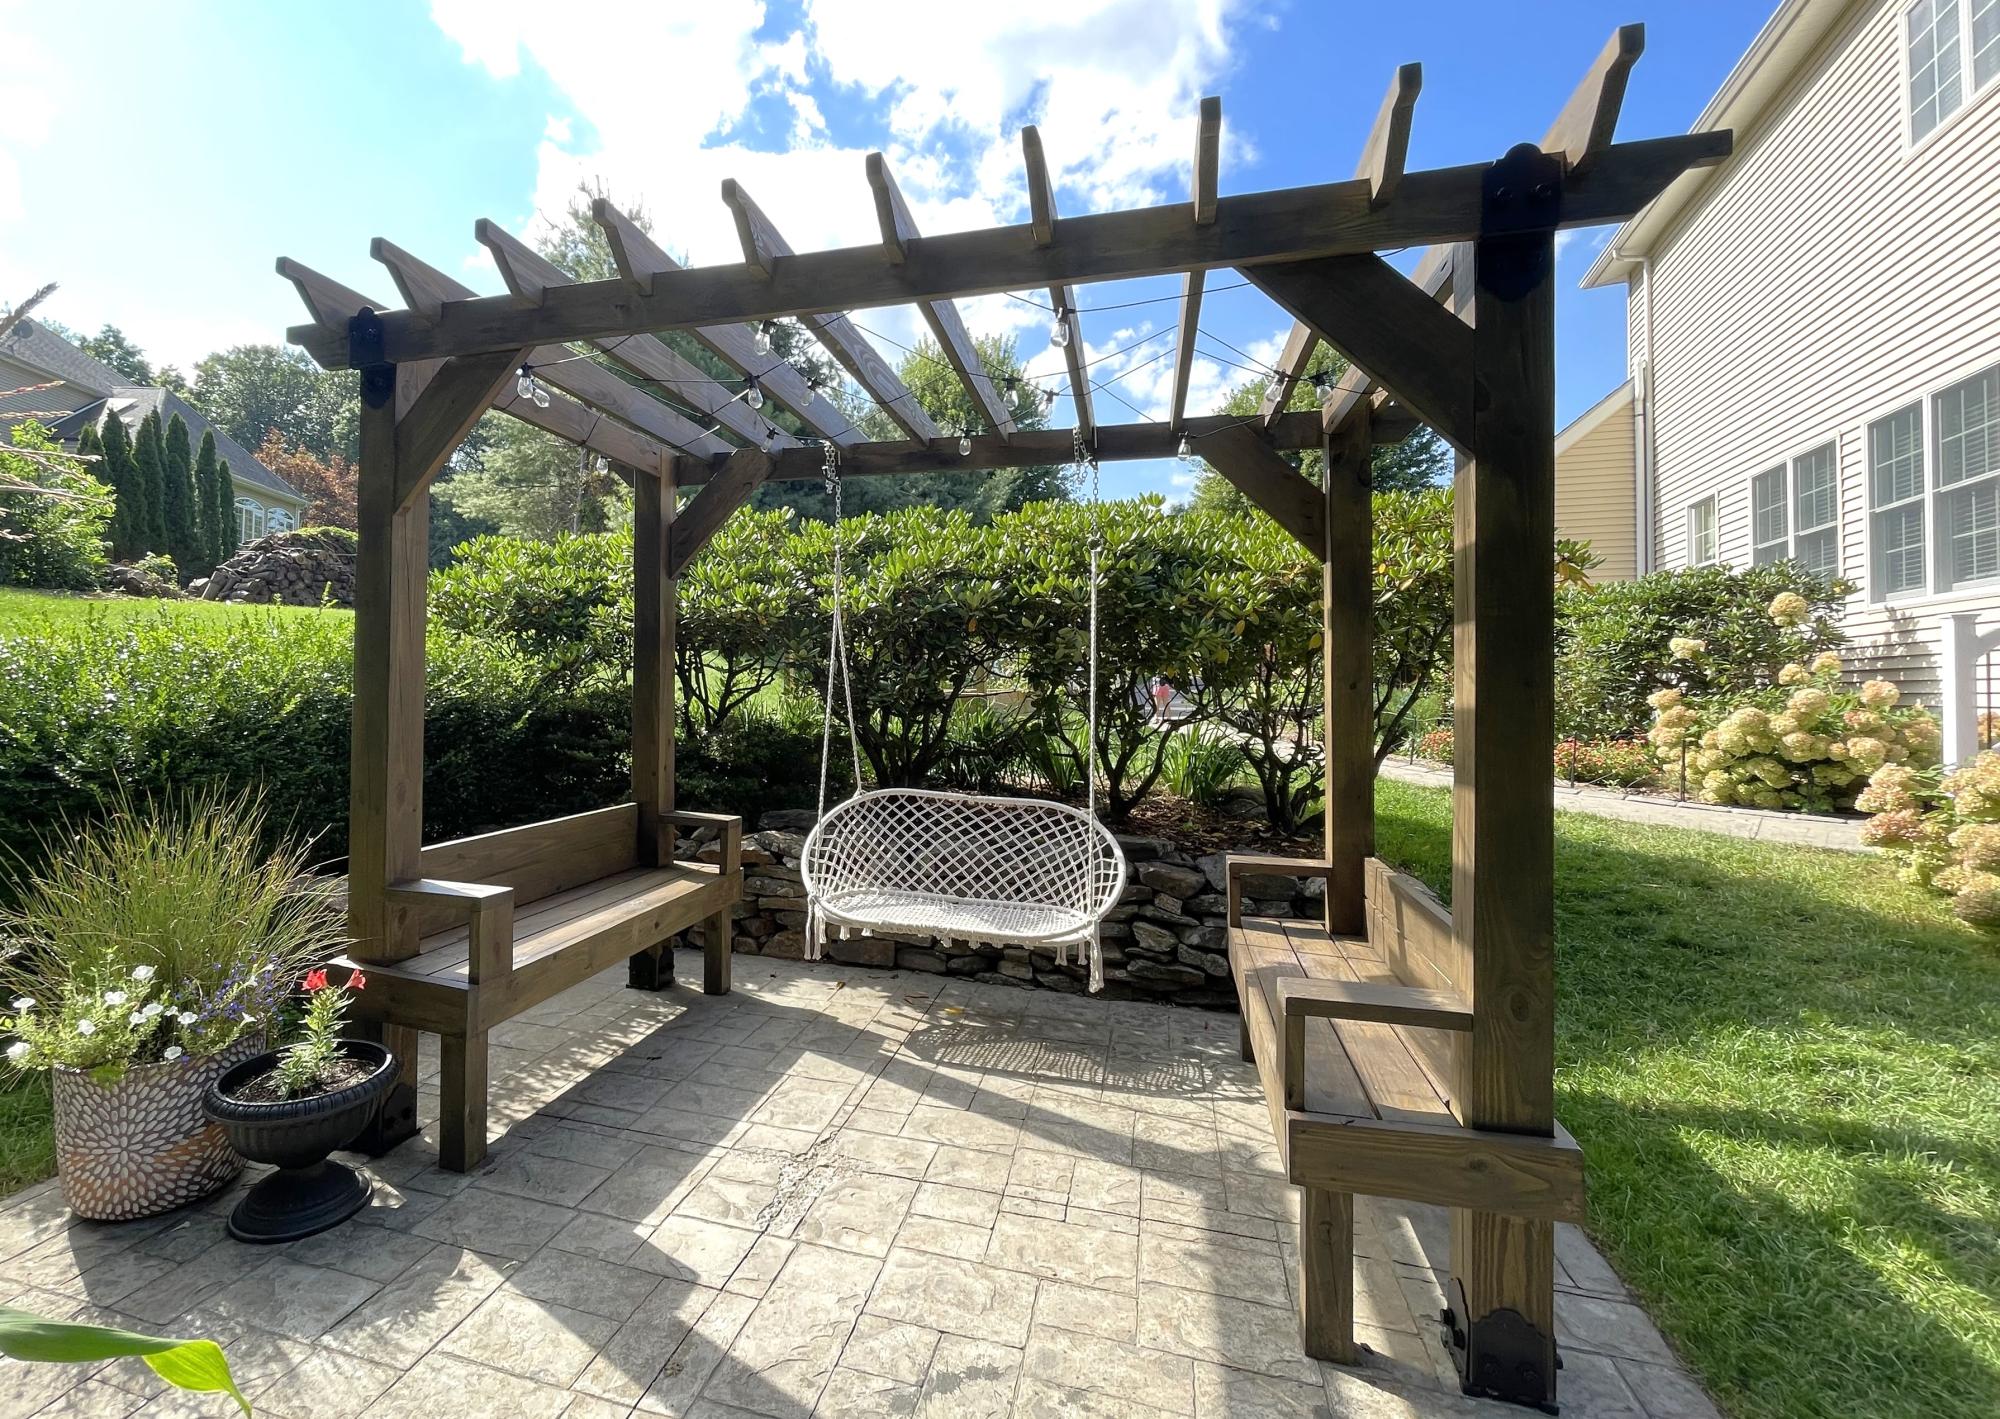
Pergola outdoor room plans modified to make side seating instead of side tables. Left sides open. Added cute crochet swing bench. Anchored to concrete slab with iron plates and added decorative wood ties that match footing. I've gotten so many compliments and no one believes I made this!
Kristen P.
Sun, 08/27/2023 - 12:56
WOW! You did such a beautiful job, love the look. Thank you for sharing!
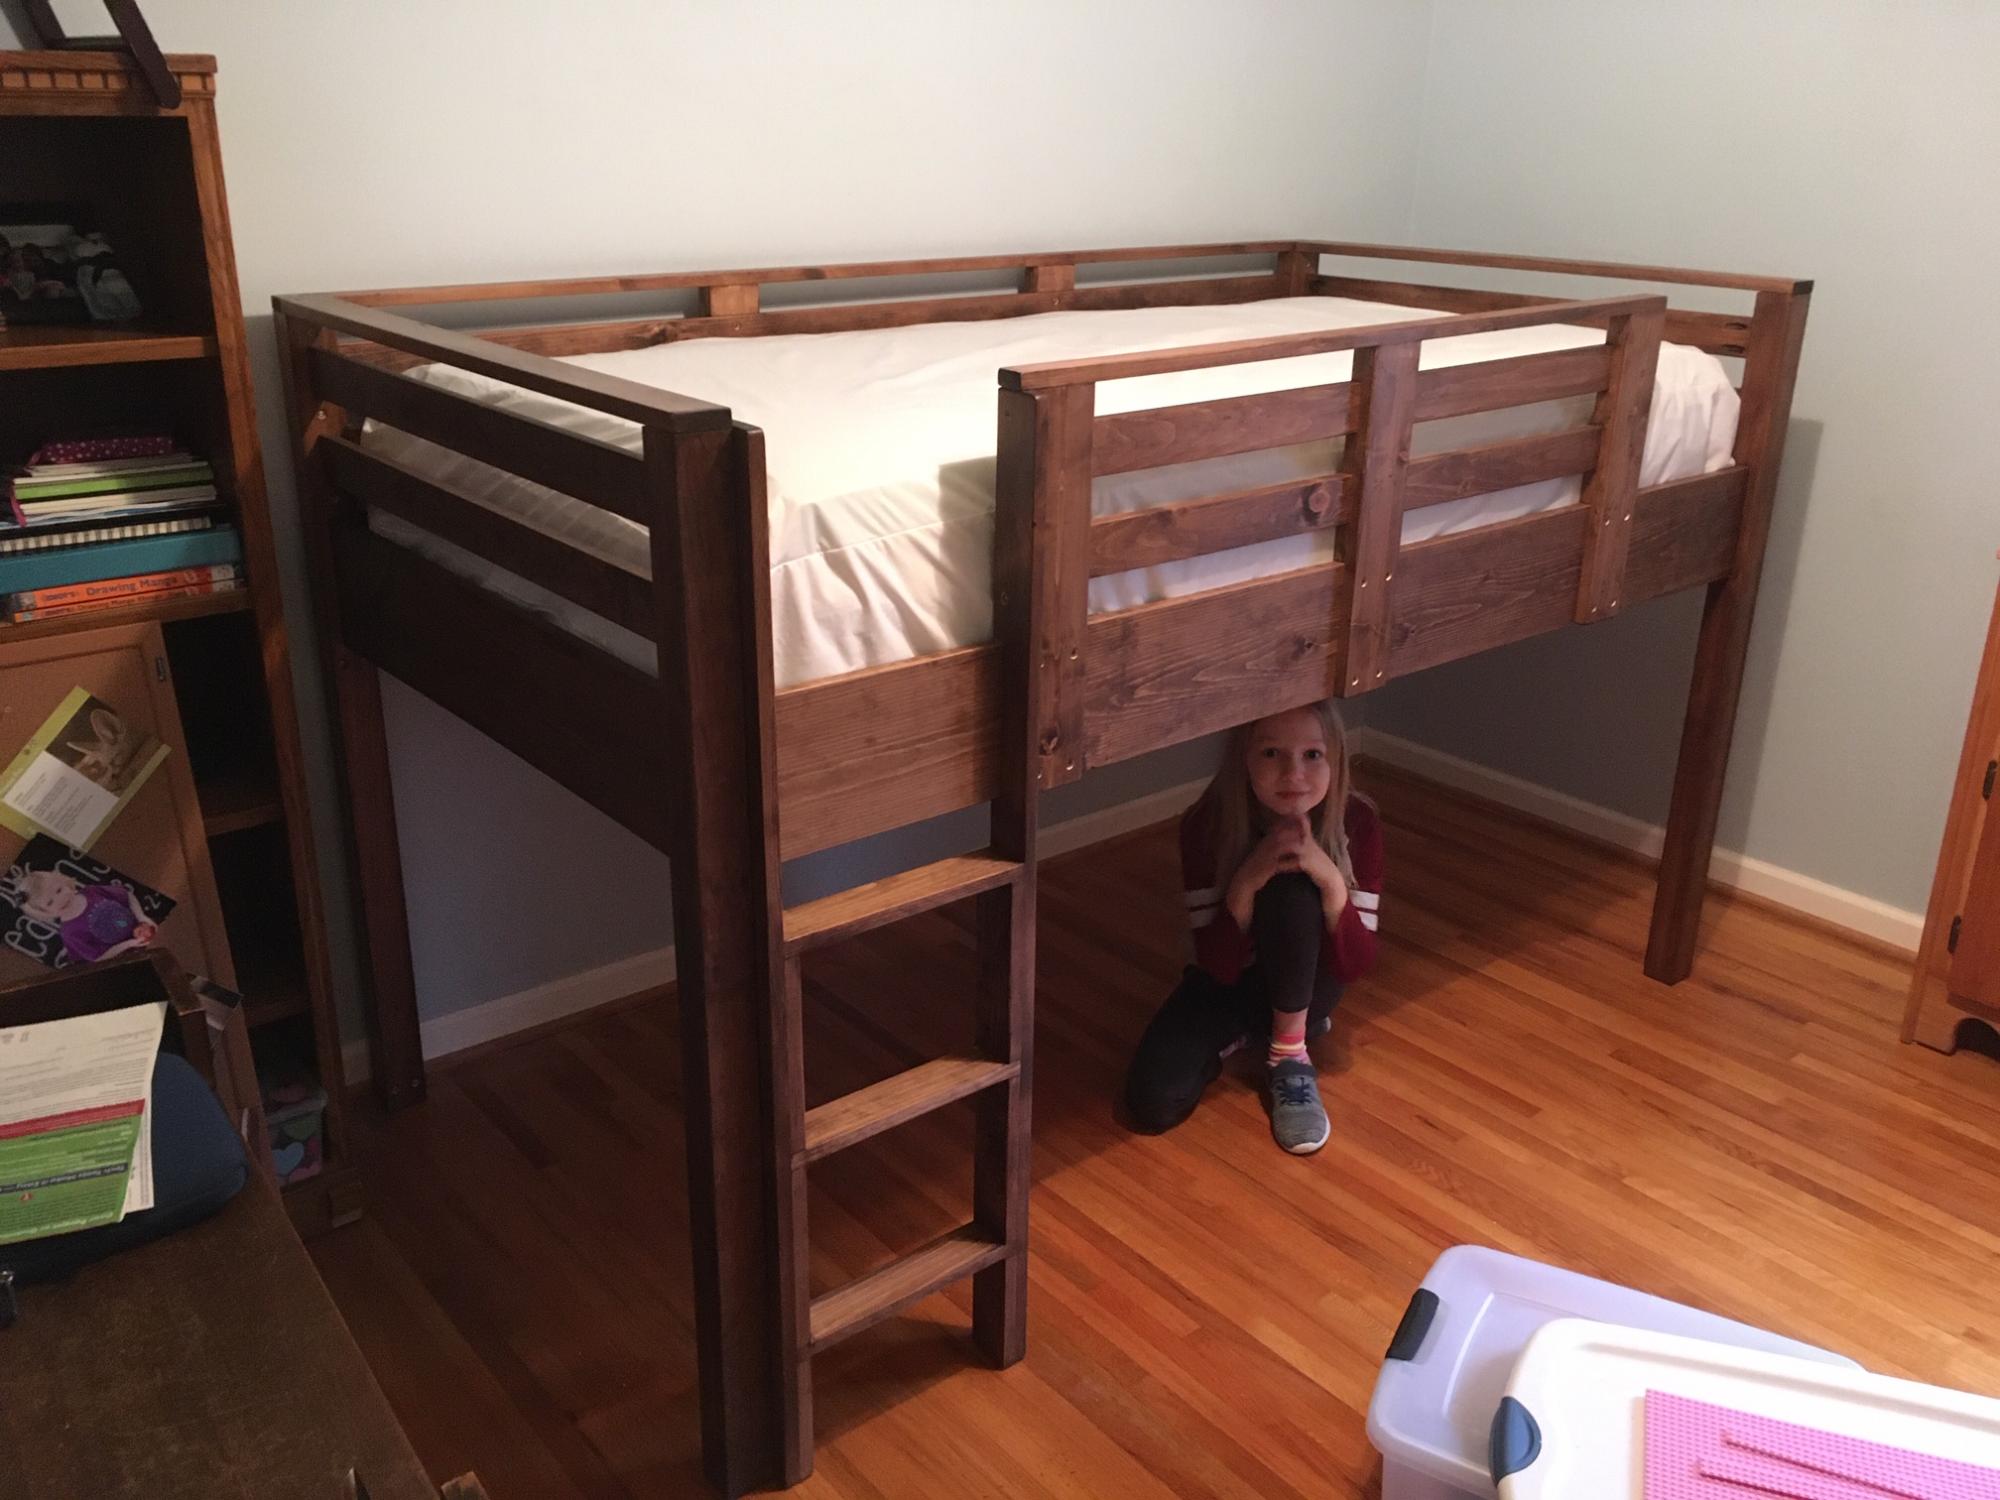
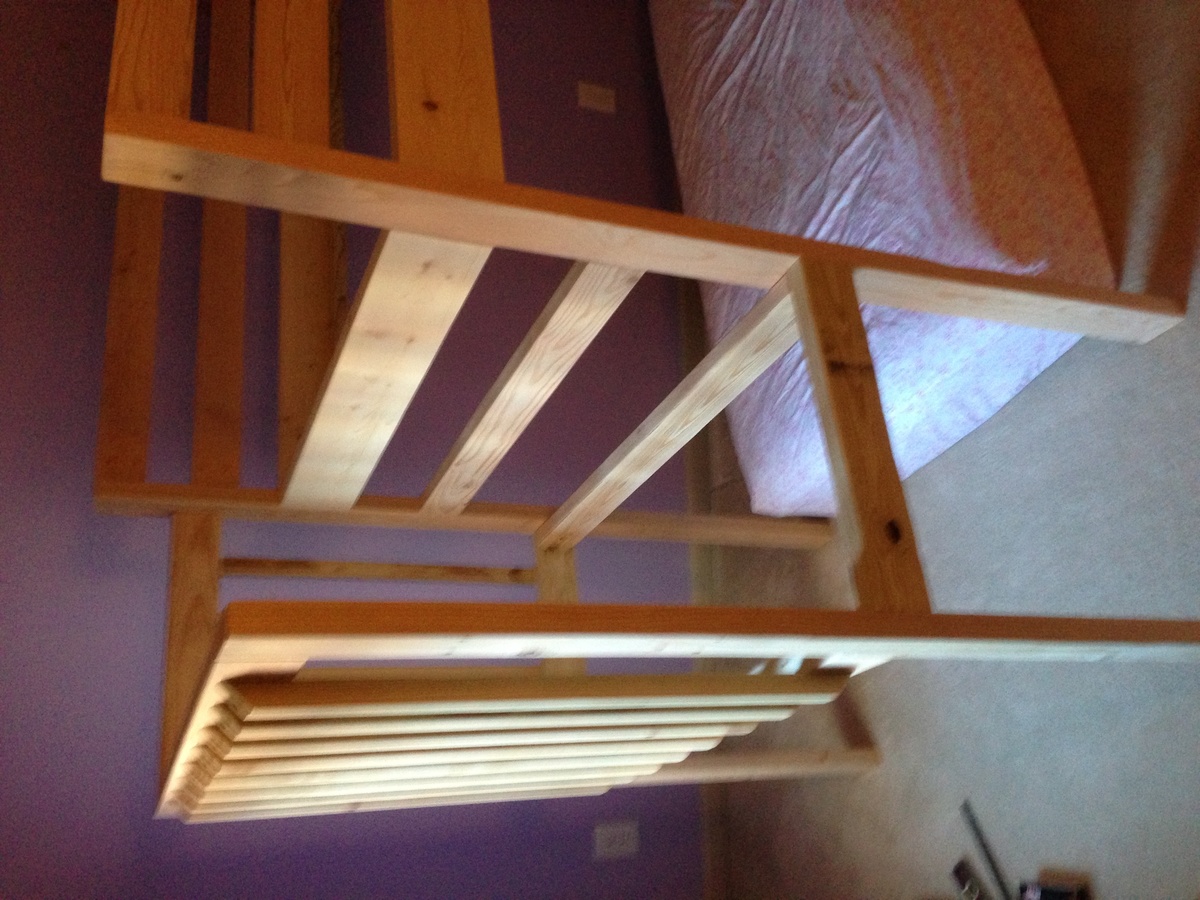
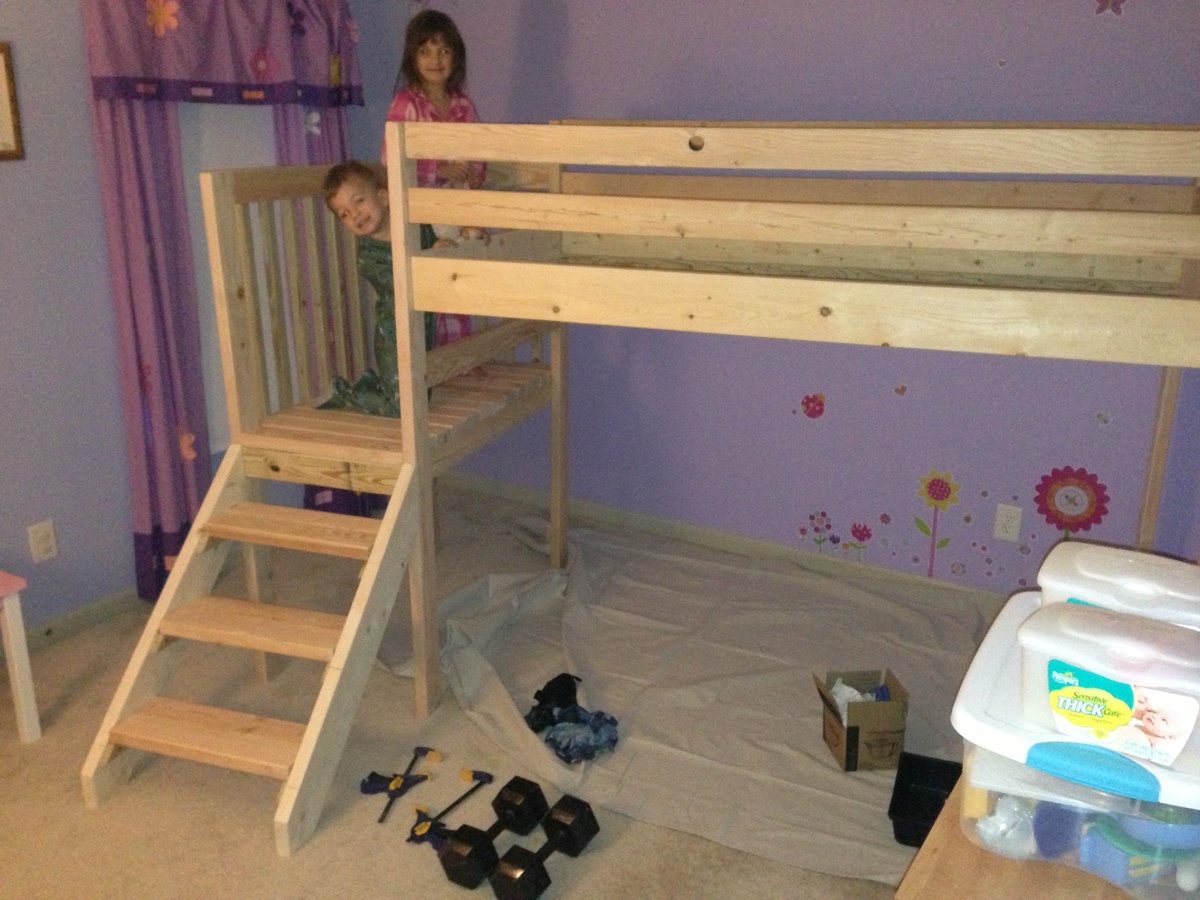
Made several modifications to this plan. Wanted the bed to be easy to change sheet, reduced overall height to 48in. The mattress is fairly thick so I increased the rail height to 18in by adding another row on the side rail. The ladder can be located on either end. My munchkin now has a new bed and with some curtains, a new hideout.

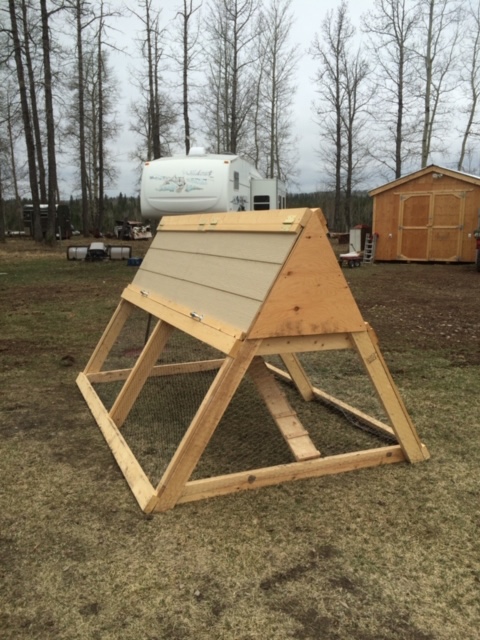
I built this chicken coop/tractor a few years ago, for my cousin. I loved the ease of the plans and the build, and she loved the hens in her backyard!
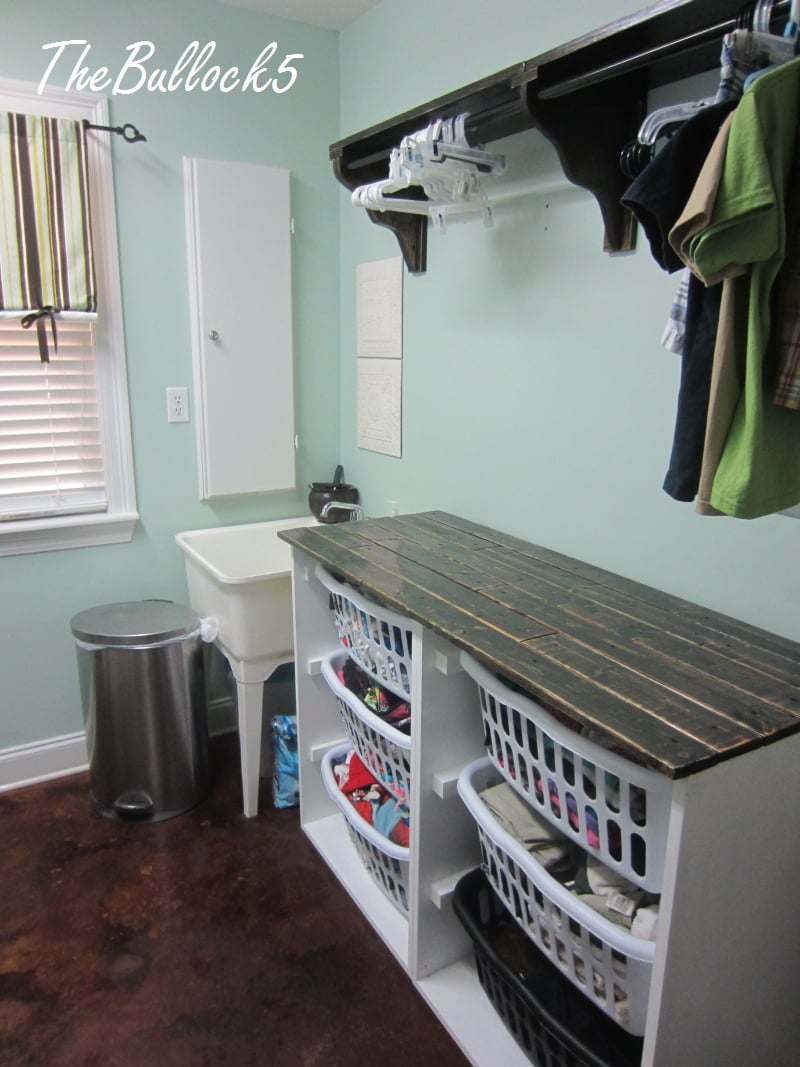
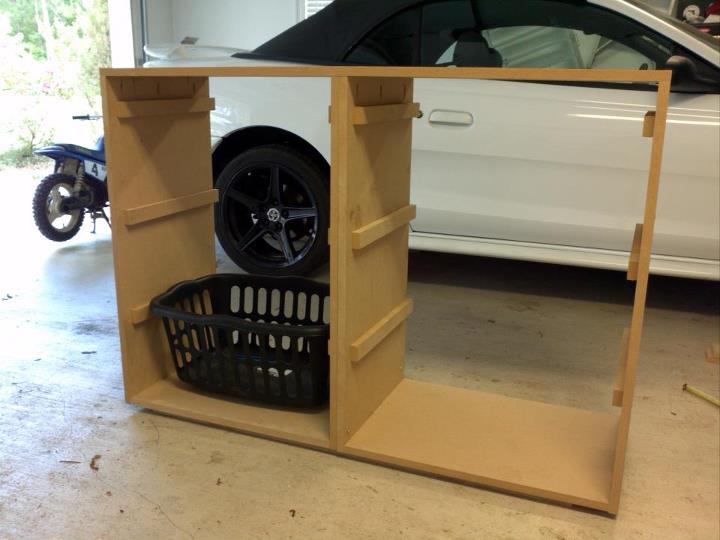
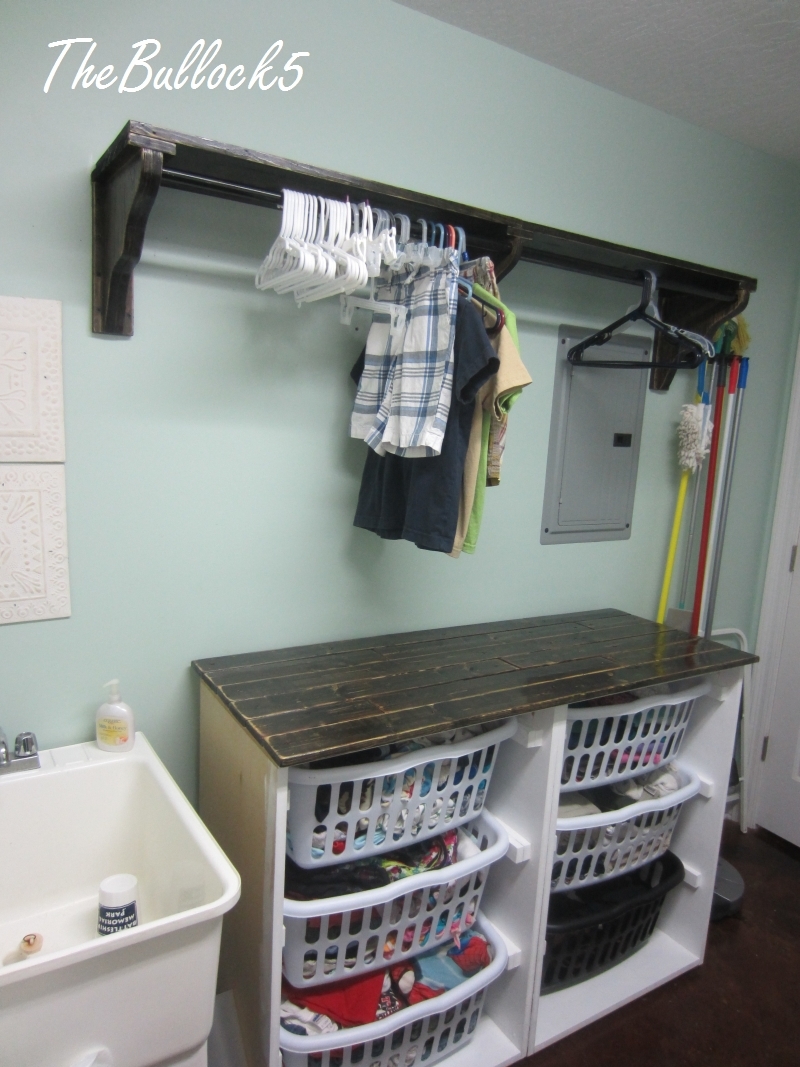
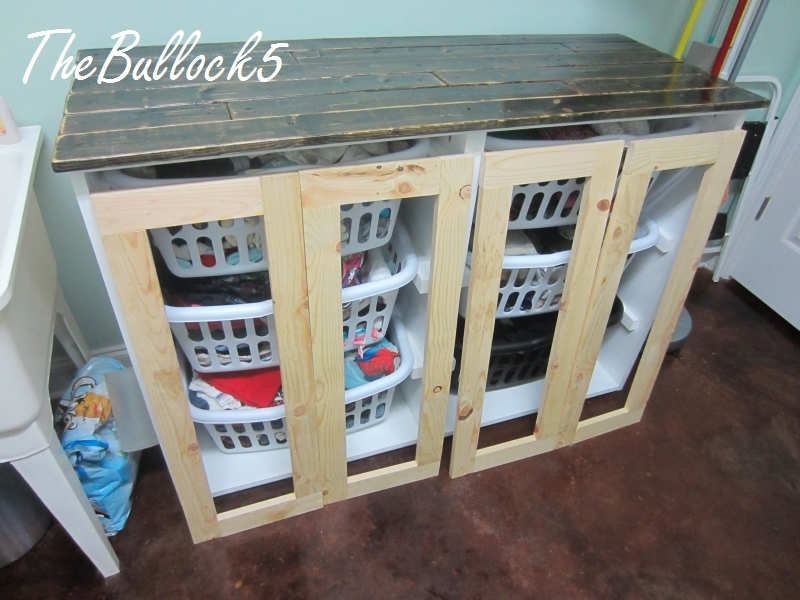
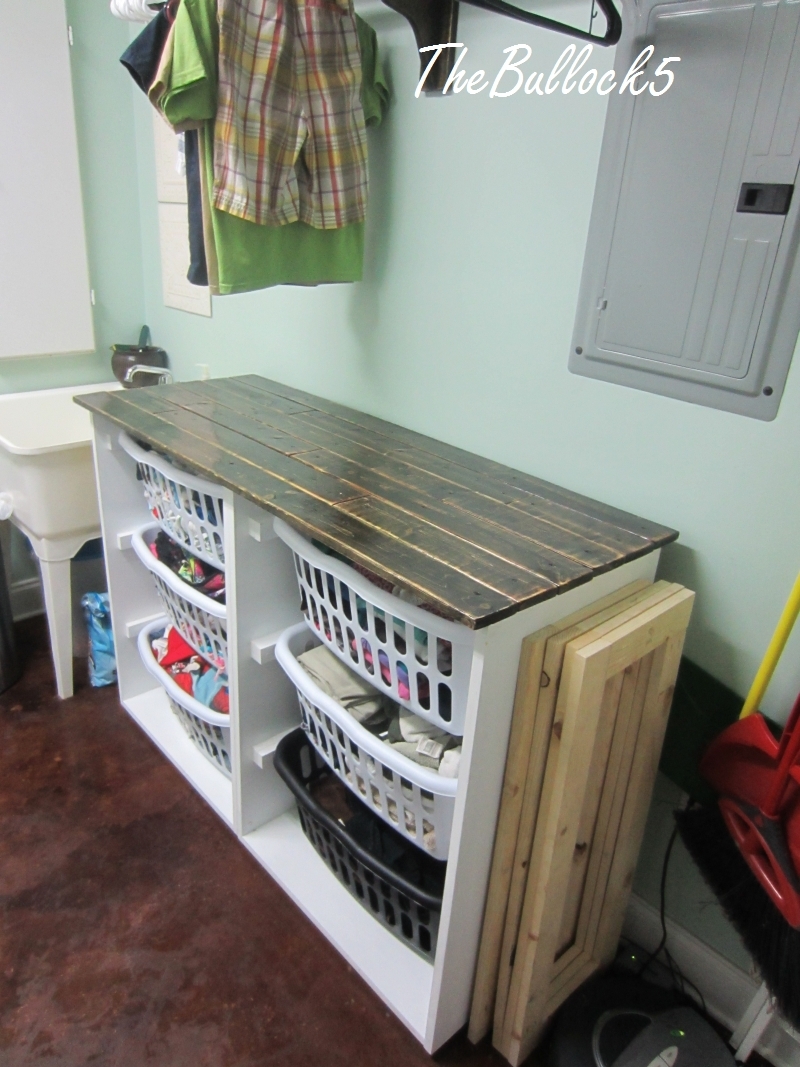
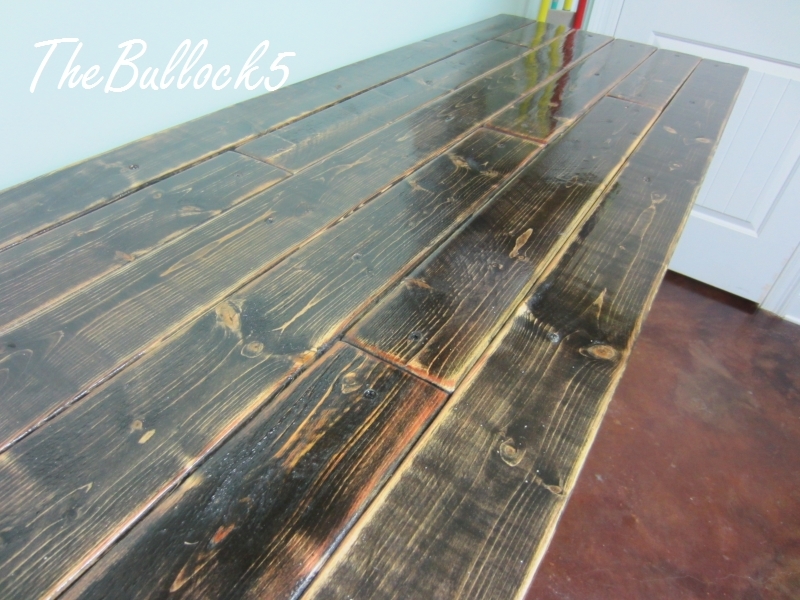
more details on my blog. I built 2 of the laundry dressers. adjusted the placement of my baskets due to restrictions in the overall height of my unit (I have a ironing board cabinet built into 1 wall that I still wanted to be able to open and use :) I used MDF, but it was a bear to work with and next time I would spend the extra $$ on birch. i painte the bottom in a semi gloss. and plan to add the doors (which will have a beadboard backing) they will be painted white with a dark walnut glaze. The top and shelf /brackets are all done in a distressed finish with ebony and mahogany stain mixed then 2 coats of poly very sturdy even filled!
Fri, 06/26/2015 - 00:00
I have been wanting to make the laundry basket dresser but am holding off because we are moving. What color did you us on the walls, I love it.


Comments
Ana White Admin
Wed, 12/29/2021 - 12:12
Awesome solution!
So much storage and it looks great! Thanks for sharing.