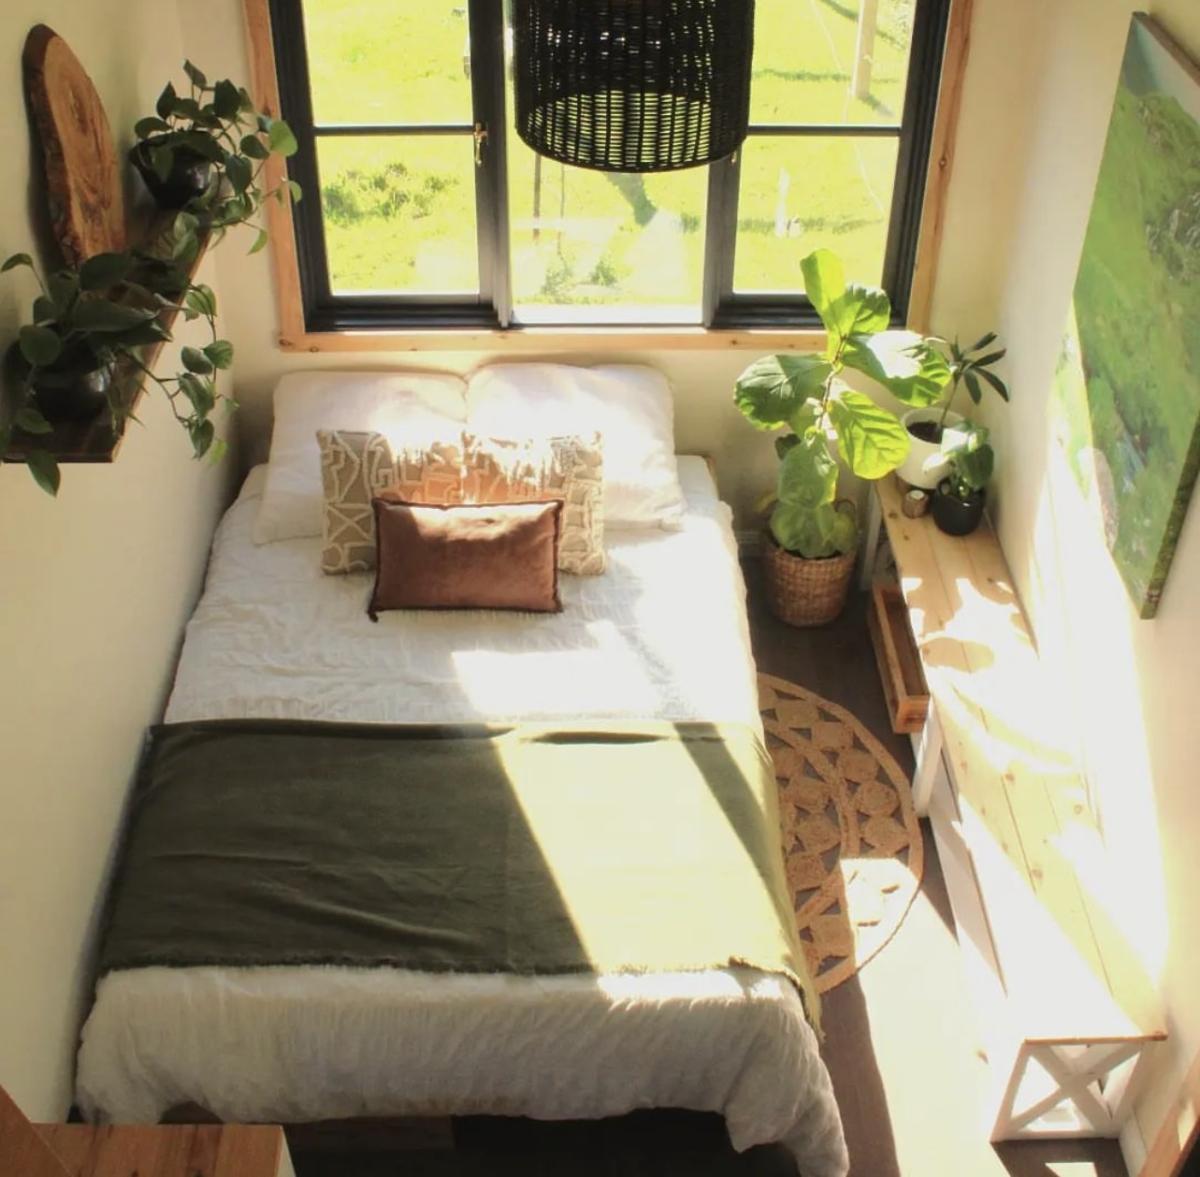
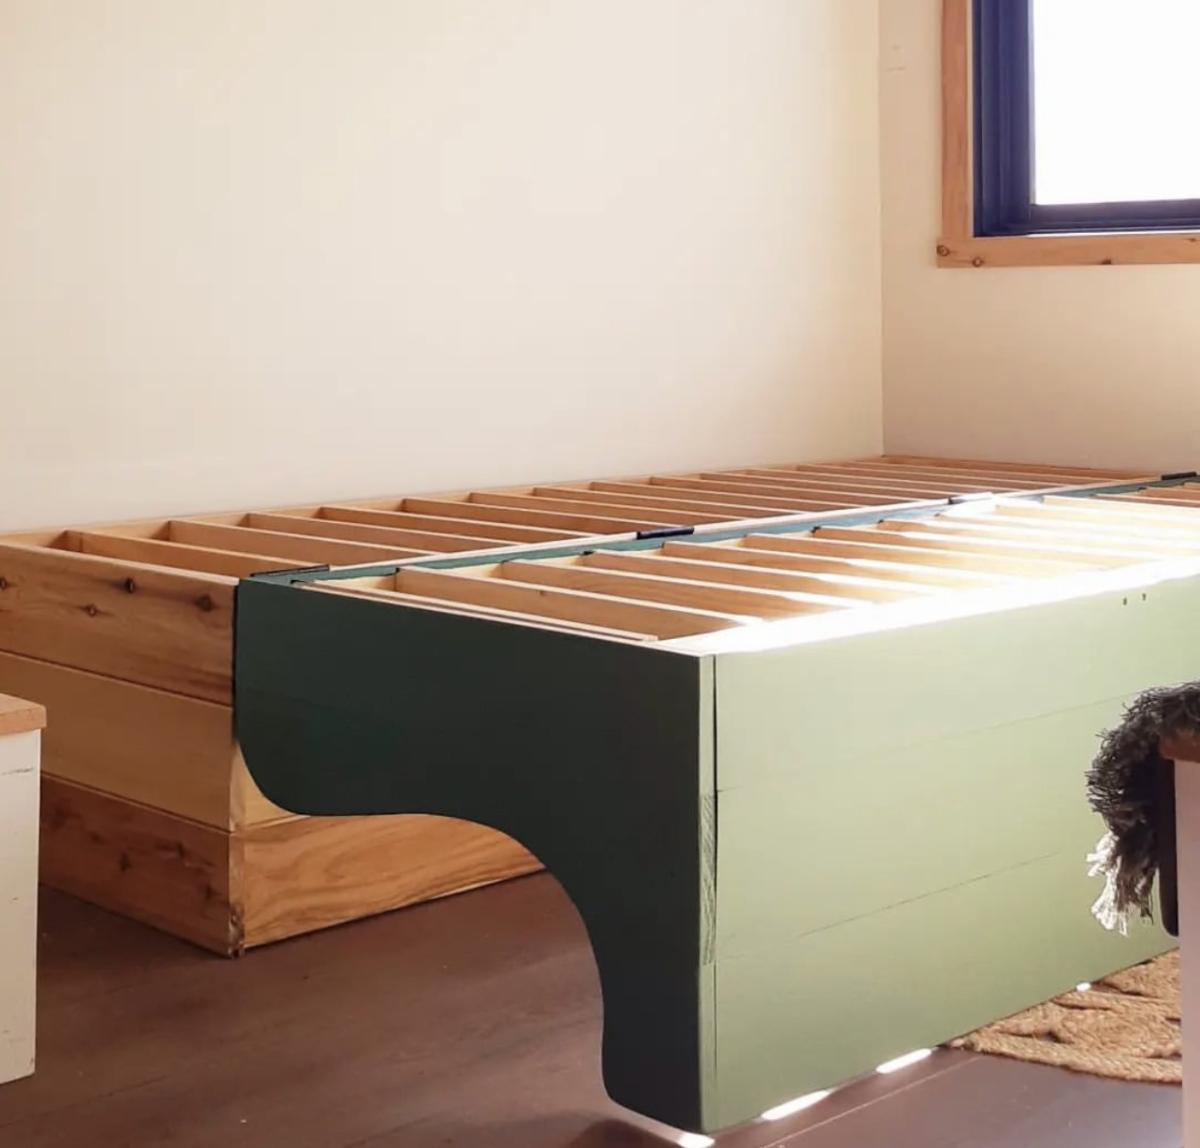
Tiny House Flip Sofa Bed - by Deirdre

Modified from our twin sleeper chair plan, this amazing hinged sofa bed was built and shared by #tinybuilderau
Built from Plan(s)
Modified from our twin sleeper chair plan, this amazing hinged sofa bed was built and shared by #tinybuilderau
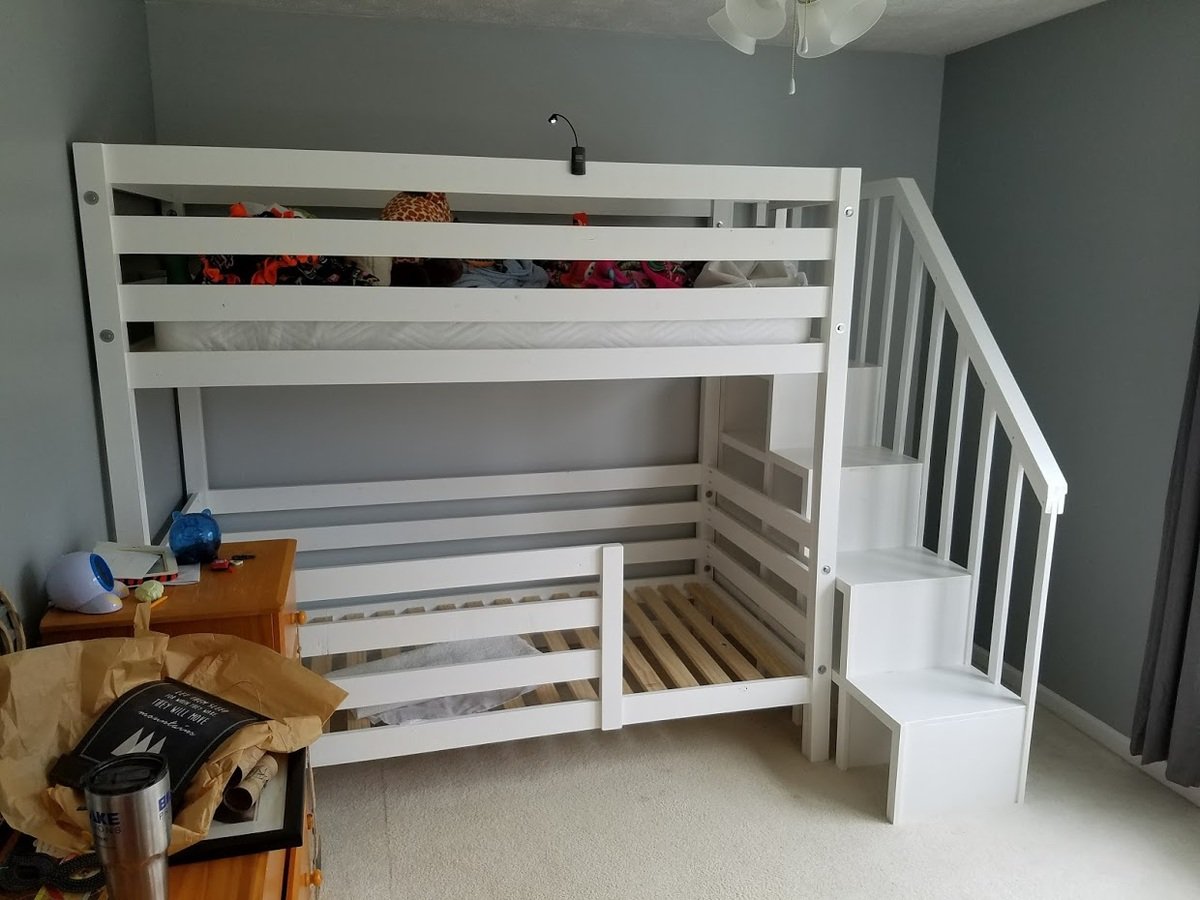
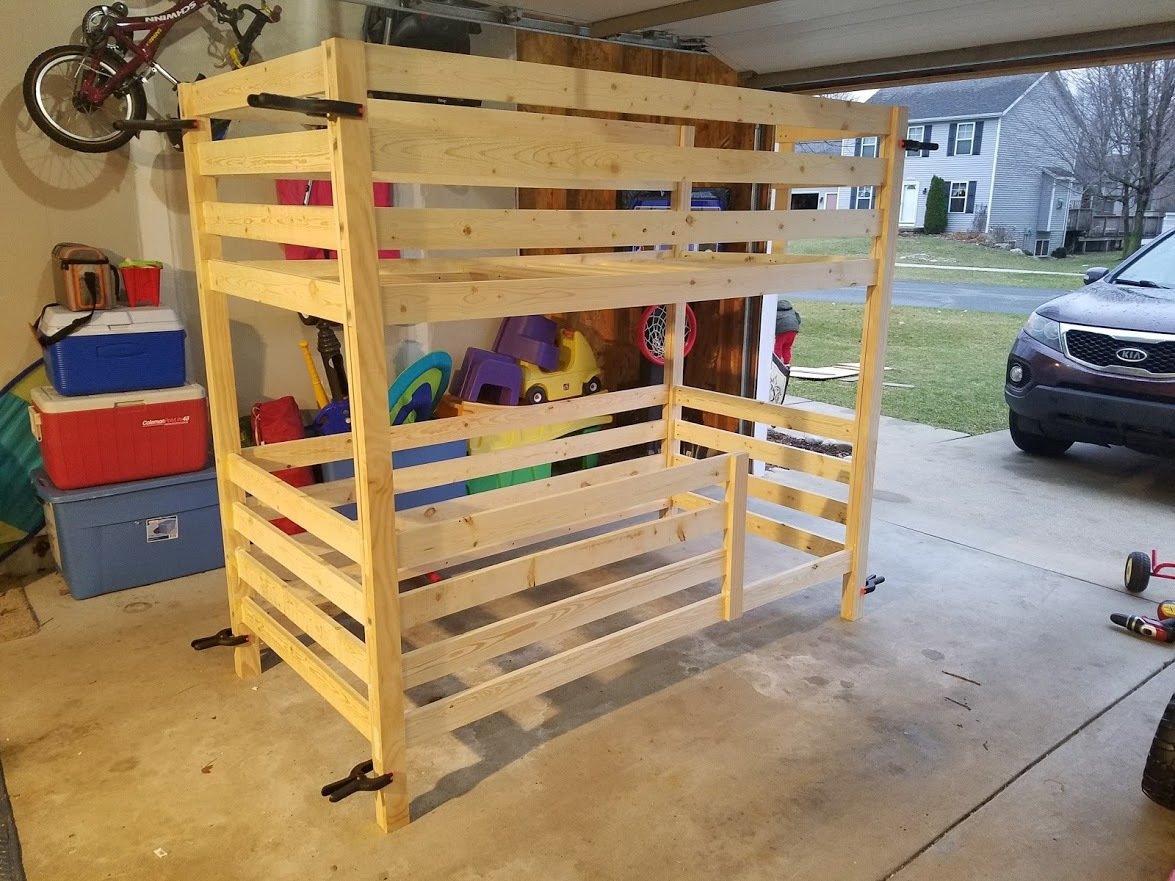
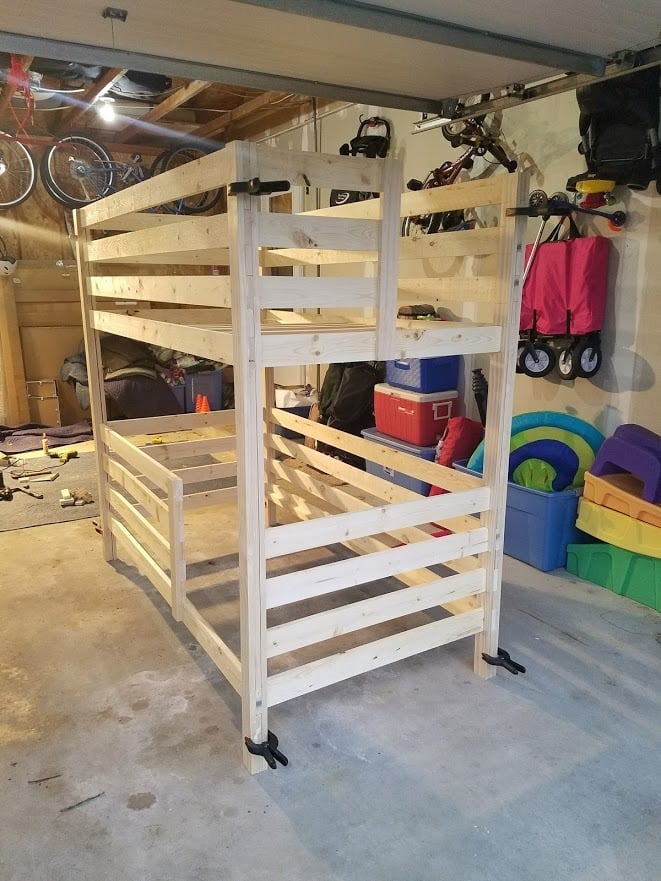
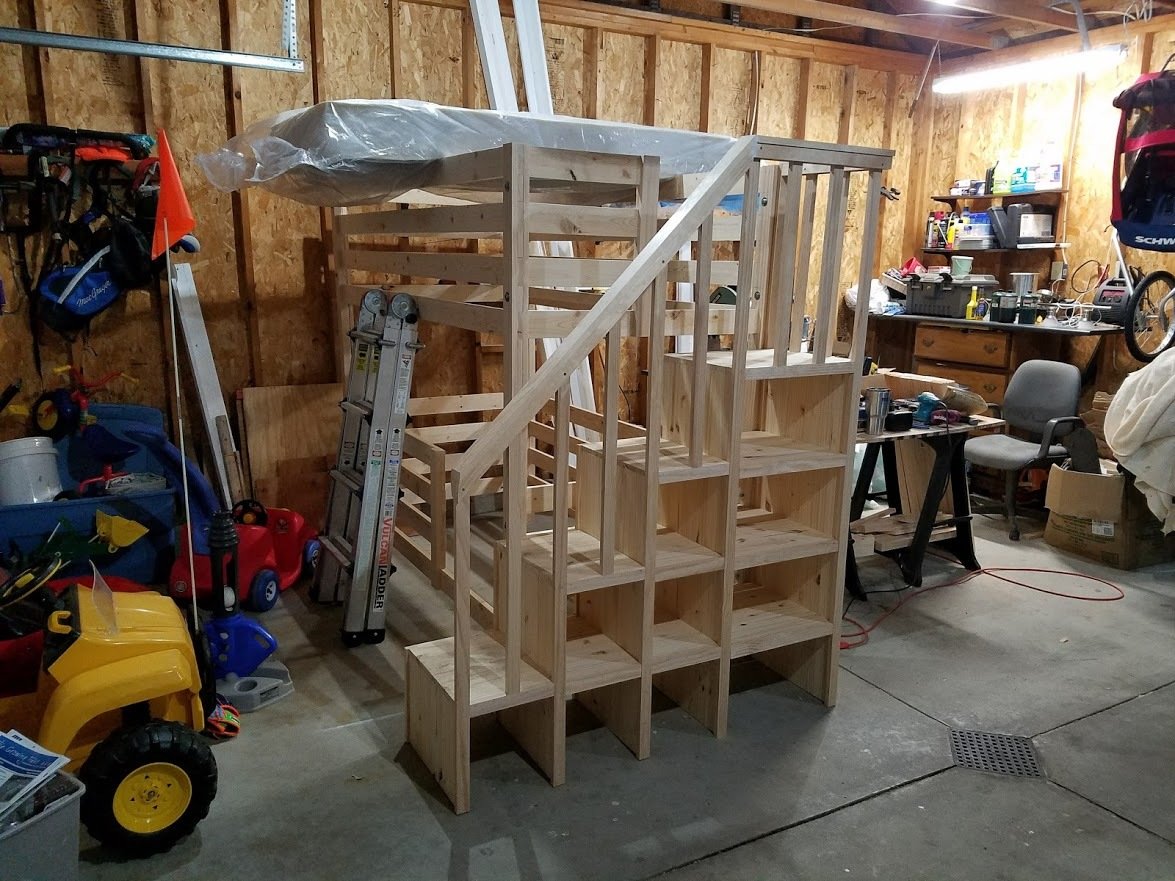
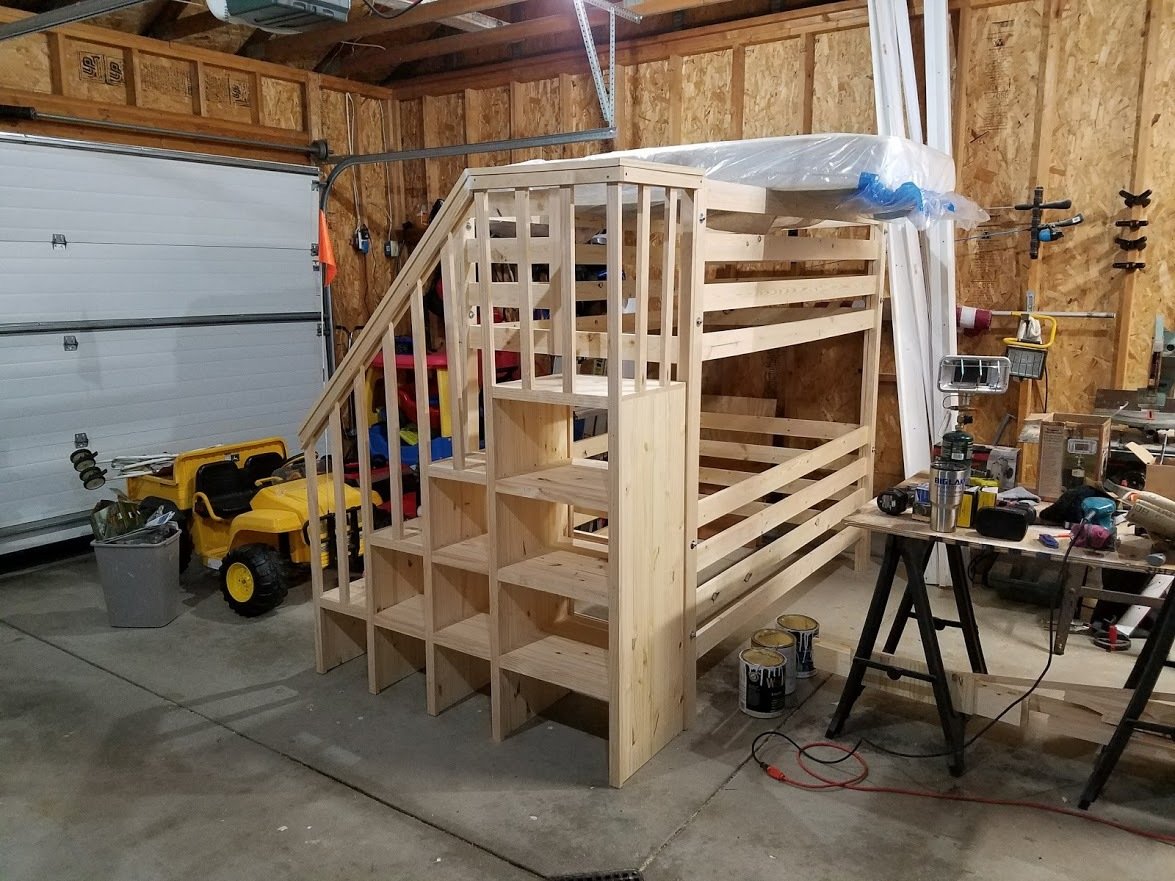
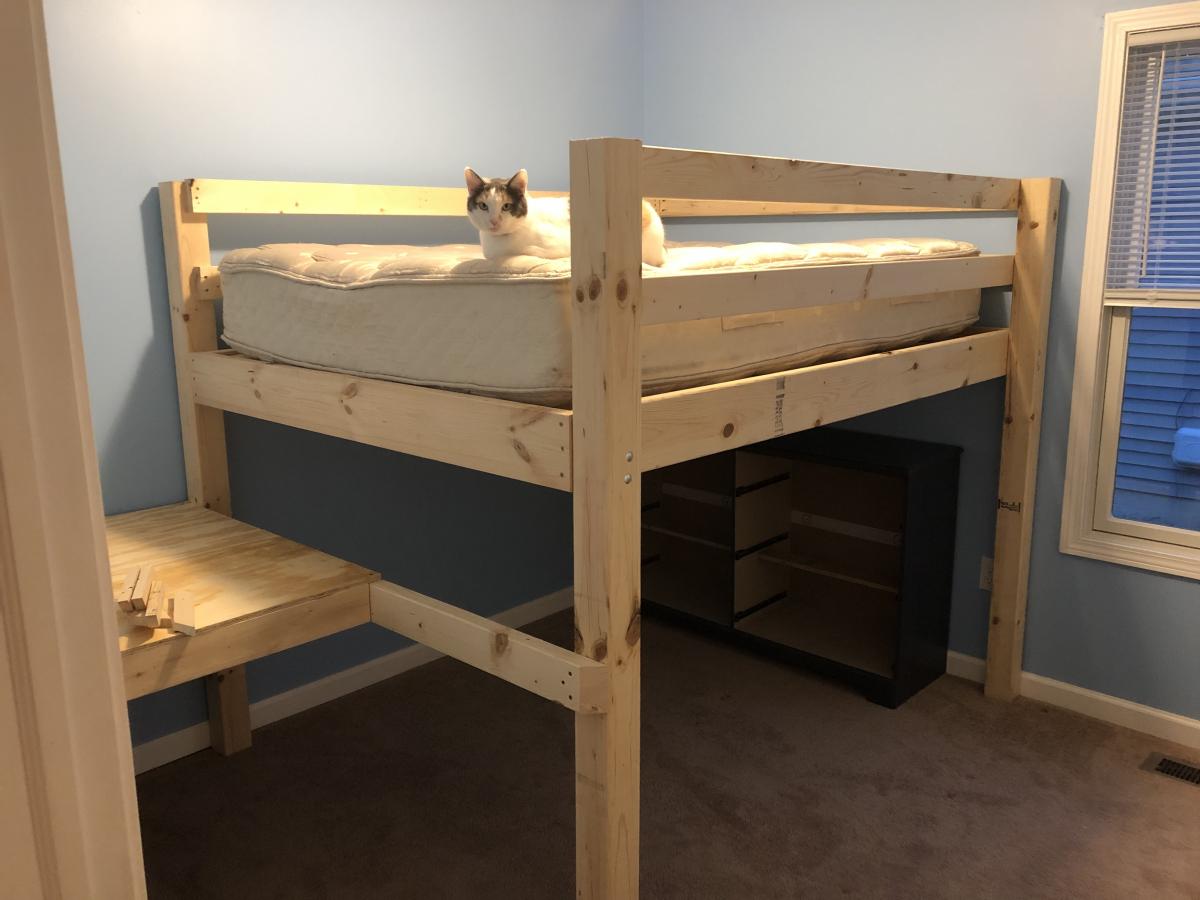
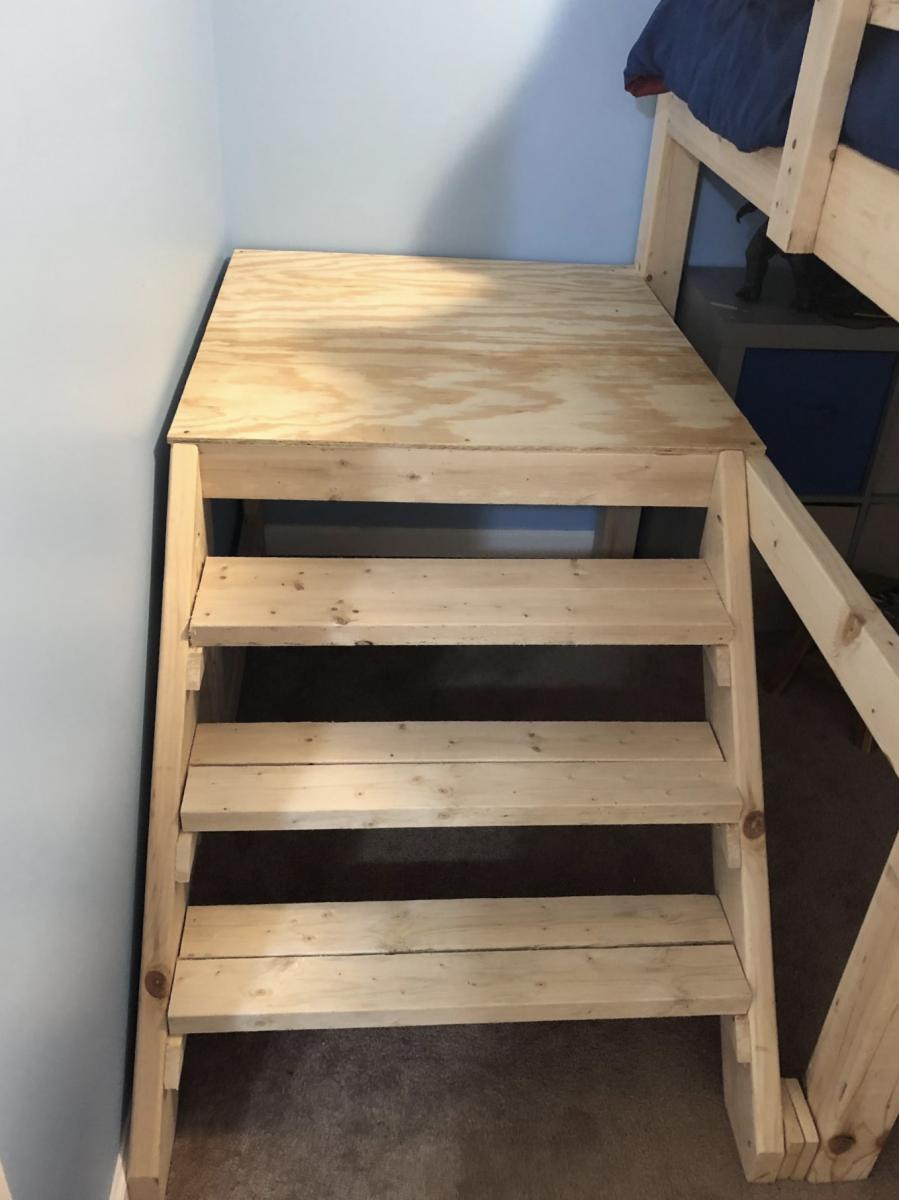
I modified the plans for the Classic Bunk beds by making them 74" tall instead of 63" and added a fourth slat all the way around to add more protection from potential falls. I created one opening in the front for my youngest to get into the bottom bunk, and built slats about 2/3's across the front to act as a gaurd rail. I created another opening on the side for my oldest to get into the top bunk with stairs instead of ladders to again prevent falls. I had to modify the Sweet Pea stairs to accomodate for the extra height in the bunk beds, simplified the railings, and I created each cubby to be big enough to use cloth storage totes that were 11x11x11. Sanded the whole bed and stairs so the corners and edges were all rounded and smooth, and put two coats of white Deck and Porch paint to stand up to the the boys running up and down. I used brackets to secure the stairs to the bed, and sixteen 3" bolts to bind the bed together. Precut and drilled 17 slats for each bed seperated them 2" apart. Spent a few hours every night during the week measuring, cutting, glueing, drilling and assembling the bed and stairs. Spent an entire weekend sanding and painting. Very happy with the way these beds turned out. Overall cost of the project including the paint was around $400.
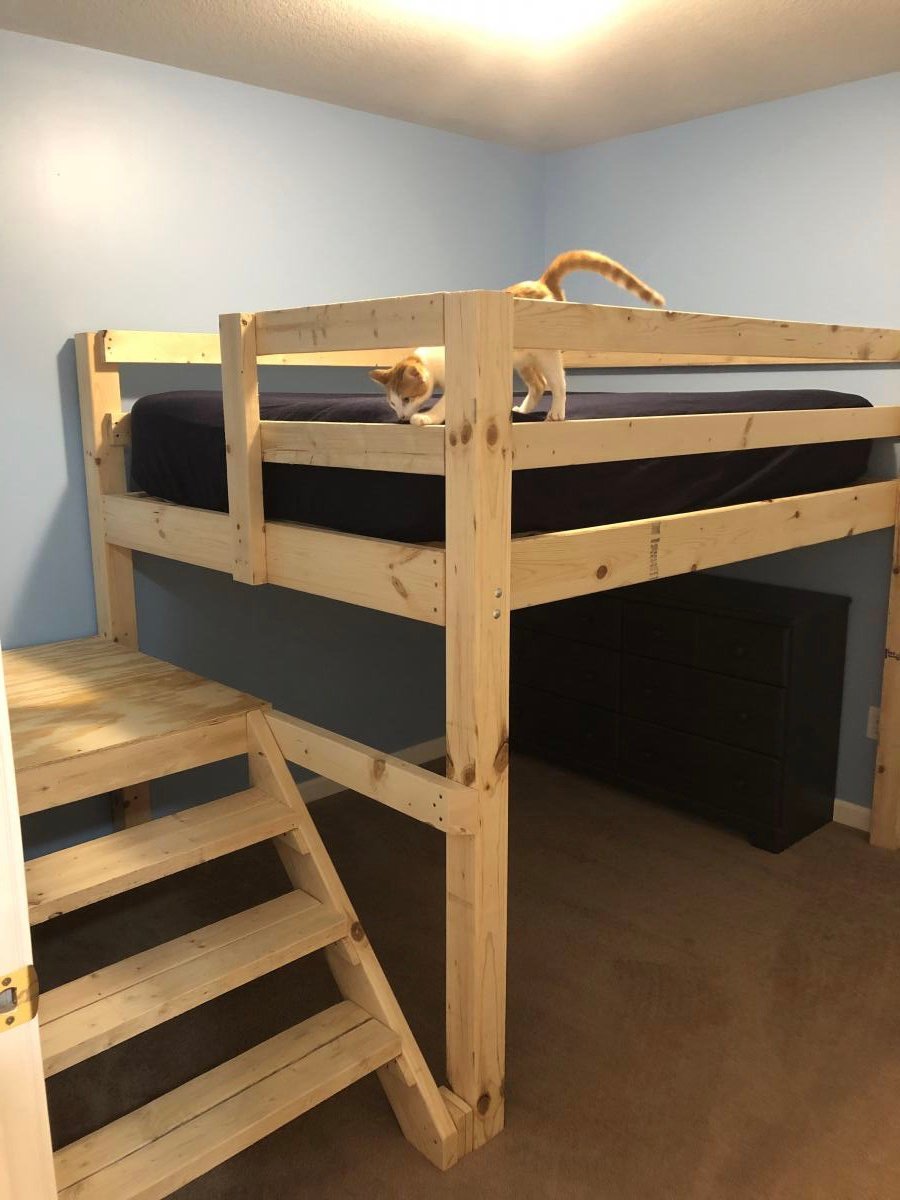
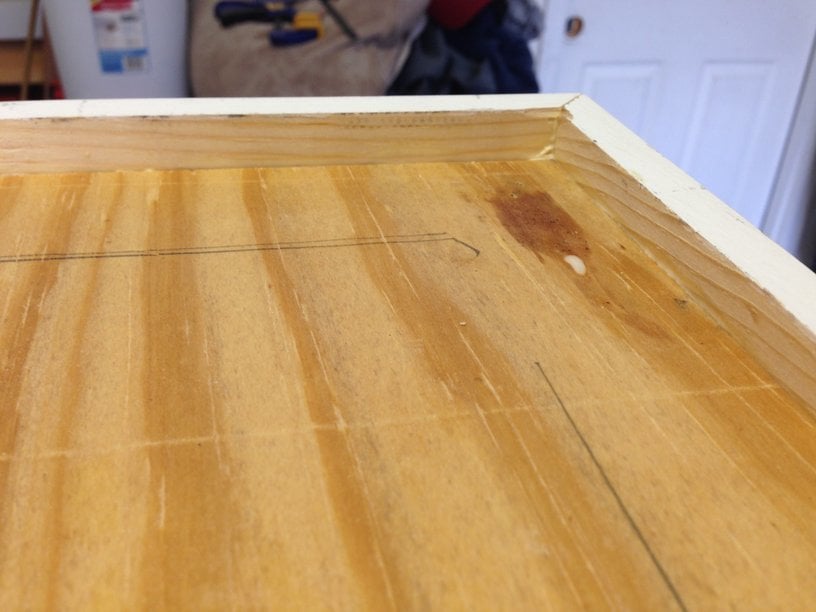
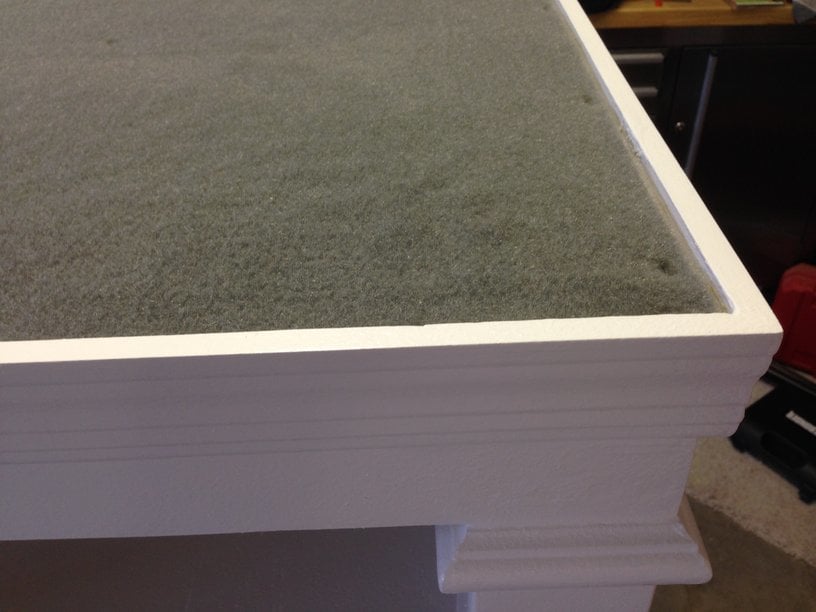
Built a full size loft bed for my kids but wanted something safer than having them climb up and down a ladder so used the Camp Loft Bed plans to add the platform and stairs. It is much easier for the kids. Going to finish by covering the platform and stairs with carpet.

Wed, 10/02/2019 - 09:51
I really like how the platform is only half way so the stairs are inset, this is very smart and good use of space.
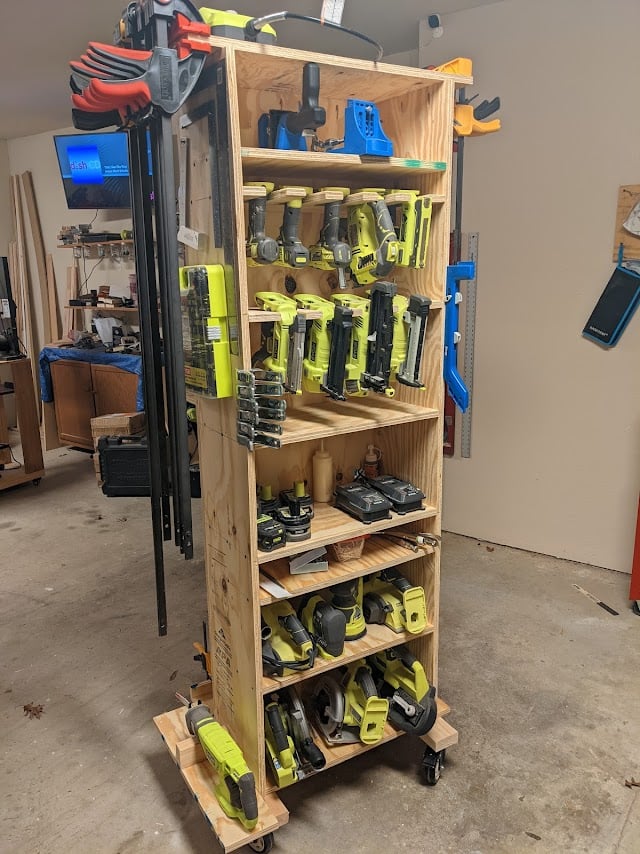
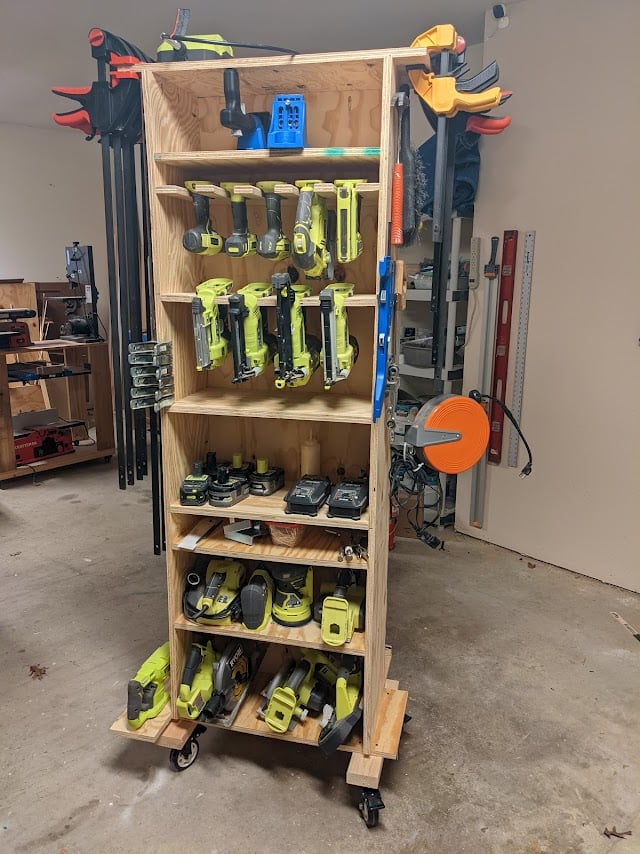
I repurpose furniture as a hobby and I got tired of having my tools hanging on a wall on the other side of the garage so I bult this rolling tool caddy. It is made out of 3/4" plywood, a couple of 2x4's and some heavy-duty casters. I built one about 3 years ago and realized that there were some things I wanted to do differently so I sold it and bult this one. My wife gave me a subscription to SketchUp and I had fun drawing it up and tweaking it. I left an over hang of 3" on both sides so I could store my clamps. I also attached an electrical cord reel on the right side and reversed the ends so the male end can plug into the wall and I can roll the unit across the room allowing me to be able to charge my batteries. The back side has a 44 drawer storage organizer and also a few shelves for additional tools like a router and a multi-tool. I'm not nearly the craftsman many of you are and I'm sure you could do a much better job. I didn't build it to look pretty but to be functional and it works for me.
Fri, 01/21/2022 - 08:28
This is EXACTLY what my husband needs!! Are you willing to share your plans so I can build it for him?
Fri, 01/21/2022 - 09:16
I really like this idea. I have my tools hung up neat all around the garage, but I keep walking back and forth for tools and batteries. It would be great to roll this over to a project and have everything you need right there. Nice work. I will modify one for my needs.

Fri, 01/21/2022 - 10:06
there are some very thoughtful features on this, notably the wings at the top and the bottom for clamps and extra tools and the different shelf heights. Well done! I'm going to build one just like it and a power strip for battery storage.
Fri, 01/21/2022 - 11:25
This is awesome - great job.
please post plans!
Fri, 01/21/2022 - 14:21
Very cool!!! I would appreciate it if you would share your plans…so that I could attempt to make me one.
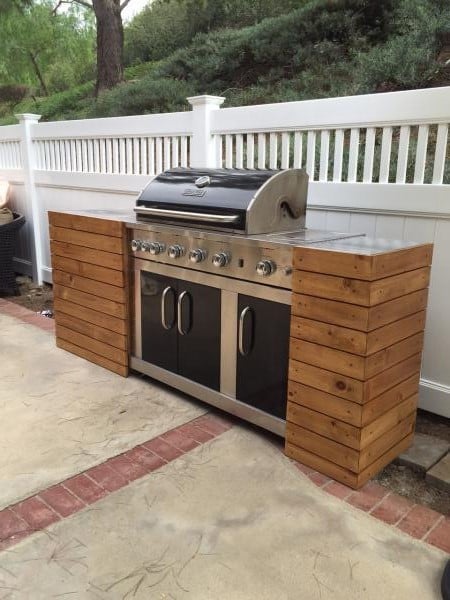
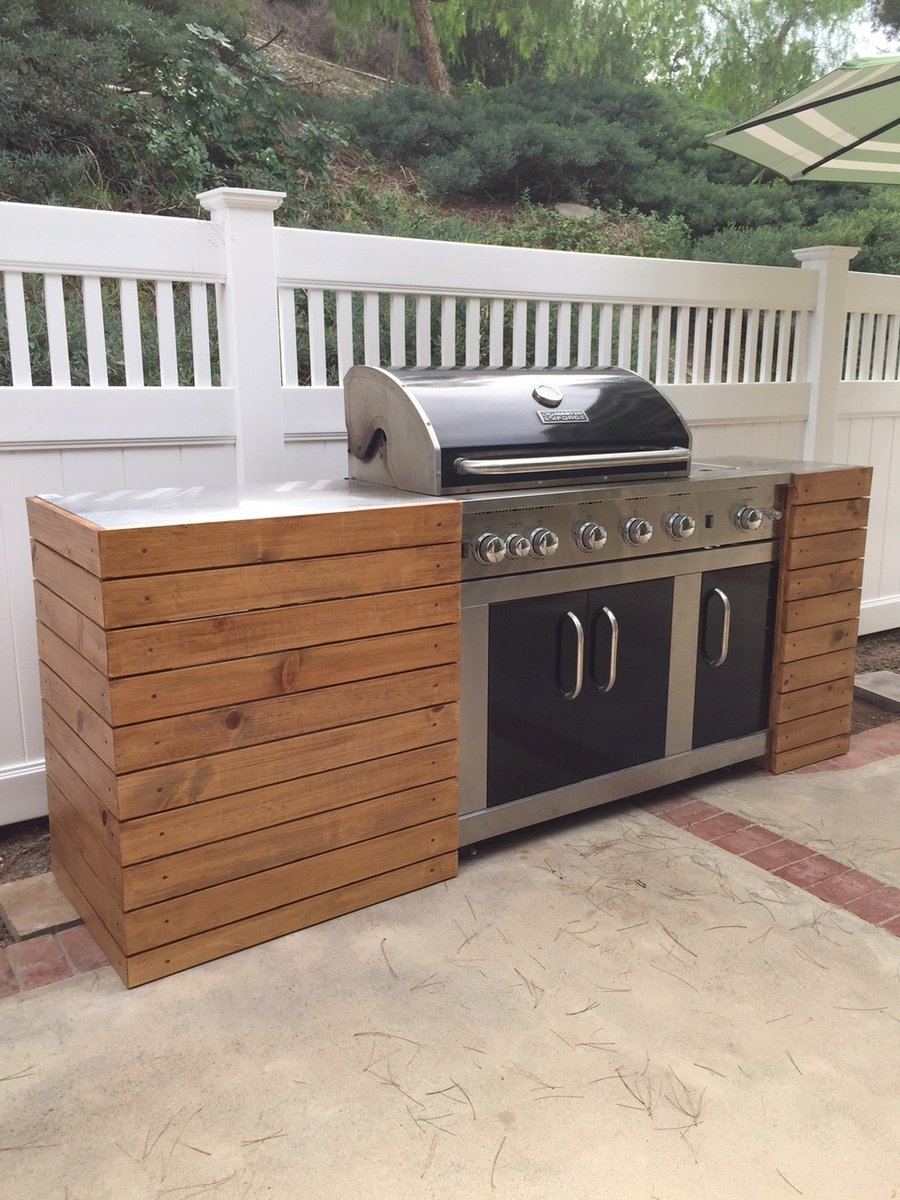
This was just a standard BBQ with an attached folding table. I used a combo of Ana's plans to add a little character and style to the BBQ and it made a huge difference in not only the BBQ, but also the backyard.
Mon, 05/23/2016 - 12:29
Hello: Very interested in which plans you used to build the BBQ Built In. Thank you.
Wed, 06/08/2016 - 09:22
Hello dbryant1977, please share the plans. Also, what's brand/model of BBQ? Very nice.
Thu, 04/09/2020 - 18:27
This is my guess on the plans used! https://www.ana-white.com/woodworking-projects/diy-grill-island-featuri…
Fri, 08/30/2019 - 09:50
Are there plans for this project or at least some pictures from while you were building it?
Thu, 04/09/2020 - 18:27
This is my guess on the plans used! https://www.ana-white.com/woodworking-projects/diy-grill-island-featuri…
Wed, 04/22/2020 - 15:52
Can you provide us with the plans for this? I would love to build one.

Mon, 03/04/2024 - 14:49
Hello: Very interested in which plans you used to build the BBQ Built In. Thank you.

My father and I made this awesome poolside towel cabinet using the Benchmark Cabinet plans. A super easy 1 day build and it looks amazing on the patio. Bring on the pool weather!

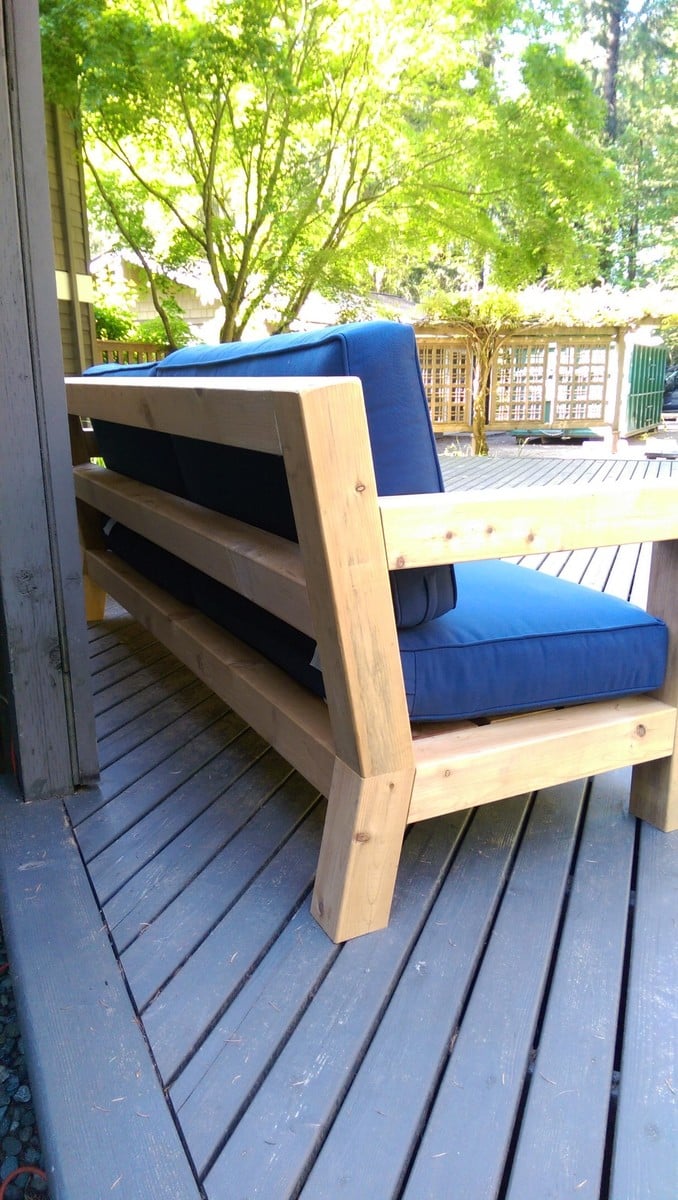
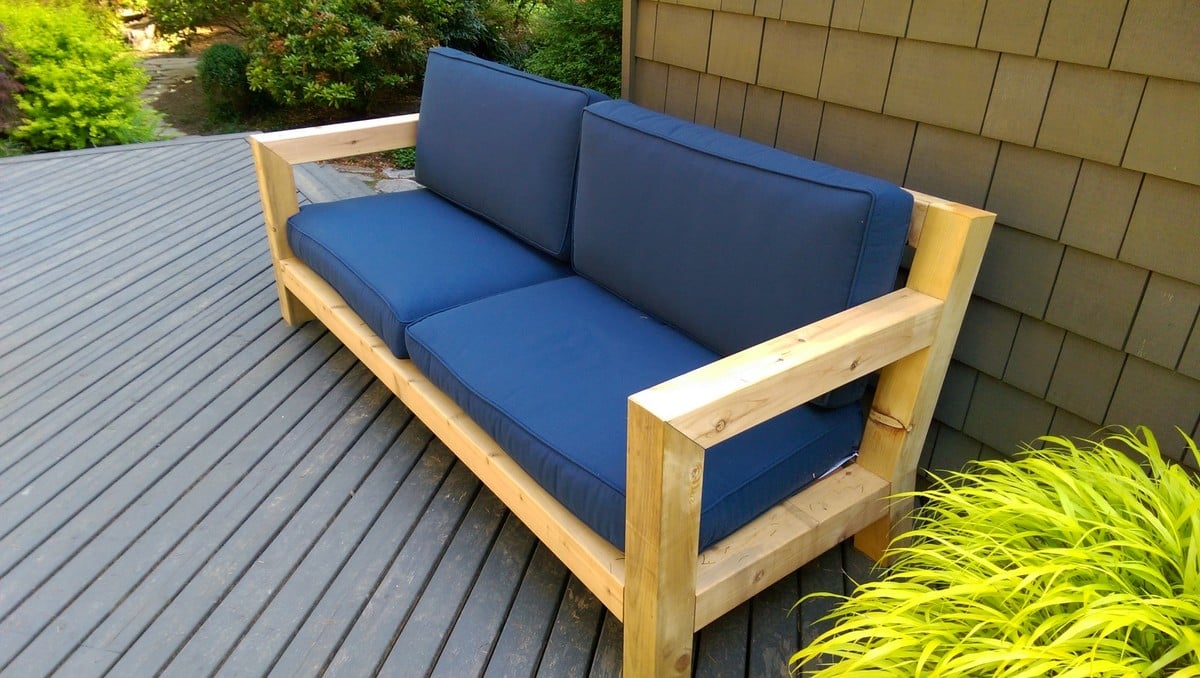
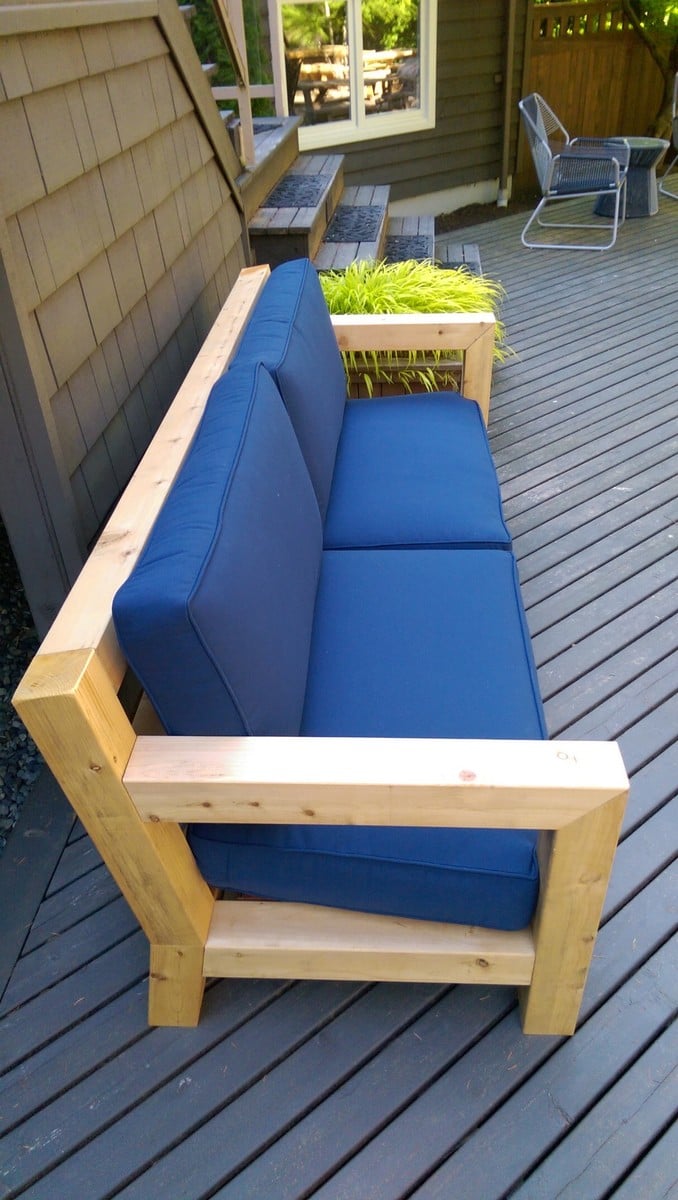
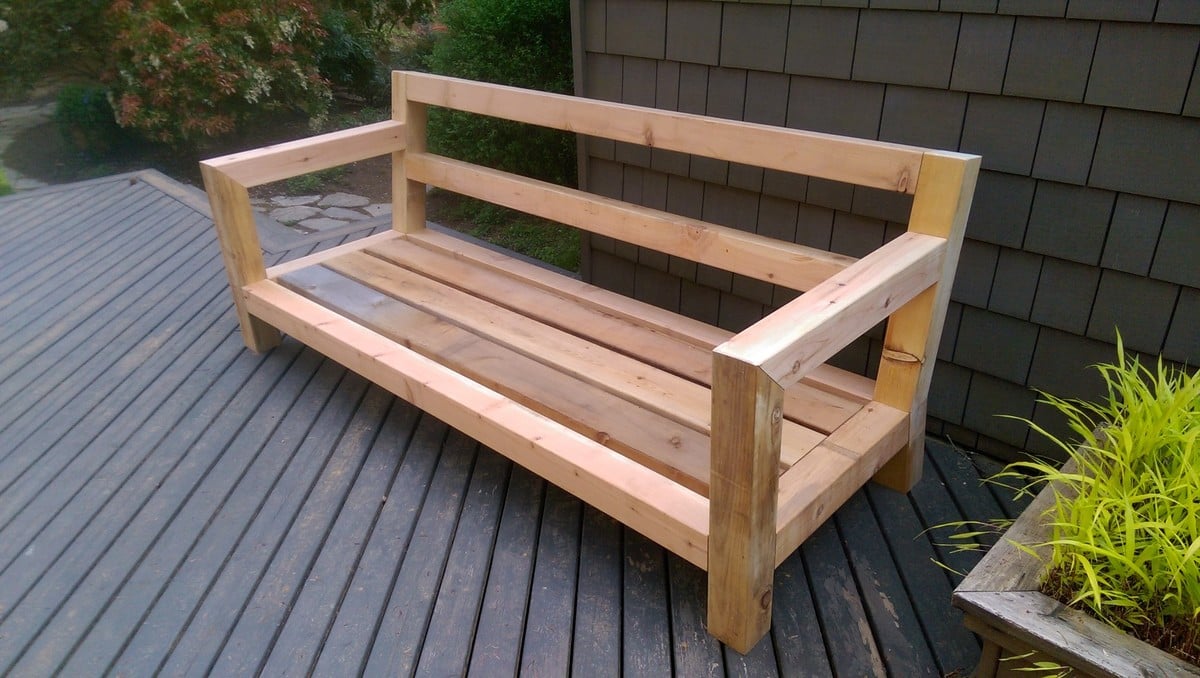
I was in love with the RH Merida set because of its clean lines and modern style. Also, the plan seemed simple enough that I could re-create it without a pattern. The only thing that I did not like about it is the lack of arms. I really like to have a place to put my arm or my beverage :) - so I added arms to the design.

Thu, 05/30/2019 - 18:45
It’s beautiful! Do you have a set of plans that you might be willing to share?
Wed, 05/20/2020 - 10:45
This is Awesome. I'm halfway in the middle as i thought I could complete without plans. Do you have any plans could share. Please....
Fri, 06/19/2020 - 15:54
were you able to get plans? I would LOVE plans too! we want to try and re-create this and would prefer NOT to get stuck!
Fri, 06/19/2020 - 15:55
Would LOVE to get plans, would even pay for them! Found rough drawings online but they are chicken scratch and hard to interpret!
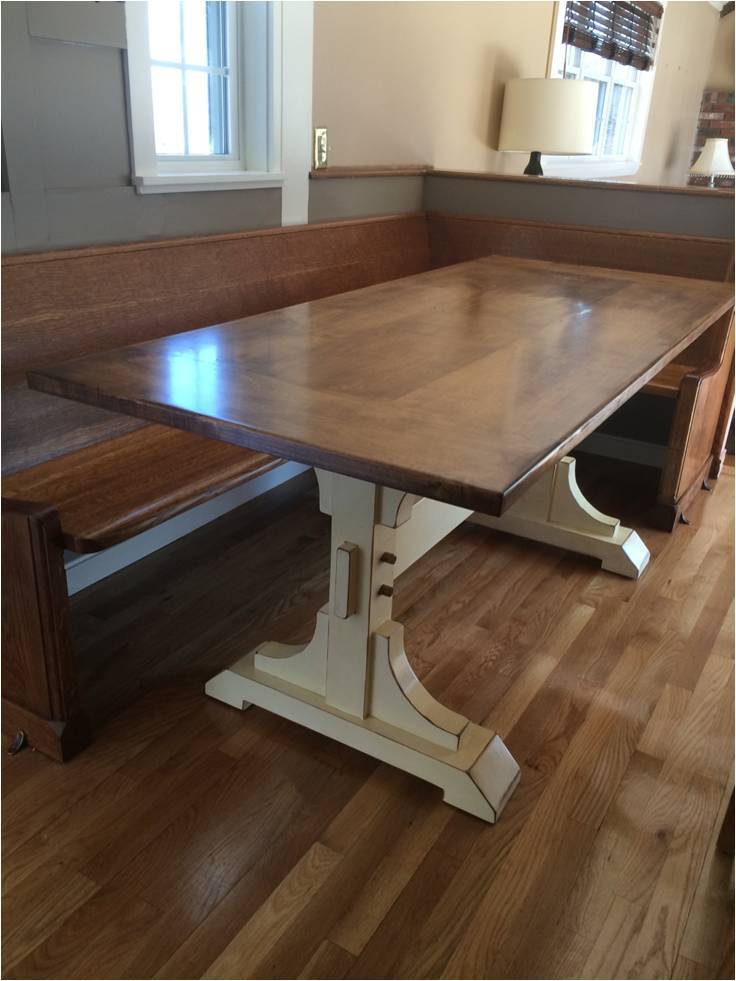
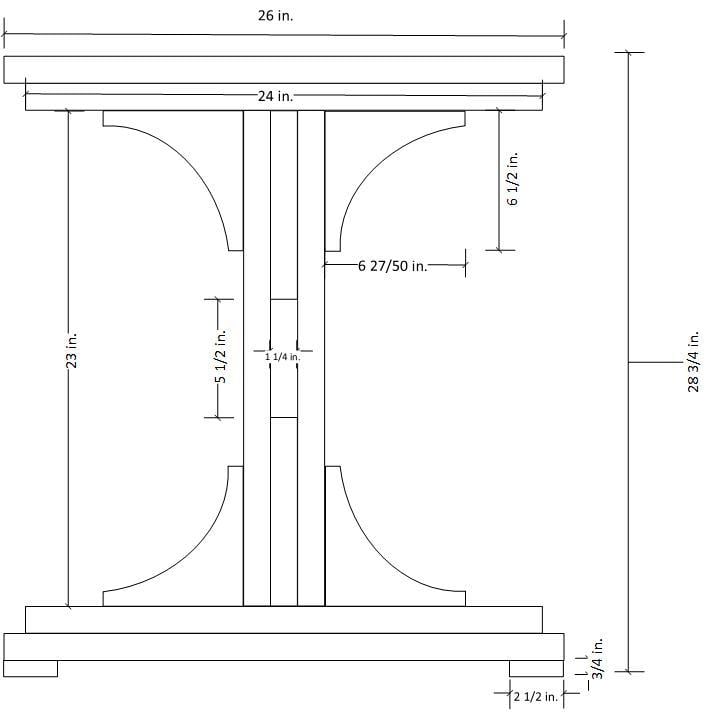
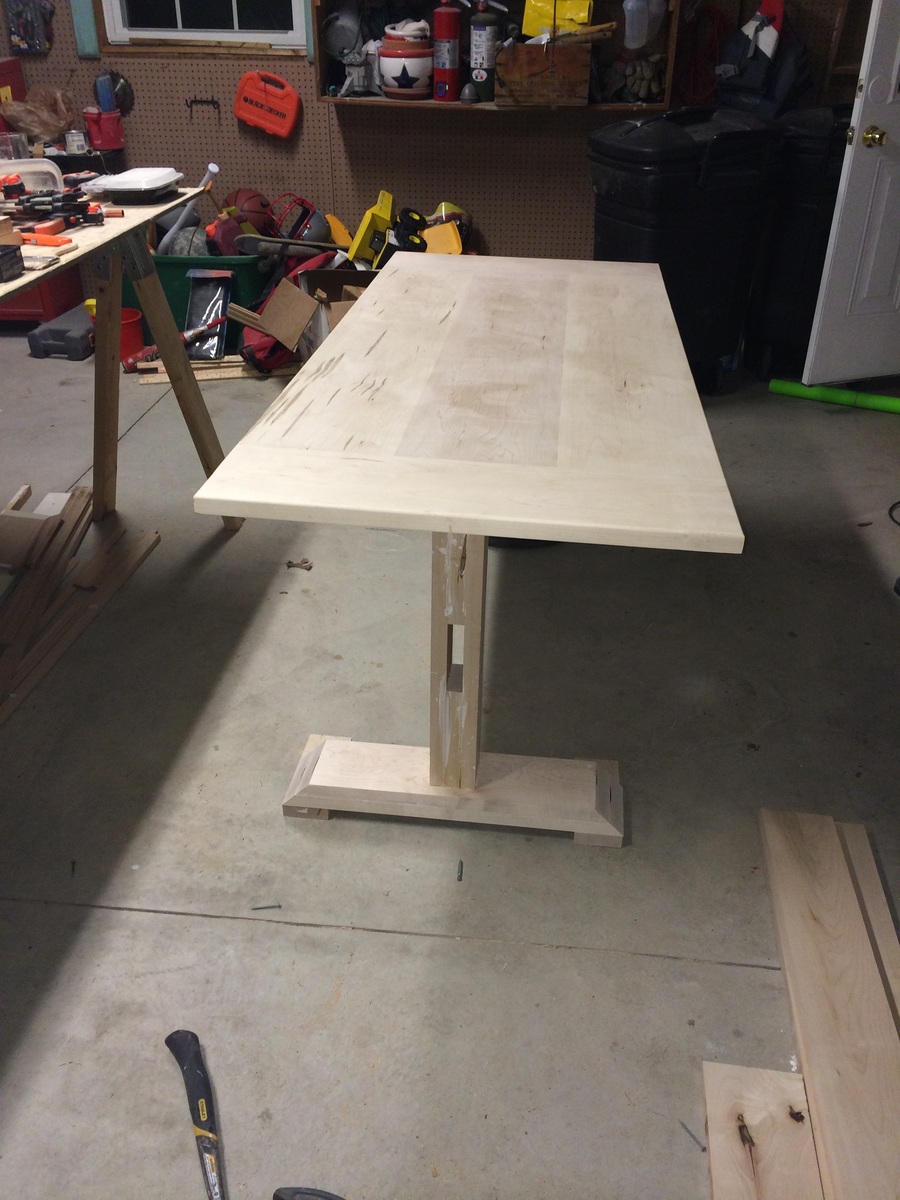
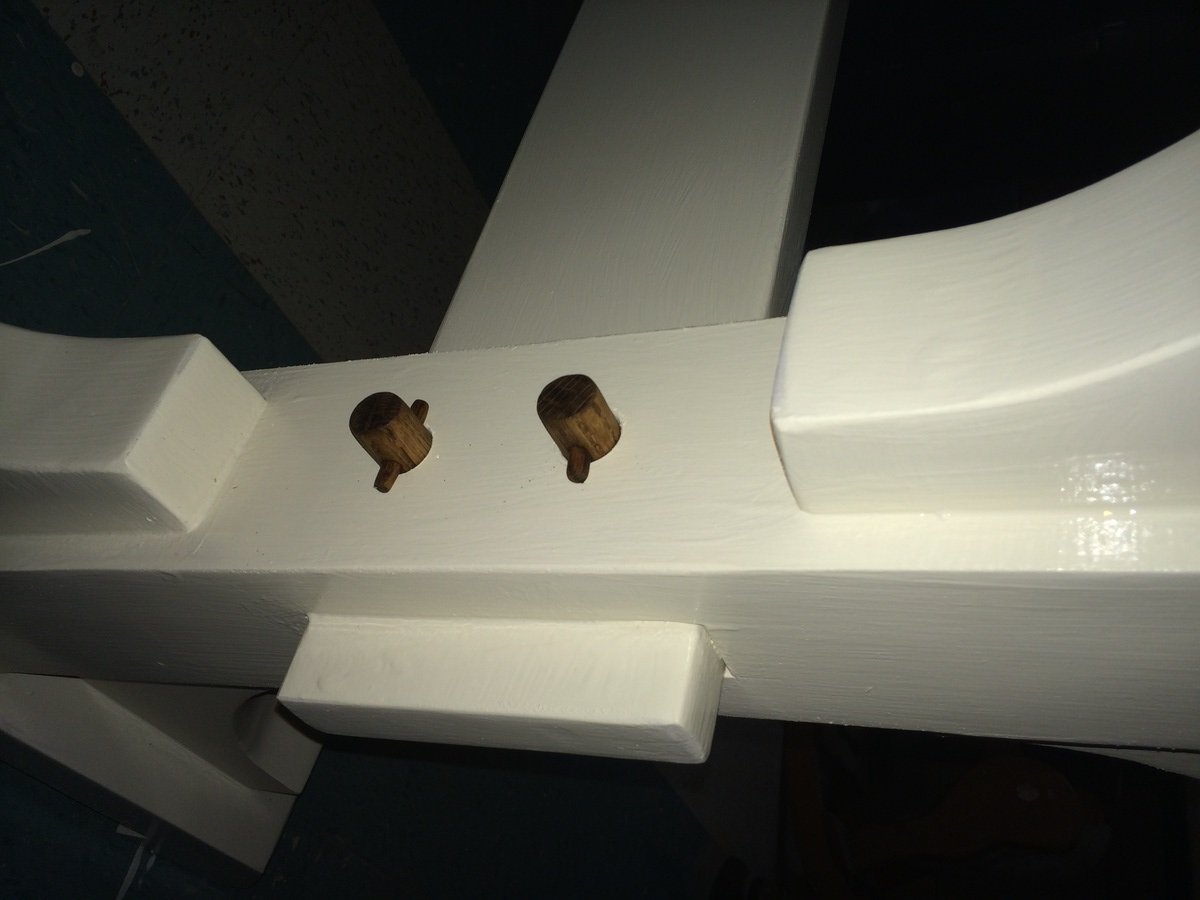
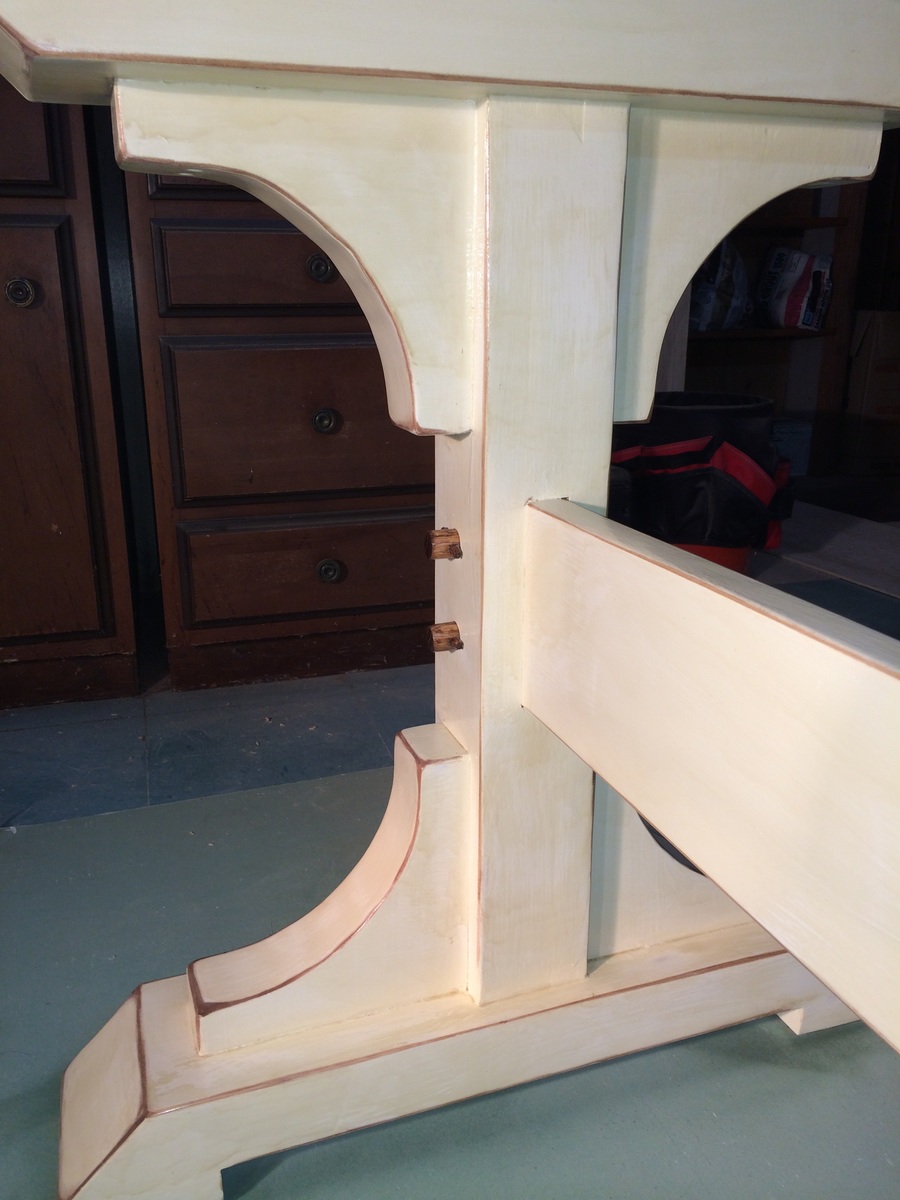
Farmhouse table made from distressed (worm hole) maple.
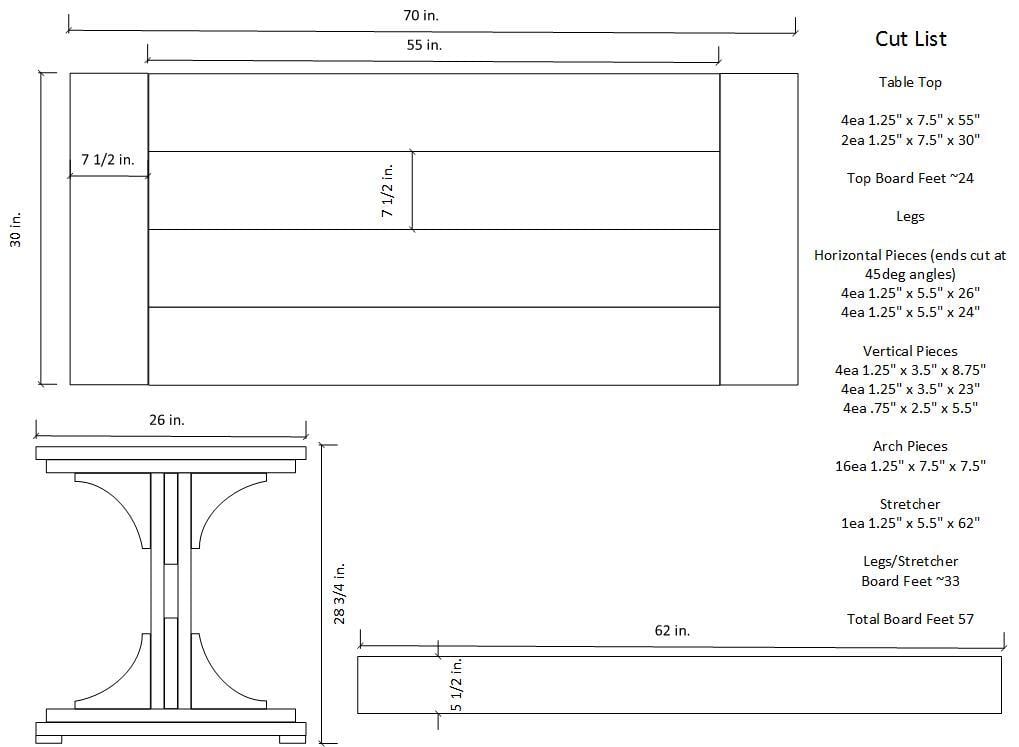
My neighbor was able to get me the 5/4 distressed maple for about $2/bd ft - I ended up buying 100 board feet and had plenty leftover. The finished board feet for this project was about 60 if I remember correctly. So the $200 was the bulk of the expense. The only other costs were sand paper, I bought a Kreg Jig, screws, Minwax Marker, paint, stain and urethane (much of which I already had).
It came out better than I anticipated. The antique white finish was not difficult at all.
Tip - When following the instructions for the finish here, I applied the first coat of urethane with a brush almost immediately after applying the Minwax marker to all of the sanded edges. I did this in haste, but ended up with some unexpected results that really added a nice touch. The stain from the marker incorporated a bit into the urethane as I brushed it giving it an antique, yellow hue. At first I thought I made a big mistake, but it turned out to add a really nice look.
Mon, 05/19/2014 - 07:29
CSaintD - The top can be removed as I did not glue it. I set 3 dowels on top of each of the 2 legs so that the top would always lign up correctly if disassembled and reasembled. The stretcher could be removed, but would probably cause some damage to the finish as it was a tight fight when I finished it. The stretcher would be removed by removing the dowel pegs that I fabricated on each leg.

In reply to Disassembly by g82martin
Mon, 05/19/2014 - 08:21
Thanks. I really like the dowel pegs on the legs/stretcher. Very nice top finishing as well. Did you square the boards to get them to be so smooth when joined?
Mon, 05/19/2014 - 08:26
I cheated a bit on the top. My neighbor who got me the wood works in a furniture reupholsery shop. He planed and joined the boards for me, which saved me a good amount of time. I'm confident I could have done this at home with my table saw, miter saw and hand plane, but what he did in 2 hours probably would have taken me 10.
Fri, 08/05/2016 - 20:35
Love the dowels you added! Planning on building this exact table pretty close to your dimensions and have a very long church pew as well! Trying to decide between L-ing my pew and cutting to straigjy 6'. Do you mind sharing the dimensions of your pew? And how did you miter the pew?
Tue, 01/21/2020 - 09:40
Beautiful table. I love the pegs added to the legs and stretcher, they add a historic detail lost in a lot of today's building techniques

Thank you! You've helped me look like a true carpenter who knows what he's doing! My whole family is impressed with my woodwork lately, and now I'm addicted. I've done your seesaw, bar table and stools plus the treehouse in 2 weeks. Thank you for sharing your plans!


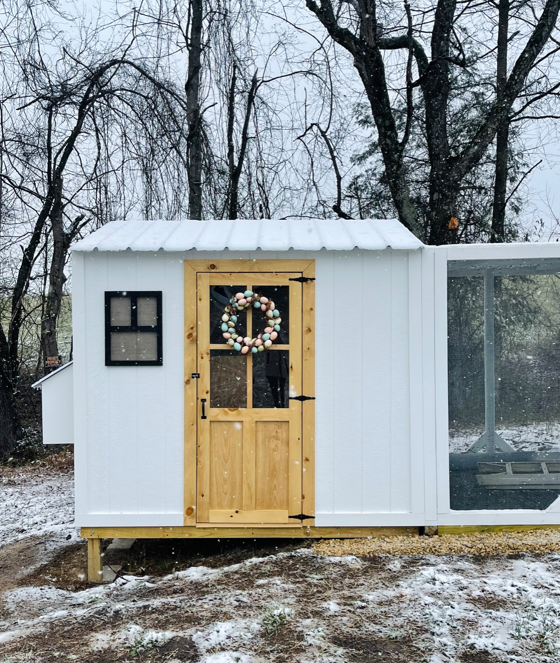
"I don’t consider ourselves experts at all and your plan was so easy to follow. We can’t wait to introduce our chicks when they’re old enough to transfer outside."
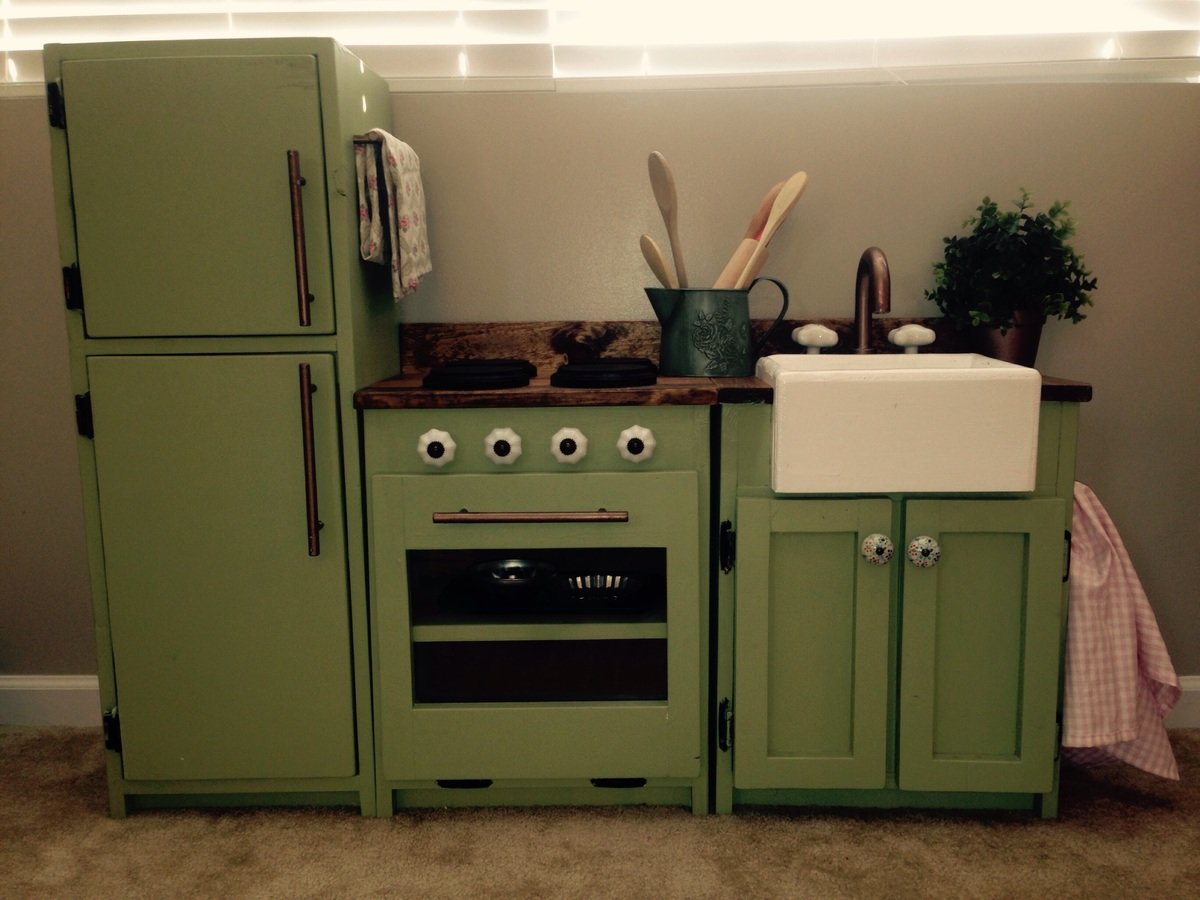
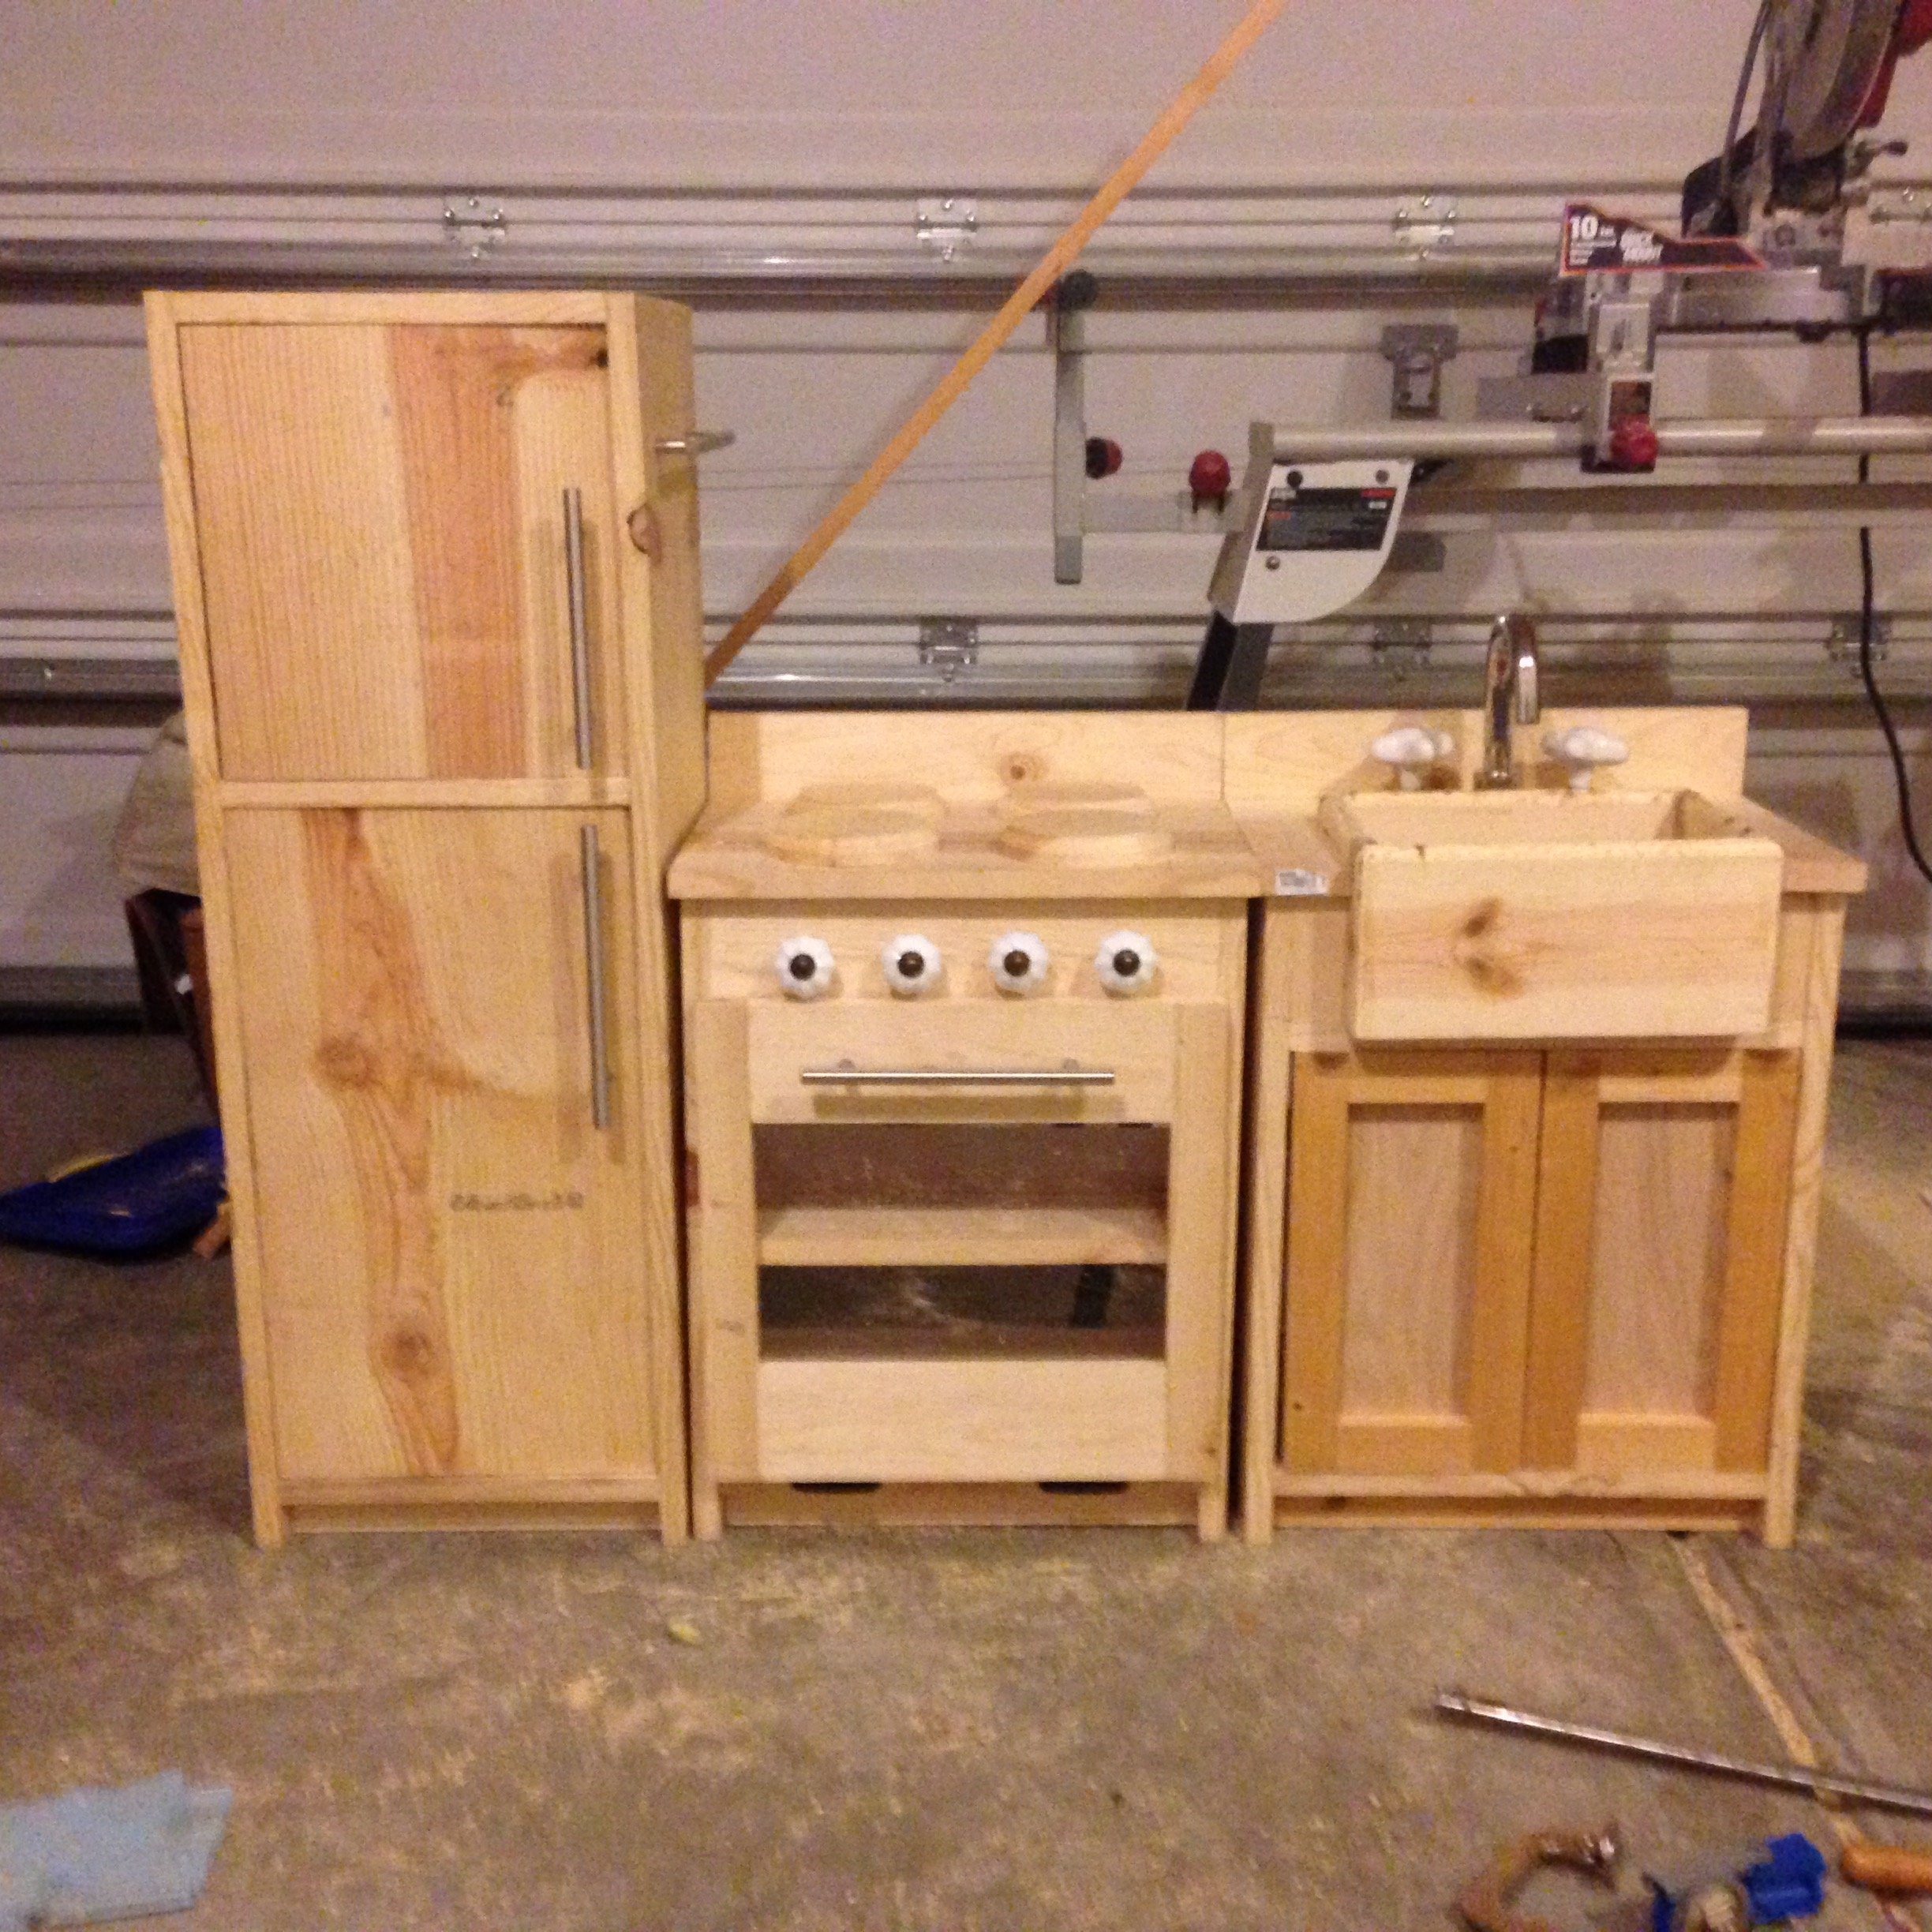
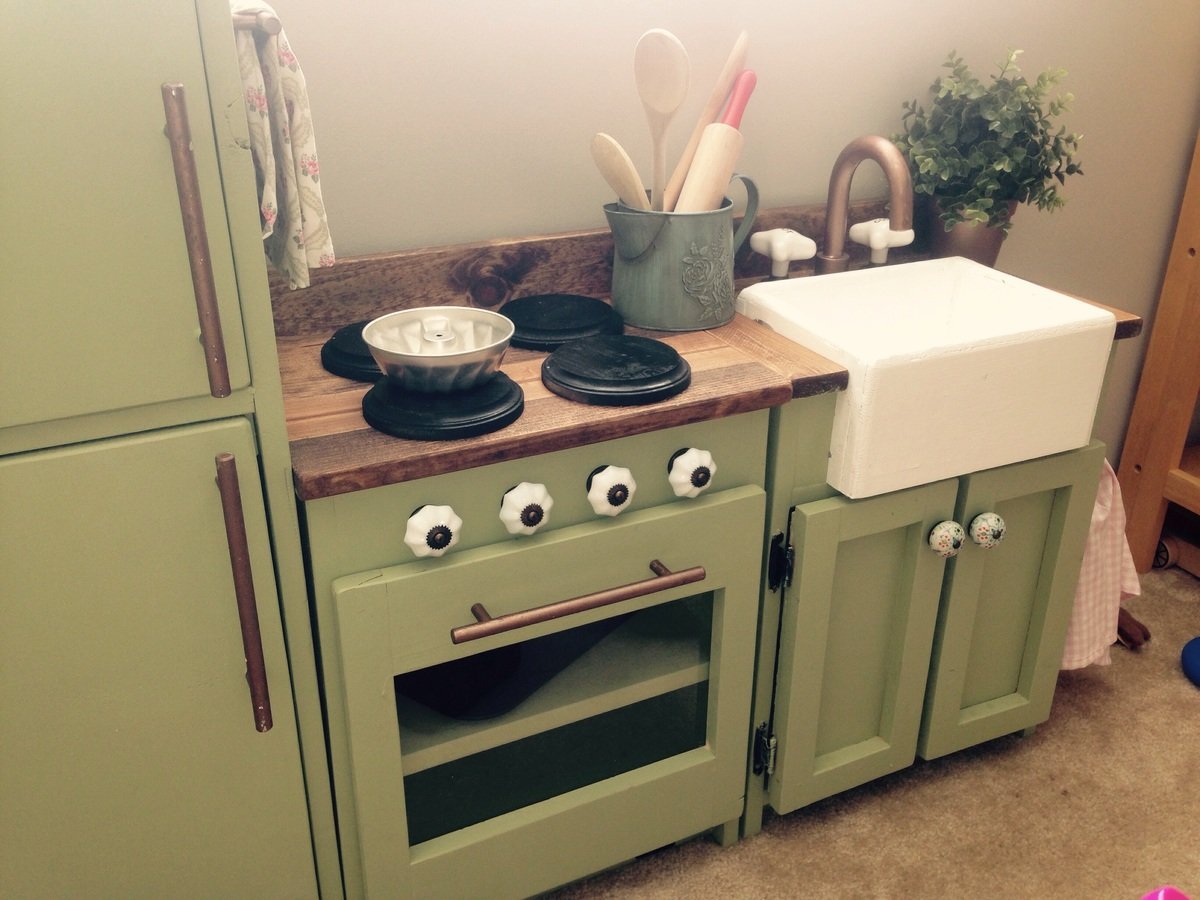
We really wanted to give our 2 year old a play kitchen for Christmas. We also didn't want to spend the money on the likes of the Pottery Barn set, and weweren't sold on the lesser-expensive options. Fortunately, a quick internet search led me to Ana White's website and plans for this play kitchen. As someone who has never built anything before, the plans seemed very doable. All of the brag posts were also inspirational and sold me on starting this project. I worked on this an hour or so after work for a couple of weeks, and then a few longer nights running up to Christmas Eve (always a bit of a procrastinator!). As neither my wife or I know how to sew, we decided to turn the space underneath the sink into a cabinet. The paint color was left over from painting our kitchen and family room, and we decided to stain the stove and counter tops. Overall, we are very pleased and proud with how this turned out, and our 2 year old loves playing with the set!

Wed, 12/31/2014 - 13:15
This looks awesome! Love all the details and the green color with the stained counter. Great job!

Wed, 12/31/2014 - 15:17
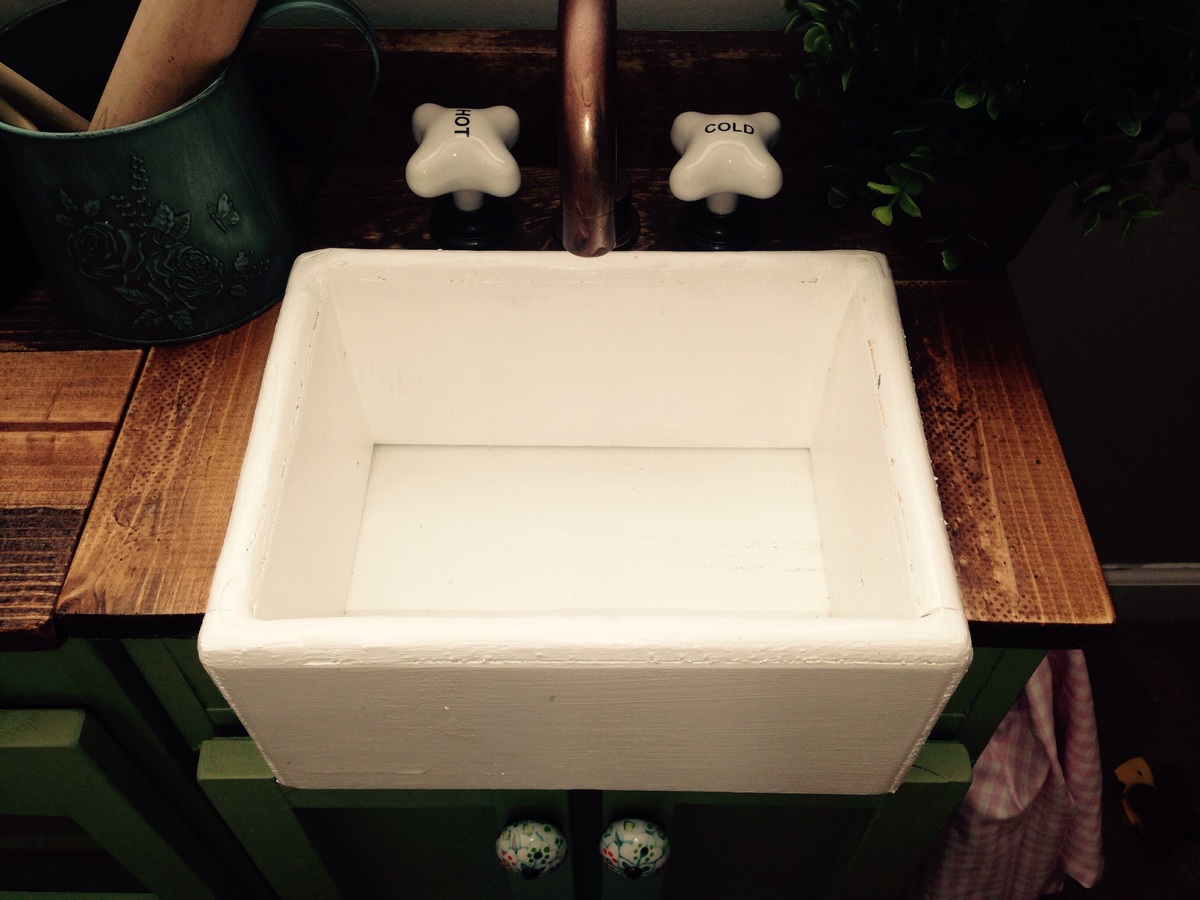
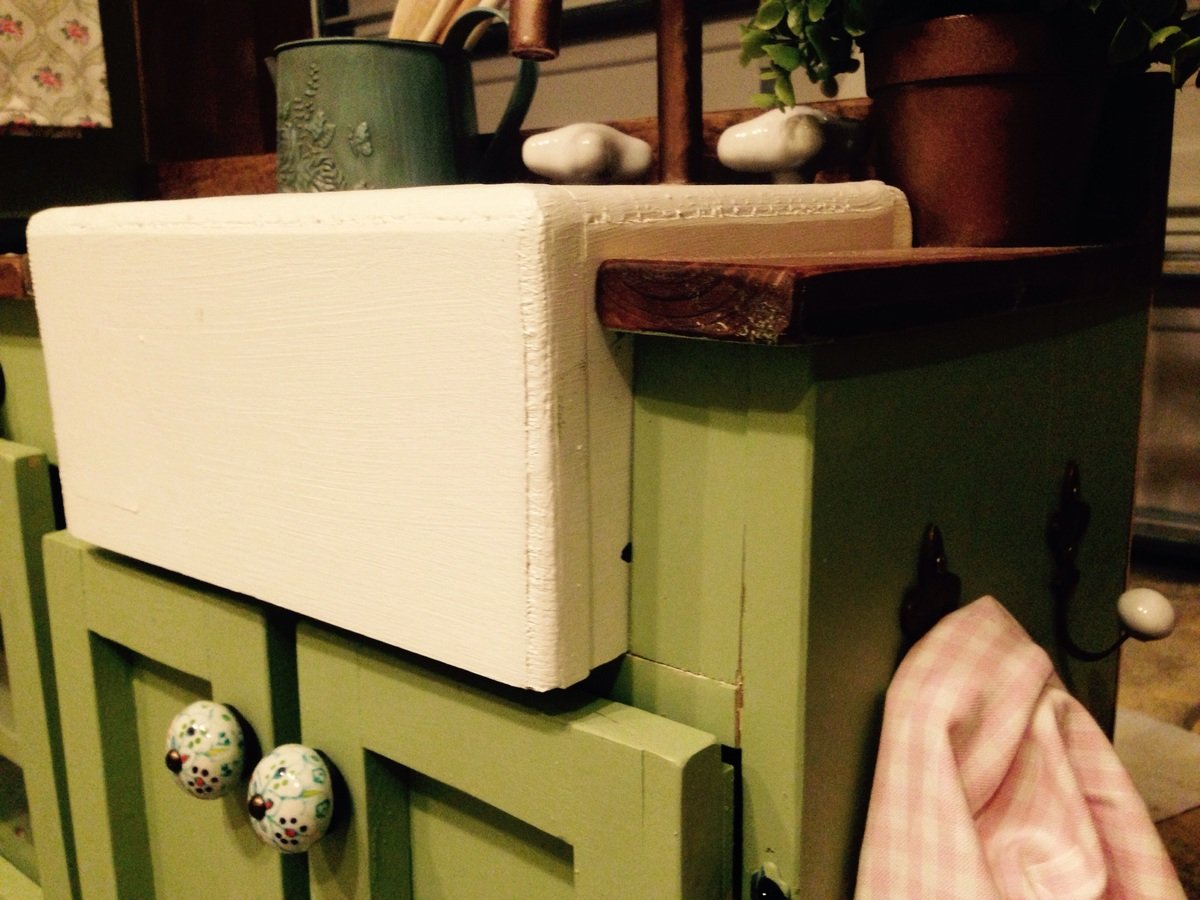
This is so adorable. I especially love the little sink.

I built a set of chairs and a coffee table for our newly designed outdoor area. These look amazing and people love sitting on them and hanging out outside our house.


This was an easy project to complete in an afternoon that does not require any advance woodworking skills

Wed, 11/26/2014 - 12:19
This project looks even better than mine! I love look with paint! Well done!
Wed, 12/10/2014 - 09:41
This is my second completed project with plans and ideas from your website. Thanks for your good work!
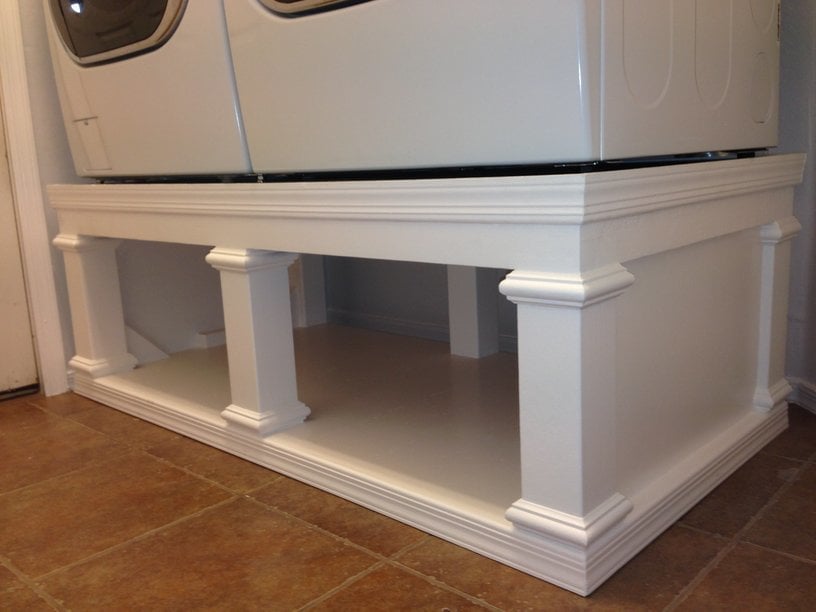
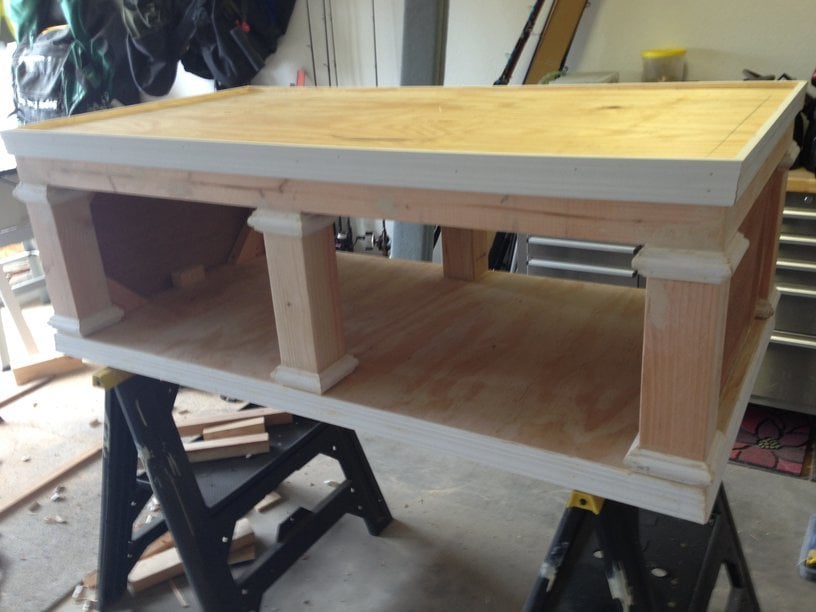
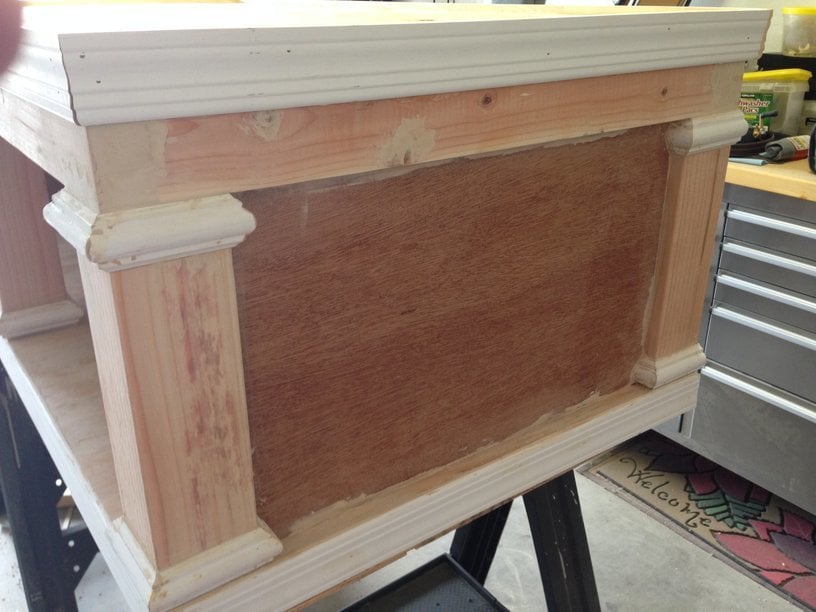
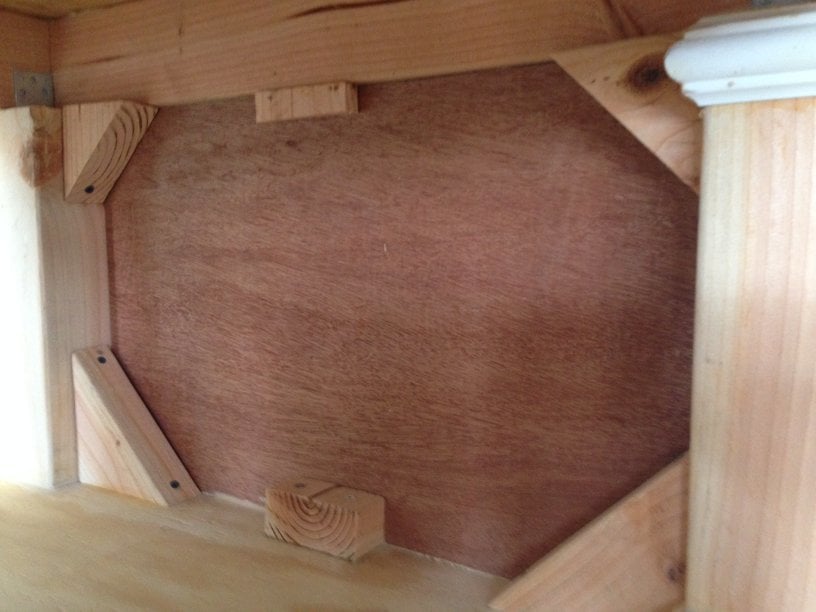
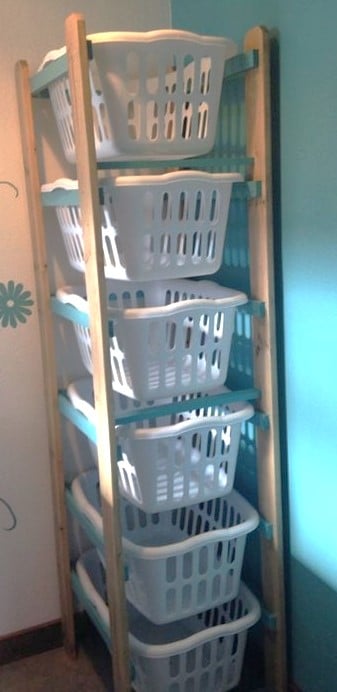
I loved this design. I couldn't believe that they wanted to charge me almost $600 for the pedestals for the washer/dryer set that I bought on black friday, so I decided to give this project a go. I basically used the same construction plans from Sausha's project, but I dressed mine up a bit. First, I chose a bit larger trim for the tops and bottoms of the posts. Then, I bought some 2" baseboards and did the top and bottom with baseboards. On the bottom, I had to use my tablesaw to trim off about 1/2" because I used 1x1" boards on the bottom so that I could have more space for baskets. Then, on the top, I inverted the baseboard and allowed it to overlap a bit so that if it were to vibrate, the washer/dryer could not fall off the edge. I also added some fabric on the top (stuff that I use to cover the bunk boards on my boat trailer...kind of like a very thick and durable felt material) to cut down on vibration and also keep the units in place. Finally, I added sides by using wedge trusses on the inside of my side posts and then I put a 1/8" piece of plywood over top and nailed/glued it to the trusses.
It turned out great. Thanks for the plans Sausha!

In reply to Nice Detail by earthbybike
Mon, 12/08/2014 - 11:42
Thanks. Yeah, I thought that it did really dress things up. I really like the way it turned out.
Mon, 12/21/2015 - 17:38
Did you use sanded plywood? Did you use any veneers for the exposed 2x4's to get a smooth finish or did you paint right on it?
lastly, what is the name of the trim you put on the 4x4s? I've hard a hard time finding it. Thank you!
Mon, 12/21/2015 - 17:44
Did you plane the 2x4s? Because they look really straight.
In reply to Question... by Zlk200
Wed, 06/29/2016 - 13:59
Sorry for the super delayed response. I didn't realize this question was here. I did not plane anything. I did sand the surfaces a bit, but I didn't get too crazy. I put 3 thick coats of paint on it which made it pretty smooth. If you look very closely in person, you can still see a bit of wood grain, but it is only noticable if you really get down and look. I did use a lot of wood putty to fill all of the gaps and crevaces and then I sanded those parts pretty well.
With regard to the trim, the top literally just standard baseboard material turned upside down, and then the little trim on the tops and bottoms of the 4x4s is just another standard strip of moulding that I got from Lowes. I think they call it "Chair Rail" moulding. Its the stuff that you put down if you are doing some sort of paint separation or wainscoting.
http://www.lowes.com/pd/1-625-in-x-12-ft-Mdf-Chair-Rail/3403018
I used woodglue on all of the moulding and tacked it on with a nail gun. Then I filled all of the nail holes with wood putty and also use the putty to fill gaps where the corners came together to make that look smooth.
I hope that helps...you are probably already done with your project by now, but I figured that I would answer anyway. :)
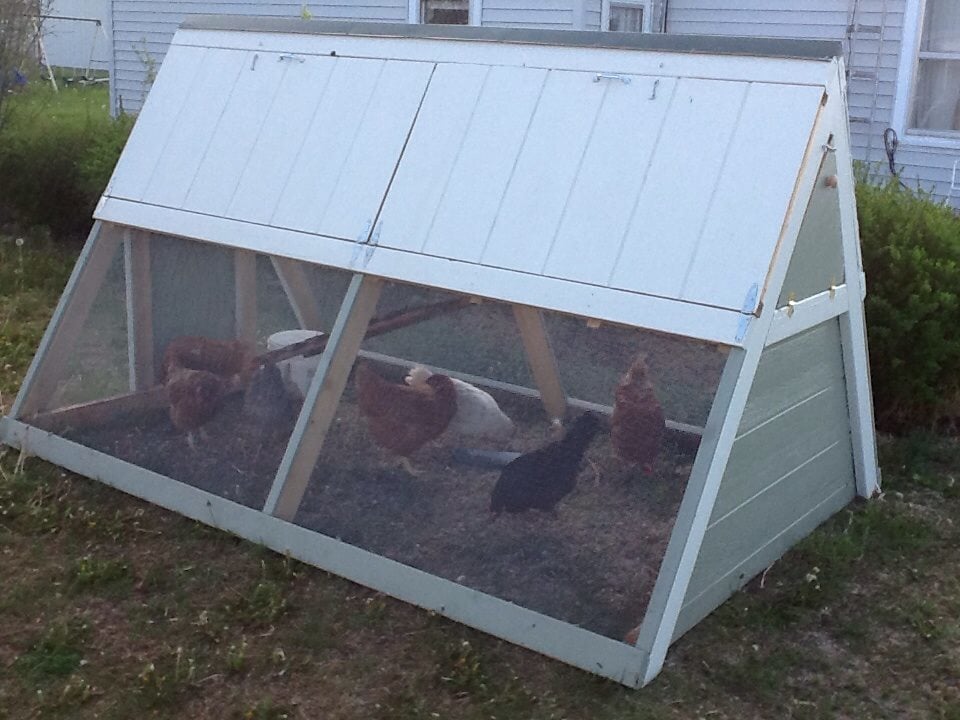
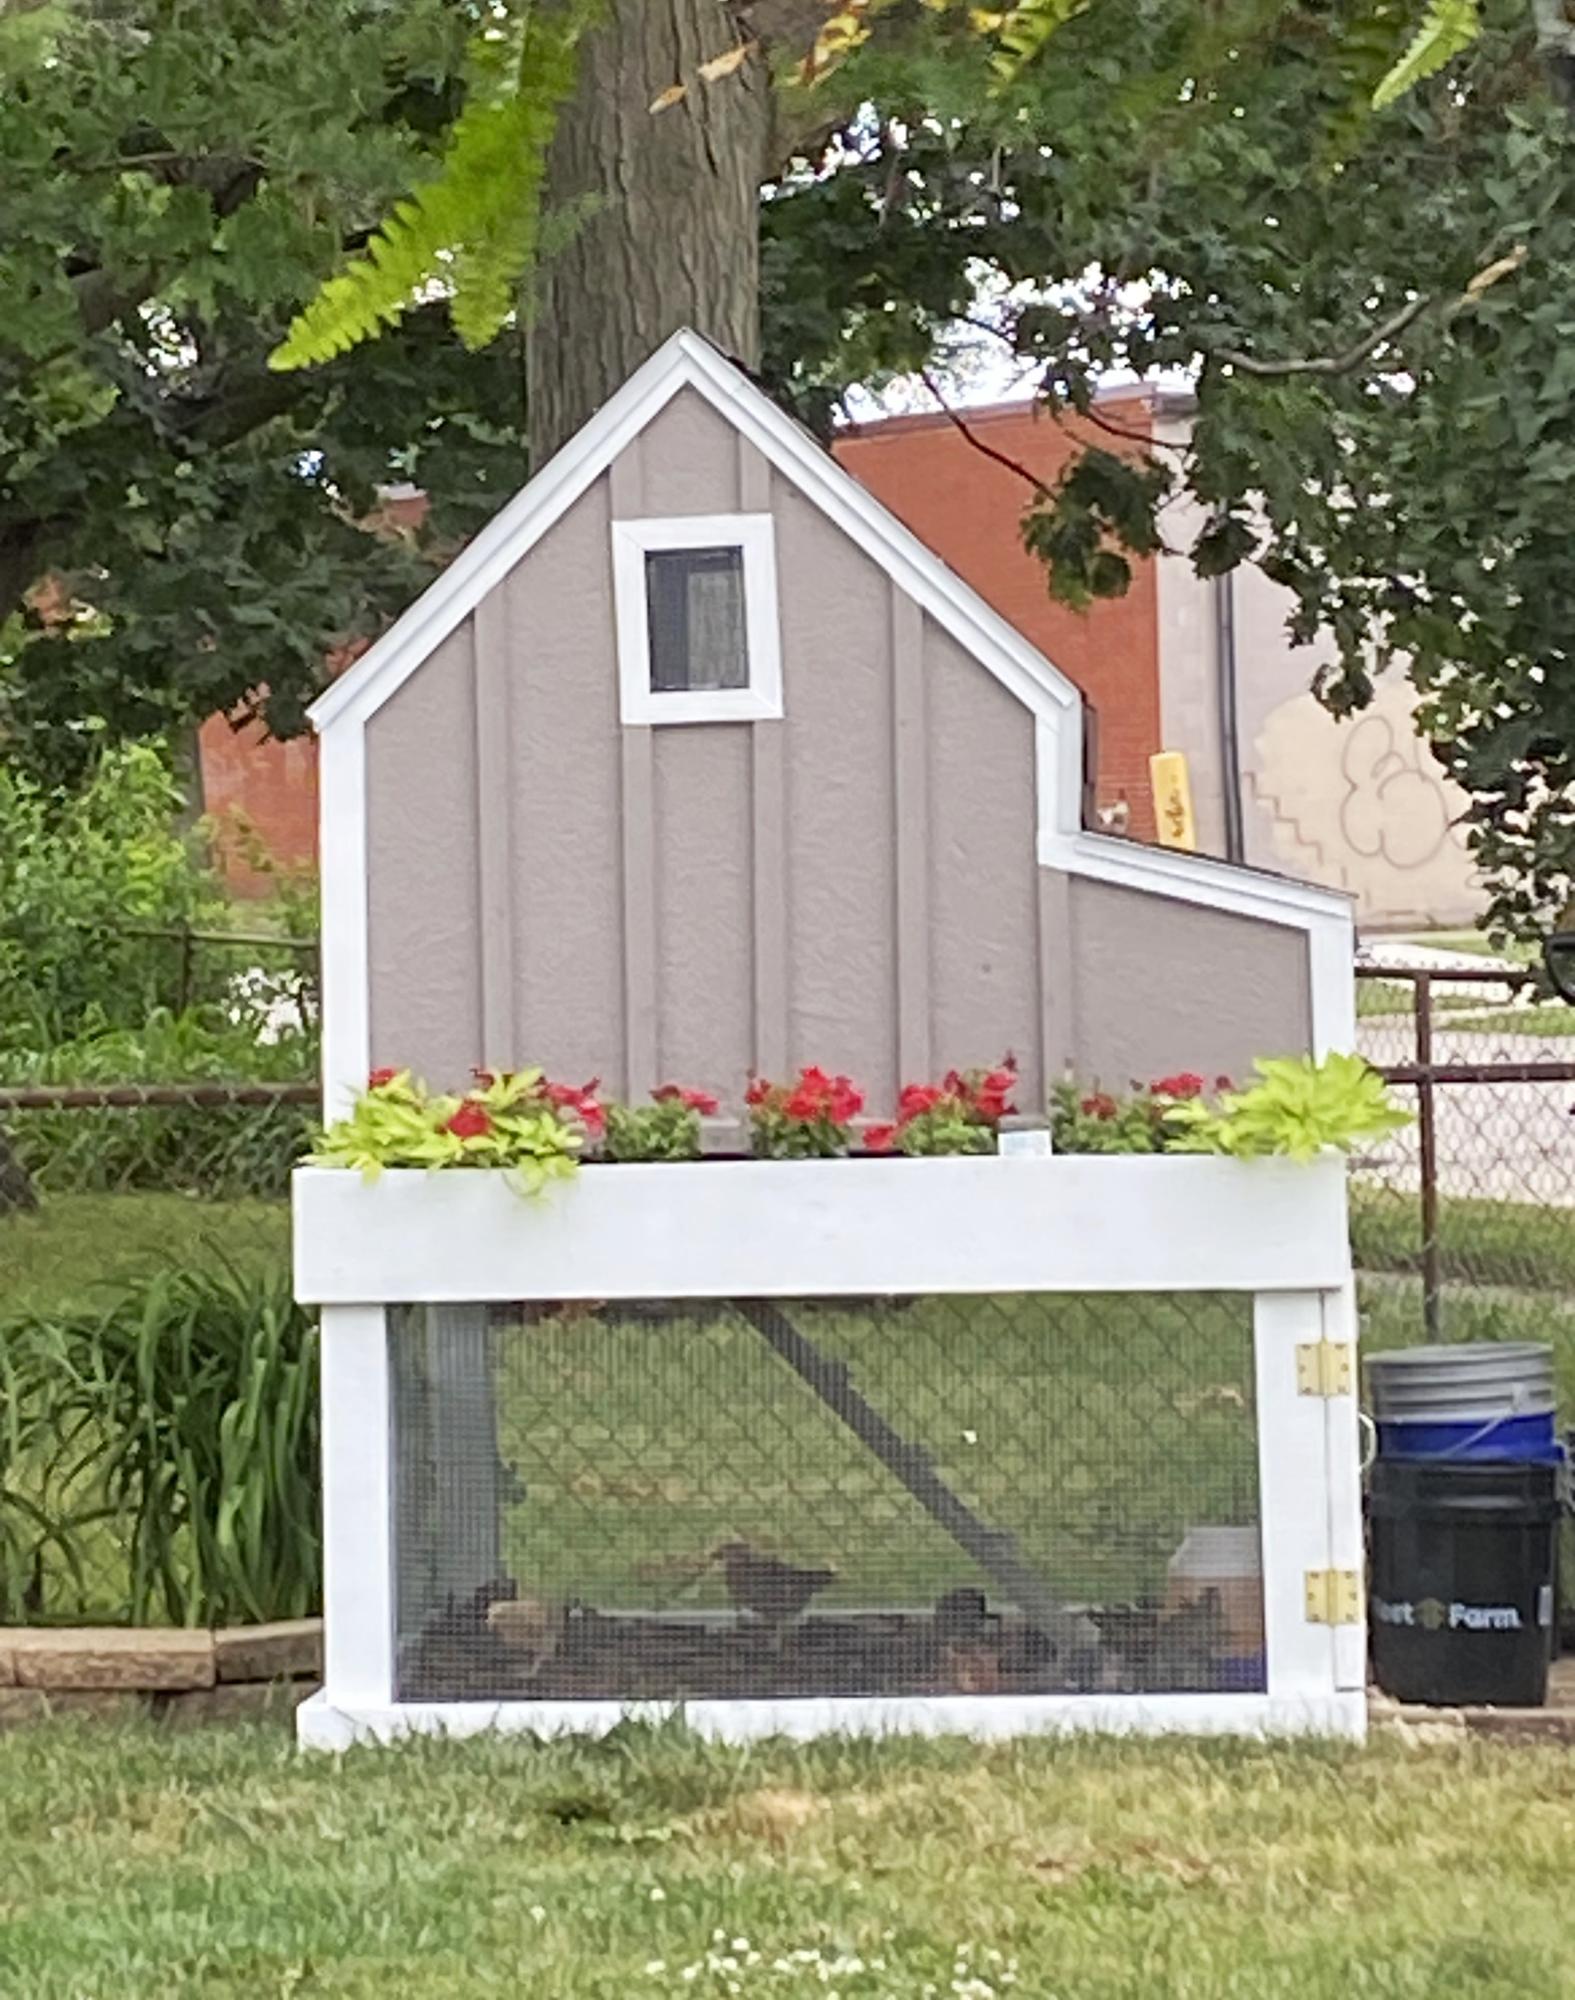
I built this A-Frame Chicken Coop using the Ana White plans. It turned out adorable, strong, and I am very pleased. Final cost was $250, and it took me 4 days (in real time, as a mom of 3). One Saturday at Lowes shopping, one Sunday afternoon cutting, and two days of assembly. Then a 5th for painting. Give or take a dozen extra runs to the hardware store! My brother-in-law helped cut the angles on his miter saw, and my uncle helped with assembly. I kinda doubt this could be done for $100 - maybe if you have a bunch of scrap materials and spare paint. We even have 7 or 8 hens in there! I only intended 3 to live in it, but my uncle added the extras and they all get along happily. I found the roof cap at Home Depot (didn't find at Lowes).
I would also like to point out that I was very afraid to do carpentry - I was afraid to even buy the lumber. But I asked for a lot of help from a lot of Lowe's and Home Depot people, and resisted the naysayers, and just got brave and did it. And it came out beautifully! If you are new to using power tools, get someone to assist, and you would need help anyway with holding things up while another drills.

Wed, 05/22/2013 - 11:59
As an extra note, I used Hardware cloth, not chicken wire. Wire will not keep dogs or predators out (and my dog immediately tried but failed to claw his way in). I bought I believe 36 inch tall rolls - the standard size that I could tell (not 30 inches like in the plans). But it fit perfectly, so I think maybe the plans had a typo? Lay out the lumber according to the plans and it will fit perfectly.

Wed, 05/22/2013 - 21:33
Very nice! Hardware cloth is definitely the way to go.
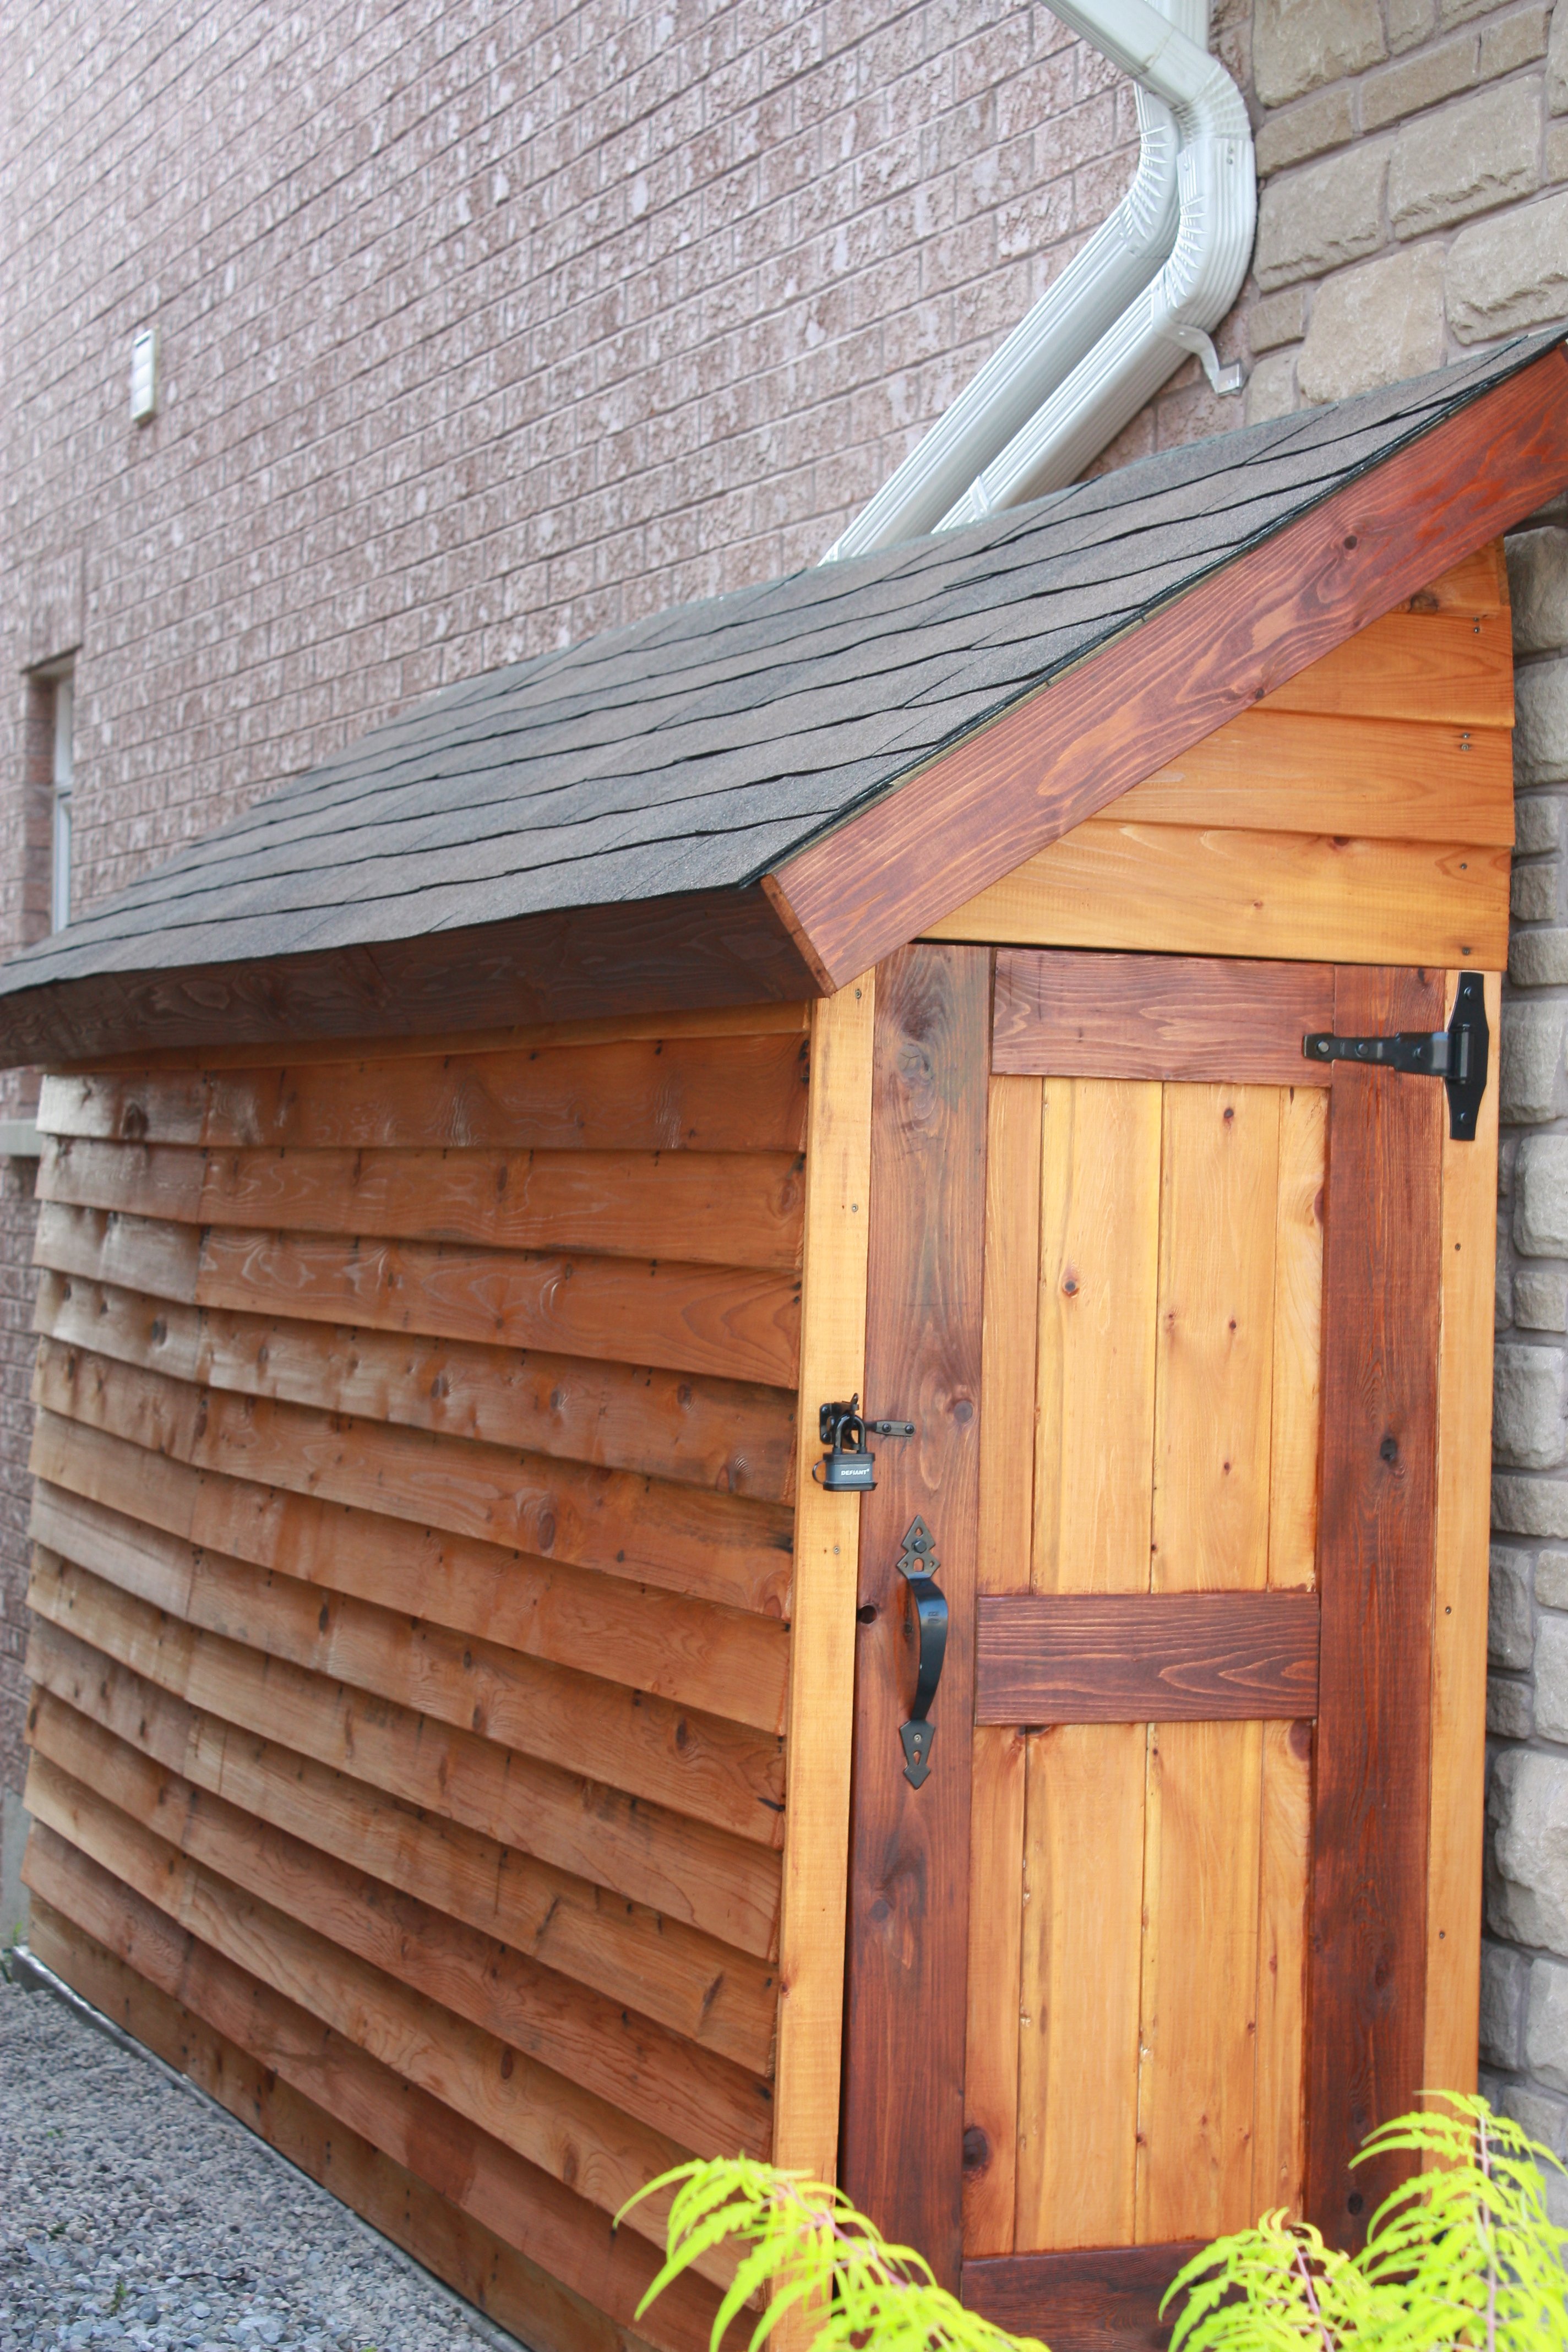
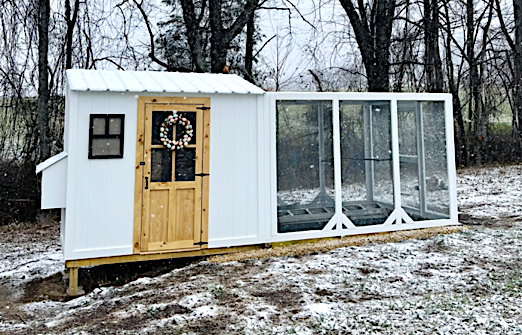
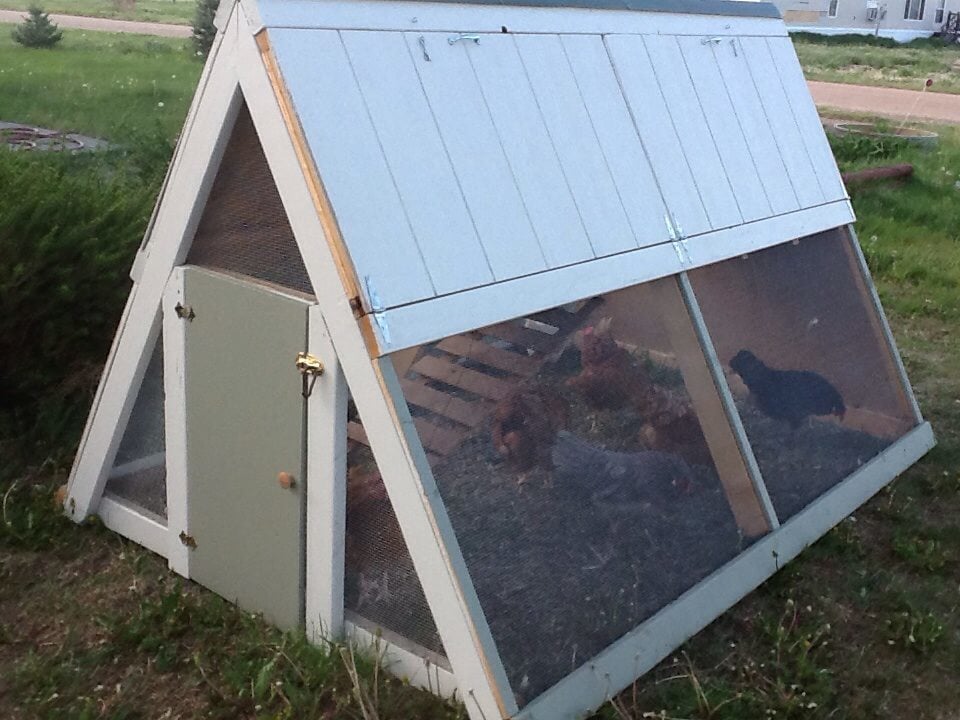
I had very little clearance on the long side of the shed, so I opted to put the door on the short side. Thanks for the plan, it was a great starting point for my project.
Tue, 09/10/2013 - 10:15
Thanks for posting! I plan to make this shed. Yours turned out beautiful!
Reader submitted photo
As a first time chicken farmer, I have four chickens now fully grown. It was 29 degrees in Iowa this morning, wondering if I should wrap the lower portion of the coop on three sides with visqueen, and should the roost windows be covered? I have straw bales to roost on and add where needed . I don’t plan to heat the coop . Any help will be appreciated.

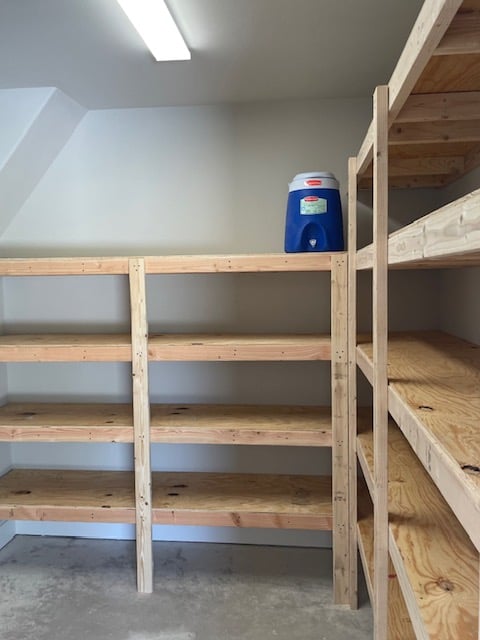
Thanks for the free plans. I did have to make modifications for the doors. i hid the hinges to give it a clean look. i used cedar for the trim and Plywood Siding Panel T1-11 4 IN OC (Common: 19/32 in. x 4 ft. x 8 ft.; Actual: 0.563 in. x 48 in. x 96 in.) for the doors. i used a metal flashing for the roof so it will vent.


I just finished my first project with upholstery! I built a bench following Ana's plans from a couple of 2x4s and used this gorgeous fabric from Minted. Minted is November's sponsor for the Fab Furniture Flippin Contest. The paint color is Behr's Island Aqua. I used 3" thick upholstery foam (and WOW that stuff is super expensive). I love diamond tufting and followed a tutorial from Addicted 2 Decorating.
The bench is super compfy. I love it and I love the bright cheery colors.


