Community Brag Posts

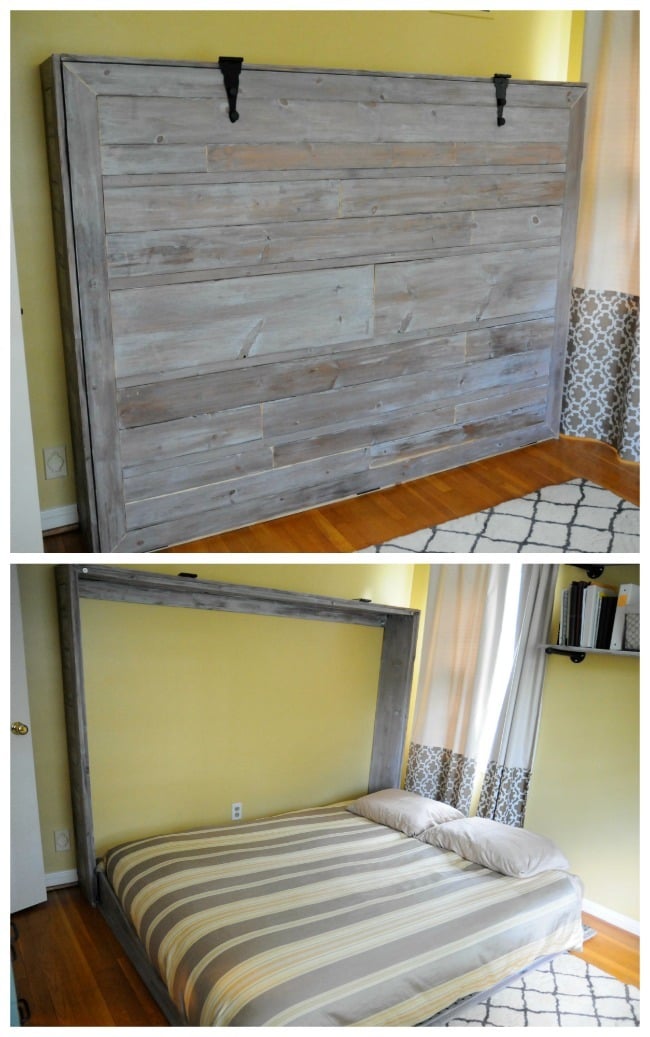
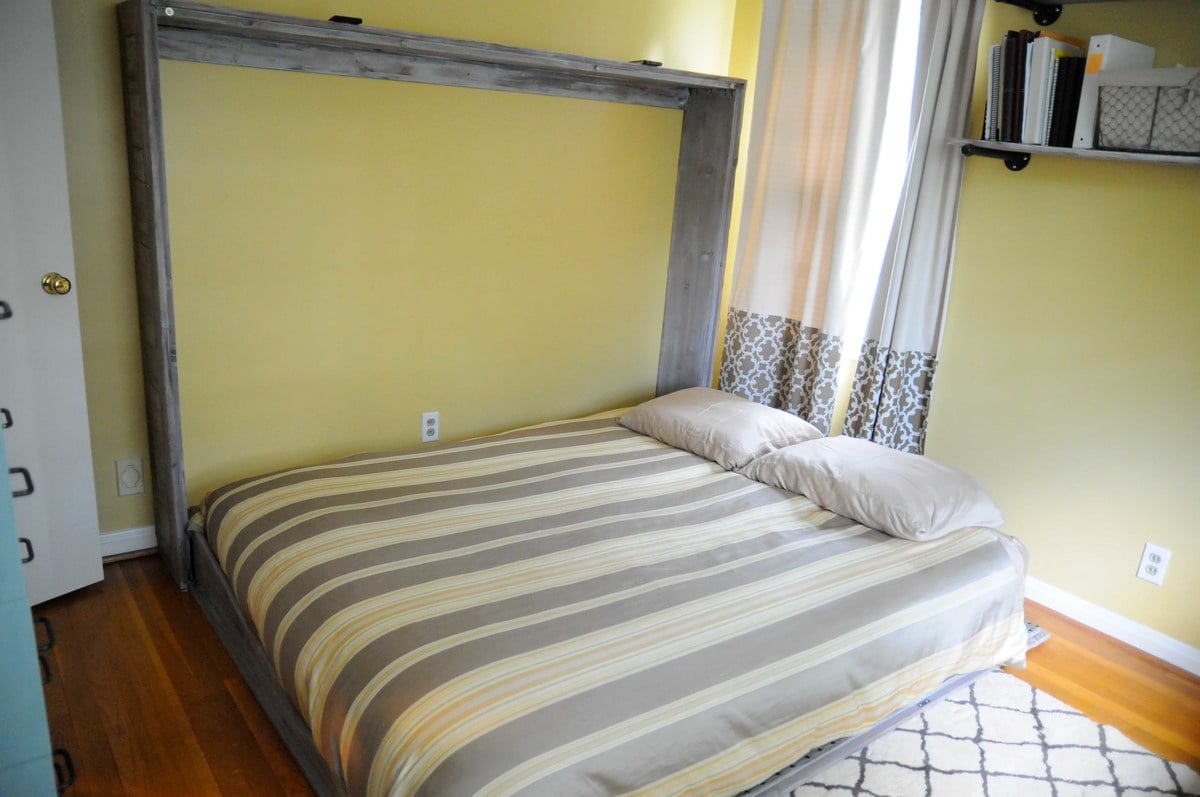
Rustic Queen Sized Wall Bed

Submitted by ldo2626 on Wed, 06/25/2014 - 09:09

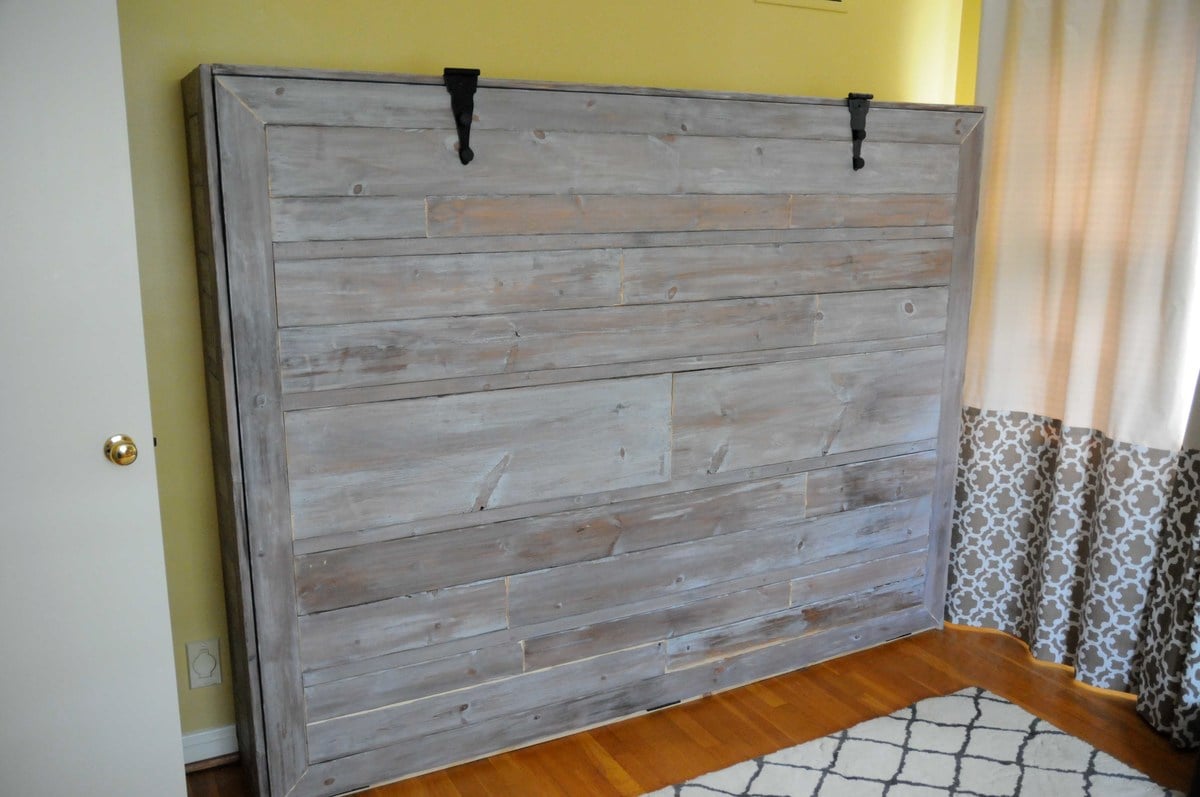
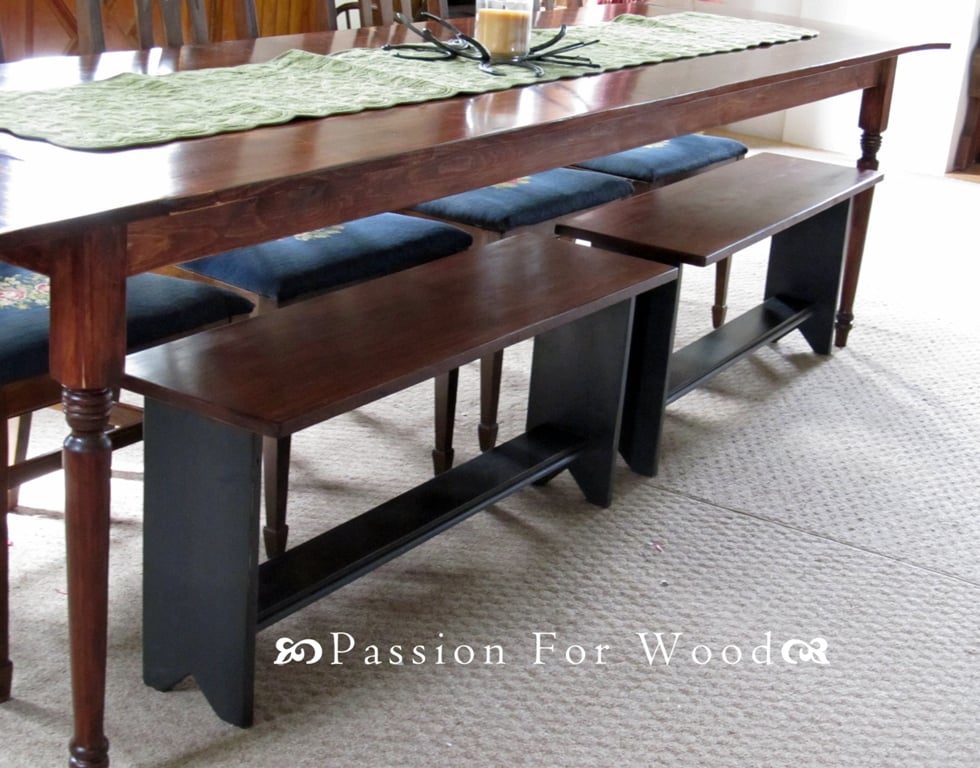
Expecting our second child, my wife and I decided to do away with our guest bedroom and combine it with our office. The only problem was our queen bed took up way too much space and it didn't get enough use to justify the sacrifice. We looked at the wall bed options available for purchase and decided they were way too blah and very expensive. I then found the "A MURPHY BED YOU CAN BUILD, AND AFFORD TO BUILD" post on Ana's website (thanks for the inspiration)! 

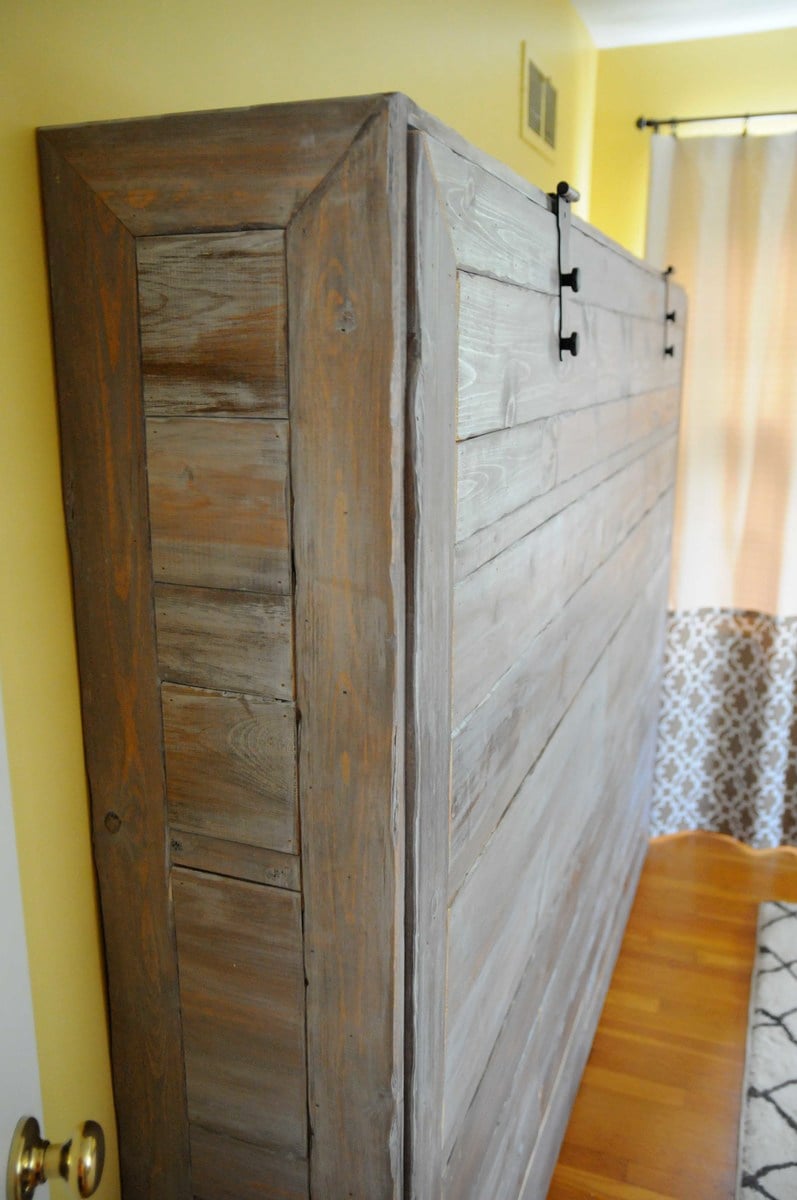
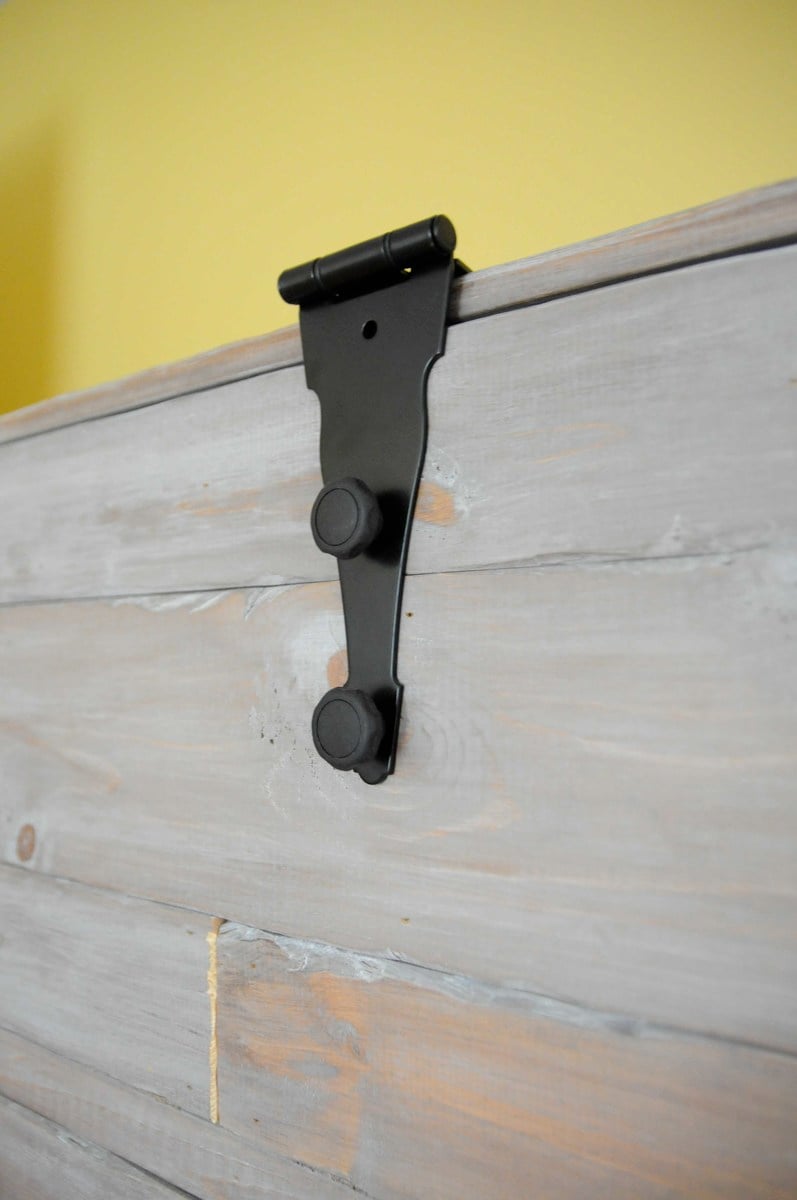
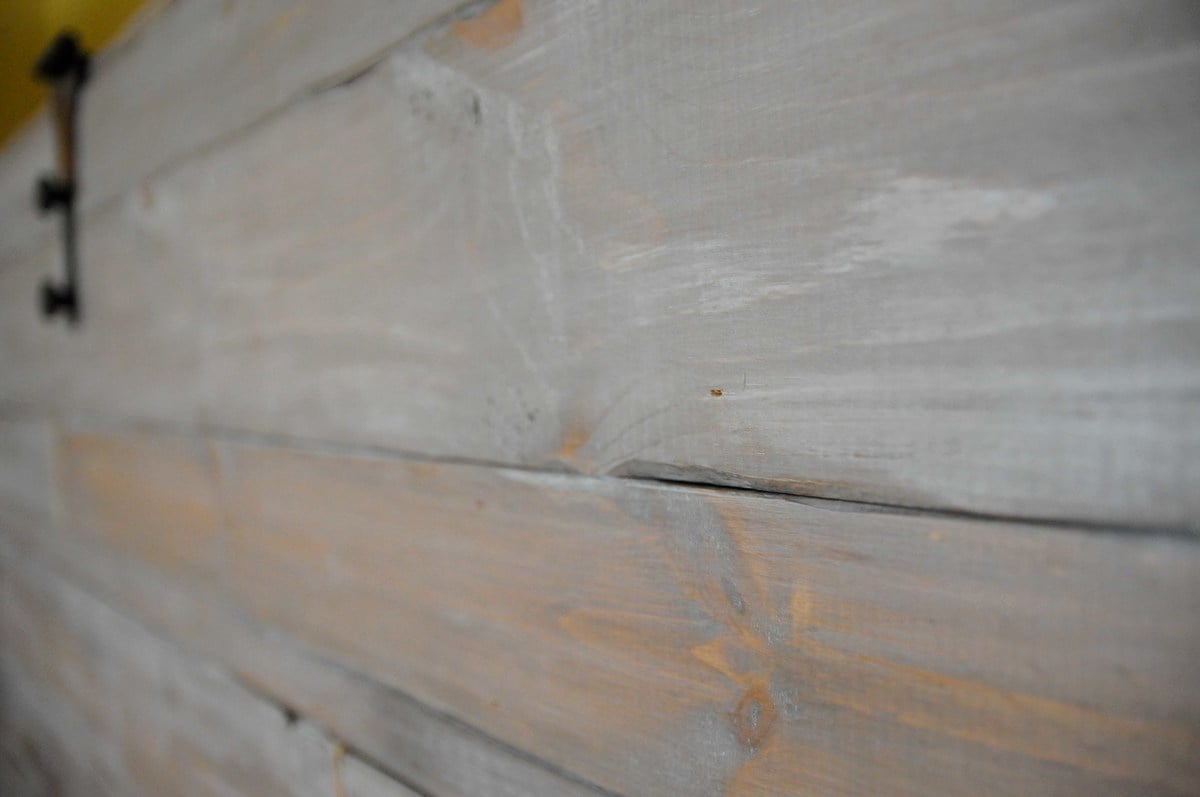
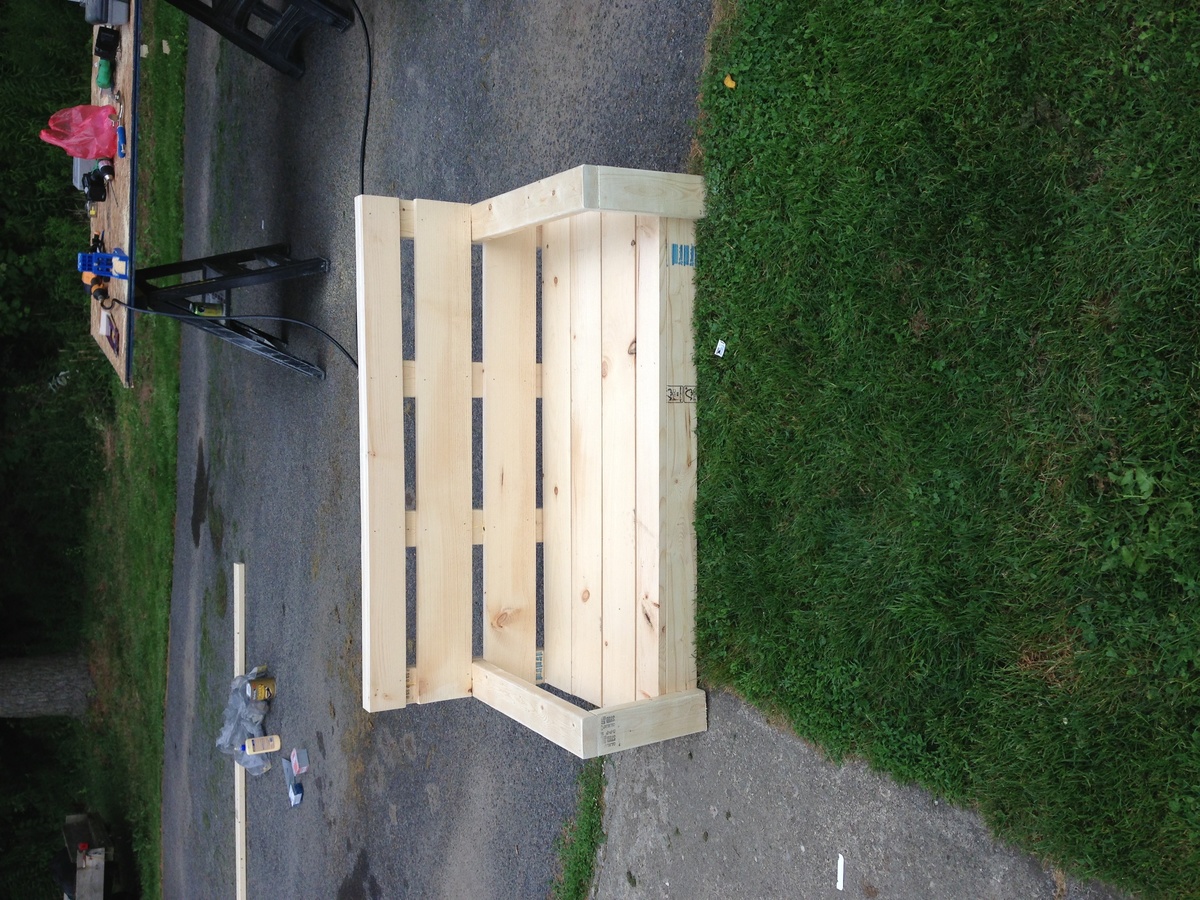
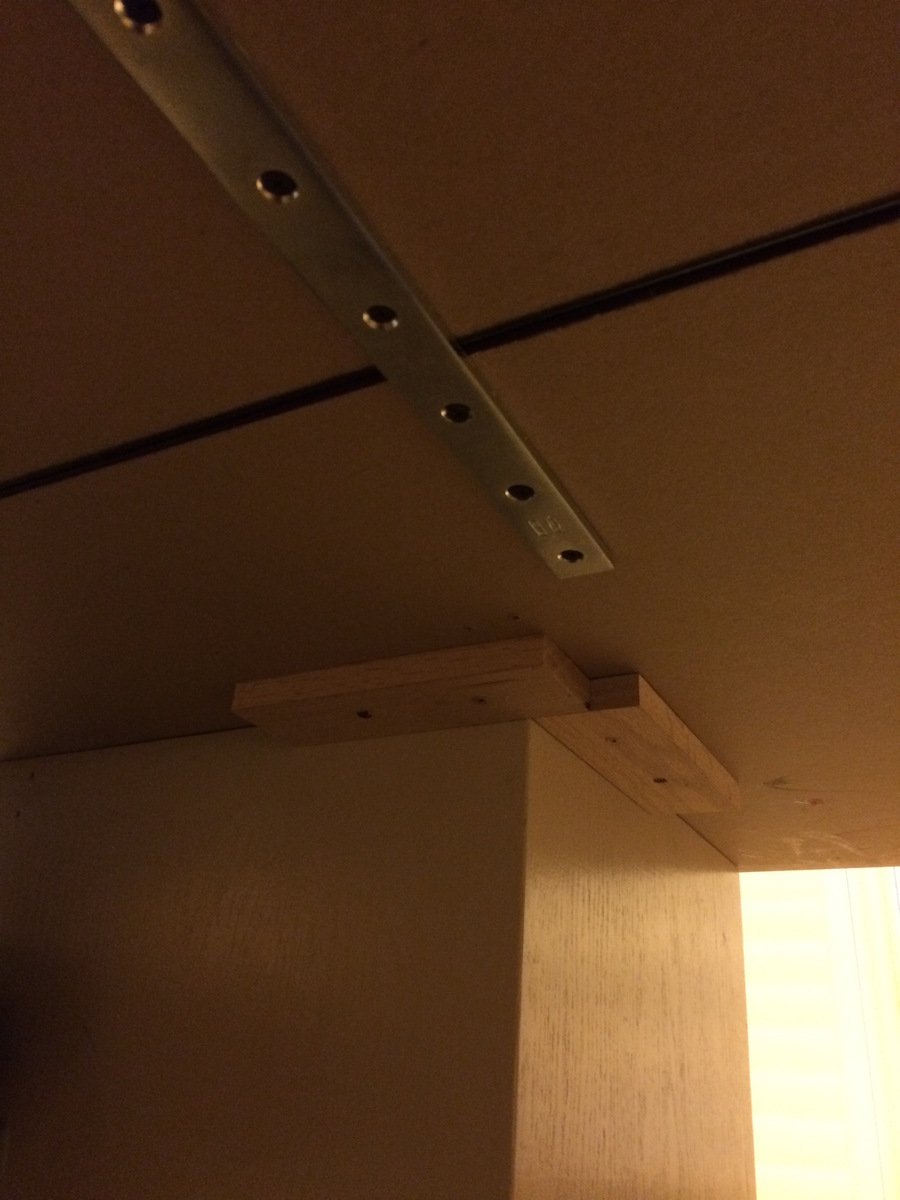
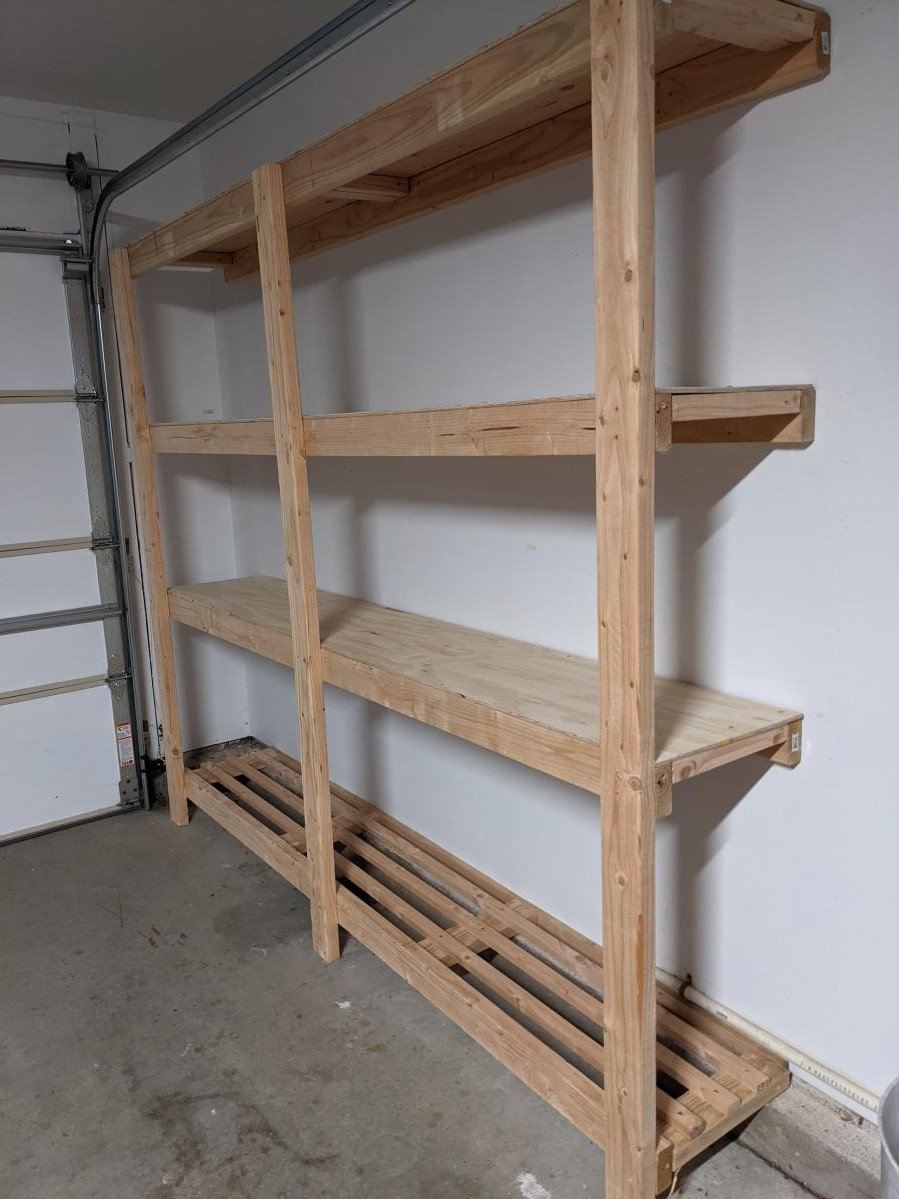
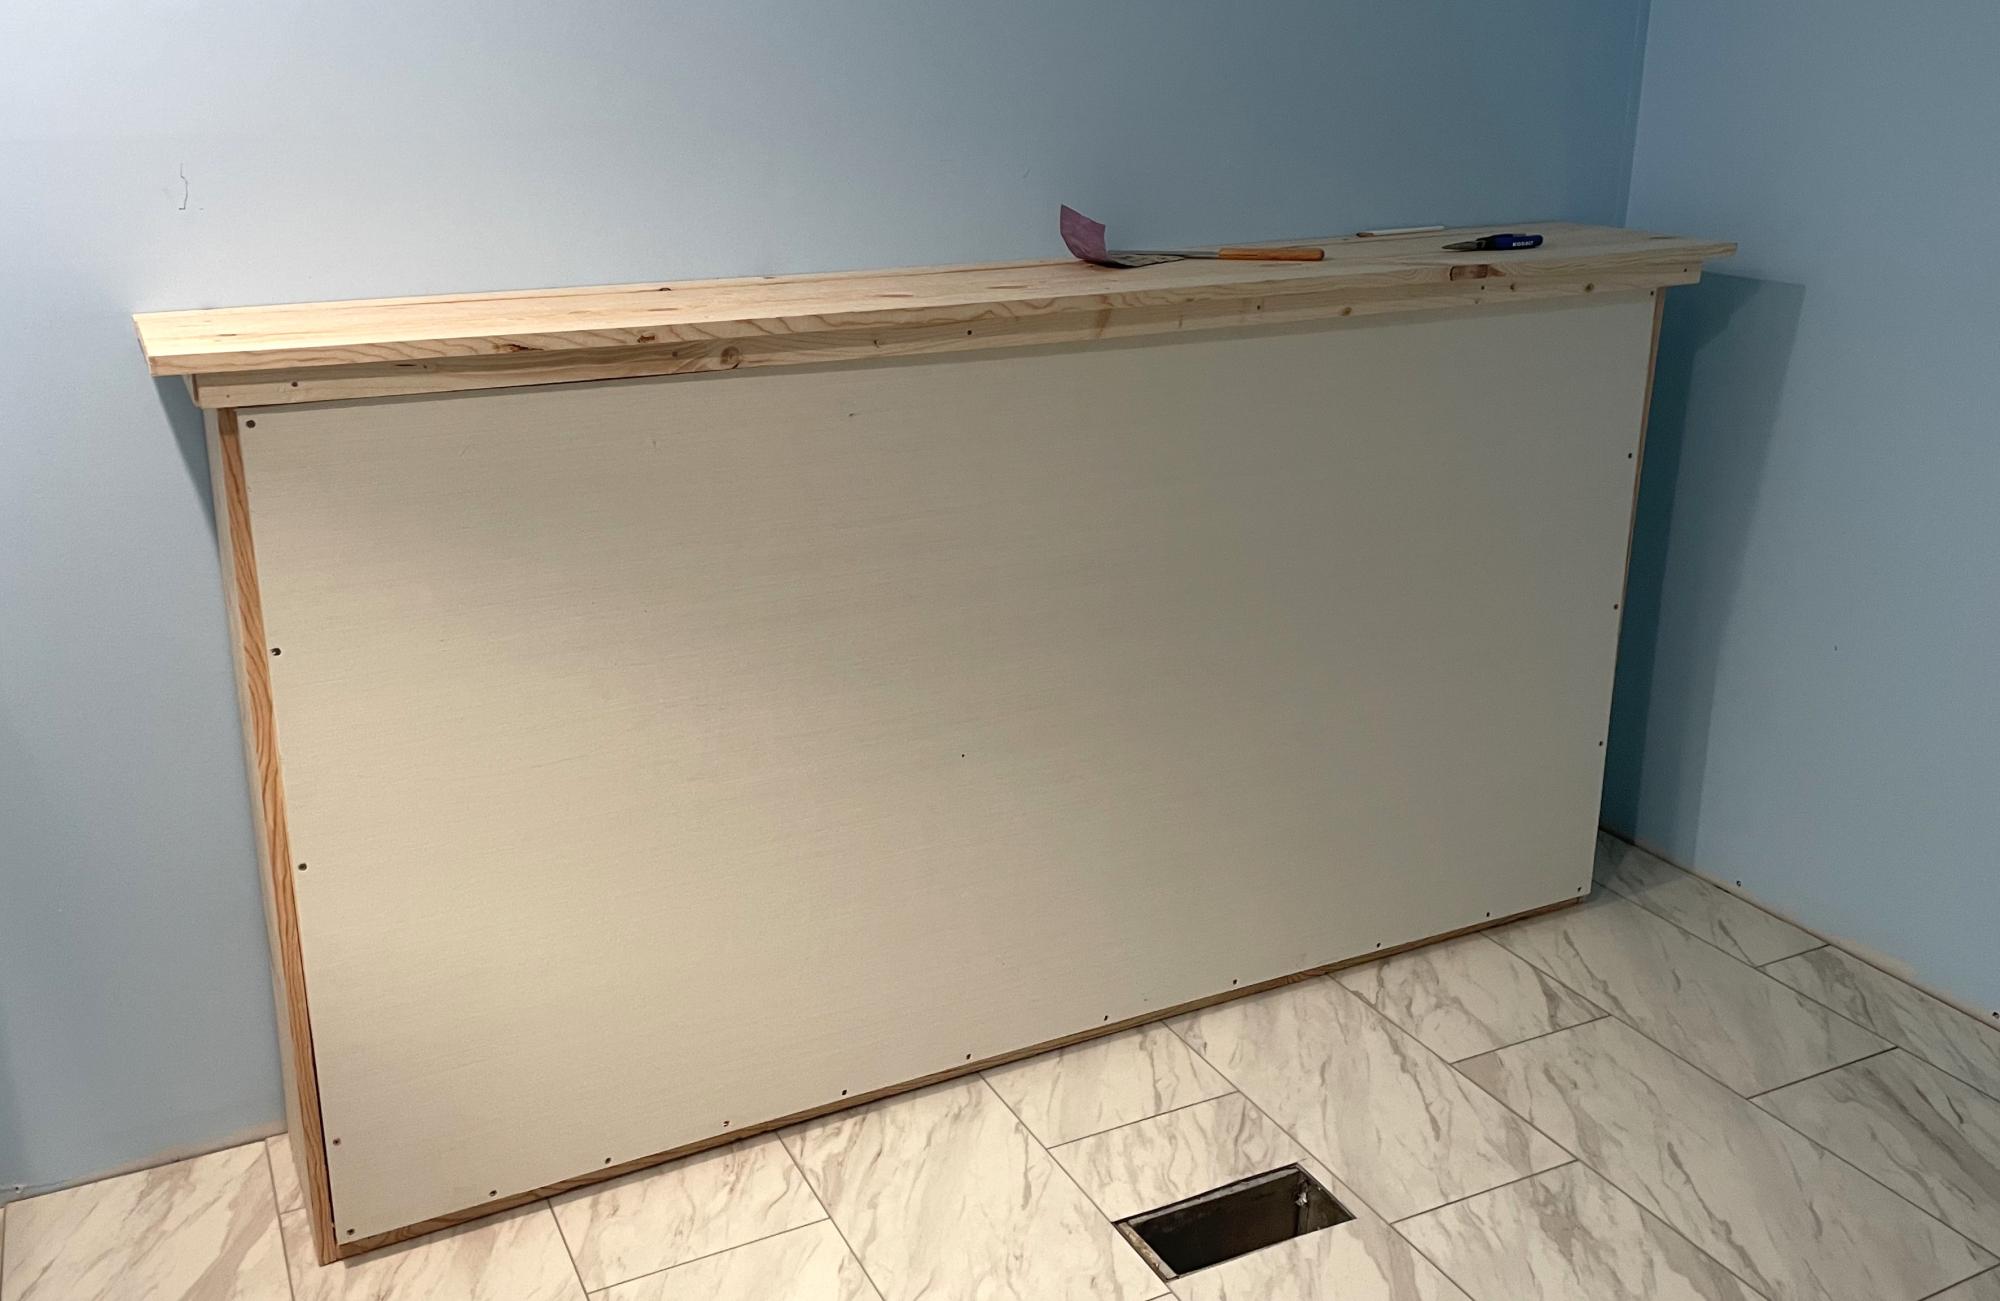
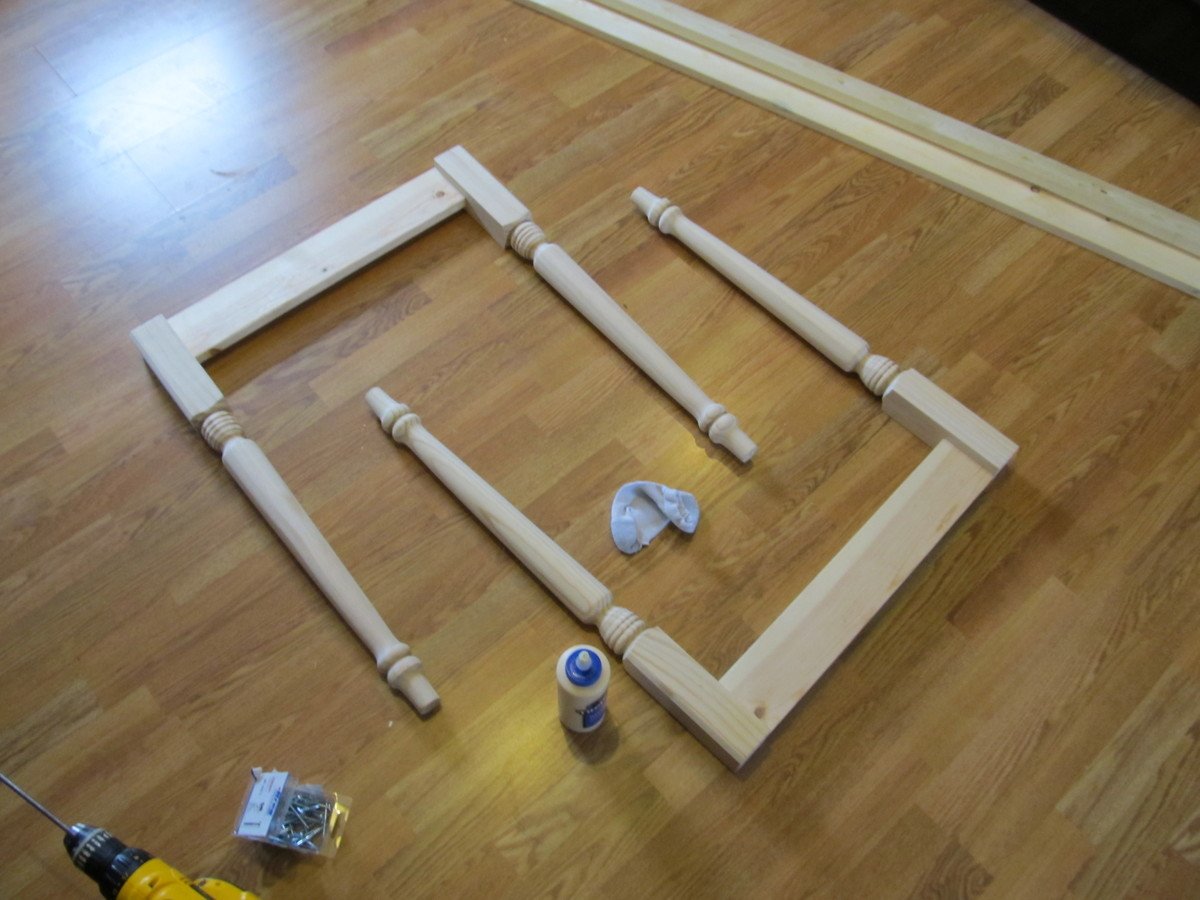
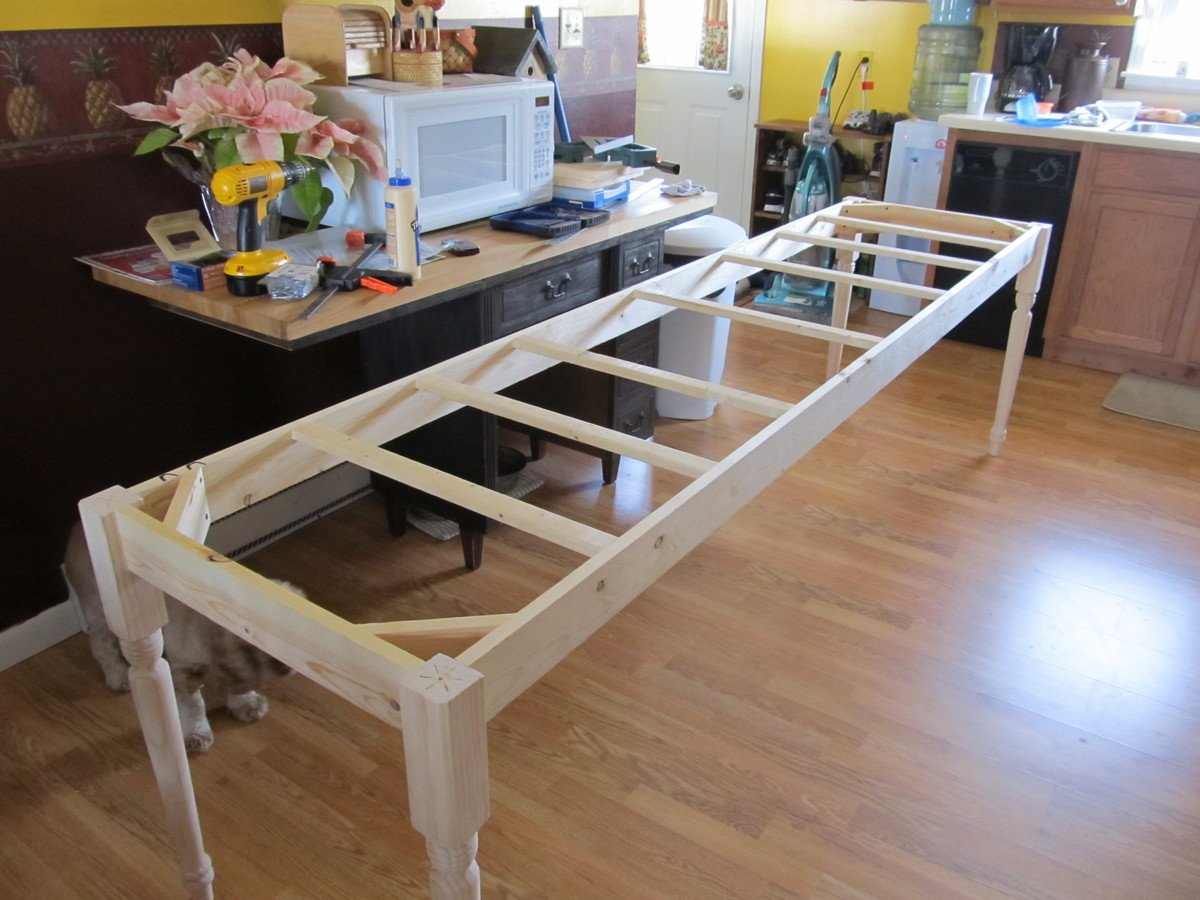
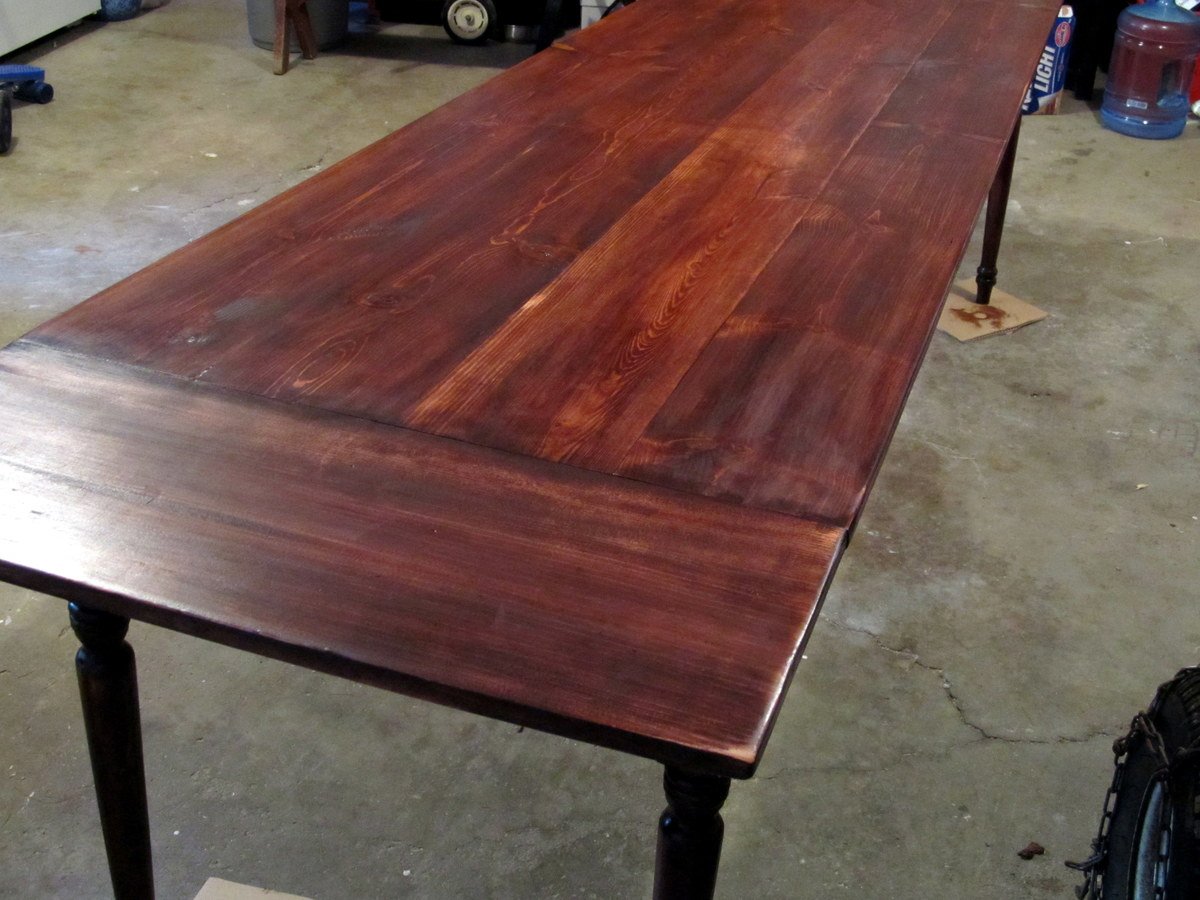
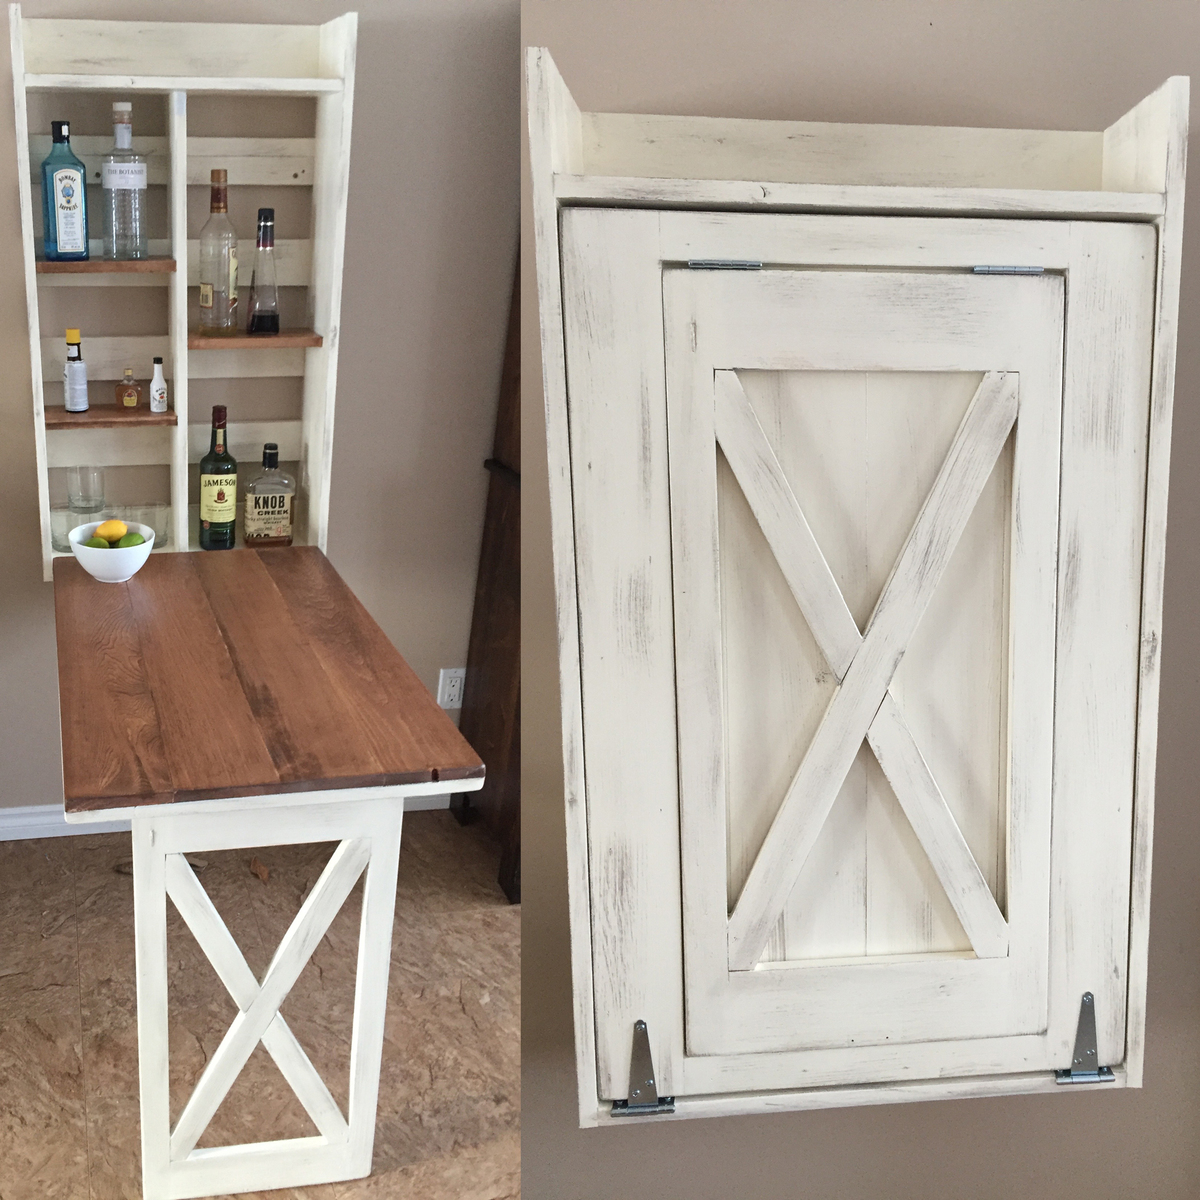
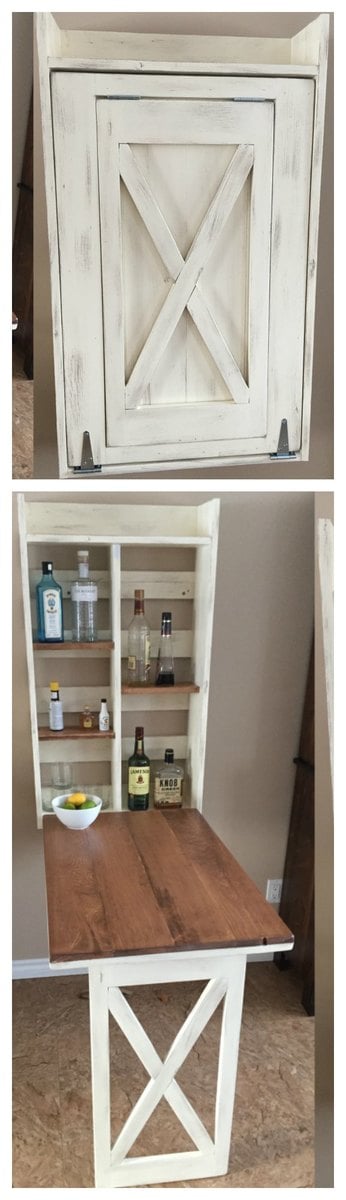
 Using cheap pine boards, plywood, door hinges, vinyl upholstery and stain I constructed the wall bed you see here. It really wasn't that difficult but facing it took the most time. To give the boards a more rustic look I used a utility knife to shave off the edges/corners and stained them with the Minwax American Walnut water based stain and the Minwax White Wash Pickling. When this started we thought we were going to have to settle for something unattractive and less than desirable. Seeing it in our office now, we love our new bed and actually think it makes the room look much better!  I didn't keep track of costs, but it couldn't have been more than $150.


Estimated Cost
I didn't keep track of costs, but it couldn't have been more than $150.
Estimated Time Investment
Weekend Project (10-20 Hours)
Finish Used
Minwax American Walnut water based stain and Minwax White Wash Pickling
Recommended Skill Level
Beginner

Comments

jwm816

Tue, 07/08/2014 - 08:08

Looks great! May I ask what the final outside dimensions were? Curious to see if this would work for me.

Thanks!

ldo2626

Wed, 08/06/2014 - 09:23

I would have to measure it when I get home... at work currently. Looking back, I think the best approach is to take the measurements from the plan, find the difference between standard mattress and queen mattress dimensions (check wikipedia for standard sizes), then add that difference back to the plan. I cut it real close on mine and could use a little more space. It would be nice to make it a bit deeper and with some head room to store comforters and pillows.

lopixy

Sun, 11/30/2014 - 18:10
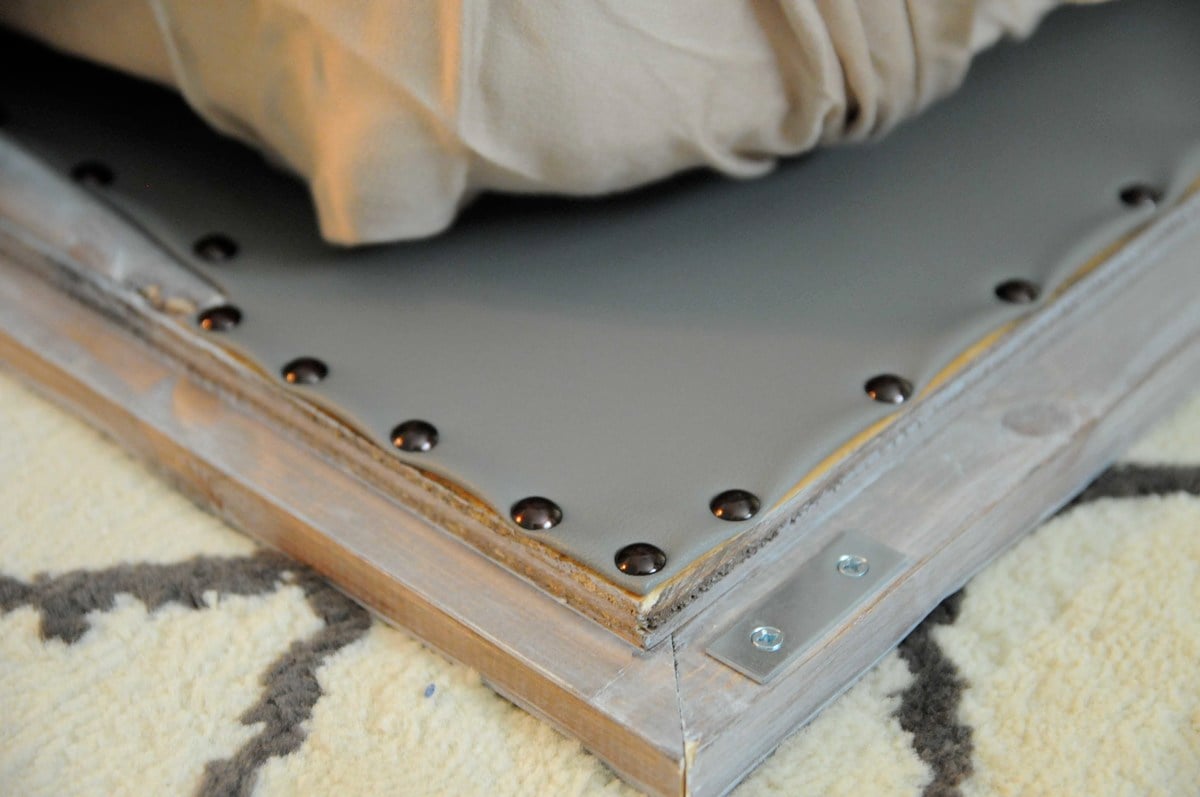
I love this!  Could you give more details about how you did the facing?  Are the pine boards just nailed onto the plywood? 

chefrgk

Sun, 12/28/2014 - 12:59

I am dying to get started on this wall bed project. I keep getting this message when trying to open the Plans.

The page you are looking for is temporarily unavailable.
Please try again later.
can someone help me find them.

chefrgk

Sun, 12/28/2014 - 12:59

I am dying to get started on this wall bed project. I keep getting this message when trying to open the Plans.

The page you are looking for is temporarily unavailable.
Please try again later.
can someone help me find them.

nicolanala

Tue, 08/09/2016 - 15:24

Hi. I would love to try this. Looking to build in the next month before parents in law come over. Is there any working links to the plans??

josheli

Thu, 01/25/2018 - 13:06

click on the bed picture above and it will take you to the plans


First Project

Submitted by Mightyd40 on Tue, 07/30/2013 - 07:08

After a couple years out of bodybuilding because of a bad injury, I decided I really needed a new hobby. I've always been impressed with woodwork but it just seemed out of my reach. I wanted a porch swing and saw these plans and though, "even if I mess up it'll only cost me a couple hundred dollars". I bought the kreg jig kit and some lumber and thankfully have all the other tools I need. This only took me a few hours to build and it was so easy and a really good time. I watched a few you tube videos with both ana and Jeff devlin from Kreg Tools and it really prepared me. The job was fun and I plan on going back to the lumber store this week just to build more stuff I probably don't need lol.

Built from Plan(s)
Estimated Cost
$250 for lumber/ kreg jig and a few other reusable initial purchases
Estimated Time Investment
An Hour or Two (0-2 Hours)
Finish Used
Minwax Bombay Mahogany stain and Poly mix
Recommended Skill Level
Starter Project

Snowboard Display Rack

Submitted by LampAtFeet on Sun, 12/15/2019 - 13:49

My son wanted a way to display his snowboard, so I modified the pallet display rack plans to fit his snowboard. It's constructed with 2x4s for the sides and 1x4s and a 1x2 for everything else. The 2x4s have an angled notch cut out so the snowboard can slide in and out. I built a top and bottom shelf to display pictures, as well as provide storage. The hooks are great for hanging boots, gloves, etc.  He loves the way it came out.

Estimated Cost
$30
Estimated Time Investment
Afternoon Project (3-6 Hours)
Finish Used
Dark Walnut stain followed by a coat of wipe on polyurethane
Recommended Skill Level
Beginner

Comments

Cedar Street Number Planter

I was looking for a way to give our house some better curb appeal and decided our stree numbers could use a facelift.  The majority of money spent on this project was for the numbers since I had enough spare cedar laying around.

house number planter

Estimated Time Investment
An Hour or Two (0-2 Hours)
Finish Used
Sedona Red
Recommended Skill Level
Starter Project

Comments

Vinyl Record Storage

I've made another record cabinet, this time with a nice dark walnut stain.  To see more details and plans visit my blog.

http://www.woodworkingfourdummies.com/


Cheers,

Ian

Estimated Cost
400
Estimated Time Investment
Week Long Project (20 Hours or More)
Finish Used
Minwax Dark Walnut
Recommended Skill Level
Intermediate

Comments

Four station desk (PB inspired)

Submitted by monty742 on Sun, 03/15/2015 - 08:58

I really liked the PB mega desk, but I didn't want to spend $1600 on it.  After seeing someone's post here (a couple years ago...) asking for plans on that desk, I decided to do it myself.  I took these two plans and made 4 base units.  They are 18" square at the top and 34" tall.  I used 2 IKEA table tops connected underneath for the top, to make a total height of 36" - counter stool height.  I constructed them a little differently than the plans, but no matter how you make them, the idea is the same.  The plan is to take them apart and make 2 desks once everyone is too old and cool to do homework/artwork together.

Estimated Cost
$500
Estimated Time Investment
Week Long Project (20 Hours or More)
Finish Used
Kitchen and Bath finish paint (2 coats) - it's a little shinier than eggshell (I only used it because I had 2 or 3 gallons extra at home :) then 2 coats acrylic top coat matte finish.
Recommended Skill Level
Intermediate

Comments

monty742

Sat, 08/15/2015 - 04:33

Just seeing your comment...sorry for the delay!  I got the stools and the light fixture at a Ballard Backroom (outlet) store near me.  3 of the stools ended up being about $40 each with the sale they had at the time, and the 4th was $60? - bought at a later time than the first 3.

AlisaH

Wed, 11/04/2015 - 07:40

How did you connect the table tops from the bottom so that the tables were secure together? I'm curious what's the best way to do this. Since two of the four seats will be where the seam is, I want to make sure I secure it properly so it's not wobbly. Thanks so much.


monty742

Sat, 01/09/2016 - 05:06

I'm just seeing these latest comments for the first time, so you may have long finished this project already!  The tops were surprisingly sturdy but I did reinforce them.  I placed the tops on the floor upside down and screwed some metal brackets (about 12" long each) across the joint in four places.  I just screwed them in through holes already in the brackets.  This wasn't the most stable because those tops are particle board and don't hold screws very well...  But since it was already pretty sturdy, I figured it would do.  It has been fine, even with standing on the top (kids who get up there and me hanging the light fixture above).

Once the tops were joined, I placed the bases so there was about a 1" overhang on the top.  To hold the top in place, I used small pieces of wood screwed to the underside of the top at the inside corner to act as a placement stop.  The top is pretty big and heavy even though they are IKEA tops, so they don't have a tendency to move or slide at all anyway.  I'm going to try to figure out how to post another picture of the braces and corner stops...we'll see if I can do it!  Let me know if you have any more questions...again, sorry I didn't see this in a more timely manner!

Pmprdwife

Sat, 01/02/2016 - 05:55

Is the photo above the Pottery Barn version or your product result?  I'm trying to figure out the dimensions for the drawer and shelf configurations.  Thanks!  BTW, I'm totally addicted to your style and personality...my husband loves the productivity inspiration I've received. :-)


monty742

Sat, 01/09/2016 - 10:17

Hi!

I'm glad you like the desk!  The one in the picture is the one I built, not the pottery barn one!  My dimensions were a good bit different than the PB desk - square bases instead of rectangular and counter stool height instead of desk/table height.  So, I have no idea if I have my plans for this anymore, so I went and measured it again for you!  

So each base is 18" x 18" square and 34" high so that with the 2" top the total height is 36".


Each base was made of oak plywood that made with 3 sides, a top and a bottom.  All edges were rabbit joints (3/8" deep in thickness of boards and probably 3/8" wide - not 100% on width of rabbits).  It's kind of a pain to do rabbit joints if you don't have a dado blade for your table saw, so you could use pocket hole screws instead.  I glued and nailed these joints with a finish nailer, I believe.  

I figured a diagram with measurements would be easier than trying to write descriptions...so I'm adding another pic with the dimensions outlined.  Drawing is NOT to scale, so sorry about that!  I really need to learn to use SketchUp.  Let me know if you have any questions!  

Monty742

monty742

Sat, 01/09/2016 - 07:57

Hi!

I'm glad you like the desk!  The one in the picture is the one I built, not the pottery barn one!  My dimensions were a good bit different than the PB desk - square bases instead of rectangular and counter stool height instead of desk/table height.  So, I have no idea if I have my plans for this anymore, so I went and measured it again for you!  

So each base is 18" x 18" square and 34" high so that with the 2" top the total height is 36".


Each base was made of oak plywood that made with 3 sides, a top and a bottom.  All edges were rabbit joints (3/8" deep in thickness of boards and probably 3/8" wide - not 100% on width of rabbits).  It's kind of a pain to do rabbit joints if you don't have a dado blade for your table saw, so you could use pocket hole screws instead.  I glued and nailed these joints with a finish nailer, I believe.  

I figured a diagram with measurements would be easier than trying to write descriptions...so I'm adding another pic with the dimensions outlined.  Drawing is NOT to scale, so sorry about that!  I really need to learn to use SketchUp.  Let me know if you have any questions!  

monty742

Thu, 07/28/2016 - 14:13

No you can't buy them from Ikea.  I bought the table tops from Ikea, but I built the bases.  The dimensions for the bases are in one of the additional pictures with the post if you want to see them!

treverandamber

Mon, 10/10/2016 - 07:41

What are the total dimensions of the table top? Thinking of building something like this, but want to make sure it will fit in my space.

Simgre81

Thu, 12/28/2017 - 07:00

Are these just slide in drawers, or did you use some sort of hardware to have them slide in and out?

wooden cooler stand

Submitted by stealth517 on Sat, 04/18/2015 - 20:48

This is the cooler stand presented by Jenny from Birdsandsaoap. Very easy to build and always ends up with someone asking to buy it or have you make them one.

Built from Plan(s)
Estimated Cost
$120.00
Estimated Time Investment
Week Long Project (20 Hours or More)
Finish Used
Minwax gloss polyurethane.
Recommended Skill Level
Intermediate

Comments

Red, White, and Blue Coop

We built this A-frame chicken coop using the plans from Ana White. We modified them a bit to include a front door, a solid front wall, and 8-foot untreated cedar fence boards (cut in half) for the loft floor instead of plywood. We also used hardware cloth instead of chicken wire since racoons are a problem where we live, and they have been known to reach through chicken wire to grab at hens. Instead of being able to open both sides of the top of the coop, we only put doors on one side just to make the building process a little simpler. The hardest part of building the whole coop was cutting the 60* angles on the 2"x4" trusses. Our cuts are not exactly perfect, so the nodes (meeting points of the 60* angle cuts) are a little rough, but we plan on covering this with a roof cap eventually. More photos and details are on my blog: http://littlefarmbigcity.wordpress.com/2013/06/29/red-white-and-blue-co… -kate

Built from Plan(s)
Estimated Cost
$175 with hardware cloth, paint, front door, and solid front wall
Estimated Time Investment
Weekend Project (10-20 Hours)
Finish Used
Paint (only on the exterior of the coop and coop ramp)
Recommended Skill Level
Starter Project

Comments

yurra-bazain

Thu, 07/04/2013 - 02:51

I love this! Makes me want to build one for my neighbor's hens with your touches in mind; perhaps in the near future. :)

Seasonal And Holiday

8 foot long shelf with a little twist

Submitted by Daniel_ram on Mon, 01/03/2022 - 17:25

I just made this shelf using 2x4s 8 ft long wood. It is very strong and looks great. My garage size required the shelf to be max 16 in deep, so I used a 1 plywood sheet divided by 3 equal parts for the upper 3 shelfs. Since I made a 4th shelf, I used 3 1x2s for the 4th bottom shelf instead of a new plywood sheet and avoided having extra 2/3 of the sheet around and also saved like 30$ since the 2x1s were only 2$ea. That touch makes it look a bit stylish too so a win win. If you do that, here's a tip: use the outer 2x4s as rails - make sure that the cleats on the lower shelf are placed a bit lower ~ 1in. In such way, you can place the three 1x2 rails at the same level as the outer 2x4s and this you end up having 5 rails total in the shelf. Do use the wooden screws with star head if you can, they were muuuuuch easier to use compared with the regular ones. Note, this shelf is very strong, probably too strong for my needs. For a 8ft long, and my storage needs (camping, Christmas stuff, other lighter things), I'd probably use 2x2s instead of 2x4s. That would save costs, specially since wood isn't cheap these days( I spent ~$150 in materials Jan 2022).

Comments

Horizontal Murphy Bed

Submitted by Anonymous (not verified) on Sun, 07/09/2023 - 17:49

We are remodeling our 3 bedroom house into a 4 bedroom. In doing so, my youngest is getting the smaller room. We decided to go with a Murphy bed to allow more play time space. I do not particularly like the fact that this bed doesn’t sit off the ground but overall love the simplicity of making it. We turned it horizontal and just love the overall product. I can mot wait to make something else from this site!

Tams

Whitney's Turned Leg Farmhouse Table

I worked up the plans in my head for about a year before my mother finally got around to having me build her 10 foot farmhouse table. That's right, this bad boy is TEN FEET LONG! And it was one of the simplest things to construct!. I used 8 foot 1x8's for the length of the table (used 4, making the table 29" wide) and 1x12's for the breadboard ends. We also splurged and purchased turned legs for $15 a piece at Blue. It really made the table extra special. Totally cost, with finishing supplies came in under $150.

Things I would change if/when I do a table of this size again:
1) I would never make a BB end so large again. I would stick to a 1x6 or smaller. With such a large size we worry about children putting too much pressure on the ends.
2) I will make the legs removable. It was a bear trying to get this table into the house. Thankfully the width was just narrow enough!
3) I won't tackle this in the winter months! Construction of the table took only a few hours but finishing in freezing temps took weeks waiting for warm-ish temperatures.

Built from Plan(s)
Estimated Cost
Less than $150
Estimated Time Investment
Weekend Project (10-20 Hours)
Finish Used
Sand, sand, then sand some more! 2 coats of Minwax Mahogany Gel Stain. 2 coats of poly on legs/base. 4 coats of poly on table top with 0000 steel wool sanding between coats
Recommended Skill Level
Intermediate

Comments

Easy to Build Workbench

Submitted by Anonymous (not verified) on Wed, 09/06/2023 - 09:09

I was wanting a work bench for my outside shed to work on occasionally and help keep organized. This is the first piece of furniture I have built totally on my own! The plan was easy. I sized it down a little with no problem. I'm a little off on a couple of the cuts but will practice more! Overall, thrilled and extremely proud of it!

Lori B

Drop down murphy bar

Submitted by nick_h on Tue, 12/06/2016 - 10:54

My attempt at the murphy bar featured on this site. Still have to add the sash locks. Added pallet crossmembers at the back, an x in the leg, and a french cleat to mount to the wall. 

Estimated Cost
$45
Estimated Time Investment
Day Project (6-9 Hours)
Finish Used
Special Walnut Minwax on the bar top and shelves, crisp linen matte latex and dry brushed casual gray for accents/aging. 2 coats of polycrylic for protection. If built again would pre stain and base coat all the wood before build time, then assemble, add accent brushing and spray the polycrylic.
Recommended Skill Level
Beginner

Comments

zannej

Tue, 12/31/2019 - 11:49

This looks awesome! I want to help my friend build this for his kitchen. I've looked at the plans in the link & I'm wondering what modifications you made for the X pattern-- how much did it alter the material & cut list?

Would you please share your material & cut list for this?

Fireplace Wall Remodel

I needed a solution to my shelving problem. I wanted something clean looking, modern, and white to flank both sides of my fireplace. Count on Ana White to come up with a plan. Within seconds of sitting down to surf her site, I found that perfect plan to build four floating shelves.

Built from Plan(s)
Estimated Time Investment
Day Project (6-9 Hours)
Recommended Skill Level
Intermediate

Cedar Garden Shed

We needed a way to get all of the lawn & garden stuff out of our garage and organized. I found Ana's plans for the Small Cedar Shed & adjusted them to fit our space. We used 2x4s as our studs & added front walls on the sides. Our shed measures 9.5'x30". We had a concrete slab poured for our foundation. We are experienced DIYer's but had never taken on a project of this scale from scratch. This project was much easier than I was anticipating, and we were able to complete it in one weekend! Similar shed kits were way more expensive and not the size that we were looking for. Thank you so much for the inspiration!

Built from Plan(s)

Comments

Seasonal And Holiday

Craftsman Style Playhouse

Submitted by aerialc on Fri, 10/02/2015 - 11:57

I mainly followed ana's plans for this playhouse. Instead of a plywood roof I used cedar shingles. I also added plexiglass to the windows.

Built from Plan(s)
Estimated Cost
$450, including deck.
Estimated Time Investment
Weekend Project (10-20 Hours)
Finish Used
Ready Seal - Dark Walnut
Recommended Skill Level
Intermediate

Comments

Barn Door Laundry Room Cabinets

Submitted by Ana White on Sat, 03/09/2019 - 19:58

Built by Kelly Flood Gugliemoni, shared on Facebook.

Sliding barn door hardware is DIY, cabinets are DIY - tutorials linked below.


Comments

Livb528

Fri, 03/06/2020 - 16:52

This looks like the exact width of my laundry room. (Tiny!) Is there a way I can find out the dimensions?? And possibly the plans? This is so beautiful and my laundry room needs some help! 

2x4 outdoor cedar couch with ottoman

Submitted by Anonymous (not verified) on Thu, 05/04/2023 - 11:51

I used pocket holes to hide the screws. I made an ottoman out of the outdoor coffee table plans to my dimensions that can be used as a coffee table when we need it.

Comments

Mission Style Side Table

Submitted by Anonymous (not verified) on Mon, 04/29/2024 - 09:36

Red oak mission-style side table with deer footprint inlays, golden oak stain.

Bob Zink

Master Bath Barn Door

Submitted by Anonymous (not verified) on Fri, 03/17/2017 - 16:34

Created this door with pine wood tongue and groove lumber and pine wood planks. Purchase barn door hardware / track from Jet.com and door handles from Hobby Lobby. 


This replaced my Master bath door and I think came out pretty good. Thank you for the ideas!!!  Jeff M.   Brownstown, Mi

Estimated Cost
Wood 55.00
Handles 2 for 8.00
Stain ( left overs)
Barn door track 54.00

Total $117.00 and 10 % Military discount at lowes
Estimated Time Investment
Weekend Project (10-20 Hours)
Finish Used
Minwax. Mix of Kona and Driftwood Grey
Recommended Skill Level
Intermediate
Back