Outdoor DIY Play Set
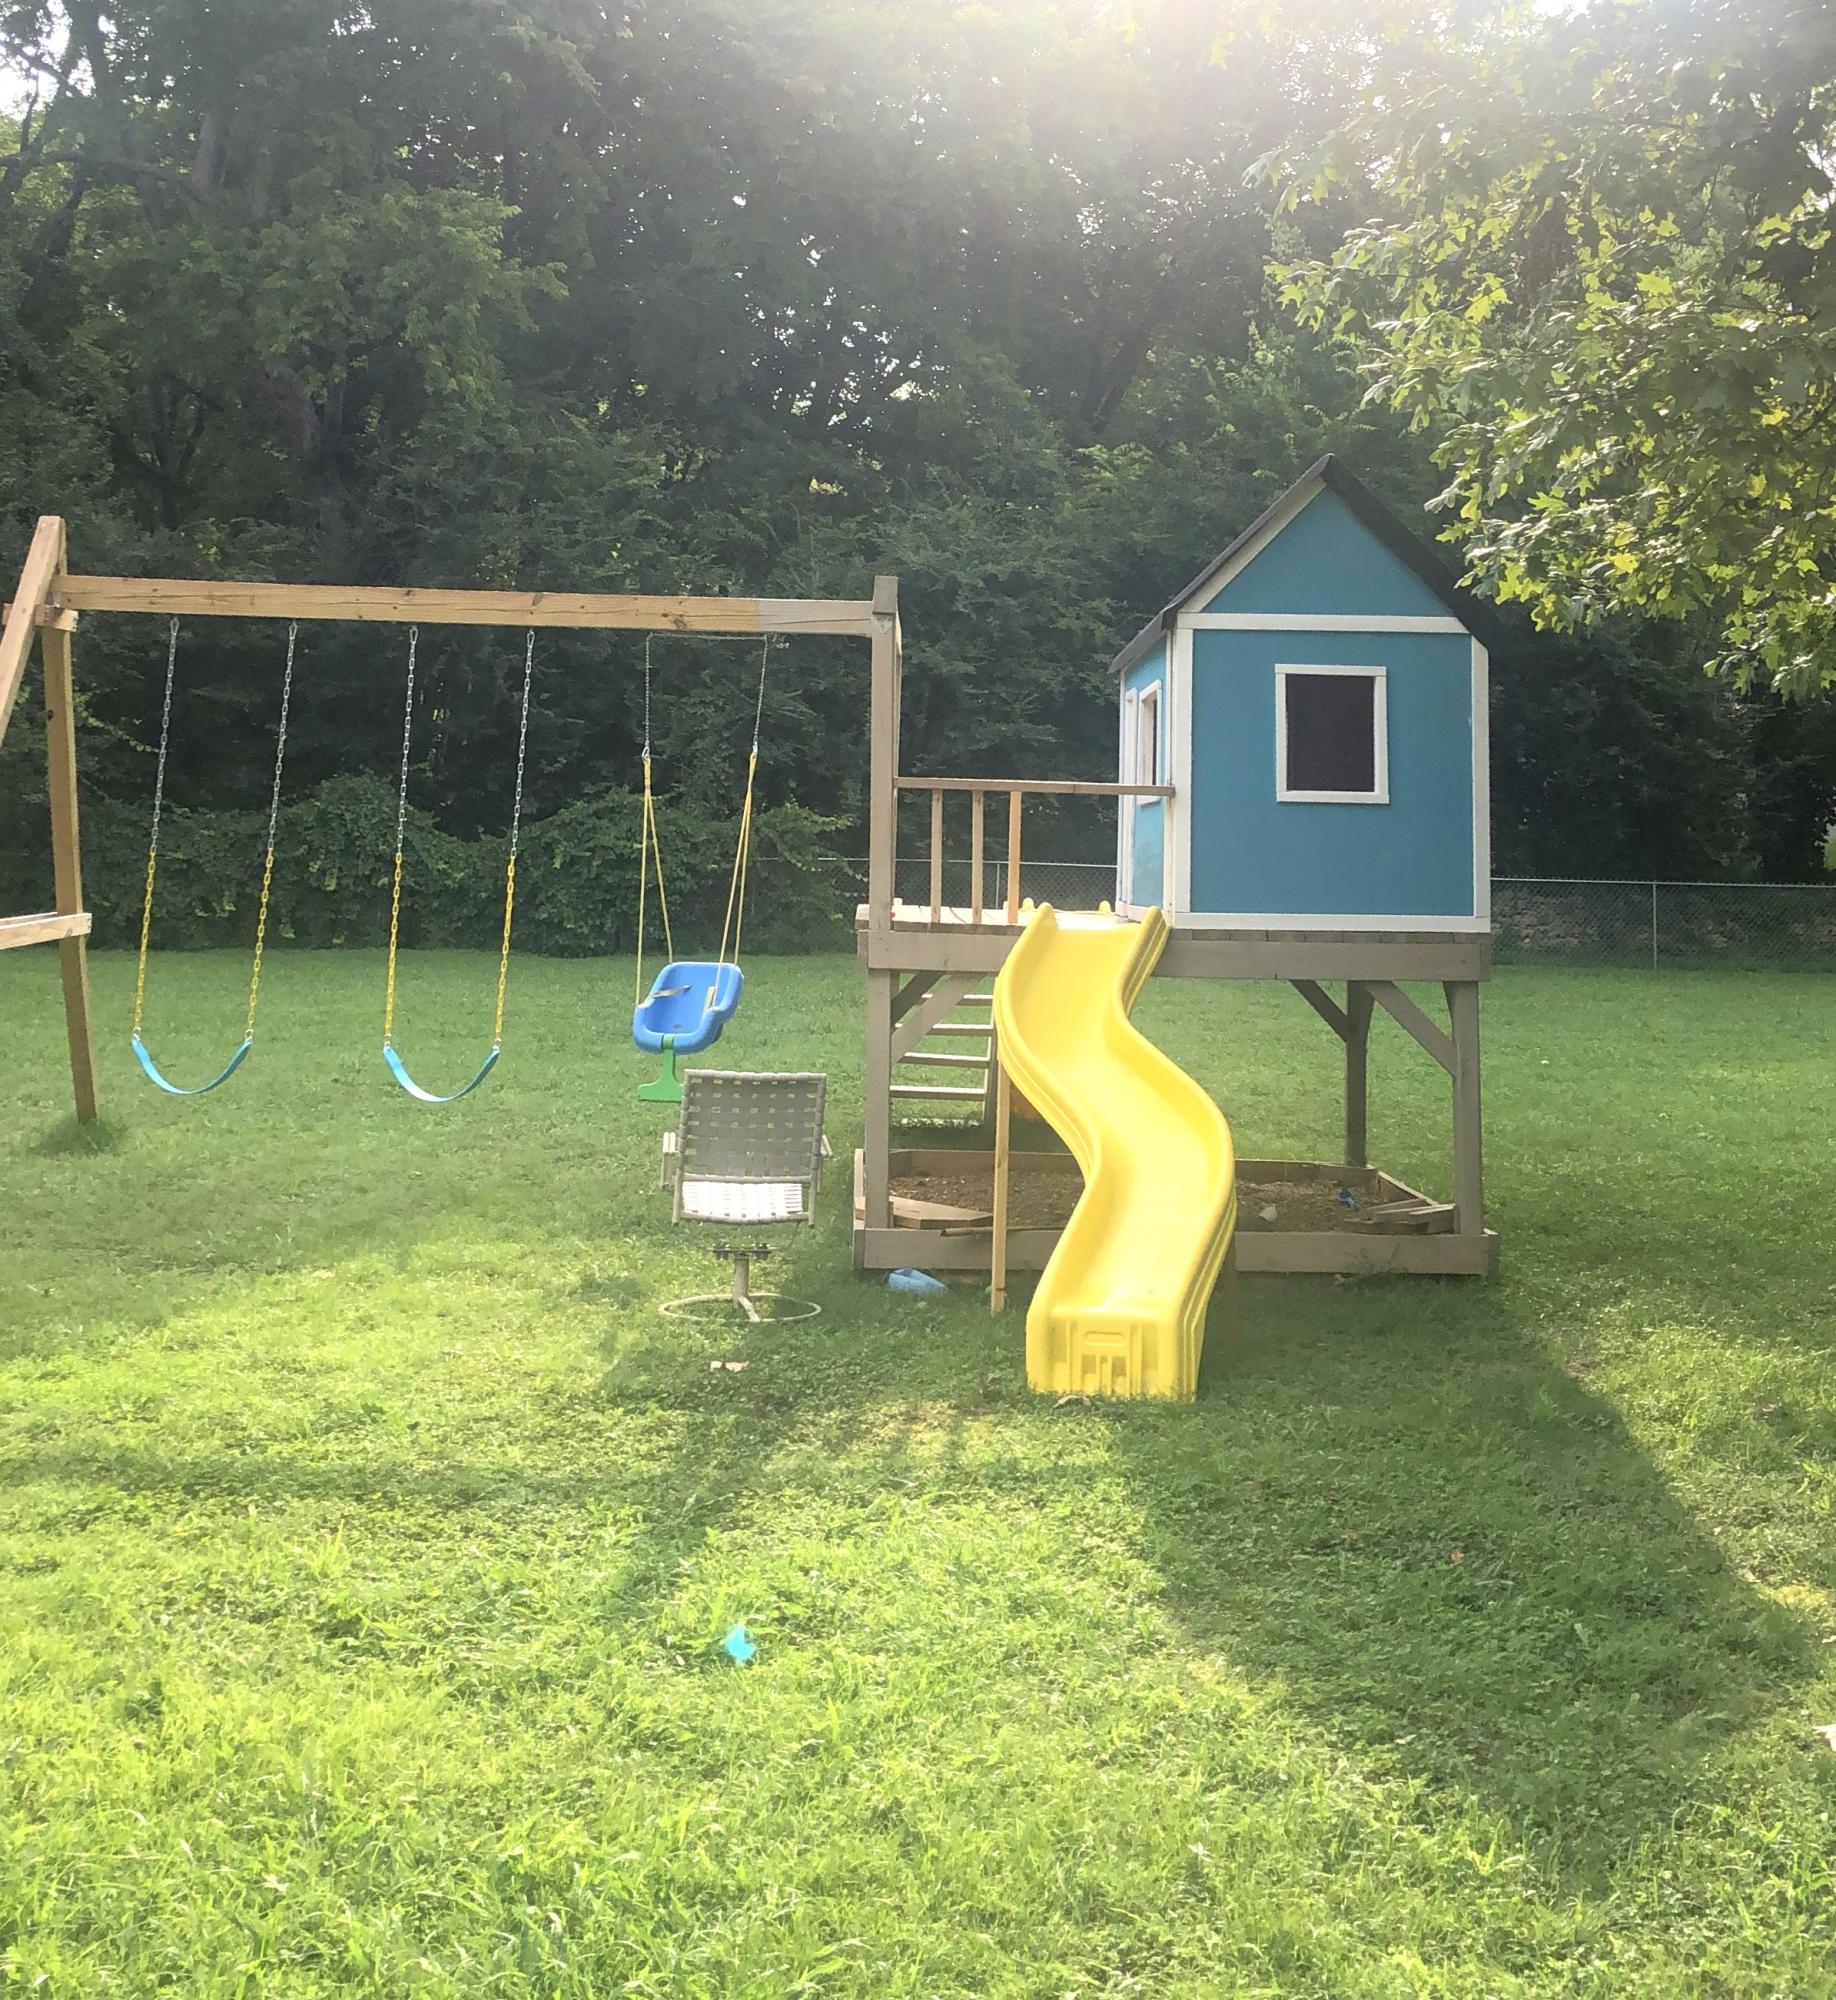
The one toy that we could not live without! Started this as a 2020 covid project and play on it everyday.
The one toy that we could not live without! Started this as a 2020 covid project and play on it everyday.
Fun project!
Hesasmoothoperator
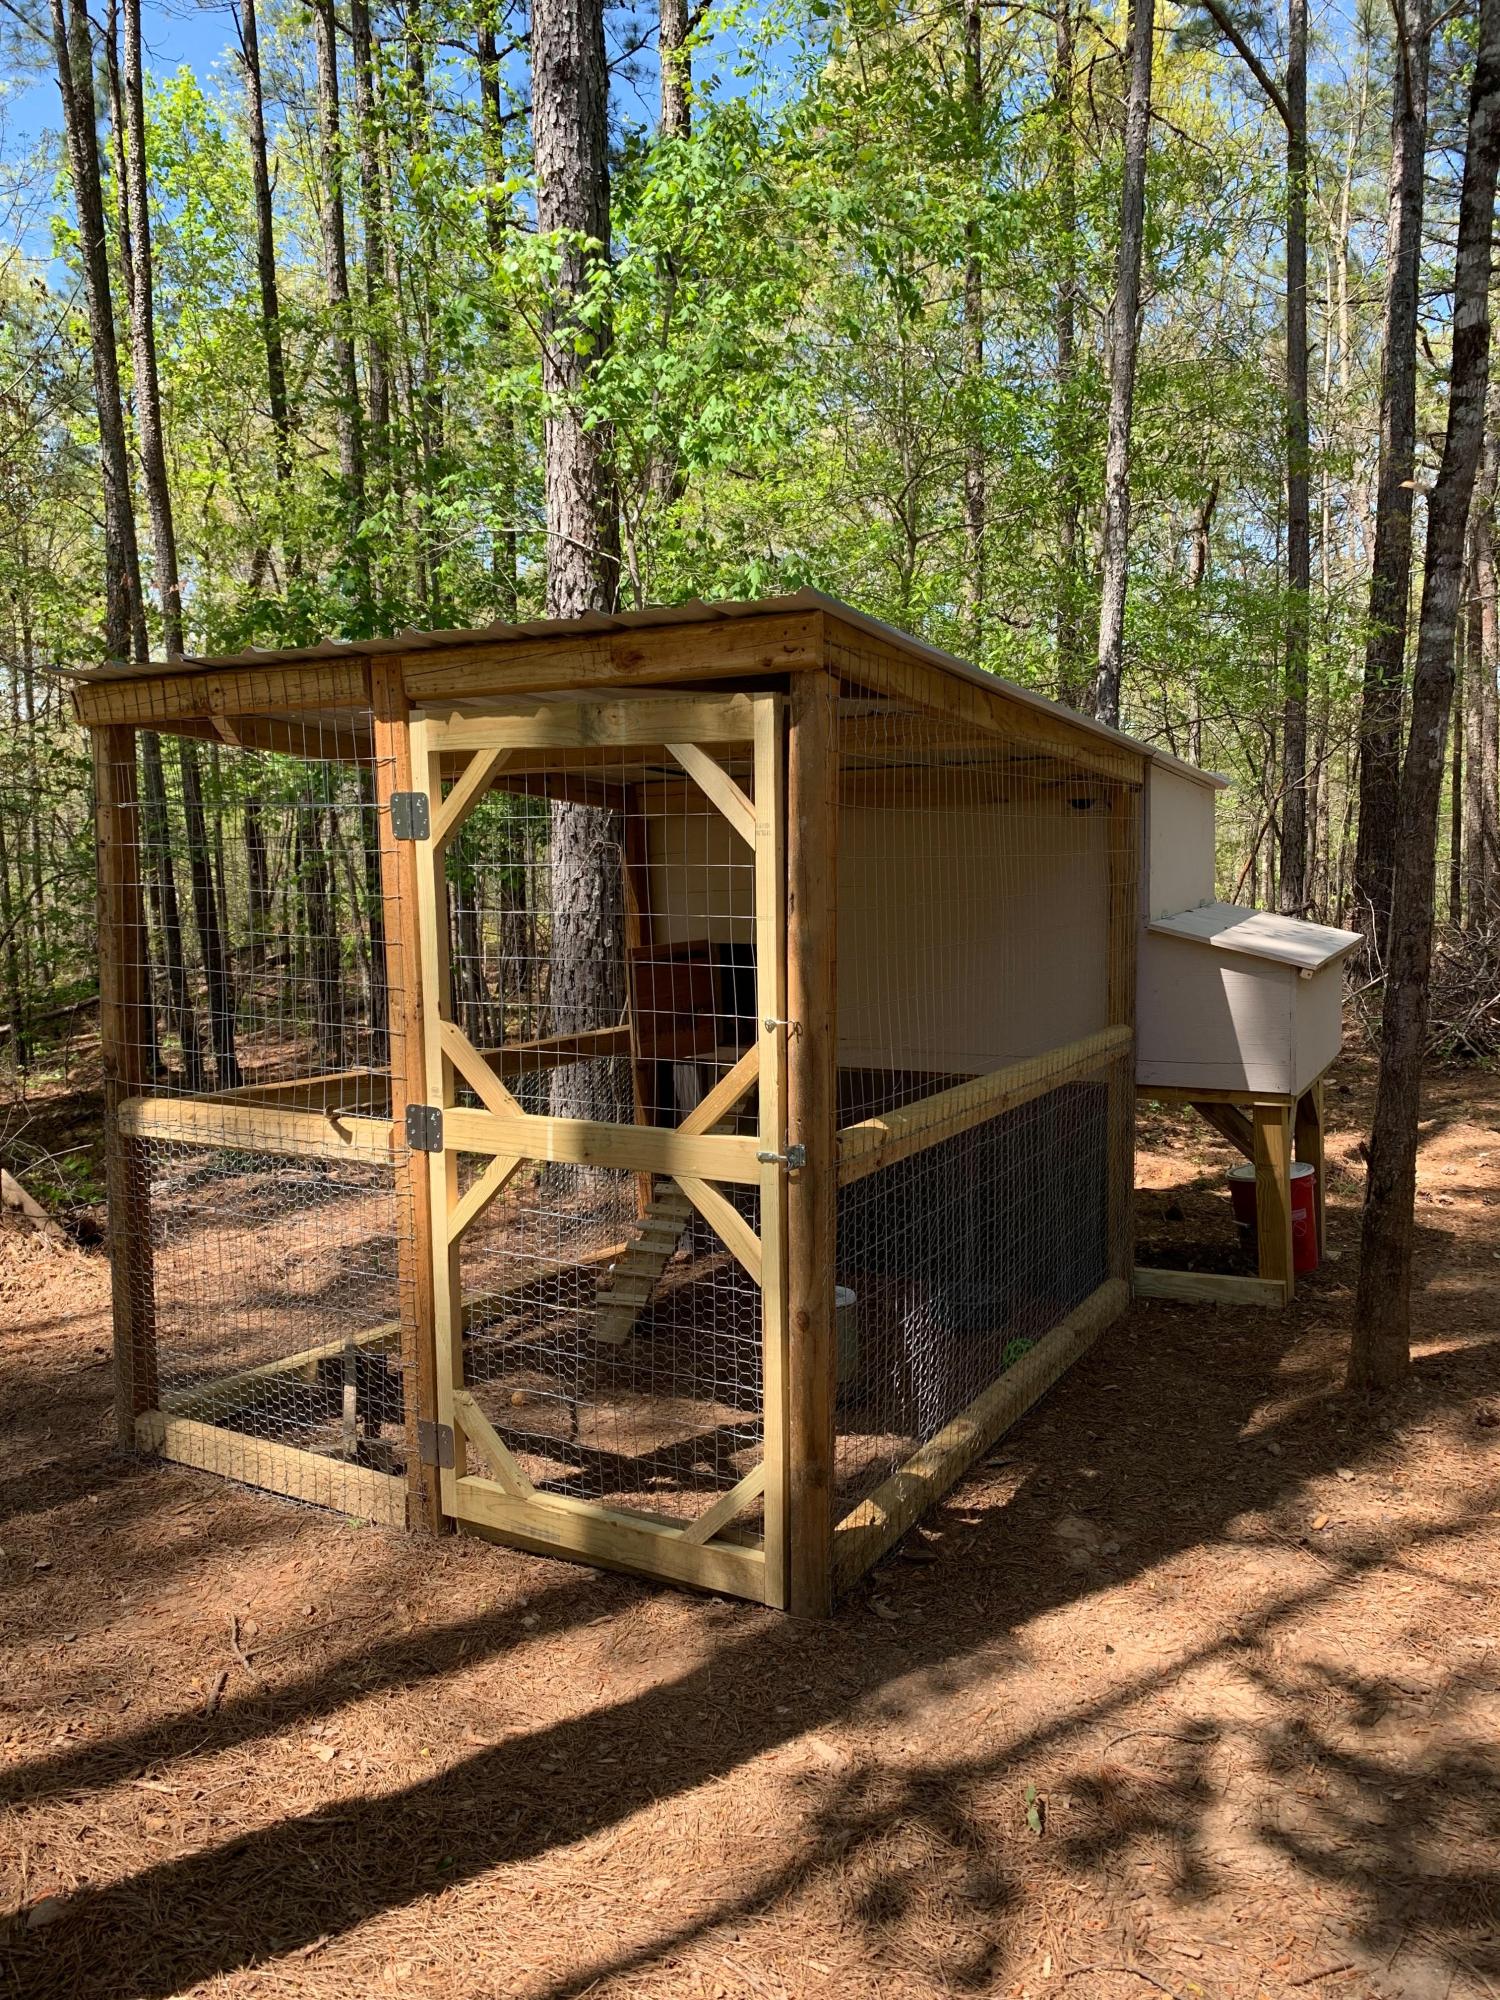
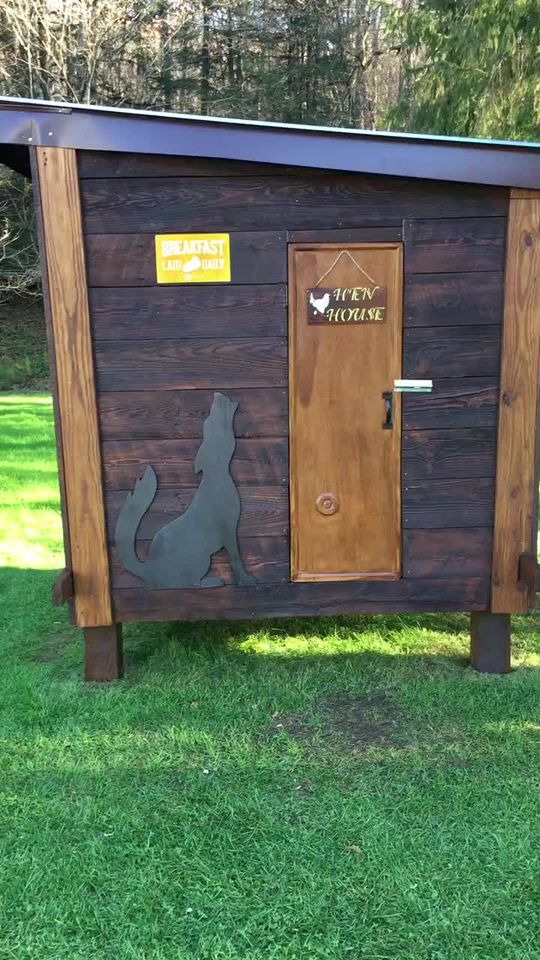
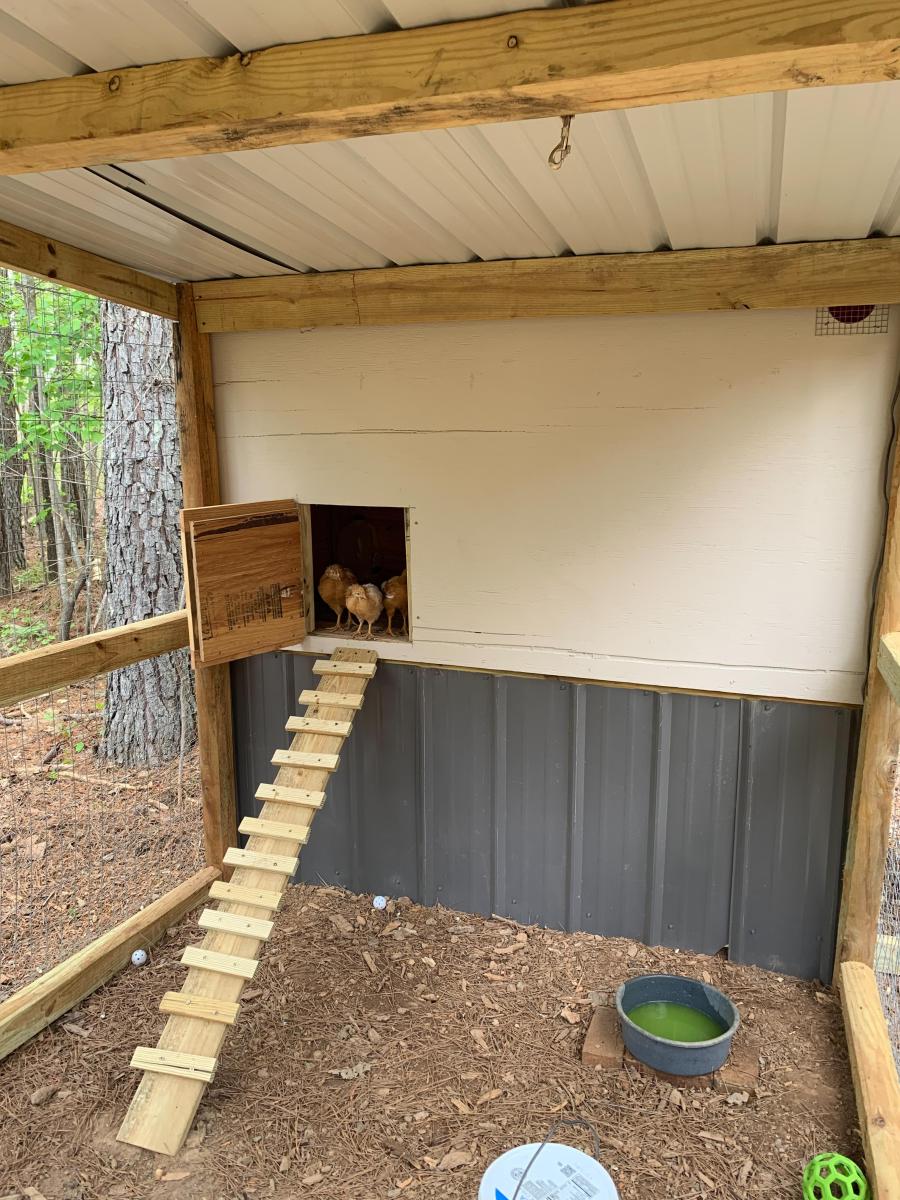
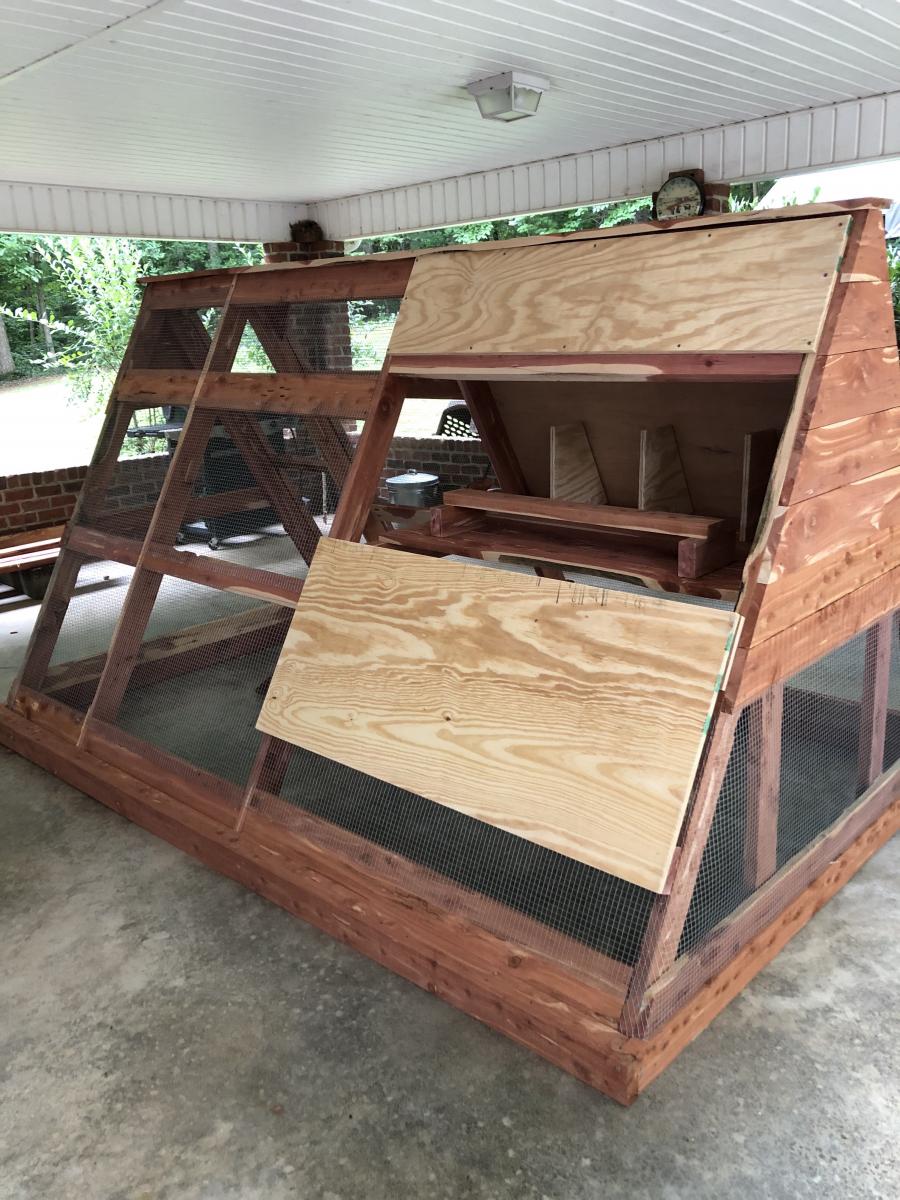
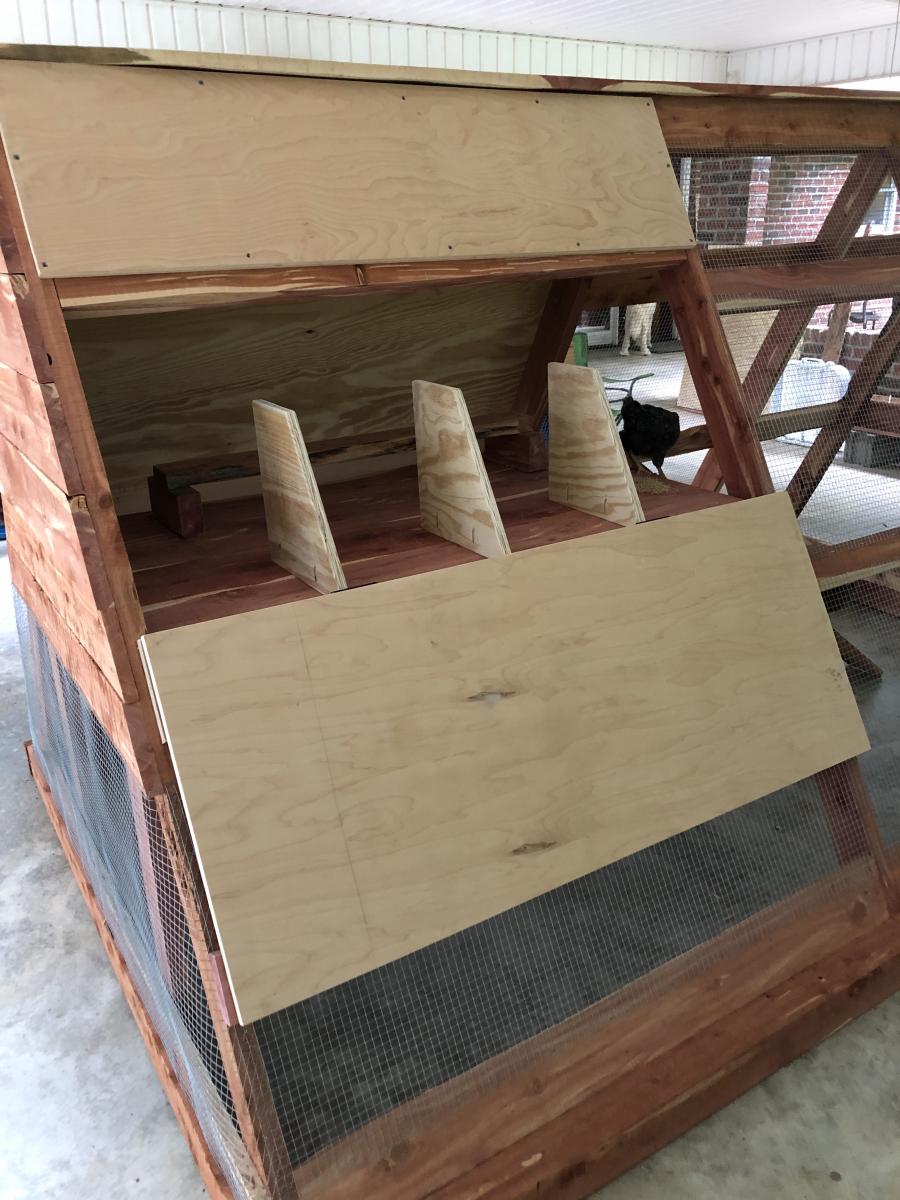
Chicken coop with run!
by Vicki
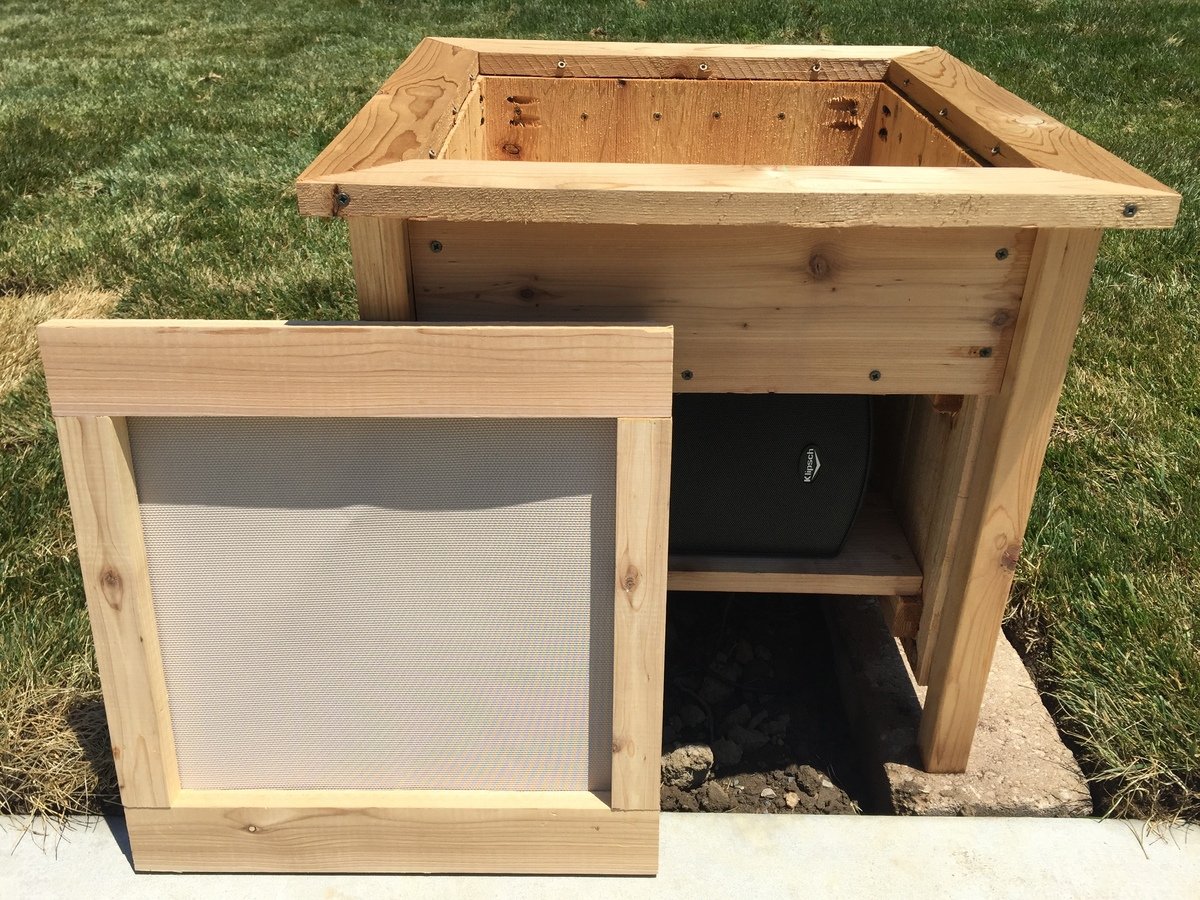
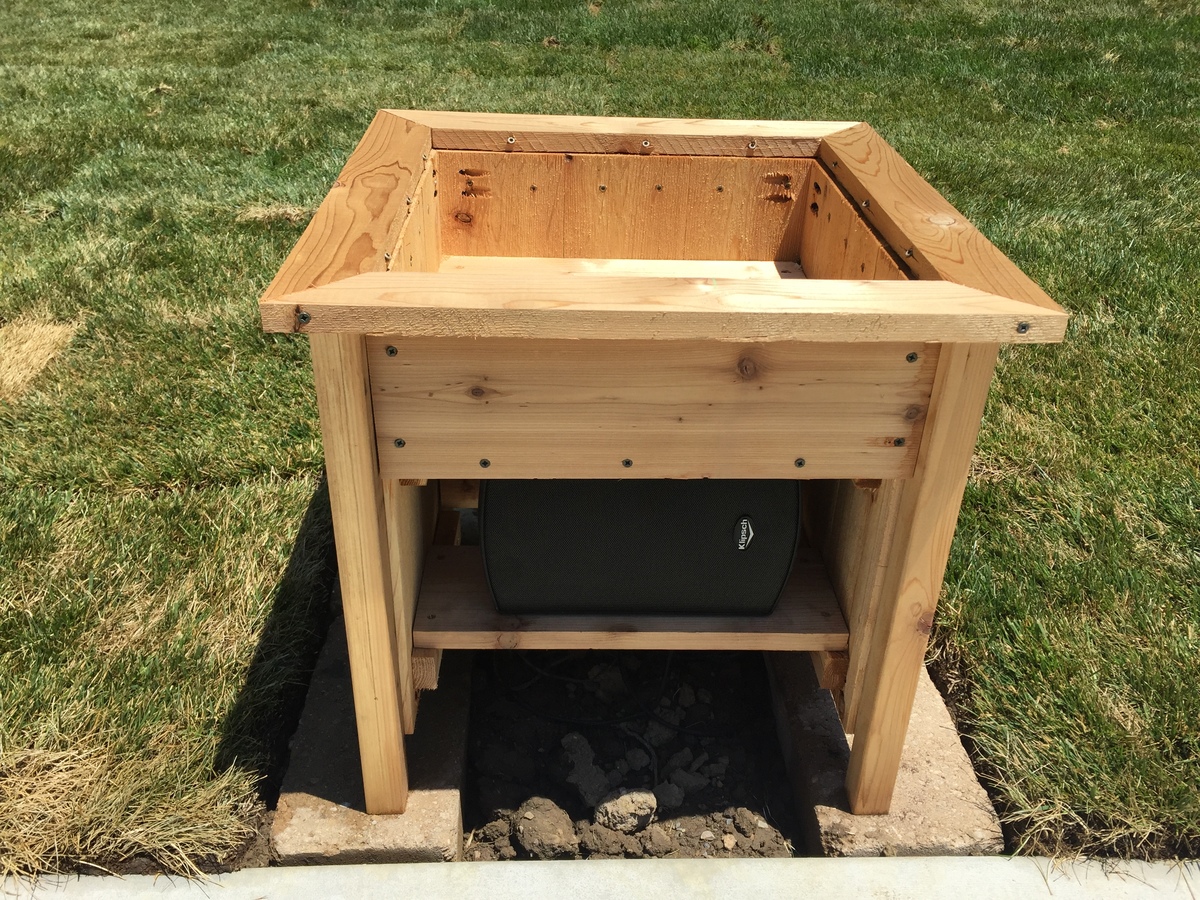
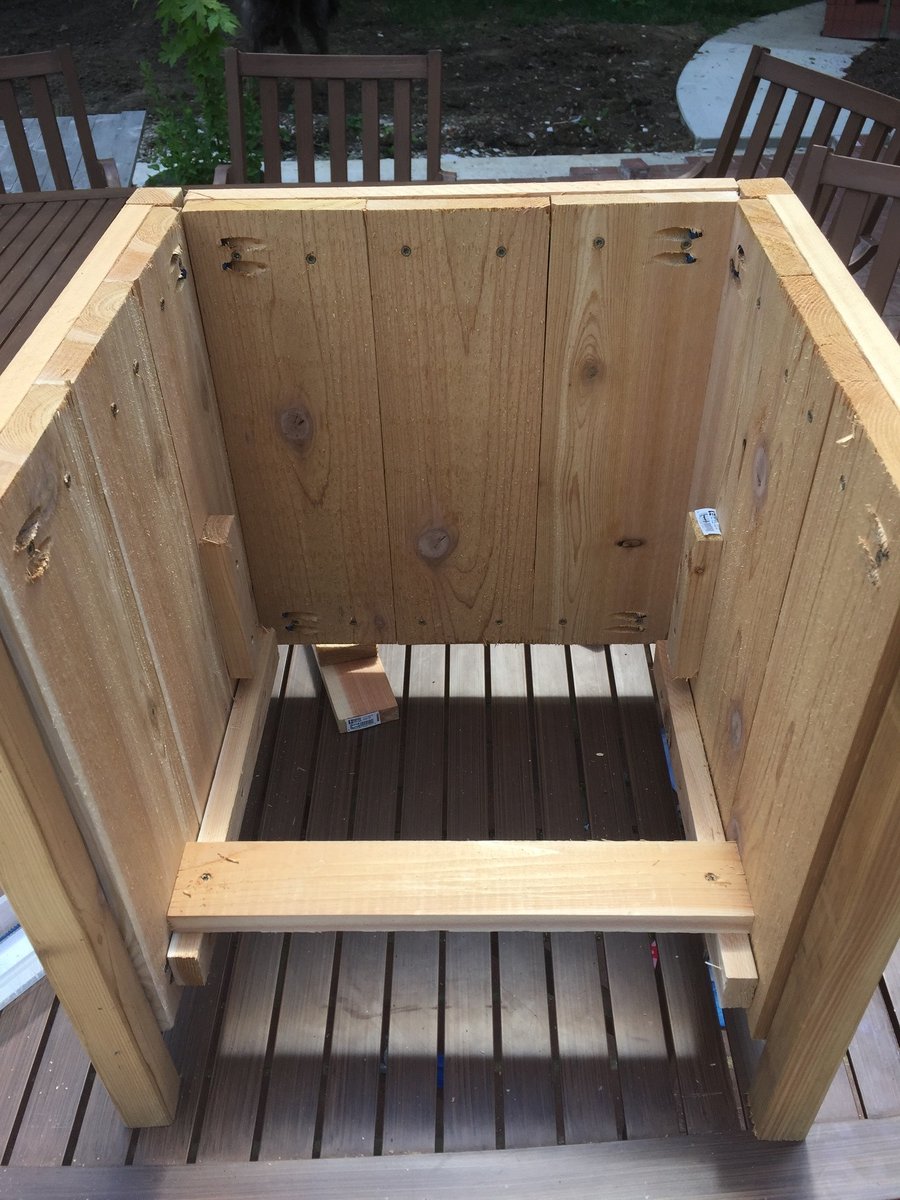
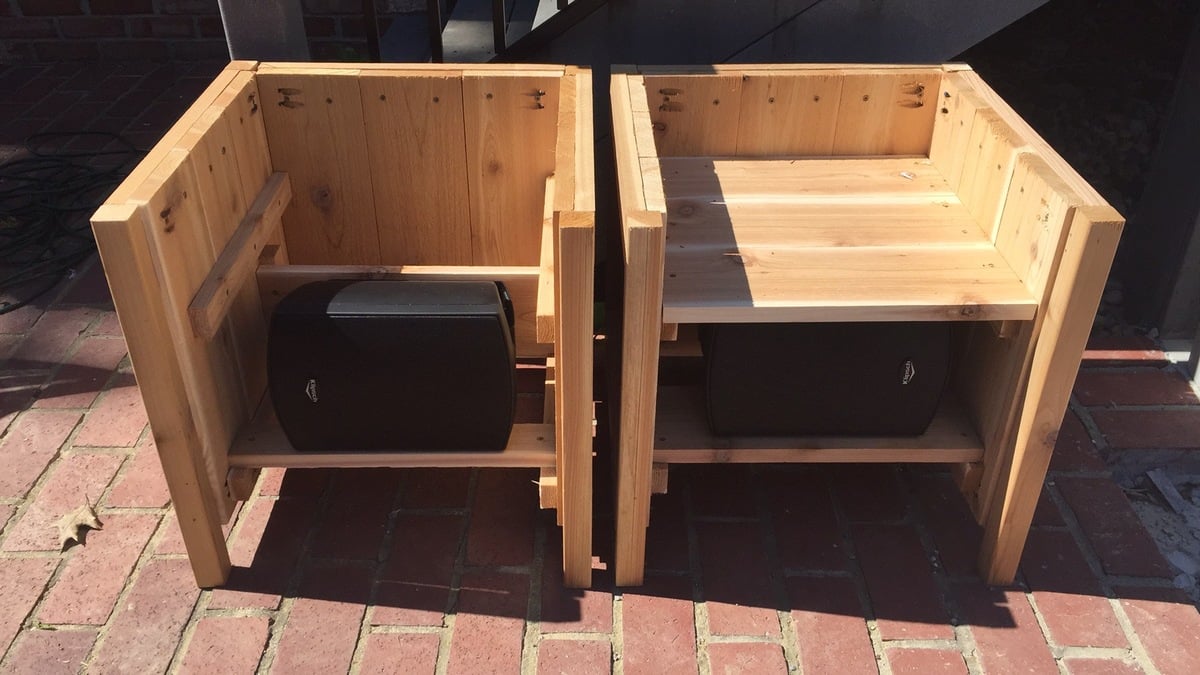
We just put in a pool and I needed something to hide a pair of outdoor speakers. I used Klipsh AW-525 speakers.
Basically I raised the bottom of the planter enough to fit the speaker under and had to add a few framing pieces to secure the speaker mount to. The mount attaches to a vertical board and the weight rests on a horizontal board. The wiring comes up from below.
The front panel uses vinyl mesh from Sailrite.com to hide the speaker but allow sound out. Imm planning to hang it with magnets if it doesn't distort sound too much.
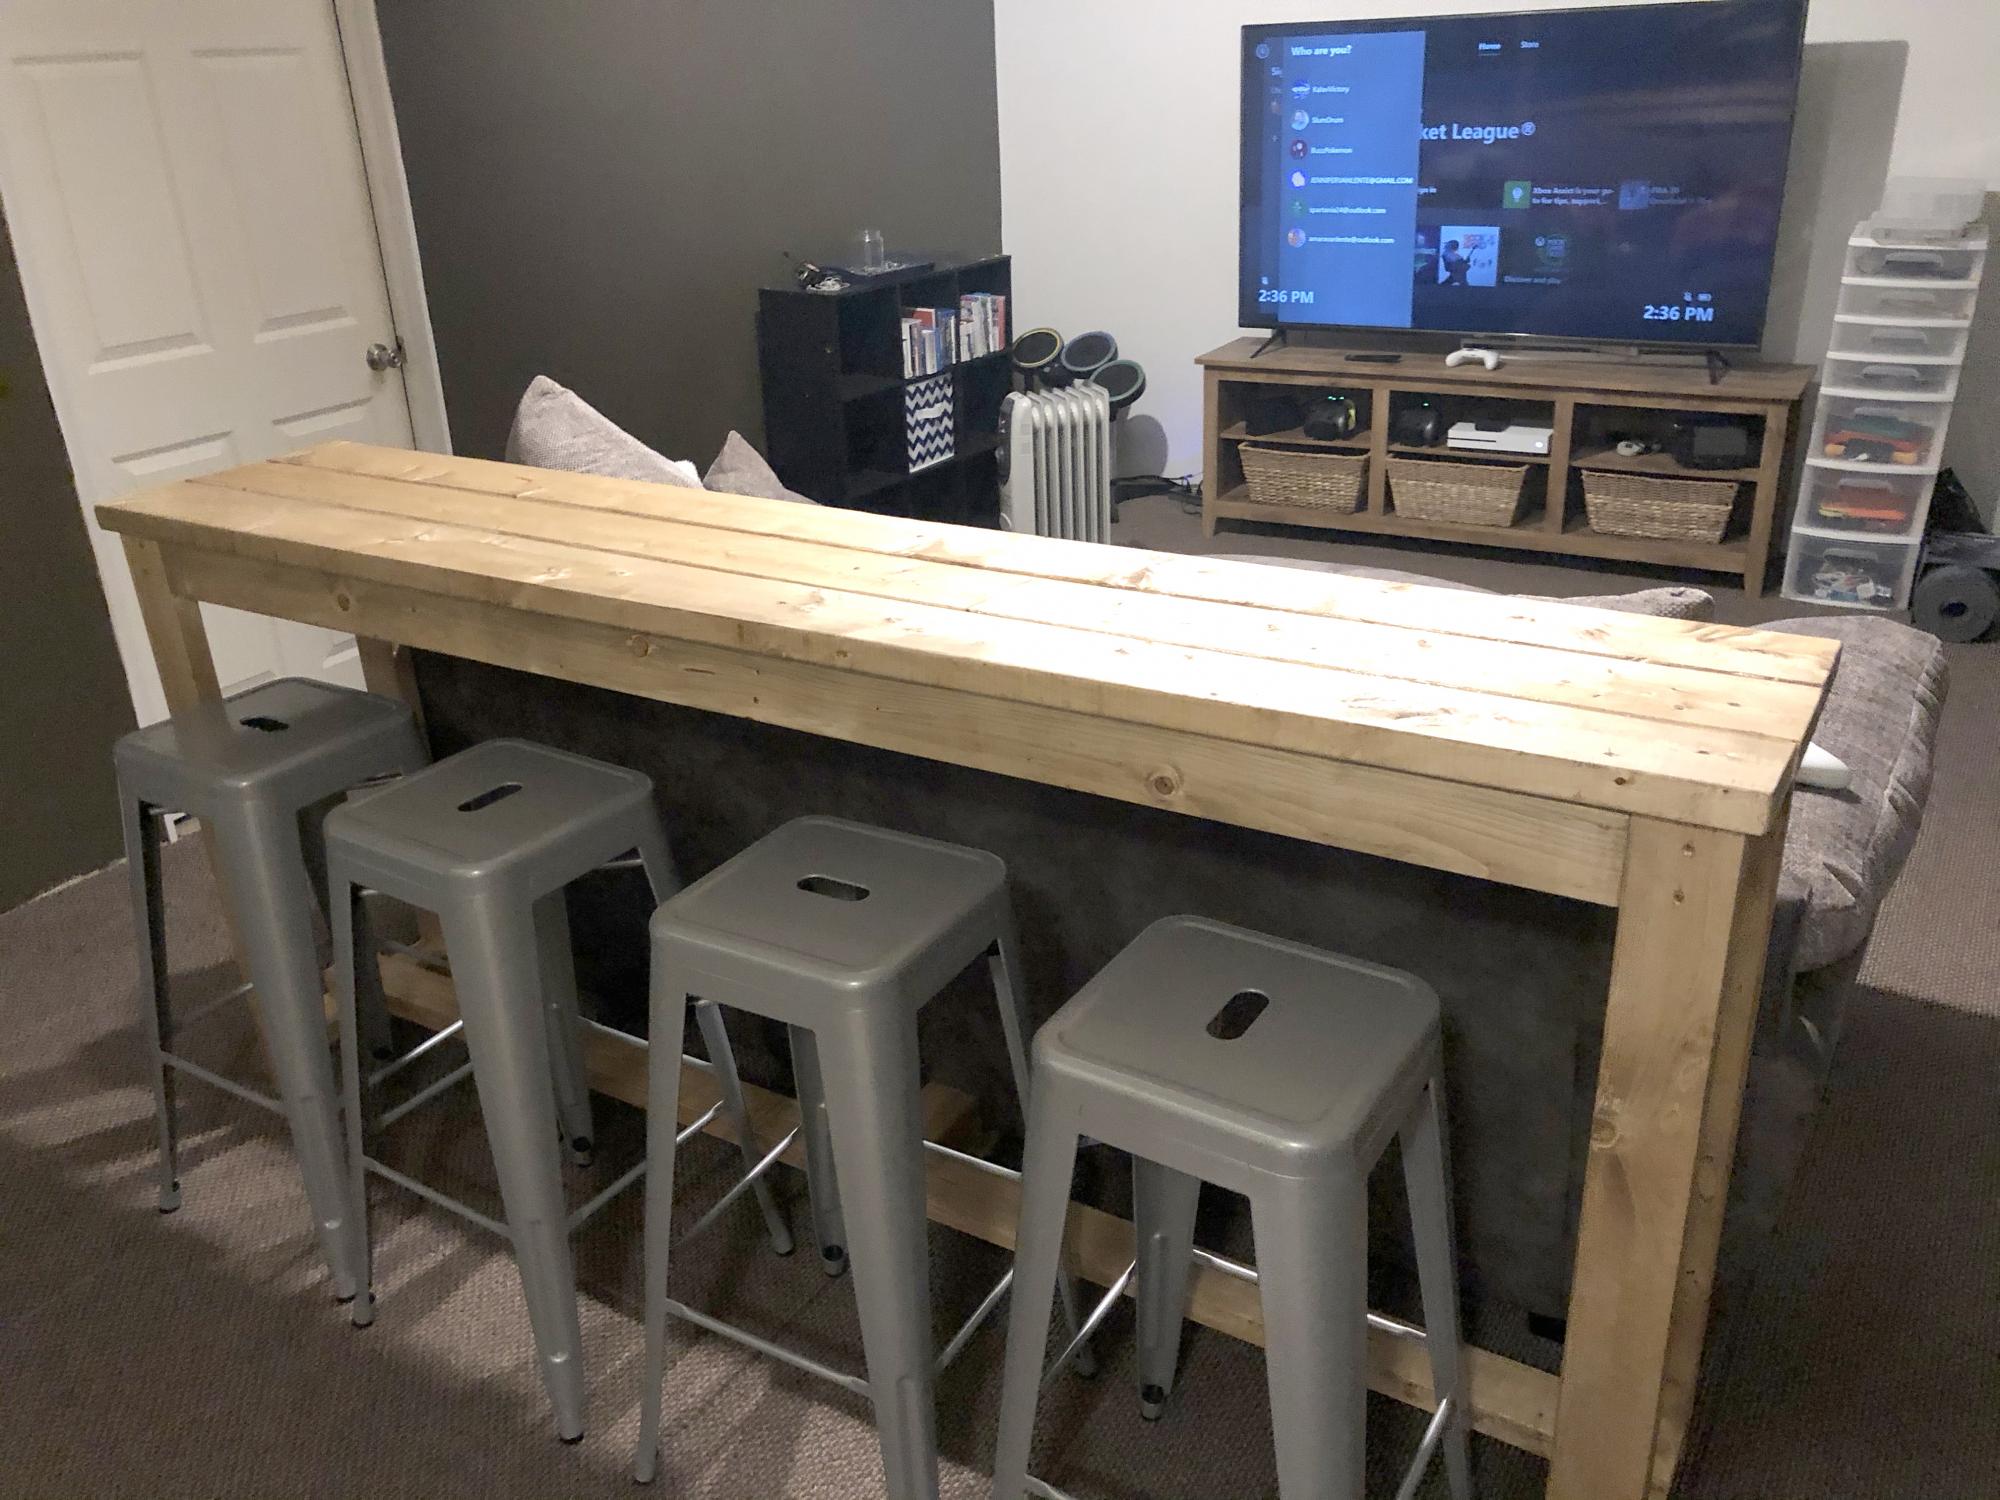
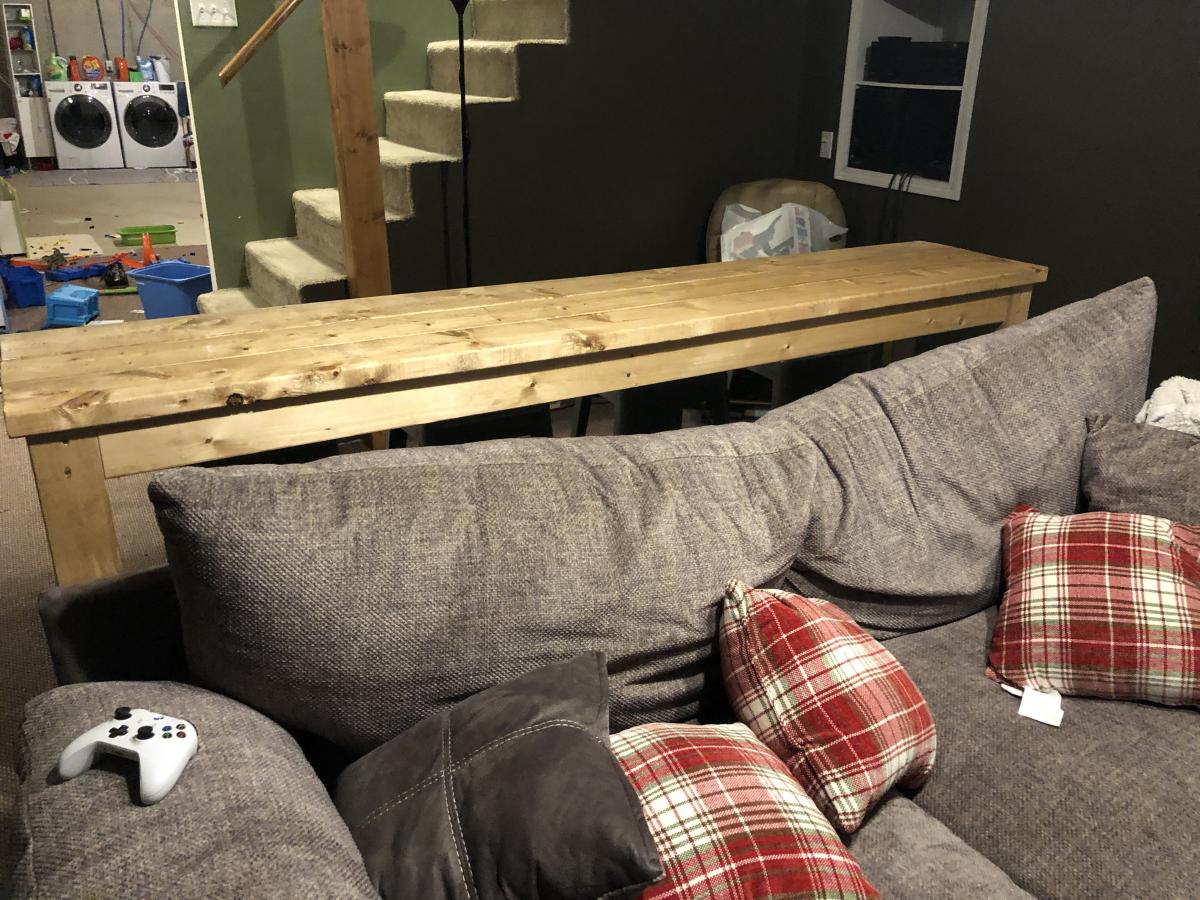
My husband and I had been looking at many different stores to try and find a bar table for behind our new couch in our basement. We wanted something that people could eat and drink at when we entertained and/or be able to sit at and play video games. I should have known we were better off to build our own rather than look in a store. It was only $30 in lumber and took 3 hours to build. And another project in the books!
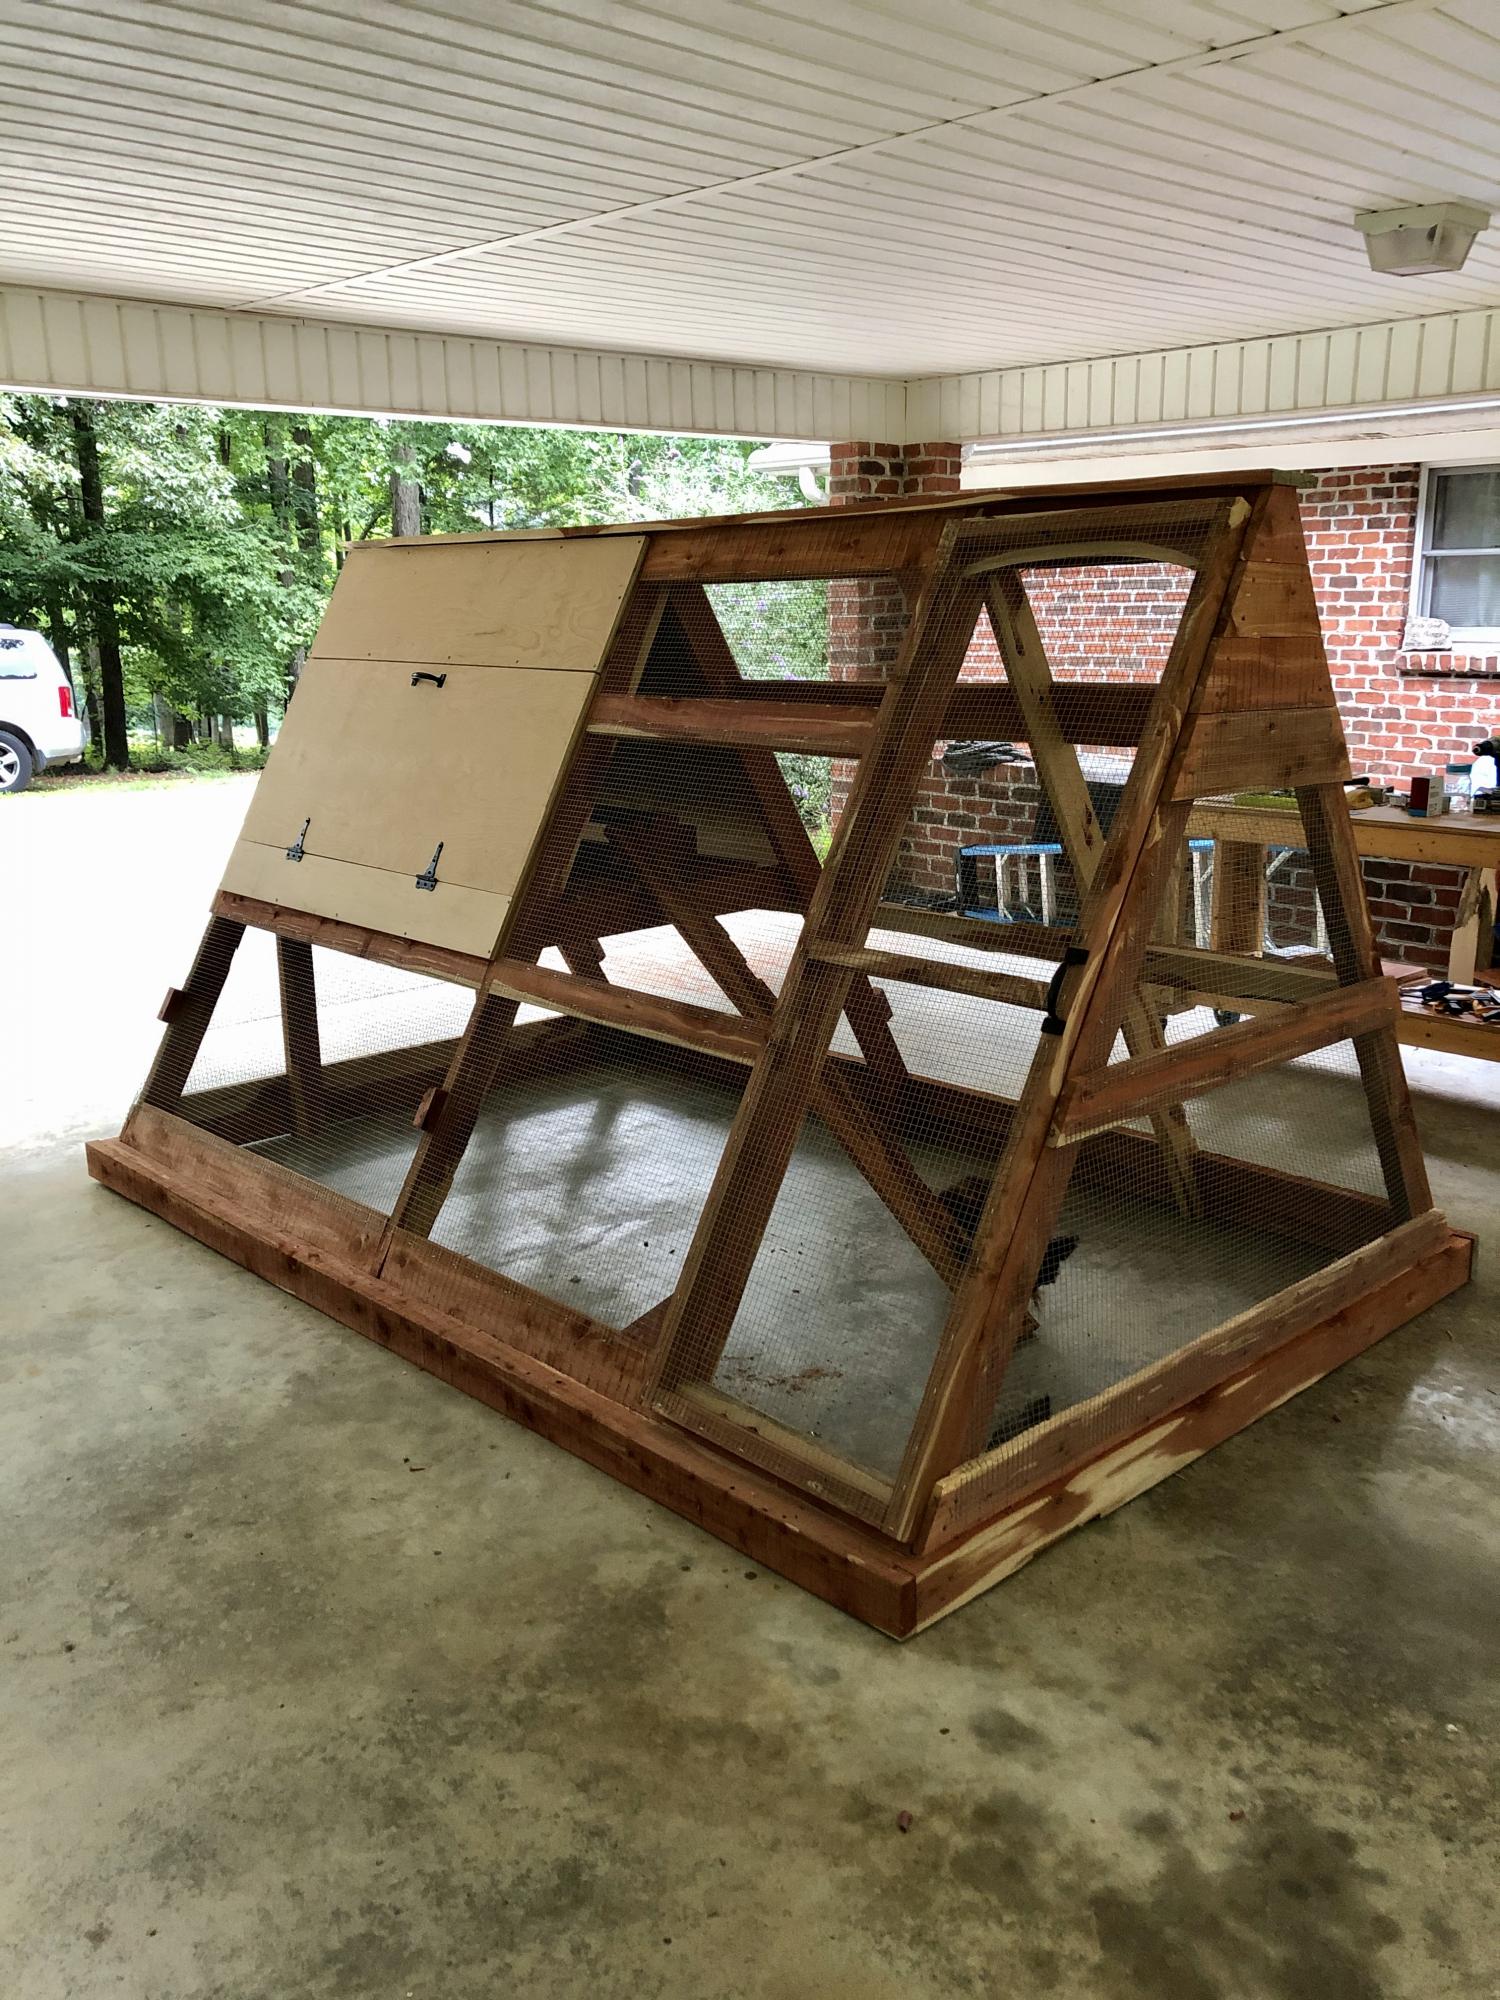
This was my biggest build yet and these plans along with being able to see a few brag posts with modicifactions made this project less intimidating. I extended the coop in order to add a walk in door. The drop down doors on both sides will give plenty of access and help with cleaning. I've added door latches to all the doors since putting it in place. My dad provided the cedar so that greatly reduced my costs. This project took about six days to complete. The fun part was getting it out of my carport : ) This was built for my daughter's chickens and she is thrilled with it. So am I! Thanks for the plans Ana!
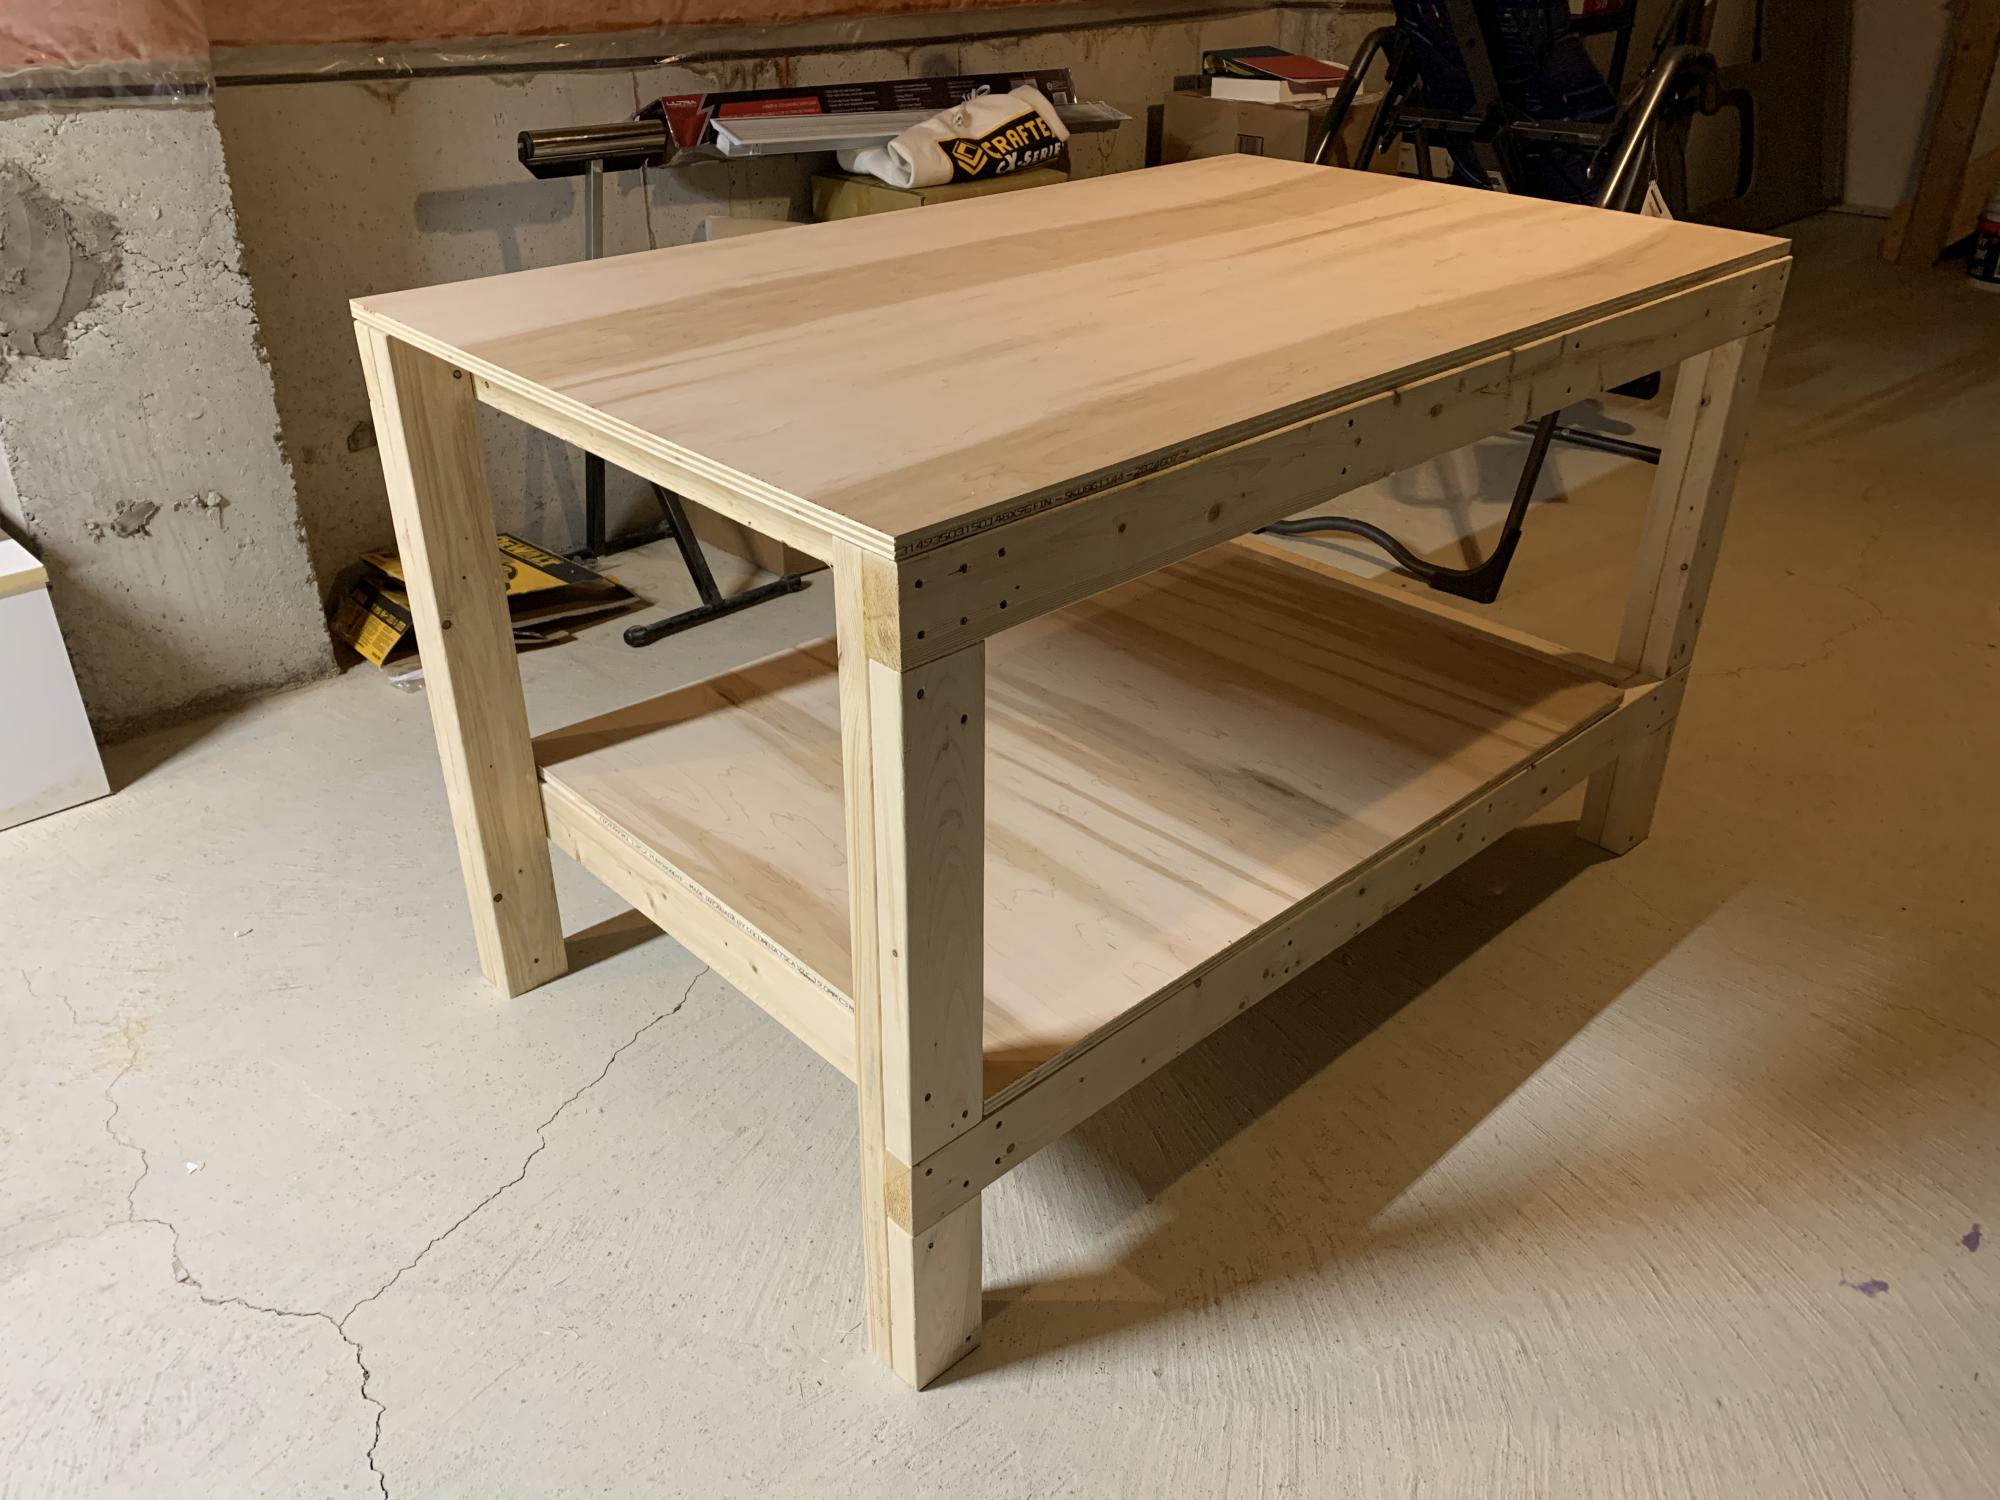
Thanks for the simple plans Anna, they worked out great!. I resized the table to make maximum use of the material, still within the same quantity you specified in your plans. I glued the legs along the lengths of the table, and kept the table top and shelf screwed in, for easy dismantling, if necessary.
Finally I added pop down heavy duty wheels allowing me to move the table (not shown in this pic) easily. When the wheels are not being used they pop up, making the table very stable. The height of the table is about 1/2” lower than the table saw, making it an ideal outfeed table as well.
Great design, and fun build.

Thanks for the free plans. I did have to make modifications for the doors. i hid the hinges to give it a clean look. i used cedar for the trim and Plywood Siding Panel T1-11 4 IN OC (Common: 19/32 in. x 4 ft. x 8 ft.; Actual: 0.563 in. x 48 in. x 96 in.) for the doors. i used a metal flashing for the roof so it will vent.


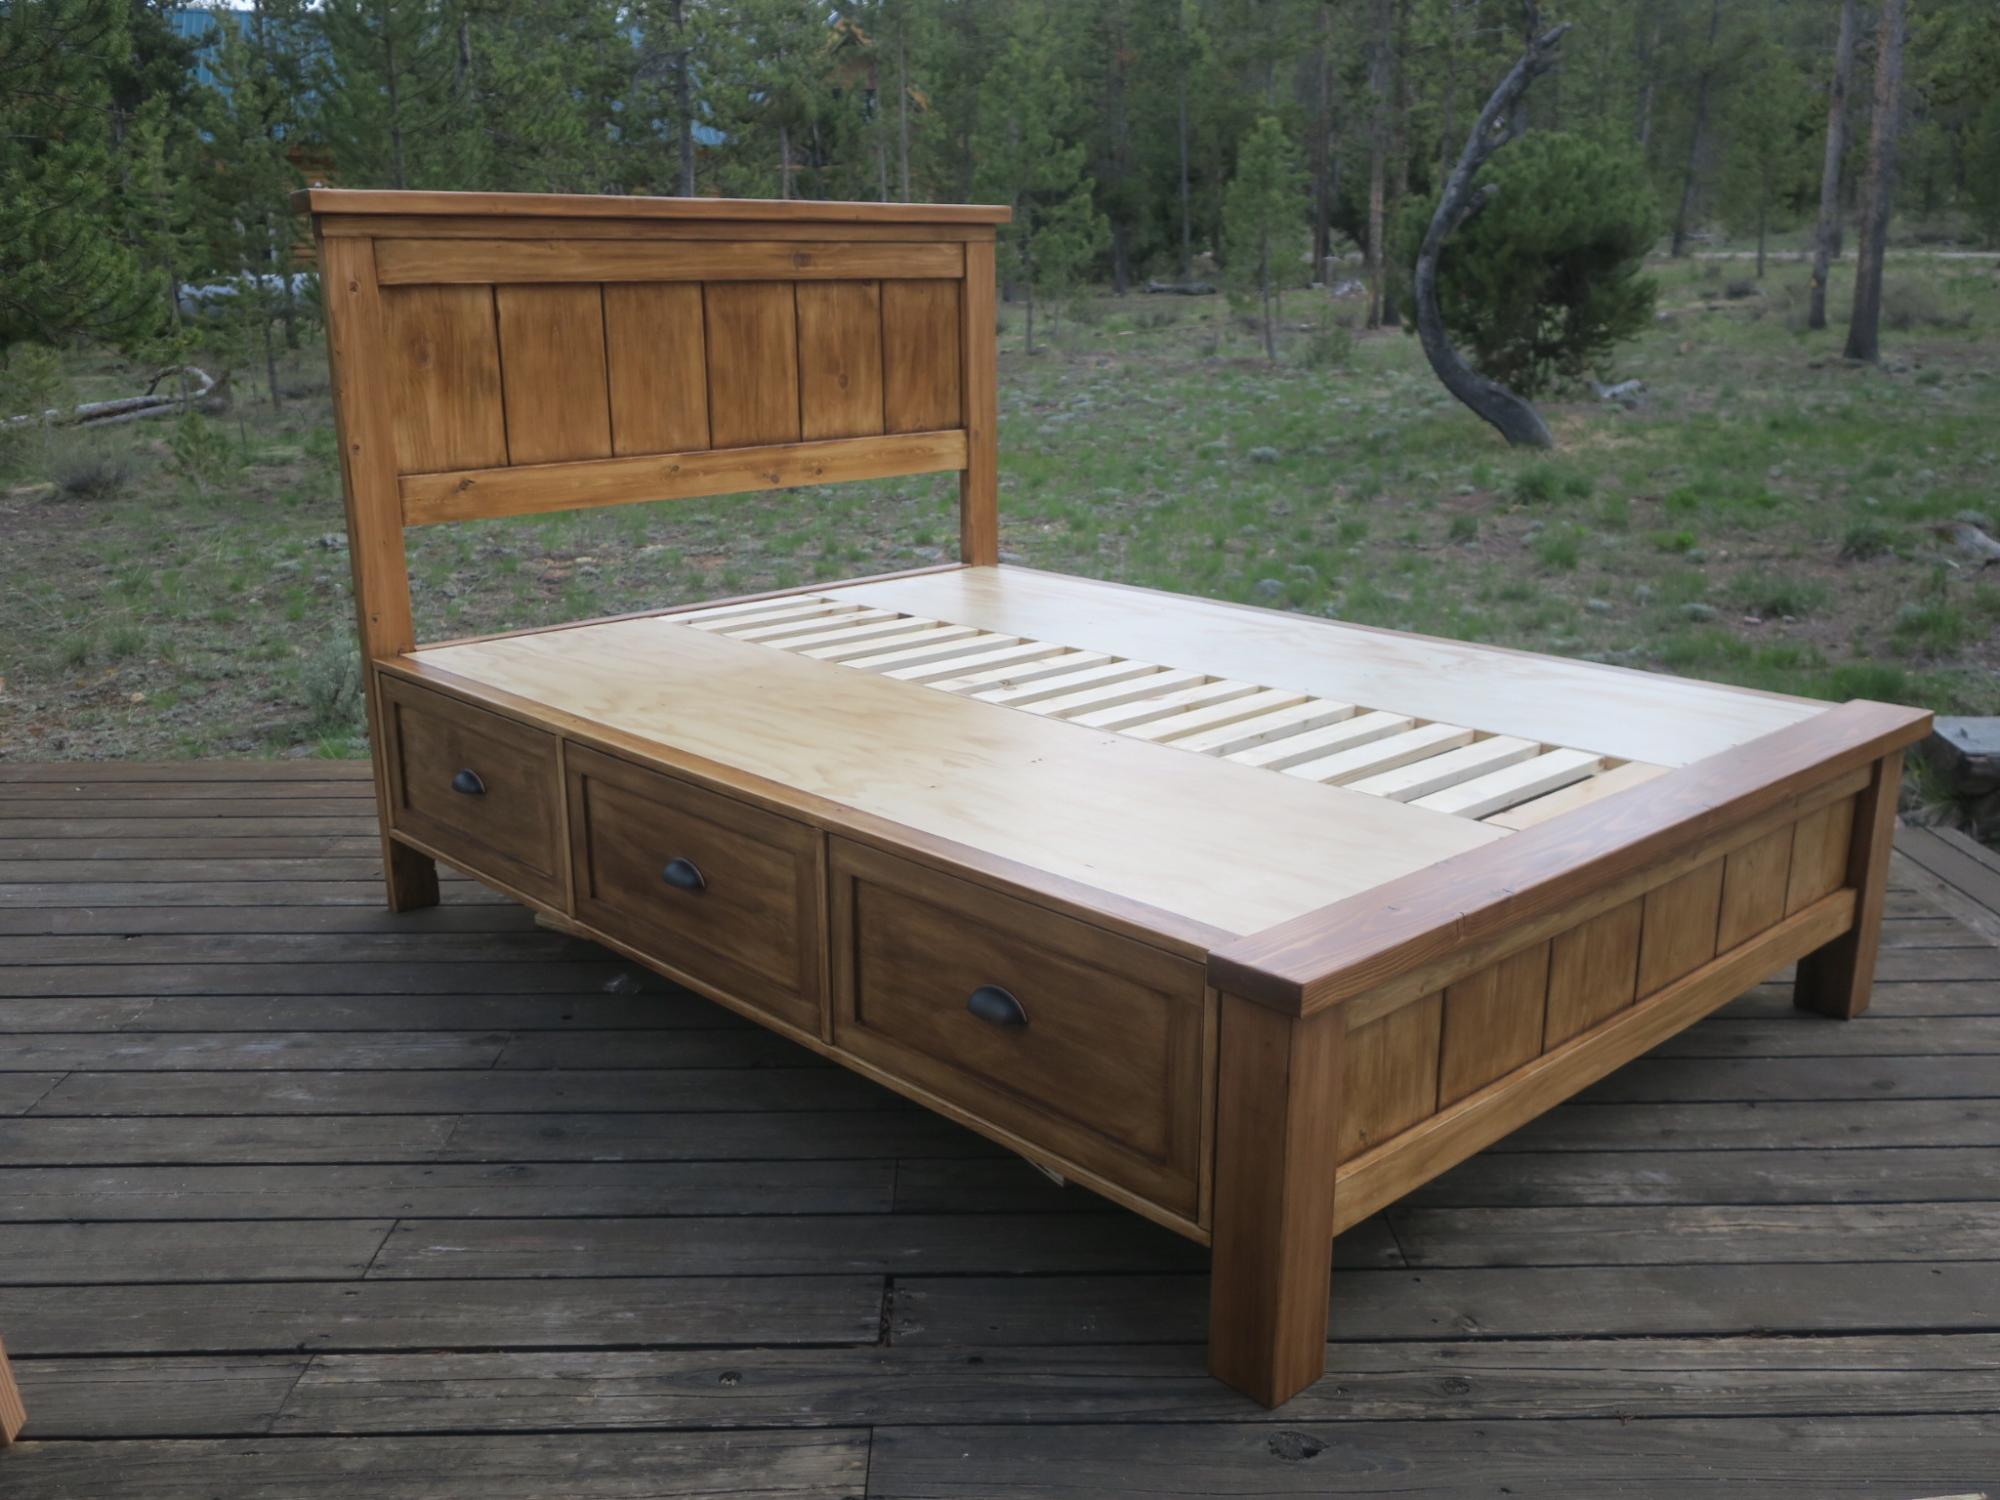
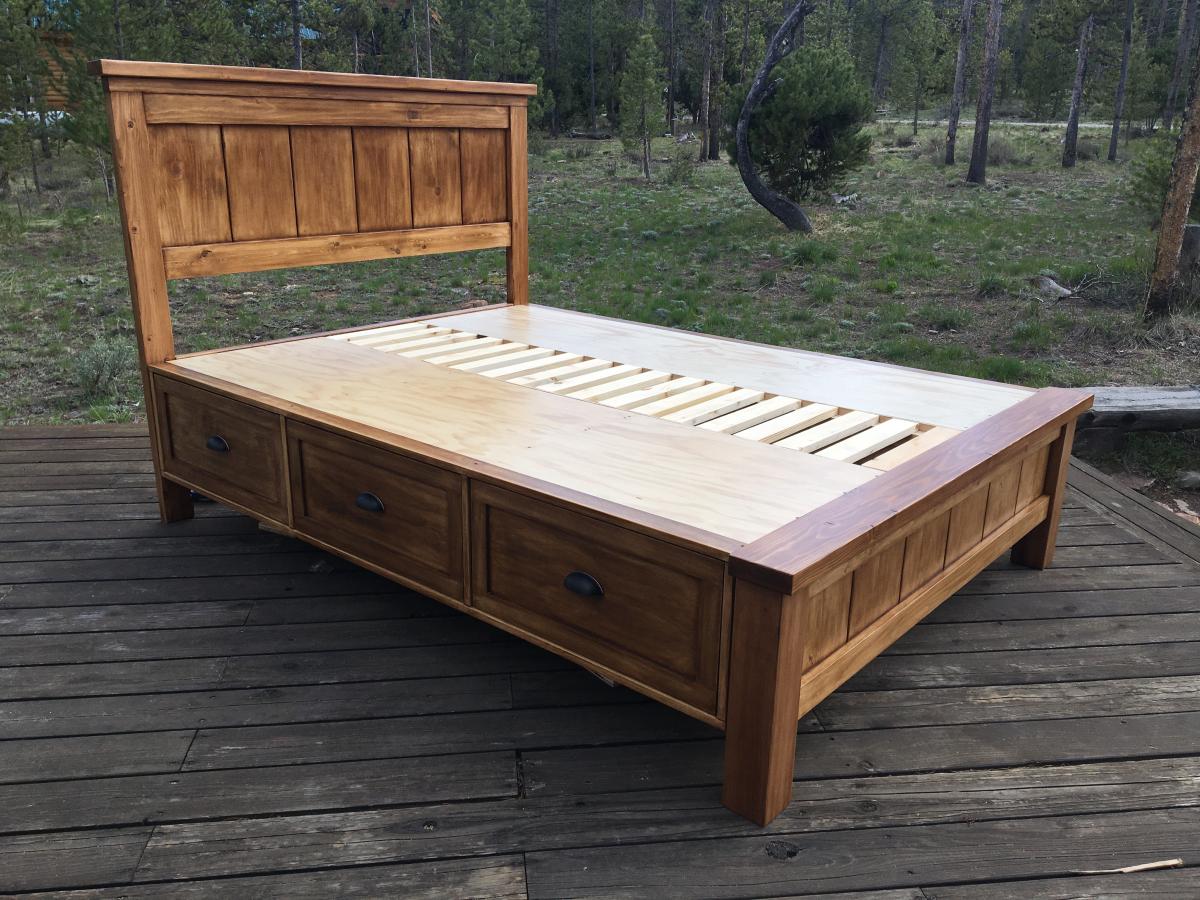
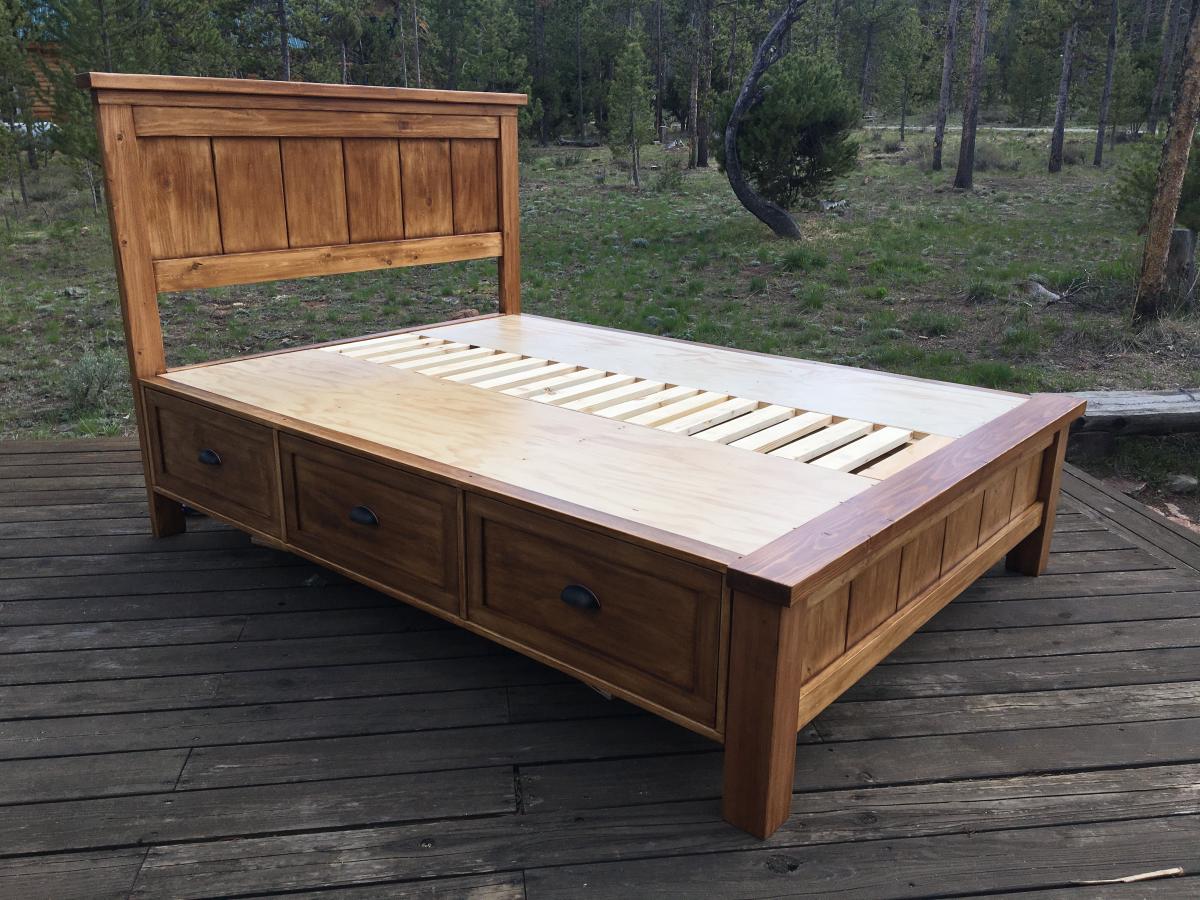
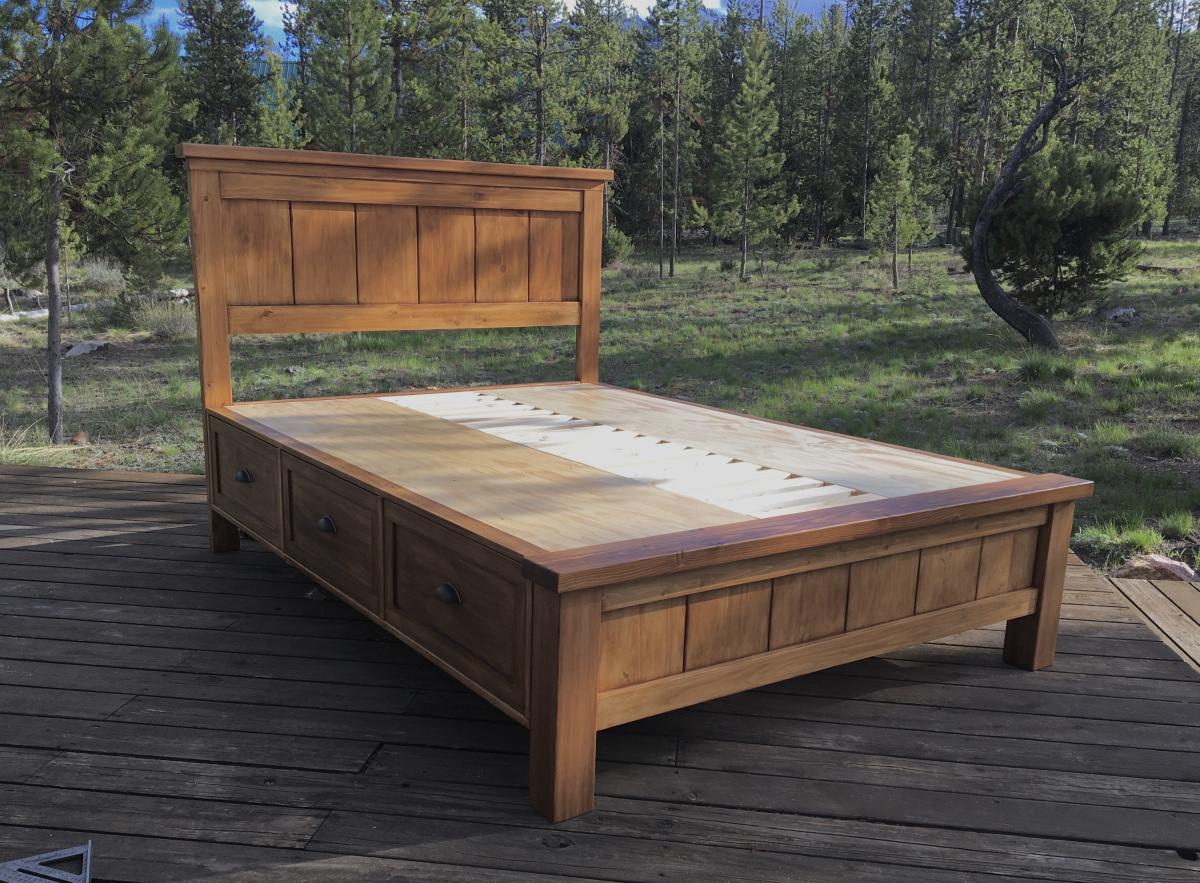
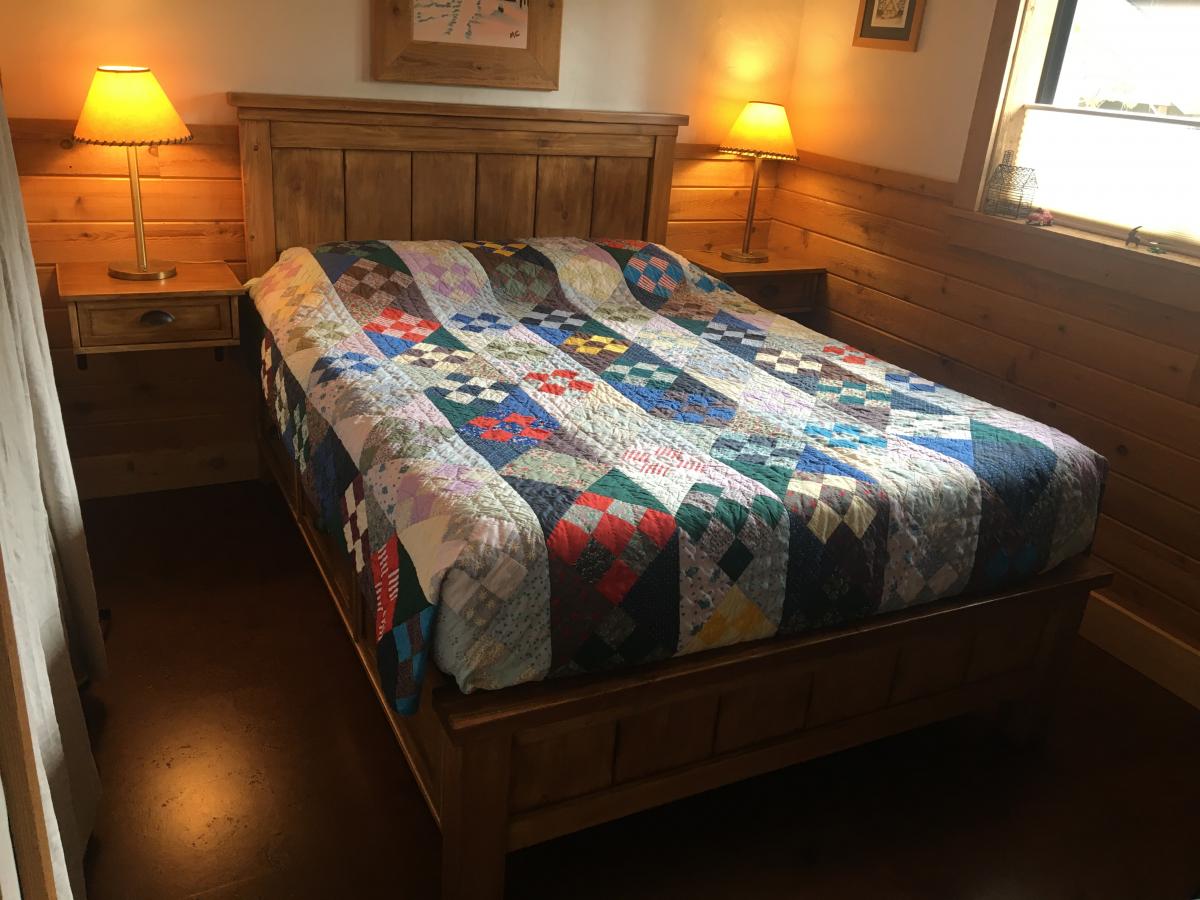
Hi, I’m Joe and love working on my cabin in Stanley Idaho. I needed a queen size bed on the ground floor but the room is small so I incorporated the footboard into into the platform to gain 6 inches of space in the room. It took a couple months working off and on but all fun. I also made the drawers deeper front to back to maximize storage. I did this at the peak of lumber prices and spent like $900 on lumber. It came out great, my Airbnb guests love it!

Wed, 10/06/2021 - 14:28
I could not get logged in to Ana-white.com on my phone where my pictures were, but now an logged in on my laptop. Is there any way to register this brag post on my account? This is Fitzanthony, [email protected]
Joe
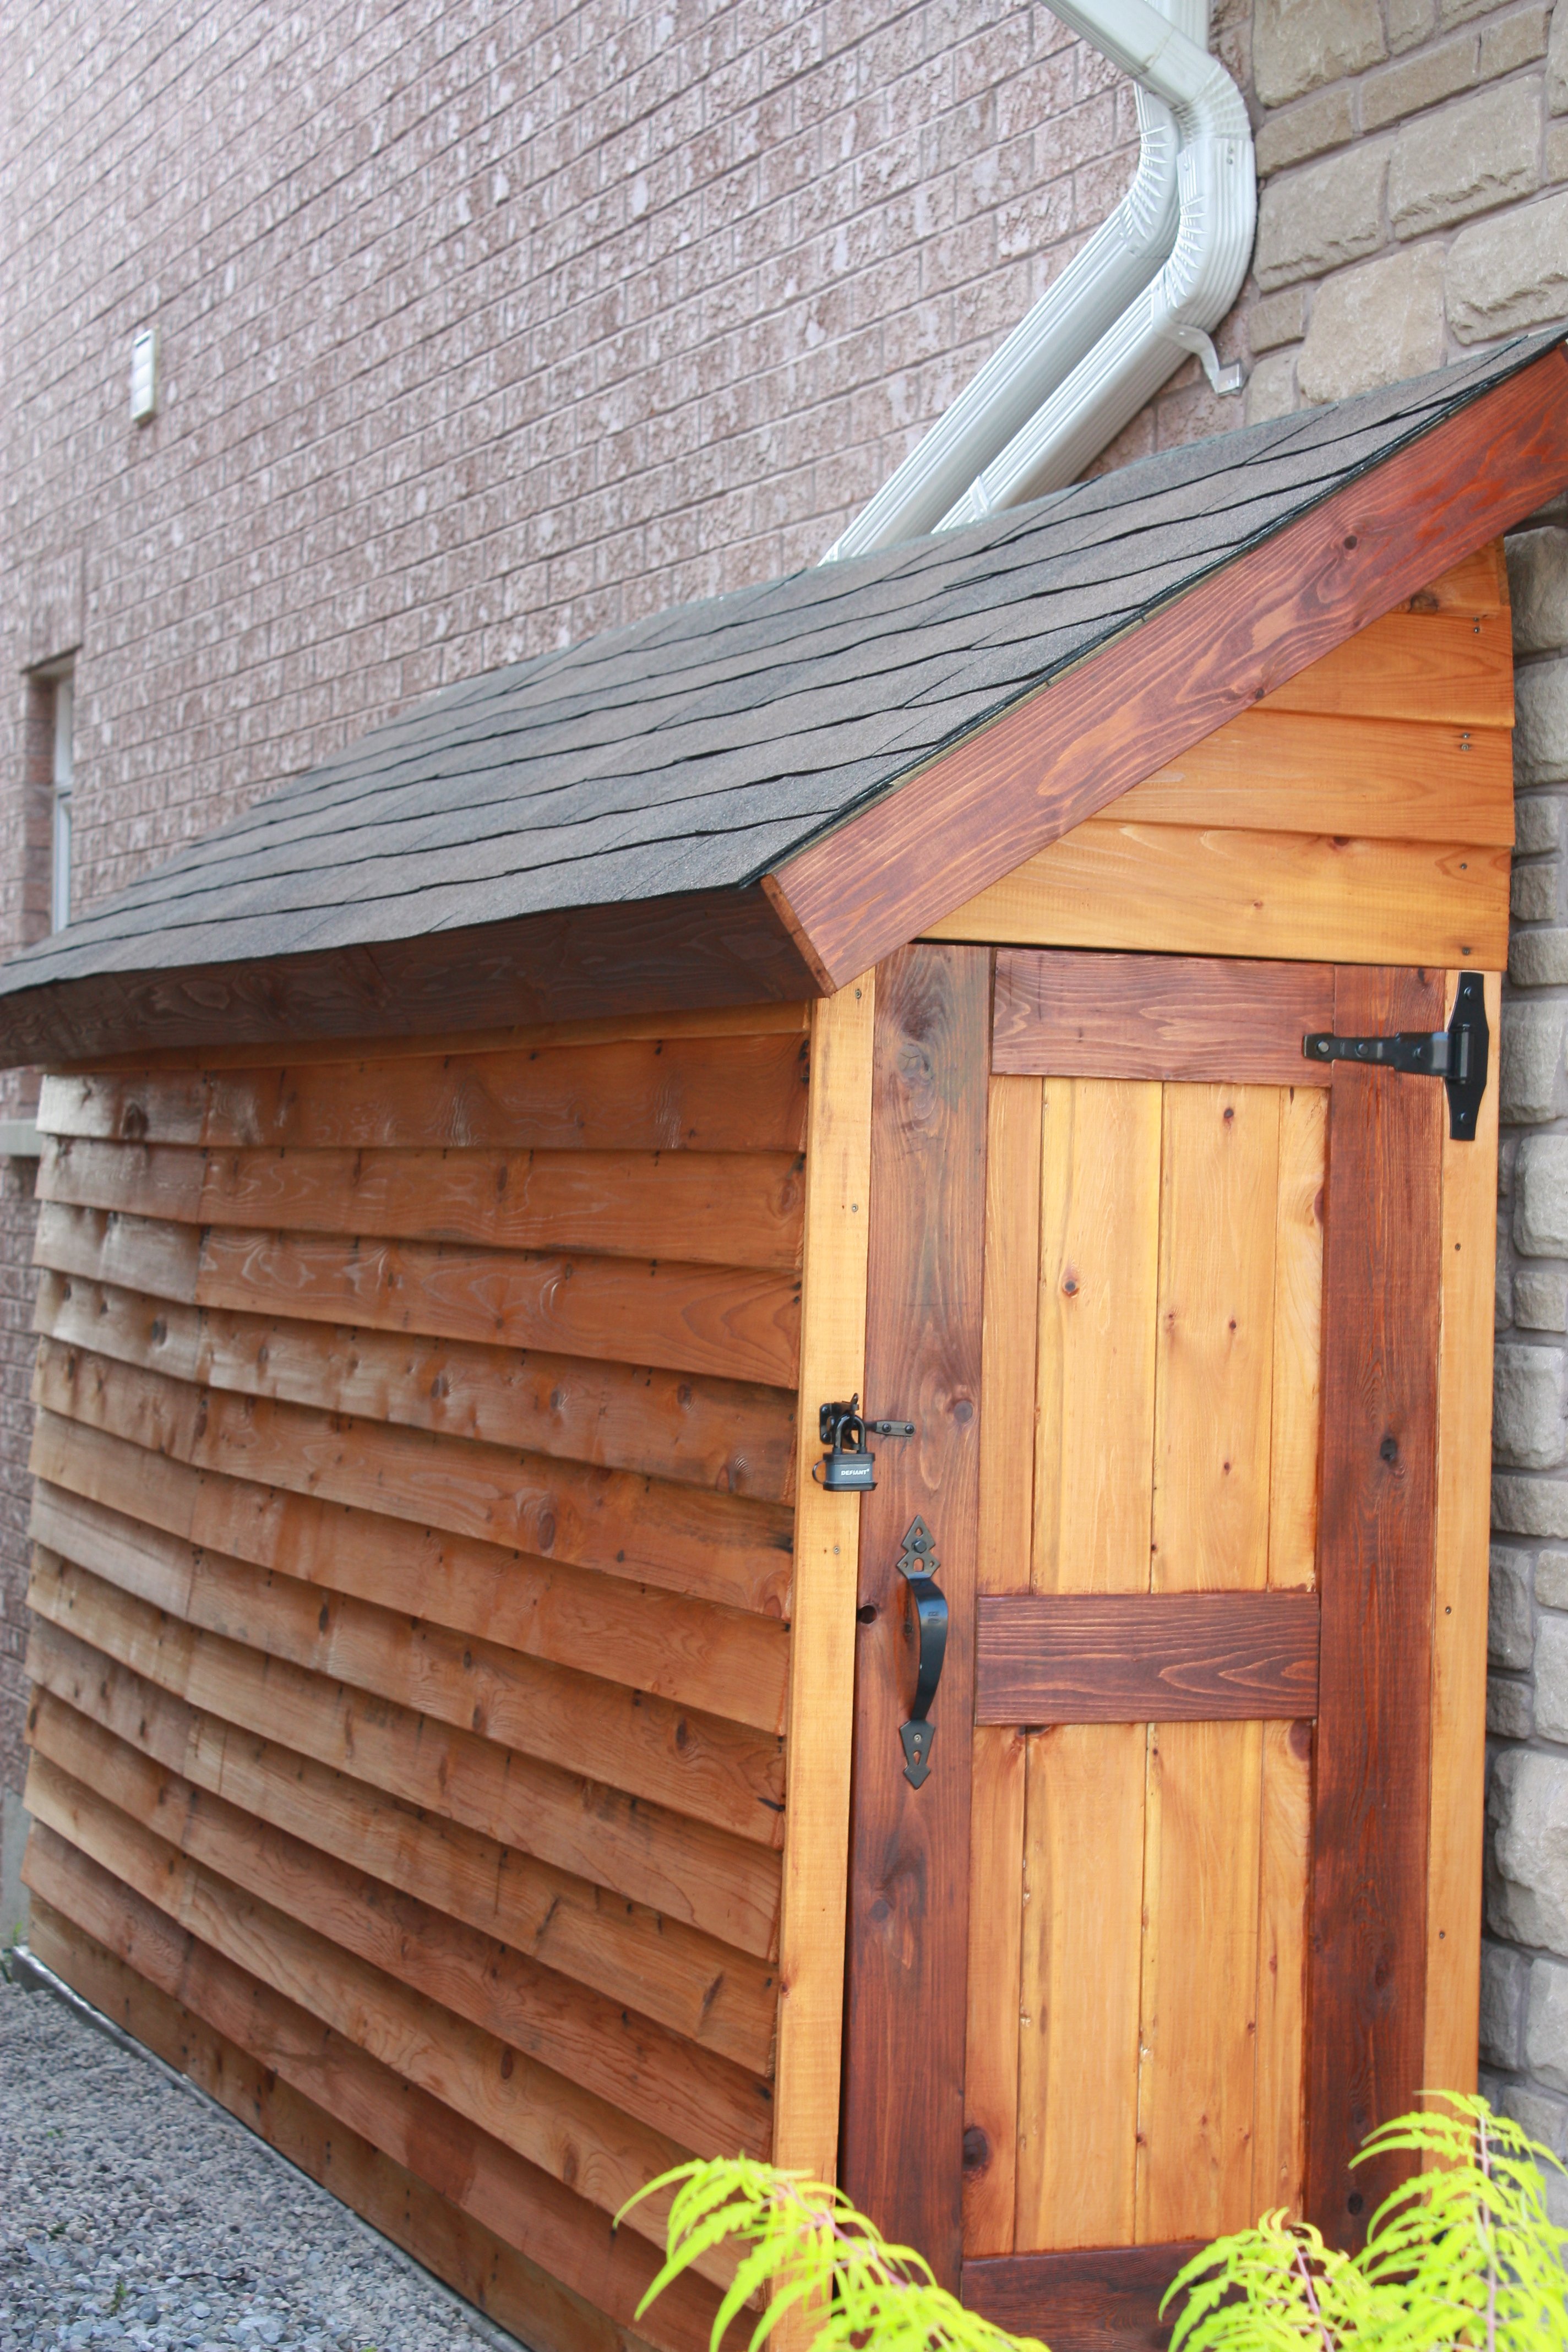
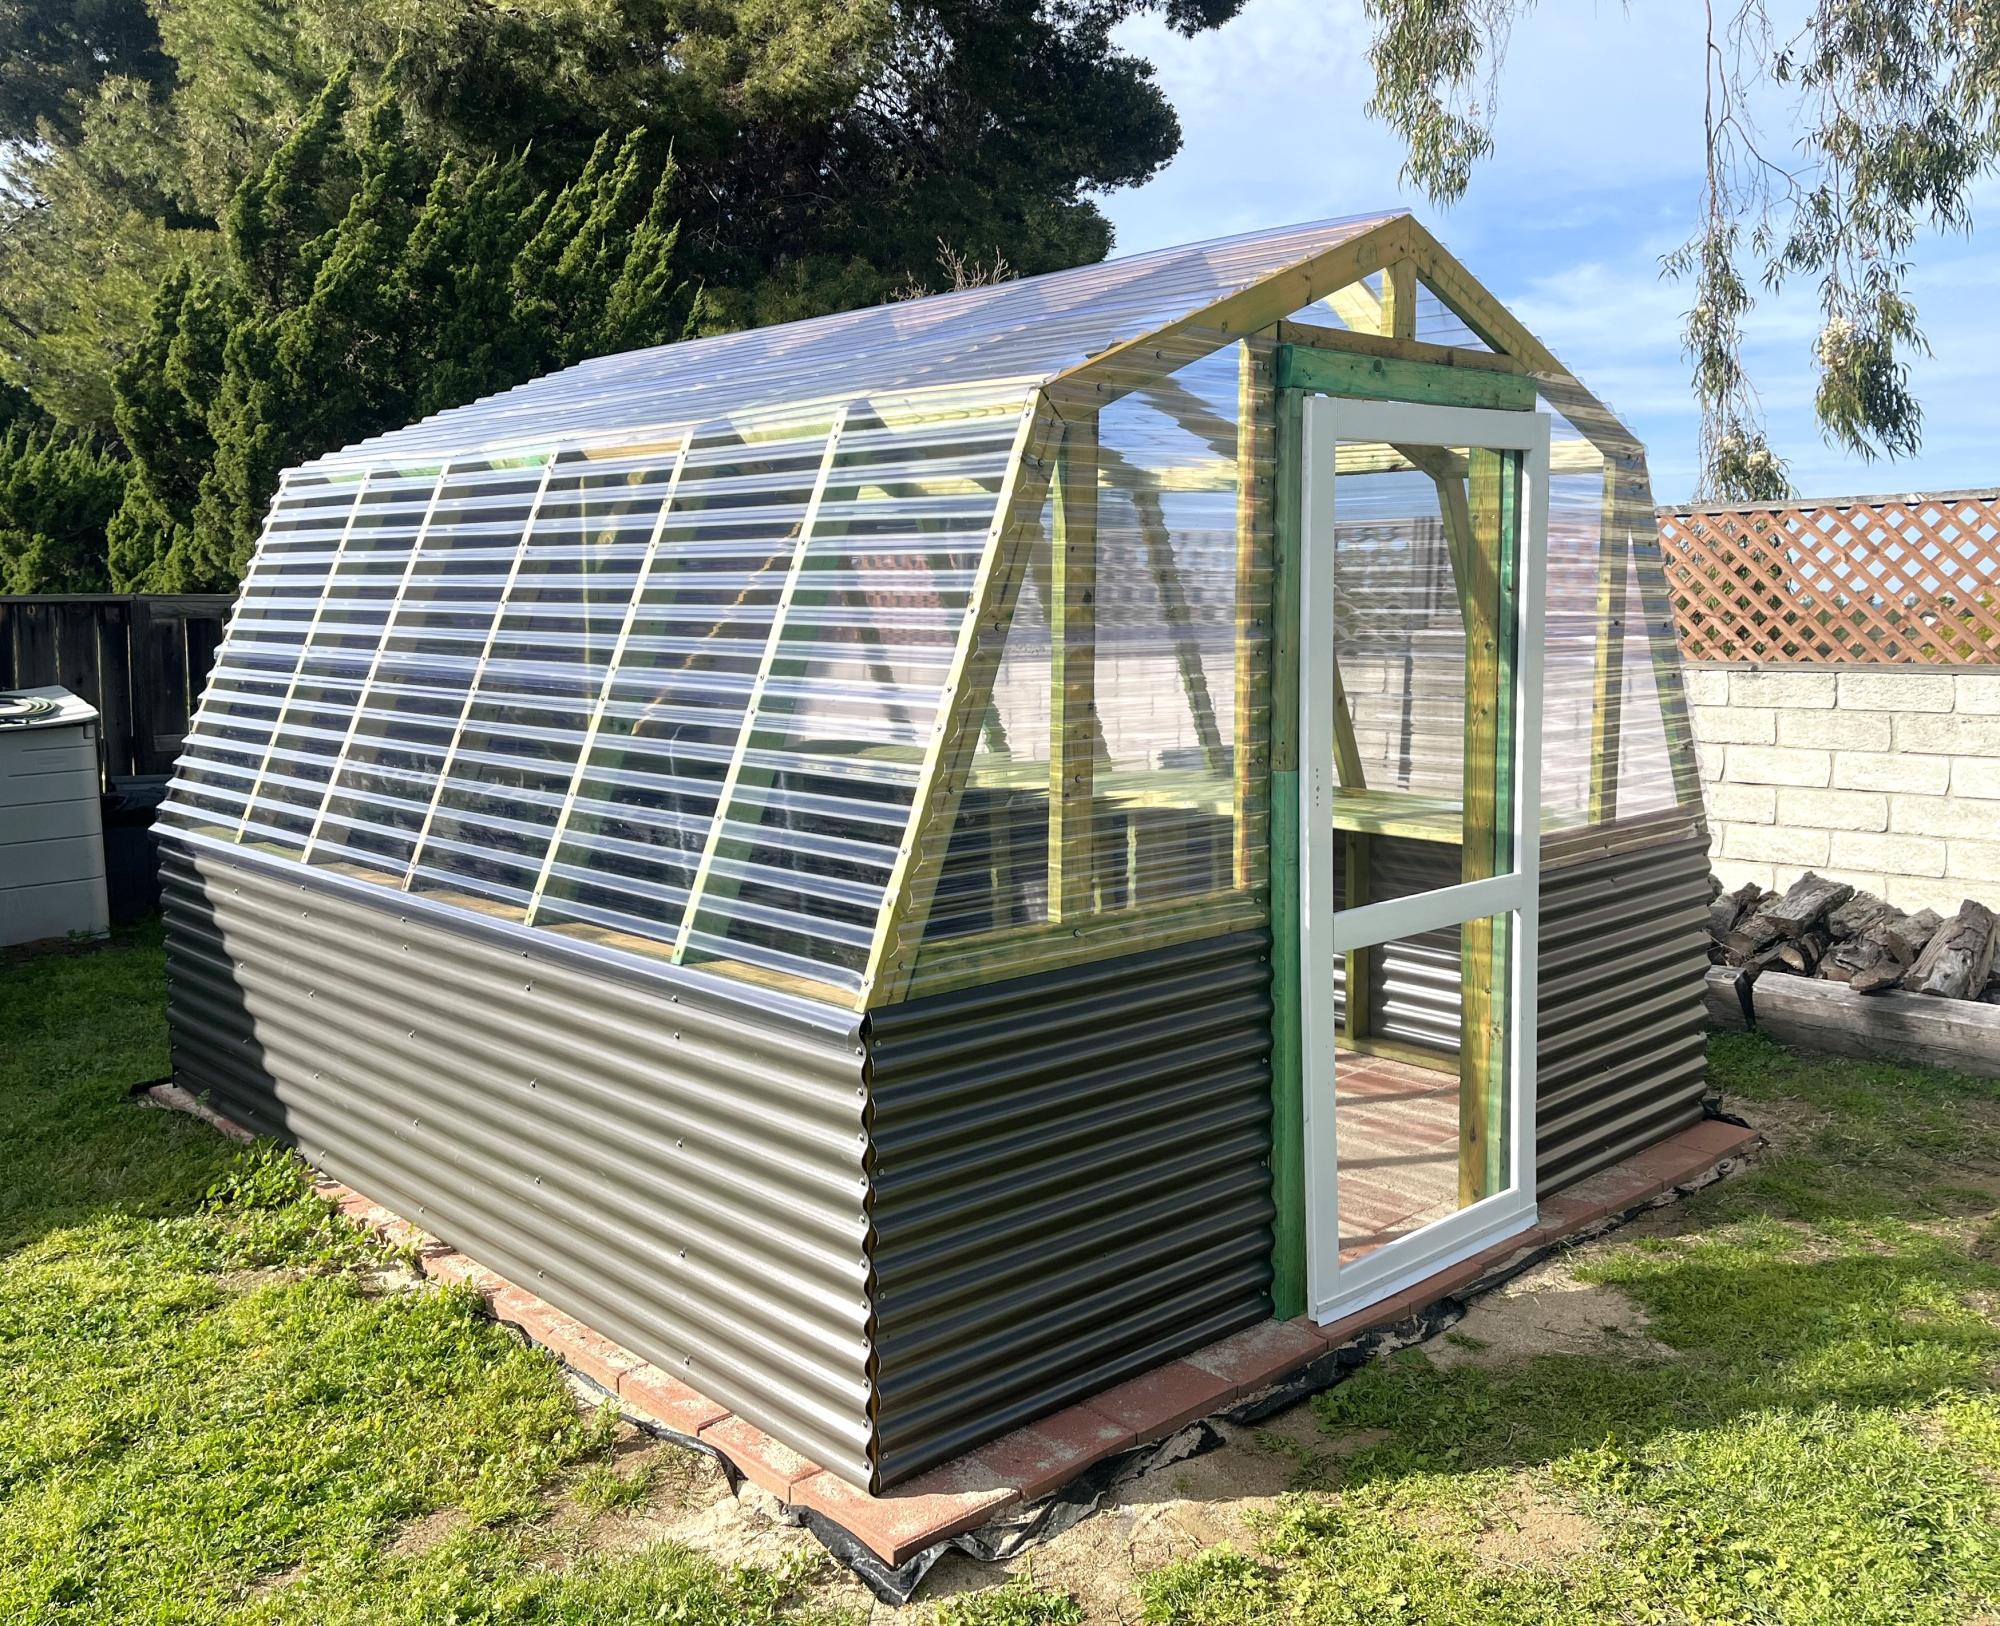
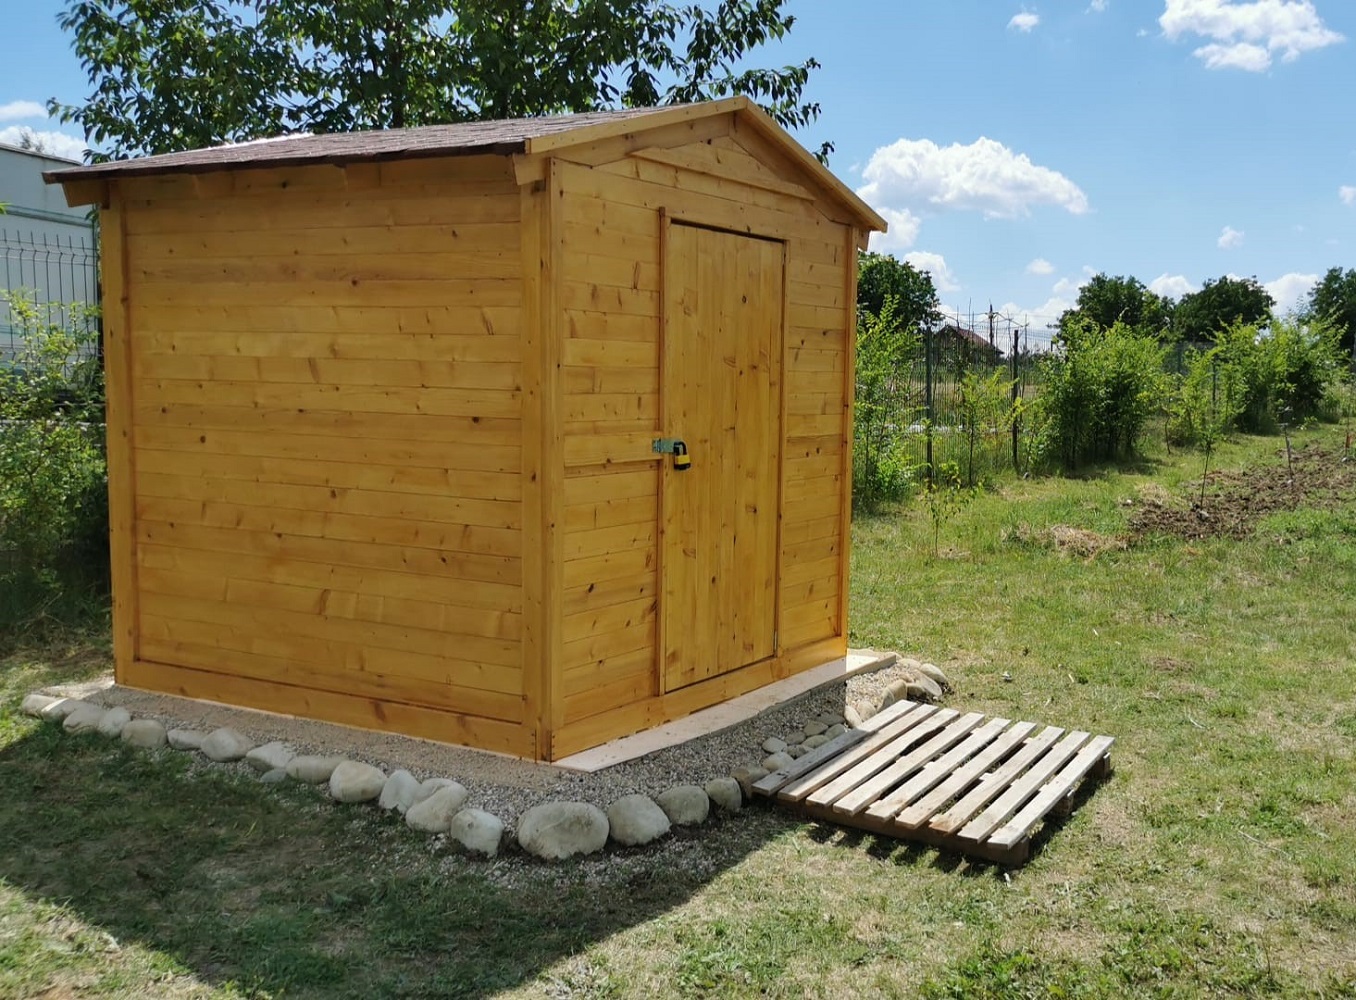
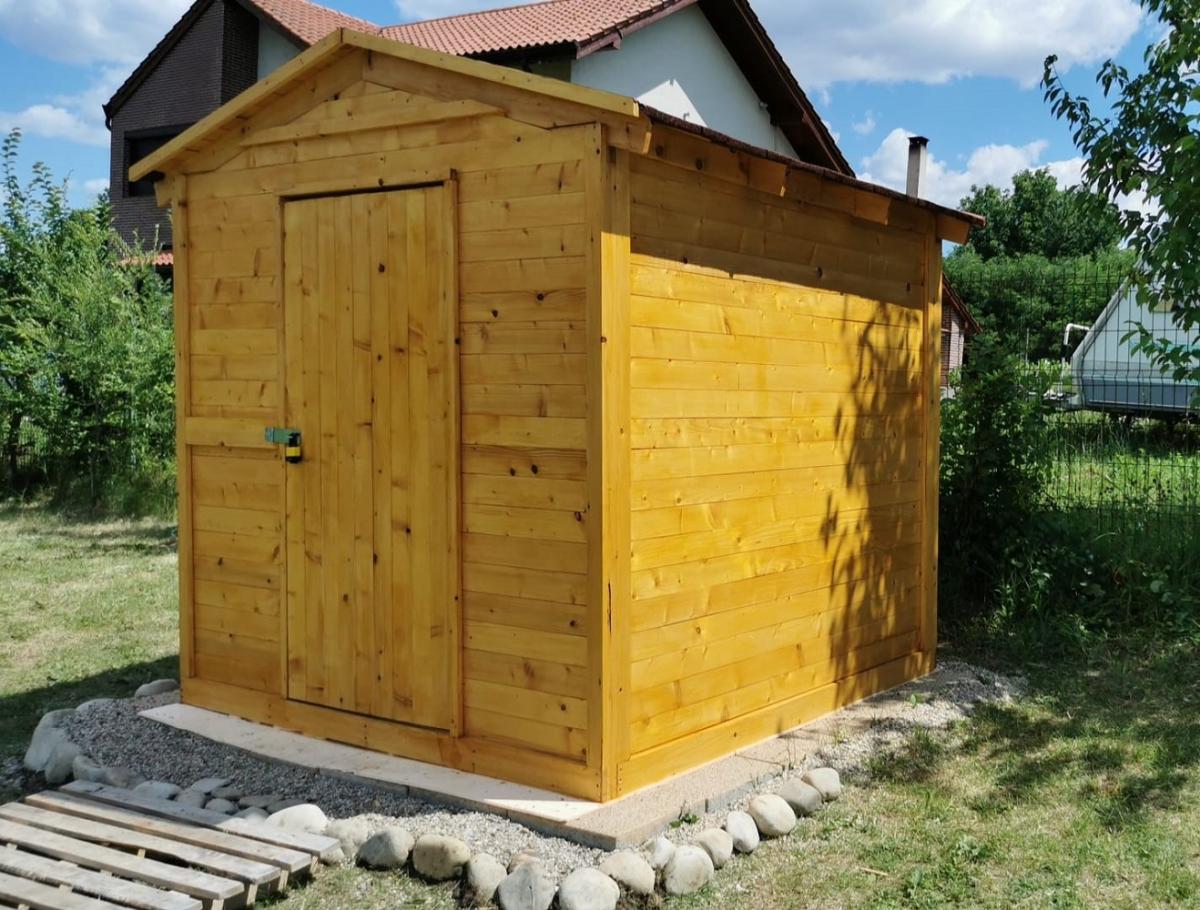
I had very little clearance on the long side of the shed, so I opted to put the door on the short side. Thanks for the plan, it was a great starting point for my project.
Tue, 09/10/2013 - 10:15
Thanks for posting! I plan to make this shed. Yours turned out beautiful!
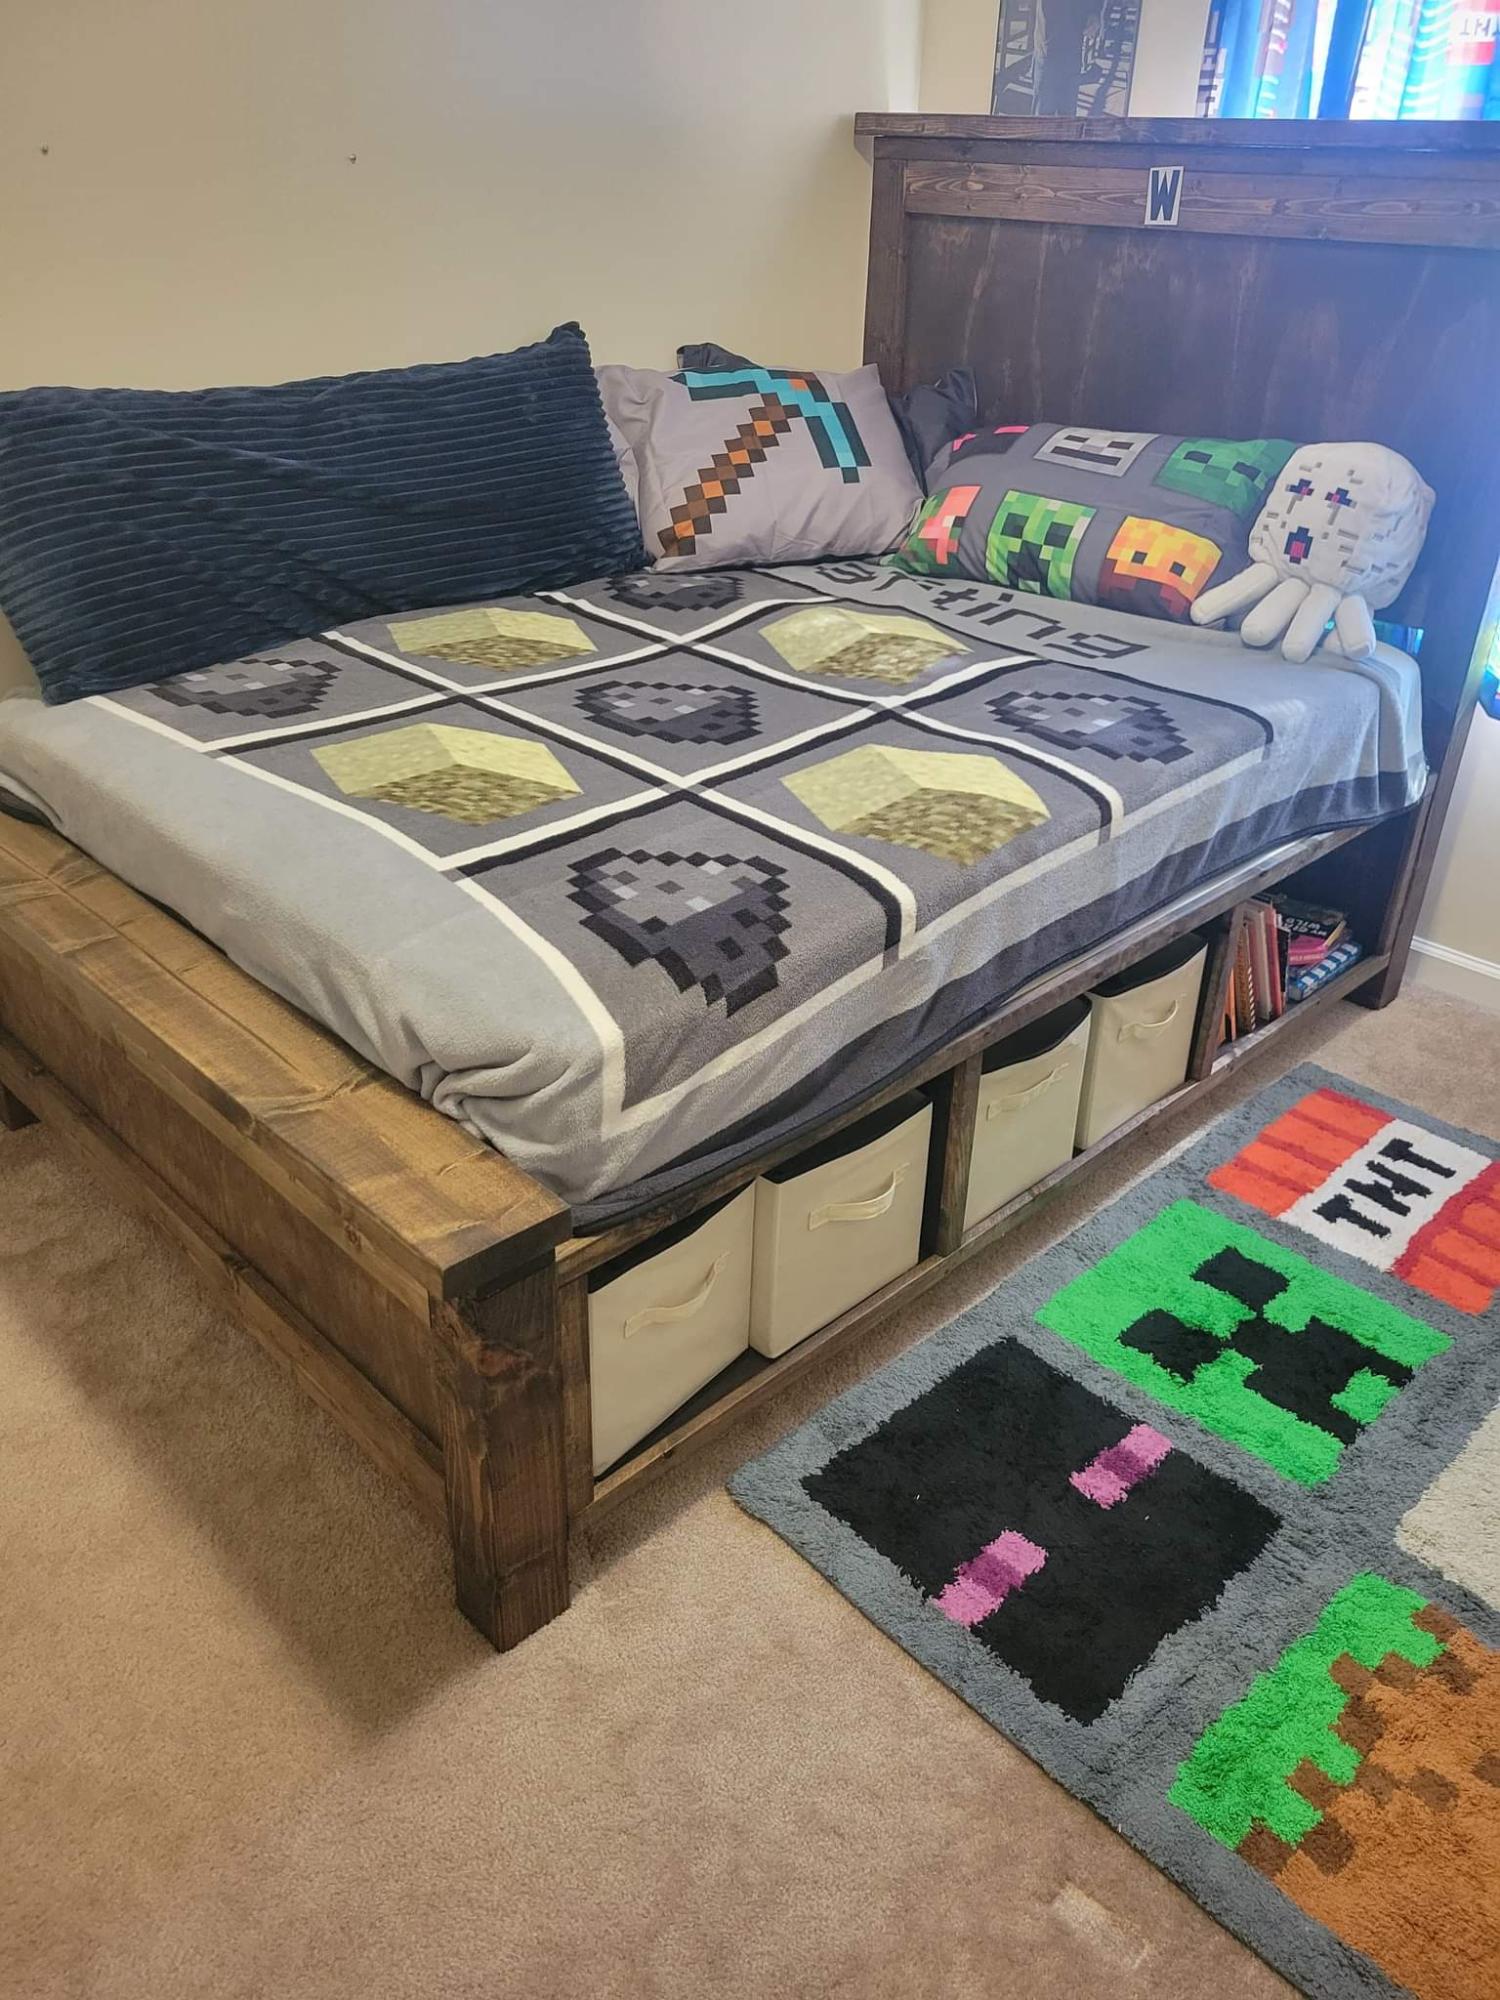
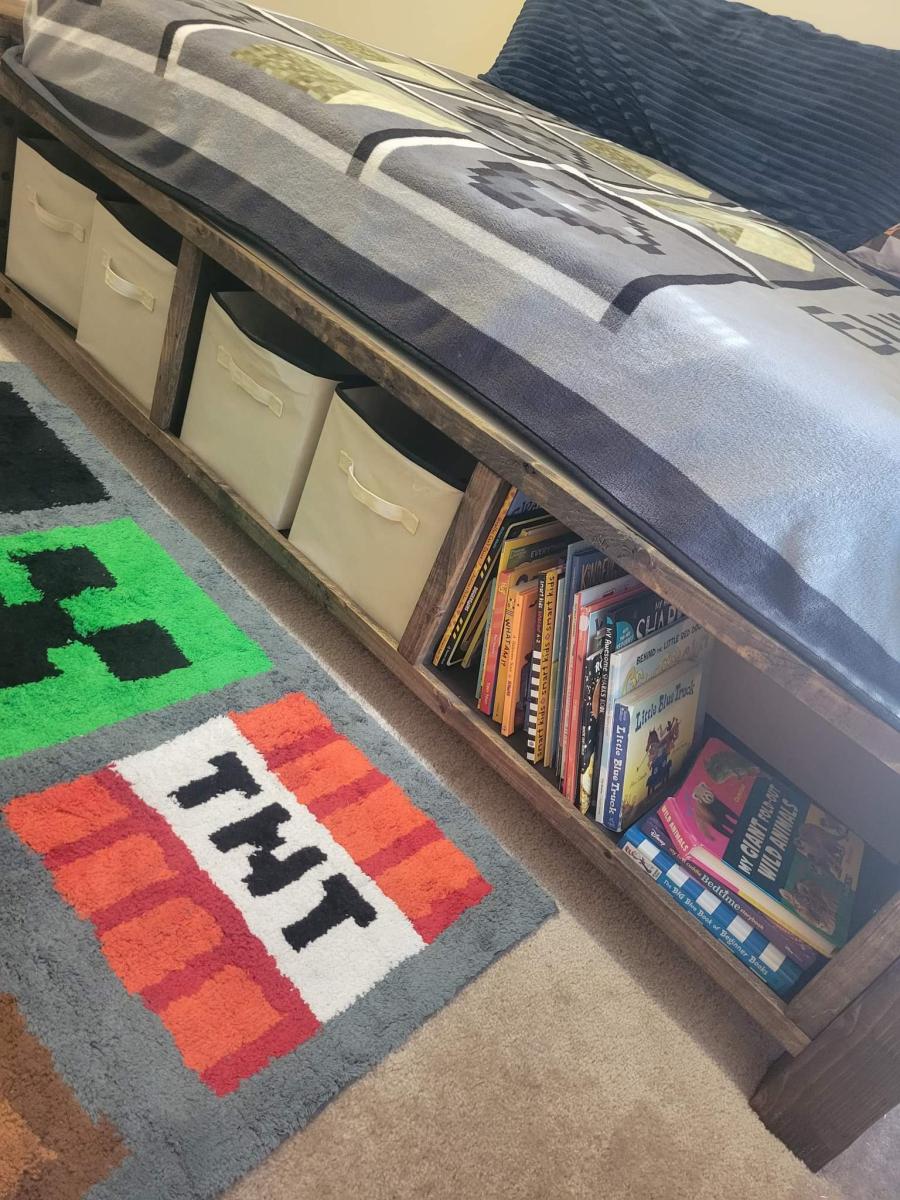
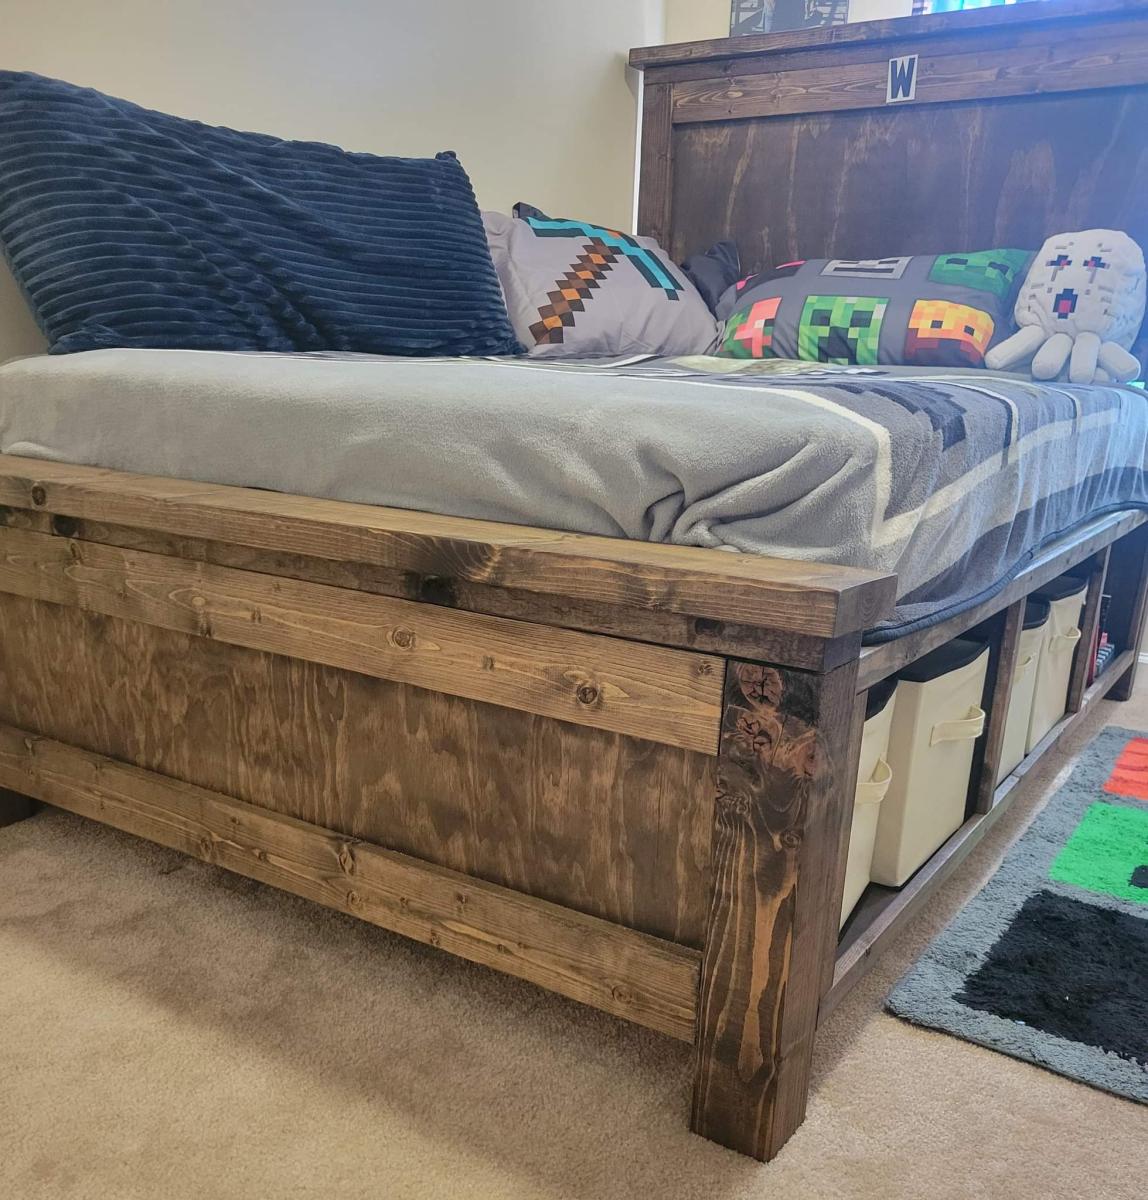
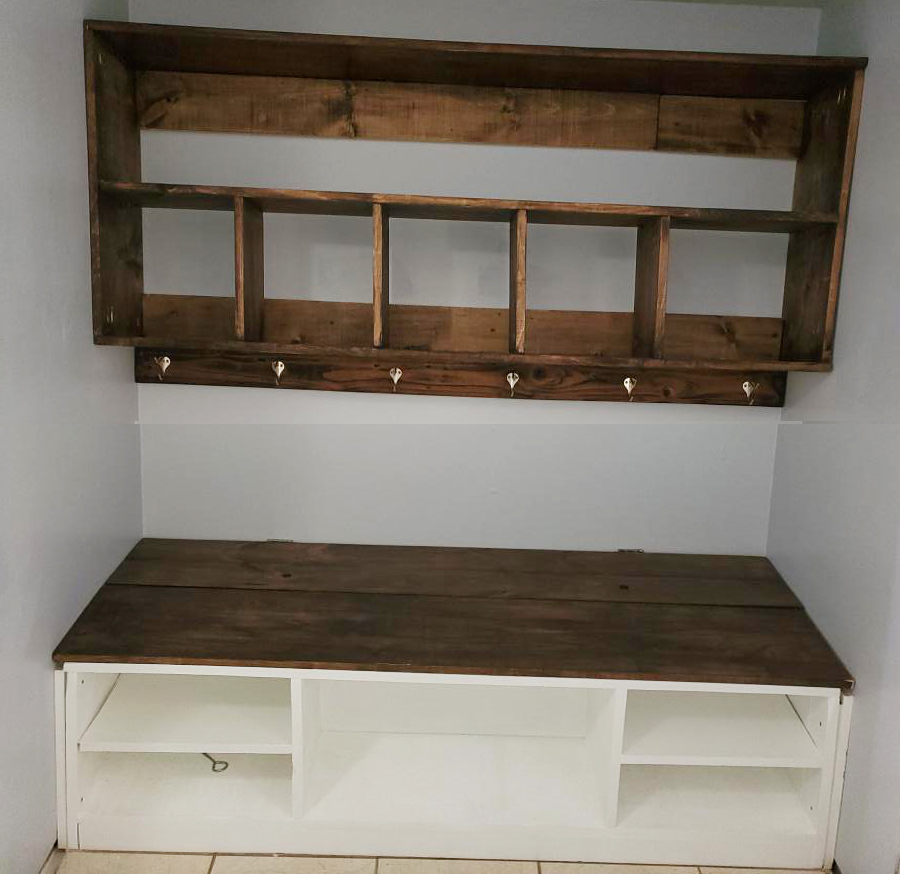
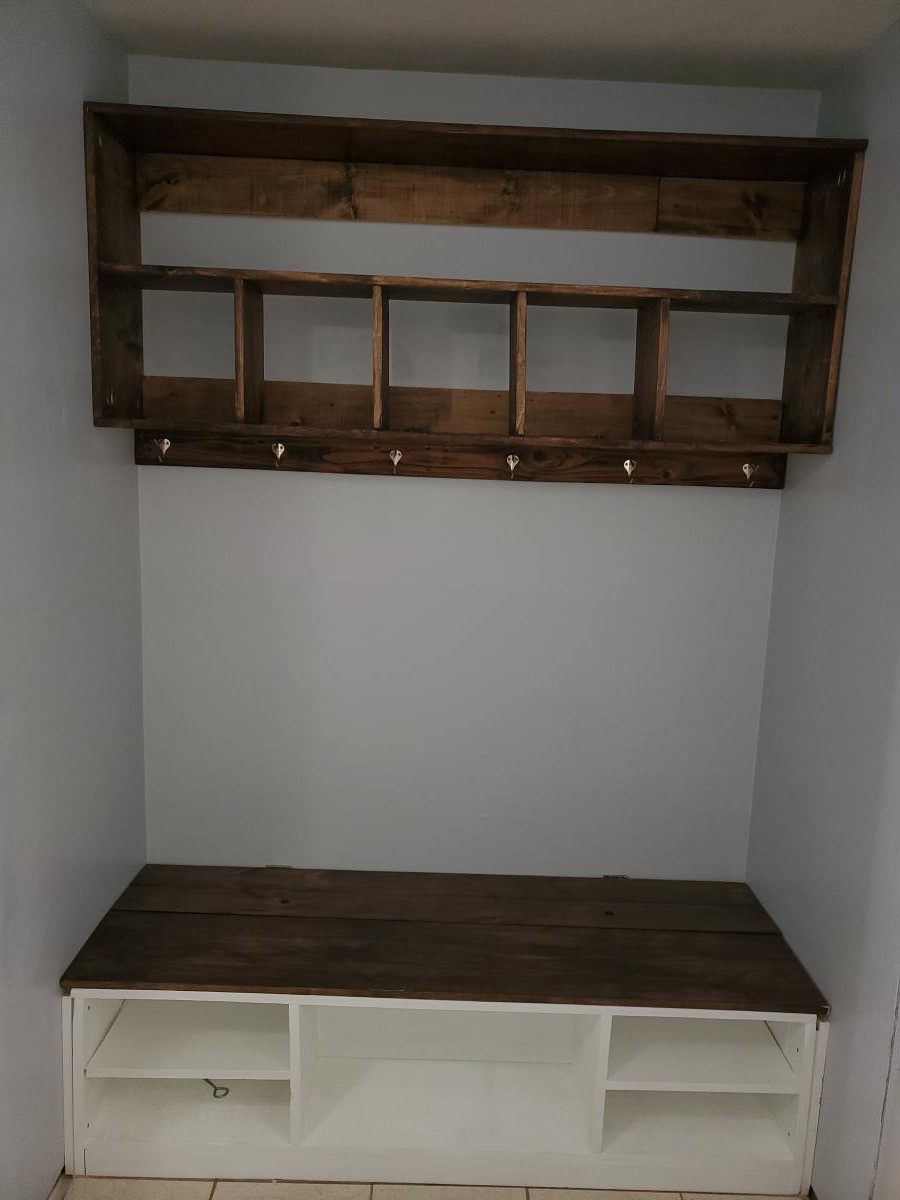
We built our little guy a twin bed when he was 1. 4 years later, he's outgrown it, and Ana White to the rescue! Not only were we able to upgrade the size to a full mattress, but the storage cubbies are a huge plus as well. Very easy to follow plans, took us about 3 days to knock it out.
Minwax Jacobean finish.
Sat, 10/08/2022 - 07:59
Love the look of this, awesome job! Thank you so much for sharing.
Hey Ana,
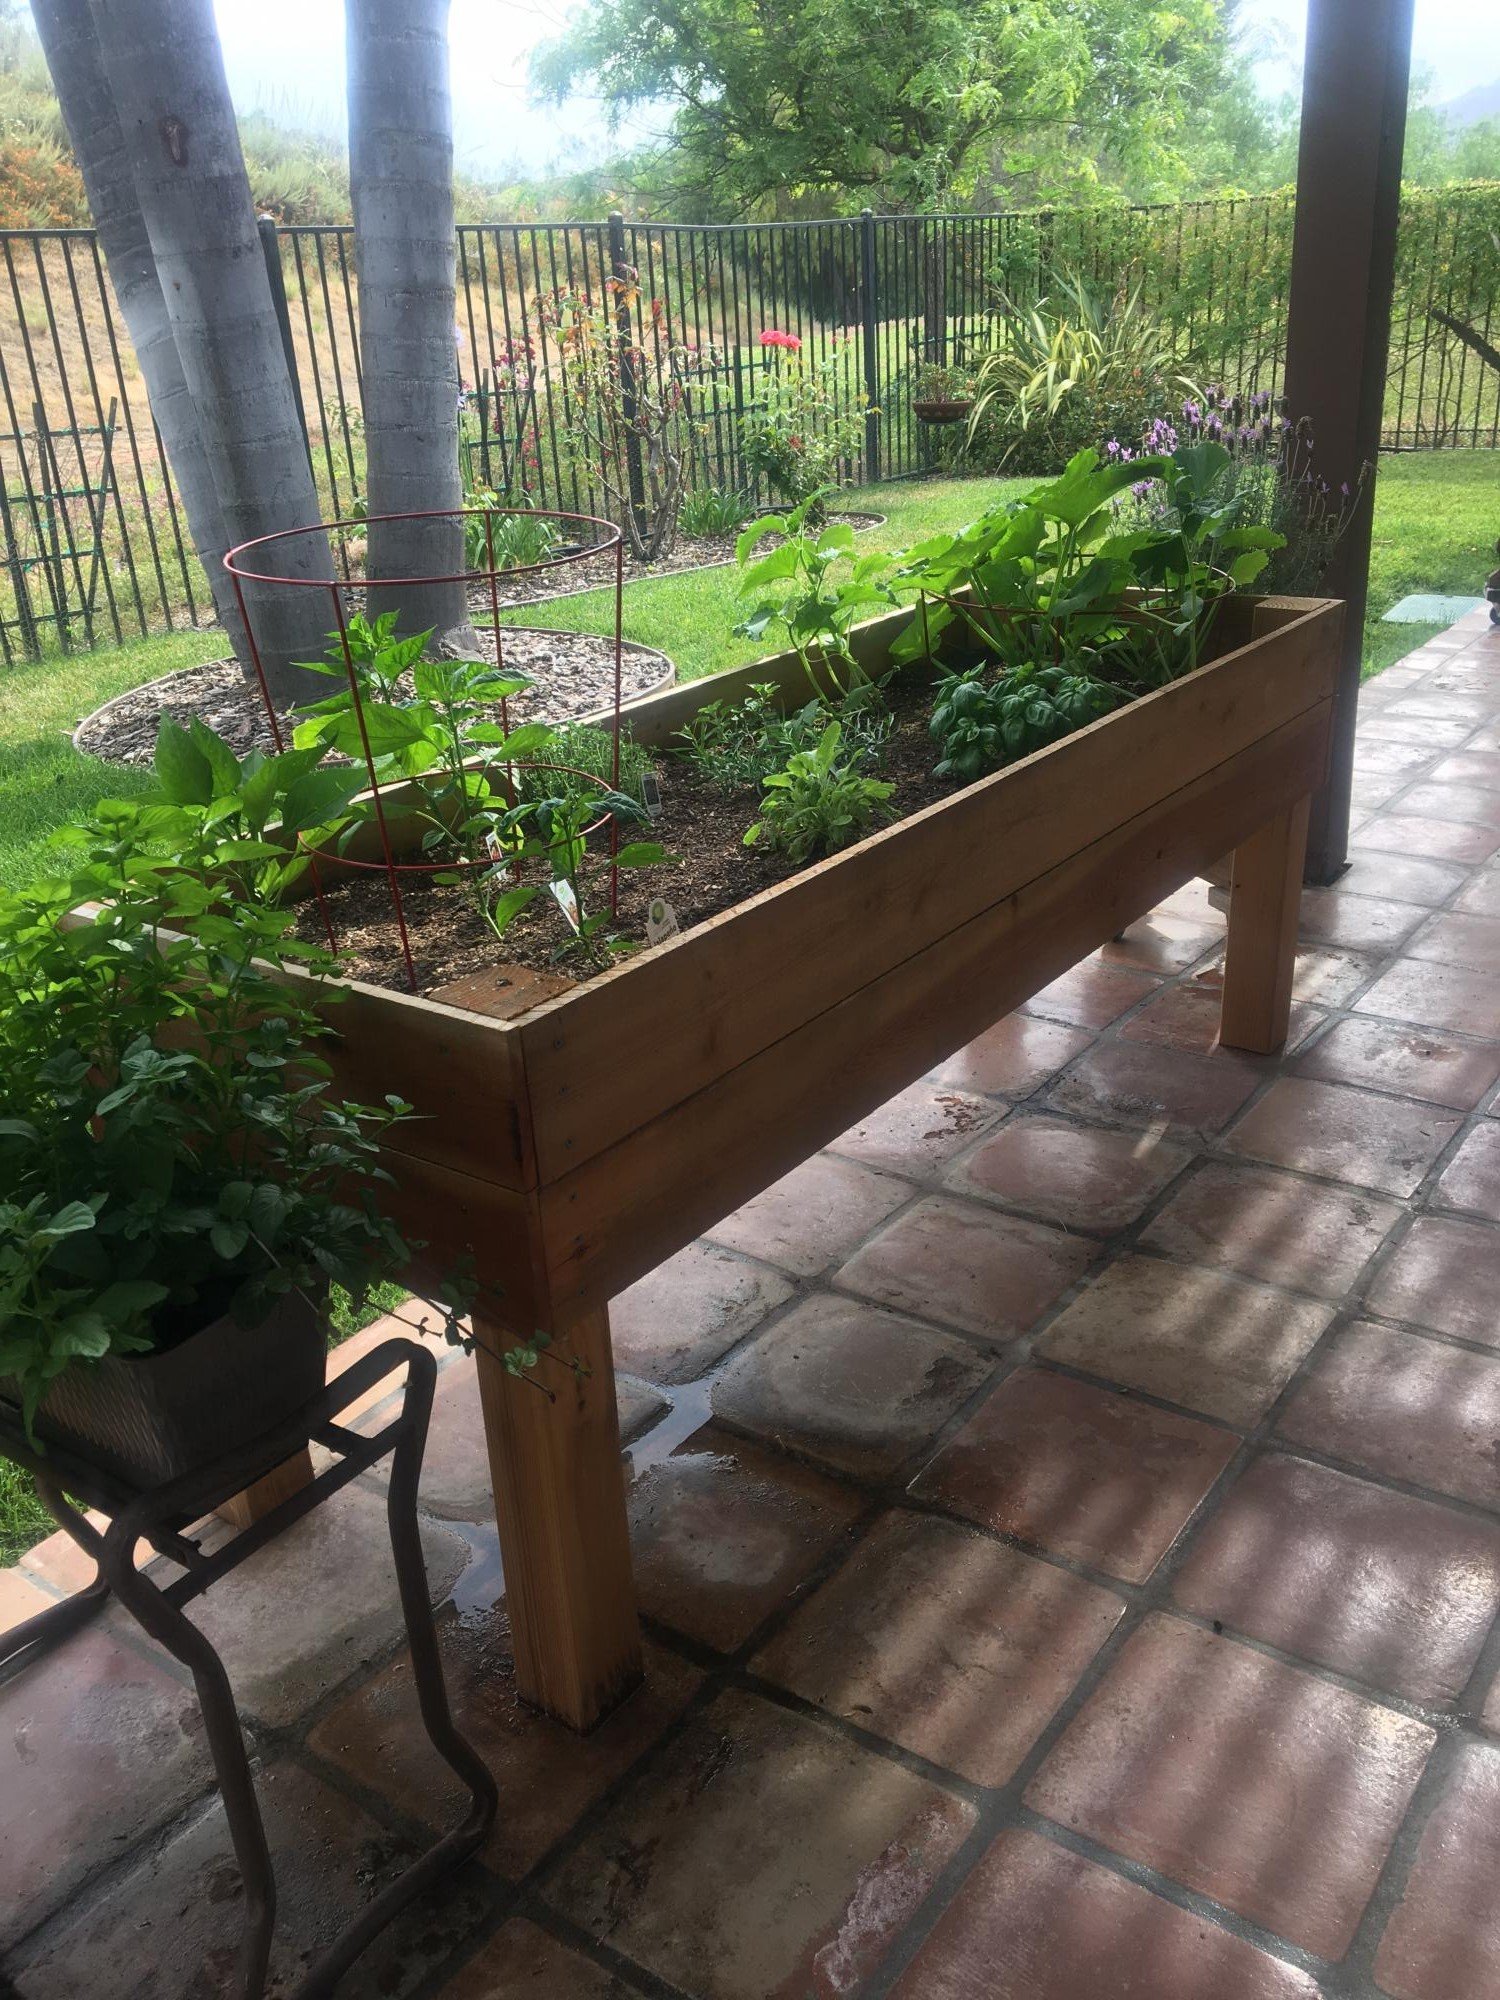
I saw your raised bed planter and decided to tackle it for ourselves. It measures 2'x8' and stands 28" to the bottom of the planter. I used redwood fencing for the sides and bottom at a cost of $1.79 each. I didn't use the wire mesh for the bottom but drilled 1/4" holes in the redwood fencing for drainage.
Thanks for the idea!!
Mike Howell

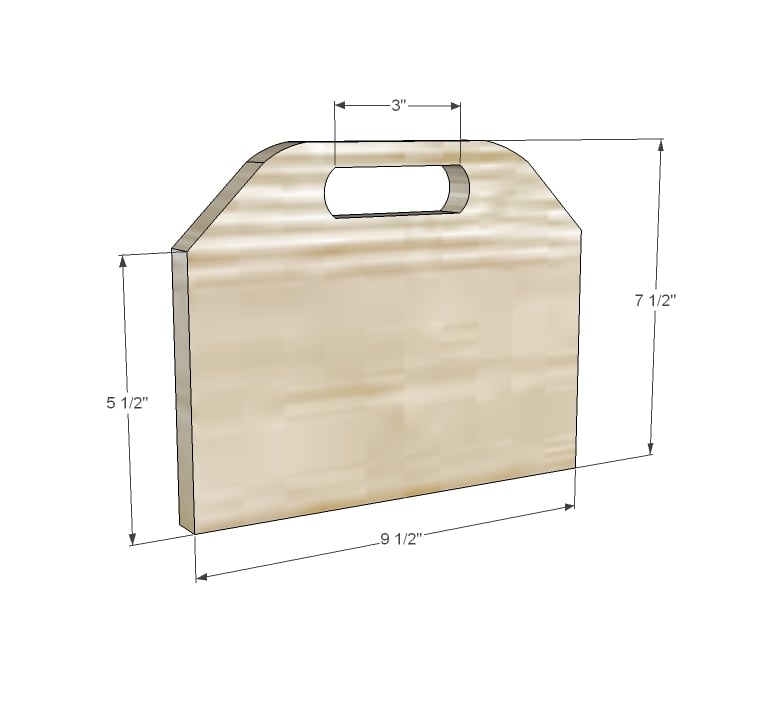
My daughter is finishing her last week of preschool. I wanted to make a small "thank-you" gift for her 3 teachers. I pieced together different ideas from ana's site and other places on the Internet. The printout is from shanty 2 chic's website. I created 3 boxes using 2 six-foot cedar fence panels. I cut mine down to size based on the dimensions of the flowers I used. Drilled a few holes on each edge and used 1/4" sisal rope to make handles. Used hemp to tie the label's to each box. Each box took approximately 15 minutes to make. Including the cost of the flowers, each box cost less than $5 too!!
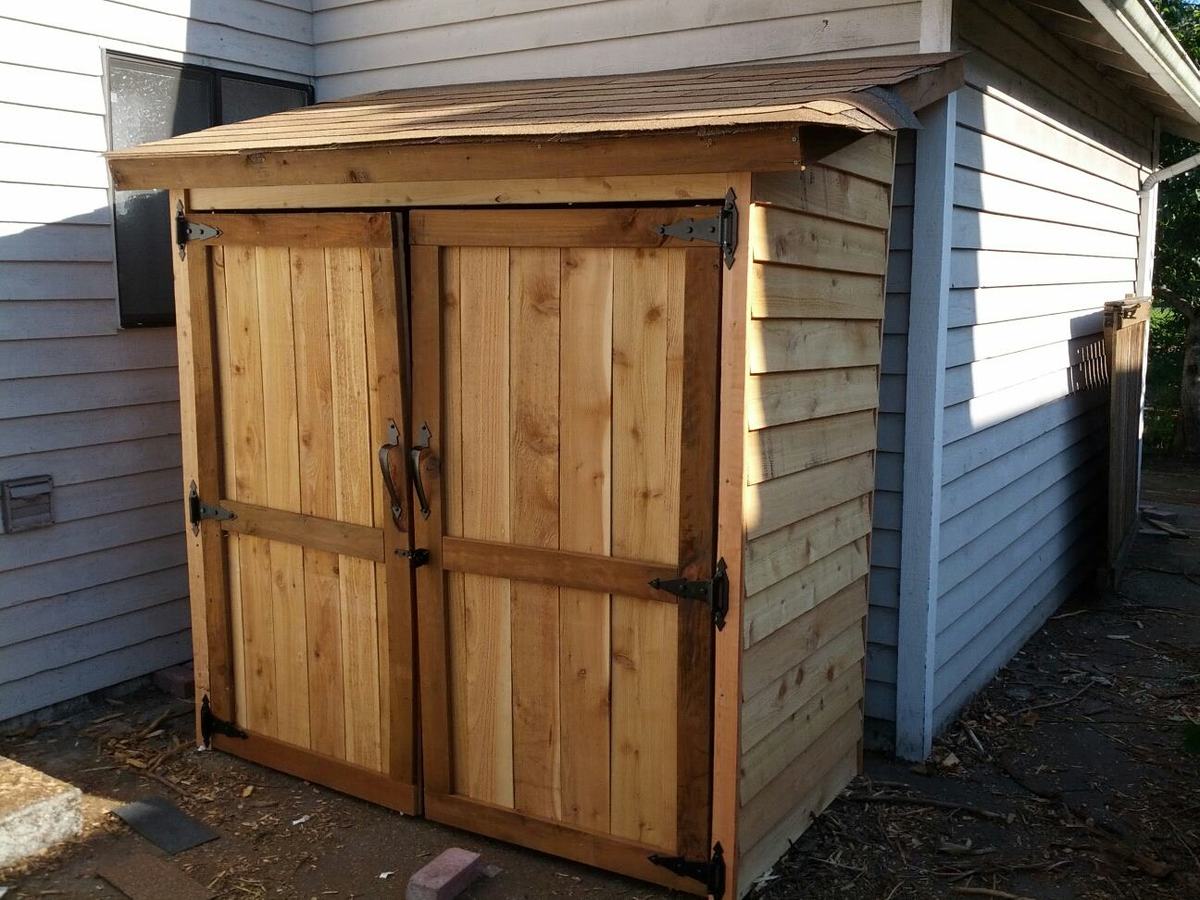
I have been dreaming about building so many things featured on this website, and I finally buckled down and built something. I figured that an outside garden shed would be a bit more forgiving than a project requiring a bit more precision, and from the picture, you can see that it's not perfect! I'm still working on trimming the shingles and I still have to stain/seal it. I've got to admit, when I first picked up the wood for the project at the store, I wondered what I had gotten myself into. But I just jumped in, and here it is.
Thu, 10/11/2012 - 10:45
What a perfect spot for it as well! Really good job with your first project.
Thants for the inspiration We love it.
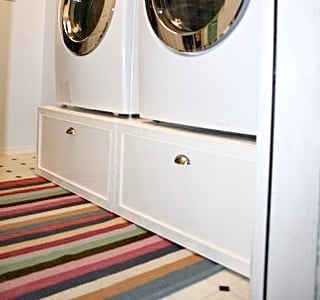
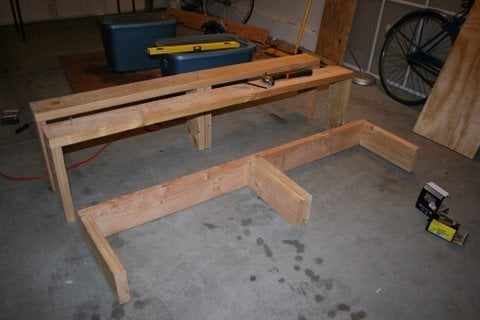
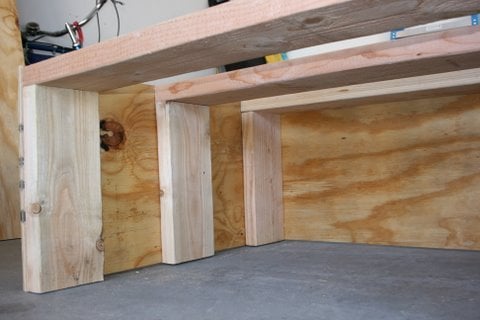
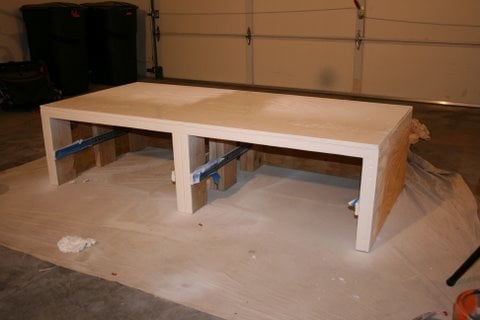
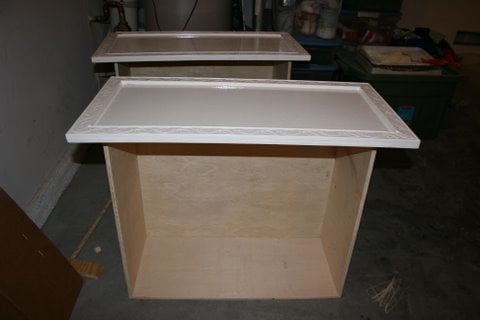
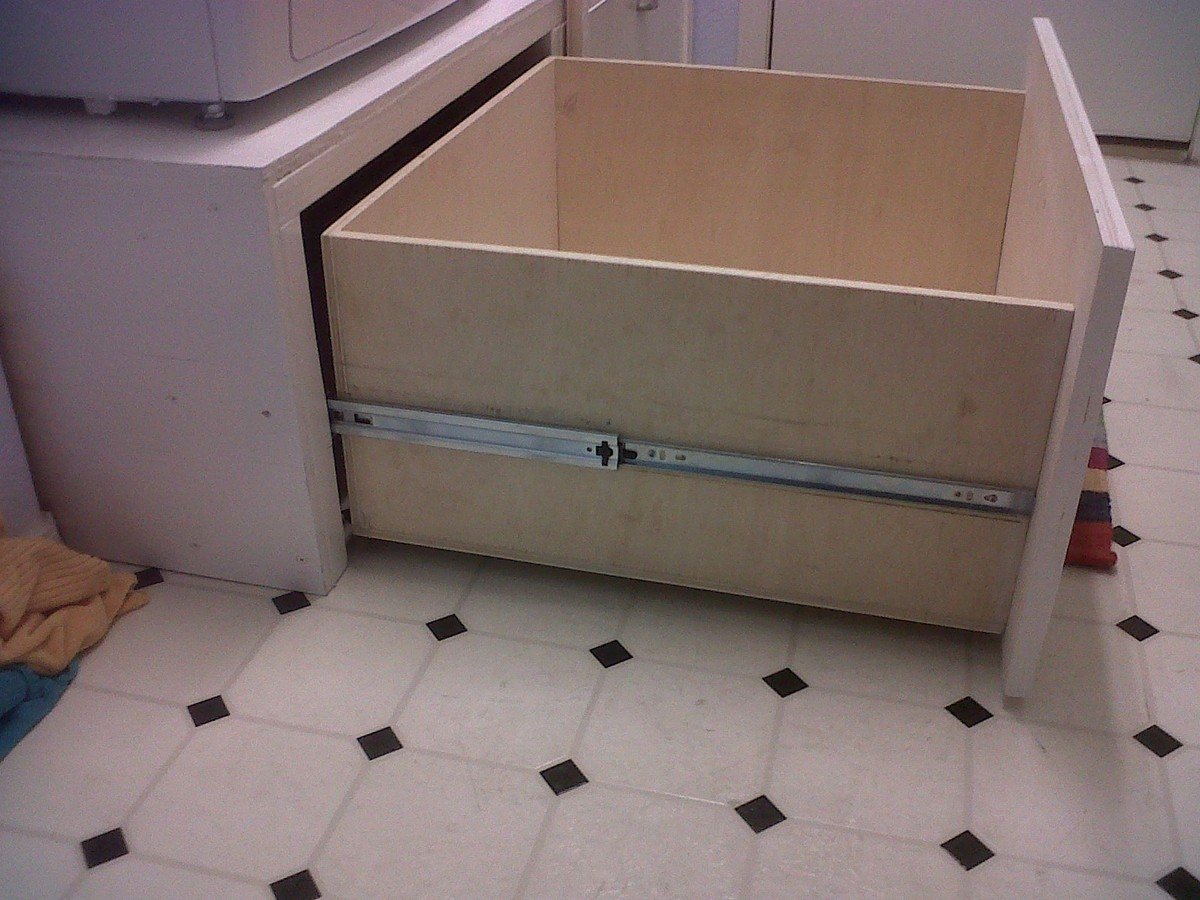
Platform (Pedestal) with Drawers for front-loader Washer & Dryer. Cheaper than buying the manufacturer's plastic pedestals and more fun to build anyway! The drawers are also much wider and deeper than the manufacturer's pedestals. We can usually fit about 3 full loads of laundry in each drawer. (That's 6 loads of laundry before we have to start folding!) It's a very easy and basic DIY project. I made a 2nd one for my brother using these plans (sans the drawers). I gotta say, the drawers are SO nice to have though. But you could just leave the front open, without drawers, and slide some laundry baskets underneath for an even quicker project. We've been using this platform now for over 2 years and there is still no squeaking or rattling. The washer & dryer haven't moved from the vibration even in the slightest. They're exactly where I placed them on the pedestal 2 years ago. There's also zero problem with the weight of the washer either...it really is a strong frame. (After finishing, I jumped up and down on it!) A couple small tweaks I would make doing it over is raising the drawers a 1/2" in. off the floor to tuck a rug underneath (as is, they sit about 1/8" in. off the floor). Also, I would cut out a couple of square holes in the back panel to access those socks that fall behind (I can't access the sides of my W&D in our particular laundry room). Lastly, I would have painted with a quality paint (I just used a few cans of white spray paint to be quicker). Step-by-Step Plans and Materials List (PDF) and many more photos found at the Blog Link below...I'm certainly no professional "Plans Writer" so email if you have questions! Happy DIY-ing! Estimated Cost: ~$200 (2x6 lumber, plywood, drawer trim, nails, screws, paint)
Wed, 03/13/2013 - 10:12
I have wanted to do the pedestal project for quite a while. I am so glad I held off though. Yours are fantastic! I would never have thought of drawers to hide the dirty laundry! Love it!
Fri, 02/07/2014 - 17:05
Hello this looks great and for the amateur carpenter I am but one item I need clarified "the top measurement at 64" is .25" greater than the bottom at 63.75"
Please explain if I am missing something
Thanks
Mon, 02/10/2014 - 15:33
Not sure what measurement you mean that's 63.75" since there's no "bottom" to the pedestals. Or do you mean 1/4" wider than the sides? The top panel should overhang both sides by 1/4" each so that when the side plywood is attached, it will be flush. Hopefully that helps? (If I'm understanding the question correctly)
Mon, 02/24/2014 - 10:29
Could leave the back panel of plywood out so you could reach what may fall behind? Then you would just have to pull the drawers out?
Thu, 12/03/2015 - 06:11
Did you ever find out if you can leave off the back panel?
Wed, 06/22/2016 - 16:35
Back panel is very very structural and provides lot of strength. If i wanted more access than the 5-7 inch of duct space behind the pedestal gives me, then i would replace the back panel with a long 2x6, that holds the three legs from going in different directions due to all that weight.
Mon, 12/12/2016 - 14:58
This is the one modification I could make if i could redo these plans...I would still put on the back panel of plywood as it stabilizes the pedestal, I would just have cut out a rectangle (behind each drawer) so that I could remove the drawers and stick my hand/arm through to grab fallen clothes or vacuum the lint.
Mon, 12/18/2017 - 19:17
Rather than cut holes in the back, I just cut the back and side boards a little small and left a gap around the bottom the whole way around. That way I can get a vaccuum hose in there or reach through and get lost items. Because my washer and dryer seem to be deeper than yours (I needed at least 33" depth, so I went with 3'), that also worked out well in getting the most out of the boards. I could do the top, back, and sides out of one single sheet of good 3/4" plywood just leaving those small gaps at the bottom for clean-up and retreival.
Fri, 11/20/2015 - 05:23
Hello,
I downloaded the pdf but have exactly the same information that the website html, where can I find a solution step by step guide?
Thank you for all the interesting posts.
Mon, 12/12/2016 - 14:55
The original step-by-step plans are found on Ana-White:
http://www.ana-white.com/2011/01/sausha%E2%80%99s-washerdryer-pedestals
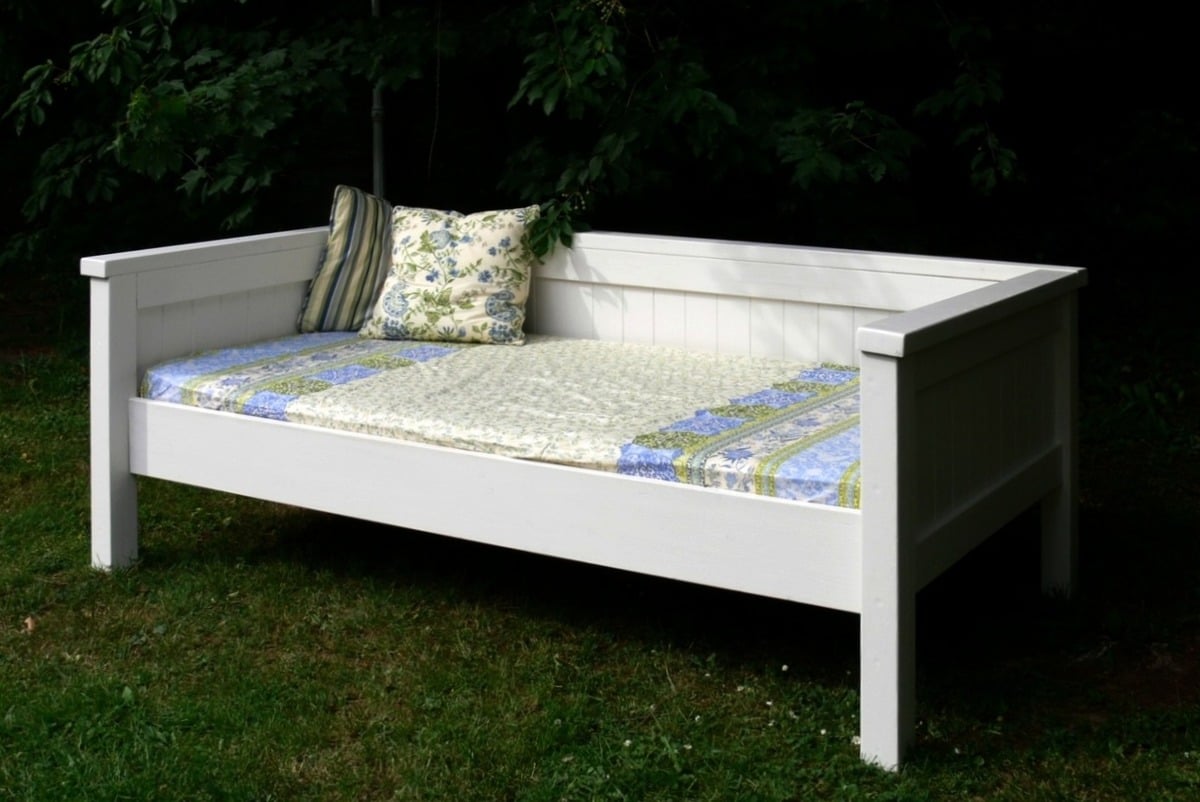
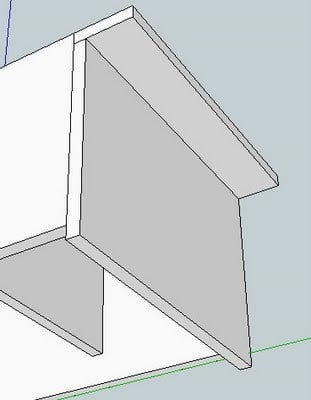
I needed a bed for my guestroom and decided to build a mixture of the simple daybed and the farmhouse bed. The back and the front rail are attached with bed brackets for easy disassembling.

Mon, 06/06/2011 - 13:45
I love the look you created, the blend of simple and farmhouse looks really great.
Tue, 06/21/2011 - 09:42
Dear Uli, I love the daybed you created and I'm planning to build my own next week for our guest bedroom, which doubles as my project room. Could you tell me what height you made the bed? It looks lower than the average headboard height, but higher than the average footboard height. I'd like to make mine close to your, which I think is just perfect.
Thanks,
Sara

In reply to Question about height by Guest (not verified)
Tue, 06/21/2011 - 13:30
Thx :-) I've made the panels 19,5" high, and the legs measure 31,5". On top of the panels I screwed and glued a timber, which is a little bit thicker than a 2x4. So the overall height is 33,5". If you like I could send you my sketchup file.
Uli :-)
Tue, 06/21/2011 - 19:42
Thanks Uli,
Those dimensions will be a big help. I've constructed more than 30 pieces now, thanks to Ana, so it's no big deal for me to design my own plans and dimensions now. I'm hoping to complete this project before my sister comes out for a visit. Wish me luck!
Sara
Fri, 08/19/2011 - 23:58
Hi, Uli! Do you think you could please help me out by sharing your sketchup notes for the "Farmhouse-Daybed-Hybrid"? This would really help me to get a handle on building this project.
Thank you from Martina.
P.S.-Though we now live near Palm Springs, California, we lived in Sachsenhausen for nearly 2 years & office was in Wiesbaden. Though I prefer the climate here, I still miss Germany.
In reply to Sketchup for Simple Daybed/Farmhouse-Bed-Hybrid by Miss Martina (not verified)
Sun, 08/21/2011 - 01:47
Hi Martina,
no problem, please give me your email-adress and I will send you that file.
Greetings from rainy Germany
Uli :-)
Sun, 08/21/2011 - 19:48
Yay! Thank you so much for the help.
[email protected]
MM-
The humidity is very low and average temperatures: 40C-46C during this time of year.
Wed, 06/20/2012 - 21:00
Dear Uli,
I am brand spanking new here on Ana-white and I love, love, love your daybed. I would like to give it a go for my daughters. Is it possible to get your sketch up notes? This will be my first build and I am so nervous about trying something without having a plan in front of me. My email is [email protected]
Blessings, Robin
Sun, 09/14/2014 - 17:23
Can you share the plans with me? [email protected]
also do you think a trundle... Specifically the Anna white trundle would fit underneath for a 2nd bed?
Wed, 09/14/2011 - 07:56
I would LOVE it if you could send me your sketchup file too. I want to build this for my guest room.
Wed, 08/31/2011 - 14:27
I would love to make this for my son's room. I am a beginner, can you provide the file for me to look at too?
Wed, 08/31/2011 - 15:35
Hello Helen,
yes, I can... but it will take till weekend. please send me your email-adress.
regards
uli
Sat, 09/17/2011 - 00:36
Hi Uli, I too LOVE what you did and would love it if you could send me the file of the sketch up too.
Thank you!
Jackie
Tue, 09/20/2011 - 12:58
Luv the bed. Would it be possible to obtain the plans?
Gratzie.
Fri, 09/23/2011 - 12:39
Uli,
I absolutely love this daybed and have been searching for such a bed, even to buy, but have found nothing. My husband is super handy and loves wood-working, so I think I am going to put him up to the task! :) Could you e-mail me your sketch-up file as well? My e-mail is [email protected].
Also, is there room to put a trundle underneath...this is a must-have for us. Do you happen to have any plans for a trundle? If not, hopefully my husband can come up with something for that!
Thanks so much for sharing your great idea and plans!
Amy
Sun, 09/25/2011 - 12:51
Mon, 09/26/2011 - 01:50
I've uploaded the daybed file to the Sketchup gallery
http://sketchup.google.com/3dwarehouse/details?mid=95f5c95ba96f7cee345d…
Wed, 07/29/2015 - 13:18
Hi Uli,
Could you email your sketch up? The link doesn't work for me :-(
Thank you so much
Tue, 11/08/2011 - 17:56
Hi Uli,
Would you email me the plans for this bed please? It's perfect and exactly what I have been looking for!
Thanks so much,
Siobhan
Wed, 11/09/2011 - 01:56
Hi Siobhan,
Wed, 12/28/2011 - 20:50
Hi Siobhan, I was wondering if you could possibly send me the plans for this bed in a Word document or through email. I tried to access the plans you attached above but my computer wouldn't allow me to open it. Also, I saw where someone else asked if a trundle would work with this bed and if you had plans for that, if so I would love to see if we can try to tackle that project as well. My email address is [email protected]. Thank you so much!...you have inspired me!!!!
Mon, 01/02/2012 - 09:58
I LOVE this bed. Would you mind sending me your sketch up and plans as well? Thanks so much and have a blessed and happy new year!
Mon, 01/02/2012 - 12:15
Please have a look here:
http://sketchup.google.com/3dwarehouse/details?mid=95f5c95ba96f7cee345d…
Mon, 01/30/2012 - 06:12
Hi, your bed is beautiful, could you please send me your dimensions, I would like to attempt, making this but kinda do an L, with a twin, and then a toddler mattress, at the head, the smaller mattress, would be like the short side of the L! Very new to this, but I would like to give it a go!
Sat, 02/04/2012 - 09:35
Uli,
I love this so much and as others have said...it is the exact height I think I would need. This is my first solo project (without help from the man in my life) and i would love all the help I can get. Could you send me your plans for the hybrid? email address is [email protected]
Thanks much,
Raven
Sat, 02/04/2012 - 10:25
Hi Jenny and Raven,
I don't have plans except the sketchup drawing which you can download from http://sketchup.google.com/3dwarehouse/details?mid=95f5c95ba96f7cee345d…
Have fun :-)
Uli
Thu, 04/12/2012 - 10:31
Do you have a mertials list you used to buy the wood, etc for this bed. We are wanting to build a similar bed and add a trundle drawer underneath. Any guidance you can provide would be great!
Rach
Fri, 04/27/2012 - 10:54
We figured it out and added one more layer to the project. We are combining the simple daybed, farmhouse daybed and trundle. So far so good.
Wed, 02/25/2015 - 20:15
That's exactly what I want to do. I cannot download Google SketchUp, (It requires Windows 7 or newer. I am still running XP.) so I cannot access the plans provided. Could you please share yours? I also need the bed to accommodate XL twin mattresses (upper and lower beds). I could make those adjustments to your plans if need be.
Wed, 05/09/2012 - 01:39
Hi Uli, I just love your bed, I'm new to building your own furniture but since I saw your bed I wanted to build it so I'm doing it. So far I have made the laterals and the back panels and now I'm putting it all together. I have some questions and maybe you can help me... you used bed brackets for the back panel, how did you put these so that they won't be seen? did you put them in the top and bottom of the panel?
Thank you very much
Judith
Mon, 05/14/2012 - 01:24
Hi Judith,
I used bed brackets at the front and back rail. They can't be seen because the mattress hides them. Additionally I connected the back panel to the sides in the way you can see at Step 4 here: http://ana-white.com/2009/12/plans-simple-daybed.html.
Hope I could help you :-)
Thu, 06/28/2012 - 10:14
Hey! I love the way you used the farmhouse bed for this daybed. It's perfect for what I'm looking for. I wanted to make my daughter the farmhouse bed but, we always wanted a daybed at the same time. This is perfect. Do you have any plans you can share with me so I can start making this? Thanks! [email protected] is my email if needed
Tue, 07/17/2012 - 10:26
I absolutely LOVE this bed and it is exactly what I want. I know many people have asked for the sketches, sooooo if anyone has received them, could they please forward them on to me??? (of Uli, if you see this and you have them) I would greatly appreciate it. You should definitely post this as a plan post because I'm sure many others would love it!
my email is [email protected]
THanks so much in advance!!! :) :) :)
Thu, 07/19/2012 - 12:58
Hi Uli,
Outstanding work. I am going t make this for my 2 year old son. Quick Question.
I am confused about how to attach the posts to the panels for the head board. I assume you drill in from the far left and right of the posts? Do you use wood putty to hide the holes later? Could you use pocket holes? Or would that not be as structurally sound. Any advise would be appreciated.
From the instructions:
Now attatch the 4x4 posts to the panels. Make sure you pre drill half way through the post and use the 4 1/2" screws. Line the top edges of the panel and the post, keeping everything square as shown. Screw into the panel where it is sandwich 3 boards thick. Put at least 6 screws in each post.
Mon, 08/27/2012 - 10:11
What did you use to support the mattress on the daybed? A boxspring would be make it too high. Thanks for any info. Can't wait to get started on this project!
Mon, 08/27/2012 - 11:15
I made a similar bed and use slats (piece of wood across) to support the mattress.
They were similar to these,
http://www.ikea.com/us/en/catalog/products/25844409/
In reply to I made a similar bed and use by jigganancy
Tue, 08/28/2012 - 16:36
That's the way I did it too.
Fri, 10/12/2012 - 20:37
Can you send me a copy of the plans for the daybed. Does it have a regular mattress or just covered foam. Thank you
Sat, 10/13/2012 - 05:05
Hi Renee,
I don't have plans, I worked with a sketchup drawing. You can download it here:
http://sketchup.google.com/3dwarehouse/details?mid=95f5c95ba96f7cee345d…
The bed is has slats for a latex mattress.
Fri, 02/08/2013 - 12:13
Hi! I would love the notes if its still possible! My email is
Thank you so much.
Celeste

Sun, 04/07/2013 - 10:27
This is a great idea for a spare bed in our home office. Under bed drawers would be a good place for oir storage, too.
Sun, 05/12/2013 - 08:52
oh my god this is adorable!!!! Please may I have the plans and directions to copy? Thank you!
Sun, 05/12/2013 - 08:54
my email addy is [email protected] for a copy of the plans,,,thanks!
Thu, 02/26/2015 - 19:16
When I use the link you provided for your plans in Sketchup, all that comes up is a diagram. Are there supposed to be dimensions and instructions? Maybe I just don't know how to use the program. Could you please provide details on how to make this? My e-mail is [email protected]
Thanks
Wed, 12/09/2015 - 12:08
Uli,
Could you also send me the sketchup file? [email protected]. I just finished building a set of simple bunkbeds for my son. Now my daughter wants me to build this bed (with a trundle) for her! Thanks! -Bryan
Thu, 07/14/2016 - 07:29
Uli or Ana,
i need a sketch up of this plan. Mixing the 2 bed plans just confuses me. Sorry and thanks in advance. Please email to me at [email protected]
Tue, 12/26/2017 - 12:16
Can you please send me these plans? I know it’s been a while. [email protected]
Our last project was building a tiny garden tools storage shed. We used only 1 x 4 boards. We don't have any plans, but you can watch the entire building process on our YouTube channel. We are very proud of the way the project turned out.

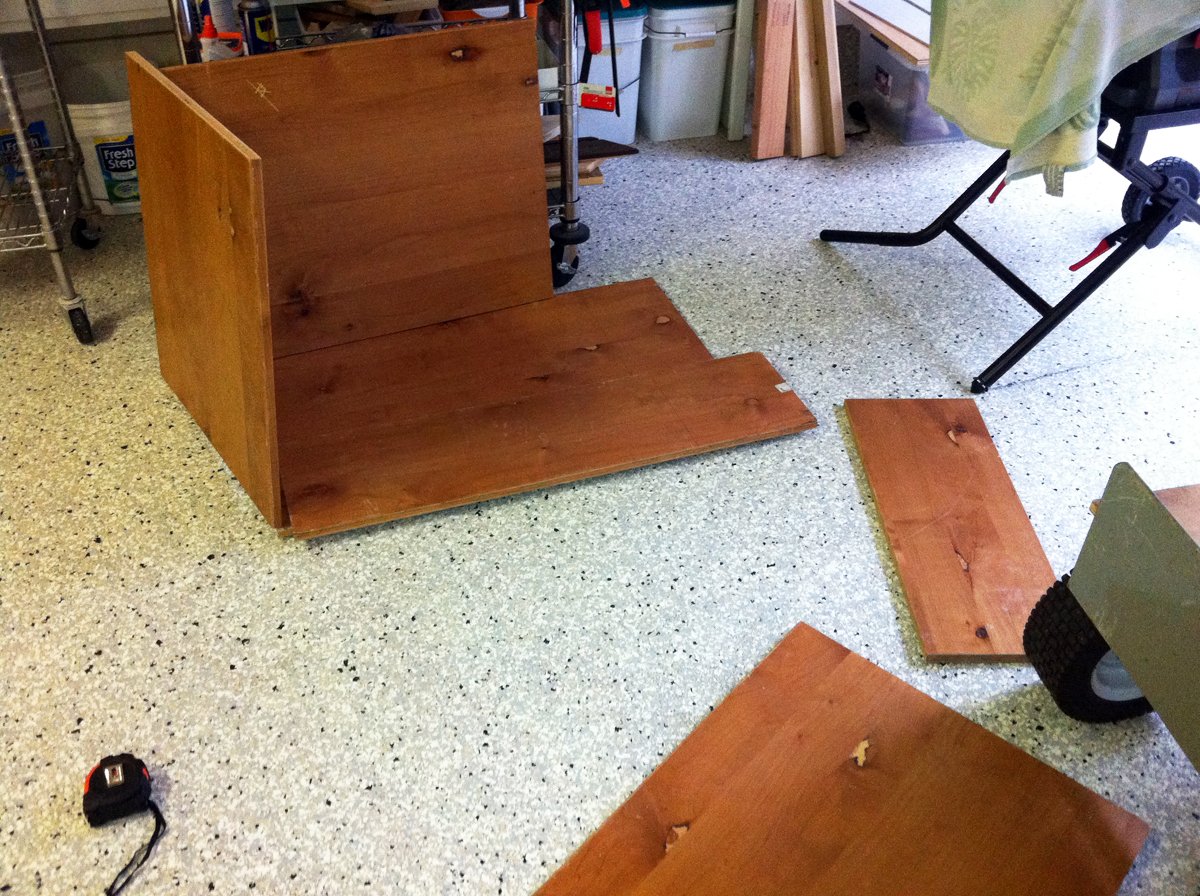
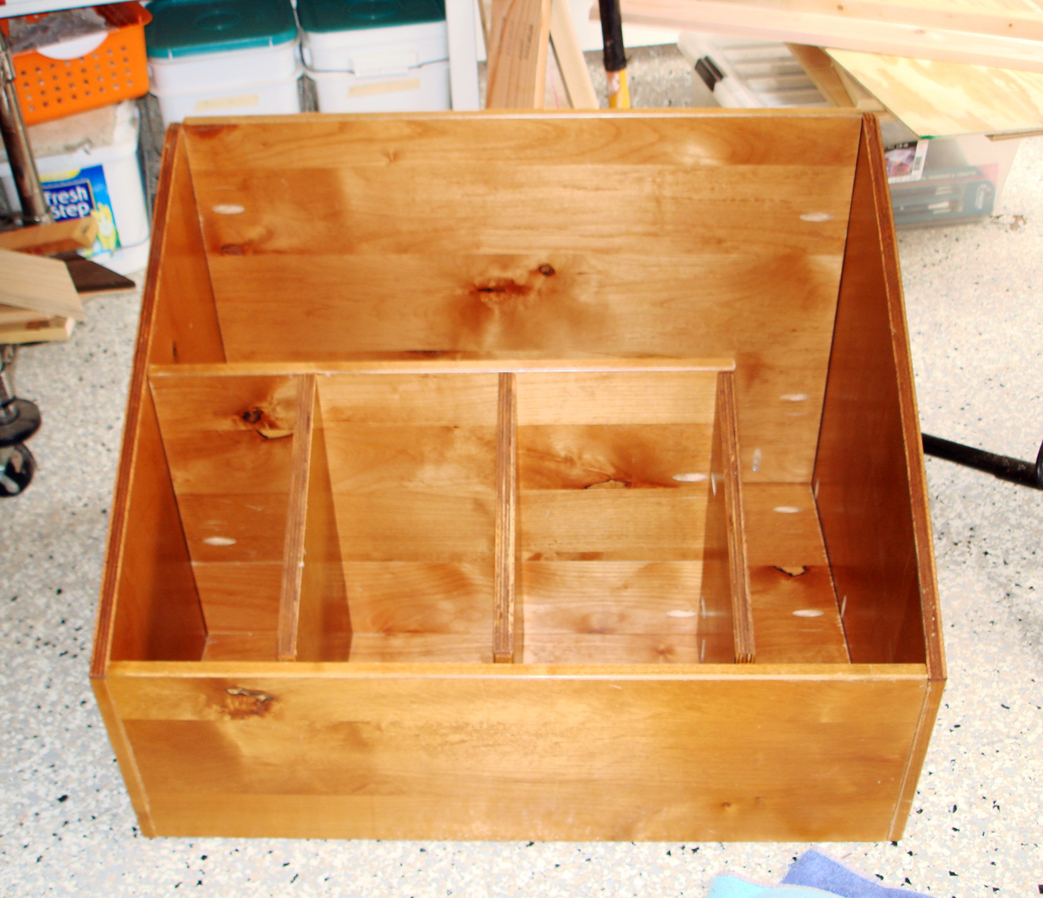
My wood scraps were definitely getting out of control, and I needed something to store the wood vertically. I had some spare wood (free from Craigslist), so I put together a wood storage bin. All in all, the project cost me the price of some Kreg screws.


Mon, 03/19/2012 - 20:13
Love it! I'm building some crates from pallet wood to store my scraps in. Your box turned out very nice.

Wed, 06/06/2012 - 13:21
I have been struggling to organize my space because my lumber is on one of my work spaces. I have the perfect space for that, thanks for the great post!
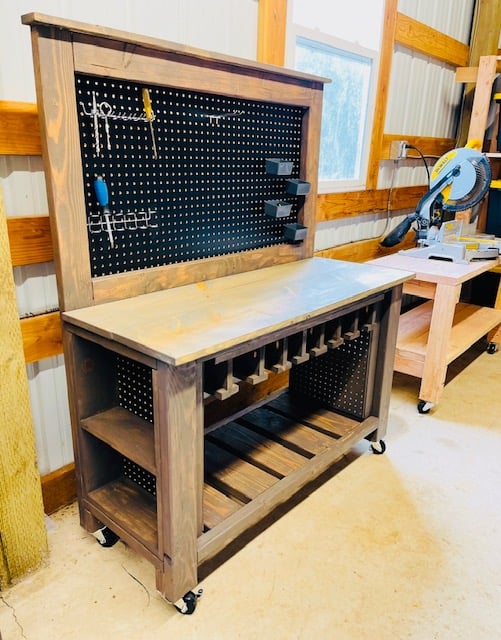
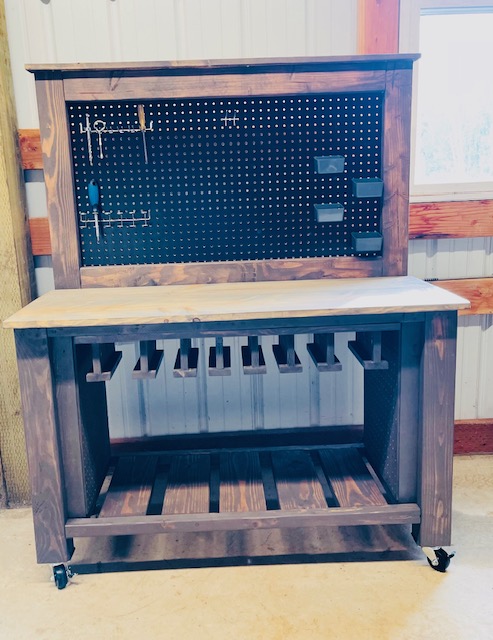
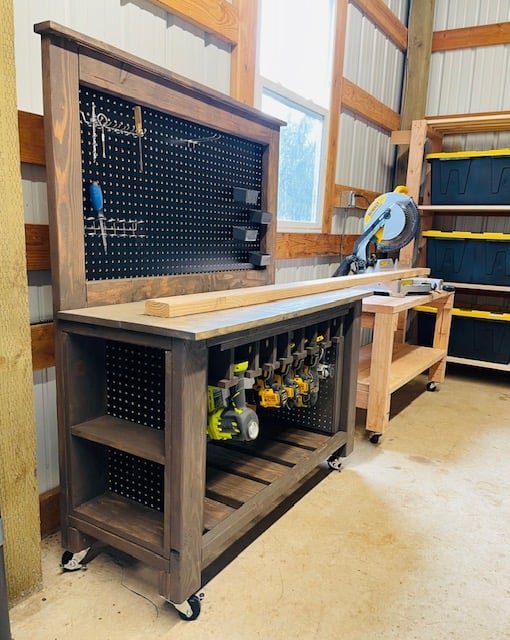
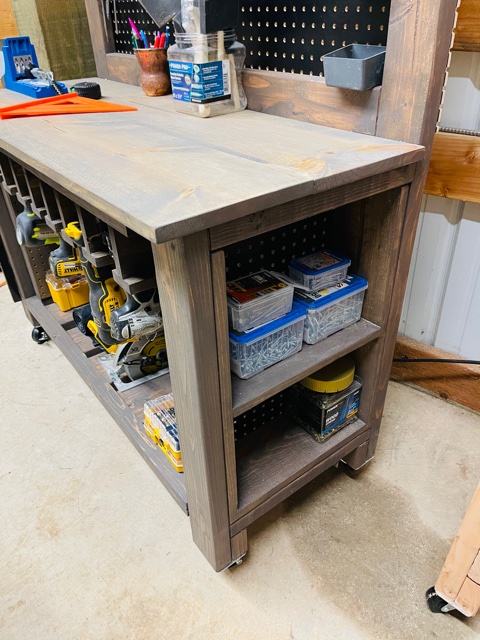
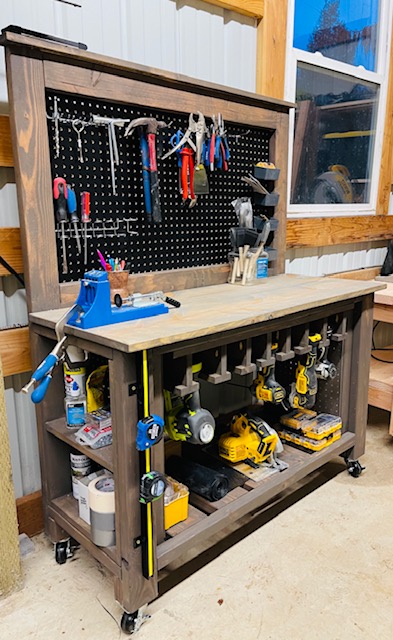
I took Ana's Farmhouse potting bench plan and made it a workbench with some mods. I added the tool storage and adjusted it for different widths depending on the tools. I added some support under the tabletop to attach the tool storage piece. On the ends, instead of the X detail I built shelves for each end for added storage for screws and paint. Finally the pegboard back allows for more storage! The height is consistent with the height of my chop saw on my other workbench for when I need to chop longer boards. I am very happy with how this project turned out and it is now full and in use!

Fri, 01/29/2021 - 10:28
Nice job on this! I think the mods really are great and practical, you're a genius!
Mon, 05/09/2022 - 07:21
True inspiration! Love love love it and stealing it for my garage!!