Outdoor chair frames and coffee table

I built a set of chairs and a coffee table for our newly designed outdoor area. These look amazing and people love sitting on them and hanging out outside our house.


Built from Plan(s)
I built a set of chairs and a coffee table for our newly designed outdoor area. These look amazing and people love sitting on them and hanging out outside our house.
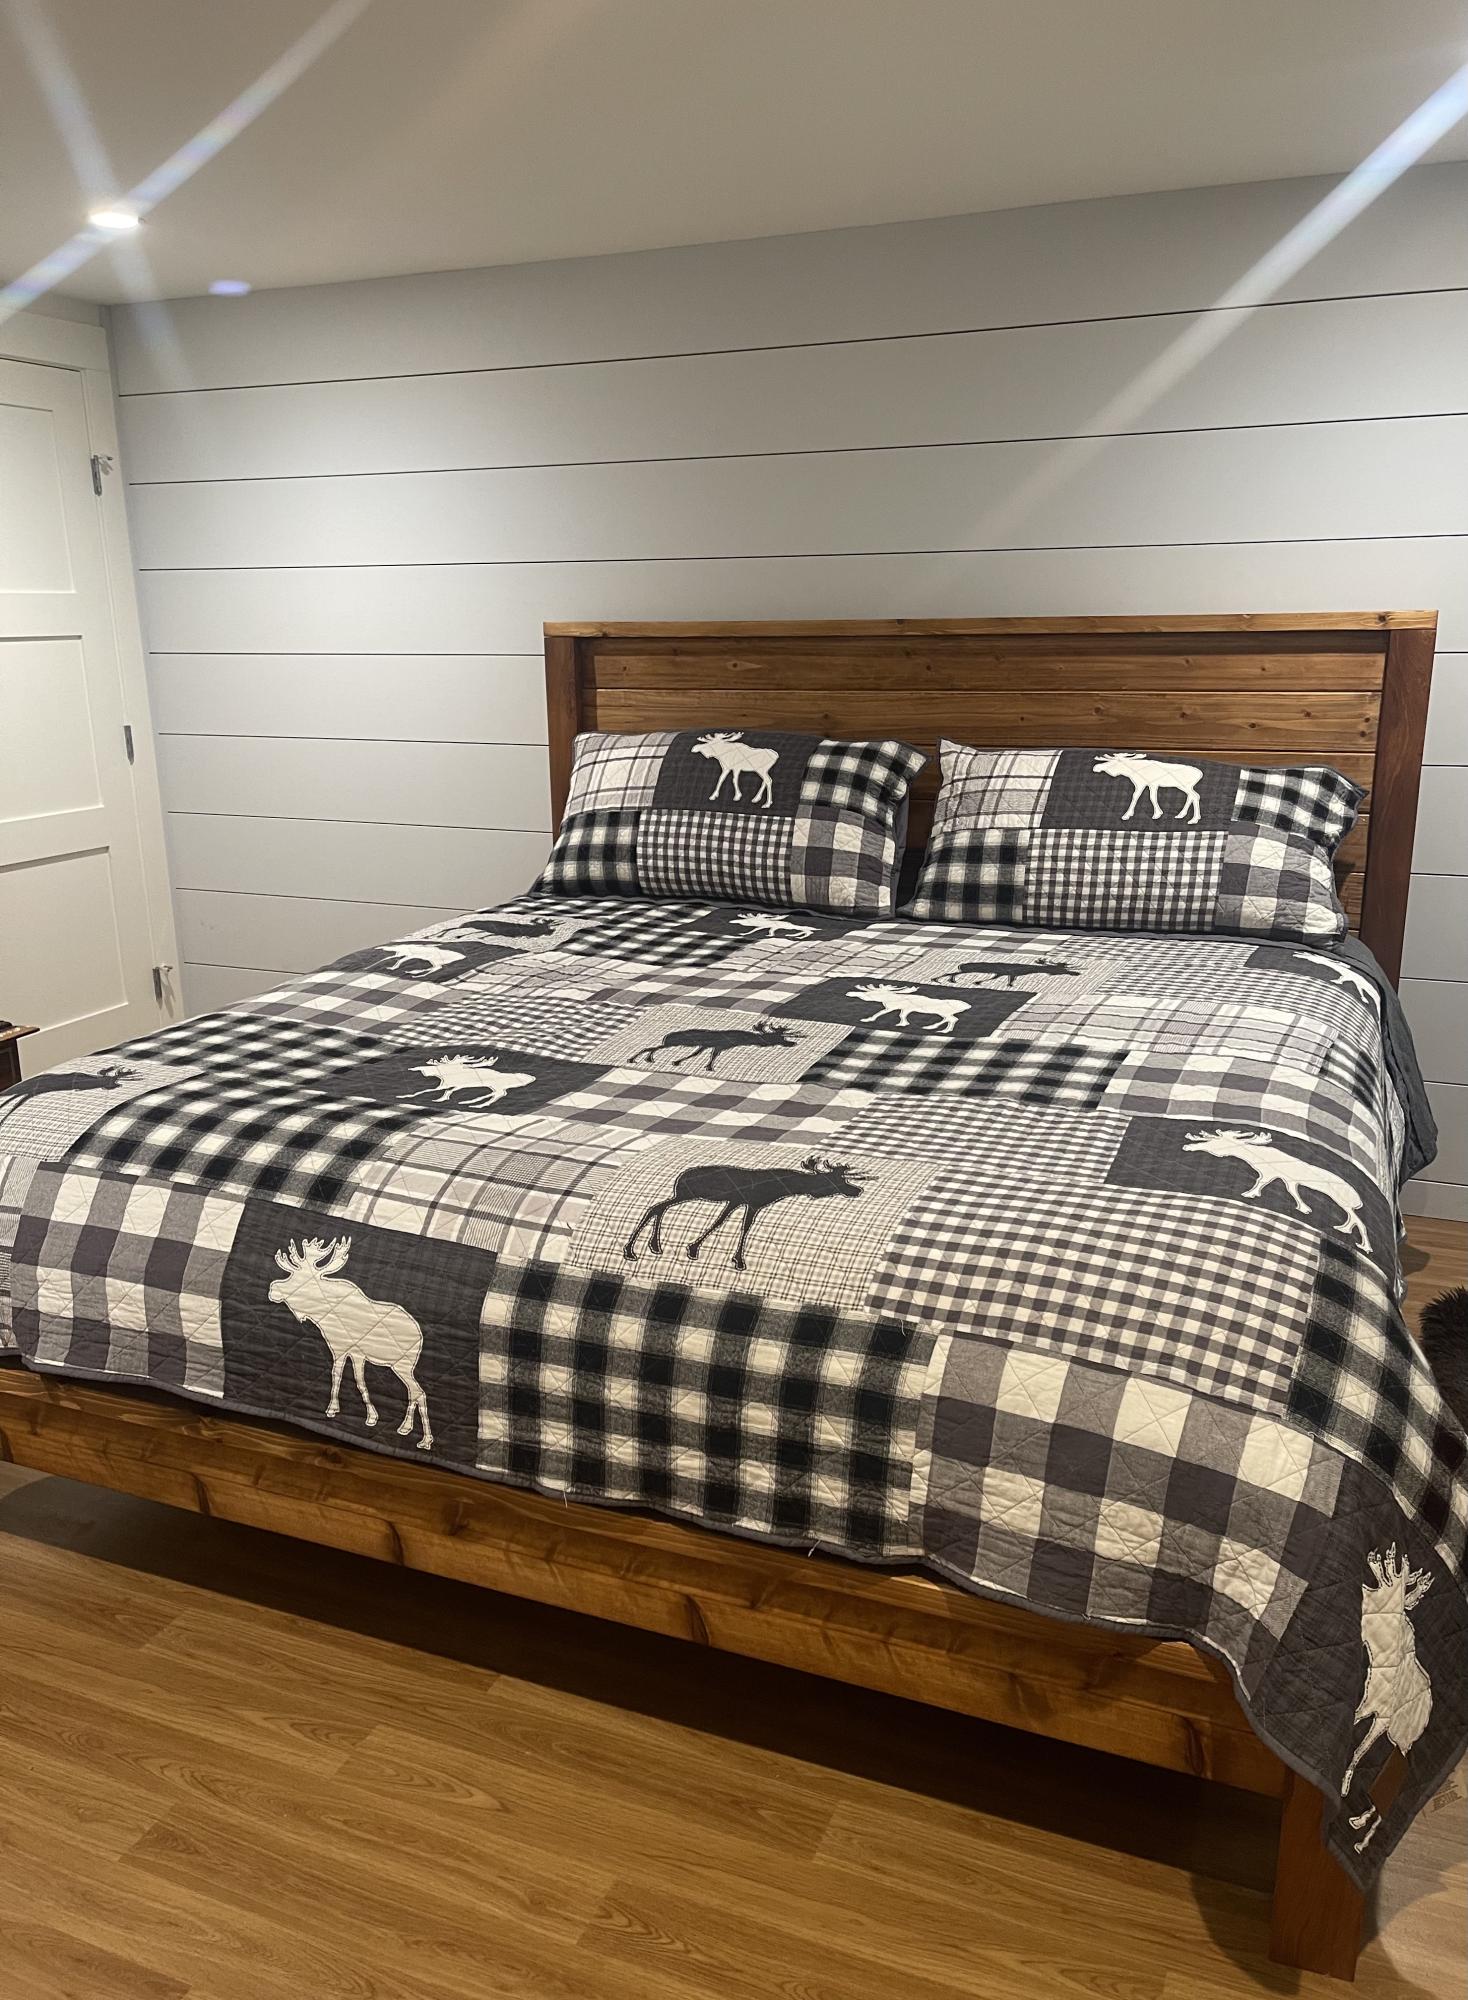
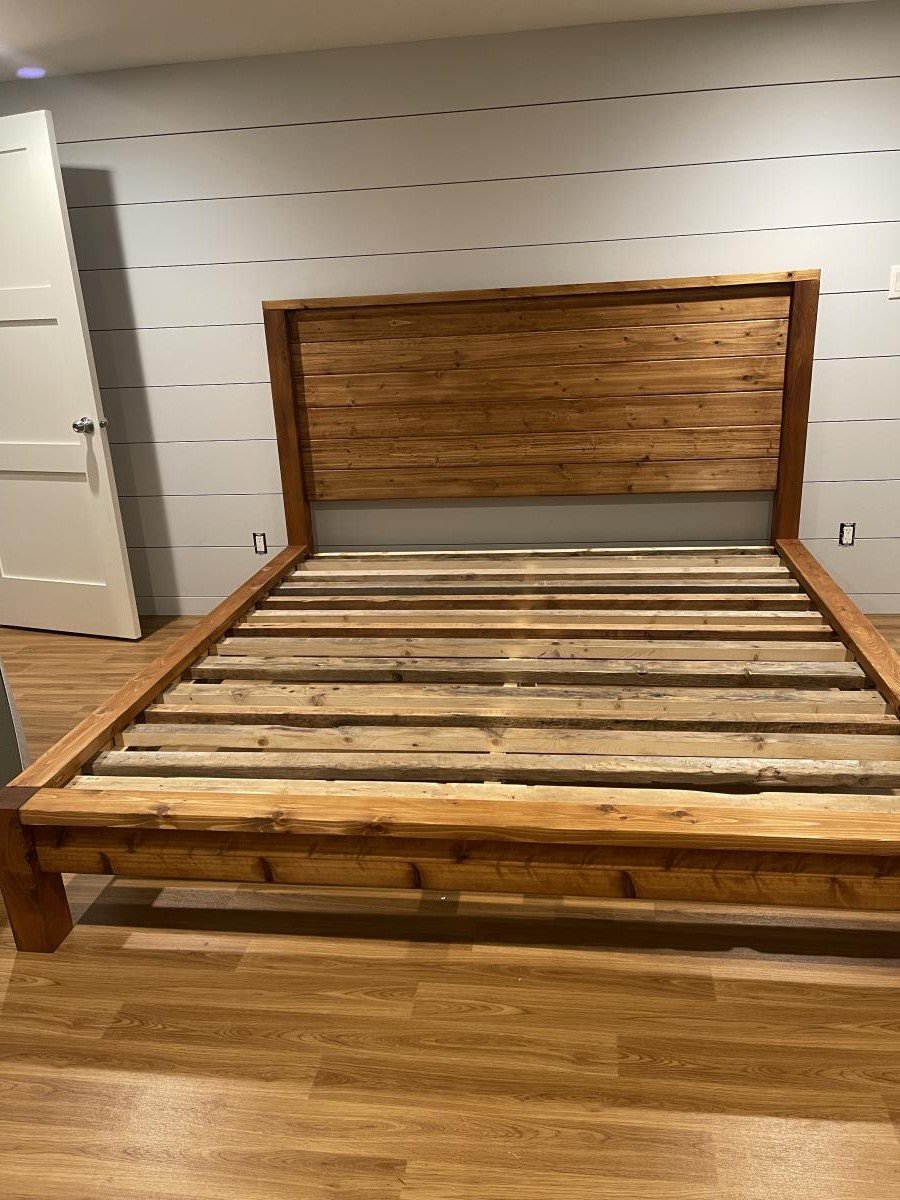
I love how this bed frame turned out! Everywhere that has stain is cedar and the rest is all scrap spruce. Thanks for another great plan Ana!
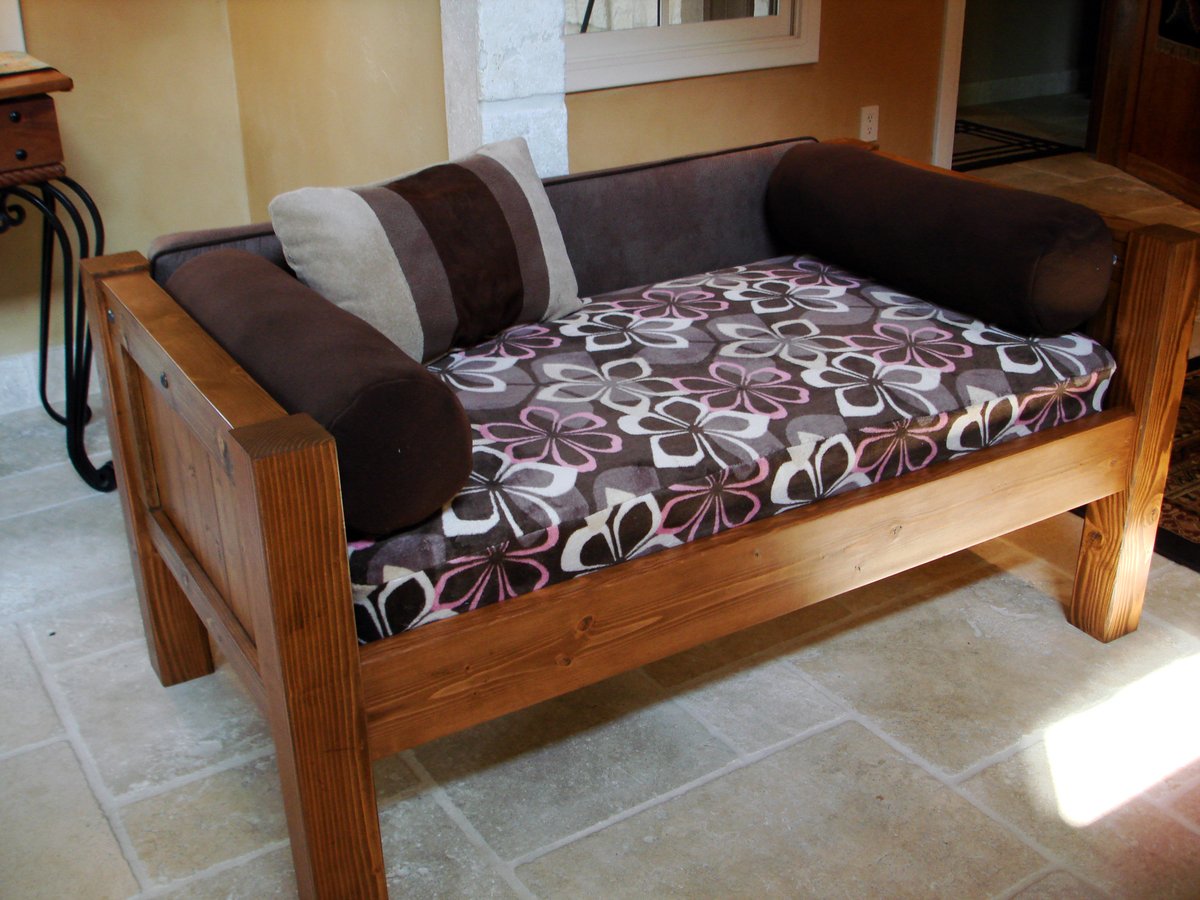
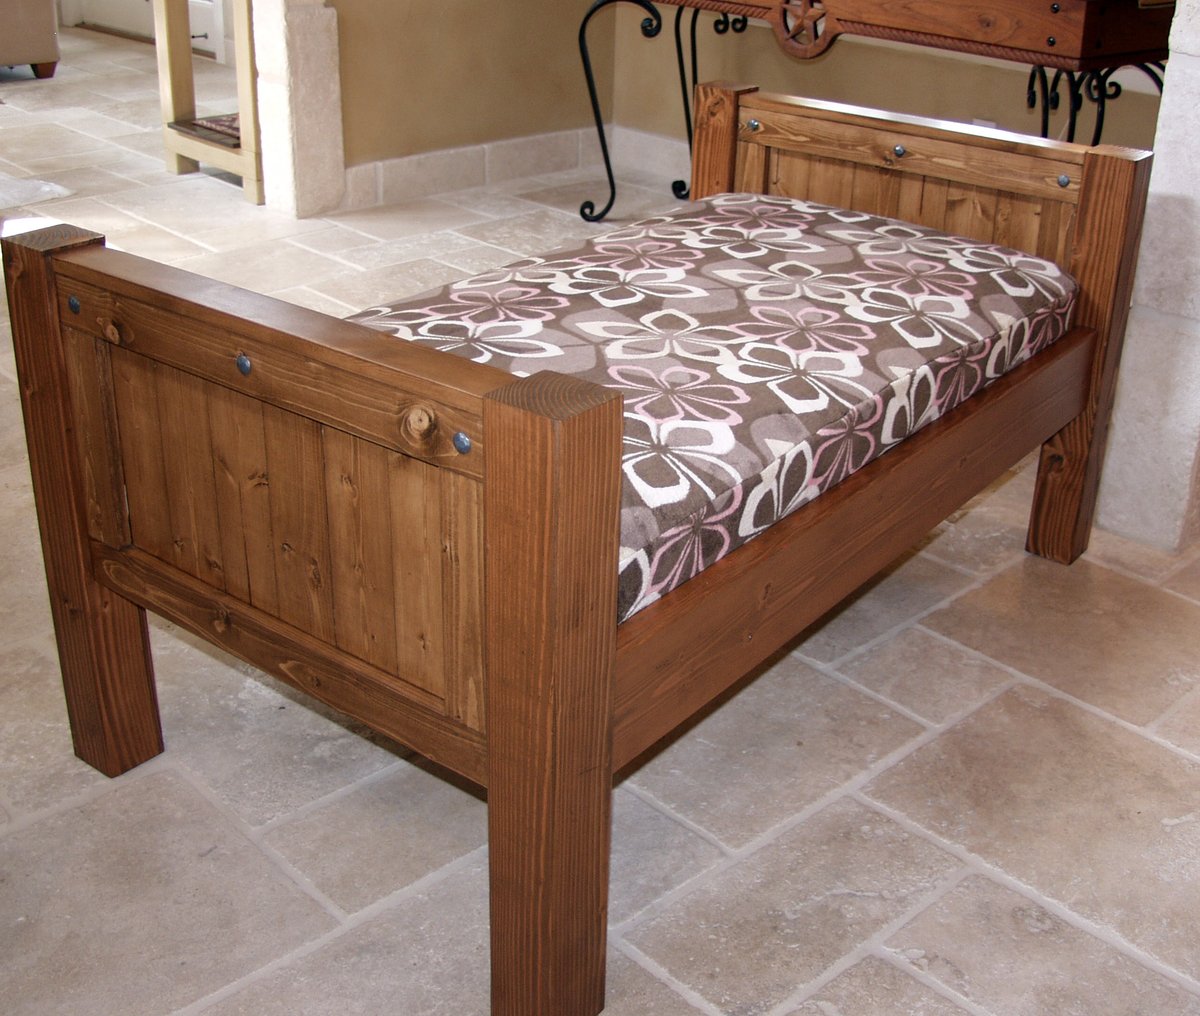
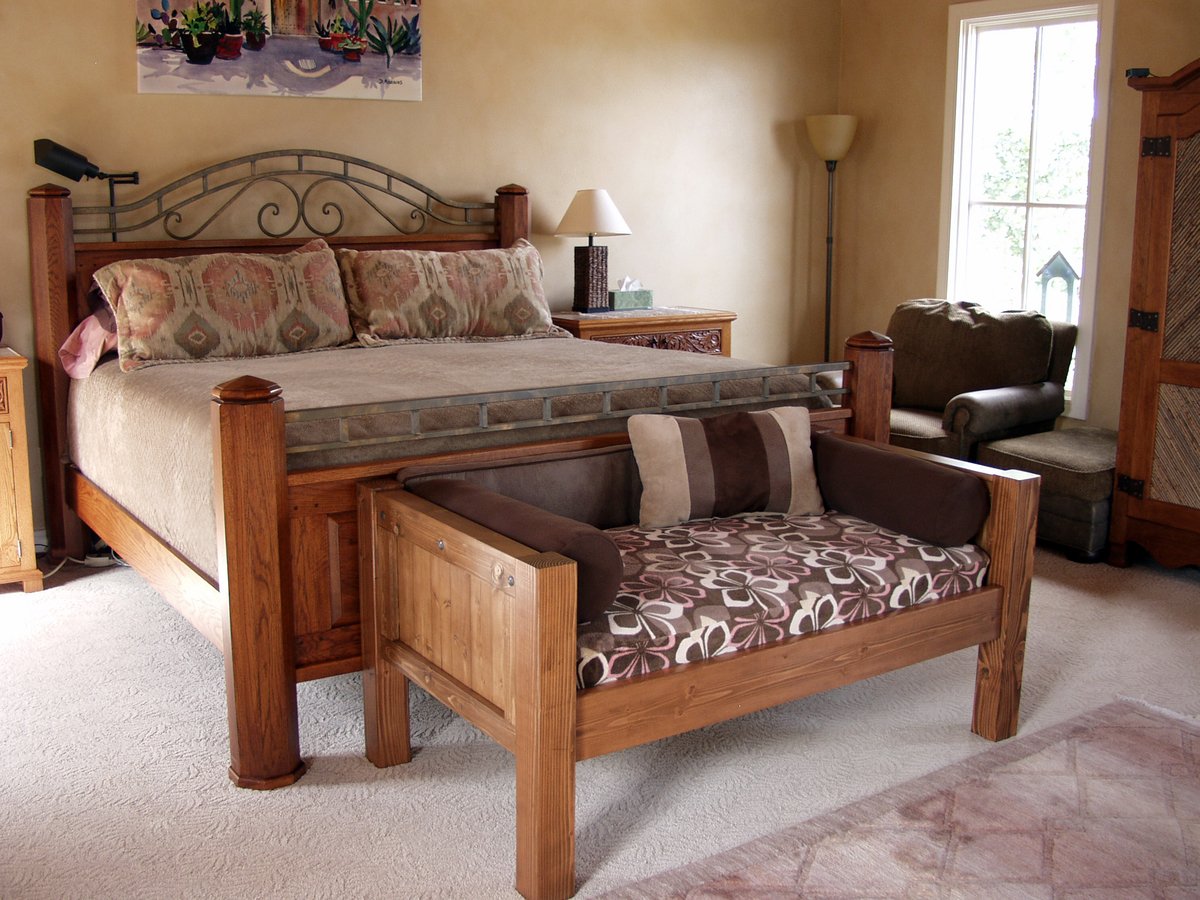
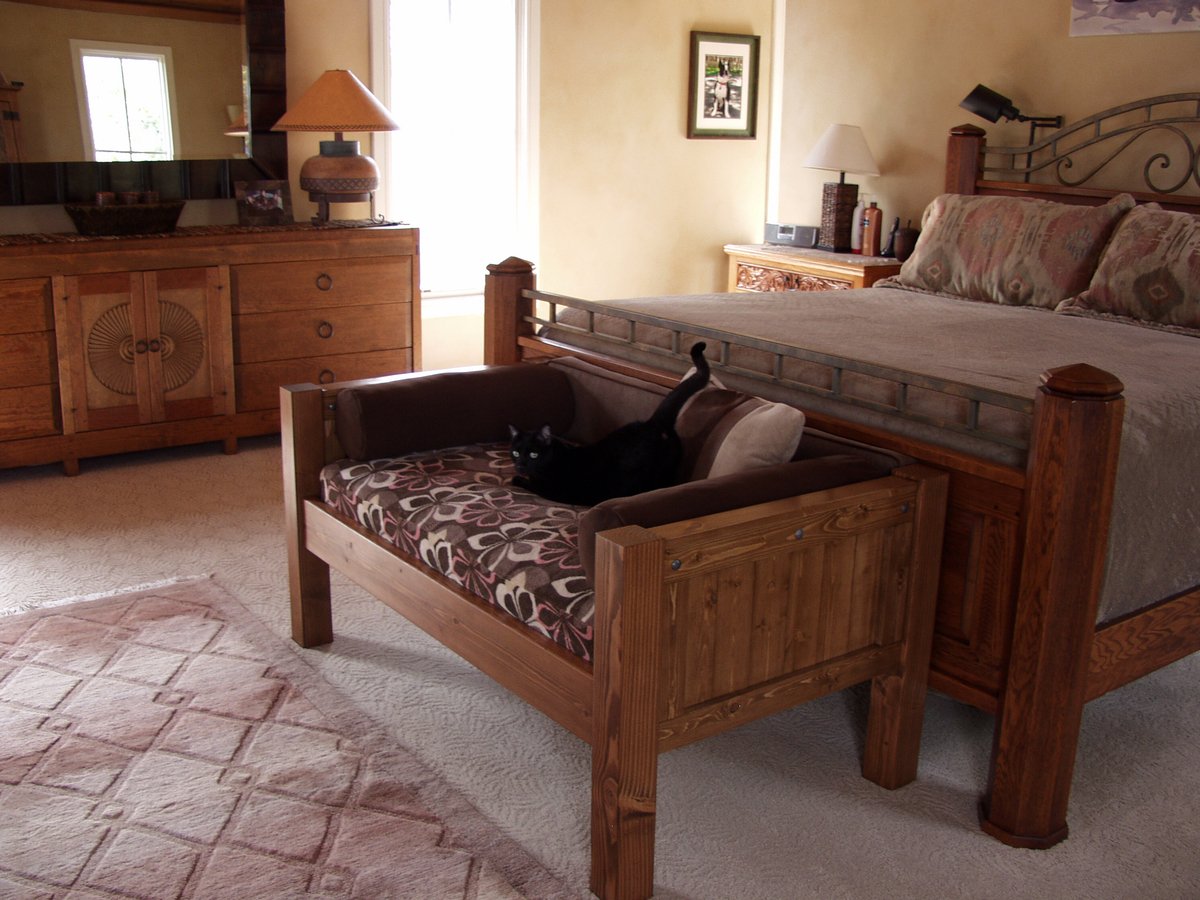
Yes, my husband and I share our bedroom with 6 dogs and an occasional cat (or 4). Our older dog (Petra) has slept on our bed for over 10 years, and she's getting too old to jump anymore. We didn't want her to feel like she was getting kicked off the bed, so I made Petra her very own bed at the end of ours so that she wouldn't feel left out. I was inspired by MurdaRae's dog bed (http://ana-white.com/2012/06/doggie-daybed), and thought it was genius to use a toddler/crib bed. So I went looking for plans on Ana-White, and came up with a mixture between a couple of twin bed plans. I love that the plans are easy enough to modify my sizes, and come up with exactly the custom solution that I need. This was my first big project using Bri-Wax. The last one was kind of a disaster when the wax changed the stain color to something not-so-great. With this project, I learned to wait at least 2 weeks before attempting to wax it. I was blown away with the results. It is a beautiful subtle satin finish that feels great to the touch. Plus, I can easily touch up all the dog fingernail scratches that will inevitably occur. When I re-assembled the bed in my bedroom, I actually nicked it in a few places. No problem -- slap on some more Bri-Wax! My Bri-Wax was 11 years old, and pure liquid. I tossed it in the fridge (per Bri-Wax's recommendation), and it was as good as new. The only real problem I had with this project was leaking sap from one of the 4x4s. I'm still fighting this today. In talking with Rustoleum/Zinsser reps, they said that no sap could penetrate their "Seal Coat" shellac product. After 5 coats, the sap is still penetrating, but only if I turn it on it's side or upside down. I'm still baffled. I made the mattress cover out of a dog blanket, and made the cushions from some remnant fabric (suitable for dogs and weekly washing), so this was a fairly inexpensive project. It was a success because Petra slept in her bed from the fist night and loved that she had all the room to herself, and no boston terrorists (I mean terriers) attempted to bother her.


Sun, 08/26/2012 - 10:24
It matches the woods in your bedroom so well and looks great! Also, I love the bolster pillows around the edges. That is something I need to make for our dog bed. Thanks for sharing.

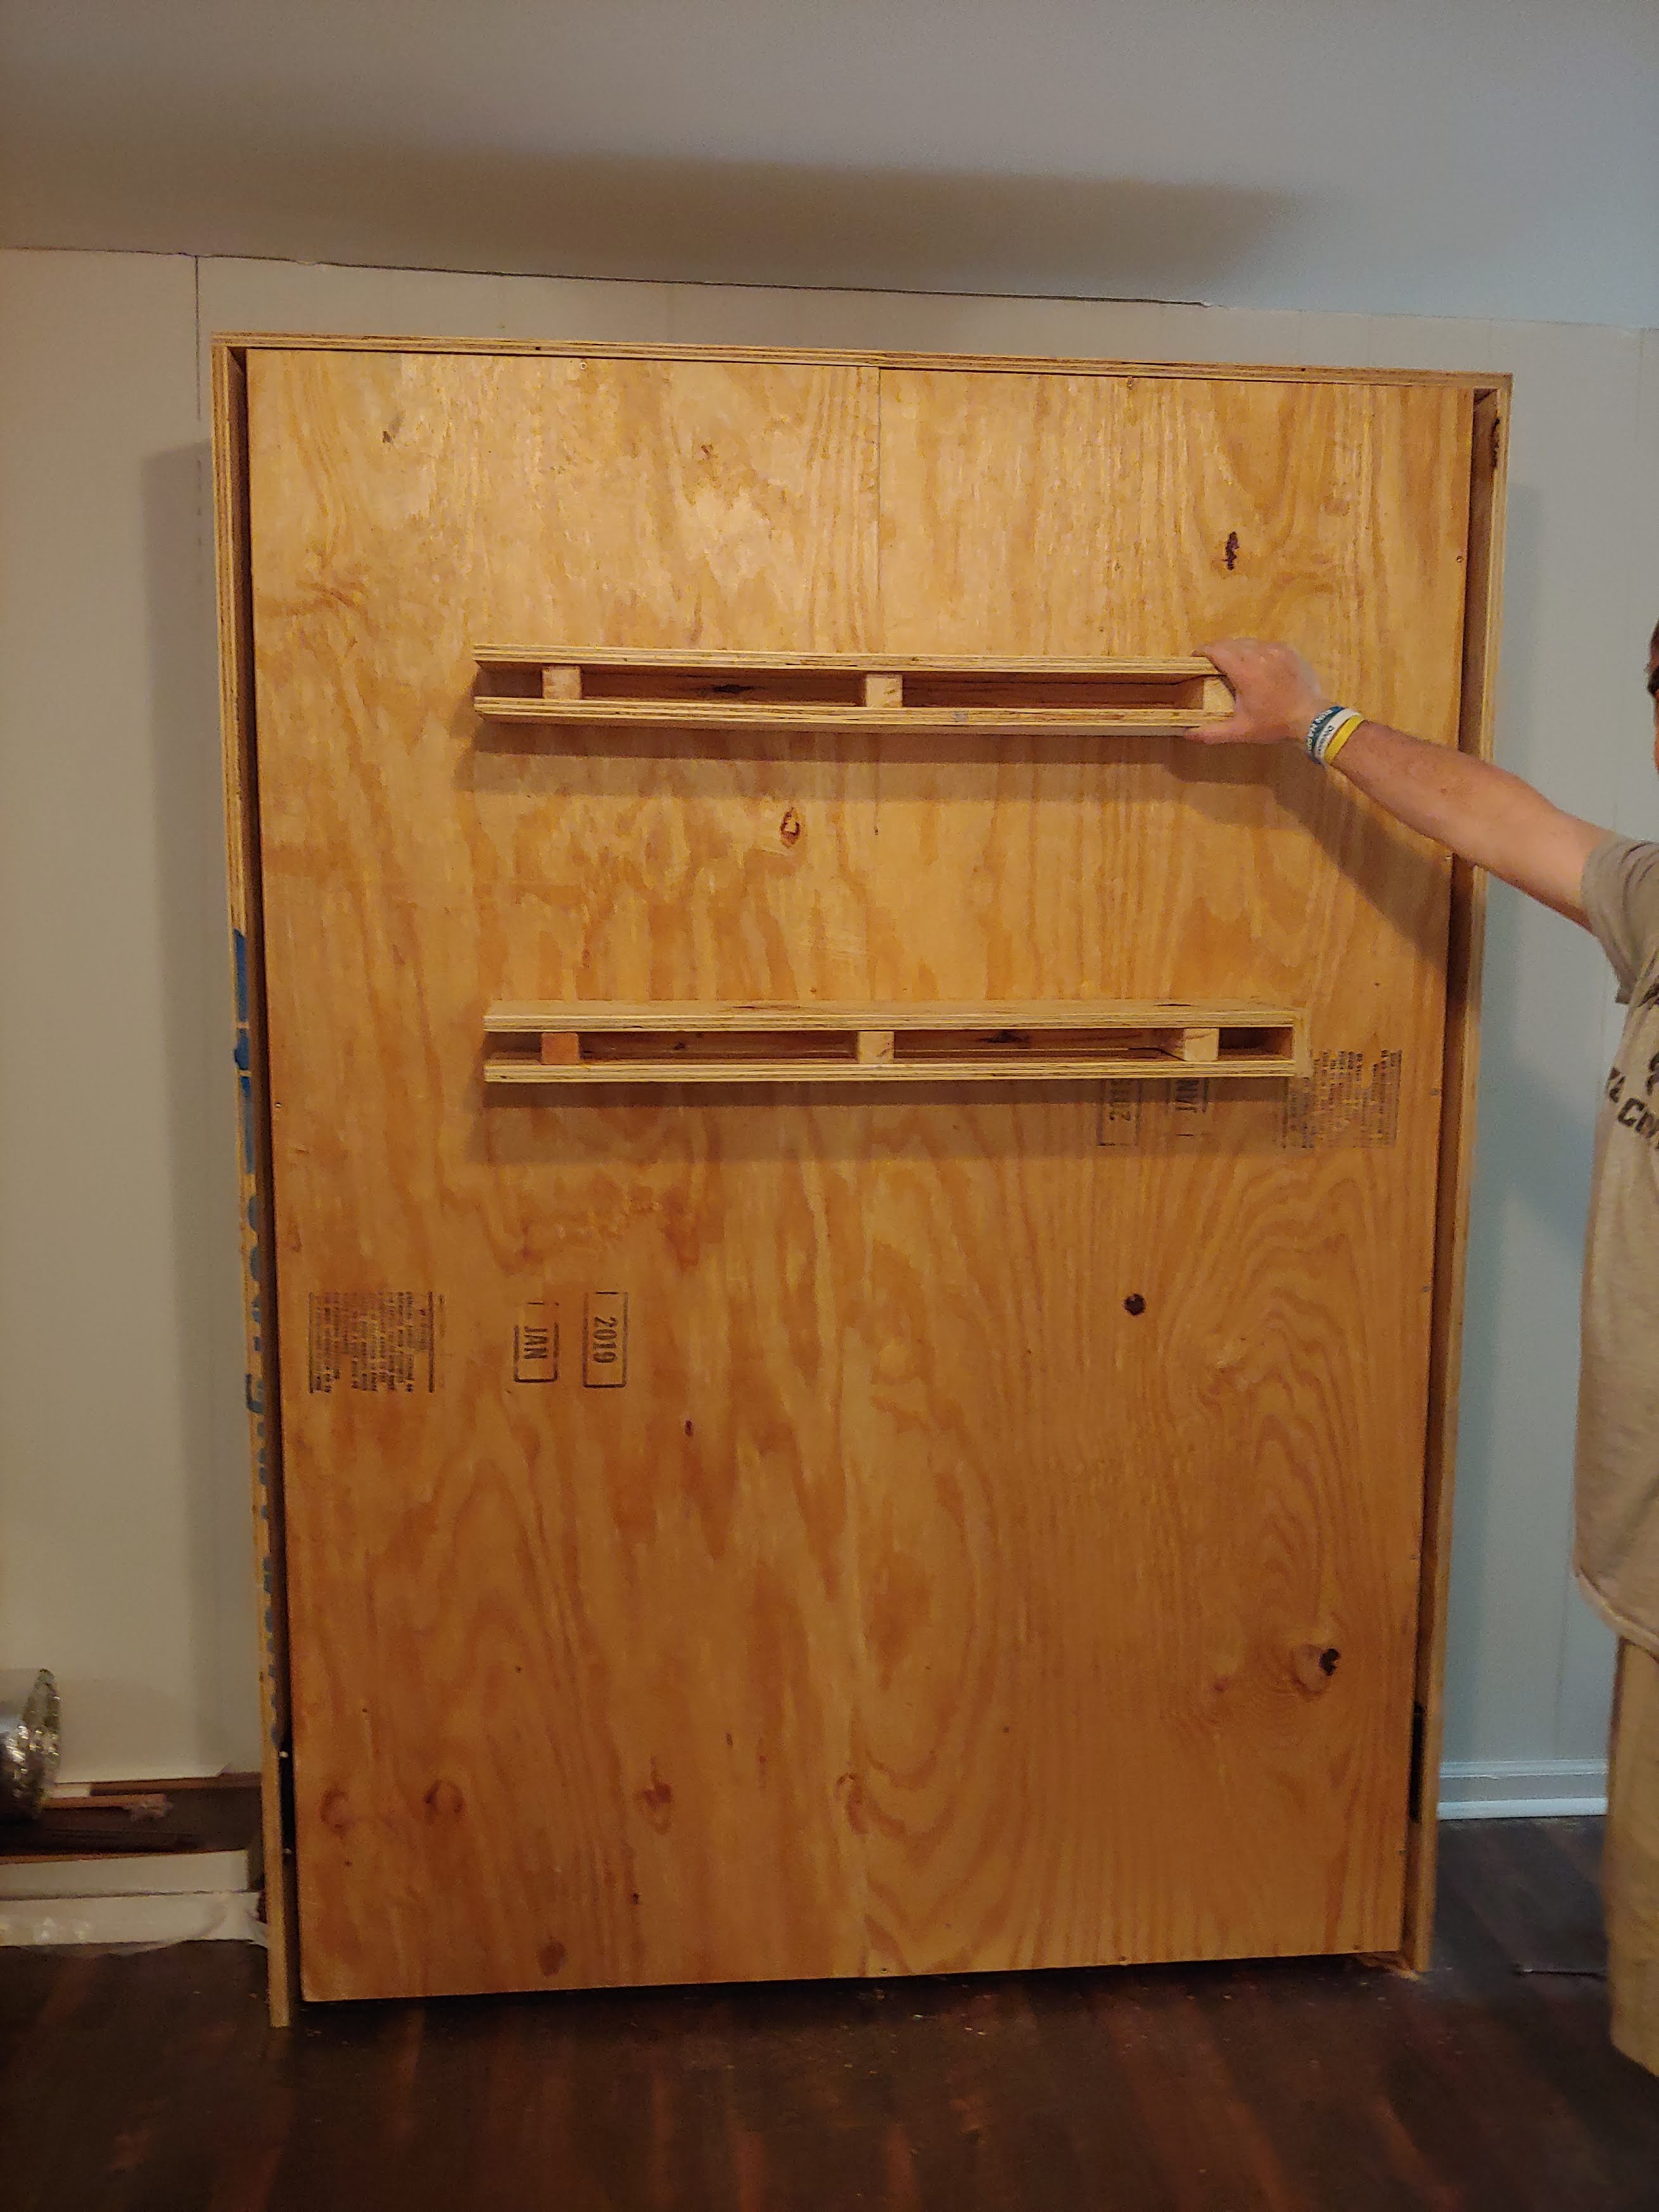
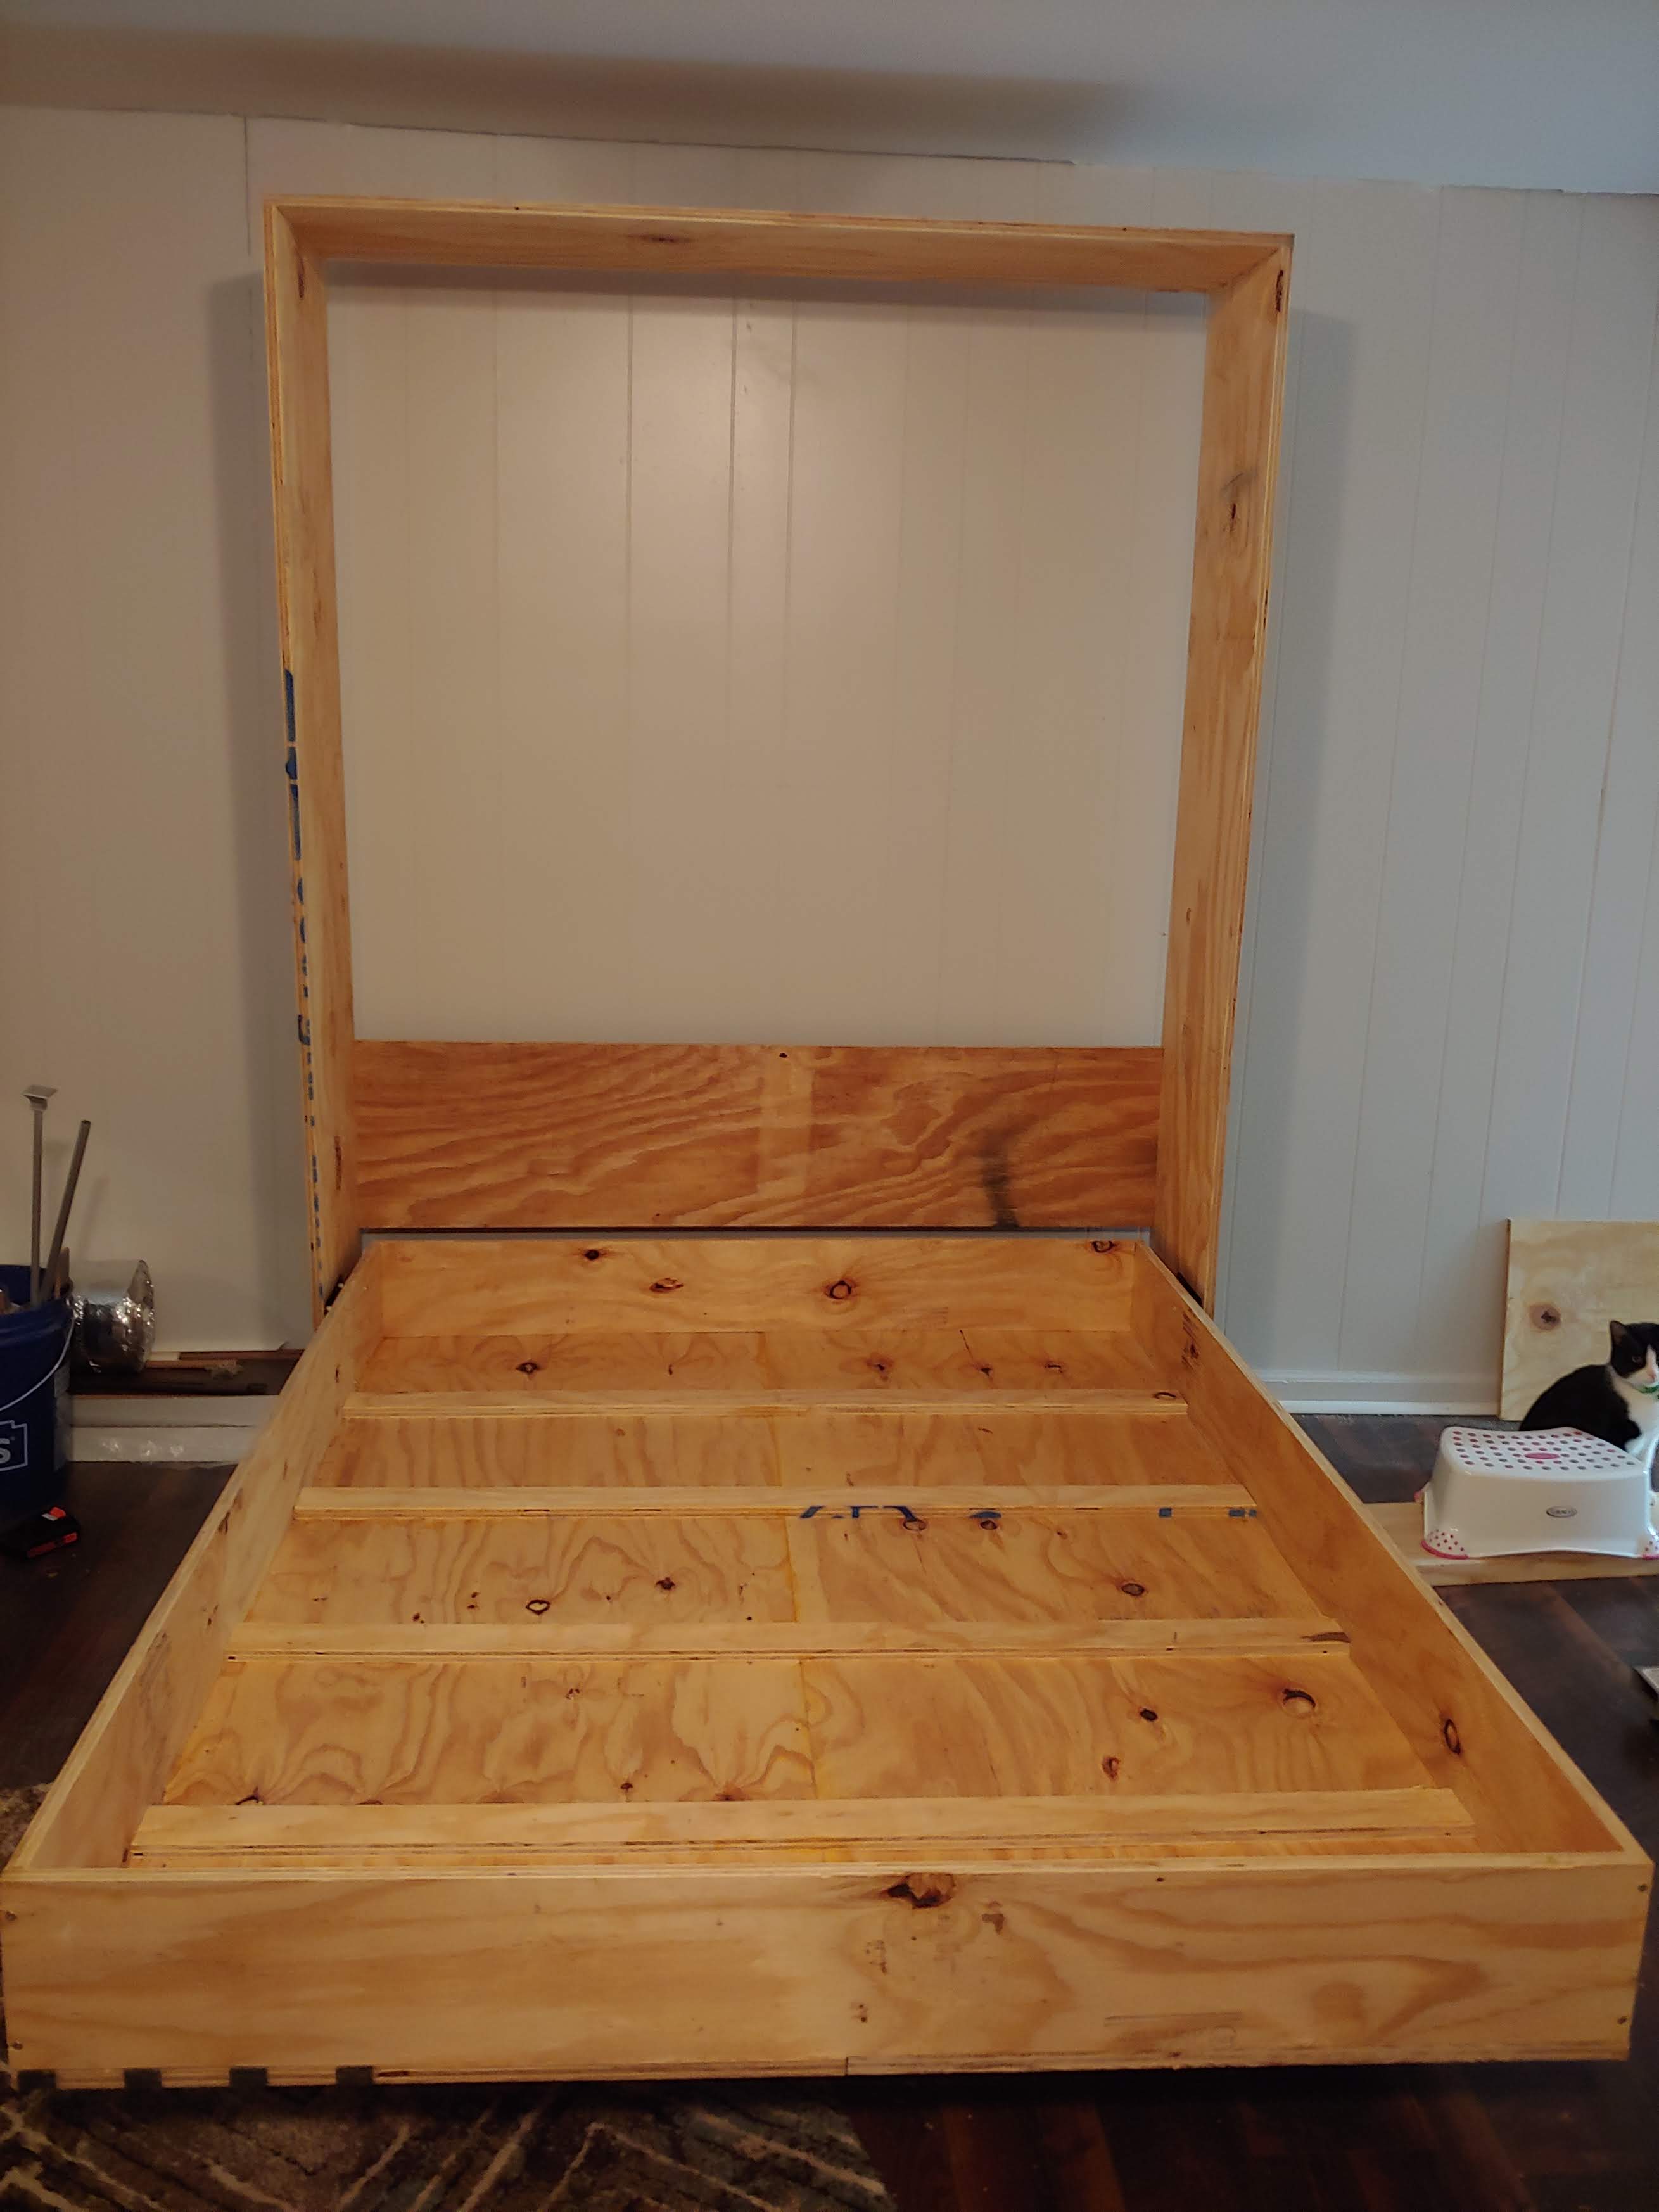
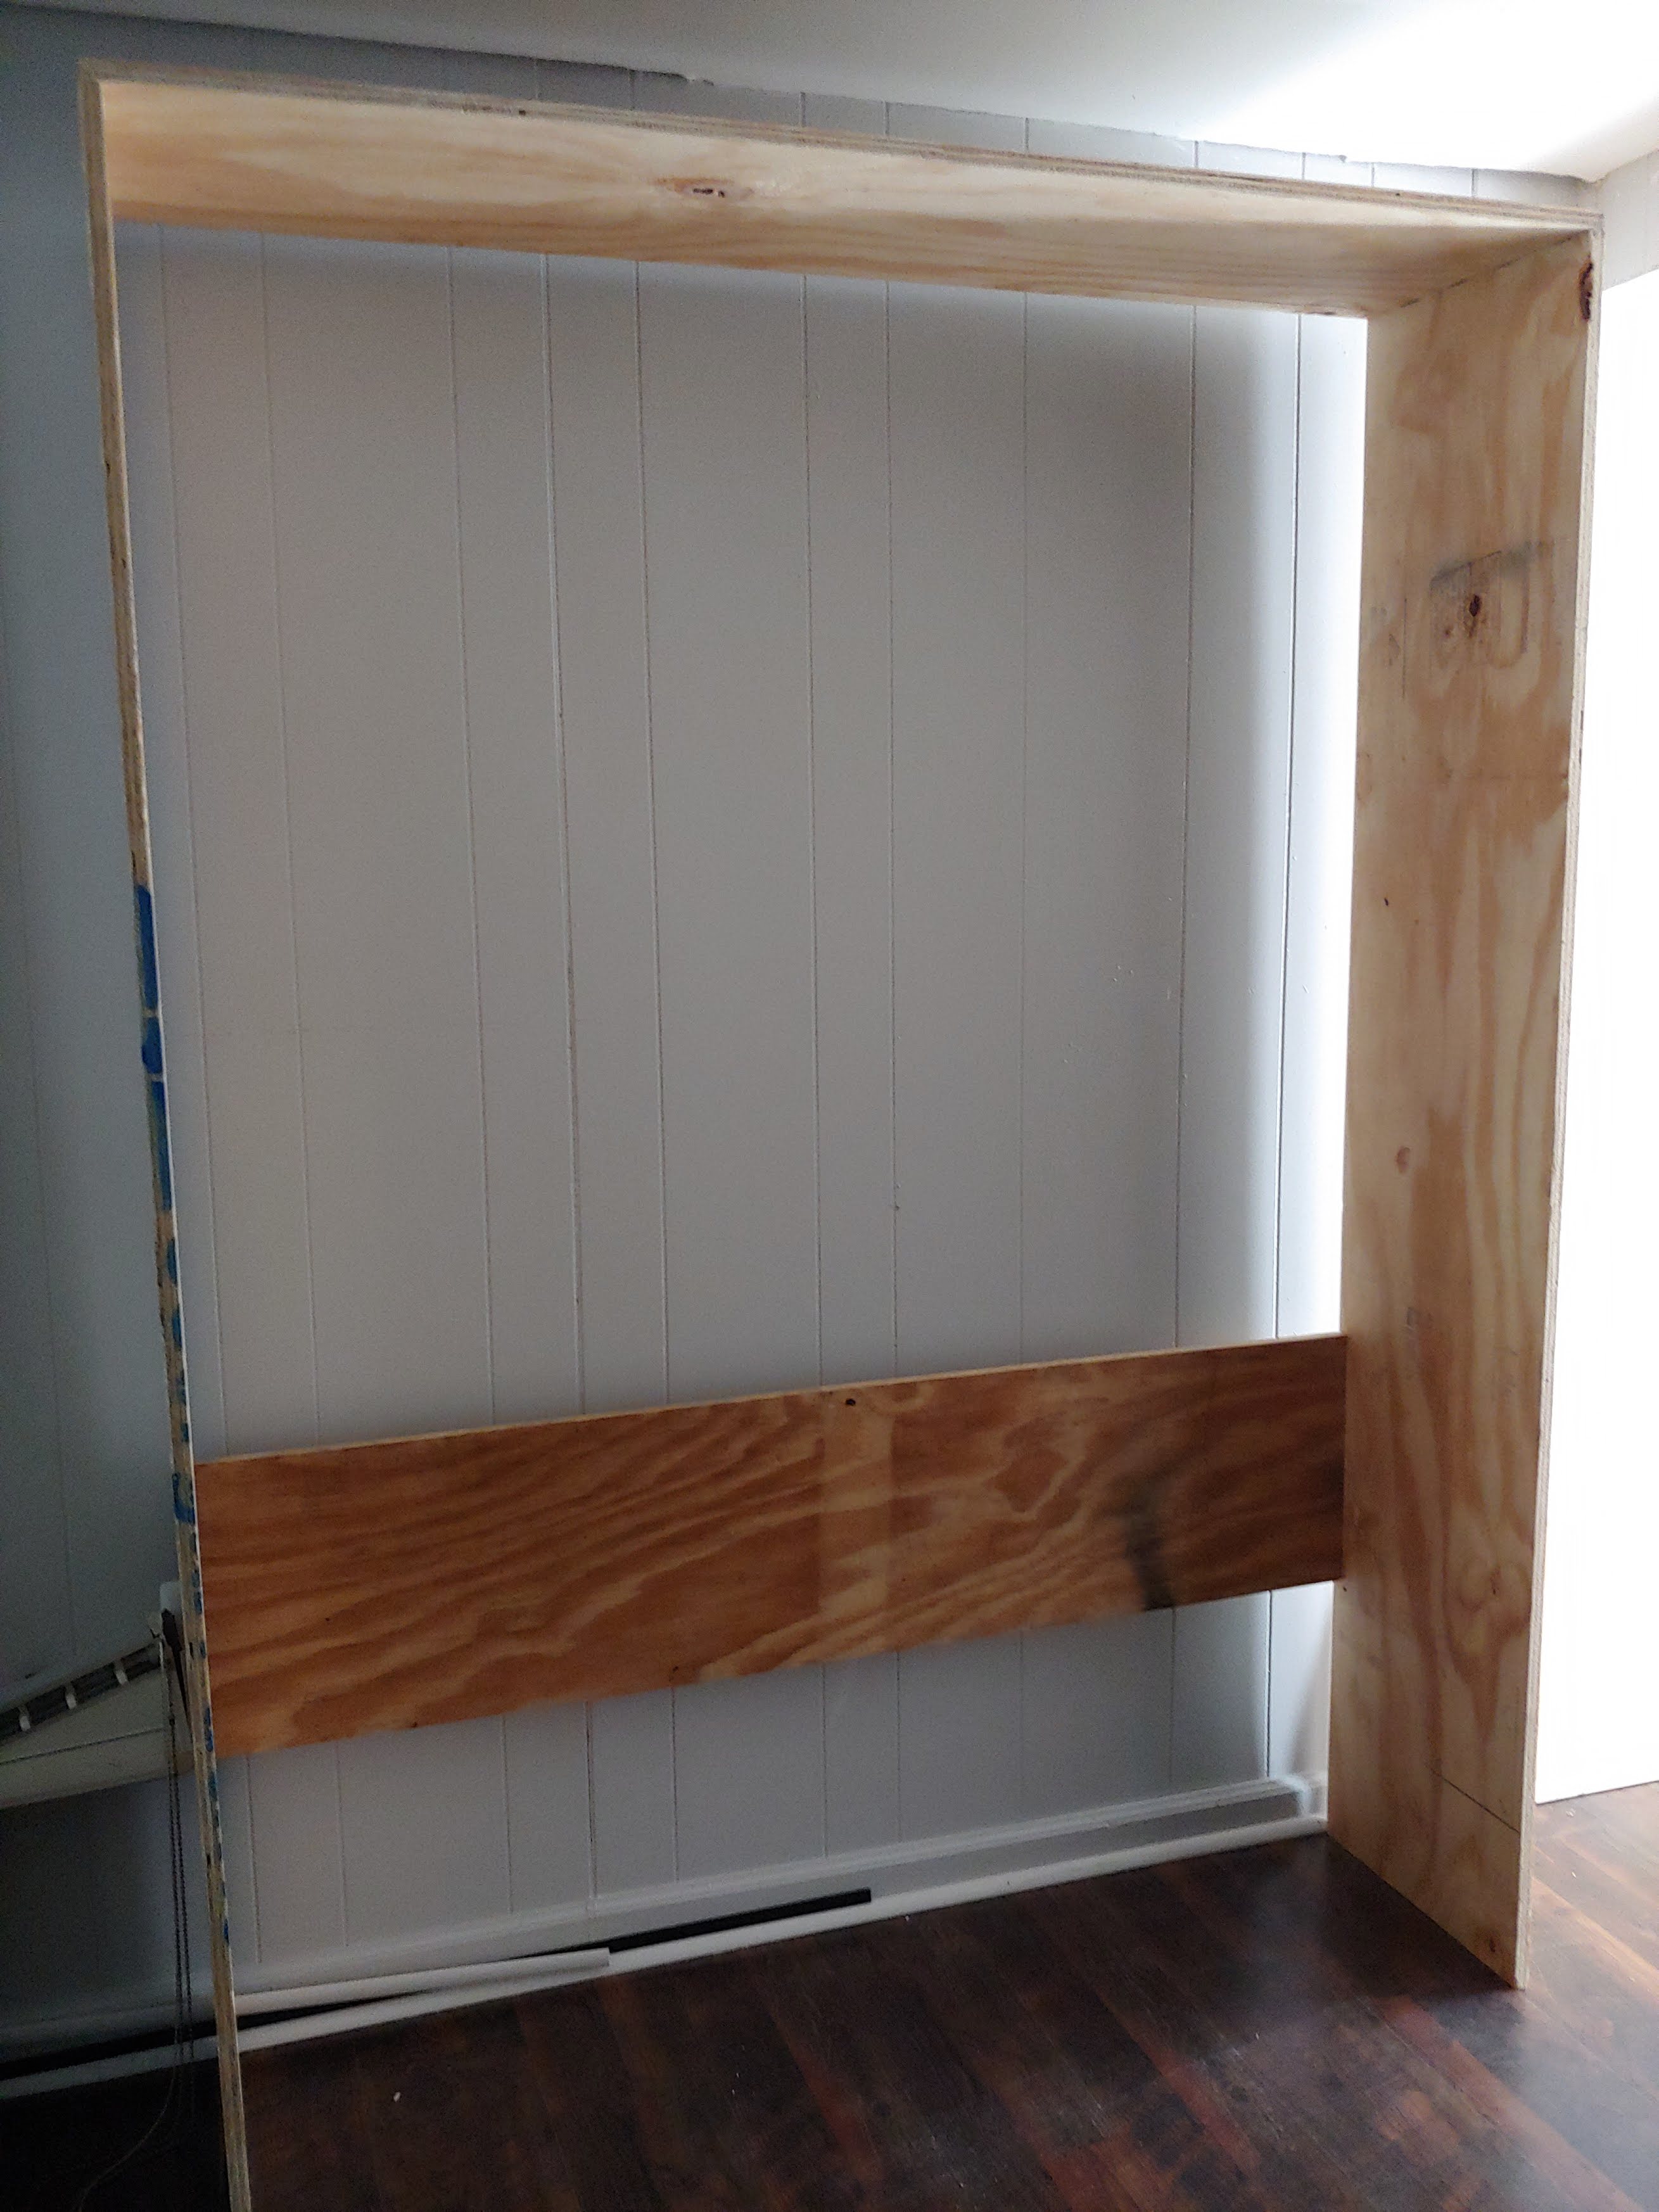
Hidden door bookshelves hide a furnace closet. Built by Kraig Faulkner
Thu, 01/23/2020 - 07:05
Great idea! Do the bookshelves swing freely when weighed down with books? What type of hinges did you use?
Thu, 09/17/2020 - 08:01
I'm currently working on a basement renovation project. I'm probably going to incorporate a feature like this for my mechanicals, too.
One important safety note for anyone who wants to do this: It's recommended that your furnace be a minimum of 30" away from any combustible materials. That includes walls and partitions. The image of this project displayed is right next to the furnace, which is not a good idea.

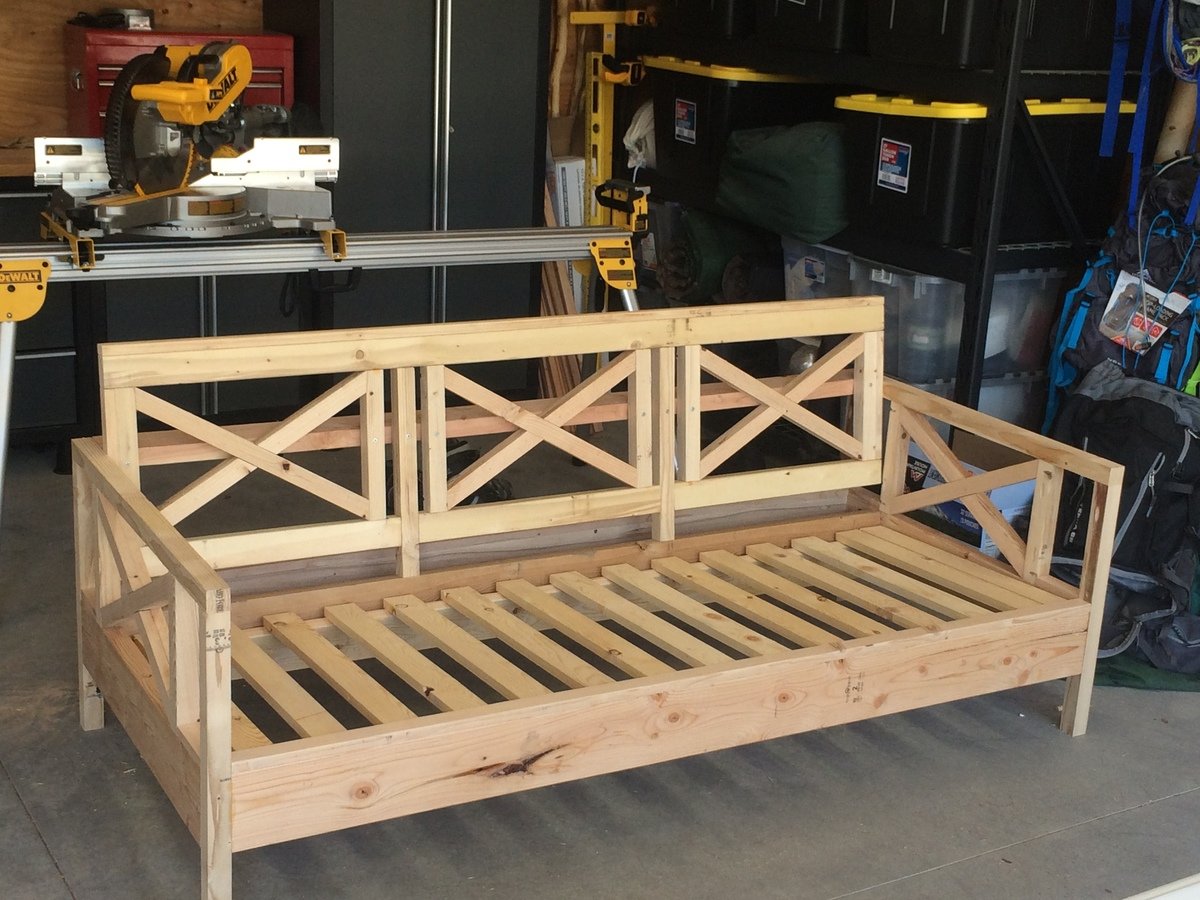
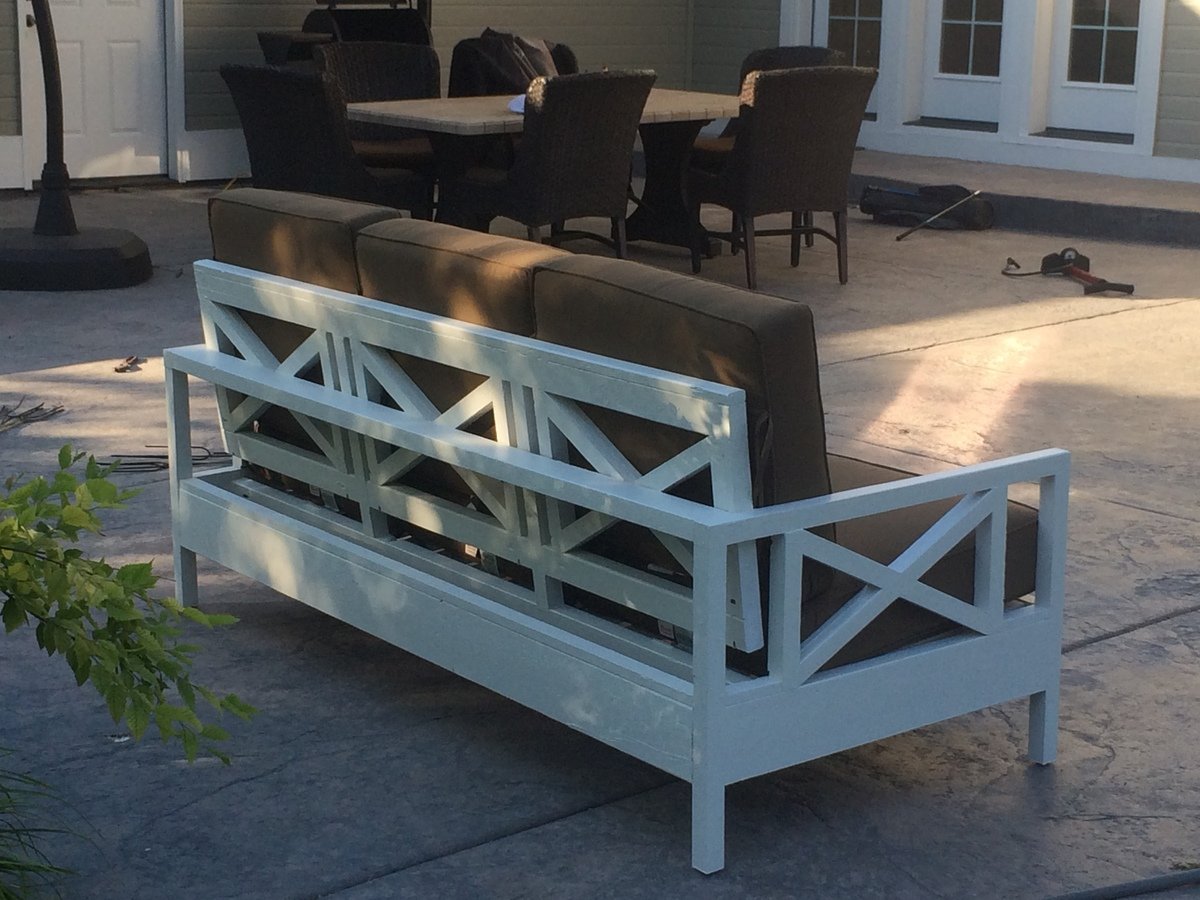
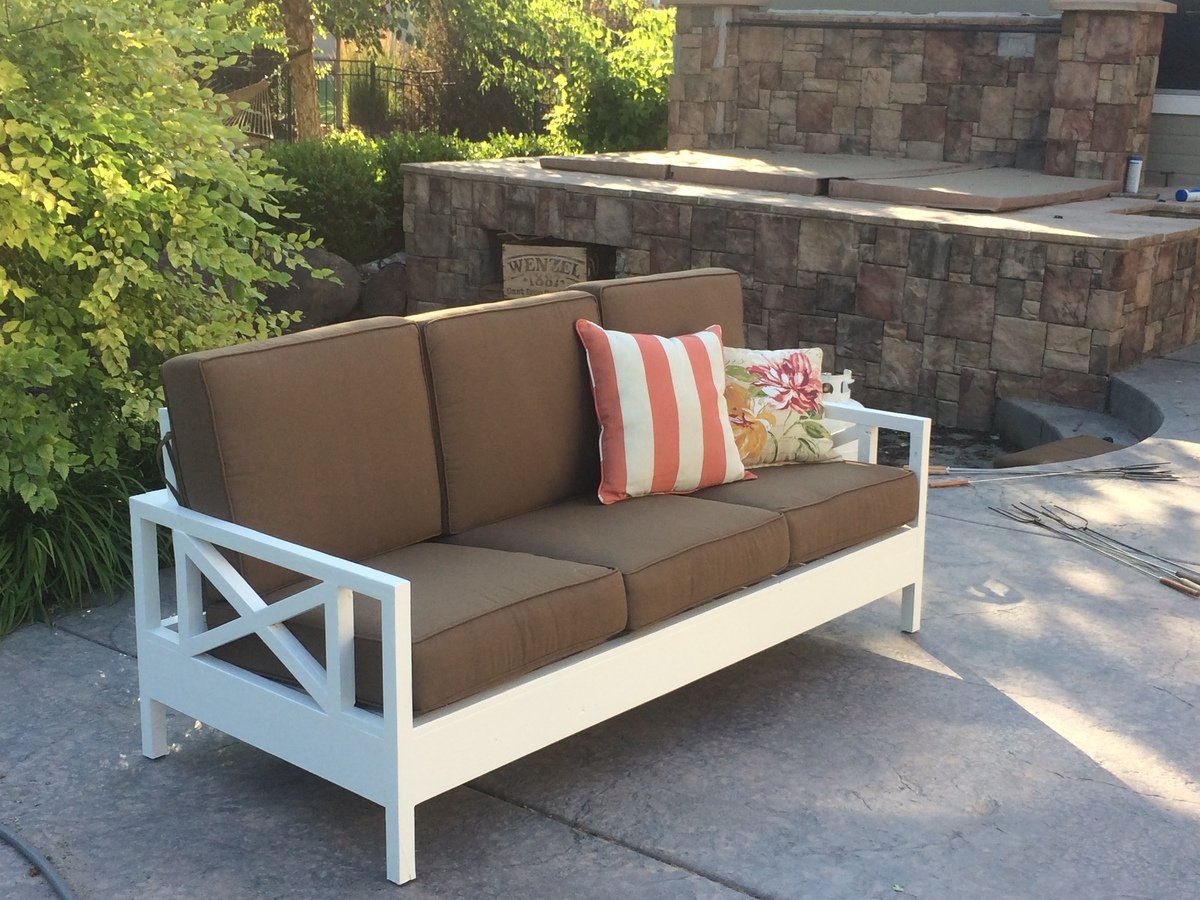
My wife loves the X pattern of the Weatherly Sofa, but wanted the tilted back from the Simple White Outdoor Sofa. This was our best of both worlds effort!
Tue, 06/11/2019 - 05:25
Can you share where you got your cushions please?
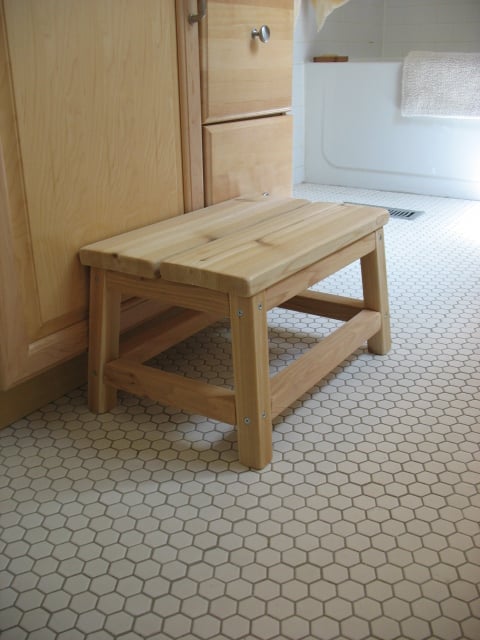
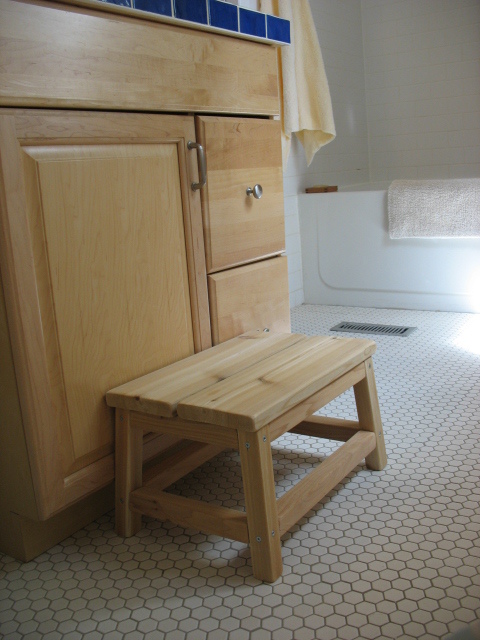
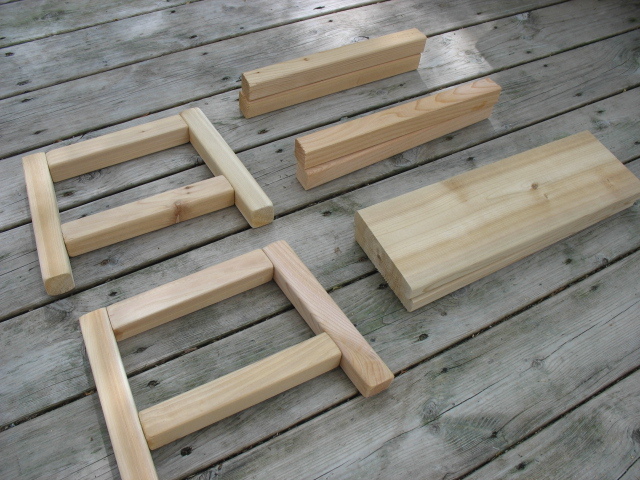
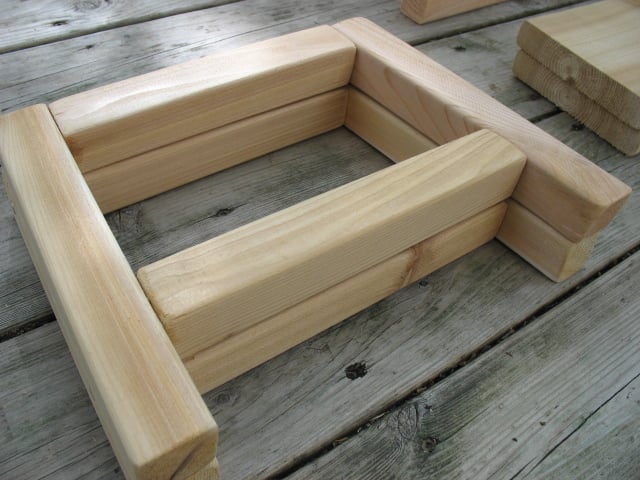
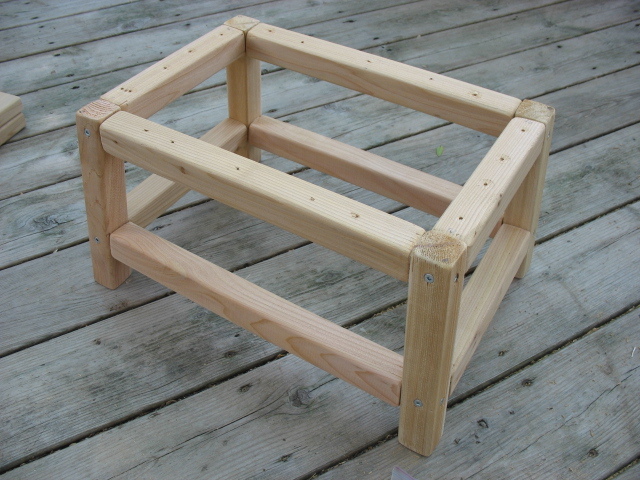
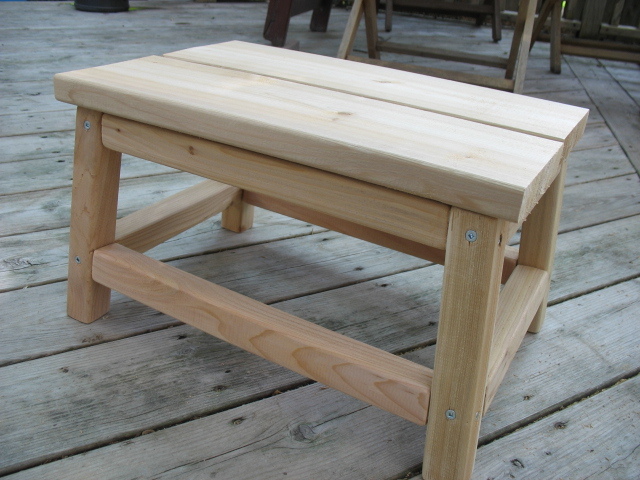
After searching the town high and low for a 10" high wooden stool, I decided to make one. Ana had the perfect stool pattern to modify for our needs - A little shorter, a little wider.....et Voila!
It's the perfect height for little ones to reach the taps in the bathroom, as well as helping out in the kitchen from time to time. And, the cedar smells wonderful.
Finished height: 10"
Top measures: 11.25" x 16.5" (2 boards, cut 16.5" long + a space in the middle)
Footprint: 12.375" x 17.375"
I also lined up the rails (instead of staggering them), similar to the Harriet Higher Chair plans. The joint will be weaker, but I prefer the cleaner lines on such a short step stool.
Thanks Ana for the great plans!
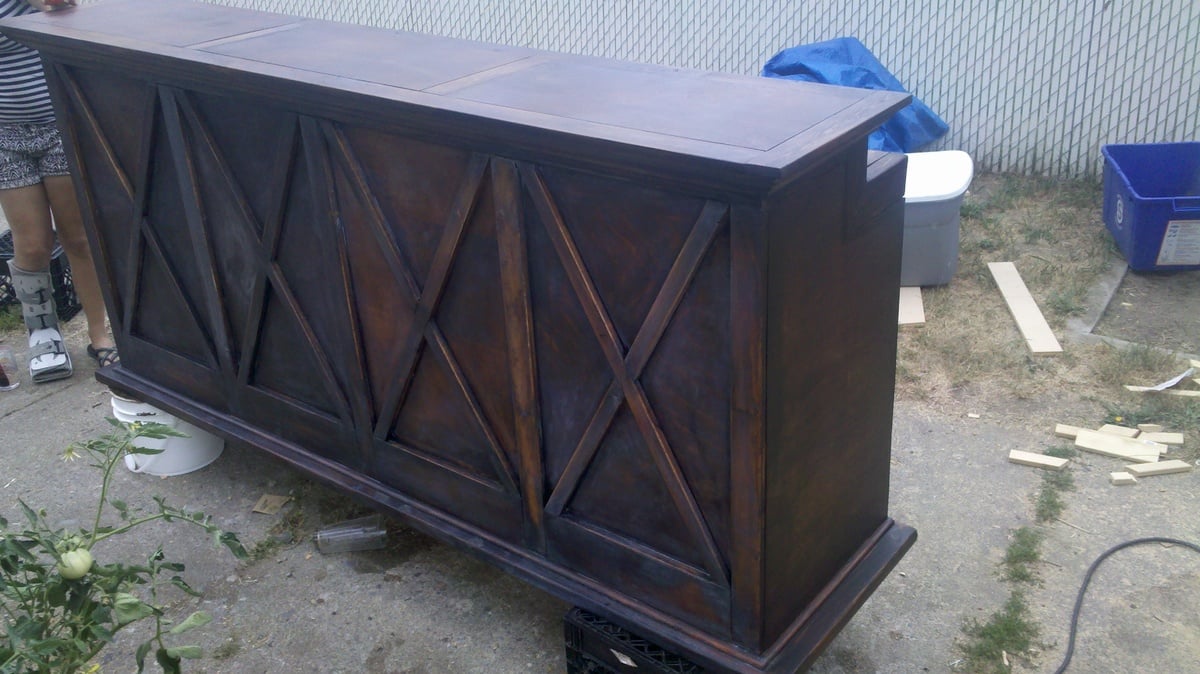
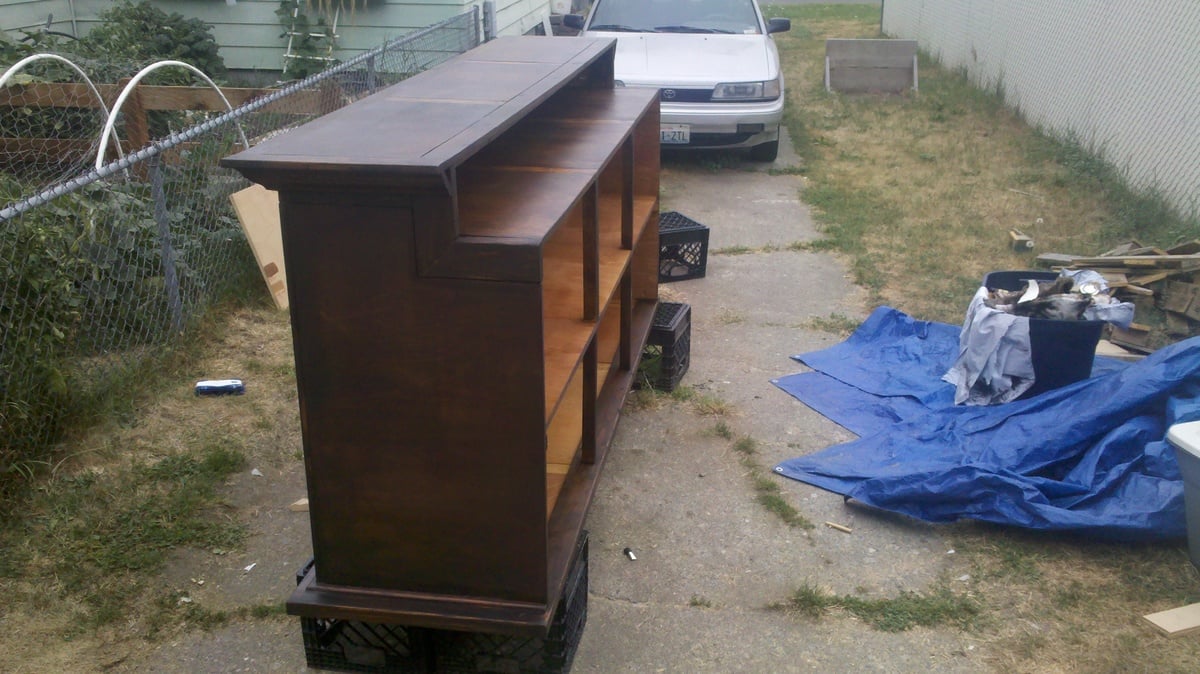
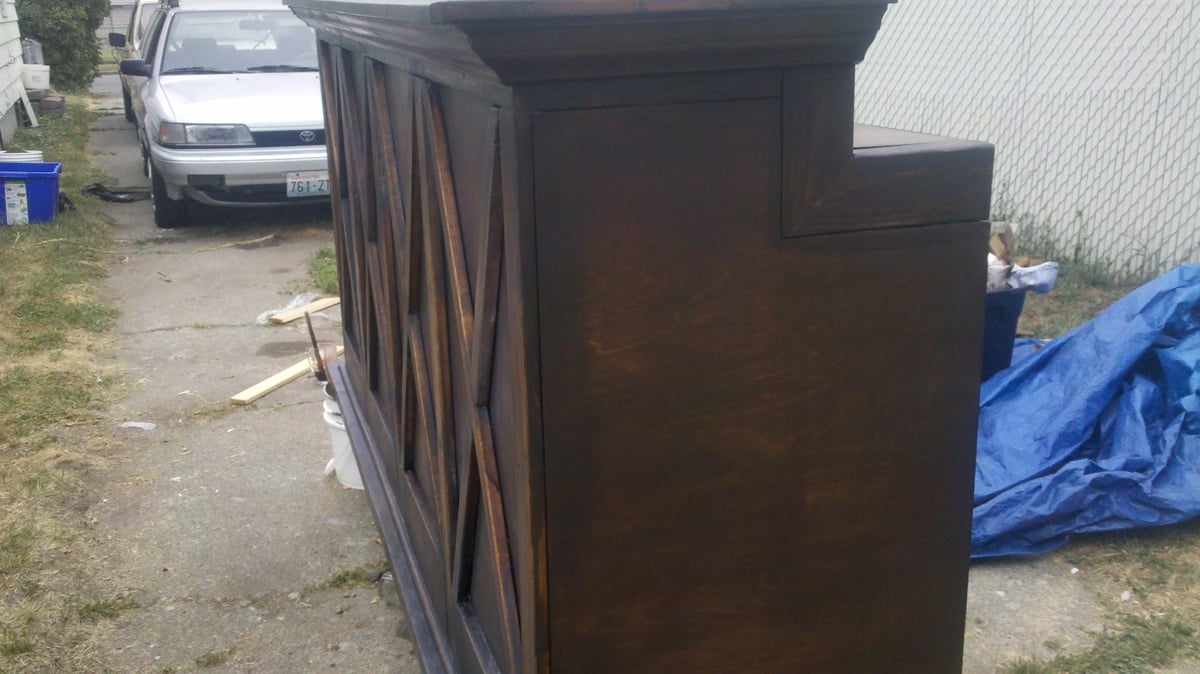
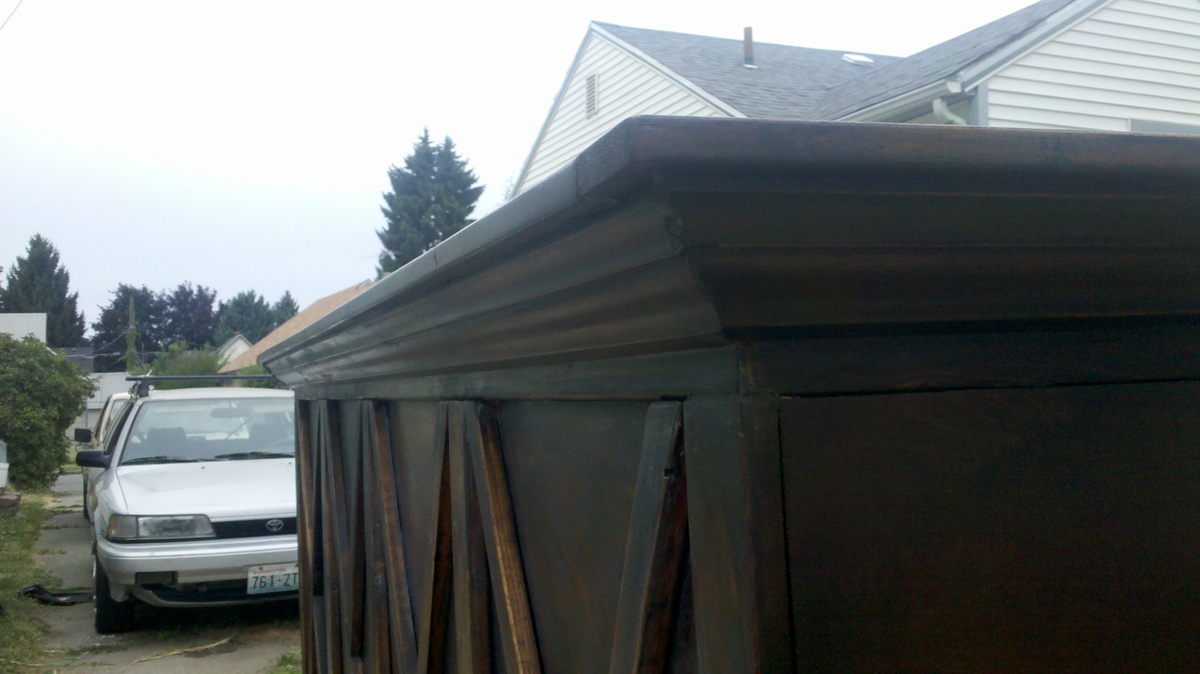
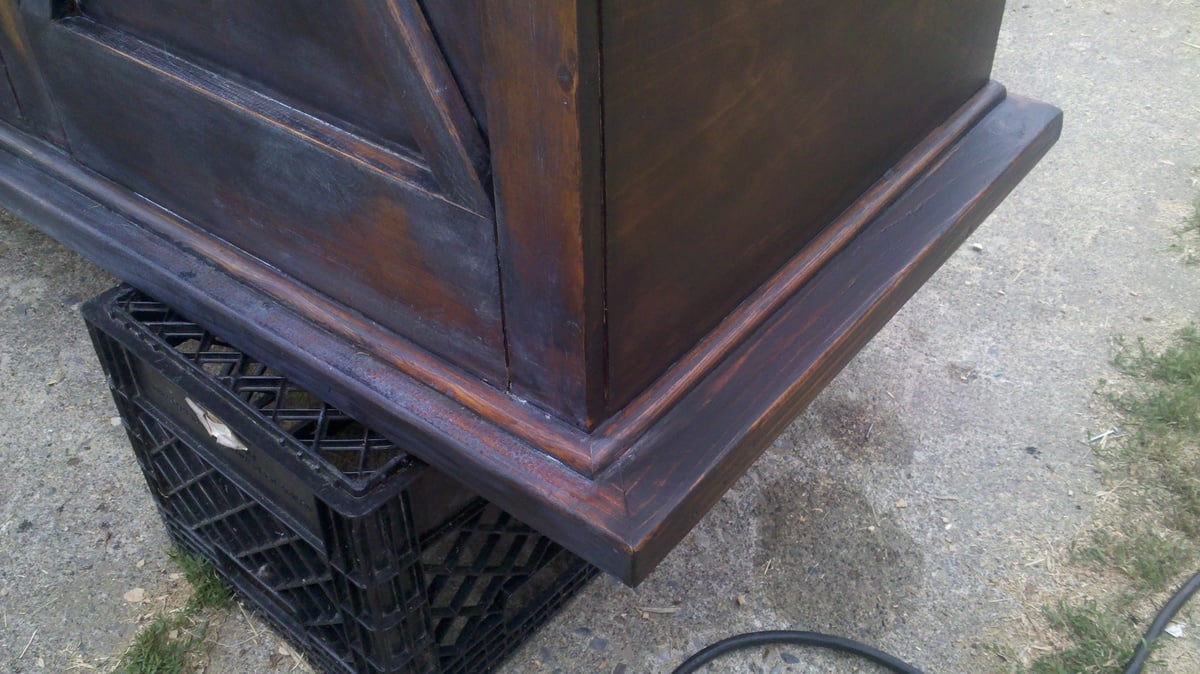
This is our first original design! We had a request for a custom bar/retail counter for my mother in law's children's re-sale store and this is what we came up with! After we found a ridiculously awesome deal on 3/4 inch hardwood plywood (the only down side was that it was already cut into 2ft by 4ft pieces) we quickly got to work. Using our trusty Kreg Jig we turned 4 pieces of plywood into one large piece to create the front of the bar. From there we attached 1x3s and 1x2s to cover any seams that were caused by the different plywood pieces.
The finish was kind of a struggle but I love how it turned out in the end. It looks like the piece was made 100 years ago and definitely has a lot of soul. I started with Early American but it made the wood too red. So from there, I layered on Kona stain, lime wax, and dark wax and this is how it turned out! Which was not exactly what I was going for, but I LOVE it!
We are so happy with how it turned out. It is being picked up by its new owner tonight and I'm soooo sorry to see it go. We're happy that the piece will be functioning beautifully in the store with TONS of storage in the back. We're very proud of this one.
oh and it cost us about $130 for all lumber and finish materials.


Thu, 08/15/2019 - 12:41
Wow!!! This is amazing! I'd love to draw up plans if you are open to that!
I used pocket holes to hide the screws. I made an ottoman out of the outdoor coffee table plans to my dimensions that can be used as a coffee table when we need it.


I made these modern Adirondack chairs for our business in Anchorage. GREAT and easy to build design by Ana - we upgraded the arms to tapered 2x6 and they're awesome!


Built this for my girlfriend's birthday present. Added a 1x4 backsplash and a 2x6 for the top shelf to give a little more shelf room instead of the 2x4 called for in the plan. Stained with Varathane "Vintage Aqua" color and then 3 coats of Helmsman Spar Urethane for outdoor durability. Set the whole thing on caster wheels (not pictured) so she can move around the deck as needed.
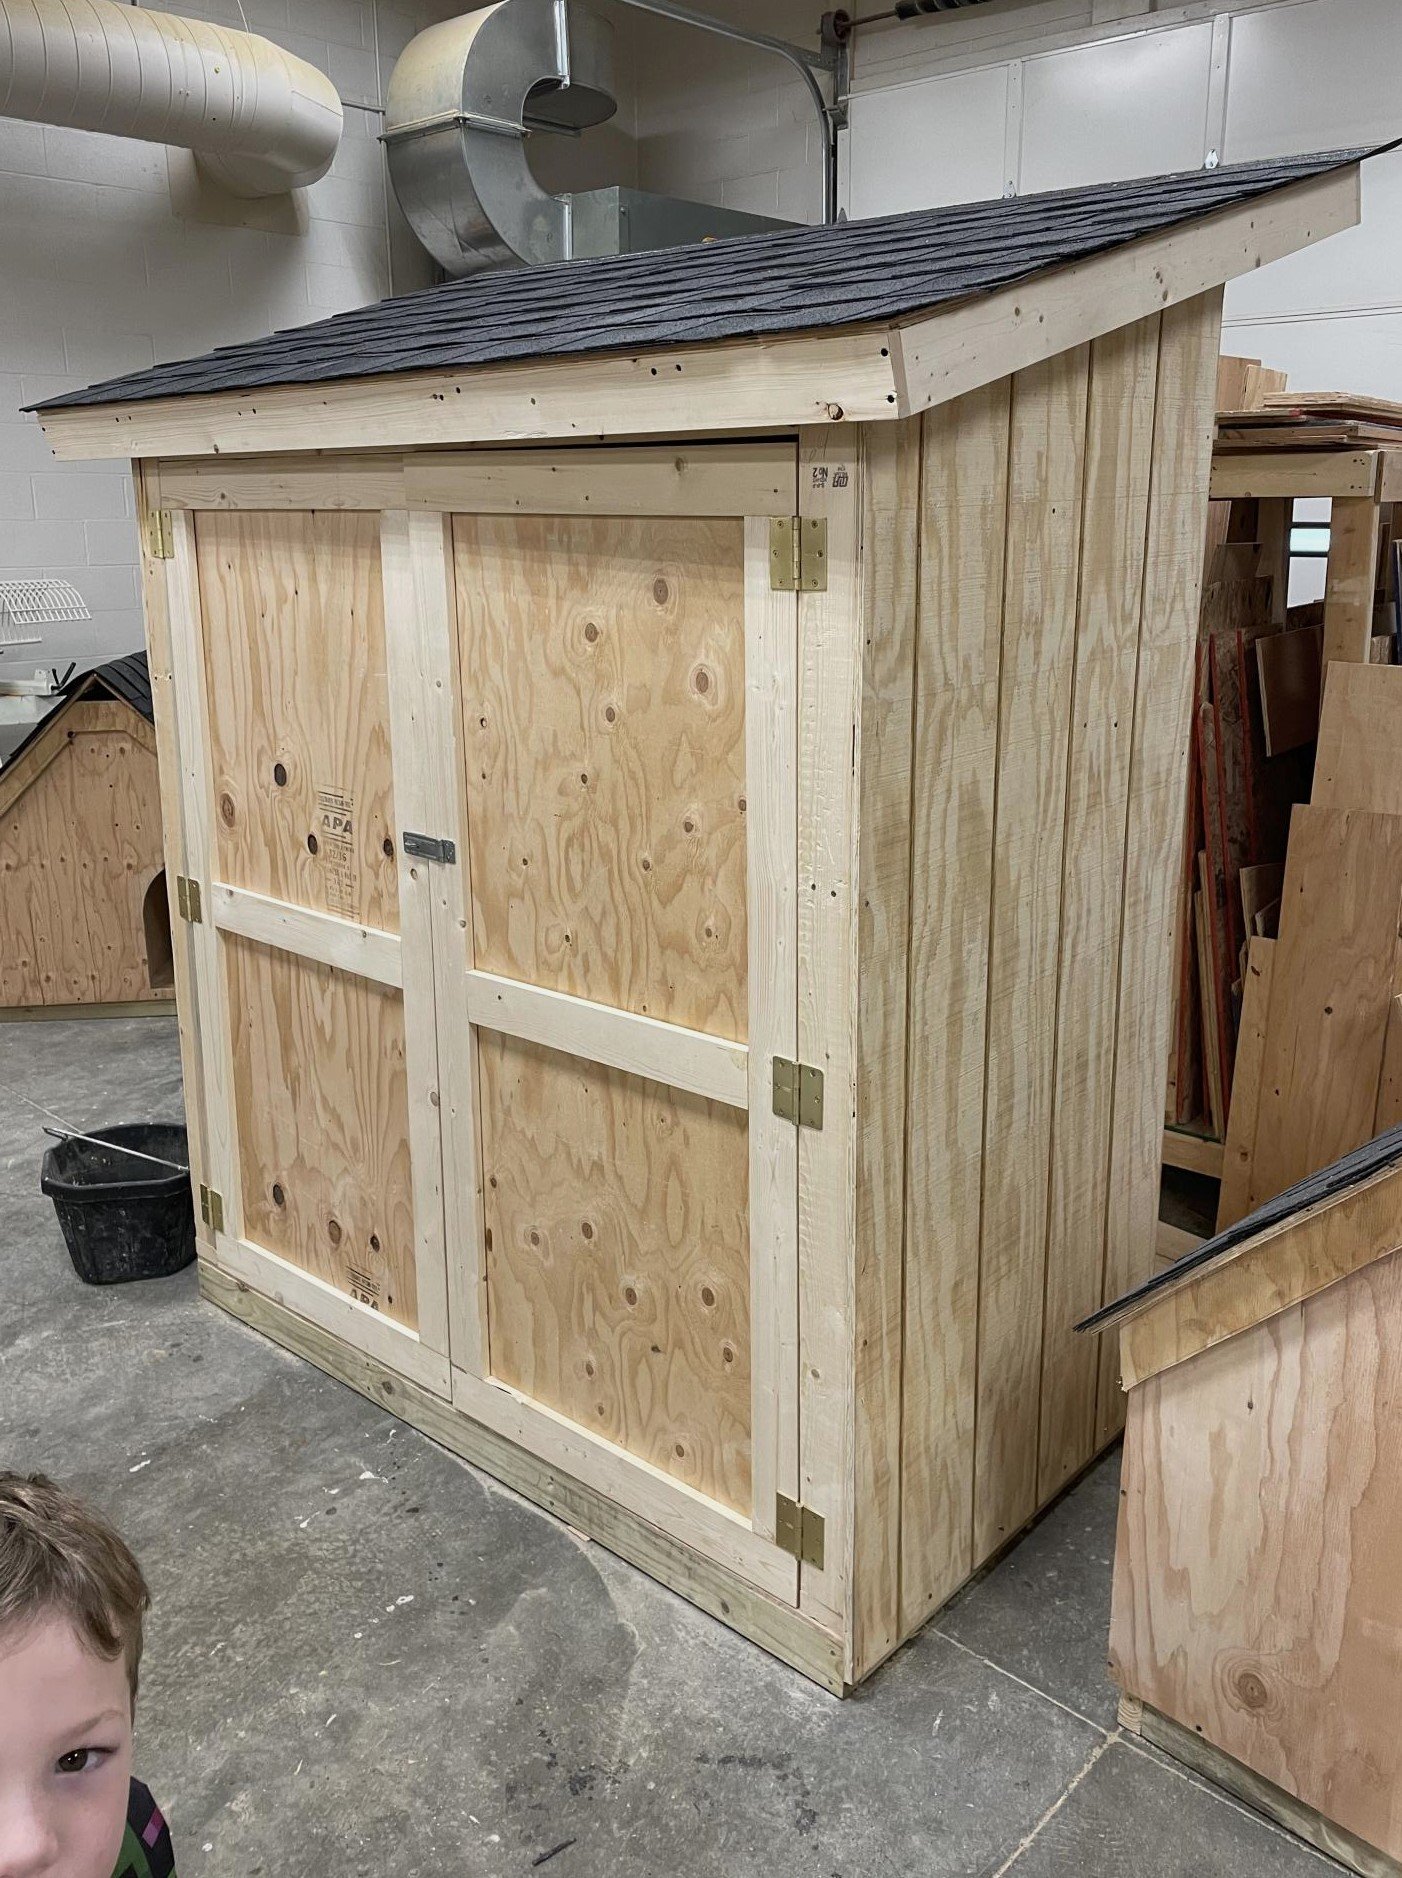
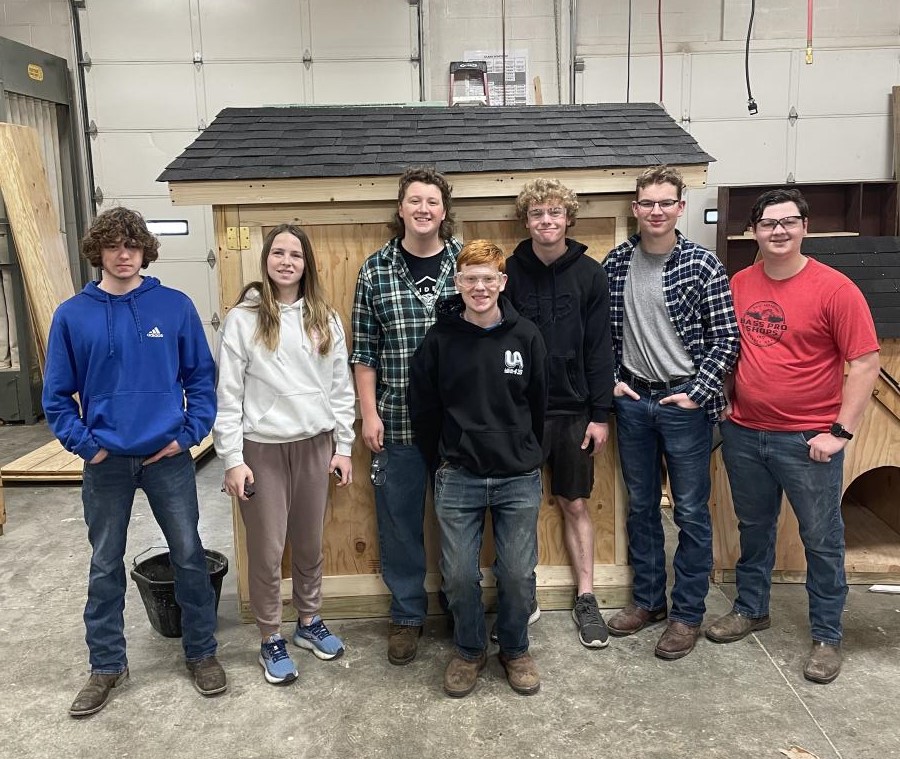
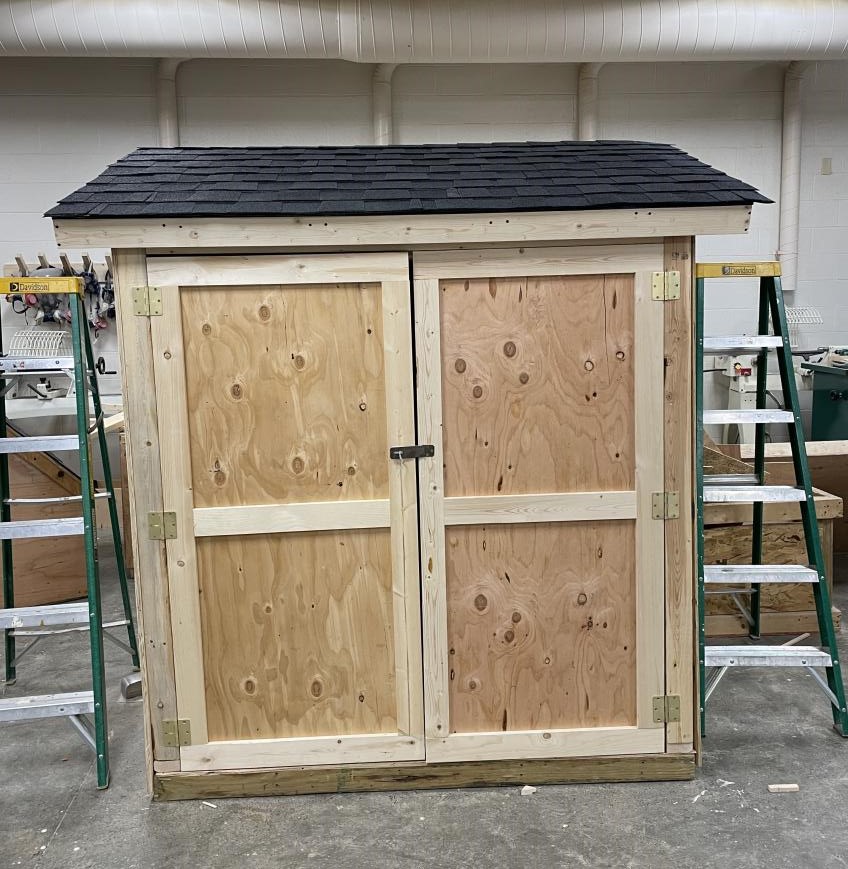
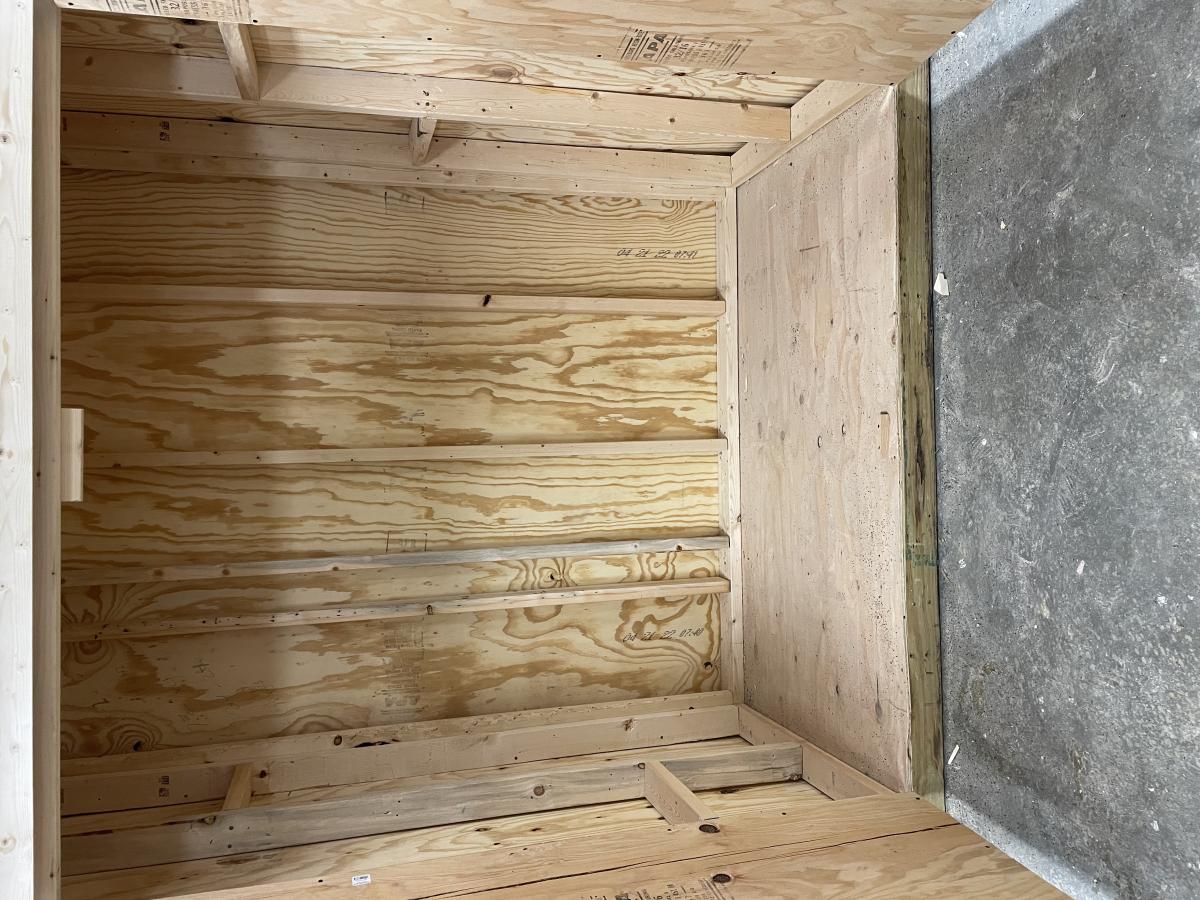
I’m a first year teacher of construction class at Waterloo High School in Illinois. We recently used your Small Cedar shed instructions with some modifications for a class project. It’s a bear getting cedar right now, so we used T1-11 for the outside and 2x4 for the frame.
Sat, 03/25/2023 - 09:14
Very fun and job well done! Thank you for sharing.
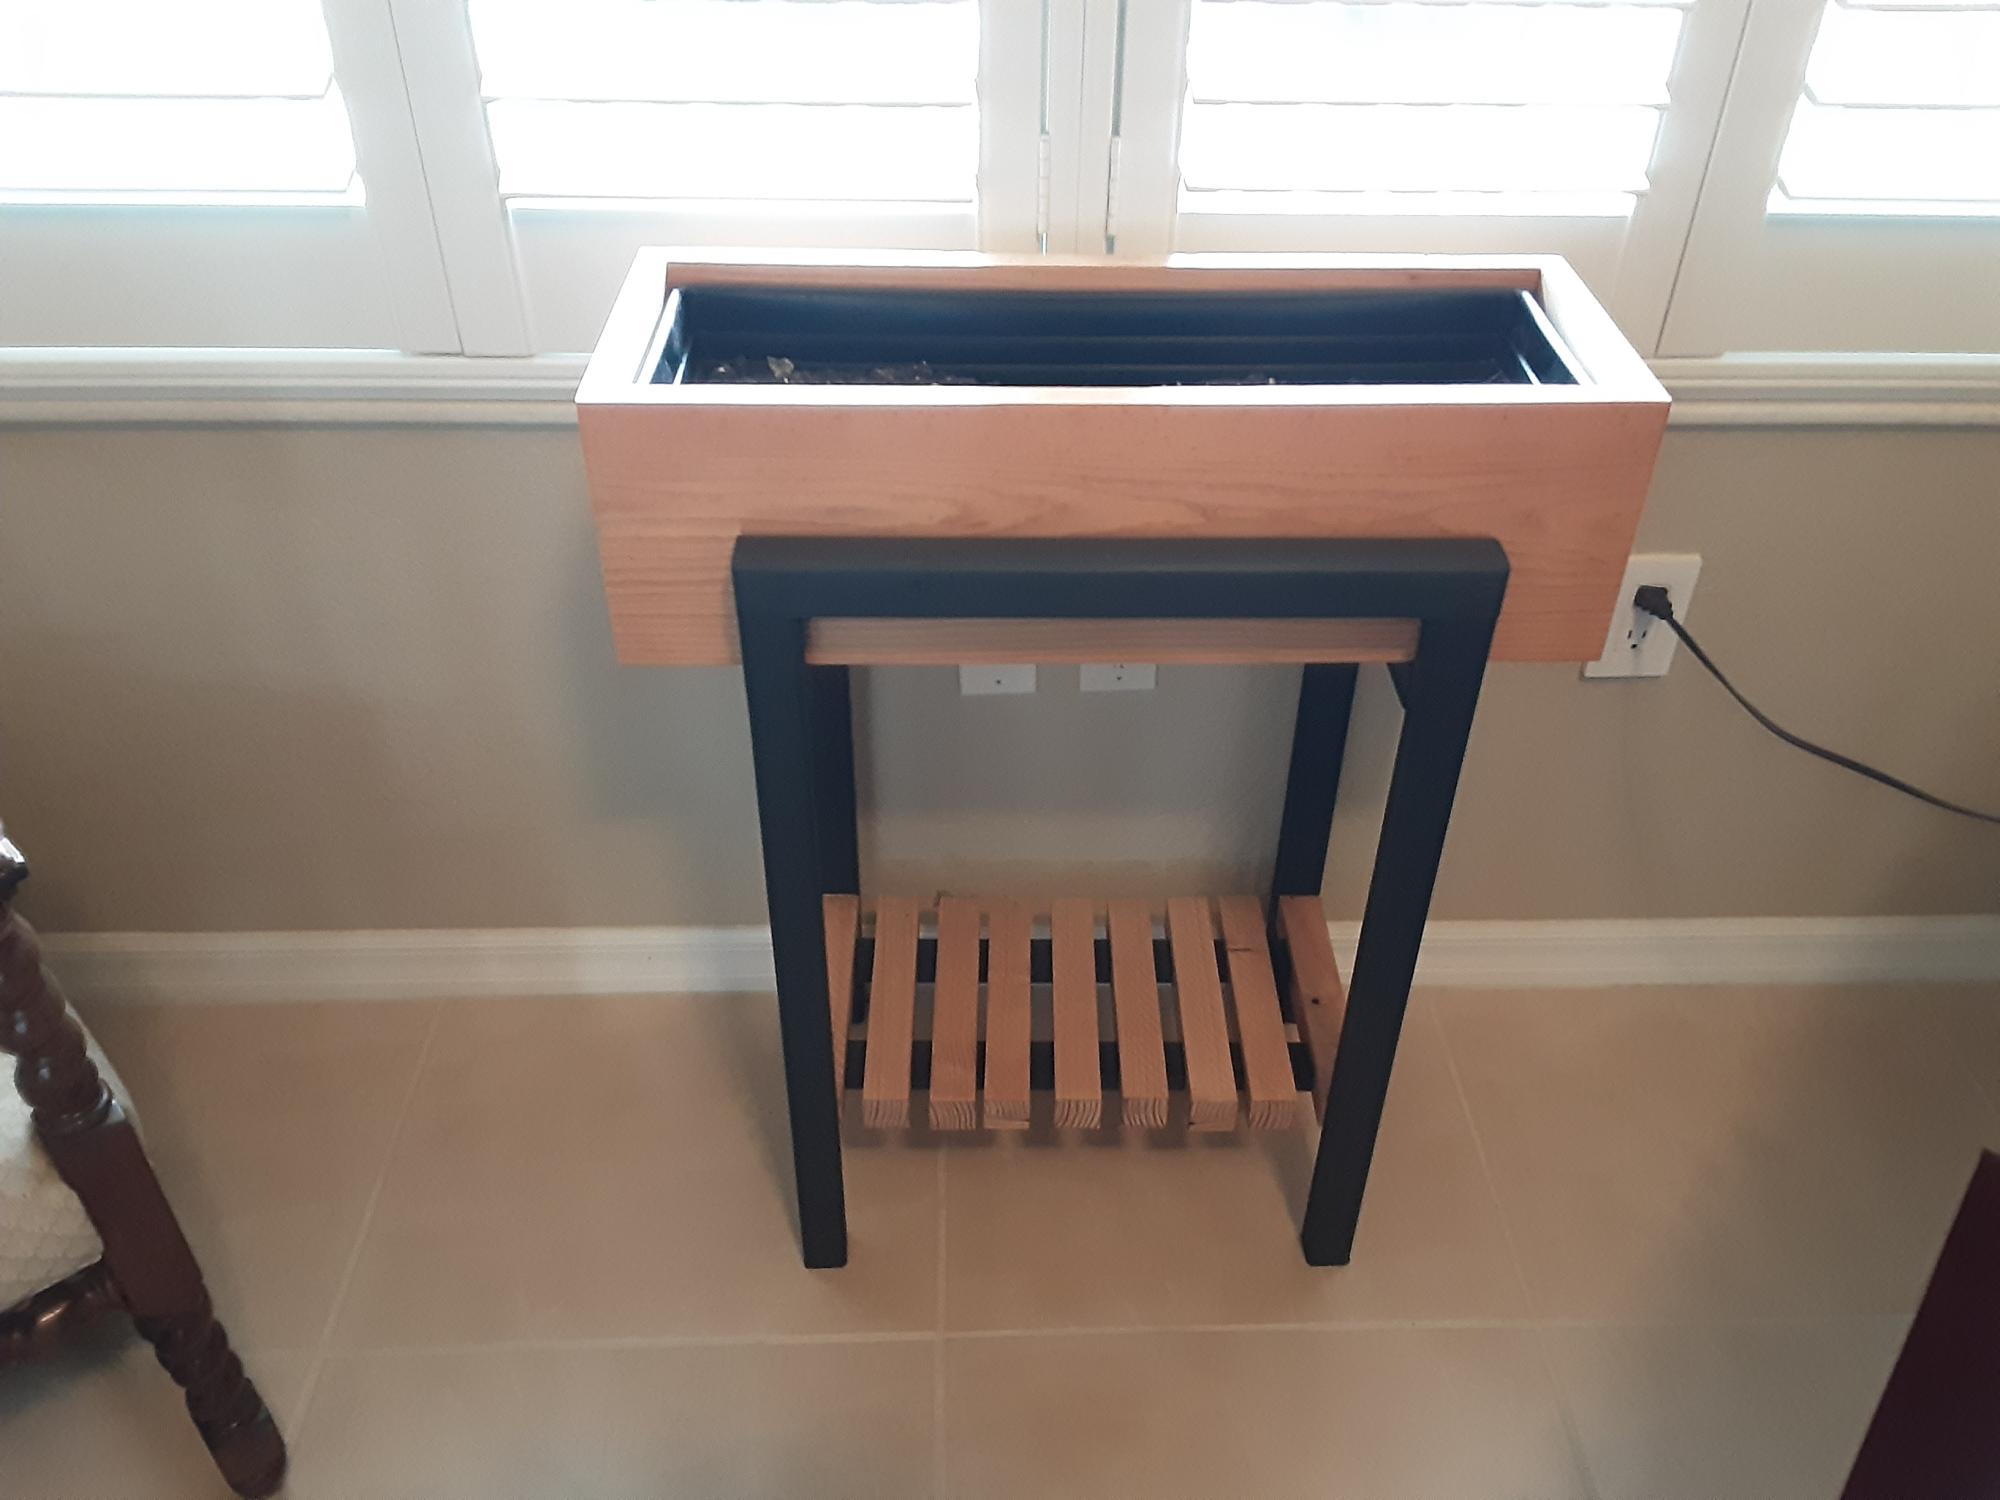
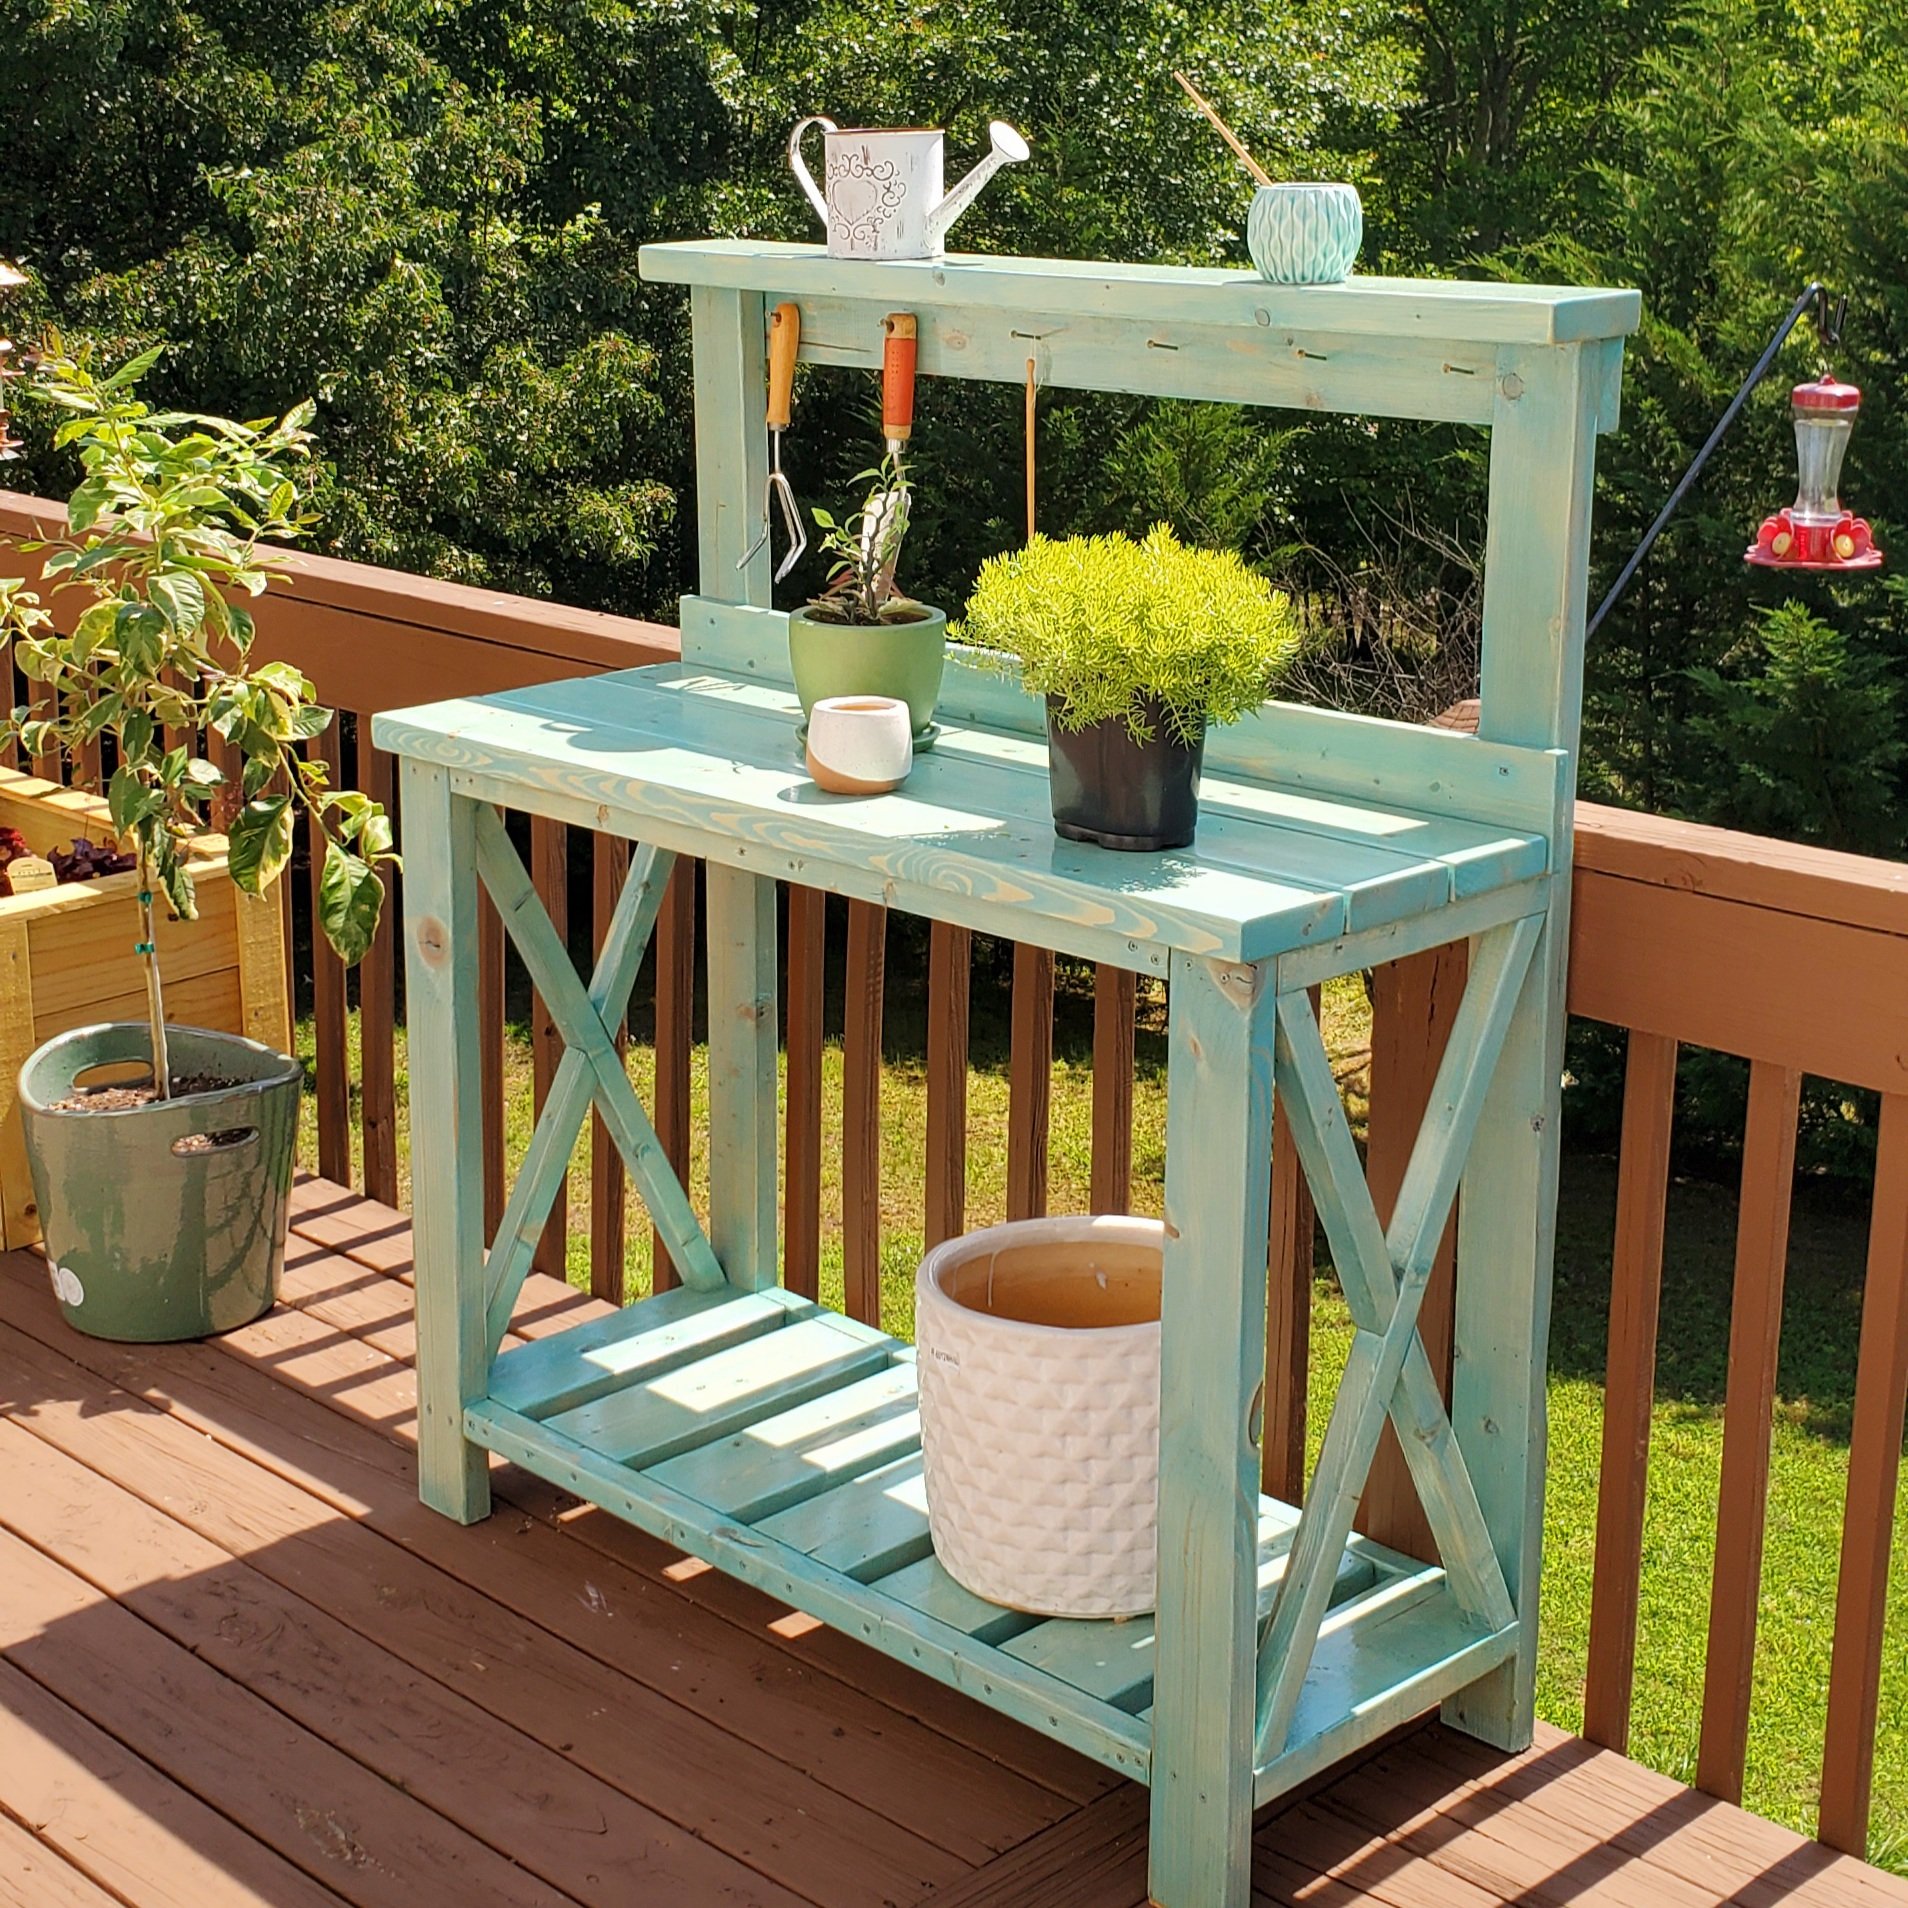
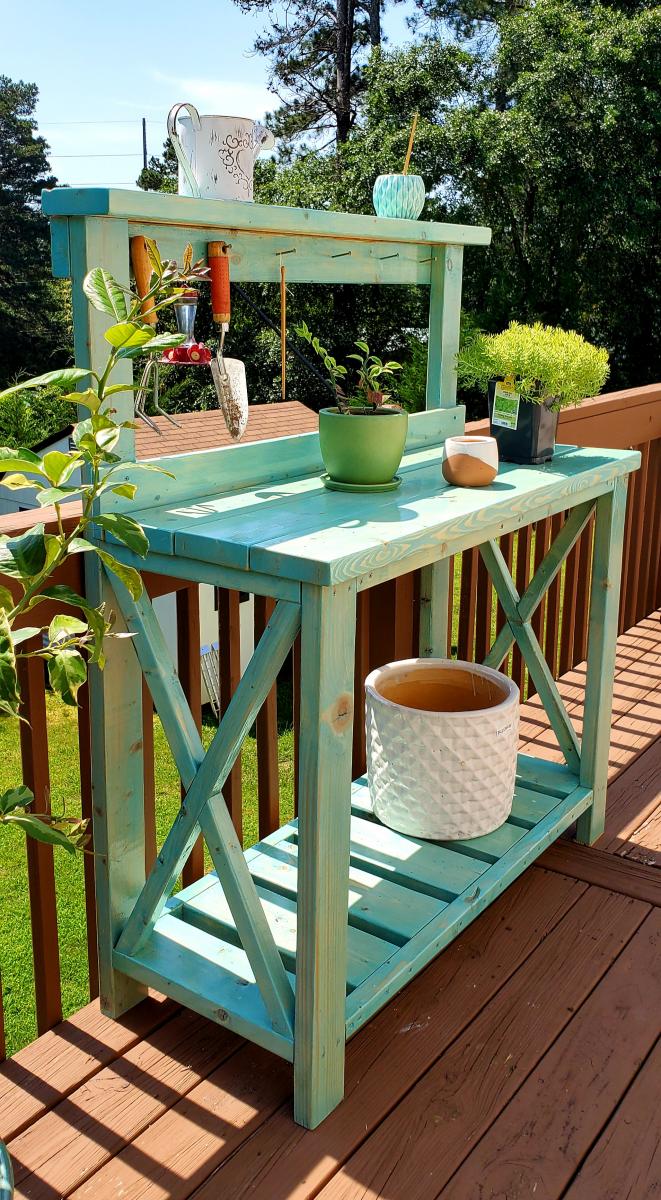
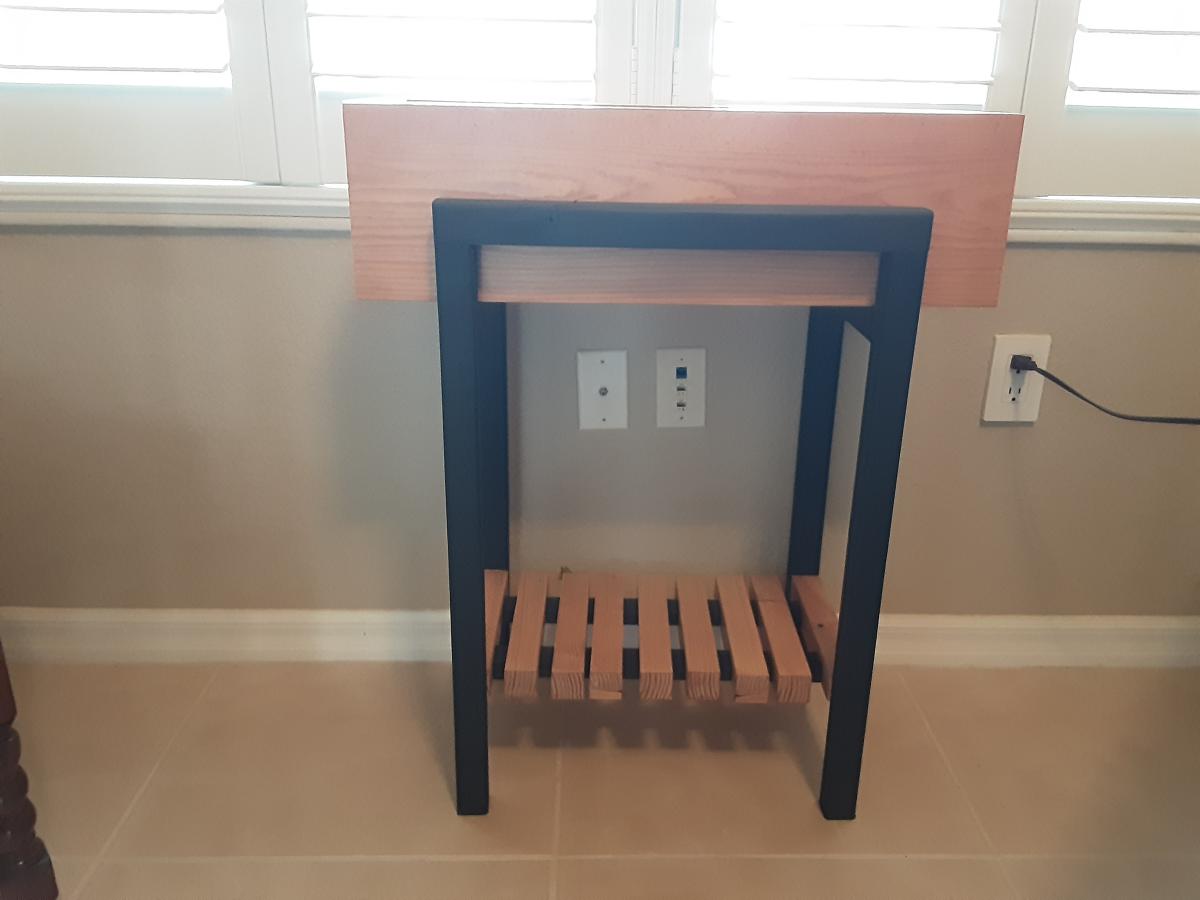
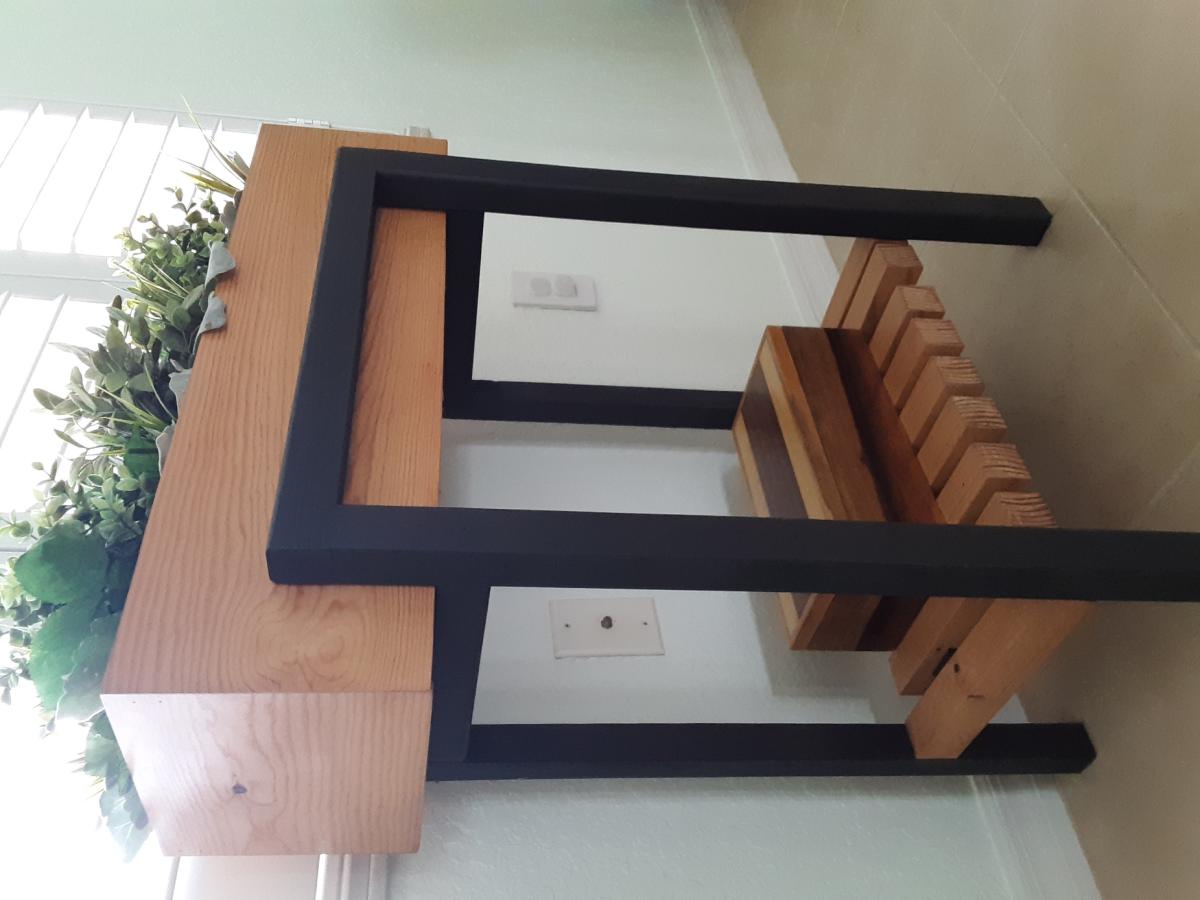
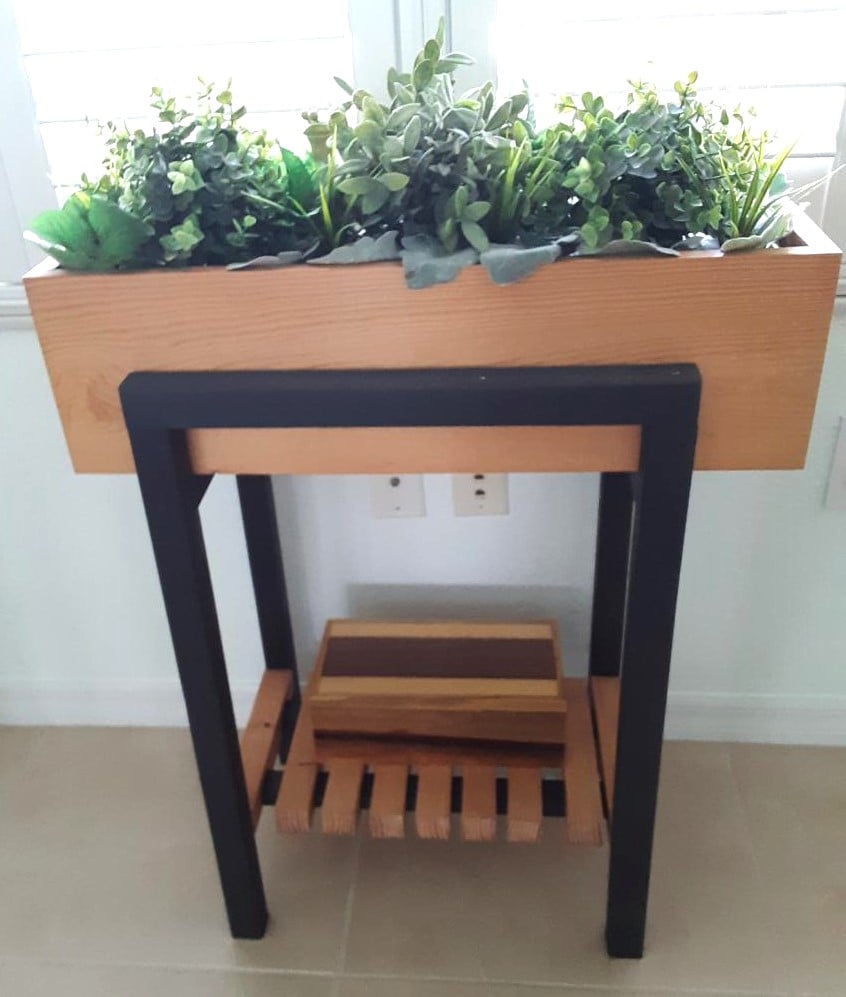
Created the stand for the raised planter using 2X2 assembled using dowels. Painted the stand mixing black with a bit of white to simulate metal. The actually plastic window box fits within a wood open box with mitered corners fir clean log. Bottom of the stand provides a shelf using (9) 2X2s with a dado placed on either end to fit on the runners of the stand.
Mon, 05/01/2023 - 08:24
It looks super high quality, love your take! Thanks for sharing.
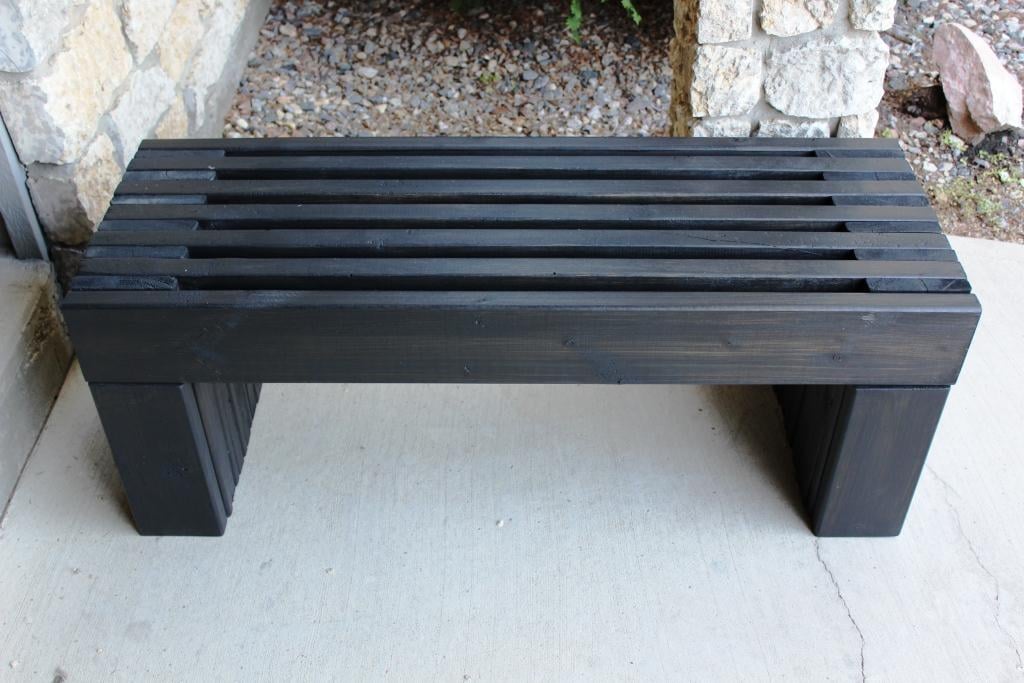
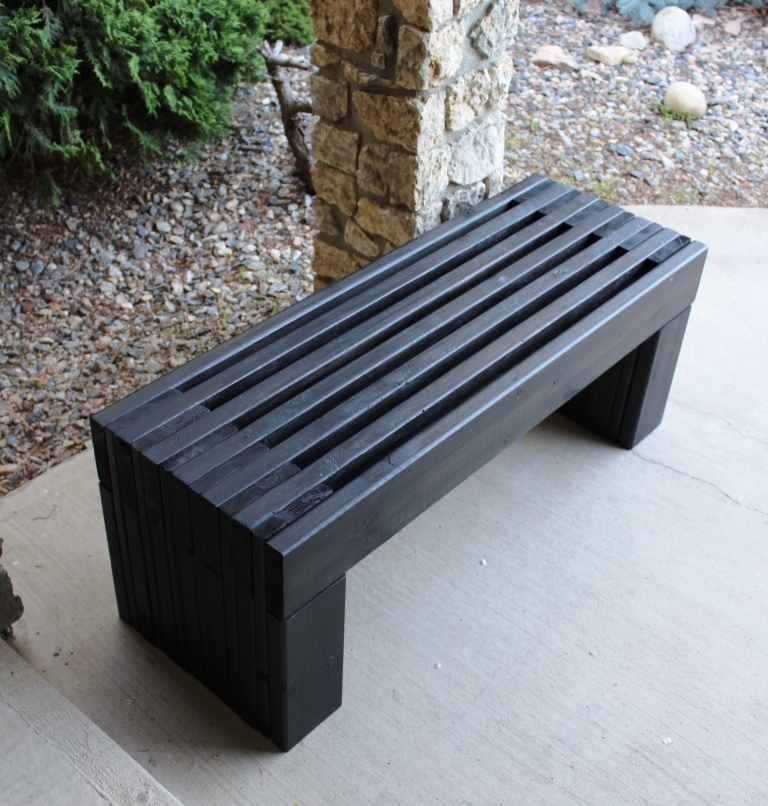
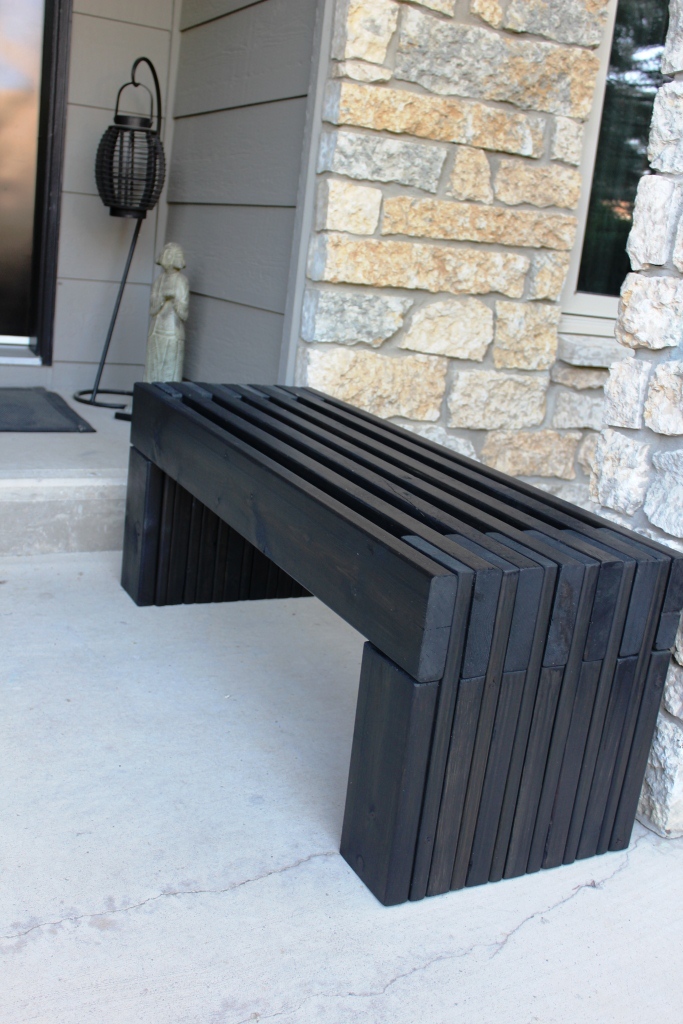
We wanted an outdoor bench for our front entrance way, this one is just what we were looking for! Thank you for the plans.
Wed, 05/04/2016 - 10:01
I am really a novice. The plans say that the 1x4's should be 18-1/2" high? But the measurement of the vertical legs are 14", and the horizontal piece is 4" high, which adds to 18". It all looks flush in the photo. Could you explain what I am missing? Thank you so much!
Wed, 05/04/2016 - 10:01
I am really a novice. The plans say that the 1x4's should be 18-1/2" high? But the measurement of the vertical legs are 14", and the horizontal piece is 4" high, which adds to 18". It all looks flush in the photo. Could you explain what I am missing? Thank you so much!

In reply to quesion by beardjulie
Wed, 05/04/2016 - 11:30
So from what i see in the plans Each 1x4 board is to be cut at 18" and the 2x4 is to be cut at 14-1/2". Cutting the 2x4 at 14-1/2" will insure the 1x4 and 2x4 are fluish for the end product. It doesnt seem to add up given the demensional names of the lumber hahaha however the actual width of a 2x4 (the one the will be going horizontal) is acutally 3-1/2". so then you cut you 2x4 leg piece at 14-1/2" and then lay the horizontal 2x4 on top the total height will be 18" and should be flush with your 1x4 that is cut at 18"

I modified this plan so I could have 4 total work areas. Total Size: 48" x 96"

Tue, 09/08/2020 - 19:42
Is there anyway you can share these plans with me!? I drew out some plans for an identical table but I think my cuts may be off! It would be so helpful.
Fri, 11/06/2020 - 12:47
Is there a full update post with instructions for the table shown?
Tue, 12/20/2022 - 22:03
LOVE this! Just what I'm looking for! Can you tell me what you used for the top?
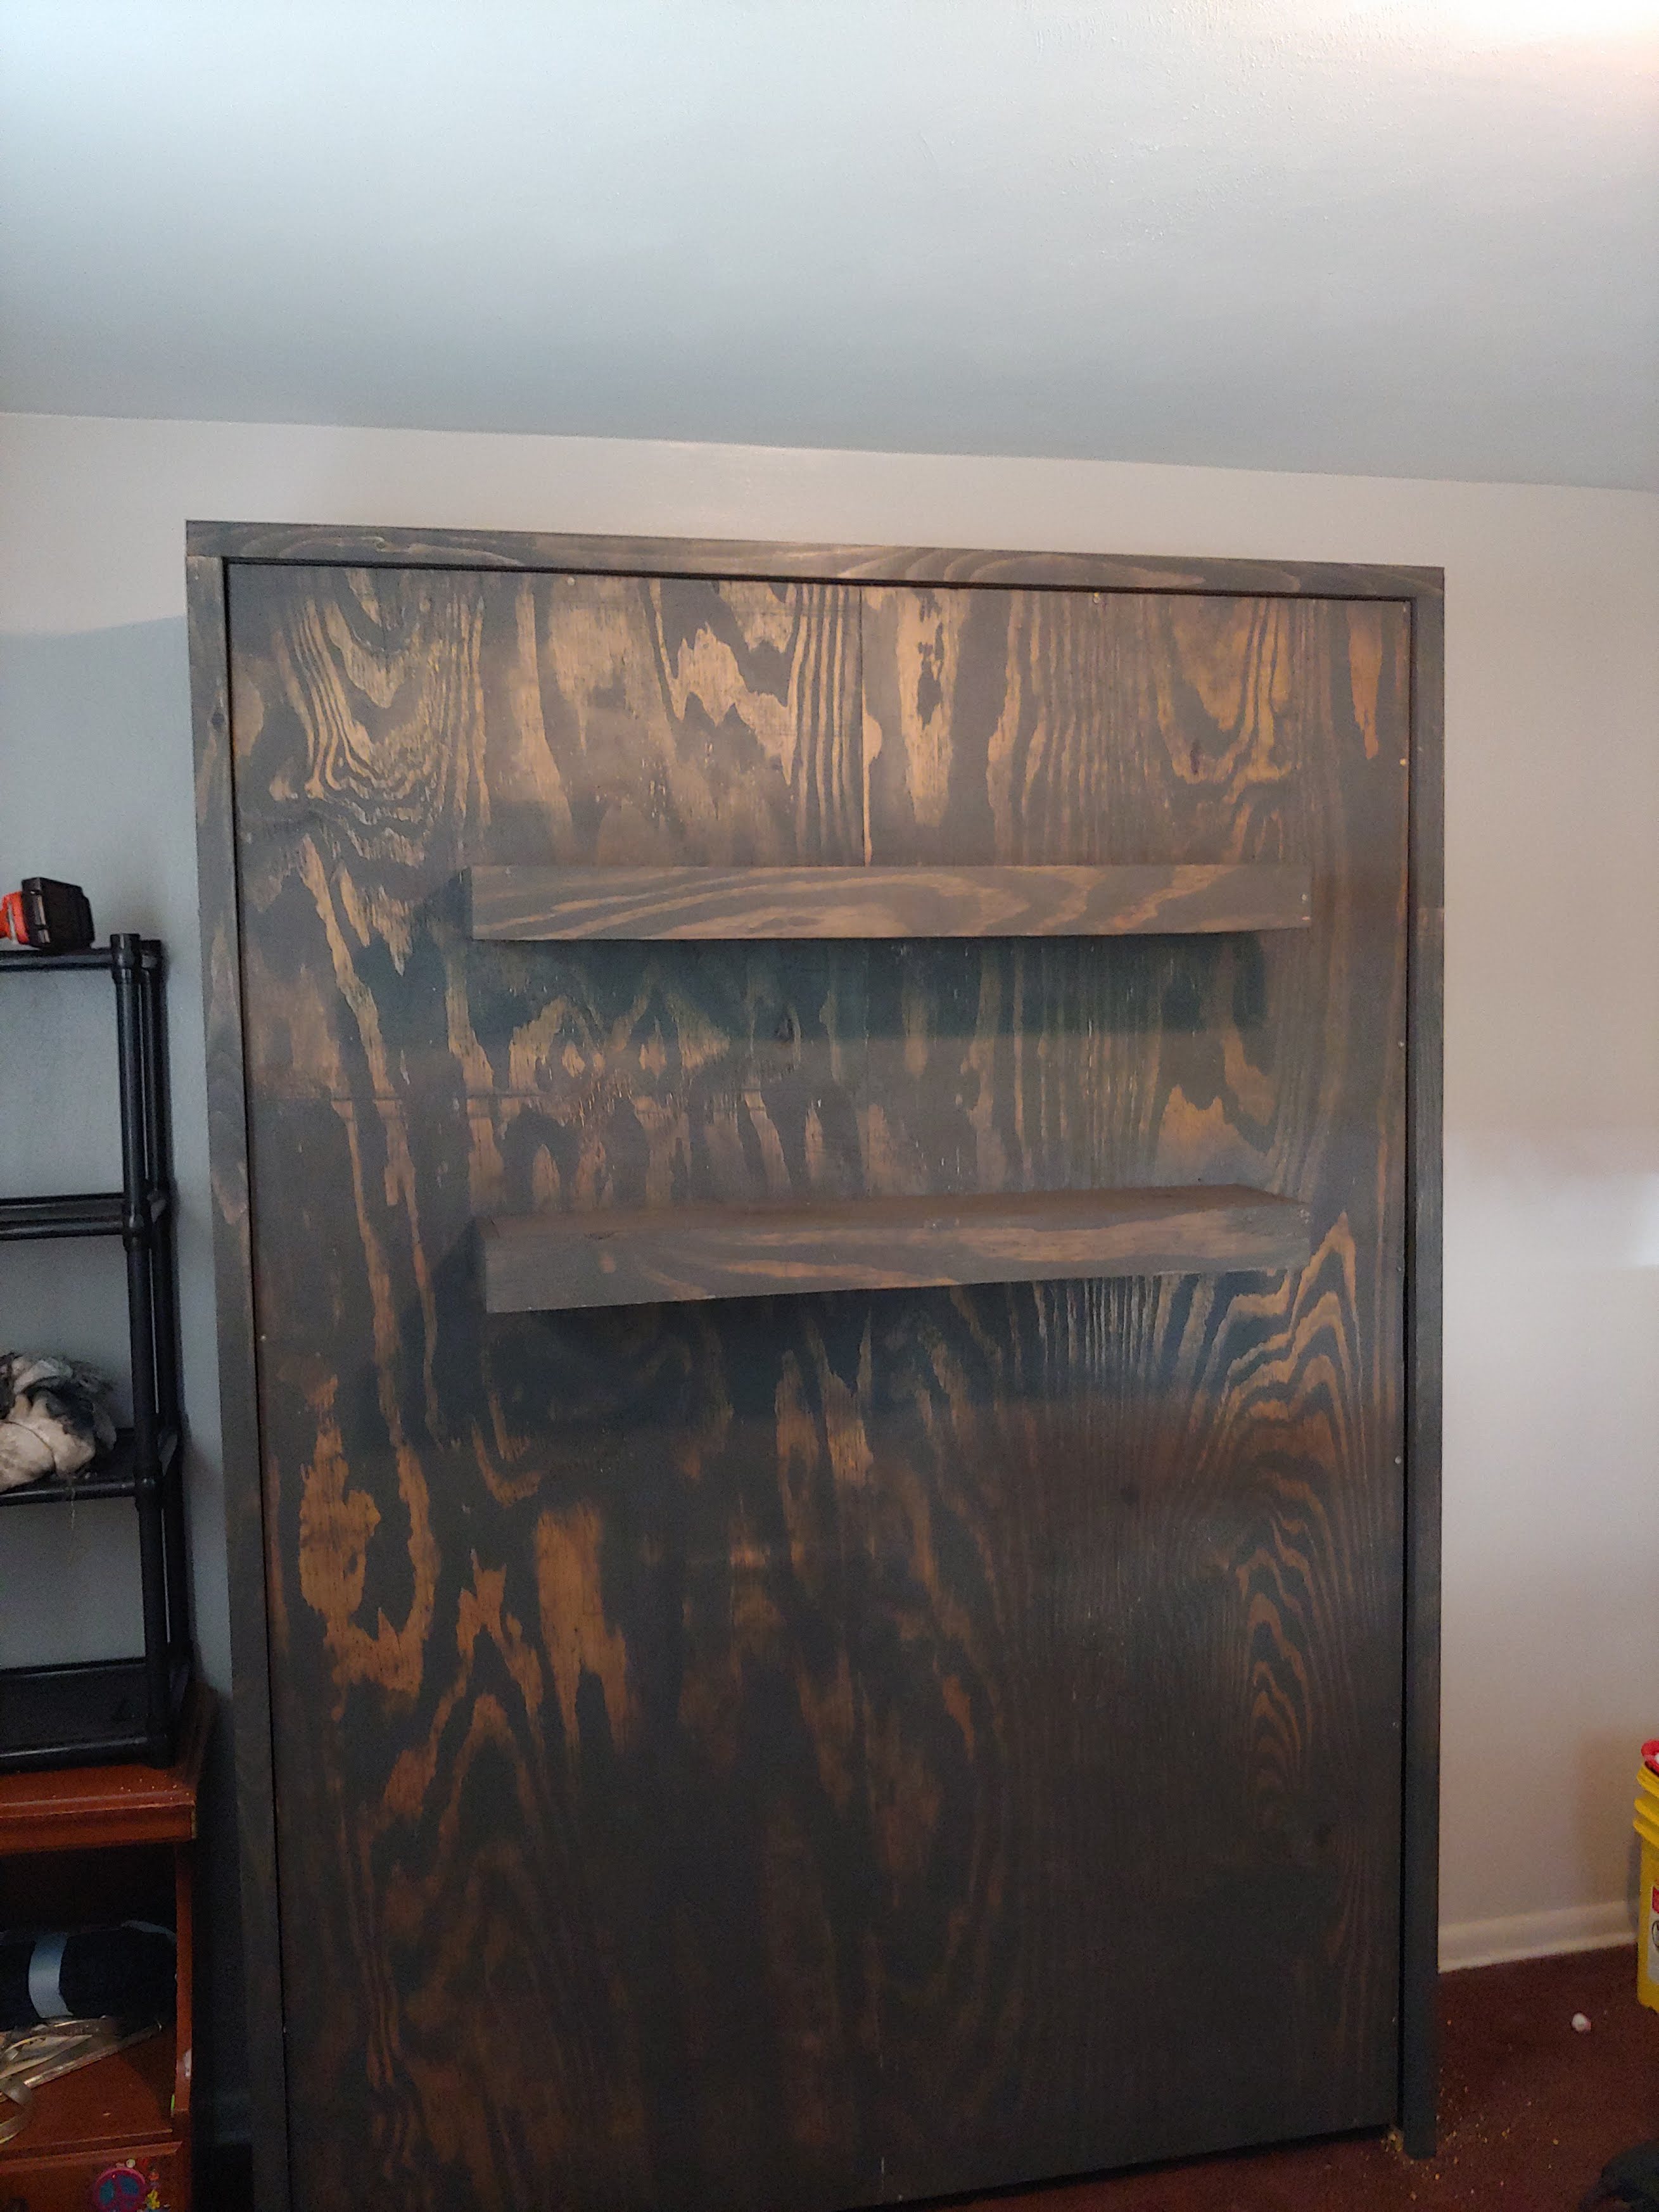
So I've always wanted to build a Murphy bed. And by always I mean since I first came across plans here that made it look so simple. It ended up taking me a while to do because my job has me working 6 days a week so I was only able to work on it for short chunks of time.
I ended up utilizing a few different plans and mashed them together to build a full size murphy bed. The shelves are the support legs when the bed is down. The "hinge" mechanism are heavy duty 360 degree seat swivels.
All-in-all it turned out WAY better than I expected with only some minor issues throughout the construction process.
Next up is a twin xl Murphy bed with a murphy desk attachment that will serve as a craft table when up.
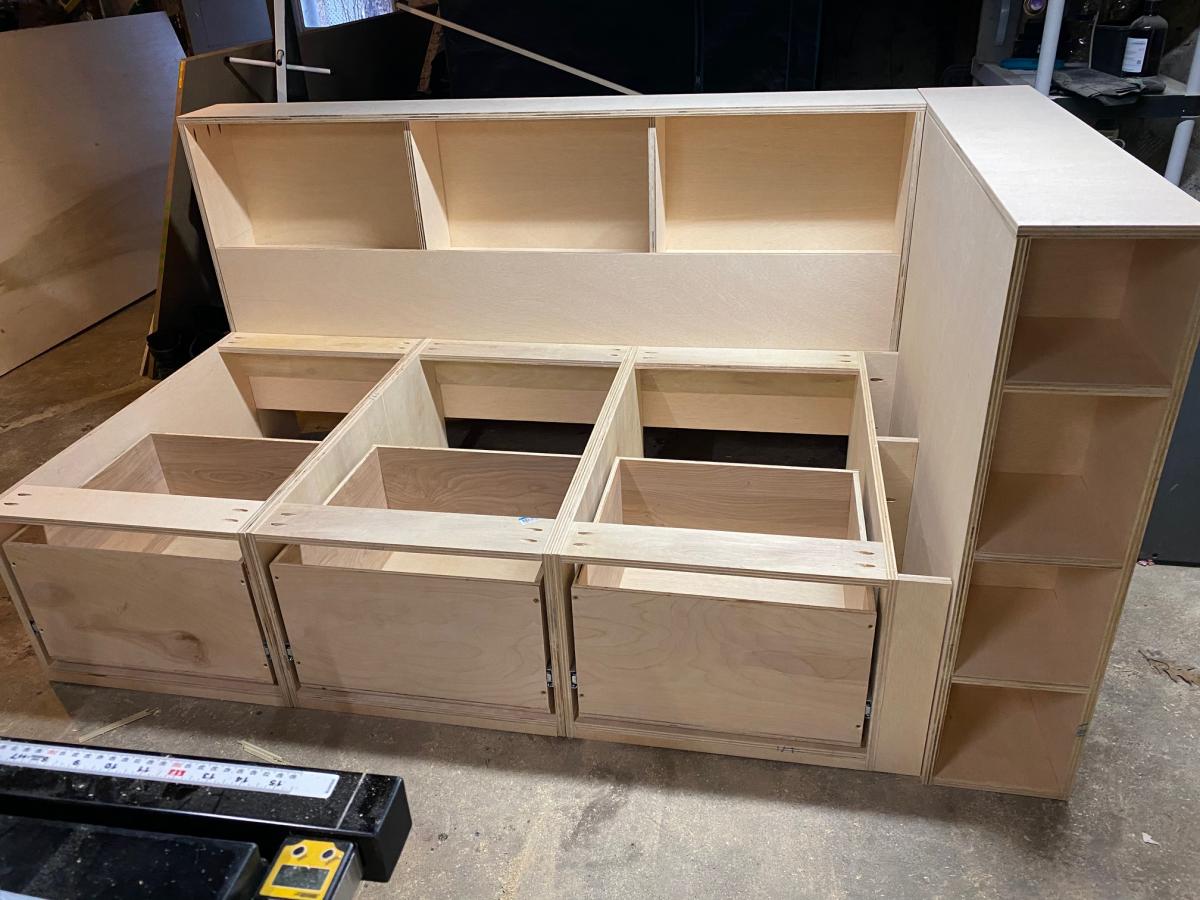
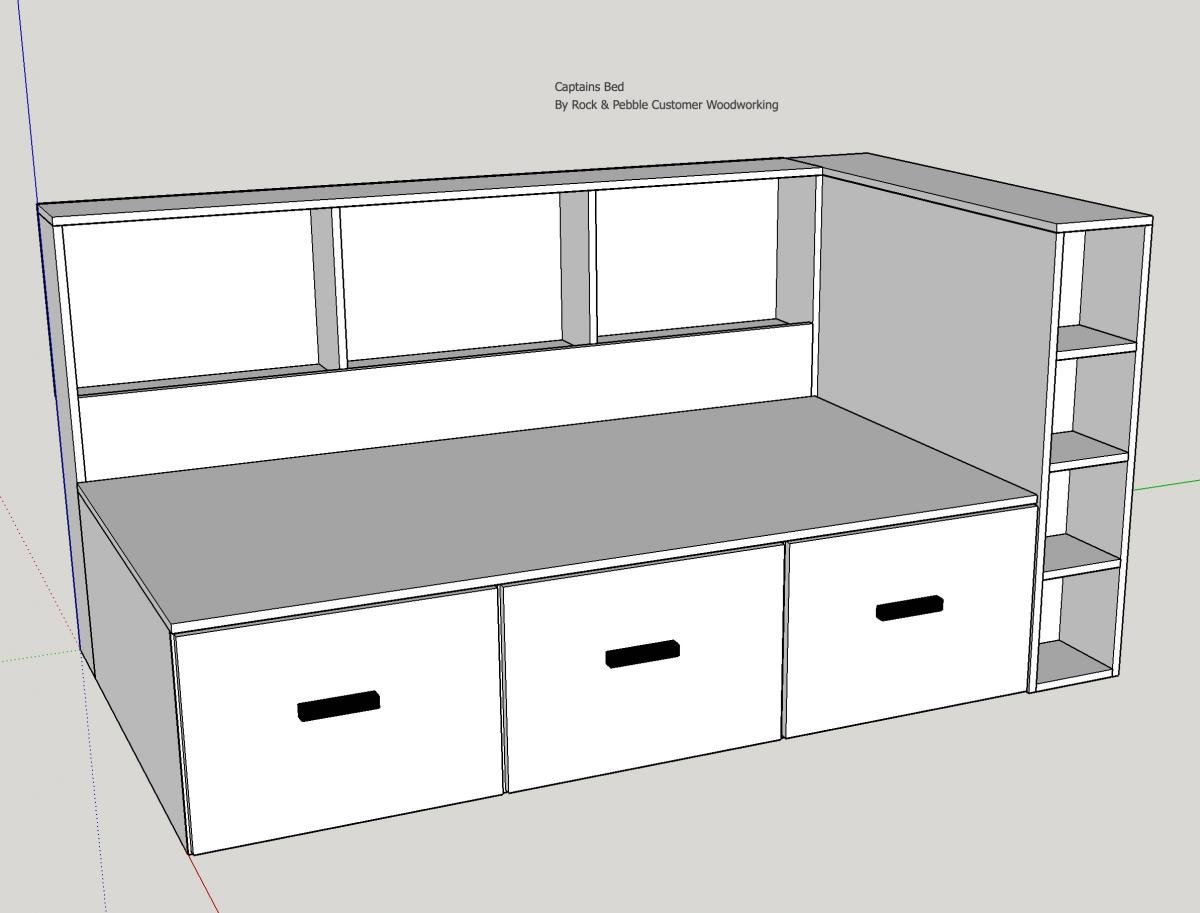
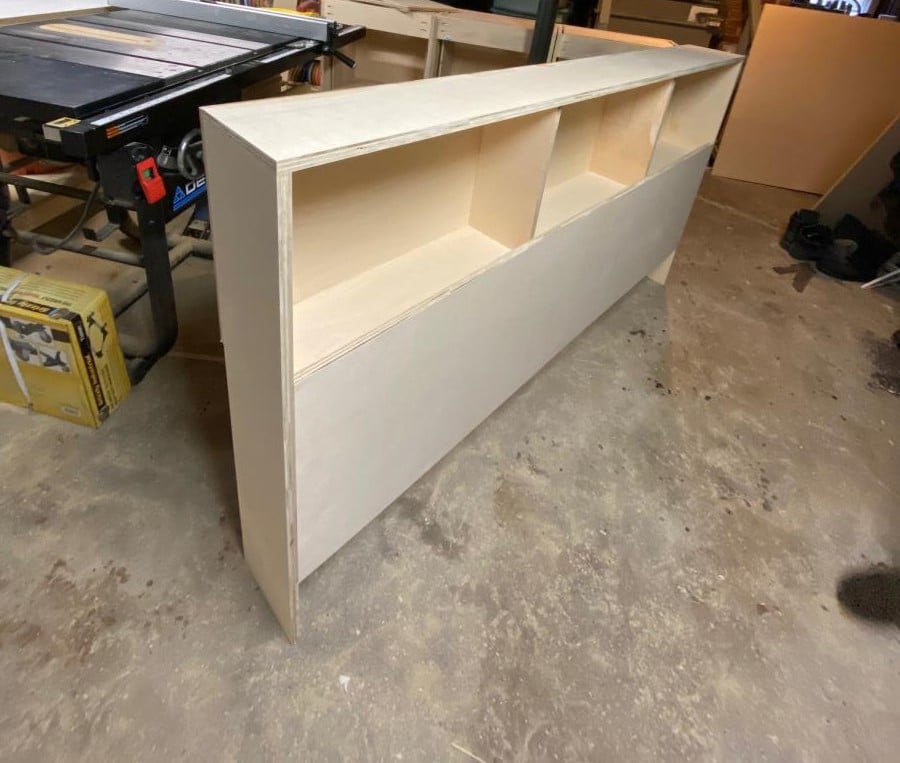
So this was a really fun project from start to finish, I wanted a storage bed with a place for my son to showcase his Super Hero collection!


Used part of the Ultimate Roll Away Workbench with Miter Saw Stand to just build one of the roll-away workbenches to work with my miter saw and table saw. I'm very happy with how it turned out.


Sun, 04/28/2024 - 12:57
Hi, I am planning on getingt a dewalt 10 inch table saw as well. I am wondering what you did to adapt it for extending the rails with the fence? Curious if there were more photos. I would very much like to adapt my station to be similar to yours. Thanks. .

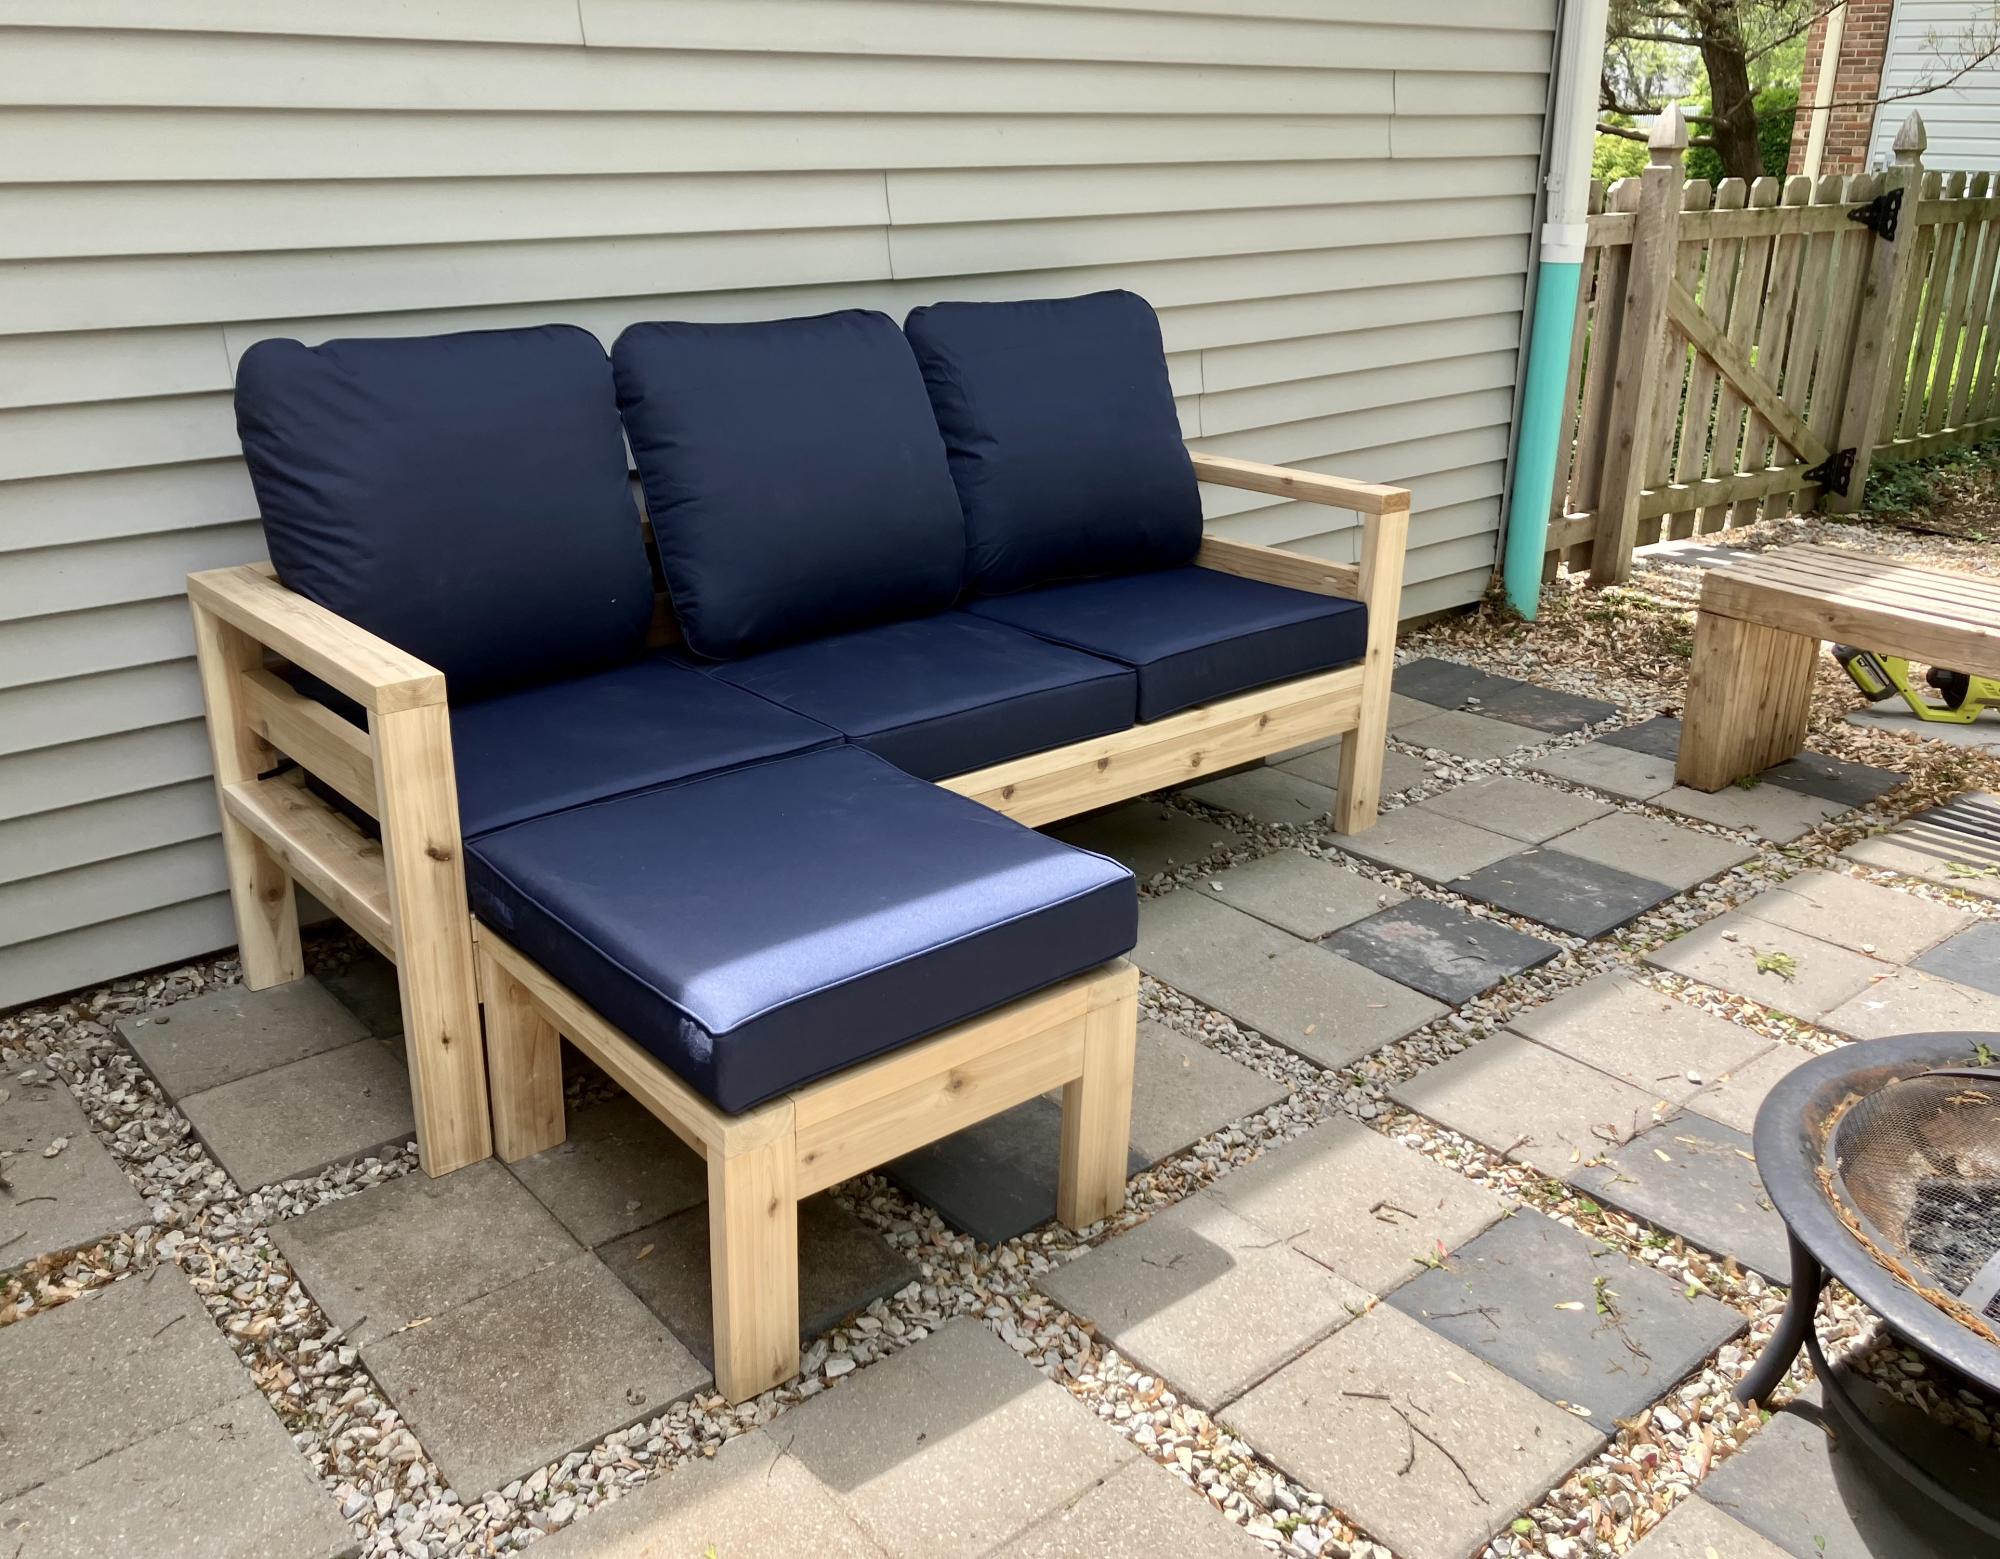
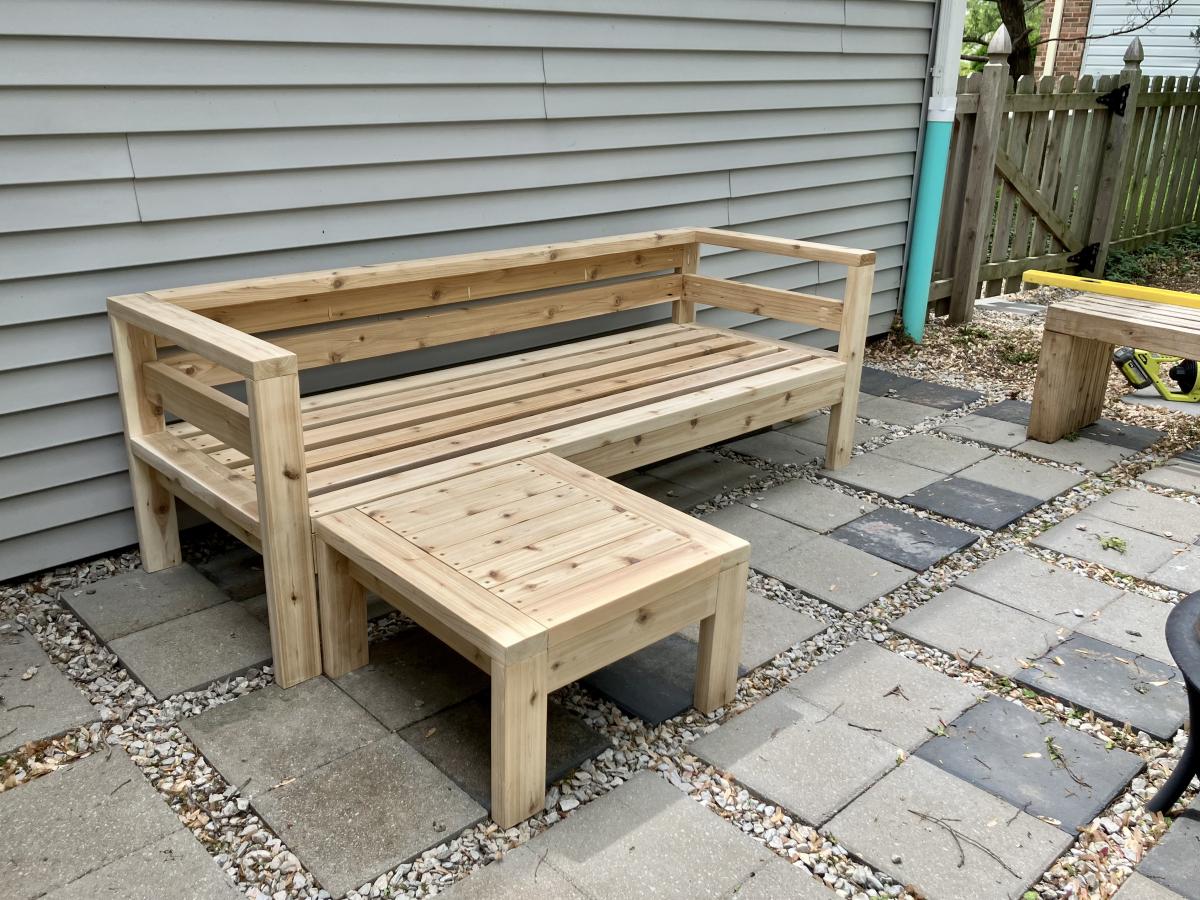
Made the outdoor sectional. The coffee table was made out of left over pieces!
Wed, 10/02/2019 - 09:54
So smart to make the coffee table out of the spare pieces.
Looks amazing!
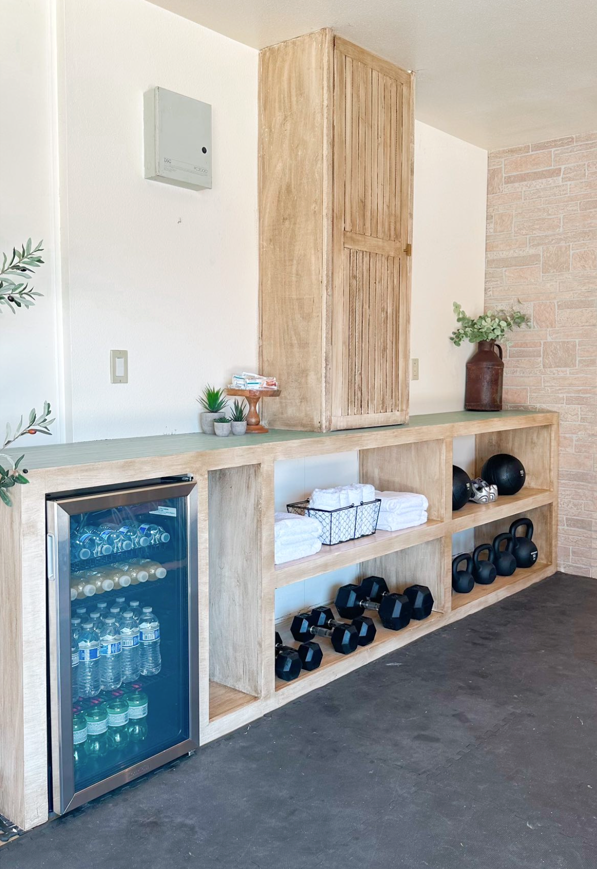
Fabulous home gym by Nailgun Nelly!
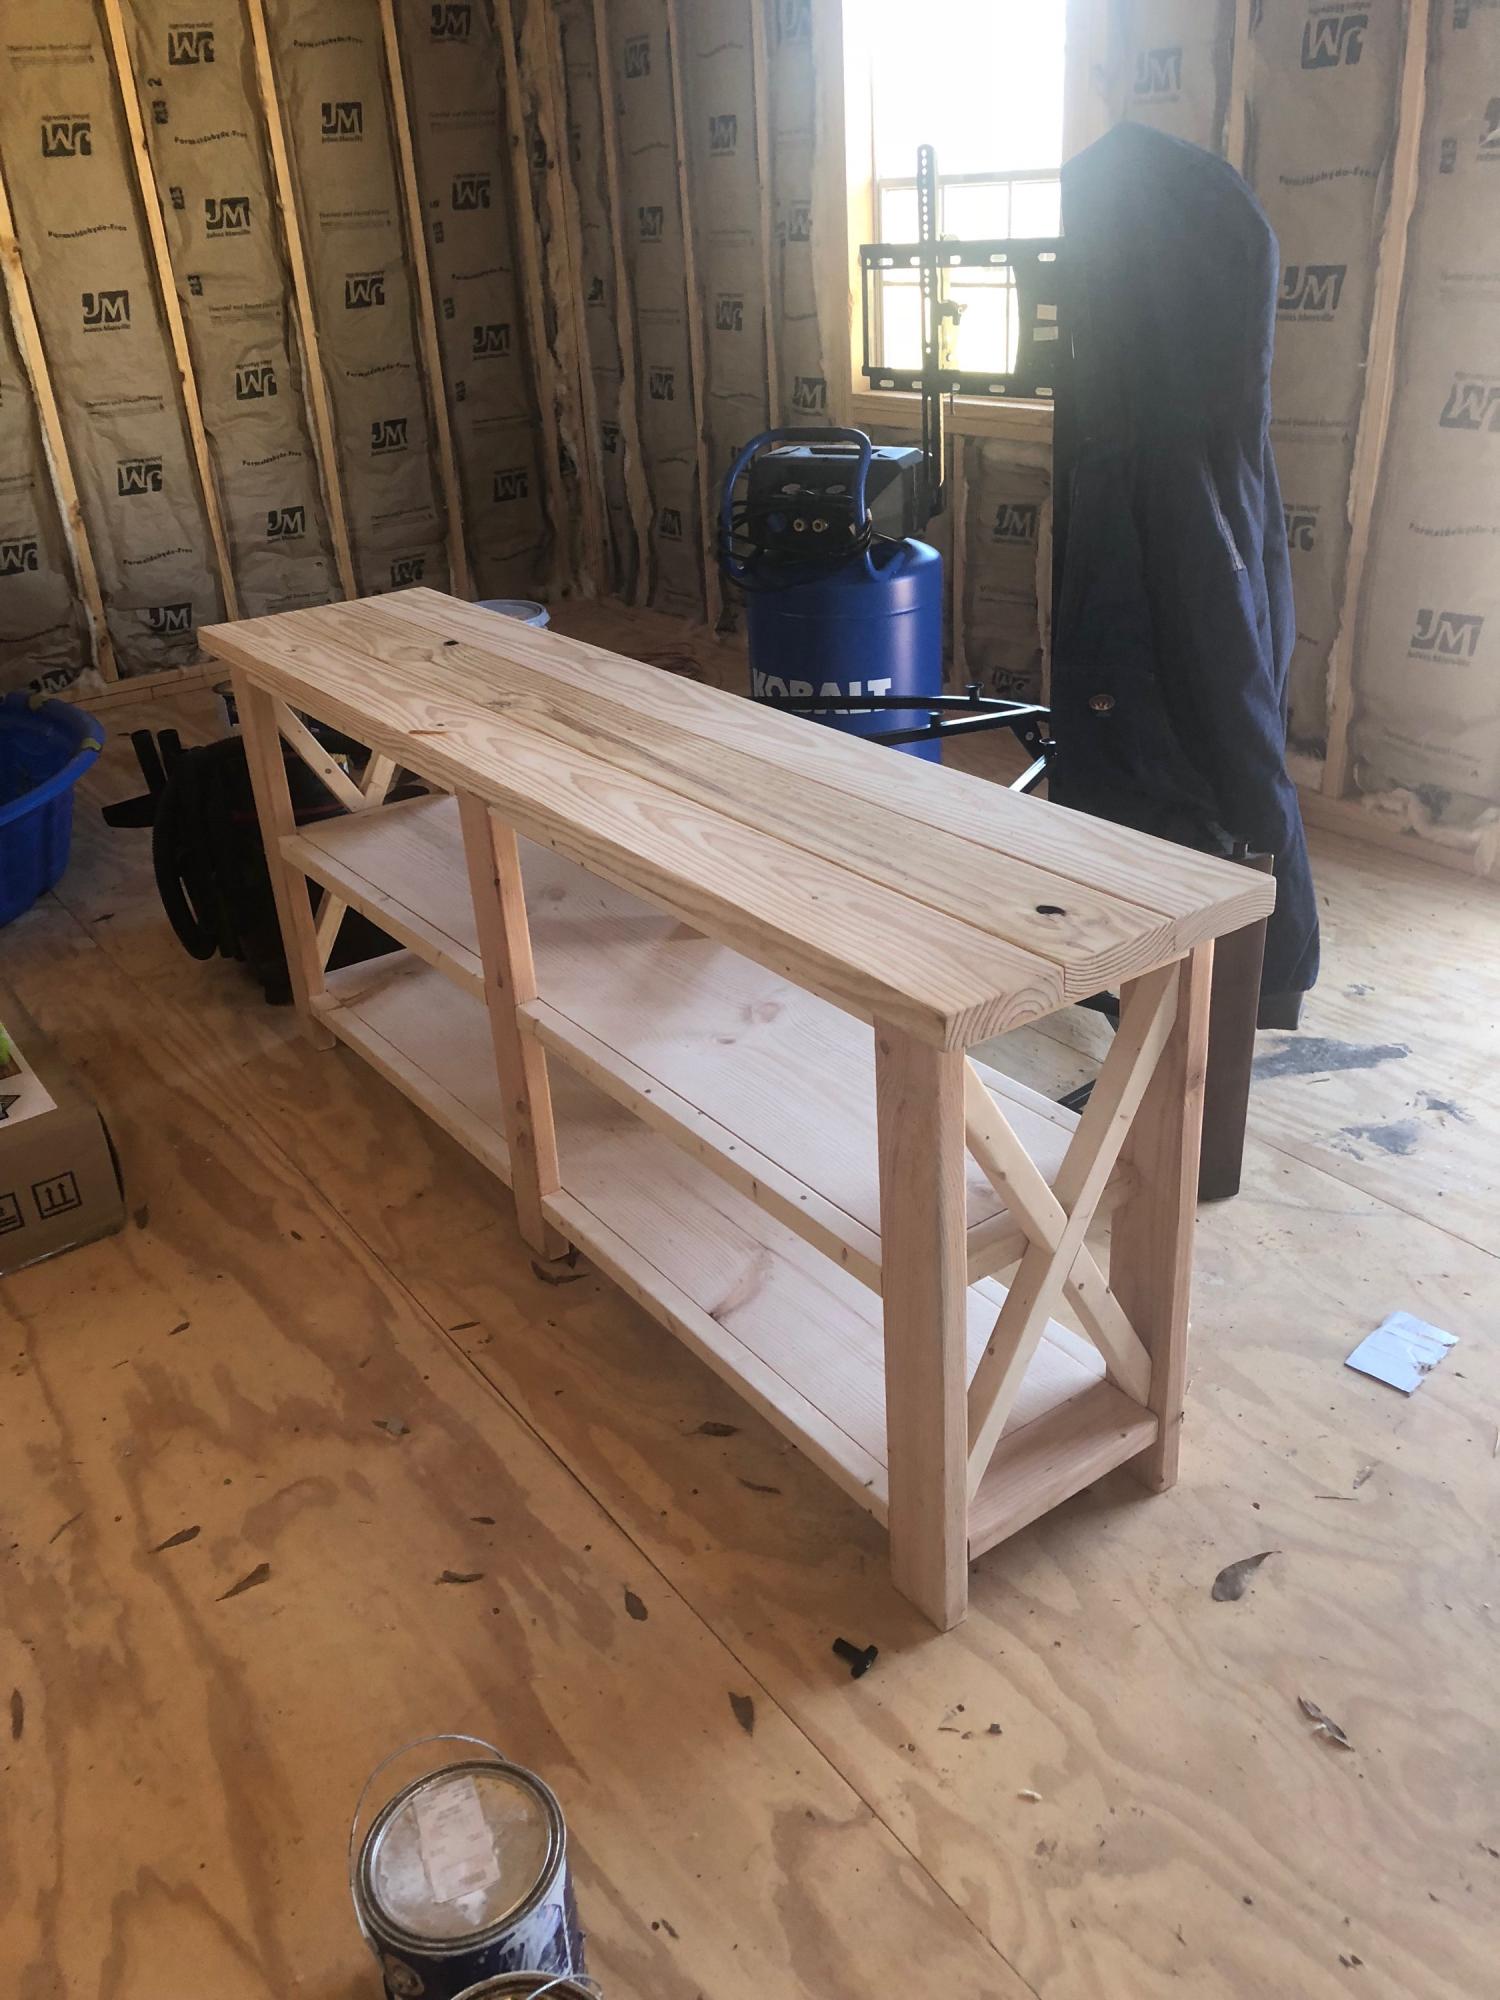
*Incorporated and modified the grand waterfall console plan
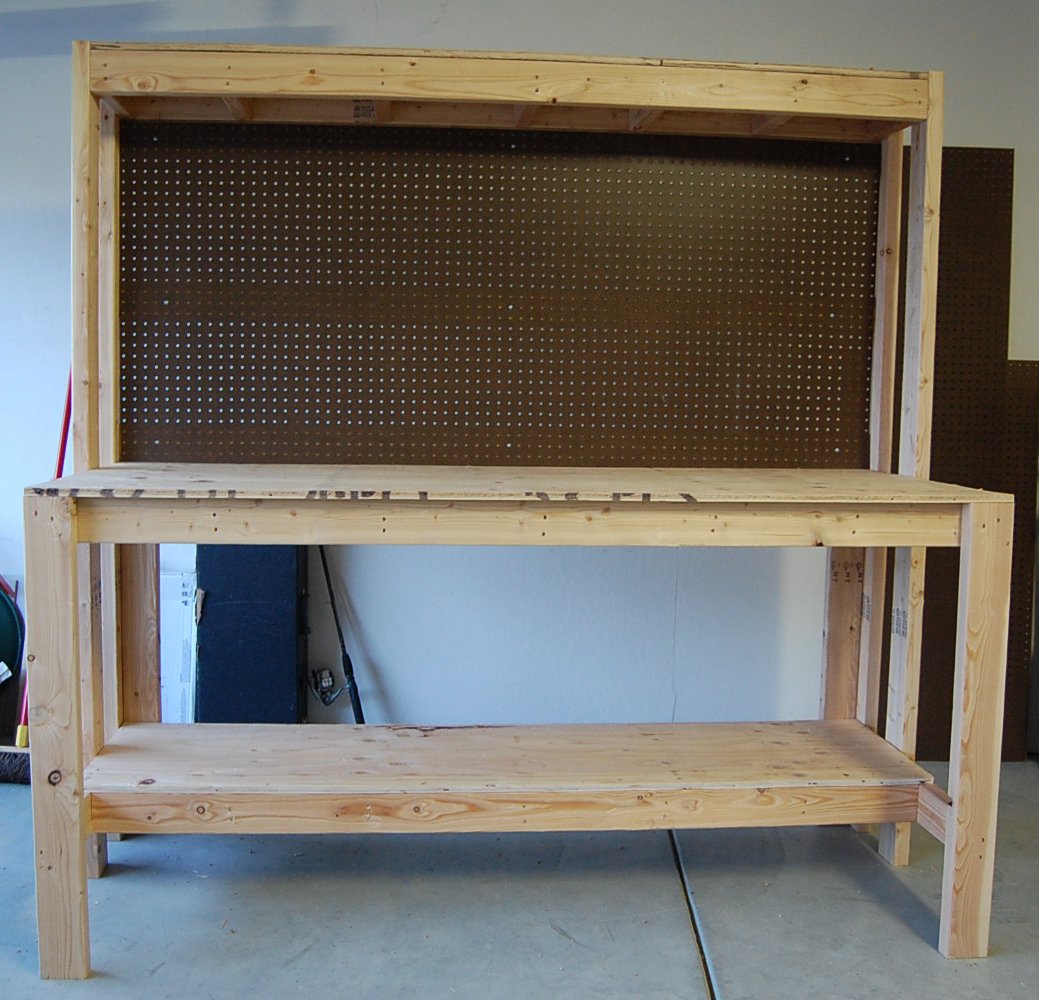
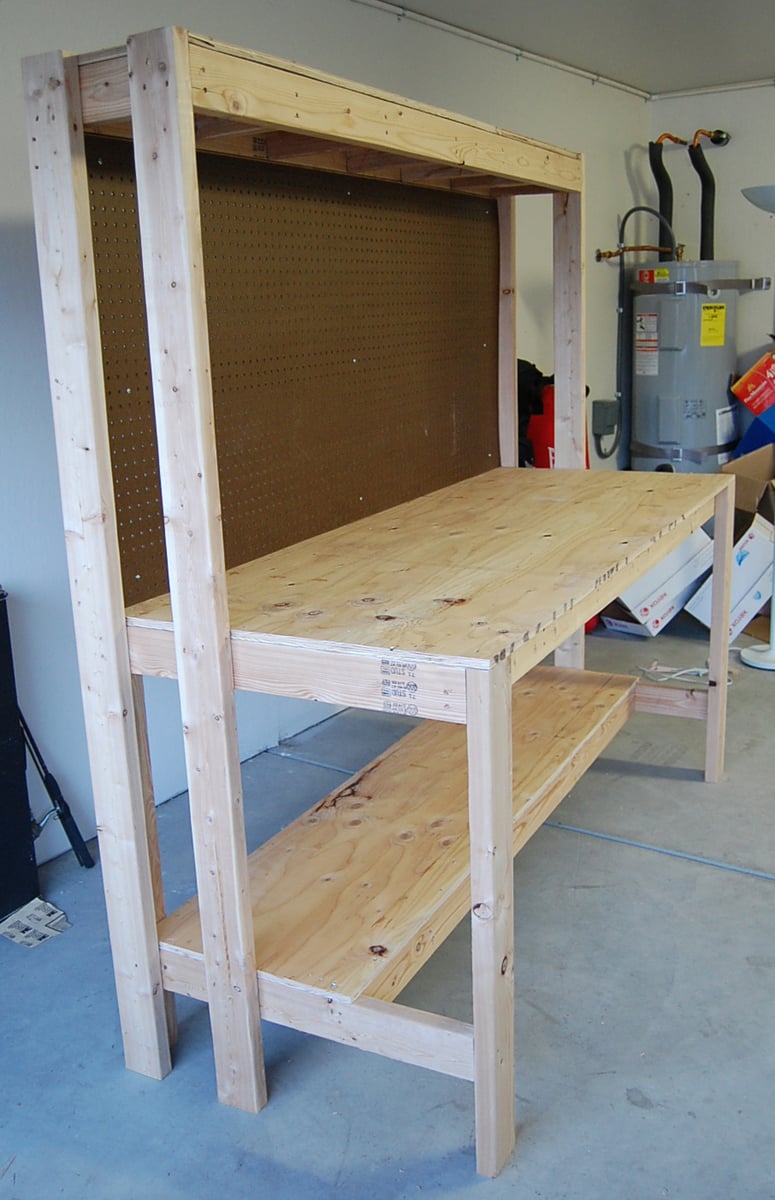
This is our 2nd project - we liked building the bookshelf so much, we decided we're gonna keep going and need a good workbench. Got these plans from the Family Handyman Website (http://www.familyhandyman.com/DIY-Projects/Woodworking/Workbenches/how-…). They claim the cost to be $50, but it was closer to $80 for us - still a GREAT project and easy to put together with the nail gun.
Sat, 04/16/2022 - 07:29
No working link. Cannot find this or the plans.
Built this for some dear friends ... turned out so pretty.


Comments
Ana White Admin
Tue, 01/10/2023 - 09:59
YAY!
Love the set, well done!