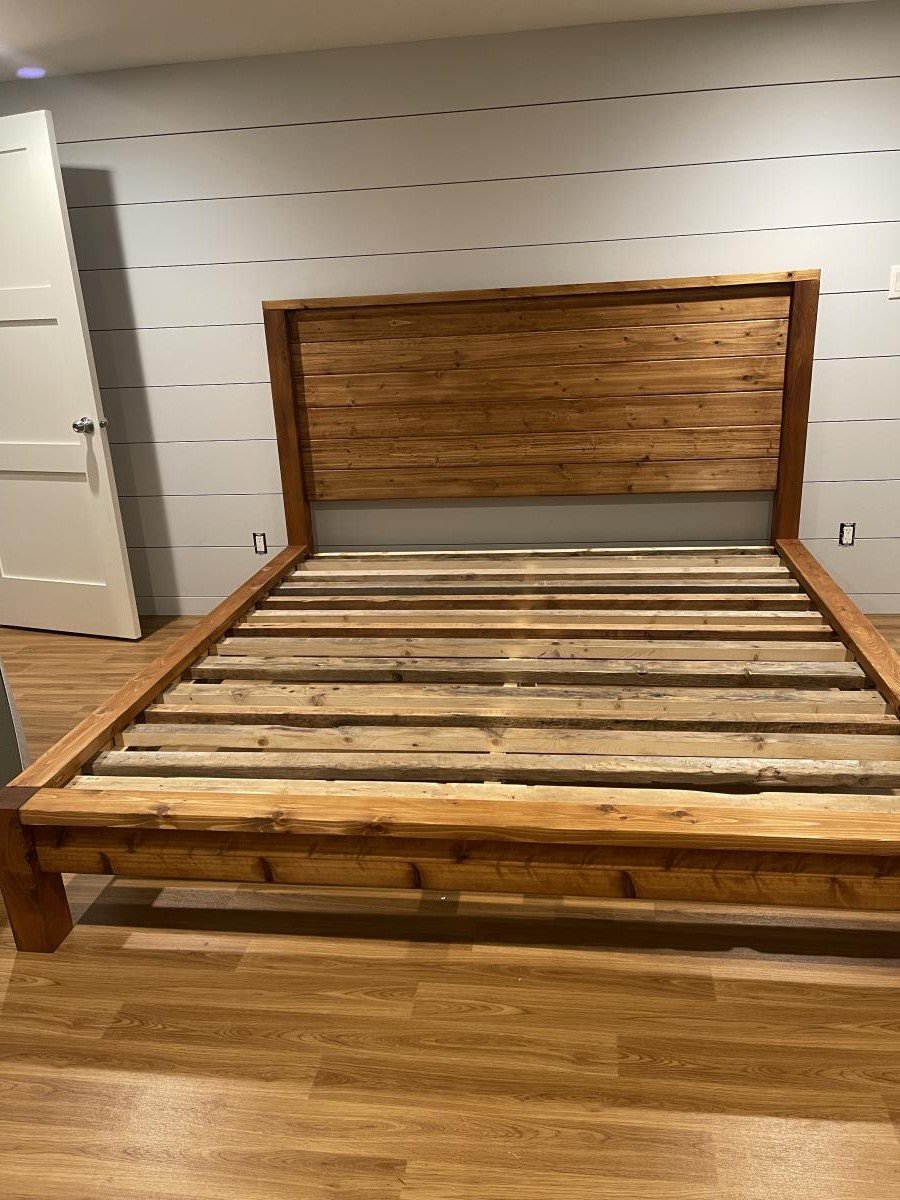
Modern Farmhouse Bed Frame
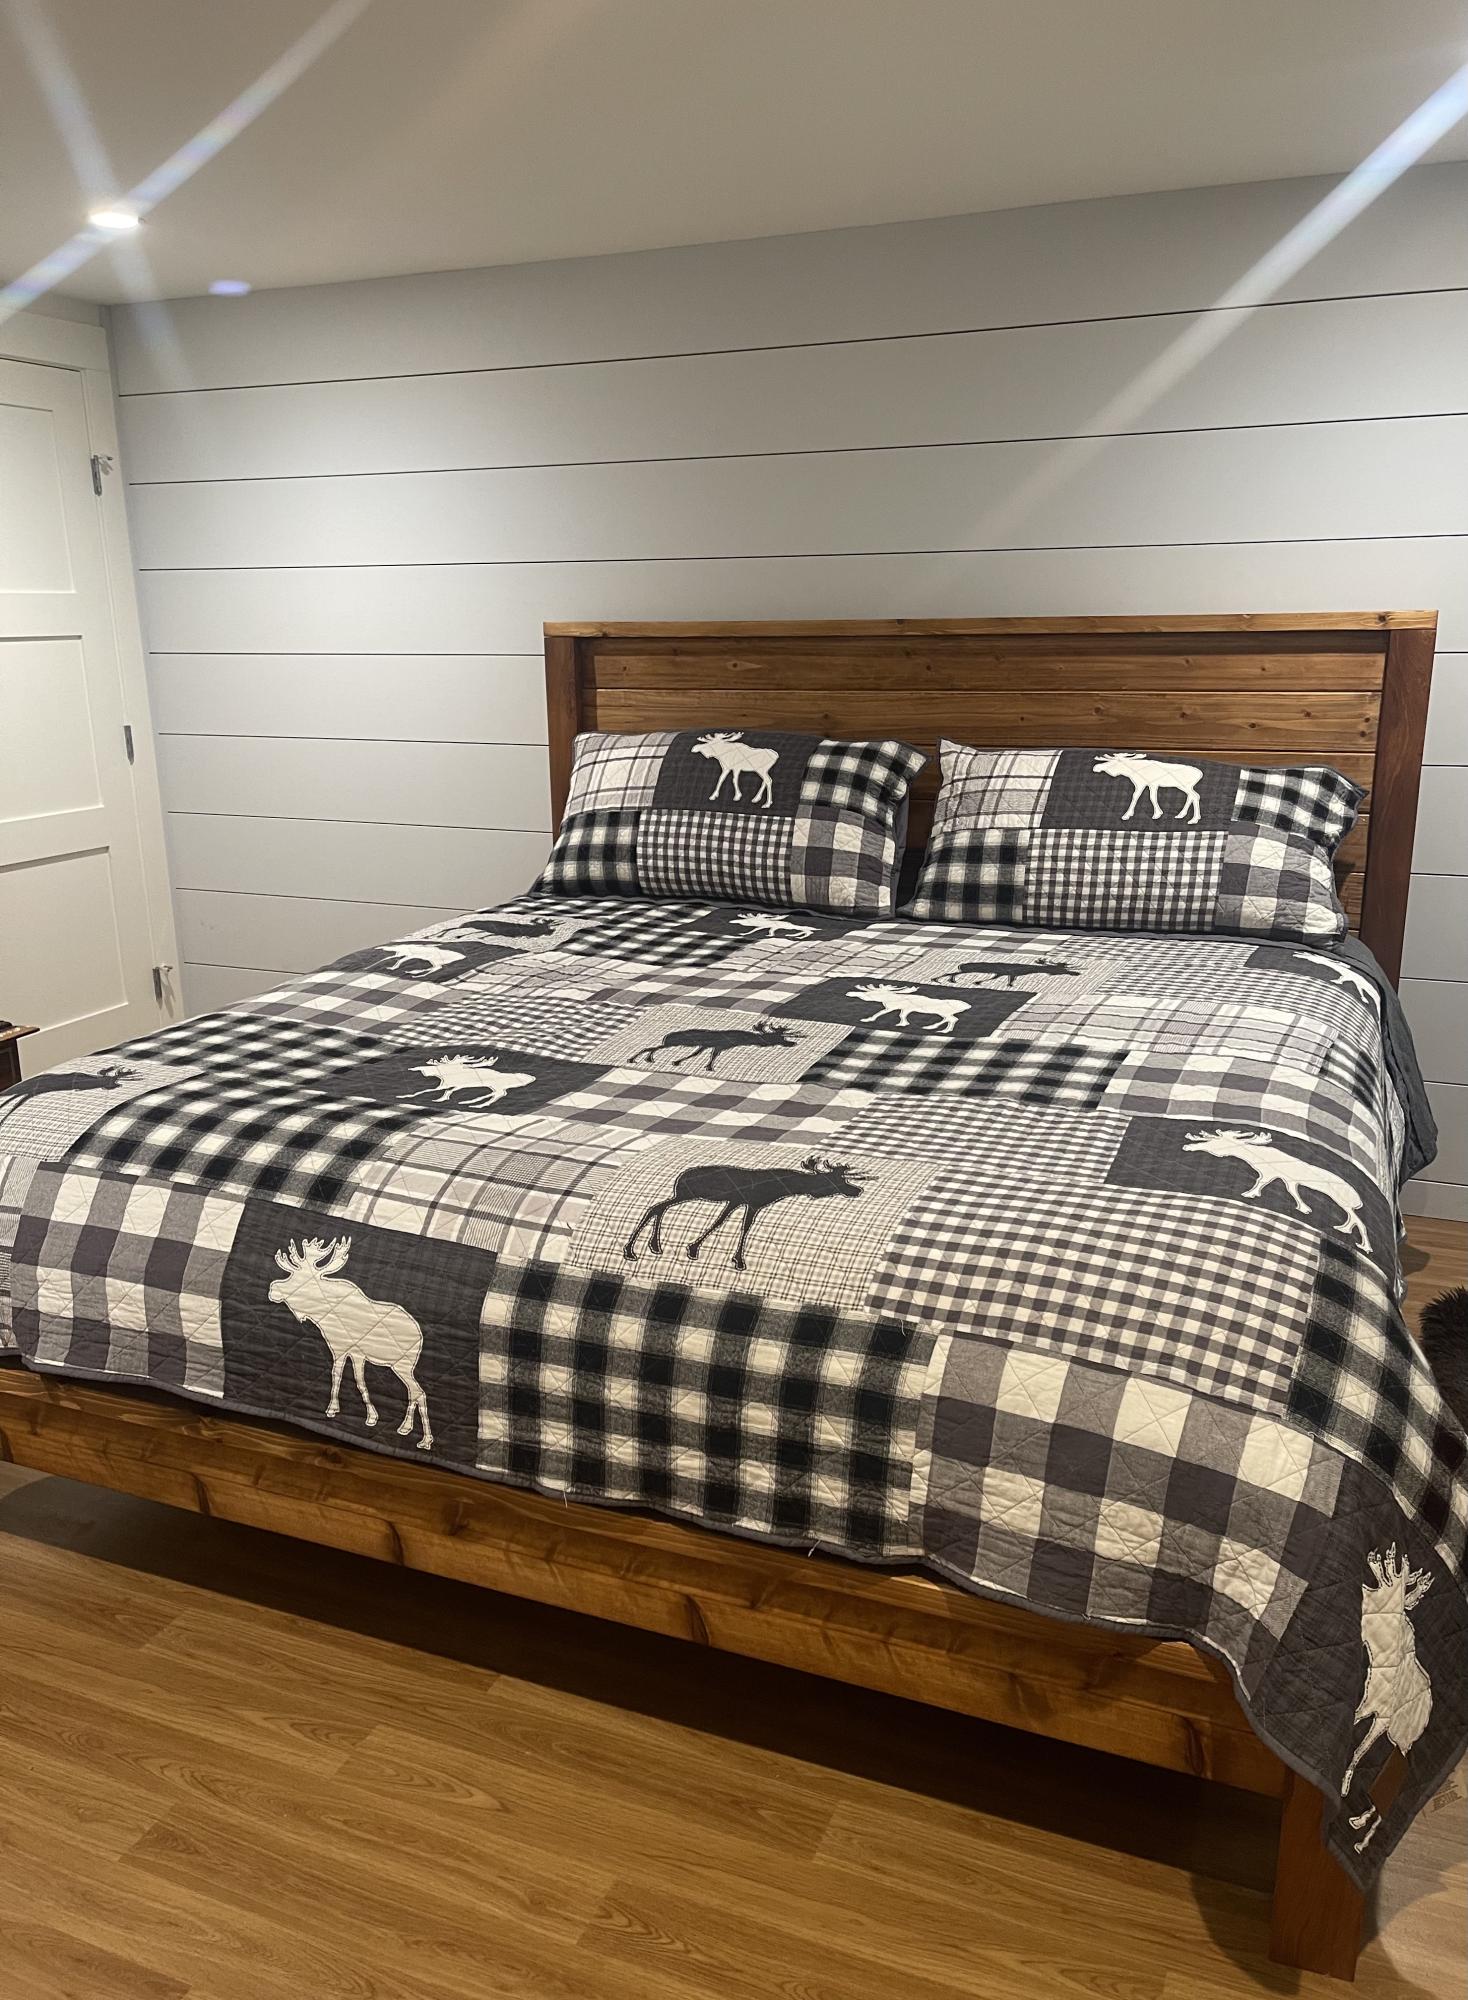
I love how this bed frame turned out! Everywhere that has stain is cedar and the rest is all scrap spruce. Thanks for another great plan Ana!
Built from Plan(s)
I love how this bed frame turned out! Everywhere that has stain is cedar and the rest is all scrap spruce. Thanks for another great plan Ana!
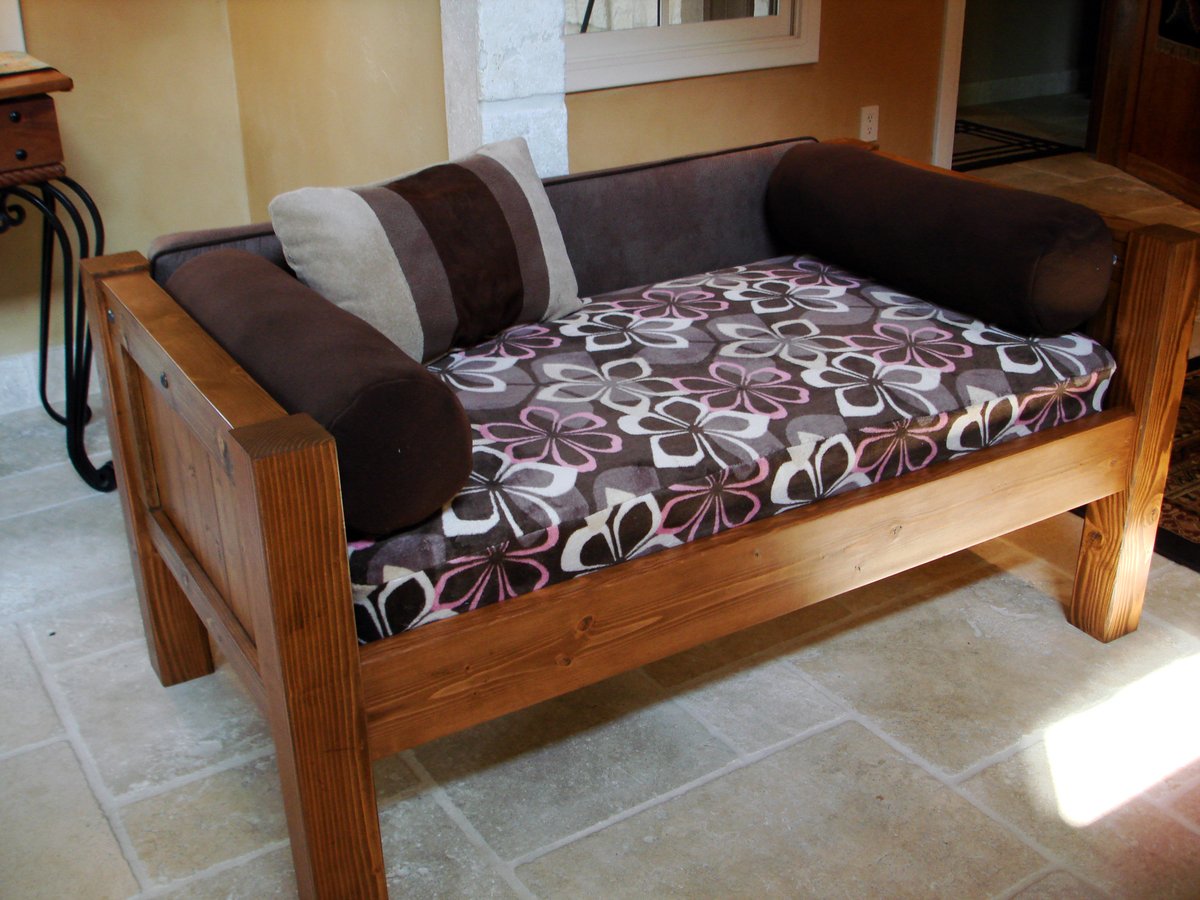
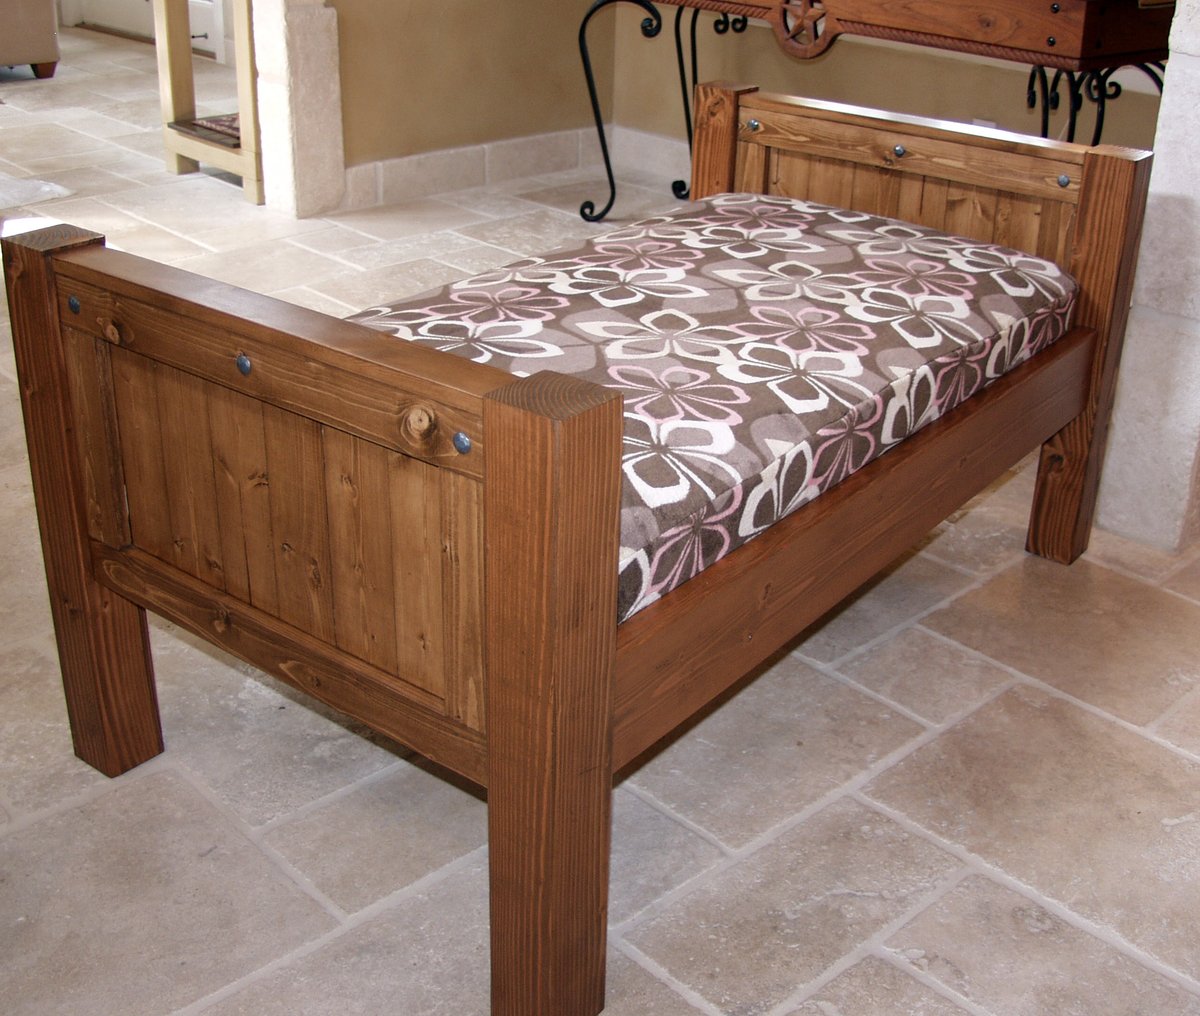
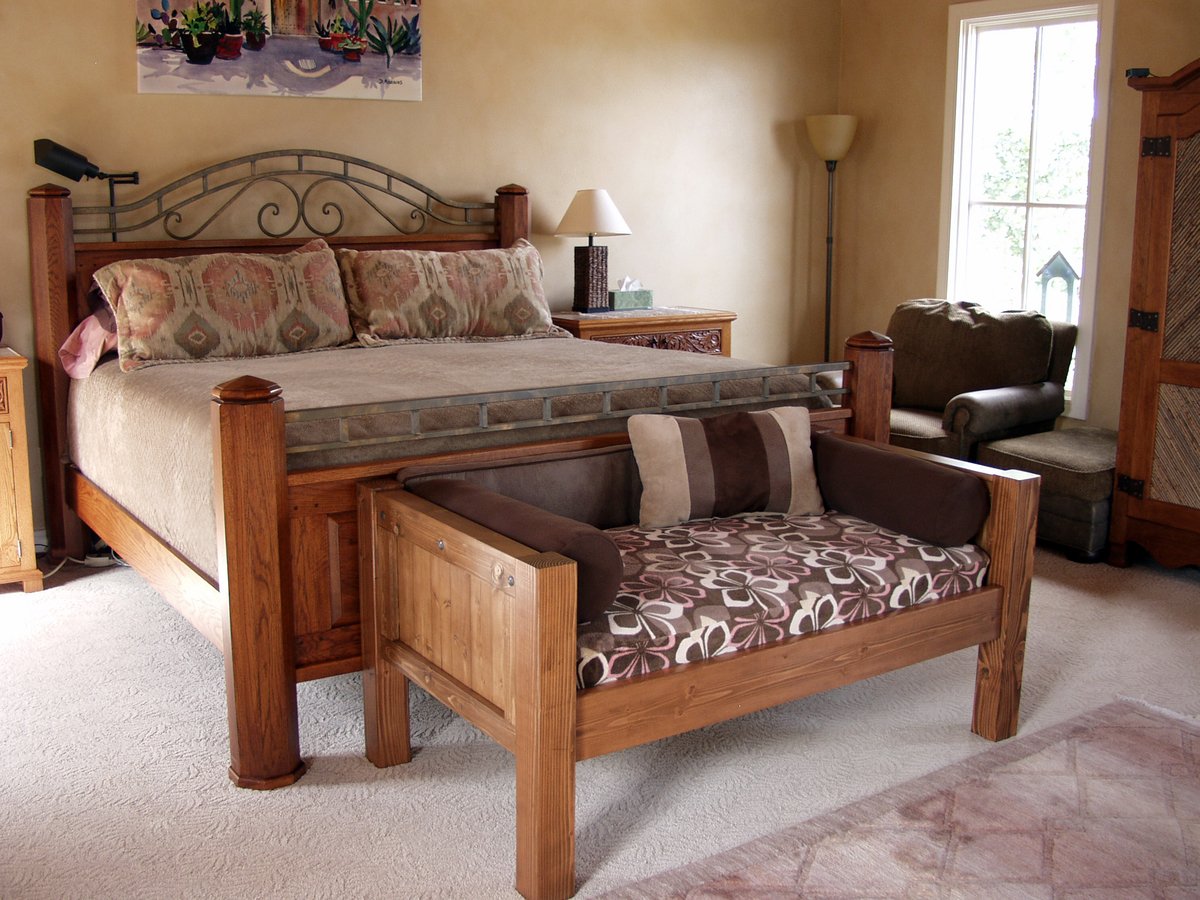
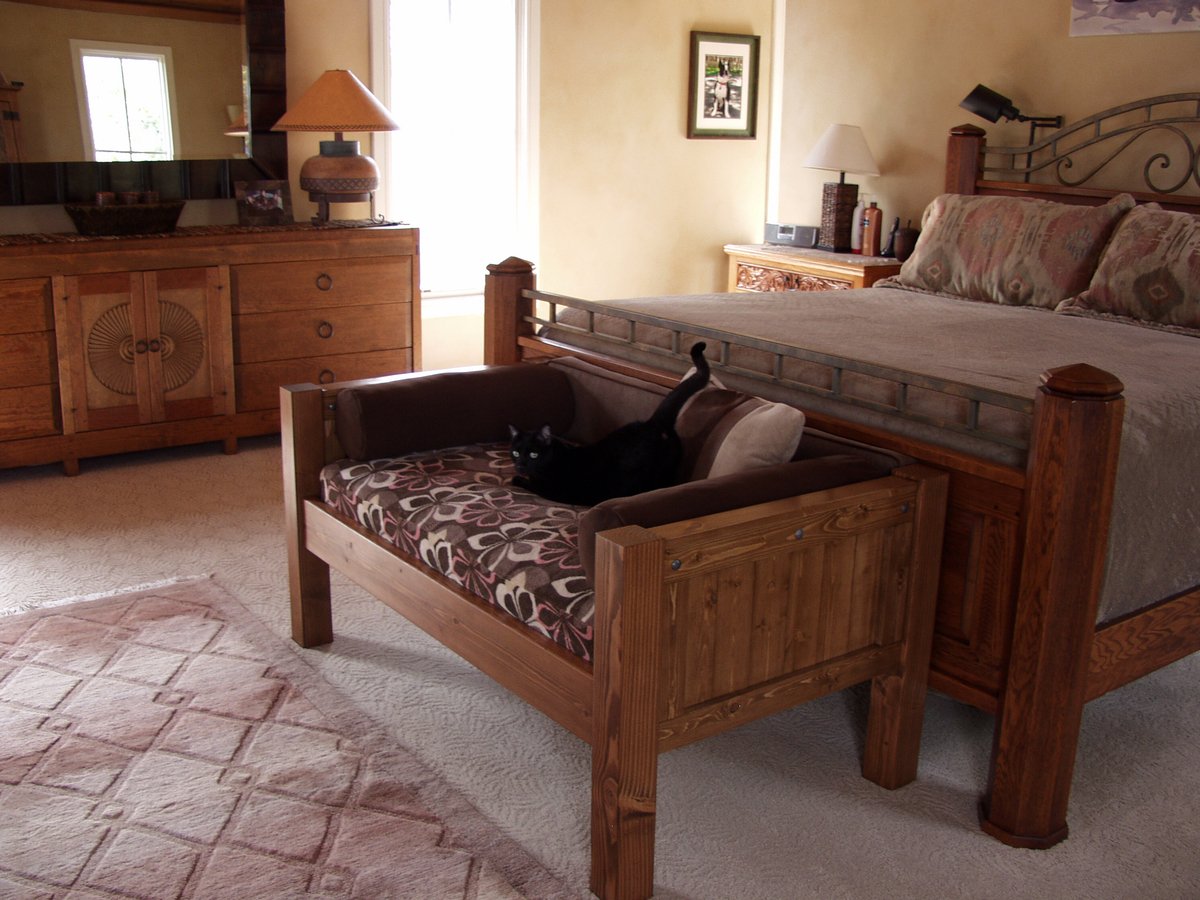
Yes, my husband and I share our bedroom with 6 dogs and an occasional cat (or 4). Our older dog (Petra) has slept on our bed for over 10 years, and she's getting too old to jump anymore. We didn't want her to feel like she was getting kicked off the bed, so I made Petra her very own bed at the end of ours so that she wouldn't feel left out. I was inspired by MurdaRae's dog bed (http://ana-white.com/2012/06/doggie-daybed), and thought it was genius to use a toddler/crib bed. So I went looking for plans on Ana-White, and came up with a mixture between a couple of twin bed plans. I love that the plans are easy enough to modify my sizes, and come up with exactly the custom solution that I need. This was my first big project using Bri-Wax. The last one was kind of a disaster when the wax changed the stain color to something not-so-great. With this project, I learned to wait at least 2 weeks before attempting to wax it. I was blown away with the results. It is a beautiful subtle satin finish that feels great to the touch. Plus, I can easily touch up all the dog fingernail scratches that will inevitably occur. When I re-assembled the bed in my bedroom, I actually nicked it in a few places. No problem -- slap on some more Bri-Wax! My Bri-Wax was 11 years old, and pure liquid. I tossed it in the fridge (per Bri-Wax's recommendation), and it was as good as new. The only real problem I had with this project was leaking sap from one of the 4x4s. I'm still fighting this today. In talking with Rustoleum/Zinsser reps, they said that no sap could penetrate their "Seal Coat" shellac product. After 5 coats, the sap is still penetrating, but only if I turn it on it's side or upside down. I'm still baffled. I made the mattress cover out of a dog blanket, and made the cushions from some remnant fabric (suitable for dogs and weekly washing), so this was a fairly inexpensive project. It was a success because Petra slept in her bed from the fist night and loved that she had all the room to herself, and no boston terrorists (I mean terriers) attempted to bother her.


Sun, 08/26/2012 - 10:24
It matches the woods in your bedroom so well and looks great! Also, I love the bolster pillows around the edges. That is something I need to make for our dog bed. Thanks for sharing.
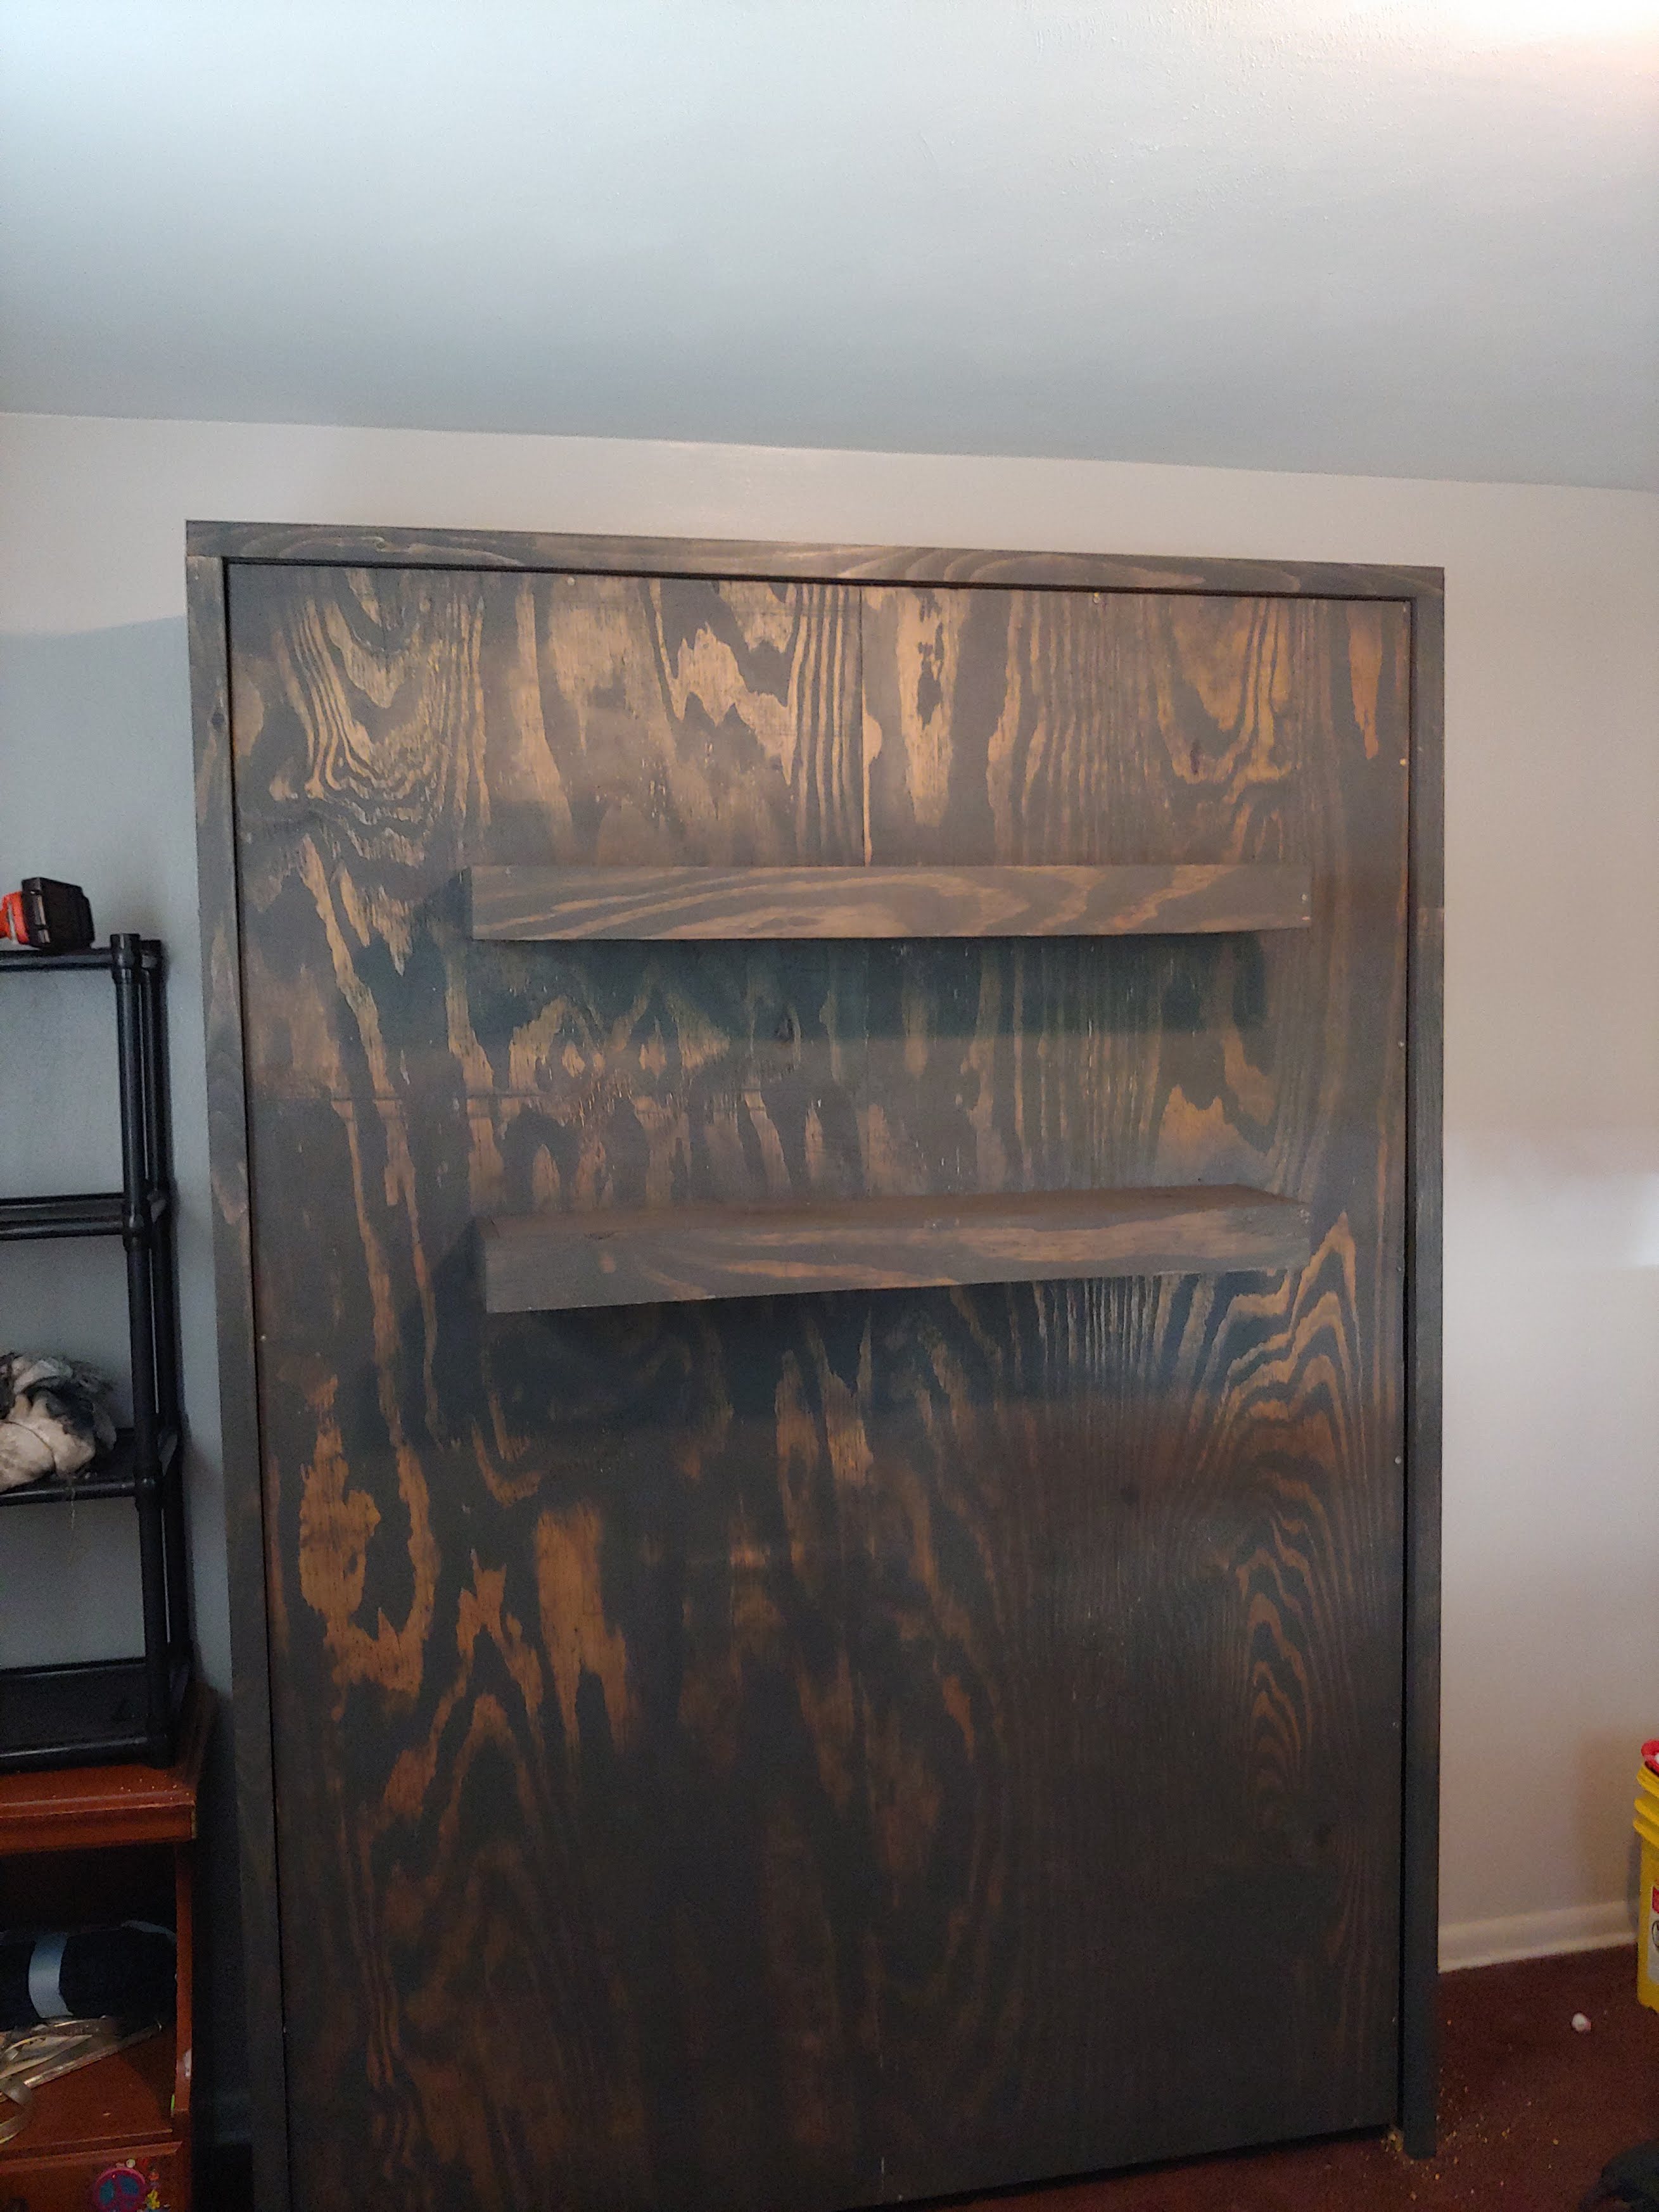
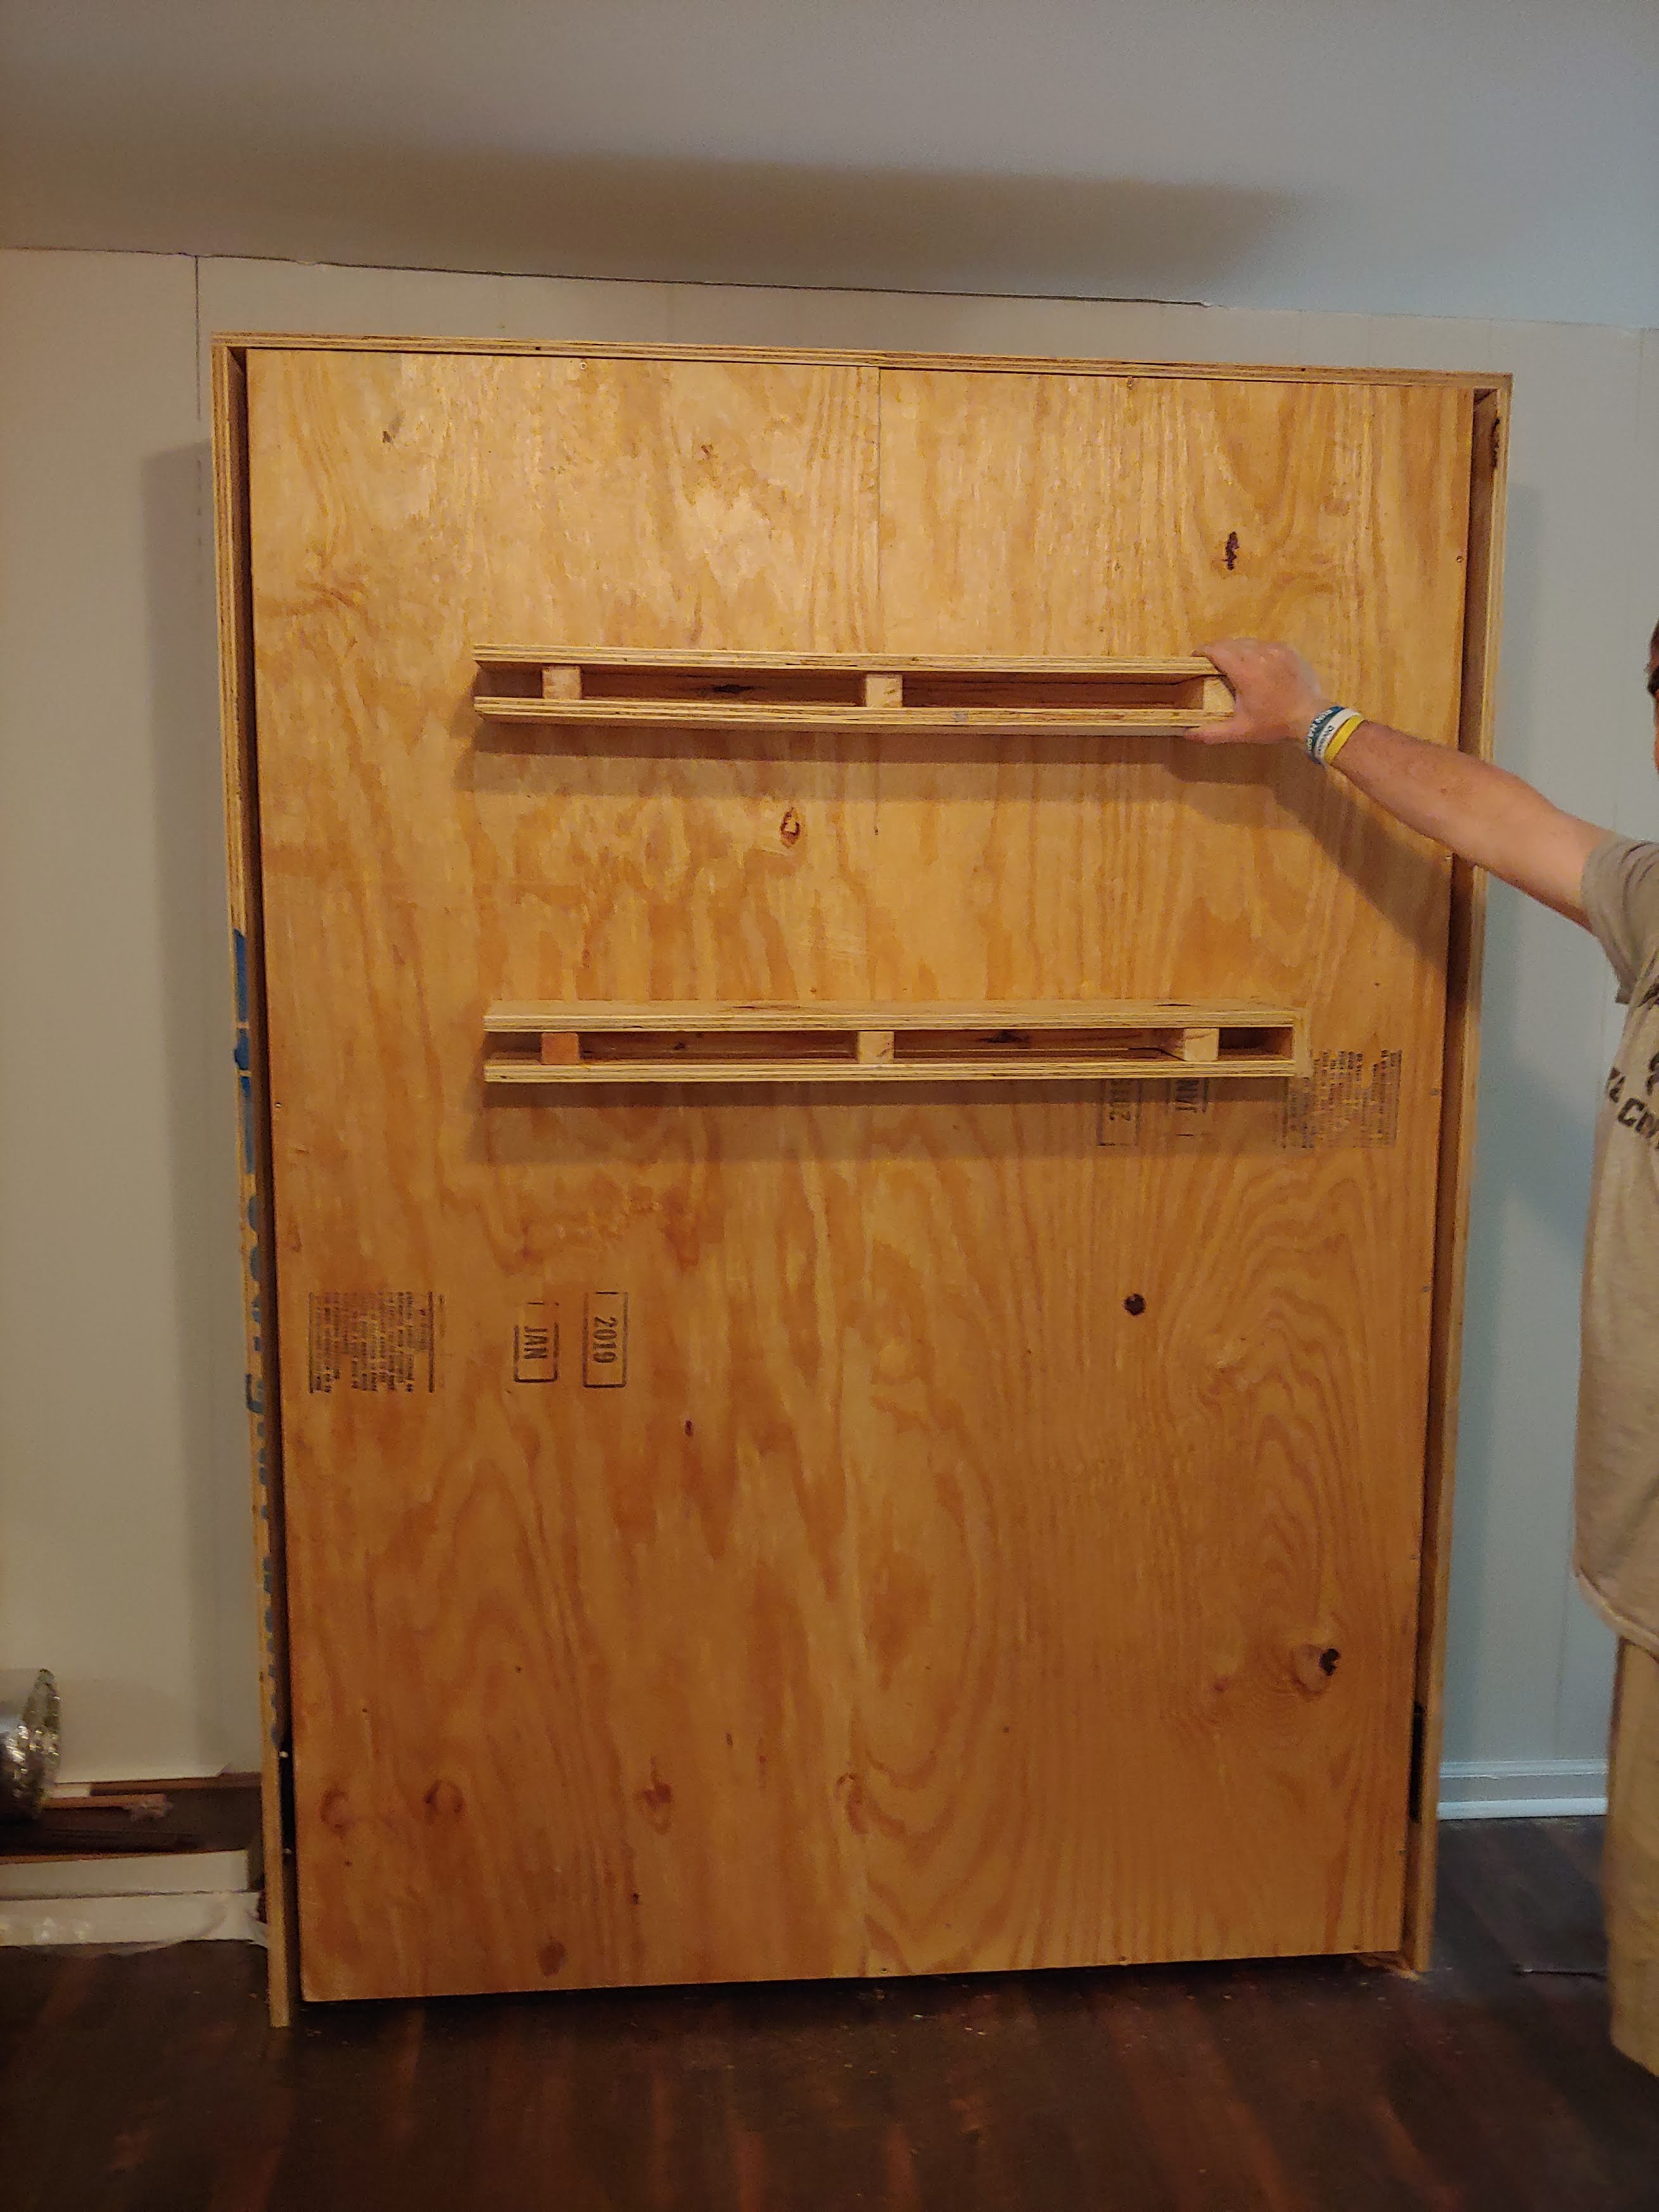
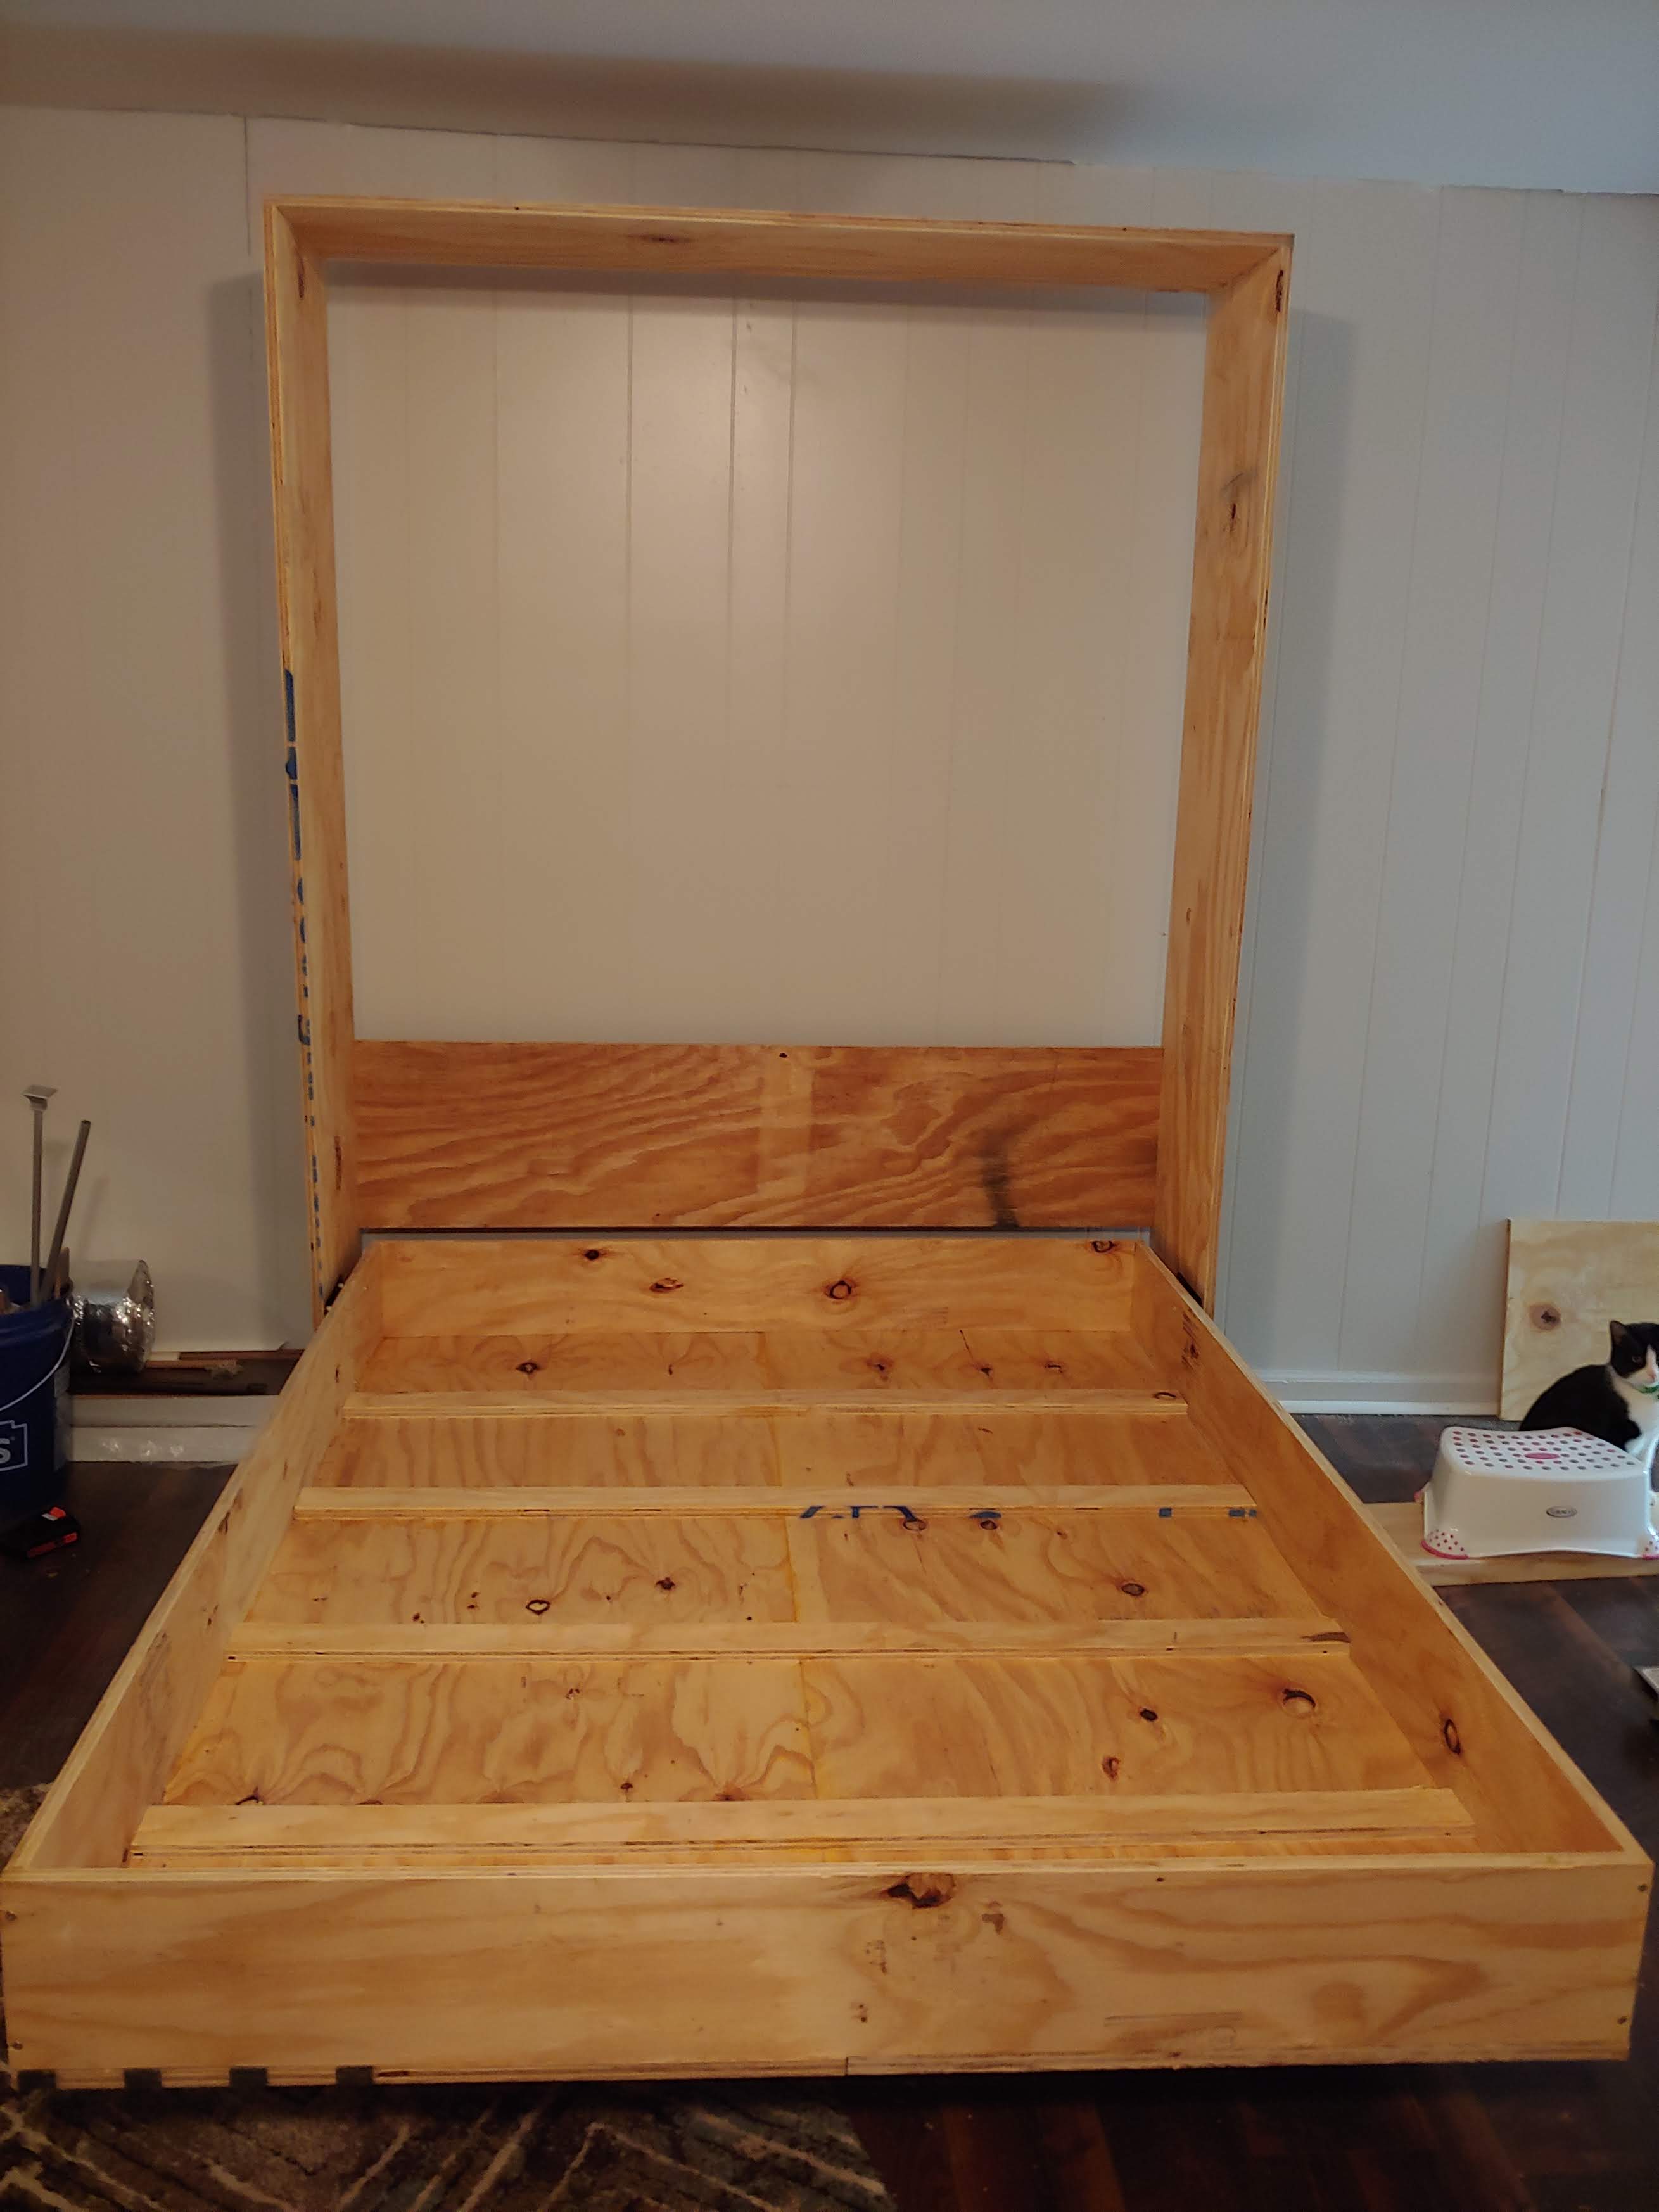
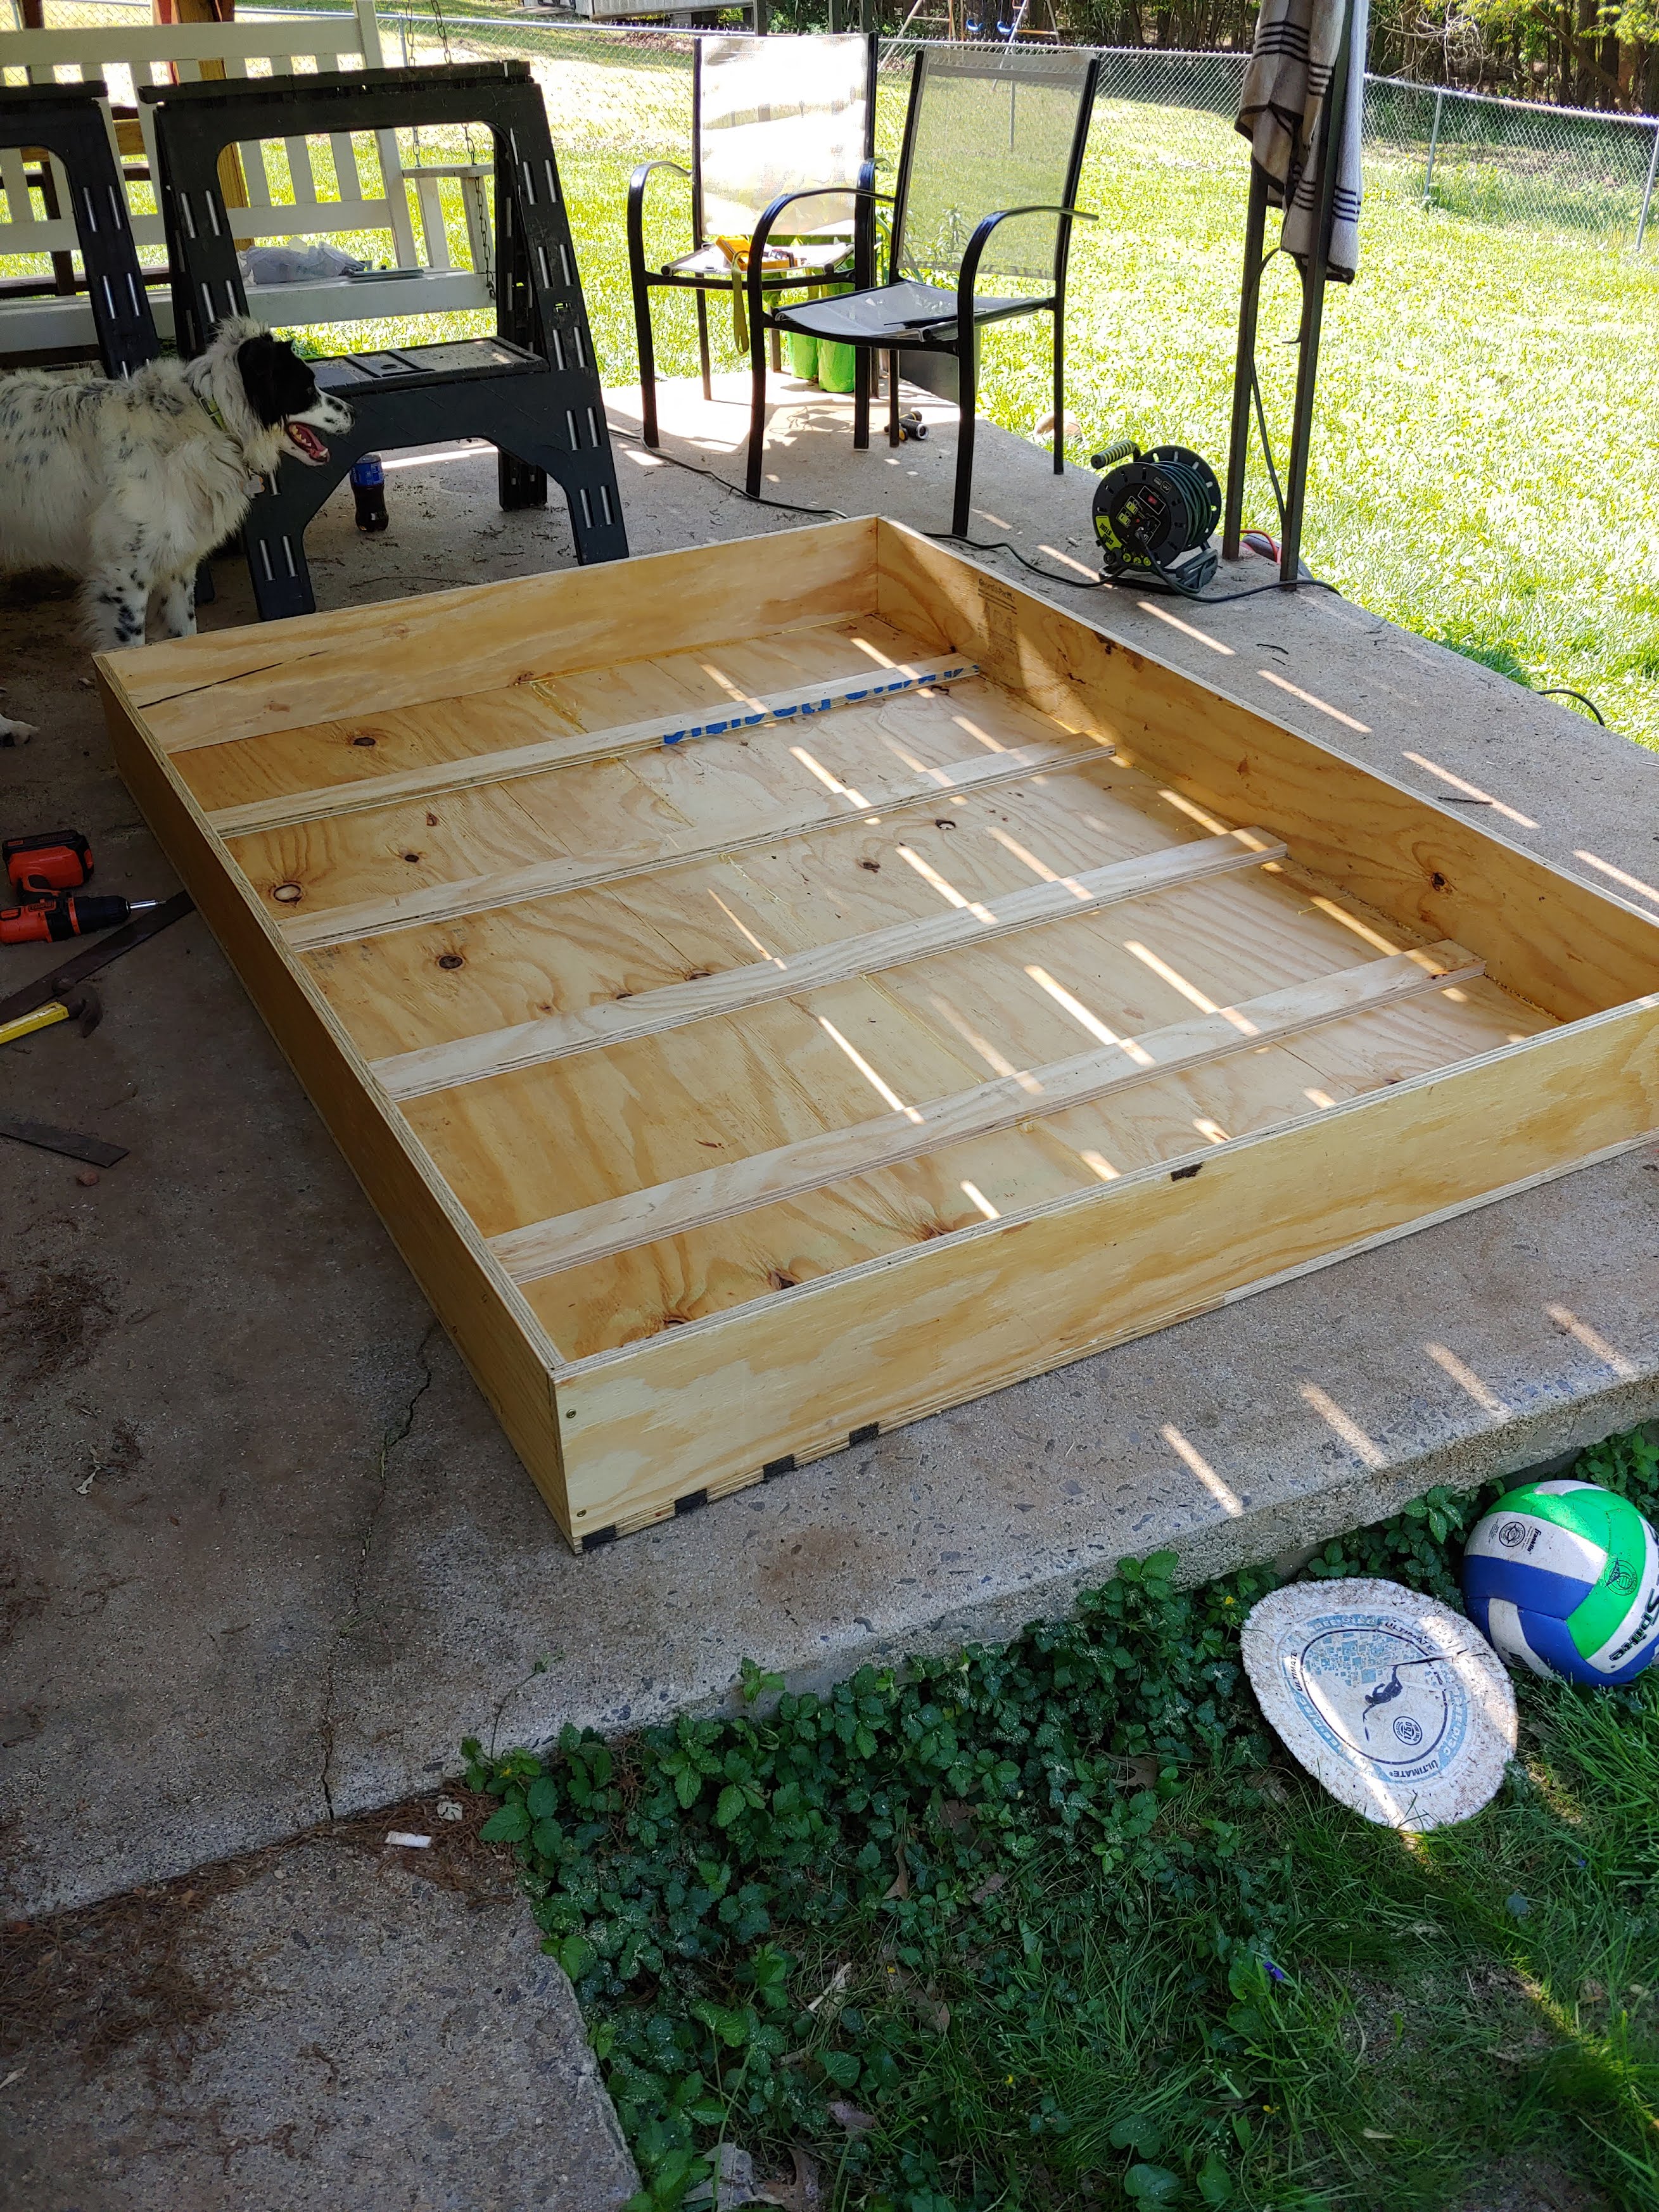
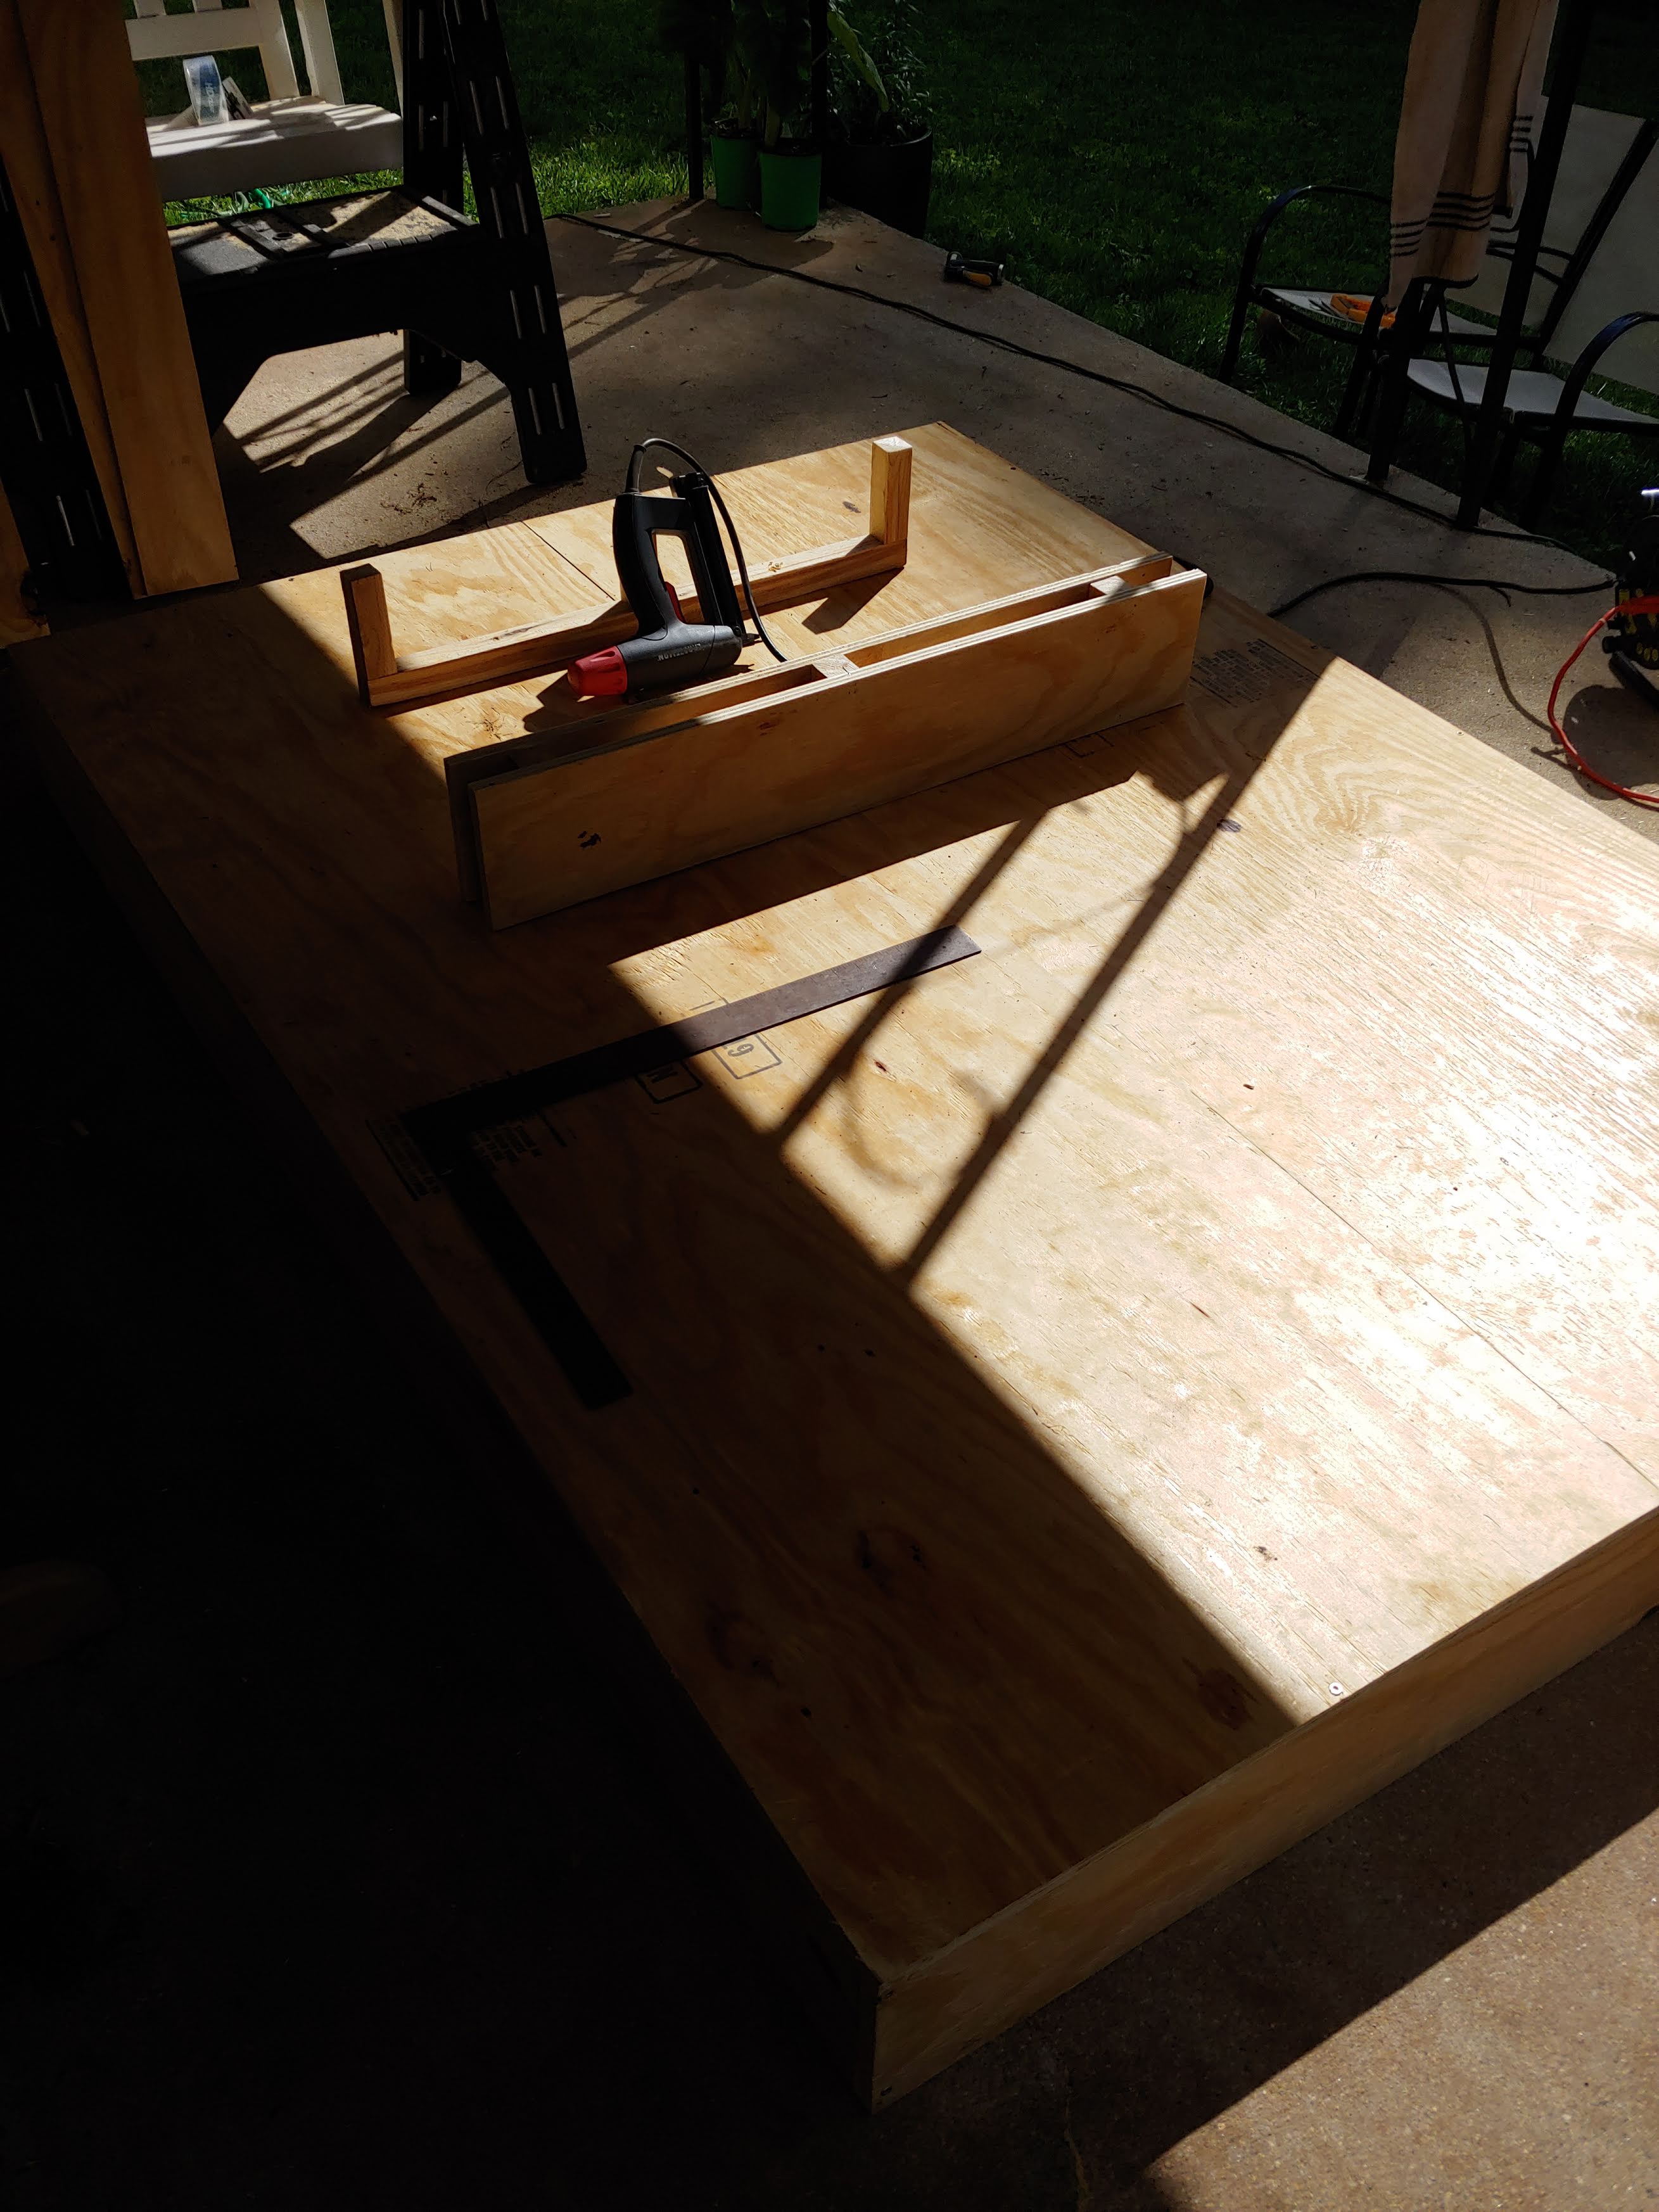
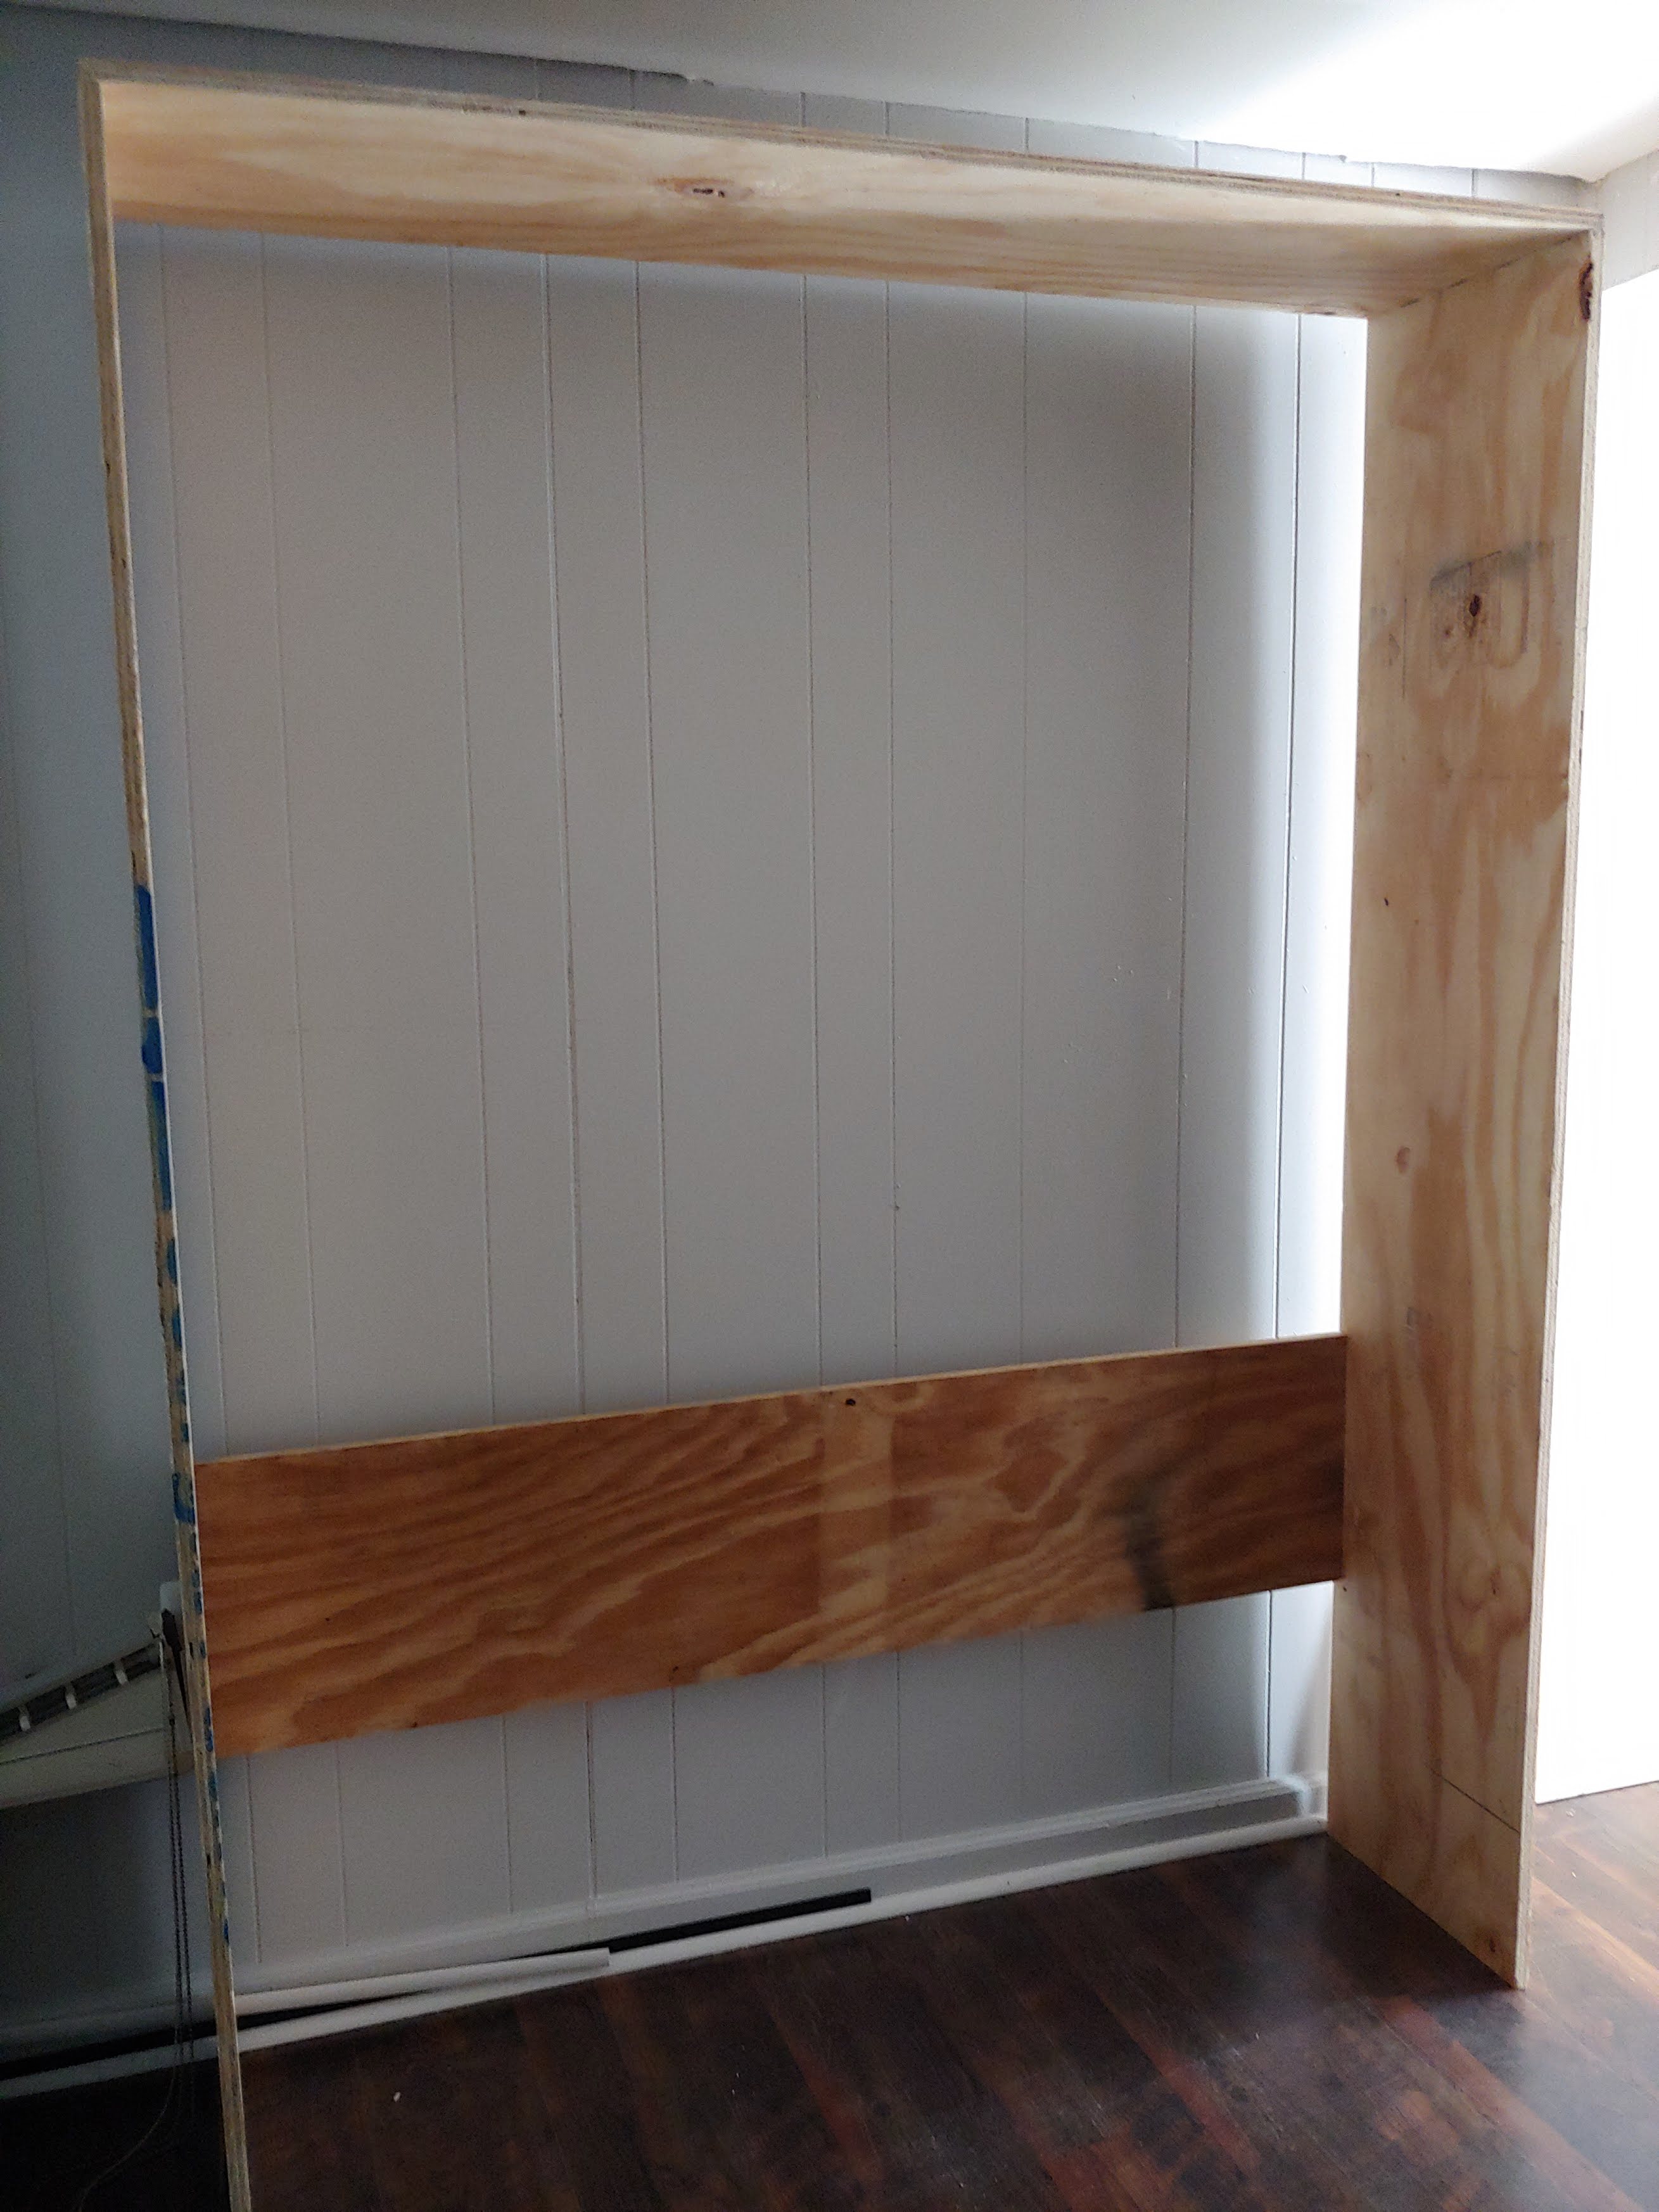
So I've always wanted to build a Murphy bed. And by always I mean since I first came across plans here that made it look so simple. It ended up taking me a while to do because my job has me working 6 days a week so I was only able to work on it for short chunks of time.
I ended up utilizing a few different plans and mashed them together to build a full size murphy bed. The shelves are the support legs when the bed is down. The "hinge" mechanism are heavy duty 360 degree seat swivels.
All-in-all it turned out WAY better than I expected with only some minor issues throughout the construction process.
Next up is a twin xl Murphy bed with a murphy desk attachment that will serve as a craft table when up.
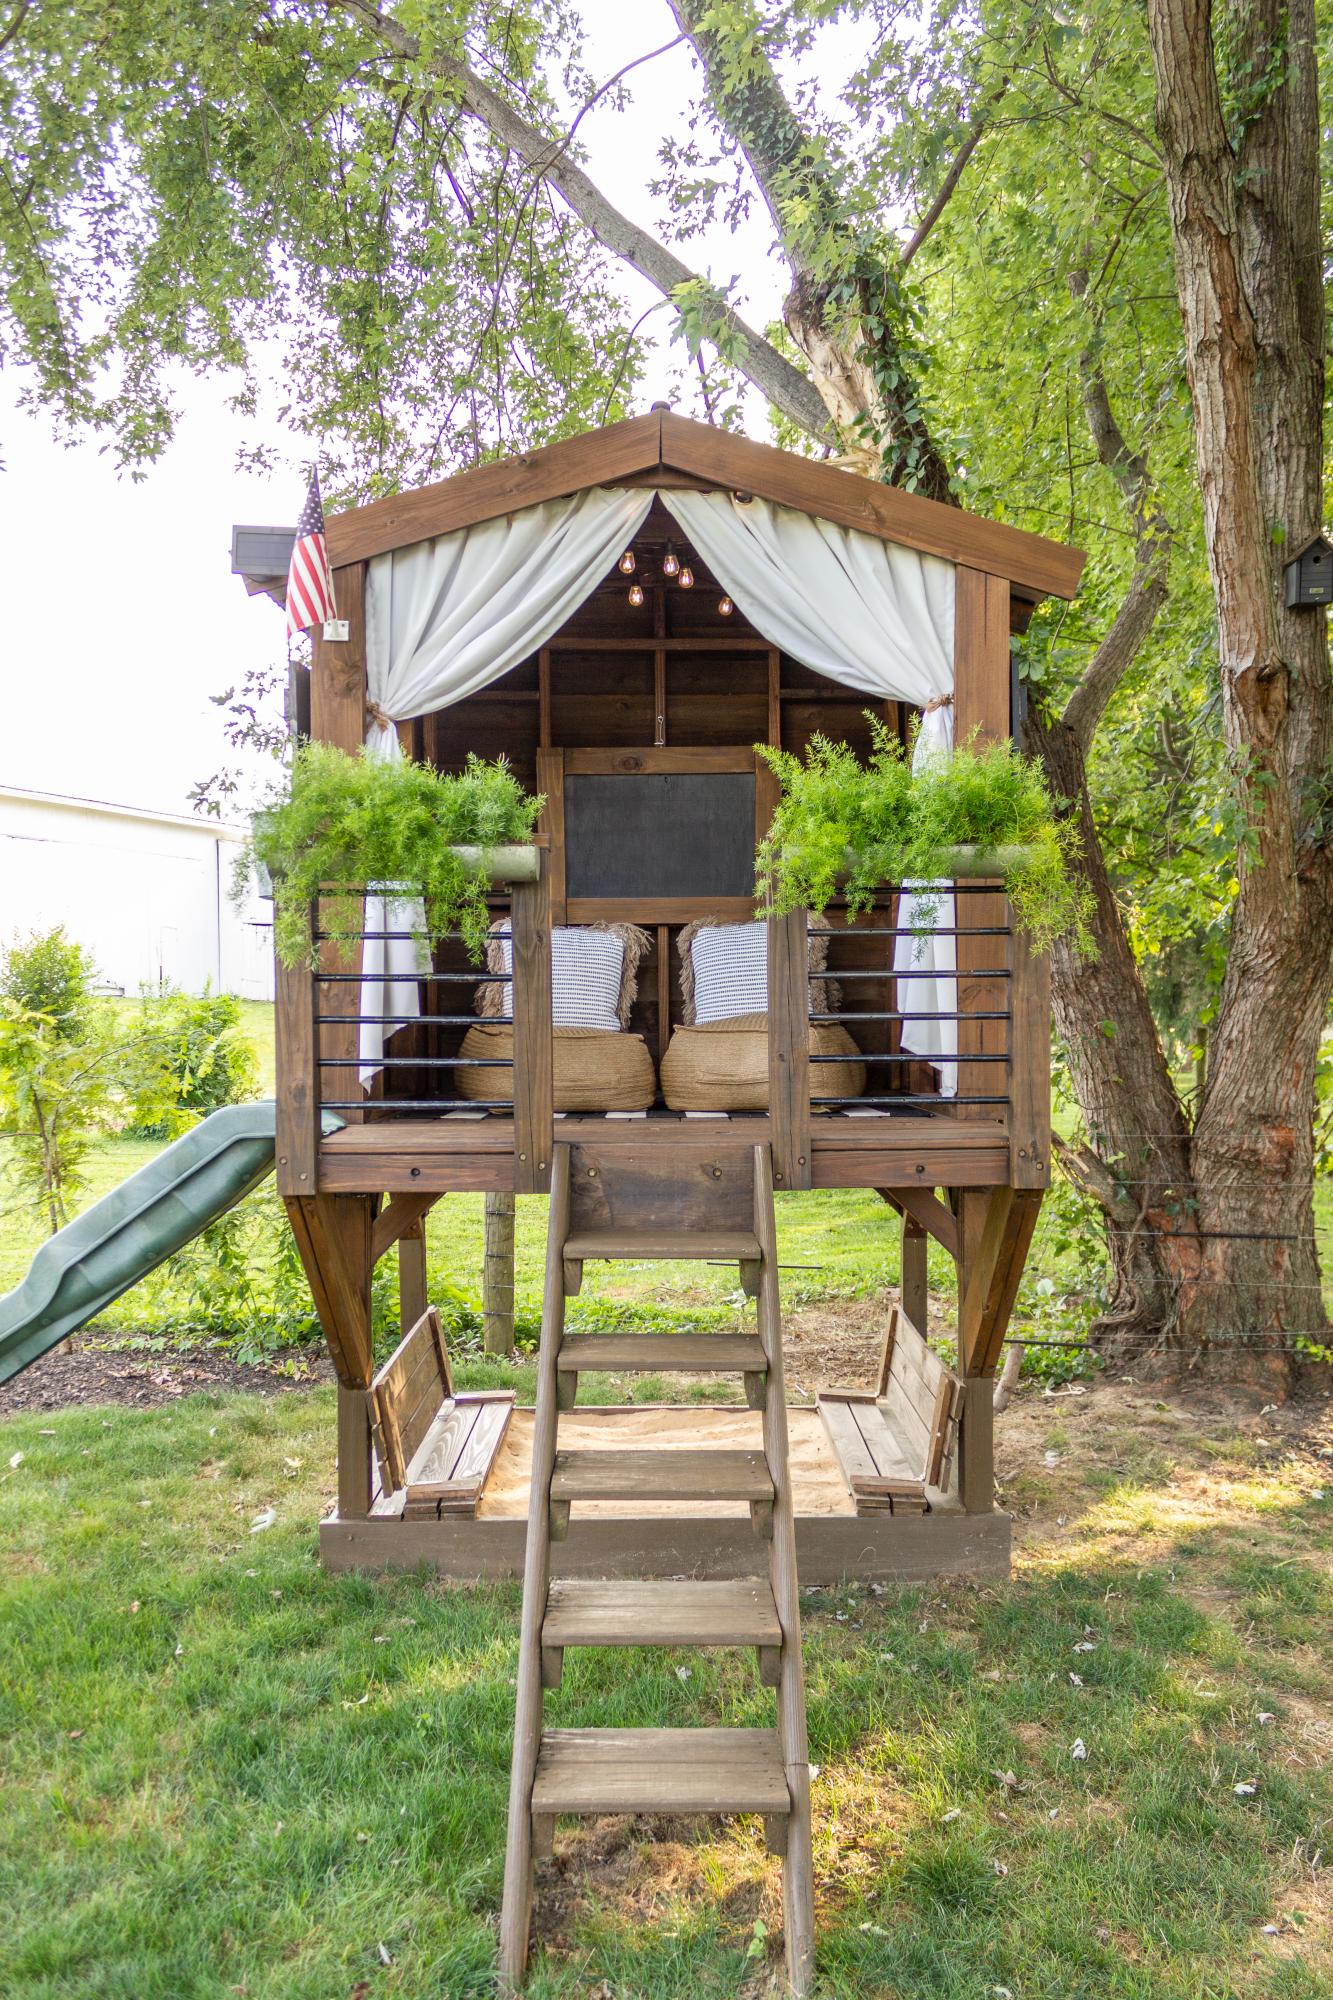
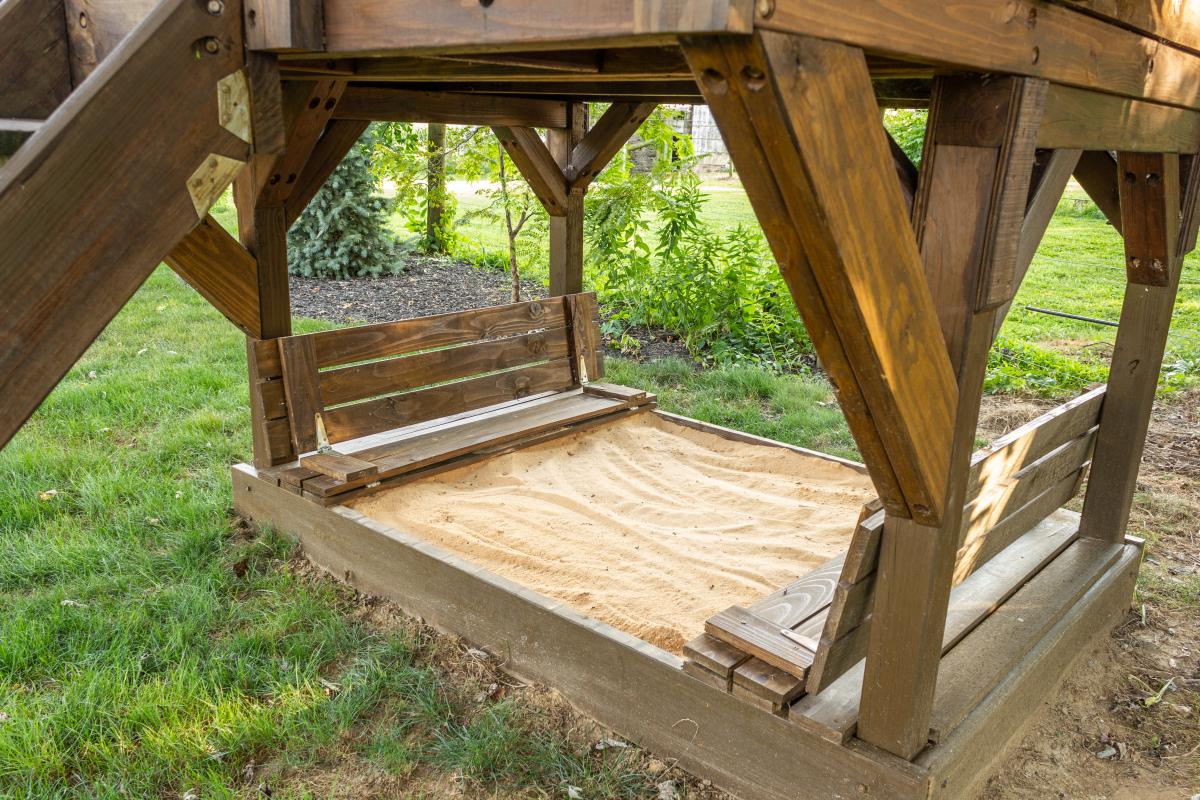
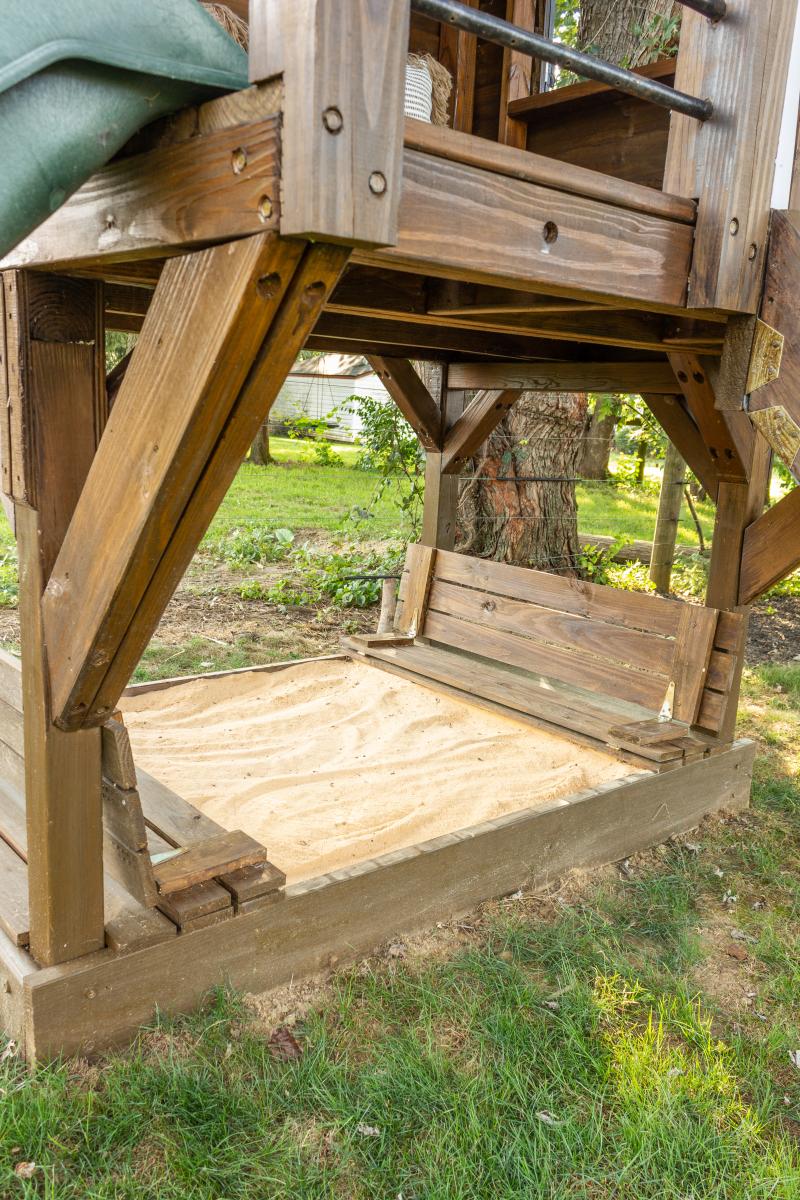
The base of our playhouse felt like the perfect spot to use the sandbox plan with built-in seats. The bench seats actually fold flat to create a lid for the sandbox when it’s not in use. I followed Ana’s plans exactly and used the list of materials she provided. The only modification I made was eliminating the back supports. It was not necessary for me to add the back supports since we have the playhouse posts to support the back of the bench.
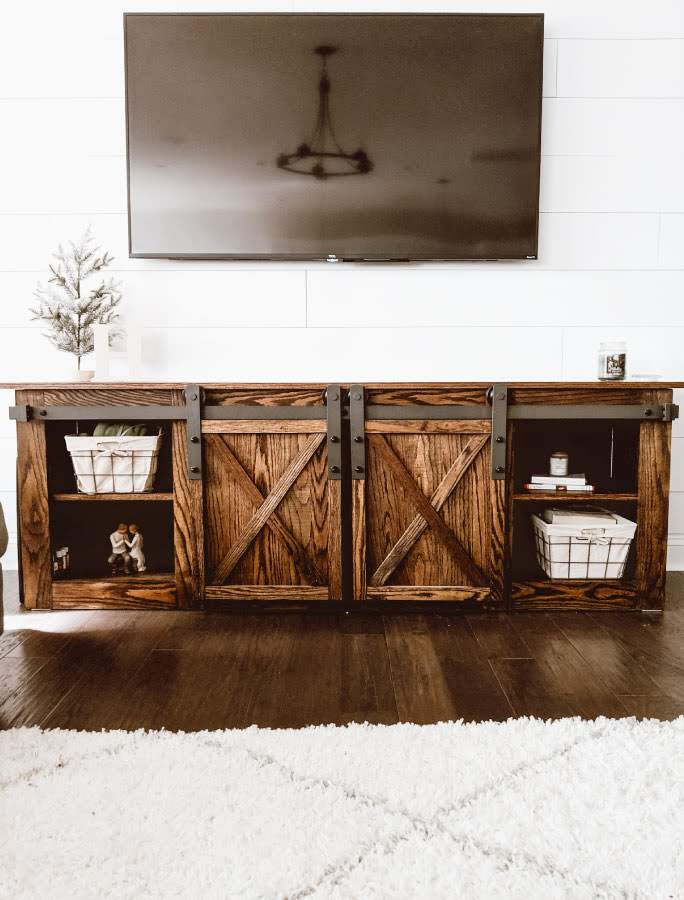
This was the second piece of furniture that my husband and I ever made. We had built a coffee table that had a lift up top so that we could eat dinner on the couch and store all of our board games. Once we tackled that, I thought we could conquer the world (even though the table was pretty basic). So when my now-husband was about to move into his first apartment without a roommate and I saw it as an opportunity to decorate my own place (even though I wasn’t living there). Luckily,he agreed it was time to get rid of his tiny Ikea TV stand that was probably 2ft off the ground and not a great height for a TV, and agreed to build this awesome TV console with me. To this day, it’s still my favorite piece of furniture in our house.
Sat, 11/09/2019 - 14:12
Love this, needing one in my front entry way. How long did it take?
The concept of hidden boot storage at the back is genius!!! I knew as soon as I saw your plan that I needed that in this space! Thank you so much for what you do!

Fri, 01/22/2021 - 11:42
May I ask how you would assemble if you wanted the hinge in the back as in this picture?
Thank you.
Wed, 08/25/2021 - 04:51
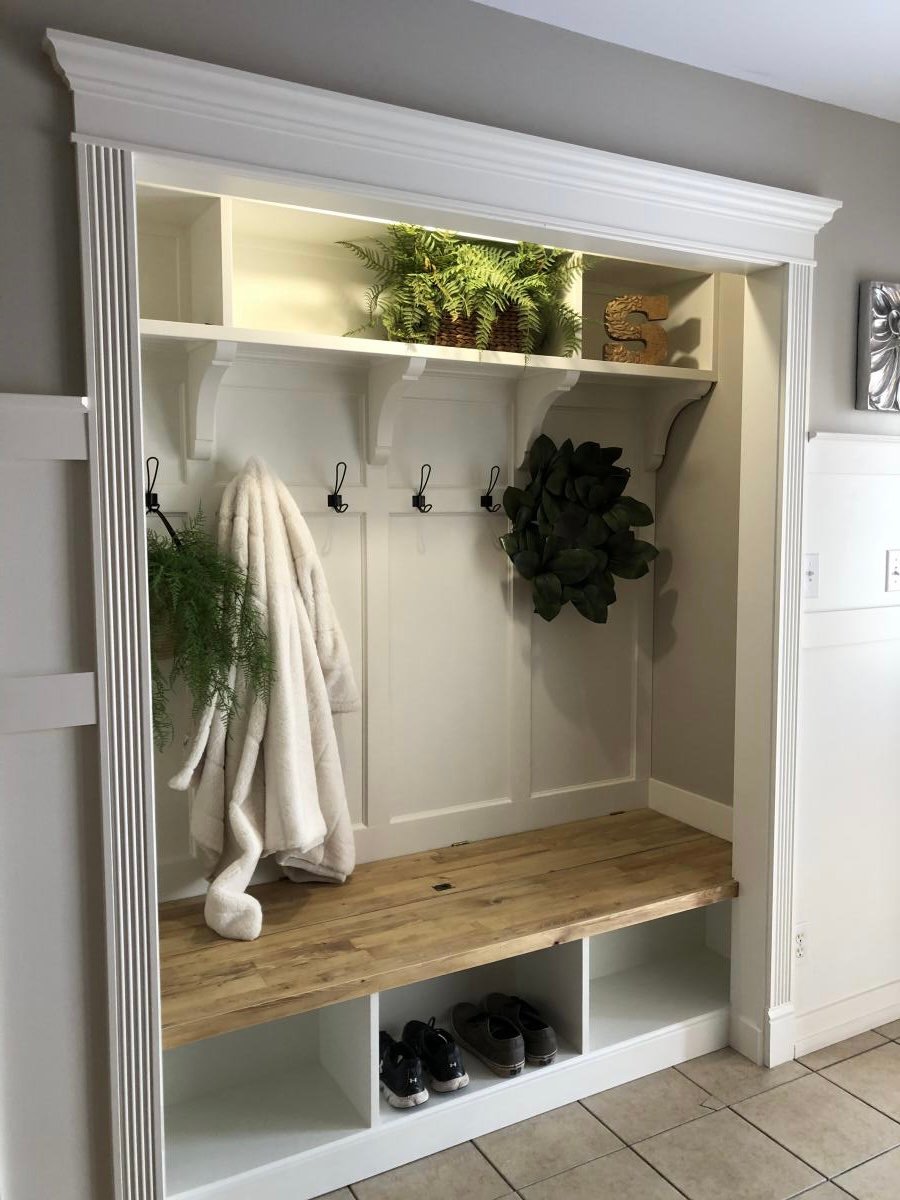
Hello, can you tell me how to find the plans for the Mudroom Closet makeover? I’m interested in doing the one pictured on this page.
Thank you

Used part of the Ultimate Roll Away Workbench with Miter Saw Stand to just build one of the roll-away workbenches to work with my miter saw and table saw. I'm very happy with how it turned out.


Sun, 04/28/2024 - 12:57
Hi, I am planning on getingt a dewalt 10 inch table saw as well. I am wondering what you did to adapt it for extending the rails with the fence? Curious if there were more photos. I would very much like to adapt my station to be similar to yours. Thanks. .
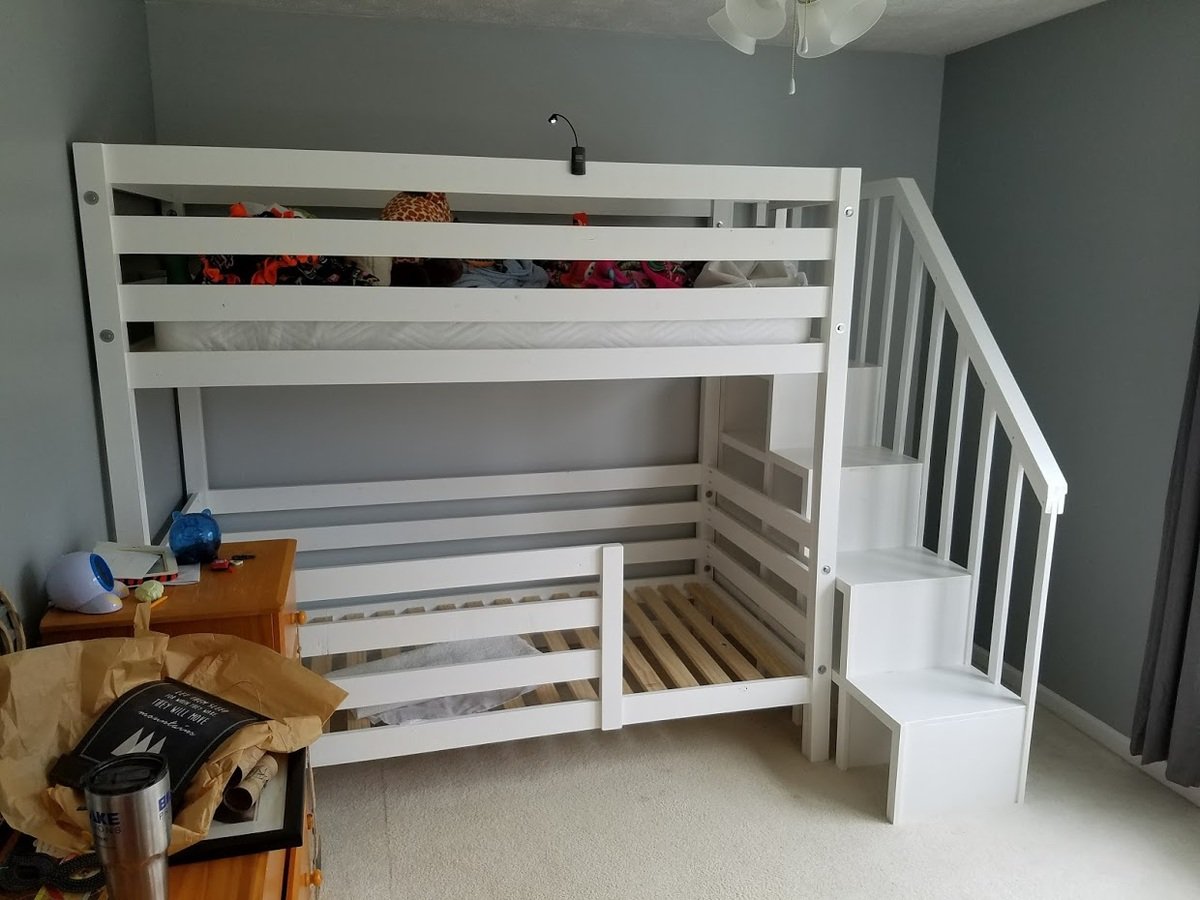
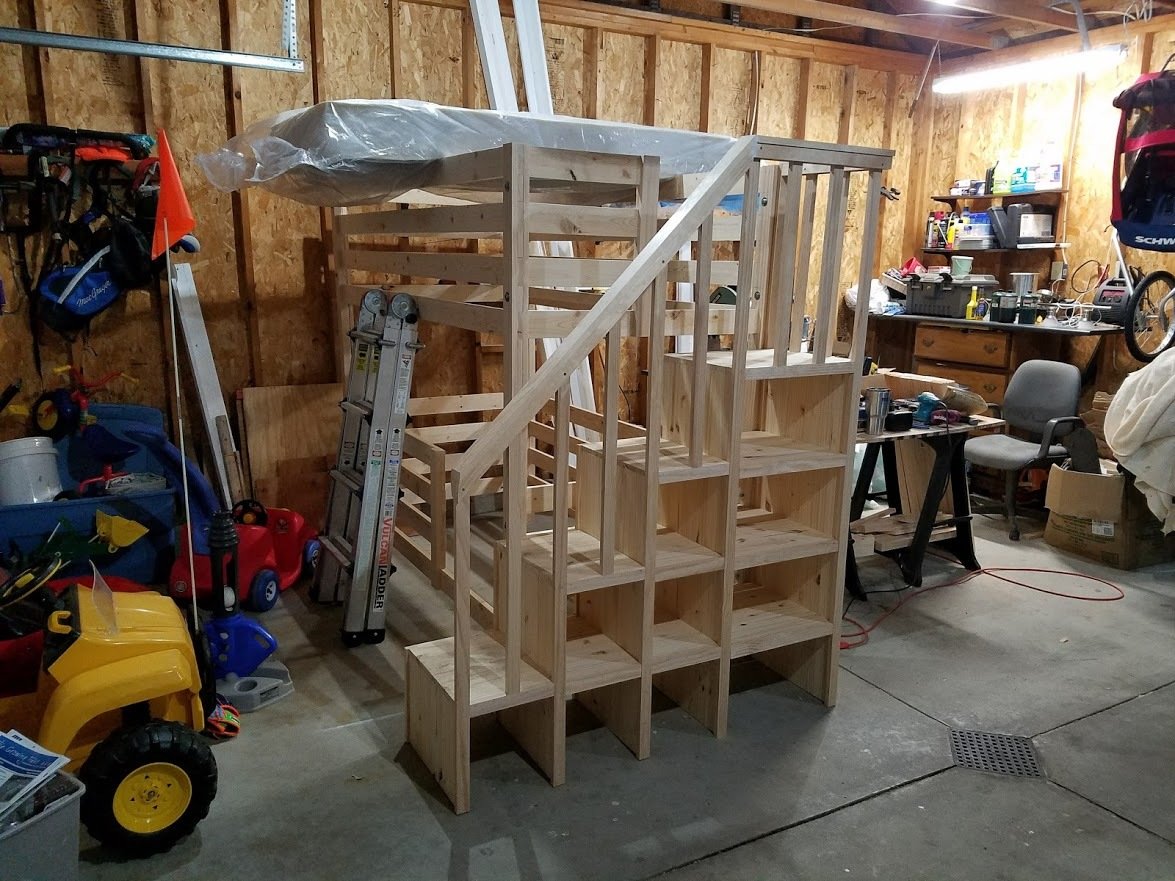
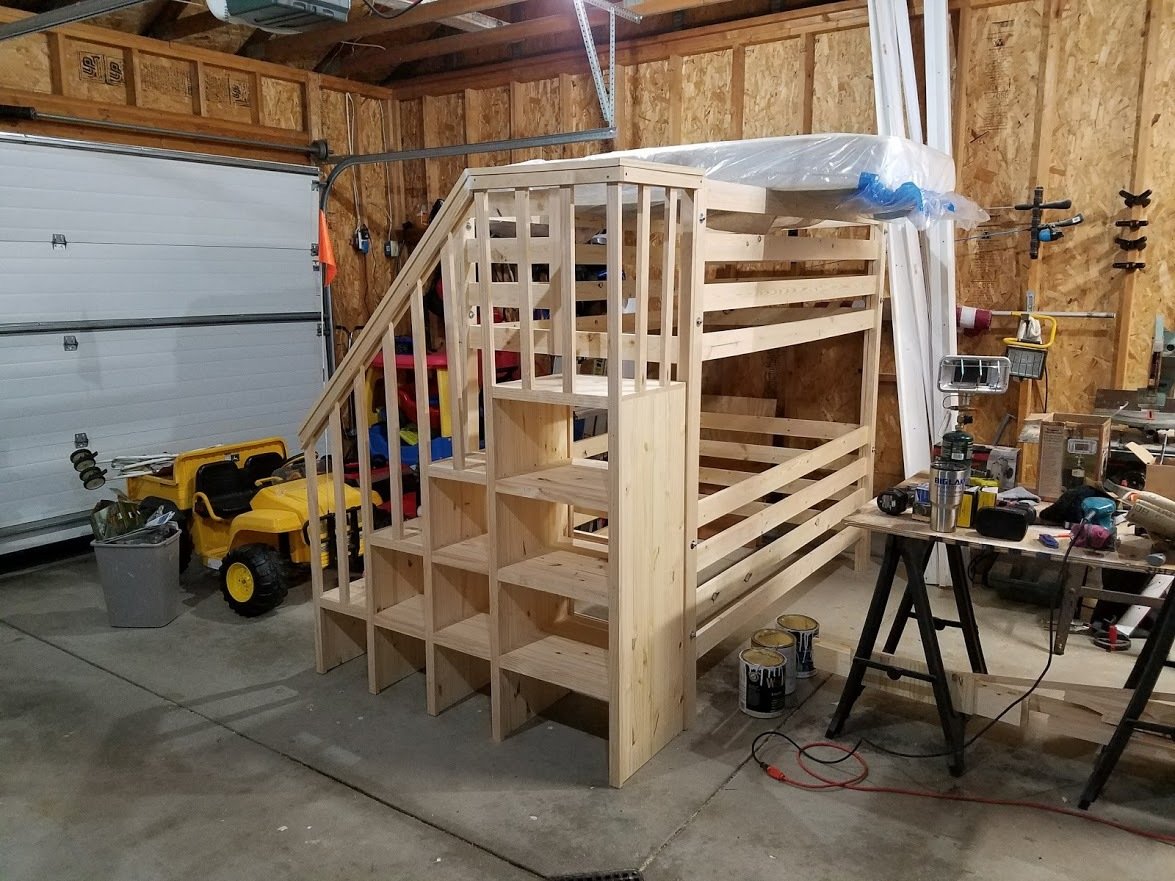
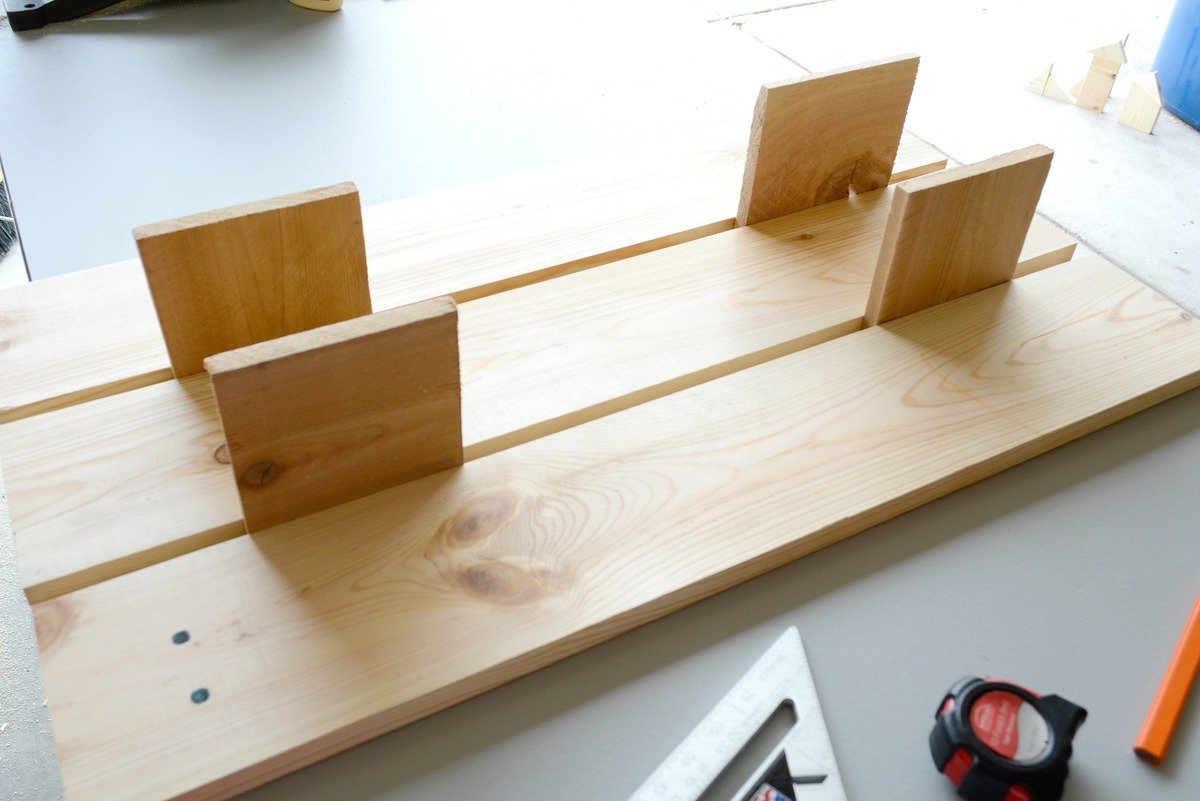
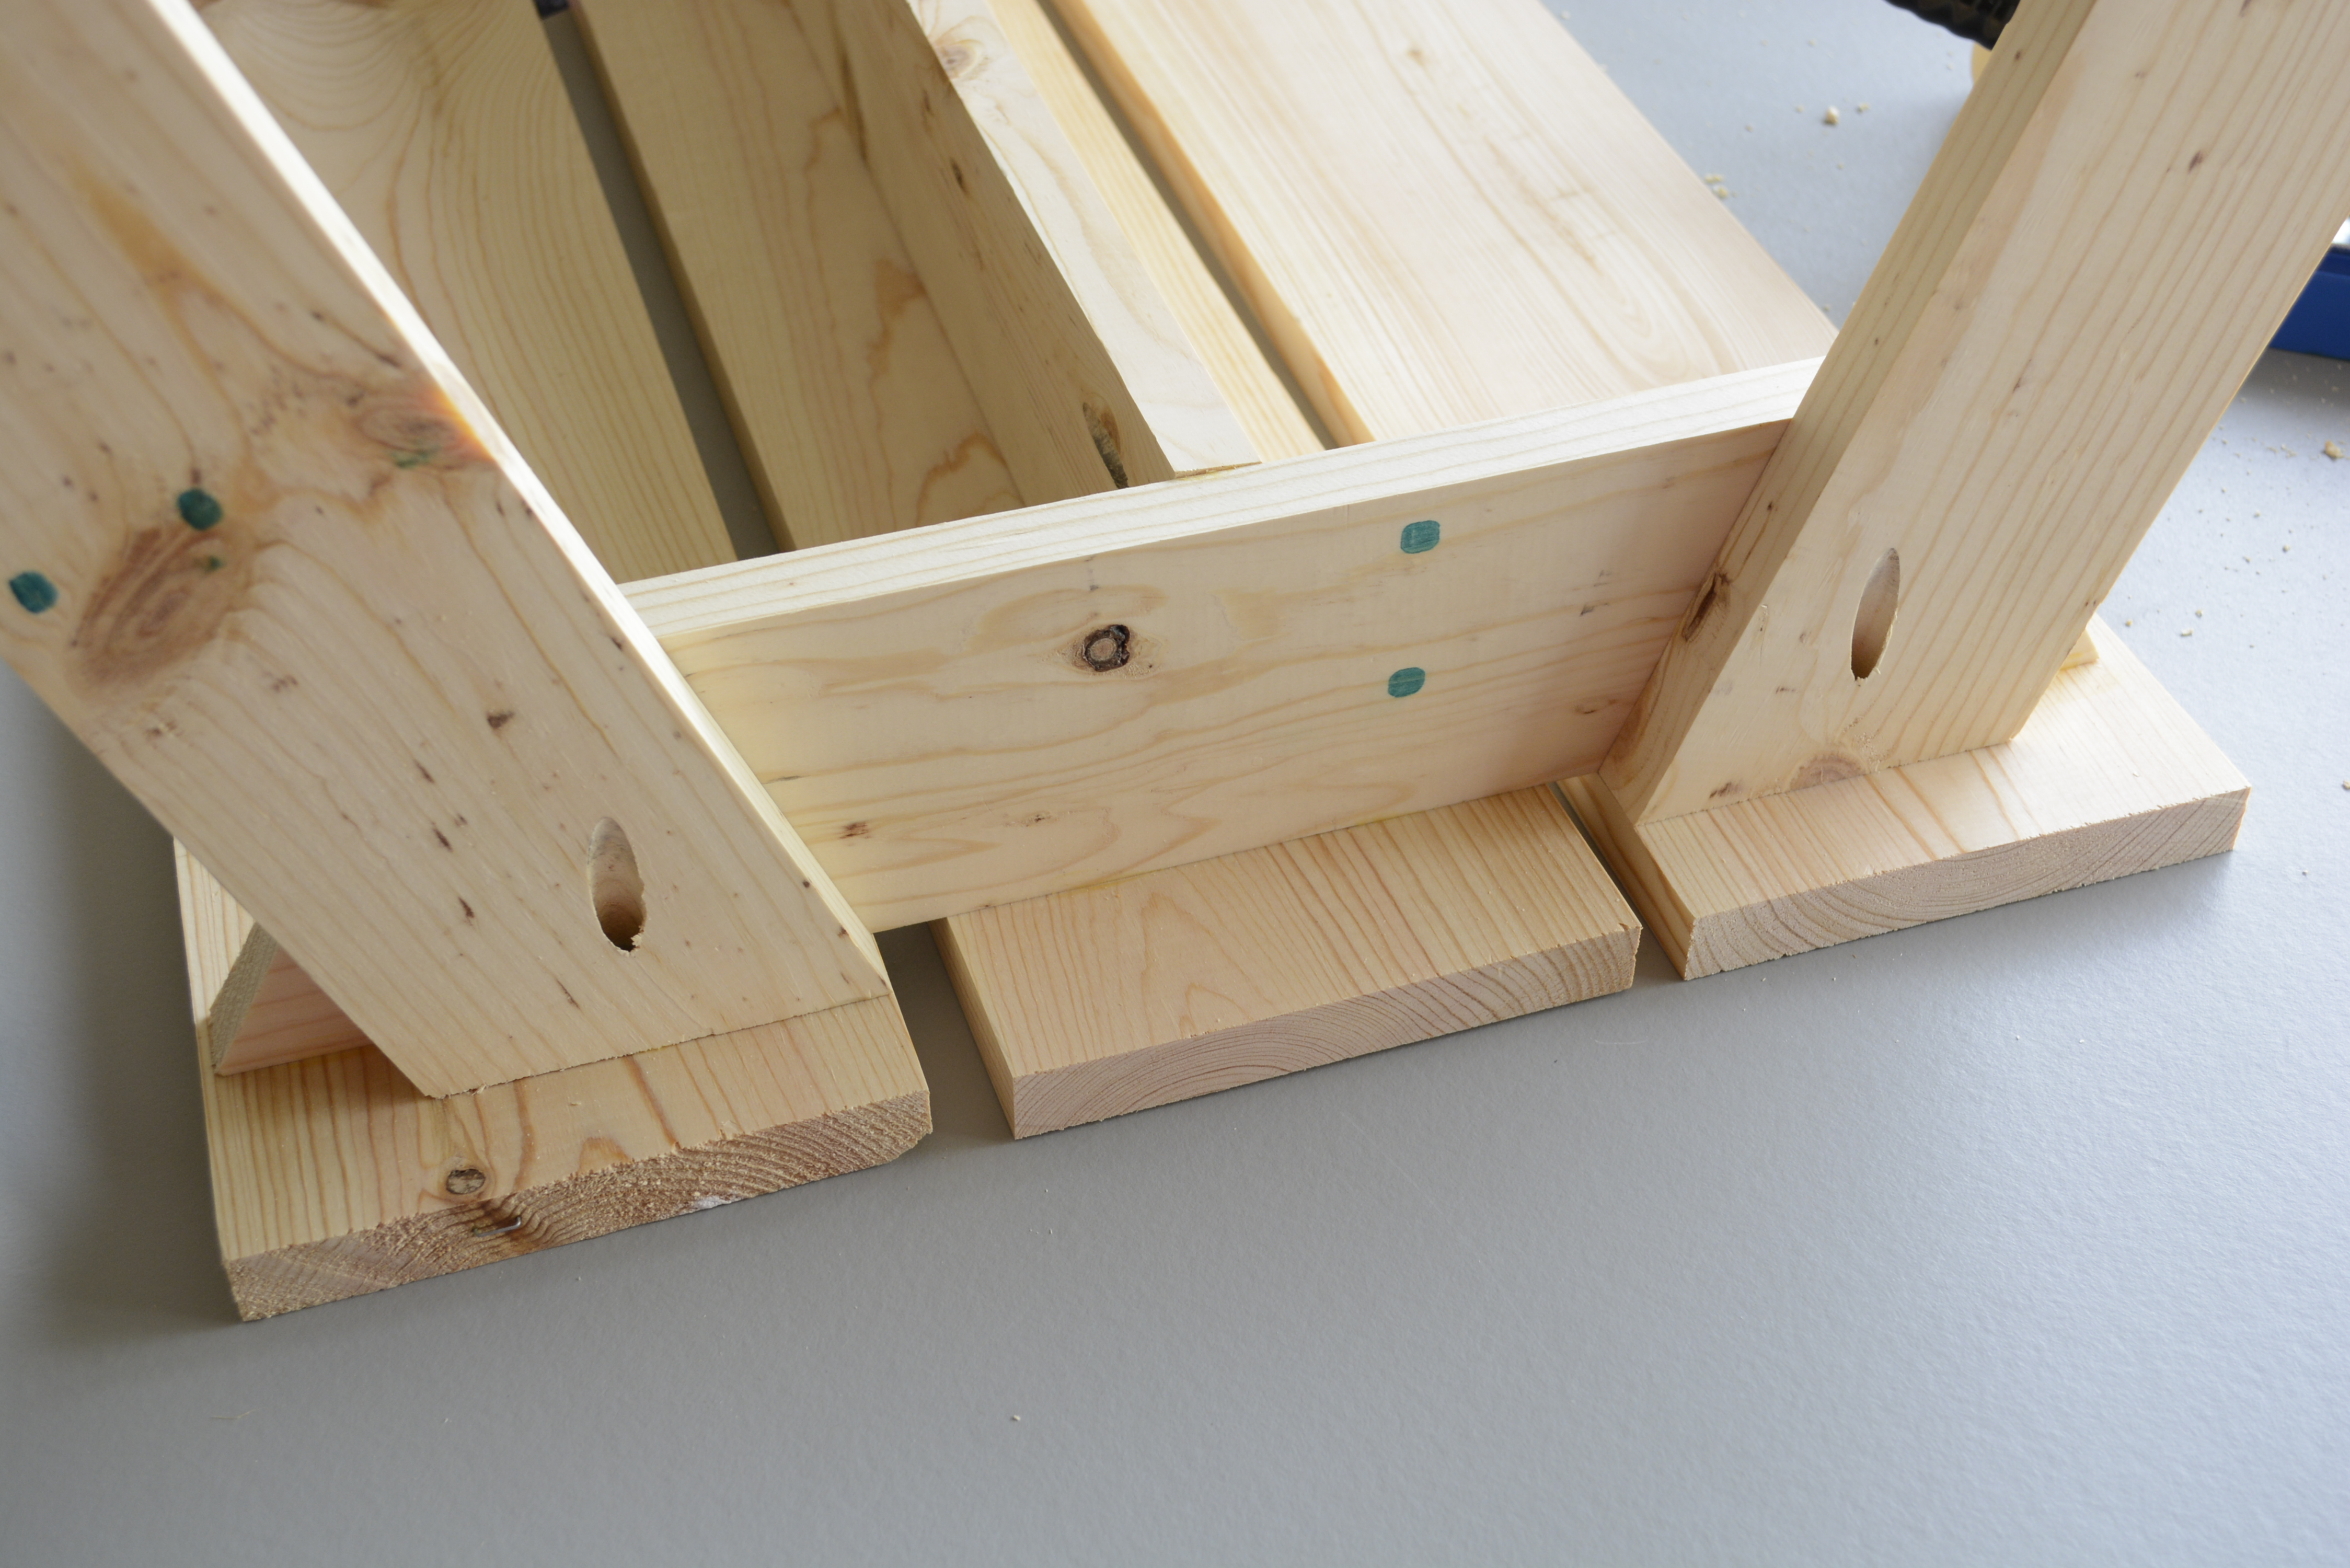
I modified the plans for the Classic Bunk beds by making them 74" tall instead of 63" and added a fourth slat all the way around to add more protection from potential falls. I created one opening in the front for my youngest to get into the bottom bunk, and built slats about 2/3's across the front to act as a gaurd rail. I created another opening on the side for my oldest to get into the top bunk with stairs instead of ladders to again prevent falls. I had to modify the Sweet Pea stairs to accomodate for the extra height in the bunk beds, simplified the railings, and I created each cubby to be big enough to use cloth storage totes that were 11x11x11. Sanded the whole bed and stairs so the corners and edges were all rounded and smooth, and put two coats of white Deck and Porch paint to stand up to the the boys running up and down. I used brackets to secure the stairs to the bed, and sixteen 3" bolts to bind the bed together. Precut and drilled 17 slats for each bed seperated them 2" apart. Spent a few hours every night during the week measuring, cutting, glueing, drilling and assembling the bed and stairs. Spent an entire weekend sanding and painting. Very happy with the way these beds turned out. Overall cost of the project including the paint was around $400.
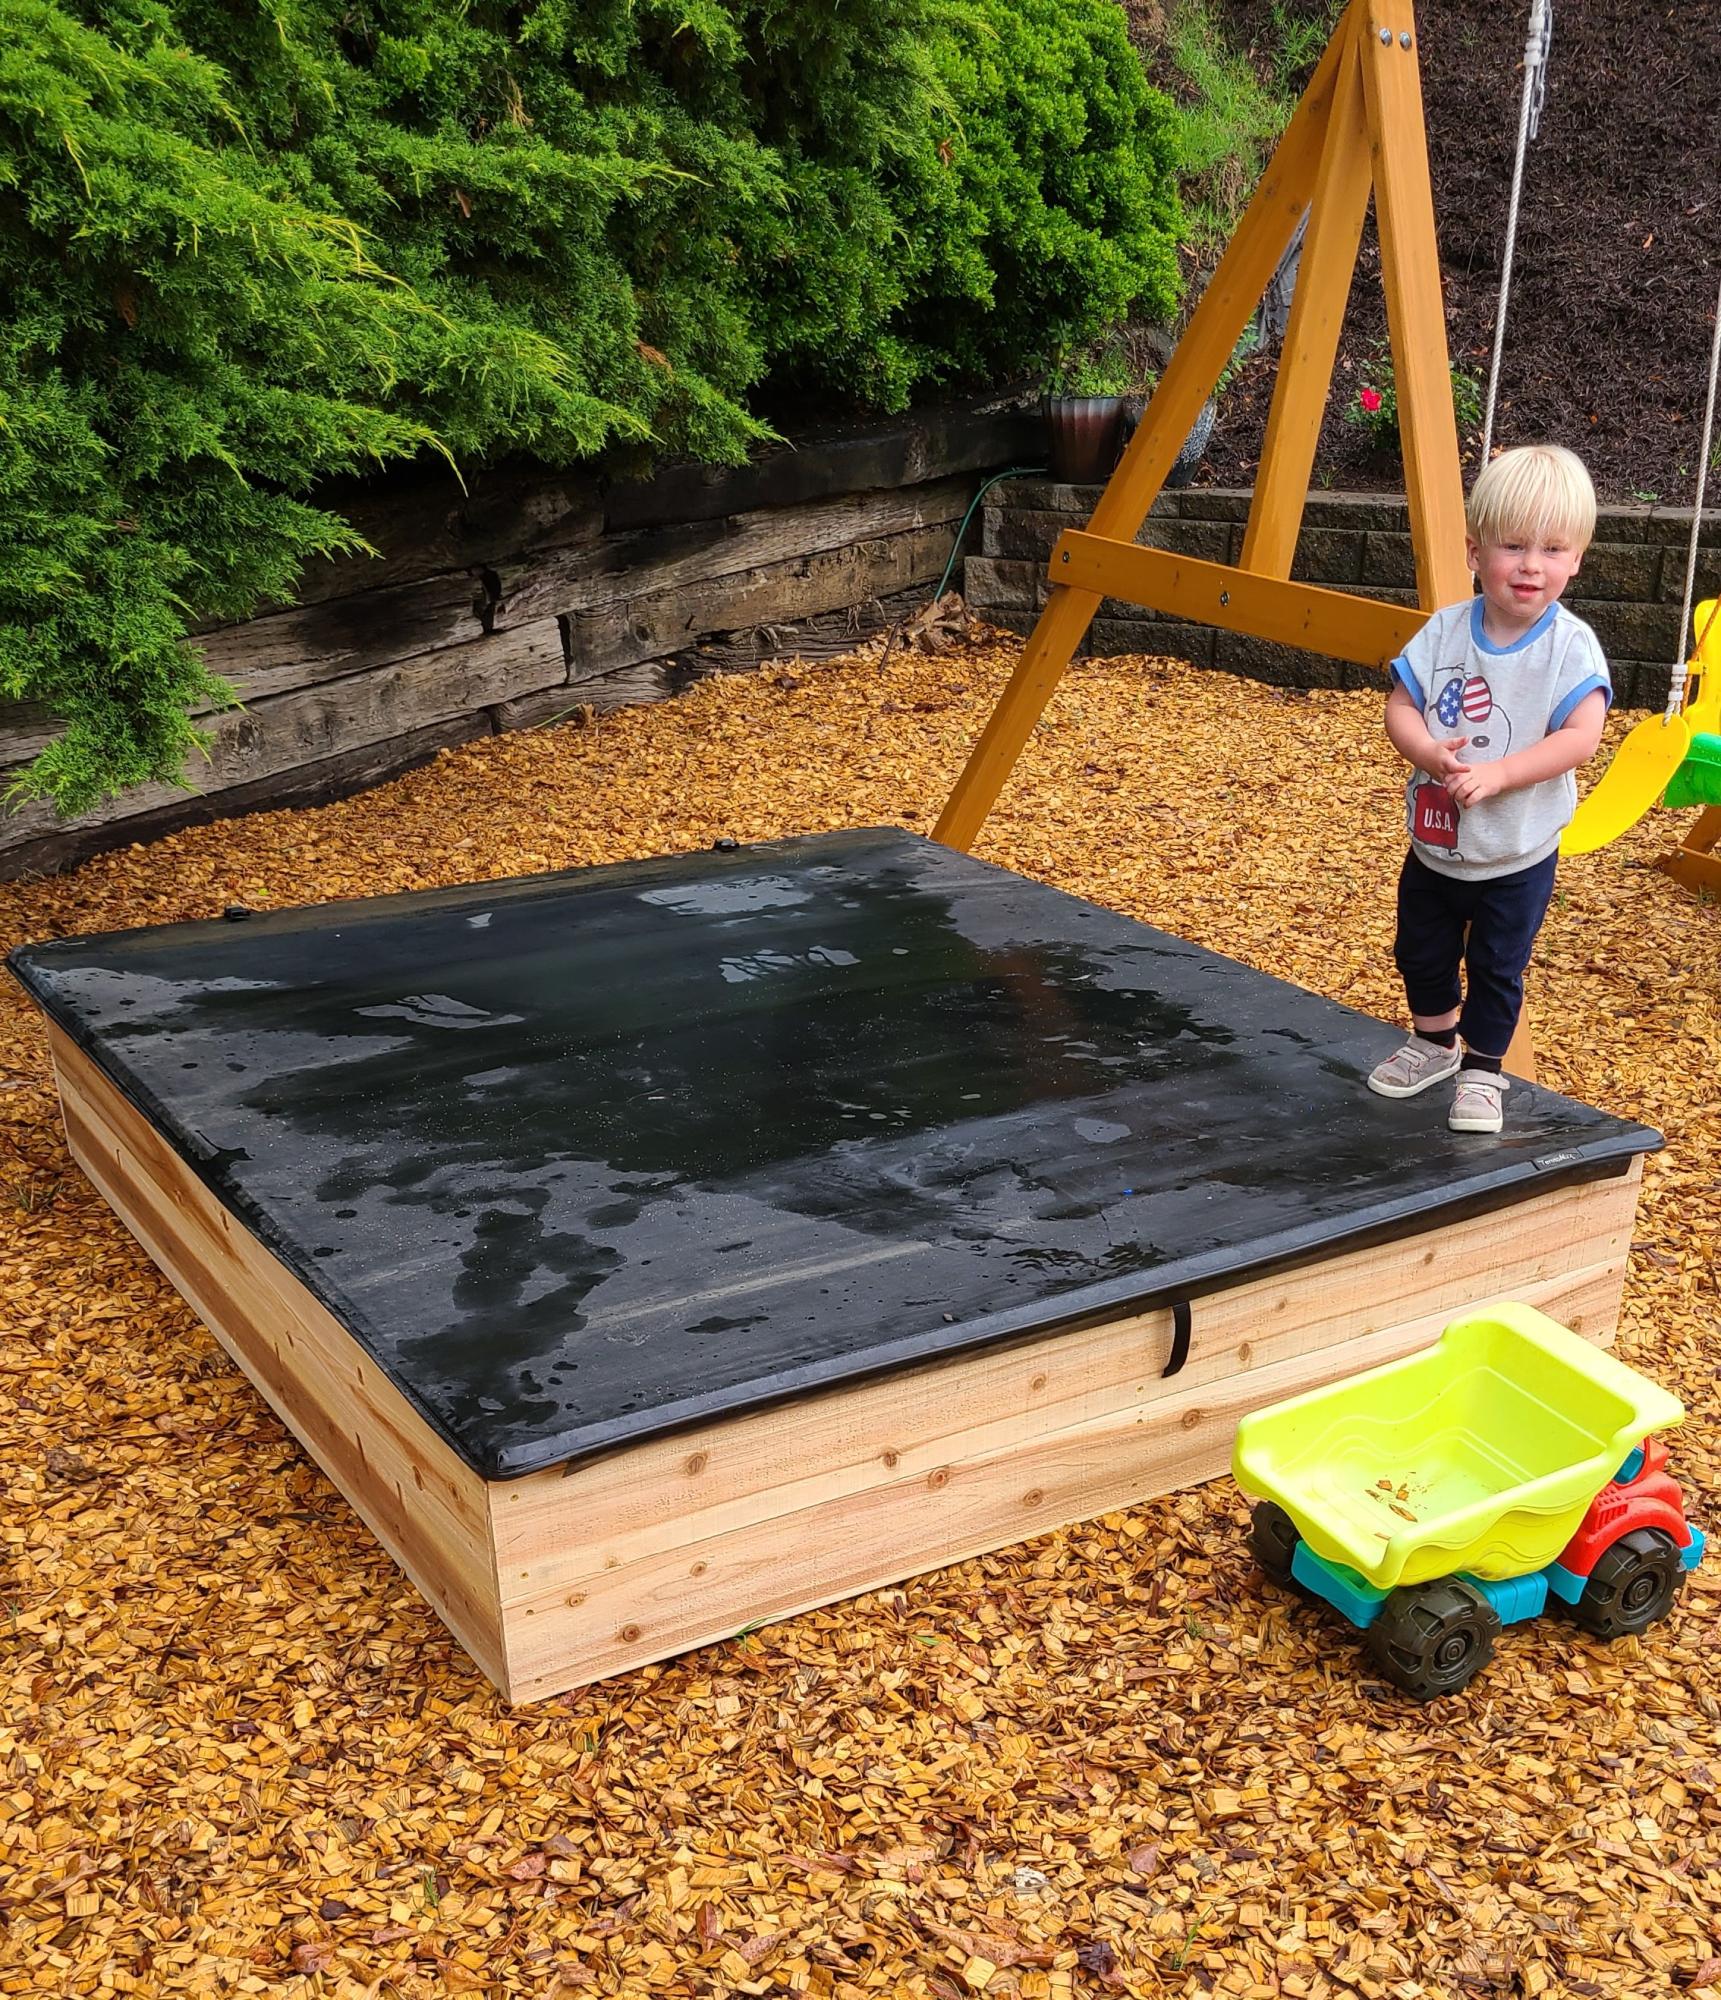
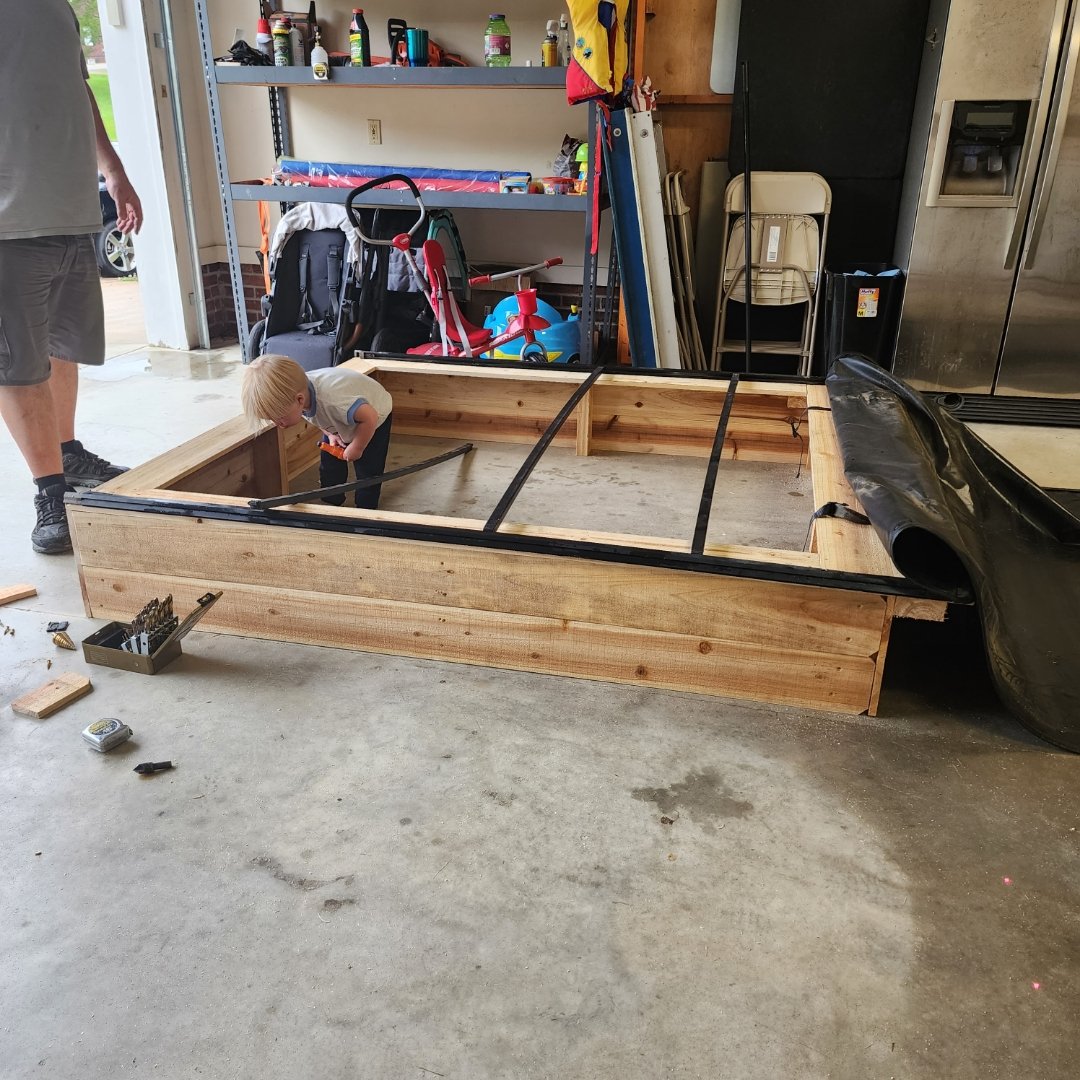
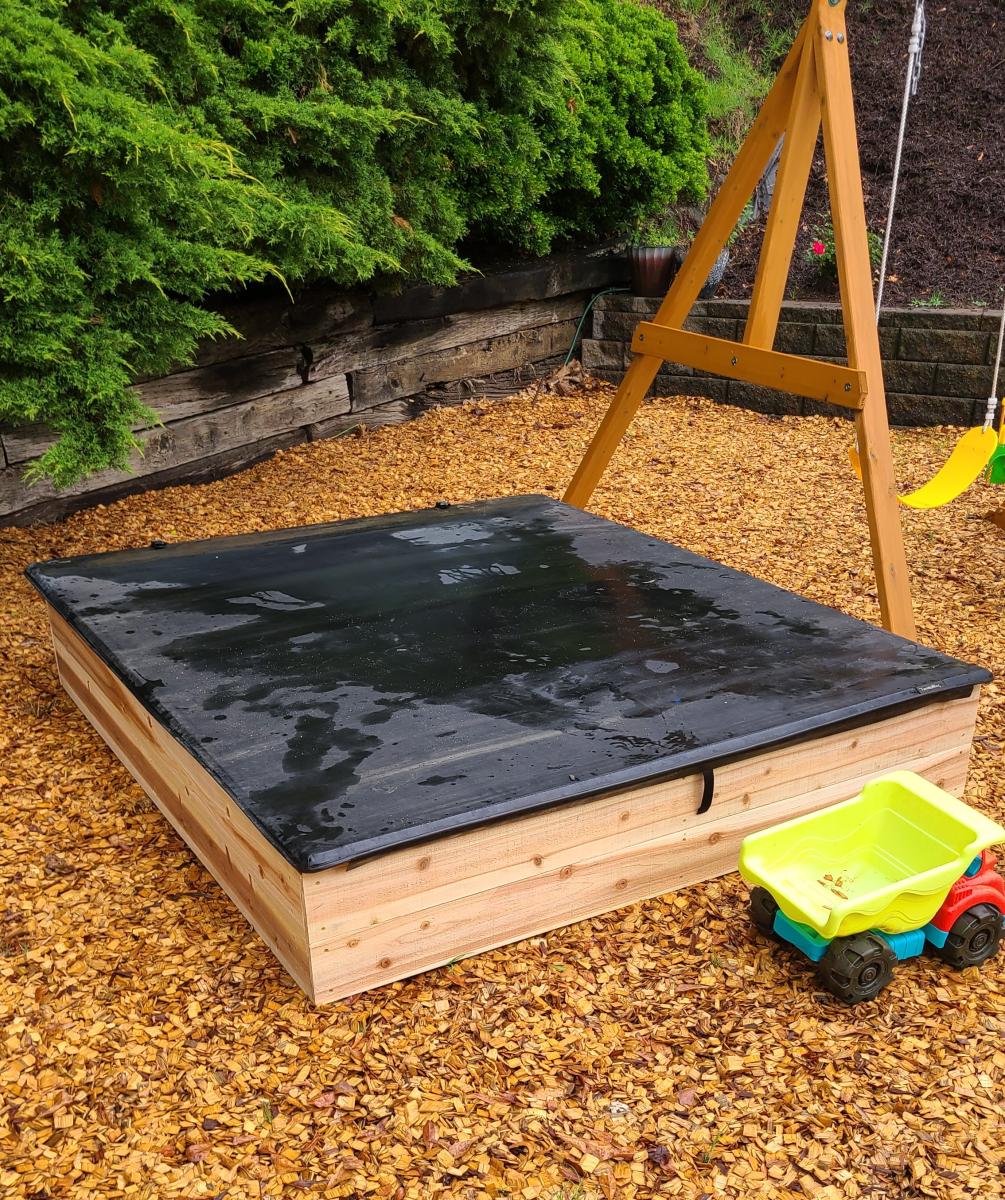
The cover is a tonneau cover for a pickup truck. It's for a 6.5' truck bed so if you notice, I had to ad a 2x4 and one more picket on top to accommodate the extra length.
The cover would add a ridiculous amount of money to the project but it was repurposed. I found it on a truck that was in an accident and going to the scrap yard. I think it it came out great and my grandson loves it.
John

Easy to build, easy to customize, perfect for totes

I used pocket holes to hide the screws. I made an ottoman out of the outdoor coffee table plans to my dimensions that can be used as a coffee table when we need it.
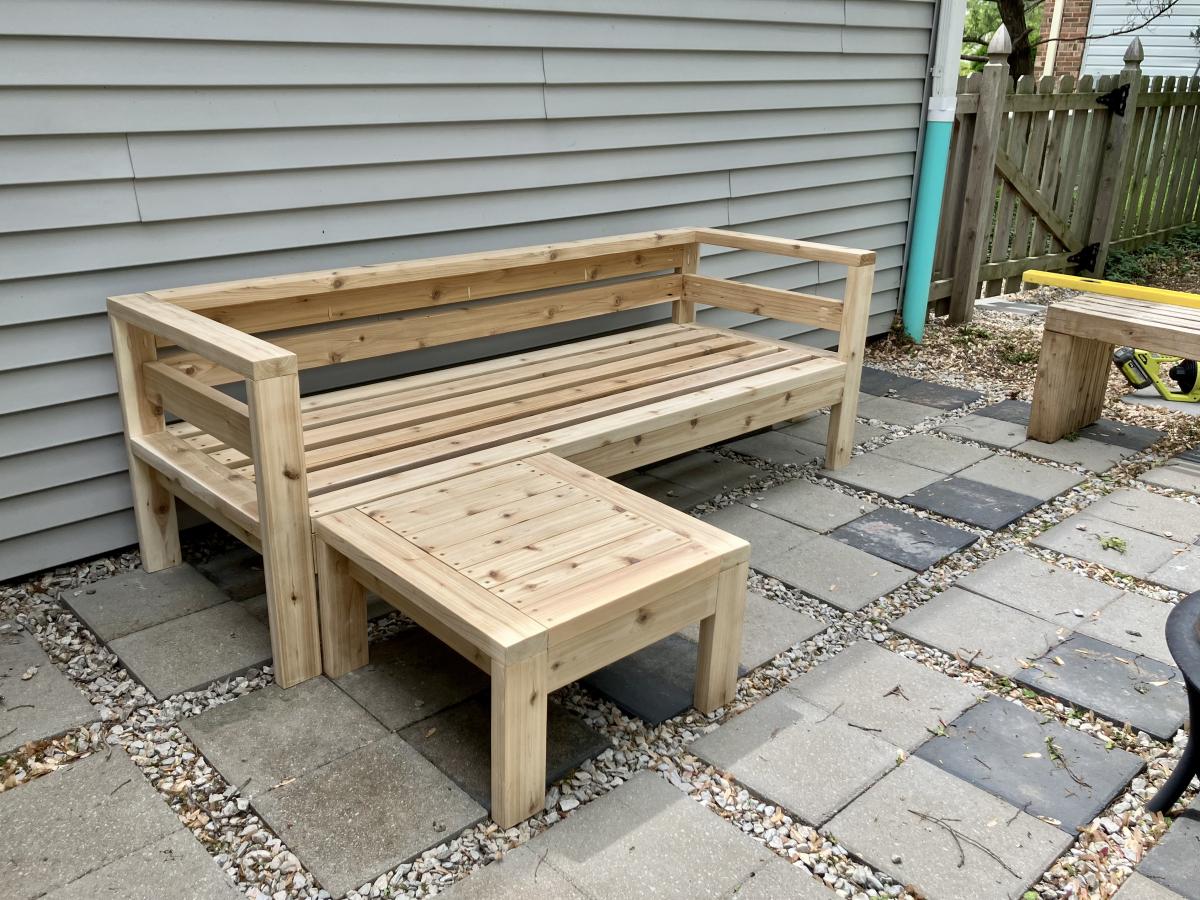

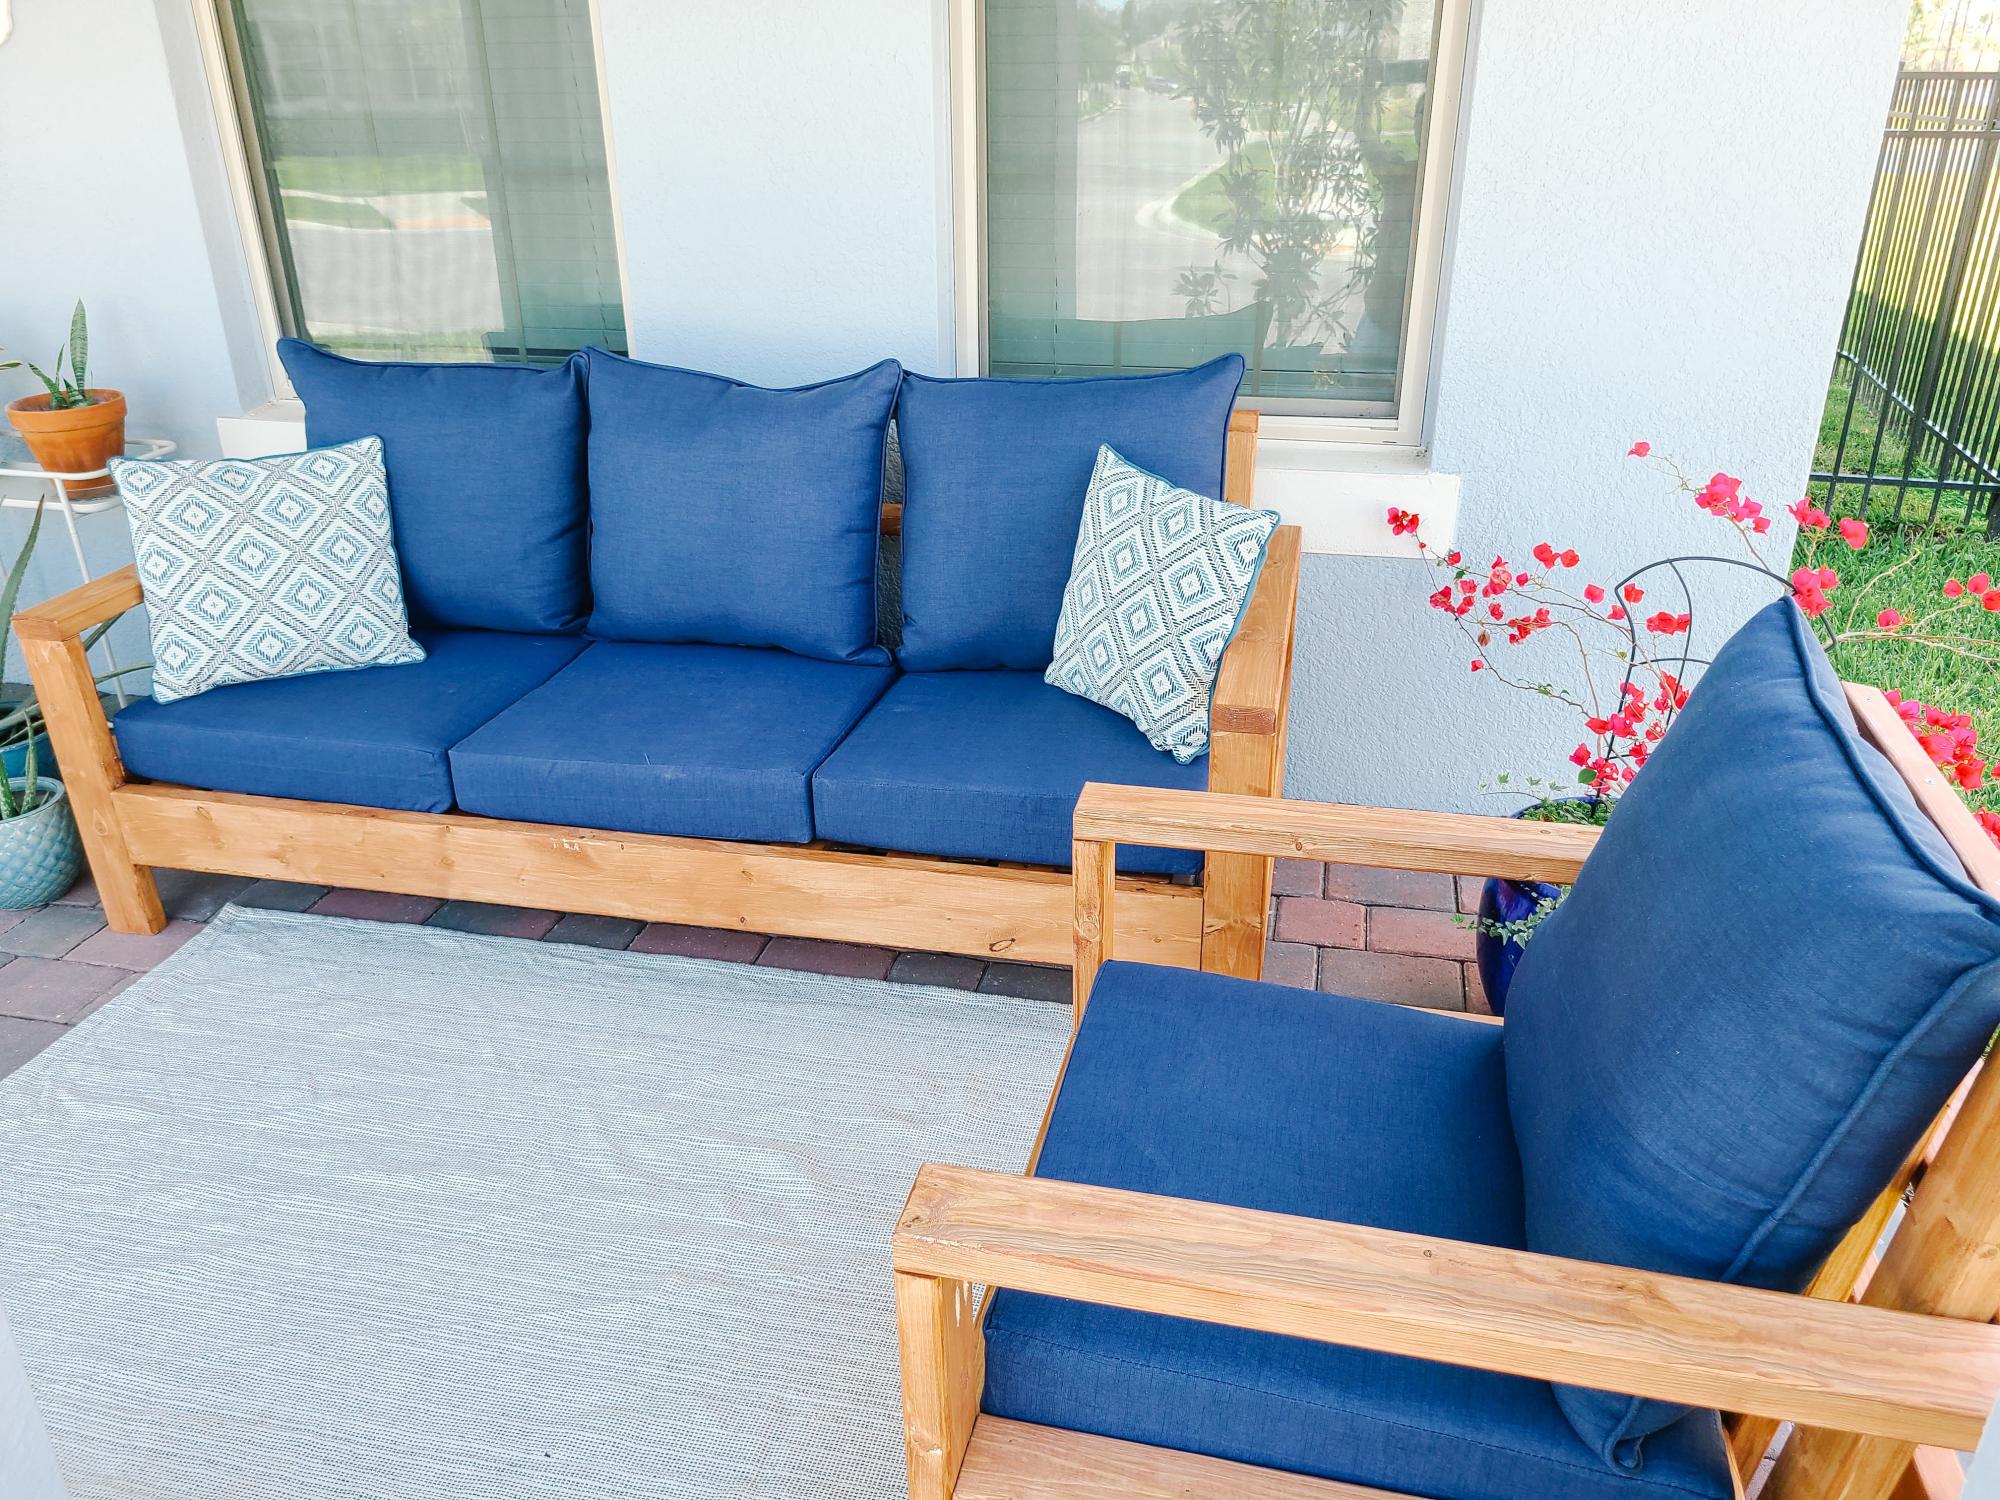
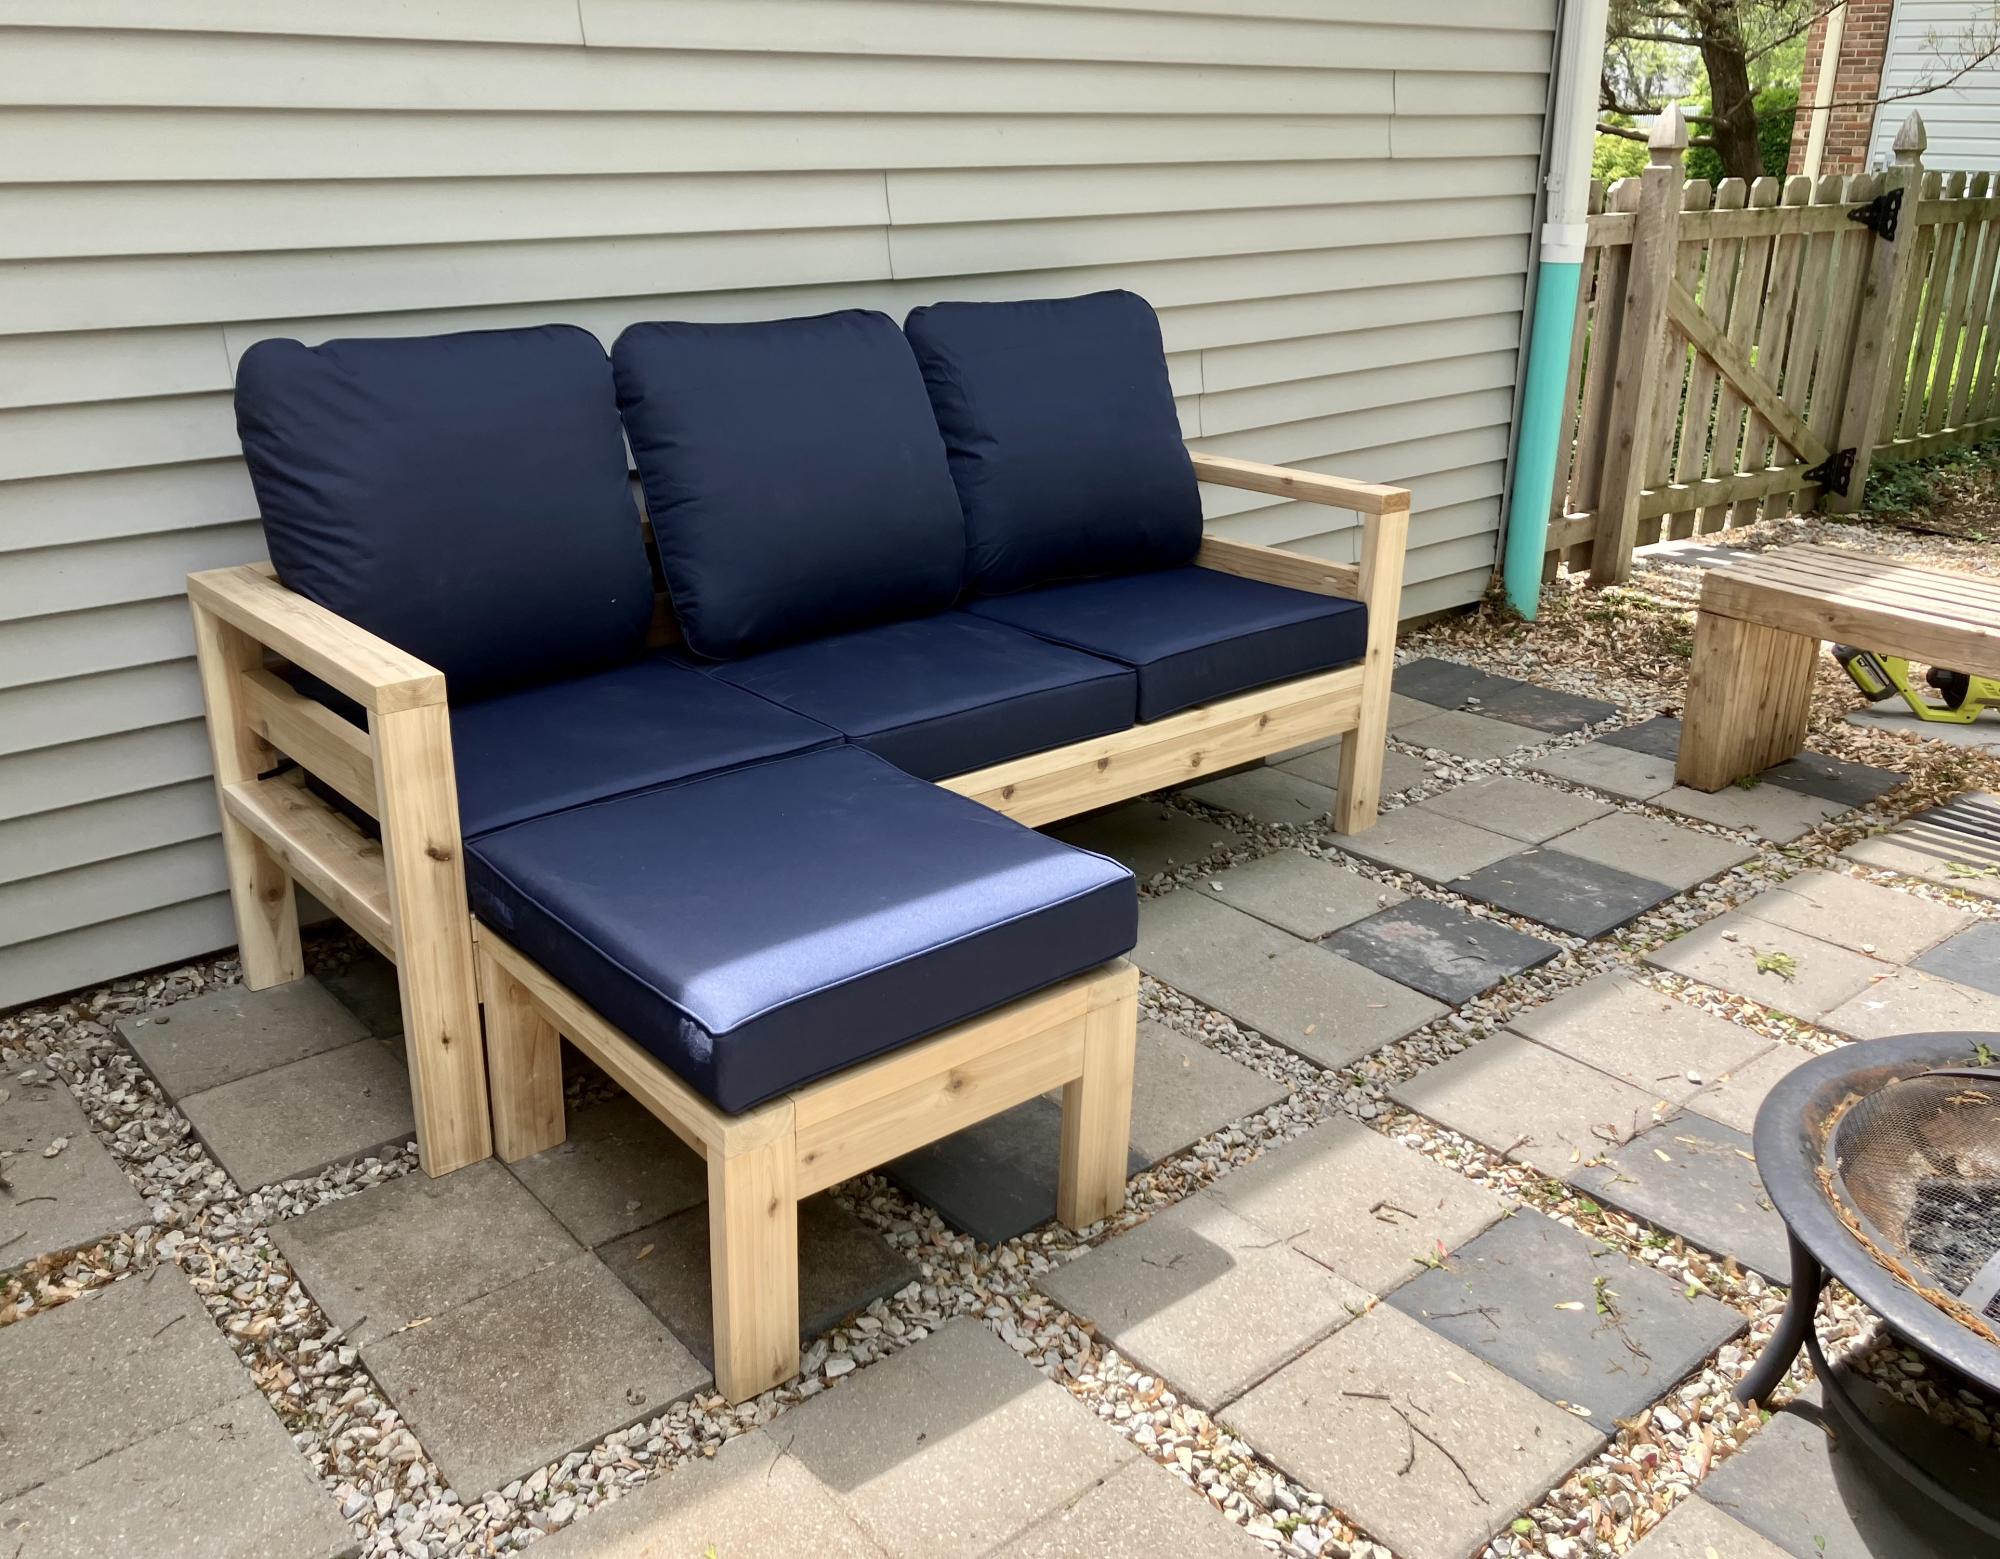
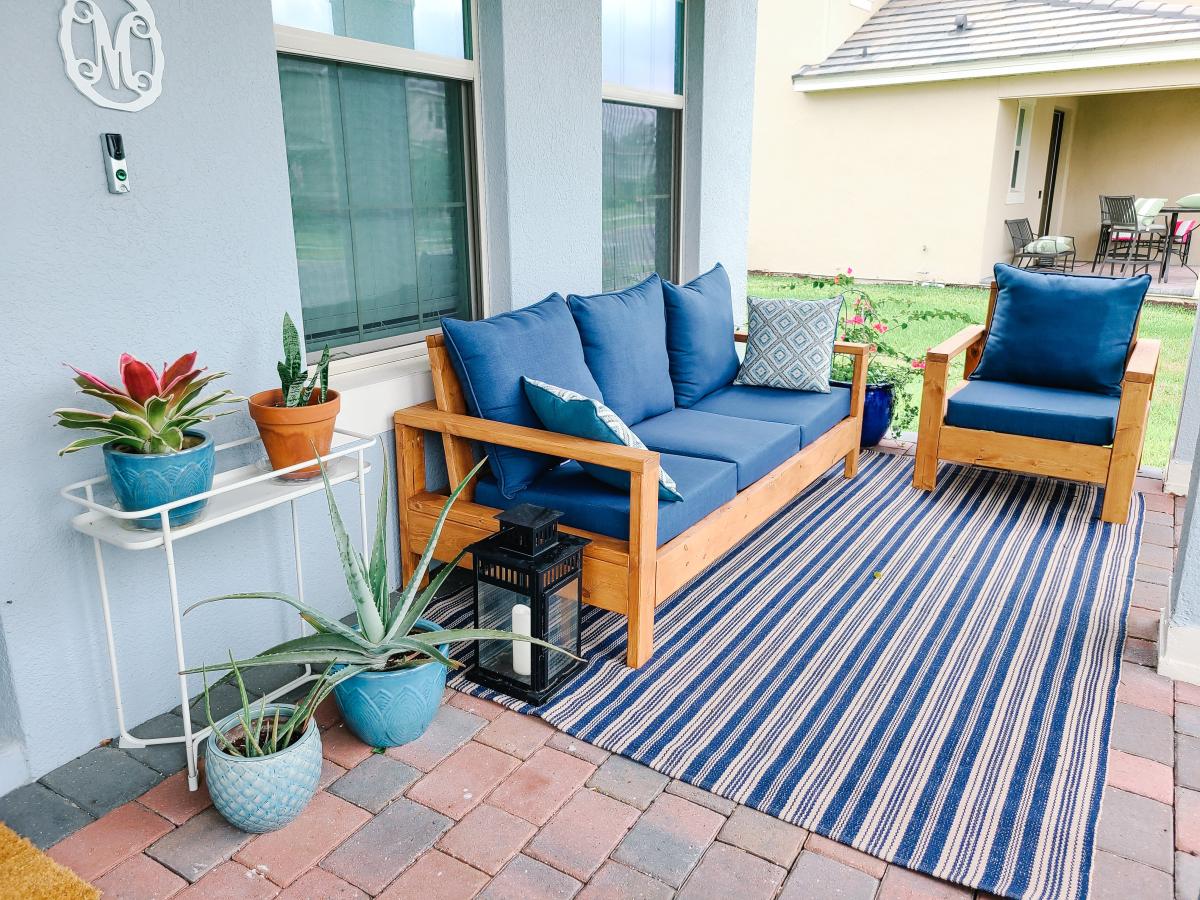
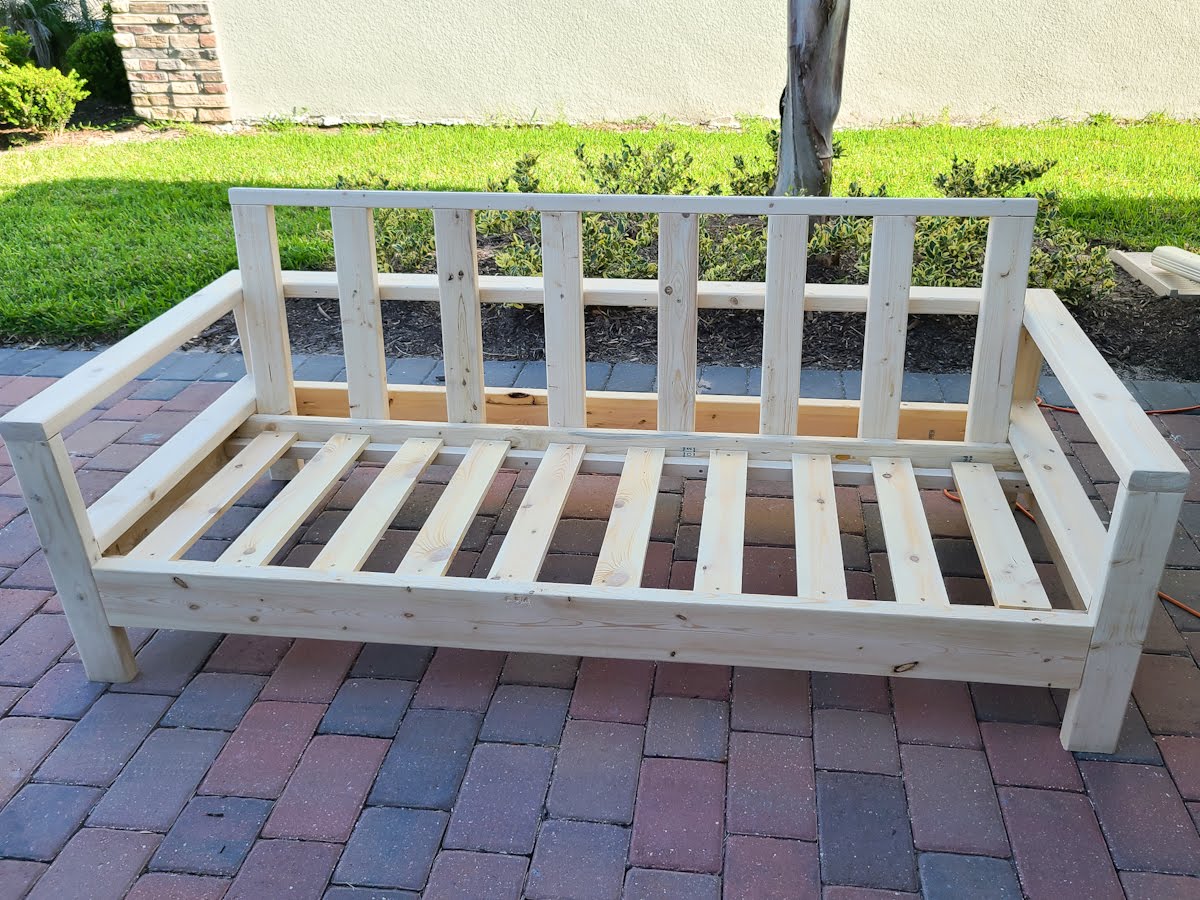
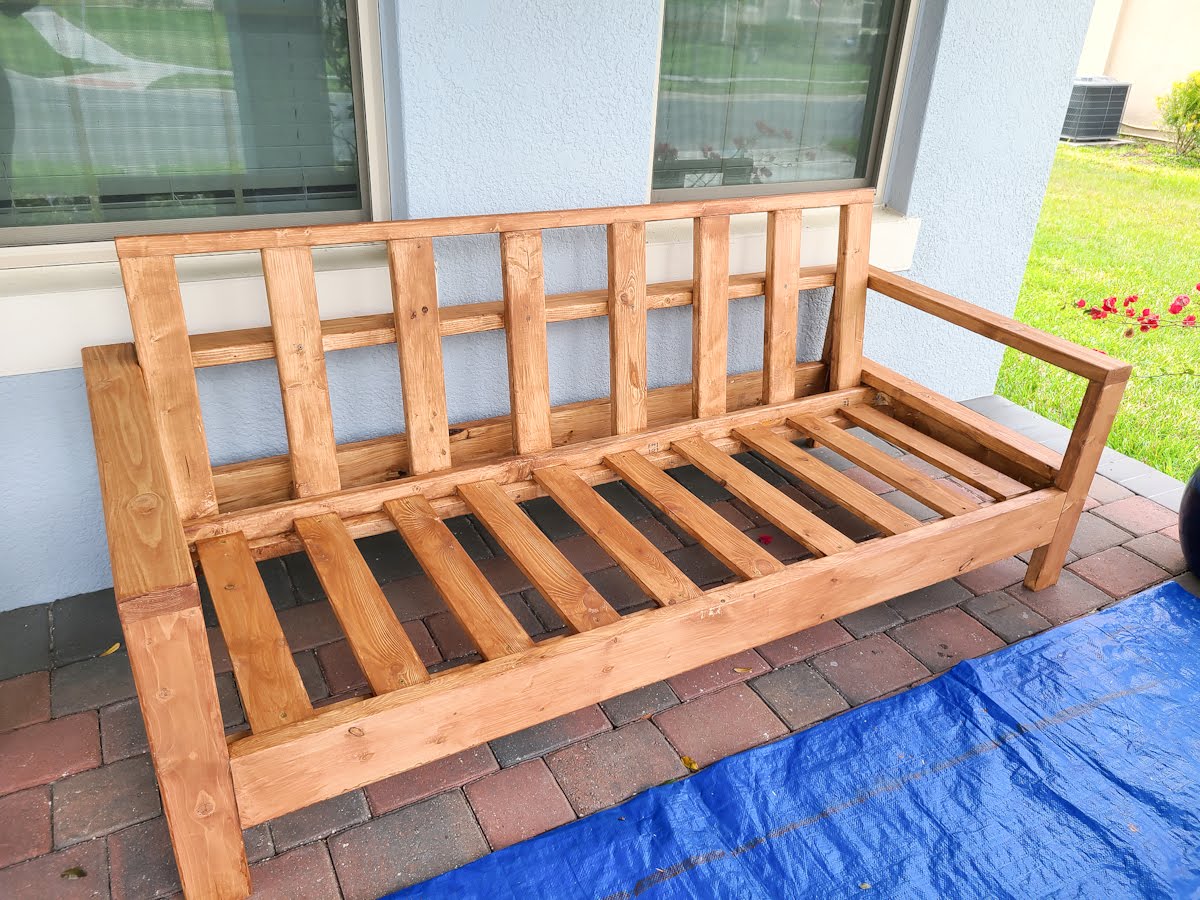
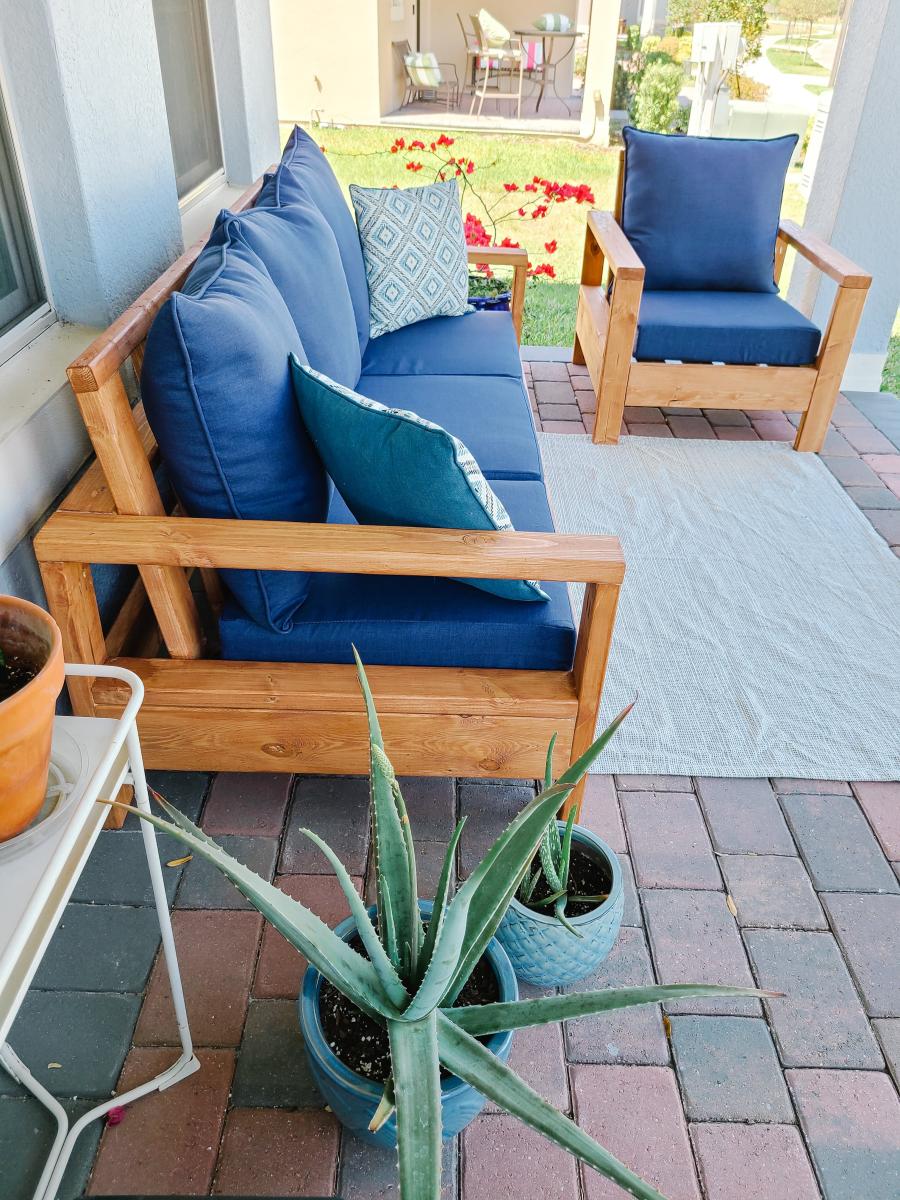
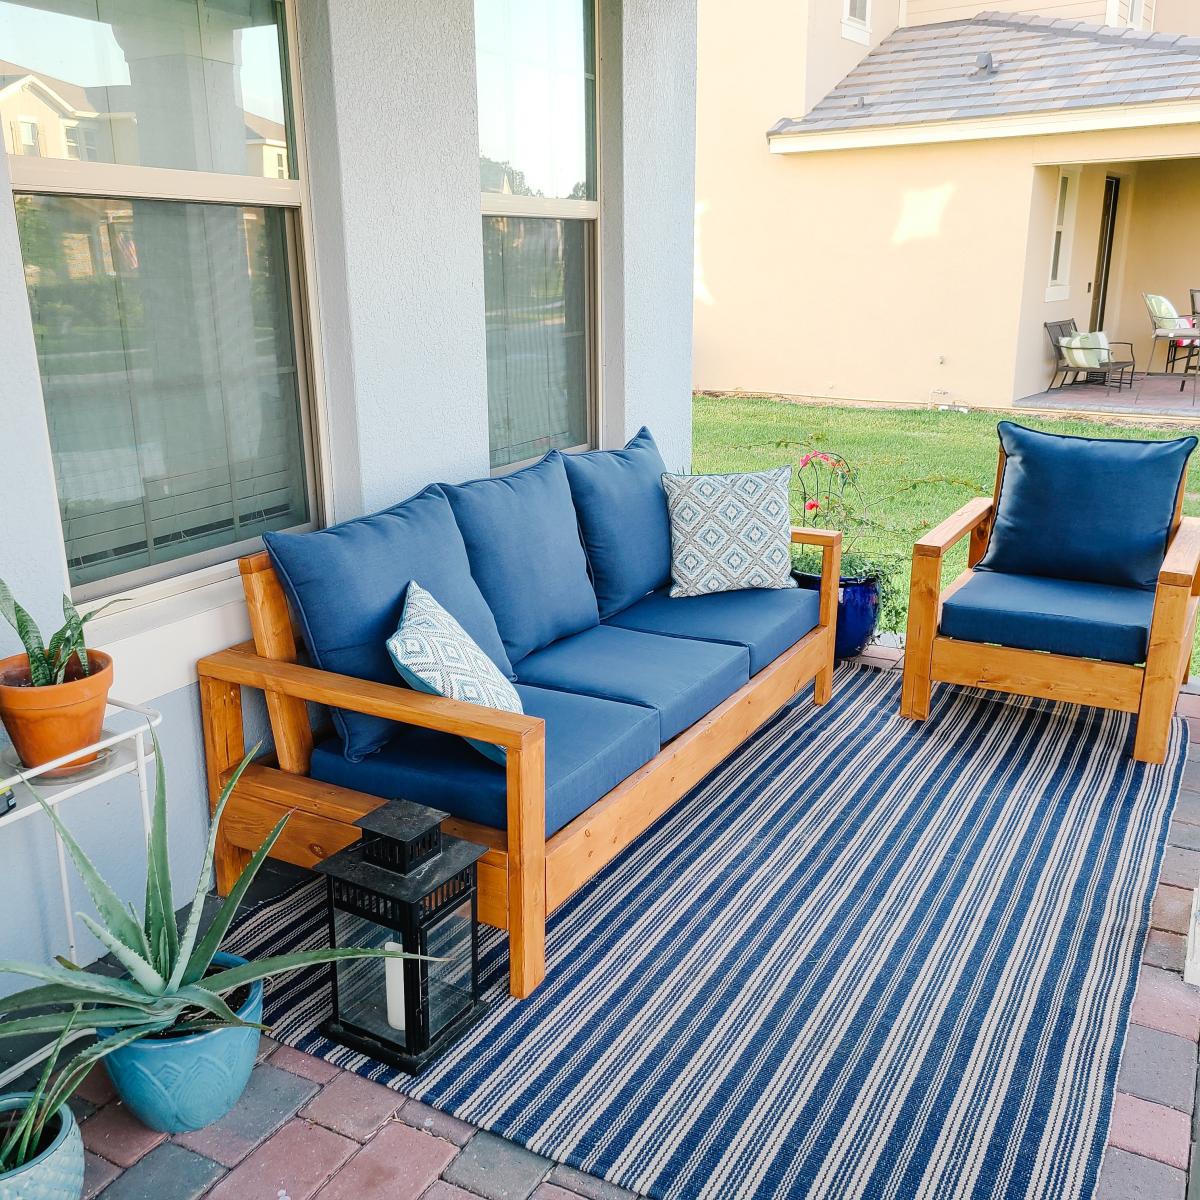
OK, I think this build may be my biggest project yet! It is definitely the heaviest. With the strong winds we can get here in Florida we needed substantial outdoor furniture.
I did make some modifications along the way measurement-wise so the sofa would fit my front porch better. All in all, this took 2 full days. I built the sofa first, stained it the next day and then decided (due to trying to get stain in all the nooks and crannies) to stain the chair pieces first before putting it together.
I am so happy with the results and so far, almost a year later, this furniture looks great and hasn't moved an inch in any of the thunderstorms we've had! Thank you Ana!!
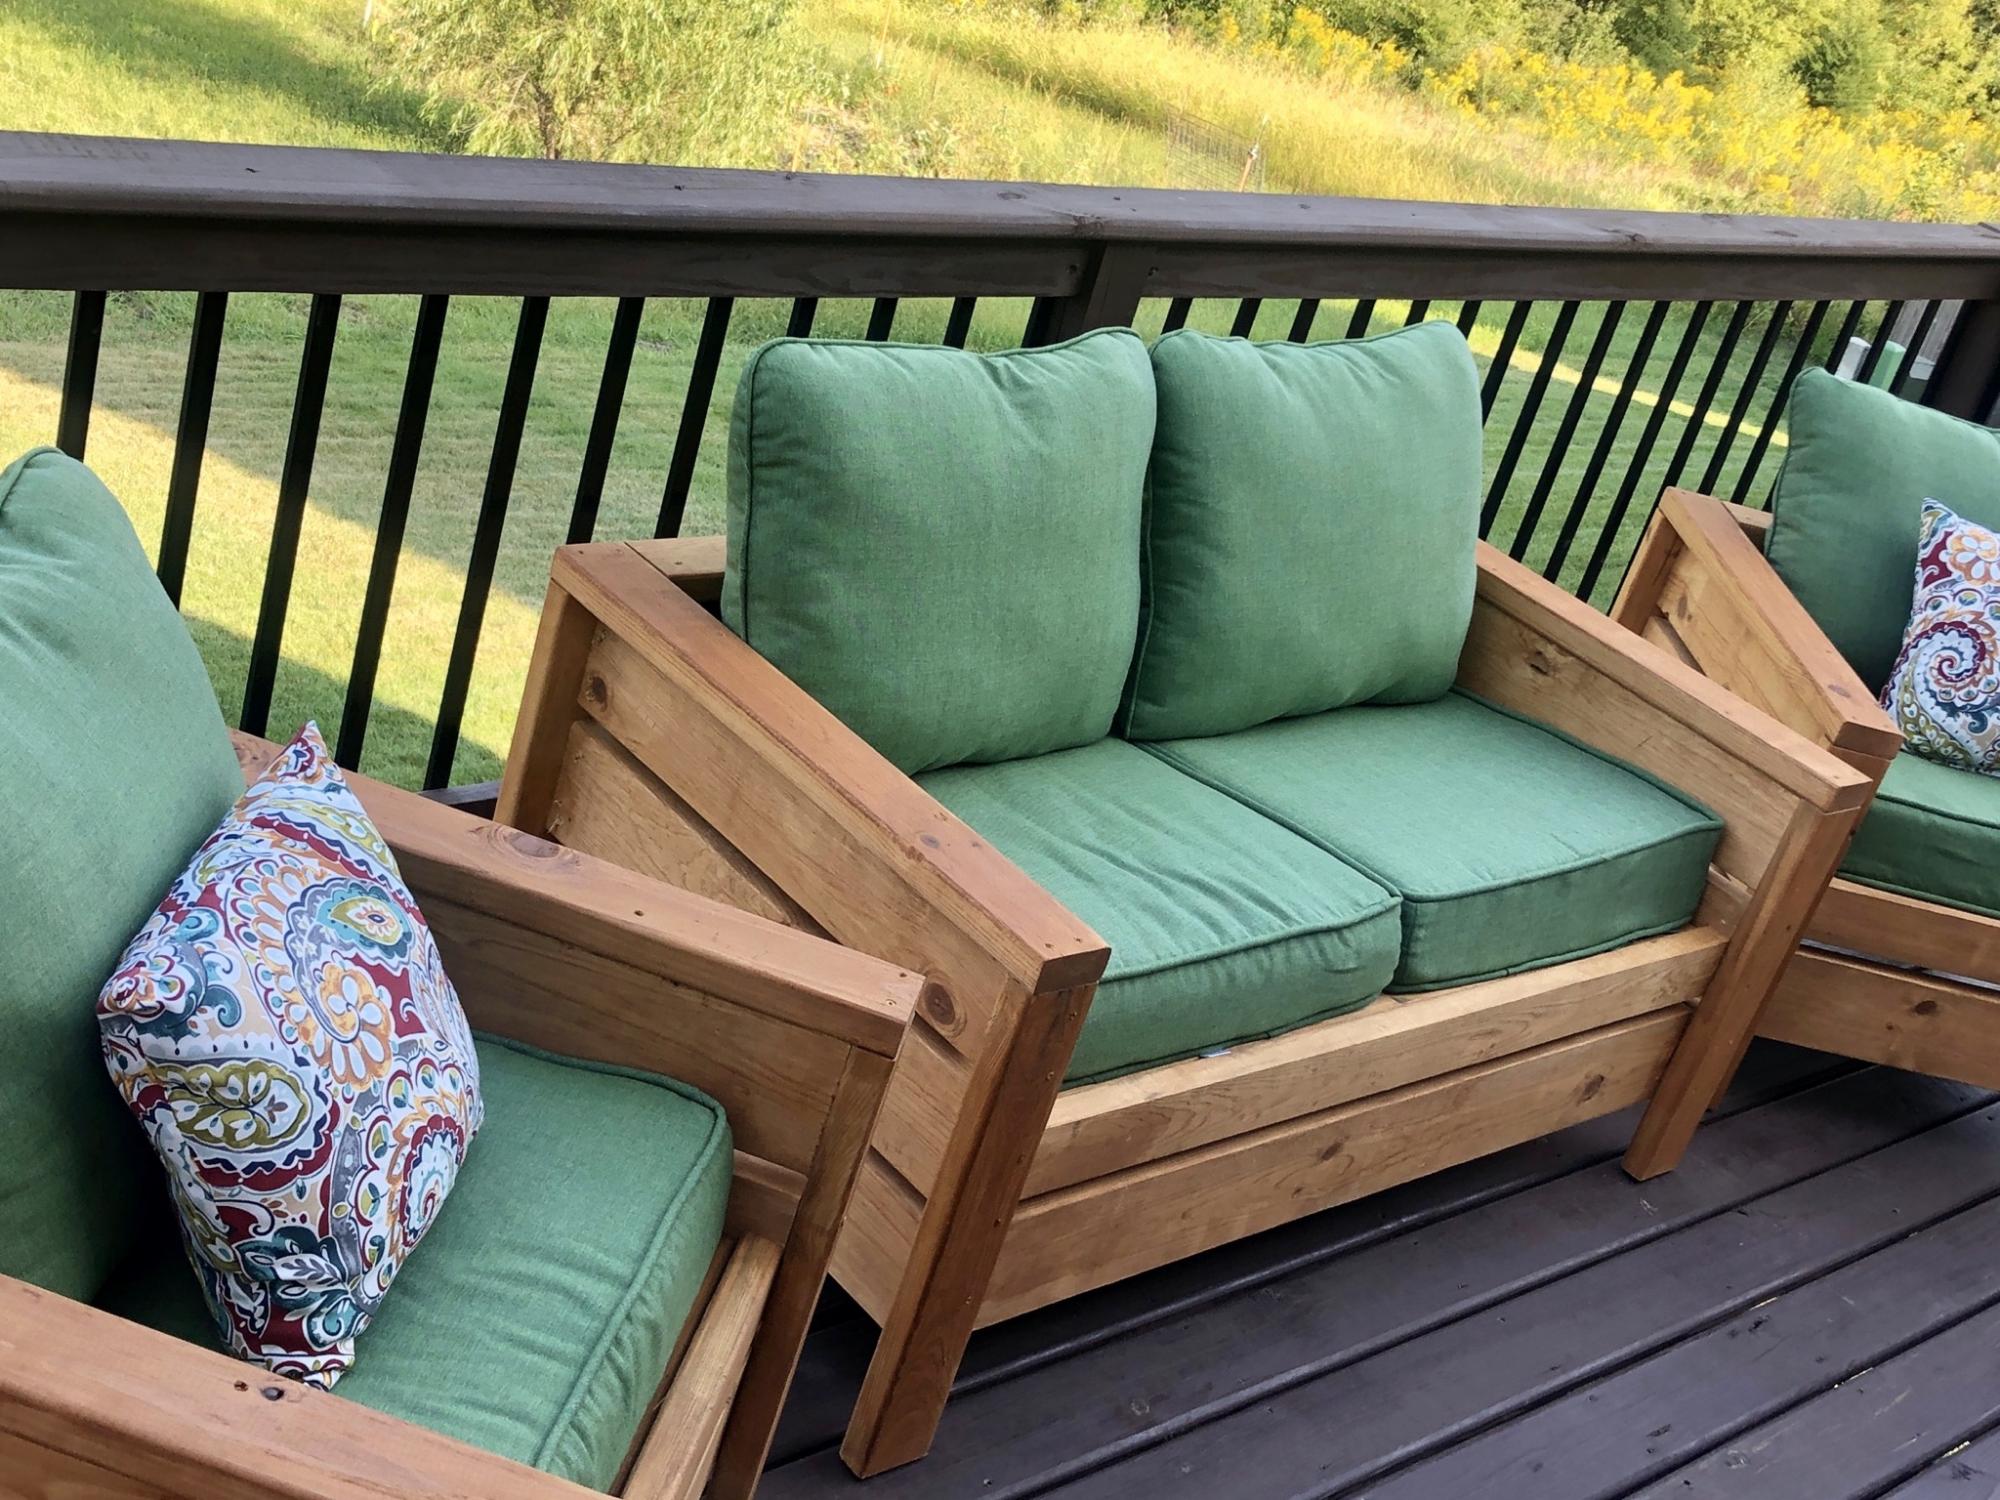
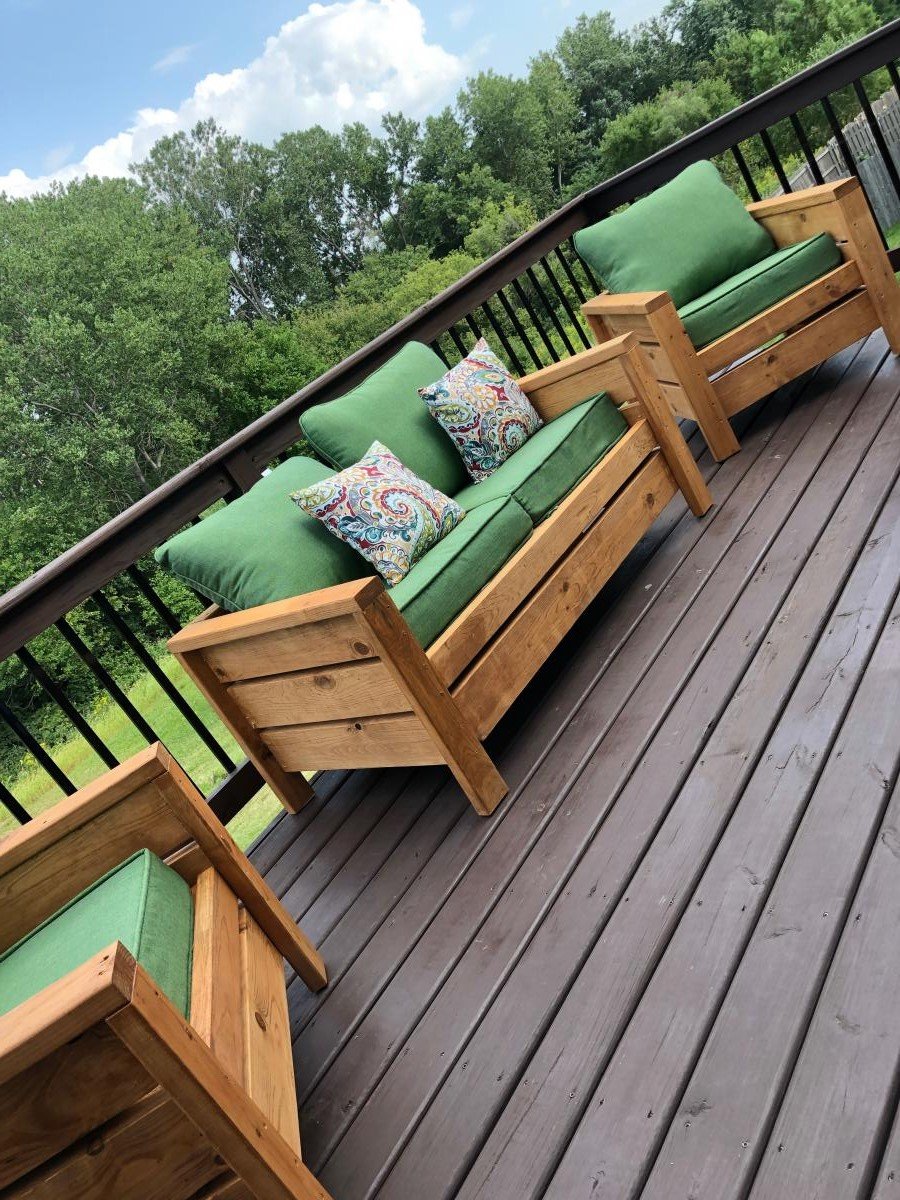
Built this over the weekend for my girlfriends sister. It was a great project and the whole family was able to work together on it, sanding and waterproofing it before assembling. The loveseat plans need a little tweaking. We ran ran the slats the same direction as the chair plans call for so we added a middle support for extra stability. We also pitched the seating down towards the back by 5* to make a more natural sitting position.
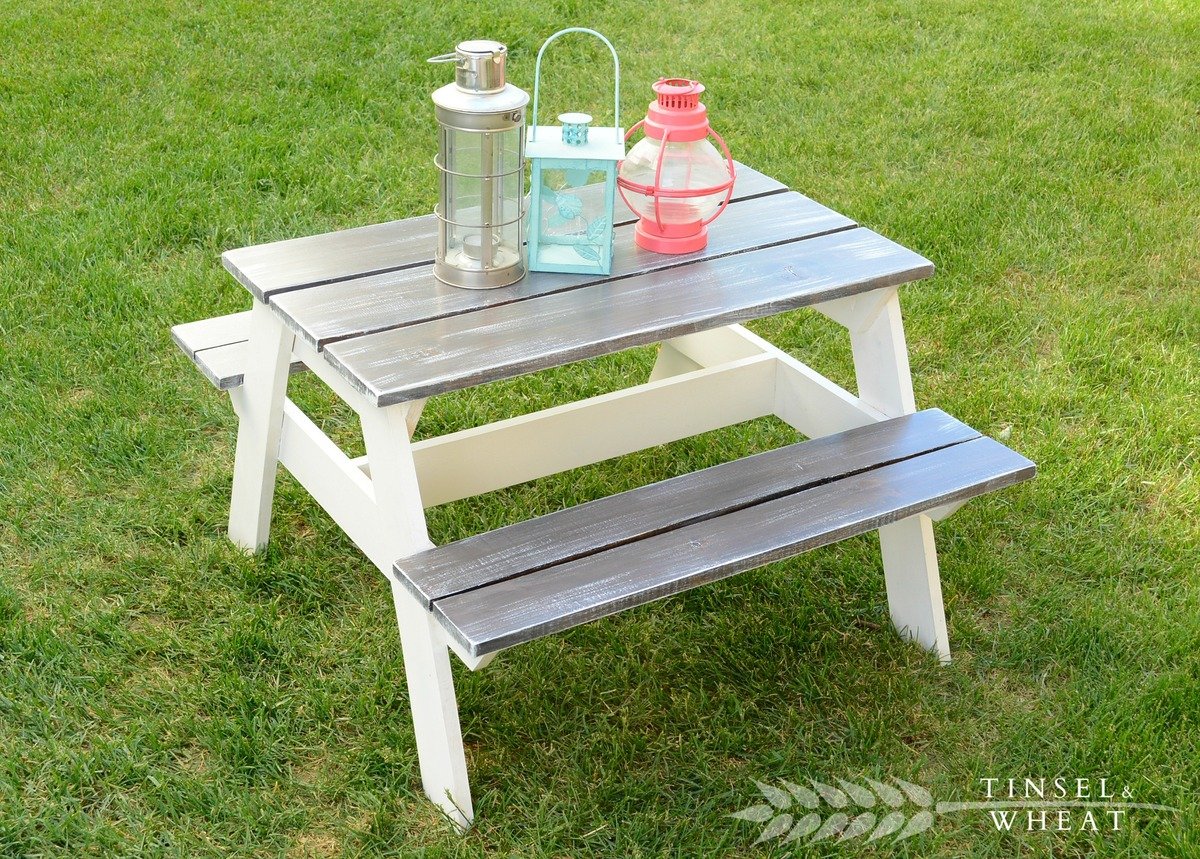
My first truly functional build! I love how it turned out, but even more importantly my kids are loving it - we are literally using it for every possible meal and snack right now. Perfect summer project, and bonus - we get to keep all the eating messes outside!
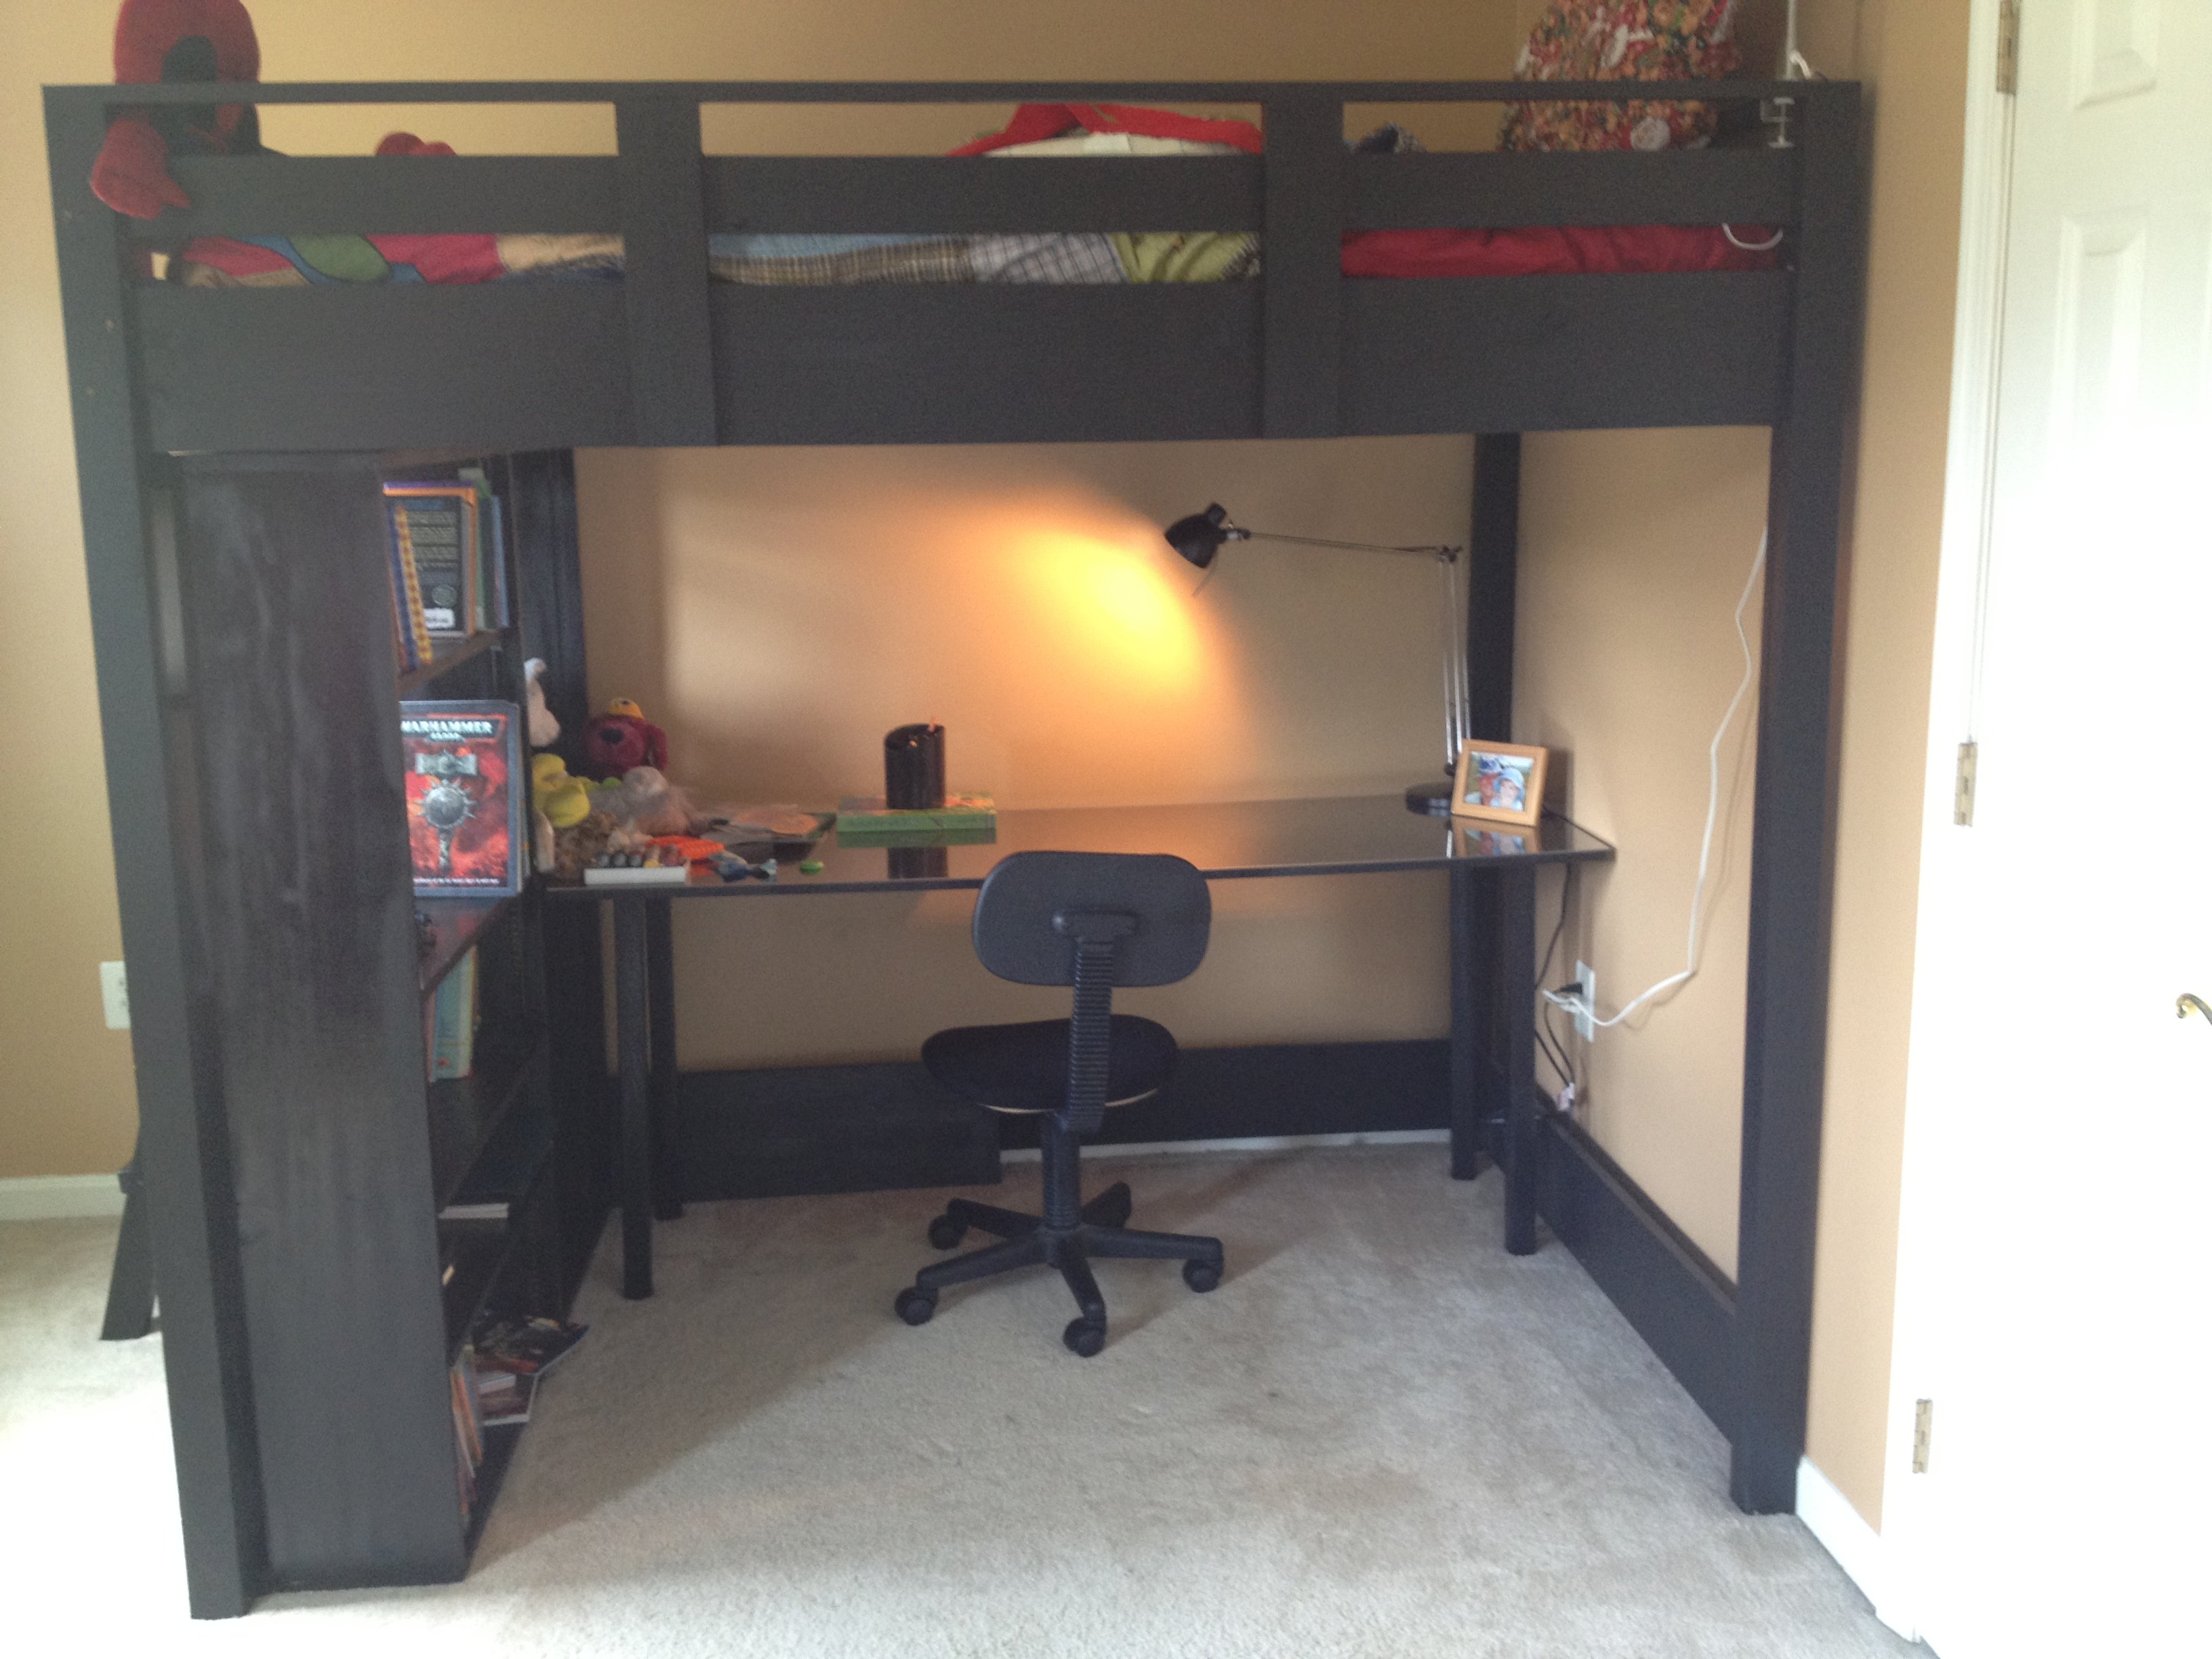
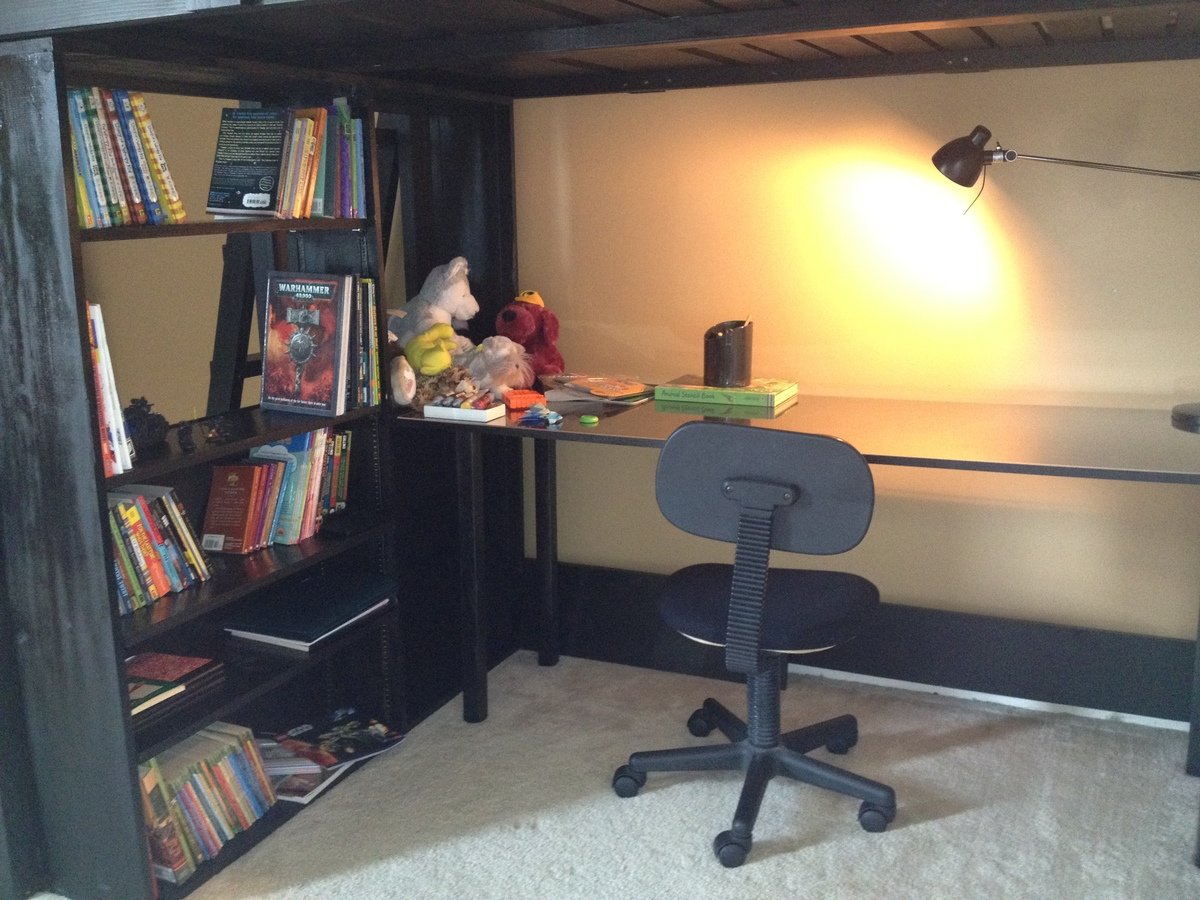
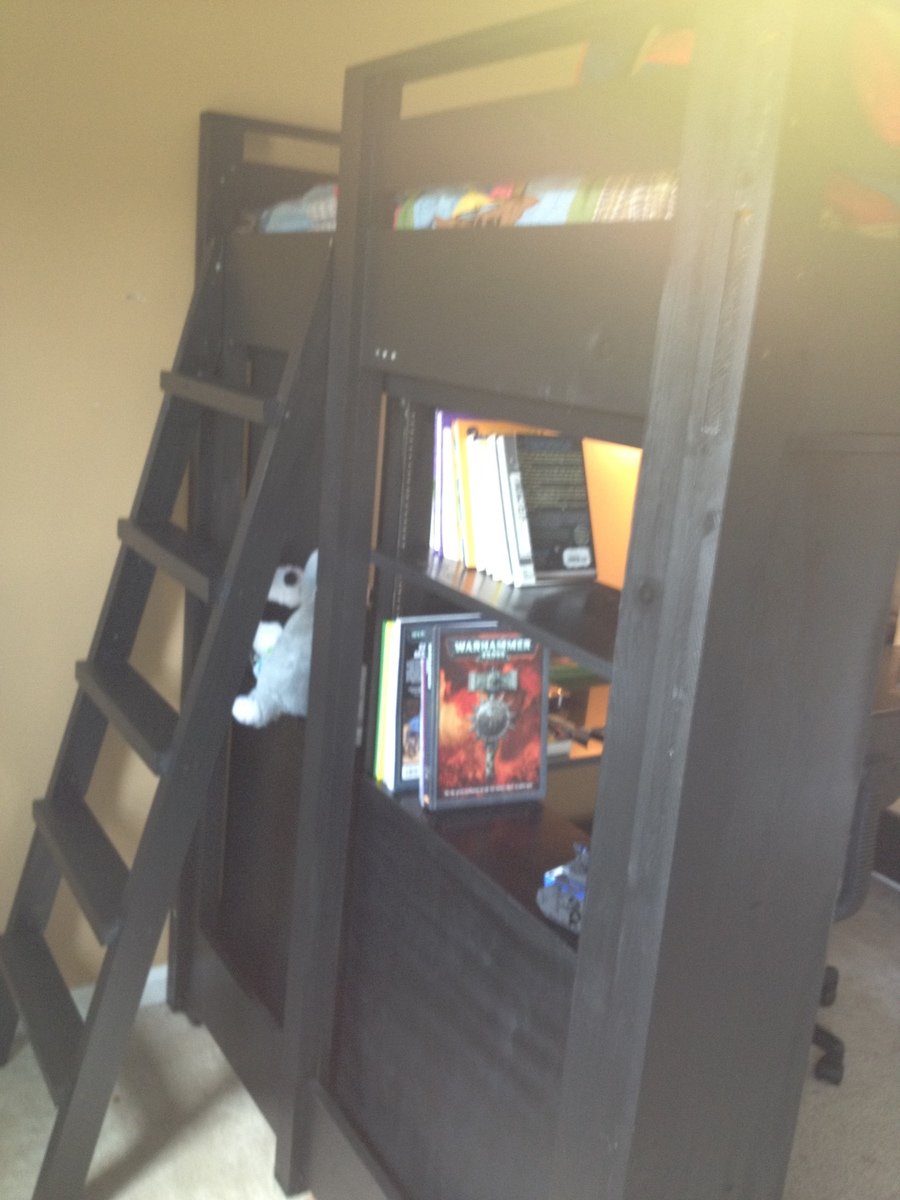
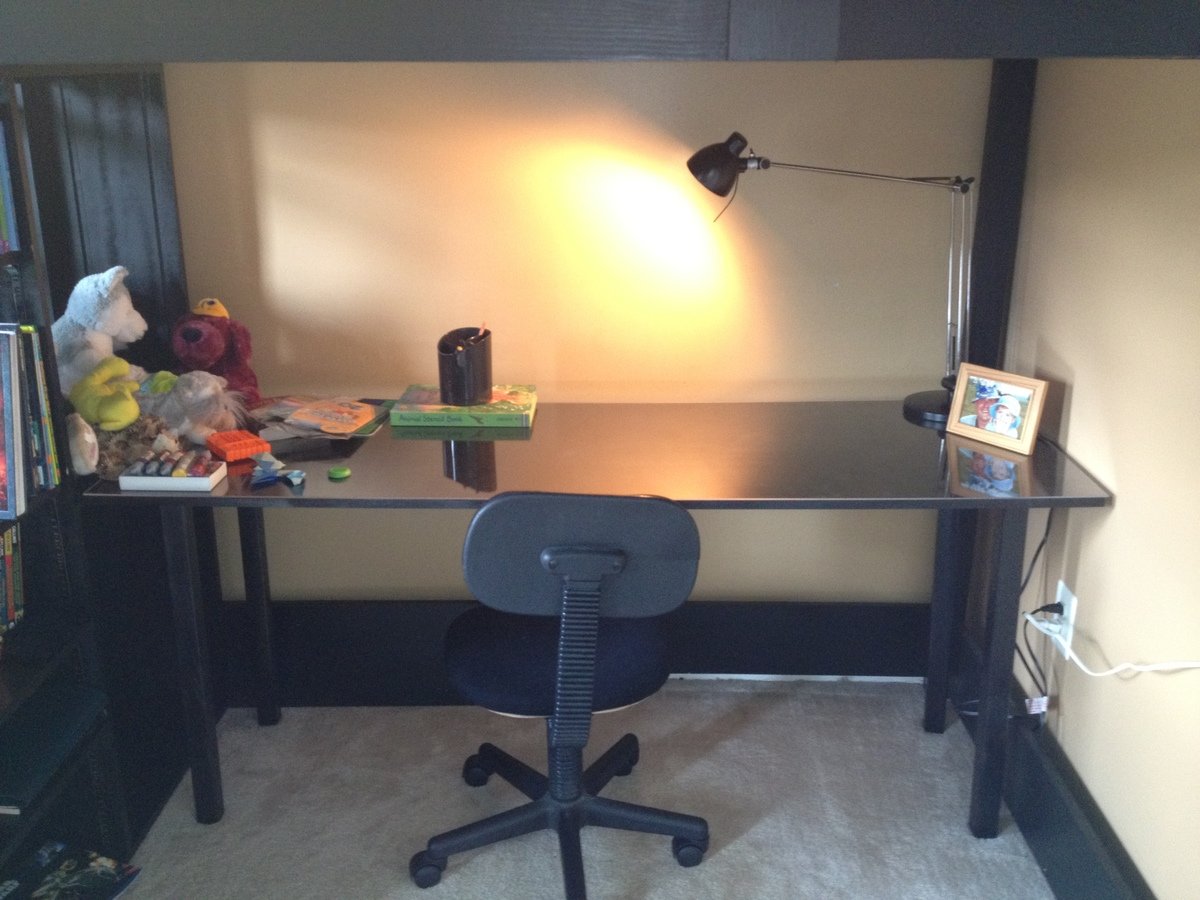
My son needed more room in his bedroom...and to be rid of the very girly furniture he inherited when he moved into his "big boy-ish" bedroom. At 10 yrs old, it was high time he got a bed that wasn't pink-tinged, white washed pine with 4 posters and enough curlicues to choke a forest. He also needed a desk which I couldn't really fit in his room with the armoire and chest of drawers that came with the Queen sized bed.
So off to Ikea we went and I saw a black loft bed for $300, but it was really, really high which meant I would have to cut it down and it was not sturdy at all. I looked at PB and saw the $1800 bed. Um, no - that wasn't happening. So, off to Ana-White I went and I'm so happy I did!
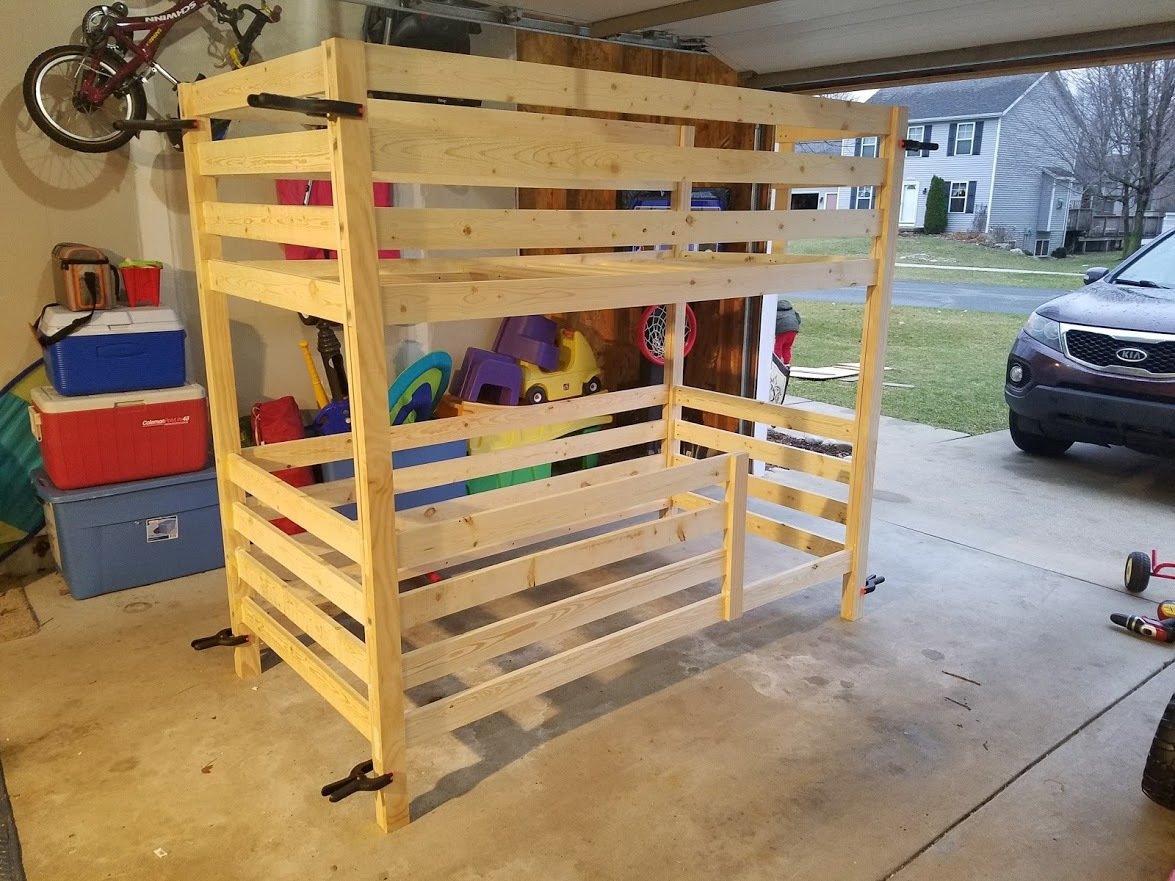
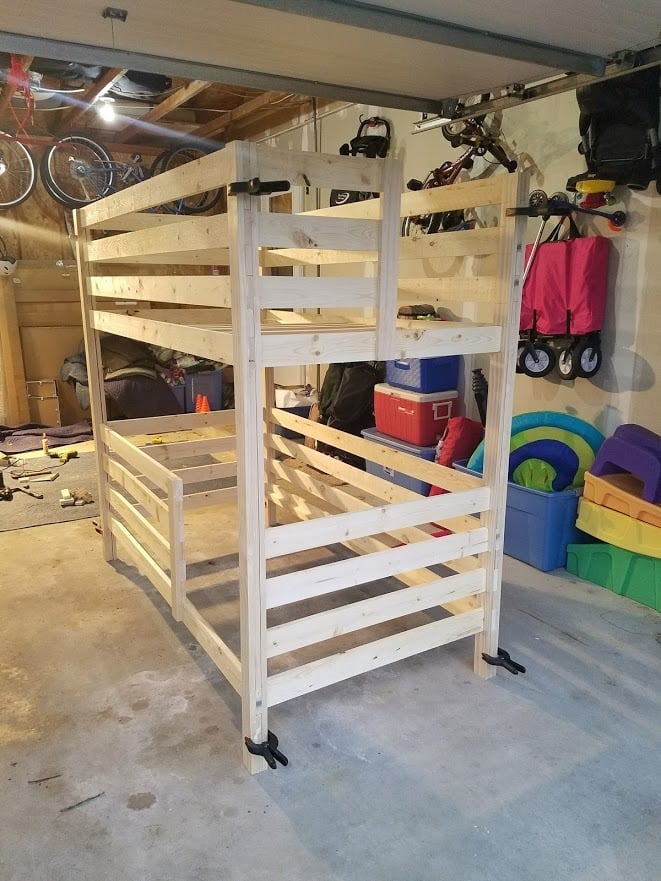
I built the full sized version of these plans and, to keep costs down, used wood I had on hand. This meant I had to work a bit at the cuts, but it all worked out.
Mods:
1) I modified the railings to have the ladder at the end of the bed to keep away from the ceiling fan.
2) Because I put the ladder at the end of the bed, I got very nervous about having a soon-to-be teen climbing on to a ladder secured to a 1x10 that was only connected to the side railings with glue and screws. So I sandwiched extra 1x3s over the bottom rails and attached them to the top railing.
3) I was very nervous about making sure that the bed was adequately supported so I put a 2x4 down the center instead of the 1x2.
4) I went a wee-bit overboard screwing things together to the point where it's a bit embarrassing and now I have to paint over the screw heads.
5) I made the ladder treads with 2x4's, modifying the inside spacer board cut lengths.
Because I had quite a bit of lumber on hand, the bed only ended up costing me about $90.
For the bookcase, I did end up buying the 1x12s and the adjustable shelf railings. I made the book shelf the entire width of of the bed and split the two sections based on width of the 1x24 board I bought for the desk. I only put the backer board up half way so that the daylight could get underneath the bed and make it not so cave-like.
The book case cost me about $70.
The desk was the easiest...but most costly item. A 1x6x24, 4 table legs and the table leg mounts ran me about $80. The plexiglass top that I had cut for the top cost me about $80.
Time wise, this would have taken me a lot less time than the 4 months it took - but I worked on it as I could and when I could, by myself. I got some friends to help me bring it upstairs and put it back together, but it was mostly done when I could fit in some time.
My son LOVES this and it really does give him so much room!!! Thanks Ana - I really appreciate it!

Thu, 01/17/2013 - 08:42
Hello,
Where might I find the modified loft bed plans that allow for a full-sized mattress and the under desk-shelves?
Thank you!
Fri, 01/18/2013 - 07:38
Hi!
To modify this to be full sized, I just added 15" to the width of the bed. Ana said this in the plans:
Cutting Instructions:
Converting to Full Size This bed can easily be converted to full size. You will simply need to add 15″ to all boards that run parallel to the ends. This includes the planks, end top pieces and the slats. Shopping list will need to be adjusted as well.
So I modified the cuts to the head and foot board parts and the full size mattress fits perfectly.
For the shelving underneath, I just looked at some of Ana's other plans for shelves and winged it.

Hidden door bookshelves hide a furnace closet. Built by Kraig Faulkner
Thu, 01/23/2020 - 07:05
Great idea! Do the bookshelves swing freely when weighed down with books? What type of hinges did you use?
Thu, 09/17/2020 - 08:01
I'm currently working on a basement renovation project. I'm probably going to incorporate a feature like this for my mechanicals, too.
One important safety note for anyone who wants to do this: It's recommended that your furnace be a minimum of 30" away from any combustible materials. That includes walls and partitions. The image of this project displayed is right next to the furnace, which is not a good idea.
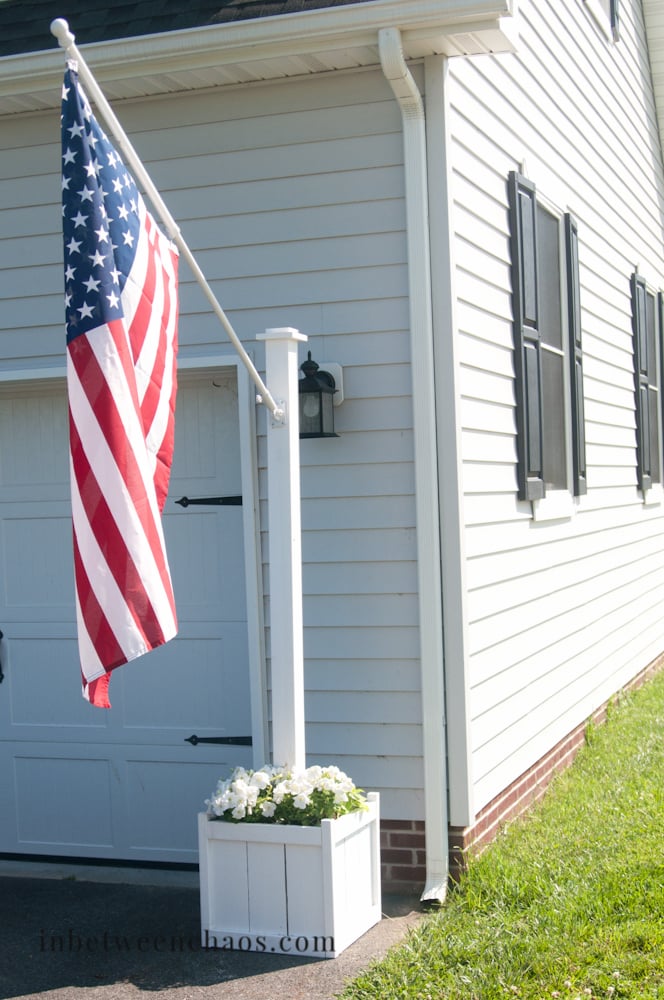
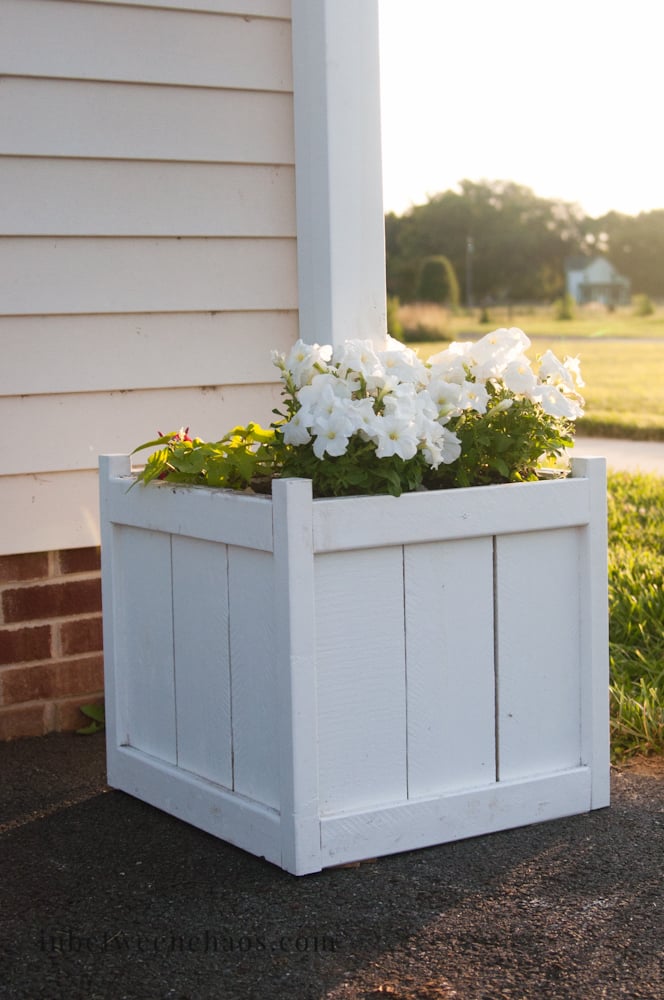
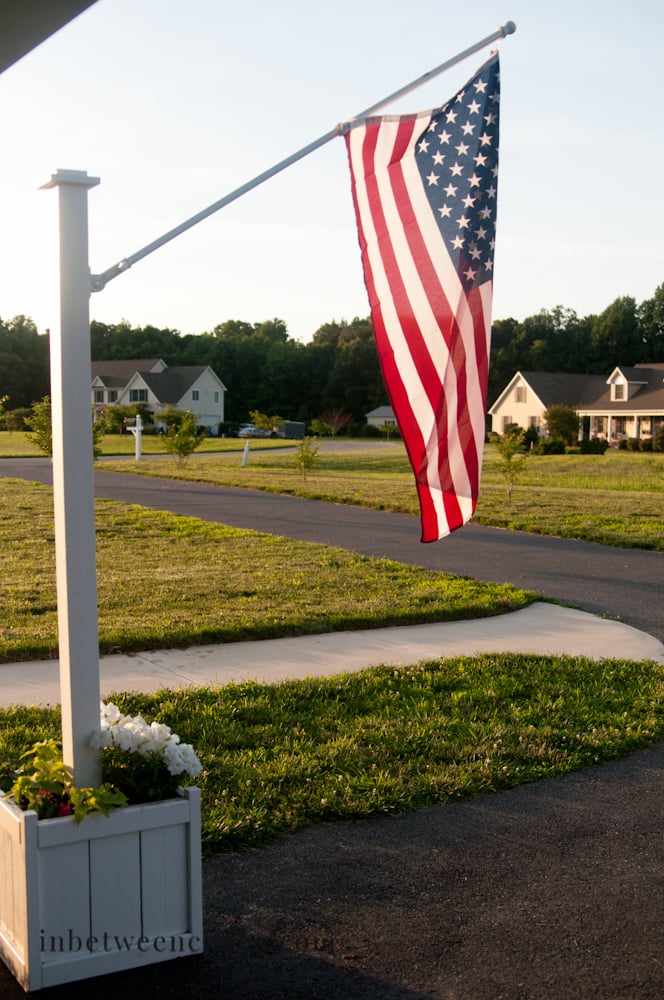
I wanted a place for a flag pole, but I didn't want to put one in the ground or screw into my siding, so I modified the cedar planter to hold a flag pole. It was a fun project! Check out more here!

I modified this plan so I could have 4 total work areas. Total Size: 48" x 96"

Tue, 09/08/2020 - 19:42
Is there anyway you can share these plans with me!? I drew out some plans for an identical table but I think my cuts may be off! It would be so helpful.
Fri, 11/06/2020 - 12:47
Is there a full update post with instructions for the table shown?
Tue, 12/20/2022 - 22:03
LOVE this! Just what I'm looking for! Can you tell me what you used for the top?
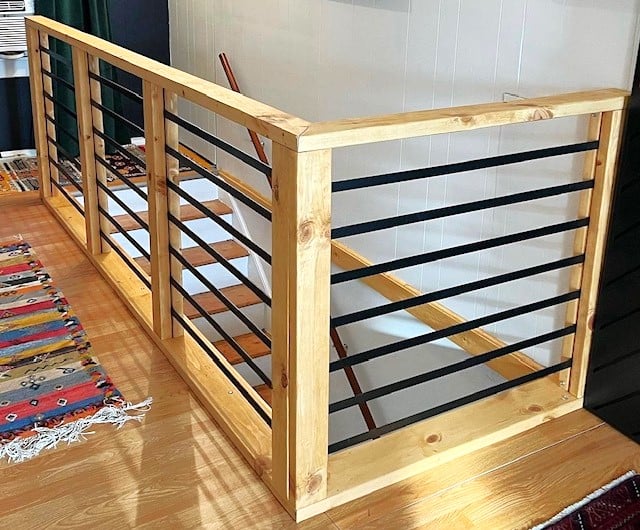
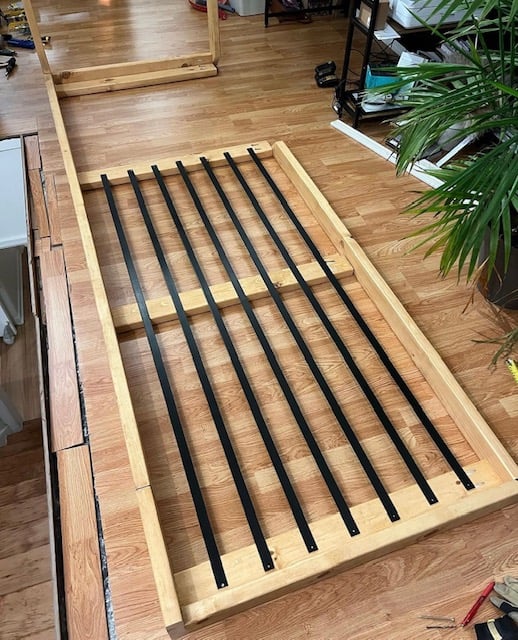
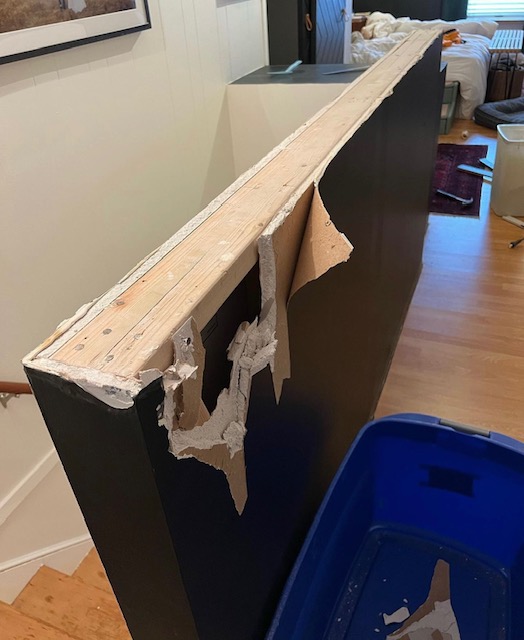
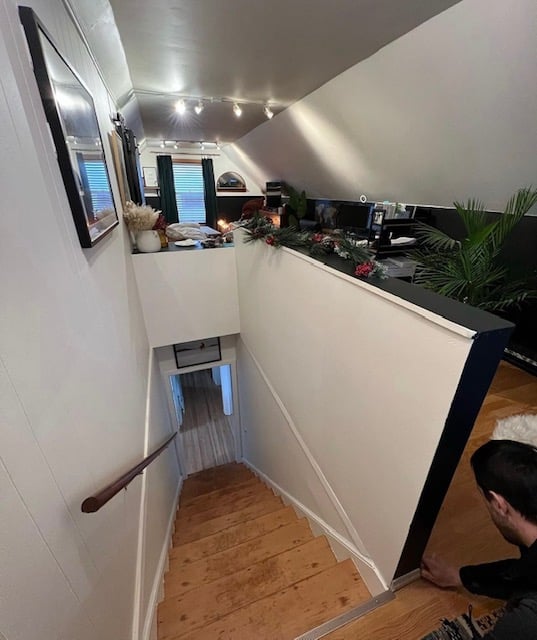
Amazing stair railing upgrade shared by Sara and Chris!

Great plans - thanks so much! Started with two chairs, and kept going...
MODS: Once built, we felt there wasn't enough back support, so added a 2x4 then 4x4 on top. Also added a 2x2 in back of the seat bed, so our 25" x 25" seat cushions didn't float around.
Recommend paint gun vs. painting by hand.


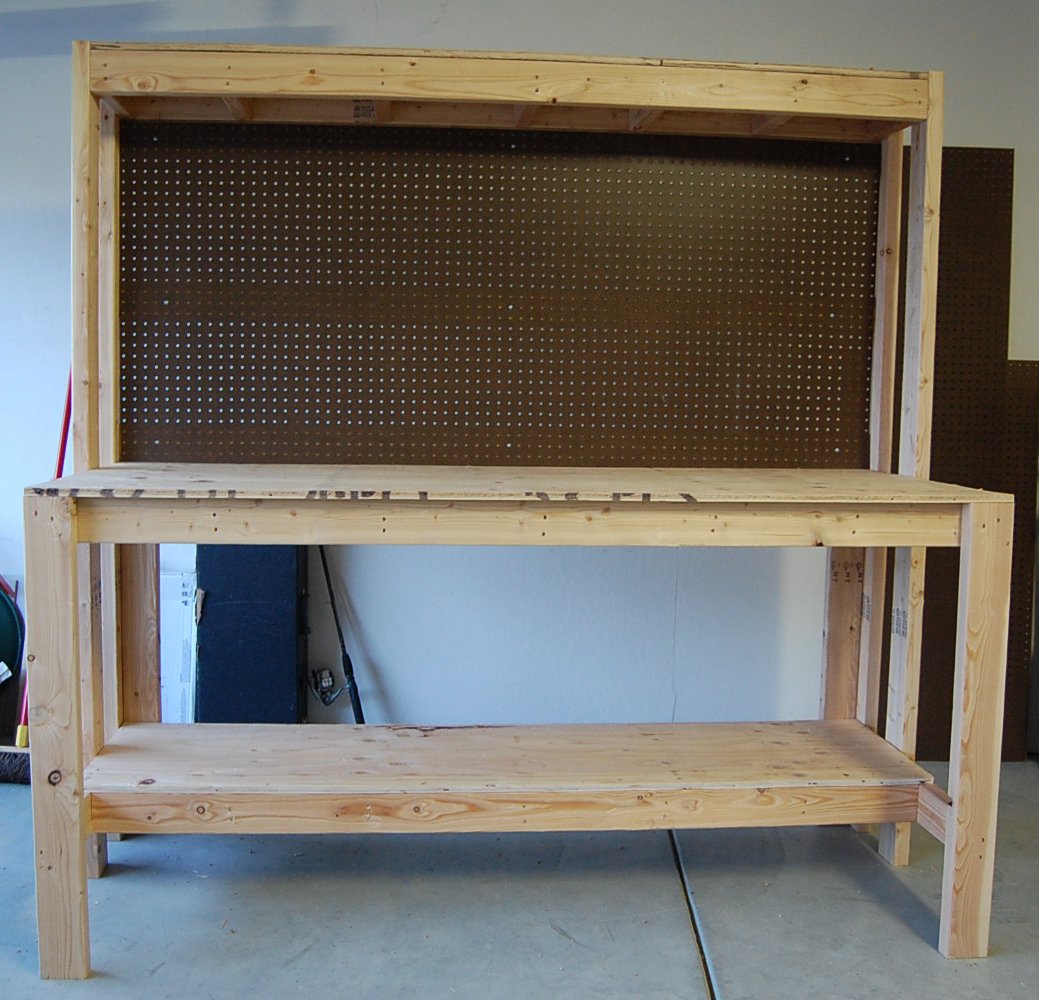
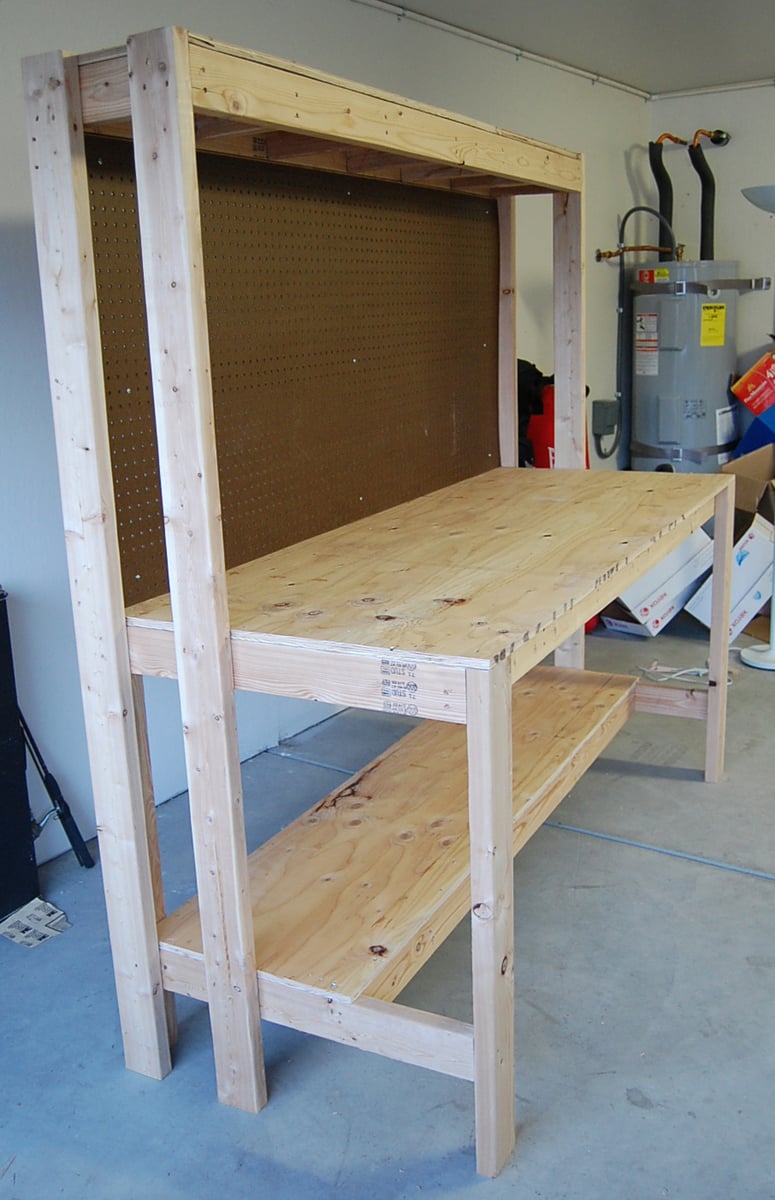
This is our 2nd project - we liked building the bookshelf so much, we decided we're gonna keep going and need a good workbench. Got these plans from the Family Handyman Website (http://www.familyhandyman.com/DIY-Projects/Woodworking/Workbenches/how-…). They claim the cost to be $50, but it was closer to $80 for us - still a GREAT project and easy to put together with the nail gun.
Sat, 04/16/2022 - 07:29
No working link. Cannot find this or the plans.

Comments
Ana White Admin
Fri, 01/07/2022 - 09:17
Gorgeous bed!
Love the whole looks, way to go!