Community Brag Posts

Easy to Build Workbench

Submitted by Anonymous (not verified) on Thu, 08/17/2023 - 13:40

Easy to build workbench. I added an extra 2 1/2 inches (width) to the top plywood cut. This gave me a 1 1/4" lip to the front and back sides. I wanted to be able to clamp on all sides of the bench. Also added casters since I wanted to use this as an outdoor table for entertaining if needed and to simply have mobility with the bench. So far I love it!

Tryde Media Center

Submitted by kendaves on Thu, 04/05/2012 - 21:24

I had just built the Tryde Side Table and it was so easy I gave a shot at this project. Took about 4 hours to build and is a really sturdy, good looking entertainment center. The only thing that I did not like that I would change is an overlap of the tabletop in the front. There is an overlap on both ends but not in the front. Other than that, I really like the outcome.

Estimated Cost
$75 - $100
Estimated Time Investment
Afternoon Project (3-6 Hours)
Finish Used
Natural Stain
Recommended Skill Level
Intermediate

Basement Sofa Table Bar

Submitted by advanlente on Sat, 03/28/2020 - 12:04

My husband and I had been looking at many different stores to try and find a bar table for behind our new couch in our basement. We wanted something that people could eat and drink at when we entertained and/or be able to sit at and play video games. I should have known we were better off to build our own rather than look in a store. It was only $30 in lumber and took 3 hours to build. And another project in the books!

Estimated Cost
$30
Estimated Time Investment
Afternoon Project (3-6 Hours)

Comments

megs502

Fri, 04/03/2020 - 11:03

do you have the plans for this? i've been looking and looking for what i needed and this is it!!

mferrara

Sat, 04/04/2020 - 05:39

Hi - exactly what I've been searching for....do you have plans available? Please and thank you!

beckaroo

Tue, 06/02/2020 - 23:04

Hello,
I would also love to see the plans for this sofa bar table.
Thank you
Becky

Farm house entertainment center

Submitted by LPJunky on Sun, 05/24/2020 - 22:36

My one of my first projects. Followed the plans here, https://www.ana-white.com/woodworking-projects/grandy-barn-door-console

Doors are 1x4 frame on 1/2” plywood and got the hardware from amazon

WINSOON 8FT Antique Double Sliding Barn Door Hardware Roller Track Kit Black, 4-18FT for Choose https://www.amazon.com/dp/B014SMIWTQ/ref=cm_sw_r_cp_api_i_bH1YEb890KWDF

A little beefy but worked. Had to trim the track a little bit to fit the build.

Also added hdmi/coax ports for easy plug ins. And an hdmi splitter since our tv only had 2 inputs.

Overall very happy with the outcome on this one

Estimated Cost
300
Estimated Time Investment
Weekend Project (10-20 Hours)
Recommended Skill Level
Intermediate

Garden bed with folding screens

Submitted by Kate_14 on Wed, 05/27/2020 - 09:39

I added folding screens to my garden bed to prevent my dog to go in it. It can also discourage hares, cats and other animals. The folding screens make it easy to work in your garden.

Estimated Time Investment
Day Project (6-9 Hours)
Finish Used
None
Recommended Skill Level
Beginner

Playset Addition

Submitted by Derek S on Wed, 06/10/2020 - 08:27

Decided our old play set needed an addition, landed on these plans of Ana's. Sat on them and mulled them over for months. Once the wife said something about adding on to it I made the purchases needed. Connected the two platforms with a bridge. I used 4"x4"x10' for the runners, same boards as the decking for the platform of the bridge(5/4"x6"), 2x4's and 1x4's for the railing. If you look at the 3rd photo, I had to chisel out the 4x4 post to get the 2"x6"x12" support to fit correctly. This should measure 2"x6"x13". Another change I made was to cut the bottom and top trim pieces longer on the front and back sections so that the trim would cover the framing of the gable end walls (see last photo). my son wanted windows so I faked in some windows with scrap 2x2's. I used 2x6's as supports from the 4x4's to the 2x6 framing (see photo 3) I added the monkey bars about a month before deciding to do the platform/deck and playhouse. The ladder is based loosely off of a couple of plans I found online. I was able to do all of this work myself except for the roof. Need my dads help to lift the plywood, he then helped me with the rest of the roof.

Estimated Cost
$1000
Estimated Time Investment
Week Long Project (20 Hours or More)
Finish Used
I used a dark wood stain fore the house, green exterior paint for the trim and white exterior paint for the interior of the house.
Recommended Skill Level
Intermediate
Seasonal And Holiday

RH Inspired Shanty Hutch & Sideboard + glass doors

Submitted by mandi10uga on Fri, 09/09/2016 - 10:50

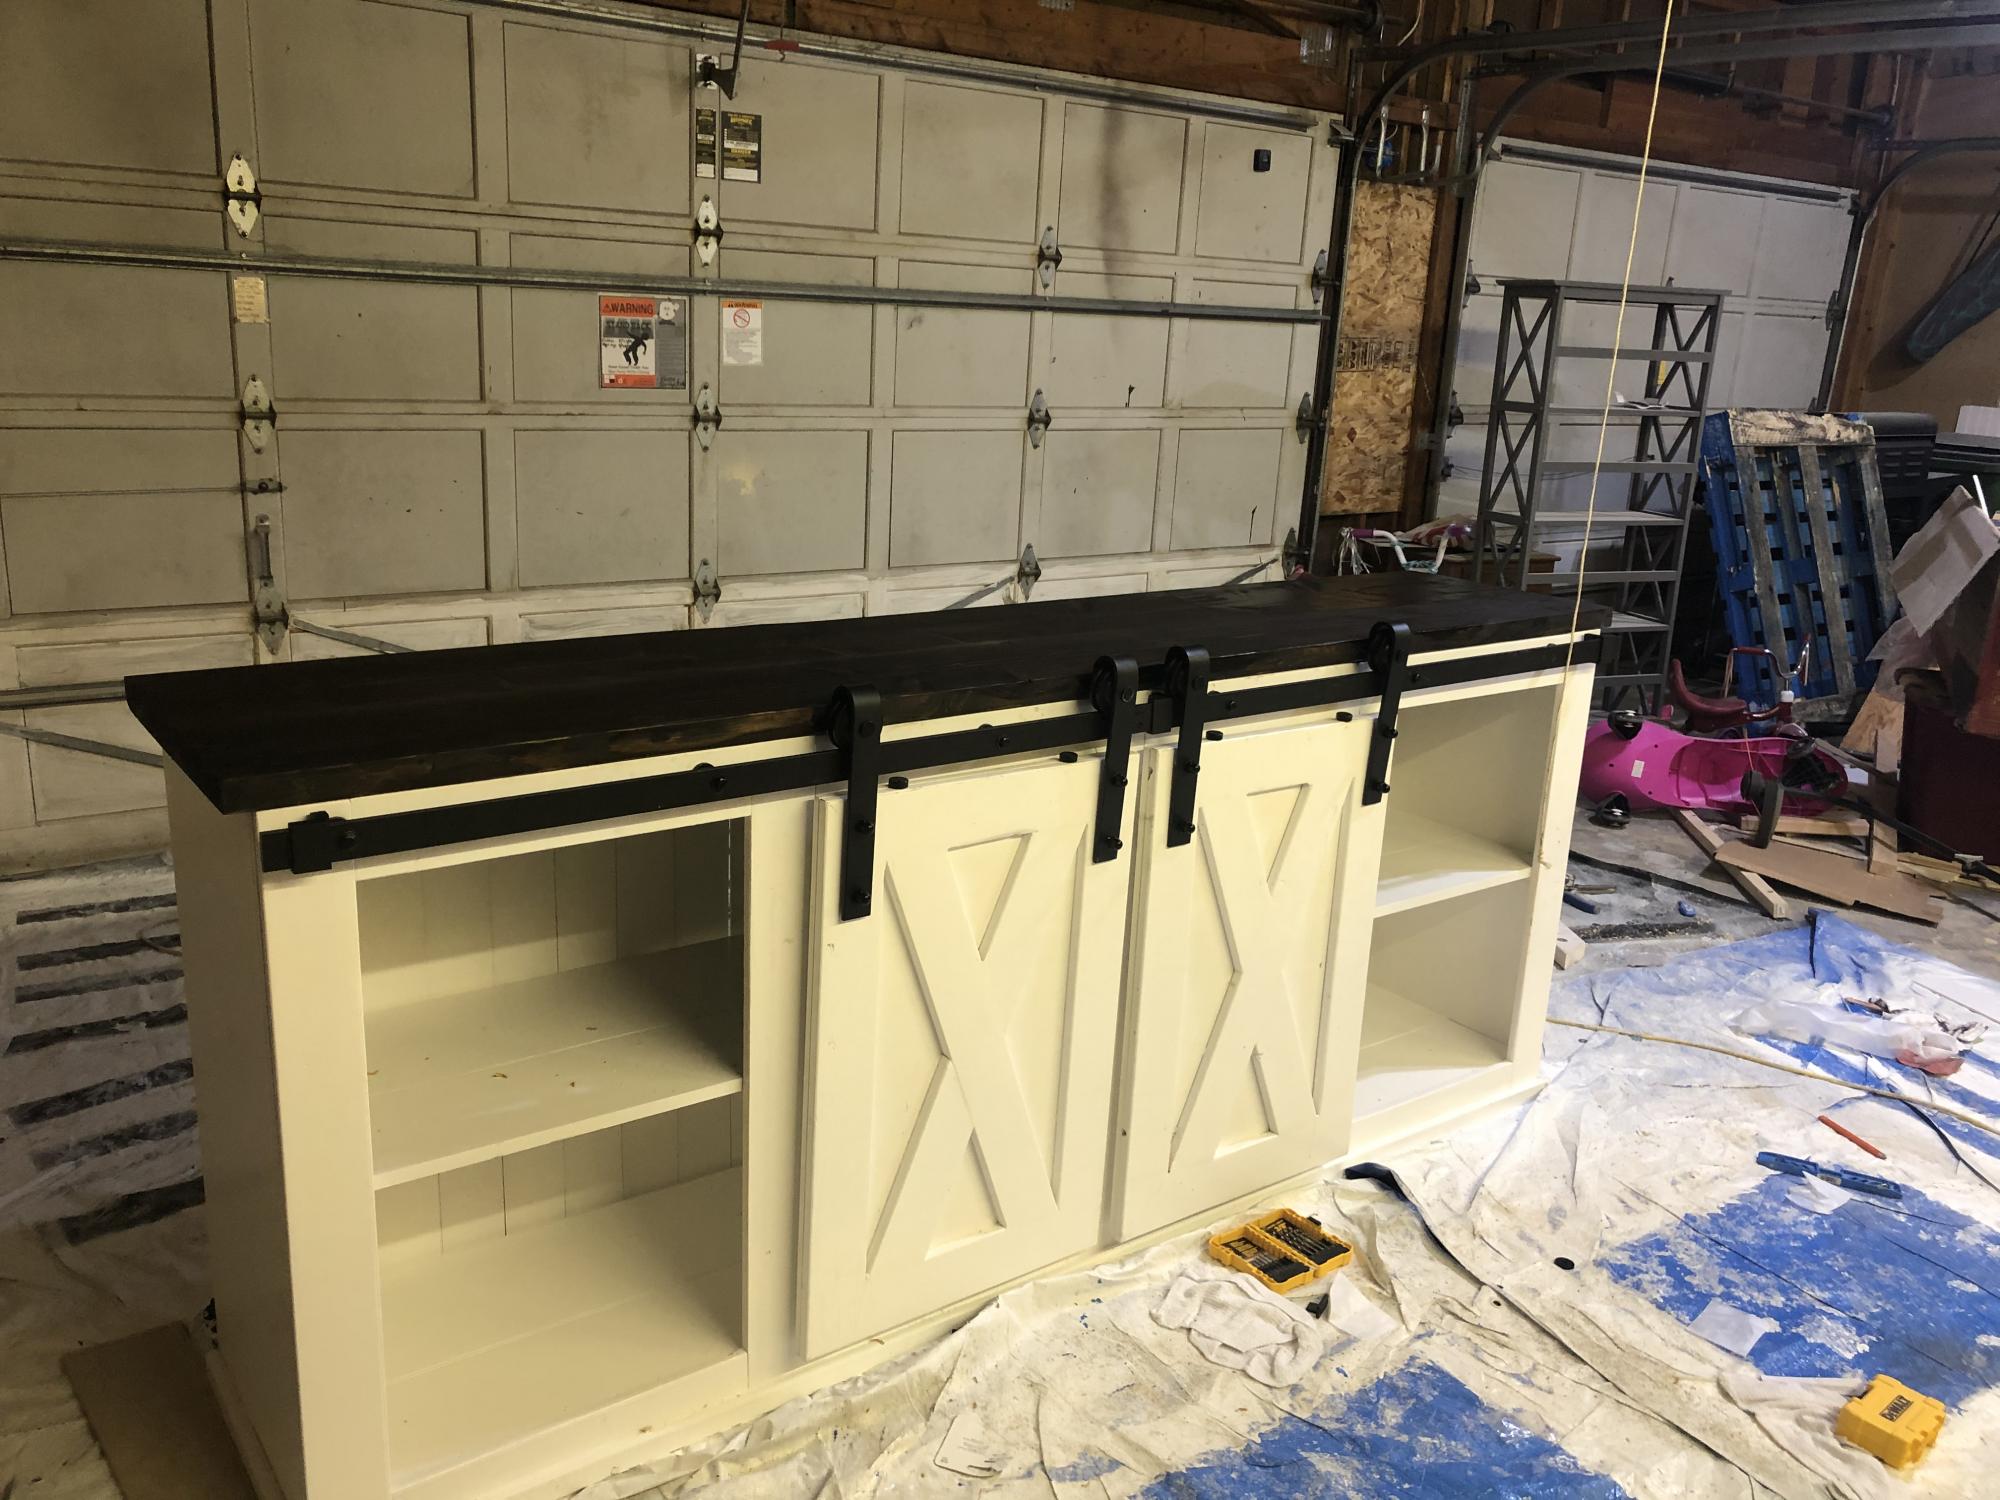
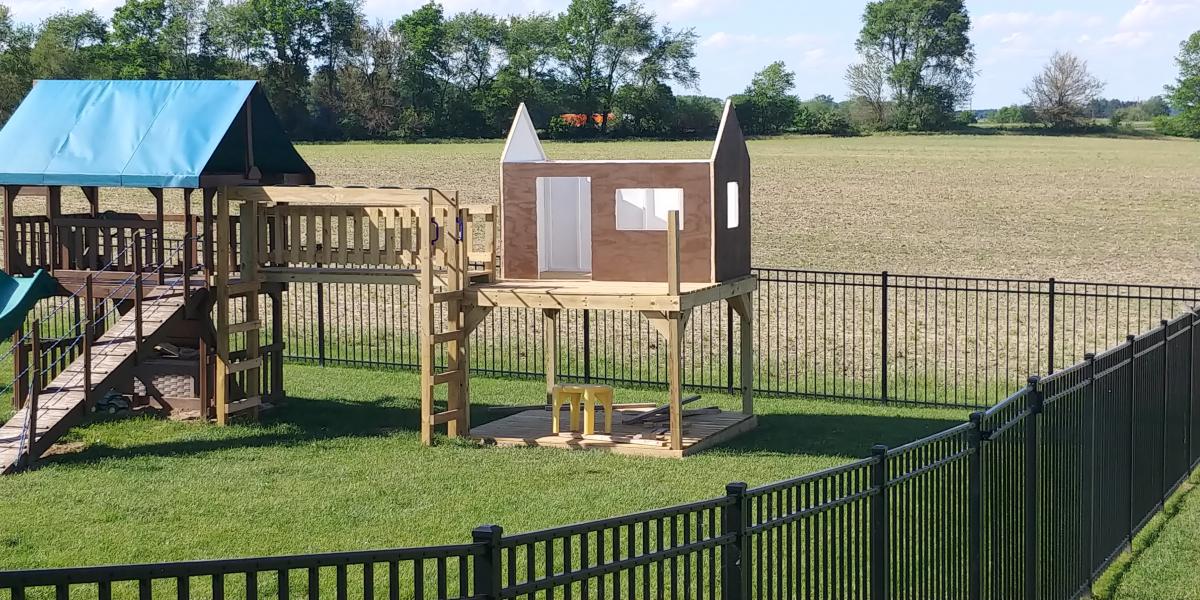
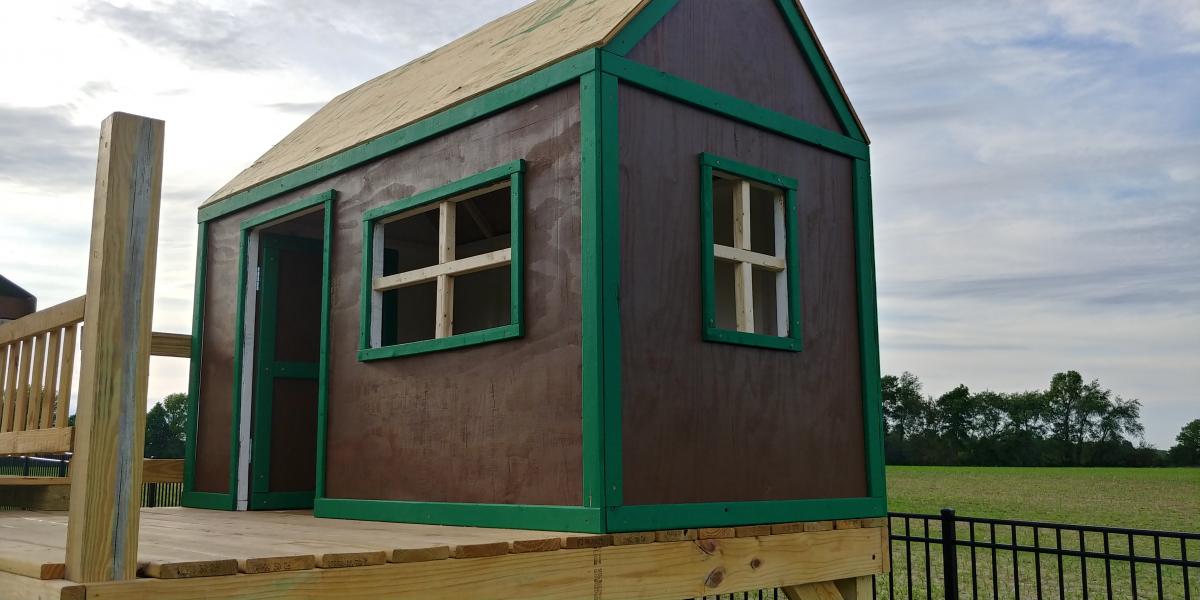
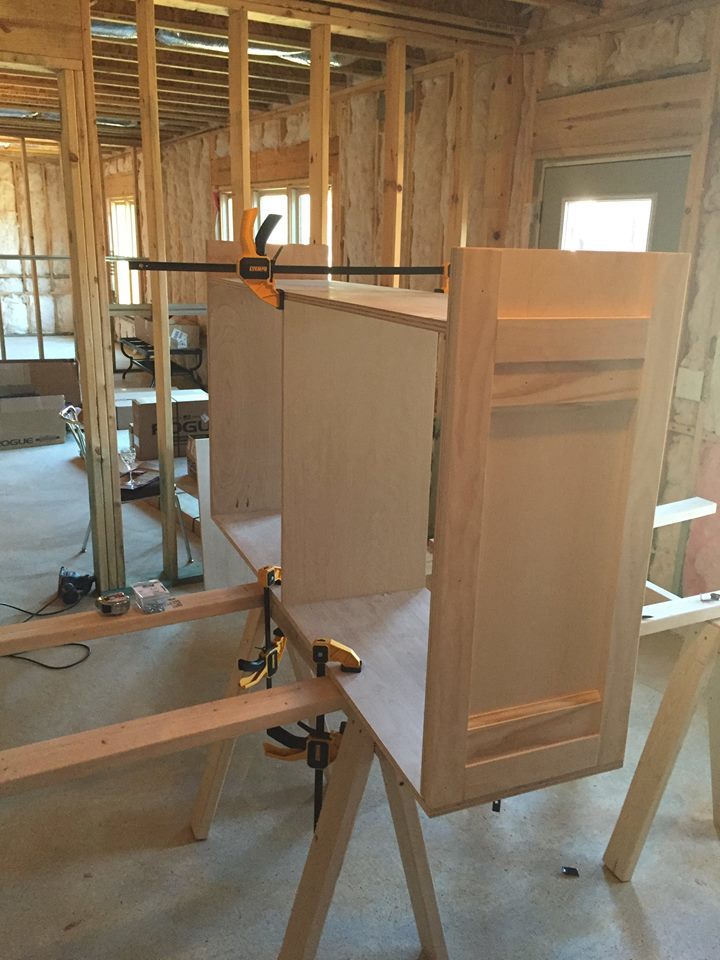
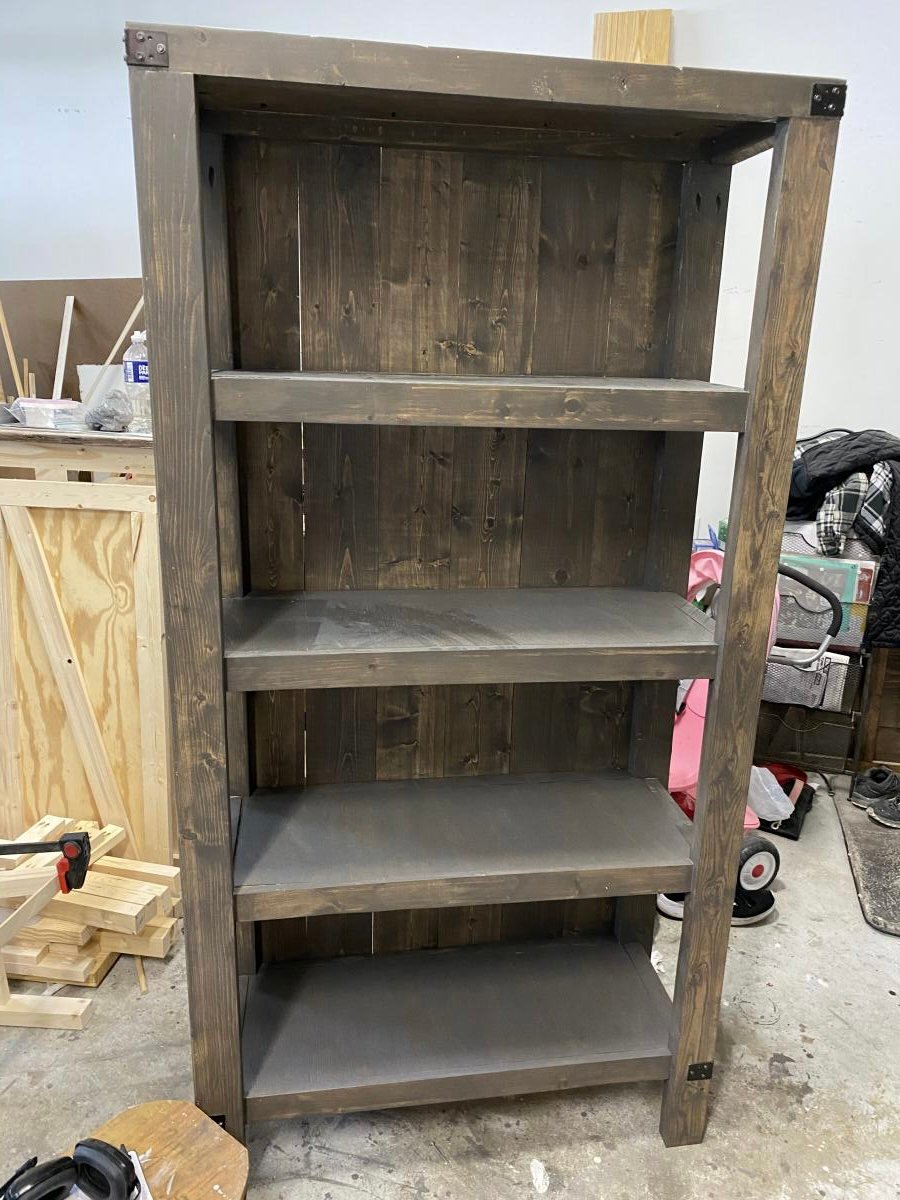
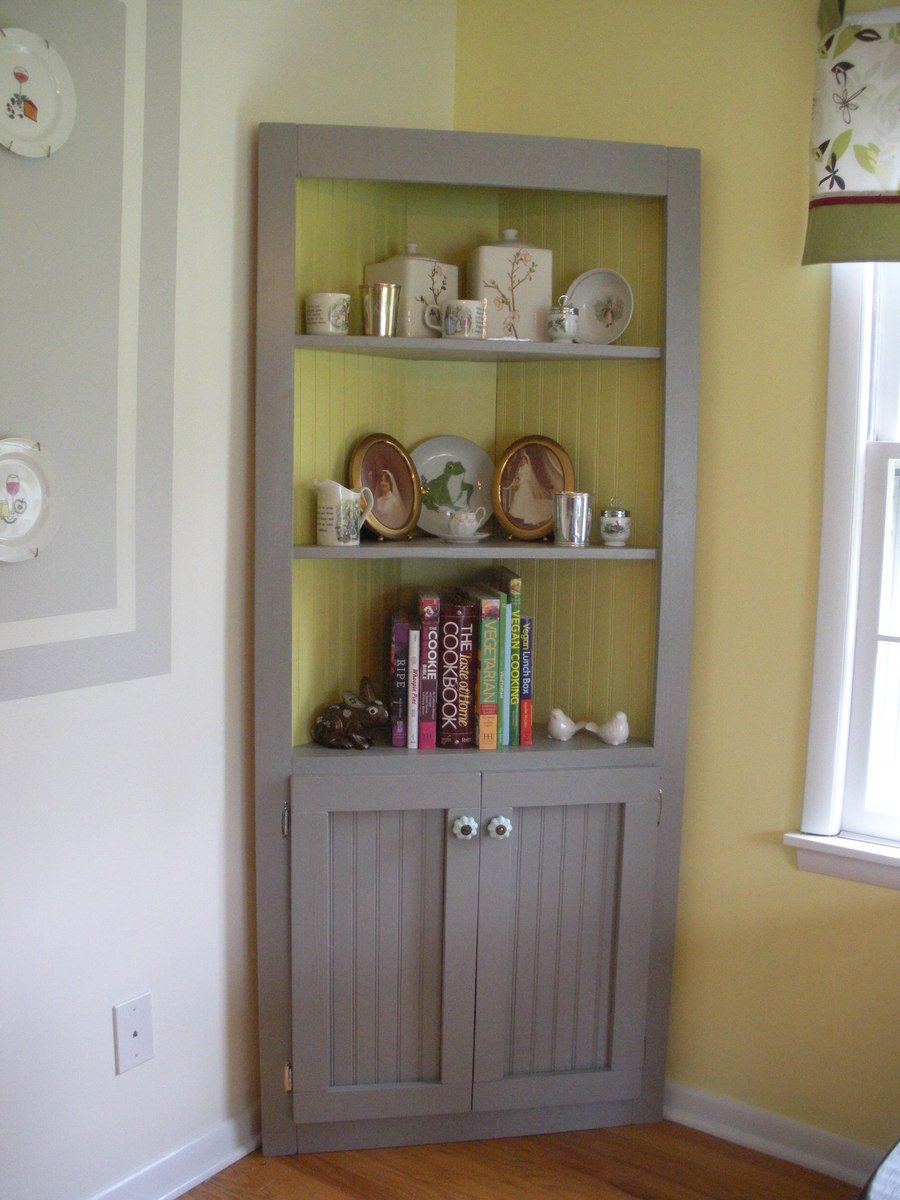
This was my first woodworking project ever - and am thrilled!! Thank you Ana-White.com!! I needed a beautiful china cabinet for a fraction of the retail cost. Once I found plans on this website, I bought some power tools and got started! I only worked a couple of hours each weekend so it took a while to finish.


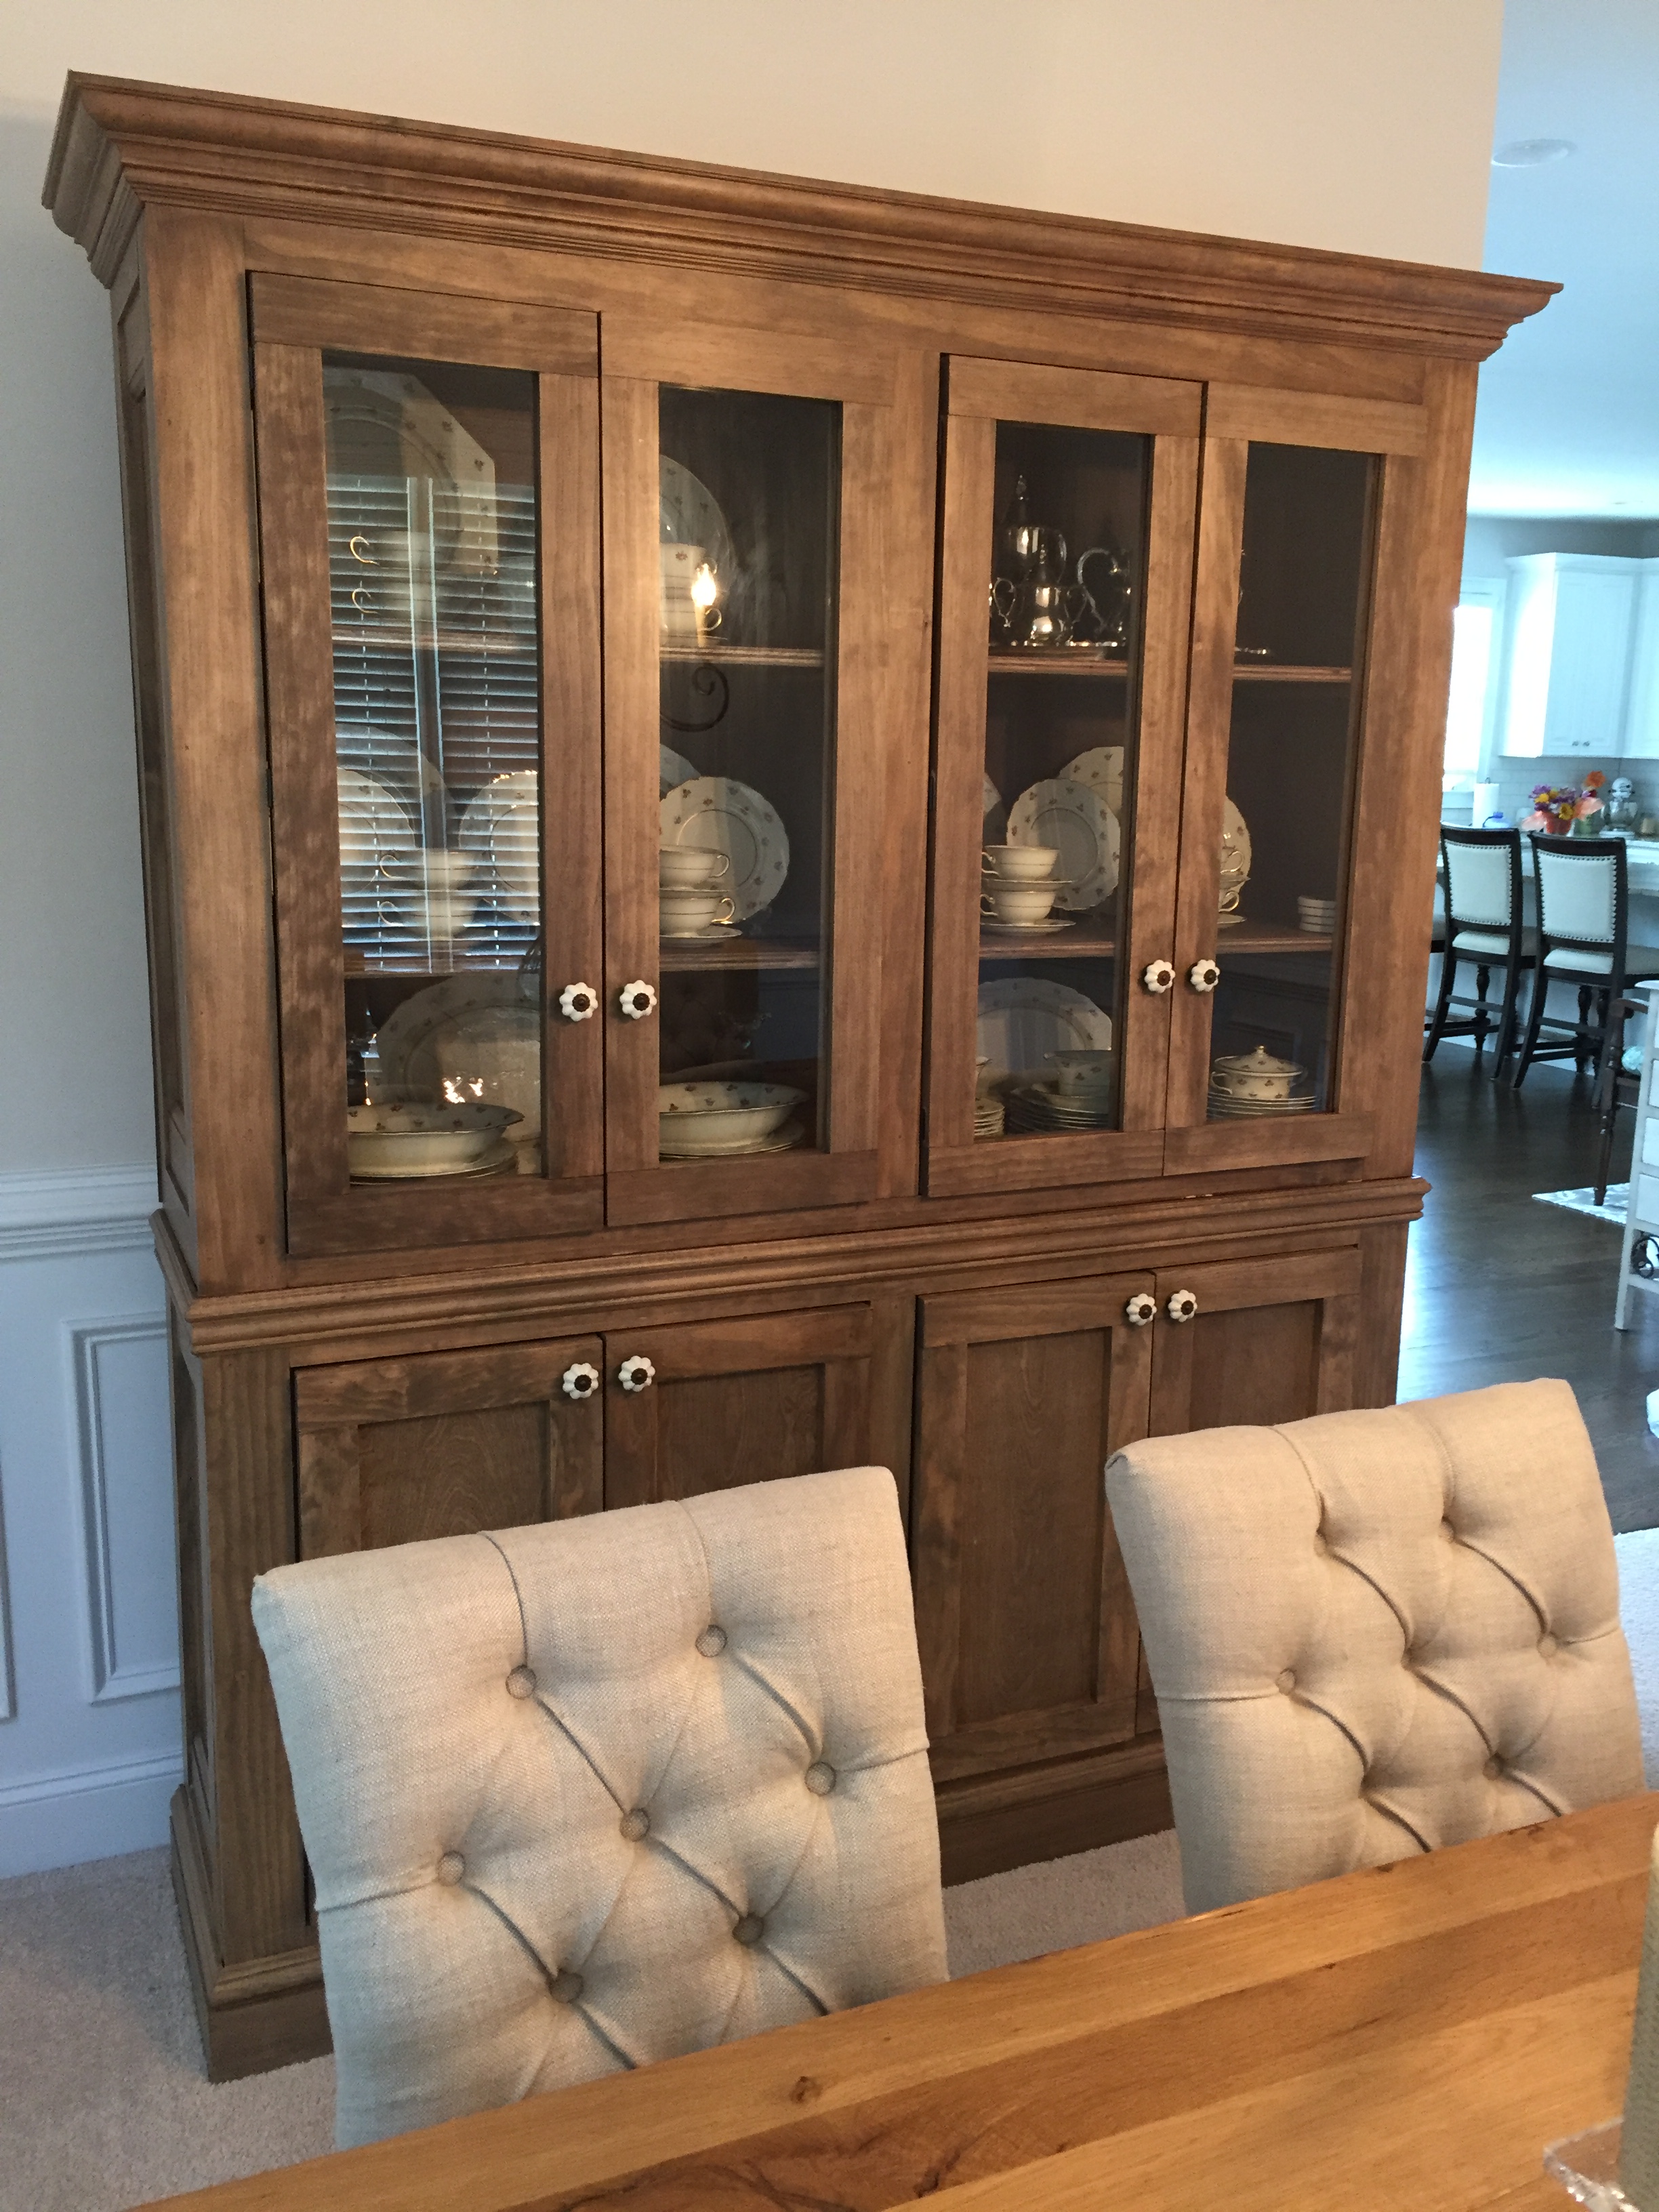
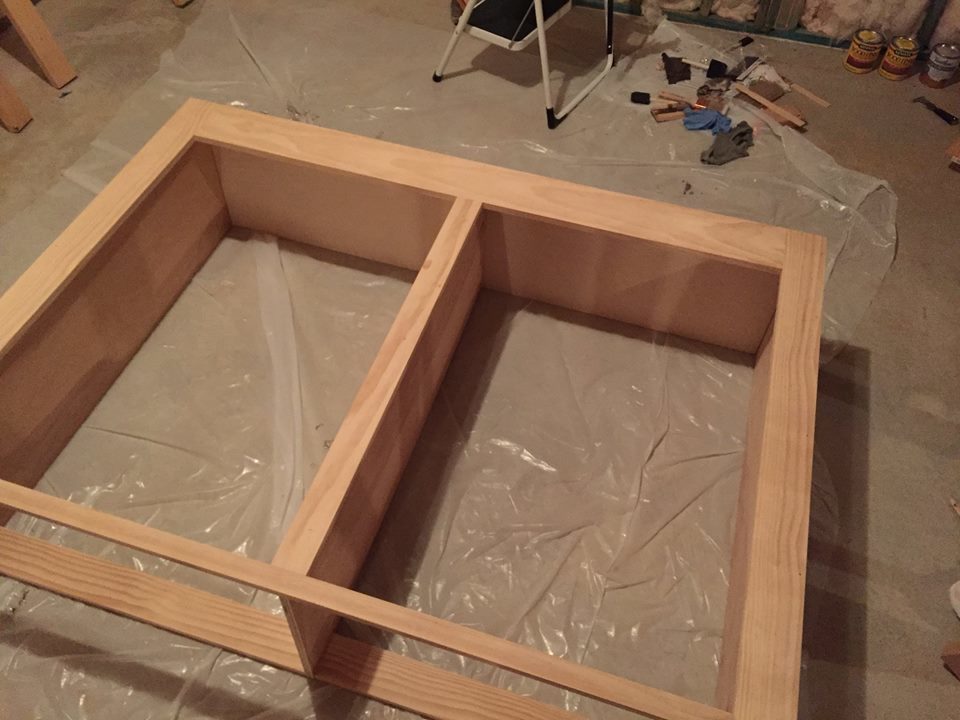
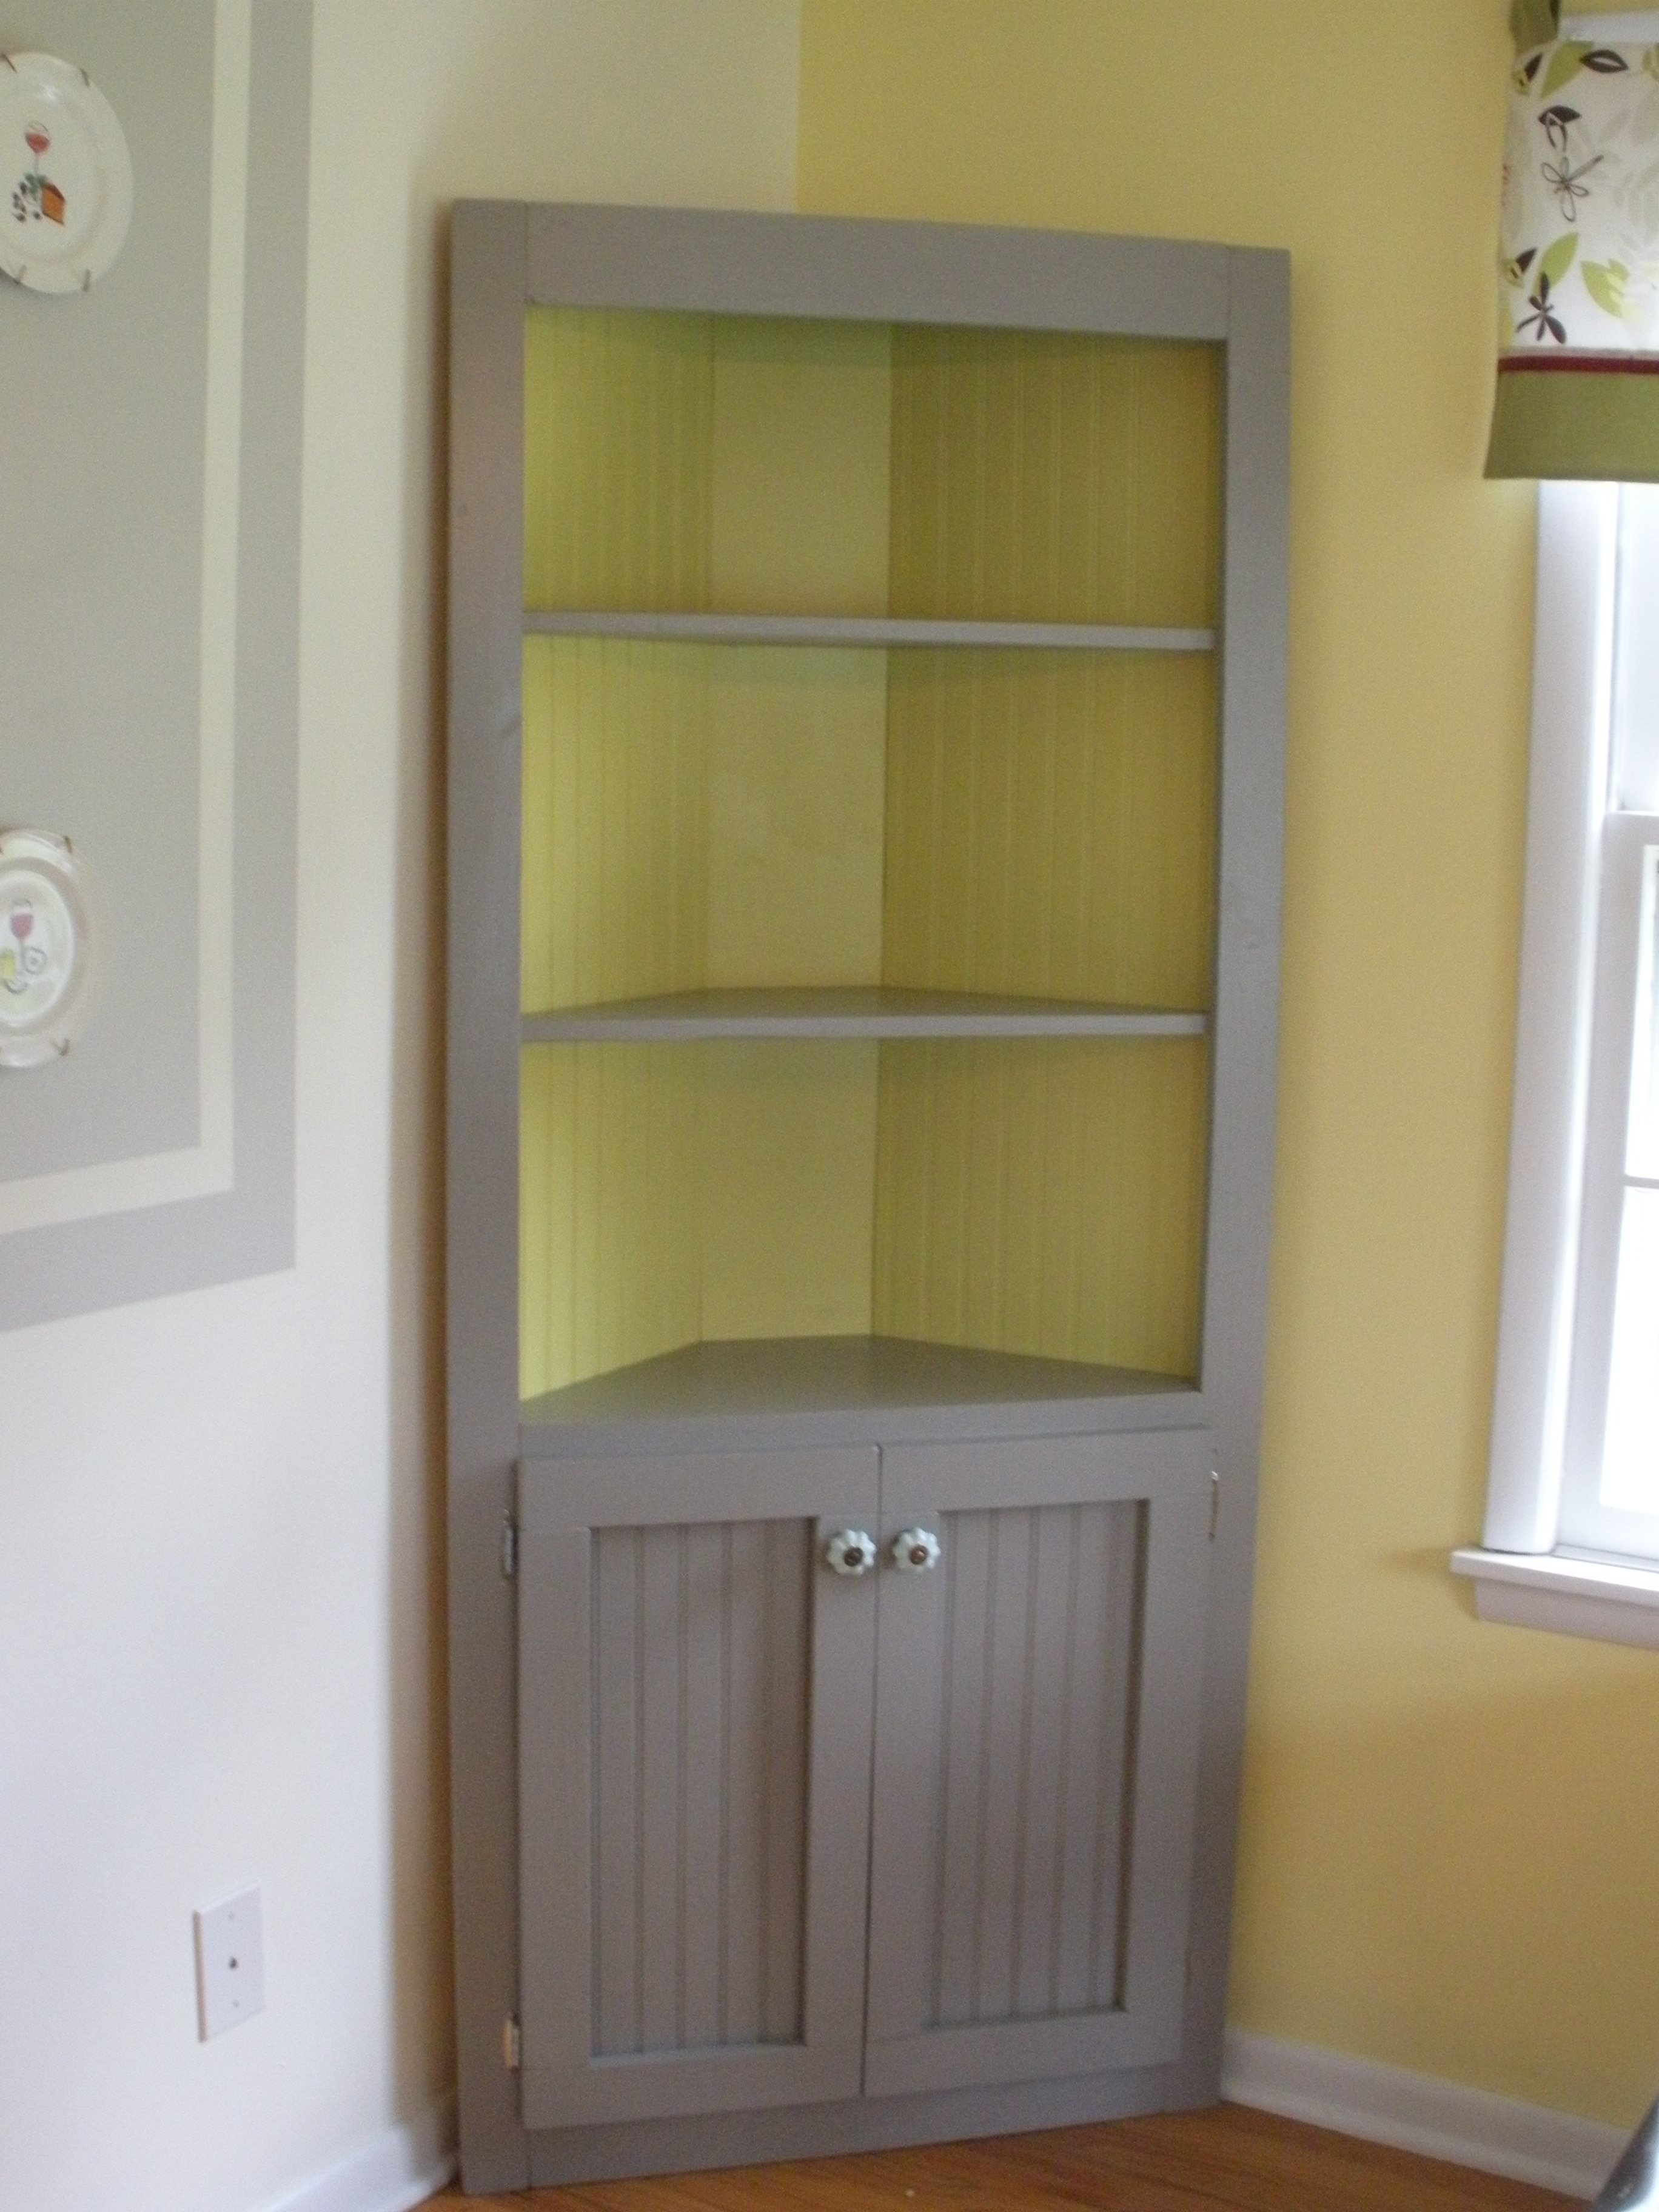
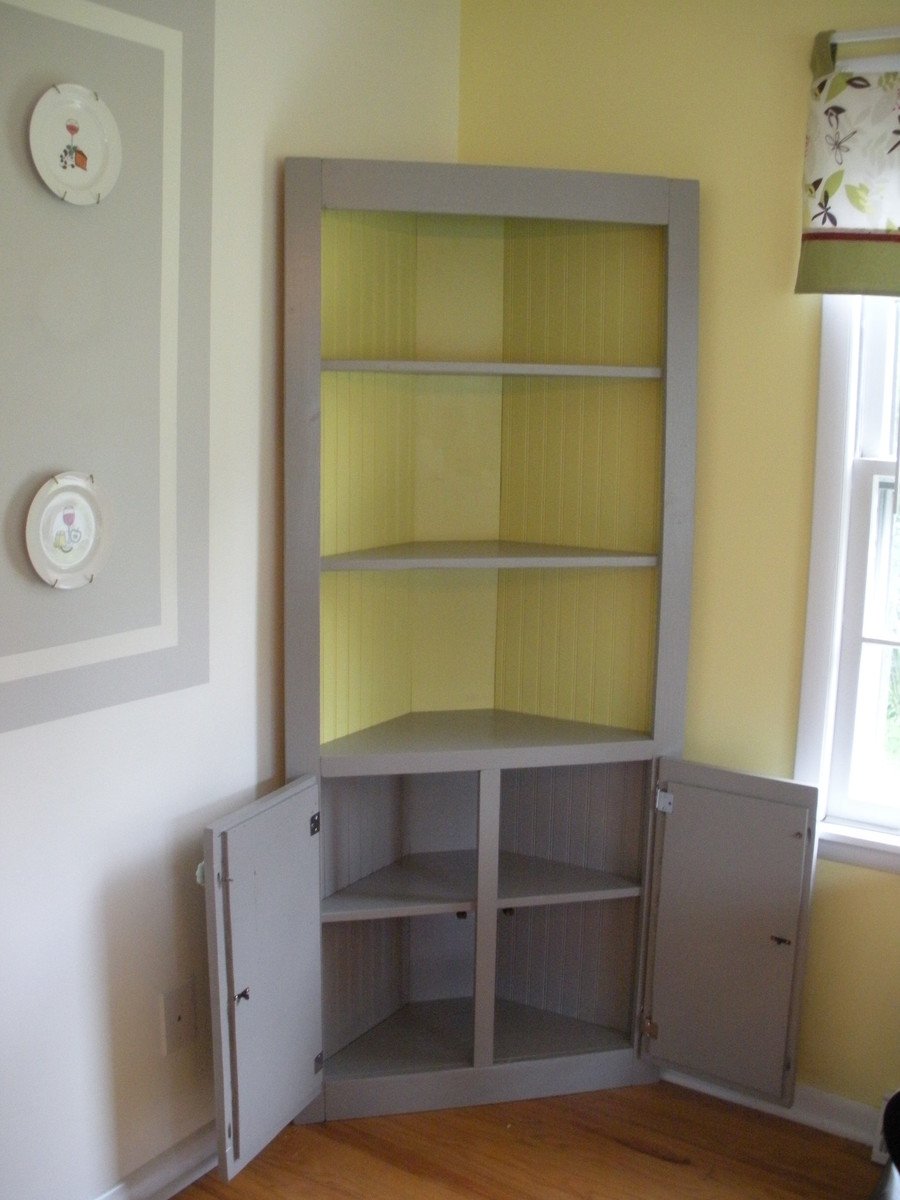
I modified the Shanty sideboard and Shanty hutch plans in a few ways: Shorter overall width to more comfortably fit my dining room, shorter height (which I now regret), fewer shelves in the hutch, different method to attach shelves, and added glass doors to the hutch. My shelves were not perfectly flush with the cabinet walls (oops) so I couldn't use pocket holes to attach them. Because I detest traditional shelving hardware, I just secured 1/2-in quarter round to the walls and rested the shelves on that.


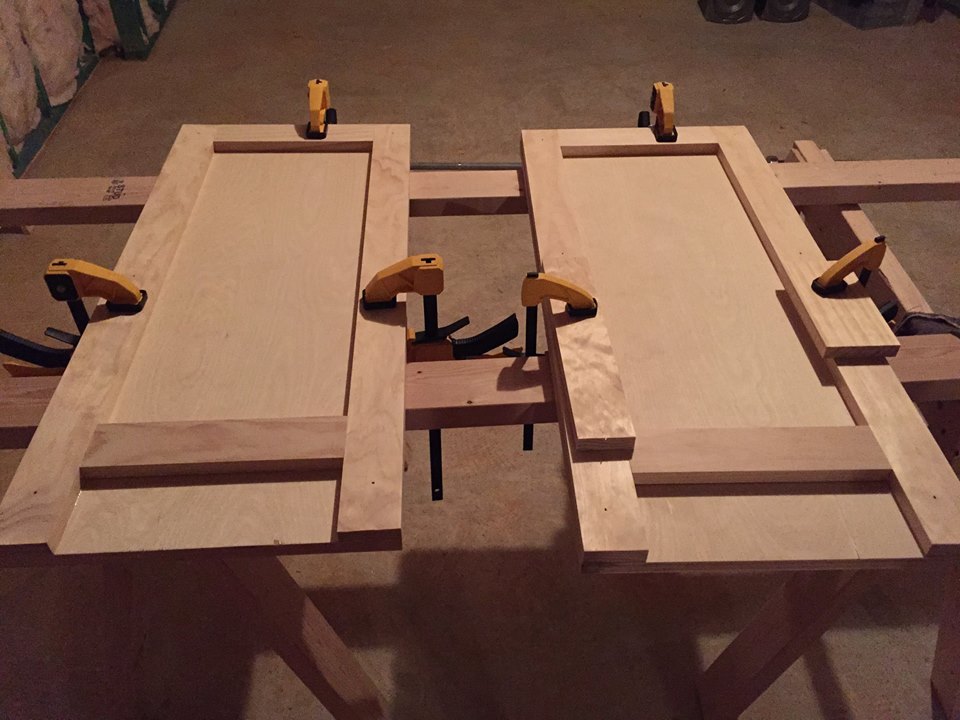
For the glass hutch doors, I built frames similar to the sideboard doors' frames -- two frames for each door, for a total of 8 frames. On 4 frames, I used a rabbit router bit to create an inset for the glass I bought and had cut at Lowe's. I secured the glass with glazier's points and silicon caulk, then attached an un-routered frame to the back of each door with screws. I chose to keep the screws on the back visible and accessible so that I could easily replace the glass if needed without destroying the door.

Built from Plan(s)
Estimated Cost
$630 plus $70 for fancy door knobs
Estimated Time Investment
Week Long Project (20 Hours or More)
Finish Used
Followed Ana-White staining tutorial and used Minwax Weathered Oak (1st coat) and Minwax Special Walnut (2nd coat). Used matte polyurethane clear coat.
Recommended Skill Level
Intermediate

Comments

pallet wood covered sand box

Submitted by Anonymous (not verified) on Tue, 02/21/2017 - 12:29

I used the same plans as posted but I tweaked them to work for the pallet wood that I ripped and sanded and stained with outdoor polyurethane. I also moved the short boards in so the box is smaller and added beams to support the bench separate. Because of Florida bugs and ants I also screwed a painting tarp to the bottom and punctured it several times for drainage to try and prevent bugs and weeds. The plans were so simple and I had so much fun making this.

Built from Plan(s)
Estimated Cost
50$
Estimated Time Investment
Week Long Project (20 Hours or More)
Finish Used
Just sanded and clear satin polyurethane outdoors coating. The product will look different depending on the pallet wood used.
Recommended Skill Level
Beginner

Henry bookshelf

Submitted by Lilbitmojo on Thu, 03/18/2021 - 15:33

My husband has been hounding me to build him a bookshelf for his office. I actually used wood that I already had in my garage. The next time I build it, I will follow it exactly... I used plywood on the shelves and planks on the back... next time, I will do the opposite, but I really love it!!

Built from Plan(s)
Estimated Cost
Less than 100
Estimated Time Investment
Afternoon Project (3-6 Hours)
Recommended Skill Level
Beginner

Comments

Shoe Dresser

Submitted by Anonymous (not verified) on Sat, 04/22/2017 - 13:52

Loved this project!  We had an old headboard so my wife came up with the idea to cut off the top posts and use them as legs.  

Built from Plan(s)
Estimated Cost
125
Estimated Time Investment
Day Project (6-9 Hours)
Recommended Skill Level
Intermediate

A-Frame Chicken Coop - Easy to Clean

Submitted by Anonymous (not verified) on Mon, 04/24/2017 - 14:25

Thanks for the free plans. I did have to make modifications for the doors. i hid the hinges to give it a clean look. i used cedar for the trim and Plywood Siding Panel T1-11 4 IN OC (Common: 19/32 in. x 4 ft. x 8 ft.; Actual: 0.563 in. x 48 in. x 96 in.) for the doors.  i used a metal flashing for the roof so it will vent.

Built from Plan(s)
Estimated Cost
$250
Estimated Time Investment
Week Long Project (20 Hours or More)
Finish Used
BEHR Transparent waterproofing finish (Cedar Natural Tone) NO 501
Recommended Skill Level
Intermediate
Seasonal And Holiday

Cute corner cabinet!

Submitted by rmurray87 on Sun, 06/02/2013 - 11:24

This project took me the majority of a three-day weekend to complete, but it was well worth it! I had the lumber store cut the beadboard panel for me so that it would fit in my car. This was also the first time I built something with doors on it, which was a bit of a learning curve, but came out alright in the end. I used pocket holes to build the face frame, and attached the shelves to the frame first before attaching them to the 1x8 back. I used 1 1/4" pocket hole screws and 2" wood screws. I left off the trim at the top and didn't bother to cut out the footer, but I think it still looks pretty cute.

Built from Plan(s)
Estimated Cost
$110
Estimated Time Investment
Weekend Project (10-20 Hours)
Finish Used
Accent color: Appletini from Valspar
Main color: Earthy Mushroom Taupe from Glidden

Everything was given a good sanding and a healthy dose of primer before painting.
Recommended Skill Level
Beginner

Comments

Pantry Shelves

Submitted by DIYAZMOM on Wed, 12/29/2021 - 09:03

We enclosed an unused wet bar and then I built the shelves to make it into a pantry.

Built from Plan(s)

Comments

Wooden garden tools storage shed

Our last project was building a tiny garden tools storage shed. We used only 1 x 4 boards. We don't have any plans, but you can watch the entire building process on our YouTube channel. We are very proud of the way the project turned out.

Built from Plan(s)

Comments

Seasonal And Holiday

Workbench

Submitted by Ulrike on Sun, 06/21/2020 - 09:37

Built 2 of the workbenches for our garage. The plans made assembly very easy and quick. We had Home Depot cut the plywood to size.

Estimated Time Investment
Afternoon Project (3-6 Hours)

Comments

Outdoor rolling bar top

Submitted by Anonymous (not verified) on Wed, 07/08/2020 - 19:43

We had some leftover granite from an outdoor kitchen build and wanted to maximize the use of it. We loved the look of a rustic table from Pottery Barn and set out to find something that was asking the same aesthetic. I came across the Jilly and Mia workbench console and thought it would work great with some minor modifications. I shortened the overall length and height, went with some heavy duty casters to support the weight of the granite, and reinforced the cross beams that would support the 3/4" plywood sheet and granite. I went with cedar for this build since it was outdoors and I'll finish it with a clear sealant.

Built from Plan(s)
Estimated Cost
$300
Estimated Time Investment
Day Project (6-9 Hours)
Recommended Skill Level
Intermediate

Comments

Over-sized 2x4 Letters

Submitted by efmolly on Sat, 01/12/2013 - 09:04

I've done a dozen or more of these letters now. Each letter has to be cut differently, but they are all made from 2x4s and pocket holed together using my Kreg Jig. I have also made some letters with curves (such as R, B, J, etc). I cut the curve out of a 2x10, left over stair stringer and then join it with some 2x4 for the rest of the piece. To make the base plates, I cut small blocks of 1x3 and rounded the edges with a palm sander. I used glue and finish nails to attach them. I have more projects like this on my blog http://pneumaticaddict.blogspot.com .

Estimated Cost
$4
Estimated Time Investment
Afternoon Project (3-6 Hours)
Finish Used
I wanted them to look very rustic, so I purposely didn't sand or use wood filler. First I painted them with 1 coat of acrylic paint a little brighter than my desired shade. I then glazed each letter with a dark brown glaze. Next, I white washed selected areas to add highlights. I distressed the edges with 100 grit sandpaper and sealed the whole thing with 2 coats of Polyacrylic in Satin.
Recommended Skill Level
Intermediate

Adirondack Minnie Mouse

Submitted by vangy04 on Fri, 11/14/2014 - 08:29

My daughter is into everything Minnie Mouse right now so I figured, why not!

Built from Plan(s)
Estimated Cost
$15
Estimated Time Investment
Afternoon Project (3-6 Hours)
Finish Used
I used stickers for the white details, but my daughter promptly peeled them all off. I suggest paint.
Recommended Skill Level
Beginner

Comments

pr22joyce

Thu, 09/08/2016 - 12:08

I have looked, clicked all over this site to download the plans for the Minnie Mouse Adirondack chair.  Can someone please help?

KelHad

Sun, 02/19/2017 - 13:28

Has anyone been able to locate the plans for the Minnie Mouse chair yet?

I still can't find them.

Laundry Station

Submitted by Anonymous (not verified) on Mon, 02/27/2017 - 10:03
We followed these plans, but instead of building two cabinets, we combined them with one side in the middle. We also used pine planks on top. The sides are painted with chalk paint, and the top is finished in dark wax. 
Built from Plan(s)
Estimated Cost
$200
Estimated Time Investment
Afternoon Project (3-6 Hours)
Recommended Skill Level
Beginner

Comments

Lawnmower Shed

Submitted by PipesTX on Wed, 01/07/2015 - 06:19

Modified the design to allow me to roll lawnmower directly in the end. Fun project.

Built from Plan(s)
Recommended Skill Level
Intermediate

Comments