Community Brag Posts

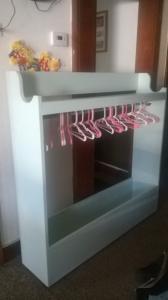
Over the toilet medicine cabinet / storage

Submitted by skyzen on Tue, 11/19/2013 - 17:06

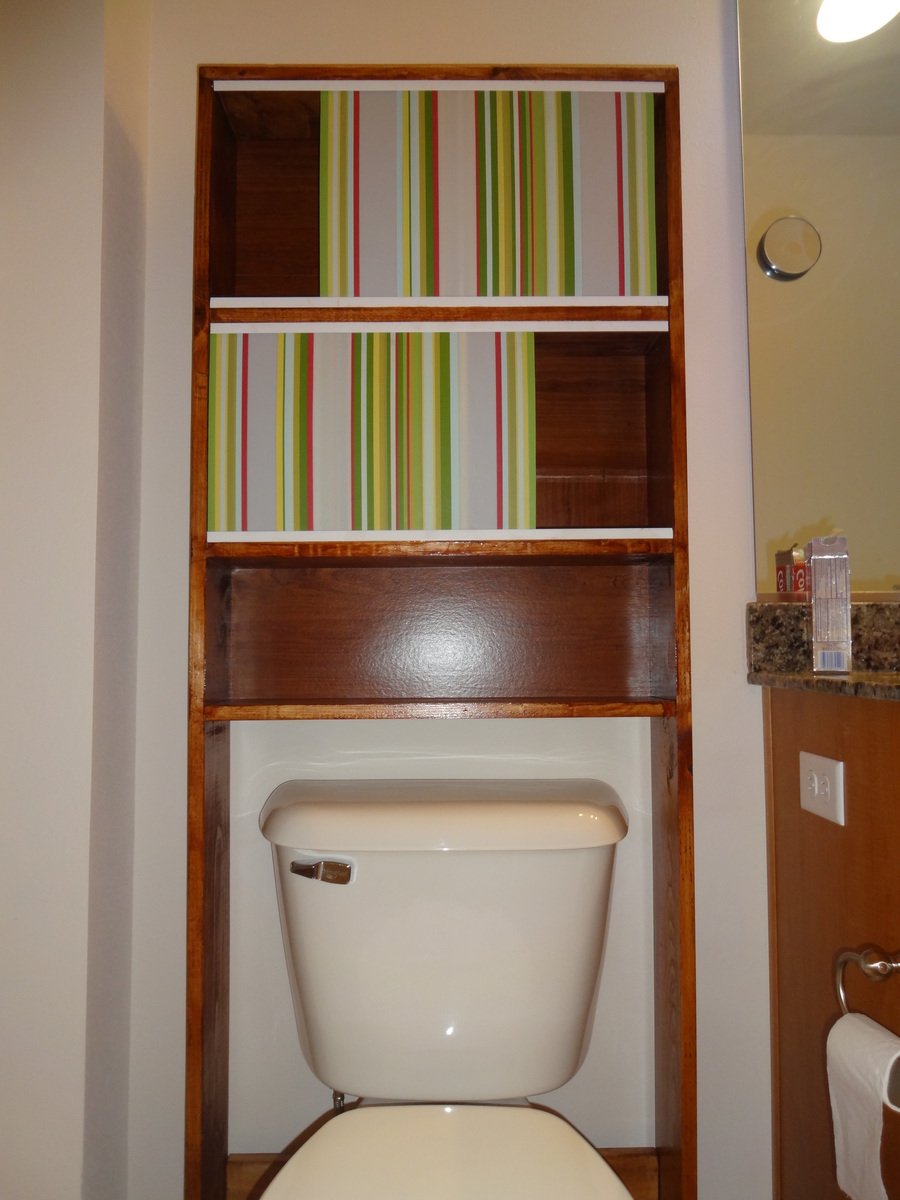
I recently discovered your blog and got really inspired. After building a couple of beginner projects following your plans, i started to think about making something that can be used as medicine cabinet and does not take much space. Came up with the idea for this over the toilet storage rack.

My goal was to recycle/reuse some of the stuff that was sitting in my garage.
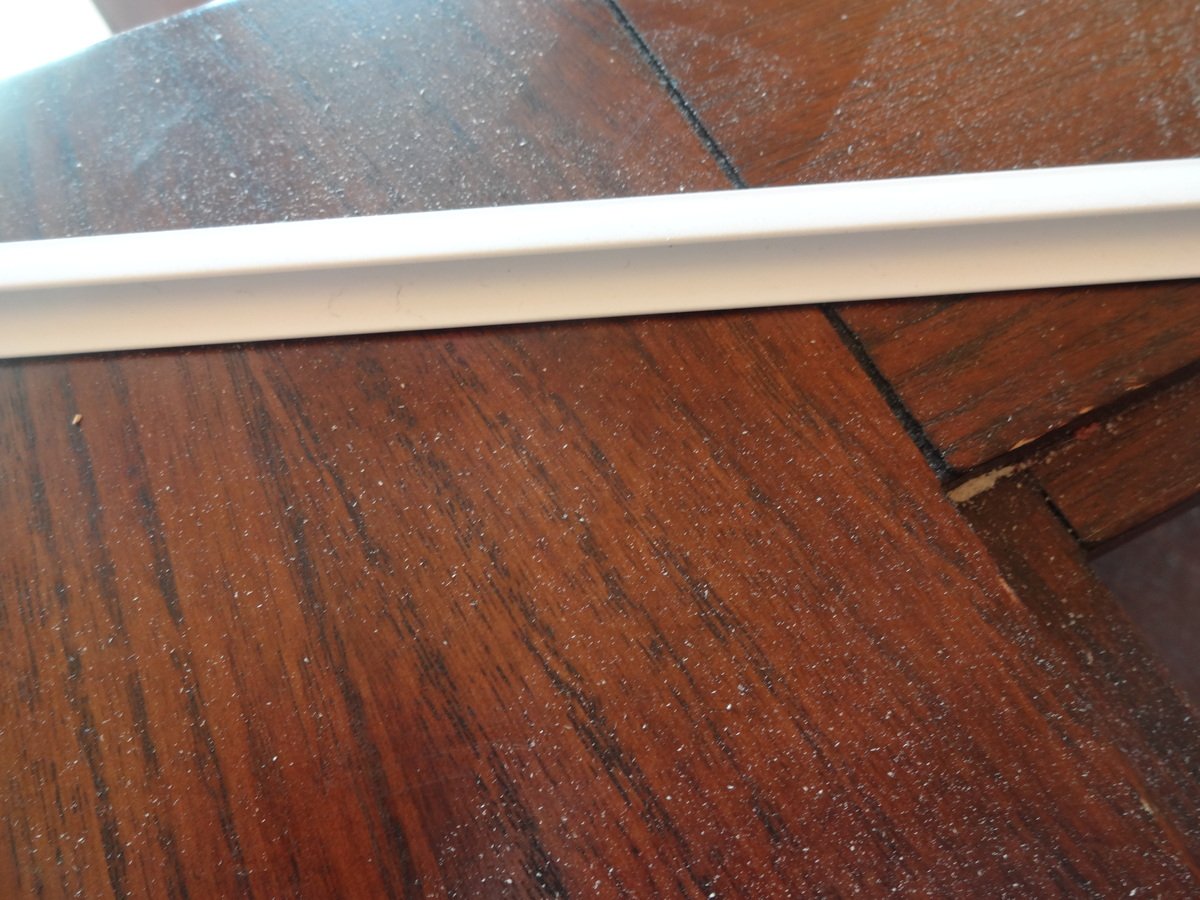
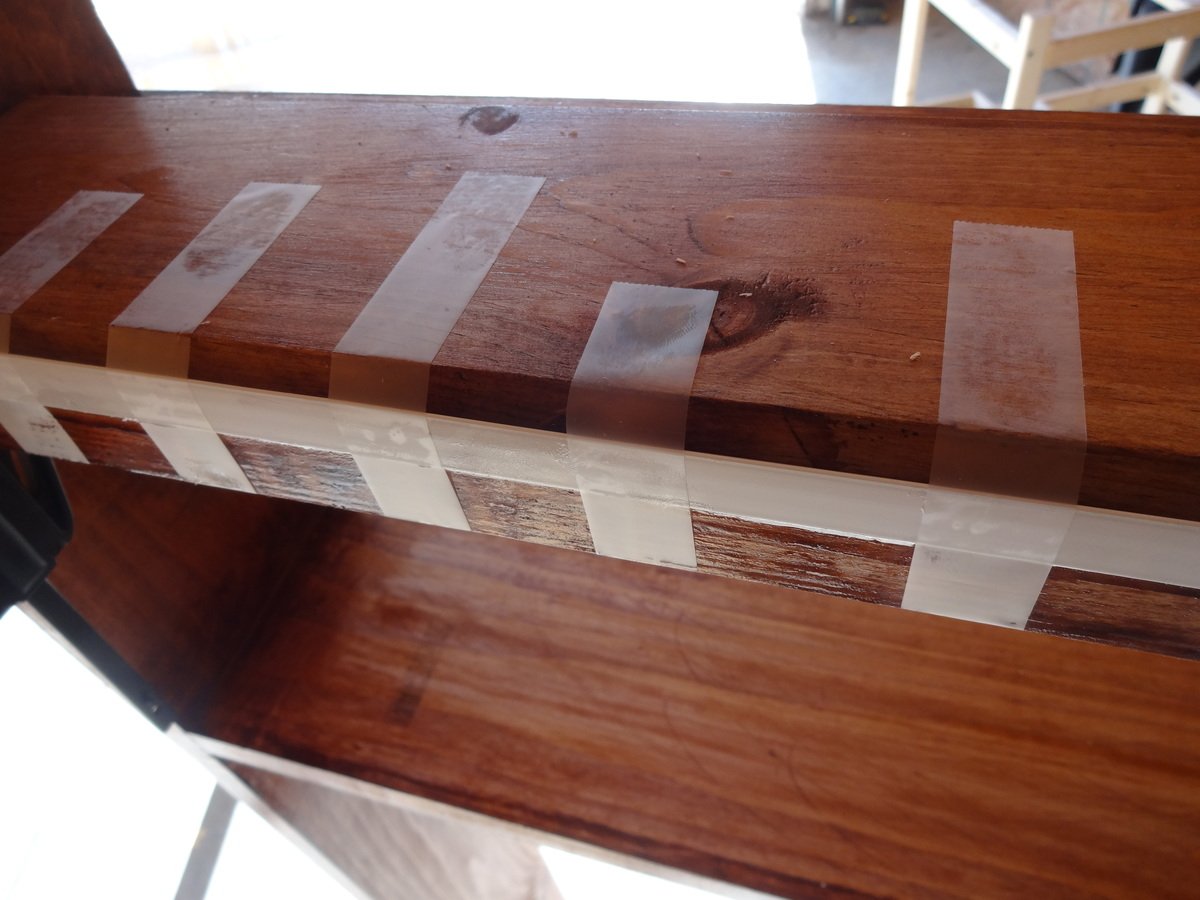
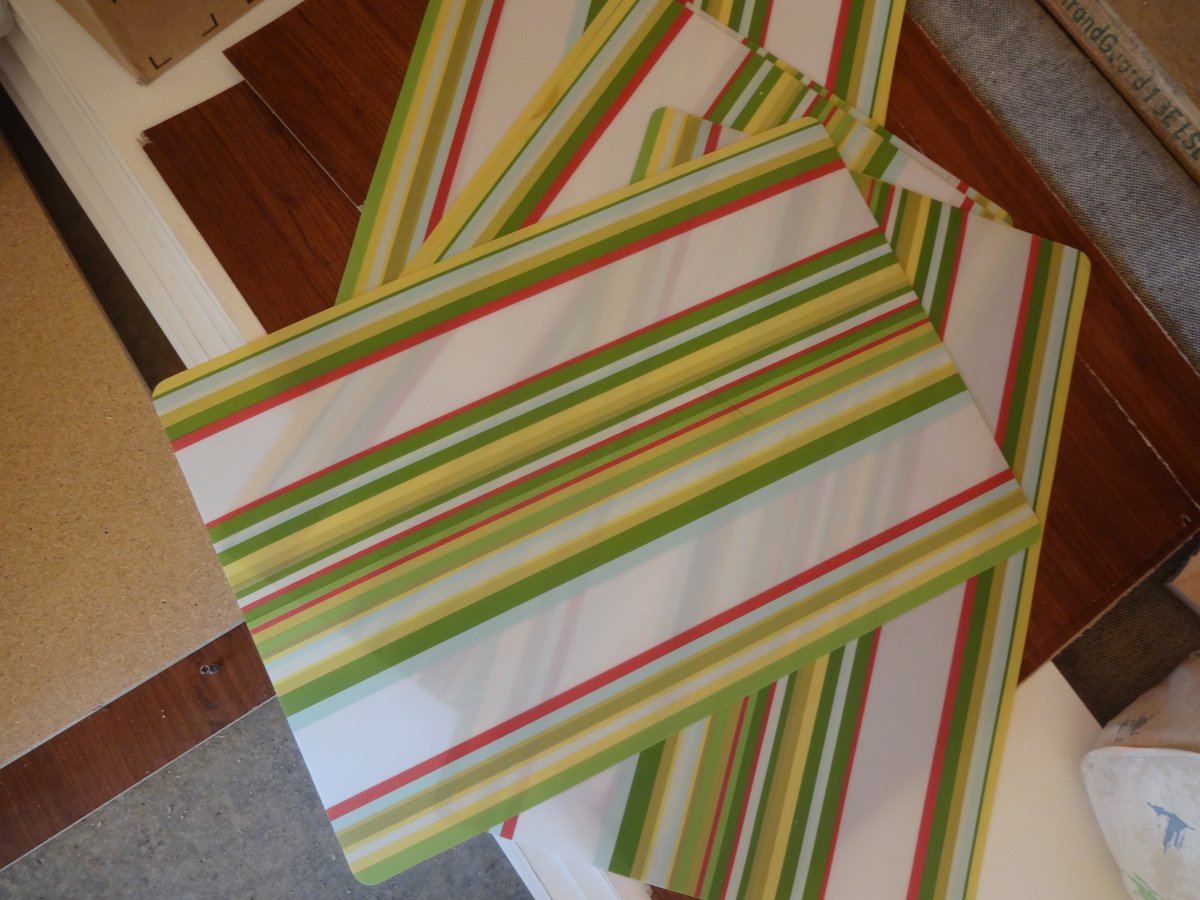
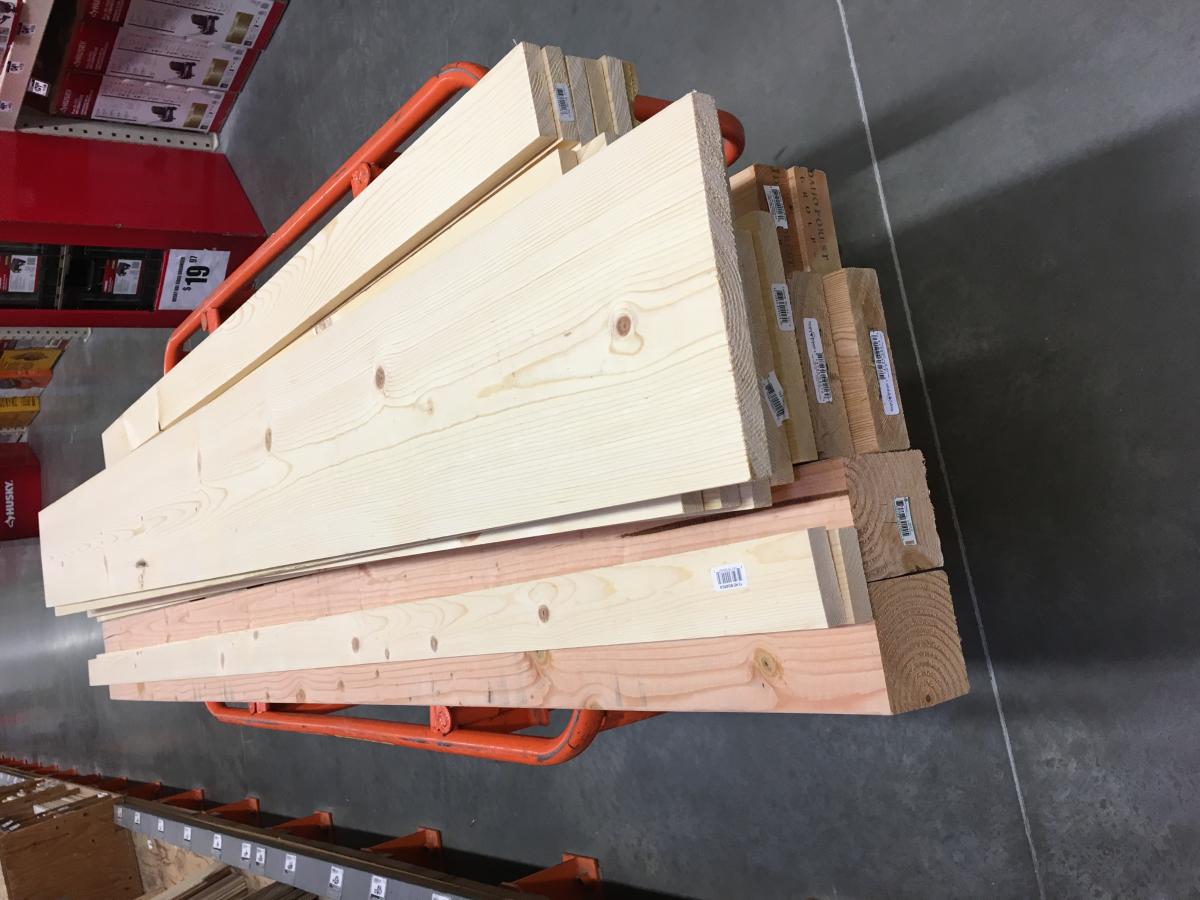
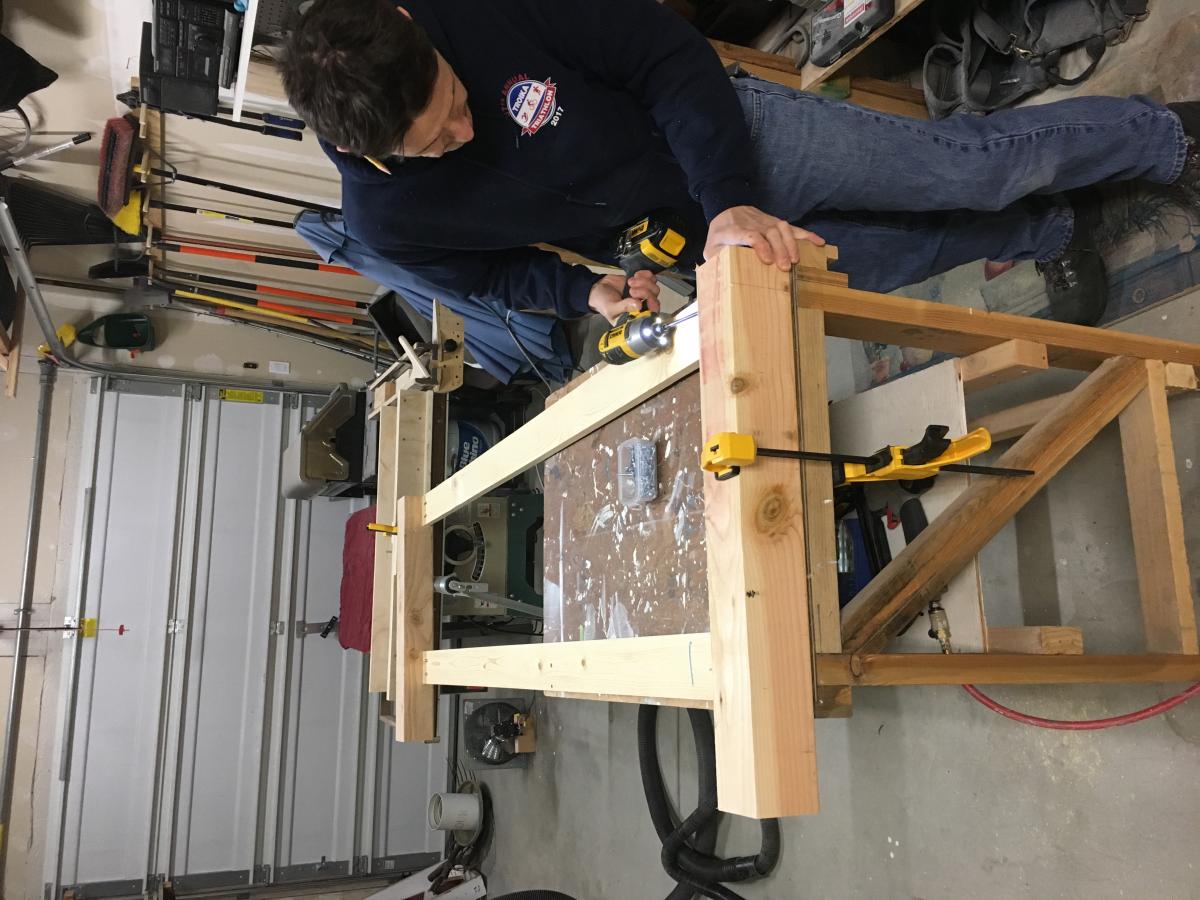
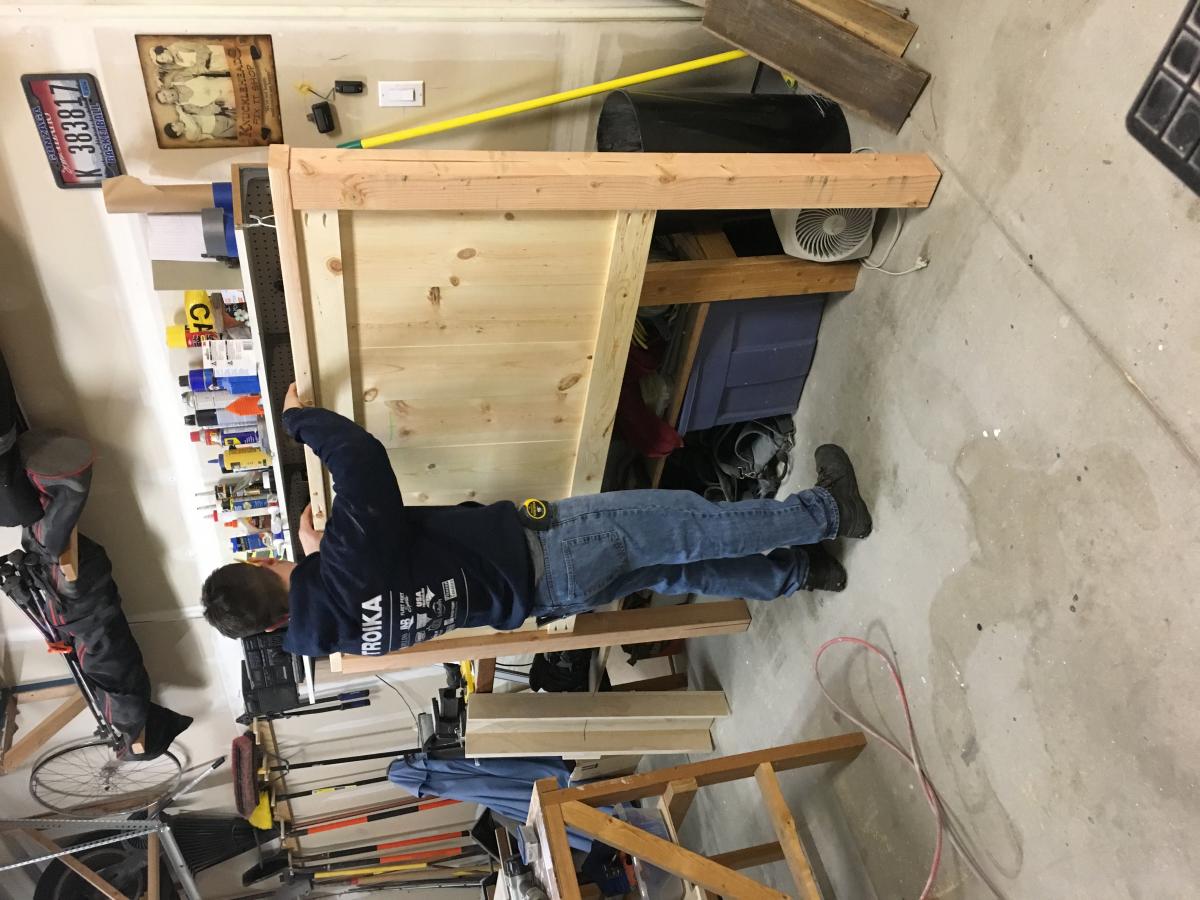
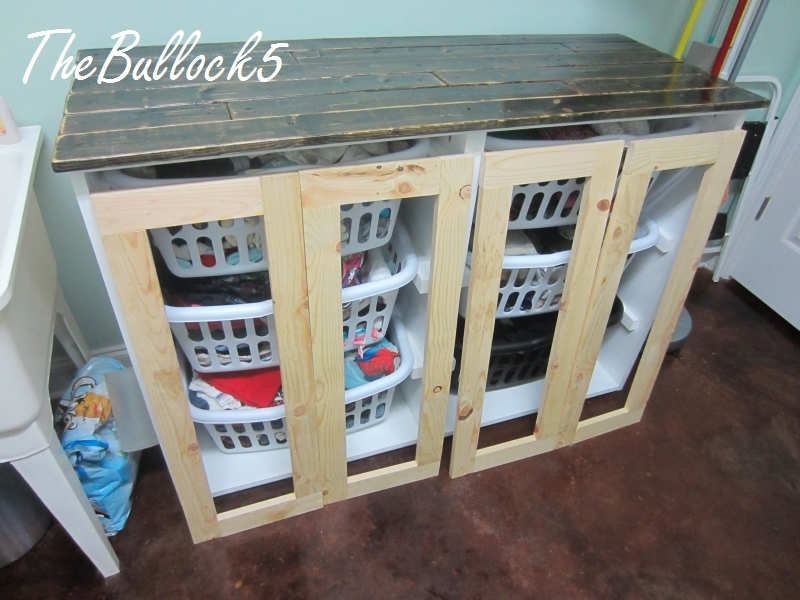
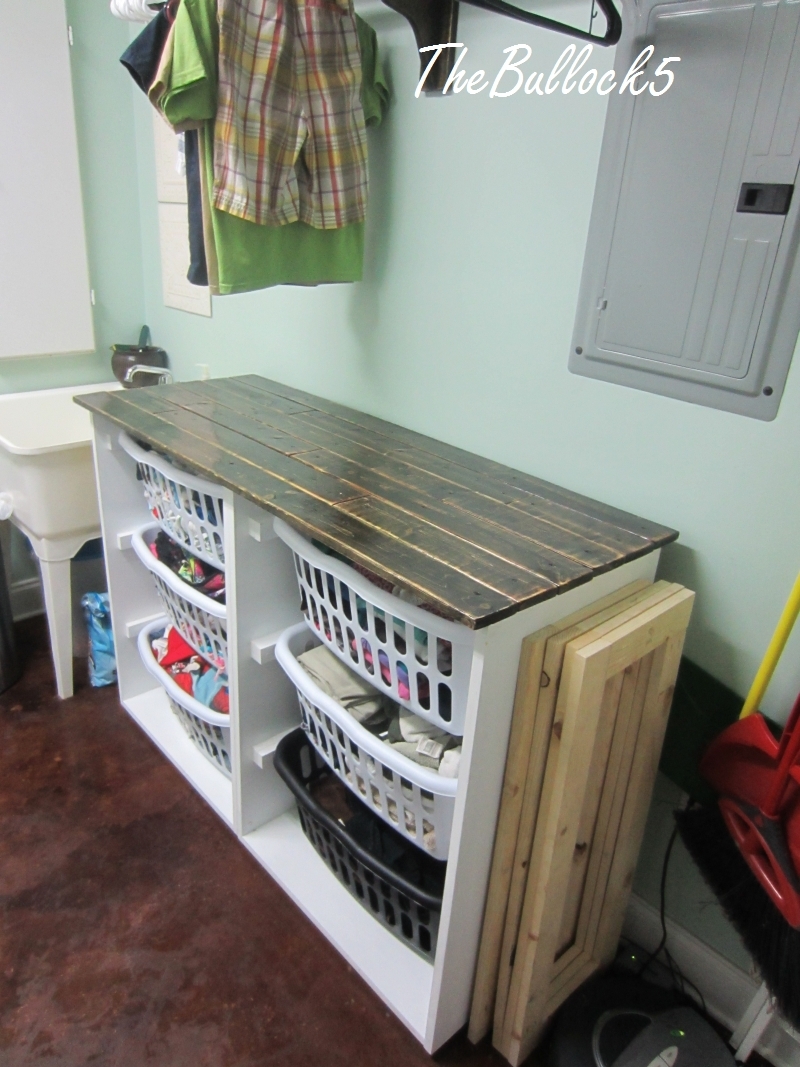
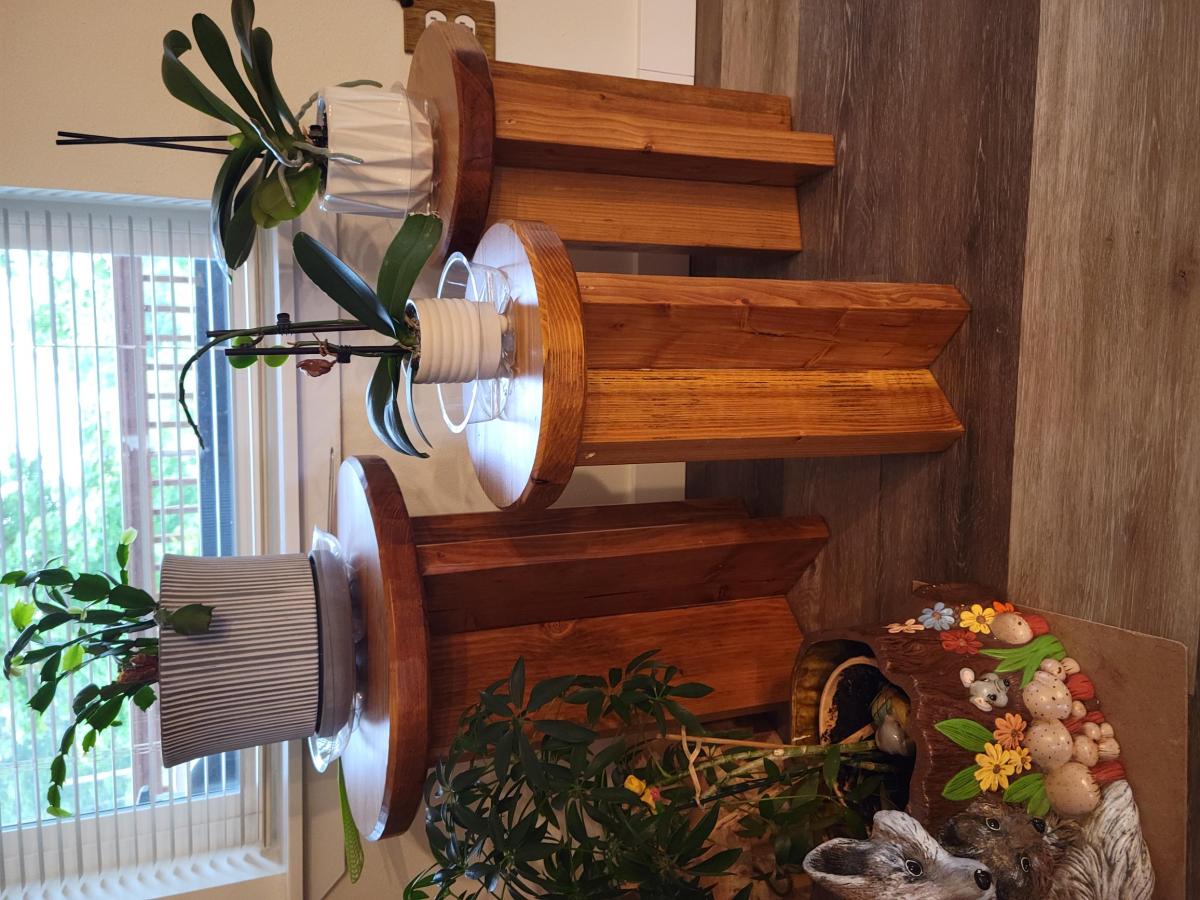
Started with building a frame using 1x6s (24 inch for shelves and 72 inch height). Used plastic table mats were used as sliding windows. Found a PVC trim (8 ft) for $2 at lowes that has been used as the rails/track for the windows. The back is piece of cardbord that was scrap from an old broken ikea bookshelf.

I am pretty happy that i recycled some stuff and made this in less than $15.

Estimated Cost
$15
Estimated Time Investment
Afternoon Project (3-6 Hours)
Finish Used
Minwax Bombay Mahogany Satin
Recommended Skill Level
Beginner

Comments

kevinwdavies

Tue, 12/01/2020 - 14:20

Did you do anything to the bottoms of the legs to prevent wet floors from wicking into the wood? I am wanting to build something similar to replace a particle board cabinet-in-a-box because the particle board did soak up water and get ruined. What I'd REALLY like are metal end caps with an adjustable foot (like you put at the bottom of a table leg) but I can't find a combination of the two anywhere.

King Farmhouse Bed

Submitted by Anonymous (not verified) on Tue, 10/01/2019 - 21:30

Fun weekend project to build together. We are loving the fresh look to our master bedroom.

Estimated Cost
350
Estimated Time Investment
Weekend Project (10-20 Hours)
Finish Used
General Finishes Snow White milk paint with Satin Topcoat
Recommended Skill Level
Intermediate

Comments

Outdoor Pergola with Seating Built-in!

Submitted by Anonymous (not verified) on Sun, 08/27/2023 - 12:14

Pergola outdoor room plans modified to make side seating instead of side tables. Left sides open. Added cute crochet swing bench. Anchored to concrete slab with iron plates and added decorative wood ties that match footing. I've gotten so many compliments and no one believes I made this!

Kristen P.

Built from Plan(s)

Comments

Seasonal And Holiday

Low Loft Bed

Submitted by enweldon on Sun, 01/19/2020 - 19:09

Made several modifications to this plan.  Wanted the bed to be easy to change sheet, reduced overall height to 48in.  The mattress is fairly thick so I increased the rail height to 18in by adding another row on the side rail.  The ladder can be located on either end.  My munchkin now has a new bed and with some curtains, a new hideout.

Built from Plan(s)
Estimated Cost
$200 lumber, $50 hardwear, stain,
Estimated Time Investment
Week Long Project (20 Hours or More)
Finish Used
Red Oak Stain with a Satin Poly coat.

A-Frame Chicken coop

I built this chicken coop/tractor a few years ago, for my cousin. I loved the ease of the plans and the build, and she loved the hens in her backyard!

Built from Plan(s)
Estimated Cost
$150 CAD
Estimated Time Investment
Day Project (6-9 Hours)
Recommended Skill Level
Beginner

Laundry Dresser foling area and hanging shelf

Submitted by sandrabees on Tue, 06/19/2012 - 13:15

more details on my blog. I built 2 of the laundry dressers. adjusted the placement of my baskets due to restrictions in the overall height of my unit (I have a ironing board cabinet built into 1 wall that I still wanted to be able to open and use :) I used MDF, but it was a bear to work with and next time I would spend the extra $$ on birch. i painte the bottom in a semi gloss. and plan to add the doors (which will have a beadboard backing) they will be painted white with a dark walnut glaze. The top and shelf /brackets are all done in a distressed finish with ebony and mahogany stain mixed then 2 coats of poly very sturdy even filled!

Built from Plan(s)
Estimated Cost
$140
Estimated Time Investment
Weekend Project (10-20 Hours)
Finish Used
white semi gloss paint, (will be glazing with dark walnut as well),
Recommended Skill Level
Beginner

Comments

Sherice

Tue, 07/15/2014 - 20:27

Very cool rendition of the original plans. I like the folding area, awesome job!

thewife

Fri, 06/26/2015 - 00:00

I have been wanting to make the laundry basket dresser but am holding off because we are moving. What color did you us on the walls, I love it.

Outdoor Sectional

We have been looking for a deal on an outdoor sectional for a whole year. Nothing. The cheapest we could find was $899 for one that was much smaller than this one and with thinner cushions. So we upped and drove to the lumber yard and purchased the lumber on the list and got to building. The total cost of lumber was $200, the Spax screws we already had on hand. We used pocket holes for the joints. The wife made the cushions herself. She had most of the fabric on hand, we just had to buy 3 yards for the back cushions, which are made of standard size pillows. They have been sprayed with fabric protectant for outdoor use (I think she used the Scotch brand). The seat cushions are 5 inches thick (they are wrapped in silk film to protect them from getting soaked when it rains or when someone who just got out of the pool sits on them), around $100 for both. It took her a couple of days to sew the box cushion covers.

Estimated Cost
$400
Estimated Time Investment
Weekend Project (10-20 Hours)
Recommended Skill Level
Beginner
Seasonal And Holiday

Loft bed

Submitted by JCostilow on Sun, 11/25/2012 - 08:35

It was time for my son to move to a big bed. So he got his sister's bed and she got a new loft bed. From the pictures on your website, she just loved this bed. I was able to throw it together and get it painted in a weekend and she was sleeping in it by Monday night. I added the rails because we weren't able to set it in a corner, and now that it is Xmas time we strung lights on them. We painted it white. For the mattress support I used 3/4" slats of MDF and used left over paint from her walls to paint the exposed side. Over all it was a pretty simple project, gives her more room and my daughter loves it.

Estimated Cost
$150
Estimated Time Investment
Weekend Project (10-20 Hours)
Finish Used
Glidden paint and primer eggshell, Dove White
Recommended Skill Level
Beginner

Modern Outdoor Collection

Submitted by Anonymous (not verified) on Tue, 10/27/2020 - 16:06

Great plans - thanks so much! Started with two chairs, and kept going...

MODS: Once built, we felt there wasn't enough back support, so added a 2x4 then 4x4 on top. Also added a 2x2 in back of the seat bed, so our 25" x 25" seat cushions didn't float around.

Recommend paint gun vs. painting by hand.

Estimated Time Investment
Weekend Project (10-20 Hours)
Finish Used
Two coats of Behr waterproof stain + sealer (BM swiss coffee)
Recommended Skill Level
Beginner

Comments

Seasonal And Holiday

Garden bench

Submitted by jsosebee on Sat, 11/01/2014 - 18:59


What goes here?

Estimated Cost
$45.00
Estimated Time Investment
Day Project (6-9 Hours)
Finish Used
None
Recommended Skill Level
Beginner

The Modern Fire Pit

Submitted by prelude on Mon, 10/04/2021 - 13:20

I started out several years ago building the Modern Adirondack Chairs using Ana White's plans. Customers loved the modern design and I was able to fulfill orders in any color or stain. Customers even asked if I could make a children's and adult size chair. These pans are available upon request.

As the trend towards outdoor living increased due to the pandemic, I expanded my product line to tables, benches and patio planters. I even created my own design for a fire pit rack and bench based upon Ana's designs.

Today, I have a thriving business for commercial and residential fire pit furniture and accessories.

I continue to follow Ana White for inspiration and ideas, George

Comments

$235 Weatherly Pergola

This is the first time I've ever taken on a project of this scale. The pergola is 12 x 11, and I was able to get it all done for $235 by having Lowe's price match a lumber yard in the next town over. I skipped out on the fancy base covers because I'll eventually make those pretty with limestone stacking rock - and because the lumber for those alone would cost about $121.
Once the treated lumber seasons, I'll stain it a darker color.

Built from Plan(s)
Estimated Cost
$235
Estimated Time Investment
Weekend Project (10-20 Hours)
Recommended Skill Level
Beginner

Comments

Cedar Boxes

Submitted by drowland on Sat, 07/09/2011 - 07:18

We built these before we saw these plans, but they are pretty much the same... We added the chicken wire to keep the rabbits (and our dog) out of the garden. We added the owl to keep the birds out. We've gotten a ton of tomatoes, onions, and bell peppers so far. Next year, we'll add a few more beds. We also added the verticle garden to take up less space, but its not deep enough. We'll make the next one deeper.

Estimated Cost
$30
Estimated Time Investment
An Hour or Two (0-2 Hours)
Finish Used
none
Recommended Skill Level
Starter Project

Comments

KatieO (not verified)

Sat, 07/09/2011 - 20:11

Wow! LOVE IT! I love the taller posts so you can incorporate the chicken wire! I SOOOO needed to do something like that this year. Also, the vertical garden boxes are BRILLIANT! LOVE IT!

drowland

Thu, 11/17/2011 - 07:59

We ended up getting a ton of tomoatoes and green peppers from the garden boxes. We've actually built a couple more. We'll probably double again before next spring. We're looking at adding more veggies.

We now have ton of stuff planted for the fall...

Guest (not verified)

Tue, 03/13/2012 - 10:46

How did you build the upright planter boxes? Do you mind explaining the building process/design? I really want to plant this in my yard!

colton's mom (not verified)

Tue, 04/03/2012 - 06:19

i love the vertical boxes. I am just trying my hand at the world with a green thumb and could use as much advice as possible about how to make as well as to line the boxes or not to line them. All advice appreciated!

berman (not verified)

Fri, 11/23/2012 - 21:53

Hi, my name is berman. I found you pin from my pinterest and your box garden is so great. I am a newbie in this field and so interested to build garden in my house. If i can ask you some question, could you please to answer that?

cheers,
berman

Seasonal And Holiday

Workbench modified with casters

Submitted by ogie287 on Tue, 04/02/2019 - 20:06

I love this workbench! I added casters so I can move it around the garage, outside, wherever it's needed. I just took 4 inches off the bottom of the legs. My hubby is admiring my handy work and planning on making one for himself.

Estimated Cost
$130
Estimated Time Investment
Afternoon Project (3-6 Hours)
Finish Used
None
Recommended Skill Level
Beginner

Comments

JBeecher

Wed, 01/25/2023 - 14:31

Love this with the casters! So beautiful. I'm new here and wondering at what point you took 4 inches off the legs. Did you build the table and then just cut off the legs? Or did you adjust the measurements of the cuts? Thanks in advance! :)

JimCoz516

Mon, 01/30/2023 - 02:32

The overall height of a 4-inch caster wheel is a little over 5 inches with the mounting bracket, so that also needs to be taken in to consideration. 2nd photo shows the overall dimensions, but to me the bracket and brake area appear to be a bit more than 1.03 inches. https://amzn.to/3DkMKzB
I think the best bet would be to have and measure the overall wheel height, prior to measuring and cutting the lumber.

Bedroom Remodel

Submitted by Anonymous (not verified) on Thu, 01/21/2016 - 18:35

We had 2 empty closets in our 100 year old home. The custom shelves took a day to build and have worked amazingly for our organization.

Built from Plan(s)
Estimated Cost
$200
Estimated Time Investment
Weekend Project (10-20 Hours)
Recommended Skill Level
Starter Project

Round Side Tables

Submitted by Anonymous (not verified) on Fri, 06/16/2023 - 18:39

I first made a set of these for my wife to use on the deck. She liked them so much that she's using them in the living room! (Second photo.) These were made from rough lumber left over from a building project so took a fair amount of time to cut and prep. I don't have a planer so the belt sander outside was put to good use. Then, to make them them fit well, I recut the sides, and rather than pocket holes I glued them into a plank before cutting the rounds with my table saw. That also gave me a tight flat top.

Her friend saw them and wanted a set, so here they are. Again I recut the sides and glued them to create a smooth plank. This time I used the router and a circle jig to cut the tops, giving me a much nicer finish. They will be stained mahogany and finished with multiple coats of polyurethane.

The large one I simply upsized from the original plan, roughly scaled. It is 22" tall, made with 2x8 lumber selected and purchased at the box store. My wife's friend is totally delighted with them! Thanks Ana for the inspiration.

Built from Plan(s)

Comments

The Gíaffe TV Stand

Submitted by Anonymous (not verified) on Thu, 02/06/2020 - 09:55

The Gíaffe Free Standing TV Mount. Handcrafted and engineered to use its center mass to deliver strength and balance for tv sizes 30-60". Display your television without detracting from your home's decor. The Gíaffe Free Standing TV Mount is the perfect solution and its rich finish will be perfect for any house/office room.

Estimated Cost
$109
Estimated Time Investment
Day Project (6-9 Hours)
Finish Used
Stain - Dark Walnut - Varathane - 2 Coats
Finish - Water Based Polyurethane - Varathane - 3 Coats
Recommended Skill Level
Intermediate

Comments