12 Foot Long Outdoor Sofa
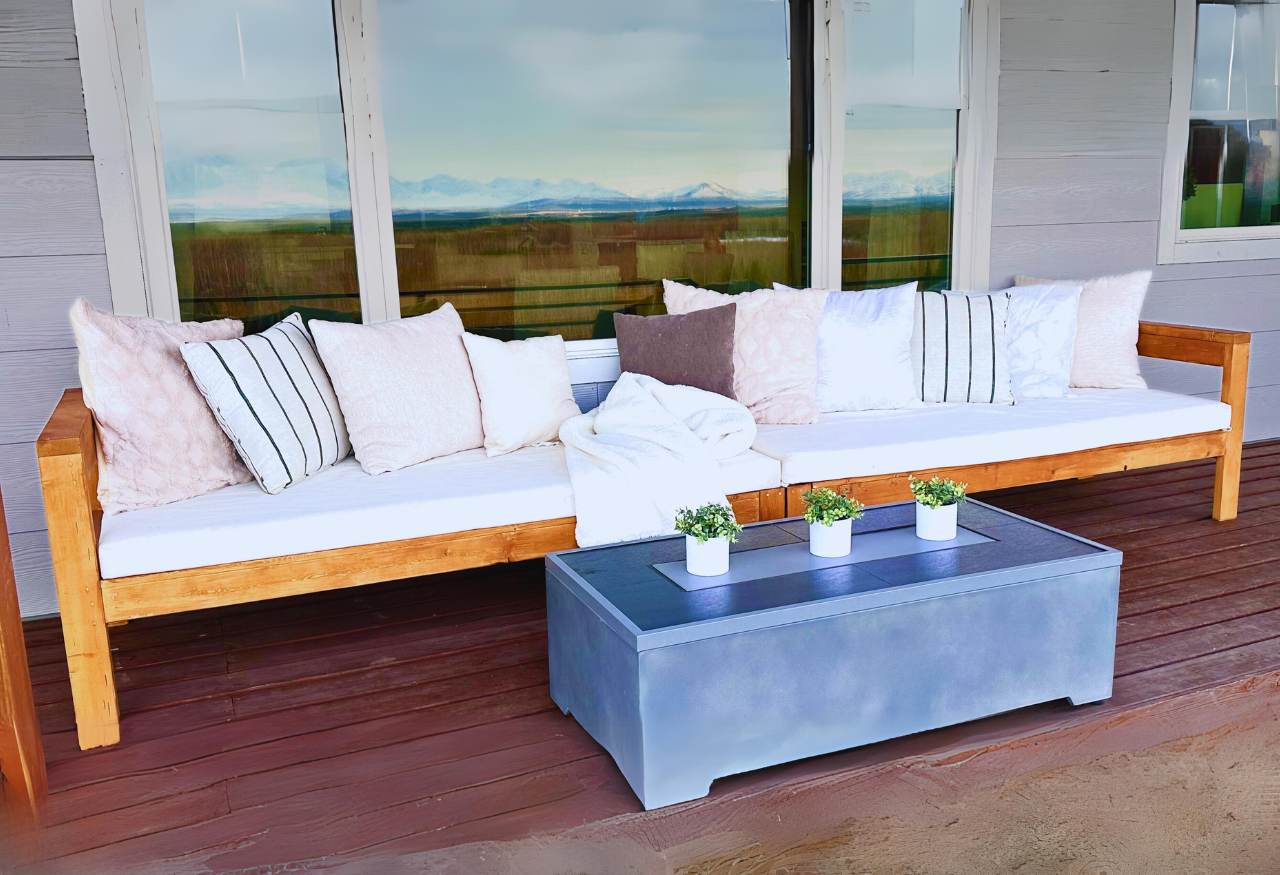
I built these two outdoor chaise lounges last year
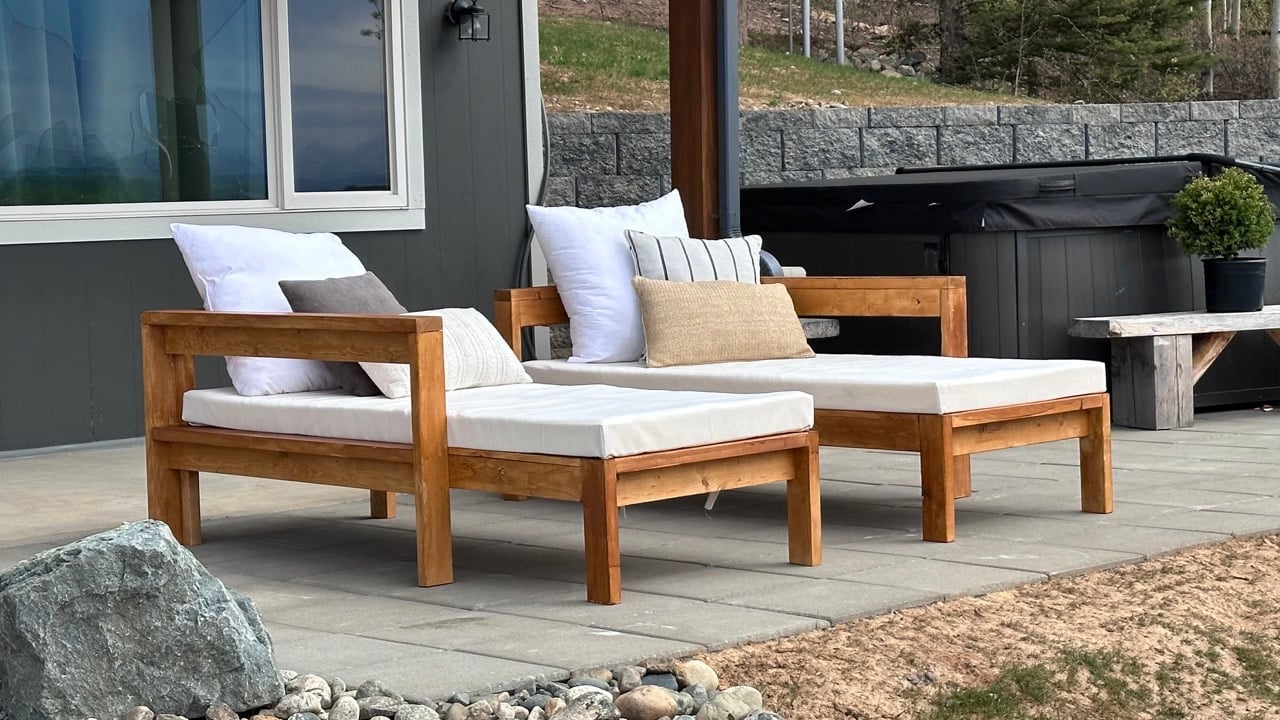
Over the winter, I stored them on the deck, turning them into a huge outdoor sofa!
Built from Plan(s)
I built these two outdoor chaise lounges last year
Over the winter, I stored them on the deck, turning them into a huge outdoor sofa!

Ana doesn’t have a plan for a catio but she does for a playhouse and a cedar shed made from 2x2’s. I sort of combined my knowledge from making her plans over the last 10 years and came up with this for my cats. It was fun to make!! My baby kitten is loving it. I used garden fencing and stapled it to the outside and pocket holes for the walls. I made each wall individually like the playhouse then connected them once in place.


Wed, 06/09/2021 - 12:36
Thank you for sharing! My daughter wants a cat for her birthday but it can't be inside due to our son's allergies. Roaming outside isn't really an option because we have coyotes. We are going to use one of these in combination with an underground electric fence.
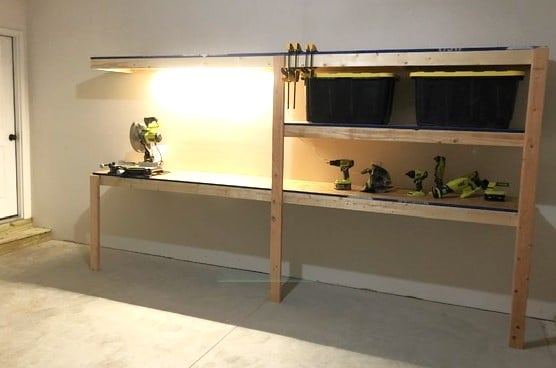
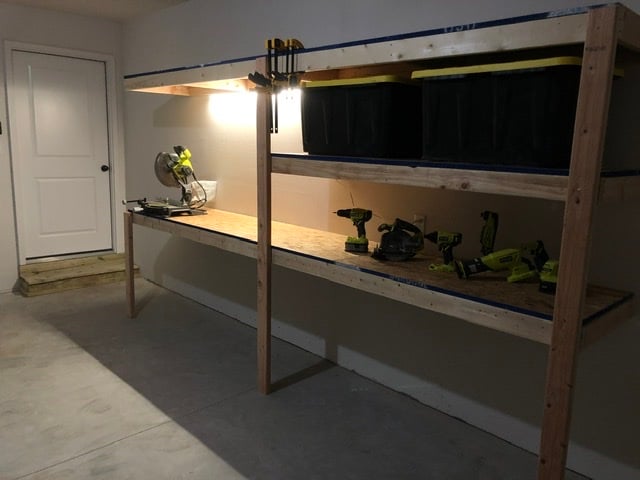
I used Ana’s plans for the garage shelves, but modified them to include a work bench. A lot of you tubers have done this, built a combination work bench and shelving, but I built nearly everything according to Ana’s plans. 12 feet long, 24 inches deep. I got some LED lights (two 1600 lumen strip lights) from menards that really brighten up my entire garage and make the work bench more useful. The one thing I really wanted was to not have a supporting pillar on the work bench to keep it open, and I loved how it turned out. I went for 3/4 plywood, mostly to have a stronger work surface, and I’m glad I did. I have since added a supporting 2x6 off of the study to support the top shelf above the bench and its strong enough to do pull-ups off of, and I have reinforced the support leg under the bench with a cross bar. Thanks for the great plans!!

I decided to try and use the plans on Ana's site but with a twist. I wanted to limit myself to using only pallets. I think it turned out great! I can't upload all the photos because they exceed the maximum size limit. If I was able to you could see how each chair is slightly different and has a lot of character. I finished them with a waterproofing oil which I highly recommend over other finishes.


Mon, 04/10/2017 - 08:51
This is exactly what I'm looking for !! Fantastic build and re-purposing is always better.

Used square laundry baskets instead of regular rectangular baskets. The square ones aren't as deep but are a bit taller so I had to modify the plans. I added a backsplash and some wooden tags to the baskets to designate them for certain colors. I also added some decorative trim and finished the bottom in a gray stain and used white chalk paint for the top.


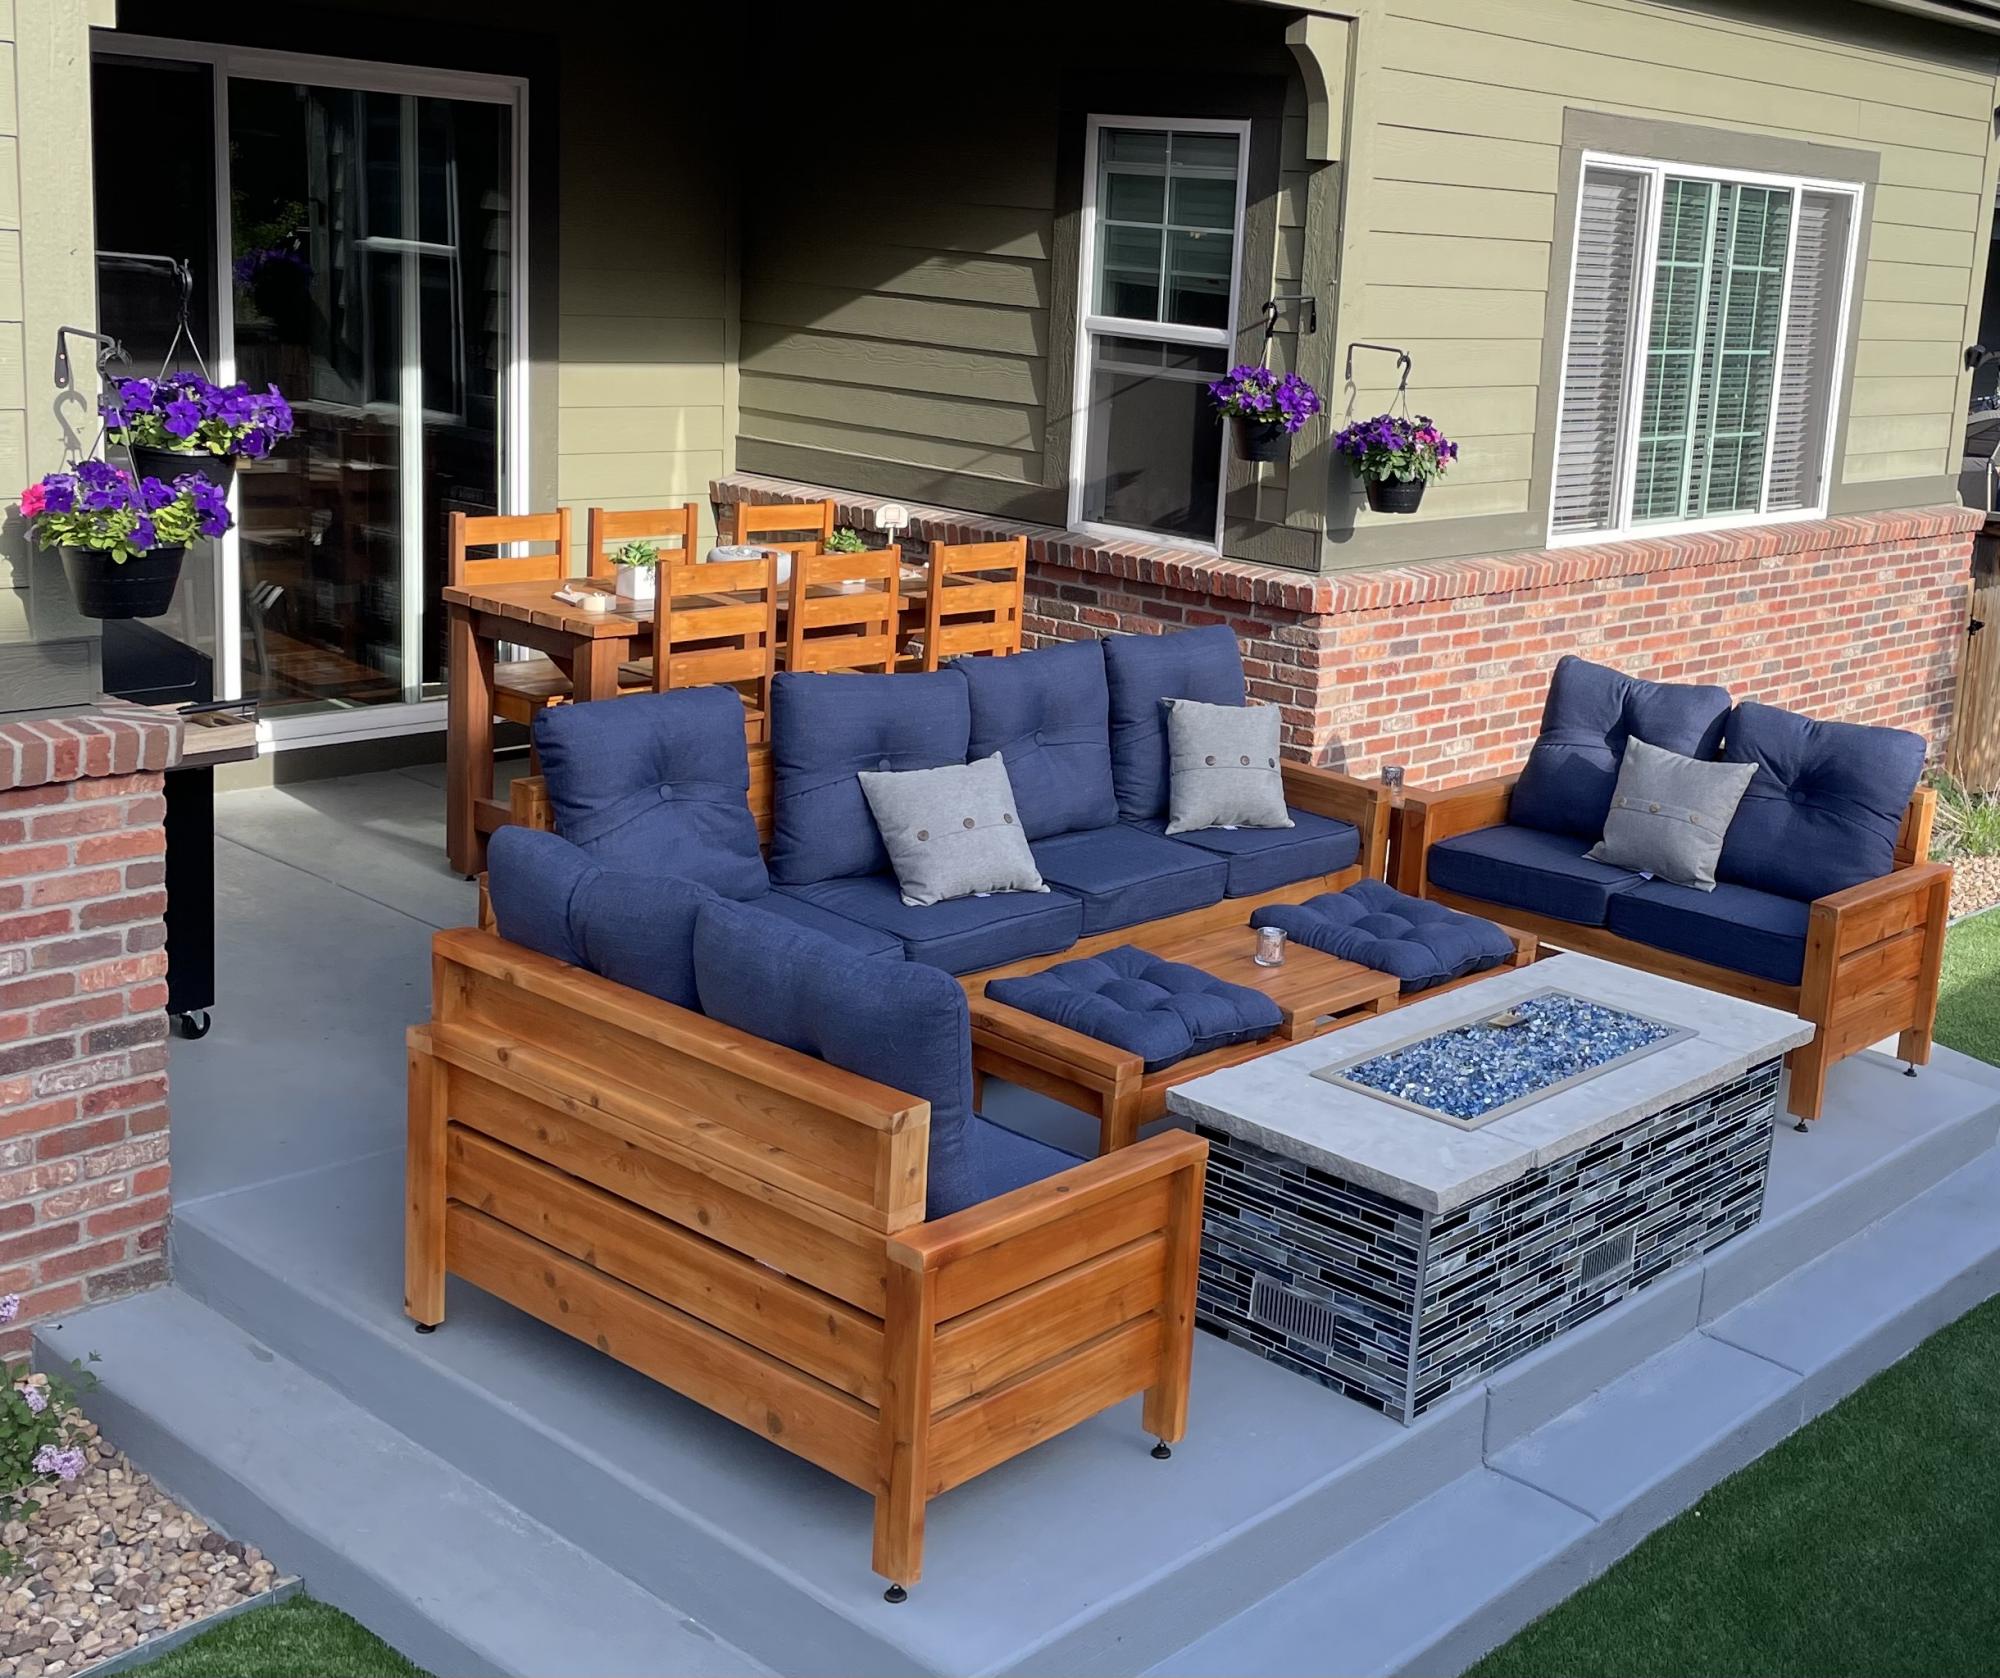
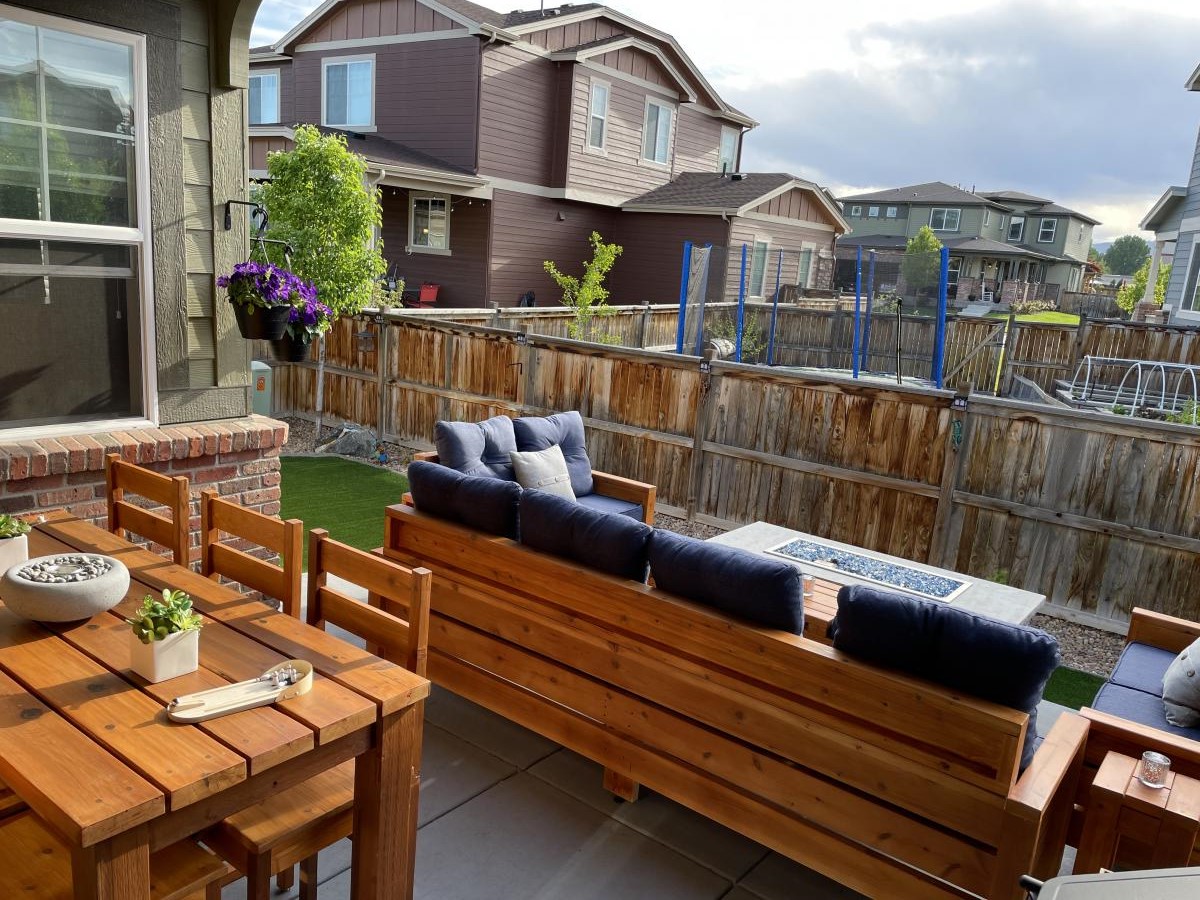
A 2-month long project to create an entertaining space in our small backyard. I started with a dining set for 6, then went on to seating around our firepit. I actually doubled the size of the Modern Outdoor Loveseat and built a 4-seat couch (added a center section for support. I also built 2 loveseats, 2 small side tables, and took some creative liberties to design a coffee table/foot rest combo. The major modification I made to the couch and loveseats was adding a back for some additional height. This really improved the comfort when leaning back. Had a great time completing this project! When lumber prices come down I'll continue the build. (2 pictures keep uploading and converting to an upside down image - no idea why, but sorry for the weird view)

Sun, 05/30/2021 - 09:58
Love the coffee table foot rest, would love to see more of the outdoor table as well! It all looks amazing and came together perfectly! Thank you for sharing, check out our Facebook page, just shared!
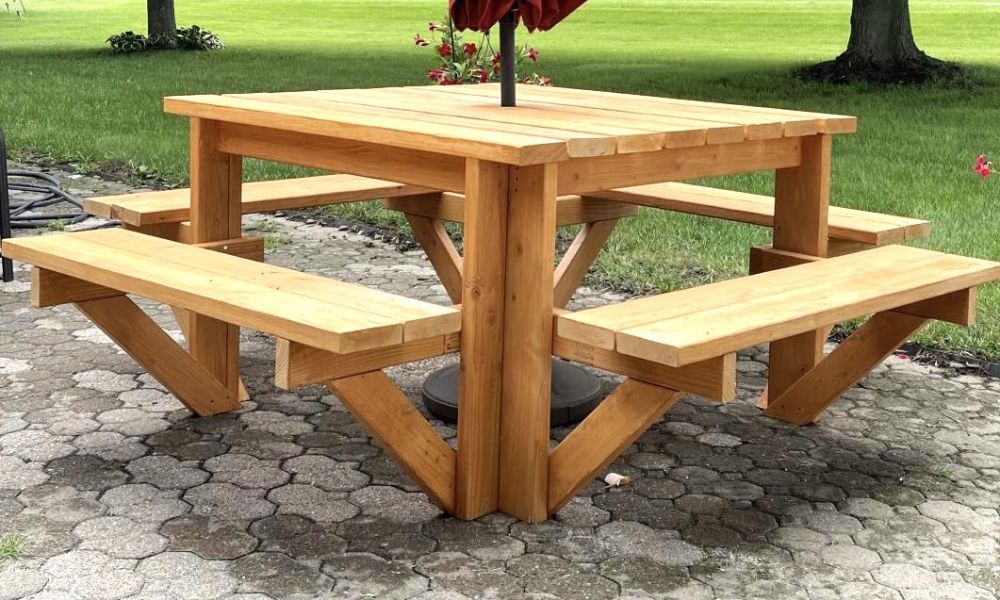
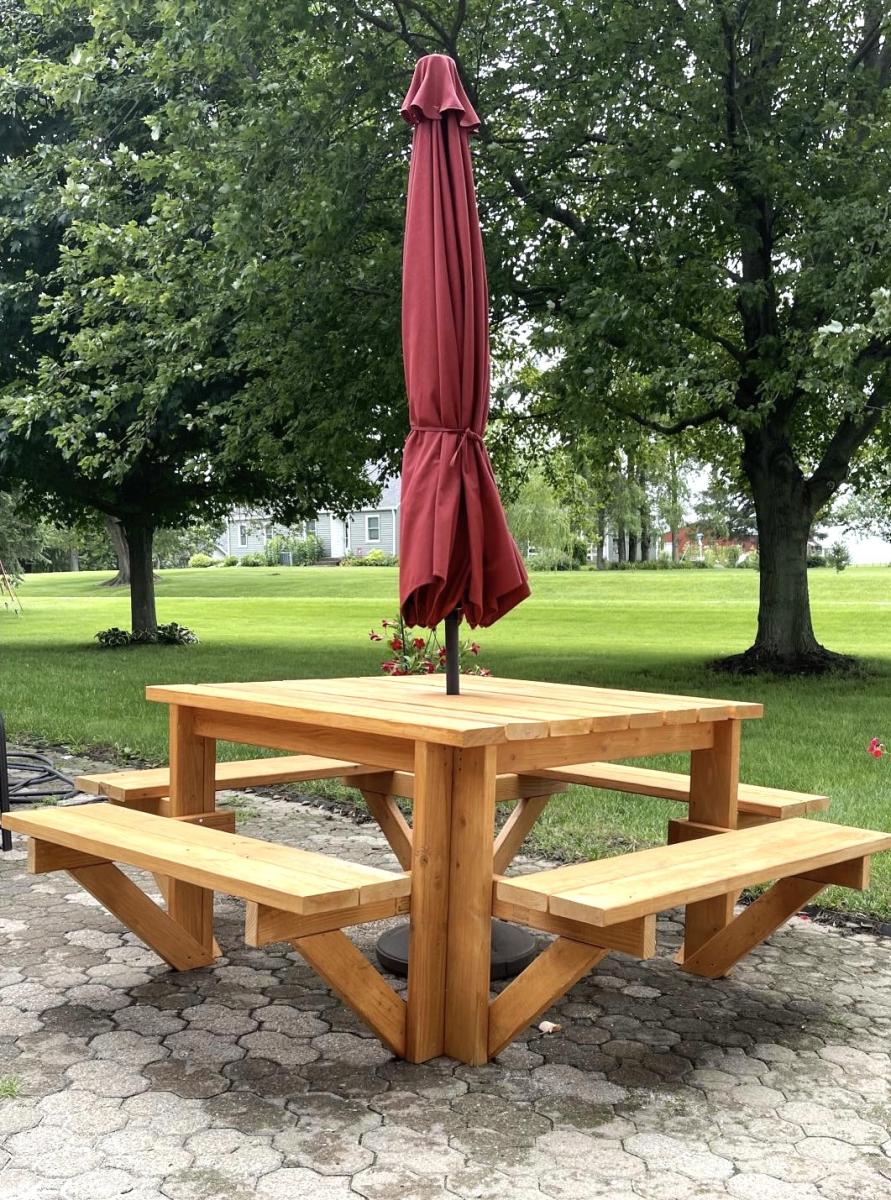
This was a great summer project. The table looks great and it was any easy build. Doesn’t get any better than this. I added a hole in the center of the table for my umbrella and used the longer screws for more frame stability.

I LOVE these plans. This was my first project, and although it was a big one to start with, the plans were easy to follow. If I can do it, anyone can. I added the rock wall. My kids and I love it. Total cost for me (including all lumber, nails, paint, slide, etc.) is about $850.
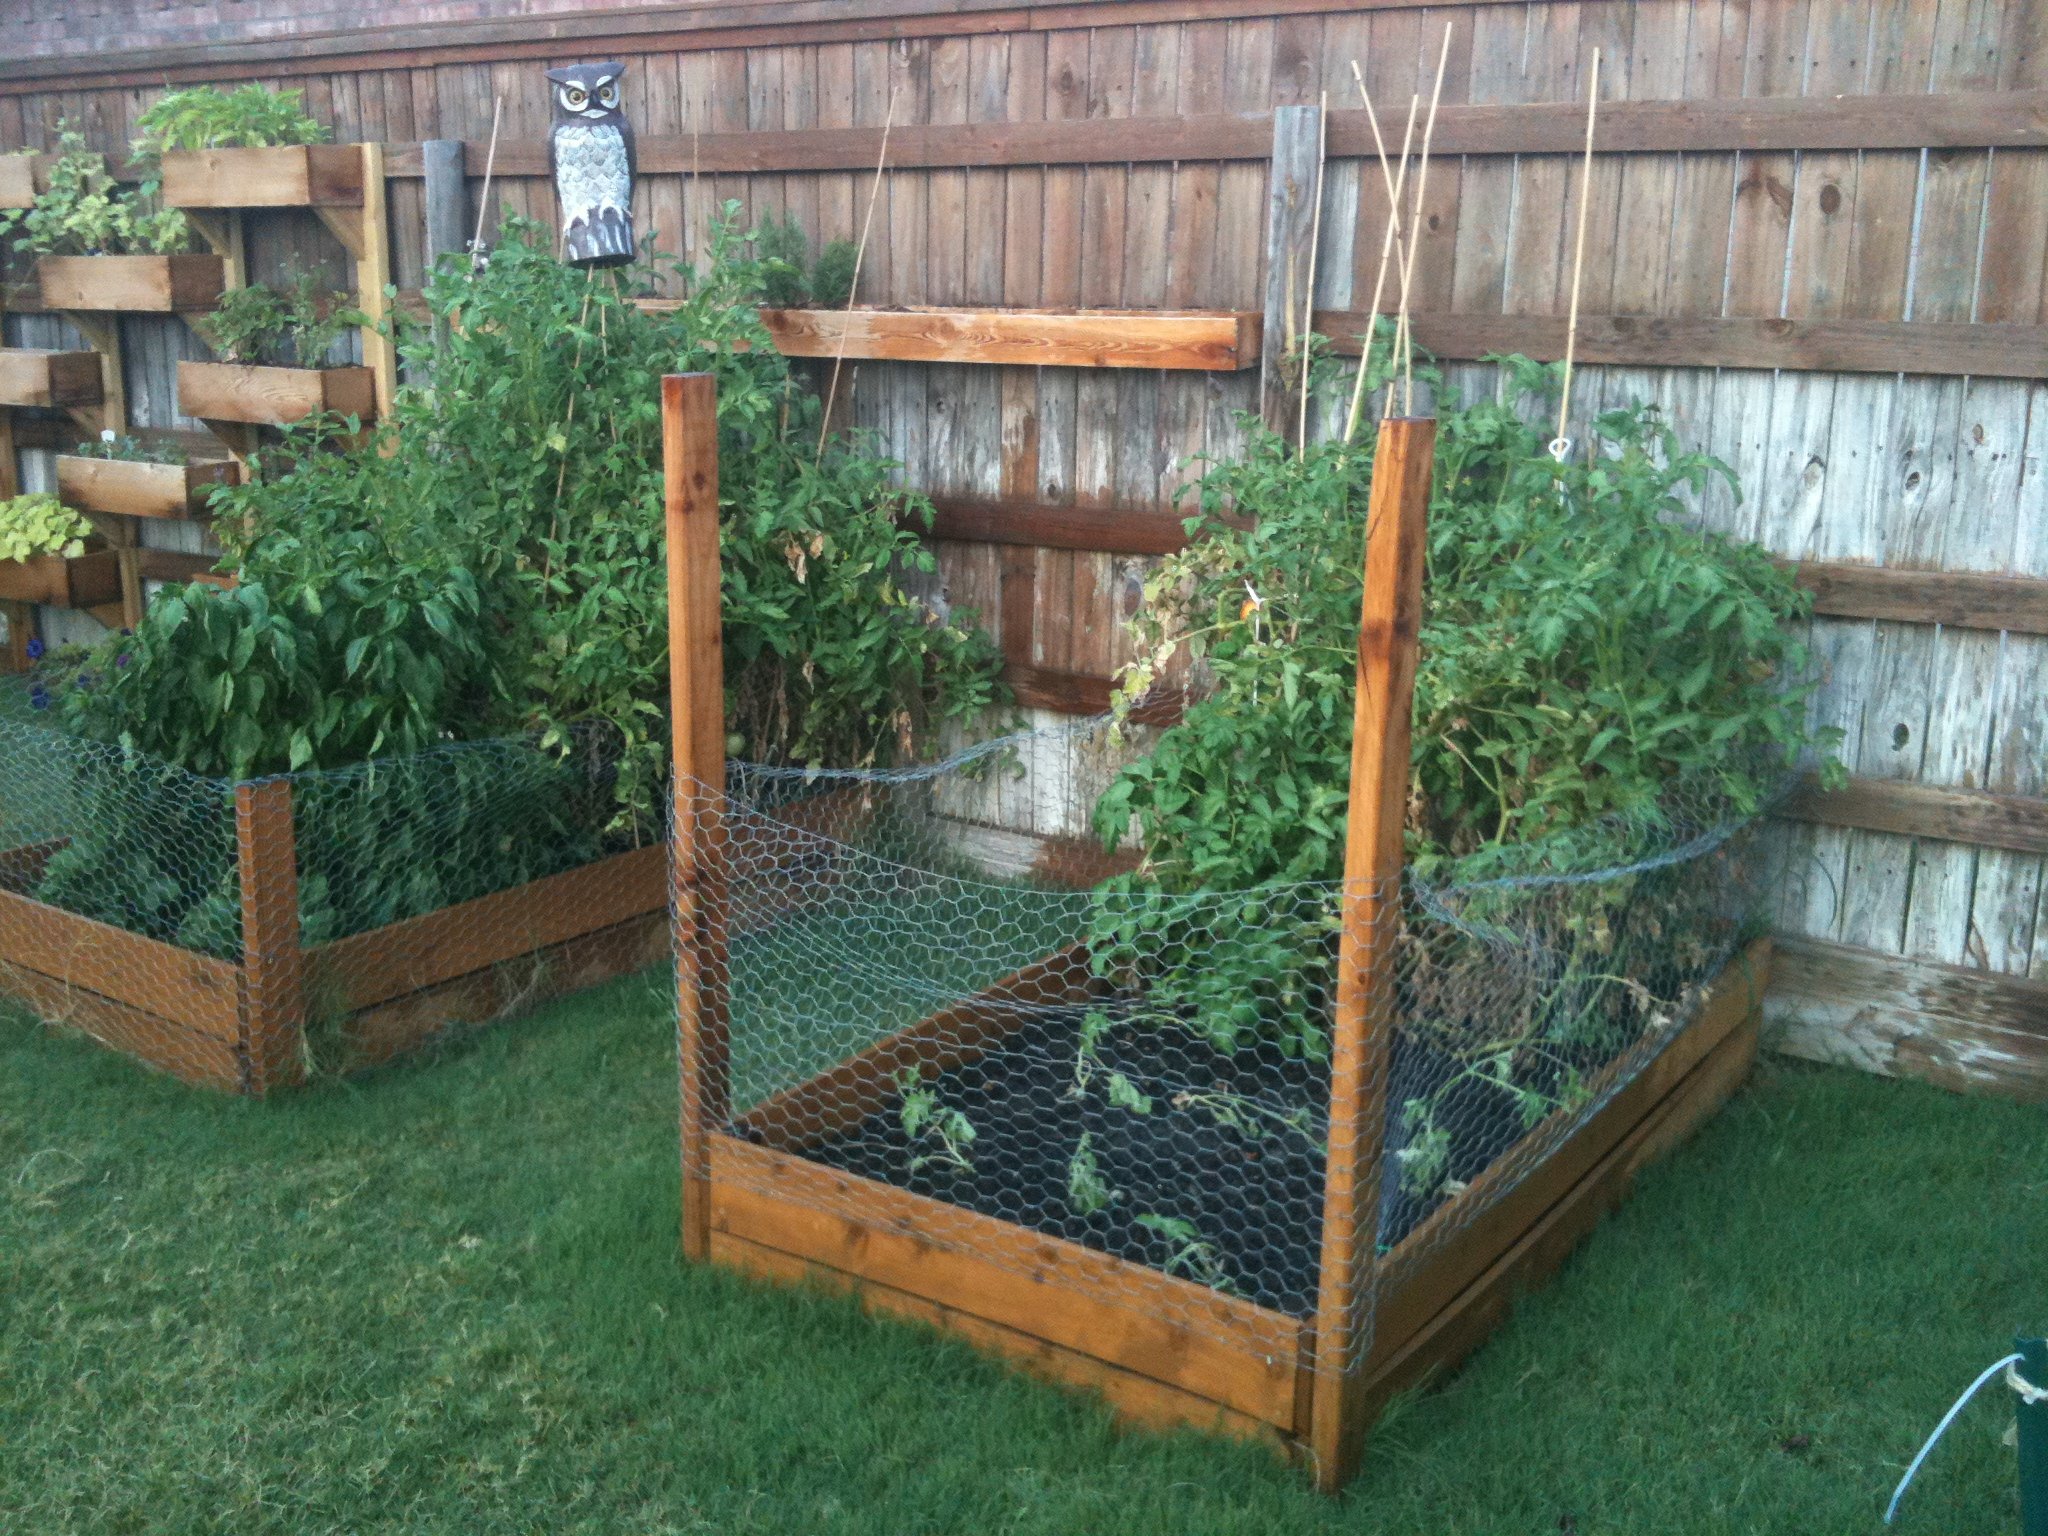
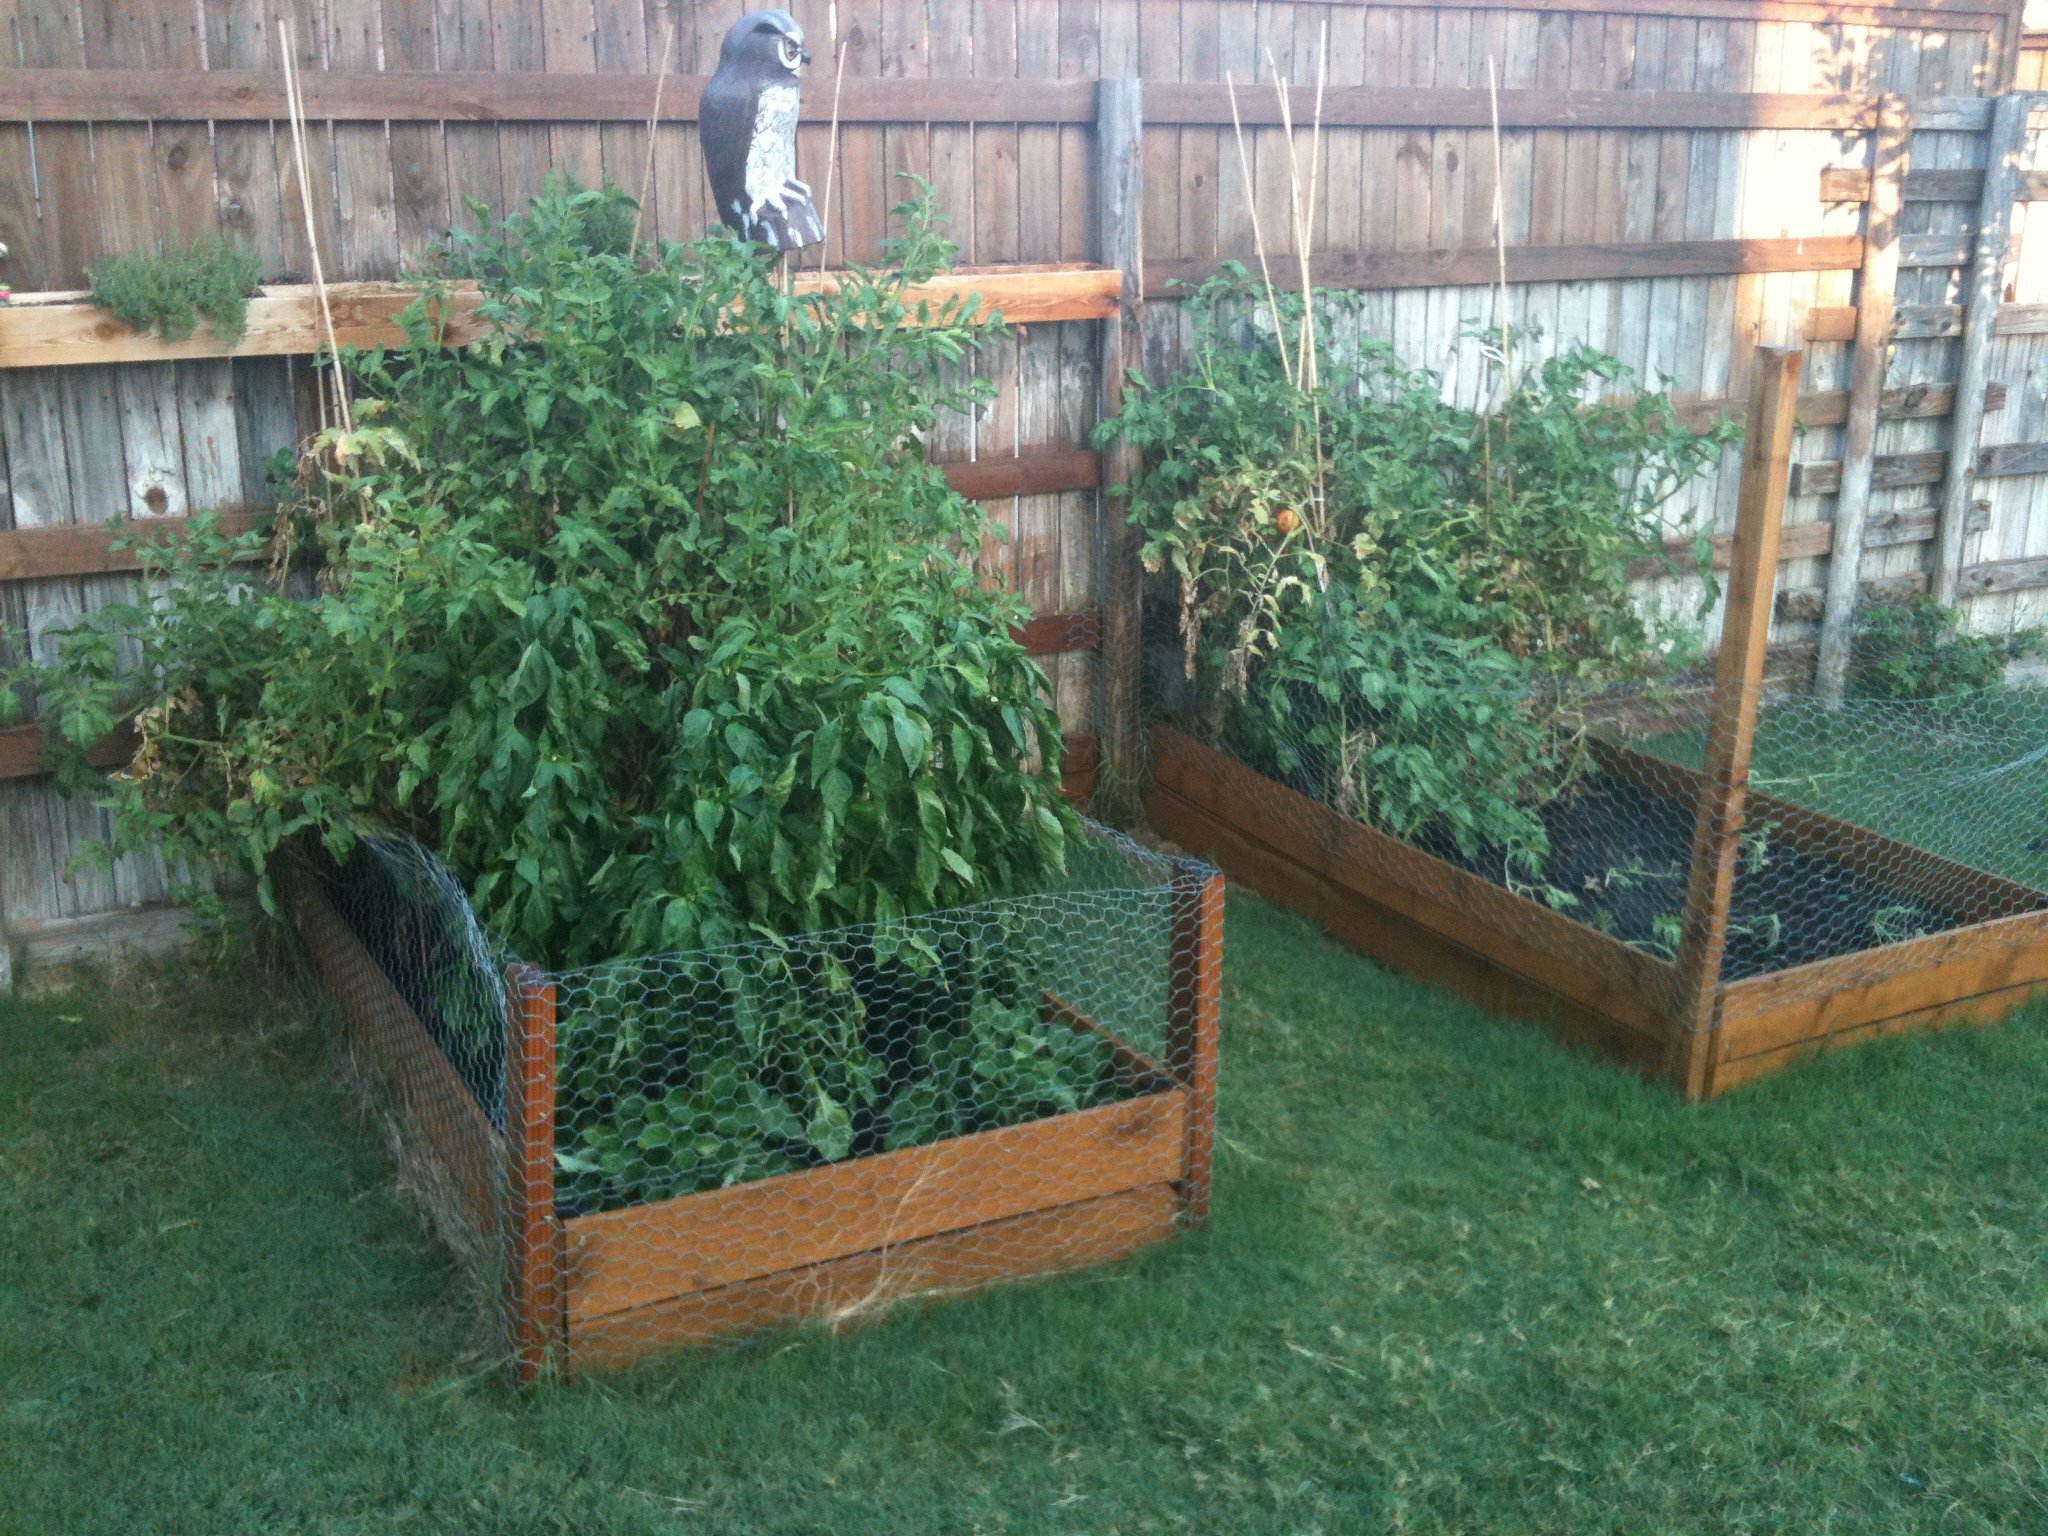
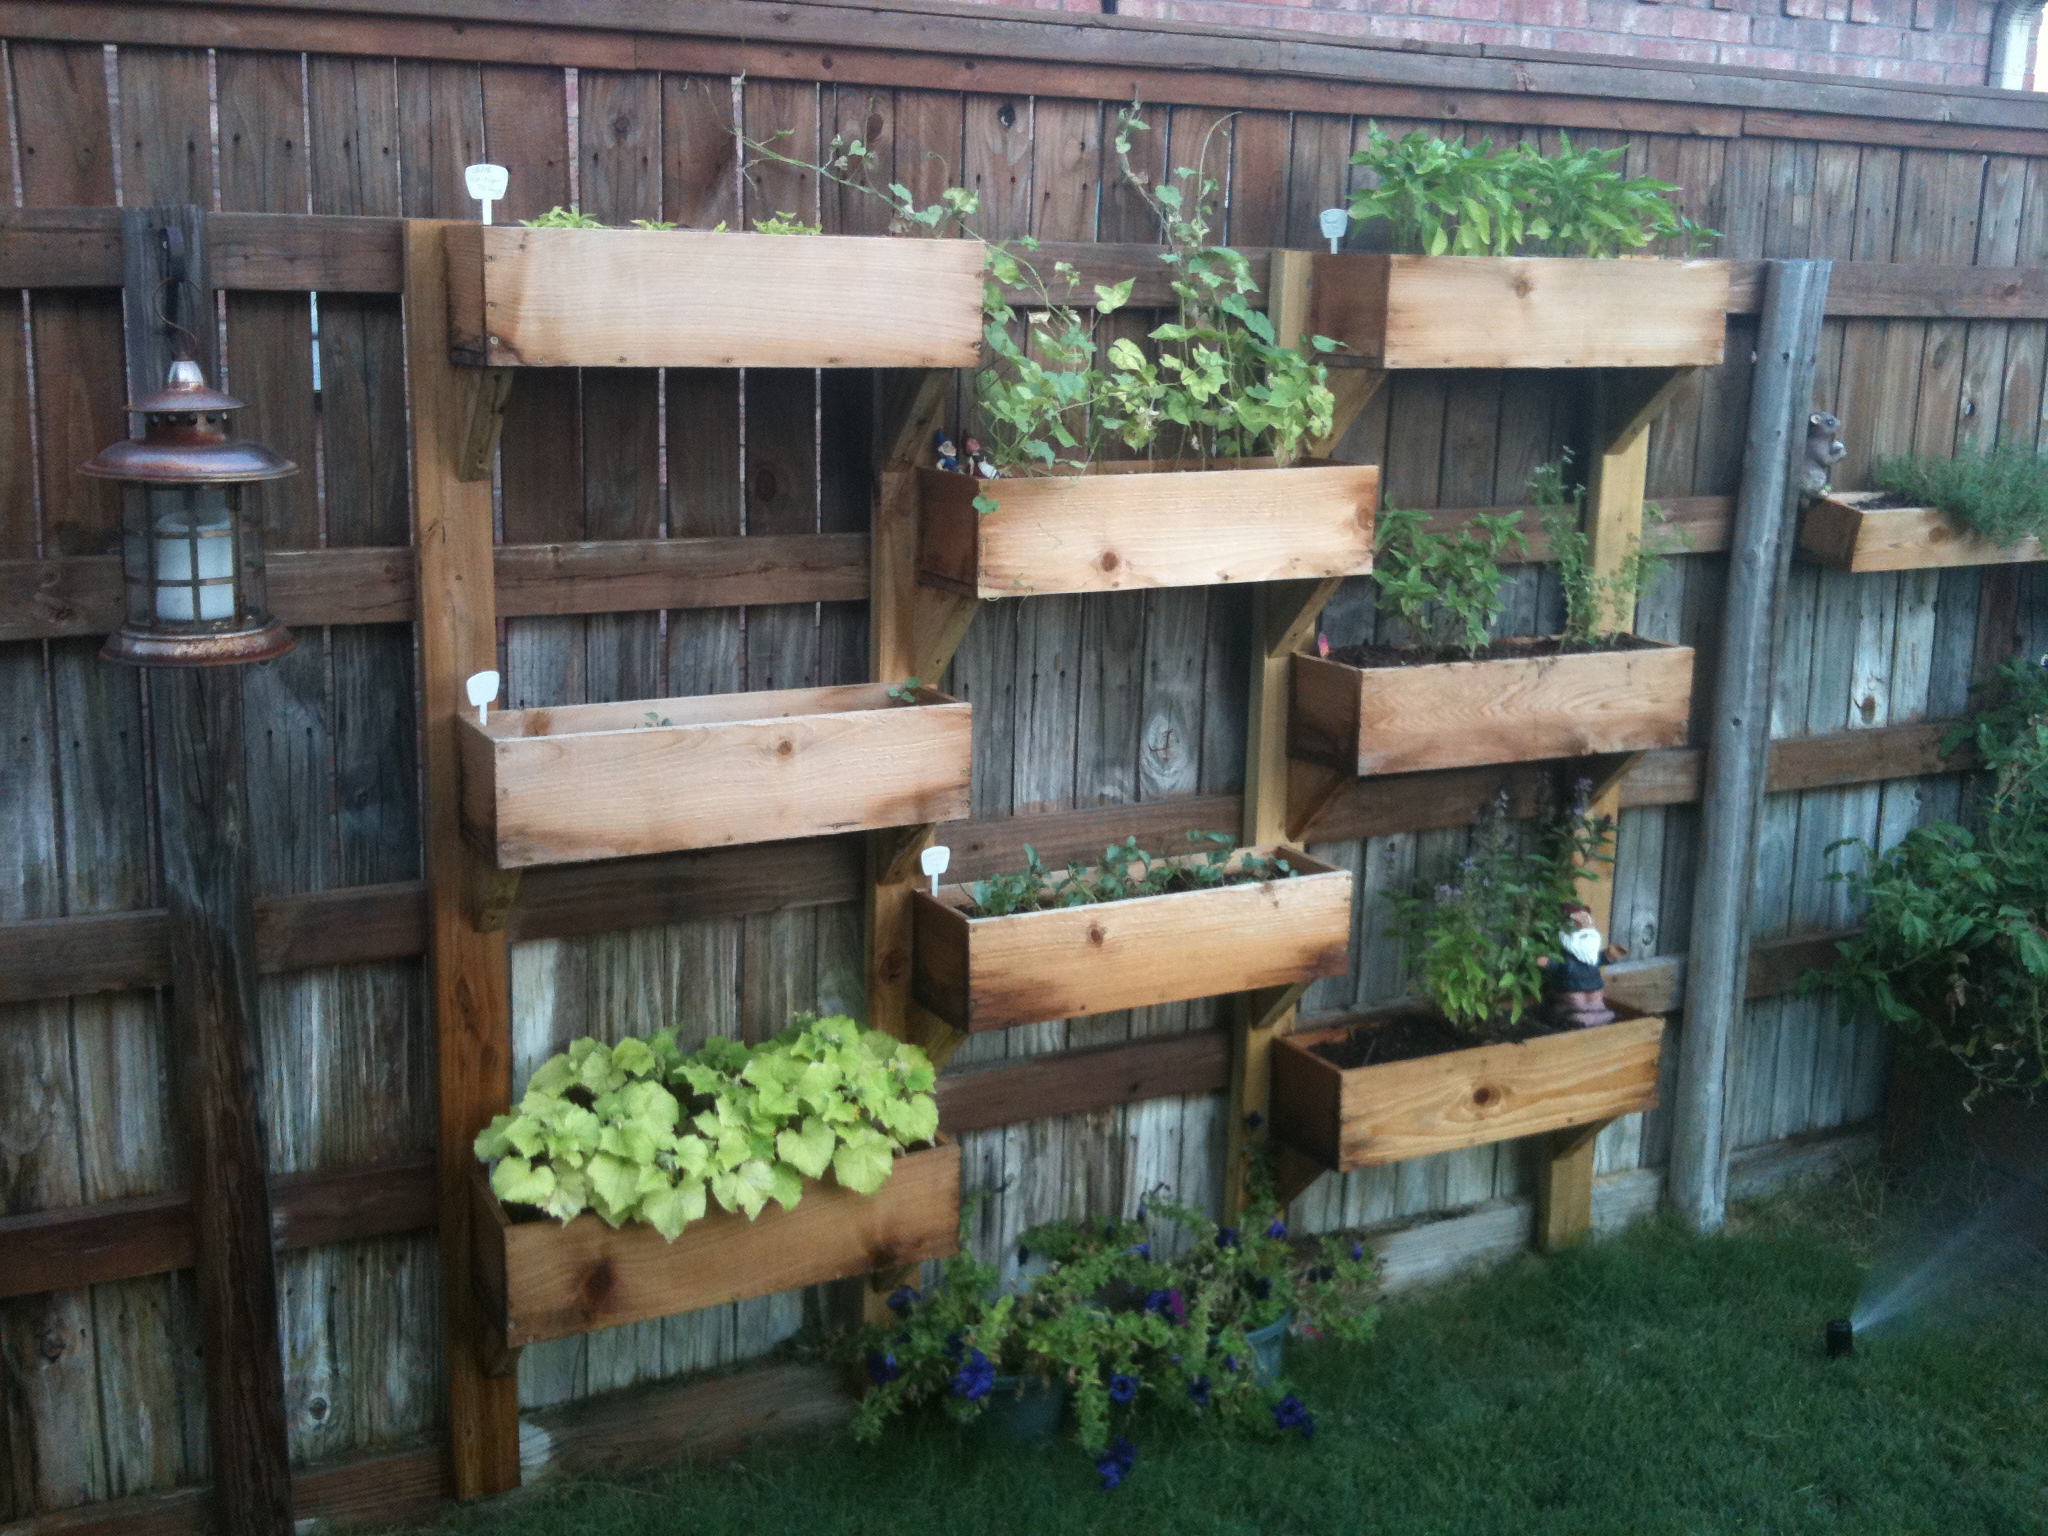
We built these before we saw these plans, but they are pretty much the same... We added the chicken wire to keep the rabbits (and our dog) out of the garden. We added the owl to keep the birds out. We've gotten a ton of tomatoes, onions, and bell peppers so far. Next year, we'll add a few more beds. We also added the verticle garden to take up less space, but its not deep enough. We'll make the next one deeper.
Sun, 07/10/2011 - 14:19
Love the vertical garden! What a wonderful idea! Did you line the boxes with plastic??
Thu, 11/17/2011 - 07:59
We ended up getting a ton of tomoatoes and green peppers from the garden boxes. We've actually built a couple more. We'll probably double again before next spring. We're looking at adding more veggies.
We now have ton of stuff planted for the fall...
Tue, 04/03/2012 - 06:19
i love the vertical boxes. I am just trying my hand at the world with a green thumb and could use as much advice as possible about how to make as well as to line the boxes or not to line them. All advice appreciated!
Fri, 11/23/2012 - 21:53
Hi, my name is berman. I found you pin from my pinterest and your box garden is so great. I am a newbie in this field and so interested to build garden in my house. If i can ask you some question, could you please to answer that?
cheers,
berman
Tue, 03/10/2015 - 21:19
Hello! Do you mind sharing the Vertical Box Instructions? I absolutely love this idea!
Sun, 05/31/2015 - 21:00
Came across this beautiful design while searching for my next diy garden idea. Wondering if there are blueprints available
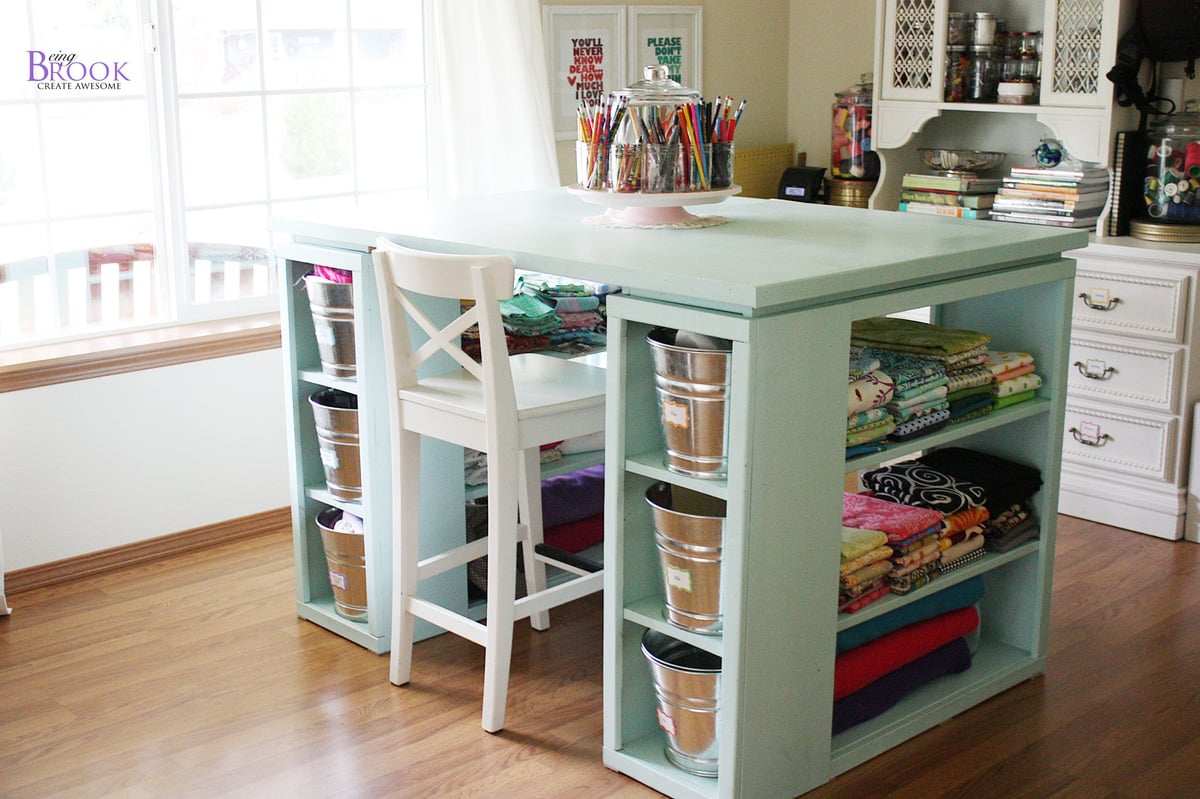
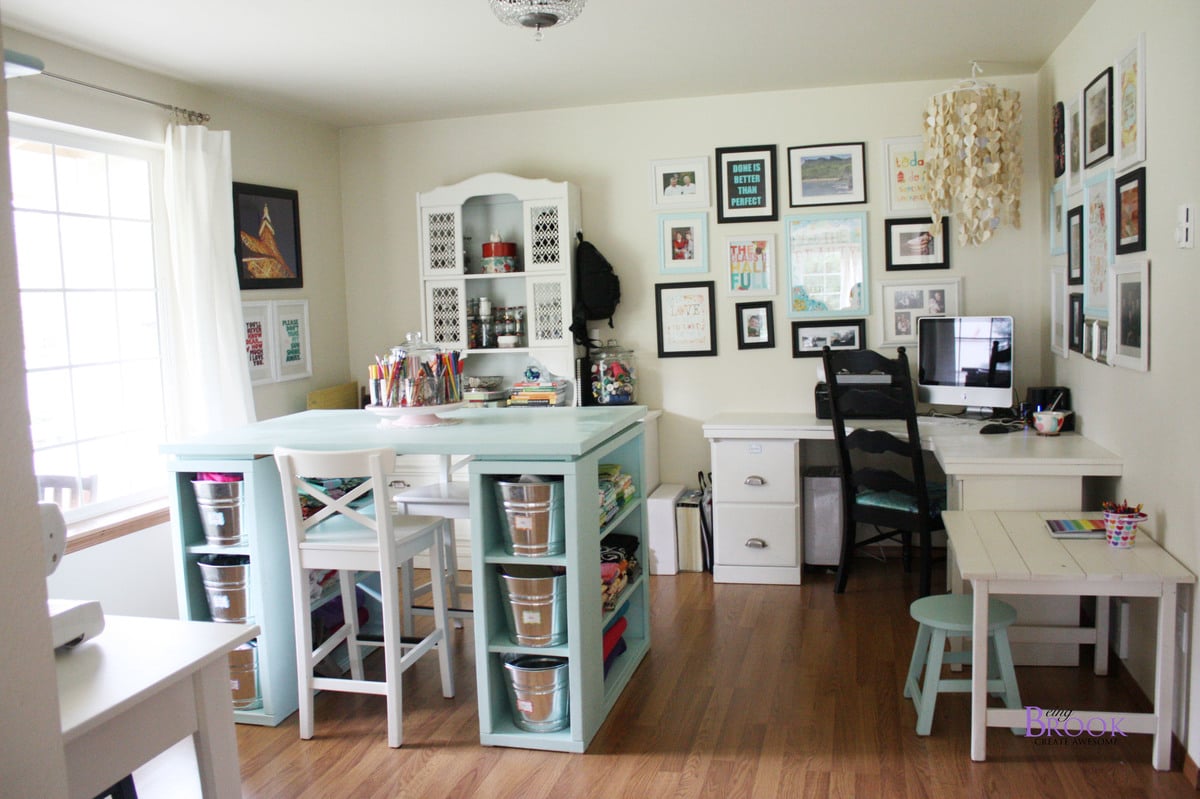
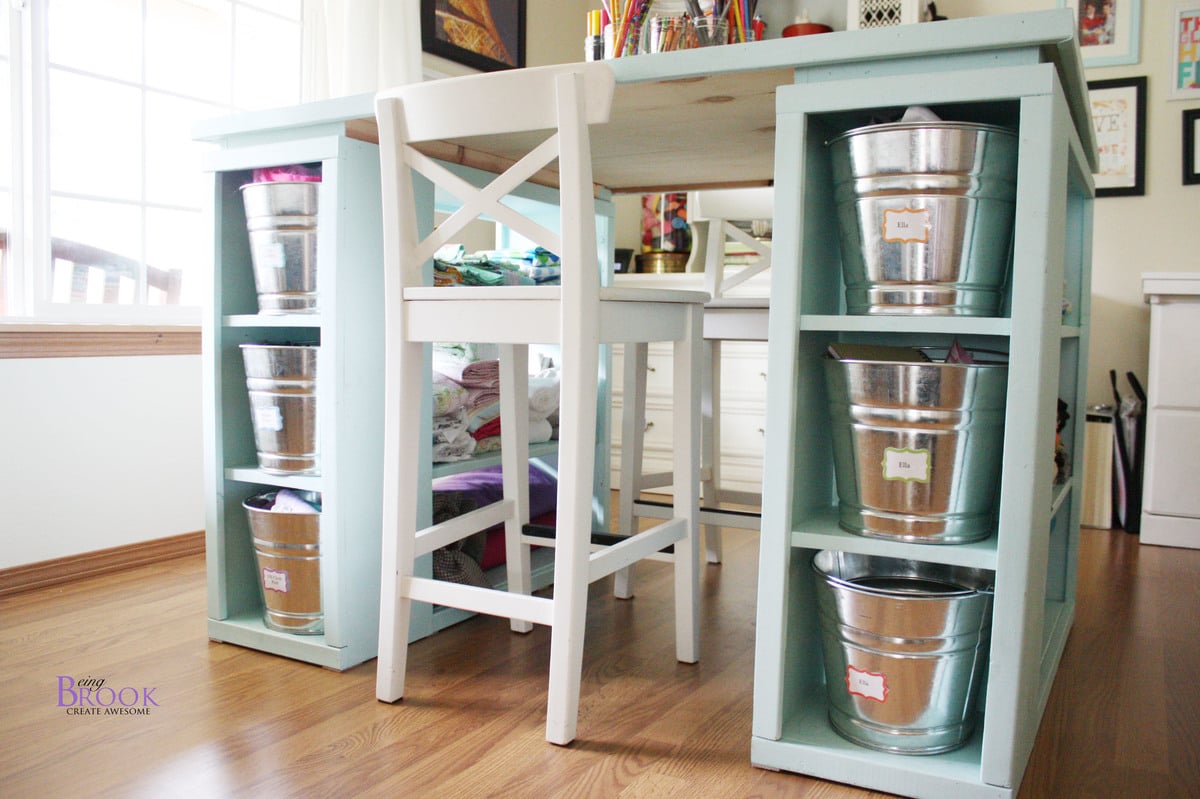
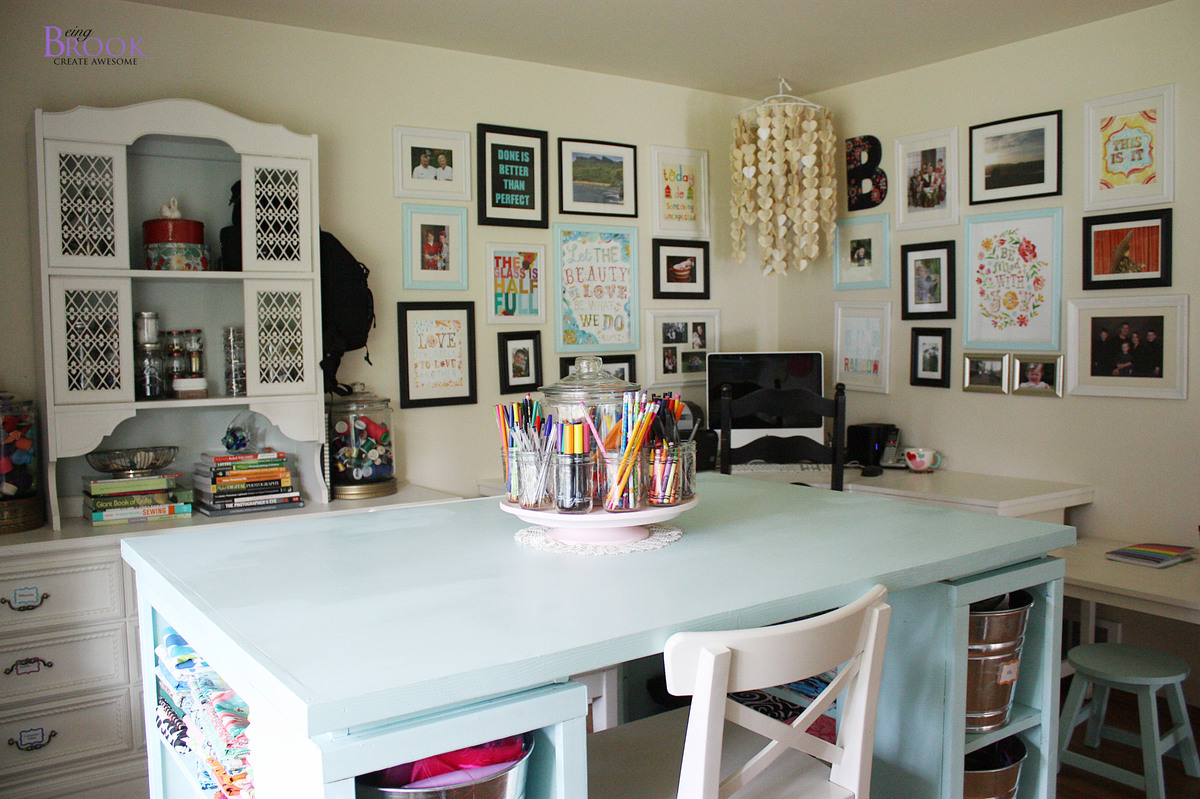
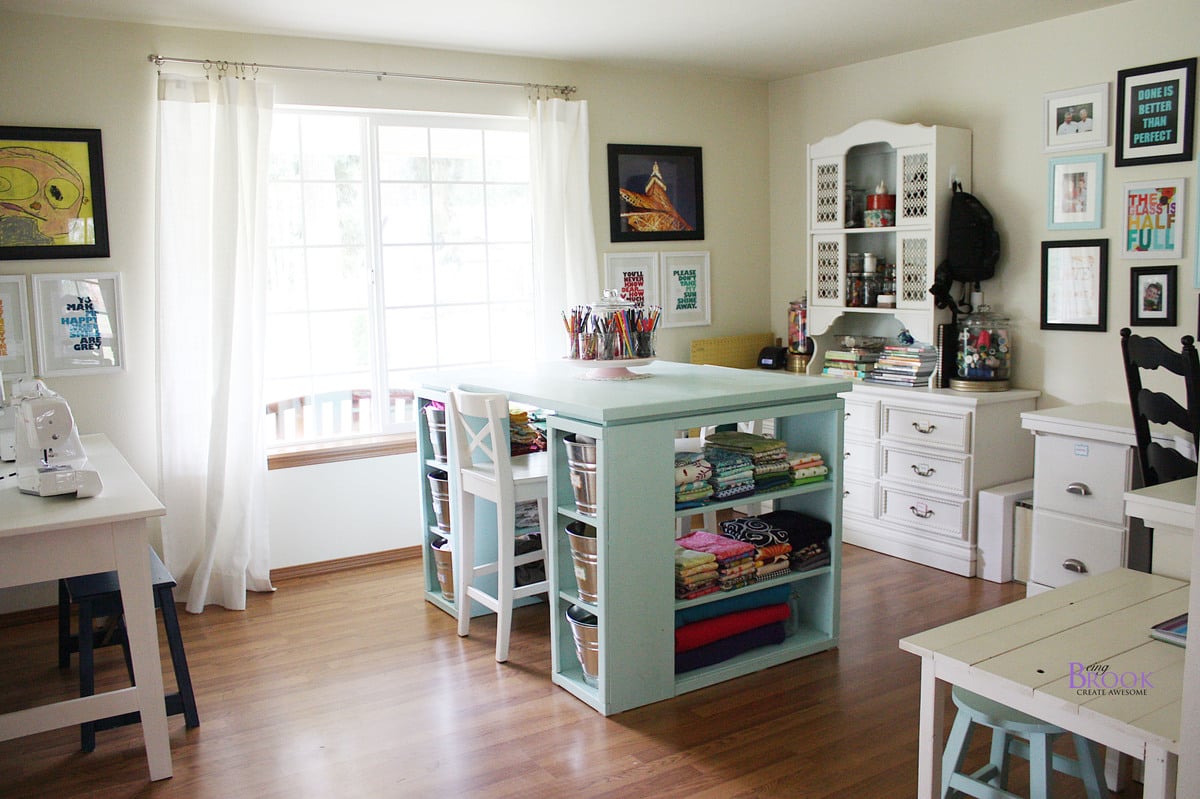
Love the Modern Craft Table! It has lots of storage space and tons of workspace on top. We used pine for the shelves and plywood for the top and edged the top with pine.
There is a spot for two counter stools at the opposite ends of the table which is perfect to give kids their own spot to craft/color.
Sun, 01/15/2012 - 20:10
I love this table but I wonder how do you use it to sew with? or do you sew on this table?

Sun, 01/15/2012 - 21:57
Brook, wow!!! This table is simply amazing! Thank you for sharing such beautiful photos too!
Mon, 01/16/2012 - 10:03
the whole room is beautifull. how many of the other pieces of furniture were built using Anna's plans?
Mon, 01/16/2012 - 10:03
the whole room is beautifull. how many of the other pieces of furniture were built using Anna's plans?

In reply to looks great by Guest (not verified)
Mon, 01/16/2012 - 20:49
Everything but the dresser/hutch and barstools we built using Ana-White plans!
Mon, 01/16/2012 - 12:06
This table is fabulous and I'm really in love with the color! Thank you for sharing. So many new ideas for my room now!
Mon, 01/16/2012 - 12:06
This table is fabulous and I'm really in love with the color! Thank you for sharing. So many new ideas for my room now!

Mon, 01/16/2012 - 17:32
You won't believe this...but today I was shopping for the wood to make the Modular Craft Table, but I did not buy the wood because I was trying to tweek the plans to change the "cubbies" and size. So, I came back to this sight and here is this craft table that would be much better. I want to make it table height rather than counter height so I can sit down and sew at it. I also want to be able to drop the back 12 inches of the table if I do not need it and so it will fit better in my room, wheels on the bottom to pull it out easily so I can extend the 12 inch table when needed. I love what you have done!
Tue, 01/17/2012 - 11:36
You did a fantastic job on this project! Love the way it looks and the color!
Great job!
Sat, 01/21/2012 - 07:00
I love this table, but I can't seem to find the directions to make it. Can you point me in the right direction to find it?
Wed, 01/25/2012 - 17:24
Is there a reason you can't sew on this (from what I gathered from a previous comment)? I want to build something for my wife's craft room and love this, but she will need to sew as well. Help?
Wed, 01/25/2012 - 17:32
Joe,
It would be hard to sew at this table because the table is counter height. You wouldn't be able to reach the foot peddle to run your sewing machine. You could alter the plans to fit a spot that could hold the peddle foot. I sew on a different table in my craft room and use this for cutting fabric and general crafts.
Brook
Wed, 01/25/2012 - 19:26
at one time I had my sewing machine in a spot that was counter height. I used a wood box to put the foot peddle on. One of anna's steep stool plans or the bathroom platform for kids plan might be good to build with this. It was also nice when I was sewing small pieces that needed lots of ironing to stand and sew at the counter.
Wed, 02/01/2012 - 14:25
I have a modern sewing machine (within last 5 years) and I routinely sew at counter height with no problem. I prefer it because it really helps my back. I cannot wait to make this!
Fri, 02/24/2012 - 22:36
Joe,
I think it would work to mount the foot pedal on the inside of the shelf area. She would use her lower outer thigh to depress the pedal while seated.
Tue, 05/08/2012 - 07:47
I love this table! I'm with Brook and don't sew on mine. Height issue is easily worked around - main issue is usually back support. Sewing at a huge workstation tends to leave you feeling unsupported and sitting on a stool (I have a nice wide comfy one from Target) leaves your back unsupported so you usually slouch (bad! bad!). I sew at my smaller desk in a good supporting chair and use my table for everything else. I use this table for a true work area including cutting. I have an Accuquilt Studio and that sucker is HUGE and heavy!
Mon, 11/12/2012 - 11:22
I just talked my fiance' into building this for me to use as a desk. I need a desk for my work from home position where I can store everything as well as have a large area to spread things out. I loved this the moment I saw it and talked him into building it for me. Can't wait to post the pictures when it is finished.
Thu, 02/28/2013 - 16:15
My husband made this FABULOUS Craft Table for me last weekend, it turned out PERFECT! Thank you so much for posting this with such detailed directions....
What do you have in your galvanized pails? What do the labels say?
Thank you!
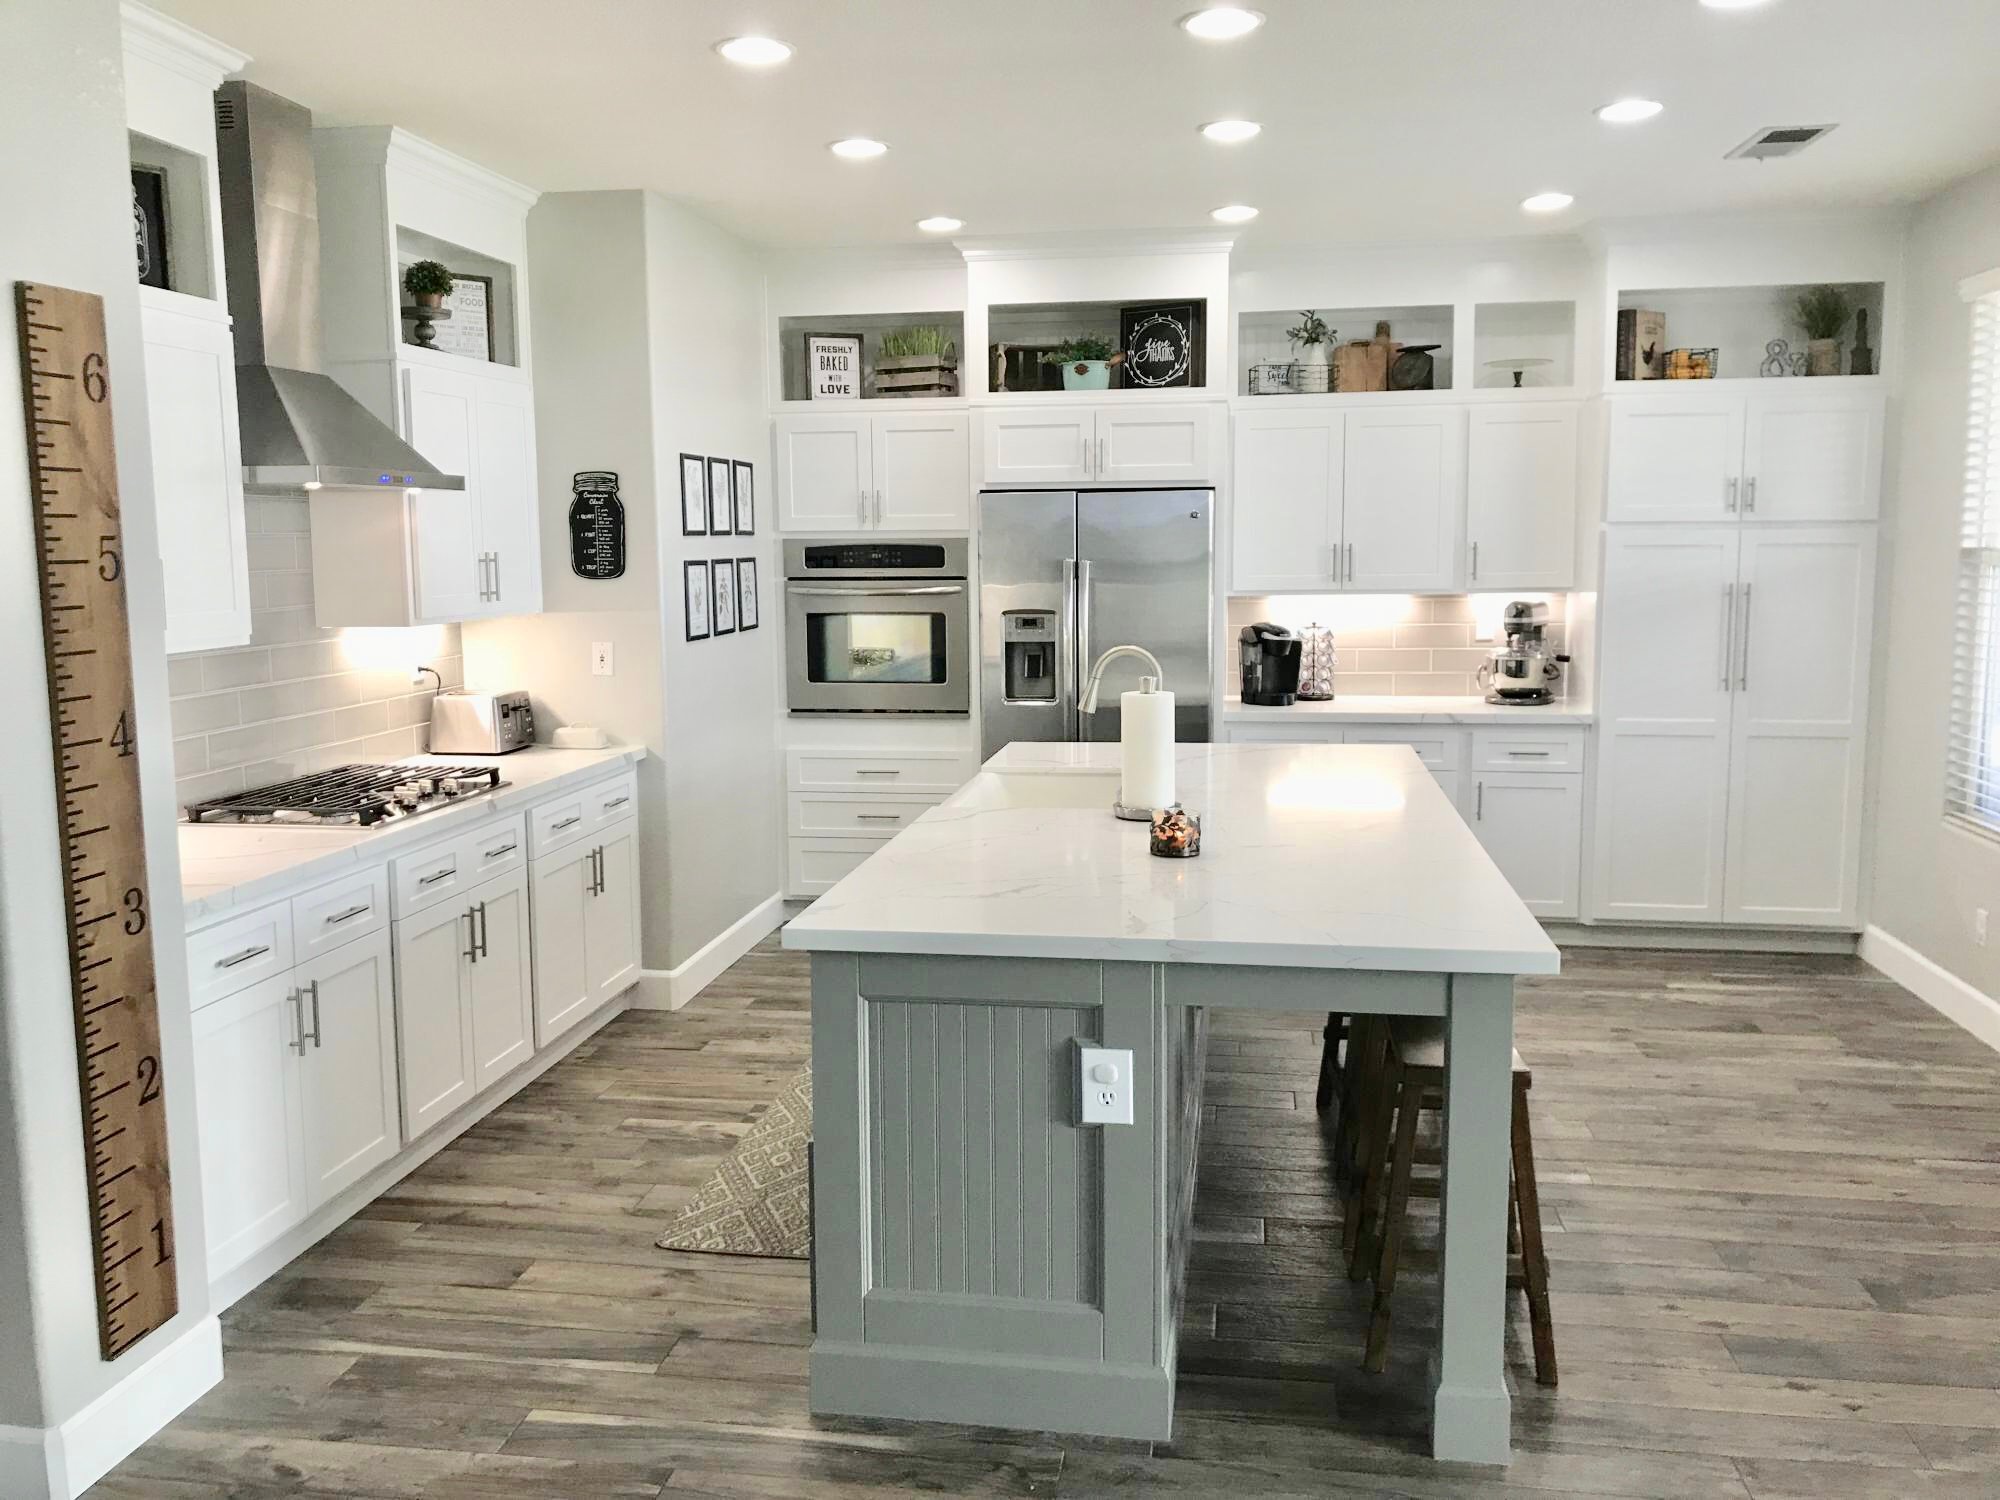
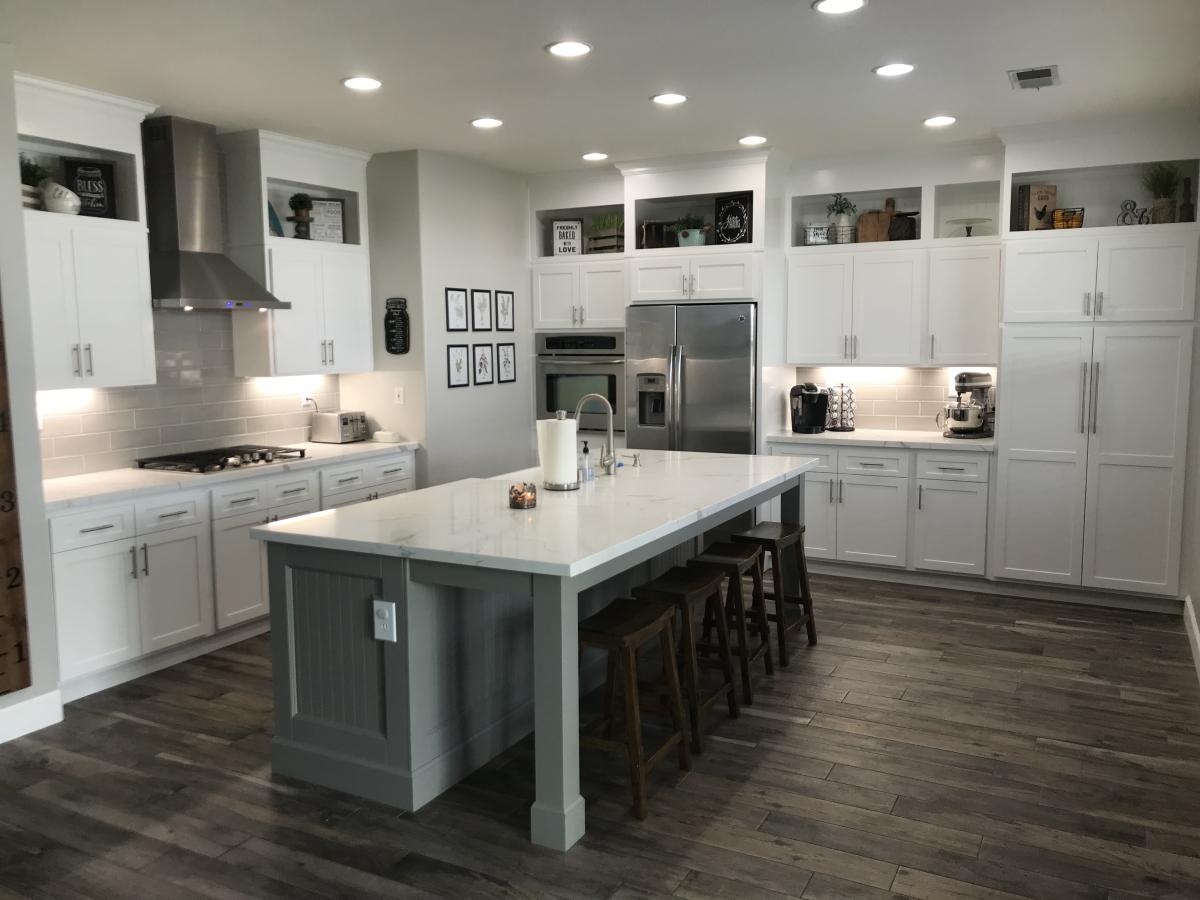
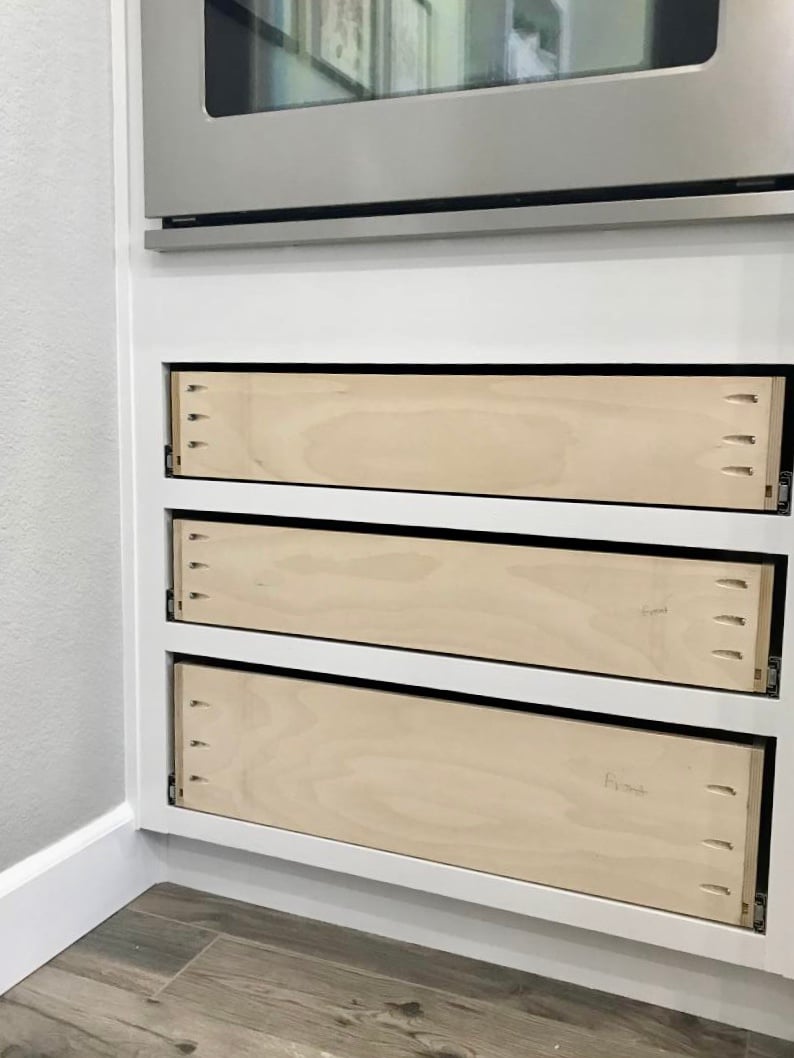
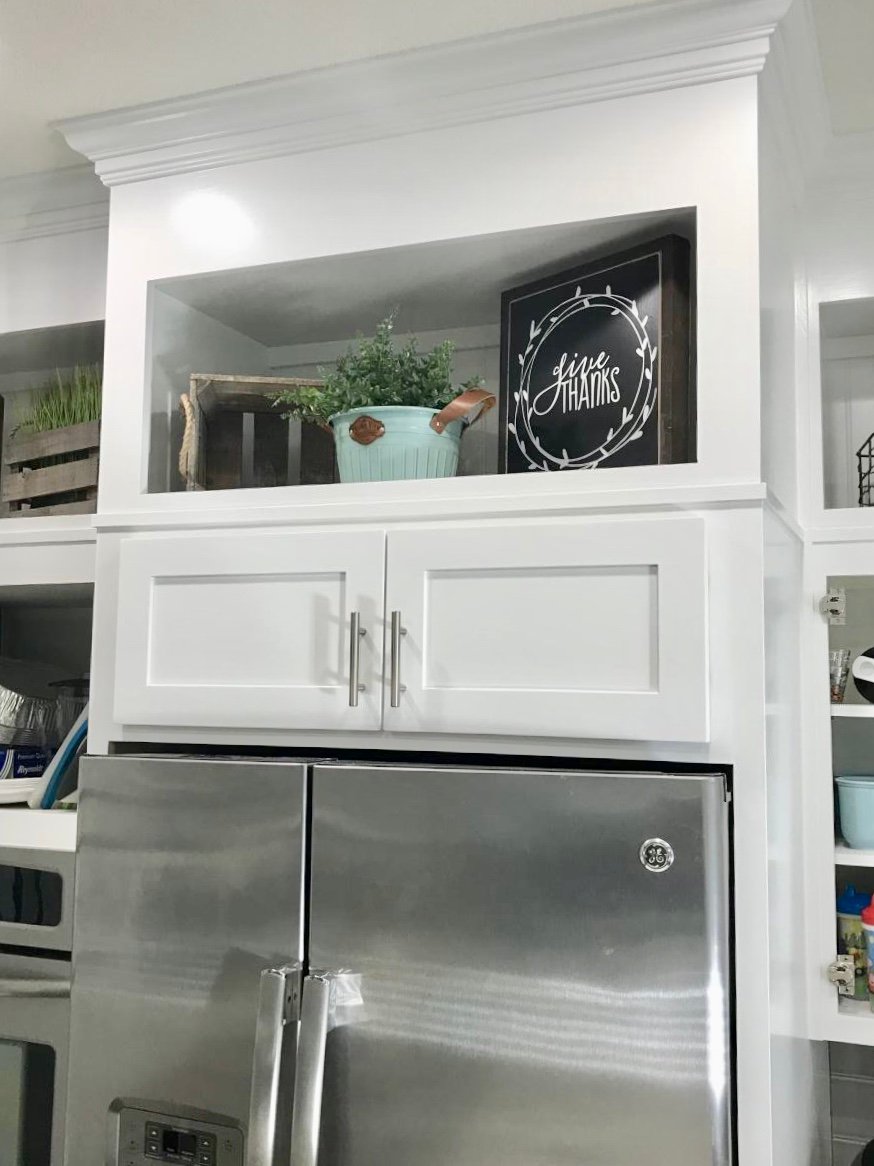
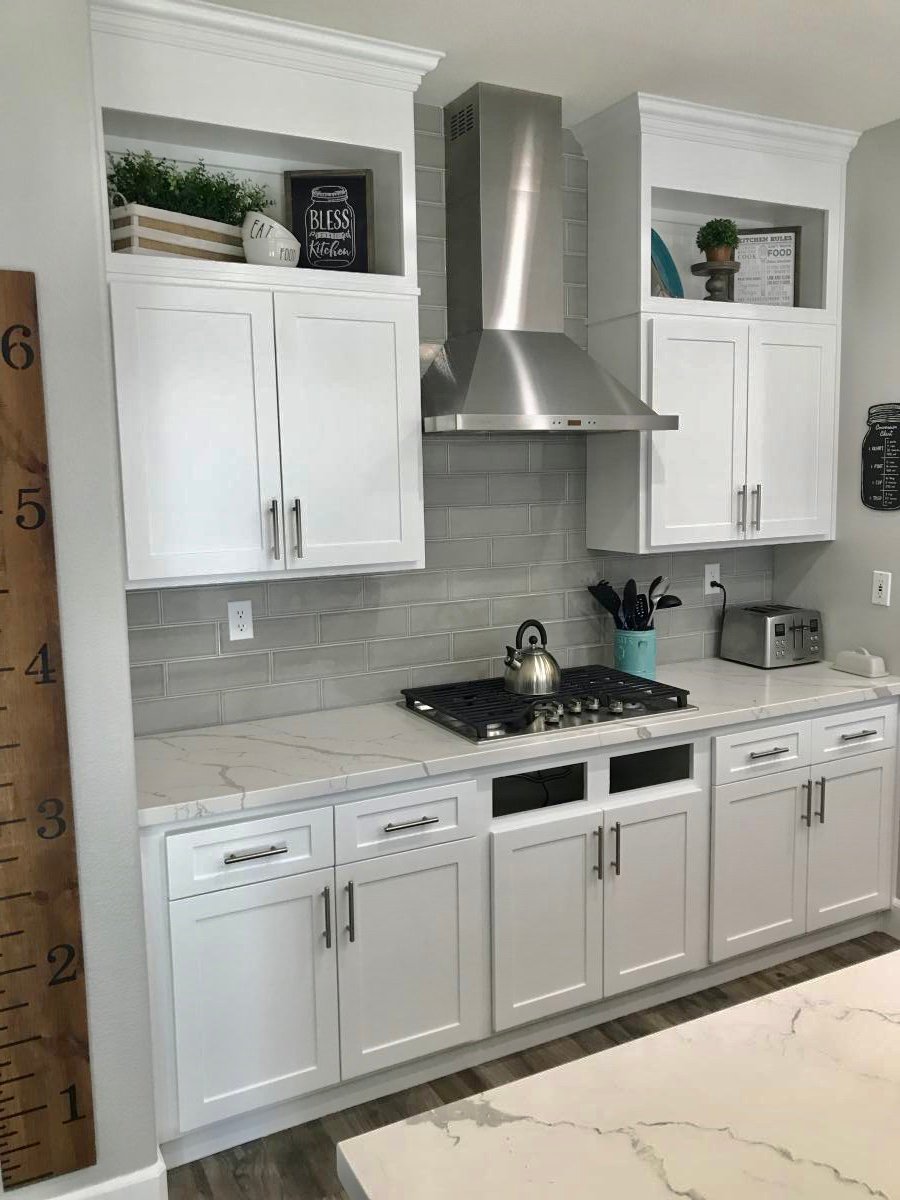
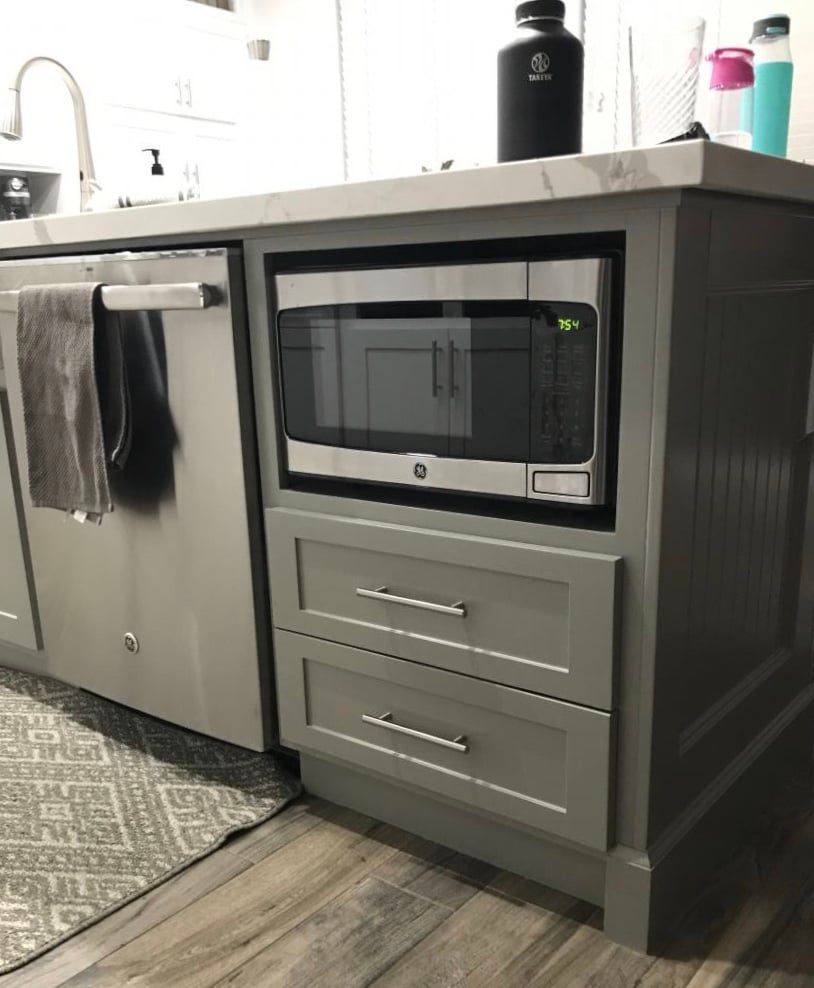
I followed the kitchen cabinet building plans to build all new upper cabinets up to my ceiling. I built all new drawers with soft close drawer slides also and built the refrigerator enclosure cabinet.I did the entire remodel myself including the new doors out of MdF.
Wed, 10/02/2019 - 22:53
What a phenomenal build! Thank you so much for sharing photos!
Tue, 11/05/2019 - 10:41
We are so thrilled to let you know your entry WON the Best Brag contest! There were many amazing entries, and it was tough to choose.
Look out for an email from us shortly!
Tue, 11/05/2019 - 11:41
Oh my gosh!!! Serious?! I can’t believe it! Thank you so much!
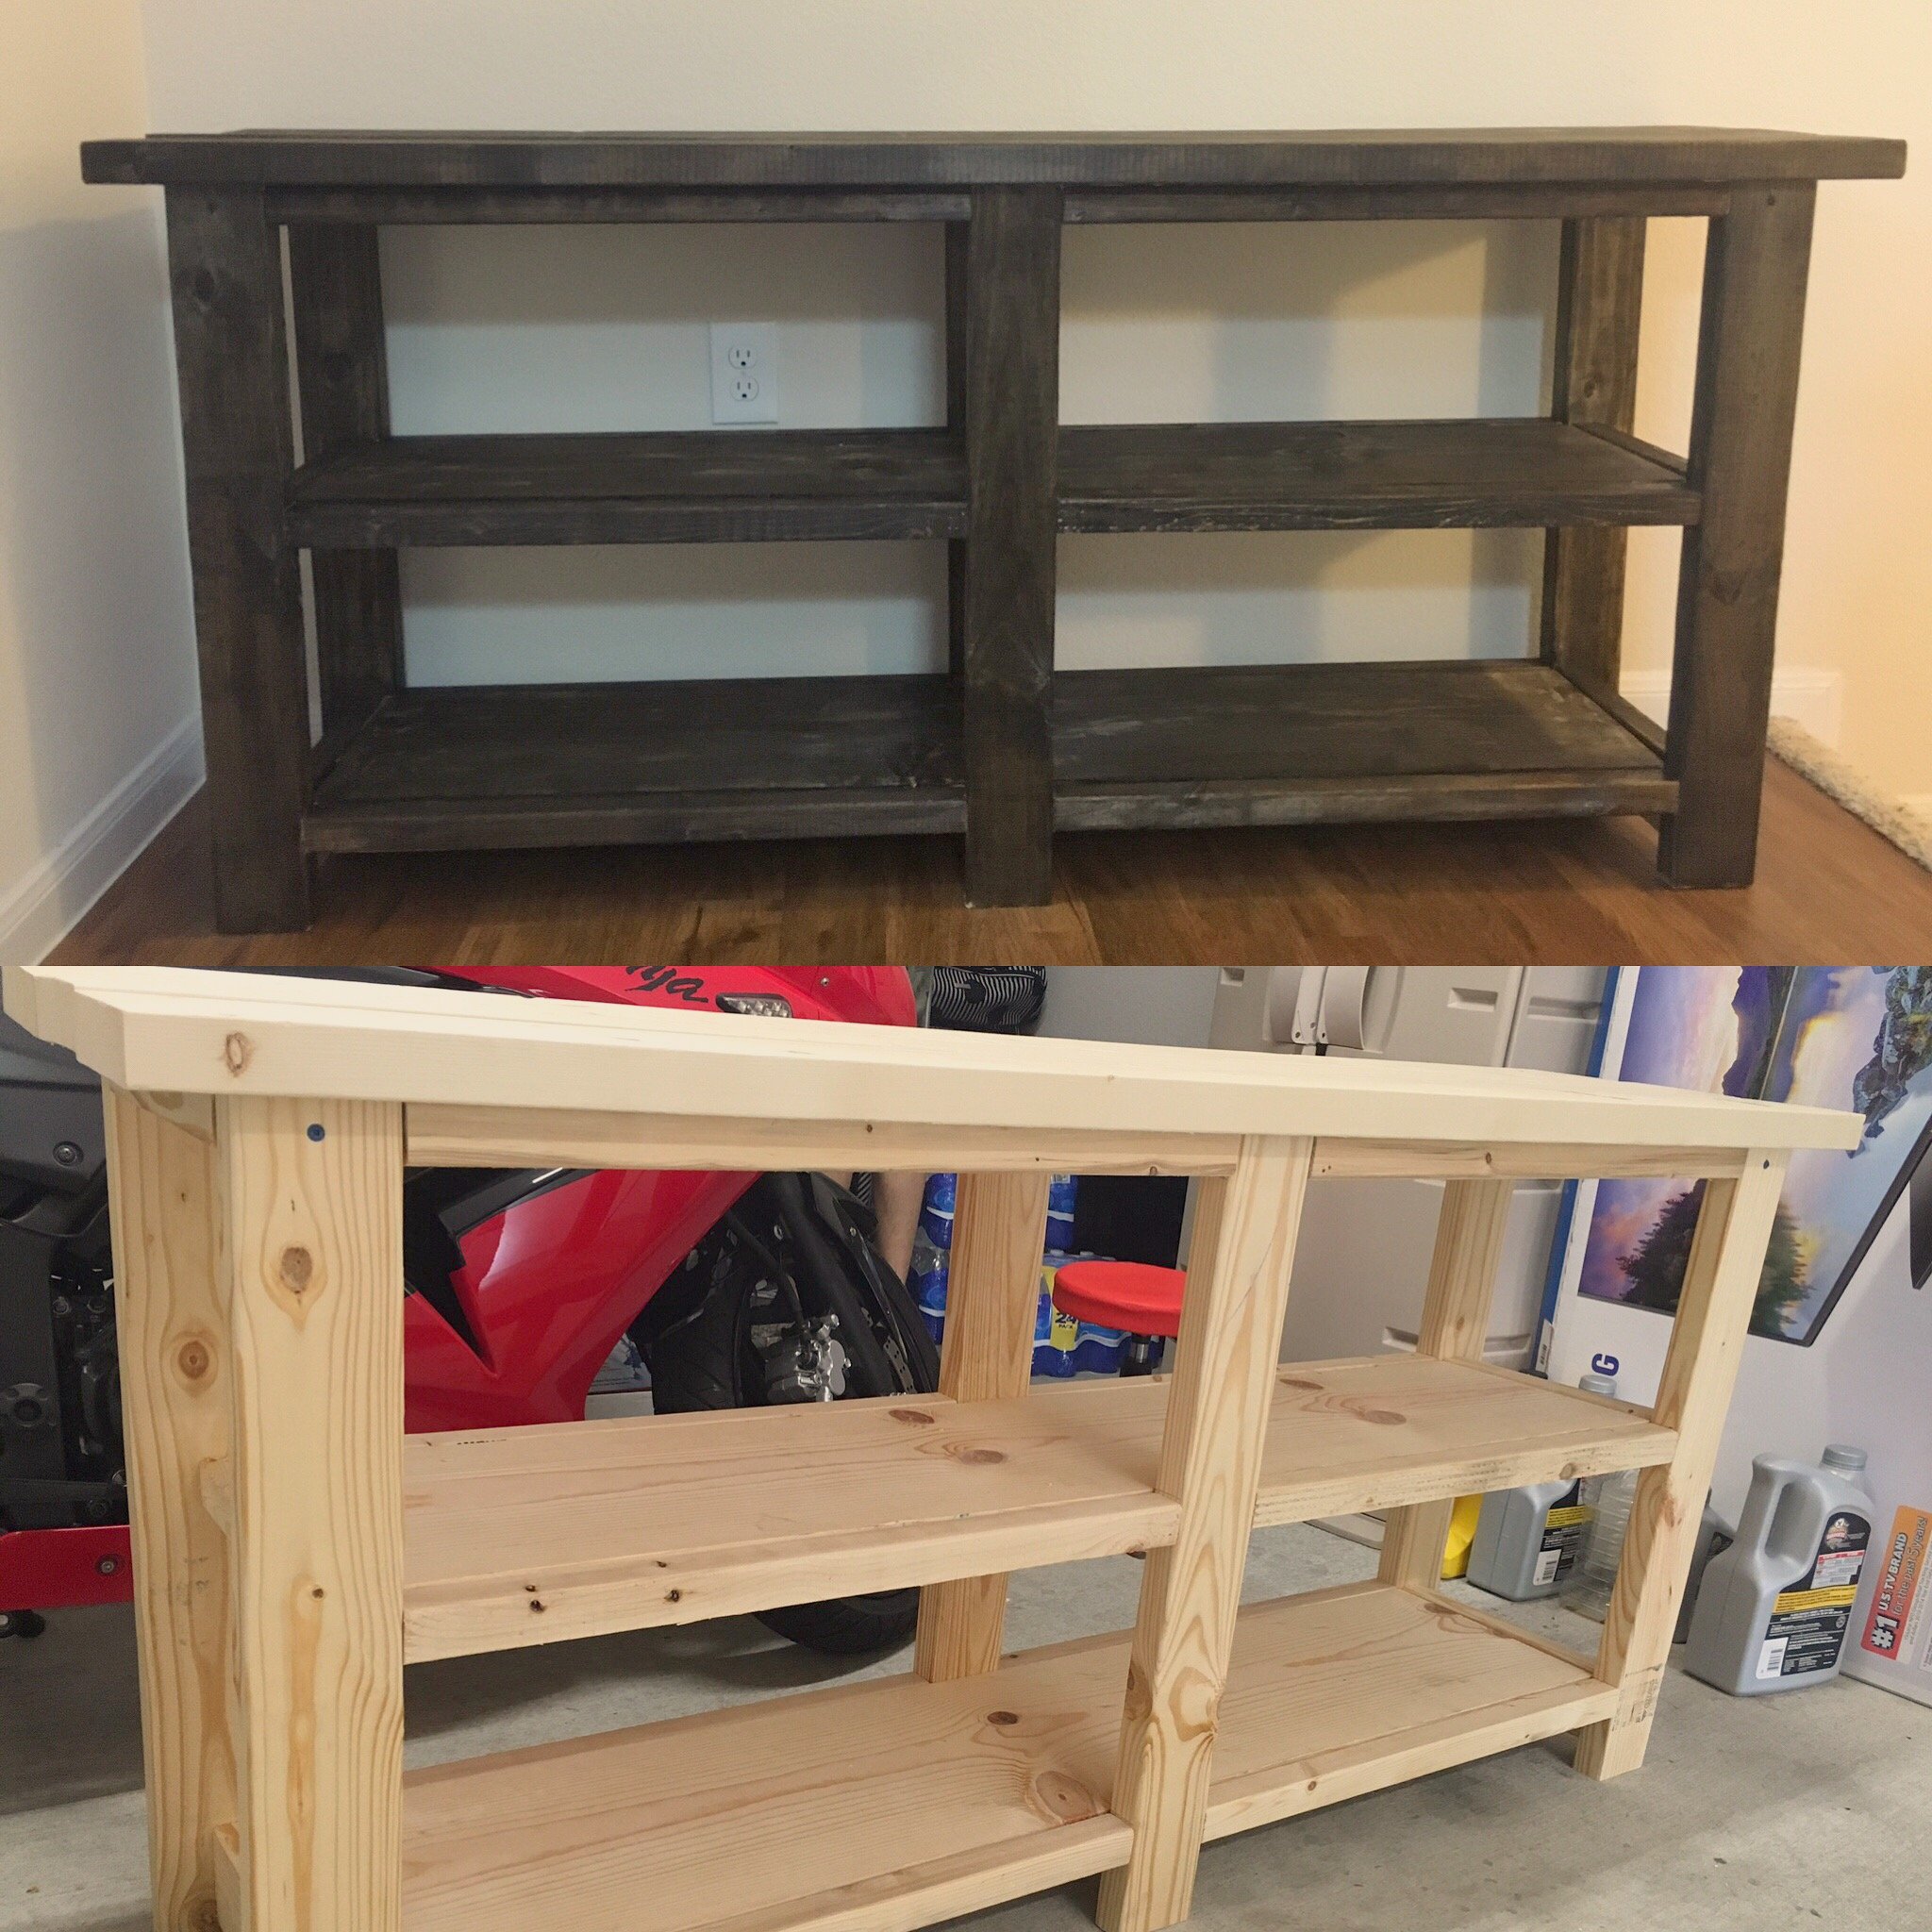
This was my first project building something from this site. I absolutely love it! We didnt add the X's because the miter saw was at my dad's house, which I was kind of sad about, but I think it still looks good. Not too bad for mine and my husbands first build!
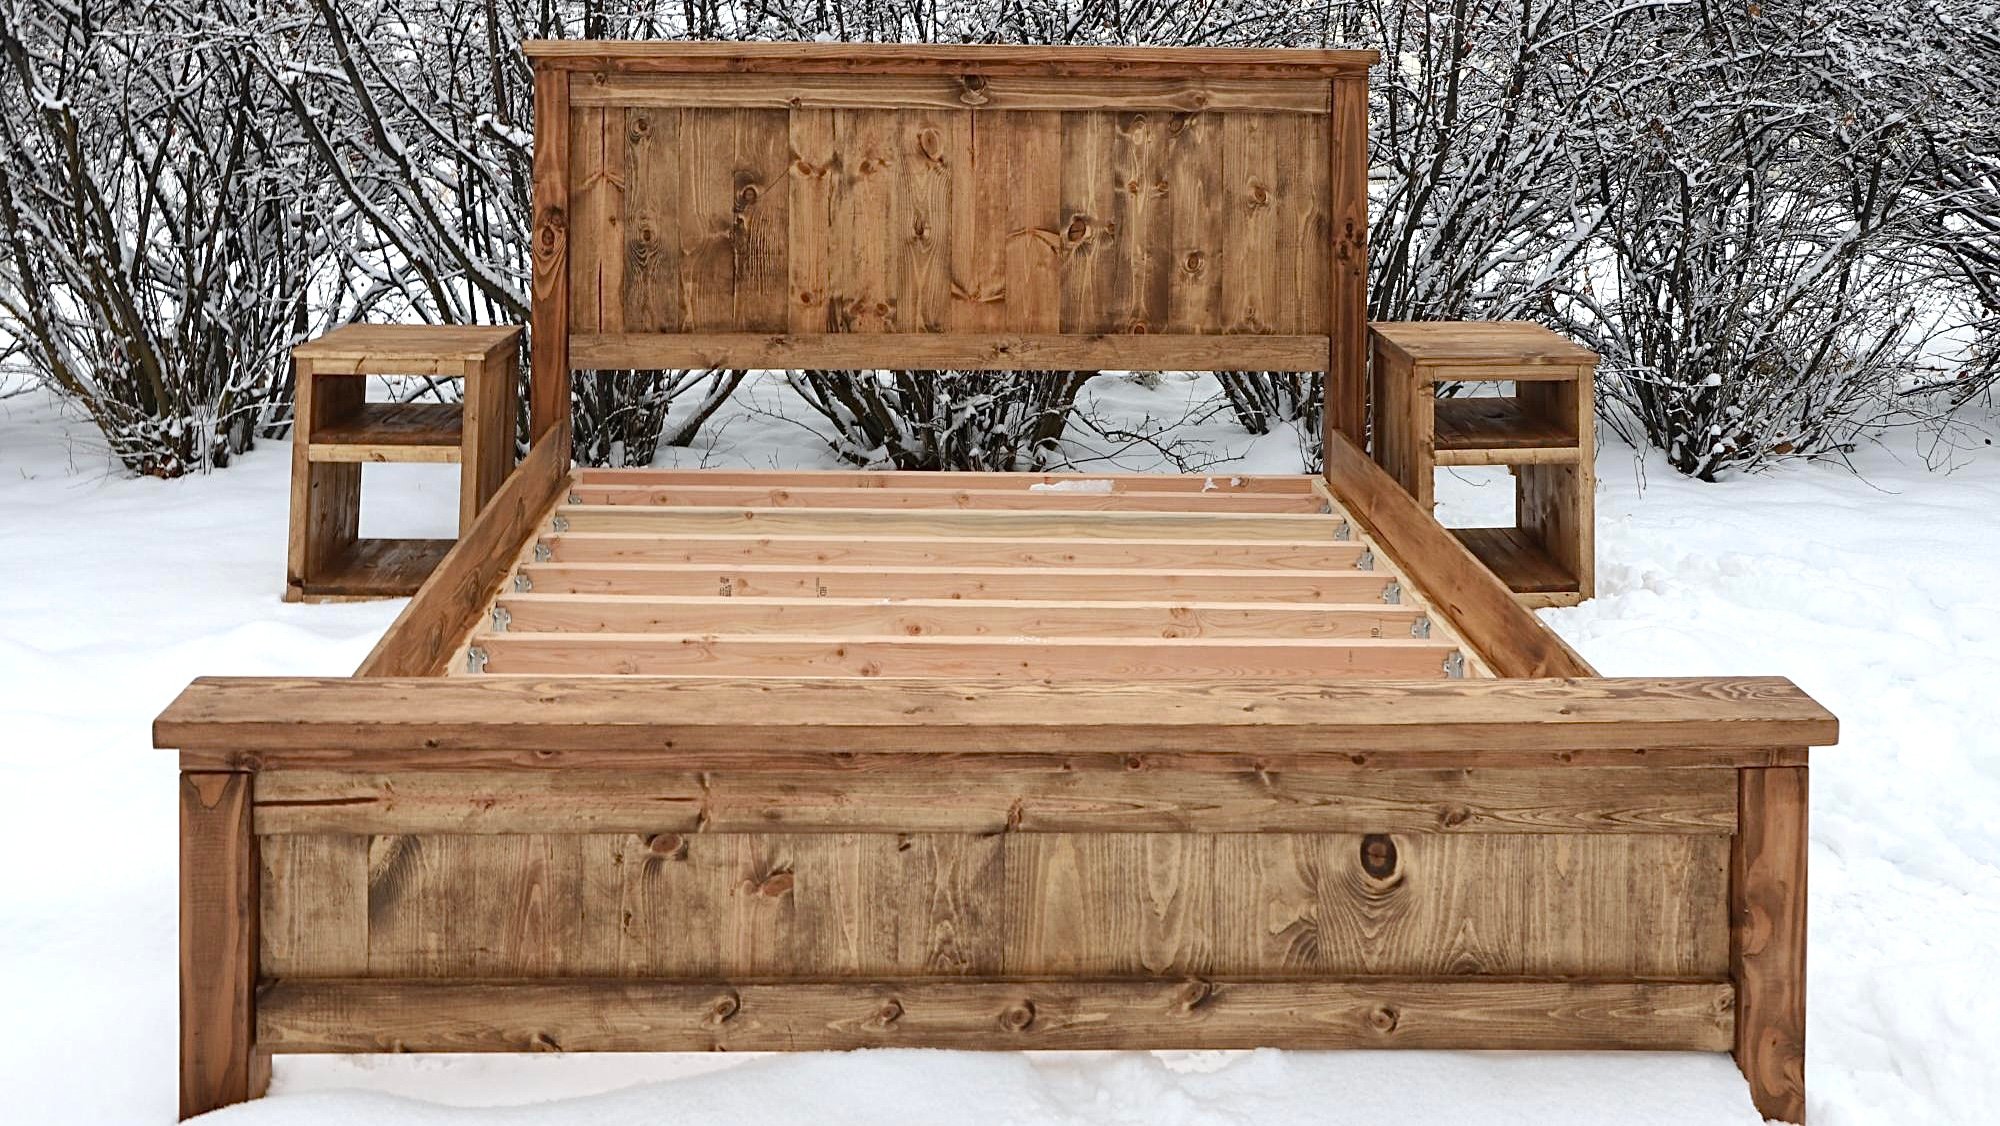
Since developing a love for woodworking I’ve began building things for other people. This particular bed frame I built for a couple who are rebuilding their home after it unfortunately burned down. It’s a beautiful farmhouse home out in the country, and this bed frame fits perfectly in their new home.


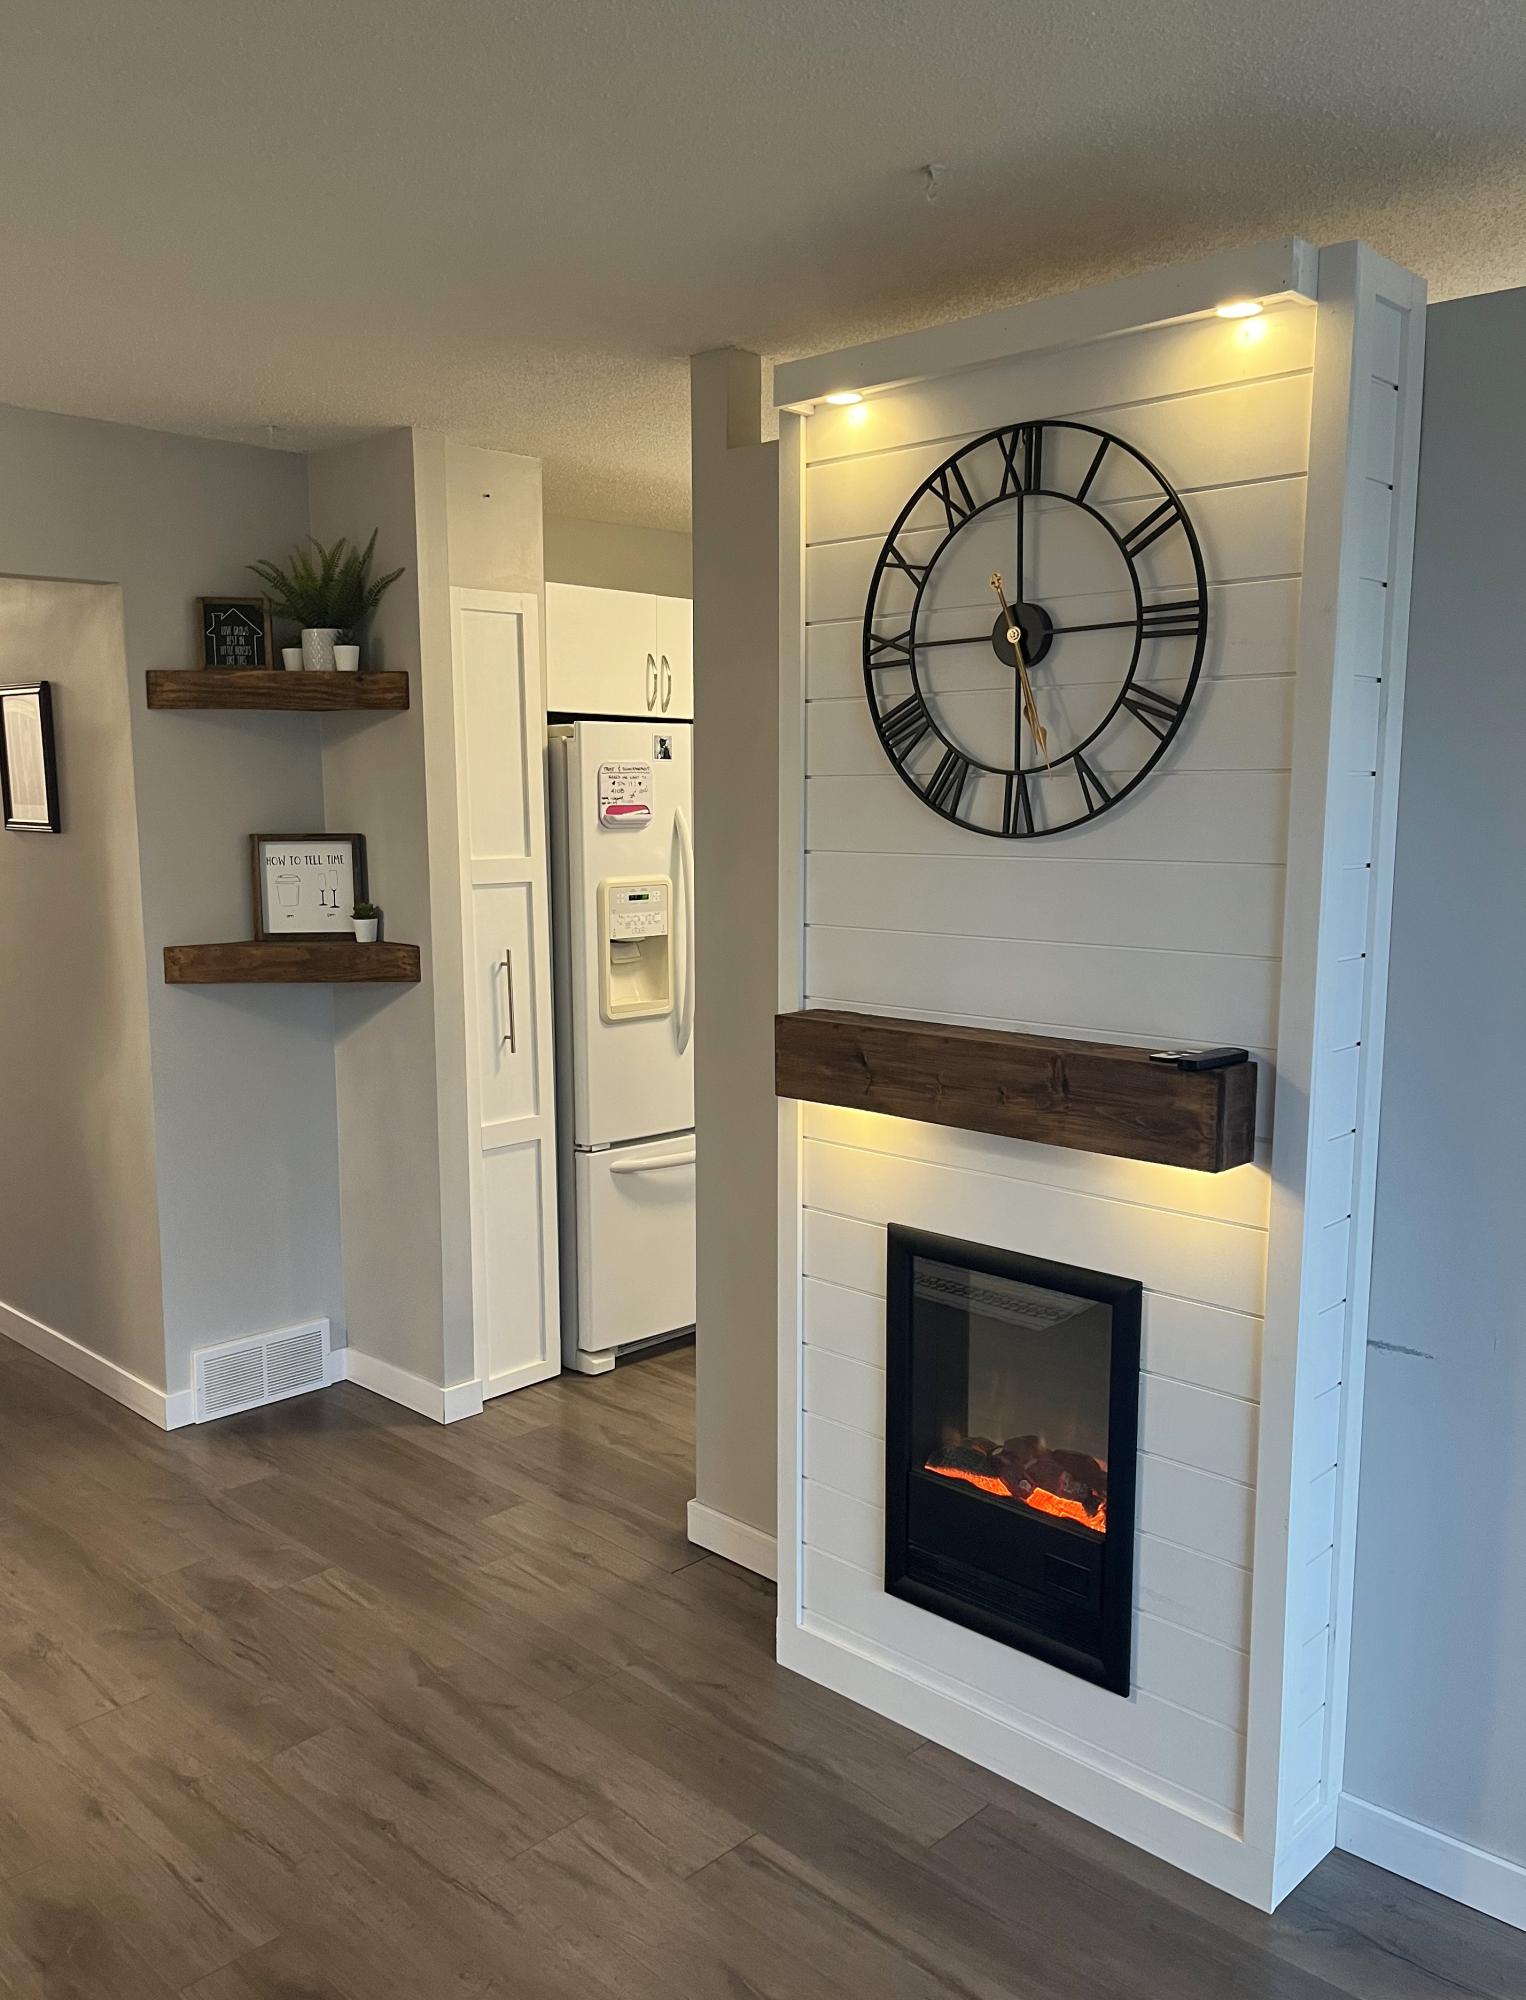
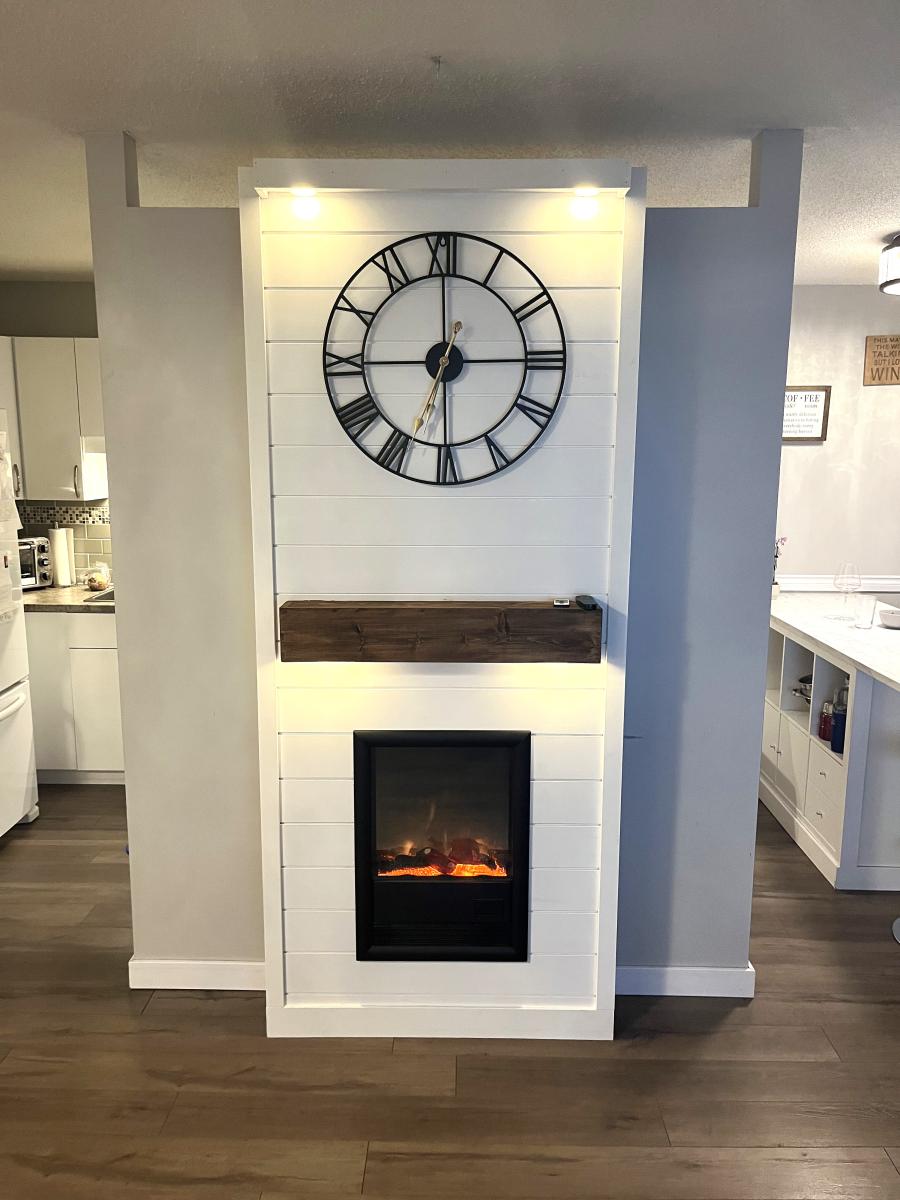
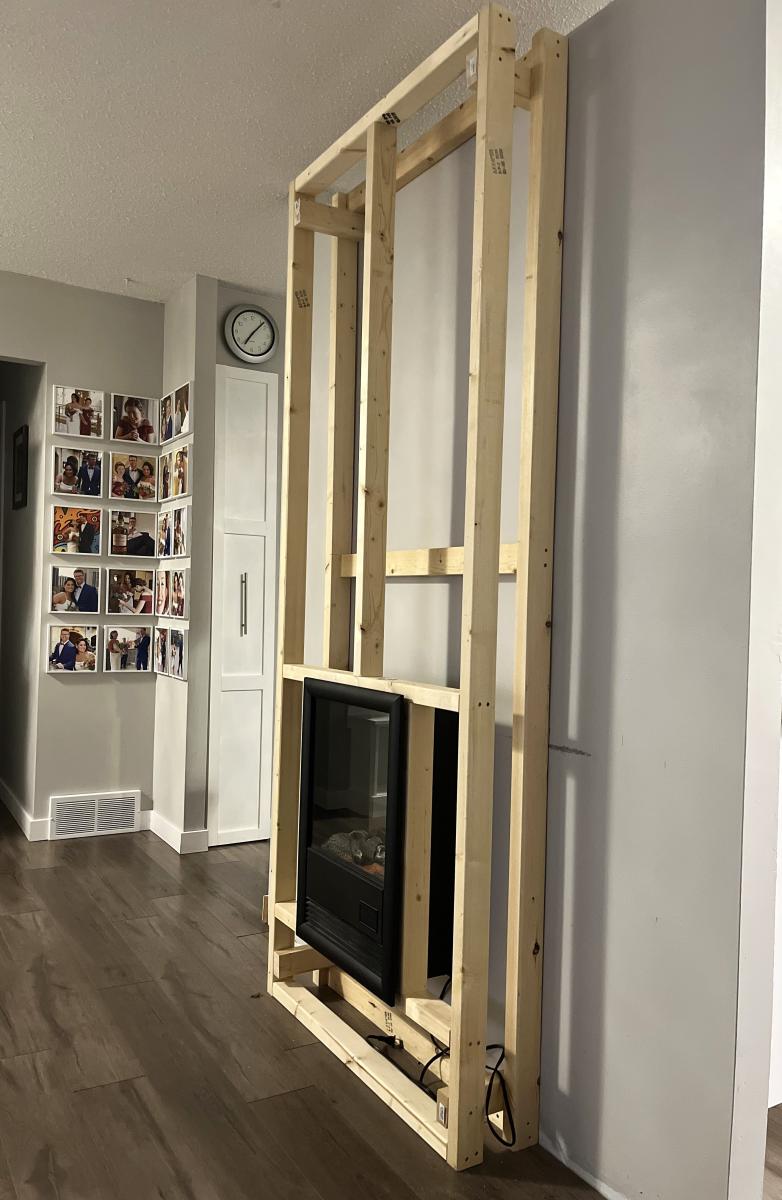
I copied Ana’s fireplace insert design. So easy and looks amazing.
It’s my favorite so far.
Thanks Ana!
Al
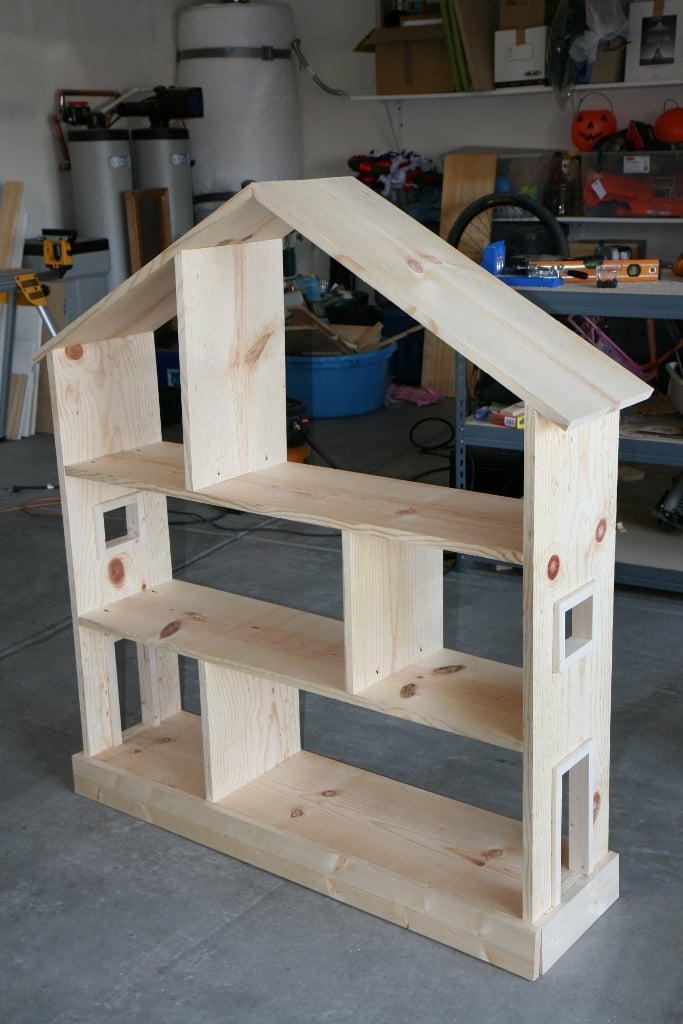
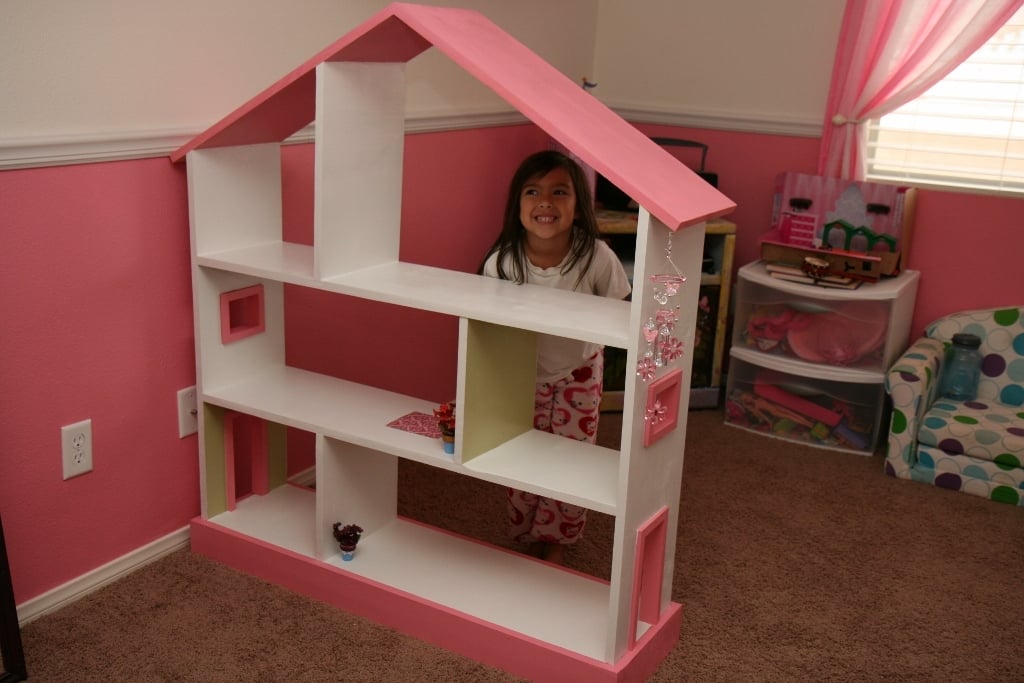
We built this for our daughter's 6th birthday! Love how it turned out :D As you can see we opted to leave the plywood backing off for the time being so she can use it as a doll house and play on both sides. When she grows out of the doll house phase we will either convert it to a book shelf, donate, or sell in a yard sale ... so many options!

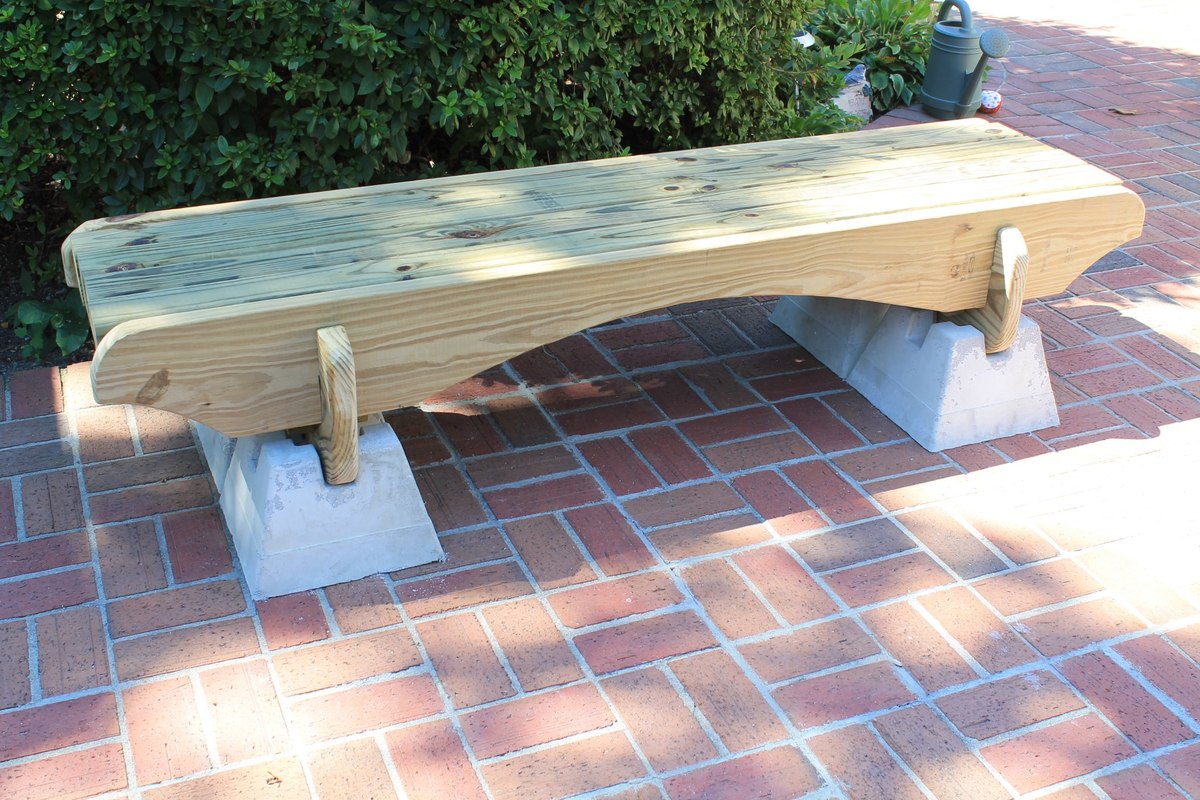
This is made by using treated lumber and concrete deck piers. The genius of this bench is that there are no screws. It fits together like a puzzle and sits on concrete deck piers. I left it untreated for a bit and decided to let the piers stay gray. The original plans called for the piers to be stained black and a stain to be applied to the wood. I wanted to post this as inspiration but will add the link to the template for the wood pieces at a later time.
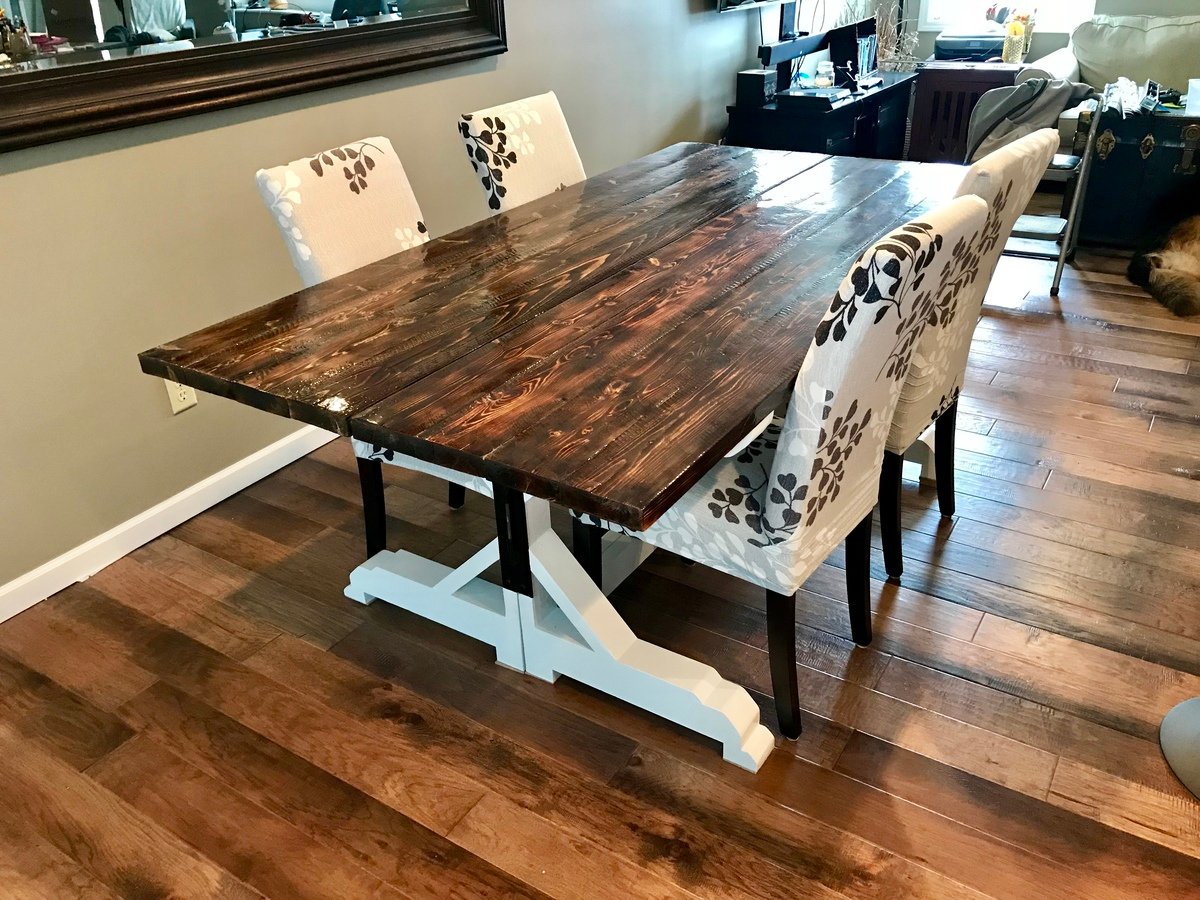
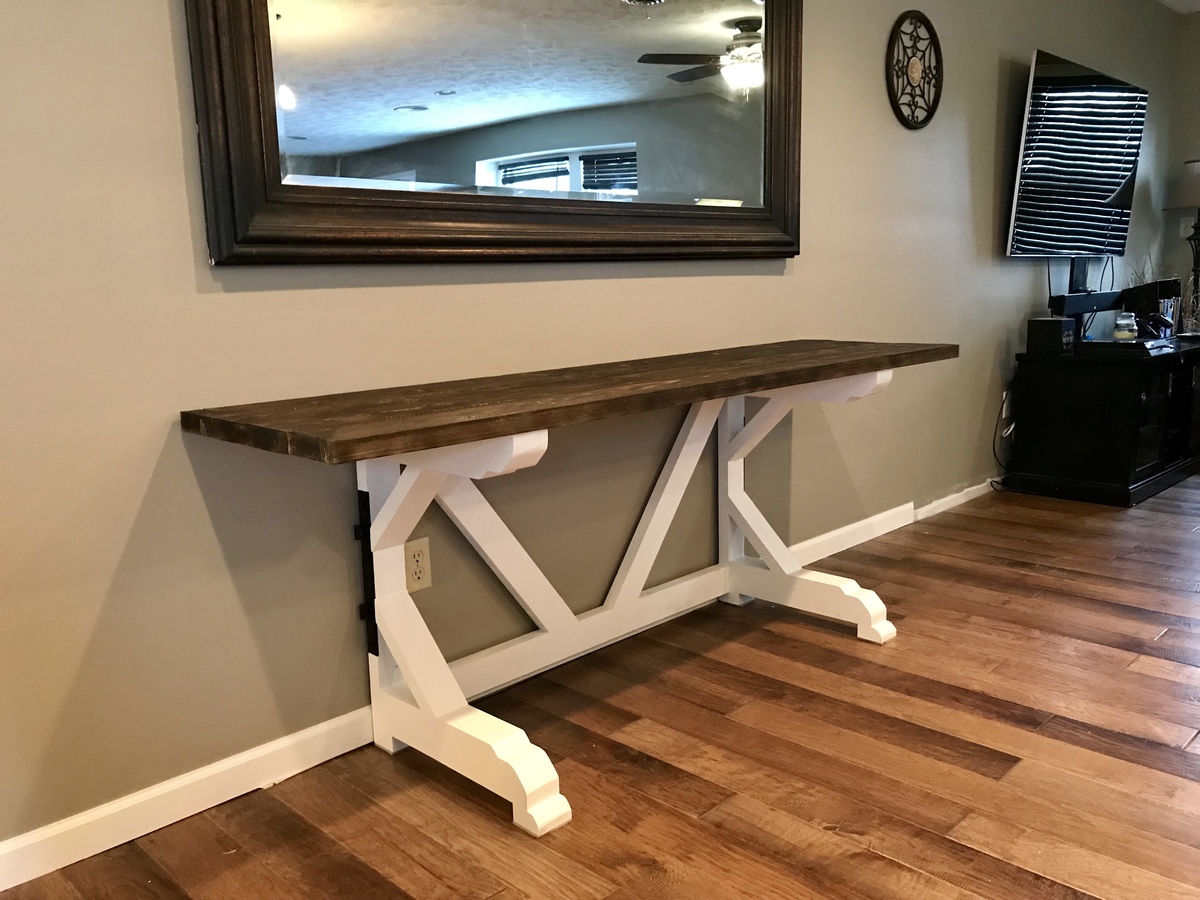
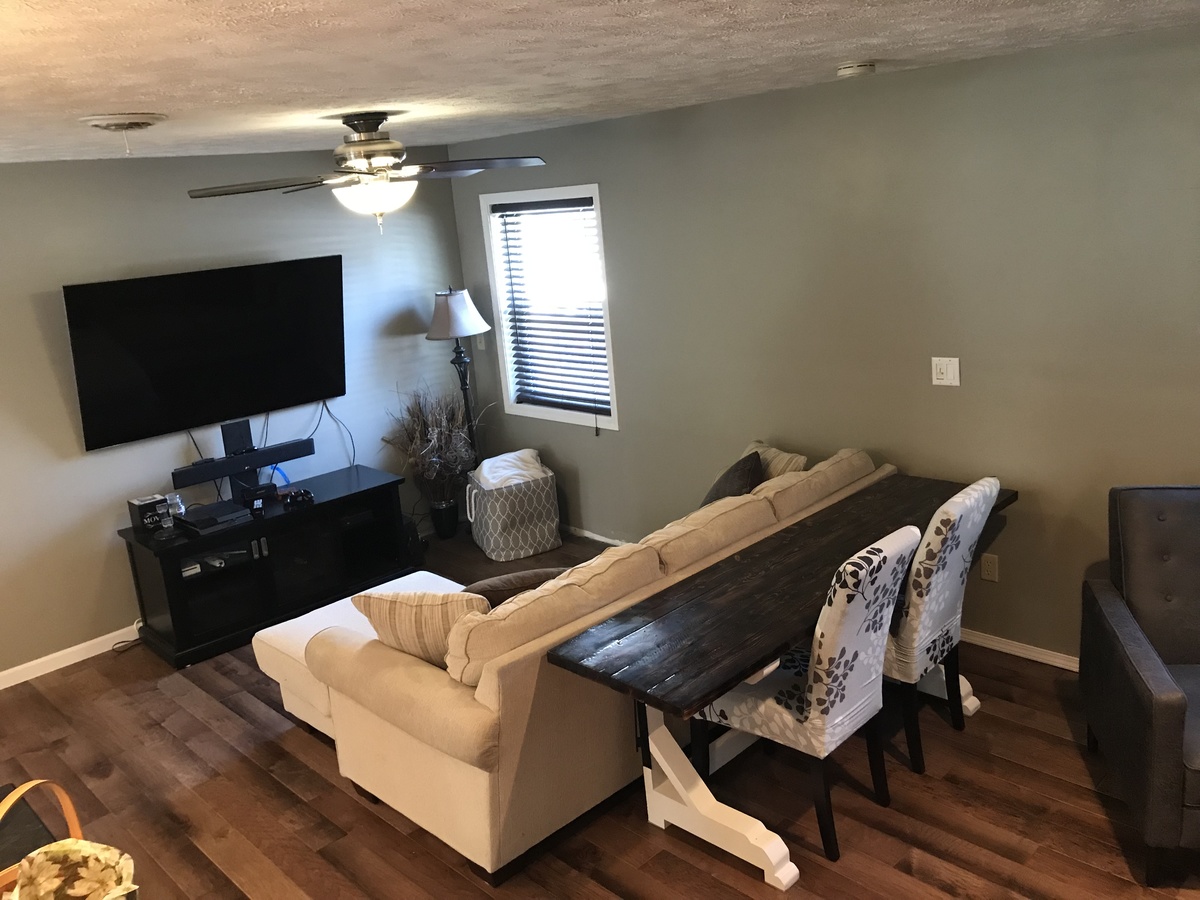
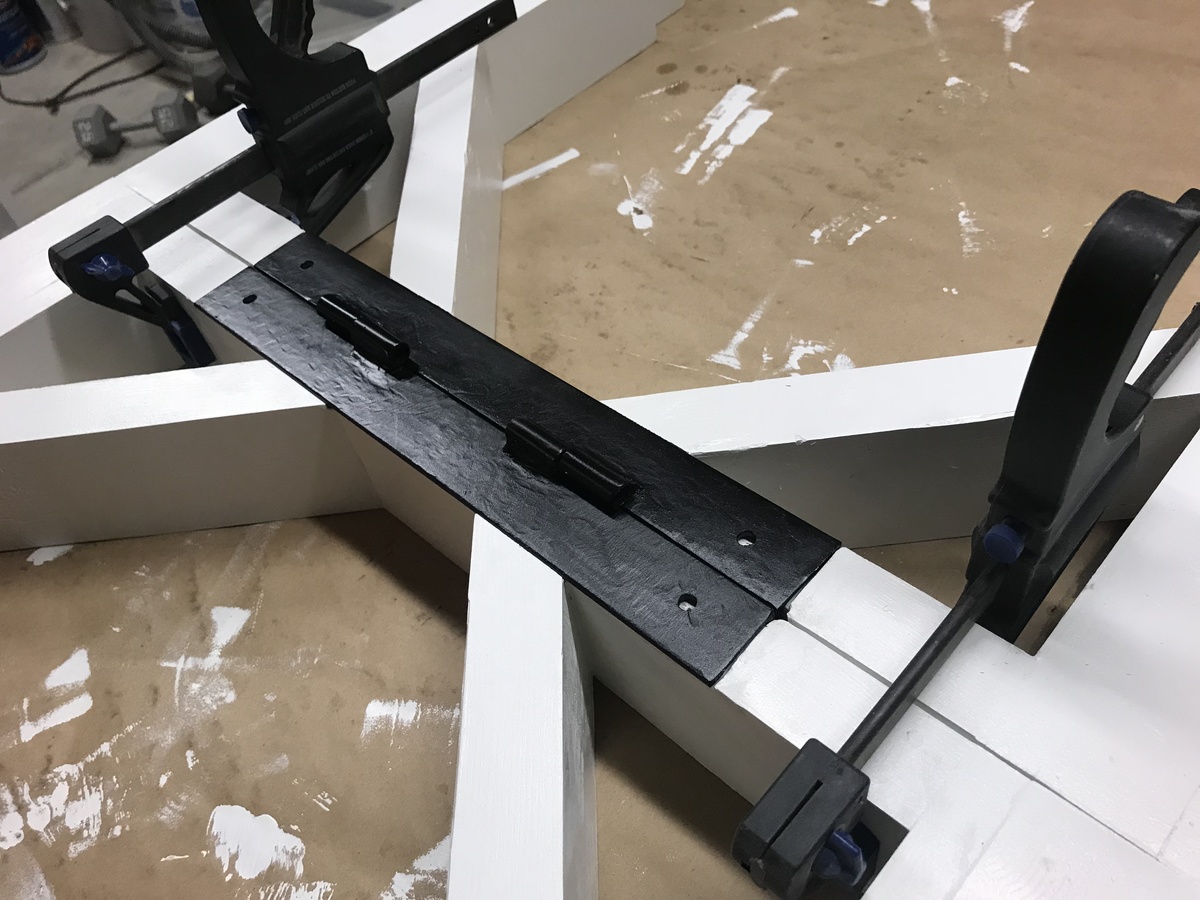
We have a smaller house and wanted a dining table as well as a table behind our couch. So, we got the best of both worlds with this minor customization. I simply split the two legs and tabletop in half, added additional feet, and built two supporting braces instead of one. For an added touch, I welded tubes to steel angle iron to make a hinge-style locking mechanism with steel pins. This locks both halves together (when using as a full table) and adds a little rustic black metal to the overall look.
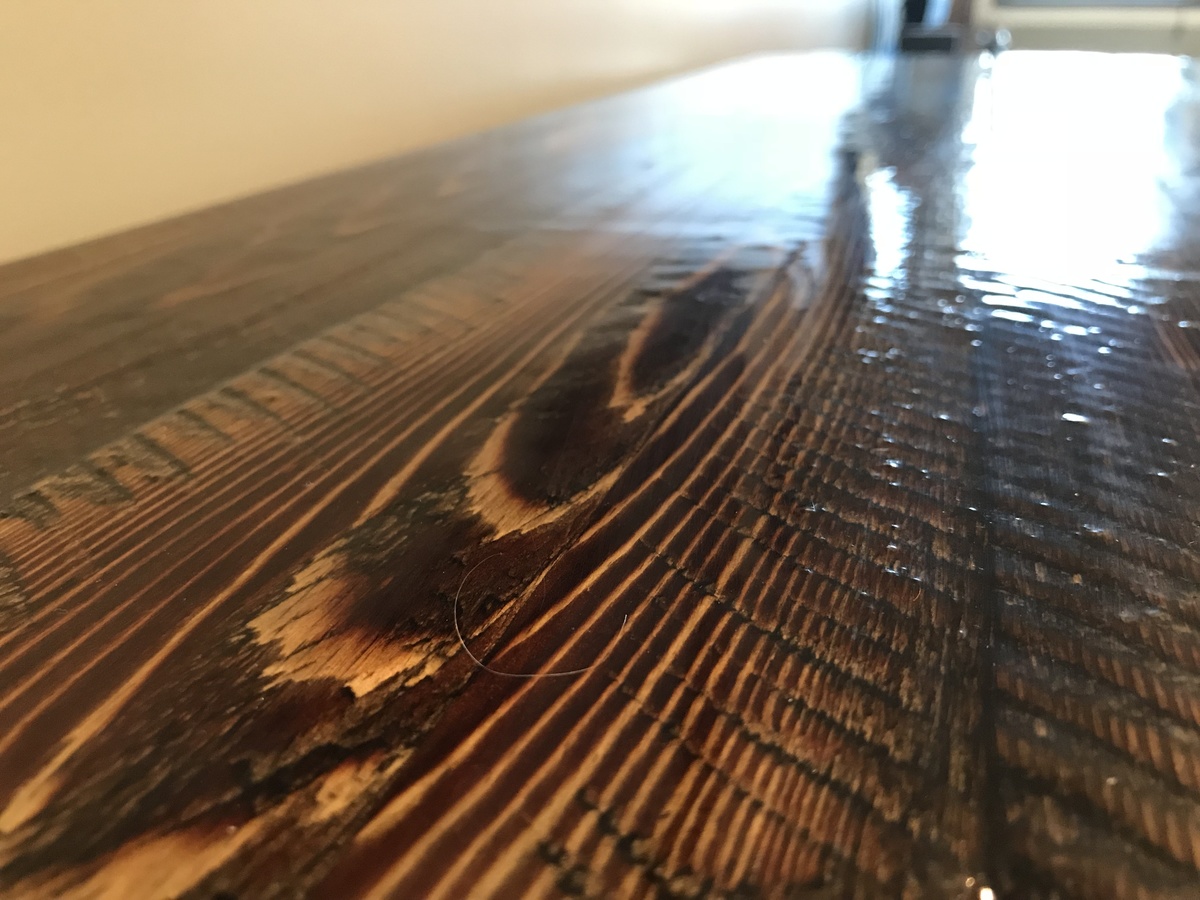
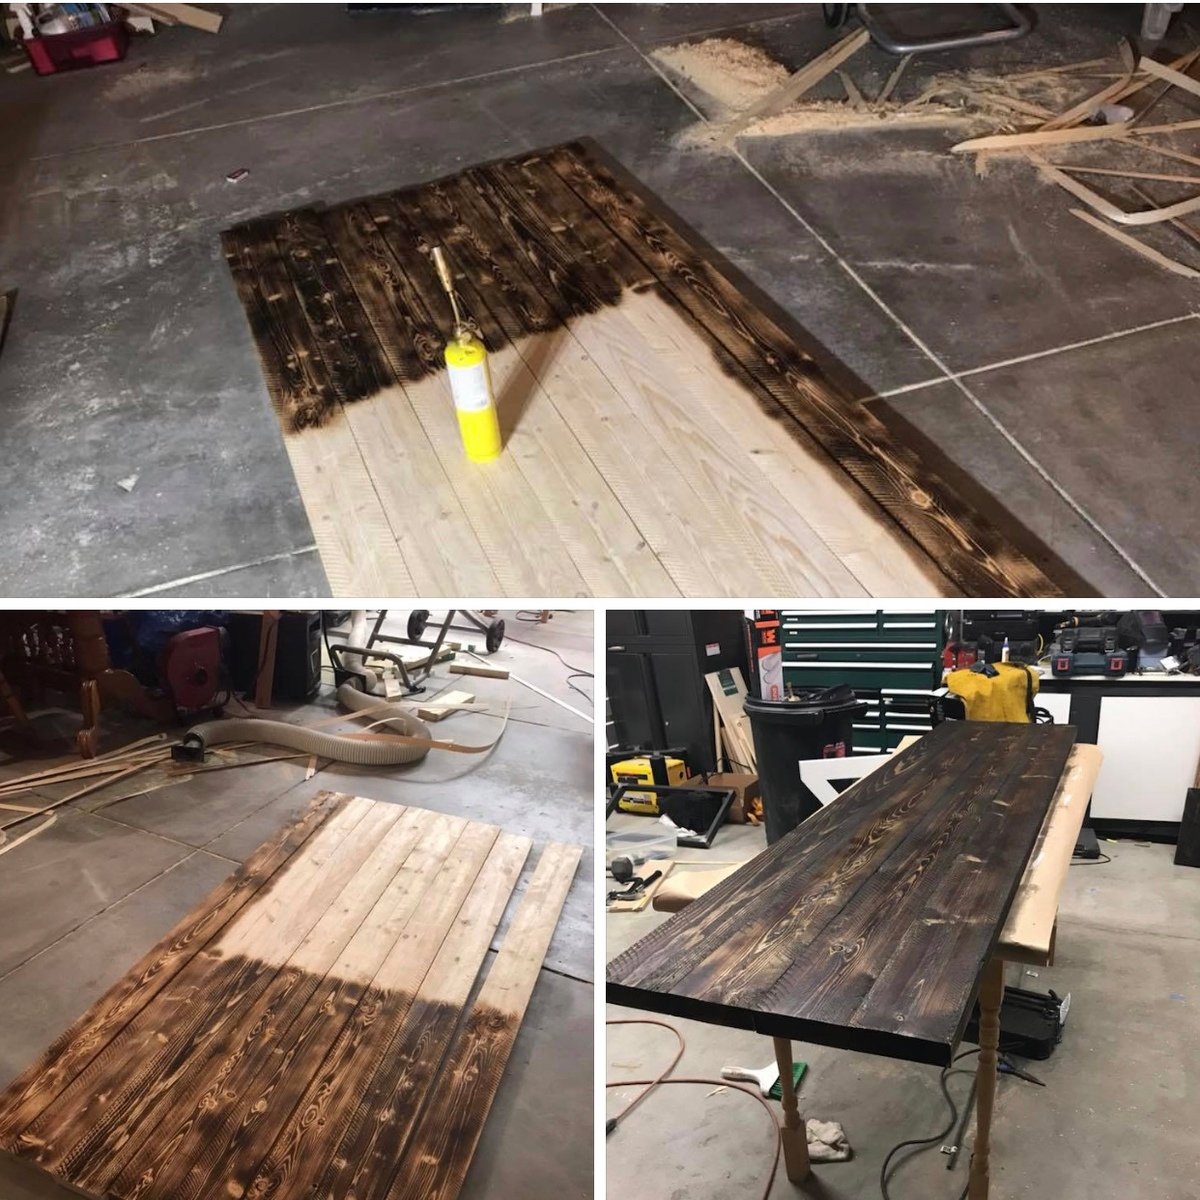
For the tabletop, I cut the sides off the lumber to get the square look. I then bent one tooth in my tablesaw and quickly cut the face of the lumber to give it a rough sawn look. I then belt sanded it all to smooth out the really rough spots. Then I shou sugi ban (burned) the top to burn off the splinters and make the grain really pop. I added a little stain to smooth out the light spots. Lastly, I put about 64oz of epoxy and lightly sanded with 0000 steelwool after it set.
Please excuse the floor trim or lack therof. I just installed the new floor and decided our table was the higher priority. :P
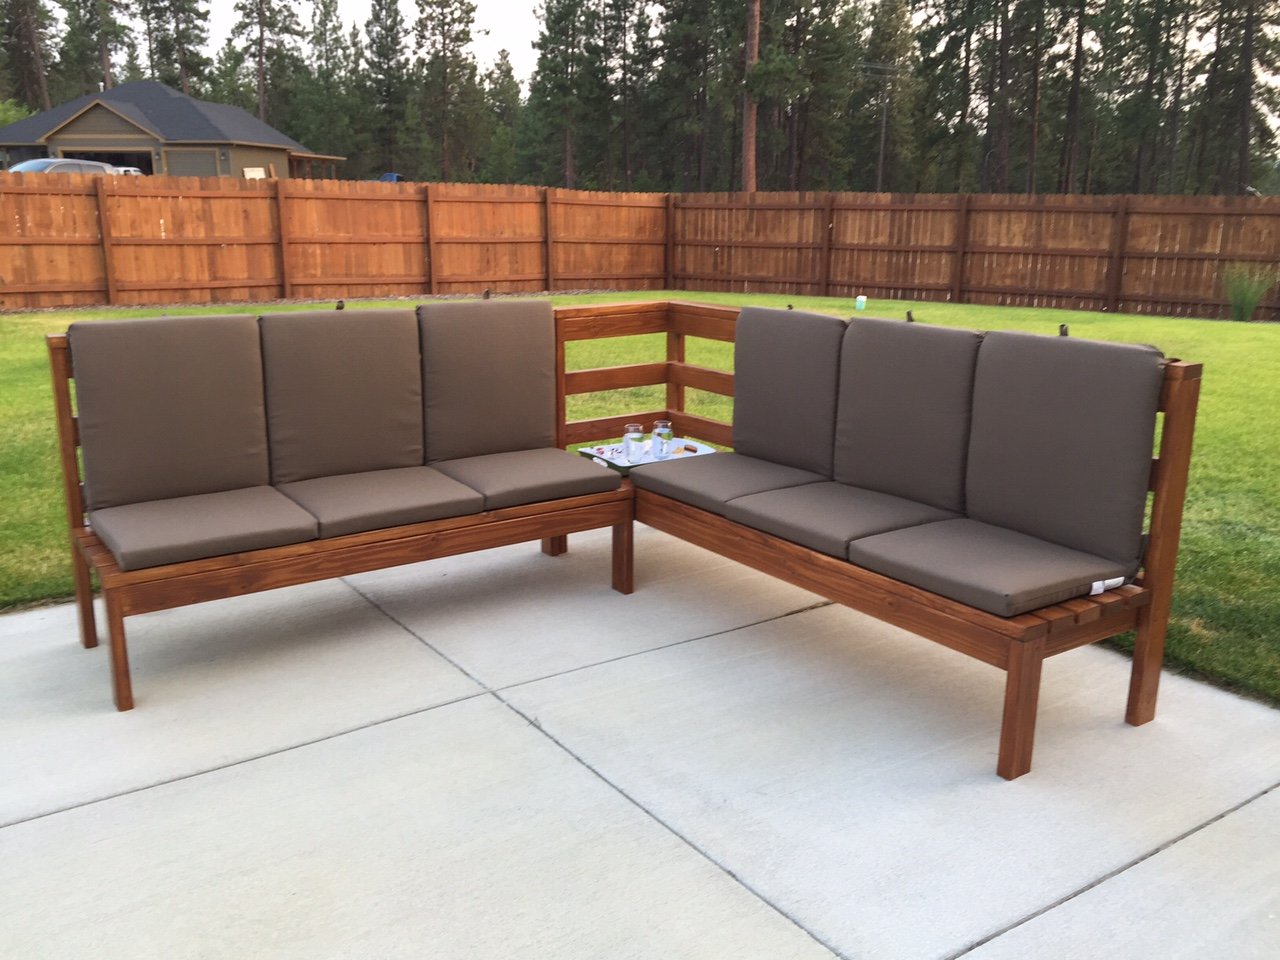
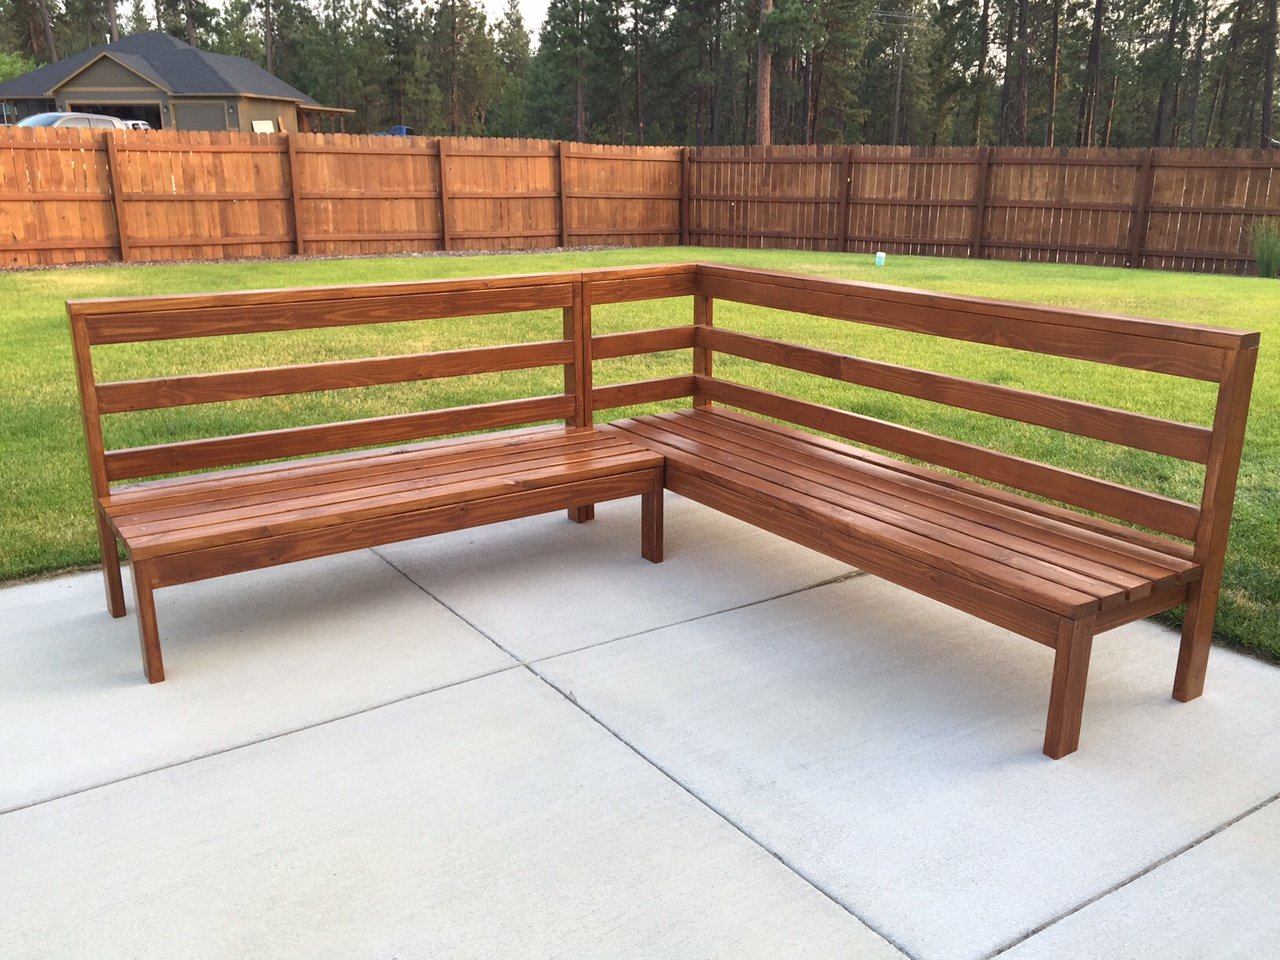
Here is my patio sectional made of 2x4s. Used my Kreg Jig for the first time to complete this project. I used pocket holes in as many places as possible, then finished it with two coats of leftover fence stain and two coats of semi-gloss outdoor Varathane spar urethane for a nice sheen. I modified the dimensions to fit the cushions that my wife purchased before I began the project. I made the back substantially taller to support the cushions and left the arms off of both ends of the sectional so people could sit facing sideways too. I left the corner of the sectional without a cushion so people would have a place to set drinks.
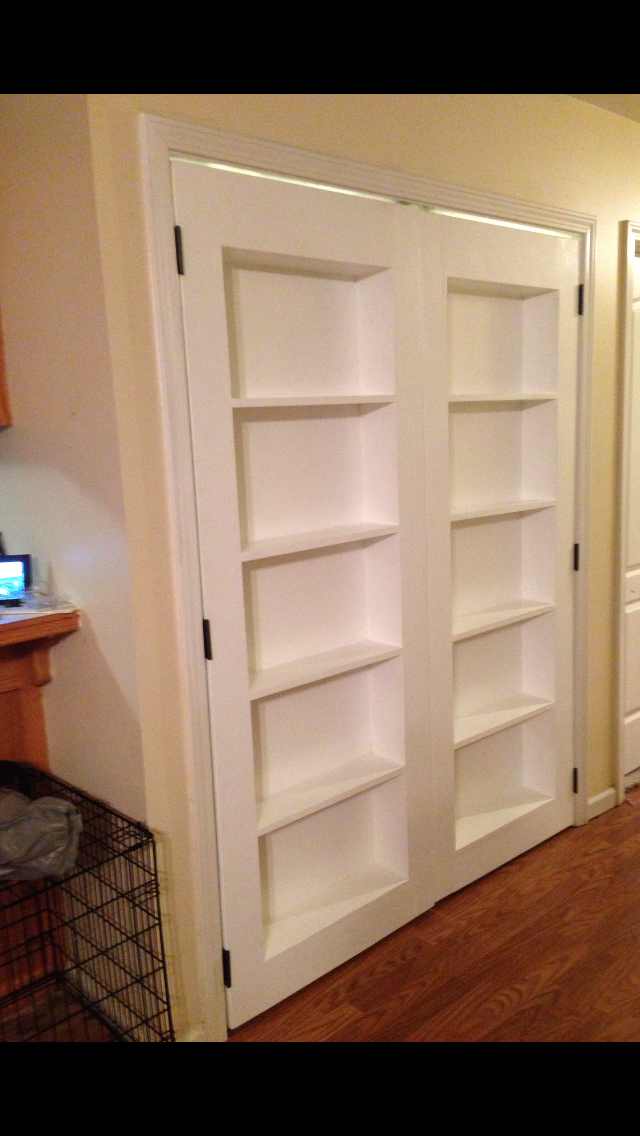
You made this project look so simple that I just had to try it. However, to suit my needs I had to make a few alterations to the plans. I had a set of bi-fold doors that were in need of replacement and I thought inset bookshelf doors would be the perfect way to replace them. This project was easy enough for me to do it myself and I am really new to the DIY game but I did have some help. I really love the way they turned out. You can read all about my my adventure at http://heresalittletmi.blogspot.com/2013/08/bookshelf-doors.html
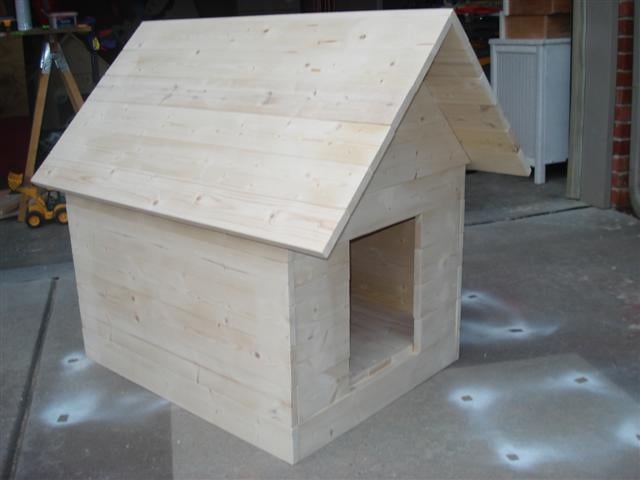
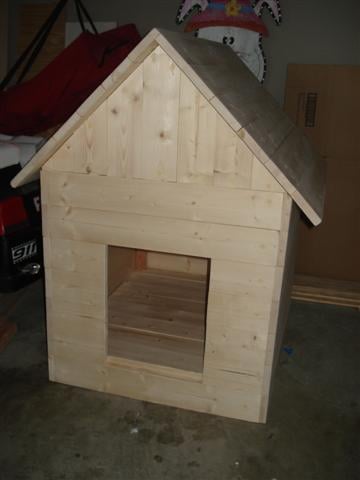
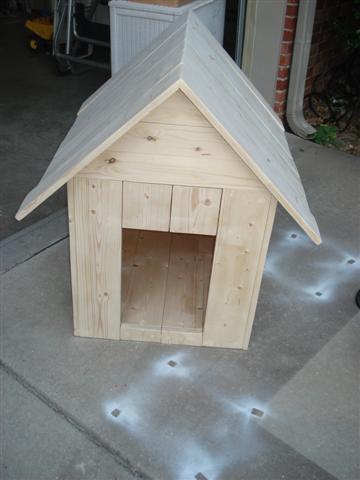
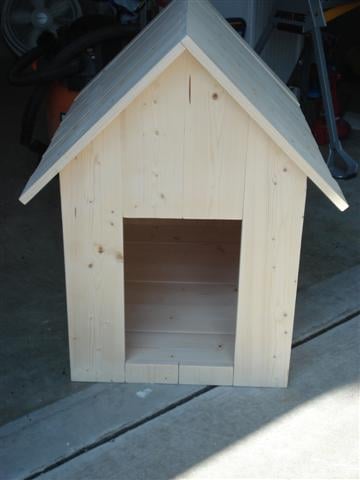
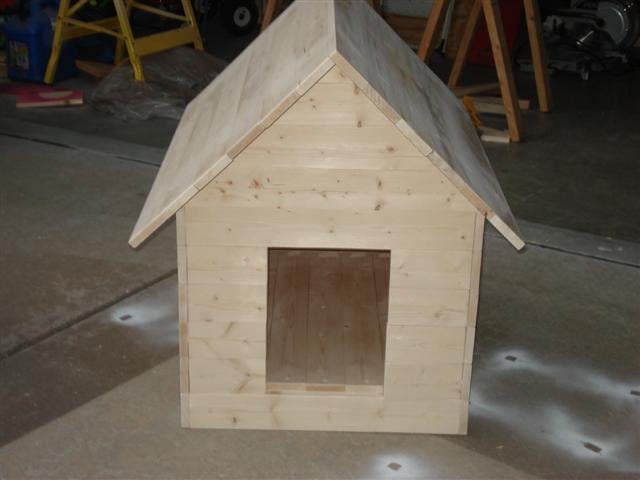
Our local Habitat for Humanity puts on an annual event where they get folks to restore discarded or worn down furniture and sell them at auction. My wife and I participated last year and this year I was asked to build 4 dog houses and then they were going to let local designers/decorators finish them out.
I figured it would be easy to find a good dog house plan, but I was wrong so I had to come up with my own designs. I did not want to use plywood becauase I wanted them to look good. So I used 1x4's and 1x6's. I built them all just a little bit different, but the same basic design on all 3. Since I am not very good with circular cuts, did not do any fancy 1/2 circle doorways!
There are "after" pictures on the Blog. Thanks for looking!
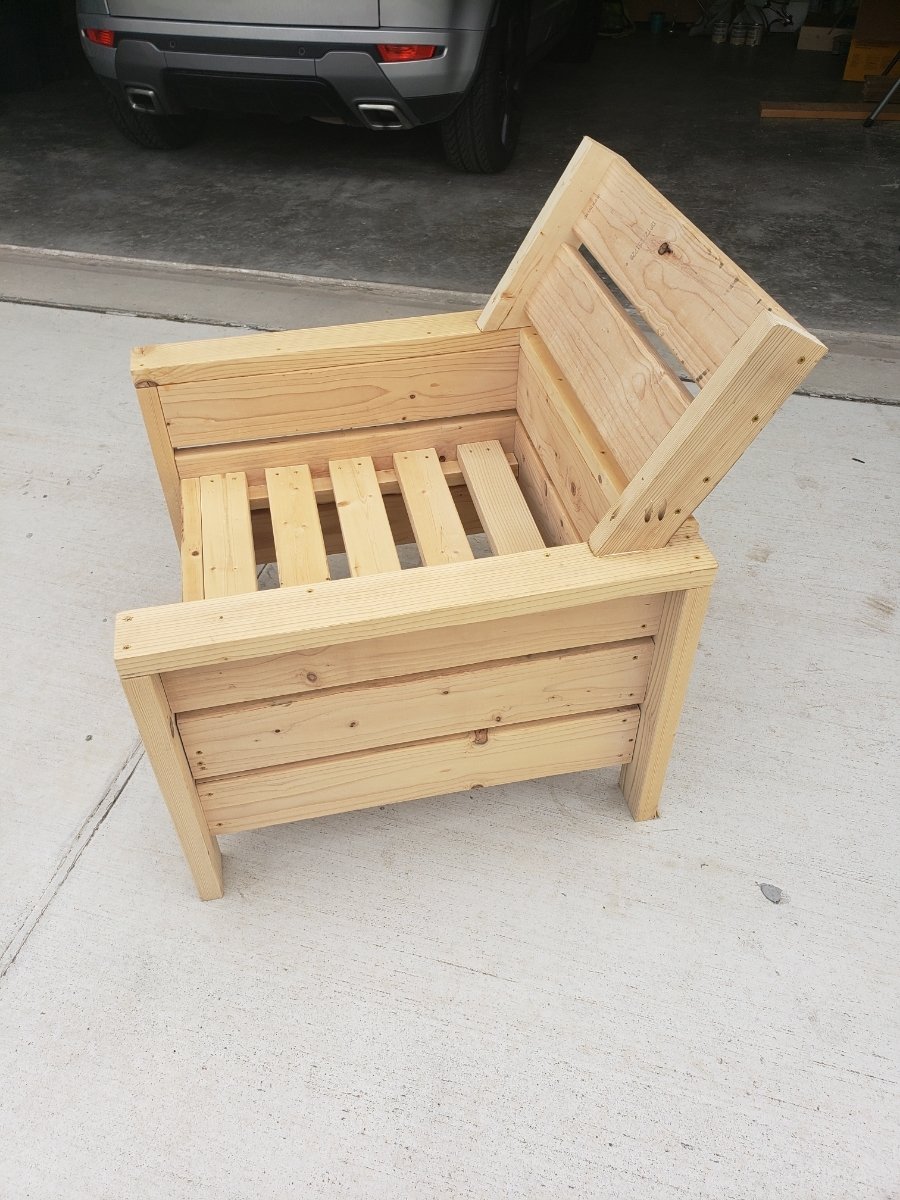
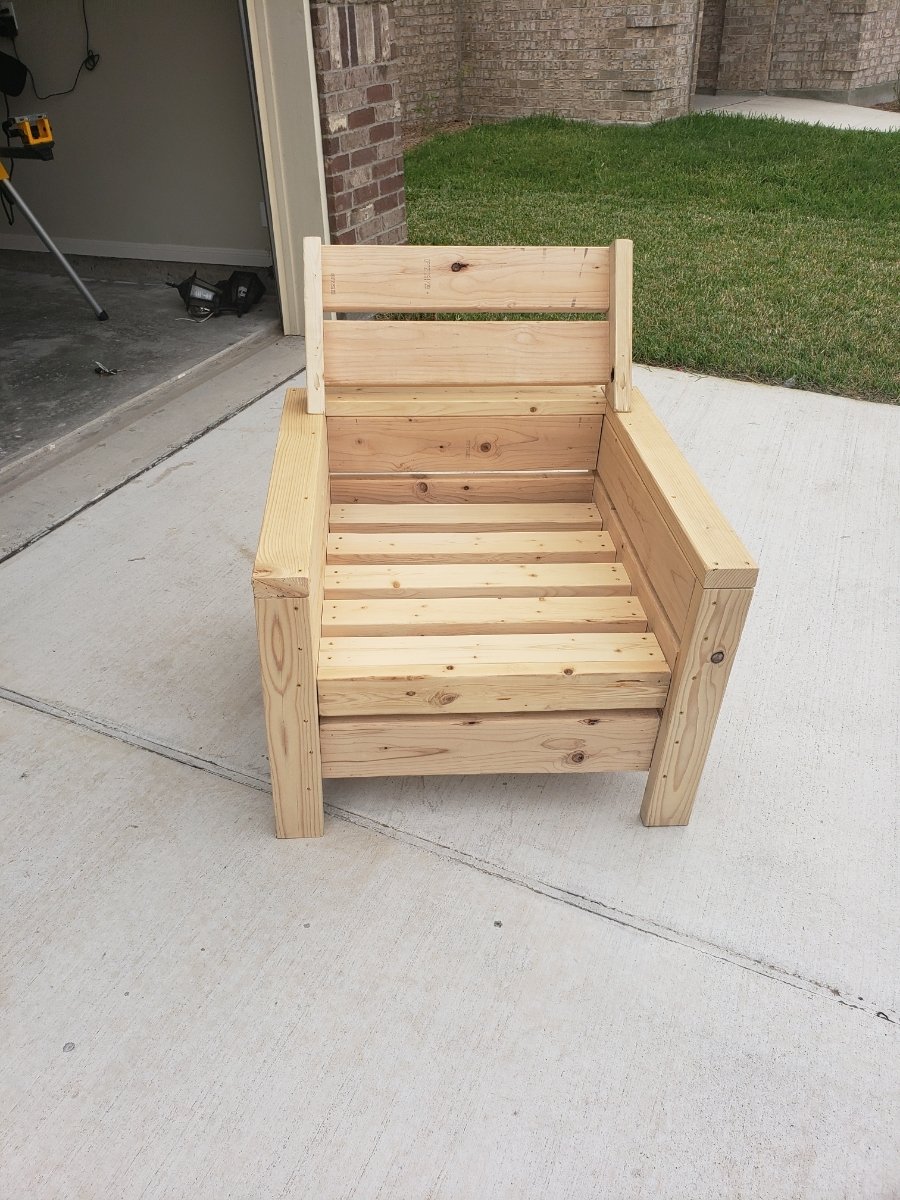
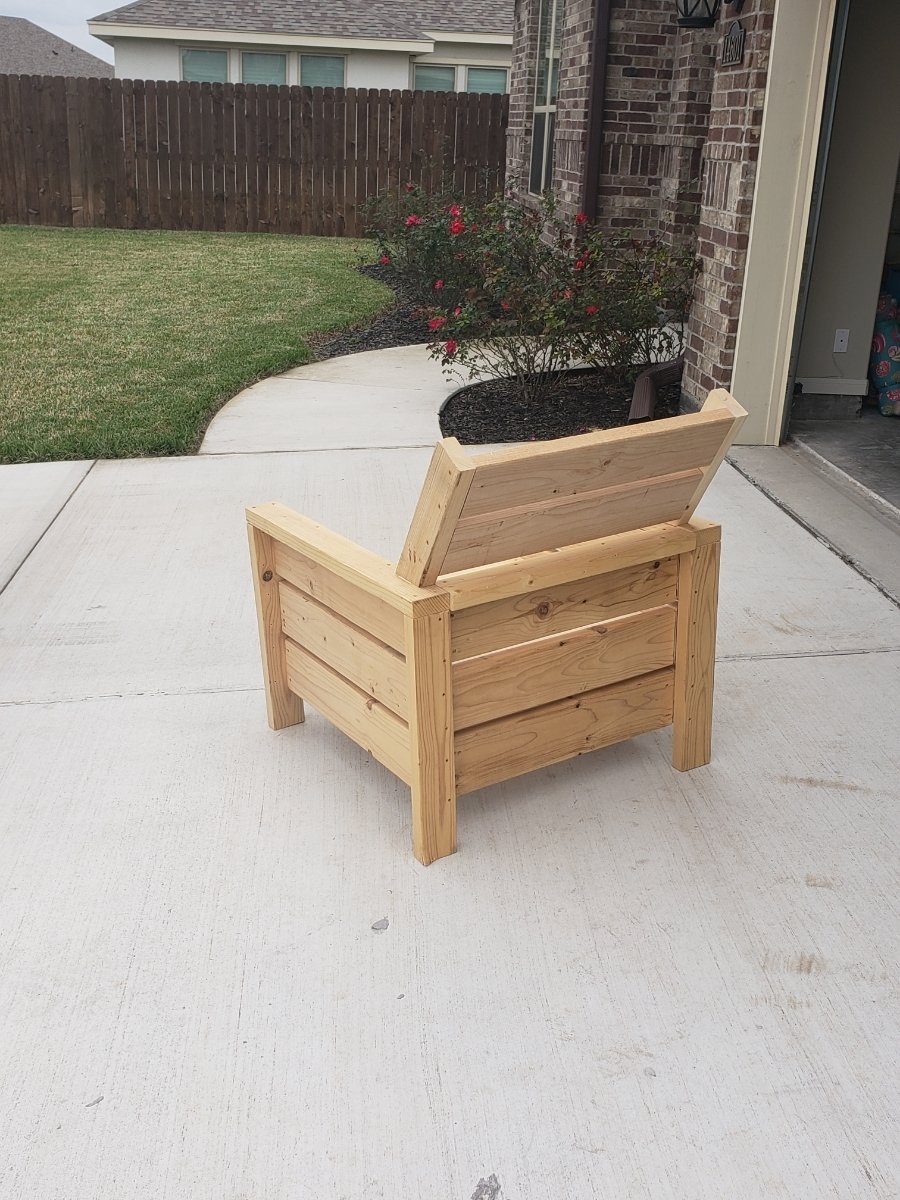
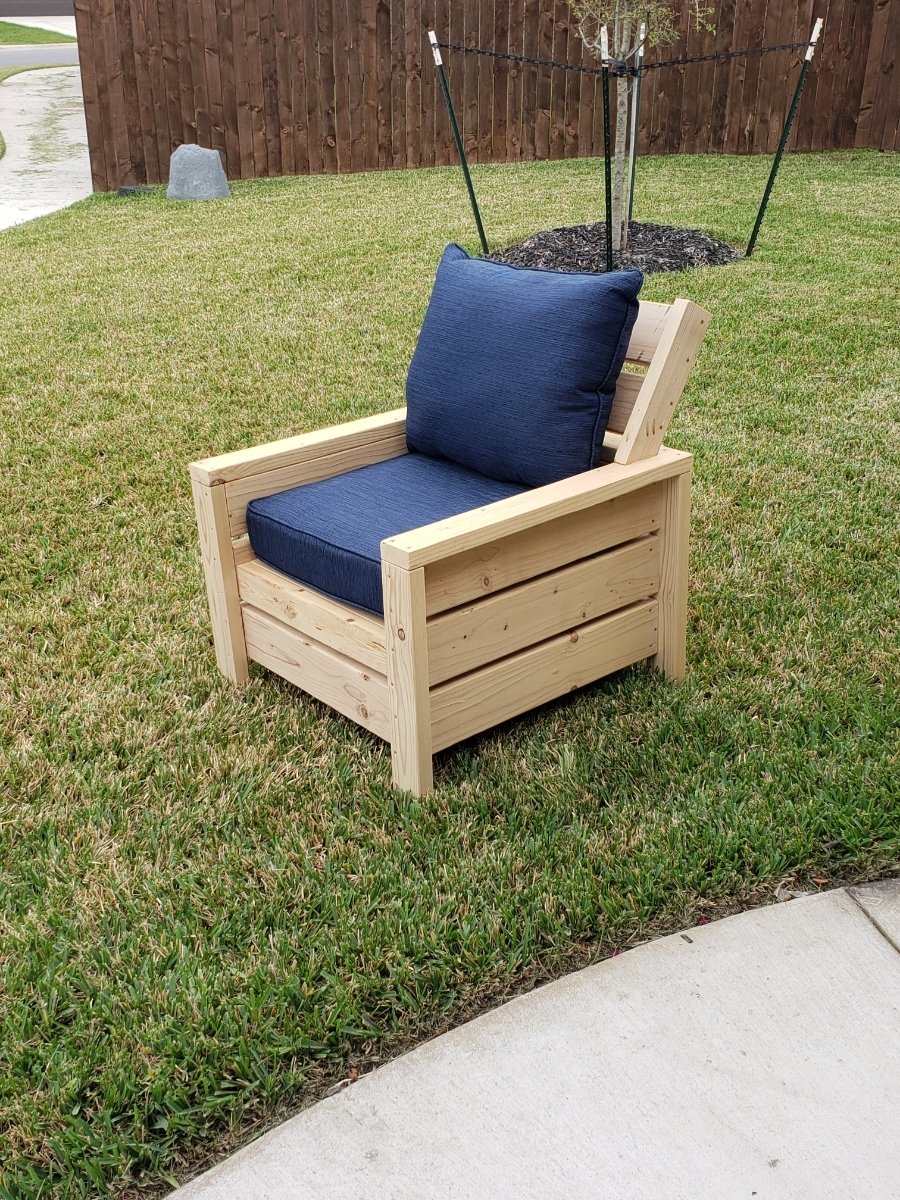
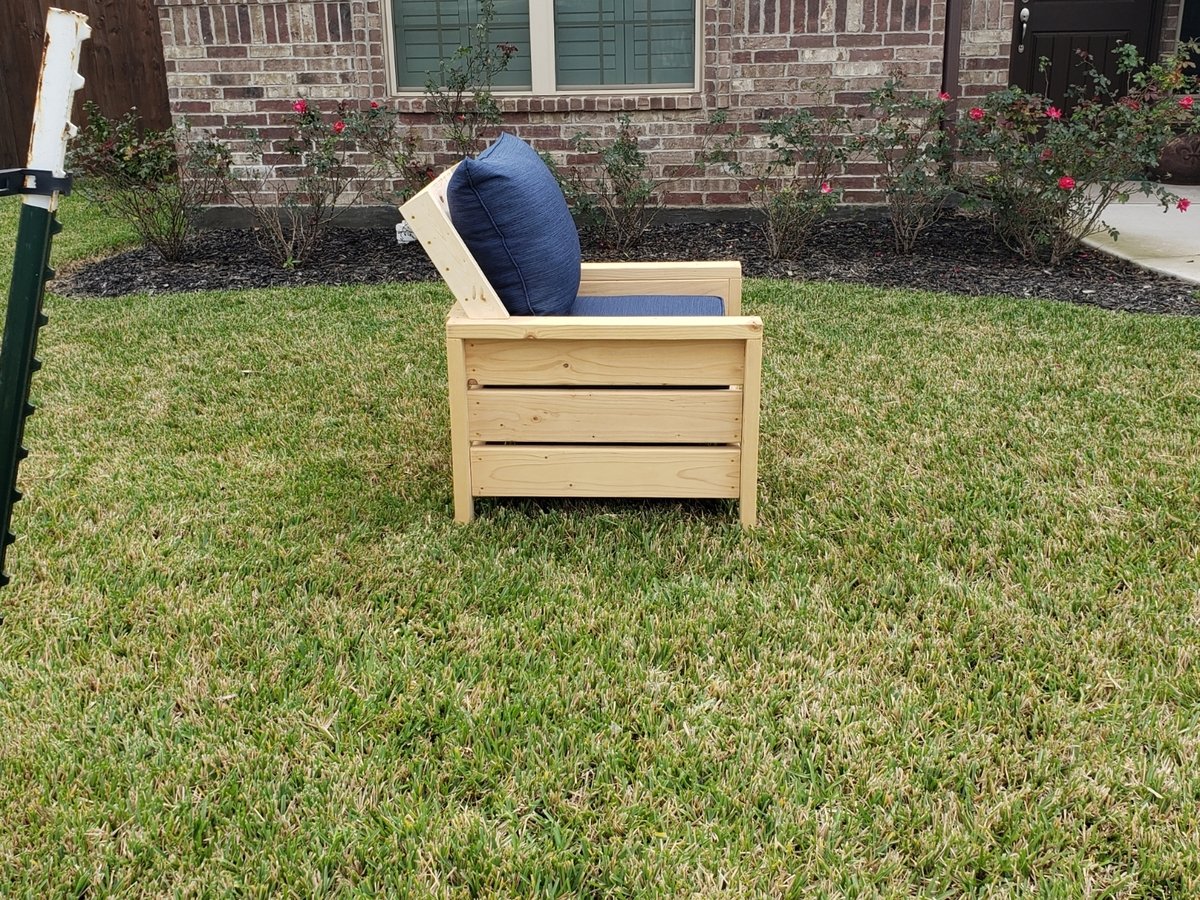
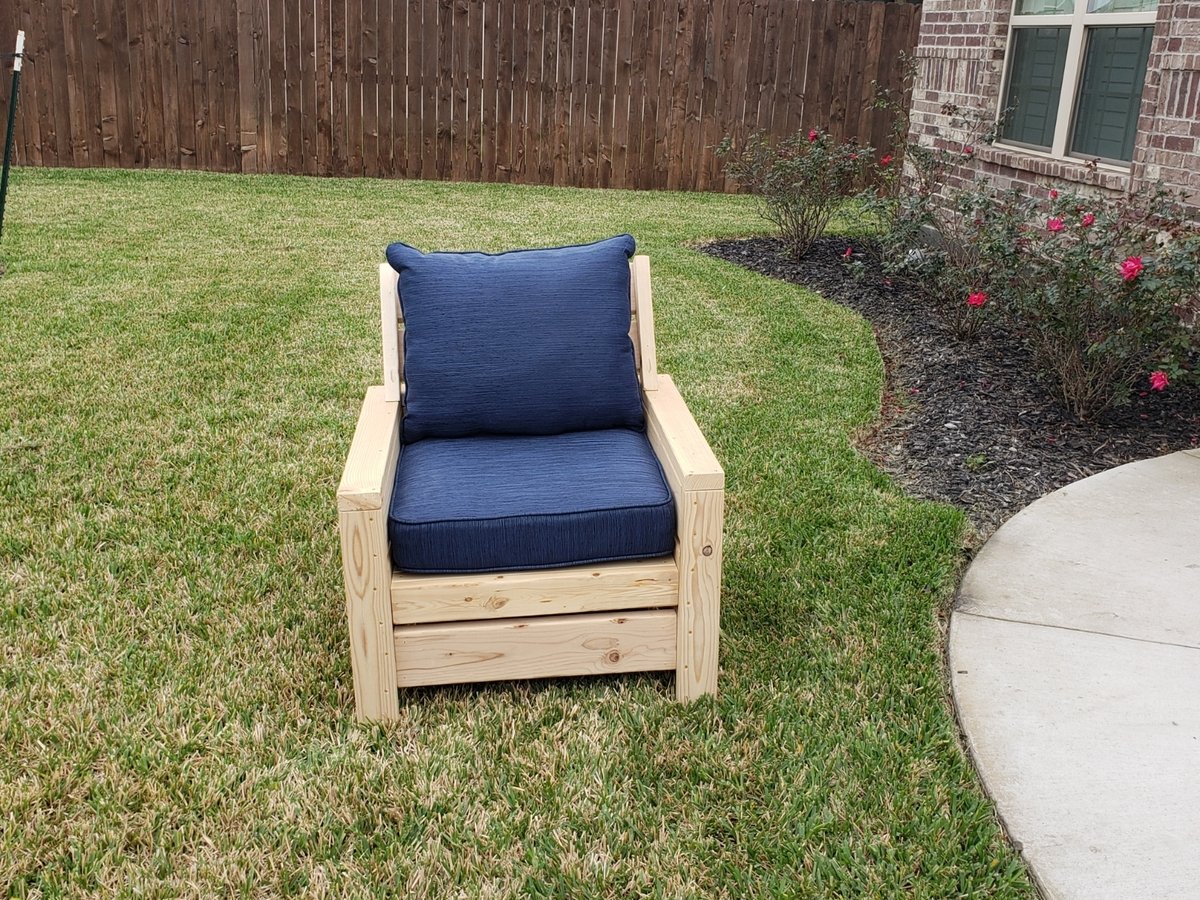
This chair was made off Ana white'smodern outdoor chair with modification to add back support. Without the back support the back pillow would keep falling off. The cushion are 25x25 but very thick for comfort.

Thu, 07/04/2019 - 12:48
What degree angle is the extended back cut. I can't find any instructions on this?