Fall Front Porch X Bench
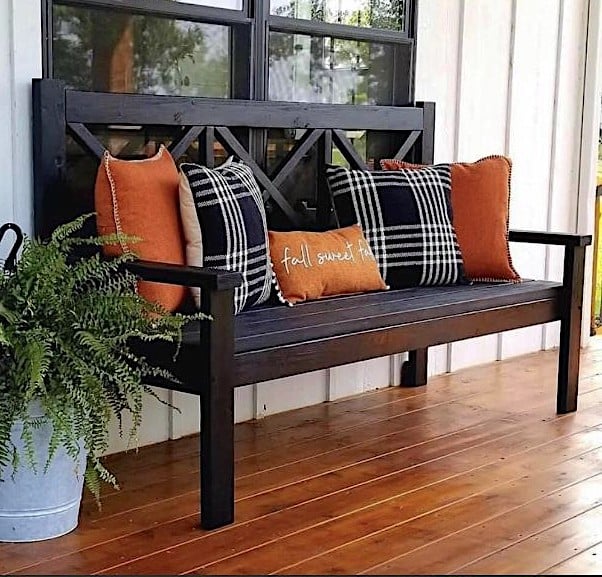
Perfect for porch sitting!
Pin For Later!

Built from Plan(s)
Seasonal And Holiday
Perfect for porch sitting!
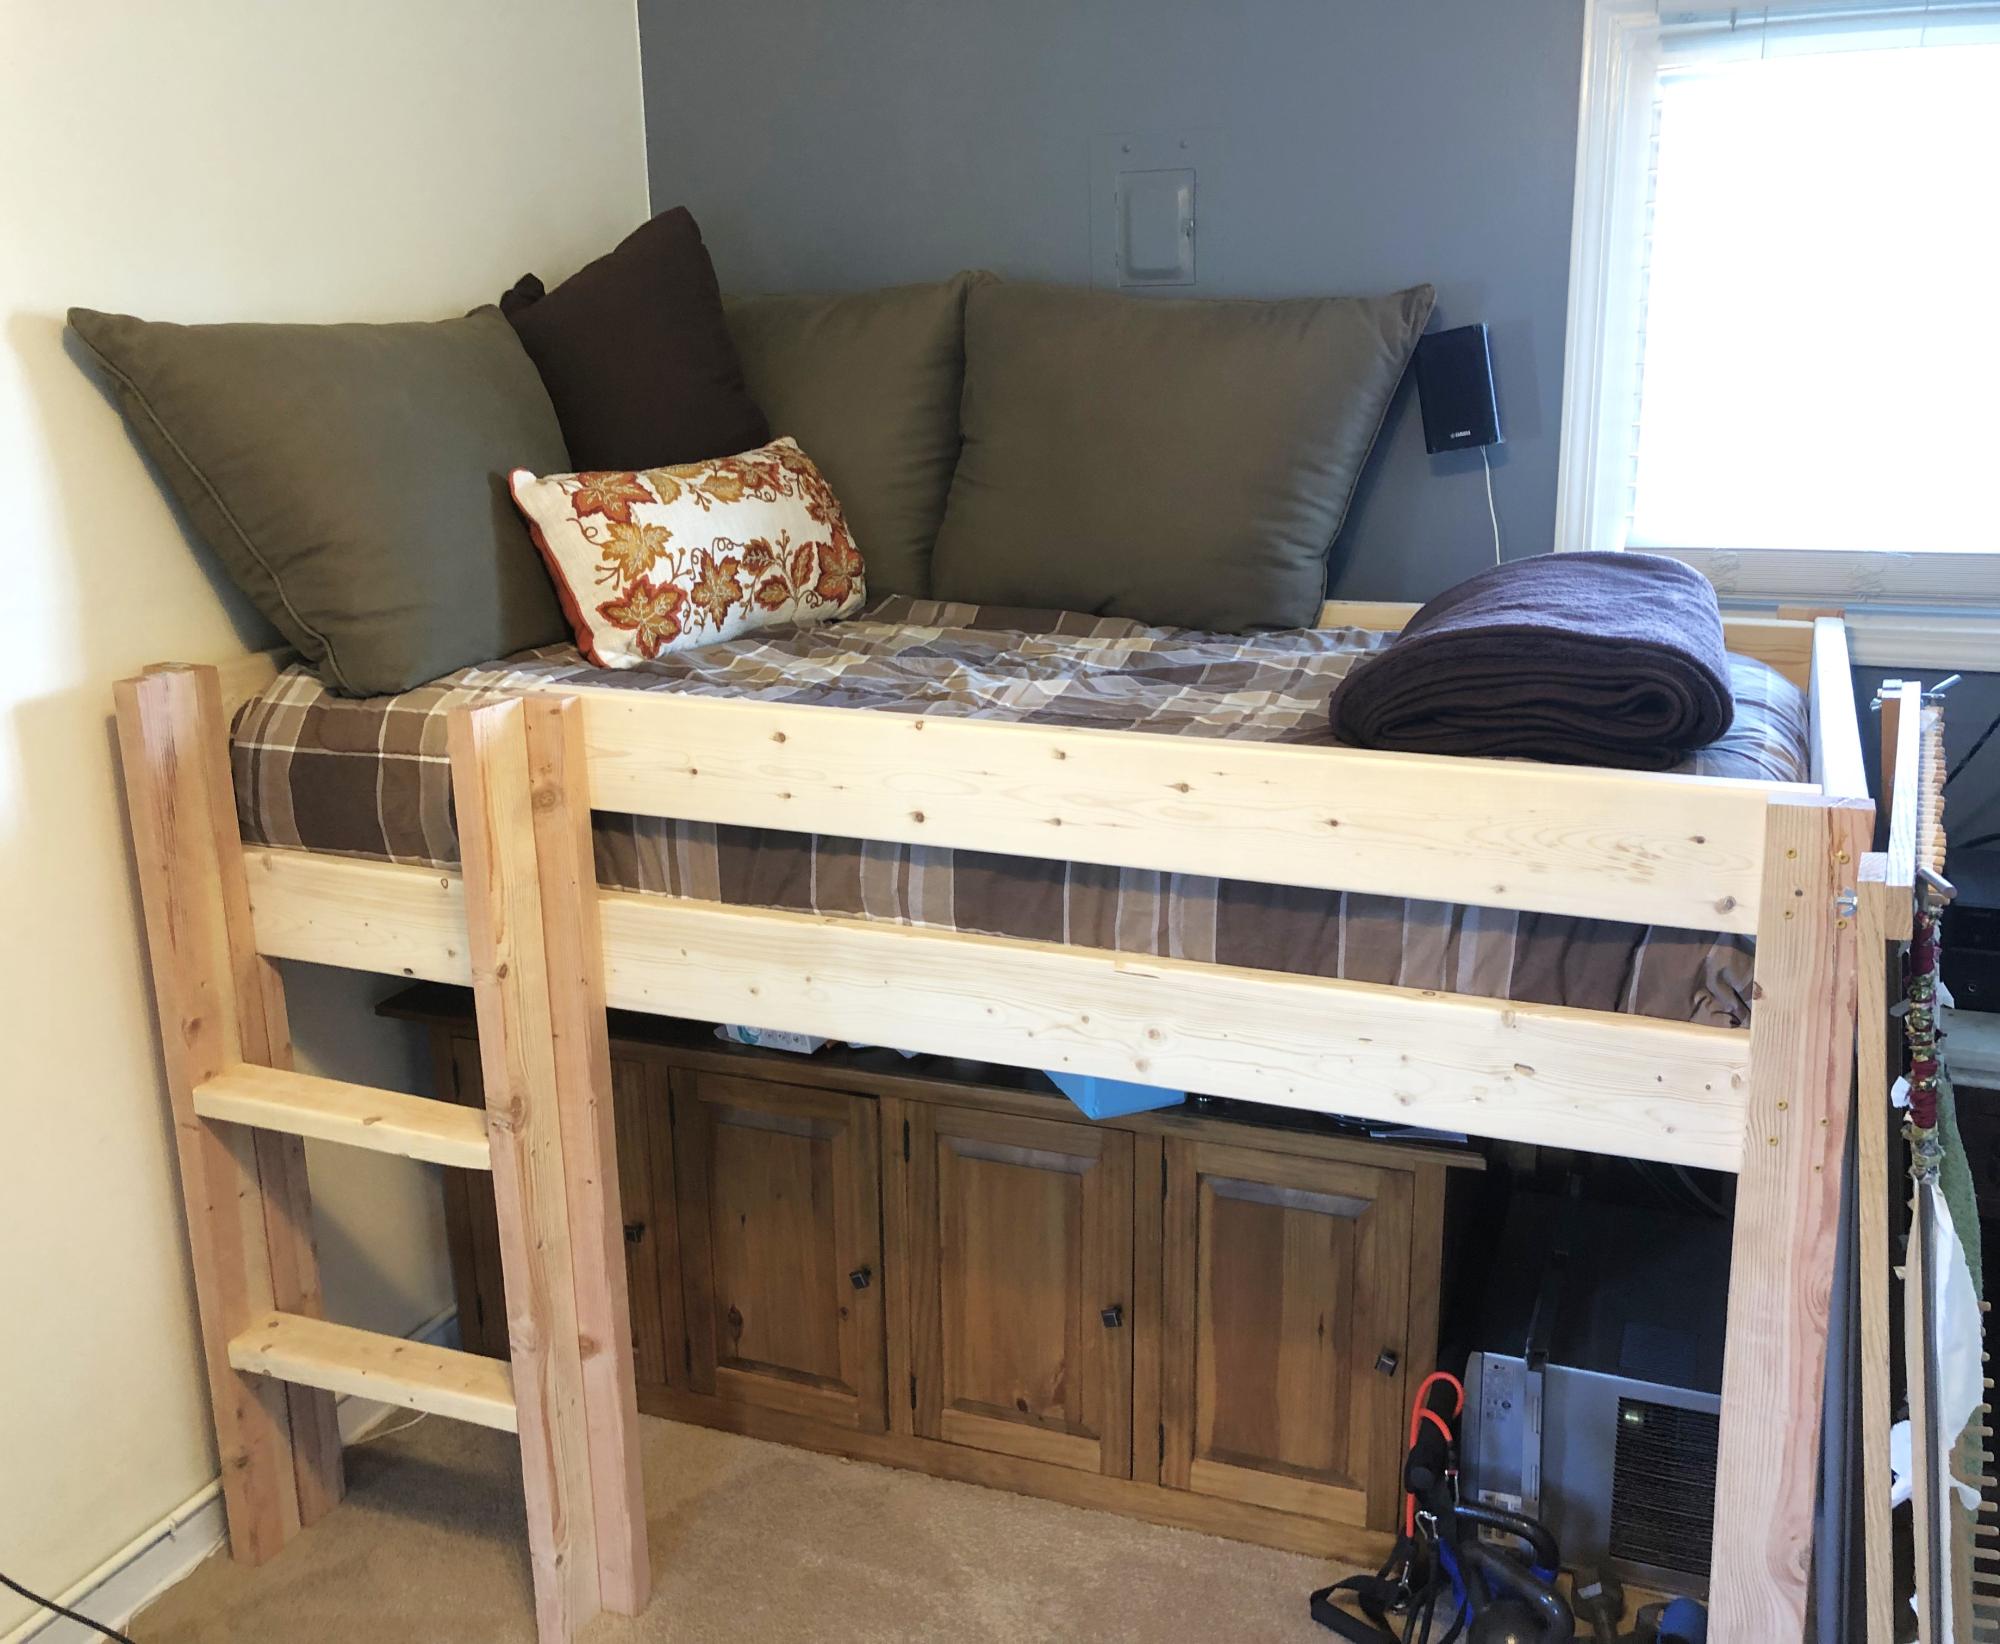
I added support for more weight by adding a 2x4 on the inside of the four legs. This way, I have the entire frame supported by screws AND 2x4, so I can rest easy.
Rebecca Nemeth
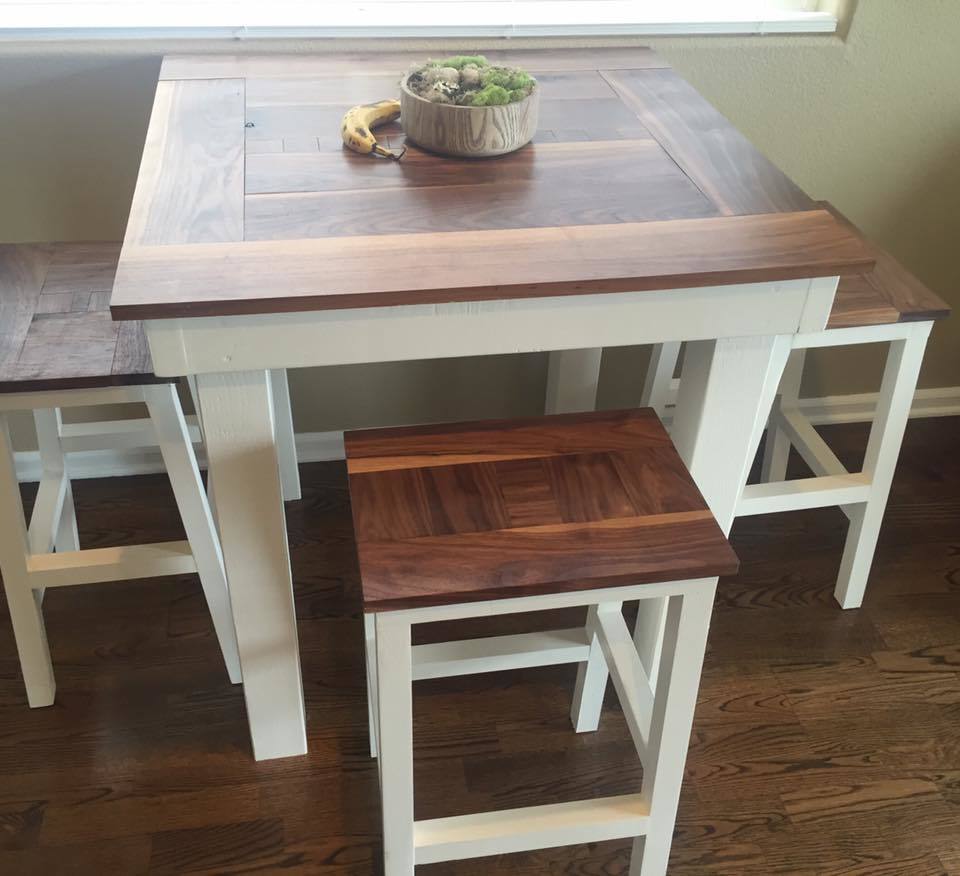
This is one of my favorite pieces because the white contrasts perfectly with the walnut hardwood. The base of the table is all standard 2x4 and 4x4s, and the tabletop is 100% walnut.
Thu, 07/25/2019 - 09:32
Would you be able to provide the dimensions of the top of the table? Also, how tall are the stools? Thank you!
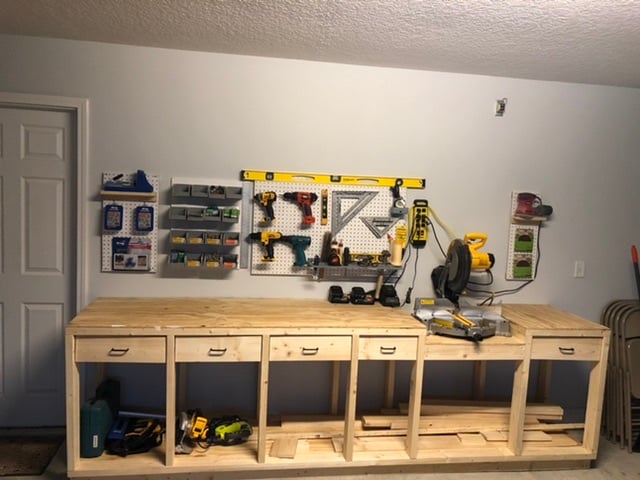
Had to size the project done to fit my garage wall.
Left the sides open to use as storage for wood.
Overall Everything worked out, love it!

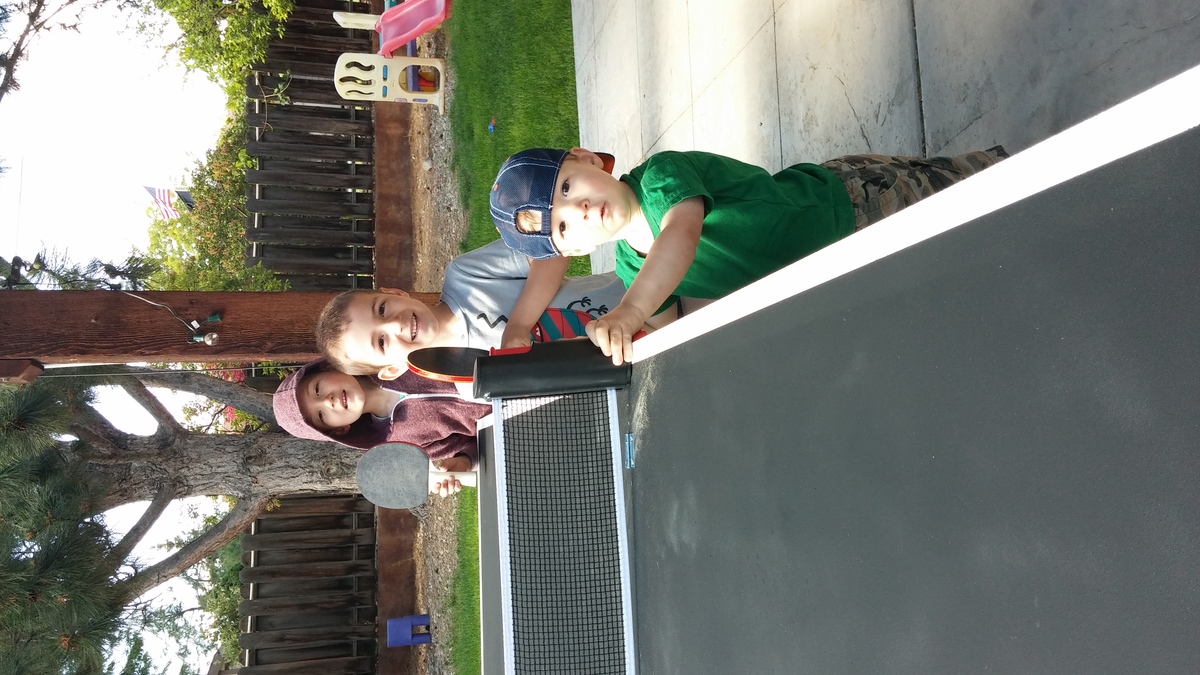
With Father's Day rolling in, my sons and I needed a gift, stat! My husband thinks that Table Tennis is the quintessential father-son activity, so that was an obvious choice.
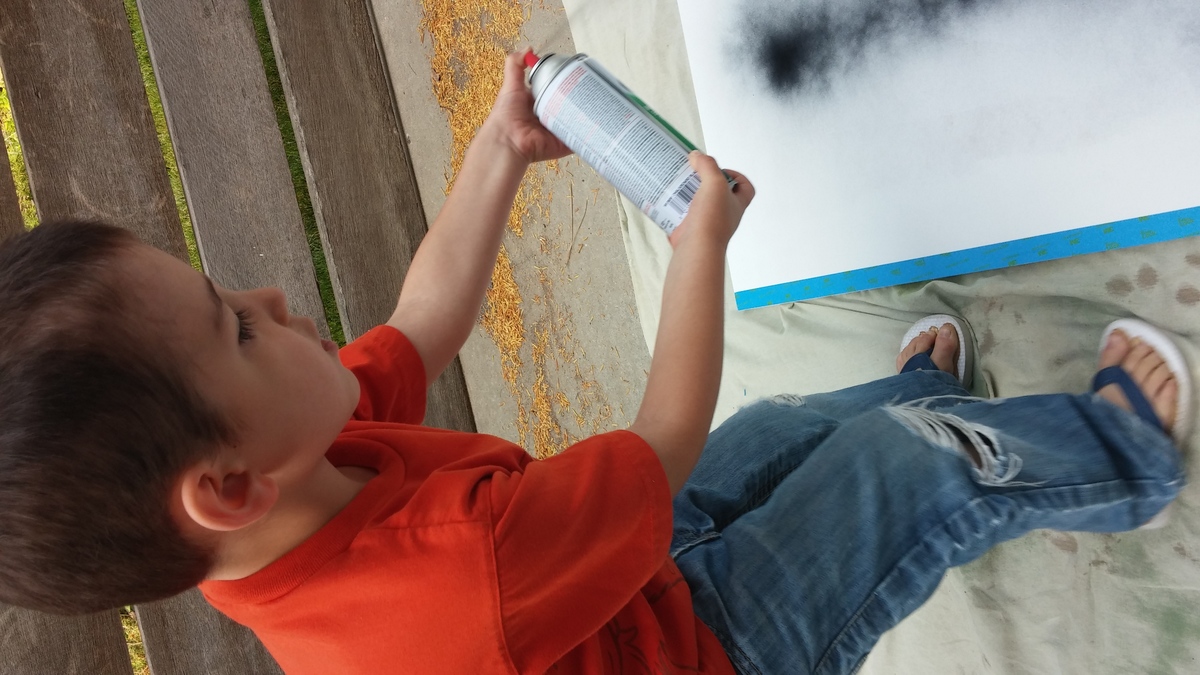
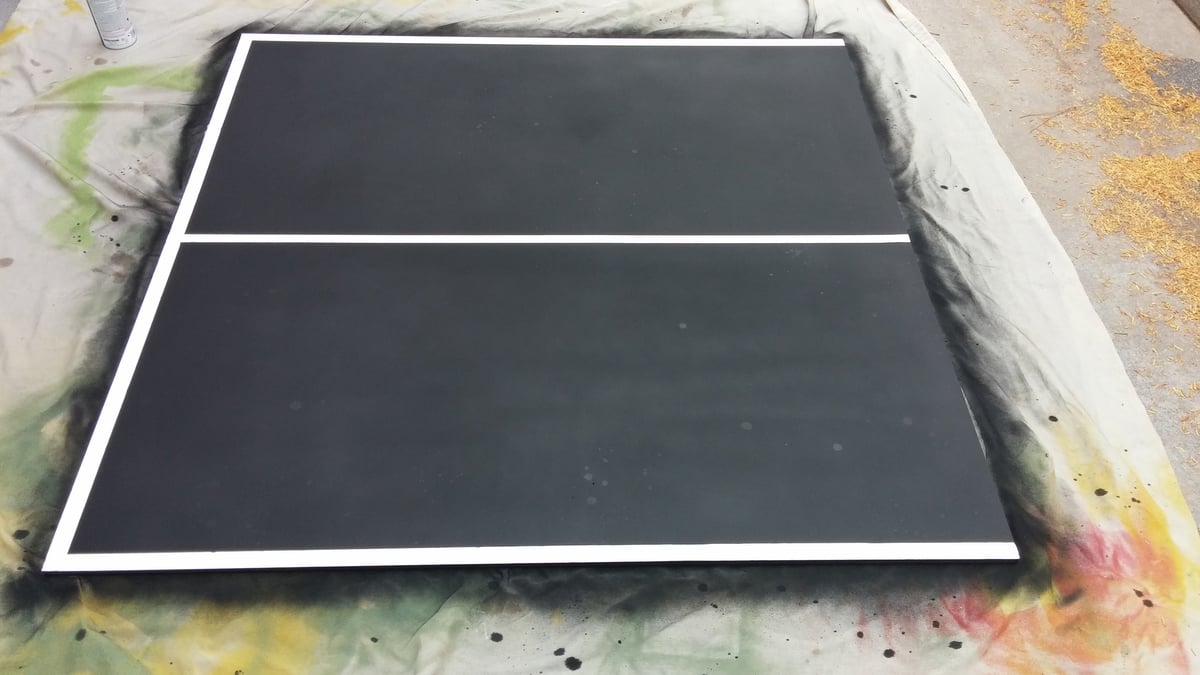
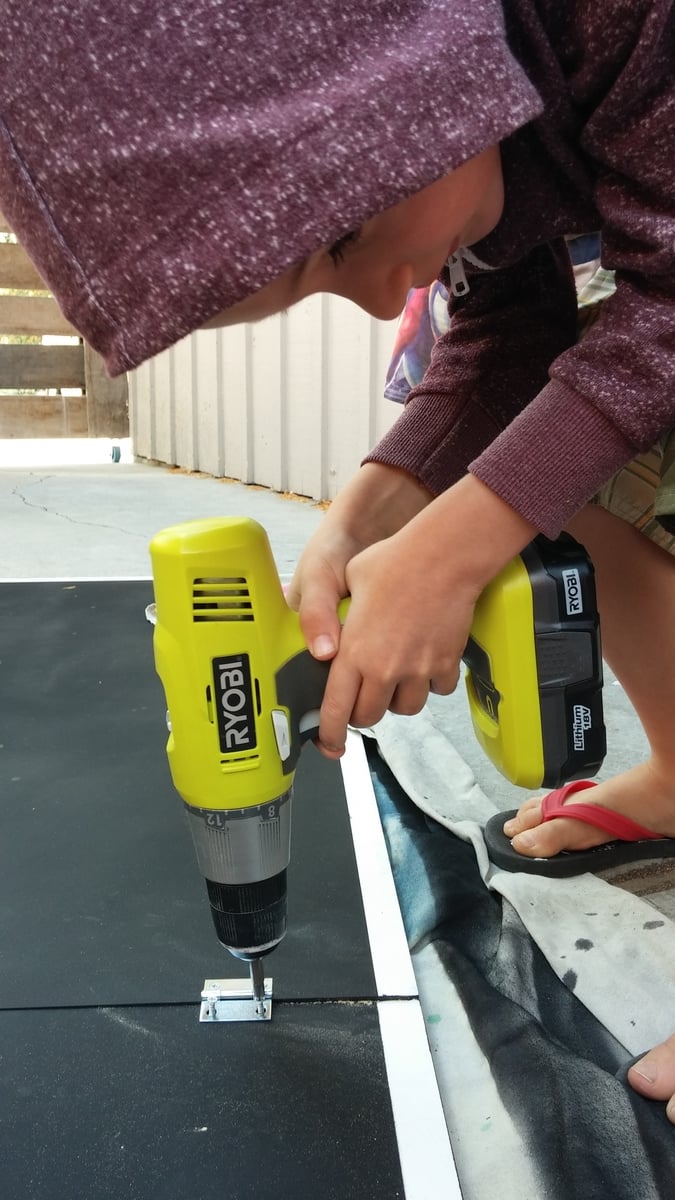
We needed something easy to make, easy to store, and budget friendly. With a 6, 4, and 2 year old helping out, I made a foldable mdf ping pong table that could easily be placed on our picnic table outside.
We had home depot cut the mdf in half, primed it, taped off some lines, spray painted it with chalkboard paint (bonus, you can keep score!), and screwed 4 small hinges to attach the 2 halves. We added a removable table tennis net, some paddles and balls, and have played nearly every day!
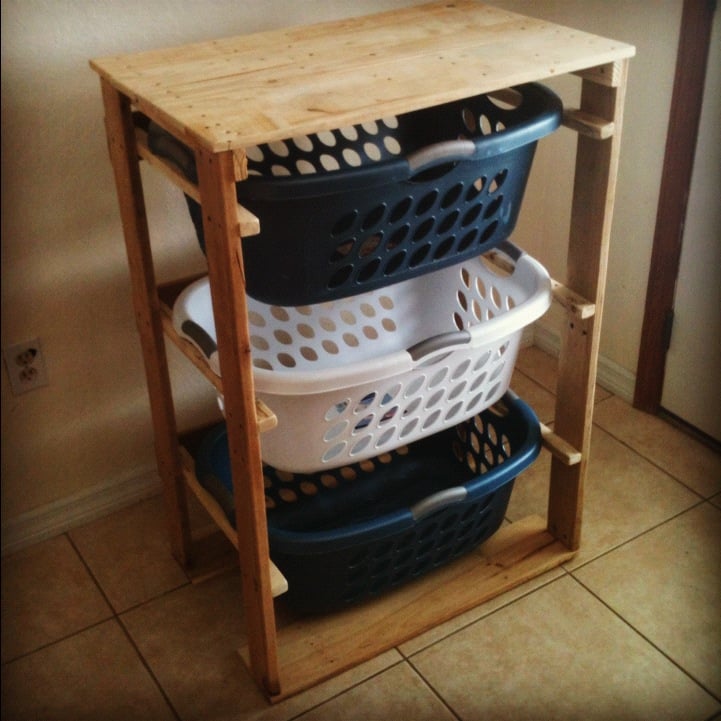
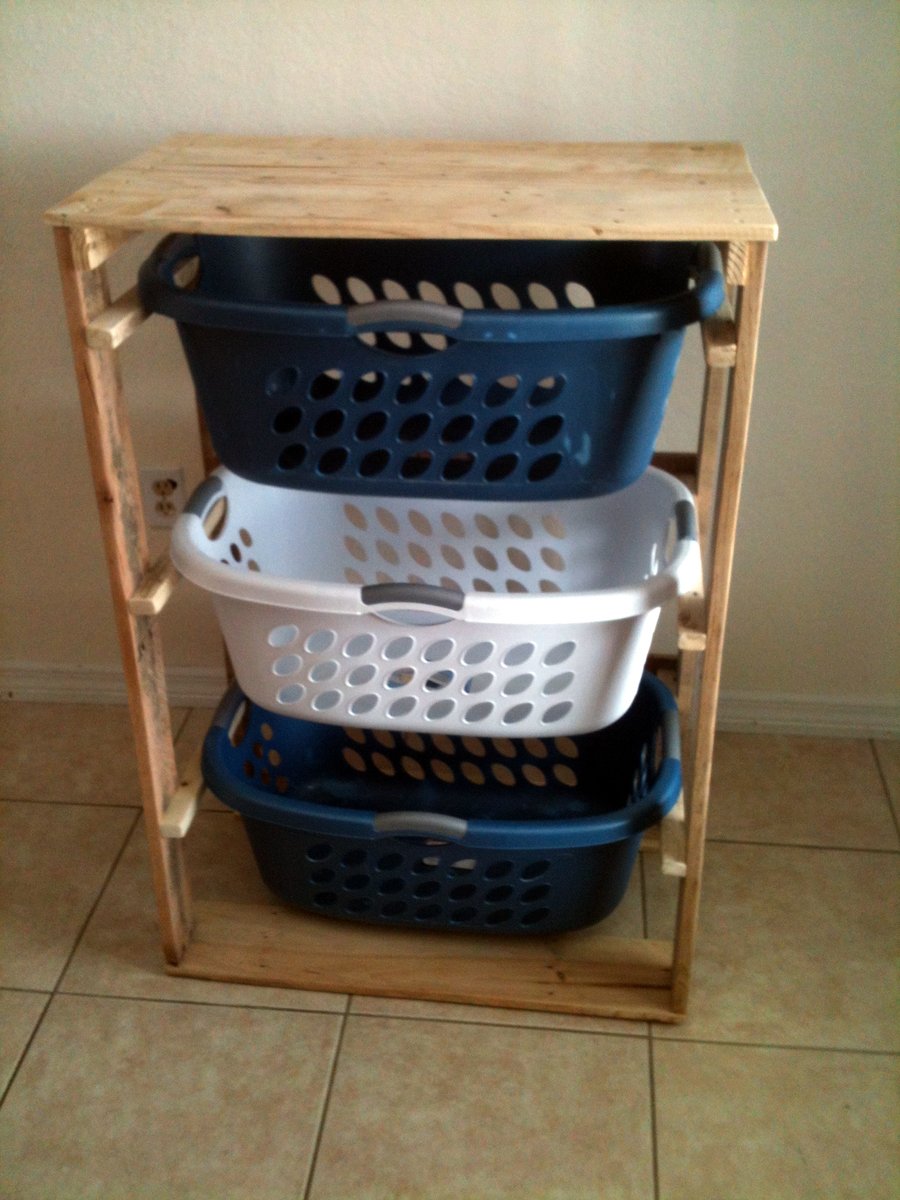
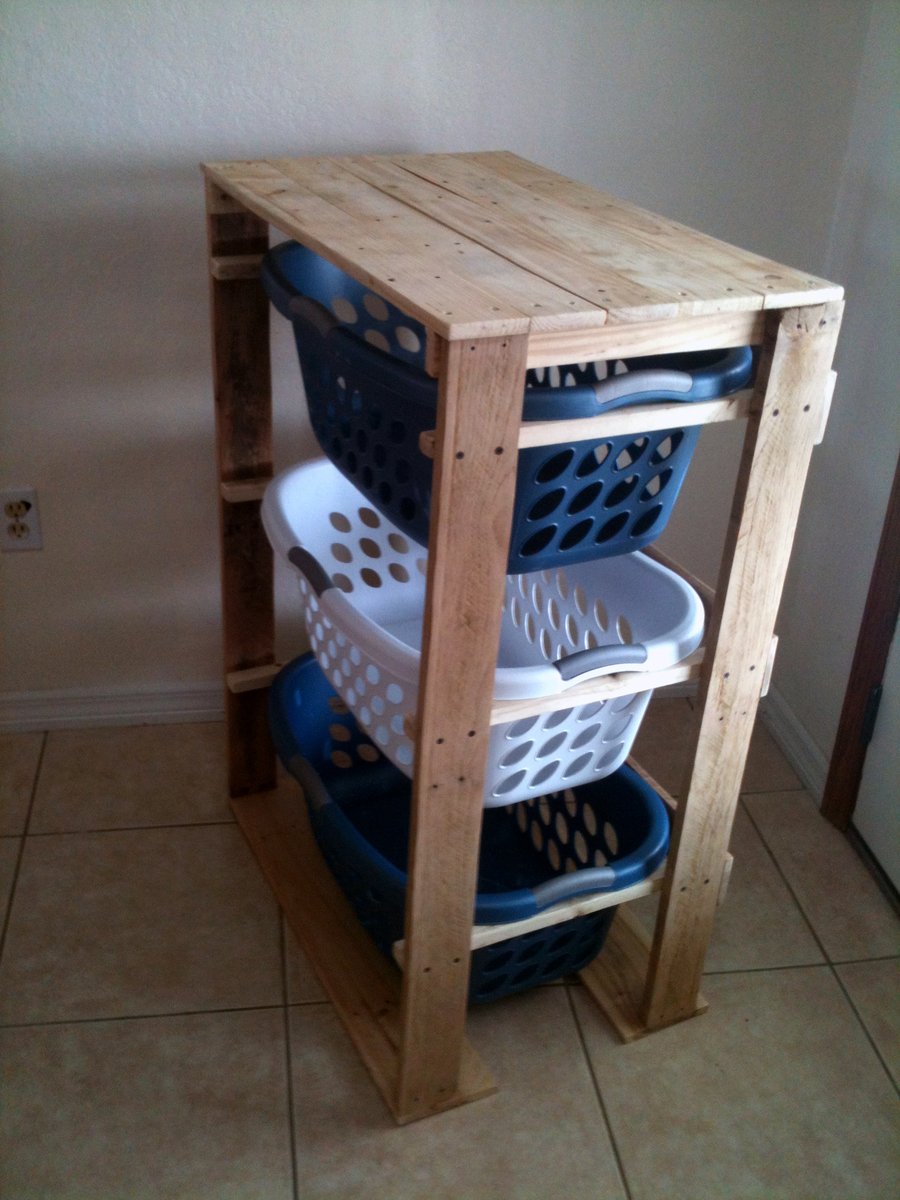
I showed my wife the Laundry Dresser featured on Ana White's website and she asked if I could make one for her, but not quite so tall. I also turned the orientation to fit our laundry room space. I used primarily oak from recycled pallets to build the Laundry Basket Dresser. She wanted a work space on top, so folded laundry, empty baskets, etc. all have a temporary resting place depending on the day. From start to finish, it took me about 6 hours. She plans to stain the piece at some point, but its already in use, so I'm not 100% sure that will ever happen until we move or something. ;-) Great idea and laundry room organization!


Sat, 09/08/2012 - 17:39
Great job on this!! I love the open sides!! Thanks for sharing. :-)
Mon, 09/10/2012 - 10:22
I love the open sides, plus it makes it much more feasible to build with scraps repurposed wood, which I love. Thanks for the inspriation
Sun, 10/19/2014 - 06:16
I have a pallet sitting against the garage that would be perfect for this
Looks fab, great job.
Fri, 01/09/2015 - 12:27
Hi, I really like this project but was curious what size laundry basket you are using in the project?
Sun, 06/14/2015 - 20:16
Soooo I made this according to the measurements and no laundry basket I find fit. Kind of dissapointed in the fact that this cool thing I just built doesn't have any baskets that will fit it. Any advice on finding a basket that fits?
Fri, 07/10/2015 - 20:14
Same here. No basket fits. Did you ever find one?
Fri, 07/10/2015 - 20:56
I think the idea is to build it to fit the baskets you have or buy some and build around them.
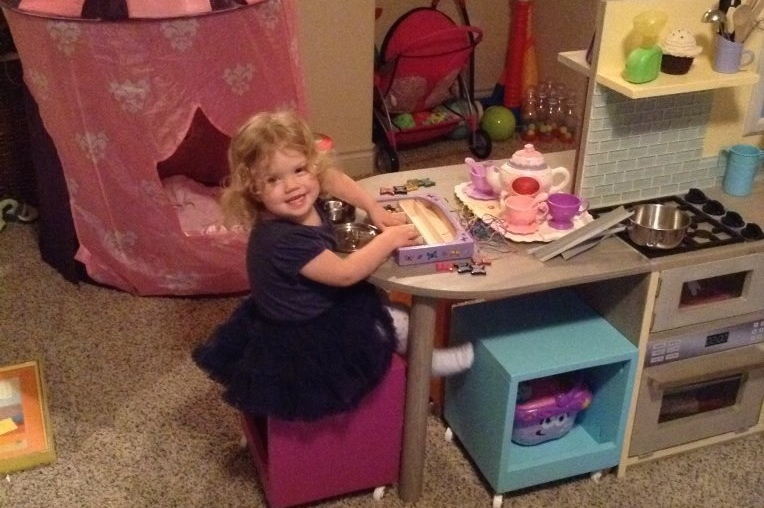
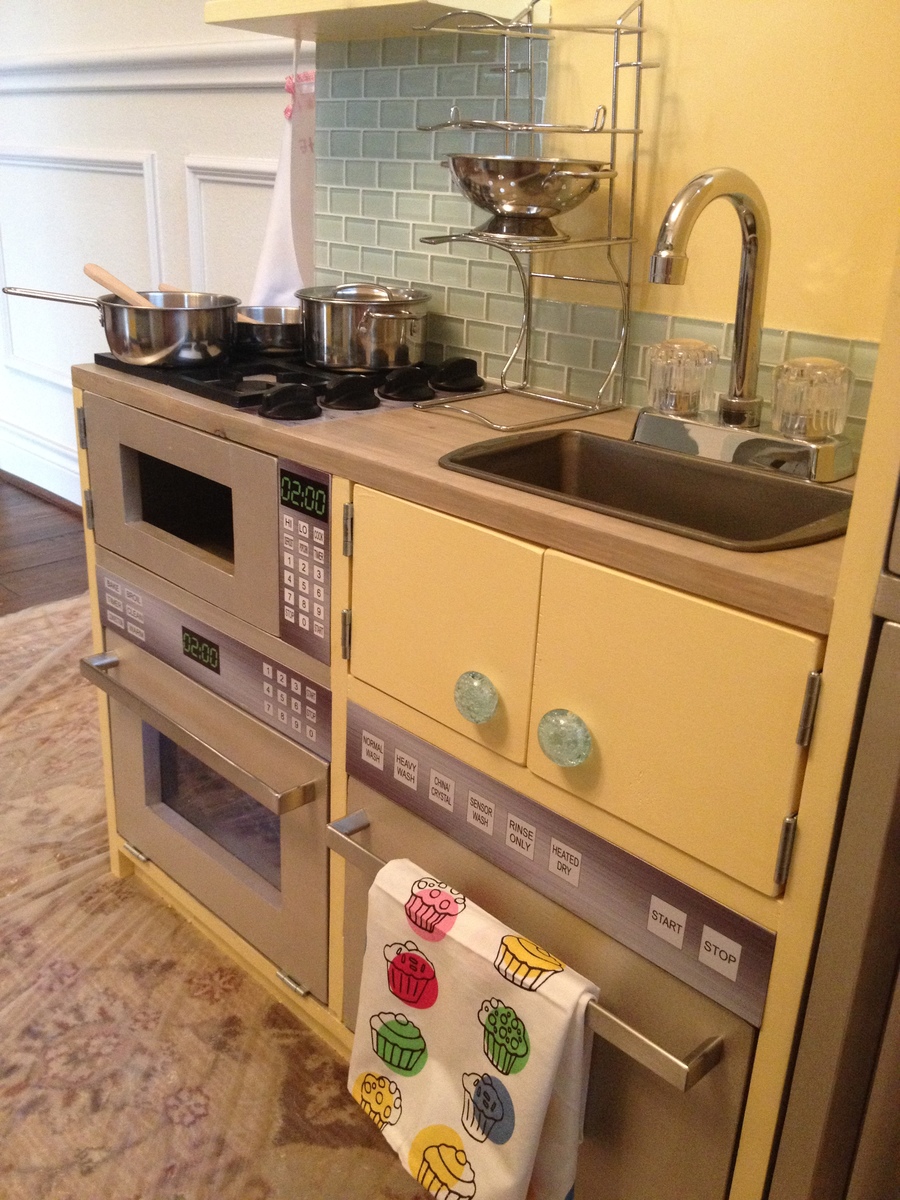
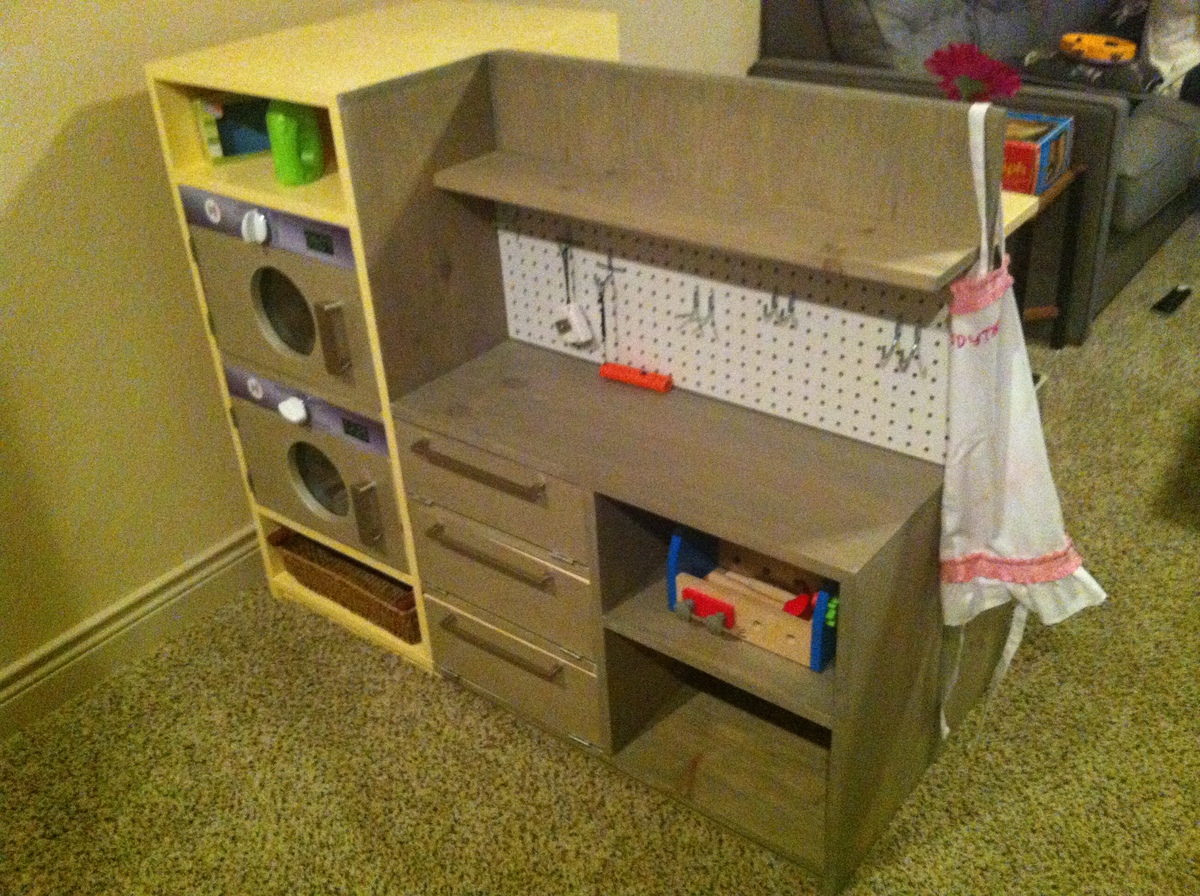
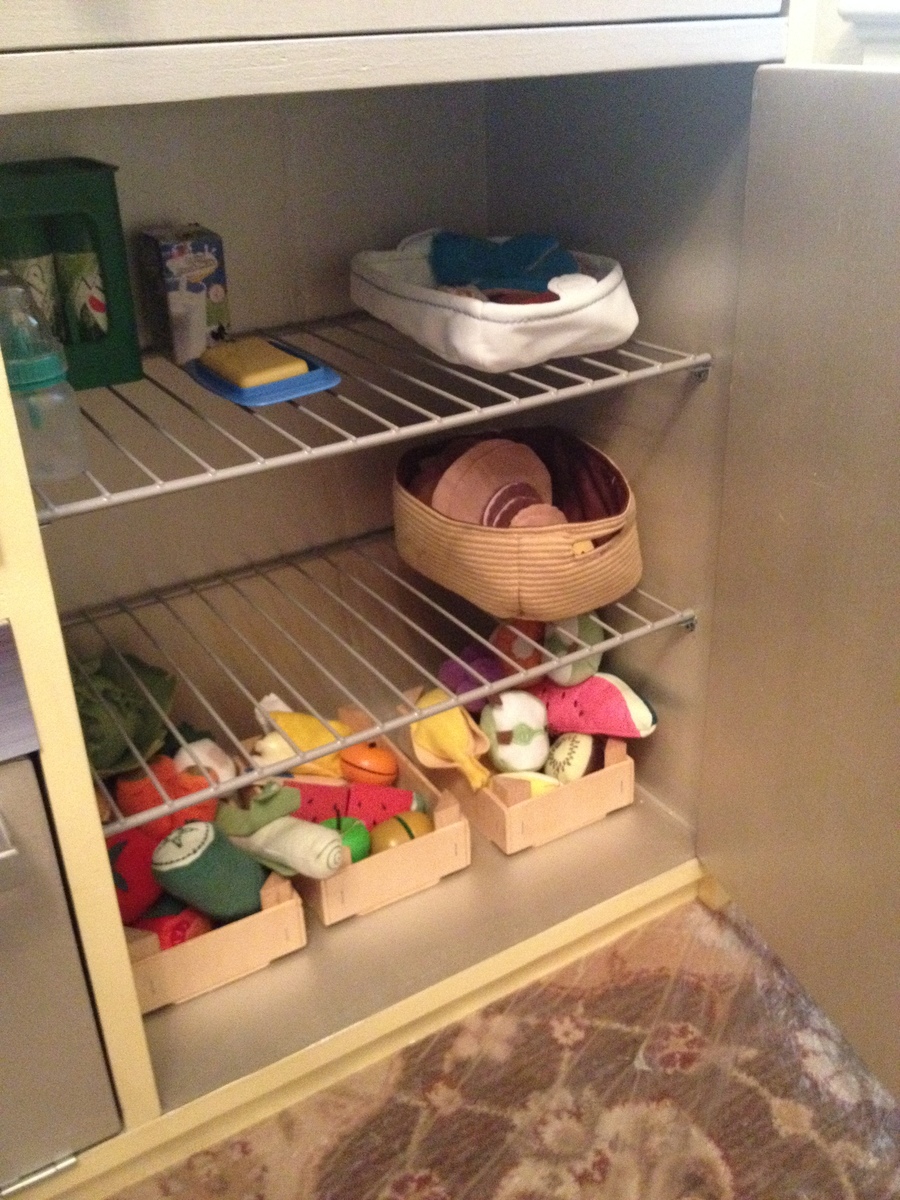
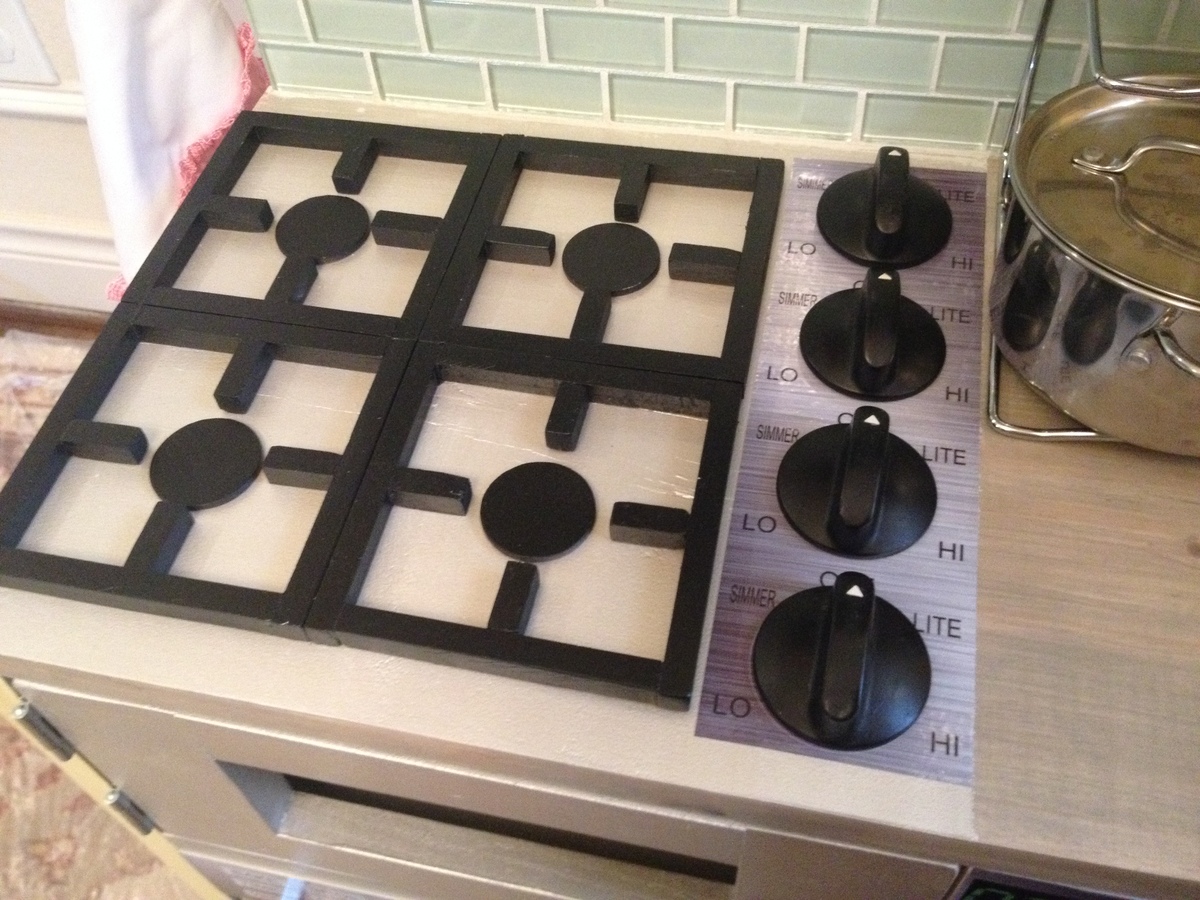
What's better than an Ana White play kitchen? 2 Ana White play kitchens back-to-back!
Slightly modified, we made 2 play kitchens, turning one into a garage workbench and laundry. We managed to just get the kitchen & garage done for Christmas morning (minus a latch & plexi for the microwave). We later added a window view above the sink, and a table and 3 storage stools to join the two units on one end. In a long mixed-use playroom with little wall-space available, they jut out from the wall, dividing the TV side of the room from the toy storage side.
Dad was excited to help put the garage-side together and bought his little girl some peg-board to hang her tools on, and installed garage lighting. As pull-out drawers cut into the storage space, her "tool cabinet" doors just fold-down. Grandpa sent her a full tool-set with power drill for her new workbench. Big brother helped piece the gas burners together and chose paint colors.
Little miss finger-painted in the garage next to me while I worked on this first woodworking venture, but she was not a bit interested in the contraption until we added the stickers! A local sign vendor we use was so tickled to be involved, he had the stickers printed in under an hour and for just $25 (which saved hours and hours of detail painting)!
Next up: the ana white dream dollhouse (which perhaps we should've started with).

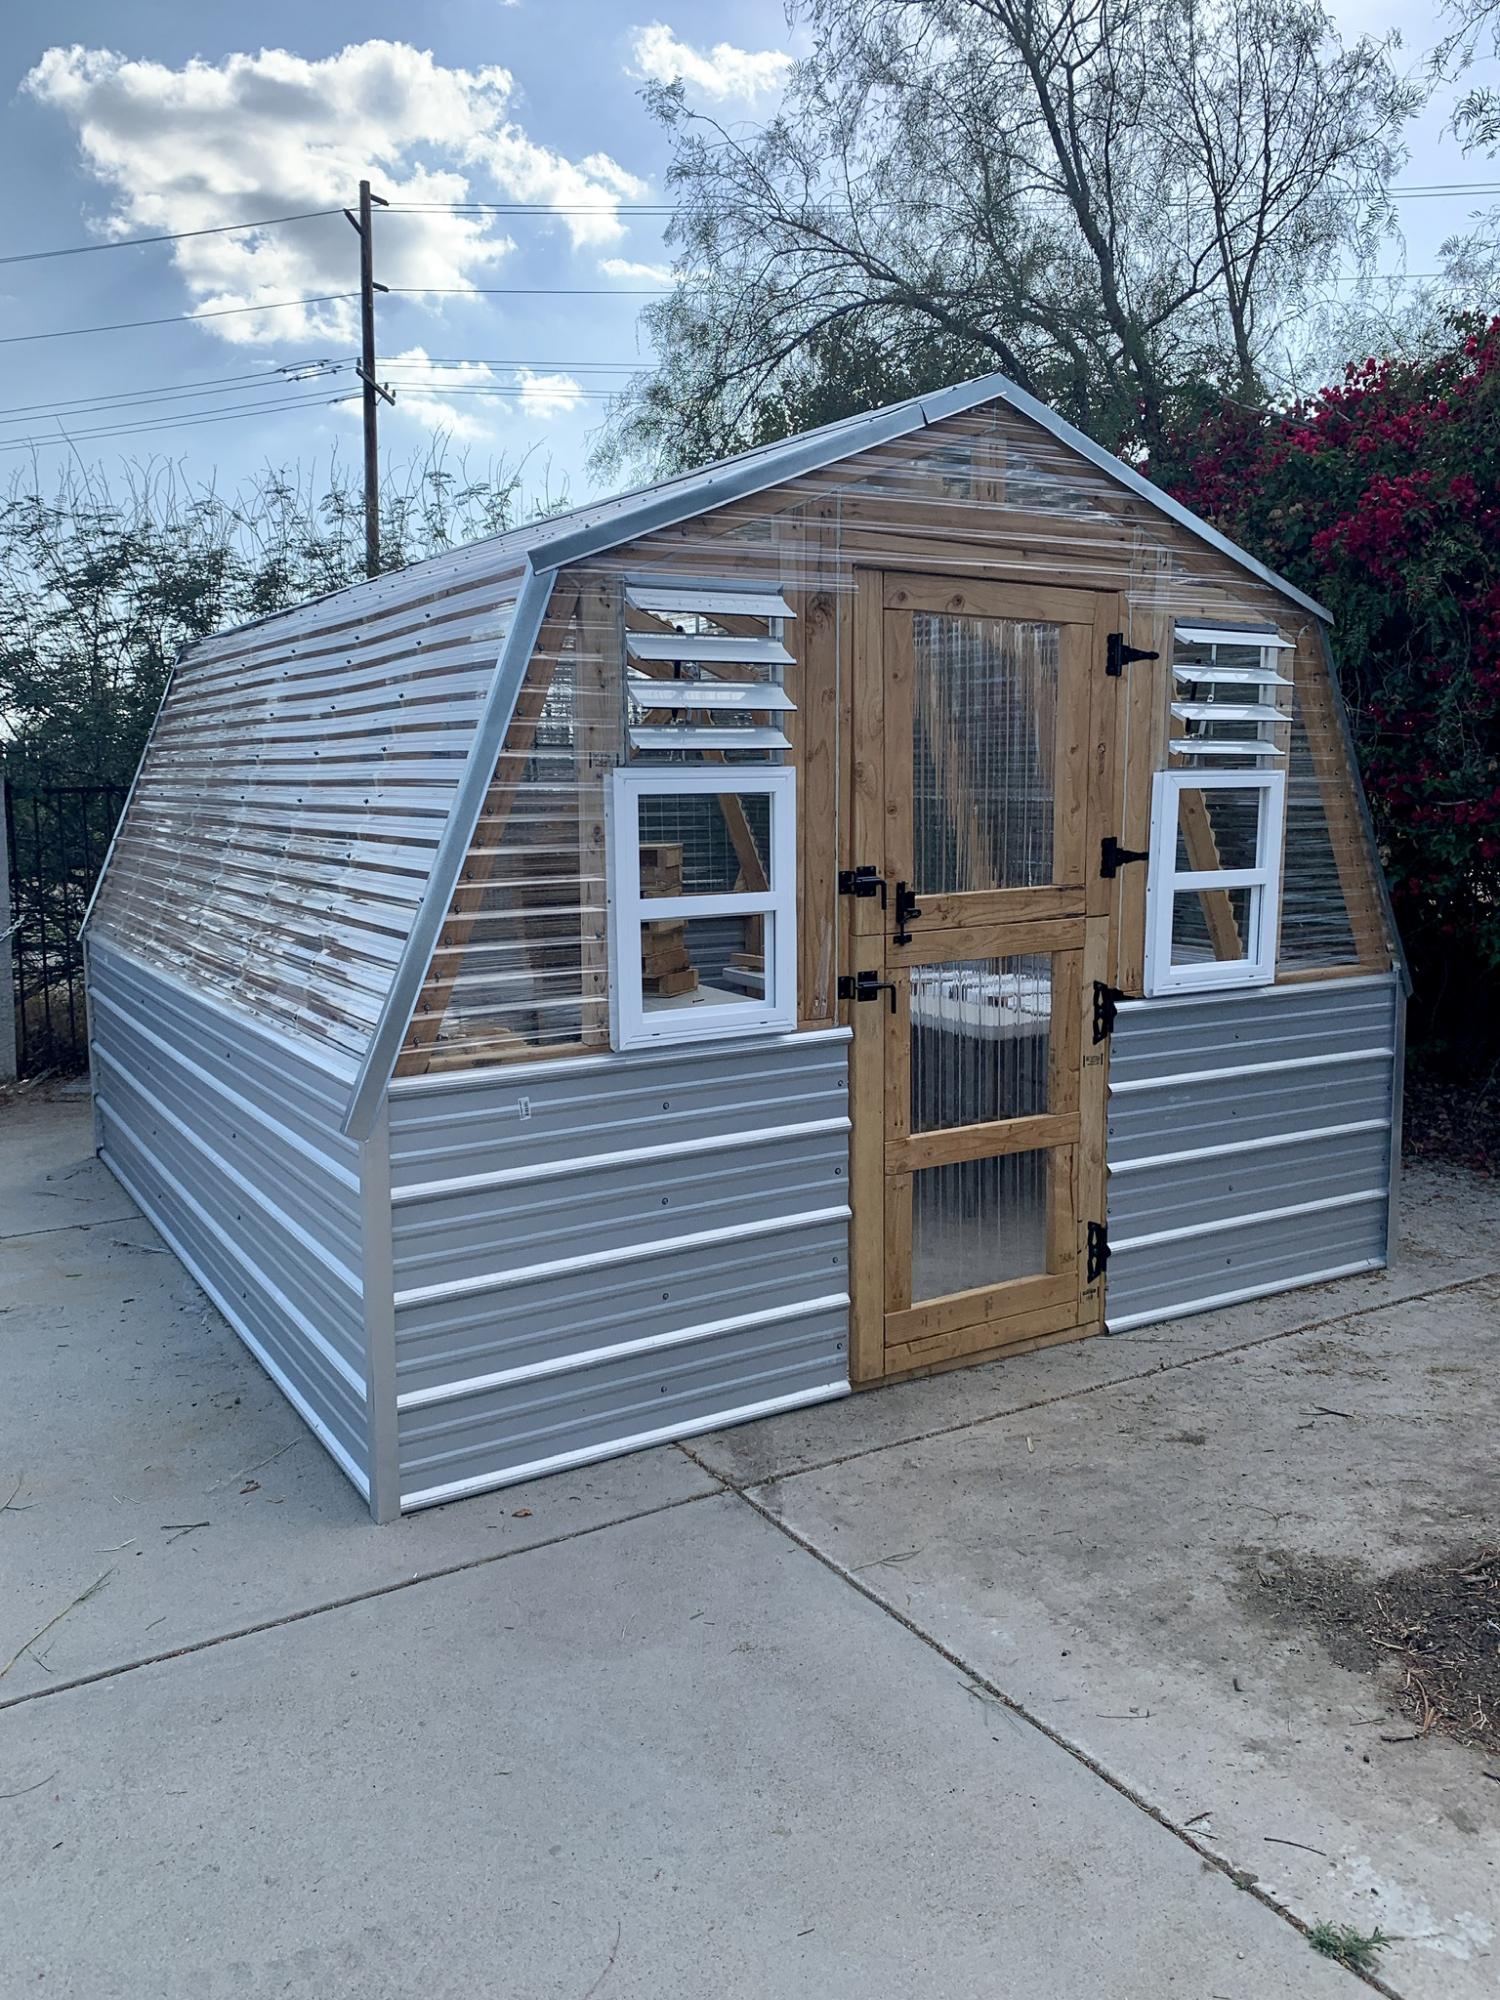
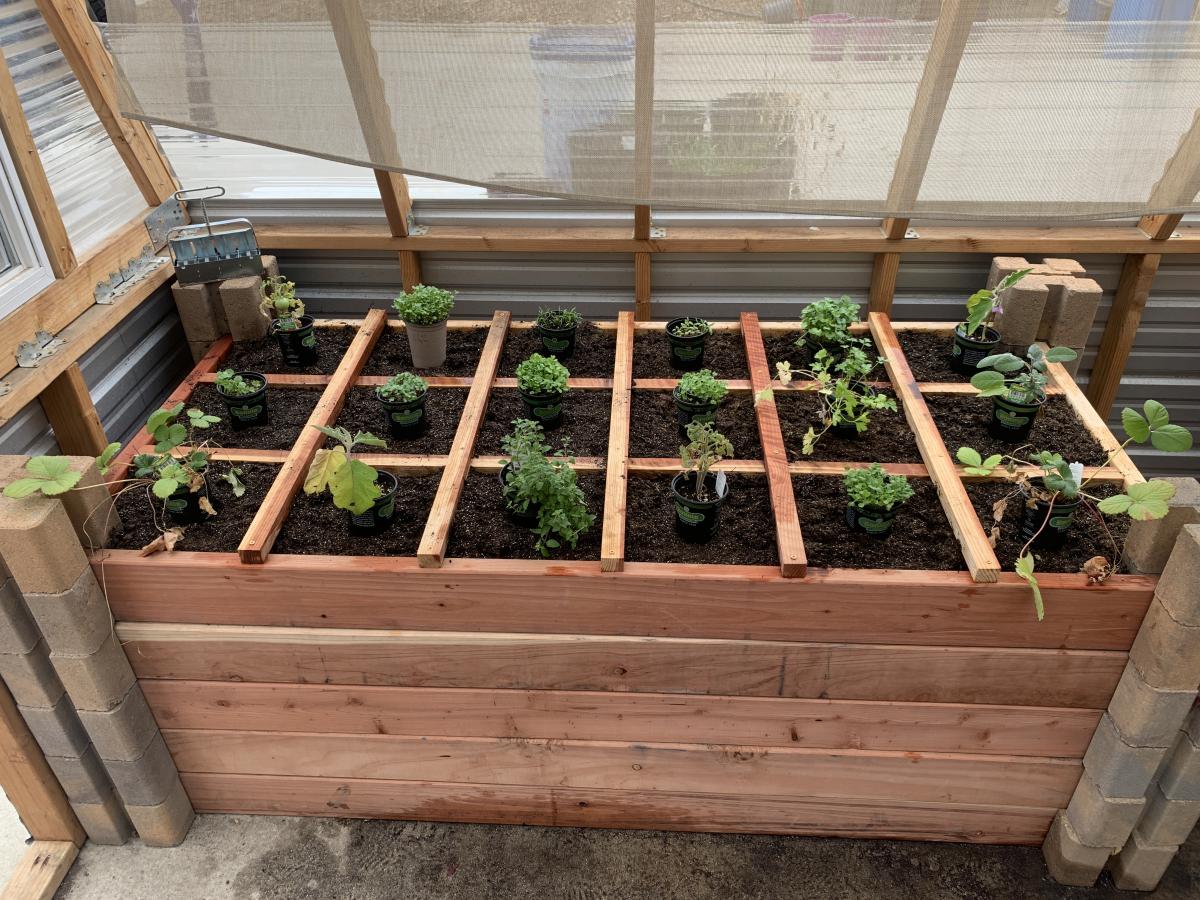
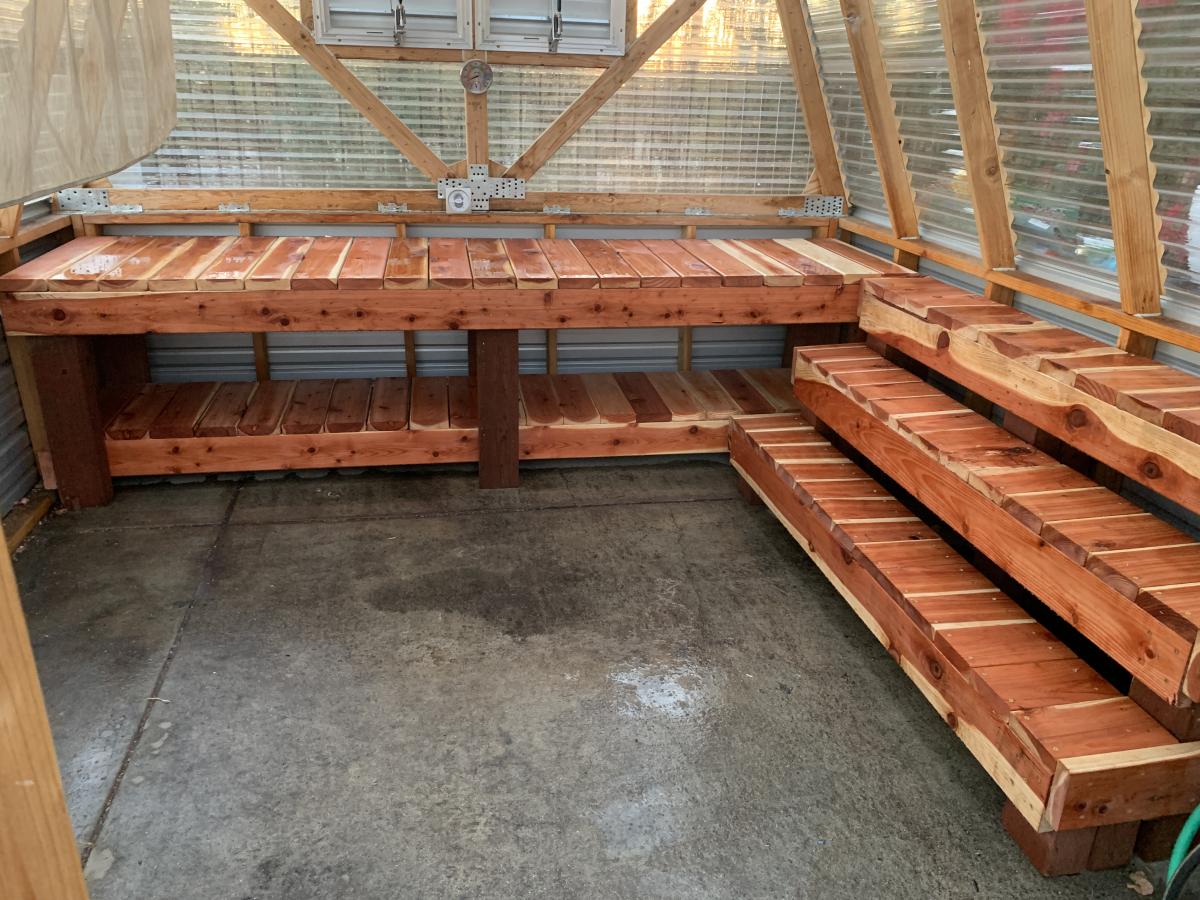
We made some modifications to the greenhouse to include a bench with three levels, a working bench and a square foot garden. We also put it on concrete to keep all the weeds out from the bottom as well.
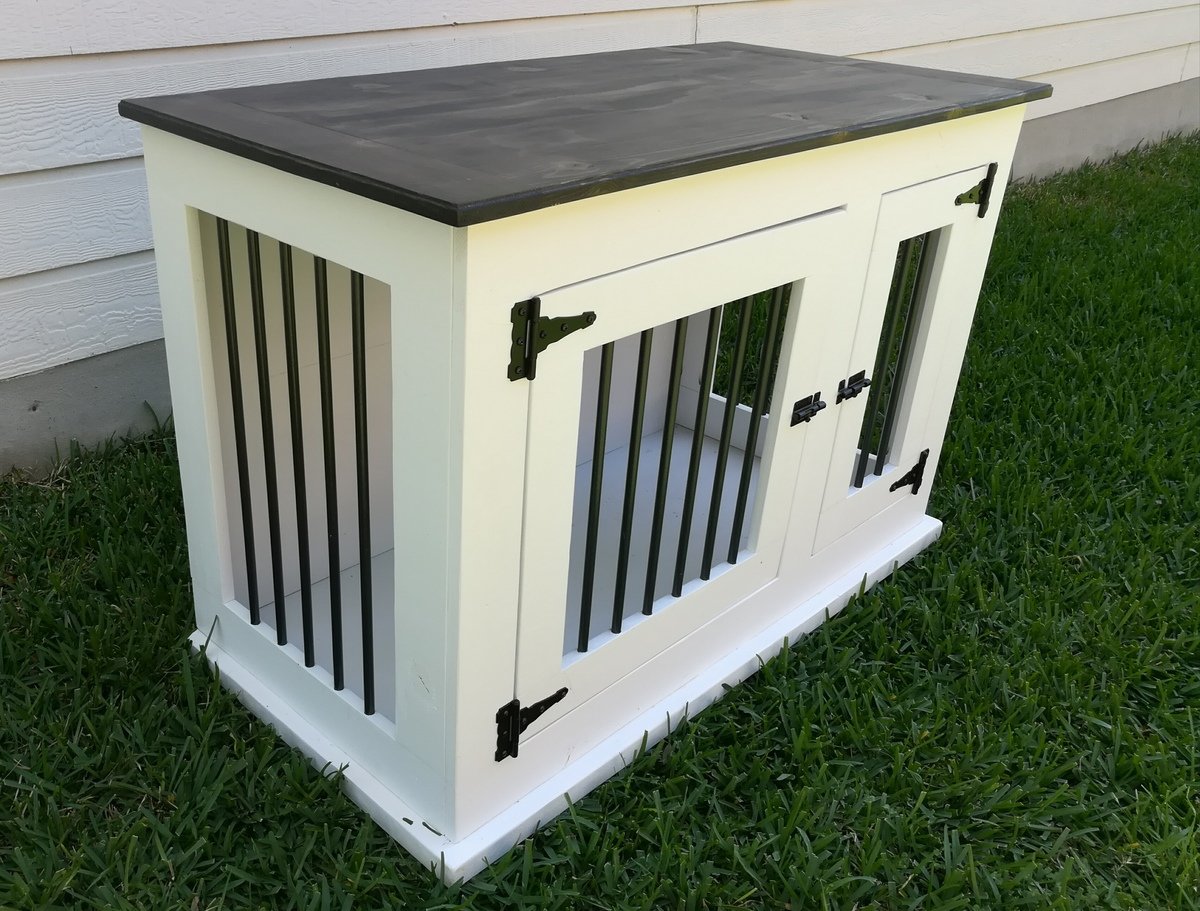
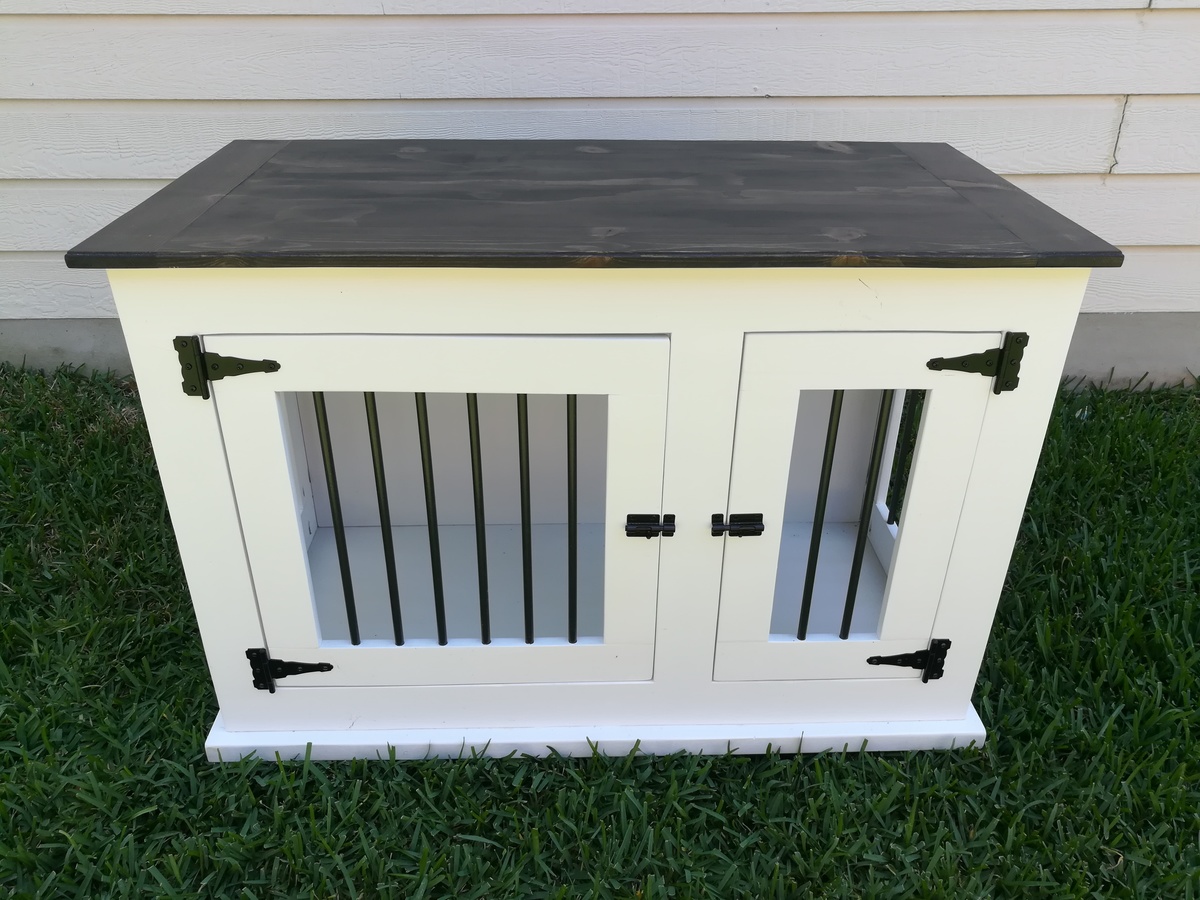
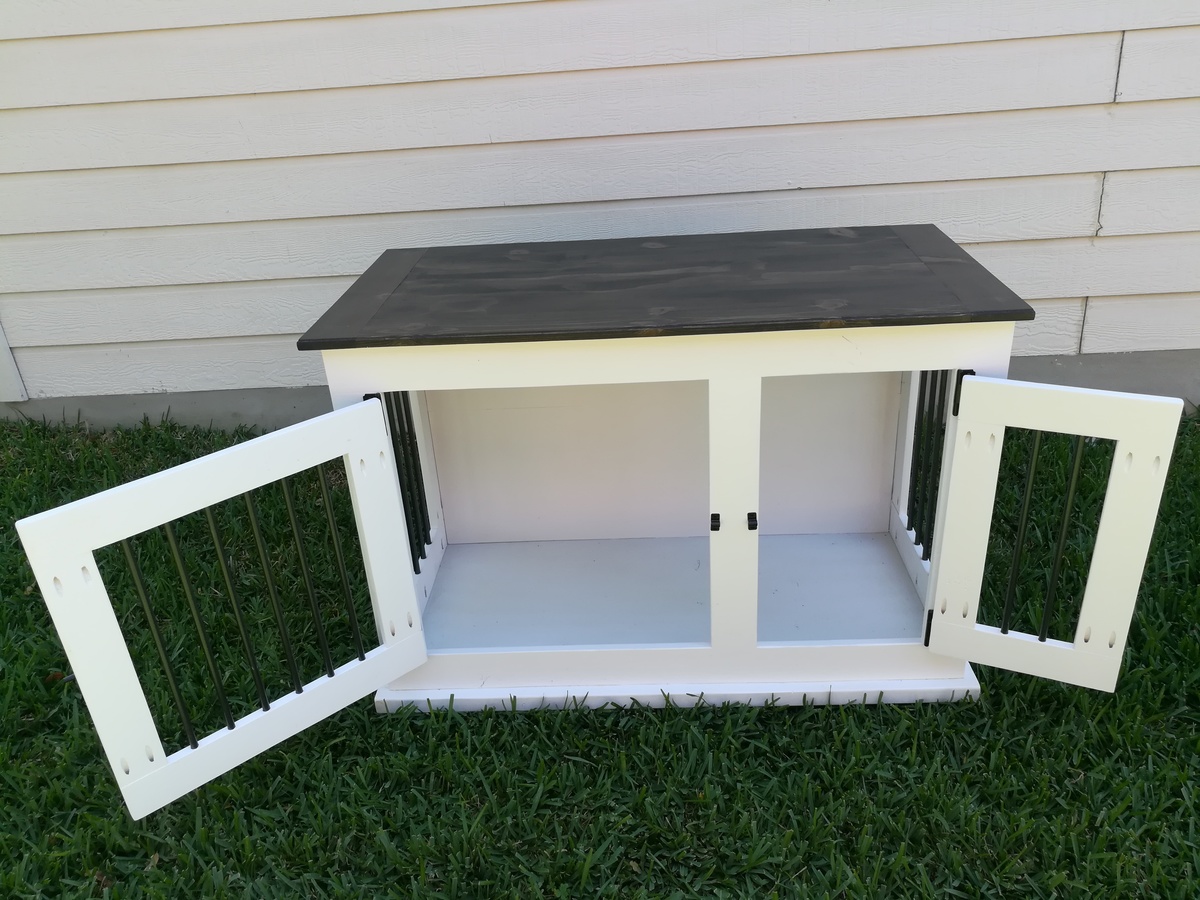
Why not treat your furry best friend like part of the family with a high end custom dog crate. This is an easy way to hide those ugly wire crates while providing another table space. Also has a top that opens up for easy access cleaning. More pictures of my work is available at:
https://www.facebook.com/Deezknotswoodworking/
Or on
PINTEREST: Ngo DIY Furniture
DIMENSIONS
4ft long X 2ft wide X 32" high
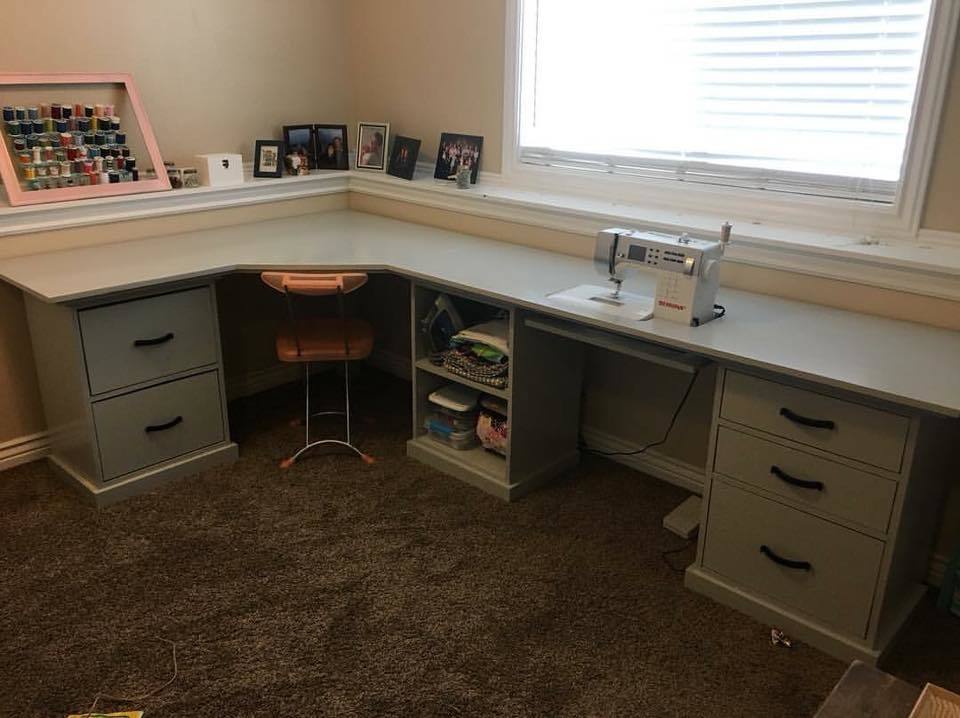
We made this sewing/craft table by combining plans from the modular office. It was a big job but SO worth it! We love your plans and use them all the time!
Submitted by Candace Ann Williams
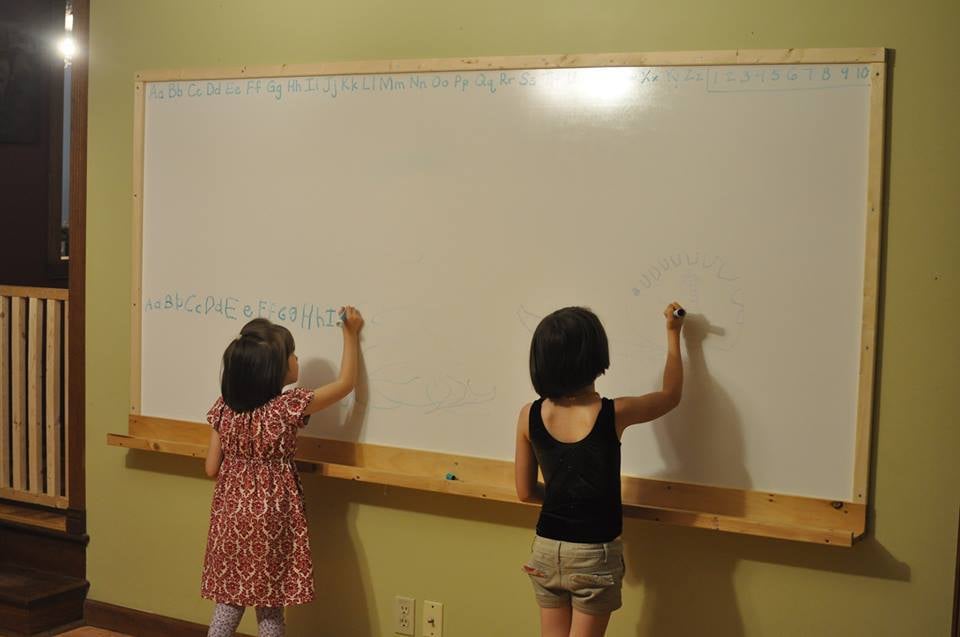
We wanted to put up a whiteboard to use for homeschooling and were amazed at the cost of even a small one. We got some shower board from Lowes that measures 8 feet by 4 feet, put 1x2" boards over the top and side edges and screwed through them into the wall studs, and added a Ten Dollar Ledge shelf we'd already been using for the kids' books. Super easy and it looks great!
Picture of my own version of the Ana White Design linked here
http://www.ana-white.com/2017/01/DIY_furniture/farmhouse-style-toy-box-…
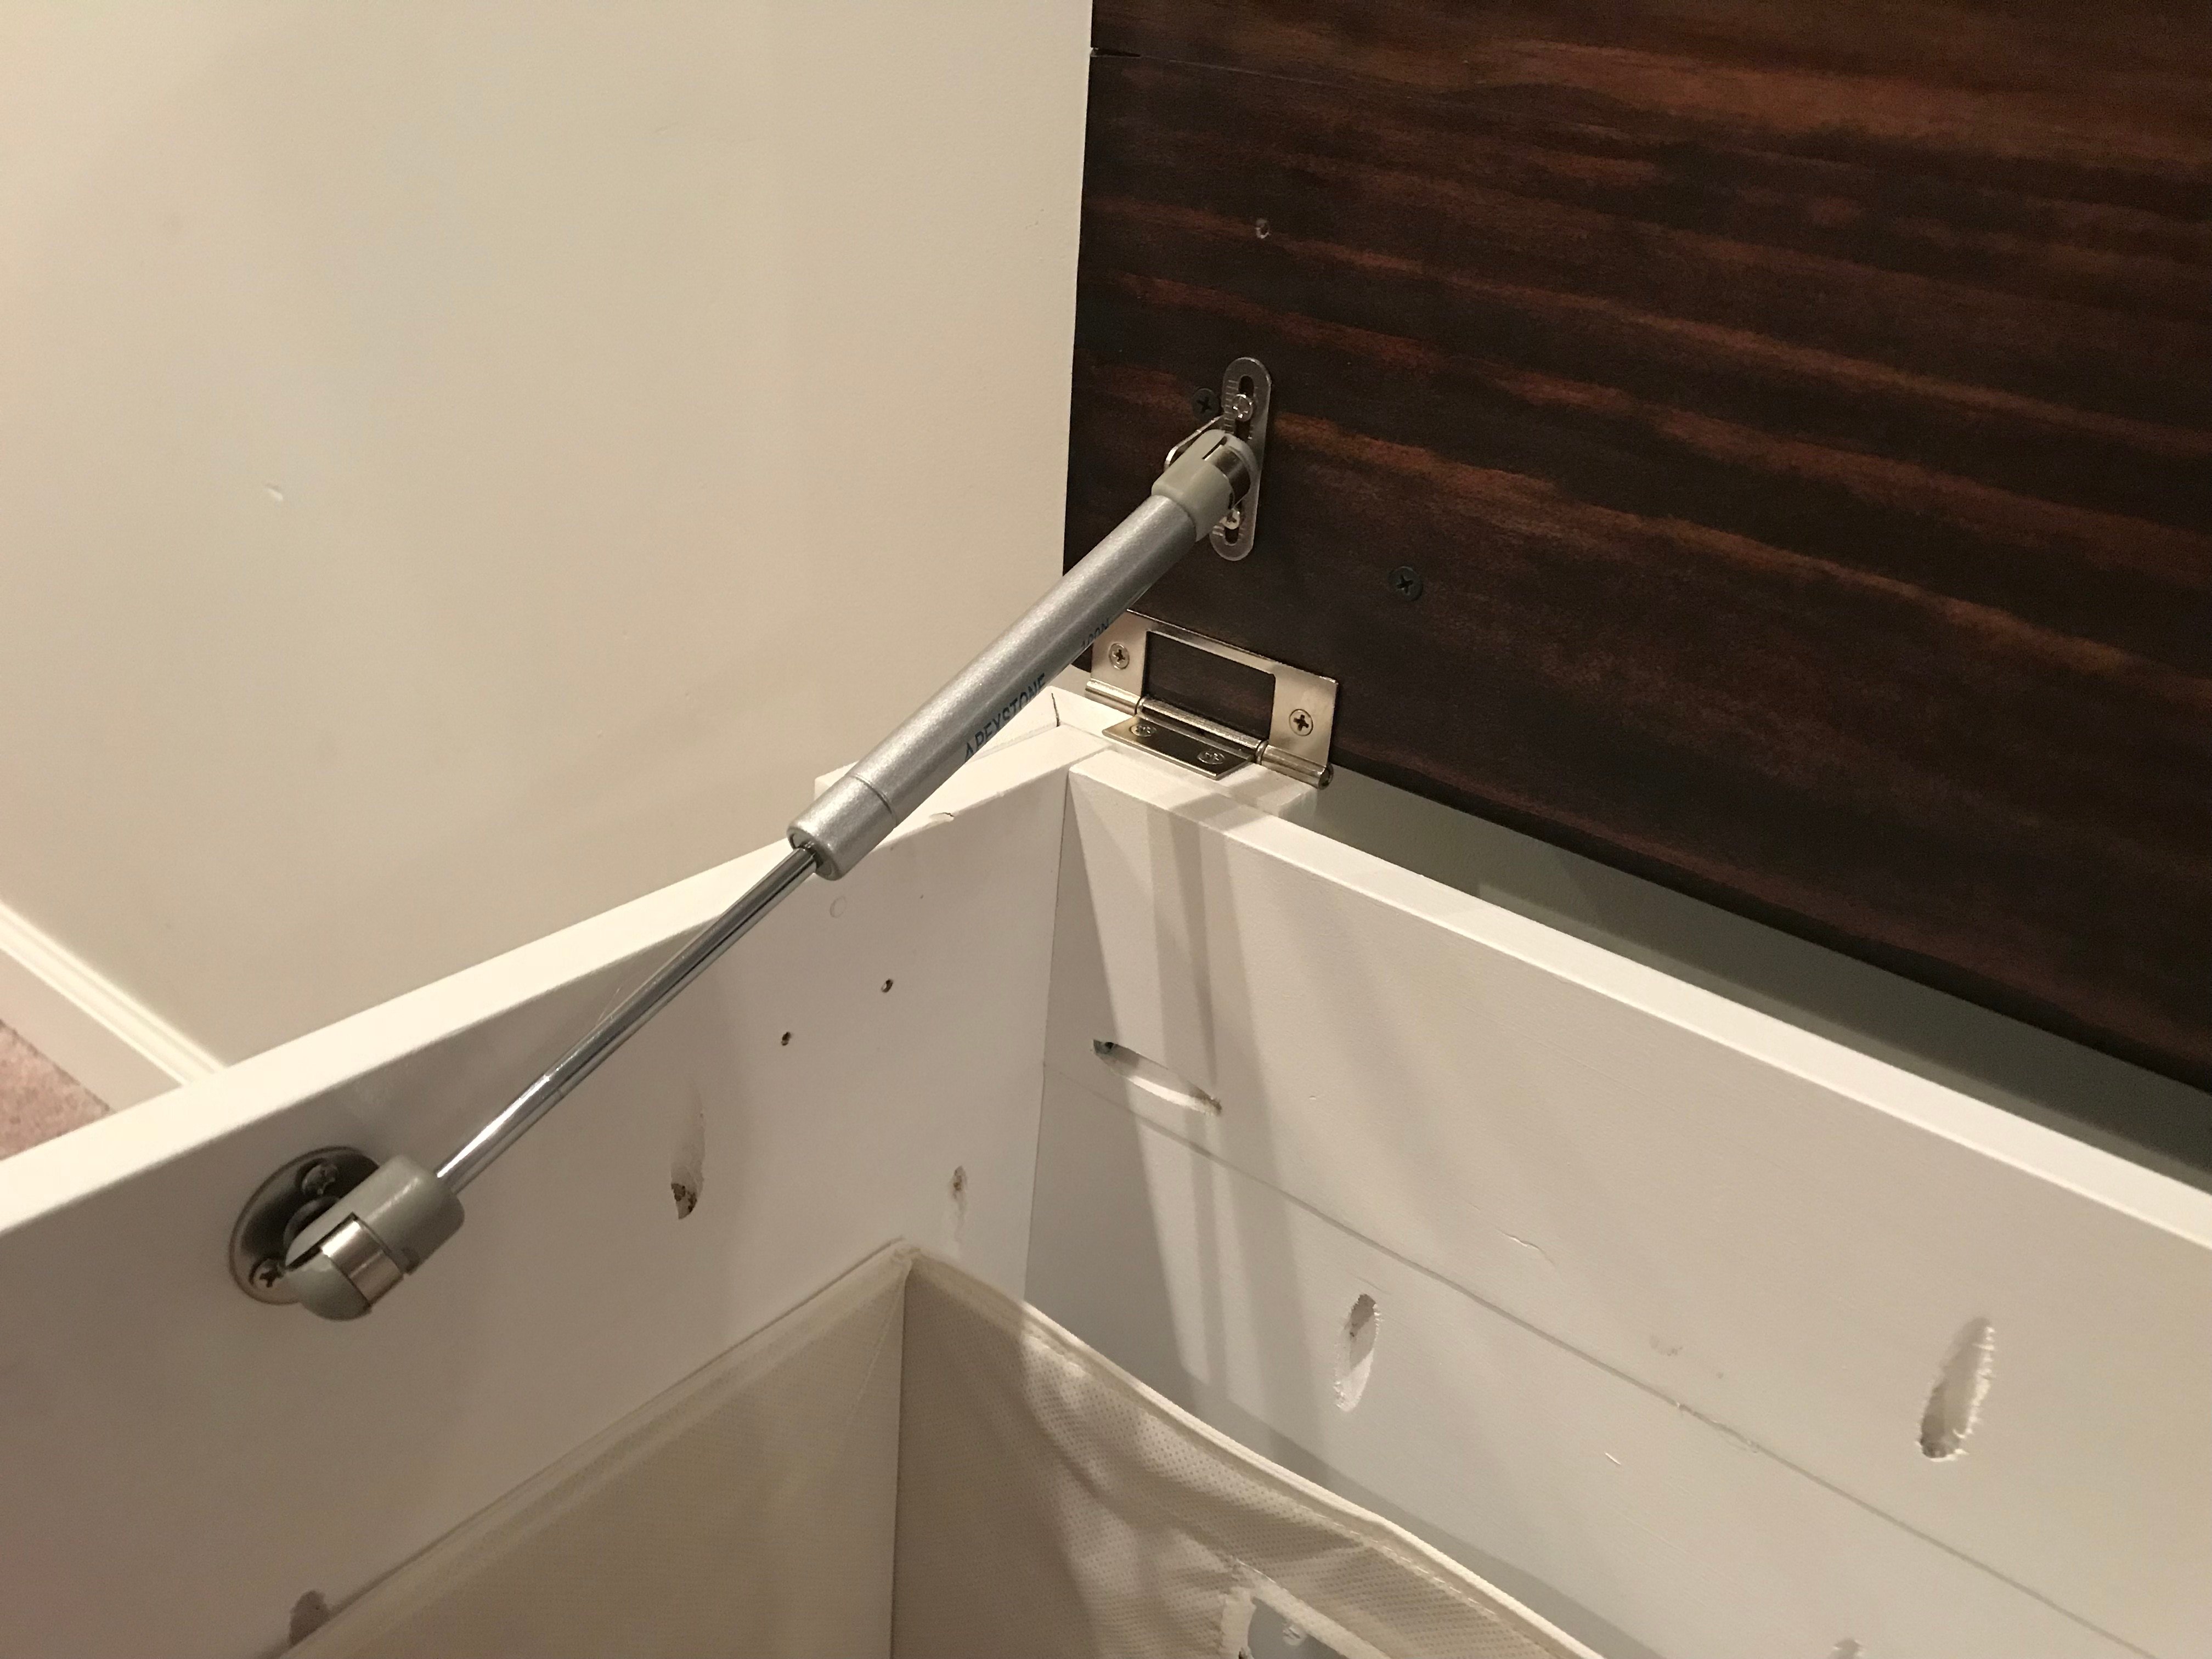
Added Gas Shocks from Amazon 100N/18lbs.

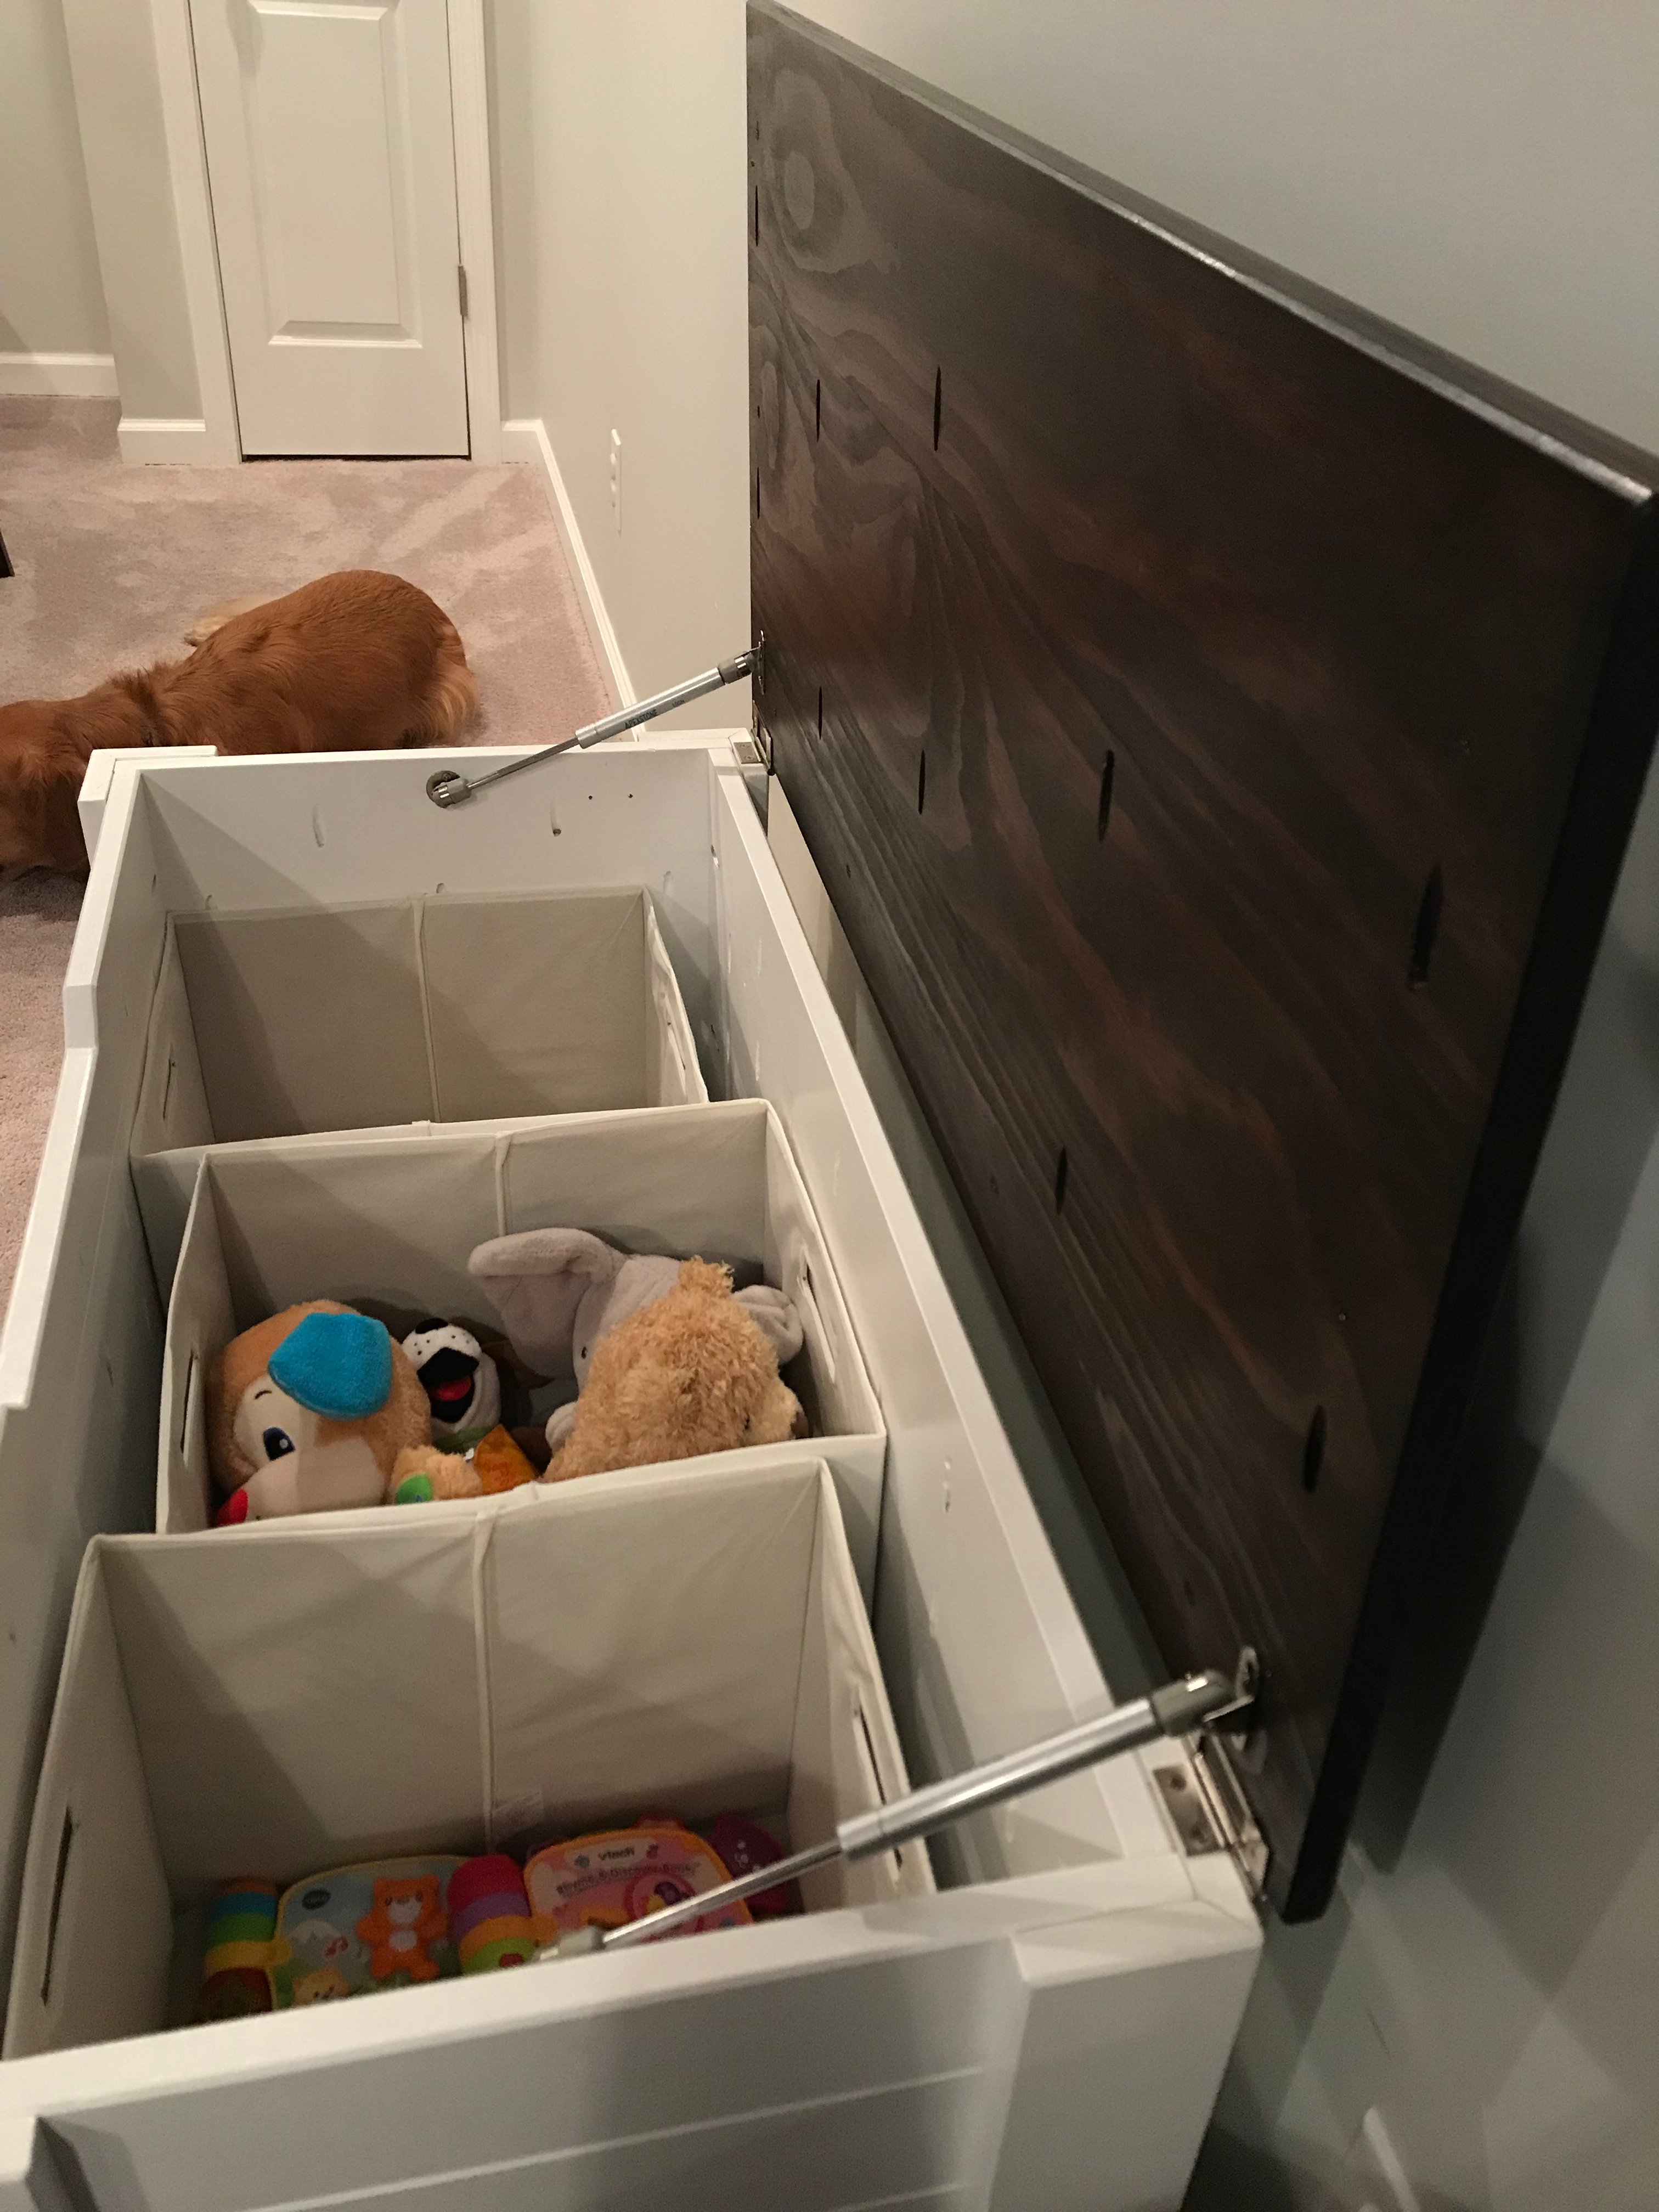
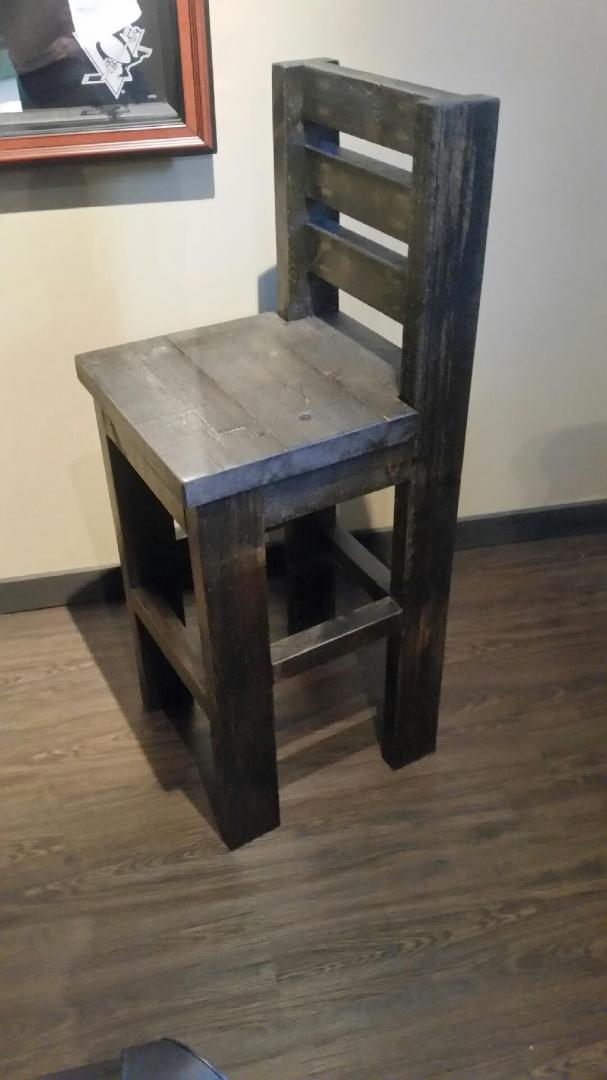
Shortened by 4". Changed all 1" to 2" and used 2x4 instead of 2x2! Used 2x6 for the seat. Used pocket holes and screws. Love them!
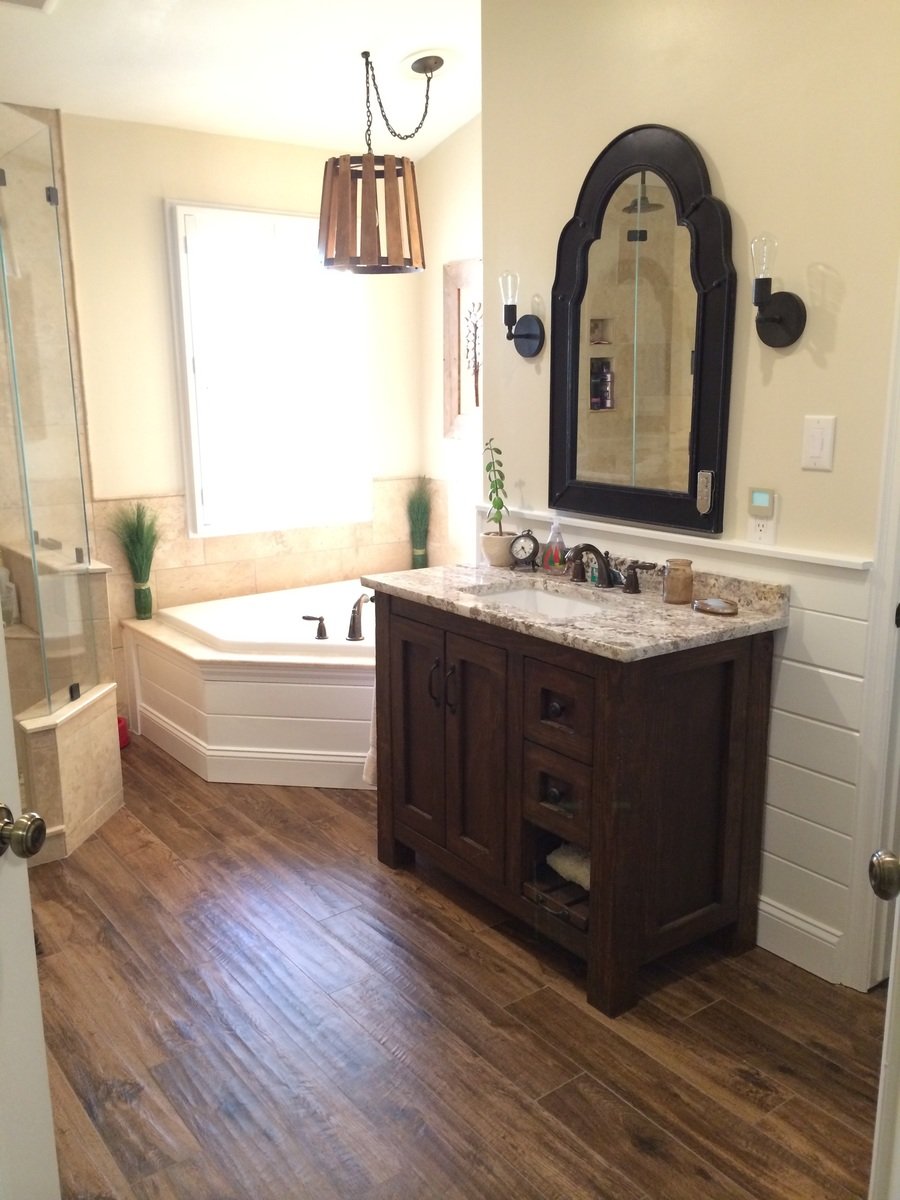
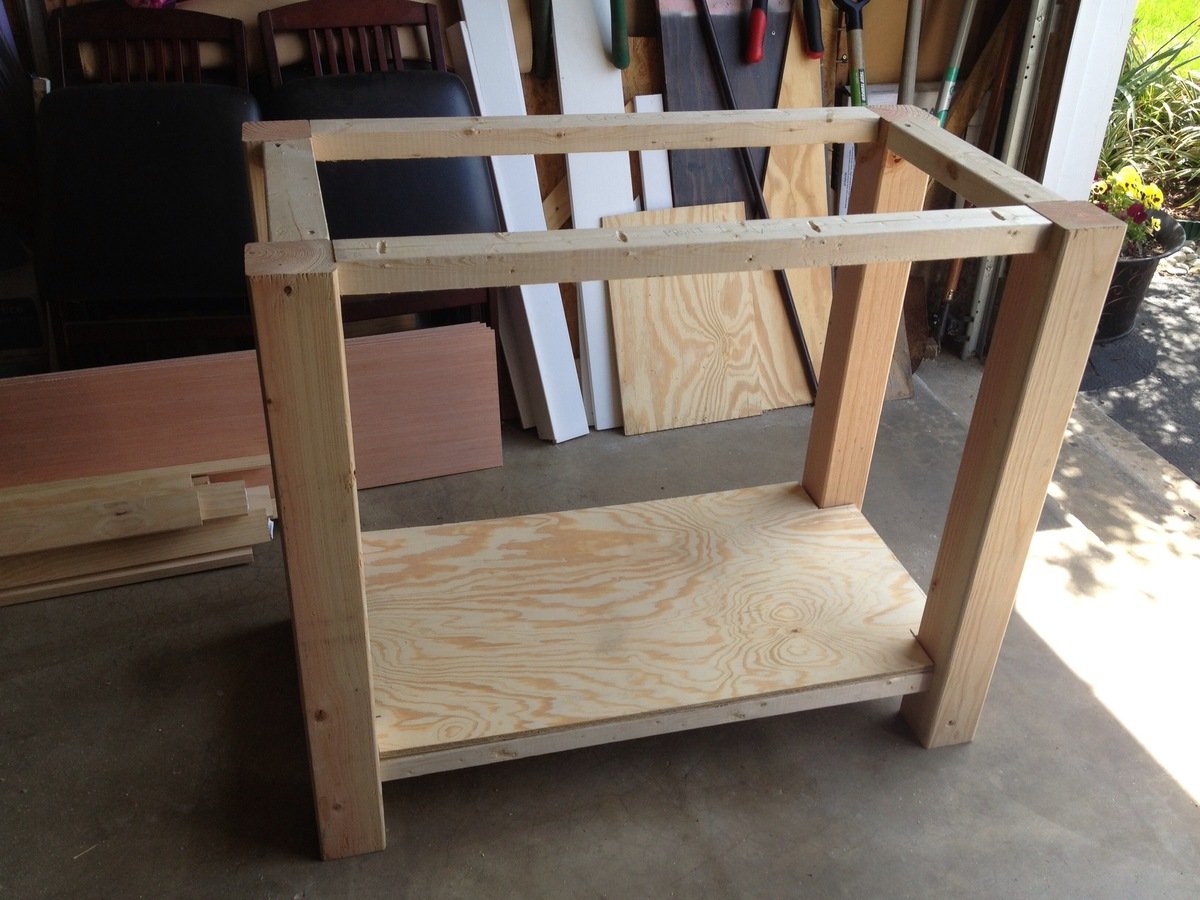
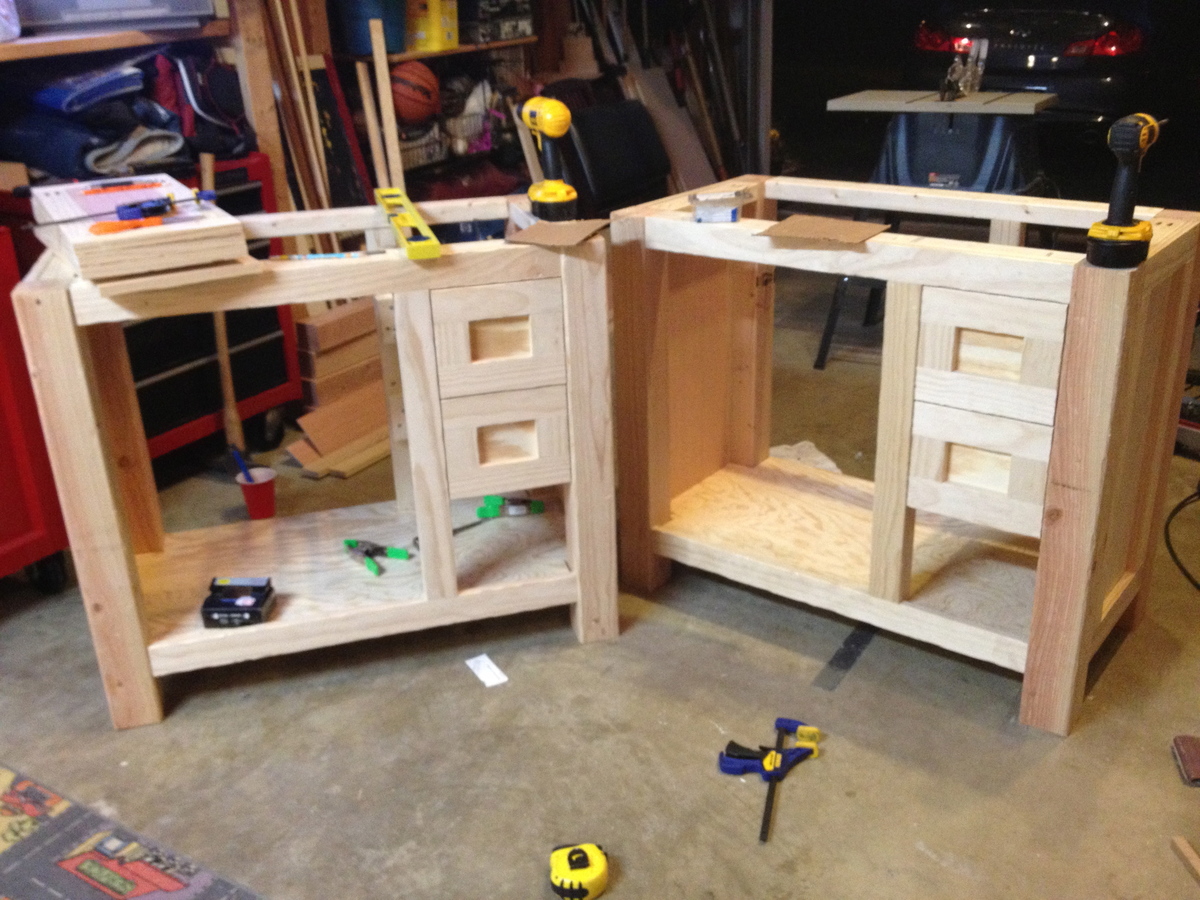
Rather than burning a few thousand on vanities for my bathroom remodel I decided to build them instead. The bottom shelf on the right slides out for a footstool so the kids can reach the sink.
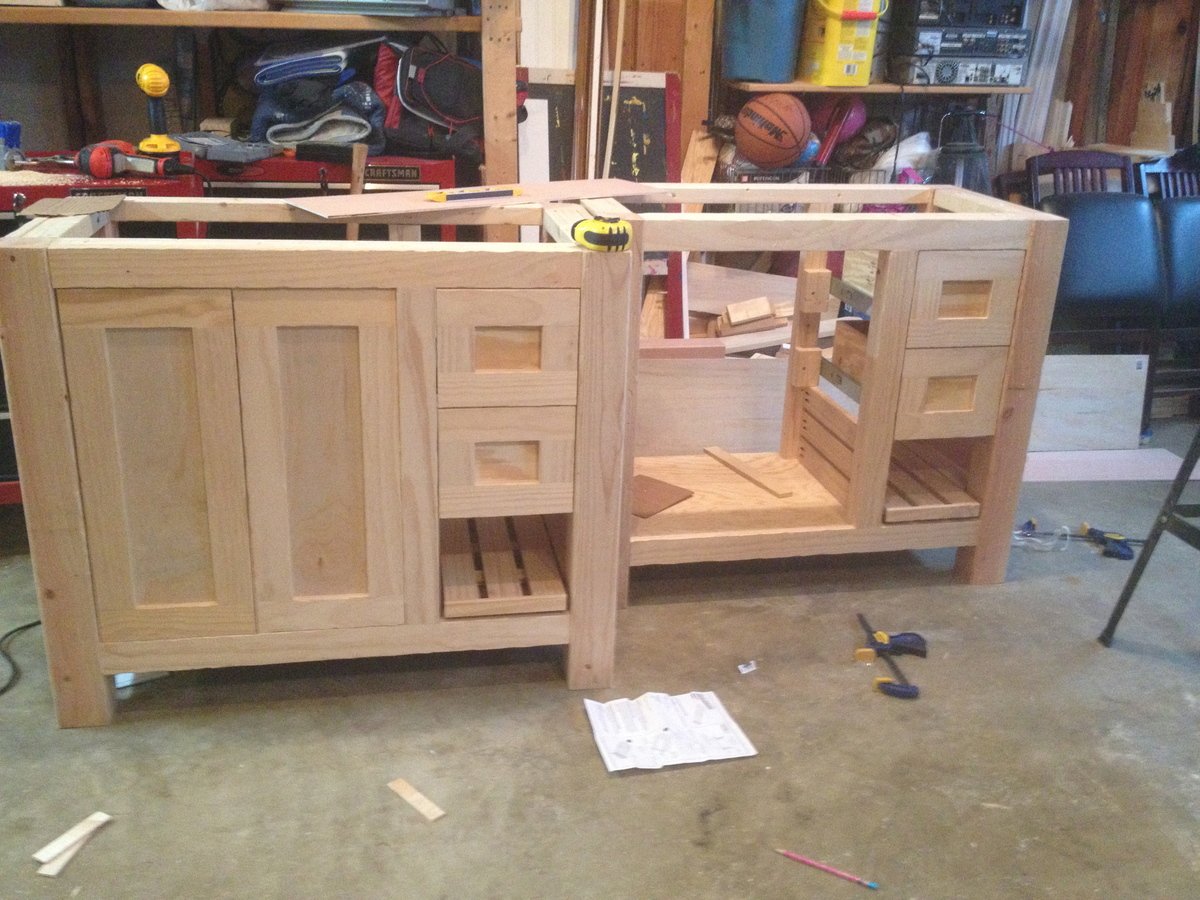

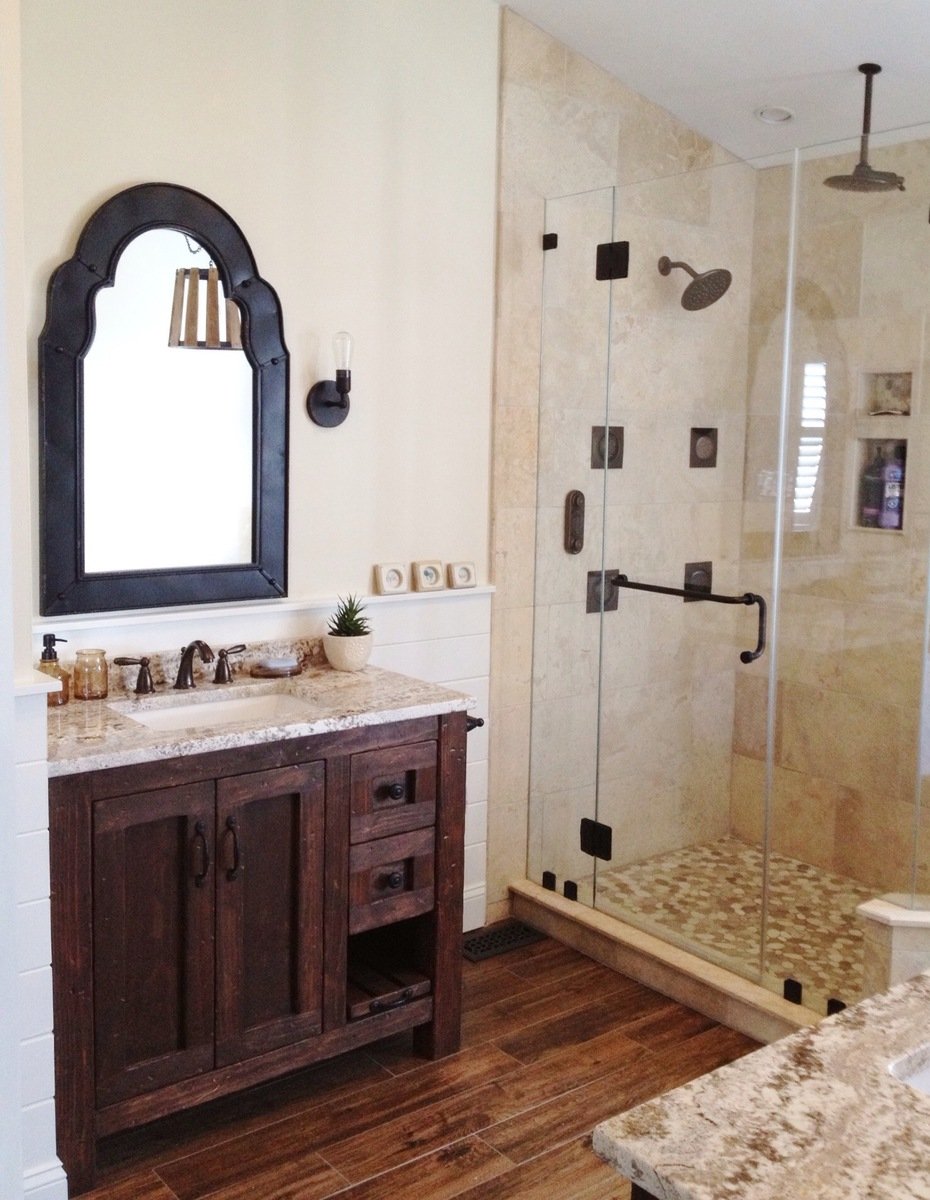

Sun, 01/05/2014 - 20:55
These are so beautiful -- they really look like high-end rustic pieces. The slide-out footstool is genius. The distressing is fantastic. I really love your pebble art as well.
Would you mind sharing the stain color?
Wed, 02/03/2016 - 17:48
I drew this up in sketchup as I was planning to build one like this, but decided to do something different. Is there a way to upload a sketchup file?
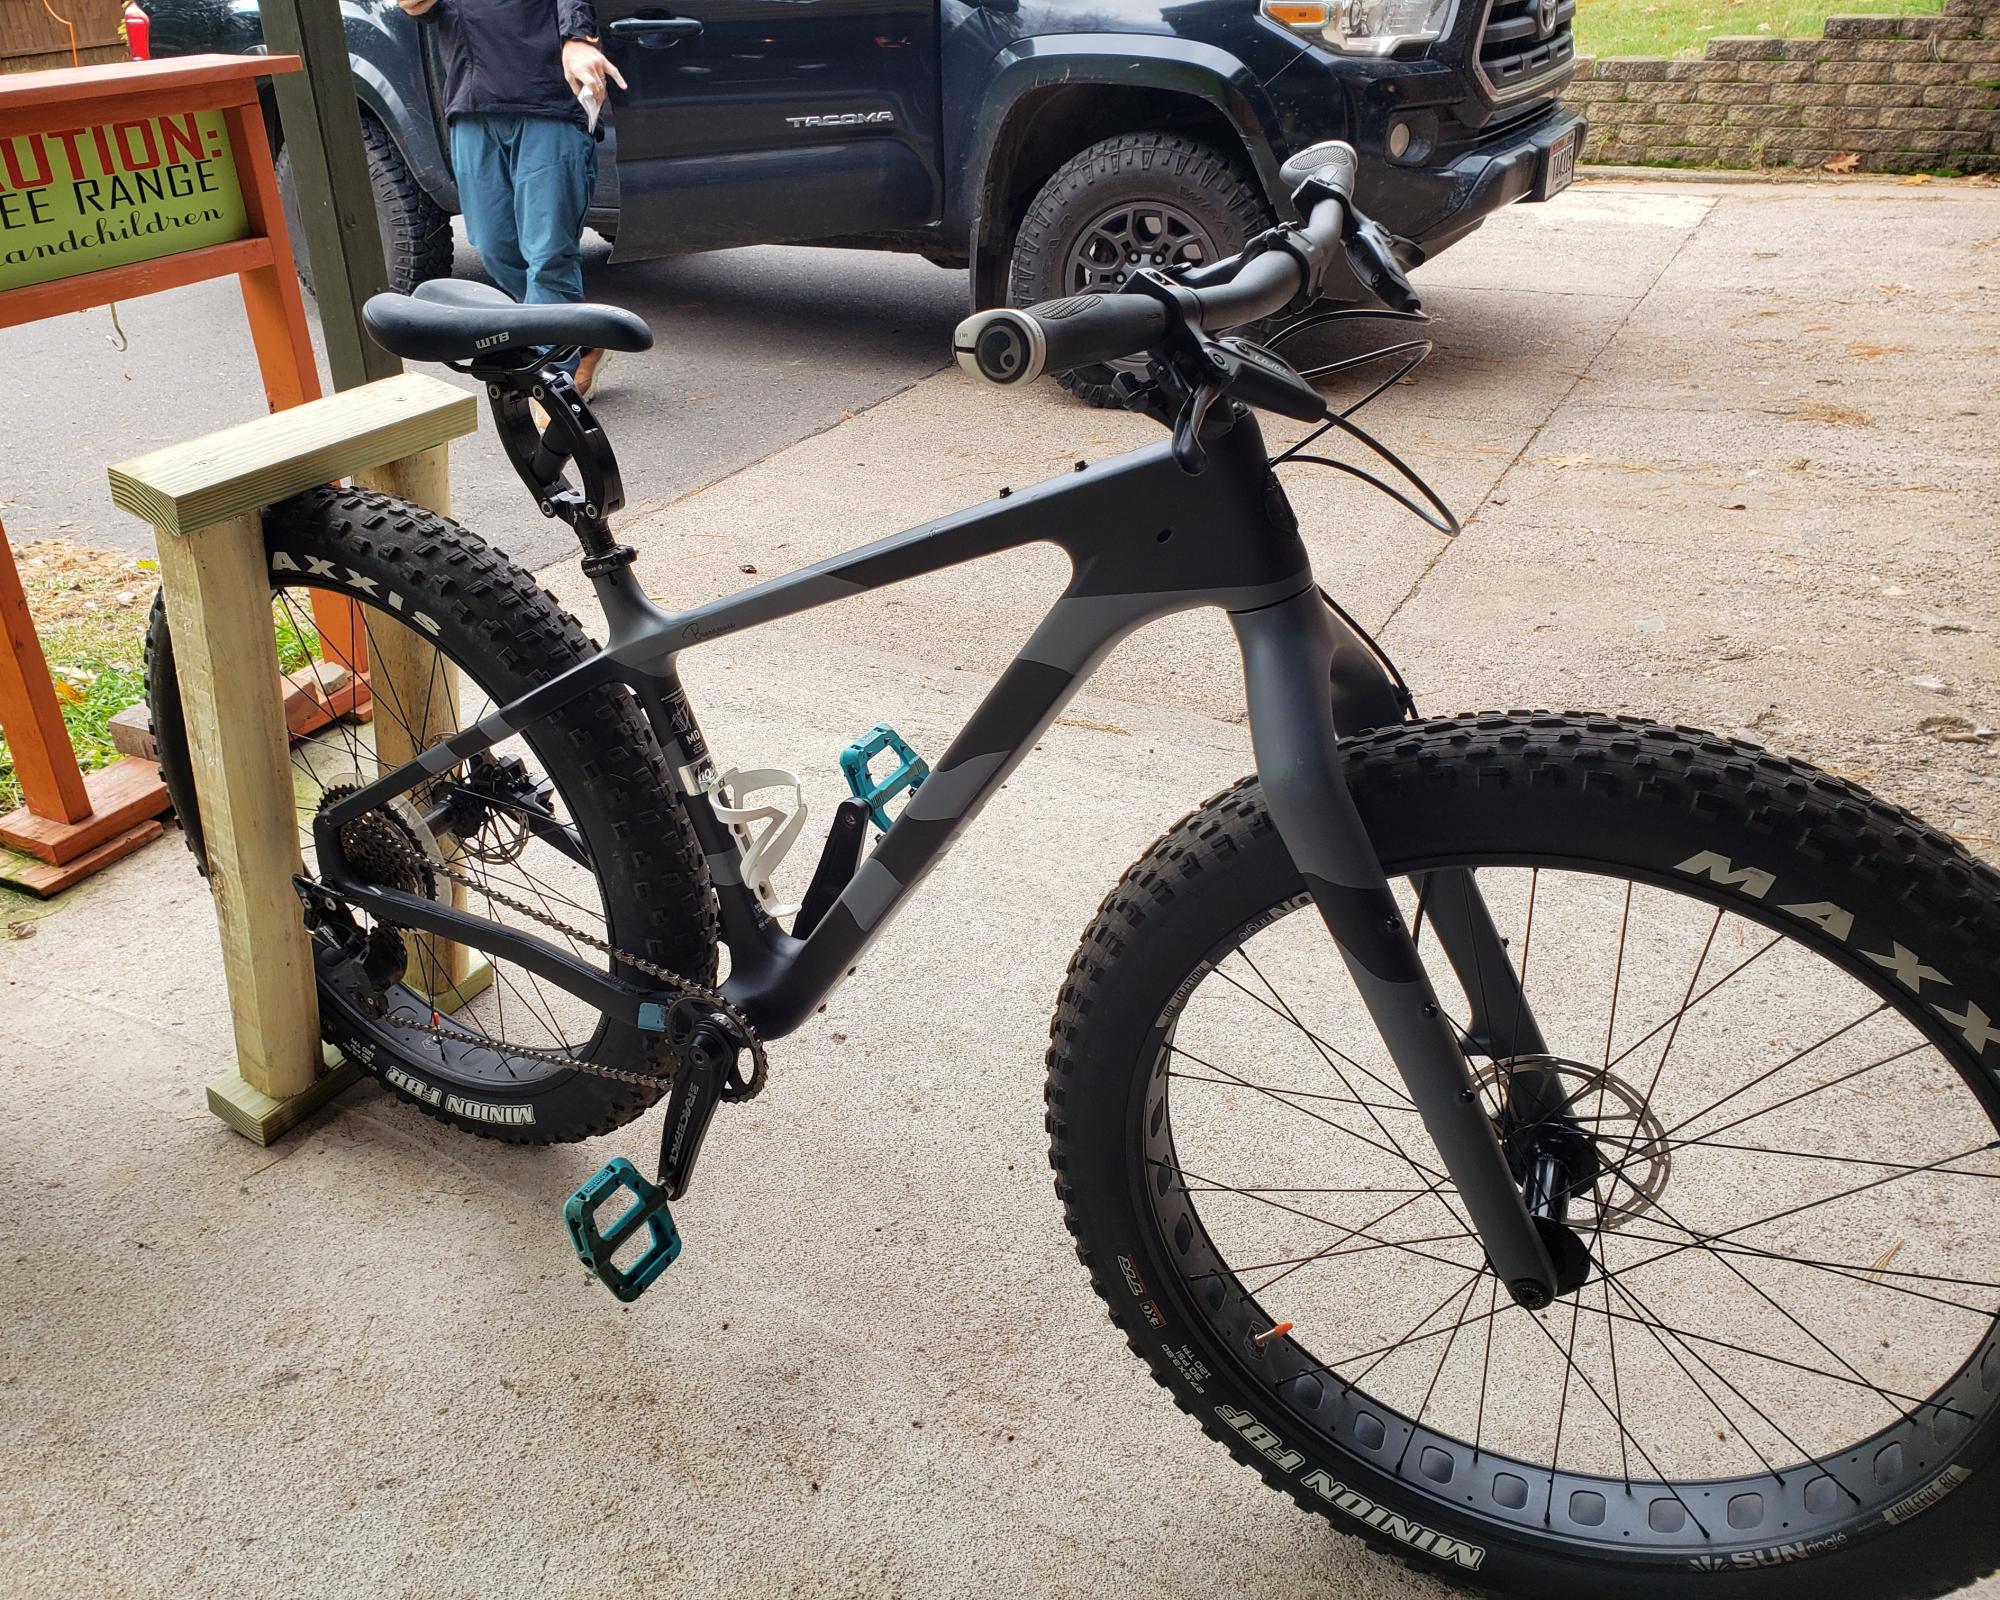
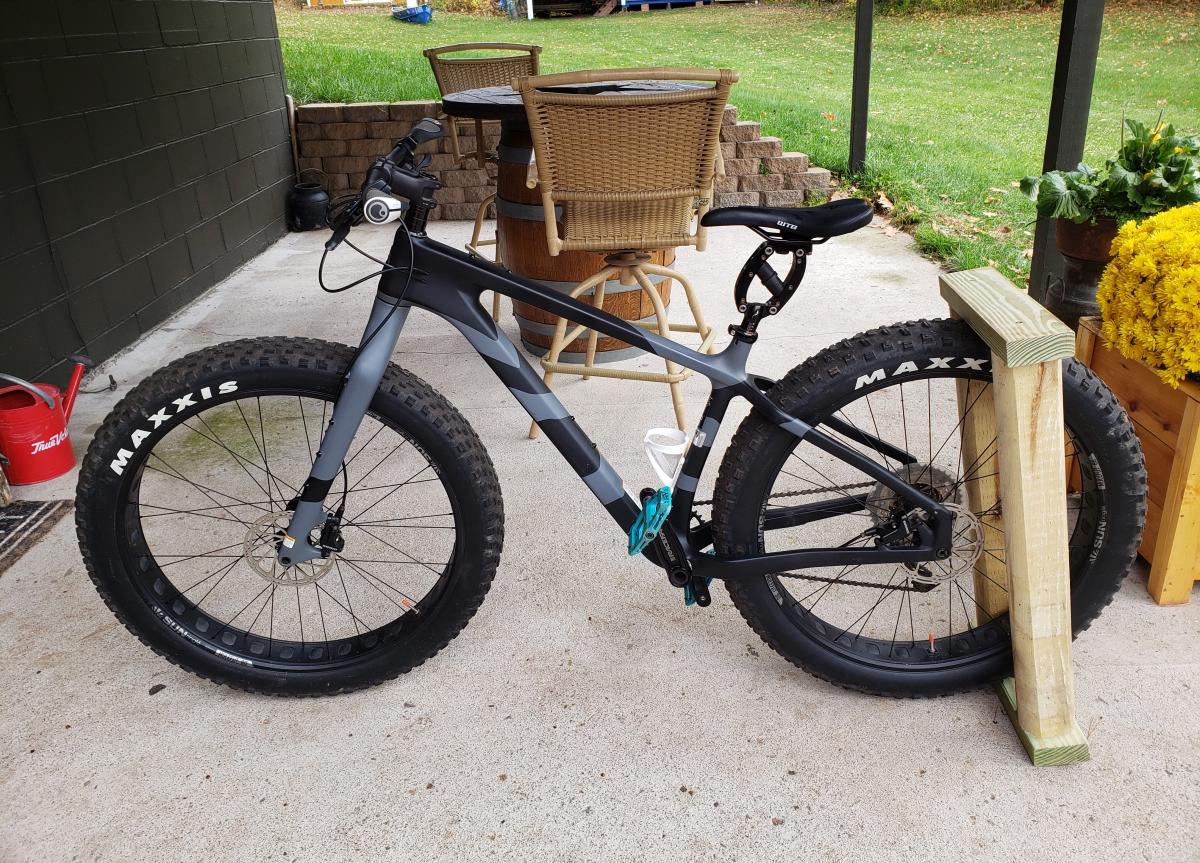
Fatbike rack! Ten minute project for the beginner. Heavy enough to keep your bike standing upright even in windy conditions. Great if you are short on space.
(2) 14" treated 2x4
(2) 28" fence posts
(8) 3 1/2" outdoor screws
6" space between the fence posts
Alter width, if needed, for your bike tire.
No part of the bike hits the wood except the tire.'
Deanna Peterson
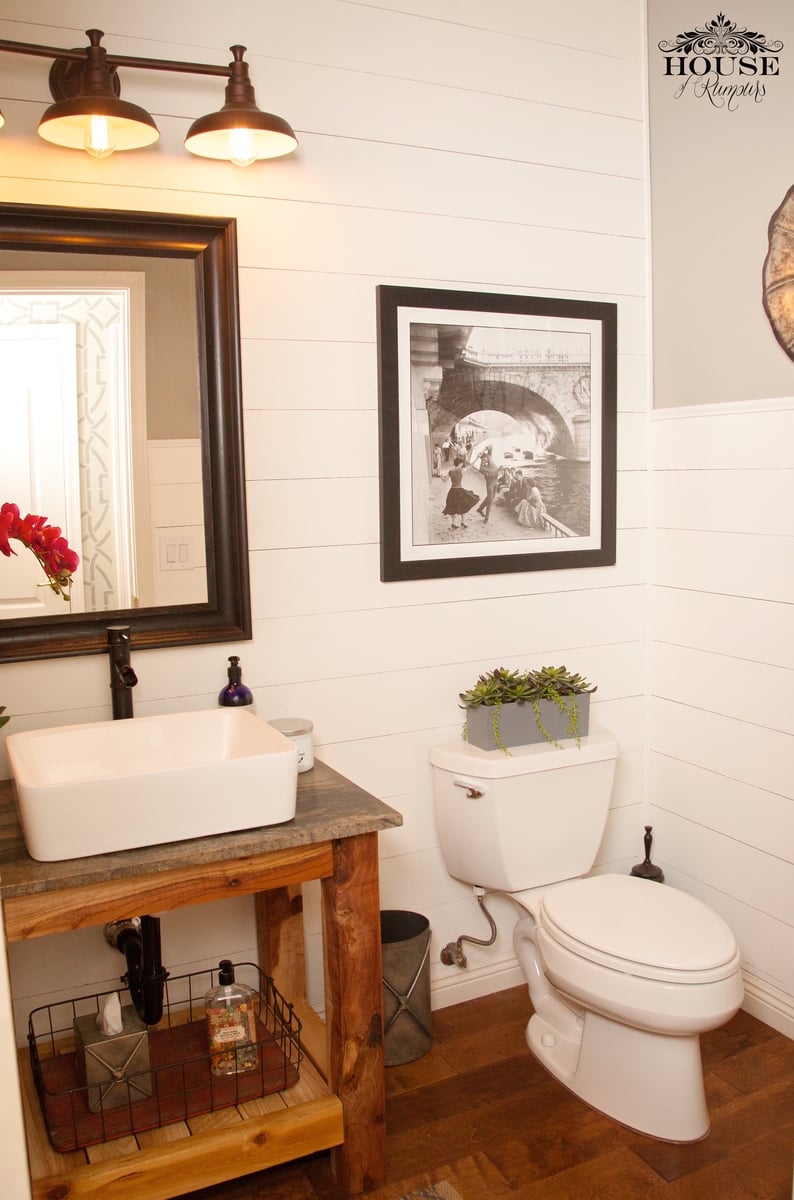
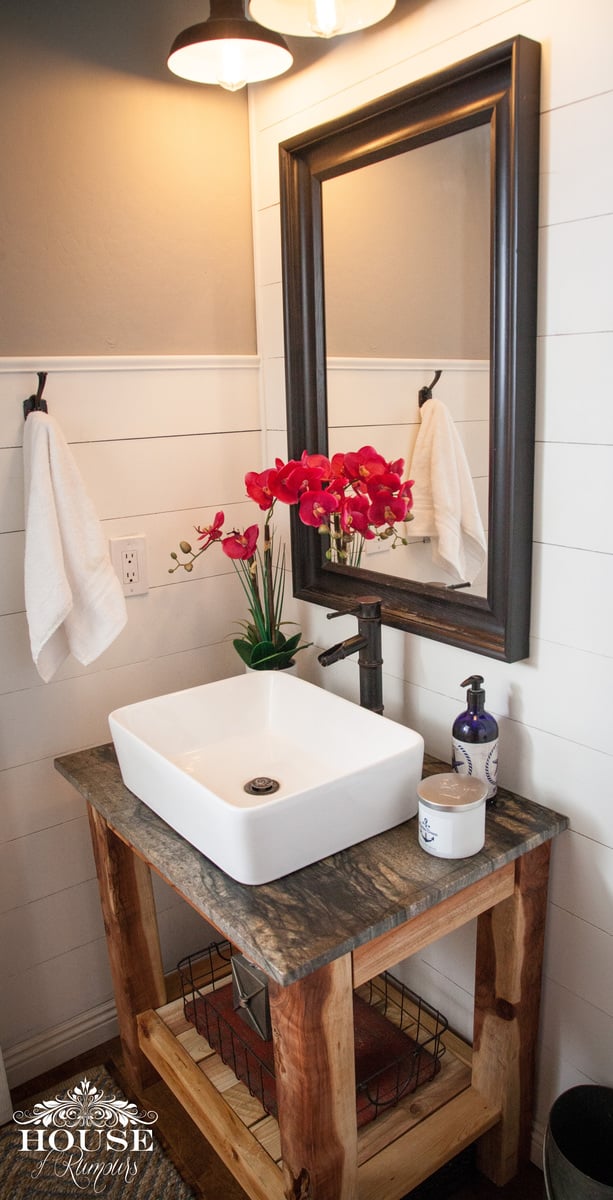
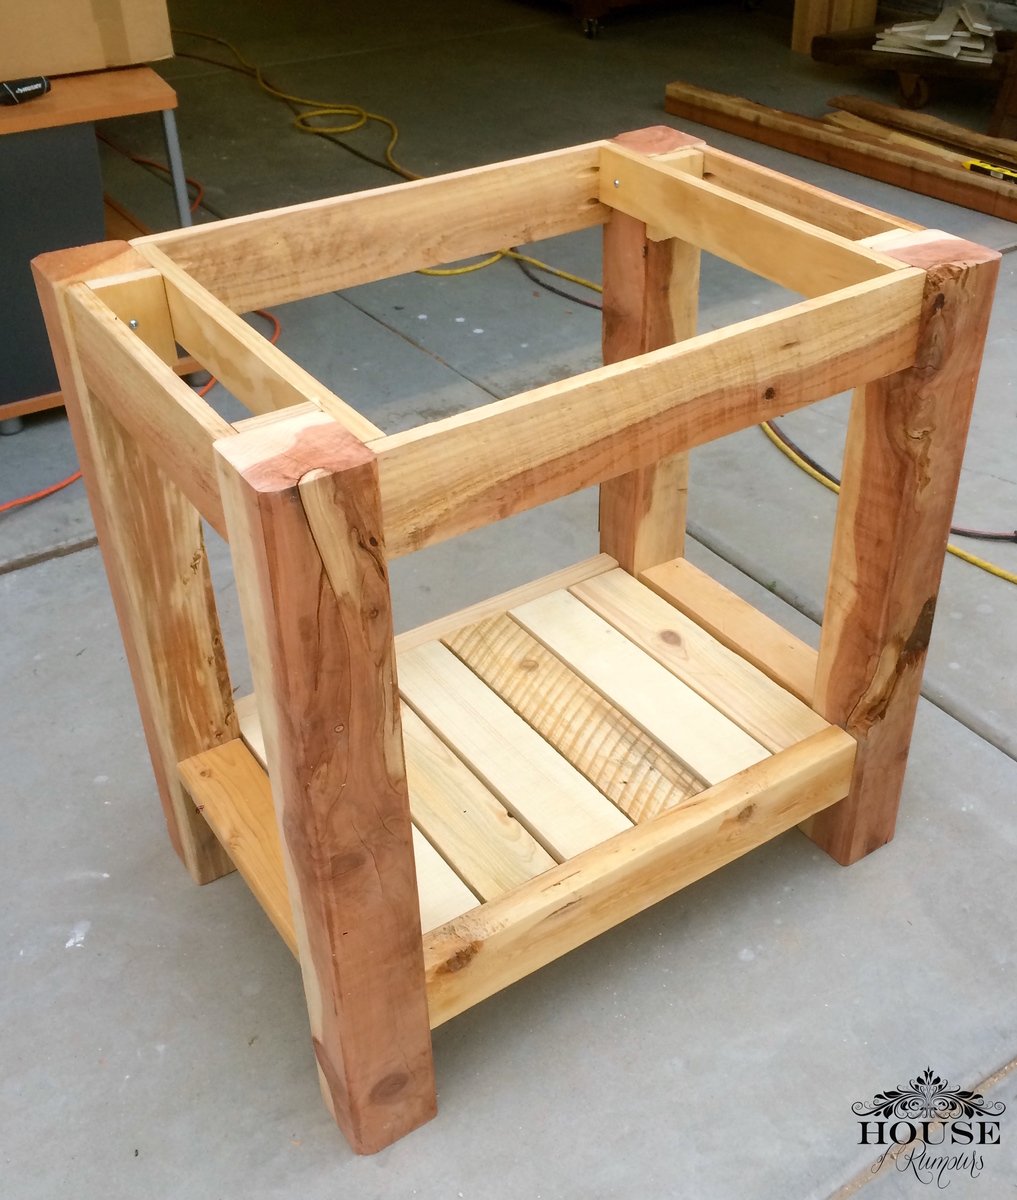
It had come time to renovate our powder room bathroom. We were on a tight budget so we decided to build our own vanity & add a little twist to it! We splurged on the granite countertop, vessel sink and faucet. Thanks to Ana White we built our vanity for less than $10! The plans were easy to follow . . . .we are so proud of our wood vanity! link to our blog: http://www.houseofrumours.com/shiplap-powder-room-diy-vanity/
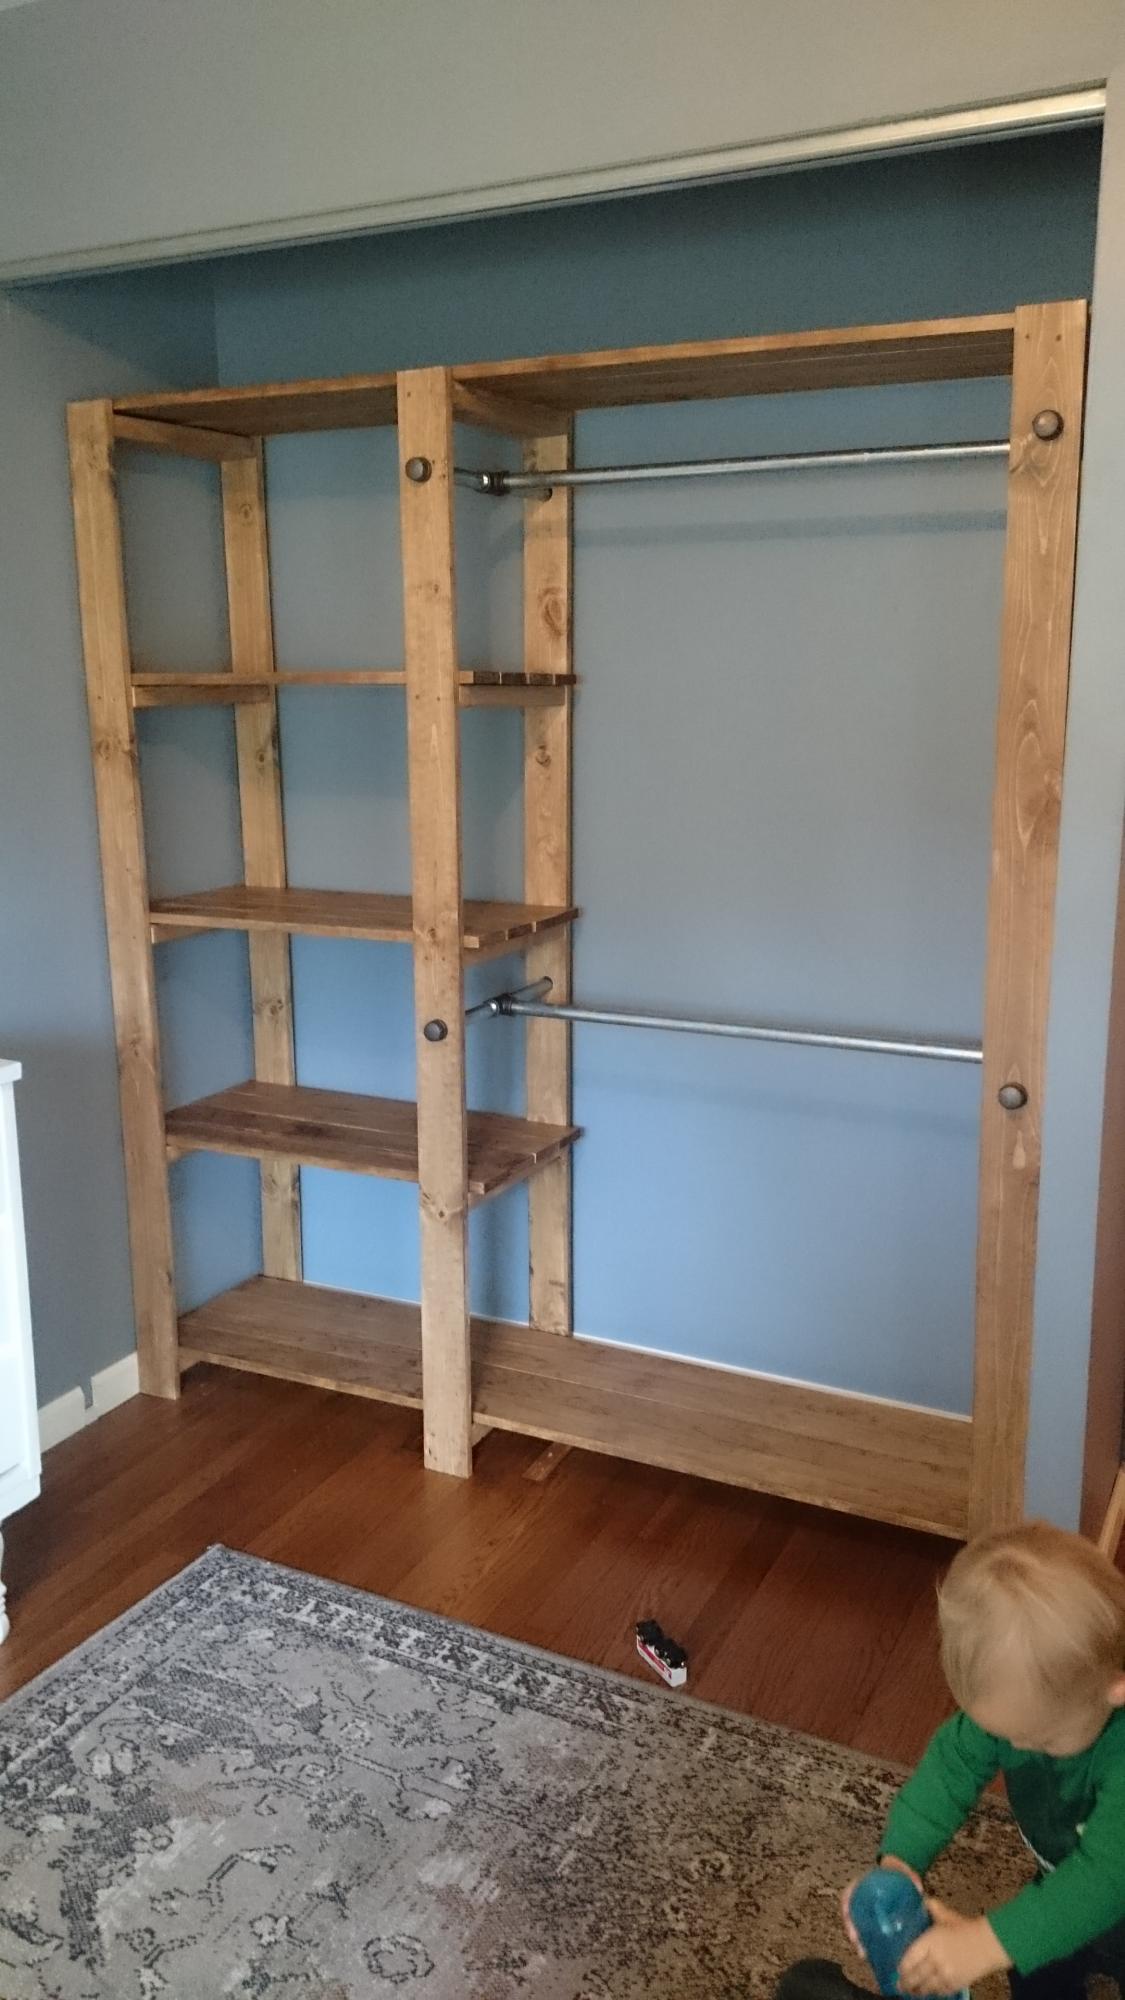
This was the second building project I've ever completed. I had to make a few adjustments to make it fit the size of ray's closet, but it was totally worth it. most of the work was in the measuring, sanding, and sealing of the wood. Ftting the frames can be a little tricky if your planks aren't perfectly straight. Otherwise, this project was pretty straight forward and can be done in just a few days depending on how much time you have to dedicate to it. Thanks Ana!
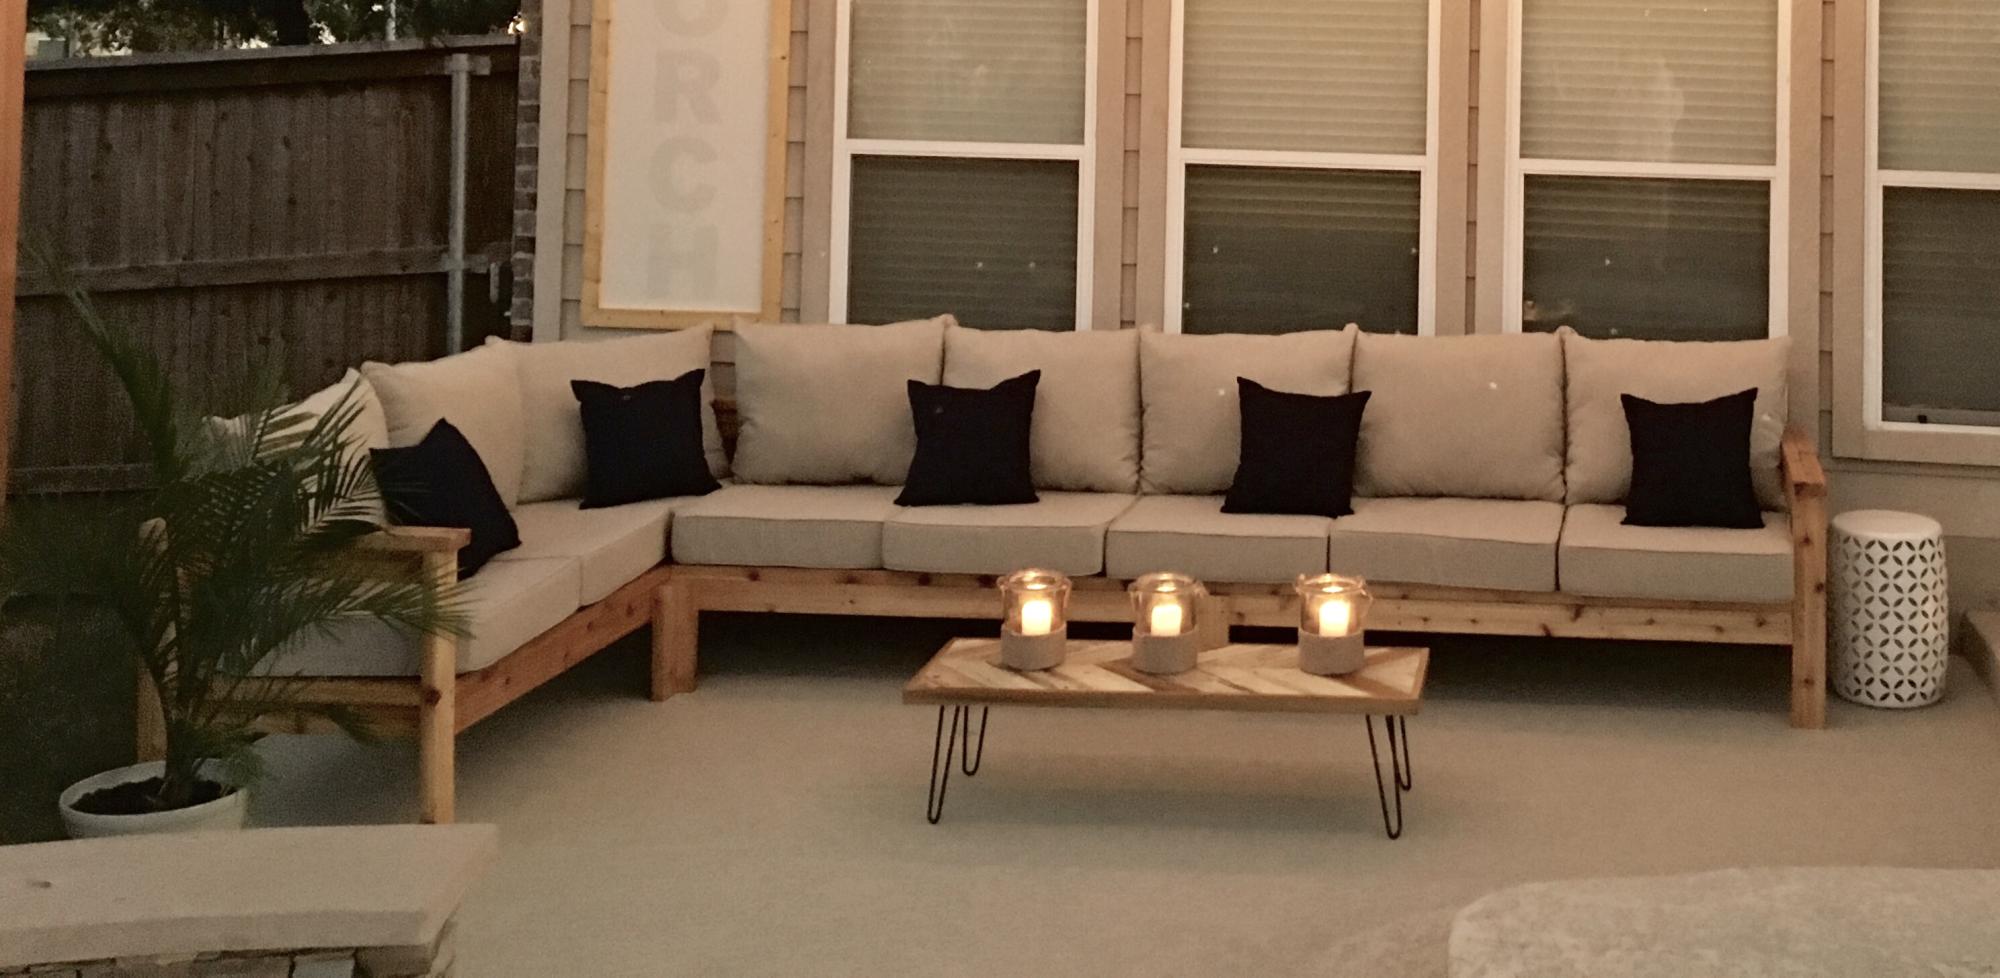
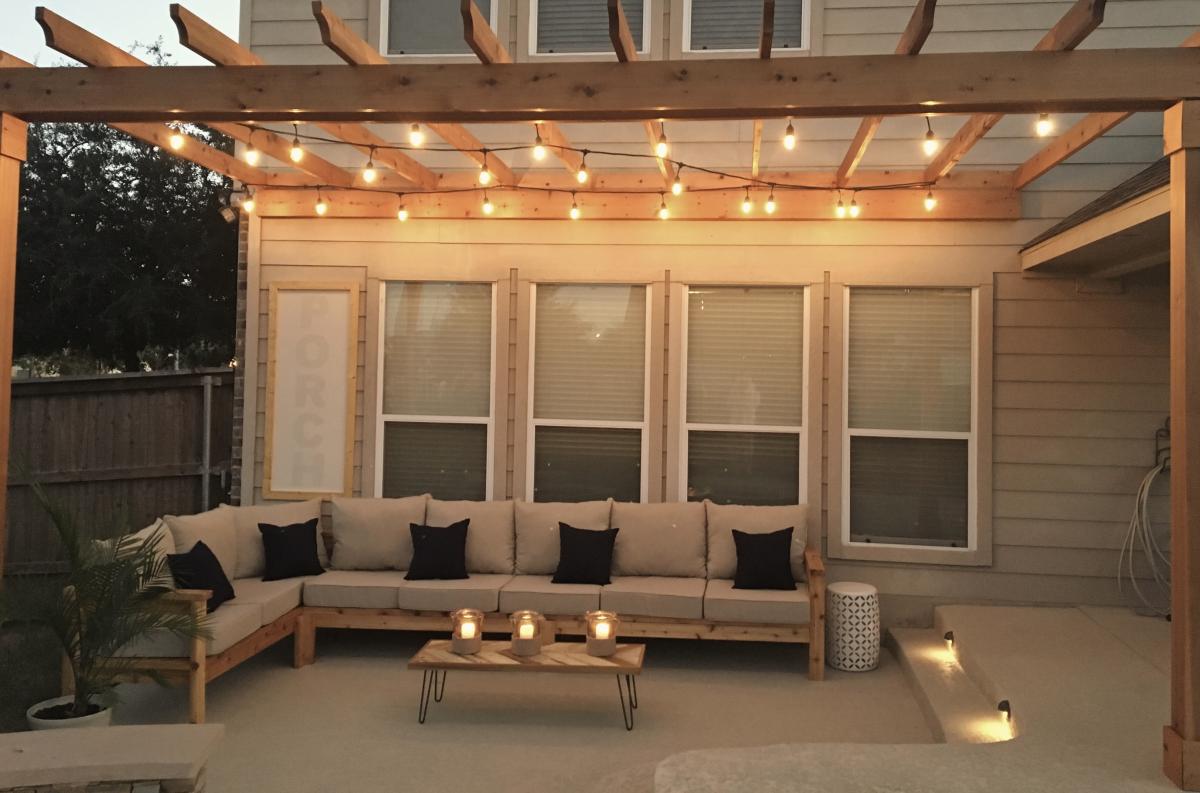
Hi Ana!
My husband used your plans to build the 2x4 outdoor cedar sectional :) He did it in 1 day and it couldn't have been easier! He even tried first time working with pallets to make a small table and it came out perfectly too! Can't wait to enjoy family time on our new back porch.
Thanks Again & Love From Austin ❤️
Kathleen
Thu, 10/24/2019 - 16:35
Hi, your furniture is beautiful. May I ask: Where did you find your cushions? And what color/ brand stain did you use? Lovely job.
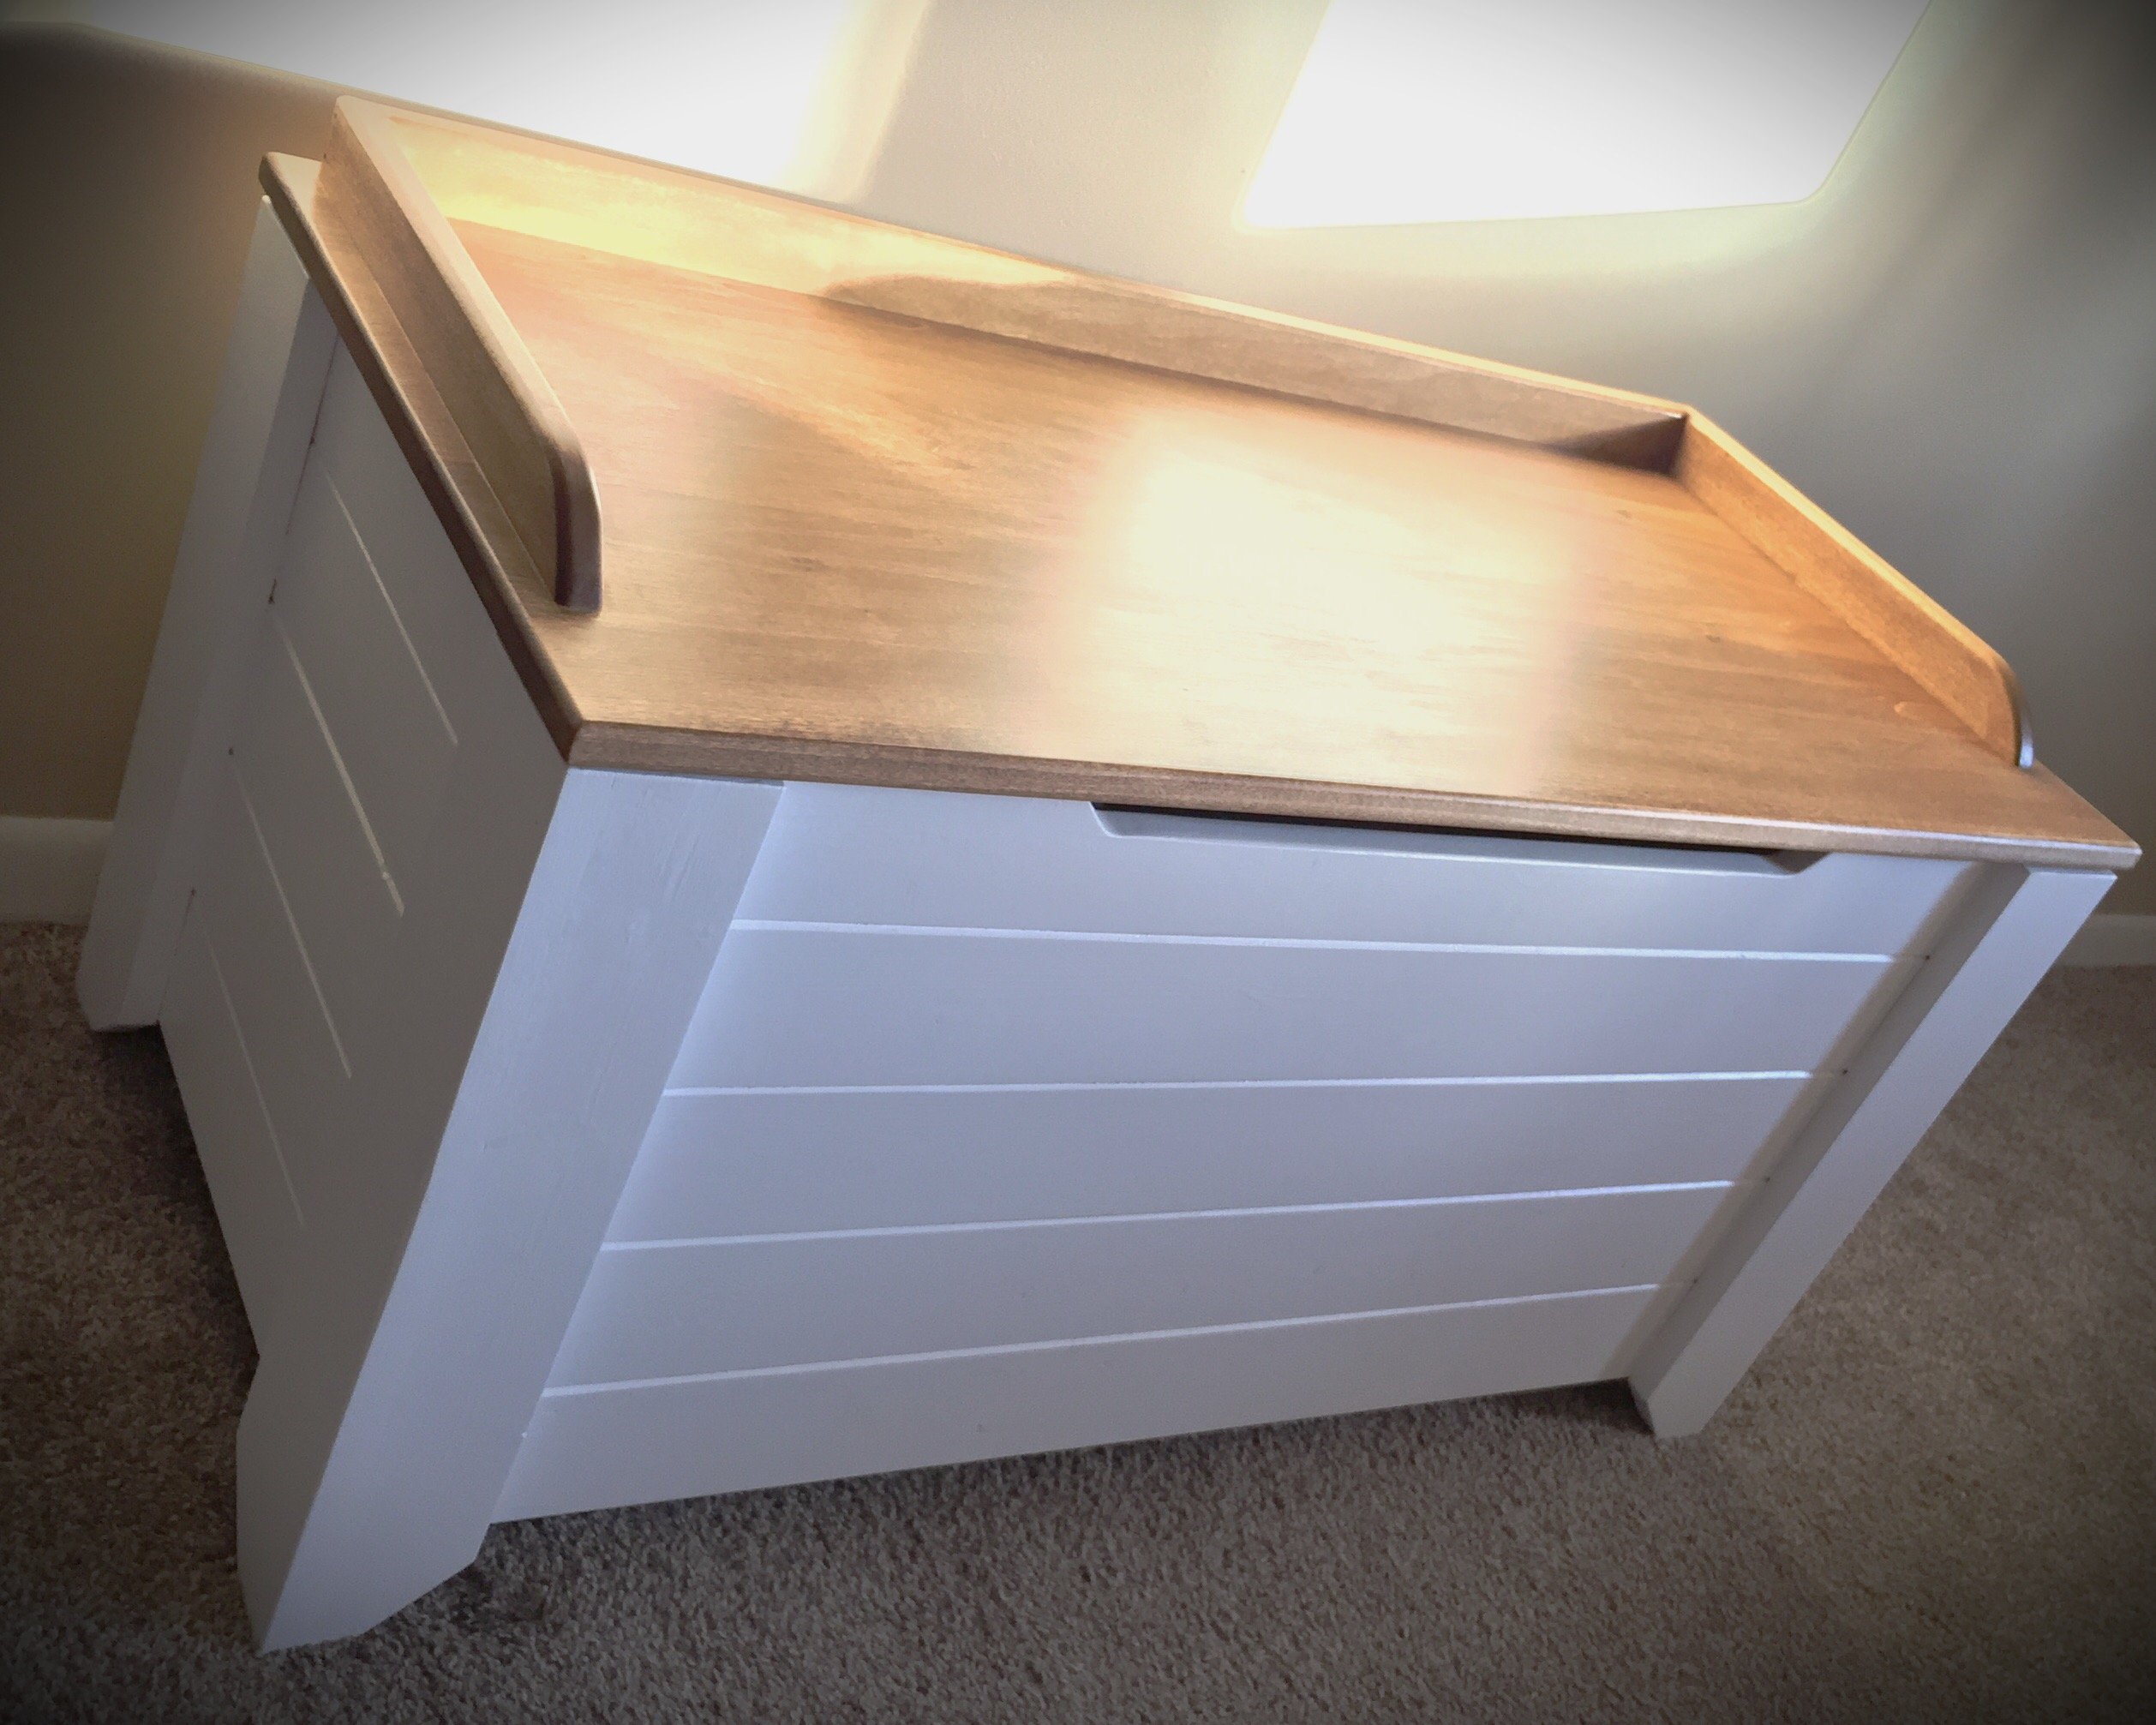
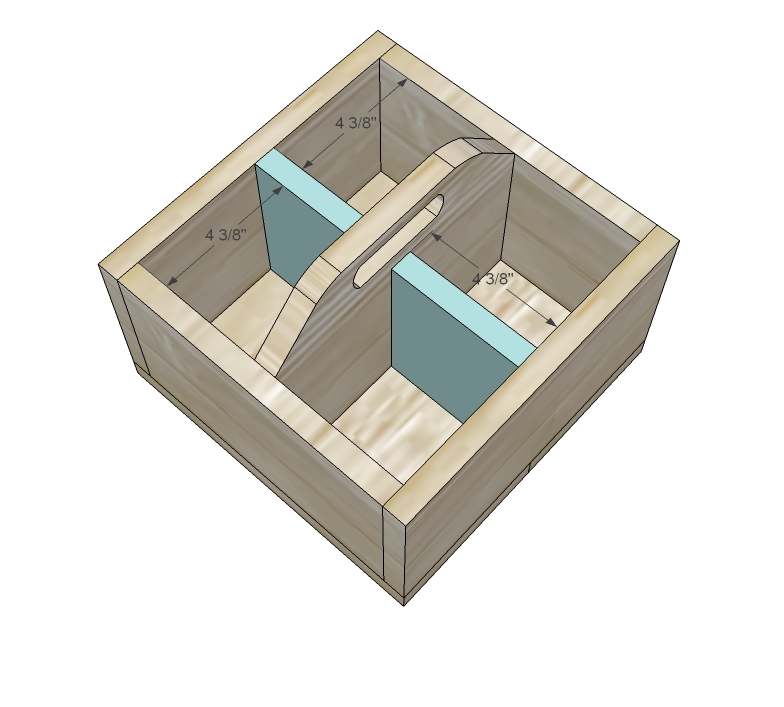
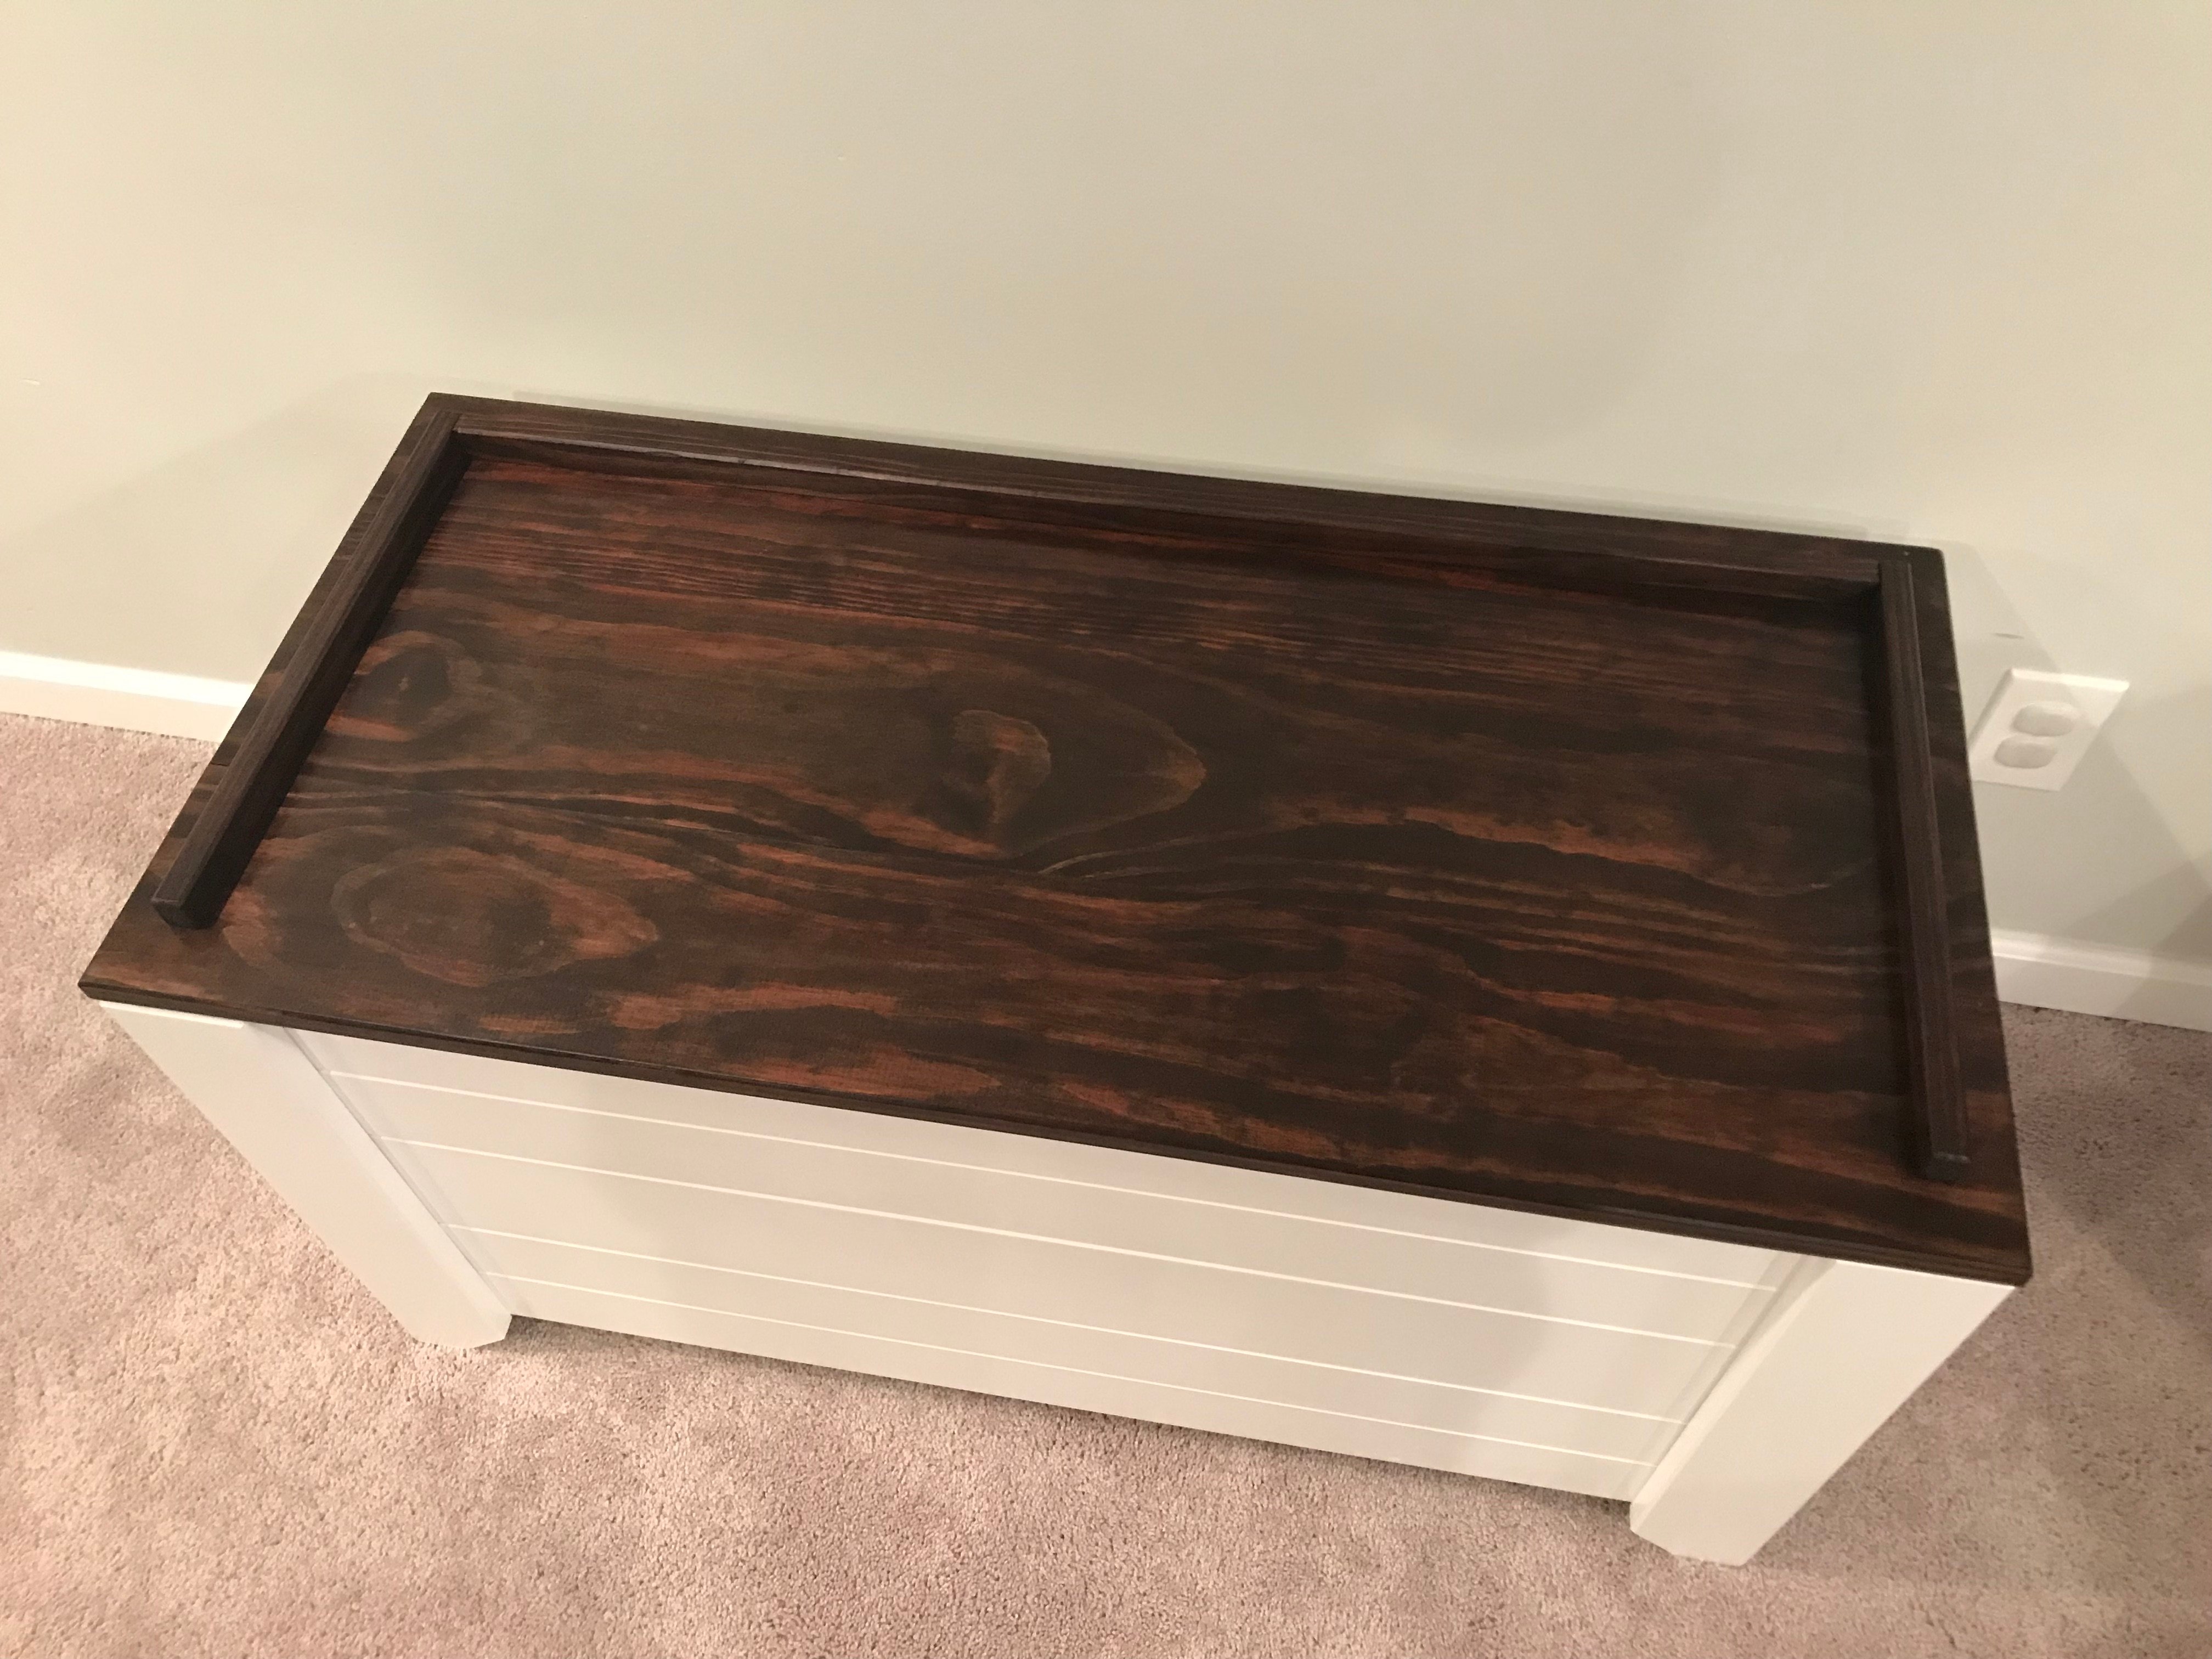
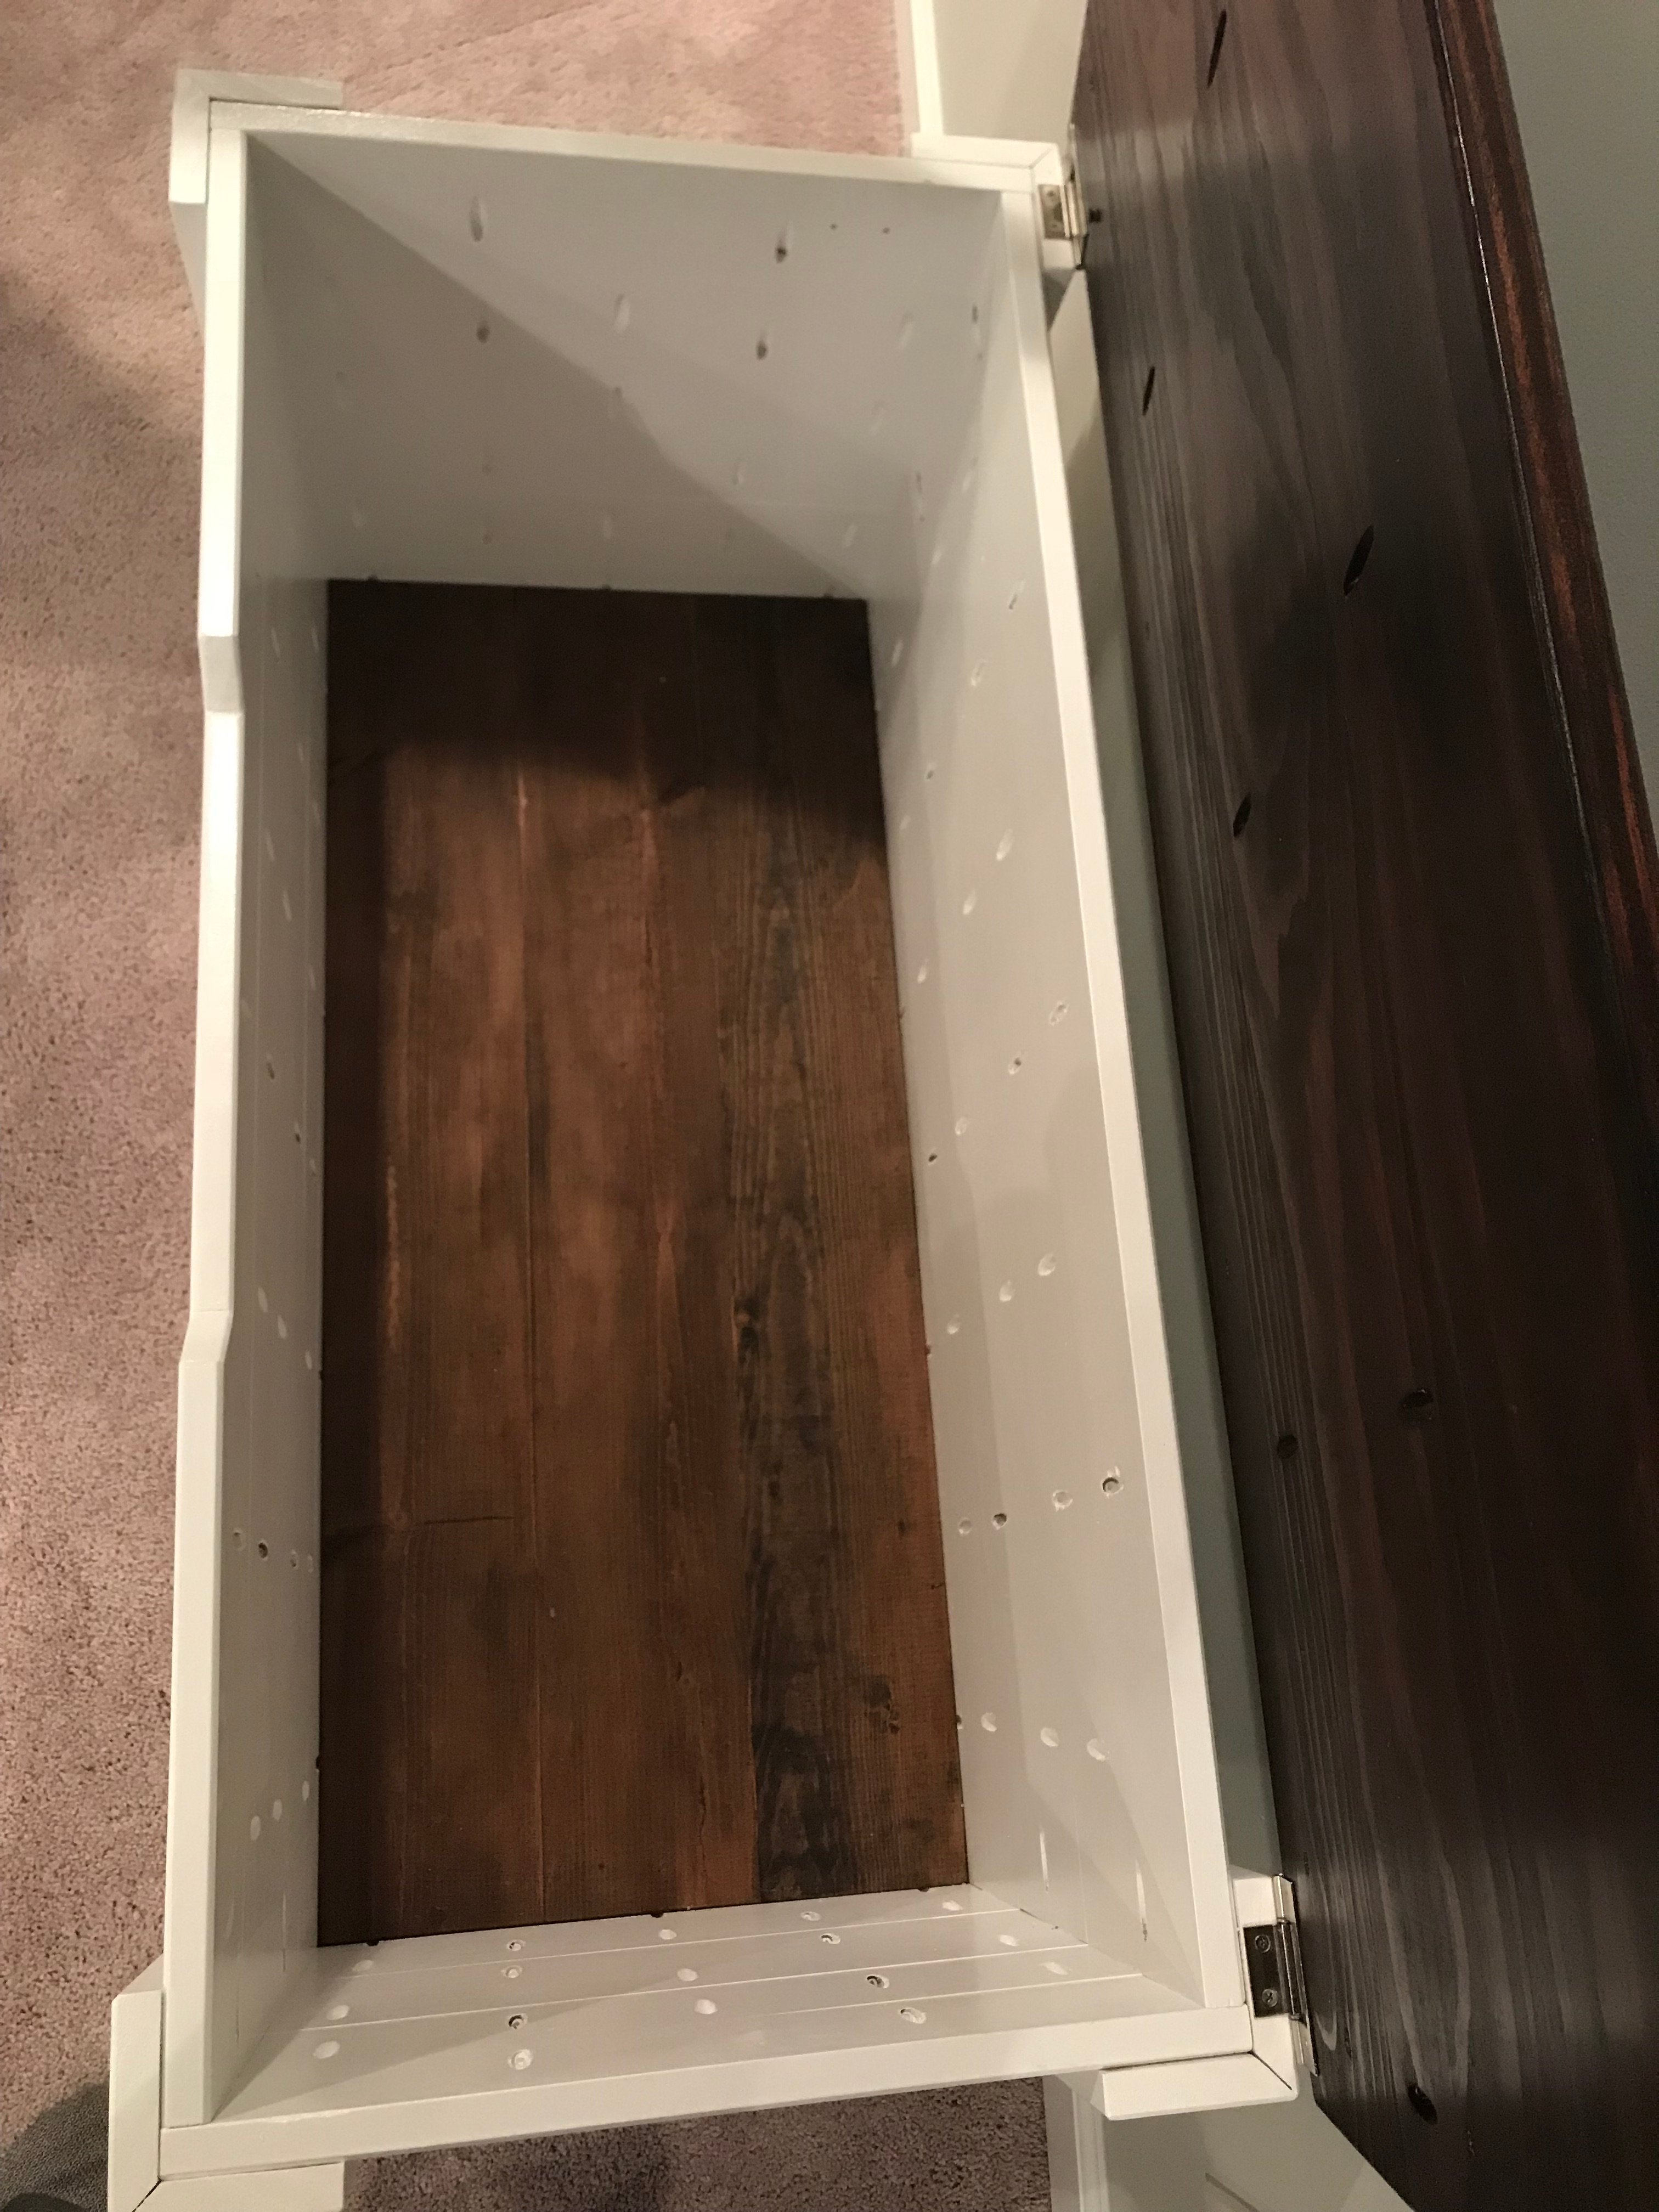
I built this for my daughter after Christmas sinse she had the living room covered in toys. The dimensions are 37" x 18" x 20"
Tue, 01/09/2018 - 05:51
HI Anna,
Can you provide more pictures or instructions on how you assembled this toy box? i want to make one just like it!
Thanks!
Wed, 03/10/2021 - 16:31
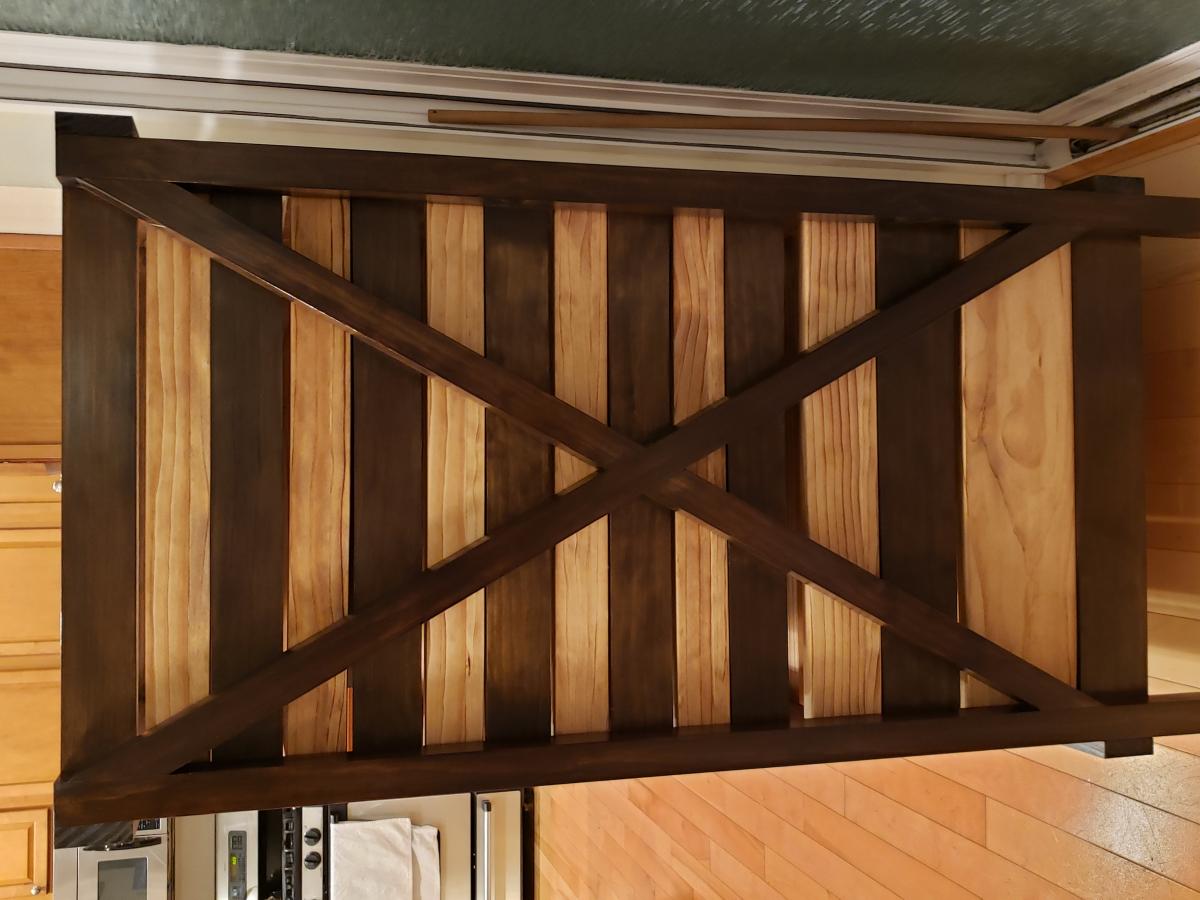
Looking at the wall panels they look like the long edge of each panel has a small bevel cut on it. This gives each panel edge a more pronounced or well-defined edge? Is this true? Was it done with a router?

So a few notes... We added a base of 2x4 pressure treated wood footing around the entirety of the greenhouse which should help keep it from rotting? Blocks are an alternative here. Our lumber store didn't carry the right size of tin sheets so we added a 2x10 at the bottom which seems to work and still look okay. We picked up a 30" metal screen door there which should assist in keeping out the critters and allows us to lock out our small kiddos who might wreck the plants :) This is a great plan!!! Thank you so much! Oh - materials ran about $700 including screen door? We went through about 4 1-pound boxes of sheet metal screws and at least a large box of 3" screws?? and 2 small boxes 1.25"?? If you cut you pieces right you may end up with an extra 8' clear sheet of corrugated plastic? We spent about 20 hours building just the greenhouse but we had hauled a lot of stuff to the site by hand... We are new to carpentry and pulled this off so anyone can do this!! Dremel tool works for cutting plastic, but not as good as the tin!! Good luck and cheers!


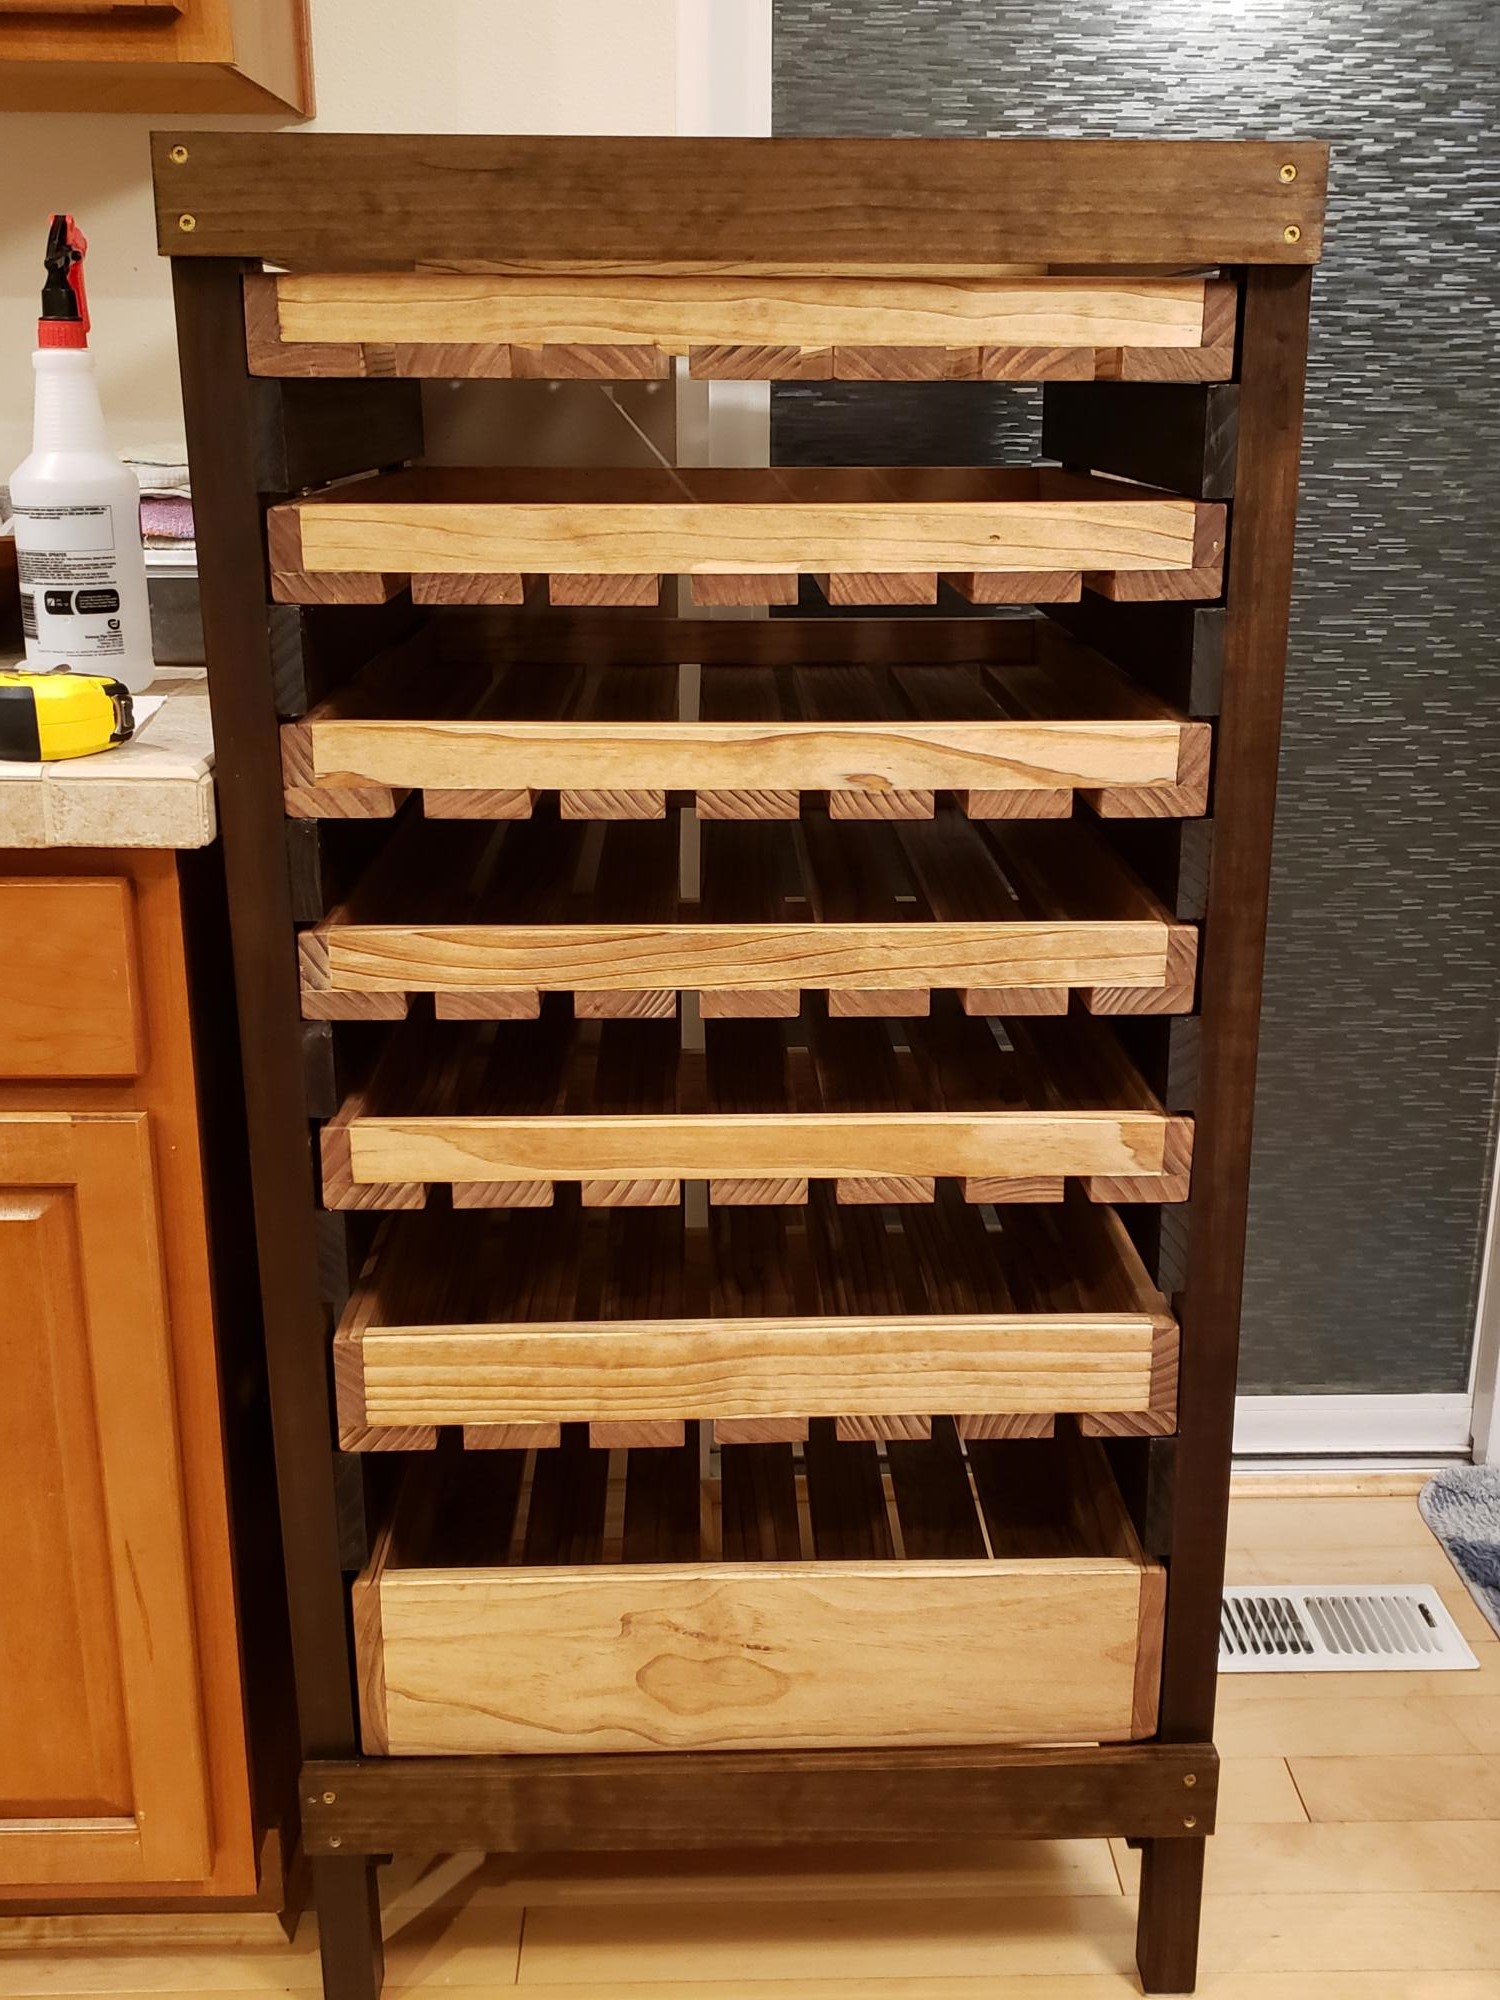
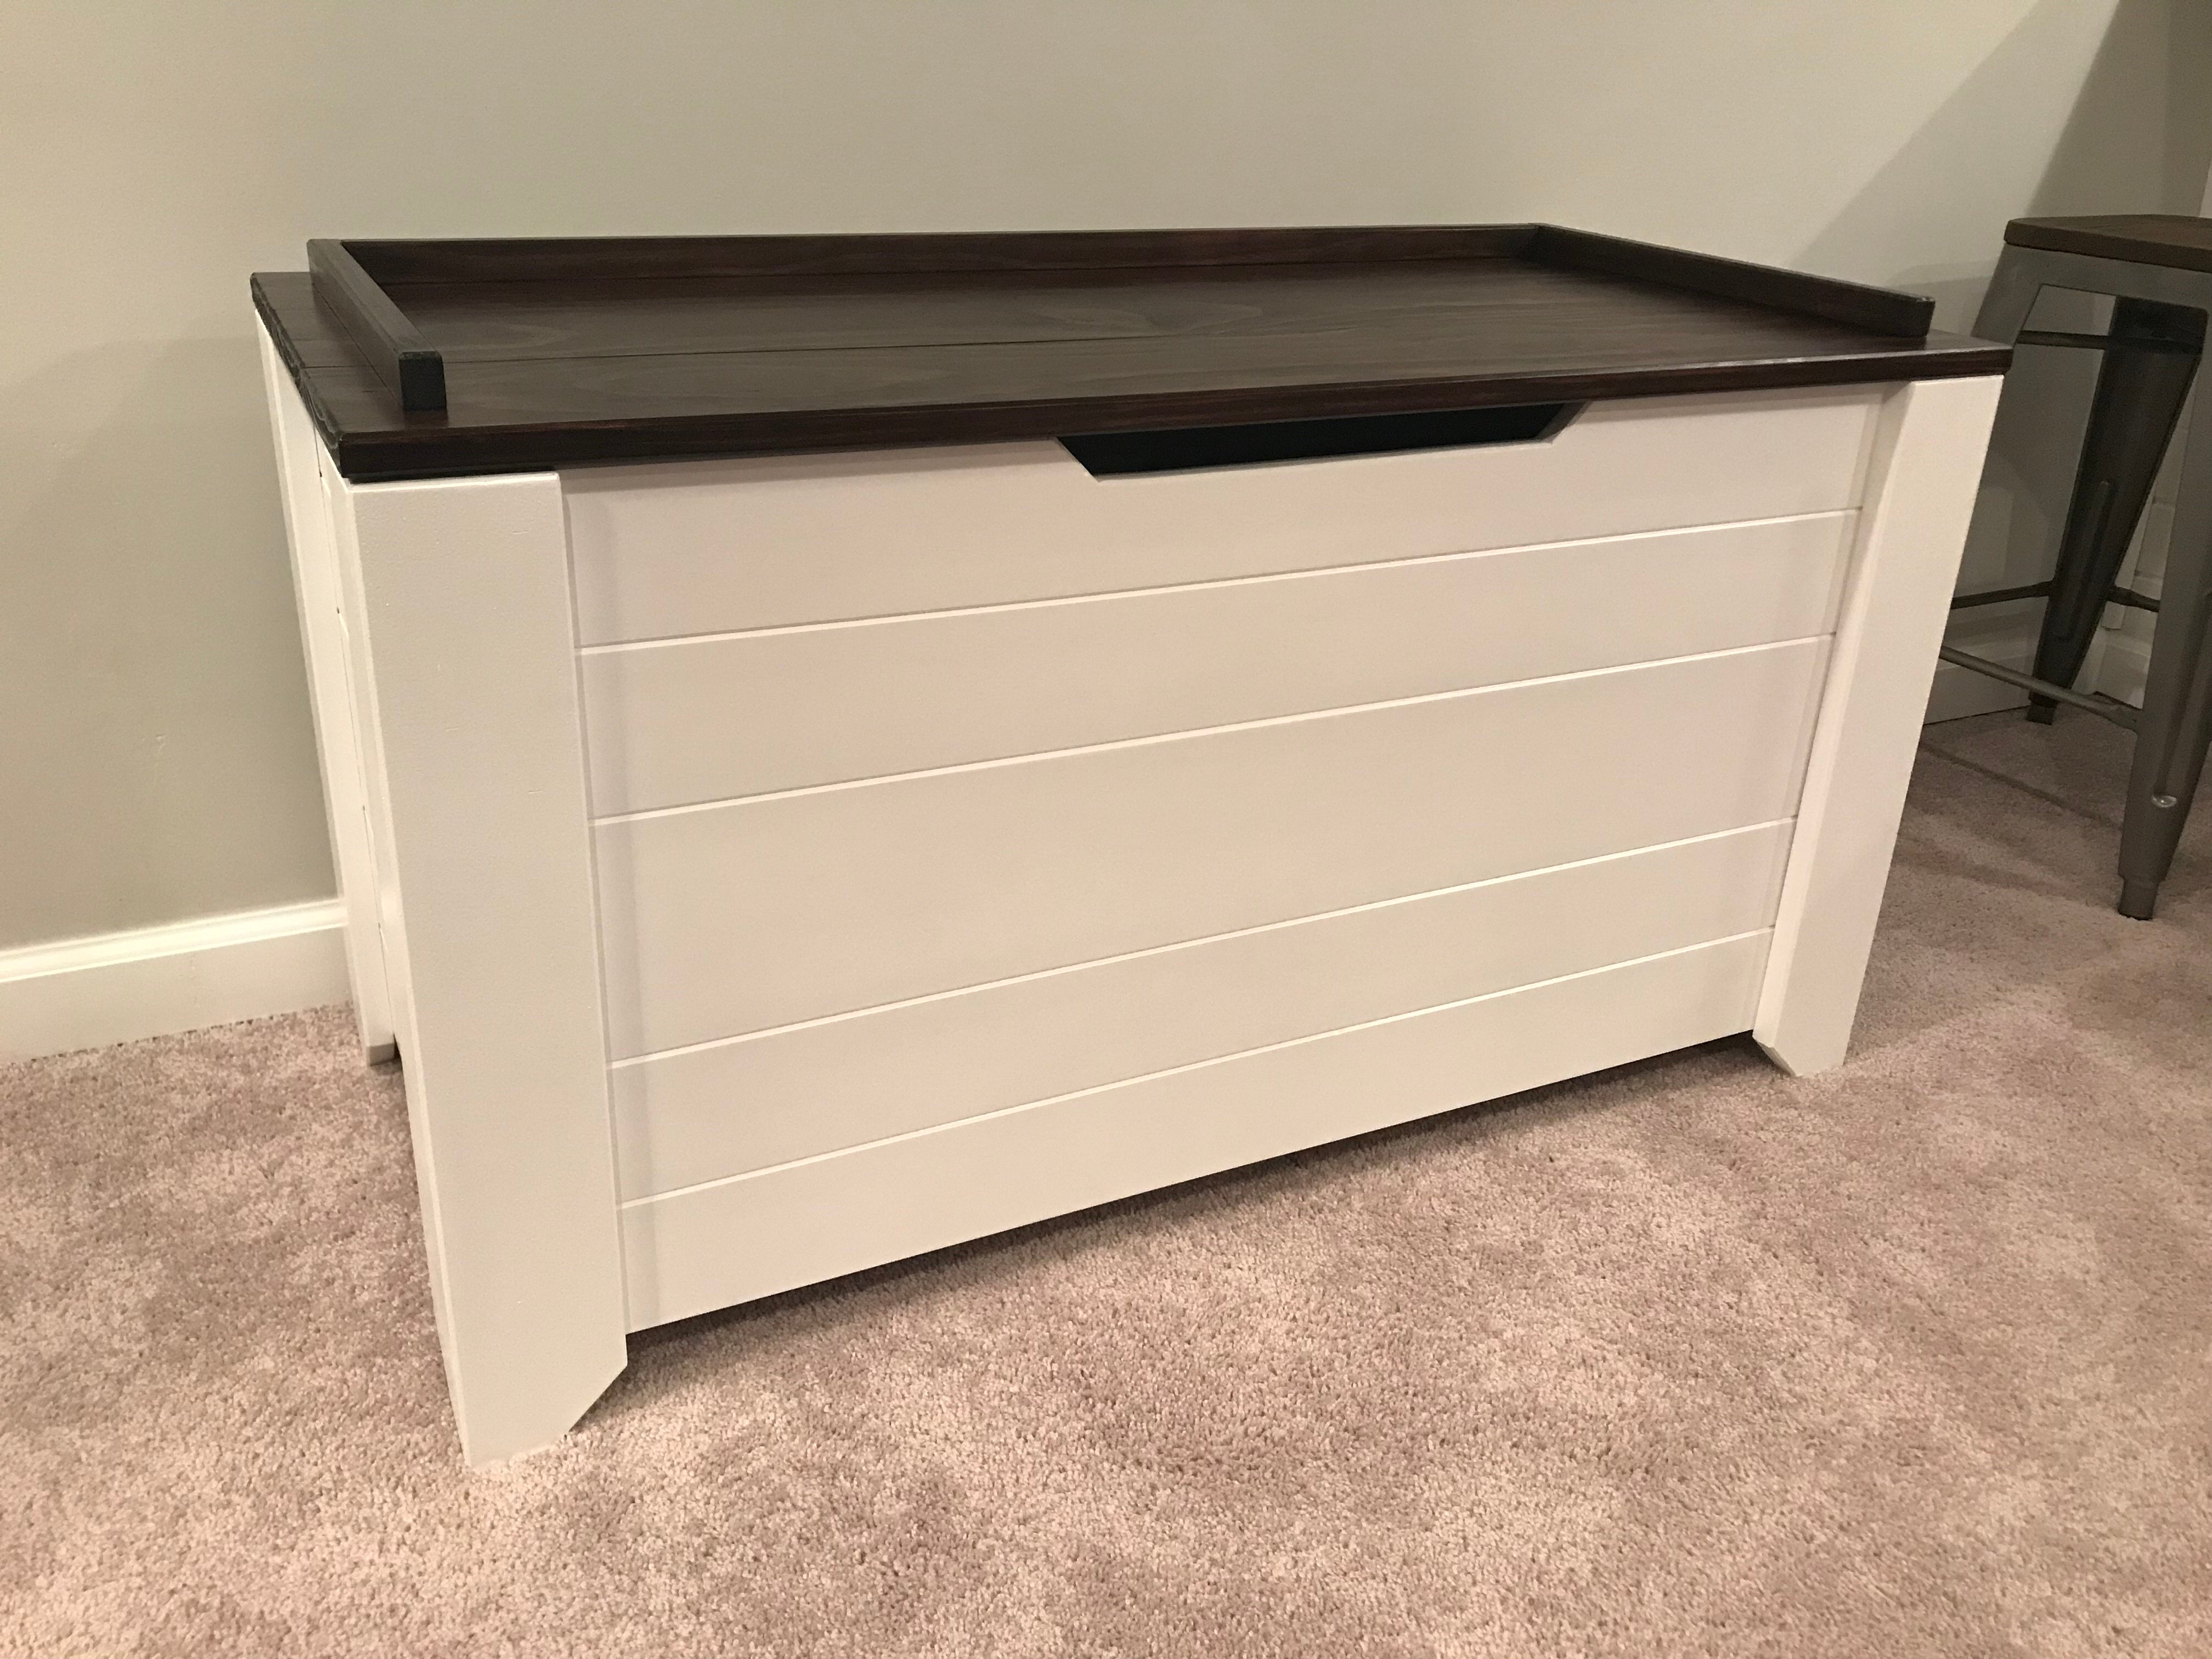
Been wanting to build this for awhile. Now I know why the plan pics are all unfinished! I modified the plans slightly to allow for 2 slightly larger trays on the bottom and allow for robotic vacuum to clean underneath.