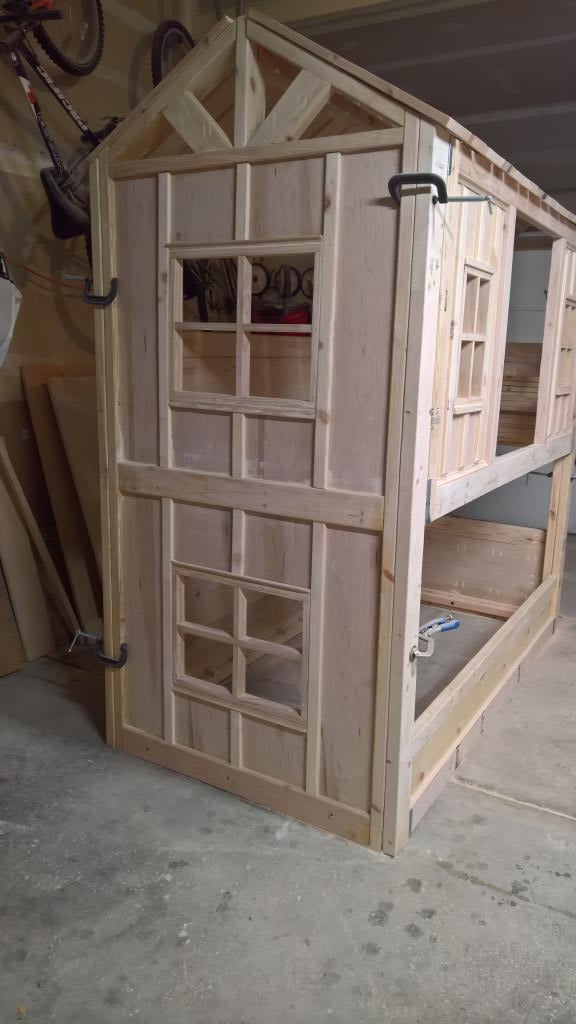
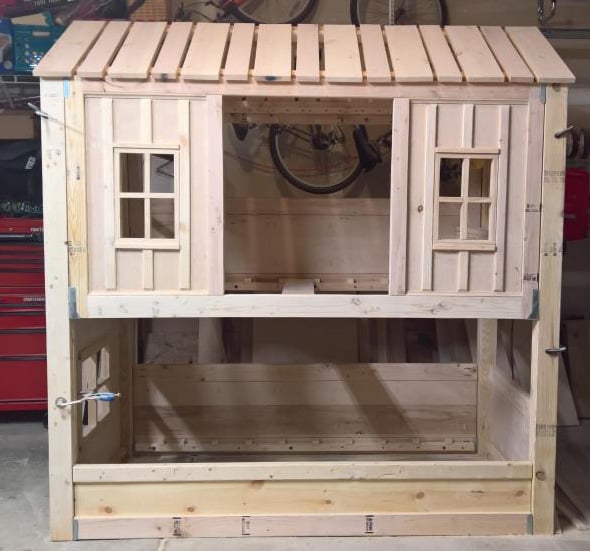
I used the corrugated polycarbonate to cover the greenhouse I made from a chalet style Sun Country Greenhouse Plans. Thanks for the idea.
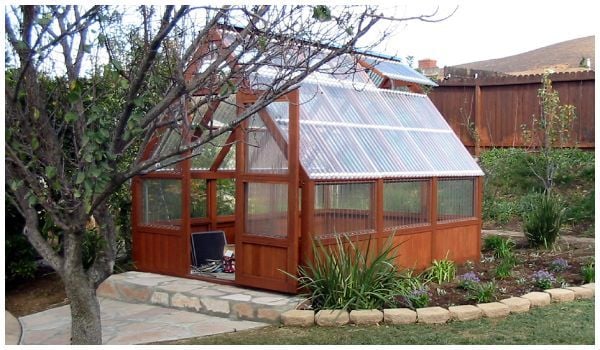
I saw the barn shaped greenhouse plan but preferred a regular roof pitch. I did however incorporate the corrugated polycarbionate as a covering. I find it odd that you guys installed the polycarbonate horizonitally instead of vertically.
Anyway thanks for the info on polycarbonate.
Built from Plan(s)
Estimated Cost
Using cedar framing... 9 x 16' @ $3000 +/-
Estimated Time Investment
Week Long Project (20 Hours or More)
Finish Used
Behr
Recommended Skill Level
Intermediate


Comments
EdenSprings
Fri, 05/01/2020 - 00:35
Chalet Greenhouse
Beautiful!
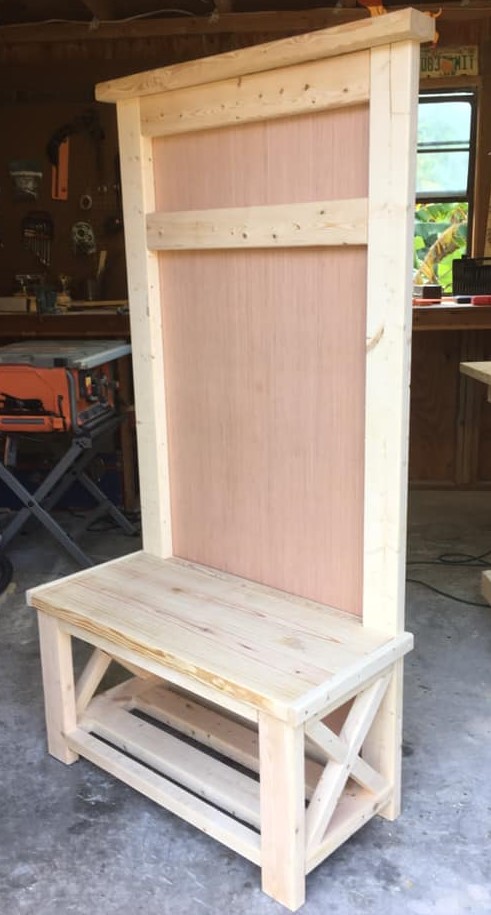
hauxy
Tue, 09/01/2020 - 17:47
Love this! I really prefer…
Love this! I really prefer the roofline on your greenhouse. Did you modify Ana's design, or did you get plans from another site? Would love to replicate your design if possible-very elegant.
kateandnatie
Mon, 03/29/2021 - 21:59
Are there plans for 10x25…
Are there plans for 10x25 greenhouse?
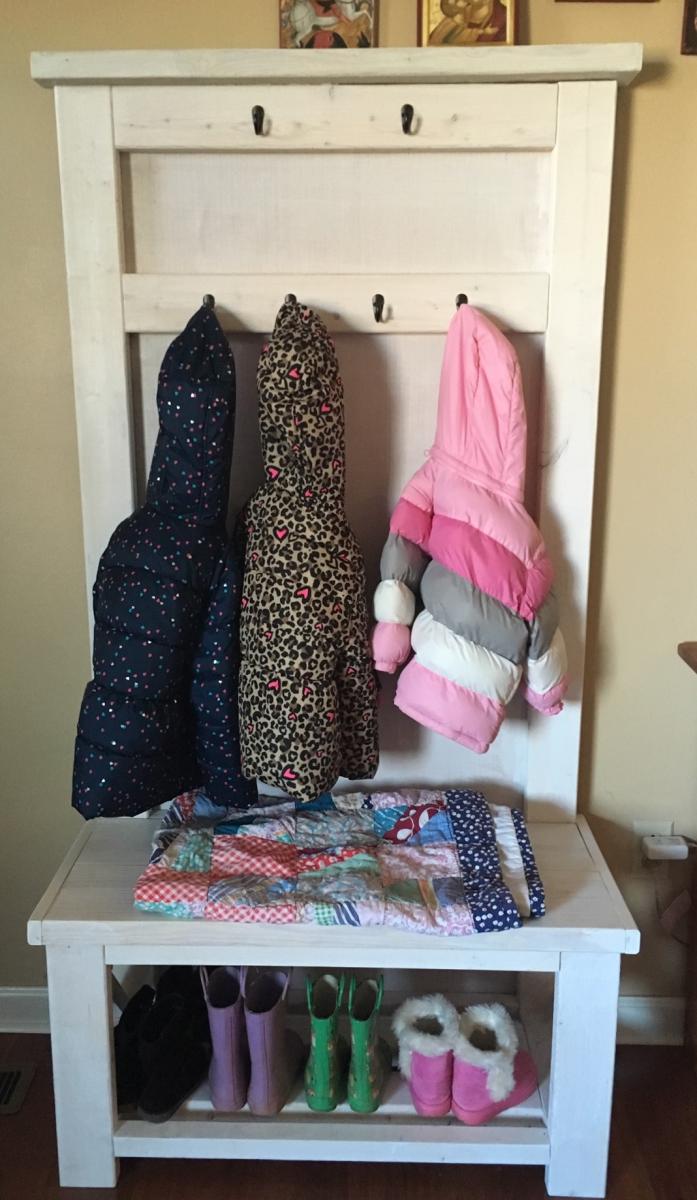
Dianne Kynaston
Sun, 07/11/2021 - 13:42
Love this!
Love this!