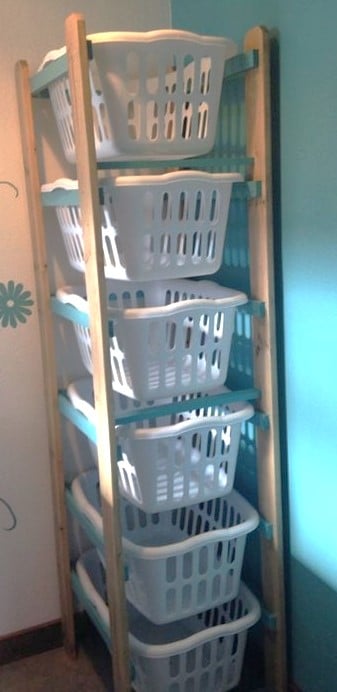
Laundry Tower
Reader submitted photo
Built from Plan(s)
Reader submitted photo

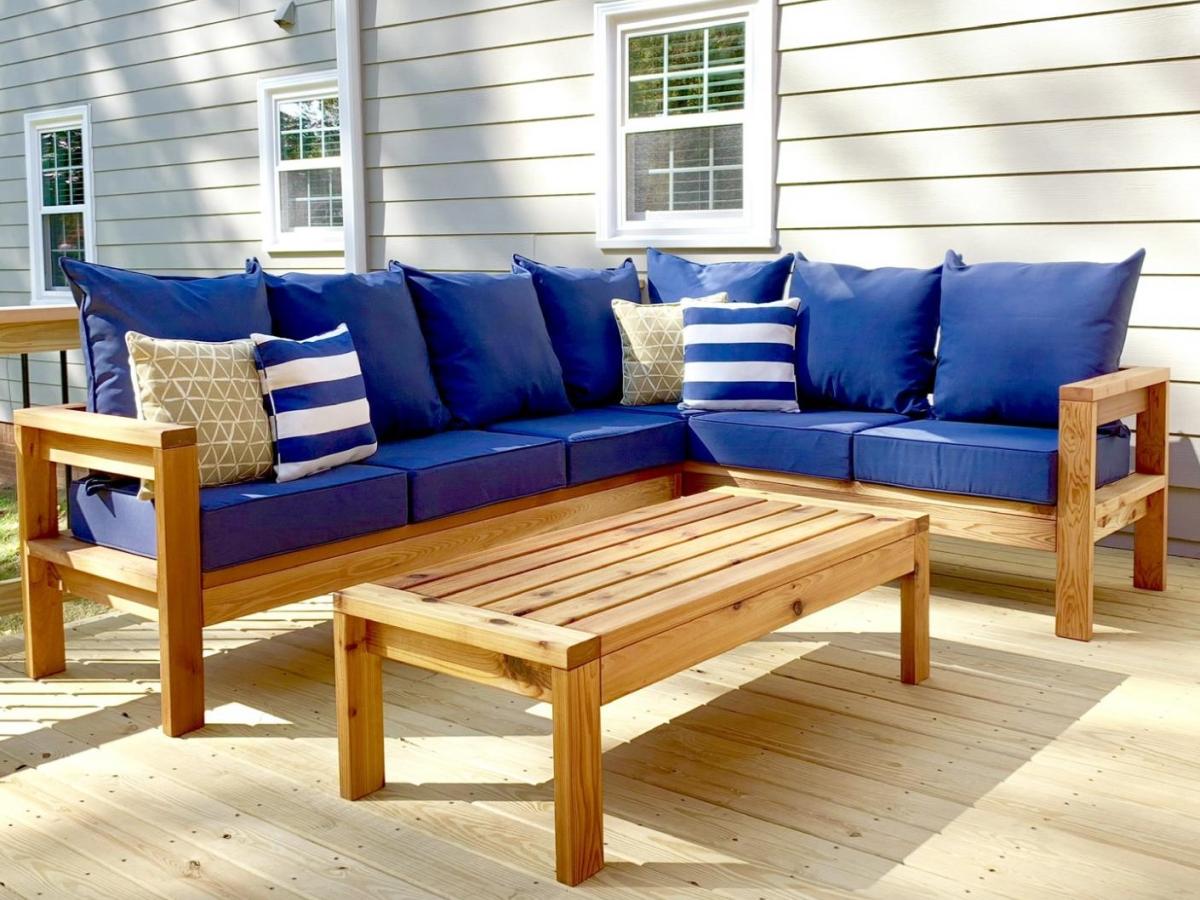
I followed the instructions on the Ana White website, and followed a few of the commenters ideas to reduce the size slightly to minimize the wood costs. I used pocket holes wherever I could to try and reduce the amount of visible screw heads. The cushions were purchased at Big Lots and the cedar was purchased at the big home improvement store. My 5 year old and I worked on this and are so proud of how it turned out.
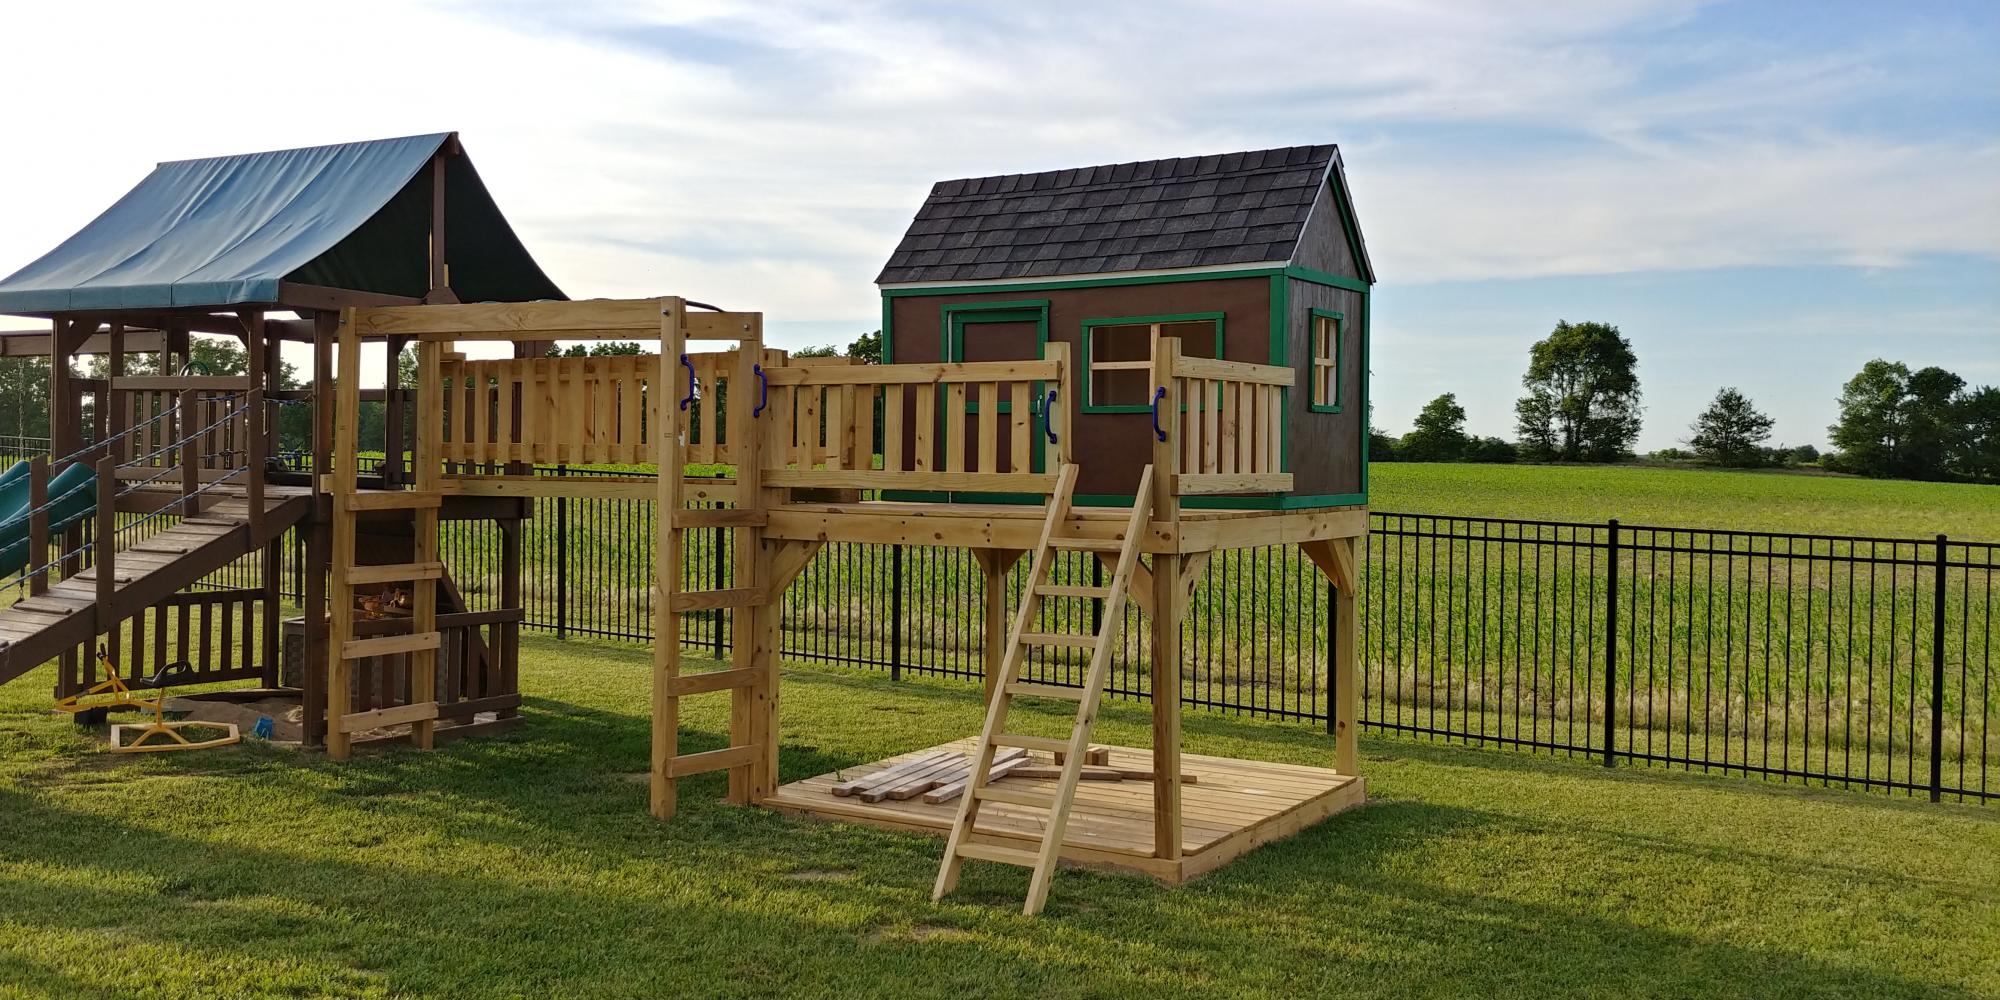
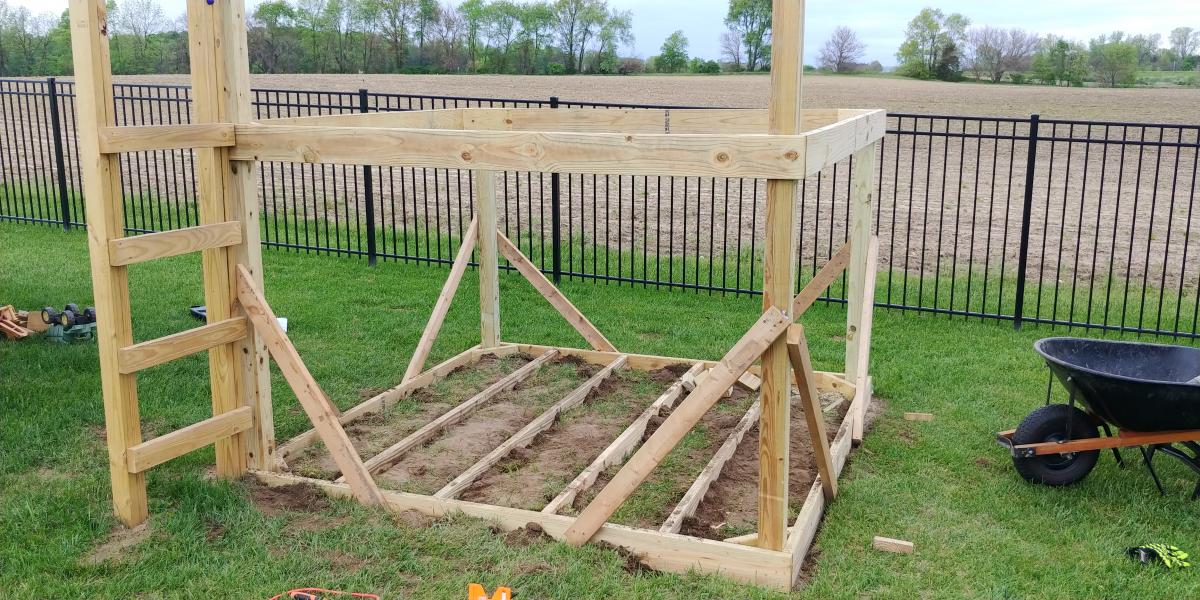
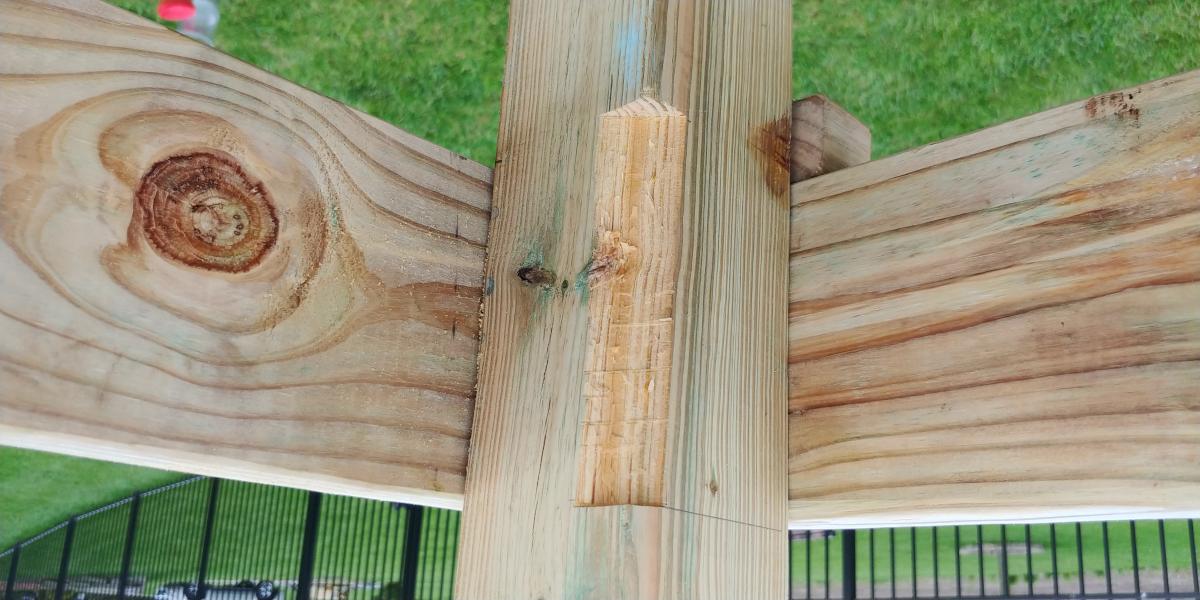
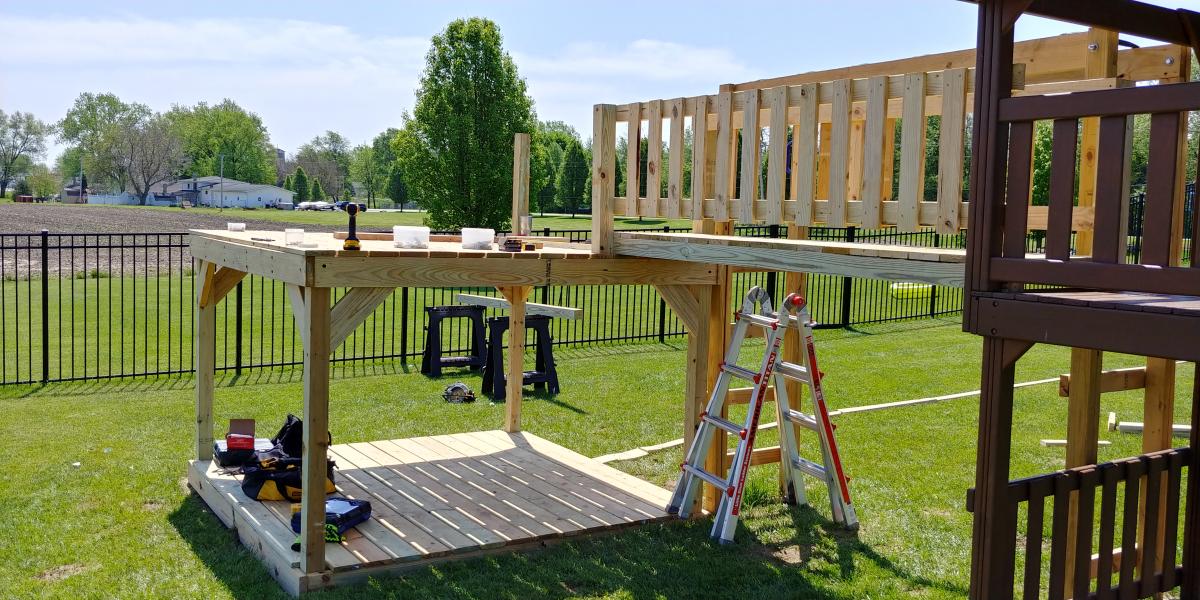
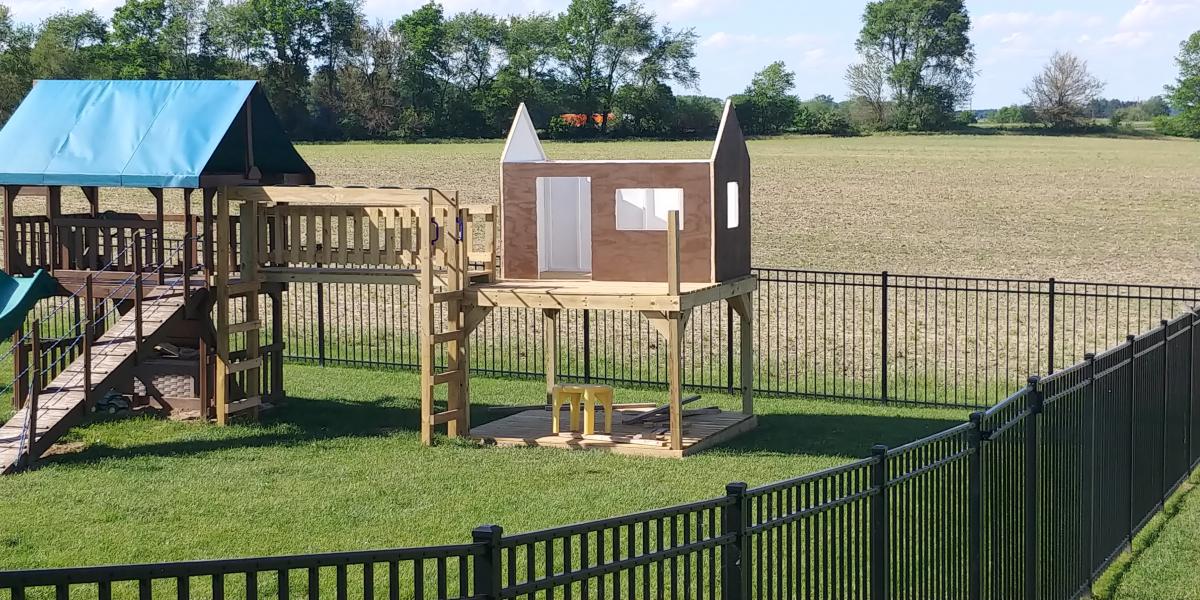
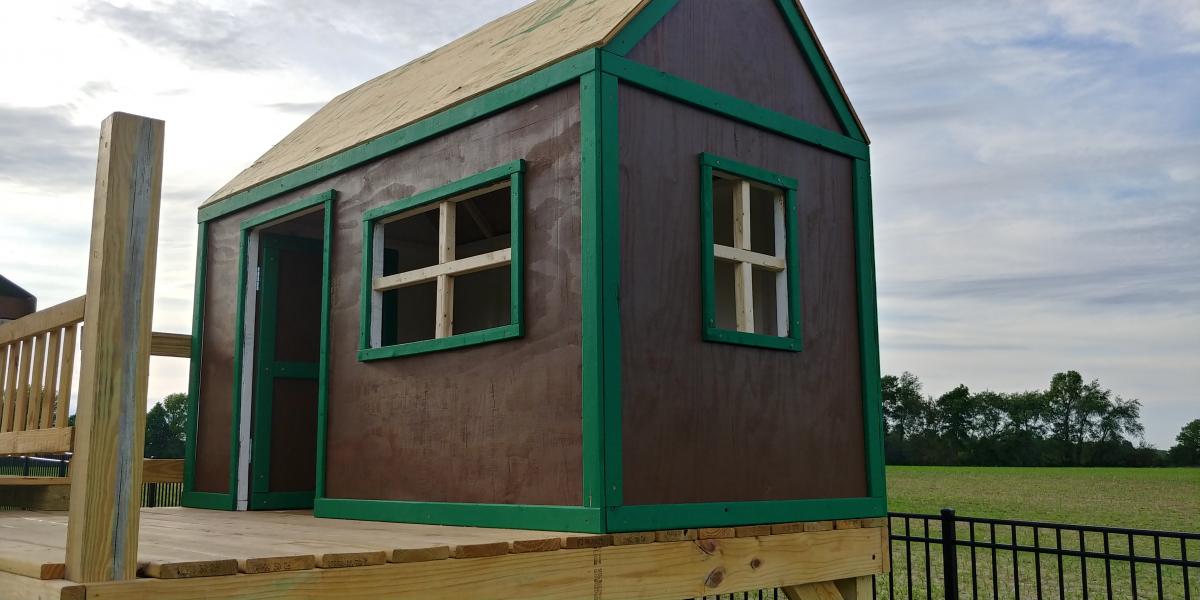
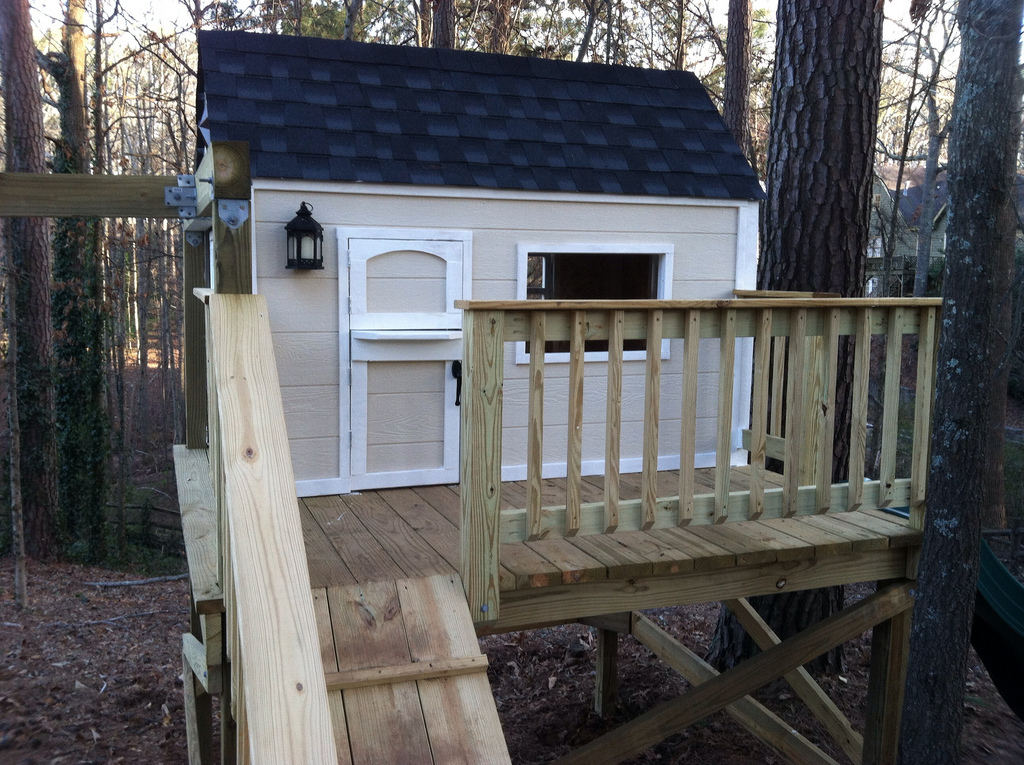
Decided our old play set needed an addition, landed on these plans of Ana's. Sat on them and mulled them over for months. Once the wife said something about adding on to it I made the purchases needed. Connected the two platforms with a bridge. I used 4"x4"x10' for the runners, same boards as the decking for the platform of the bridge(5/4"x6"), 2x4's and 1x4's for the railing. If you look at the 3rd photo, I had to chisel out the 4x4 post to get the 2"x6"x12" support to fit correctly. This should measure 2"x6"x13". Another change I made was to cut the bottom and top trim pieces longer on the front and back sections so that the trim would cover the framing of the gable end walls (see last photo). my son wanted windows so I faked in some windows with scrap 2x2's. I used 2x6's as supports from the 4x4's to the 2x6 framing (see photo 3) I added the monkey bars about a month before deciding to do the platform/deck and playhouse. The ladder is based loosely off of a couple of plans I found online. I was able to do all of this work myself except for the roof. Need my dads help to lift the plywood, he then helped me with the rest of the roof.
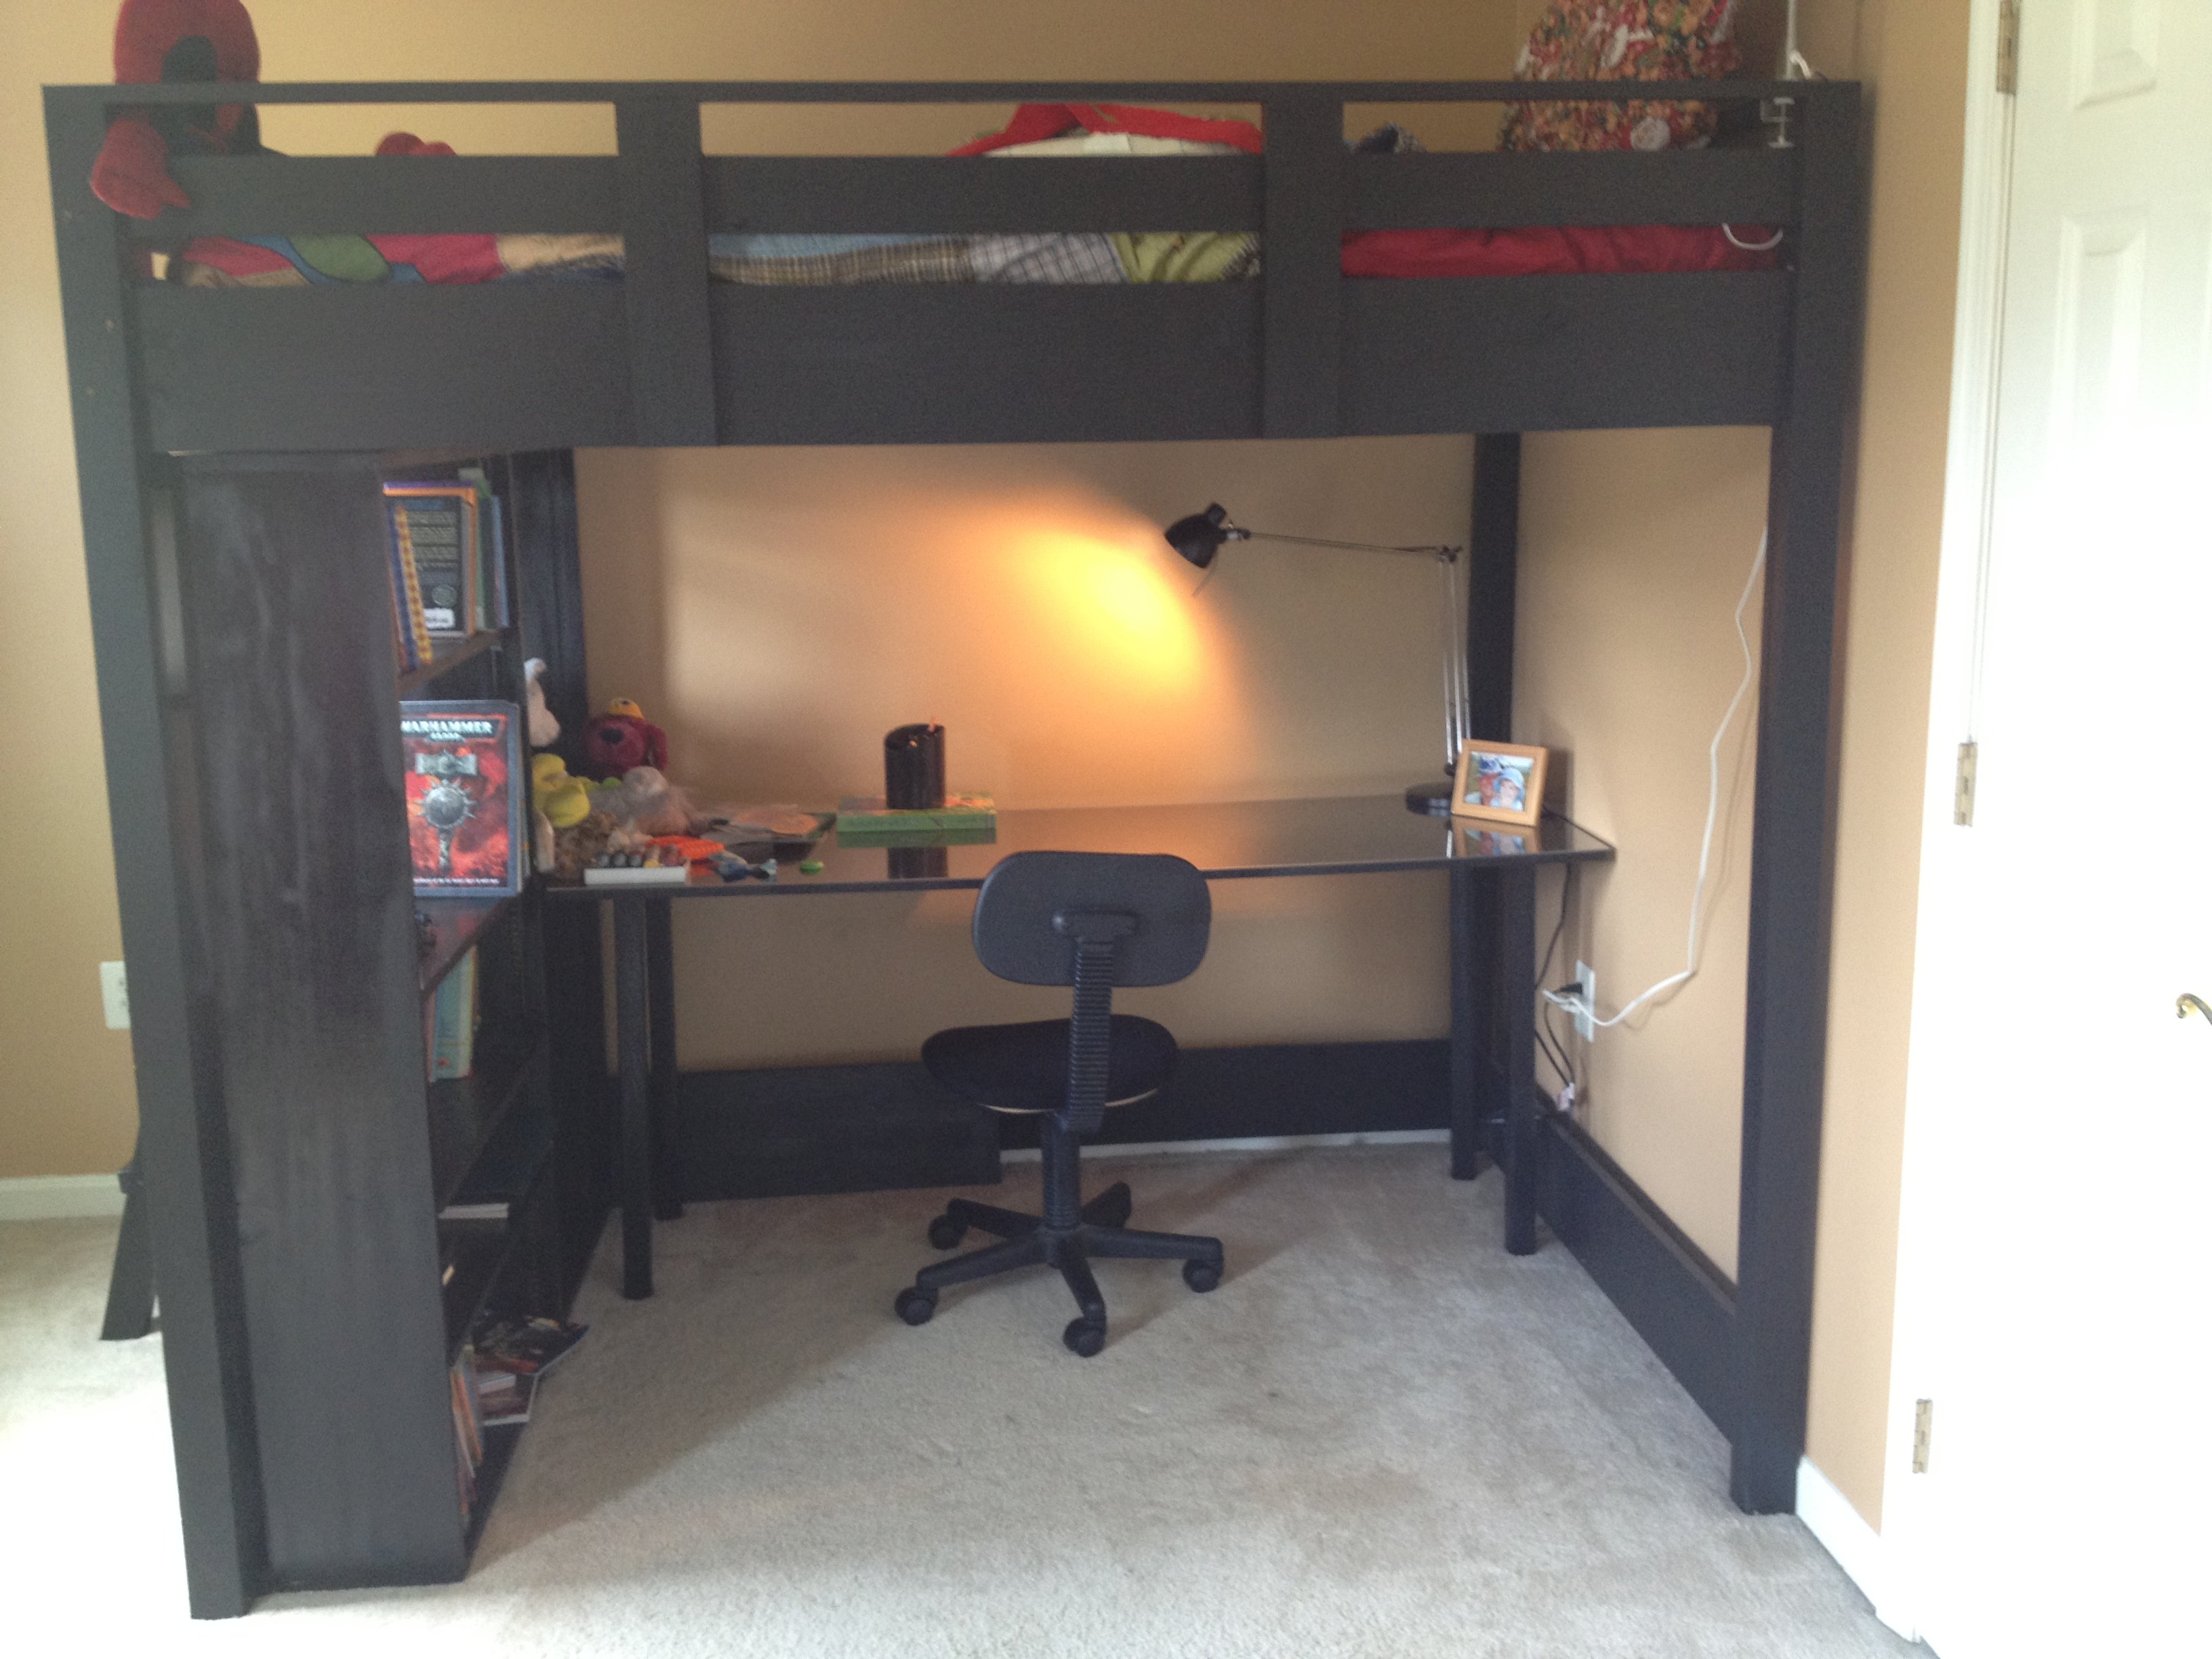
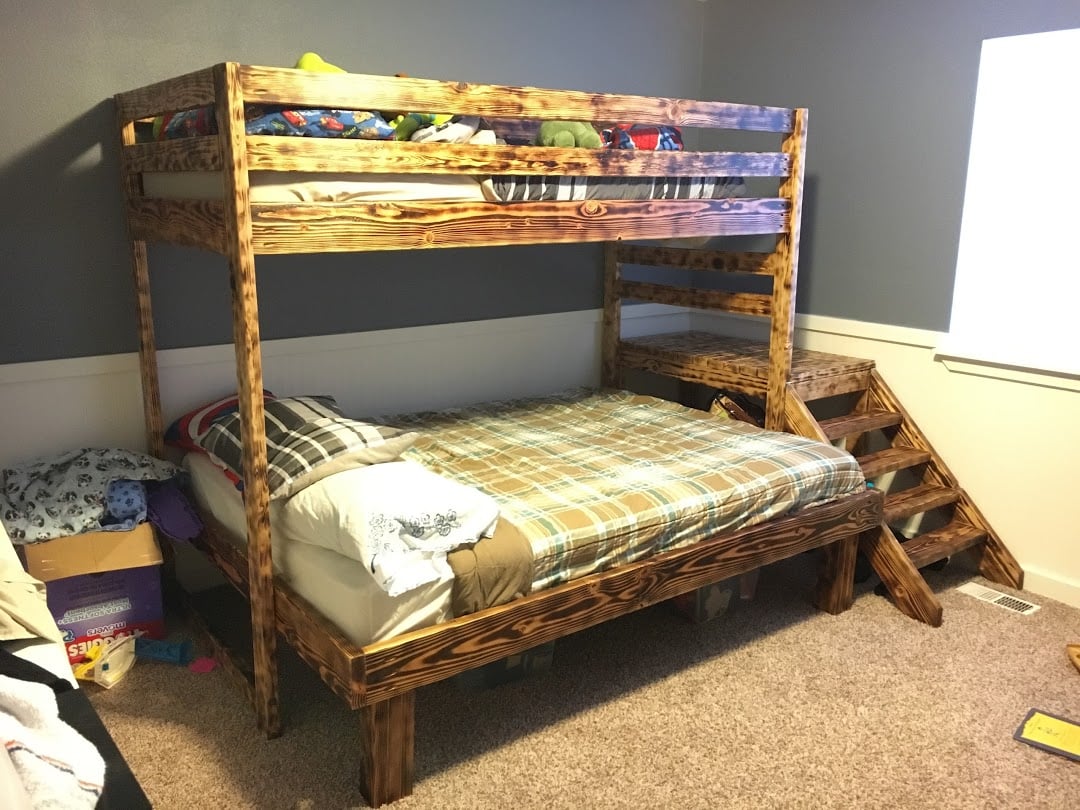
My son needed more room in his bedroom...and to be rid of the very girly furniture he inherited when he moved into his "big boy-ish" bedroom. At 10 yrs old, it was high time he got a bed that wasn't pink-tinged, white washed pine with 4 posters and enough curlicues to choke a forest. He also needed a desk which I couldn't really fit in his room with the armoire and chest of drawers that came with the Queen sized bed.
So off to Ikea we went and I saw a black loft bed for $300, but it was really, really high which meant I would have to cut it down and it was not sturdy at all. I looked at PB and saw the $1800 bed. Um, no - that wasn't happening. So, off to Ana-White I went and I'm so happy I did!
I built the full sized version of these plans and, to keep costs down, used wood I had on hand. This meant I had to work a bit at the cuts, but it all worked out.
Mods:
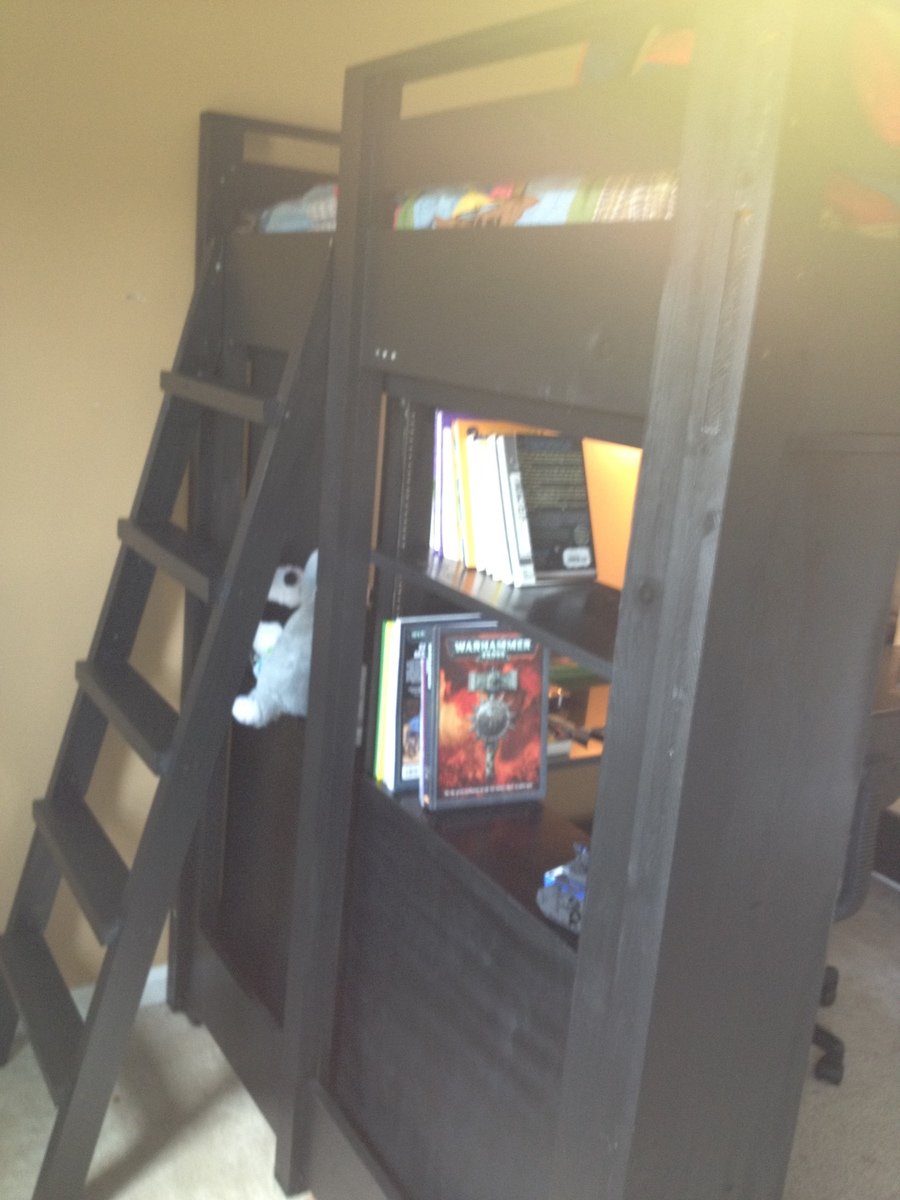
1) I modified the railings to have the ladder at the end of the bed to keep away from the ceiling fan.
2) Because I put the ladder at the end of the bed, I got very nervous about having a soon-to-be teen climbing on to a ladder secured to a 1x10 that was only connected to the side railings with glue and screws. So I sandwiched extra 1x3s over the bottom rails and attached them to the top railing.
3) I was very nervous about making sure that the bed was adequately supported so I put a 2x4 down the center instead of the 1x2.
4) I went a wee-bit overboard screwing things together to the point where it's a bit embarrassing and now I have to paint over the screw heads.
5) I made the ladder treads with 2x4's, modifying the inside spacer board cut lengths.
Because I had quite a bit of lumber on hand, the bed only ended up costing me about $90.
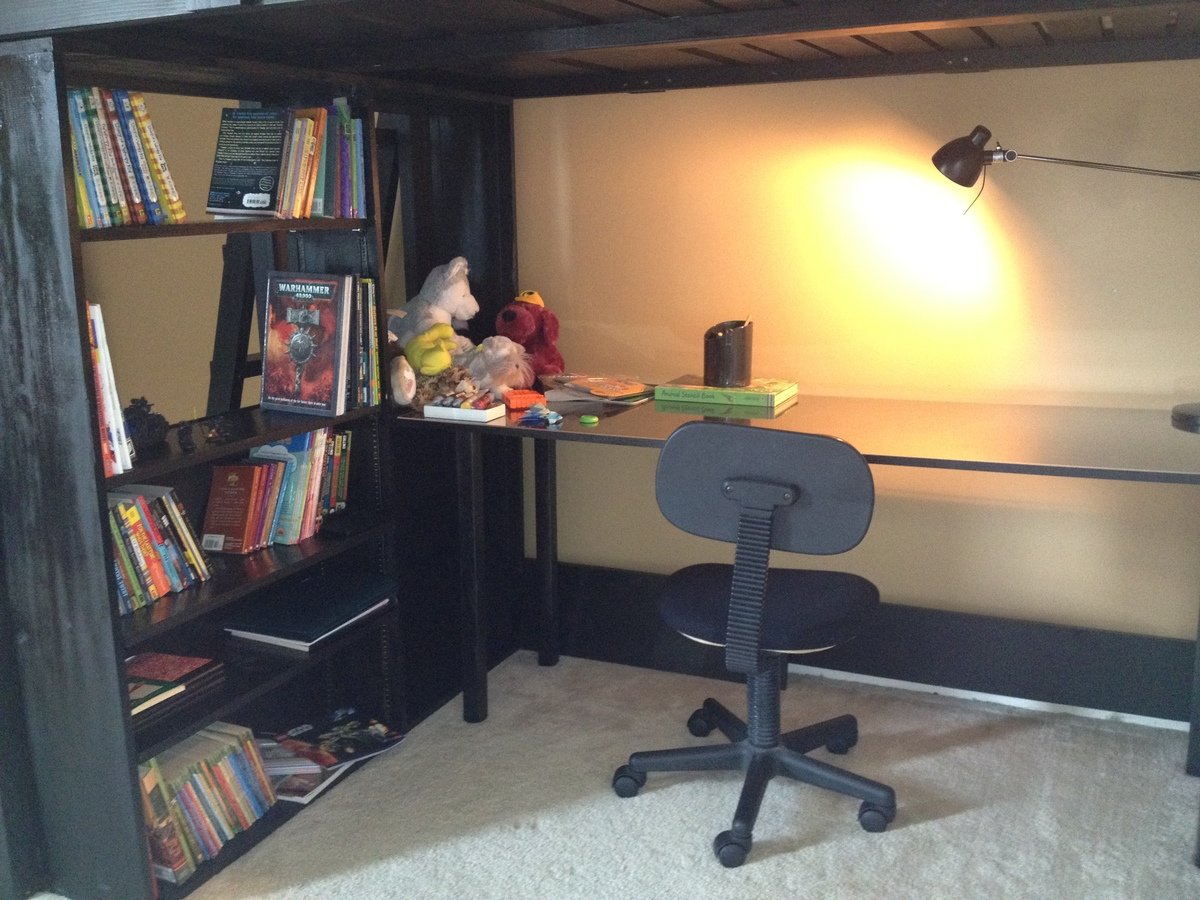
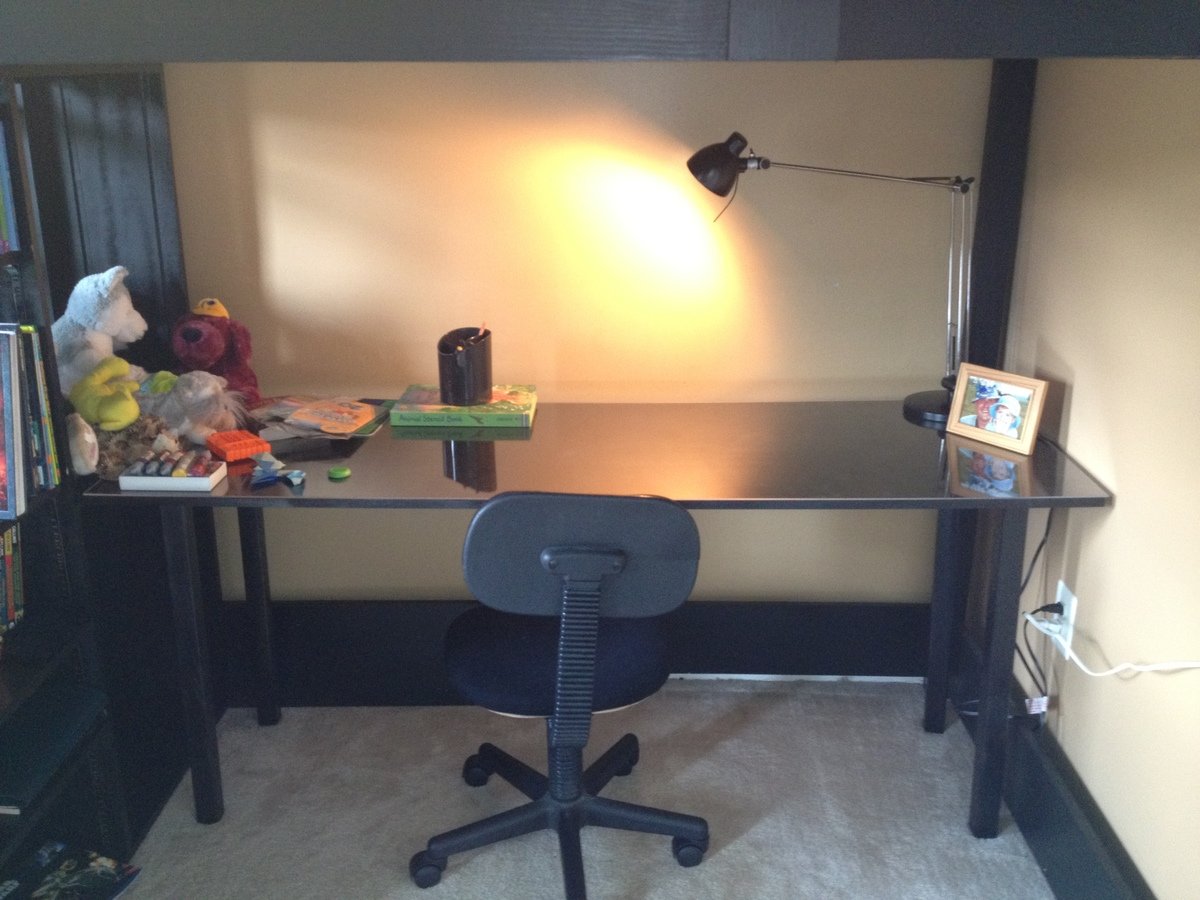
For the bookcase, I did end up buying the 1x12s and the adjustable shelf railings. I made the book shelf the entire width of of the bed and split the two sections based on width of the 1x24 board I bought for the desk. I only put the backer board up half way so that the daylight could get underneath the bed and make it not so cave-like.
The book case cost me about $70.
The desk was the easiest...but most costly item. A 1x6x24, 4 table legs and the table leg mounts ran me about $80. The plexiglass top that I had cut for the top cost me about $80.
Time wise, this would have taken me a lot less time than the 4 months it took - but I worked on it as I could and when I could, by myself. I got some friends to help me bring it upstairs and put it back together, but it was mostly done when I could fit in some time.
My son LOVES this and it really does give him so much room!!! Thanks Ana - I really appreciate it!

Thu, 01/17/2013 - 08:42
Hello,
Where might I find the modified loft bed plans that allow for a full-sized mattress and the under desk-shelves?
Thank you!
Fri, 01/18/2013 - 07:38
Hi!
To modify this to be full sized, I just added 15" to the width of the bed. Ana said this in the plans:
Cutting Instructions:
Converting to Full Size This bed can easily be converted to full size. You will simply need to add 15″ to all boards that run parallel to the ends. This includes the planks, end top pieces and the slats. Shopping list will need to be adjusted as well.
So I modified the cuts to the head and foot board parts and the full size mattress fits perfectly.
For the shelving underneath, I just looked at some of Ana's other plans for shelves and winged it.
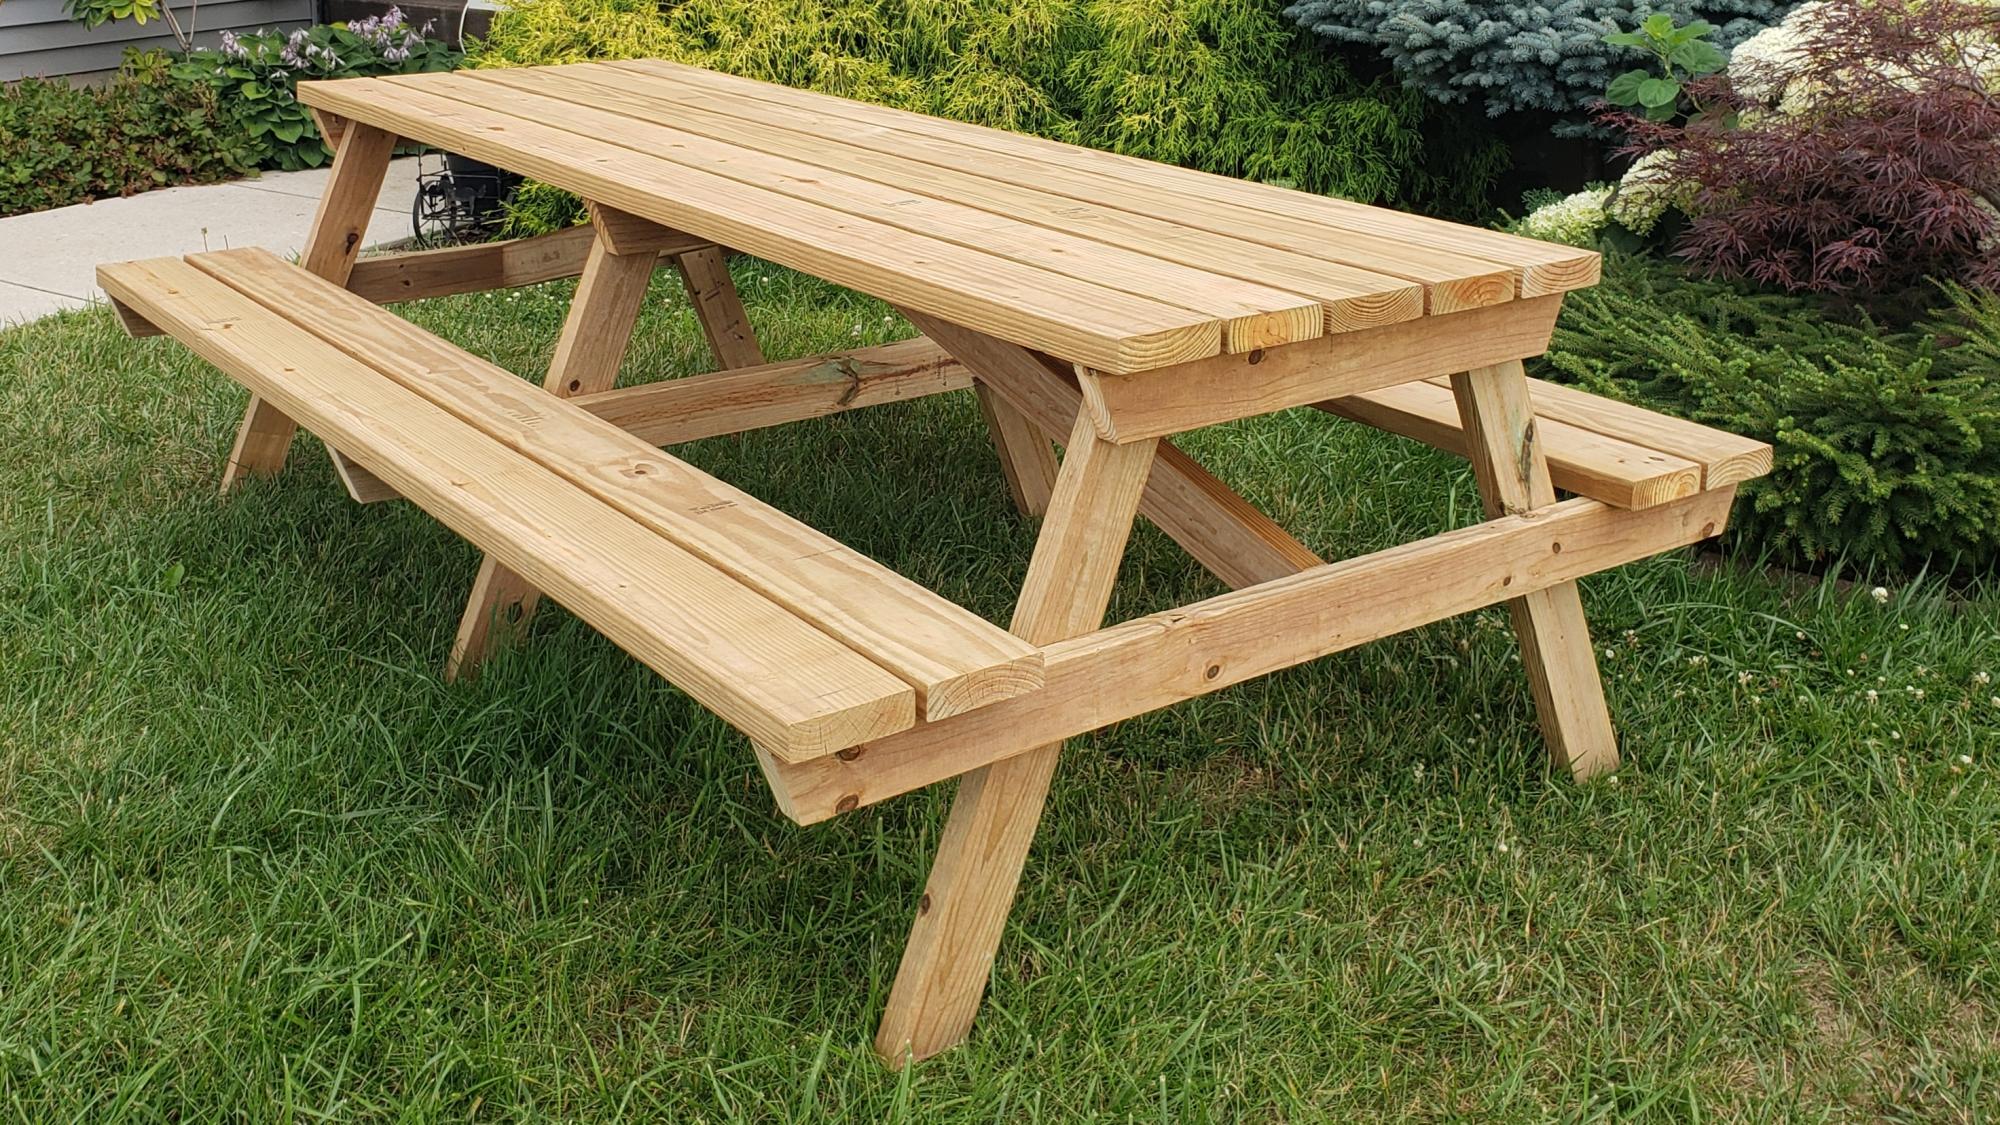
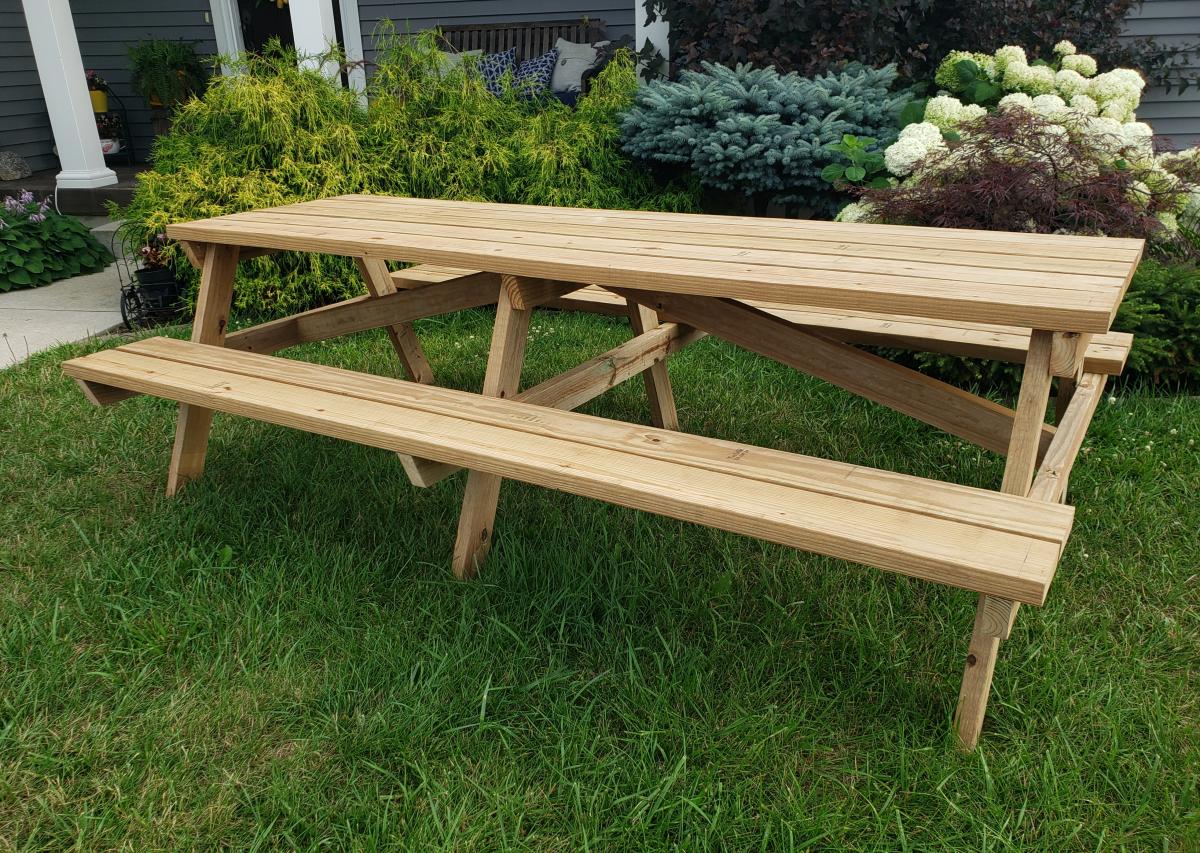
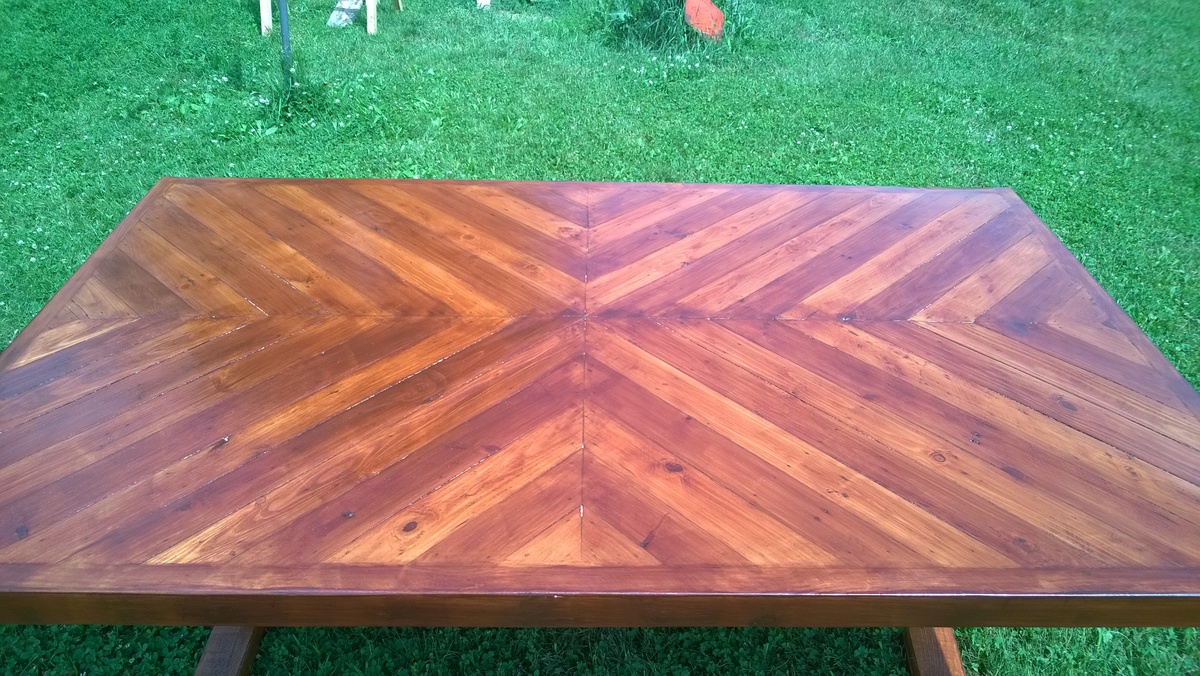
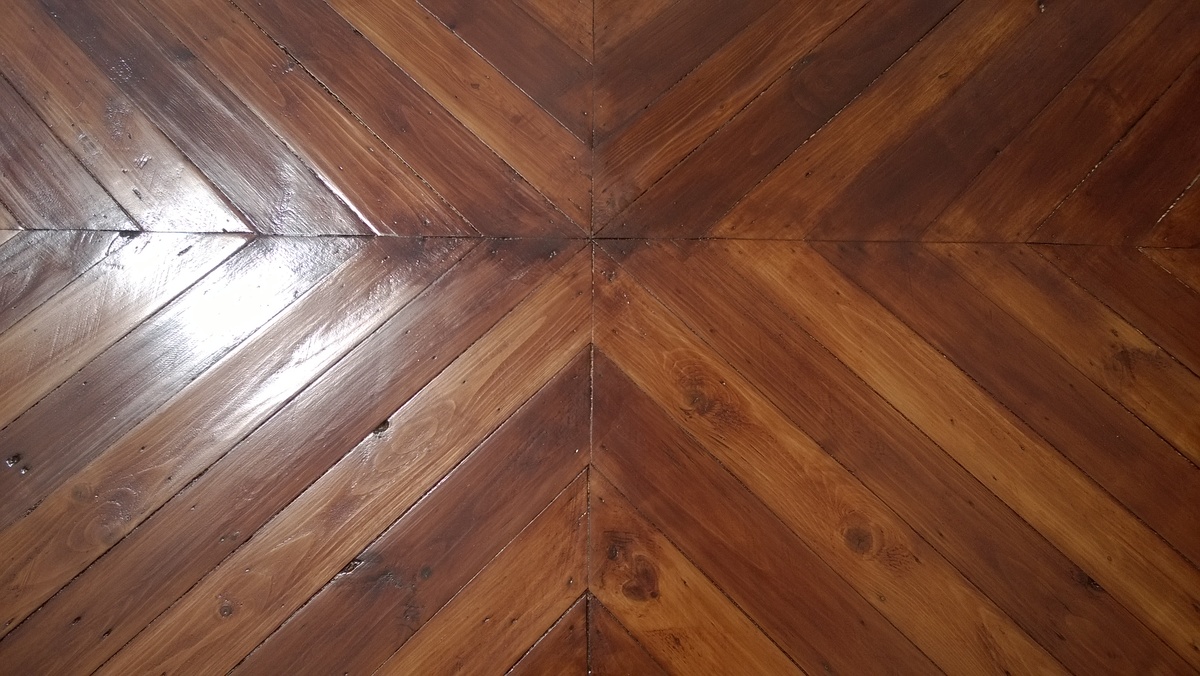
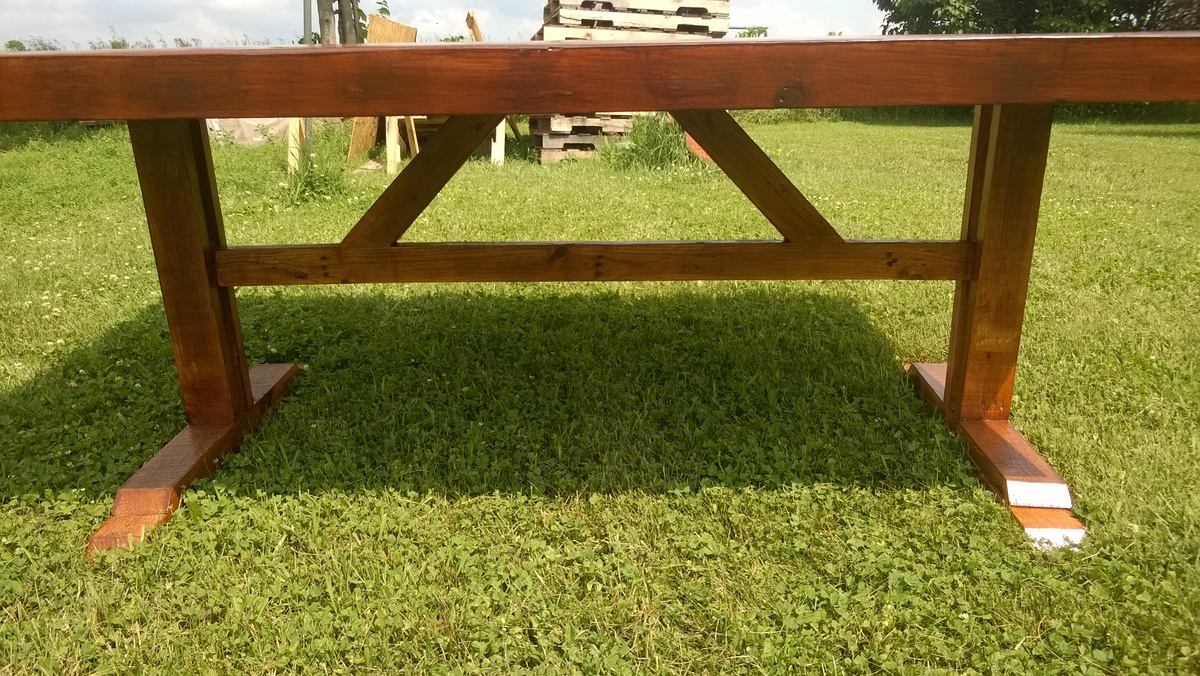
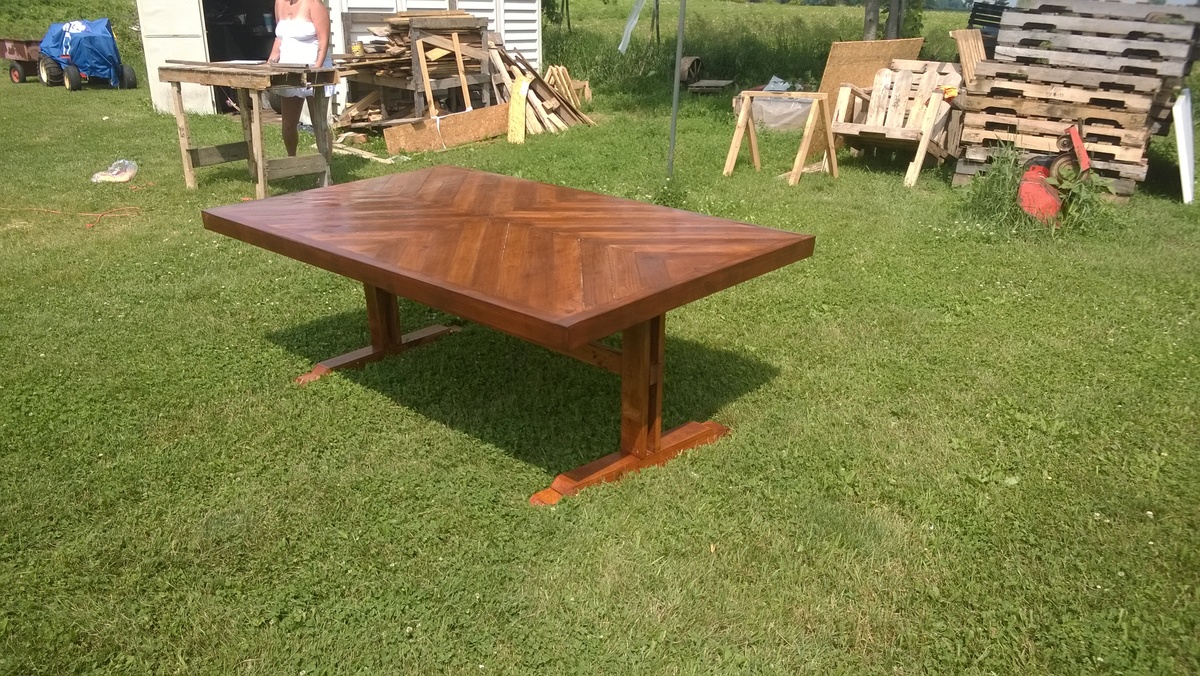
My teenage son and his father took over the bulk of the building duties this time. We chose to use treated lumber as untreated lumber with finish applied doesn't do well in Michigan weather in my experience. We made it more beautiful by using the treated lumber in cedartone. We used pocket holes to attach the top and seats to the supports to make for a smooth appearance. This is one large and heavy table! The plans were accurate and the build was fairly simple, but having many hands made working with the large piece easier.

Wed, 07/22/2020 - 12:10
This is BEAUTIFUL!!! Thank you so much for building this table and sharing photos!
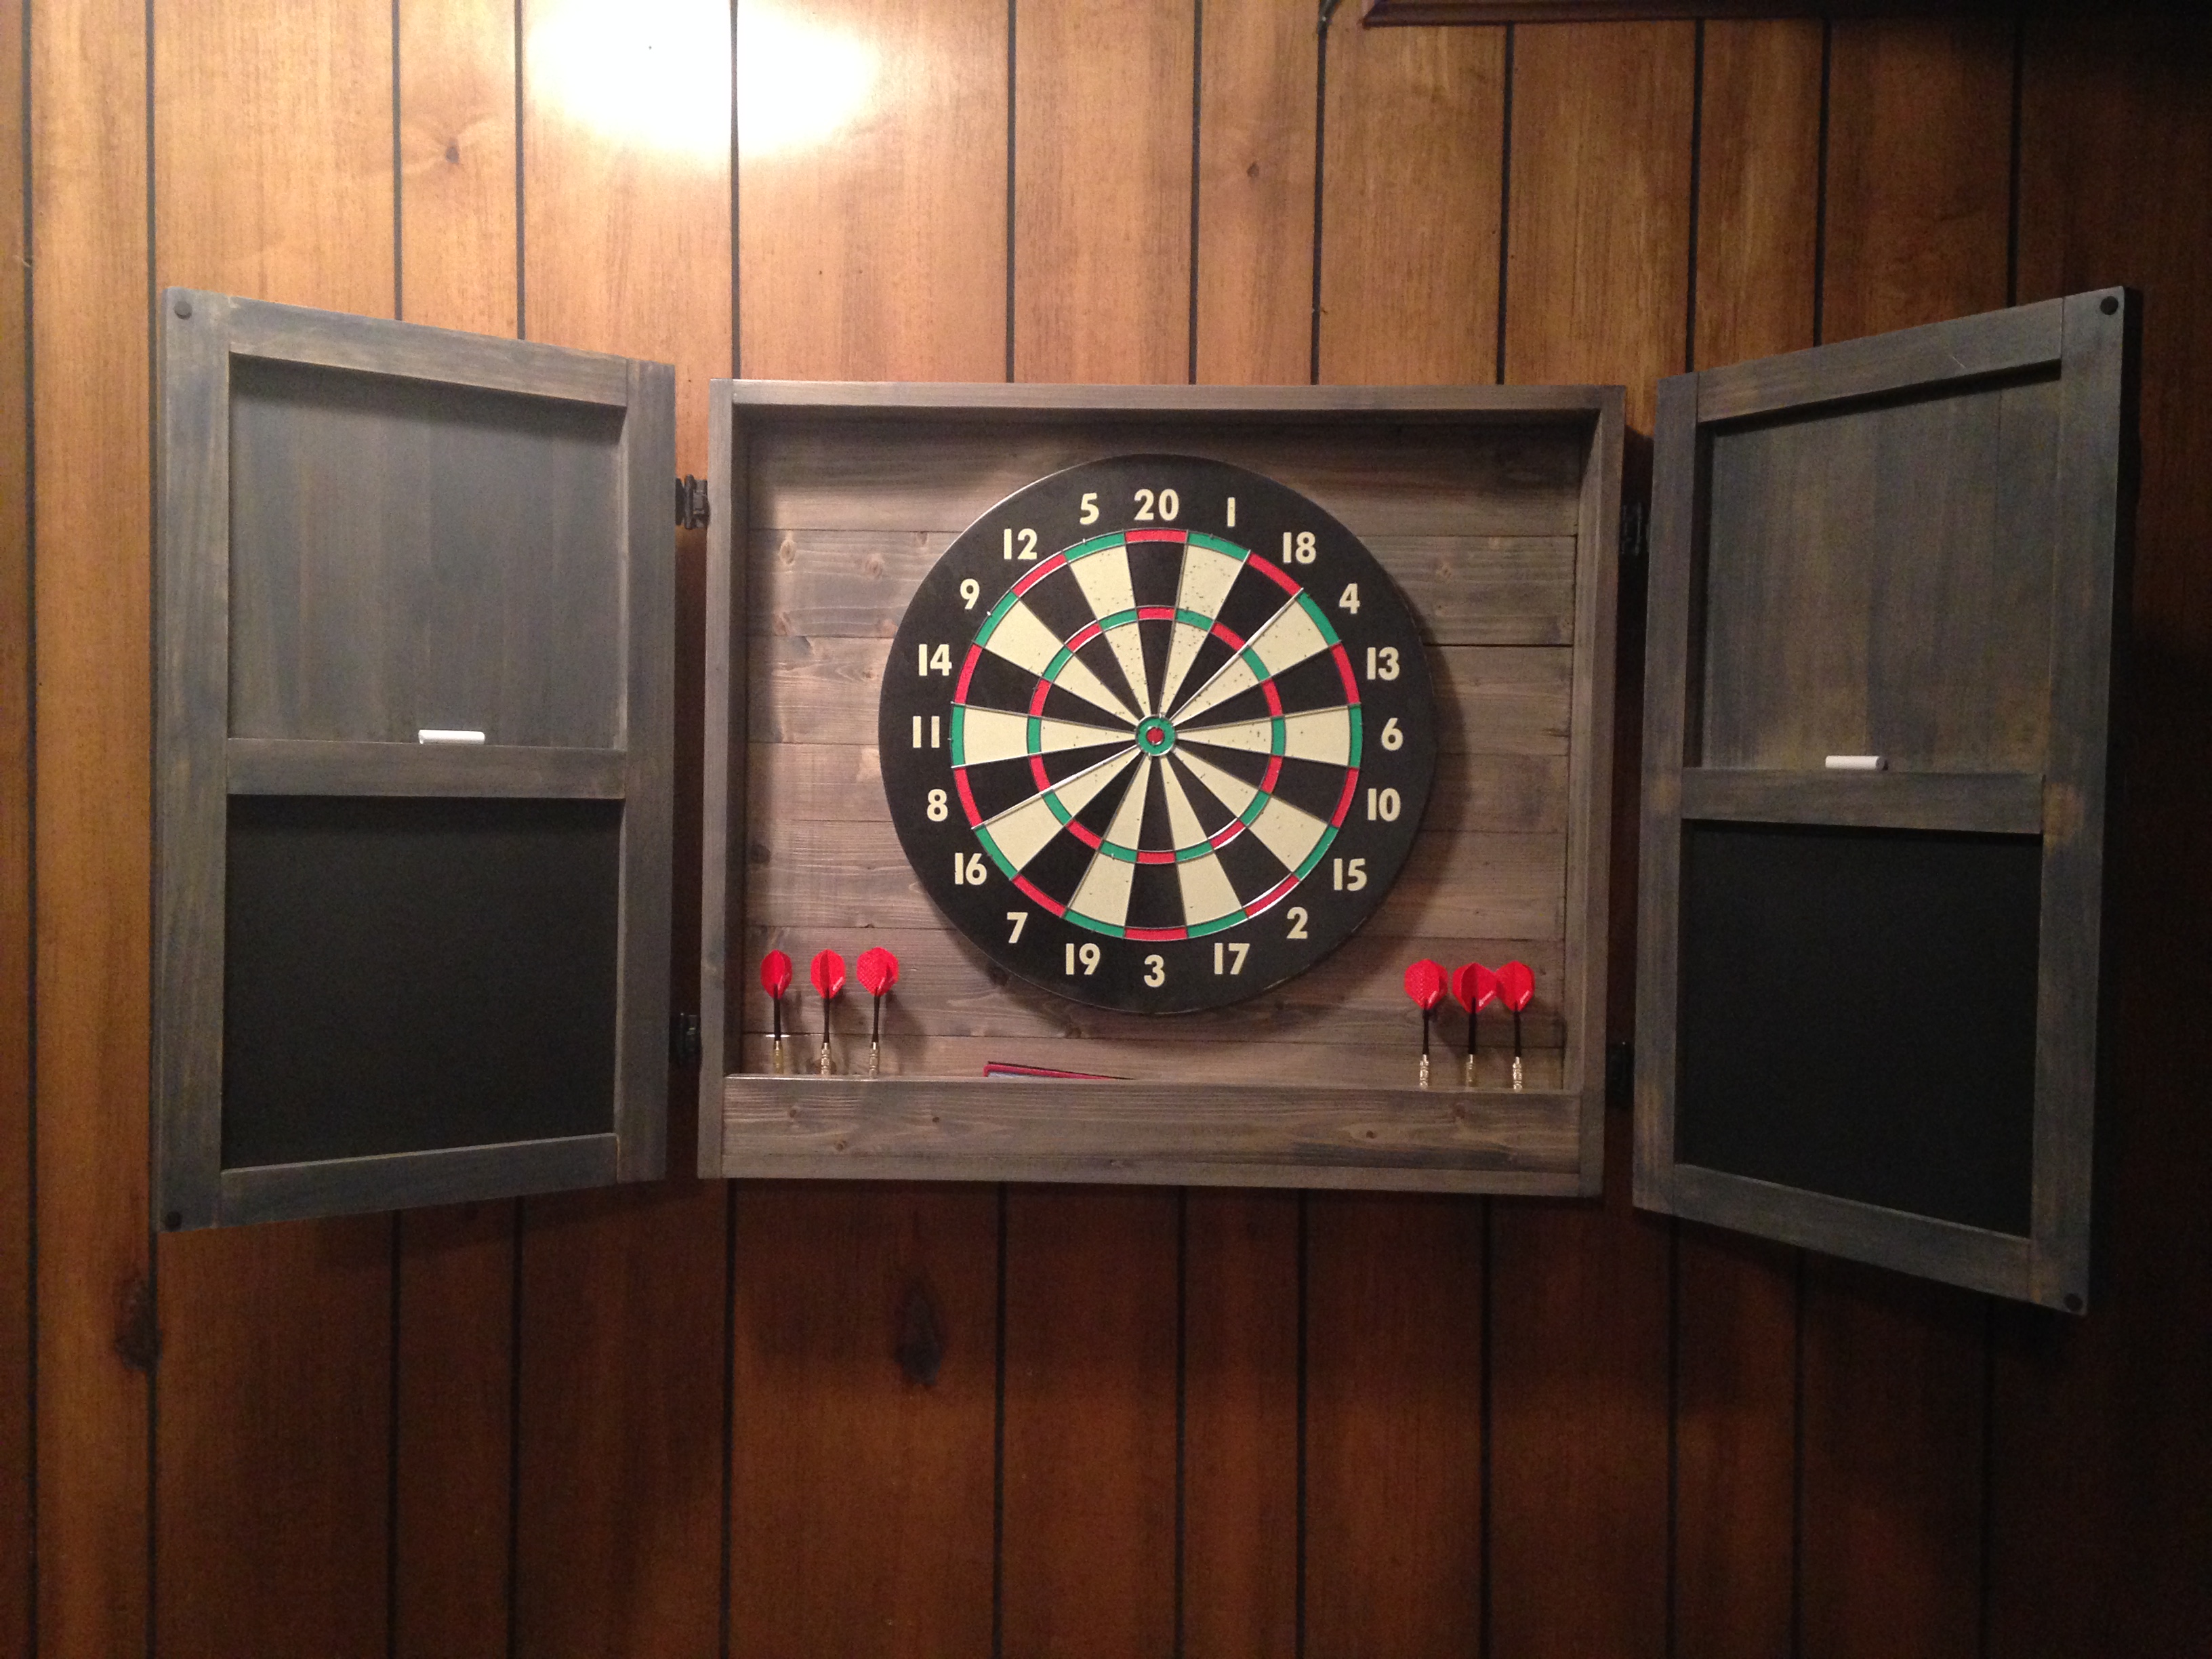
I had a big empty wall in my den/man cave, so I decided to build a dartboard cabinet instead of just hanging a dartboard on the wall. No plans for this, I just made it up as I went. Measured twice, sketched it out and cut as I went.
I use pine 1x4's for the frame and back. 1x3's for the accessory box, 1x2's for the door frame, and poplar strips for the doors and door braces. The darts are held by 6" long 2x2's with holes drilled.
Wood screws, finish nails, and small brads were used to hold everything together.
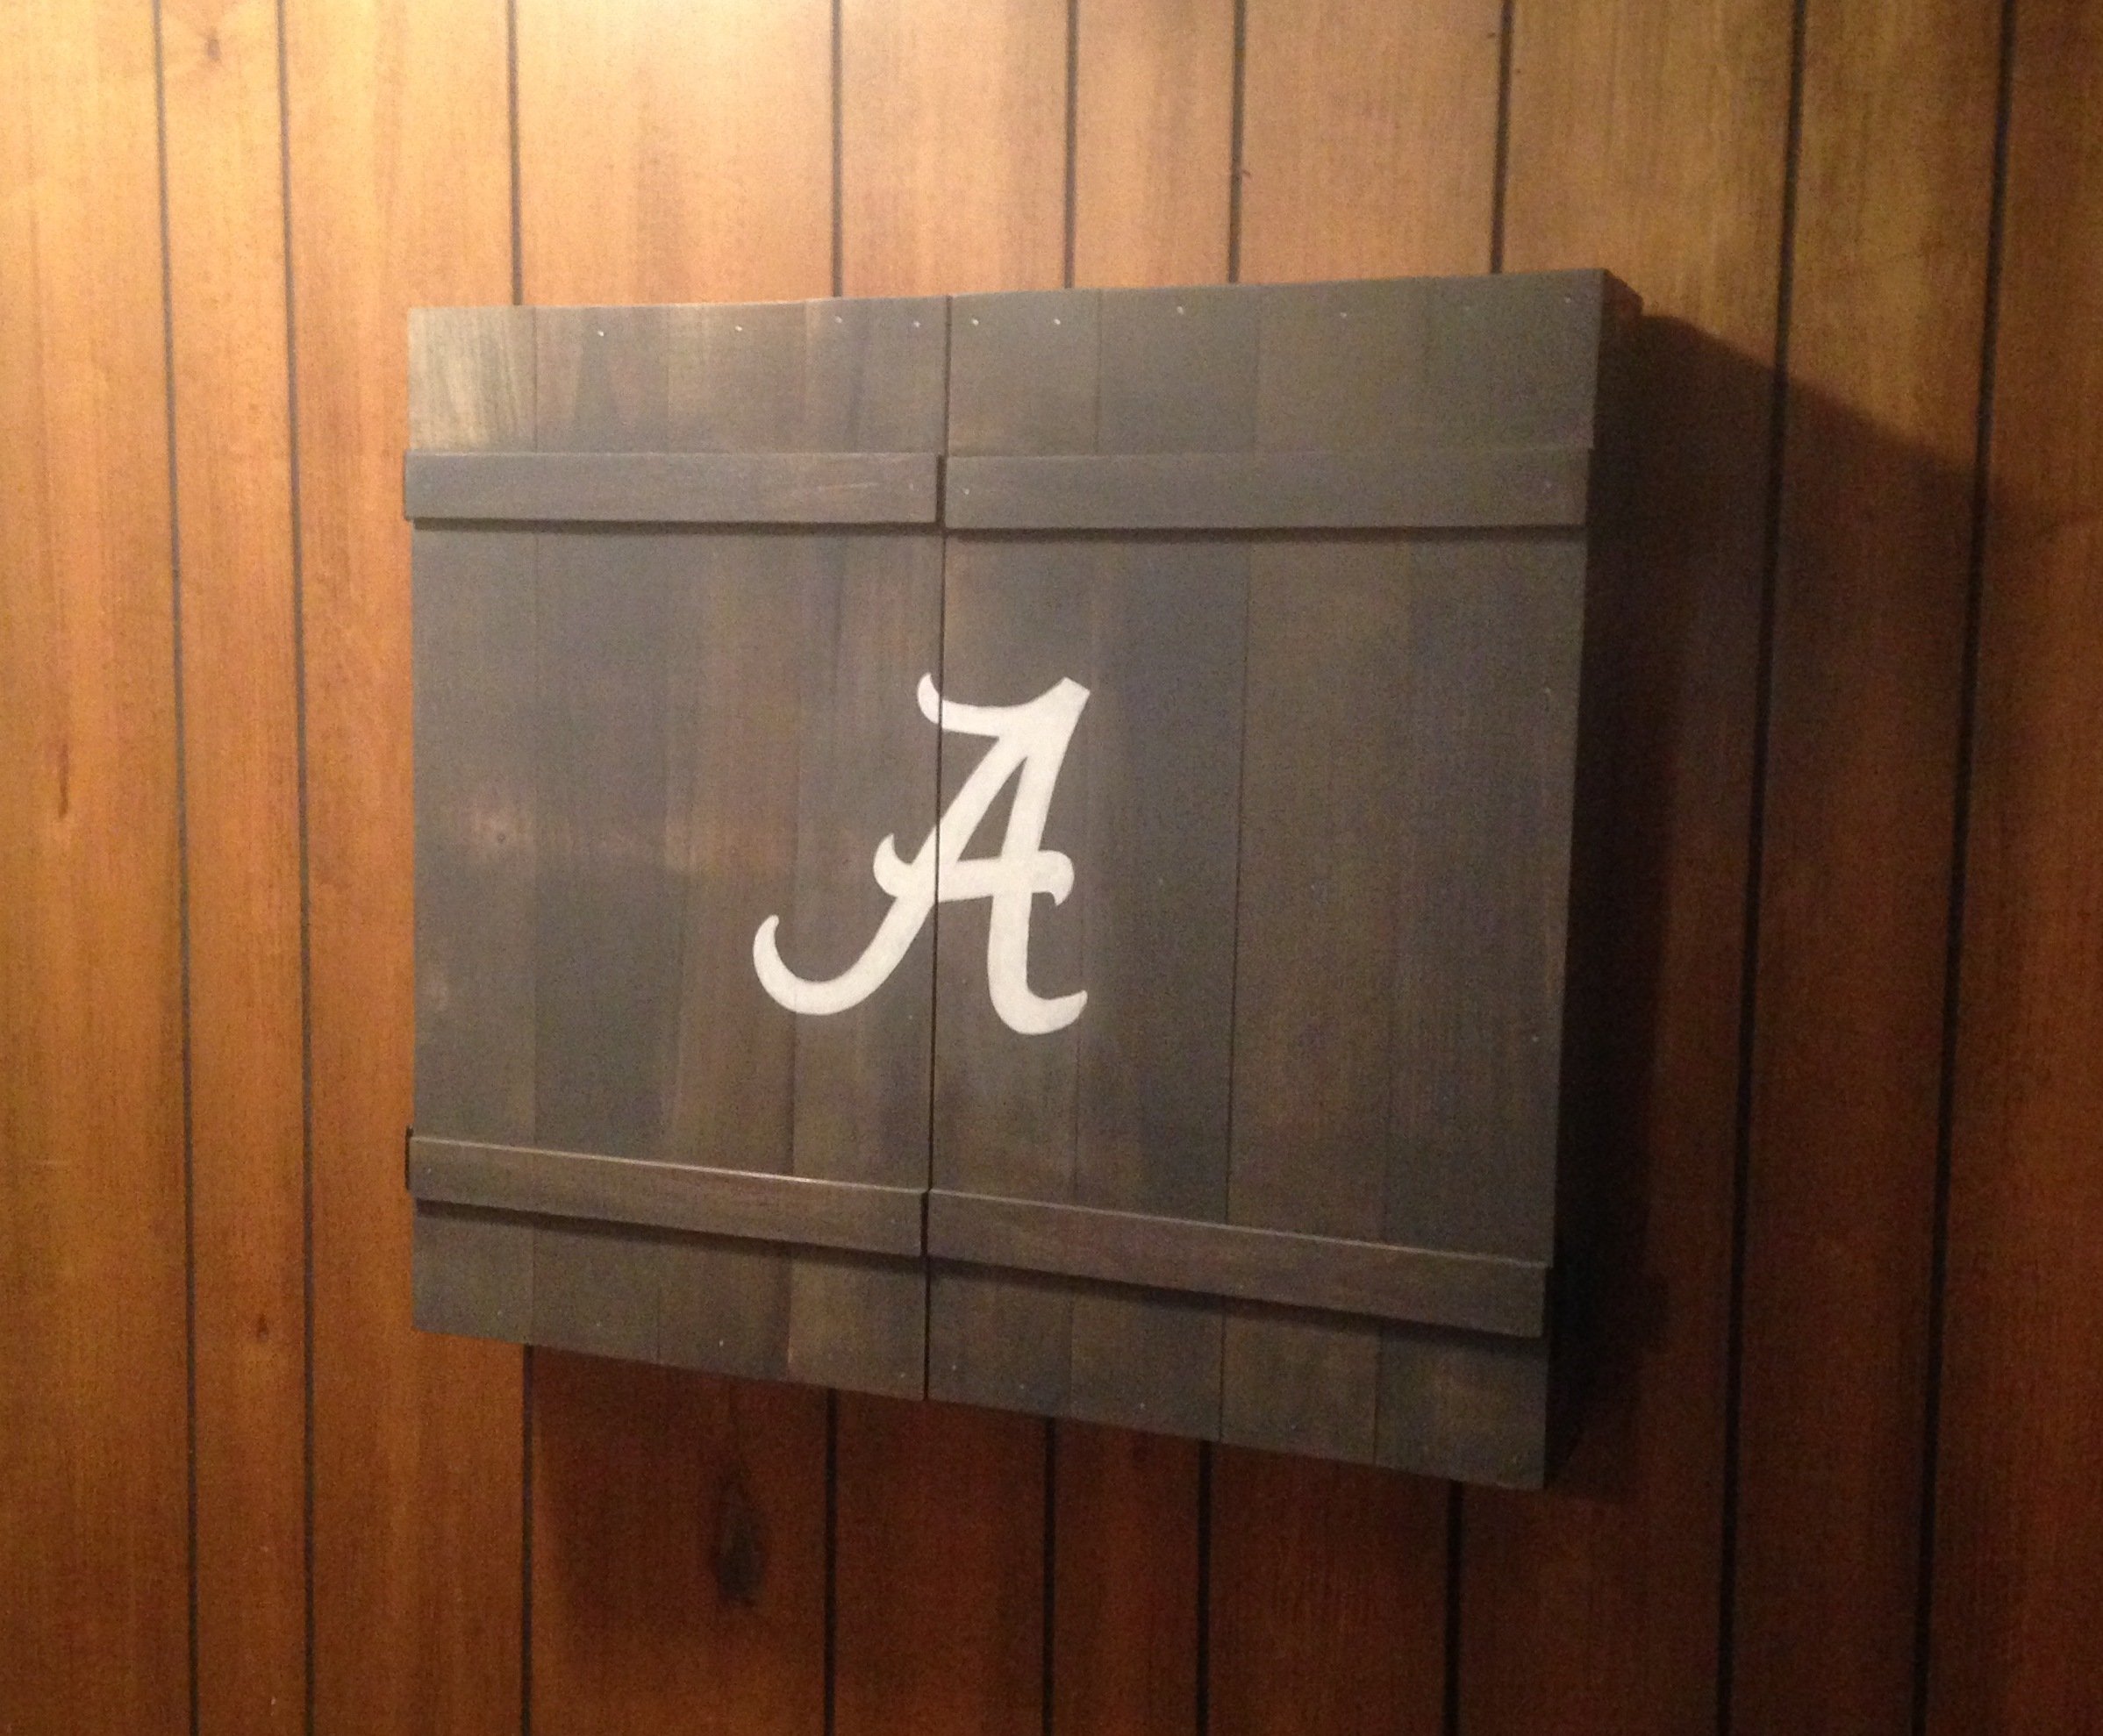
The chalkboards are simple MDF's cut and sprayed with chalkboard paint. Overlay hinges are used for the doors, and the dartbord is held on with screws from the back so it can be replaced when needed.
The Alabama A is hand-painted.
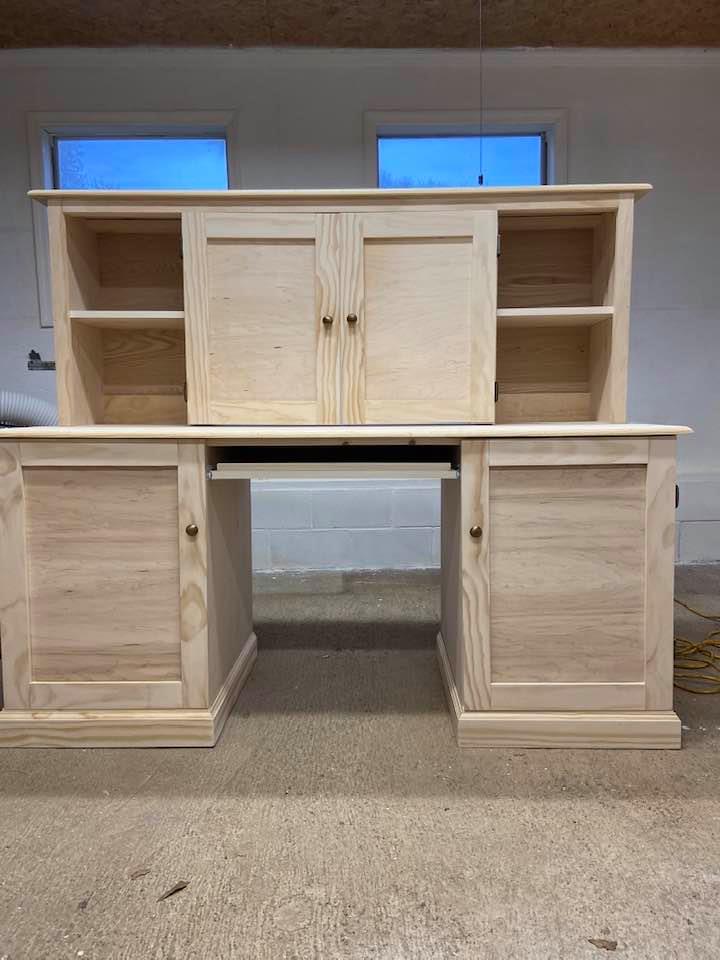
My cousin needed a computer desk but wanted it to look like a piece of furniture when not in use since they have limited space. The left side stores her tower, the right side has a pullout shelf for her printer and storage for printer paper & supplies. She works with 2 monitors so the center on the hutch will accommodate both but be hidden when she isn't working. This was a fun project and using Shelfhelp made it a joy to build. They will be my "go-to" place when building large pieces of furniture.
Sat, 12/19/2020 - 10:30
Thank you for using Shelf Help! It looks fantastic:)
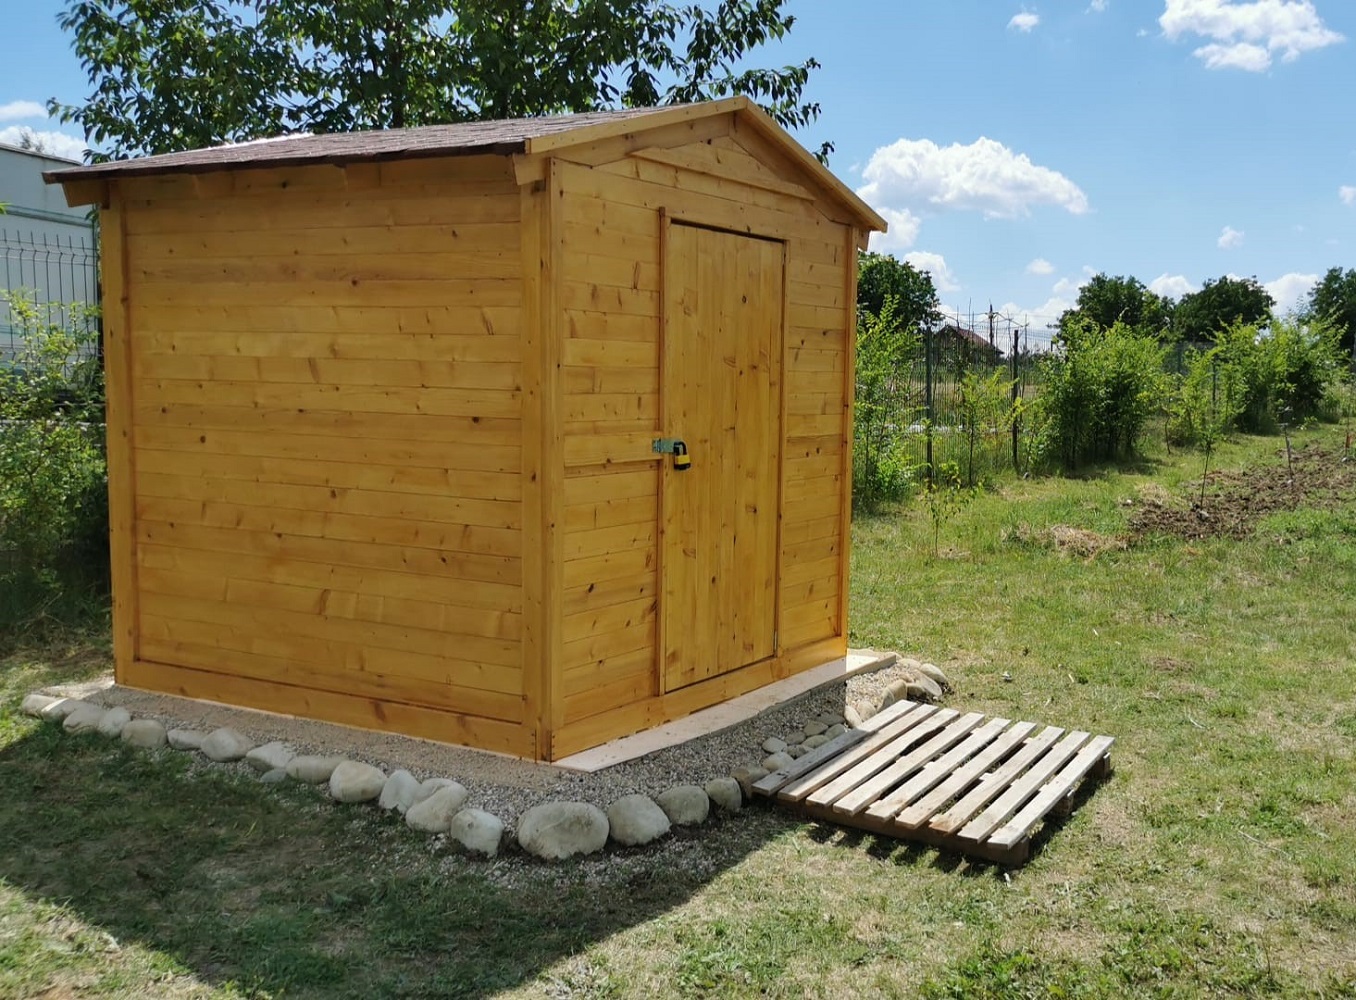
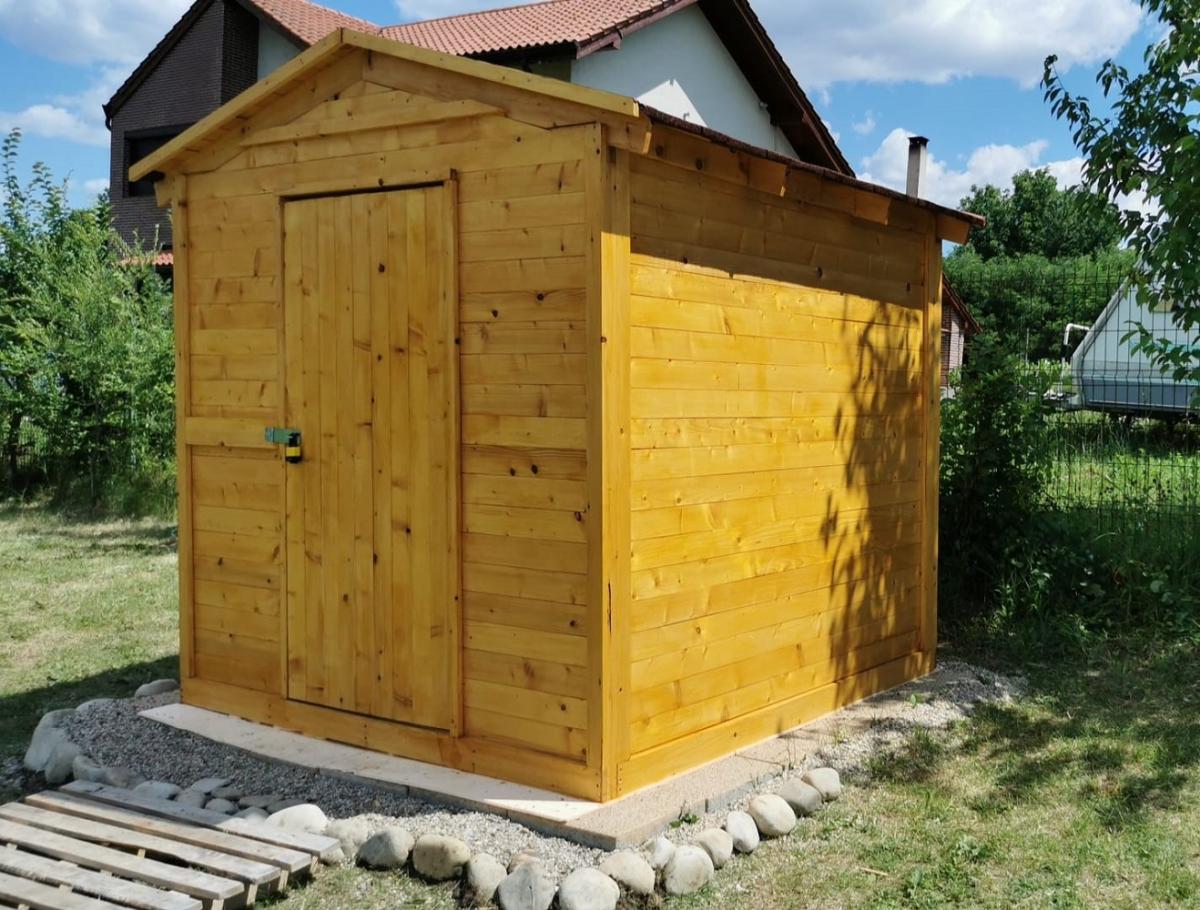
Our last project was building a tiny garden tools storage shed. We used only 1 x 4 boards. We don't have any plans, but you can watch the entire building process on our YouTube channel. We are very proud of the way the project turned out.
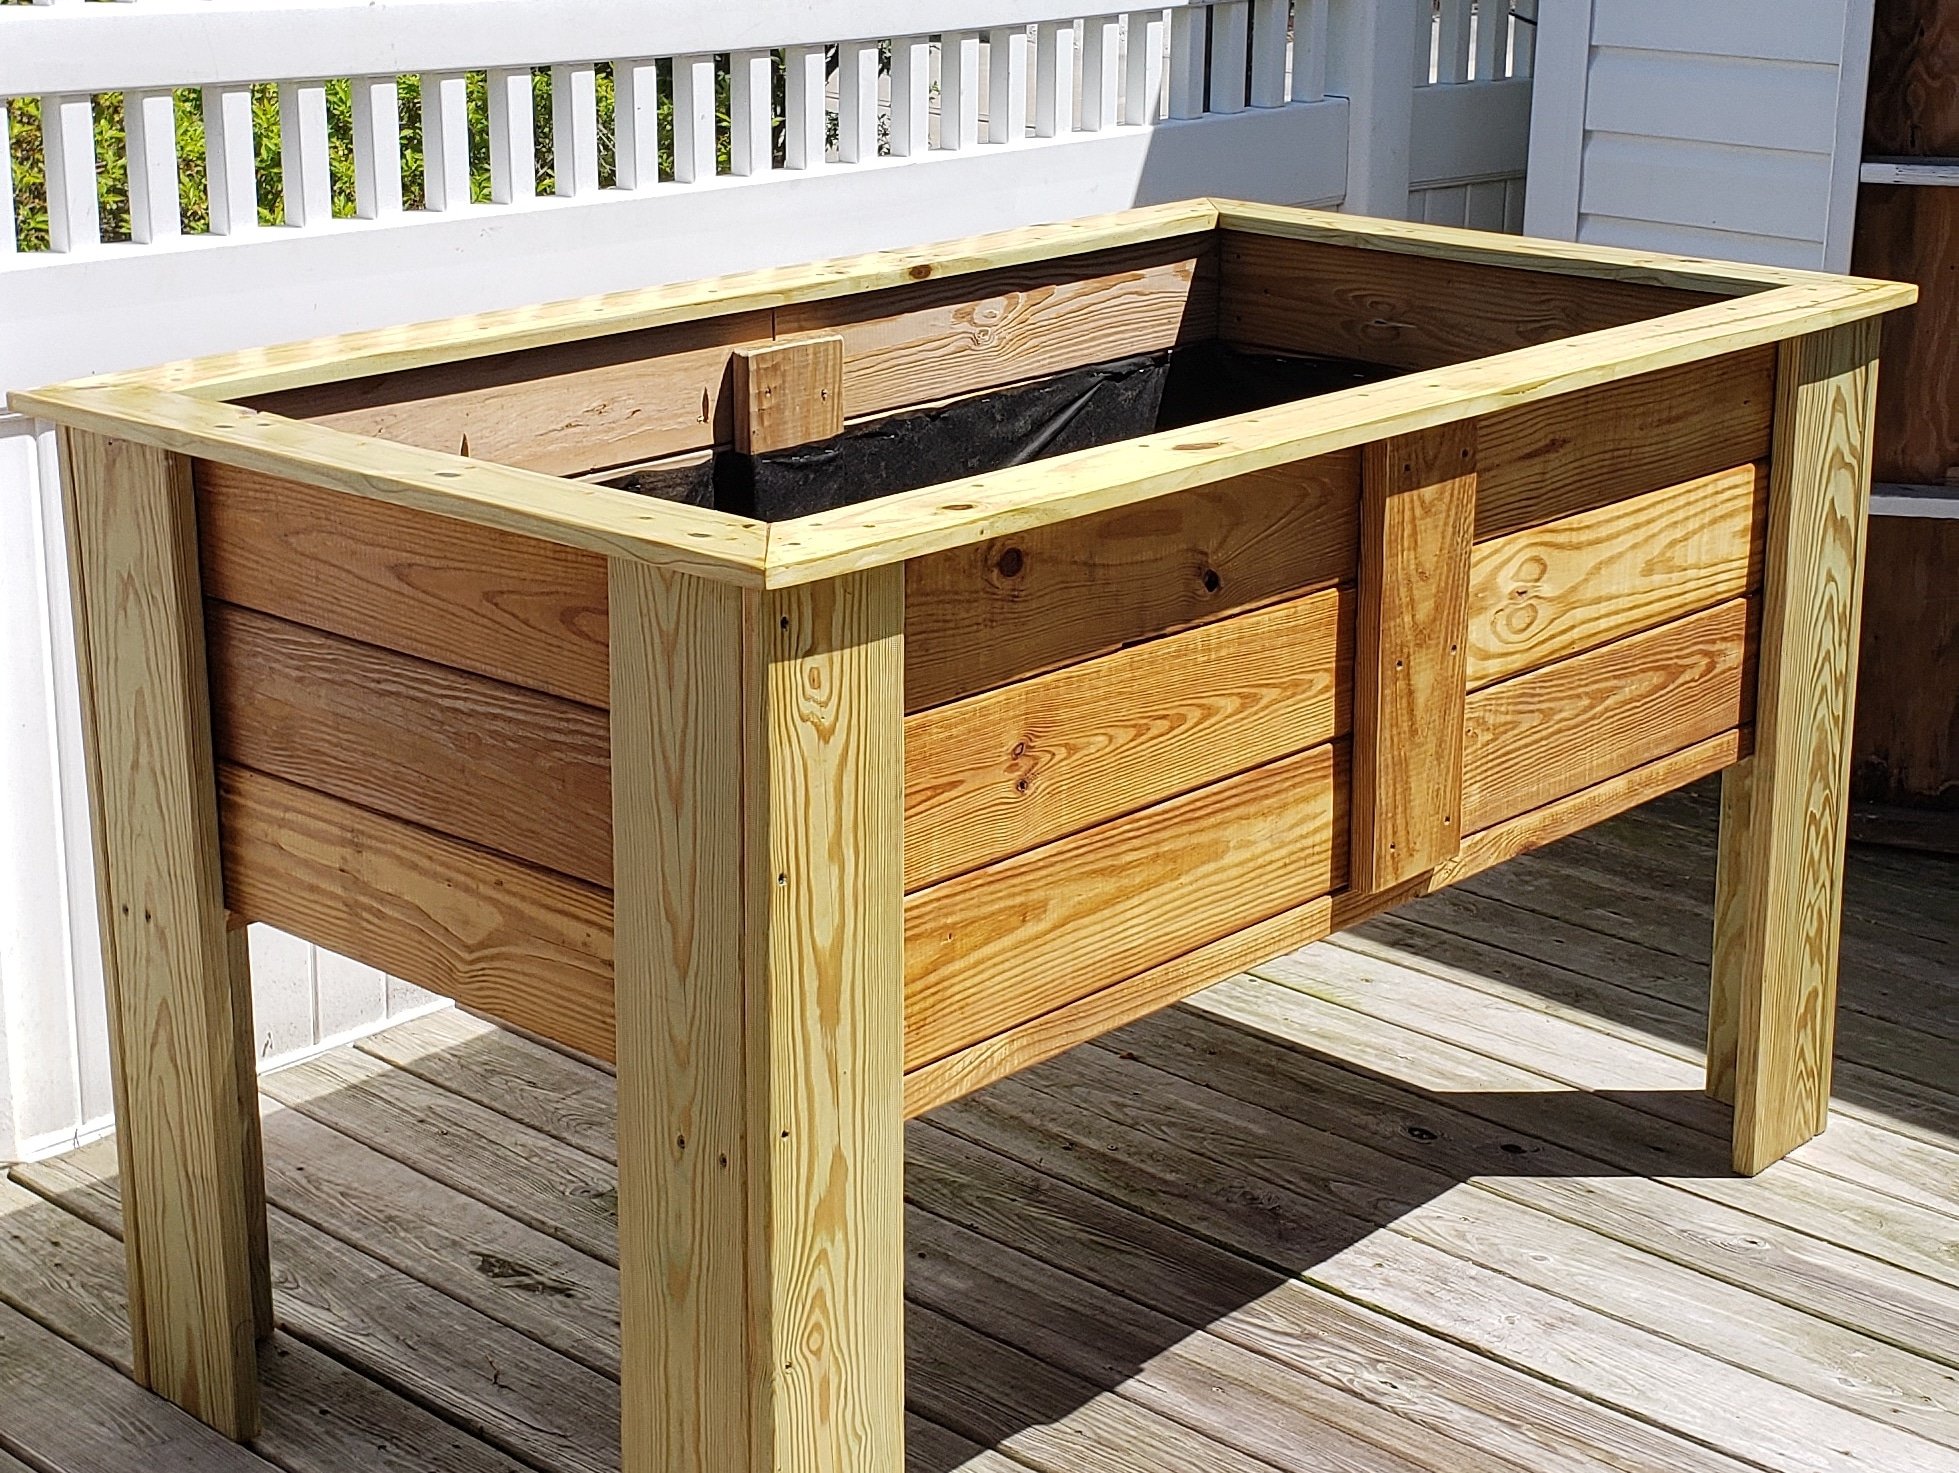
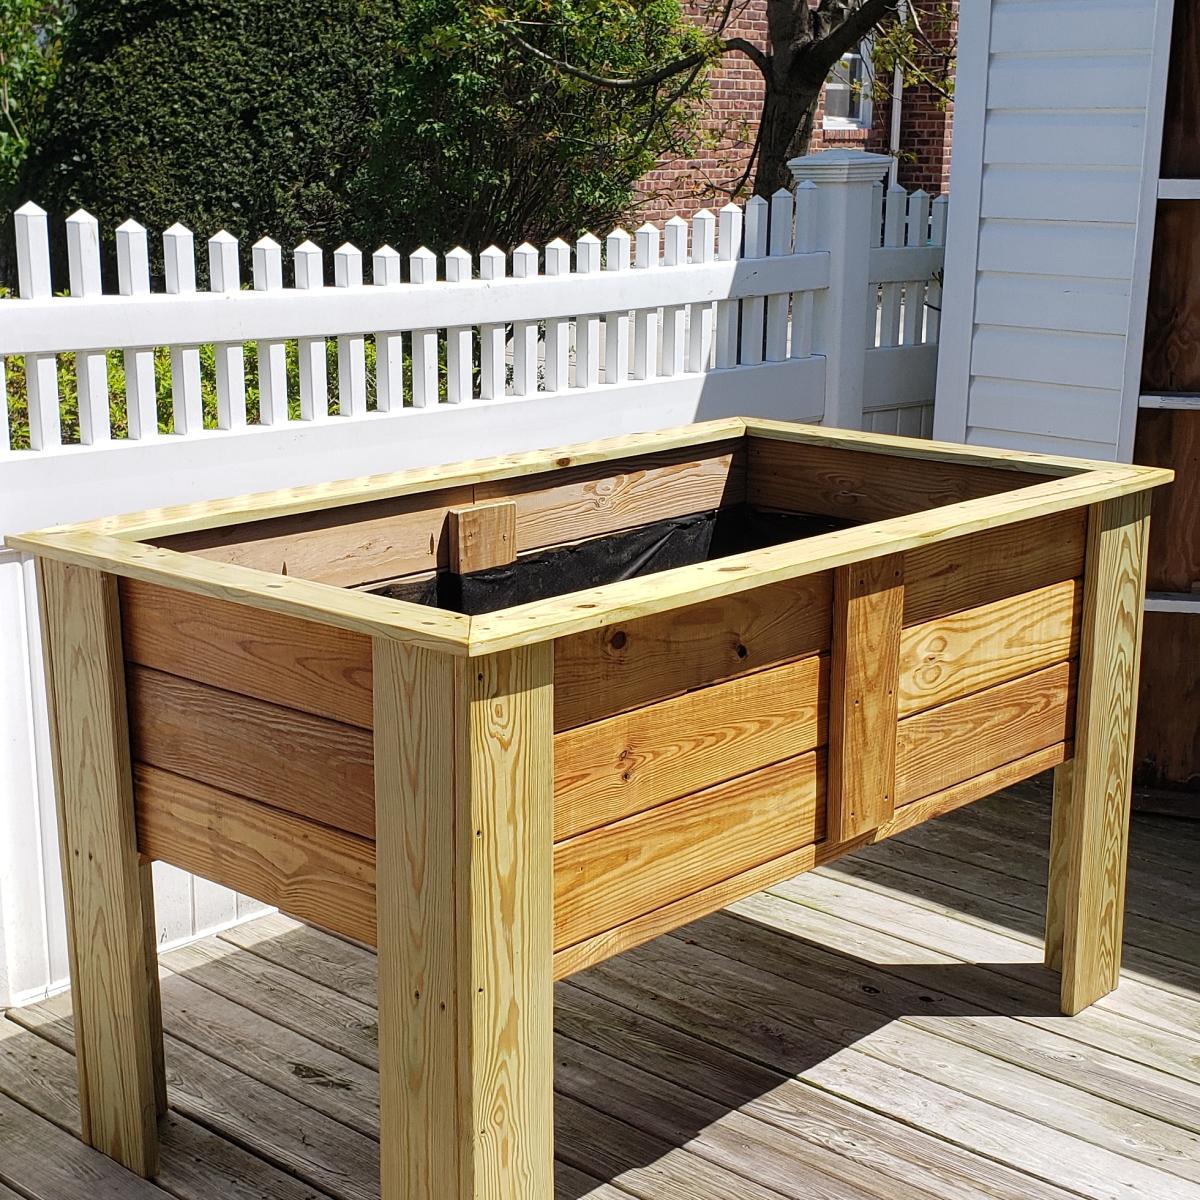
A friend of mine has issues with her knees but loves gardening so I built this to allow her to continue gardening. She loved it.
I didnt follow any particular set of plans I watched several you tube videos and combined different ideas from the videos to develop my own plan.
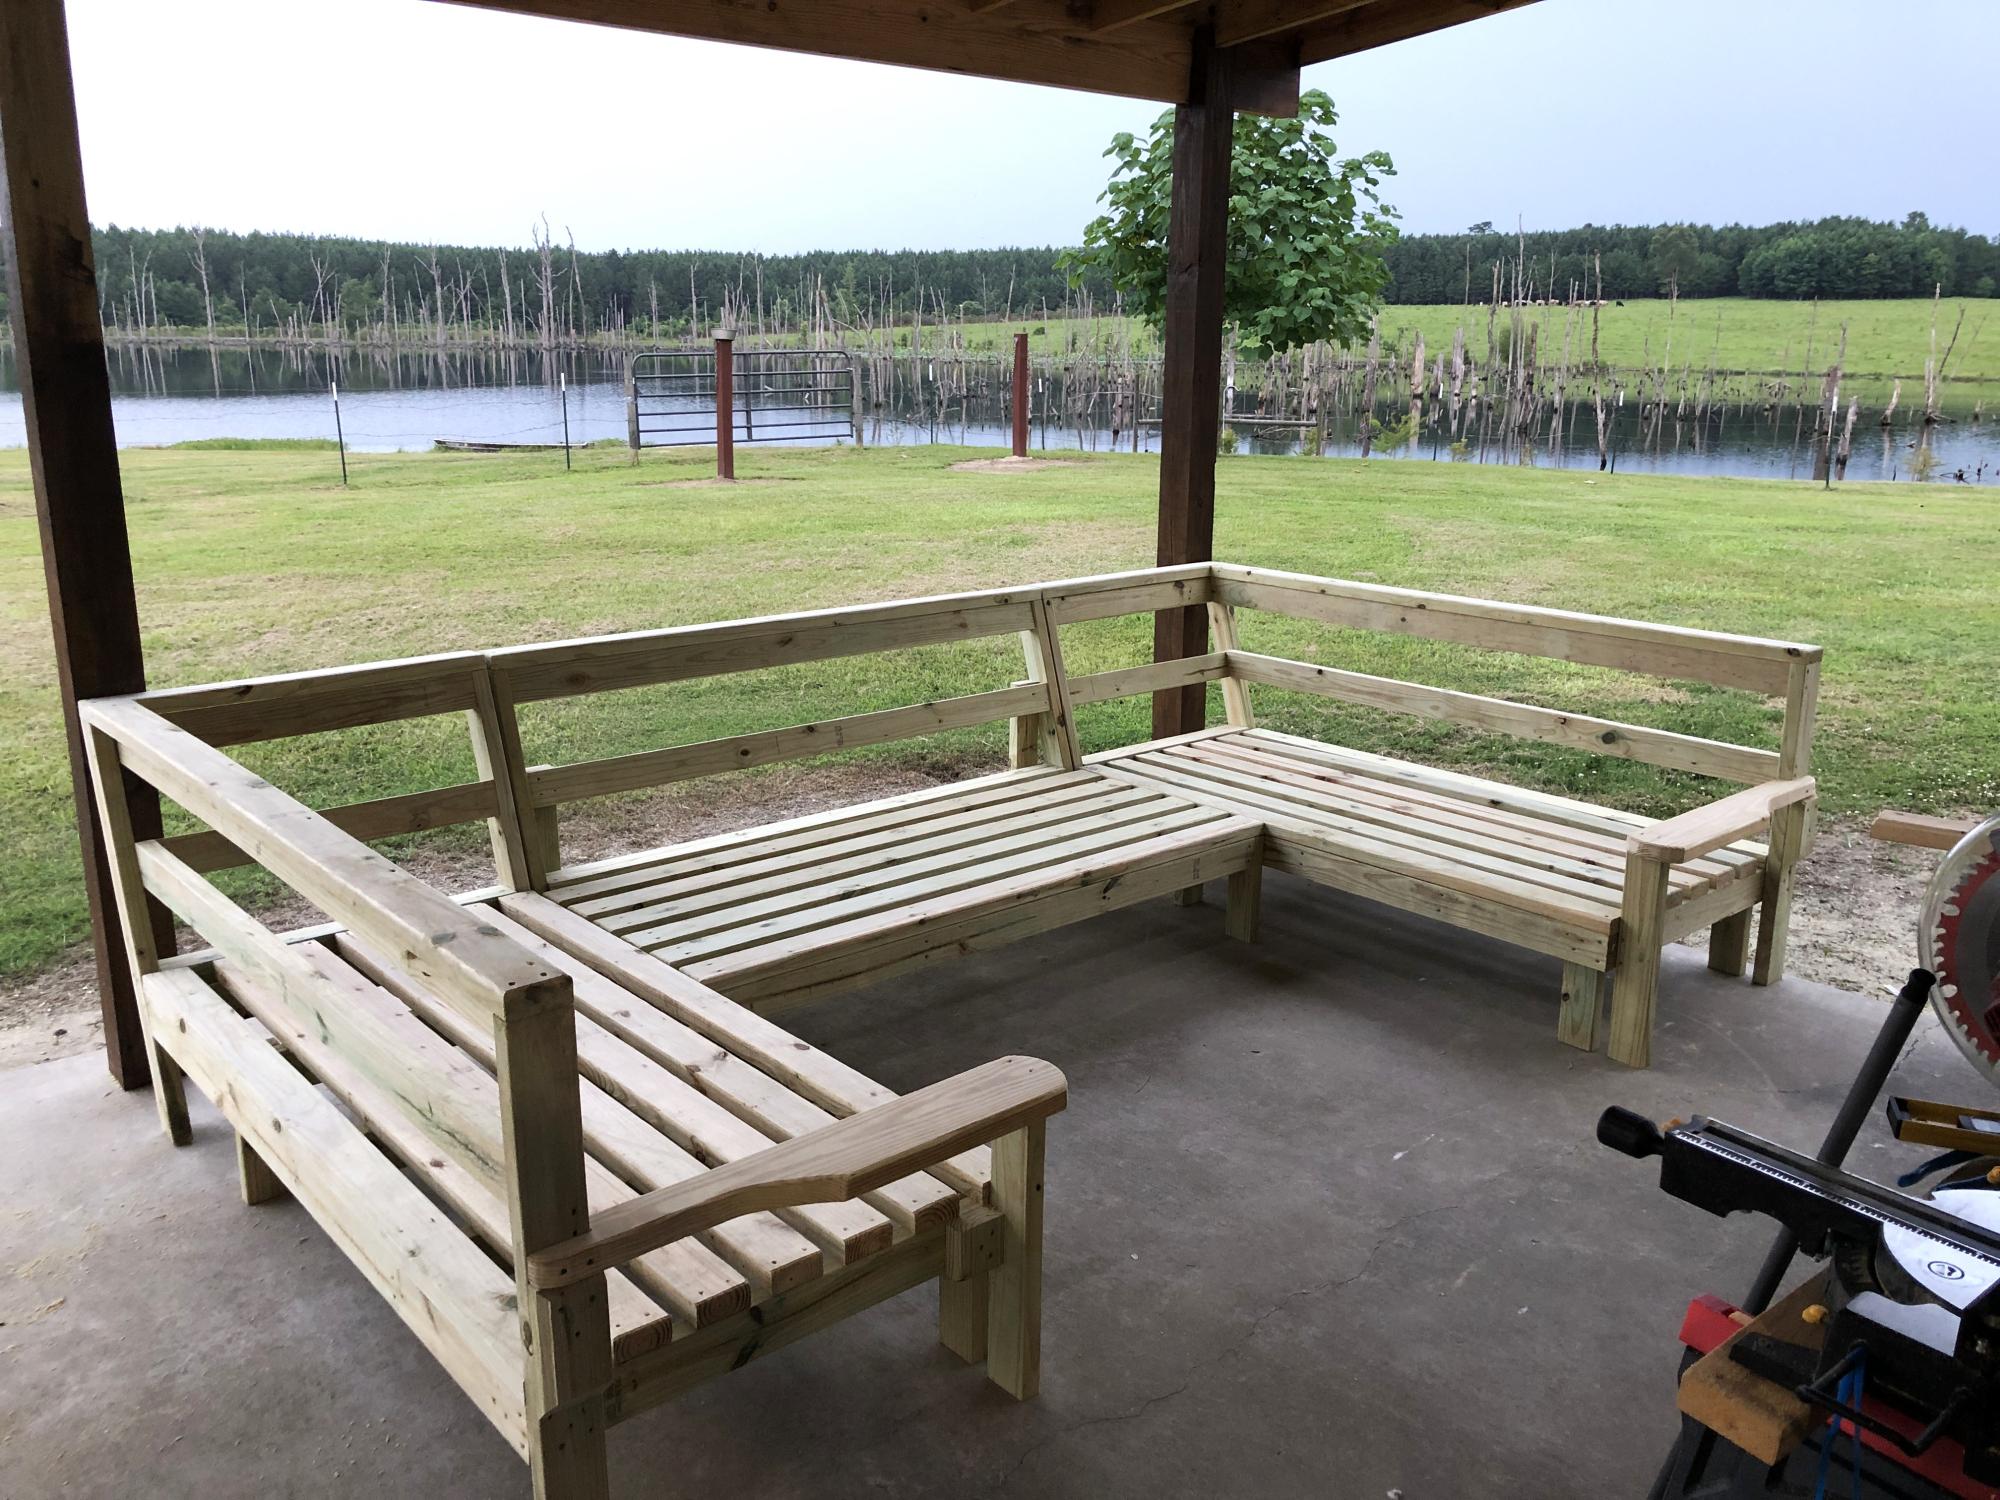
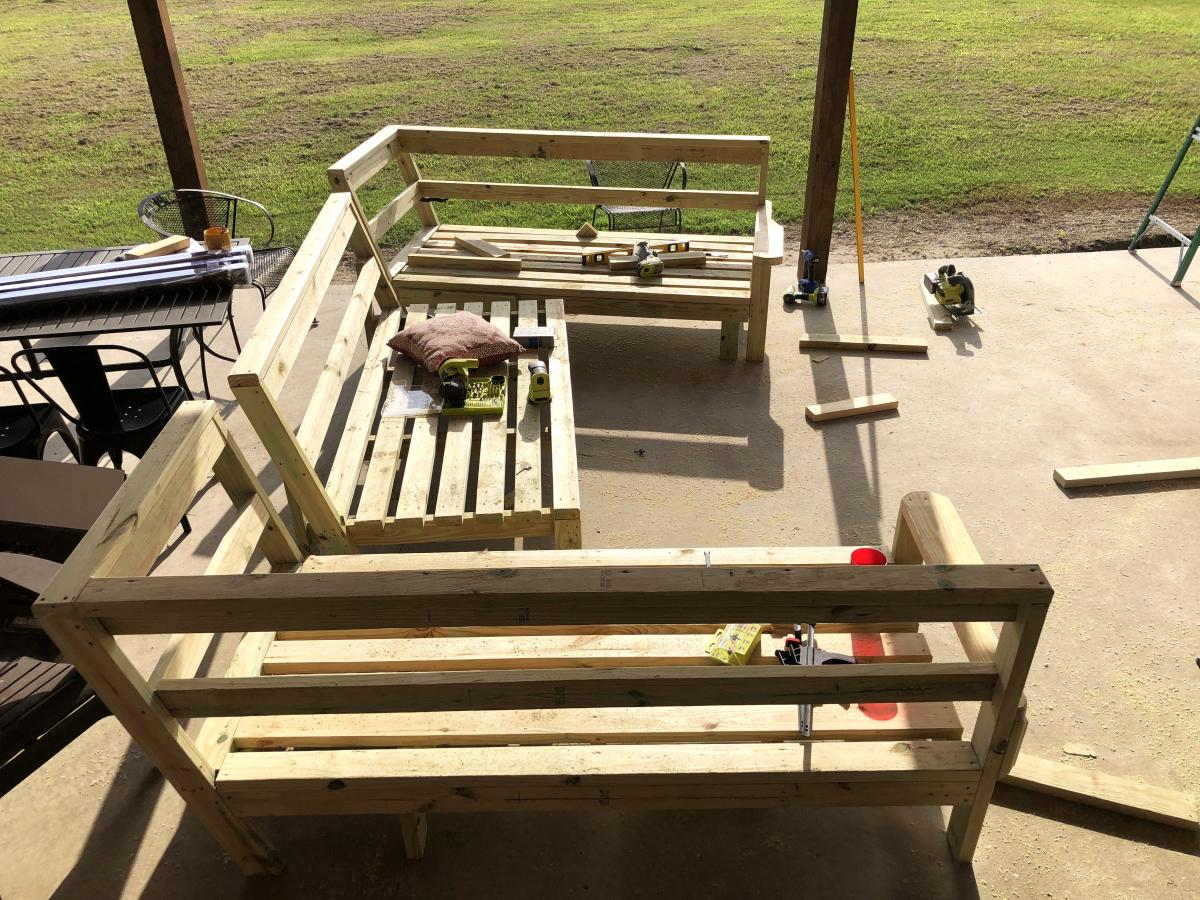
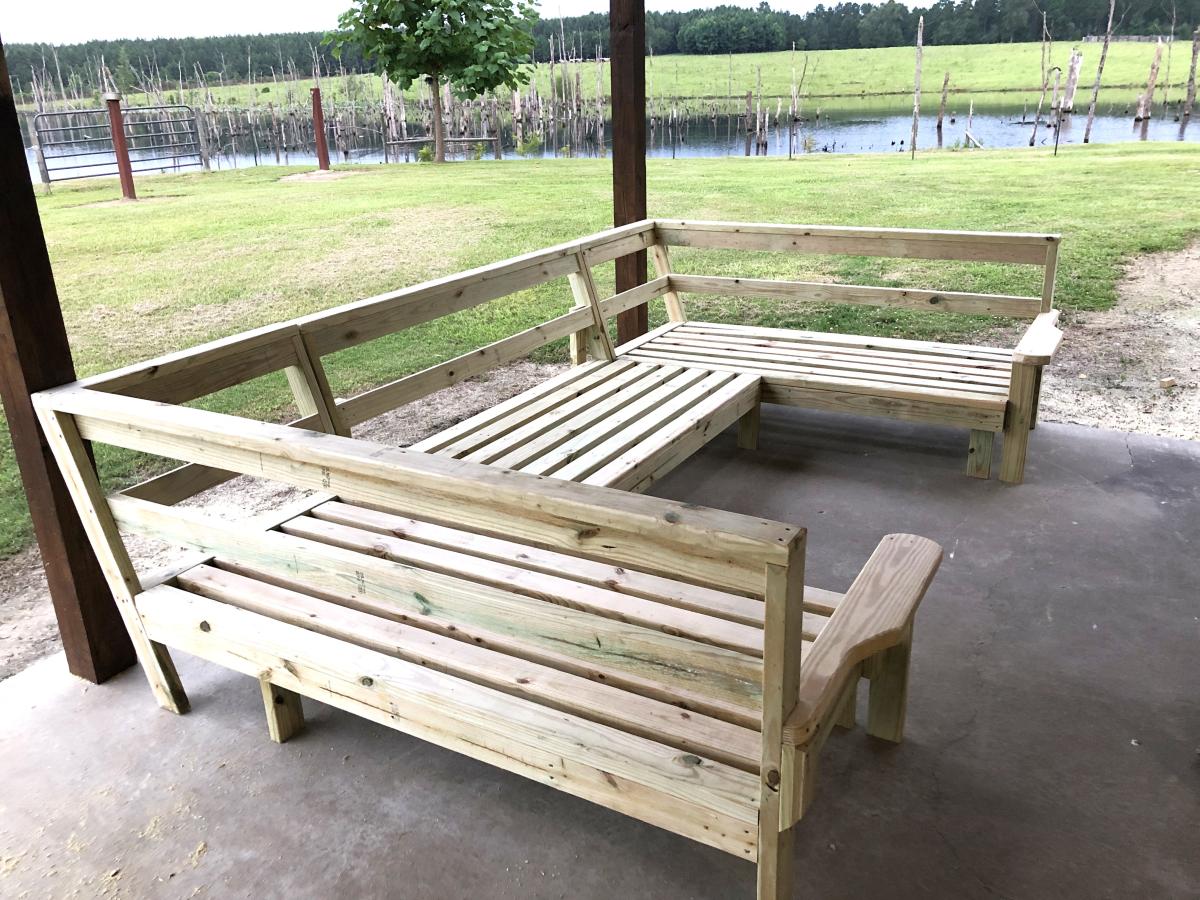
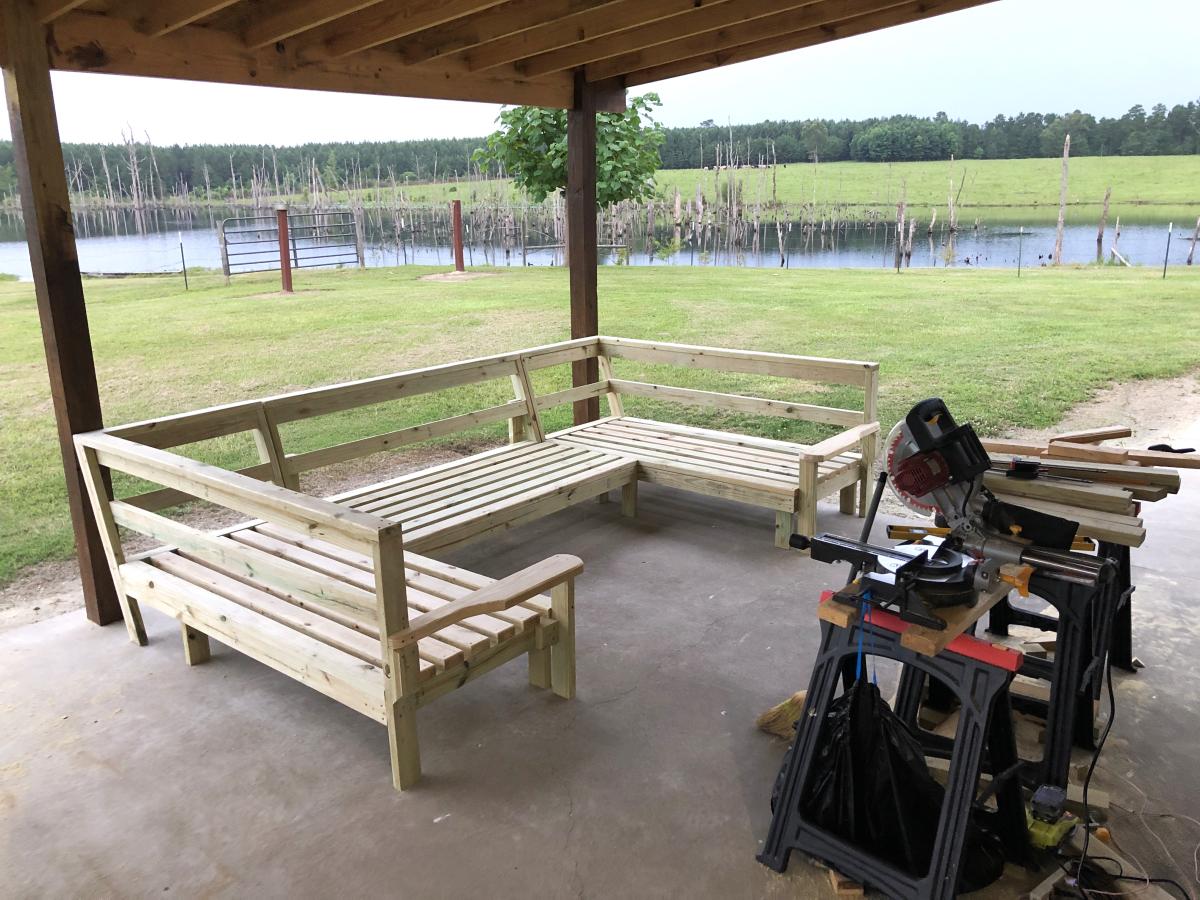
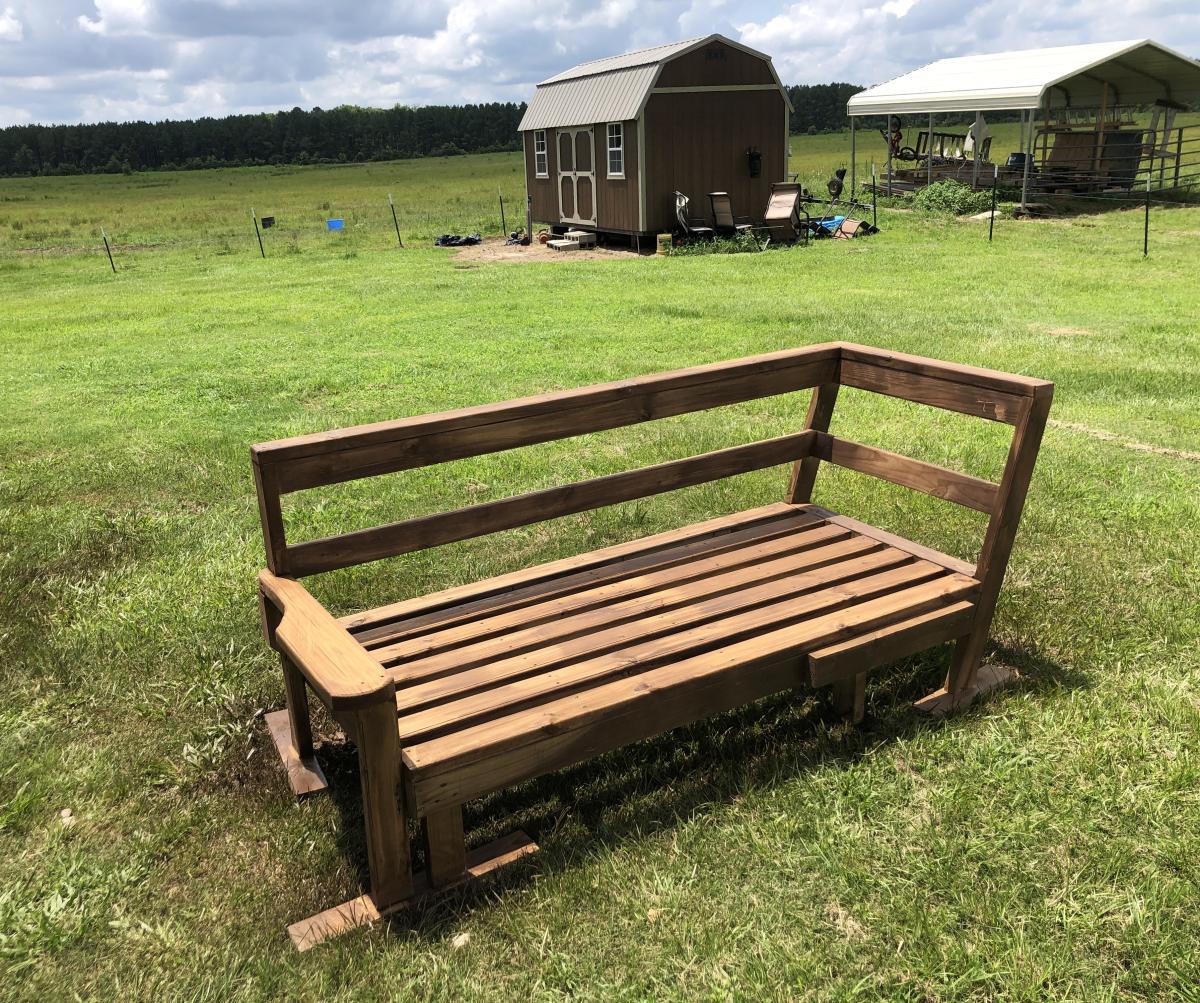
I did your same couch but made the back lean in the middle parts 15 degrees. Love your website. I'm 3 years sober and to try to sell this on facebook marketplace.
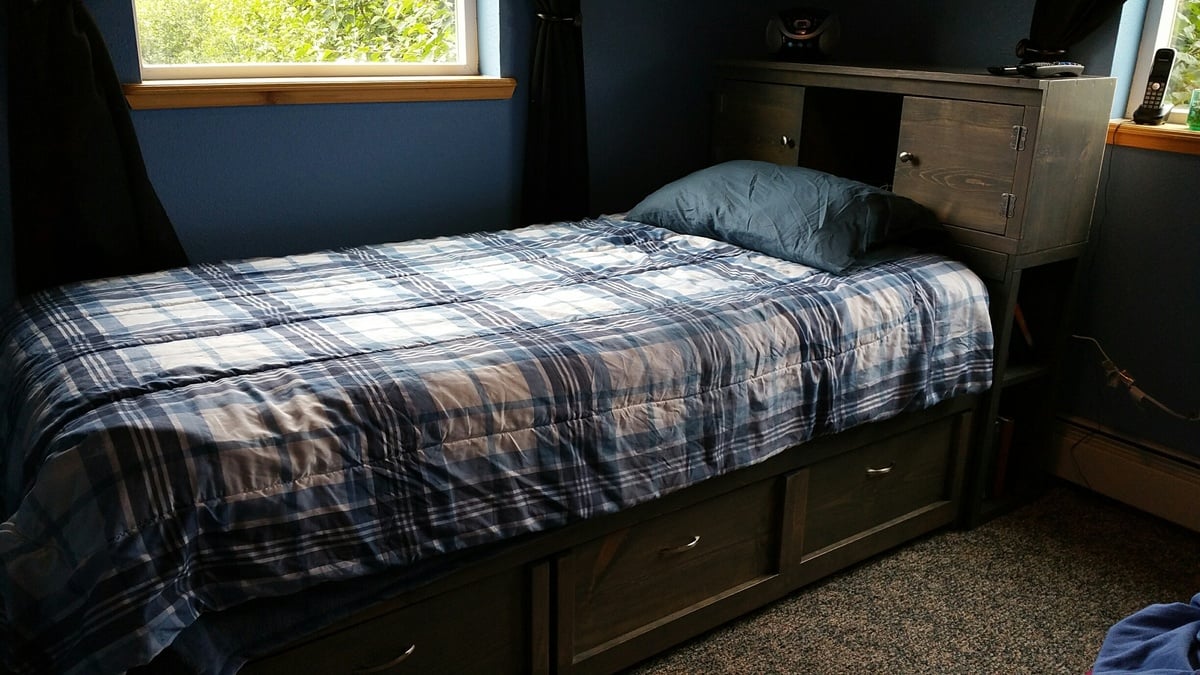
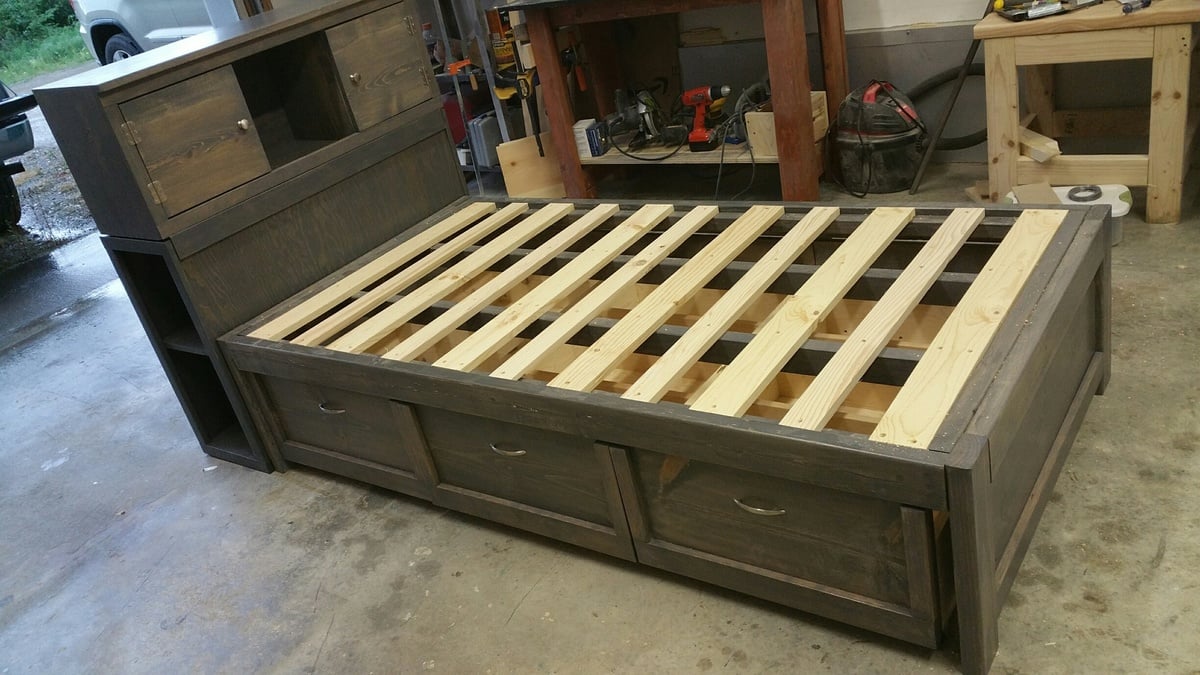
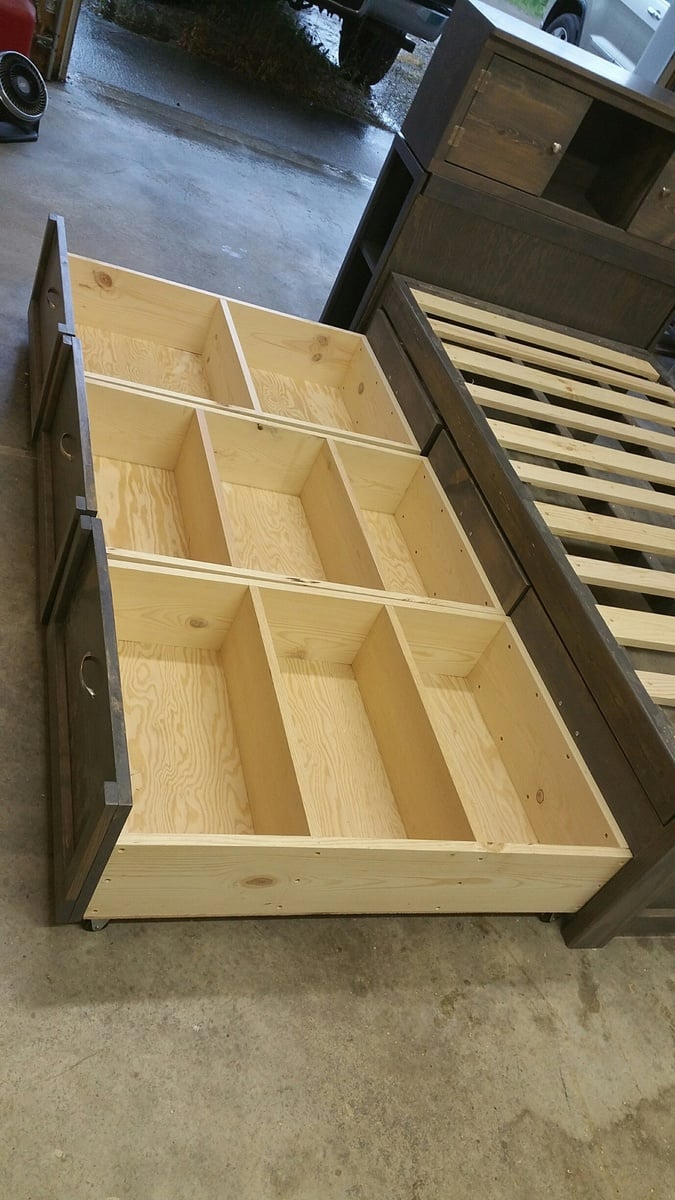
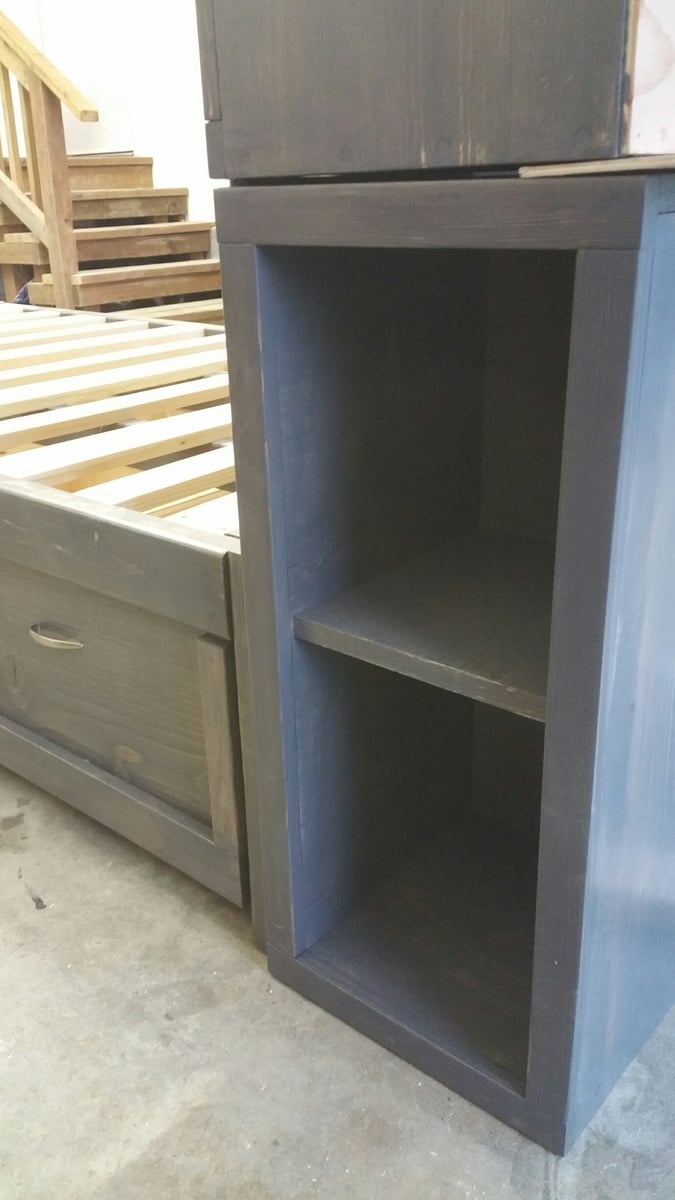
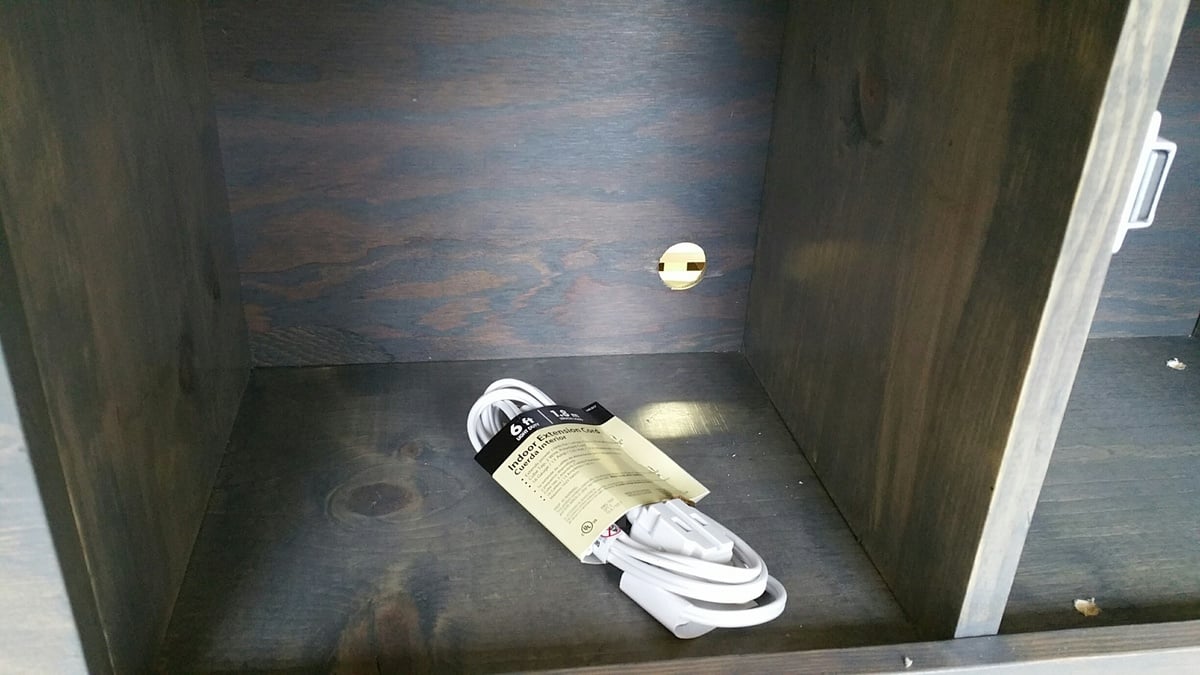
I combined Ana's plans for Daybed with Storage Trundle Drawers and a Storage Headboard with a Small Hutch.
This is my 3rd daybed with storage drawers. It's such an easy build and gives so much extra space. The entire project took about 40 hours. I used Minwax stain in Classic Grey and three coats of polyurethane. For the drawers, I used 1.5" casters. I drilled a hole through the back of the headboard to feed cords through. Then I put the whole thing in the back of my truck and drove 500 miles for the final assembly. :) In the provided photos, some of the pieces are flush because I hadn't permanently attached them.

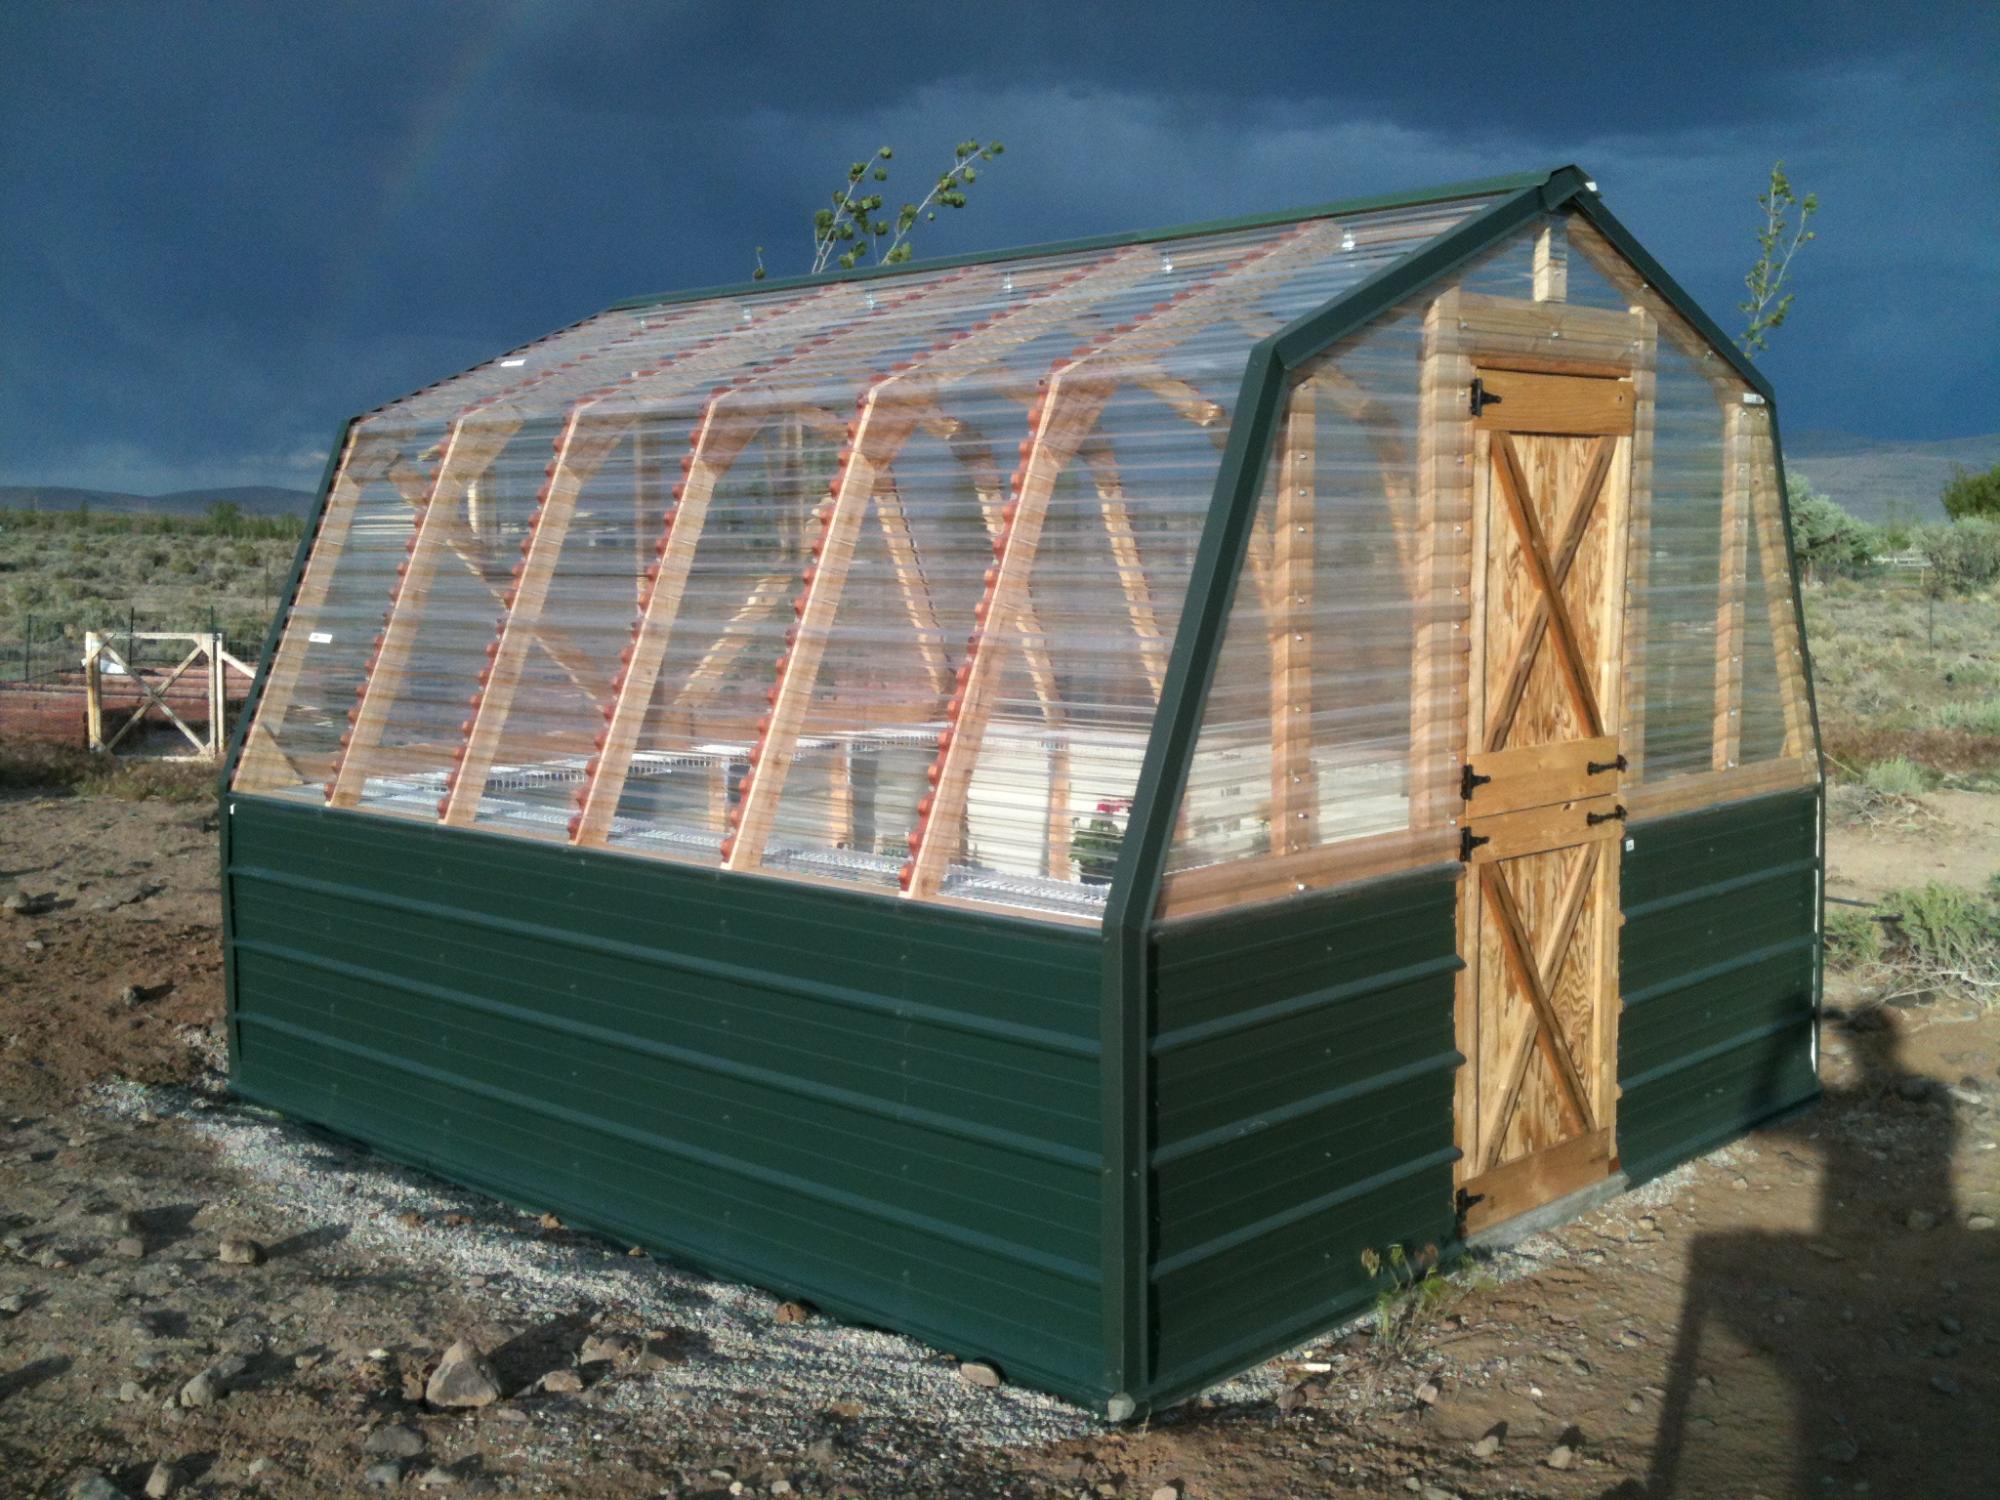
We built the first one about 8 years ago, and then the wind flipped it over and scattered it all over the back part of the property. I then dug footings and anchored the second one down; I was able to save the Dutch Door I made for the first one. Thanks for the plans!!!
Fri, 04/08/2022 - 10:35
That's not going anywhere! Thanks for sharing, it looks amazing!
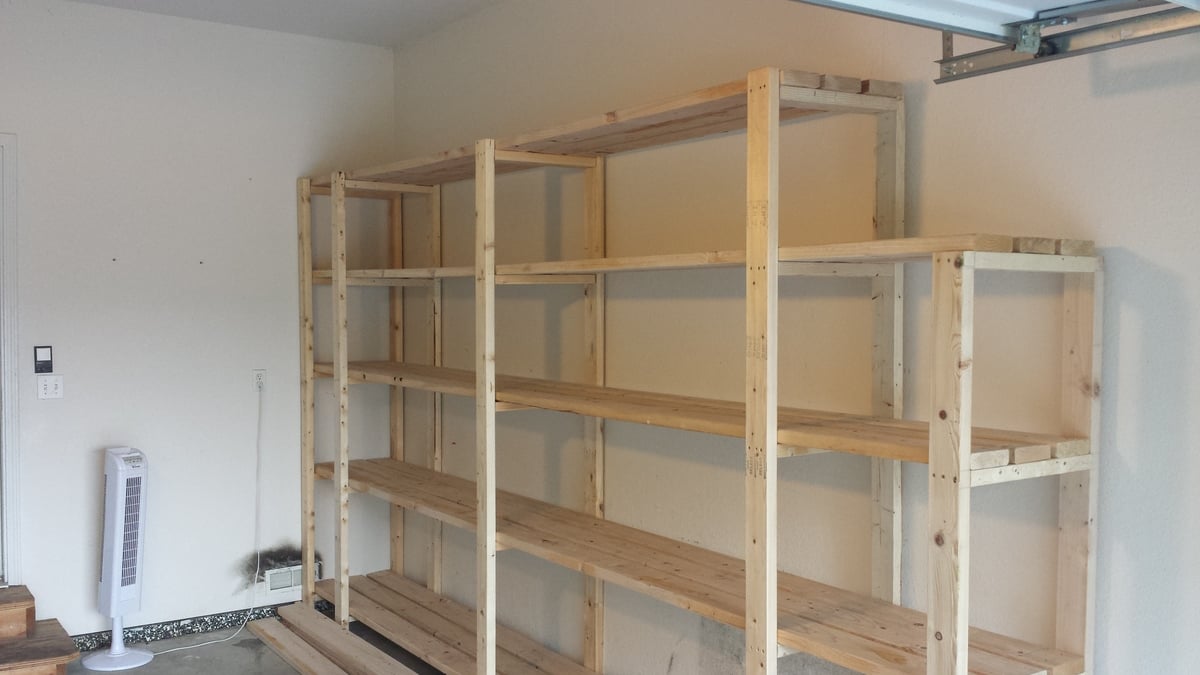
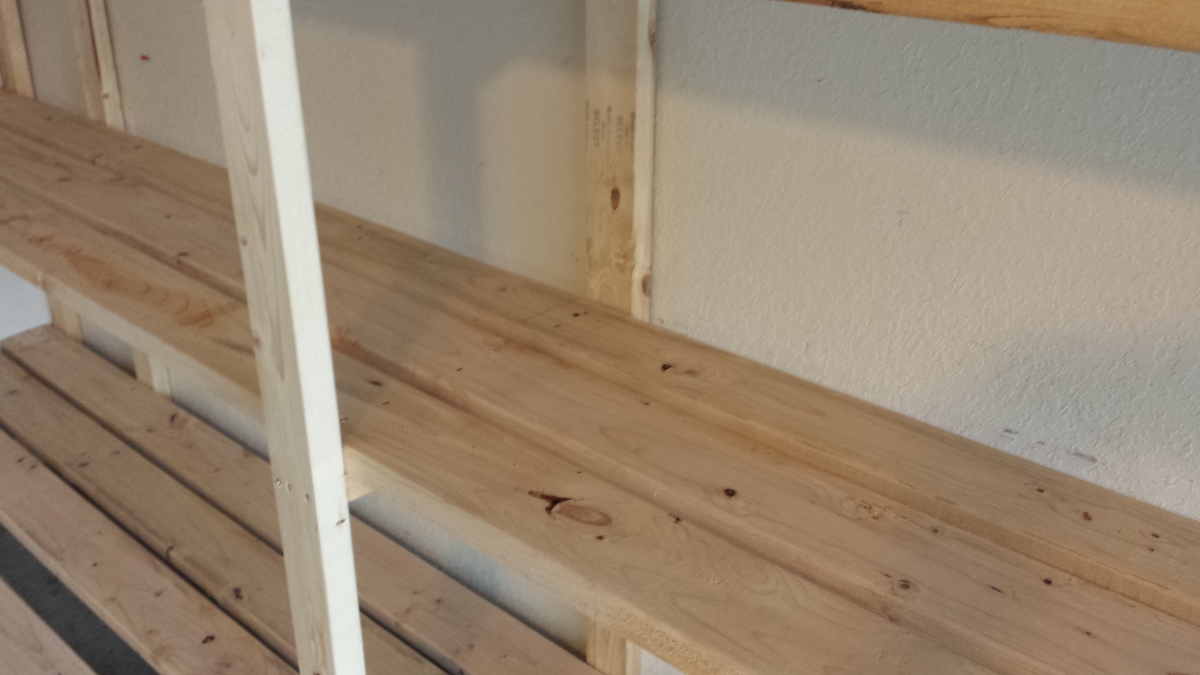
My father-in-law and I knocked this project out in about 5 hours including the trip to the lumber yard. You've got a great basic design here! A few modifications we made:
1. I thought the depth of the shelves in the original plan was a little too shallow so I used 3 2"X6"s instead of the 4 2"x4"s. That made the shelves 1 1/2" deeper. Although 2"x6"s are obviously more expensive, the overall cost for the project didn't change much because we only had to use 3 boards per shelf instead of 4. This also reduced the amount of screwing and made it easier to position the shelf boards without taking measurements since we only had one middle board to deal with (instead of 2 with the 2"x4"s). We just eyeballed the spacing of the middle shelf board as we worked.
2. Since our garage has a 10' ceiling, I decided to go 8' tall with the unit. This allowed us to add a 5th shelf.
3. Some oversized tubs can be 18-20" high or more so I varied the height of each shelf -- 24" at the bottom, then 20", 18" and 16". There's approx. 24" available between the top shelf and the ceiling.
4. Due to the position of the garage door track, I had to notch out a couple feet at one side. The end support piece is only 6' high.
5. Since many storage tubs can be 16-18" wide, I made sure that there was at least 54" between 3 of the vertical support structures. This will allow us to store 3 tubs side-by-side and maximize storage. You might notice that I have two vertical supports that appear to be very close together near the back wall. I did this so I would have something on that side to attach more shelving to on that short wall where the garage door opener is.
The only cuts we had to make for this entire project were for the 18 1/2" 'braces' or support pieces on the vertical ladder structures. The shelves are either 14' or 12' (top shelf only) and the vertical 2"x4"s are either 8' or 6'. Most lumber yards will carry these lengths in either 2"x4"s or 2"x6"s.
We didn't use any wood glue, and I admit this may come back to haunt me. However, to get a good fit and eliminate gaps, I used clamps I already owned to squeeze the boards together before adding the screws. Everything feels very solid and sturdy to me.
Because of the extra height compared with the original plan, I was worried about it possibly tipping over (we have a 10-year-old who likes to climb ![]() ) so I made sure that 3 of the supports are lined up with the wall studs. After leveling the entire unit, I plan to anchor it to the wall using 3 1/2" screws.
) so I made sure that 3 of the supports are lined up with the wall studs. After leveling the entire unit, I plan to anchor it to the wall using 3 1/2" screws.
So for about $187 in lumber and maybe $20 in construction screws, I've got 76 feet of STURDY shelving that should accommodate hundreds of pounds! Not a bad investment at all...
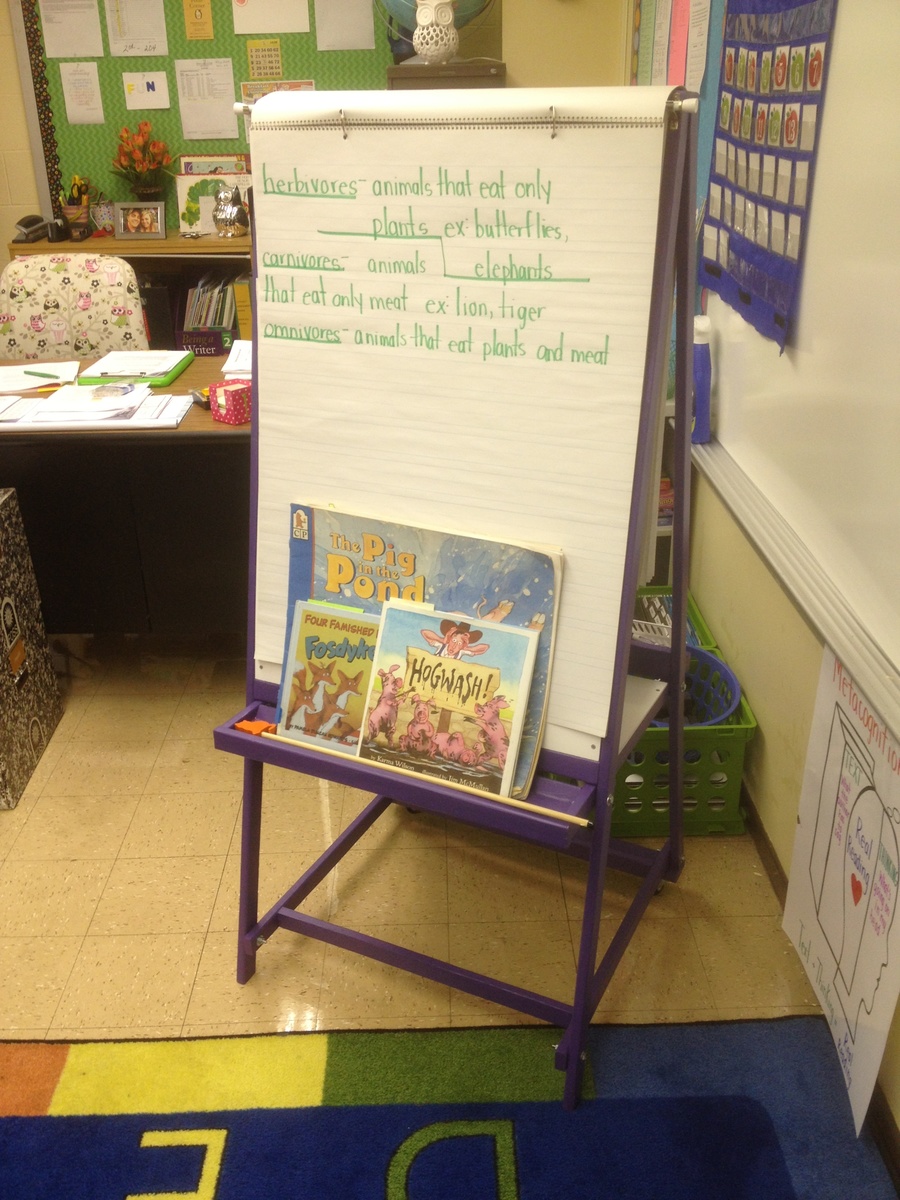
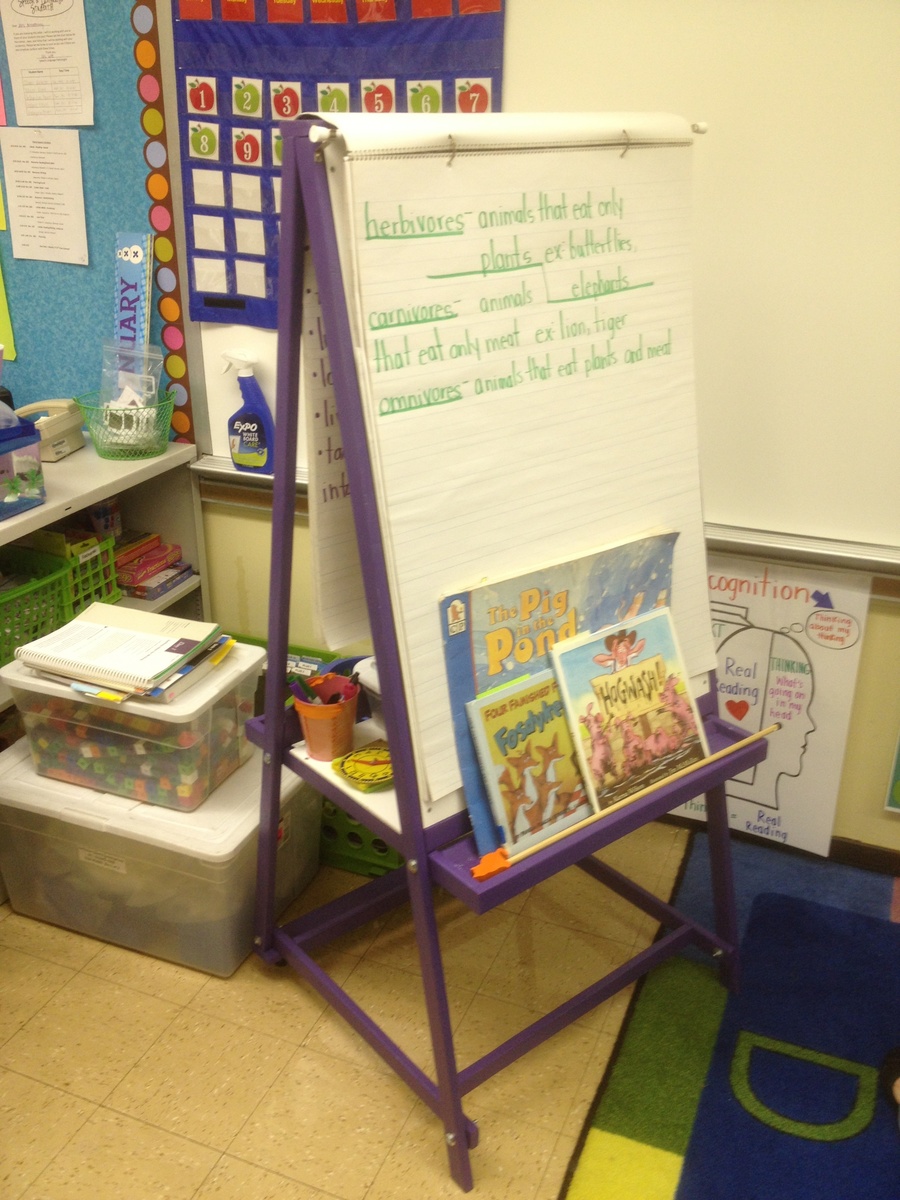
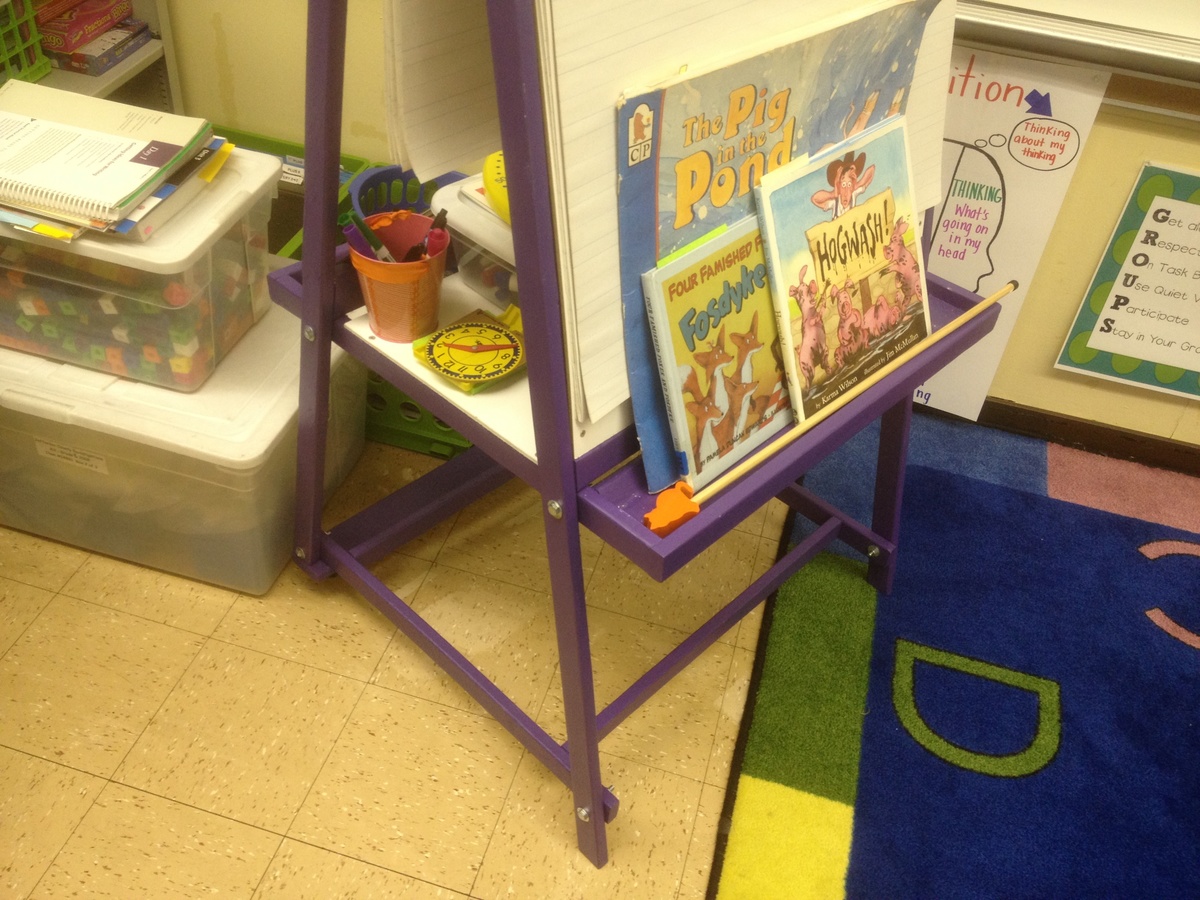
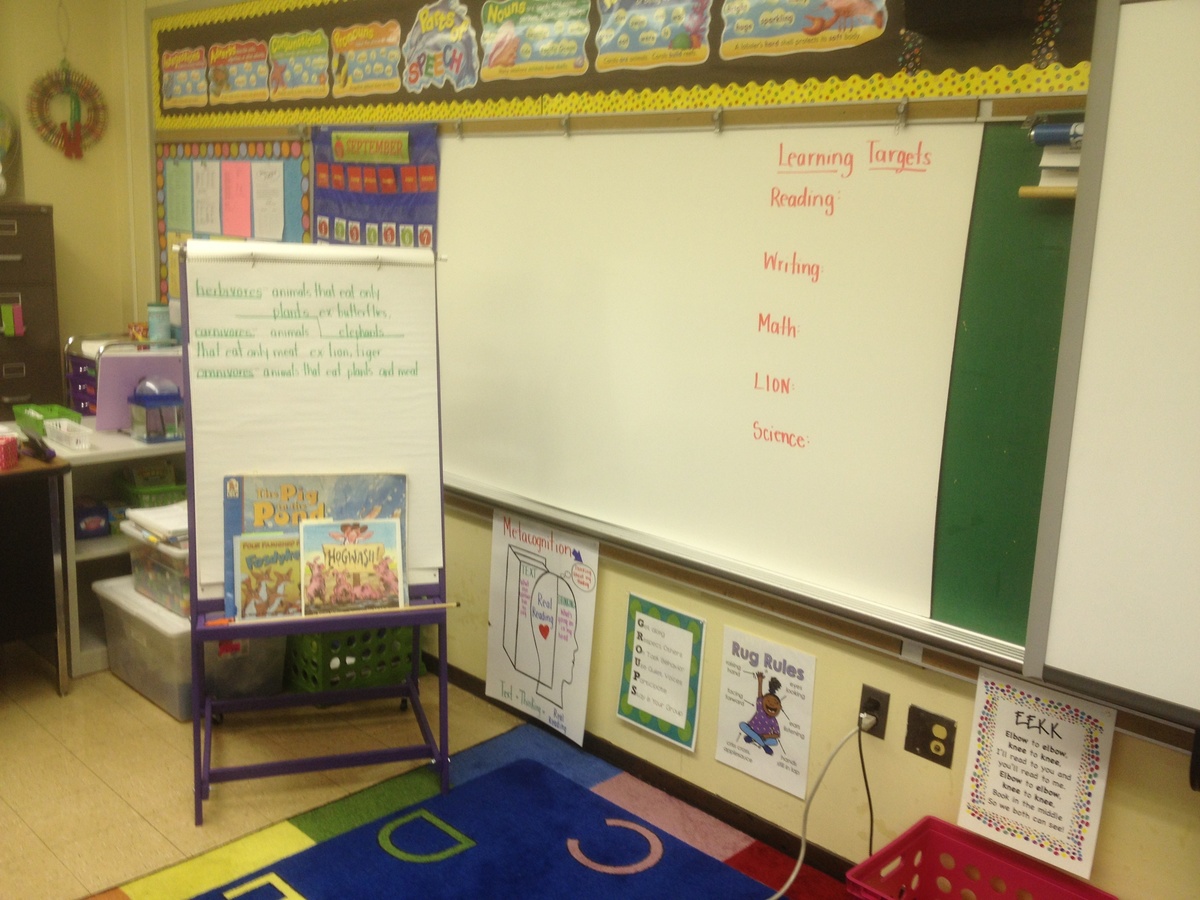
I built this easel for my wife who teaches 2nd grade using the plan on this site. I used a jigsaw to make all the cuts which is why some of them are not perfect. All holes were countersunk and covered with wood filler as I have not yet purchased a Kreg Jig. One sample jar of paint was just enough to cover the whole project with 2 coats. Home Depot sells the whiteboard in 2' x 4' pieces for about $10 in my area. The toughest part was getting the holes to line up just right for the bolts that fix the four main pieces together. Some of them I had to use a little bit of force to make fit. The plan was easy to follow and worked well. I added a curtain rod to the top to hang a paper pad from which I bought for about $5. The big whiteboard behind the easel was hung over the existing chalkboard using industrial strength velcro strips. I bought the whiteboard material from Home Depot for $13 for a 4' x 8' sheet (it is actually called a "hardboard panel board". It works very well with dry erase markers and was an easy, cheap way to install a whiteboard over the current chalkboard.

This is the nightly sleeper for our 6yo (queen) and 4yo (twin) boys, but we have in-laws who visit from out of town frequently and we also wanted a place to allow them to be comfortable as couples.
To accomodate adult headroom on the queen, I raised the entire loft 7" (72" high) and to fit the queen beneath, I had to lengthen the loft rails by 9" (84" long). To fill the resulting gap, I just used some 39" scraps of 2x4 and 2x6 overlapped to create a 4x10 landing which actually ended up a cool addition since it gives the kids a spot lower than the mattress to make the transition from the ladder to the mattress. It also has given us adults a spot to sit off the mattress while comforting them to sleep when needed, so we don't end up waking them when we leave.
I based the height of the queen legs (made four of them) off the size of a standard storage tote, which was ~13". We can fit 12-16 totes of clothes or other random storage under the bed as a result. The queen frame was just a simple 64"x84" rectangle out of 2x6s with 7 2x4s used as crossbeams to hold the mattress.
Note on the mattresses - these 8" memory foam mattresses are just as comfortable as our expensive name brand king mattress, but MUCH cheaper!
https://www.walmart.com/ip/Mainstays-8-inch-Memory-Foam-Mattress-Multiple-Sizes/47826185
Despite raising the loft, I kept the height of the stair platform the same, but just added a second 'ladder' rung to get up to the loft (refer back to the 4x10 landing spot on the loft). To keep with the using available storage space theme, instead of attaching the stairs permanently, I used 1"x4" hinges to that we could swing the stairs up and put 4 more storage totes under there. (However, we quickly found that the kids liked that area as a 'fort', so we've left it open for their use.)
In the picture, you'll note there are four treads/steps on the stairs because I thought to myself "little feet, little steps" would be better. I soon learned that the littles are more than capable of using adult sized steps while adults nearly killed themselves coming down the little feet, little steps. As such, I ended up removing one of the middle steps and moving the new singular middle to a spot between the other two. Much better, stay with 3 steps.
While the queen can stand alone, I still attached it to the 'legs' of the loft so that our rambunctious boys didn't 'sweep the leg' and bring the whole thing down on themselves while under it.
This was done entirely with thrown out pallets. Lots of work and sweat but I love it! Used polystain as the finish. Only spent about $30 in supplies ie screws, nails, stain.
Sat, 10/24/2015 - 13:27
This is awesome!! How did you make the length with the pallets?
We built this in early 2013. We ended up turning the house 90 degrees on the deck, because the slide worked best off the backside of the deck due to the various heights around the deck. The sloped back yard caused some challenges, but in the end it's a very sturdy deck with the cross beams attached. Thanks for posting these plans online for us, our 3 daughters are loving the playhouse and swingset! Here are some more pics of the project: http://www.flickr.com/photos/11031534@N00/sets/72157633009259873/
Fri, 03/22/2013 - 16:39
Love this - my grandson's back yard is too small to build something like this; which is why we had to settle for his loft bed airport/clubhouse.
Thu, 06/27/2013 - 05:24
I'm planning on building two A-Frames and no playhouse, so my questions are focused there.
Did you do any modifications to swing portion of the plans?
Is it sturdy enough for an adult to swing on as well?
It looks like you put the posts in the ground, did you cement them in too?
How high off the ground is the bottom of the support beam for the swing?
Is there any issue side-to-side swaying?

I LOVE these plans. This was my first project, and although it was a big one to start with, the plans were easy to follow. If I can do it, anyone can. I added the rock wall. My kids and I love it. Total cost for me (including all lumber, nails, paint, slide, etc.) is about $850.
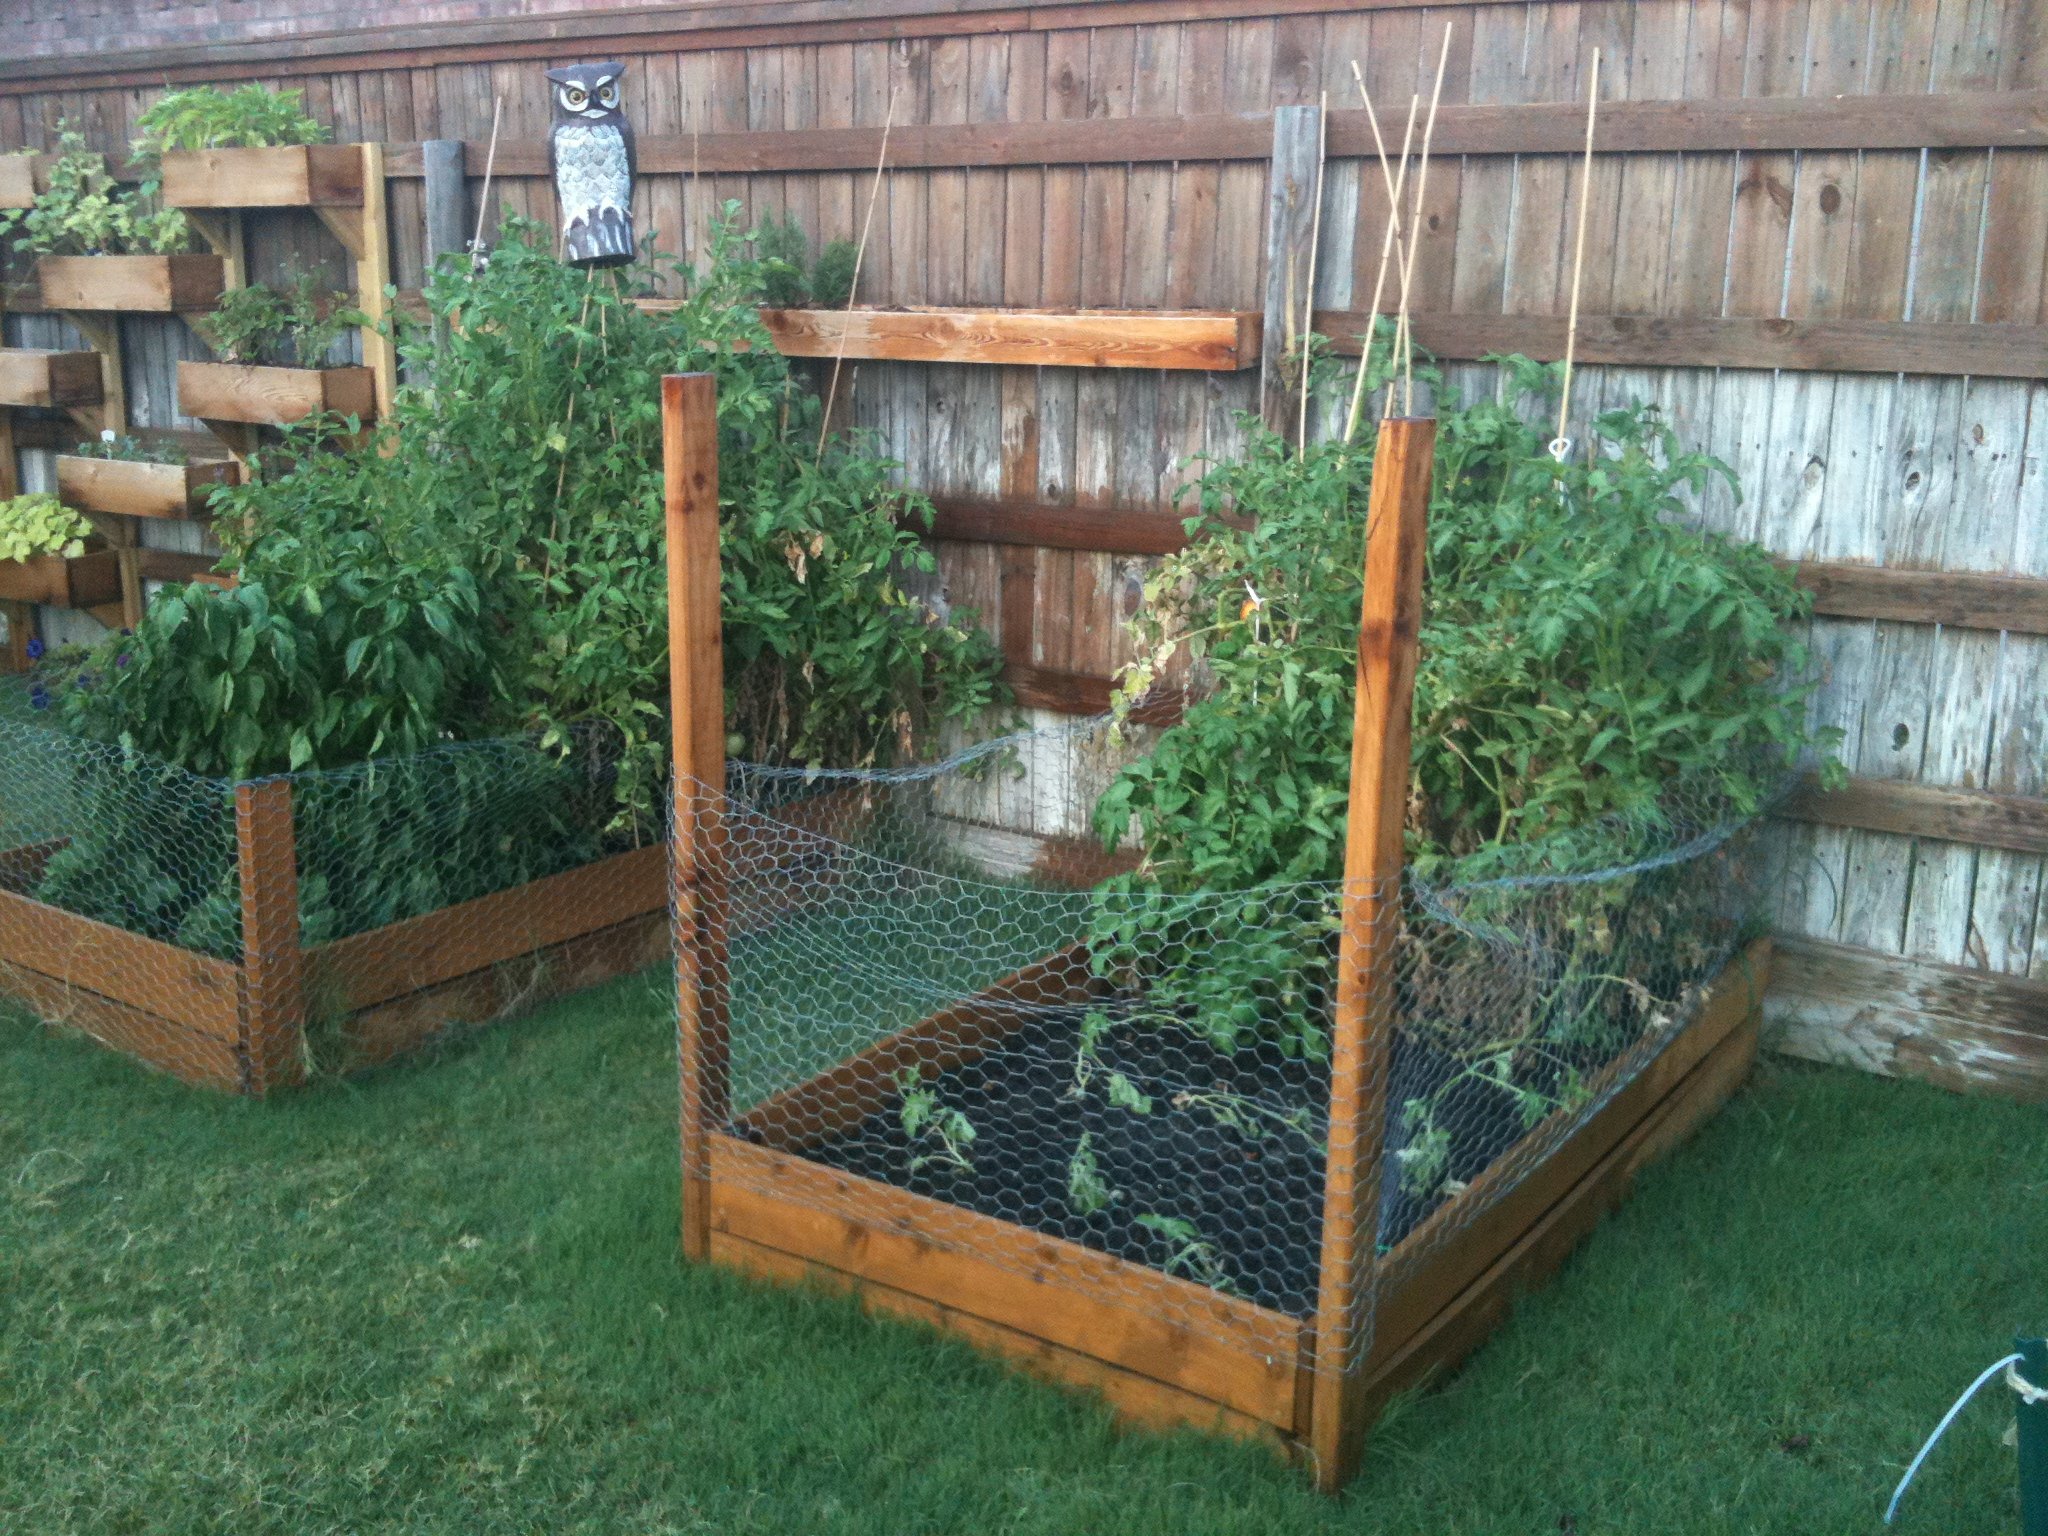
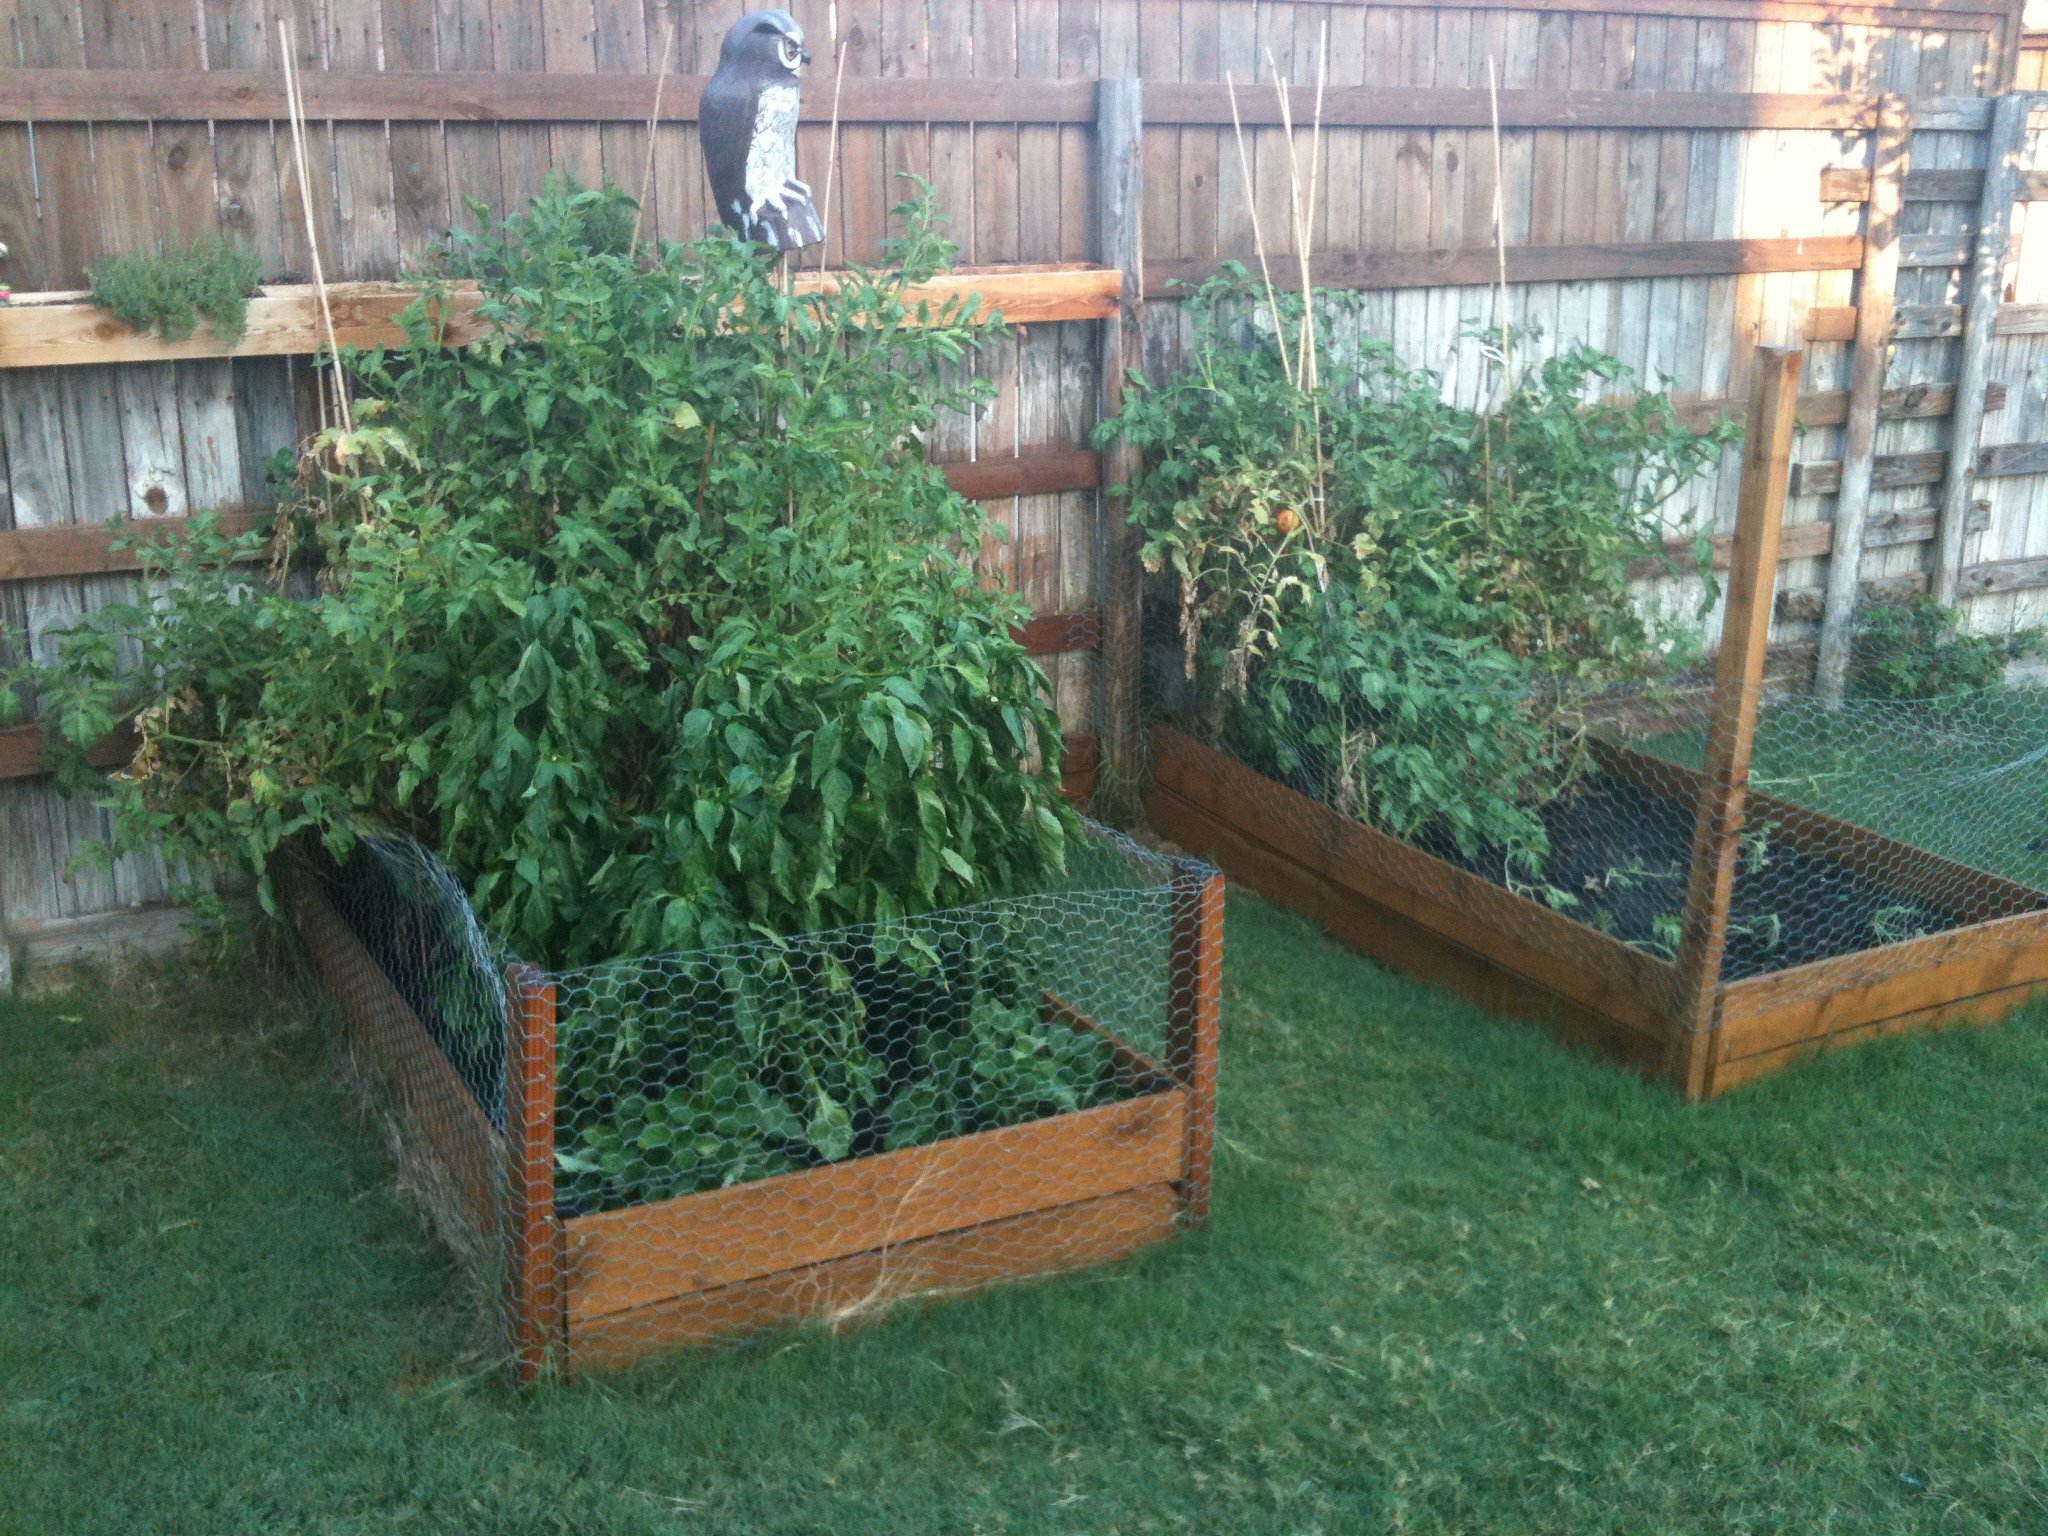
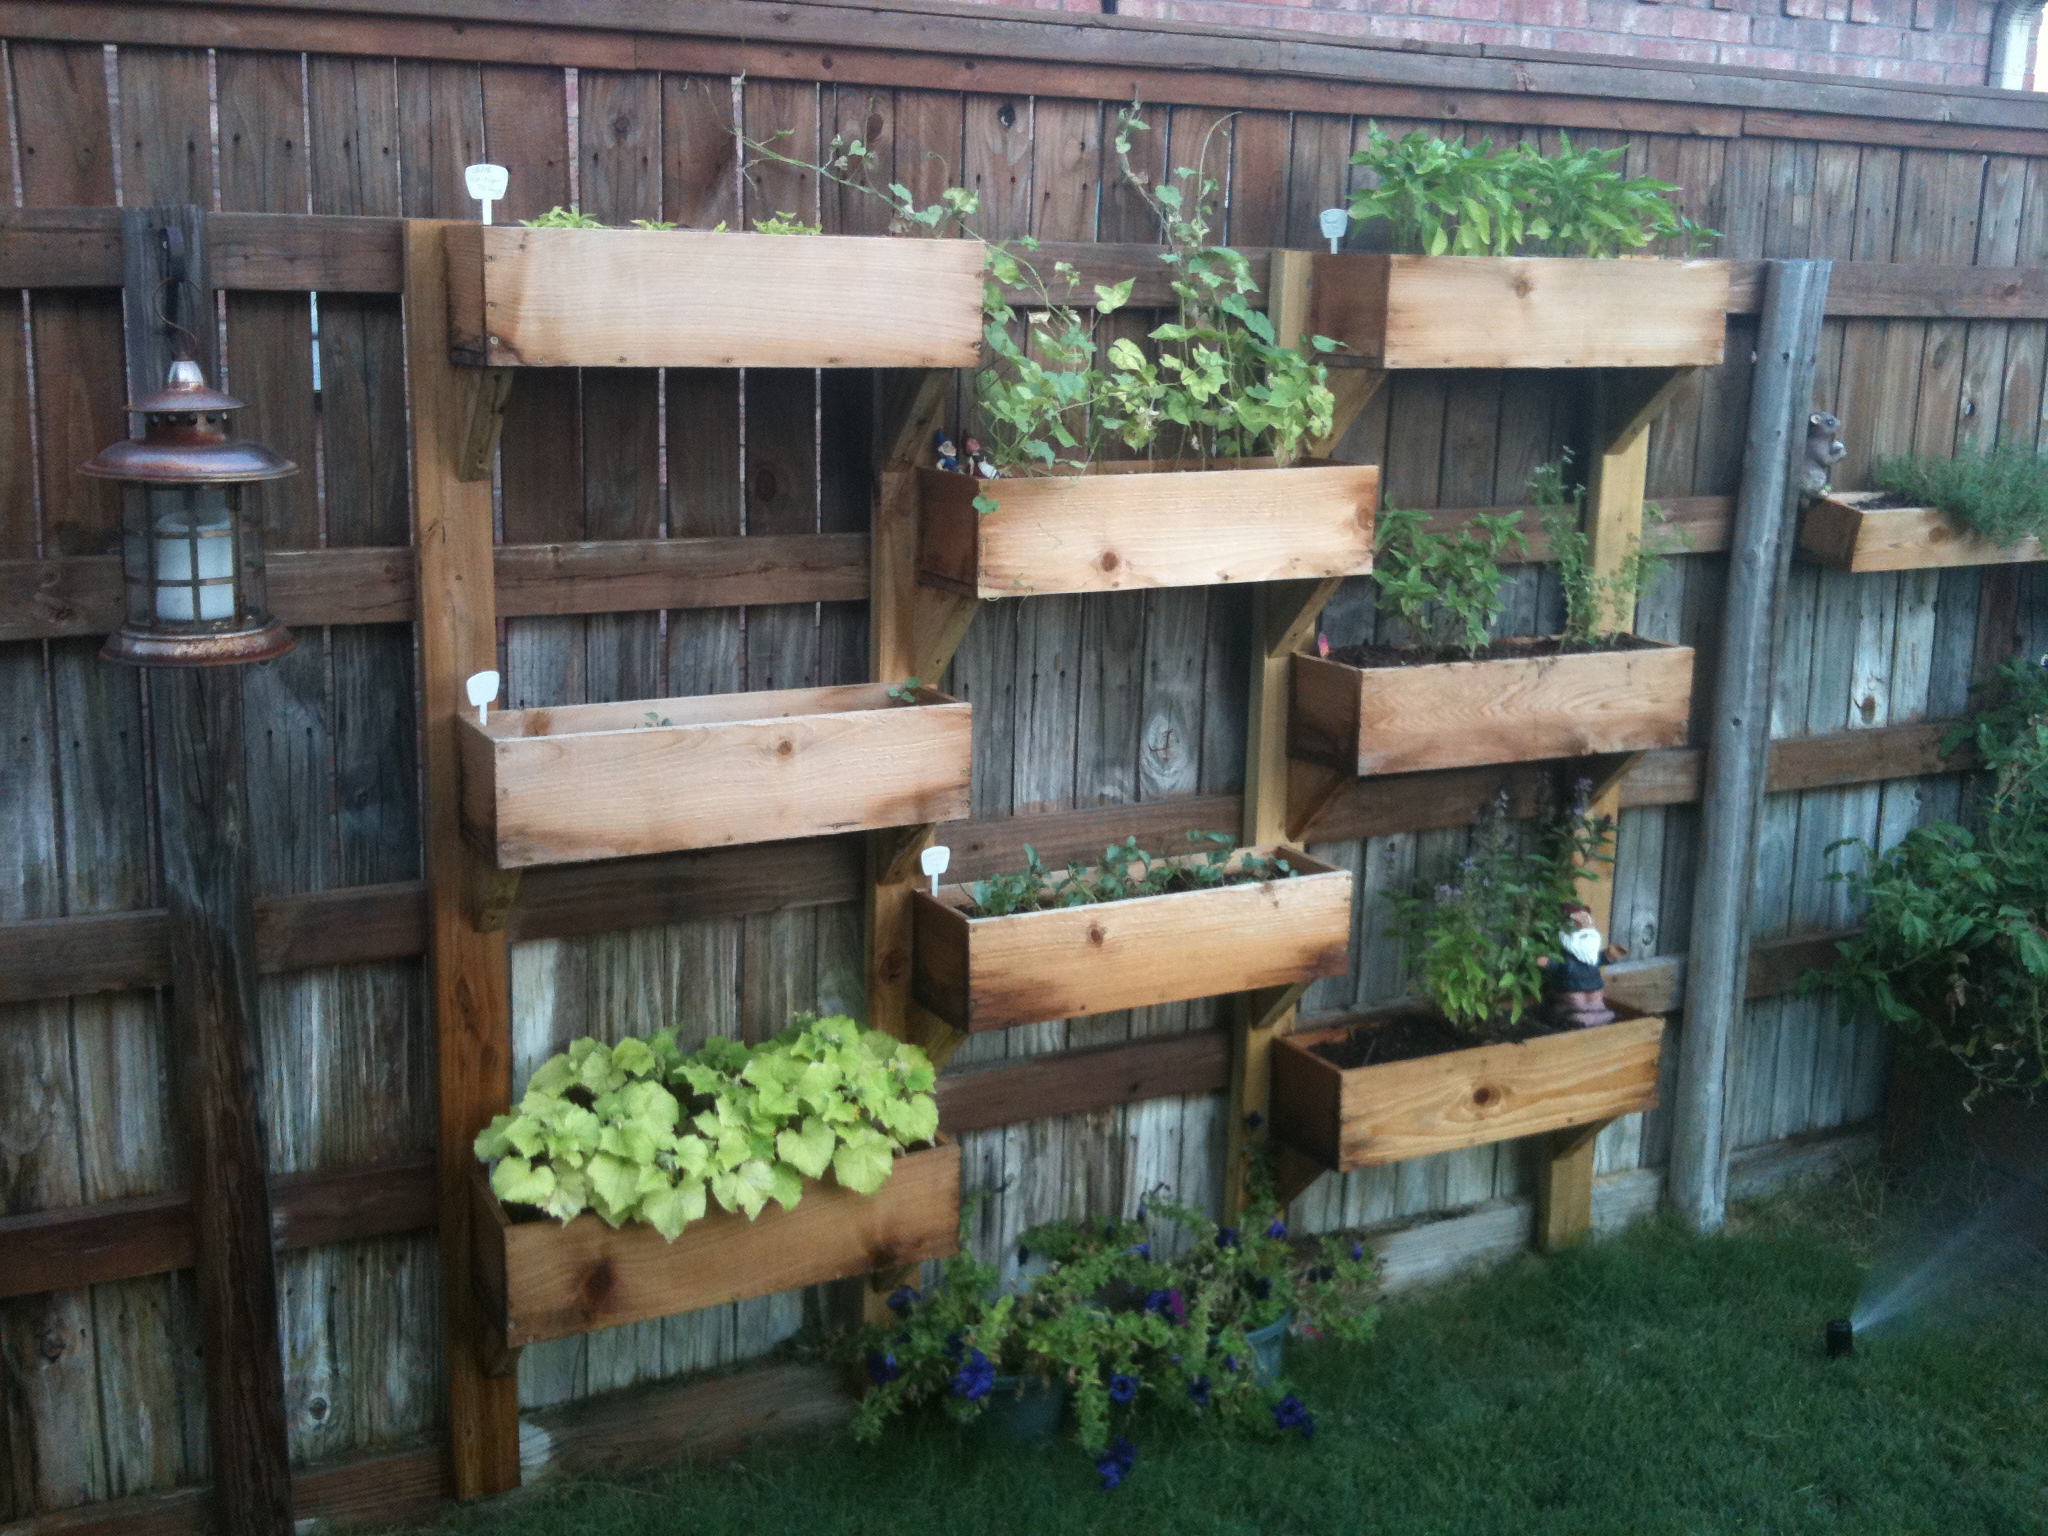
We built these before we saw these plans, but they are pretty much the same... We added the chicken wire to keep the rabbits (and our dog) out of the garden. We added the owl to keep the birds out. We've gotten a ton of tomatoes, onions, and bell peppers so far. Next year, we'll add a few more beds. We also added the verticle garden to take up less space, but its not deep enough. We'll make the next one deeper.
Sun, 07/10/2011 - 14:19
Love the vertical garden! What a wonderful idea! Did you line the boxes with plastic??
Thu, 11/17/2011 - 07:59
We ended up getting a ton of tomoatoes and green peppers from the garden boxes. We've actually built a couple more. We'll probably double again before next spring. We're looking at adding more veggies.
We now have ton of stuff planted for the fall...
Tue, 04/03/2012 - 06:19
i love the vertical boxes. I am just trying my hand at the world with a green thumb and could use as much advice as possible about how to make as well as to line the boxes or not to line them. All advice appreciated!
Fri, 11/23/2012 - 21:53
Hi, my name is berman. I found you pin from my pinterest and your box garden is so great. I am a newbie in this field and so interested to build garden in my house. If i can ask you some question, could you please to answer that?
cheers,
berman
Tue, 03/10/2015 - 21:19
Hello! Do you mind sharing the Vertical Box Instructions? I absolutely love this idea!
Sun, 05/31/2015 - 21:00
Came across this beautiful design while searching for my next diy garden idea. Wondering if there are blueprints available
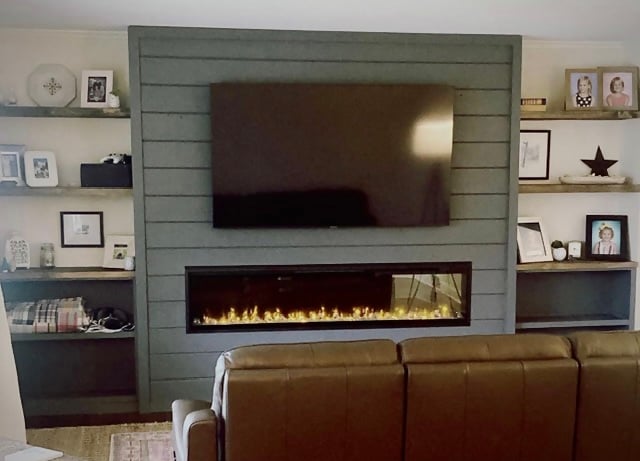
Entire wall fireplace built-in!
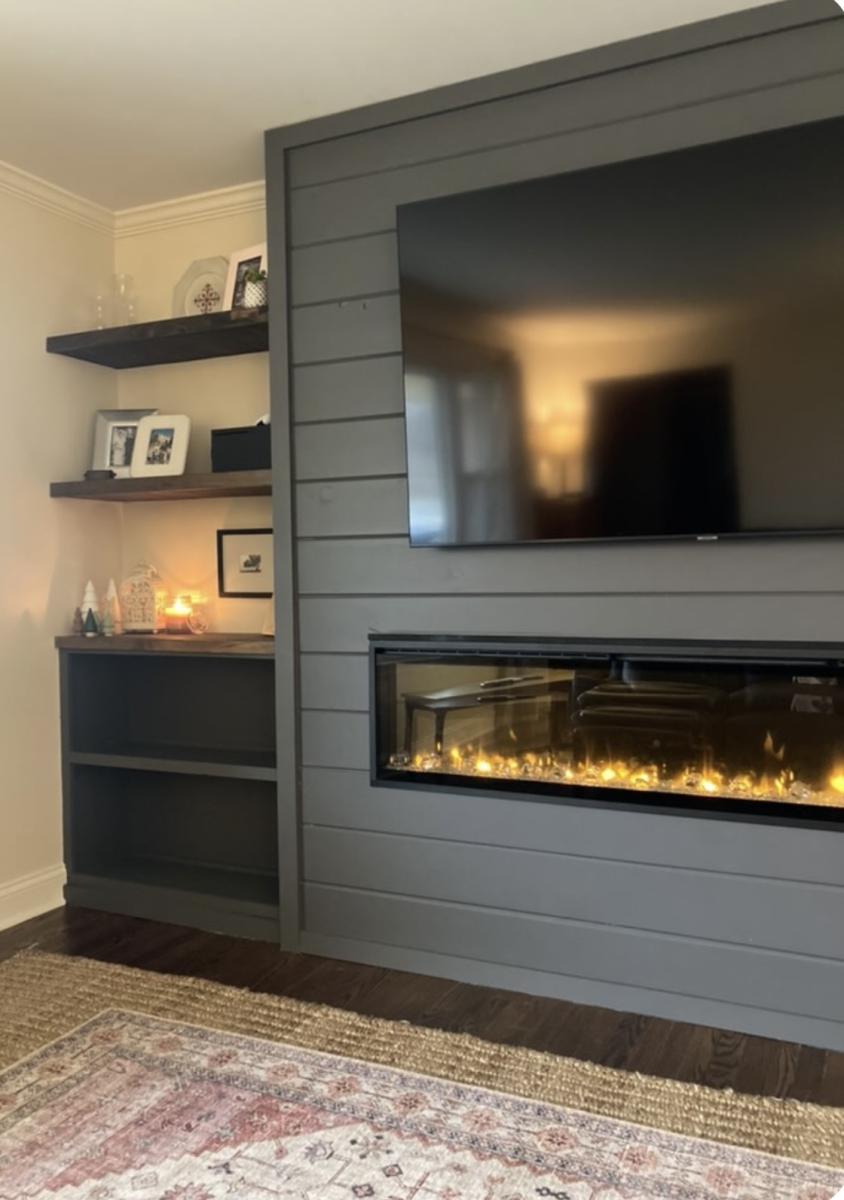
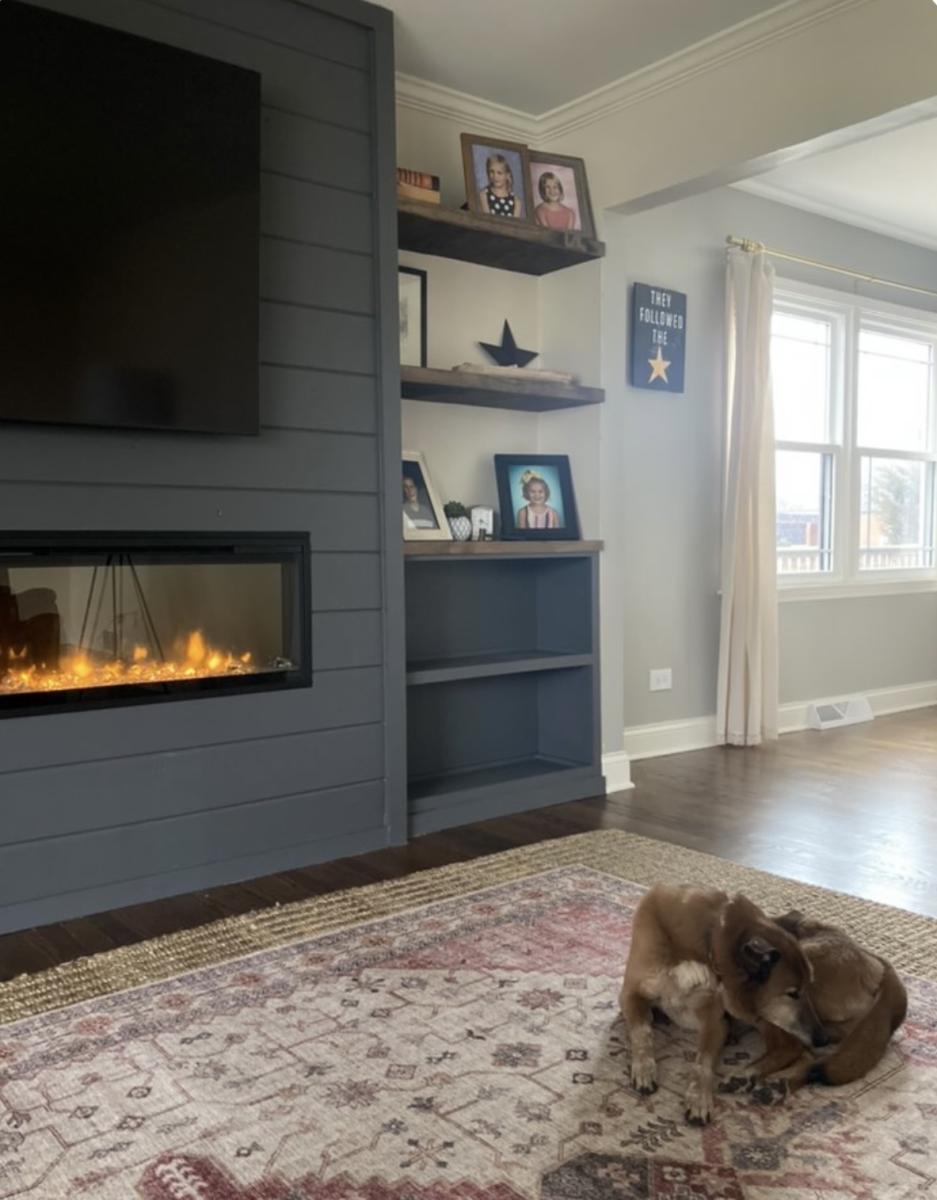
This was my first project building something from this site. I absolutely love it! We didnt add the X's because the miter saw was at my dad's house, which I was kind of sad about, but I think it still looks good. Not too bad for mine and my husbands first build!