Can Shelf Organizer
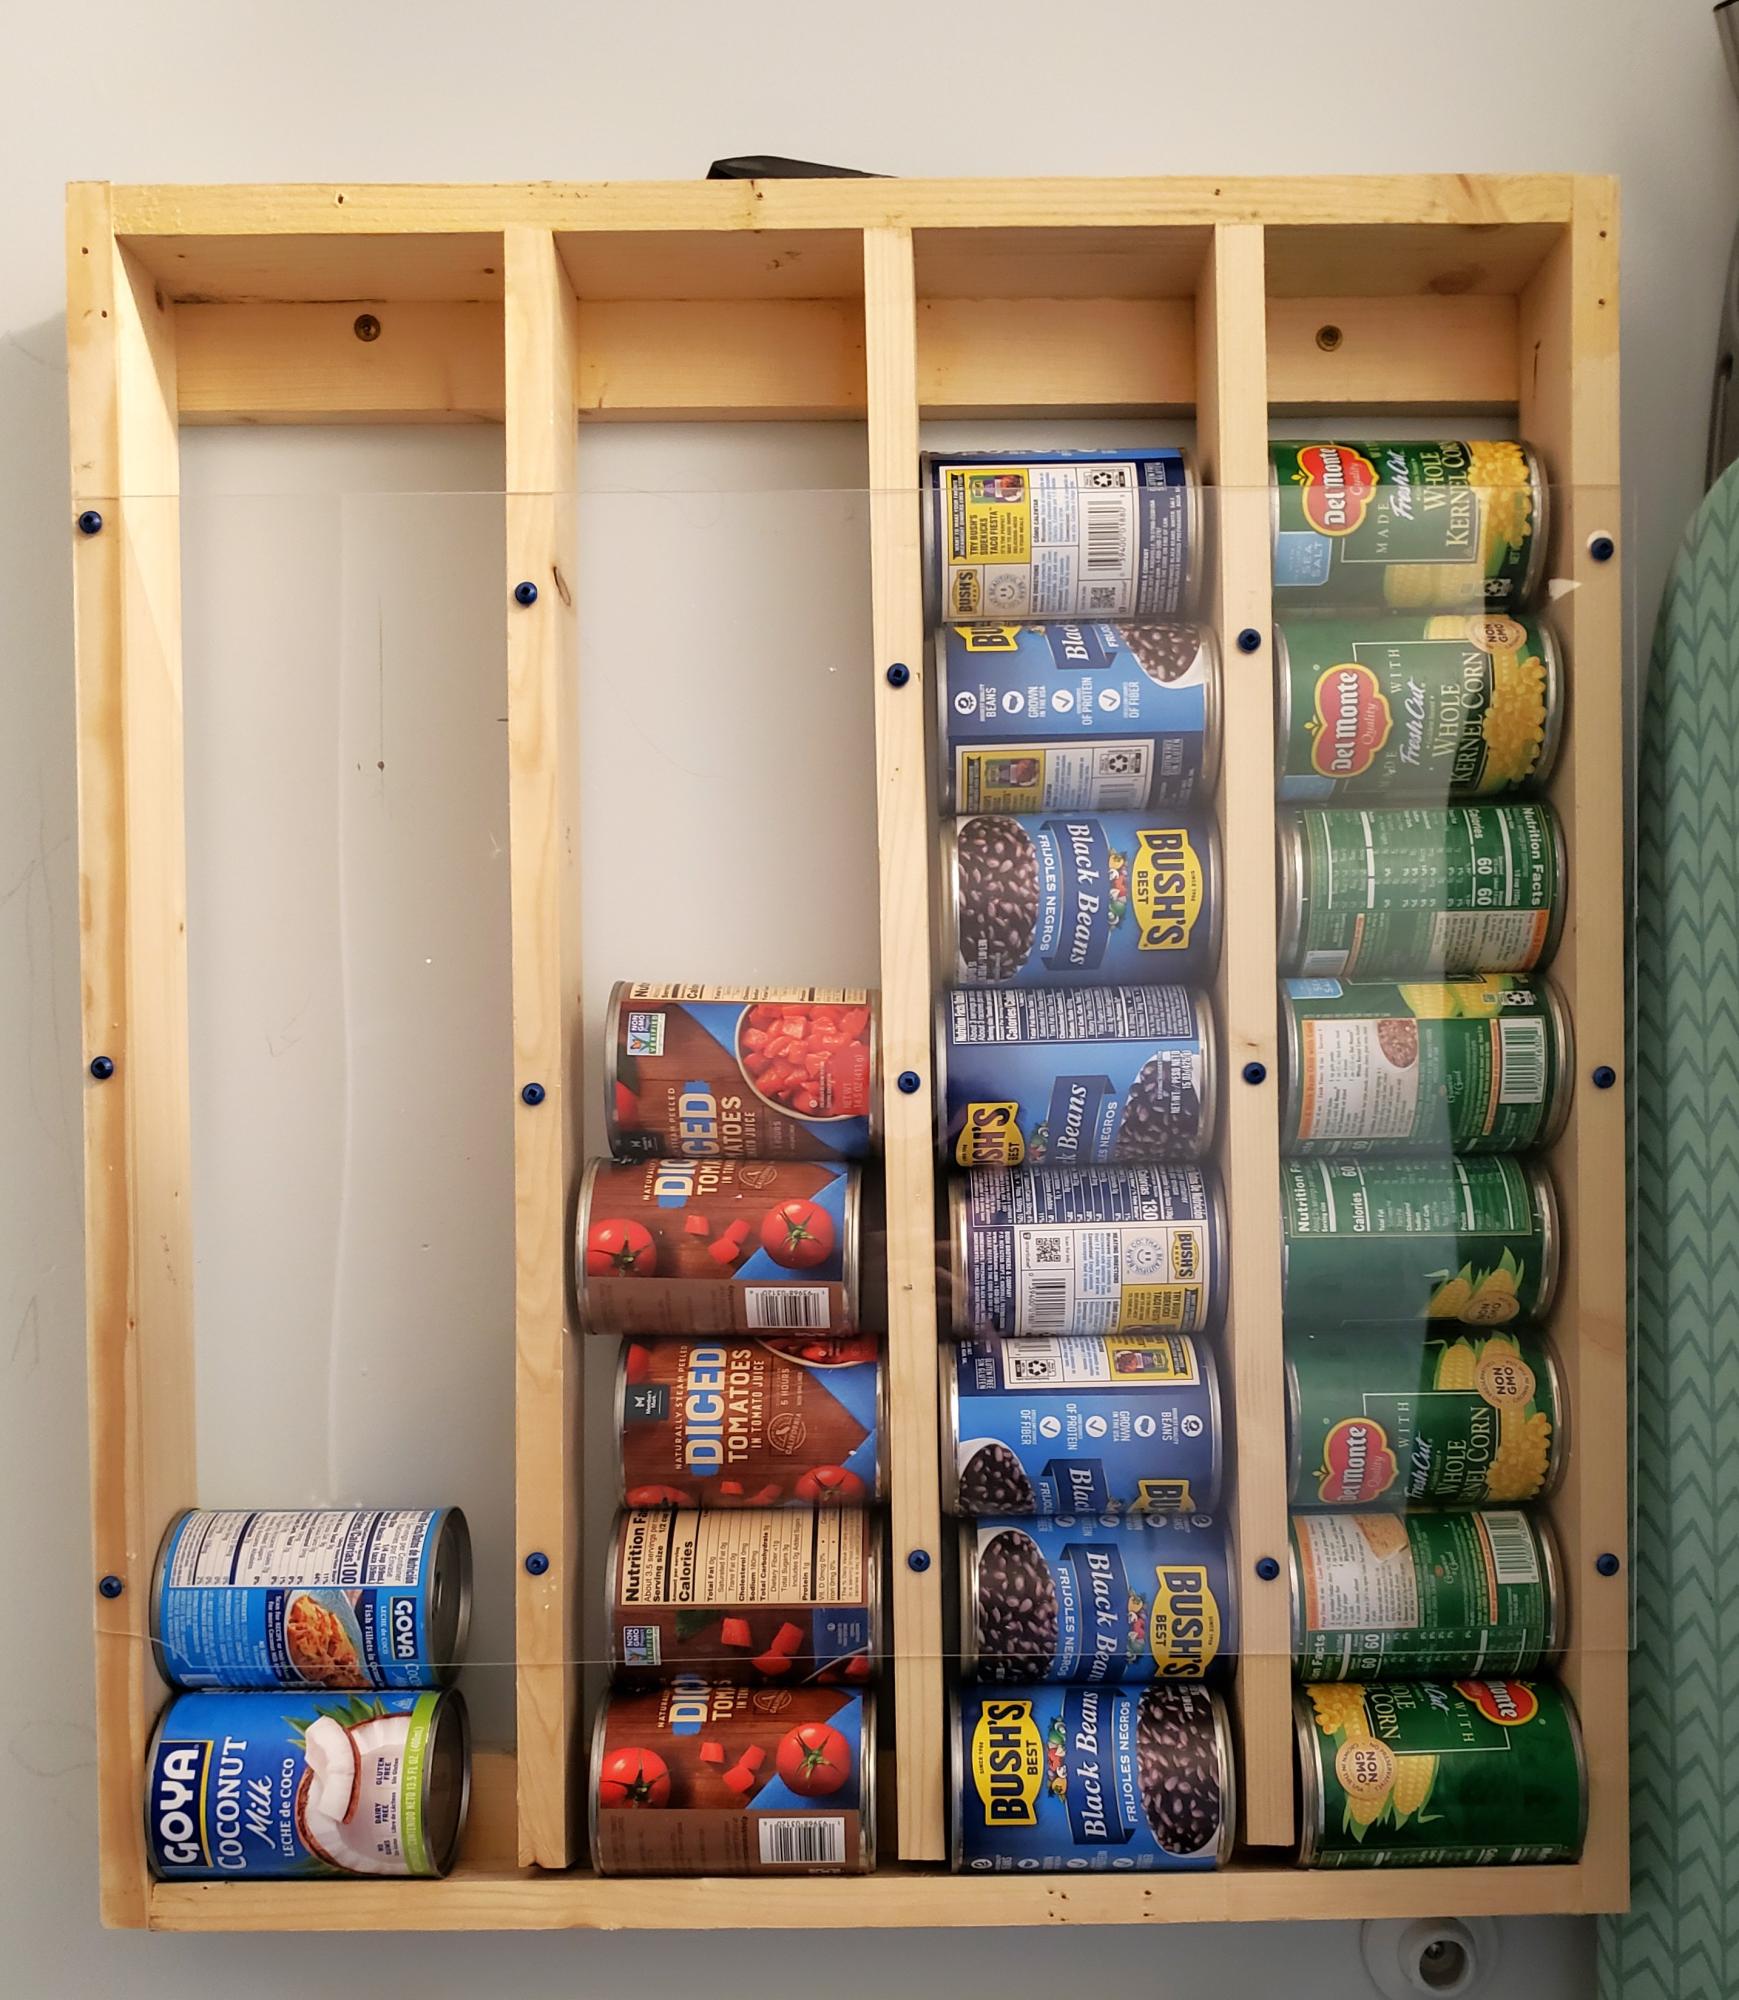
We didn't paint it, but between two newbies, it only took an afternoon. It has freed up a ton of space in the cabinets!
Hattie
Built from Plan(s)
We didn't paint it, but between two newbies, it only took an afternoon. It has freed up a ton of space in the cabinets!
Hattie
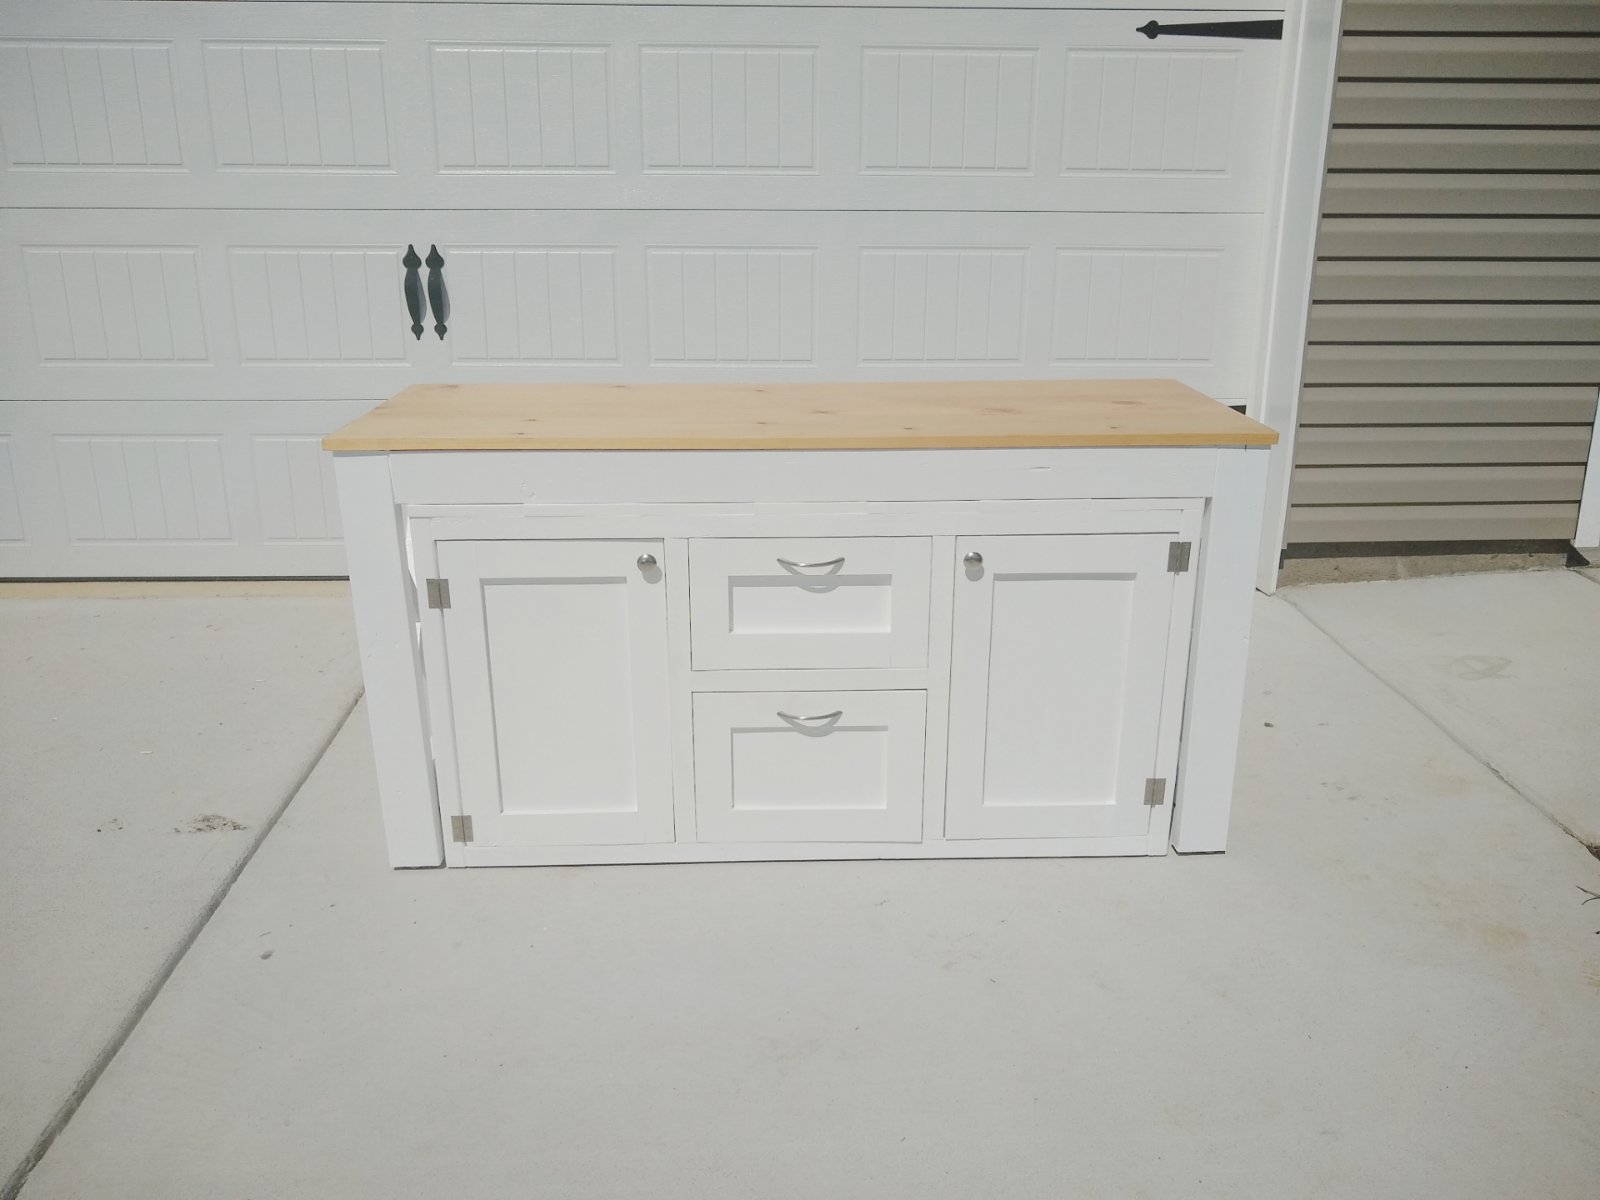
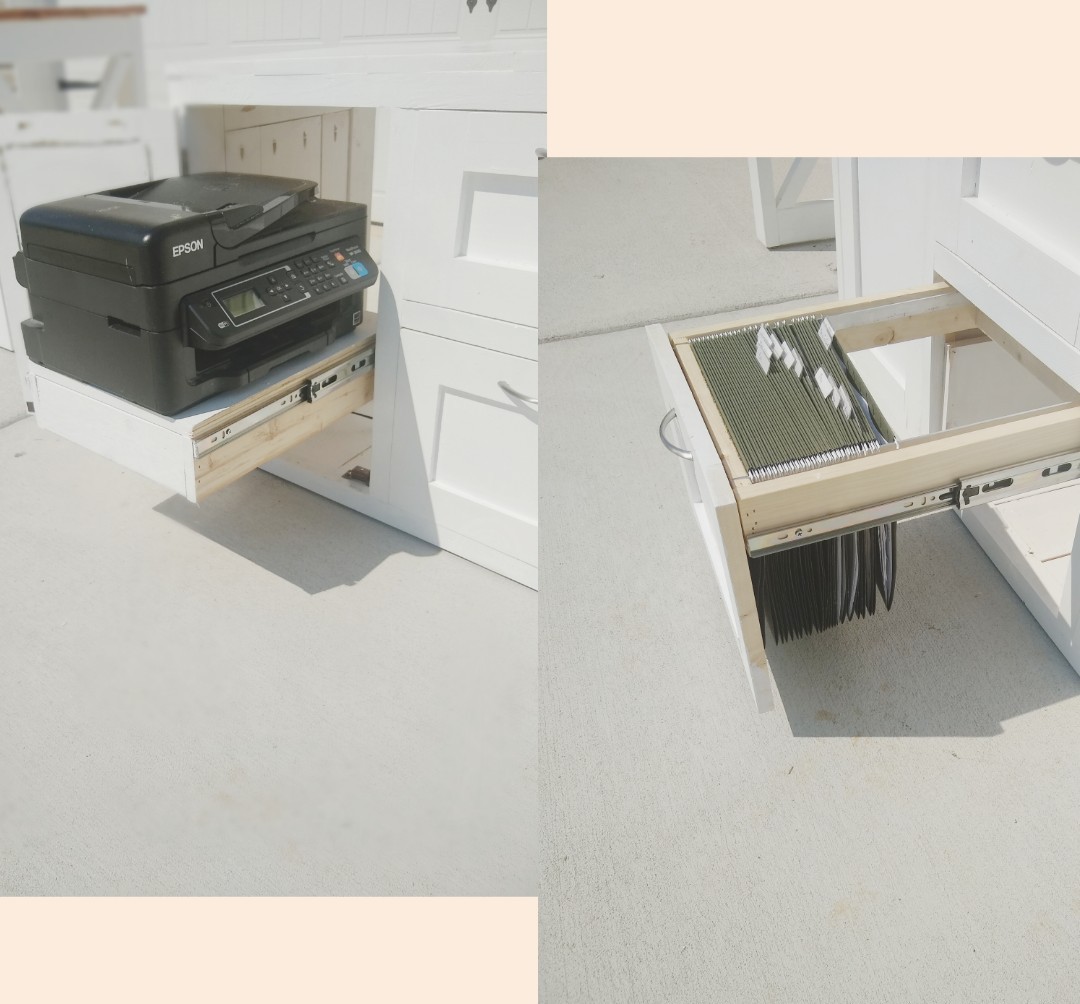
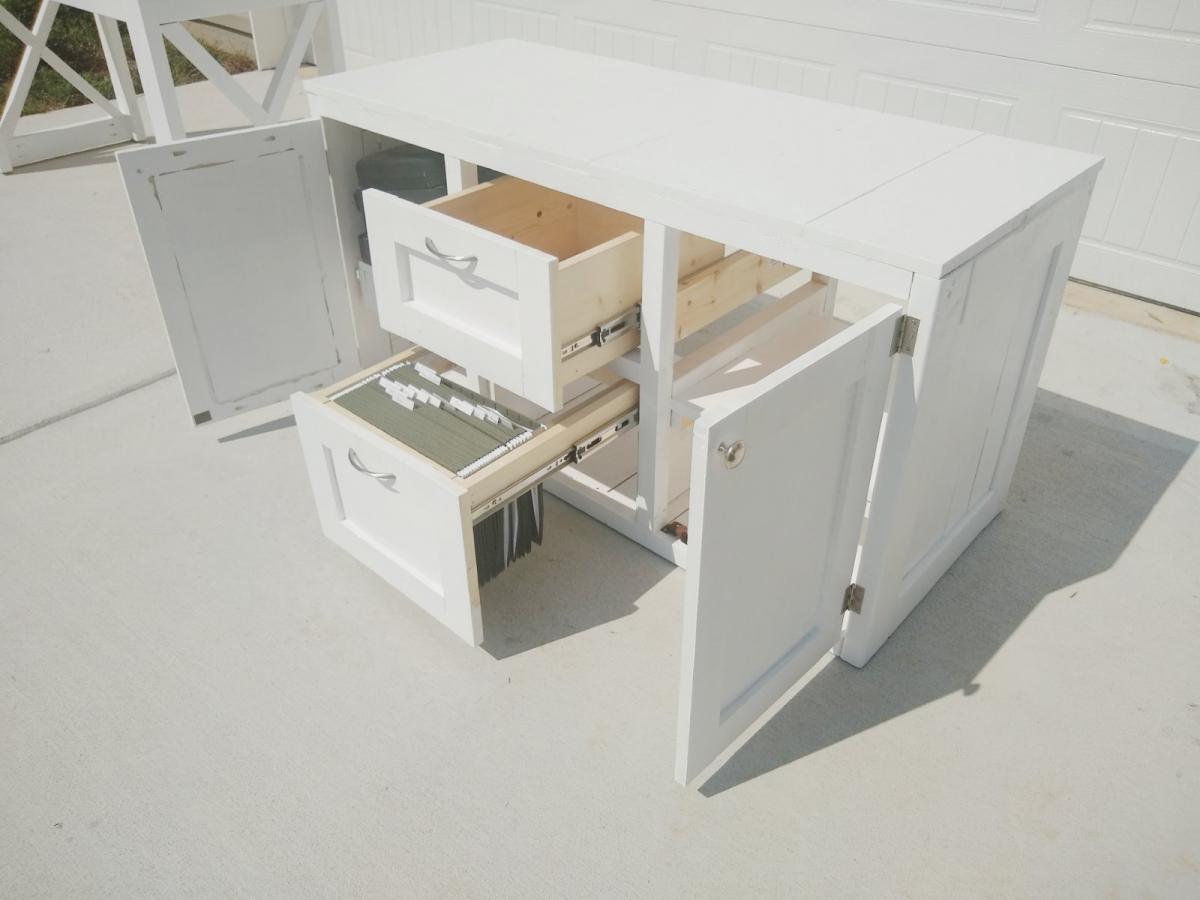
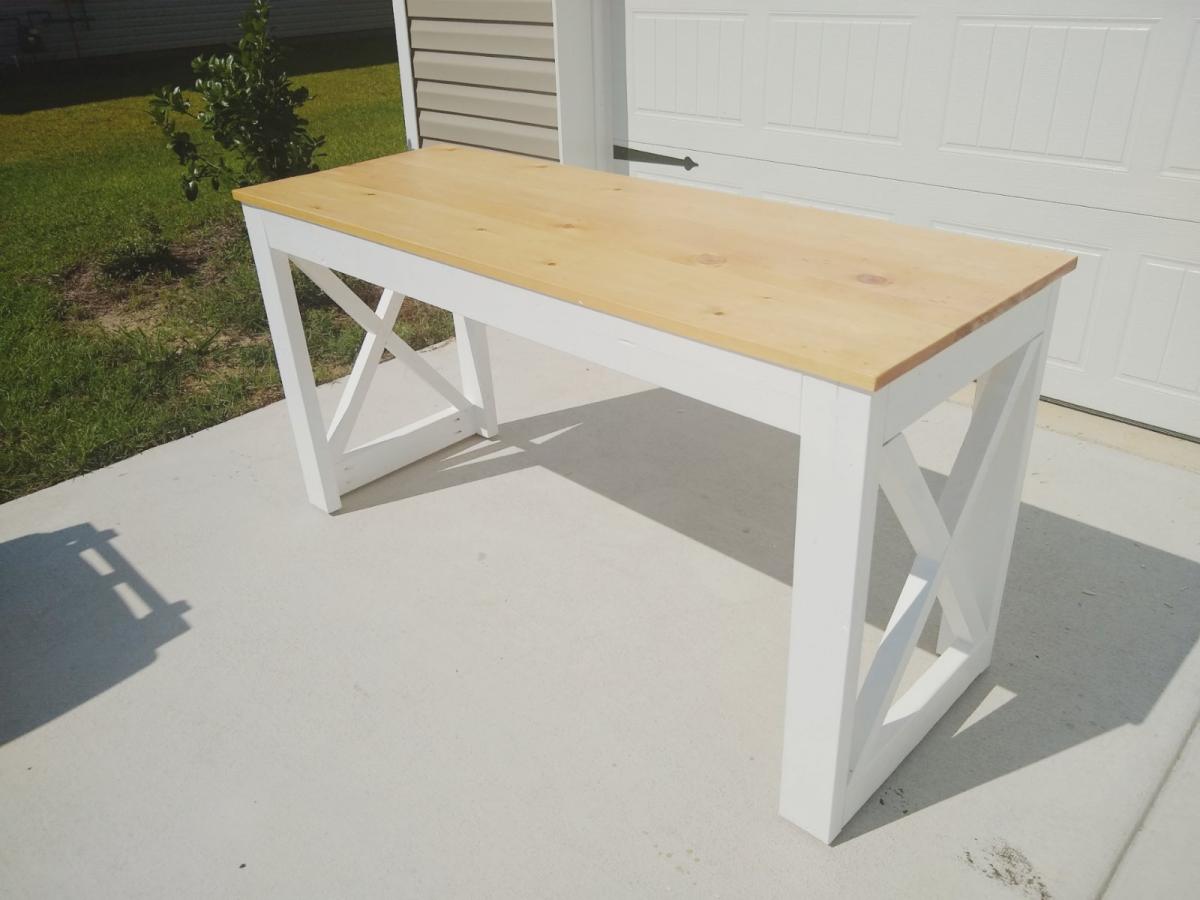
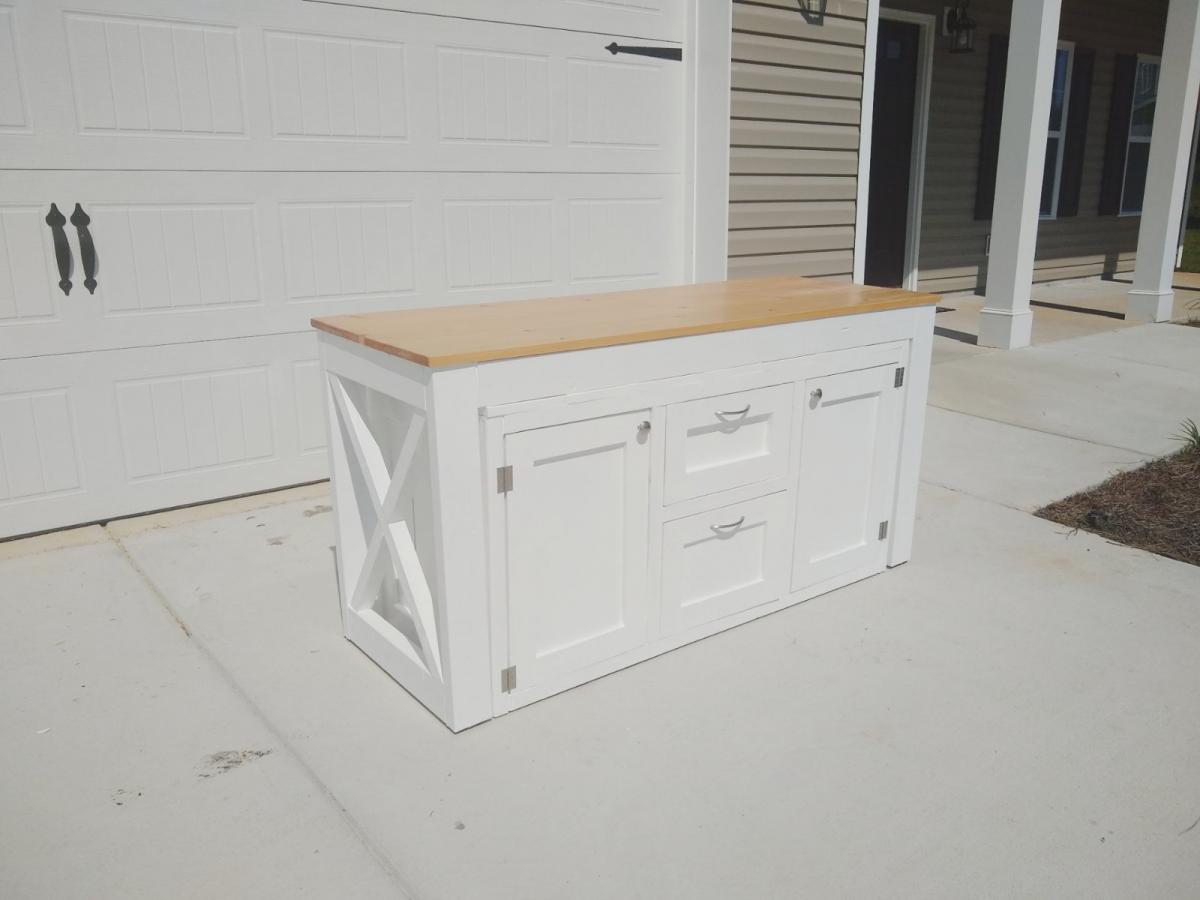
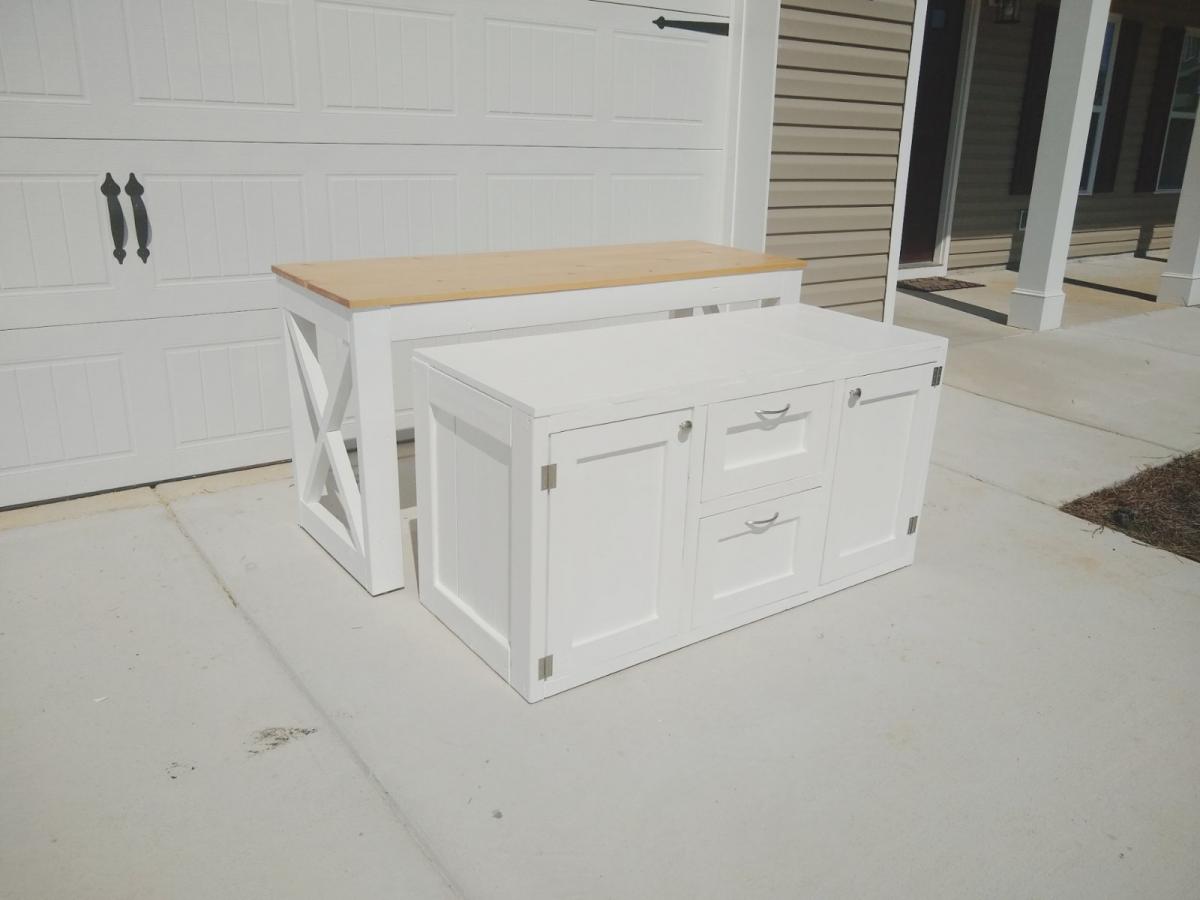
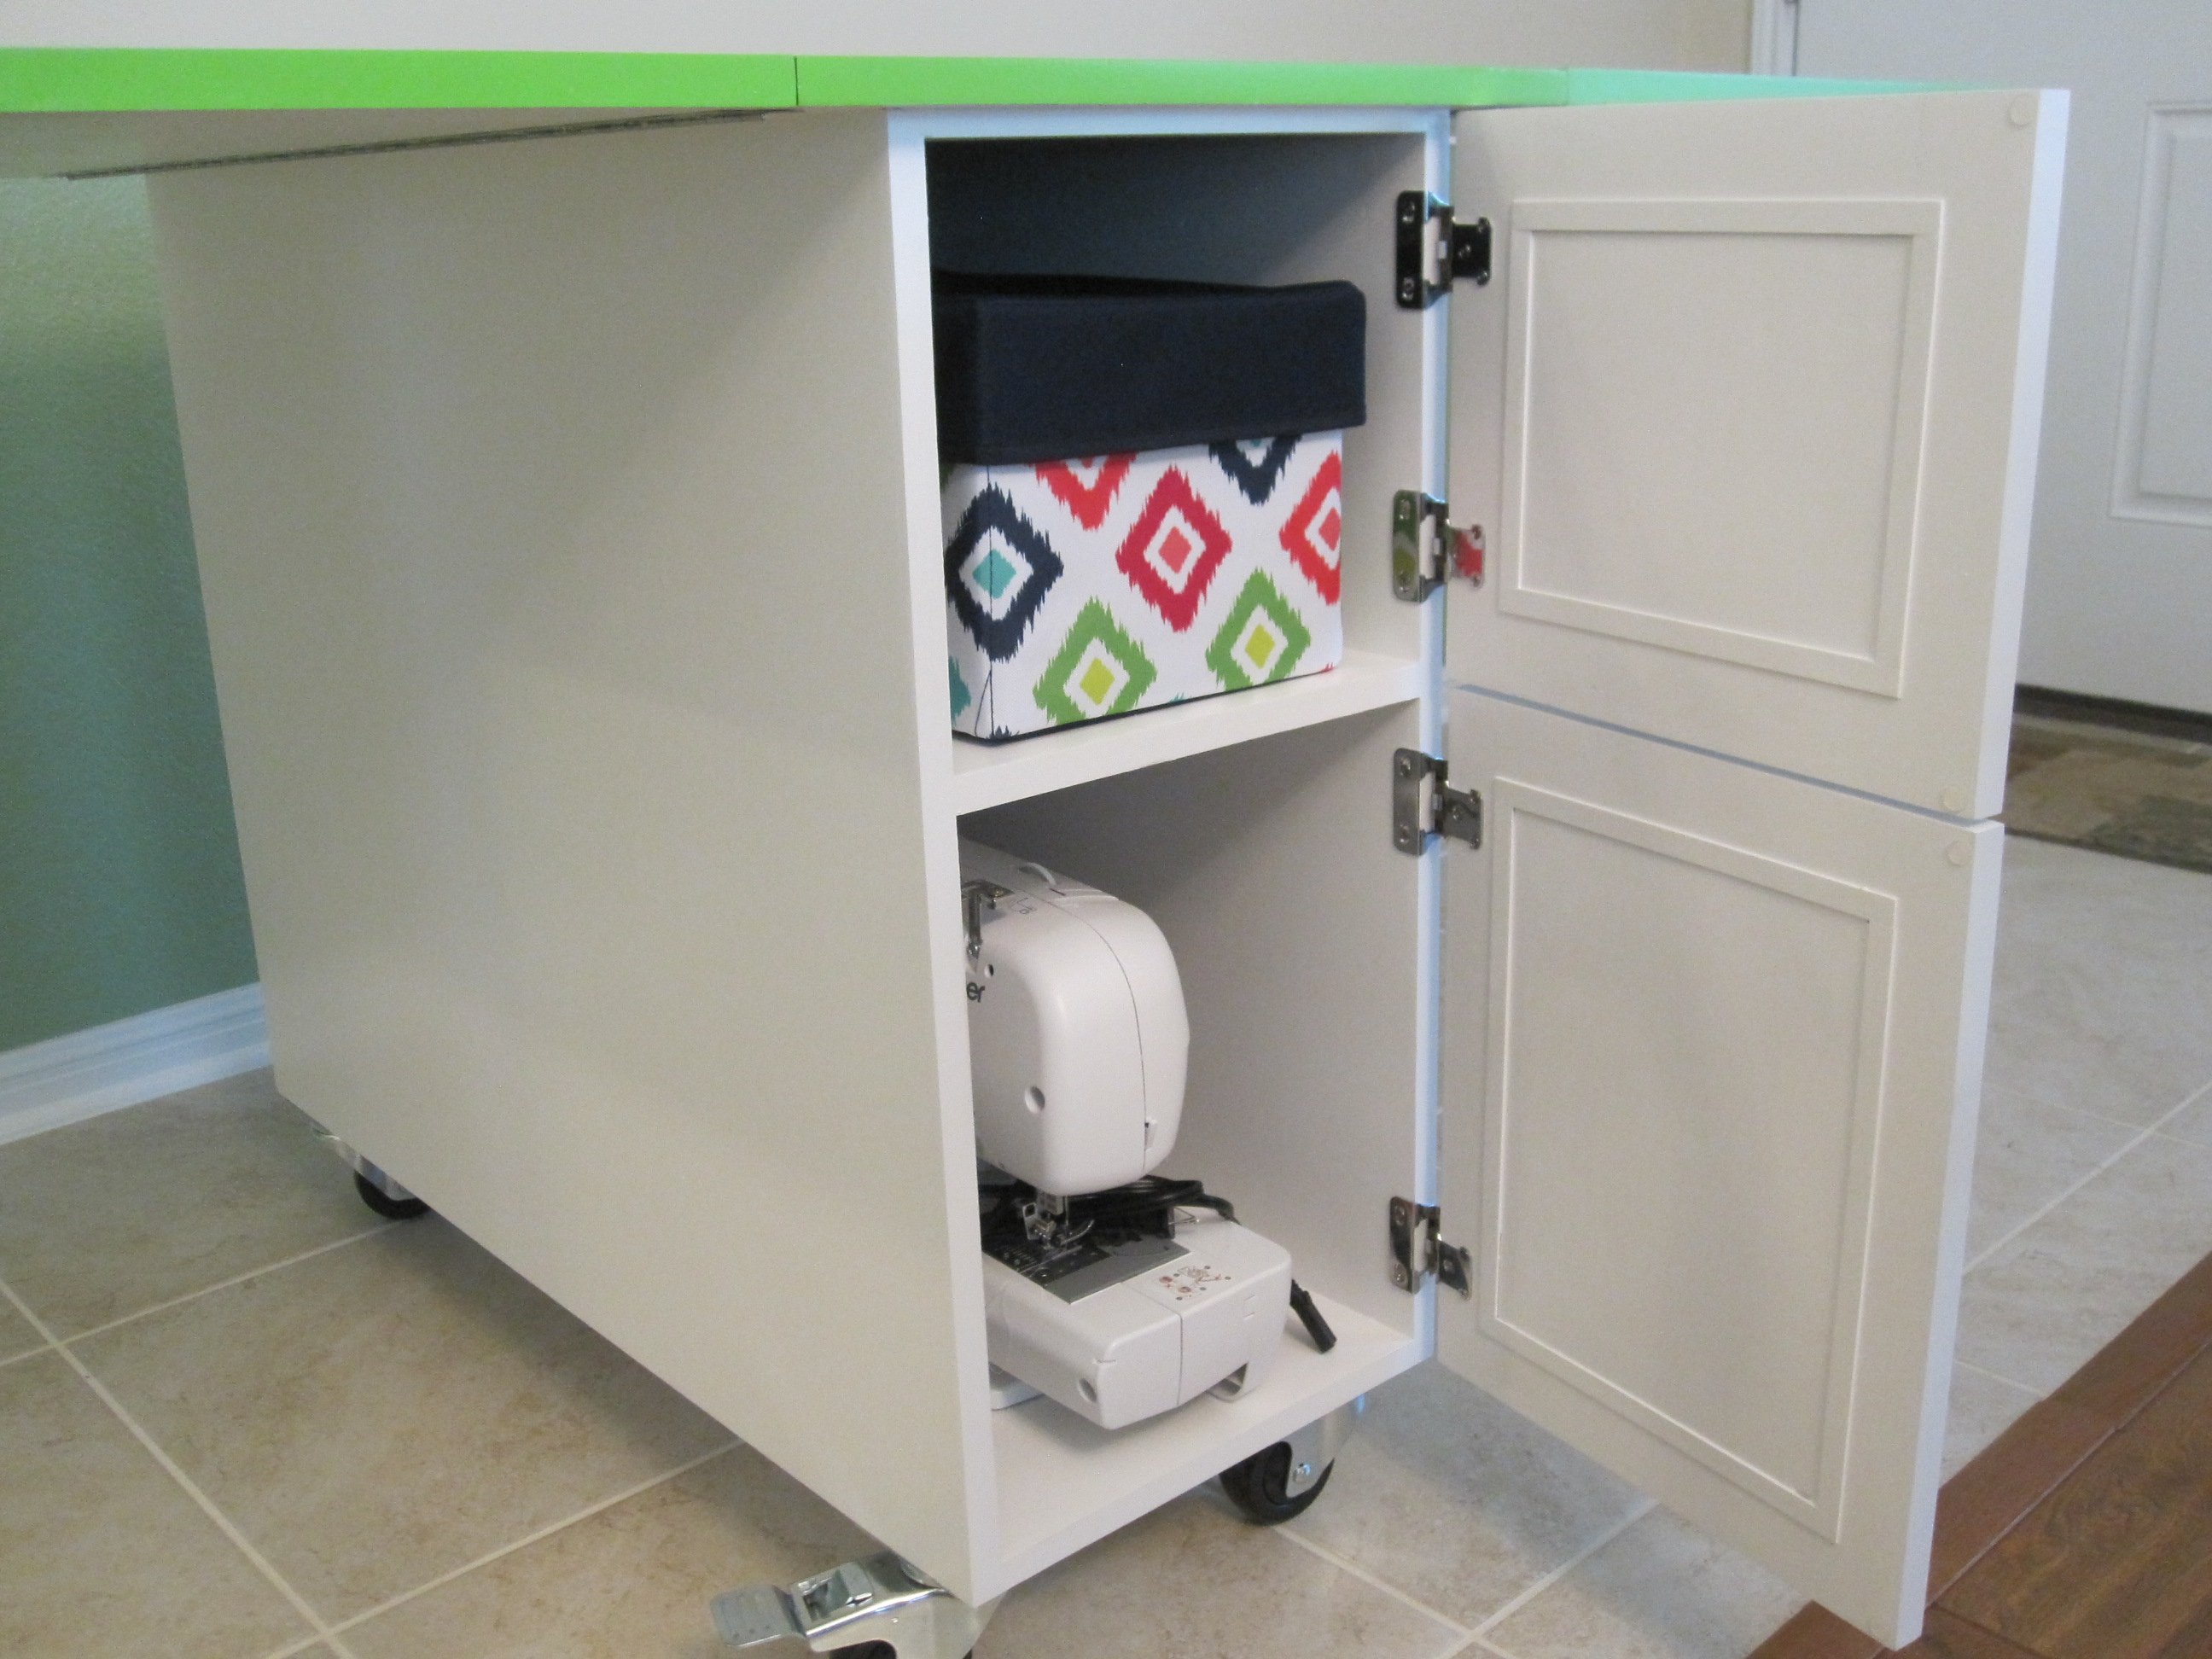
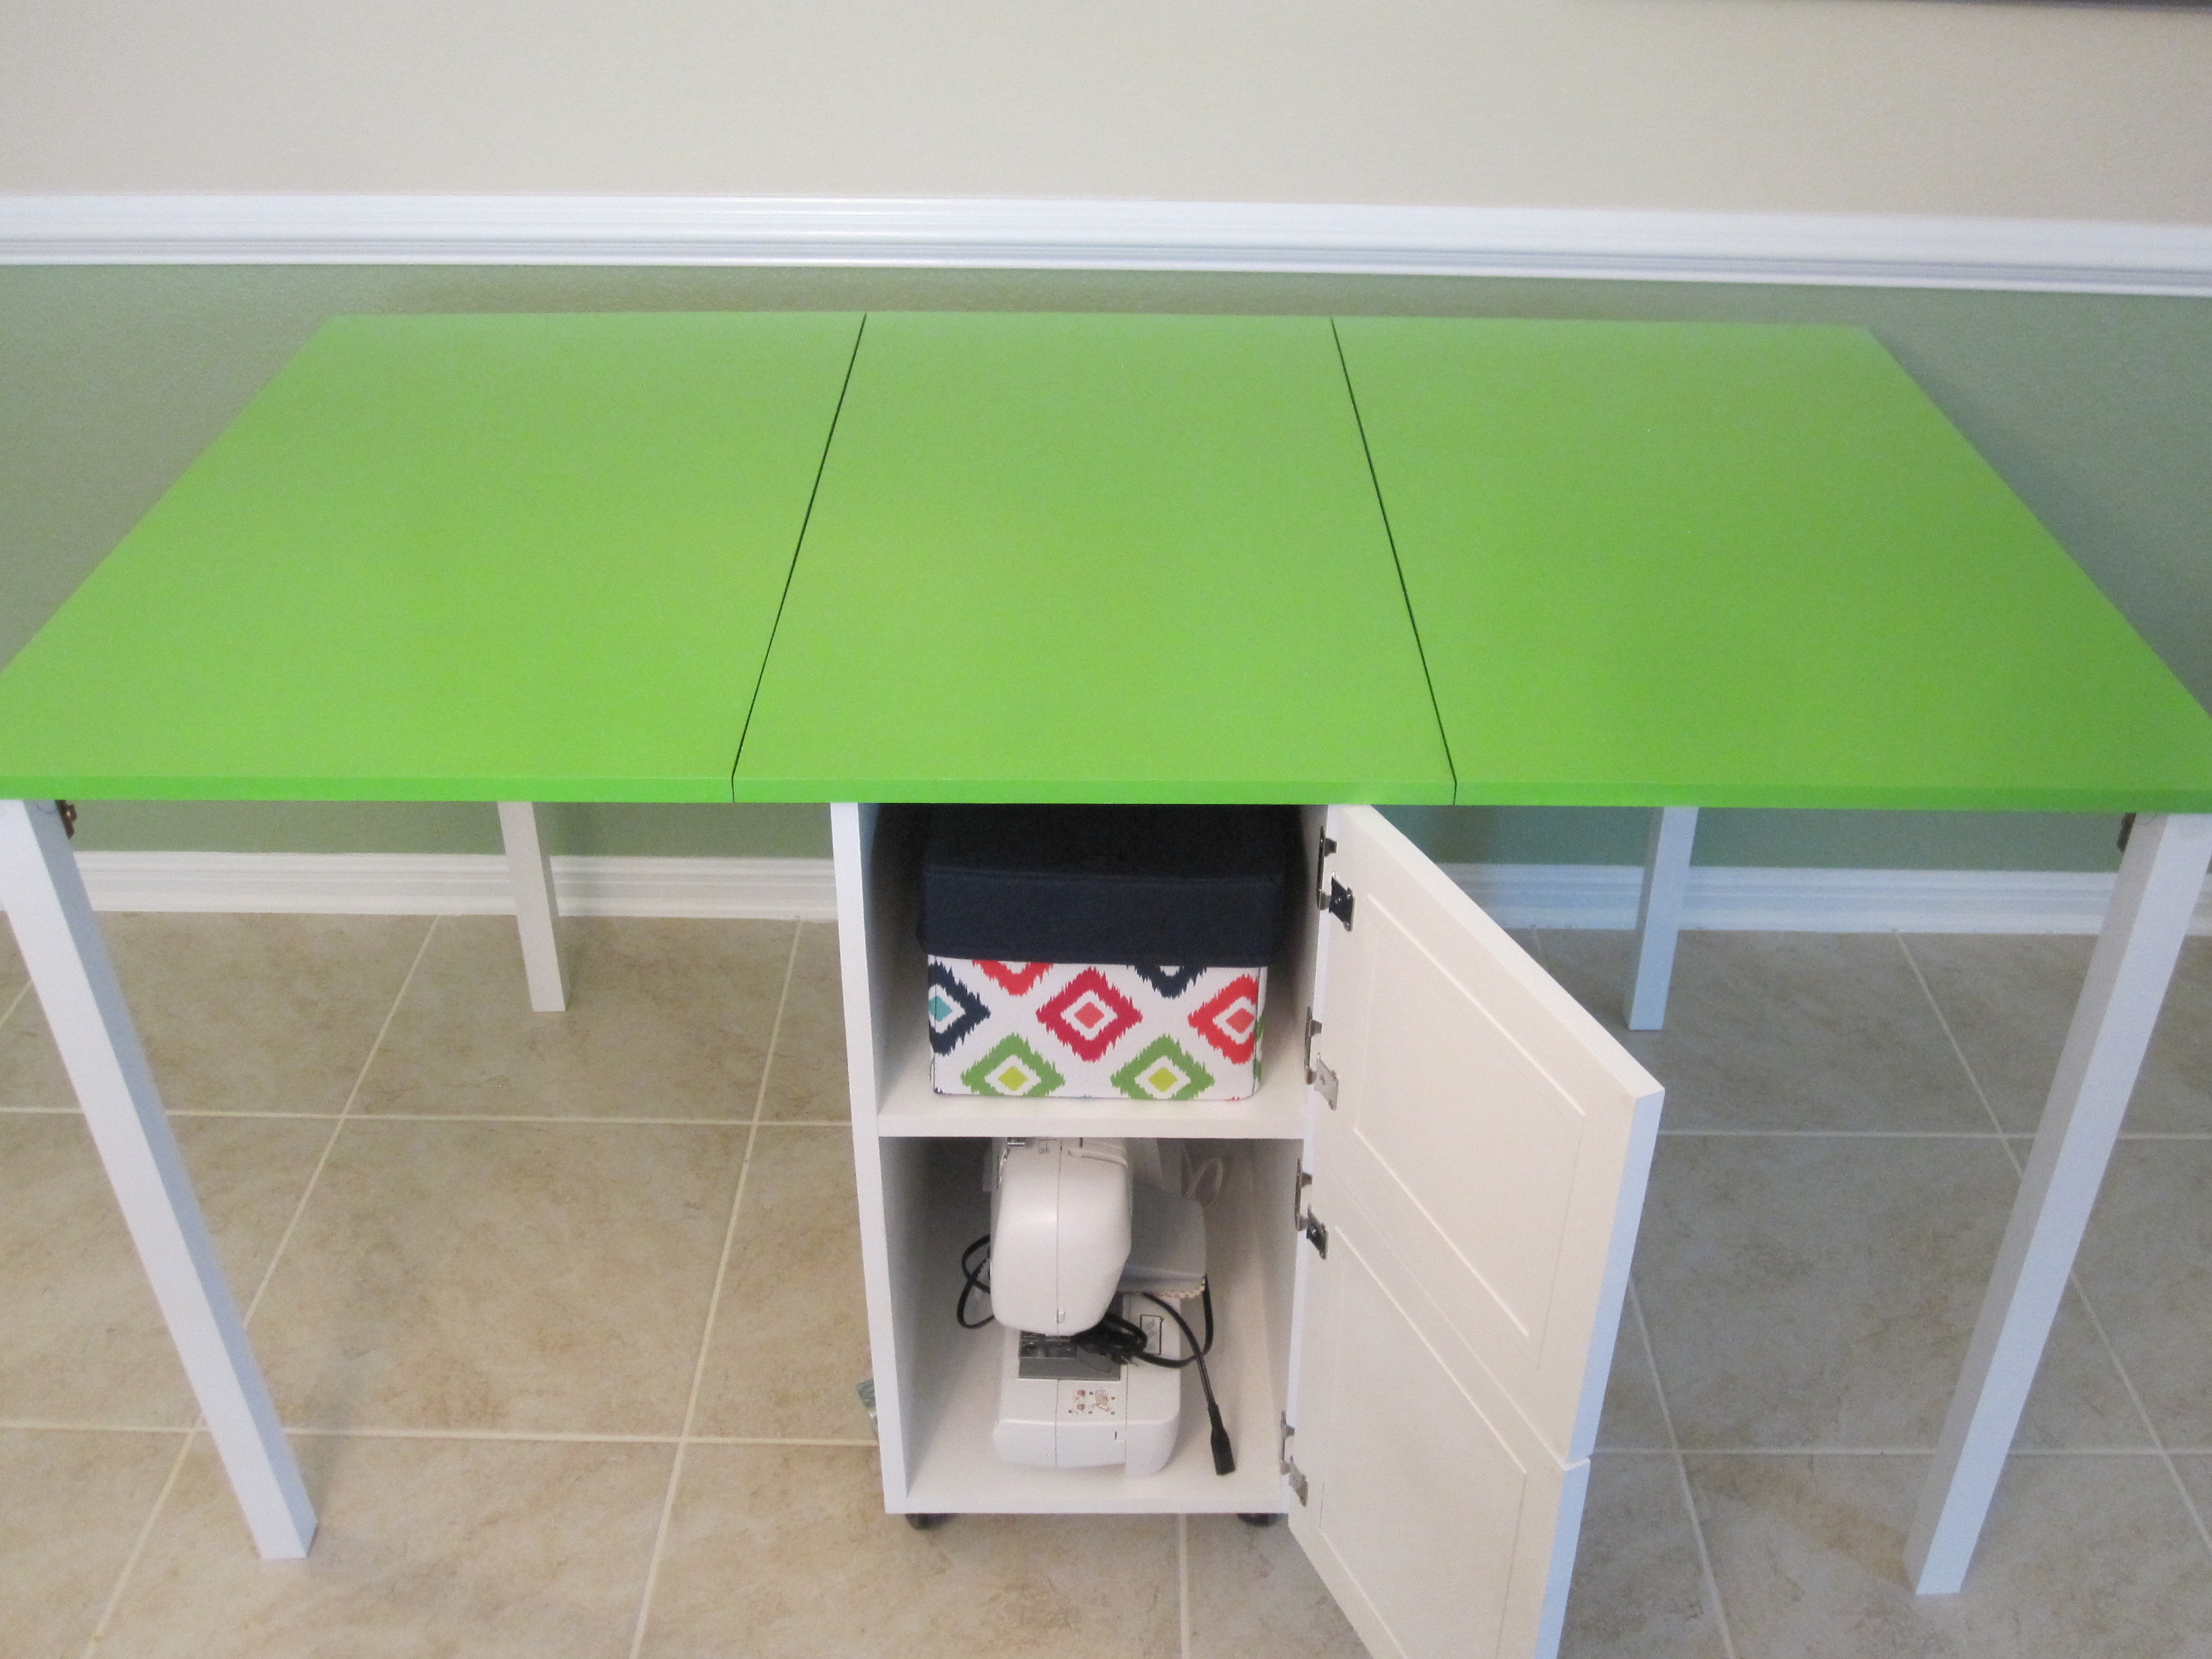
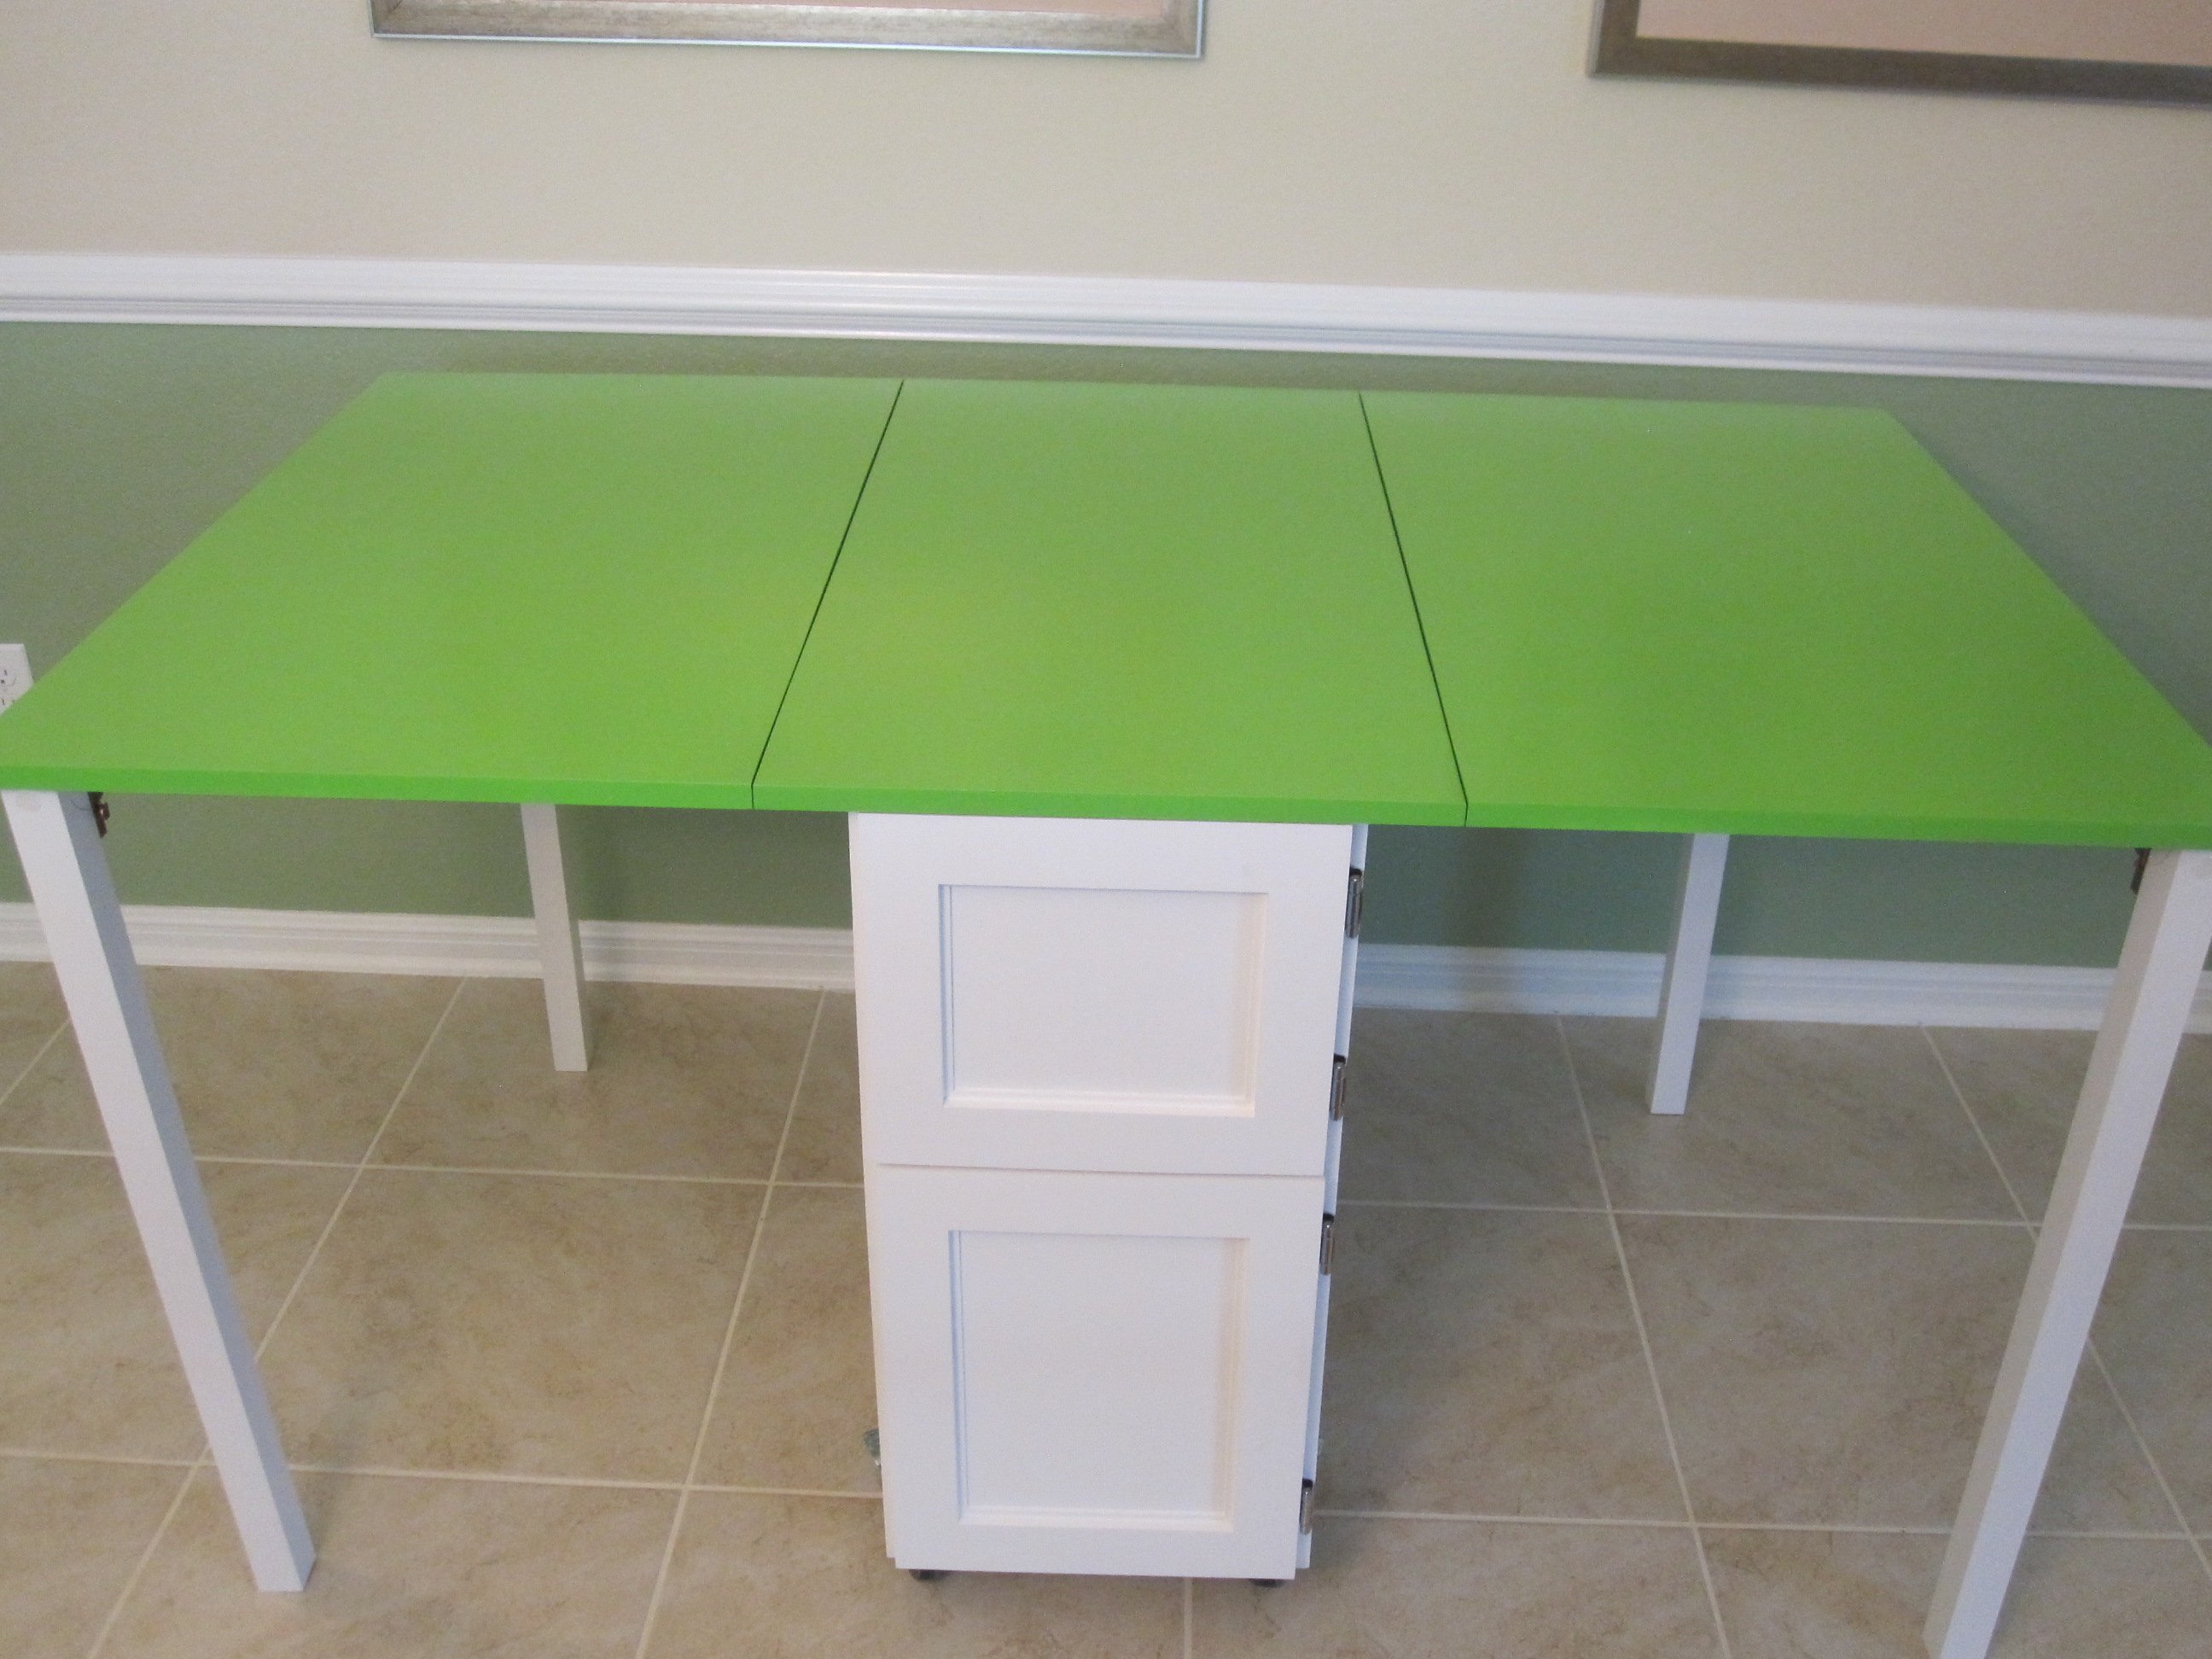
So loving this nesting office station❤️! We will have a sofa sleeper in the office as well. So we needed a desk that could be moved to the wall when the sofa sleeper is being used by guest. I saw a post from Ana for her Nesting Grill Station and I came up with the idea to make this nesting office station. The cabinet includes a file folder drawer (which is from Ana's mail boss plans), a regular drawer, cabinet doors with shelves. One of the shelves is a pull out shelf for the printer. I think it came together great! Design for nesting desk inspired by these plans: https://www.ana-white.com/woodworking-projects/nesting-grill-station https://www.ana-white.com/woodworking-projects/mail-boss
Wed, 07/15/2020 - 04:40
I love this! Very creative and practical design and oh so pretty. Nice job!
Mon, 08/31/2020 - 09:47
This looks so good. Great work. Do you mind sharing how you concealed the wheels? Do you have wheels on both pieces?
Sat, 10/03/2020 - 08:35
Hi, Thank you! Actually I didn't add wheels to the design since this will be in an office with thick carpeting. I added adjustable metal foot pads to the bottom of the desk.
My hubby made it for me after seeing yours!! I LOVE IT THANK YOU SO MUCH!
The buy list is correct the cut list is wrong the bottom 2*4's listed should both be 2*6's
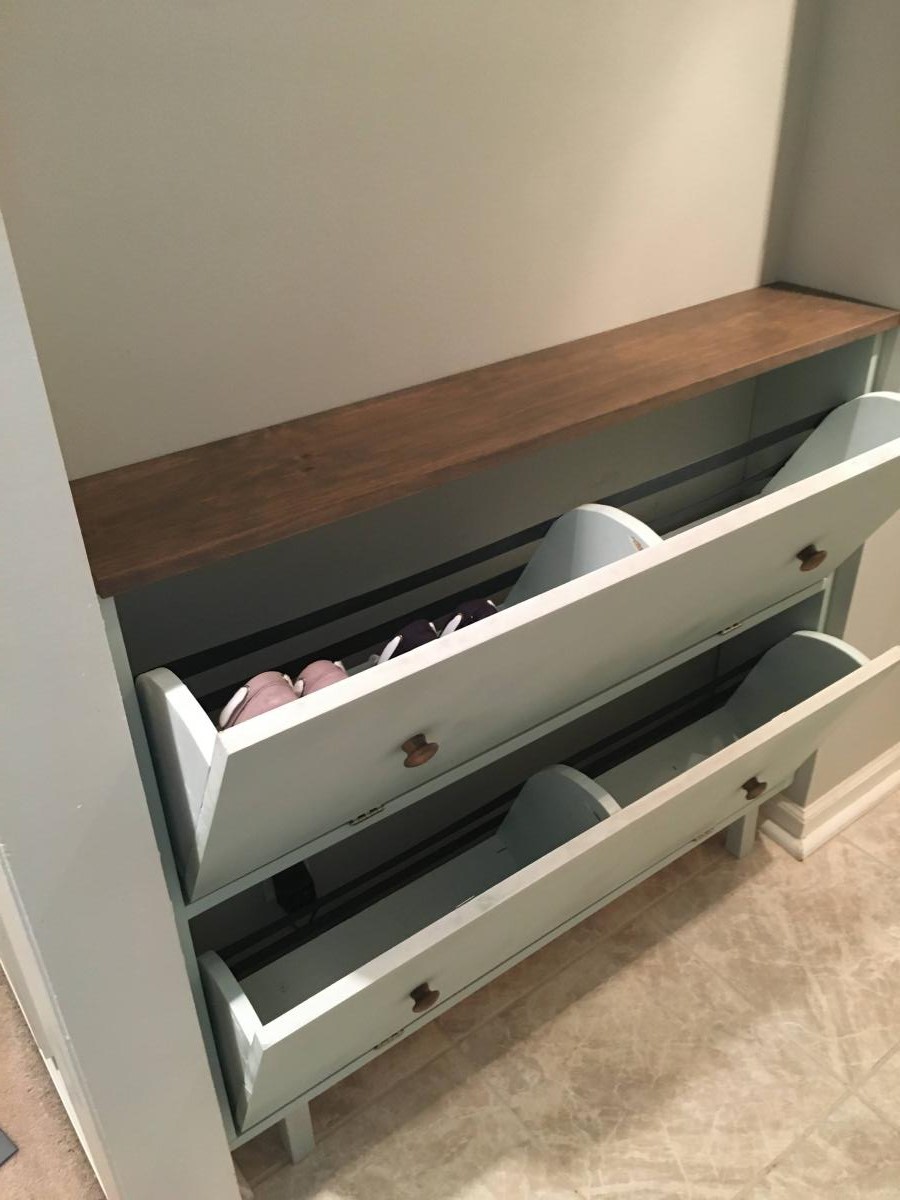
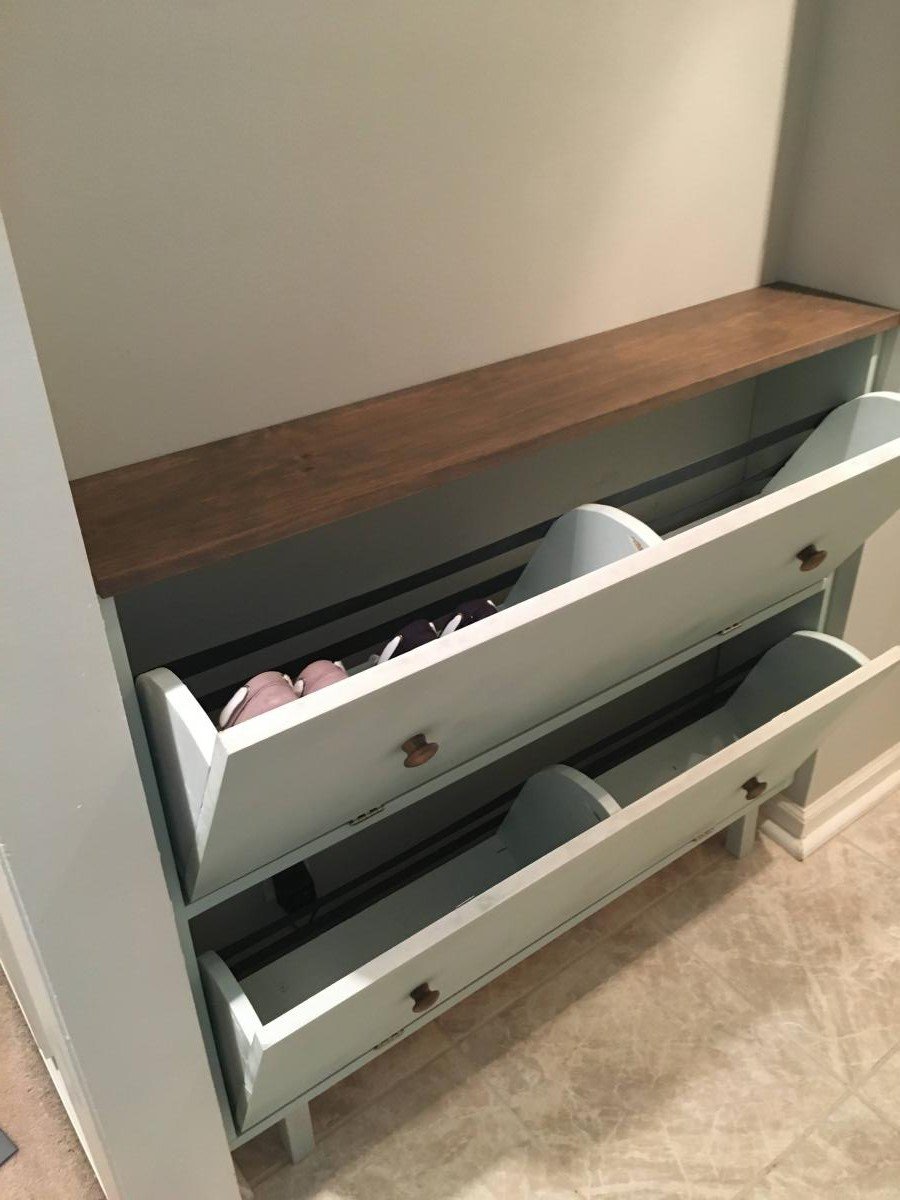
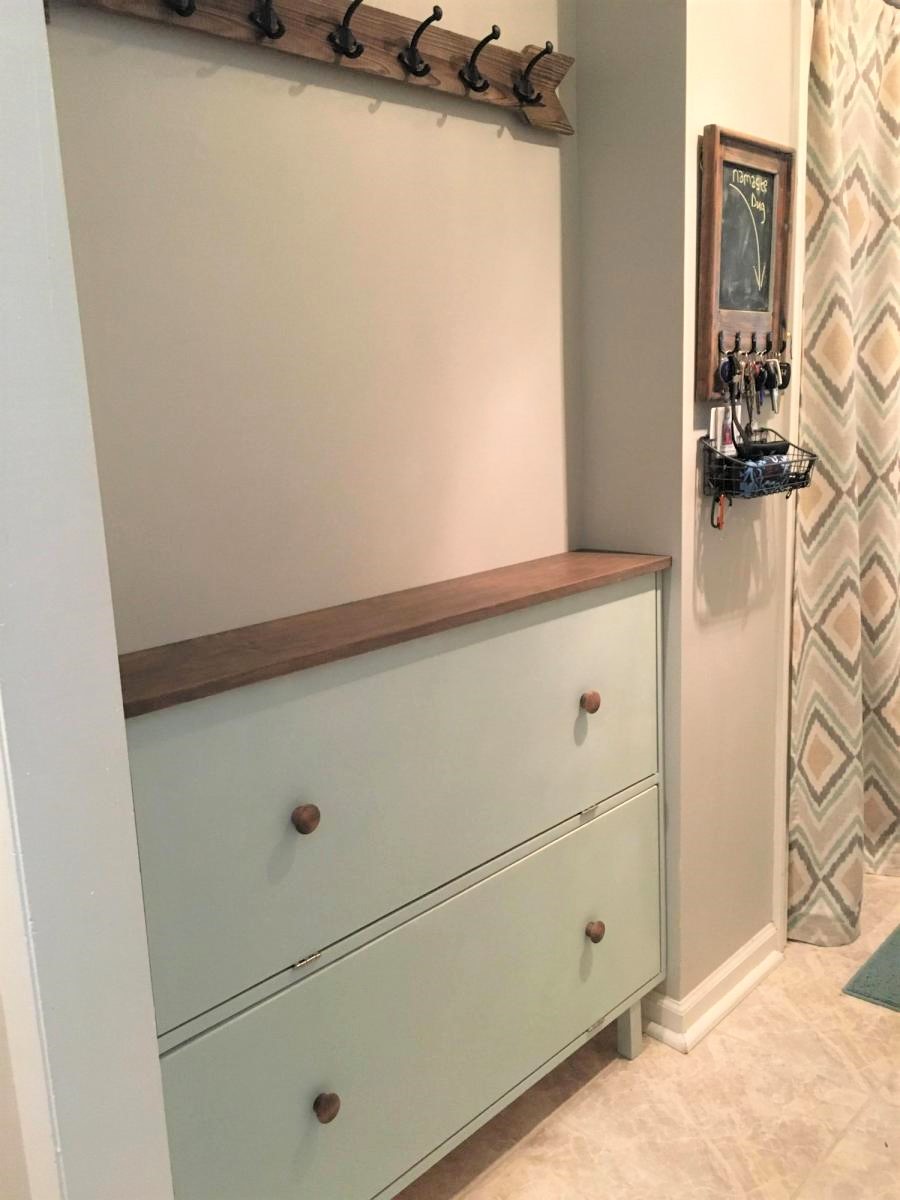
I had this space in my mudroom that was a perfect spot to make a custom shoe dresser. I adjusted the plans I found on this website to custom make storage for shoes. Now this weird little space is functional.
Built the sewing table for my wife Penney. It has a work surface that is 36" x 60" and is 32" high.
Used 3/4" Baltic Birch and used premium pine to add edge banding. Used 1/4" plywood for a back to the sewing table to add strength and I think helps the look of the table. My Kreg Jig was used everywhere possible when assembling the case. Used full length piano hinges with #6 x 5/8" screws to attach the leaves to the table. Made the doors using premium pine with a plywood panel. For the legs, I used folding, locking leg brackets from Lee Valley to attach the 1-1/2" square poplar legs. The casters are 3" double-locking from Woodcraft.
Went a little over budget, but it turned out very nice and she loves it.
Thank you for the easy to follow plans.
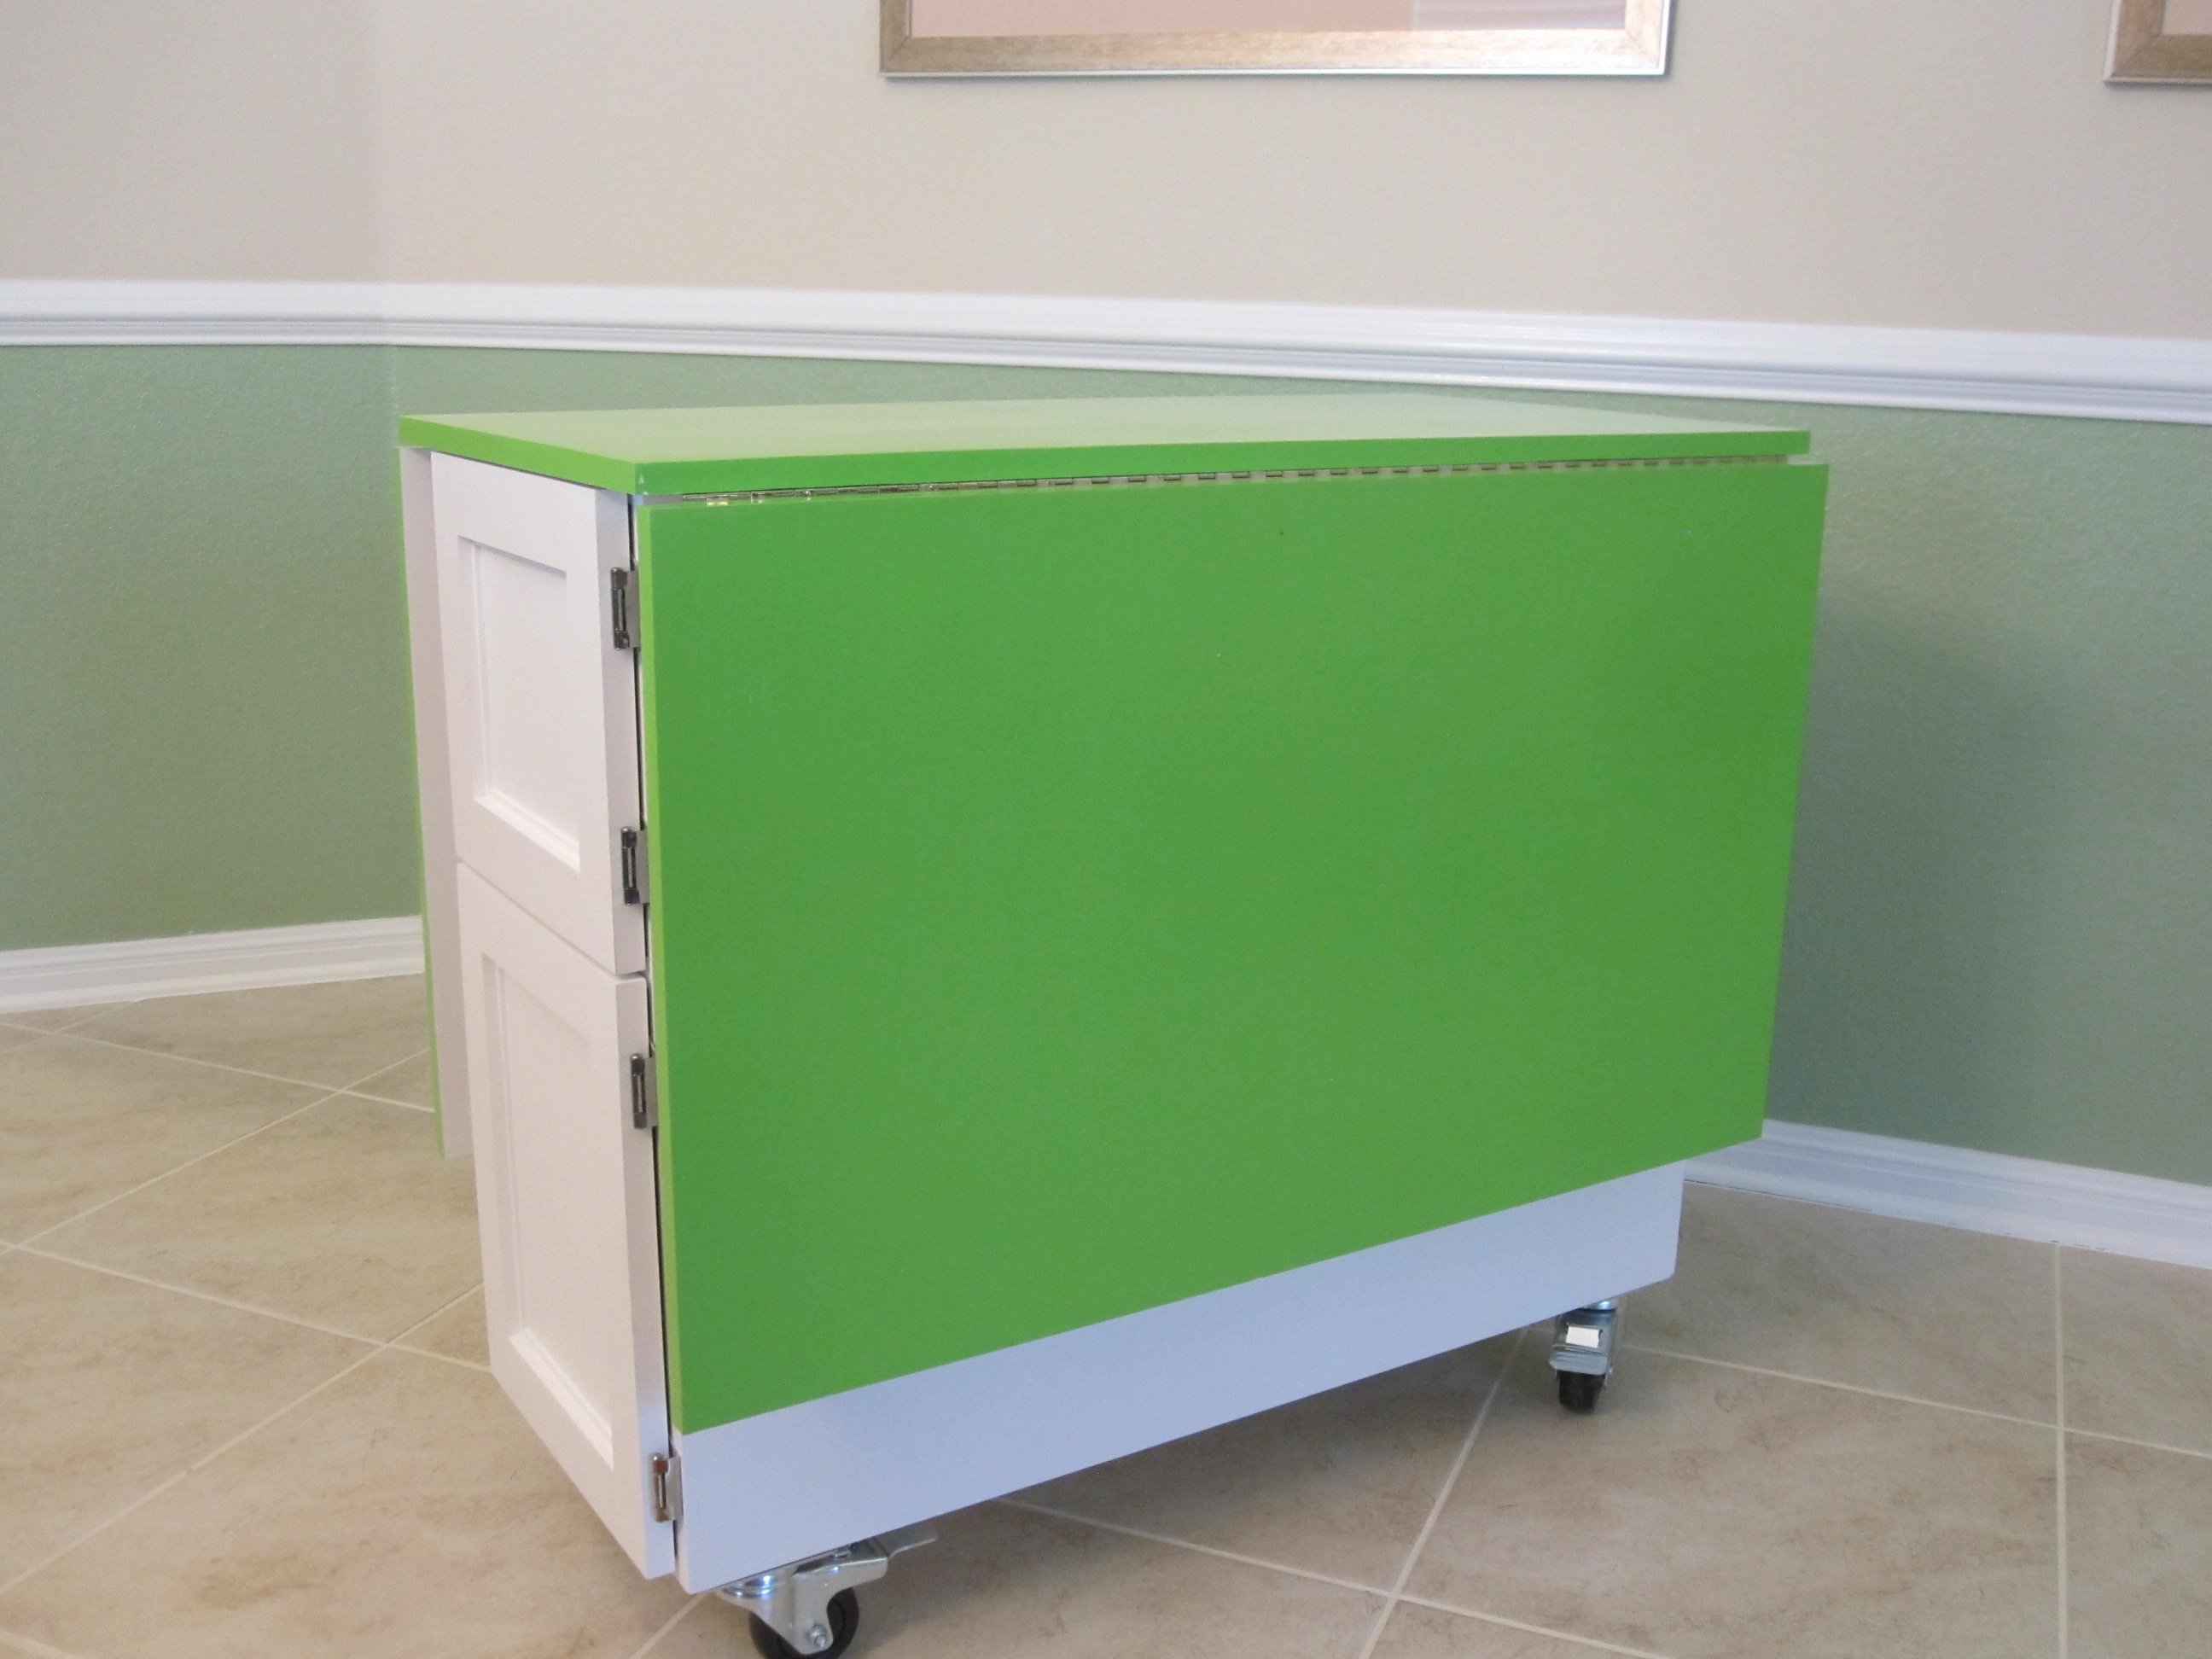

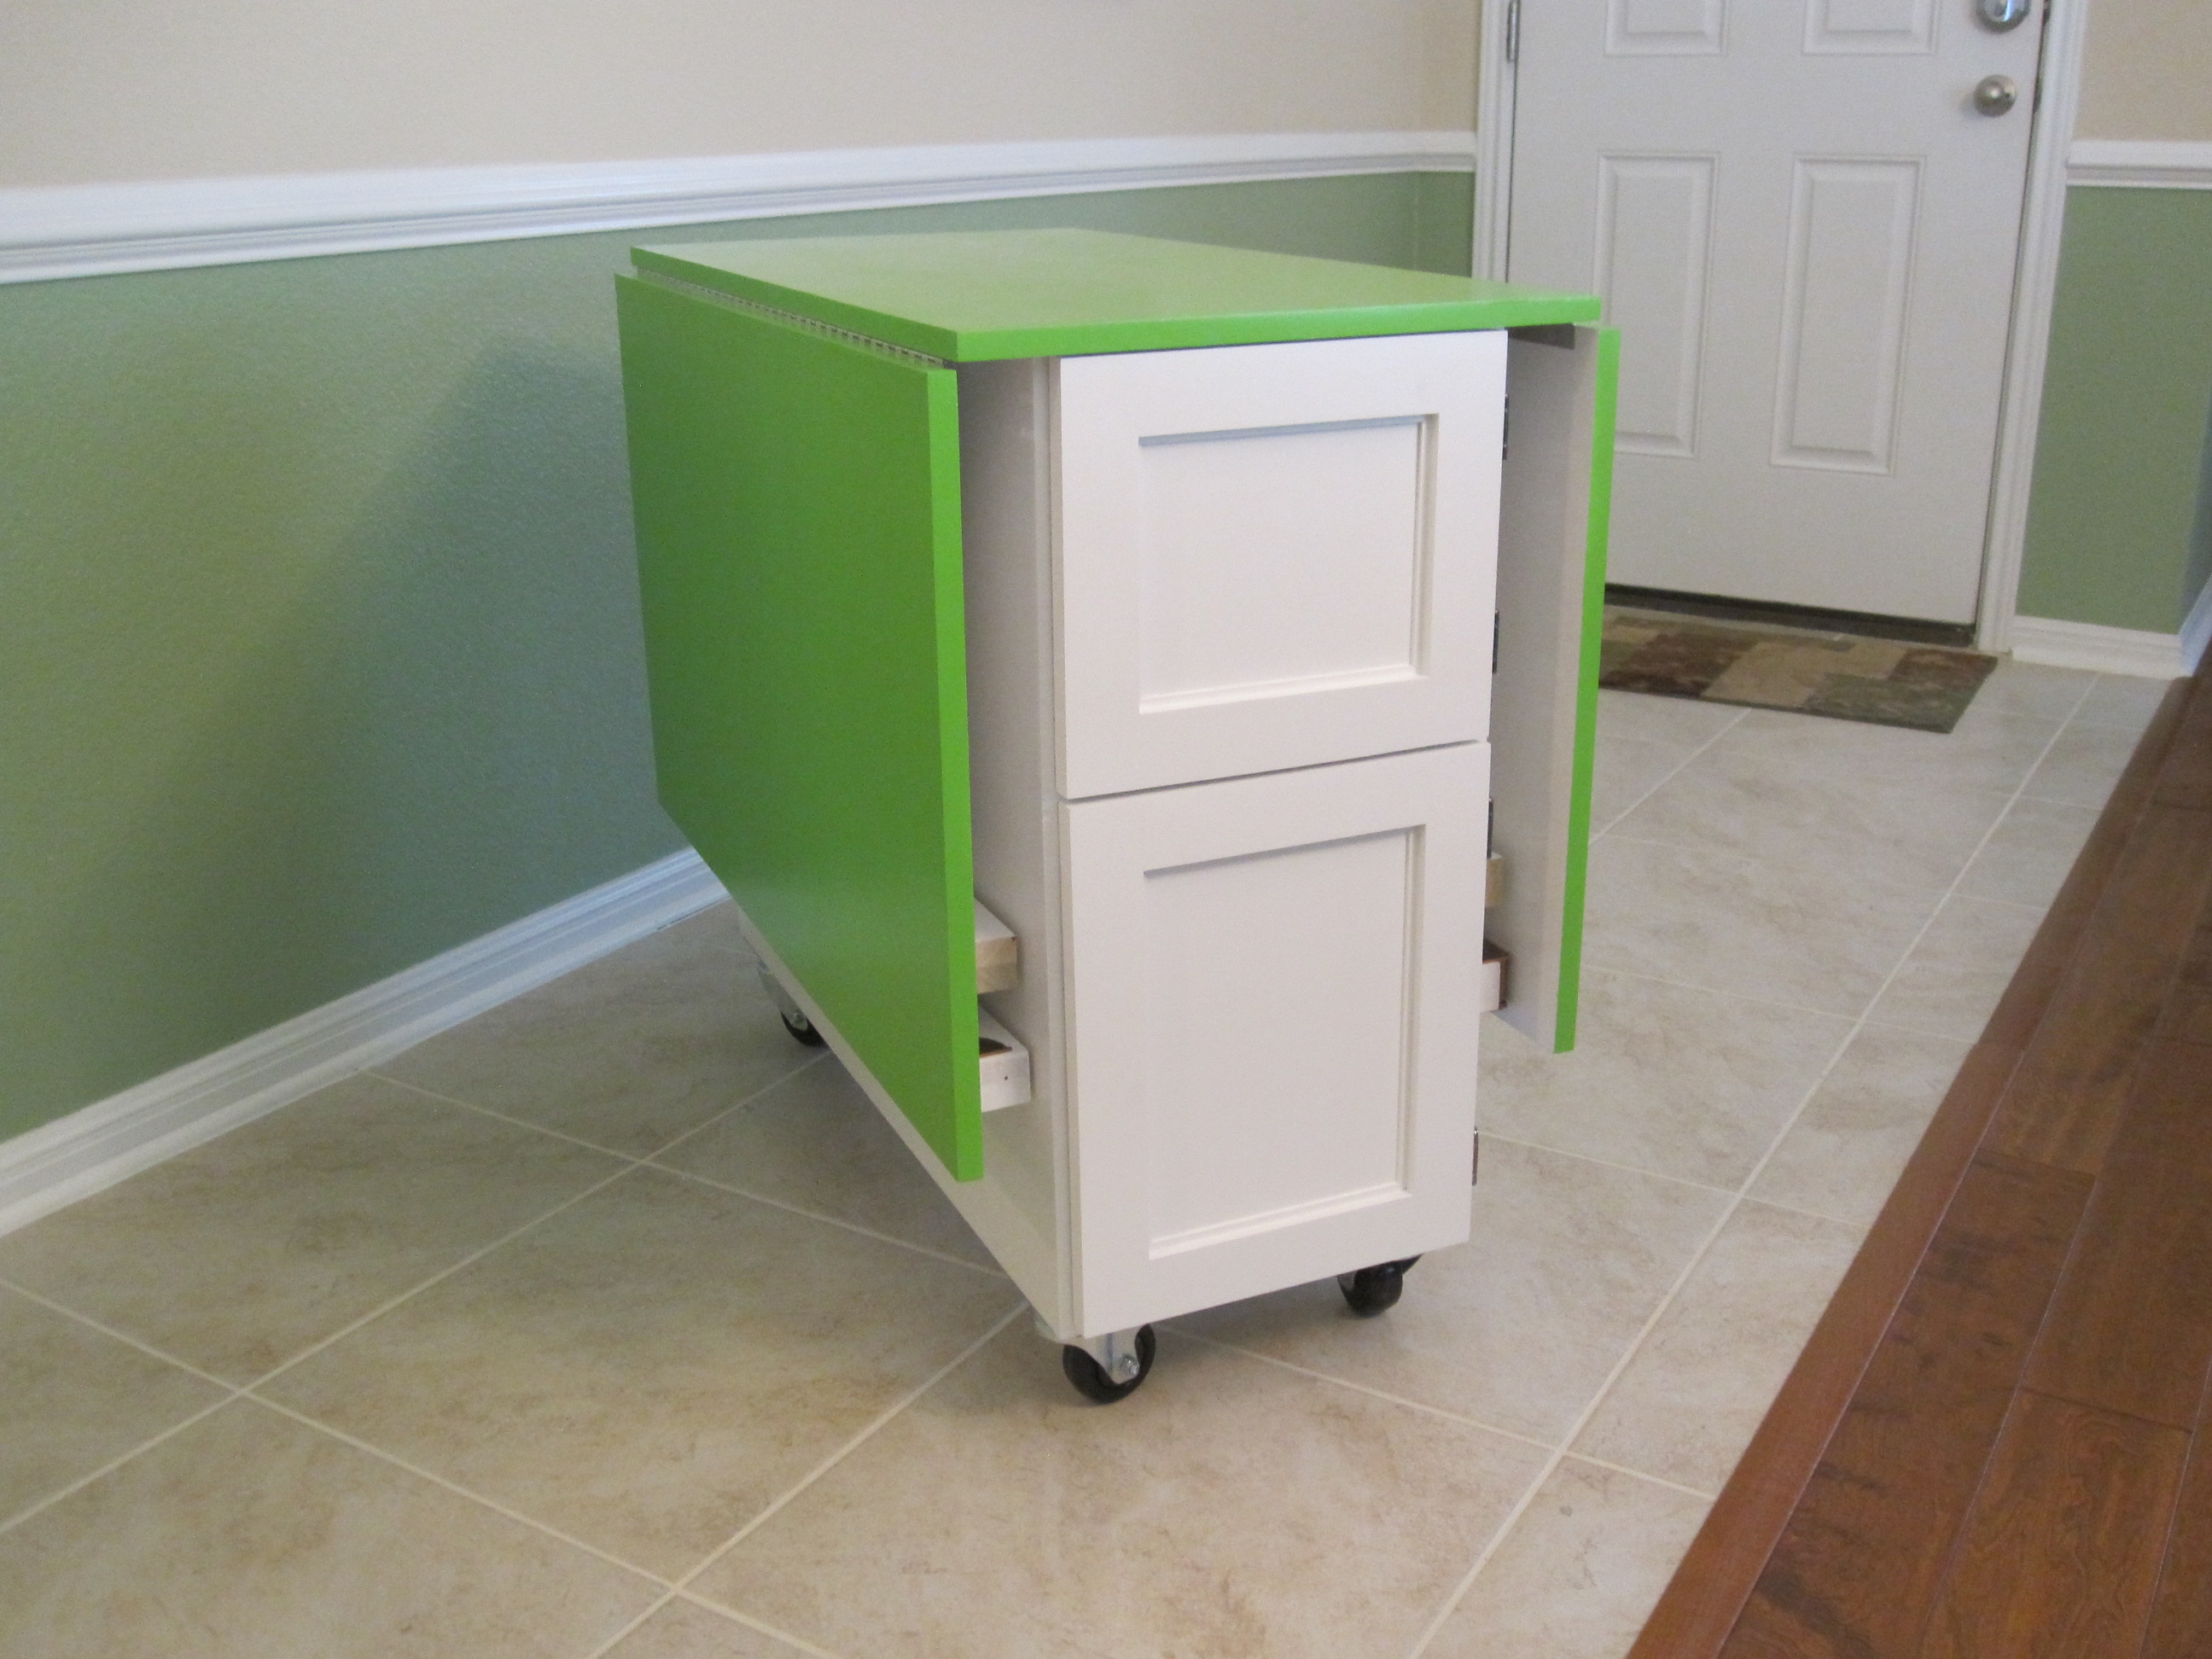
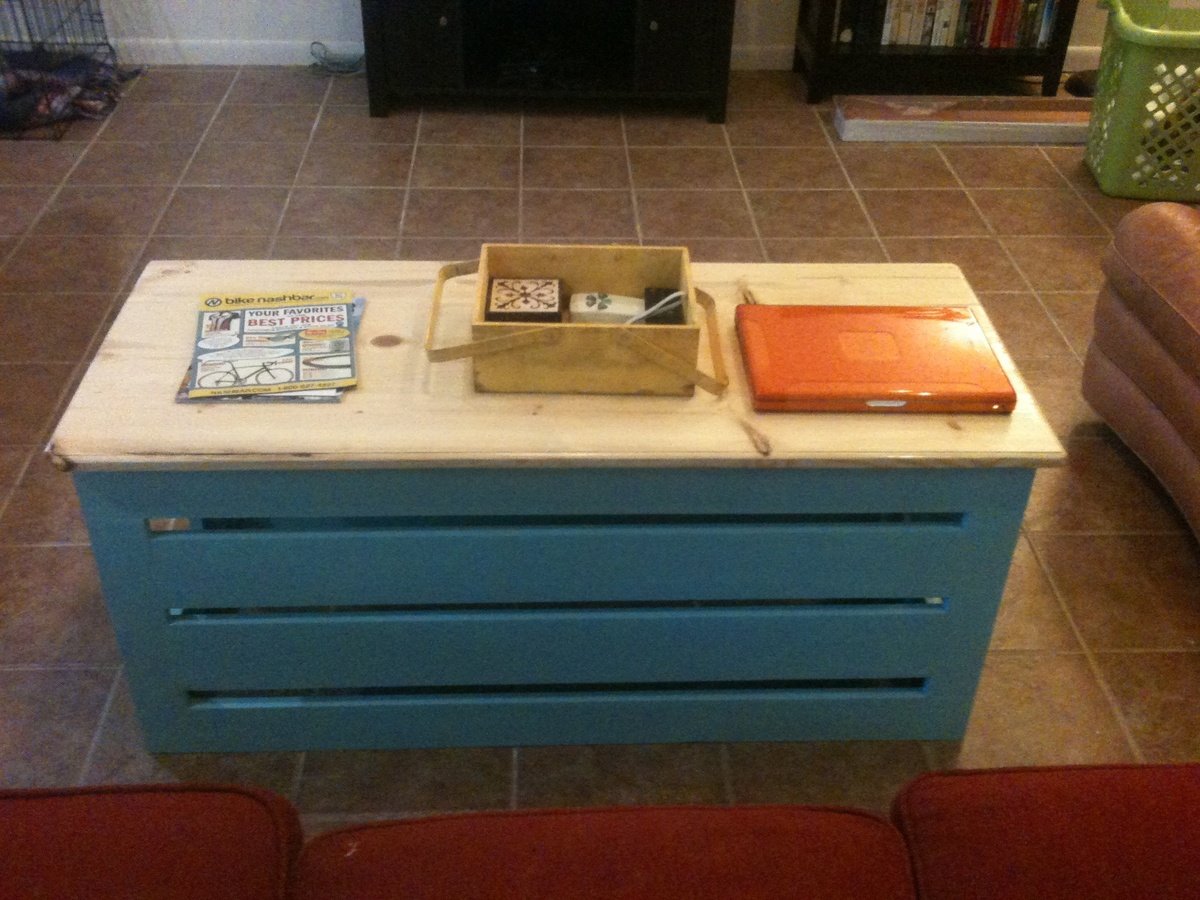
After seeing the patio table with beer/wine cooler, I wanted to build this for my brother and wife who recently bought a house. I asked them if they were interested and of course they said yes. I modified the original plans by adding a 2x4 on each side of the cooler to make the table wider. I also made the legs out of 4x4 vs the 2x4s that were originally called for. I used redwood and then stained it and used a varnish for the final coating. I probably wouldn't use the varnish again for an outdoor table, because it looks like it should be an indoor table vs outdoor. Overall, I'm pleased with the results and the best part about it, I get to enjoy it every time I go over for a BBQ.


Wed, 07/03/2013 - 13:04
Awesome table, do you happen to have the measurements you used. I'd like to make the same table but I need the lumber yard to make the cuts.
I'm a beginner DIYer and I knew one day I was going to have to make a workbench. I made mine 24x48 so I wanted a little more support to hold up the drop down leaf. I searched your site and found another plan with these gatelegs and knew this is what I wanted. I love the way it came out. What do you think?

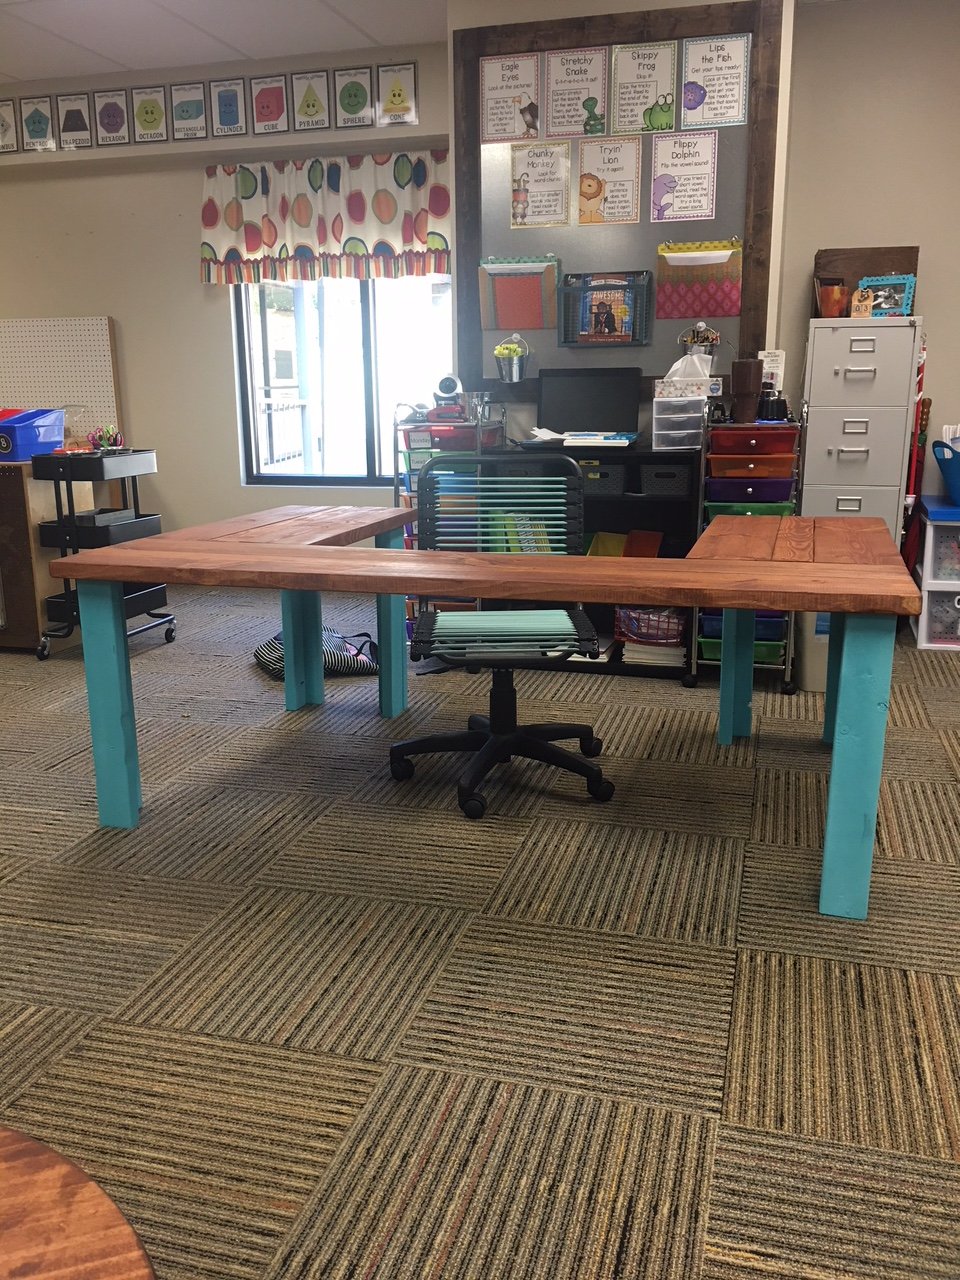
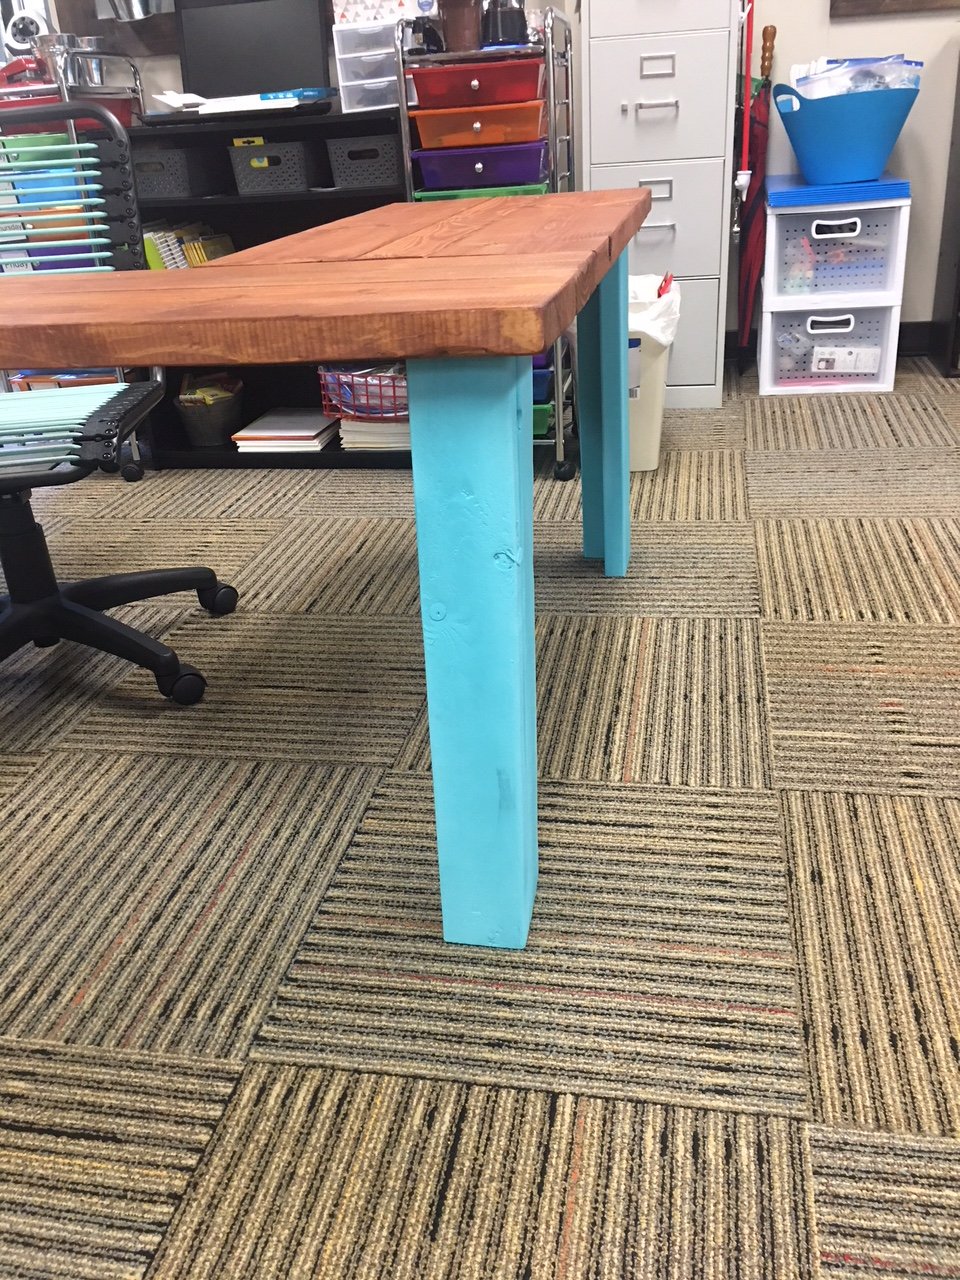
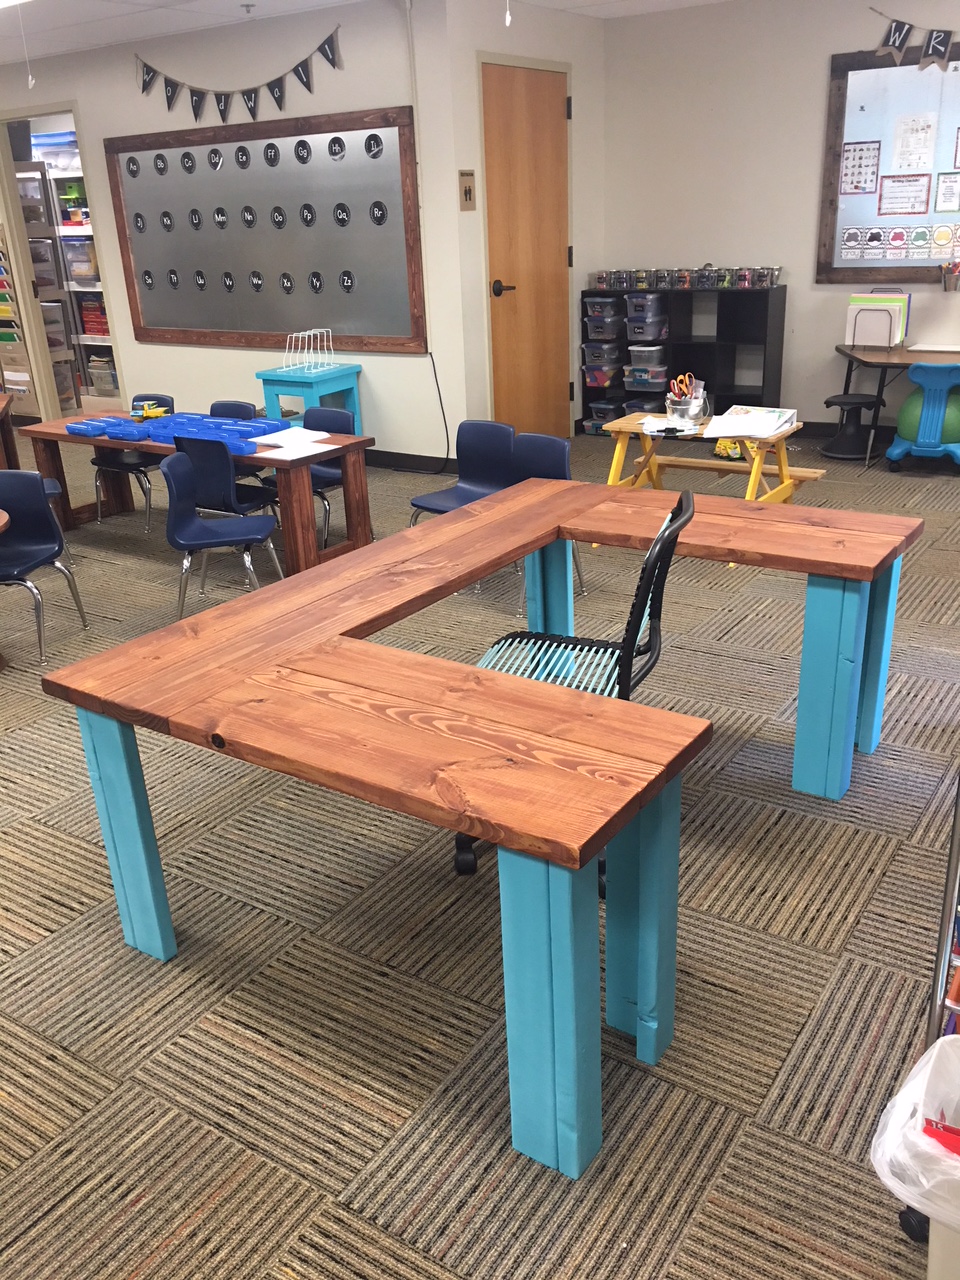
Been a while since I had time to actually build anything worth posting about! My wife wanted some items for her Kindergarten classroom this year, so built several items, most inspired by the Farmhouse family.

Sat, 06/29/2019 - 05:47
I love this! Can you give me the plans and list of materials for constructing it?
Sun, 06/30/2019 - 12:33
I am also a teacher and would love to build this desk for my reading class. Do you have plans?
Mon, 07/01/2019 - 18:05
I love this table for my classroom. Can you share the plans or the dimensions?
-Stephanie
Sun, 07/07/2019 - 09:46
I would love plans/dimensions for this! I was thinking I could also paint the top with wipe off board paint.
Sun, 07/07/2019 - 14:59
I would love to make one for my classroom. Can you share the plans and materials list for this table?? Thanks!!
Mon, 07/08/2019 - 19:11
I am looking to make this for my fourth grade classroom - can you provide the dimensions you used? Thank you so much.
Wed, 07/10/2019 - 11:59
Love this!
I would love this for my classroom! Can you share the plans and materials.
Thank You!
Mon, 07/22/2019 - 18:25
Anyone have any luck with figuring out the dimensions??
Thu, 07/25/2019 - 17:20
Has anyone gotten the plans for this table? I have contacted Ana White and tried other ways also. I would love for someone to share.
Thank you
Teri
Mon, 08/19/2019 - 12:09
I am guessing the corner posts are 2 x 4s, the top is 2 x 10s. It looks like the width is 6’ (looking at the floor carpet tiles being 24” square). So 2 - 2 x 10s side by side for the main part of the desk top and 2 - 2 x10s perpendicular on each side of the chair. I guess the height is subject to choice and the length of each side would also be subject to choice or to the length of the 2 x 10s to be economical.
an educated guess would be 4 - 8’ 2x10s for the top and 6 - 6’ 2 x 4s for the legs?
Anyone else have any input here? Open to suggestions.....
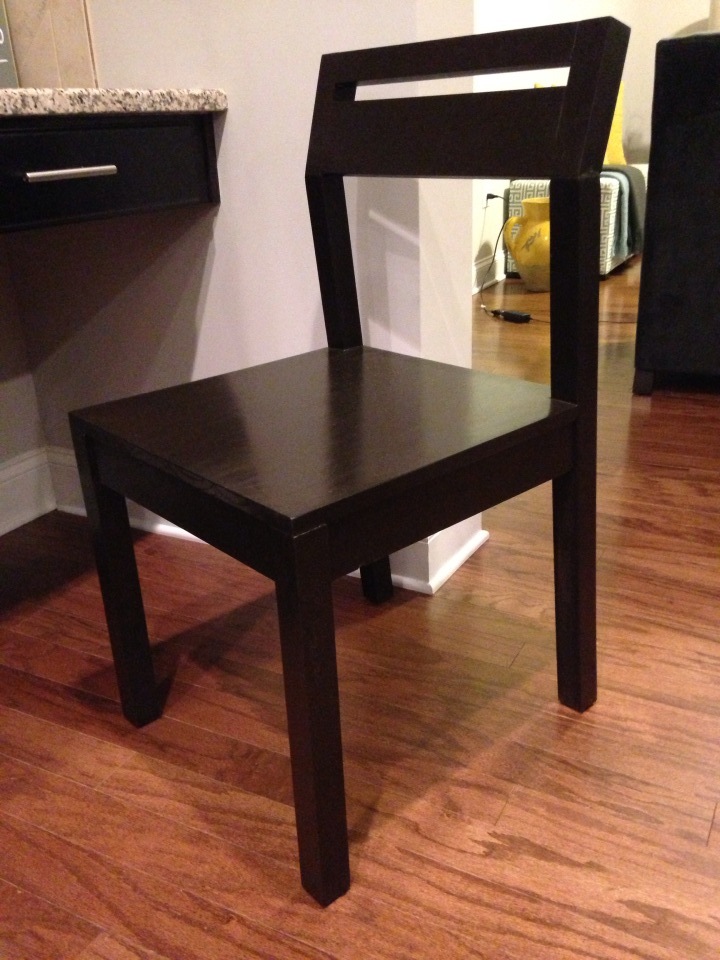
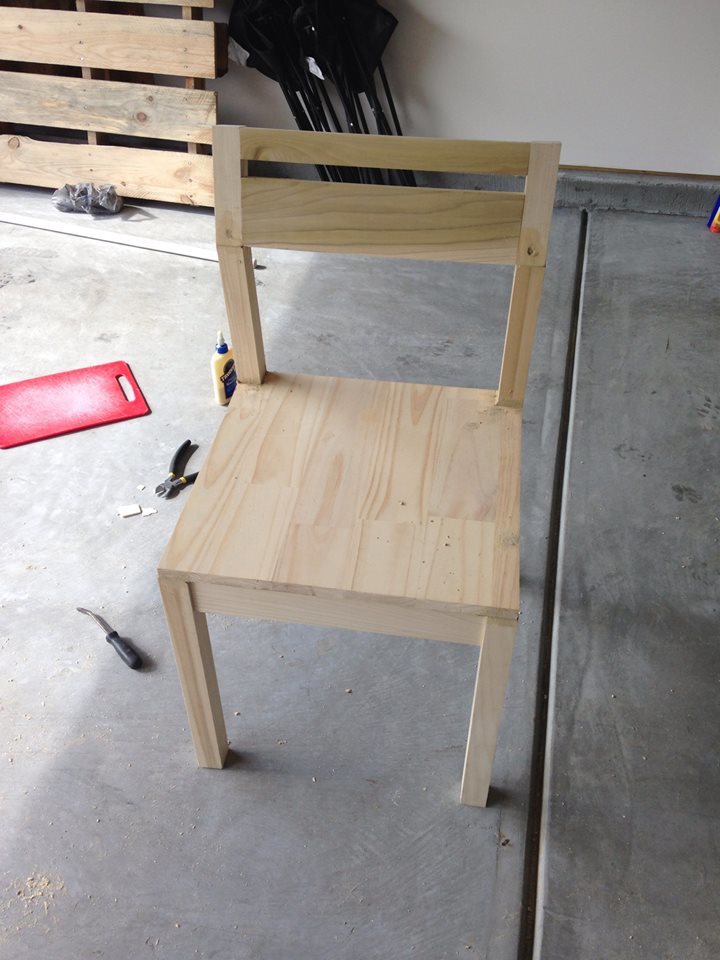
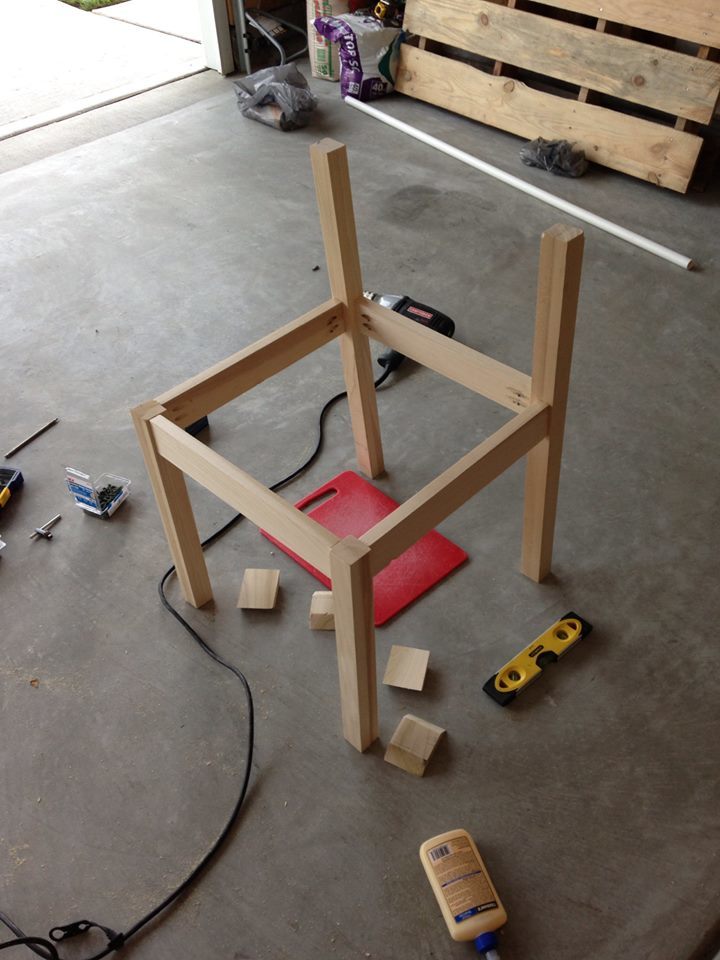
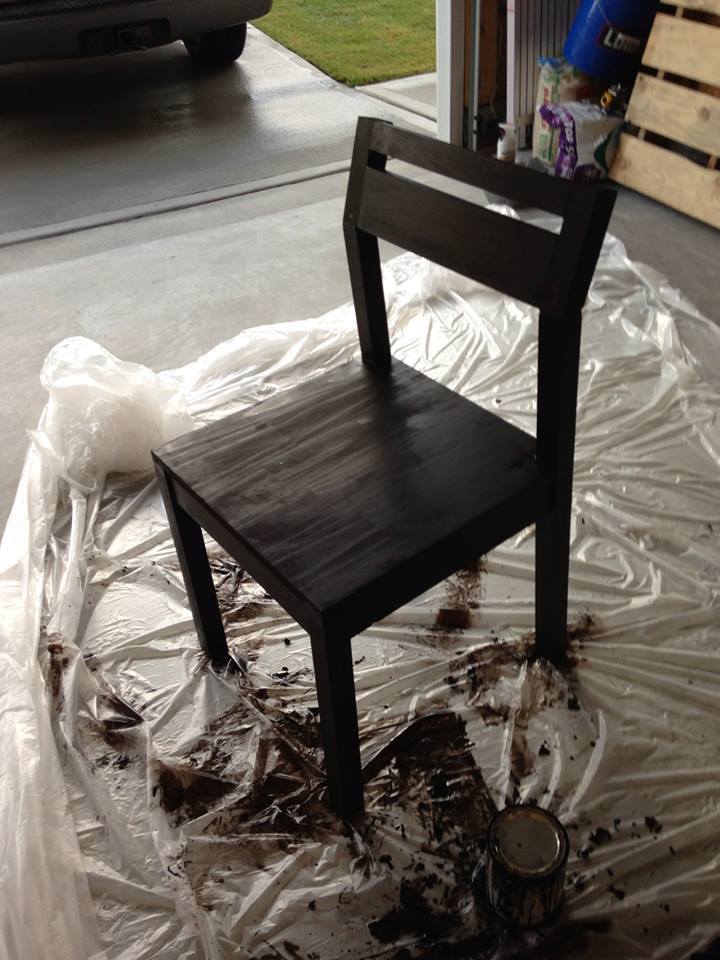
This was a fairly easy project that I believe had great results. The finish time includes a few nights of polyurethane and sanding to finish.
The fairly costly price is from wanting to make this chair like a real finished project. The bulk of the chair is made from poplar and the seat is made from a pine project board.

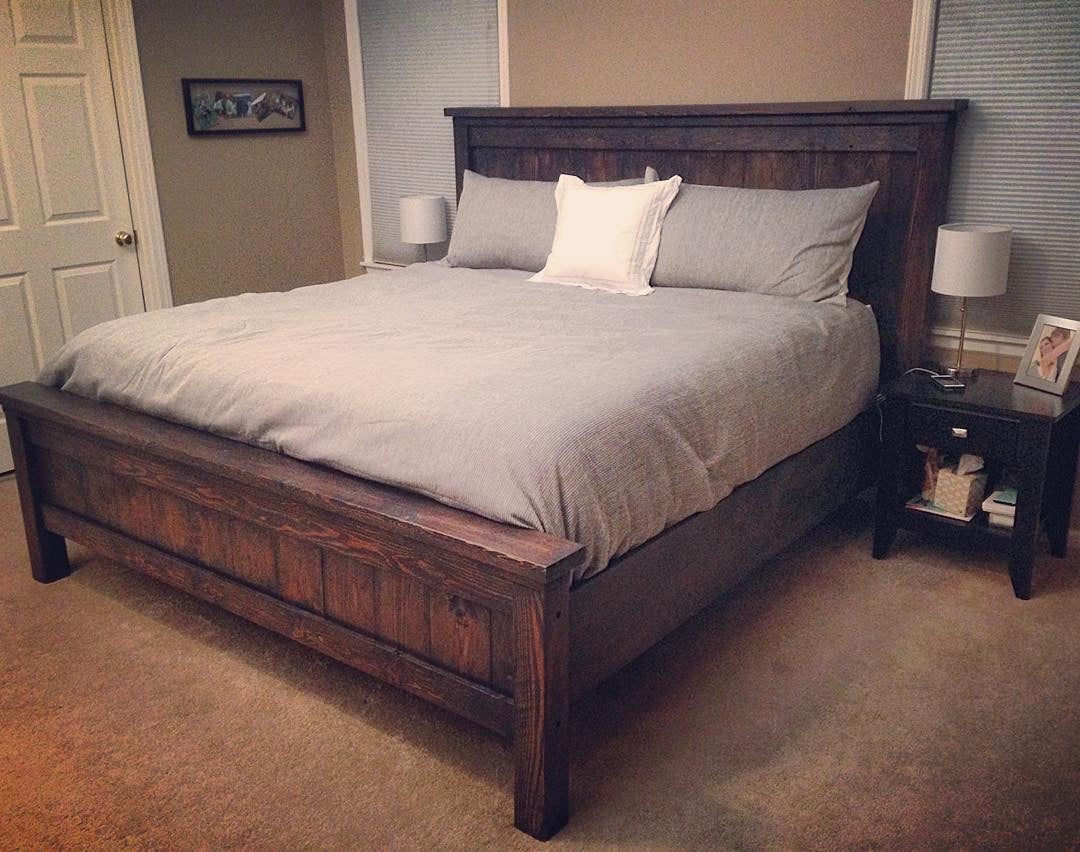
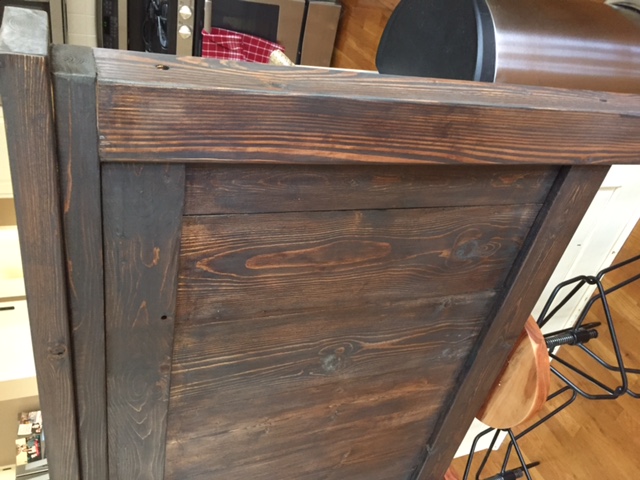
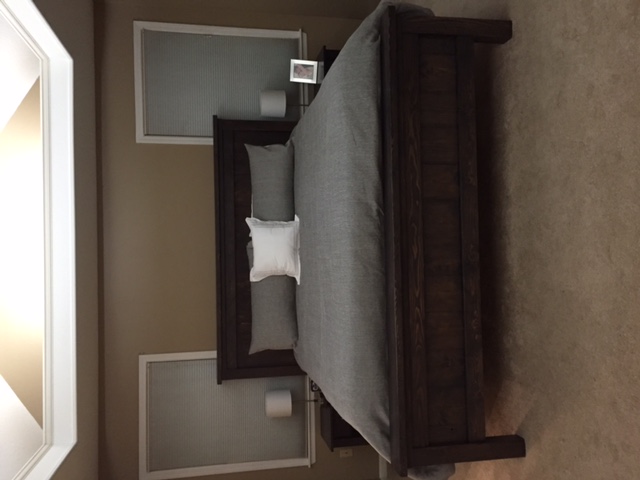
This was our first ana white build. Bed build took one Saturday - to finish up took another week or so working nights - most of our time spent on getting the color we wanted and sanding and finishing. Building the 2x4 frame took more time than anticipated as well. We are super happy with how it turned out.
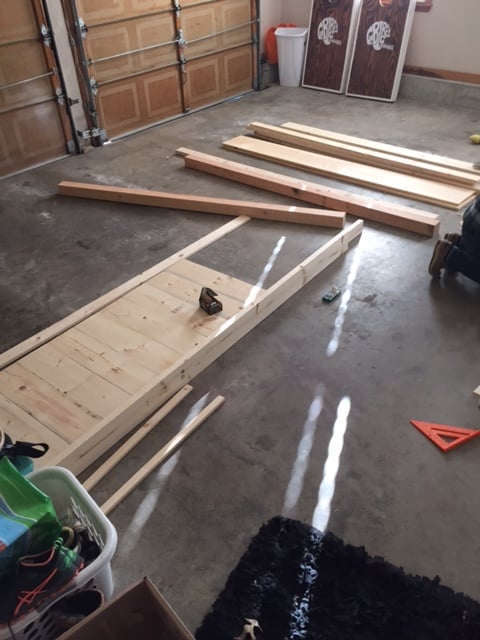
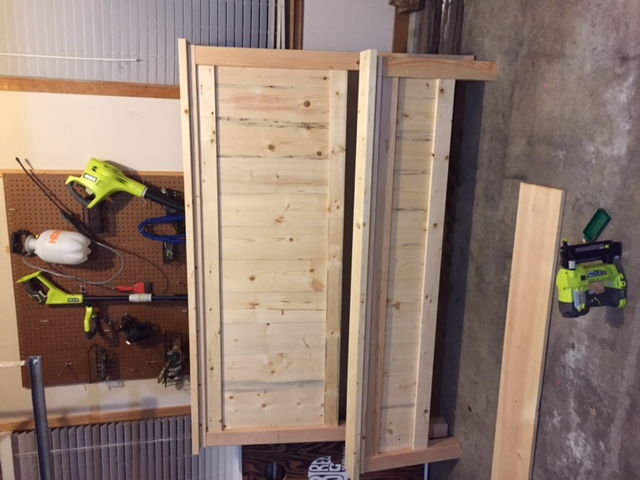
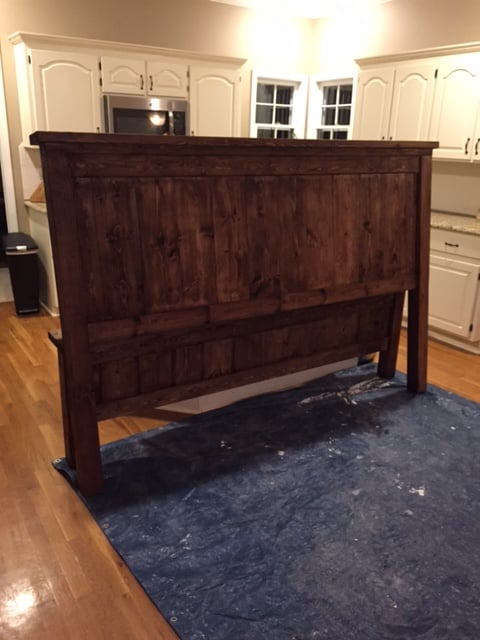
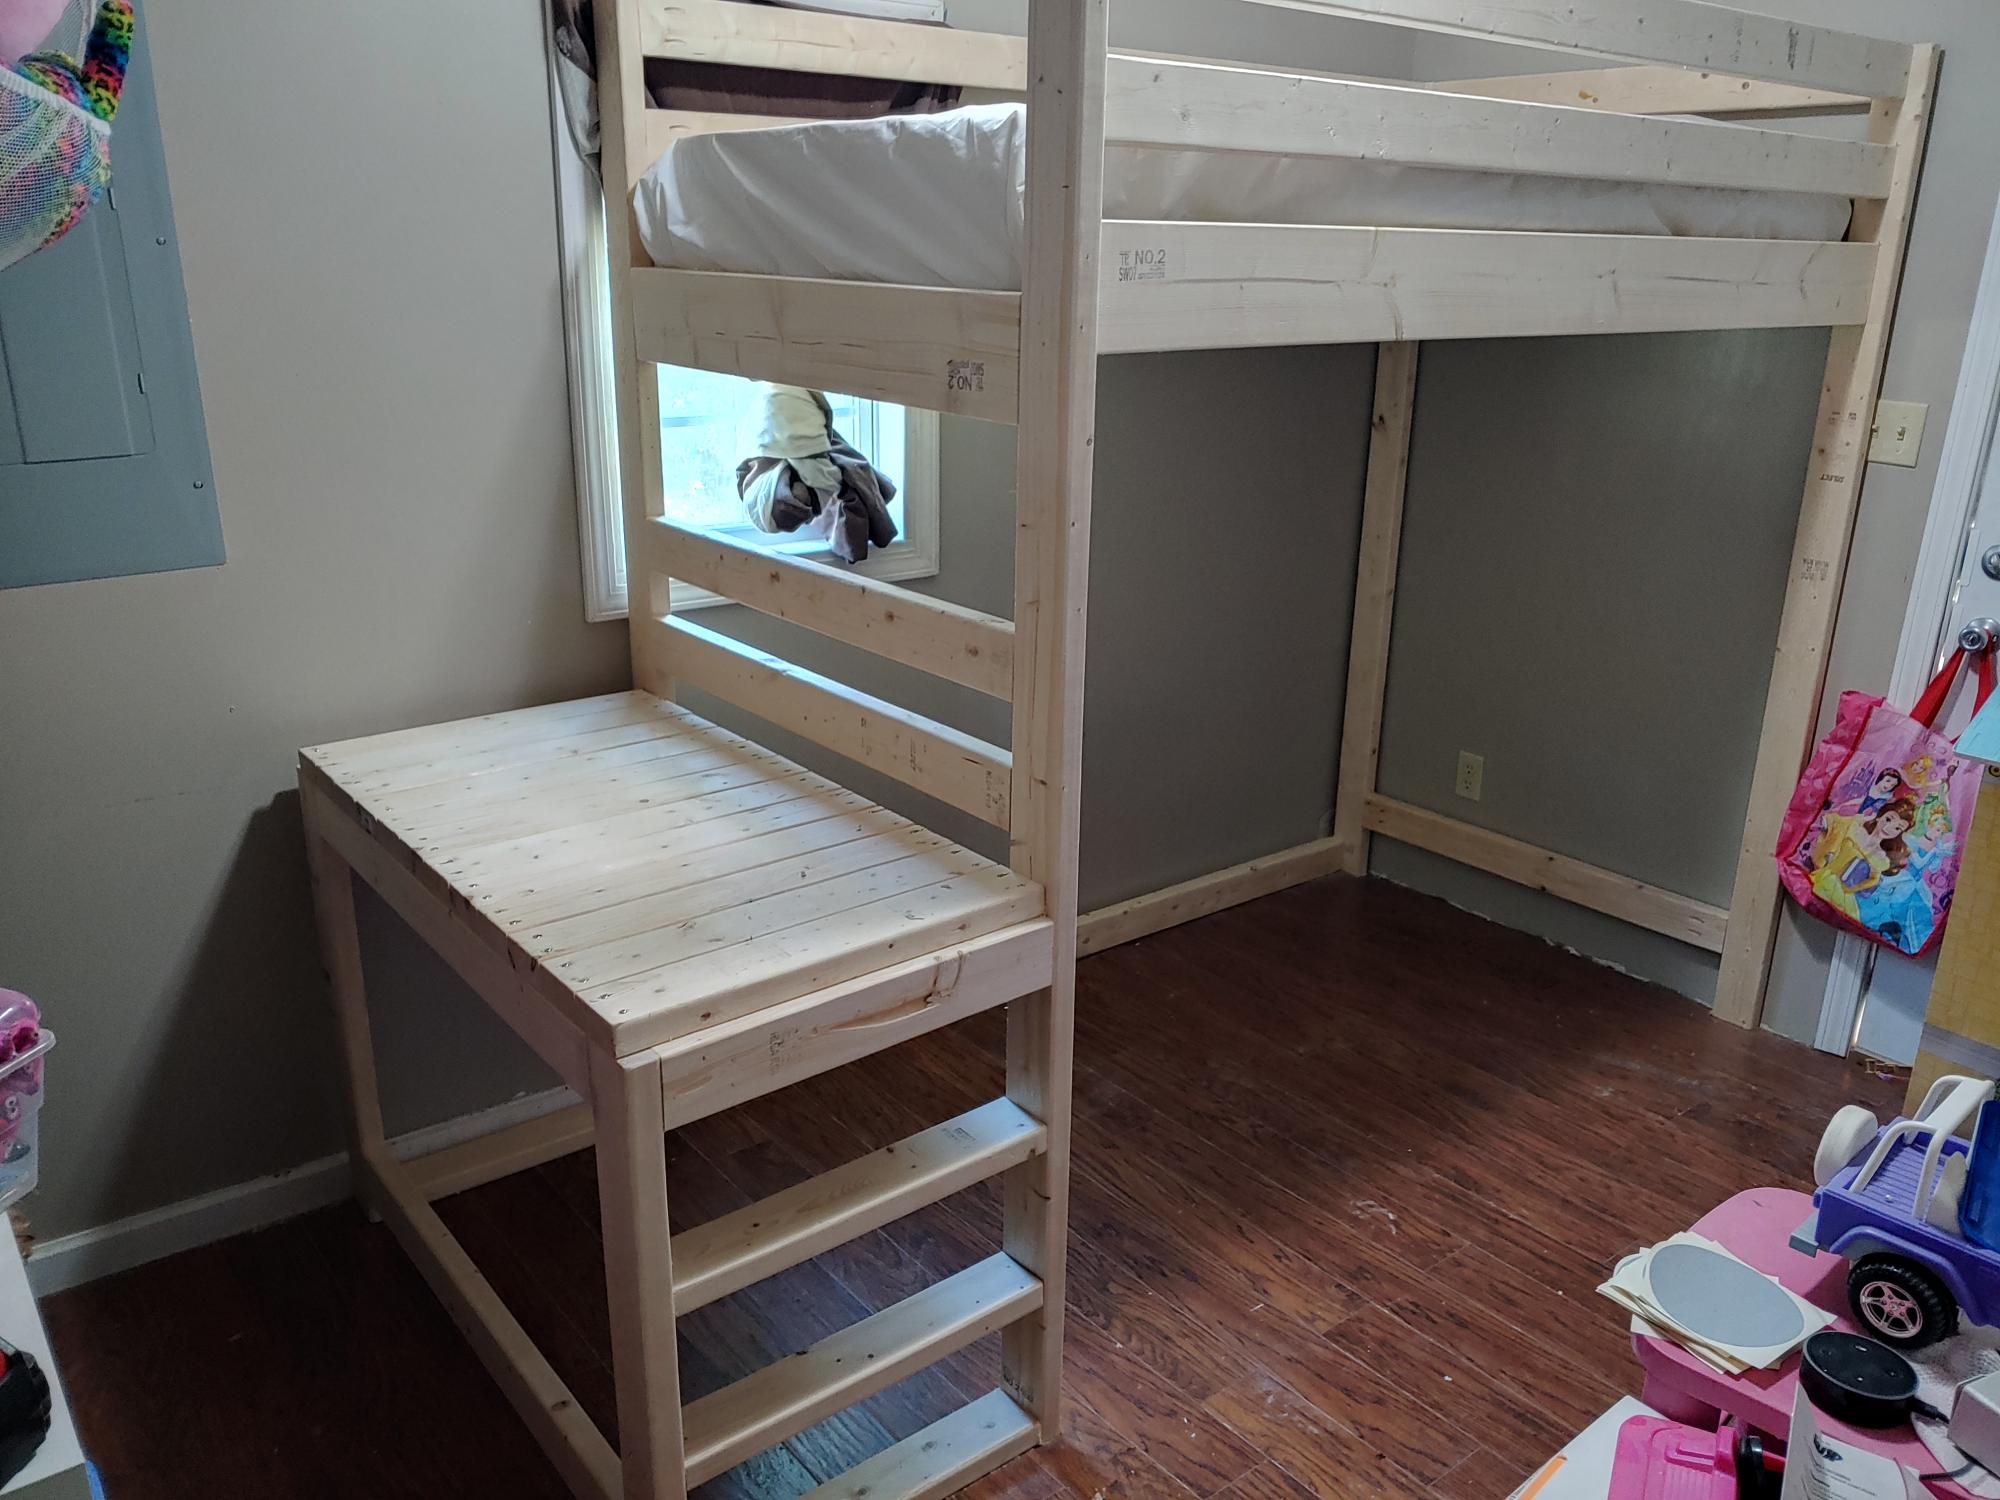
I modified a few things to fit my needs. I did a small ladder instead of steps to save room. I added a 2x4 down the middle with brackets to add extra strength for mattress area. I used my kreg drill bit to make holes for the 2x2 to also help with strength. I am a big guy and the bed was solid so no issues with weight. I added 8 inches to the main post to add height underneath for a doll house, book shelf and some other things my wife wanted under there. Excellent plans and my daughter loves it.
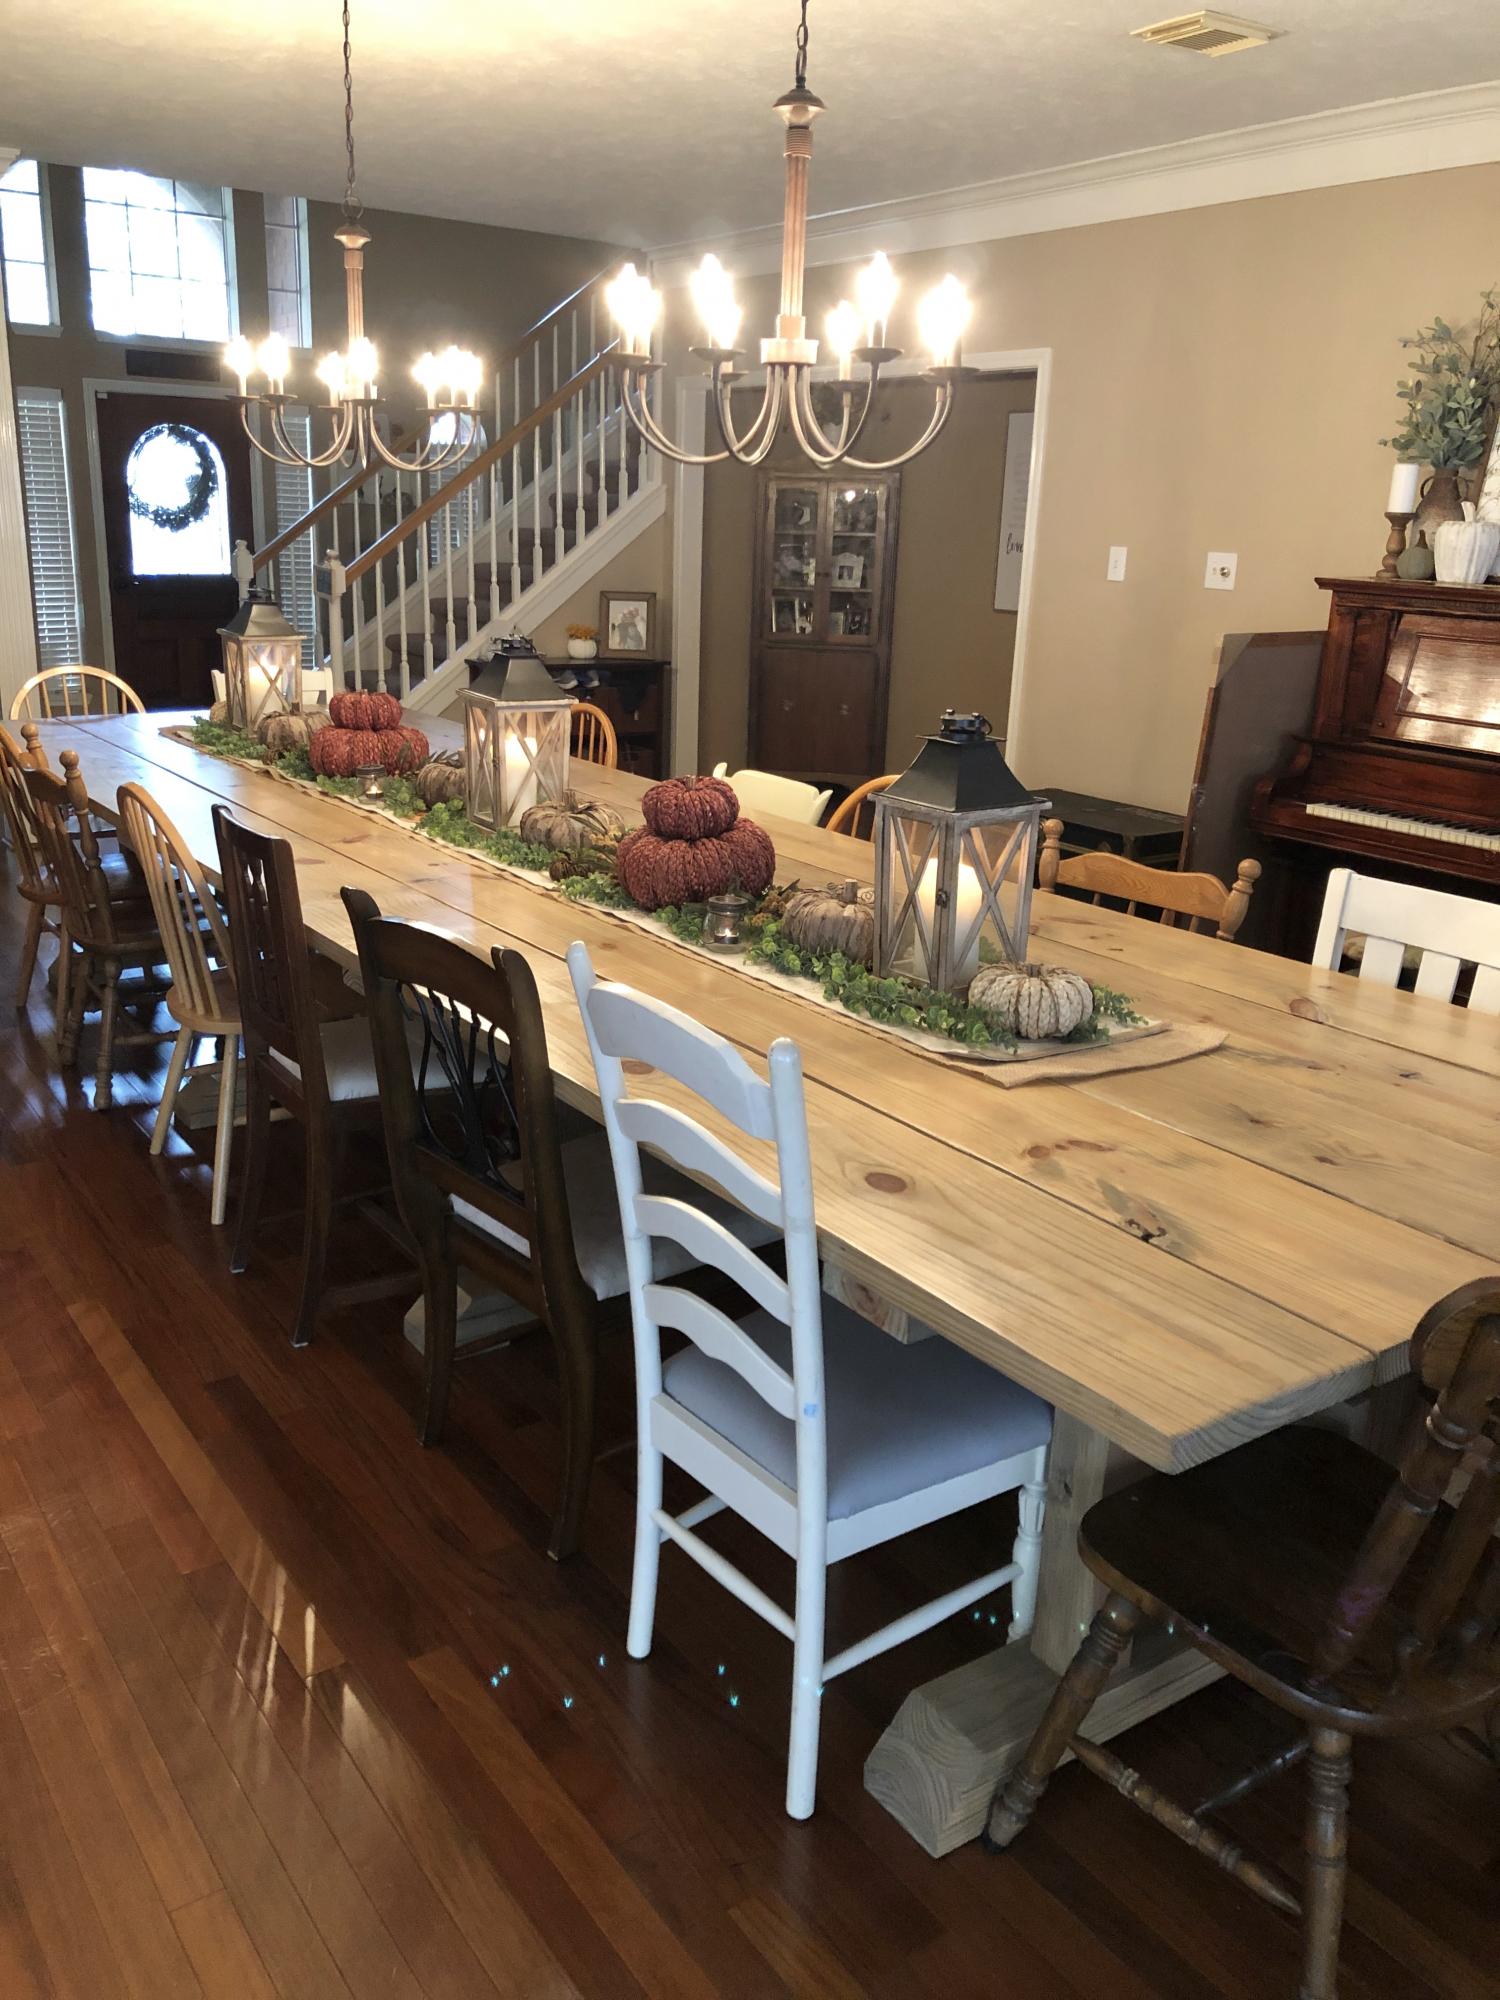
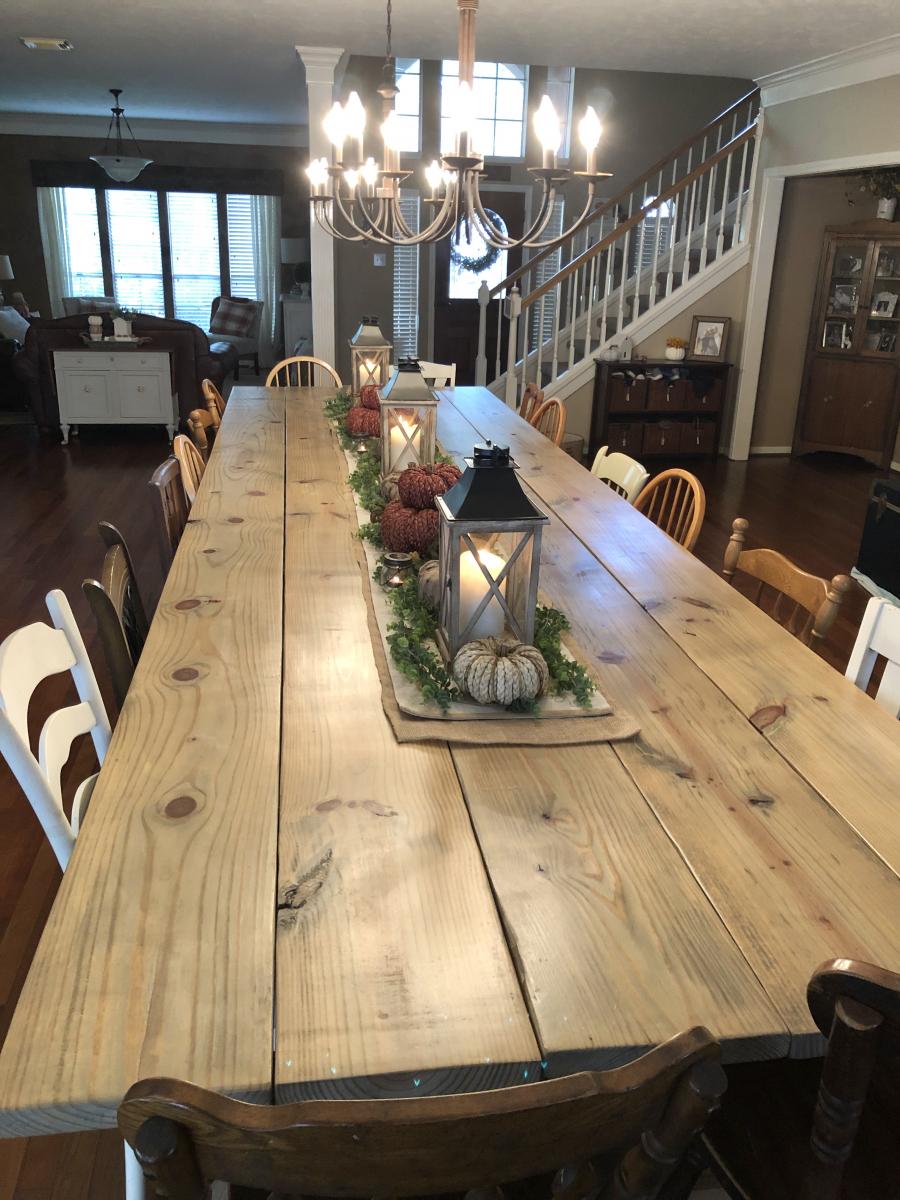
This table was created using a variety of plans. It can seat up to 20 people comfortably. The table top was built with 5 pieces of 2x12. The legs were a combination of 4x4 posts and 2x6s. 2 coats of Minwax Weathered Gray was the stain and then 3 coats of varathane semi-gloss finish. We sanded between each coat of poly.
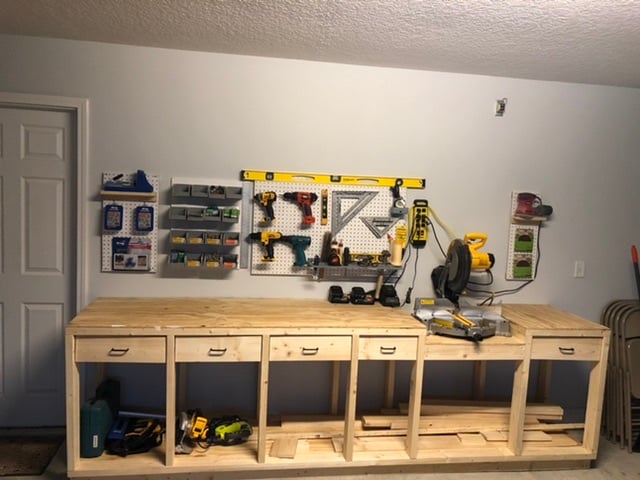
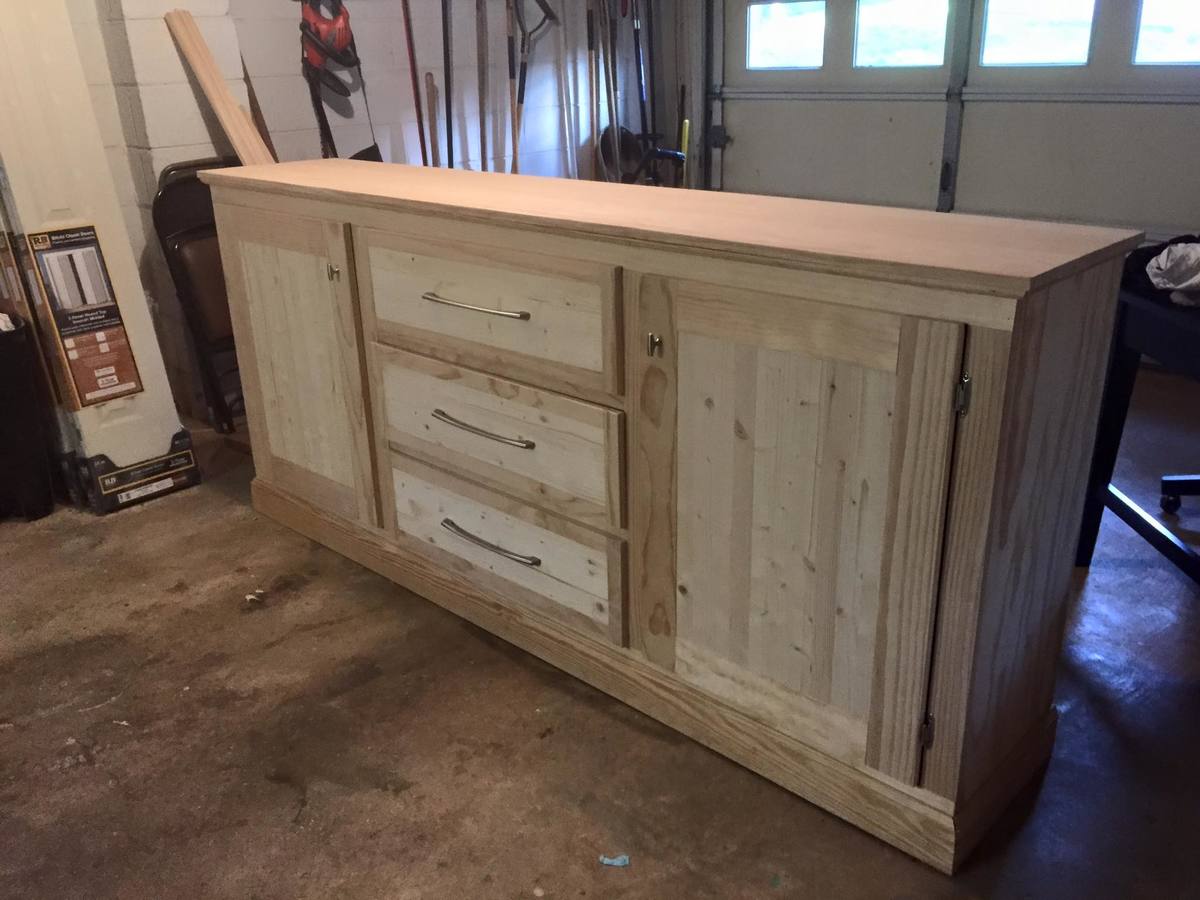
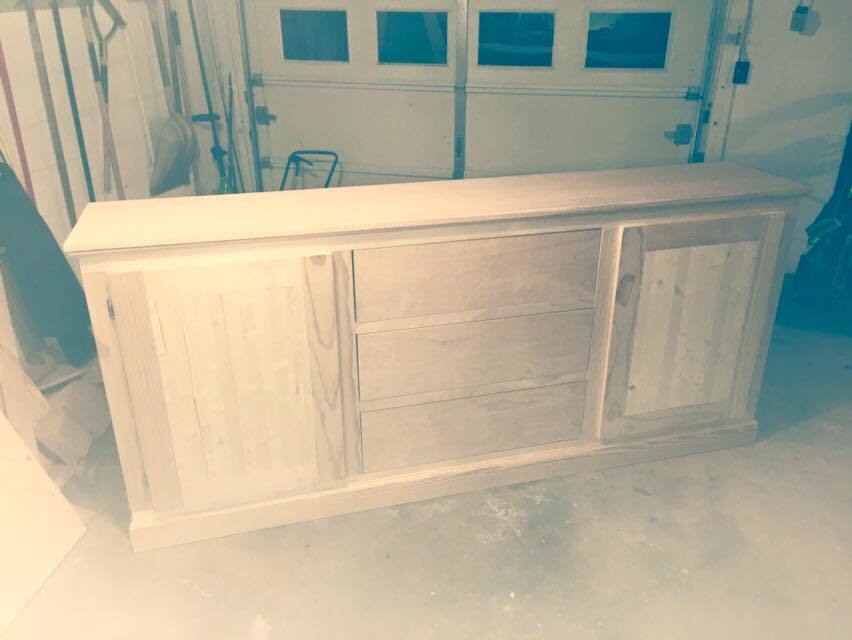
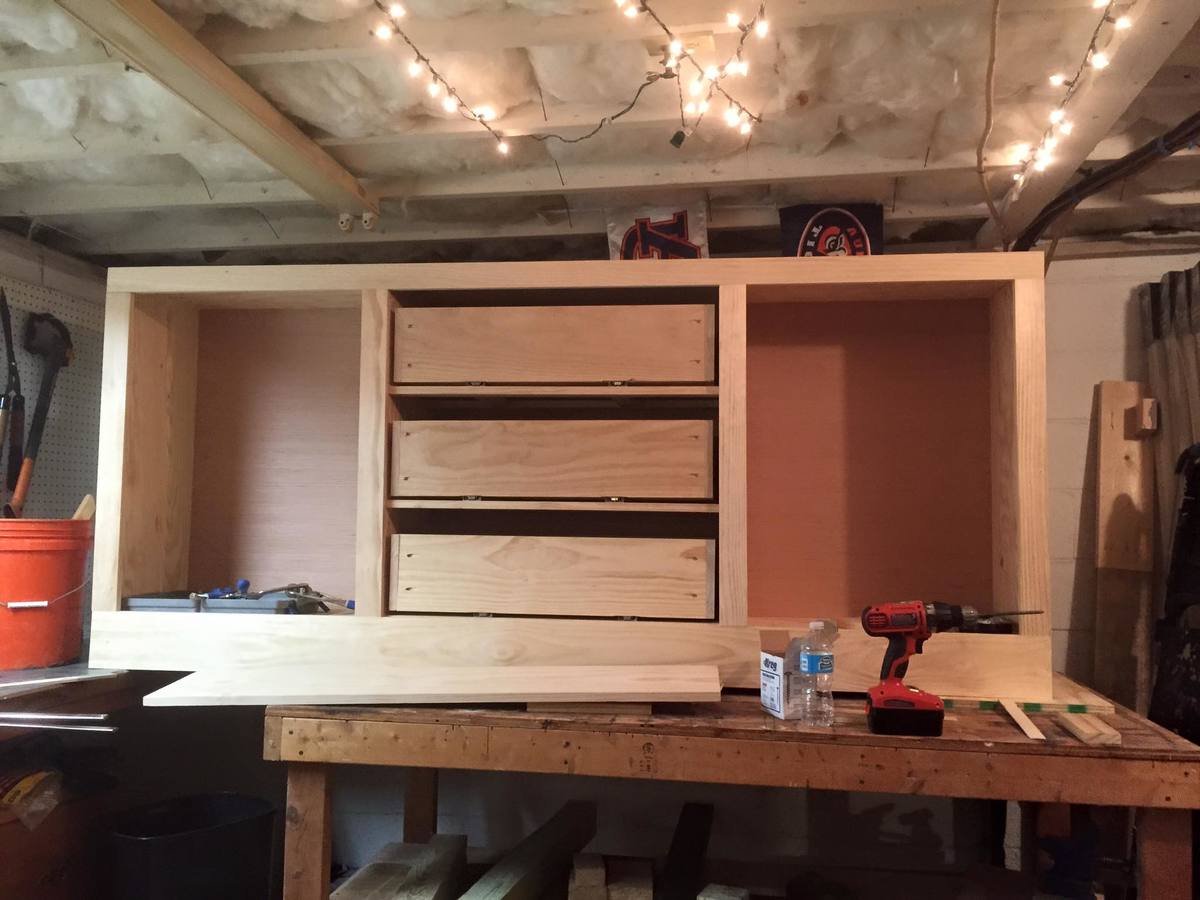
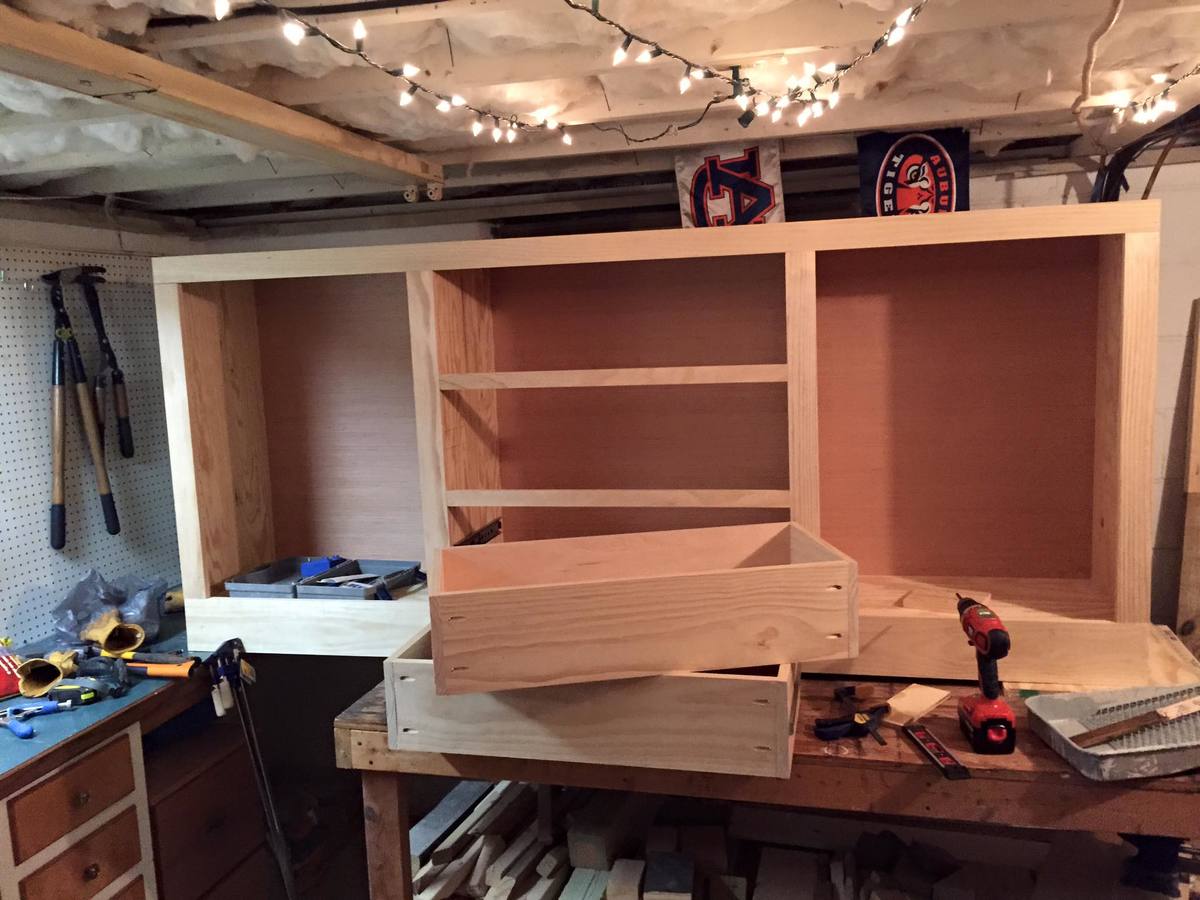
Had to size the project done to fit my garage wall.
Left the sides open to use as storage for wood.
Overall Everything worked out, love it!
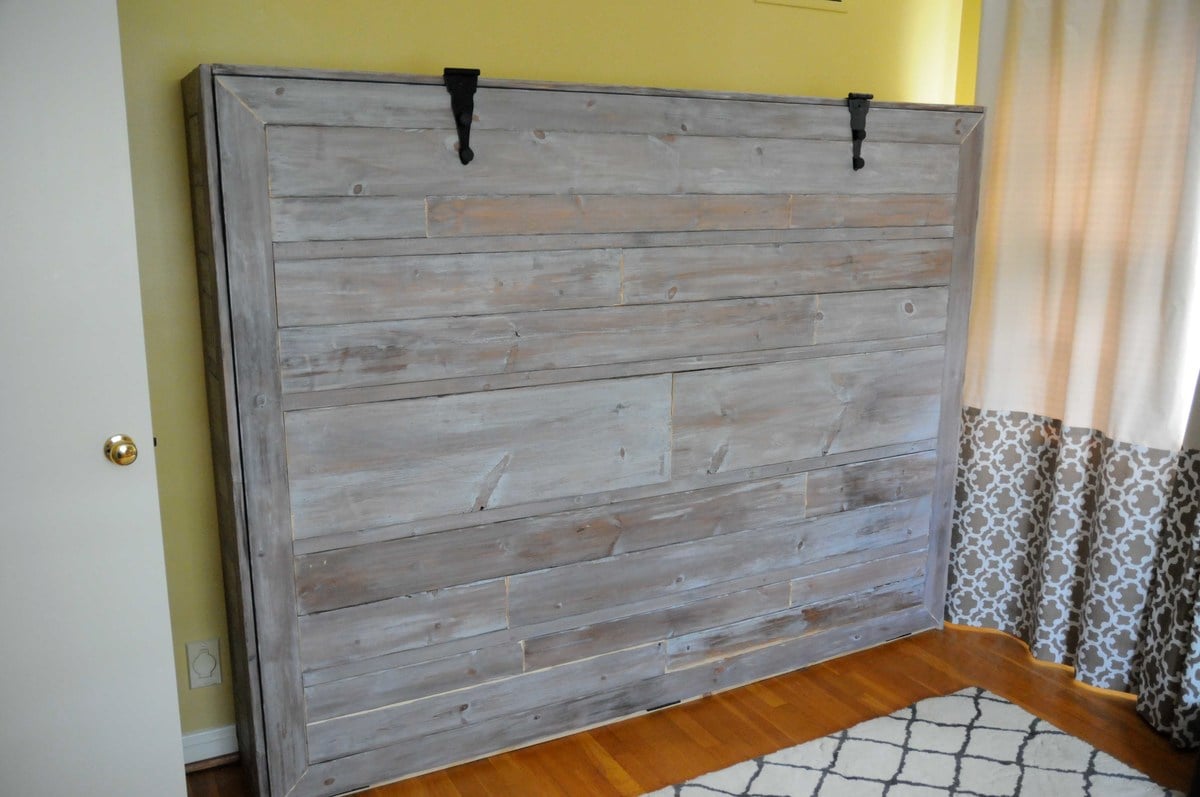
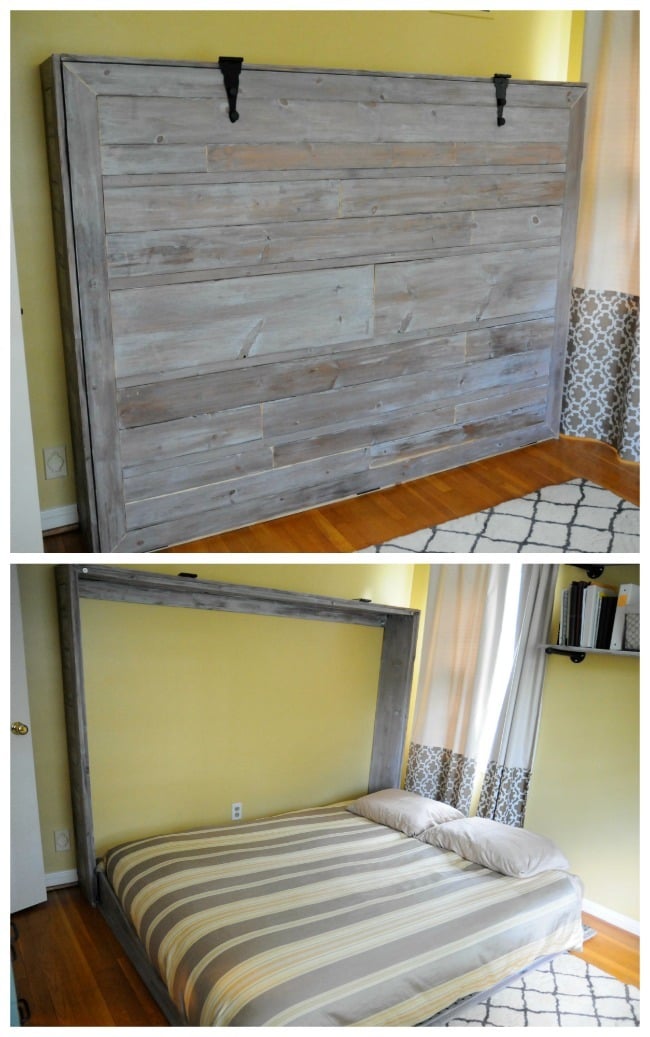
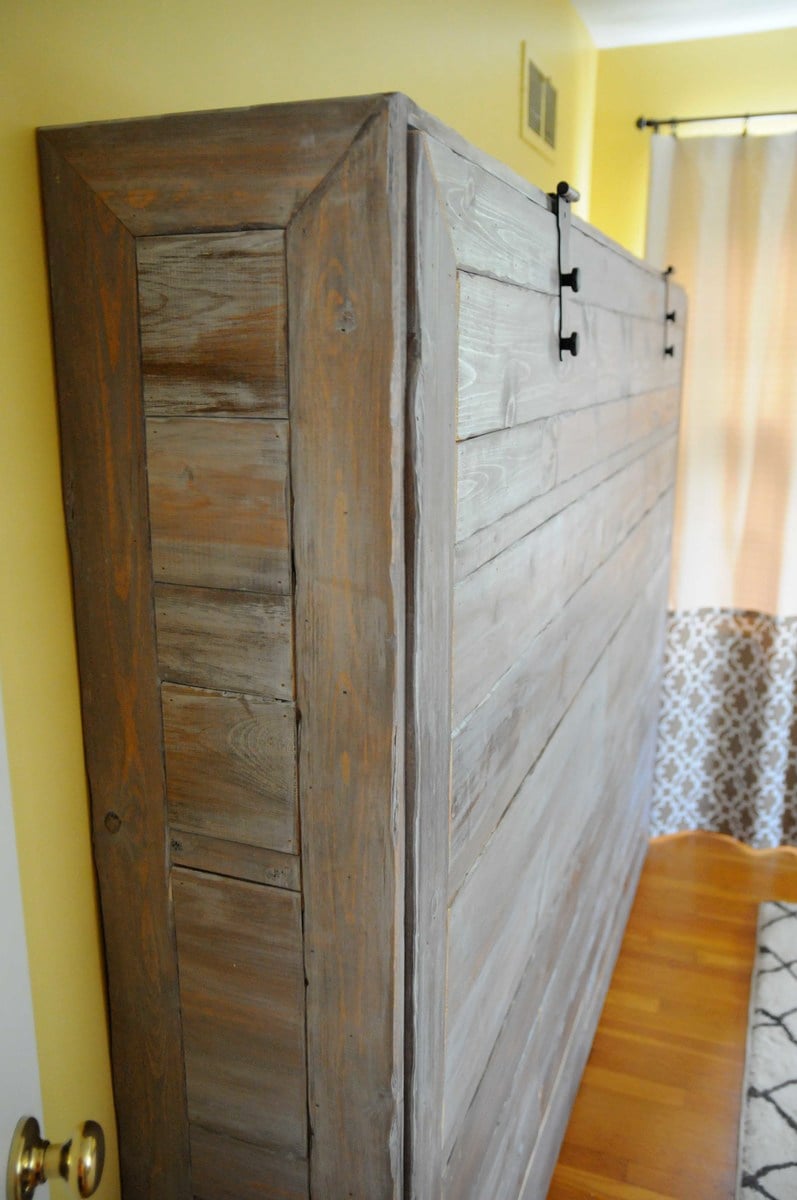
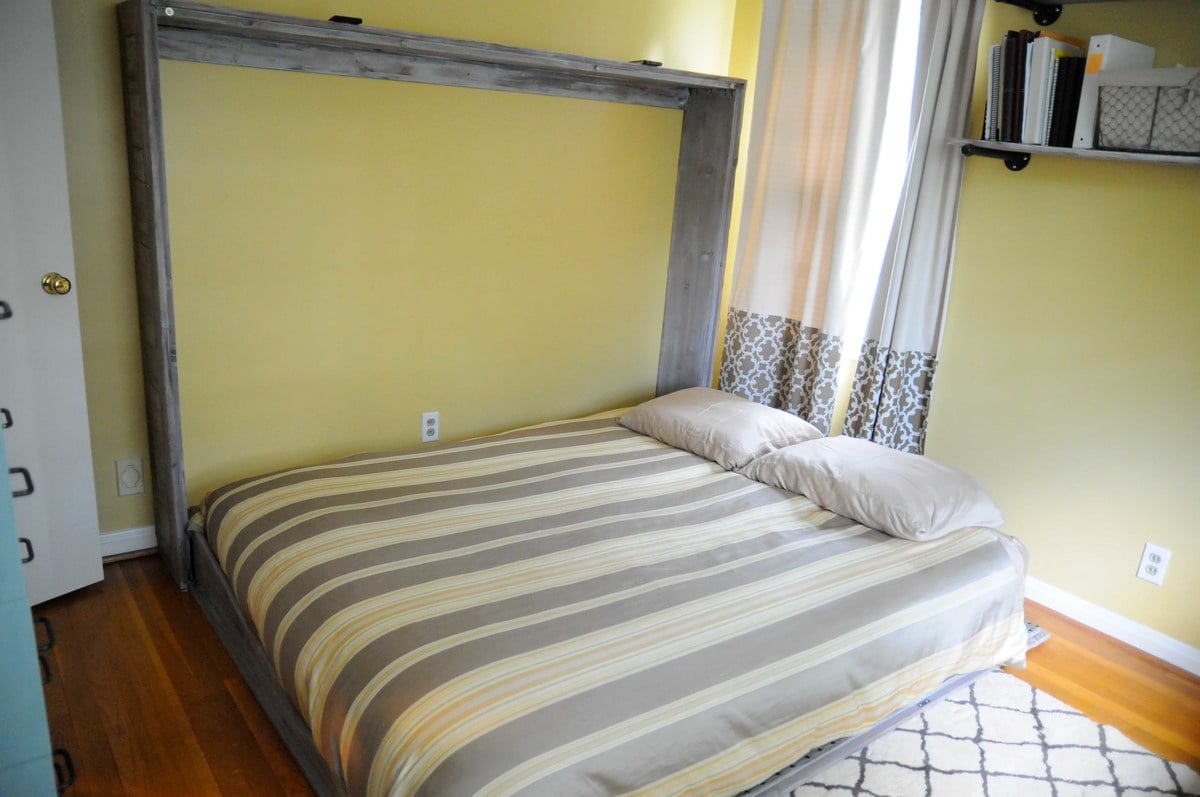
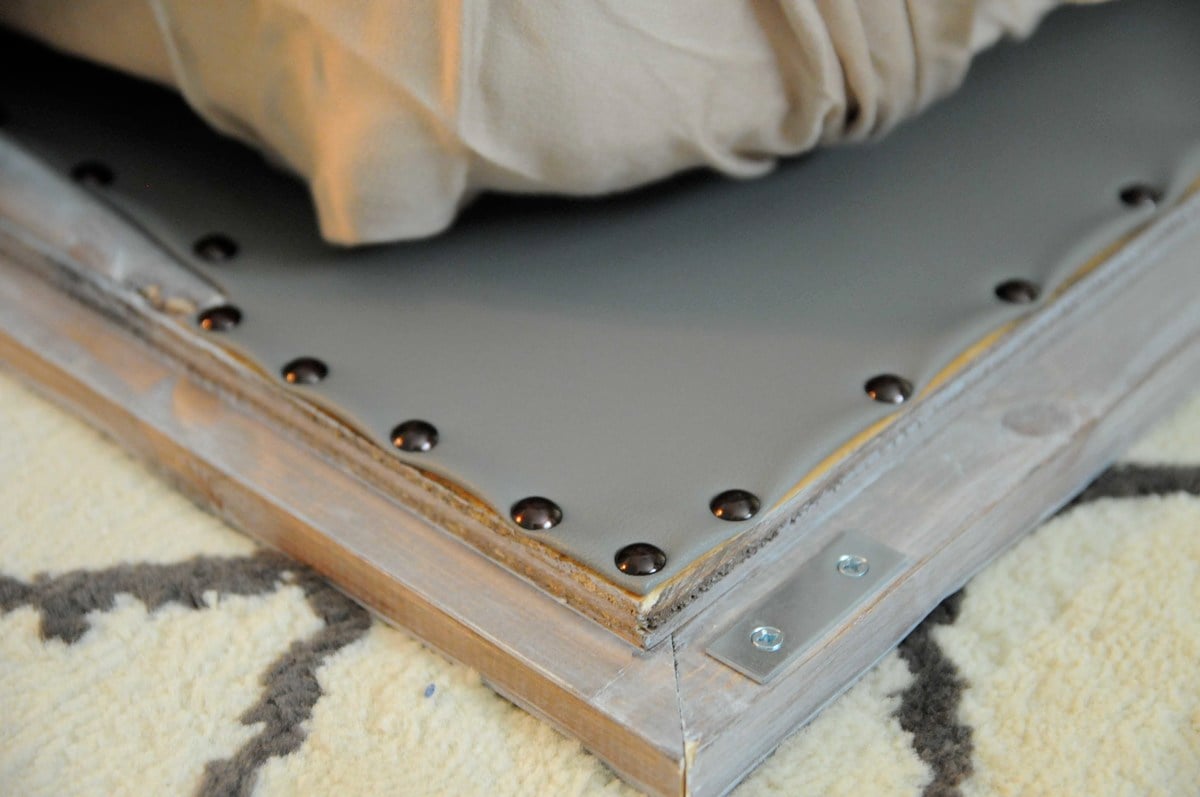
Expecting our second child, my wife and I decided to do away with our guest bedroom and combine it with our office. The only problem was our queen bed took up way too much space and it didn't get enough use to justify the sacrifice. We looked at the wall bed options available for purchase and decided they were way too blah and very expensive. I then found the "A MURPHY BED YOU CAN BUILD, AND AFFORD TO BUILD" post on Ana's website (thanks for the inspiration)!
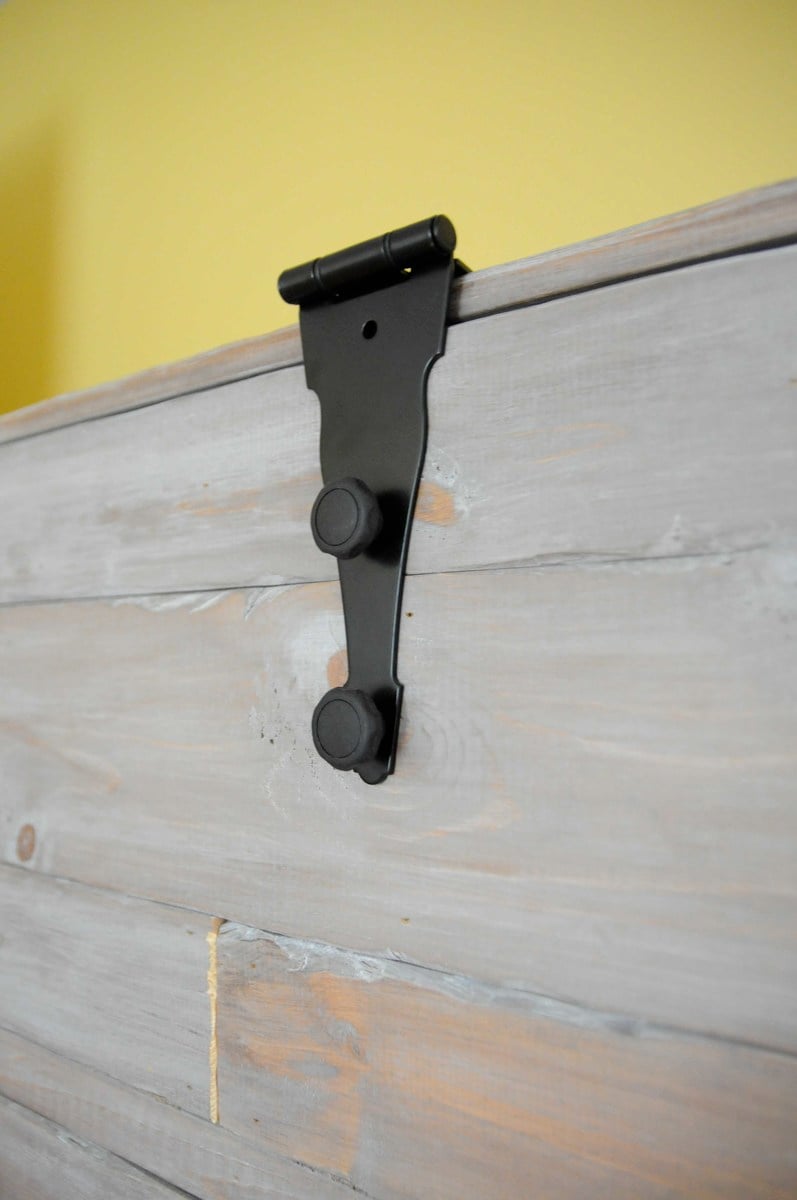
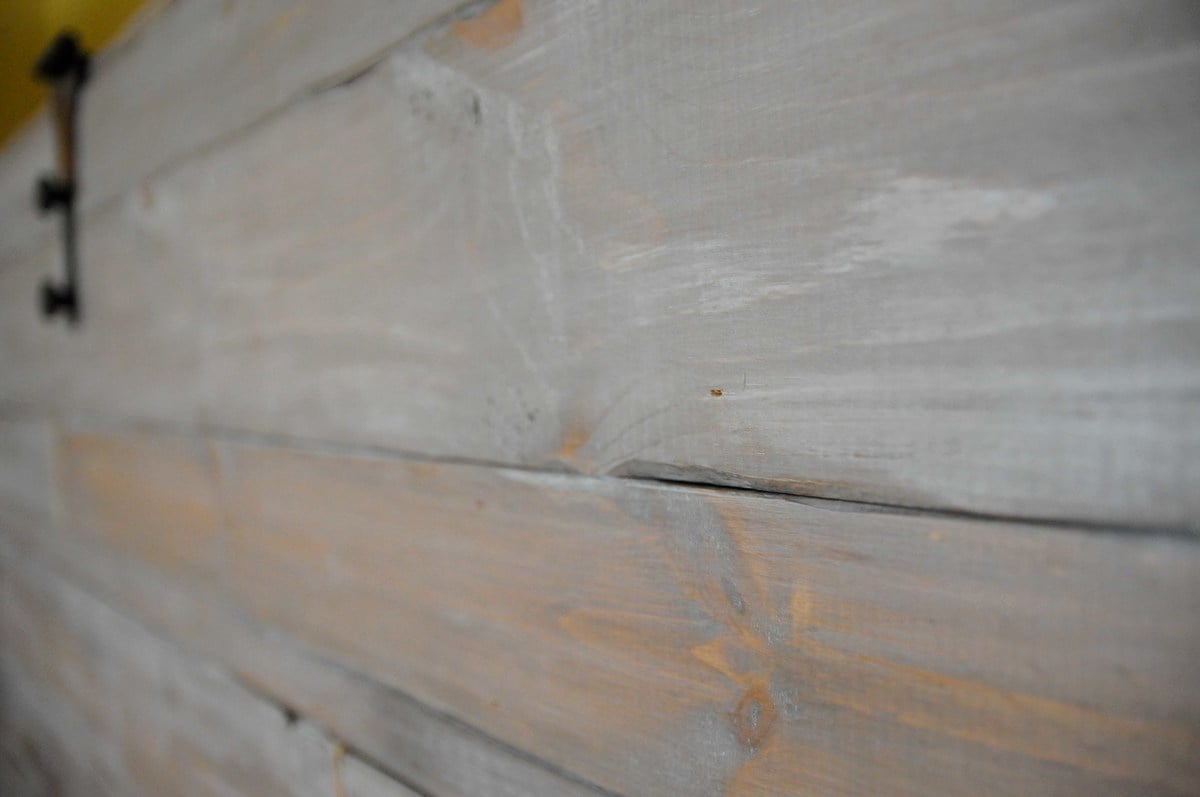
Using cheap pine boards, plywood, door hinges, vinyl upholstery and stain I constructed the wall bed you see here. It really wasn't that difficult but facing it took the most time. To give the boards a more rustic look I used a utility knife to shave off the edges/corners and stained them with the Minwax American Walnut water based stain and the Minwax White Wash Pickling. When this started we thought we were going to have to settle for something unattractive and less than desirable. Seeing it in our office now, we love our new bed and actually think it makes the room look much better! I didn't keep track of costs, but it couldn't have been more than $150.
Tue, 07/08/2014 - 08:08
Looks great! May I ask what the final outside dimensions were? Curious to see if this would work for me.
Thanks!
Wed, 08/06/2014 - 09:23
I would have to measure it when I get home... at work currently. Looking back, I think the best approach is to take the measurements from the plan, find the difference between standard mattress and queen mattress dimensions (check wikipedia for standard sizes), then add that difference back to the plan. I cut it real close on mine and could use a little more space. It would be nice to make it a bit deeper and with some head room to store comforters and pillows.
Sat, 03/21/2015 - 08:32
To fasten the facing I used wood glue then a Ryobi 18ga nail gun. It's part of their 18v One+ line and works great!
Sun, 12/28/2014 - 12:59
I am dying to get started on this wall bed project. I keep getting this message when trying to open the Plans.
The page you are looking for is temporarily unavailable.
Please try again later.
can someone help me find them.
Sun, 12/28/2014 - 12:59
I am dying to get started on this wall bed project. I keep getting this message when trying to open the Plans.
The page you are looking for is temporarily unavailable.
Please try again later.
can someone help me find them.
Sat, 08/15/2015 - 12:05
did you ever find the plans?
I'm having thee same problems

Tue, 08/09/2016 - 15:24
Hi. I would love to try this. Looking to build in the next month before parents in law come over. Is there any working links to the plans??
Wed, 01/24/2018 - 21:42
WHERE CAN I FIND THE PLANS, MATERIALS LIST AND DIMENSIONS? THE ATTACHED LINK TO YOUR ARTICLE LEADS TO A TWIN SIZE BED. THANK YOU
Thu, 01/25/2018 - 06:30
is there a link to the plans? I can't find them and I really want to make this

Hi Ana,
thank you for all you inspiring build plans
I have build a few of your 2x4 out door furniture plan
2x4 outdoor sofa
2x4 one arm outdoor sofa
2x4 outdoor side table
2 pcs of the essential outdoor chair for deep seat cushion.
Johan Janssen from the Netherlands

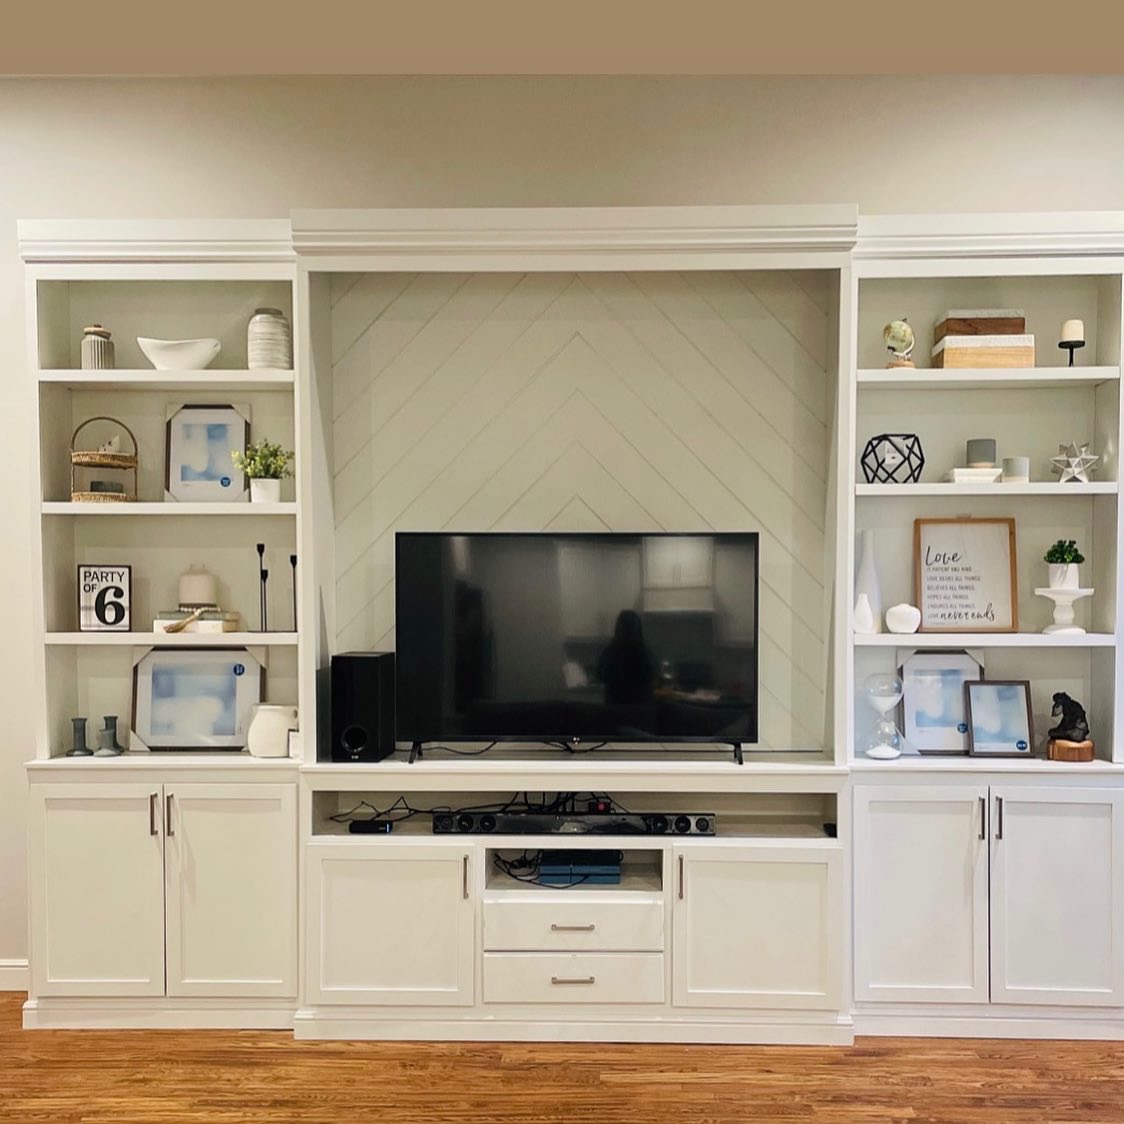
Largest Build I have done up to date. It took a bit longer but it was so worth it. Wanted something different than all the entertainment centers I saw so I created a herringbone back. I love how it turned out.
-@theorthhome/instagram
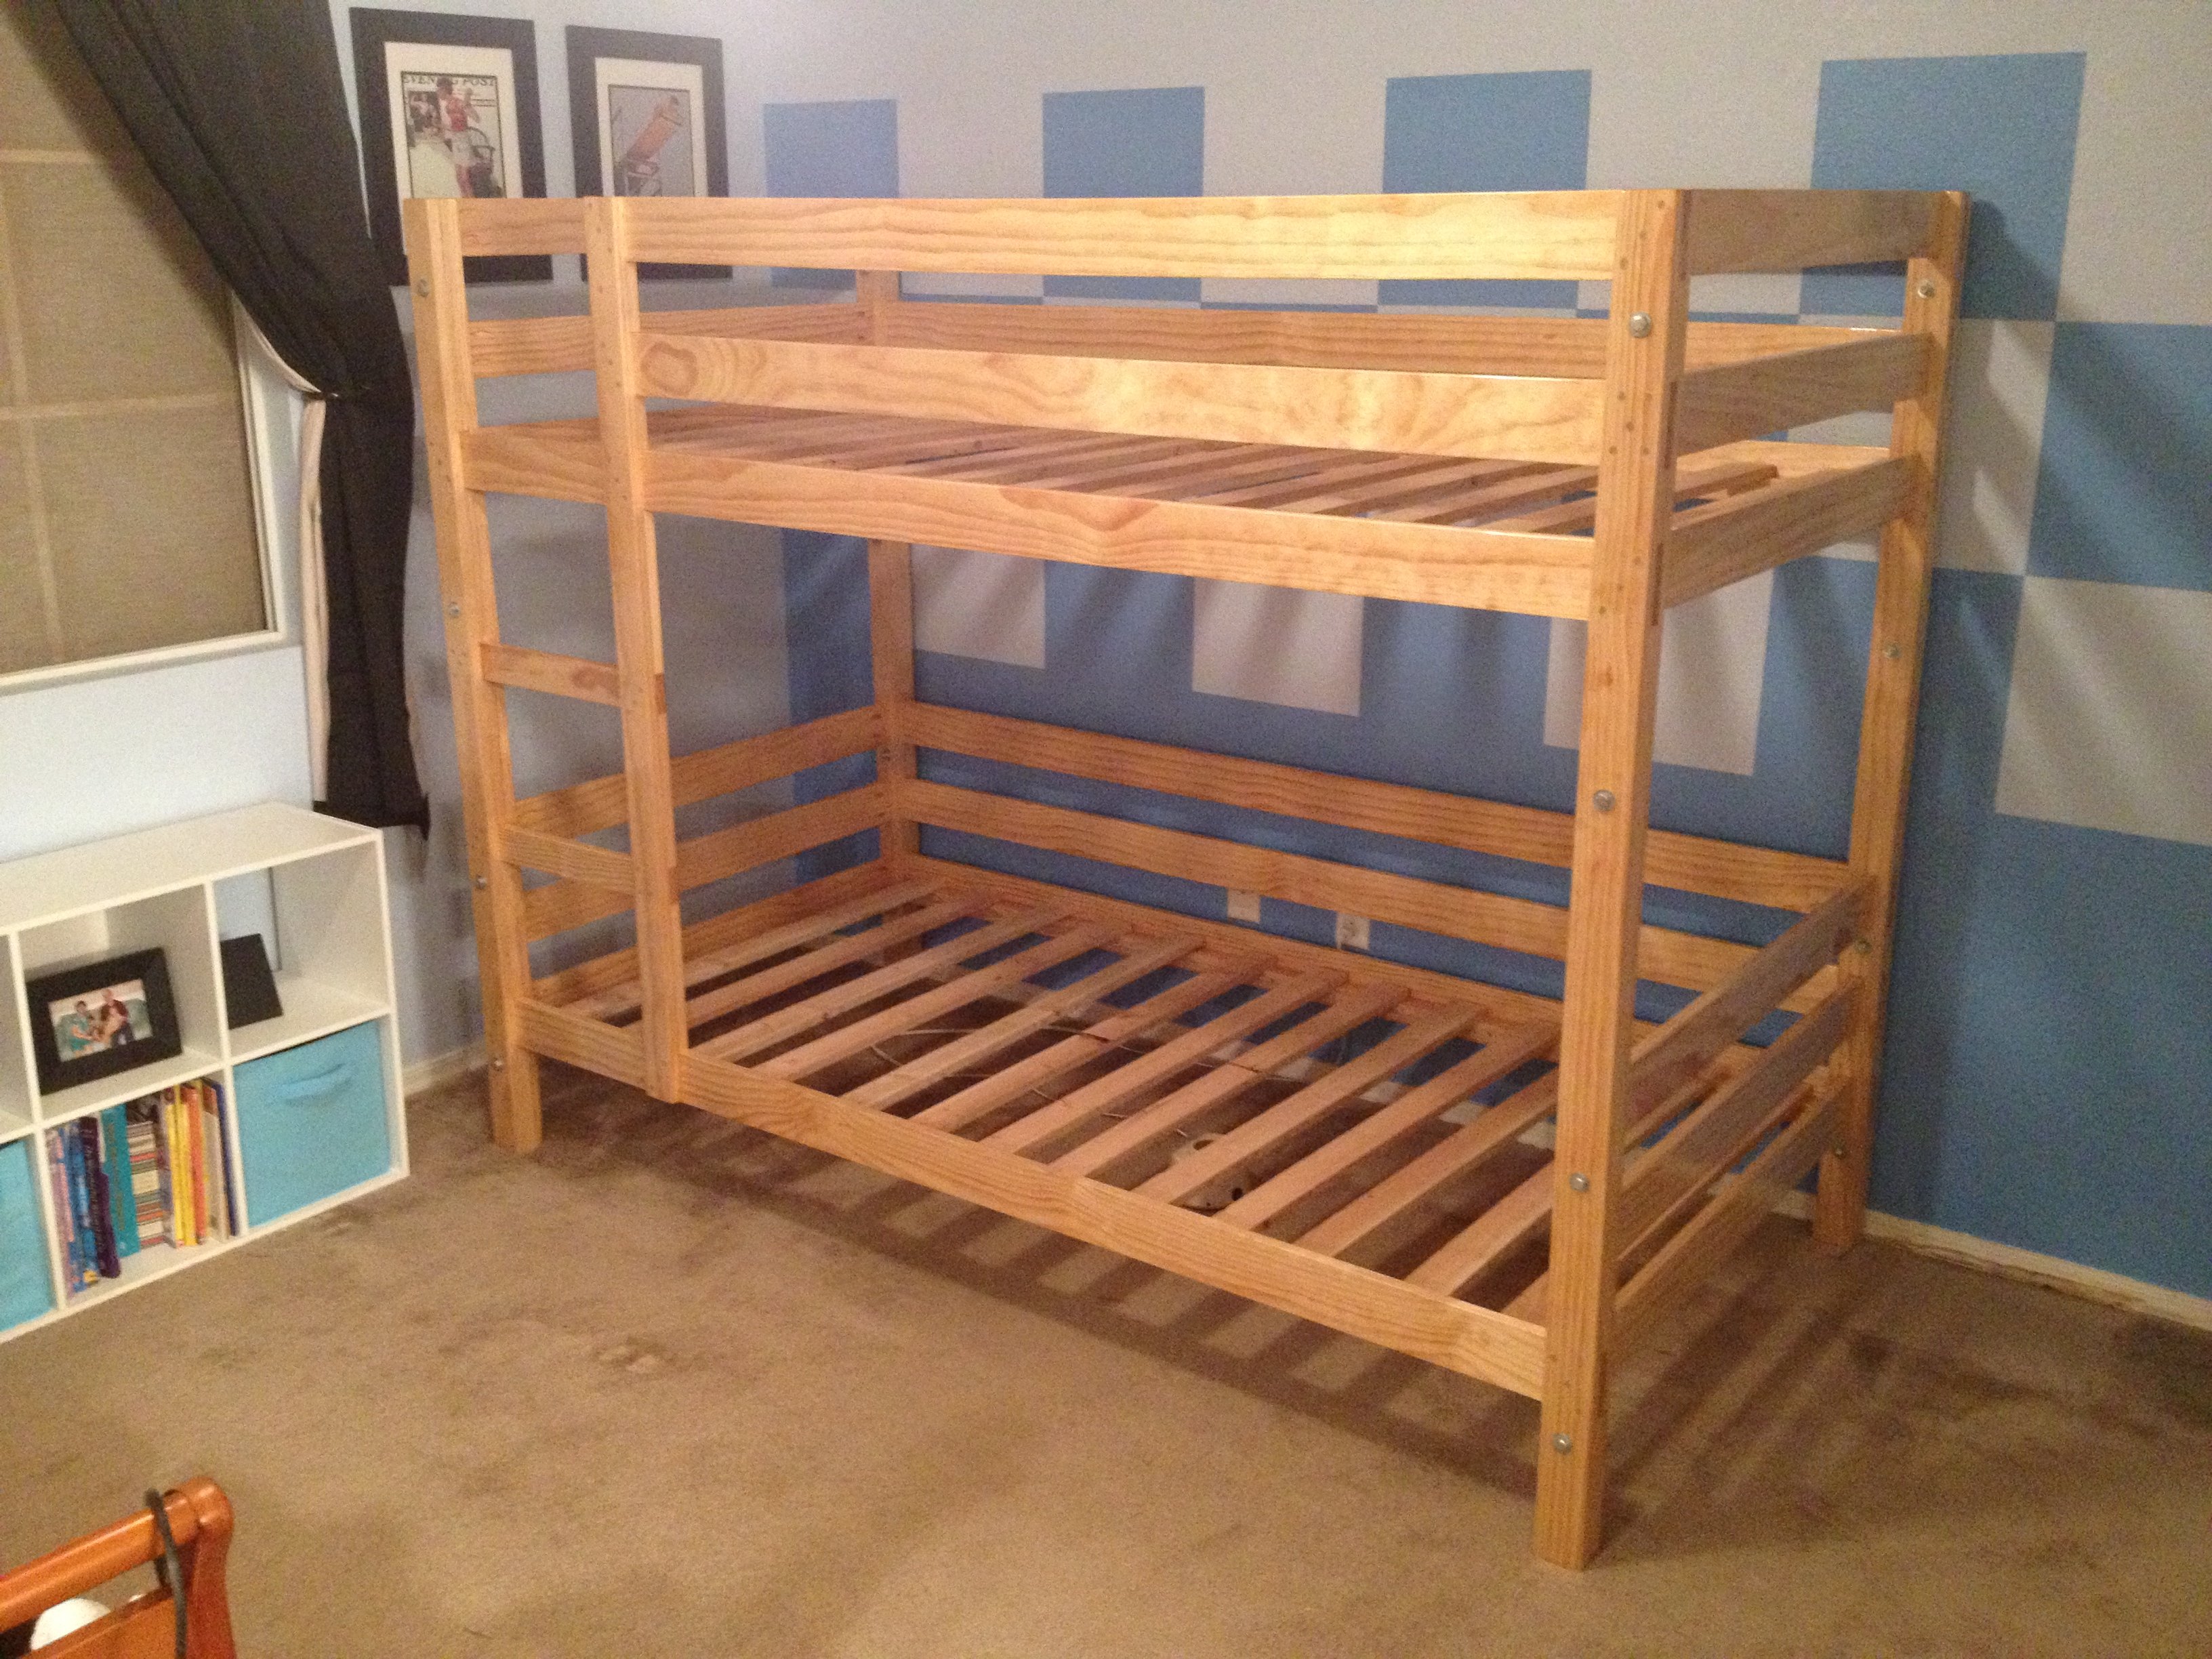
Construction phase of the bunk beds was about a day and a half project...Cutting, assembling, screwing, bolting. Nothing complicated about it at all. Just followed the instructions step by step. I didn't use metal brackets to reinforce the mattress rails (that the slats lay on). I'm a good 250lbs and I laid on them without a problem. Also, similar to the posted Comments, the original materials list is short a little lumber. I followed the advice of some of the Comments that indicate how much additional wood you'll need. I didn't have to make any additional trips for wood.
The finish took me another 2-3 days (incl. drying wait-time between stain and polyurethane coats). The sanding (electric hand sander) takes a number of hours to sand all the surface area and all the edges (300 grit). I then I applied 1 coat of pre-stain wood conditioner and then immediately 1 coat of Natural color stain (basically clear oil stain but it brings out the wood grain just a bit), and then 2 coats of semi-gloss polyurethane for a shine / protection. Each of those coats took me 2+ hours as I applied them using a paint brush (vs. spray gun).
Since I only need to take apart the bunk beds into 4 pieces to carry upstairs(front, back, 2 sides), I simply bolted them together using 3" bolts (with washers / nuts). 4 bolts in each of the 4 corner posts.
The only real modification I made was moving the ladder to the left-hand side (vs. right-hand side per the instructions). All other measurements were basically the same.
Really happy with the mini Kreg Jig! Simple to use and provides solid joints for the rails of the 2 shorter sides (without showing screw-heads from the exterior).
My toddlers have been sleeping on them for a week now and no squeaking or shaking. They are sturdy. And neadless to say, my boys LOVE having bunk beds.
Sure I could just buy some inexpensive bunk beds for $200-300 but where's the fun in that!?
Let me know if you have questions, happy to help out! Thanks again to Ana and her site.


Wed, 06/12/2013 - 09:55
The bolts I used are 3/8" x 5". I used 16 total bolts to assemble. Each bolt (+2 washers & nut) is maybe $2-$3 at Home Depot. So in total, around $35-$40 for the bolts and hardware.
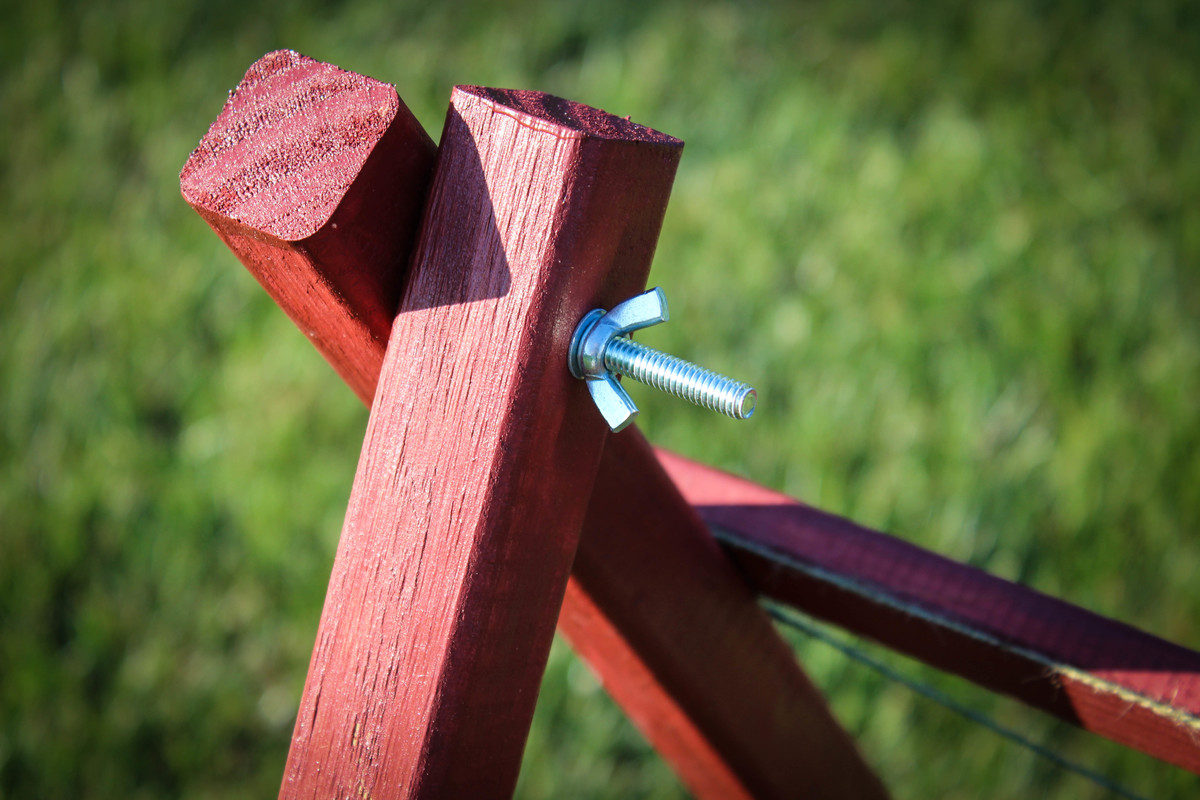
I borrowed the idea from the dog kennel plans, made obvious modification, and this is what it became. Enjoy!
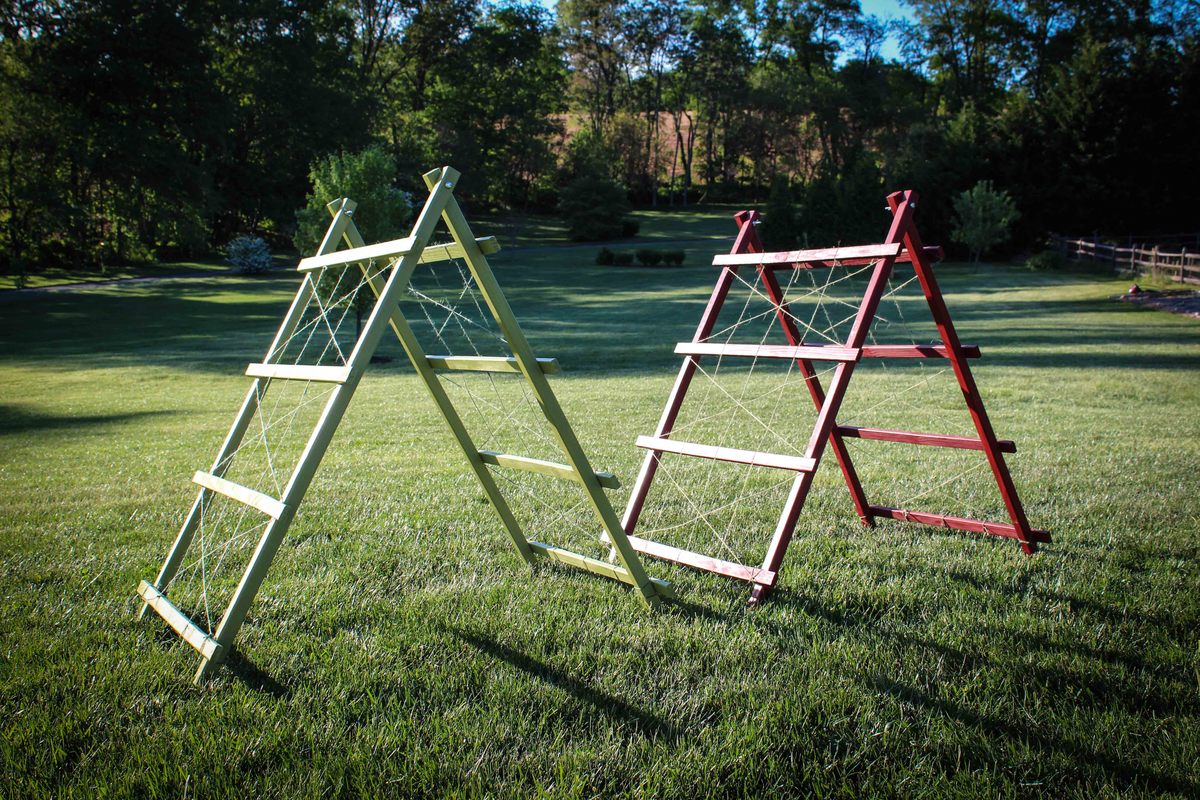
Video of the Build:
https://www.youtube.com/watch?v=xH3ABM3X3uE
Build Instructions:
http://www.instructables.com/id/Garden-Trellis/
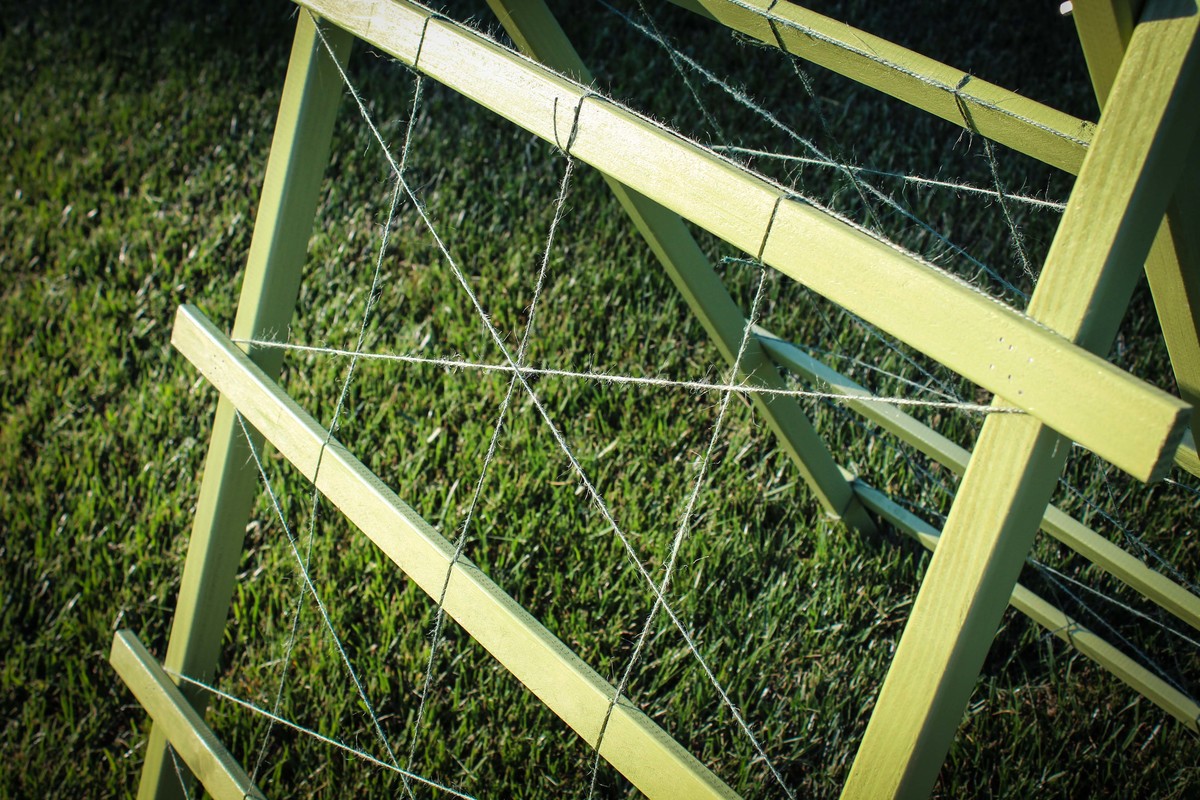
This adjustable garden trellis for cucumber/pea/bean vines is a quick project for the vegetable garden. The trellis gets the vines off the ground and is more productive in less space. No giant rotting cucumbers to find three weeks after the rest have matured. It is made from small lumber and twine. Paint is optional but gives a nice pop of color. Just in time for the rapid growth of summer!
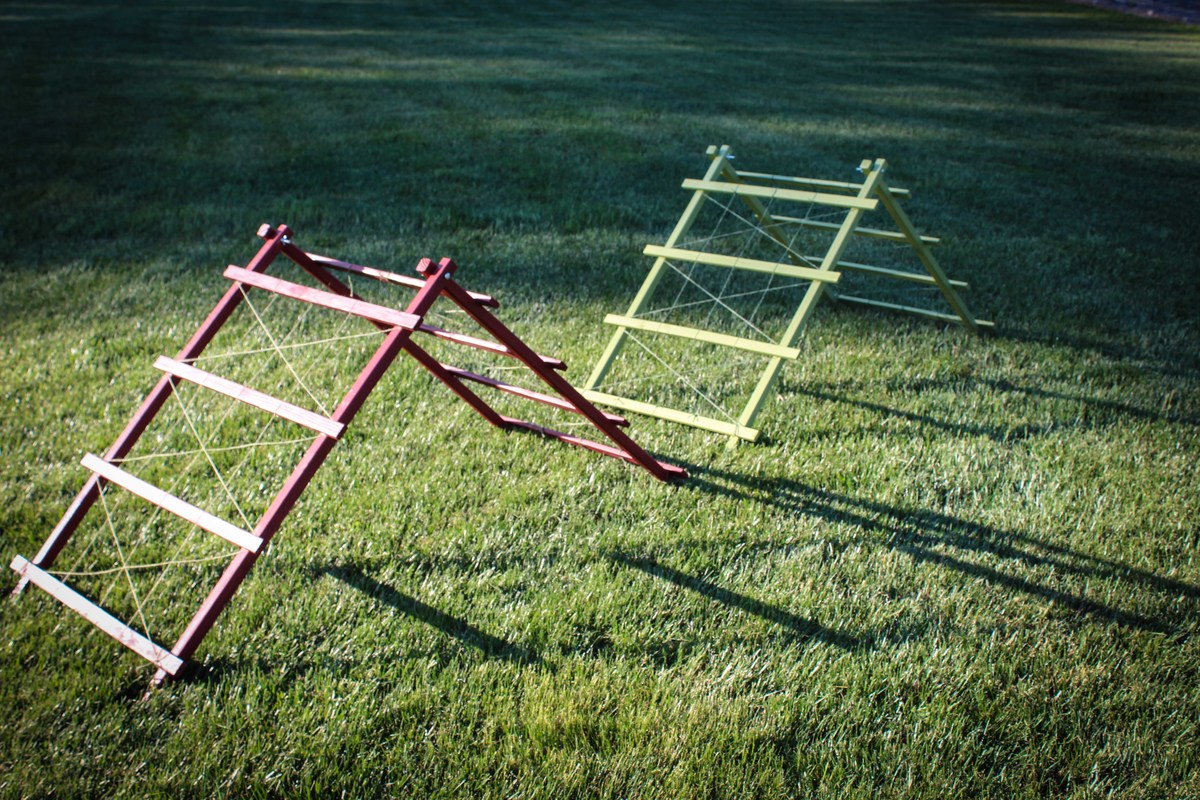

Kept it natural for now. Might stain it in the future.
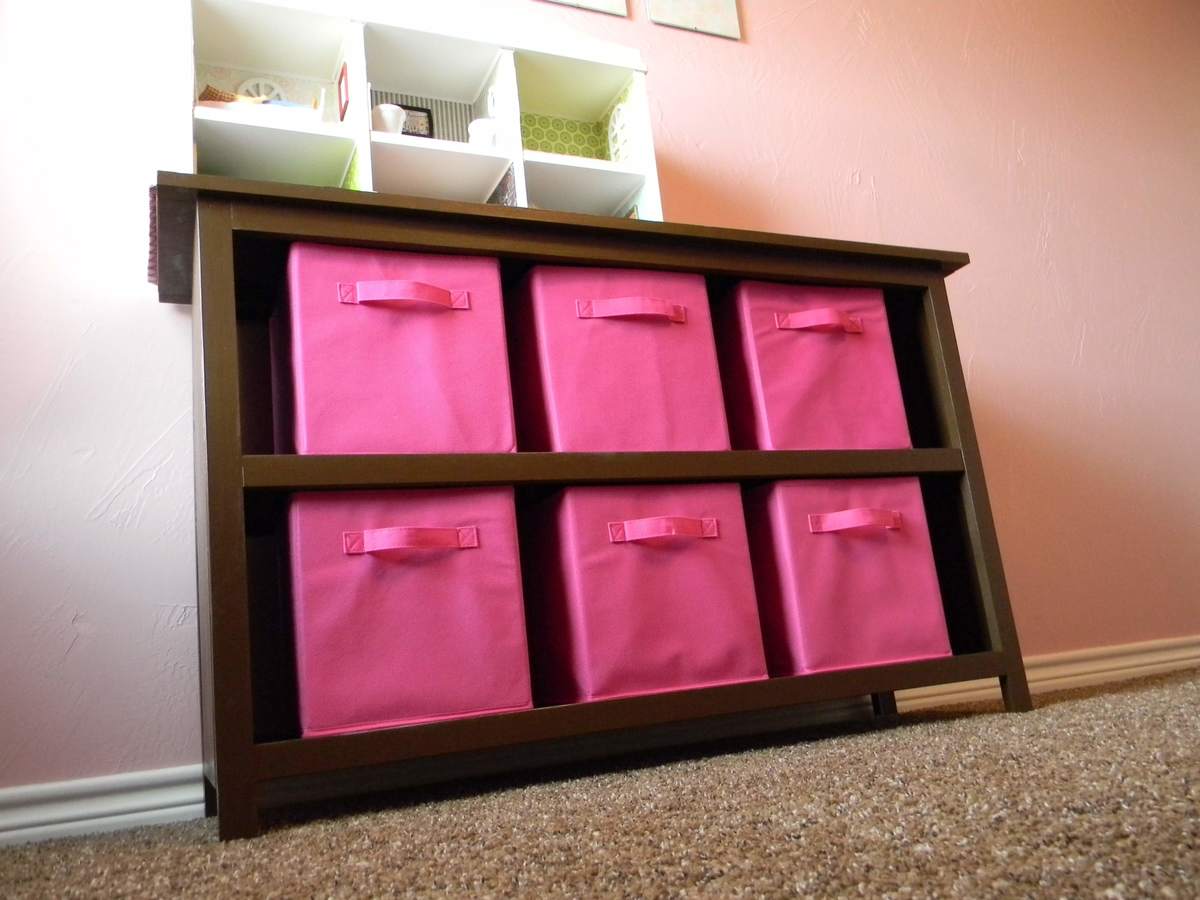
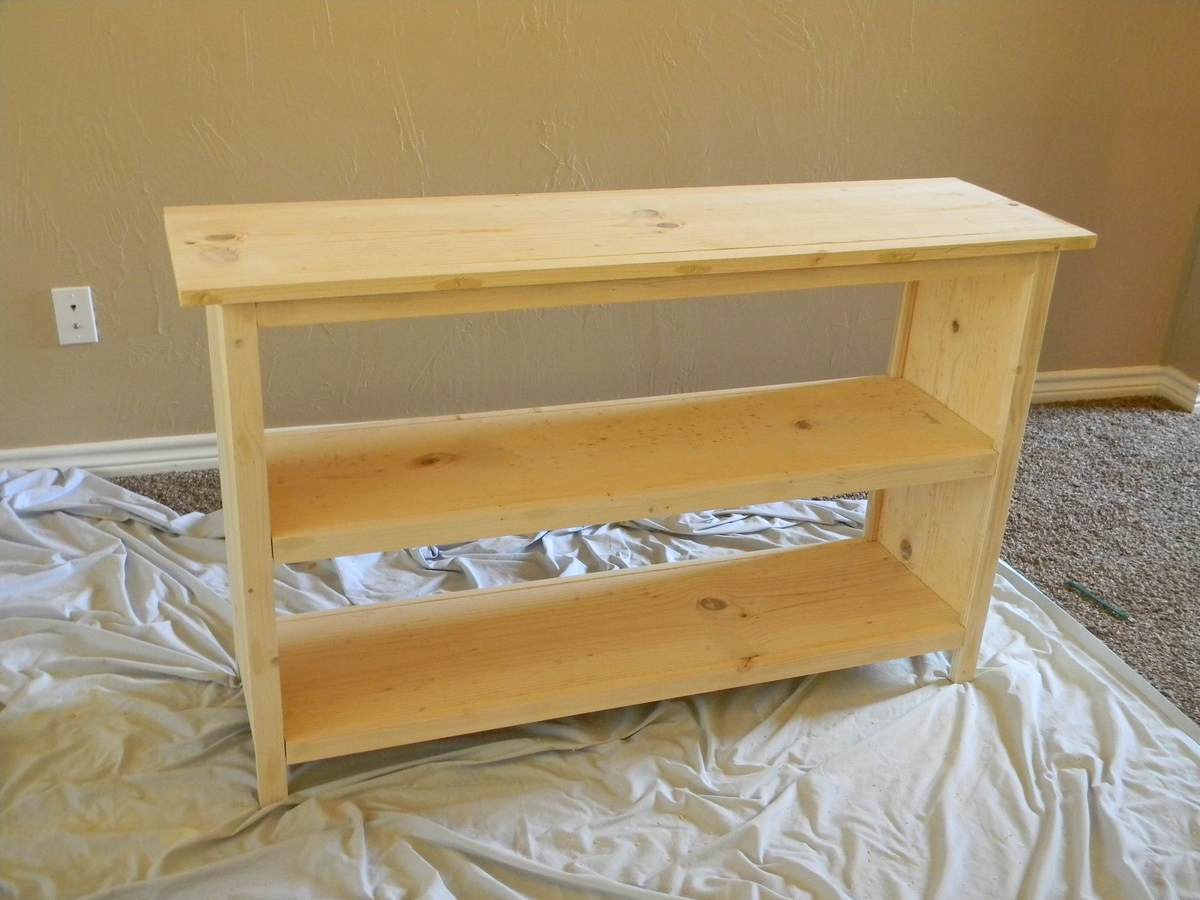
I just made one of the shelves instead of two like the plan calls for. It's painted a dark brown to match the bunk bed that I previously made for my girls. Mine was a little more expensive because I used 1x12's instead of plywood.
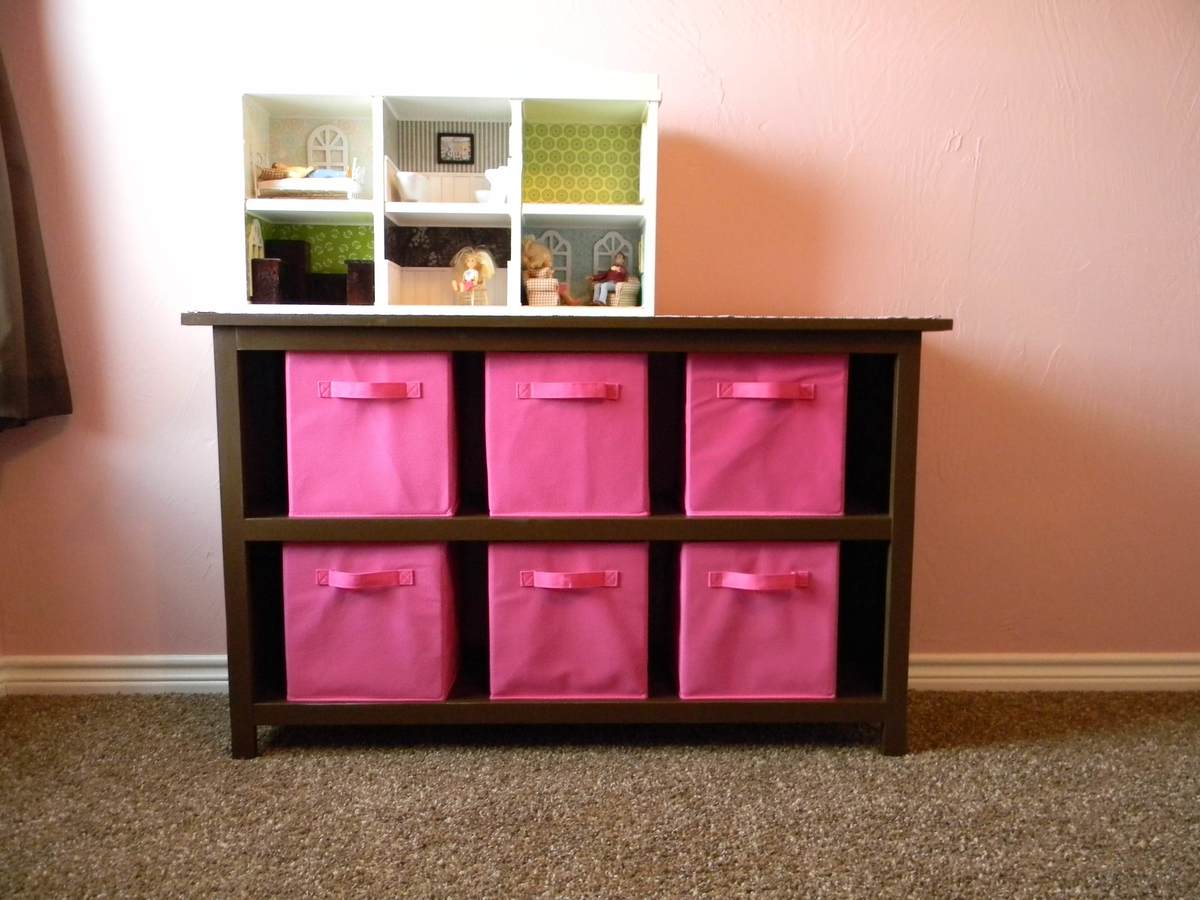
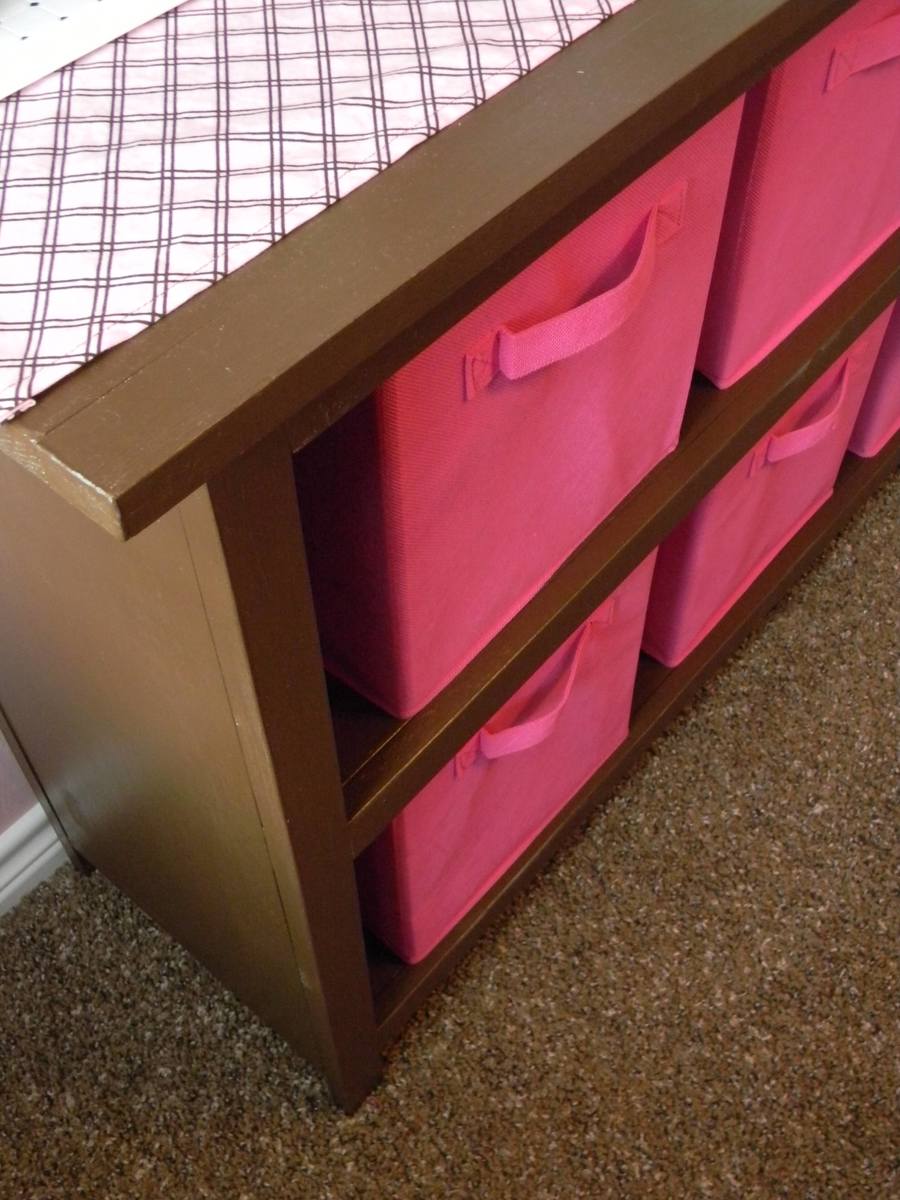
Mon, 07/11/2011 - 19:14
You did a beautiful job! Where did you get your pretty pink storage bins? I've been looking for some like them for my granddaughter's room.
Mon, 08/29/2011 - 19:56
They're just the closet maid bins. I think I bought mine at Lowe's.