Community Brag Posts

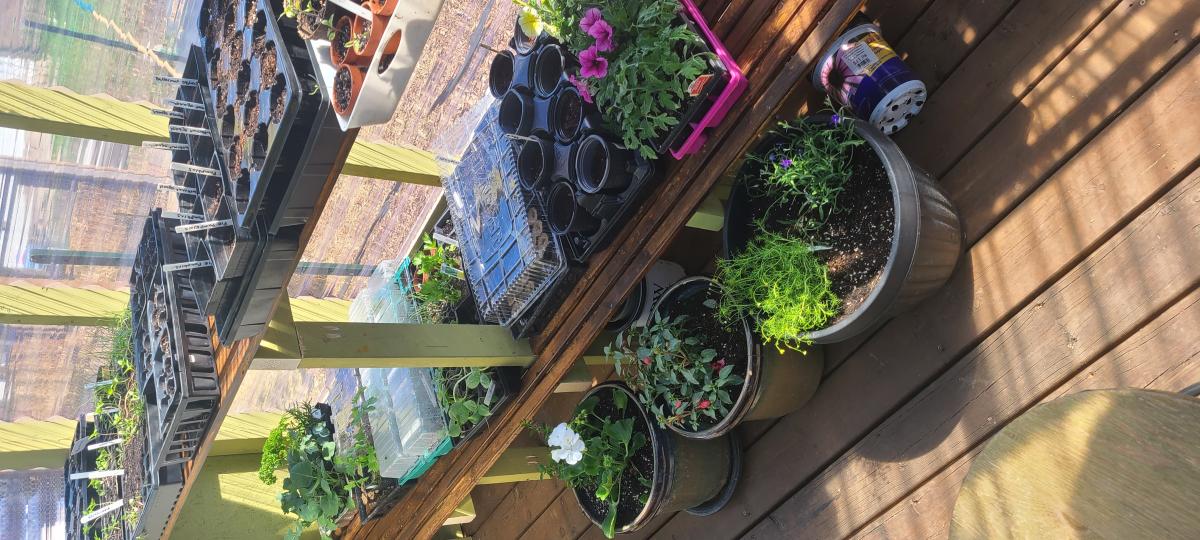
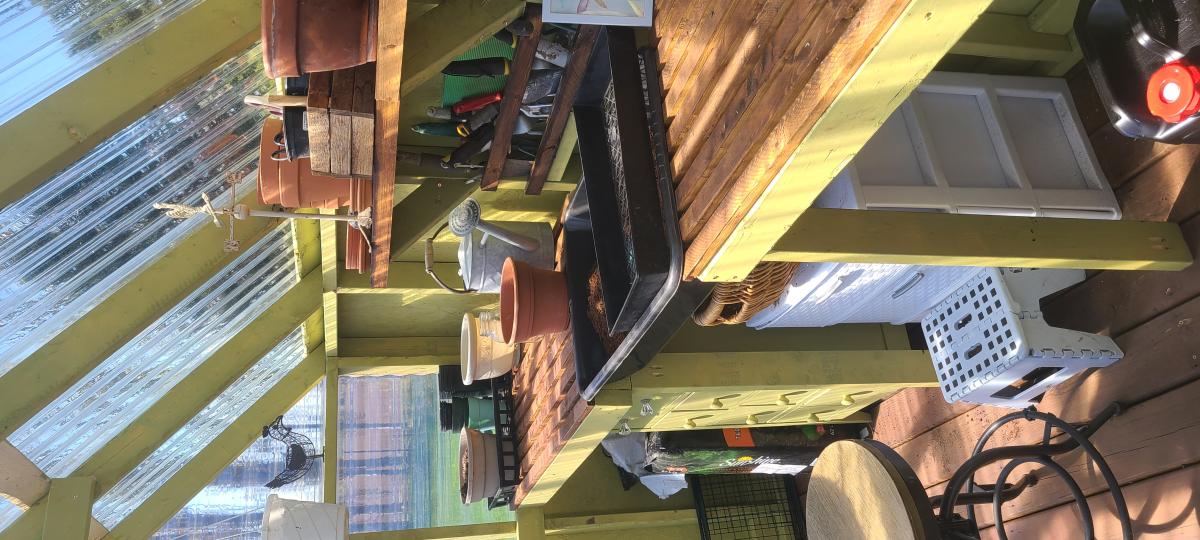
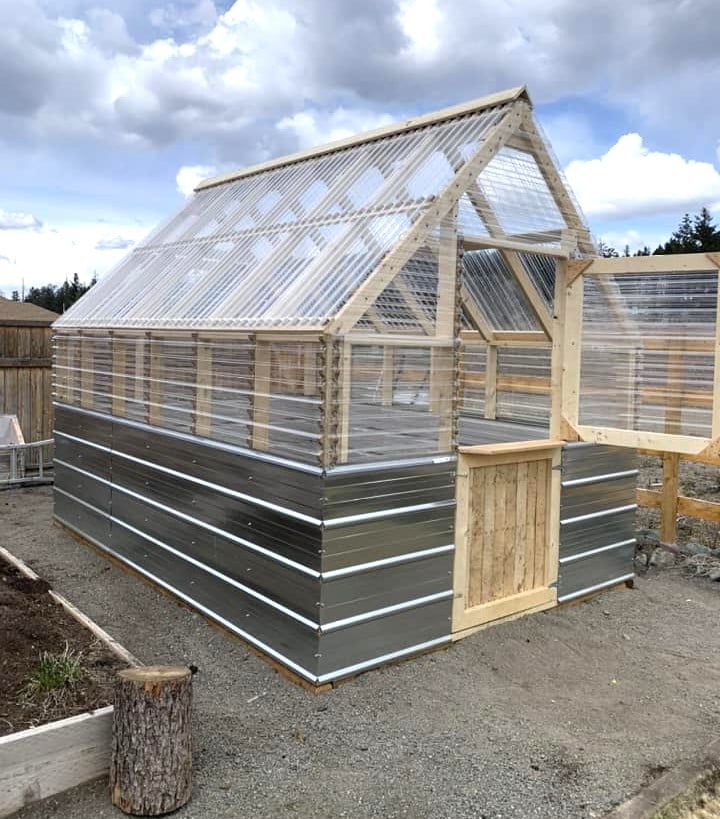
Colorado Backyard Gable Greenhouse
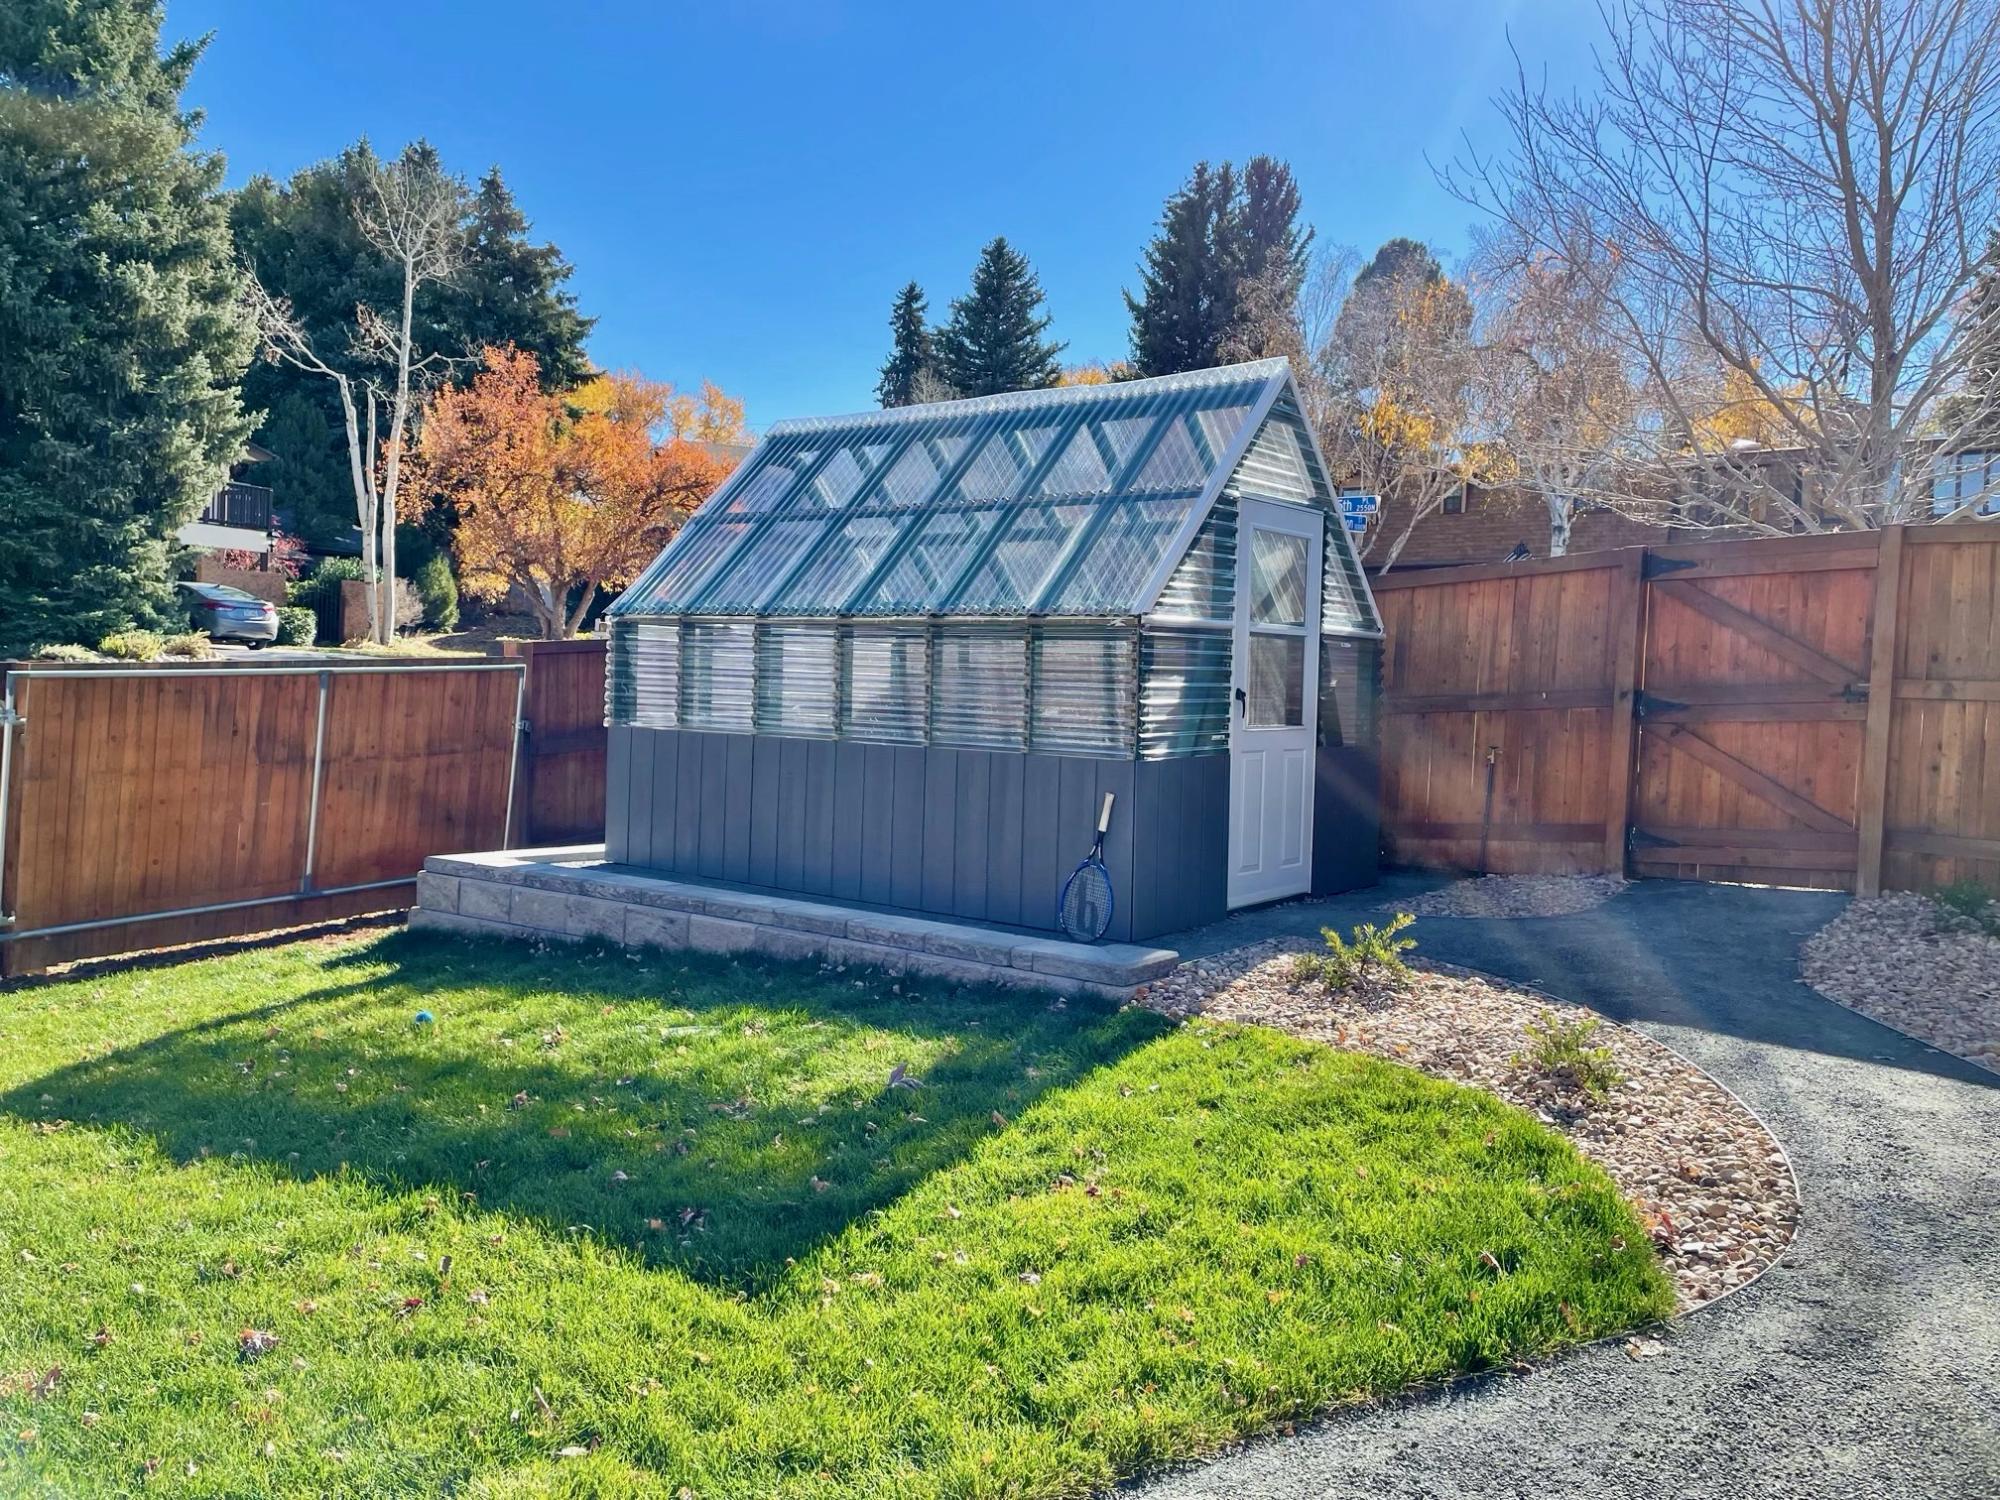
We started this project last fall with the goal of creating a multi use hobby greenhouse with plenty of space for the kids to get their hands dirty. We purchased the Small Gable Roof Greenhouse plans and made our first (of many) trips to the hardware store. Since becoming homeowners in 2015, we've done countless projects but nothing as big as this. We are still very much learning the nuances of greenhouse growing in Colorado, but that has become a fun experience for our entire family. Since completing the structure, I've found that I'm more interested in making the space more functional than I am in actually gardening. I added a shelf built almost entirely from old pallets, a raised cedar bed and solar powered exhaust fan/lights. Luckily, my wife loves spending time in there tending to the plants! As the summer heat sets in, we will face new challenges of how to keep the space cool. Maybe by adding a shade cloth and misters? Regardless of what the "output" looks like we are loving this new hobby and are looking forward to learning new skills!
Comments
Farmhouse Writing Desk with Turned Legs

I modified the Small Old English Style Farmhouse Dining Table plan to build a writing desk. I used five 1x6 boards for the top for a width of 27.5 inches. I made my desk 56 inches in length. I put the drawer on the long side like a pencil drawer. I did use the legs that Ana recommended in the plan. I love how it turned out. I used dark walnut danish oil and dark wax for the finish.


Built from Plan(s)
Estimated Cost
225
Estimated Time Investment
Day Project (6-9 Hours)
Finish Used
I used Watco dark walnut danish oil and Minwax dark paste wax.
Recommended Skill Level
Intermediate
Comments
Sat, 08/31/2019 - 05:18
Beautiful! What are the…
Beautiful! What are the brands of oil and wax that you used?
Fri, 10/04/2019 - 21:46
Thank you! I used Watco…
Thank you! I used Watco Danish oil and I used Minwax dark wax. I've tried alot of different wax brands and I always come back to Minwax. It dries the hardest in my opinion.
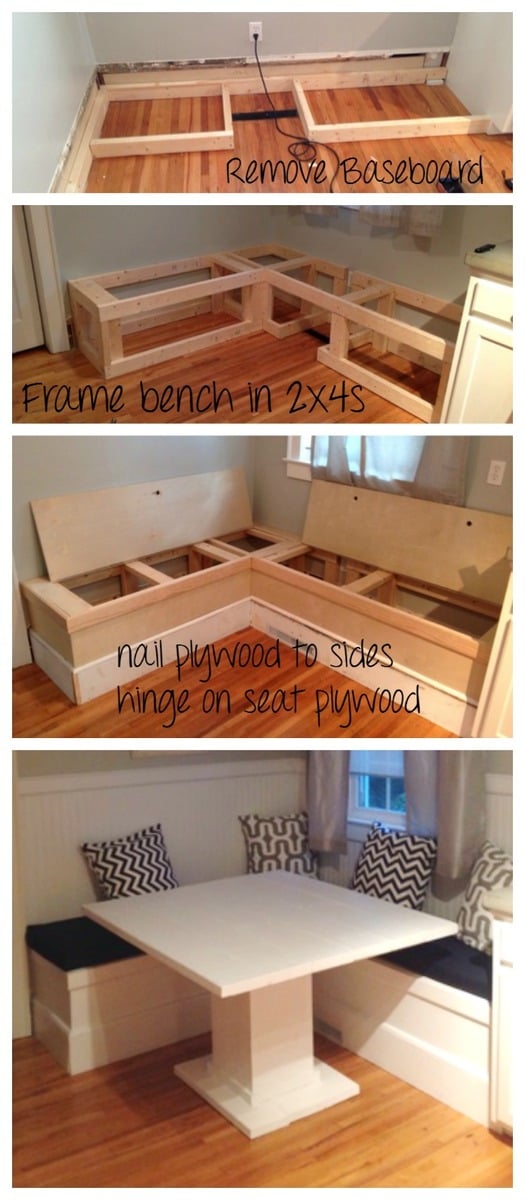
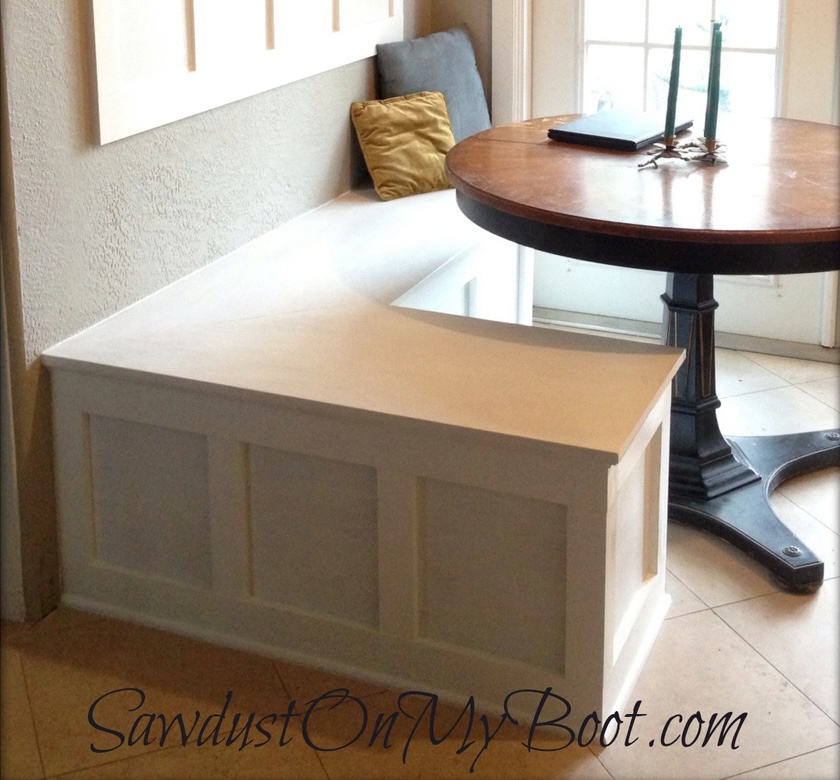
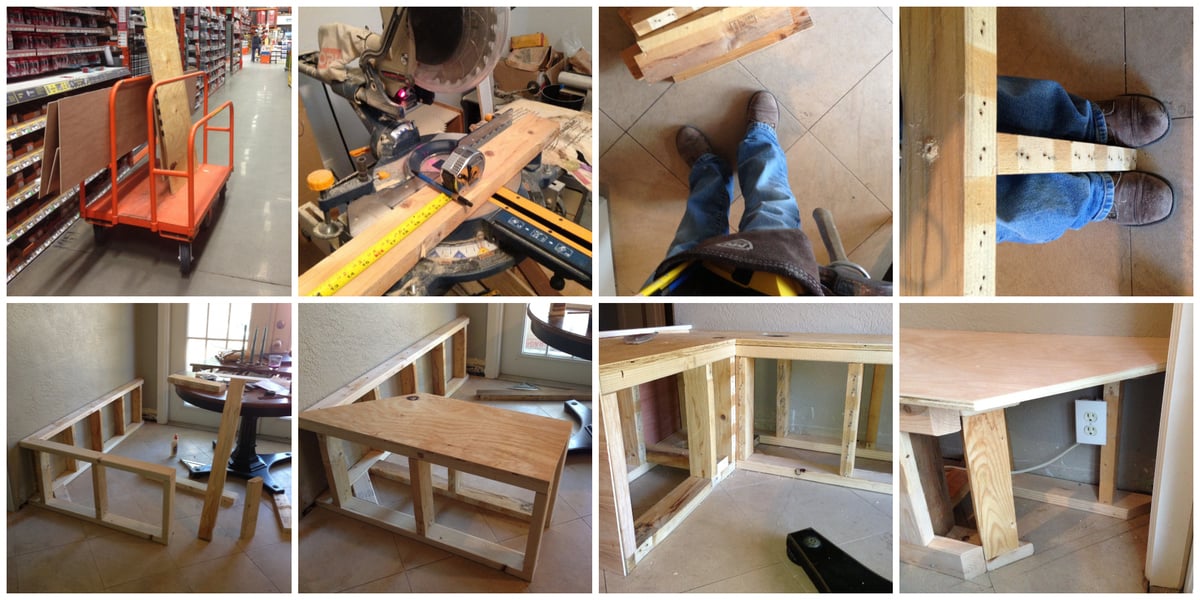
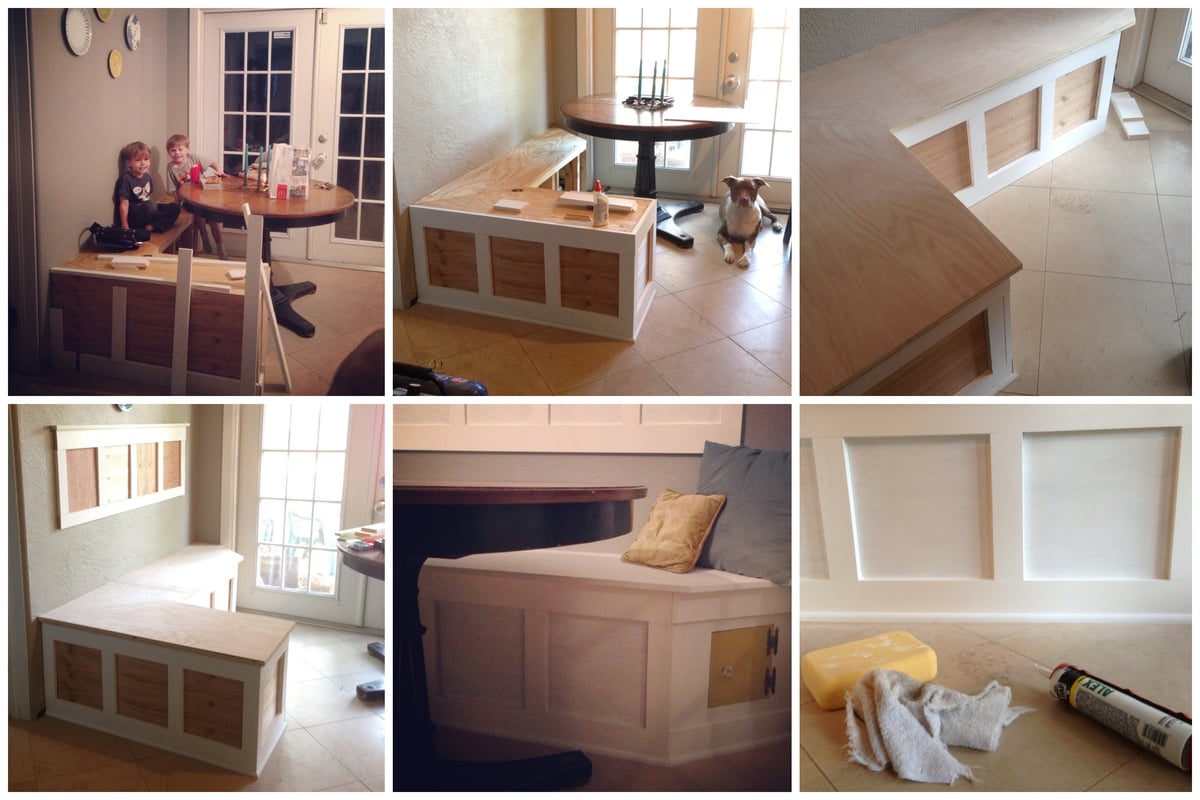
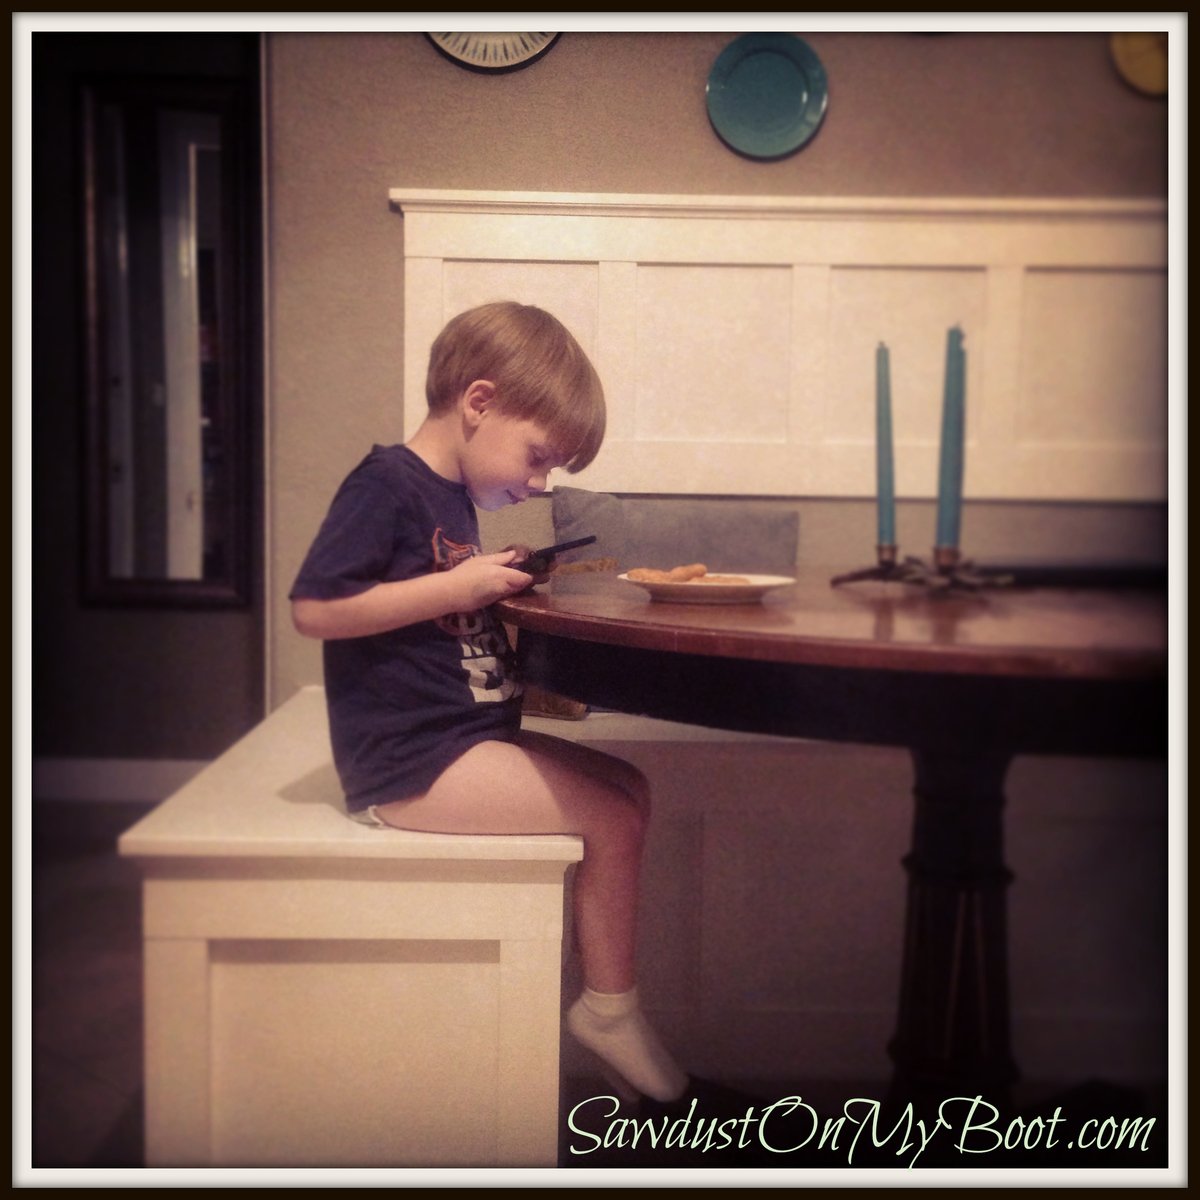
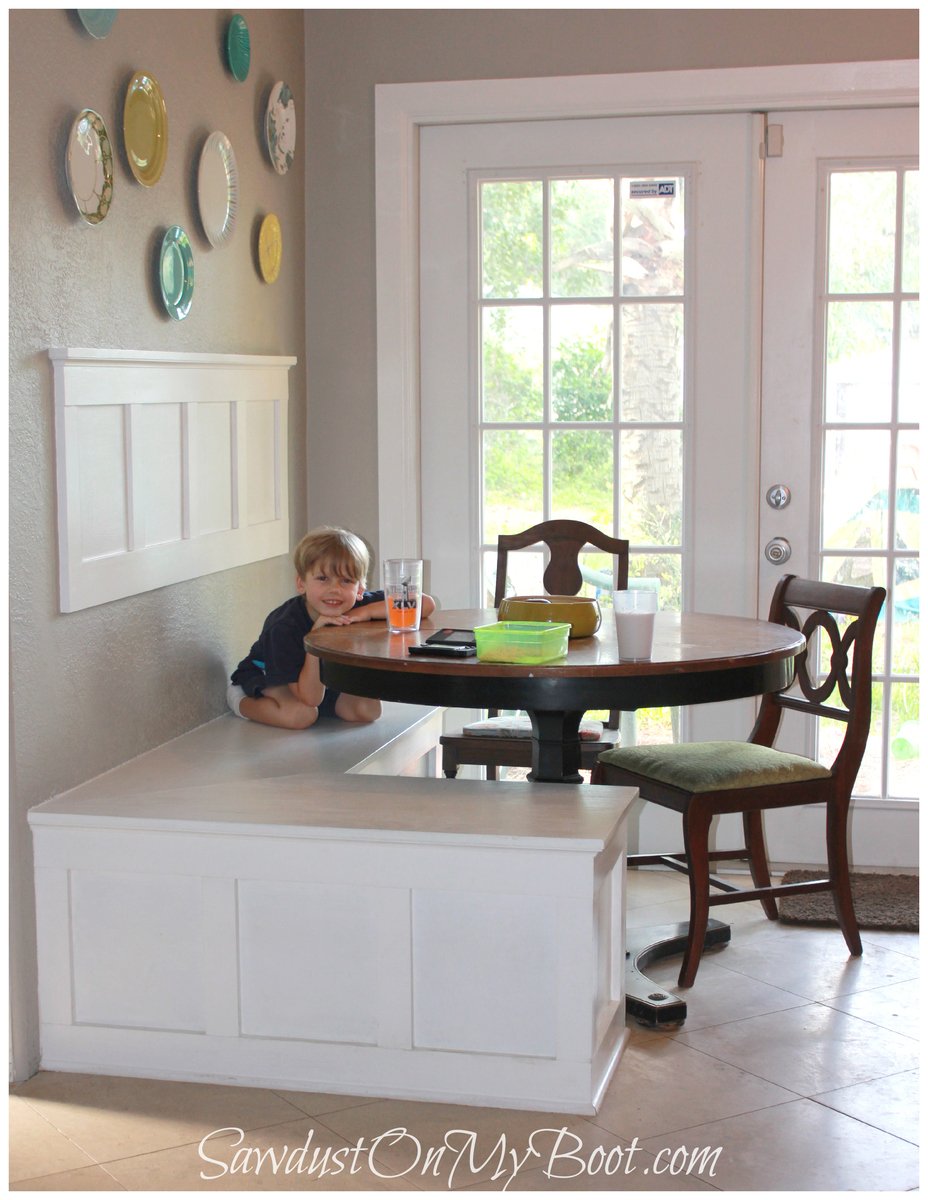
DIY Breakfast Nook with Storage

DIY Breakfast Nook
I completed this project in a weekend, over 2 days. The space was an empty void in the corner of our kitchen, so I decided to fill with a functional seating and eating space.
I first removed the trim from the wall, so I could reuse it on the front of the box later, to make the bench match the rest of the kitchen. One challenge I came across was rerouting the a/c vent through the front of the box so we didn't lose that circulation.
My sister-in-law chipped in to make the cushions and pillows to soften it up. I added the DIY table, and further defined the space with wainscoting and trim.
Built from Plan(s)
Estimated Cost
$500
Estimated Time Investment
Weekend Project (10-20 Hours)
Finish Used
Semi-gloss trim paint was use, to have the ability to clean later after meals, etc.
Recommended Skill Level
Intermediate
Comments
Sun, 01/09/2022 - 16:45
Breakfast Nook
Hey there,
Absolutely love your DIY breakfast nook. Unfortunately the additional blog/info link is no longer working as I'm trying to gather more information. Would anyone be able to send the instructions and/or new link?
Thank you
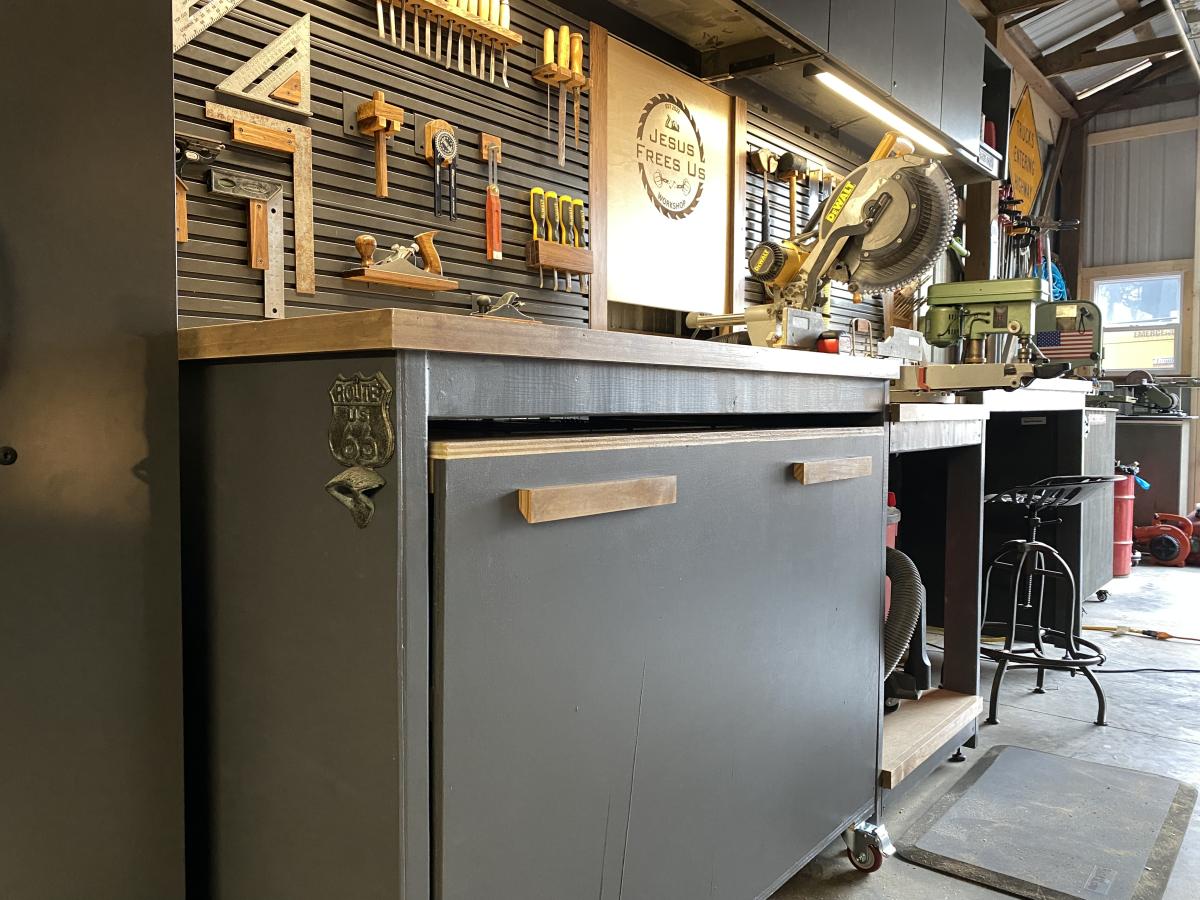
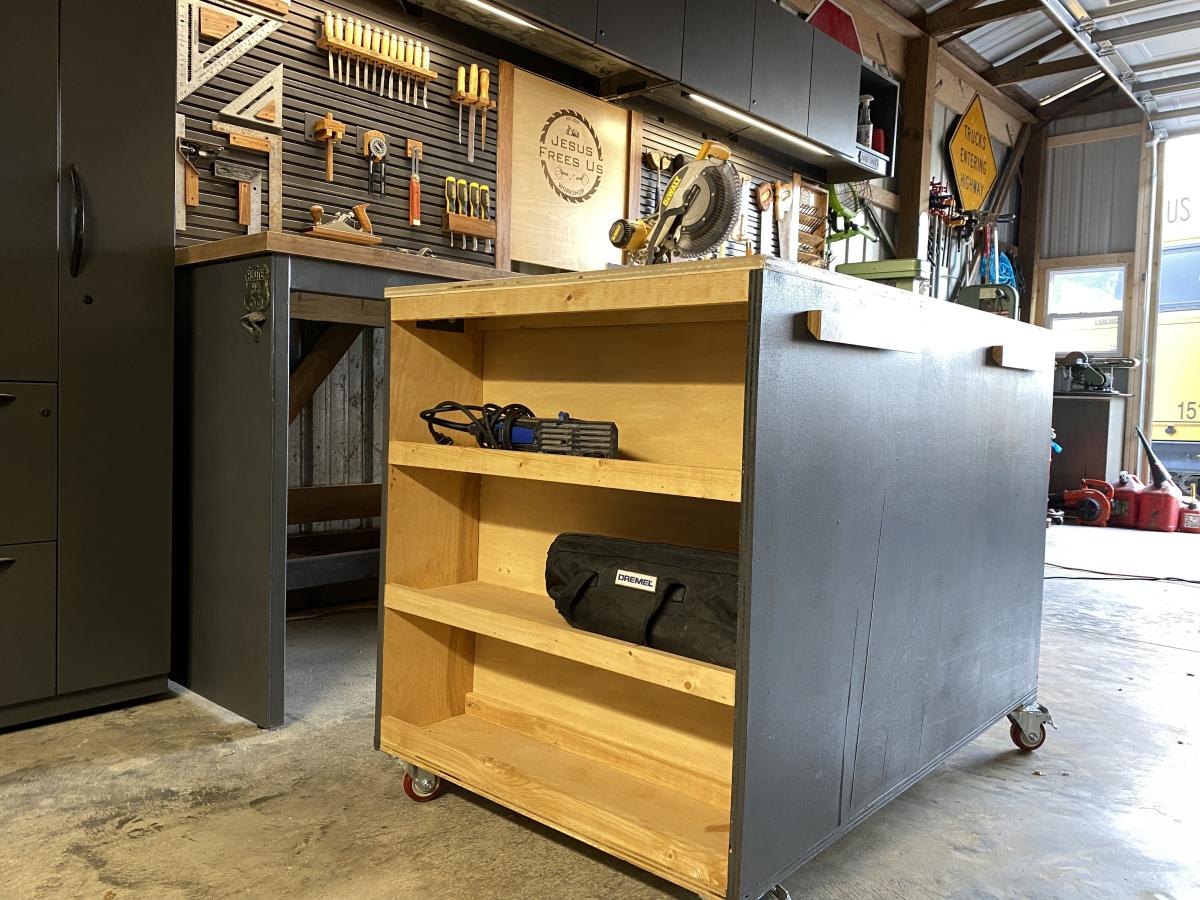
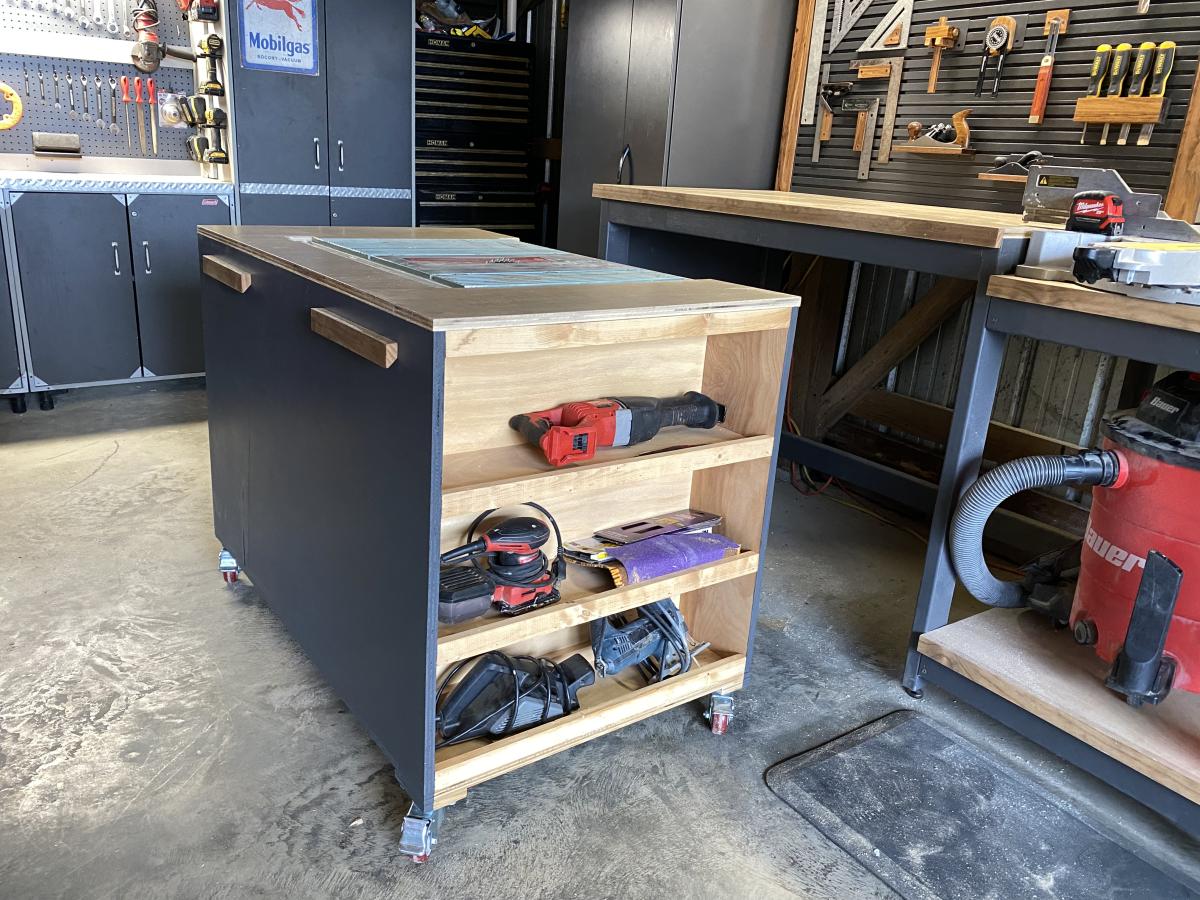
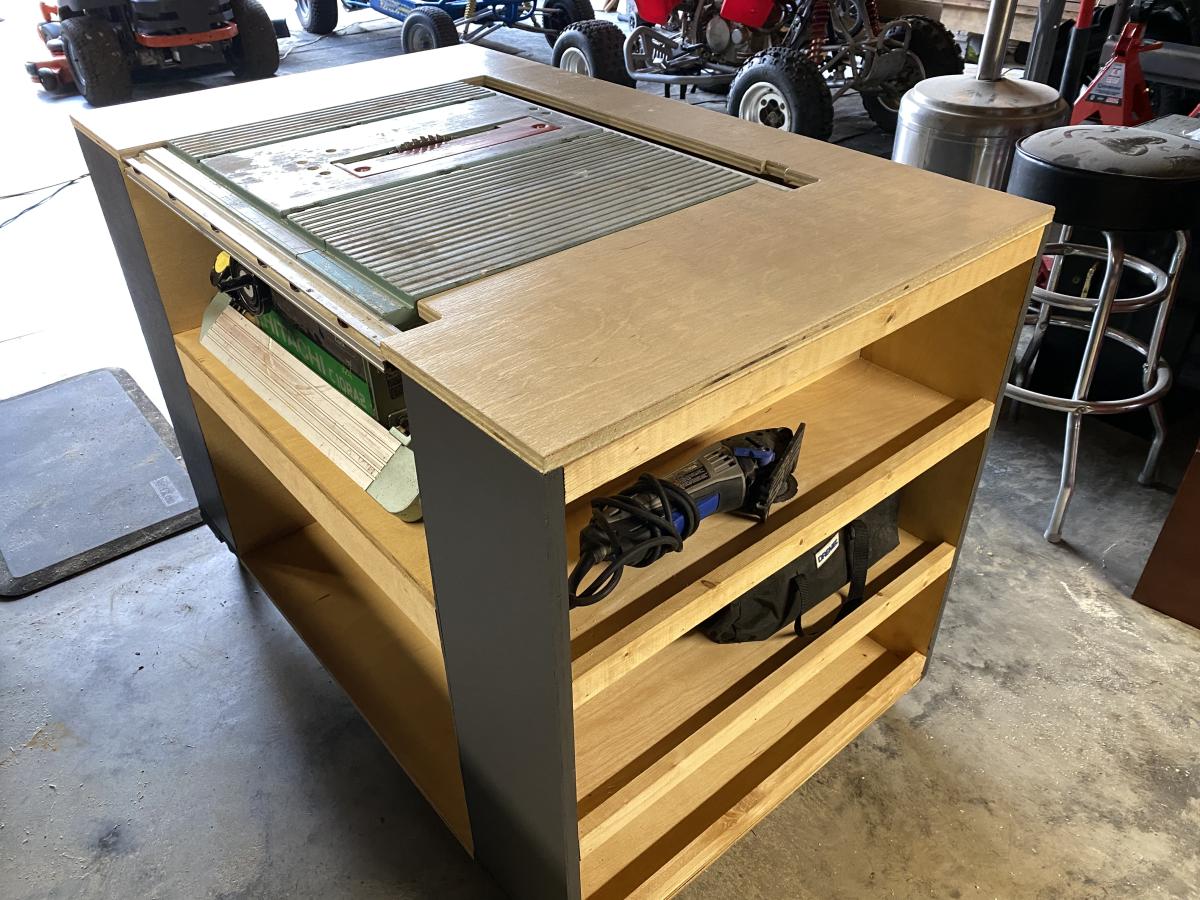
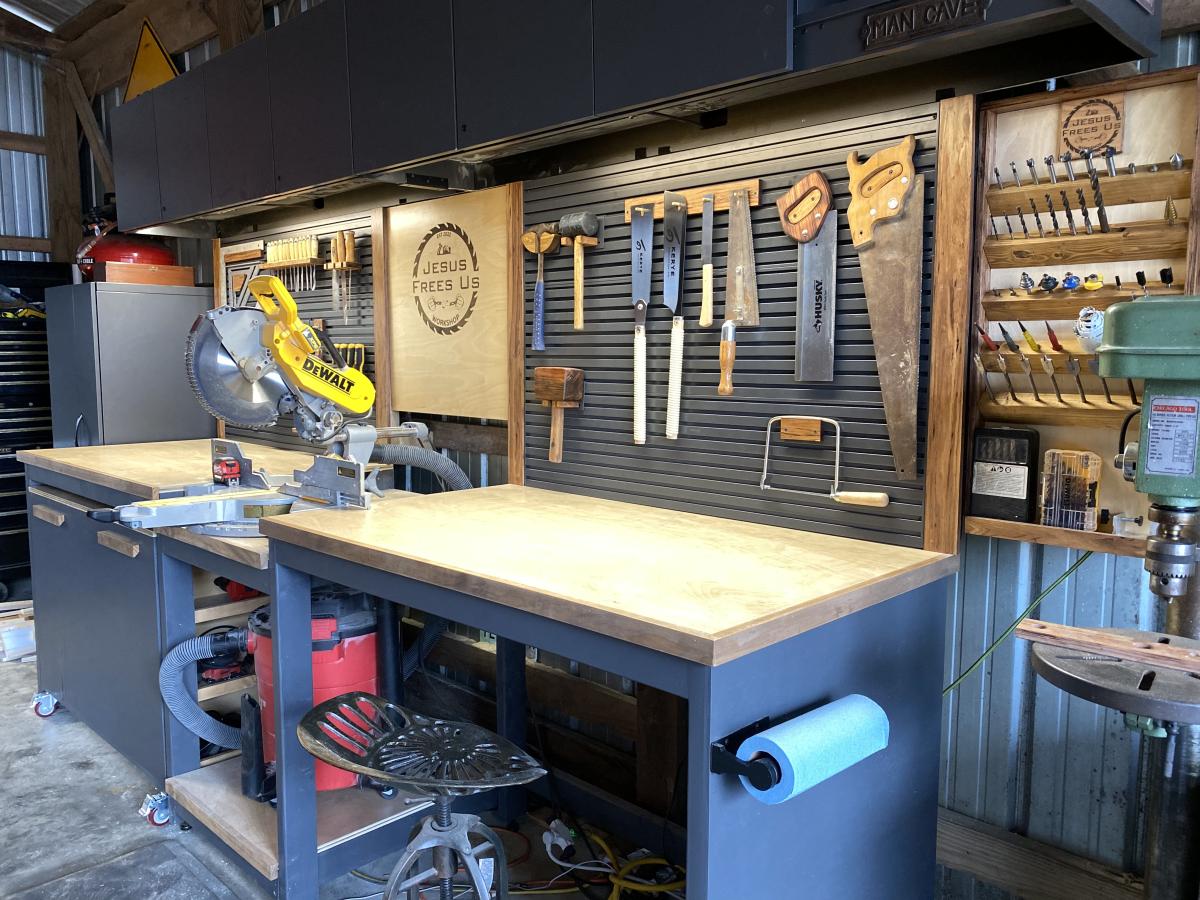
Ultimate Workbench/Miter Station
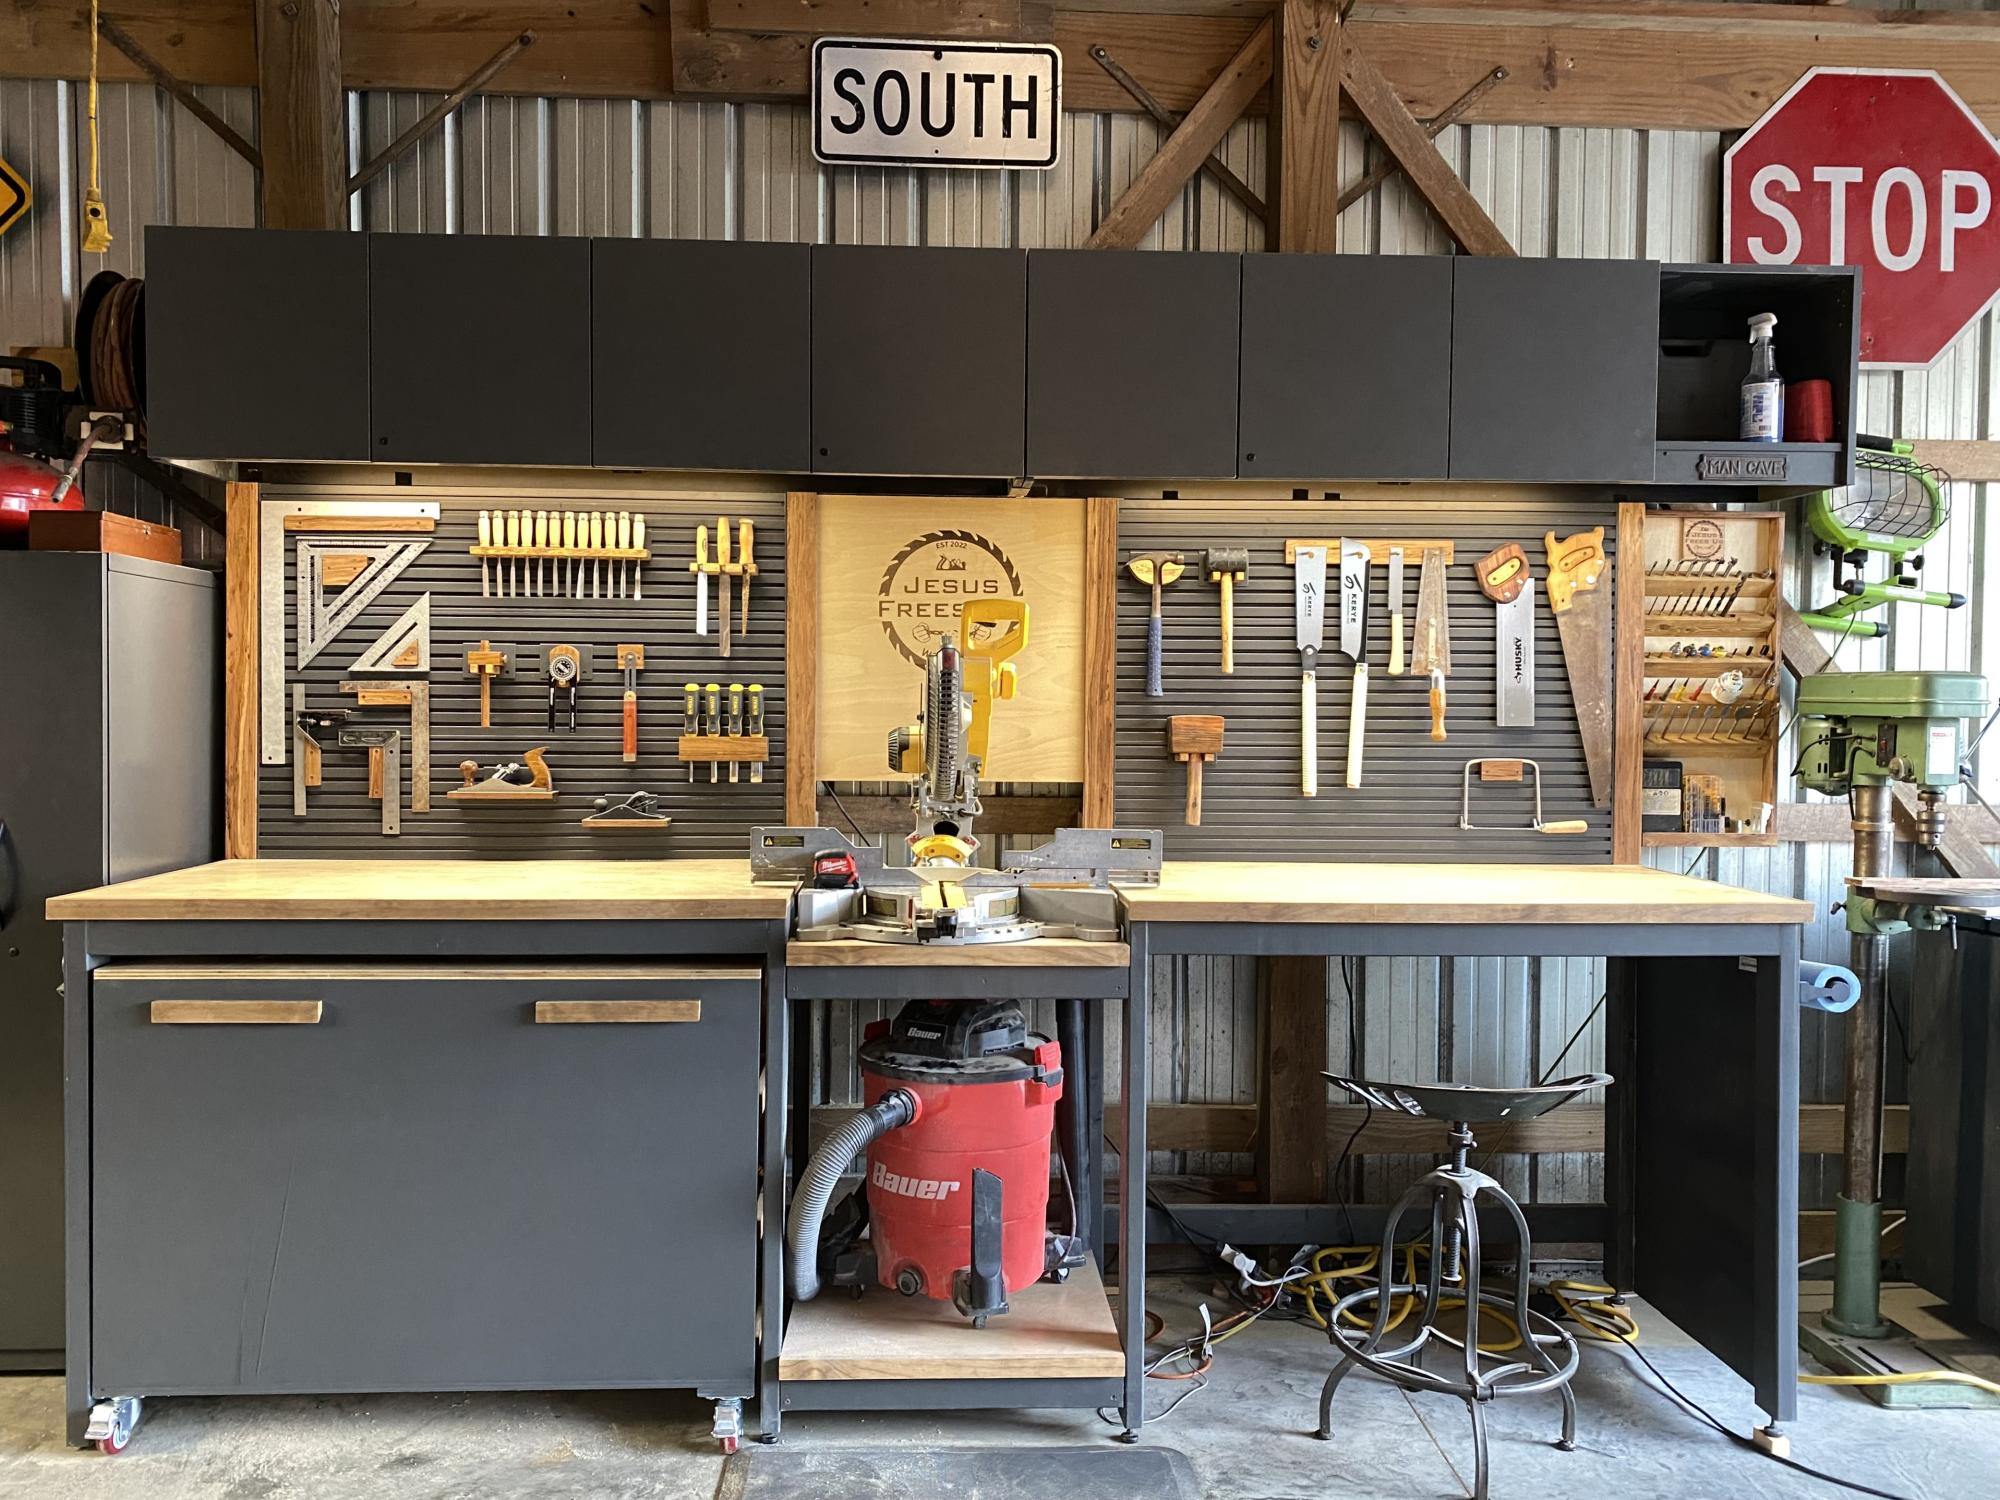
This plan is exactly what I needed for my workspace. I ended up adding some slat wall pieces and cabinets above from cubicles in an old office nearby that closed down for a tool wall and storage. I left the right opening empty due to how unlevel my floors are. I may close it in later with drawers or cabinets, but it will be my sitting workspace for now. I trimmed out the edge with 1x2s and painted and stained everything for aesthetics.
Built from Plan(s)
Comments
Mon, 03/06/2023 - 17:36
Stunning workbench!
WOW, this looks so good! Thank you for sharing your amazing work.
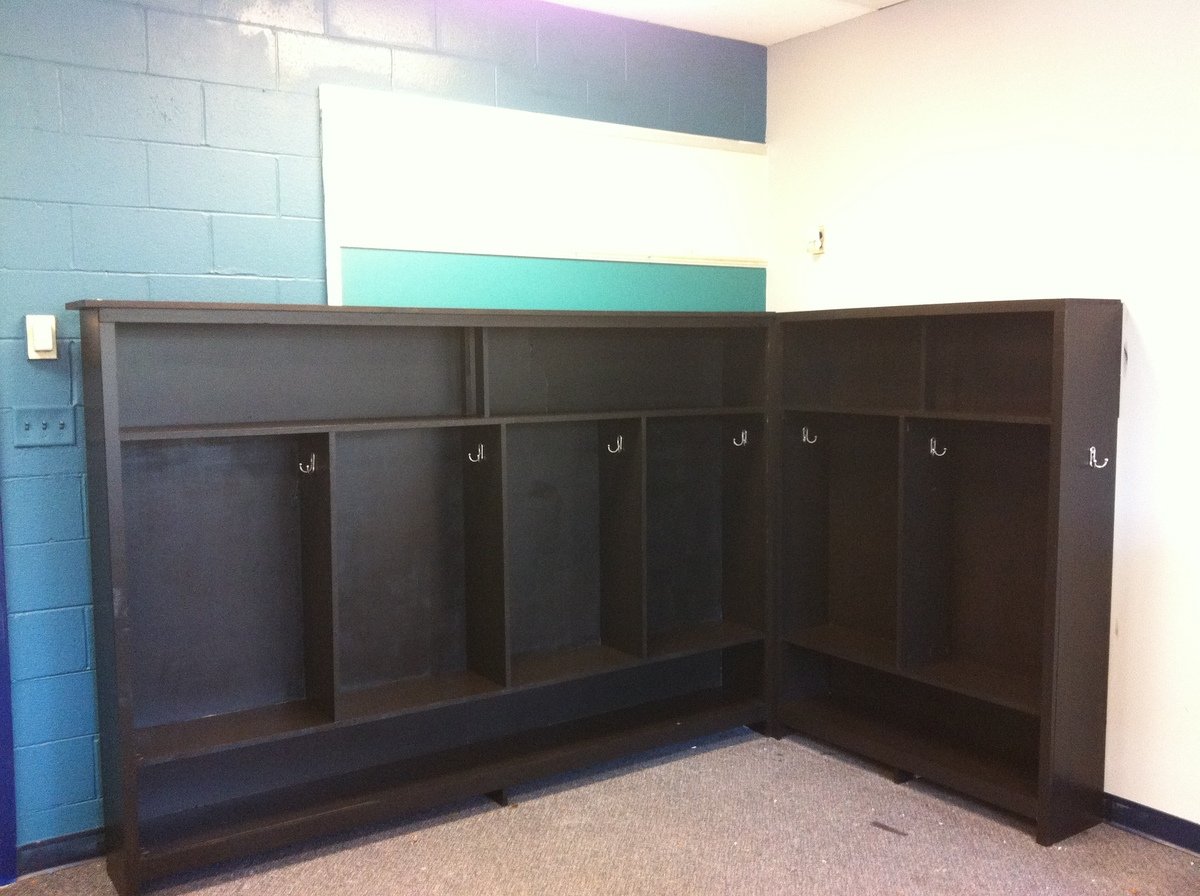
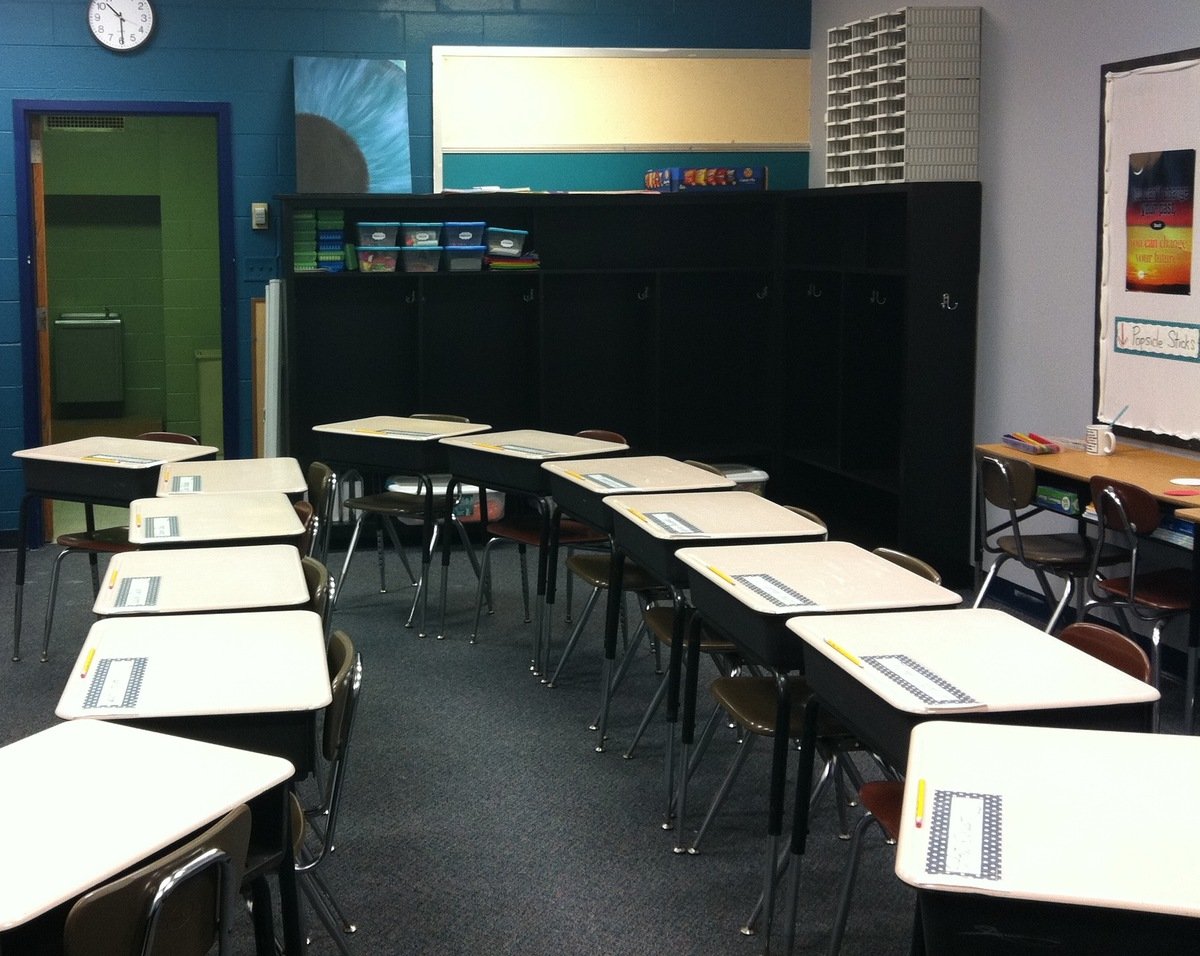
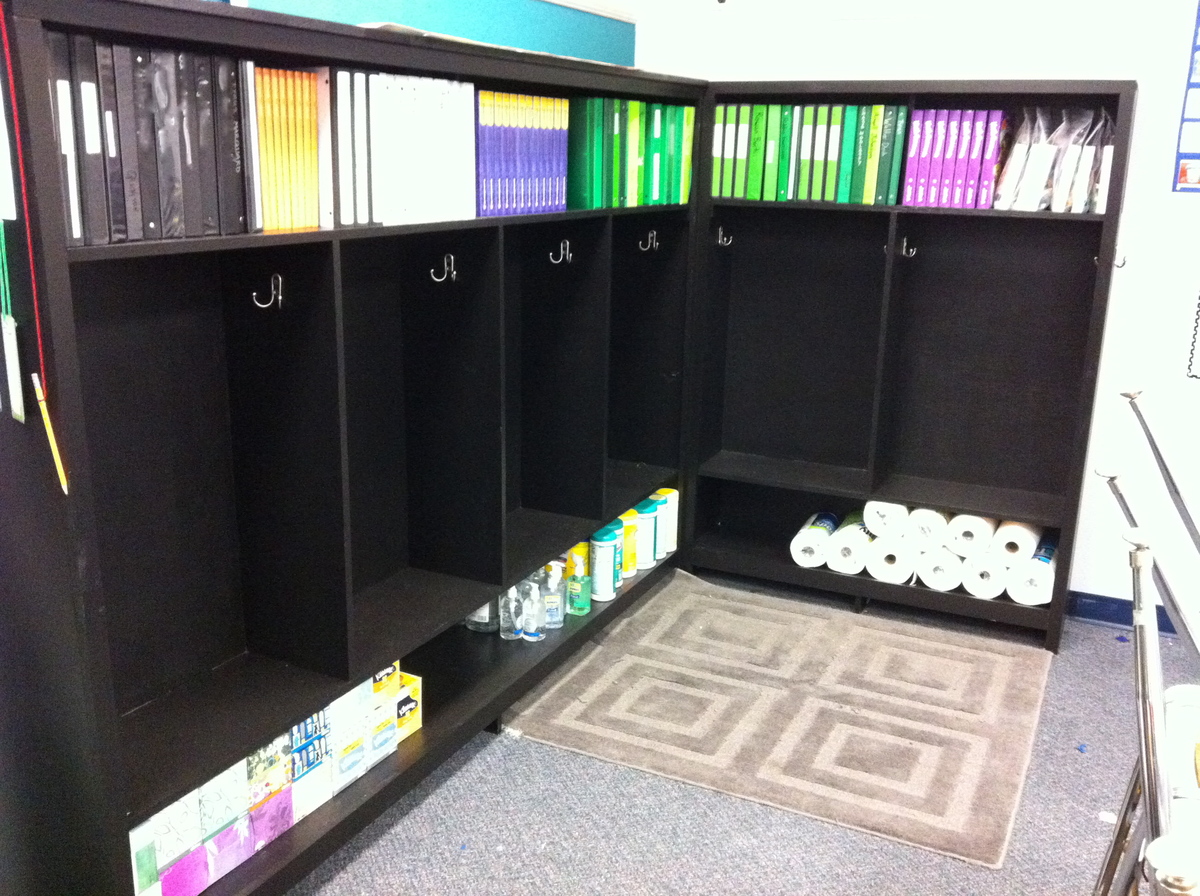
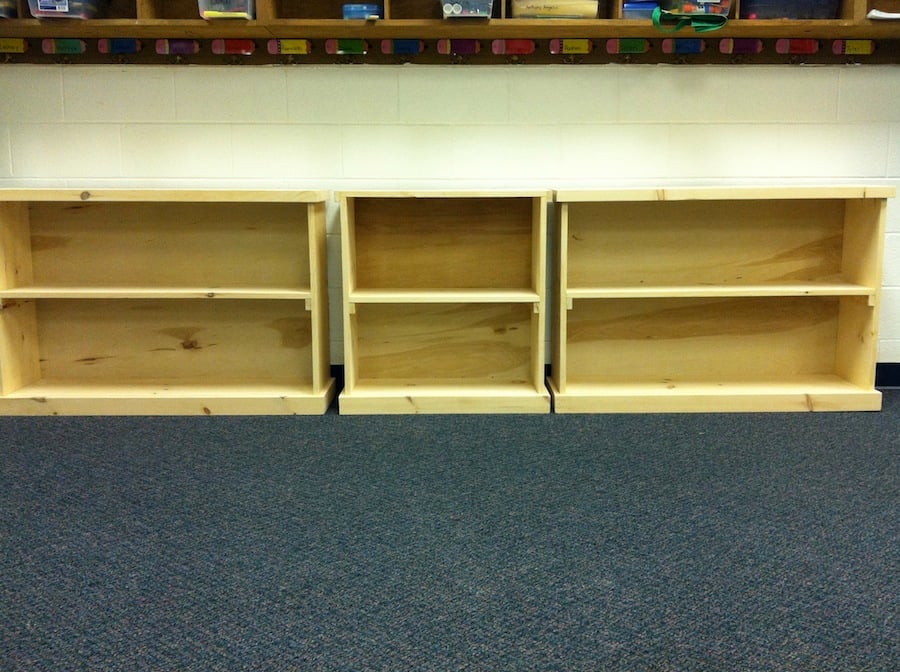
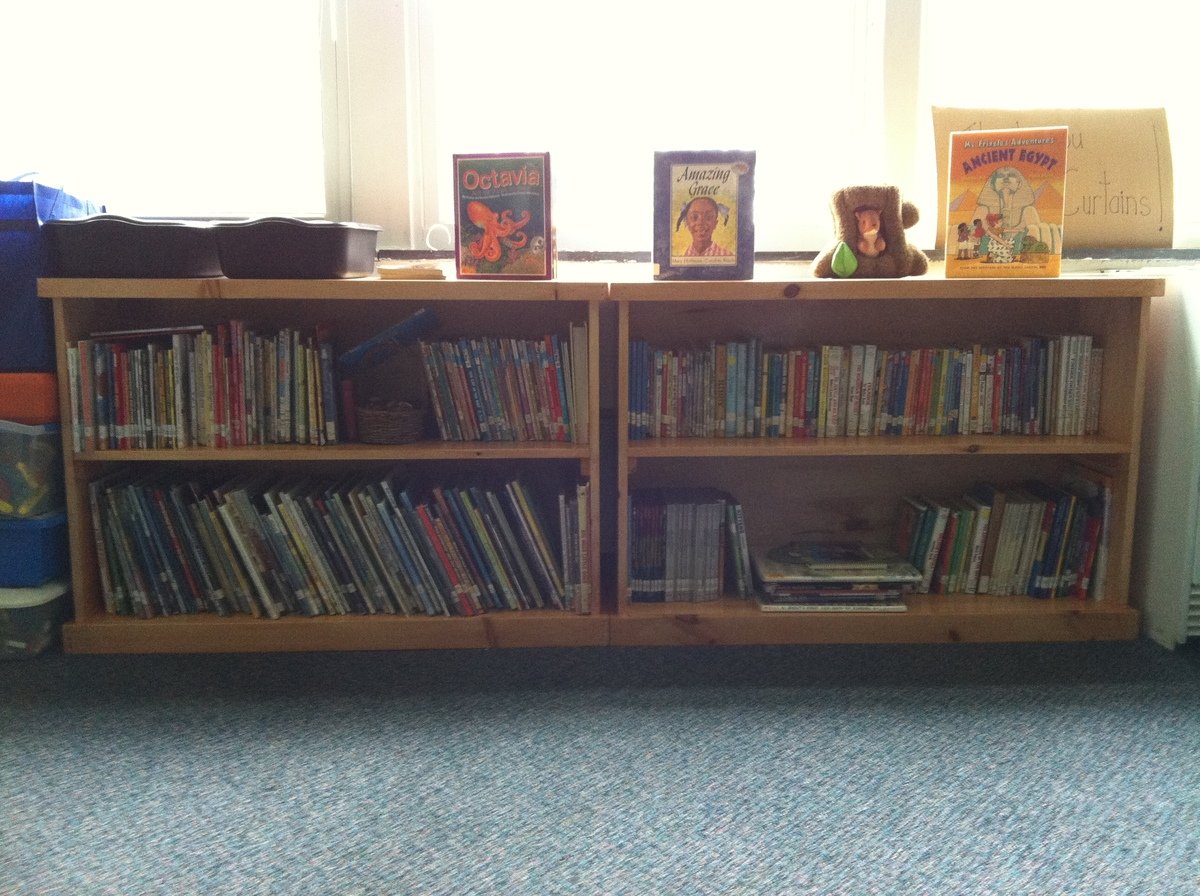
Storage for my Classroom
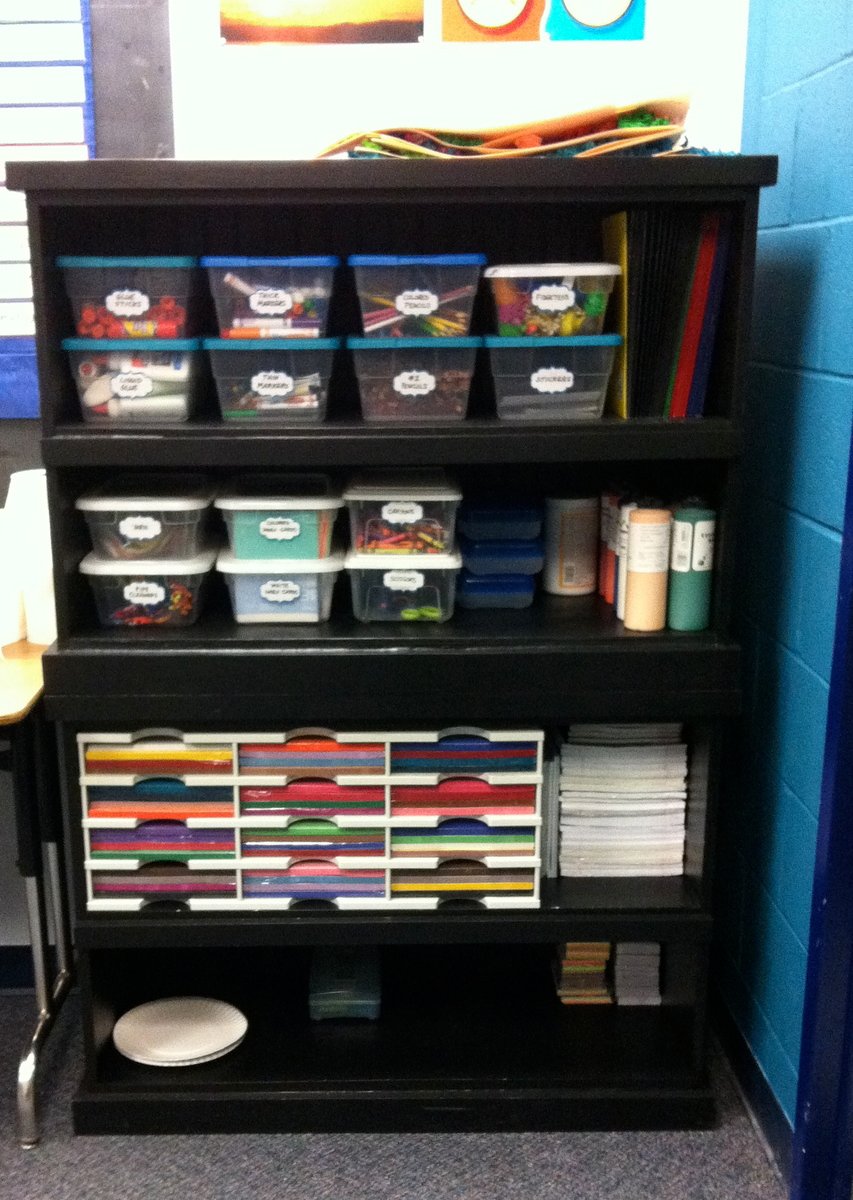
I am a teacher and my school is a brand new school leasing out an old school building for us to use. The classrooms were completely empty and I needed storage solutions. I didn't have cubbies for the kids to put their belongings in, nor did I have any storage for my own supplies and things for the kids/classroom. So I decided to build "lockers" for them with the additional storage, plus some bookcases to store supplies on. One of my fellow teachers loved them so much, she asked me to build her some - so I did. My classroom has the BLACK "lockers" and bookcases, the Honey colored are my fellow teacher's bookcases.
Built from Plan(s)
Estimated Cost
about $350
Estimated Time Investment
Weekend Project (10-20 Hours)
Finish Used
black glossy paint
Recommended Skill Level
Intermediate
Comments

Tue, 12/06/2011 - 21:55
What a great job!
I'm surprised the district hasn't hired you to create storage for all the classrooms! These are really nice. What lucky kids - and coworkers.

Thu, 12/08/2011 - 10:31
That is fantastic!!!
How cool that you did that for your class!!! :) Love it!
In reply to Question by Guest (not verified)
Fri, 08/01/2014 - 15:39
cost and plan
the $350 cost was for everything in the pictures. the plans I used are linked - the main storage is just 2 of the bookcases stacked one on top of the other.
Board & Batten Banquette
My family needed a seating area for our tiny kitchen and a built-in banquette solved our spatial design problem perfectly! I basically built it like a short and wide freestanding wall with a board & batten design and plywood top for seating. More details on my website post...
Built from Plan(s)
Estimated Time Investment
Weekend Project (10-20 Hours)
Finish Used
board & batten with latex paint
Recommended Skill Level
Intermediate
Comments

Greenhouse
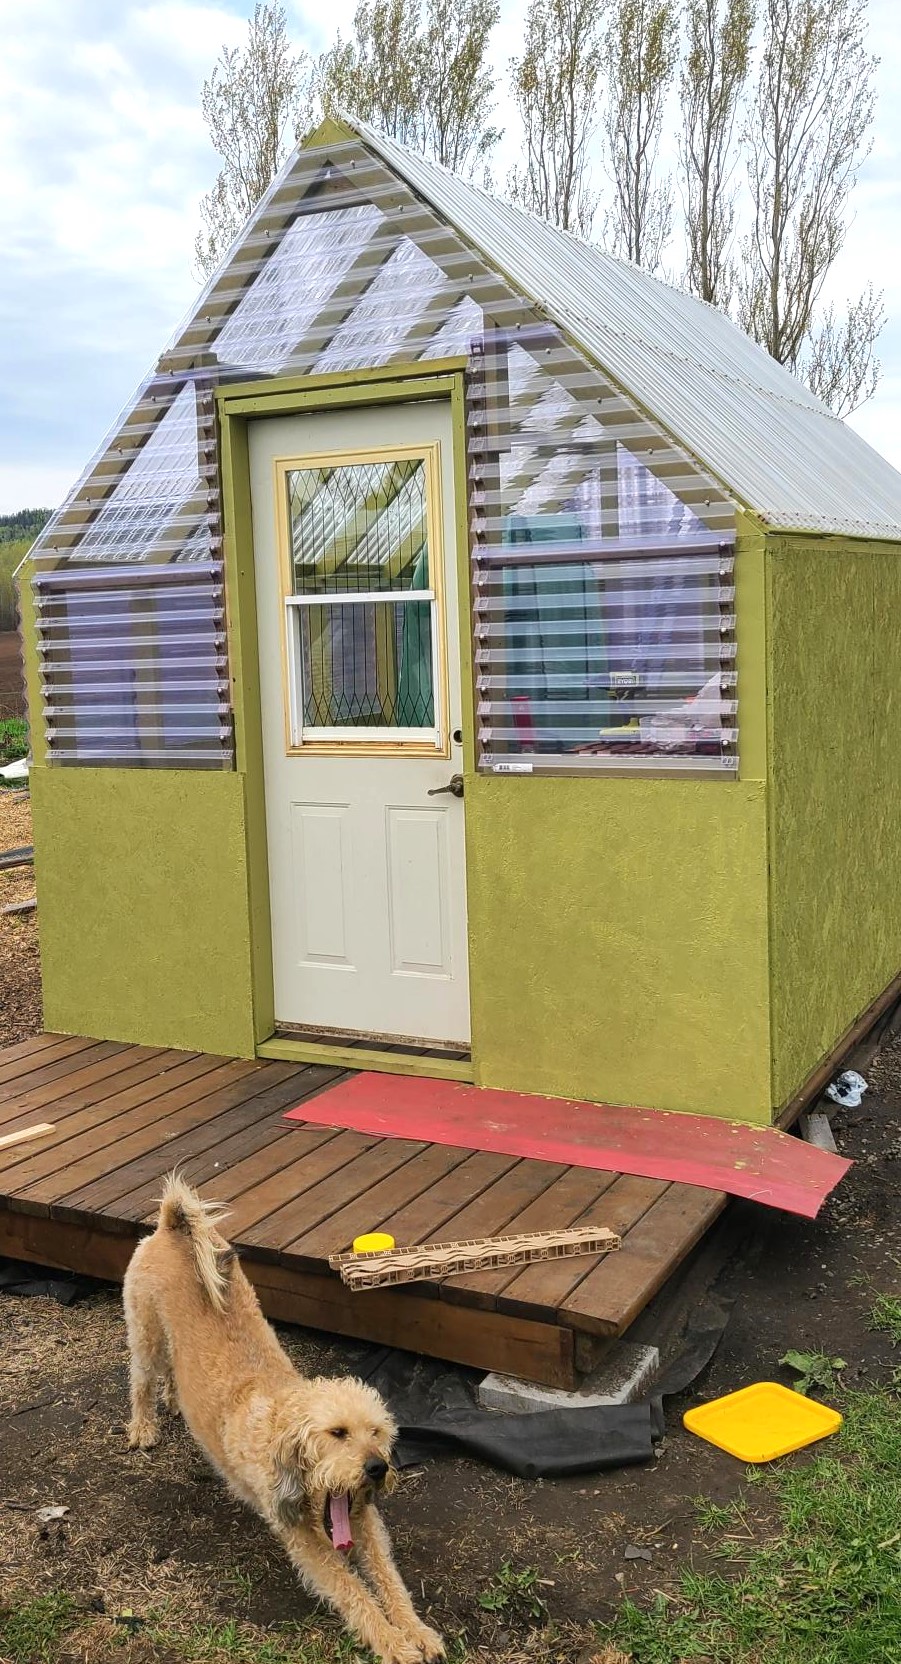
We followed Ana's plans but went 1 ft taller on the pony walls to increase the height. We are so impressed with how it turned out. I'm excited to grow plants in Northwestern Ontario.
Built from Plan(s)
Comments
Fri, 05/26/2023 - 19:43
Superb Greenhouse!
It looks awesome and love your pup! Thank you so much for sharing.
Outdoor sectional

Made the outdoor sectional. The coffee table was made out of left over pieces!
Built from Plan(s)
Estimated Cost
$260
Estimated Time Investment
Weekend Project (10-20 Hours)
Finish Used
We used a semi transparent stain applied with brush. We would recommend a hand sprayer instead.
Recommended Skill Level
Beginner
Comments

Wed, 10/02/2019 - 09:54
So smart to make the coffee…
So smart to make the coffee table out of the spare pieces.
Looks amazing!
Bunk Bed
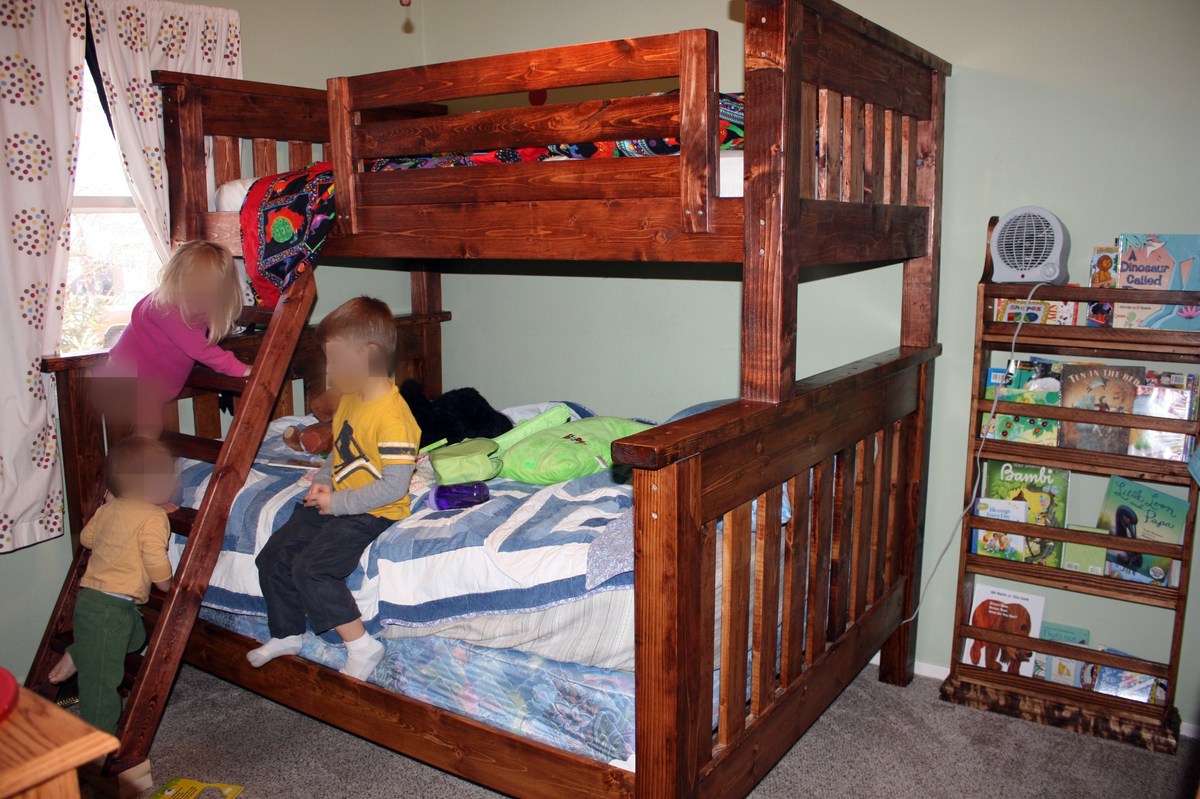
I am very happy to have completed the up portion of the bunk bed. The full size down was done quite sometime ago and I became sidetracked on other projects.
This is a sturdy bed and a favorite in my home. One day I even found my husband napping (hiding) on the top bunk.
The part that I like the best is when we graduate from bunk beds we still have two beds to use.
I also completed the ladder and it works, but I cut it just alittle shorter than the plan called for. Lets just put another on my to do list.
Built from Plan(s)
Estimated Cost
100-200
Estimated Time Investment
Week Long Project (20 Hours or More)
Finish Used
minwax, red oak stain. Minwax Poly
Recommended Skill Level
Beginner
Comments

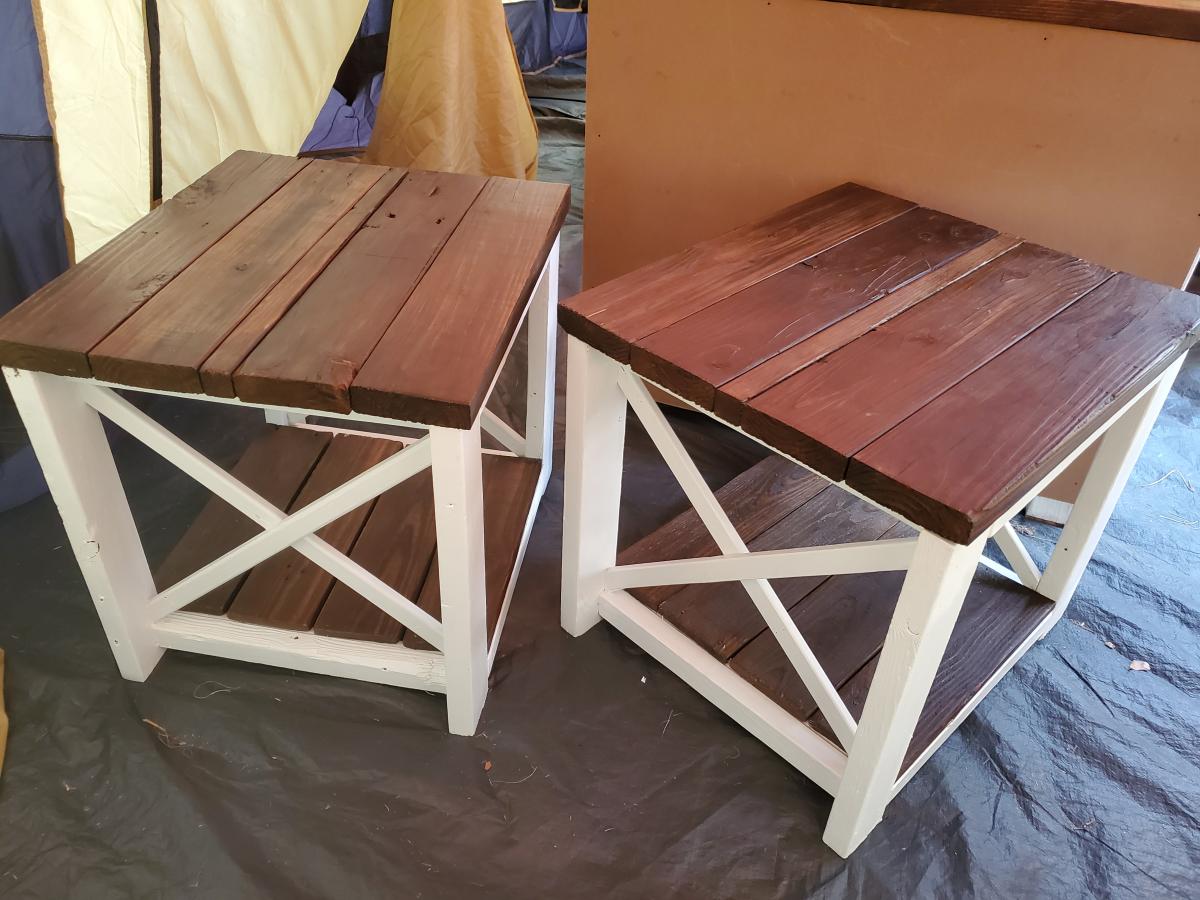
Reclaimed Hurricane Micheal X style Farmhouse design
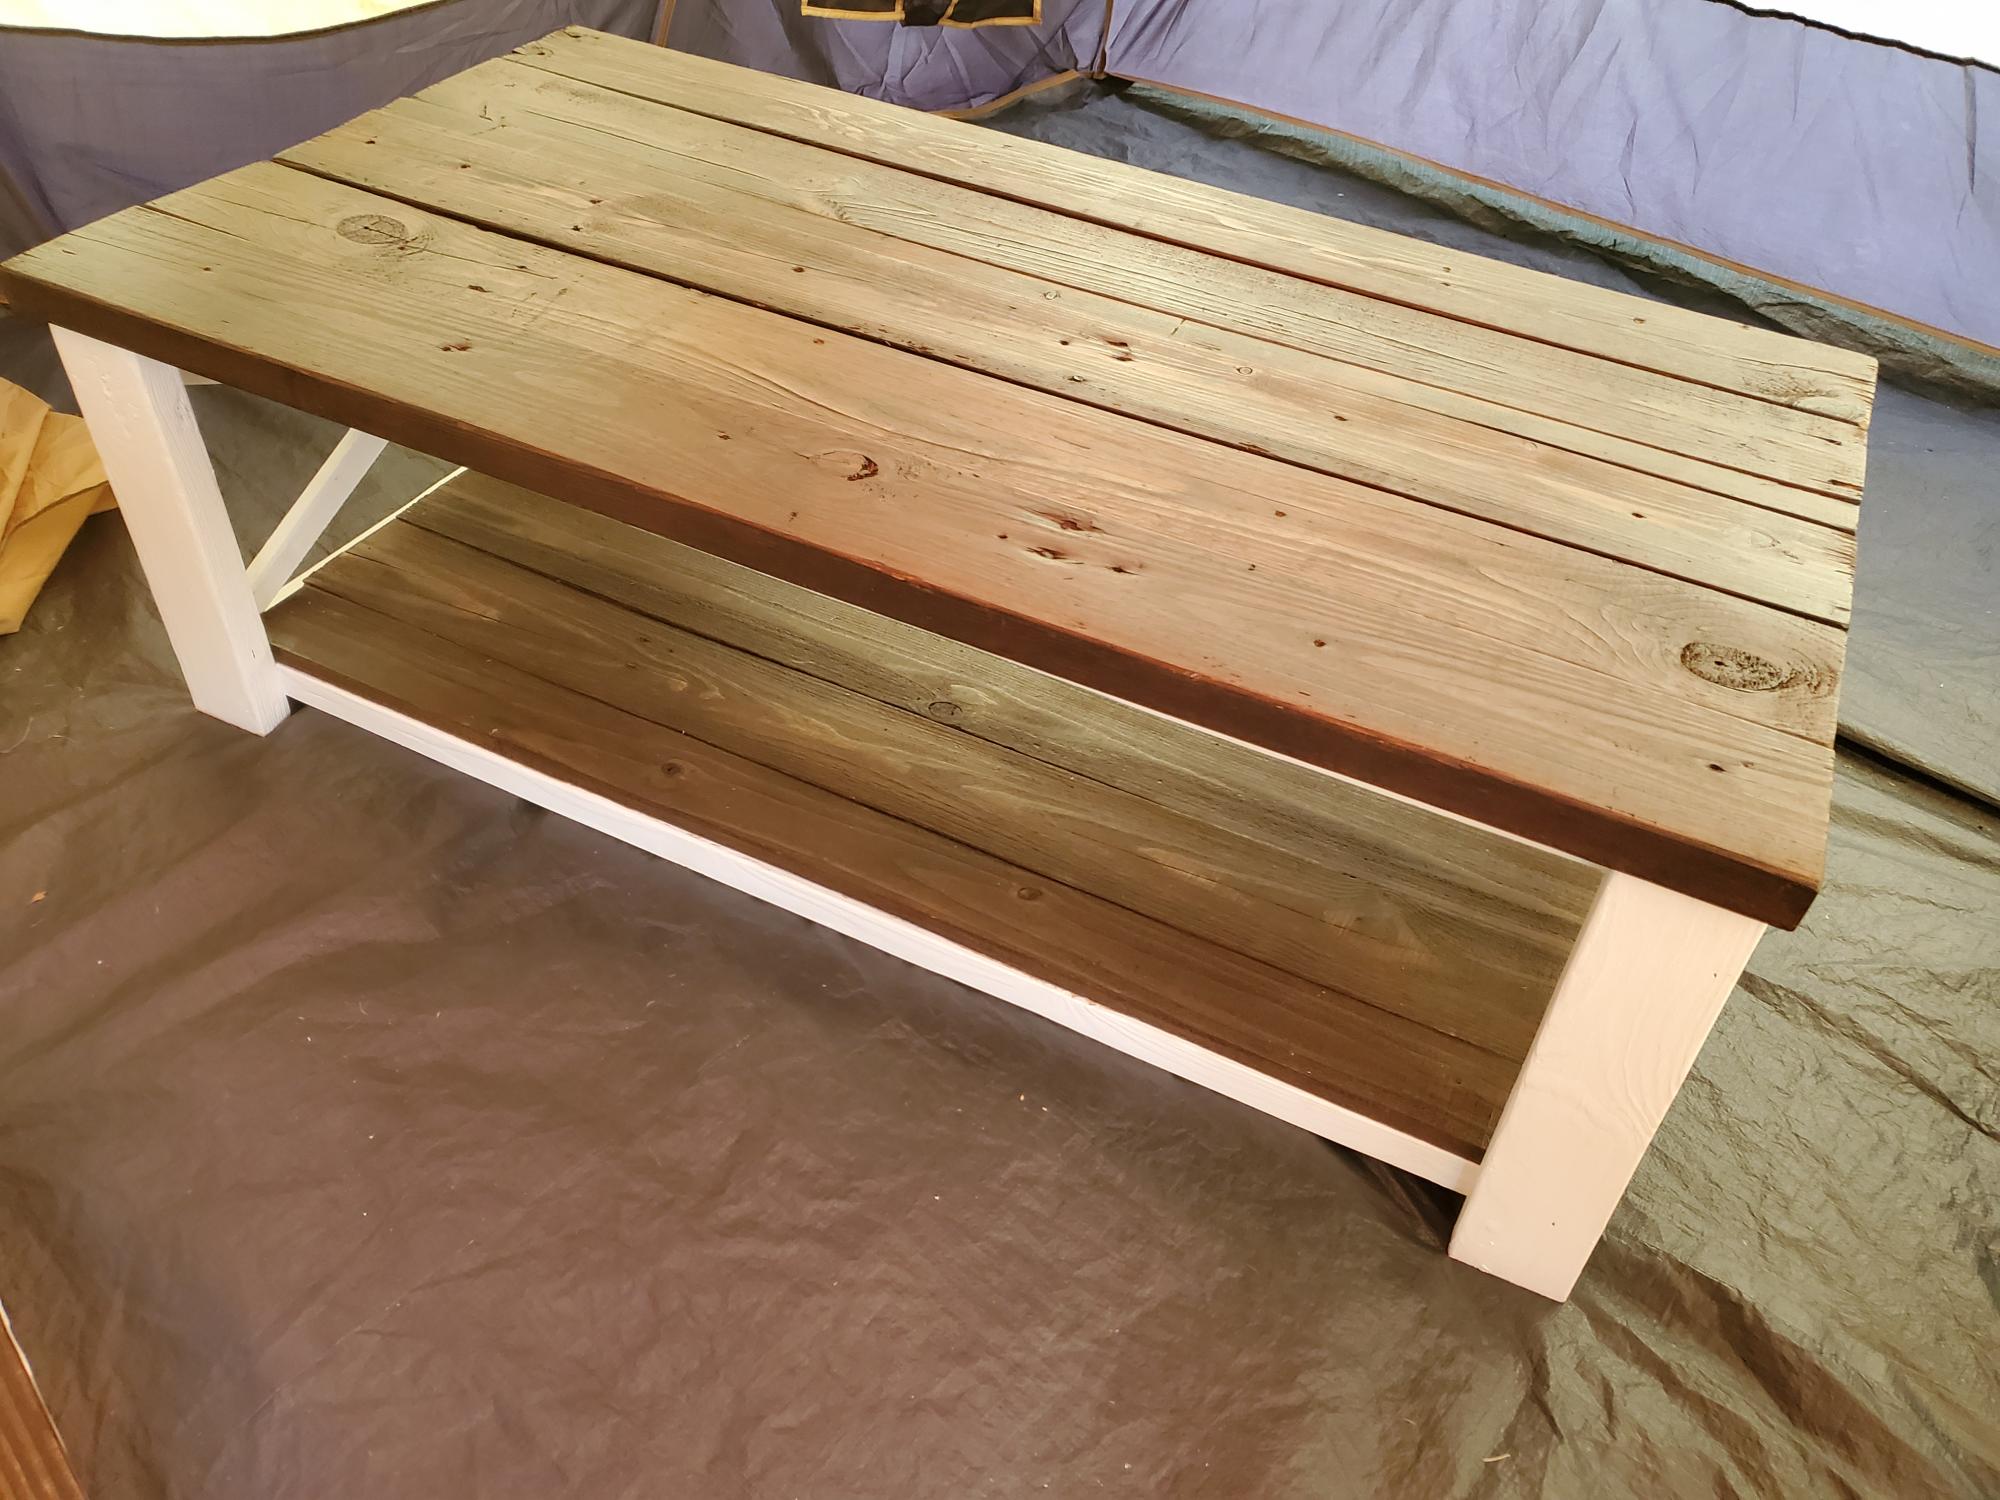
On this project which I use from Ana White designs, I learned how to cut at an angle and I learned what wood too use to get the look you want. I also just wanted to say thank you for showing us diyer how to feel confident about building and using our hands. It is a good therapy, woodworking and creating.
The wood is all made from reclaimed Hurricane Micheal timbers that I cleaned, sanded, detailed, sanded again, painted, stained, and clear coat.
Even though the wood was used and free, it still has a process upon completion
Built from Plan(s)
Estimated Cost
50 In total cost
Estimated Time Investment
Afternoon Project (3-6 Hours)
Finish Used
I used Minawax English Chesnut Stain for the tops and a Valspar Latex Paint with a polycrylic semi gloss for easy cleaning. Sand paint I used 60, 100, 220, and 400 grit.
Recommended Skill Level
Intermediate
DIY Greenhouse
DIY Greenhouse by Trenton Kirby on Facebook!
Built from Plan(s)
Simple Outdoor Conversation Set
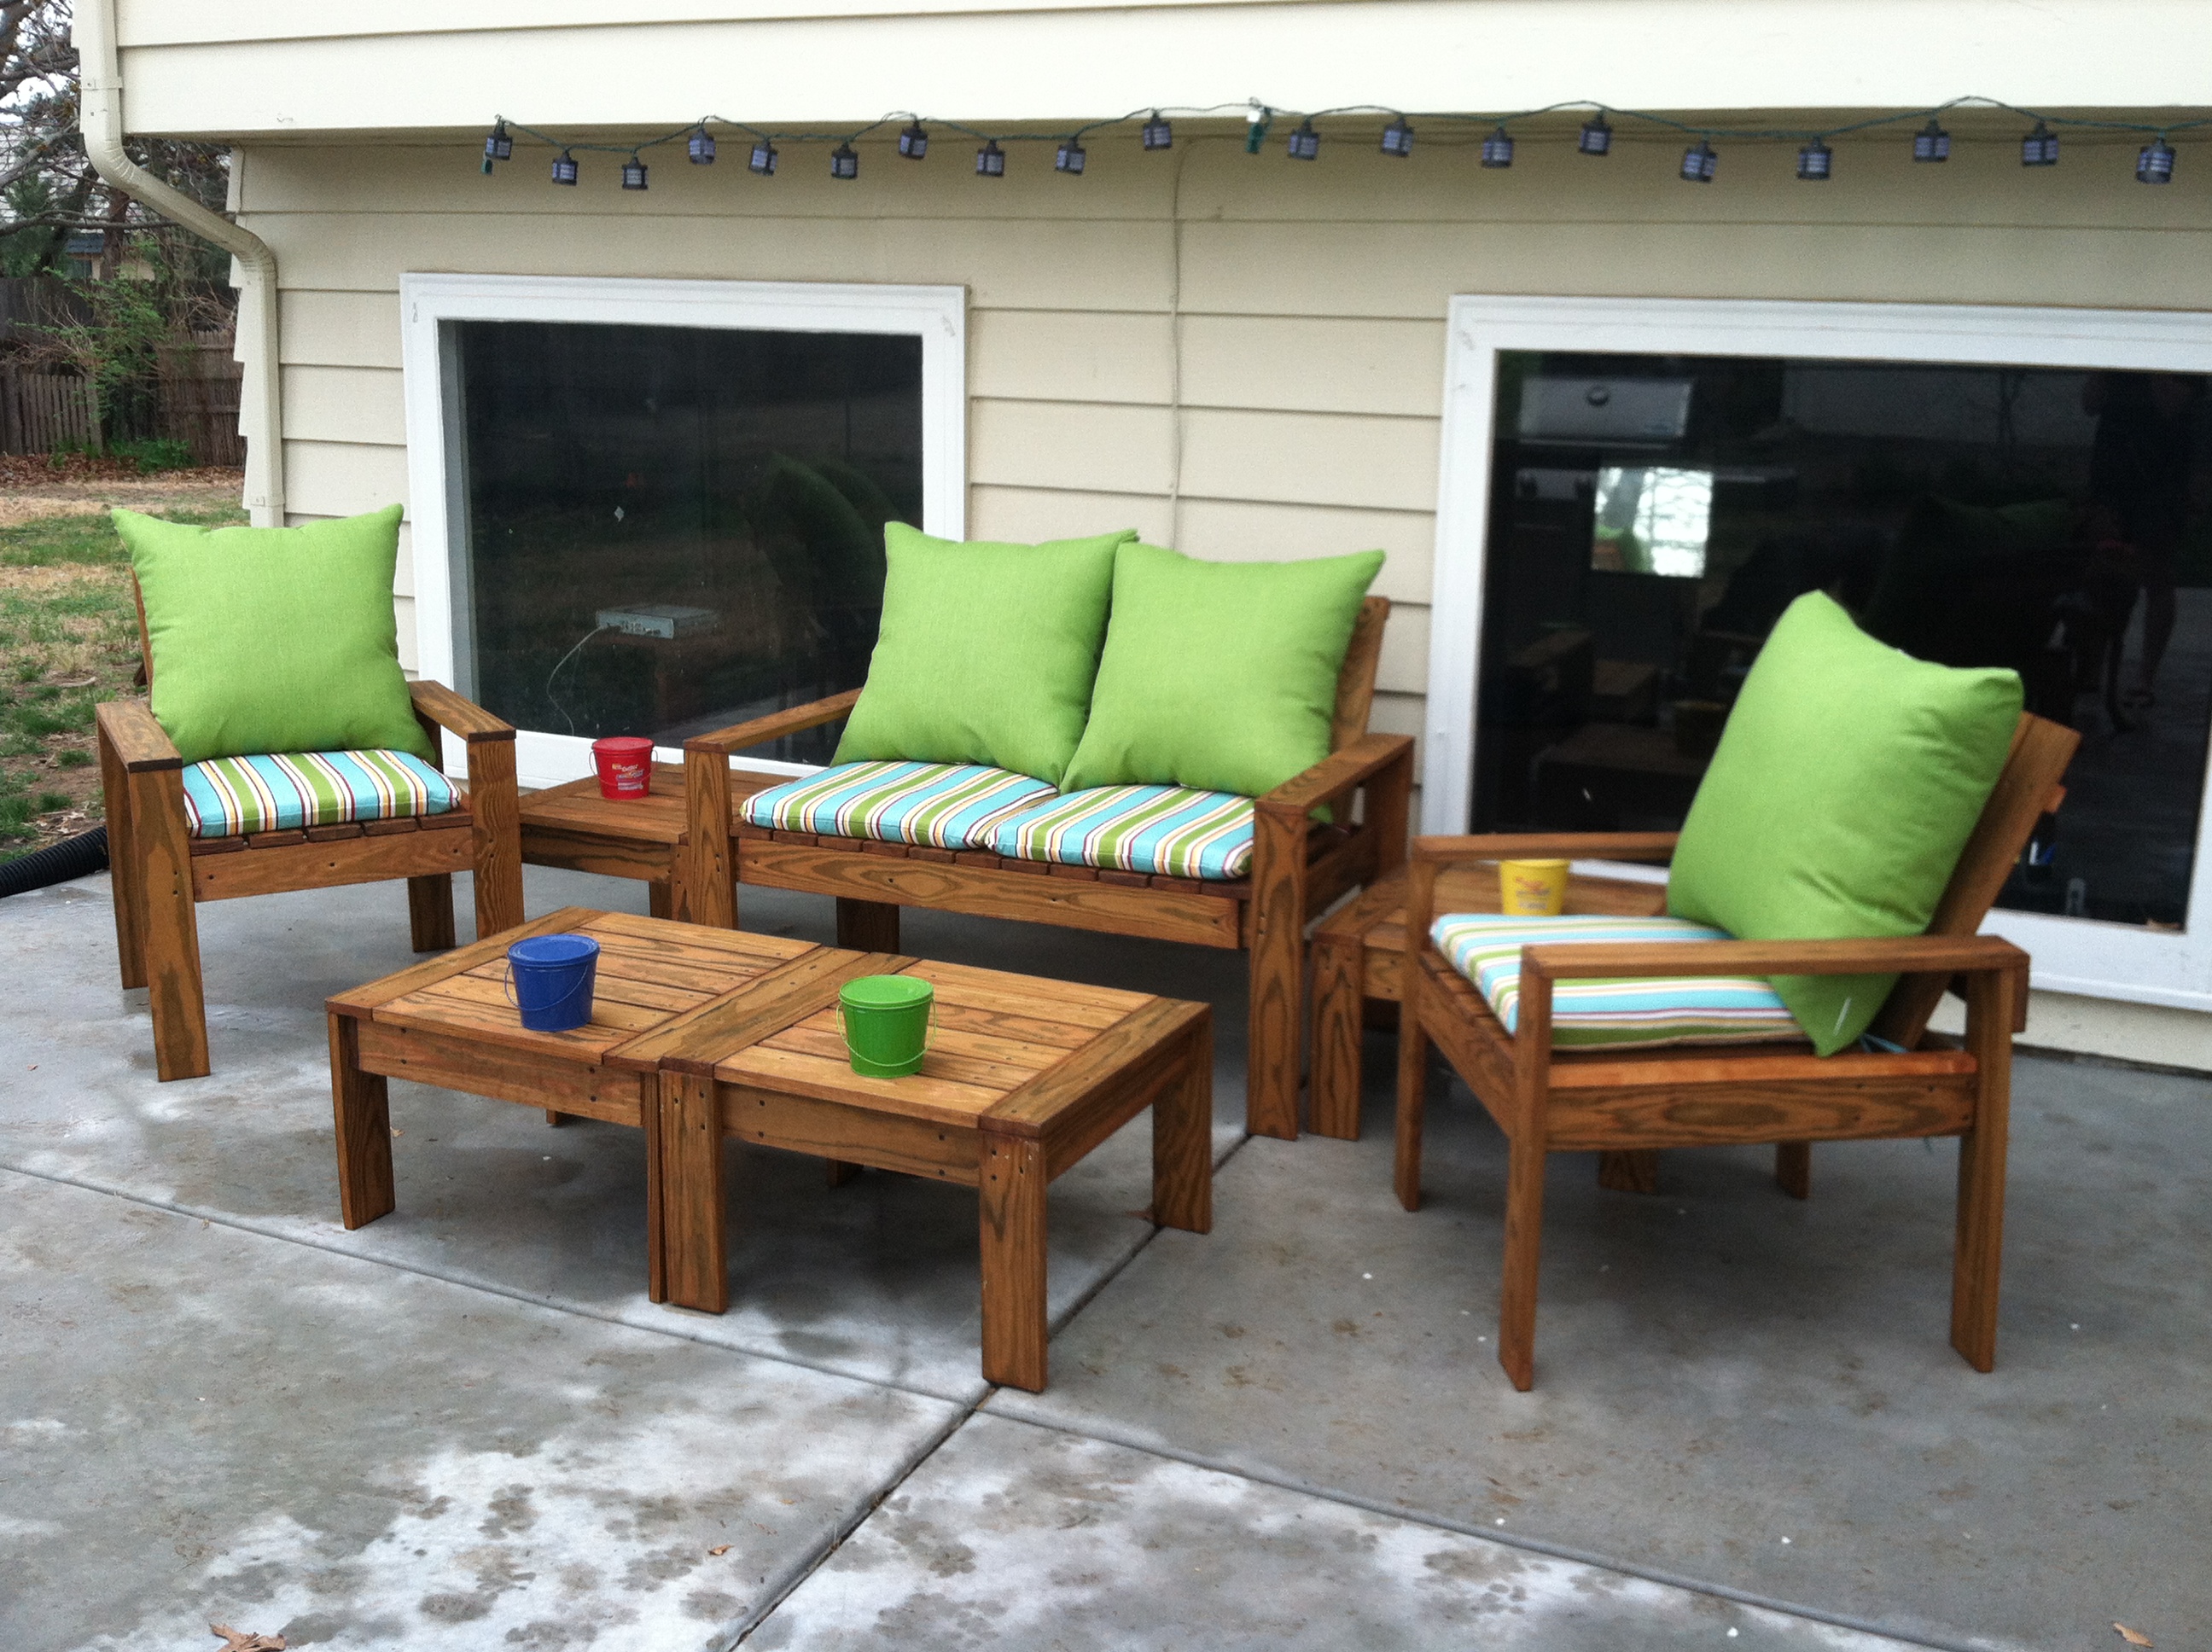
Spring is around the corner and I had no outdoor furniture. My boyfriend had just talked me into a new weber grill, which did not leave much budget for new outdoor furniture. That's when I came across this web site and thought 'I can do that'. So I talked me boyfriend into helping build this Simple Outdoor Conversation Set. We used plans for the Simple Outdoor Lounge Chair and Simple Outdoor Ottoman and then followed the alterations by post for 'My Modern Outdoor Patio Collection' to make the loveseat.
The whole project came together over 5 days.
Day 1: Cut all boards (5 hrs)
Day 2: Sand all boards (5 hrs)
Day 3: Stain all boards (6 hrs)
Day 4 & 5: Assemble furniture (9 - 10 hrs)
The total project took about 25 hrs and cost about $350. Here's the breakdown wood and supplies $204 from Lowe's for pretreated wood. $145 on cushions (NOT ON SALE); $60 for the seat cushions from Home Depot and $80 for the back cushions from Wal-Mart. We were originally planning on only having the seat cushions, but the seats were long when you set in them with your back against the bear wood (I was setting so far back, my feet couldn't reach the floor) so we opted for thick back cushions to make it more comfortable. The project finished up just in time for our first BBQ party! (March 2012)
Built from Plan(s)
Estimated Cost
$204
Estimated Time Investment
Week Long Project (20 Hours or More)
Finish Used
Redwood toner and sealant
Recommended Skill Level
Starter Project
Comments
Sun, 03/18/2012 - 13:16
Oh I love this!!! Love the
Oh I love this!!! Love the cushions and the colors too!

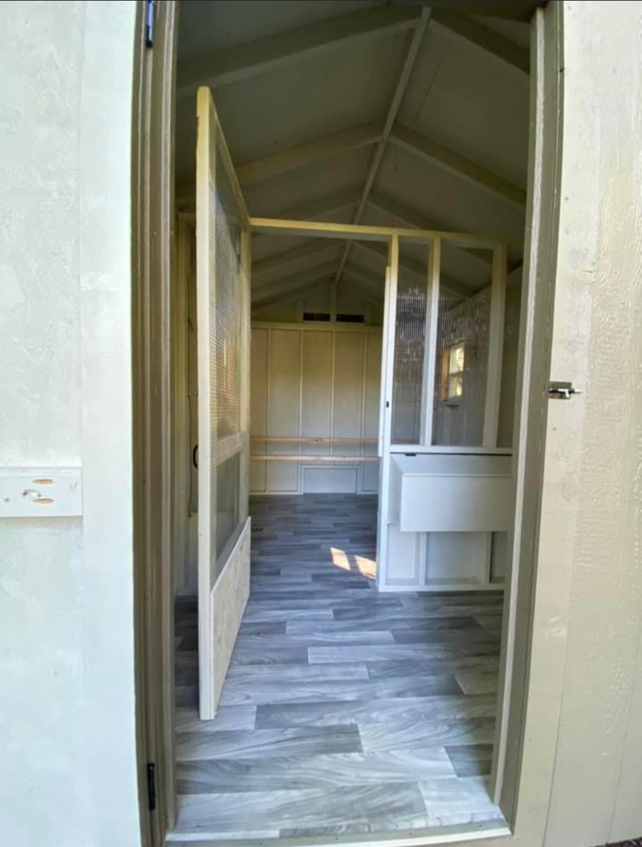
DIY Shed Chicken Coop
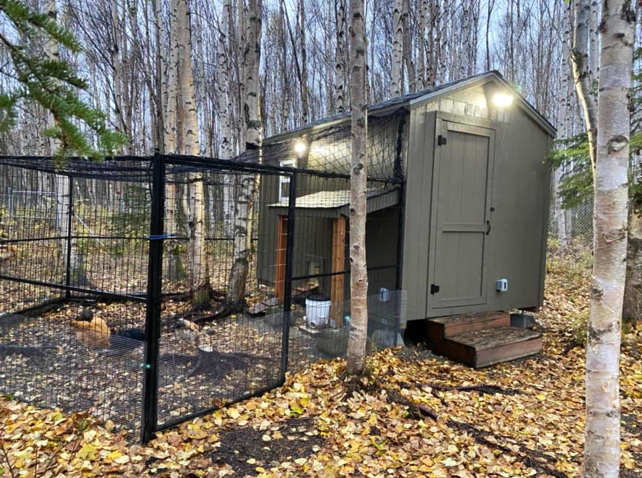
8x12 coop modified from your classic shed plans. 2/3 for the chickens, 1/3 for storage.
by Harmony Munson
Built from Plan(s)
Comments
Mon, 10/16/2023 - 10:48
Great Coop!
Fabulous job on this project, love the color choice and functionality!
Fri, 10/27/2023 - 11:54
Look really roomy plus a…
Look really roomy plus a place for storage in front for feed.
Outdoor Sectional

I had so much fun building this! I got a little creative with the corner section and decided to make it a table. I built a small hatch so that I could put in a container for ice and cold beer. When the hatch is not in use, the container can be removed and the hatch can be closed to provide more table space. I also added drink holders!


Built from Plan(s)
Estimated Time Investment
Week Long Project (20 Hours or More)
Finish Used
none yet
Recommended Skill Level
Beginner
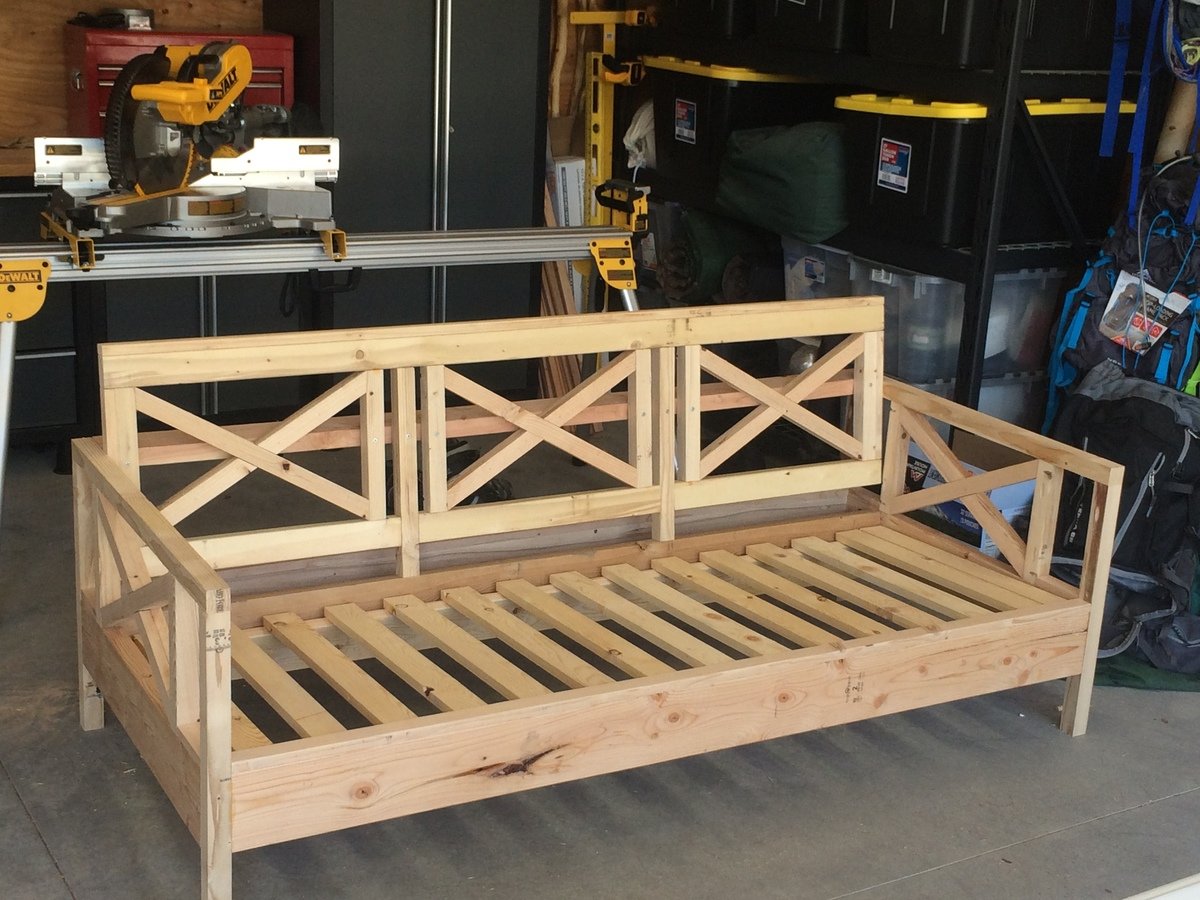
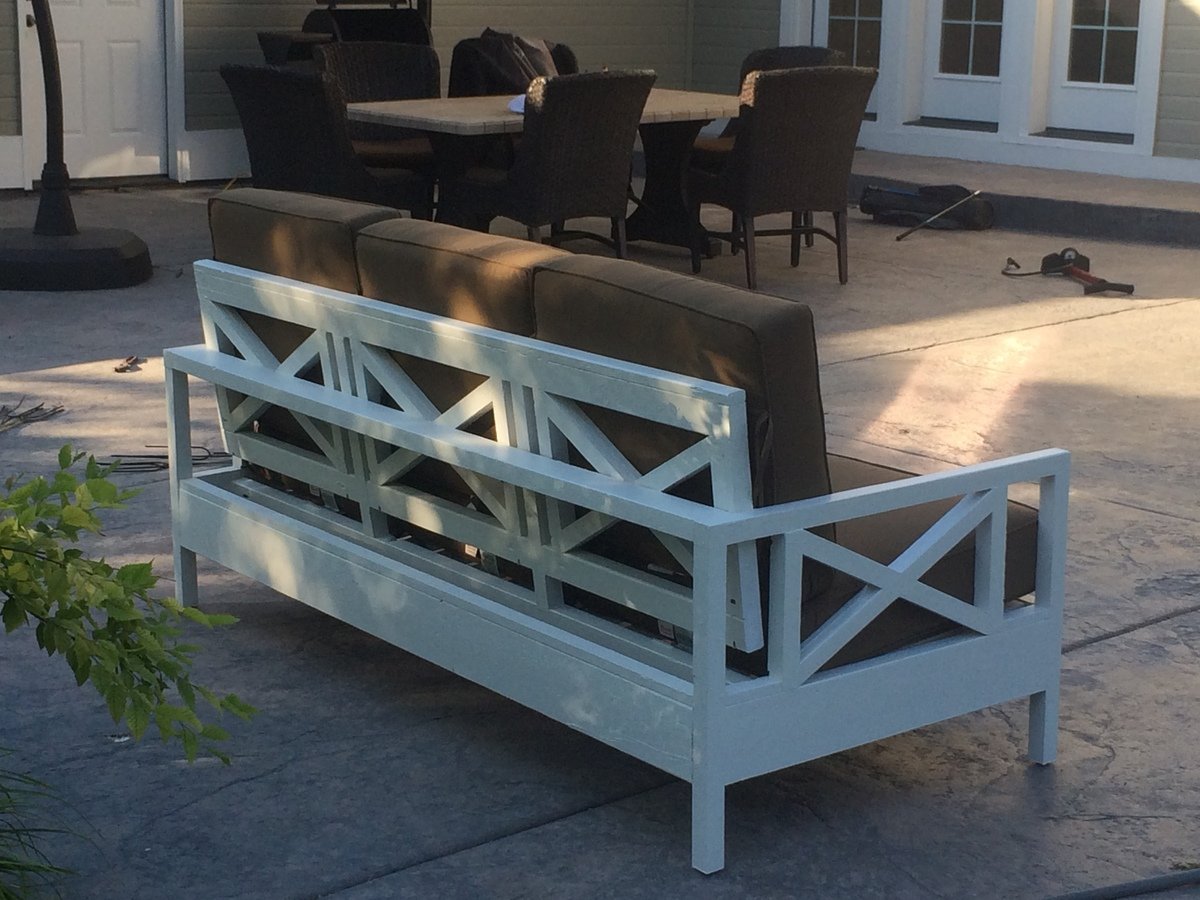
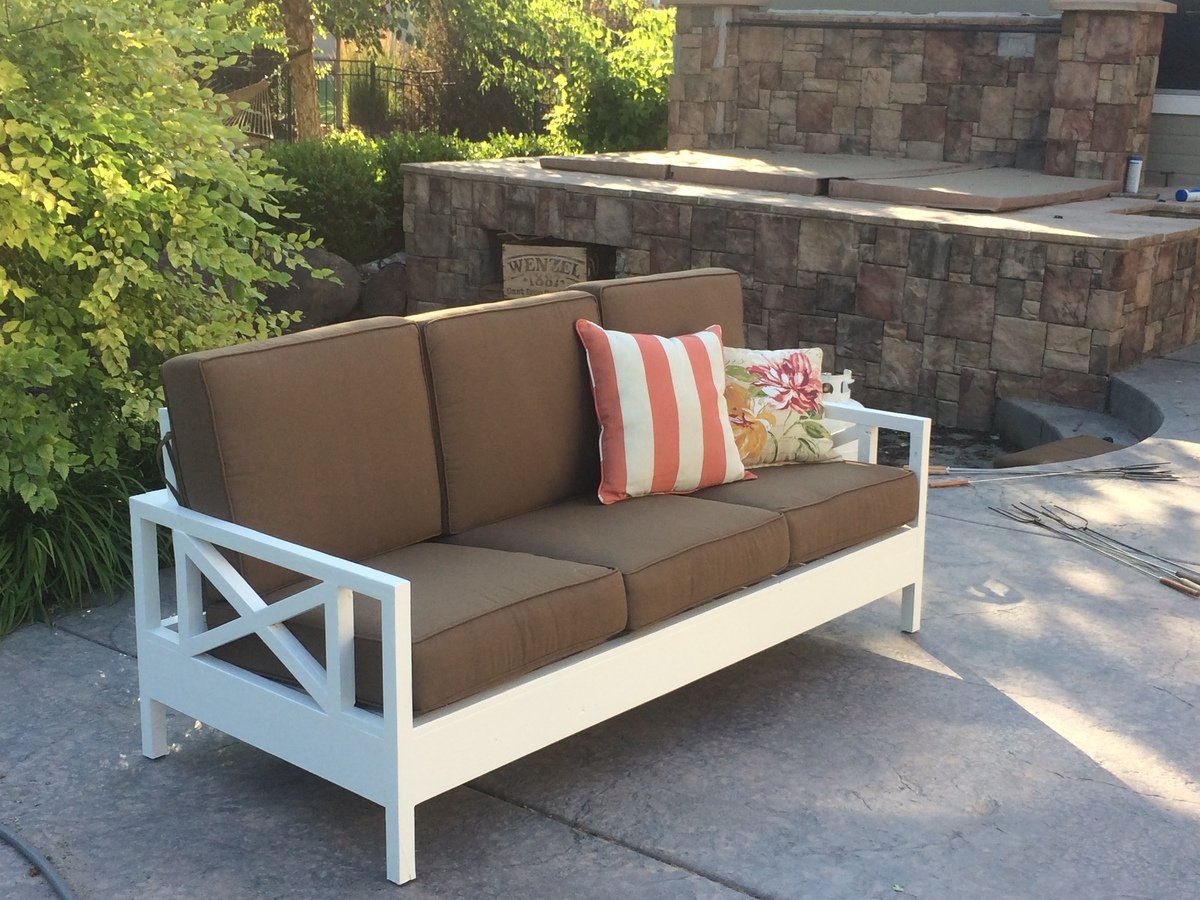
Outdoor Sofa Mash-up

My wife loves the X pattern of the Weatherly Sofa, but wanted the tilted back from the Simple White Outdoor Sofa. This was our best of both worlds effort!
Built from Plan(s)
Estimated Cost
$85 for lumber and materials without cushions.
Estimated Time Investment
Afternoon Project (3-6 Hours)
Finish Used
Primer and outdoor paint.
Recommended Skill Level
Beginner
Comments

Tue, 06/11/2019 - 05:25
Can you share where you got…
Can you share where you got your cushions please?
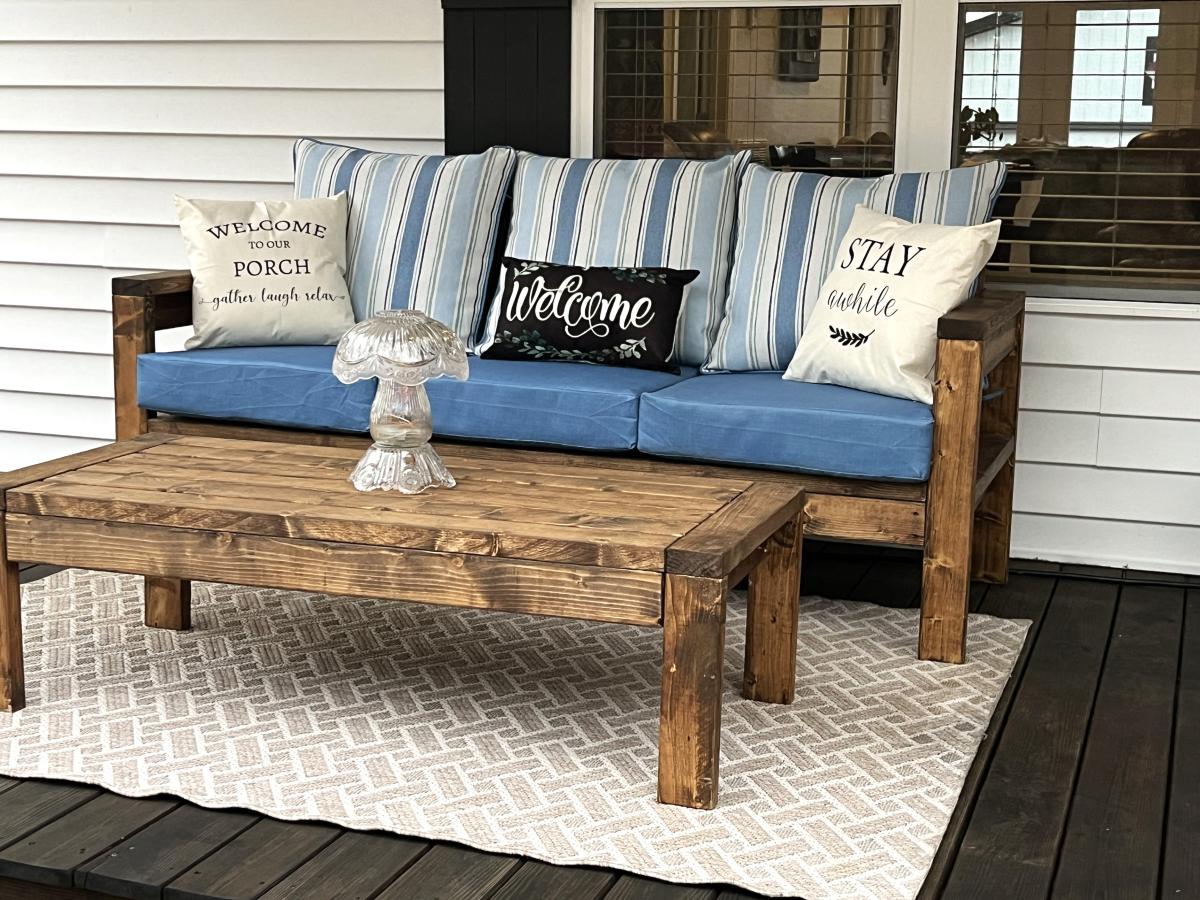
2x4 Outdoor Wood Sofa and Coffee Table
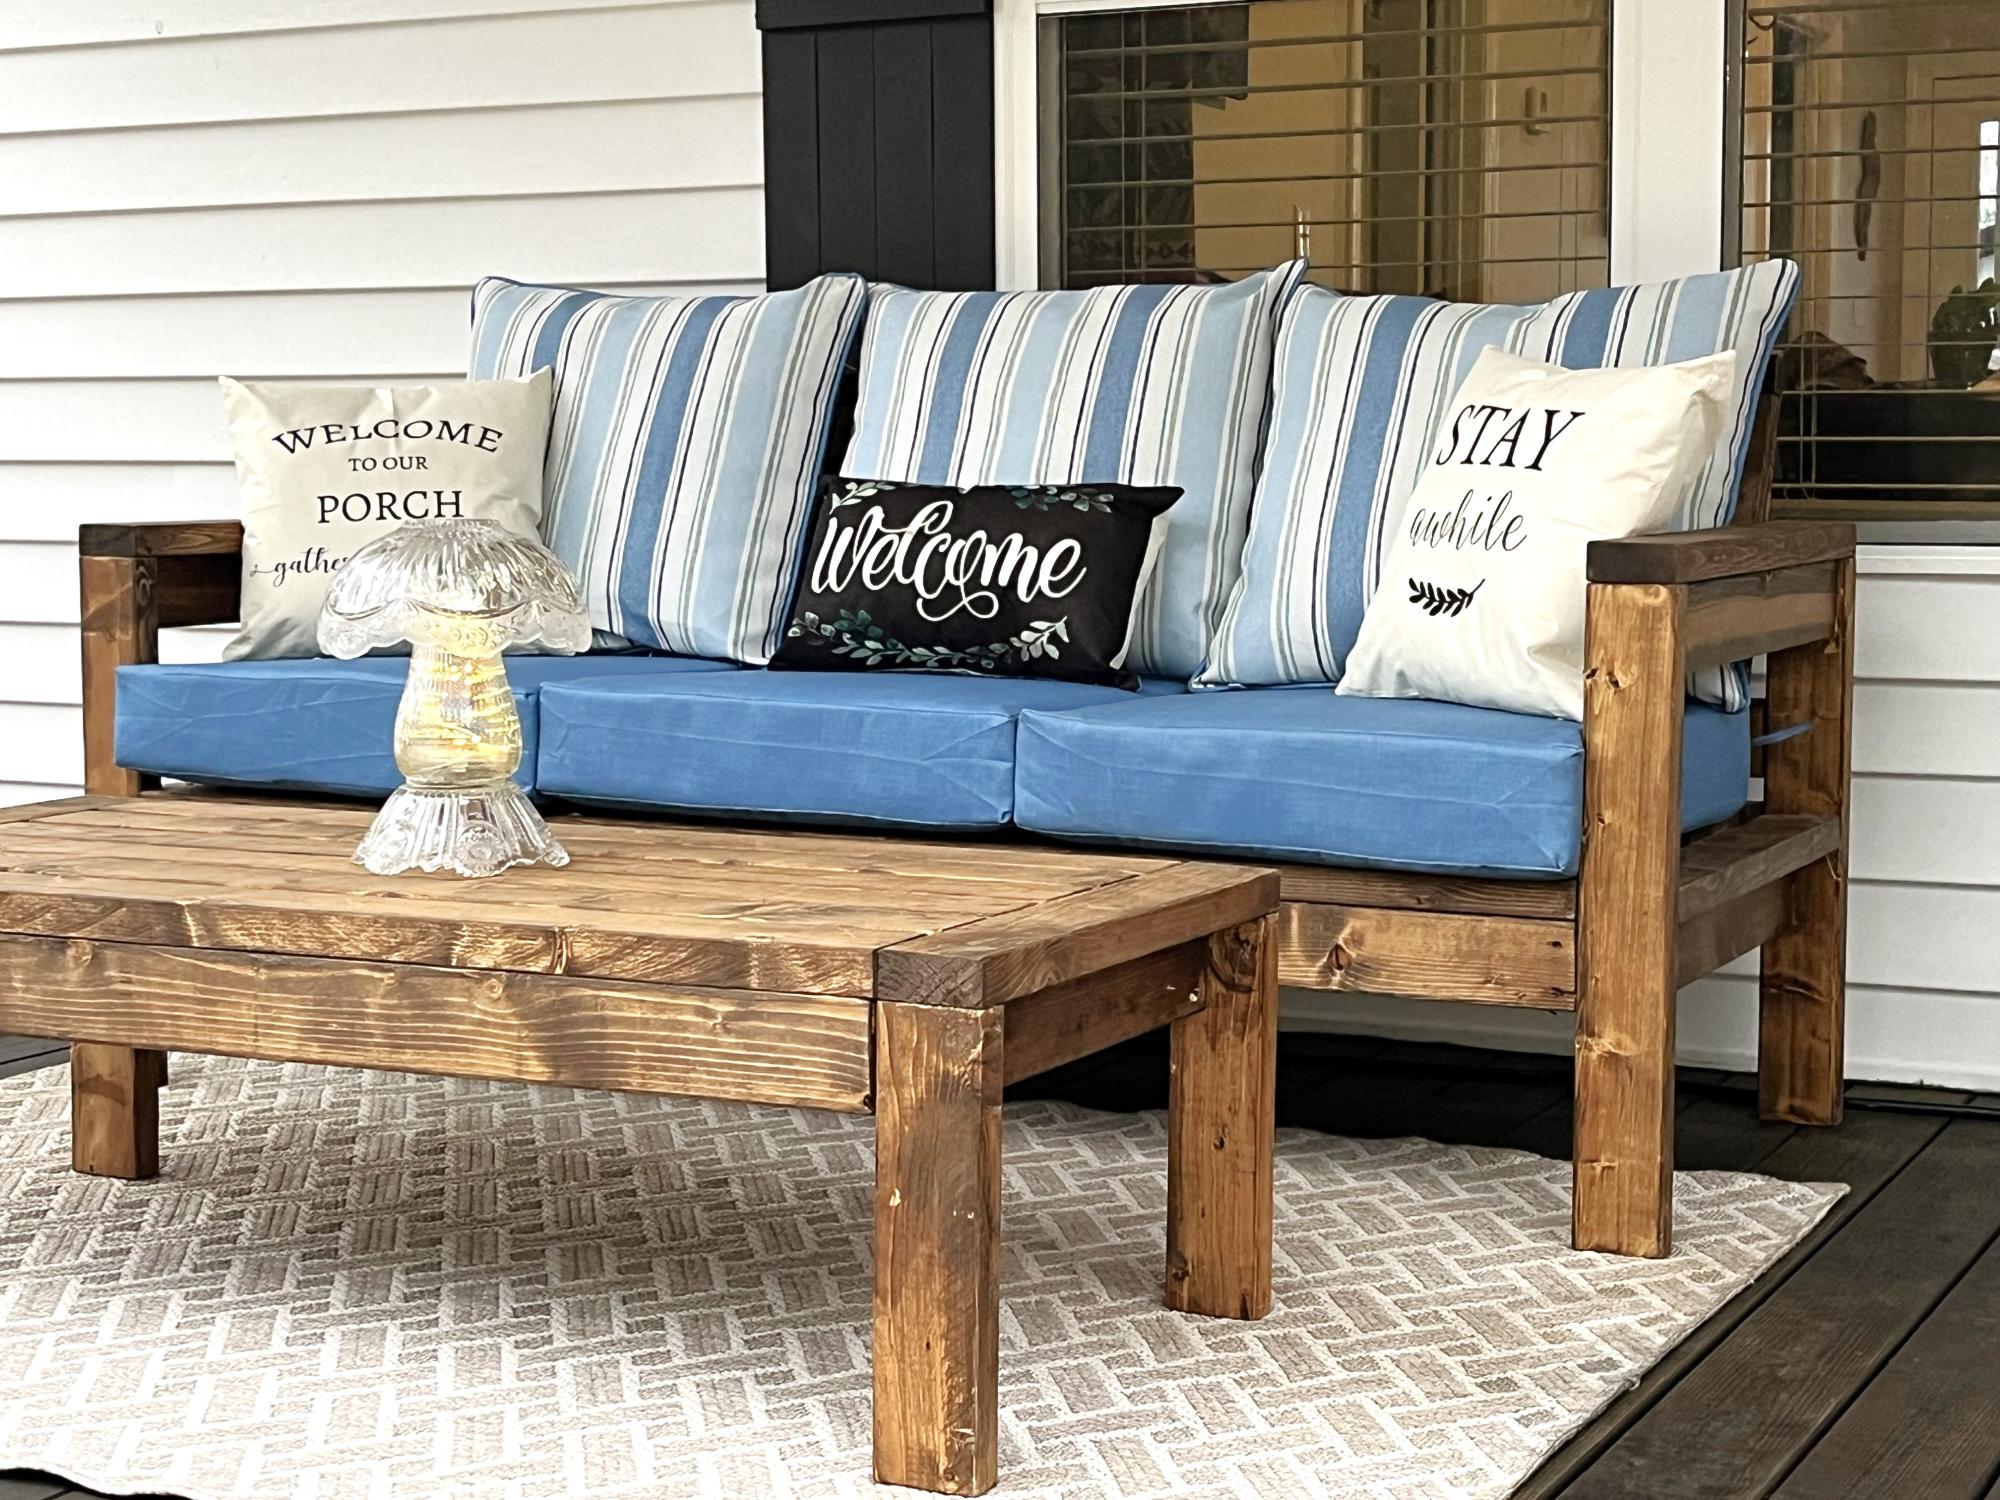
I previously had rocking chairs on my porch, but was looking for something much more comfortable that I could enjoy sitting on the porch and watching the squirrels play in the yard. Created this from your sofa plan.
Valerie Tanner
Built from Plan(s)
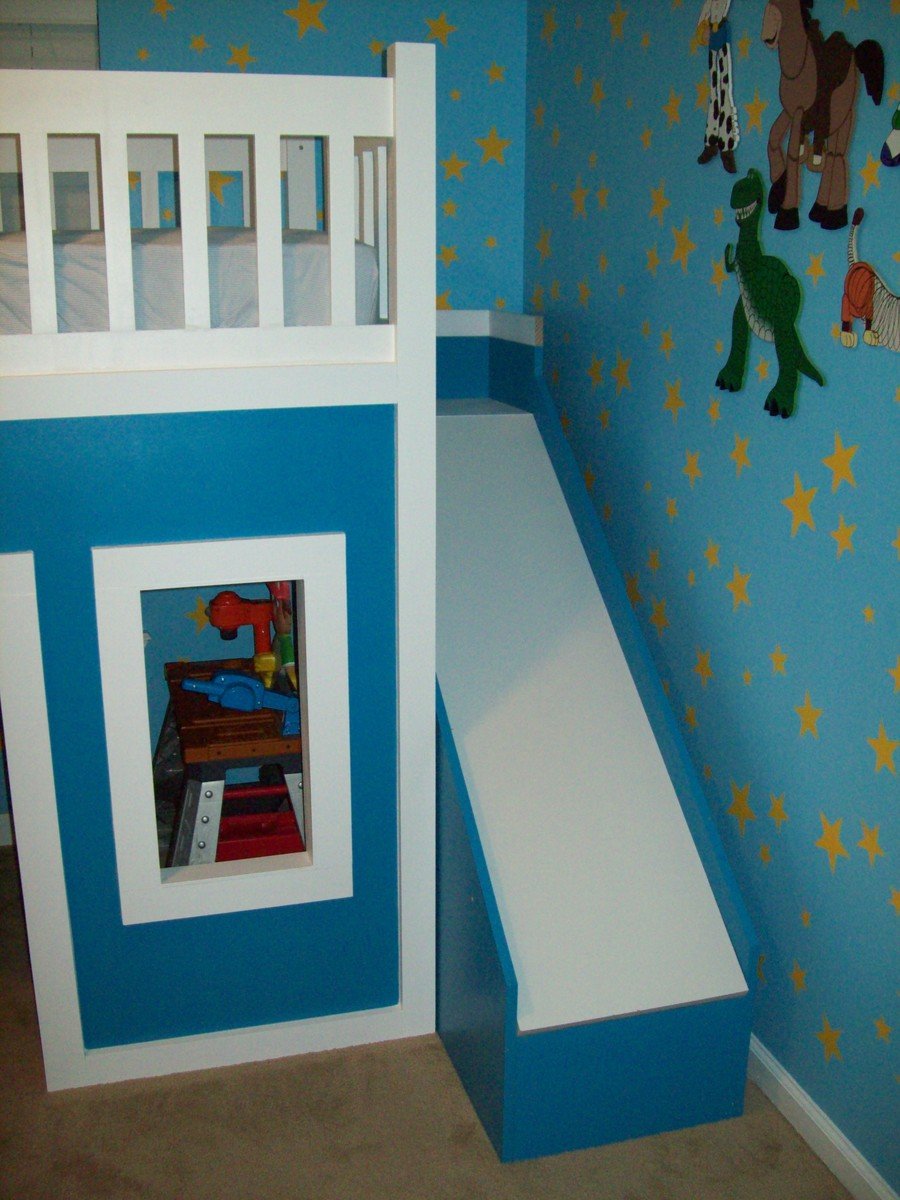
Playhouse Loft Bed With Stairs And Slide

My son was about to turn 3 and I really wanted to redesign his bedroom as a birthday surprise. We went with a Toy Story themed room, he just loves Toy Story.
I started off by painting the walls blue with yellow stars like Andy's room in the movie. I added some custom painted art work and then it was off to find a cool playhouse bed. My husband and I were shopping around and we could never really find what we were looking for in the store. So we decided to build one ourselves using plans from this website.
I used the playhouse loft bed and the playhouse loft bed stair plans, for the bed and the stairs. I used the castle loft bed plan as inspiration for the slide. The project took us about 5 weeks from start to finish. We both have full time jobs and we did most of the work on the weekends. I looked at each plan very carefully and made notes. I had to modify the stair plans slightly to fit the space where we wanted to put the bed. The stairs look narrow, but they work just fine. My husband and I can both use them to get up in the bed. The stairs feature hinged stair tread with built in storage. We built them like that at first, but then later decided to make them stationary stair treads, with plywood. I didn't like the way the hinges looked and the top stair was so deep that I was worried my son would fall in there and get stuck. The storage idea was neat, but his safety was more important to me. The bed turned out really nice and VERY sturdy. Both my husband and I are able to get up there with my son (not at the same time).
Another modification that I made was instead of slats to hold on the mattress, I used a piece of plywood. I wanted the roof in the playhouse to look finished, and I didn't want to see his bedding hanging down from the slats. I painted the top of the plywood white, where the mattress goes to blend in with the slats, and the other side was painted blue to match the walls inside the playhouse.
I did modify the playhouse front facade to have 2 windows and one door. I like the symmetrical look. The total project cost about $400. I used birch plywood and select pine boards, and about 6 quarts of paint. I noticed AFTER we had finished the bed using the birch plywood, that Home Depot had cabinet grade plywood on a random end cap, that was just as nice for $12 less a sheet. If I could do it all over again, I would definitely use that!. I wanted the paint to have a nice smooth finish, without having to do a lot of sanding or patching.
We had Home Depot cut the plywood to the dimensions we needed. I had my husband cut the rest of the wood dimensions listed in the plans, and then I painted all of them before we put the pieces together. I used a small roller and self priming paint. The paint finish looks great. After assembling the bed I can not imagine what I would have gone through trying to paint it after the fact.
The slide was a bit tricky, I looked at the plan for the castle loft bed and attempted to use those dimensions, and for the most part they worked. But when we went to assemble the slide, we did end up recutting some of the wood to different dimensions. I used a piece of the melamine coated closet shelf material for the slide.
It is already finished in white and its nice and slick, like a slide should be! I hate MDF, but for this it seemed the best fit. We cut the top edge at an angle to meet up with the slide platform. PLEASE BE CAREFUL with this material. After it was angle cut the edge was razor sharp and I sliced my fingers up. Once it was installed it butted up perfectly to the slide platform, and the edge was hidden and not a danger. But use caution during the install.
Clamps are your friend! We used Kreg clamps for everything. They kept the wood in place while we were screwing the parts together. The coolest thing that my husband came up with was clamping two identical pieces for plywood together, and drawing the template for the slide support walls. Then he used his circular saw to cut them out. We ended up with two mirror image pieces. They looked awesome. I left them clamped together when I sanded the edges as well.
We really didn't have any building experience other, than building tables and chairs for children, We got the deluxe Kreg jig kit and a miter saw on Craigslist for $50 each and they were both practically brand new. This was the first time we had ever used a Kreg jig and we are both addicted. That thing is the bomb.
We locked my son out of his room for a week while we assembled everything. We had the big reveal at his birthday party and all of the guests were excited to see it after seeing my facebook teaser posts of our progress. There were 8 kids up there at one time and the bed did not budge. They all enjoyed the slide. I did the planning and paint and my husband did an awesome job making all of the cuts and sanding everything. We are both very proud of the final product. My son love his new big boy bed.
DISCLAIMER: This bed is not recommended for a child under 6 years old. My son is mature for his age and we monitor him carefully.


Built from Plan(s)
Estimated Cost
$400
Estimated Time Investment
Week Long Project (20 Hours or More)
Finish Used
self priming paint
Recommended Skill Level
Beginner
Comments
Mon, 01/21/2013 - 12:41
This bed is awesome. My
This bed is awesome. My boyfriend and I want one just like this for are son. Did you happen to write out all your dimensions? I would love to make this bed for my son.
Mon, 10/20/2014 - 03:10
Finished Dimensions
I also would like to know the finished dimensions of your project. What is the hight, length, and depth?
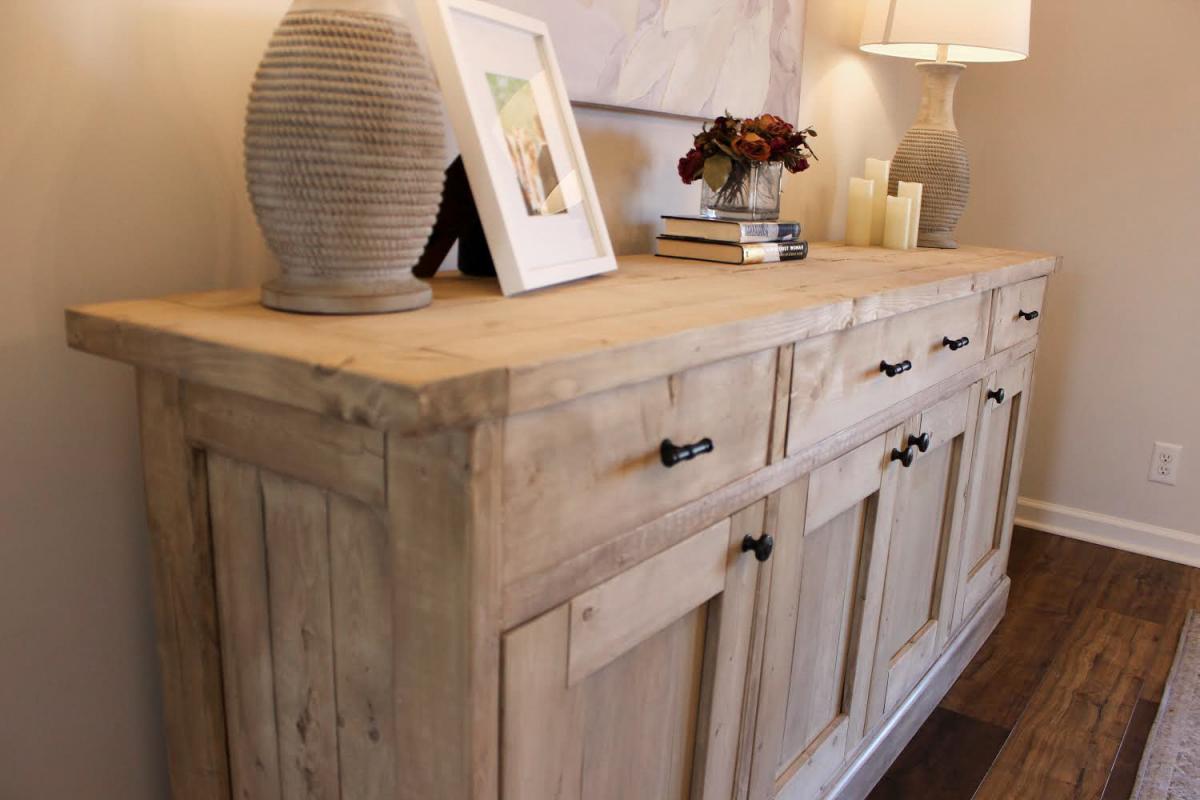
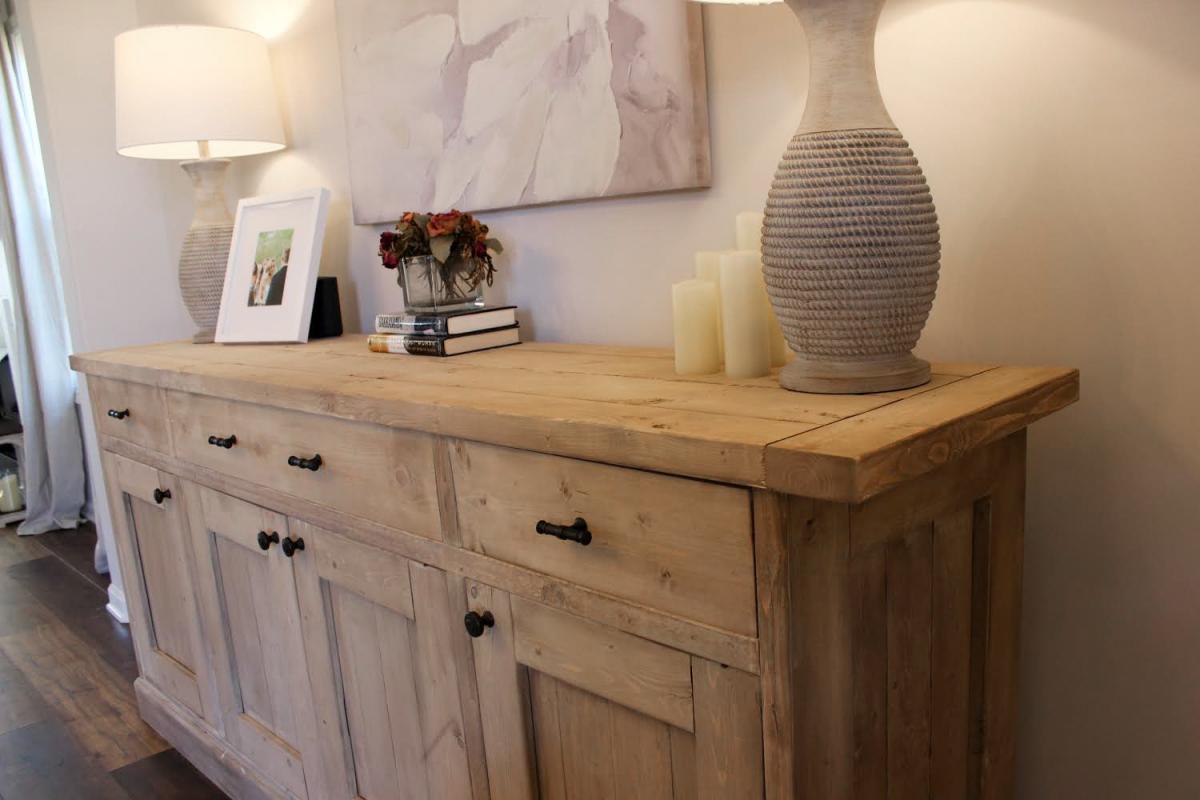
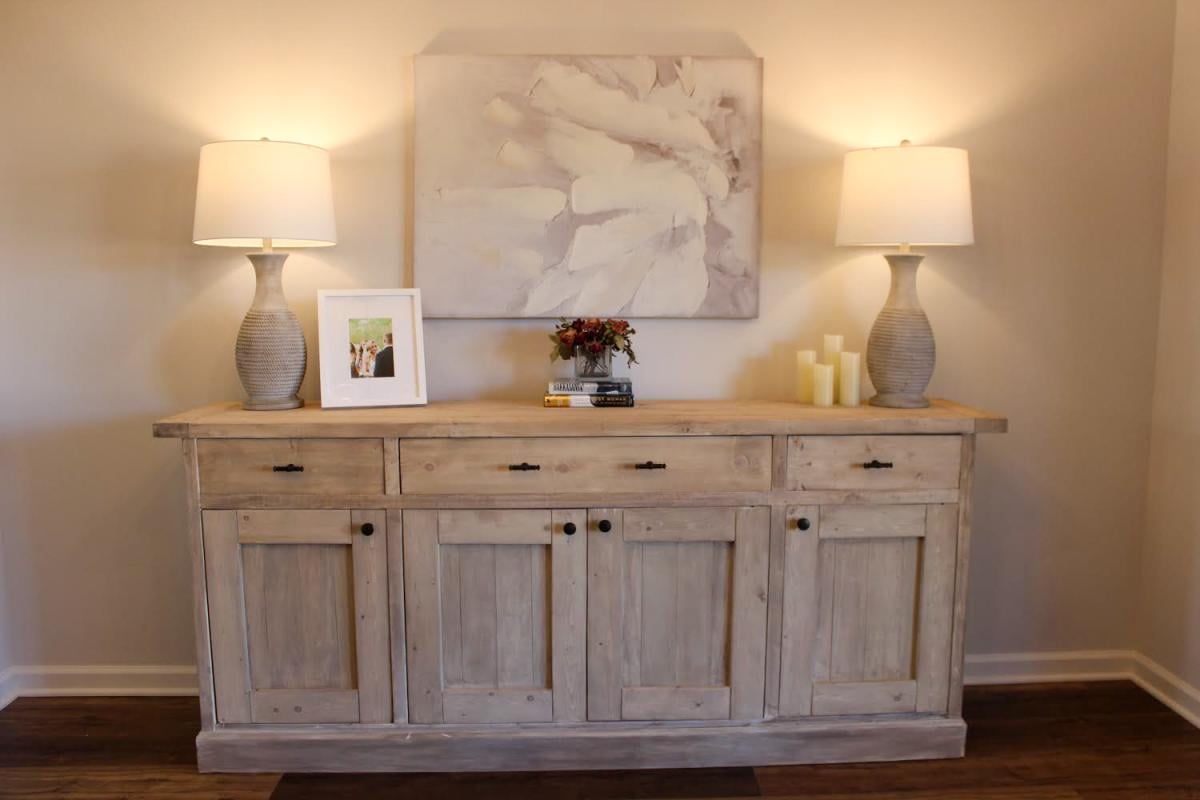
Light Wash Sideboard

Inspired by the RH Salvaged Wood Panel Sideboard. No measurement adjustments to deviate from the Planked Wood Sideboard plan.
Built from Plan(s)
Estimated Cost
375
Estimated Time Investment
Weekend Project (10-20 Hours)
Finish Used
General Finish Milk Paint (color: Linen) custom wash. Finished with a glaze in Van Dyke Brown.
Recommended Skill Level
Intermediate
Comments
Sun, 11/01/2020 - 12:42
Classic piece!
Great choice of finish! Thanks for sharing your beautiful build:)
Rhyan Collection Coffee Table and End Tables
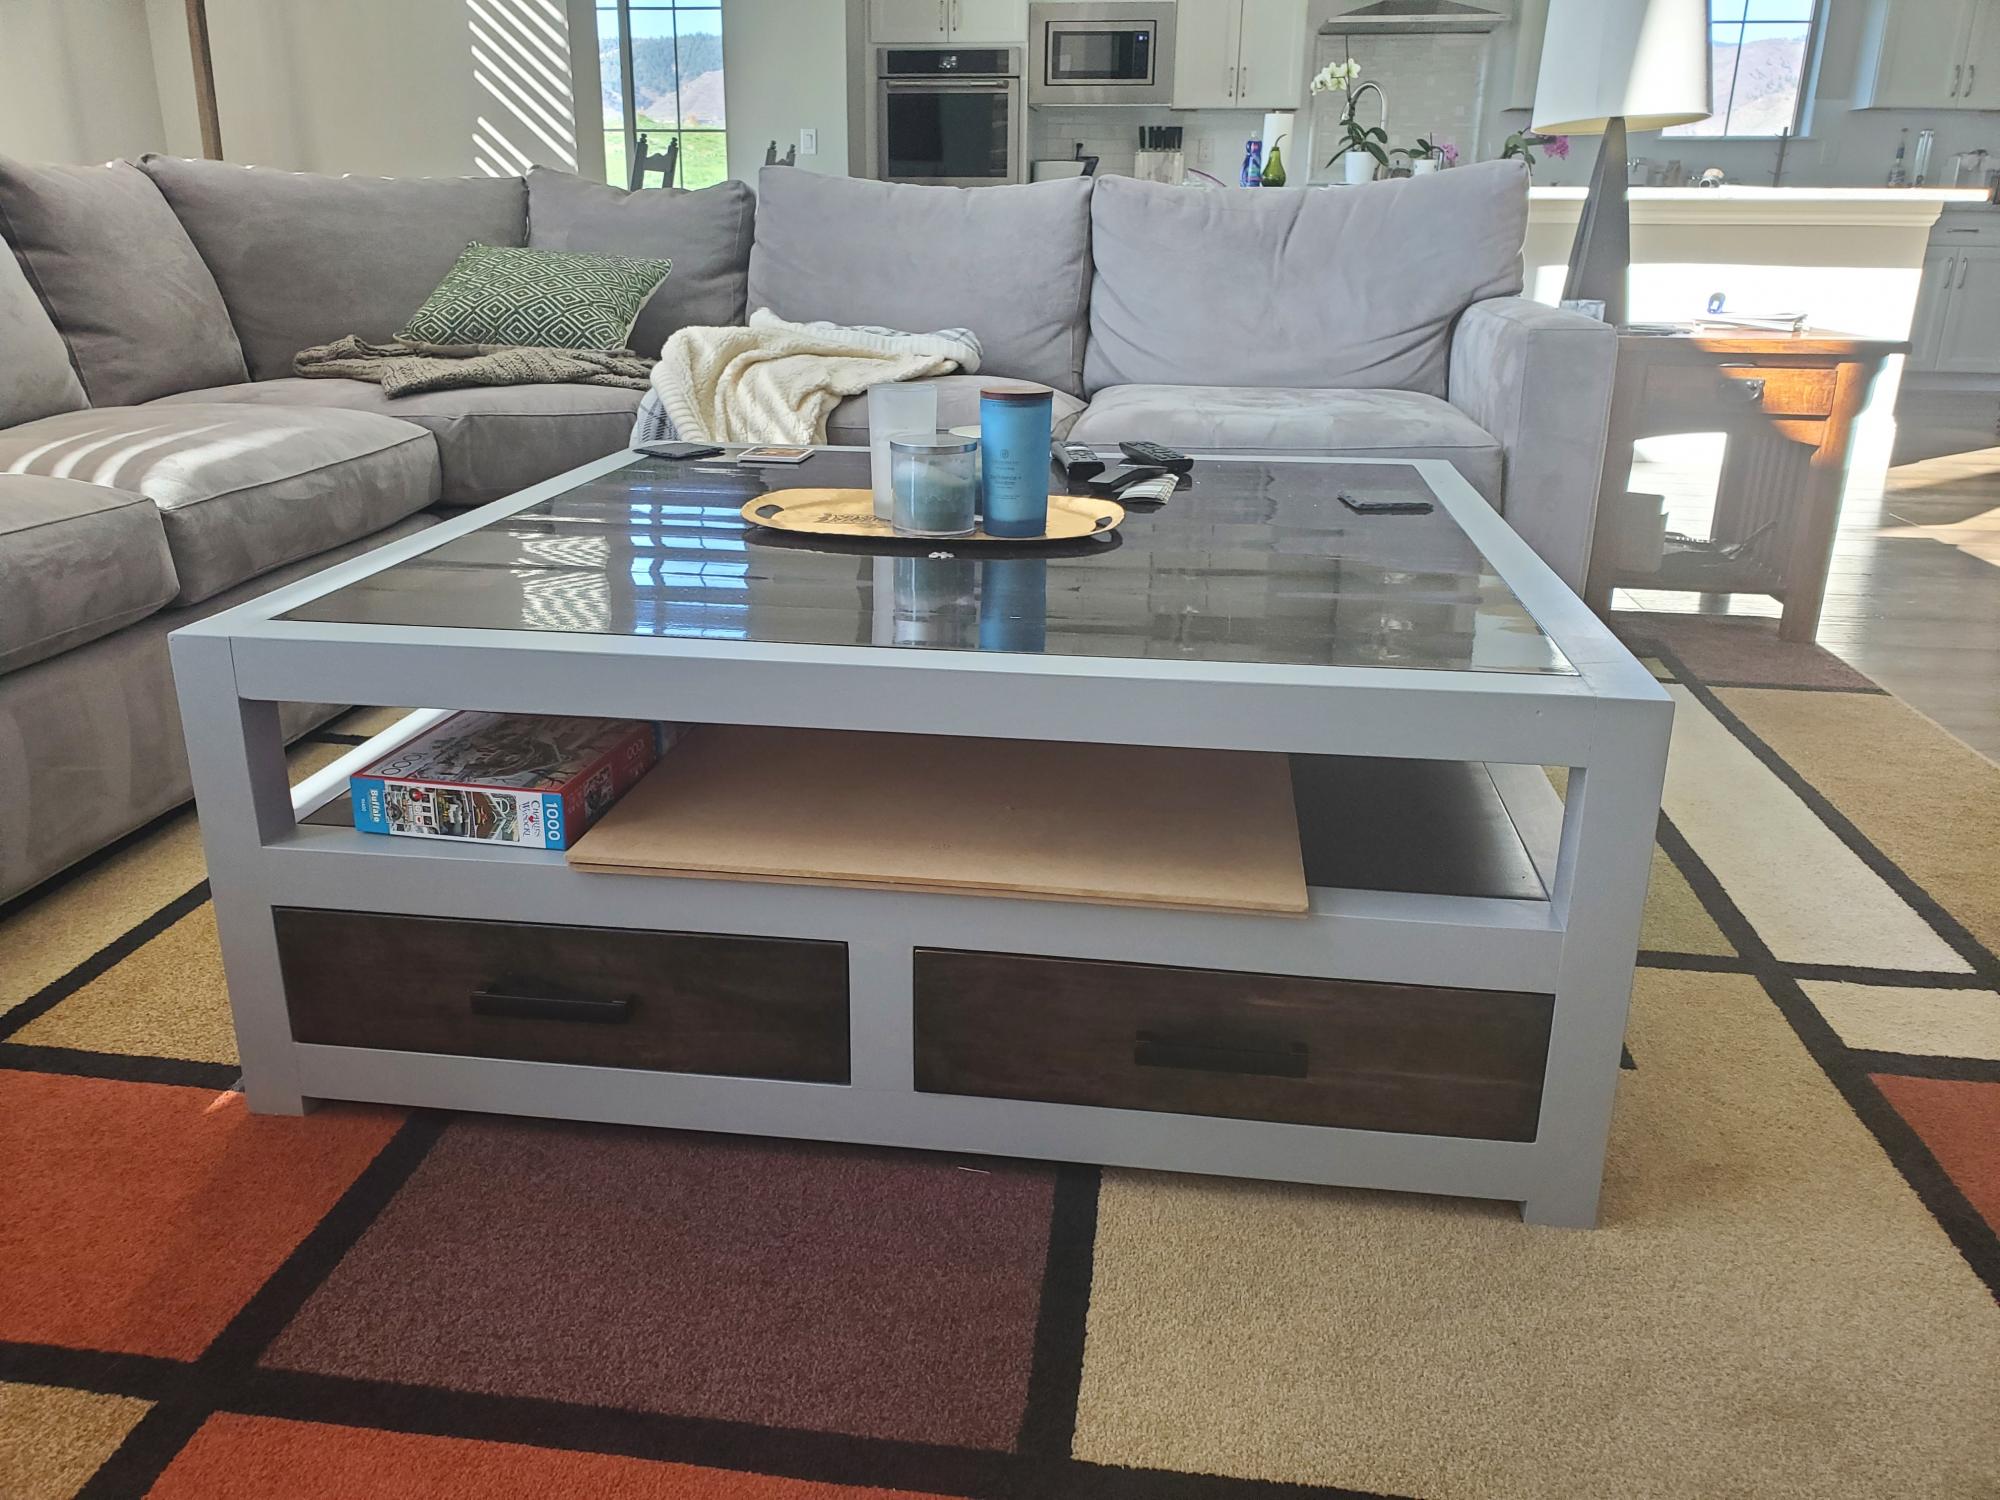
Modified the Rhyan Coffee Table plan for a square, 4-foot by 4-foot coffee table. Used poplar 1 x 3s glued together and then planed down to 2.25-inch square for the structural members. The stained wood portions are glue-ups make from Hemlock 1x 6s from Lowe's.

Estimated Time Investment
Week Long Project (20 Hours or More)
Finish Used
The paint is a color match from Sherwin Williams of a chalk paint from Valspar call Kid Gloves. The stain is leftover from the builder of our house and is the same stain used on our stair railings. Drawer pulls are off the shelf from Home Depot.
Recommended Skill Level
Intermediate
Comments
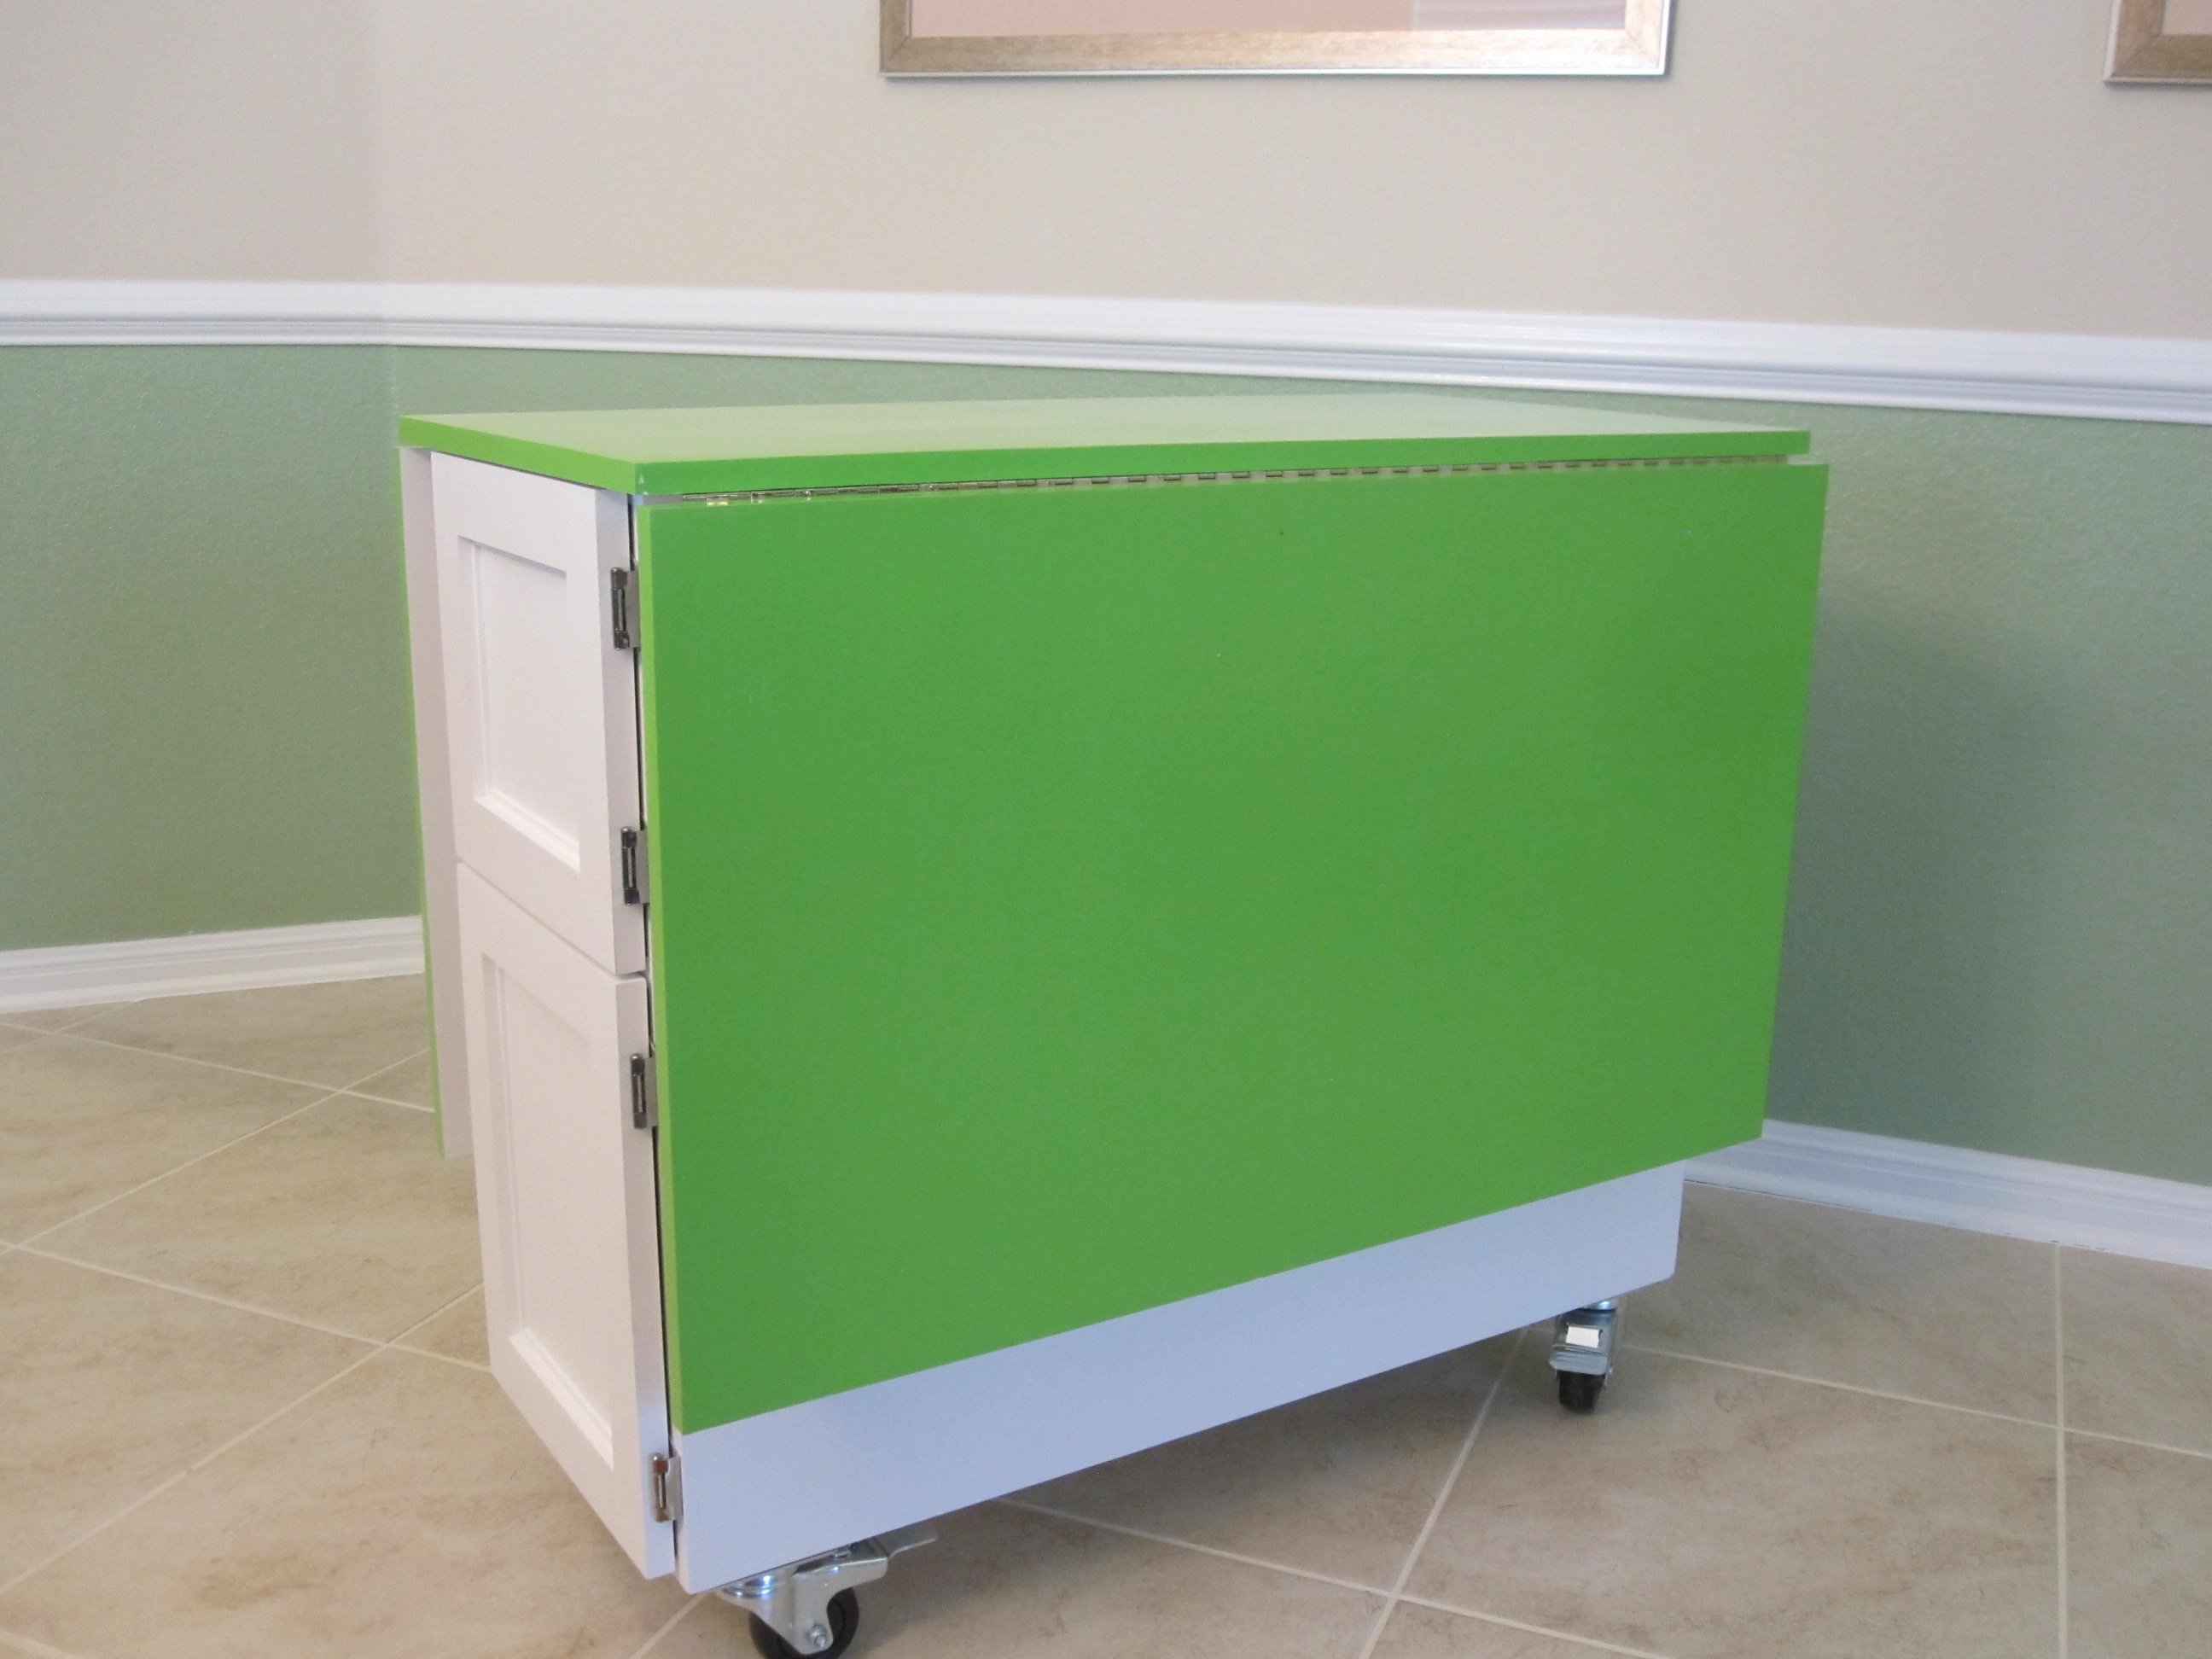
Penney's Sewing Table
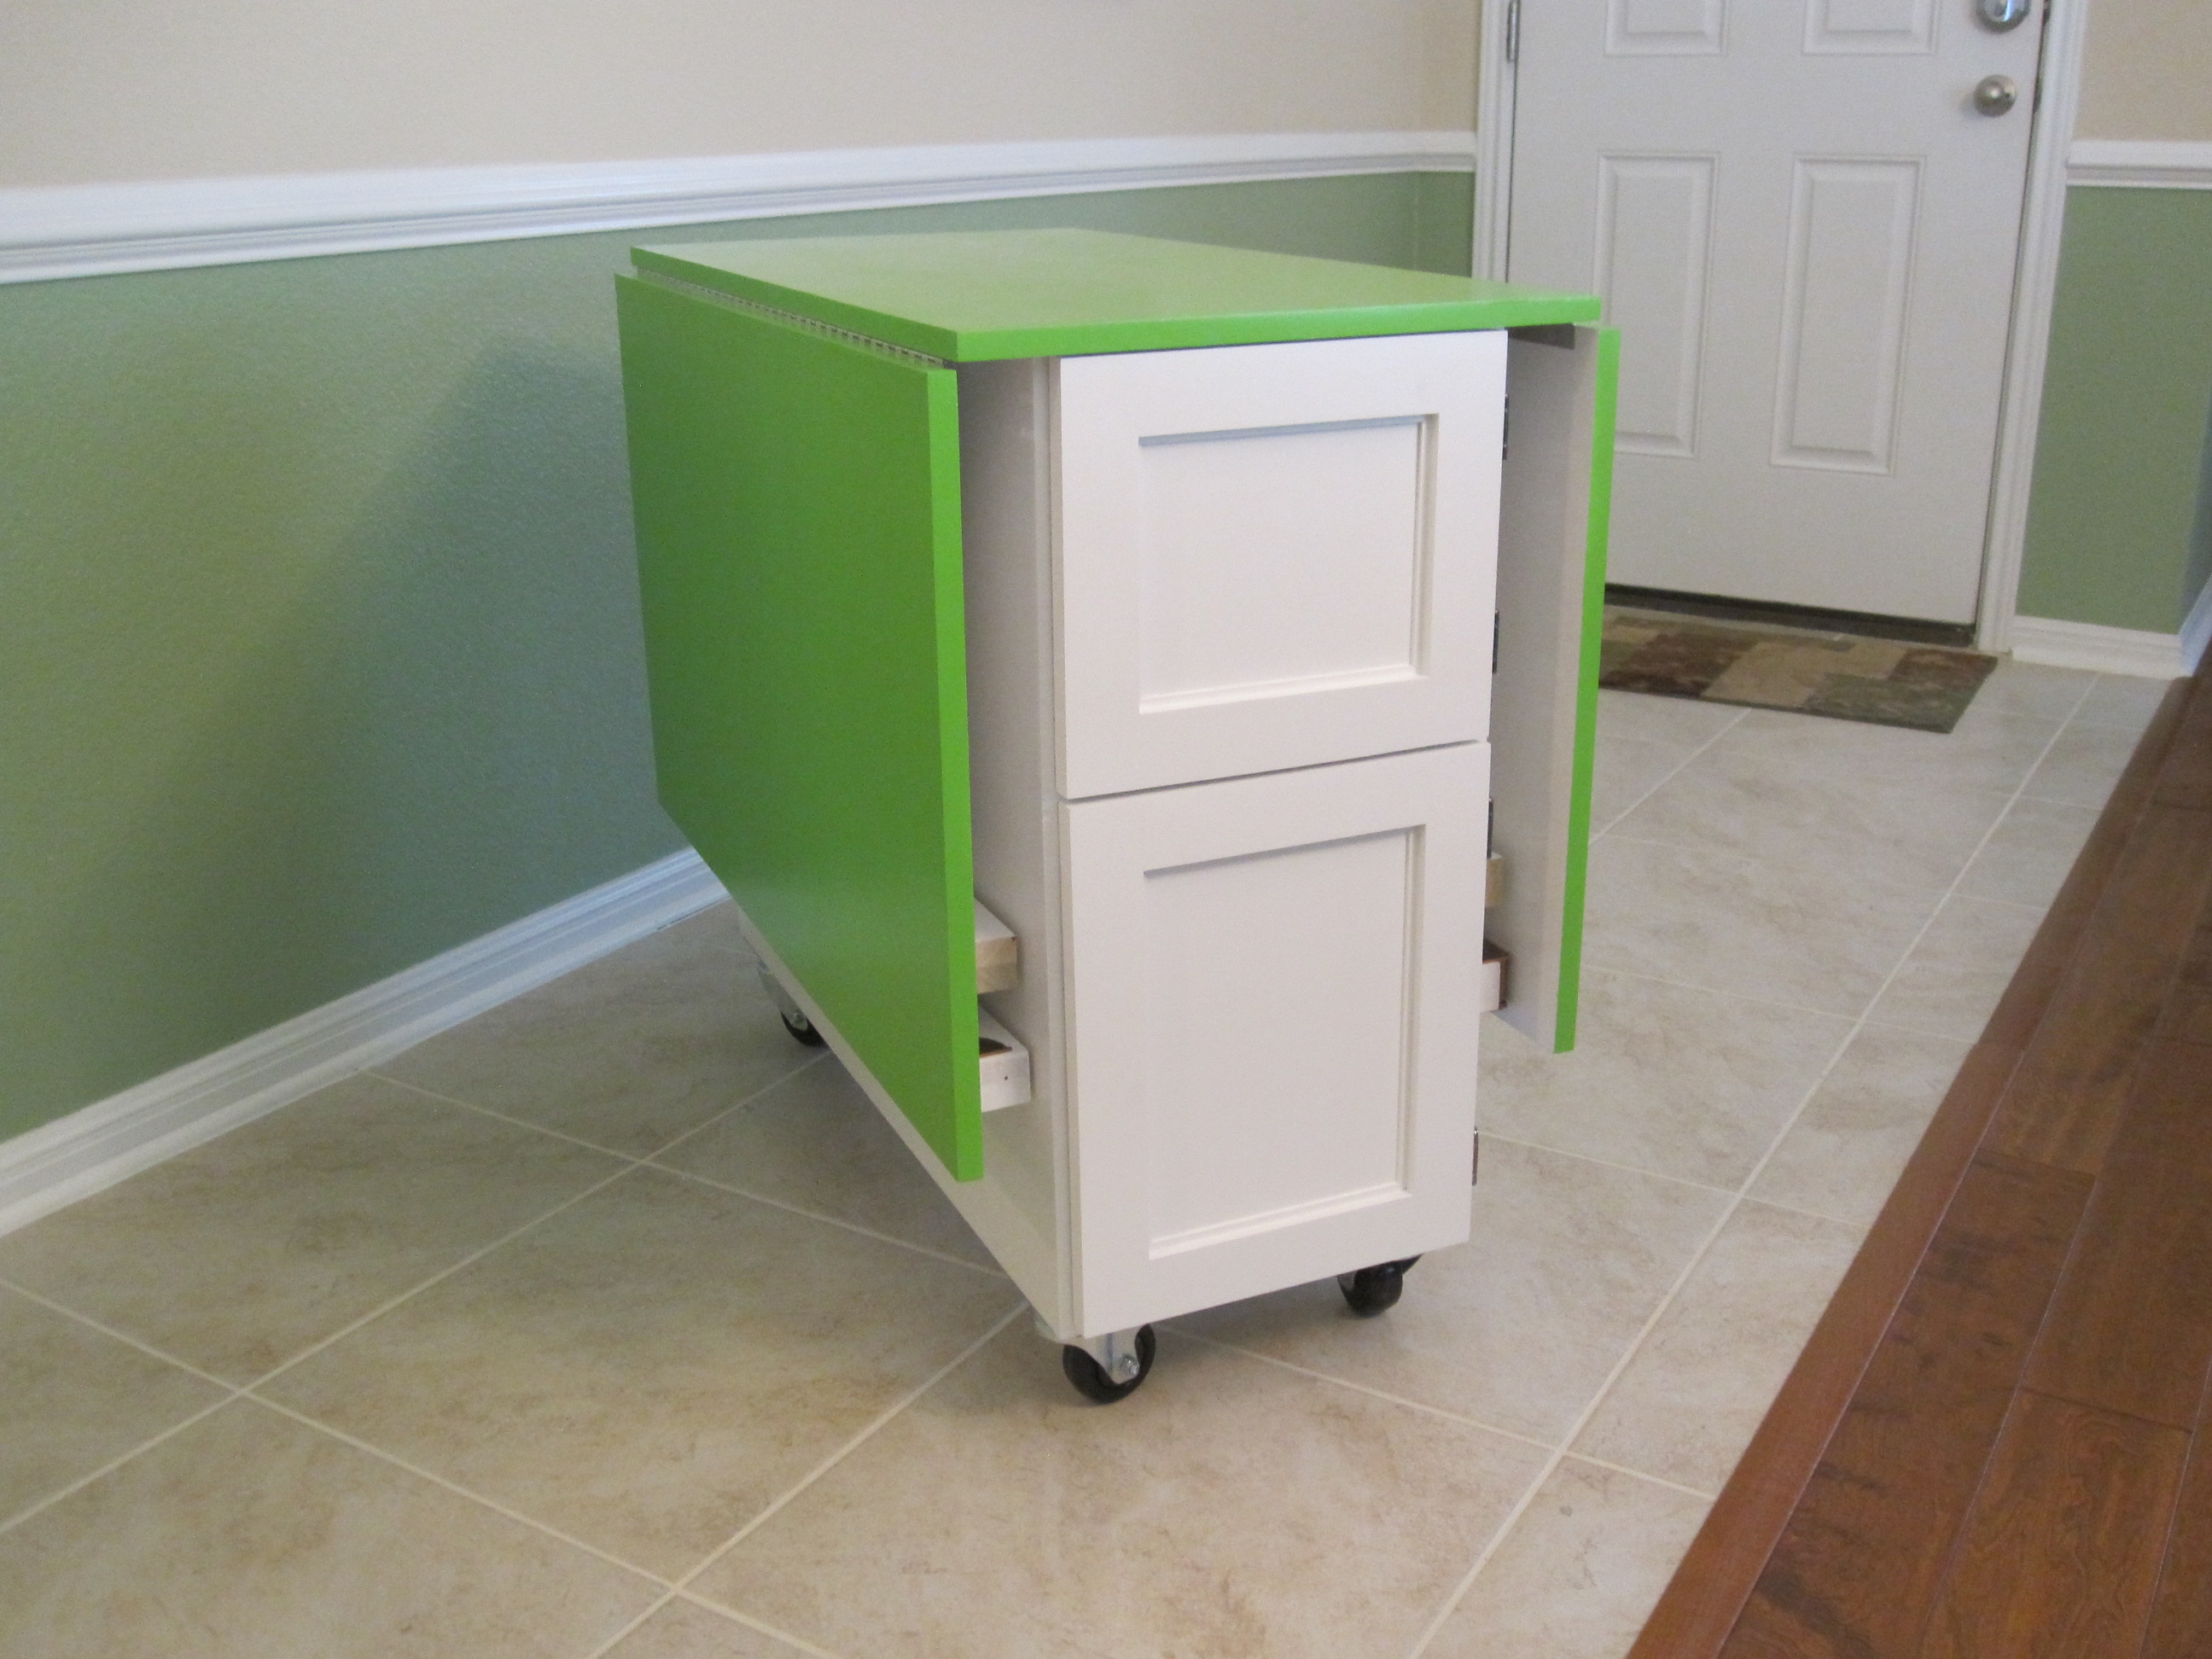
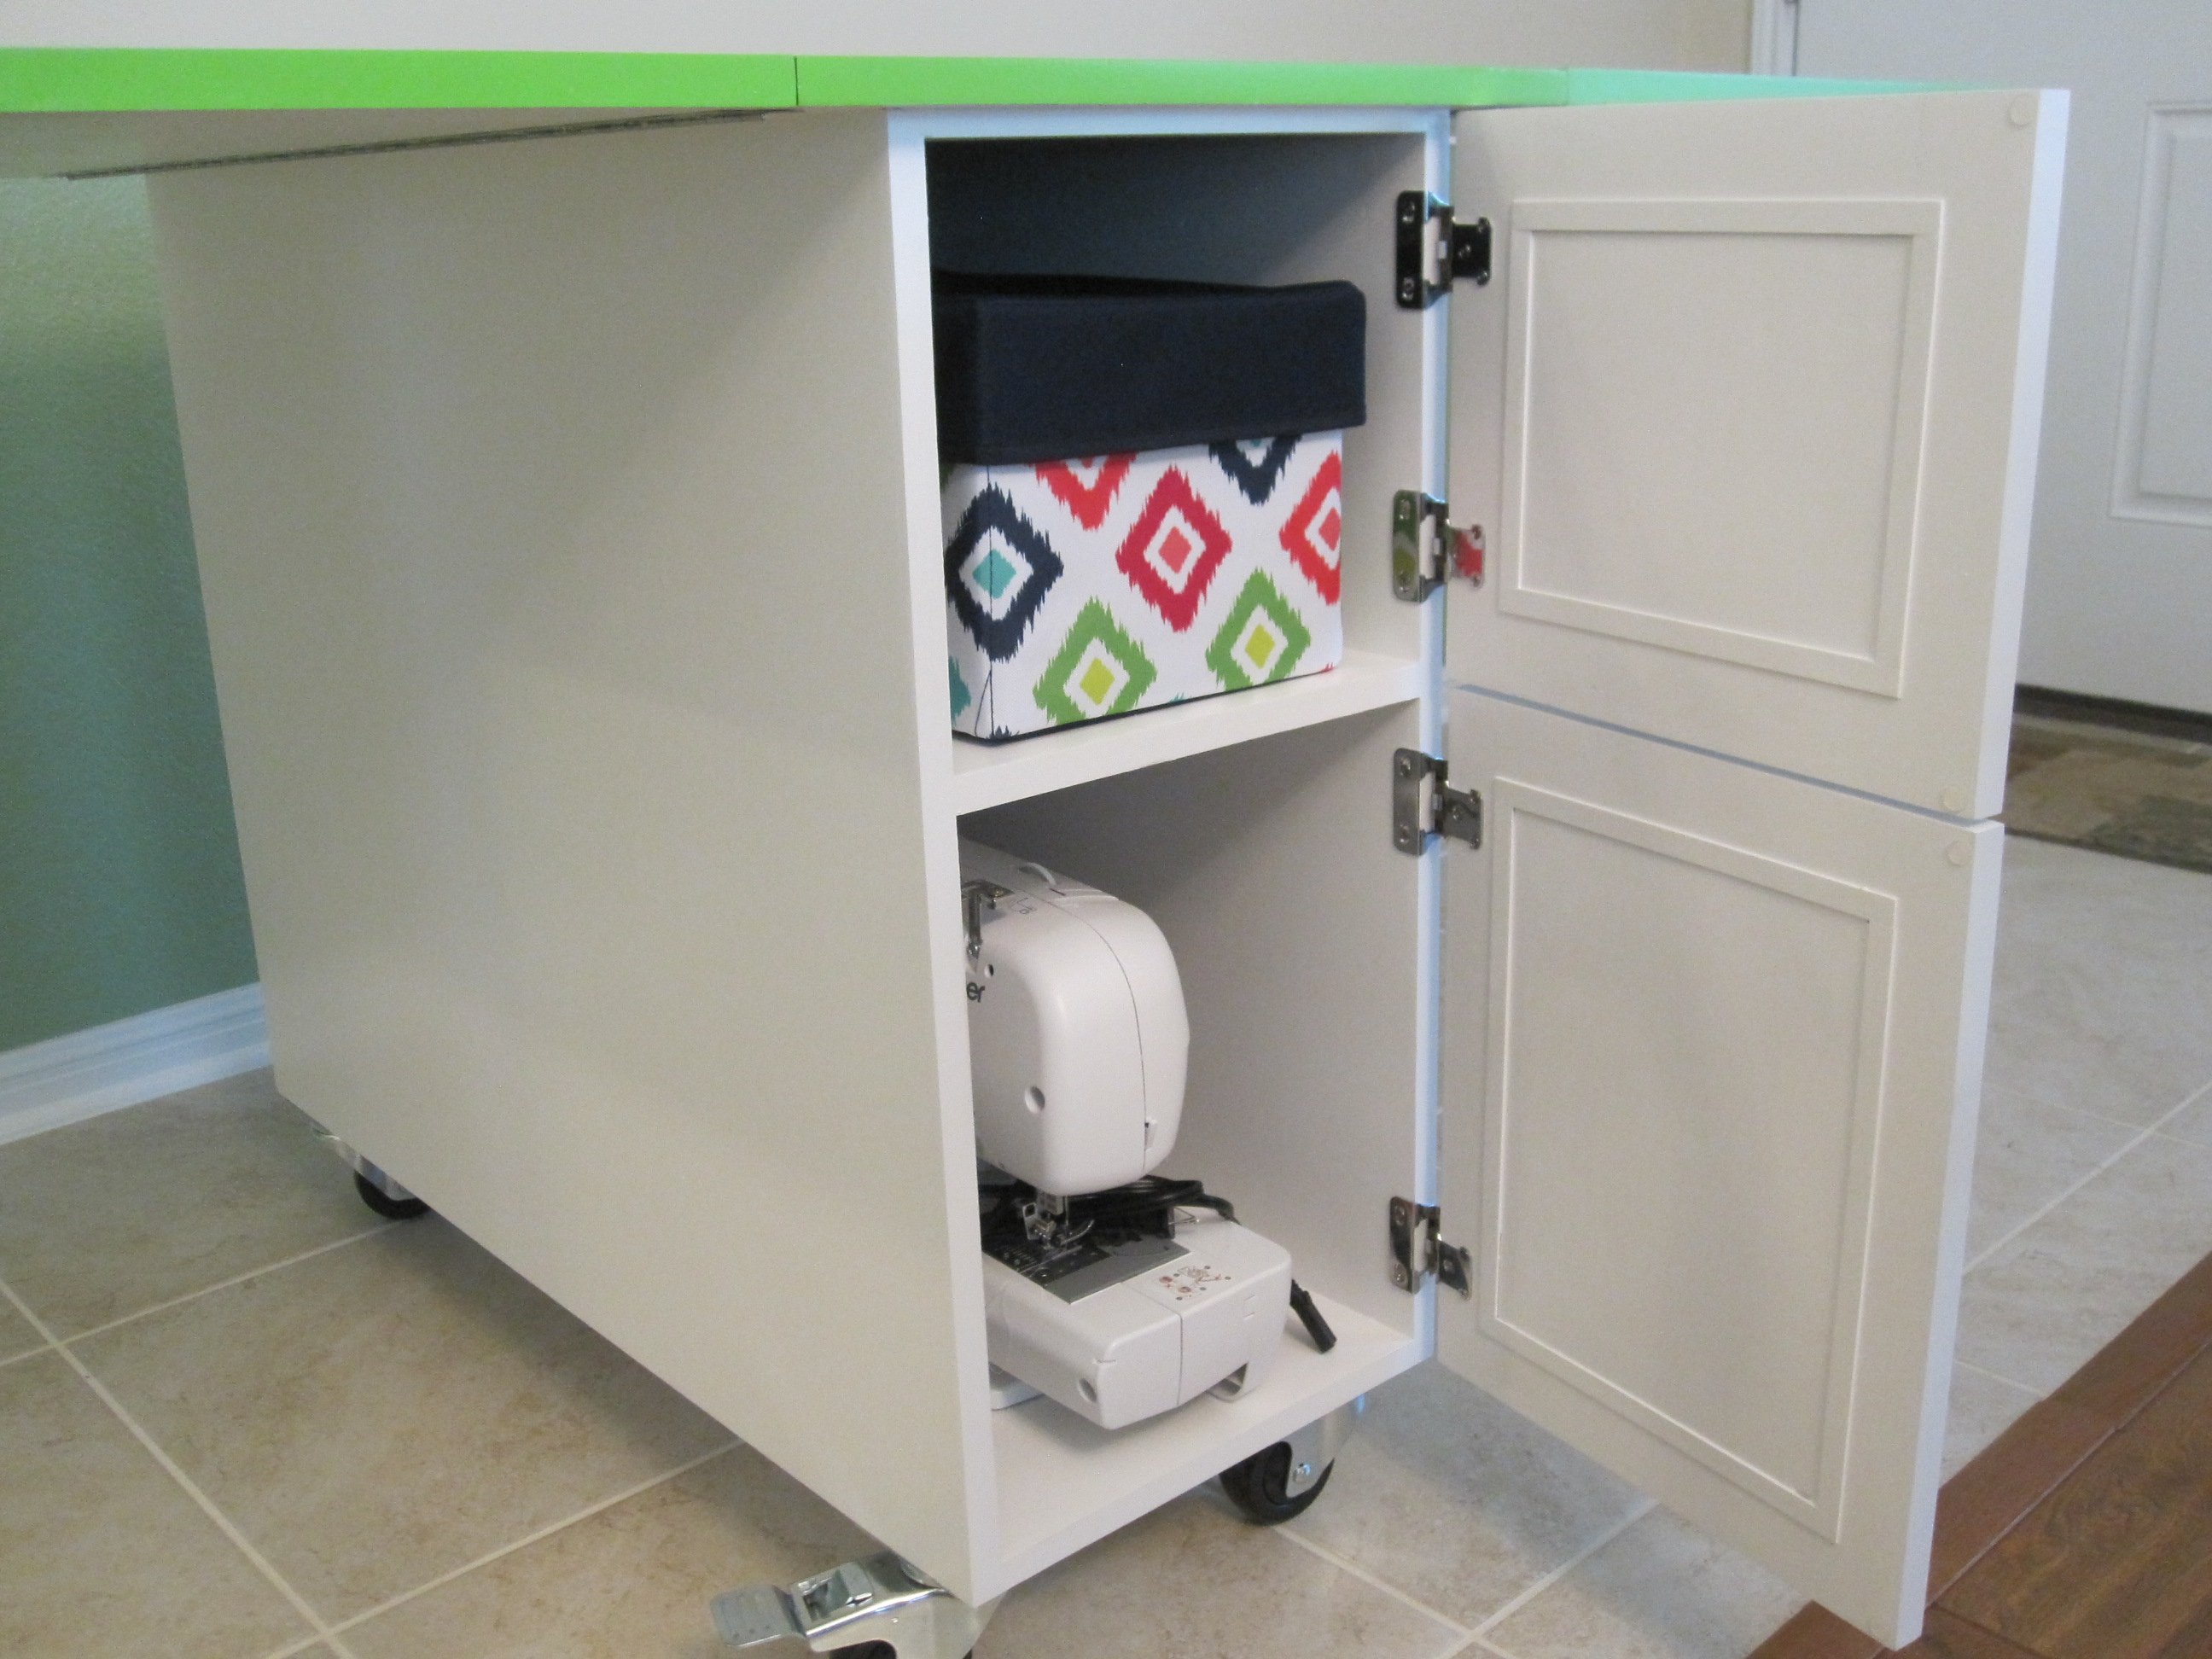
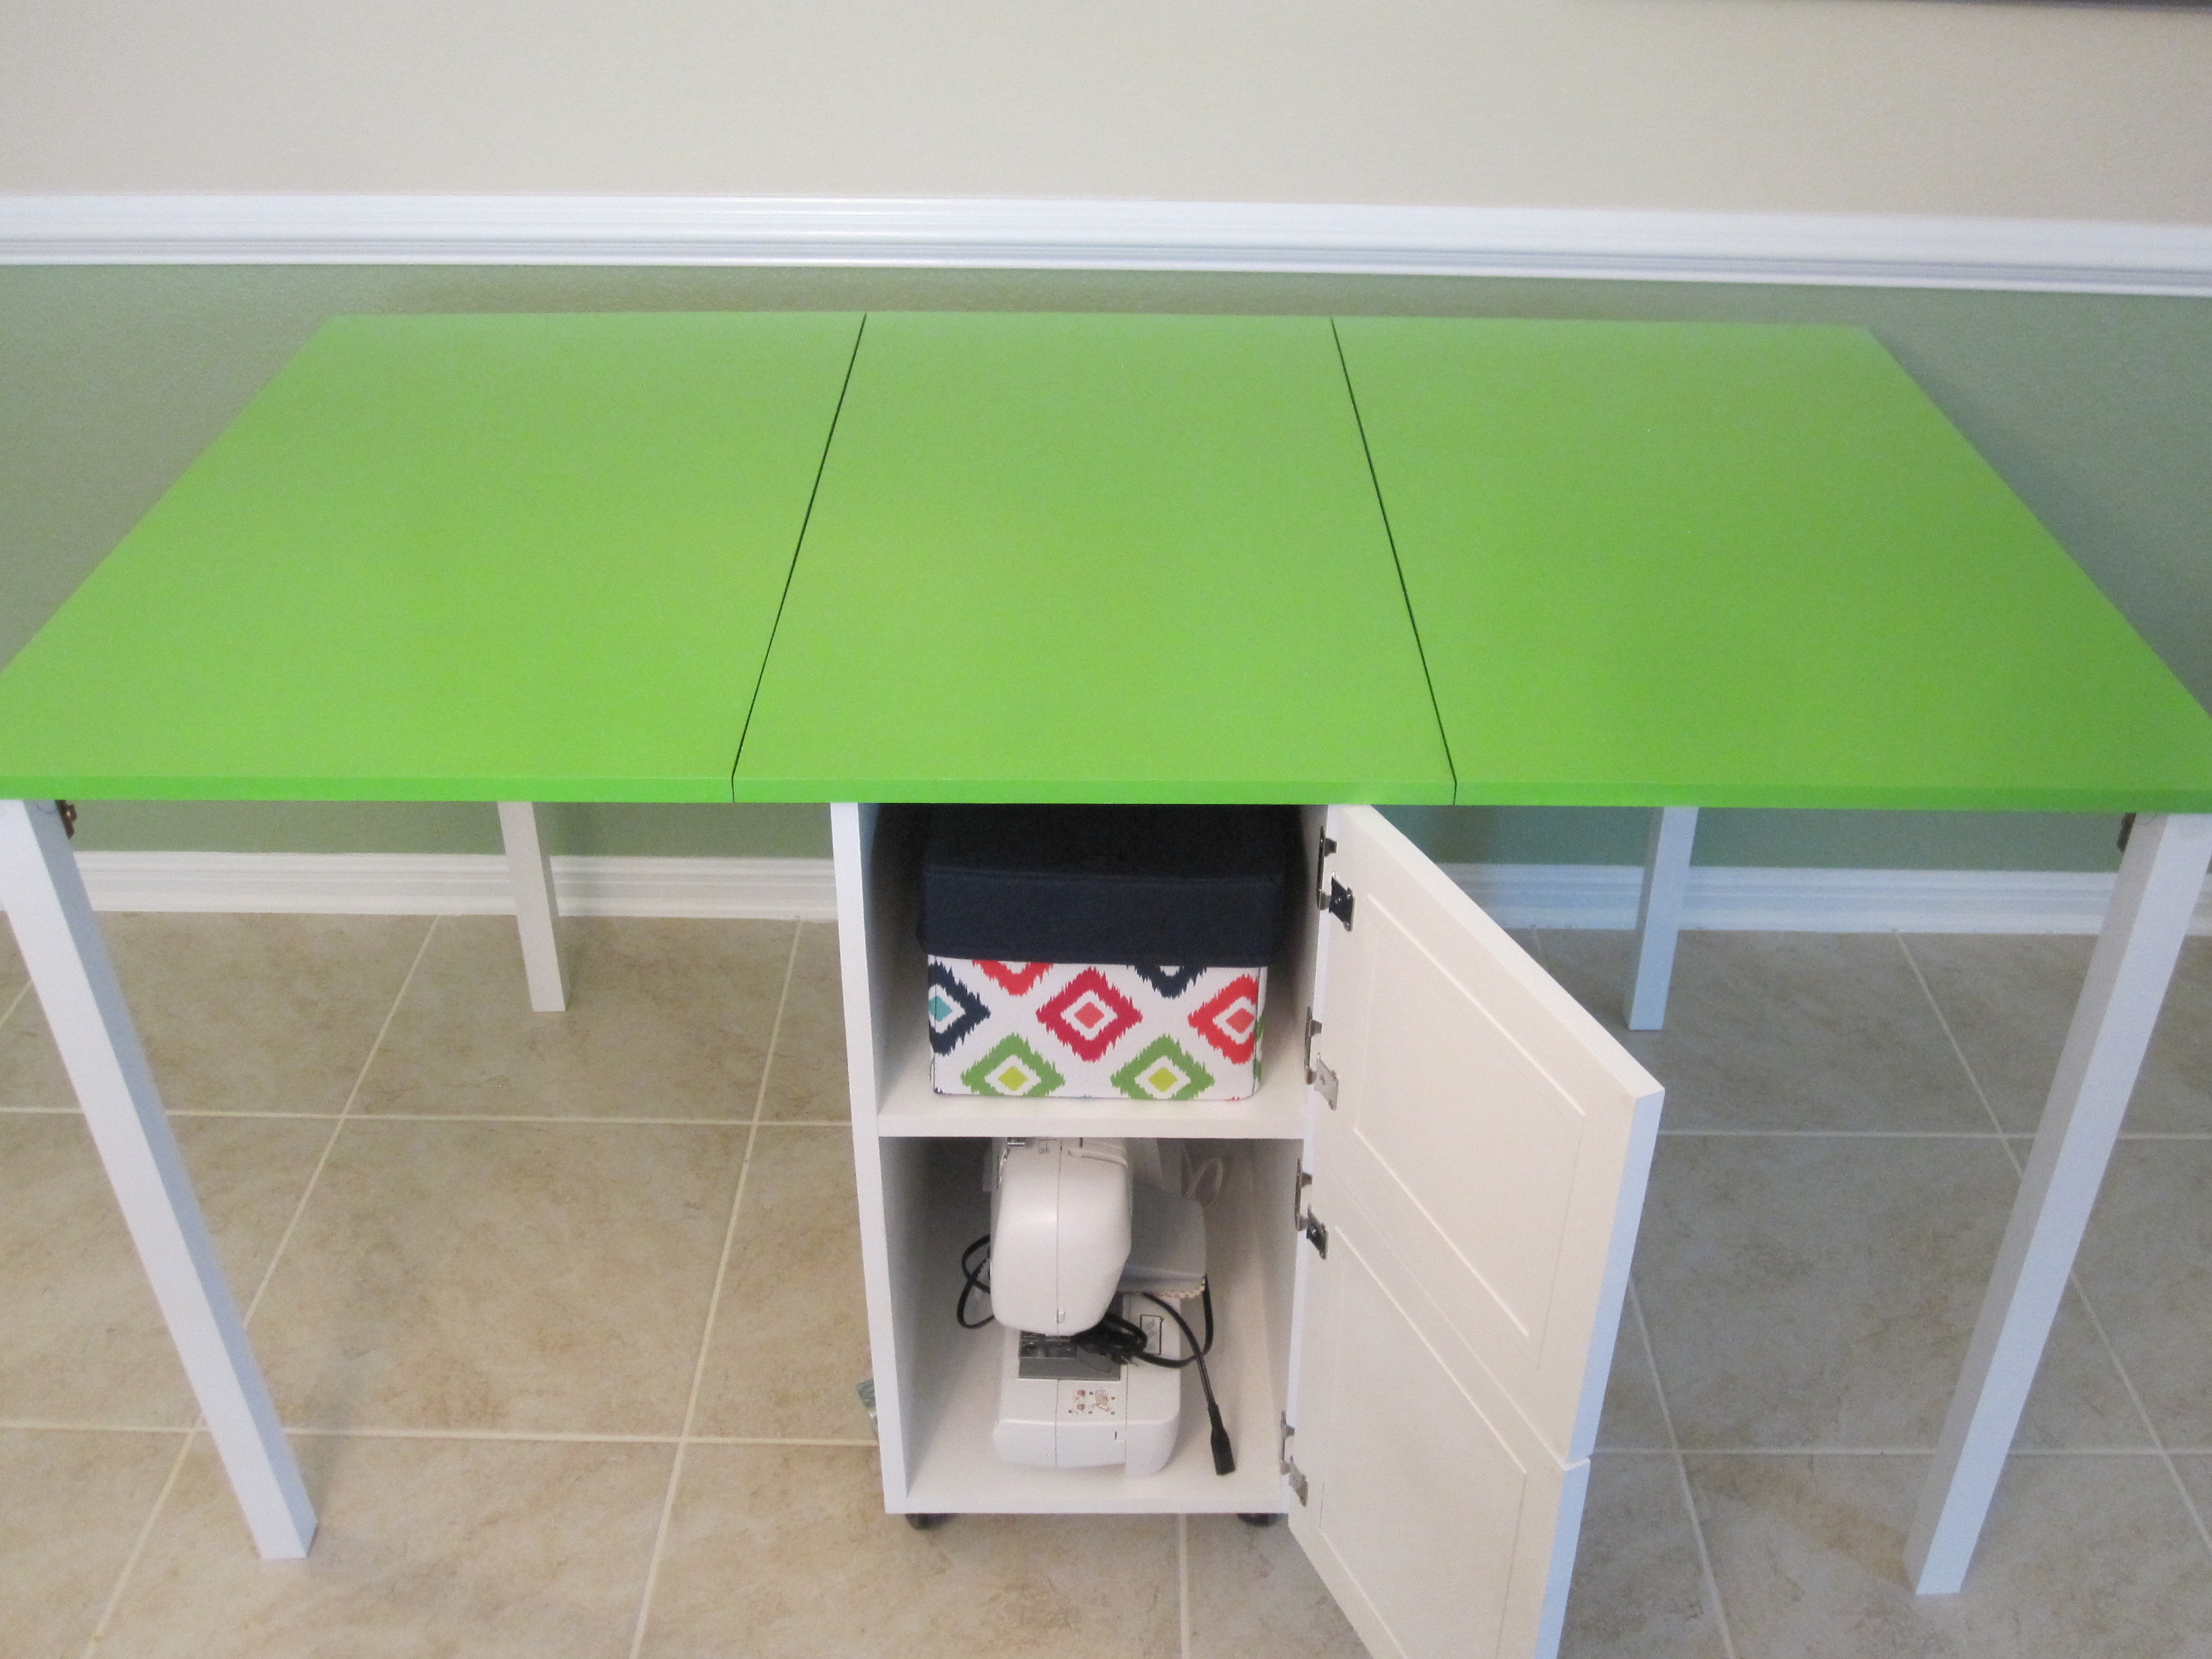
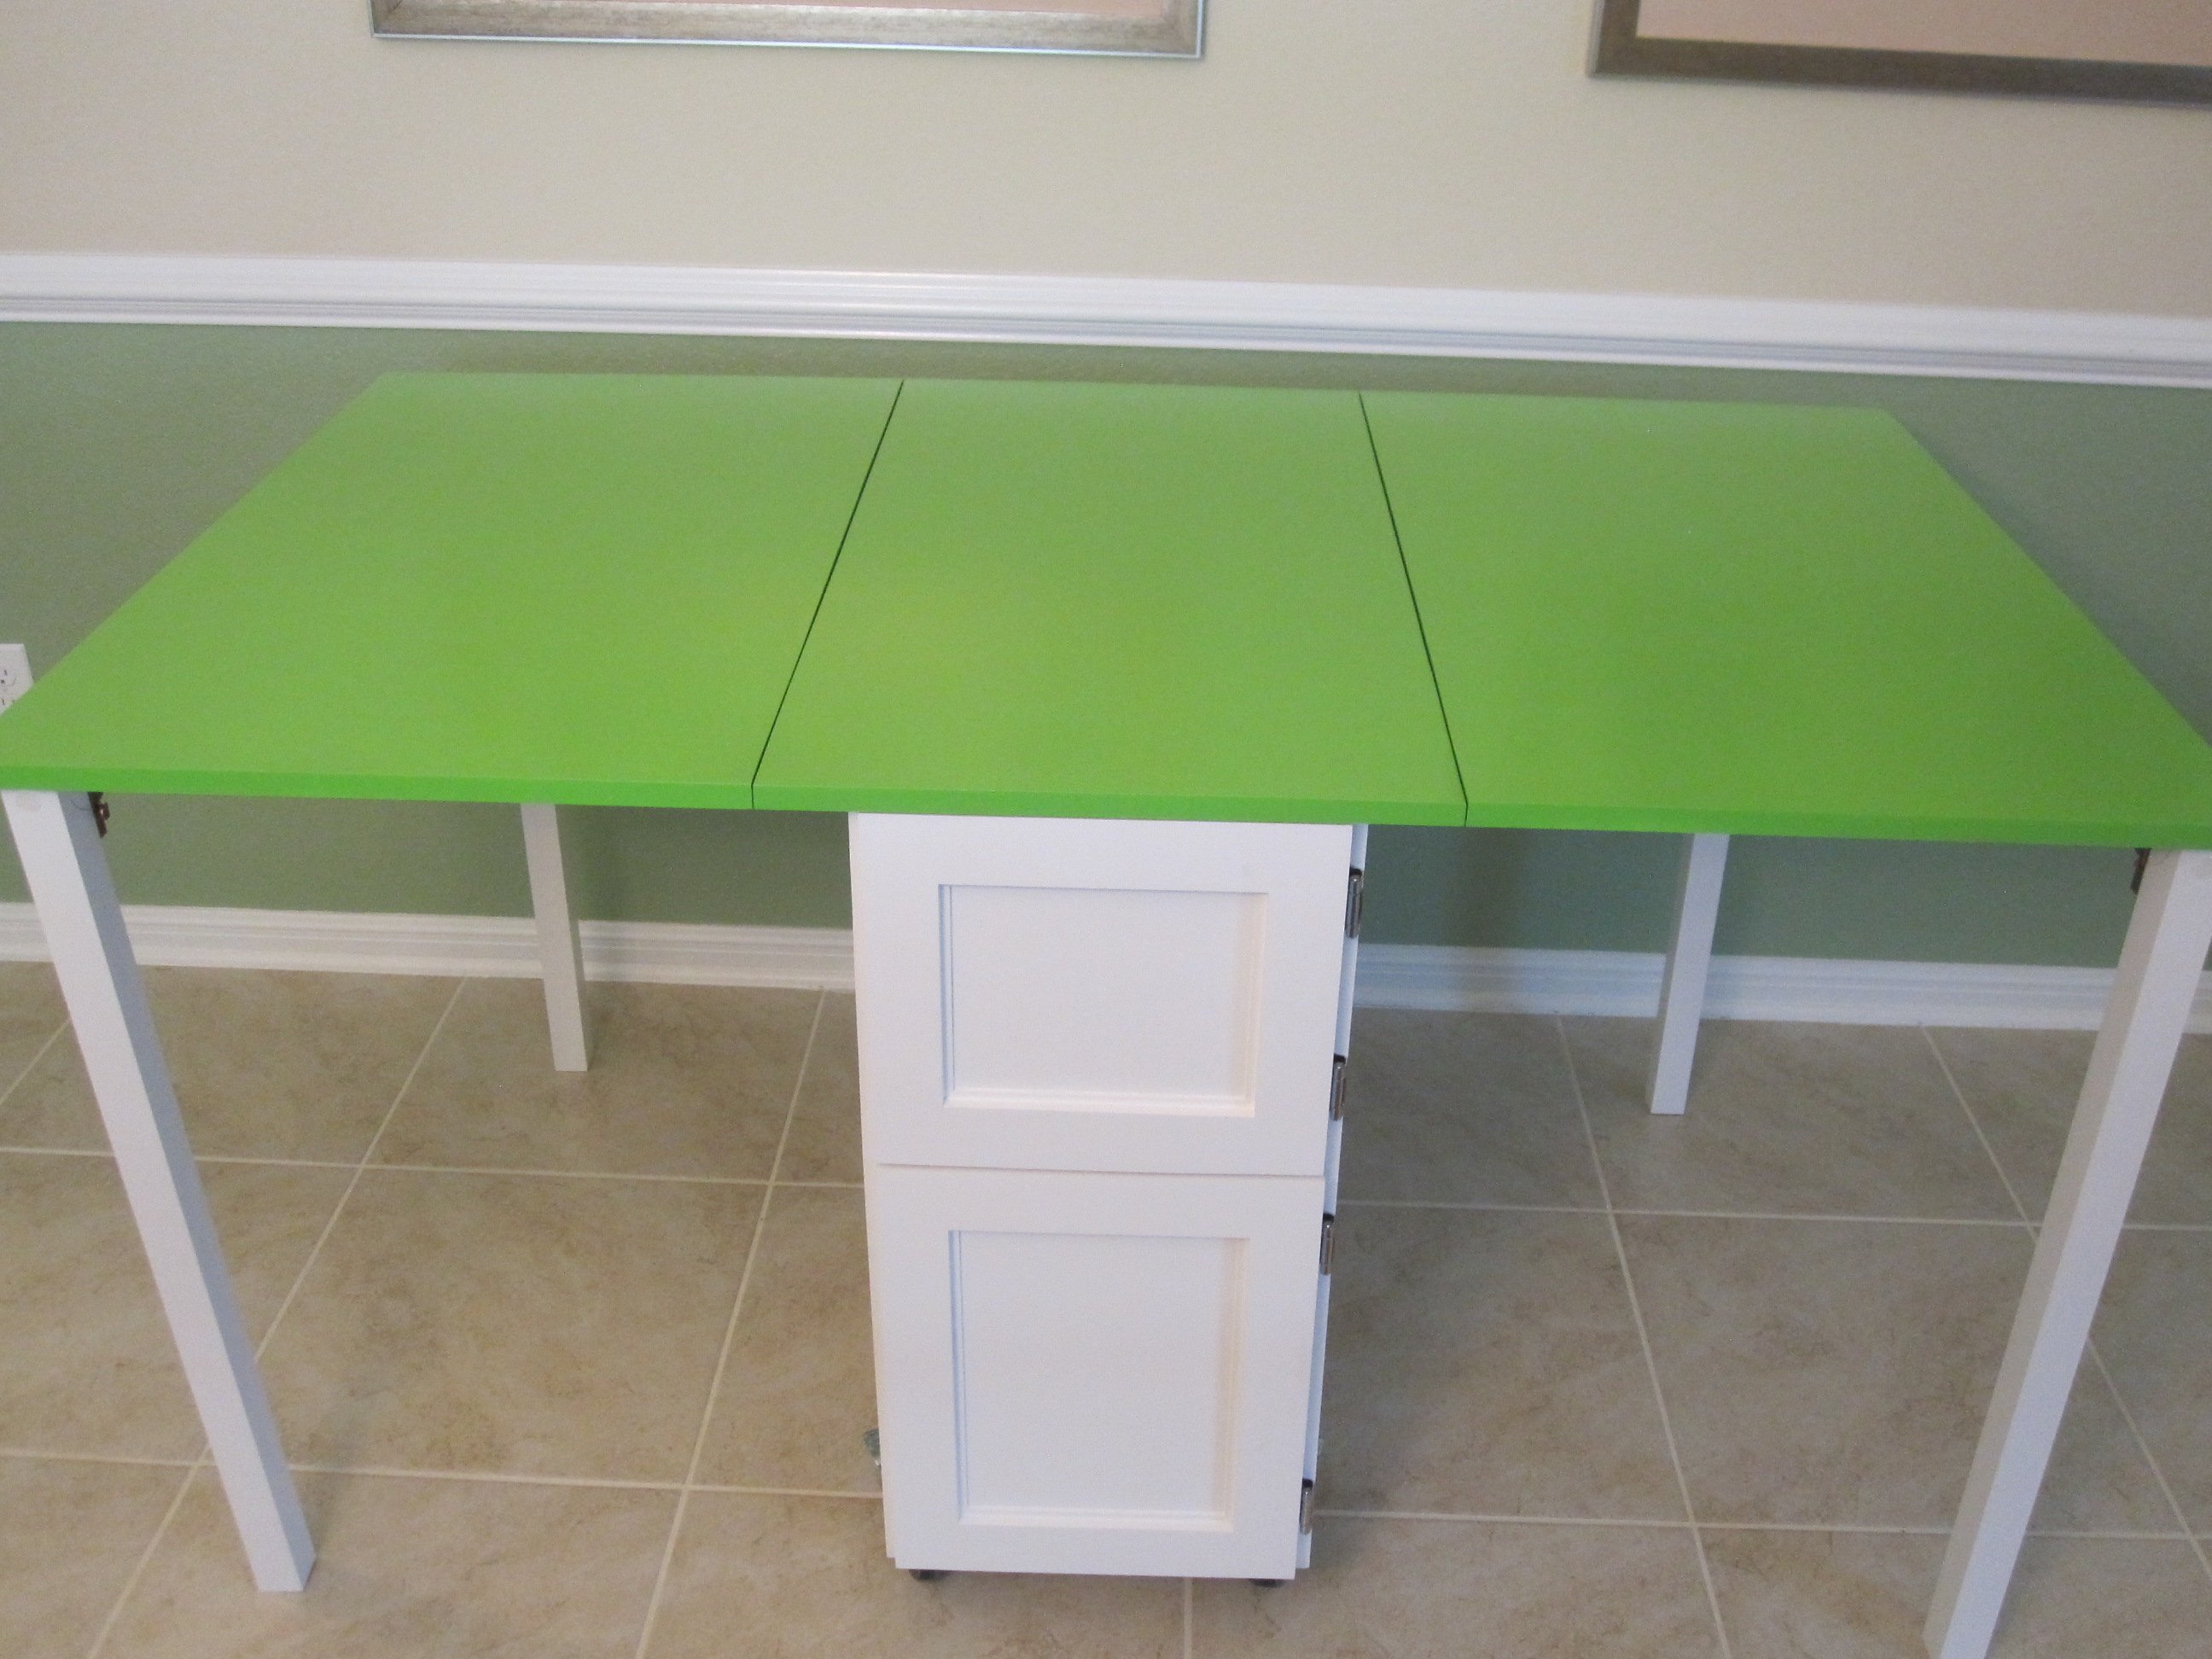
Built the sewing table for my wife Penney. It has a work surface that is 36" x 60" and is 32" high.
Used 3/4" Baltic Birch and used premium pine to add edge banding. Used 1/4" plywood for a back to the sewing table to add strength and I think helps the look of the table. My Kreg Jig was used everywhere possible when assembling the case. Used full length piano hinges with #6 x 5/8" screws to attach the leaves to the table. Made the doors using premium pine with a plywood panel. For the legs, I used folding, locking leg brackets from Lee Valley to attach the 1-1/2" square poplar legs. The casters are 3" double-locking from Woodcraft.
Went a little over budget, but it turned out very nice and she loves it.
Thank you for the easy to follow plans.
Built from Plan(s)
Estimated Cost
$275
Estimated Time Investment
Week Long Project (20 Hours or More)
Finish Used
Benjamin Moore Advance Paint semi-gloss. Sprayed 3 coats using HVLP sprayer of both white and green. Used Benjamin Moore Fresh Start Primer - 2 coats sanding between the coats.
Recommended Skill Level
Intermediate