Community Brag Posts

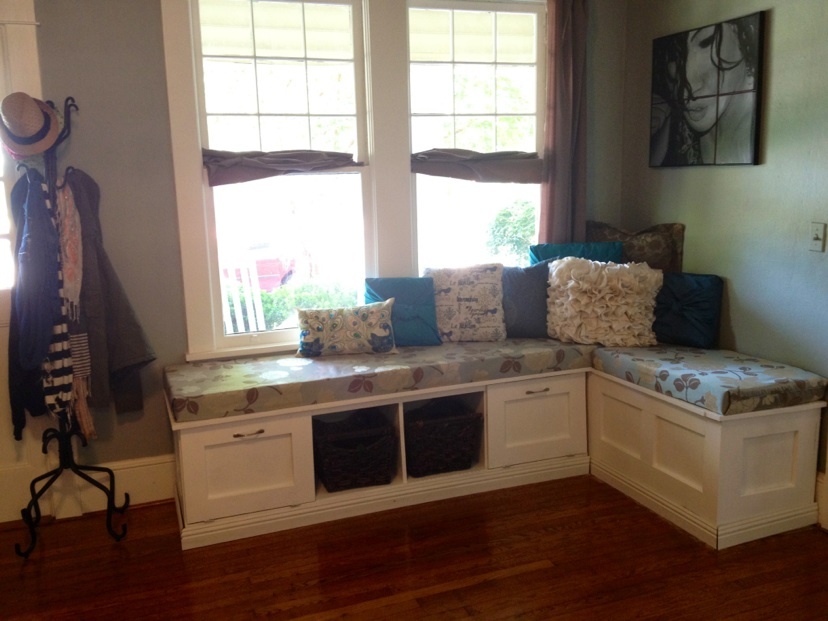
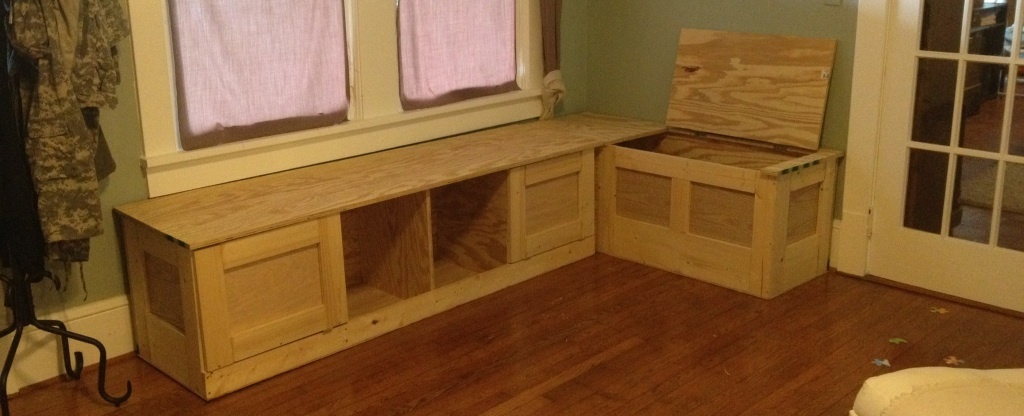
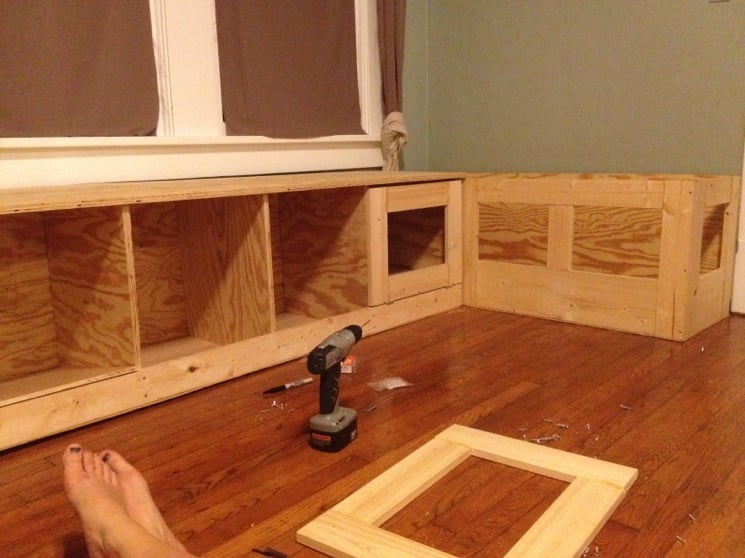
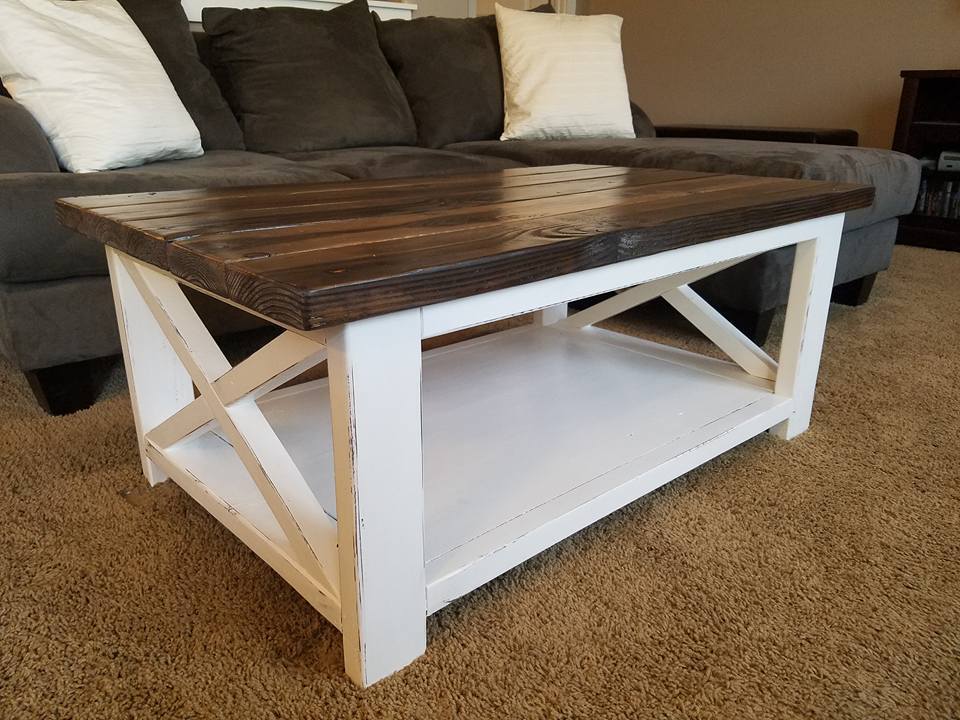
Apartment Perfect Dinng set

Submitted by Tbacks on Sat, 03/30/2019 - 19:17

We modified the farmhouse table and bench to make a table for our daughters apartment. We made the table 54” long which turned out to be the perfect size for the apartments dining room space.  You may also notice we built a dog bowl table to match the farmhouse table style.  Love the design!

Estimated Cost
$200
Estimated Time Investment
Weekend Project (10-20 Hours)
Finish Used
Off-white paint wash bases with a weathered wood treatment for table, bench and chair tops
Recommended Skill Level
Intermediate

Console entry table

Submitted by Anonymous (not verified) on Thu, 07/20/2023 - 12:07

This entry table I made from wood I got from a recycle center of wood products. It’s been in our entry now for several years. I have only basic tools-no planers and jointers, etc. I do have a fold up table saw that I use once in awhile. I enjoy working with natural /live edge and or construction grade materials. Always impressed with the items Ana has built. Good job Ana😁👍

Built from Plan(s)

Wood Storage Box

Submitted by Joni on Sun, 03/18/2012 - 10:42

My wood scraps were definitely getting out of control, and I needed something to store the wood vertically. I had some spare wood (free from Craigslist), so I put together a wood storage bin. All in all, the project cost me the price of some Kreg screws.

Estimated Cost
Free!
Estimated Time Investment
Afternoon Project (3-6 Hours)
Recommended Skill Level
Beginner

Comments

hoffer5353

Wed, 06/06/2012 - 13:21

I have been struggling to organize my space because my lumber is on one of my work spaces. I have the perfect space for that, thanks for the great post!

Cubby Shelf with Ironing Board Top

Submitted by PinnSB on Sun, 02/02/2014 - 11:56

Originally I wanted a cubby shelf for the empty space between the sliding door and window in our master bedroom. However, that is also where the ironing board always sat out and I got tired of looking at it. So this project evolved and I decided to add an ironing board to the top of it. I used a 41" 1x12 for the top and 2-11" scraps for the flaps on either side. I covered each piece with one layer of felt and one layer of fabric. Flaps were attached to main board with hinges. Under-mount drawer slides were used to both allow the board to shift left and right and to support the flaps in open position.

Built from Plan(s)
Estimated Cost
$85
Estimated Time Investment
Day Project (6-9 Hours)
Finish Used
Valspar Ultra White Satin Paint
Recommended Skill Level
Starter Project

Comments

rlmilam3

Wed, 02/03/2016 - 21:07

Are there more specific plans for building the ironing board part of this? The other builds are so specific, having everything laid out even the amount of screws needed. But this one is definitely lacking. Is there further directions elsewhere that I'm missing?

itzann

Thu, 02/04/2016 - 09:24

Hi, this particular project was submitted by a reader, who modified the plans of the cubby shelf to include the ironing board top. It is not part of Ana White's project plan, so that is why there are no specifics. Perhaps you could try contacting the person who posted, and he/she could tell you more details. 

-Ann

A First Planter Project

Submitted by Anonymous (not verified) on Mon, 09/18/2023 - 15:44

Cedar Planters, my first planter. Thanks Ana!

Caleb

Built from Plan(s)

Comments

Vertical Herb Planter

Submitted by Anonymous (not verified) on Tue, 05/10/2016 - 20:04

Used your plans but make changes to the planters since I do not own an angle machine.  They look great and the cost was less than $30

Estimated Cost
$28
Estimated Time Investment
Afternoon Project (3-6 Hours)
Finish Used
Deck screws
Recommended Skill Level
Starter Project

Comments

NextGreenLife

Tue, 05/30/2017 - 14:33

Can appreciate wanting to do projects but not having all the necessary fancy tools.  I need to make two of these anyway (one to give away), so going to steal this idea to make it a wham-bam quick job!

Playhouse Loft Bed

Submitted by BethStew5 on Wed, 07/18/2012 - 22:12

This is my first build from this site! I used 6" boards to give the siding a plank look rather than using plywood. To make the height work, I used 8" boards for both the top and bottom planks. I also made the door a little taller. Other than that, I followed this plan step-by-step. It was very easy to follow and I really enjoyed making this bed. My daughter (and my sons) really enjoy it!

Built from Plan(s)
Estimated Time Investment
Week Long Project (20 Hours or More)
Recommended Skill Level
Intermediate

Mimi Storage Bench Revised

Submitted by Nataland on Fri, 07/27/2012 - 15:02

I needed a way to turn my large, open, many-windowed Foyer into a functioning entry way. I Loved Mimi's Storage Bench, but i needed the dimensions to be very different, so I used her bench as a concept guide.
The bench under the window is 76 inches, and the bench on the right that backs into the corner is 58 inches. I used a four inch foam pad. I think the pad might have been excessive- it cost a lot more money than I had intended to spend.
This is my third building project. Previously I built some bookshelves and a set of shed doors.
I would consider this an entry level project. The hinges on my fold down drawers were the most aggravating part. The whole project would have been much easier if I had been able to use Mimi's exact plans. As it was, I had to make my own cut list and purchase list.

Estimated Time Investment
Week Long Project (20 Hours or More)
Finish Used
white satin behr paint- untinted. I purchased the base paint with no color mixed in.
Recommended Skill Level
Beginner

Comments

CONICA (not verified)

Thu, 10/25/2012 - 06:46

I love this! It is exactly what I need in my kitchen. Do you happen to have the cut and purchase list you made?? Or other instructions? Thanks!!

Kitchen Island

Submitted by bbomer on Tue, 09/04/2012 - 18:41

I built this island using Ana's base cabinet plans. I simply added a face frame to all the sides because they are all visible. My wife drew up the plan that includes open storage at one end and an overhang at the other to provide room for a stool. We bought the butcher block top online. It comes unfinished, so we had to sand it down smooth and treat it with mineral oil.

Estimated Cost
Approx. $500
Estimated Time Investment
Week Long Project (20 Hours or More)
Finish Used
Danish Oil + Shellac + Latex + Minwax Polycrylic
Recommended Skill Level
Intermediate

Comments

Kathy in Pittsburgh (not verified)

Wed, 09/05/2012 - 09:55

I'm in love....this is gorgeous! You both should be very proud of how it turned out. Now, if only my kitchen weren't so small that I can touch both opposite countertops with my arms spread out.....I would build this in a heartbeat! :P

Blinky114

Thu, 11/06/2014 - 09:25

As Kathy in Pittsburgh said, .."this is gorgeous!" I too would be building this if my kitchen were nearly large enough to accommodate it.

Thanks for posting this, it gives me inspiration.

Mark in Portland, OR

mpullan

Sat, 11/25/2023 - 14:23

Pretty much what my daughter wants. I’ll have to be looking at yours a bit to figure out the open shelves. Thanks for posting!

Outdoor rolling bar top

Submitted by Anonymous (not verified) on Wed, 07/08/2020 - 19:43

We had some leftover granite from an outdoor kitchen build and wanted to maximize the use of it. We loved the look of a rustic table from Pottery Barn and set out to find something that was asking the same aesthetic. I came across the Jilly and Mia workbench console and thought it would work great with some minor modifications. I shortened the overall length and height, went with some heavy duty casters to support the weight of the granite, and reinforced the cross beams that would support the 3/4" plywood sheet and granite. I went with cedar for this build since it was outdoors and I'll finish it with a clear sealant.

Built from Plan(s)
Estimated Cost
$300
Estimated Time Investment
Day Project (6-9 Hours)
Recommended Skill Level
Intermediate

Comments

Rustic X Coffee Table

Submitted by Anonymous (not verified) on Tue, 10/25/2016 - 19:11

I had already built the Rustic X End Tables, and 3 years later I finally built the Rustic X Coffee Table to match!  I shorted the length by 8" and coated the whole piece in a steel wool and vinegar solution.  I then went back and used White Adirondack chalk paint by Folk Art for the base.  I sanded the edges lightly for the distressing and put 3 coats of Minwax Matte Polyurethane over the entire piece for the top coat.  I ended up putting 2 large wicker baskets underneath for extra storage and it is perfect!

Built from Plan(s)
Estimated Cost
$60-$100
Estimated Time Investment
Weekend Project (10-20 Hours)
Finish Used
Steel wood & Vinegar, White Adirondack chalk paint by Folk Art, Minwax Matt Polyurethane
Recommended Skill Level
Beginner

Argie Bedside Table (Nightstand)

Submitted by thehallway on Sat, 10/27/2012 - 07:56

I built this bed for the guest room at our previous house. The room was small, so I made floating shelves for the nightstands to save space. We have since moved and are now renting, so we didn't want to put holes in the walls to hang the shelves. I took the opportunity to build these nightstands instead. The original design was a little too tall and wide, so I reduced those dimensions by 3". This was my first time building drawers, but they went together surprisingly well. I had used a combination of stain on the bed and was worried about matching it, but 2 coats of Minwax Dark Walnut ended up being a pretty close match.

Built from Plan(s)
Estimated Cost
$75
Estimated Time Investment
Day Project (6-9 Hours)
Finish Used
2 coats of Minwax Dark Walnut & Poly
Recommended Skill Level
Intermediate

Comments

Printer's Console or Sneaky Litterbox Cabinet? Cat Litter Box Cabinet

Submitted by Joni on Sun, 11/25/2012 - 08:12

I had been wanting to build something to hide the litterbox for a long time. When I saw the Printer's Console plan, I knew this was the perfect plan for a cat litter box furniture. I loved that Jen Woodhouse's version was completely modified to her bar plan, so I thought I could modify for my litterbox idea. I modified the plans on size, as I was trying to use a bunch of mis-matched plywood. I also modified it to include a cat door, a cat passageway on interior panel, a vent on the back behind one of the drawers, and the stone top. I built a frame on the back to house the backing as an inset piece, as I didn't want it to be seen at all. I learned a very important lesson during this build. Not all 1x3s are created equal. Once I got my doors assembled, they were too big for the opening. I couldn't shave off the tiny amount needed, and couldn't make anything work short of starting over with 1x4s, sawing off a small amount, and cutting down the # of "drawers" (and handles). I wanted the inside to be fully finished (because cat pee on raw wood would not be good!). I had to finish certain "planes" prior to putting the thing together. I used kitchen and bath paint on the inside floor and sides for easy cleanup. The stone was carryover from construction on our house 12 years ago. The handles were an amazing deal @ $1.81/each .


Built from Plan(s)
Estimated Time Investment
Week Long Project (20 Hours or More)
Finish Used
Minwax Wood Conditioner, followed by a mix of American Walnut & Onyx Minwax water-based Stain. 3 Coats of Old Village Gel Varnish. On inside, I used a kitchen/bath paint.
Recommended Skill Level
Intermediate

Comments

blueskiesinNM

Mon, 06/17/2013 - 12:23

Love your use of the buffet. Our family has discussed making a piece of furniture like this for our smaller dog. Nice to see someone has done it! Our big dog has scheduled feedings but our little dog would prefer to be a free feeder. Poor thing chokes down his food in our pantry listening to our big dog breathing under the door waiting for him to finish. When he is done we open the door and the Big, greedy dog bolts in looking for left overs. A family member has to wait patiently for the little dog to finish so he can escape the pantry. I really don't want a doggy door in my pretty swinging bi-fold doors to my pantry which is also access to our kitchen.That would be a pain to have to keep closed all day. But this buffet idea is super cute! Thanks for the inspiration.

wayneled

Fri, 01/09/2015 - 22:01

I know this is an old post, but I'll ask anyway

I love this piece and am in the planning stages for ours. Thank you for sharing!

I am Wondering how you went about the table top. Did you install a 3/4 ply on top but not flush, allowing room for mortar and tile? If so how much room did you allow for the tile/mortar? 1/2 inch? How did you keep the surface of the tile level and uniform? Lastly, did you seal the tile with anything when you finished?

Aesthetically, the tile top really sets this piece off and I really want to make my own.

Thanks

Seasonal And Holiday

Pantry Door Storage - 78 inch tall version.

Submitted by Anonymous (not verified) on Sun, 01/22/2017 - 09:47

Pantry Door Storage

Thank you for your plans.  Love this!  I made a few errors and would make a few changes if I were to do it again...  I would make the dowels higher from the shelves (I think I made a mistake).  I would also try to place the dowels closer to the front of the unit to give deeper shelf space - bigger space containers would benefit from deeper storage.  But it's a great improvement over the commercial options.  Combined with motion sensor LED lights, the pantry is much improved!  Thanks again! 

Built from Plan(s)
Estimated Cost
60
Estimated Time Investment
Afternoon Project (3-6 Hours)
Recommended Skill Level
Beginner

Sewing Table

Submitted by lexaroo on Sat, 12/19/2020 - 11:08

I used the sewing table plans from Ana's sie to make a sewing table for my mother-in-law's birthday. She loves it. the plans worked great. I did upgrade the legs with some Locking table leg extensions from Amazon. https://smile.amazon.com/gp/product/B06VTJZHS6/ref=ppx_yo_dt_b_asin_tit… I also used pocket holes instead of just screws. If I made another one I would use a thicker piece of lumbar for the legs maybe a 2"X 2" instead of the 1"X 3" I'd used.

Built from Plan(s)
Estimated Cost
50
Estimated Time Investment
Afternoon Project (3-6 Hours)
Finish Used
General finishes Java Gel or Expresso
Recommended Skill Level
Beginner

Comments

SMALL GABLE ROOF GREENHOUSE

Submitted by Ledopmi on Wed, 12/23/2020 - 06:07

I was planning on building a greenhouse some time next year but I just happen to see this by chance and fell in love with it. I've always built from my own designs but when I saw this I decided to purchase the plans. I couldn't be more happy with it. Right now its doubling as a feed room. I wanted a solid foundation so I build a floating deck to mount the walls on. The deck added quite a bit to the total price.

Built from Plan(s)
Estimated Cost
$1384.94
Estimated Time Investment
Week Long Project (20 Hours or More)
Finish Used
Paint
Recommended Skill Level
Advanced

Comments

Outdoor bar grill surround with 2 post pergola

I wanted to build an L shaped outdoor bar with a 2 post pergola over the grill.  I couldn't find any plans online that would fit the space I had, so I decided to build it myself with custom dimensions.  The top bar is approx. 7'3" across, and 15" wide, while the distance from the right edge (next to the house) to the end of the bar is approx. 9'1".  

I framed it with PT lumber and the 2 pergola posts are sitting on top of the pavers and supported internally within some of the framing studs.  Since the pavers sit on top of concrete, I didn't feel the need to dig up the existing pavers and achor them in the ground.  

I used hardiboard for the exterior and tiled the lower section of the bar.

For the actual high bar top, I wanted to do something unique, and found a 900 year old scrap slab of Cypress at a local lumber yard.  One side was smooth, but underneath was gouged out from different saw cuts and very uneven.  I screwed a piece of 3/4" PT plywood underneath and trimmed it with 1-1/2" Cypress.  I stained the whole thing with a dark honey colored stain and put a generous amount of poly on it once it was dry.  There are a few cracks and nicks on it, but once it was stained, it looked awesome.  

Estimated Cost
I lost track after a while, but I would say $600-700.
Estimated Time Investment
Week Long Project (20 Hours or More)
Finish Used
Minwax honey colored stain for the bar top. Minwax provincial stain for the pergola and minwax dark walnut stain for the oak trim.
Recommended Skill Level
Intermediate

Comments

Jelly Cupboard Armoire

Submitted by Fallmark18 on Fri, 12/12/2014 - 11:23

This is my first solo and most ambitious project. I only had some help with getting the doors hung. I combined my long-time love of machine embroidery and my new found love of woodworking to create the doors on this project and really make it something special. I'm going to be using this piece in place of a chest of drawers in my bedroom.

Built from Plan(s)
Estimated Cost
About $150
Estimated Time Investment
Week Long Project (20 Hours or More)
Finish Used
Rustoleum Ultimate Wood Stain in Cabernet and several coats of Rustoleum Interior Ultimate Polyurethane
Recommended Skill Level
Intermediate

Comments

JoanneS

Fri, 12/12/2014 - 13:21

What an awesome project! Love the finish, and the design on the doors. How did you do the door panels? They're lovely!

Fallmark18

Fri, 12/12/2014 - 14:53

Thanks so much for the compliment! The door panels are made of replacement storm door screen. I used my embroidery/sewing machine to embroider the design onto the screen.

Fallmark18

Tue, 12/16/2014 - 09:25

I'm so glad people like it. Everything I know about building I've learned from your site!

Grandy console

Submitted by Anonymous (not verified) on Tue, 03/21/2017 - 06:13

I took a different direction on the doors instead of using the barn doors I used old wooden windows in place of them. 

Built from Plan(s)
Estimated Time Investment
Weekend Project (10-20 Hours)
Recommended Skill Level
Intermediate