Community Brag Posts

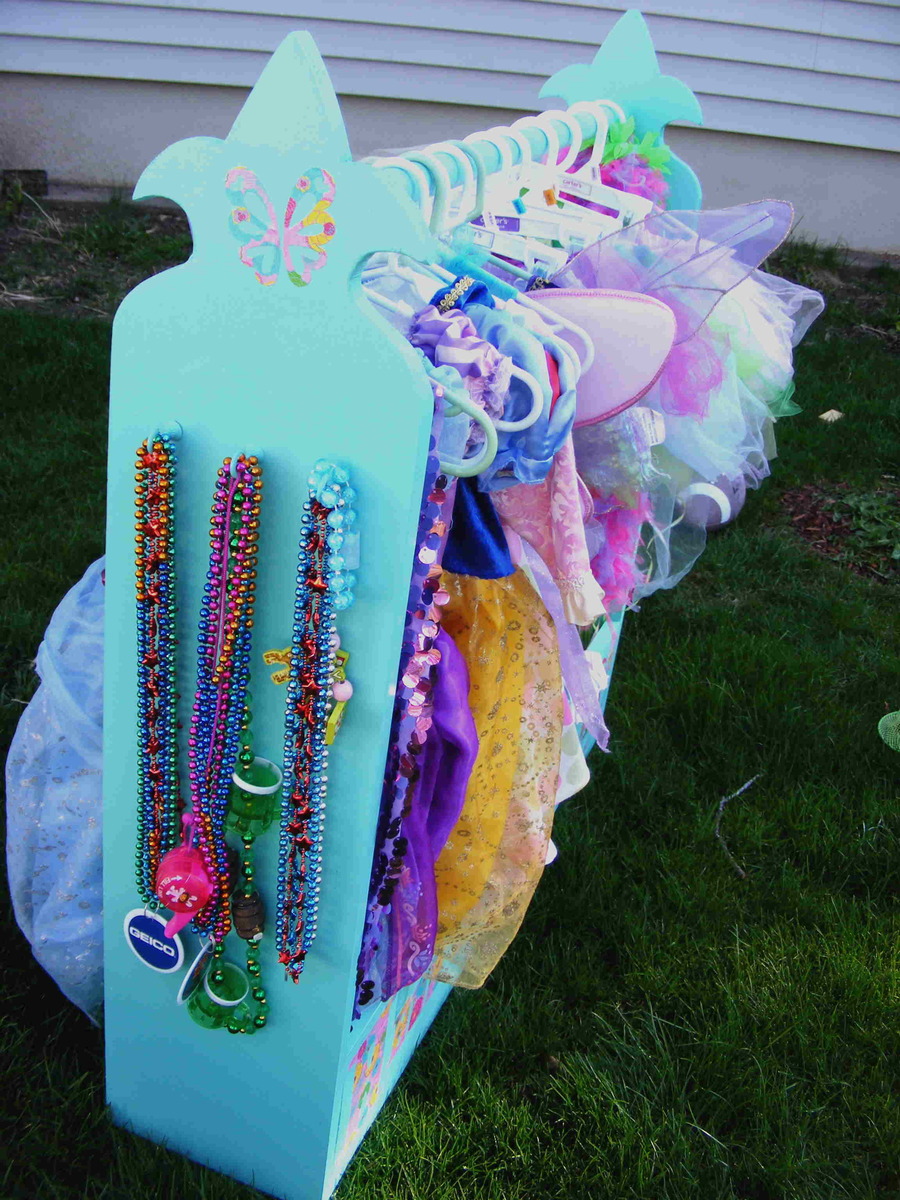
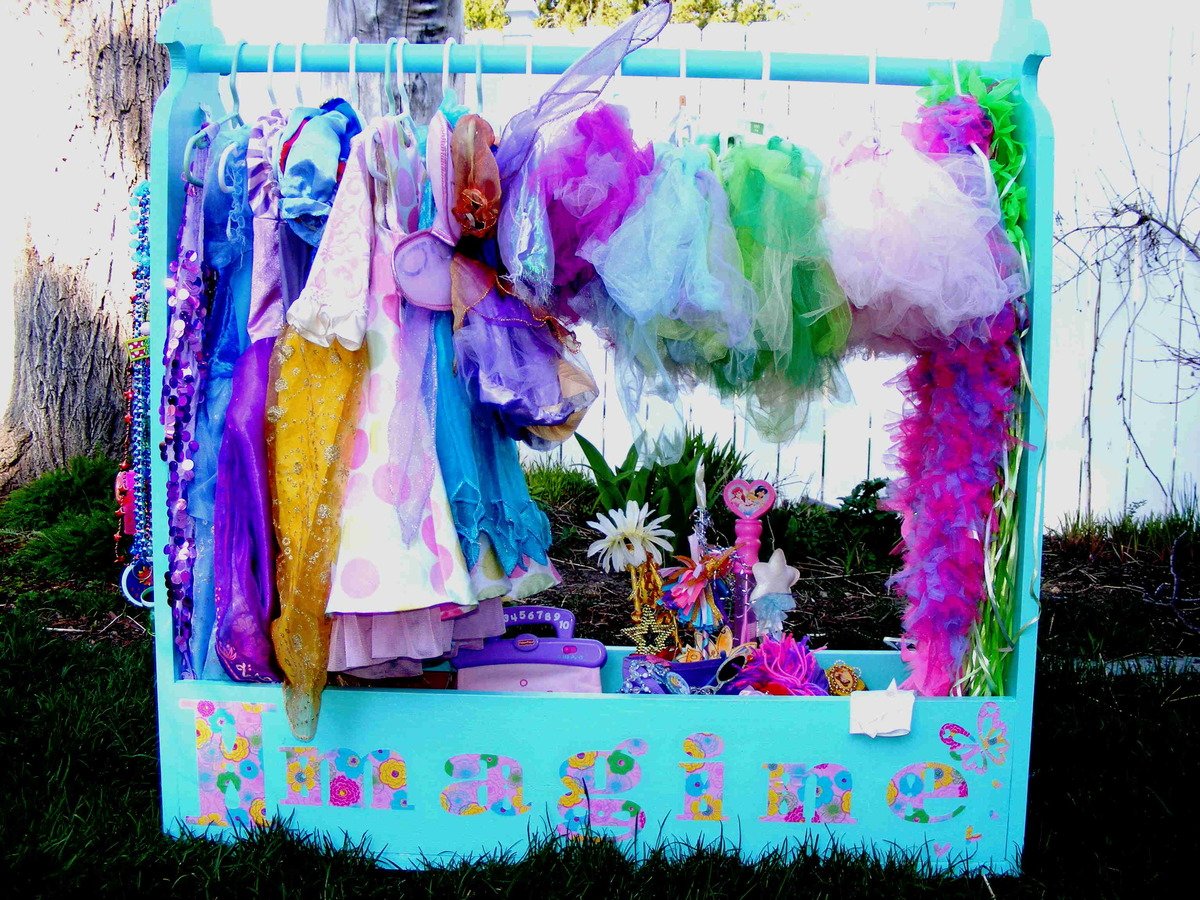
Fancy Fleur de Lis Dress-Up Rack

I saw the plans for the dress-up rack and immediately knew I had to make one for my girls. My three-year-old is in her prime dress-up stage and we had been shoving all of her princess crap in plastic drawers. She really couldn't get to them and stuff was constantly strewn all over the floor.

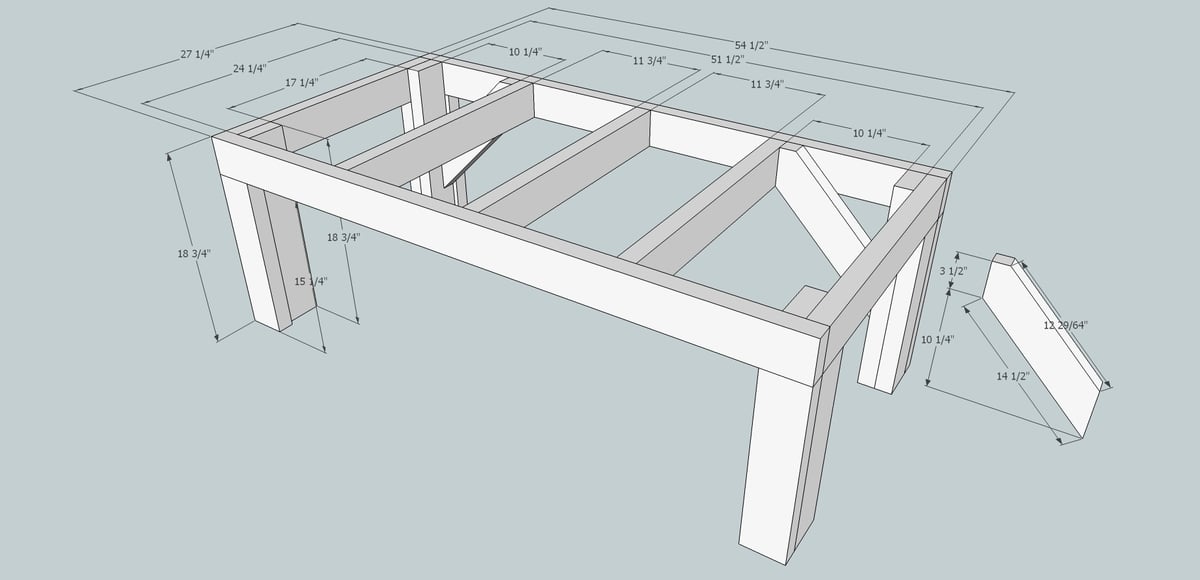
Enter the dress-up rack plan:

Thank You Ana! I looked over the plan and decided against the shelf feature on top, considering it would become a haven for junk. I figured the cubby space underneath would be a great catch-all for all of her shoes, purses, wands, and the like.

I purchased only two boards for the whole thing, as it was cheaper to buy an entire 12 foot length of 1x10 than several pieces with leftover scrap. So I had the 12 foot board cut into three equal lengths (4') at Lowes before I took it home, I also had the 1x8 cut in half. Every thing fit nice in my car (carseats included) for the ride home.

I decided on 44" for the height and width, so that it would be roomy enough to fit everything, and short enough for my three-year-old to hang up the dresses by herself.

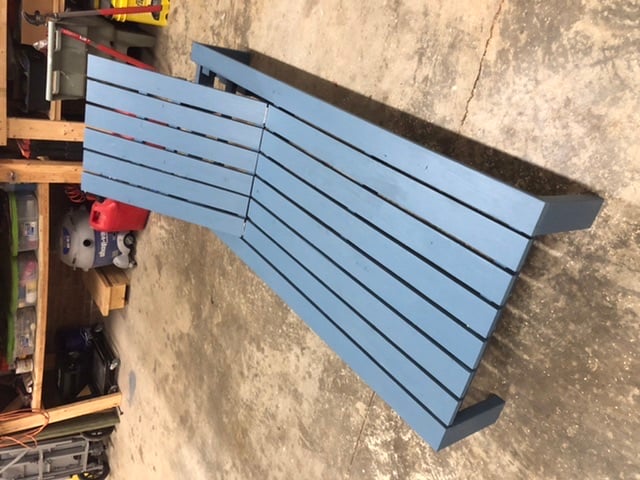
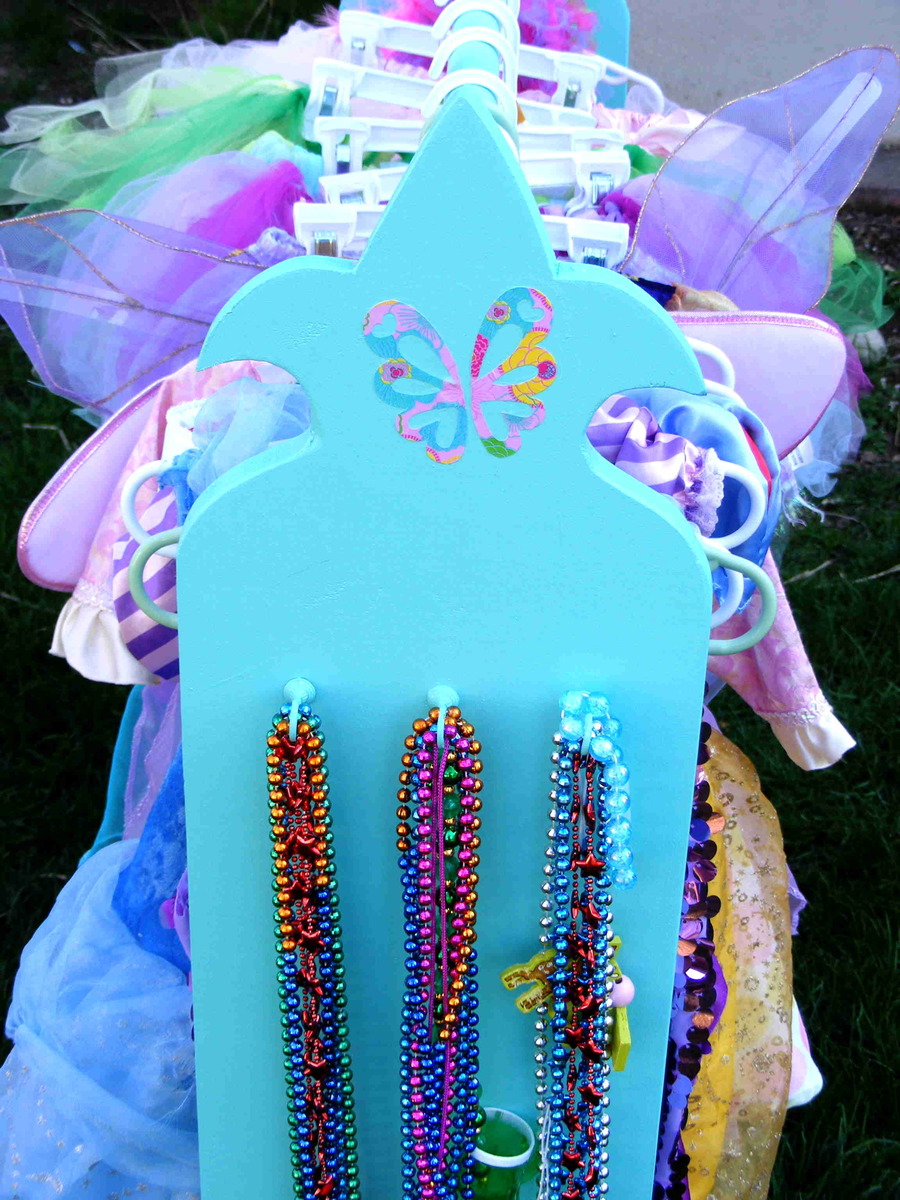
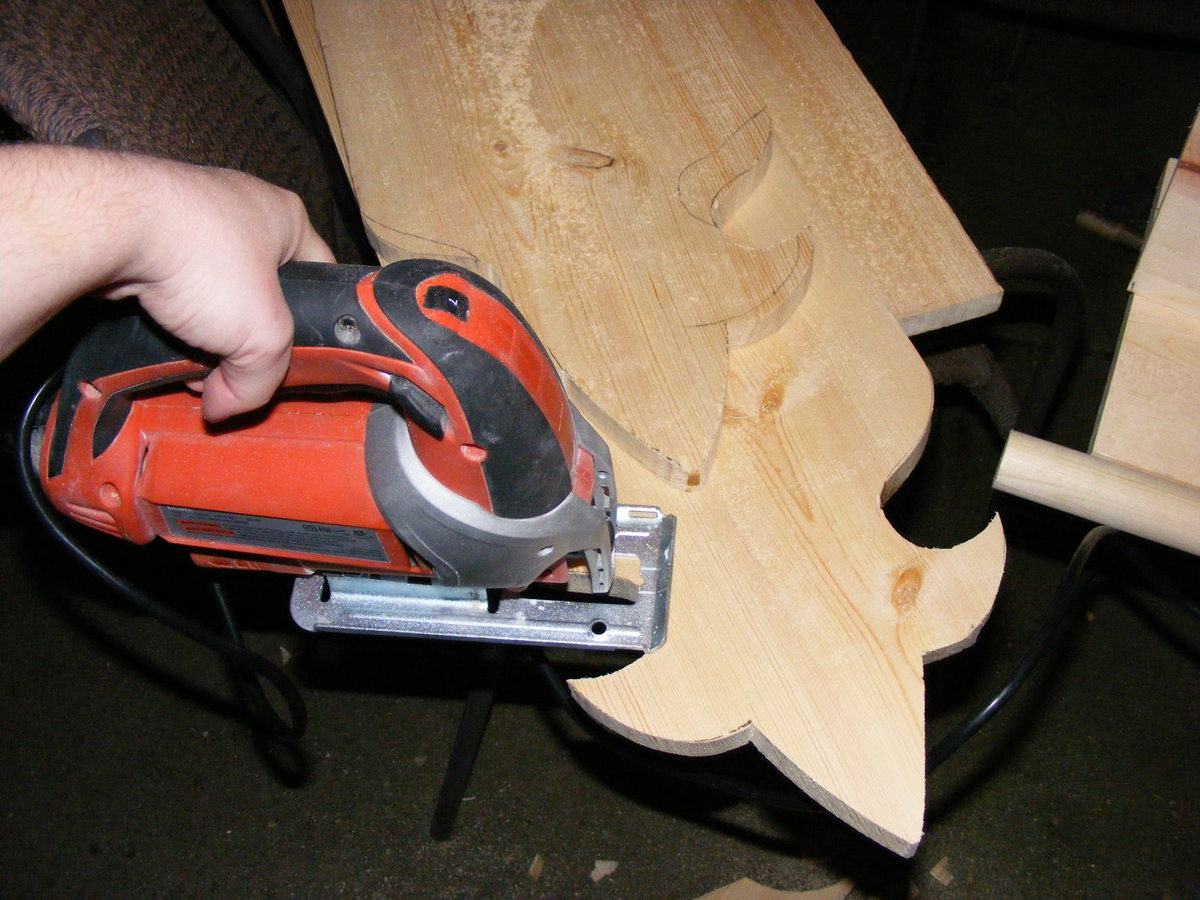
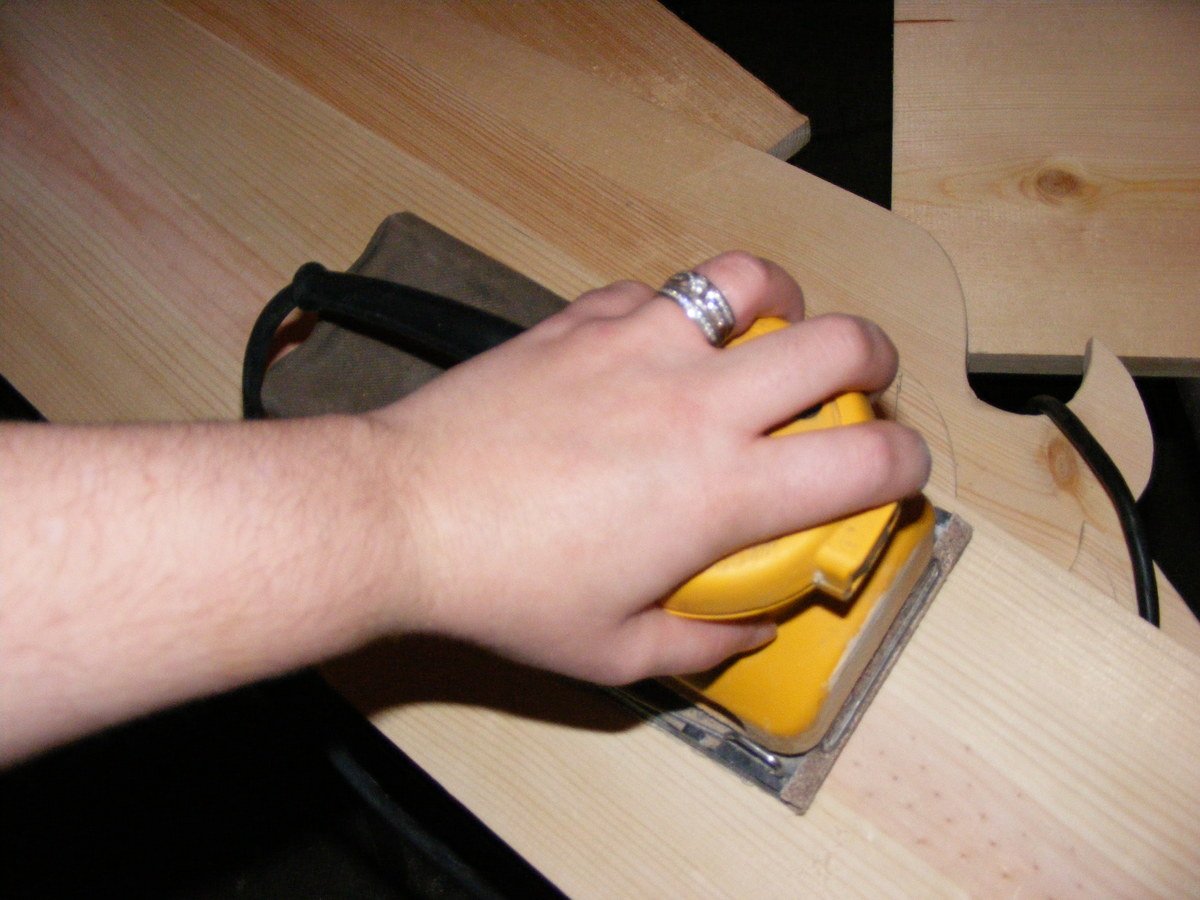
Then came the artsy part. I wanted a little whimsy in the design so I chose a Fleur de Lis pattern for the top ends of the rack. a little fancy, a little princessy, and fun at the same time. I rough sketched the pattern on one board (fold a piece of paper in half, draw one side, cut out, and voila, perfect mirror image. trace on the wood), cut it with a jigsaw, and traced from that one onto my next board. It was a little tricky with the jigsaw getting in the nooks and crannies, but I just took my time. The sanding hides all the rough stuff anyway.

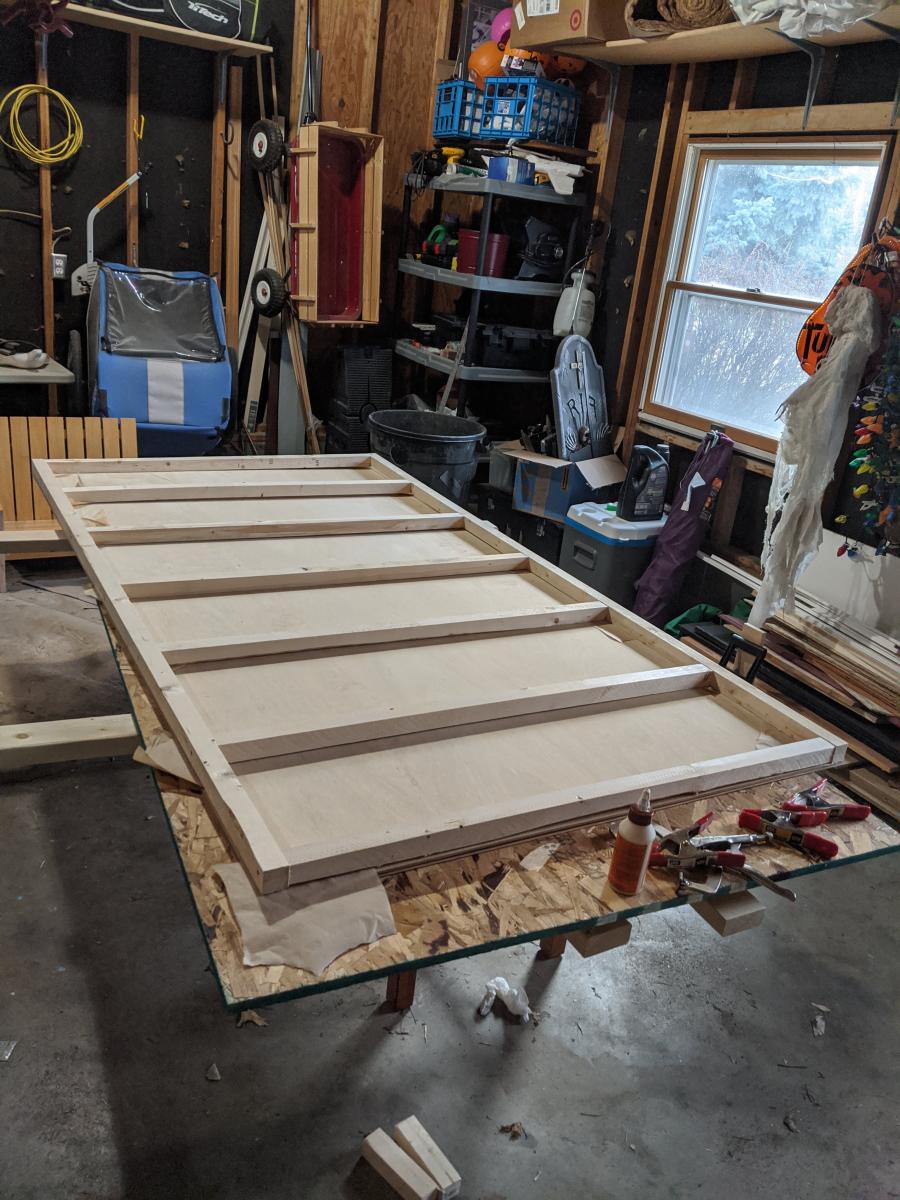
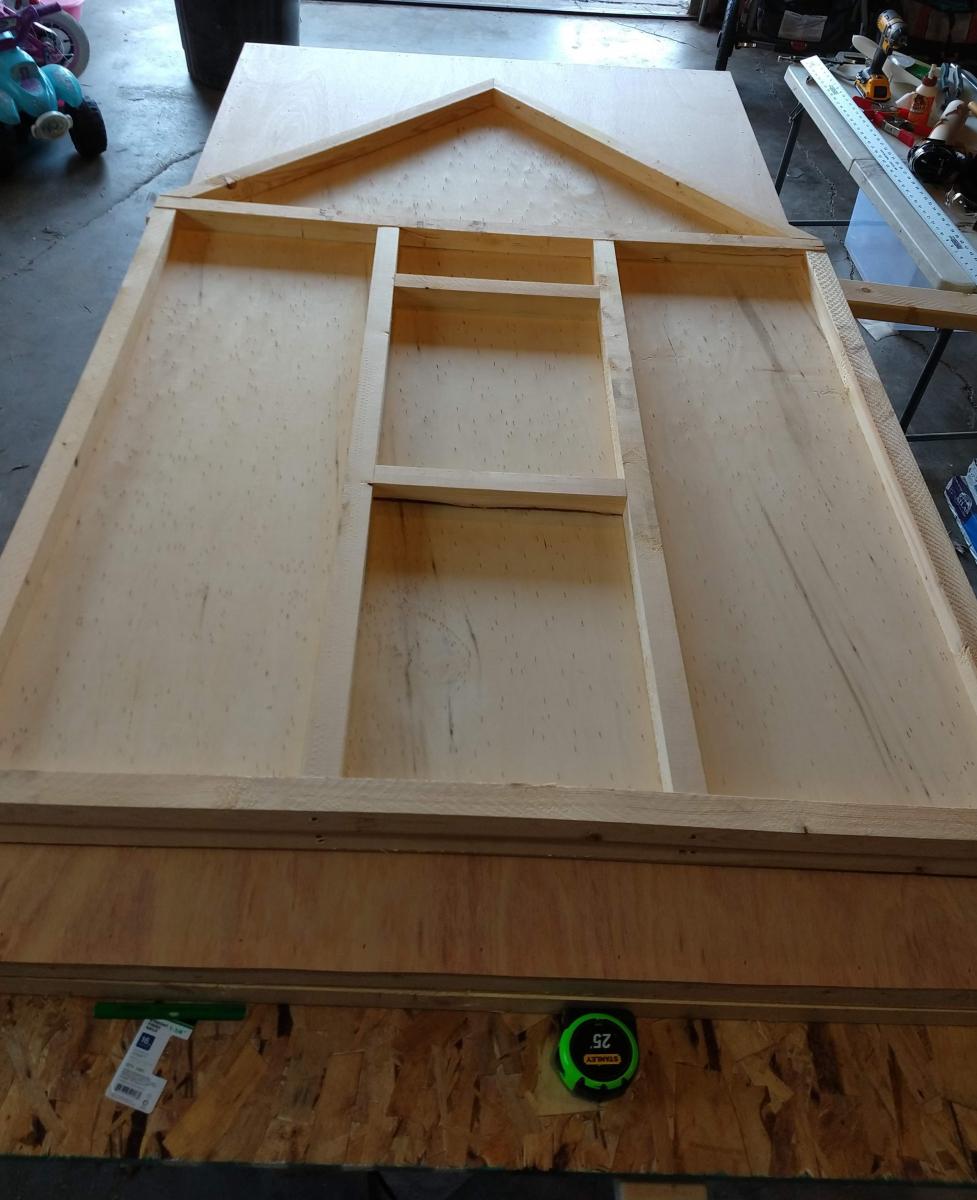
I assembled the piece as the plan instructions followed.
For the closet rod, I measured down the same distance and pre-drilled into the rack ends, then glued and screwed one side of the rod into place. I put a little glue on the other end to give it a little stick while I did the first screw so it would hold still for me. For the other end, I put my screw through the 1x10 and left a little poking out to catch the rod and hold it still while I used the level to make sure it wasn't crooked. Then I did the final screwing.

I used a little wood filler, then primed and painted. I also added three hooks on one end to hold all of the necklaces my daughters like to tangle into one big ball.

Then I used my Cricut and some patterned paper to make the word "Imagine" (I saw this on someone else's and loved it), I also cut out a few butterflies too. Seriously, what can't the Cricut do? (font cartridge was Cindy Loo) The last step was decoupaging them on there with a little Mod Podge. *I placed the butterflies right over the screw holes that showed on the ends.

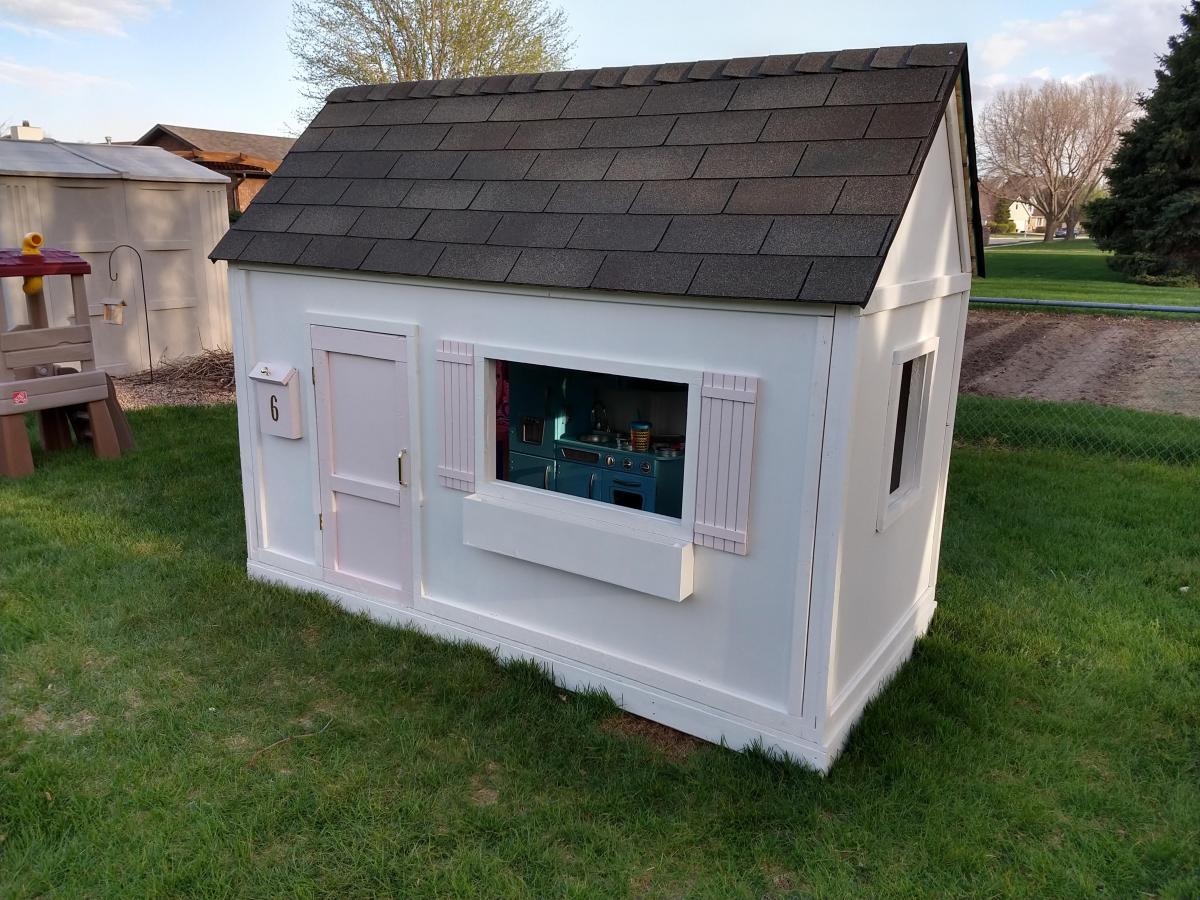
It turned out lovely! And best of all, my kid can hang her stuff up all by herself, she has plenty of room underneath for her accessories, and the whole thing is so darn cute...Thanks!

Estimated Cost
$25-$35
Estimated Time Investment
Afternoon Project (3-6 Hours)
Finish Used
Mistint in Valspar Satin, Olympic Primer (Lowes)
Patterned Paper for decorations, Mod Podge (JoAnn's or Michaels)
Recommended Skill Level
Beginner

Murphy Bed

Submitted by Newfey on Fri, 07/19/2013 - 14:59

This is a Murphy Bed that I made for my daughter Alicia for their getaway home at Canadian Lakes, MI. Due to limited space i had to make it horizontal instead of the normal way of being vertical. It really comes in handy and takes up very little space.

Finish Used
Red paint mixed with Baking Soda
Recommended Skill Level
Intermediate

Comments

JoanneS

Fri, 07/19/2013 - 15:17

Looks great! Love the color and the trims you used. Where did you find your hinge hardware? PS- How did you like the baking soda paint? I've tried ASCP which was good but very pricey, and last time made my own with some plaster of paris. Your finish is lovely.

Newfey

Sat, 07/20/2013 - 18:47

I bought the spring hardware on line. I can't take the credit for the paint as my daughter did that part. She loves the way that the baking soda and paint covers everything and it is a whole lot less expensive than buying the commercial stuff.

Closet Door and DVD Storage

Since we moved into our house over a year ago, we had no closet doors for our TV room. Just a giant gaping hole in the wall. Filled with 2 boxes of DVDs. Needless to say, it was really unattractive. I saw someone on the Knock-Off Wood facebook page building her own closet doors, and I was inspired. I drew out a quick sketch and got to work. They were really simple to make, but because they were so bulky they were a bit hard to manage. (The husband never helps out with my "buildy" projects, but I definitely needed an extra hand getting these into place!) I also built the behind the door storage to go on the larger door for all of our DVDs. What turned this project into a "Weekend" project rather than a "day" project was really the bulk and the finishing. While I am normally the self-proclaimed queen of spray paint, I took the time to do a really nice hand painted and glazed finish on the doors. (The DVD storage, though, went back to my area of expertise with the spray paint.) We LOVE all of this extra storage! We definitely have room to grow our DVD collection now!

Built from Plan(s)
Estimated Cost
$100
Estimated Time Investment
Weekend Project (10-20 Hours)
Finish Used
For the doors, I used General Finishes Milk Paint in "Snow White" with a coat of "Van Dyke Brown" glaze. For the DVD storage, I used 4 cans of Rustoleum spray paint in "Dark Grey" gloss.
Recommended Skill Level
Intermediate

Comments

teembee

Tue, 06/21/2011 - 17:00

hi I was wondering you had plans created for these doors...I "need" these doors!!

Debi_G (not verified)

Sat, 07/07/2012 - 19:37

Bypass doors drive me nuts, so I'd love love love to see a how-to about the doors you built. They look great!

Frosted Plexiglass Entry Door

We gutted our above garage apartment a year ago and have been DIYing as much as is reasonable inside. We installed Allure Ultra vinyl flooring throughout, which is thicker than the old, chipping peel and stick vinyl there was previously. Instead of planing the previous termite eaten hollow-core door with heavy, less-than-secure glass jalousies, we decided to build our own entry door.

We were able to use orphaned 2x6s in my mom's garage and old trim we saved from gutting our apartment. The choices we made amounted to a total of about $150 for this door, including basic door hardware and $70 plexiglass. The hardest part was spraying the plexiglass, as I'm a rather unsuccessful spray painter.

We appreciate having our custom door, and we hope someone else in need of an entry door is inspired to save money and try one out too!

Estimated Cost
$150, based on our choices and what wood was already owned
Estimated Time Investment
Week Long Project (20 Hours or More)
Finish Used
Olympic semi-gloss latex paint in a deep purple shade.
Recommended Skill Level
Intermediate

Comments

JoanneS

Thu, 07/25/2013 - 16:04

This is gorgeous! You did such a great job on this, love the custom design features you added to this door. It looks classy and expensive. :)

Laundry Dresser

Submitted by biffnderf on Sat, 07/02/2011 - 23:08

We had a very limited area for these to fit, so my hubby had to change the dimensions to fit these square baskets. We needed enough spots for our family of 10! I LOVE THEM, thanks; Ana!

Built from Plan(s)
Estimated Cost
$50 each
Estimated Time Investment
Afternoon Project (3-6 Hours)
Finish Used
Water based paint
Recommended Skill Level
Starter Project

Comments

Guest (not verified)

Wed, 01/11/2012 - 14:53

We are going to have to turn the baskets the same way due to the space in out laundry room. Do you happen to remember the dimensions of them? Thanks.

Guest (not verified)

Thu, 02/09/2012 - 07:08

Do you have the dimensions for the square baskets? These would work much better in my home.

Guest (not verified)

Tue, 02/14/2012 - 16:42

We did something similar when our family was 8 (6 foster children). We bought 4 baskets (2 people per room) and then just had them on regular shelves. I LOVE the look of these! Unfortunately baskets give out over time and I can't ever seem to find baskets that once again are the same size as previous baskets. Did you order the baskets on-line someplace that you can consistenly get the same size for when the baskets wear out?

Guest (not verified)

Wed, 02/22/2012 - 12:35

I have all the same laundry baskets that I bought at wal mart for like 3 or 4 bucks a piece. I would think that just meausring out the size according to the laundry baskets would work out fine! they have never stopped selling the ones that I buy, i find them at every wal mart I go to

Lindy Holcomb (not verified)

Fri, 03/02/2012 - 06:05

I would love the Dimensions for this shelf.

Lindy Holcomb (not verified)

Fri, 03/02/2012 - 06:19

I would love the Dimensions on this shelf.

Guest (not verified)

Thu, 03/08/2012 - 05:13

Seriously? $50 for these plans. Get real. Fine woodworking plans don't cost this much. Take some wood, make a box, and put slats in it to fit the baskets. The entire set wouldn't cost $50!

davidmac (not verified)

Thu, 03/08/2012 - 06:18

The plans are free. The build costs $50. See the plans on the link above the cost.

christine (not verified)

Sat, 03/17/2012 - 20:54

once again can anyone please give the measurements for this square basket design and the basket model number as well. i am very challenged when it comes to building things, but with the idea of home depot doing the cutting i think i could manage if i had the measurements. i need the square size to work for my space though. thanks in advance.

Guest (not verified)

Sun, 04/01/2012 - 09:18

I have tried clicking on the link above the cost to get the Plans...however it brings me back to the ORIGINAL Plan rather than YOUR plan (skinnier and taller)...Im sorry if I am being dense but I would really love to get the dimensions of YOUR plan but am having trouble accessing them?? Help please!!

Guest (not verified)

Fri, 04/13/2012 - 23:27

Where it says PS there is a link to the other dimensions.

Cari Downing (not verified)

Fri, 04/20/2012 - 14:05

If you use the large wire baskets made by elfa they would not break like the plastic. The initial investment would be more but would save money over time.

Sonya Chapin

Tue, 07/24/2012 - 04:34

Easy and awesome! My teenage children and I made these over the week-end! Super easy and great looking! Our first project was the laundry pedestal and these are a great compliment. We let Home Depot cut the wood due to time restraints and assembly was a snap! Thanks for the great family projects. My husband passed away in April and these projects have really helped us in the healing process (excellent for constructive bonding time).! Thanks again

Rustic X Farmhouse Coffee Table with Storage

Submitted by Anonymous (not verified) on Sun, 02/05/2023 - 08:54

This project was made from reclaimed wood from my office where they had built a temporary safety railing out of 2x4s and 2x6s. I added a compartment for storage. The top is stained in a classic grey. I painted the body in black followed by white. I then sanded the body to allow the black to bleed through for a distressed look.

Comments

Laundry Pedestal

Submitted by jerfer on Mon, 12/26/2011 - 18:00

I modified Sausha's design, taking out the bottom shelf, adding a back brace, and putting fascia boards on. I also put in a 2x4 between the underframe and each back leg at a forty-five degree angle as braces. My legs are a bit different too. I used three 2x4's. The first leg piece goes from the plywood top to the ground. I put four screws between it and the frame. Then I took two 2x4's and placed them butted at a ninety degree angle around it flush with the frame above.

Estimated Time Investment
Weekend Project (10-20 Hours)
Finish Used
Mini-wax Bombay Mahogany
Recommended Skill Level
Beginner

Comments

moonhopping

Mon, 01/23/2012 - 13:08

I have been drooling over the original pedestal plans since they posted. When I showed them to my dad the first thing has said we could have more clearance without the bottom plat form. I am going to copy your plans this week end thank you very much.
I did want to ask do you have any vibration issue without the bottom plat form?

Thank you for sharing, great sketch –up!

Dave C (not verified)

Wed, 03/21/2012 - 14:00

Did you have any issues with machine vibration?

Fancy X Farmhouse table and bench

Submitted by Anonymous (not verified) on Wed, 10/16/2019 - 09:09

Used the fancy X farmhouse table plan with slight modifications. I decided to use a 4X4 vs two 2X4 as the main leg for the base. I thought it would provide more strength for my final product. Did the same on the bench. Then i moved the support and brace over and added an additional one to provide extra support for the concrete top and trough i made. All in all the base and the bench came out beautiful and am so over the moon with them both! It was my first project I have done (very ambitious I know) but now I am hooked!

Estimated Cost
350
Estimated Time Investment
Week Long Project (20 Hours or More)
Finish Used
Cabot Gold Pre-Tinted Sunlit Walnut Transparent Exterior Stain and Sealer
Recommended Skill Level
Intermediate

Pottery Barn Inspired Chaise Lounger

Submitted by gtd869 on Wed, 04/15/2020 - 20:34

I followed Ana’s Modern Chaise build. The number of 2x4’s specified in the instructions is incorrect. You need 3 not 2. Other than that, a great plan.

Comments

Cedar Fence Board Planter Box

Submitted by iowachap on Sat, 03/15/2014 - 19:40

Using Ana's 10 dollar raised garden planter box idea, I made my own using the cedar fence boards and then used 2 x 3 x 8 studs for the L corner supports and mid center support along with top rail. This photo is the first 3, I will have a total of 6 boxes. Will post more as I progress.

Estimated Cost
20 to 25 dollars per box
Estimated Time Investment
Afternoon Project (3-6 Hours)
Finish Used
I used 6 fence boards, 2 for each side of the 6' long runs, and 1 for each short 3' section cut in half.

I got the 6' x 5 1/2 " x 5/8 " cedar fence boards at the orange box

I used 2 x 3 x 8 boards for the corners the middle support and the top rail. I got these at the blue box

I used 2 " and 2 1/2" exterior star bit screws.

NOTE: I pre drilled holes in the fence boards and screwed all the boards to the L corner sections from the inside out, so the screws are on the inside of the box, they did not poke through the 2 x 3 boards.

Instead of trying to measure how far off the side of the board I needed to go to match the vertical 2 x 3 boards, I just cut 10 11 inch long 2 x3 sections, and then used the 2 1/2" screws and made 4 L corner pieces the shorter side I screwed the short 3 foot length fence boards too, once I had both my short sections screwed to the L corner sections, I then stood one up and screwed 2 of the 6' length boards to the L corner section. Then the other side.

Once all 4 walls were done, I would then measure 3' in the middle of the 6' long side runs, and put in an additional 2 x 3 x 11" again screwed from the inside of the box out.

Now that all the 2 x 3 x 11" L corners and side support sections were connected to the fence boards I then cut 76 1/4" 2 x3 boards one for each length run, and then 2 26" 2 x 3 sections that were all cut on 45 degree angle to complete the top rail.
Recommended Skill Level
Starter Project

Playhouse

We built this playhouse for our daughter's 6th birthday. She absolutely loves it! We were looking at purchasing one, but they were way out of our budget. Ana saved the day with these plans :).

Estimated Cost
$320.00
Estimated Time Investment
Weekend Project (10-20 Hours)
Finish Used
We painted the house with white Pittsburg Ultra Exterior Latex paint. The mailbox, door and shutters were all painted with Pink Viburnum Sherwin Williams Satin Exterior paint.
Recommended Skill Level
Intermediate
Seasonal And Holiday

2x4 Adirondack Chairs (w/2x10s)

Submitted by dustblock on Sat, 05/02/2020 - 19:11

After seeing the post for these new plans, I knew it would be only a matter of days before I was building my own set. I've always wanted to do Adirondack Chairs but disliked the dated look and all the curved cuts of the typical styles. Great job Ana on such an amazing set of chair plans. One substitution I made, as I wanted to go treated but didn't have 1x10s locally, was to use 2x10s for the back and seat boards. I also lengthened the back supports 1/2" to accommodate for the thicker boards and extended the arm rests 1 1/2" so they went past the legs a bit. With those two changes, all of my long pieces use a 33 1/4" measurements for cuts. Will be making my second set as soon as I have time. These will be about 3 1/2" wider to give a bit more room to the chair. Another awesome plan from Ana White!

Estimated Cost
$60
Estimated Time Investment
Afternoon Project (3-6 Hours)
Recommended Skill Level
Beginner

Converted TV wall niche

Submitted by Vol4Life1 on Tue, 12/13/2016 - 05:35

We bought this house about a year ago and we finally got around to removing this pointless niche!  The center divider and bottom were removed.  The cabinet and hutch were assembled seperately.  


This is still a work of progress.  I am looking for a nice decorative molding face for the top.  If anyone has any suggestions please let me know!  We will most likely paint it white to match the fireplace mantle.

Estimated Cost
300
Estimated Time Investment
Week Long Project (20 Hours or More)
Finish Used
Paint
Recommended Skill Level
Intermediate

First Major Furniture Project

Submitted by dfraley22 on Tue, 09/16/2014 - 11:57

This was my first major furniture project. My daughter wanted a changing table and this looked like it would be a good choice.I made a few modifications; it's a little taller as my daughter and her husband are on the tall side, I also added a small rail to keep the changing pad from sliding off. Overall it was a great learning experience. I have built several outdoor pens and small houses for our chickens, but this was my first attempt at a piece of furniture. I think it turned out well, and my daughter and her husband are happy with it (and that is what matters).Of course I see the mistakes but I learned from them and now know what to do (or not to do) next time.  Plans are great, easy to follow ....thank you ANA!! Can't wait to try another plan.

Built from Plan(s)
Estimated Cost
about $150
Estimated Time Investment
Weekend Project (10-20 Hours)
Finish Used
Rustoleum - American Walnut, Weathered Gray, Wheat, Willow with a top of American Walnut, and Carrigton. 3 coats of polycrylic, and the frame is HGTV Home Cream from Sherwin Williams.
Recommended Skill Level
Intermediate

Shoe Dresser

I had this space in my mudroom that was a perfect spot to make a custom shoe dresser. I adjusted the plans I found on this website to custom make storage for shoes. Now this weird little space is functional.

Built from Plan(s)
Estimated Cost
80
Estimated Time Investment
Day Project (6-9 Hours)
Finish Used
Rustoleum chalk paint Serenity Blue, classic grey and special walnut Minwax
Recommended Skill Level
Intermediate

Comments

Outdoor Bar Height Table with Built-In Ice Trays

Submitted by RuthAU on Fri, 01/27/2017 - 22:11

This was my first furniture project and only my 2nd woodworking project, the previous one a cubby house over 20 years ago, so I was a bit nervous. I did lots of planning, research and designing before the first cut. I incorporated ideas from Ana projects as well as from other sites and learned how to use a drop saw, various sanders and the pocket hole jig.

We wanted a tall table because when sitting a a regular height table the view is blocked by the deck railing.

I decided to make it out of hardwood for durability in the Australian outdoors and also because we get sea air where we are. The hardwood (Blackbutt) was challenging to work with - extremely heavy and difficult to drill into, but the finished product is SO solid and will outlive us all. Due to the weight and density of the timber I overengineered as far as joining went, using more pocket holes than usual.

I saw the idea of the built in ice troughs years ago and was keen to incorporate them into my table. I also made the legs detachable so that the table top could be moved out onto the deck once it was finished and the legs added in situ. Once it was set up my husband put big screws into the legs just in case but it would really take an earthquake to move this thing.

I managed to build it over 3 weekends and finished it just in time for our family Christmas party but it only had 1 coat of stain on it at that stage. I finished it off later and we also decided that the ice trough covers would look good in a contrasting colour so did them in charcoal. If I made it again it would be a much quicker project as there was alot of 'firsts' and learning along the way.

The dimensions are:

2660mm long (about 8' 9")

1150mm wide (about 3' 9.5")

1165mm high (about 3' 10")

The legs are solid - 140 x 140mm (5.5")

It seats 10 - 12 comfortably and 14 at a squeeze.

We got the bar stools 2nd hand for an absolute steal - 12 for $200! They are handmade hardwood too and look great.

The timber was quite expensive but I was able to use the work account so got it at trade price. This would be a very expensive table to buy but all up it cost us about AU$1100.

This project was not exactly easy but I would class myself as a novice. With the right planning and preparation (plus stubbornness) anyone could do this :-)

Estimated Cost
About AU$1100
Estimated Time Investment
Week Long Project (20 Hours or More)
Finish Used
Intergrain Natural Stain - semi transparent - Redwood for the majority and Charcoal for the trough covers.
Recommended Skill Level
Beginner

Comments

Modified desk into makeup vanity

Submitted by jlfreck23 on Mon, 12/14/2020 - 19:22

I built this for my adult daughter’s Christmas present. I modified the plan to have three drawers instead of the cubby. I also tapered the bottom of the legs. I added a back piece to hold a mirror. I also added door knobs to the back for necklaces.

The top and the back board are both 4 boards glued and clamped together. I finished the edges of the top, drawer fronts, and the back board with an ogee router bit.

Estimated Cost
$140 (lumber is expensive right now)
Estimated Time Investment
Weekend Project (10-20 Hours)
Finish Used
Mahogany stain on the top and drawer faces. It is a golden oak stain for the base. Finished with a satin polyurethane.
Recommended Skill Level
Intermediate
Back