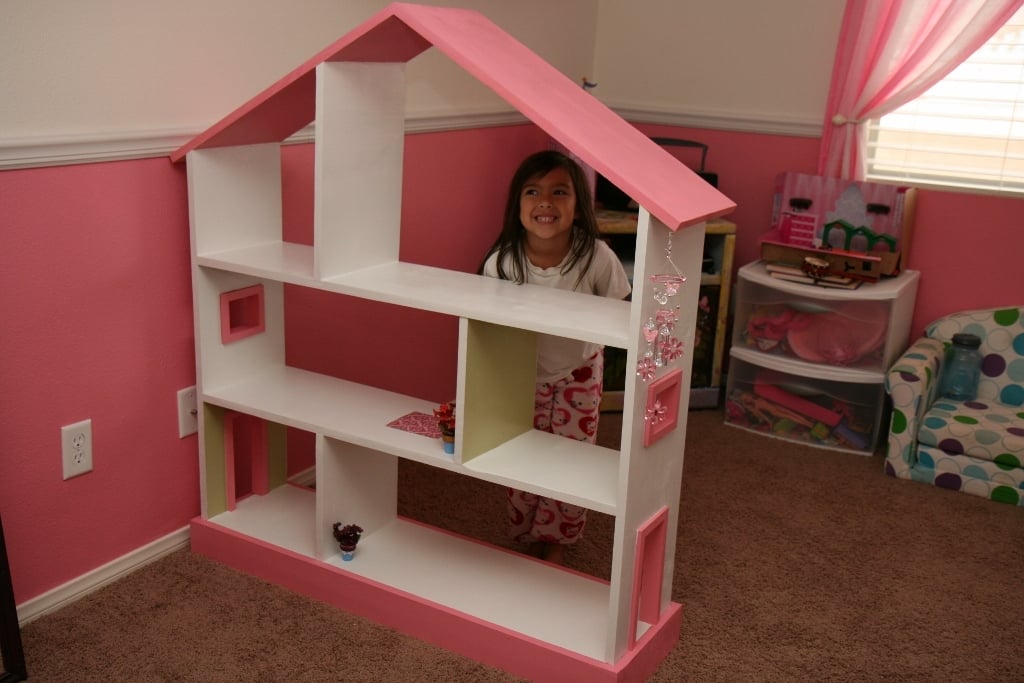
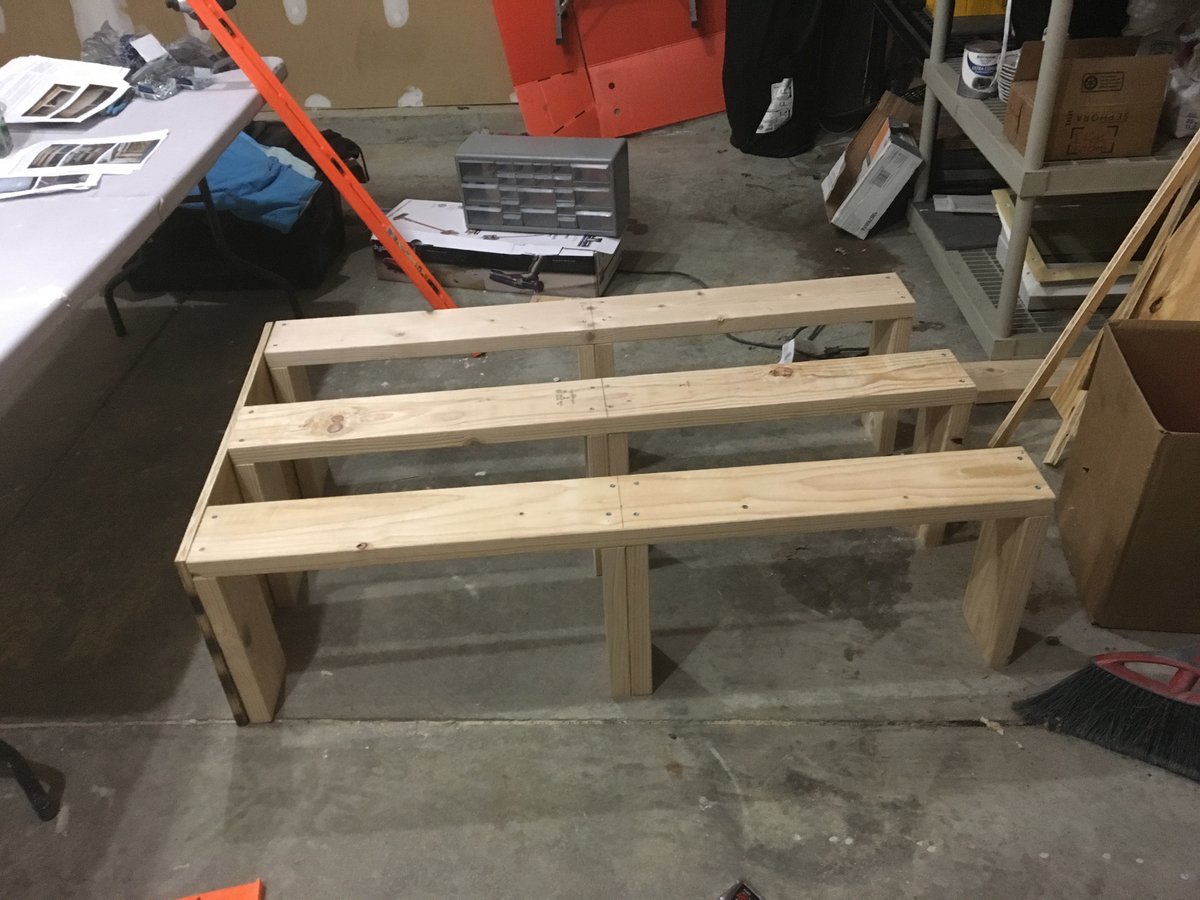
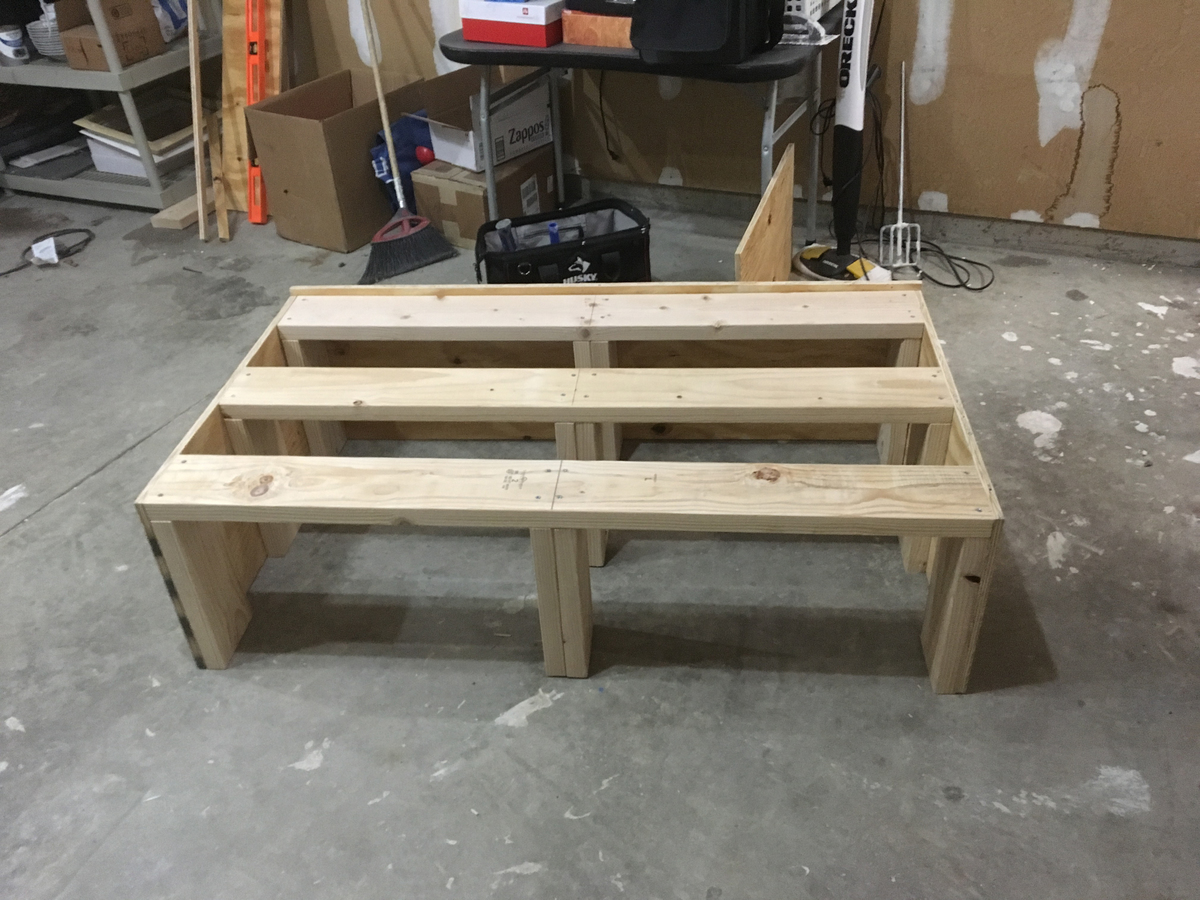
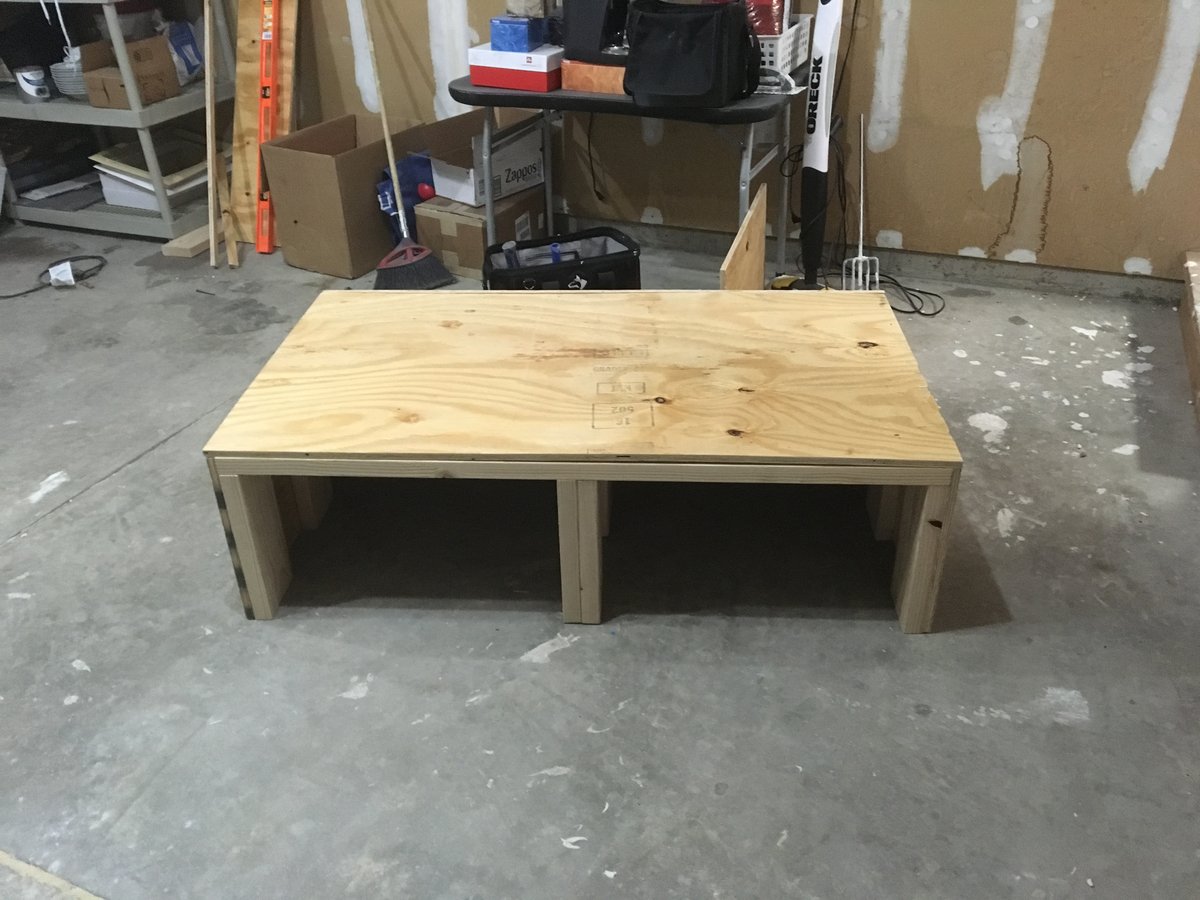
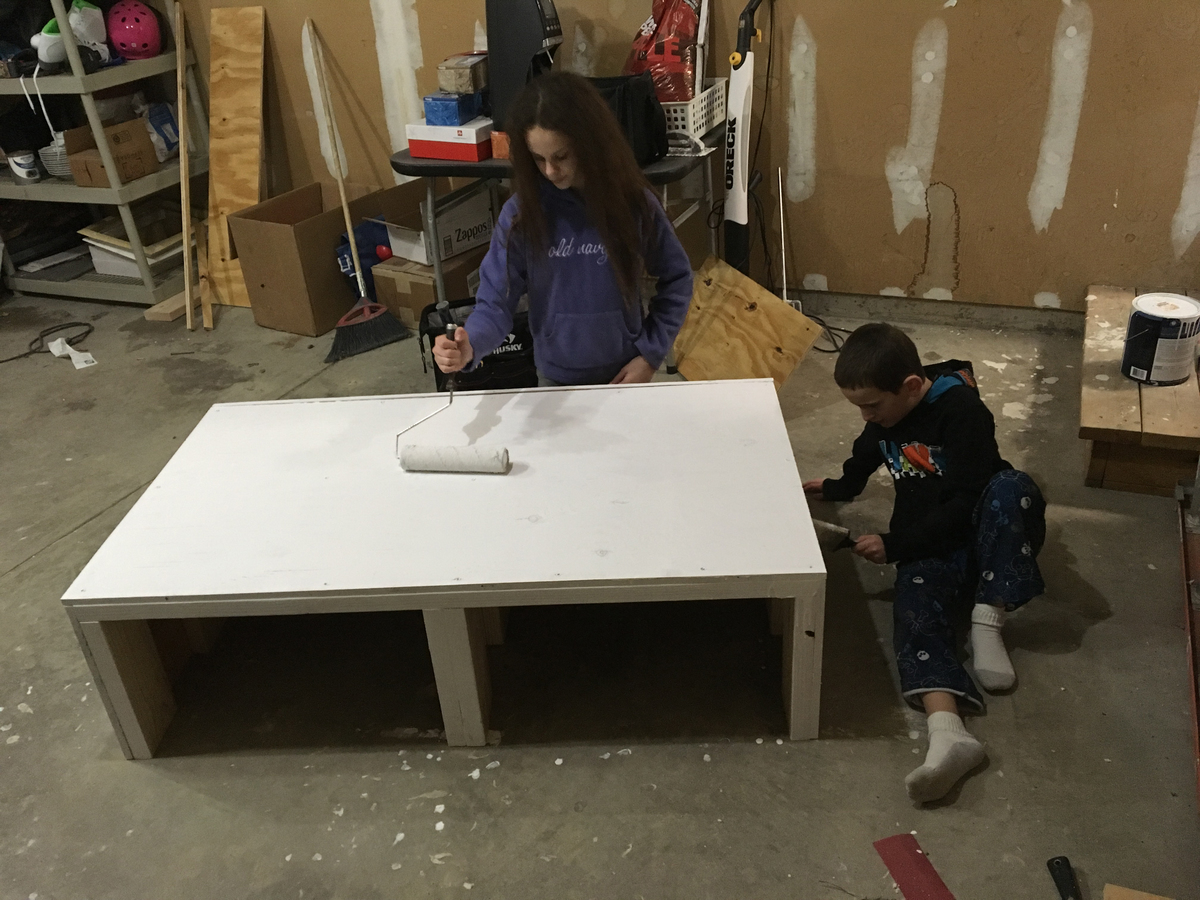
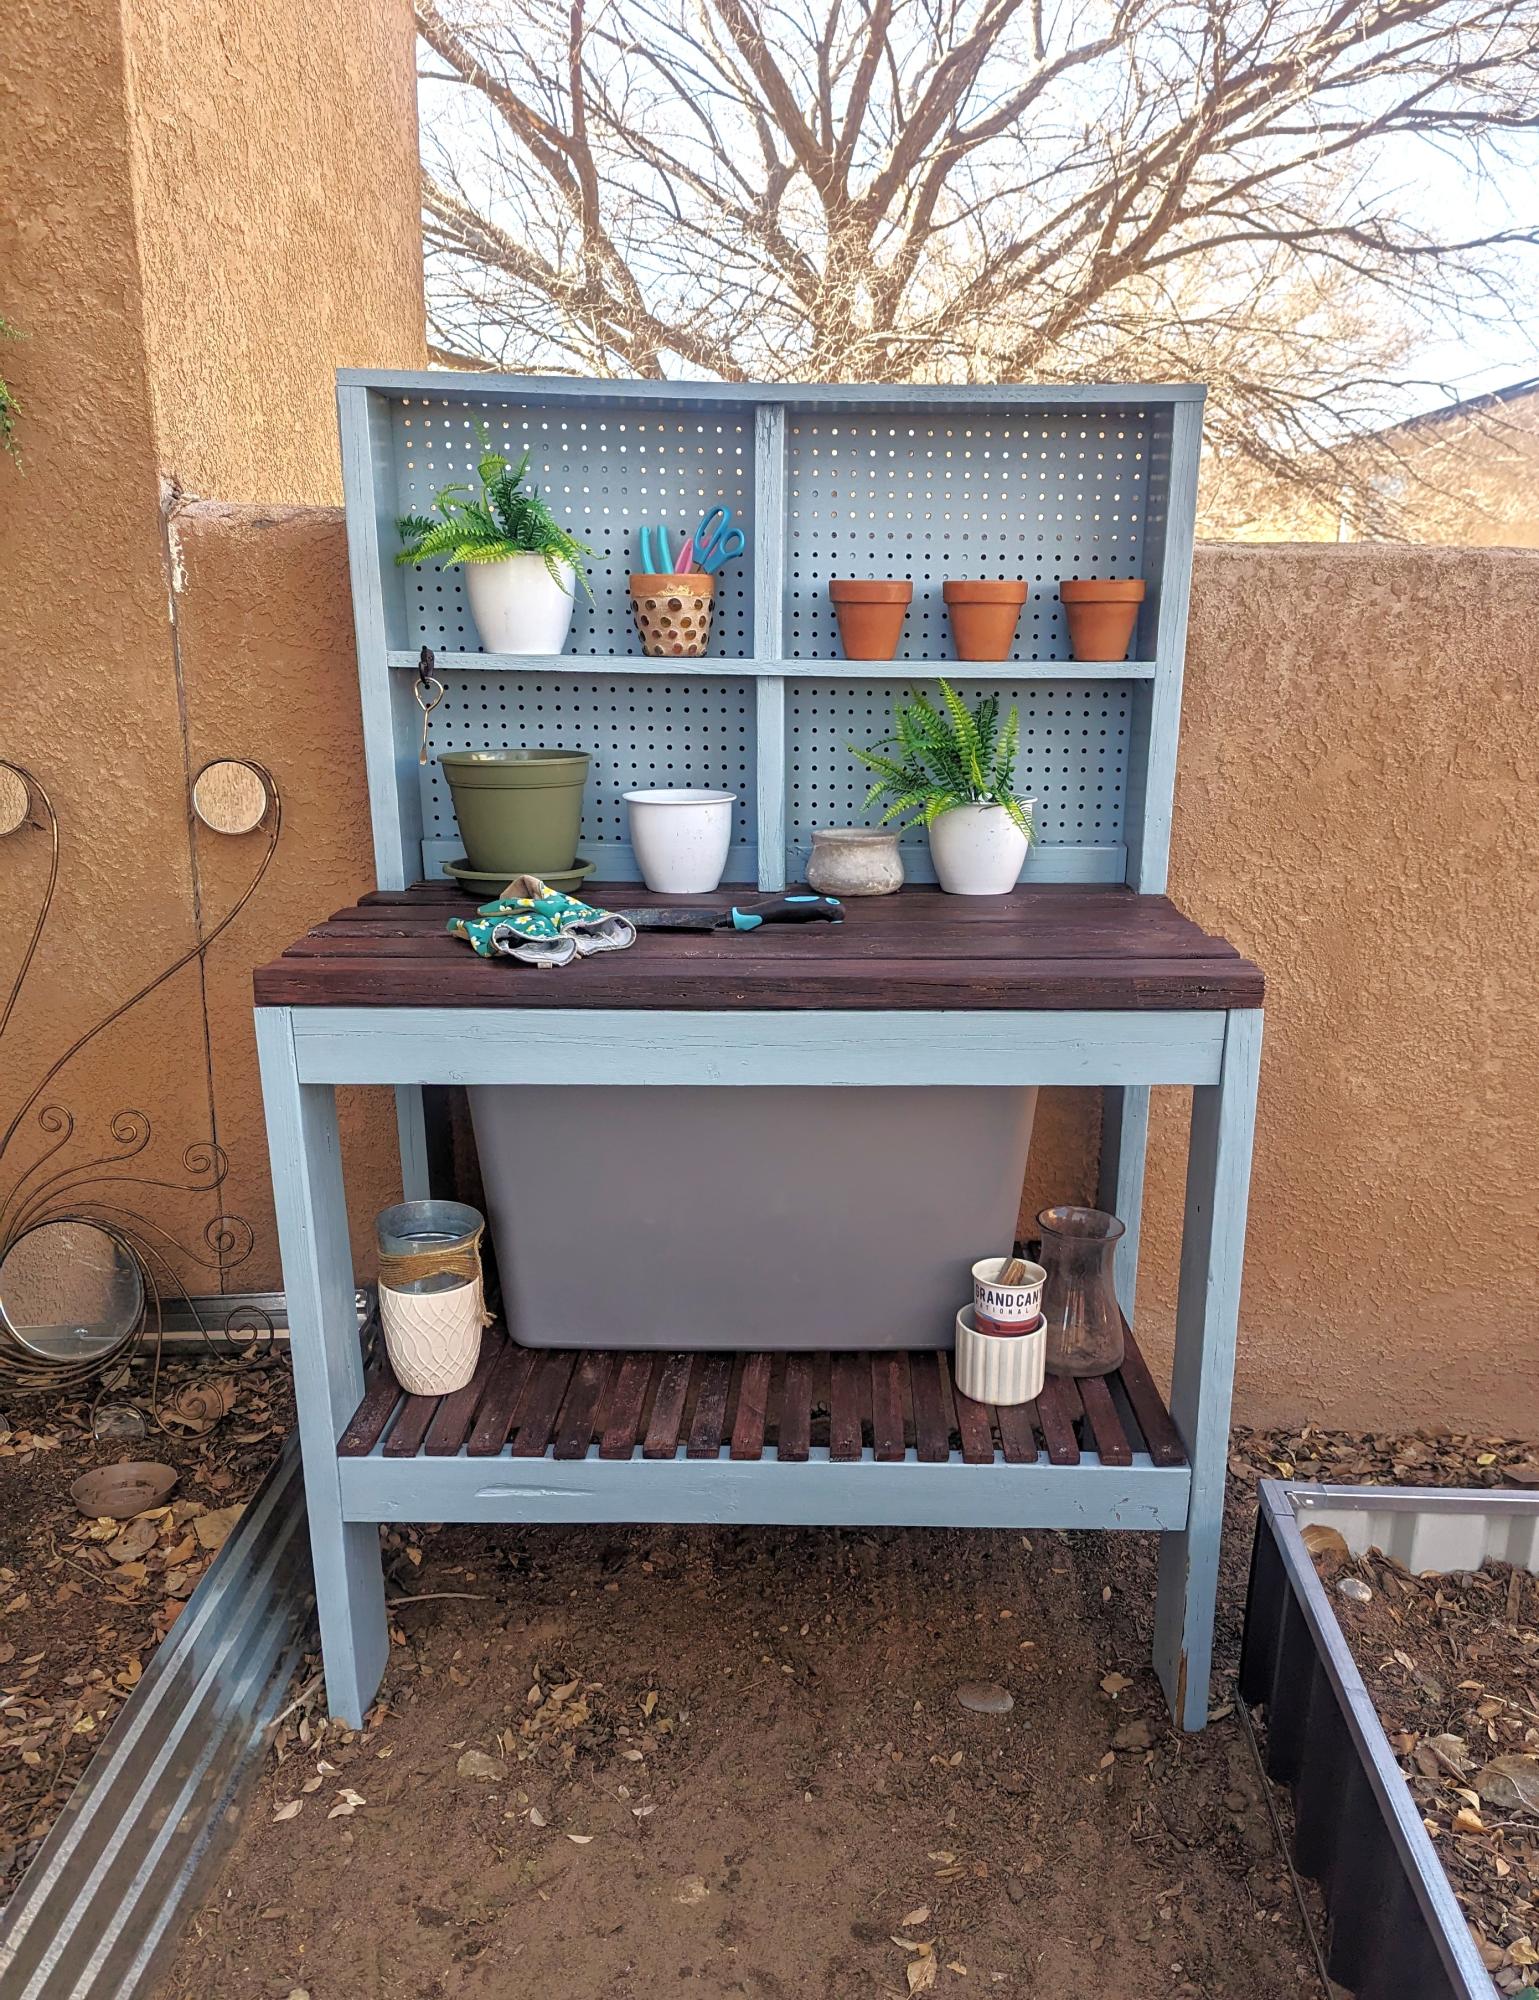
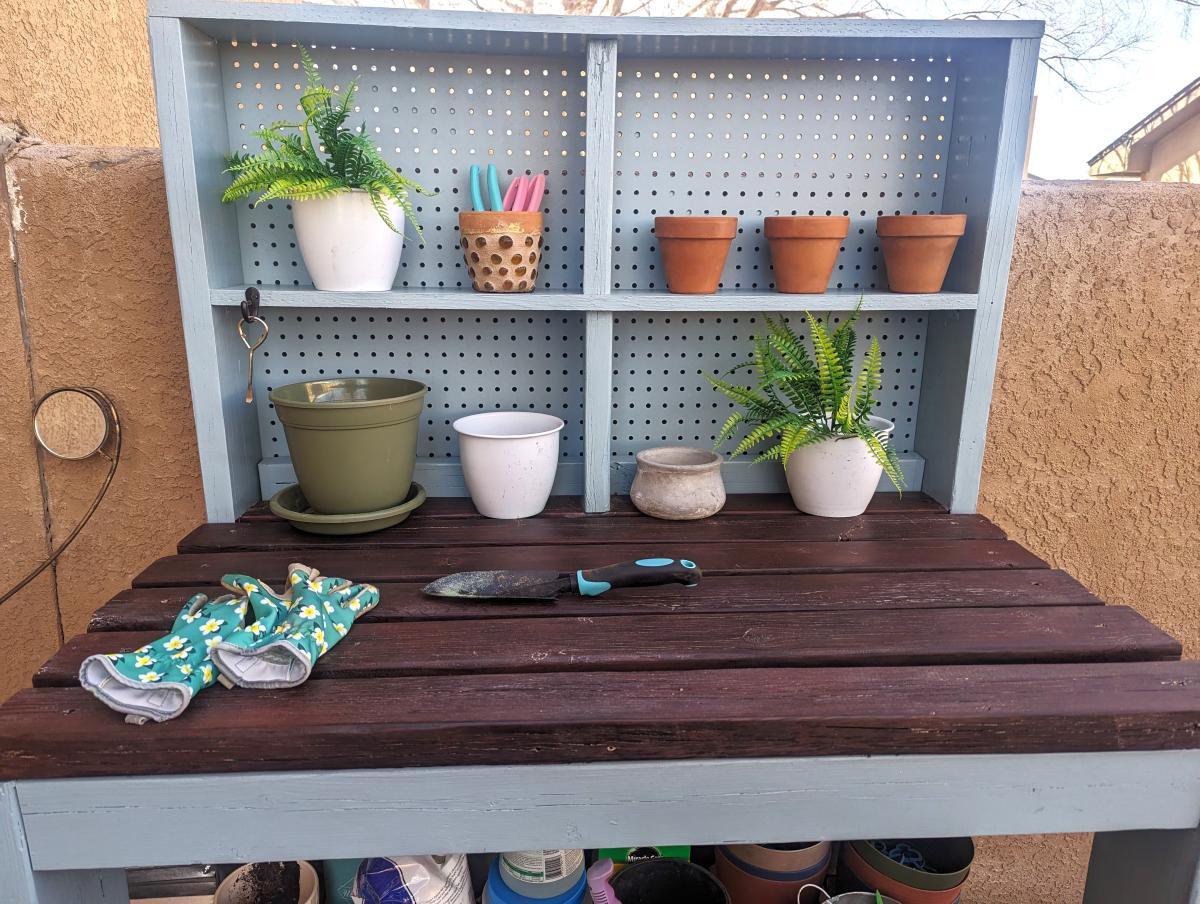
Community Brag Posts

Bookcase Dollhouse

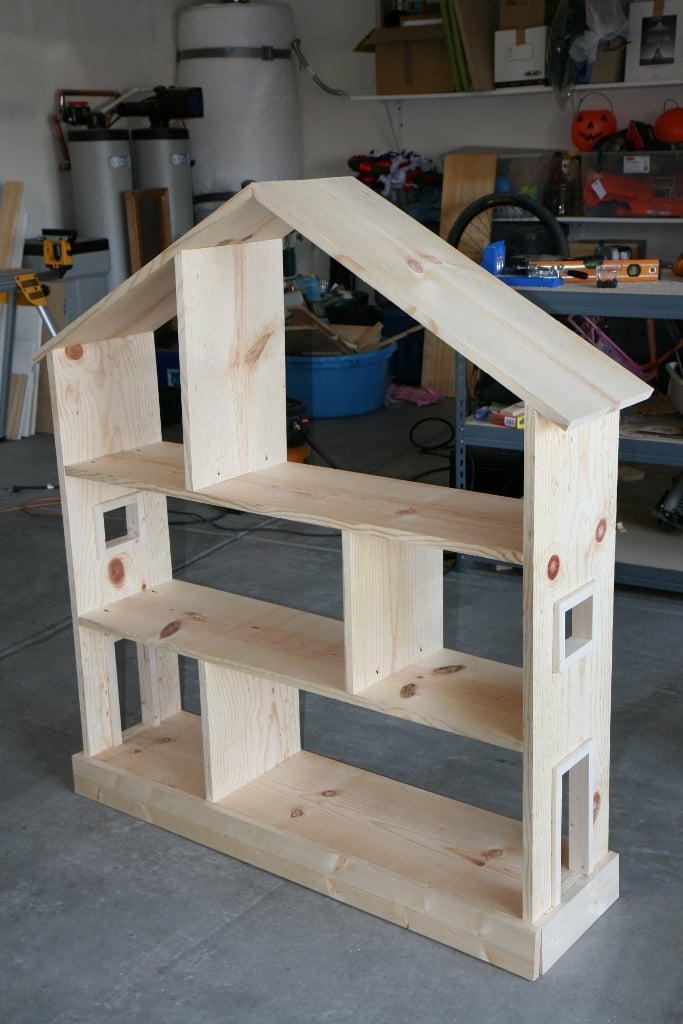
We built this for our daughter's 6th birthday! Love how it turned out :D  As you can see we opted to leave the plywood backing off for the time being so she can use it as a doll house and play on both sides. When she grows out of the doll house phase we will either convert it to a book shelf, donate, or sell in a yard sale ... so many options!

Built from Plan(s)
Estimated Cost
$74 wood & white paint
Estimated Time Investment
Afternoon Project (3-6 Hours)
Finish Used
One quart semi-gloss white paint (2 coats) bought at Walmart. Pink and green colors were left over paints from when we painted the walls in our home.
Recommended Skill Level
Beginner

Comments

Queen storage bed modified

Submitted by Anonymous (not verified) on Thu, 06/18/2020 - 19:11

I used wood from an older Ana white project of a loft bed my daughter had out grown. I liked the look of Ana's Mom bed but wanted storage so I modified the plans slightly. I will add drawers later.

Estimated Cost
200
Estimated Time Investment
Weekend Project (10-20 Hours)
Finish Used
Sweet coconut easy flow paint in Matte
Recommended Skill Level
Intermediate

Geo Headboard -first project

Submitted by LHGinWC on Mon, 07/20/2020 - 11:07

This project was fun and I learned a ton! I used the Modern Geo Headboard plans and then modified them to fit my room. This was my first project and I'm glad I did it but I should have started with something simpler to learn about my tools and understand the process better. I'm proud of myself and I'm looking forward to my next project. Thanks to Ana for the plans and the inspiration, staying busy during this pandemic is a lifesaver!

Built from Plan(s)
Estimated Cost
$200
Estimated Time Investment
Afternoon Project (3-6 Hours)
Finish Used
Magnolia Paint- Vibrant Horizon
Recommended Skill Level
Beginner

Tilt Out Recycling Center

Submitted by ppavel on Fri, 09/18/2020 - 07:36

Tilt Out Recycling Center to match the floating desk and barn door in the same room. Great project from the recycling center plans. (slight modification)

Estimated Cost
$80
Estimated Time Investment
Weekend Project (10-20 Hours)
Finish Used
Espresso Stain (Minwax)
Polyurethane Finish (3 coats)
Recommended Skill Level
Beginner

Comments

Bathroom tower shelf

Unfinished pine bathroom tower shelves. I assembled all pieces with kreg jig and pocket hole screws. It was a quick and easy project.

Estimated Time Investment
Afternoon Project (3-6 Hours)
Recommended Skill Level
Intermediate

Comments

Living Room Wall Makeover

Submitted by djolly1231 on Sun, 05/30/2021 - 10:36

We have lived in our home for 2 yrs now and have been trying to figure out what we wanted to do with the plain boring wall with cords handing from out behind the tv due to no power outlet on that wall. We finally decided to do the whole wall in shiplap but the the cost of lumber going through the roof I went with 1/4 underlayment that I had ripped down to 6in strips at my local hardware store. I cut them down to size with my miter saw the painted them white before I attached them to the wall with 1 1/4 brad nails and used nickels for my space in between each row. The cabinets are 36 in tall. The carcass is made fro 3/4 in MDF and the face frames are made from 1x3 pine and attached with wood glue and brad nails. Cabinet doors are made from 1x4 pine for the frame and 1/4 underlayment for the center. I used my hand router to route out a 1/4 deep groove for the center to drop into the frame I used wood glue and brad nails to attach it to the frame and filled in any gaps with paintable caulk. They are attached to the studs in the wall with 3 in wood screws. The mantle is made from 1x6 pine boards and attached to a wall bracket made from 1x6 that are attached to the wall in each stud with 3 in wood screws. The mantle is attached with wood glue and 1 1/4 brad nails. The shelves were made out of 1/2 Poplar 4x8 plywood sheet ripped down to size. The wall brackets are made from 1x2 pine attached to studs with 3 in wood screws. And the shelves are attached with wood glue and 1 1/4 brad nails. I added 3 1x2 spacers to each shelf between the top and bottom board to prevent them from sagging before attaching the face of the shelves with wood glue and 1 1/4 in brad nails. This project took about a month to complete because I worked on it during free time. Also this was the first major build I have ever done so I was also learning along the way. Some parts were frustrating but most of it was fun and a great learning experience. Also this project evolved as I was building it. My wife loves the finished product. Now it’s time to find my next project.

Estimated Cost
500
Estimated Time Investment
Week Long Project (20 Hours or More)
Finish Used
Dark walnut stain. Valspar Ultra in eggshell and ultra white for the color of the cabinets , shiplap and crown
Recommended Skill Level
Intermediate

Comments

DIYGina

Tue, 12/05/2023 - 11:47

Surprisingly makes your living room appear so much larger compared to the before picture! Thank you for sharing your photos with us and congrats on a great result!

Modified Garage Shelf (w/ Workbench)

Submitted by Anonymous (not verified) on Thu, 06/08/2017 - 11:15

Great plans allow for versatility and easy customization. Put the whole thing together in a day w/ one other person. My set up is 16' long - 5' on the side shelves and 6' for the workbench. Added a pegboard and fluorescent light under the top middle shelves. I'm also designing a slim drawer to go under the workbencheck area. Thanks a bunch!

Estimated Cost
~$150 including pegboard.
Estimated Time Investment
Afternoon Project (3-6 Hours)
Finish Used
Will stain dark in the future
Recommended Skill Level
Starter Project

Comments

Chicken Tractor

Submitted by Cliffhorn on Thu, 05/02/2013 - 07:26

A friend of mine got two baby chicks and needed something for them to live in. She also wanted to be able to move it around the yard so they could have freah grass to be on. It uses 2x4s, 3/4 plywood, chicken wire, and plastic roofing. It was a fun build.

Estimated Time Investment
Day Project (6-9 Hours)
Recommended Skill Level
Starter Project

Comments

Rustic Wood Cooler Box made from Pallets!

Watch the video on how I did this project here: http://youtu.be/IoP2cKN2WeY

For this week's woodworking project I'm building a Rustic Cooler Box from used Pallets. The project was a lot of fun to do and pretty simple! By just using some old Pallets that were free I was able to build something that will get a lot of use. Plus, by using the Pallets I think it turned out really cool looking!

How to video http://youtu.be/IoP2cKN2WeY

Built from Plan(s)
Estimated Cost
$40 for cooler and accessories. Pallet wood was FREE.
Estimated Time Investment
Day Project (6-9 Hours)
Finish Used
Outdoor Polyurethane. Wood was left natural.
Recommended Skill Level
Intermediate

Comments

Wounded Marine

Fri, 06/14/2013 - 05:14

That is way to cool. I love your idea for the sides. It adds a lot of texture and cleans up the look of it. I enjoyed watching your videos. You have a lot of talent and I like your work man.

Stevens

Wed, 11/27/2013 - 04:02

Awesome way of doing a pallet cooler. Keeping the cost minimal your way of finishing it was really good. Personalizing such coolers would be interesting!

tedgray86

Fri, 10/17/2014 - 10:30

Cooler looks amazing!!  Well done!  What is the black ring inbetween the hose bib and the cooler?  I am looking for something similar to hide the PVC coupling as its white and my cooler is stained.


Thanks

Murphy Bed

Submitted by Newfey on Fri, 07/19/2013 - 14:59

This is a Murphy Bed that I made for my daughter Alicia for their getaway home at Canadian Lakes, MI. Due to limited space i had to make it horizontal instead of the normal way of being vertical. It really comes in handy and takes up very little space.

Finish Used
Red paint mixed with Baking Soda
Recommended Skill Level
Intermediate

Comments

JoanneS

Fri, 07/19/2013 - 15:17

Looks great! Love the color and the trims you used. Where did you find your hinge hardware? PS- How did you like the baking soda paint? I've tried ASCP which was good but very pricey, and last time made my own with some plaster of paris. Your finish is lovely.

Newfey

Sat, 07/20/2013 - 18:47

I bought the spring hardware on line. I can't take the credit for the paint as my daughter did that part. She loves the way that the baking soda and paint covers everything and it is a whole lot less expensive than buying the commercial stuff.

Closet Door and DVD Storage

Since we moved into our house over a year ago, we had no closet doors for our TV room. Just a giant gaping hole in the wall. Filled with 2 boxes of DVDs. Needless to say, it was really unattractive. I saw someone on the Knock-Off Wood facebook page building her own closet doors, and I was inspired. I drew out a quick sketch and got to work. They were really simple to make, but because they were so bulky they were a bit hard to manage. (The husband never helps out with my "buildy" projects, but I definitely needed an extra hand getting these into place!) I also built the behind the door storage to go on the larger door for all of our DVDs. What turned this project into a "Weekend" project rather than a "day" project was really the bulk and the finishing. While I am normally the self-proclaimed queen of spray paint, I took the time to do a really nice hand painted and glazed finish on the doors. (The DVD storage, though, went back to my area of expertise with the spray paint.) We LOVE all of this extra storage! We definitely have room to grow our DVD collection now!

Built from Plan(s)
Estimated Cost
$100
Estimated Time Investment
Weekend Project (10-20 Hours)
Finish Used
For the doors, I used General Finishes Milk Paint in "Snow White" with a coat of "Van Dyke Brown" glaze. For the DVD storage, I used 4 cans of Rustoleum spray paint in "Dark Grey" gloss.
Recommended Skill Level
Intermediate

Comments

teembee

Tue, 06/21/2011 - 17:00

hi I was wondering you had plans created for these doors...I "need" these doors!!

Debi_G (not verified)

Sat, 07/07/2012 - 19:37

Bypass doors drive me nuts, so I'd love love love to see a how-to about the doors you built. They look great!

Hanging queen swing

Submitted by Anonymous (not verified) on Fri, 09/02/2022 - 06:03

I built 3/4 OD ply base on 4x4’s. Rope had 3/16 steel cable inside it attached to ceiling hardware for strength. Rest was 2x4 painted. Little overbuilt but it was my first.

Comments

Easy, Economical Garage Shelving from 2x4s

I modified the width of the shelves and as you can see from the variable height of my garage one side was made higher.  

I used some scrap wook so I was able to cut expenses by about 25 dollars.  The total cost was 50 dollars not including the nails.  Although time is money.  It took me one day to draw up the modified design, get prices and get the wood and then another day to put it together.  With what I saved by doing it myself I could have made more working and buying a premade unit.  However with this said, it would not be my personal accomplishment and modified to my unique needs.  Besides, I had fun doing it.  

Thanks for your info.  It was very clear and simple.  Debbie

Estimated Time Investment
Day Project (6-9 Hours)
Recommended Skill Level
Starter Project

Comments

Smart Simple Workbench

Submitted by Anonymous (not verified) on Thu, 12/29/2022 - 04:31

Built this workbench and added some casters from Rockler Woodworking. Also added a power strip for convenience and a handle made from black pipe parts that I had in the garage. I also added a sheet of masonite to the top that I can replace if needed.

Comments

Washer & Dryer Pedestal

Thank you dmccoy!! Washer & Dryer Pedestal / Platform with Drawer

Followed your plan and these came out sturdy and solid.

I adjusted it to 55 inches to fit my smaller space and decided to not build the drawers.

So simple to put together and saved over $400 

Estimated Cost
About $100
2X6 wood, plywood, screws
I had extra paint in the garage
Estimated Time Investment
Afternoon Project (3-6 Hours)
Recommended Skill Level
Beginner

New counter height planters in use

Submitted by jrbdmb on Fri, 06/20/2014 - 05:05

Using the counter height planter plans from Janettx. Thanks!

Estimated Time Investment
An Hour or Two (0-2 Hours)
Recommended Skill Level
Beginner

Comments

Janettx

Mon, 09/20/2021 - 13:24

Nice job!!! I'm still using mine. I ended up putting 12"x12" pavers under each leg to extend their life. After the 2nd year now we get bumper crop out of ours each season.

Workbench with pegboard

Submitted by bredbu on Wed, 07/01/2020 - 18:37

I made a workbench for my garage it was pretty easy. I also made an instructional youtube video if you want to learn how to make it. #diy #workbench #bench

Estimated Cost
125
Estimated Time Investment
Afternoon Project (3-6 Hours)
Finish Used
none
Recommended Skill Level
Beginner

Folding Plant Stand

Submitted by abronson on Sat, 01/26/2013 - 13:25

Easy to build and inexpensive about $20.00. I decided to build the stand and then disassemble all bolted items before painting. It made getting an even coat on all the individual boards a lot easier. In the directions please note that you need 24 washers for the connections. I found that re-tightening all the bolts prevented the shelves from moving even when a heavy pot is placed on top. Love that it can be folded up and tucked in the garage. Thanks Ana for the great plan.

Built from Plan(s)
Estimated Time Investment
Day Project (6-9 Hours)
Finish Used
Valspar Satin Leafy Rise
Recommended Skill Level
Starter Project
Seasonal And Holiday

Mud Room

Submitted by Anonymous (not verified) on Sun, 01/24/2021 - 20:03

This was so easy and fun! We splurged a bit on nice cedar because apparently the cedar mills are down due to covid so the less expensive fencing isn’t so readily available. The hubs helped me rip down the larger boards, then I cut and assembled it all. Not including the buying and ripping, this took me maybe 4 hours to complete and we ended up with a beautiful kitchen for my daughter’s 5th birthday! Thanks for these super easy to follow plans!

Built from Plan(s)
Estimated Cost
$150
Estimated Time Investment
Afternoon Project (3-6 Hours)
Finish Used
None
Recommended Skill Level
Beginner

Comments

Window Shutters

Submitted by Anonymous (not verified) on Fri, 05/05/2017 - 09:33

I really wanted to add a layer of depth to the front of our house, and my favorite option was adding new shutters! I used fence boards to keep cost low and to be sure that the wood would stand up to all weather conditions. I protected the wood with an oil-based sealant made for exterior use. I attached the cross braces with chunky screws and painted those black. I love how they turned out!

Estimated Cost
About $45 for the wood (my shutters were just tall enough to need a full fence board each - you may be able to double up) and about $36 for the chunky screws.
Estimated Time Investment
Afternoon Project (3-6 Hours)
Finish Used
I used the oil-based Varathane Satin sealant - not stain color required.
Recommended Skill Level
Beginner