Community Brag Posts

Kids Table & Chairs

Submitted by jeffh on Fri, 01/19/2018 - 12:12

I washed the plans for the farmhouse table in hot water!

I modeled this kids table off the farmhouse table and then made the chairs out of 3/4" plywood with bright colours.

Estimated Cost
two 2x10s and four or five 2x4s, plus screws and stain for the table. All four chairs were made out of one sheet of 3/4" plywood. The stain and paint probably cost more than everything else put together, but I still have tons of it left. If you exclude the leftover stain, I'd guess about $75-$100 for everything.
Estimated Time Investment
Weekend Project (10-20 Hours)
Finish Used
Can't remember. Walnut was the stain colour.
Recommended Skill Level
Beginner

Scrap Wood Cart

Submitted by Scrivman33 on Sun, 02/25/2018 - 13:45

Saw the other project and based everything off of that. I made some adjustments on the shelf side to ensure I could lay down 3 layers of 2x6's without it hanging off too far. At first I wasn't going to go with the rail shelf system, but I couldn't find anything that I liked at the store to make actually shelves. I did cut a 2* angle on the bottom and top of the shelf framing. I figured if I put enough weight on those shelves, I woudln't want it messing with the frame of the cart too much. On the bin side, I decided to just do different heights instead of angled because I know I'll have plenty of 3' plus. I chose to put a scrap bin on the end for anything smaller than a foot. Many of those joints were done with my Kreg setup, but not all of them. The last fix I did was add a 2x4 to the insde of the shelf frame. This was to move the shelf hangers in so that an 8' board wasn't just edge to edge (I found that to be a problem when I put some of the 1x4's on there...they would be on 2, but not always all 3). So moving each side in around 1.5" gives you about 3" to play with as far as 8' lumber goes. This enabled me to turn my old storage into bench and shelves and I'm ready to get moving on projects!

Estimated Cost
$200-$250
Estimated Time Investment
Day Project (6-9 Hours)
Finish Used
None
Recommended Skill Level
Beginner

Balin Consle Table Extraordinaire

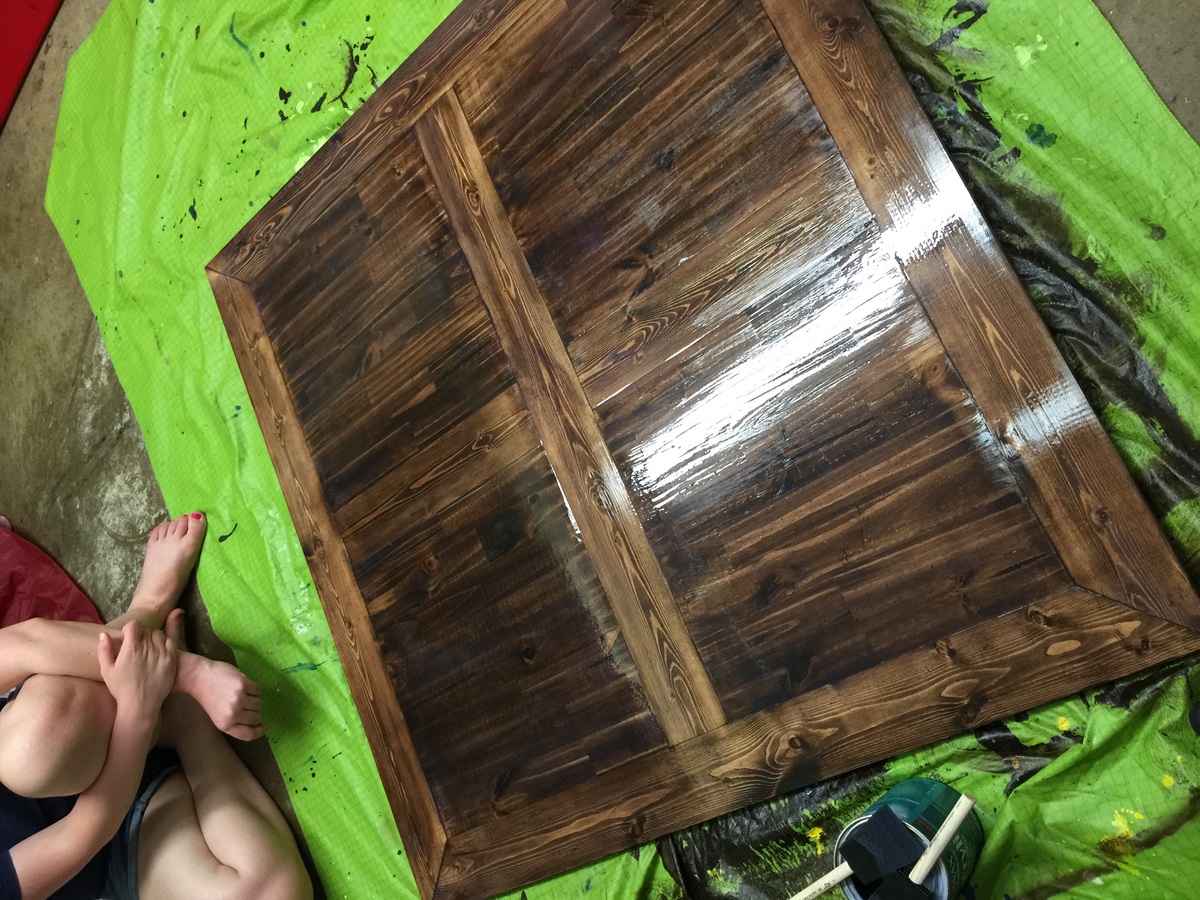
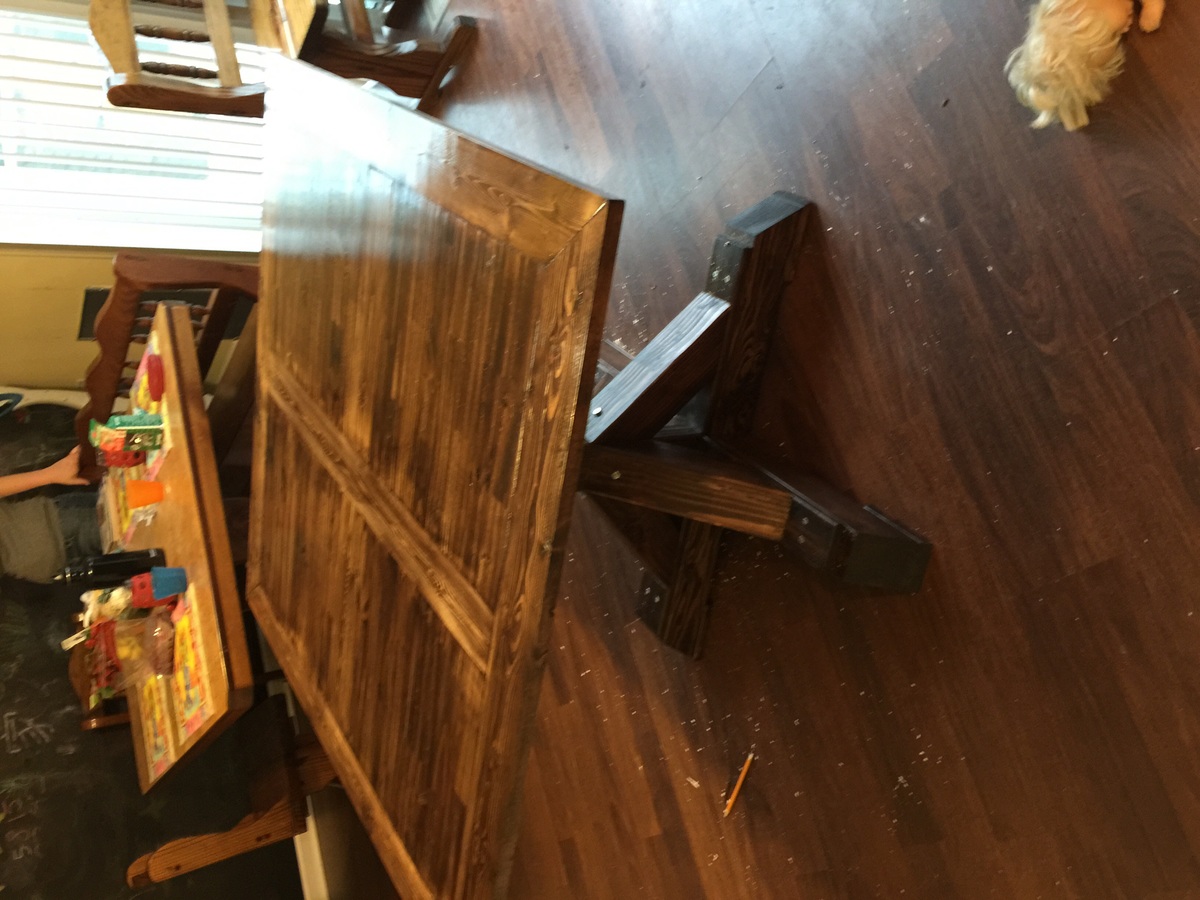
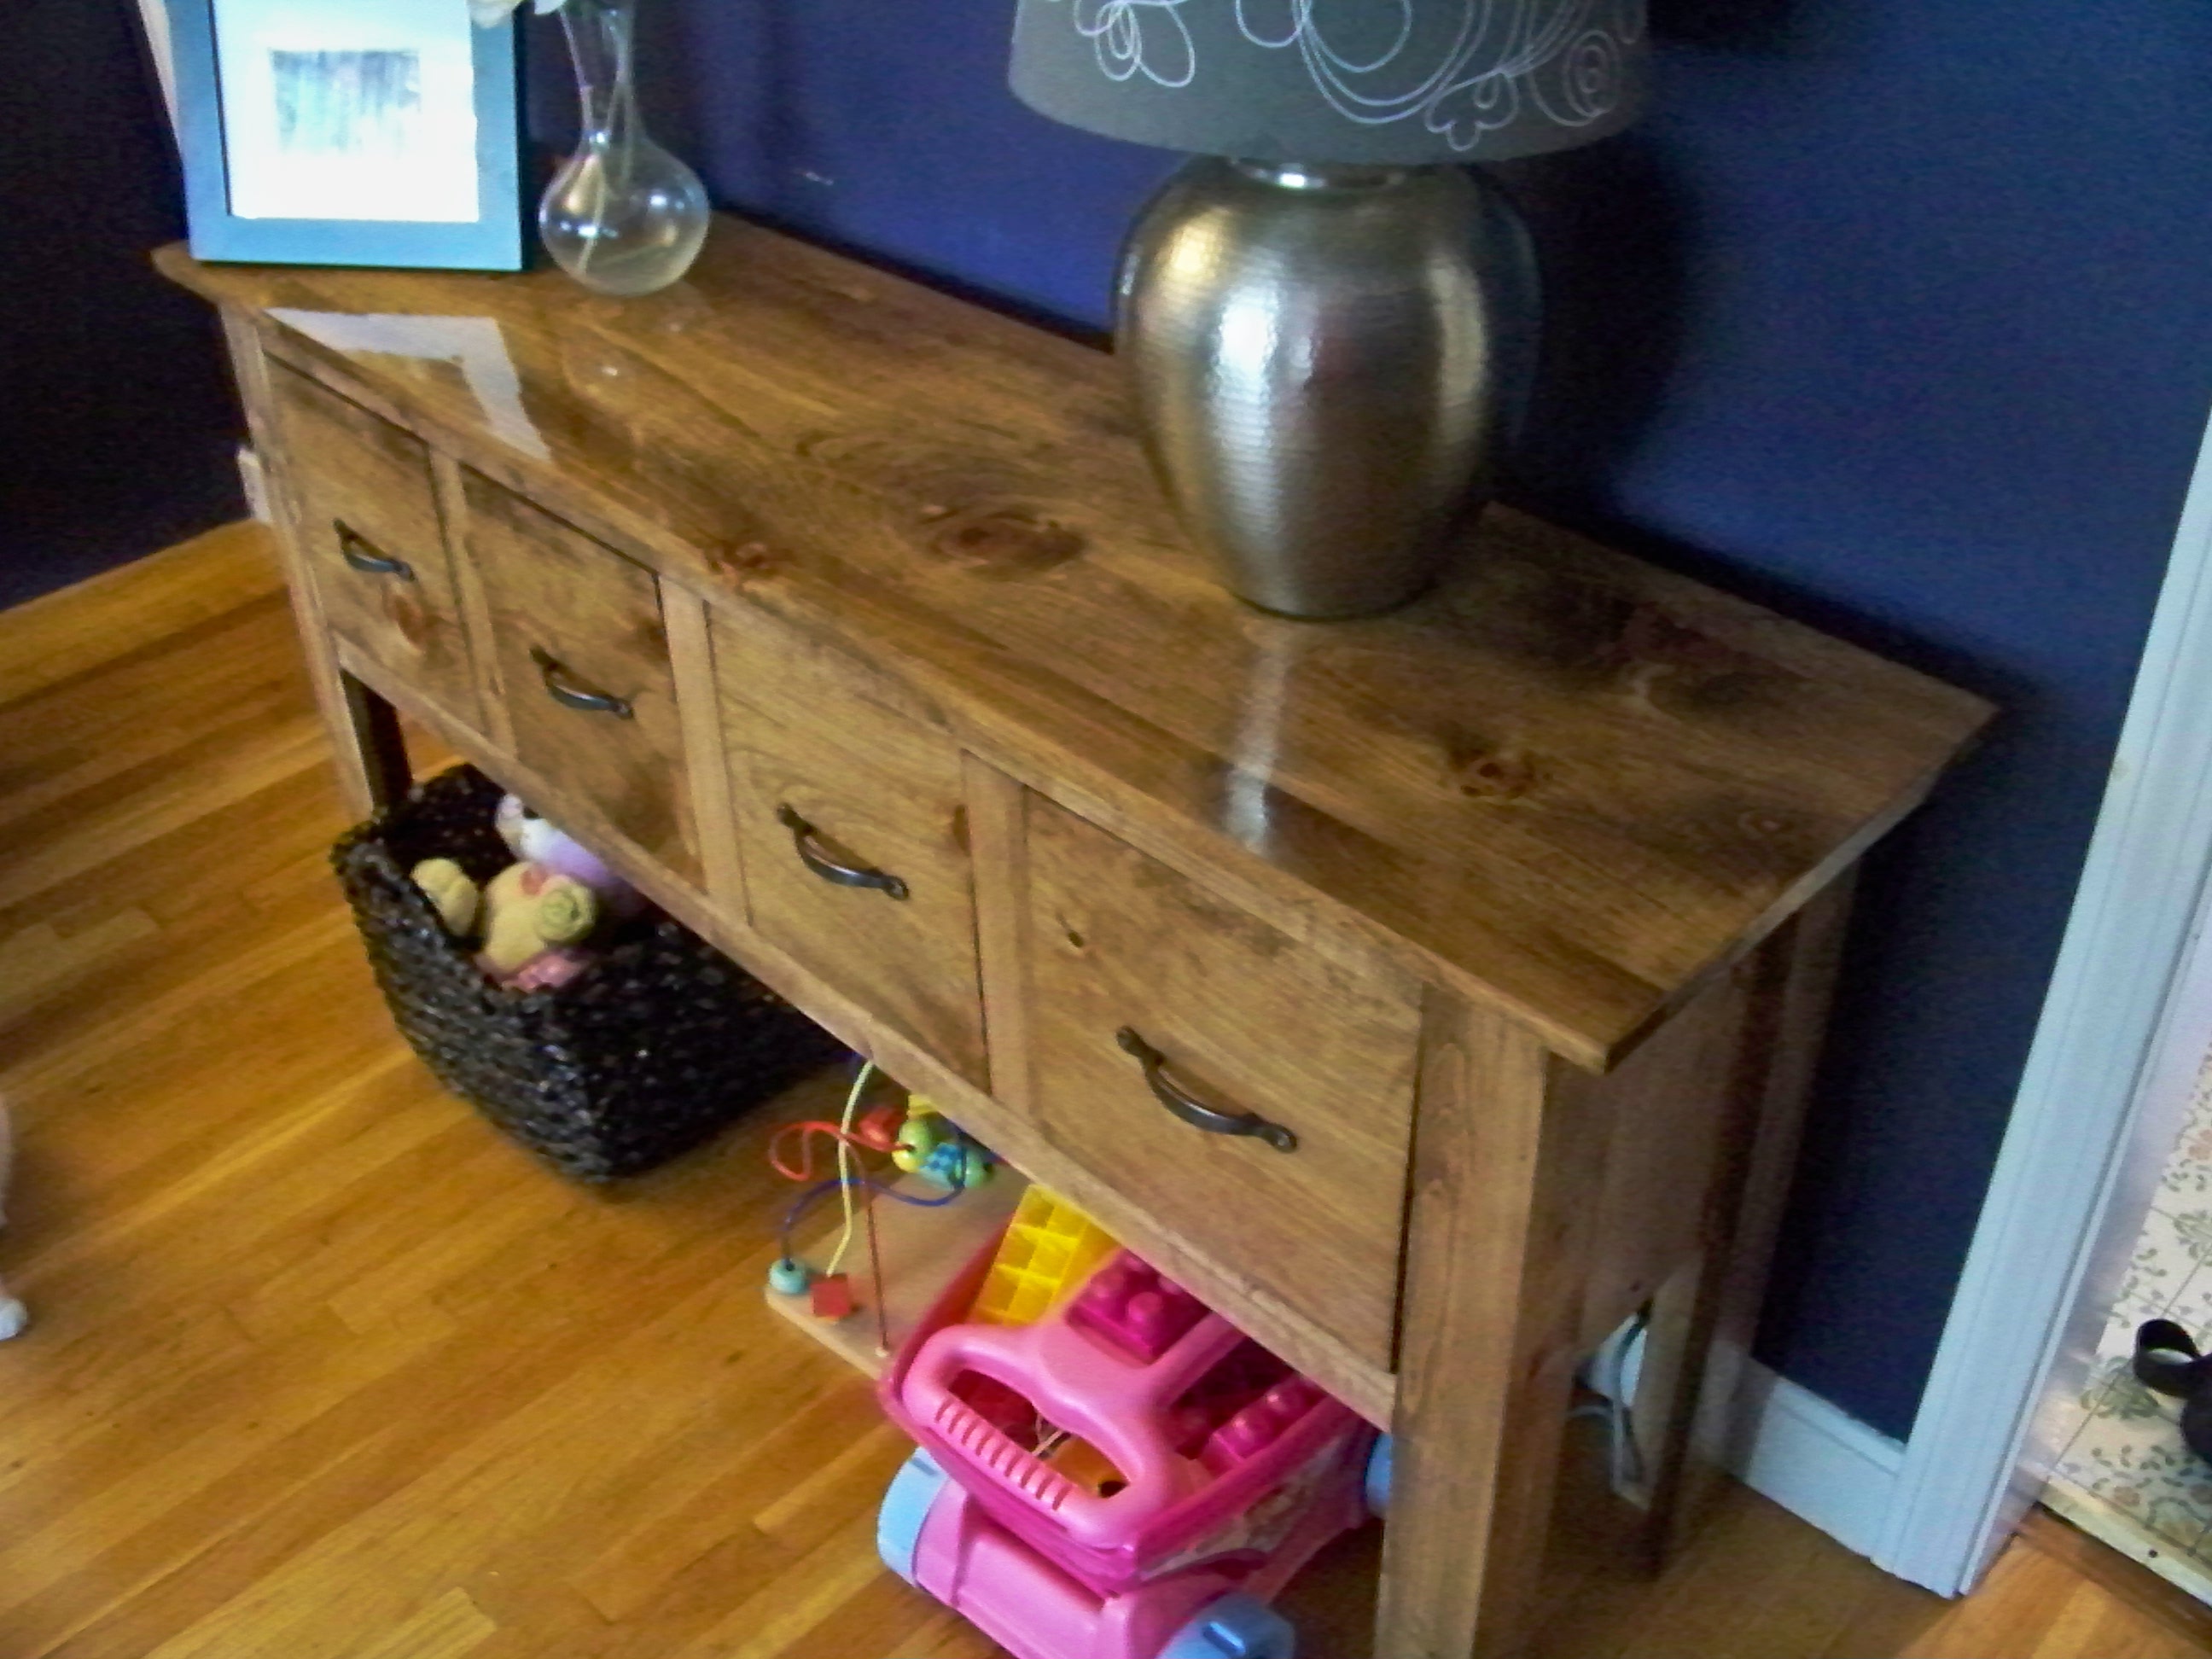
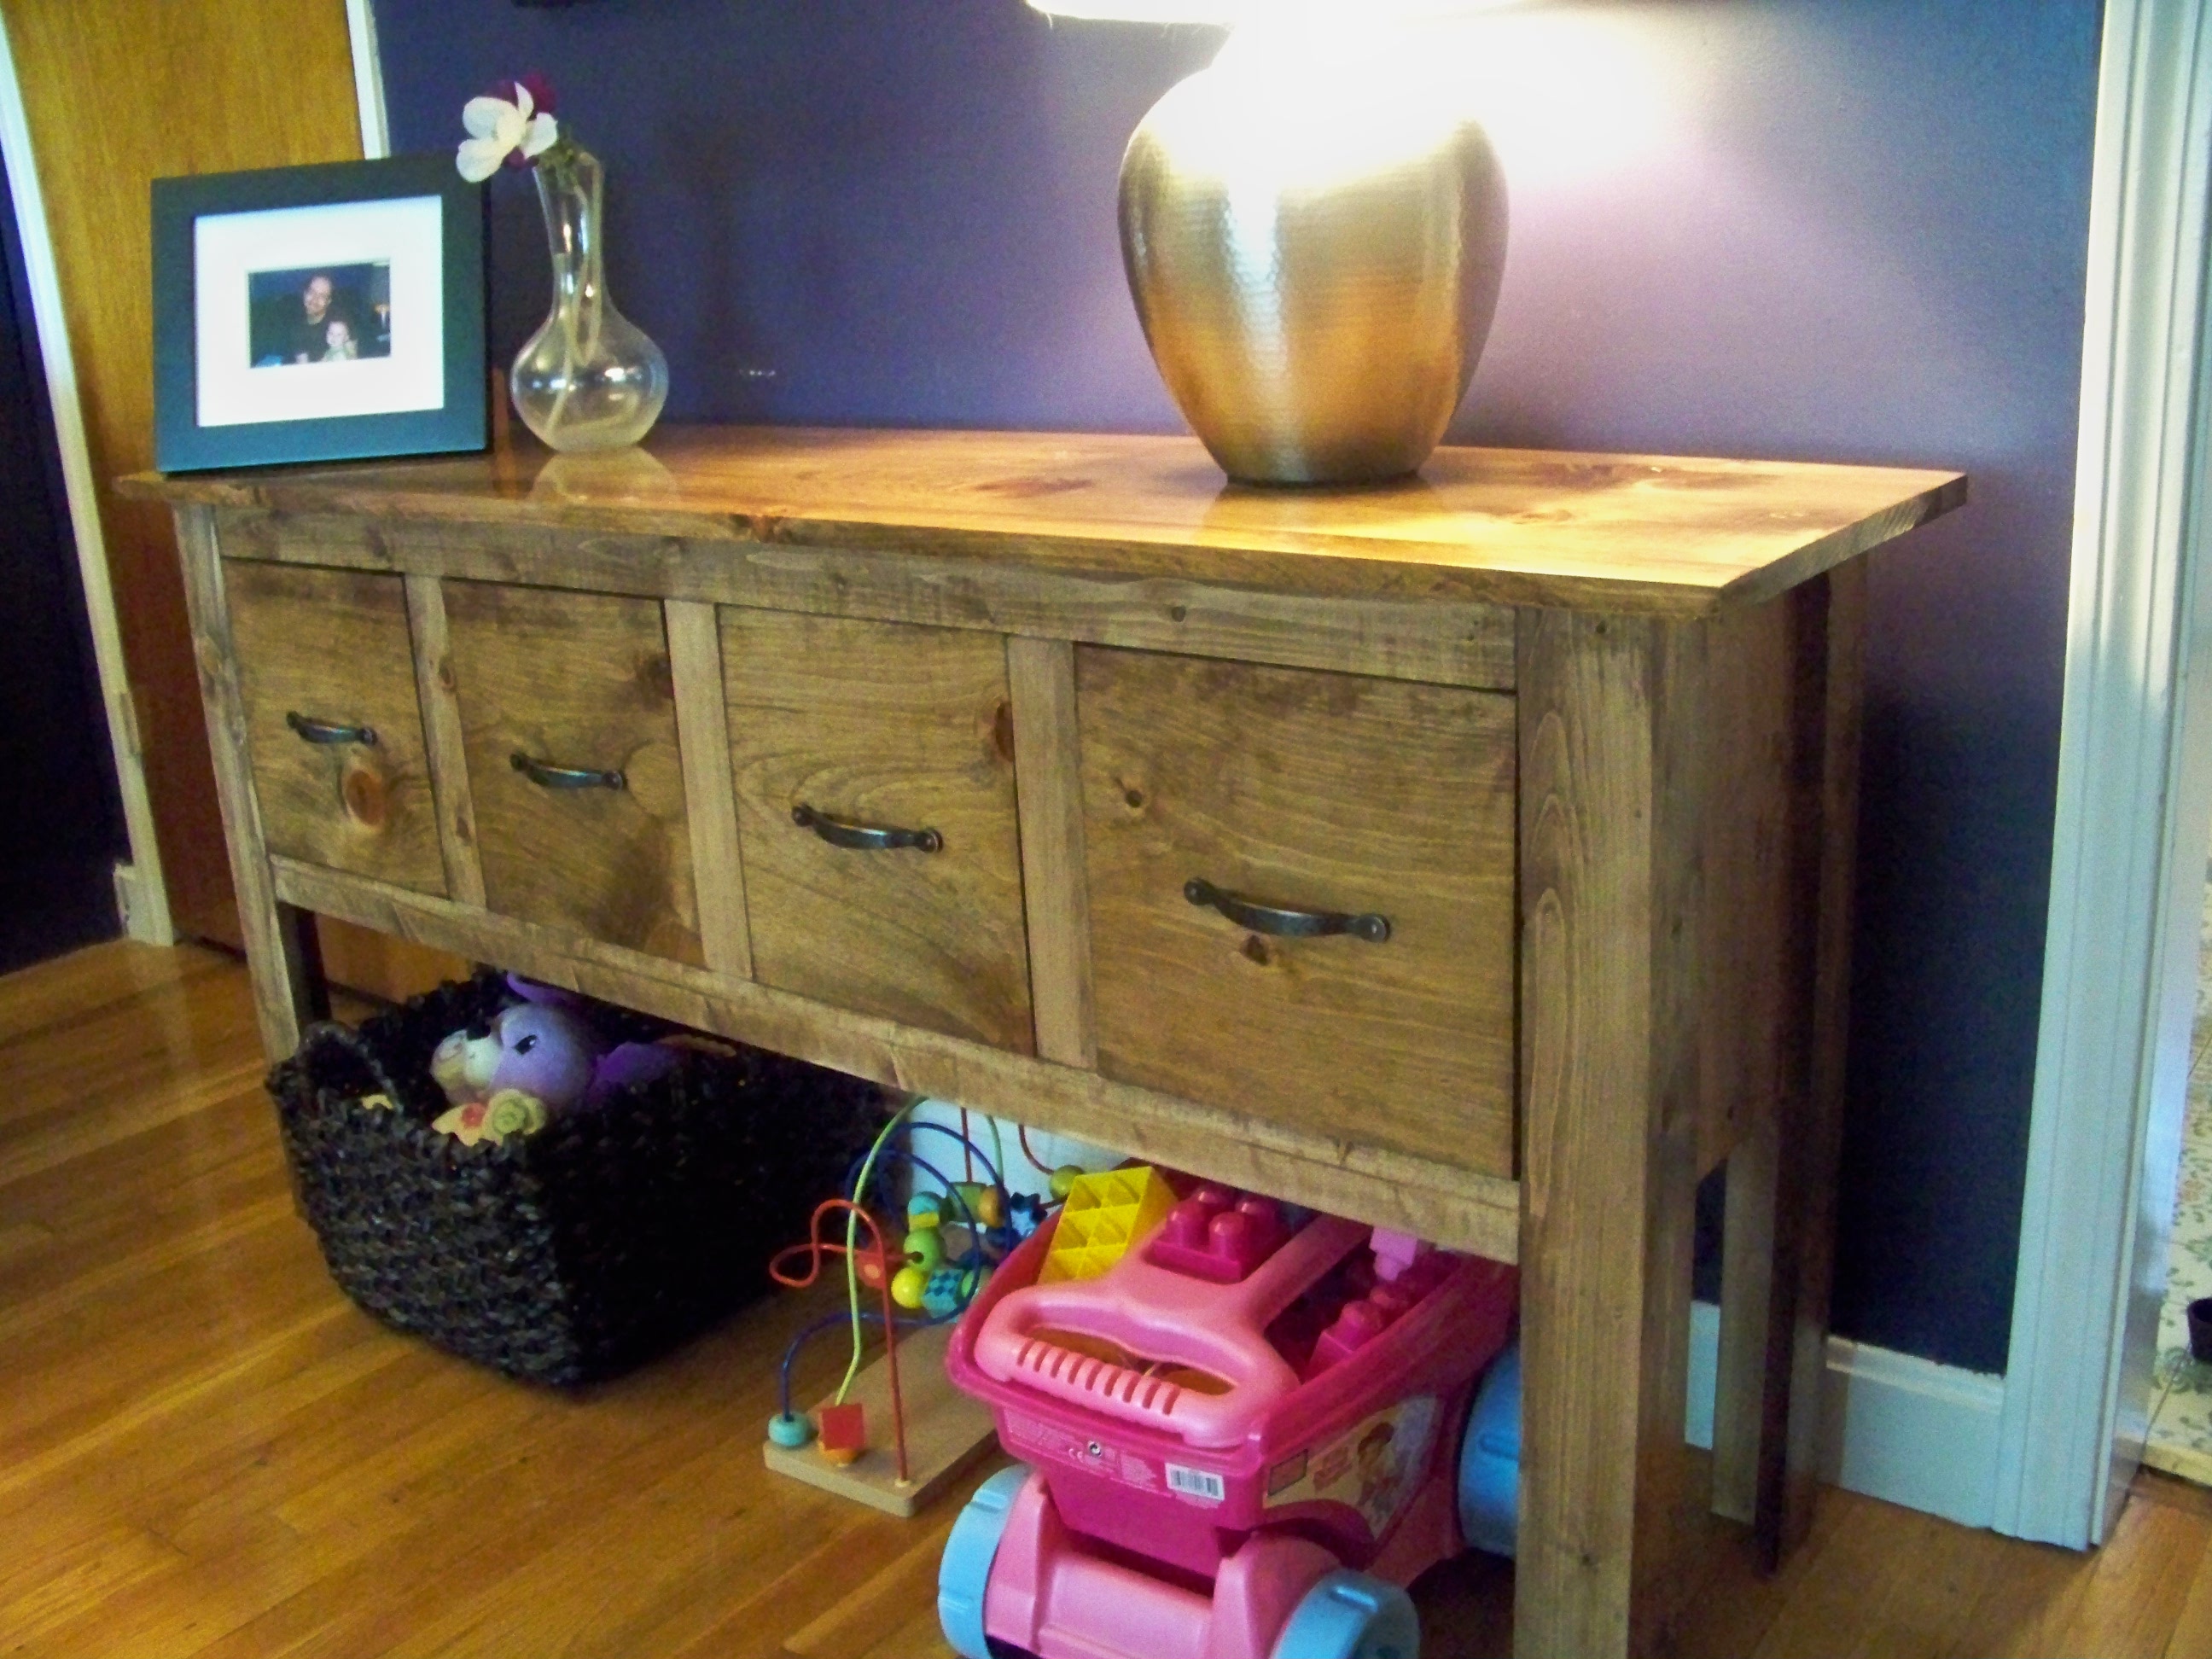
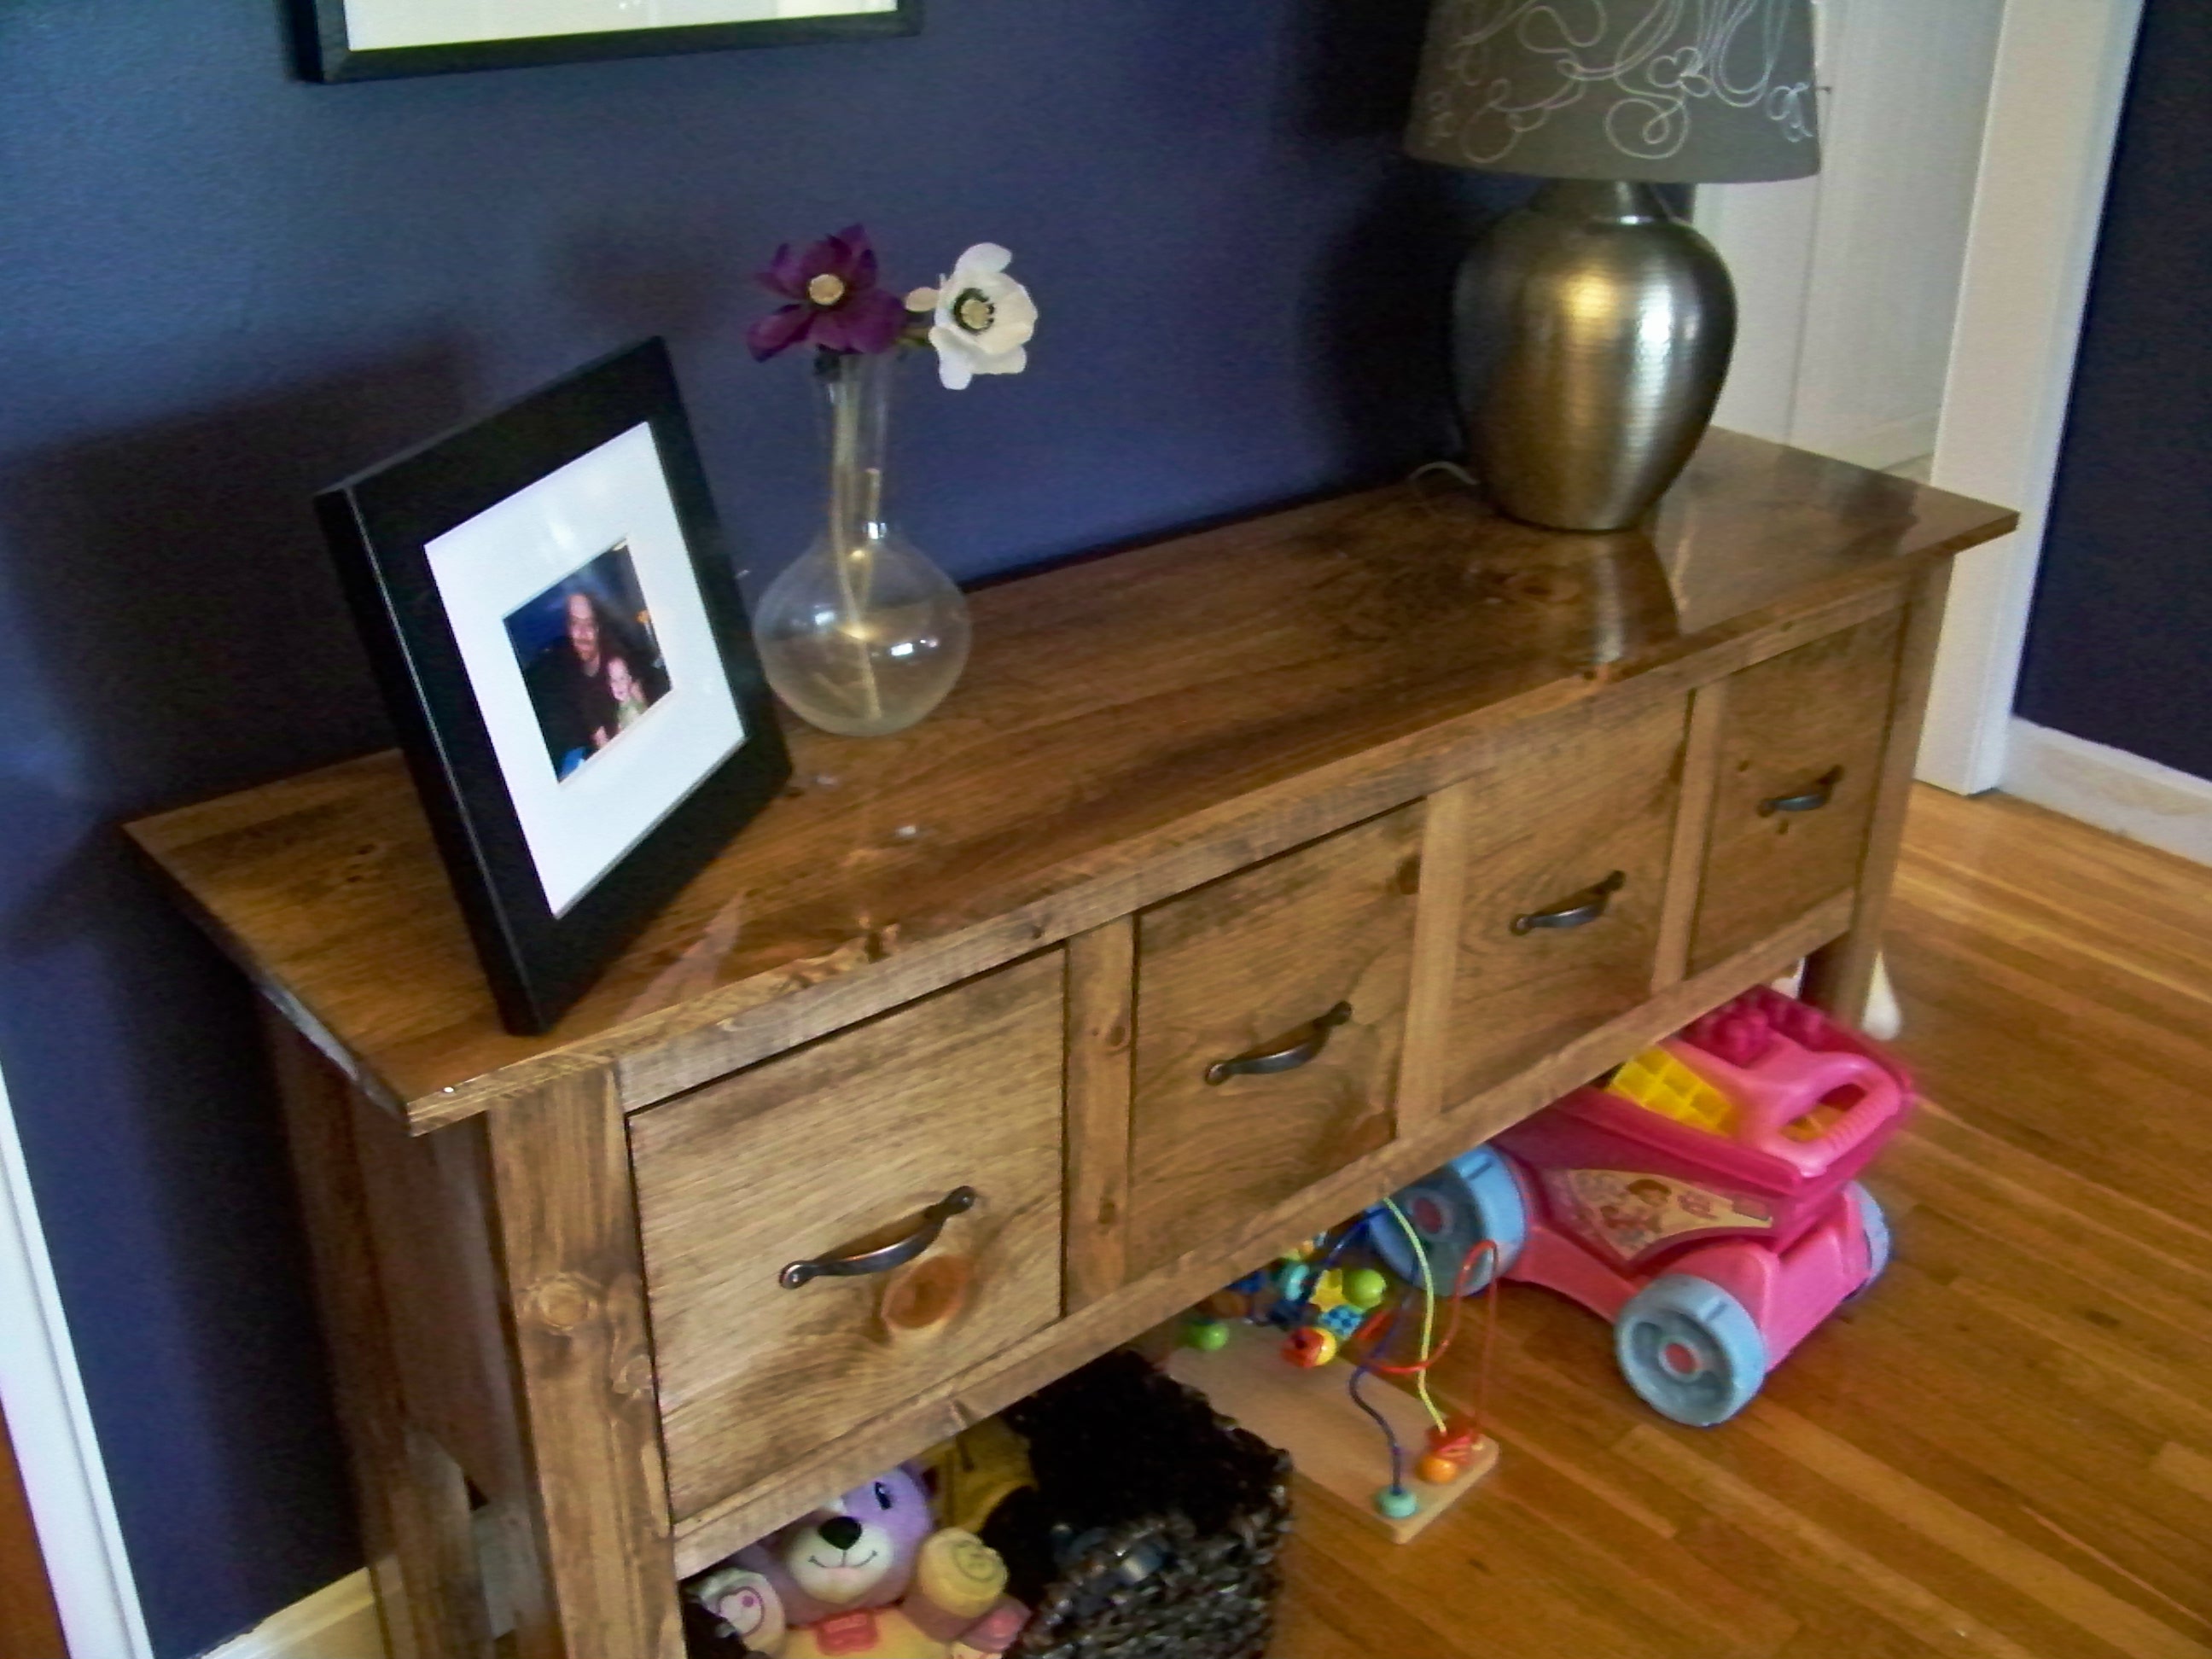
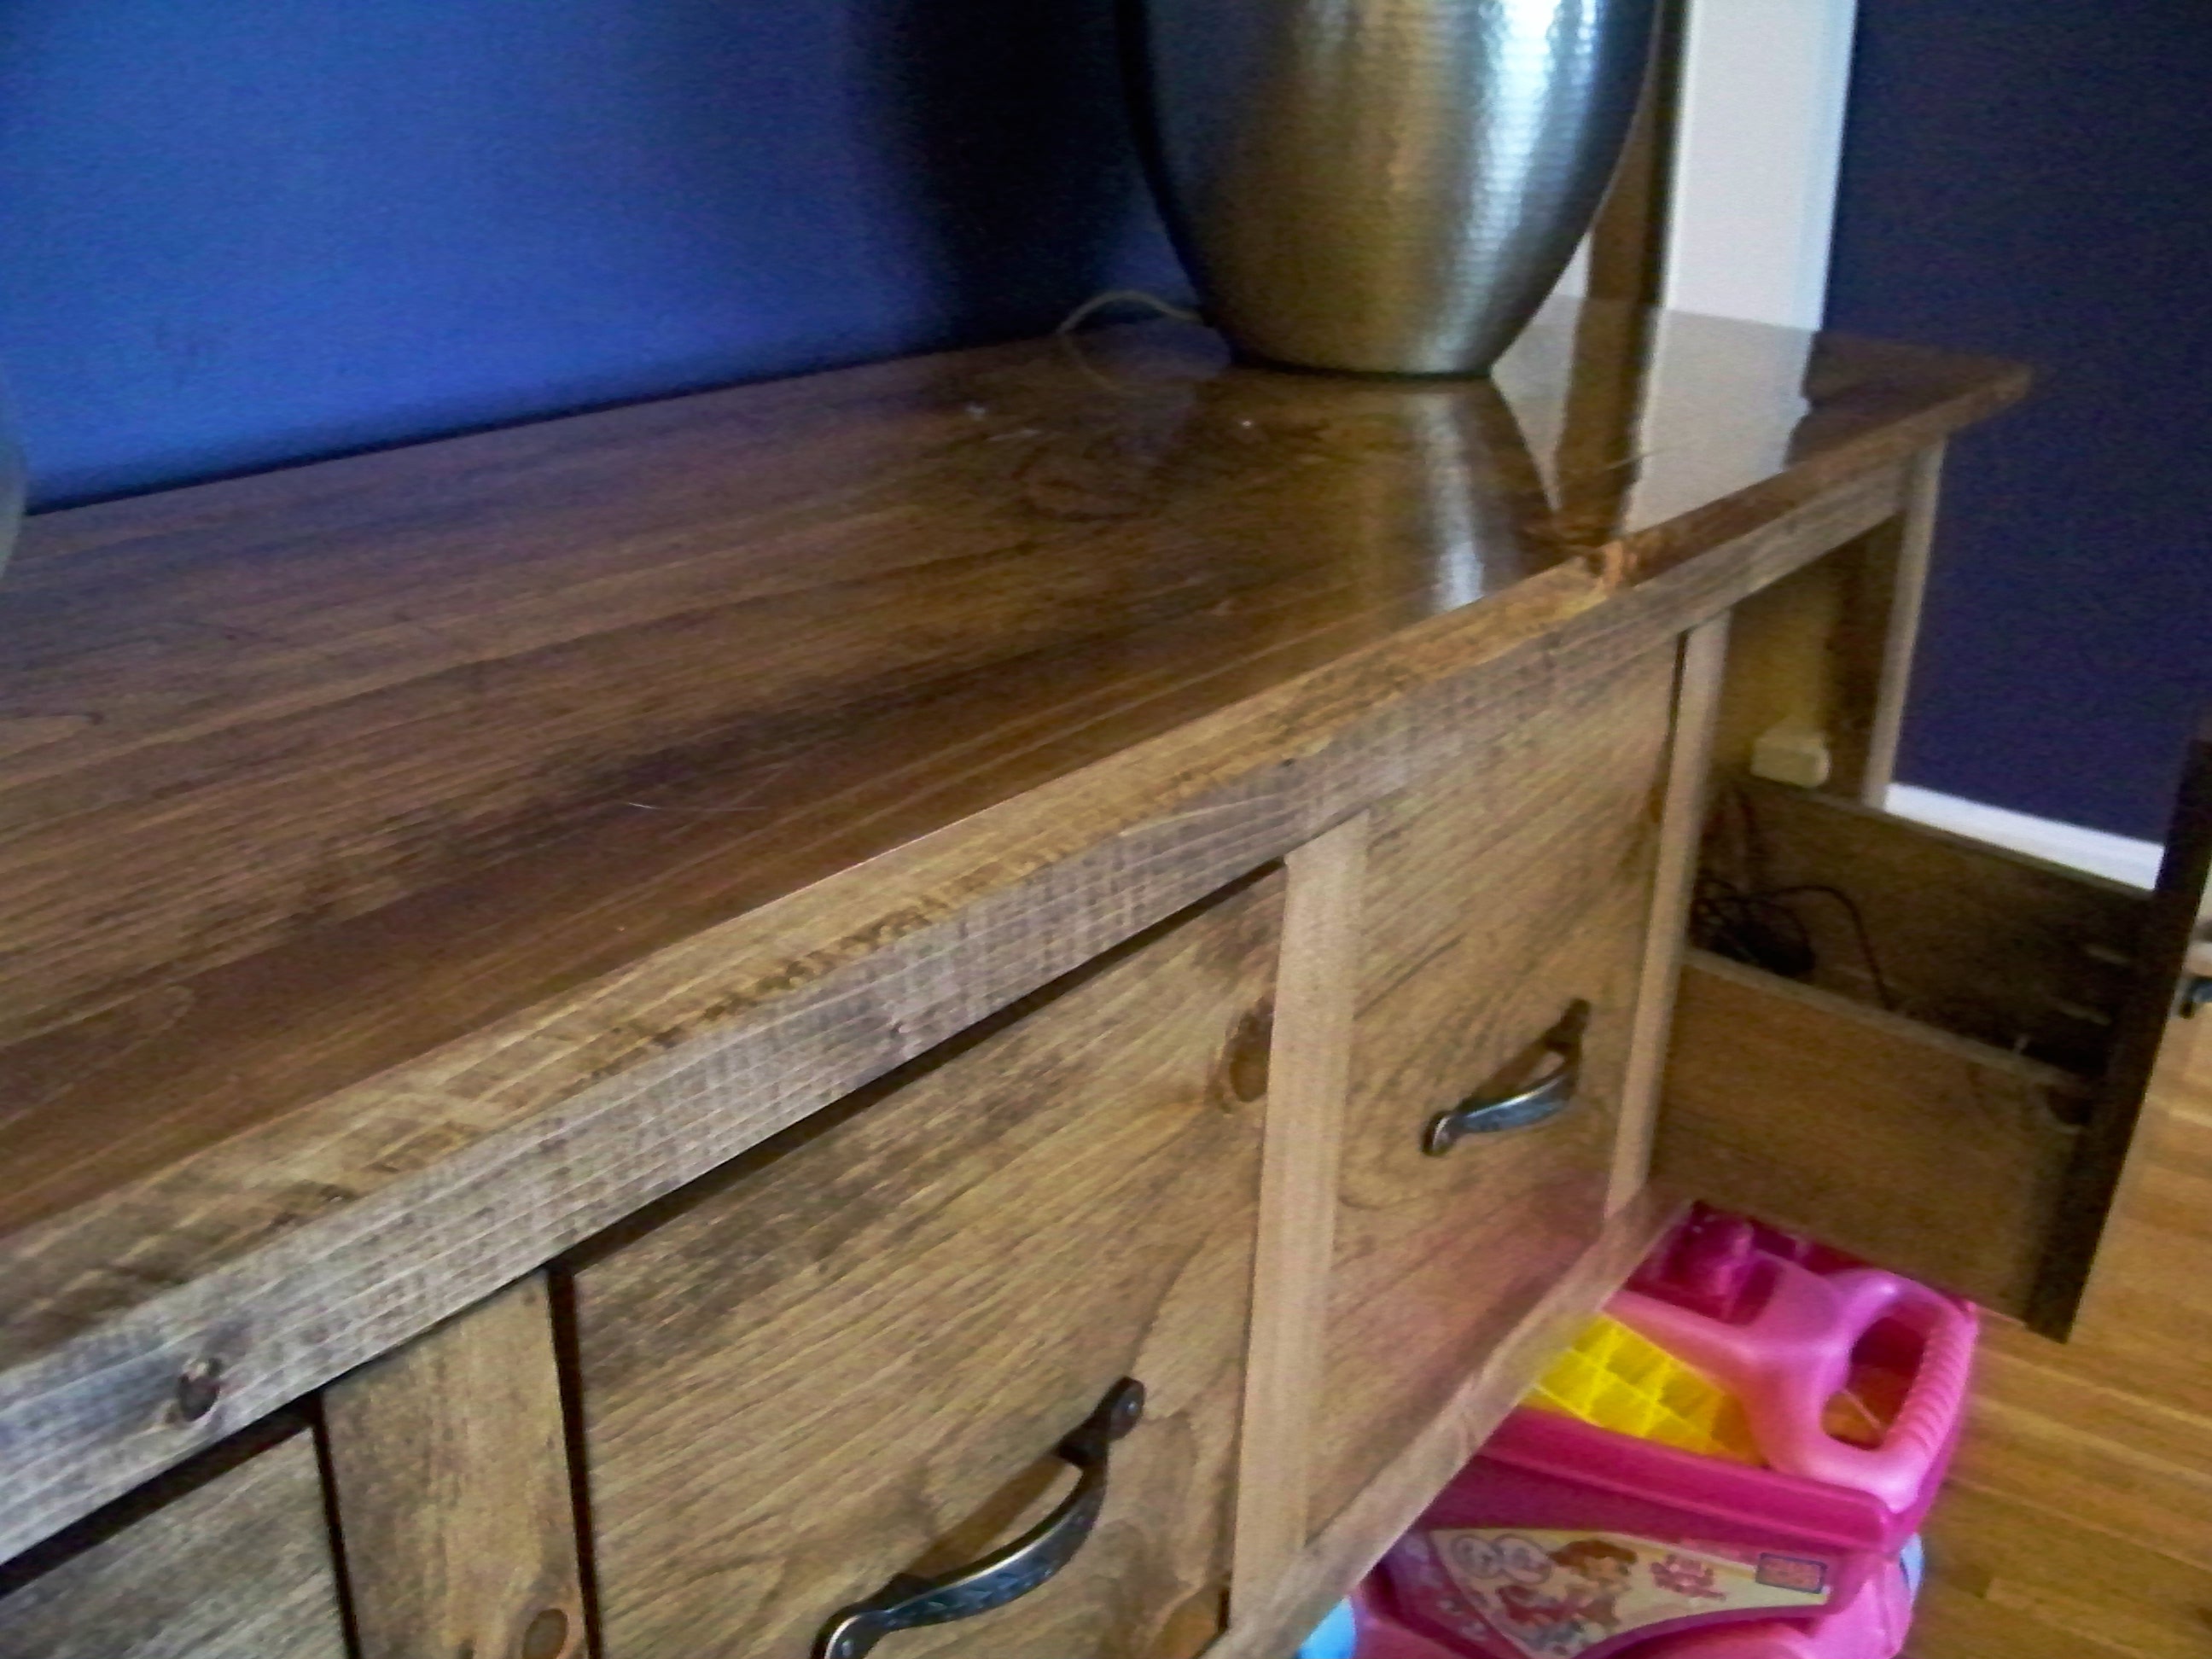
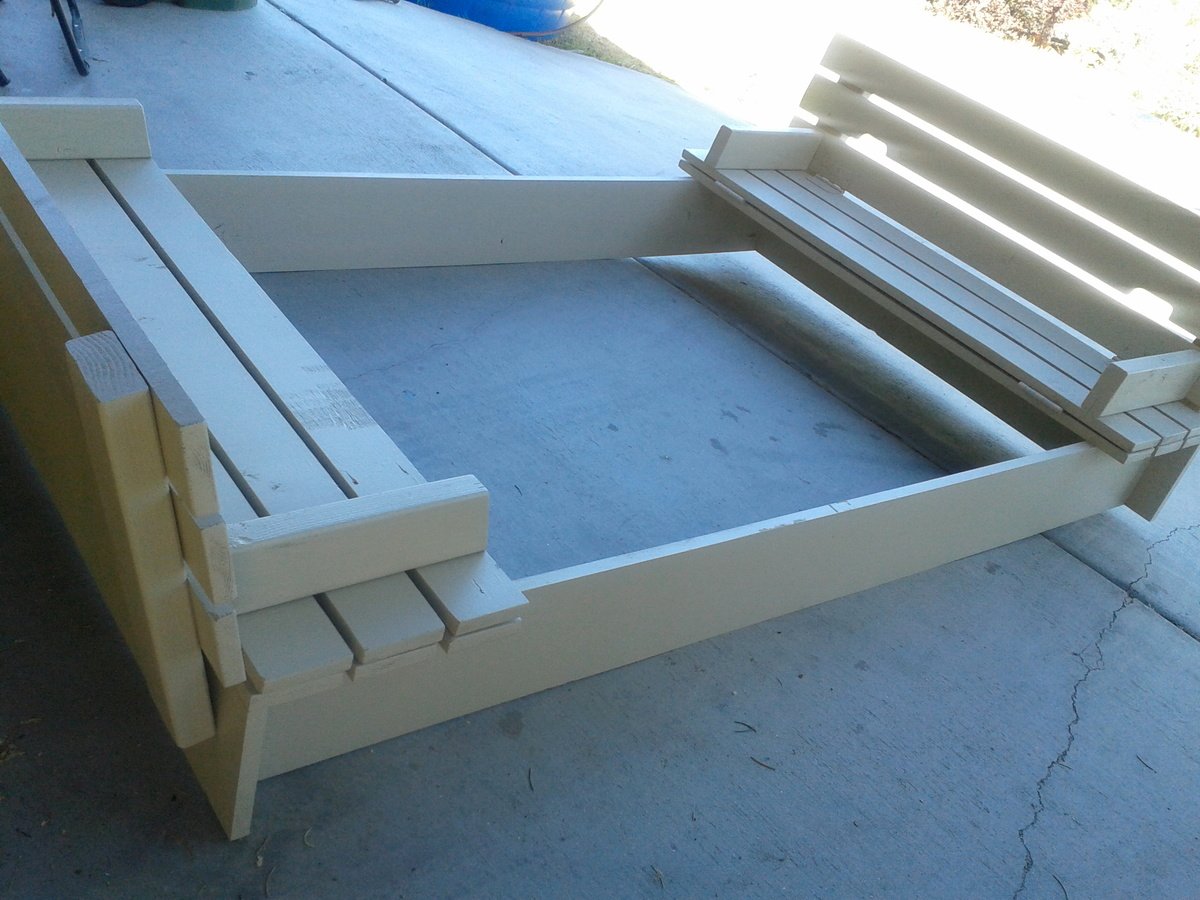
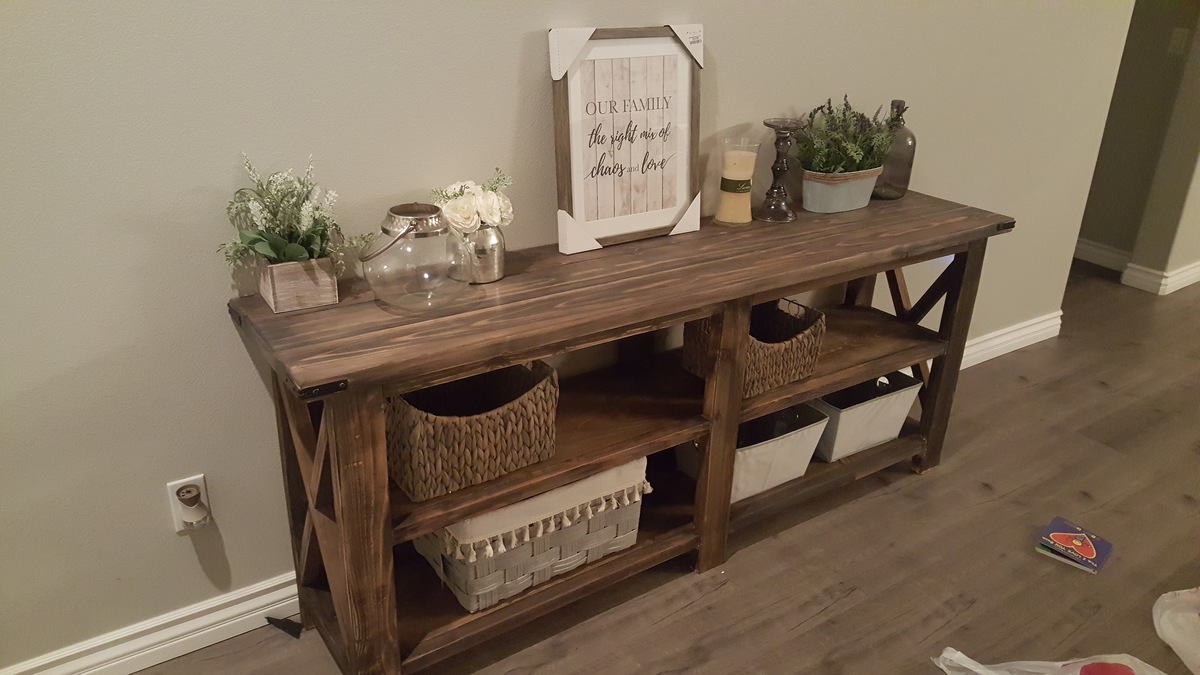
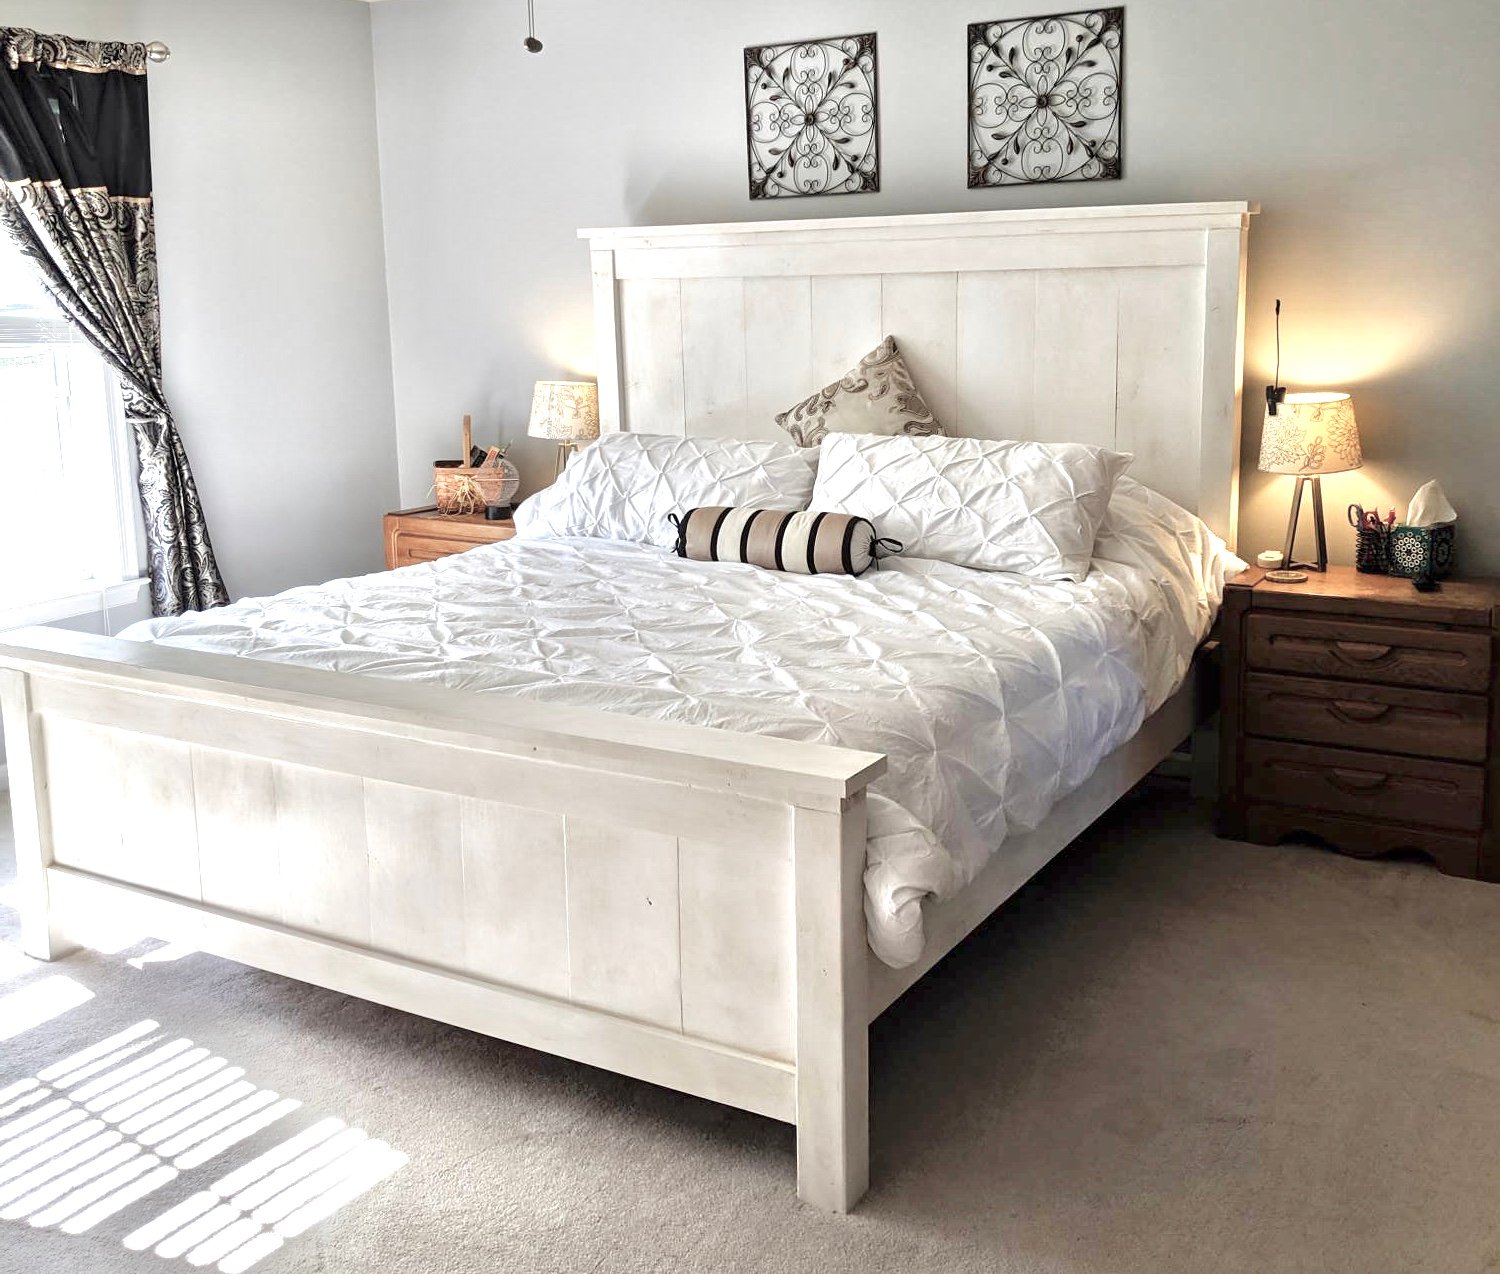
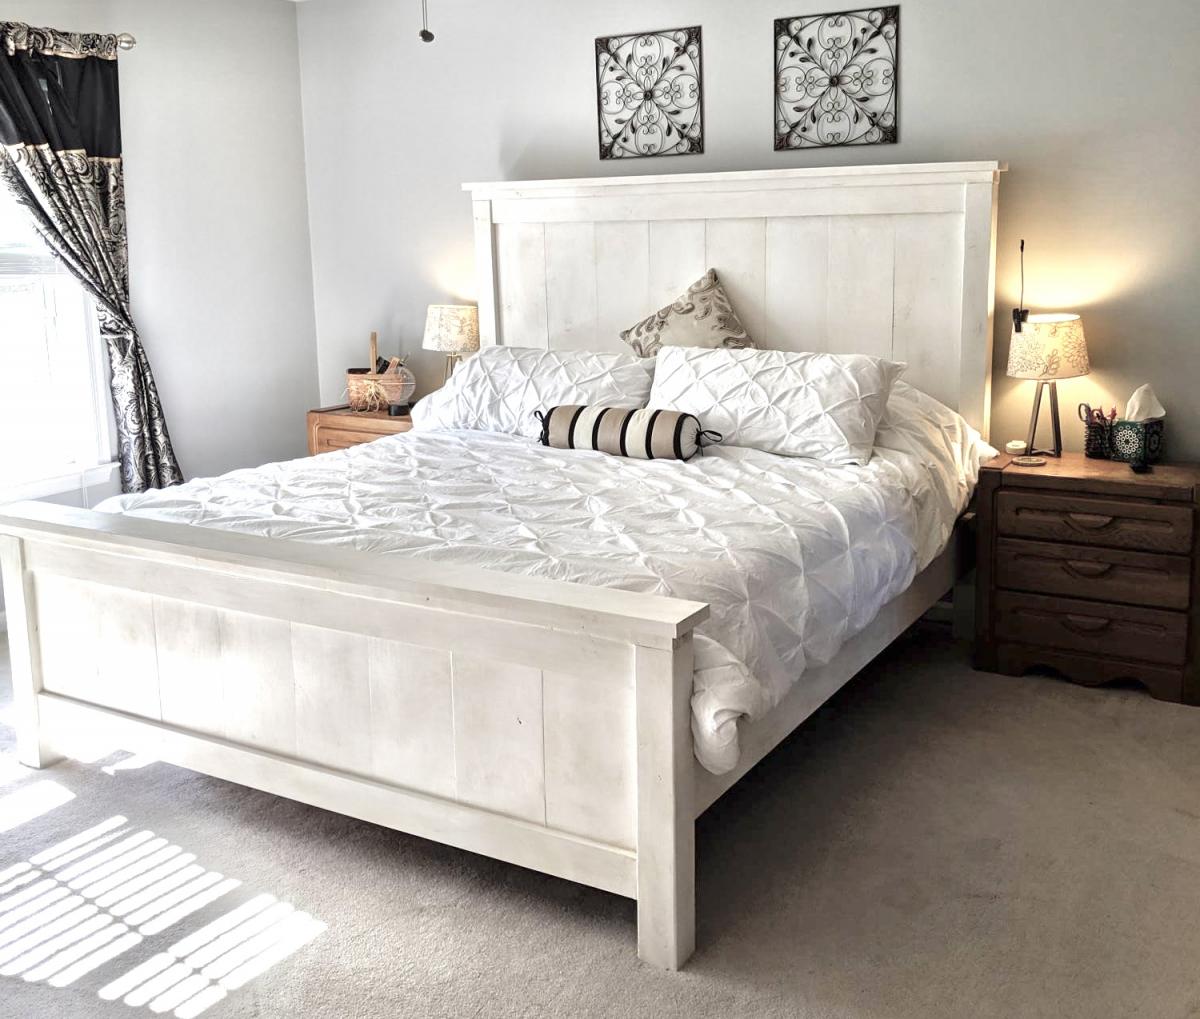
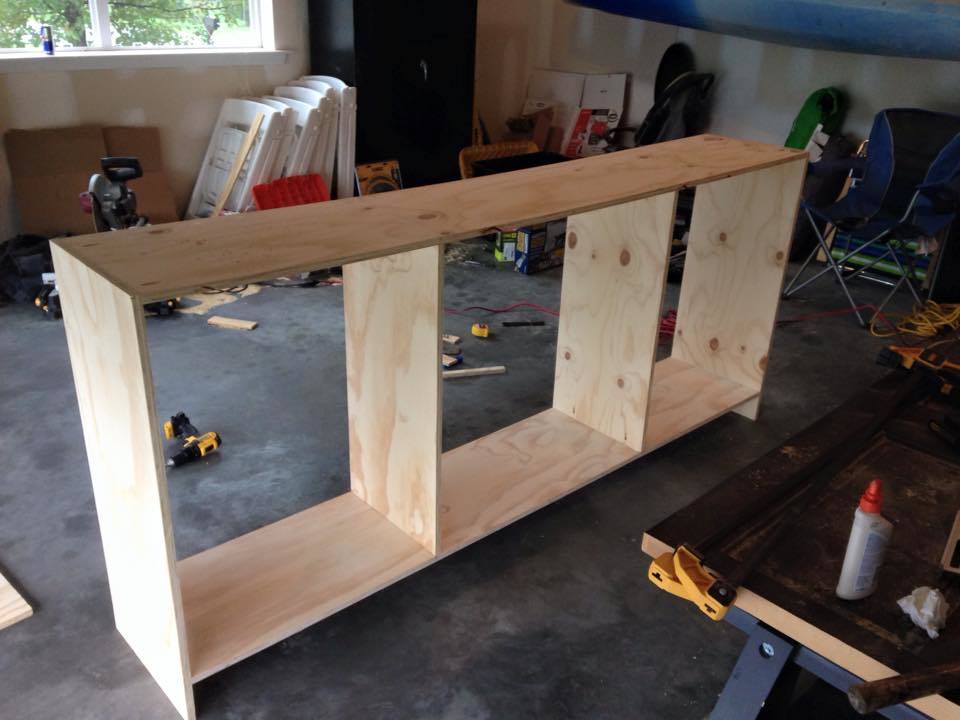
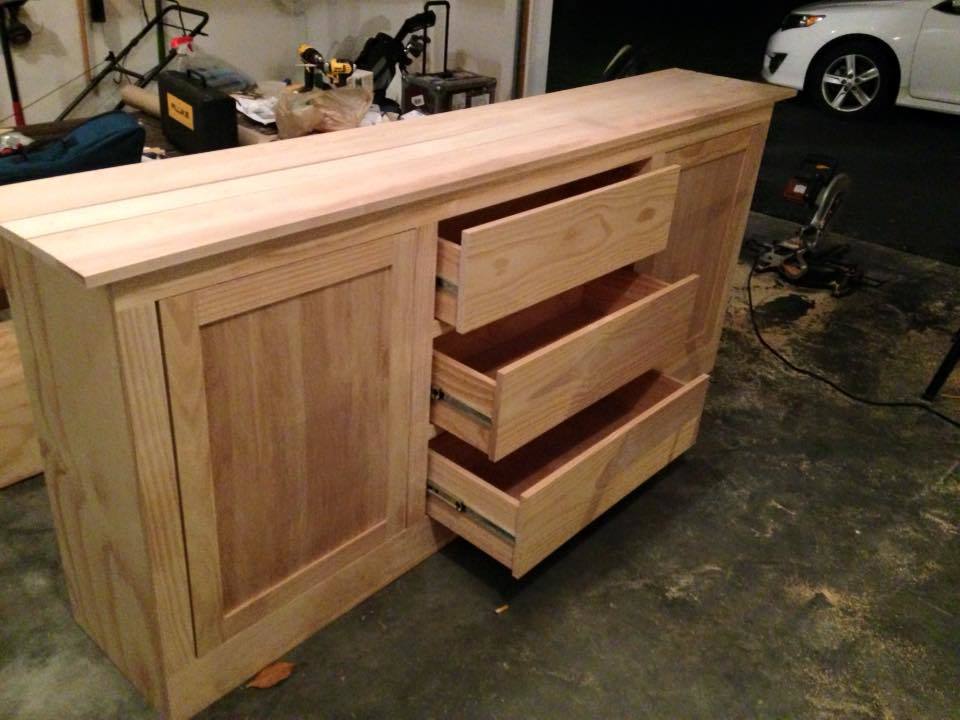
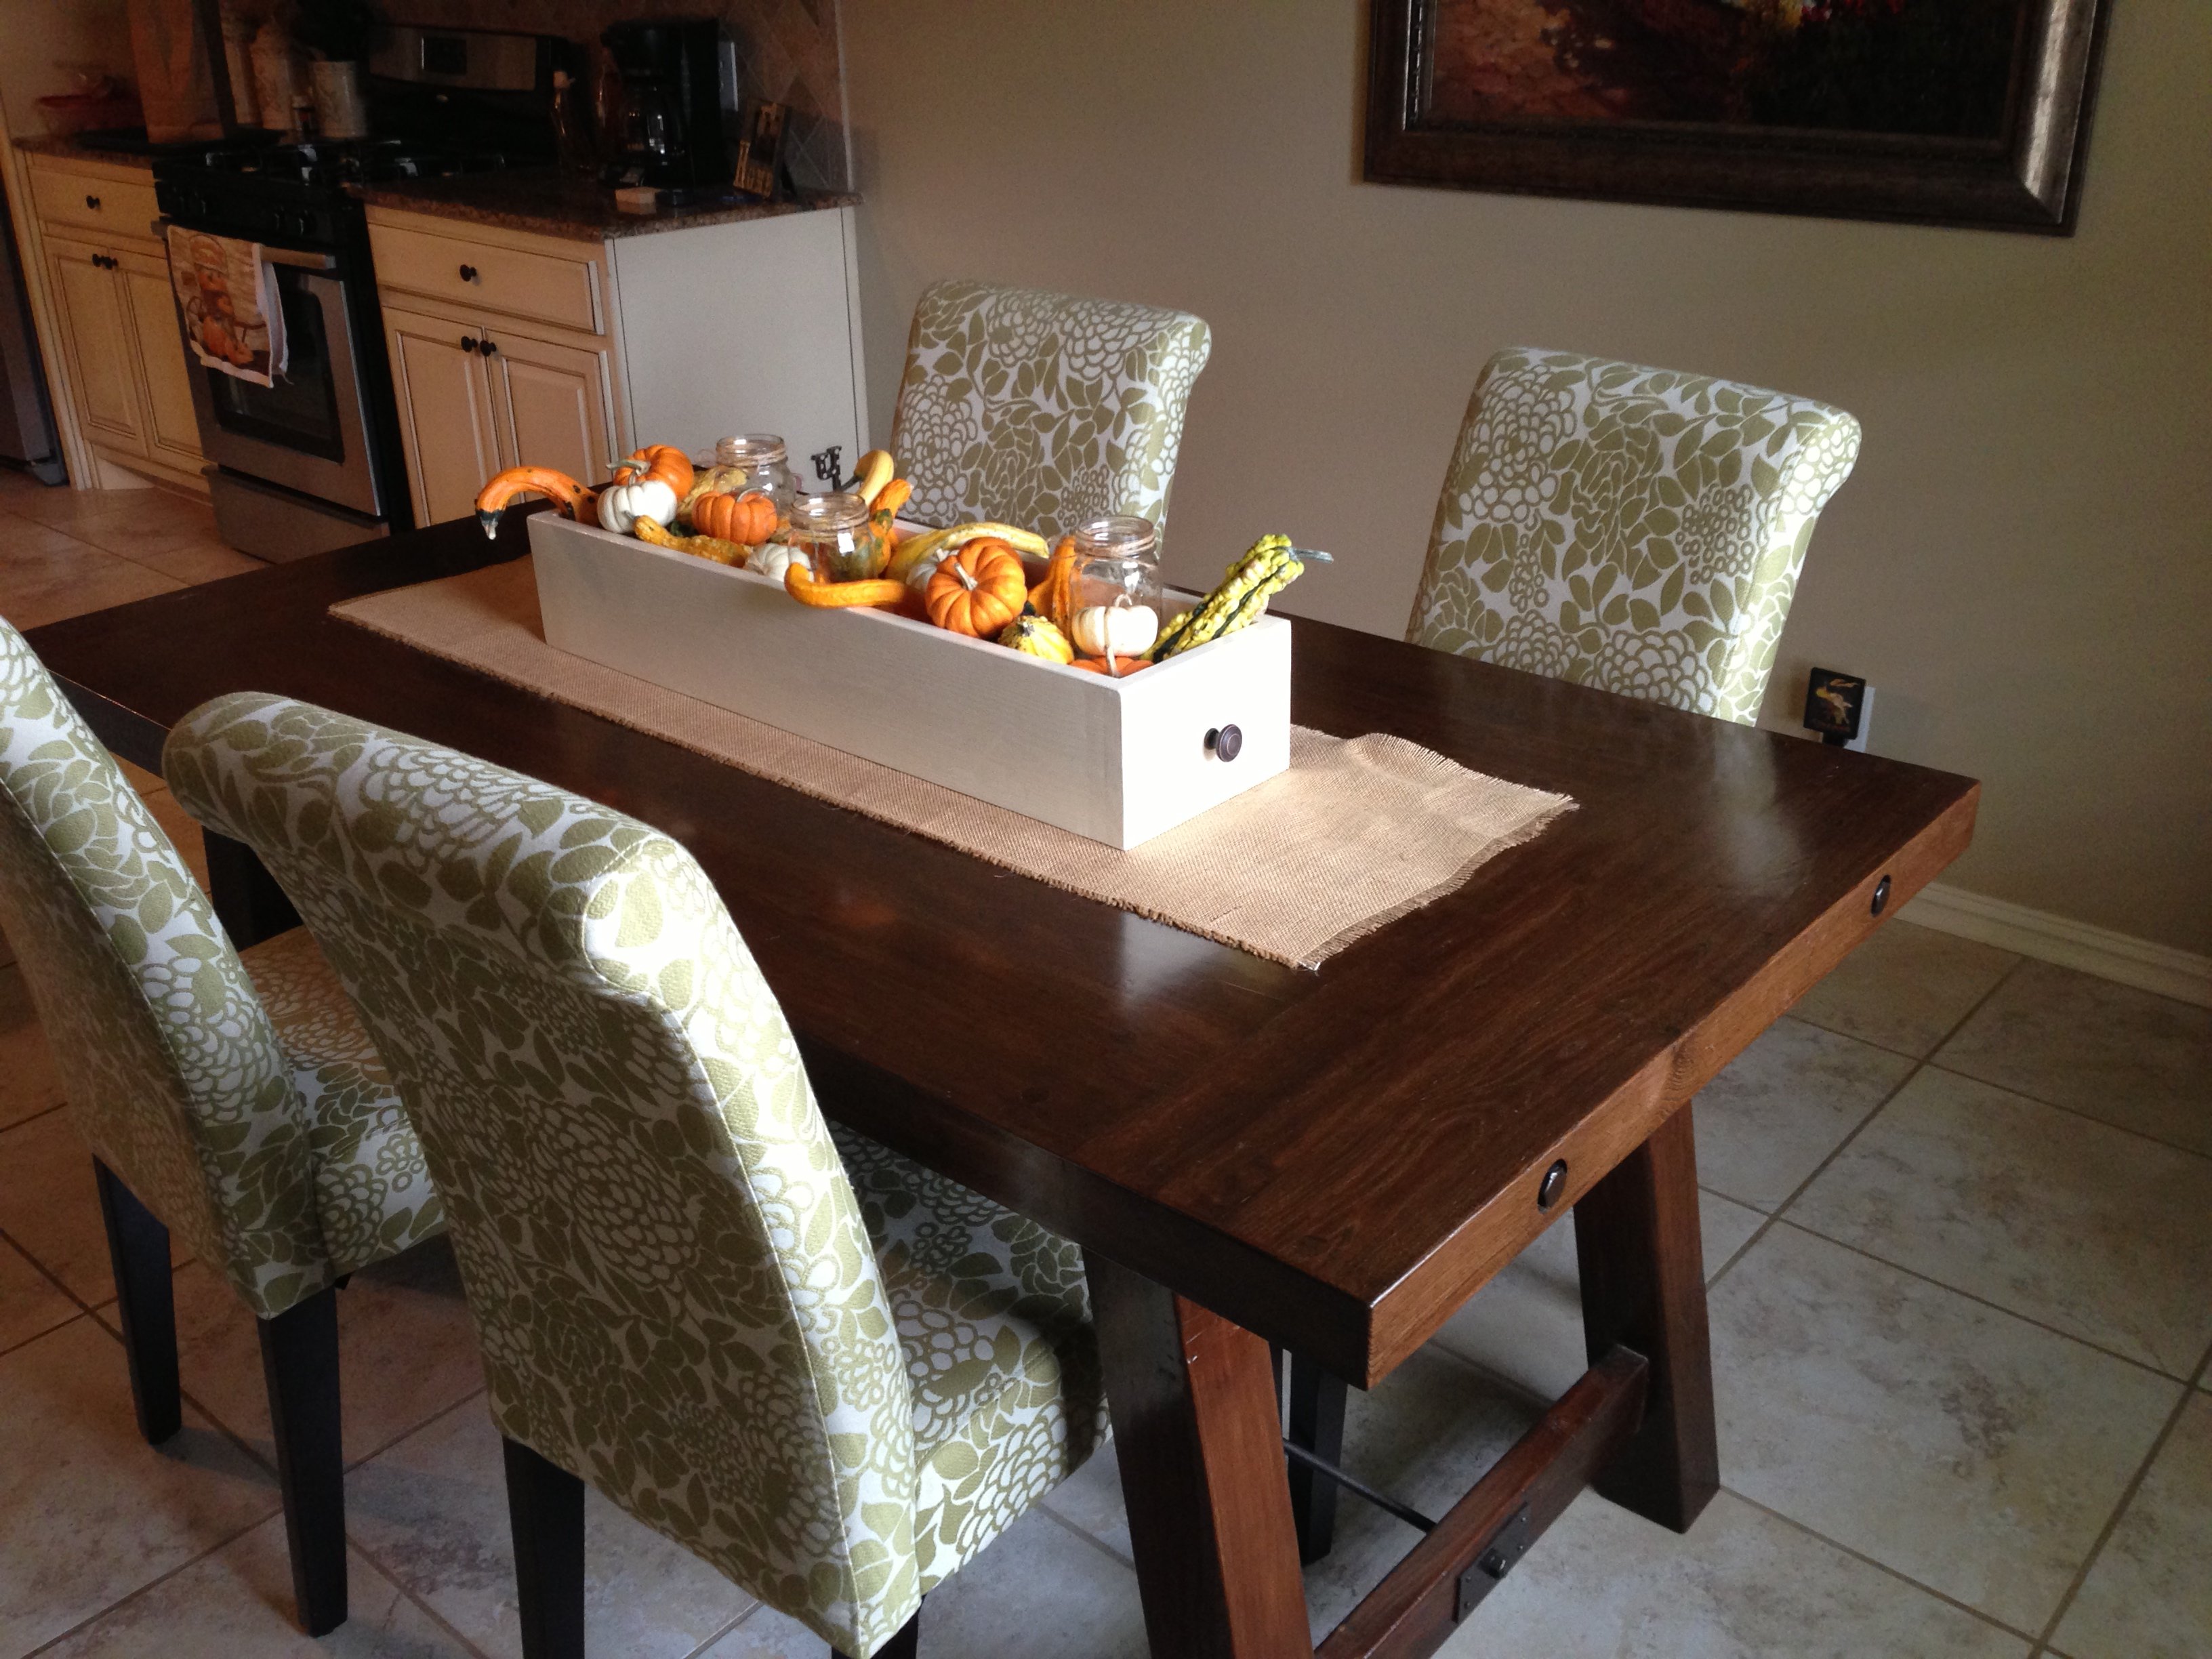
My wife and I picked this out as our first somewhat complex piece from Ana's site to make. Most of the table is made from left over 1x4s I had from a fence we made. I only needed 2 1x12s as we didn't make the drawers as deep.

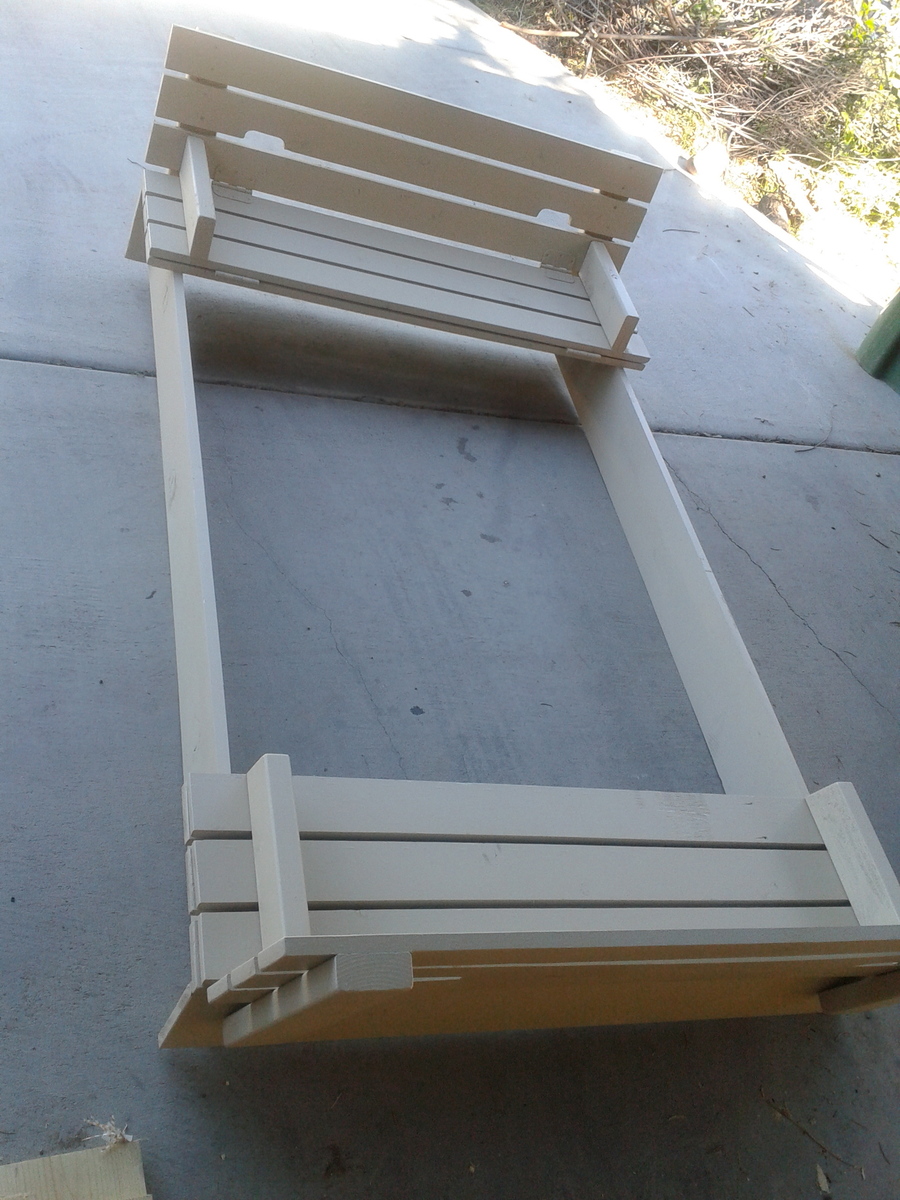
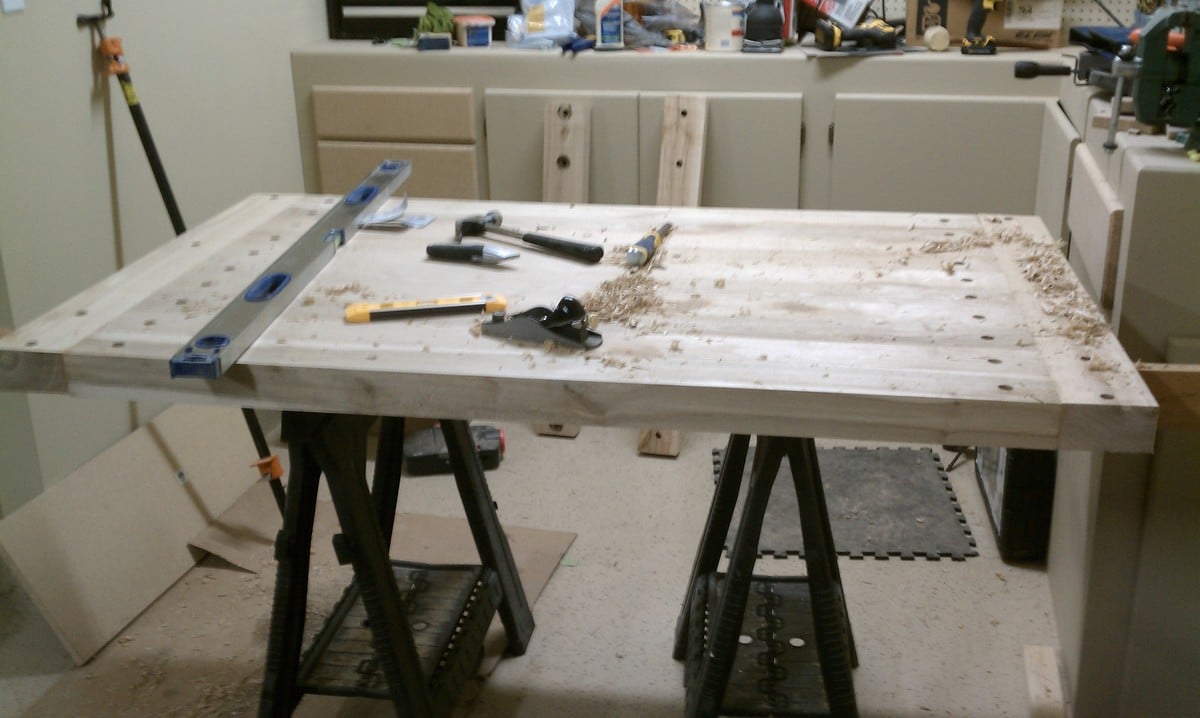
Because I cut down the 1x4s for the legs (and didn't examine the plans in detail first) I made them 3 inches wide when the ones in the plan are only 2.5 inches wide. This made for a few adjustments, such as the middle two drawers being a bit narrower.

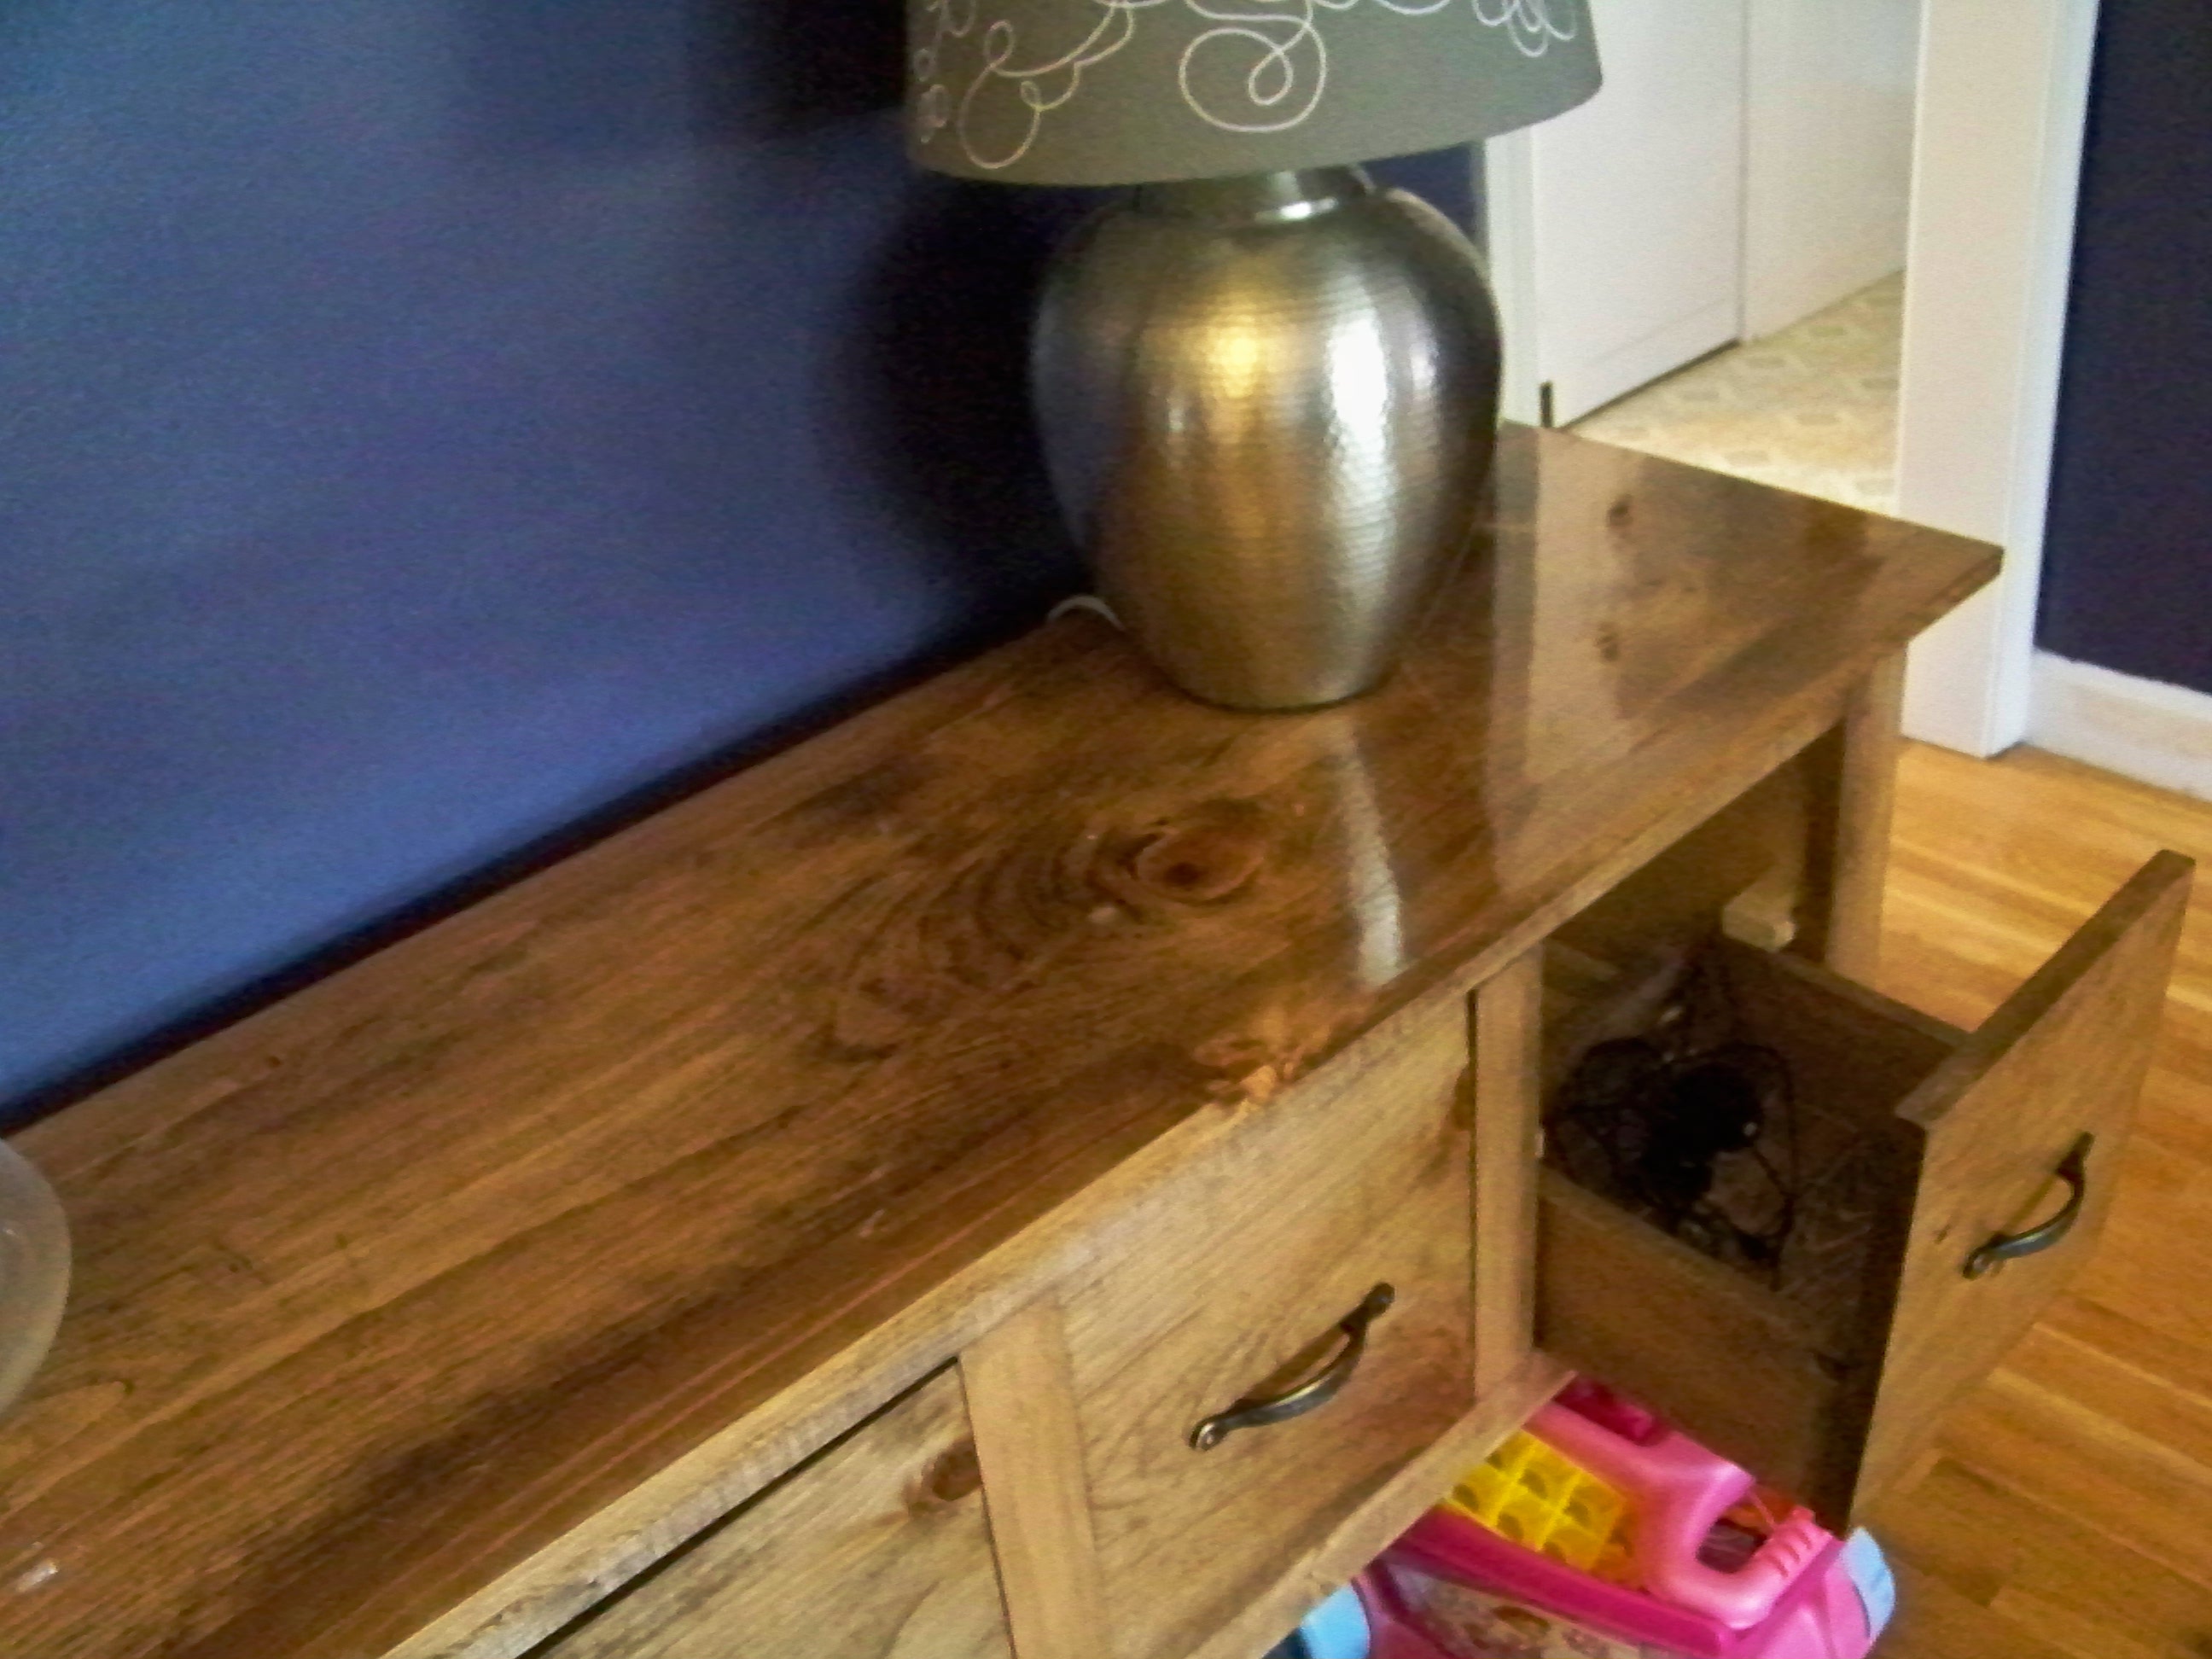
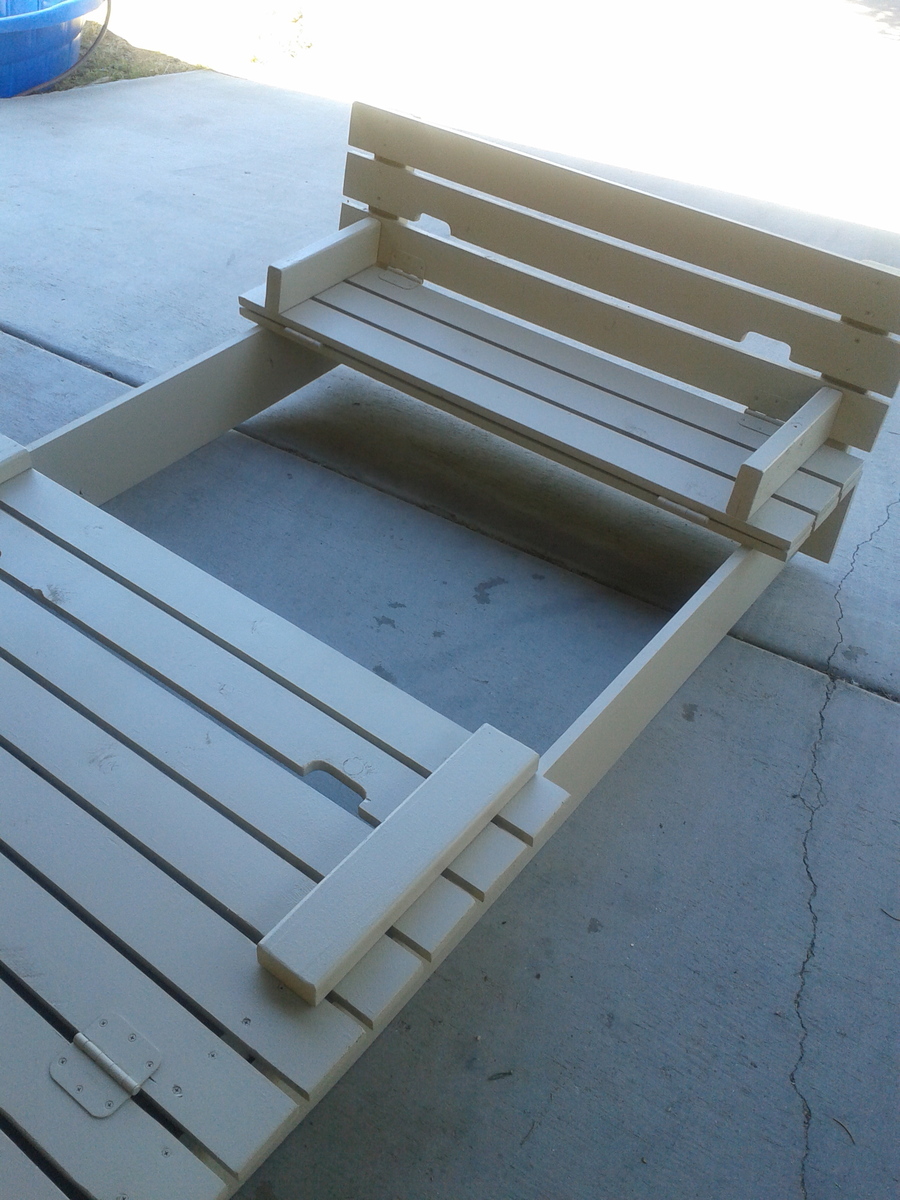
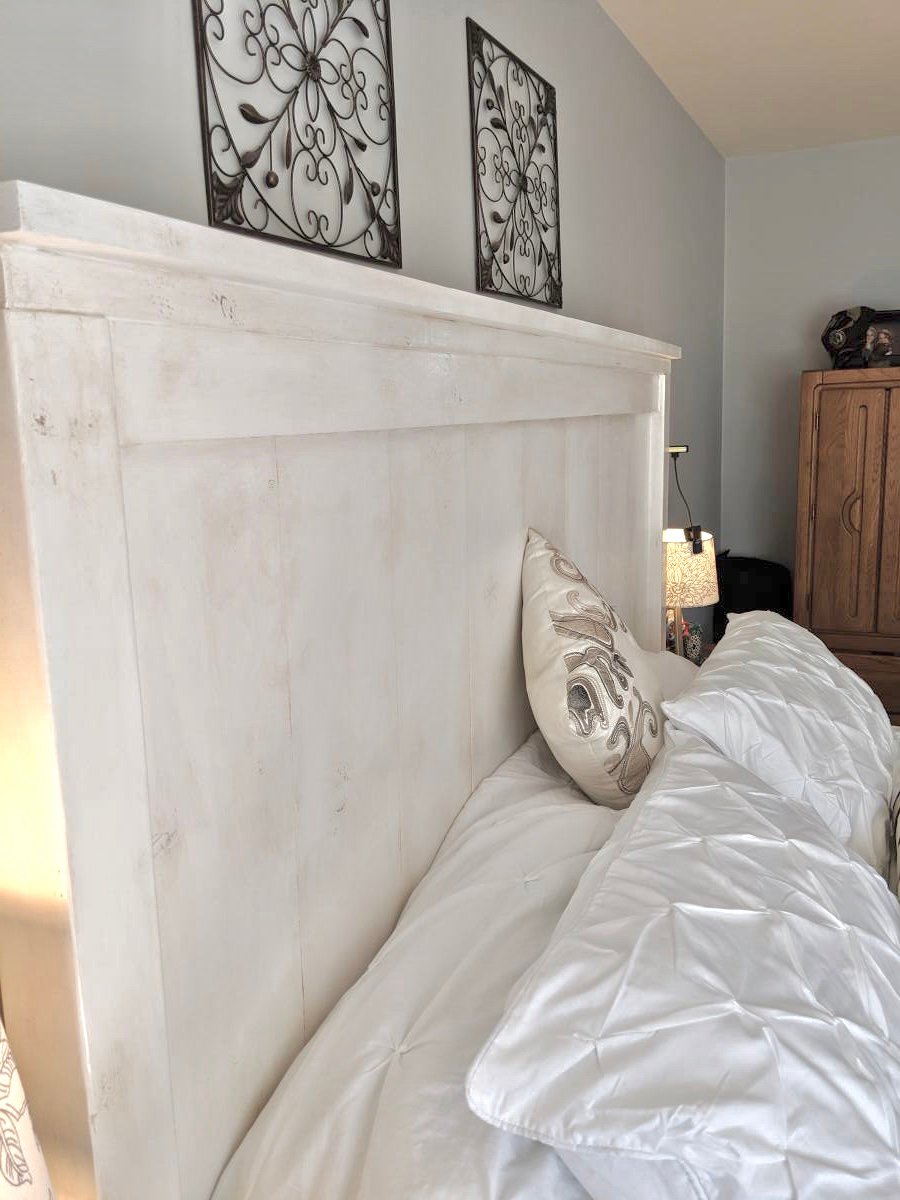
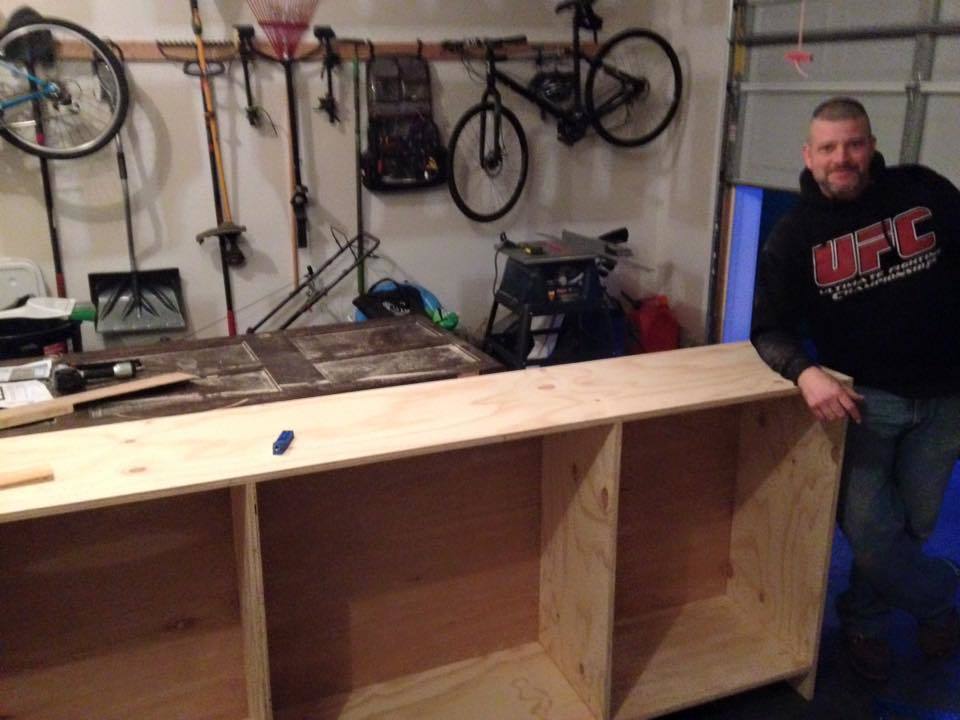
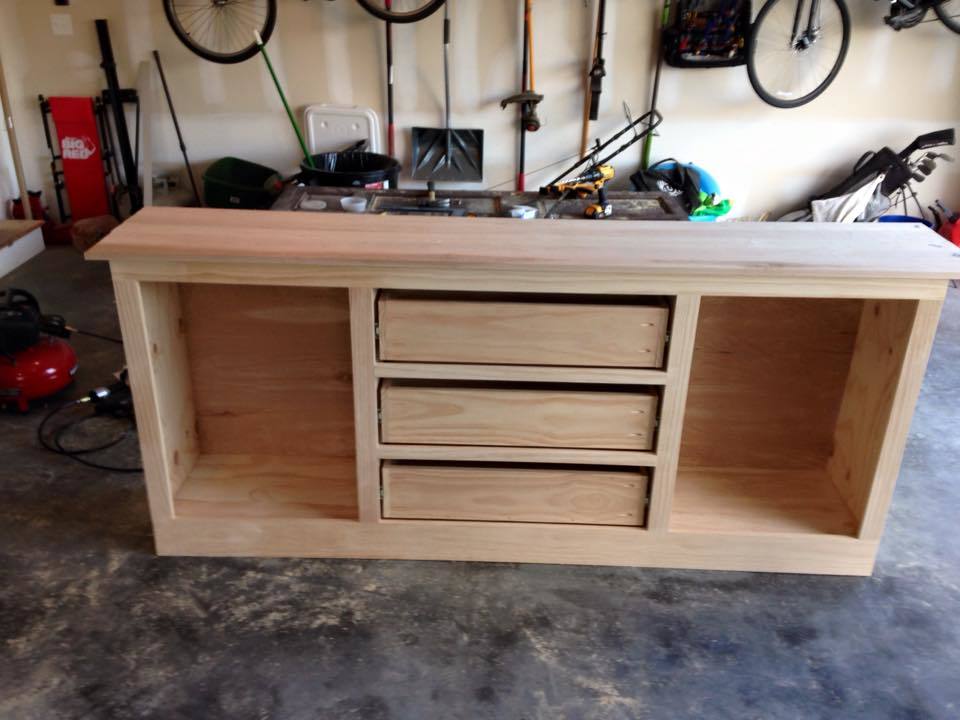
The fronts of the drawers are normal height, but the boxes are only 4 inches high inside (so they don't fill up with as much junk, lol).

The 1x12s were only 11 inches wide, so I laminated some 1x2s on the sides to make it wide enough.

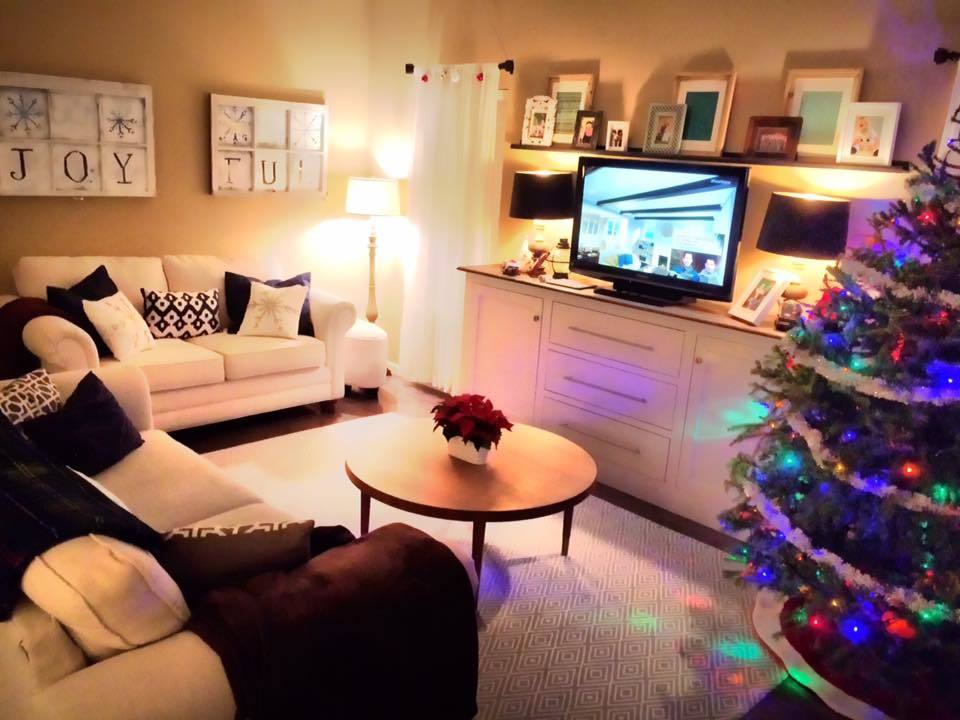
I think it really turned out well and we're already planning some complimentary pieces for our living room.

Counting the left over wood from the fence it probably cost around $50 including the stain and polyurethane.

Built from Plan(s)
Estimated Time Investment
Weekend Project (10-20 Hours)
Finish Used
We stained the table with minwax walnut stain, sanding lightly after 2nd and 3rd application. After that we put on 3 coats of semi-gloss polyurethane sanding between each. Lastly, on the top we put on 3 coats of clear gloss.
Recommended Skill Level
Beginner

Hexagon address planter

Not much to say, just a quick project to use up some scrap lumber. Better to use it than burn it. 

Estimated Cost
$15 for the numbers, wood was all scrap 2x2 and 1x2
Estimated Time Investment
An Hour or Two (0-2 Hours)
Finish Used
Minwax English Chestnut and Thompsons Outdoor Sealer
Recommended Skill Level
Starter Project

Custom Sandbox with built-in seats

Submitted by Ljmommy on Sat, 09/28/2013 - 10:13

On this project we modified a few things like the arm rests which we cut at an angle to keep kids from pinching fingers in there if someone decided to move the bench back on them. We also modified the size which we made 6'x4' to maximize play sand space and kid space. Therefore this made our benches bigger so that big kids (my husband) could sit on the benches and play in the sandbox. Yes there was talk about putting cup holders but I won the conversation by mentioning sand in his drink and we would have to do a sippy cup. We notched out the handles instead of installing handles which made it look sleek. We used the template from the hinge so it matched the shape....clever huh? We decided to primer and paint this one sandstone in the brick and mortar sample book by Behr and had them put it in an exterior paint color for us. We used a wagner paint sprayer which made the project fast at the end. Overall still an easy project for anyone. I do suggest pre drilling all holes first before screwing in screws so the wood doesn't split when doing the slats on the top.

Built from Plan(s)
Estimated Cost
$50-$75
Estimated Time Investment
Afternoon Project (3-6 Hours)
Finish Used
Primer/Paint
Recommended Skill Level
Intermediate

Comments

Rustic x console

Submitted by Anonymous (not verified) on Mon, 03/11/2019 - 23:02

This is my first ana white project and my first woodworking project. I think i like this new hobby i just picked up. 

Built from Plan(s)
Estimated Time Investment
Weekend Project (10-20 Hours)
Finish Used
Black tea, vinegar/ steel wool stain, wax finish
Recommended Skill Level
Beginner

Barn Door Pantry Build

Submitted by Anonymous (not verified) on Sat, 03/18/2023 - 14:54

Using the Barn Door Pantry plan, I partially built this in my shop then took it apart and transported it to my son's house where we reconstructed it. This is a massive project and I recommend that you have enough room (and help) to build it and move it. The door is built with 1/2 inch plywood, framed with 1 by 4's with bead board inserts.

Built from Plan(s)

Comments

Outdoor day bed

Submitted by TamTamW on Wed, 07/03/2019 - 09:28

Loved making this. Used old sun curtains and a sheet for extra splendor. 

Built from Plan(s)
Estimated Time Investment
Weekend Project (10-20 Hours)
Finish Used
None.
Recommended Skill Level
Beginner

Comments

Love the console

Submitted by Sissy0820 on Wed, 07/17/2019 - 17:56

I love how this console turned out I made a few changes > Made it taller at top to fit the larger hardware and changed the top.

Built from Plan(s)
Estimated Cost
$400
Estimated Time Investment
Week Long Project (20 Hours or More)
Finish Used
painted base white , burned top then clear coated it.
Recommended Skill Level
Intermediate

Washer Dryer Pedestals Bases

This pedestal base for the washer and dryer really created the perfect opportunity to organize and declutter our tiny laundry room. Had to resize it a bit to fit the space but it turned out perfect! I added a super easy top for an even counter space and bought some stock laundry room cabinets to sit in the back for extra storage. Such an upgrade!

King Bed Frame for adjustable base

Submitted by Anonymous (not verified) on Tue, 10/08/2019 - 05:50

I could not find a frame which would accommodate my new adjustable king base. Modified Anna's plans by increasing the height of the headboard and footboard. Finished with chalk paint and antique finish for a rustic look. Side rails attached with mortises to allow for moving bed in 4 pieces if needed. Love my new bed

Estimated Cost
$300
Estimated Time Investment
Weekend Project (10-20 Hours)
Finish Used
Chalk paint (purchased from Habitat for Humanity re-store) using recycled paint. Finished with three coats of Annie Sloan wax
Recommended Skill Level
Intermediate

Comments

khowe791

Sat, 11/30/2019 - 03:31

Hi! We are making this headboard this weekend. We want to increase the headboard height and footboard as well. Do you happen to know the cut measurements or how you adjusted the height of the 1x6 (or 1x8 as others used) to make it work? Yours looks perfect! Thank you in advance for any feedback! 

Media Cabinet Base of built-in

Submitted by Anonymous (not verified) on Wed, 03/02/2016 - 11:21

First furniture project. It was a little intimidating - but once you get the cabinet squared everything else is just about precision cuts and patience to get the finish you want. Inset drawers are tough because they really show any mistakes.

Completed over 3 weekends.

My wife loves it! Our plan is to use this as the base of the built-in, and surround the TV with shelving up to the ceiling. Applying the concepts to this build will allow me to custom build the top unit, probably at some point next year.


Cheers!

Built from Plan(s)
Estimated Cost
$1000
Estimated Time Investment
Week Long Project (20 Hours or More)
Recommended Skill Level
Intermediate

Square Turned Leg Farmhouse Kitchen Table

I had to do a 3ftx3ft square table since our eating area in the apartment isn't big enough for a dining table, but I really like how it turned out :) I also added breadboard ends because I can't stand how the cut ends look. I got the legs from osborne wood

Built from Plan(s)
Estimated Cost
$160
Estimated Time Investment
Weekend Project (10-20 Hours)
Finish Used
Minwax English Chestnut, Antique Beige Paint, and Helmsman Clearcoat
Recommended Skill Level
Beginner

Comments

Outdoor Canopy Daybed - First Project!

Submitted by Anonymous (not verified) on Fri, 07/28/2023 - 14:16

This was the first time I ever built anything - before this is hardly used a drill. It was big for a first build, and I did it entirely alone aside from a few text messages with questions. I added a couple little end tables to it for a book and a drink, and it’s now my favourite outside summer spot.

Facebook user @robyn.marie.3572

Built from Plan(s)

Twin Farmhouse Bed

Submitted by uncdrum on Sun, 02/16/2014 - 19:14

My dad and I built this twin farmhouse bed for my three-year-old son. I used no-mortise bed brackets from Rockler Woodworking and modified the plan by adding slat brackets mounted directly to the rails with 1x3 slats.

Built from Plan(s)
Estimated Cost
$250
Estimated Time Investment
Day Project (6-9 Hours)
Finish Used
Sherwin-Williams 'Naval' in satin finish (three coats).
Recommended Skill Level
Beginner

Pottery Barn benchwright farmhouse dining table

Submitted by Nathan1342 on Sat, 05/19/2012 - 21:57

UPDATE: For everyone that was asking to see additional photos, I have uploaded them all to flickr. Here is the link: HERE Since doing this table I have built probably 15 more just like this one and developed a much better process then in the pictures above.  If you have any questions or want to chat about it further shoot me a comment or email at [email protected].

I had originally seen this table on the Pottery Barn website. My wife and I really liked it but couldn't afford to pay the $1200 bucks after tax and shipping. it didn't look to difficult to build so I decided to give it a shot. The wood for the top of the table was almost 3in thick 4.5in wide and 51in long. It was wood from an old pallet that was used to transport a very large air handler. Very heavy dense wood. Since the lengths were only 51 inches I opted to put 2 horizontal pieces on either side to extend the total length to approx 70in. I was inspired by the plans for the benchwright table that I saw on this site but chose to deviate from the plans on here to make it as close to the real thing as possible. I also happen to have access to very thick pieces of hardwood. The only thing I had to buy at lowes were the legs. The legs are 4x4 Douglas fir posts. The top pieces were all glued and screwed together. The ends were also done this way but had a very large lag bolt that held them together to match the pottery barn table. This was originally very rough wood so anything to help get the warp out was used. The legs are set at a 10 degree angle and the table stand 30 in tall. The hardest part of this table was finding the turnbuckle and the threaded rods so it could officially be 99% like the pottery barn table. I also had no idea how hard it was to find left hand threaded anything. I ended up finding everything I need at McMaster.com and my local Fastenal store. To make the brackets that went on either side of the rods i simply bought a piece of 1/8 sheet metal at my local Home depot and cut it to size. They also sold hammered brown paint which gave the metal a worked old look. Once this was all constructed I used two heavy coats of wood conditioner to seal the wood. This was the key to getting the color I wanted. It tells you on the can not to let the wood conditioner dry on the wood but if it does, when you apply the stain you get a 100% consistent color. Worked wonders. It almost felt like I was cheating. I used a water based condition and stained it with rustoleums "dark walnut" stain. Finished it with 5 coats of minwax semi gloss. I only did 5 coats because I was brushing it on and had trouble getting the bubbles out of it. In the final picture it looks much shinier then it is in person. The last picture of when it was still in my garage is a better indication of the final finish. I have a boat load of additional picture, so if you have any questions or want to see more pictures of how it was constructed, shoot me a message. Thanks!

Estimated Cost
300
Estimated Time Investment
Week Long Project (20 Hours or More)
Finish Used
Minwax Semi-gloss
Rustoleum Dark Walnut Stain
Minwax water based wood conditioner
Recommended Skill Level
Intermediate

Comments

Bunnie1978

Sun, 05/20/2012 - 08:16

I've had trouble with bubbles too... I have two pieces of advice for your next bubble-free project...
1. Get a sprayer. Seriously.
2. If you don't get a sprayer, use the foam pad-brushes for your final layer of poly. Put the last layer on thick and use the largest side of the brush (the side) and lay it down over the wood and drag it slowly accross with the whole large surface on the wood. If it is soaked in poly it will lay it down smooth with little if any bubbles, keep the surface you're working on flat, and after you've finished that, just make sure you clean up any edges where the poly may have dripped down. Last step, when it's almost dry, use 600 grit sandpaper to VERY lightly smooth out any little bumbs, which will come off more like paste than dust. But really, you should just get a sprayer. :)

In reply to by Bunnie1978

Nathan1342

Sun, 05/20/2012 - 17:42

Hey Bunnie,

Thanks for the tips! I completely agree with you about the sprayer. I do actually have a sprayer but didn't want to get the garage covered in over spray. Maybe one of these days I will get ambitious and apply another coat. :)

Bunnie1978

Sun, 05/20/2012 - 19:22

My whole living room is covered in overspray right now... just got a sprayer and used it for the first time this weekend. LOL. I don't have a garage.

SawgrassHomeGirl

Sun, 05/20/2012 - 09:35

This is awesome! Can you give more direction as to which specific items you got at mcmaster.com and Fastenal?

Also, how did you attach the sheet metal pieces? If you have any more pictures of the underside (frame) of the table, I'd love to see them!

Thank you very much, and again, this is spectacular. We want to try to build this, too.

Great job!

Cindy from Indiana (not verified)

Sun, 05/20/2012 - 10:38

Love it! This project turned out great and I love how you tracked down the hardware - that finishes it off perfectly!

Like SawgrassHomeGirl, I'm wondering what the actual names of the items are that you tracked down. I went and paged through the McMaster and Fastenal sites, but since I'm completely unfamiliar with mechanical doodads I'm not even sure which categories to look under.

Fantastic job! Thanks for posting this!

Nathan1342

Sun, 05/20/2012 - 18:13

Thank you for the nice comments. This was my first official project so I am happy that it turned out well!

Sure! I'd be happy to know the names of the hardware items. At Mcmaster.com the turnbuckle I purchased was Item number 30045T44 . It is about 6in long and seemed to fit nicely with the length of the table. the rods were just simply threaded rods which I purchased at fastenal since we have a few of their stores in town. The rods come in 6 ft pieces so I didn't want to have to pay the shipping. If you don't have a Fastenal near by here are the item numbers for the rods; 90322A220 -right hand threaded rod and 95625A160 - left hand threads. They are a bit more expensive at mcmaster though.

The biggest thing I was worried about was that the entire rod had threads on it so I was worried that it would look odd. But after getting it painted you don't even notice that it isn't just a solid pipe.

Sawgrass: shoot me your email address and I'll send you some more pictures. This site only allows me to post 5 additional photos. But to elaborate on the frame and the metal pieces, I didn't' really build a frame for it. You can essentially break it down into two pieces: Top and the legs. Instead of building a frame and screwing the pieces down on it, I opted to screw each of the pieces together using a Kreg tool and also glue them. the wood was heavy enough to support everything without an elaborate internal structure. The two end pieces help keep things from warping. The only reinforcement I did for the top was to take 3 2x4's and screw them horizontally on the underside. You will be able to see all of this in the pictures. As for the metal pieces, i drilled 5 holes in each piece. 4 holes for the screws that hold it to the leg region and one half inch hole in the middle for the rod to go through. I have a bunch of close ups of this process so you should be able to get a very good idea of how things work. Overall I tried to keep everything as simple as possible.

Thanks for all the interest and if anyone has anymore questions please don't hesitate to ask!

Cindy from Indiana (not verified)

Tue, 05/22/2012 - 09:01

Thank you so much for taking the time to answer our questions! You did a fantastic job on this table and I am adding it to my ever-growing list of projects to do!

Now I'm off to find that hardware. :-)

Thanks, again!

lillylamp

Fri, 11/08/2013 - 06:33

My e-mail is [email protected]
My husband is making this table for Thanksgiving dinner. We are expecting 14 people so he is making the table a total of 12 feet long! Any input or pictures will be greatly appreciated!
Lisa and Gary Peters
Angola, IN

aclisto

Fri, 09/05/2014 - 14:53

Could you send me the more pictures link?  Great job!  goldmoon8(@)hotmail(dot)com

Destiny (not verified)

Tue, 05/22/2012 - 16:58

So i wanna build this table this summer, could you shoot me some more pictures of the designs and actual steps for building it. i absolutely love it, and i hope mine comes out as good as yours!

Robert (not verified)

Sat, 05/26/2012 - 13:13

This has been on my to do list for a while now, but I haven't been able to work out the hardware details like you did. I would love to get some more pictures especially of the underside and of your rod to stretcher connection. Thanks again and you did an amazing job!

Bulldog1Jack

Fri, 04/25/2014 - 18:43

Nathan,
Can you send me the link for the other photos...table is awesome.
Thanks
John

Aubrey (not verified)

Sat, 05/26/2012 - 17:54

I love this table! I am new to this site and to building, but I want this to be my first project. Could you possibly email me the detailed pics and plans also so I can get started? :) Thanks so much!

ajmccallister

Tue, 05/29/2012 - 18:41

I am really inspired by the table you built. It looks like you built your legs with 4x4s. Did you drill through them to get the notch on the outside or did you do something else just to get the look? Great work!

Nathan1342

Tue, 05/29/2012 - 20:58

Hi Aj,

Yes, I did use 4x4's for the legs. It was much easier this way, did a great job achieving the heavy look I was interested in and was the closest I could come to the pottery barn table. To answer you question, no I did not drill through. I attached the 2x4 cross member with 2 leg screws from the outside of the 4x4 leg. I then cut a small piece of the 2x4 and nailed it over the lag screw holes to simulate the 2x4 cross member coming through. It looks just like I cut a hole and the whole thing is coming through. I get asked how I did it by people that see it in person because it doesn't look like a separate piece is just nailed on.

If you look at IMAG0306 and IMAG0308 on flickr you can see what it looks like without them on and if you look at the bottom left hand corner of the picture you can see the pieces that have been cut and not put on yet.

Sara (not verified)

Mon, 06/11/2012 - 06:48

Your table is gorgeous! I'm curious how much this cost for you to build (lumber and finish materials) and how much of an increase in cost do you think it would be if you had to purchase all the lumber?

In reply to by Sara (not verified)

Nathan1342

Mon, 06/11/2012 - 11:01

The Lower portion was probably about $200. The biggest expense was the threaded rods and the turnbuckle. The rods were about $30 each and the turnbuckle after shippping was about $20. The wood for the lefts and cross members were purchased at my local lowes so they were pretty cheap. As for the top, its hard to say since wood prices vary quite a bit between types and thickness. If you were to buy wood like I used you would probably have to visit a sawmill and see if you could get rough cut wood that is at least 2.5 inches thick. I would estimate $300 give or take. If you follow the plans that ana has setup for the top you don't necessarily need to get wood that is that thick. You can achieve close to the same look but just using 3/4 in pieces. I think if you look very closely at the pottery barn pictures, they do not use 100% solid wood either. But I wanted the heavy look and the solid appearance. So total you are probably looking at $500-$600. Hope this helps!

Curt (not verified)

Wed, 06/20/2012 - 11:28

Great job Nathan - I appreciate your workmanship on the table. You've answered one of my questions regarding the look of the cross member protuding thru the leg - slick idea. My other question - why all the large round holes in the bottom of the table? By the way, the dowel effect that you accomplished really pops. I too like the looks of the thicker boards. Thanks for posting an interesting and comprehensive article. Curt

In reply to by Curt (not verified)

Nathan1342

Thu, 06/21/2012 - 13:06

Those holes in the bottom of the table were there when the wood was salvaged. This was a pallet so they had it bolted together with large lag bolts. The bolts had large washers inset into the wood. The bolts were secured on the underside of the wood and went through every piece. Luckily, they were consistent and only bolted from one side.

Thanks!

Sara (not verified)

Tue, 07/10/2012 - 06:36

Thank you, Nathan, that really helps! Did I mention your table is beautiful?

leabea28

Fri, 08/03/2012 - 12:53

Hi Nathan,

Awesome table. I just hope I can find some 3" thick lumber without breaking the bank! It looks like you attached the legs by putting 2 bolts through the legs into the small apron on the short ends of the table. It also looks like you might have also put in some pocket holes on the inside of the legs, going straight down into the underneath of the table boards. Is that right? I am just wondering how sturdy it is, since it's such a heavy table.

Thanks!

Lea

In reply to by leabea28

Nathan1342

Mon, 08/06/2012 - 11:43

Yes, you are correct. I attached the legs with 2, 6inch lag bolts. I pre-drilled them at the correct angle (which I eye balled) and ratcheted them in. I was a little worried about them being sturdy enough so I went ahead and made a few pocket holes and secured it that was also. The legs overall are very sturdy. The table probably weights 150-200lbs and I was able to pick up one side of it only holding onto one leg. Table doesn't wobble at all. The cross member holding the legs together also helped pull everything together.

Thanks for the question! Feel free to ask any others!

Nathan

JenFarrell (not verified)

Sun, 08/12/2012 - 18:17

Fantastic table! Thanks for posting all the instructions and places to buy hardware. My husband and I can't wait to try this!

JenFarrell (not verified)

Sun, 08/12/2012 - 18:19

Fantastic table! Thanks for posting all the instructions and places to buy hardware. My husband and I can't wait to try this!

3RaysofSunshine

Fri, 08/24/2012 - 09:33

Nice work! I made bench seats in this style - maybe I'll post pics sometime too! I saw in your description that you used thick wood to be more like the original... just wanted to let you know that I have seen the "original" and yours is much better! Pottery barn does NOT use solid 3" wood for the top. If you look closely at the pics in their online catalog you can even tell... they use thin planks with a side piece to make them look thick. The only hefty piece is on the very end .

Also, I wanted to mention that I have had great luck with wipe-on polyurethane... never any bubbles. Just be sure to use lint free cloths and lots of thin layers.

Again, nice work!

3RaysofSunshine

Fri, 08/24/2012 - 10:05

I apply with a cloth. It takes many coats but they are so thin they dry fast. In between coats, I wet sand with 1000 grit wet/dry sandpaper. After towel drying, I run my hand across the surface. You'll feel any spots you missed. Then use a tack cloth to pick up any dust (there's always some...) I get a perfect finish using this method. I'm sure spraying is great too... I just like not having another piece of equipment to clean!

My last project (a patio table) I had run out of the wipe-on poly and decided to use something else - whatever I had on hand. Grr! Not nearly as nice looking so I'm doing it over. I'll post pictures of a few projects as soon as I can figure out how.

greenebeansmom (not verified)

Sun, 11/18/2012 - 21:15

Why cant my husband make stuff......booooooooo! Wonderful table I am so jealous lol.

Shannan with an A

Tue, 04/16/2013 - 16:34

Before I clicked on your brag photo, I really thought it WAS a Pottery Barn table posted for comparison! Wow, that is beautiful!!!

Nathan1342

Thu, 05/02/2013 - 15:04

Hey Lea,

It was only 1/8 in thick metal so a simple jig saw with a metal bit worked great. Wear eye protection though. It shoots off all sorts of hot metal bits. To drill the holes I just used a power drill with a metal bit. Make sure you drill 100% straight or the bit will bind and jerk the drill right out of your hand. Ideally, a drillpress would work much better since I nearly broke my wrist on the second large hole.

Let me know if you have any other questions!

Thanks,

tcoche

Sat, 06/01/2013 - 20:36

The table looks awesome man! Love it. I just got done building the benchright table to Ana Whites plan, see mine here http://ana-white.com/2013/05/farmhouse-benchright-table-build-0

I just ordered the left hand threaded rod, right hand threaded rod and turnbuckle from McMaster.com...total cost for all 3 was 22 bucks. Here are the McMaster part numbers:
90036A033- left hand rod
98841A033- right hand rod
30045T44- galvanized turnbuckle

I'll hopefully get the rods and turnbuckle this week so I can totally complete this project.

Again, awesome job nathan!!!

CoreyOrvold

Sat, 07/13/2013 - 22:28

What a great table. We plan on starting ours soon but are having trouble find large bolts for the table top sides. What size did you use and where did you find them?