Dresser
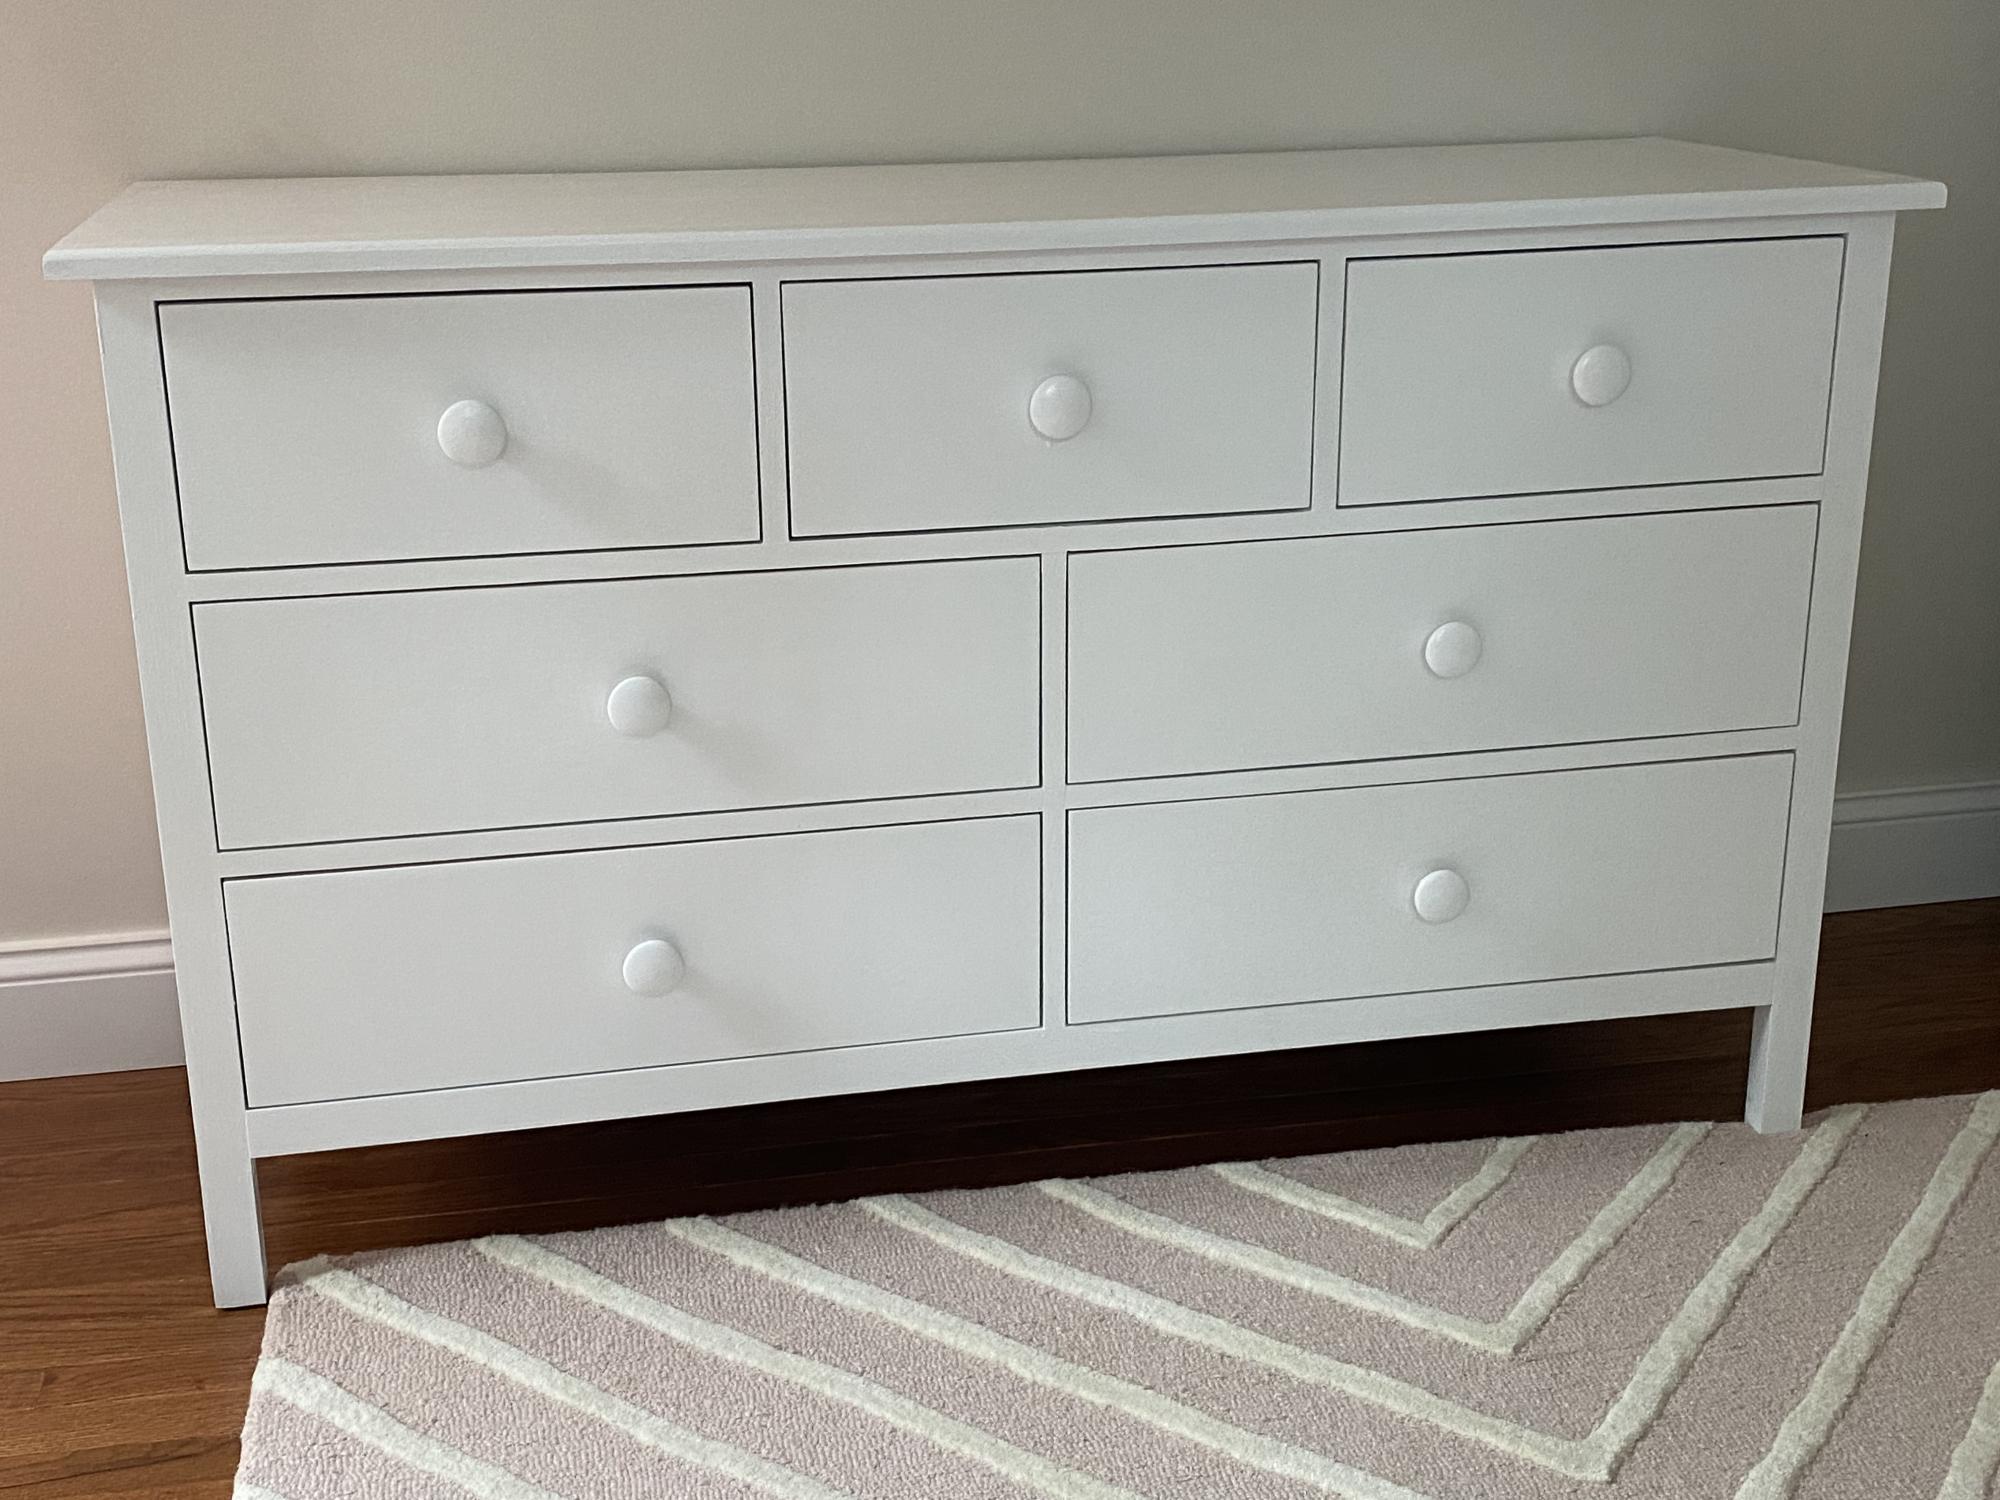
Used Ana’s plan and adapted for slow-close sliding drawers.
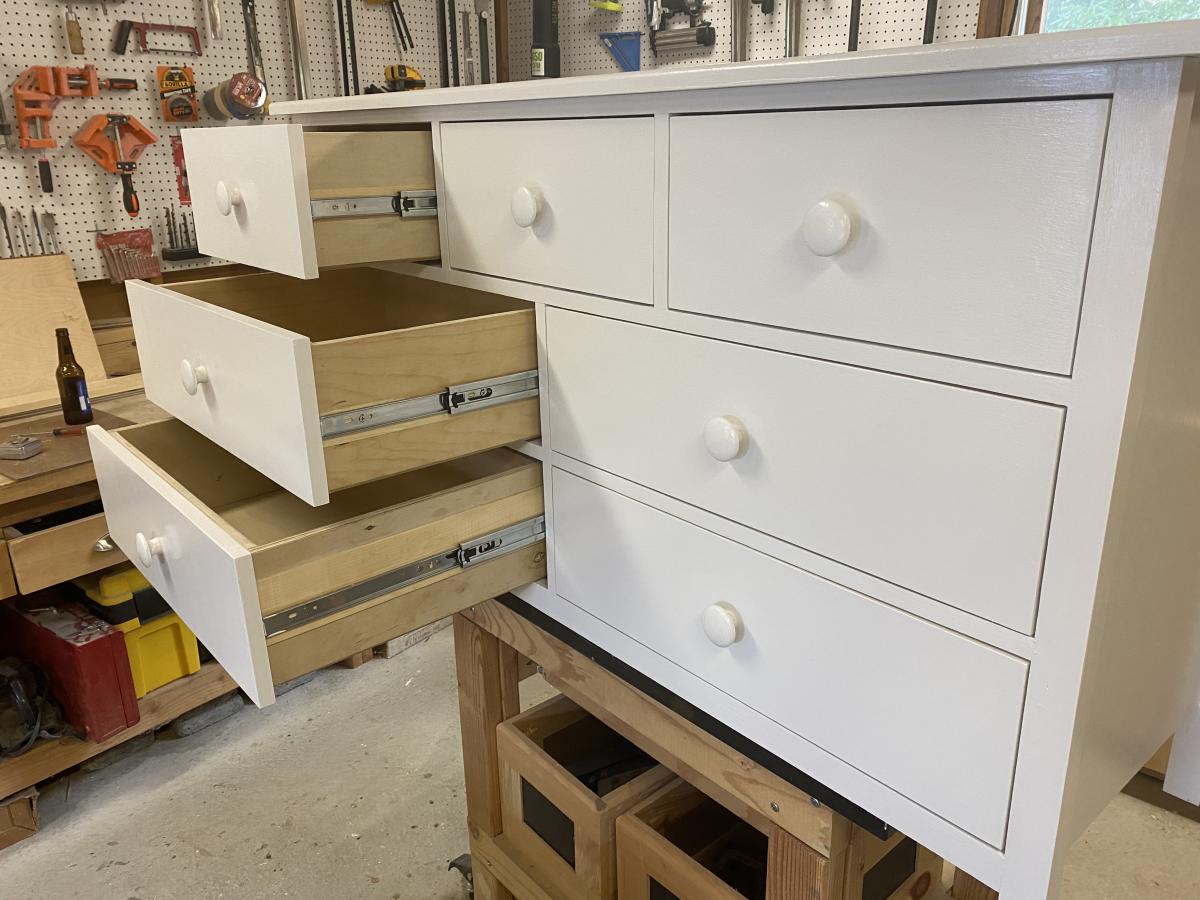
Built from Plan(s)
Used Ana’s plan and adapted for slow-close sliding drawers.

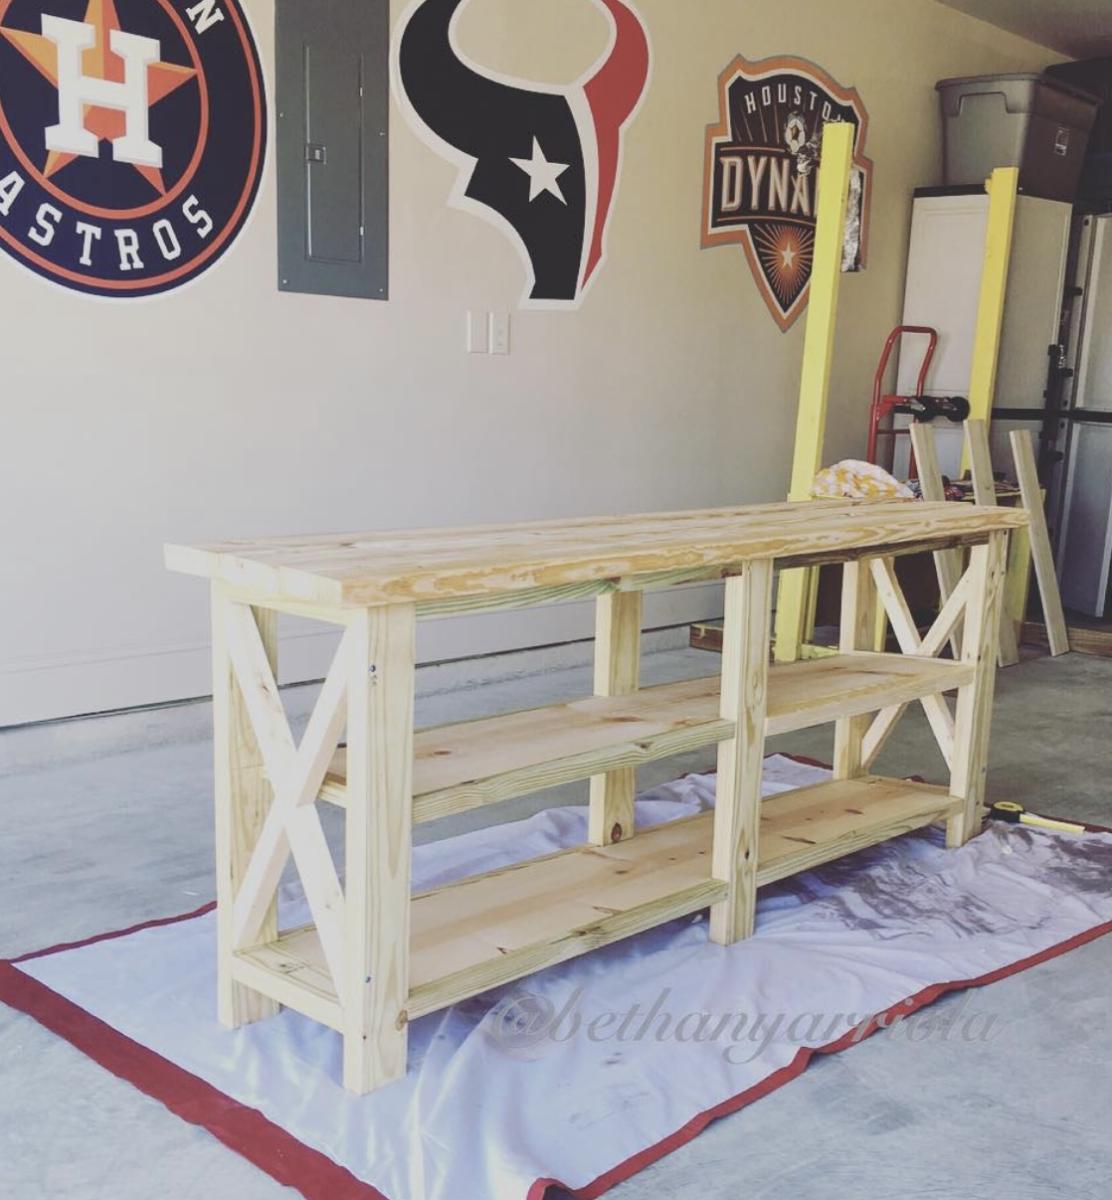
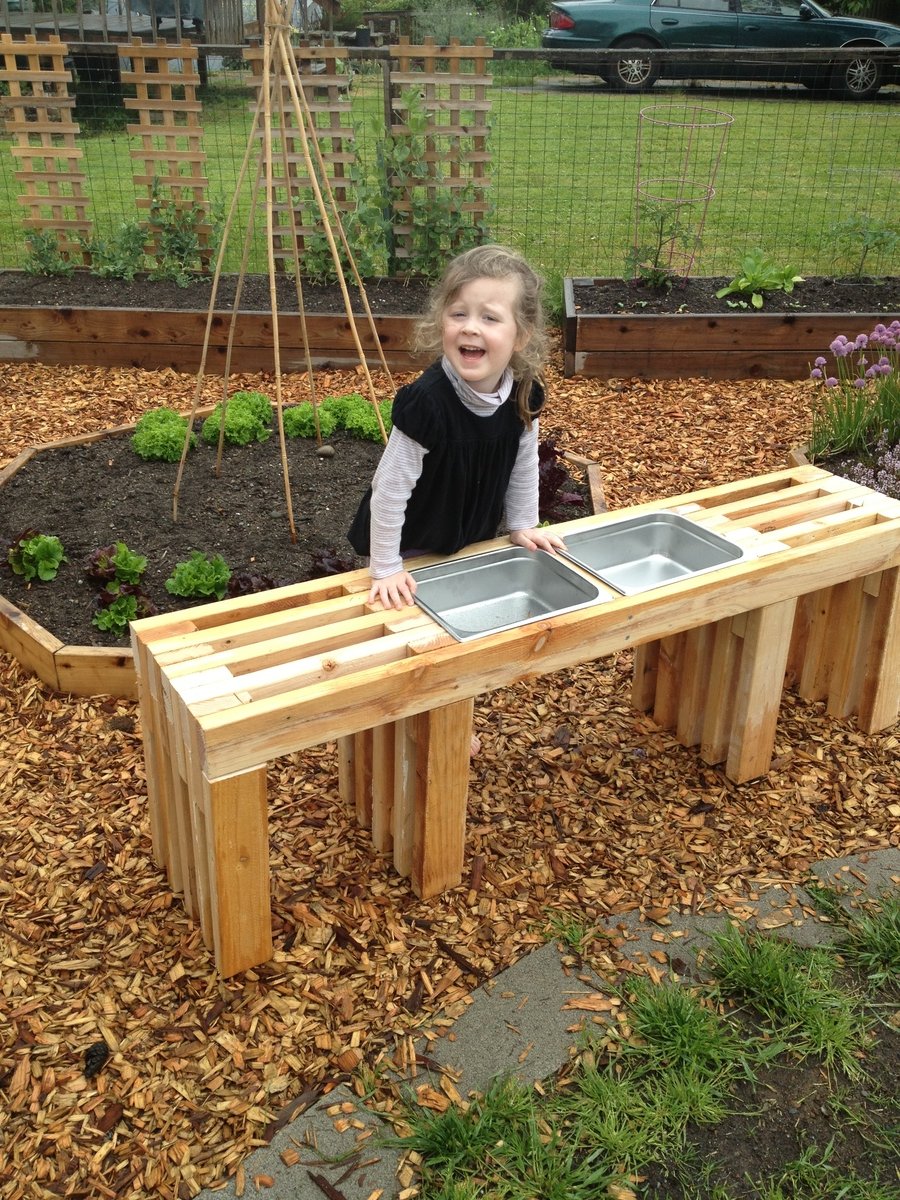
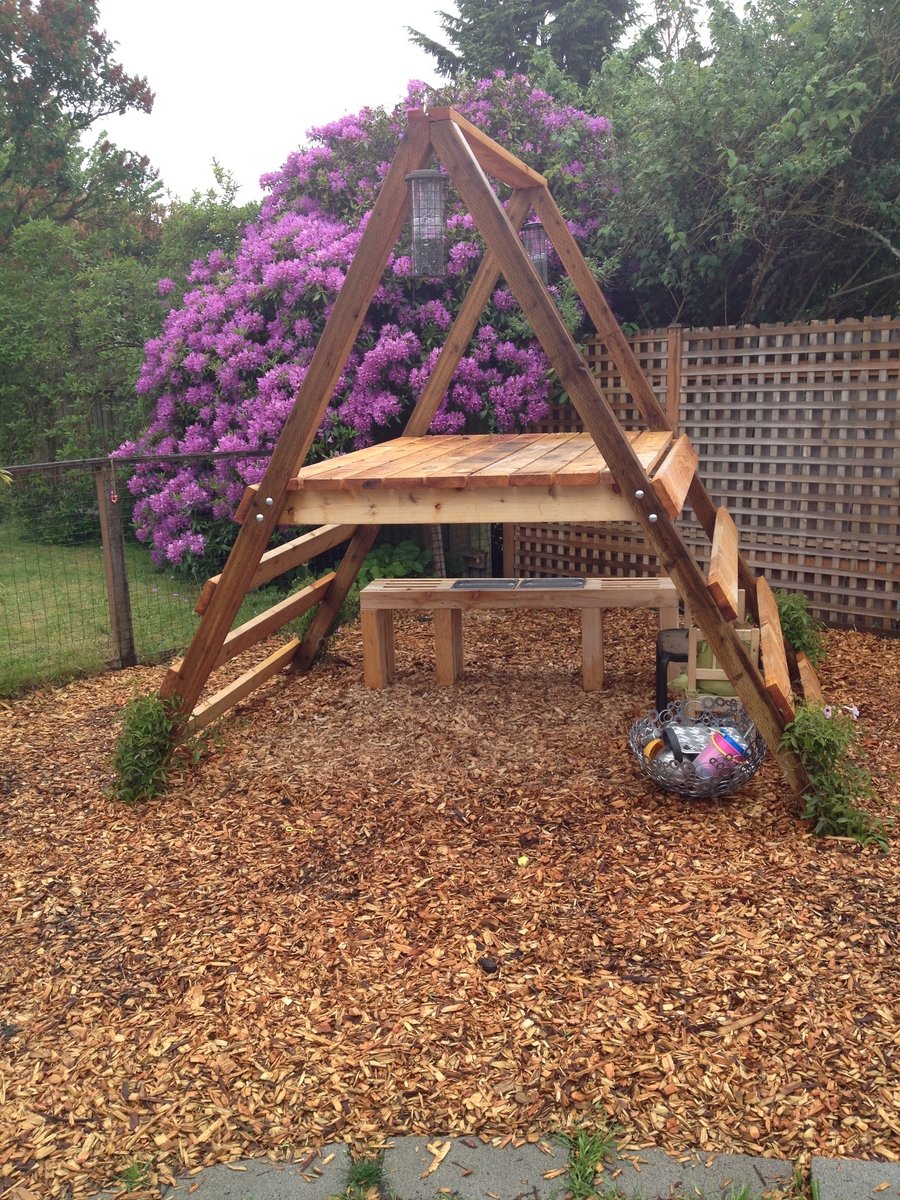
I've been looking for a simple design for a consol table that I could easily modify to fit in my kids' club house. This one fit the bill perfectly! I also happen to have a pile of 2x4s left over from a closet demo, so I wanted to use those up. I basically built 2 of the consol tables, letting the 2 outer-most horizontal beams extend across and 25.5 inch space and connect the two consols. Then I put in a middle beam and that created the perfect space to set some catering pans in it. Also, I only had 2x4s so I used those for all the pieces, making the gaps a little wider than the original design. And lastly, because I didn't quite have enough wood, I shortened the vertical beams. If you look at the picture, all of this will make more sense! Thanks for the inspiration and direction! ps - I have no idea how to rotate the photos. Sorry!
My first real project, can't wait to do another one.
Mon, 06/01/2015 - 20:57
Thanks! Yeah the finish was a bit difficult but finally came out nice.
Thu, 06/02/2016 - 11:00
I know this is an old post. But just wondering about your finish as well. So when u say white wash what did you use?
Beautiful by the way!
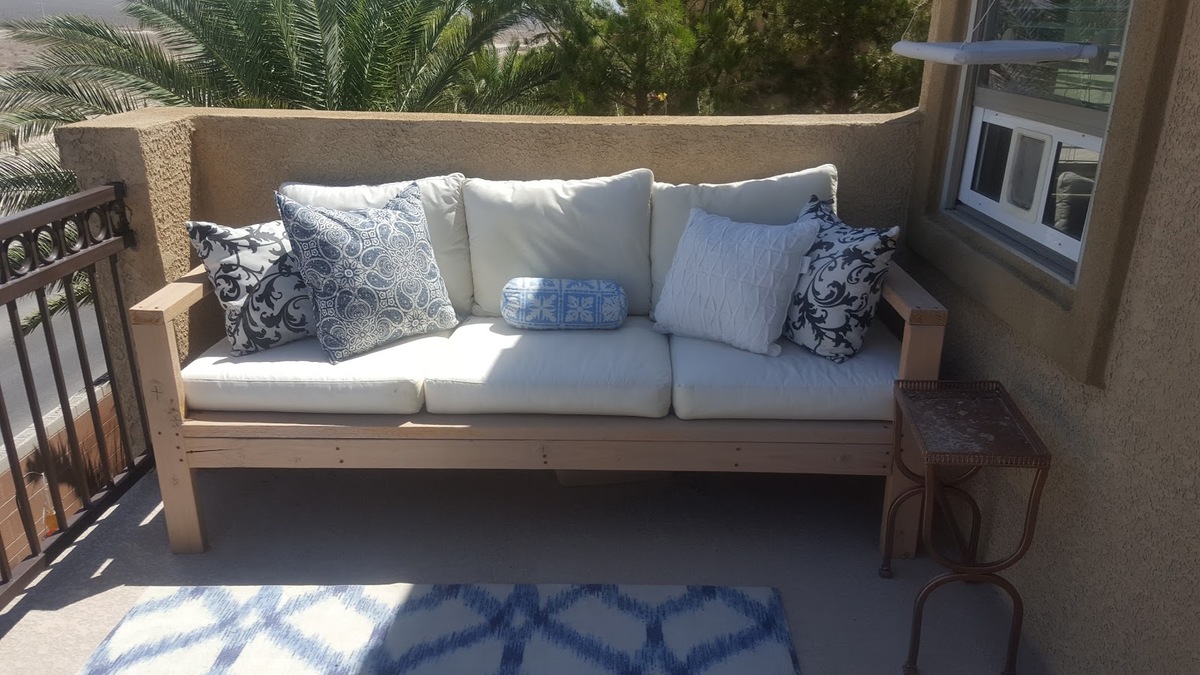
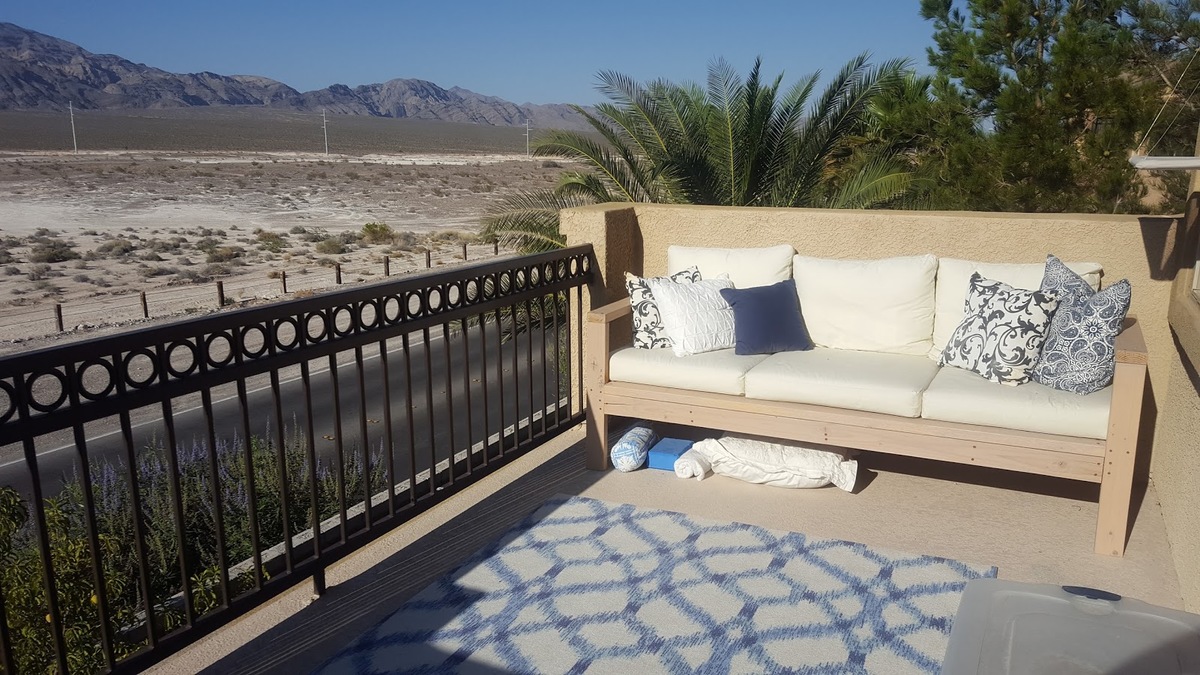
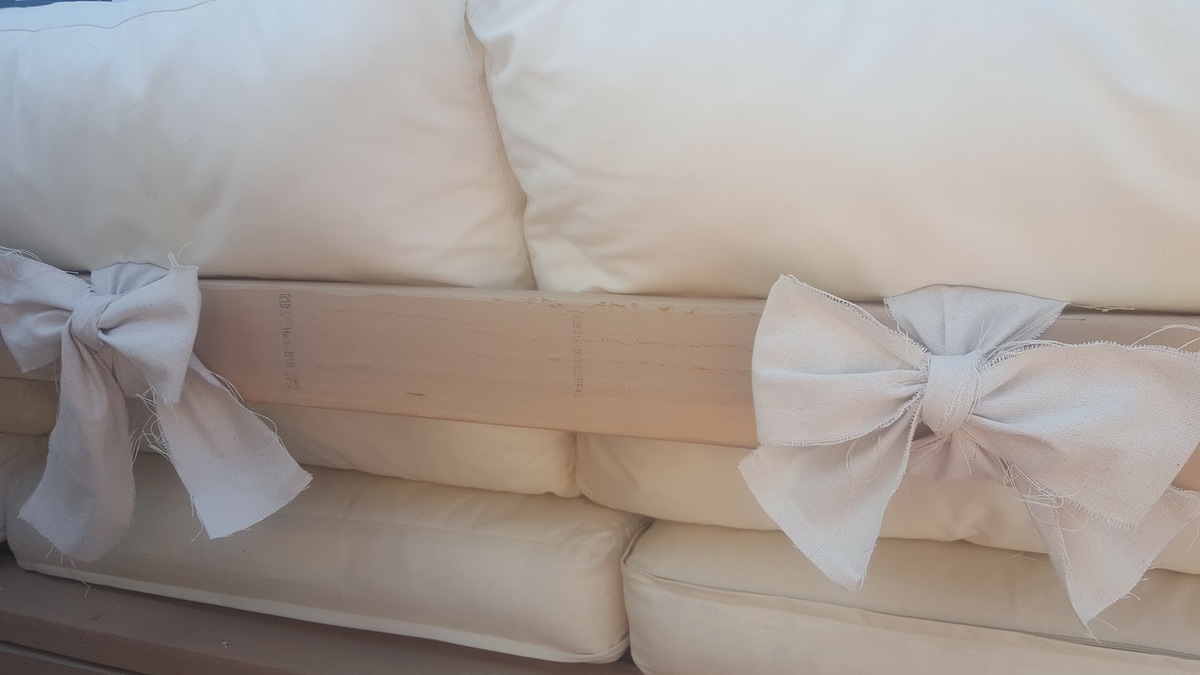
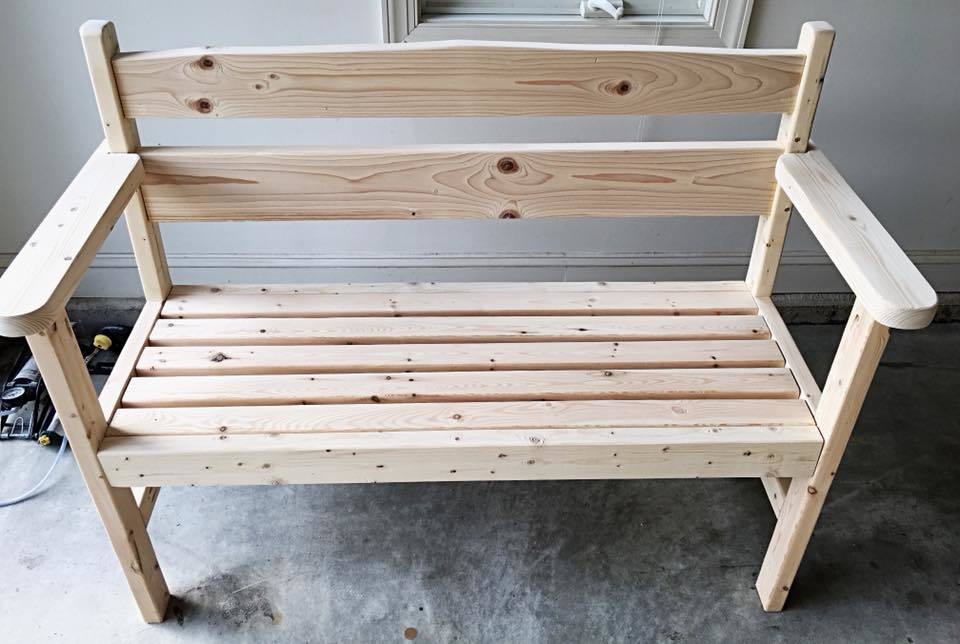
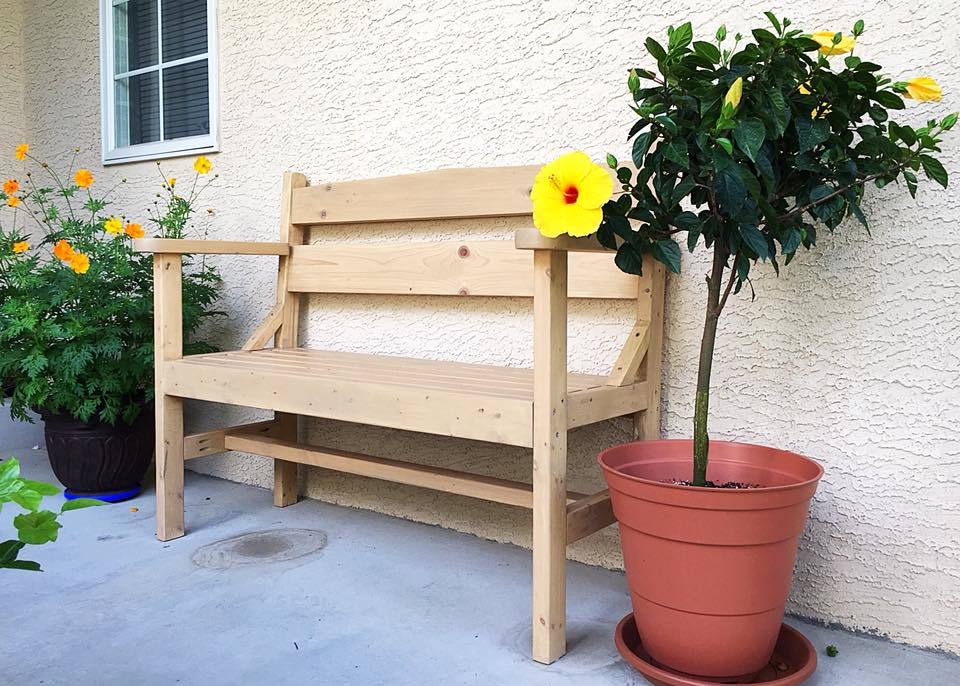
Decided to build Ana's outdoor sofa for our Master Balcony and love the results. I was a bit impatient to finish the build and therefore did not take the time to use pocket screws for a more finished result, (which I will do next time). Regardless, I love how the sofa turned out and would reccomend for anybody to build. The cheapest outdoor cushions I could find were from Ikea and we spent around $160.


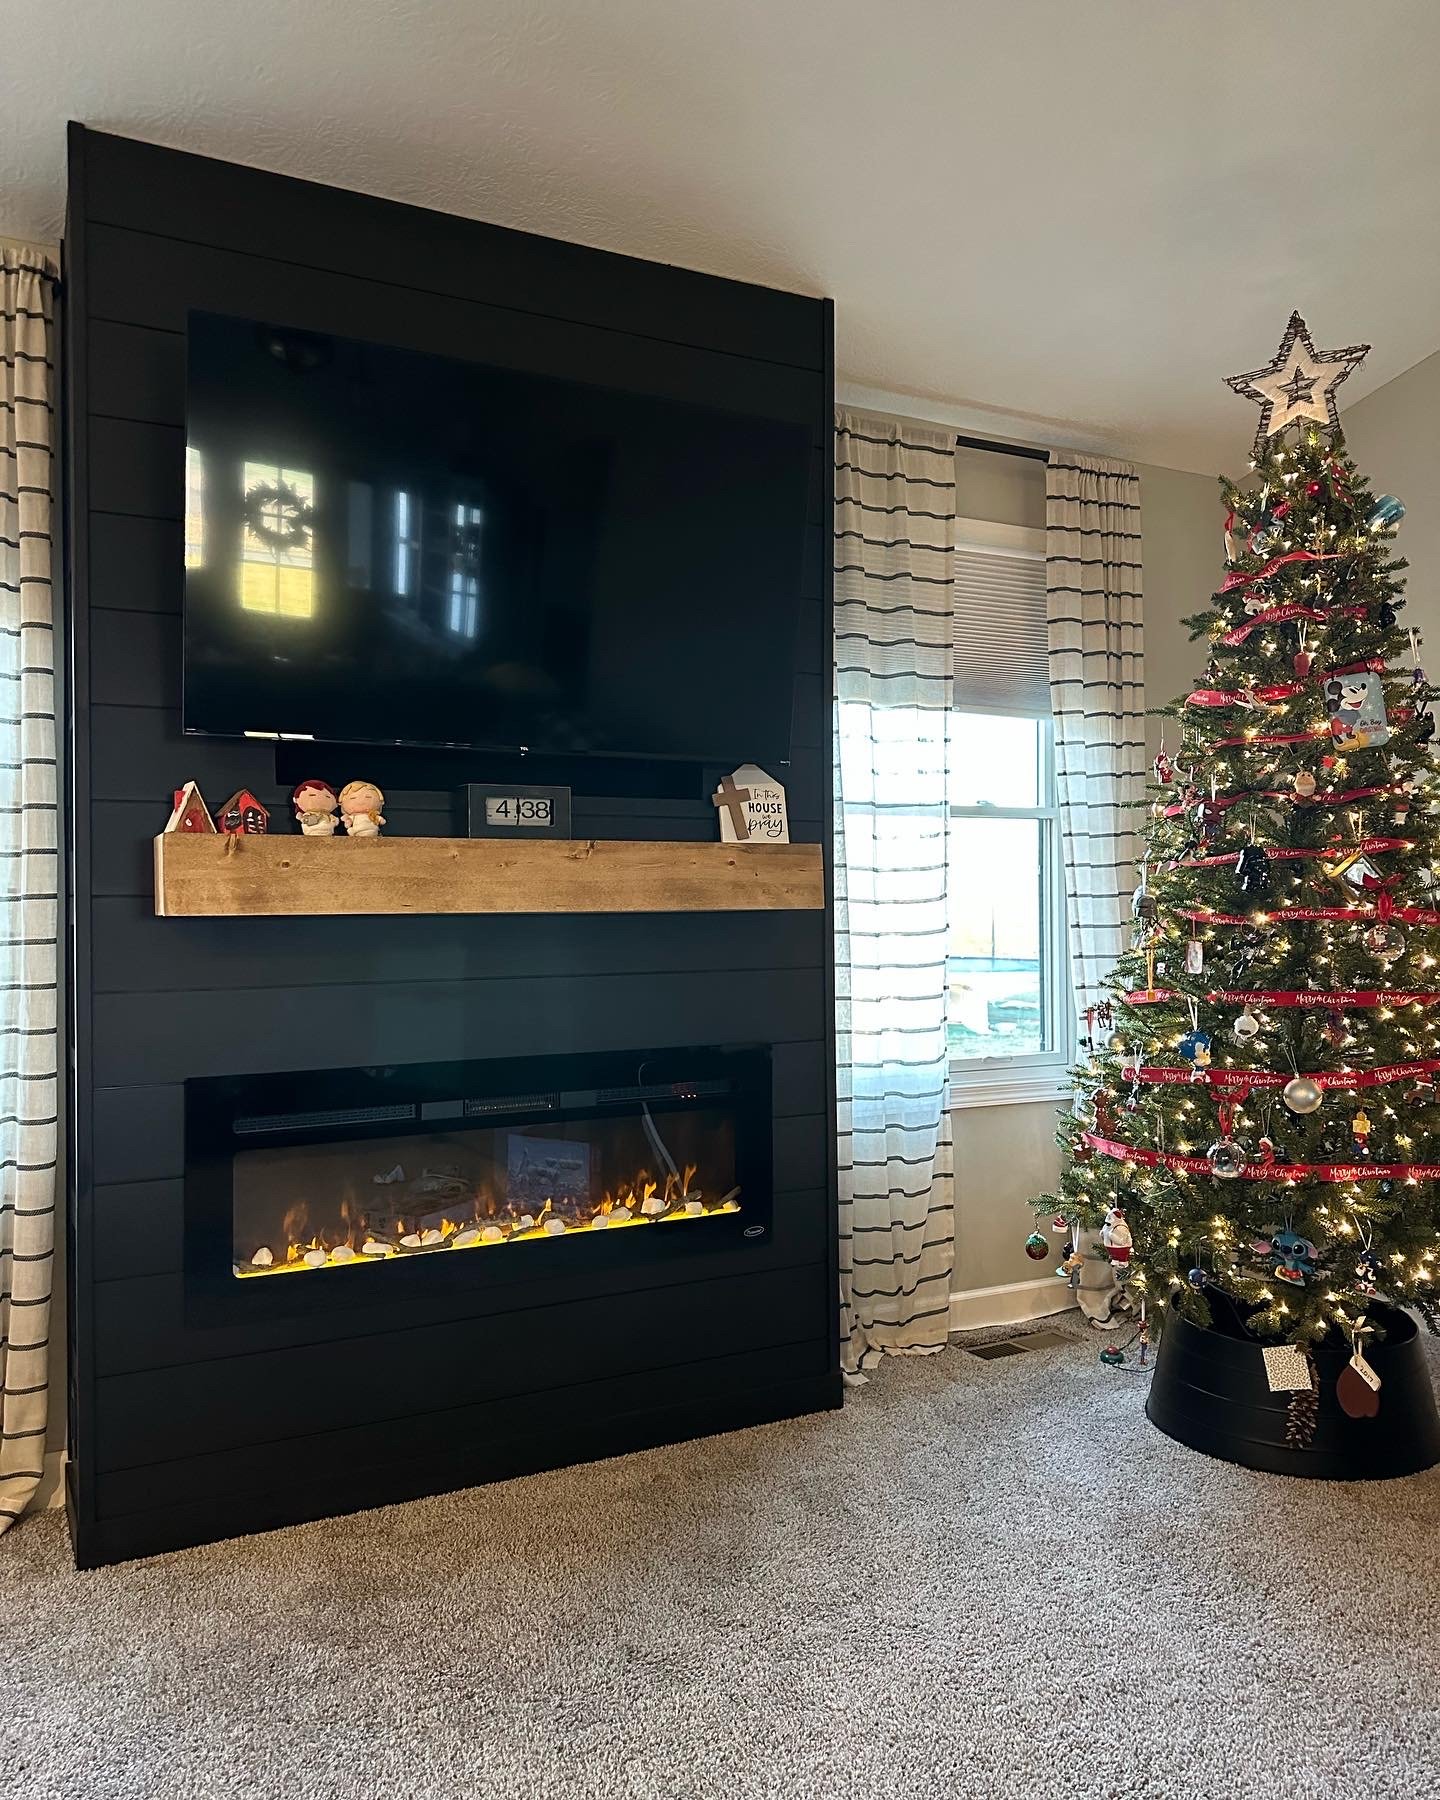
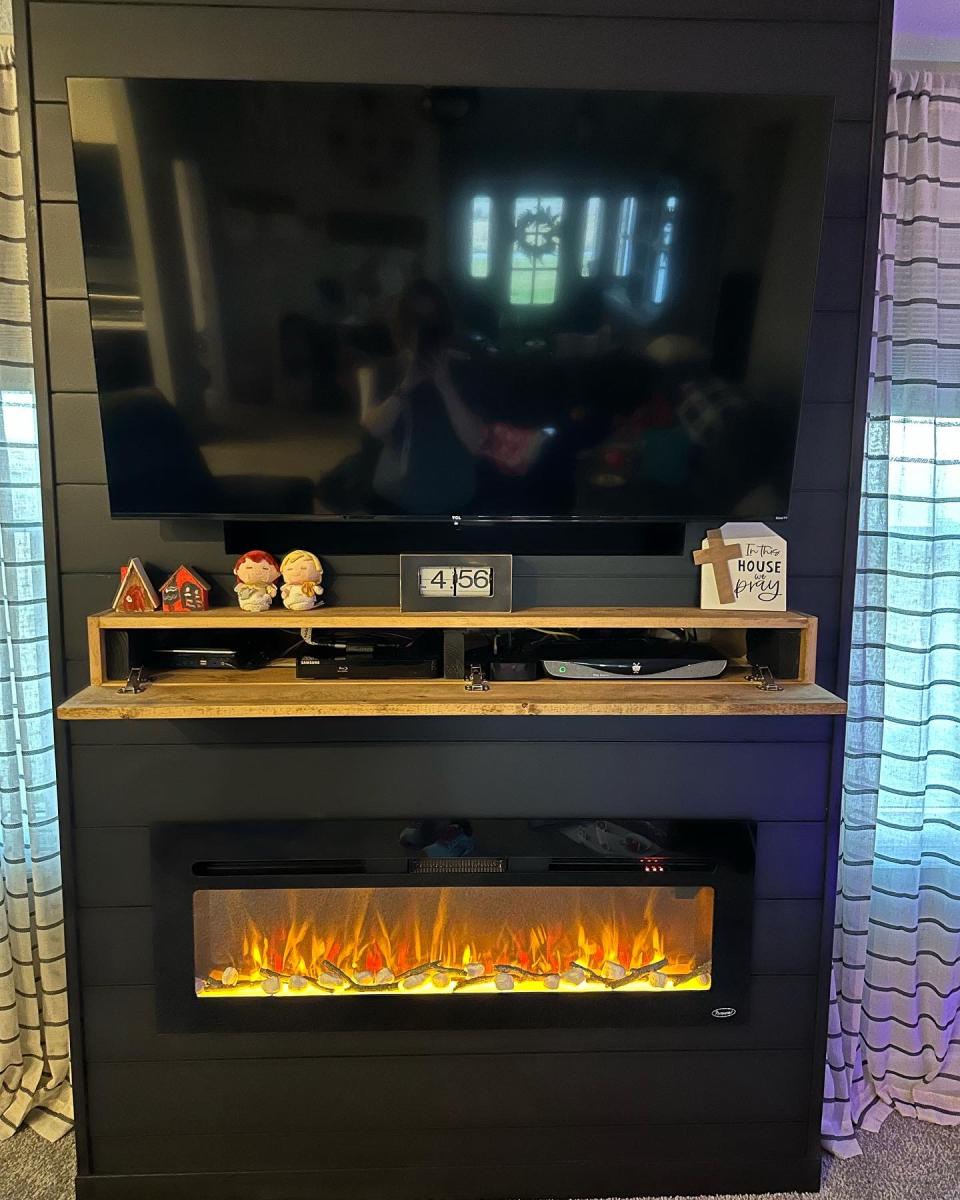
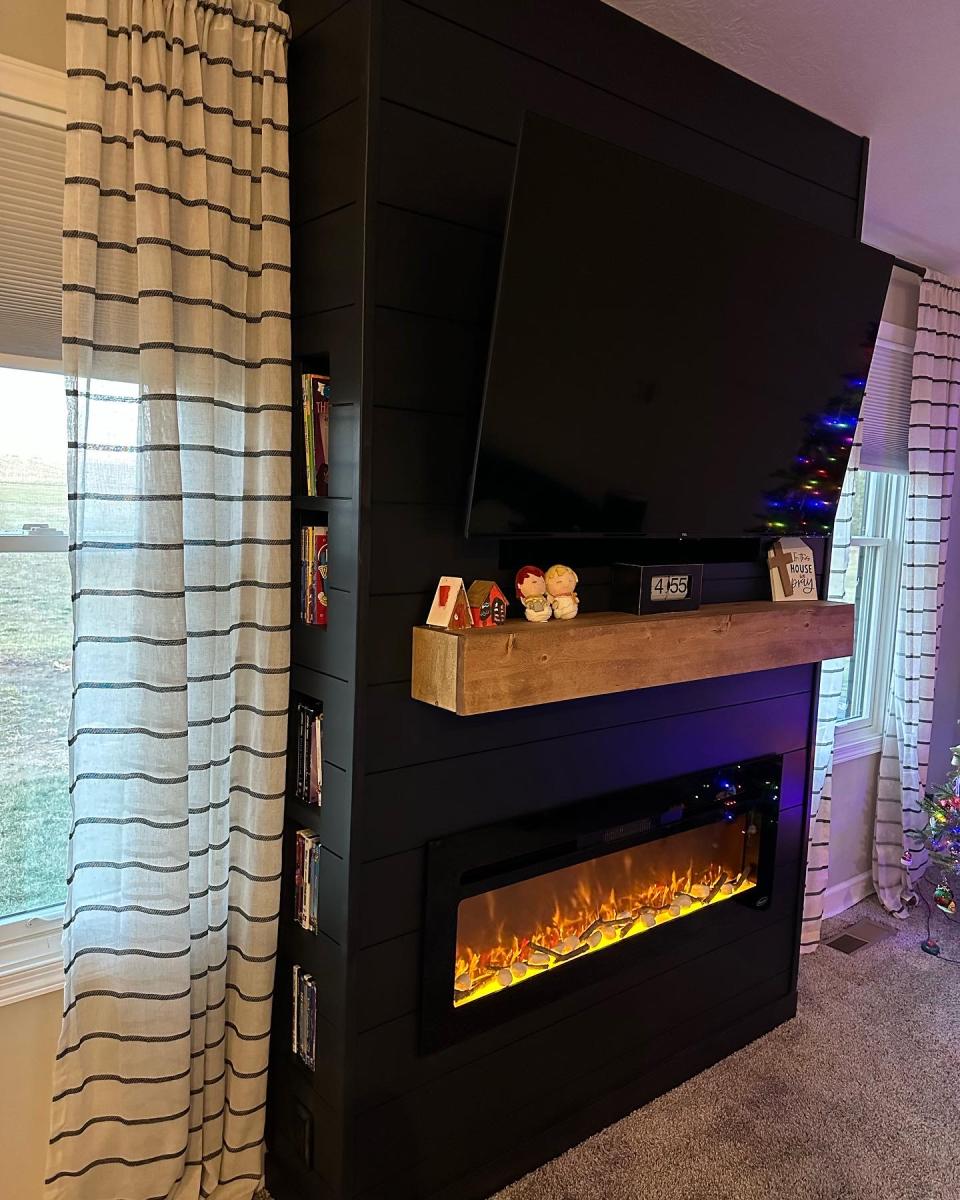
Thank you Ana for you Fireplace design as it was exactly what I needed! We’ve lived in our house for 3 years now and I’ve wanted a fireplace ever since. Your plan was perfect and with a few modifications I made it come to life. My 9yr daughter as I was almost done building thought there should be a shelf for books and movies below the fire place. It gave me the idea of adding storage on the sides. I had already had the idea of the mantle storage and just used a floating shelf idea and made that. This was a lot of fun!! It took me a little over a week to build. But can’t wait to build something else for our house… like the mudroom!
Amy
Thu, 12/01/2022 - 16:07
Oh my goodness, you knocked this one out of the park! Amazing job, thank you for sharing.
Sun, 01/08/2023 - 19:02
That looks awesome! My husband and I are planning on doing this as well. I do have a question, as I see you have carpet just like us. Did you cut out the carpet where you built out, and if so how did you go about that, or did you just build on top of it?
Thanks Ana! Appreciate all the plans and how much I’m learning.
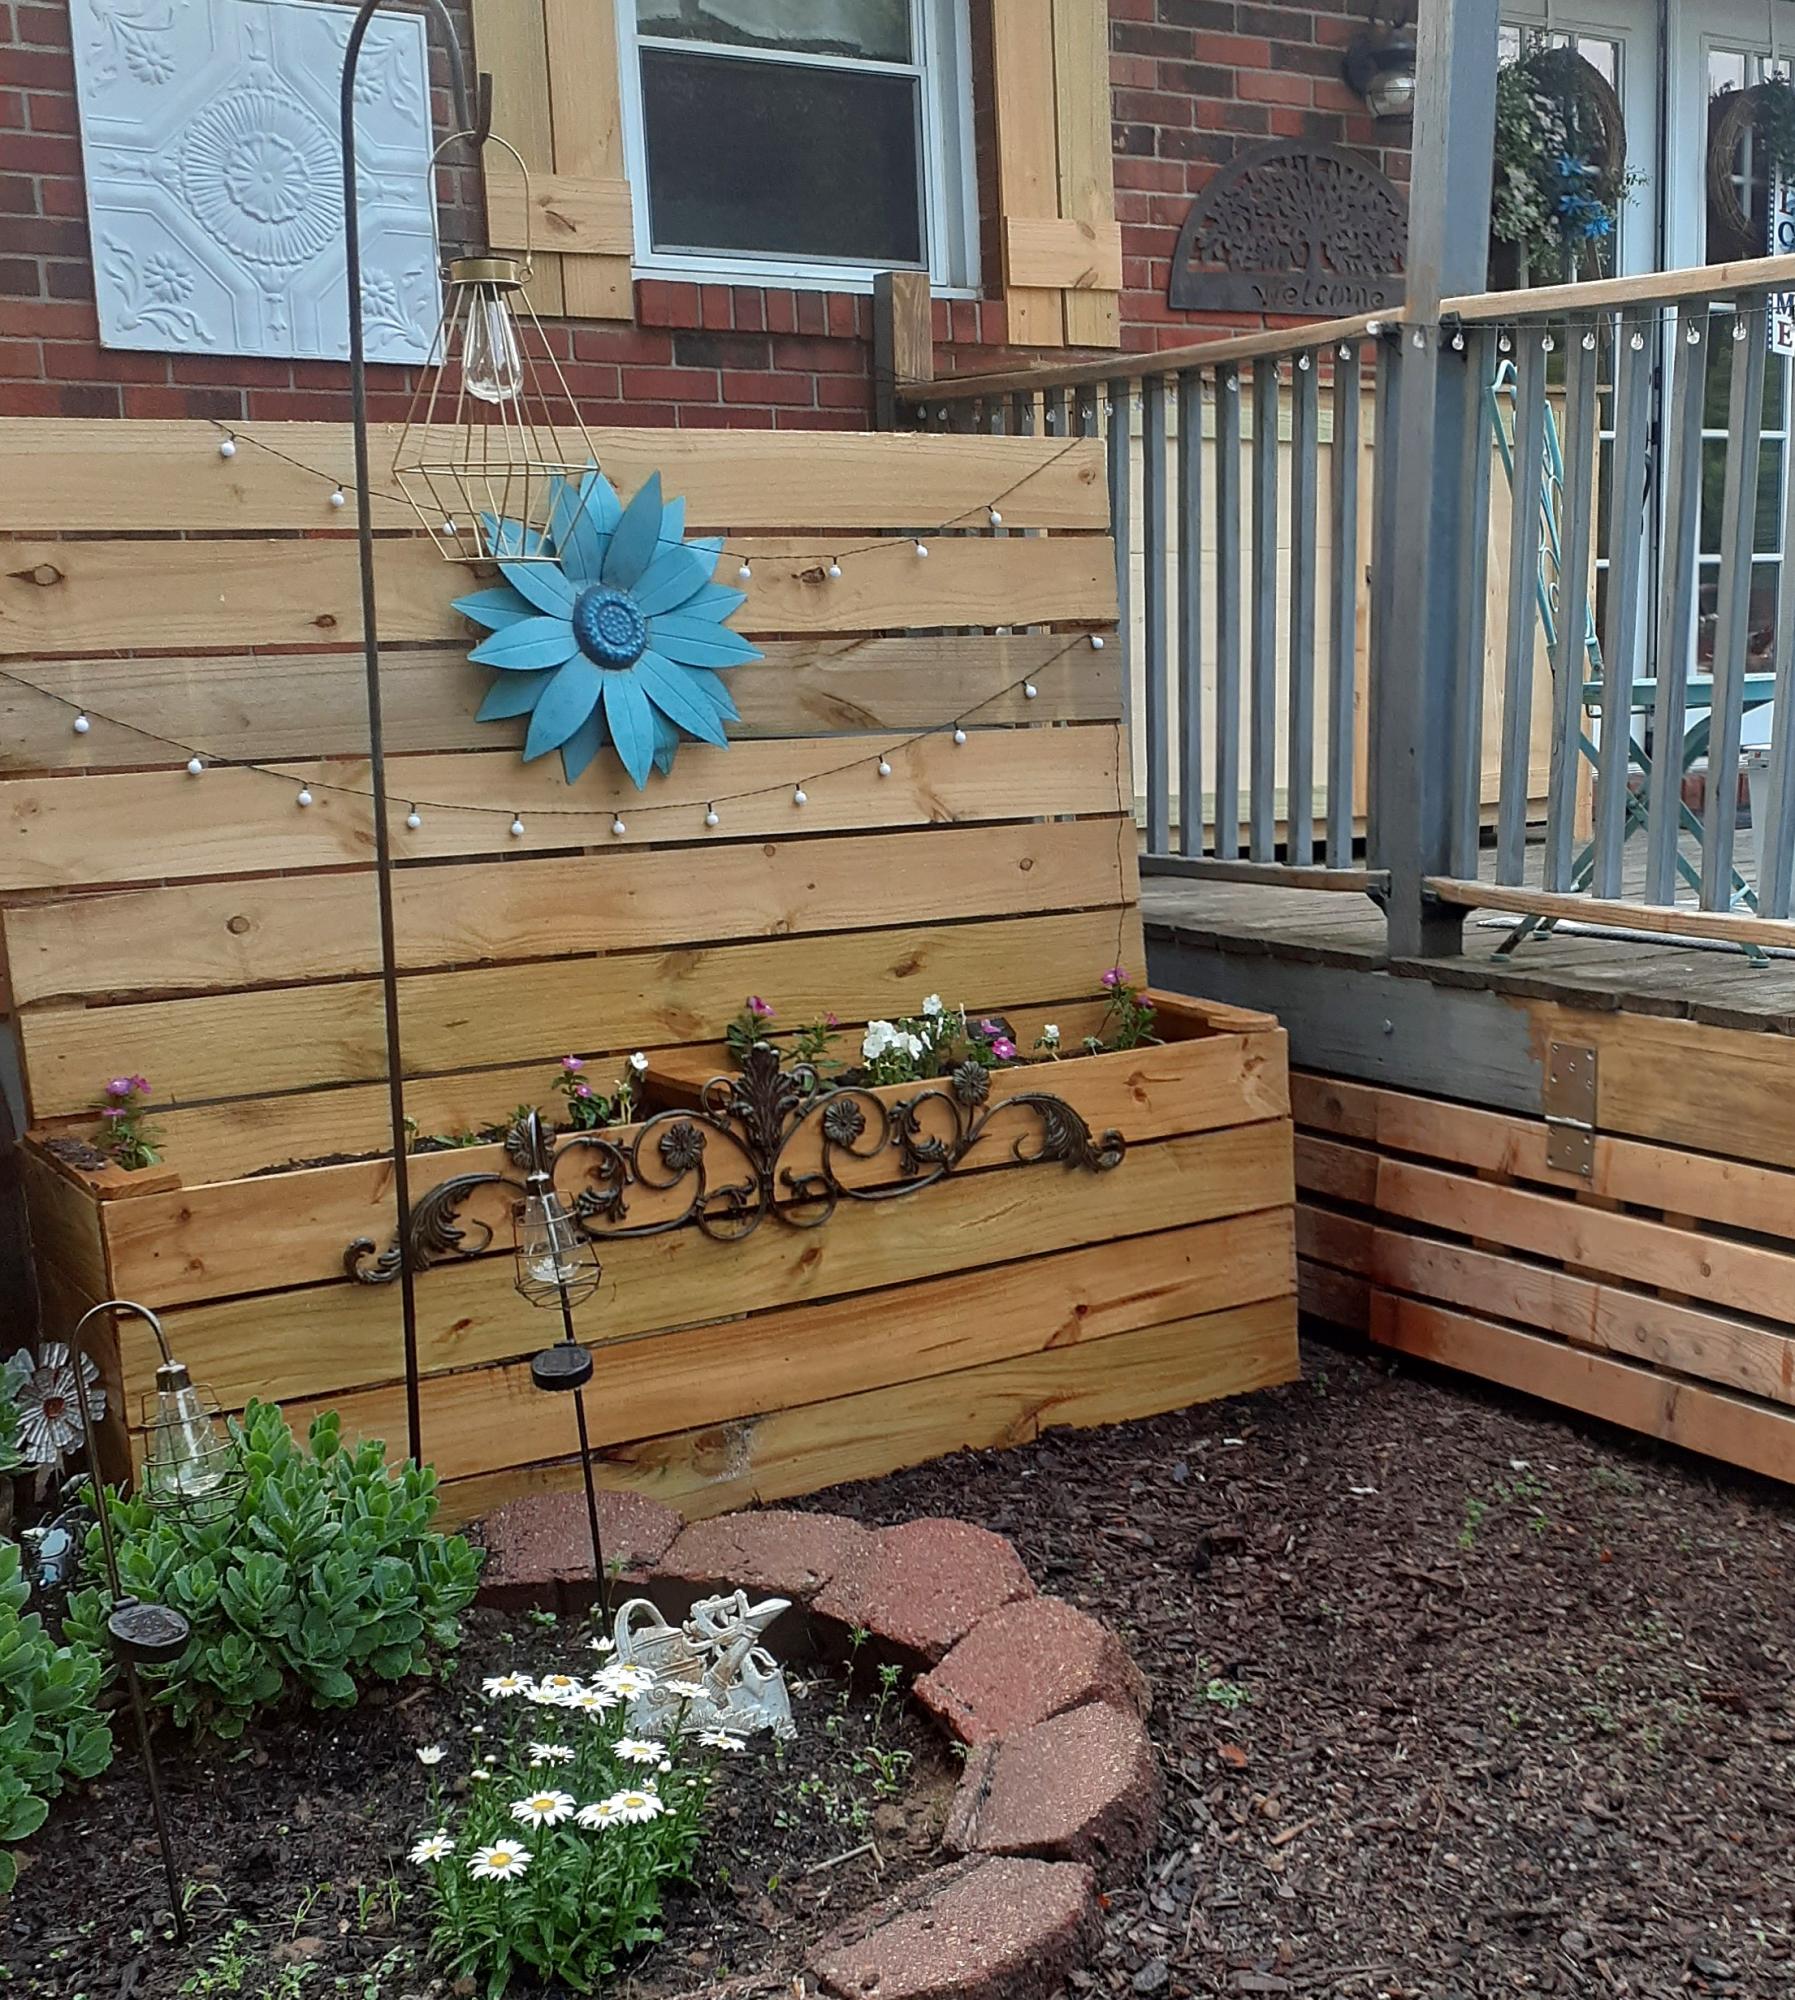
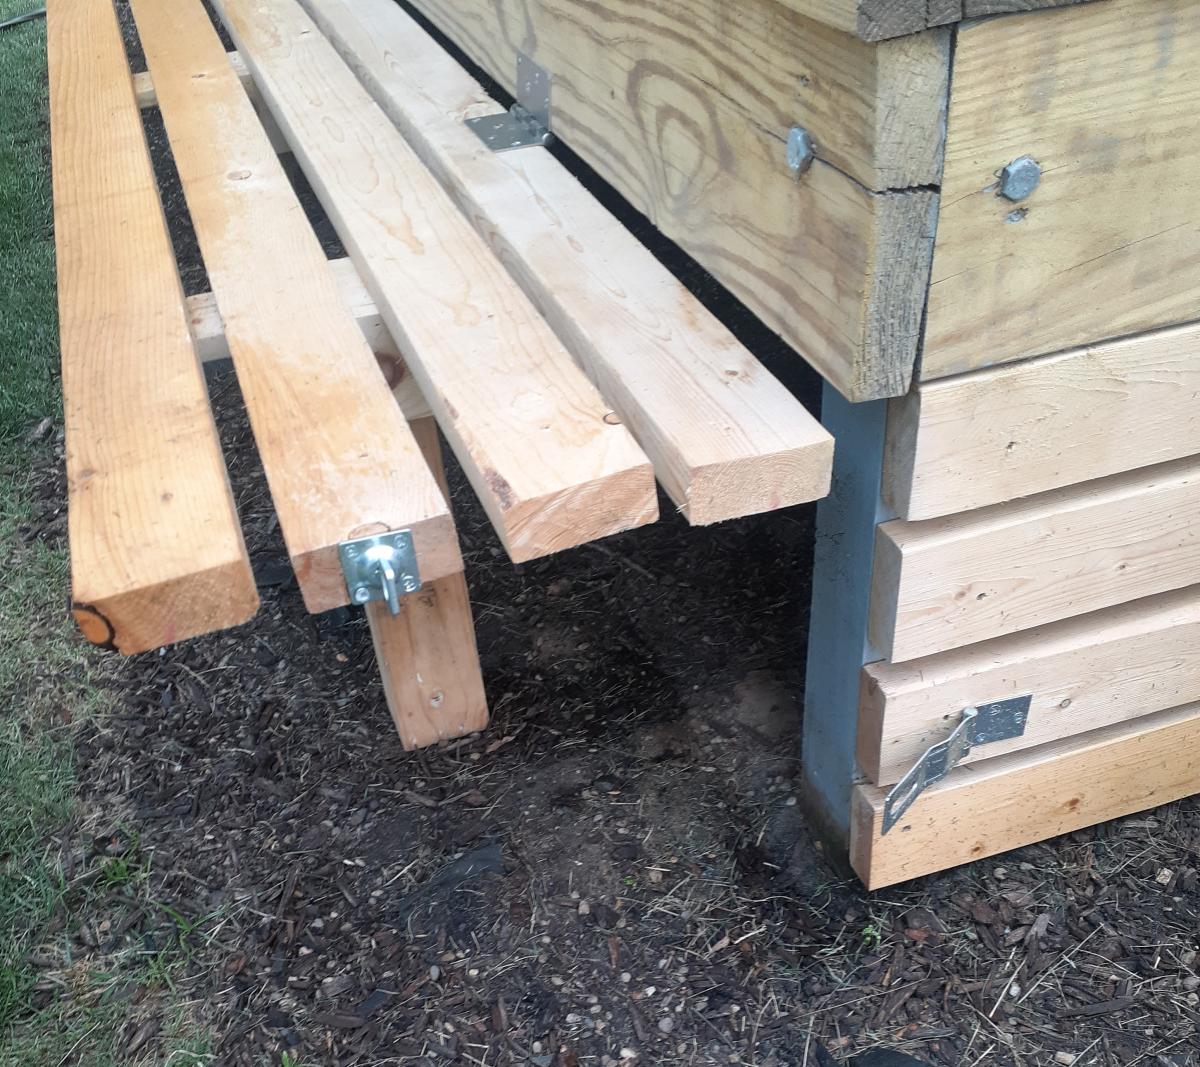
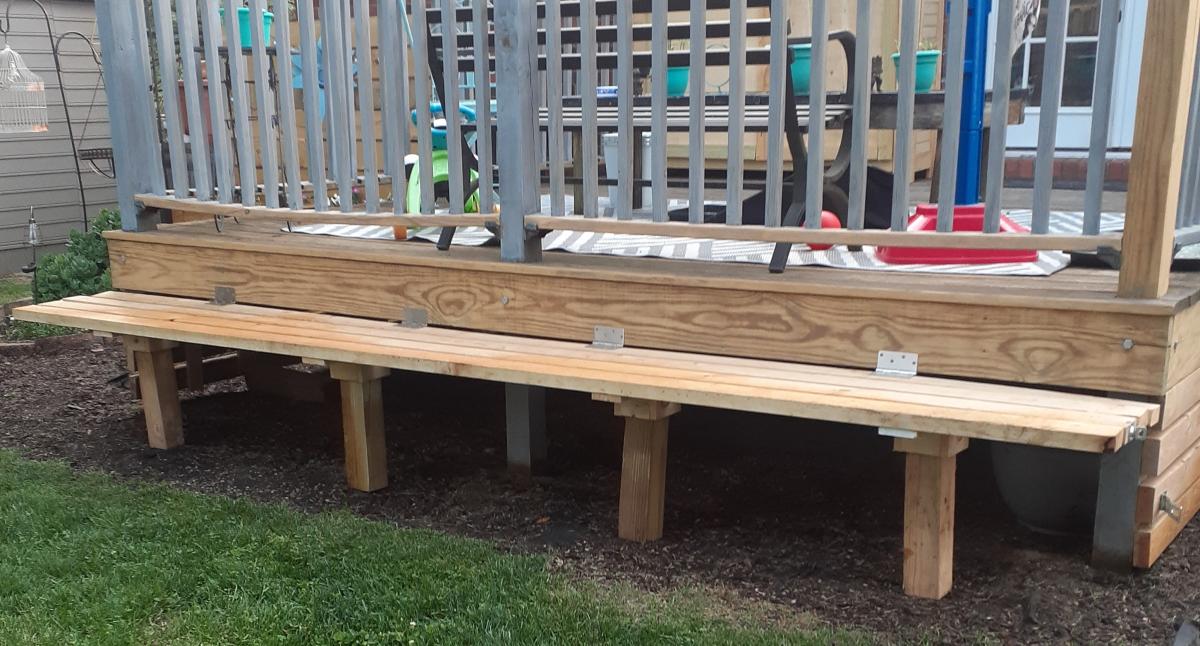
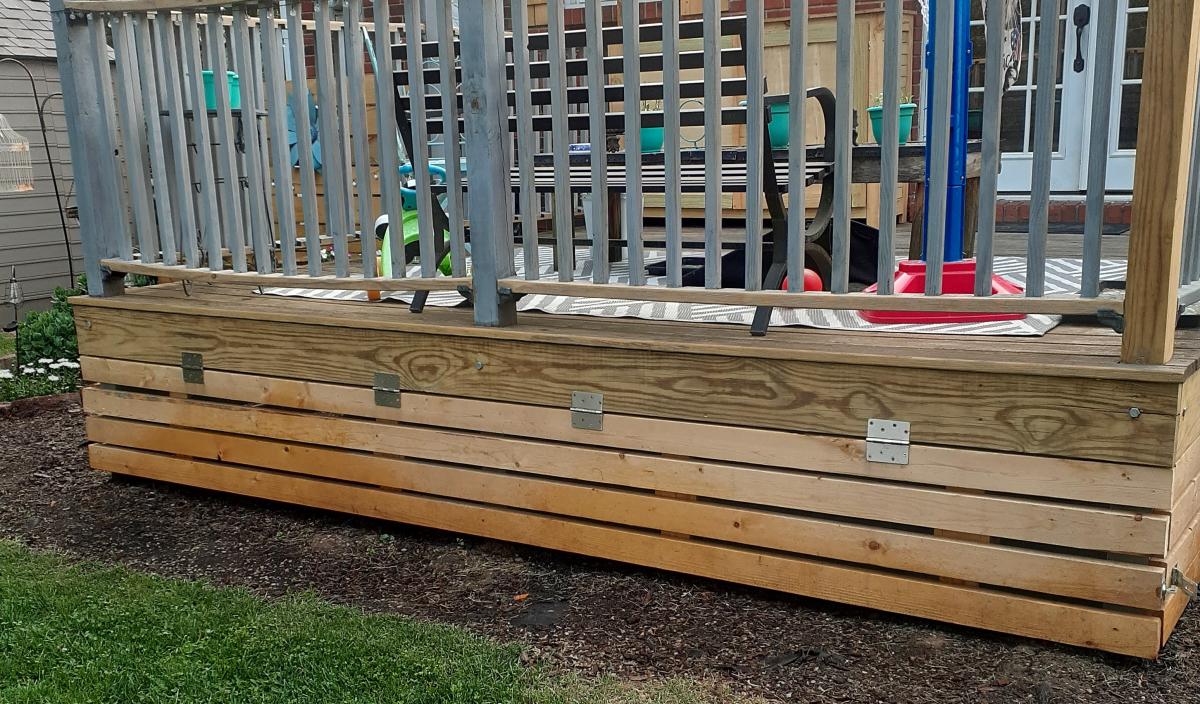
In the middle of a much needed makeover on our back deck! We did not have skirting around the deck and decided that we would like to close it in for extra storage(ladders,compost bin...) and we came up with this little something as a bonus. We are always hosting backyard get togethers and seating is a challenge. Setting up and putting away chairs,ugh. This has been the perfect solution. This was completely an "as we went" plan but the biggest need to know is, heavy duty hinges! (As I said,the deck is getting a makeover so go easy on the appearance:)
Jodi and Matt B.
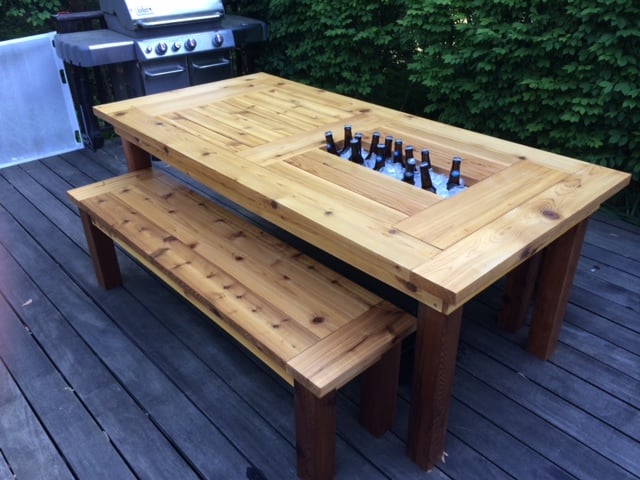
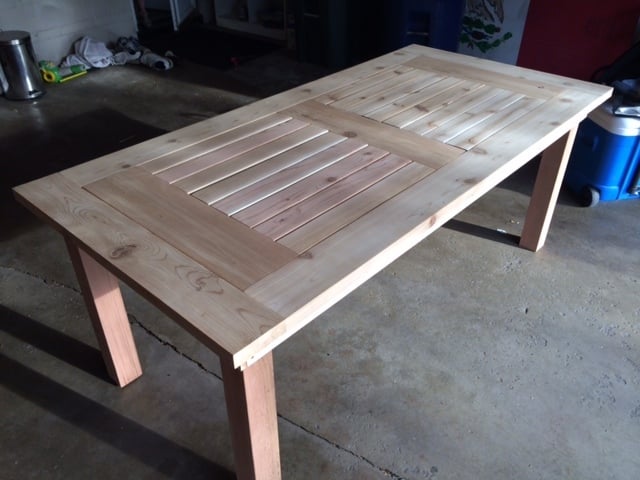
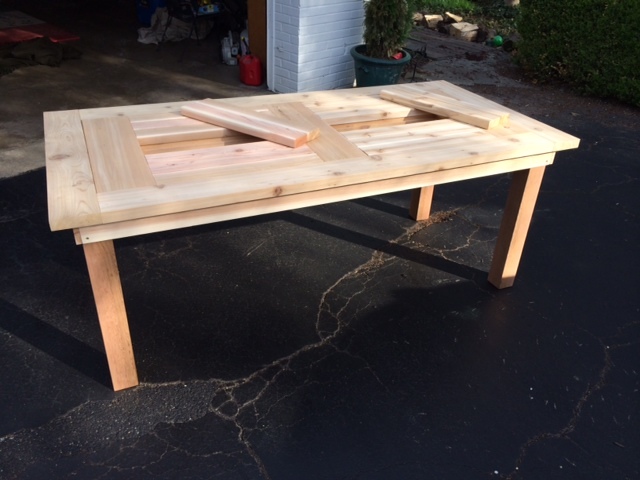
We needed a new patio table for our deck and I loved this design. I made it out of cedar which worked beautifully and made a few small tweaks:
- Needed it longer and wider so added two more 2x4's to the middle and added 2x6 end caps (as another poster had done).
- I did not add the holes to the cooler covers for uniformity, they slide in and out very easily.
- I used 4x4's as the legs and constructed the table skirting around it. This is a very sturdy design.
Built some benches for seating and they worked out great.
Overall I loved this build and it was fairly simple. Stained with Penofin deck stain (red label) and a spar varnish for protection.
Hope you like it!


Thu, 04/24/2014 - 07:43
Thank you! Local lumber yard that had great stuff. I will say though that I had to get some additional pieces from Home Depot and their cedar is fairly nice too. Beware though, they don't have true 1x cedar (at least here in St. Louis) it's more like 1/2 inch think.
Thu, 04/24/2014 - 07:43
Thank you! Local lumber yard that had great stuff. I will say though that I had to get some additional pieces from Home Depot and their cedar is fairly nice too. Beware though, they don't have true 1x cedar (at least here in St. Louis) it's more like 1/2 inch think.
Tue, 07/08/2014 - 20:00
Really well done with the two-tone stain. What particular colors of Penofin did you use? I'm working on a similar build and would like to use your color combination.
Mon, 05/04/2015 - 10:06
Do you happen to have your lumber list? I'm not the greatest with add ons, LOL! If you happen to have a step by step that's even better.
Thanks,
Jennifer
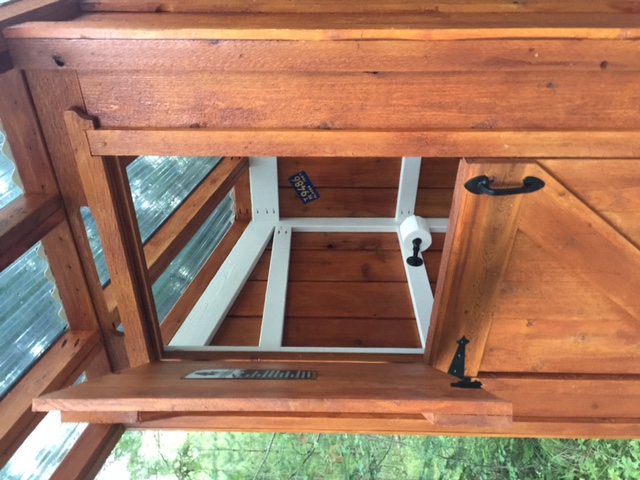
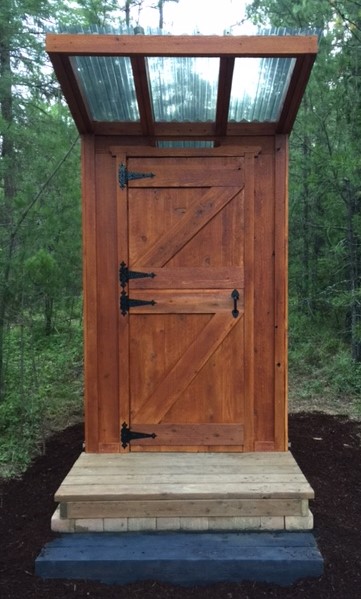
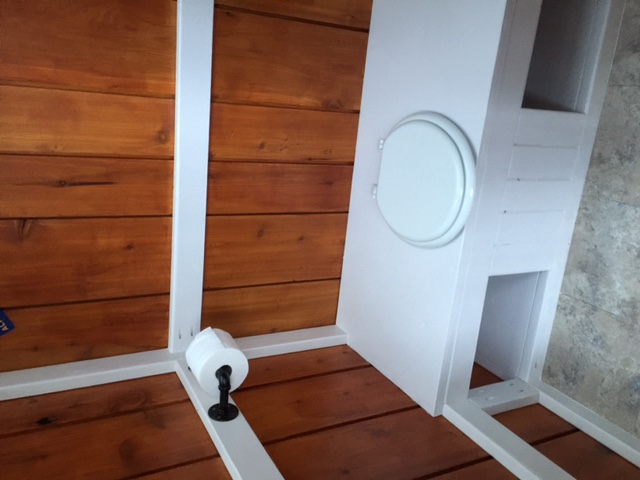
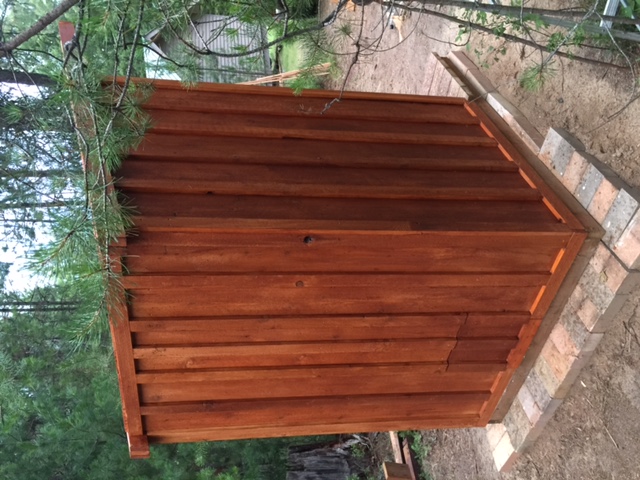
We have a small rustic cabin that needed a clean, functional outhouse. We followed Ana's plans, but with a few modifications to include a Solar gray polycarbonate roof to let in light. We also decided on cedar board & batten for the siding. We look forward to many years of use.
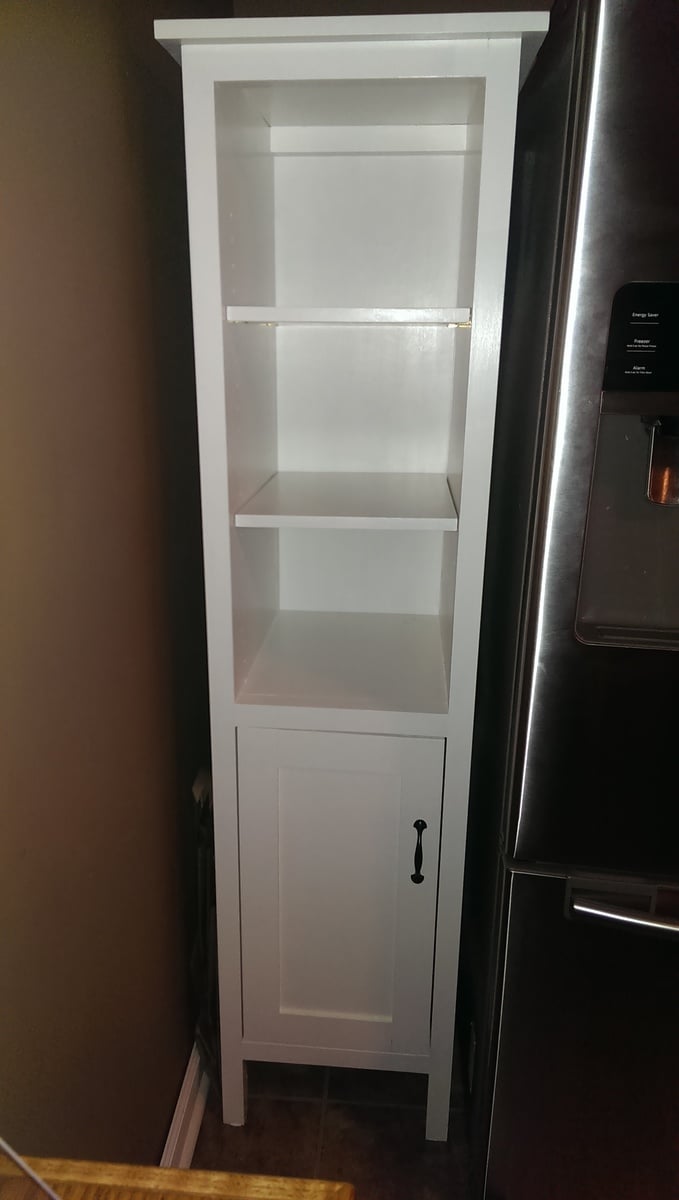
We needed some extra kitchen storage with a baby on the way and this project did the trick! We needed something skinny since space is a premium in our kitchen. I am happy with how this turned out. I made the shelves adjustable using the Kreg shelf pin jig, which worked amazingly.

I honestly think Ana is a mind reader. Whenever I need plans for a particular piece of furniture, they magically appear on her site. Of course if she was a true mind reader, everything will be exactly as I need it requiring no modifications. That's what makes her plans so amazing. I can build bigger and better because I've learned to modify her plans to fit my current needs.
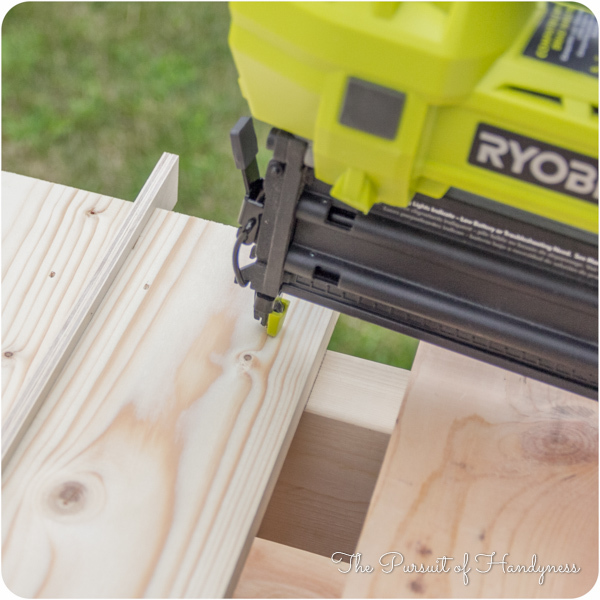
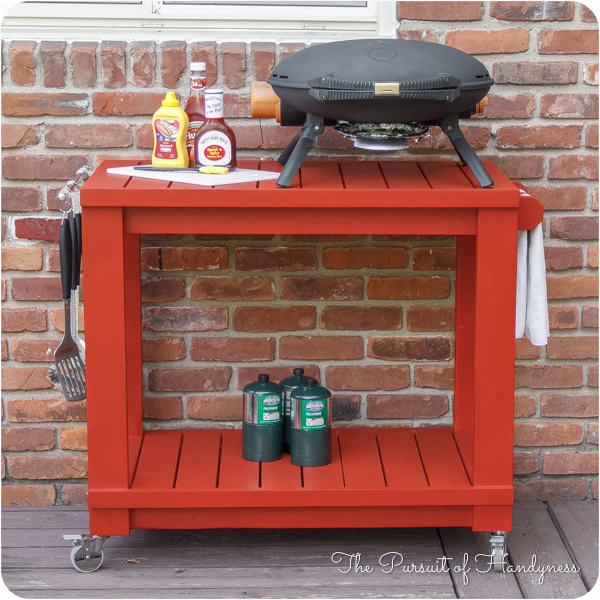
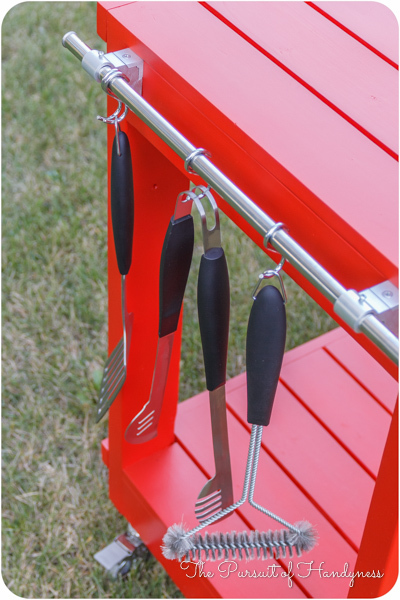
This Cart was no exception. I had to make mine a few inches deeper and change the height of the legs and it was a piece of cake. I put this together in less than 2 hours and finishing was easy too.
I did a blog post all about what I did differently including how I constructed a towel bar instead of the pipe. Check it out at www.thepursuitofhandyness.com


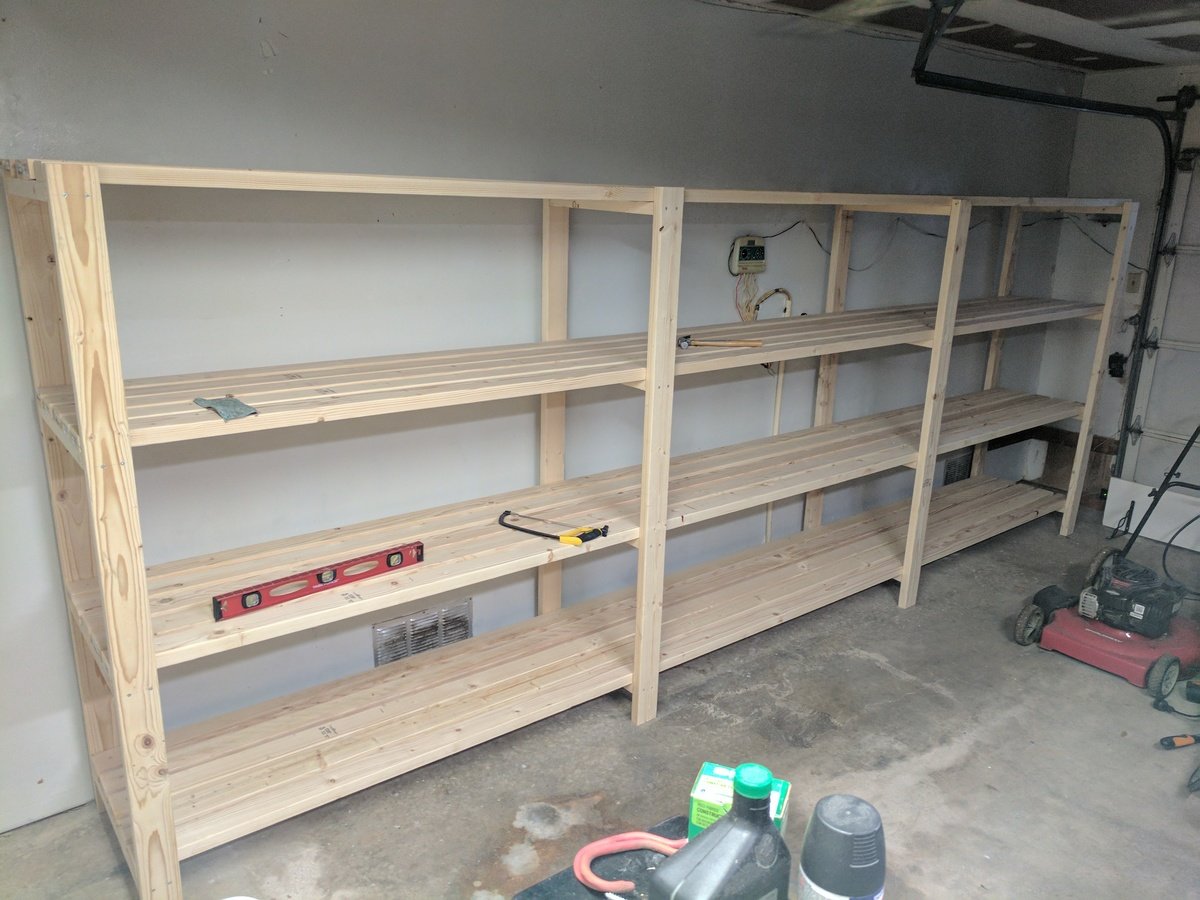
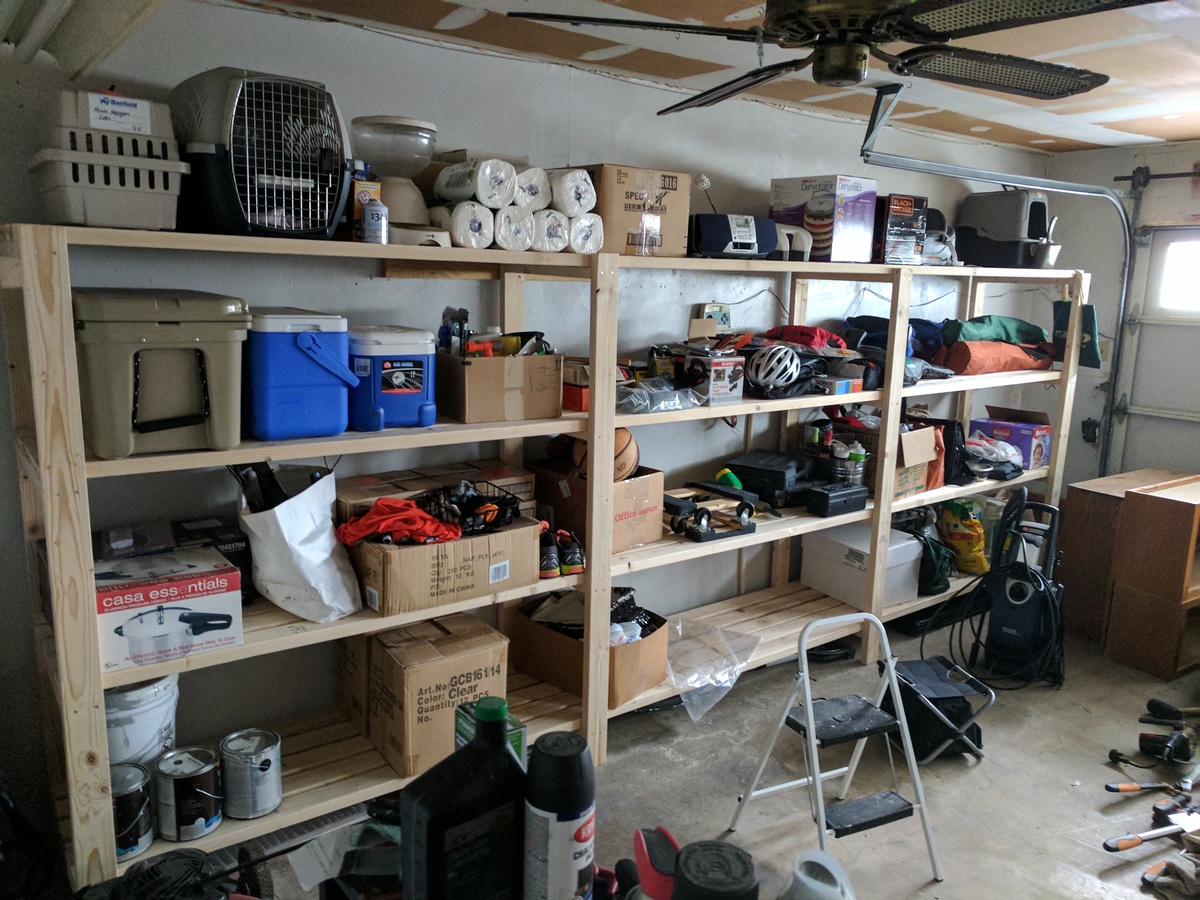
I made my shelves 16 ft by 6ft by 2ft - added another plank to each shelf to increase the width. I compensated for the slope along the garage wall by offsetting all the screw-in points in the front legs half an inch. This thing is HEAVY.
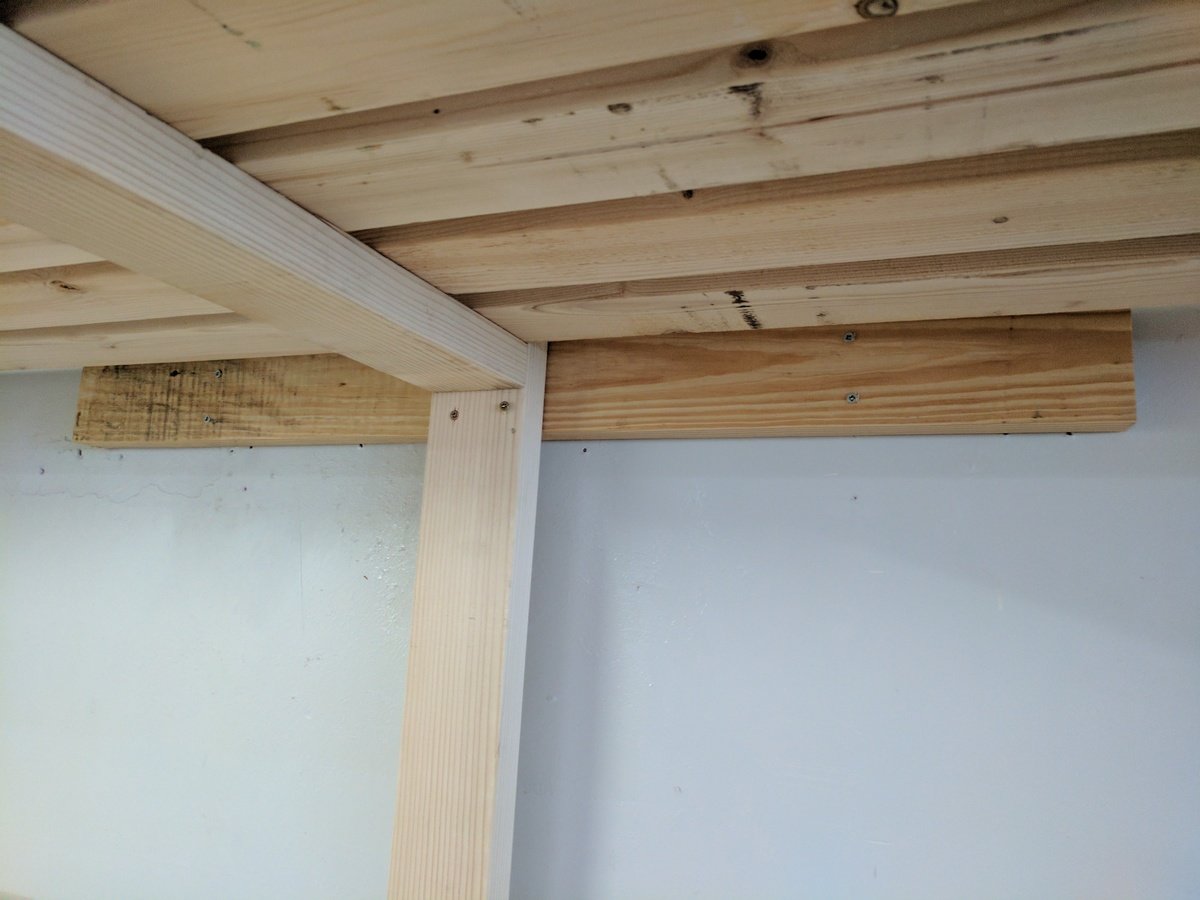
I anchored the unit to the wall by securing 2 scrap 2x4s to the studs - 1 at the 2nd set of legs and 1 at the far right legs - and screwing the unit legs into the 2x4s. This way, I didn't have to line the unit up precisely with the studs.
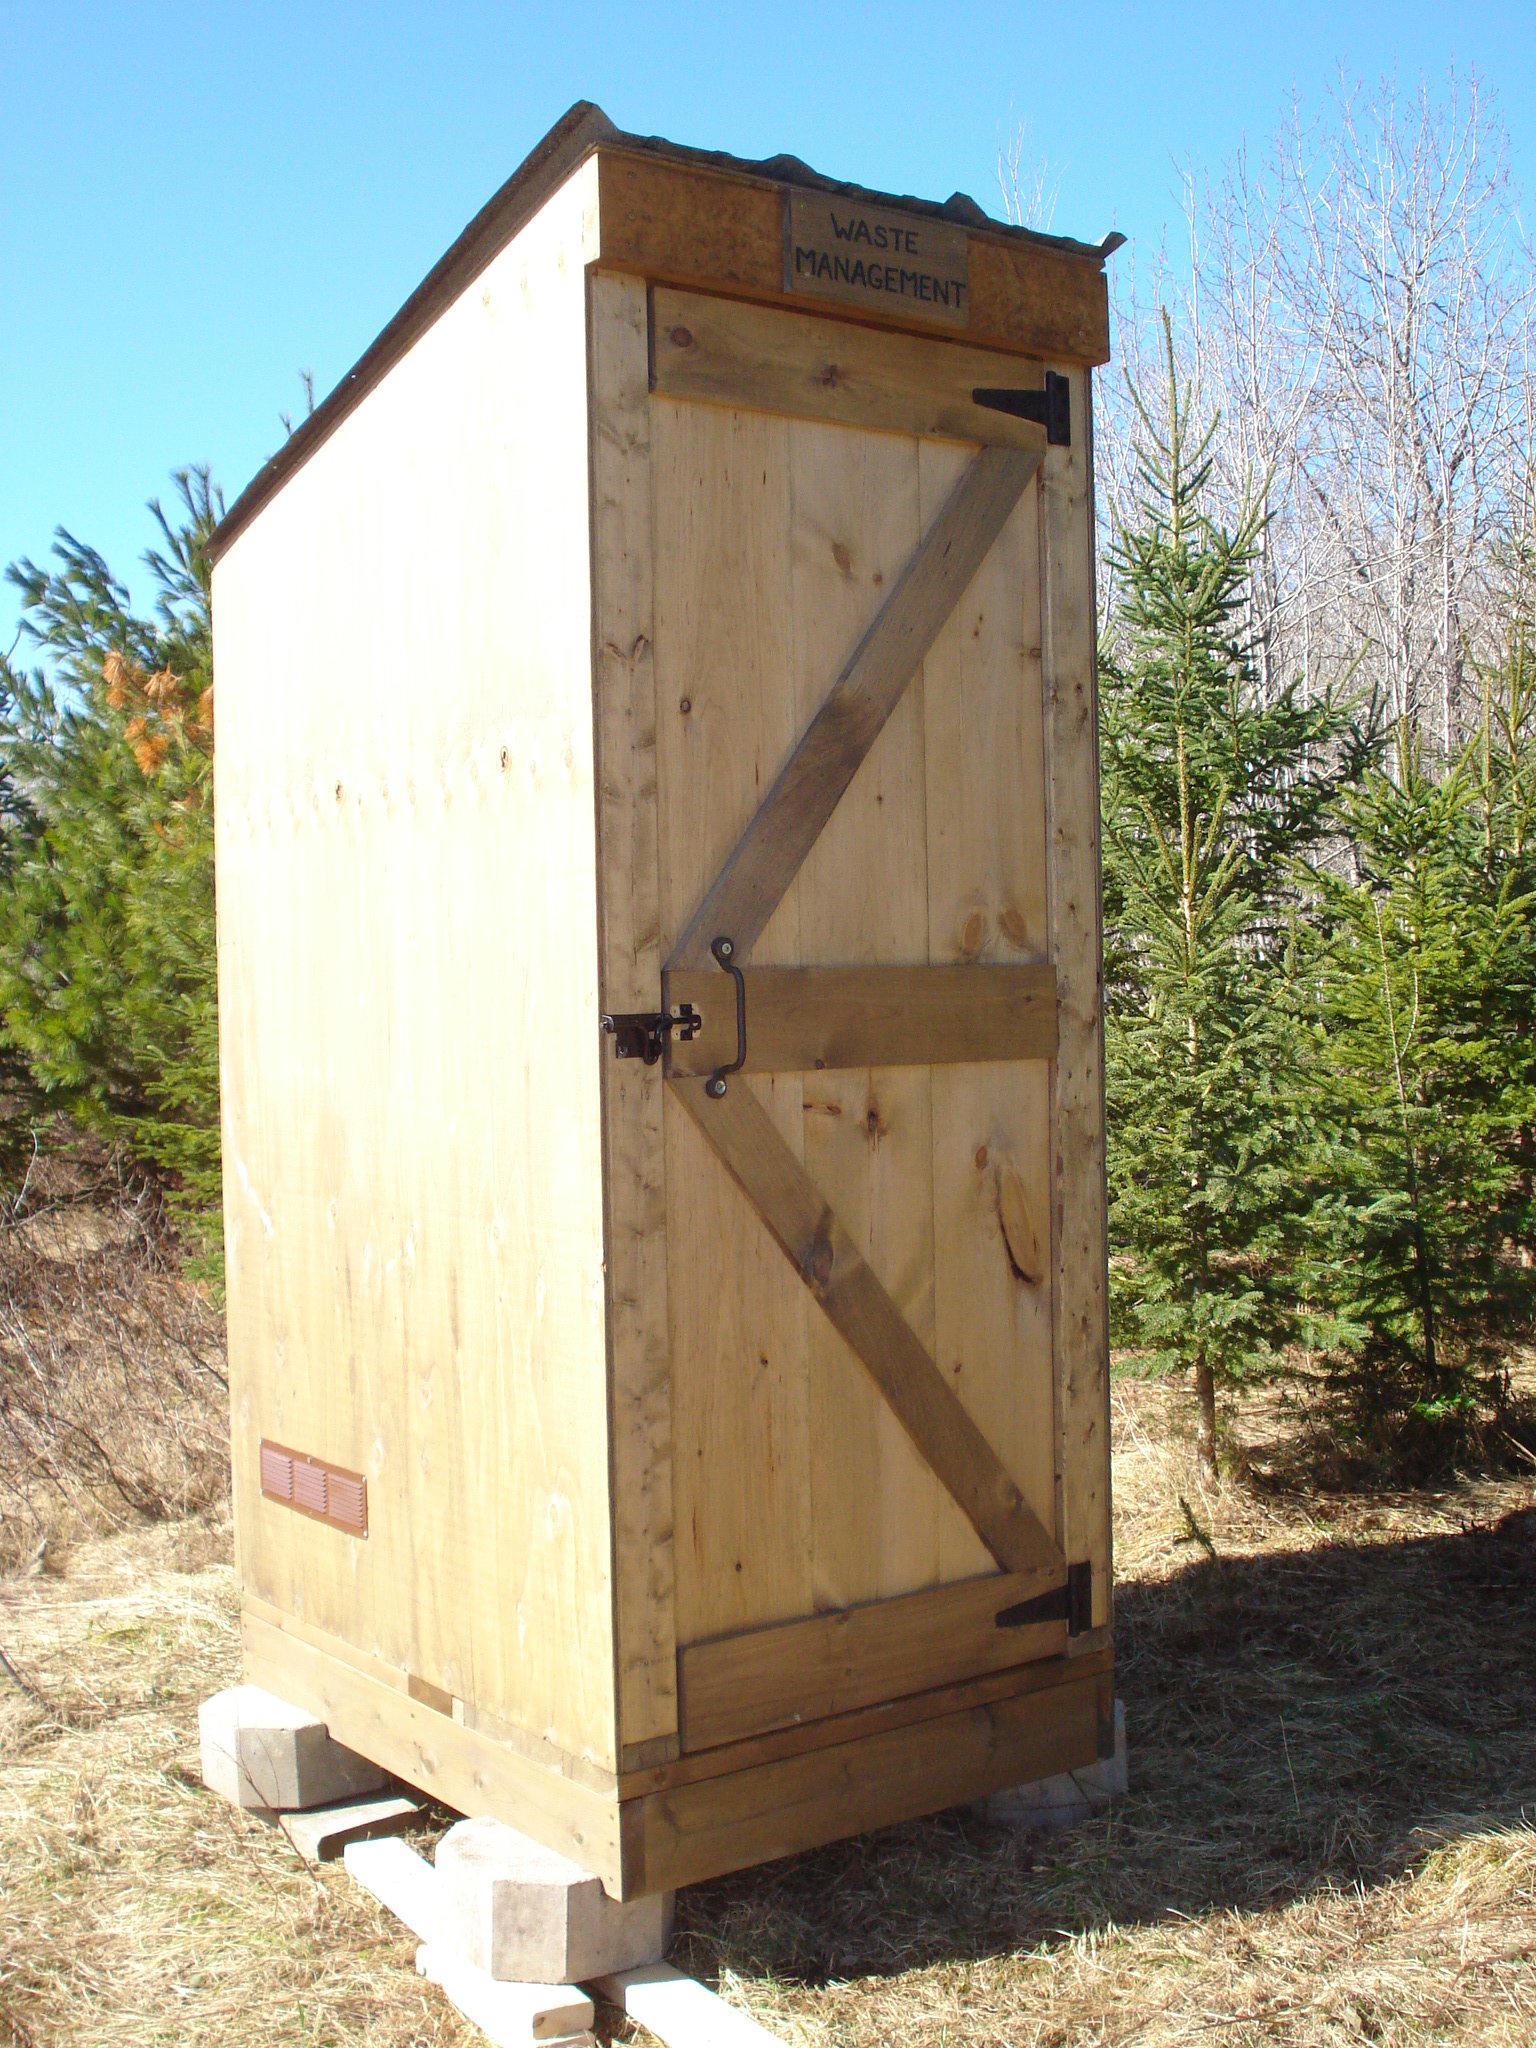
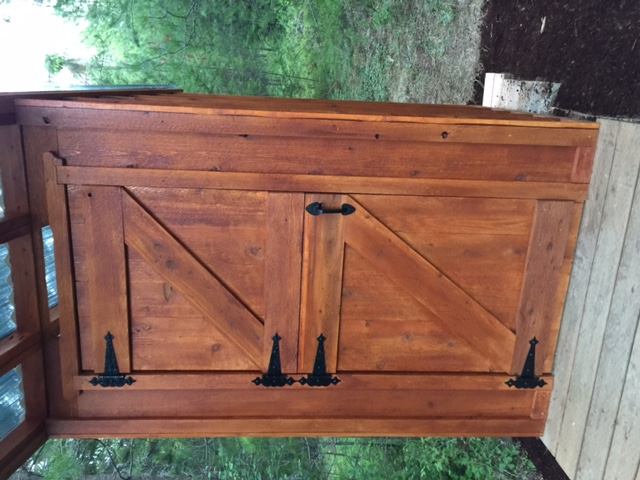
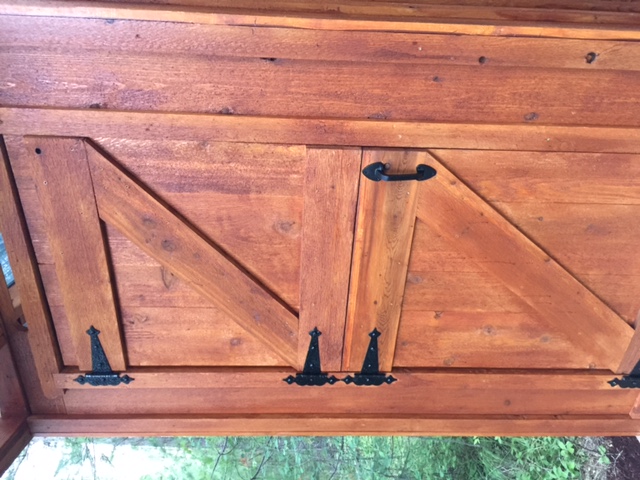
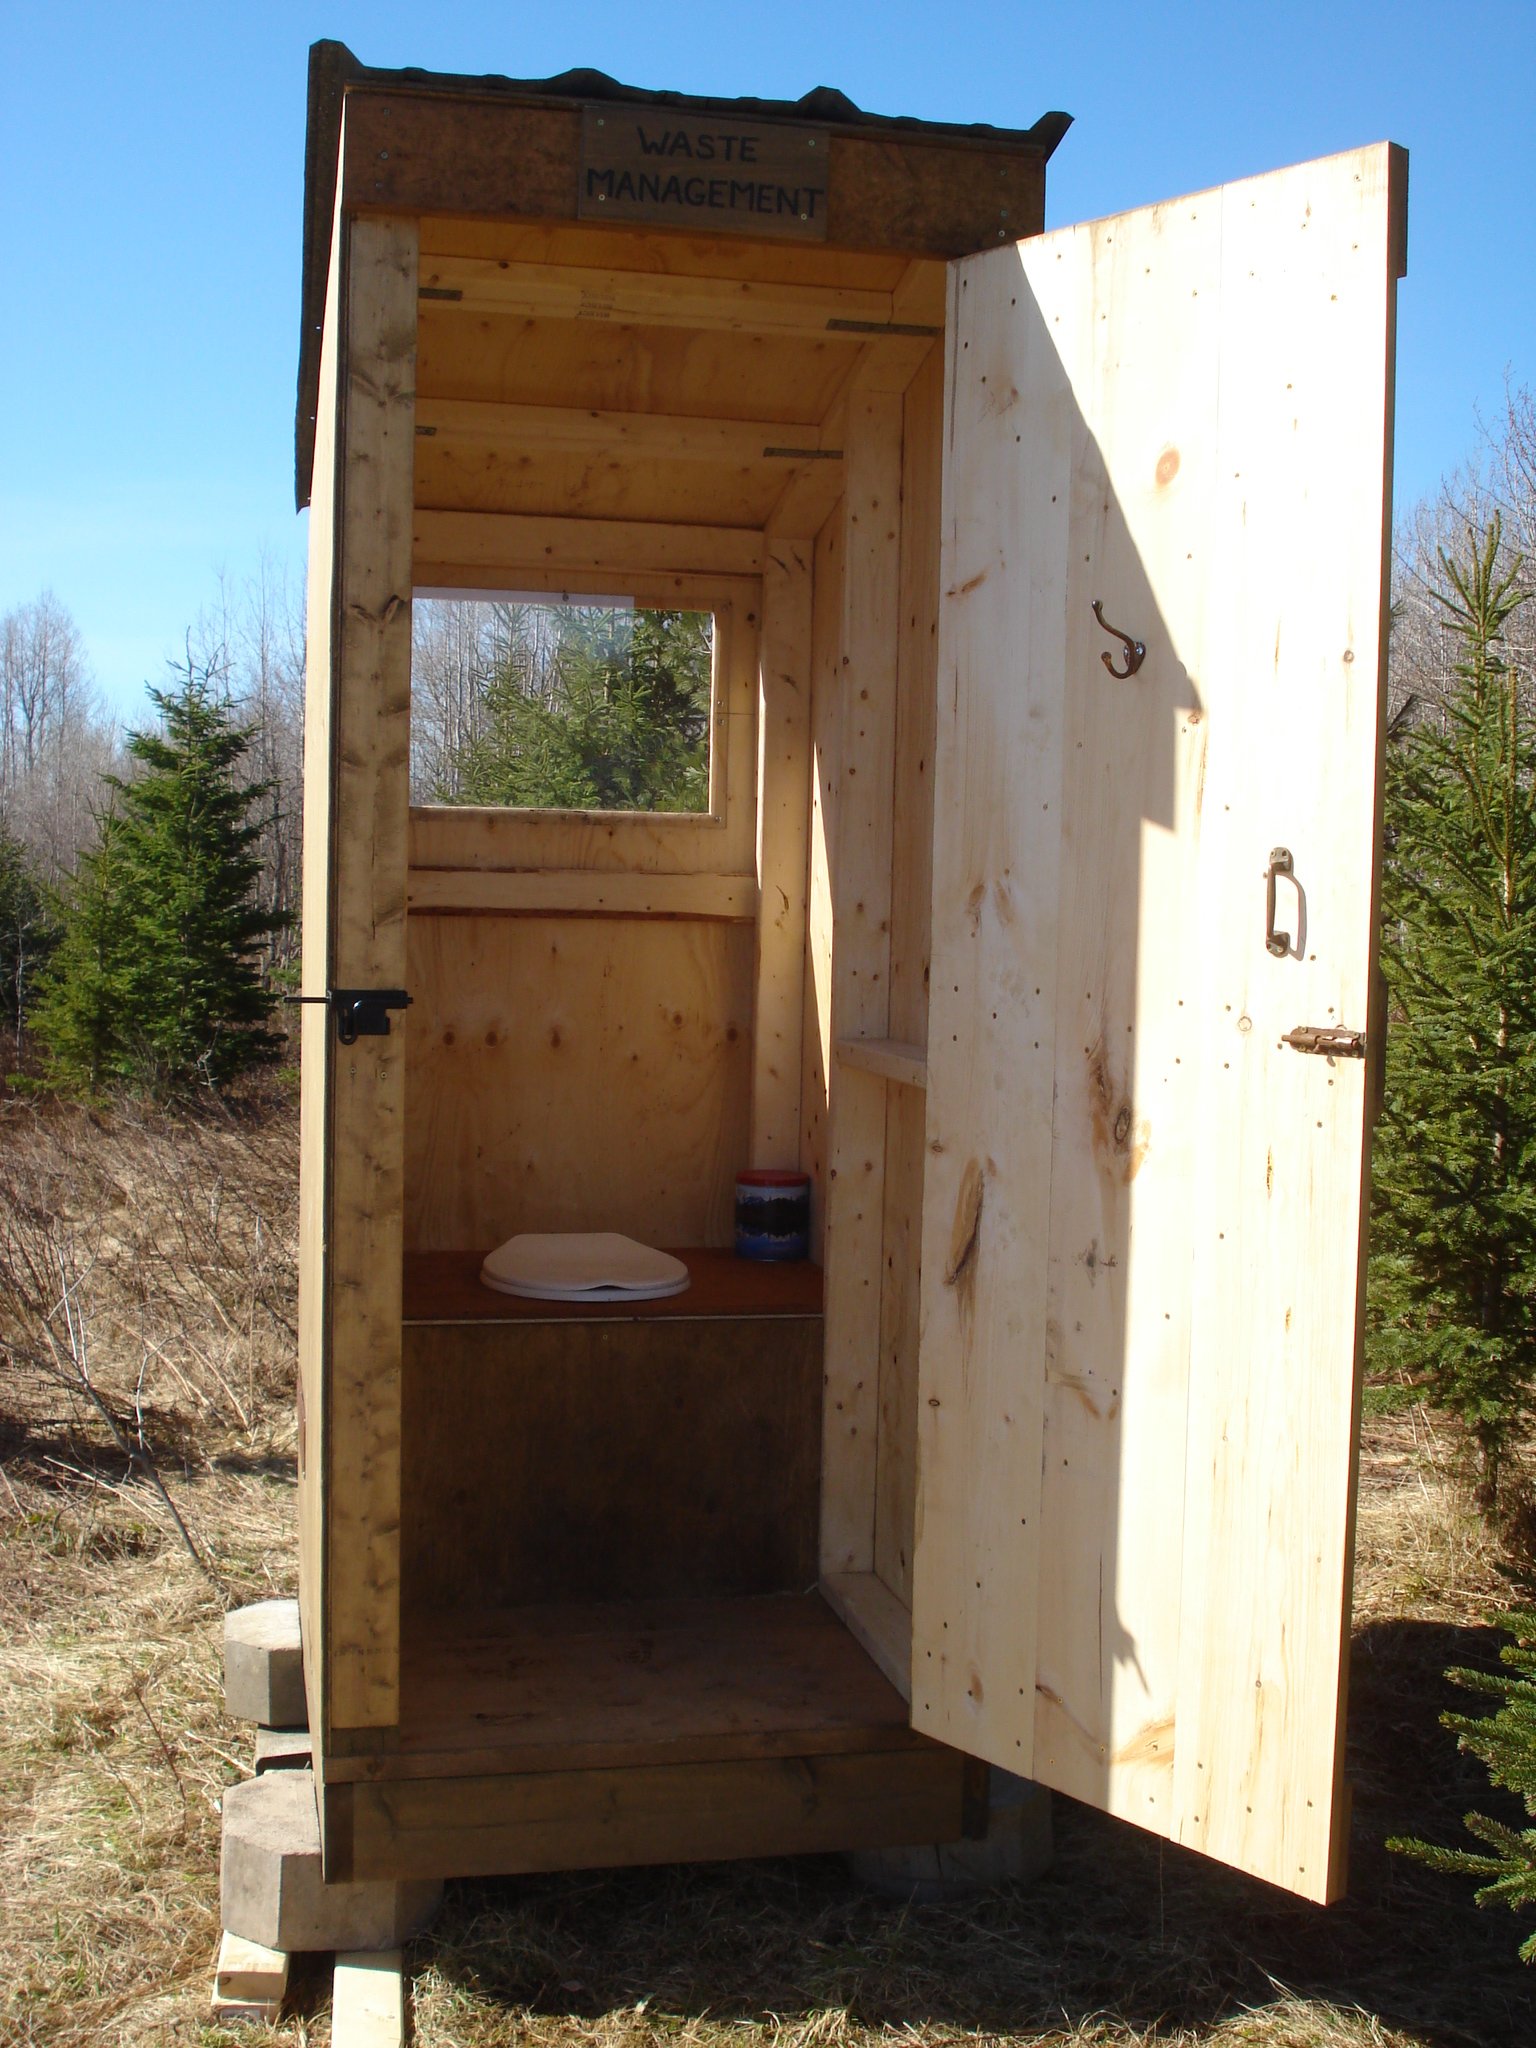
I had my nephew build this outhouse for our new 70 acre lot - no neighbours in sight so I had him put in an acrylic window (with a view). I left off the deck and had him put the boards tight together so 'critters' didn't get in as easily. I made a sign for above the door - 'Waste Management' for a touch of humour. The plans were easy to follow and I love it. Thanks, Ana.

Thu, 04/20/2017 - 16:45
So excited to see this one built! Your nephew did a great job, love the window in the back!
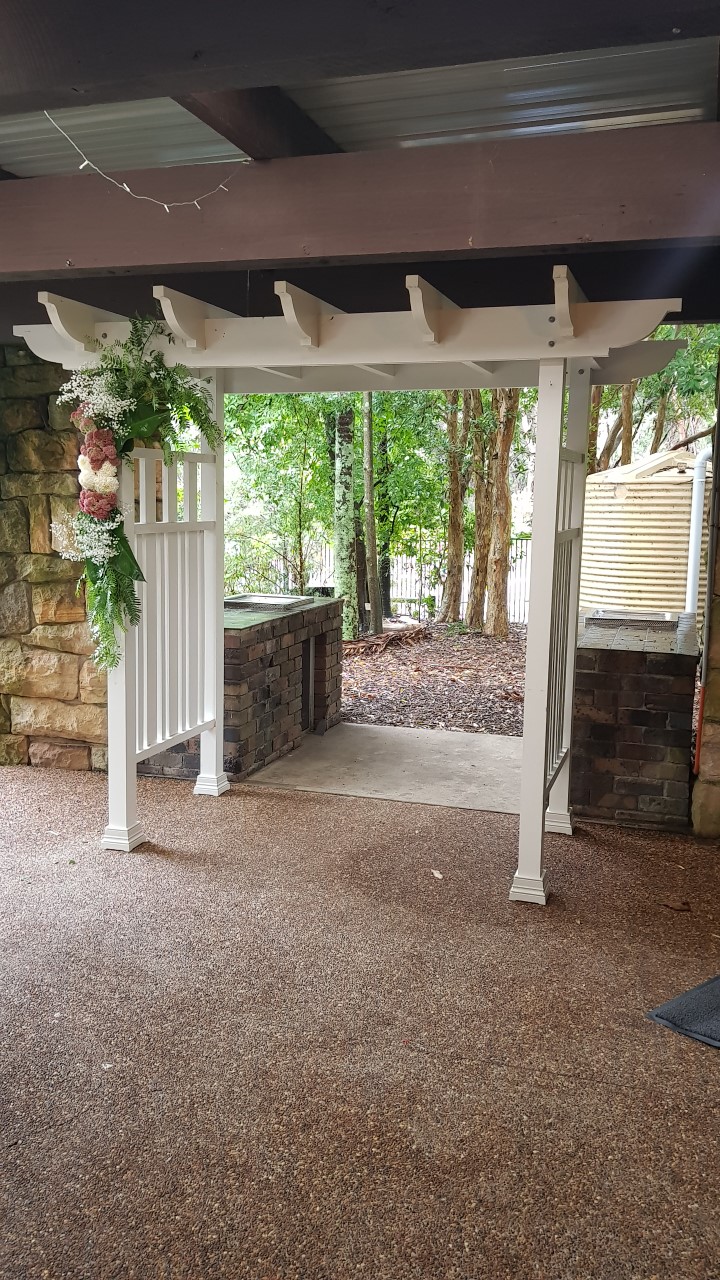
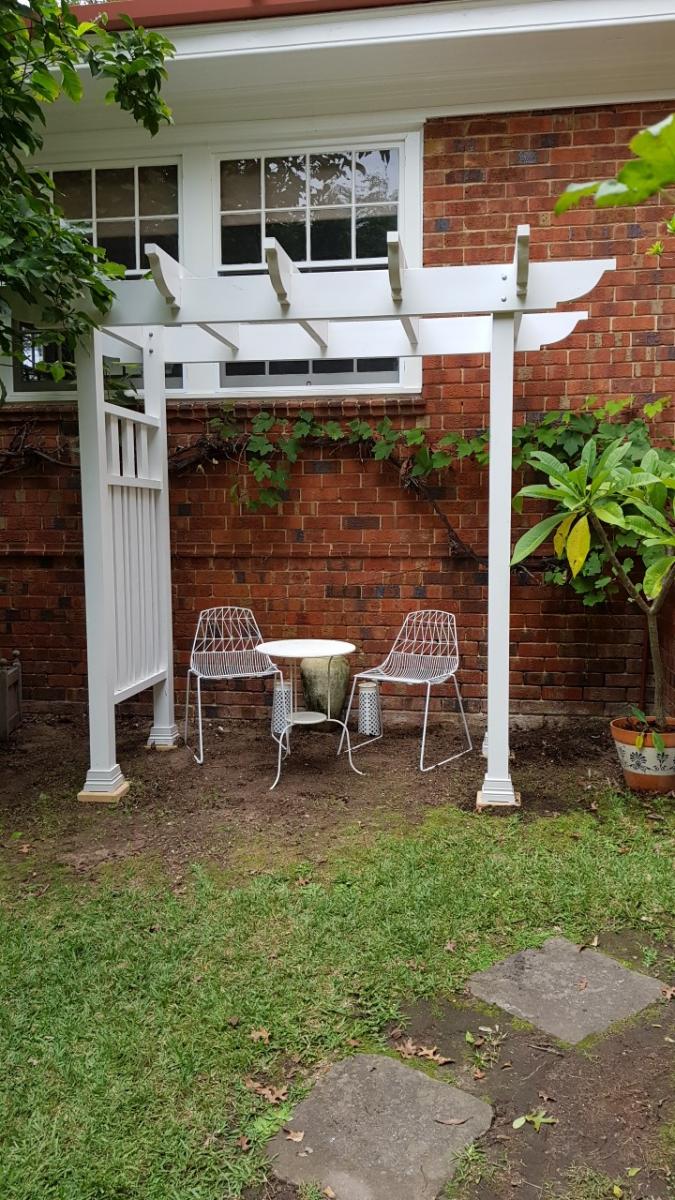
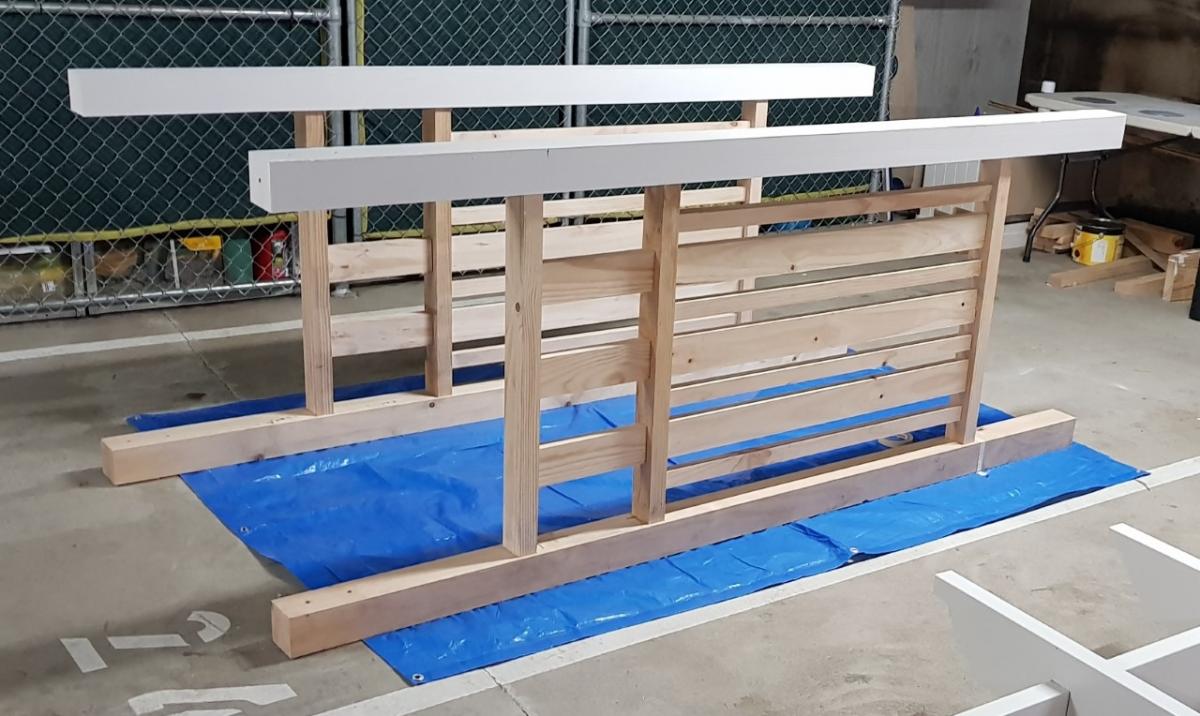
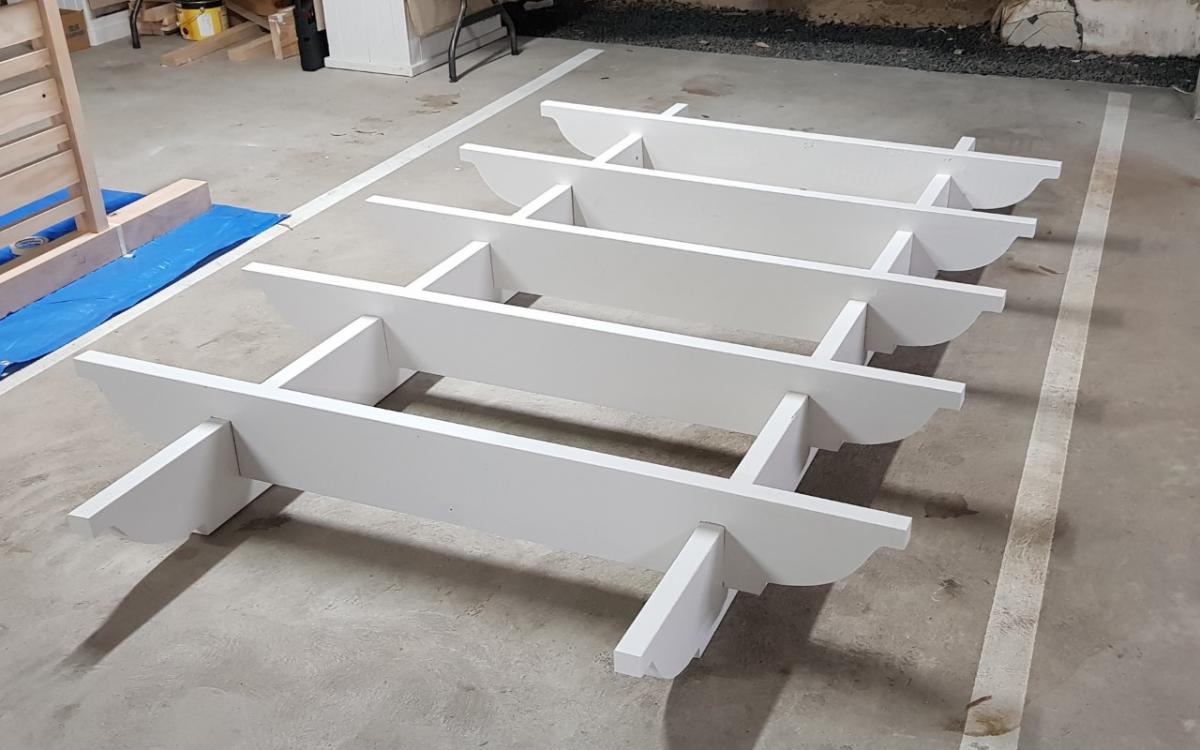
Hi, I built this wedding Arbour for my daughters wedding a while ago and unfortunately, I have no plans as I built from my head. It now sits in pride of place within thier garden as arch for thier garden.
I built this with a drop saw, hand saw, router, drill and hammer only.
I follow Ana's plans every release and save her plans for when I retire in two years to build for our house as well as try to run a small business from my shed.
Thank you Ana for you continued plans and wonderful advice.

Tue, 10/05/2021 - 10:40
WOW, such a sweet gift and reminder of their special day! Thanks for sharing:)
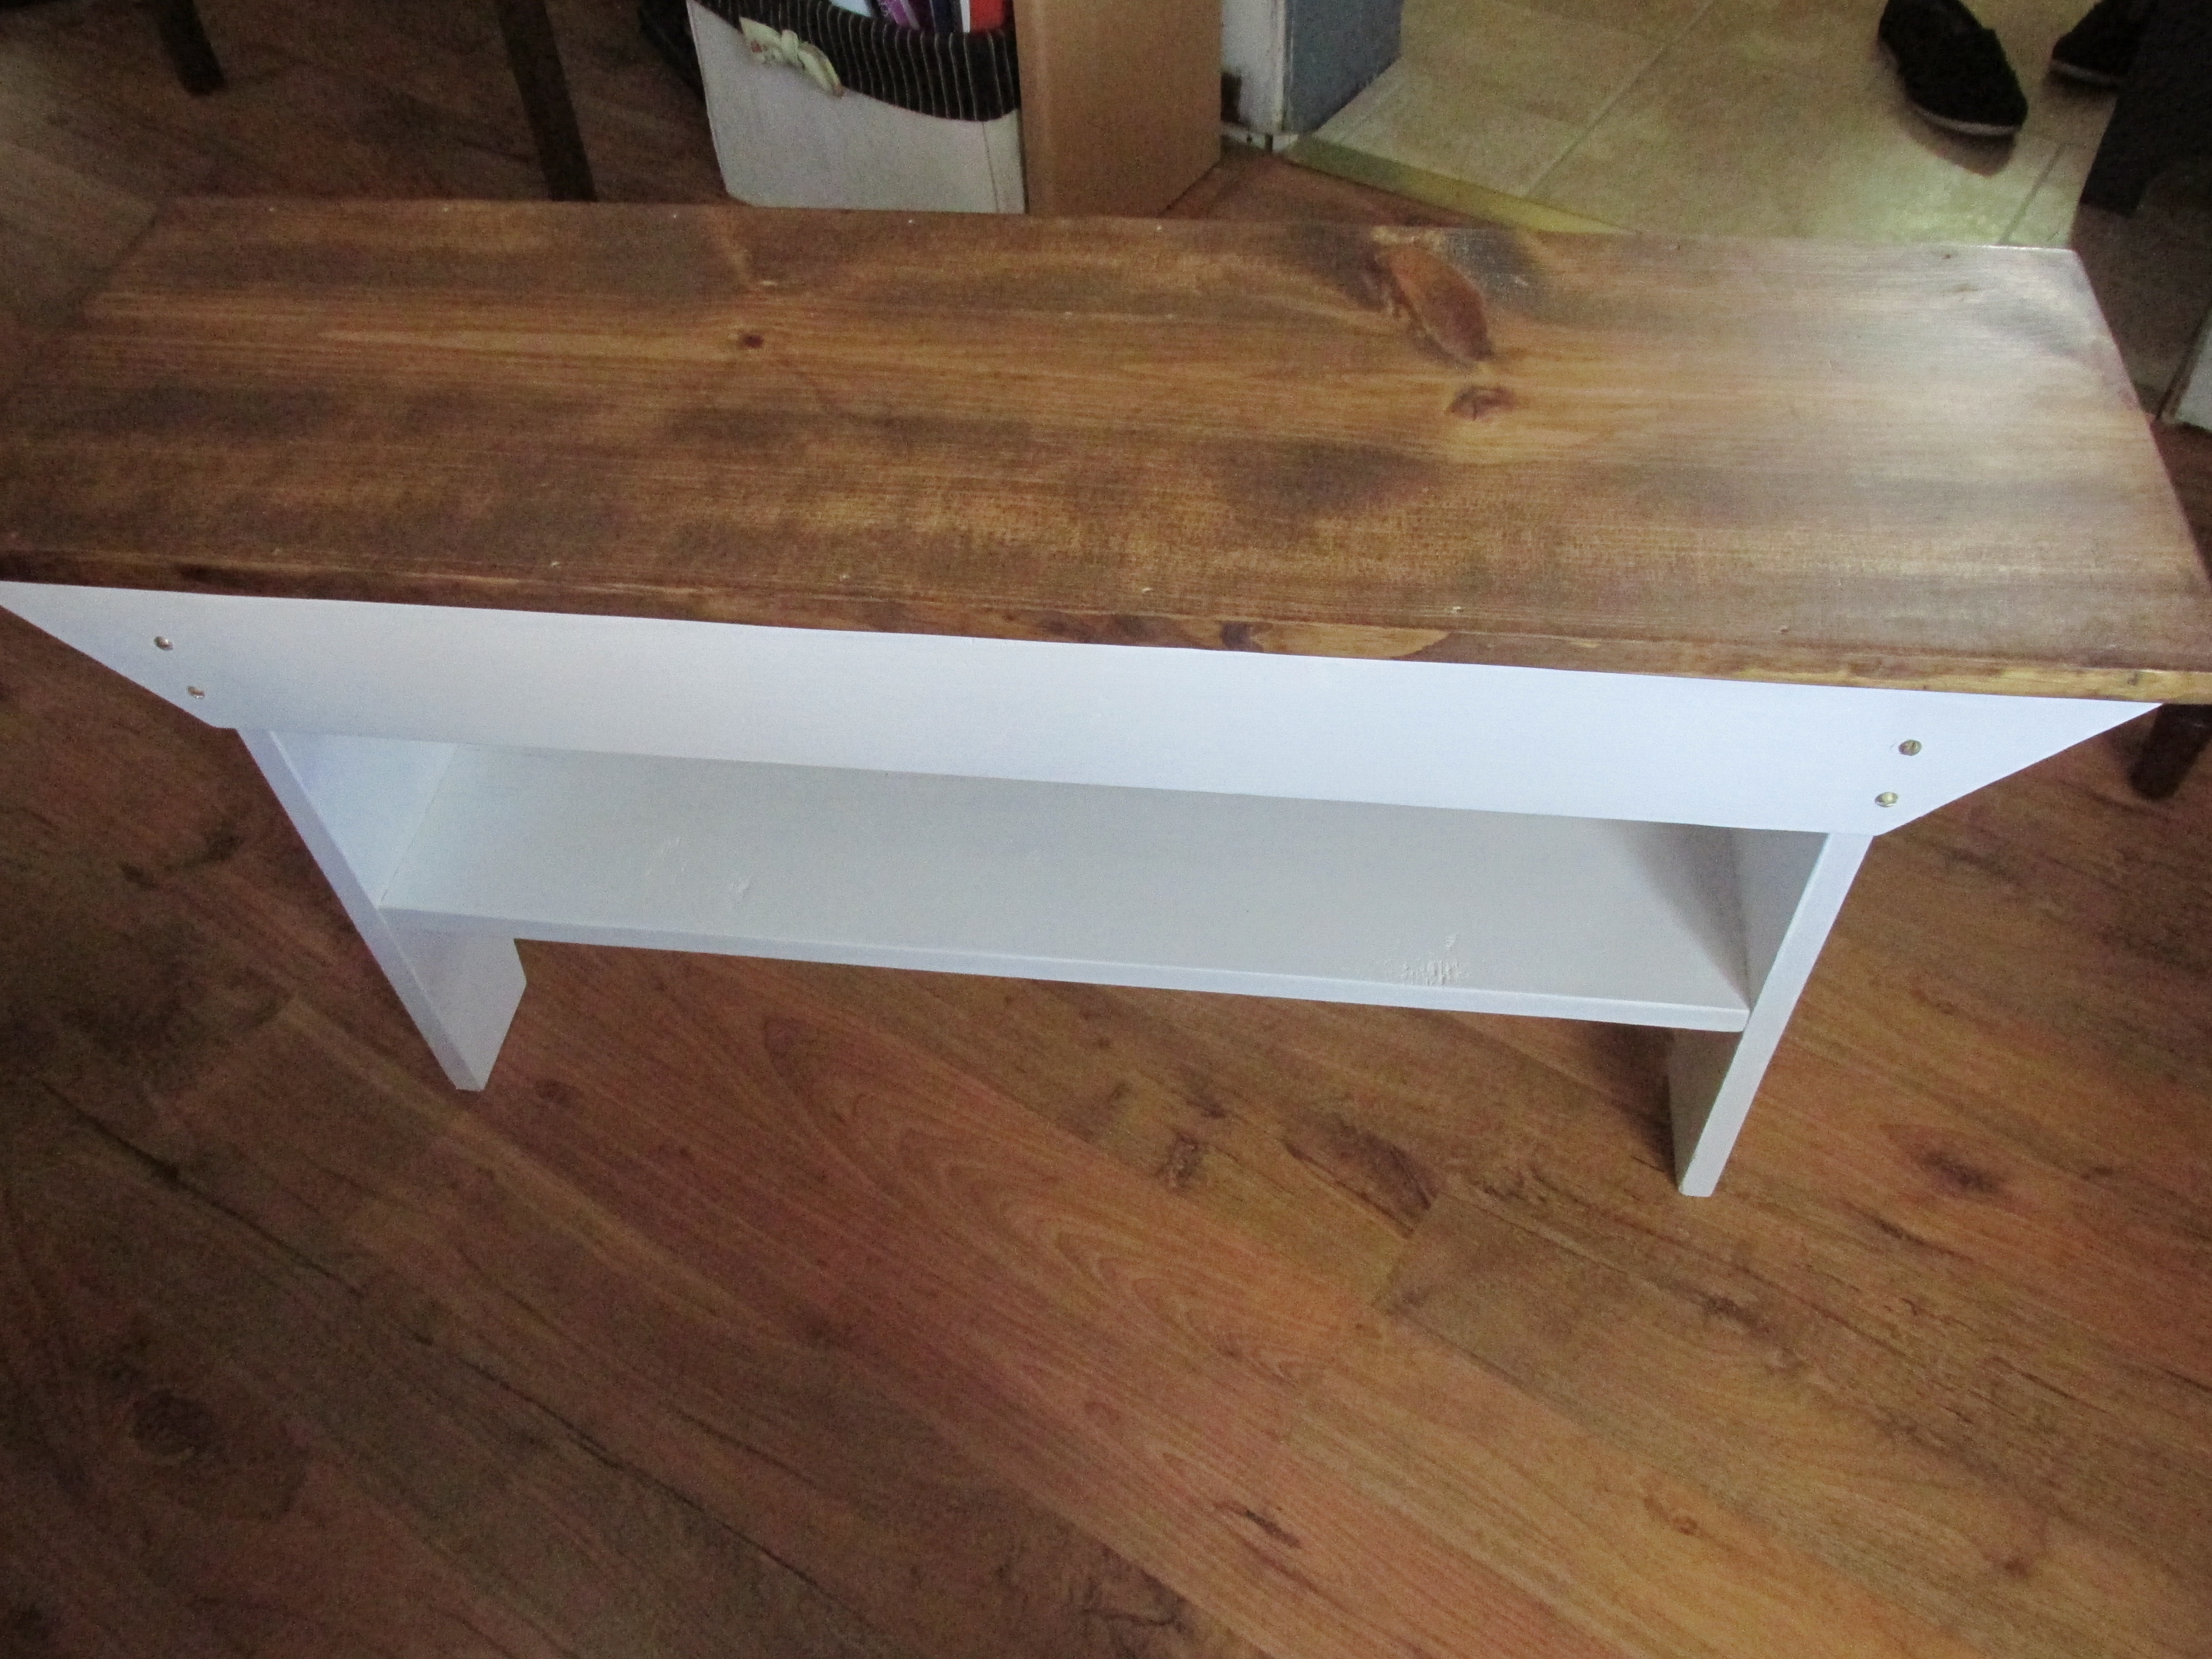
I built this bench in one afternoon and did the finishing work on the other. Tools used were a handsaw, jigsaw, Kreg Jig Mini and electric sander.
I modified the plan to use 10 inch lumber for the sides so that it would fit in the space where it would be used. Overall length was increased to 30 inches. Most of the wood was already on hand, but a 12"x4' piece was purchase for the top (instead of reclaimed pieces)
Bottom shelf was joined with the Kreg screws. Aprons were fastened with brass screws. The top was put on with finishing nails.
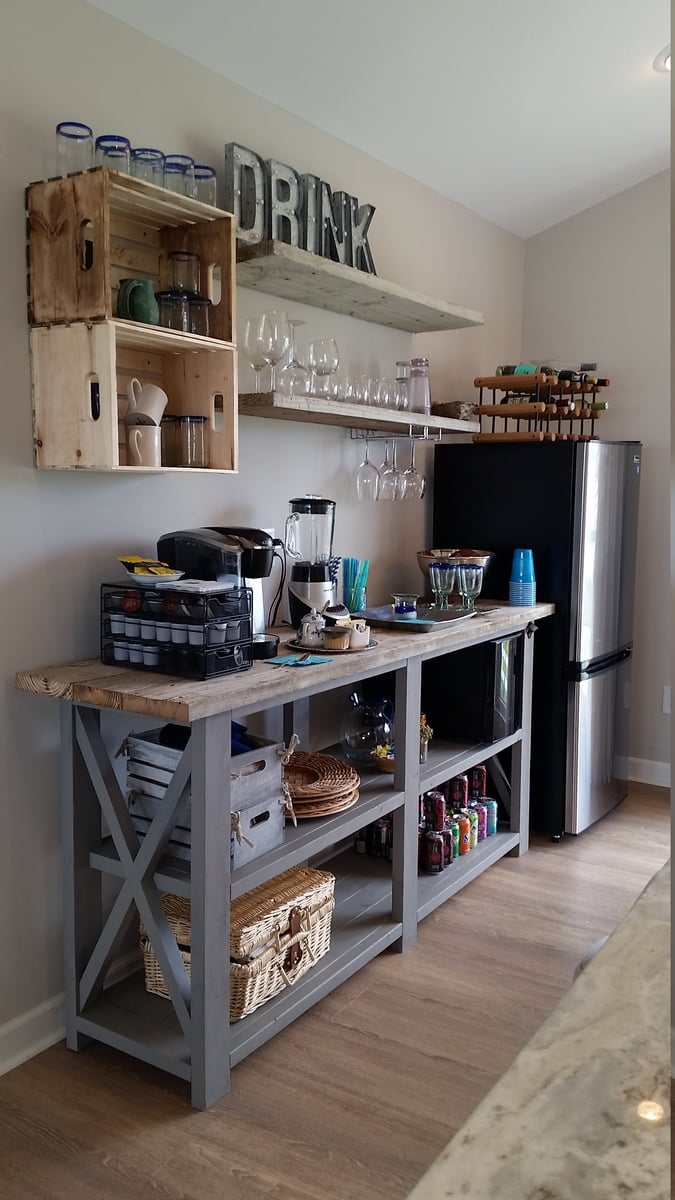
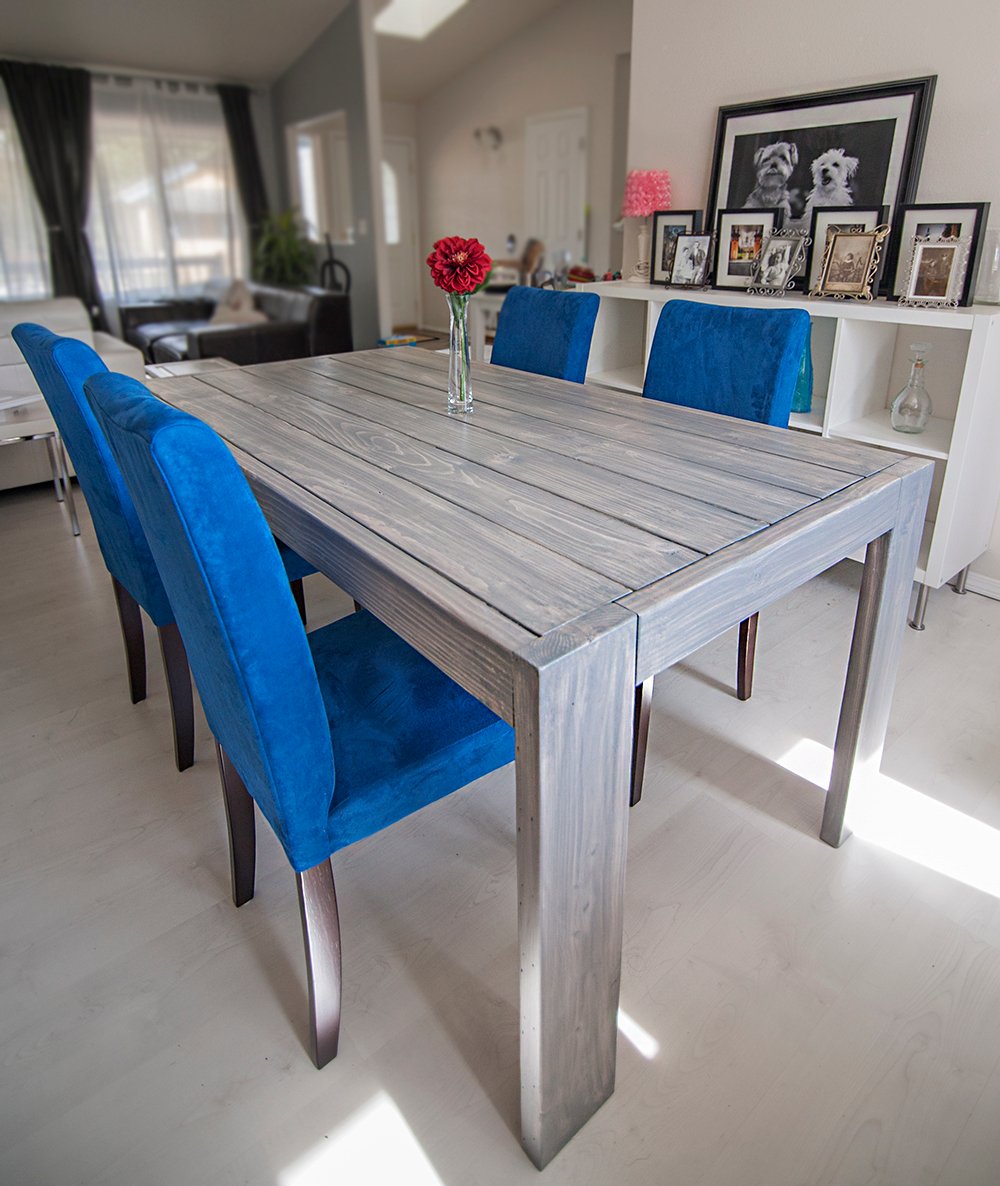
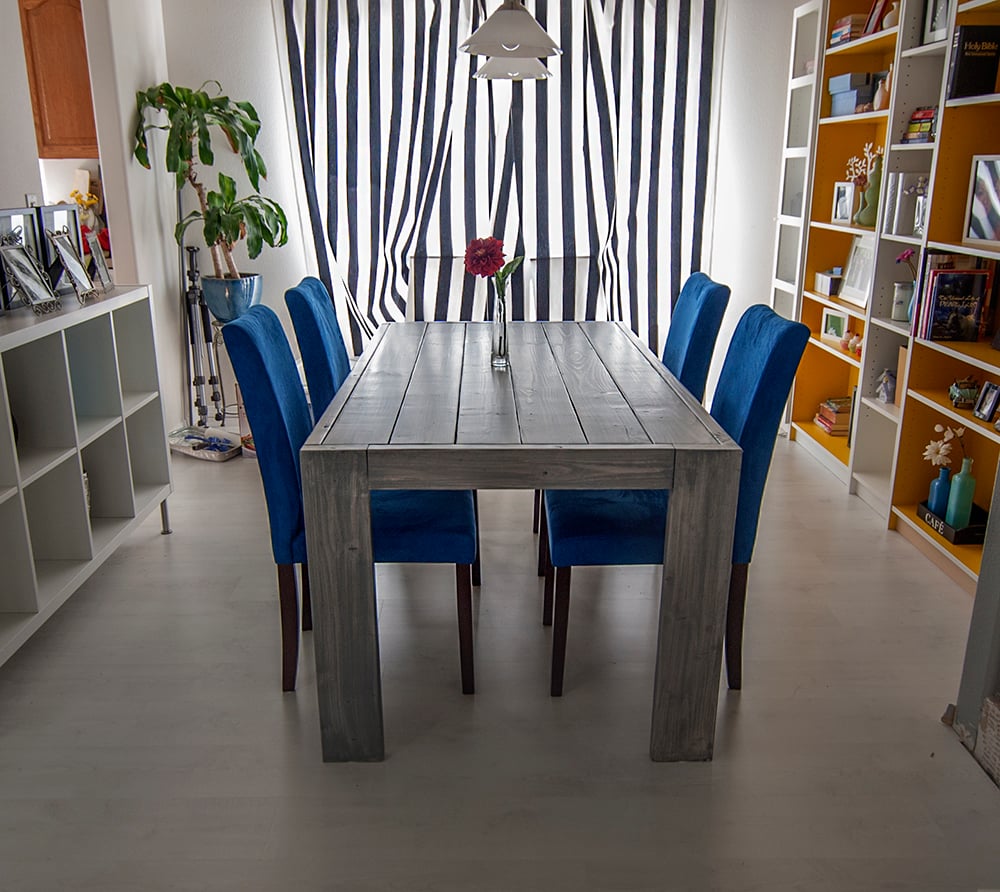
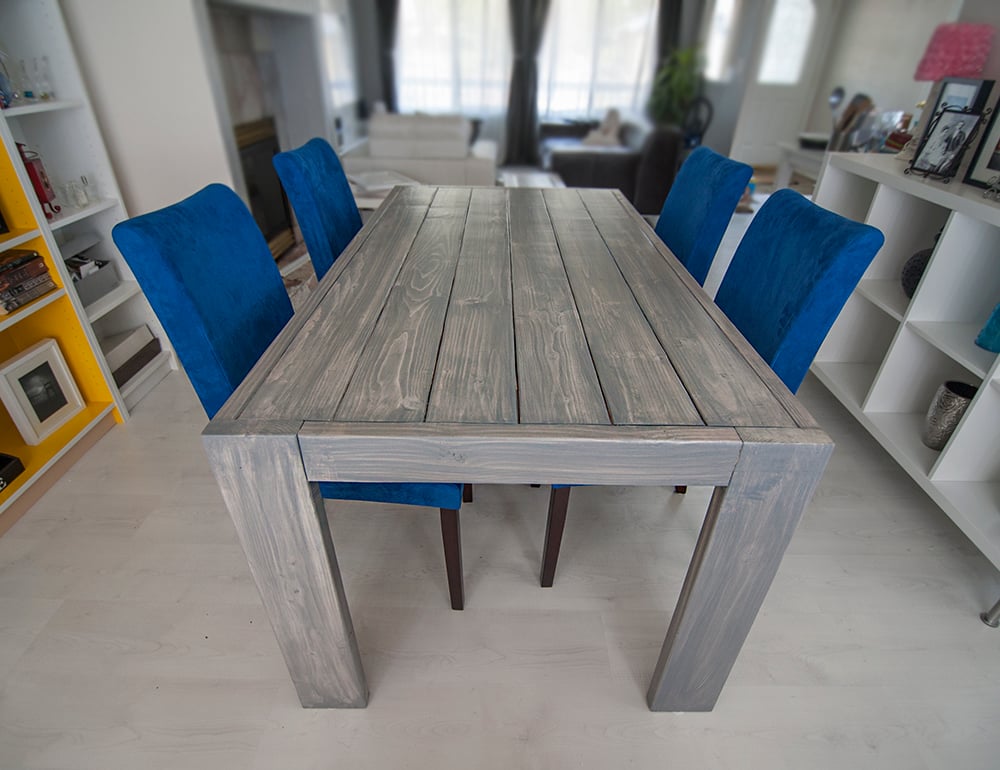
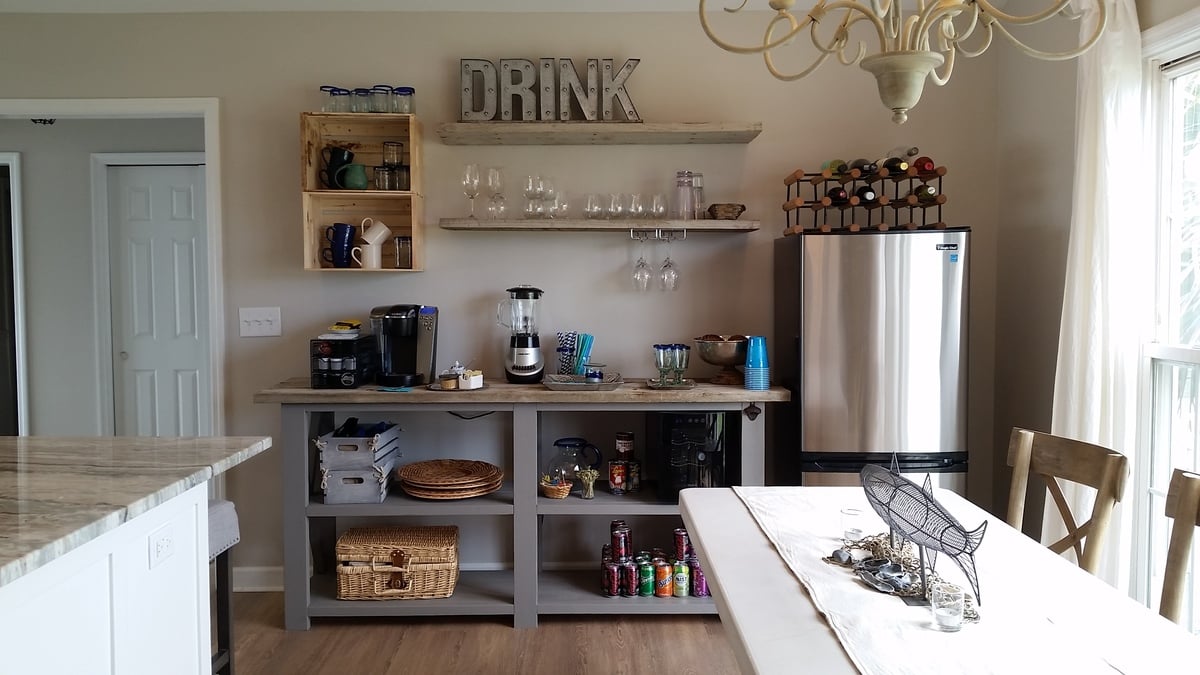
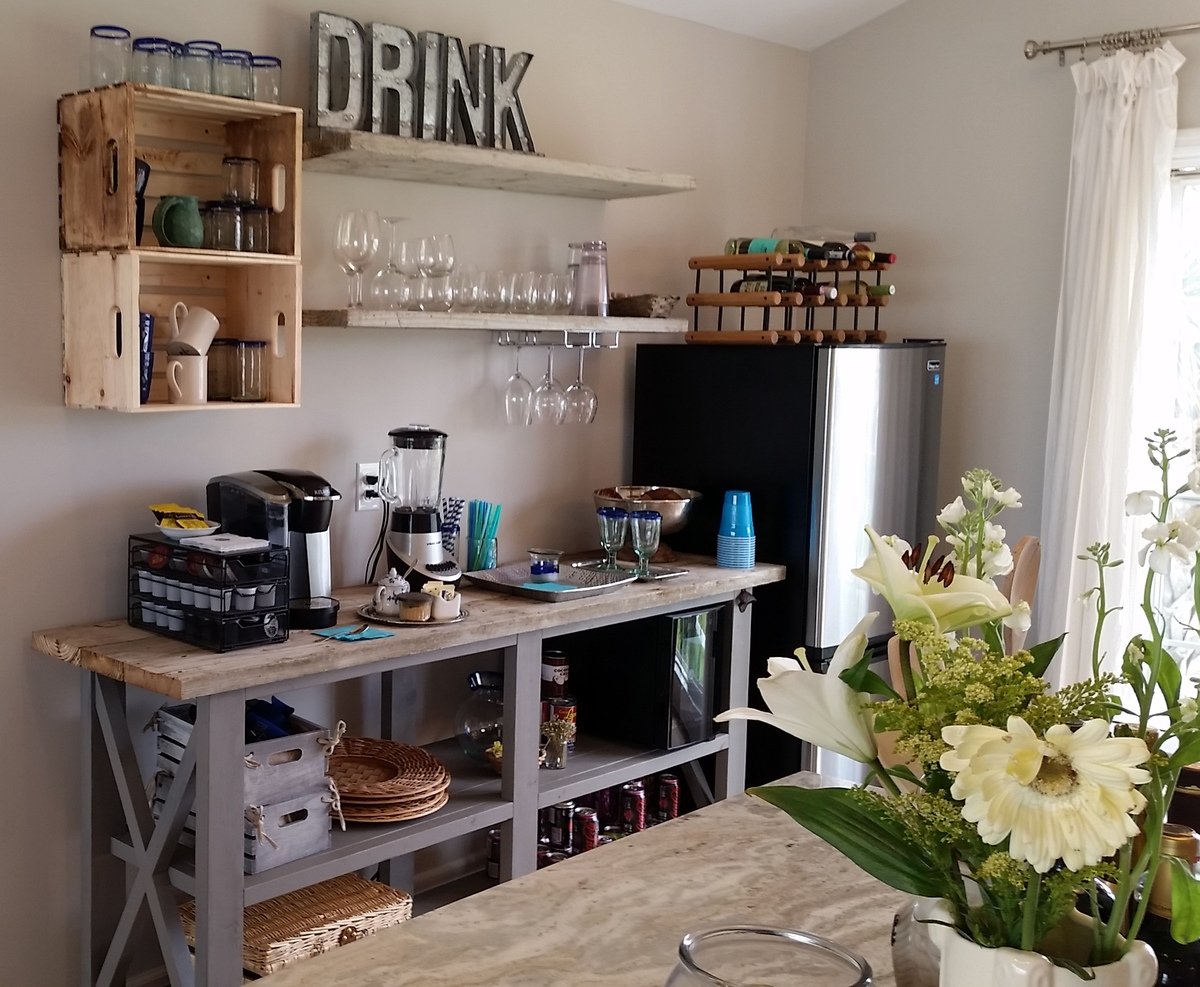
We used old dock wood for the surface of our X table for a nice beach house beverage center (sand bar!). We adjusted the size to fit our space (a little longer and wider) and used additional studs for the shelves instead of 1" shelving, glued and PH/PS together. To cut the X pieces I just held the 1x1 on the end of the table where it goes and marked the lines. Then I clamped a guide board at the correct angle on the table saw to make all the cuts, starting a bit long and shaving off until it just fit.
With all the pocket holes and screws I wouldn't consider this a beginner project. Some additional steps and pictures in your description would help also. End result is really nice.


Used the plans changed some dimensions a little bit.

After finding the build plans for this while browsing Ana White's site, I knew I had to convince my husband to help me create this. I'd been drooling over certain high-end decor store's version for a while now, but refused to pay the costly price tag. This is now one of my favorite pieces in our home, and I love saying that we built it ourselves :) See the full post at: http://www.fromourhidingplace.com/2011/07/how-to-get-your-husband-to-bu…
Mon, 08/01/2011 - 10:19
Mind sharing where you found your casters? I am having a hard time finding anything I like. Thanks!
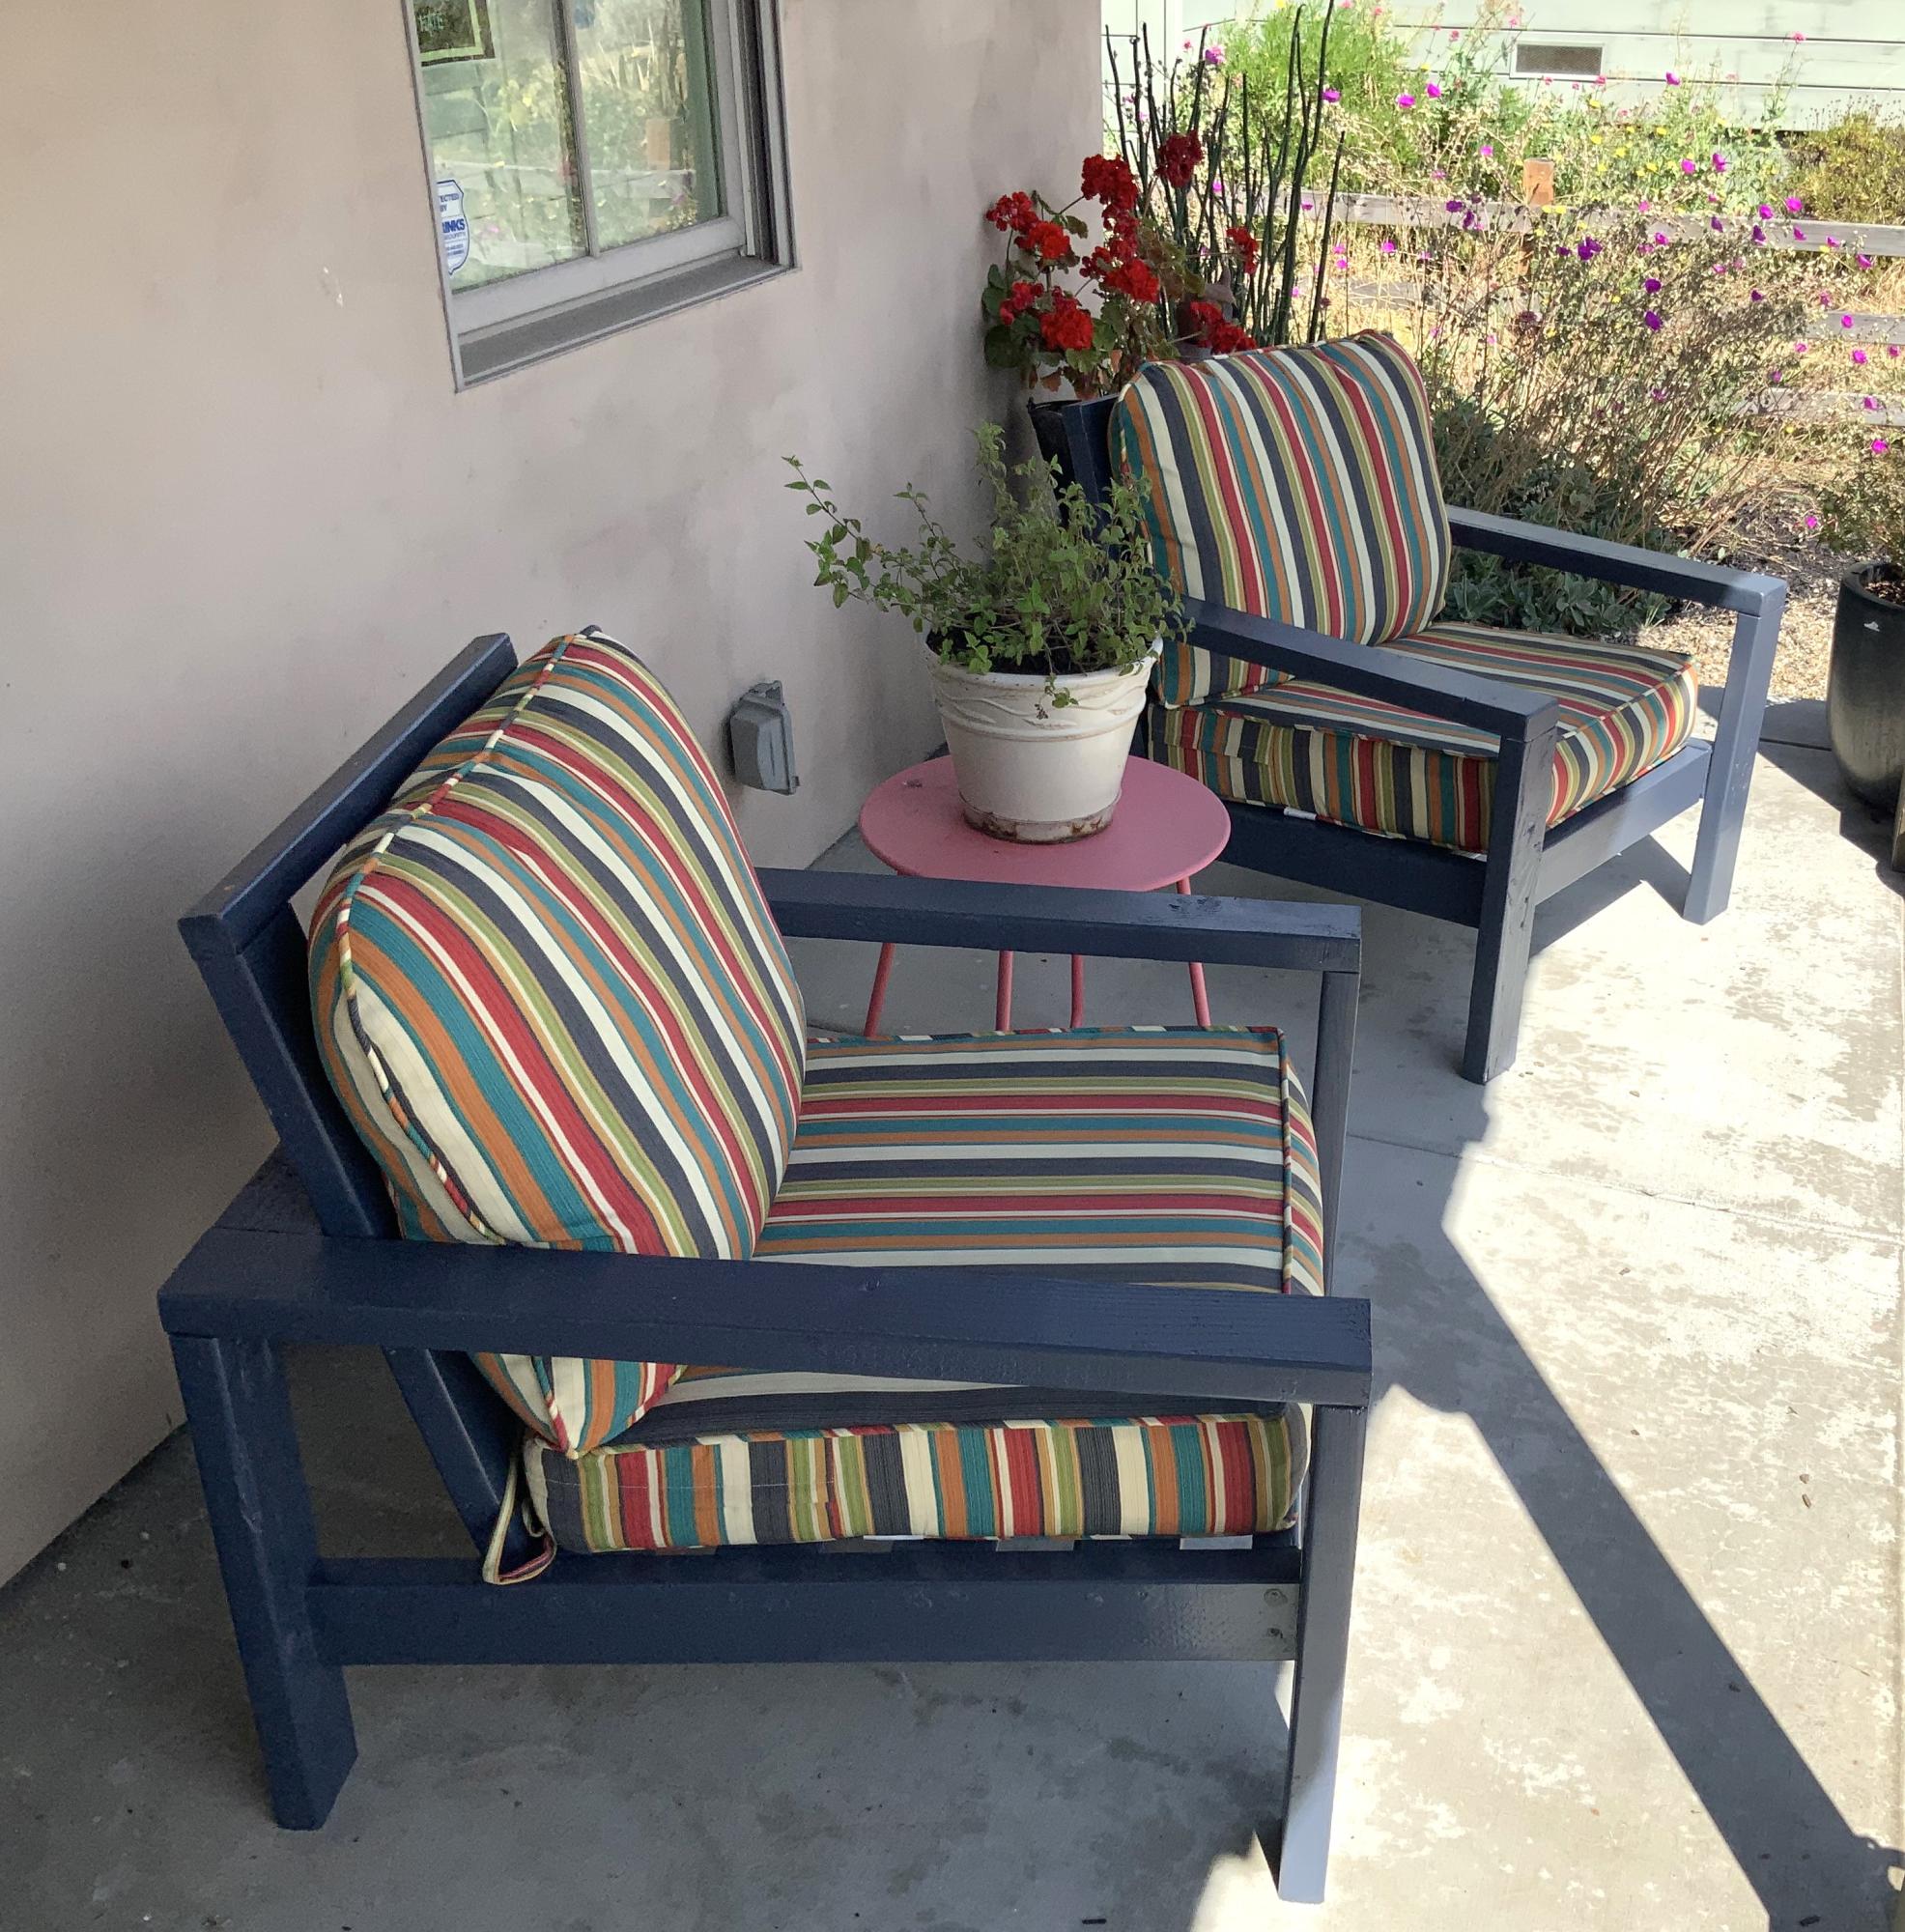
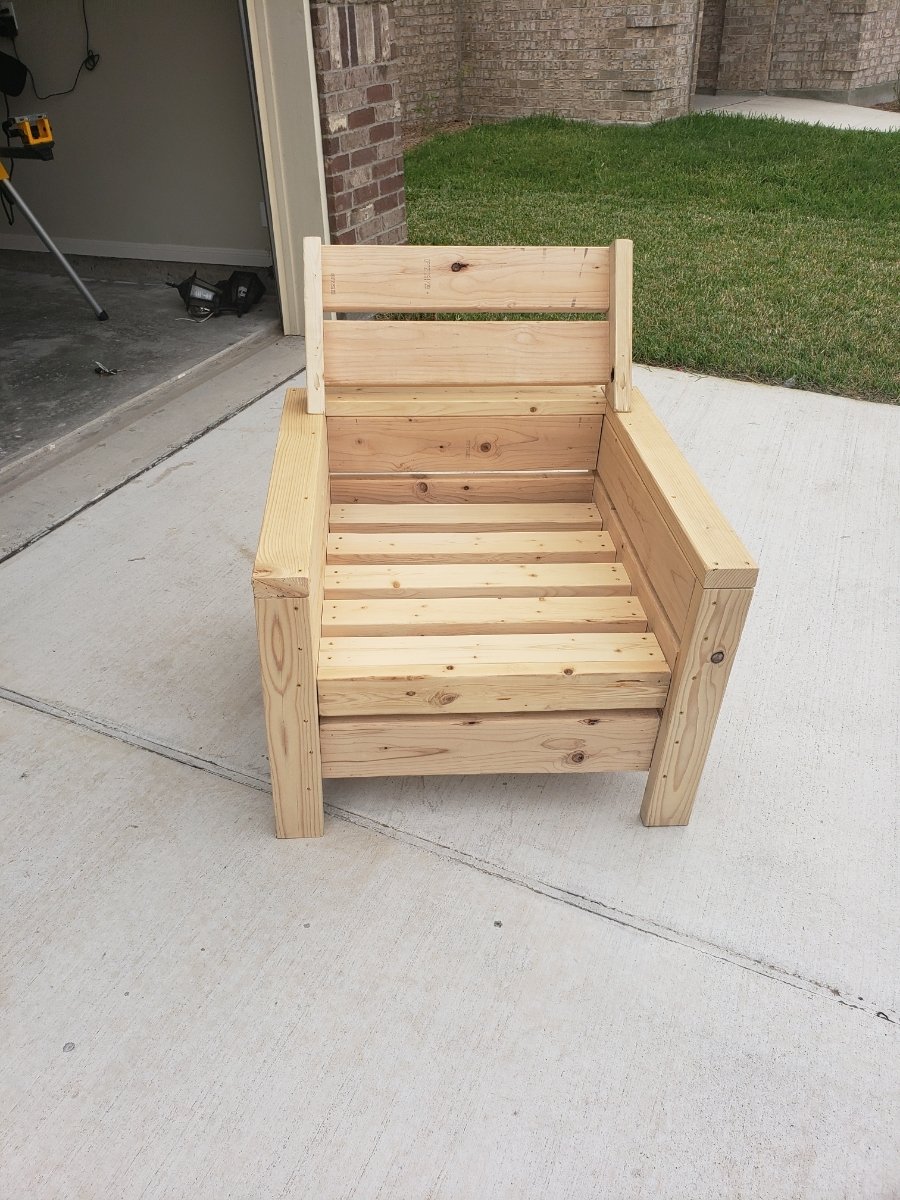
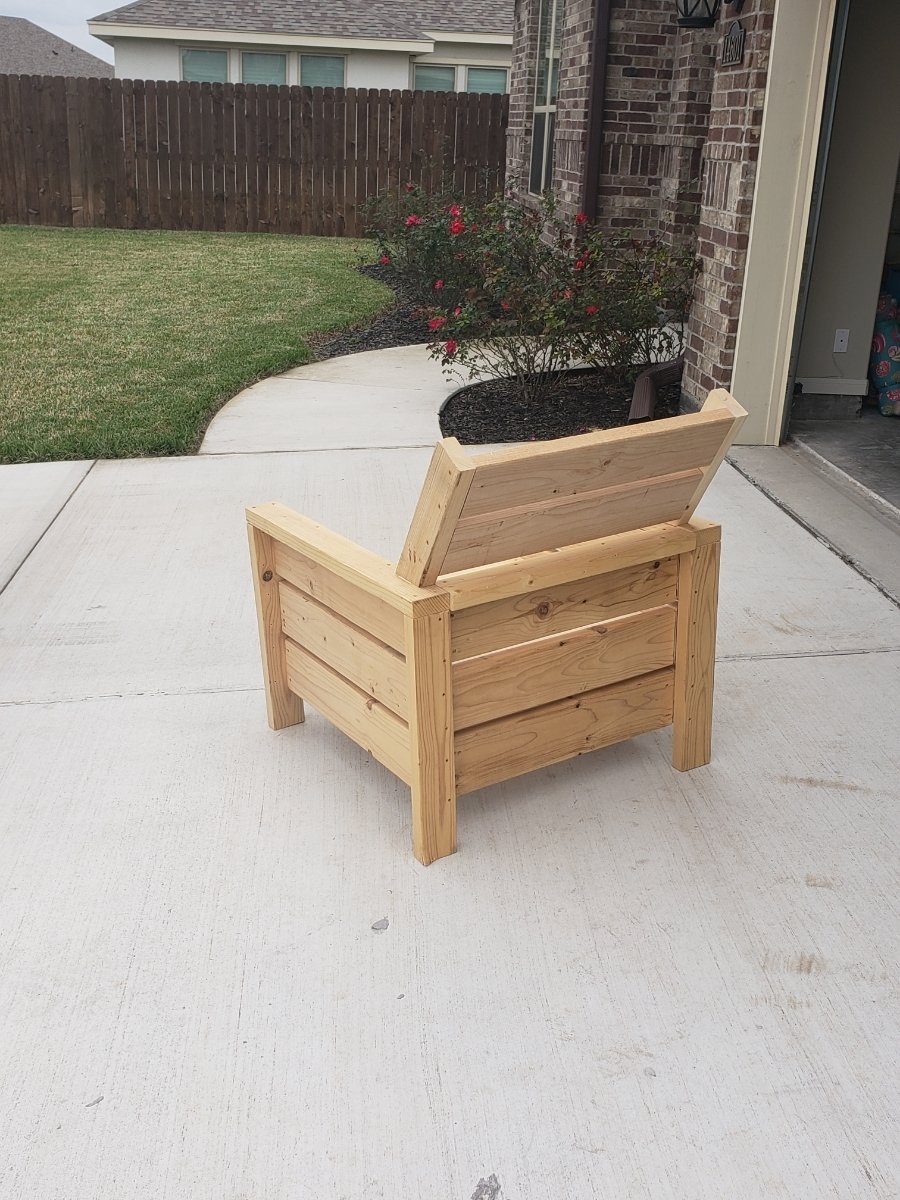
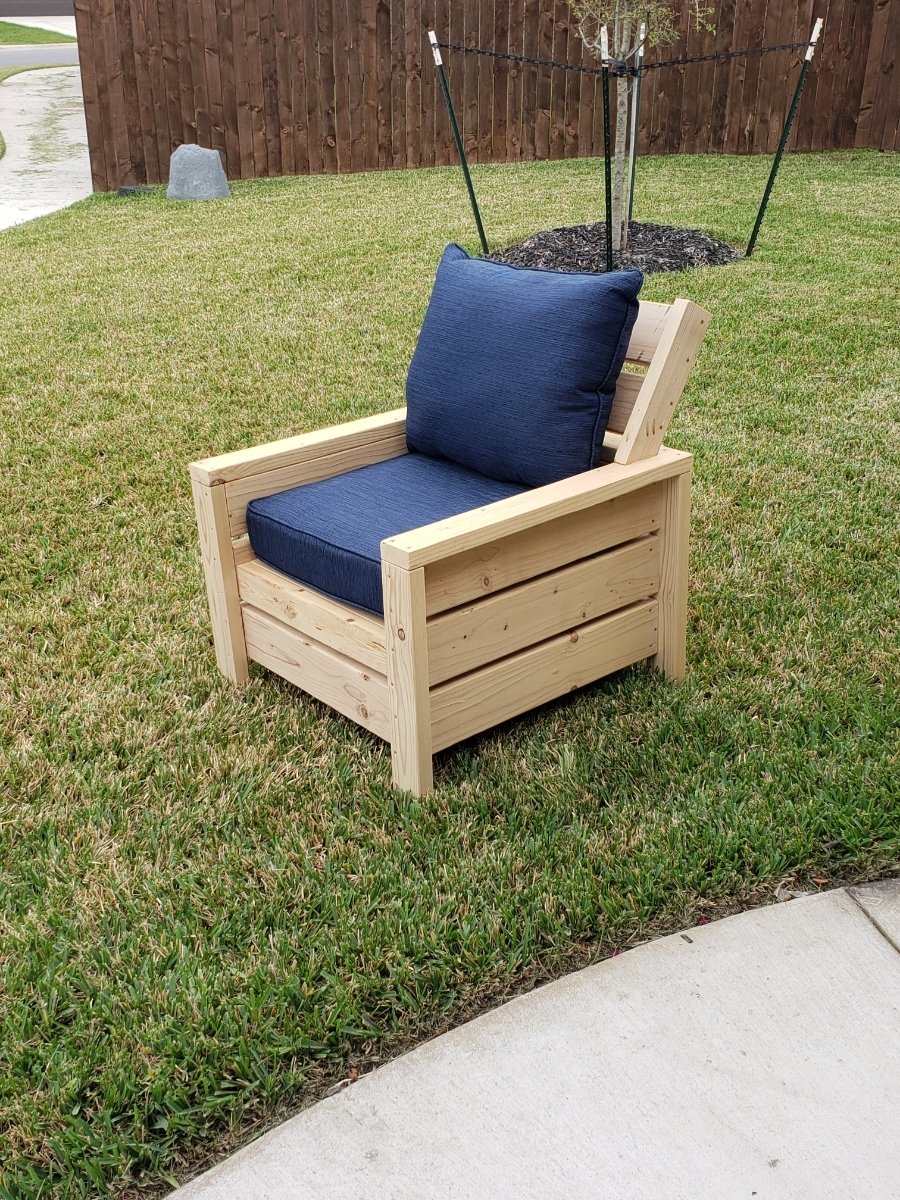
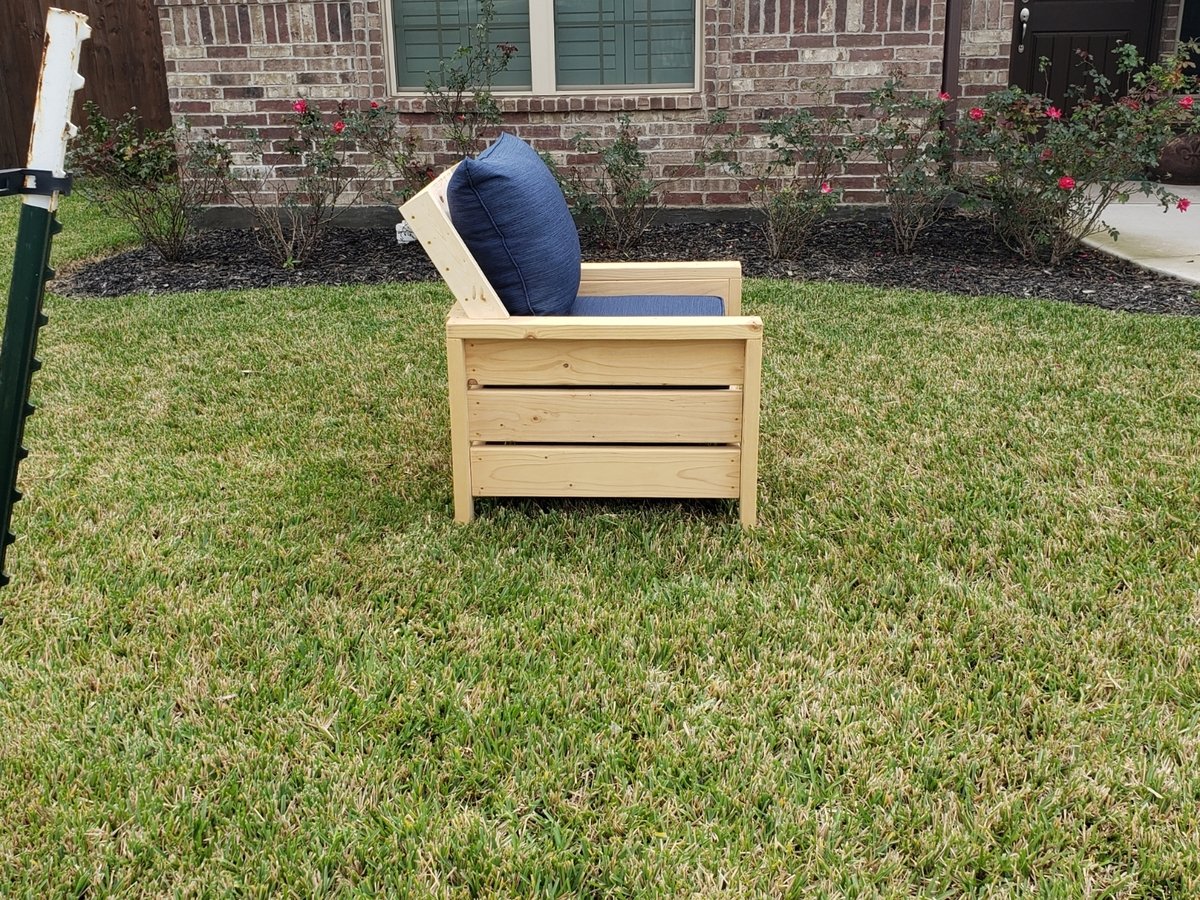
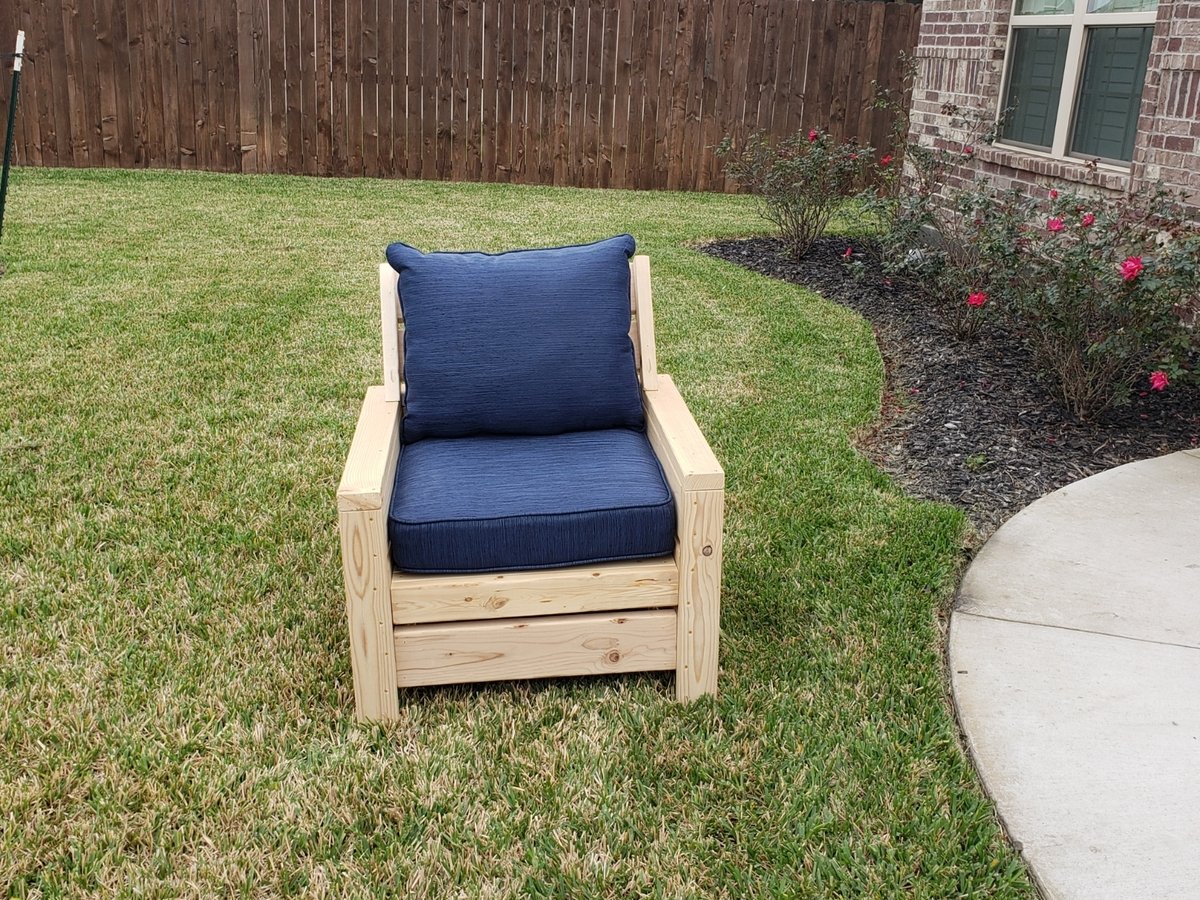
This chair was made off Ana white'smodern outdoor chair with modification to add back support. Without the back support the back pillow would keep falling off. The cushion are 25x25 but very thick for comfort.

Thu, 07/04/2019 - 12:48
What degree angle is the extended back cut. I can't find any instructions on this?
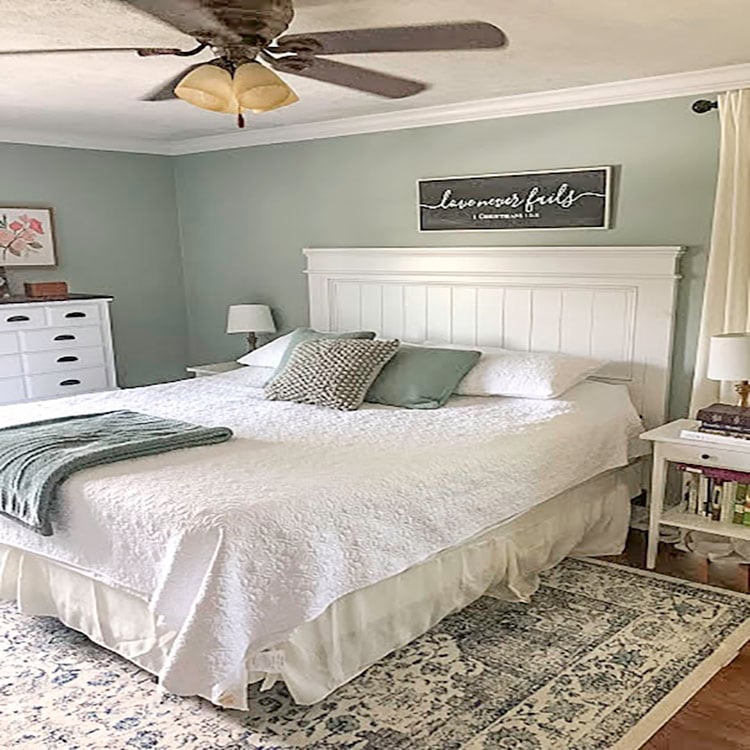
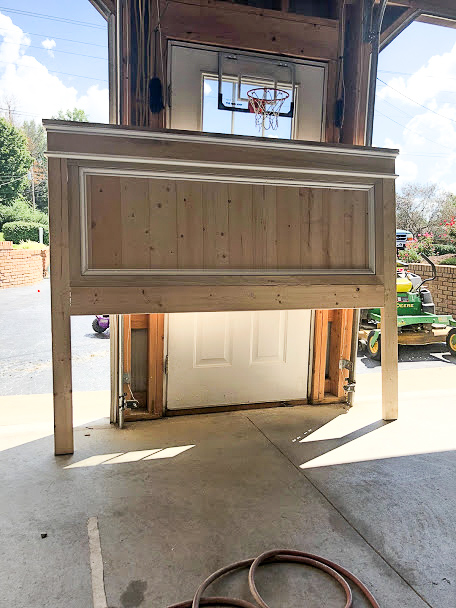
Ever since we moved into our current home, our master bedroom headboard has been at the top of our my project list. I knew I wanted a beautiful farmhouse style headboard. What I didn’t want was the heavy retail price tag. I searched high and low at places like Target, Wayfair, Amazon and even Walmart without finding an affordable option for us.
There is this perfect vantage point of our bedroom from the glider in my son’s room. I remember staring at that empty wall space above our bed for years, it felt like, while rocking our son to sleep. Just willing a headboard to appear. I wanted it so bad I could taste it. Something about looking at that same view, night after night, and waiting, waiting, waiting for it to happen just makes me appreciate it so much more now that it’s here, as so often happens in life.
This project inevitably got put on hold over the years after one thing or another got in the way. Either we didn’t have the time to devote to it, or we always had something else to put our money into. Untilllll I stumbled across Ana White’s Farmhouse Headboard Plans.