Community Brag Posts

$40 Ping Pong table top game

With Father's Day rolling in, my sons and I needed a gift, stat! My husband thinks that Table Tennis is the quintessential father-son activity, so that was an obvious choice.
We needed something easy to make, easy to store, and budget friendly. With a 6, 4, and 2 year old helping out, I made a foldable mdf ping pong table that could easily be placed on our picnic table outside.
We had home depot cut the mdf in half, primed it, taped off some lines, spray painted it with chalkboard paint (bonus, you can keep score!), and screwed 4 small hinges to attach the 2 halves. We added a removable table tennis net, some paddles and balls, and have played nearly every day!

Estimated Cost
$40
Estimated Time Investment
Afternoon Project (3-6 Hours)
Finish Used
Chalkboard spray paint
Recommended Skill Level
Starter Project

Comments

Mud Kitchen

Submitted by Noyehx4 on Mon, 07/20/2020 - 12:48

This was my first build, like ever. I am very proud! Props given to my hubby who is a carpenter by trade. I went back and forth on stains and paint colors at home depot. He didn't rush me and was awesome the entire time! He actually picked up the supplies, and is now a fan of the self tap screws! He thought he knew where everything in home depot was, but he had to ask to find those LOL. He wanted to use his new nail gun, but I wanted to follow the plans. The plans are awesome! We decided not to add an oven door just yet. Likely will soon. (Avoiding pinched fingers for now) I also have the knobs for the front, but it was hot and since I had only just stained them, they needed time to dry and second coat yet. (I kind of forgot about them once I finished them with my new dremel) We purchased the hose kit from the kitchen section at home depot. It came with everything, I searched market place and even posted asking if anyone had a used one for sale. No luck. This was $20 and came with everything, the guys at home depot showed me what adapters to get to ensure that it would hook up to our garden hose, and we grabbed those too and they worked perfectly! I messed up cutting one of the angles for the shelf the wrong way, but there was enough scraps for my husband to help me fix it. It was a fun build, and so rewarding to see our kids playing with it! I used my dremel 4300 and it wasn't powerful enough for the thicker wood, so my stove tops are thinner, but he actually enjoys setting them up and spraying them off the table with his hose! I painted the brass hooks green when we were painting the kitchen so they would match. The pots and pans came with the little tote and the apron chef hat and pot holder. It was a perfect finishing touch. *Edit to add photos kitchen hose kit from home depot, reading comments, others had a hard time finding adapters. I suggest taking what you have with you to home depot so they can show you what adapters you need. We needed three because we have a quick attachment on the end of our garden hose, (for our sprayer) now little mans mud kitchen can be connected and disconnected easily!

Built from Plan(s)
Estimated Cost
$75
Estimated Time Investment
Weekend Project (10-20 Hours)
Finish Used
Rust-Oleum Ultra Cover 2X Enamel Spray Paint and Behr Semi-Transparent Waterproofing Exterior Wood Stain and Sealer
Recommended Skill Level
Starter Project

Big Sandbox with Lid

Submitted by flinchball on Mon, 09/21/2020 - 13:18

Made the sandbox 6x6. Recessed it so it sits flush with the timber’s around our fire pit area. I added extra armrests in the middle that double as supports when the lid is closed in case anyone wants to walk on it. Filled the sandbox full enough that the armrests sit on the sand when closed. It’s very sturdy now for walking on and the kids have tons of room to play. Thanks for a great plan to work from.

Built from Plan(s)
Estimated Cost
$100
Estimated Time Investment
Day Project (6-9 Hours)
Finish Used
Boiled linseed oil.
Recommended Skill Level
Beginner

Comments

Our Mantel Moulding Headboard with a Unique Twist

Submitted by jwwilson24 on Sun, 01/06/2013 - 12:15

The charming Mantel Moulding Headboard with a unique accent feature where the "fire" would normally be. We created a tufted cushion for this open space to create a unique twist.

My wife and I completed this project over 4 days, but still under 20 hours not including wait time for wood filler and paint to dry.

Built from Plan(s)
Estimated Cost
$165
Estimated Time Investment
Weekend Project (10-20 Hours)
Finish Used
After sanding down the wood with a medium grit sandpaper, we brushed on an initial coat of primer. After the primer dried we applied between 2-3 coats of Valspar Radience Paint and Primer (spray paint) Gloss Azure Snow. This awesome color gives you the classic white with hints of grey and blue.

If you go the paint and primer combo you do not necessarily need to brush on the primer first. For a more smooth and glossy look of the wood accents more counts may be needed but please wait until the first coats are mostly dry.
Recommended Skill Level
Beginner

Comments

Mud room Bench

I mimicked one of the brag post on this webpage. I used 1x4s and luan for my back. The seat is 2x4s with a project panel stained and polyurethaned. I am grateful for people sharing their wonderful projects on this site for inspiration.

Estimated Cost
140
Estimated Time Investment
Weekend Project (10-20 Hours)
Recommended Skill Level
Intermediate

Kitty Outhouse

My first Ana White project. Built Ana’s awesome small cedar shed as an outhouse for our many cats. The have access to it from inside the house. Great way to keep litter boxes and the mess out of the house. It is stand alone, and attached to the house, in front of a bedroom window. There are two ‘entrances’ as well as two, one-way, escape hatches, if a cat in the outhouse is interrupted by another cat (I.e. a male cat comes in and the female feels trapped) they can exit to the outside (one way so no critters can come inside!). Ana has easy to build plans, great site! I plan on making the square table just posted today for my newly refurbished deck. Keep in mind, my estimated costs and time reflect a LOT of additional features on the inside. The shed itself, very easy, simple, inexpensive. Very little waste with Ana’s projects as well.

Built from Plan(s)
Estimated Cost
$500
Estimated Time Investment
Week Long Project (20 Hours or More)
Finish Used
No finish, at least not yet.
Recommended Skill Level
Intermediate

Comments

Amazing Farm Table and Benches

Submitted by Anonymous (not verified) on Mon, 10/04/2021 - 19:55

Built this deck dining table and benches from Lowes cedar, and the results way exceeded my expectations! The plans were so well written, it was easy to slightly modify (made both table and benches wider and longer) and the build was very simple. The clear directions helped give me the confidence to do this and we have got so many nice compliments. There was nothing this sturdy and simple even available to buy. I even built a coffee table and bar table after modifying the plans a bit. Thank you Ana!

Comments

Little Kids Picnic Table

This little table was built for our grandson who loves it so much, it was taken inside. About 6 hours, and he took possession of it. Amazing piece!

Built from Plan(s)

Comments

Monkey bar and play house

Submitted by Anonymous (not verified) on Sat, 10/09/2021 - 06:21

Inspired in one of your projects this was my first project with wood and turned out a go to place for the kids and guests to play all the time.
Thank you for the plan. Kids appreciate it too.

Comments

White Wash Pickled Farmhouse Table

When we sold our last house, we sold the dining room furniture we had custom built with it. We did projects, homeschooled and ate off of a folding table for the first 7 months we lived in our new house. Until we built our new farmhouse table!

Estimated Cost
300
Estimated Time Investment
Weekend Project (10-20 Hours)
Finish Used
We chose to white wash/pickle our farmhouse table. All the instructions can be found here: http://www.akadesign.ca/white-wash-pickling-get-the-restoration-hardware-look-for-less.
Recommended Skill Level
Beginner

Comments

Kitchen Cabinet

Submitted by rjustice21 on Thu, 09/26/2013 - 09:18

My wife and I needed space in our kitchen to store various items. This cabinet works perfectly for that purpose.

Built from Plan(s)
Estimated Cost
$100
Estimated Time Investment
Weekend Project (10-20 Hours)
Finish Used
Dark Red paint. I am not sure of the name.
Recommended Skill Level
Beginner

Comments

mybartmart

Fri, 09/27/2013 - 21:17

That paint colour is beautiful. As is the pantry, very well done. I wish you could find out the name and brand of the colour. It is stunning.

mybartmart

Fri, 09/27/2013 - 21:17

That paint colour is beautiful. As is the pantry, very well done. I wish you could find out the name and brand of the colour. It is stunning.

Rustic Side Tables

Submitted by zawatkins on Sat, 02/01/2020 - 16:05

Made these side tables and they turned out great! I did buy some drawer stops from Swisco to keep the drawers from falling out. 

Built from Plan(s)
Estimated Cost
$115
Estimated Time Investment
Weekend Project (10-20 Hours)
Finish Used
I used Minwax stain - first stained with Dark Walnut and then before it was dry, I put Simply White over top and immediately wiped it off. Then 3 coats of polyurethane
Recommended Skill Level
Beginner

Children's Craft Table with Attached Paper Roll

Submitted by bdel on Fri, 06/03/2016 - 12:17

This table was a birthday gift for my 3-year old cousin. It was fun to brainstorm ideas to get it exactly the way we wanted it instead of buying one pre-made. Once we had our plans it was an easy build, done over a weekend. A full list of materials as well as step-by-step instructions can be found in the blog post linked. The top is a 20x36 pine shelf board with a 1x2 pine apron attached underneath. There are vertical support boards to hold a raised tray for supplies, and to hold the paper roll under the table. Note that the table legs are inset at one end to accommodate the paper roll. We added two magnets to the face of the table and tied two knobs (with metal washers glued on) to the underside. The paper can then be sandwiched between the magnet and the metal and won't move around while the artist is at work. It's our favorite feature! There are also magnets glued to the inside bottom of the tray to hold the buckets in place and keep them from being knocked over easily. This project was so much fun! I love having the chance to share it with you all!

Estimated Cost
$70
Estimated Time Investment
Weekend Project (10-20 Hours)
Finish Used
Minwax polyurethane in clear semi-gloss. Lightly sanded between coats. Sanded with ultrafine steel wool before final coat. Note that the polyurethane may discolor the wood putty and make it stand out.
Recommended Skill Level
Beginner

Golf Bag Stand

Submitted by Anonymous (not verified) on Sat, 11/18/2023 - 12:11

Golf bag stand
Can’t remember if found this plan here or not but get most my plans here. Fun and easy build.

Comments

Modern slatted bench

Submitted by Whimwhams on Mon, 06/27/2016 - 11:51

I made this for my sister the day before her house warming party. It was a pretty easy build. I used wood glue and 2" nails. Using a nail gun, this came together pretty quickly. I do wish that I had wide enough clamps to hold everything in place while it dried, because there were a few gaps due to some imperfect boards. I used 104" stud length boards, so I only need to purchase 7 instead of 9. this was enough to make the cuts for the top and both leg pieces from each board. the price was the same and we had limited space in our van for boards, so this was a better option for us. I used a sprayer hooked up to an air compressor to apply the stain and was able to get in between the slats fine with this method, brushing over it as I sprayed. Luckily I chose the same color as her deck not knowing, so it matches great. Now I need to make one for myself! :)

Estimated Cost
$40
Estimated Time Investment
Afternoon Project (3-6 Hours)
Recommended Skill Level
Starter Project

Cedar Street Number Planter

I was looking for a way to give our house some better curb appeal and decided our stree numbers could use a facelift.  The majority of money spent on this project was for the numbers since I had enough spare cedar laying around.

house number planter

Estimated Time Investment
An Hour or Two (0-2 Hours)
Finish Used
Sedona Red
Recommended Skill Level
Starter Project

Comments

John Deere Tractor Bunk Bed

Submitted by Veronica P on Sun, 07/06/2014 - 16:43

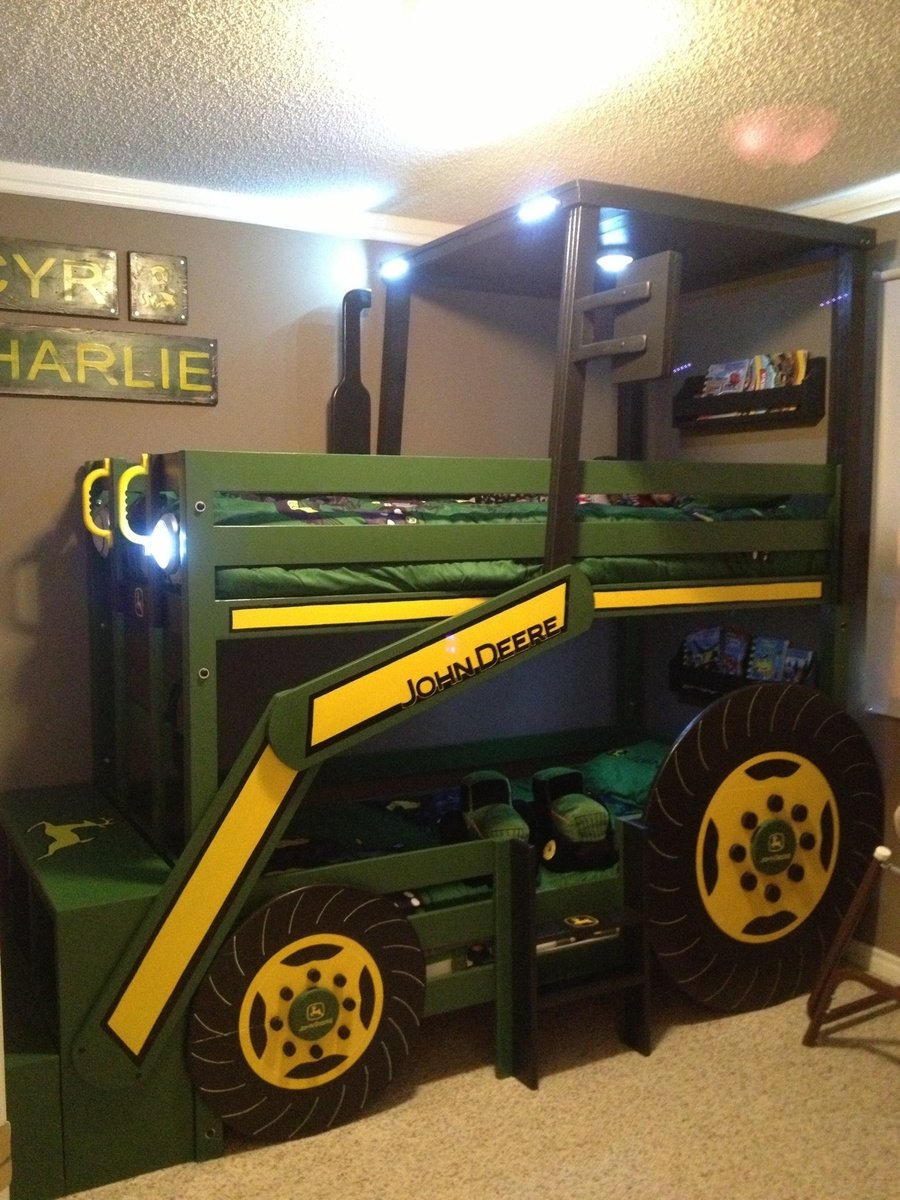
With another baby boy arriving in August, my one and three year olds are moving to a "big boy" room. My oldest decided he wanted a bunk bed and as they both are obsessed with tractors, when I saw the "John Deere Tractor Bunk Bed" plan, I was sold.

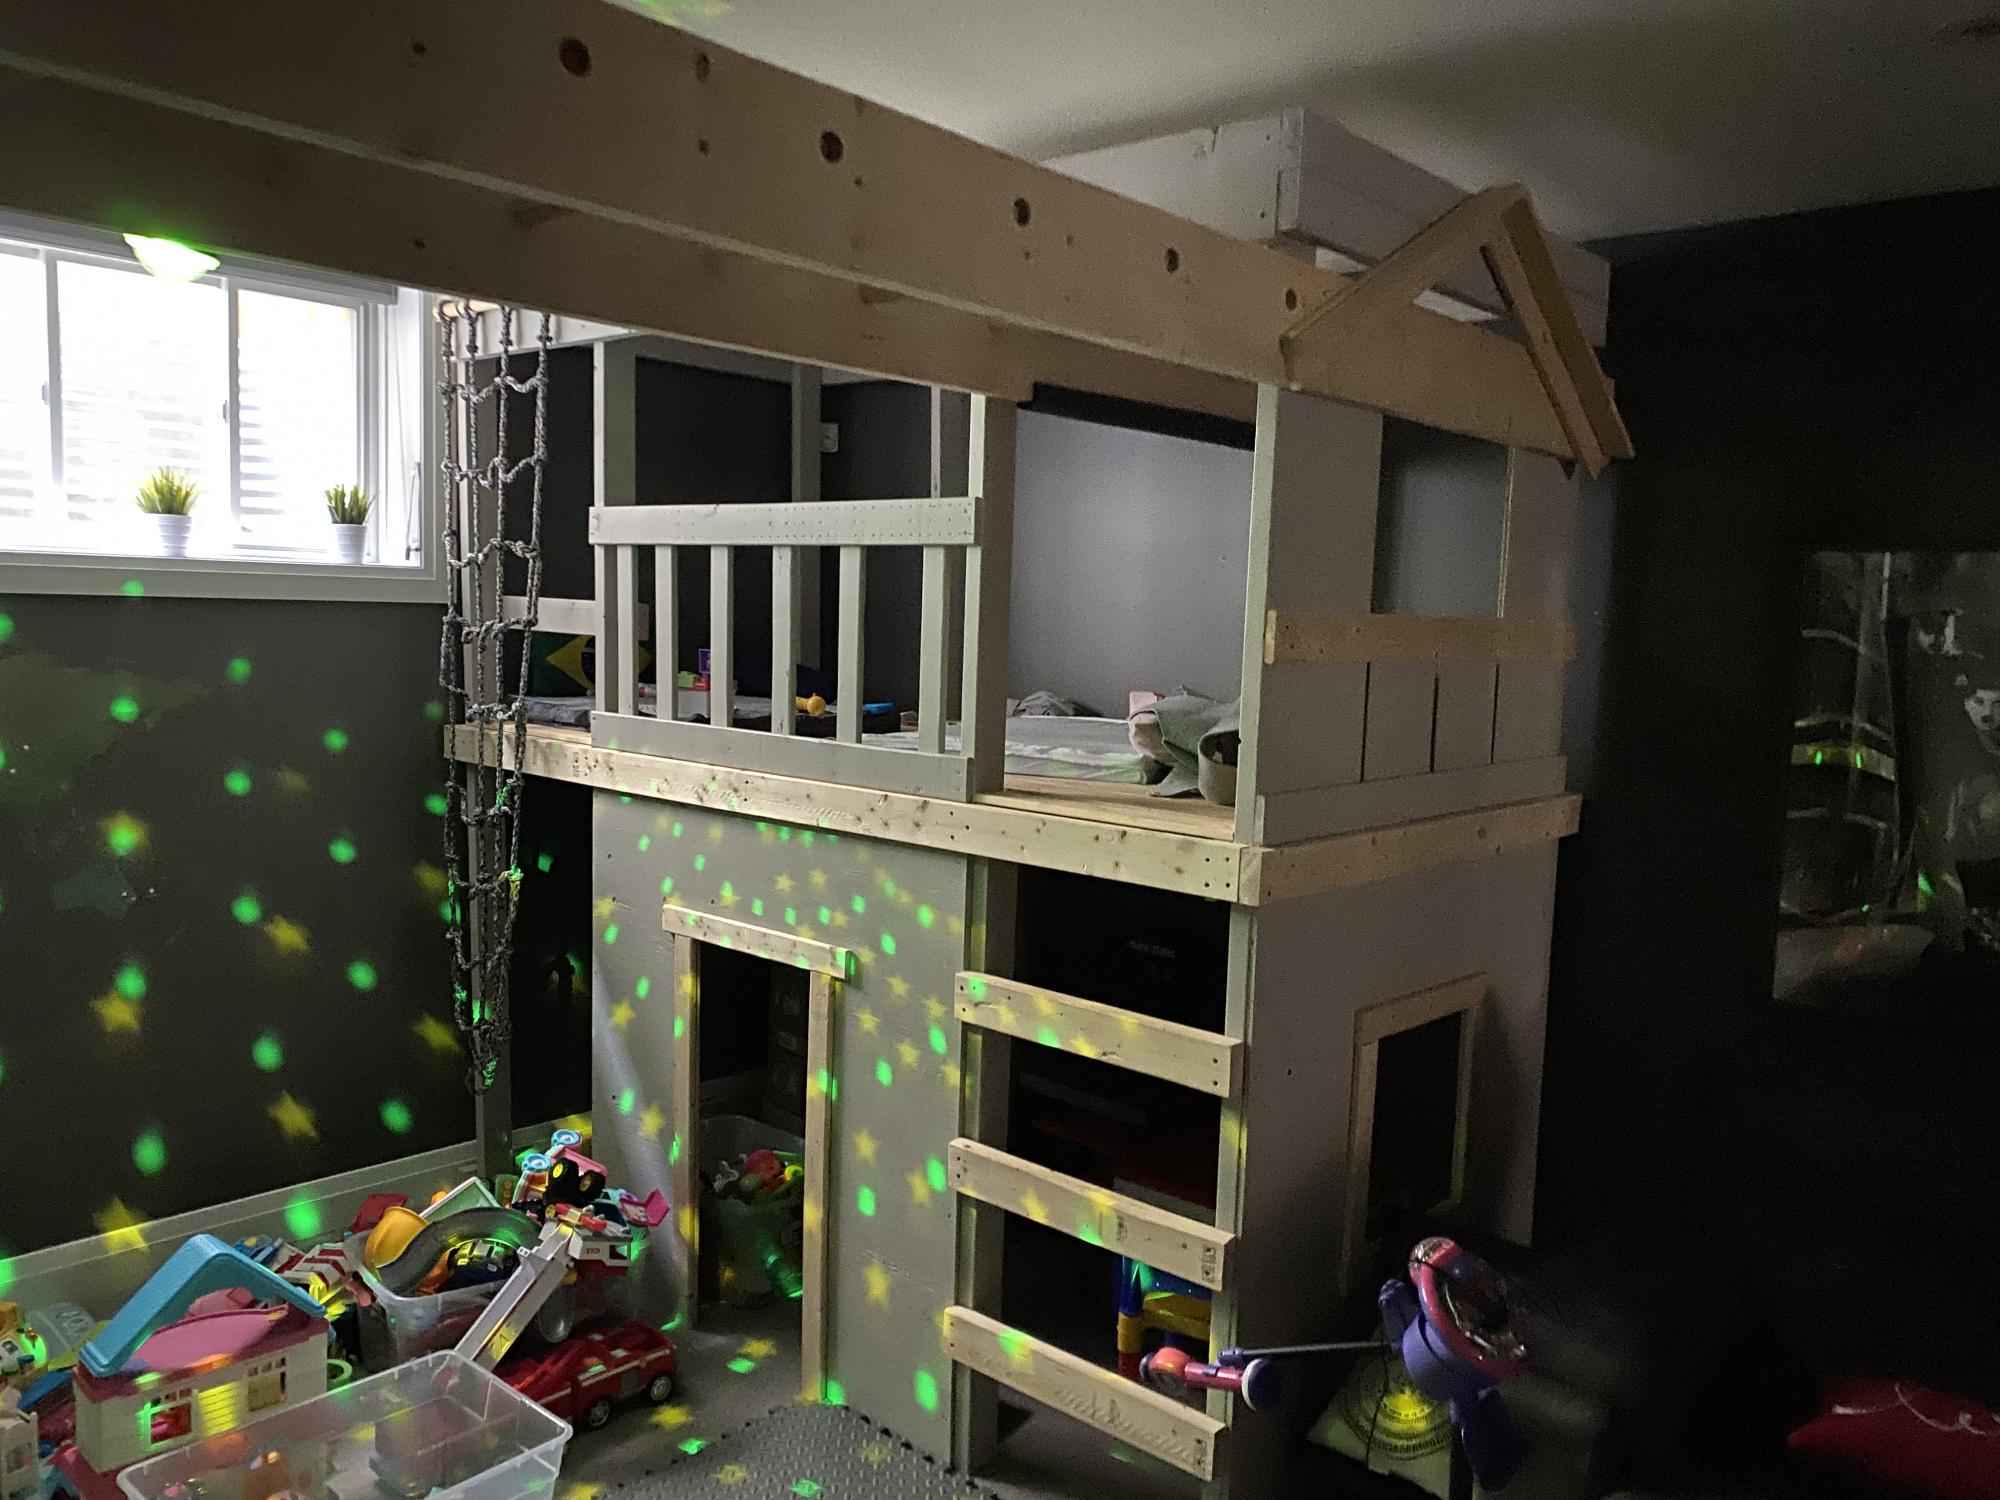
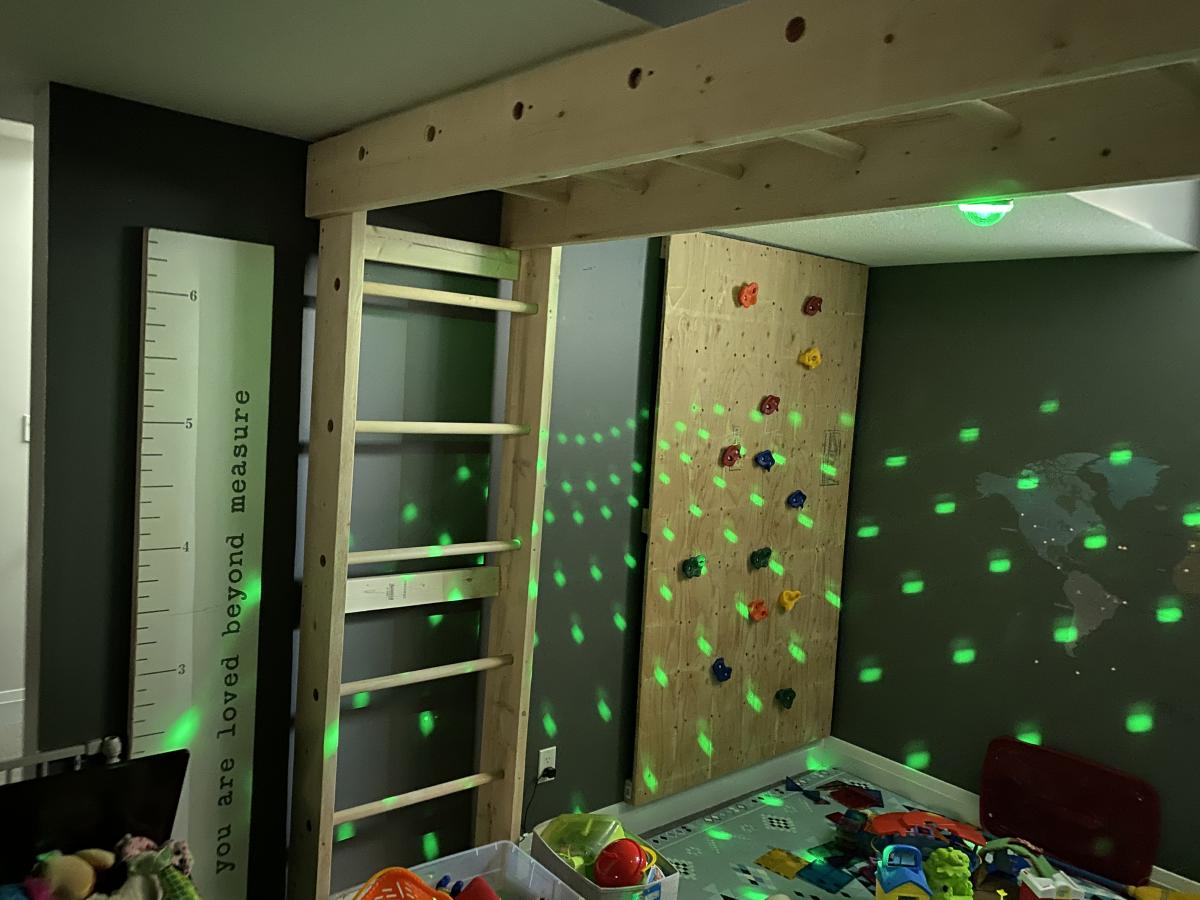
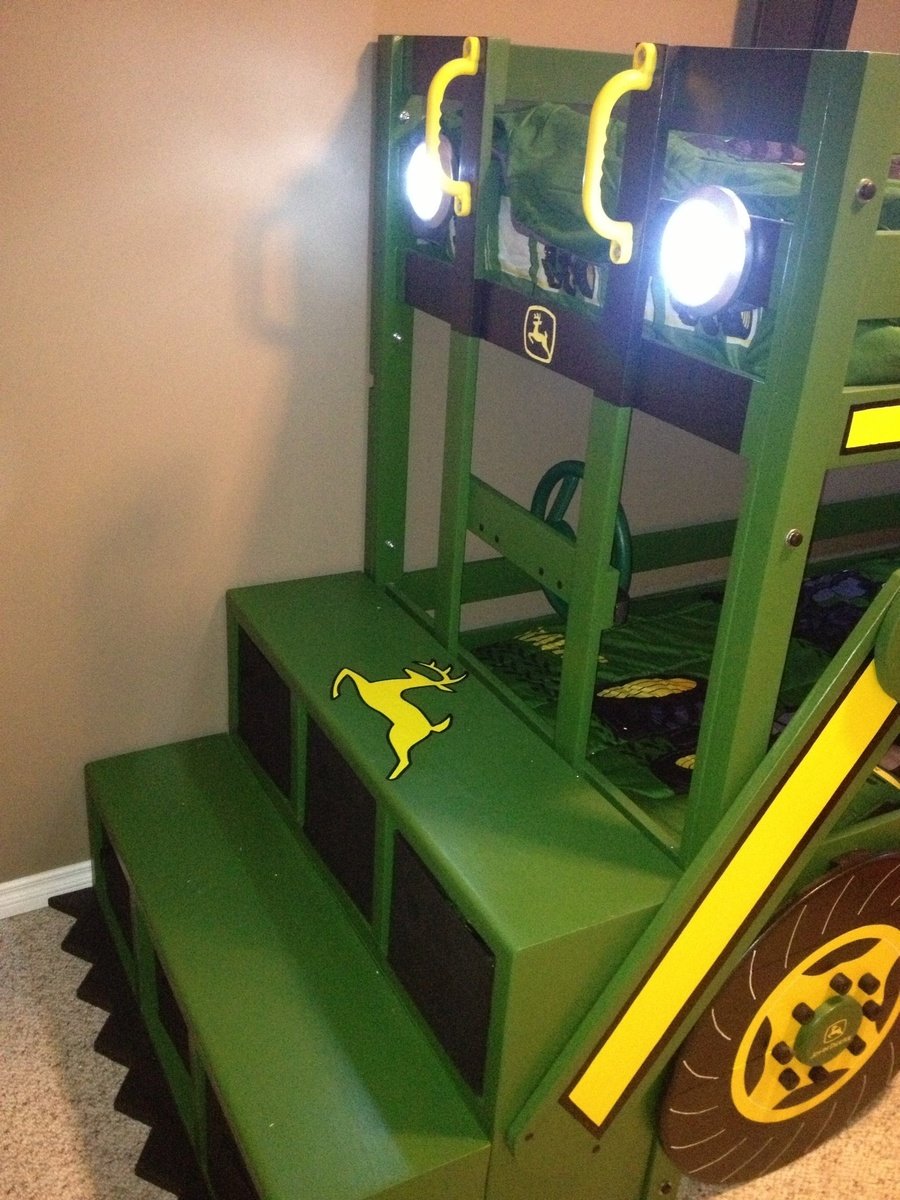
We would be needing a twin sized bunk bed though not a toddler. I used the classic bunk bed plans and simply modified them to suit our needs. I moved the ladder to the front, added a rail on the bottom bunk and added a small ladder to the side for my one year old to climb into the bottom bunk.

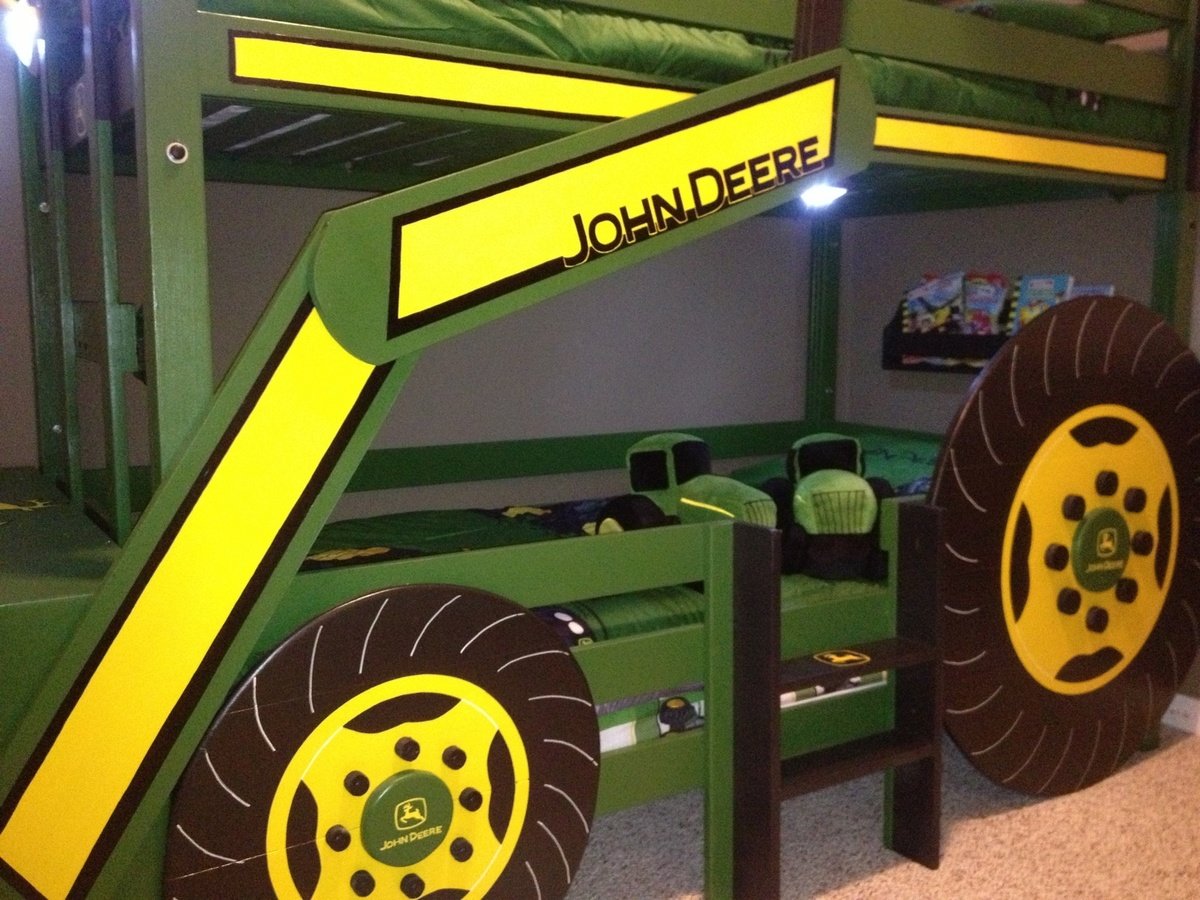
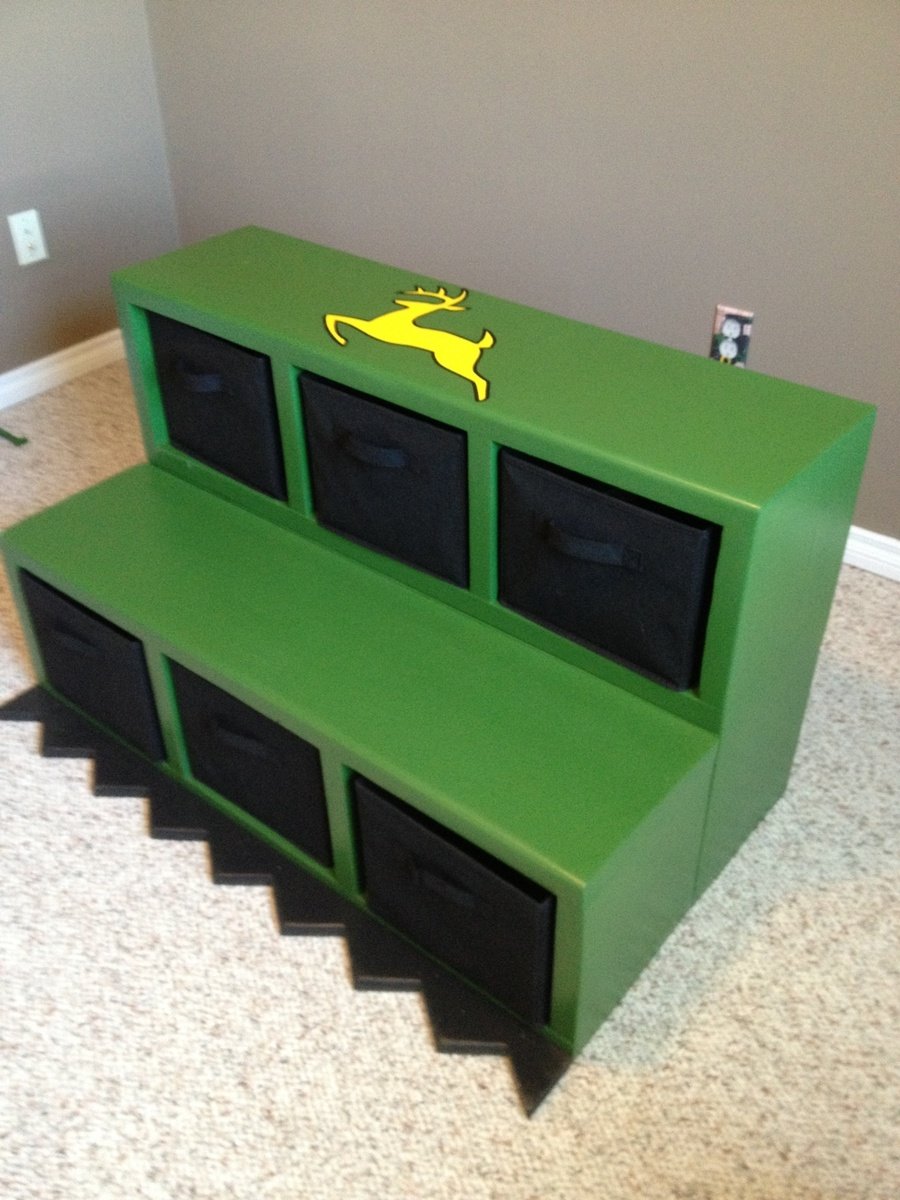
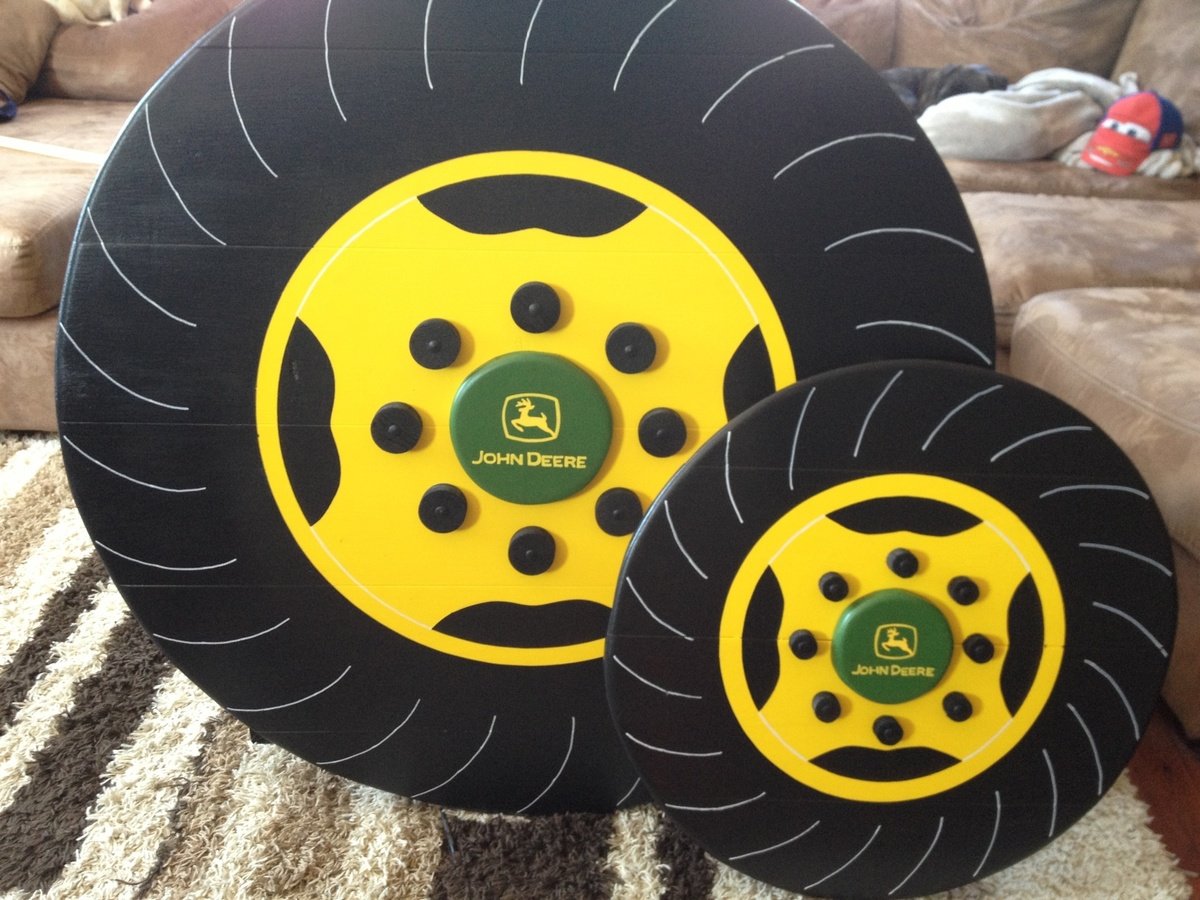
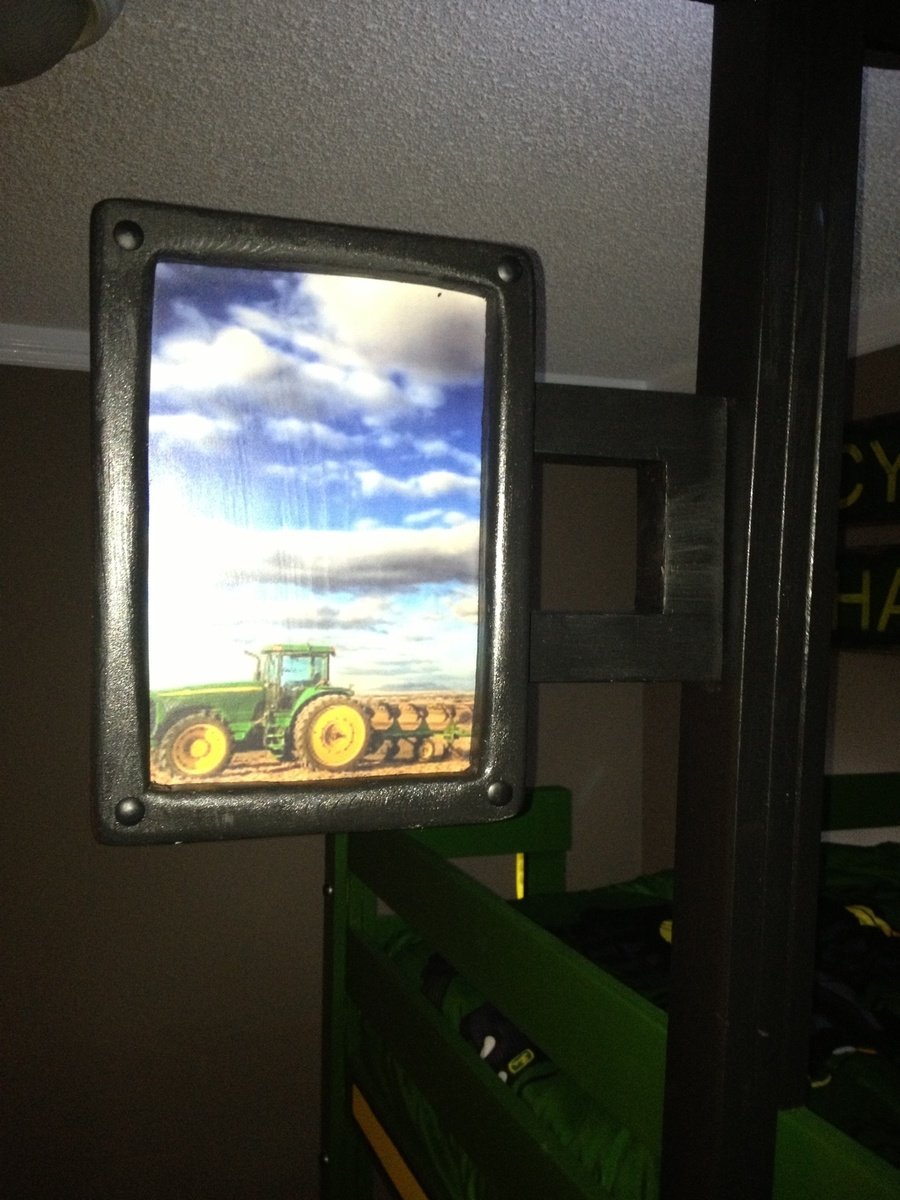
Once the the frame of the bed was complete, I added the tractor accessories. A couple of storage cubby shelves with fabric baskets for toy tractors which act as stairs up to the ladder and make the tractor bucket at the front. Also, the wheels which are made from joined 1x6s as I find plywood hard to sand and paint to the quality of finish I like. A cab & roof from 1x4s framed together. A side mirror that I decoupaged a picture of another tractor on. I used push lights for the headlights as well as a reading light above each bed (they're on timers so they'll turn themselves off). A steering wheel (play equipment access from toys r us). Also, I built and mounted by the head of both beds a "flat wall book holder" so they would have somewhere to store a few books.

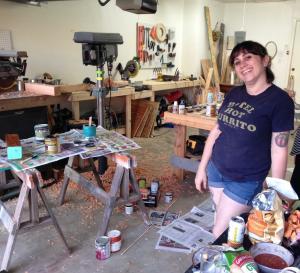
My boys and I are fairly new to building so I spent a lot of time planning and measuring to ensure it would all come together in the end. It paid off because it all went smoothly (even with "help" from my boys). It's not perfect but they're very happy with the result. We also built a John Deere themed "Just my size closet" and even finished with over a month to spare before the new baby arrives! :)

Just want to say a quick thank you to Ana both for the amazing plans and also the inspiration to take on these projects. The time spent with my boys building as well as the resulting treasures are priceless and I would have never realized what we were capable of had I not stumbled upon your website and been so inspired by you and everything you've accomplished. Thank you!

Estimated Cost
$550.00
Estimated Time Investment
Week Long Project (20 Hours or More)
Finish Used
John Deere Green paint (home depot was able to color match a toy tractor), marigold yellow and black and polyurethane.
Recommended Skill Level
Beginner

Comments

Ana White Admin

Mon, 07/07/2014 - 12:13

I love this, such a great build and eveything came together perfectly! Thanks for sharing!

spiceylg

Thu, 07/10/2014 - 19:12

What an incredible build! I agree with Thriftygirl, I love all of the details!

carongirls

Tue, 09/30/2014 - 05:35

I am in the process of copying your bed right now. Just mine will be a toddler loft bed. Thank you for the ideas!

busymomof3

Thu, 10/09/2014 - 14:12

I am new to this and I was wondering were to find the measurements for the twin size bed?  I would love to make this for my boys!!

Veronica P

Mon, 11/03/2014 - 07:48

Sorry for the slow response to those requesting plans. For main structure of the bunk bed, I used Ana's "Classic Bunk Bed" plans. For all of the add-ons, I made up my own plans. I'm pretty low tech so unfortunately they're just pencil & paper plans but I'd be happy to scan and email them to you if you're interested. Just message me and I'll send them your way. :)

MartyC

Wed, 01/28/2015 - 14:08

Hi Veronica, Well done fantastic job! Two little men who want to move in together because of a new addition on the way. Their request though is a John Deere Bunk Bed! would be grateful if you could forward on your plans if you have time, Kindest regards.

tkdiver1

Tue, 05/26/2015 - 18:13

These are just what my grandsons need. I would love your plans.

Thank you

tkdiver1

Tue, 05/26/2015 - 18:14

These are just what my grandsons need. I would love your plans.

Thank you

Mimi64

Sun, 09/06/2015 - 10:06

Dear Veronica,

Our grandson, 6 years old, will absolutely adore this bed.  He loved riding on Grandpa's real JD tractor.  Please send me your plans for the attachments.  They are just darling and I could not do any better.  Thanks for your generosity!

bmeche

Fri, 09/13/2019 - 21:11

Hi Veronica. My 3 year old just loves the tractor bunk bed. I was wondering if you would mind sending me the plans you have. It would be greatly appreciated. My email is [email protected]   

Thanks in advance 

MyMaw

Wed, 10/16/2019 - 17:56

If you're still sharing, we would love a copy of your add-ons plans. 

Thanks,

MyMaw and PawPaw

Veronica P

Tue, 12/16/2014 - 07:21

I just emailed those plans. There should be nine attachments. Please let me know if you don't receive any of them.

cnejones

Thu, 12/18/2014 - 21:51

Could you please email me the plans for this project my son would love this

Veronica P

Tue, 01/06/2015 - 08:21

Hello all. I've tried emailing plans to all those who've requested them. I had some trouble attaching the files as they were large so if you didn't receive them, please let me know and I can resend. Thanks

Alwardt2708

Tue, 01/06/2015 - 11:53

Hi Veronica. I did not receive an email. Woul you have time to try again? If you email me your address I can send you my fax number if that's easier too. Thank you so much! I can not tell you how much I appreciate your dedication to this! [email protected]

Tapered planter

Submitted by Anonymous (not verified) on Mon, 07/13/2020 - 07:40

Next time, I will cut the 1x2 and 1x3 at the 5 degree angle to match the top and bottom planes...
Thanks for the idea! It is great

Built from Plan(s)
Estimated Cost
30.00
Estimated Time Investment
An Hour or Two (0-2 Hours)
Finish Used
Sanded with 80 grit and clear polyurethane
Recommended Skill Level
Beginner

Paulieboxer

Ana, First time I have every attempted any kind of woodwork/building furniture other than building Ikea stuff. The plans were very easy to follow and now I want a chop saw for xmas. I roped my daughter in to help me and we completed the project in 2 days. Husband was totally blow away by our achievement. I love it and feel accomplished. Away to work on the table and further benches/seating over the next few weeks. Pauline

Estimated Cost
£200
Estimated Time Investment
Day Project (6-9 Hours)
Recommended Skill Level
Beginner