Community Brag Posts

Our Mantel Moulding Headboard with a Unique Twist

Submitted by jwwilson24 on Sun, 01/06/2013 - 12:15

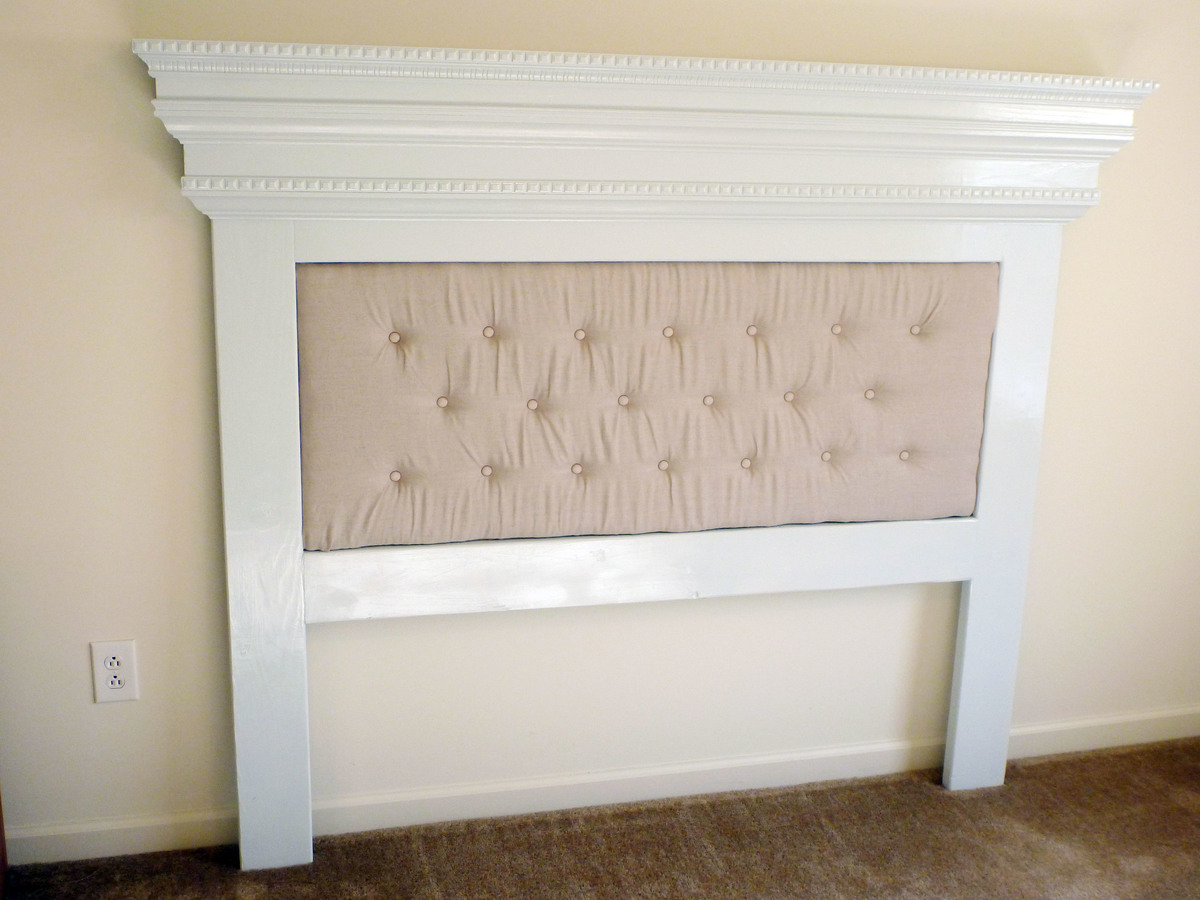
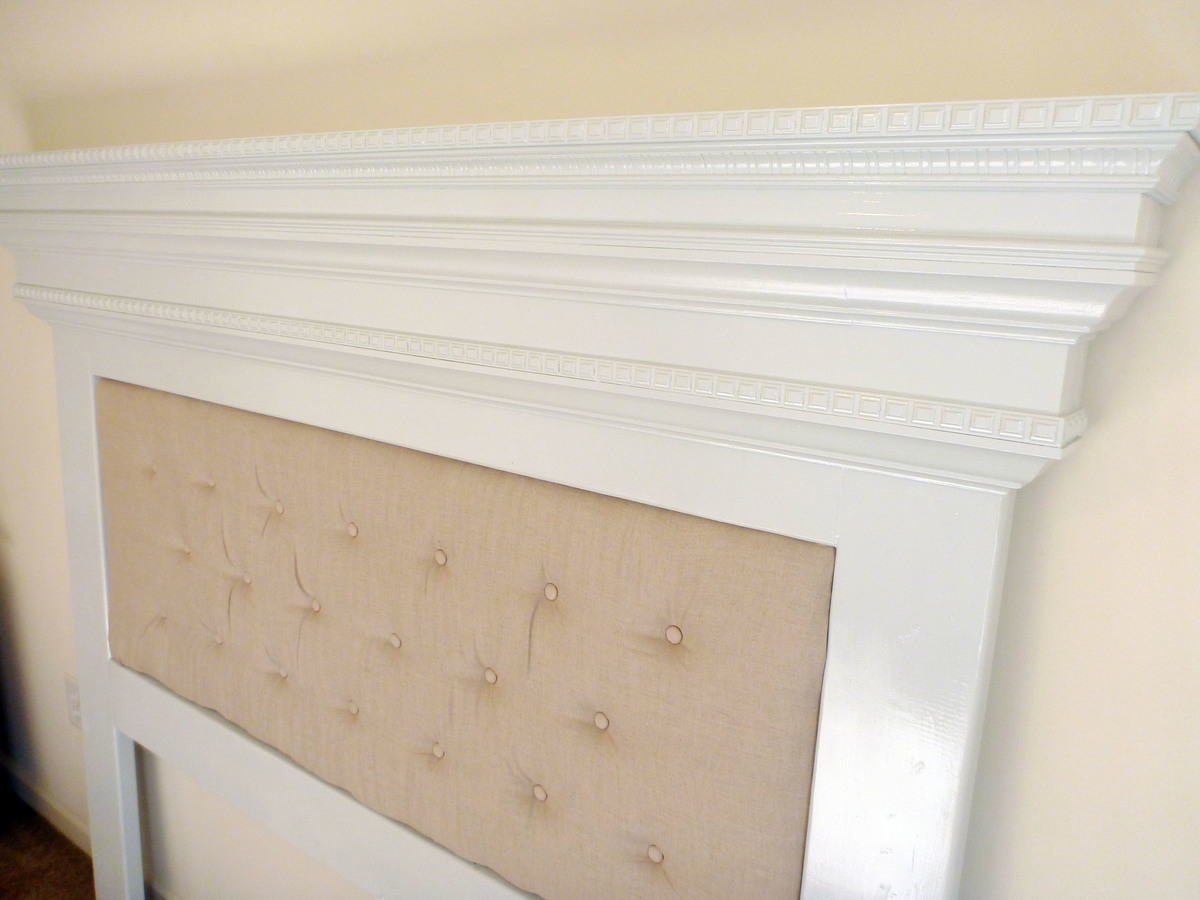
The charming Mantel Moulding Headboard with a unique accent feature where the "fire" would normally be. We created a tufted cushion for this open space to create a unique twist.

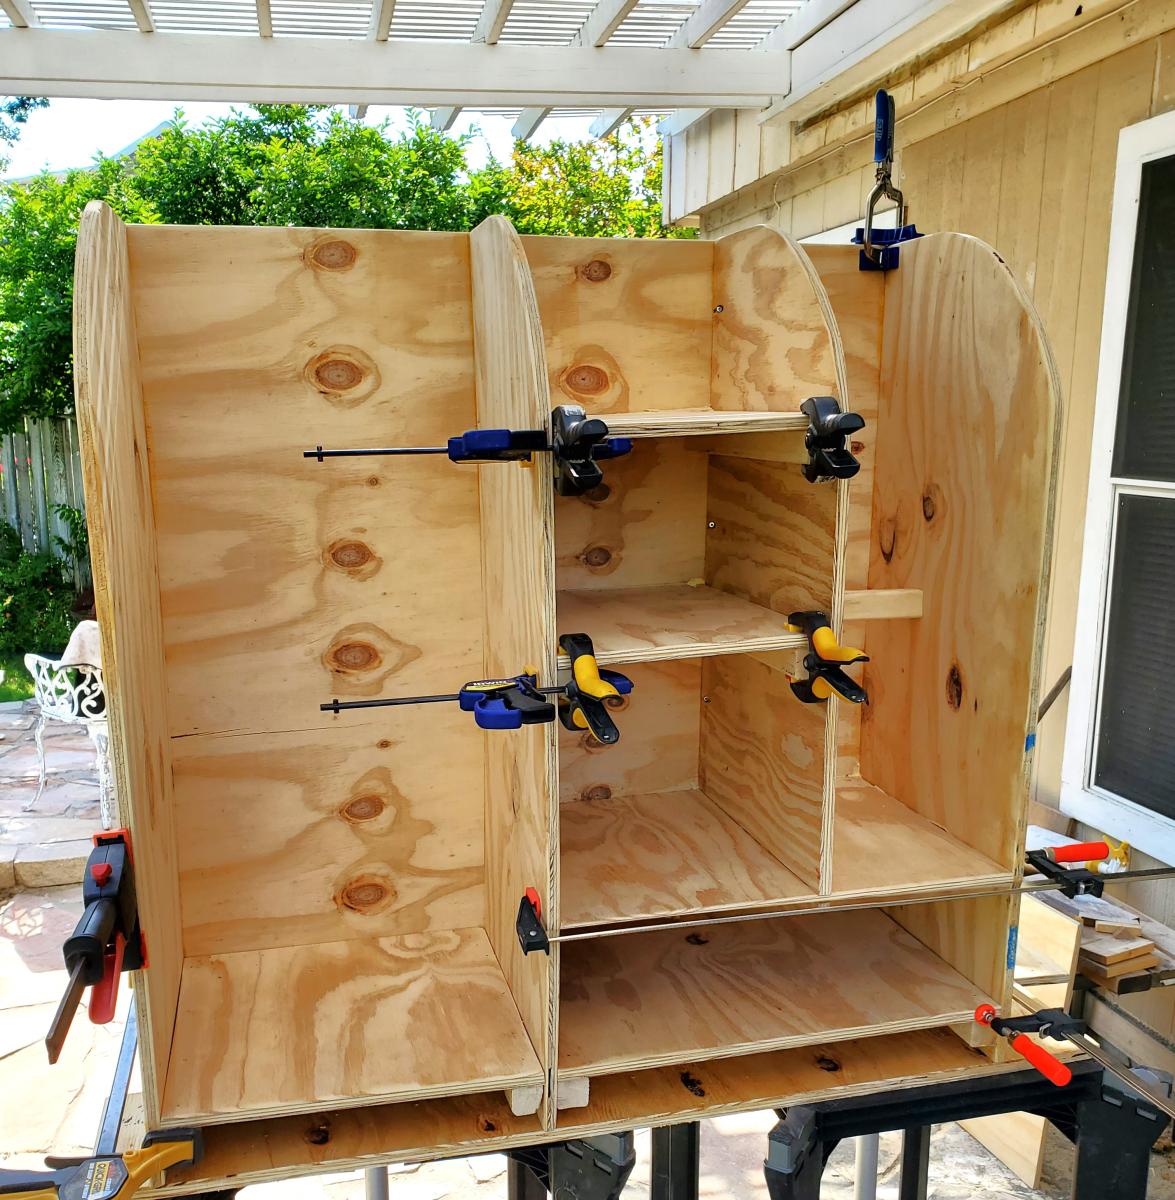
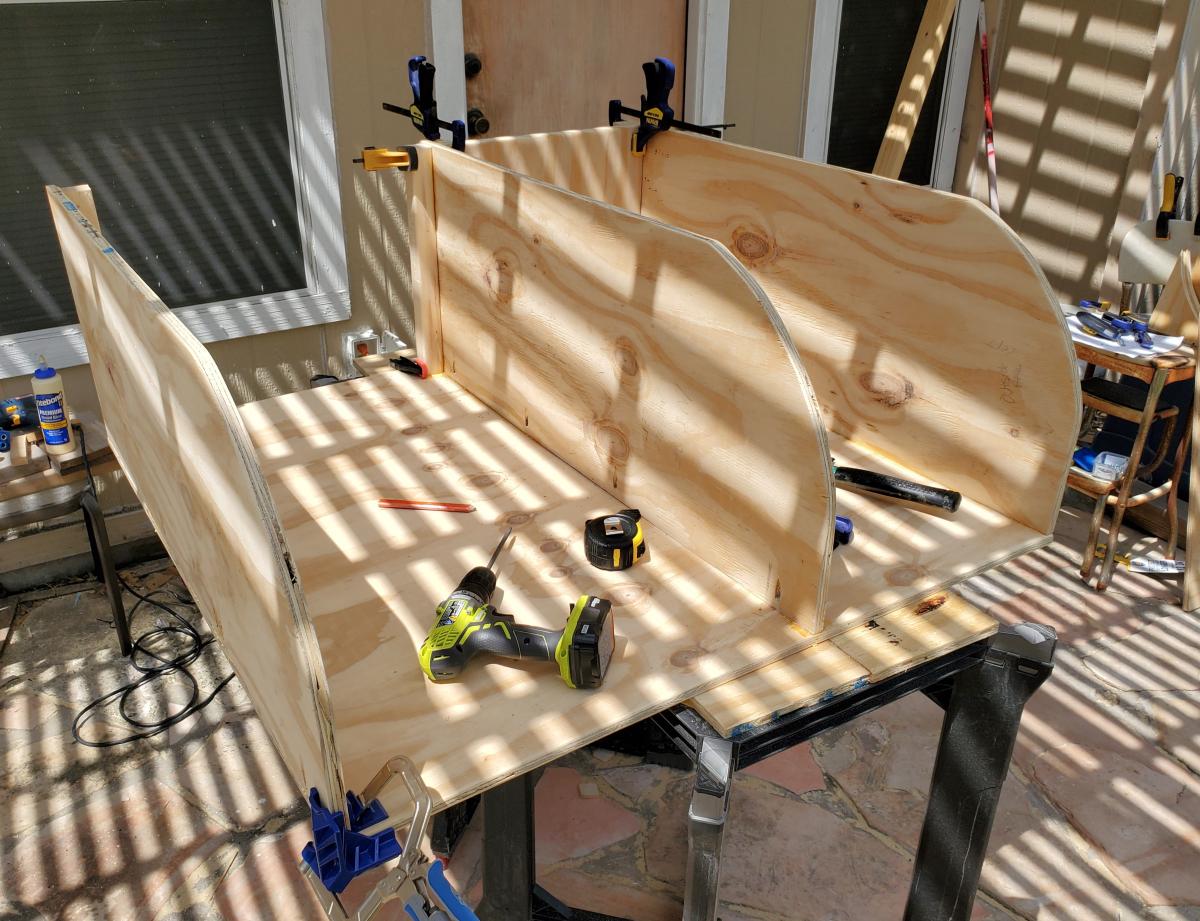
My wife and I completed this project over 4 days, but still under 20 hours not including wait time for wood filler and paint to dry.

Built from Plan(s)
Estimated Cost
$165
Estimated Time Investment
Weekend Project (10-20 Hours)
Finish Used
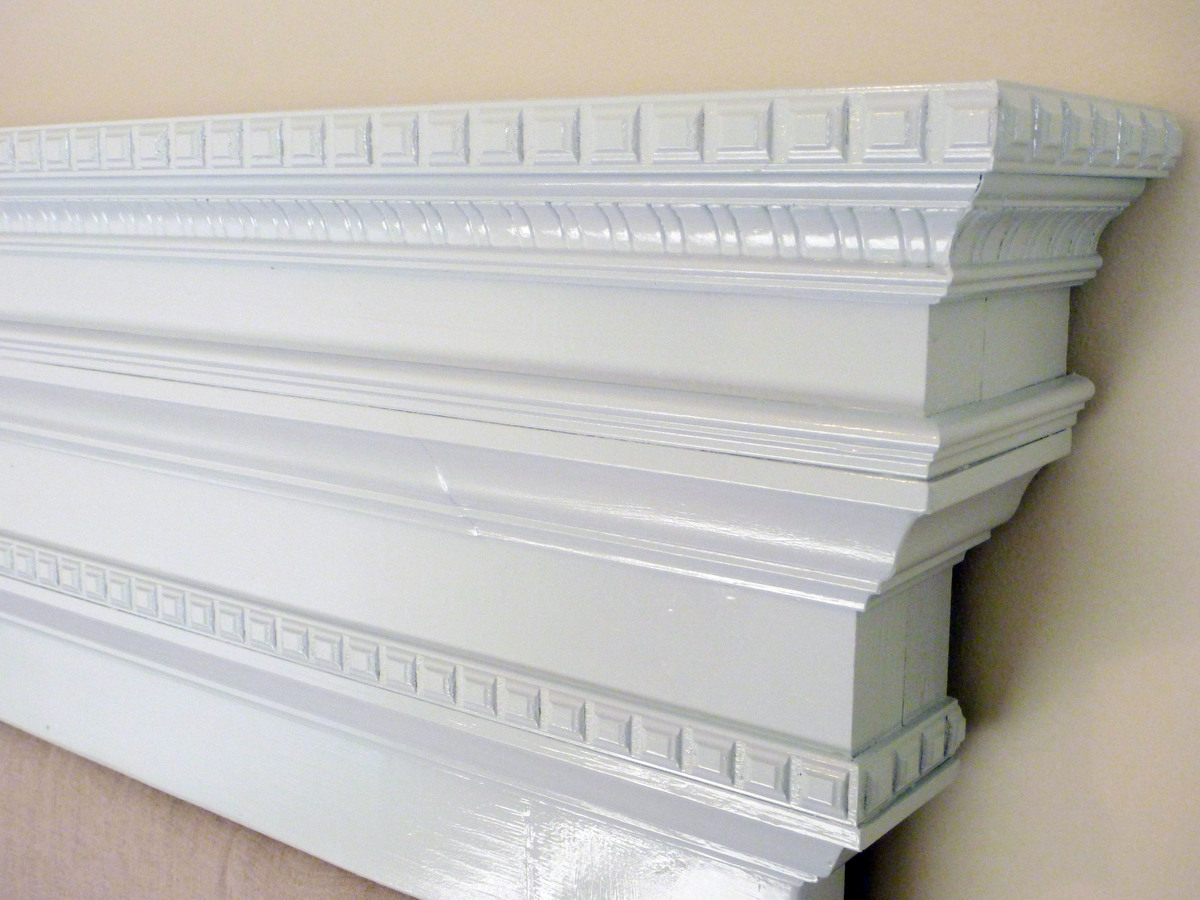
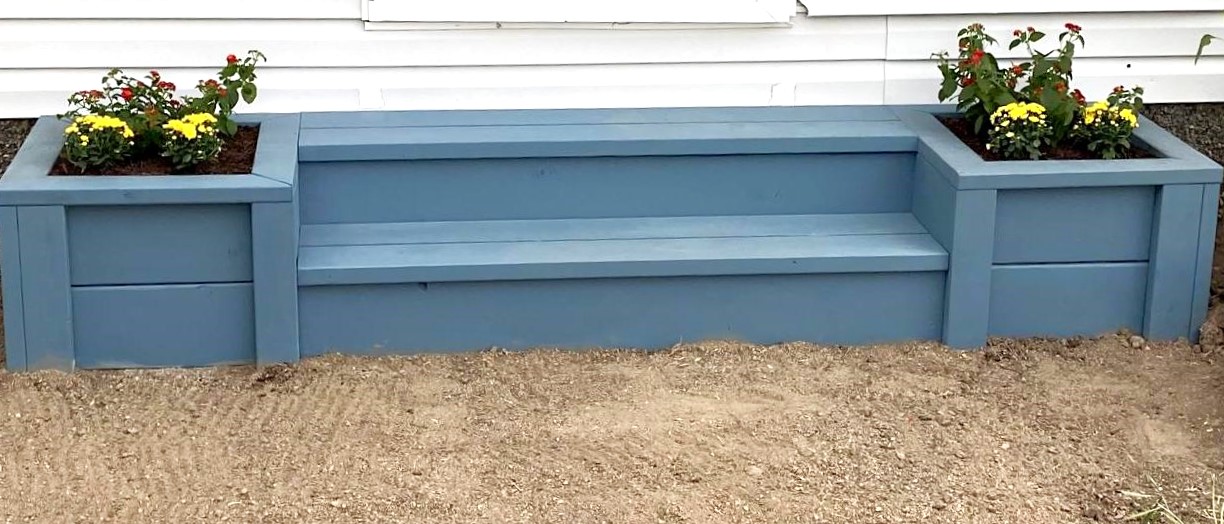
After sanding down the wood with a medium grit sandpaper, we brushed on an initial coat of primer. After the primer dried we applied between 2-3 coats of Valspar Radience Paint and Primer (spray paint) Gloss Azure Snow. This awesome color gives you the classic white with hints of grey and blue.

If you go the paint and primer combo you do not necessarily need to brush on the primer first. For a more smooth and glossy look of the wood accents more counts may be needed but please wait until the first coats are mostly dry.
Recommended Skill Level
Beginner

Comments

Mud room Bench

I mimicked one of the brag post on this webpage. I used 1x4s and luan for my back. The seat is 2x4s with a project panel stained and polyurethaned. I am grateful for people sharing their wonderful projects on this site for inspiration.

Estimated Cost
140
Estimated Time Investment
Weekend Project (10-20 Hours)
Recommended Skill Level
Intermediate

Kitty Outhouse

My first Ana White project. Built Ana’s awesome small cedar shed as an outhouse for our many cats. The have access to it from inside the house. Great way to keep litter boxes and the mess out of the house. It is stand alone, and attached to the house, in front of a bedroom window. There are two ‘entrances’ as well as two, one-way, escape hatches, if a cat in the outhouse is interrupted by another cat (I.e. a male cat comes in and the female feels trapped) they can exit to the outside (one way so no critters can come inside!). Ana has easy to build plans, great site! I plan on making the square table just posted today for my newly refurbished deck. Keep in mind, my estimated costs and time reflect a LOT of additional features on the inside. The shed itself, very easy, simple, inexpensive. Very little waste with Ana’s projects as well.

Built from Plan(s)
Estimated Cost
$500
Estimated Time Investment
Week Long Project (20 Hours or More)
Finish Used
No finish, at least not yet.
Recommended Skill Level
Intermediate

Comments

Amazing Farm Table and Benches

Submitted by Anonymous (not verified) on Mon, 10/04/2021 - 19:55

Built this deck dining table and benches from Lowes cedar, and the results way exceeded my expectations! The plans were so well written, it was easy to slightly modify (made both table and benches wider and longer) and the build was very simple. The clear directions helped give me the confidence to do this and we have got so many nice compliments. There was nothing this sturdy and simple even available to buy. I even built a coffee table and bar table after modifying the plans a bit. Thank you Ana!

Comments

Little Kids Picnic Table

This little table was built for our grandson who loves it so much, it was taken inside. About 6 hours, and he took possession of it. Amazing piece!

Built from Plan(s)

Comments

Monkey bar and play house

Submitted by Anonymous (not verified) on Sat, 10/09/2021 - 06:21

Inspired in one of your projects this was my first project with wood and turned out a go to place for the kids and guests to play all the time.
Thank you for the plan. Kids appreciate it too.

Comments

Garage Workshop Bench

This was my second project, with so many more projects in mind, figured I needed to get started on a Workshop bench. This was a fun and easy project and such a great plan.

Comments

A-Frame Chicken Tractor

Submitted by Tonya P on Tue, 07/09/2013 - 19:46

New to raising chickens, but eager to jump right in to it.
We bought a pre-made coop for the main home for our new chicks and it's very nice, not something I could do myself since I'm not yet at that level, but I saw this chicken tractor and thought it would come in handy for what I have in mind so I made up my mind to build it.
The lumber, chicken wire, staples, and wheels are all store bought new and came to about $75. The materials we had on hand were the screws, hinges, plastic coated metal shelving (used in the nesting area, I thought that would make it easy to clean), paint, and the corner piece of vinyl siding for the roof cap (hubby's brilliant idea, and I painted it green with spray paint for vinyl).
I did not try to build it quickly, I don't really know how much time it took me, but if I had to guess I'd guess total time would amount to about 3 afternoons, by myself.
I wanted to leave the top on the one side open with the option to slap on the other boards if/when the need arises. I have the other t1-11 panels that can sit right in those areas because I stapled the chicken wire in a way that would allow it.
I also added a flip up panel as seen in the pictures for access. I didn't want a small door that I would have a hard time getting to things in there. I'm so glad I added this feature, it sure gives plenty of room for me to maintain the food and water dispensers as well as get in there and catch the little chickies :)
I wanted it green to blend into the wooded background in our backyard. I didn't want to take any beauty away from the cedar greenhouse and fencing we added last year, and this tractor would be moved from time to time and I felt this green that we had on hand was perfect to help it blend in rather than stand out.
This thing is heavy! I have a hard time moving it around and usually need my husband to move it so I won't hurt myself. I am considering some options... I don't like the rope I have on it to pull it, any suggestions would be appreciated.
As with the other items I've made with Ana's plans, this was fun and pretty easy to make. I love this site! Soon I will take on my next project, I've bought and gathered the materials, I'm anxious to get started :)
Thank you for looking :)

Built from Plan(s)
Estimated Cost
$75 - $85 for the new materials listed
Estimated Time Investment
Weekend Project (10-20 Hours)
Finish Used
Green exterior paint we had on hand.
Recommended Skill Level
Intermediate

Tool Caddy

Submitted by docbromo on Thu, 01/20/2022 - 15:21

I repurpose furniture as a hobby and I got tired of having my tools hanging on a wall on the other side of the garage so I bult this rolling tool caddy. It is made out of 3/4" plywood, a couple of 2x4's and some heavy-duty casters. I built one about 3 years ago and realized that there were some things I wanted to do differently so I sold it and bult this one. My wife gave me a subscription to SketchUp and I had fun drawing it up and tweaking it. I left an over hang of 3" on both sides so I could store my clamps. I also attached an electrical cord reel on the right side and reversed the ends so the male end can plug into the wall and I can roll the unit across the room allowing me to be able to charge my batteries. The back side has a 44 drawer storage organizer and also a few shelves for additional tools like a router and a multi-tool. I'm not nearly the craftsman many of you are and I'm sure you could do a much better job. I didn't build it to look pretty but to be functional and it works for me.

Comments

Jayp413

Fri, 01/21/2022 - 09:16

I really like this idea. I have my tools hung up neat all around the garage, but I keep walking back and forth for tools and batteries. It would be great to roll this over to a project and have everything you need right there. Nice work. I will modify one for my needs.

BigMacQue

Fri, 01/21/2022 - 10:06

there are some very thoughtful features on this, notably the wings at the top and the bottom for clamps and extra tools and the different shelf heights. Well done! I'm going to build one just like it and a power strip for battery storage.

White Wash Pickled Farmhouse Table

When we sold our last house, we sold the dining room furniture we had custom built with it. We did projects, homeschooled and ate off of a folding table for the first 7 months we lived in our new house. Until we built our new farmhouse table!

Estimated Cost
300
Estimated Time Investment
Weekend Project (10-20 Hours)
Finish Used
We chose to white wash/pickle our farmhouse table. All the instructions can be found here: http://www.akadesign.ca/white-wash-pickling-get-the-restoration-hardware-look-for-less.
Recommended Skill Level
Beginner

Comments

Kitchen Cabinet

Submitted by rjustice21 on Thu, 09/26/2013 - 09:18

My wife and I needed space in our kitchen to store various items. This cabinet works perfectly for that purpose.

Built from Plan(s)
Estimated Cost
$100
Estimated Time Investment
Weekend Project (10-20 Hours)
Finish Used
Dark Red paint. I am not sure of the name.
Recommended Skill Level
Beginner

Comments

mybartmart

Fri, 09/27/2013 - 21:17

That paint colour is beautiful. As is the pantry, very well done. I wish you could find out the name and brand of the colour. It is stunning.

mybartmart

Fri, 09/27/2013 - 21:17

That paint colour is beautiful. As is the pantry, very well done. I wish you could find out the name and brand of the colour. It is stunning.

Children's Craft Table with Attached Paper Roll

Submitted by bdel on Fri, 06/03/2016 - 12:17

This table was a birthday gift for my 3-year old cousin. It was fun to brainstorm ideas to get it exactly the way we wanted it instead of buying one pre-made. Once we had our plans it was an easy build, done over a weekend. A full list of materials as well as step-by-step instructions can be found in the blog post linked. The top is a 20x36 pine shelf board with a 1x2 pine apron attached underneath. There are vertical support boards to hold a raised tray for supplies, and to hold the paper roll under the table. Note that the table legs are inset at one end to accommodate the paper roll. We added two magnets to the face of the table and tied two knobs (with metal washers glued on) to the underside. The paper can then be sandwiched between the magnet and the metal and won't move around while the artist is at work. It's our favorite feature! There are also magnets glued to the inside bottom of the tray to hold the buckets in place and keep them from being knocked over easily. This project was so much fun! I love having the chance to share it with you all!

Estimated Cost
$70
Estimated Time Investment
Weekend Project (10-20 Hours)
Finish Used
Minwax polyurethane in clear semi-gloss. Lightly sanded between coats. Sanded with ultrafine steel wool before final coat. Note that the polyurethane may discolor the wood putty and make it stand out.
Recommended Skill Level
Beginner

Golf Bag Stand

Submitted by Anonymous (not verified) on Sat, 11/18/2023 - 12:11

Golf bag stand
Can’t remember if found this plan here or not but get most my plans here. Fun and easy build.

Comments

Modern slatted bench

Submitted by Whimwhams on Mon, 06/27/2016 - 11:51

I made this for my sister the day before her house warming party. It was a pretty easy build. I used wood glue and 2" nails. Using a nail gun, this came together pretty quickly. I do wish that I had wide enough clamps to hold everything in place while it dried, because there were a few gaps due to some imperfect boards. I used 104" stud length boards, so I only need to purchase 7 instead of 9. this was enough to make the cuts for the top and both leg pieces from each board. the price was the same and we had limited space in our van for boards, so this was a better option for us. I used a sprayer hooked up to an air compressor to apply the stain and was able to get in between the slats fine with this method, brushing over it as I sprayed. Luckily I chose the same color as her deck not knowing, so it matches great. Now I need to make one for myself! :)

Estimated Cost
$40
Estimated Time Investment
Afternoon Project (3-6 Hours)
Recommended Skill Level
Starter Project

Cedar Street Number Planter

I was looking for a way to give our house some better curb appeal and decided our stree numbers could use a facelift.  The majority of money spent on this project was for the numbers since I had enough spare cedar laying around.

house number planter

Estimated Time Investment
An Hour or Two (0-2 Hours)
Finish Used
Sedona Red
Recommended Skill Level
Starter Project

Comments

John Deere Tractor Bunk Bed

Submitted by Veronica P on Sun, 07/06/2014 - 16:43

With another baby boy arriving in August, my one and three year olds are moving to a "big boy" room. My oldest decided he wanted a bunk bed and as they both are obsessed with tractors, when I saw the "John Deere Tractor Bunk Bed" plan, I was sold.

We would be needing a twin sized bunk bed though not a toddler. I used the classic bunk bed plans and simply modified them to suit our needs. I moved the ladder to the front, added a rail on the bottom bunk and added a small ladder to the side for my one year old to climb into the bottom bunk.

Once the the frame of the bed was complete, I added the tractor accessories. A couple of storage cubby shelves with fabric baskets for toy tractors which act as stairs up to the ladder and make the tractor bucket at the front. Also, the wheels which are made from joined 1x6s as I find plywood hard to sand and paint to the quality of finish I like. A cab & roof from 1x4s framed together. A side mirror that I decoupaged a picture of another tractor on. I used push lights for the headlights as well as a reading light above each bed (they're on timers so they'll turn themselves off). A steering wheel (play equipment access from toys r us). Also, I built and mounted by the head of both beds a "flat wall book holder" so they would have somewhere to store a few books.

My boys and I are fairly new to building so I spent a lot of time planning and measuring to ensure it would all come together in the end. It paid off because it all went smoothly (even with "help" from my boys). It's not perfect but they're very happy with the result. We also built a John Deere themed "Just my size closet" and even finished with over a month to spare before the new baby arrives! :)

Just want to say a quick thank you to Ana both for the amazing plans and also the inspiration to take on these projects. The time spent with my boys building as well as the resulting treasures are priceless and I would have never realized what we were capable of had I not stumbled upon your website and been so inspired by you and everything you've accomplished. Thank you!

Estimated Cost
$550.00
Estimated Time Investment
Week Long Project (20 Hours or More)
Finish Used
John Deere Green paint (home depot was able to color match a toy tractor), marigold yellow and black and polyurethane.
Recommended Skill Level
Beginner

Comments

Ana White Admin

Mon, 07/07/2014 - 12:13

I love this, such a great build and eveything came together perfectly! Thanks for sharing!

spiceylg

Thu, 07/10/2014 - 19:12

What an incredible build! I agree with Thriftygirl, I love all of the details!

carongirls

Tue, 09/30/2014 - 05:35

I am in the process of copying your bed right now. Just mine will be a toddler loft bed. Thank you for the ideas!

busymomof3

Thu, 10/09/2014 - 14:12

I am new to this and I was wondering were to find the measurements for the twin size bed?  I would love to make this for my boys!!

Veronica P

Mon, 11/03/2014 - 07:48

Sorry for the slow response to those requesting plans. For main structure of the bunk bed, I used Ana's "Classic Bunk Bed" plans. For all of the add-ons, I made up my own plans. I'm pretty low tech so unfortunately they're just pencil & paper plans but I'd be happy to scan and email them to you if you're interested. Just message me and I'll send them your way. :)

MartyC

Wed, 01/28/2015 - 14:08

Hi Veronica, Well done fantastic job! Two little men who want to move in together because of a new addition on the way. Their request though is a John Deere Bunk Bed! would be grateful if you could forward on your plans if you have time, Kindest regards.

tkdiver1

Tue, 05/26/2015 - 18:13

These are just what my grandsons need. I would love your plans.

Thank you

tkdiver1

Tue, 05/26/2015 - 18:14

These are just what my grandsons need. I would love your plans.

Thank you

Mimi64

Sun, 09/06/2015 - 10:06

Dear Veronica,

Our grandson, 6 years old, will absolutely adore this bed.  He loved riding on Grandpa's real JD tractor.  Please send me your plans for the attachments.  They are just darling and I could not do any better.  Thanks for your generosity!

bmeche

Fri, 09/13/2019 - 21:11

Hi Veronica. My 3 year old just loves the tractor bunk bed. I was wondering if you would mind sending me the plans you have. It would be greatly appreciated. My email is [email protected]   

Thanks in advance 

MyMaw

Wed, 10/16/2019 - 17:56

If you're still sharing, we would love a copy of your add-ons plans. 

Thanks,

MyMaw and PawPaw

Veronica P

Tue, 12/16/2014 - 07:21

I just emailed those plans. There should be nine attachments. Please let me know if you don't receive any of them.

cnejones

Thu, 12/18/2014 - 21:51

Could you please email me the plans for this project my son would love this

Veronica P

Tue, 01/06/2015 - 08:21

Hello all. I've tried emailing plans to all those who've requested them. I had some trouble attaching the files as they were large so if you didn't receive them, please let me know and I can resend. Thanks

Alwardt2708

Tue, 01/06/2015 - 11:53

Hi Veronica. I did not receive an email. Woul you have time to try again? If you email me your address I can send you my fax number if that's easier too. Thank you so much! I can not tell you how much I appreciate your dedication to this! [email protected]

Tapered planter

Submitted by Anonymous (not verified) on Mon, 07/13/2020 - 07:40

Next time, I will cut the 1x2 and 1x3 at the 5 degree angle to match the top and bottom planes...
Thanks for the idea! It is great

Built from Plan(s)
Estimated Cost
30.00
Estimated Time Investment
An Hour or Two (0-2 Hours)
Finish Used
Sanded with 80 grit and clear polyurethane
Recommended Skill Level
Beginner

Paulieboxer

Ana, First time I have every attempted any kind of woodwork/building furniture other than building Ikea stuff. The plans were very easy to follow and now I want a chop saw for xmas. I roped my daughter in to help me and we completed the project in 2 days. Husband was totally blow away by our achievement. I love it and feel accomplished. Away to work on the table and further benches/seating over the next few weeks. Pauline

Estimated Cost
£200
Estimated Time Investment
Day Project (6-9 Hours)
Recommended Skill Level
Beginner

Planter steps

These steps turned out great!!! My in-laws were using some busted up pallets as a front porch so I knocked these out in a few hours. The blue stain looks really good and matches the other blue on various out-buildings. Very easy project and the plans available were spot on. Thanks Ana!!

Estimated Cost
$175
Estimated Time Investment
Day Project (6-9 Hours)
Finish Used
Stain
Recommended Skill Level
Starter Project
Seasonal And Holiday