Community Brag Posts

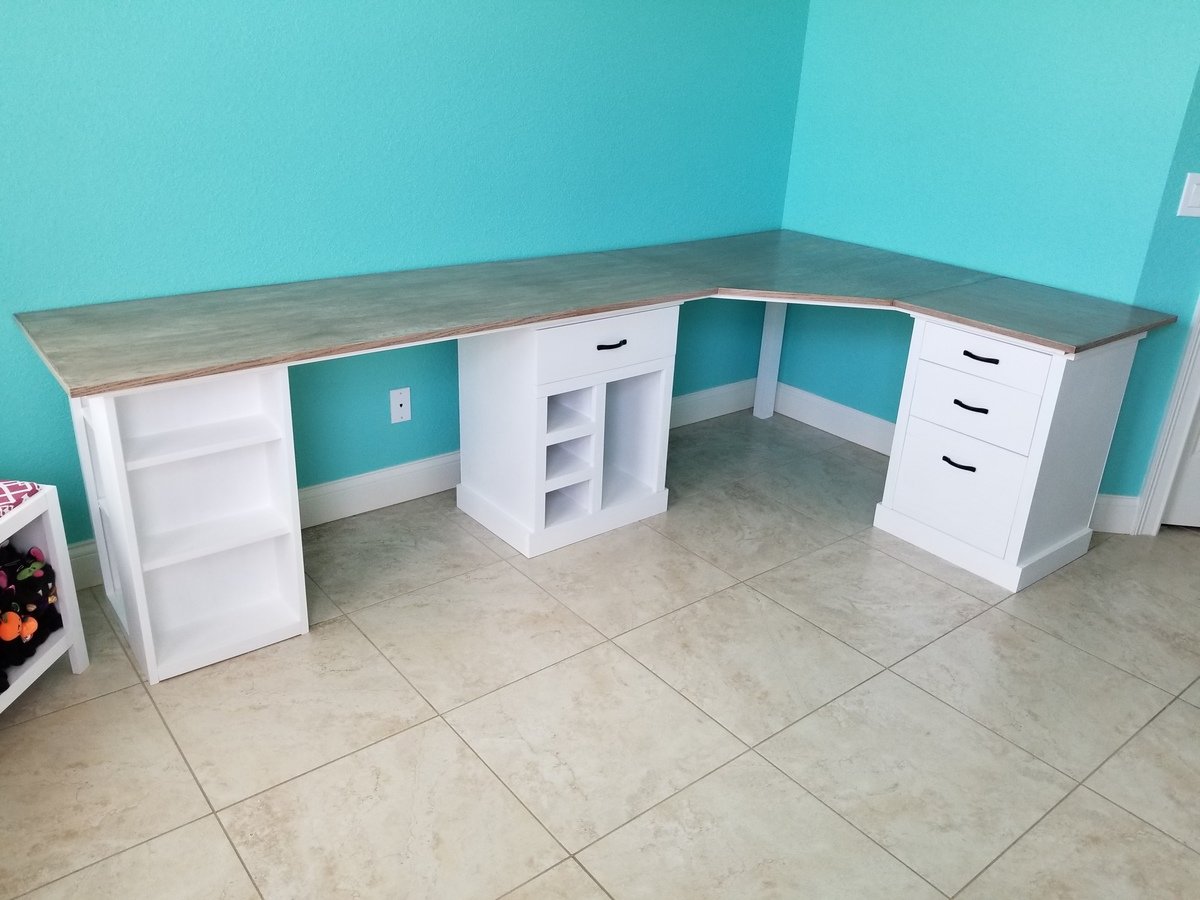
Modular Corner Office and Craft Desk
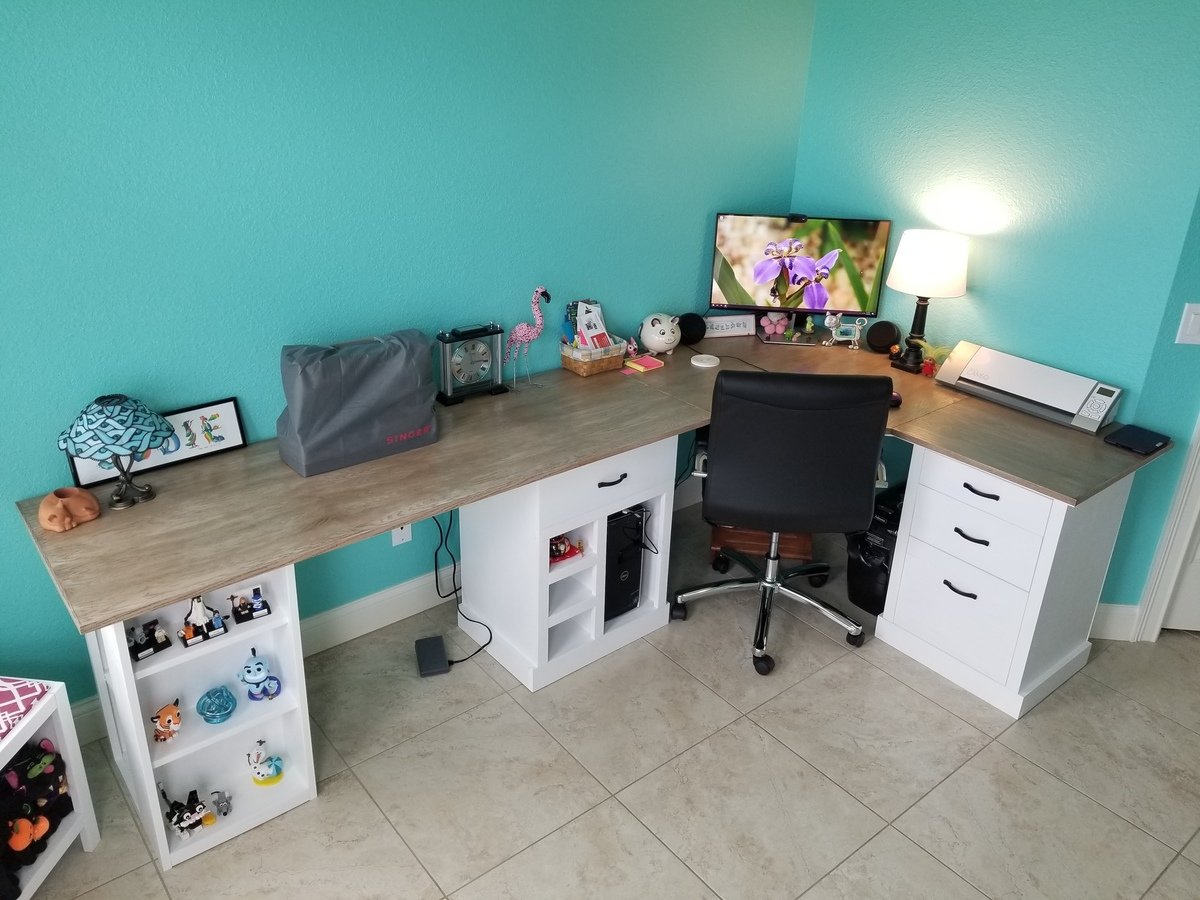
I started creating the furniture for my new craft room by making the Easy Three Cube Benches I found here. I modified them so that my cats could lay on top and look out the windows. The cube benches gave me the confidence to design a printer stand. Using Ana White's technique of "build the box" and then add the rest, I designed a custom printer stand I am so very proud of! After the printer stand, I moved on to the final piece that would complete my craft room, a modular desk with plenty of workspace to complete any craft I want. I modified each module a little to keep with the theme design of the room. I created three modules. The last one being a bookcase that is a modification of the Modern Craft Table bases. I used better quality Oak plywood for the desk top, and good pine and whiteboard plywood for the modules.
Built from Plan(s)
Estimated Cost
$500
Estimated Time Investment
Week Long Project (20 Hours or More)
Finish Used
For the modules I used Valspar Furniture Paint in ultra white. For the desk top I used Minwax Simply White stain and then Minwax Dark Walnut over that to create the "driftwood" style look. I sealed the desktop with about 5 coats of Minwax wipe-on poly.
Recommended Skill Level
Intermediate
Comments
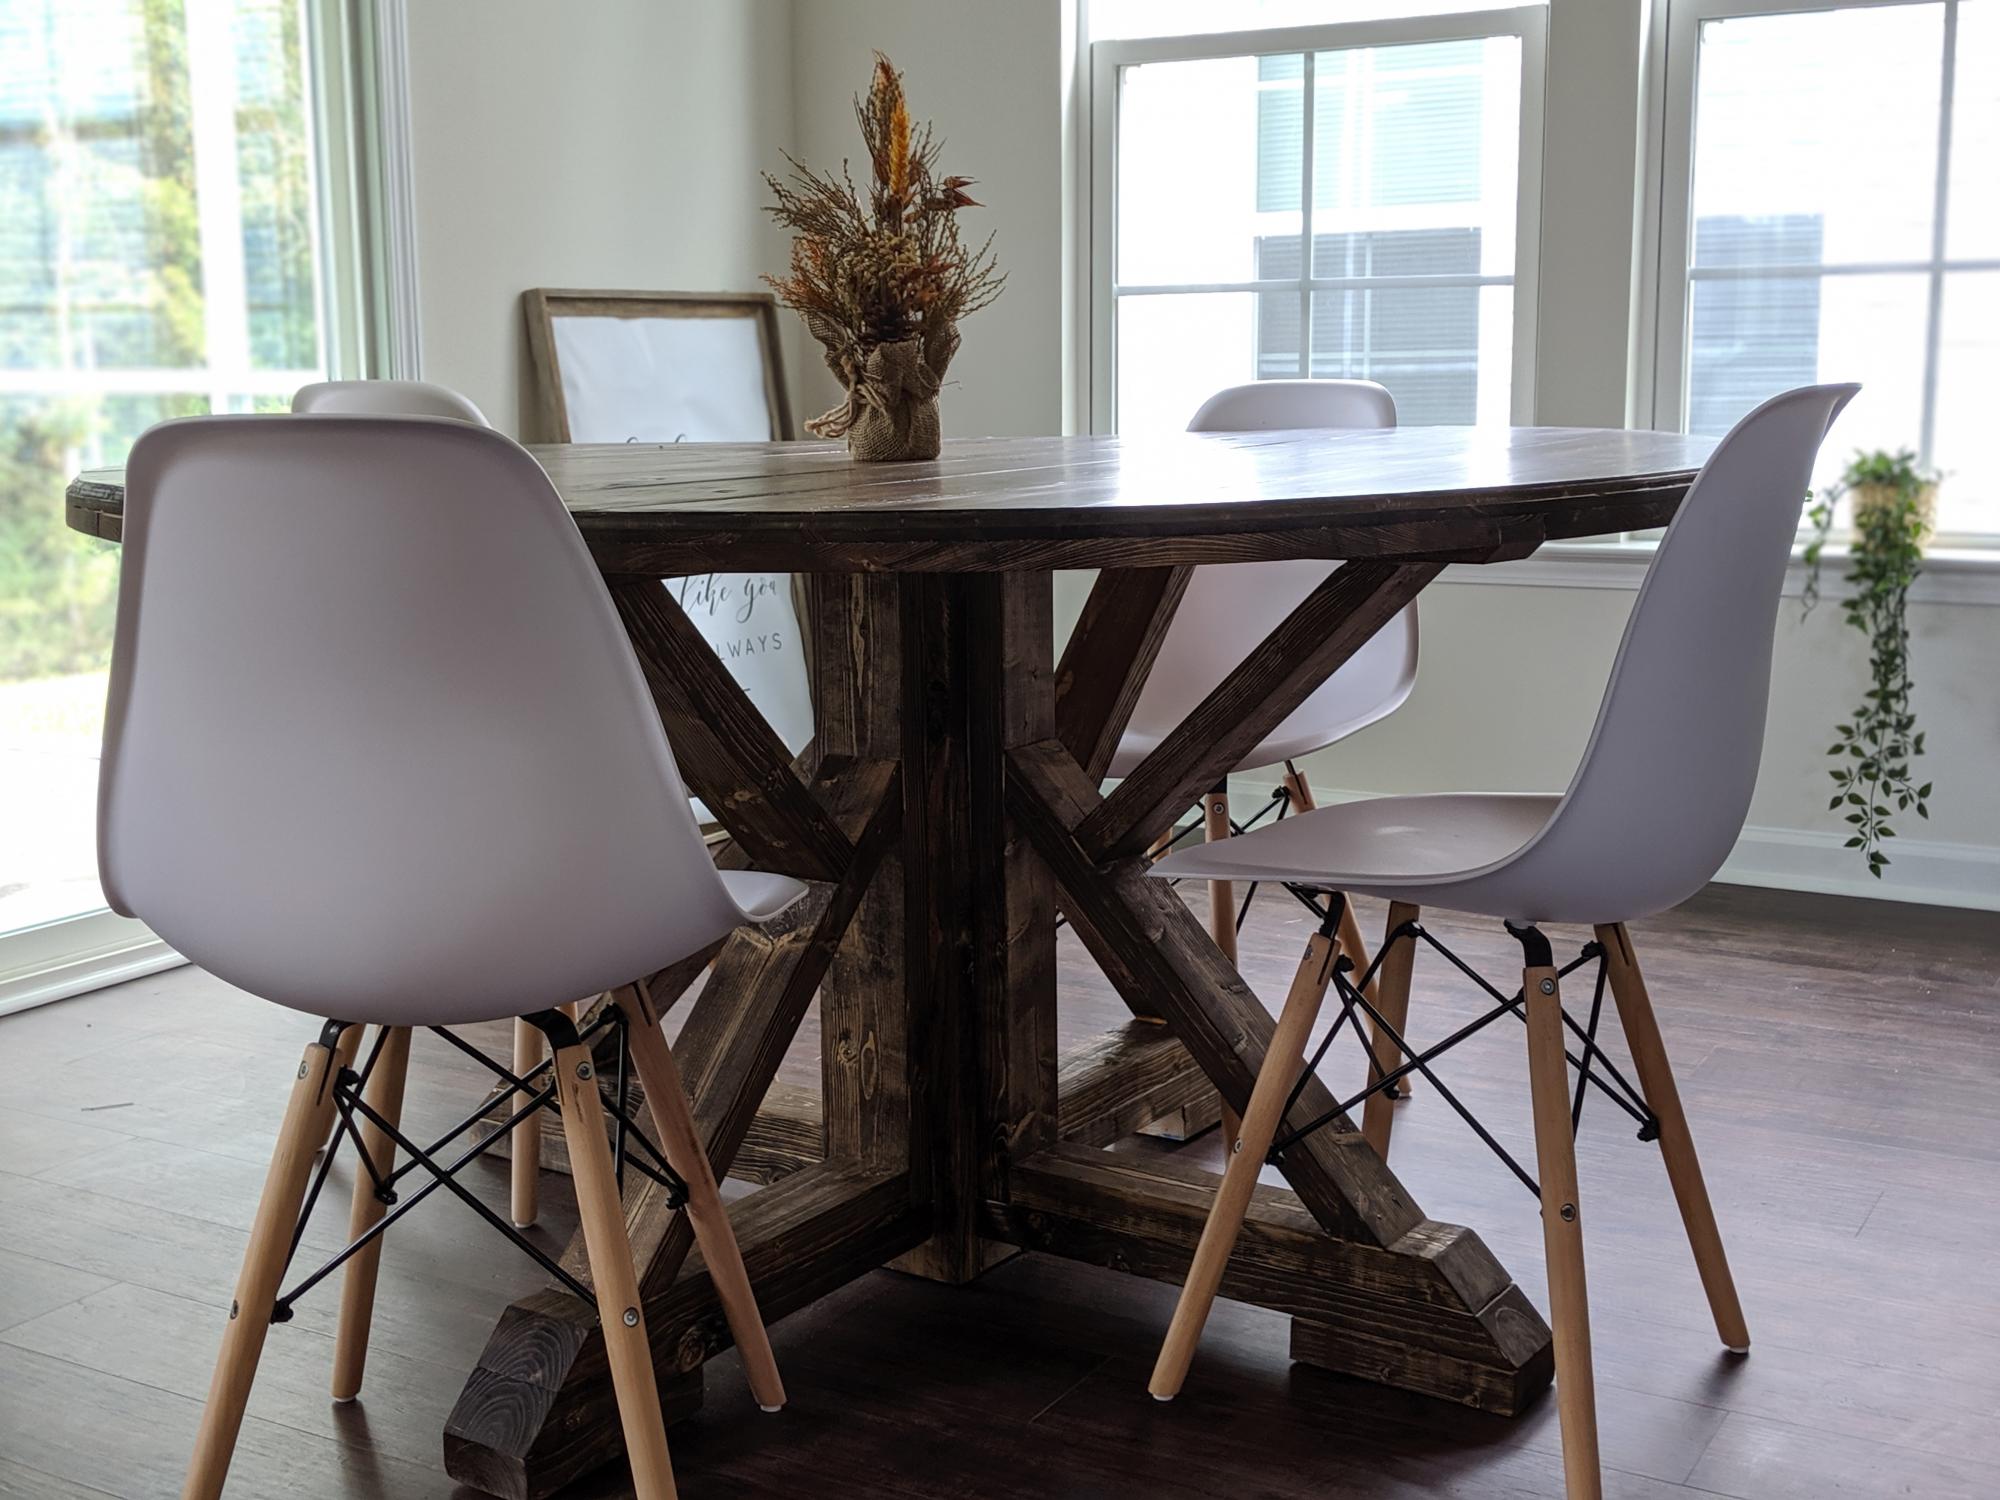
Modern Craft Table *tweaked*

Completed Modern Craft Table! We tweaked the plans a bit because I was looking for a larger table top. The top now measures 48" x 76". We simply did this by adding an extra set of cubbies to the other side of the shelves. Absolutely LOVE how this turned out! All I need now is 4 counter height stools built and lots of shelves to complete my craft room! Will be sure to post those once they are completed!
Built from Plan(s)
Estimated Time Investment
Weekend Project (10-20 Hours)
Finish Used
Ultra White Latex Paint
Recommended Skill Level
Beginner
Comments

Thu, 11/17/2011 - 01:10
Darn I was so excited to see
Darn I was so excited to see you craft table! I apologize that your brag post did not show images. If you can send me images at knockoffwood(at)gmail.com I'd be happy to post. Thanks so much for submitting a brag post. Ana
Sun, 03/04/2012 - 07:31
Craft Desk
I LOVE LOVE LOVE your craft table. I want one! Looks like my husband wil have to get busy! Thanks for sharing!
Kristina
Houston, TX
Tue, 05/29/2012 - 00:05
Question about Middle support
This is great!! I am planning something similar, but what is your idea or the plan you used for the middle support to keep it from sagging over time? My idea is to run another cubby in the middle from side to side. What do you think?
Mon, 01/21/2013 - 09:54
I love the modern craft
I love the modern craft table, just what I have been looking for, do you share instructions, dimensions, etc.? thanks, Laura
Thu, 05/12/2016 - 15:14
Are plans for the tweaked version?
I'm loving this and would love to have FIL build it for me but the plans look like its for the regular modern craft table but not the tweaked? Also is there support for the middle? Can you send me a link for the tweaked supply list please, can't seem to find it. Love what you do!
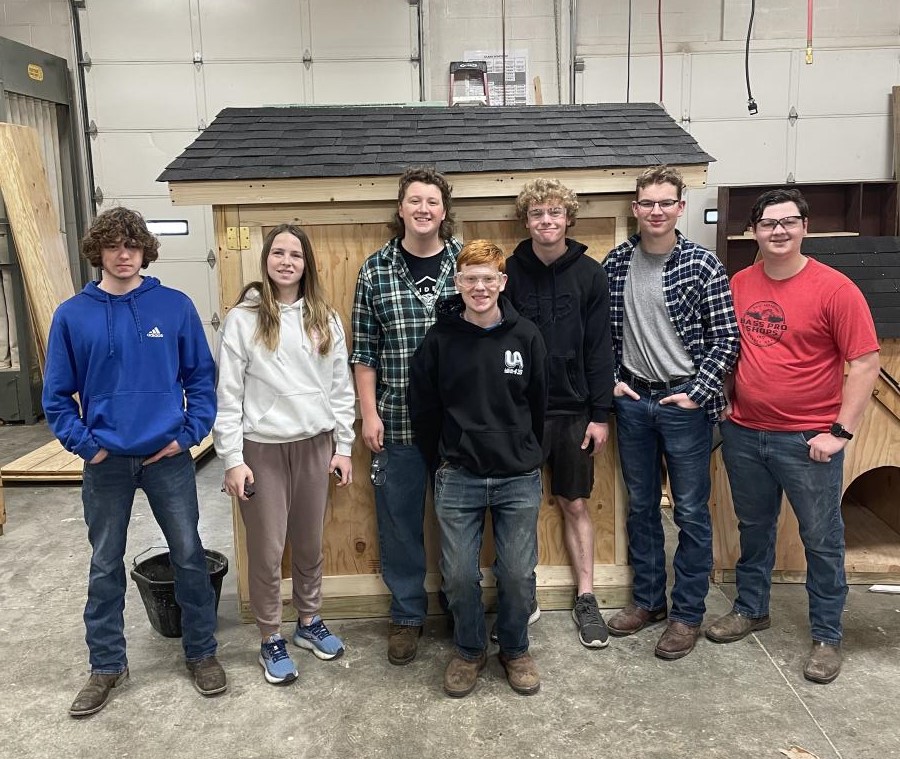
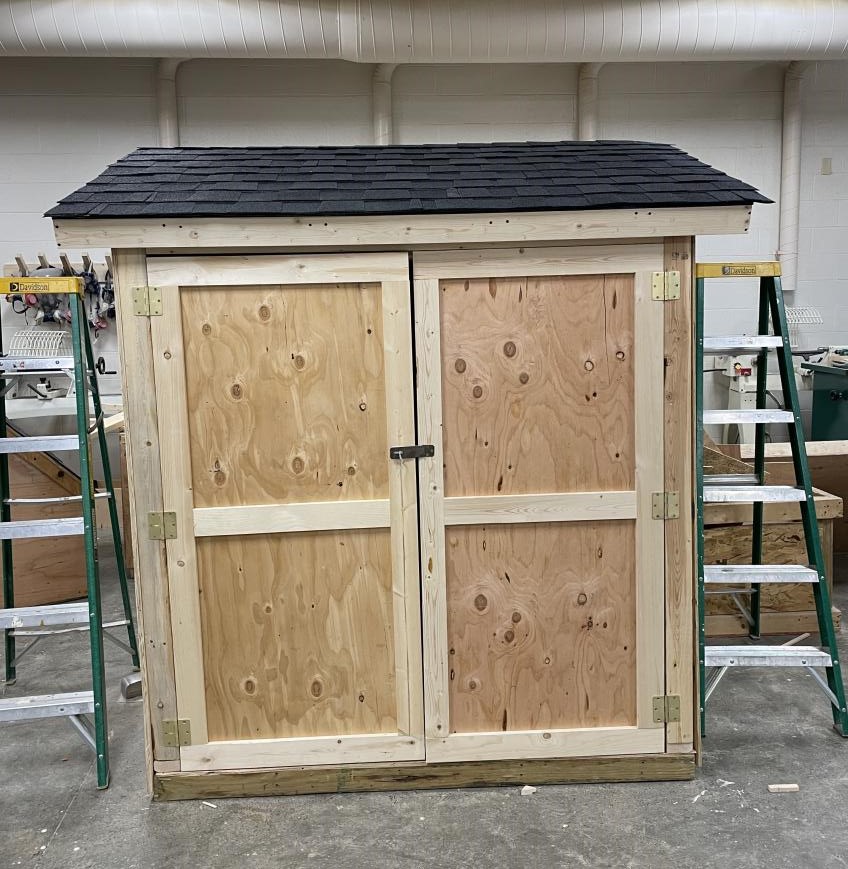
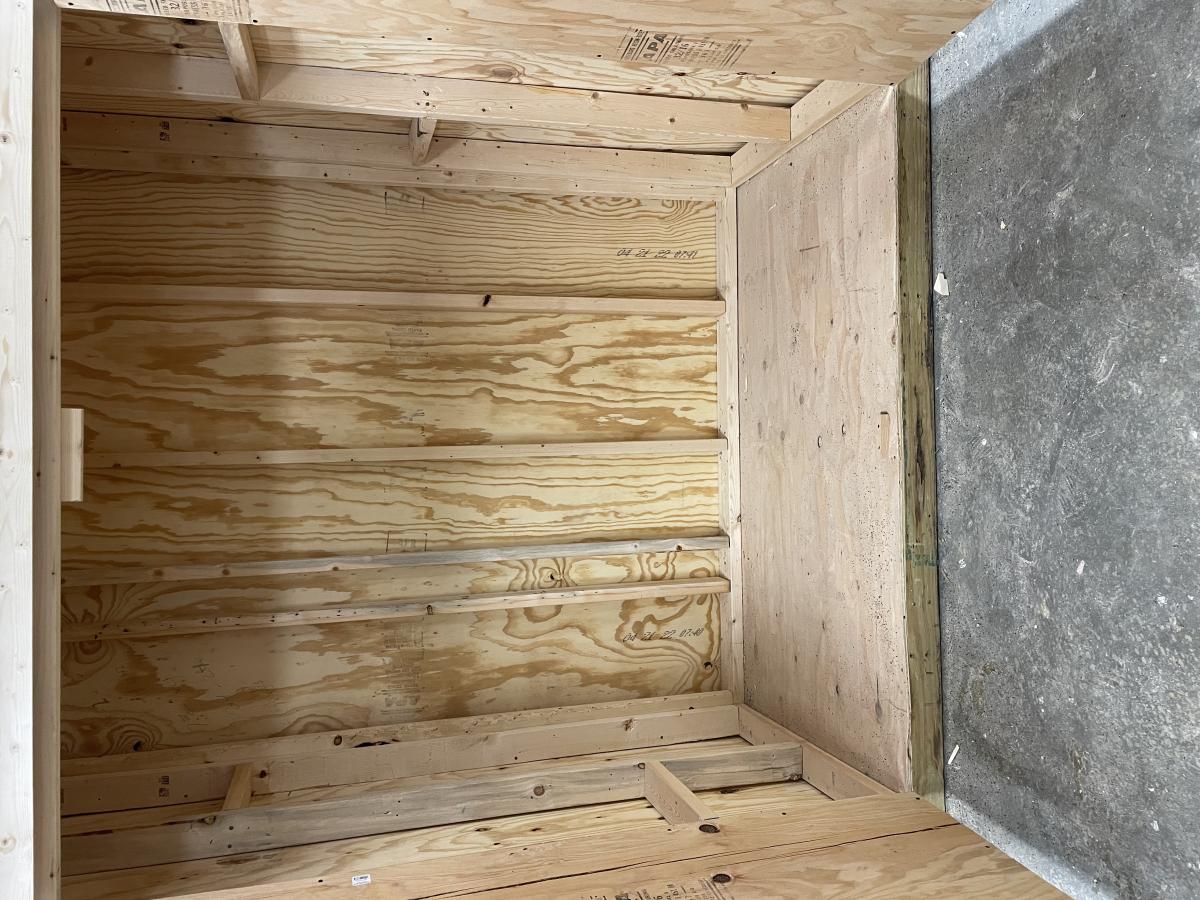
Lean-To Shed
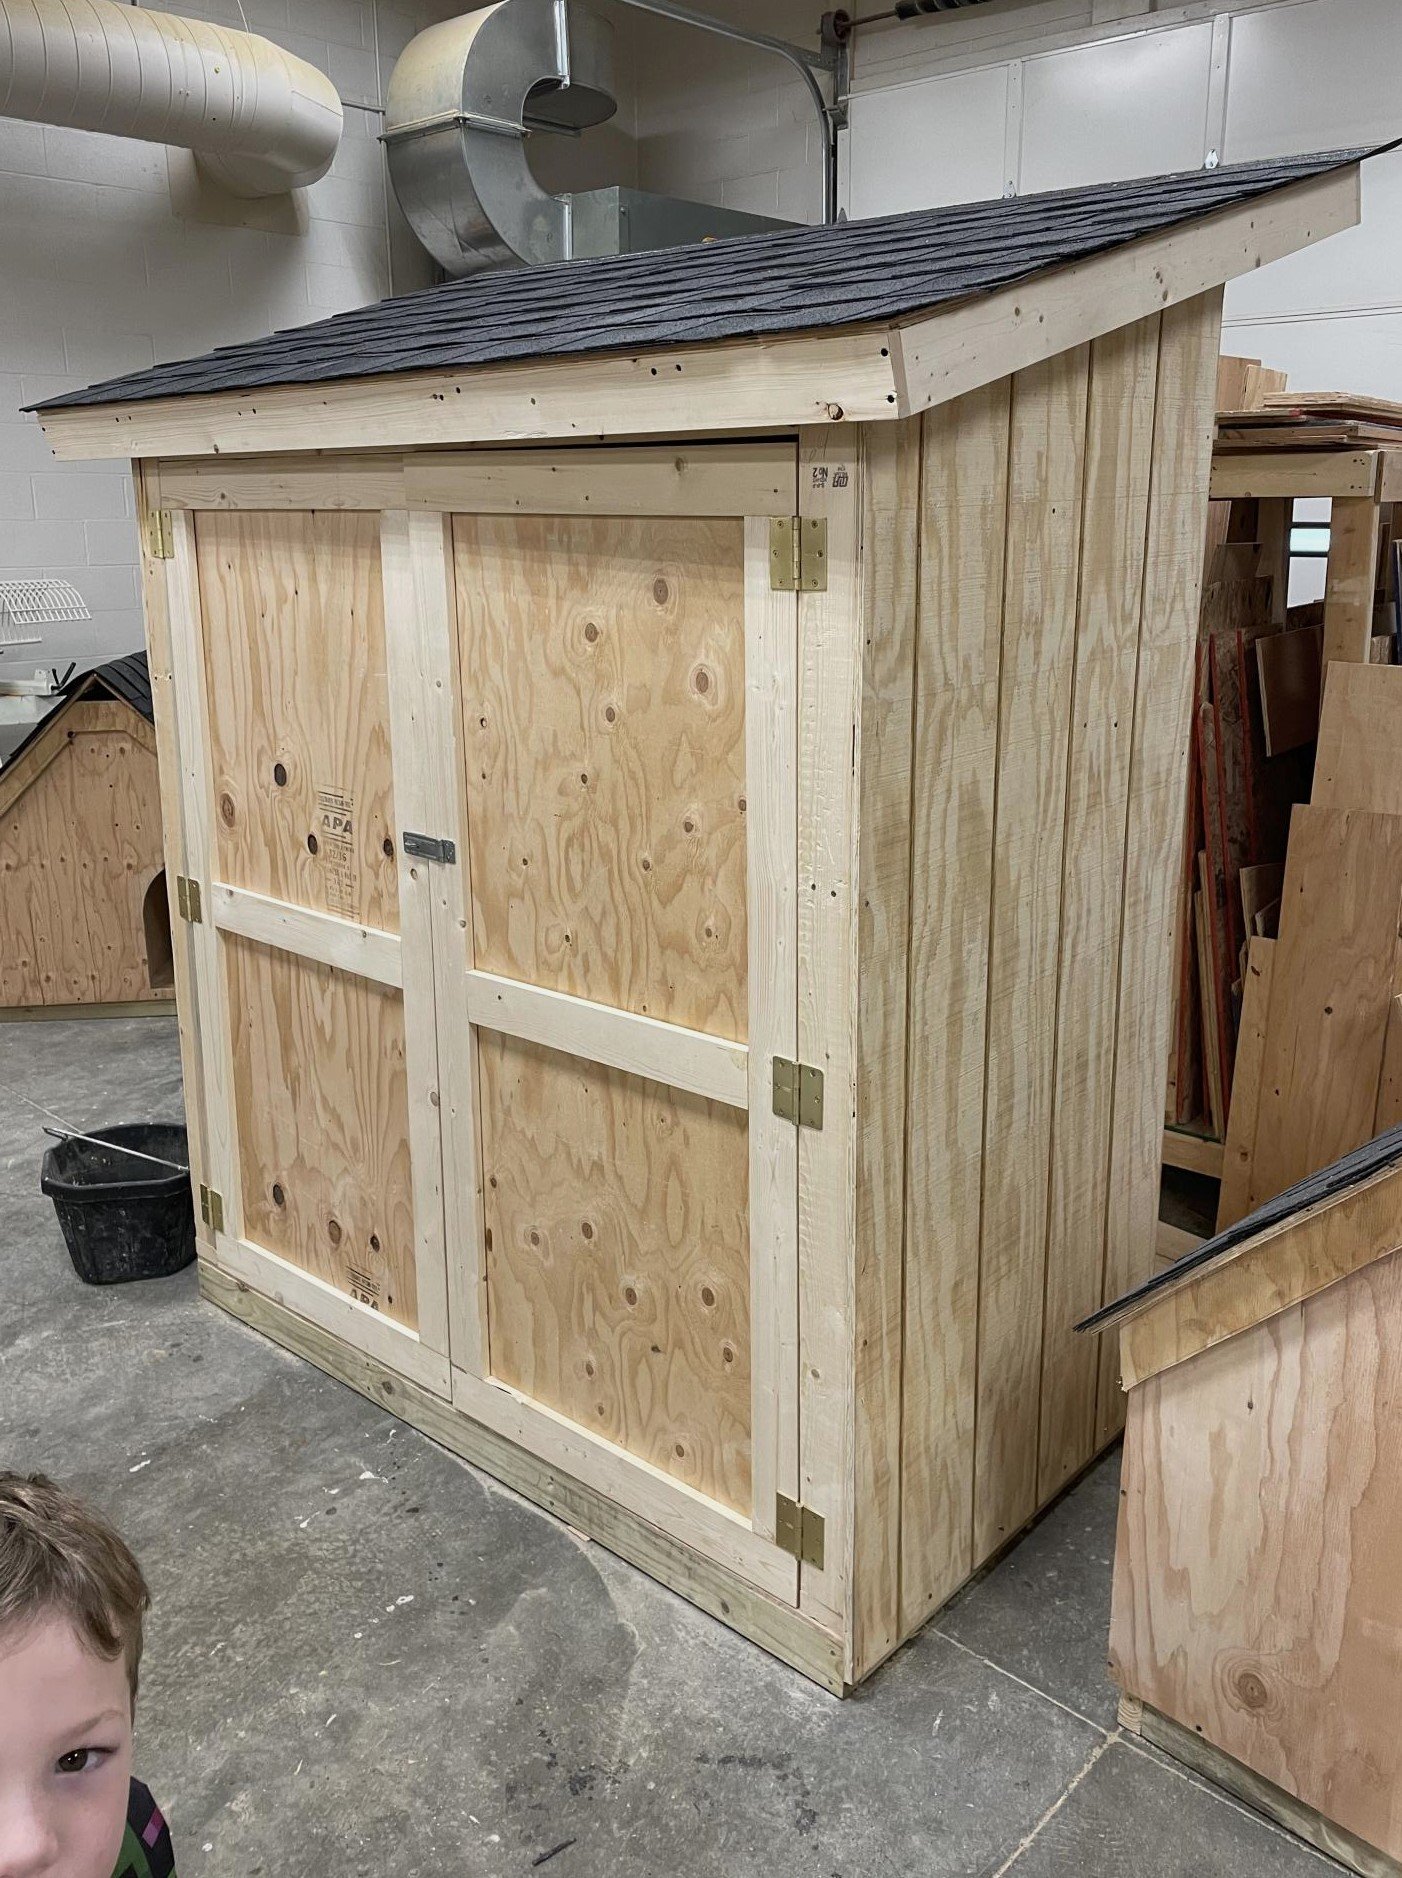
I’m a first year teacher of construction class at Waterloo High School in Illinois. We recently used your Small Cedar shed instructions with some modifications for a class project. It’s a bear getting cedar right now, so we used T1-11 for the outside and 2x4 for the frame.
Built from Plan(s)
Comments
Sat, 03/25/2023 - 09:14
Great project for your class!
Very fun and job well done! Thank you for sharing.
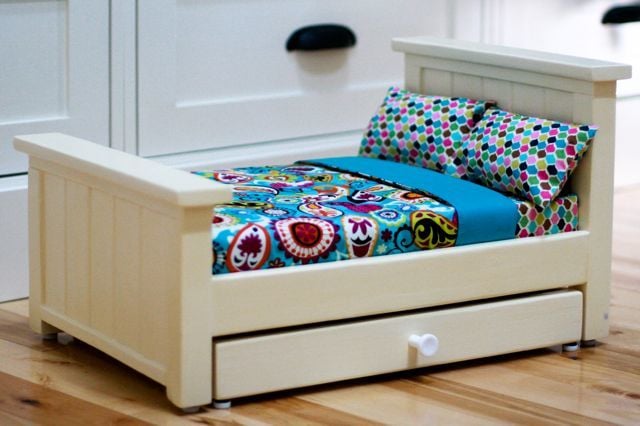
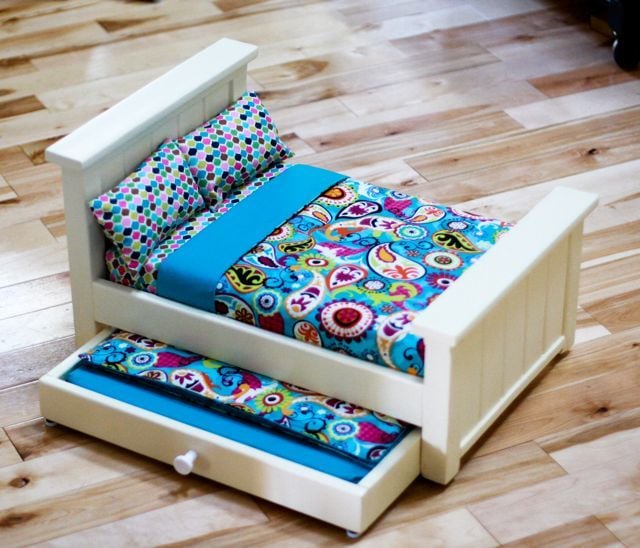
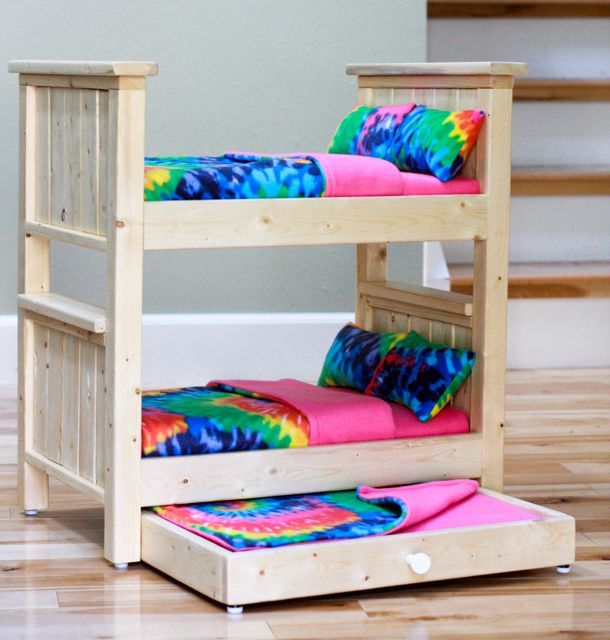
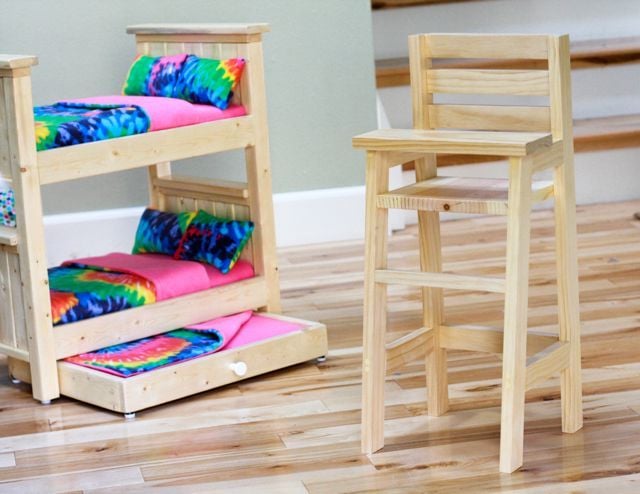
Farmhouse Doll Beds

For these beds I modified the original farmhouse doll bed plans to accommodate a few more dolls. In the process, I discovered that, while doll furniture turns out SUPER cute, it takes me about the same amount of time to build a little piece as it does to build a big piece, especially when you consider the time it takes to sew the bedding.
I put these together mostly with nails and glue, but used my kreg jig to join the rails to the headboards and footboards.
Built from Plan(s)
Estimated Cost
$20 or less per bed.
Estimated Time Investment
Weekend Project (10-20 Hours)
Finish Used
Paint and Vermont Natural Coatings PolyWhey to seal. Lots of sanding before and in between coats.
Recommended Skill Level
Beginner
Comments
Wed, 12/14/2011 - 23:05
Hillary you are so inspiring
Hillary you are so inspiring and talented!!! Love!

Thu, 12/15/2011 - 06:00
Great job!
I love the mods you did on these. For the farmhouse w/trundle, I know you had to raise up the bottom and it looks like you did the headboard sized boards for the footboard and made the headboard w/even longer boards? Then for the bunkbeds, are those all headboard lengths for the head and footboards and then just very long 2x2s for the posts? I am never brave enough to mod anything just yet! I also absolutely love that bedding on the top pic! So bright and cheery!
In reply to Great job! by spiceylg
Thu, 12/15/2011 - 06:51
mods and bedding
Isn't that bedding beautiful? I love it. The fabric is from Hobby Lobby. They have so many cute calicos.
Yes, you got the mods right. If I were to do the trundle again, I'd make the headboard longer so that it goes almost to the ground like the footboard, otherwise you can see the trundle.
The bunk was easy -- much easier than the other bunk plans all out of 1x2s. I've made them both now and the farmhouse one just comes together a lot faster (once you figure out the measurements).
Thu, 12/15/2011 - 09:57
Cool
I love Hobby Lobby but never think to check out their fabric! Silly me, I'll have to do just that! Okay, thank you for the info. I just noted the additional detail of the feet, how nice! If you don't mind, I'd love the measurement of the 2x2 for the bunks, simply because I'm lazy like that, lol!
Thu, 12/15/2011 - 10:27
2x2 and other mods
The 2x2s are 22 3/4" and the slats in the headboard are 7". I think the bottom of the bottom headboard is around 2 3/4" or 3" from the bottom of the 2x2s. All the width measurements are the same as in the original plan. Also, I used lath strips for the mattress to rest on instead of a rectangle of 1/4" ply -- it seemed easier and I think it was cheaper, too.
Fri, 12/16/2011 - 08:00
Super cute!
You are so right about the time it takes.
I made a stuffed doll and her clothing for a niece, and I could have made myself two complete outfits in the time it took to sew one dinky doll dress.
Tue, 02/28/2012 - 07:40
Trundle
Hillary how did you do the trundle for the farmhouse single bed. I read where you said you would do the headboard longer,but this is going to be my first build and I need a little more instruction to make the trundle and how long would you do the headboard. Thanks!!!
In reply to Trundle by lmhaney (not verified)
Tue, 02/28/2012 - 09:05
doll trundle
Hey. I made the trundle using 1x3 boards just slightly shorter than the size of the overall bed (so it would fit underneath). I used two 18 1/2" 1x3s and two 14 1/2" 1x3s. I built it using pocket holes on the 14 1/2" 1x3s, screwing into the 18 1/2" 1x3s. Then I attached two 1x2 cleats to the bottom insides of the 18.5" boards so that I'd have a place to set support pieces for the mattress. I attached the cleats with glue and nails, I think, but pocket screws would work fine, too. I used pine lath for the support, attached with glue and staples.
For the headboard, I cut my panel pieces at 7", I think, but I should have cut them at 9 3/4" so that the headboard panel would extend closer to the ground like the footboard panel does. Here is an abbreviated cut list:
footboard panel -- 5 1x3s @ 6"
footboard legs -- 2 2x2s @ 7 1/4"
headboard panel -- 5 1x3s @ 9 3/4"
headboard legs -- 2 2x2s @ 11"
All of the horizontal cuts are the same as the original plan as long as you are using #1 pine. If you are using #2 pine or furring strips, your horizontal cuts will need to be slightly smaller b/c your panel board will be slightly narrower than the plans expect.
Just be sure to screw the side rails of the bed in high enough to get the trundle underneath.
Hopefully that all makes sense! Good luck! Can't wait to see photos!
Sun, 08/05/2012 - 04:04
You think that the hardware
You think that the hardware store will cut all the peaces for me?

In reply to You think that the hardware by Aida (not verified)
Sun, 08/05/2012 - 06:29
Getting wood cut
They -might- cut it for you. But based on the experience of a lot of people here, and the advice of some Home Depot employees also on here, it's a mistake to have them do that.
You can do the cuts on your own though. If you can't afford a circular saw, or you're uncomfortable with them, you can buy a hand saw for about $25. It's no good for cutting plywood or MDF, but for solid wood it's hard to beat.
Mon, 08/06/2012 - 19:26
Nope, I don't think they
Nope, I don't think they will. And if they did you won't be happy with the outcome. Too many cuts and there's no way they'll get every cut right. You'd be better off finding a friend with a miter saw you could borrow for an hour to get all the pieces cut. Good luck!
Sun, 08/12/2012 - 08:27
Farm house doll's bed
Thank you........ I may have to stop been afraid of using this tools and just use it lol............love this bed and my daughter want me to make it for her........ I will post pictures
Tue, 10/29/2013 - 08:53
selling one?
Just curious if you have ever thought of making these and selling them?? I have been looking for a doll bunk bed for my daughter for Christmas and love this bunk bed with trundle. So thought I would ask if you would consider making one and selling it!!
Sun, 12/08/2013 - 18:07
Beds and bedding are gorgeous!!!
I absolutely love what you did with the trundle and the bunk bed. You are so talented! Thank you so much for sharing the measurements that you used to make the bunk bed and sharing tips. I am going to attempt to make one for my daughter. This will be my first woodworking project. I am crossing my fingers it goes well. Thank you! :)
Sonny's Play Mud Kitchen
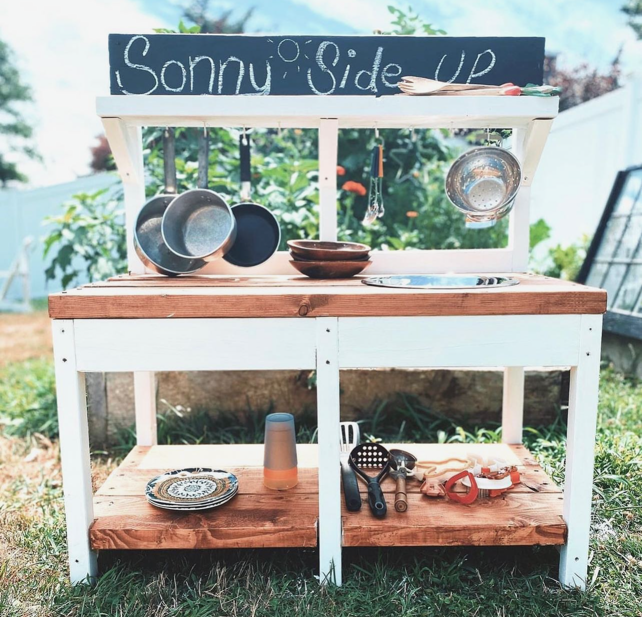
Darling Mud Kitchen by Sarah Jean Gammon
"I had this idea of making Sonny a mud-kitchen, a kids play kitchen for the yard. I mentioned it to Brent and he laughed saying he had enough projects on his list. This was not something he was going to build. Sooo I built this all by my self...or as Sonny would say, “me do this my own self”. It cost ~30 bucks in lumber and a trip to the thrift store for some second hand pots and pans. 3 hours later, a little paint, a little stain and voila... Sonny Side Up Mud Kitchen! Thanks for the plans Ana."
Built from Plan(s)
First Project
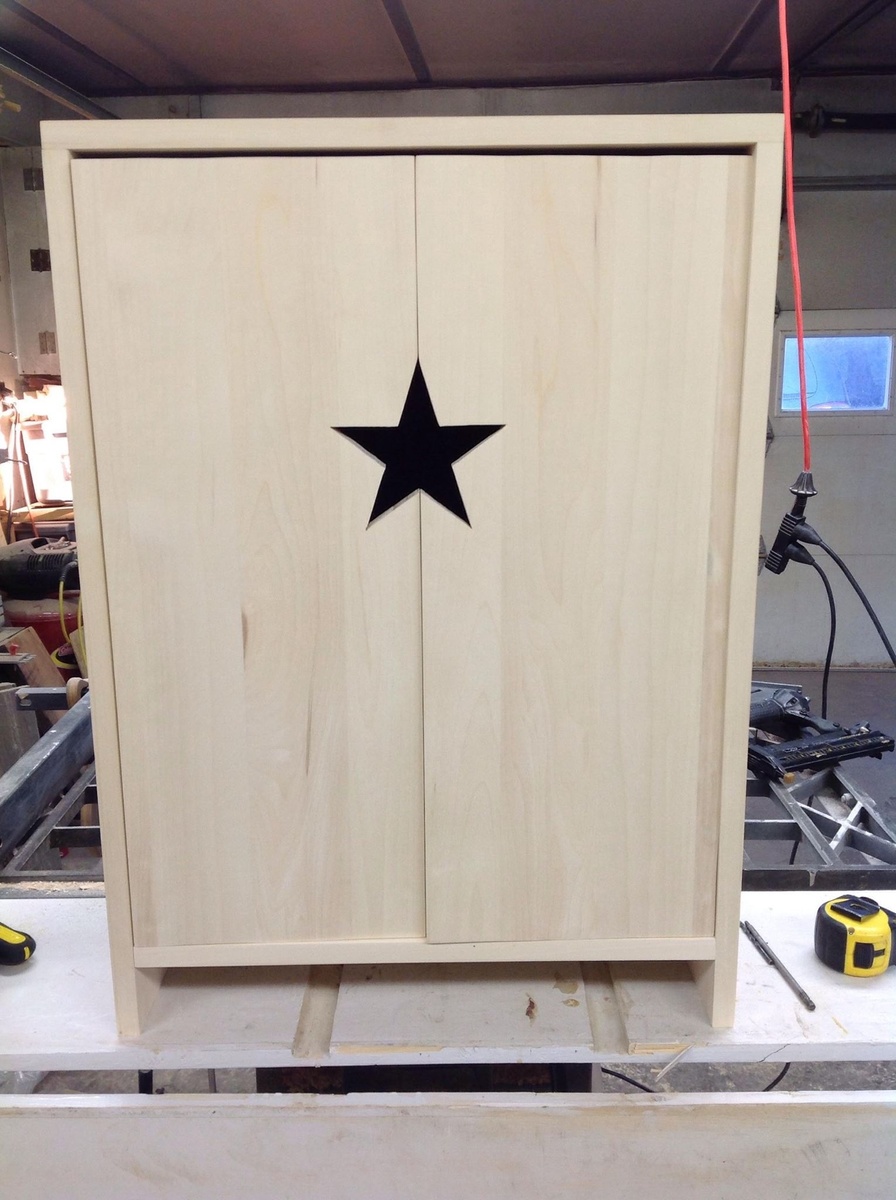
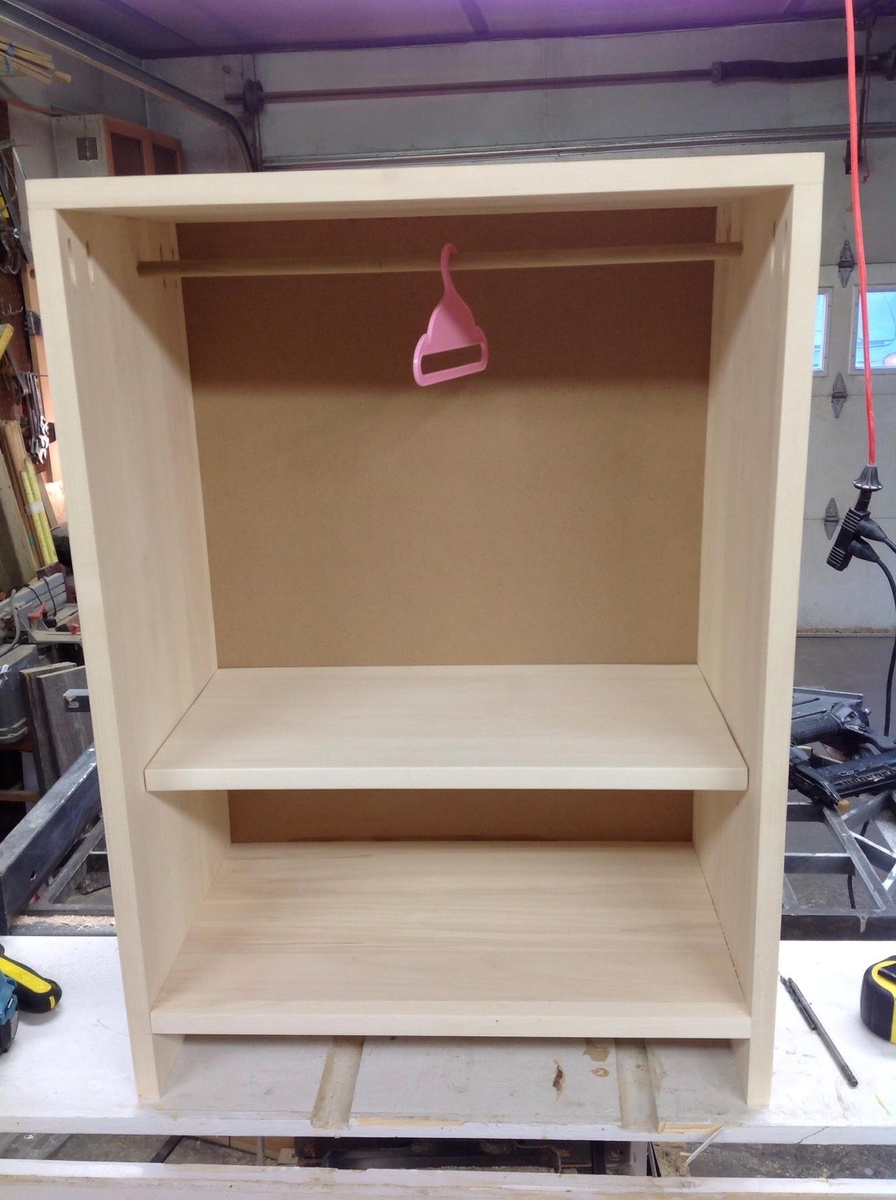
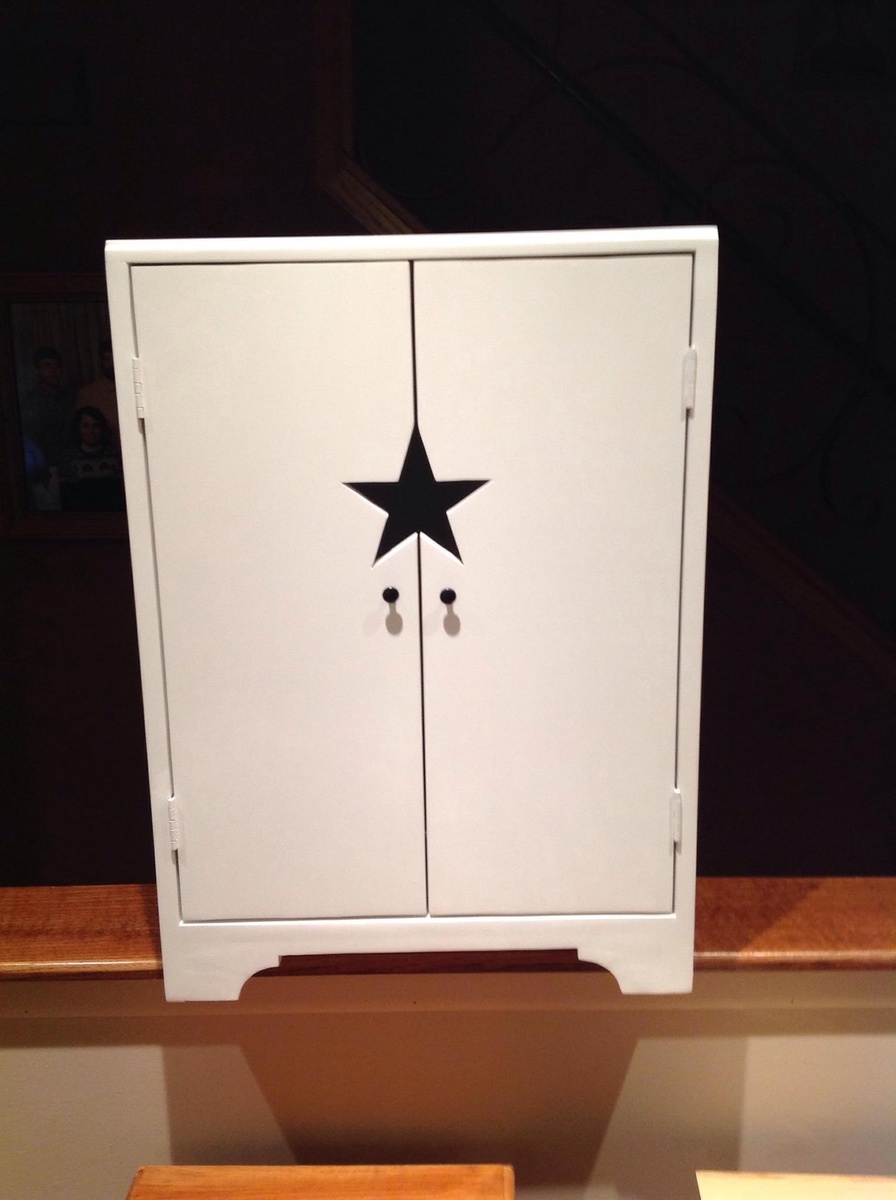
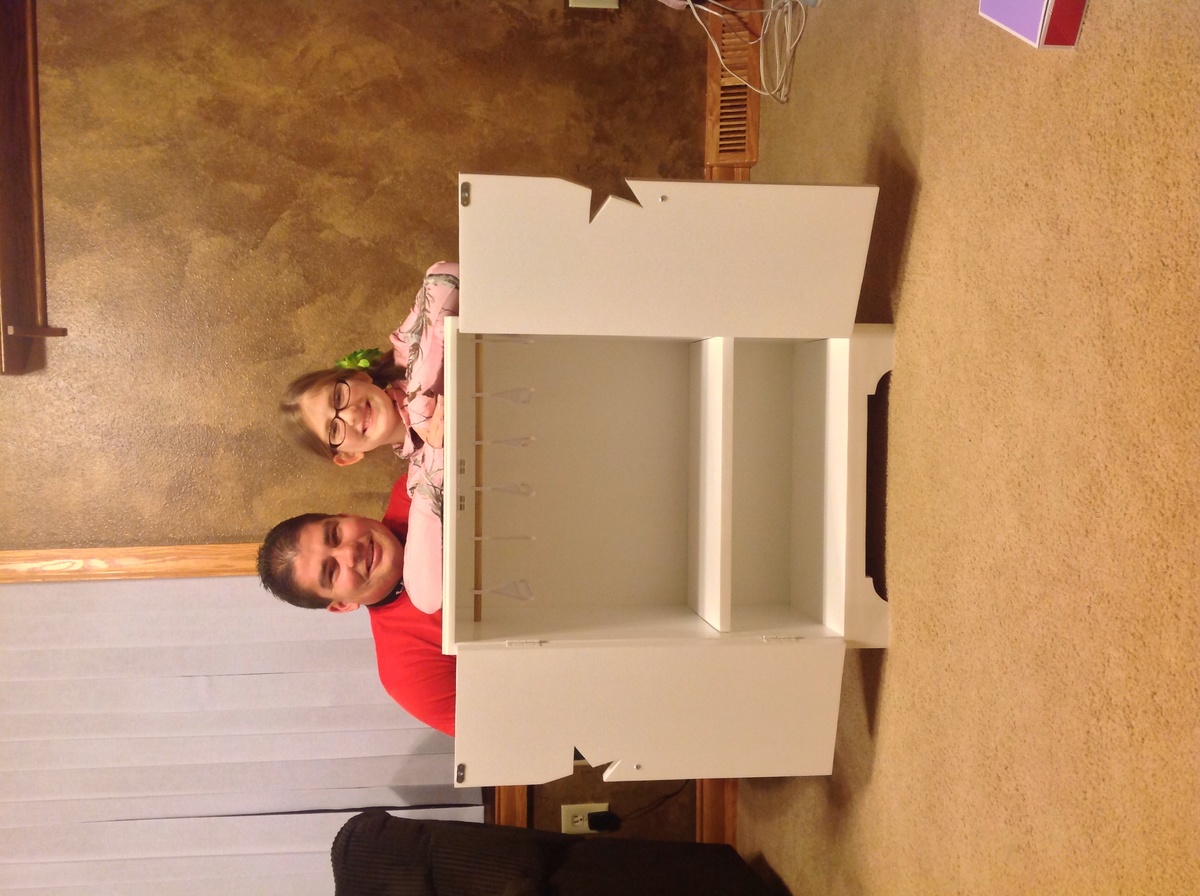
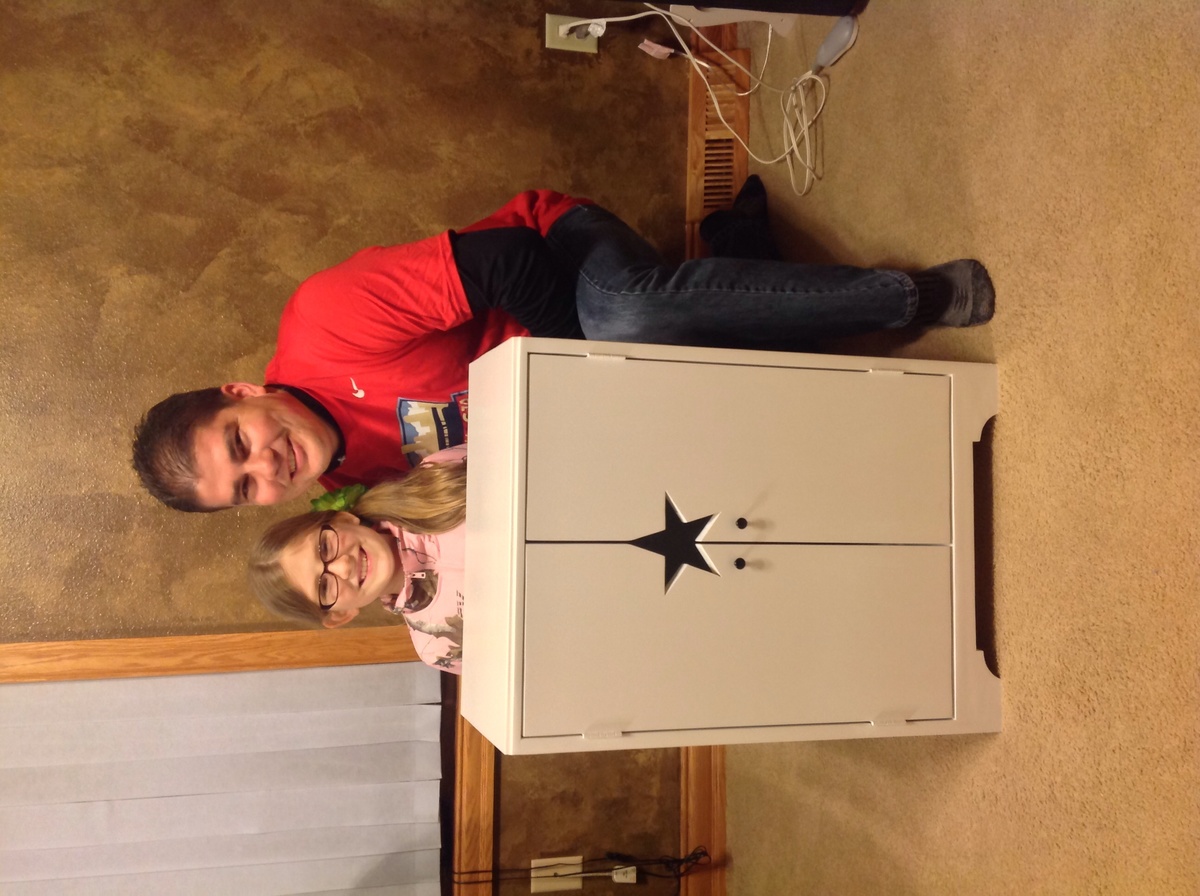
My 11 year old is a girlie girl and has been asking my wife and I for the American Girl Star Armoire cabinet for 2 years. I found a similar plan here on Ana-White's Plan page. I decide to use a little nice quality wood (Aspen) instead of just a clear pine wood. It turned out nicer than even I could have expected.
My daughter got this for her 11 Bday this past Sunday and has already filled the cabinet with all her special AG Dresses. I added my own twist by putting a 1/4" Chalkboard back on it so she can use it to play school with her AG Dolls.
I have a couple people interested in making one for them for Christmas. :)
My next project will be one of the bunk-beds featured on Ana's website.
Built from Plan(s)
Estimated Cost
$72.00 (Material & Hardware ONLY)
Estimated Time Investment
Afternoon Project (3-6 Hours)
Finish Used
My friend has a "cup gun" sprayer and the cabinet has 3 coats of white paint.
Recommended Skill Level
Beginner
Comments
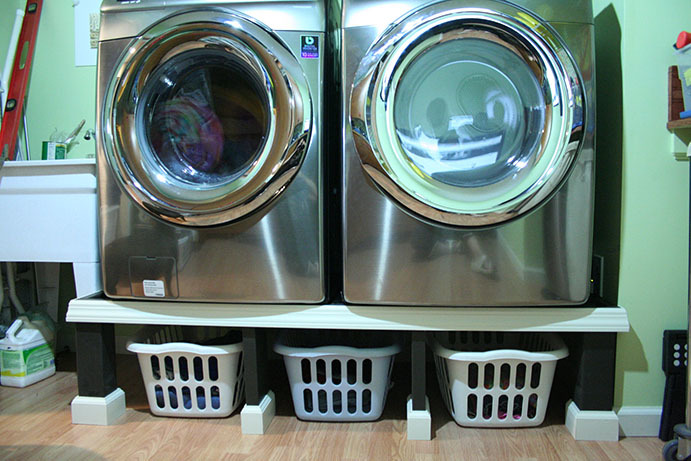
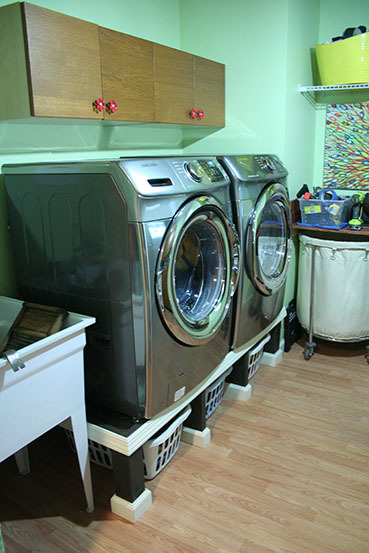
Modified washer/dryer pedestal
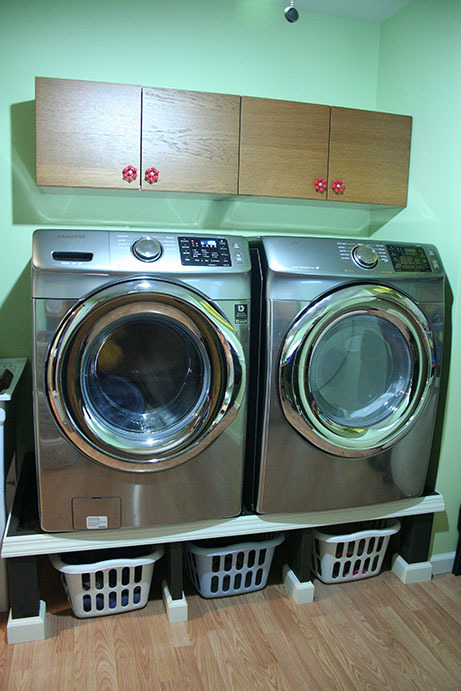
I loved the idea of building a washer and dryer pedestal for extra laundry basket storage underneath! Sashua's is beautiful so I took her idea and modified it a bit to work for me. My washer is very, very heavy and I was worried that if there was no support under the weight in the middle, it would start to bow and sag. The original plan also put the washer too high for me to have been able to use without a step stool. So in my modification I screwed cleats into the 2X4 frame of the laundry room wall, placed the 3/4" plywood on top of it and screwed it in. In the front, I used 4X4's as the two corner leg supports and then added two 1X6 supports in the front center, creating three laundry basket bays. I placed it directly onto the floor as opposed to building the bottom base. This saved me money since I was able to buy half the lumber and also allowed me to lower the height of the platform while leaving enough space for my baskets. The top of my platform is approximately 14 1/2" high, which is just low enough so that I can see into the soap filling compartment at the top of the washer. Being that I'm only 5'2" I would have needed to use a step stool to use my washer at the original 19 1/2" plan height. I framed the top edge of the platform with 2X2's, to ensure that my washer or dryer never walked off the edge. Finally, I added some trim along the front edge and around the legs and that's it!
Built from Plan(s)
Estimated Cost
$60
Estimated Time Investment
Afternoon Project (3-6 Hours)
Recommended Skill Level
Beginner
Comments

Mon, 02/15/2016 - 12:25
Looks Great!!!
I REALLY like this modified version, I think it looks GREAT! when you say you screwed cleats to the back wall, are you talking a 2x4 across the back fastened to the studs, or what did you use? I think my wife would love this version, and I may just have to get started on one myself. ![]()
One arm 2x4 outdoor sofa
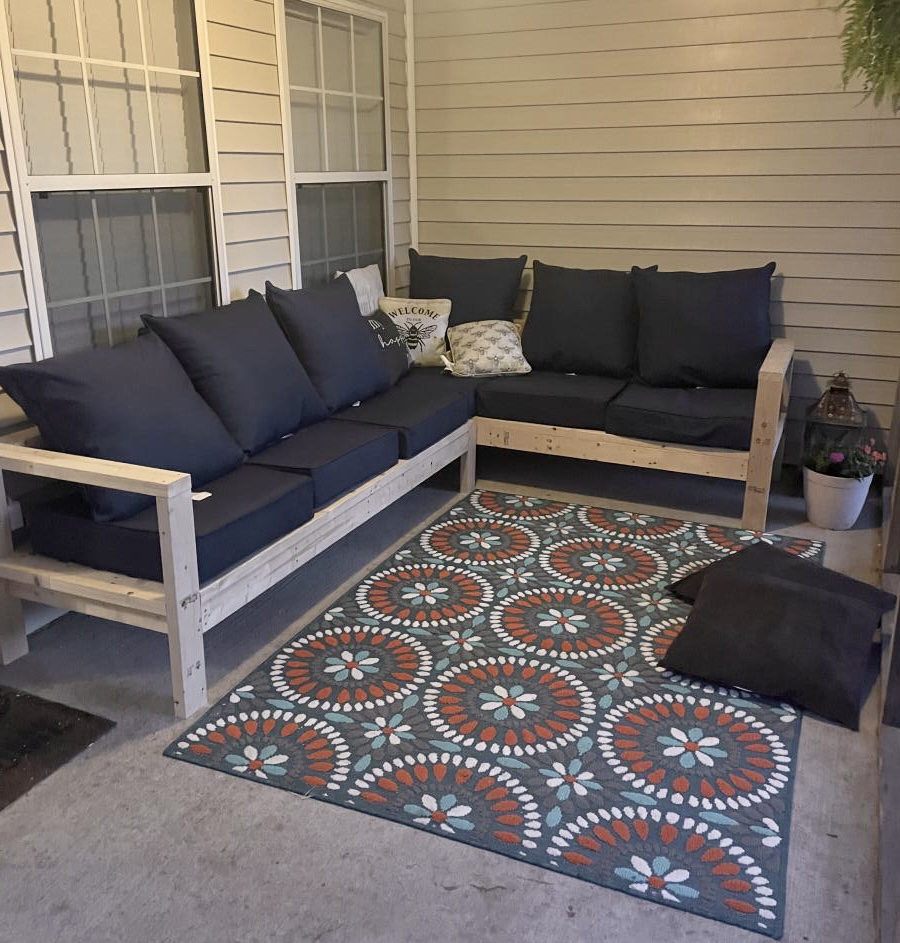
This was so super easy. We are so in love with this. Thank you Ana for making DIY so much fun!

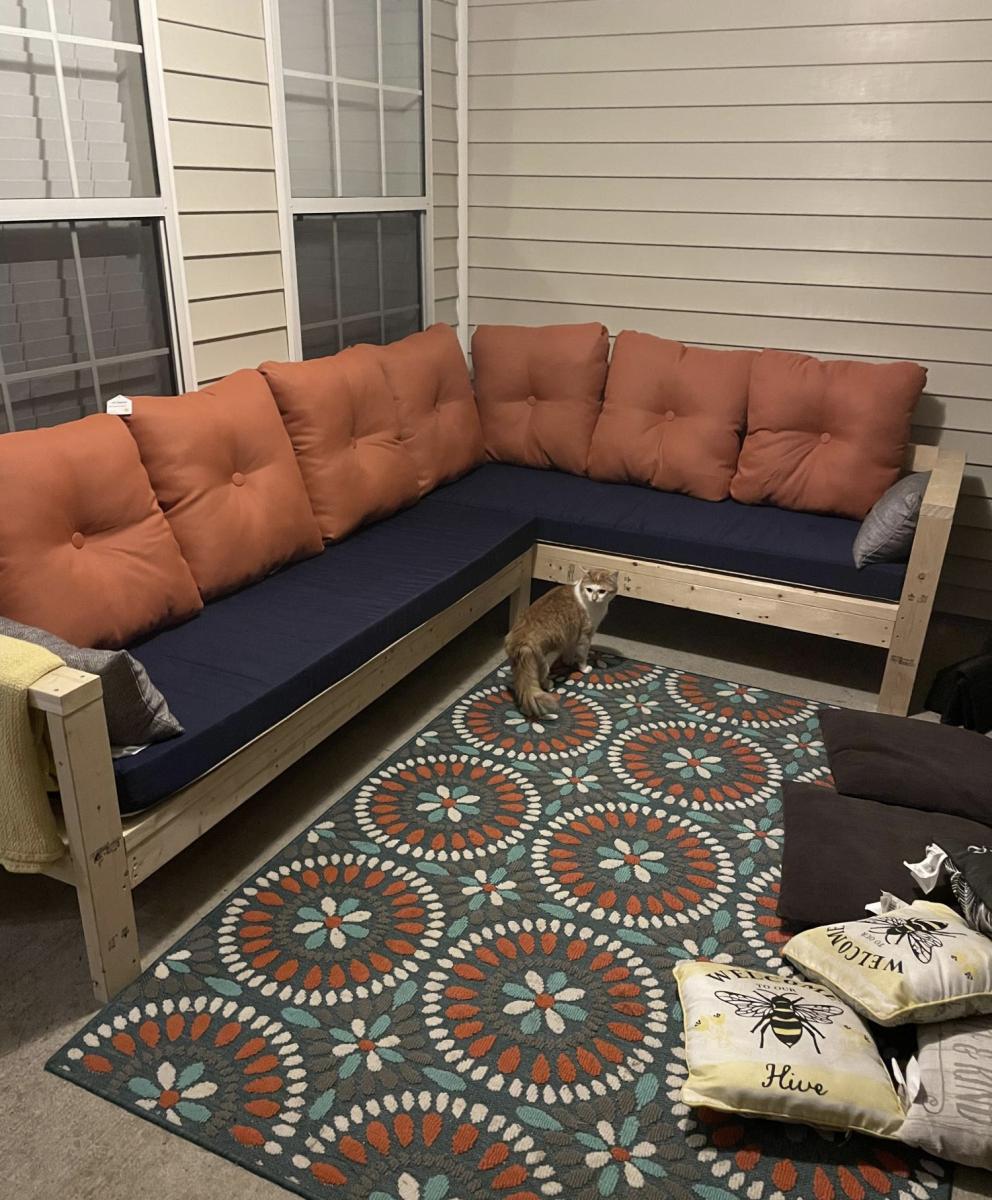
Built from Plan(s)
Comments
Thu, 05/18/2023 - 09:22
Excellent outdoor seating!
Way to go, so happy you enjoy it! Thanks for sharing.
High back porch swing
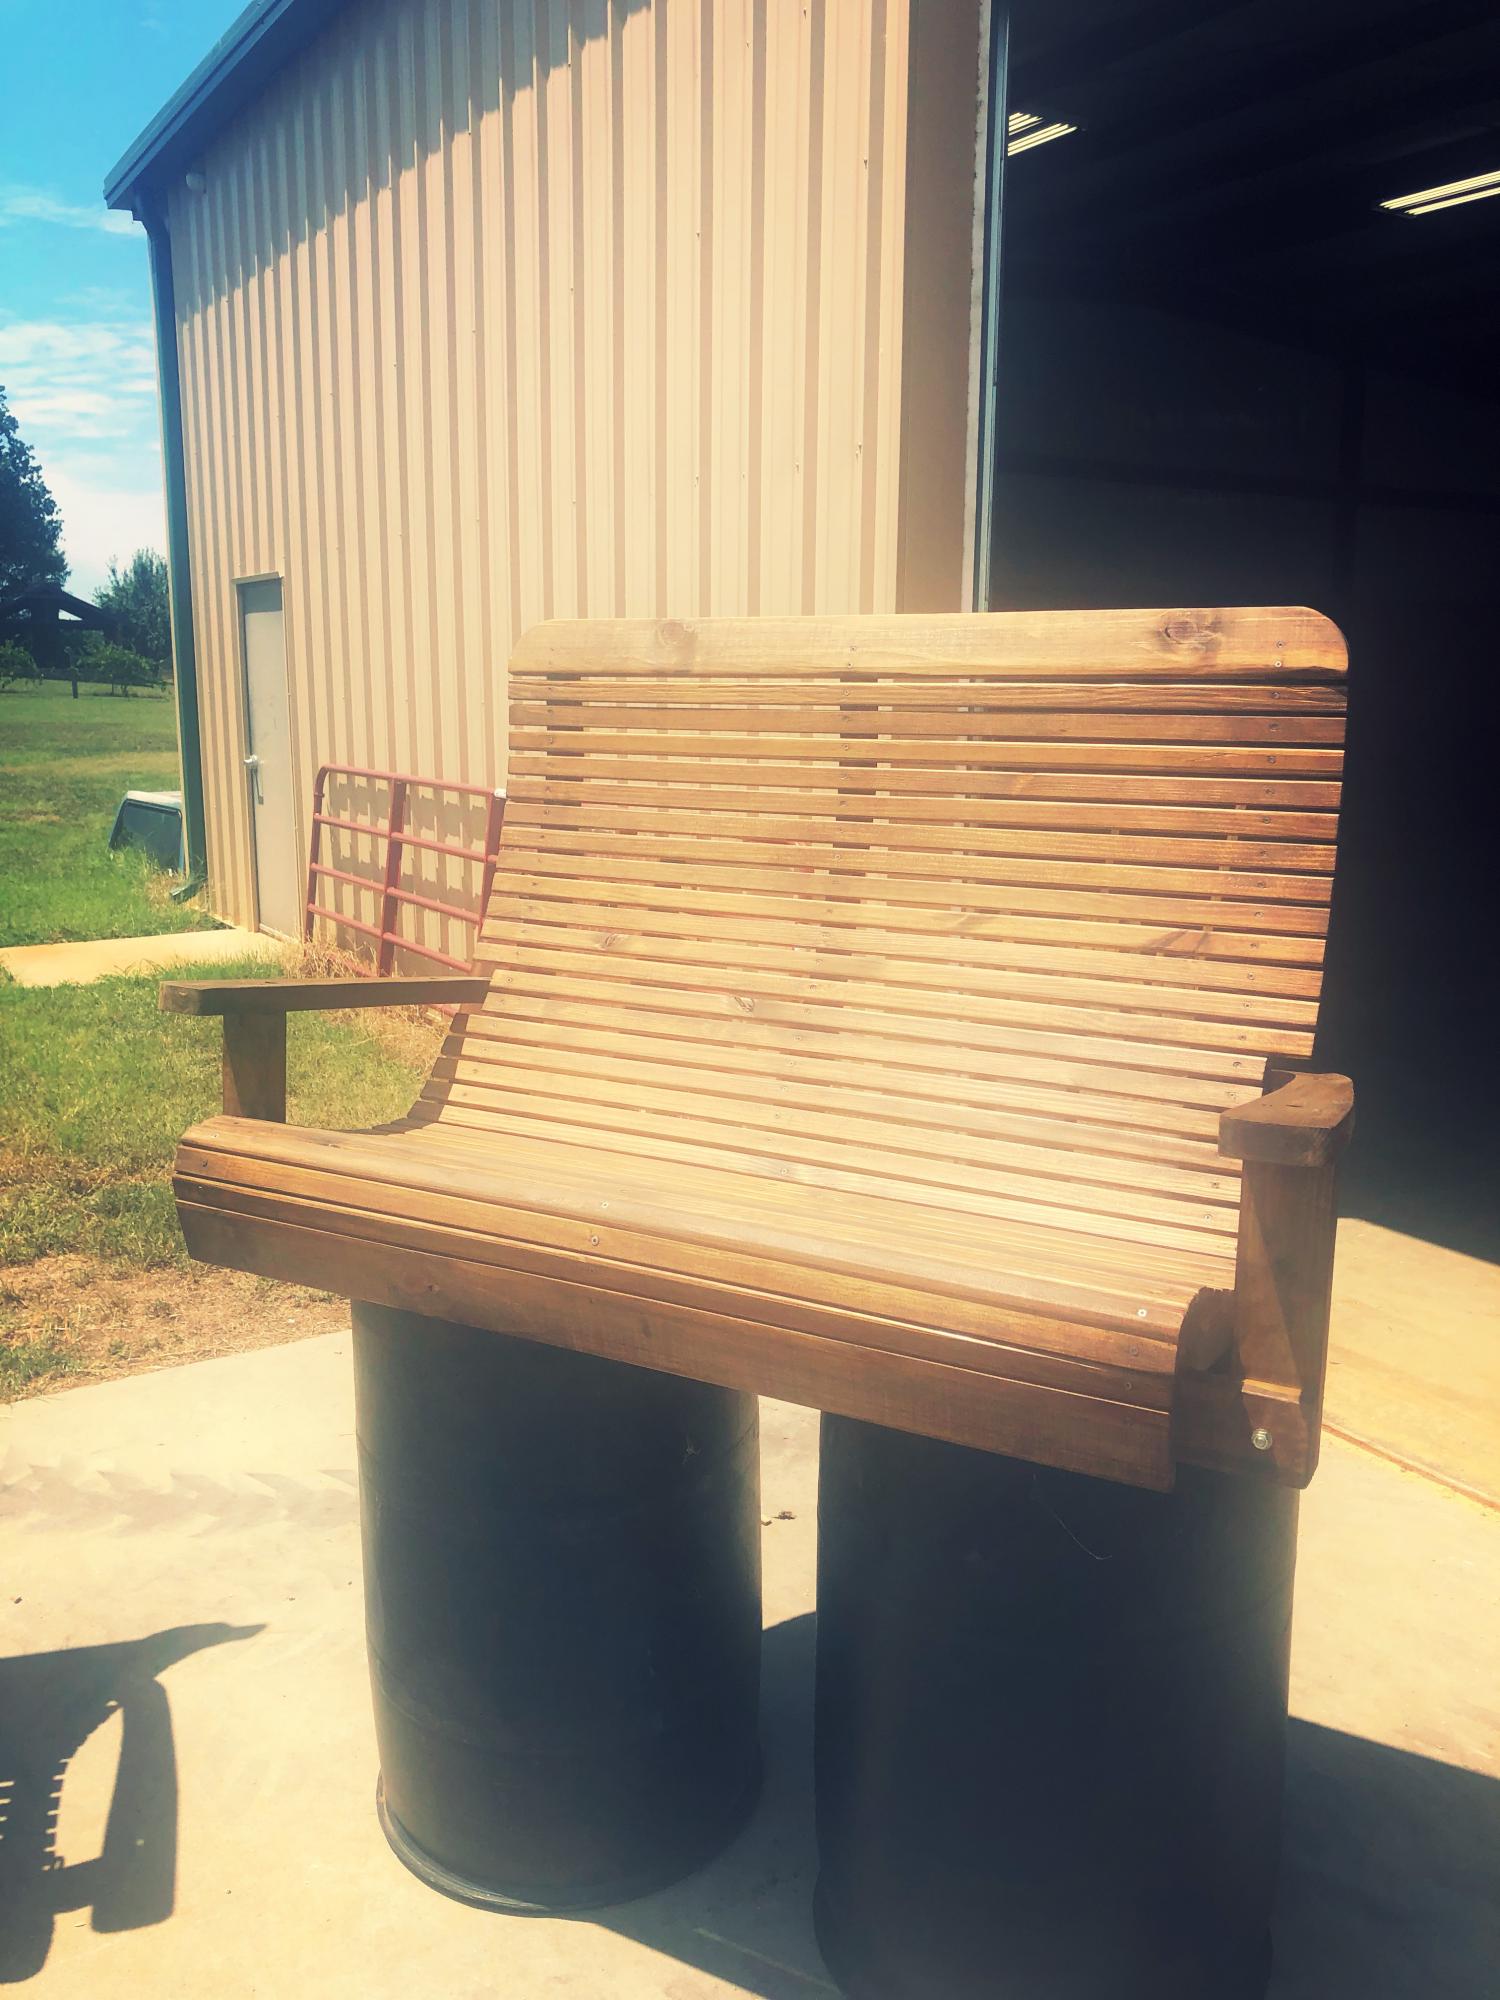
it was an old swing on the family farm. I saved it from the burn pile and remade it. Have made five so far. All hav even 5ft wide, but one was 7ft. Amazingly comfortable swing!
Estimated Cost
175
Estimated Time Investment
Weekend Project (10-20 Hours)
Finish Used
Provincial 211
Recommended Skill Level
Intermediate
Comments

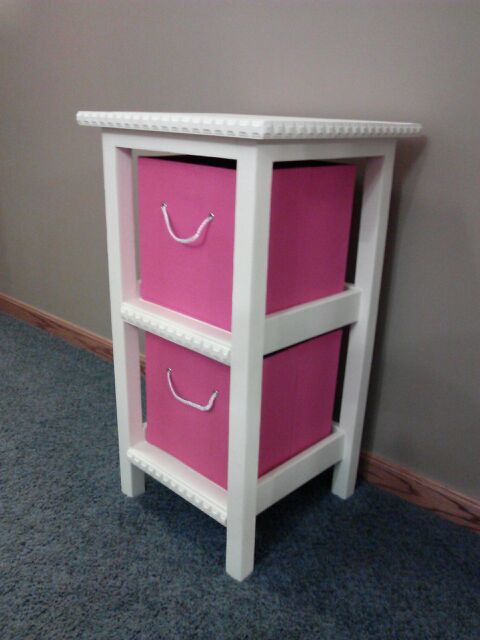
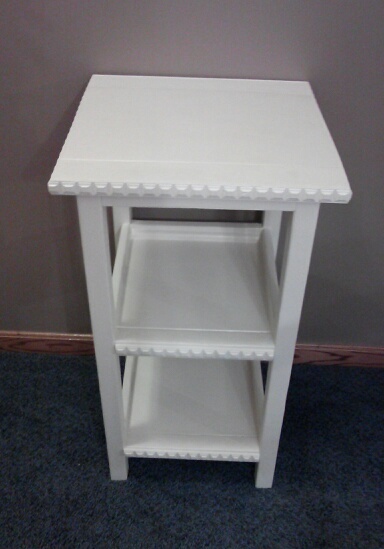
Storage Basket Shelves
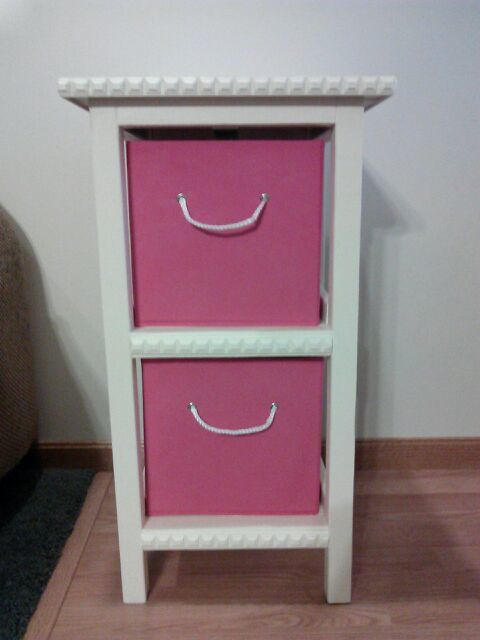
I built this and then ordered storage baskets that fit to the size. I built it exactly to the plan except I did not make the top flush to a back wall and I added decorative trim. I think adding trim really adds a nice look to this project.
The tower was super easy to build and took hardly any time. The most time was spent on the finishing work (sanding and painting).
Built from Plan(s)
Estimated Cost
Unknown/used leftover wood
Estimated Time Investment
Afternoon Project (3-6 Hours)
Finish Used
Sherwin Williams sample paint color matched to an antique white.
Recommended Skill Level
Beginner
Rustic X-Entryway Table
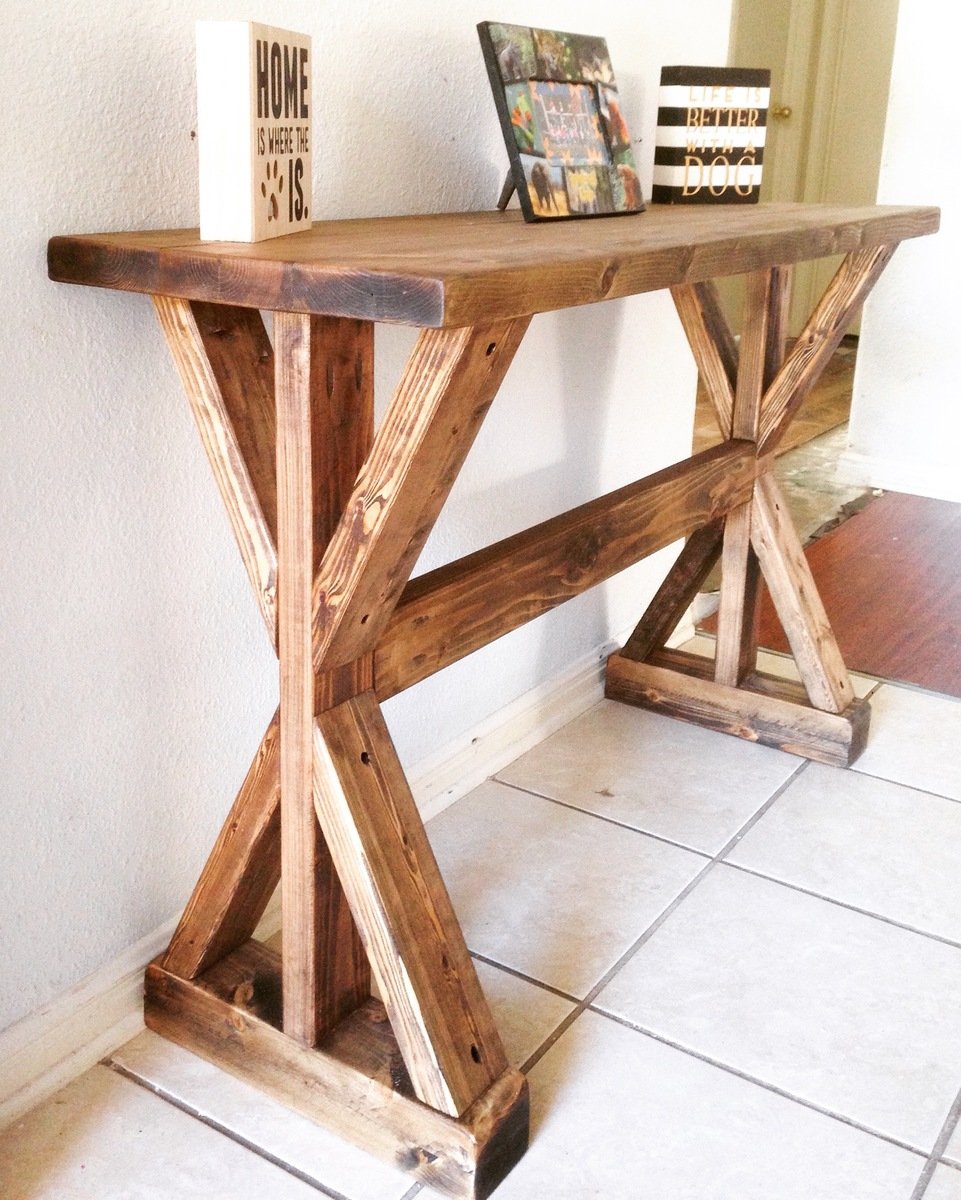
Handmade rustic entryway table. Stained with Varathane Stain and made from 2x4s & 2x6s Canadian white pine
Estimated Cost
$25
Estimated Time Investment
Day Project (6-9 Hours)
Finish Used
Varathane Ash Stain.
Varathane Polyurethane Satin
Varathane Polyurethane Satin
Recommended Skill Level
Intermediate
Comments
Mon, 04/11/2016 - 05:30
Dimensions
Hi,
I really love your entryway table. Do you have a plan that we can use with dimensions and cut list?
Thank you
Tue, 05/17/2016 - 20:33
Plans? What saw(s) did you use?
Hello can you provide us with plans for this? What saw(s) did you use?
Sun, 08/21/2016 - 08:18
Do you have plans for this
Do you have plans for this entry table?! I love it but can't seem to find the plans?
Thank you!
In reply to Are there plans for this ? by Jatin2286
Fri, 03/16/2018 - 10:49
I could draw you plans...
If you are OK with waiting a few days, I could draw you plans based off of the images.
In reply to Are there plans for this ? by Jatin2286
Sat, 03/17/2018 - 19:38
Here are plans for you.
I modified the design slightly, by adding feet and a 1x4 board accent (that makes it easier to build). I'm assuming the overall height is 29.5" and the length is 48". If you want these to be different, feel free to reach out to me and I can help you adjust.
You can find the plans here: http://famousartisan.com/diy-x-base-sofa-table-plans-or-entry-table/
In reply to Are there plans for this ? by Jatin2286
Sat, 03/17/2018 - 19:39
Here are plans for you.
I modified the design slightly, by adding feet and a 1x4 board accent (that makes it easier to build). I'm assuming the overall height is 29.5" and the length is 48". If you want these to be different, feel free to reach out to me and I can help you adjust.
You can find the plans here: http://famousartisan.com/diy-x-base-sofa-table-plans-or-entry-table/
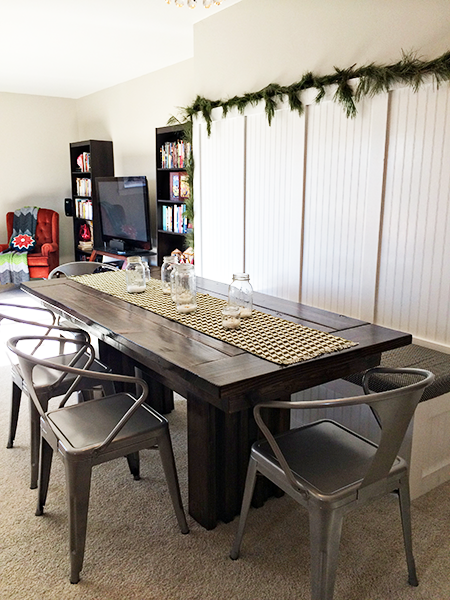
Modern Dining Table
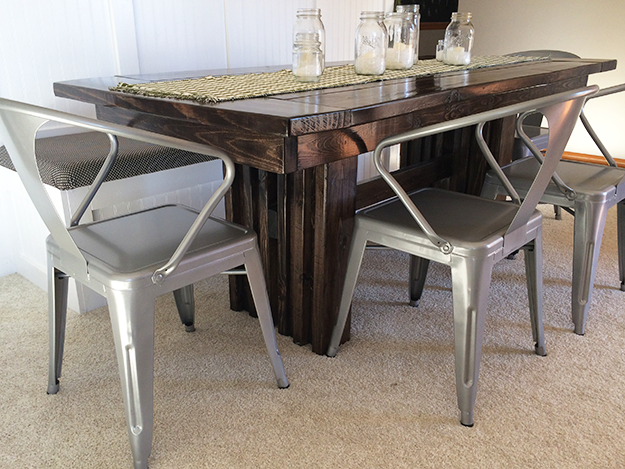
Our extra long living/dining room was just begging for a little definition. So I scoured all of Ana White's plans for some inspiration for the perfect-for-us table. I have never built anything, so I enlisted the help of my genius dad and we got to work!
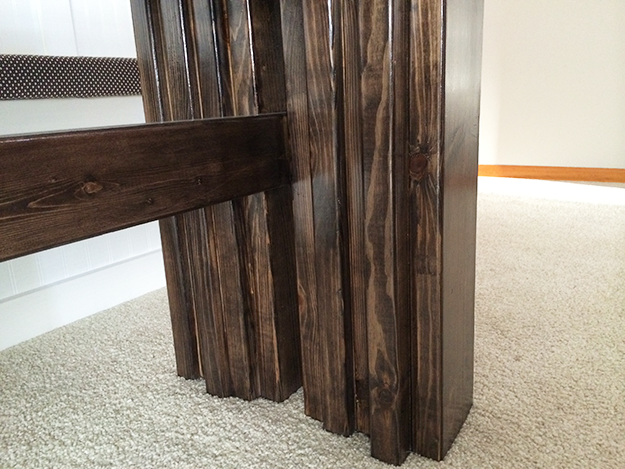
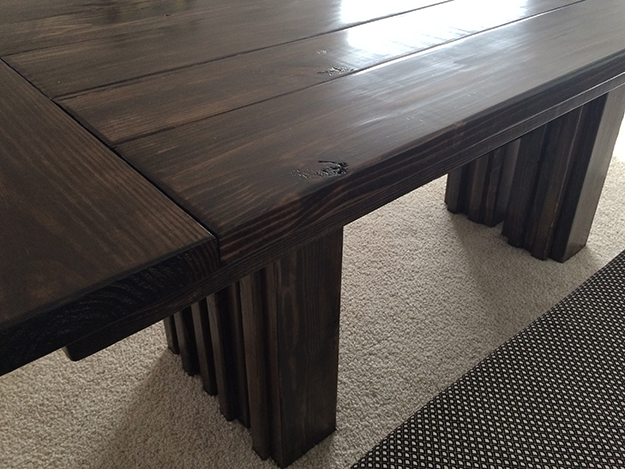
We ended up using elements of the Modern Outdoor Patio Table and the Farmhouse Table. We sized the patio table down to six feet long and used the board layout from the farmhouse table for the table top. We also changed up the table legs a bit to add some visual interest.
After tackling the table, we built the banquette and beadboard wall. I never thought I would learn so much about power tools. Ha! This project was so much fun. Thank you for the free plans!! I can't wait to work on our next project!
You can read more about our table here: http://www.becomingwhitney.com/dining-area-progress/
here: http://www.becomingwhitney.com/it-is-finished/
and here: http://www.becomingwhitney.com/christmas-cheerin-it-up/

Built from Plan(s)
Estimated Cost
$200
Estimated Time Investment
Weekend Project (10-20 Hours)
Finish Used
I sanded this baby within an inch of its life. I chose not to use a wood conditioner because I wanted a rough look, and I adored the unevenness of the stain in some areas. I put on one heavy coat of Minwax Espresso stain with a rag. I used a teeny paintbrush to get the legs and between the planks of the table. Then I sealed it with a semi-gloss water-based poly. I put five coats on the table top and sides and three coats on the legs. It gave it a great finish, but isn't too shiny in person.
Recommended Skill Level
Intermediate
Comments
Tue, 01/07/2014 - 10:15
Awesome table!
The fabulous thing about DIY is how you can modify a plan to suit your needs. You and your dad have built a one-of-a-kind that can be handed down to future generations. Love the style and finish. Keep up the good work!
Tue, 02/18/2014 - 19:39
your table
can you share the cut list and measurements for your beautiful TABLE?
BIG STEVE
Round Farmhouse table
I took on a little bit more than I could chew with this one, but after a little R&I(Resourcefulness, and Ingenuity) I was able to figure it out. I love how it turned out though! Thanks for the inspiration!
Built from Plan(s)
Estimated Cost
$120
Estimated Time Investment
Weekend Project (10-20 Hours)
Finish Used
Dark Walnut with Matte poly top coat
Recommended Skill Level
Intermediate
Comments
4 Person Sewing Table
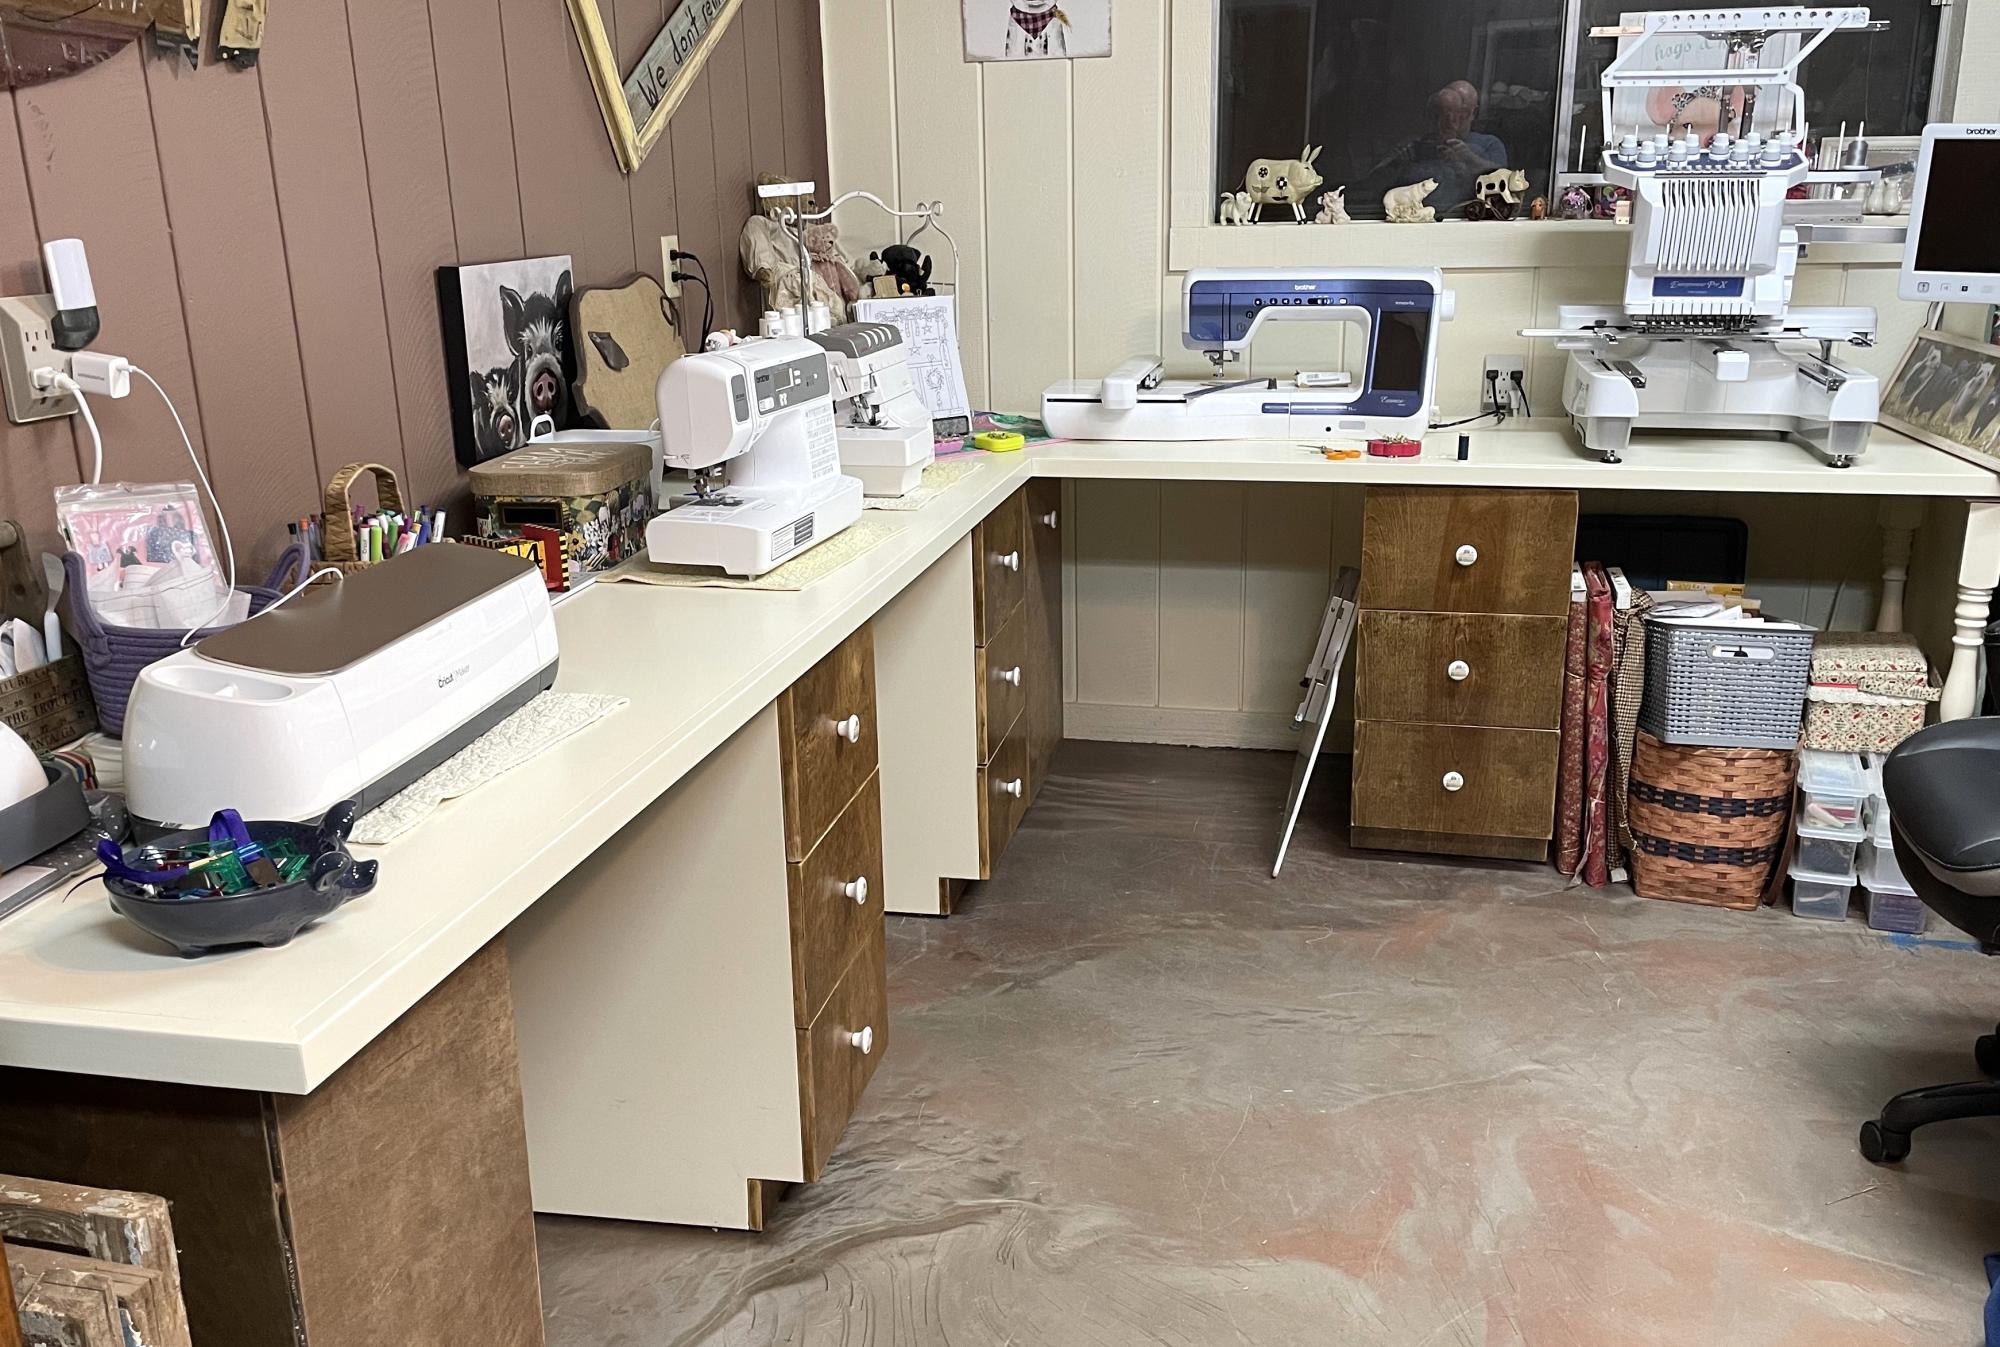
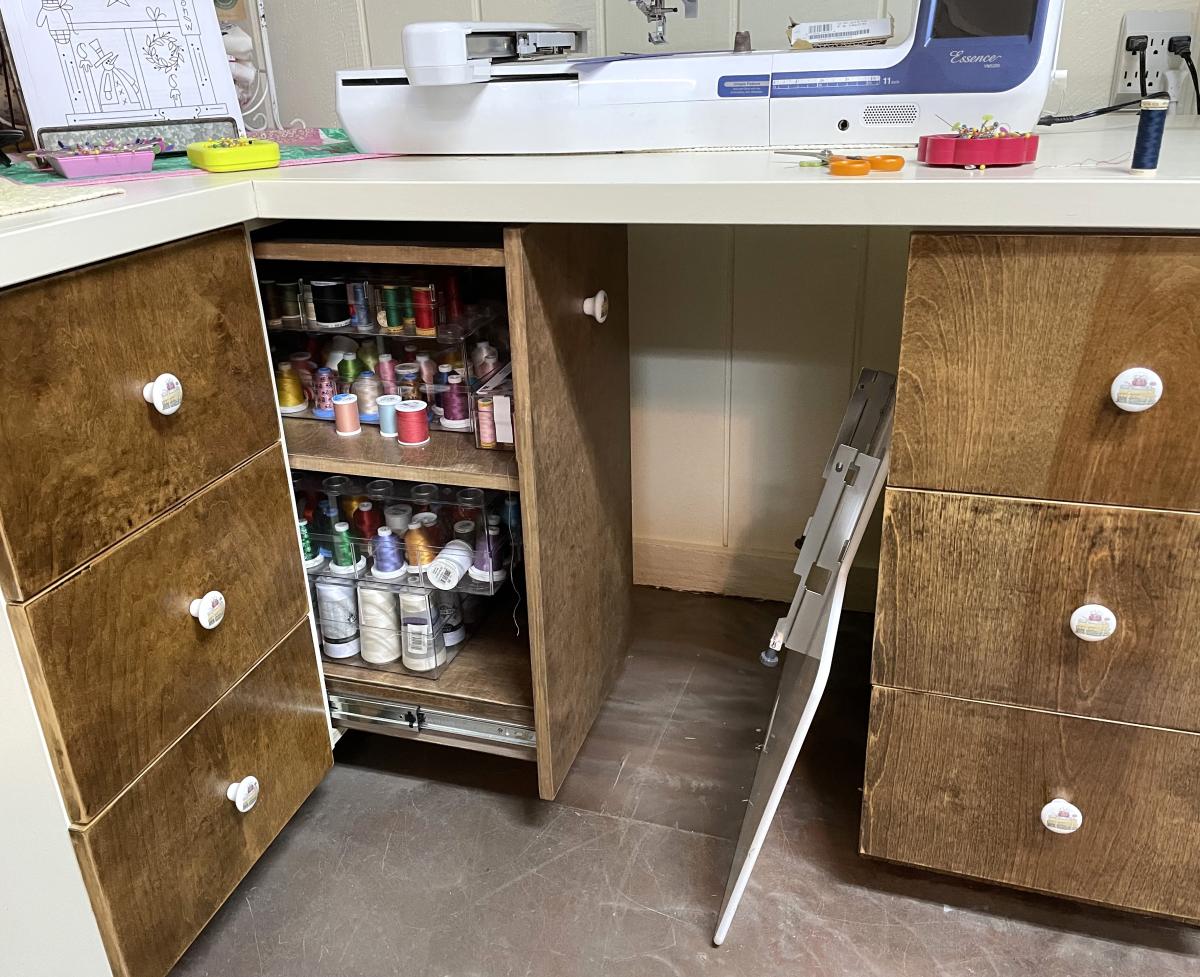
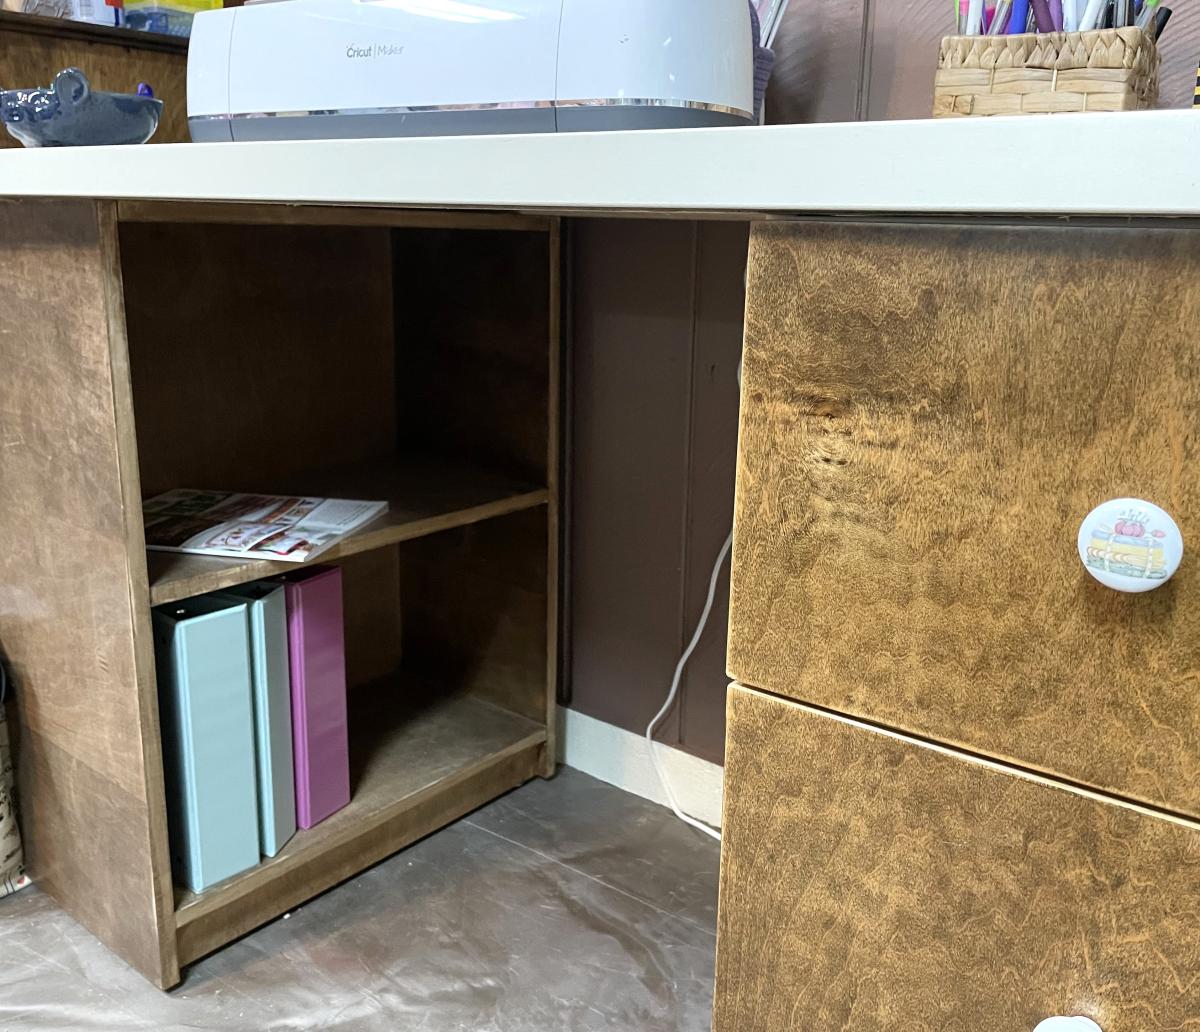
Four station sewing table. Each station separated by a 15” 3 drawer cabinet. Blind corner includes a pull out shelf/book case which doubles as support for the back corner. Long end supported by a bookshelf which is turned 180 from the original design due to other furniture placement that can easily be changed later. Short end supported by temporary legs. 5th station and additional 5ft. of cabinets on the way. Roughly 10ft x 8ft x 26in. x 31in. high. Wife saw similar on Pinterest which was tagged Ana White but only found brag post so used imagination and basic cabinet design plans modified to meet my size requirements.
Pops’ Workshop
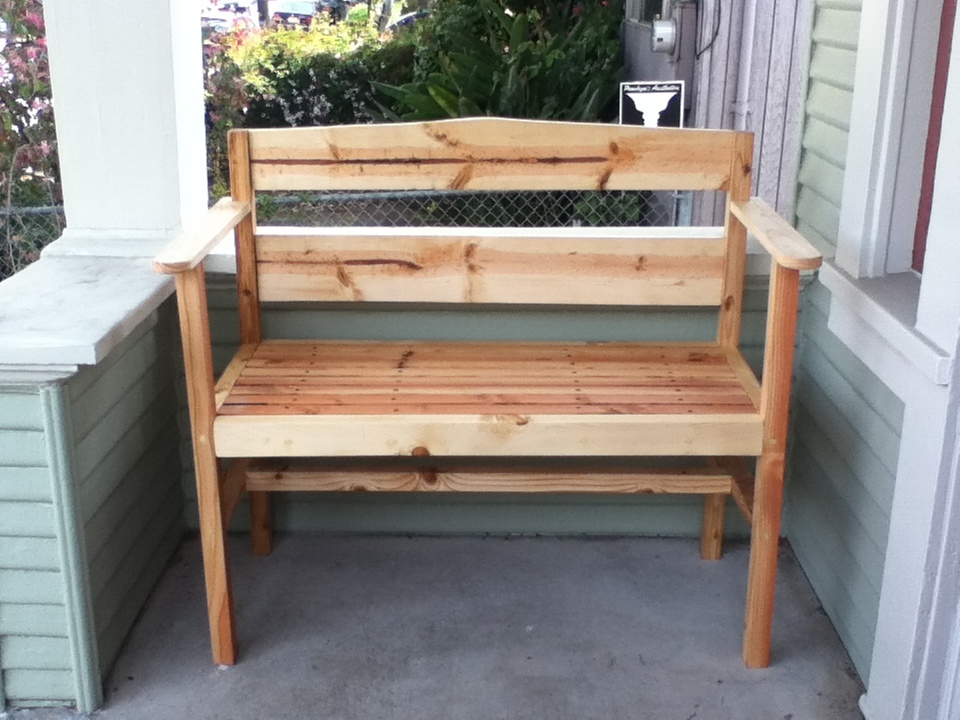
Garden Bench on a diet
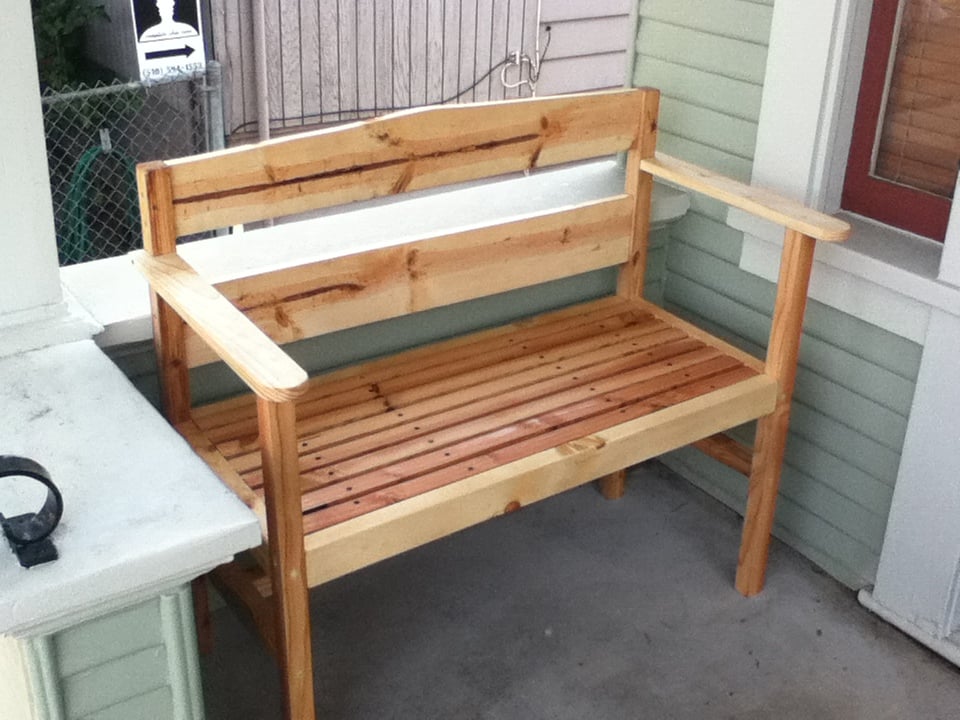
This bench was perfect for our front porch, but after I bought all the lumber I realized how big and substantial it would be. So, I slimmed it down and swapped out the following: seat slats 1x2, posts and supports 2x2, arms 1x3, backrest 1x6, aprons 2x3. Looks great and feels like a better fit for our porch. Enjoying the afternoon sun in style now, thanks!
Built from Plan(s)
Estimated Cost
$25
Estimated Time Investment
Day Project (6-9 Hours)
Finish Used
Thompson's Water Seal
Recommended Skill Level
Beginner
Comments
Wed, 05/01/2013 - 09:31
bench on a diet
I would like to make the bench on a diet since my front porch is smaller aswell. Are the cuts the same as original plans?
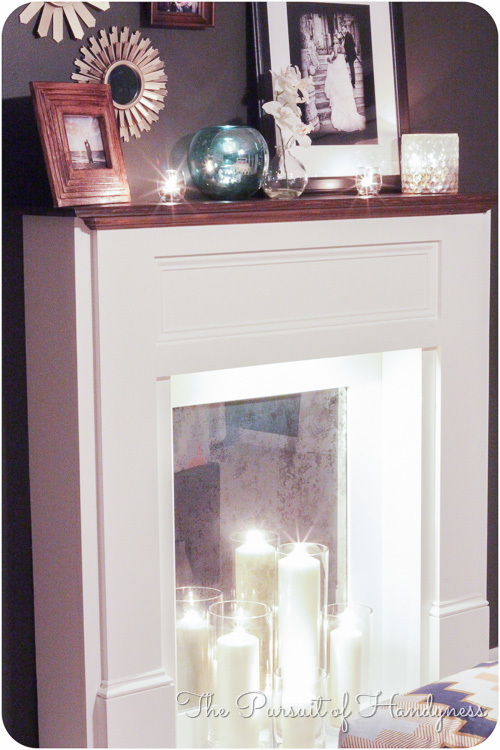
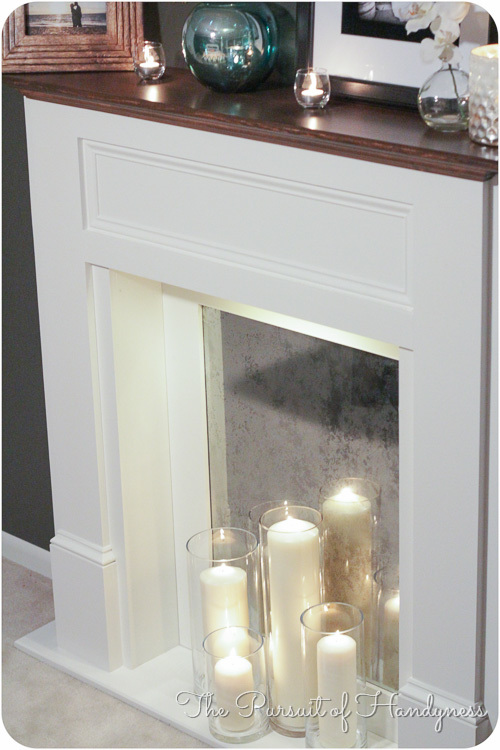
DIY Faux Mantle /Fireplace
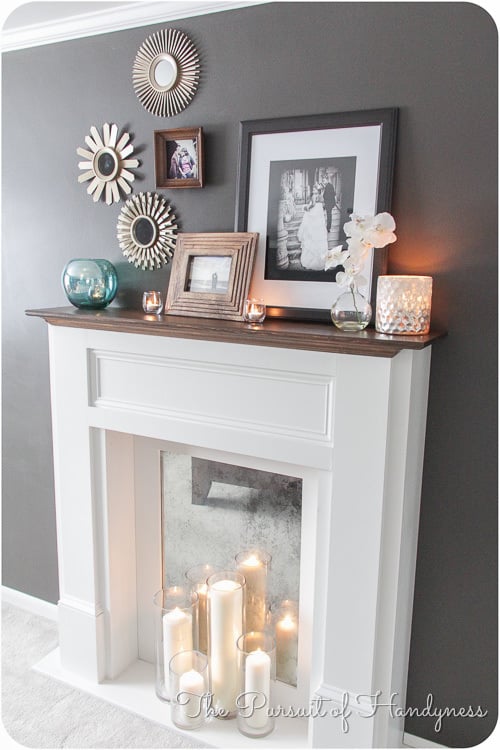
When I first saw Mimi's Faux Mantle I dreamed about building one for my house but I didn't know where. When I began renovating my Master Bedroom I found the perfect place for it on a bare uninteresting wall.
To add interest to the mantle, I stained the top and attached a faux hearth using a 1x12 painted the same color as the rest of the mantle. I also Diy'd a distressed mirror glass insert to bounce the lighting off. I added low voltage LED lights too.
It turned out better than I expected.
Visit my blog http://thepursuitofhandyness.com for a full tutorial of the building process and the distressed mirror glass.

Built from Plan(s)
Estimated Cost
$25.00 - $75.00
Estimated Time Investment
Day Project (6-9 Hours)
Finish Used
Behr Silky White in Satin & Rustoleum Ultimate Stain in Early American mixed with Dark Walnut. Sealed with Rustoleum Ultimate Polyurethane in Satin.
Recommended Skill Level
Intermediate
Comments
Wed, 01/22/2014 - 23:56
broken link
Hi Ana,any chance you can fix the link for the plans of this mantle?
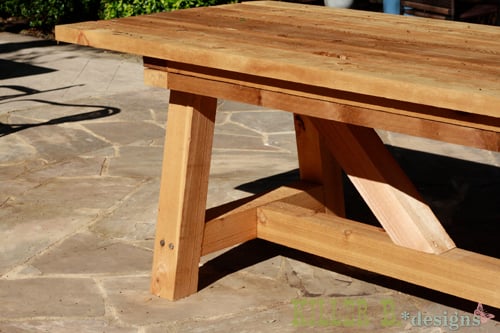
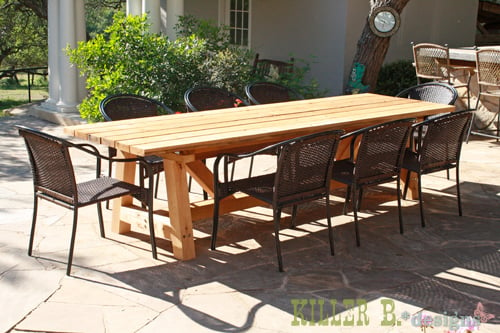
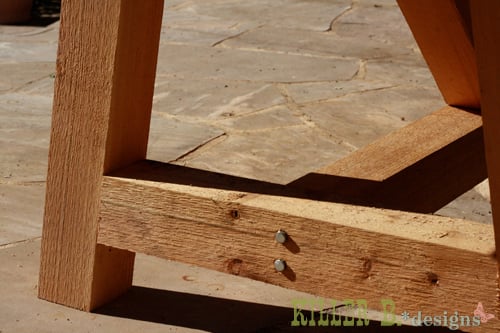
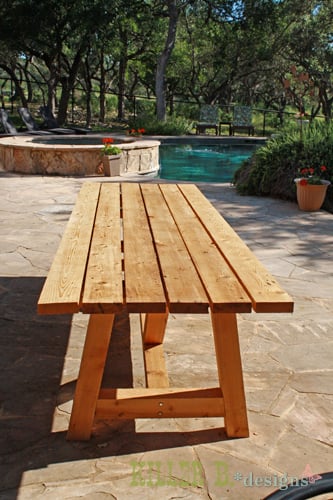
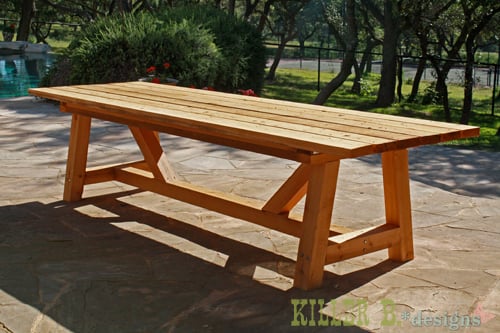
10 foot long Provence Table with 4x4's
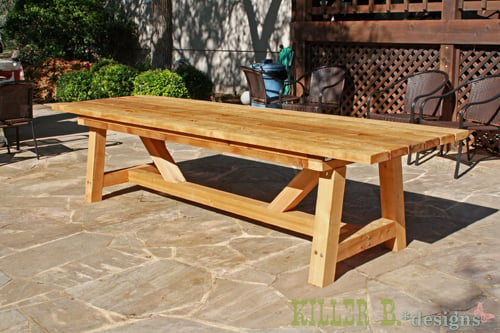
My mom was looking for a new outdoor table, and asked me to come up with something. I found the link for these plans (http://www.thedesignconfidential.com/2011/04/free-diy-furniture-plans-t…) to knock off Restoration Hardware's $4000 Provence Beam outdoor table. Overall I liked the plan, with the chunkier look of the 4x4's. But there were a lot of errors in the diagrams, and the finished height is 34" which is ridiculously tall for a table. So we took it apart and cut the legs back down to change the finished height to 30". We chose rough-cut cedar for it's look and outdoor properties, not wanting to use treated lumber for a dining table. We couldn't find 2x10's like the plan, so we substituted seven 2x6's just like Ana's plan, but left a 1/2" gap in between so water can drain and not pool on top and rot the wood. Also, since we were working with 4x4's for the legs, we chose heavy duty lag bolts instead of screws to join them together. I love the finished look they give. Overall it's a sturdy, yet lightweight table that my mom loves and has already used for entertaining!
Built from Plan(s)
Estimated Cost
$230
Estimated Time Investment
Day Project (6-9 Hours)
Finish Used
outdoor sealer
Recommended Skill Level
Advanced
Comments

Wed, 04/25/2012 - 10:02
Thank you!
Thanks Brook! It was so much fun to build. I put my dad and husband to work while I was the "project manager" ;)
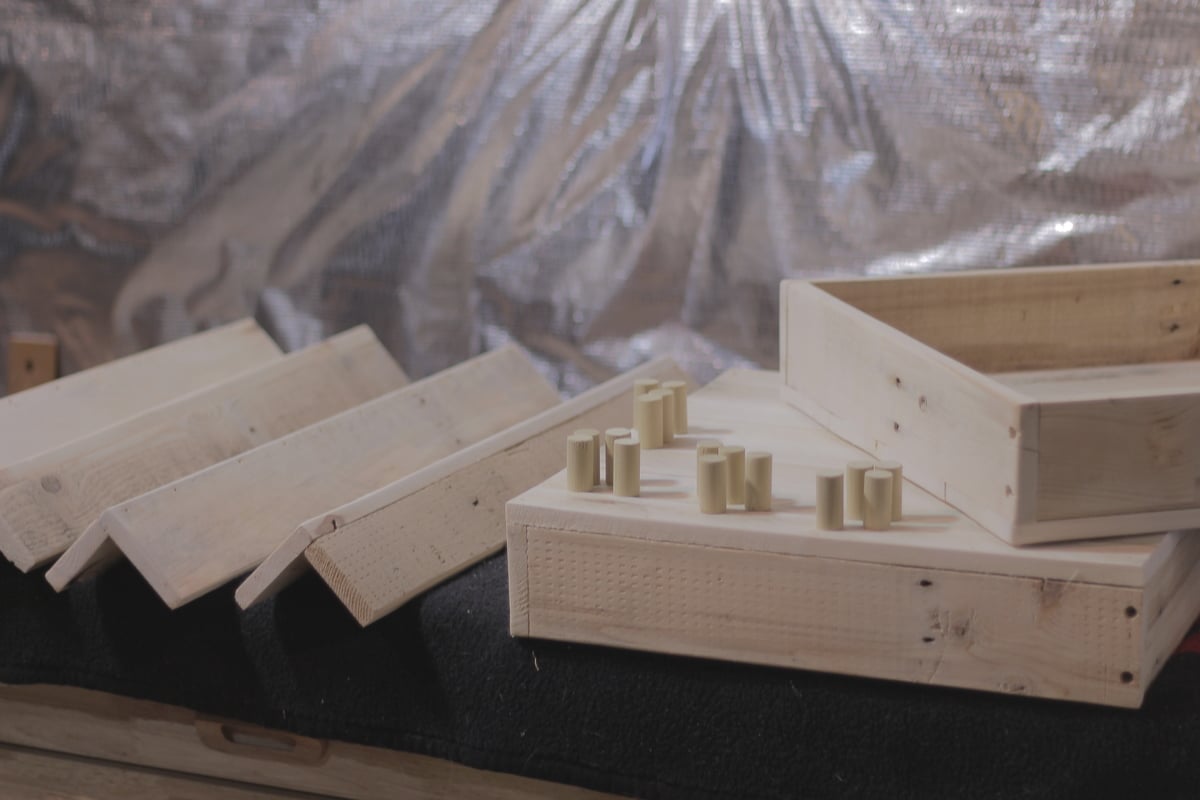
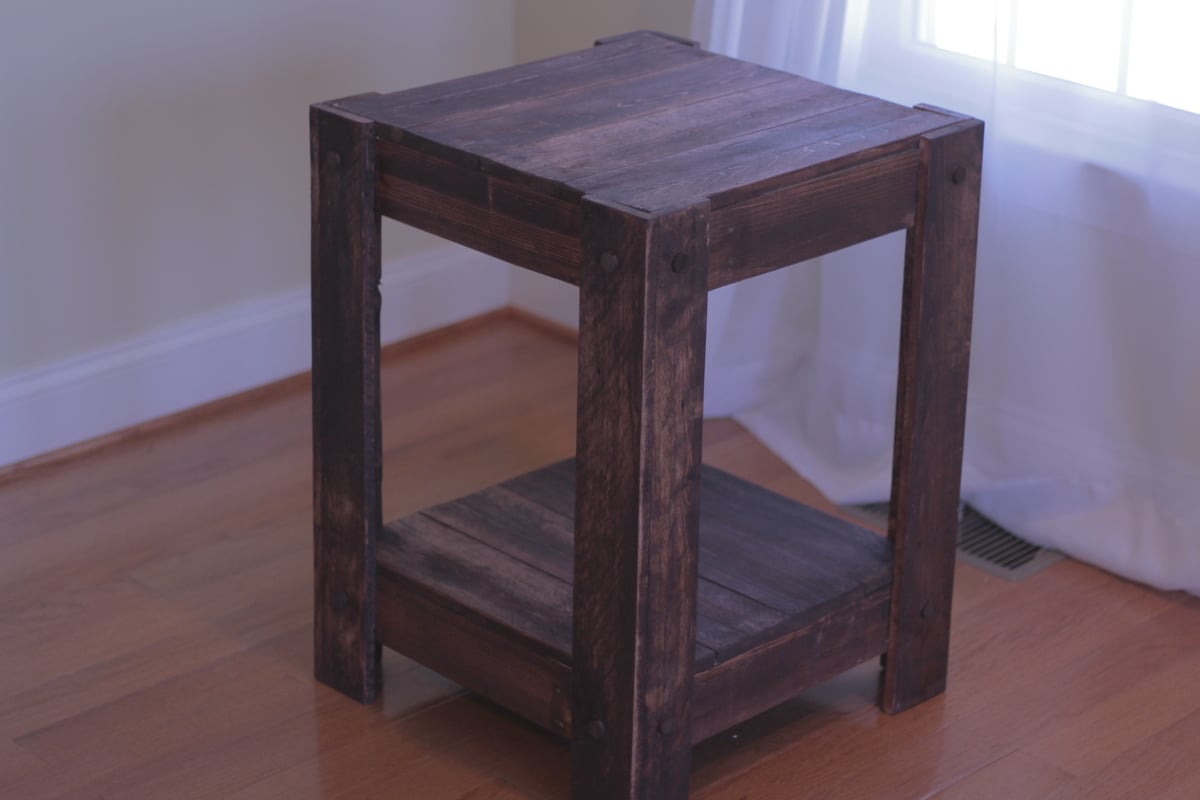
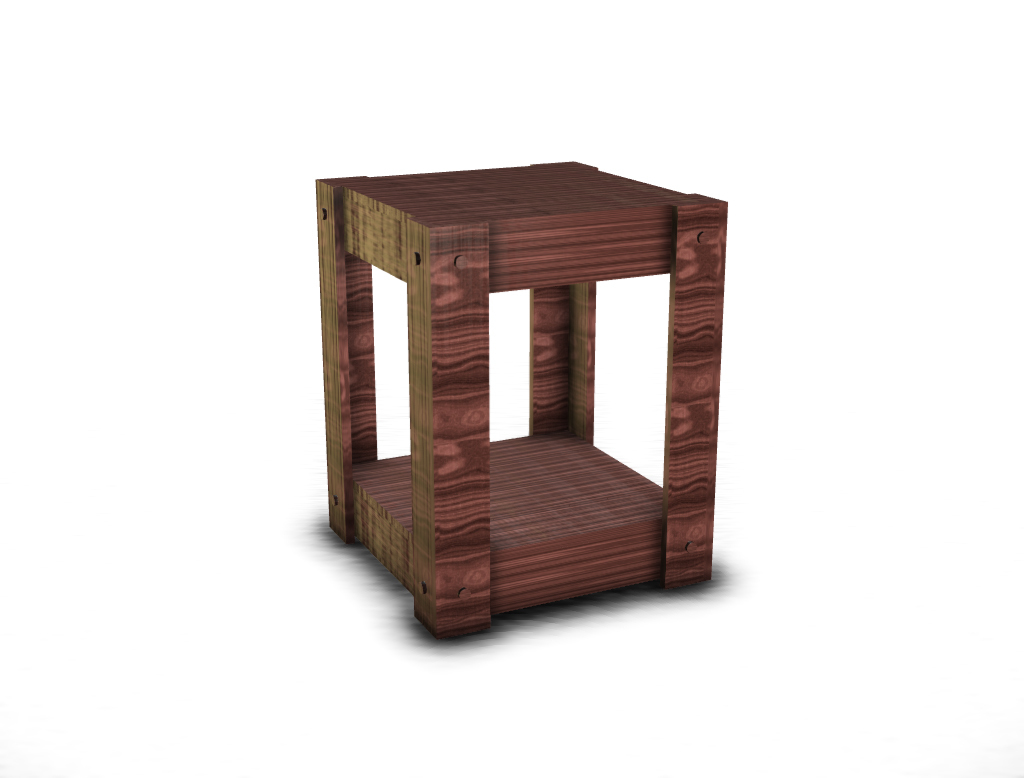
End table made from pallets (plans included)
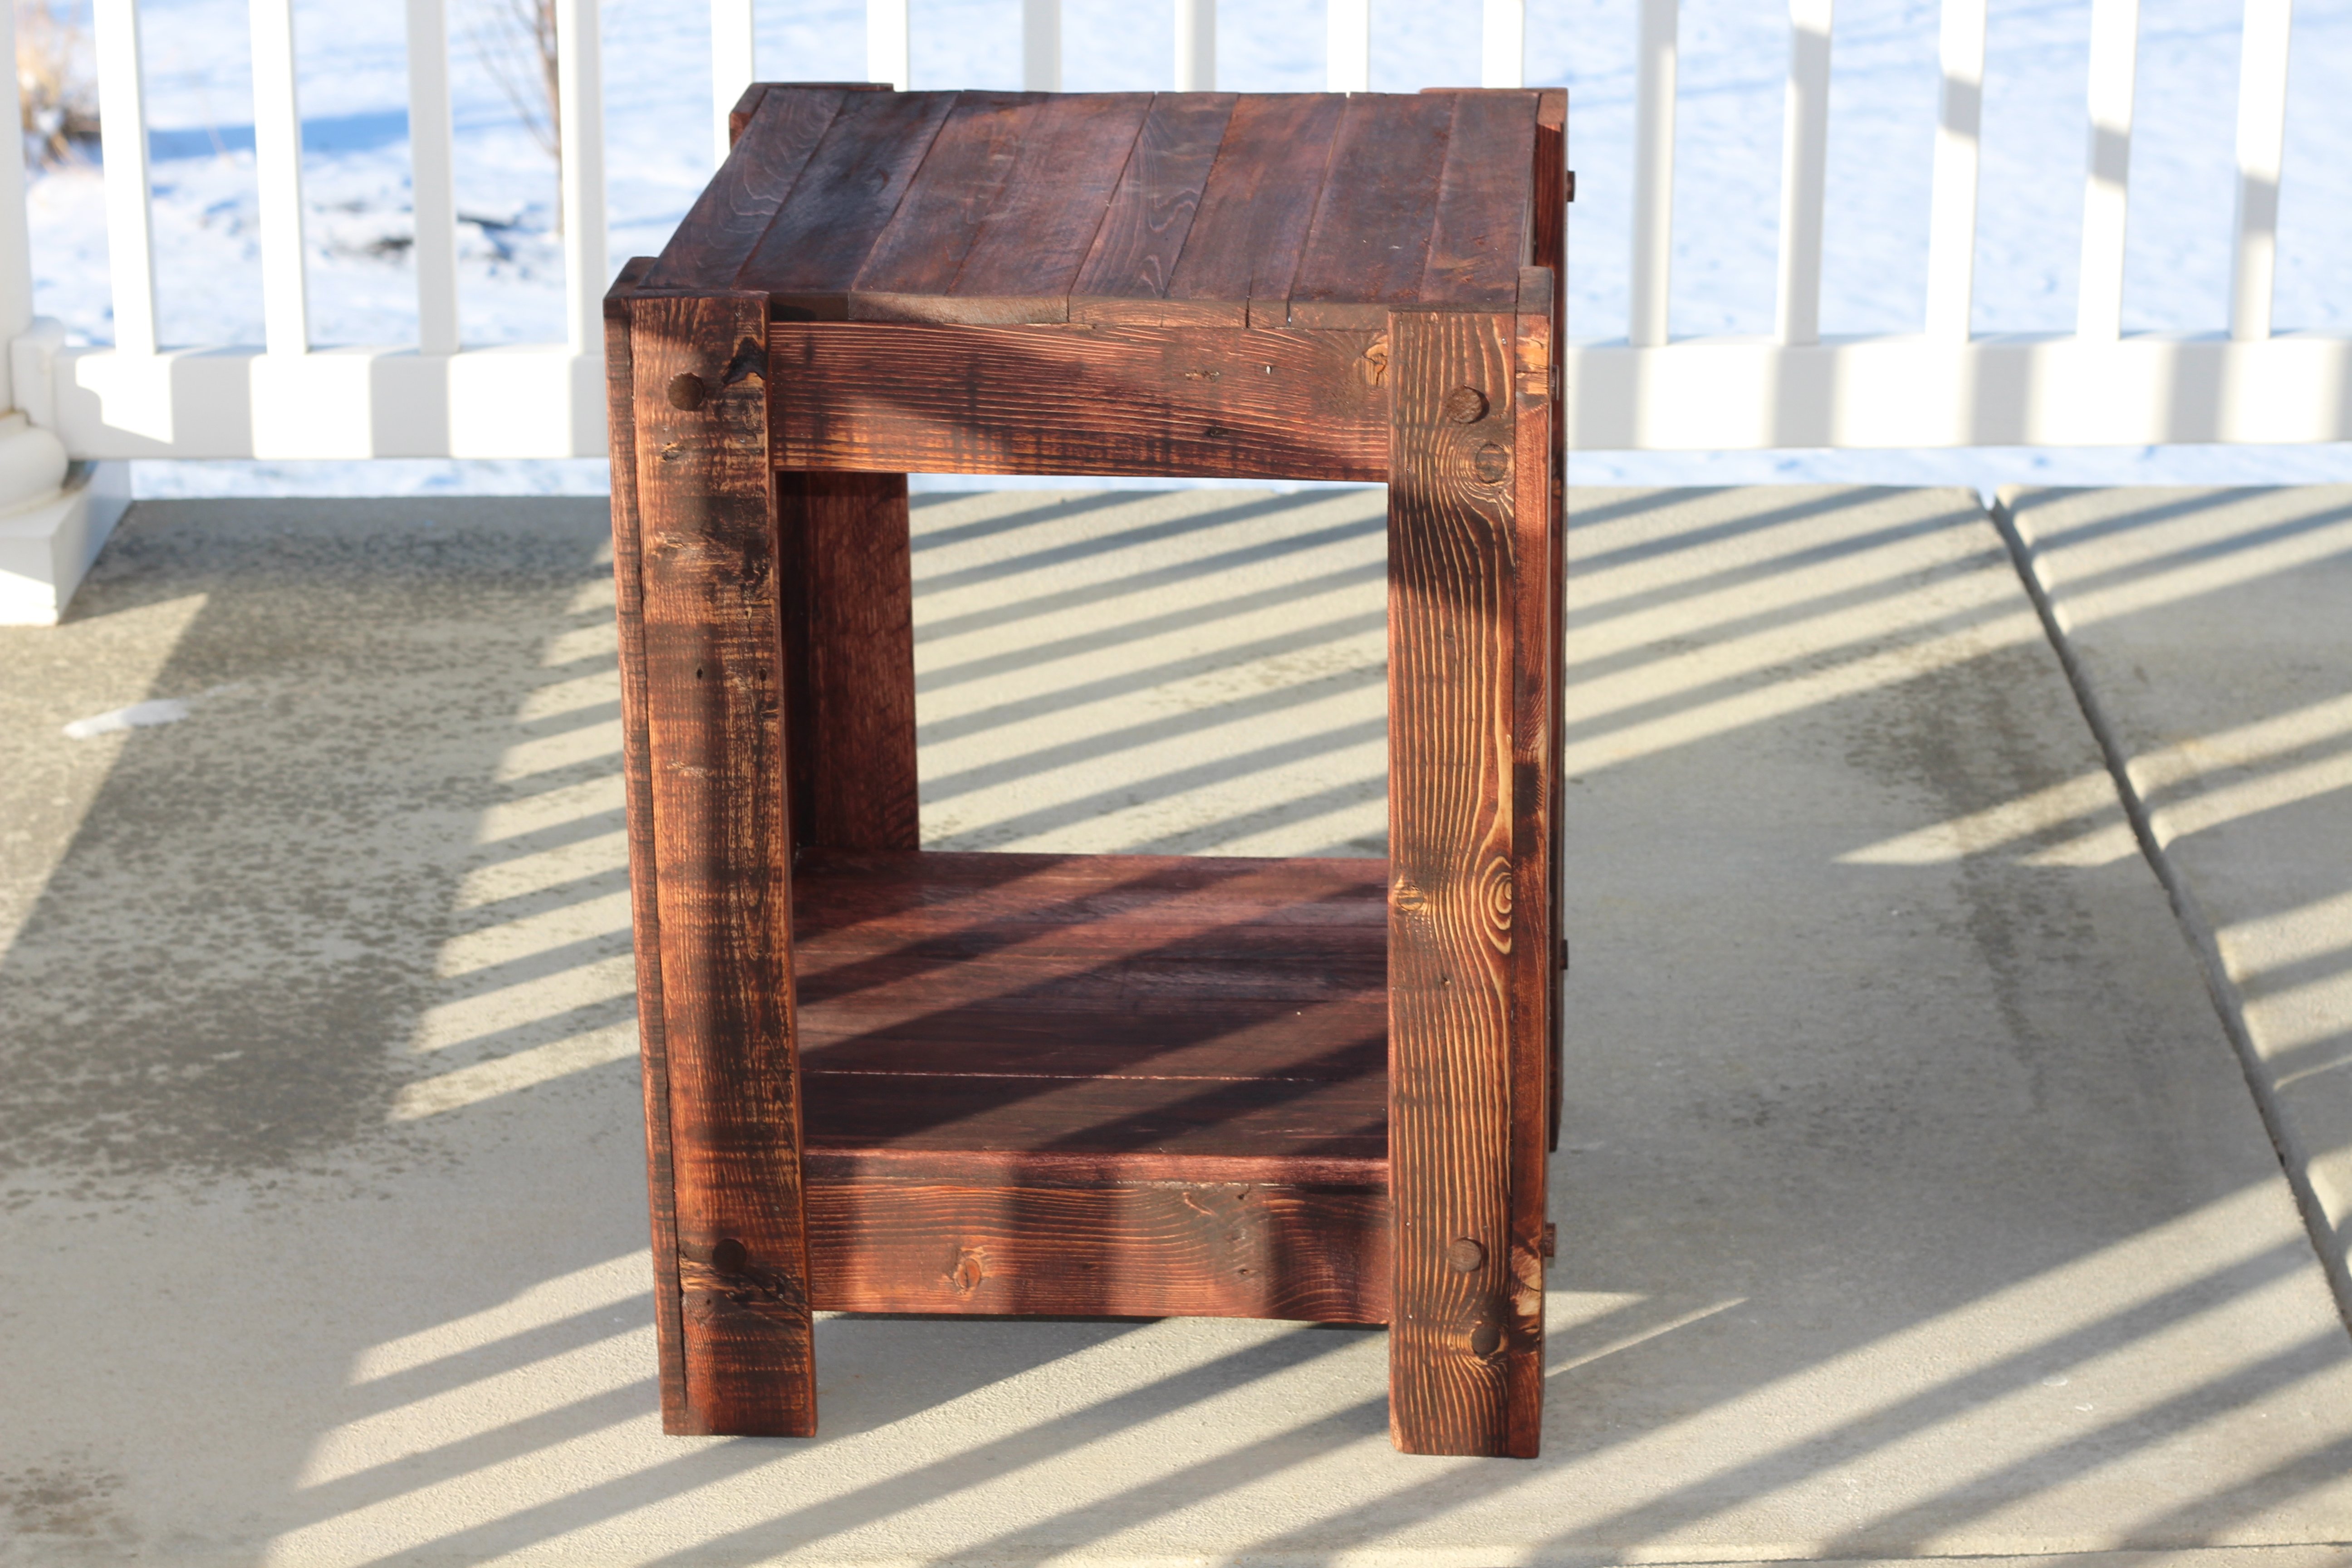
Building an outside side table out of scrap pallets.
Video of the build:
https://www.youtube.com/watch?v=kVAYXVGiL_8
Drawing File
https://googledrive.com/host/0B21TbB8gGNQbX2dlNGdxR0NuOE0/end_table.pdf
Estimated Cost
$5 for stain and nails - free pallets
Estimated Time Investment
Day Project (6-9 Hours)
Finish Used
Red Oak
Recommended Skill Level
Starter Project
DIY Shiplap Fireplace Built-in
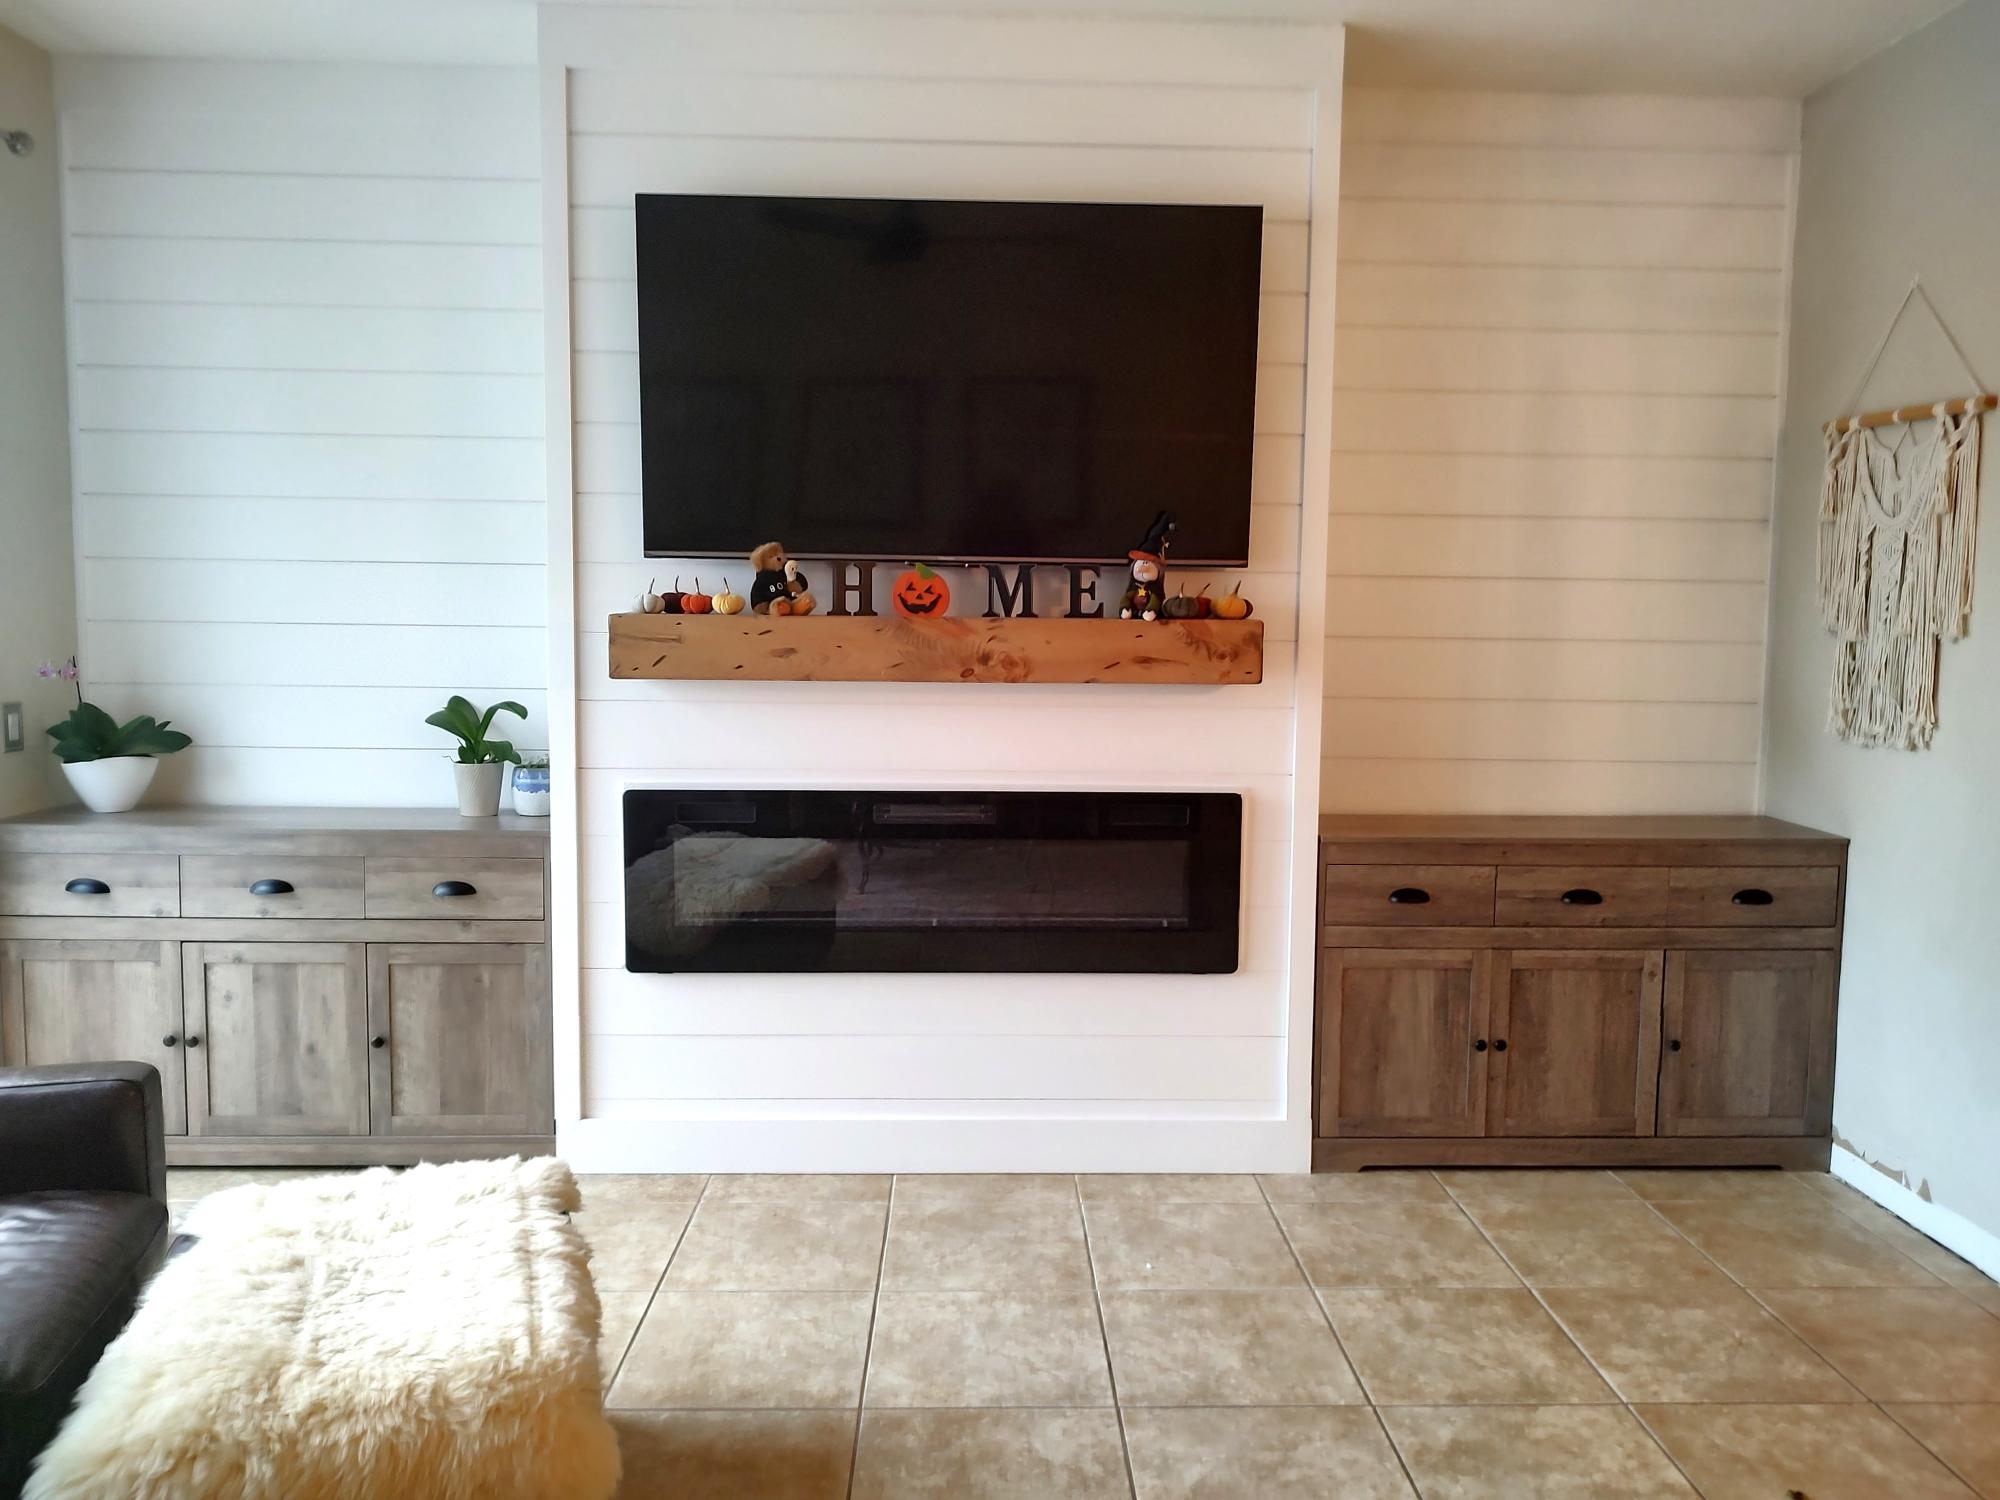
Tweaked your plans slightly but I'm happy with results!
Handy Kandi
Built from Plan(s)
Seasonal And Holiday
Comments
kkmerrett
Tue, 01/31/2023 - 08:46
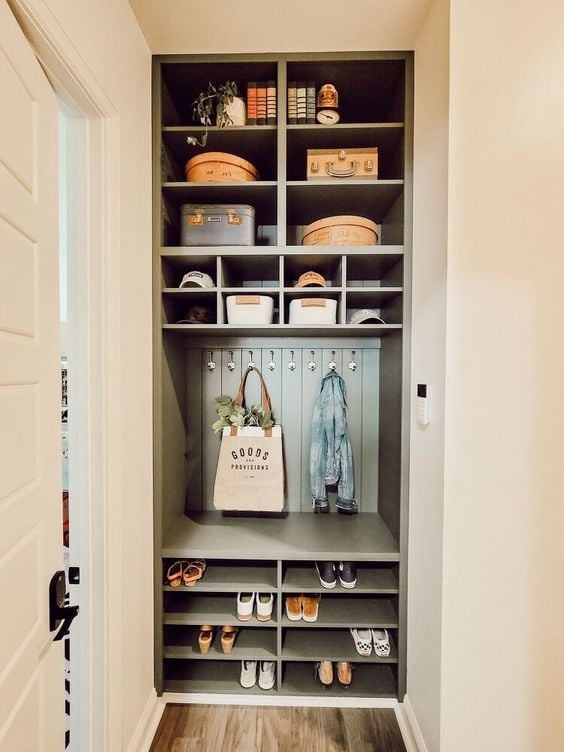
Love this drop zone.
Very nice!