Mid Century Modern Entertainment Console
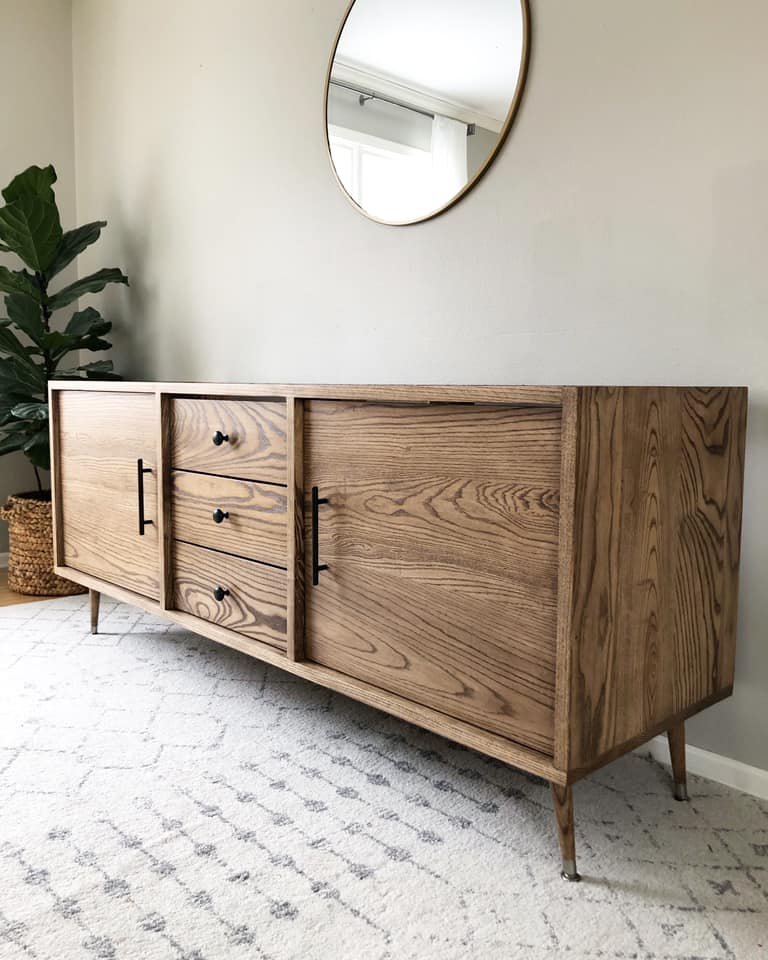
Built by Holli Peterson
Built from Plan(s)
Built by Holli Peterson
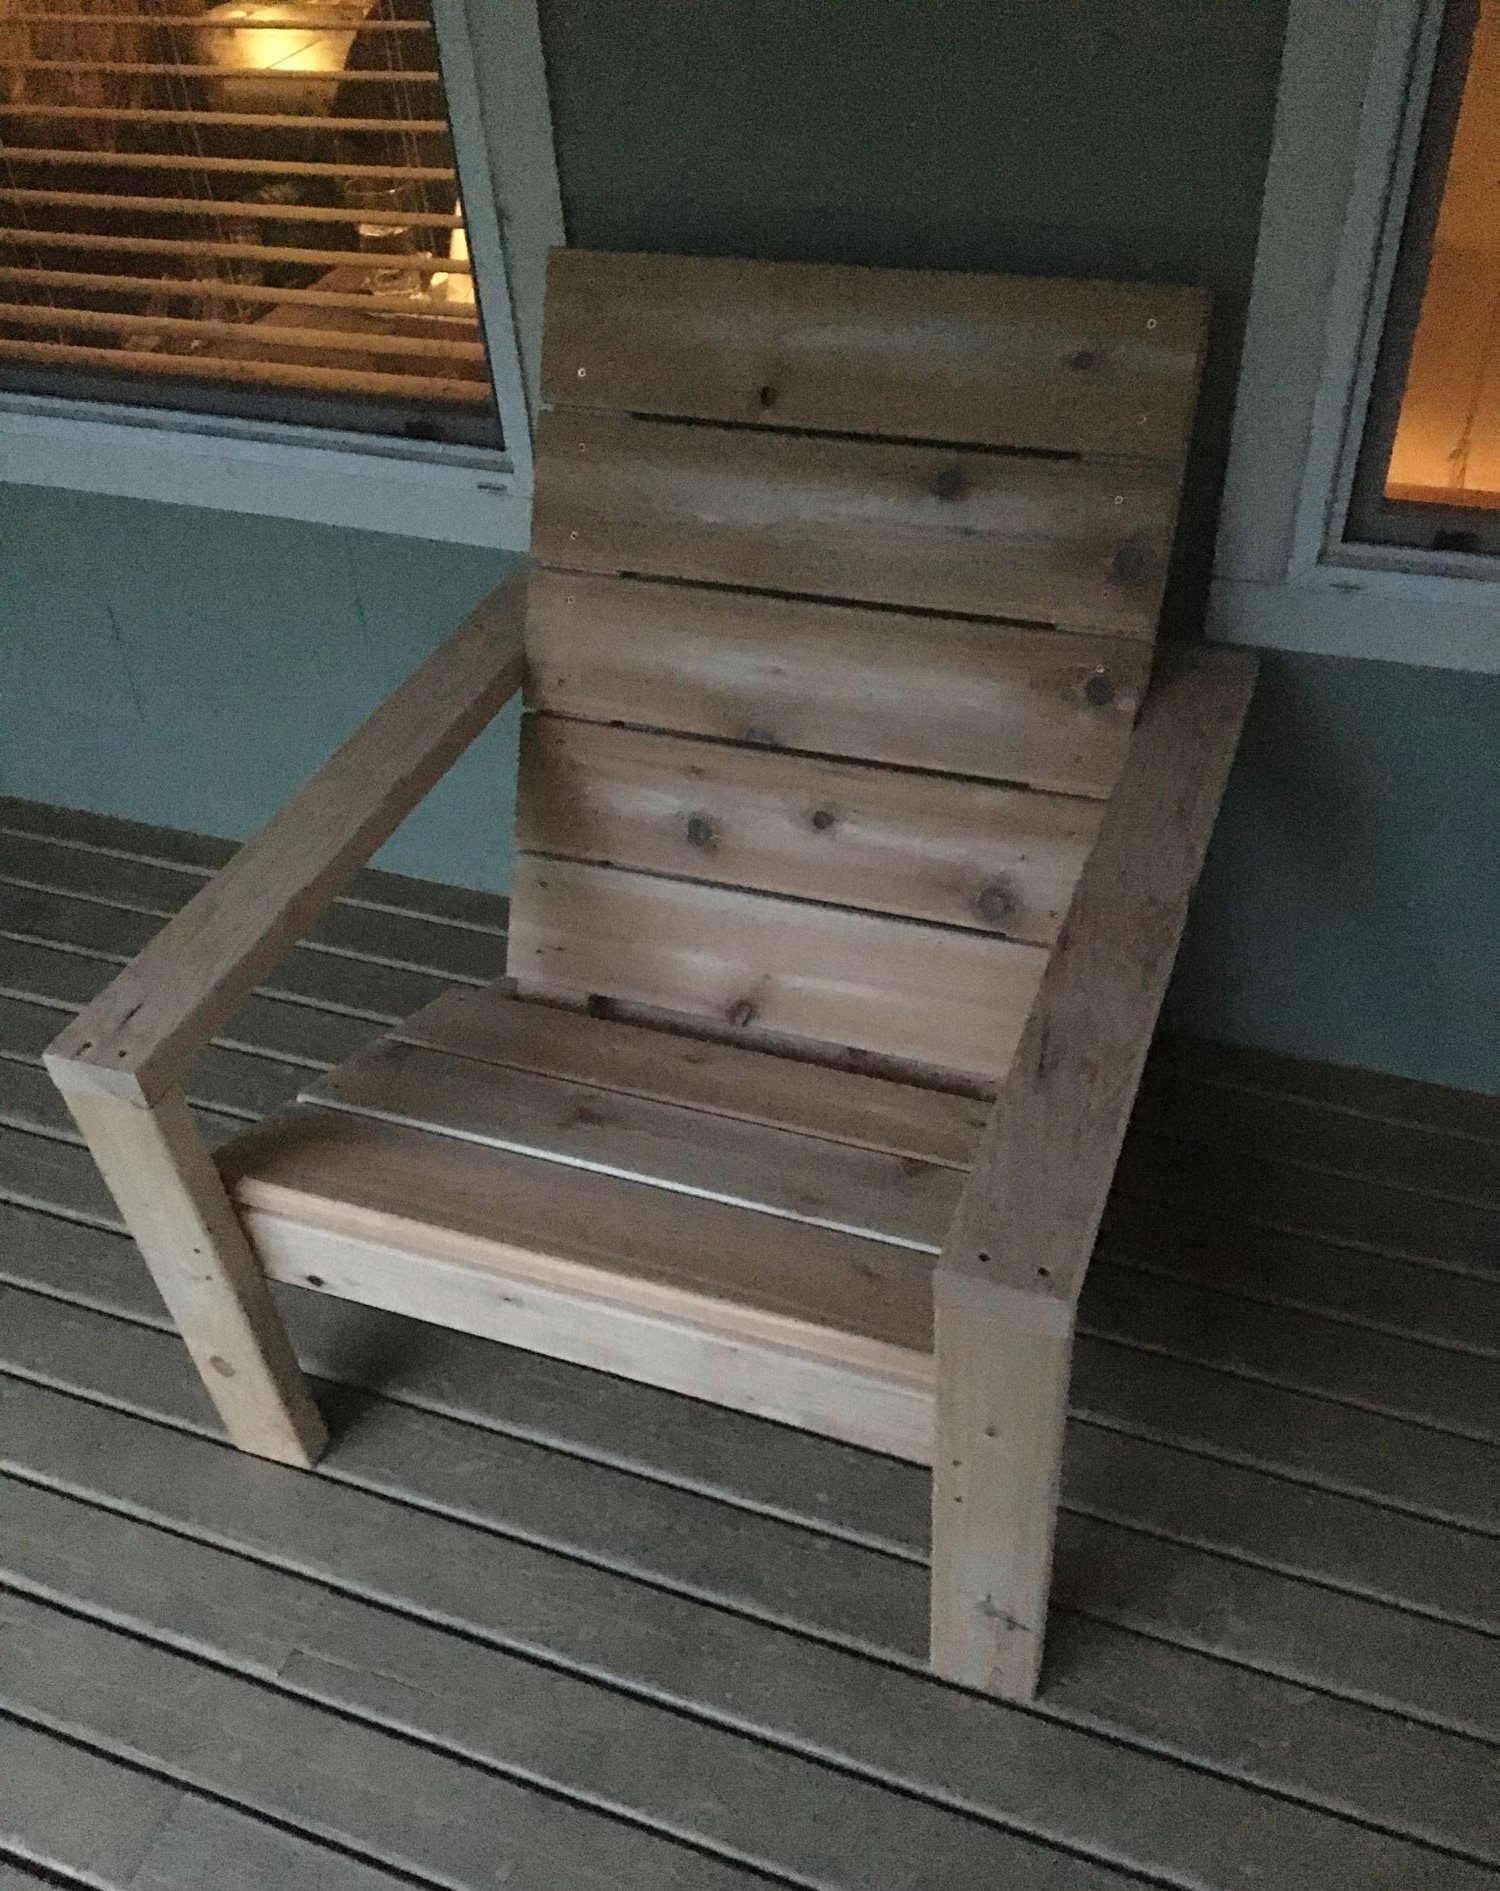
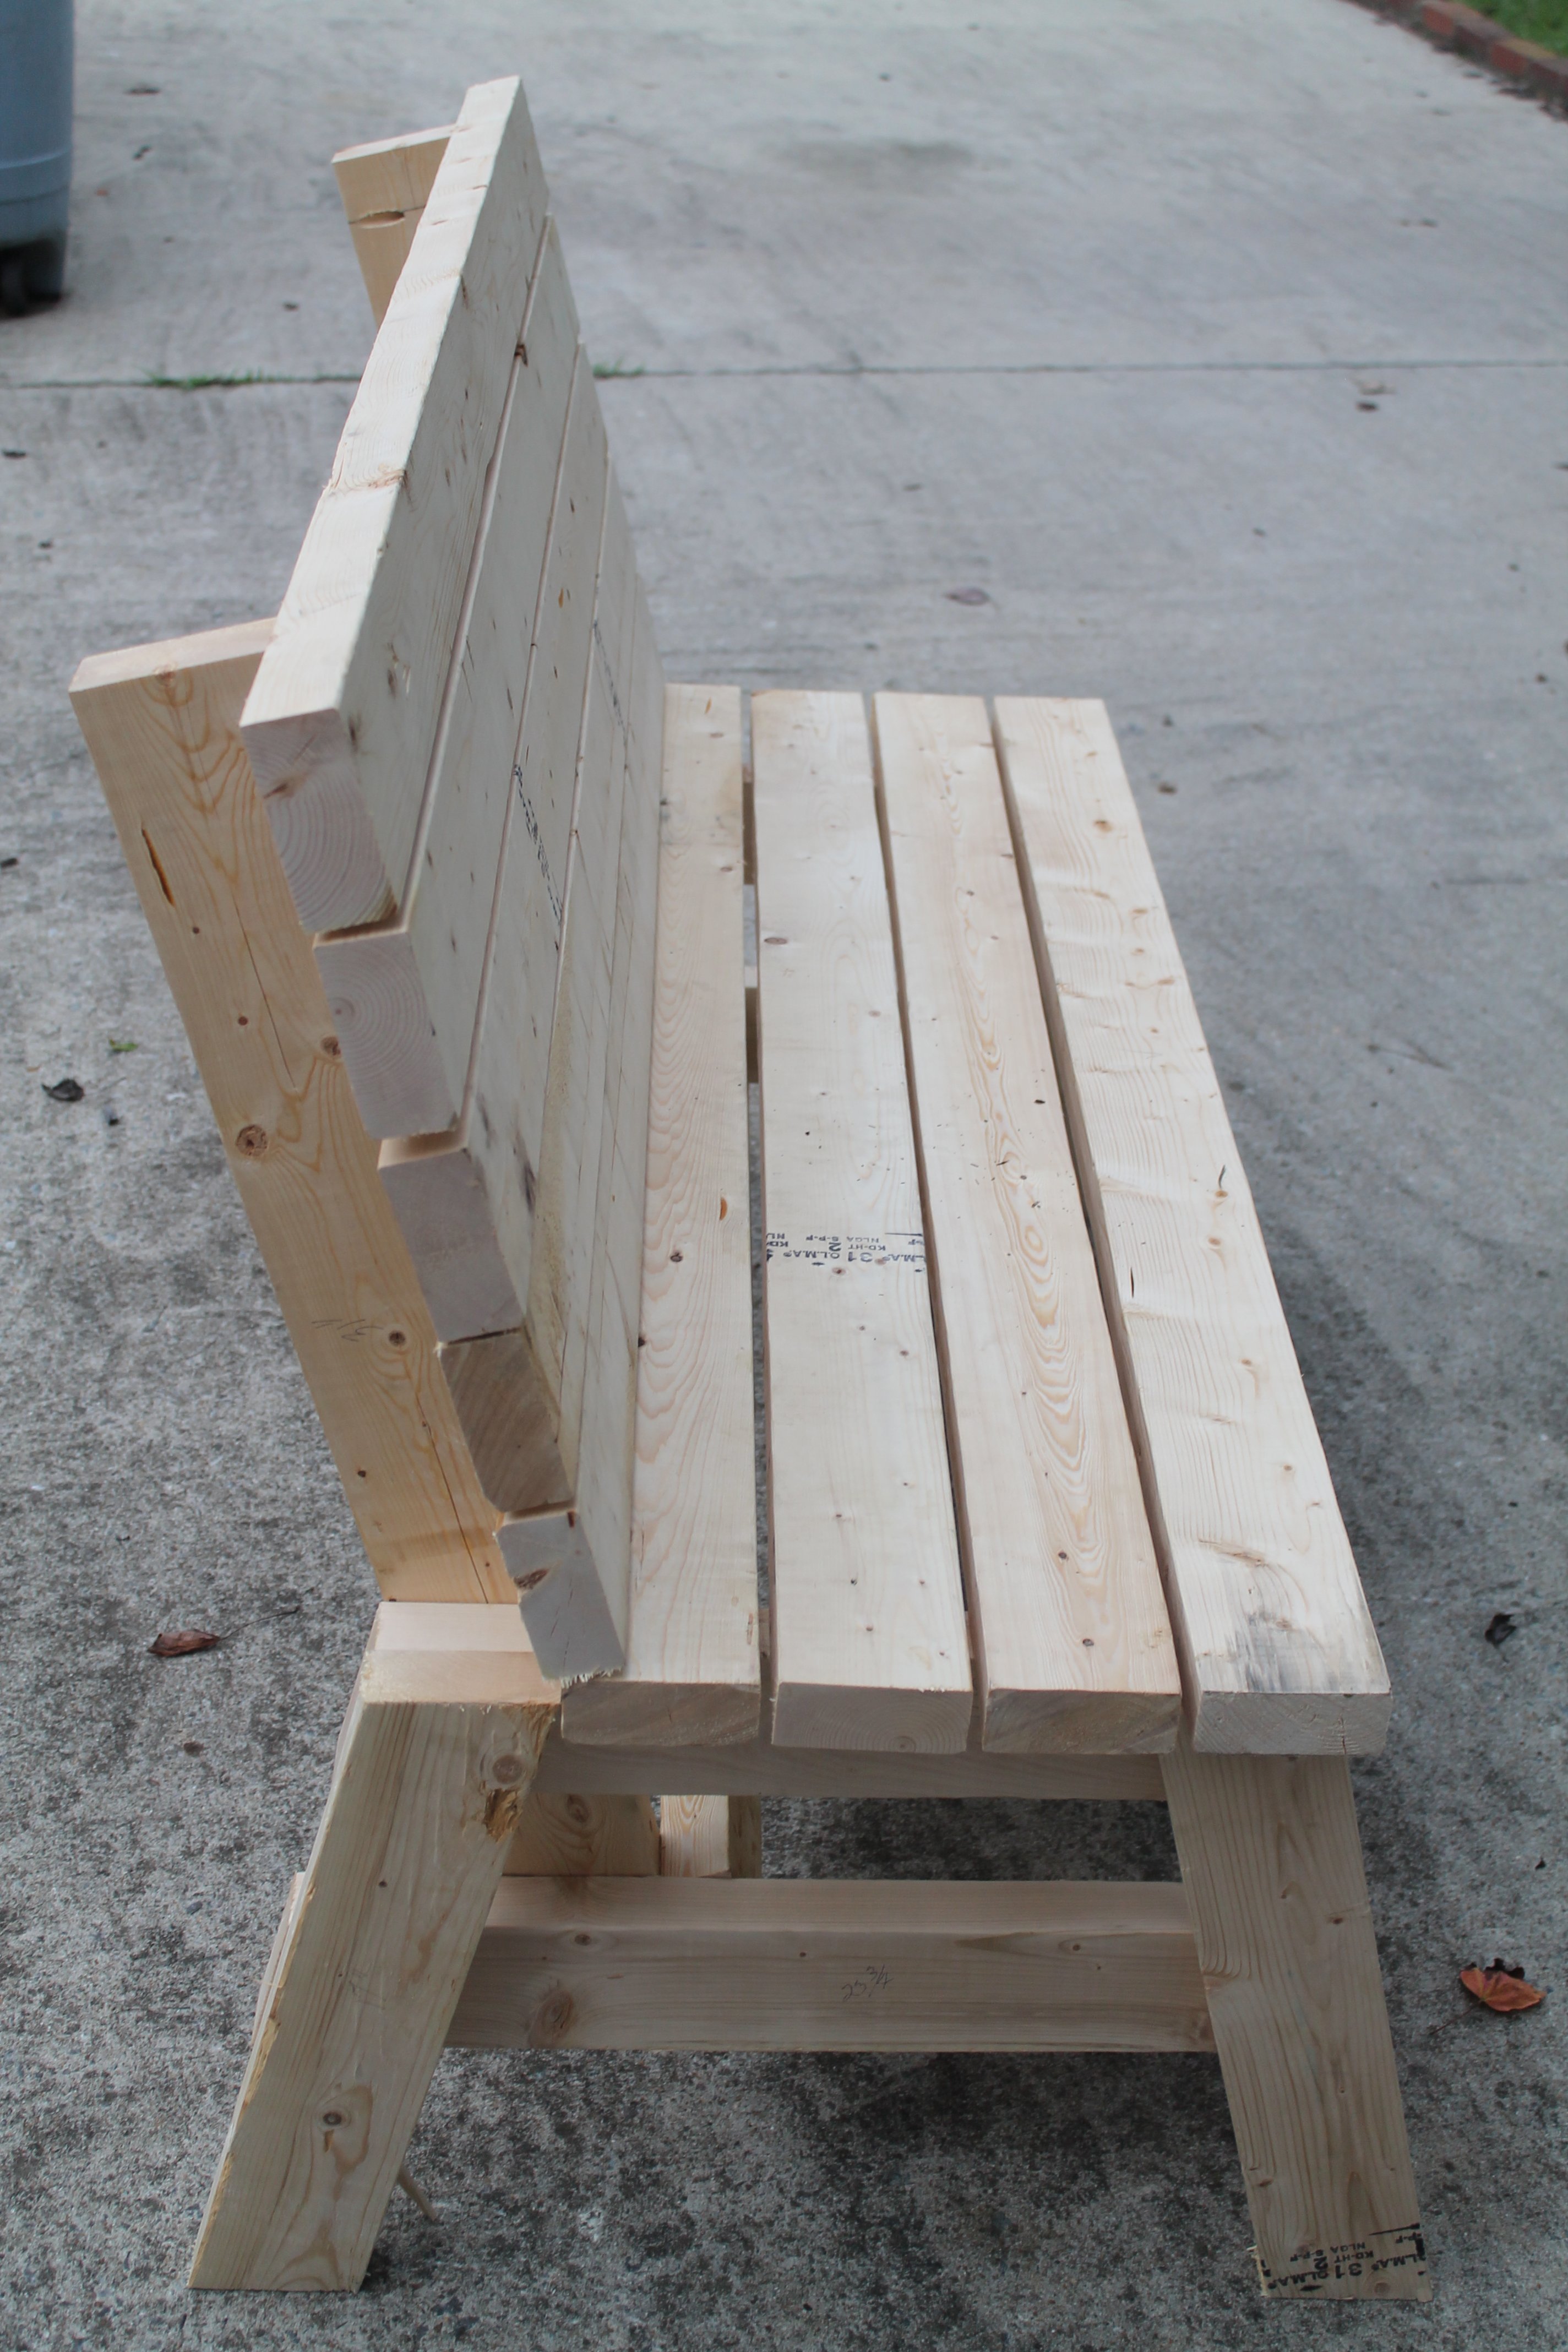
As soon as I watch the video I knew I needed to try this one. I built it out of excess material from previous projects. I did not have the 1x10 so I used 5/4 x6 red cedar and decided that since we are of the wider sort that I needed to change the width for us. It worked out great. I kept all the other dimensions and did the math for the positions of the seat back positions from what Ana used. She is correct. Very comfortable chair with the angles and height.
Mon, 05/04/2020 - 07:25
It turned out beautiful!
I am also interested in a wider version, would you kindly share which pieces you changed and the math for positioning the back?
Thank you so much!
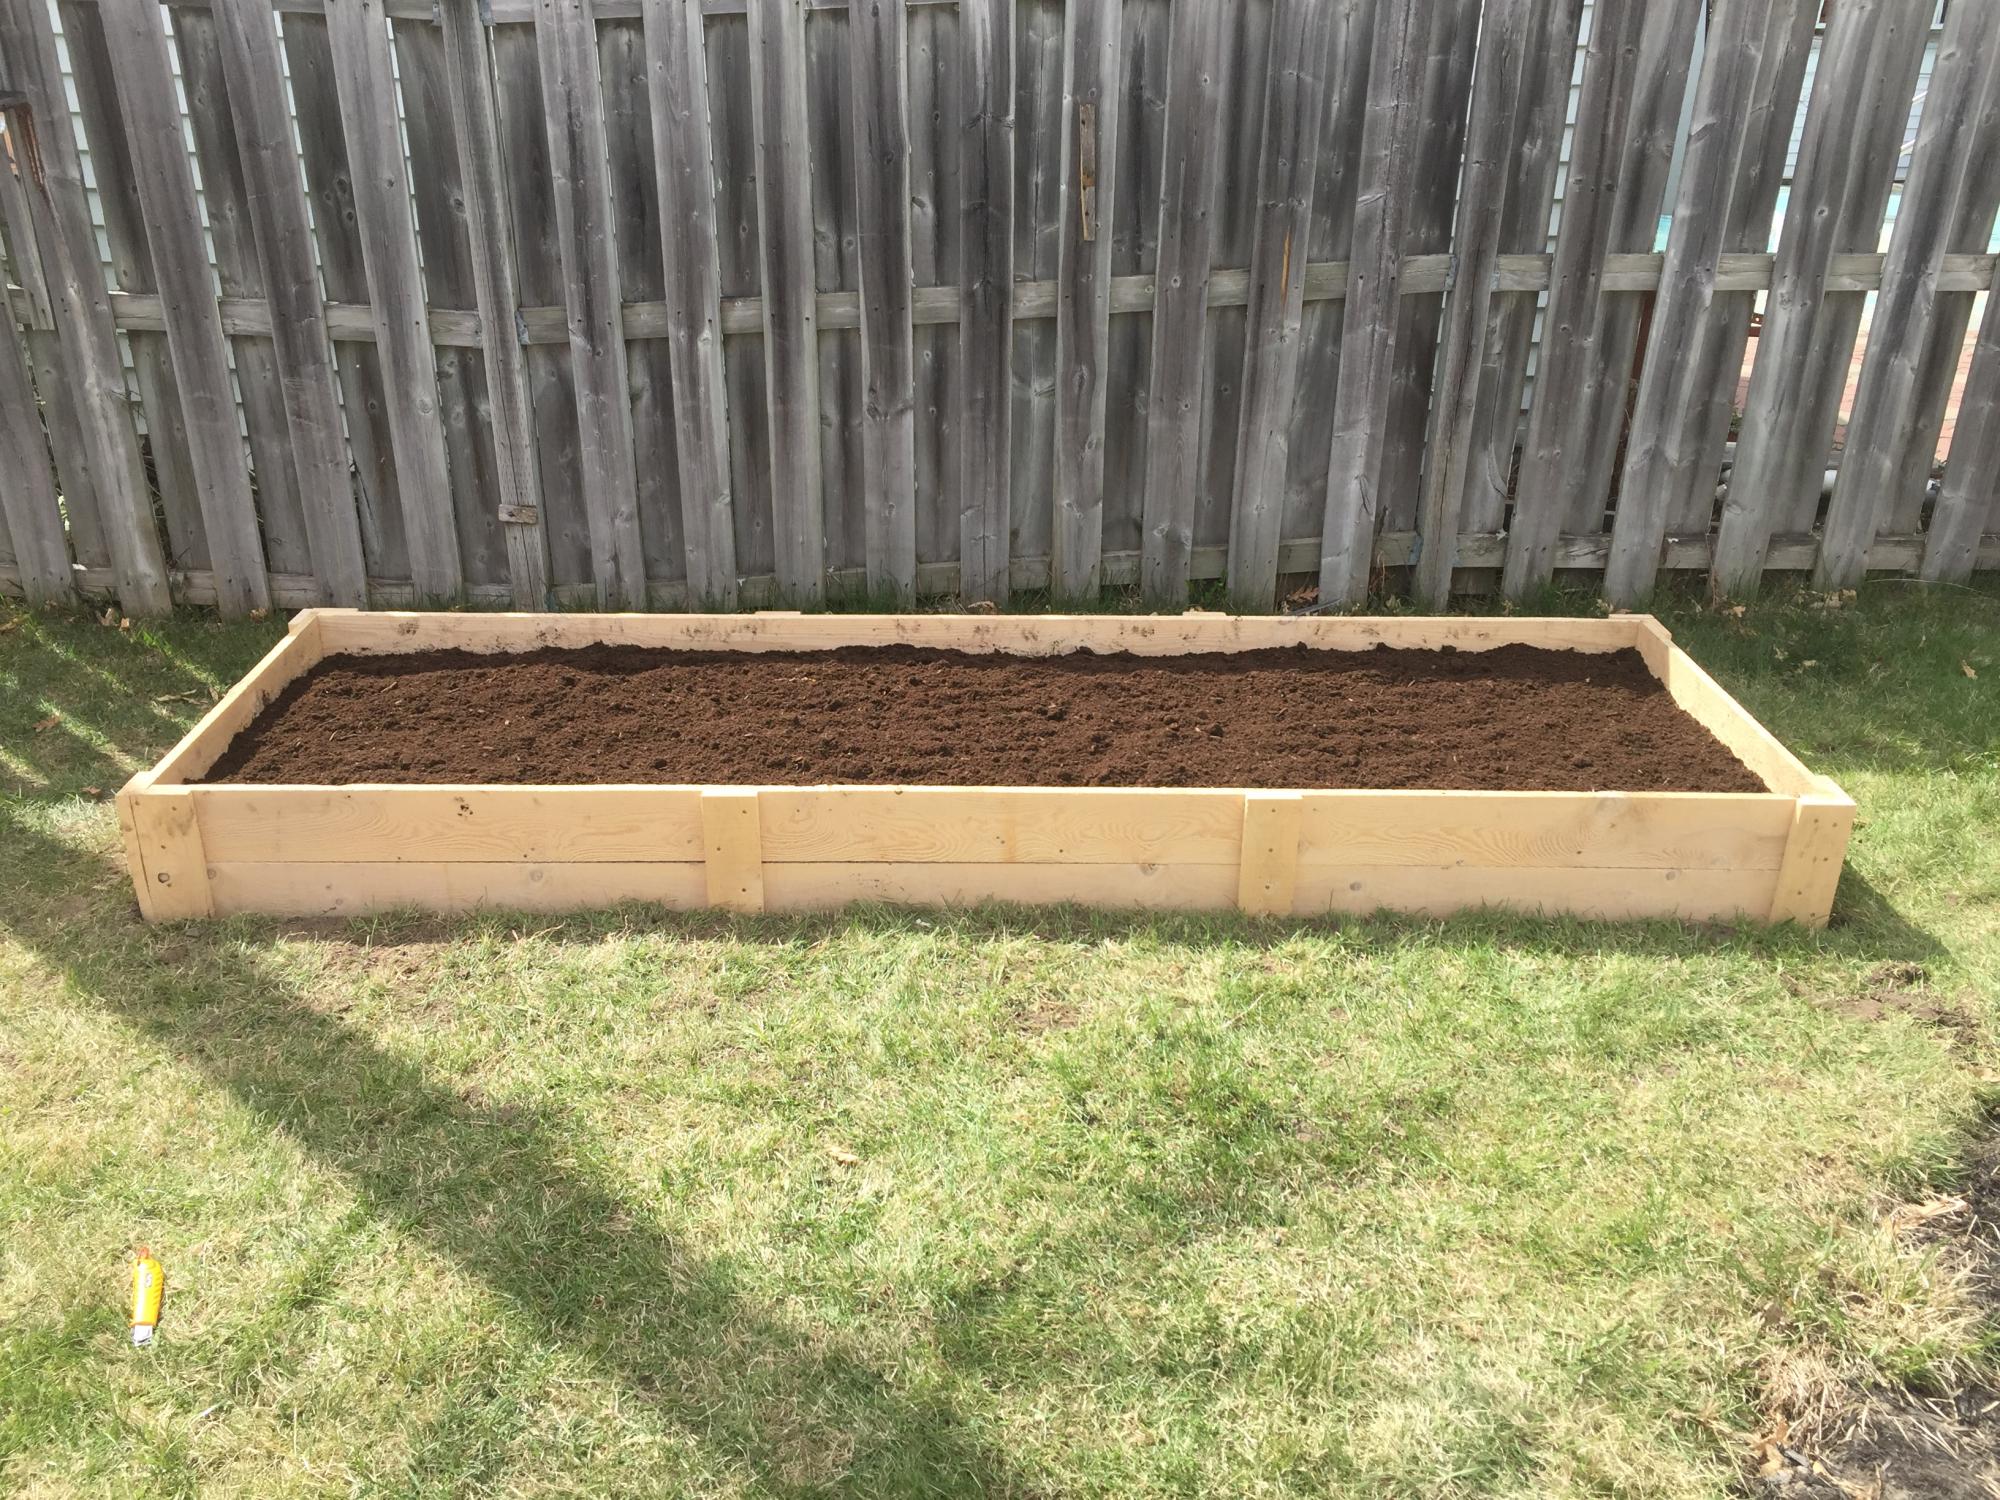
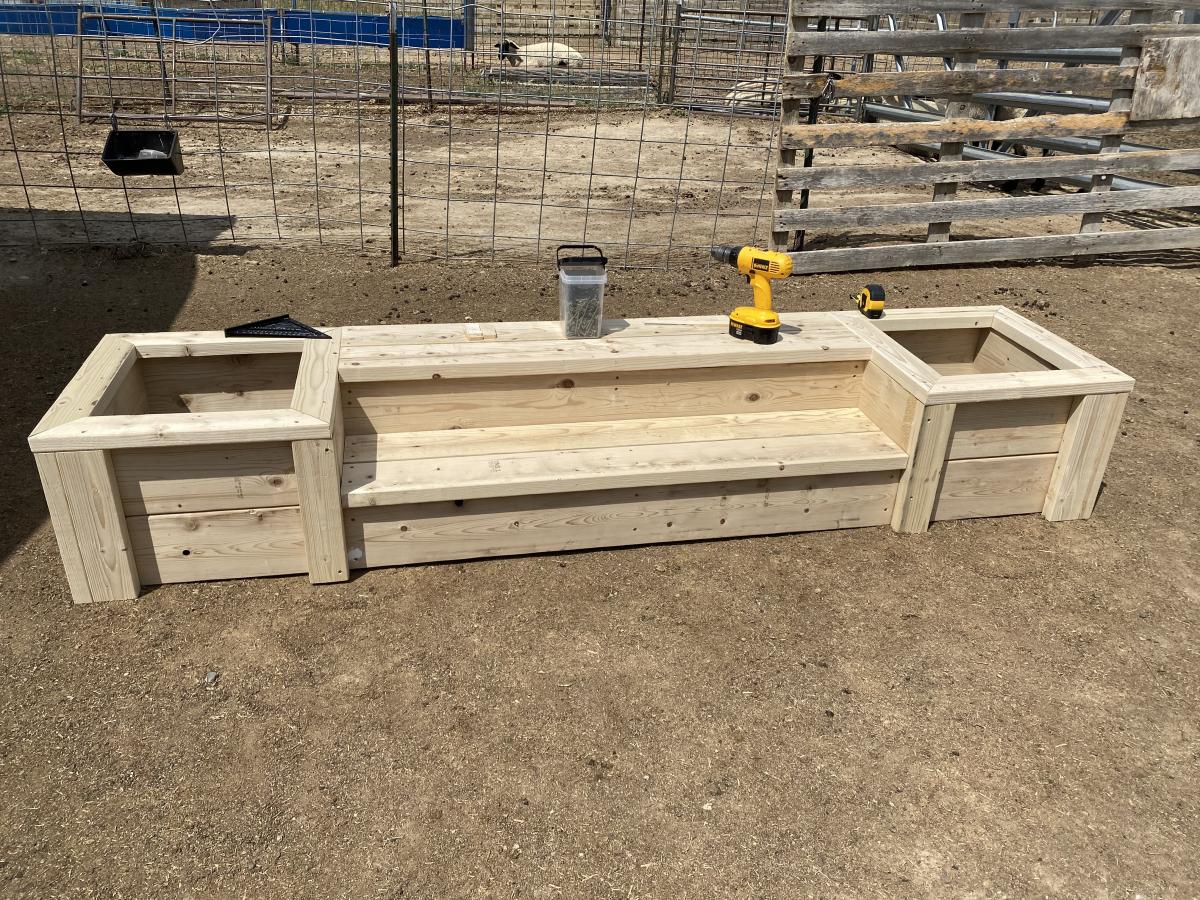
We built this 3x10 feet raised garden bed.
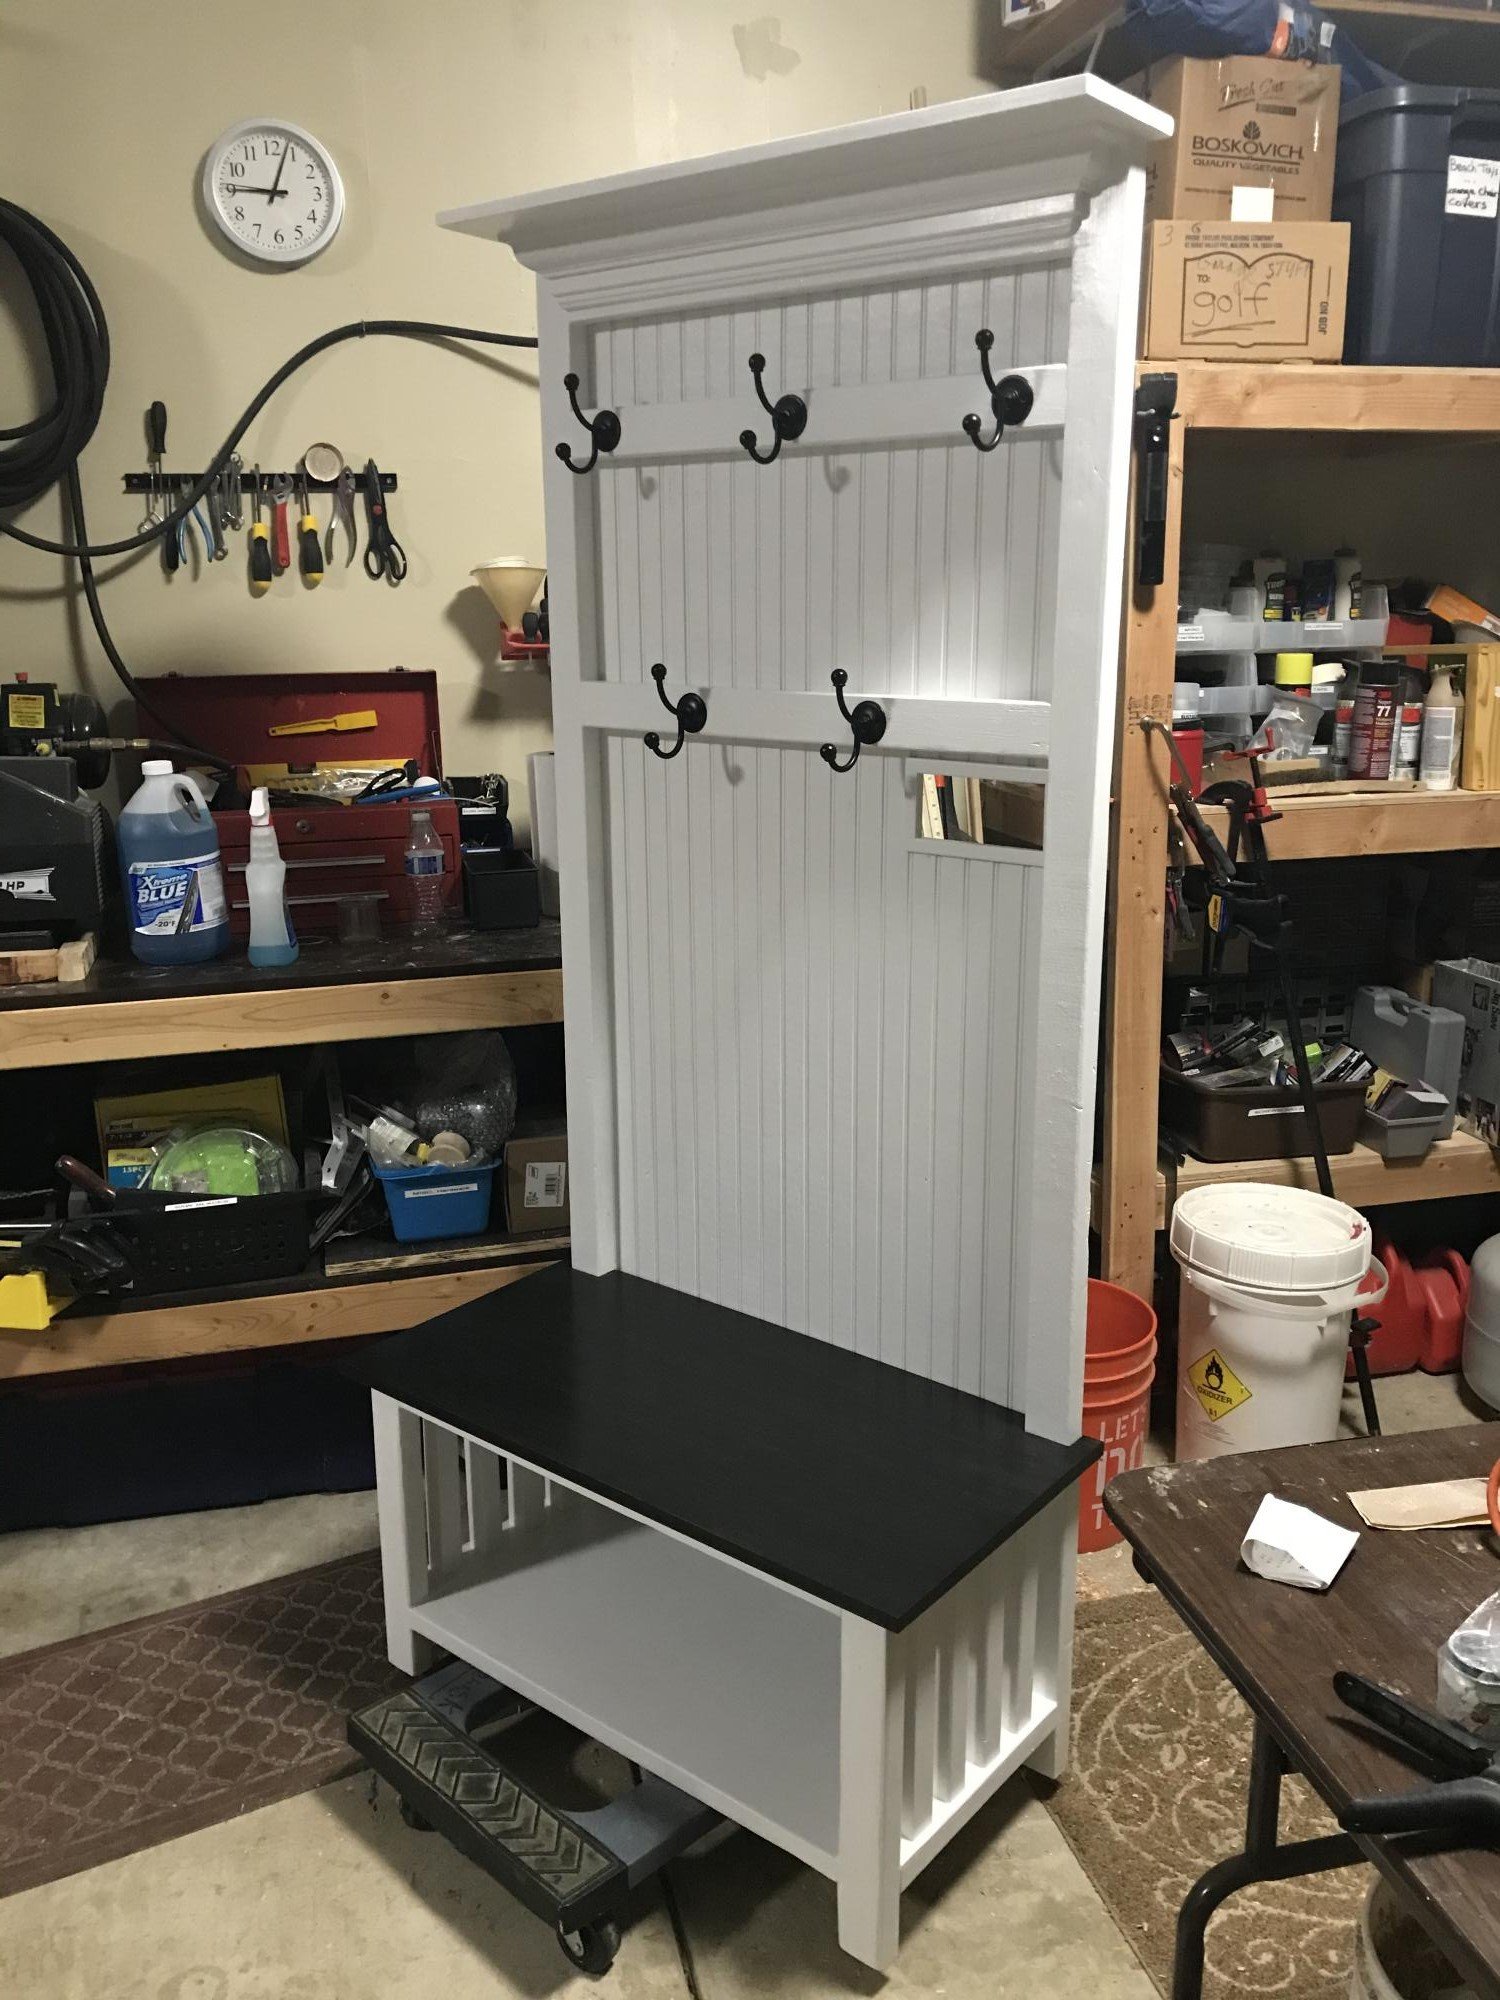
Thanks for the inspiration Ana! My daughter wanted a custom size hall tree and bench with a light switch cut out - basically your plans with an ebony stained poplar seat and bead board backing (to match her wainscoting). I had a little crown left from another project so I added a little detail to the top shelf.....And a Couple of lower level Hooks for the grandkids coats! She loved it and it was fun to make!! Mike in Columbus, OH
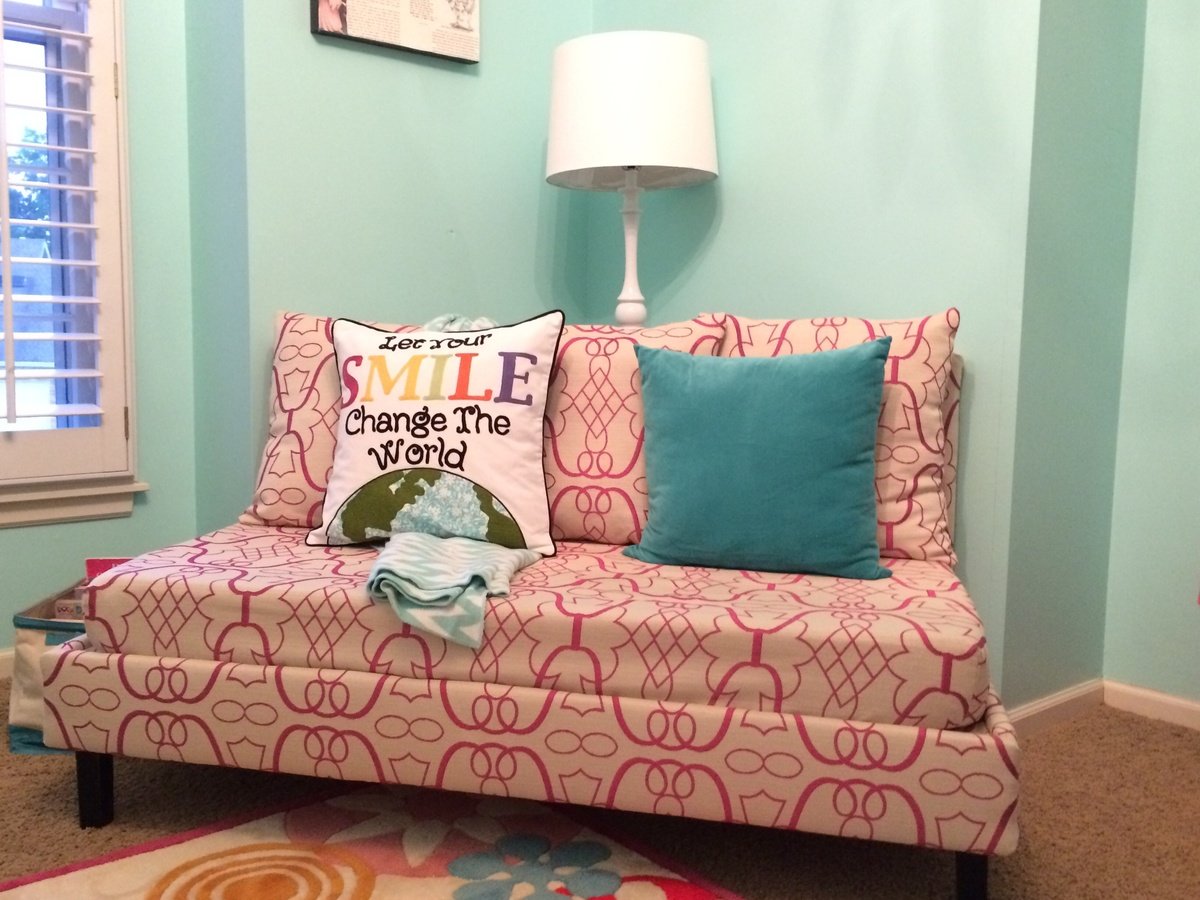
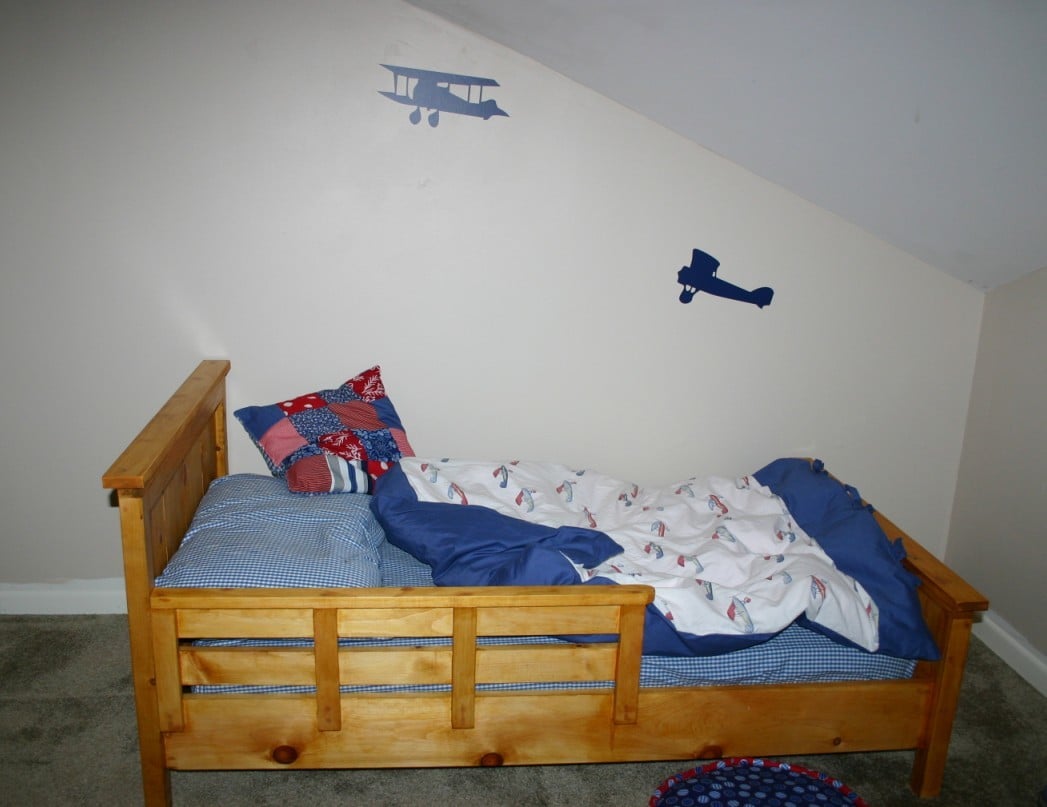
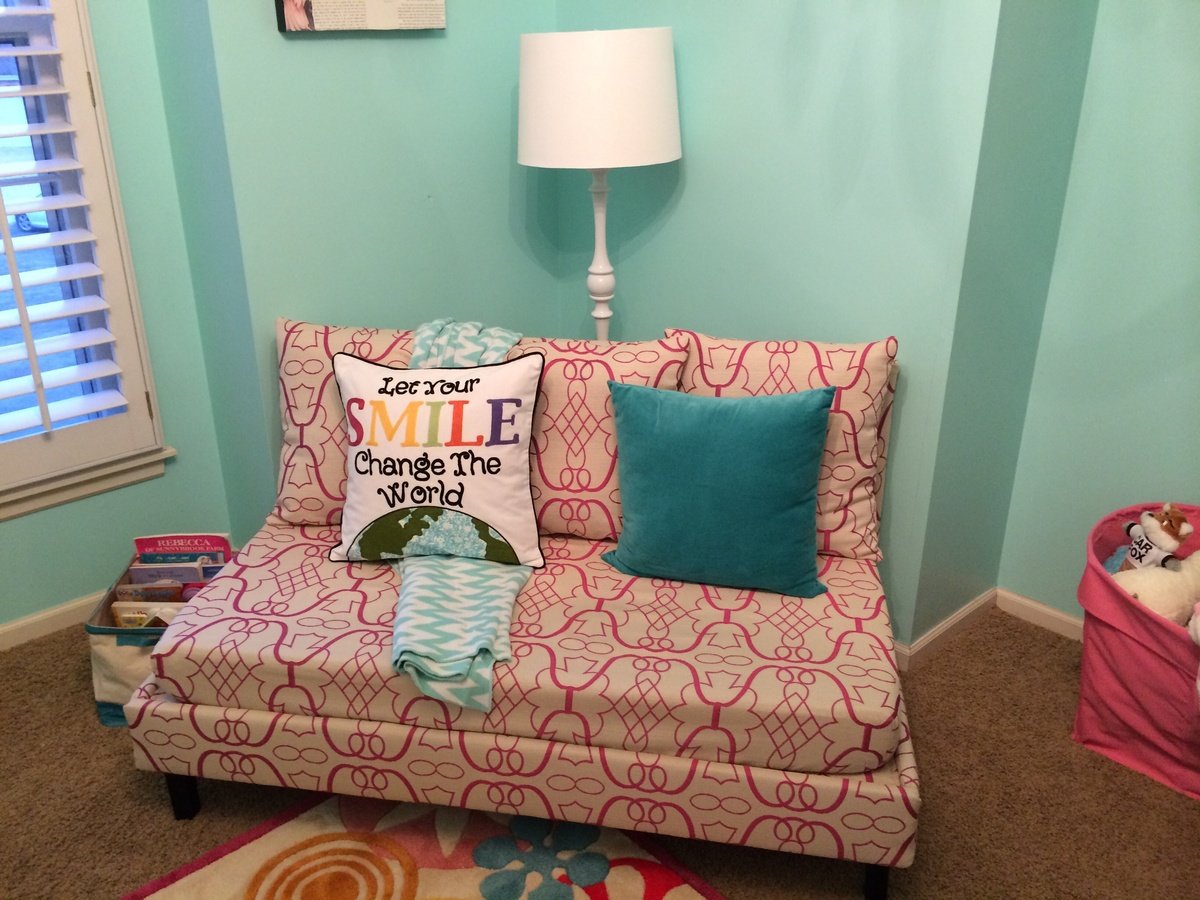
My husband built our daybed and I upholstered it. I made 3 large pillows and the mattress was covered by sewing the fabric as if it were a fitted sheet. This way it can easily be removed for cleaning or swapped out for a regular sheet if our daughter needs to sleep here. We cut the legs off an old table for the front legs of the daybed. We love reading on it and we are so pleaded with how it came out.
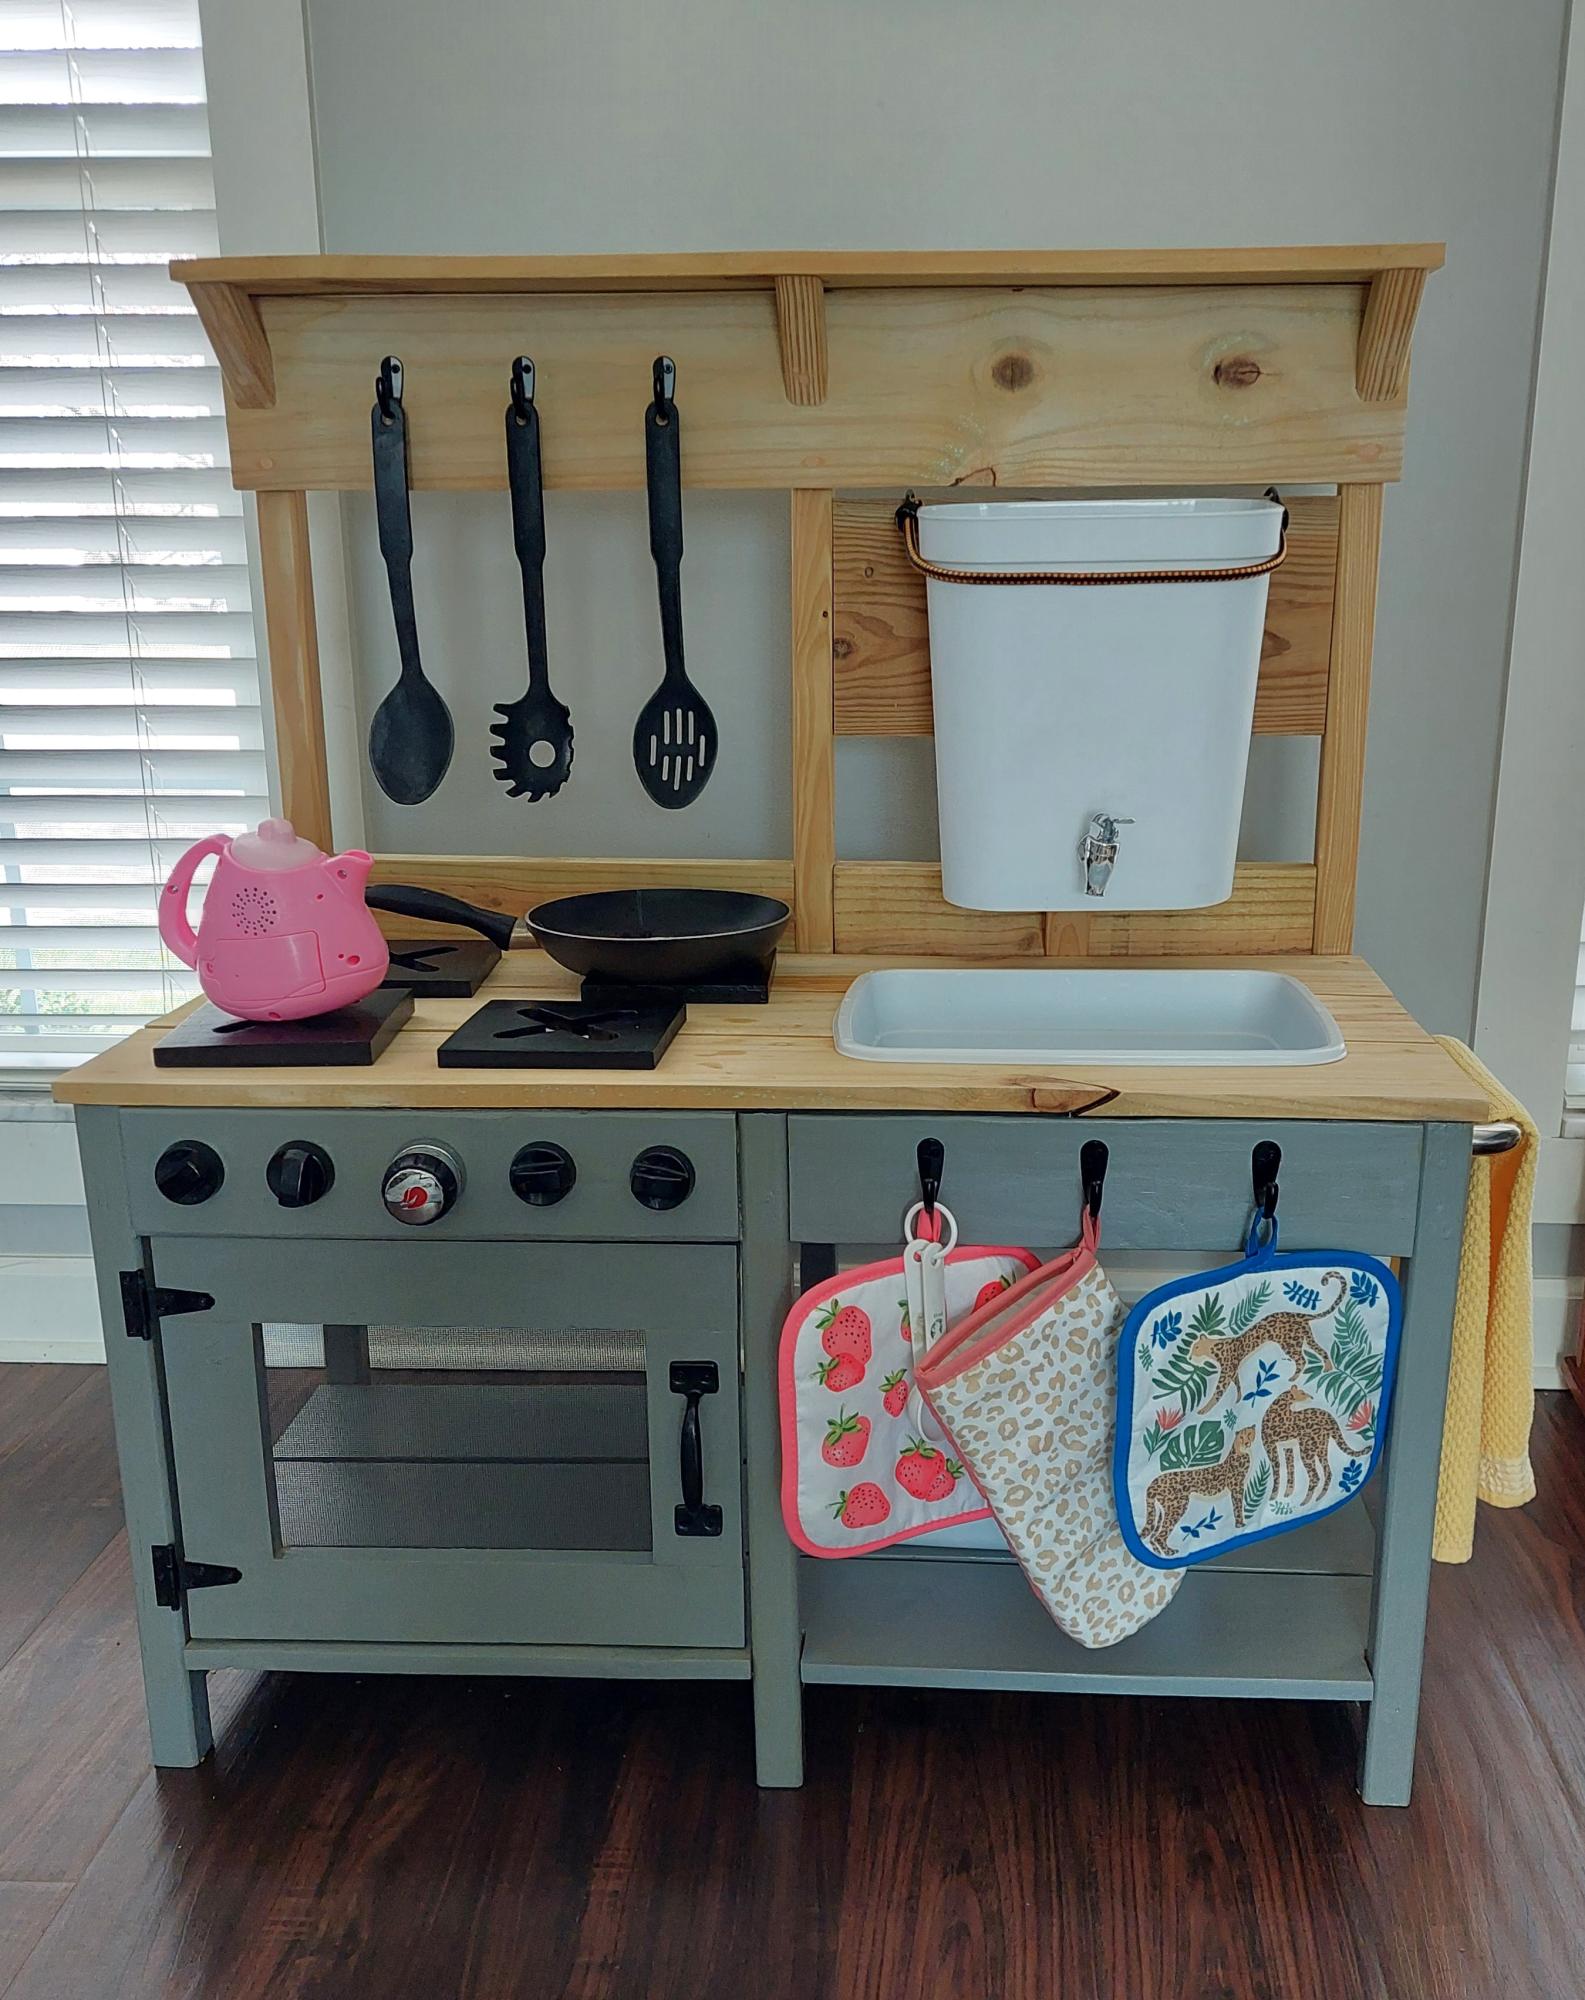
I built this using Ana's plans for her outdoor play kitchen. I live in North Carolina and took it to my grandchildren in Ohio. They love it! I used an inexpensive beverage dispenser installed into a trashcan and connected a small aquarium pump to recirculate the water from the sink to the water tank. I'm super pleased with how it turned out!
Nancye Butterworth
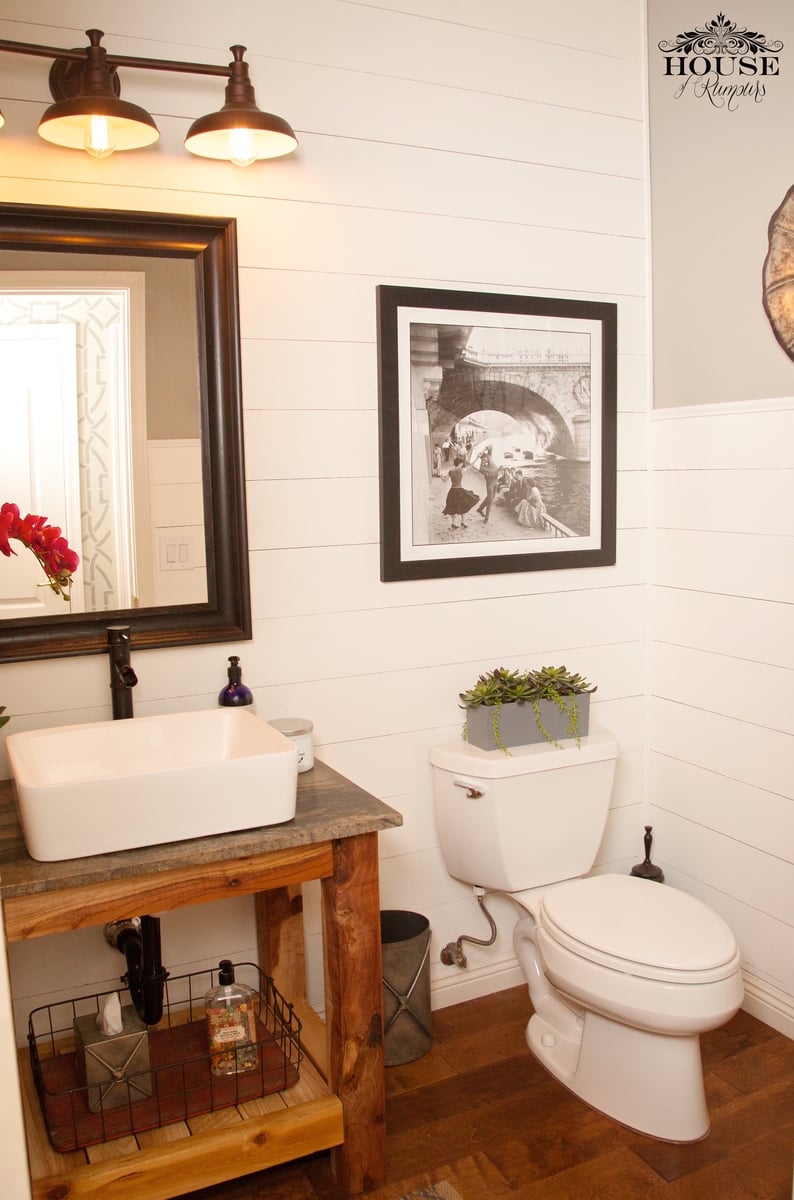
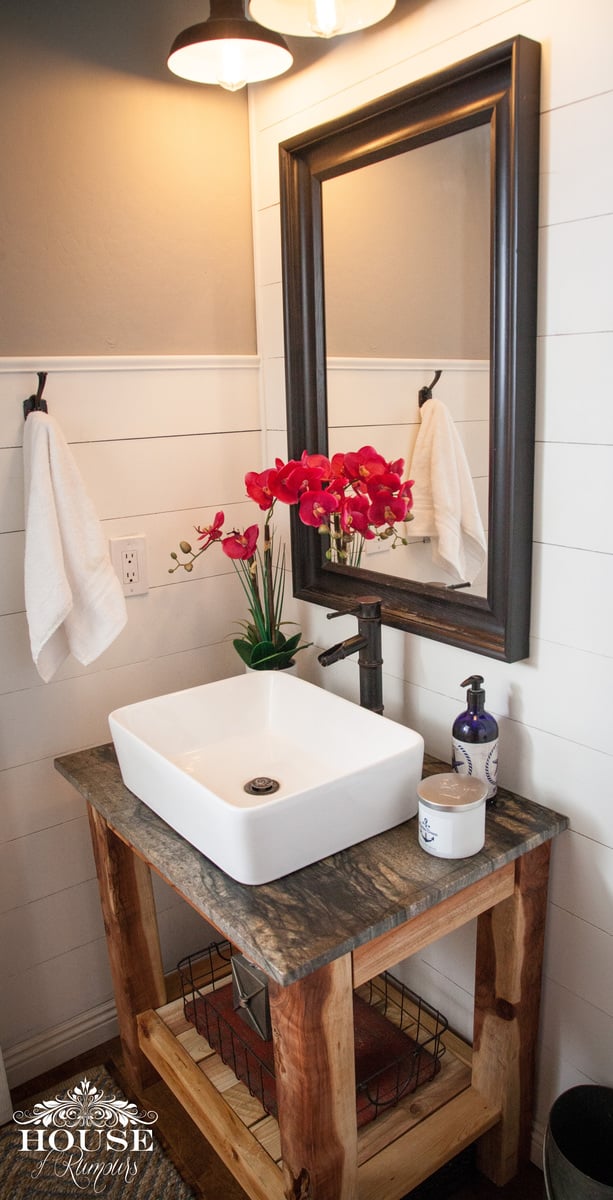
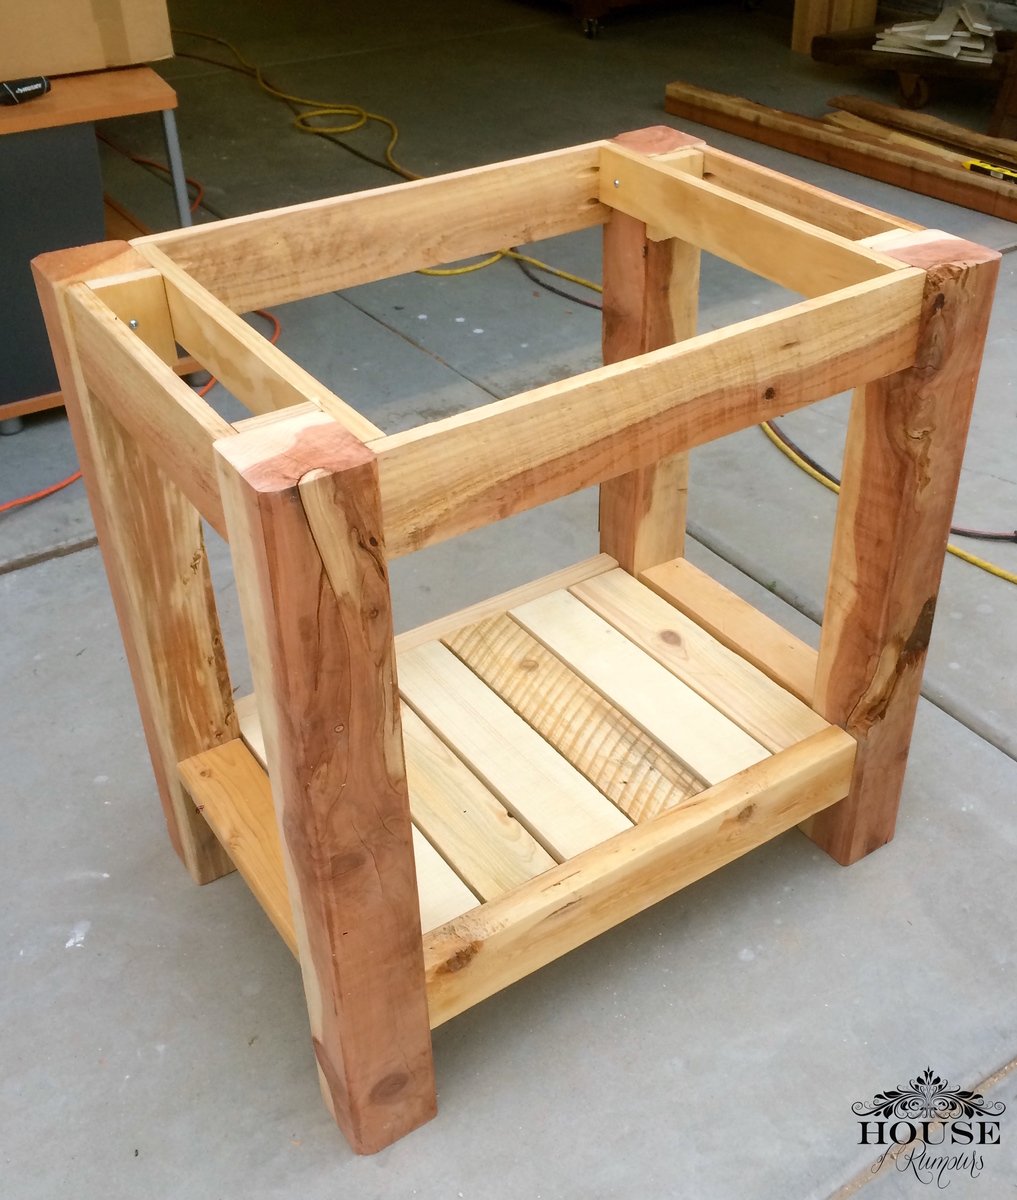
It had come time to renovate our powder room bathroom. We were on a tight budget so we decided to build our own vanity & add a little twist to it! We splurged on the granite countertop, vessel sink and faucet. Thanks to Ana White we built our vanity for less than $10! The plans were easy to follow . . . .we are so proud of our wood vanity! link to our blog: http://www.houseofrumours.com/shiplap-powder-room-diy-vanity/
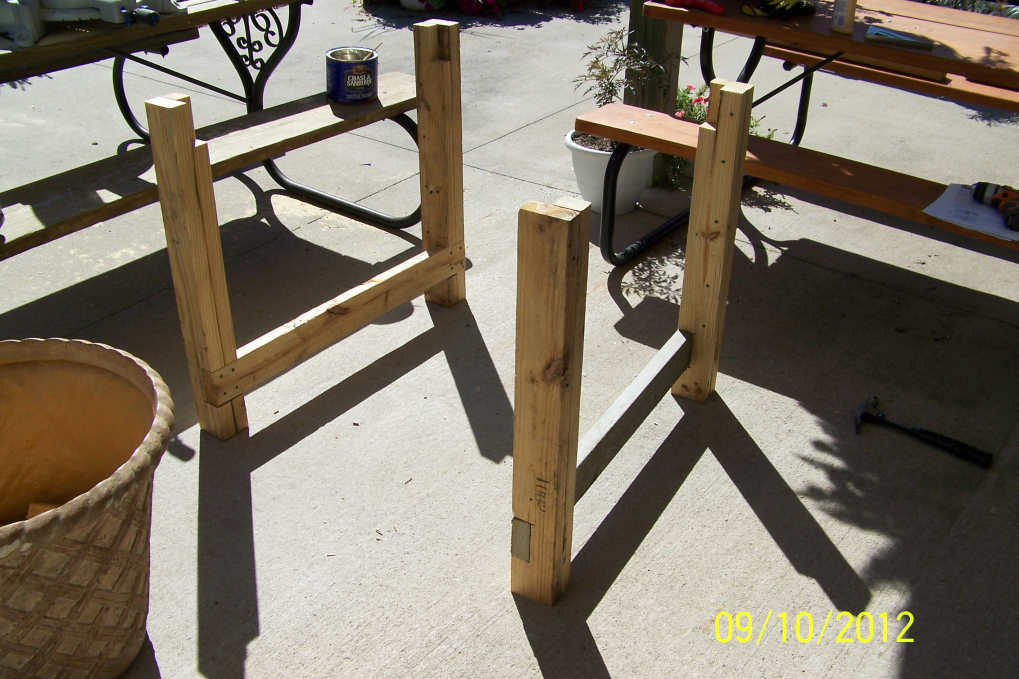
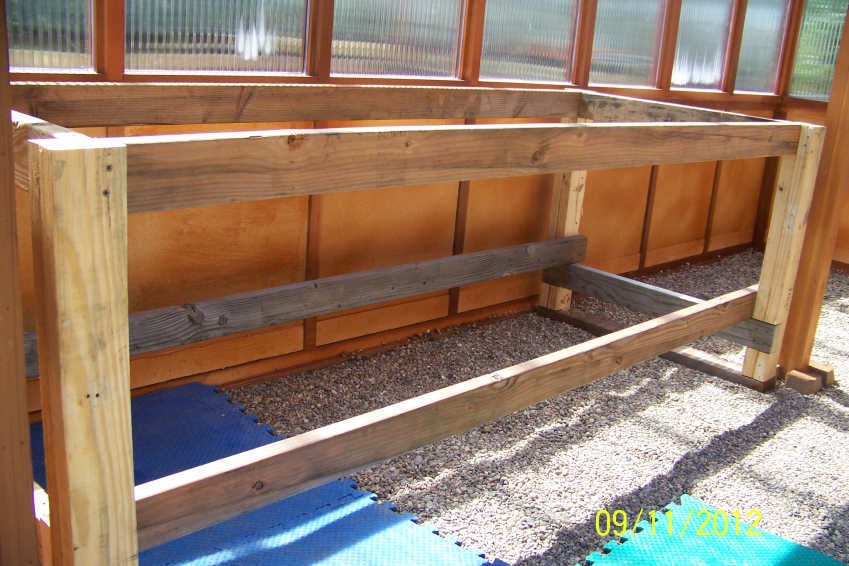
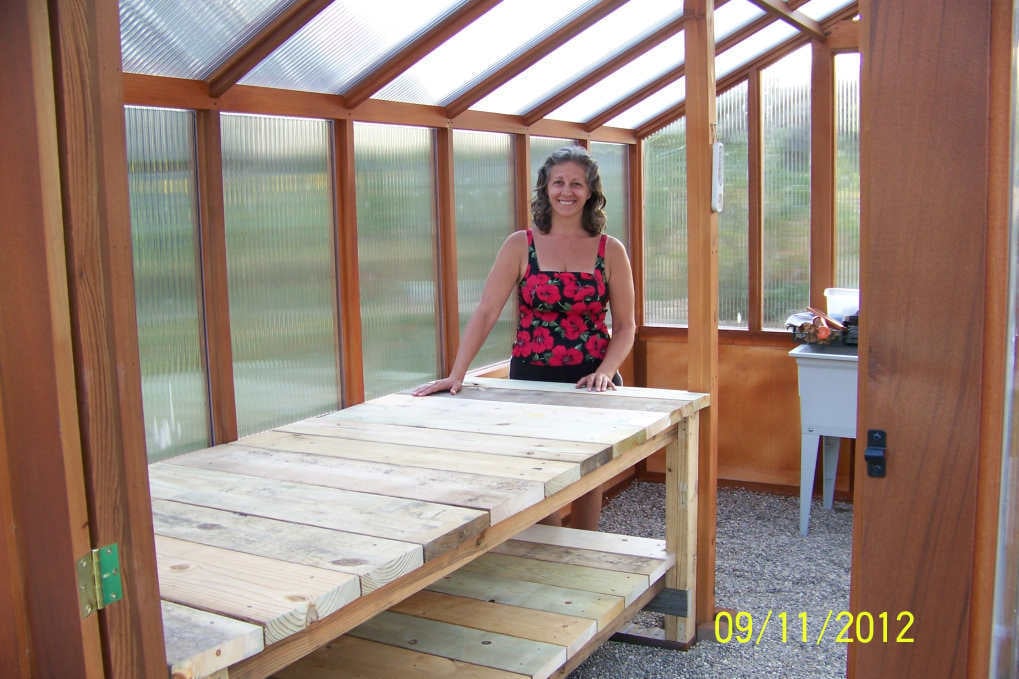
Before my new greenhouse was even delivered and built, I was searching for ideas on potting / greenhouse benches. The company wanted nearly as much $$ for the benches as they did for the greenhouse. By accident I came upon Ana's site. I saw the Farmhouse Table plans, then I saw Handy Andy's modification of the plan, and I was inspired to build them myself!
I found a big pallet of 2x pieces of wood at Menards for $25. They usually set out a pallet of odds and ends that are of "like" items. These were about 3.5' long pcs of 2x10's and 2x8's and such (I have enough of these to do the other benches I want to build... and then some!). I also used some 2x4's that came off a really nice sturdy pallet that we picked up for free, and the rest were just boards we had around the shed.
Hubby was willing to help me with this project, but I wanted to do it myself. He did help with the heavy lifting, and I do appreciate that :) Once I had the frame built, we had to move it into place in the greenhouse otherwise we would not have been able to get it in there. And now that it's complete... it's HEFTY!!! And believe me, it's not going to shift about! lol I also put 2x4's across the bottom of the legs so that it wouldn't sink down into the pea stone floor.
The benches basic construction is the Farmhouse Table, but I added a bottom shelf, a little like Handy Andy's. I must say, because this was not a fine piece of furniture, I was not as intimidated or nervous. It was great for my first ever big project :) It took me some time to complete it, over the course of 2 days, but then I also have to cook and clean and work and garden and a hundred other things in a day :) So, I was in no hurry, but it was a very fun project and I'm SO glad I took it on.
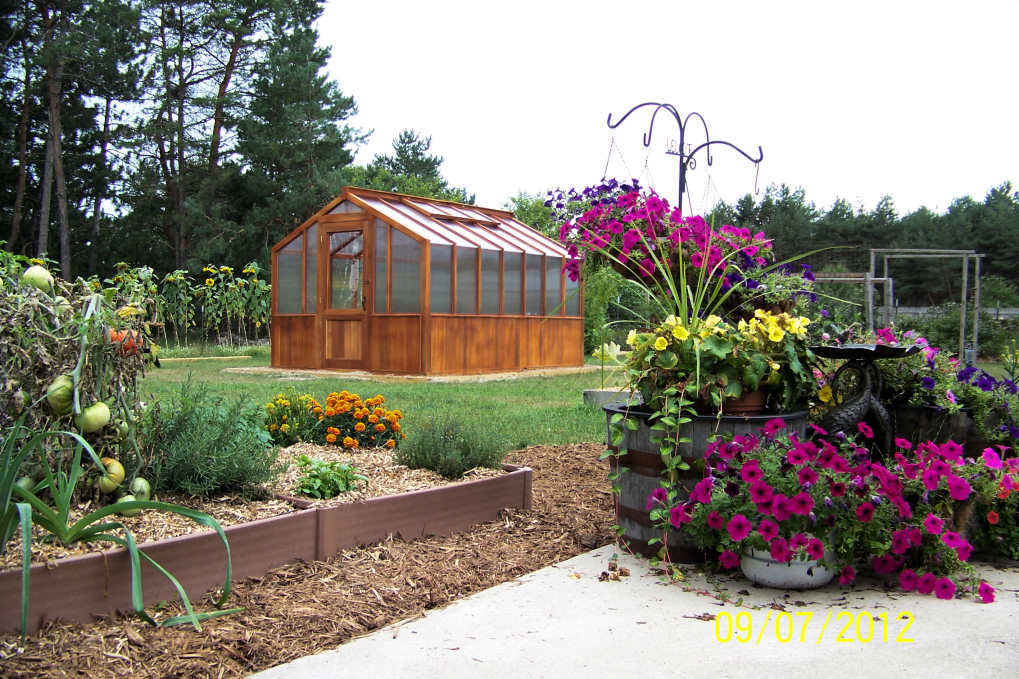
I will be building more of these benches to fill up my beautiful new 10x14 Cedar Built Greenhouse.
Thank you Ana, and Handy Andy!!! I couldn't have done it without your examples!
~ Tonya

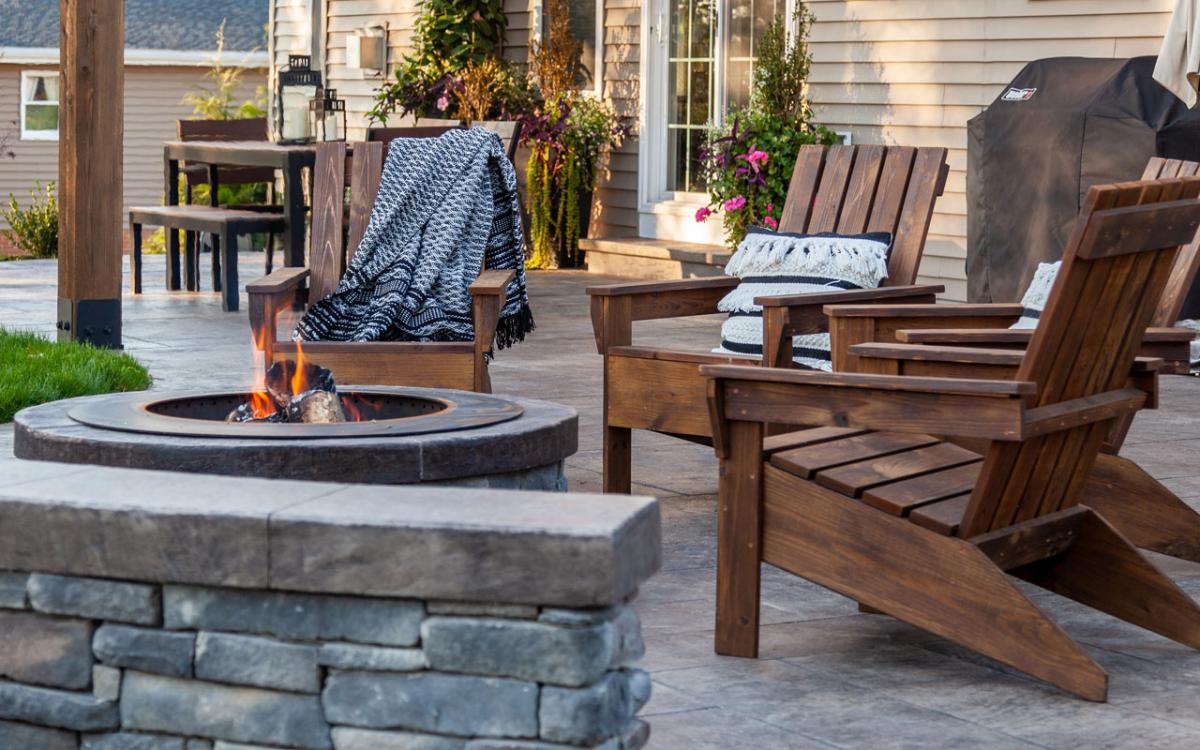
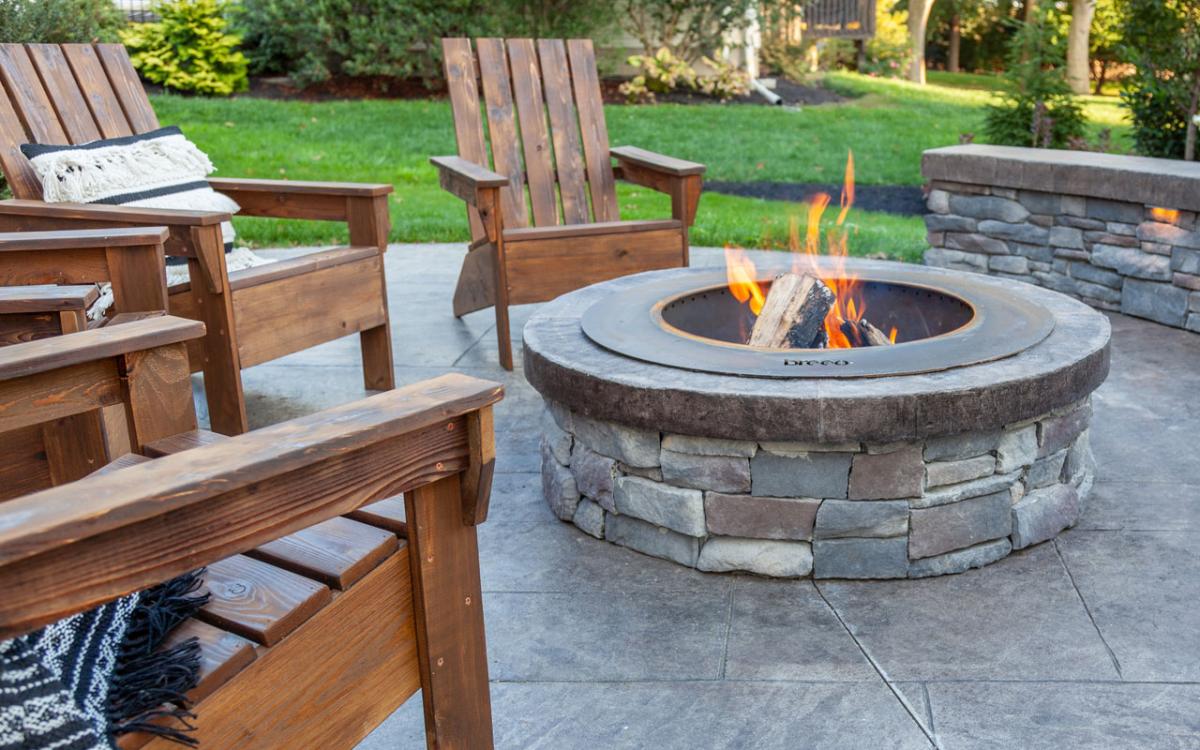
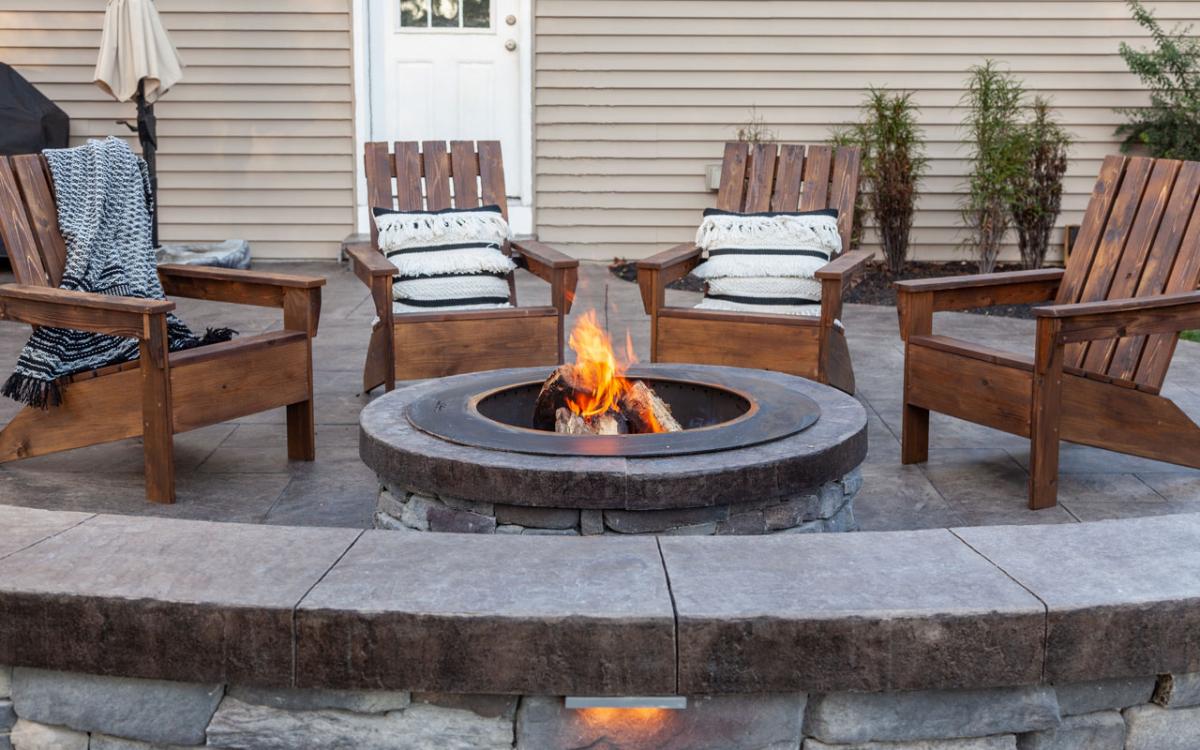
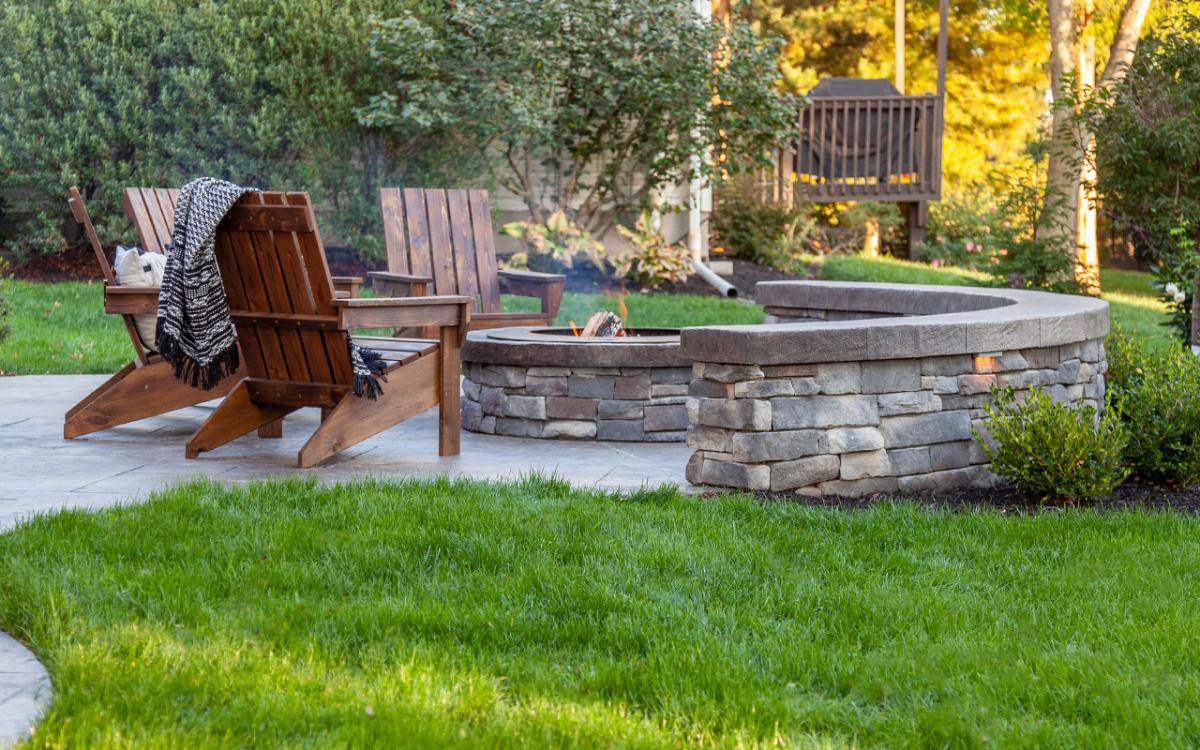
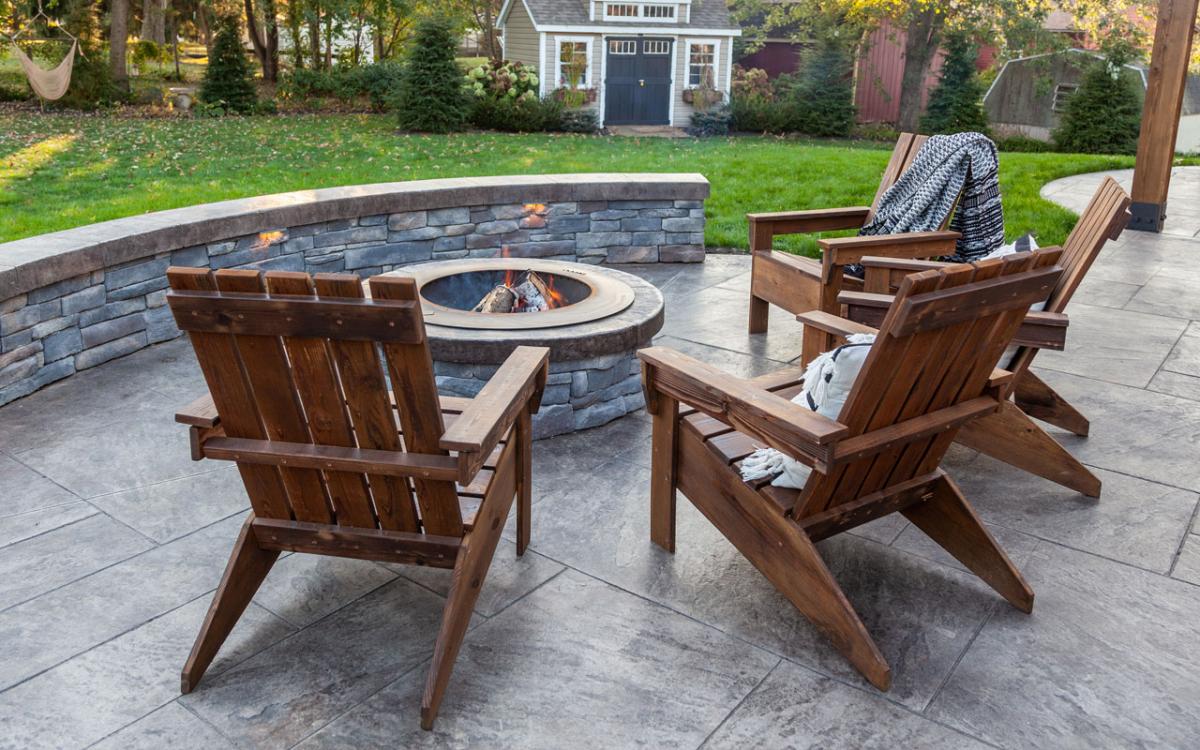
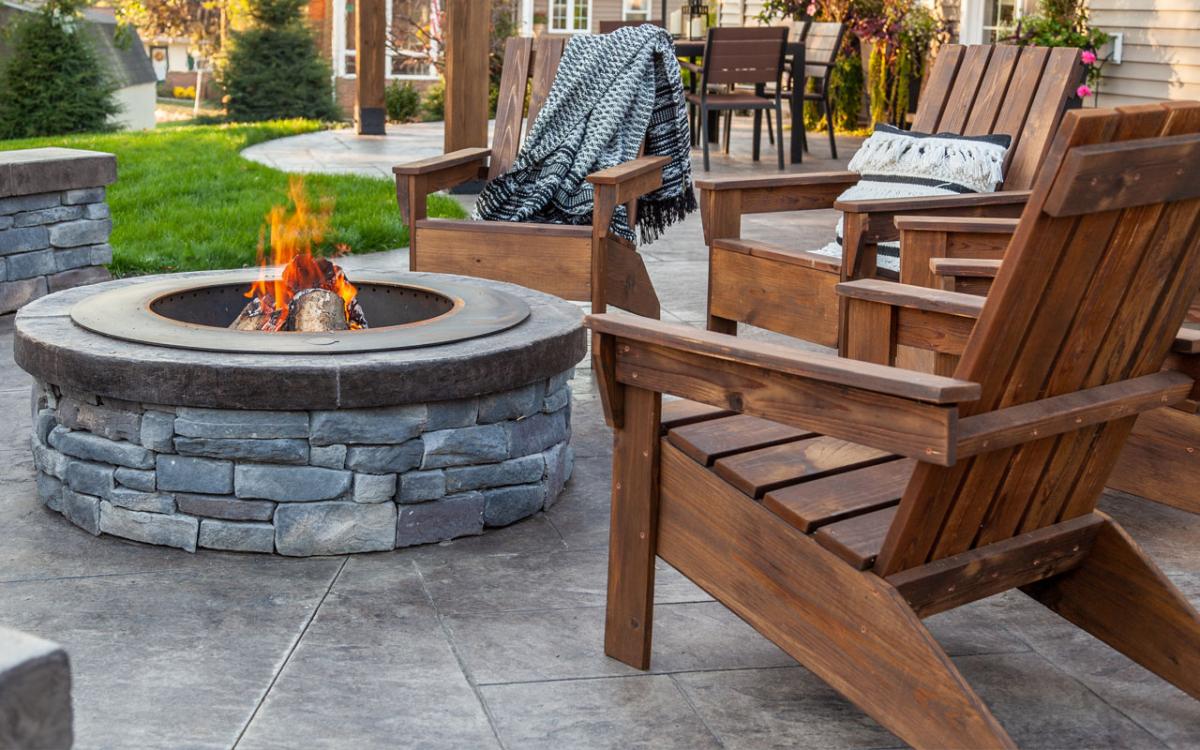
I am long overdue to share these Adirondack chairs that I made last fall. I followed the exact plans for Ana’s Adirondack Chair to make my own. These chairs have such a simple, clean, modern style that I love. Adirondack chairs, no matter what style, are just an all-around classic!
I make and sell kids picnic tables on craigslist and a buyer asked about making one of these. I took it on and found the plans on here very easy! I now list these on craigslist also and hope to sell more before the summer is over.
This is the very first thing I've ever built! I would never have thought it could be so easy! Thanks so much Ana - your my hero!!!
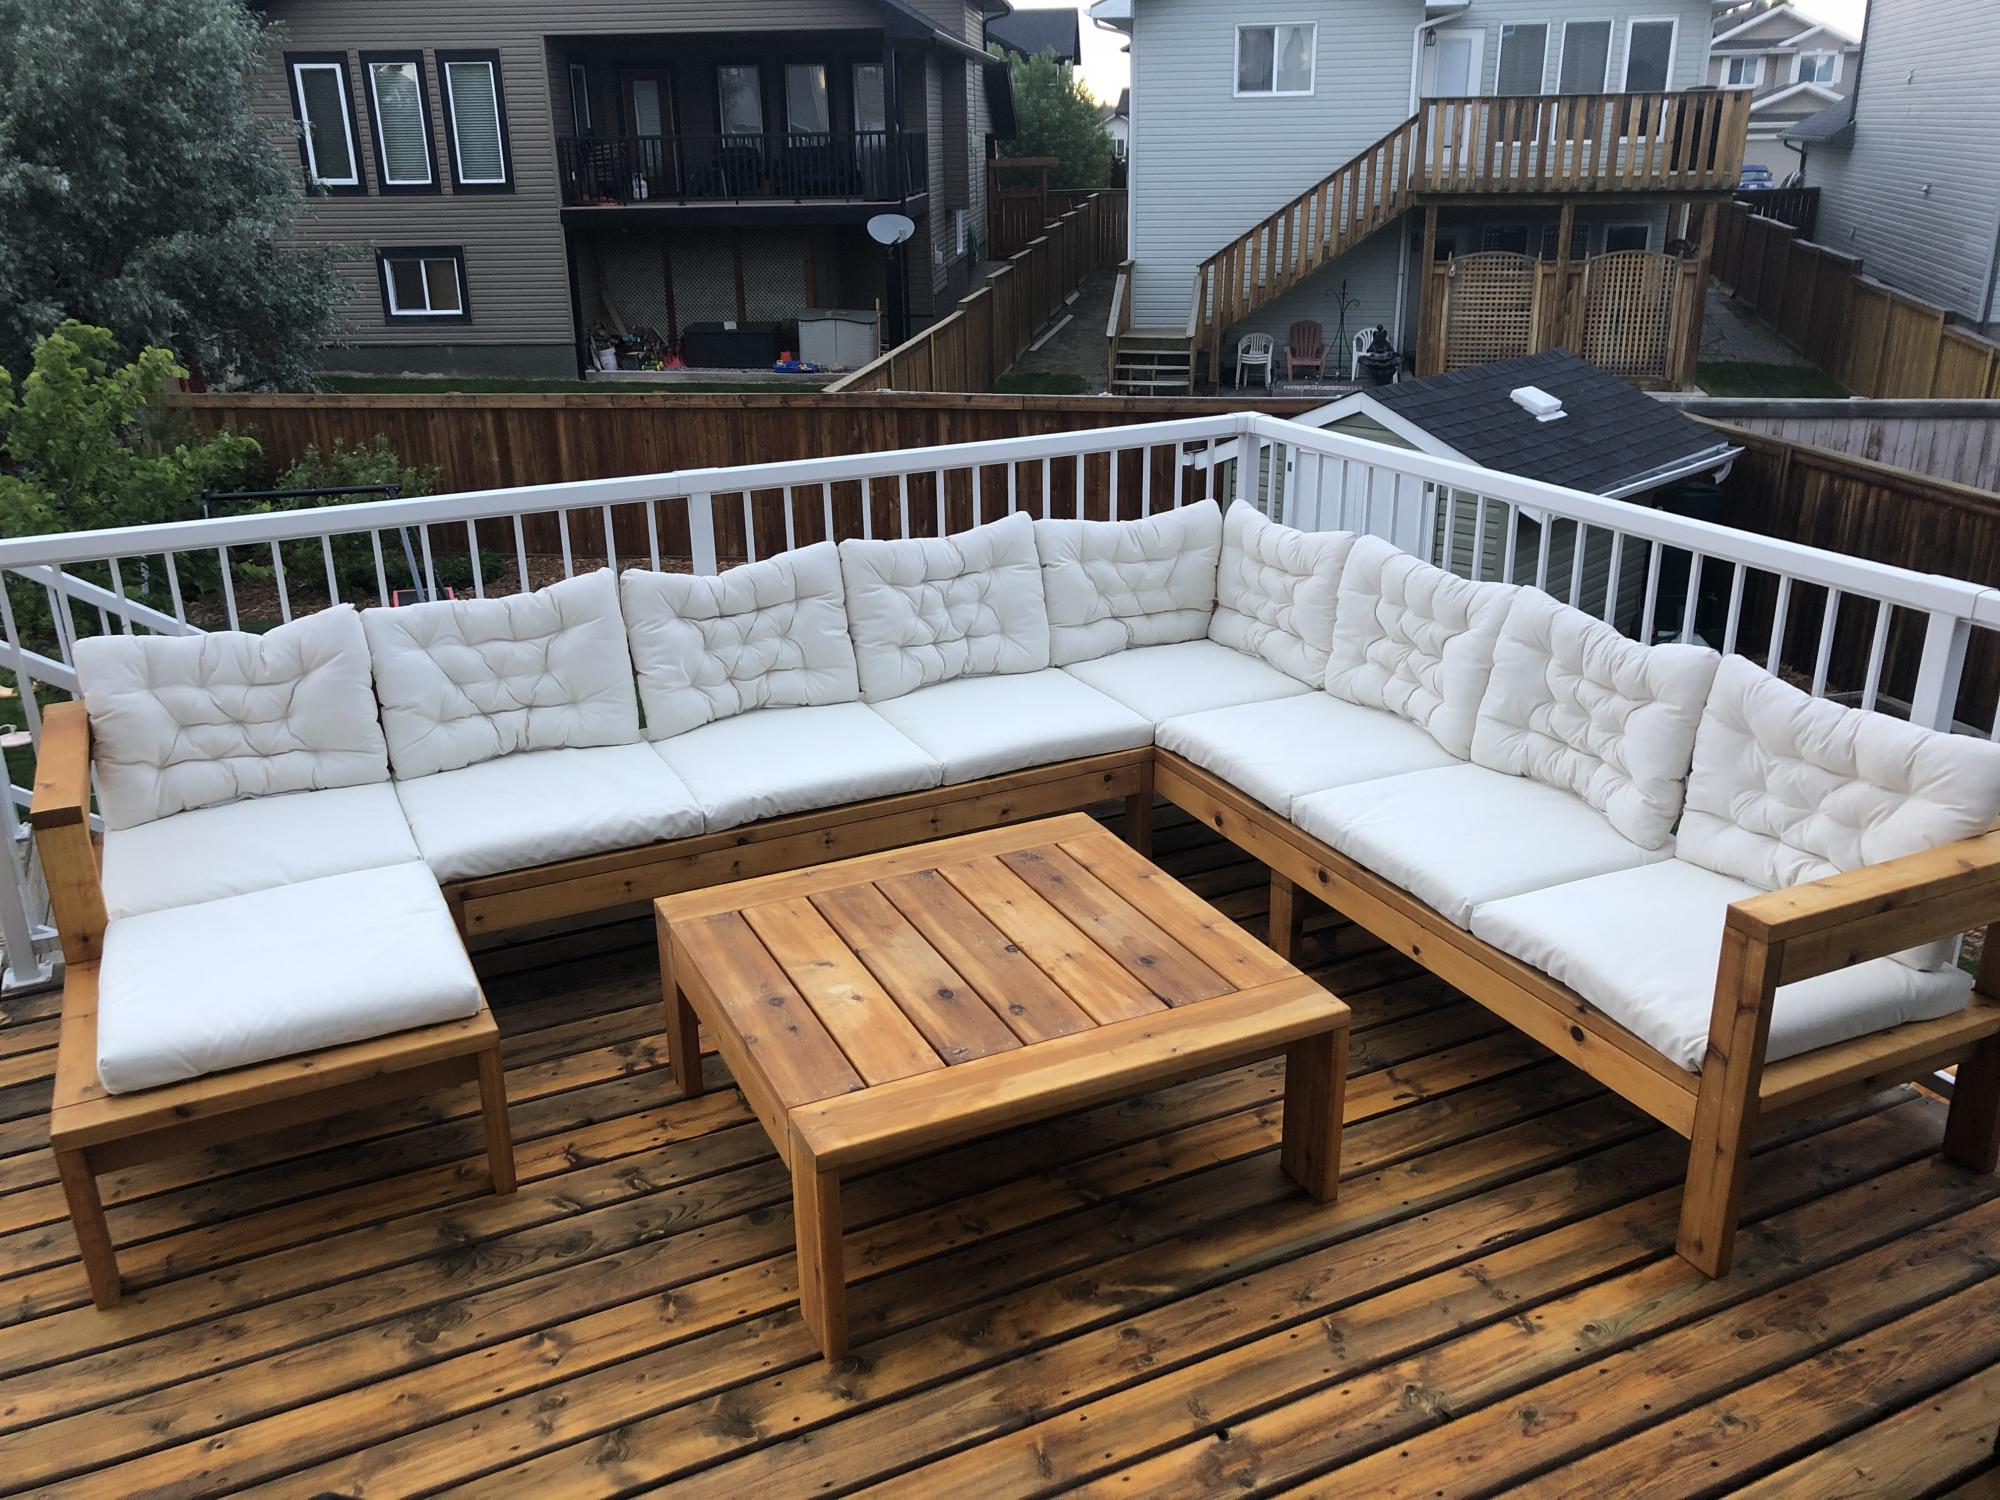
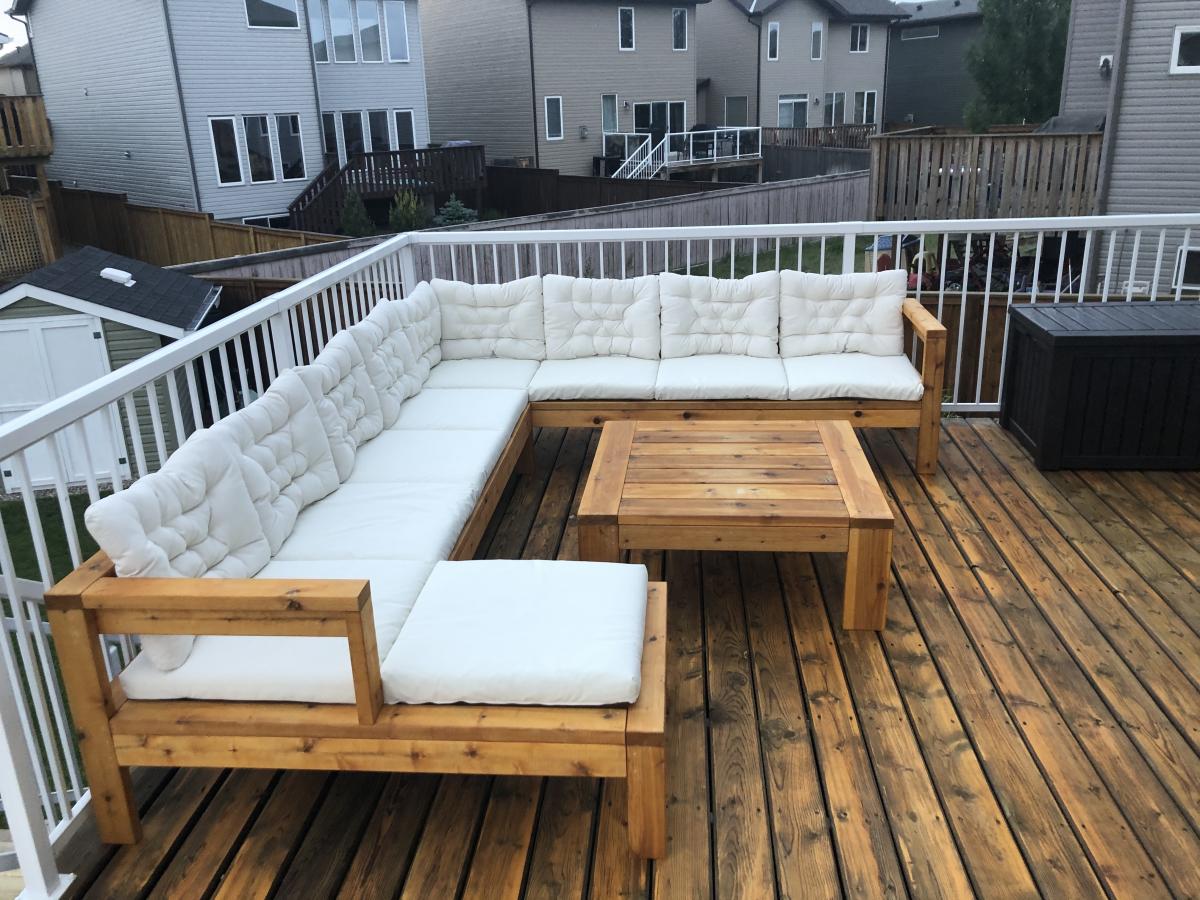
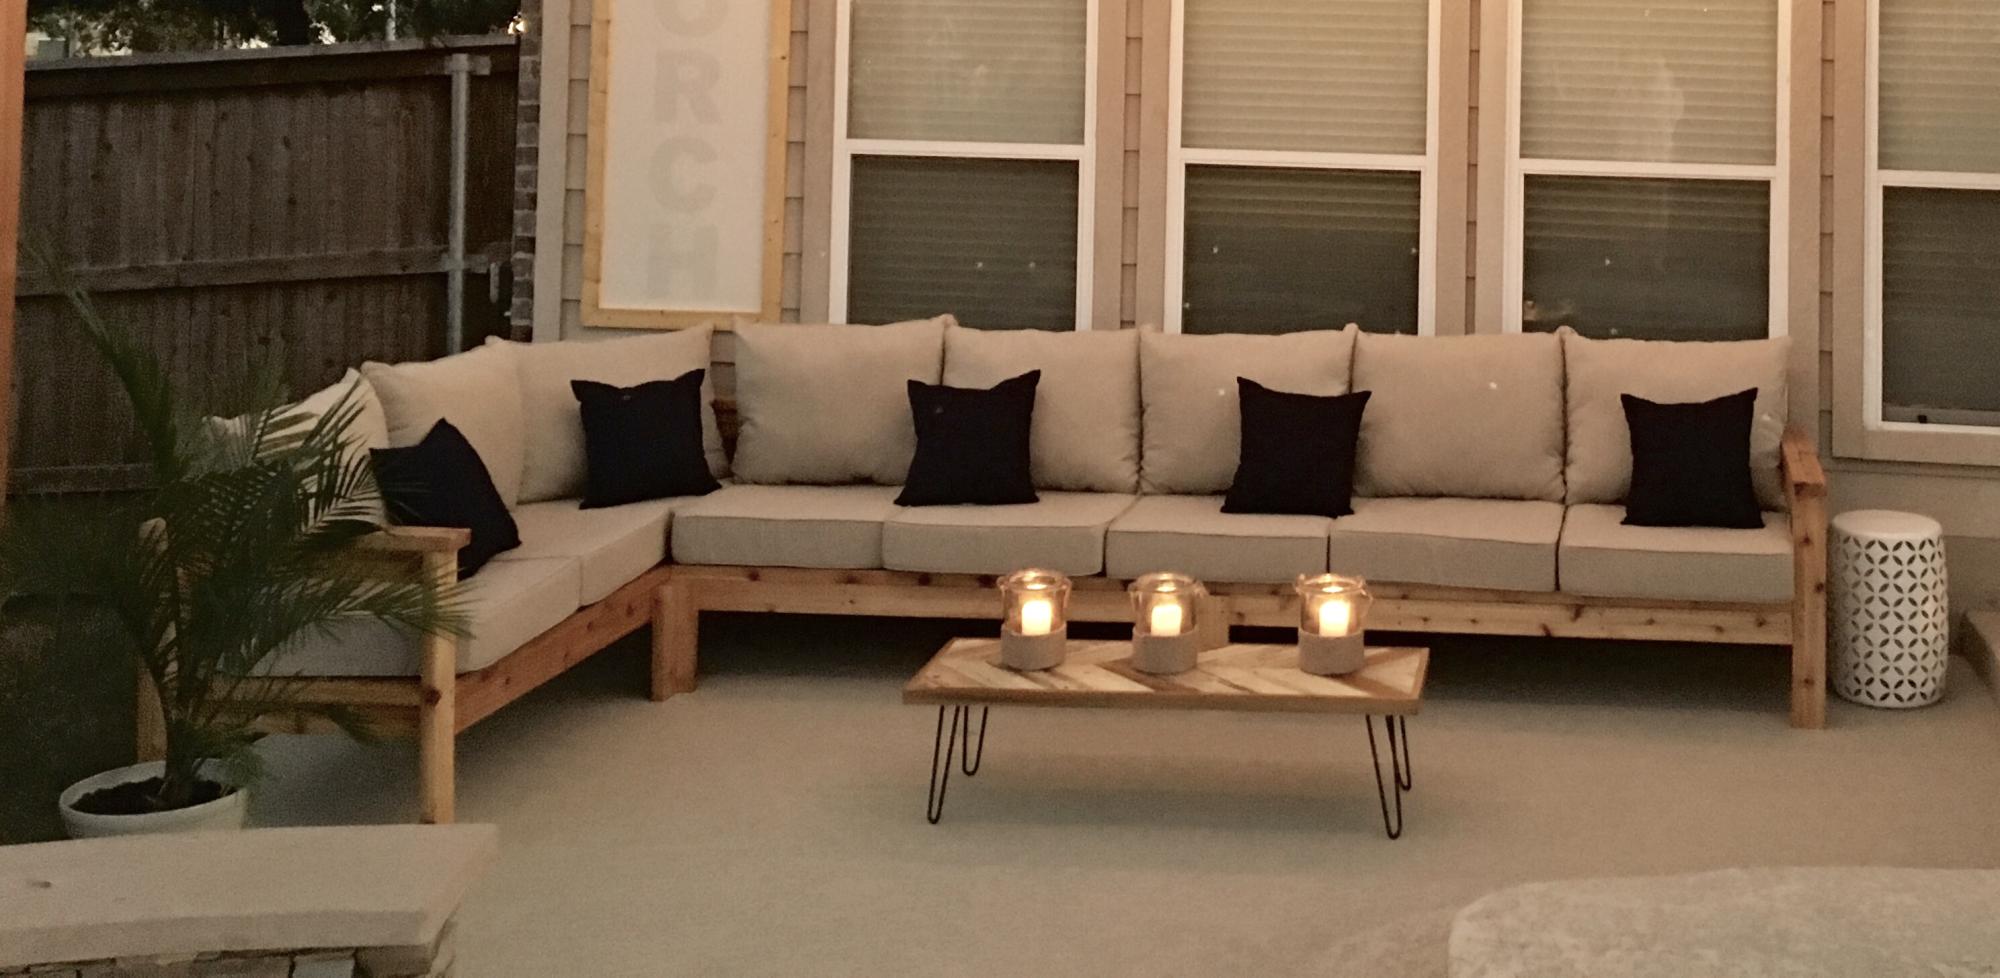
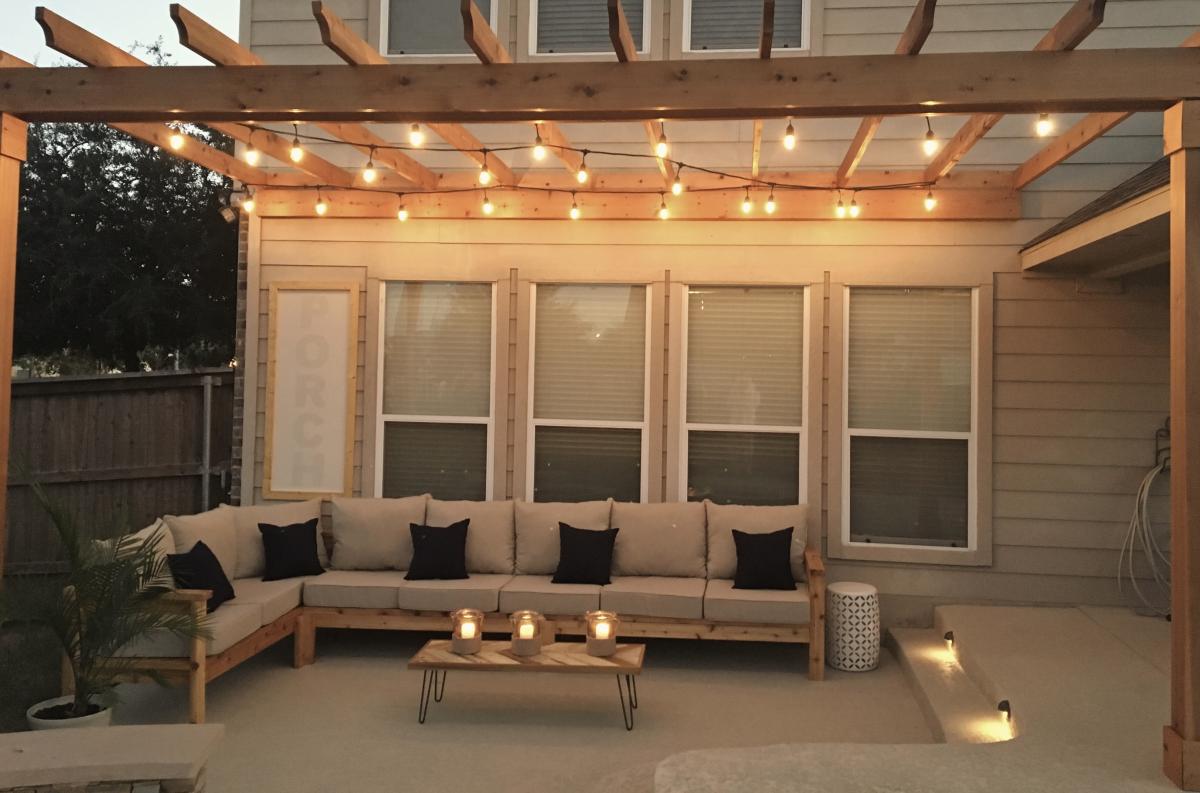
Modified the plans of the outdoor sofa and sectional piece to create this set, then added cushions from IKEA.
Wed, 02/21/2024 - 10:27
I'm building the sectional this weekend, and saw your addition to the end piece and am going to steal your idea. Very nice.
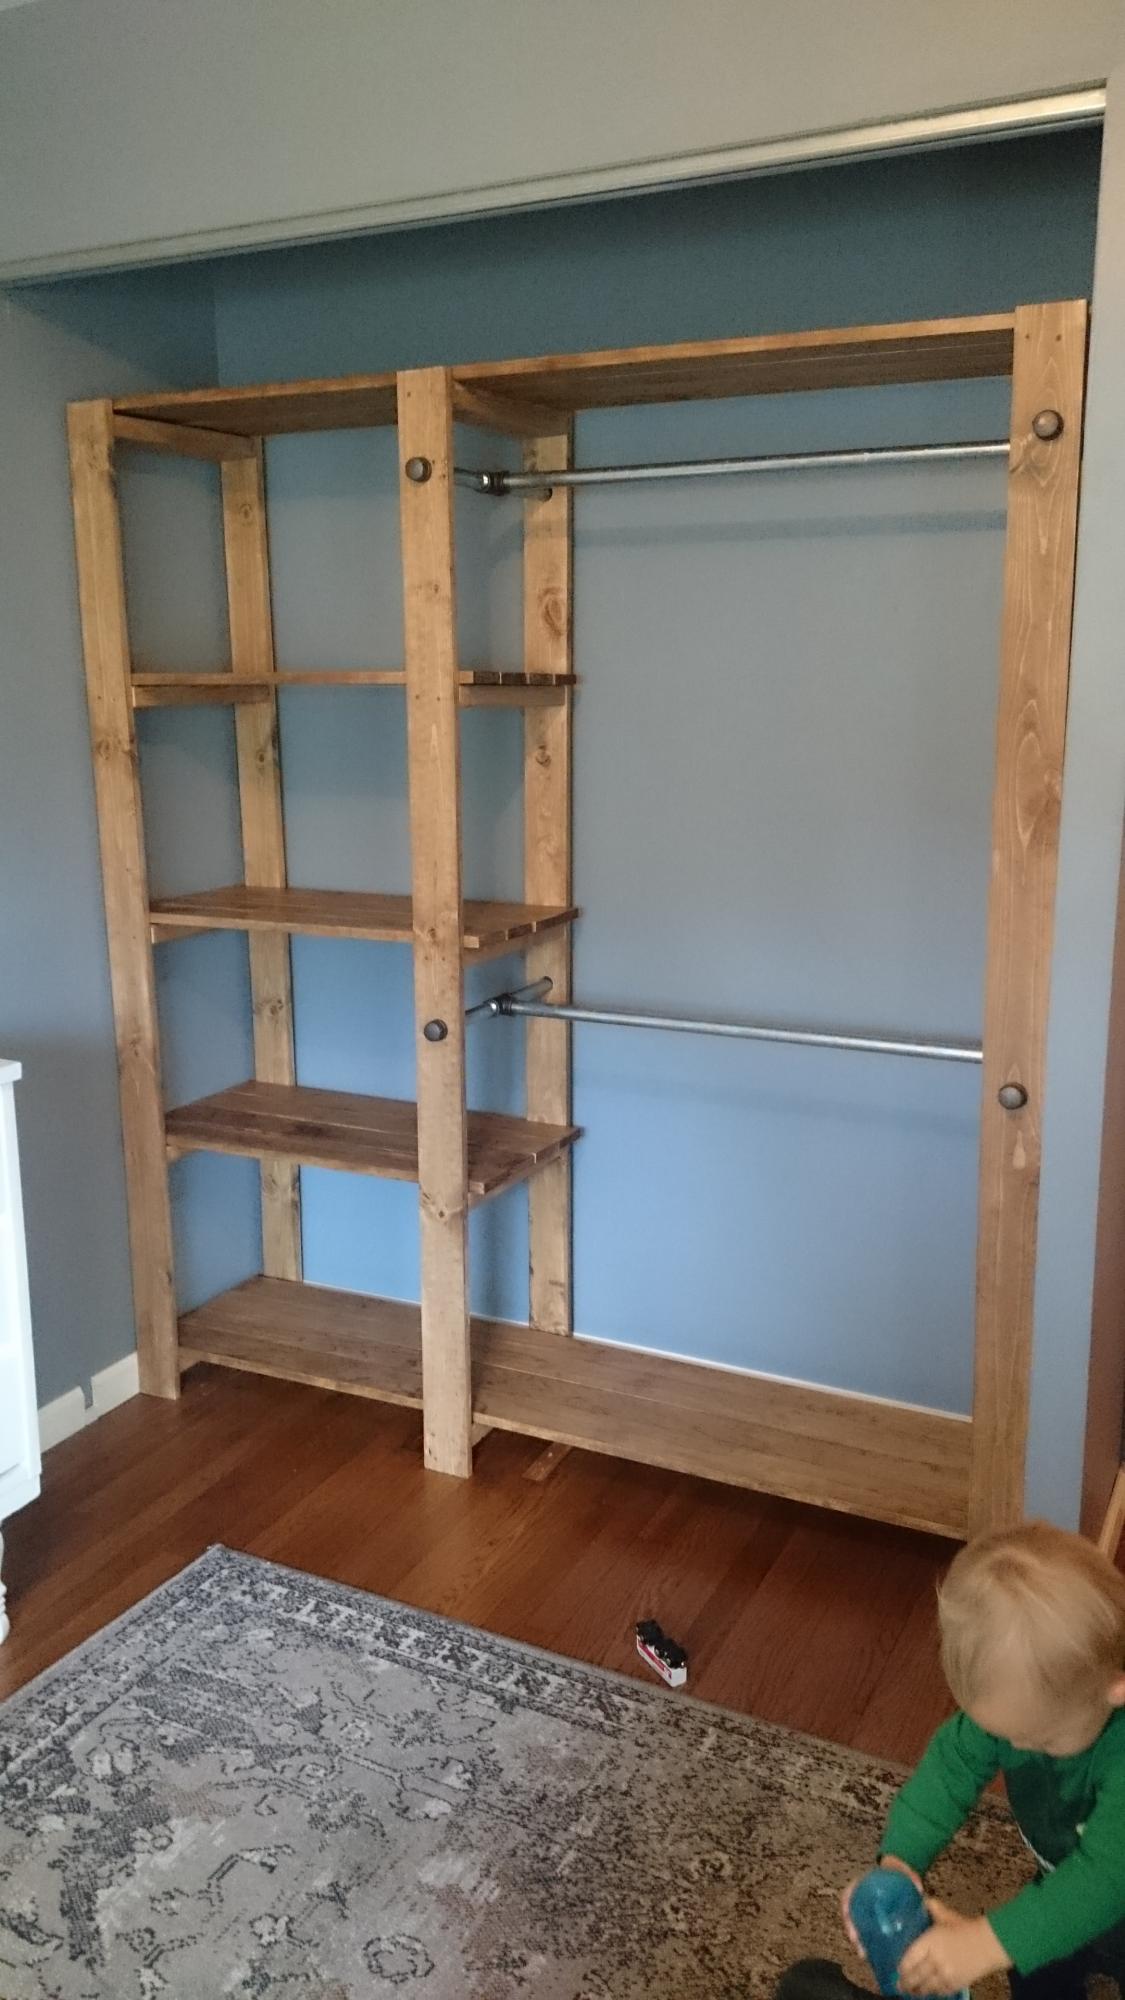
This was the second building project I've ever completed. I had to make a few adjustments to make it fit the size of ray's closet, but it was totally worth it. most of the work was in the measuring, sanding, and sealing of the wood. Ftting the frames can be a little tricky if your planks aren't perfectly straight. Otherwise, this project was pretty straight forward and can be done in just a few days depending on how much time you have to dedicate to it. Thanks Ana!
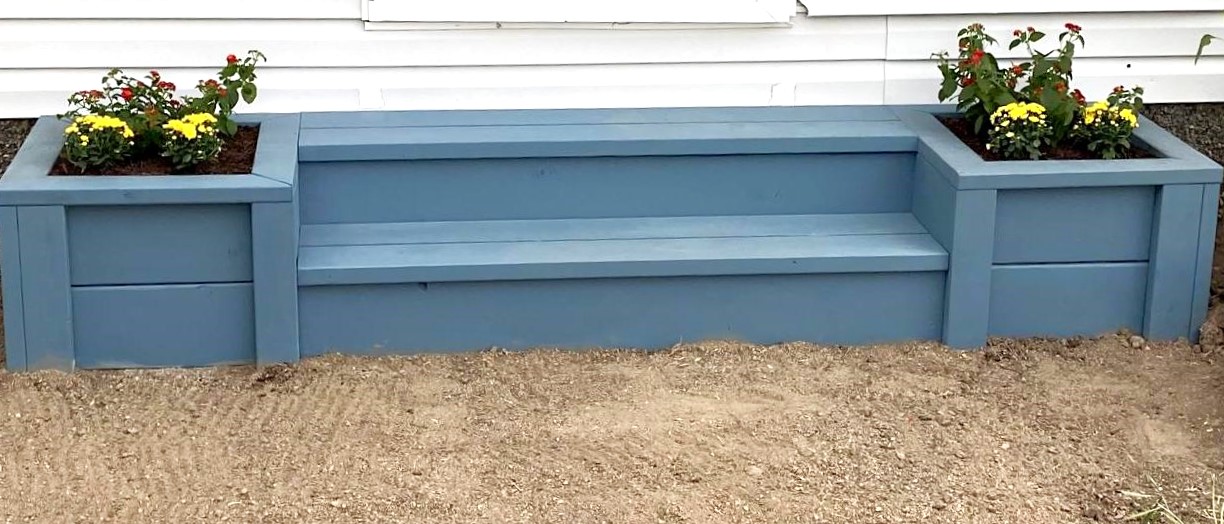
These steps turned out great!!! My in-laws were using some busted up pallets as a front porch so I knocked these out in a few hours. The blue stain looks really good and matches the other blue on various out-buildings. Very easy project and the plans available were spot on. Thanks Ana!!
Hi Ana!
My husband used your plans to build the 2x4 outdoor cedar sectional :) He did it in 1 day and it couldn't have been easier! He even tried first time working with pallets to make a small table and it came out perfectly too! Can't wait to enjoy family time on our new back porch.
Thanks Again & Love From Austin ❤️
Kathleen
Thu, 10/24/2019 - 16:35
Hi, your furniture is beautiful. May I ask: Where did you find your cushions? And what color/ brand stain did you use? Lovely job.
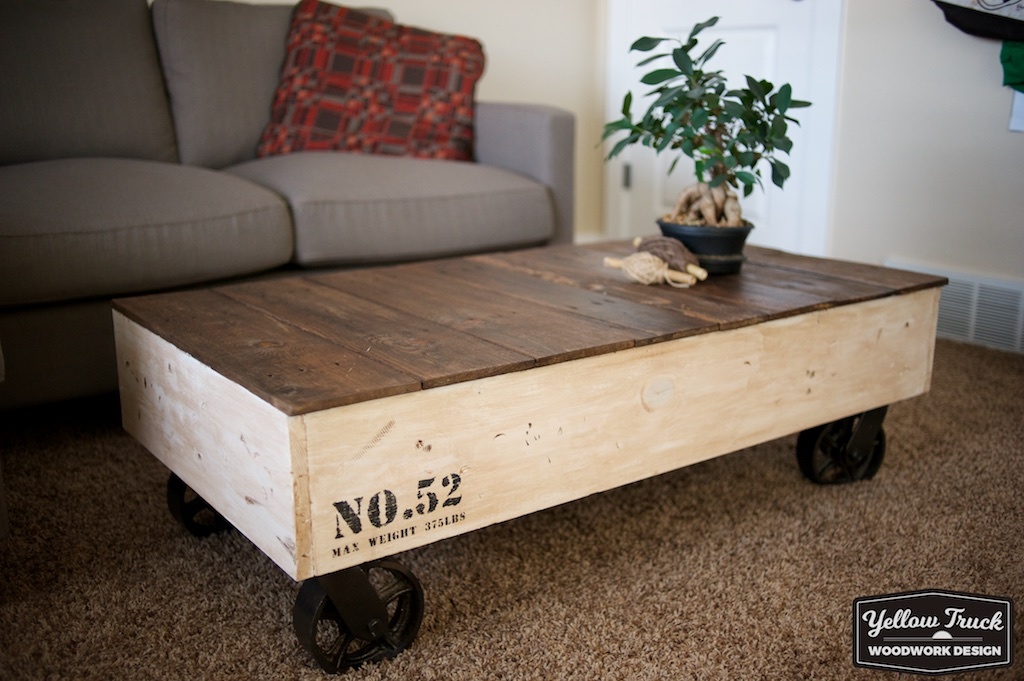
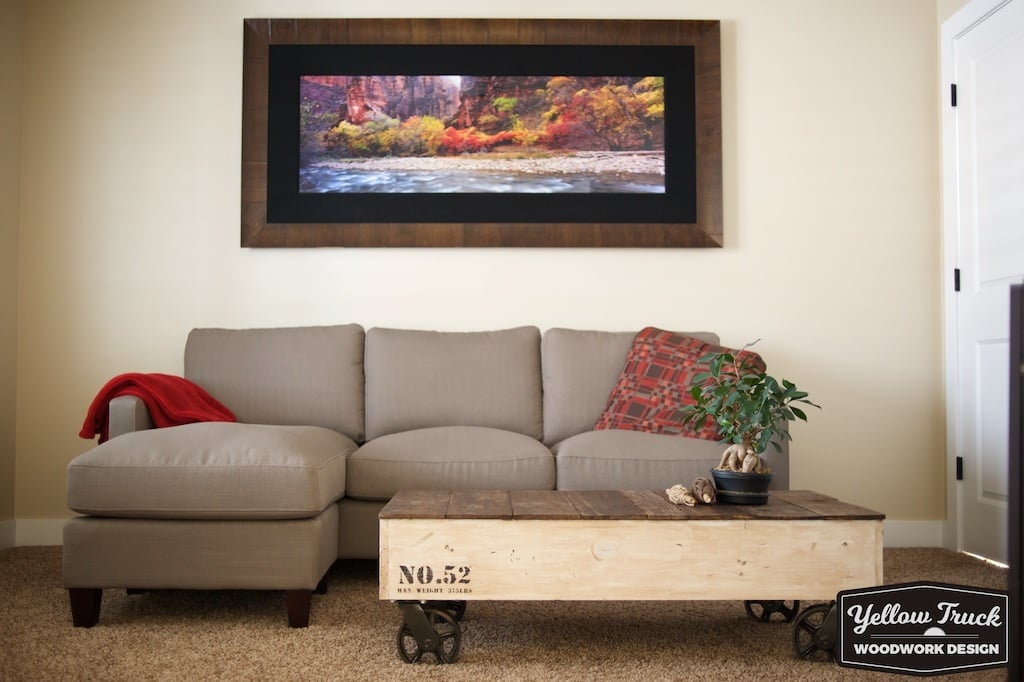
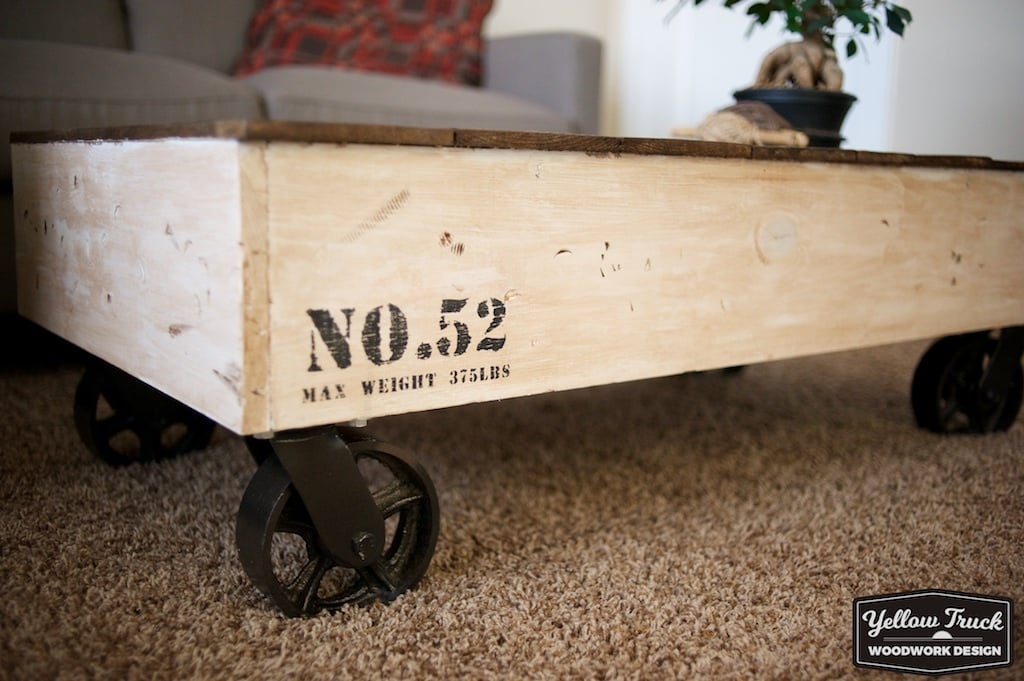
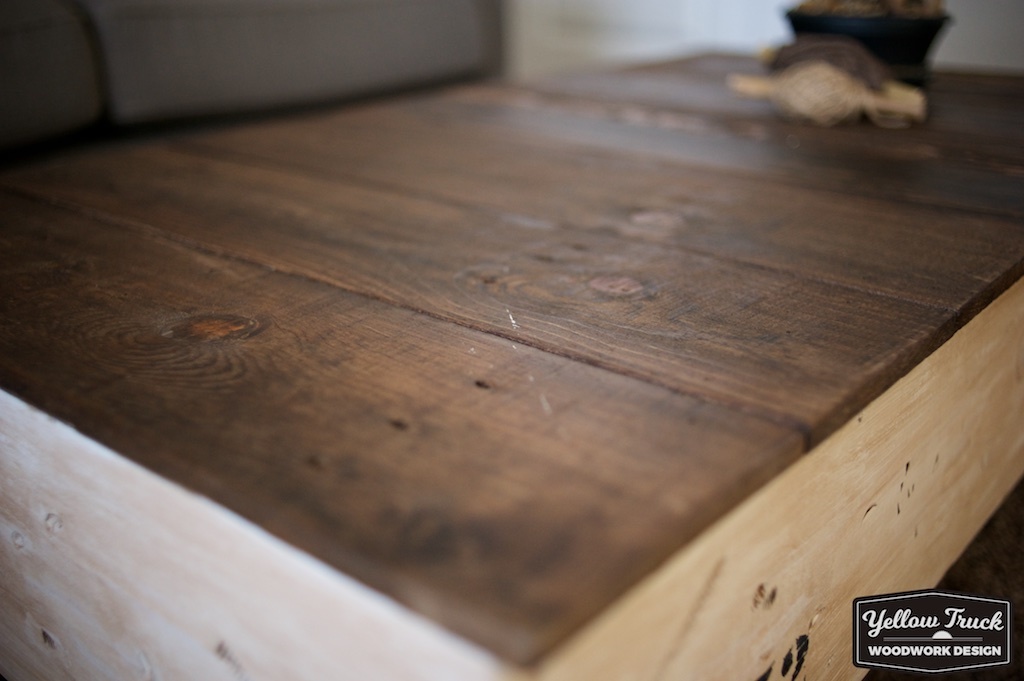
I built this last weekend and had a blast with it. The design was from Ana's Factory Cart Coffee table, but I built it a little bit different. The side boards are from 1x8 pine instead of 1x6. I wanted it to be a little bit taller. I ended up getting the casters from Home Depot. They were $25 each. However I saved some cash on the top by using wood from a pallet that I sanded down and stained. The overall cost was about $120 with $100 of that being just the casters.
I did the No.52 and max weight by creating a stencil and painting it with black paint and sanding it down.
Sat, 12/31/2016 - 16:38
I forget to login before I posted this so it shows as a guest. Sorry about that.

I made this in an afternoon. Loved this project. It is made with 2x4's using a Kregs Jig and mitre saw (plus additional tools like a drill and square). This was my frist time using the Kregs Jig and I am sold!!
The free plans were taken from another website. They are very detailed and there is even a video (I recommend it as he gives a great tip for making sure the back stays equal/level to each other before putting the back on). Even though you can build this by yourself, I did have help for the heavier sides once they were assembled. I plan to build the additional side table soon and finish them both with sanding and staining when the weather seems less iffy for rain.
If you are looking for a good beginner project that doesn't take forever or have complicated steps, this is your project.
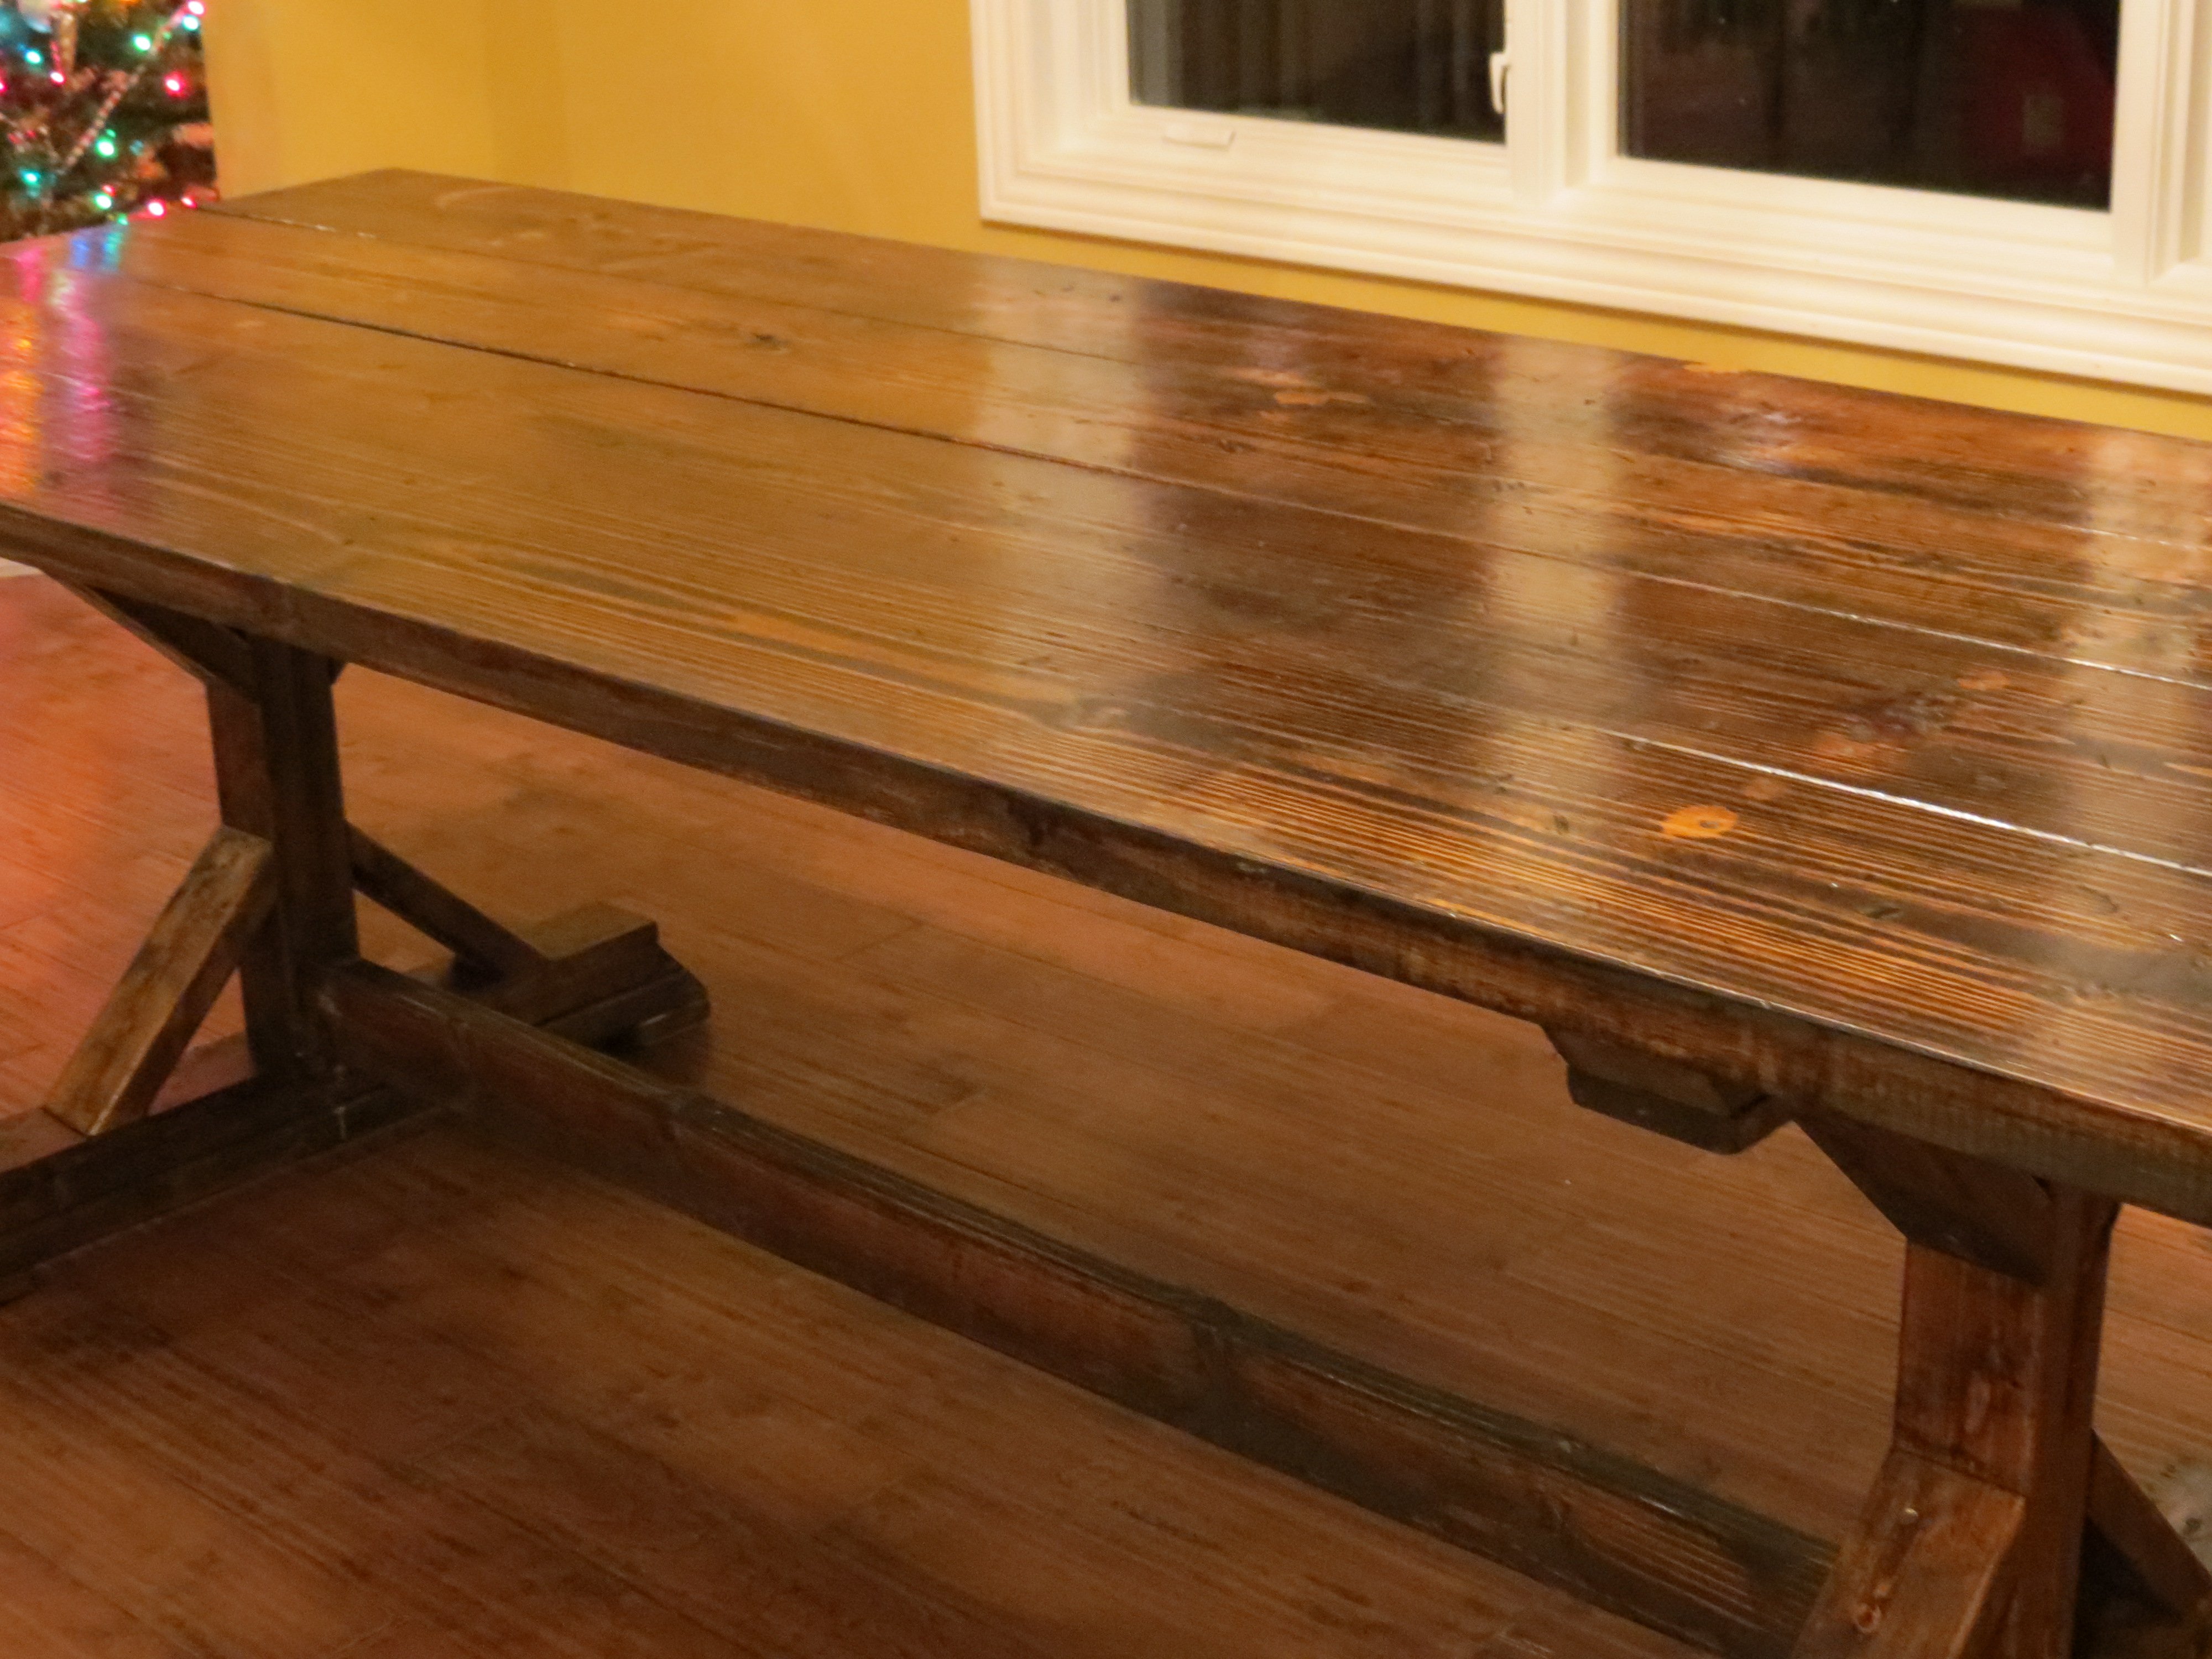
We built this table over one weekend and did the finish work another weekend. We are in the middle of building our home so the table project took a back seat for awhile but we are happy with the result in the end! Could be done all in one weekend without an issue.
You can read about it and see lot's more photos here:
http://letsjustbuildahouse.blogspot.com/2012/12/diy-rustic-farmhouse-ta…
and I'm sure I will be posting more photos with hopefully a bench soon too on:
http://letsjustbuildahouse.blogspot.com/
thanks for the plans can't wait to see what I can talk my husband into next from Ana's site!
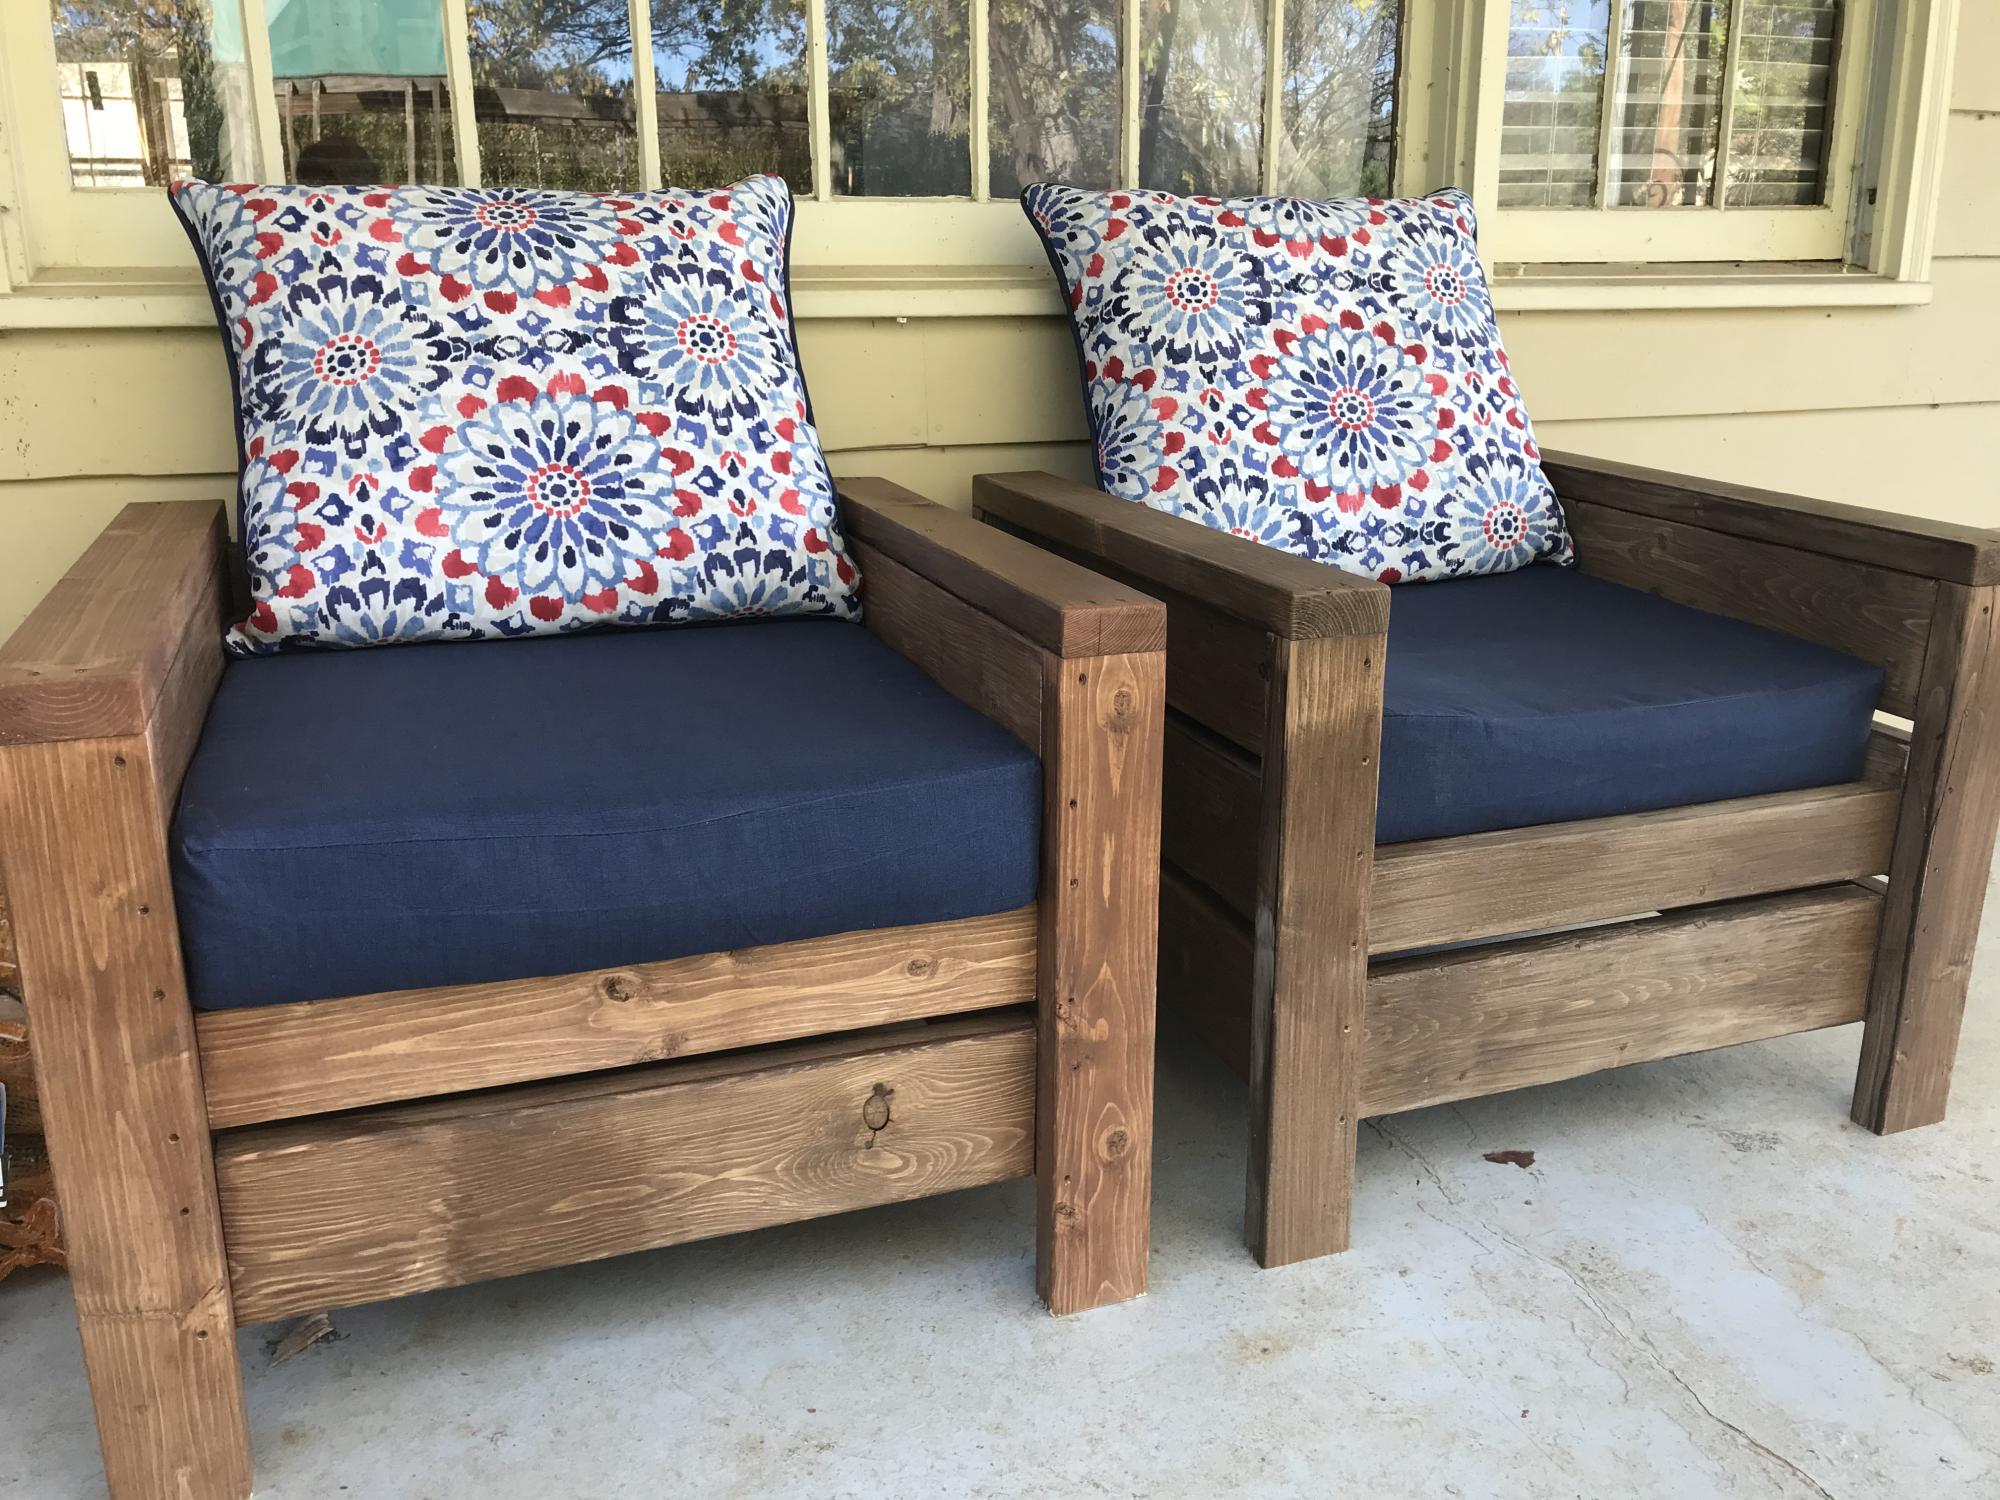
I built two of Ana's "Modern Outdoor Chairs" and adjusted the plans to accommodate 24" in cushions. We're pleased with how they turned out and have gotten great use out of them. Thanks for the plans, Ana!
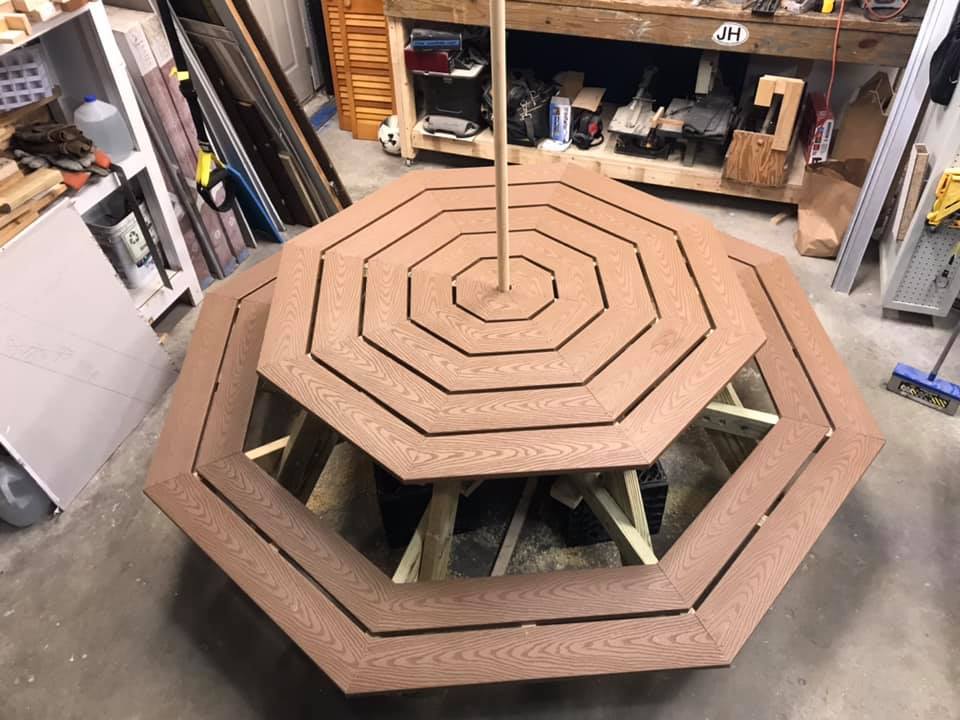
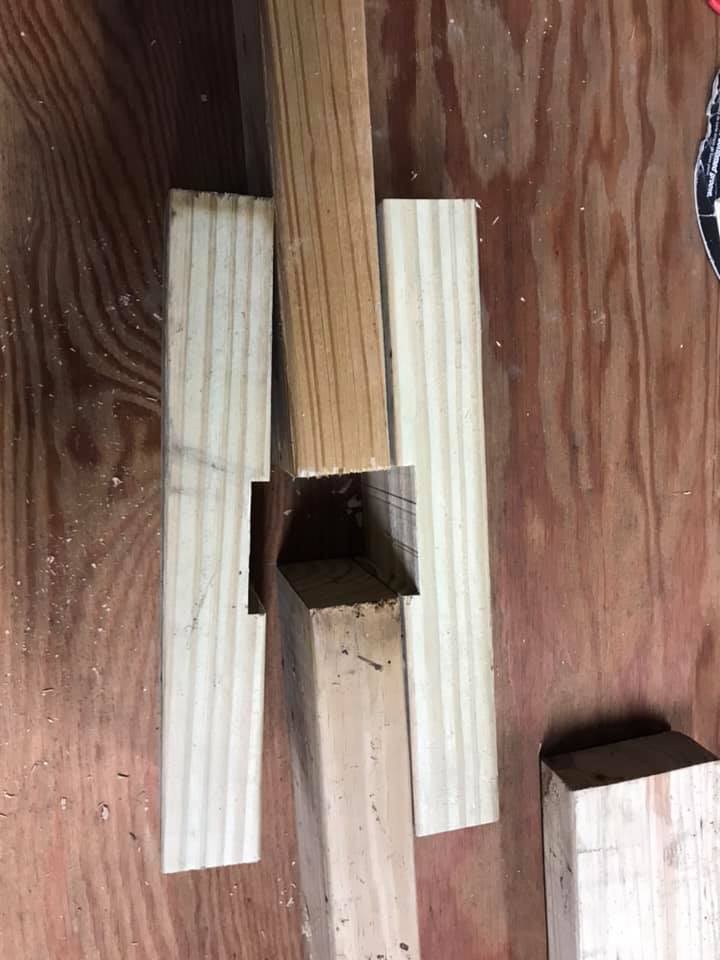
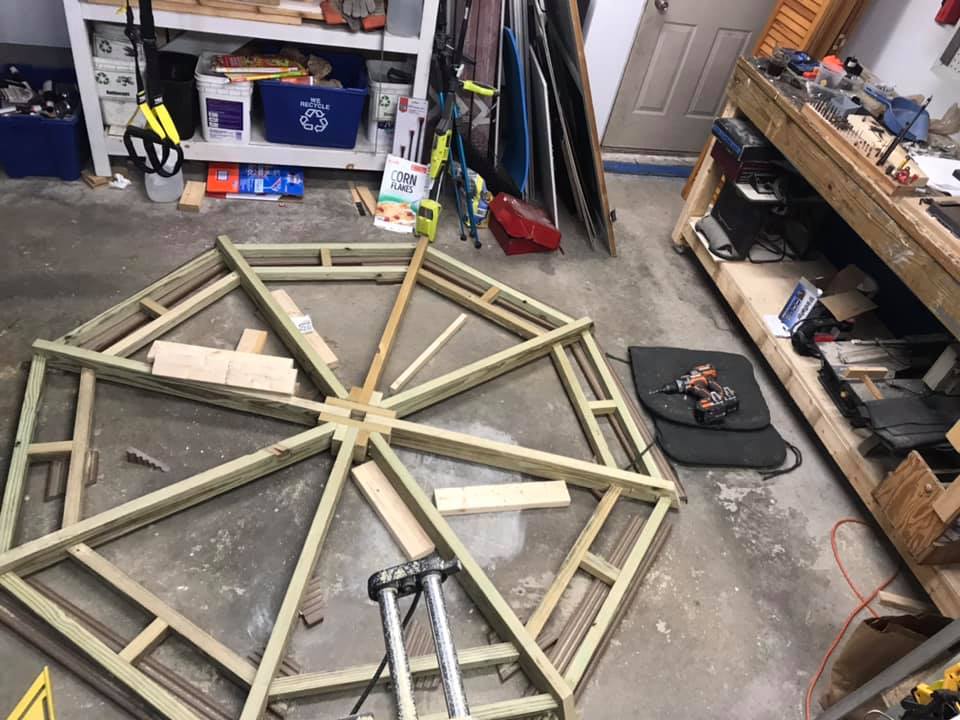
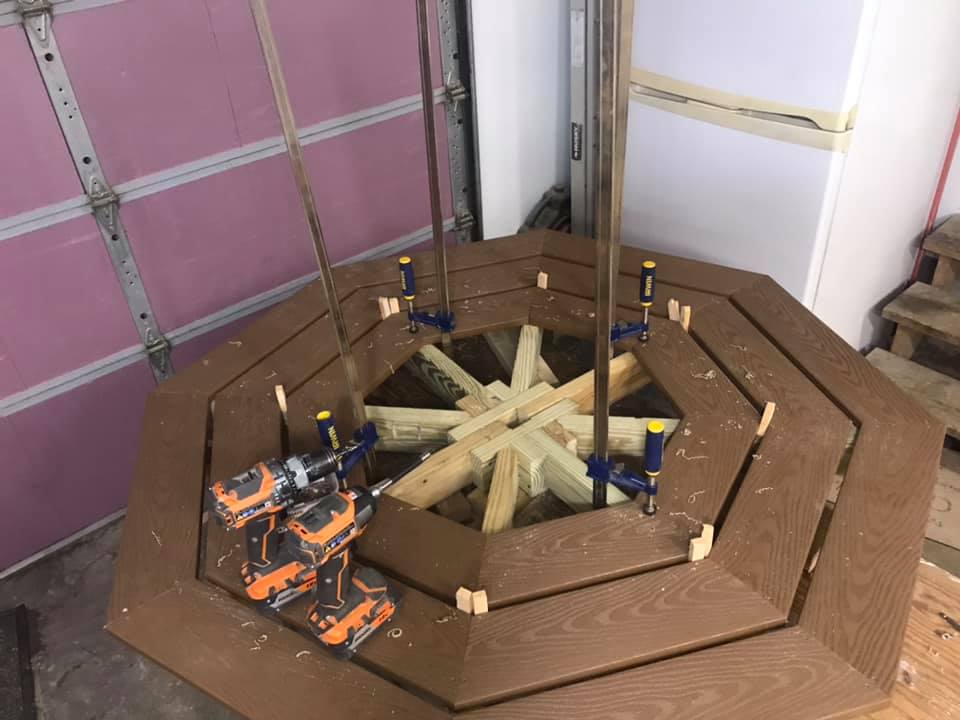
I built the octagon picnic table, and modified in a couple of ways.
1) Due to project deadline (Christmas) (and cost) I opted for composite decking for a finished top and bench, and pressure-treated 2x framing stock. Builder beware! Composite decking can be 5 1/4" wide, which impacts the spacing between the pieces, which means re-calculating most of the table-top pieces. Also, I added lateral structure underneath the benches (more weight!)
2) I really wanted that hole in the center, and hope that my solution (which slightly weakens the overall structural integrity) withstands the test of time.
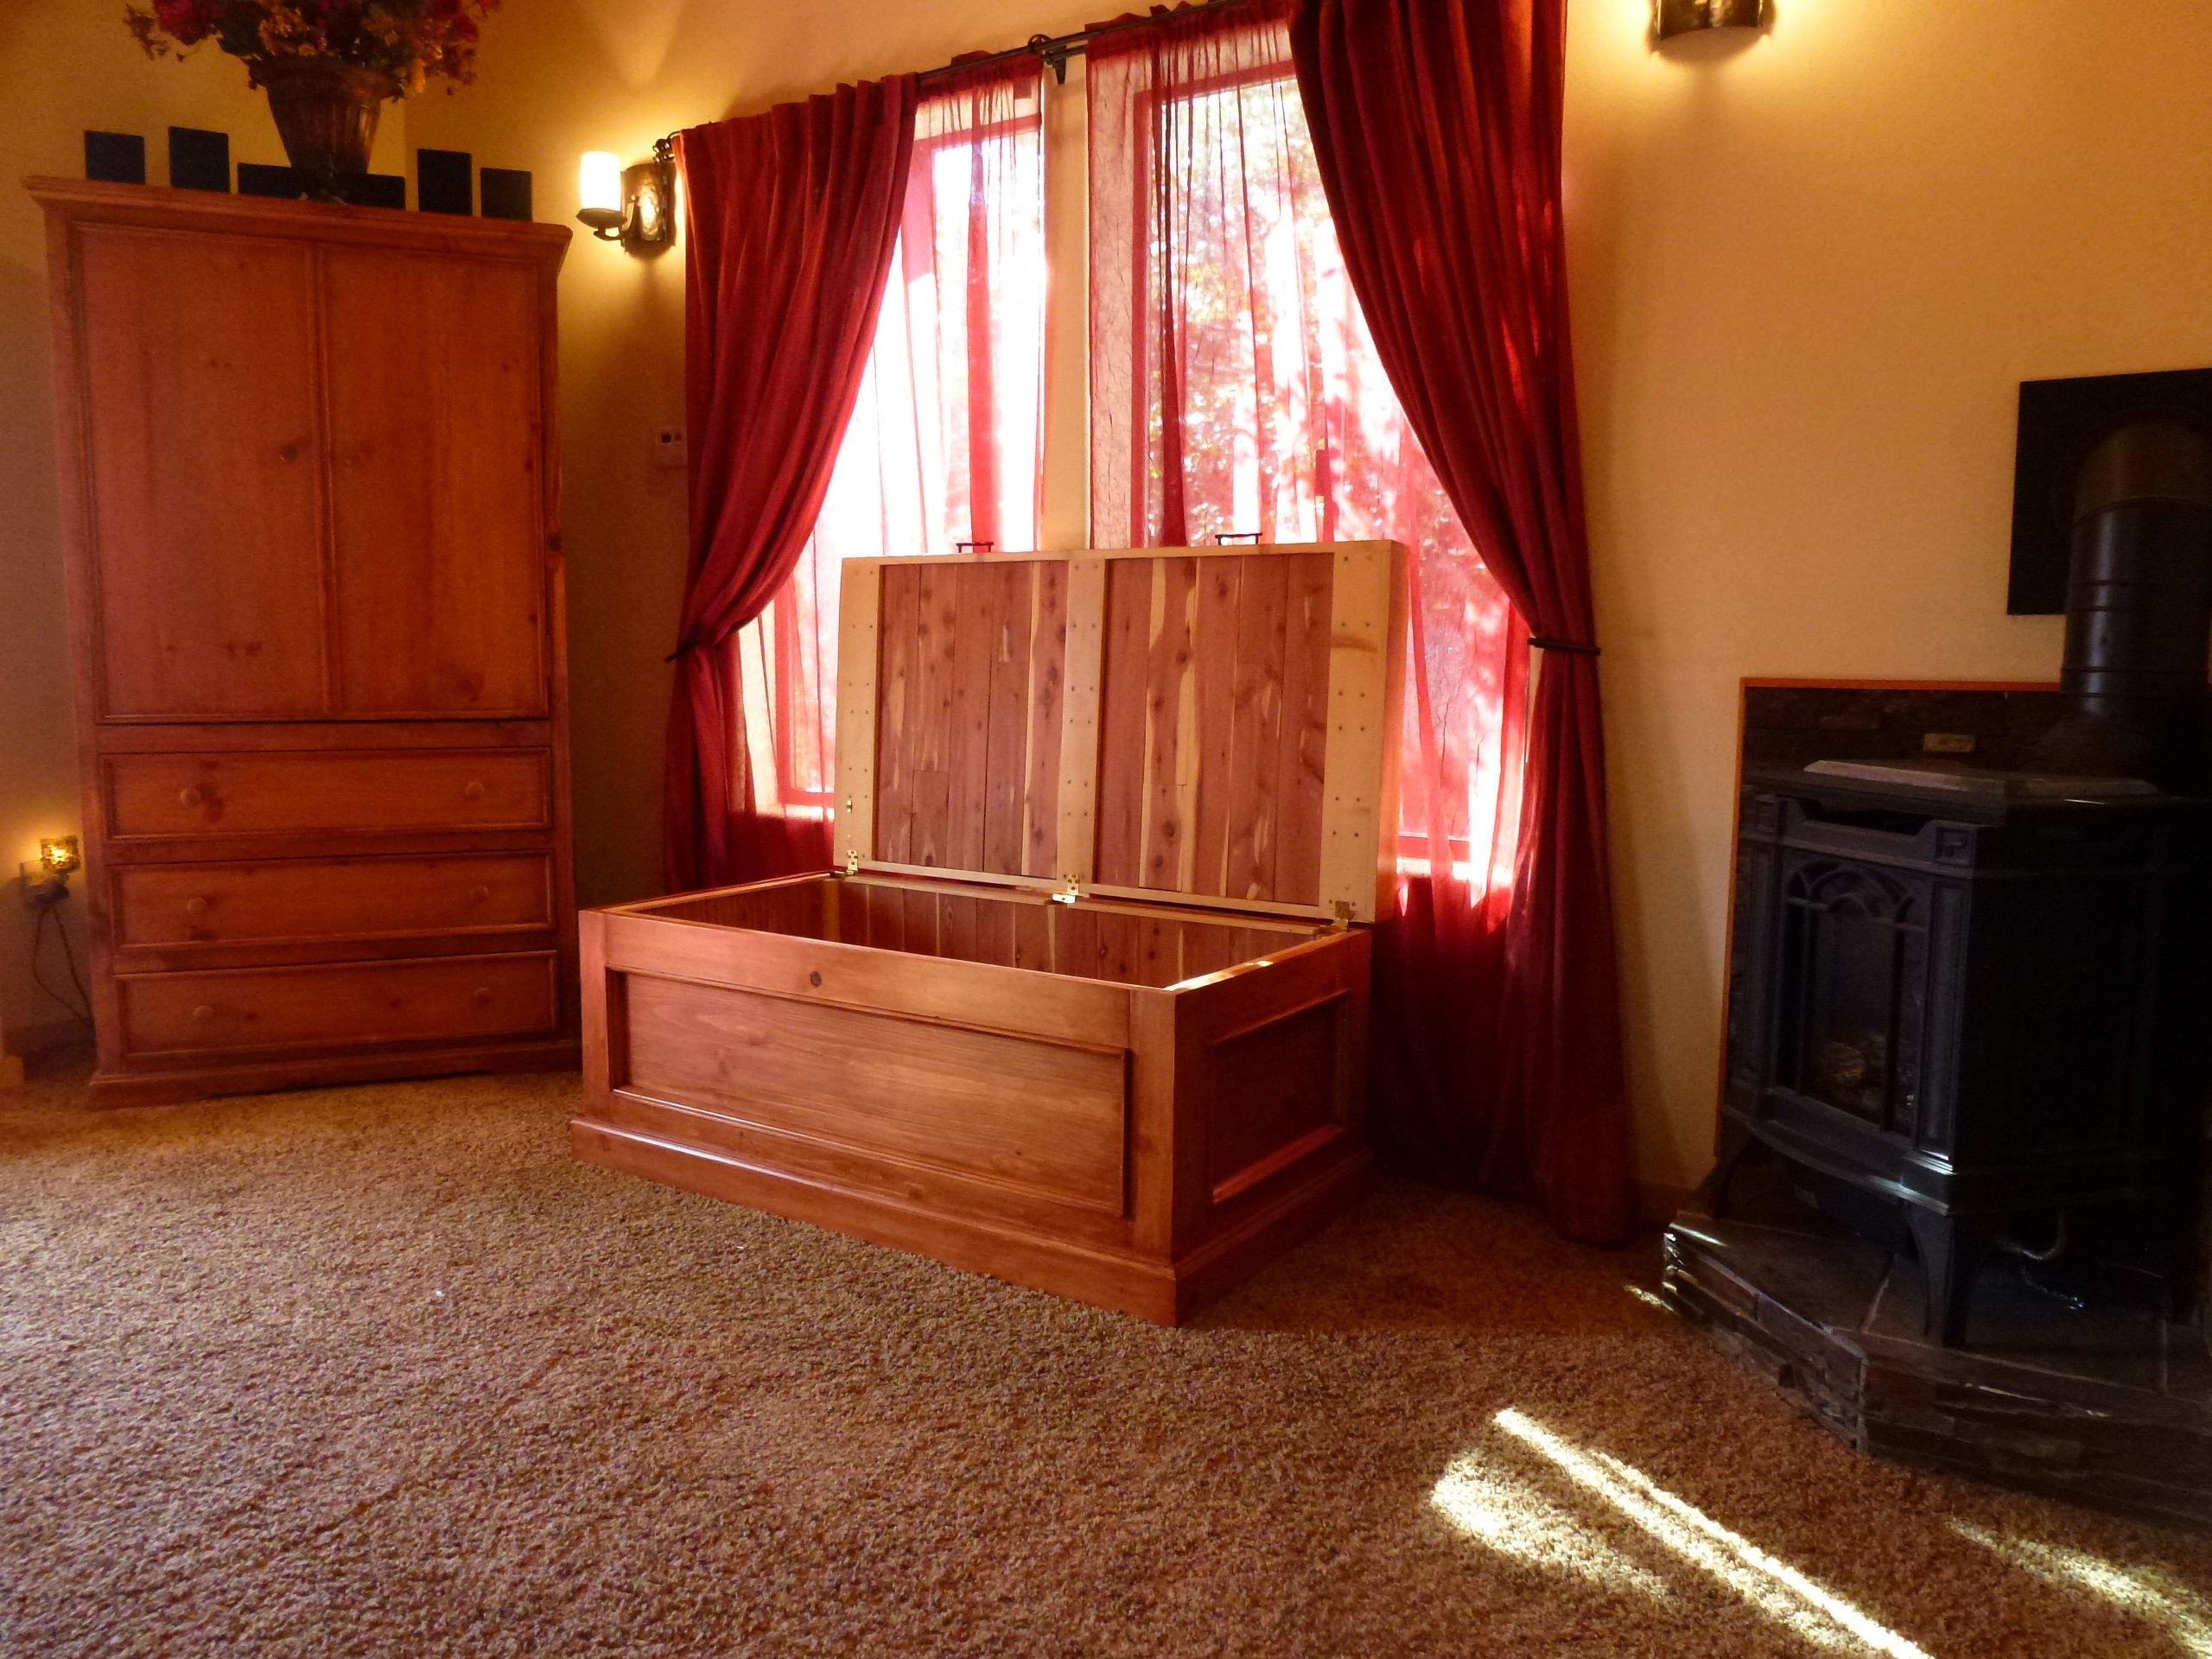
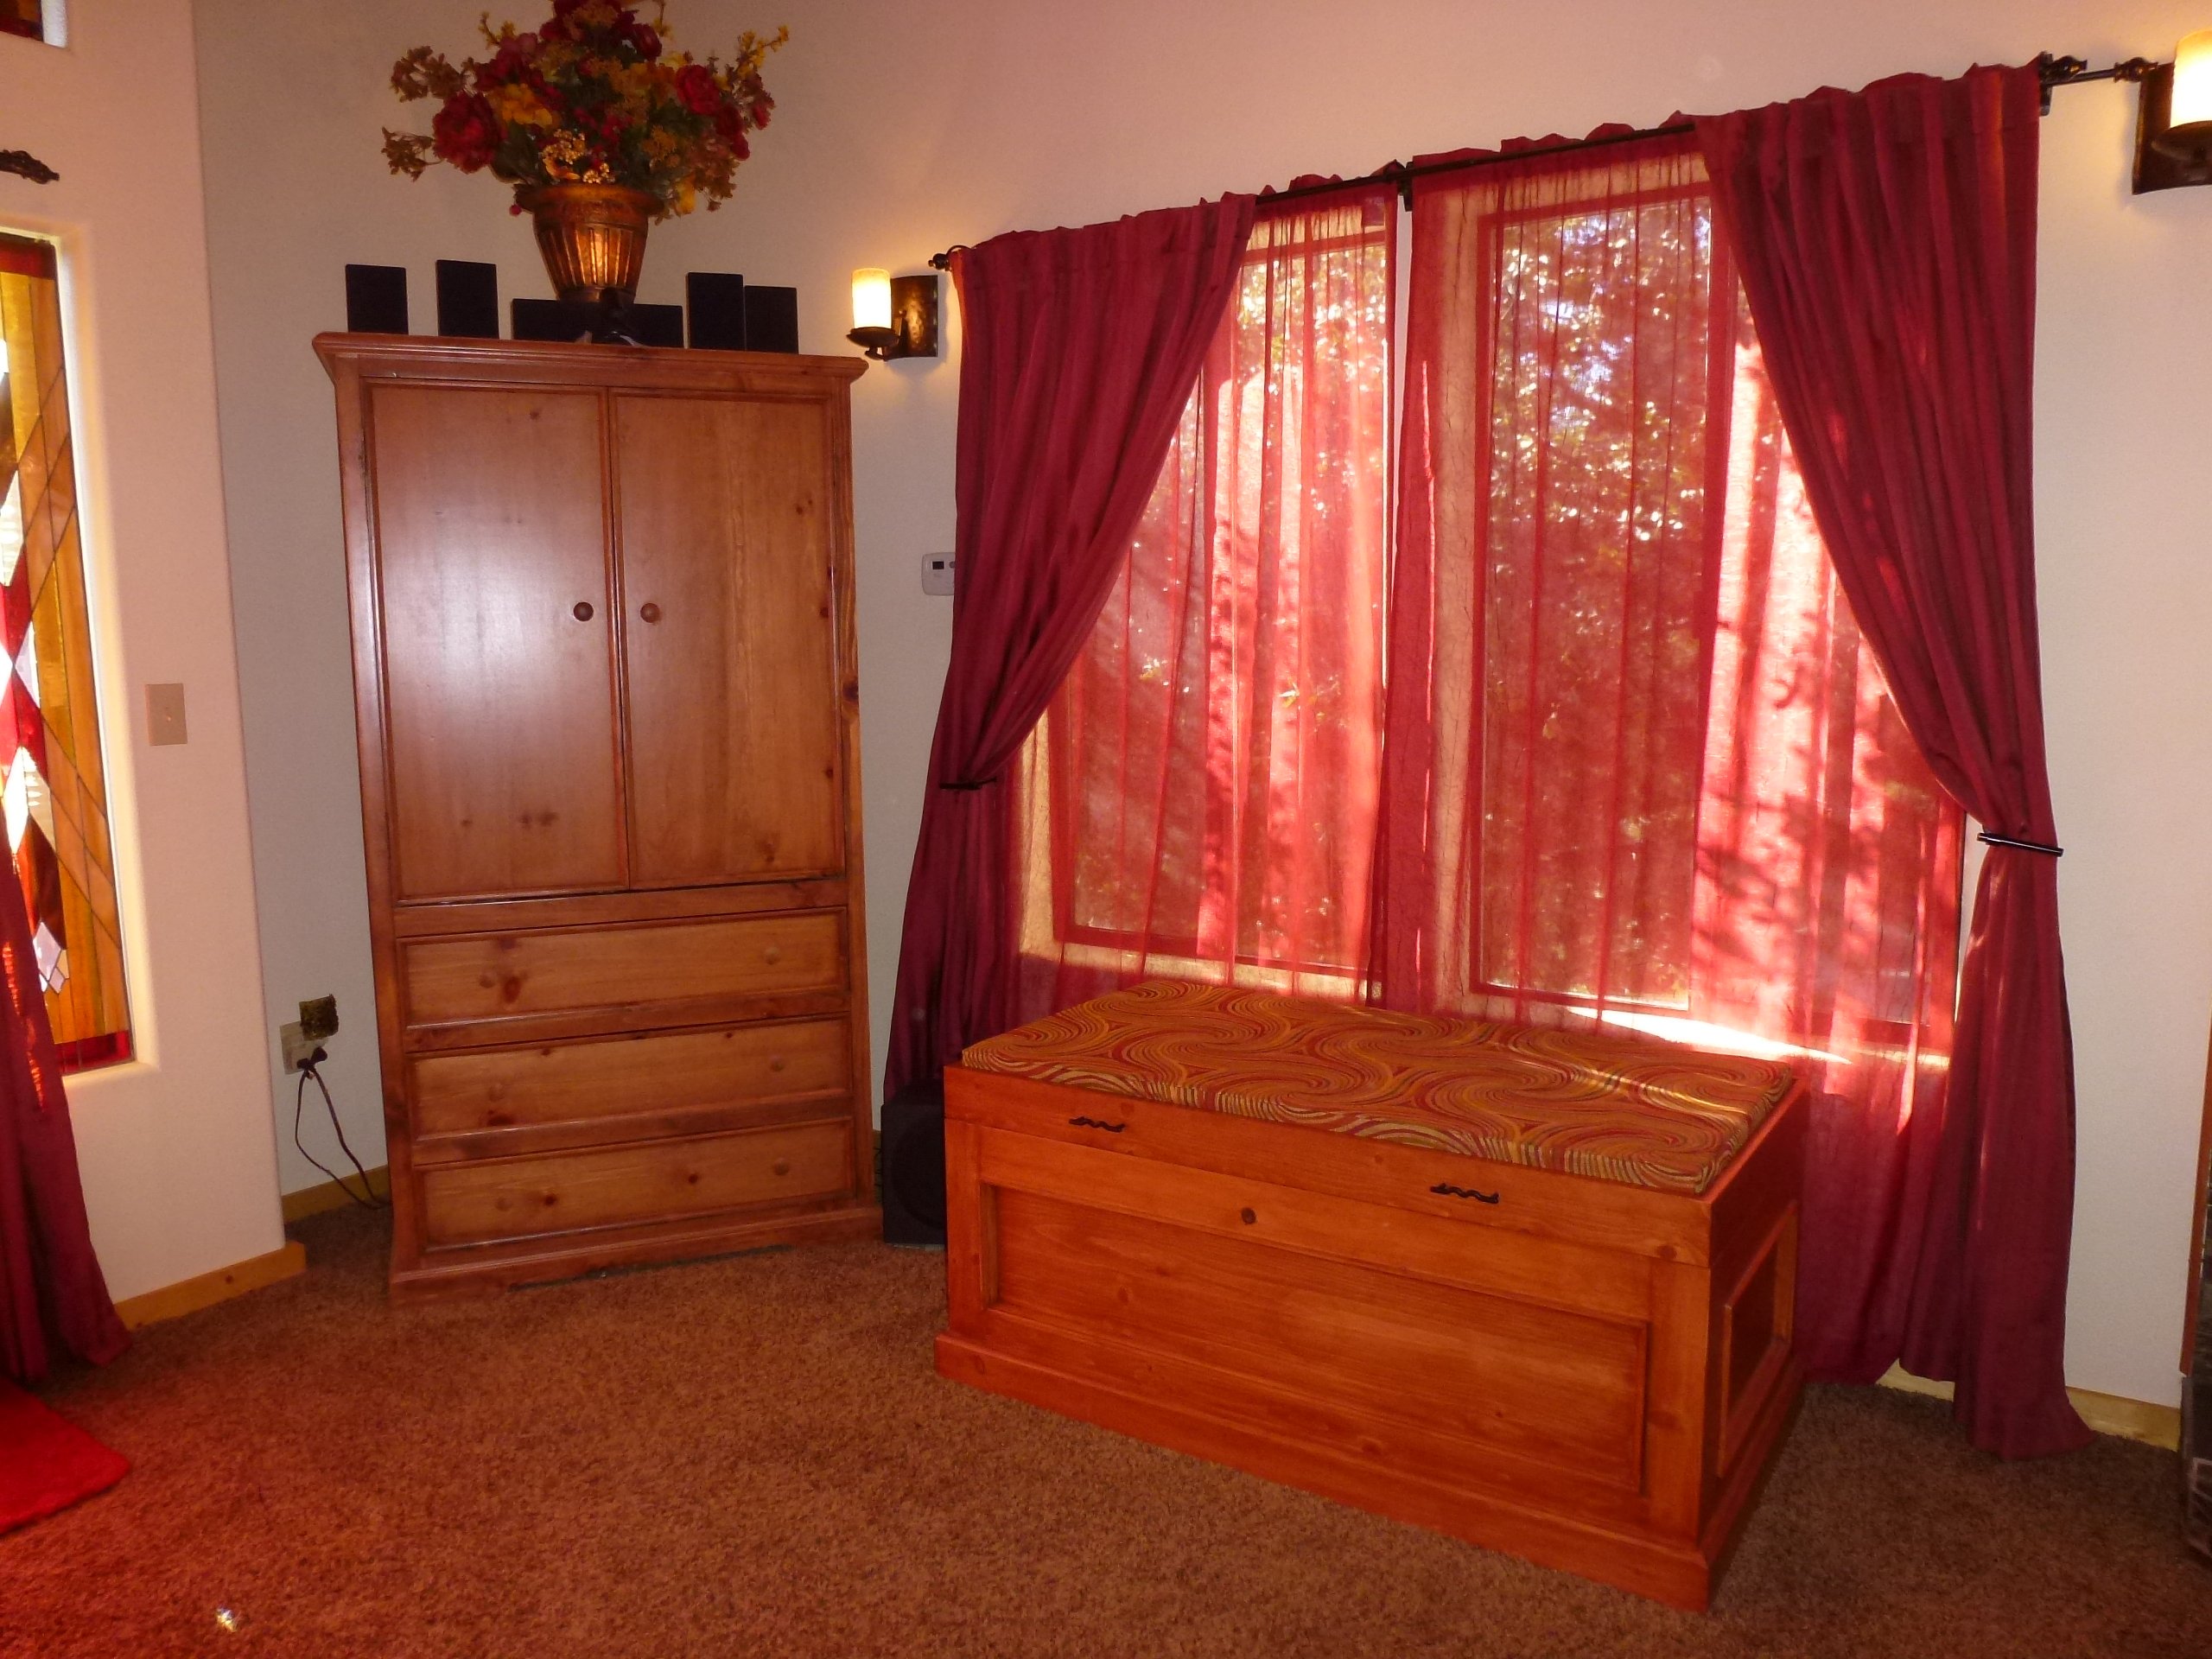
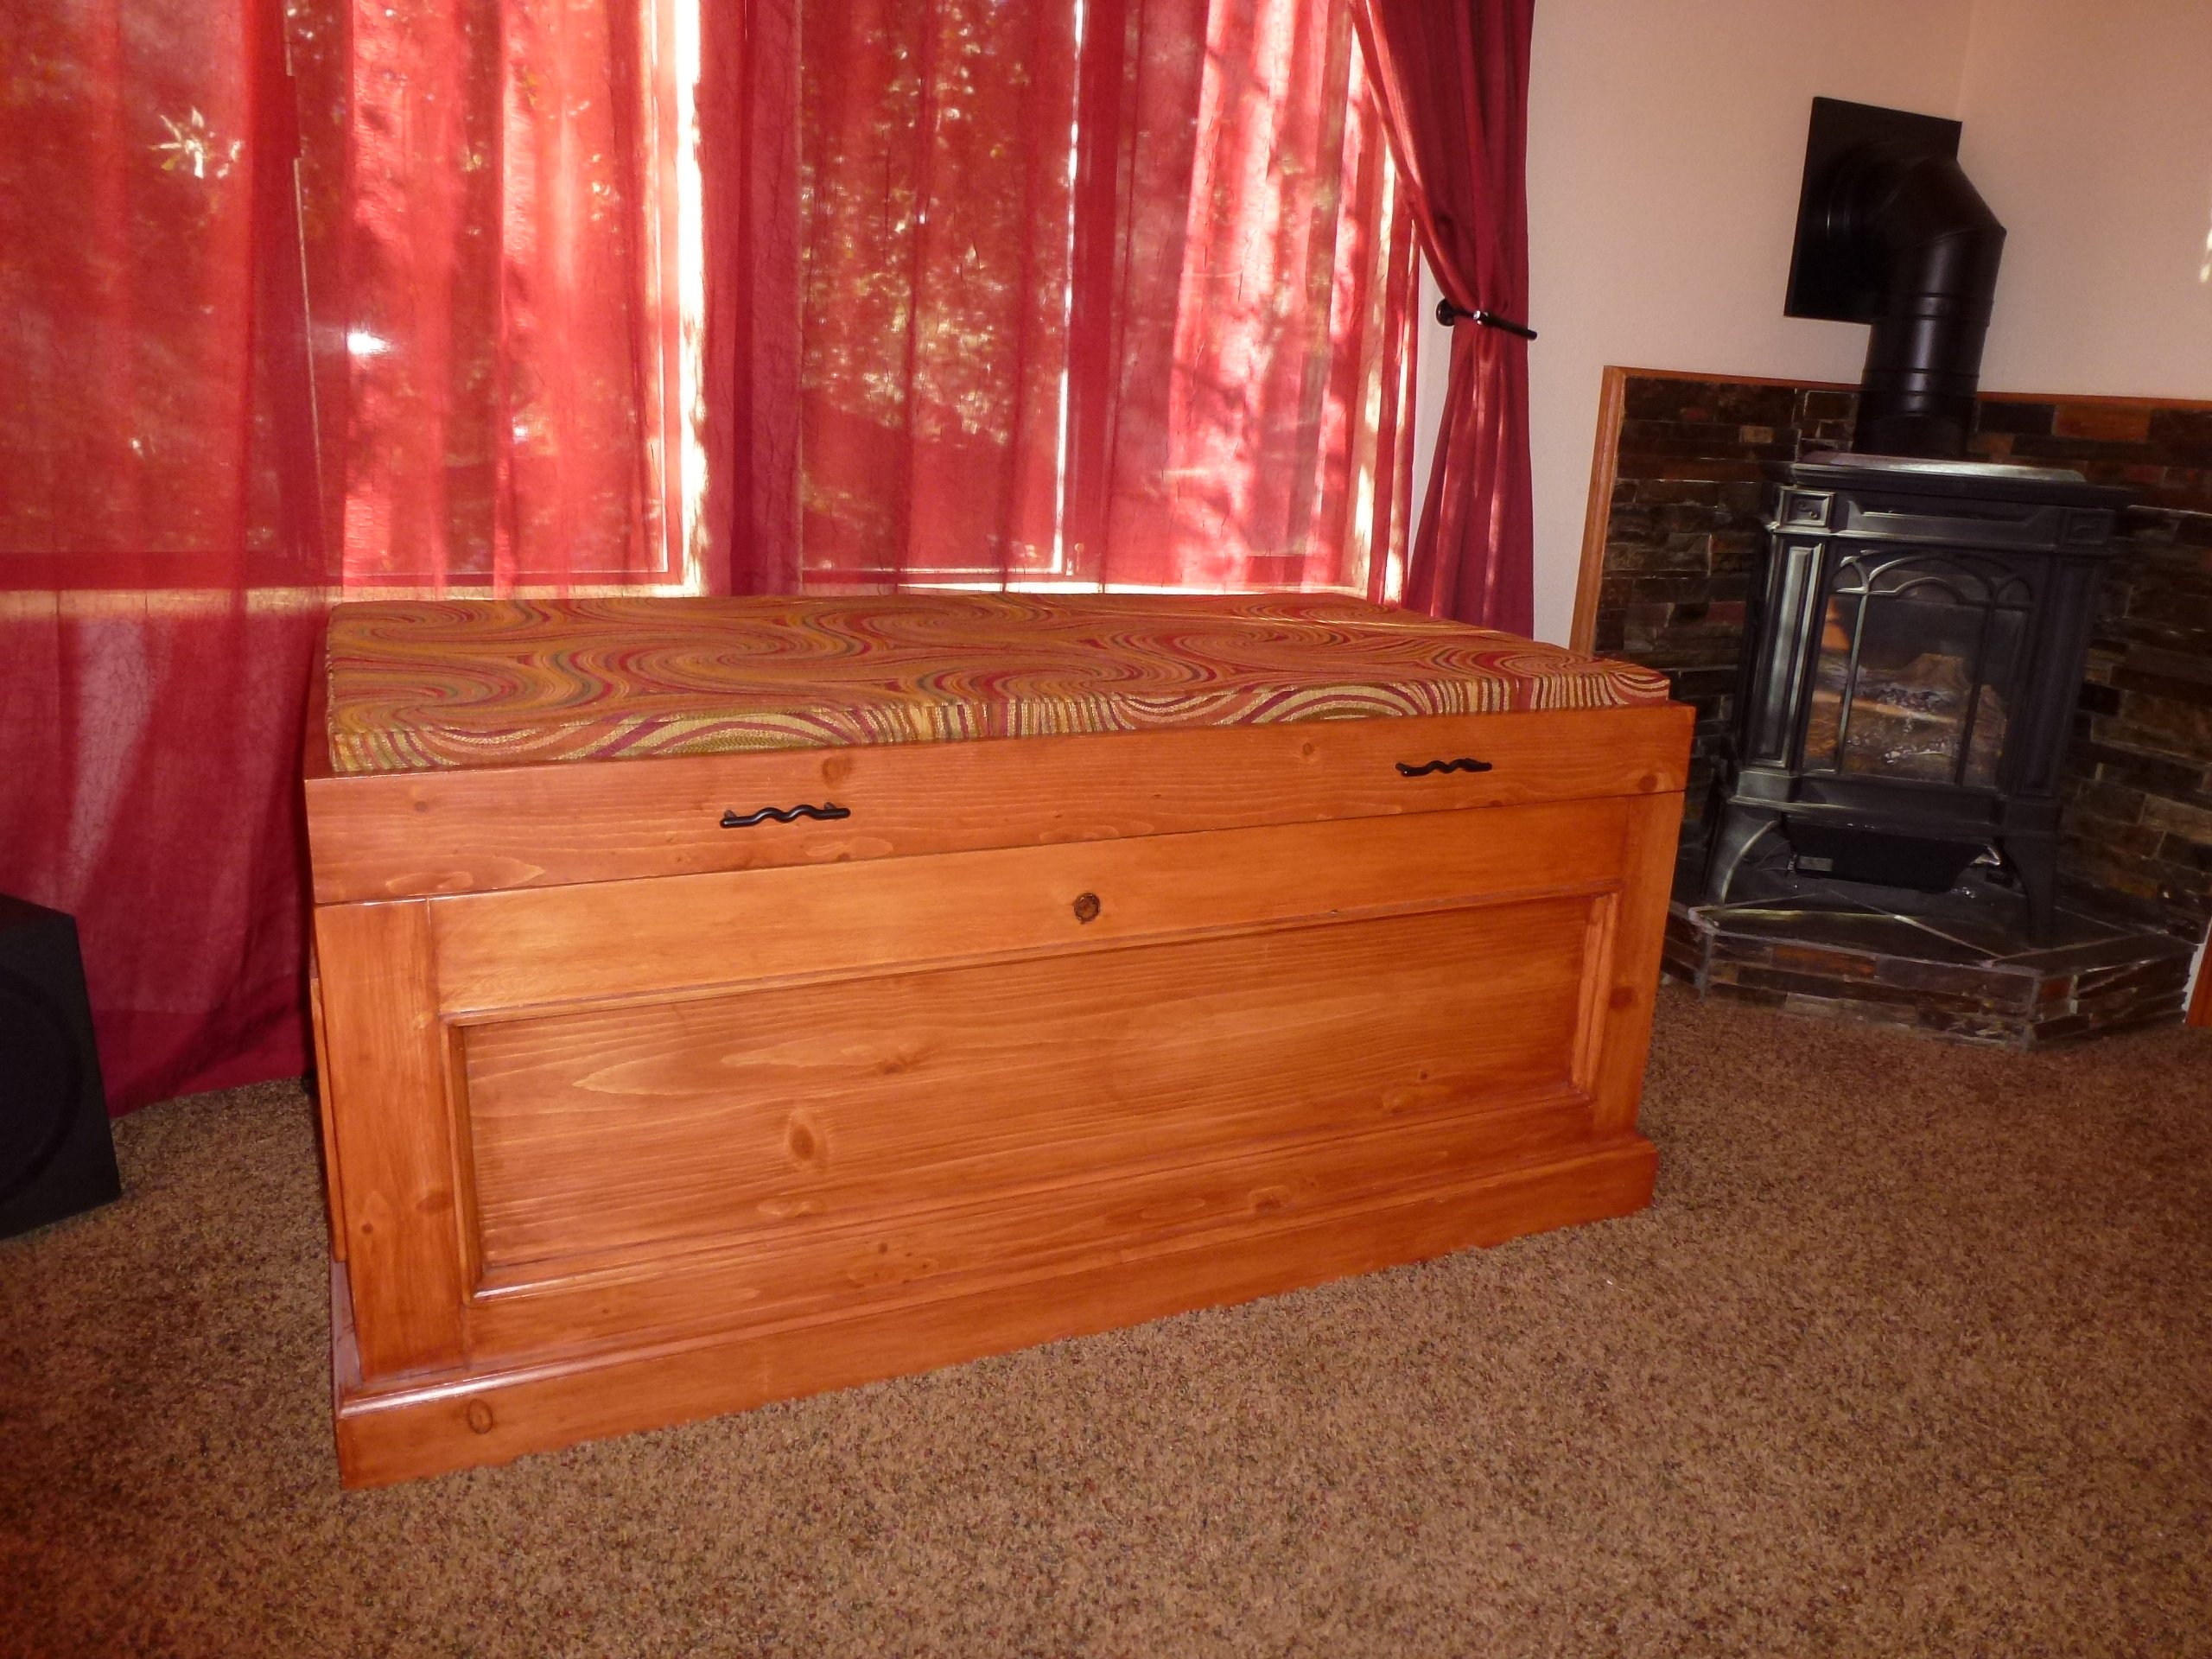
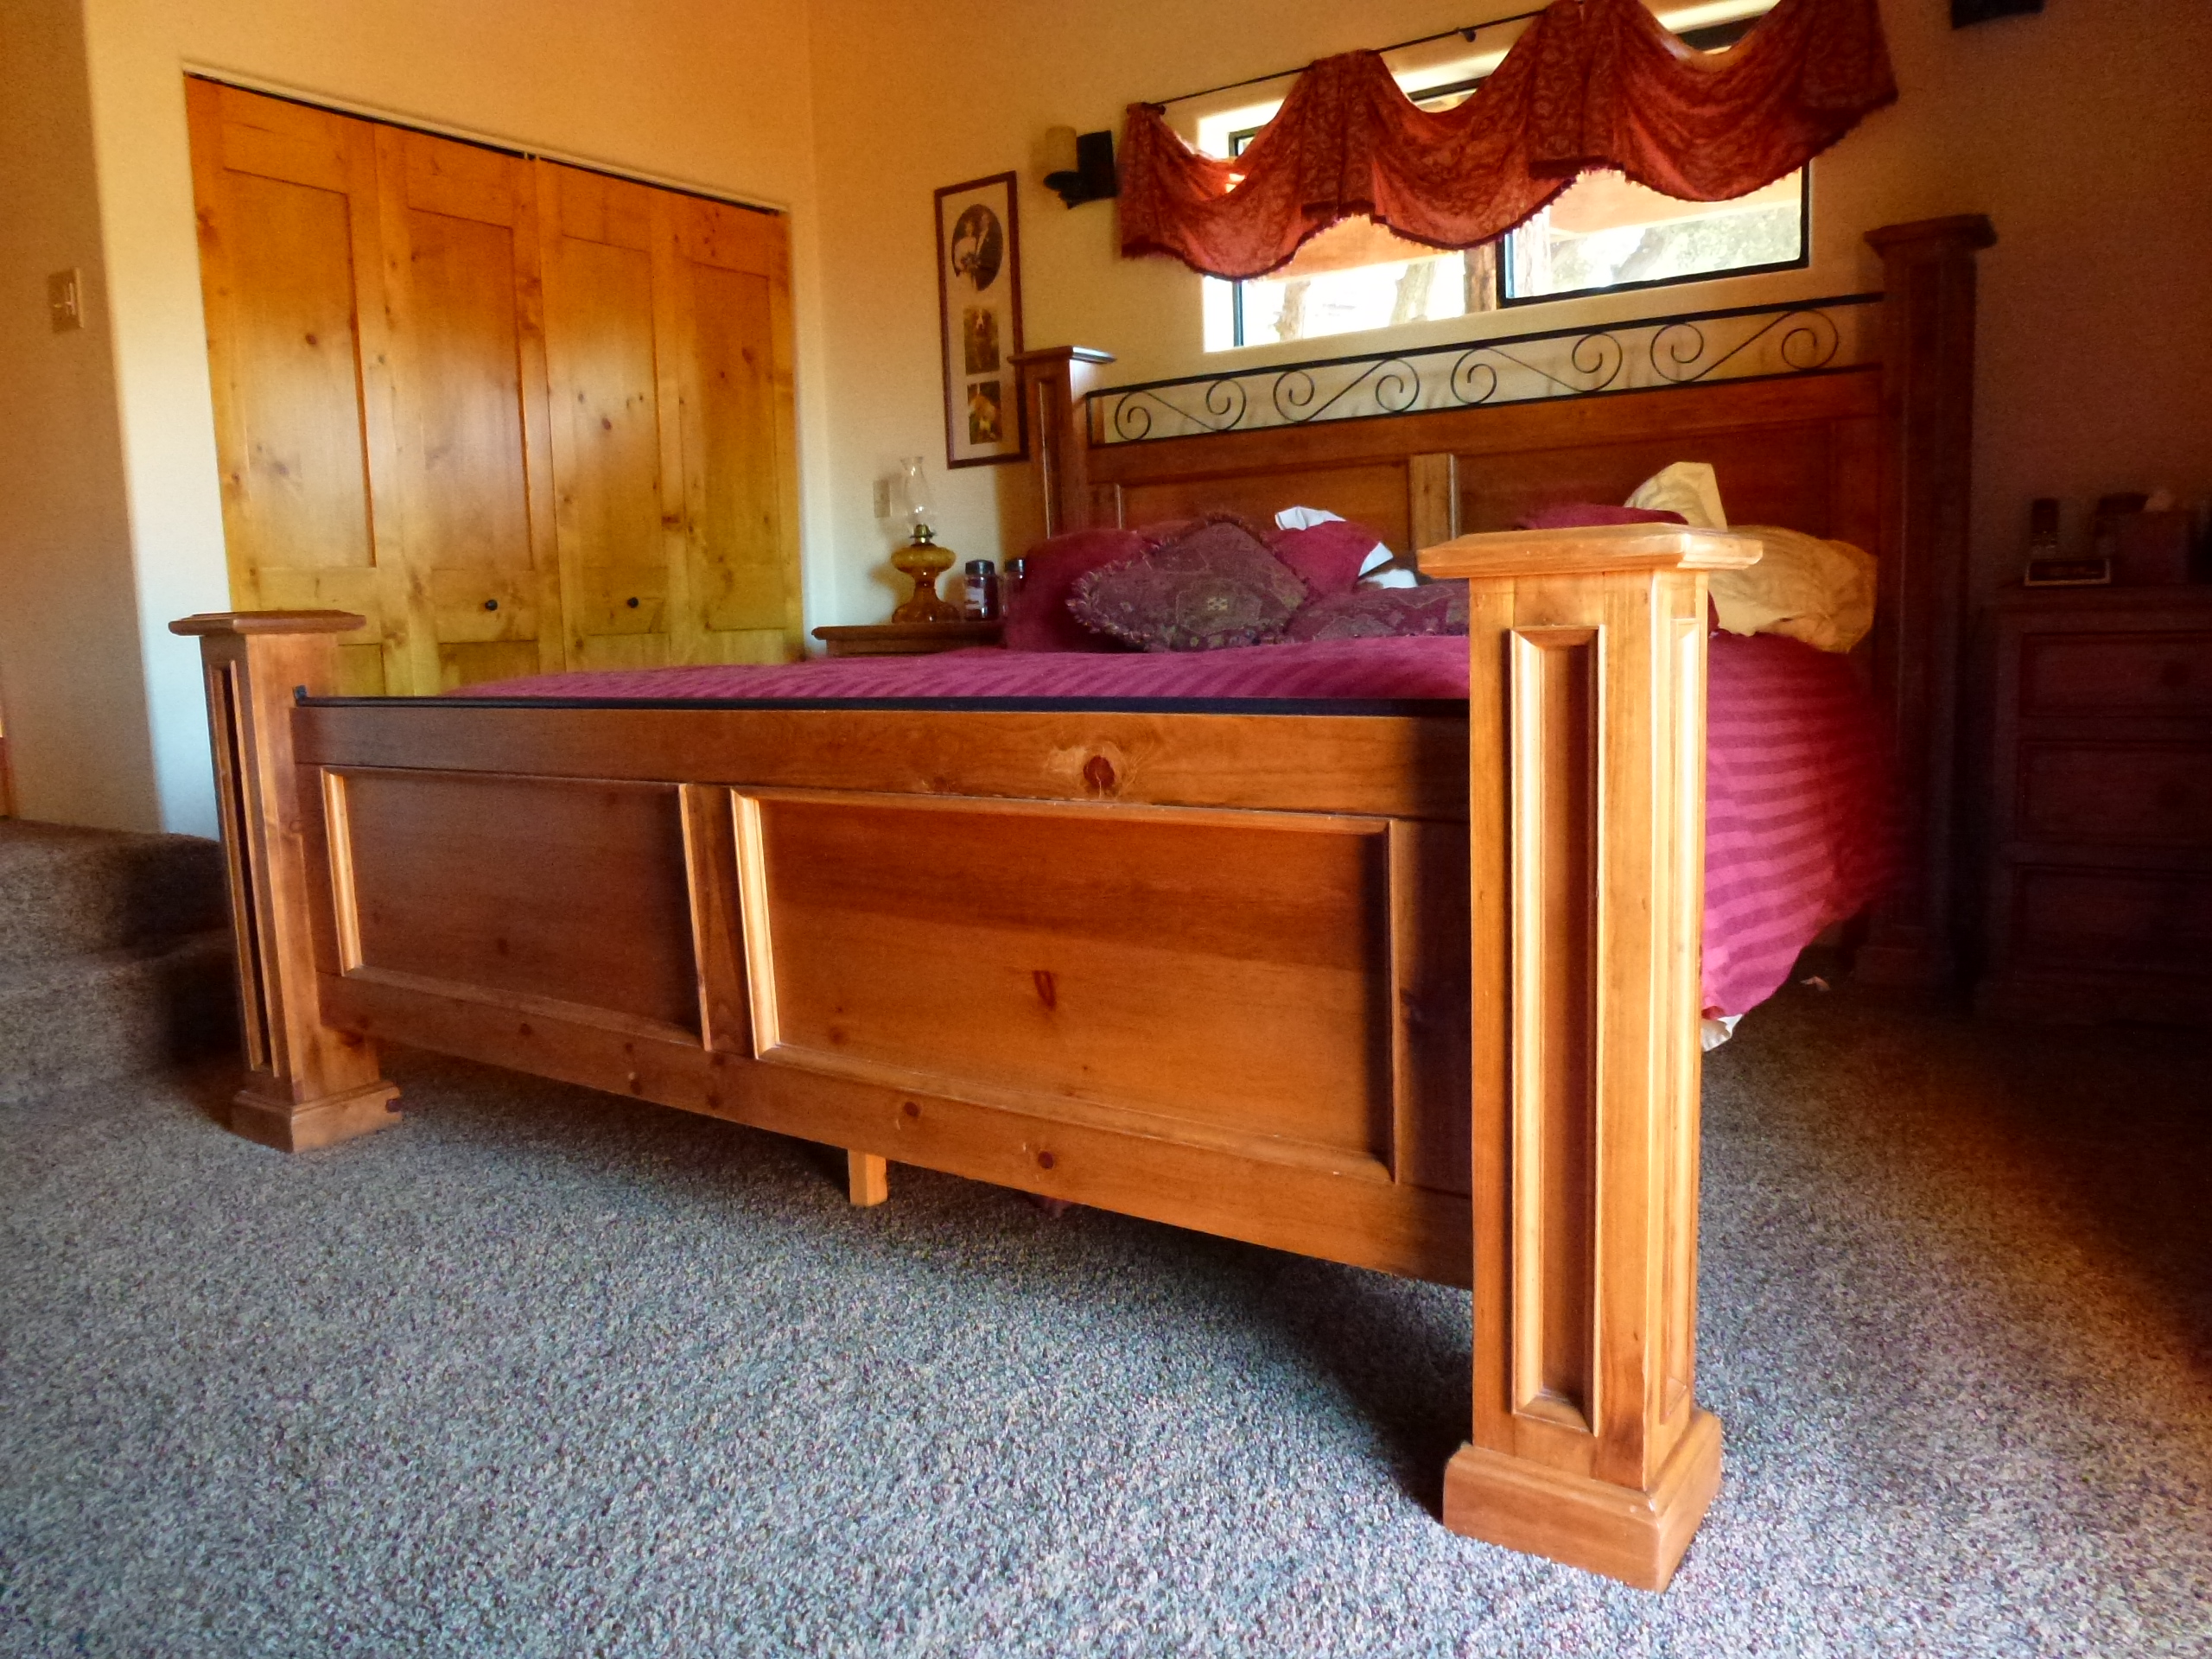
We have considered buying a cedar-lined chest to store blankets, towels, etc. for many years. However, we couldn’t find one that came close to matching the Knotty Pine bedroom set that we had in our master suite.
Hence, our design criteria was quite simple; match the bedroom set and have a chest sturdy enough to support our Beagles as they peer at the squirrels outside the window.
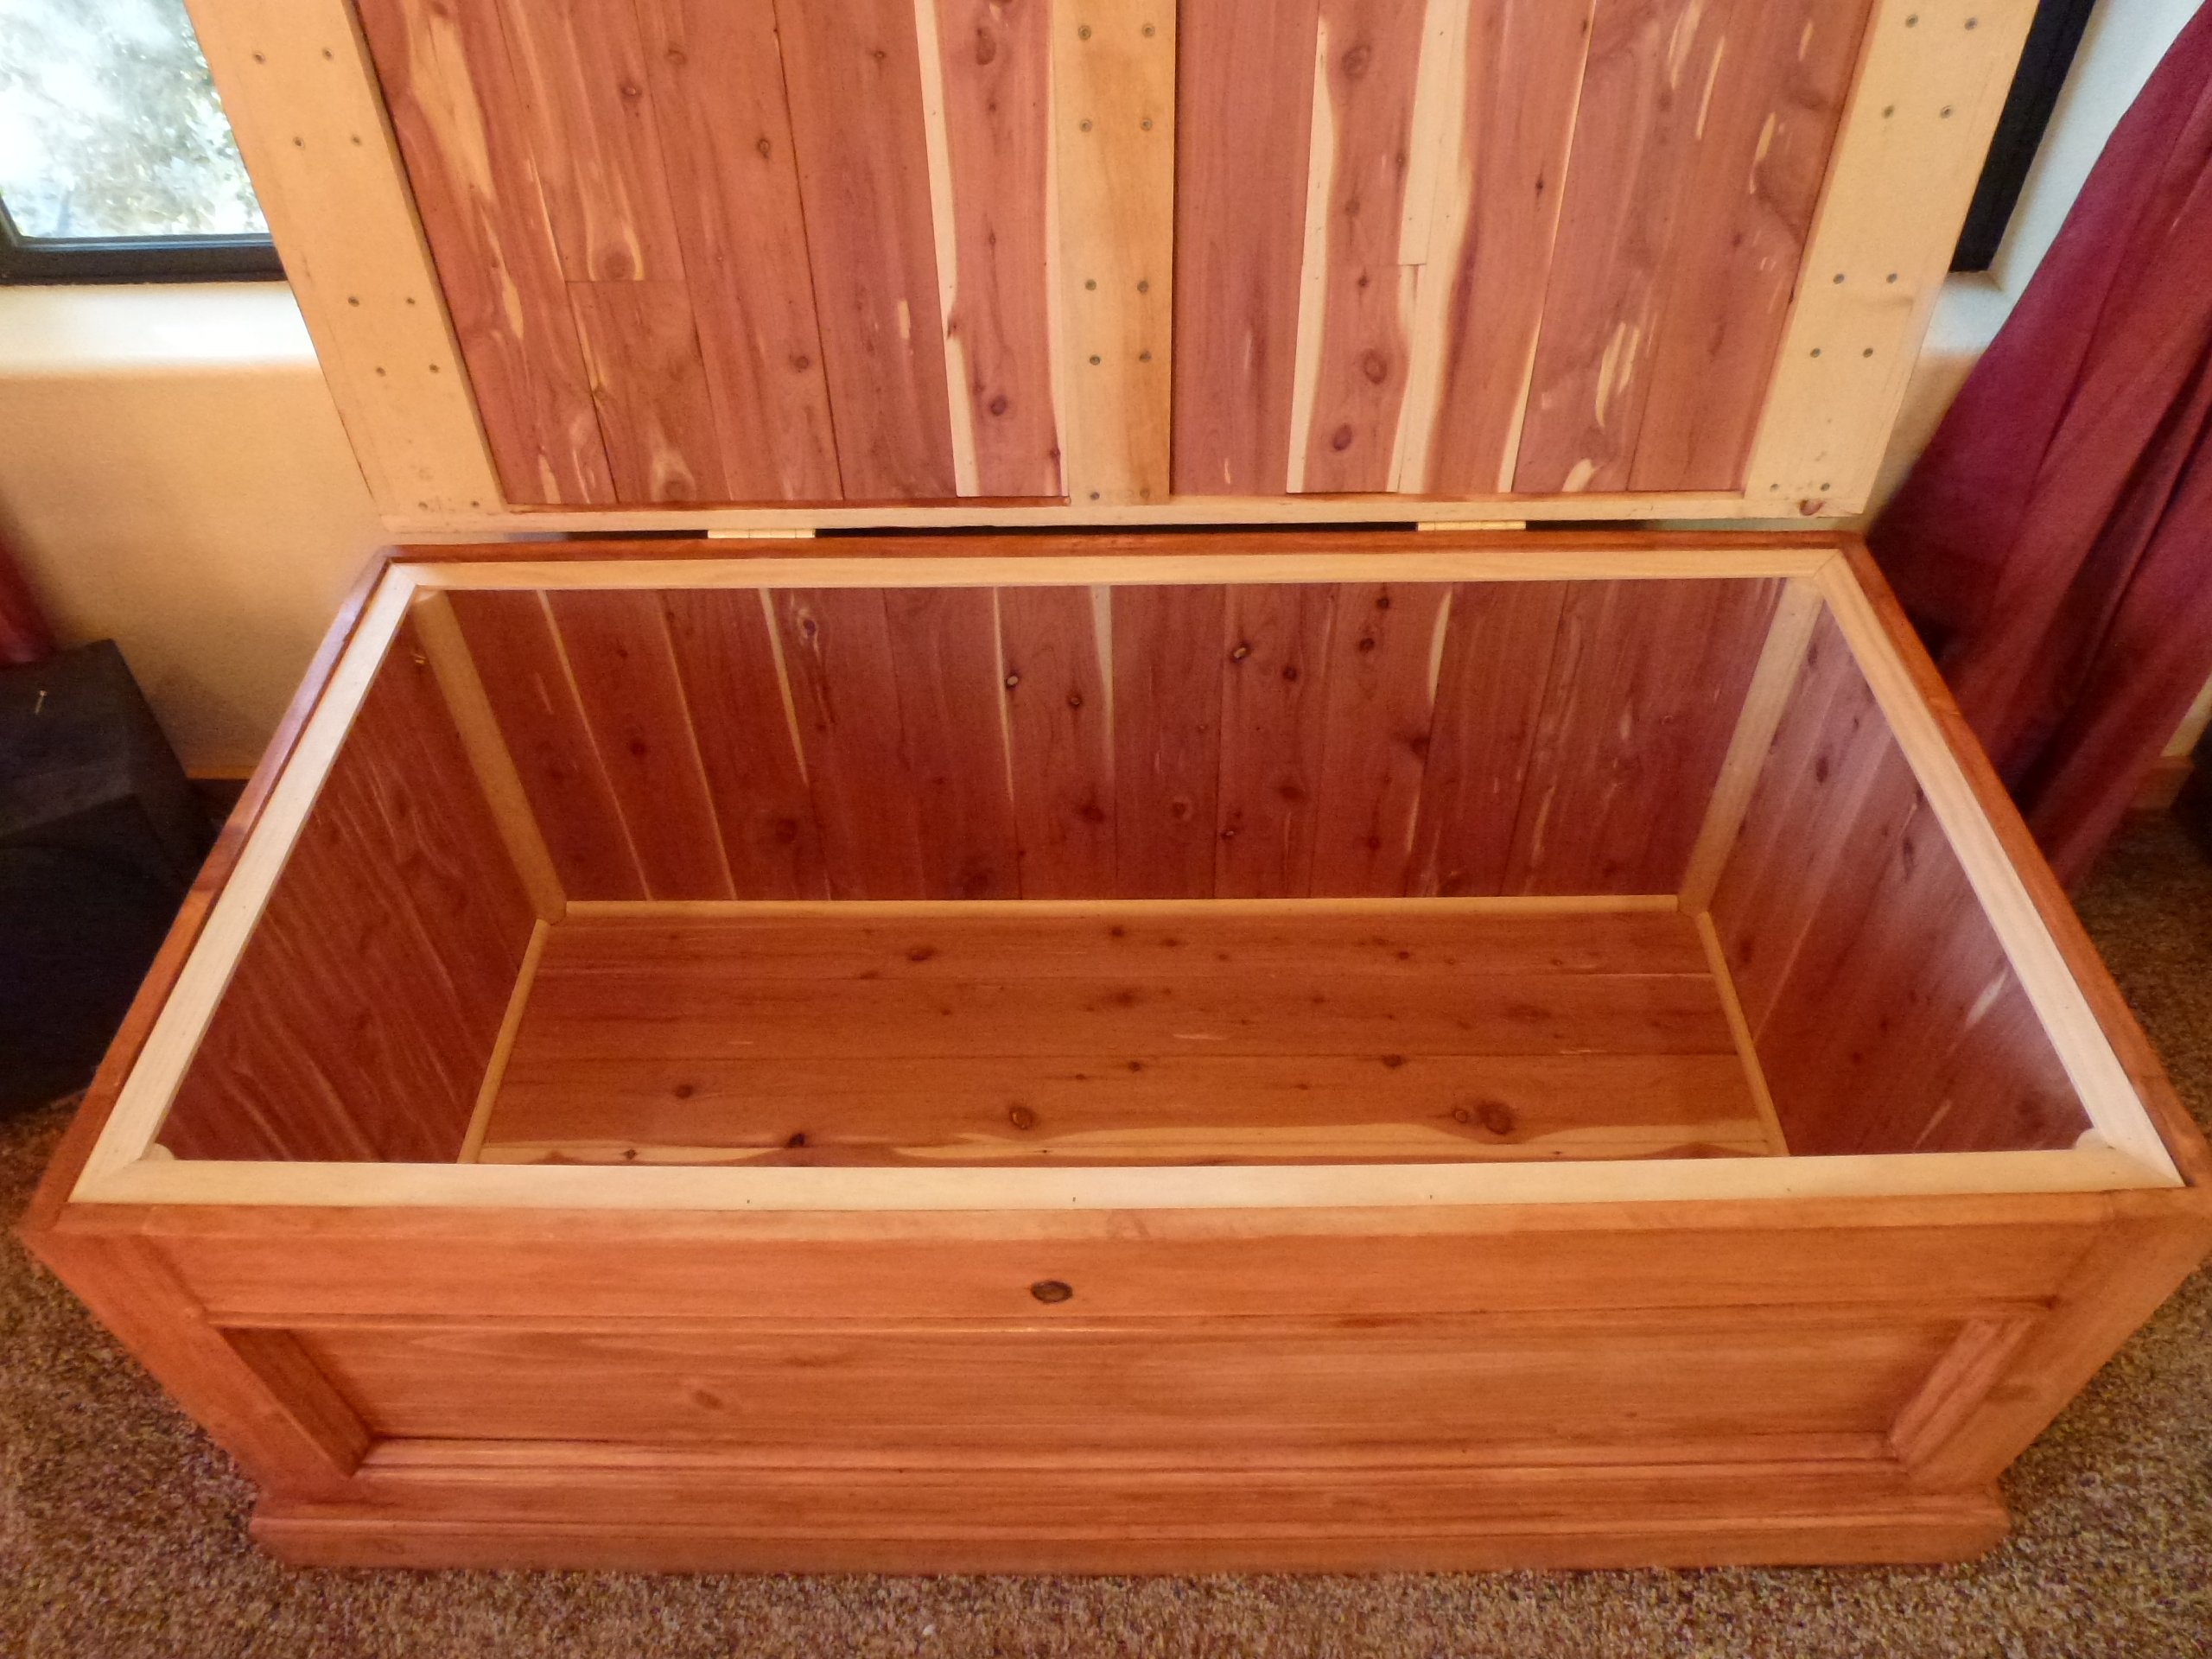
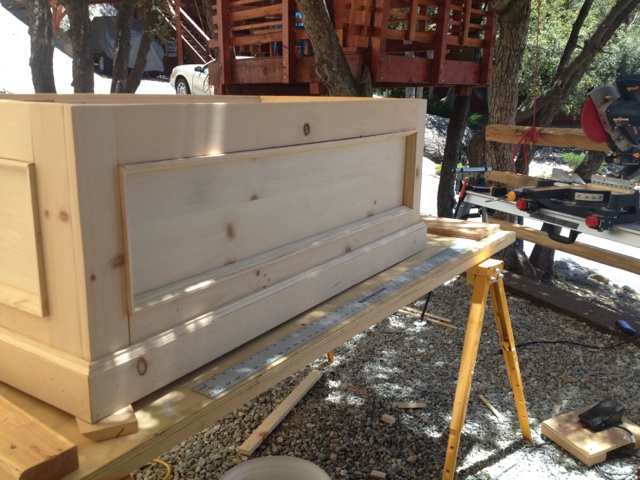
We used plans / ideas from several different chest designs which were readily available on the internet. Most of those plans were using hard woods such as oak. Those plans called for a hard wood framing with ¼” oak plywood for the panels. Since we needed to use Knotty Pine to match the bedroom set, we used 1” Knotty Pine for framing and Knotty Pine ¾ ply w/ Kreg Screws and copious glue to strengthen the construct. We finished it off with locally available 3/8” cedar T.G. planks. It is very heavy and very strong! This project was done entirely w/ Kreg Screws and no router rabbeting for the panels.
We learned the following while doing this project:
· When using soft woods, always put the power sander on the wood before you start the sander. Otherwise, you can get scratching / sander burns that don’t present themselves until staining begins.
· While very strong, ¾” plywood is very heavy!
· When using plywood, it is recommended that you stain both the visible and non-visible sides of each piece where glue is not to be applied. Otherwise the chance for delaminating increases dramatically.
60 hours work and $350 to build.
Mon, 12/15/2014 - 12:40
Beautiful chest. I better get busy and make one.