Community Brag Posts
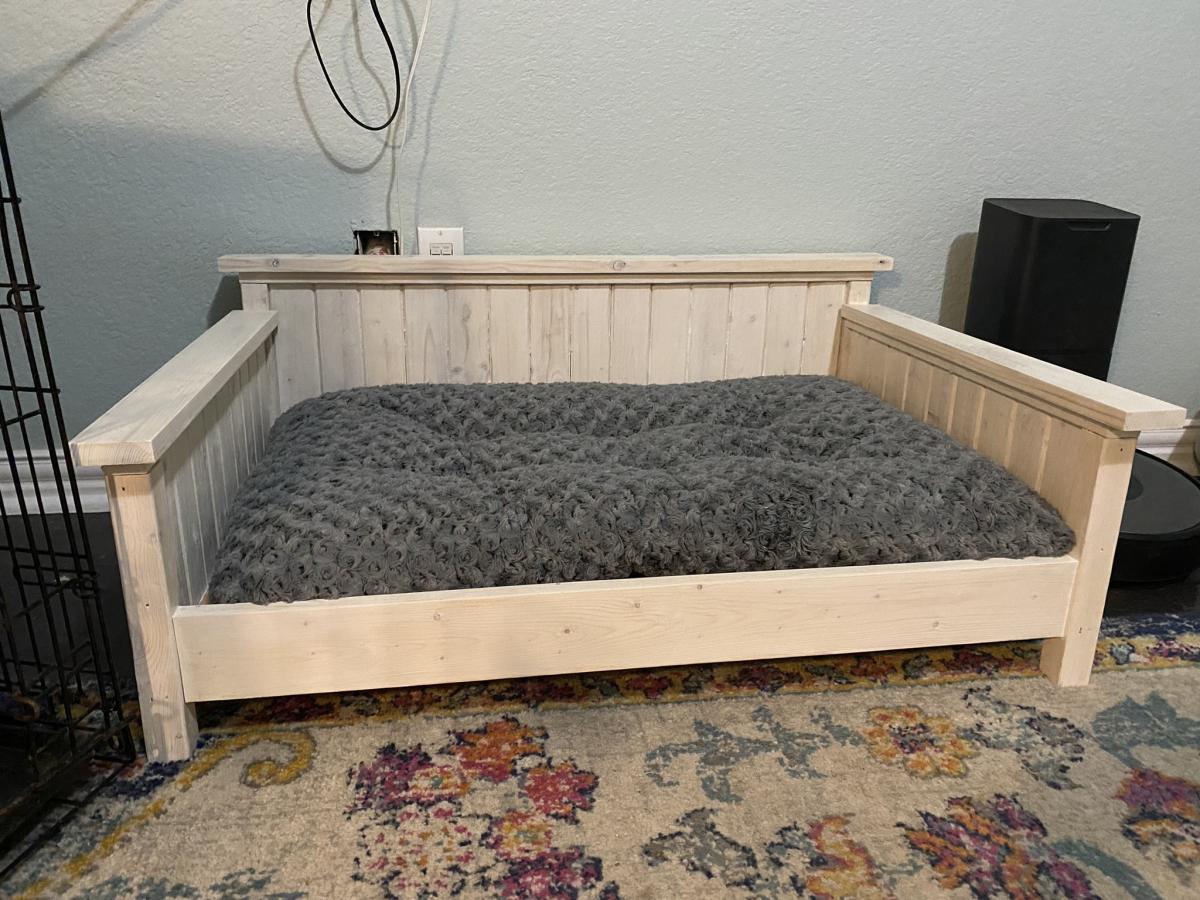
Farmhouse Doggie Daybed
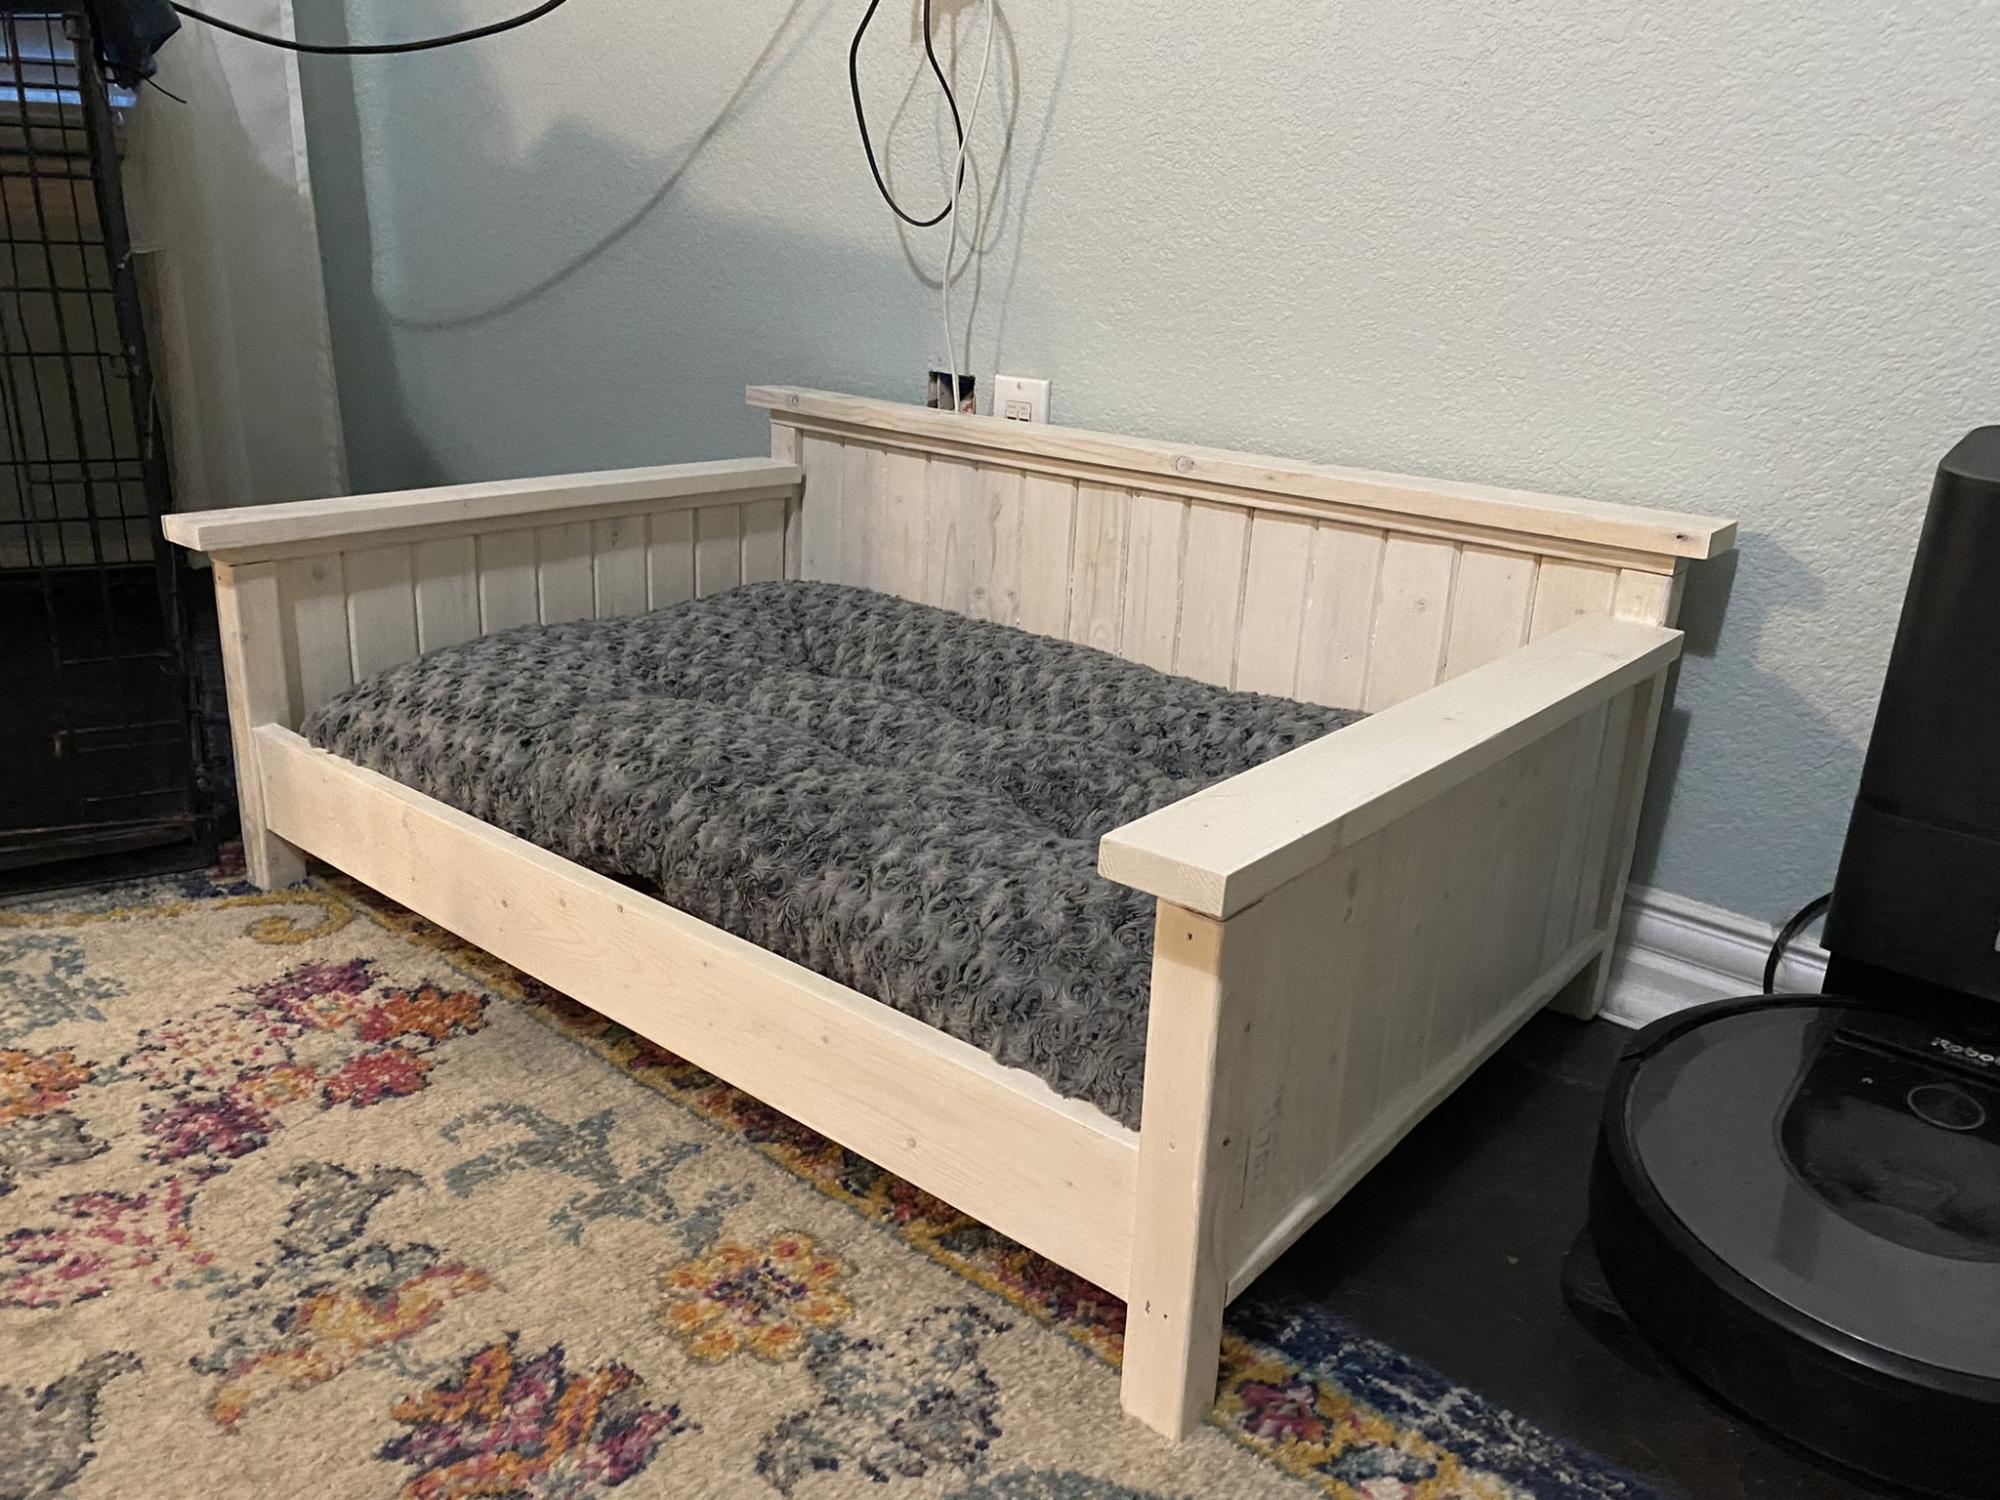
This was adapted from the Farmhouse bed plans to match our king size farmhouse bed.
Comments
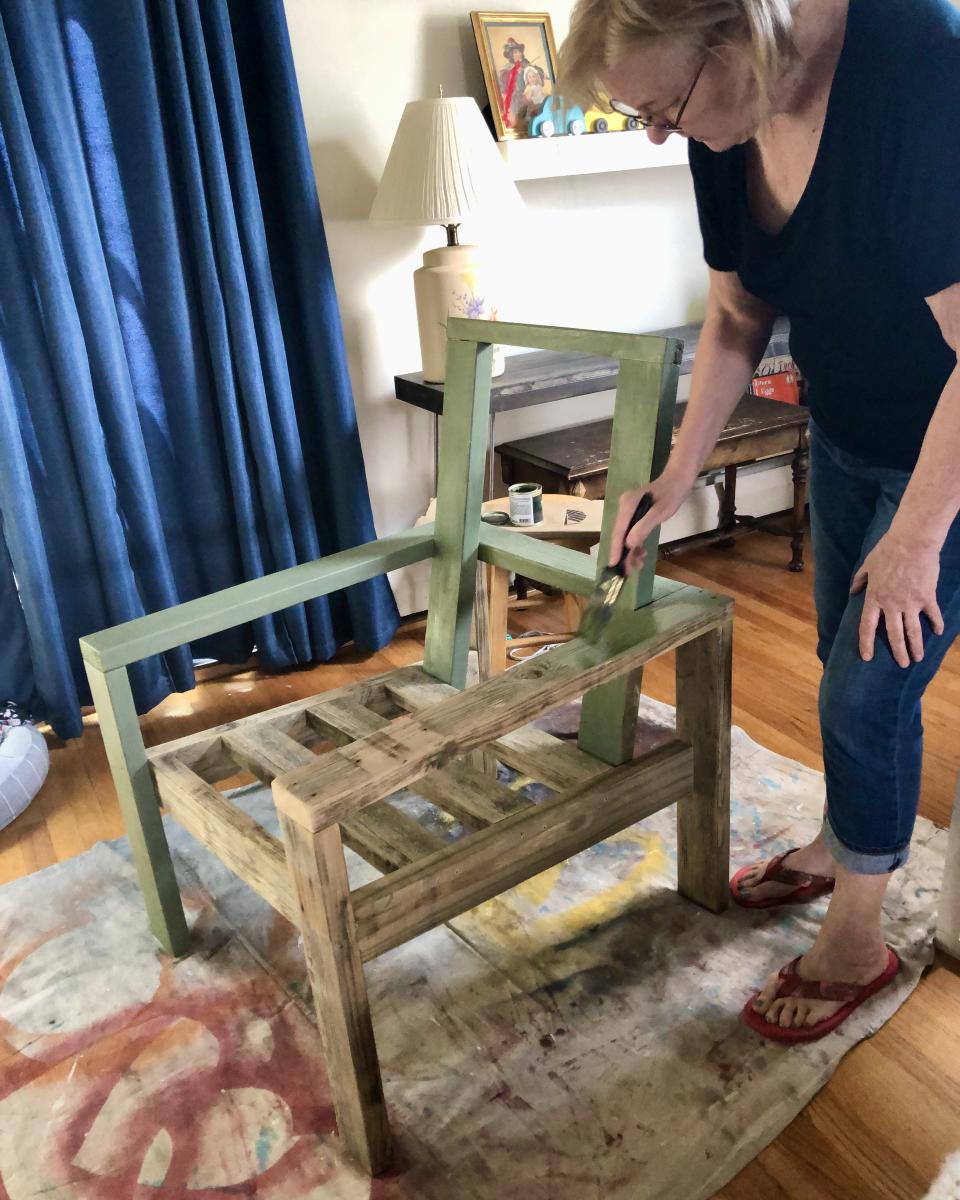
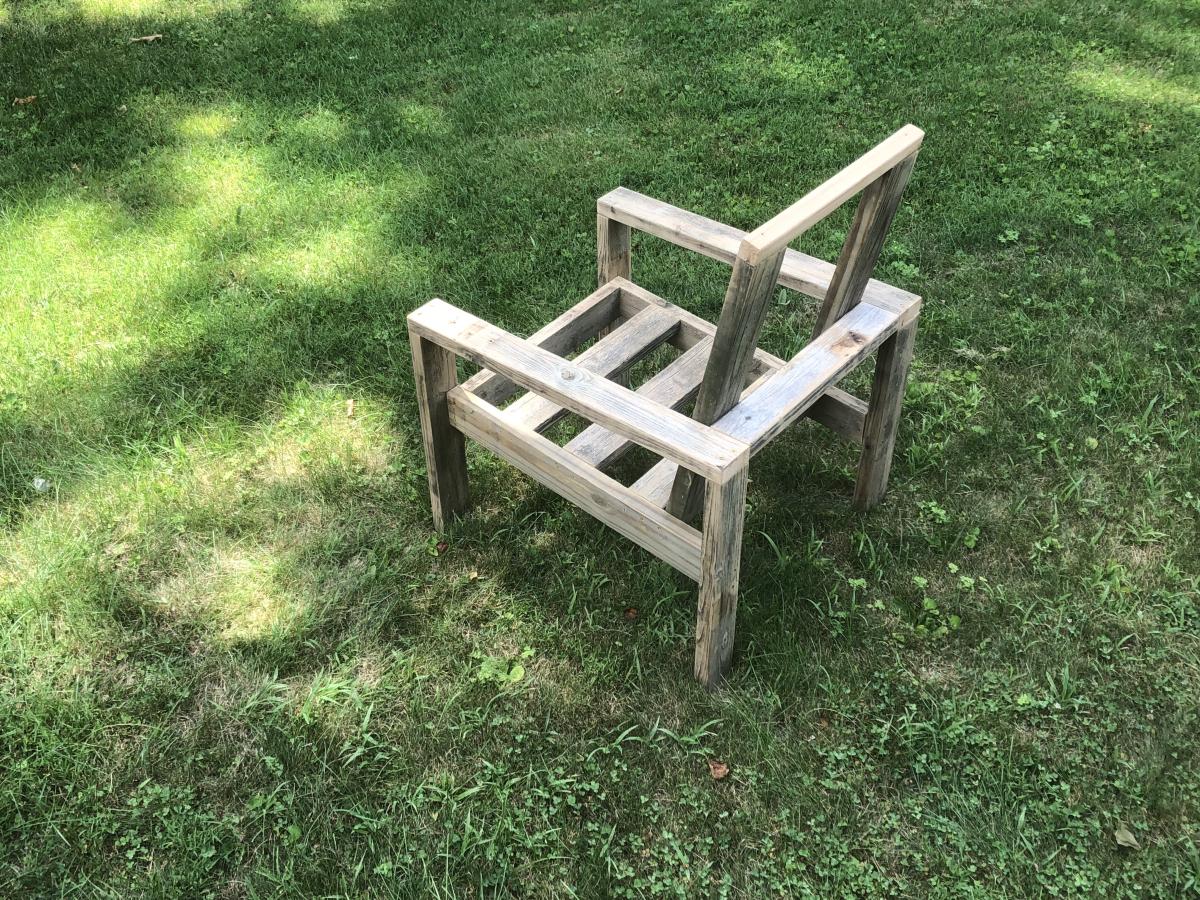
Comfortable Easy-Build Chair
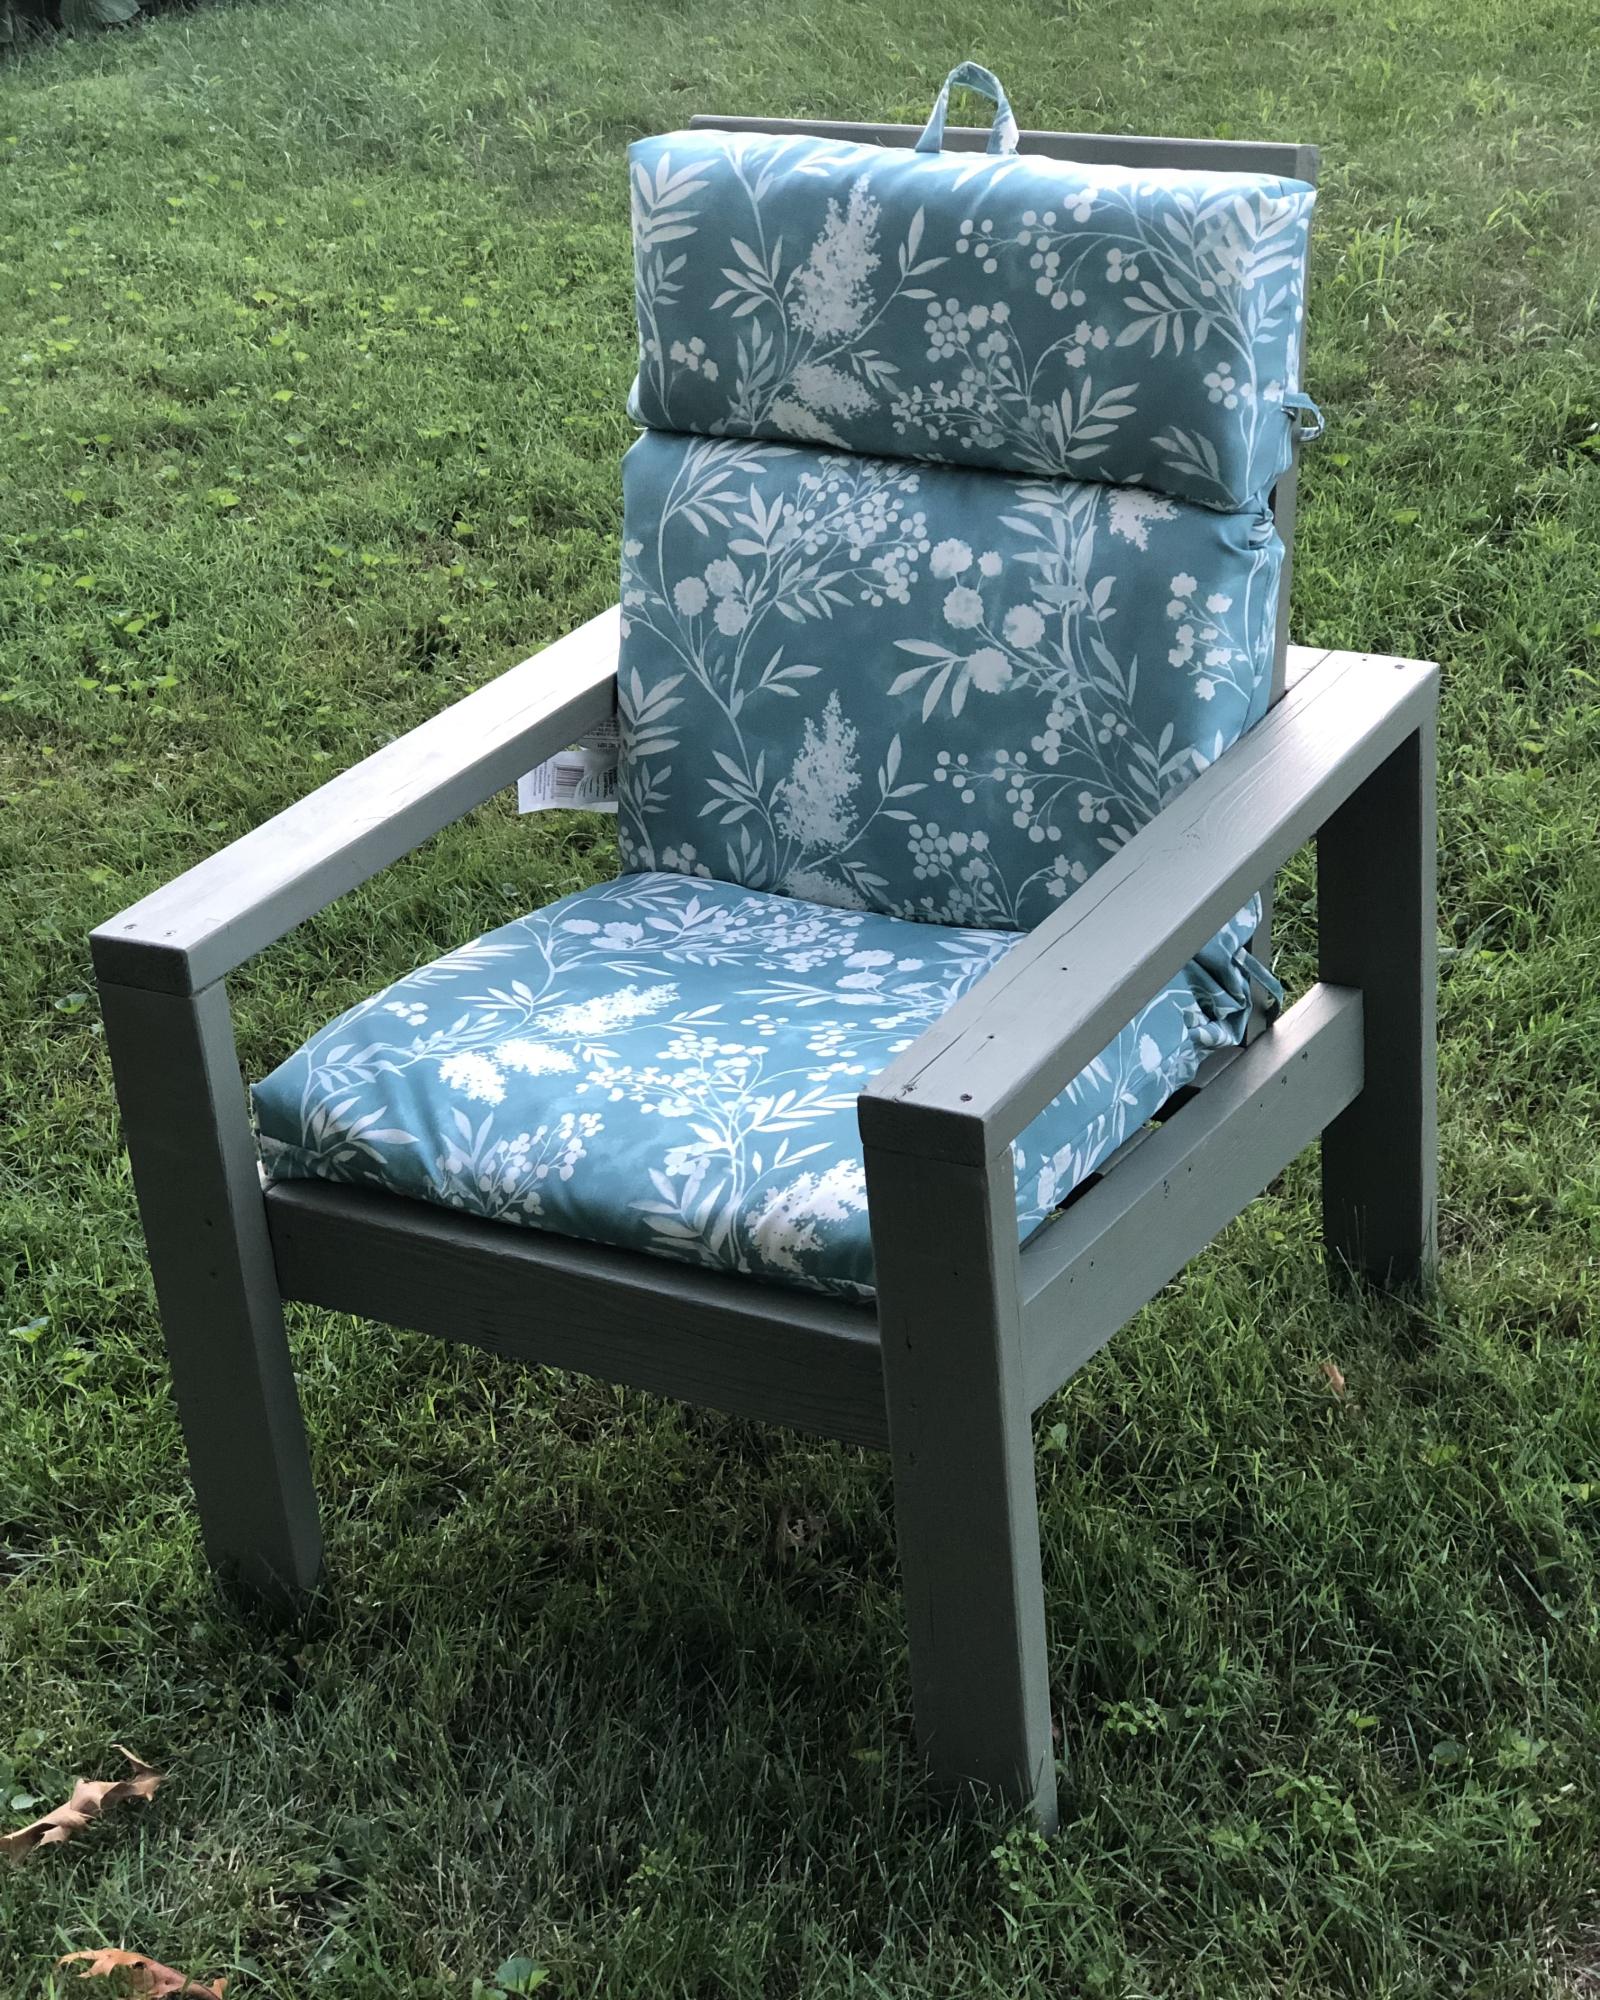
This was a great project! If a 70 year old woman can build it, so can you. I had an old bench that used 2x4's and those plastic ends. I took it apart and salvaged most of the boards after sanding them down. So my cost was zero dollars to build this, but I'm sure it wouldn't last as long as using new wood.
I found the instructions easy to follow. I used 2 1/2" exterior star screws, and finished the wood with solid exterior stain in a sage green. The wood wasn't in great shape, so a transparent stain would not be a good choice for me.
I bought a $16 chair cushion and I'm tempted to make another chair!
Built from Plan(s)
Comments
Fri, 08/12/2022 - 17:05
Gorgeous chair!
Great use of material, love the finish! Than you so much for sharing.
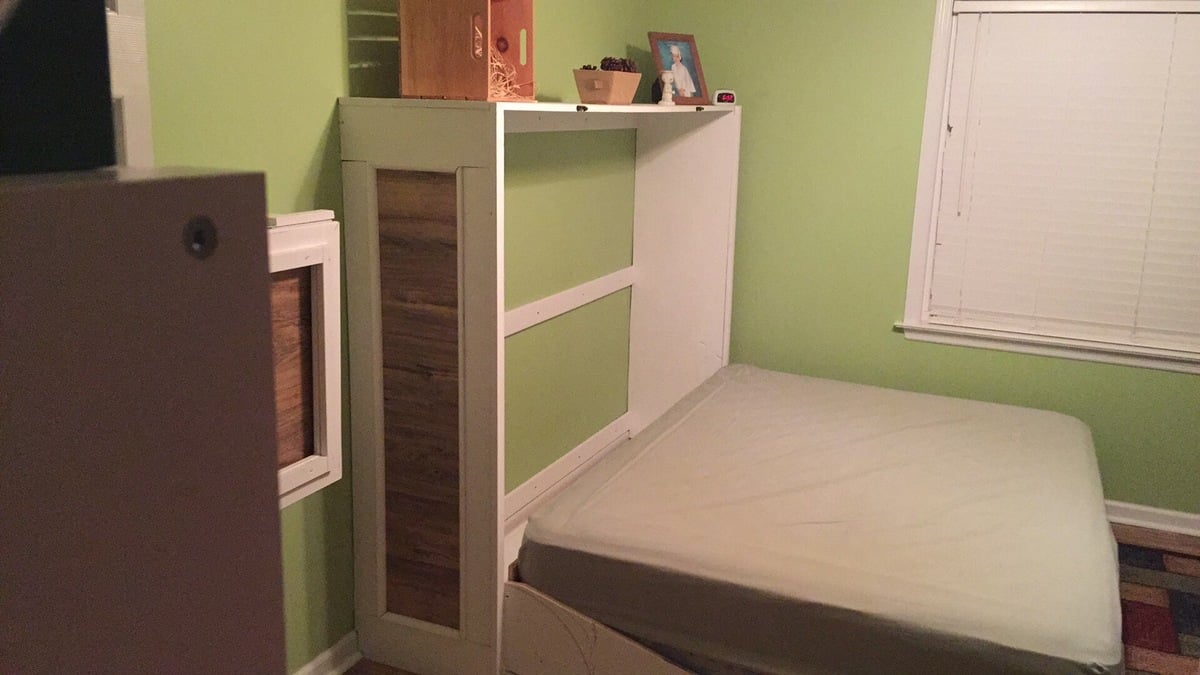
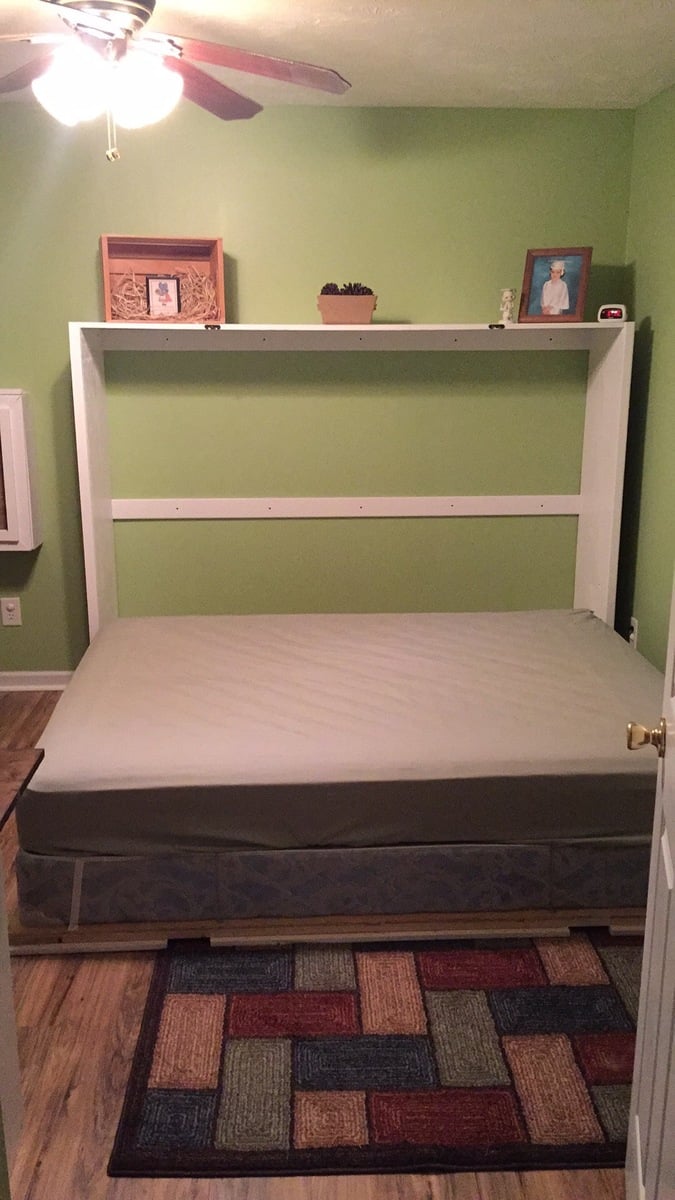
Queen Murphy Bed
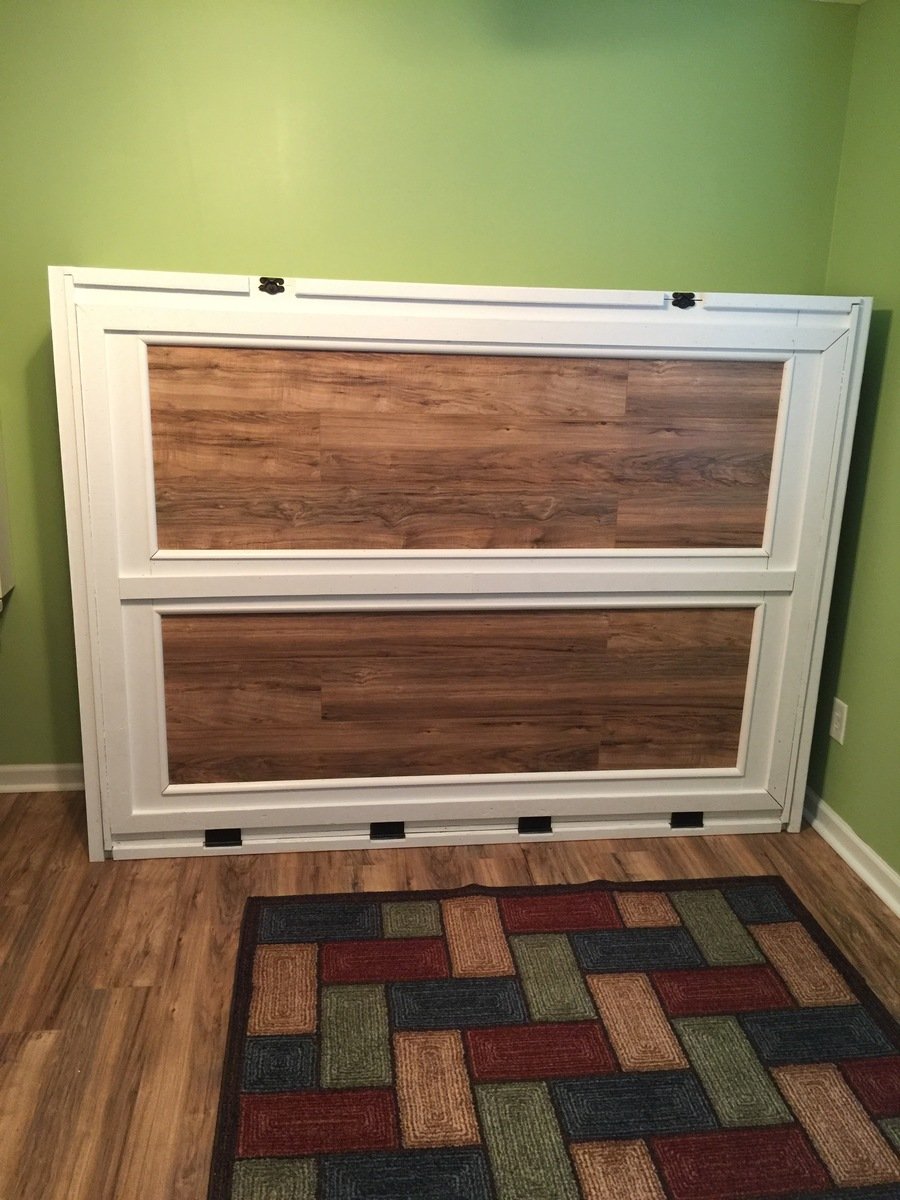
Not too bad of a project but had to a good bit of guess work so I could changed the plans for a queen size bed and flip in on its side.
Built from Plan(s)
Estimated Cost
$200 if you already have the bed
Estimated Time Investment
Week Long Project (20 Hours or More)
Finish Used
White Paint and laminate flooring left over from the floor.
Recommended Skill Level
Beginner
Comments
Sun, 05/29/2016 - 18:50
Measurements
Good evening!
I am new at wood working, and would be very interrested in knowing the different measurements you changed to get from a twin to queen murphy bed. If it is posted on this page, I tried but couldn't find it. Thank you for your help. Have a good day.
Marie-Julie
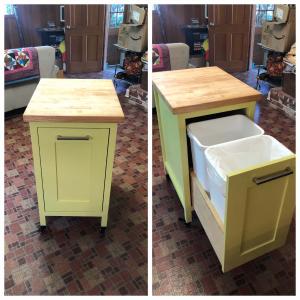
Chartreuse Moving Double Pull Out Trash Can

I replaced all of the drawers in our 1960's kitchen with custom built new drawers that have full extension slides. I can't afford a complete remodel, but the new drawers allow the kitchen to function much better. The old drawers had wood slides that would allow you to pull them out about 2/3 of the way. Any more than that and the whole drawer would slide out and go crashing to the floor.
I had wanted to build a cabinet like this, but I couldn't figure out how to pull it off. I'm an amateur with basic tools working out of my garage. I found Ana's plan and combined it with my experience making drawers to make this cabinet. I use Blum soft close slides and the cabinet is working great so far.
The butcher block top is left over from countertops I put in the kitchen. The project basically started with me wanting to put that last bit to good use. It's 1 1/2 in thick acacia. I wish I'd have gone for maple but the acacia is okay.
I don't know if you can see it in the photo, but it has locking casters on the feet so that we can move it around when we need to clean the kitchen floor, but it doesn't move when you pull on the drawer. I guess it can also double as a little island when we have dinner parties.
Built from Plan(s)
Estimated Cost
$100.00 I'm really not sure. The slides and paint were pretty expensive. Of course I didn't use all the paint so if something else needs to be chartreuse I have more. The wood was poplar and some high quality plywood. It's 3/4 ply on the slides but only 1/4 on the back. The drawer is made with left over baltic birch 1/2 in ply that I had left over from my other drawer projects. I guess you could consider the varnish and nail free too as I already had those. Building the drawer is really a whole separate project that takes as long as the cabinet. And the Shaker door is also its own little project.
Estimated Time Investment
Week Long Project (20 Hours or More)
Recommended Skill Level
Beginner
Comments

Fri, 05/03/2019 - 09:54
Amazing Pull Out Trash Island!
What an awesome piece! Adds so much function to your kitchen in a tiny footprint. Love the color and the top!
In reply to Amazing Pull Out Trash Island! by Ana White
Sun, 05/05/2019 - 10:30
Thanks Ana. I appreciate…
Thanks Ana. I appreciate that. I couldn't have done it without you! : )
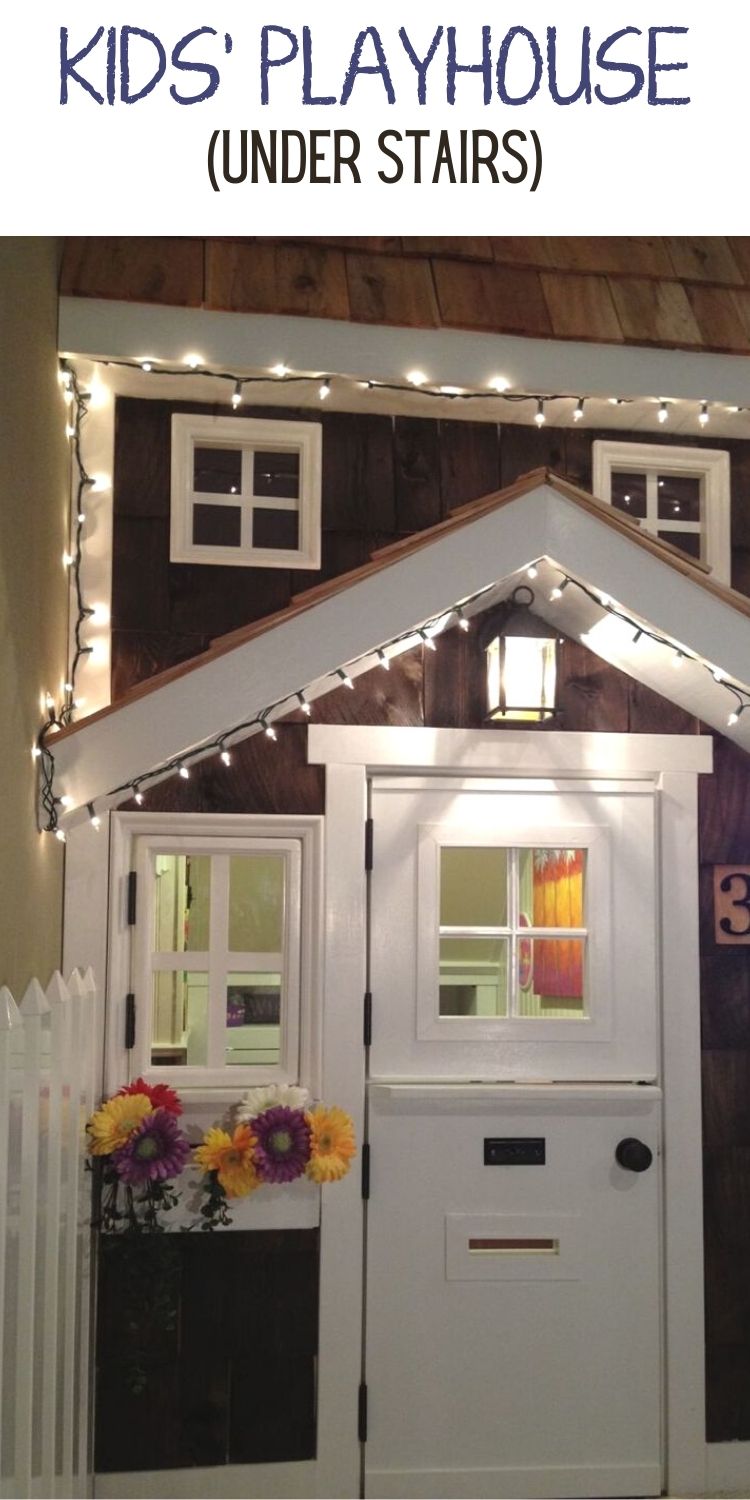
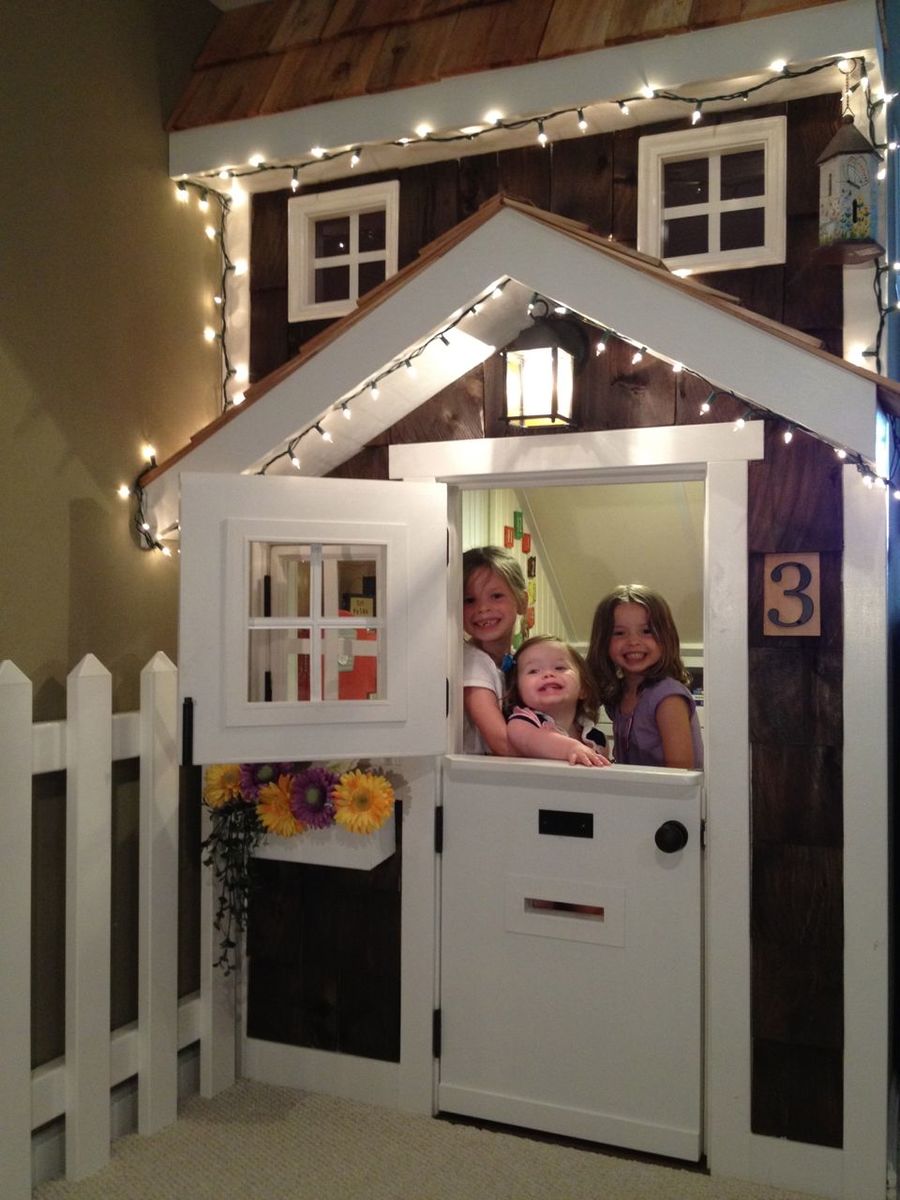
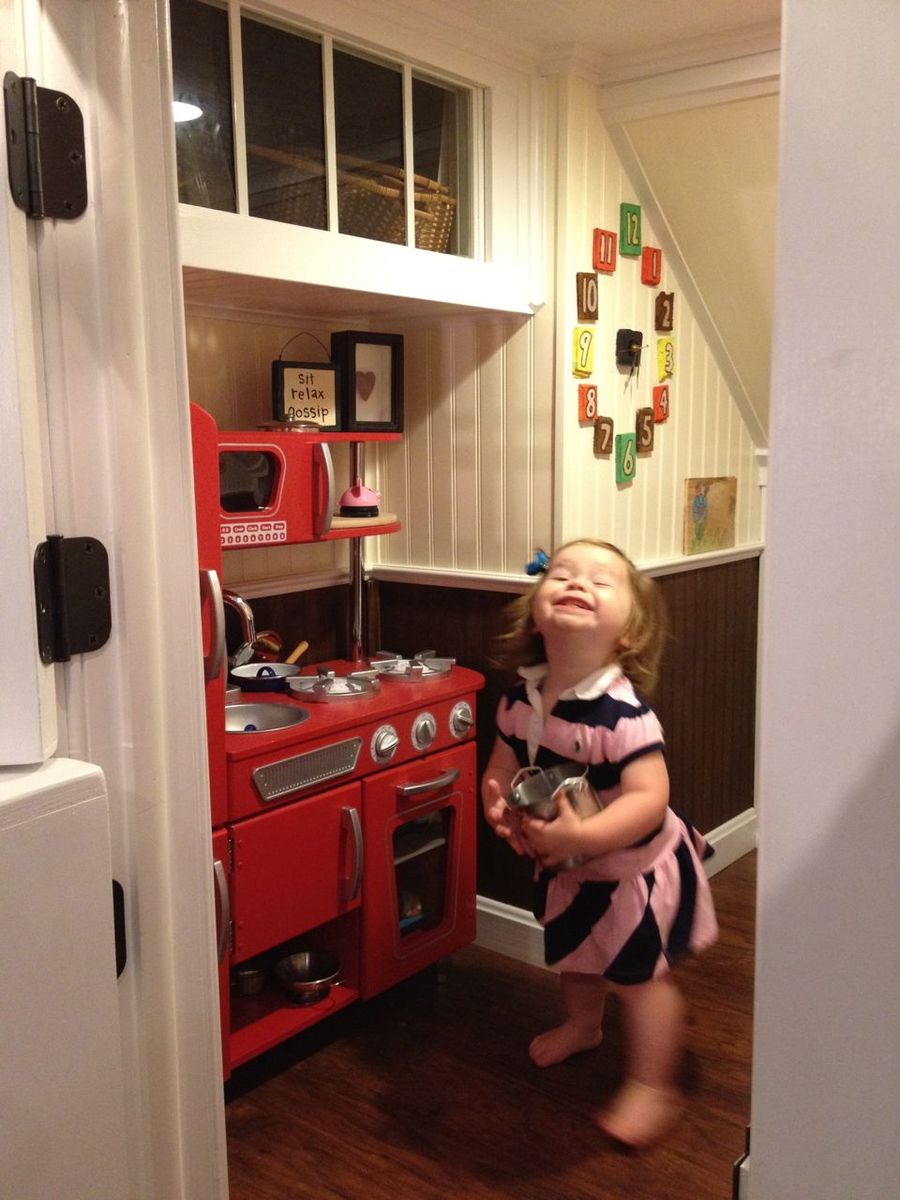
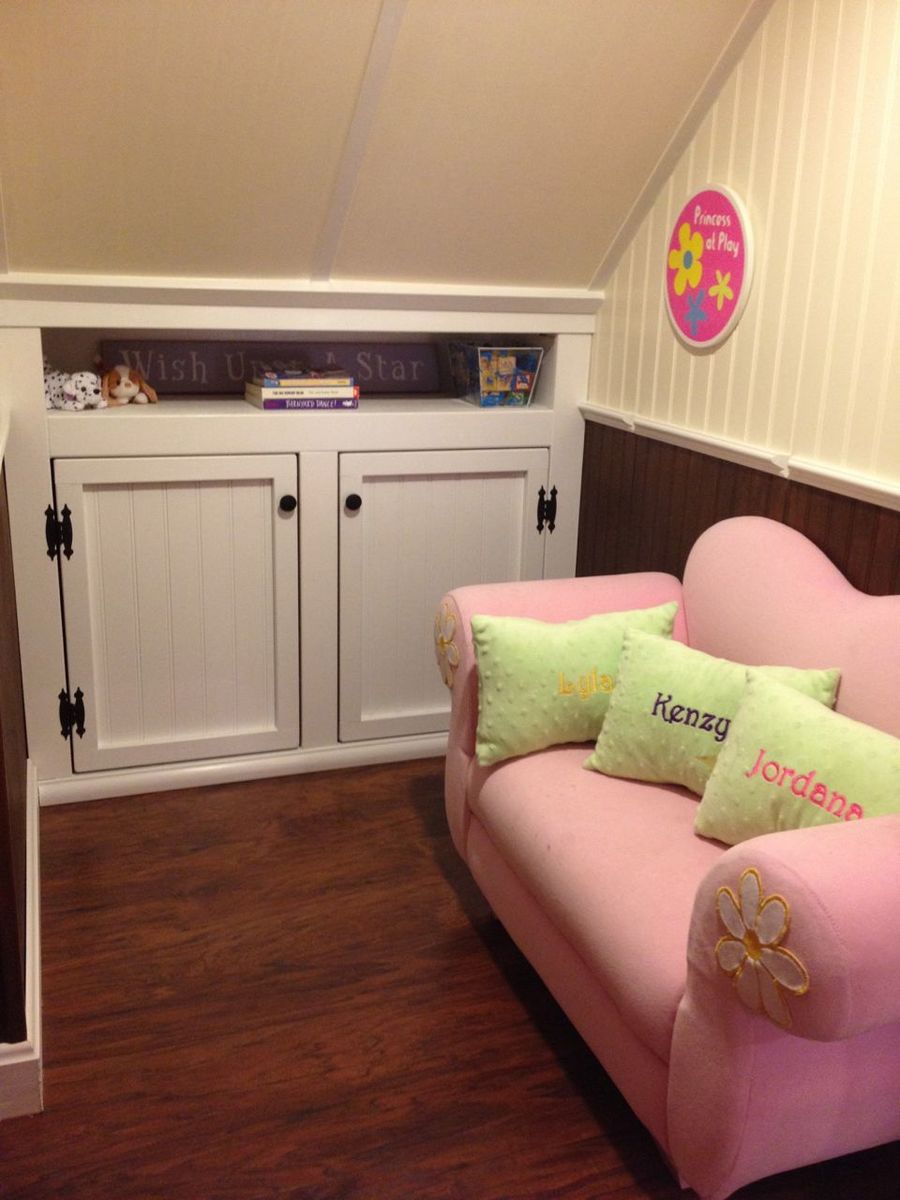
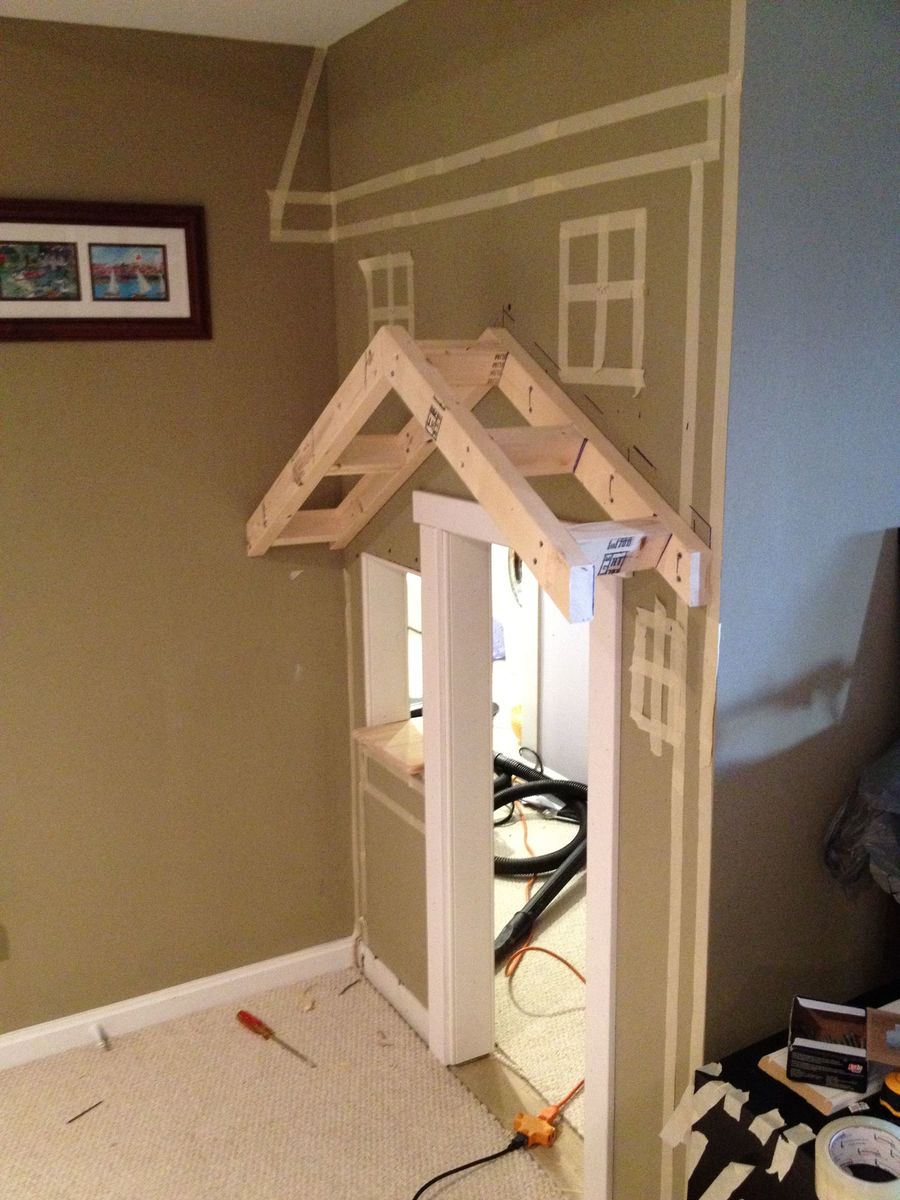
Kids' Playhouse (under stairs)

Had the perfect space for a little playhouse under the stairs in the basement and it's been our plan for 4 years to do something. Finally, we did something. Wanted depth so I added the roof and portico. Also added cedar shingles that I picked up for $7 at HD. Inside I had extra laminate flooring so I put that down and added beadboard, chair rail and crown molding. There's also a small transom window above the small kitchen area. The kids love the barnhouse doors with old fashioned doorbell, mailslot and window. The bookshelf under the stairs was the final touch. I didn't use any plans from this awesome site but did, as always, get a bunch of tips and inspiration!
Pin for Later!

Estimated Time Investment
Week Long Project (20 Hours or More)
Finish Used
Dark walnut stain on cedar shingles.
Recommended Skill Level
Intermediate
Comments
Sun, 12/18/2011 - 19:00
Wow! That is awesome!
Wow! That is awesome!
You really did a great job on that! So imaginative, too. WTG!
Sun, 12/18/2011 - 19:58
That is so stinkin' adorable!
That is so stinkin' adorable! Fantastic job. I love everything about it. Your kids (and grandkids) will remember the playhouse under that stairs forever!


Mon, 12/19/2011 - 06:54
Great idea!
Wow, this is too cool! They are going to love love love this! Can't wait to see the kitchen reveal!


Sat, 12/31/2011 - 18:26
too cool for words!
You did an amazing job on this. I'm planning a bunkbed with a similar facade. I love how cozy it looks without having to make an actual pitched roof. The shingles are such a nice touch that I may have to copy you! And it's wired for lights; you've really outdone yourself.
Mon, 03/19/2012 - 14:26
Door
Thanks to all of you for the nice comments! Re: the door, I just cut a plain 18x80 door slab ($21 from orange) and trimmed it out. I still need to put the window grille over the open space, and was hoping to find a cool 'speak easy' grille that fits the space.
Thanks again!
Thu, 05/03/2012 - 23:38
Soooo Cute!!
This has to be one of the most adorable things I've ever seen! What an awesome idea......how cool is that for the kids??! Love the lighting and the laminate (or is it hardwood) flooring inside. Even the stove is gorgeous! Such fond memories will be made there and remembered forever. Kudos!!
Fri, 07/13/2012 - 22:10
kid's playhouse under the stairs
I love this. I was just wondering about the little red kitchen. It looks like something I remember as a little girl back in the 60s. Did you make it or buy it somewhere?
Wed, 12/05/2012 - 15:34
Oh my goodness this is such
Oh my goodness this is such an inspiration! However, as a beginning tool user, I don't think I could get my finishes so nice. How much experience had you had at this kind of stuff before? Was the area closed in before this project or did you do that too? I've got an open stairway into our basement and would be starting from scratch with ceiling, walls, etc. and have no experience hanging drywall or anything. I think it would take me a year. Great job, and thanks for sharing!
Sat, 06/21/2014 - 12:51
How to - play house door
Hi there!
I was just wondering how you made the door for your play house? We're basically stuck at this level in ours right now... ;) Thanks for any tips!!!
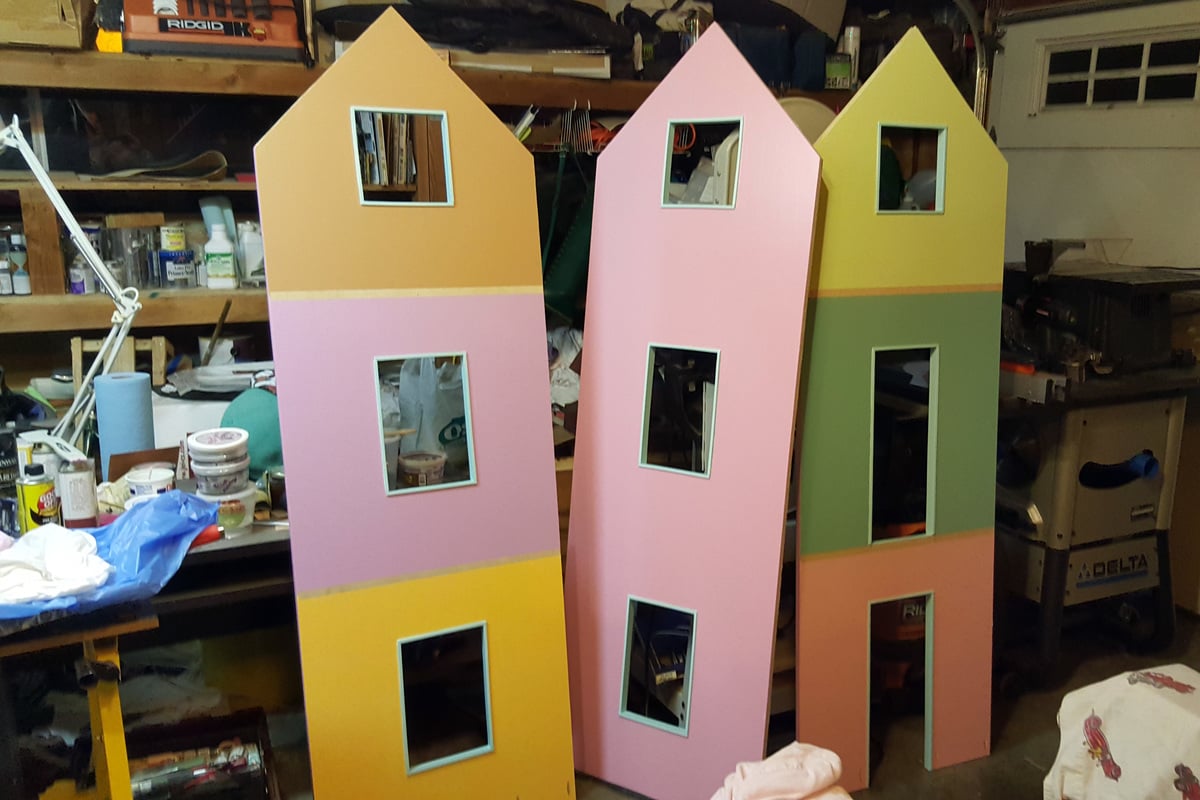
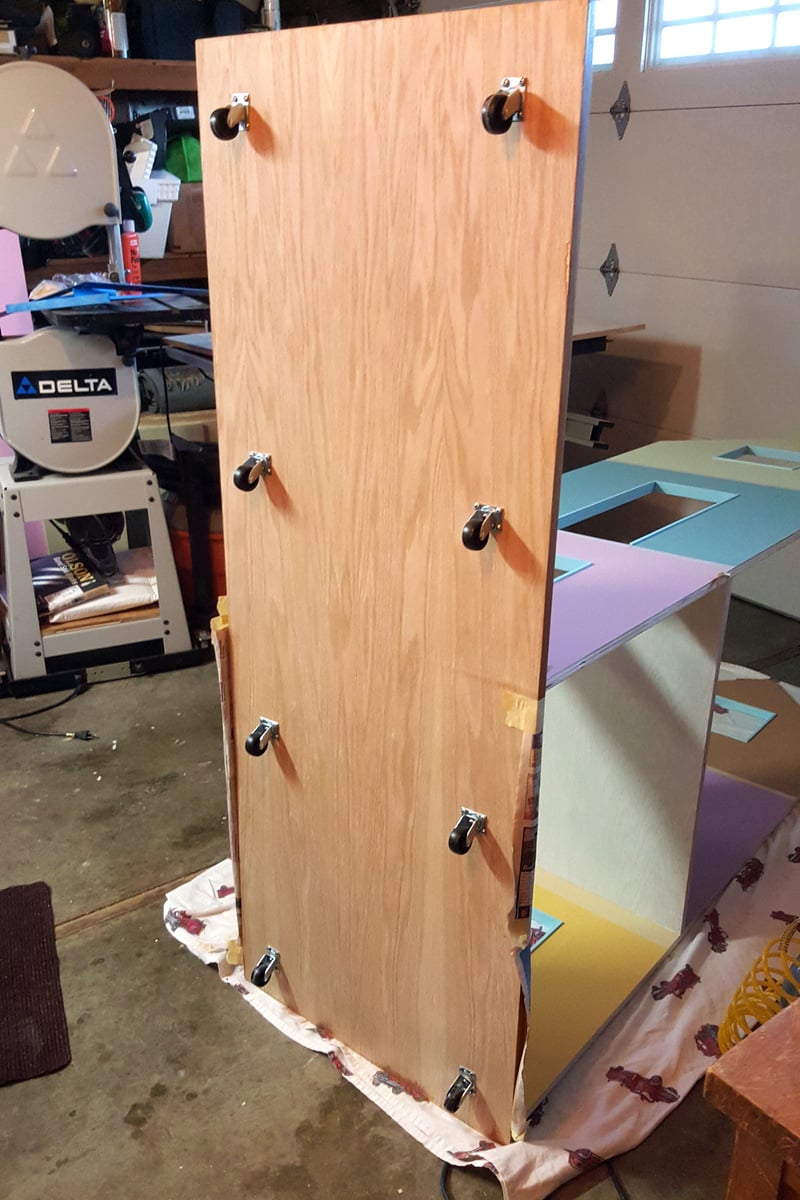
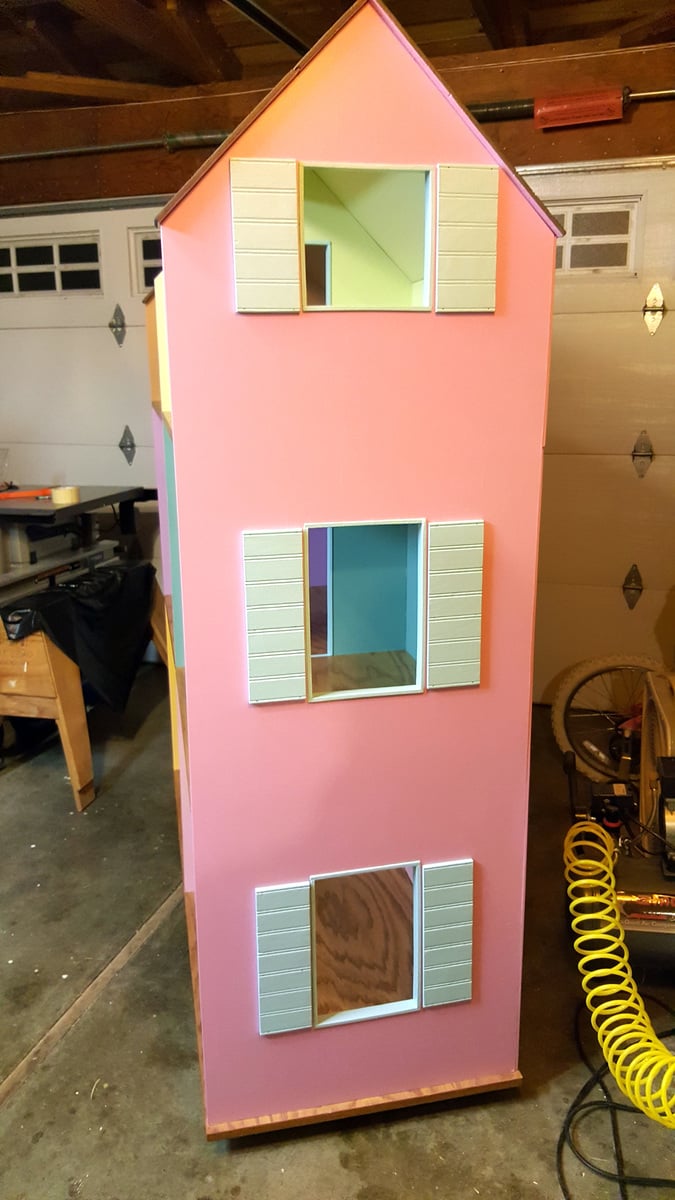
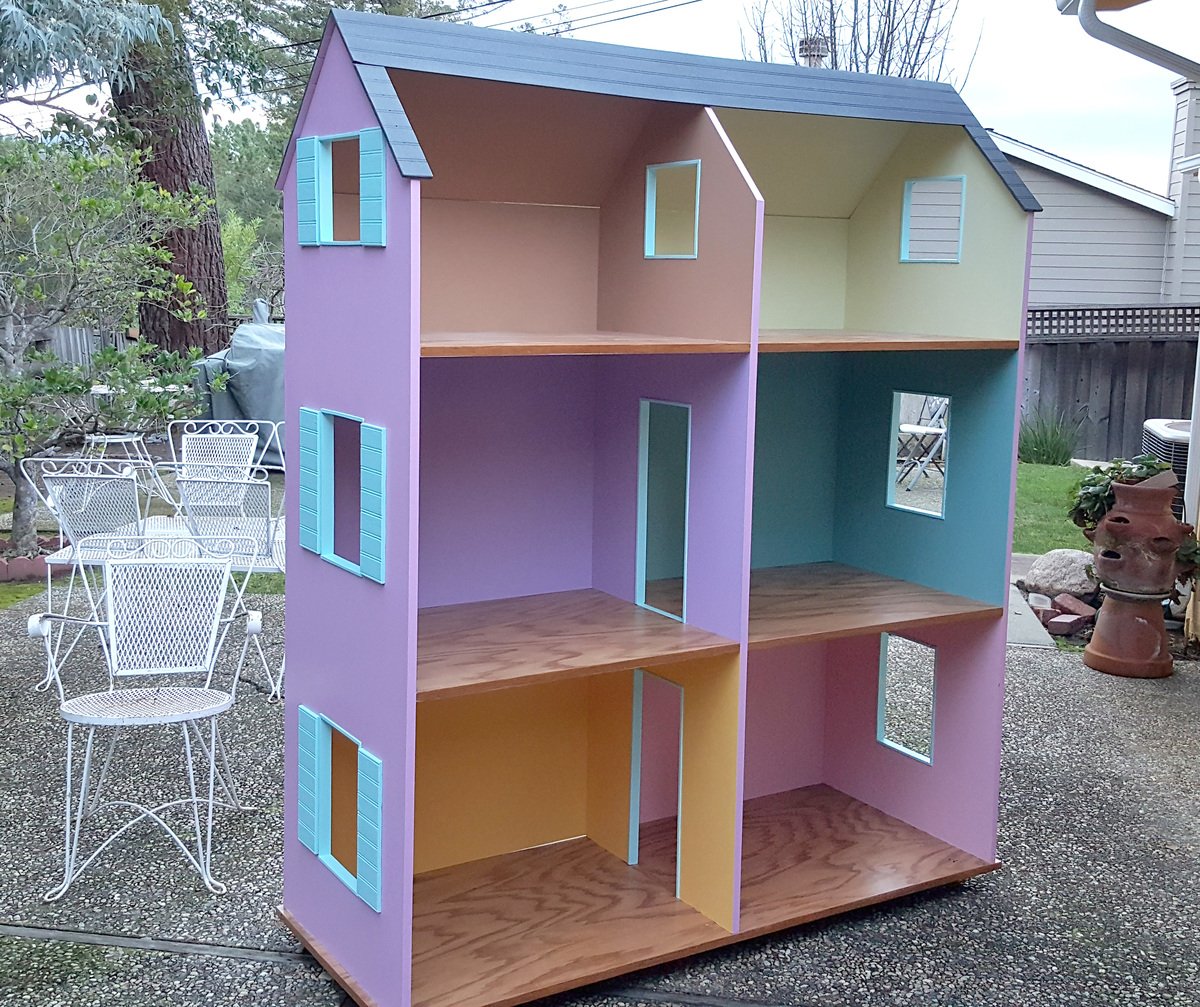
Breeding house
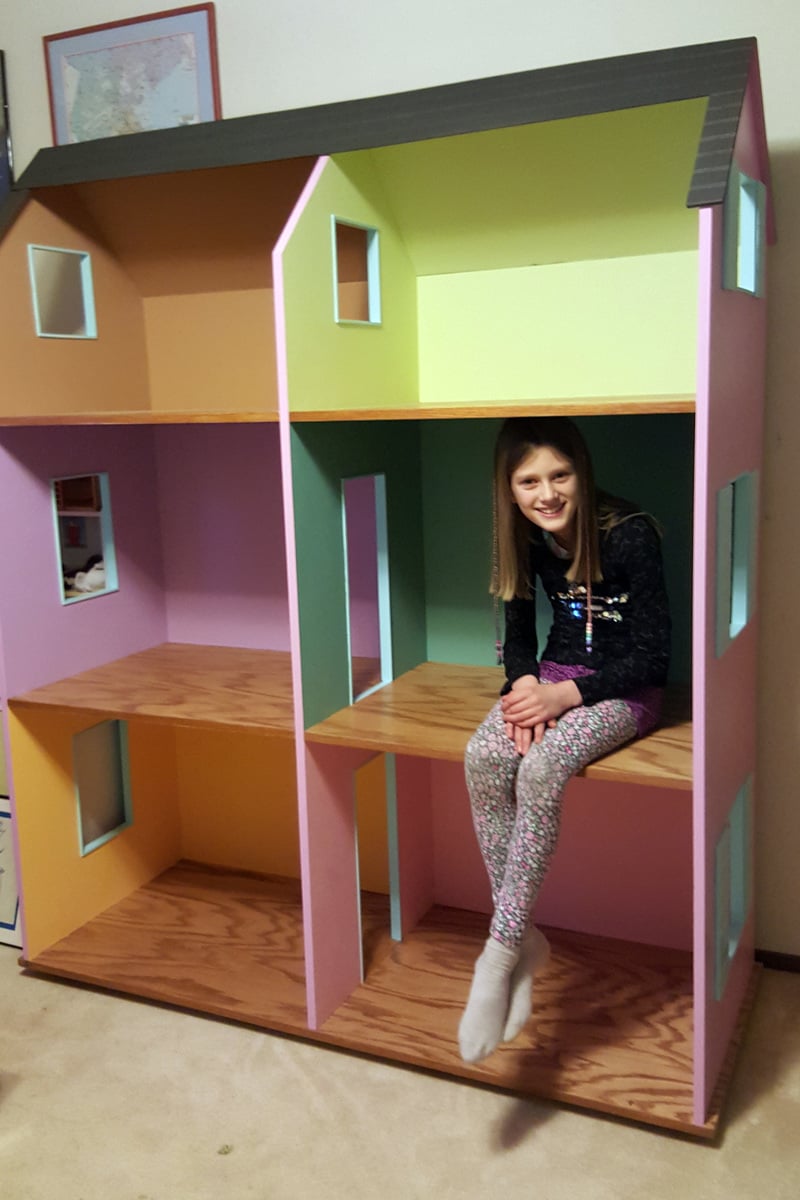
My daughter and I dedicate this doll house to my great uncle George Breeding who made a beautiful doll house for my sister when we were kids. I hope my kids will carry the maker bug into the next generation! Great plans!
Built from Plan(s)
Estimated Cost
I know I spent more than $350 on material.
Estimated Time Investment
Week Long Project (20 Hours or More)
Finish Used
urethane and paint
Recommended Skill Level
Beginner
Comments

Thu, 12/15/2016 - 08:21
Dimensions
I'm wondering the same. The dimensions looks bigger here. Would you mind sharing? I like the size of the rooms here. Thank you.
Reclaimed-Wood Headboard, Queen
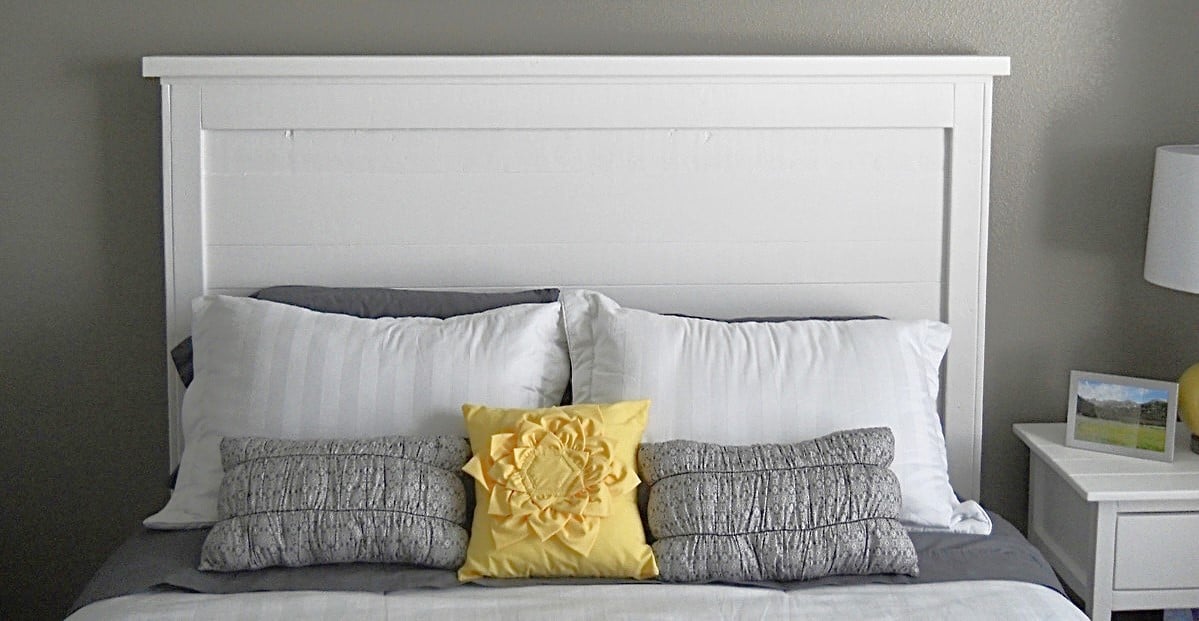
Wow, there are some really ugly headboards out there. I was intending to re-do one from craigslist but saw this plan and knew it had to be built! This was our first major woodworking project, and I think it turned out pretty good! And especially for only $45! It was a very easy build with accurate instructions/measurements! Great for beginners!
Built from Plan(s)
Estimated Cost
$45
Estimated Time Investment
Afternoon Project (3-6 Hours)
Finish Used
Paint: Lowe's Valspar "Du Jour" White
Recommended Skill Level
Beginner
Comments
Wed, 01/04/2012 - 23:49
Just love your bed and
Just love your bed and nightstand! Really inspiring and I love how you decorate too! Thank you for taking your time to share.

Sun, 01/08/2012 - 07:00
Elegantly executed
That's a wonderfully polished piece for something with the word "reclaimed" in the title, especially since it's your first. Looking forward to what you'll be doing a year from now if the first effort is this good.
Sun, 06/03/2012 - 15:53
headboard w/ reclaimed wood
I am new to Pinterest and Ana White, so is there any chance I could get plans for this emailed to me or sent to me at Pinterest?
Fri, 07/13/2012 - 16:29
To get the plans, all you
To get the plans, all you have to do is click on the link next to spot up above that says "from plans" and they will pop up.
Seasonal And Holiday
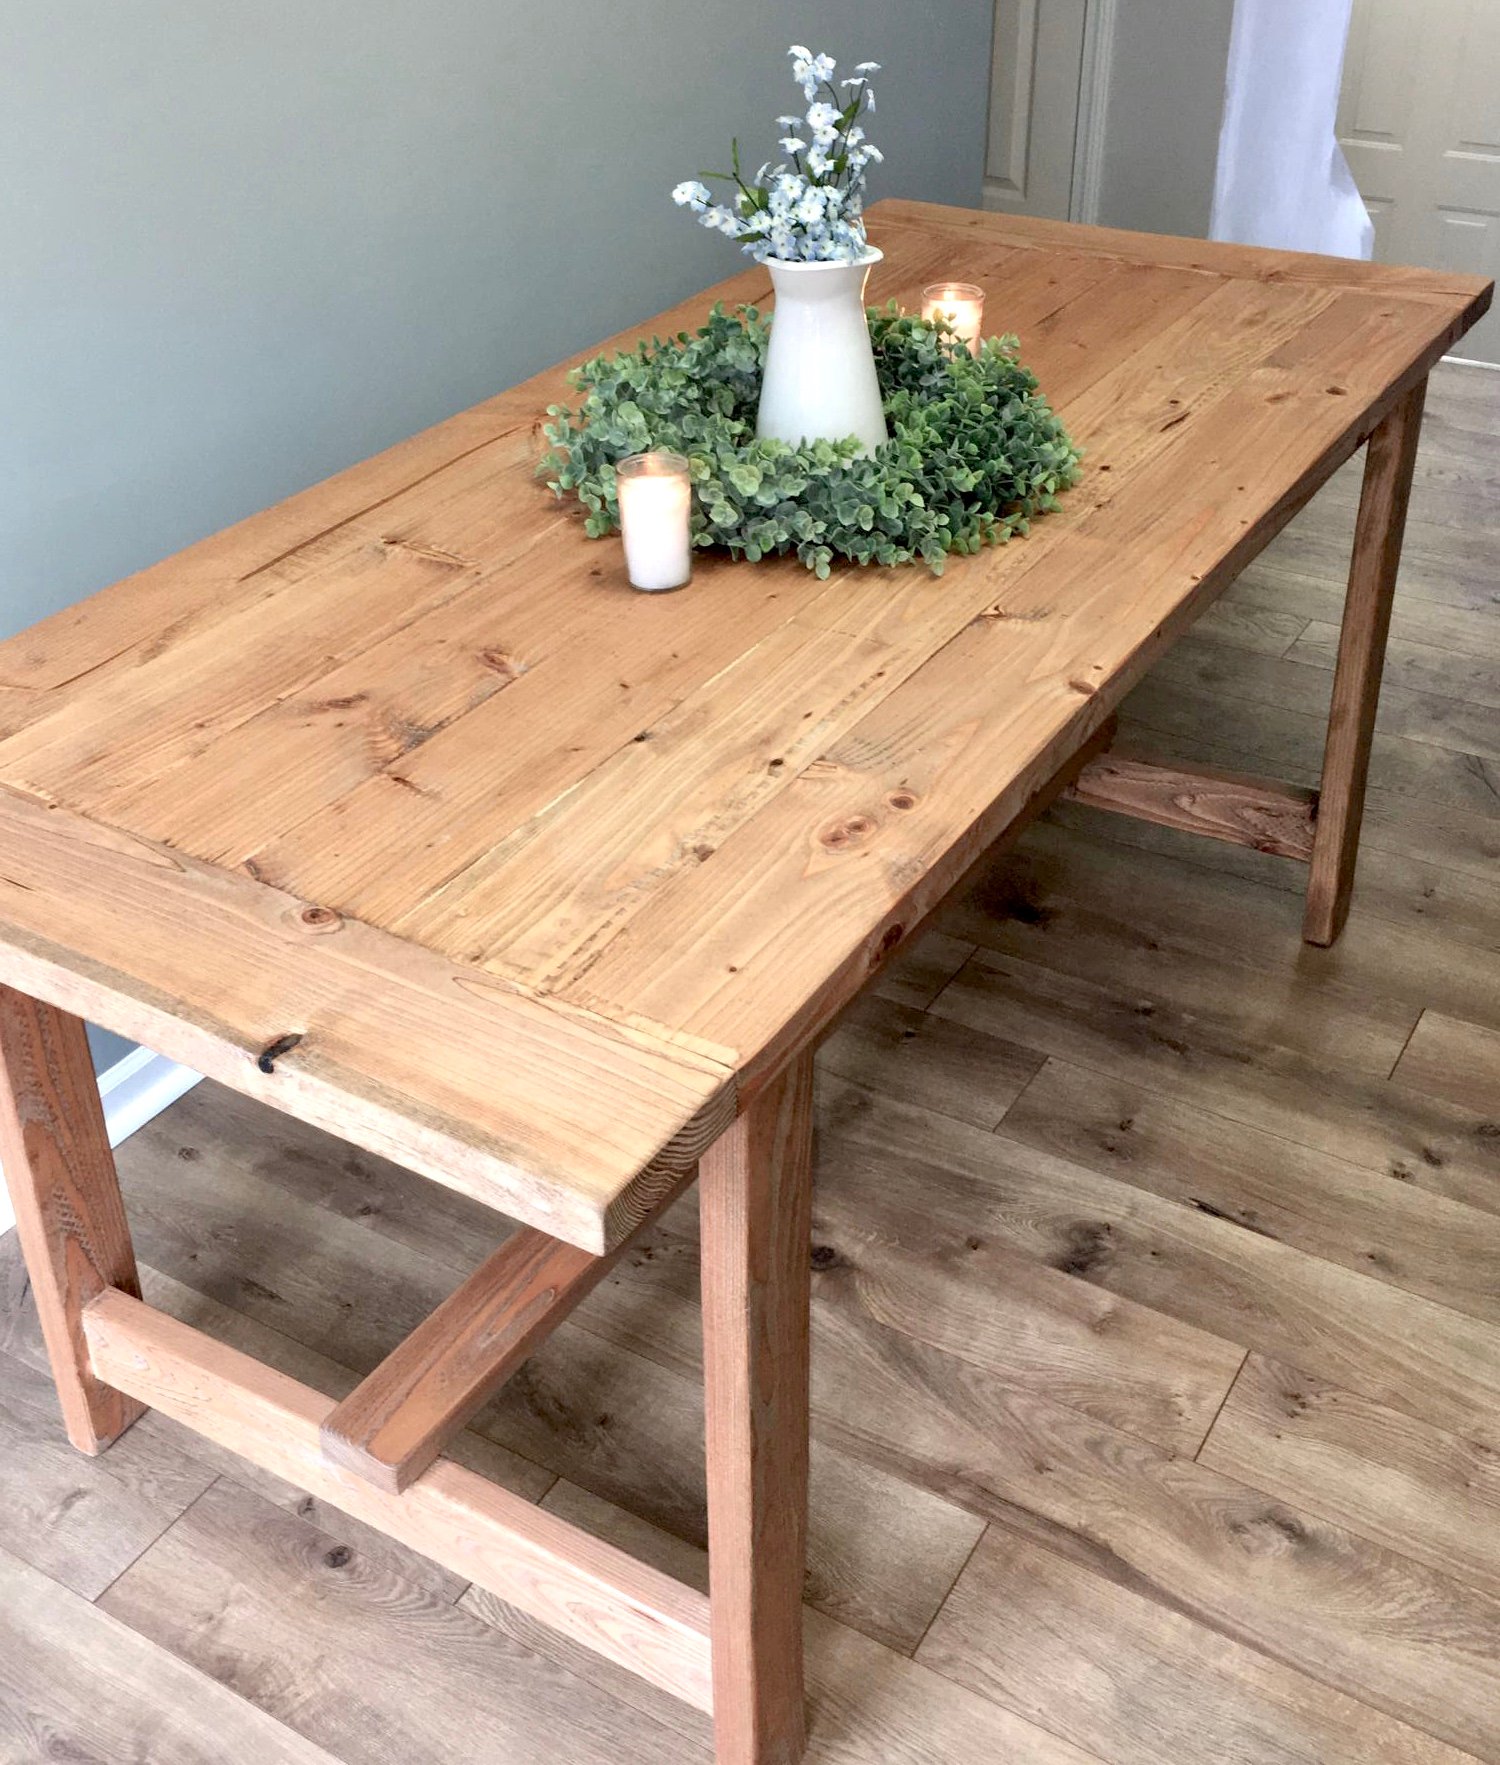
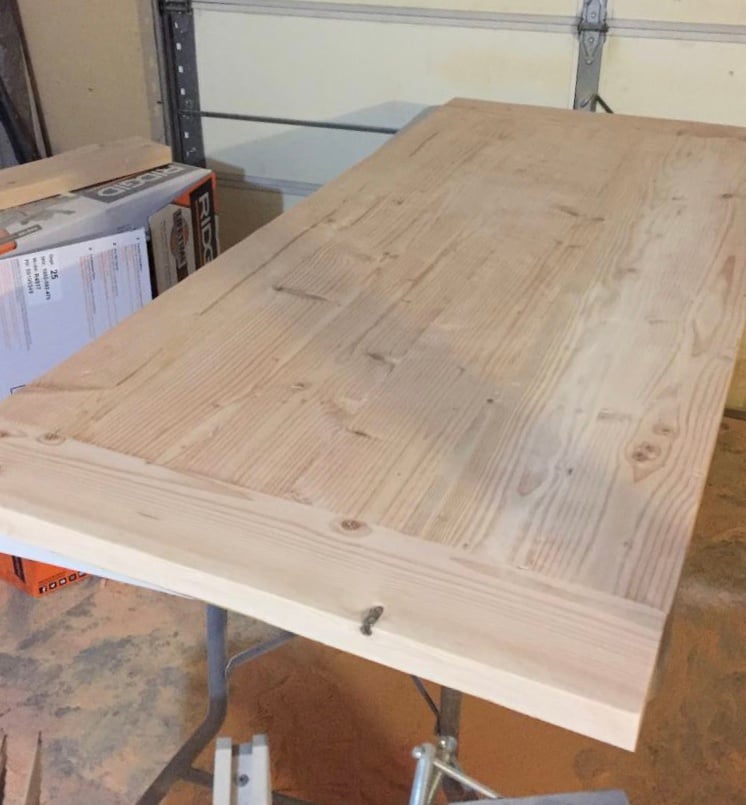
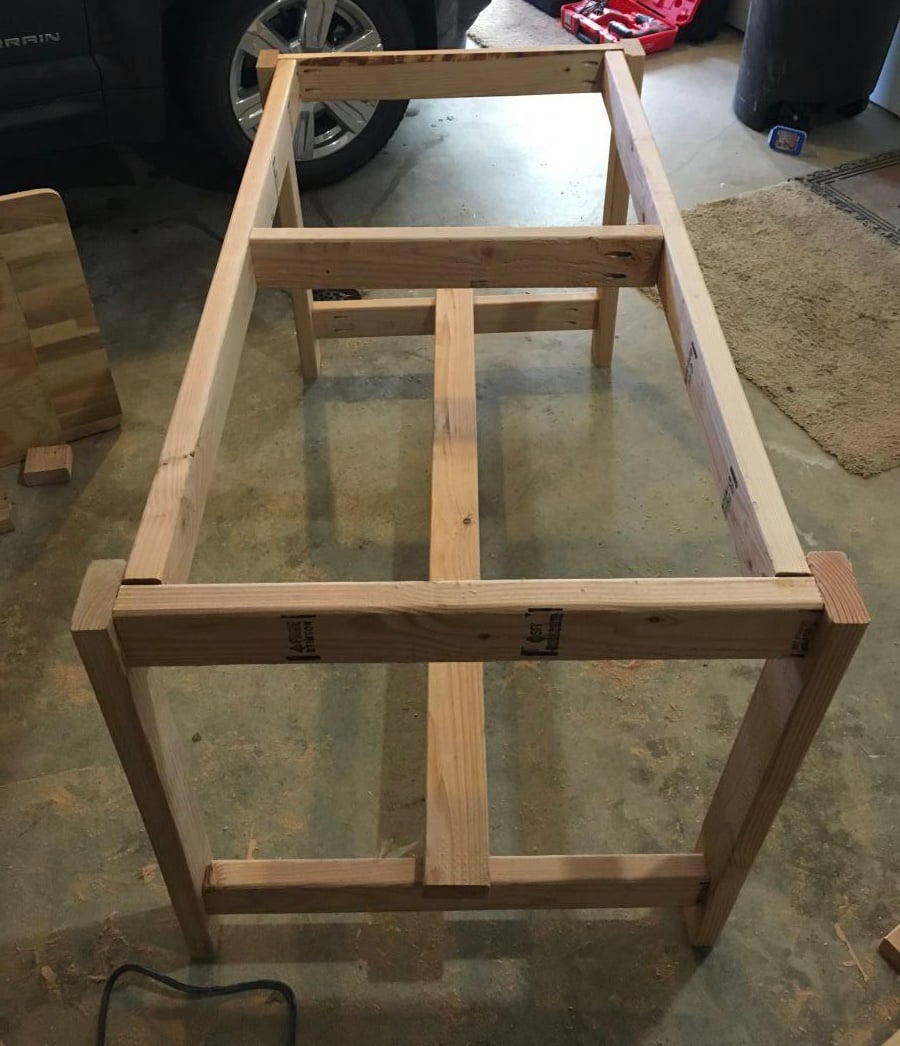
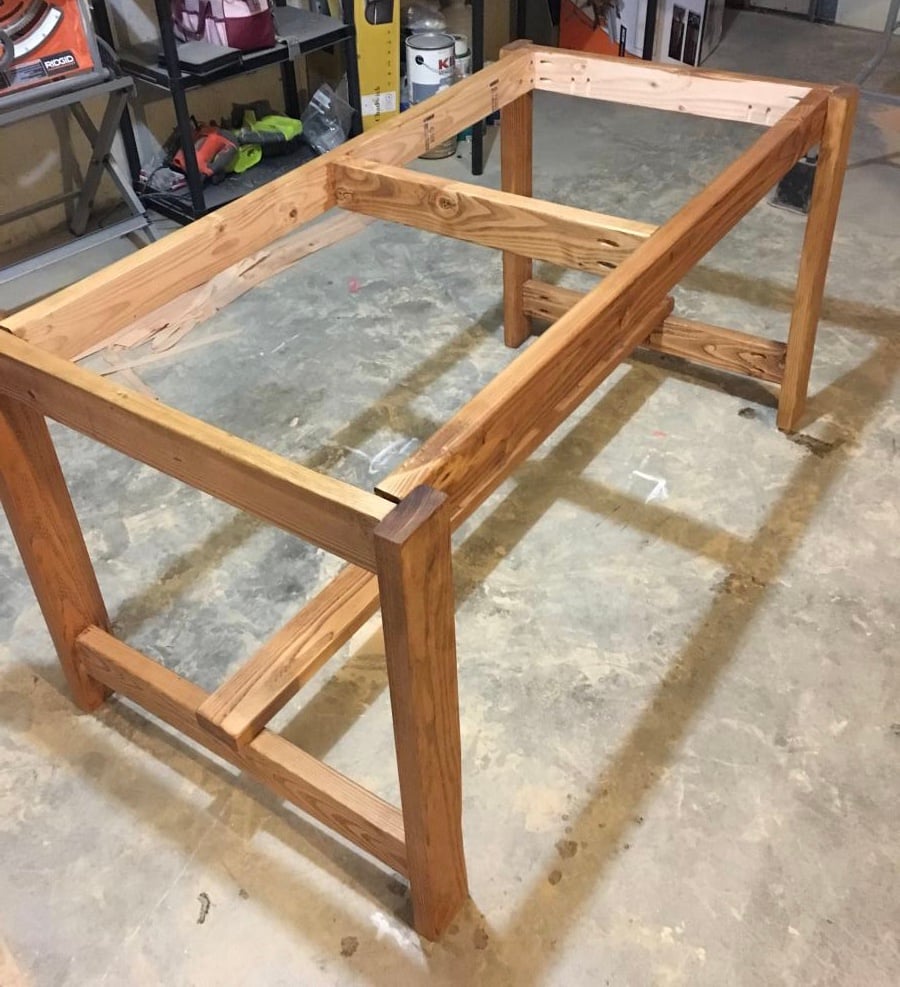
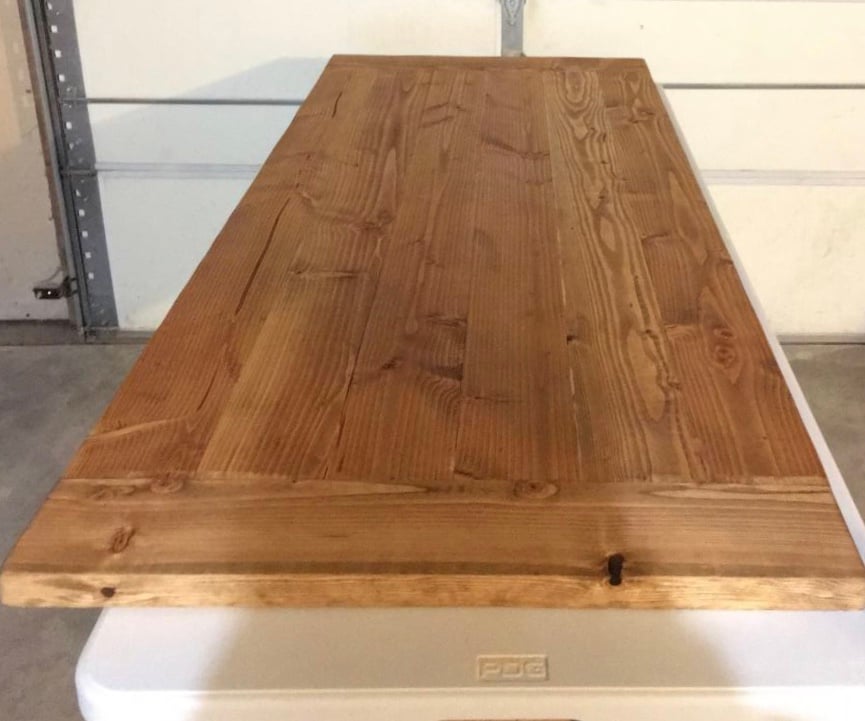
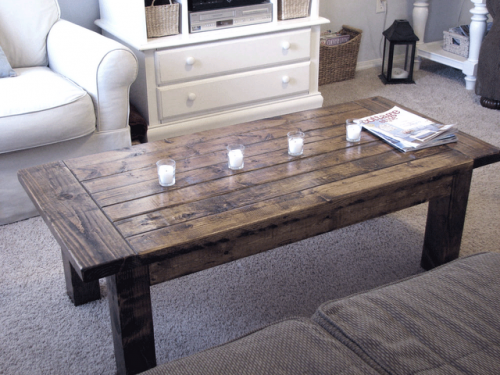
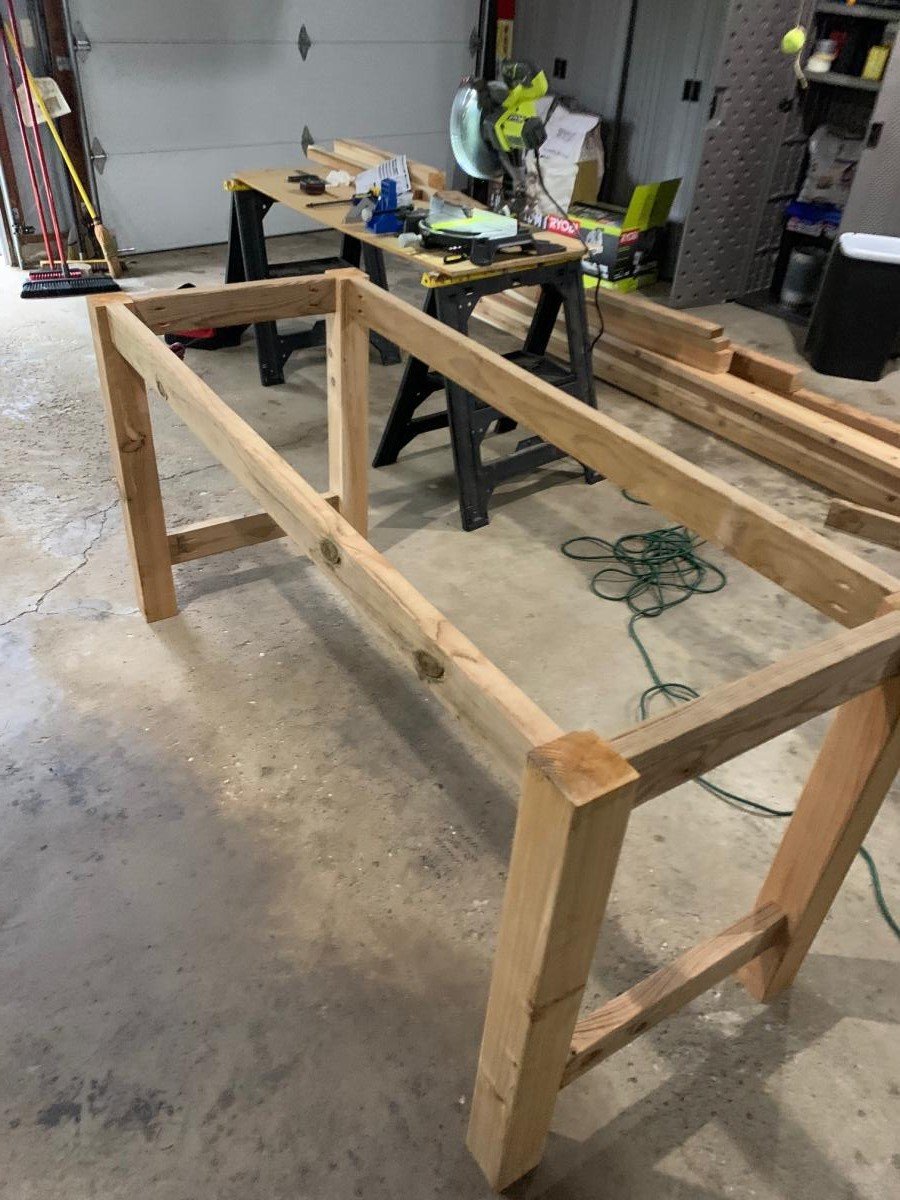
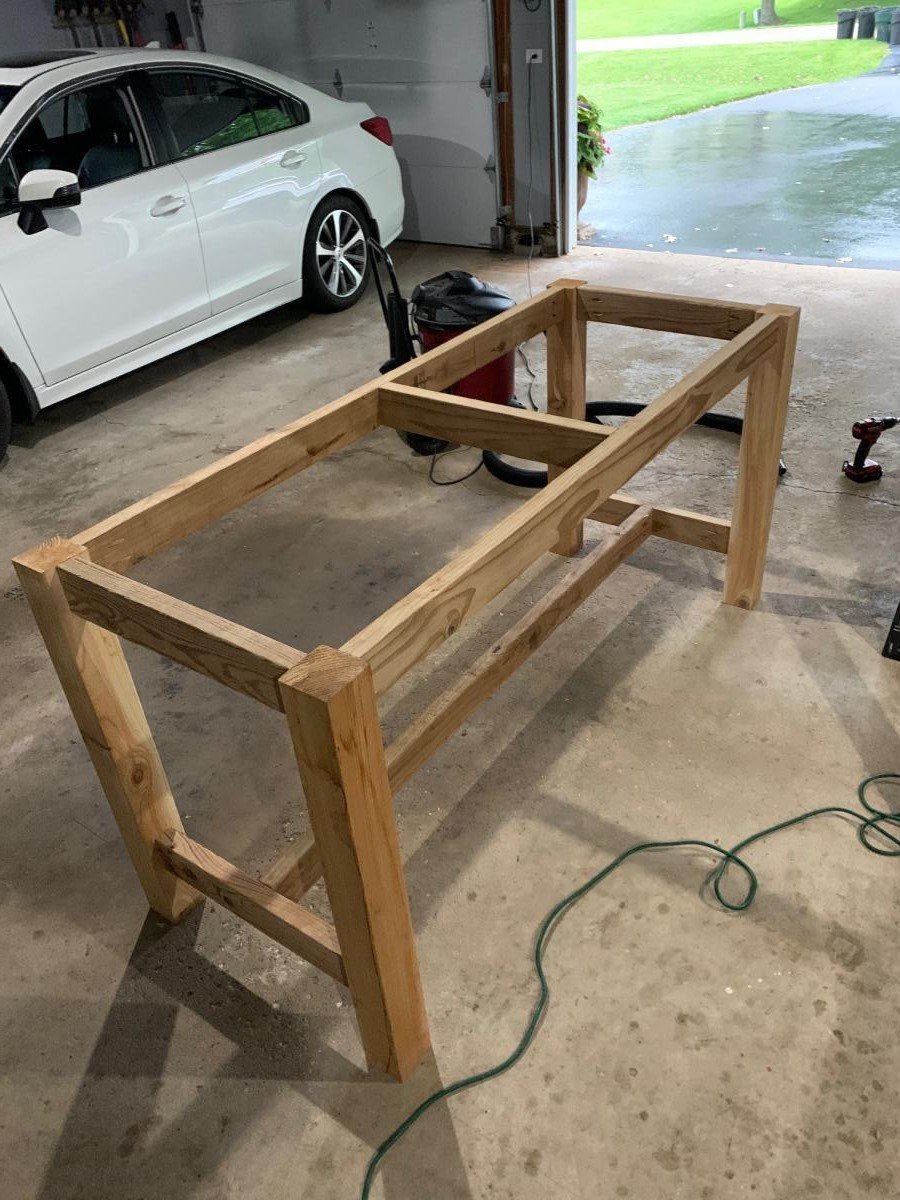
Modified Modern Farmhouse Table
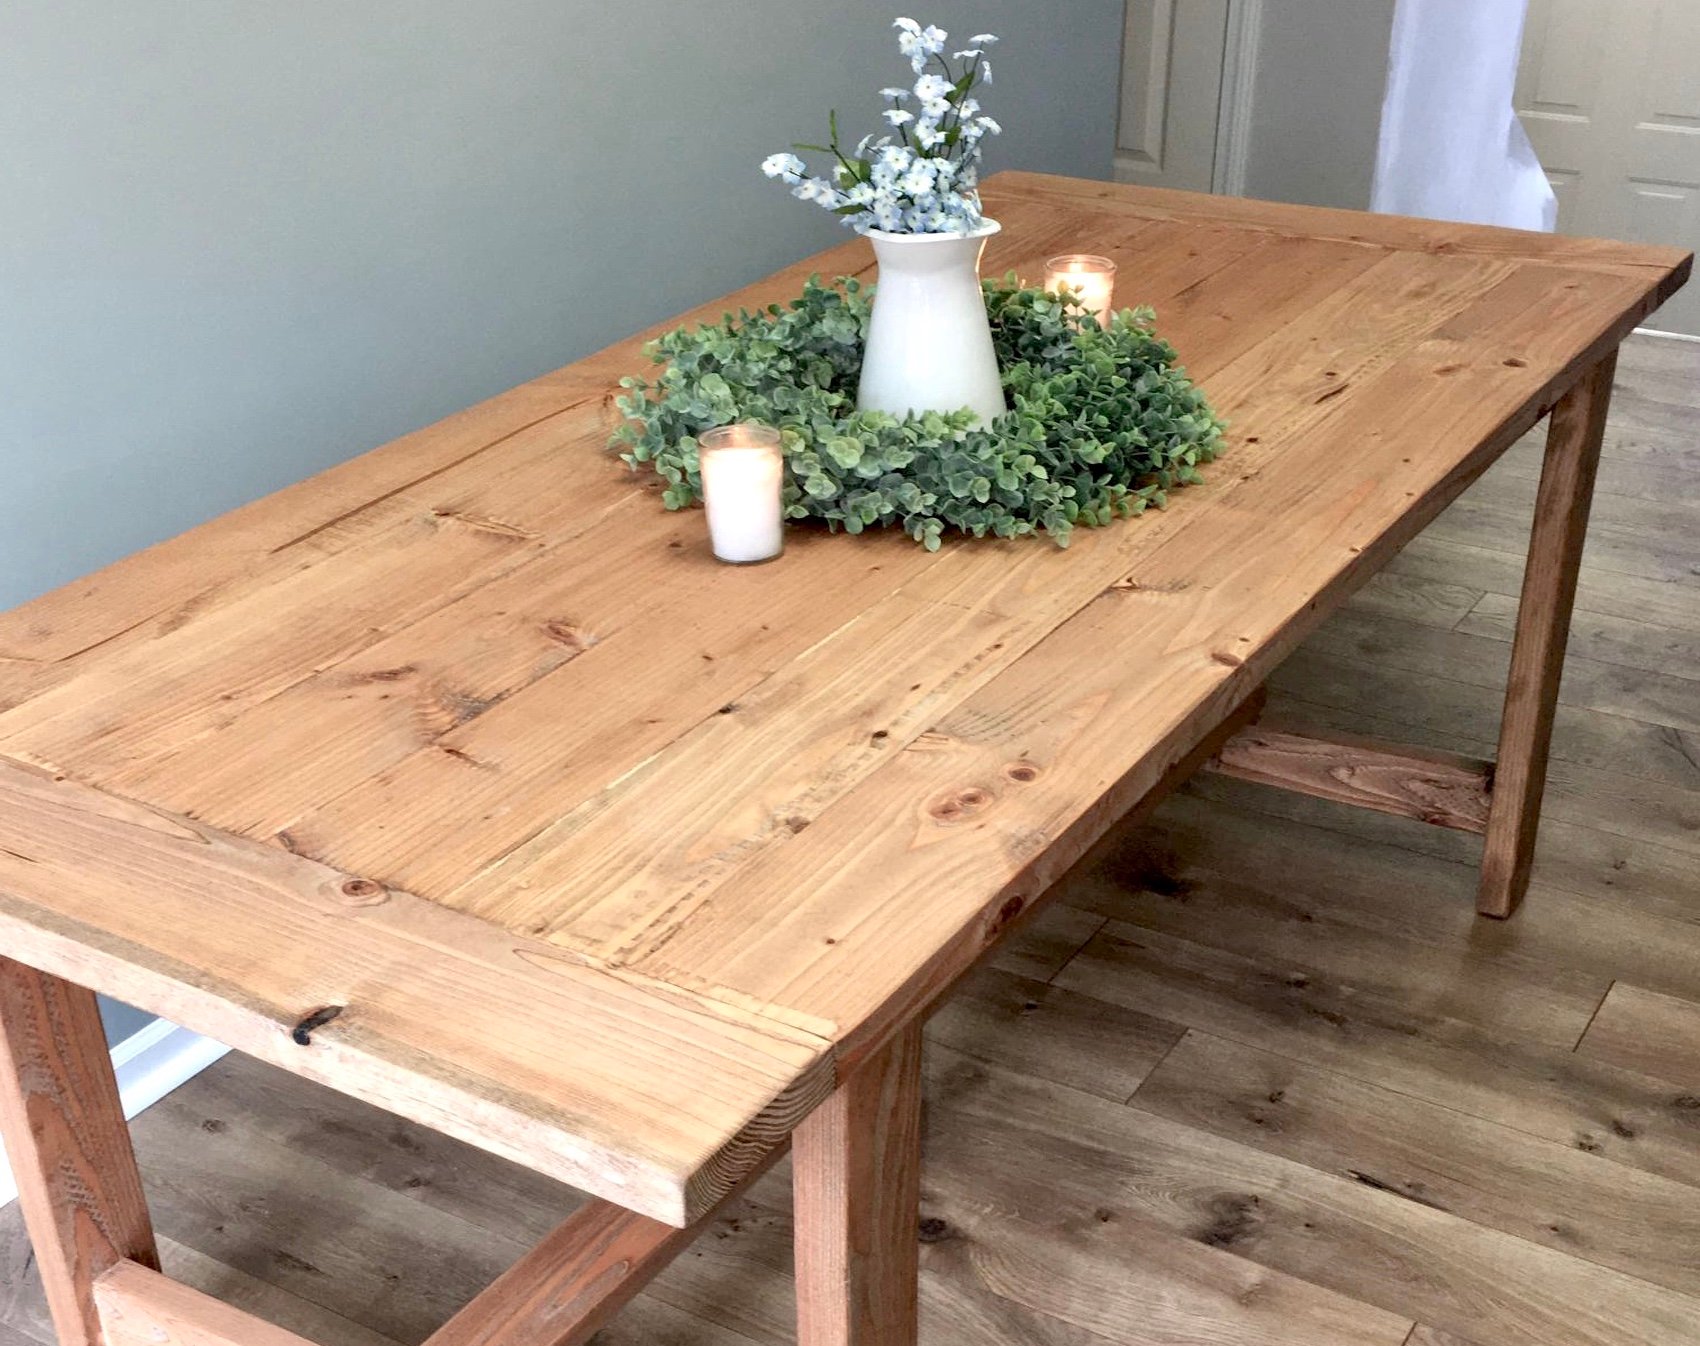
This project was actually my first build (besides a small blanket ladder). I used the Ana White plans every step of the way! Since this build I have created coffee tables, side tables, console tables, head boards and a bed frame. This table gave me the confidence to try an original project of my own. Although this table was fairly simple, it was the project that started it all. That is why I chose for this piece to be my brag post.

Built from Plan(s)
Estimated Cost
$100
Estimated Time Investment
Weekend Project (10-20 Hours)
Finish Used
Watco Danish Oil in Medium Walnut
Recommended Skill Level
Beginner
Privacy Planter Fence
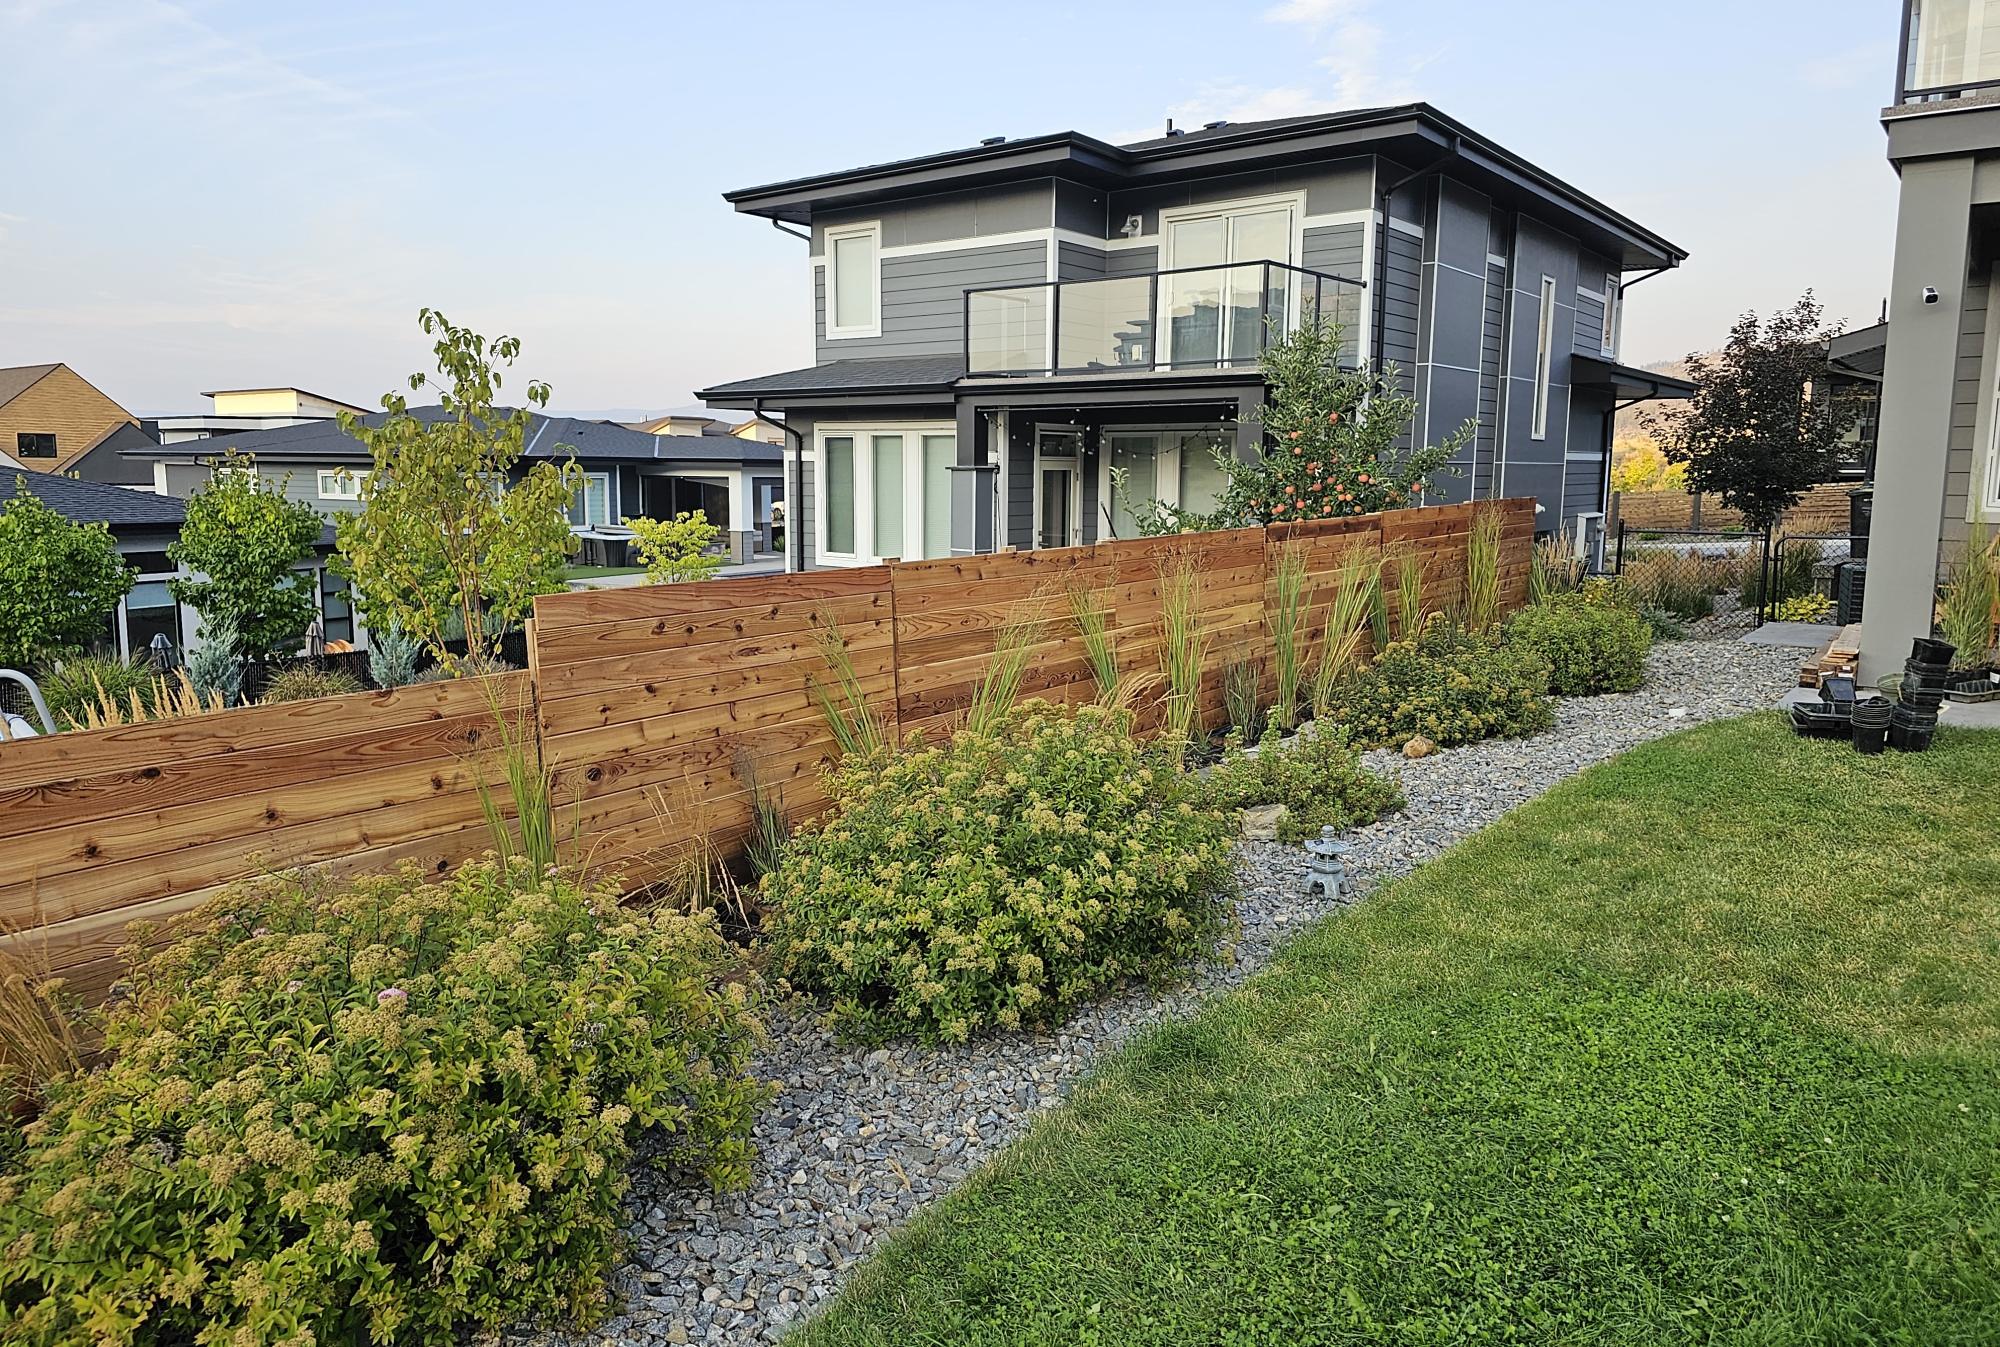
Created a privacy planter fence, using multiple planters. Most of the bases were custom sizes due to the existing rock wall. Tongue and groove cedar utilized and coated with linseed oil. I ensured the frames were square and plumb which the directions omit for some reason. Great week long project!
Kyle
Built from Plan(s)
DIY Swing Bench
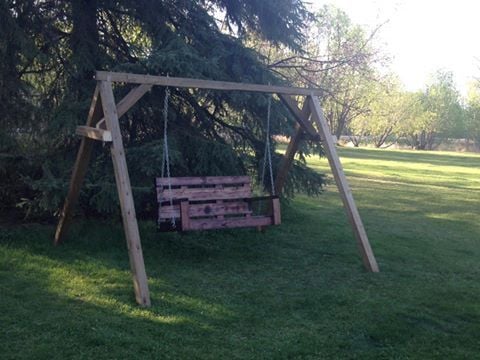
Perfect plan Ana , very easy to make. Swing hung on the A frame bulid with 4X4
Built from Plan(s)
Estimated Cost
swing $60
A frame $120
A frame $120
Estimated Time Investment
Day Project (6-9 Hours)
Recommended Skill Level
Beginner
Swing Slide Playset for Grandson
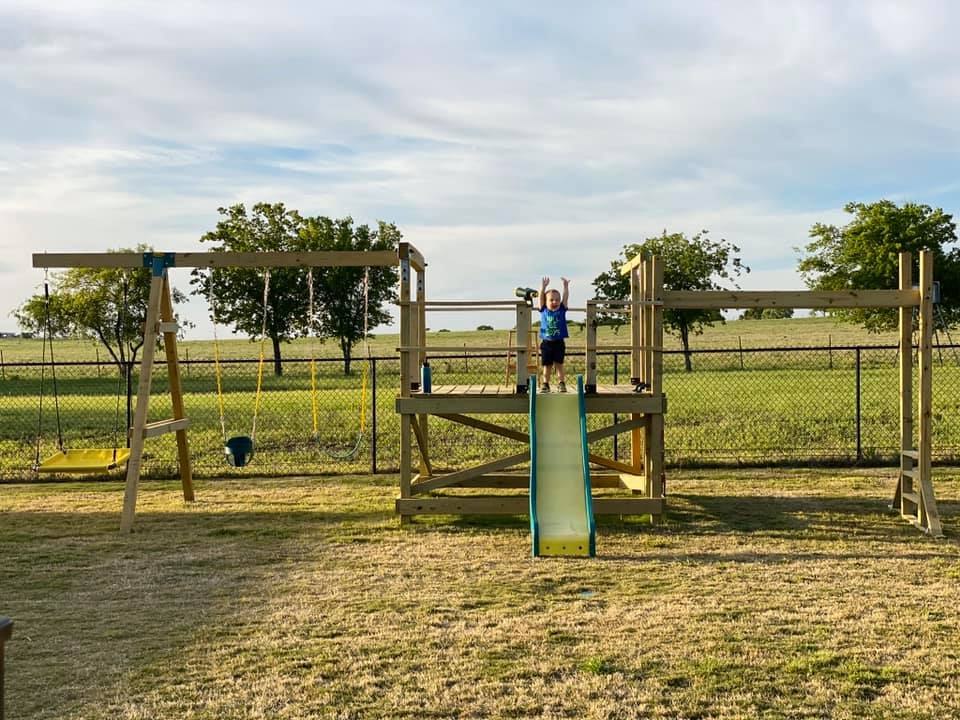
We are used to seeing our grandson every weekend but during the 2020 COVID quarantine we were unable to do so. Instead, we filled our time building him a swing set for our backyard. He loved it!! We are going to add more to the swing side but the hardware I want isn't available right now (apparently there is a lot of swing set building going on during this time). I look forward to many years of playing on this with our grandson and hopefully additional grandkids in the future... Our cost was pretty high mainly because our first round of lumber came from a local lumberyard that was willing to deliver within a few days (big box was going to take several weeks) and they had what is supposed to be higher end lumber (not sure I am convinced of that)....also, i chose some pretty expensive hardware (brackets) just for the added security.....


Built from Plan(s)
Estimated Cost
1800-2000
Estimated Time Investment
Week Long Project (20 Hours or More)
Finish Used
not done yet but will be staining/sealing when the wood is ready
Recommended Skill Level
Intermediate
Comments
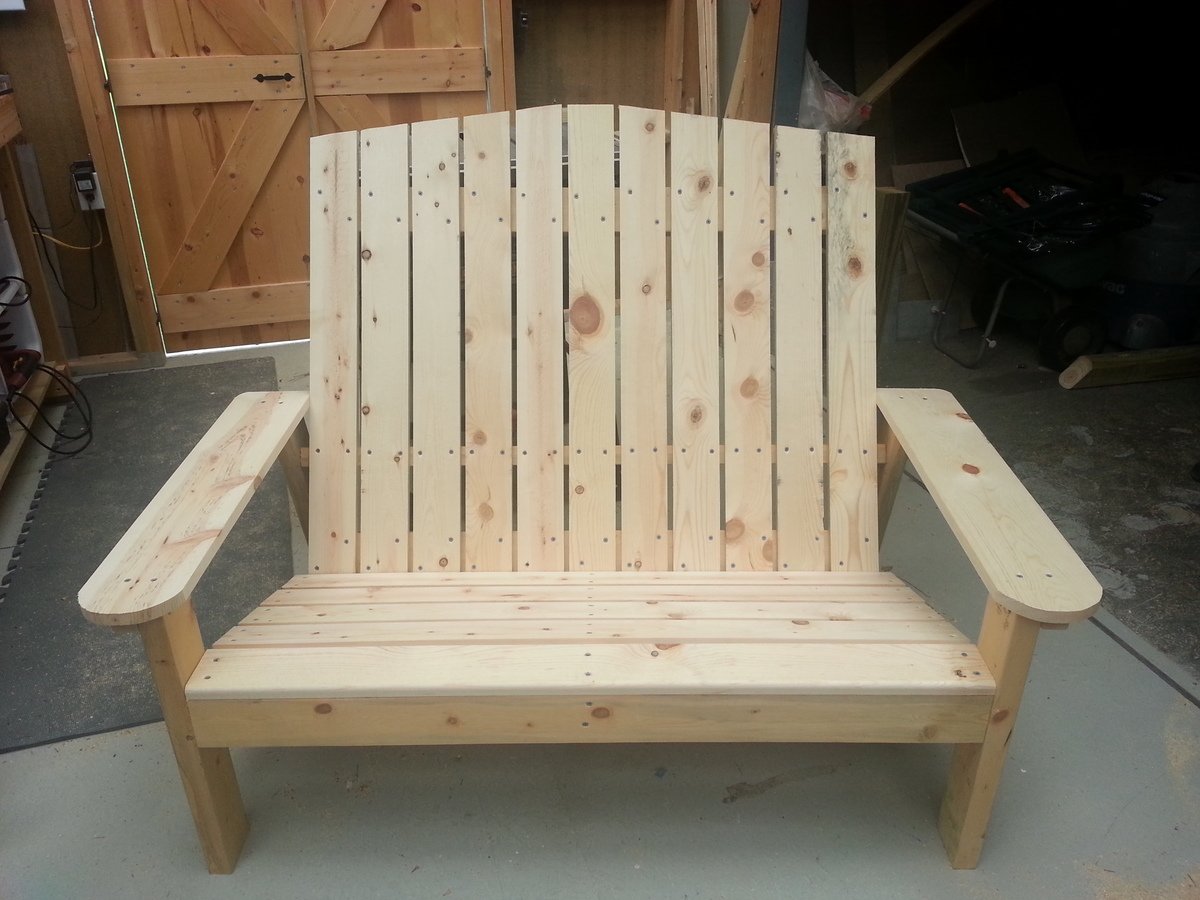
Modern Outdoor Bench
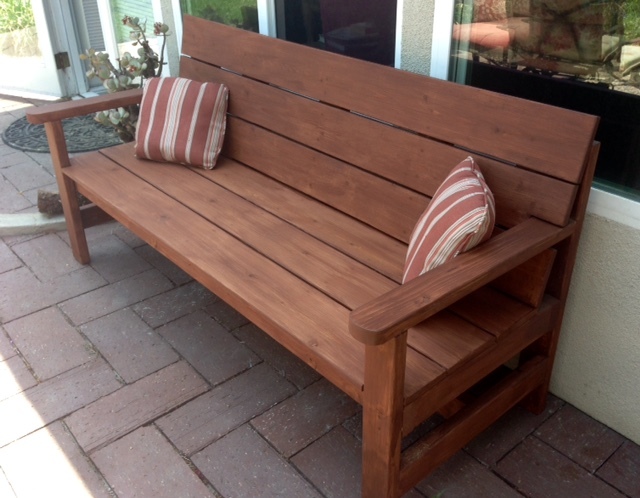
Great plans! I modified the bench by adding a slanted back (which enabled me to put the slats closer together), extending and curving the front of the arms and extended the seat to the outside of the legs.
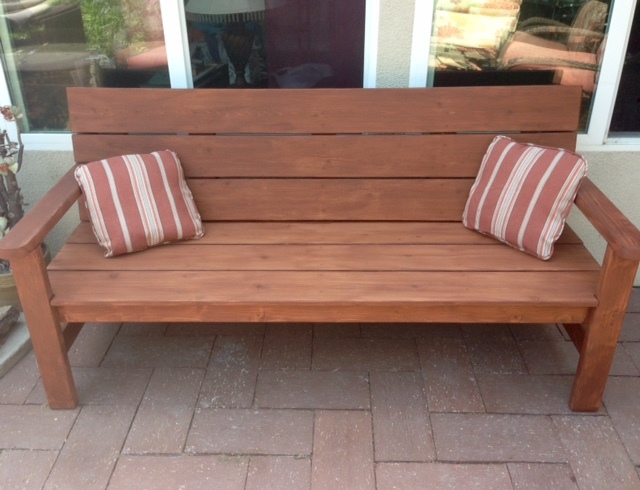
Recommended Skill Level
Intermediate
Comments
Wood Accent Table
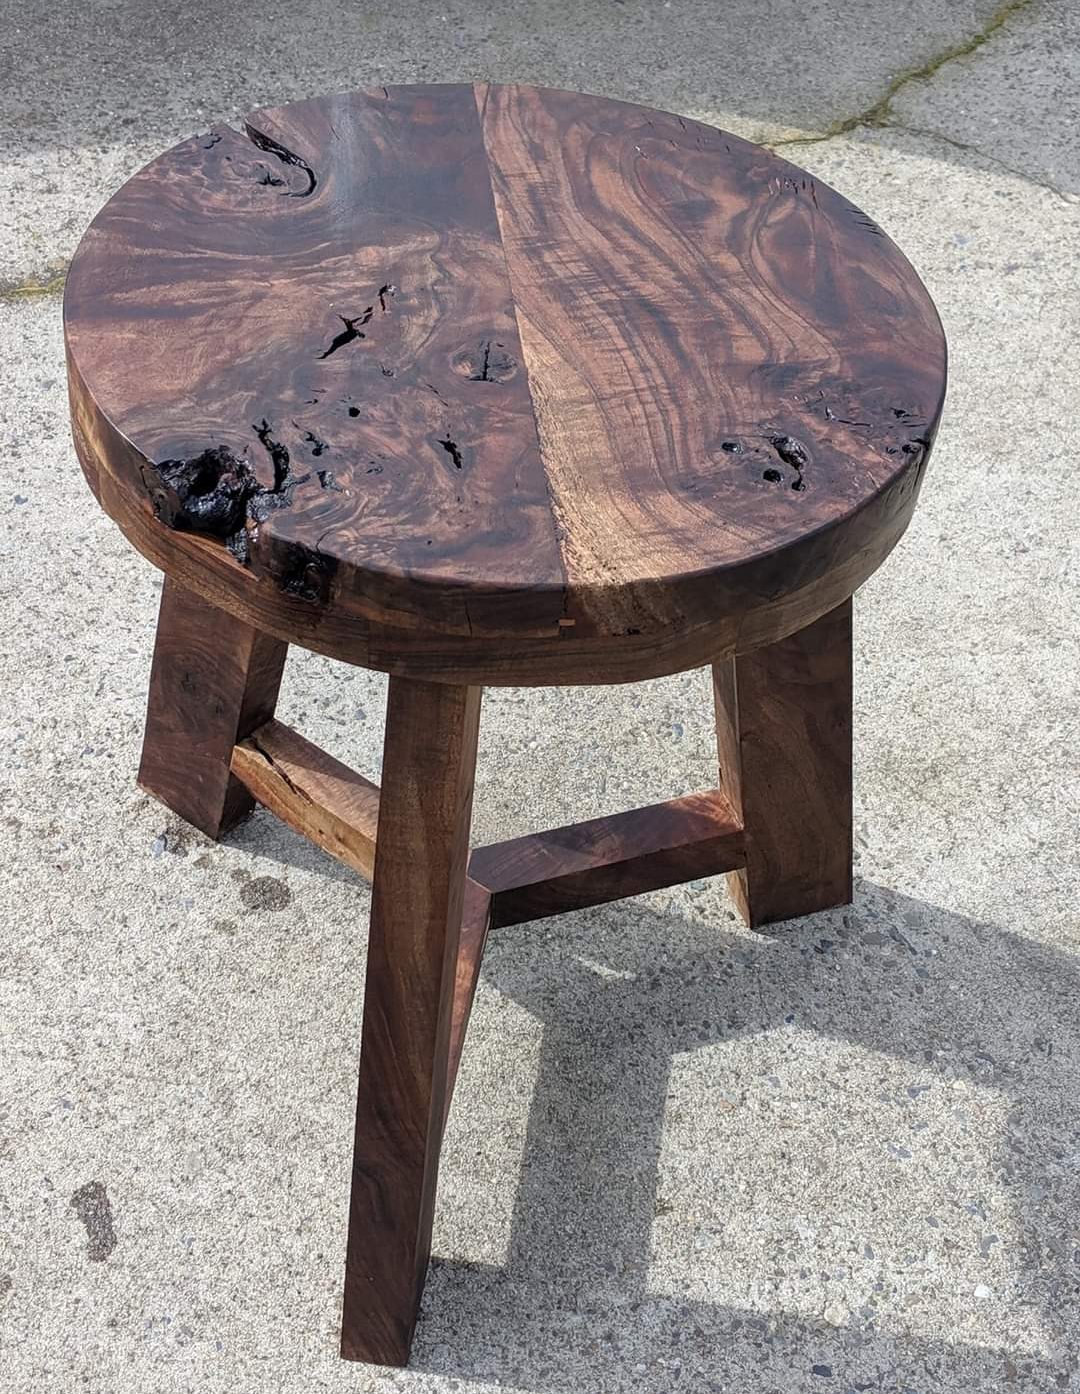
This thing is a beast ! I made the top way thicker than I should have but I love it.
Built from Plan(s)
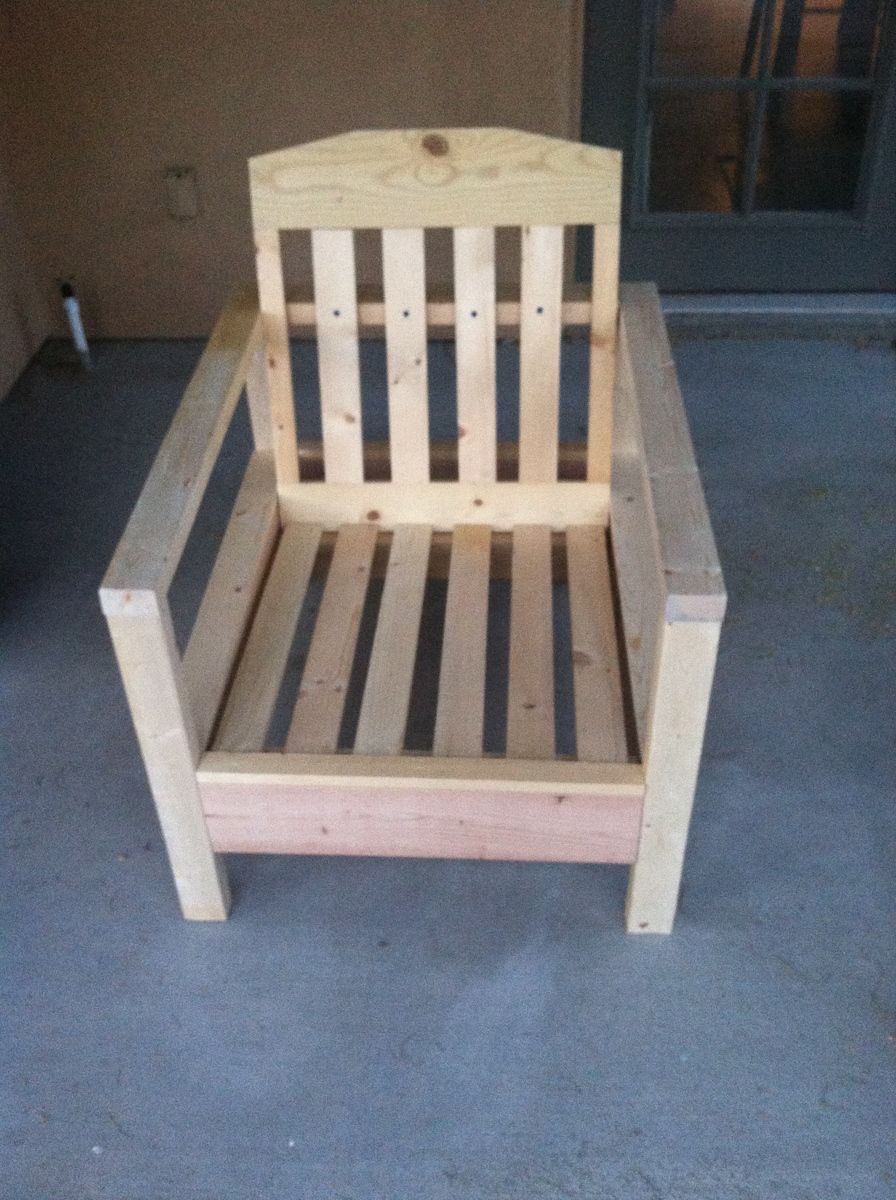
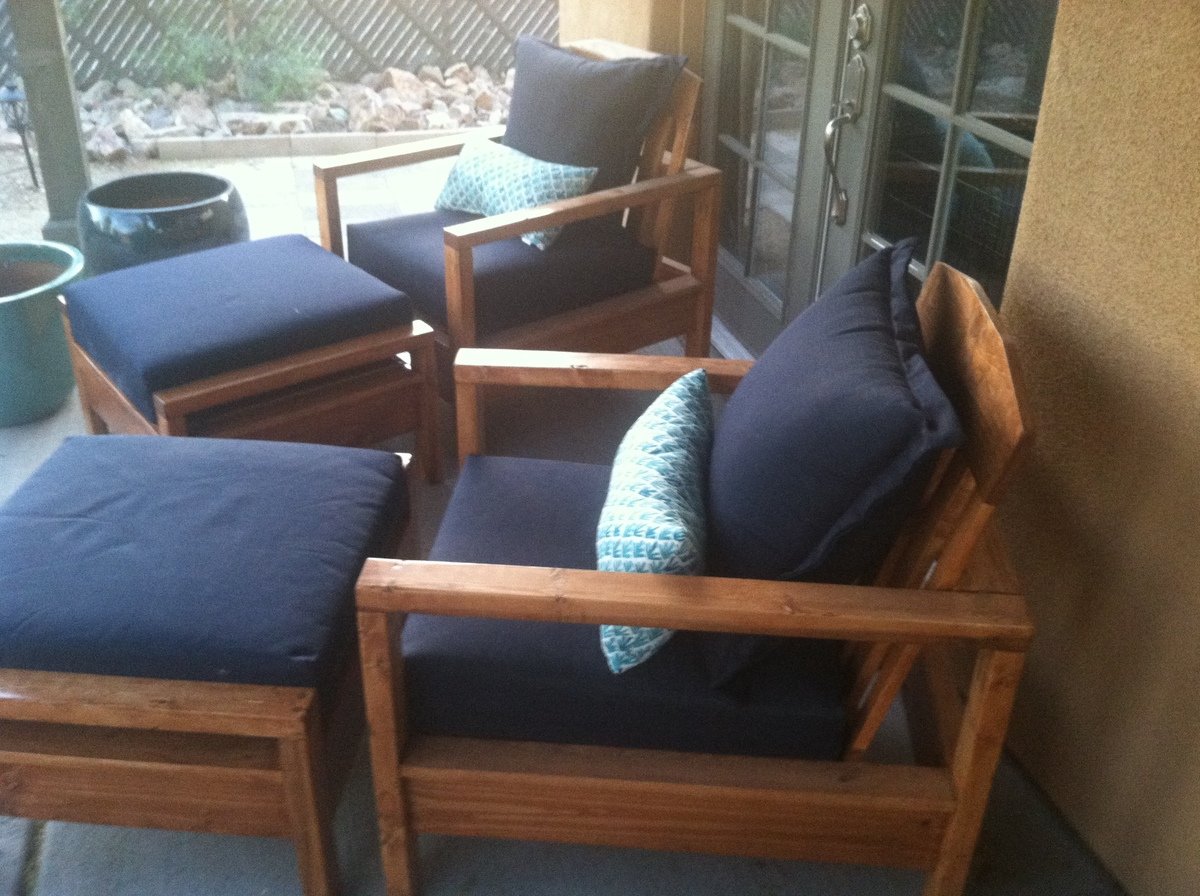
Simple White Outdoor Chair
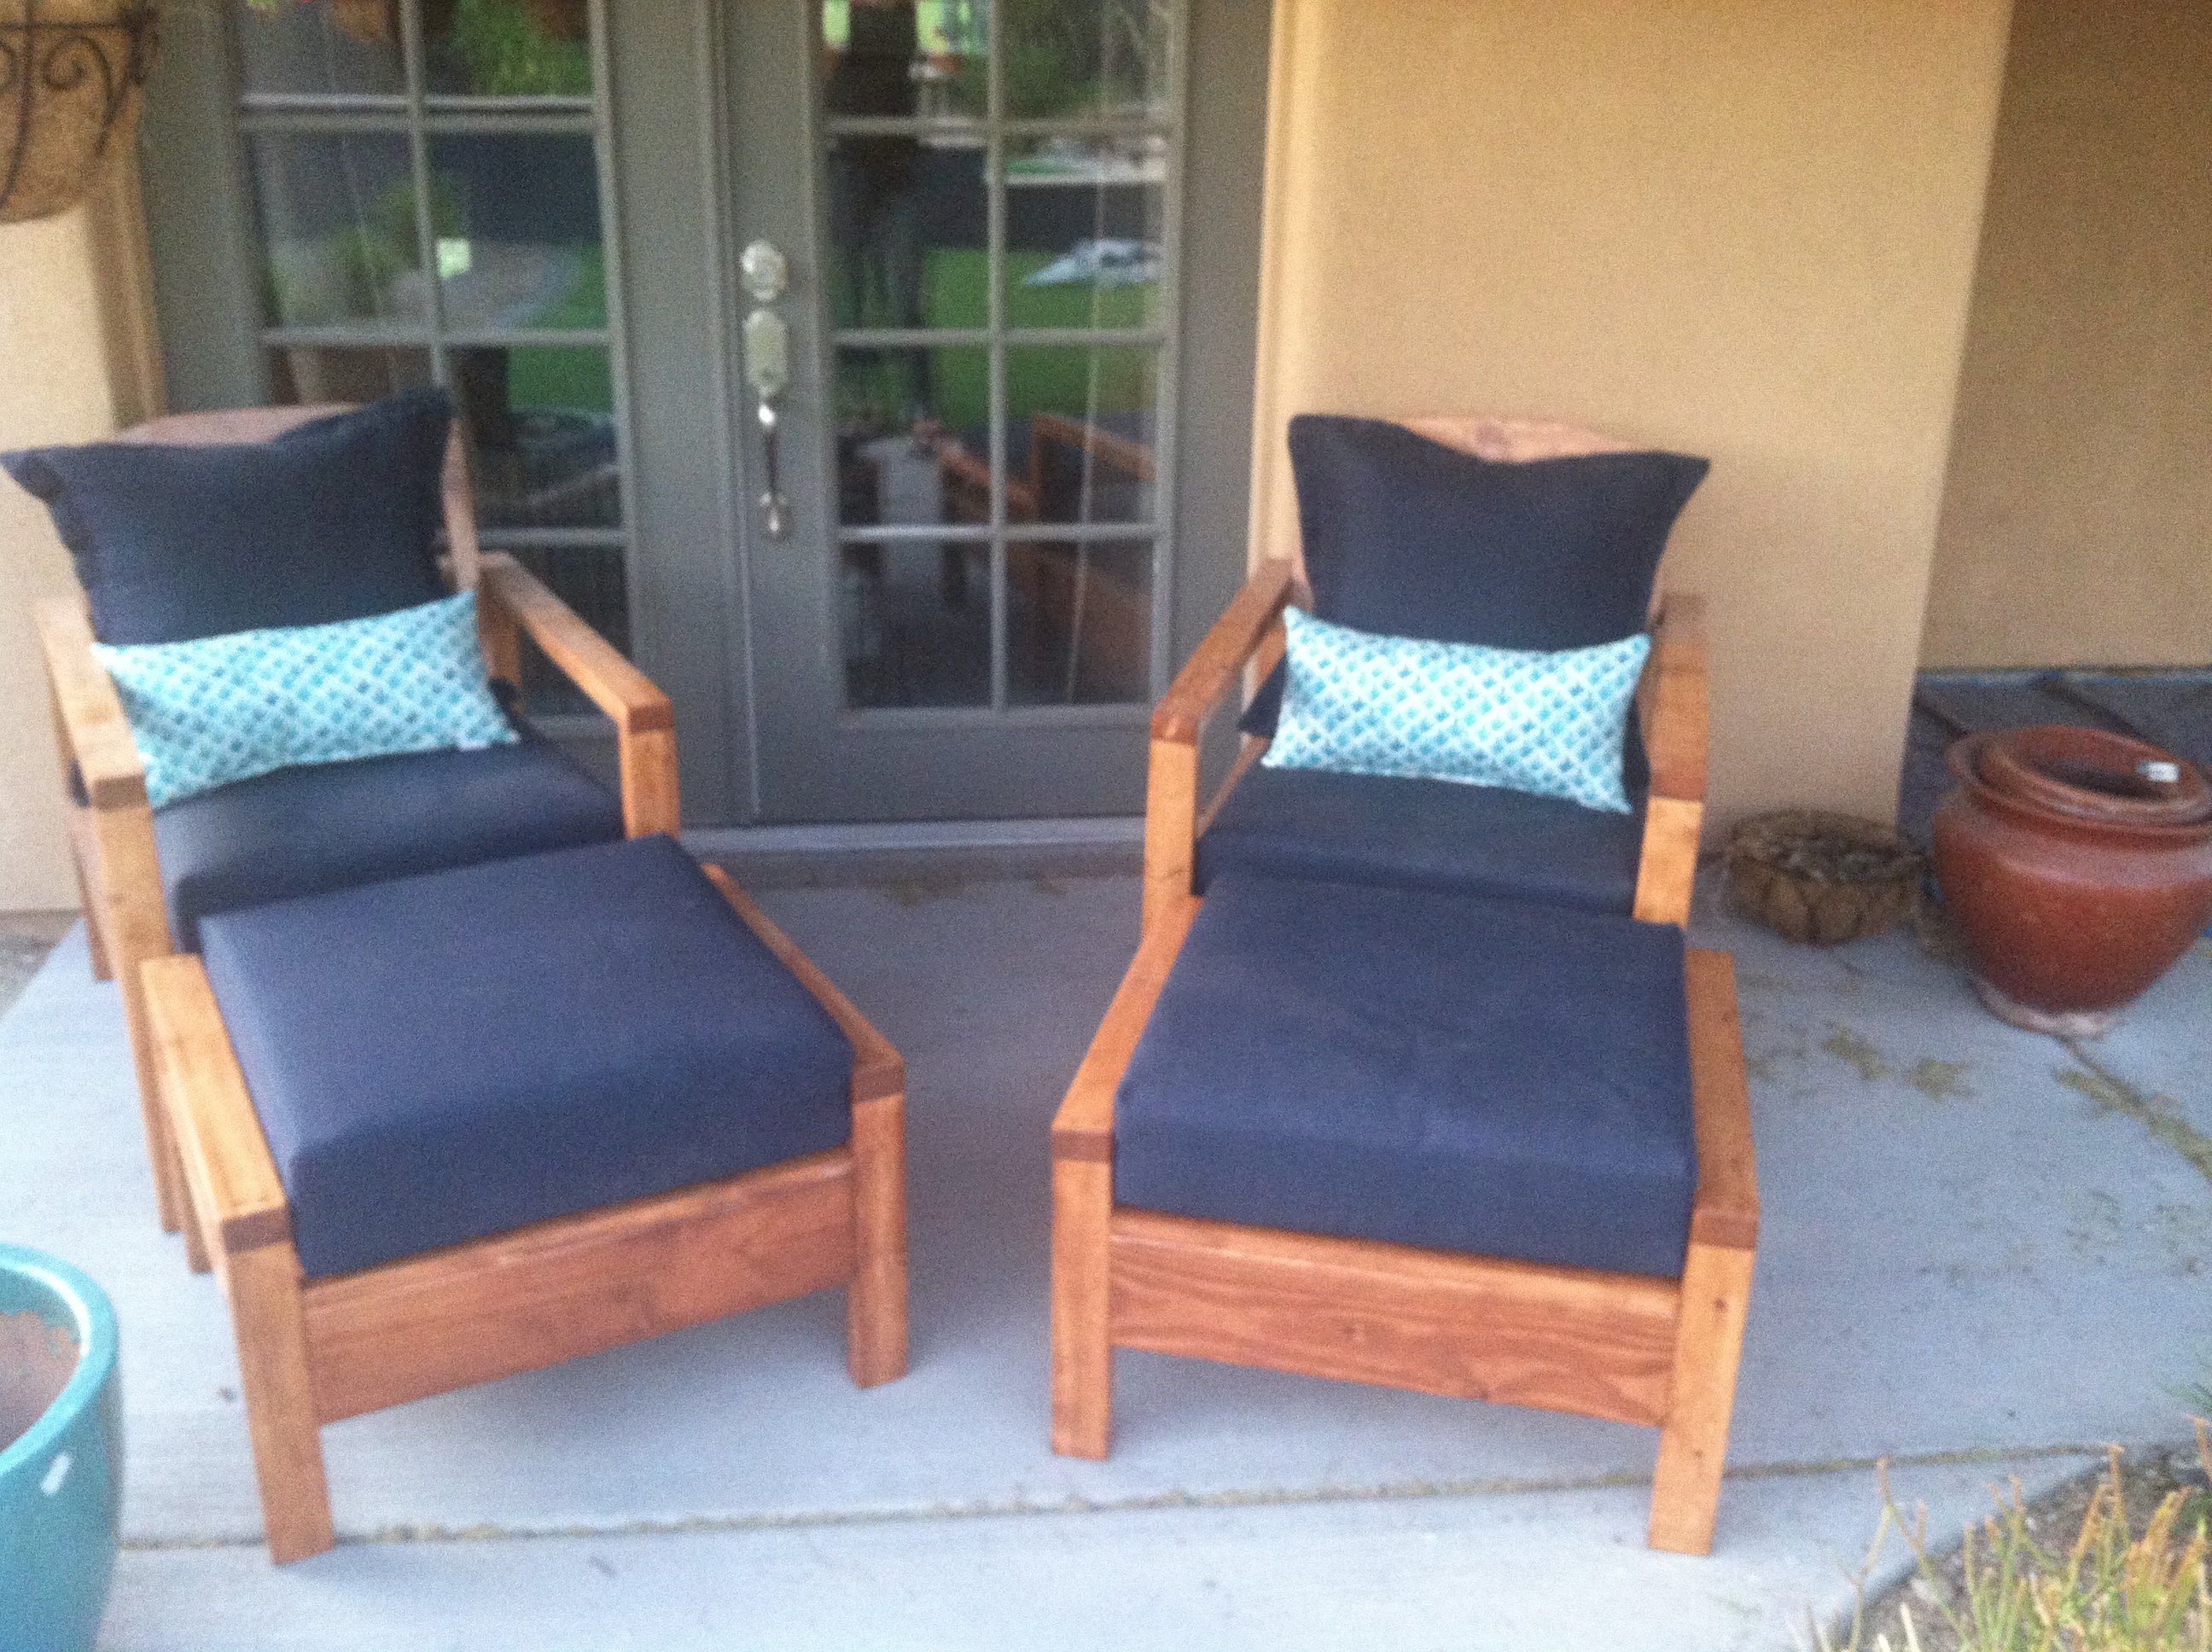
These chairs followed the simple white outdoor chair instructions. There were a few adaptations. I used 2x3s instead of 2x2s for the legs, like in the simple white outdoor loveseat instructions. I purchased my cushions from Target, and their dimensions are different than the cushions used in the instructions, so I changed some of the chair dimensions. I created the pattern for the ottomans, but it is very much based on the simple white outdoor chair instructions.
Fun project and happy with the results. Staining instead of painting probably made the project take twice as long.


Built from Plan(s)
Finish Used
Minwax Ipswich Pine - 2 coats,
Deft Exterior Polyurethane semi-gloss- 3 coats
Deft Exterior Polyurethane semi-gloss- 3 coats
Recommended Skill Level
Beginner
Comments

Thu, 05/22/2014 - 13:37
Beautiful!
Your chairs are gorgeous - I feel compelled to go copy your handiwork immediately. :)
Would you mind sharing a link to the Target cushions you used? They look great on your chairs.
Sat, 05/24/2014 - 10:56
Thanks! Threshold Outdoor
Thanks!
Threshold Outdoor Deep Seating Cushion:
http://www.target.com/p/threshold-outdoor-deep-seating-cushion/-/A-1508…
Threshold Outdoor Deep Seating Back Cushion:
http://www.target.com/p/threshold-outdoor-deep-seating-back-cushion/-/A…
Just a note on the cushions, they are beautiful and highly economical, but that also means they likely aren't as supportive as cushions 2 or 3 times their price and the covers do not have a zipper, so you can't wash them. That being said, I am happy with cushions.
Fri, 05/23/2014 - 07:44
Love the ottomans!
I built these chairs and love seat last summer and have sat on them wishing I had ottomans! You inspired me to build the ottomans. I have the same Theshold cushions from Target and they are great! Good job!
Sat, 05/24/2014 - 11:09
Ottoman notes
Thanks!
The only tricksy part about the ottomans for me was attaching the "armrests". There isn't enough room to use the pocket hole screws after attaching the side aprons. I tried screwing the "armrests" to the legs before the aprons, but that just caused problems. In the end I screwed the side aprons and legs together and then screwed the "armrests" down from the top. I used wood filler to fill in the holes above the screw heads. So it isn't quite as clean looking, but worked for me.
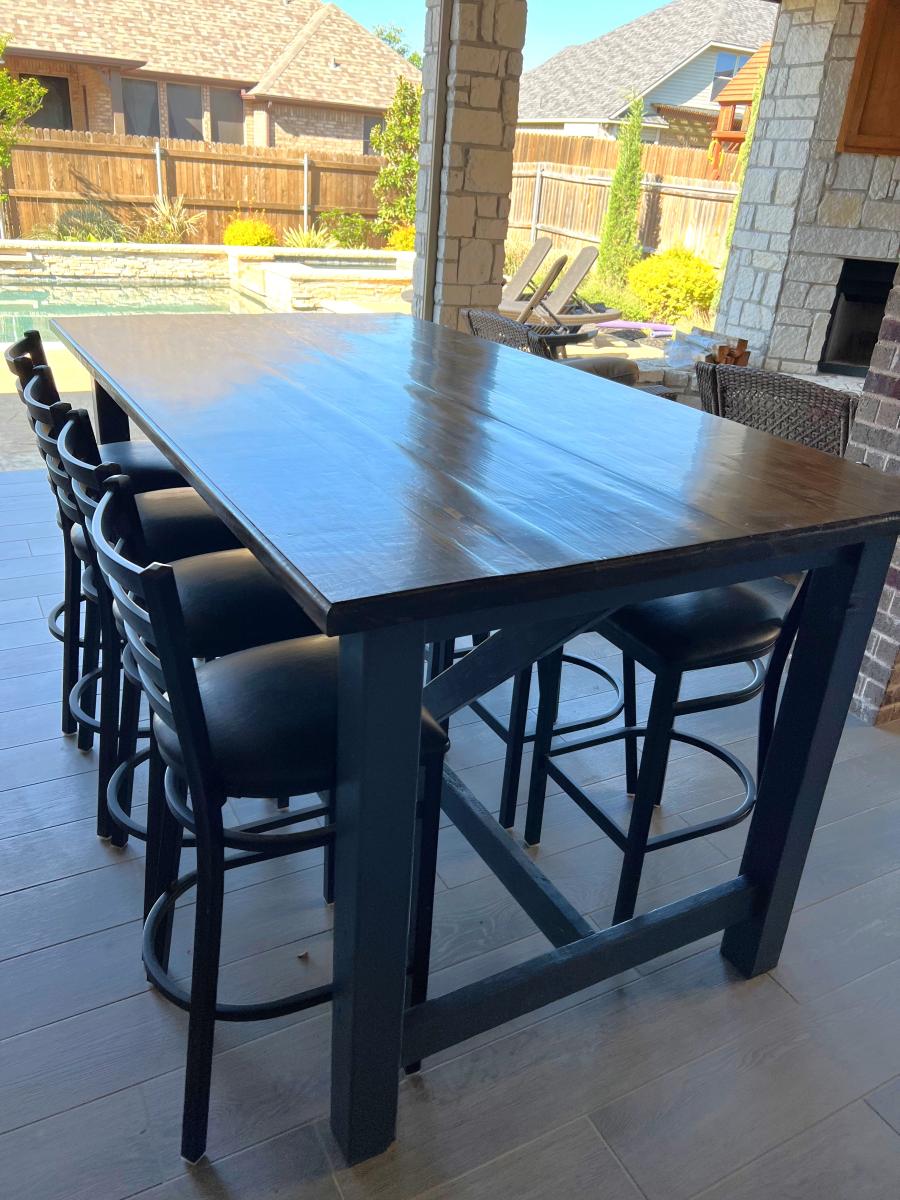
Outdoor Farmhouse Table
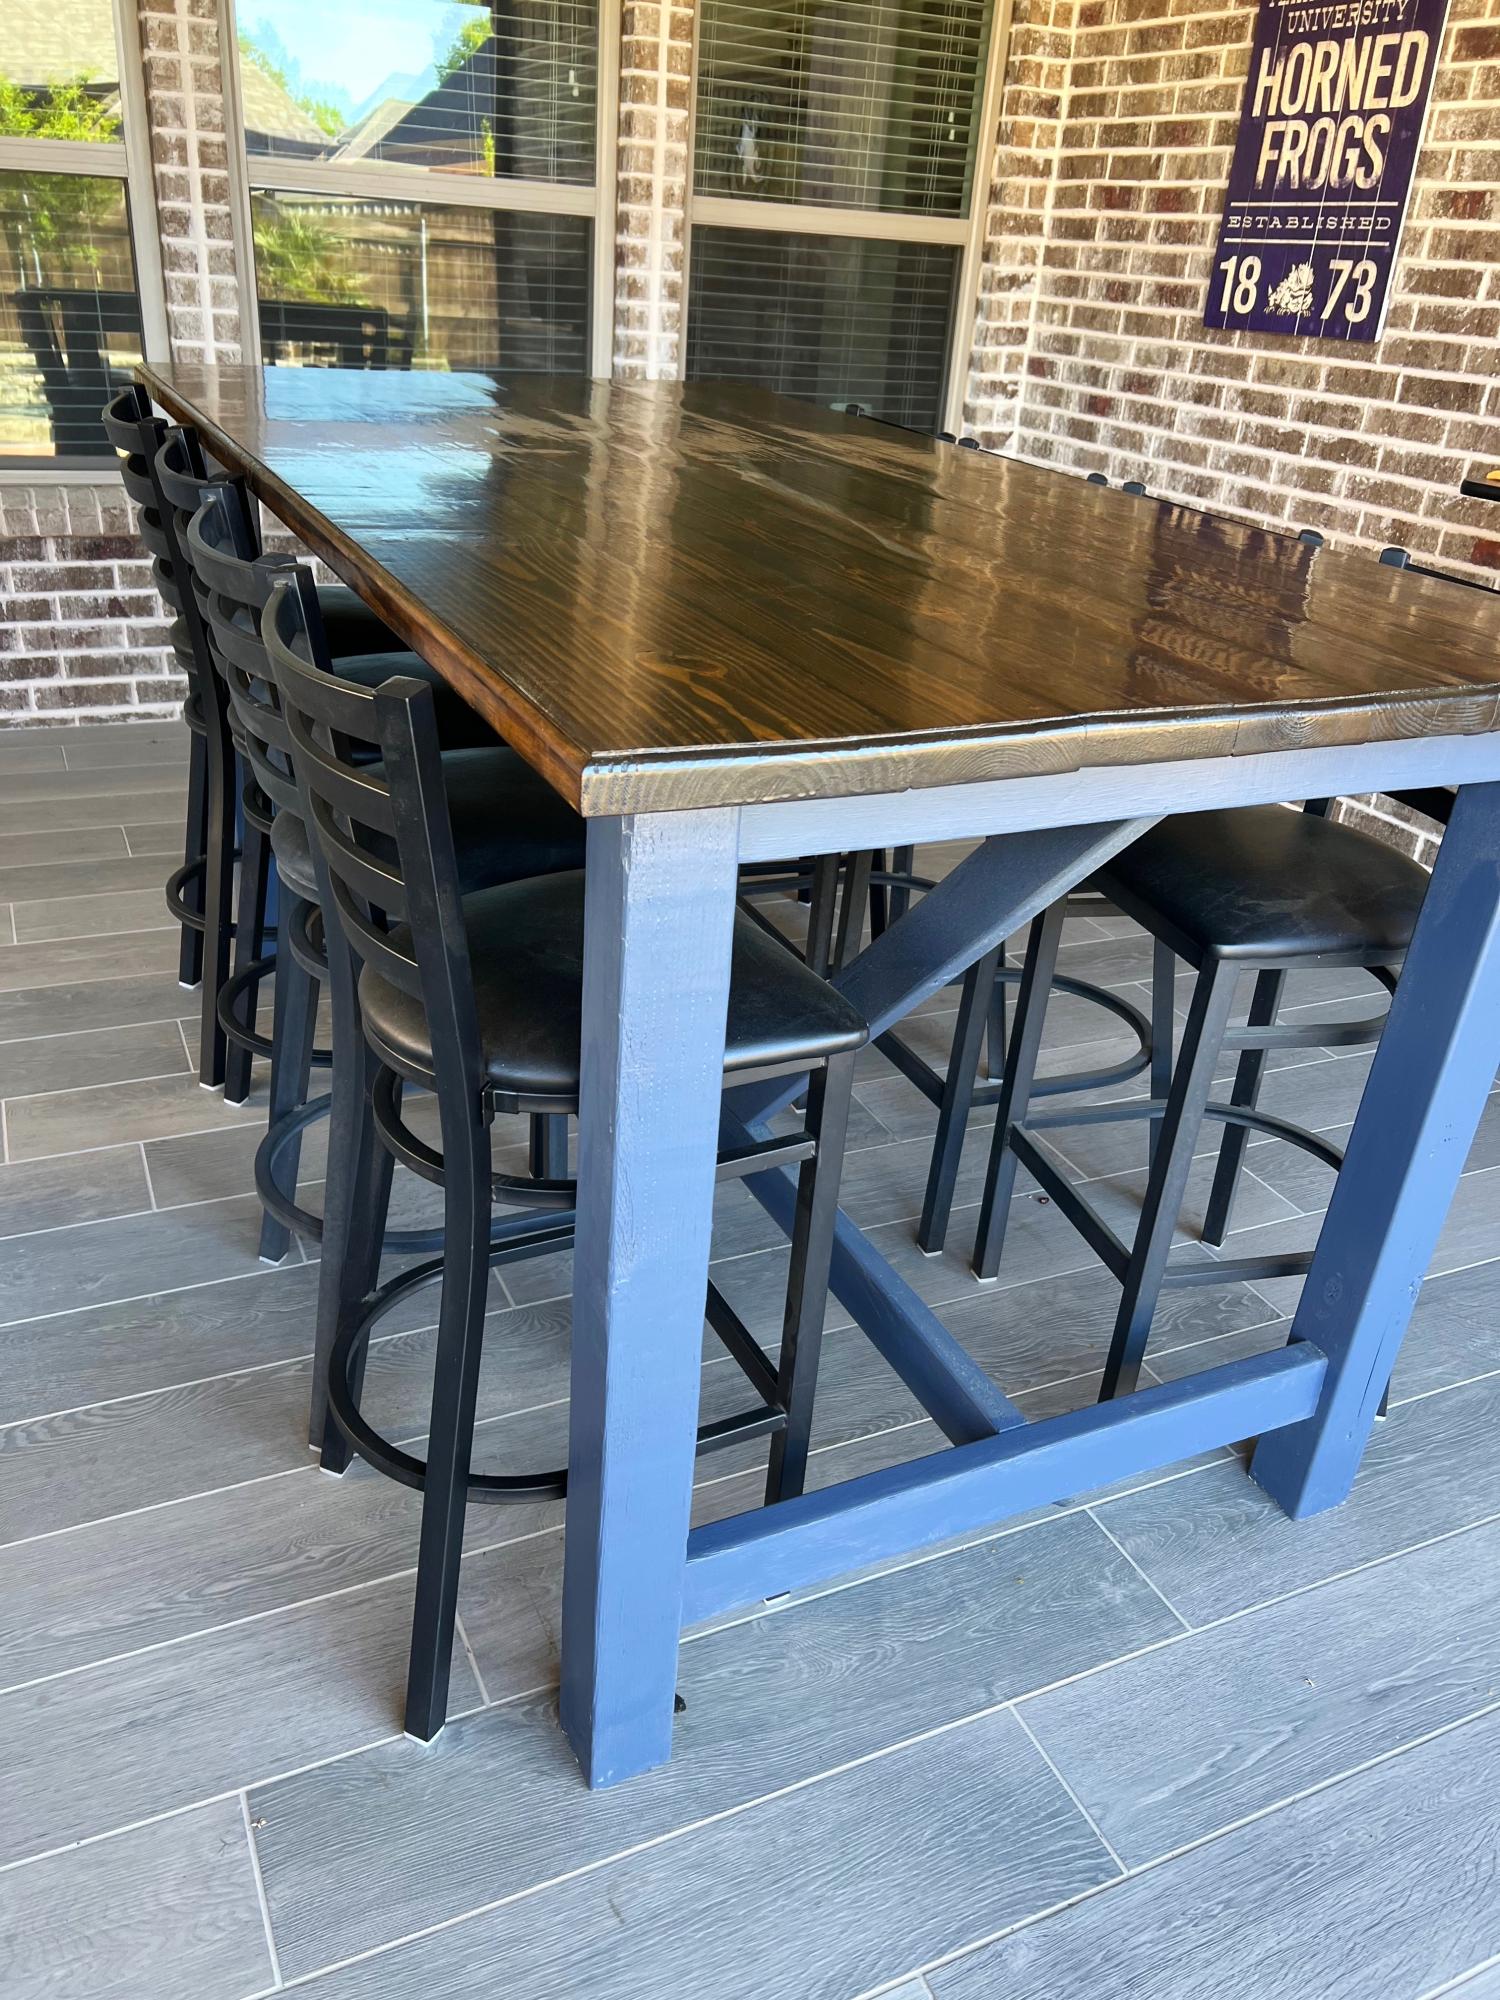
I liked the design of the barnyard dinner table and needed a table on the patio for family get togethers. I modified the table plans to seat 10 and made it bar height. I also finished the top vs planks. Came out great.
Kevin Cole
Built from Plan(s)
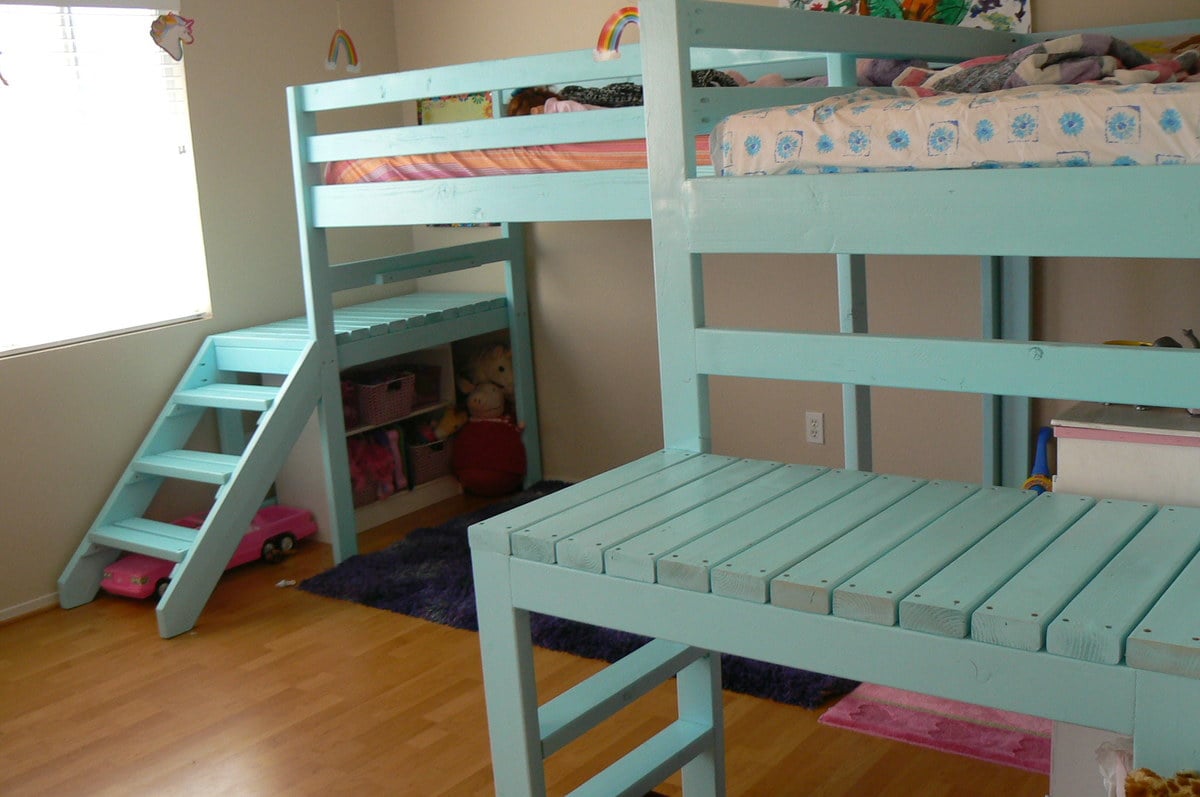
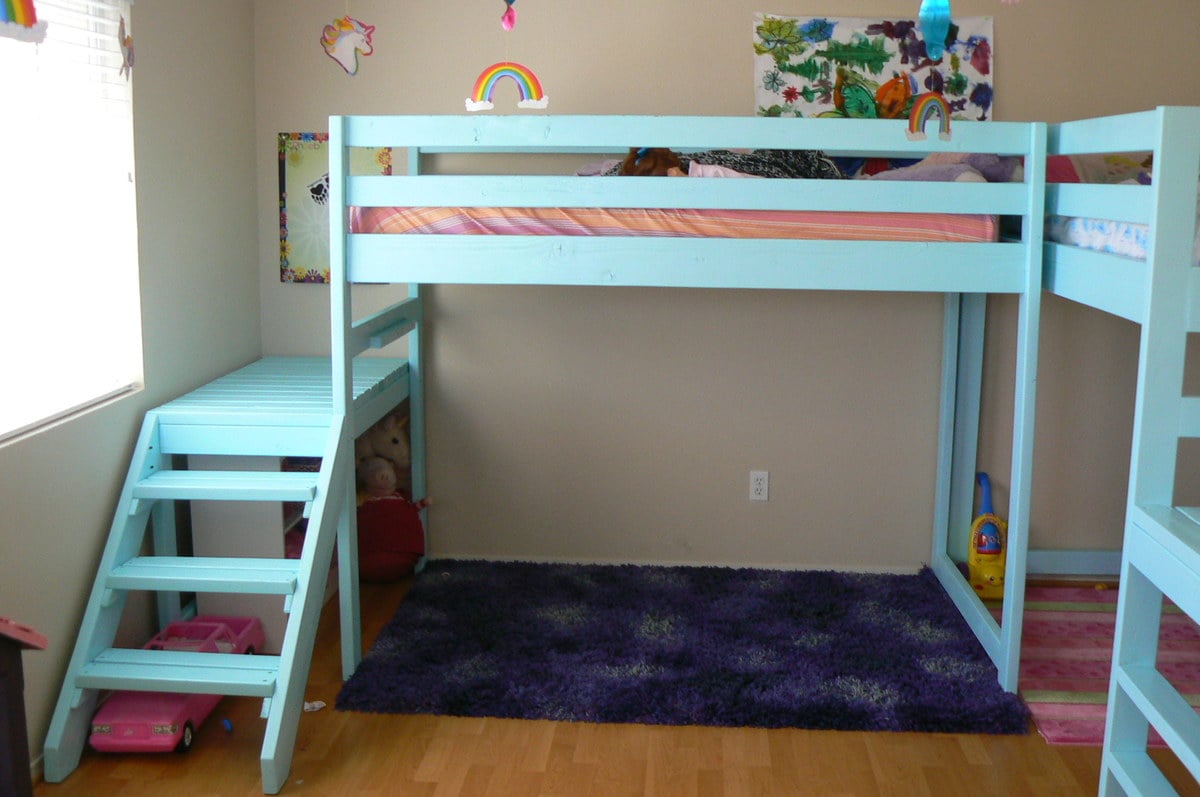
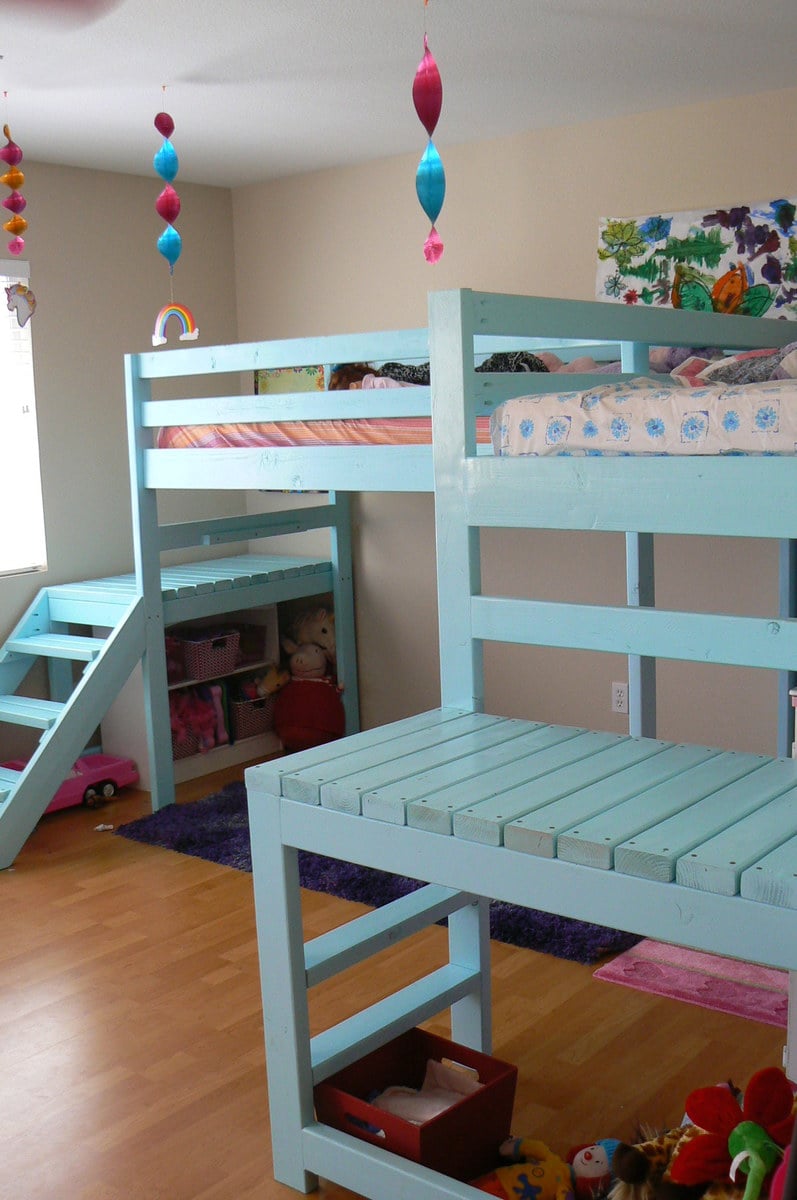
Two Camp Loft Beds

Ana read my mind! I was telling my husband that I wanted "L" shaped loft beds for our girls abouttwo weeks before she posted these plans! As soon as I saw them we went and got our lumber. So excited to have these done and the girls love them!
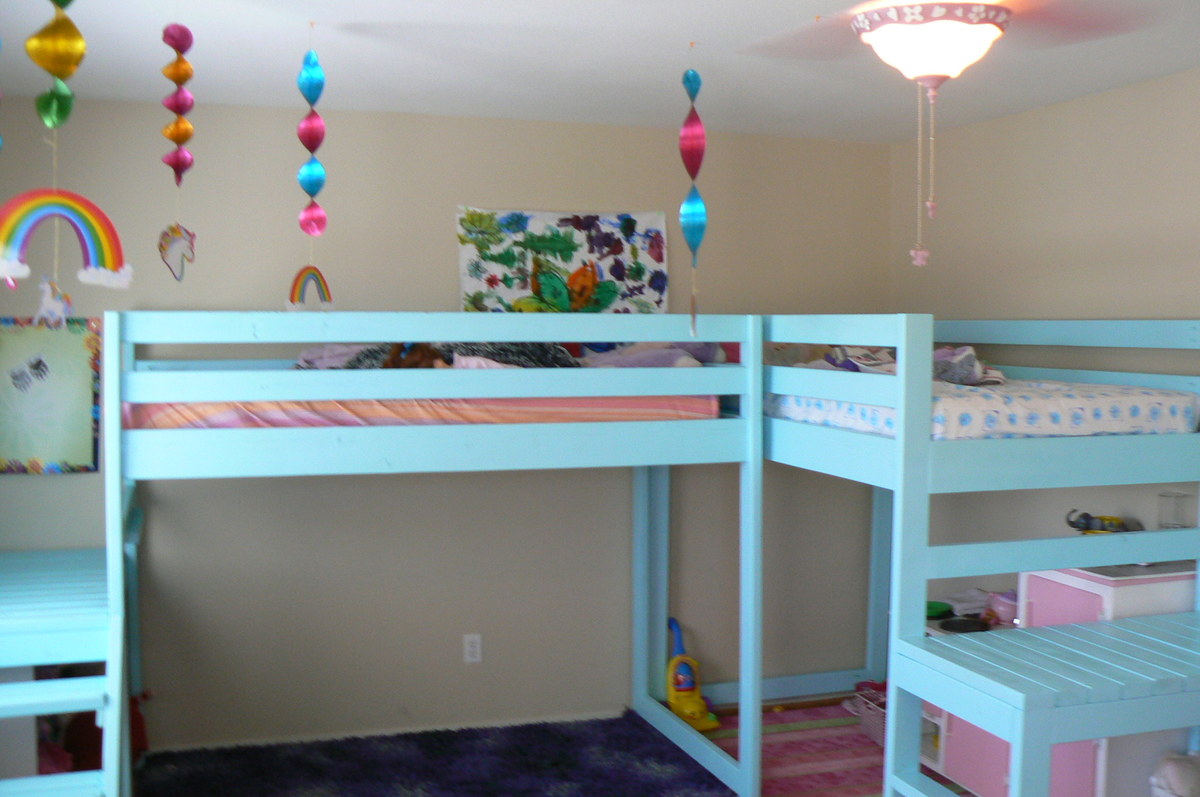
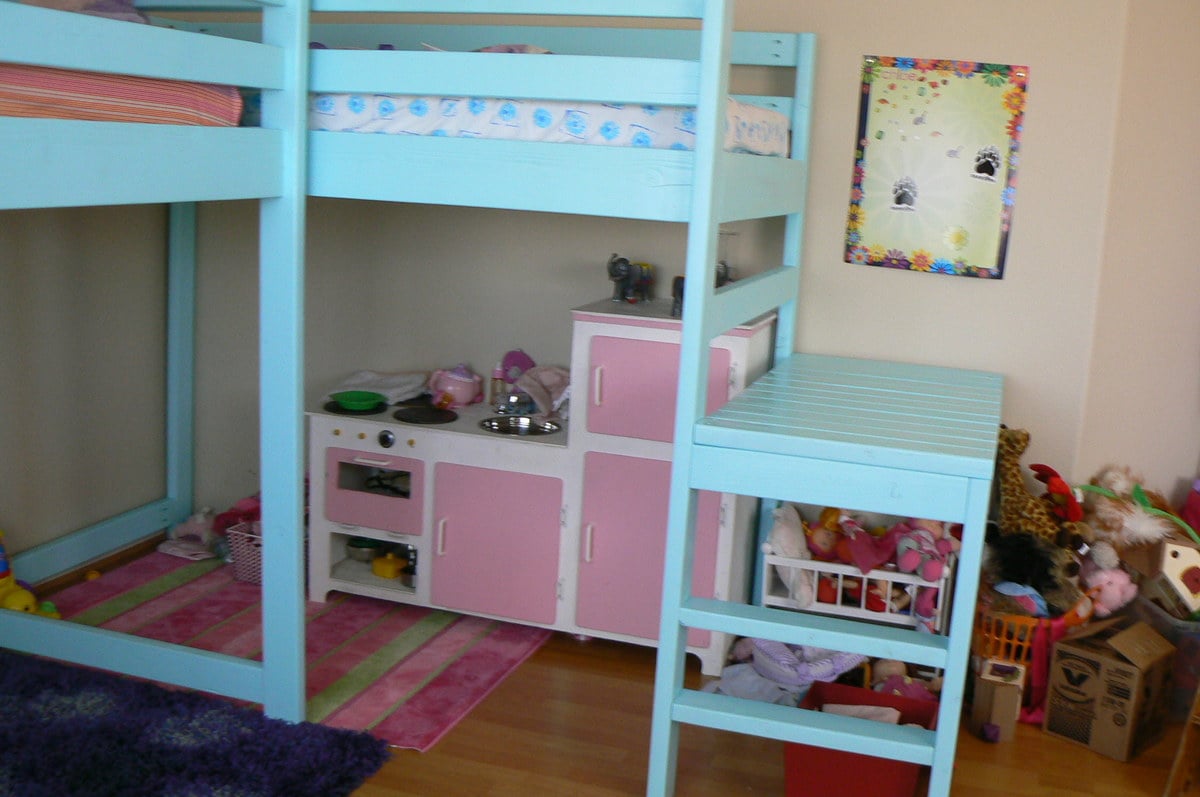
Built from Plan(s)
Estimated Cost
$75 each
Estimated Time Investment
Weekend Project (10-20 Hours)
Finish Used
Bher premium paint
Recommended Skill Level
Beginner
Comments

Thu, 09/13/2012 - 13:05
Question about stairs
I saw another post where they did horizontal 2x4s instead of stairs. I see that you did one of each. Could you tell me what your thoughts are on how the kids like them....if the 2x4 steps are easy to get up and down on....
We are adopting and we're not sure what age children we will get....so, I want to make sure they are easy to navigate. Any thoughts???
Thank you!
Tue, 09/03/2013 - 09:30
answer about stairs
we id the stairs for our 3 year old and the ladder for our 5 year old. She has no problem getting up and downthem but our 3 year old doesn't like to come down the ladder ones. The stairs are really nice and make the bed easily accesable even for me. =)
Wed, 02/04/2015 - 18:48
Overall Dimensions?
What are the overall dimensions with the two landing areas and stairs? I really like this idea, but the bedroom is not super big. Thanks!
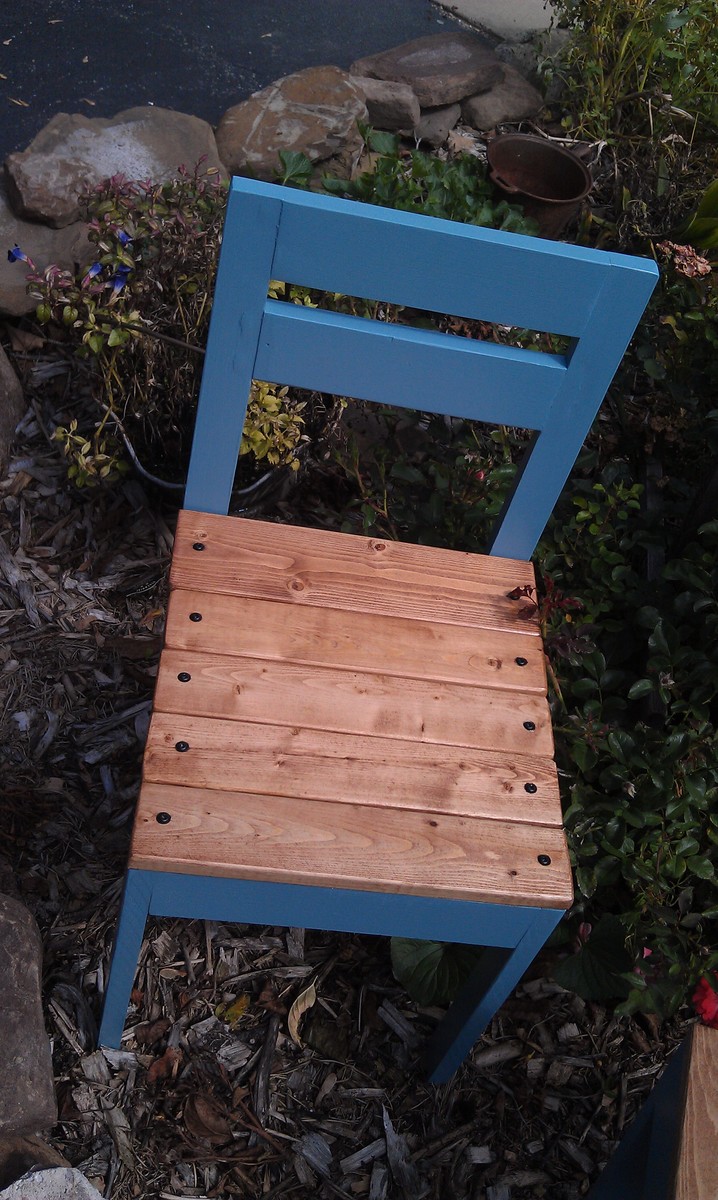
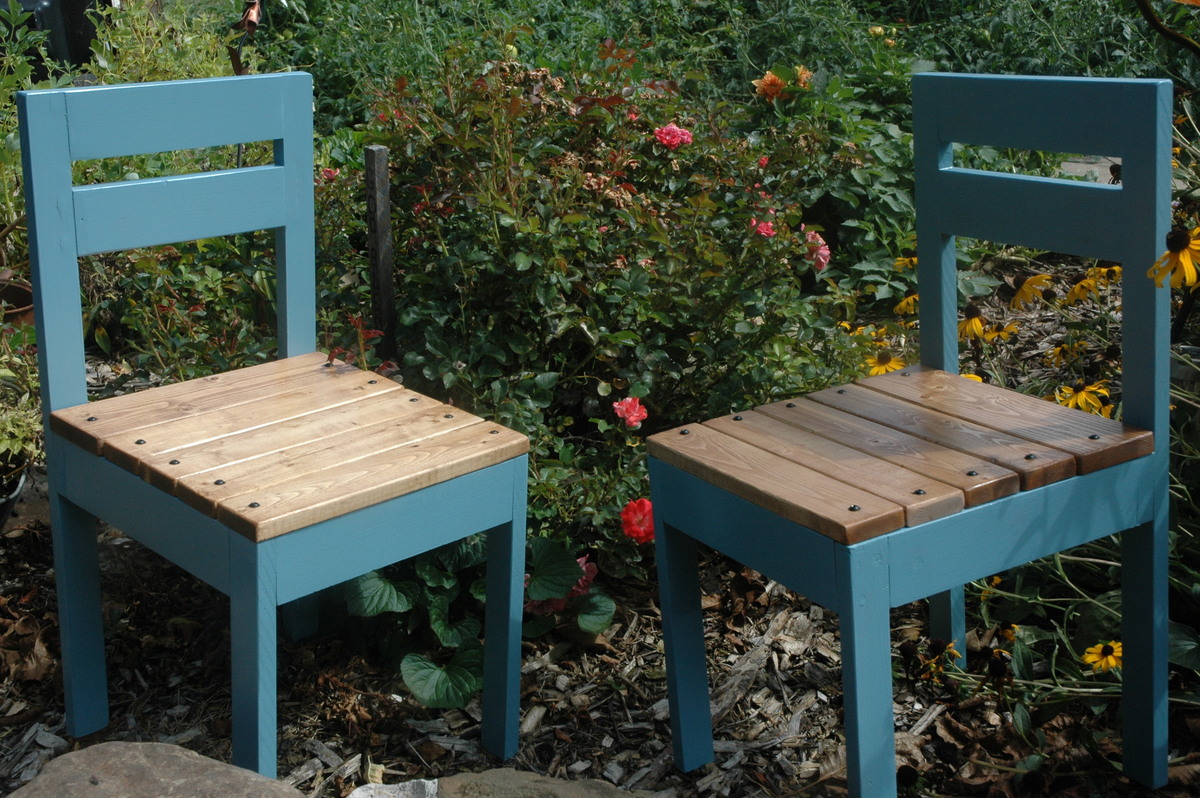
Kids' Trestle Play Table and Four Dollar Chairs
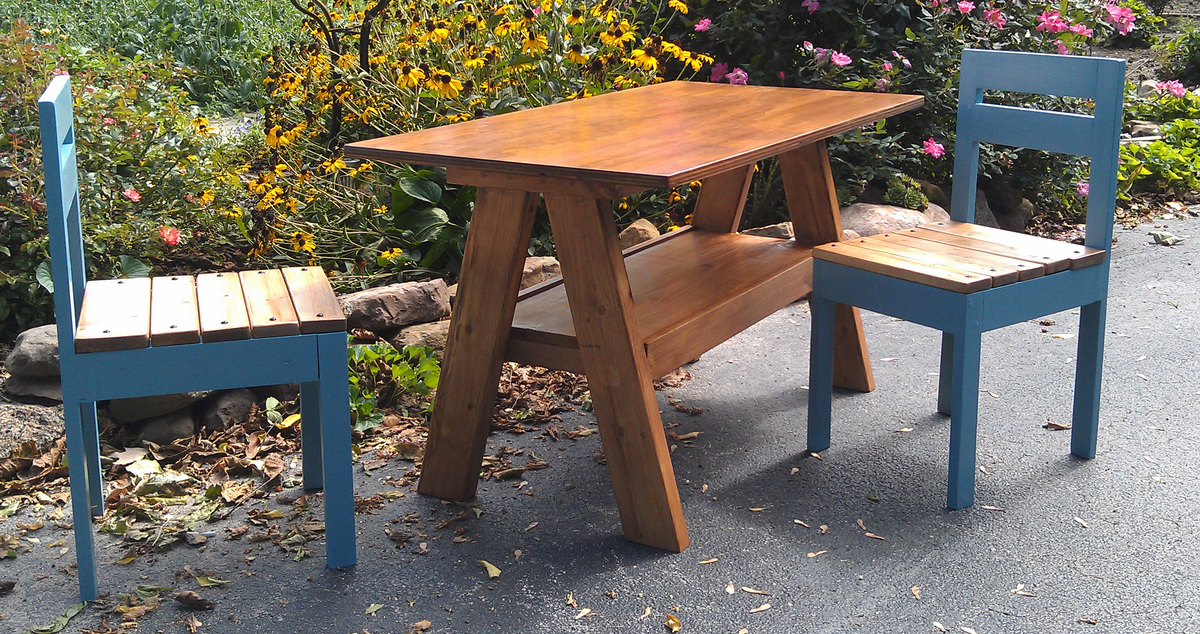
I wanted an inexpensive but wonderful gift for a special co-worker who is having her first baby after many years of trying and painful medical treatments. I loved this PB inspired trestle table and thought the plans looked like something I could handle. Paired with the four-dollar chairs, I felt this would be a winner. I had a few burps along the way with the table project....there's a paint stick glued to the bottom of one of the legs as a shim....have no idea how that leg ended up shorter. There's also a countersink drill bit inside the table somewhere, broke right off in there! My biggest challenge with the table was the stain. I have never used the all-in-one stain before and have to say, it is a tough product to work with. It is hard to do with a brush. I brushed on my first coat and wasn't happy at all. Sanding away mistakes is an ordeal because the poly in the product hardens everything up so quickly. I really had trouble here and am still not happy with how the stain turned out....I wish I had applied the first coat with a cloth, as I did all the other coats because there is so much more control than with a brush. If I use this product again (which I probably will), I would only apply with a cloth. The chairs were a breeze, however, you may notice that my back legs are on the wrong spot....that was a mistake I made with the first chair. Since I used glue before screwing, I couldn't undo it. So I just made the second chair the same way....no big deal, but they are NOT stackable this way. I tried to use firring strips, but they were splitting like crazy, so I just used them for the seat slats and used regualar boards for the rest. The other thing I did differently was that I didn't countersink my screws on the seat boards. I painted my pocket hole screws black and let them show. This way, if my friend ever wants to change the color of the chairs, she can easily unscrew them, paint the chair and screw them back on. This was a fun and "just challenging enough" project. The table was my second build and the chairs are my third. Each project has taught me a ton!

Built from Plan(s)
Estimated Cost
$50.00
Estimated Time Investment
Weekend Project (10-20 Hours)
Finish Used
Min-Wax All in One Stain with Poly in Antique Walnut for table and chair seats - 3 coats for table top and two coats on everything else.
Benjamin Moore's Niagara Falls in eggshell finish for chair body.
Benjamin Moore's Niagara Falls in eggshell finish for chair body.
Recommended Skill Level
Beginner
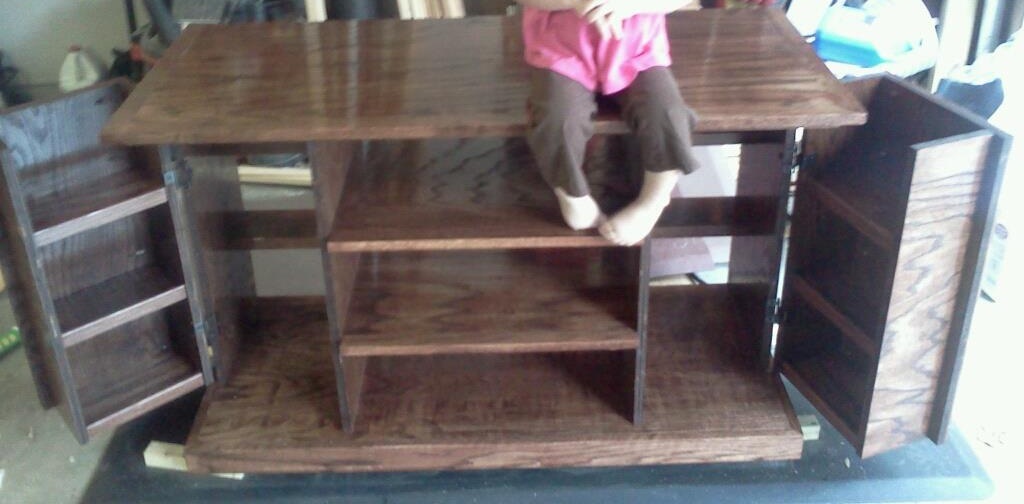
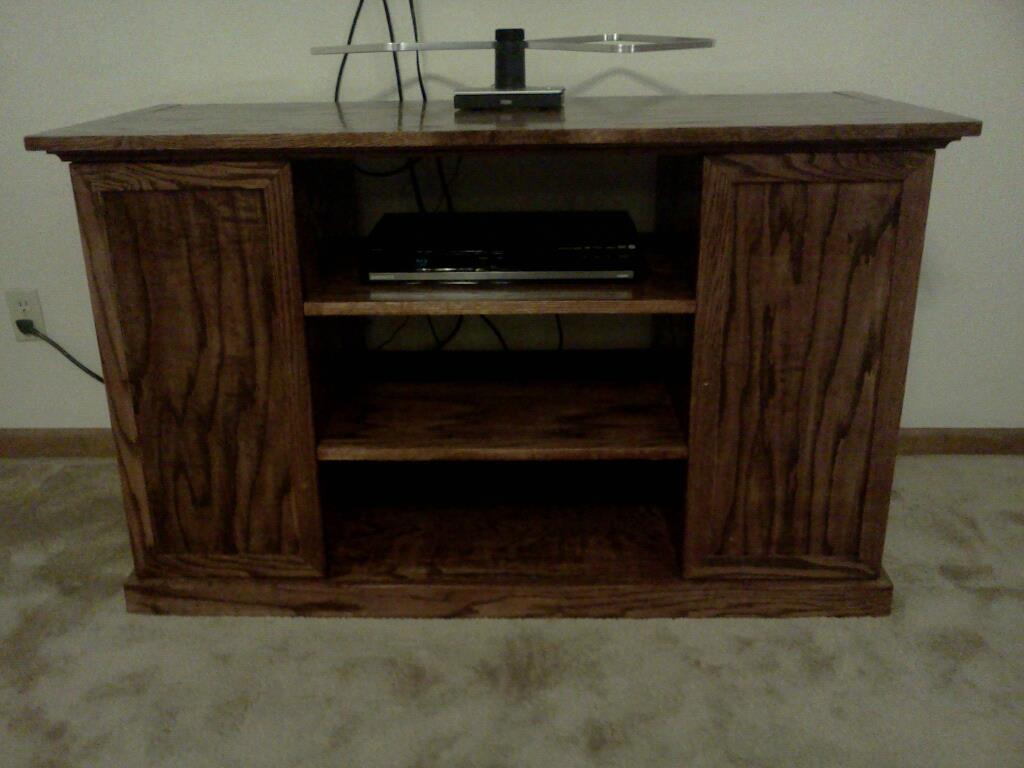
Media Storage Entertainment Center

Entertainment center with Bluray/DVD storage in the doors. Based on the Cynthia media stand by Pottery Barn. I drew it up to my personal preferences using Draftsight (free 2d cad software). Used 3/4" oak for everything except for a few trim boards. It came out great, we are very proud to call it our own.
Estimated Cost
$250
Estimated Time Investment
Weekend Project (10-20 Hours)
Finish Used
Minwax dark mahogany
Minwax clear gloss polyurethane (2 coats)
-assembled
-sanded
-wiped with mineral spirit dipped rag
-stained with a brush
-1st coat of urethane using a foam brush
-light sanding with 220 grit
-wiped with mineral spirit dipped rag
-2nd coat of urethane using a foam brush.
It has an almost mirror finish now.
Recommended Skill Level
Intermediate
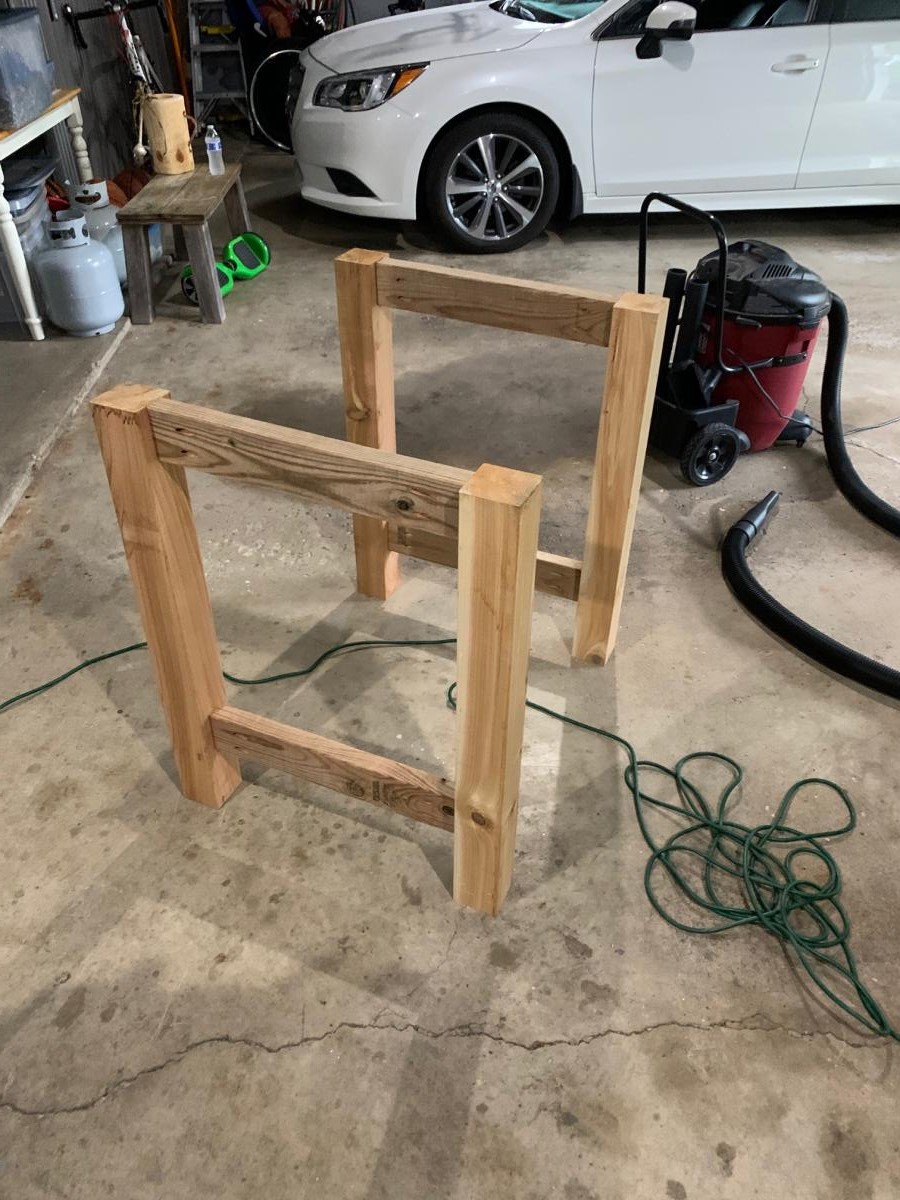
Outdoor bar table
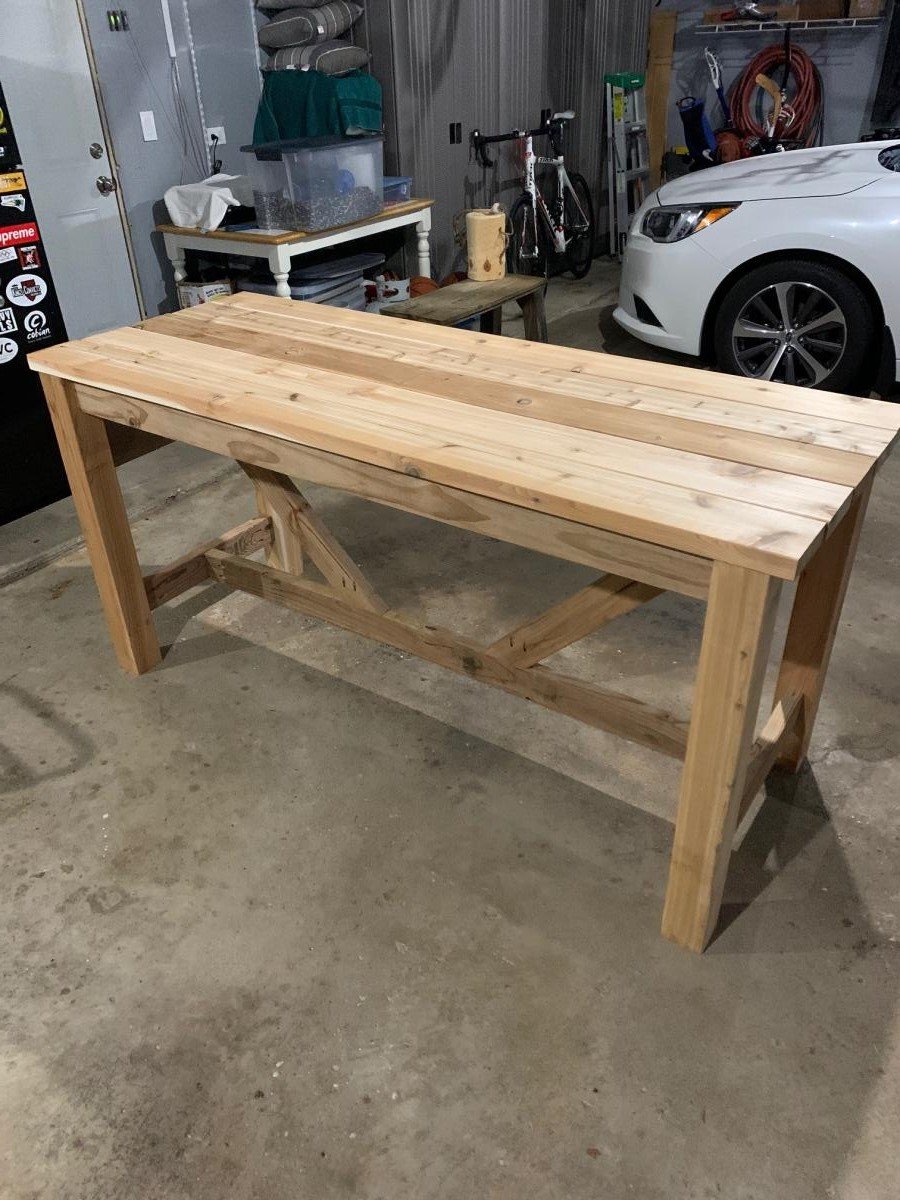
Not quite finished but love the table already. Trying to decide how to stain/paint it. The Kreg jig was a must for this project. It was my first of hopefully many! I used cedar for the 4x4s and 2x6 top pieces. The 2x4s are treated lumber (only because there were no more cedar ones....apparently lumber is getting hard to get lately!!!). Anyway....thanks for the great plans and motivation for this project.
Built from Plan(s)
Estimated Cost
Lumber was about $150 bucks (I bought mitre saw and kreg jig, too)
Estimated Time Investment
Afternoon Project (3-6 Hours)
Finish Used
Will probably use semi transparent stain
Recommended Skill Level
Beginner
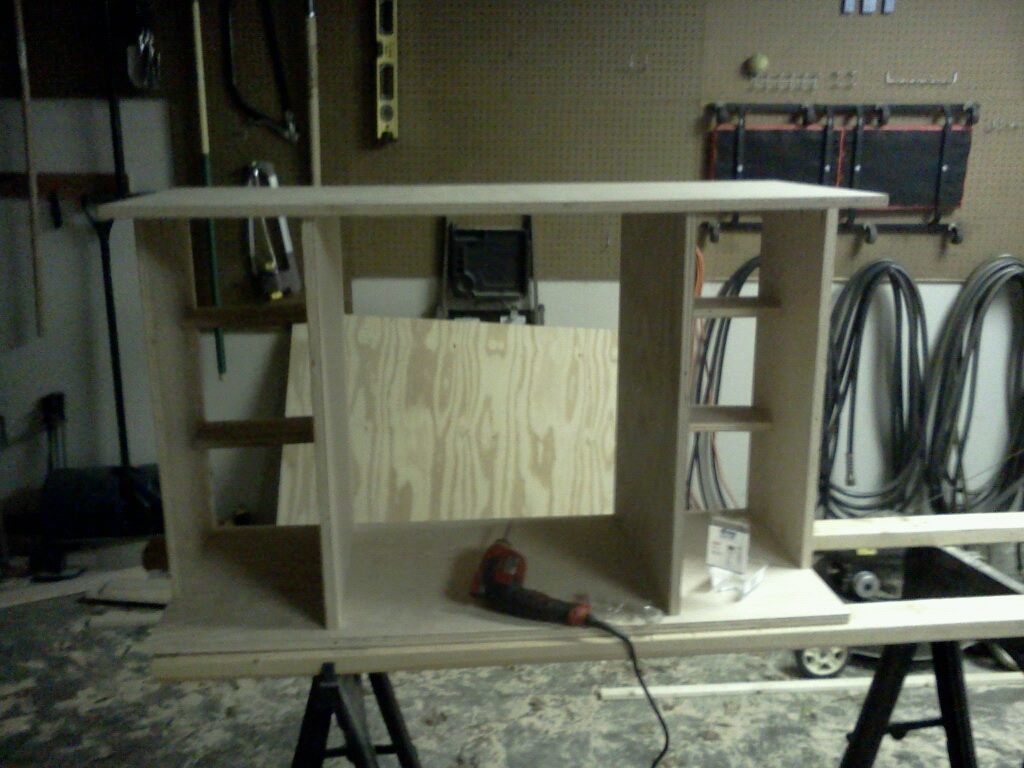
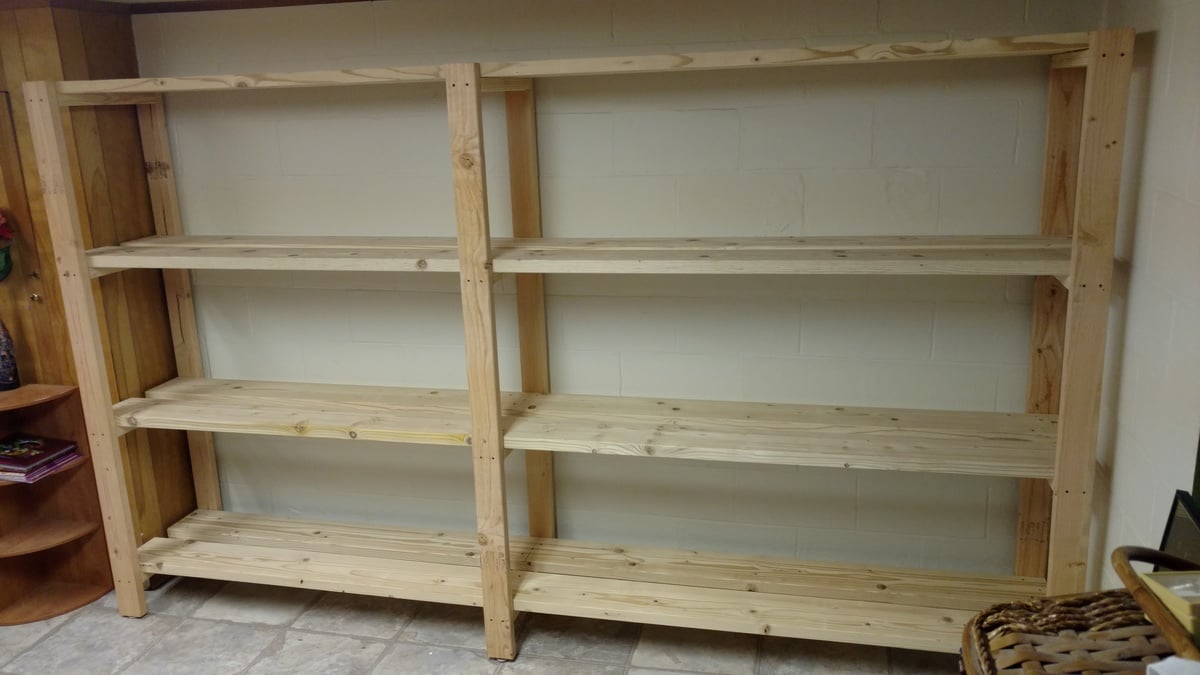
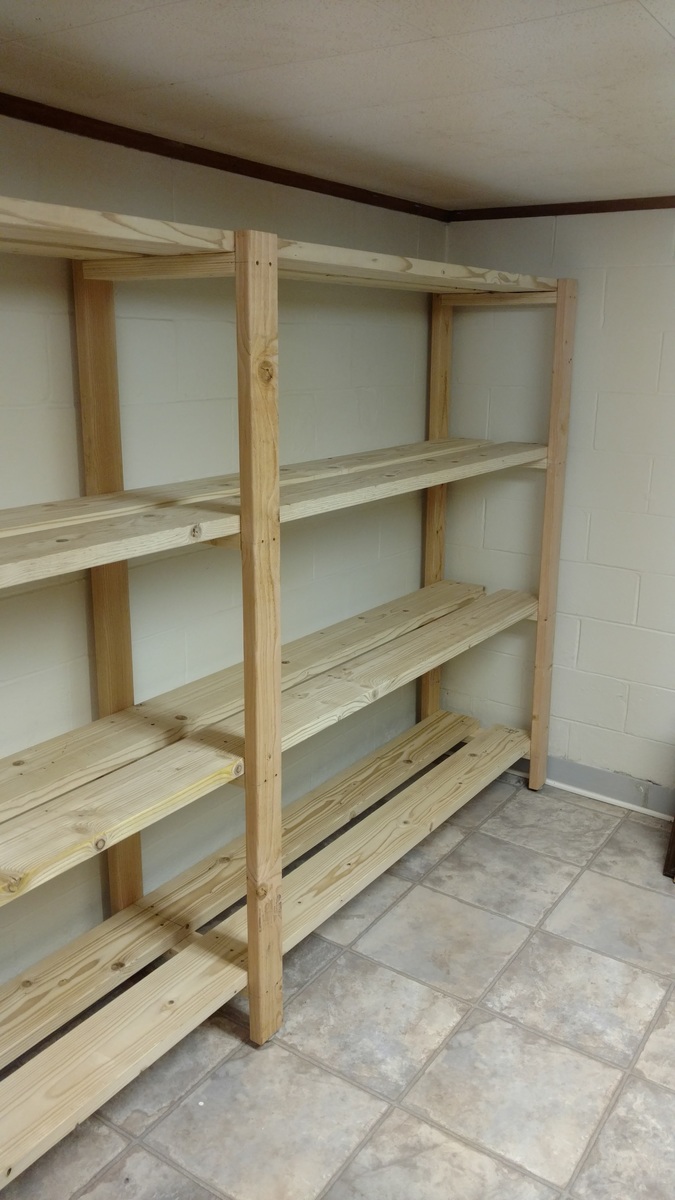
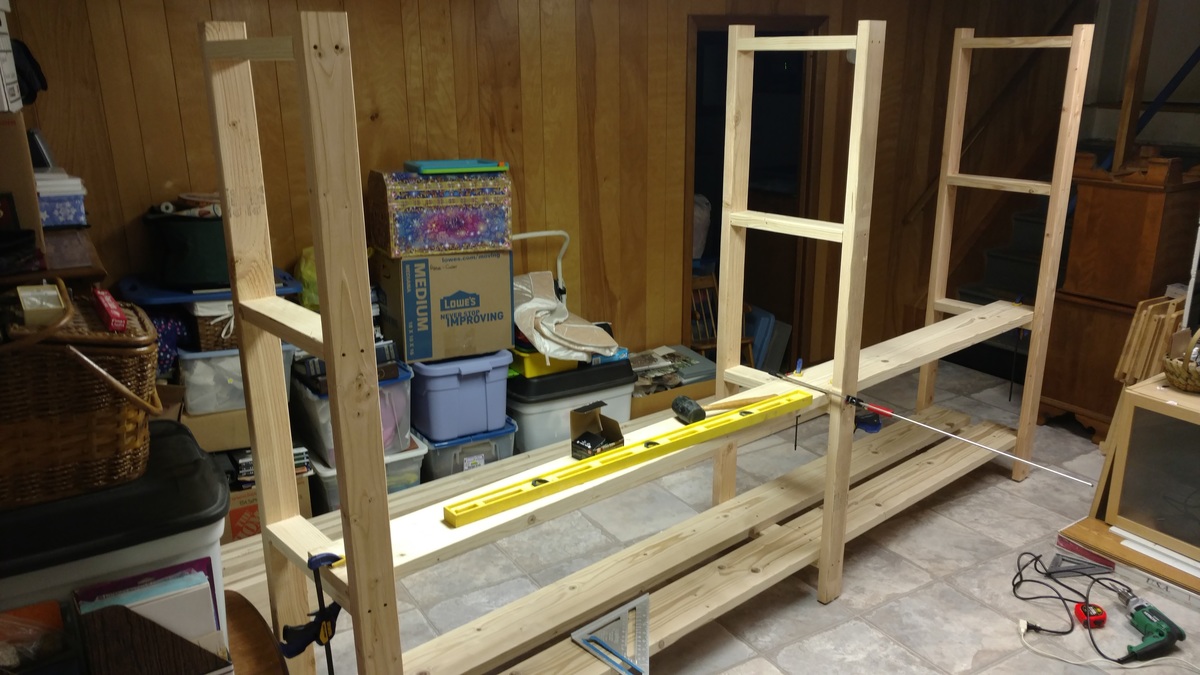
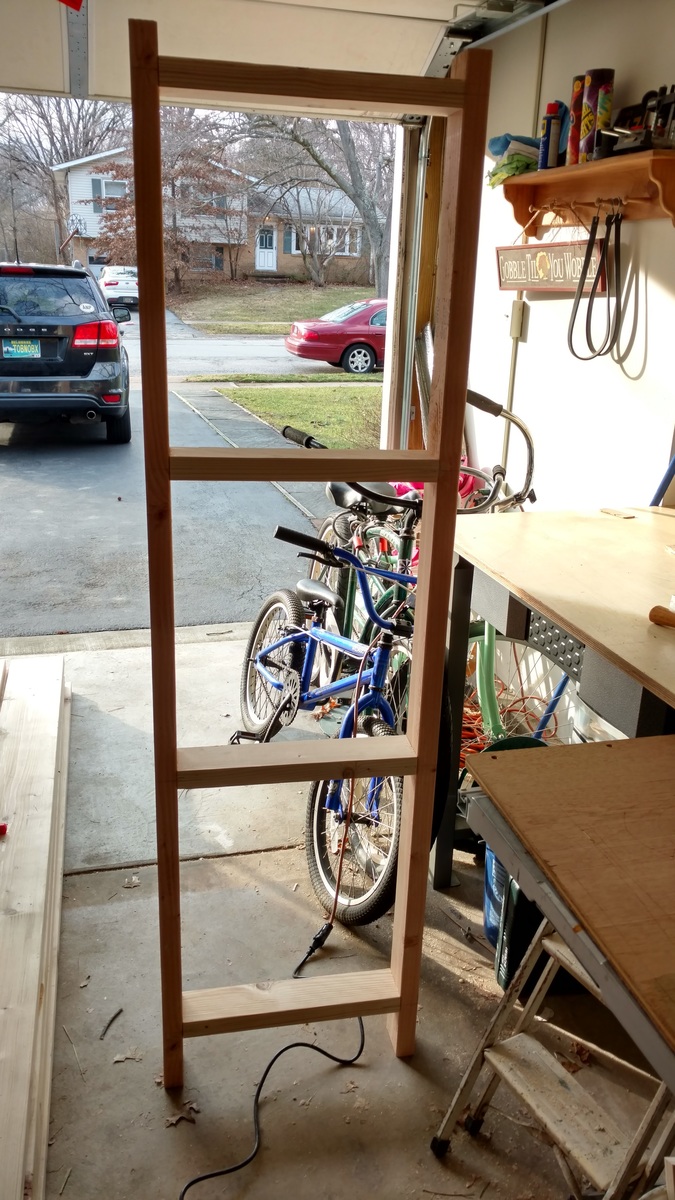
Basement Shelving....
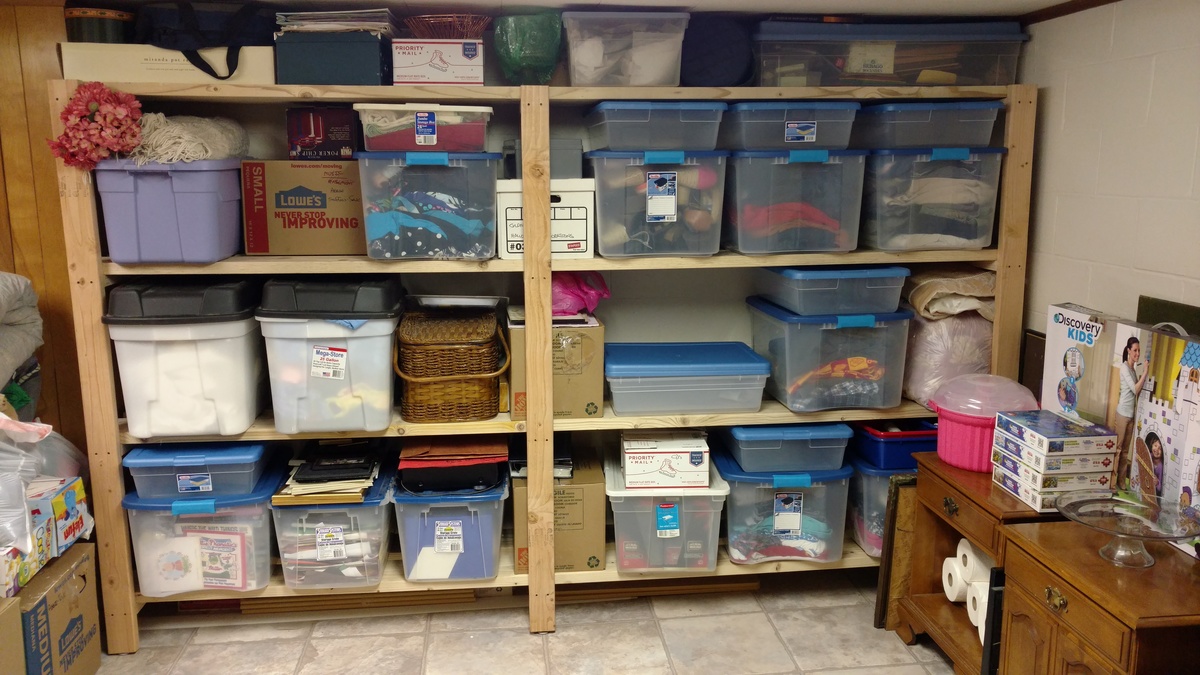
Time to get organized in 2017....and what better way than with some custom shelving. This was not too bad of a project to complete. It only took about 6-8 hours to cut, frame, and assemble everything together (thanks to an interruption or two). 'Twas nice to have a project for once that I didn't have to care about finishing the project with wood filler, sanding, painting. I am sure my wife thanks me more as I would have been another week getting things just right!
A few changes that I made from the original plans:
- used 2x8 for the shelving runs as I only was dealing with a 10ft run and was a few bucks cheaper to buy 8 boards vs 16 boards. Plus less cuts!!!
-installed adjustable furniture feet in the supports to deal with sloping basement floor. Unexpected side effect was it was easier to slide the unit around in the basement as I assembled it.
Outside of those changes I remained faithful to the original design. I didn't bother filling the screw holes as we will be hiding the shelving unit with a curtain once we turn the room into a TV/Office area.
Also as it wasn't 100% clear from the original plans, but the height measurements for the shelf supports are to center... not sure why it didn't register with me right away... but just in case anyone else didn't realize that as well.
Built from Plan(s)
Estimated Cost
$150 for wood, screws, wood glue, and adjustable furniture feet
Estimated Time Investment
Day Project (6-9 Hours)
Finish Used
None
Recommended Skill Level
Beginner
Comments
Mokman88
Sat, 05/03/2014 - 19:40
Actual plans for this
Actual plans for this loveseat/bench are not showing unfortunately :(