Community Brag Posts
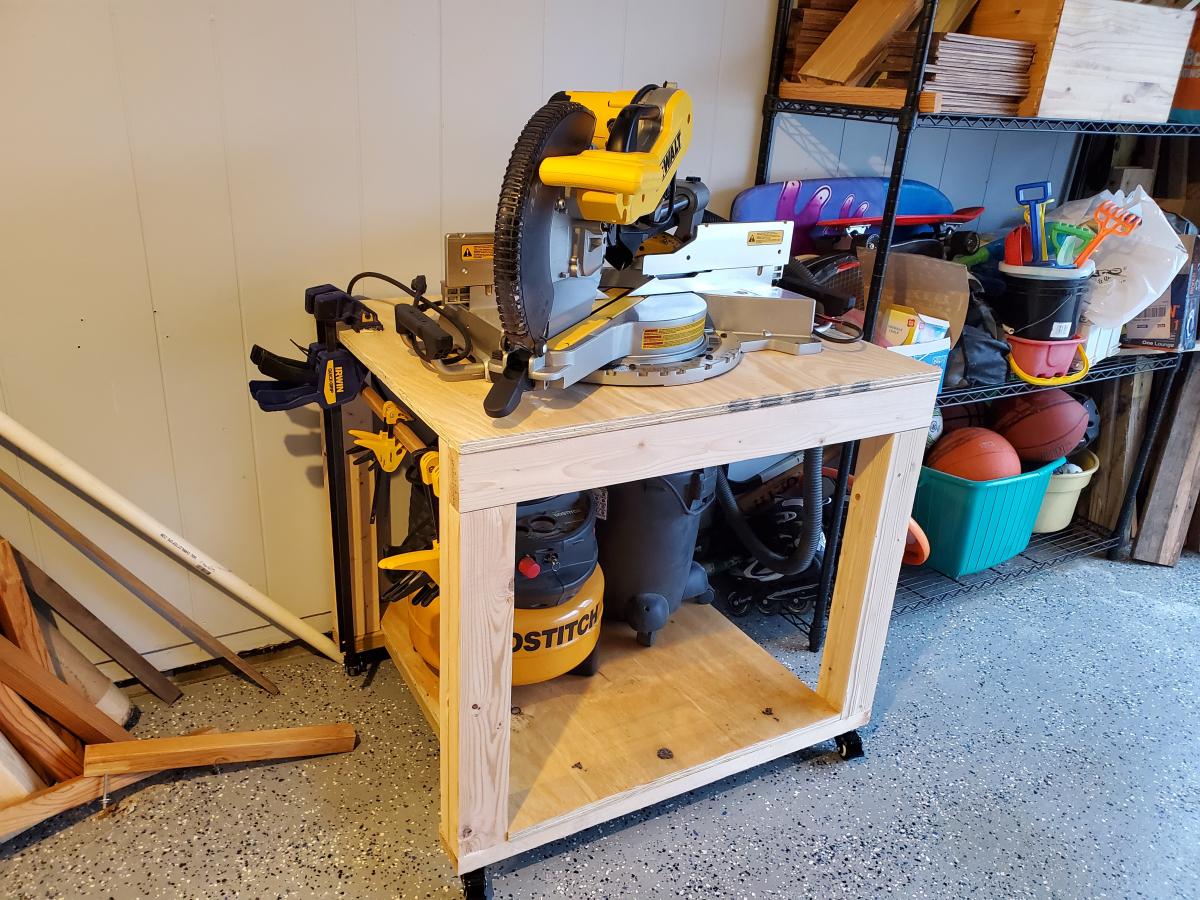
Easy DIY Garage Workbench with modifications

My fabulous husband bought me an awesome new miter saw for Christmas, and it is way too heavy to lug around! So my first project with the new saw was a workbench to mount it on! I added wheels so it can roll anywhere. I'm also very short and wanted to store a very tall shop vac on the lower shelf so I made modifications to accommodate that. I also made it 30" x 36" to make it just the right size for my saw. I will be using this piece as the center of other work tables I will build in the future!
Built from Plan(s)
Comments
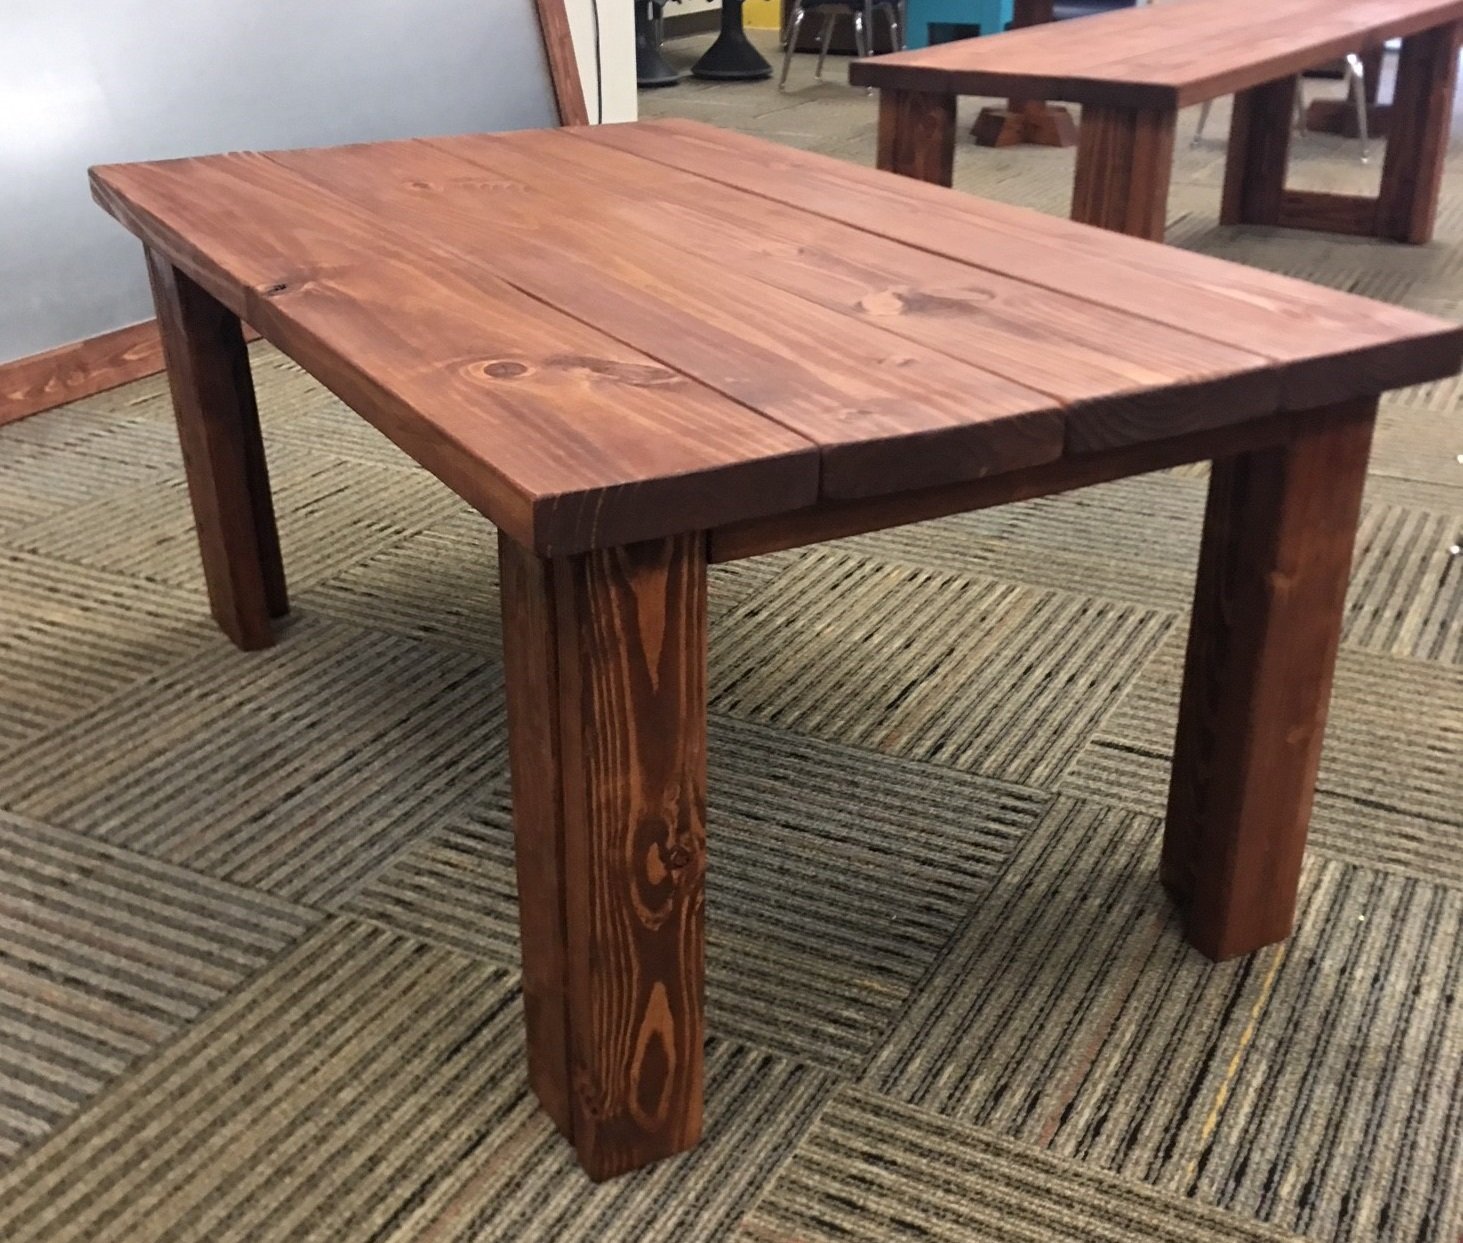
Wife's Kindergarten Classroom
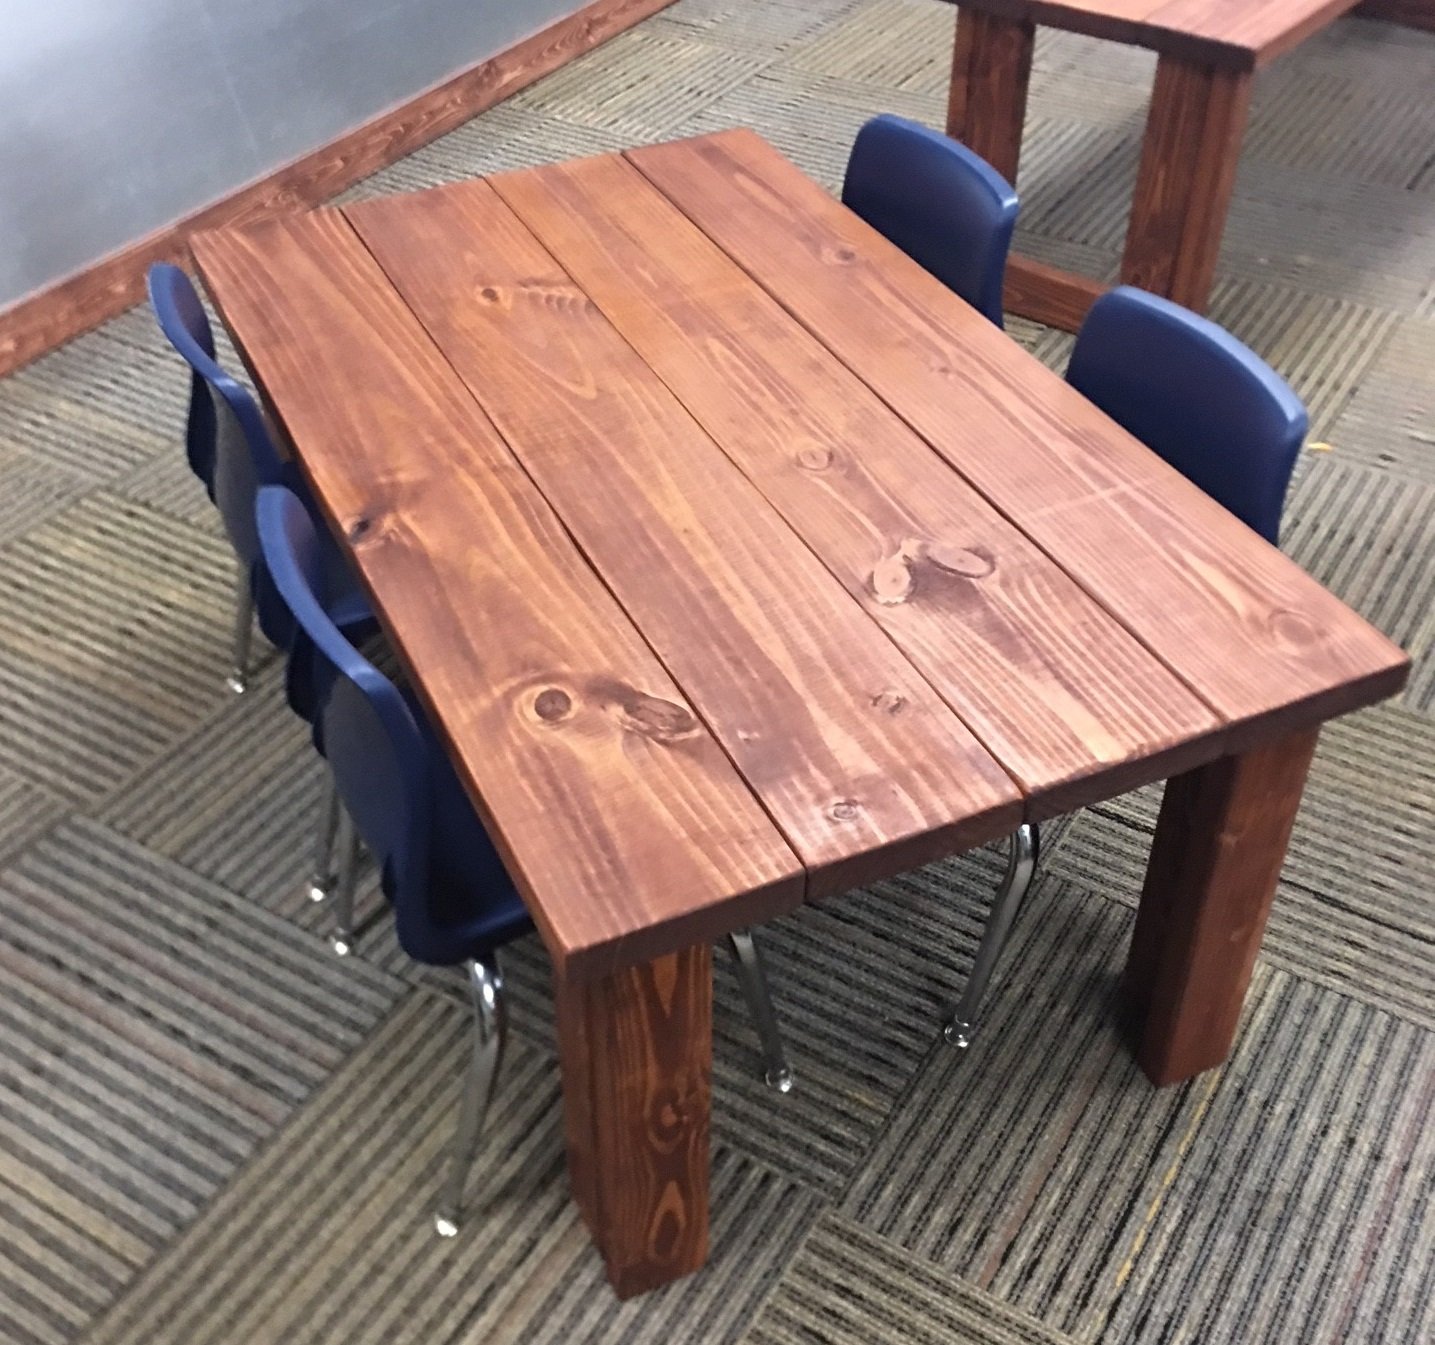
Been a while since I had time to actually build anything worth posting about! My wife wanted some items for her Kindergarten classroom this year, so built several items, most inspired by the Farmhouse family.
Estimated Time Investment
Day Project (6-9 Hours)
Recommended Skill Level
Beginner
Comments
Grill table with stainless steel top

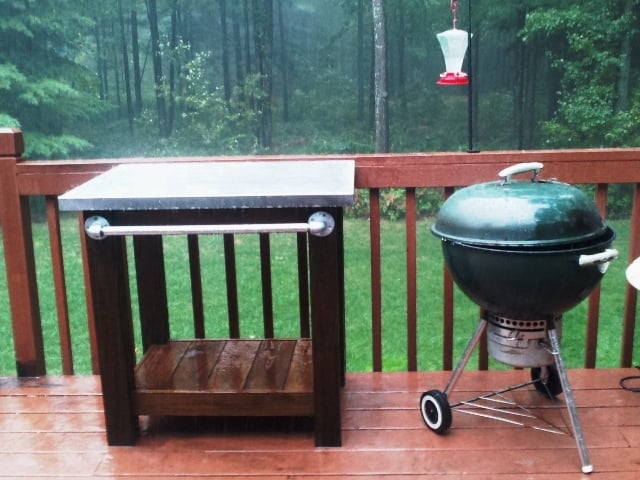
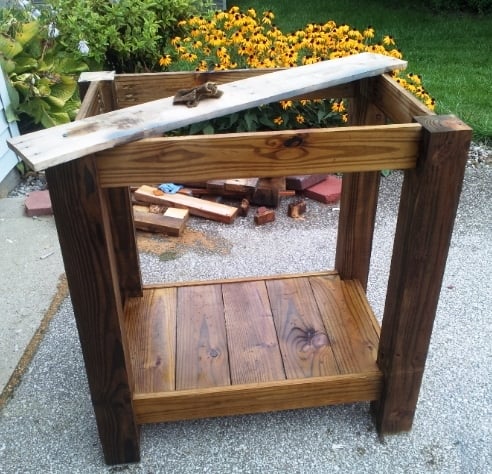
I made this table to go next to an outdoor grill to be used as a food prep area or just a surface for holding ingredients (instead of using the deck railing!). The top is stainless steel which fits tightly over 2 3/4" pieces of plywood laminated together. The bar/handle in front is made out of galvanized pipe. All wood was treated.
Legs - 4x4 posts
Bottom shelf - 1x6's
Sides - 1x4's
Top - 2 pieces of 3/4" plywood laminated together with a stainless steel top (custom fit) over top
Towel bar - galvanized pipe (cut and threaded to size at Lowe's), floor flanges and 90 degree elbows
Estimated Cost
$120
Estimated Time Investment
Day Project (6-9 Hours)
Finish Used
I used Kona stain but since it was over treated wood the stain did not take as dark as it should have. I will have to restain this piece after it has completely dried out.
Recommended Skill Level
Intermediate
Comments

Thu, 05/15/2014 - 10:33
Stainless Top
Sorry about the late reply! Yes, I just gave my dimensions to a local steel supplier and they made the top. I think I have about $40 into the stainless. They didn't weld the corners but I've never had an issue with them.

Sat, 04/26/2014 - 15:41
Stainless steel sheet metal
I too would like to know your source for the sheet metal.

In reply to Stainless steel sheet metal by Pursuit of Handyness
Thu, 05/15/2014 - 10:35
Stainless Top
I just found a local steel supplier, told them what I need and they formed the top. It cost me around $40 (without welding of the corners). I took a fine grit sandpaper to it afterward to scuff it up so it didn't look so bright.
Wed, 04/30/2014 - 12:55
Grill table with stainless steel top
I would like to know are there any plans available to make this table? I am very impressed of its design.
In reply to Grill table with stainless steel top by AMR4412
Thu, 05/15/2014 - 10:46
Plans for top
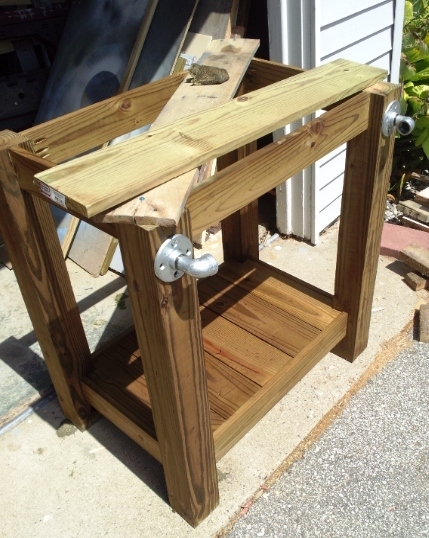
No...I didn't have any plans when I built it but it's a very simple concept. I chose to use all treated wood since I knew it would be sitting outside unprotected. However, my 4x4 posts weren't square so this caused a lot of problems and everything was built to fit. I believe I just used 4x4's, 1X6s (for the bottom shelf) and 1x4s for the sides (top and bottom). For the top, I just laminated 2 pieces of 3/4" plywood together to bulk it up and then had the stainless top built to fit. It fit perfectly so I didn't glue it to the plywood. This makes it easy to remove and clean, if necessary. For the galvanized pipe (towel bar), I bought it at Lowe's and had them cut/thread it to fit my dimensions.
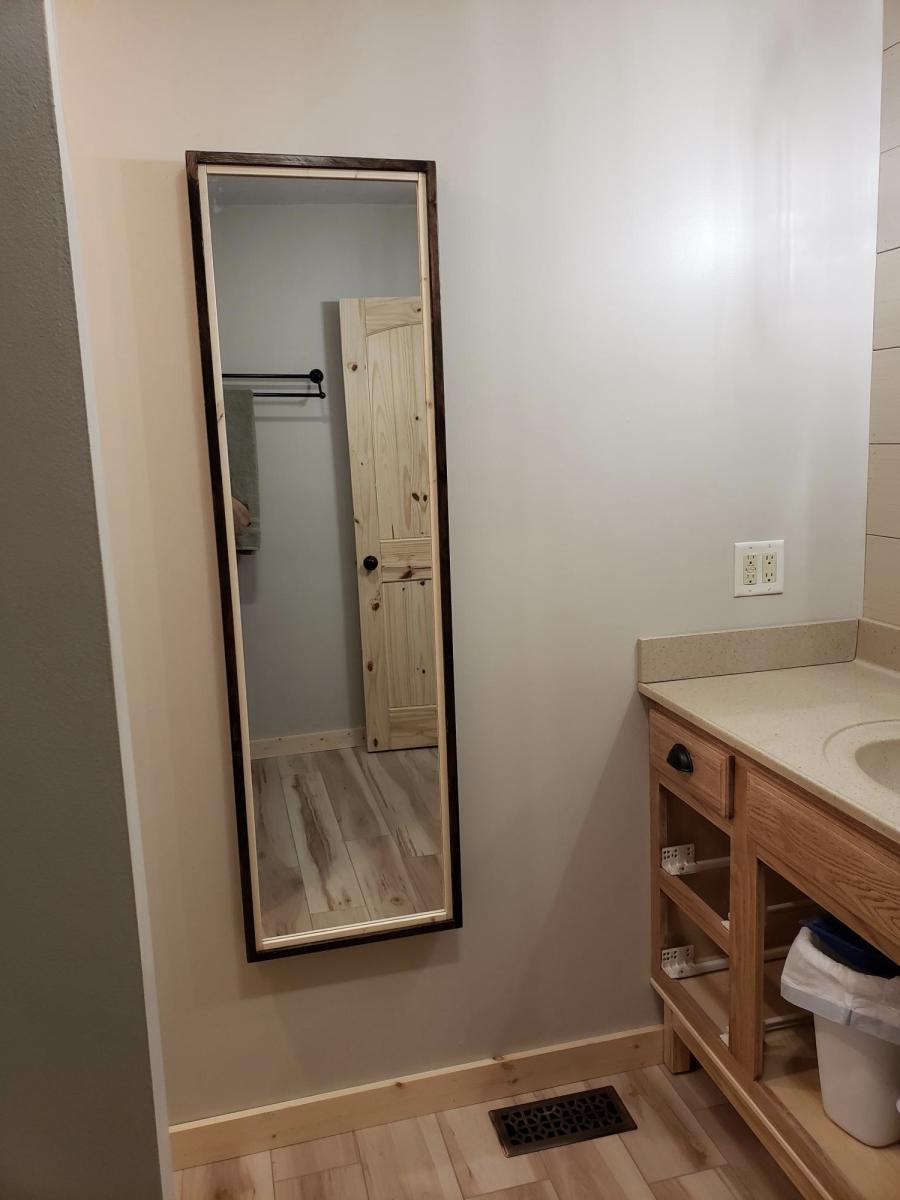
Recessed cabinet
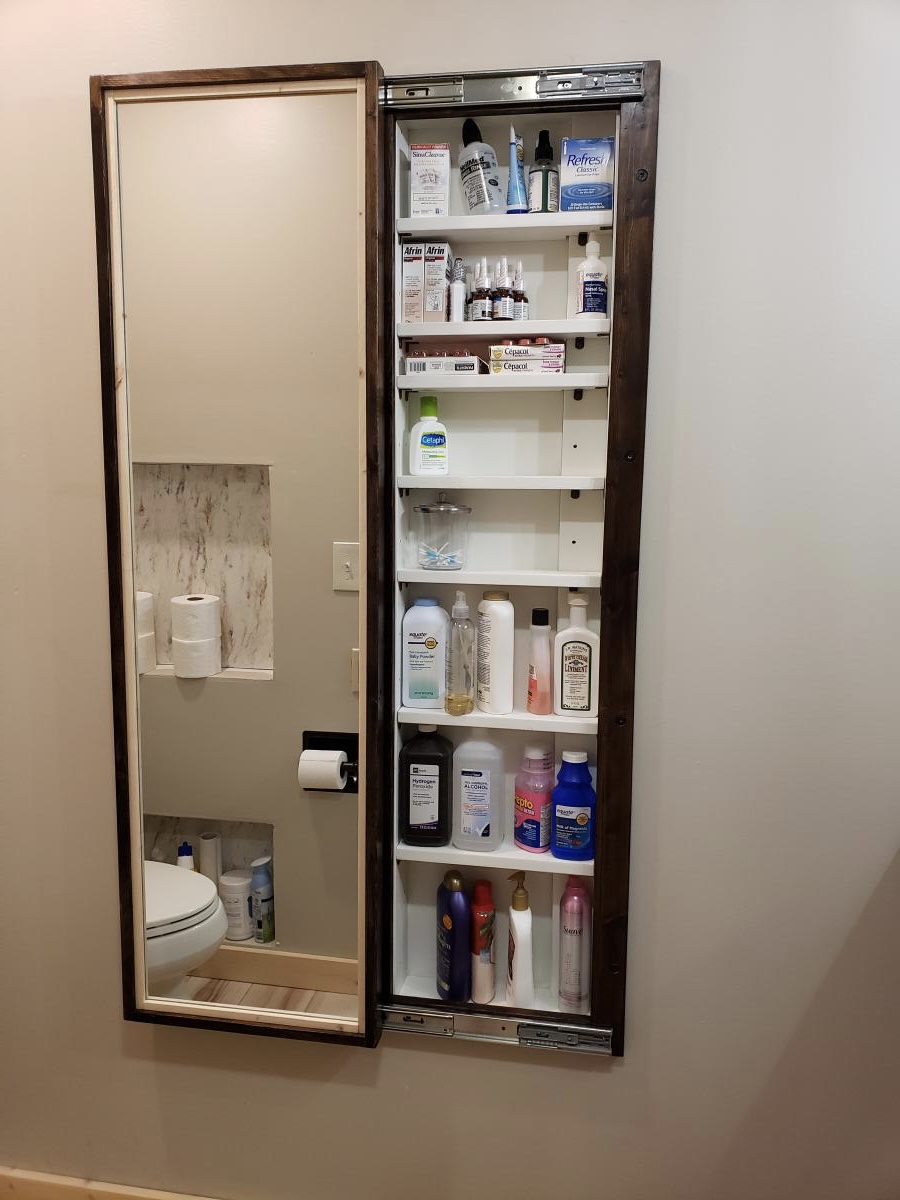
My bathroom has very little storage space. So during our recent remodeling of the room, I decided to add this cabinet. Changed the plan a little to make it recessed in the wall. I love how it turned out!

Built from Plan(s)
Comments
Sat, 09/03/2022 - 13:28
Fantastic bathroom storage!
This looks amazing, love how it's recessed! Thankyou for sharing.
I used the corrugated polycarbonate to cover the greenhouse I made from a chalet style Sun Country Greenhouse Plans. Thanks for the idea.
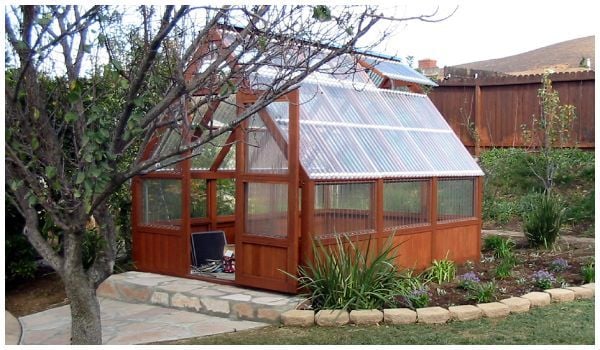
I saw the barn shaped greenhouse plan but preferred a regular roof pitch. I did however incorporate the corrugated polycarbionate as a covering. I find it odd that you guys installed the polycarbonate horizonitally instead of vertically.
Anyway thanks for the info on polycarbonate.
Built from Plan(s)
Estimated Cost
Using cedar framing... 9 x 16' @ $3000 +/-
Estimated Time Investment
Week Long Project (20 Hours or More)
Finish Used
Behr
Recommended Skill Level
Intermediate
Comments
Tue, 09/01/2020 - 17:47
Love this! I really prefer…
Love this! I really prefer the roofline on your greenhouse. Did you modify Ana's design, or did you get plans from another site? Would love to replicate your design if possible-very elegant.
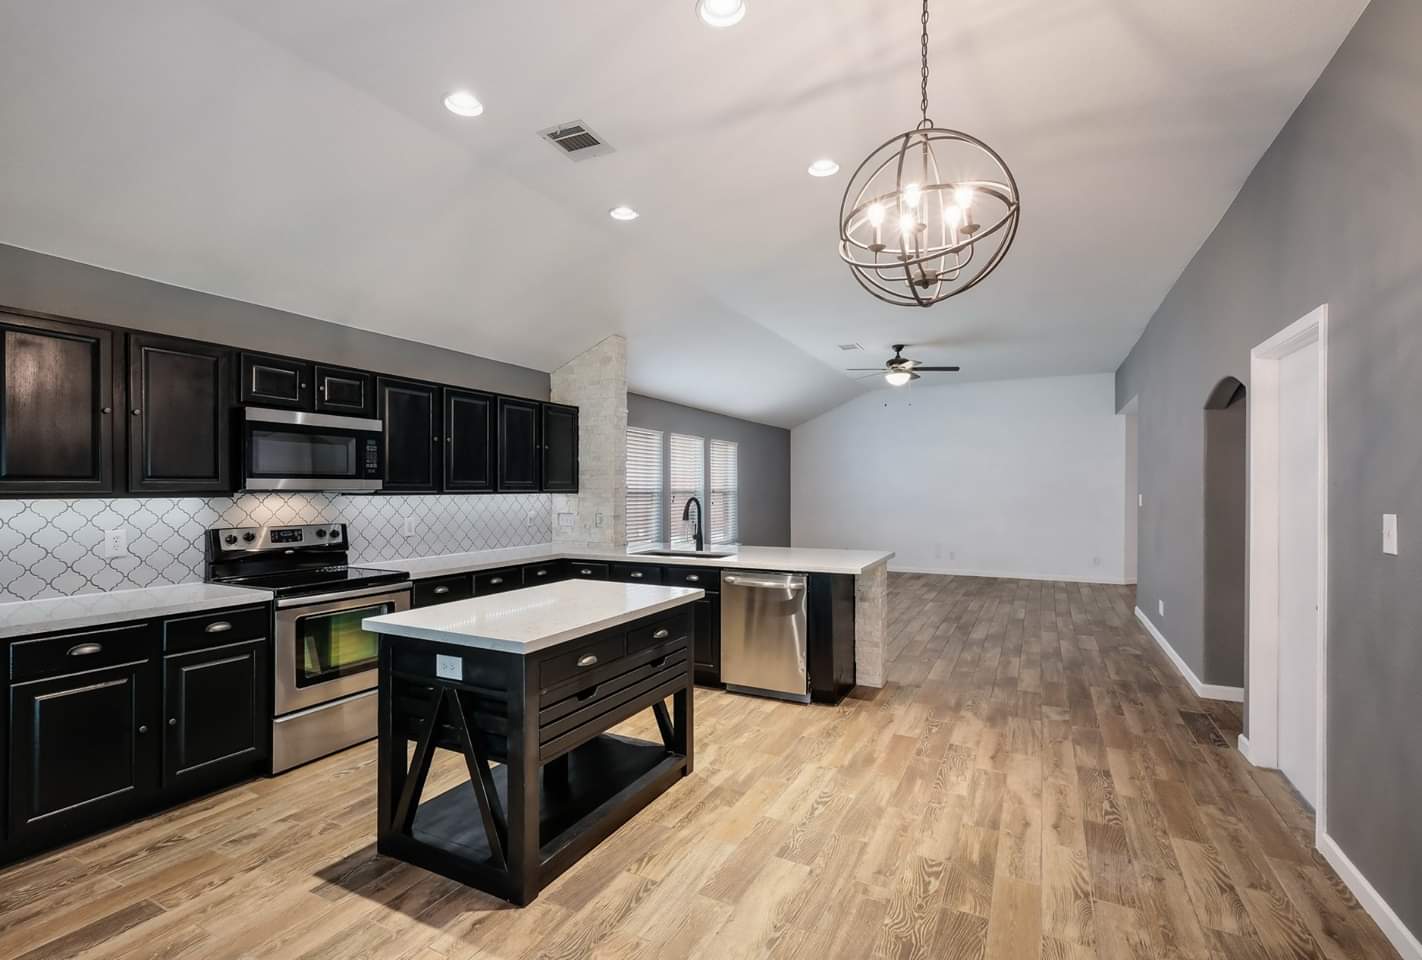
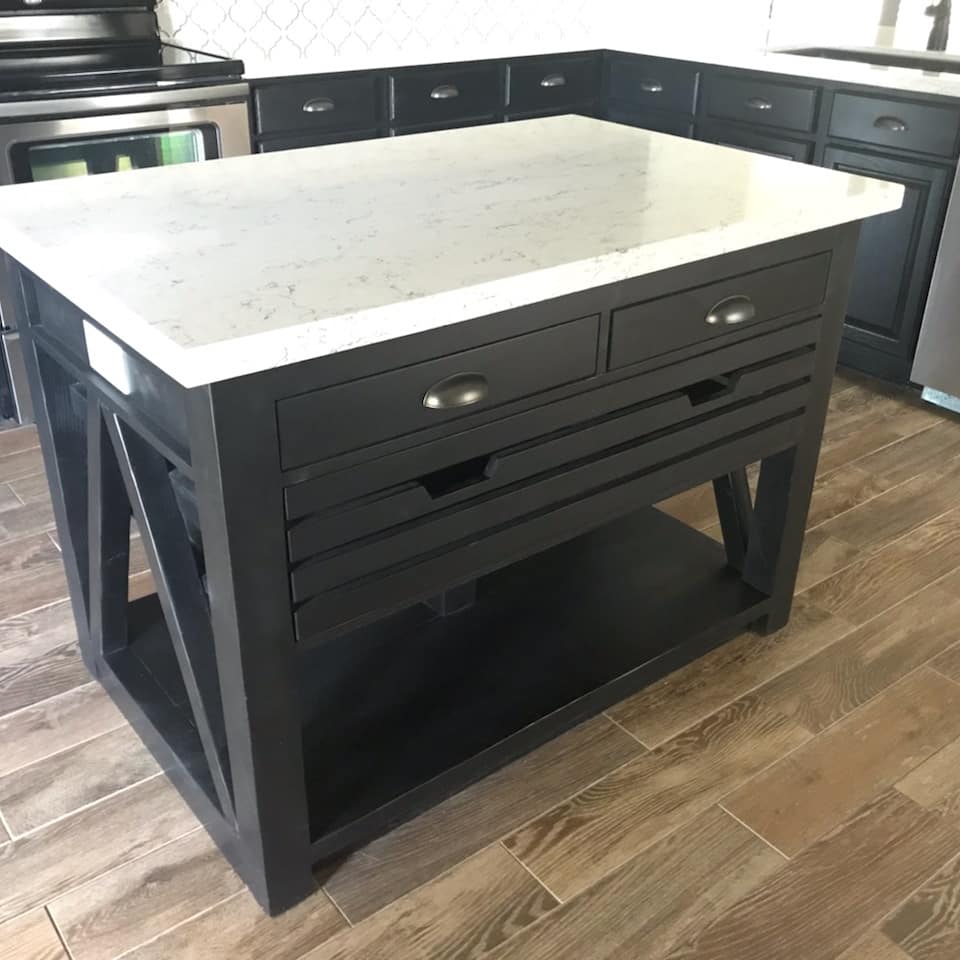
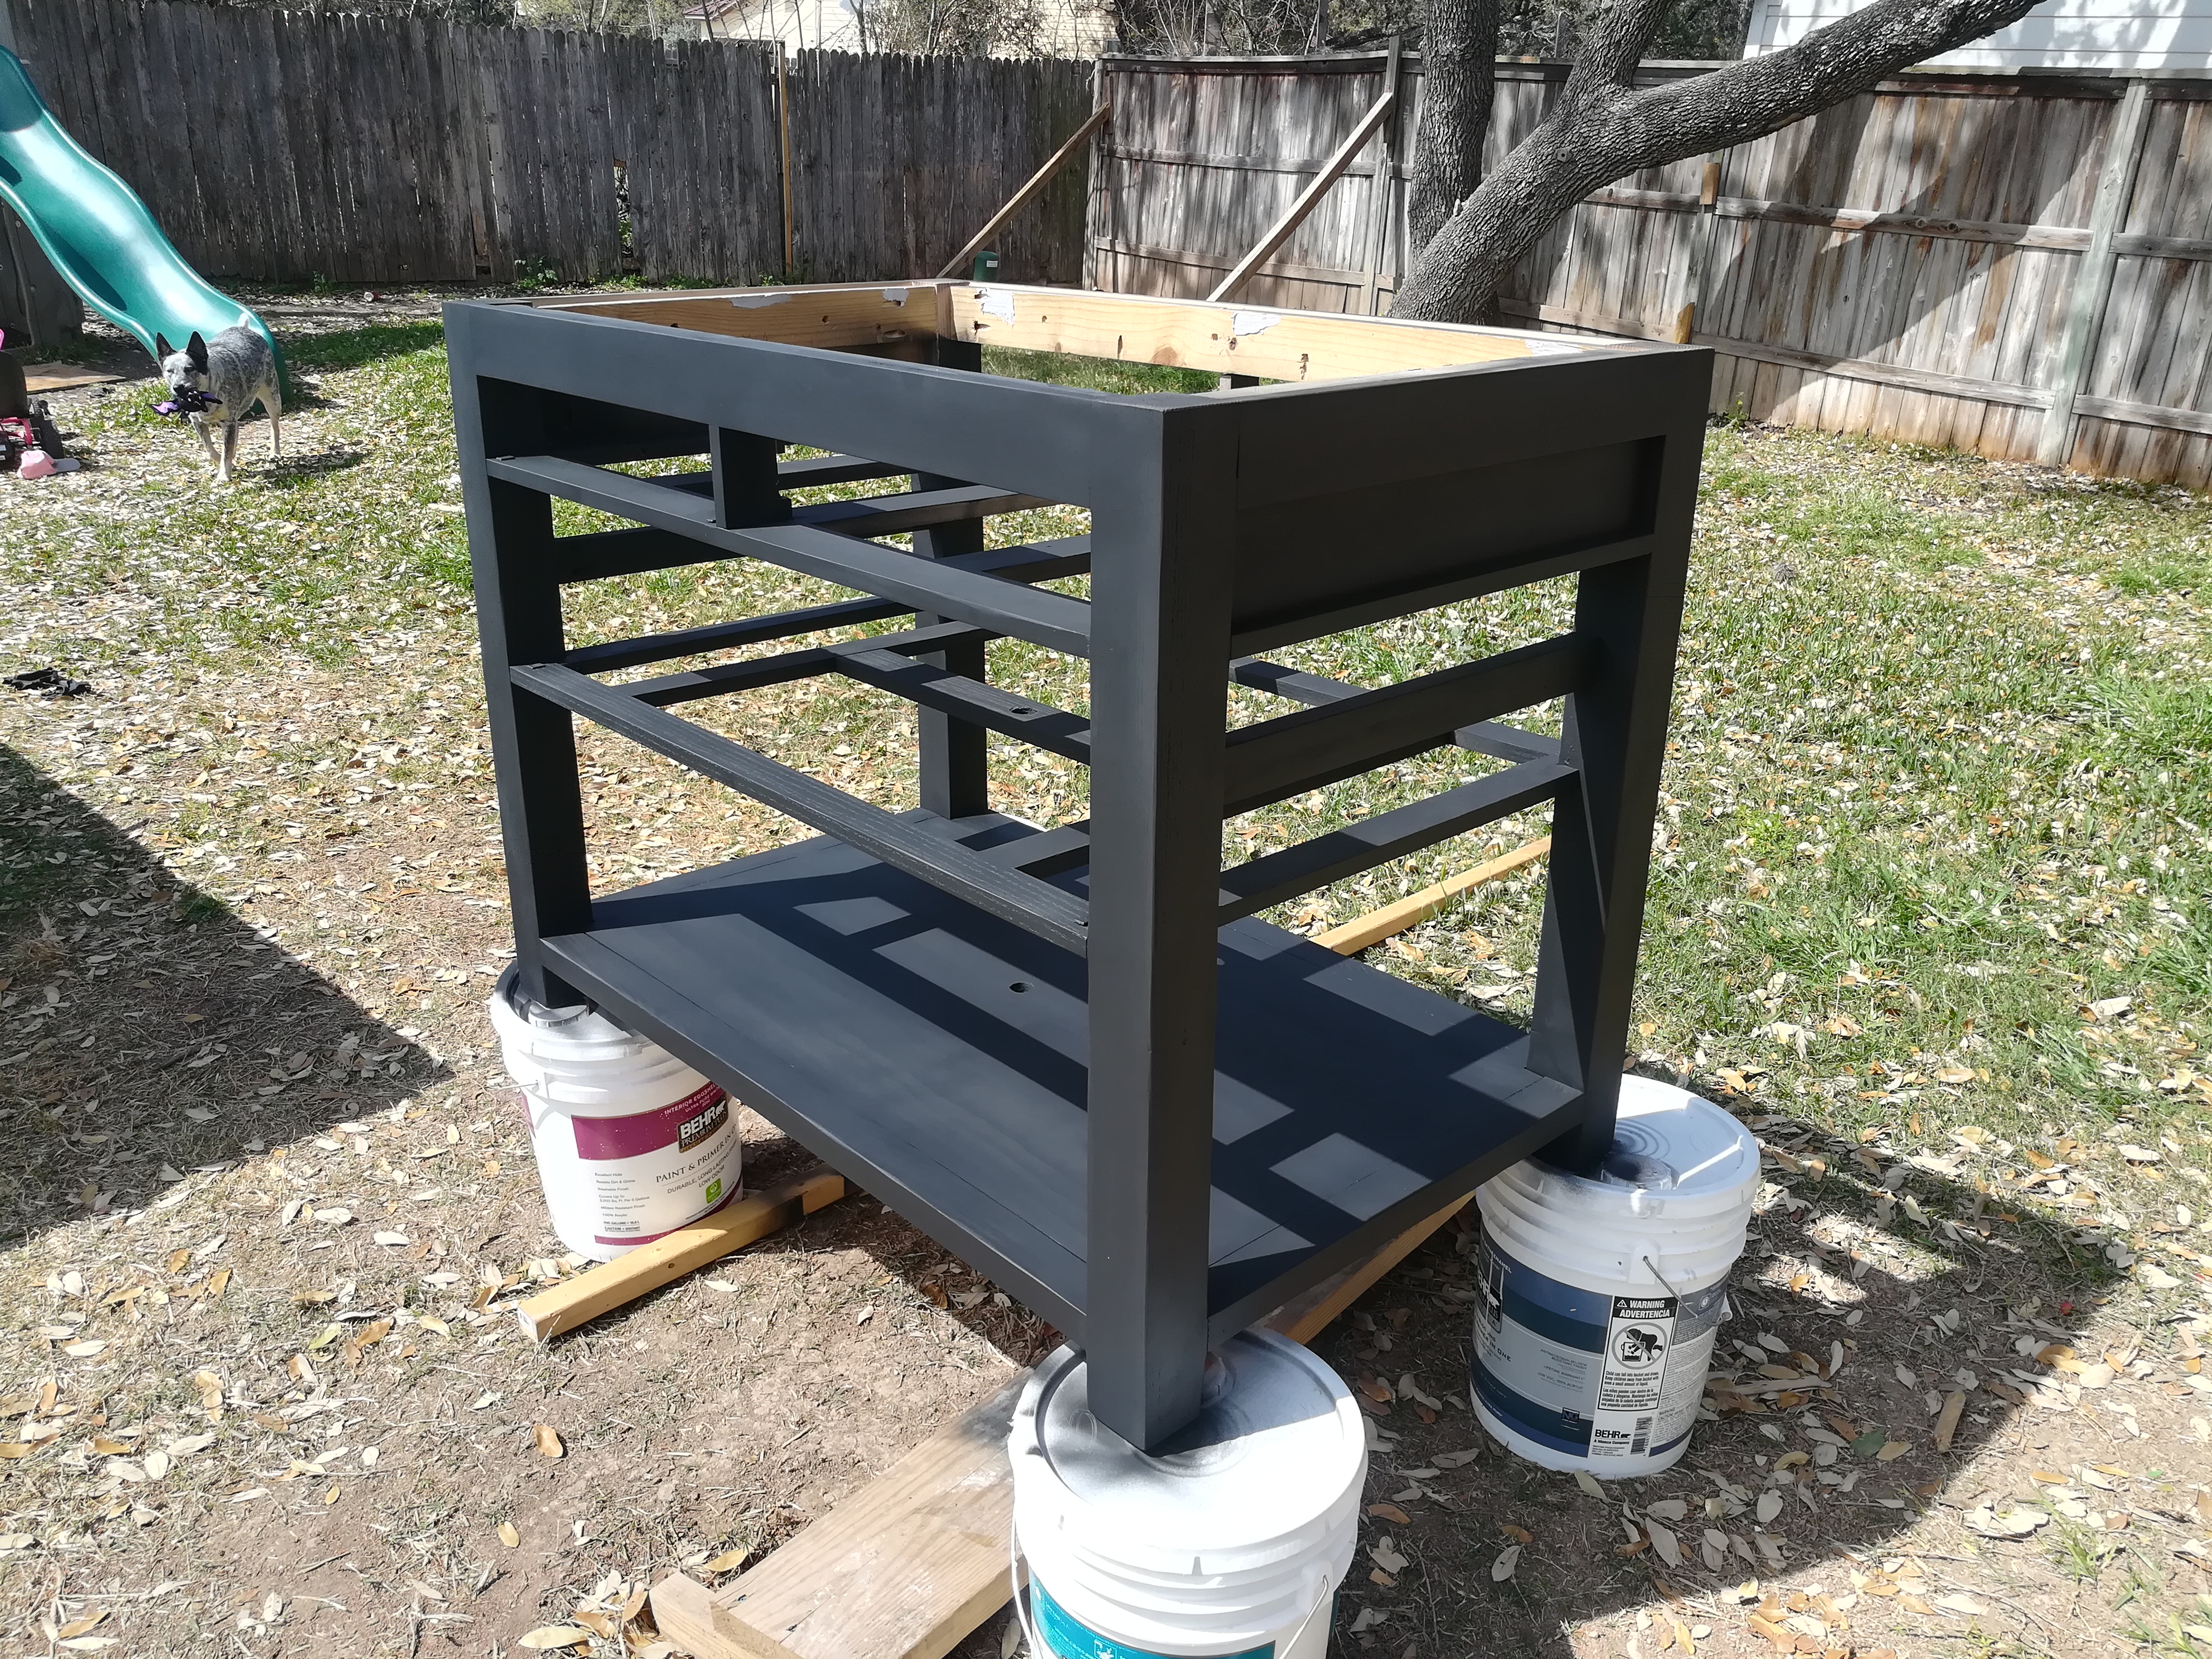
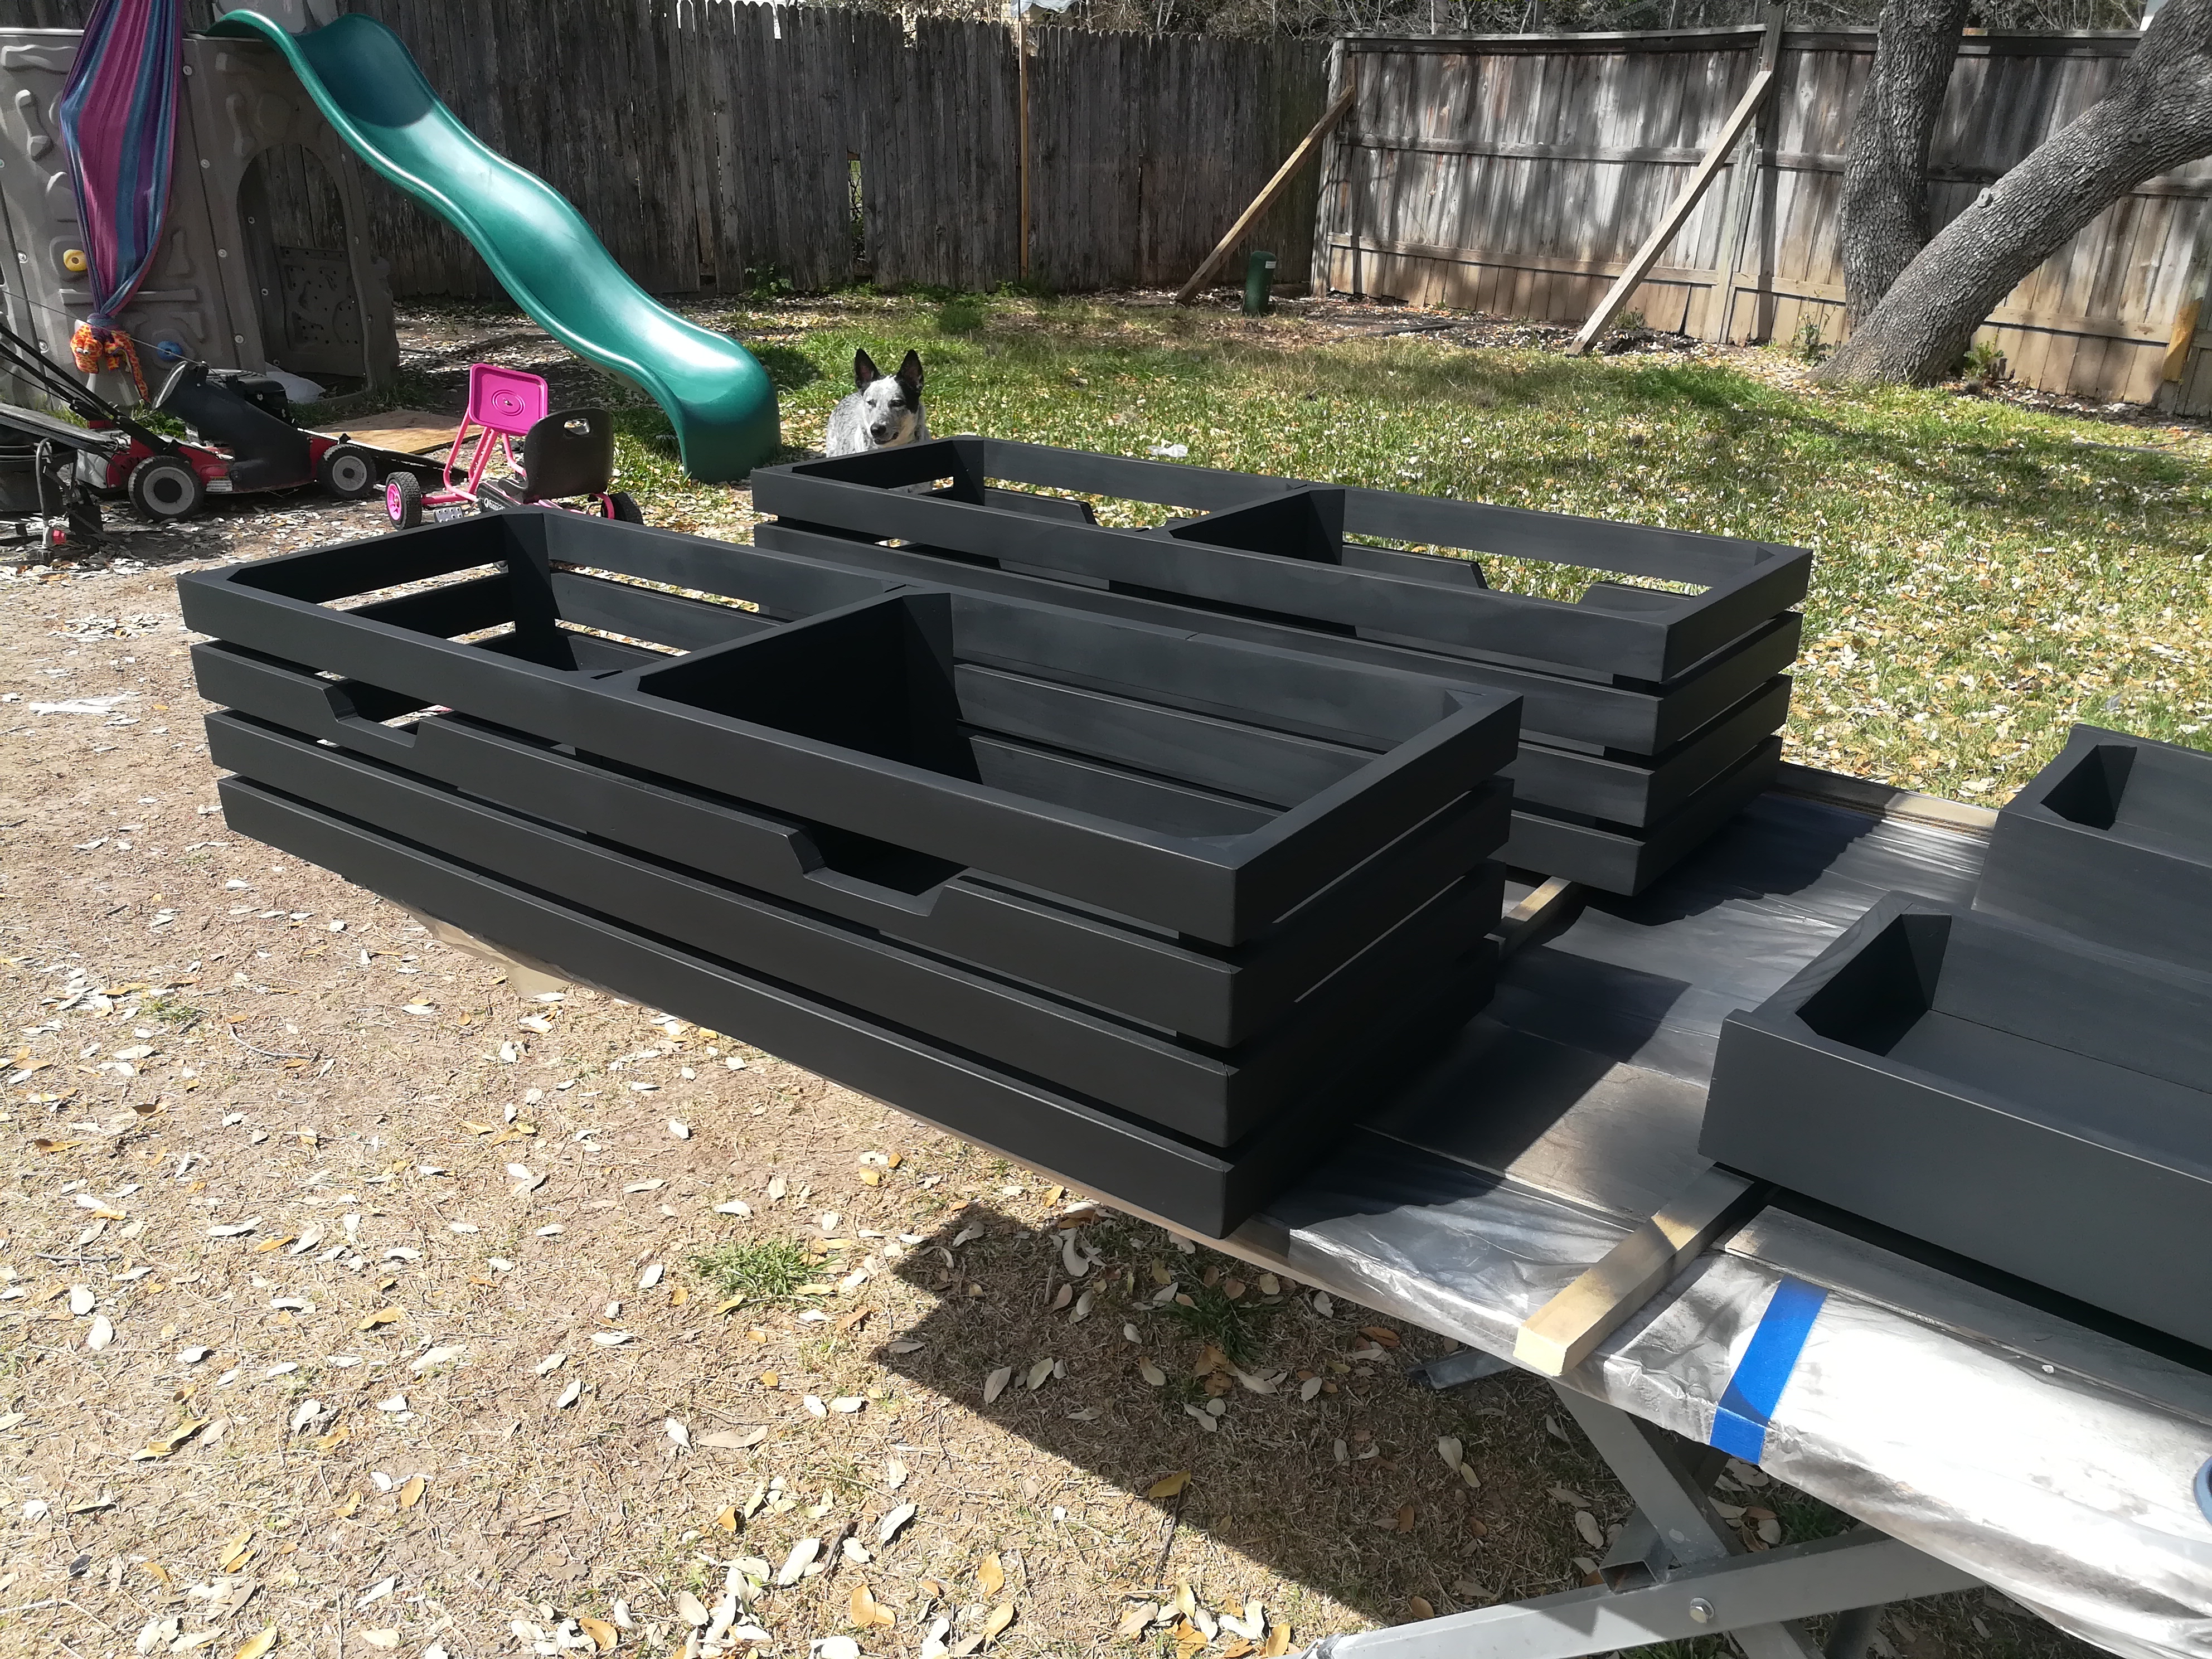
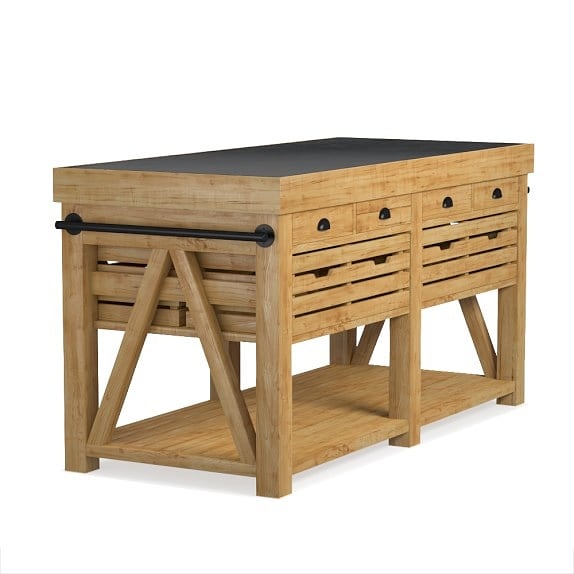
Homemade DIY Kitchen Island inspired by Williams-Sonoma "Cooper Double Kitchen Island"
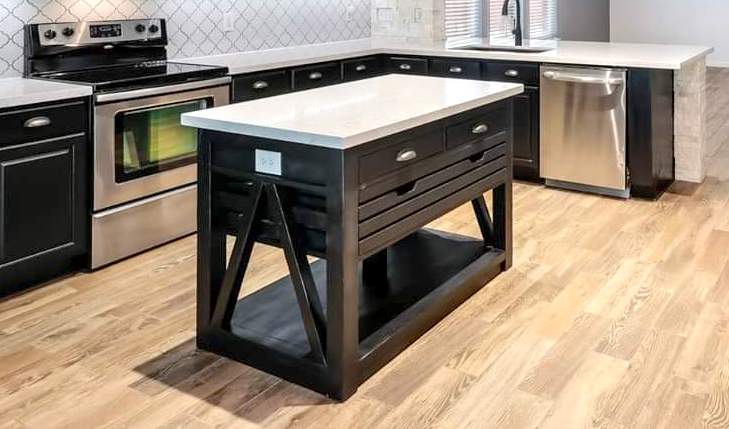
My latest furniture build, custom kitchen island inspired by Williams-Sonoma "Cooper Double Kitchen Island. The workers there weren't too happy when I was at their store taking measurements and me telling them, I'm going to build one myself. The most expensive part was the matching quartz top on it. Here is my start to finish pictures. It's a great addition to my complete home renovation project, which is now on the market for sale. If anyone wants specs and build info, to build it yourself let me know! Thank you Ana-White for inspiring in 2013 to start wood working and building, I have learned so much from your DIYs from the first x console table to now building anything my mind can imagine. https://www.zillow.com/homedetails/8707-Braun-Path-San-Antonio-TX-78254…
Built from Plan(s)
Estimated Cost
$600
Estimated Time Investment
Week Long Project (20 Hours or More)
Finish Used
Rust-Oleum Cabinet Transformations black
Recommended Skill Level
Advanced
Comments

Sun, 05/05/2019 - 19:35
Amazing DIY Kitchen Island
Stunning!!! This project is amazing! Thanks for sharing all the photos, so inspiring! Ana
Fri, 05/01/2020 - 22:12
Hi, where can I find the…
Hi, where can I find the plans for this? It looks incredible!
Tue, 01/26/2021 - 07:39
This is a great build! Are…
This is a great build! Are there plans available for it?
Playhouse Loft Bed with Stairs
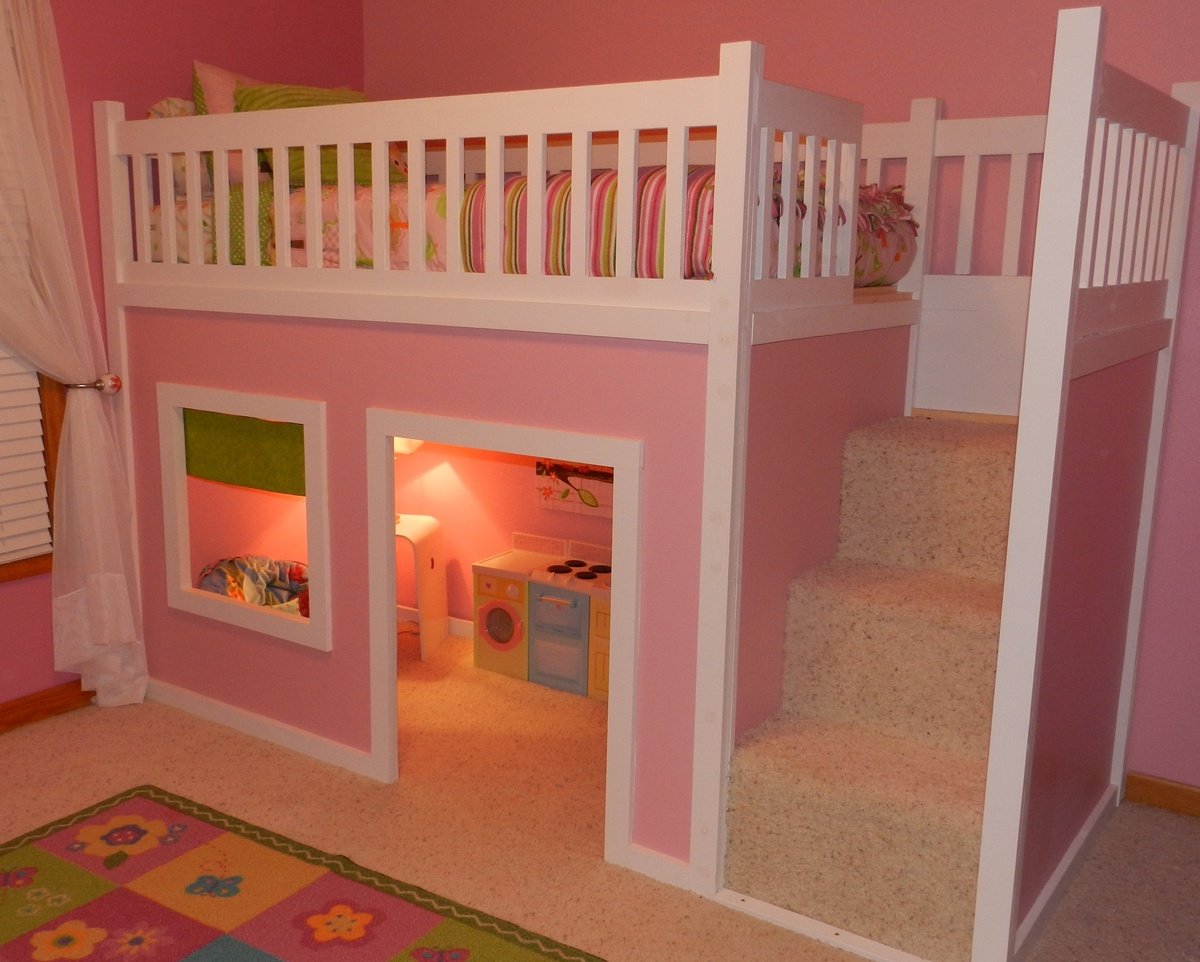
When I showed my husband the plans for this playhouse loft bed on Ana's site, he decided that we needed to build it for our daughter for Christmas. We combined the two plans for the Playhouse & the stairs and modified it slightly to fit our space. We had left-over carpet which we used on the stairs. She absolutely LOVES it!! And secretly, I think her 3 older brothers do, too. Thanks SO much, Ana!!
Built from Plan(s)
Estimated Cost
350
Estimated Time Investment
Weekend Project (10-20 Hours)
Finish Used
Paint is BHG Pink Carnation.
Recommended Skill Level
Beginner
Comments
Sat, 01/12/2013 - 19:47
Loft bed with stairs...plans
Omg....I love this I need to know how to do out....so I can make my husband build it..
Thu, 01/05/2012 - 06:34
are the plans free, and if so
are the plans free, and if so can I get a copy?
Thu, 01/05/2012 - 07:16
Philip and Guest - The plans
Philip and Guest -
The plans are free, and click on the links in the post
From Plan: (plans are linked here)
Sun, 01/15/2012 - 17:58
Playhouse Loft Bed Stairs Plans
RE: http://ana-white.com/2012/01/playhouse-loft-bed-stairs
Would you please send me the plans for the Playhouse Loft Bed with Stairs?
Thank you.
Tue, 01/17/2012 - 09:20
Playhouse Loft Bed Plans
I would like to know how to get a copy of the plans for this bed. This is exactly what I want to do in my little girls room but I have not beed able to find plans. Thanks!
In reply to Playhouse Loft Bed Plans by Guest (not verified)
Fri, 01/27/2012 - 21:44
links
If you look in the section above, you'll see "From Plan:" There are two links (they're black and don't look like links. You'll need to hover over them). One for the basic bed and one for the stairs.
Tue, 01/17/2012 - 18:38
Loft Bed..
I do not see the plans for the playhouse loft bed. Where is it located? Can you email it to me or post the link?
Thu, 01/19/2012 - 21:42
LInk to the plans
In reply to Age by Guest (not verified)
Fri, 01/27/2012 - 21:38
Age appropriate
I would say your 2 year old daughter is a little young for a bed this high. I think general guidelines would suggest waiting until age 6 for lofted and bunked beds, but I think that's being very cautious. Our daughter is just about to turn 4 and she does fine in it.
Wed, 01/25/2012 - 11:29
Looks fantastic!
You did a great job! That looks fantastic!
I'm going to be making this bed within the next month or two for my daughter. She's 4 (will be 5 in April). I know the overall design isn't *that* high off the floor, but my daugter has a tendency to roll out of bed...often. LOL
Do you find the guardrail/slats are high enough to prevent roll offs, or should I add some height to them when I build?
Yours turned out awesome! I can see why your daughter (and sons) love the bed!
Cindy
In reply to Looks fantastic! by Cindy from Indiana (not verified)
Fri, 01/27/2012 - 21:34
Guard rails
Hi Cindy.
Thanks for your kind words.
We had the same concerns about our daughter rolling or falling out. She is almost 4, but still had rails on her previous bed. We put the slats that the mattress sits on in the very lowest possible position and actually traded twin mattresses with her brother who had a thinner mattress. Her's had a pillow-top and even the extra 2 inches made quite a difference.
There are nearly 9 inches between the top of her mattress and the top of the rails which is plenty to prevent accidental roll-outs, but it certainly wouldn't hurt to add extra if it would make you more comfortable.
Now if we could just keep her from standing up there, I'd feel a whole lot better. lol
Good luck with yours.
Kara
Sat, 01/28/2012 - 07:27
Thank you!
Hey Kara,
Thank you so much for replying! That does make me feel more comfortable that there will be around 9" between the mattress top and the rail top. Not sure yet if I'll add a bit more or not, but it's good to hear how it worked out for you guys. Now I'll be hoping to keep my little dare devil from trying to 'fly' off the top of it and we'll be good to go. LOL
Thanks, again! That was really helpful.
Cindy
Thu, 01/26/2012 - 12:59
Hi! LOVE THIS!!! Am planing
Hi! LOVE THIS!!! Am planing on making for my daughter. Any chance there are plans for this in a Full Size bed?
In reply to Hi! LOVE THIS!!! Am planing by Guest (not verified)
Fri, 01/27/2012 - 21:48
Full Size
I've seen some posts on Ana's Brag Boards of these lofts with full sized mattresses on top. Ana's original plan is a twin bed, but others have modified it to suit their needs. You may just want to search and see if anyone has included their plans for a full. Sorry I can't be more help. Good luck!
Tue, 01/31/2012 - 18:32
Very Nice...
That is very nice if you dont mind me asking how long did you make that one... I am wanting to make one for my daughter but I dont have 103 inches that called for in the one plan...
In reply to Very Nice... by JessiW (not verified)
Sat, 02/04/2012 - 16:10
Length of bed
We made our bed to the exact specifications that Ana gave (103"), however, if you need to save space, you could leave the stairs off and opt for the ladder.
In reply to Bed Plans by Kelly Kelley (not verified)
Wed, 02/15/2012 - 18:34
Plans
Hi Kelly,
There are links to the 2 plans in the "ABOUT THIS PROJECT" section above. Just hover your cursor over the "From Plans:" and the links will change color. They appear black and therefore, don't look like they're linked to anything. They're both there. Good luck!!
Sat, 02/11/2012 - 09:30
I need the plans for this can
I need the plans for this can someone please send me them :) [email protected]
Wed, 02/15/2012 - 18:40
Where to find the plans...
There are links to the 2 plans in the "ABOUT THIS PROJECT" section above. Just hover your cursor over the "From Plans:" and the links will change color. They appear black and therefore, don't look like they're linked to anything.
Or...I've added them here.
http://ana-white.com/2010/09/playhouse-loft-bed
http://ana-white.com/2010/09/easy-playhouse-loft-bed-with-storage-stairs
Mon, 03/05/2012 - 20:01
Decor
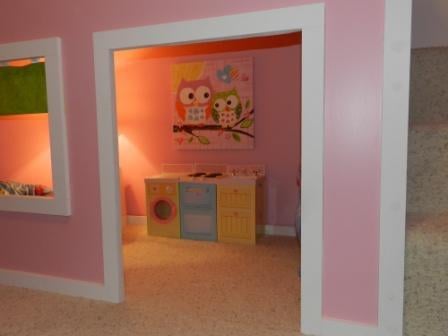
Hi there, I was wondering if you could tell me where you got the fabulous little washer and dryer combo that I see in the photo. I know the sweet owl painting is from target, but I love the little play space you seem to have created! :)
Sat, 03/17/2012 - 22:52
Cute Decorations!
I LOVE this so much! I love the color scheme as well, we decided to copy the scheme in my daughter's room. I was wondering where you got the curtain from? Did you buy it or make it yourself? It's almost exactly the color of the green paint we bought so I would love to know. Also, I love the washer and dryer too, also curious about that. Thanks!
In reply to Cute Decorations! by Kirstie (not verified)
Mon, 03/19/2012 - 19:40
Decorations
Hi Kristie.
I made the little curtain and the little washer/stove/sink set are from the Playskool Rose Petal Cottage collection. Good luck building your playhouse. It's a little girl's dream!!
Wed, 03/21/2012 - 20:27
Changing sheet?
Hi Kara,
I'm really interested in building two of these for my girls... they caught my attention because they've been asking for a bunk bed and I don't want to do a bunk bed because I hate the idea of struggling to change the bedsheets. Just wondering if it's a hassle with a bed this height.
Yours looks amazing, btw!
Thanks,
Sarah
Tue, 04/10/2012 - 11:18
playhouse with loft bed
oh my god i love this it would be awesome for my daughter also. were you able to stay in your budget???? do you think is a safe style for a 3 year old? she would go absolutely nuts!
Fri, 04/13/2012 - 20:17
so beautiful! if i wanted to
so beautiful! if i wanted to do this with a full mattress how would i tweak the measurements? i want to do this with a full with the stairs... just so she can be in the bed for a longer period and also the space underneath to be a bit bigger... also if i wanted to make the stairs have a drawer? i really would appreciate alll the feedback if possible because im so far from handy... :-/ and 1 more thing how did u get a light down there?
Fri, 05/11/2012 - 18:27
I was wondering if once put
I was wondering if once put together is it easy to take apart? My dad builds houses for a living and was going to make it for my daughter at his house then bring it to mine to set it up
Sun, 06/10/2012 - 14:40
My husband and I just
My husband and I just finished making this bed with stairs for our 3 year old and he loves it.
Tue, 06/12/2012 - 06:41
up to??
what age would you reccommend this for?? my son is 3 n a half and i woant to attempt to make this bed, but dont want to spend time and money if i will have to buy him a new bed in a couple of years. i would like it to last a good while. also, like veahava, i was wondering if this was easy to dismantle once put together as i am planning a move in the future, thankyou
Tue, 10/02/2012 - 02:14
This is absolutely divine -
This is absolutely divine - you are so talented! I have just found this website and can't imagine I'd ever be able to make something so beautiful. Putting up a shelf is beyond me. Your daughter must be so proud of her little nighttime palace!
Sun, 10/21/2012 - 20:01
Playhouse Loft Bed with Stairs
I am trying to get the plans for this bed with the stairs but when I click on the link it doesn't give me the plans. Help, my granddaughter would love love love this. Thank you so much.
Wed, 01/16/2013 - 06:05
hi! Someoneo to tell me how
hi!
Someoneo to tell me how many hours spent on it?
Mon, 02/04/2013 - 20:53
PLEASE, PLEASE, PLEASE,
PLEASE, PLEASE, PLEASE, SOMEONE TELL ME HOW TO GET THE PLANS, I REALLY WANT THIS BED FOR MY LITTLE GIRL!!!!

In reply to PLEASE, PLEASE, PLEASE, by ochoa
Mon, 05/25/2015 - 22:12
You can download more plans
You can download more plans from these resources:
Thu, 02/14/2013 - 12:36
Playhouse loft bed with stairs
This is awesome, how do I get a copy of the plans for this bed? I would love to do this for my grand daughter as a birthday gift
Thu, 02/14/2013 - 12:48
Playhouse loft bed with stairs
found the link, here is it for those wo are also looking I can't wait to start this project THANKS
http://ana-white.com/2010/09/easy-playhouse-loft-bed-with-storage-stairs
Wed, 09/11/2013 - 05:11
Absolutely Love this Bed!
We made this bed for our daughter and now my son and daughter play with her kitchen and table underneath in the playhouse. Your instructions were so easy to follow and everything matched up perfectly. We did do the ladder due to space but the bed is beautiful. We get so may compliments when people come over and I always tell them about your website. You truly have awesome ideas! I can not wait for the next project and I am sure it will be off your site :-)
Mon, 10/07/2013 - 17:26
playhouse with loft bed and stairs
I love your playhouse with loft bed! How tall is the underneath part? Would you be able to fit a desk underneath? Also, could the plans be adjusted to accommodate a double bed?
THANK YOU!!
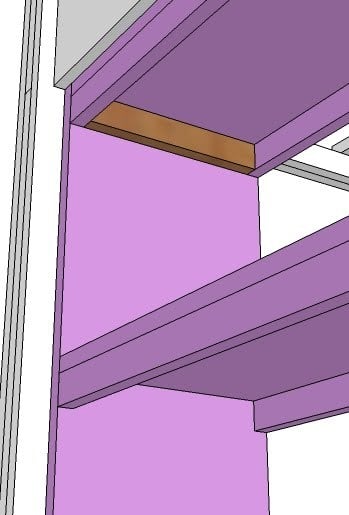
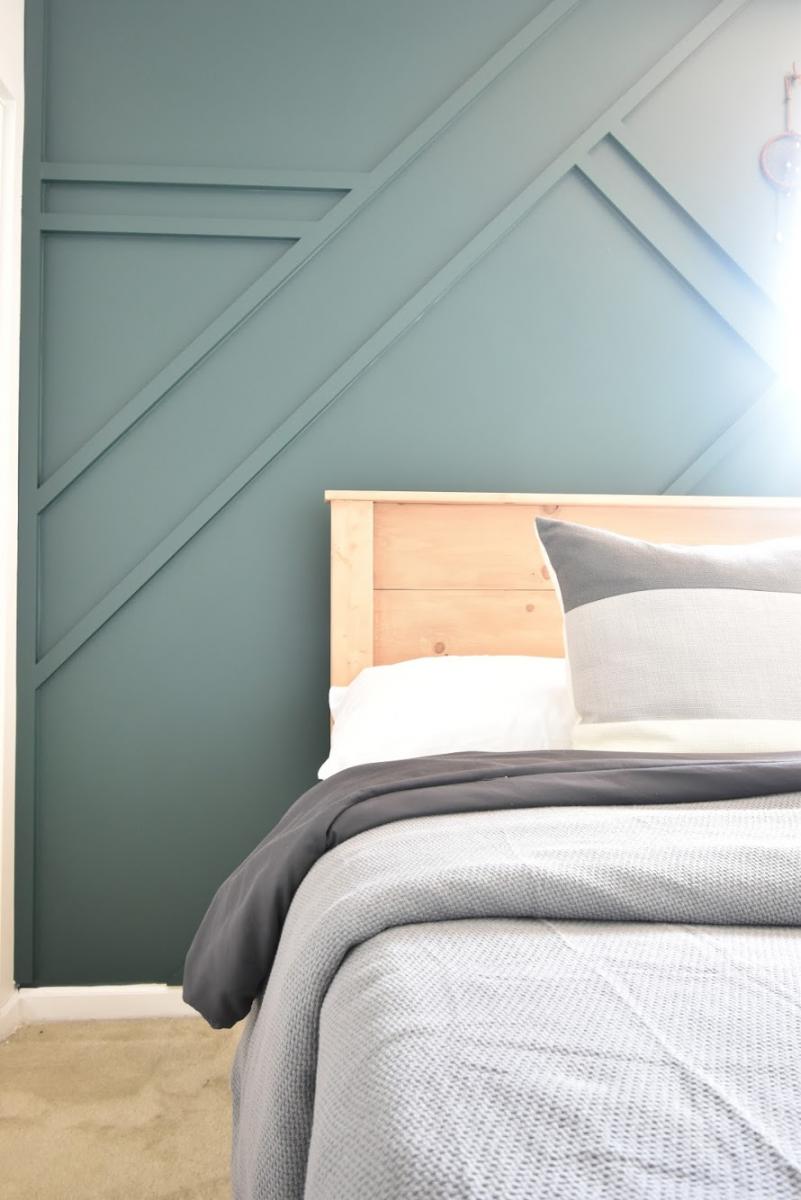
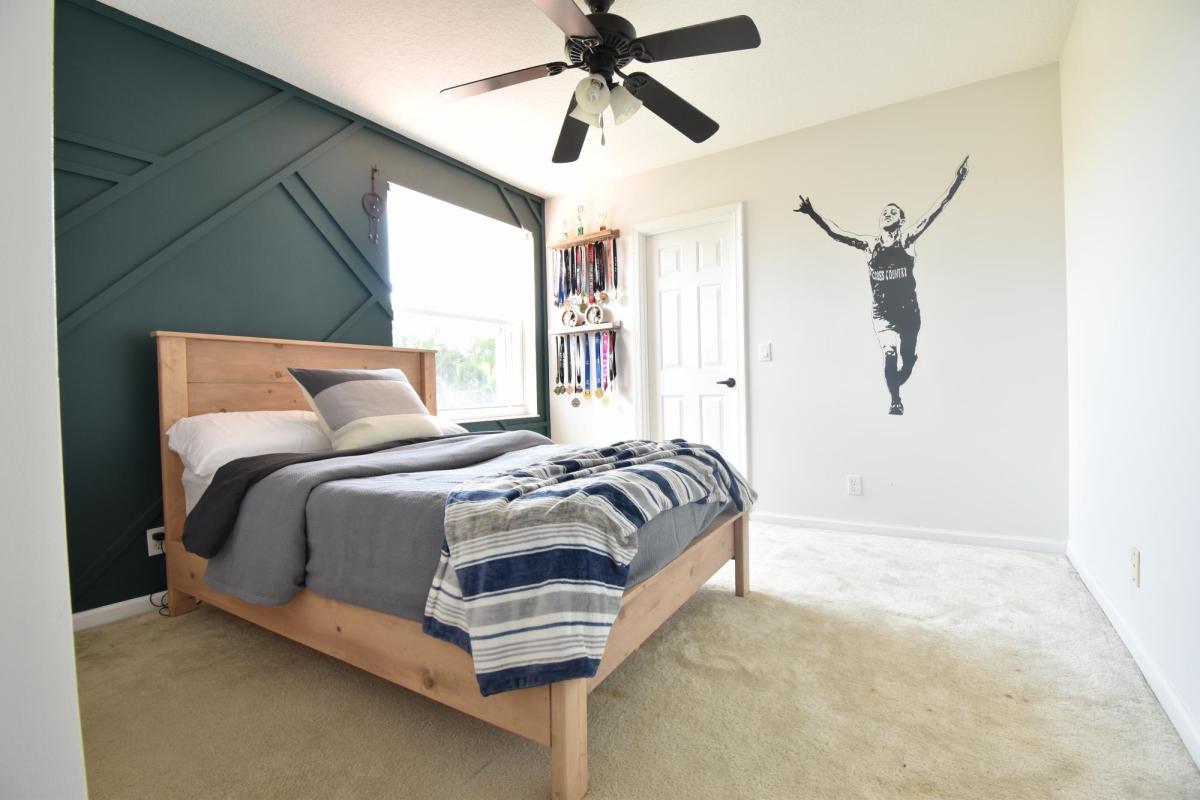
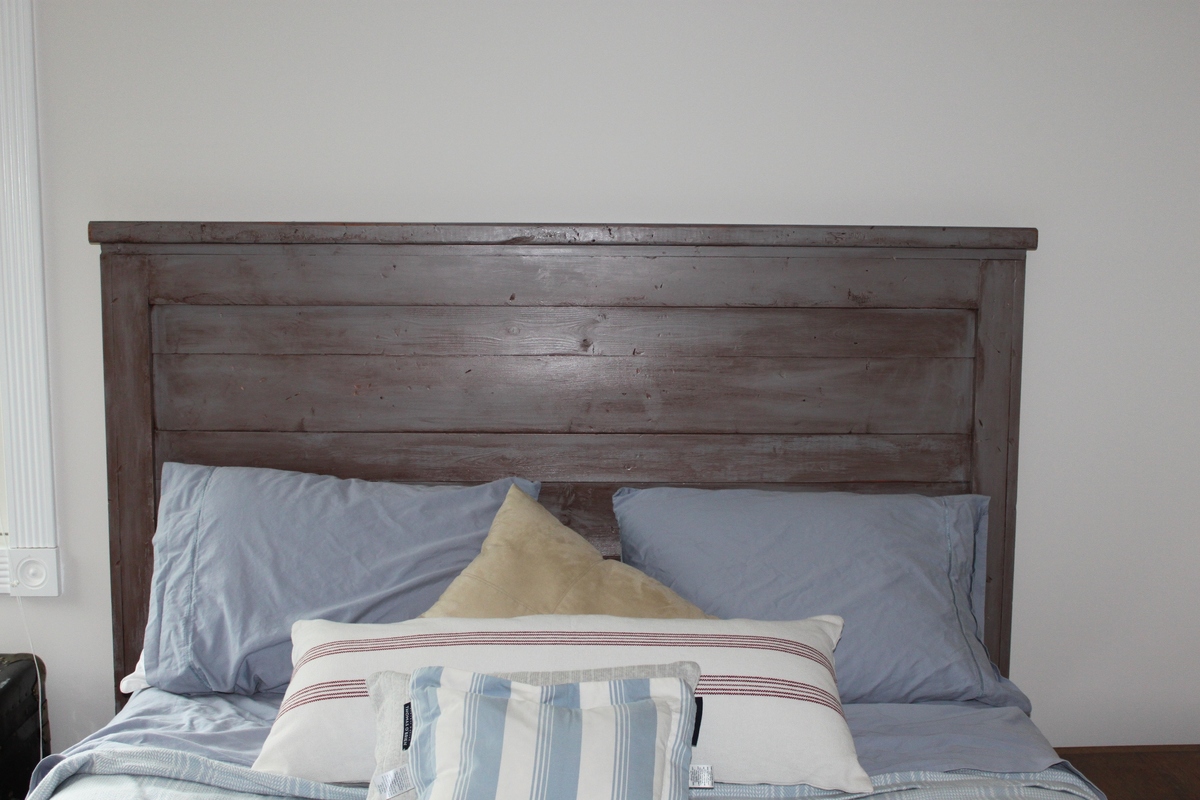
Panel Bed for Ray
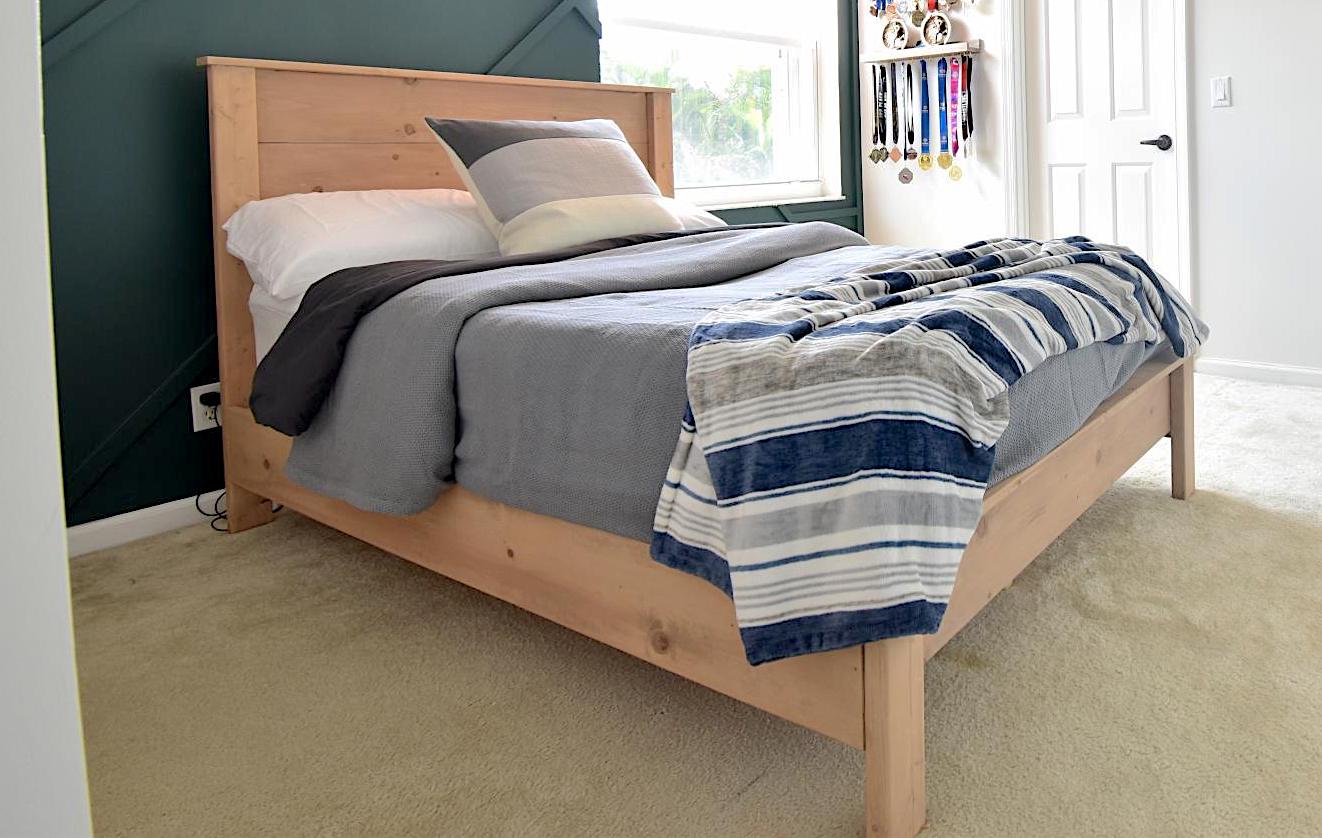
I made this bed over a weekend while I “room crashed” my oldest’s bedroom.
I’m so happy with the result. I experimented with stains mixing two, well layering colors.
That was a lot of fun!
I hope to write a blog post about it one day. I will add it to my ever-growing To Do List.
Let me know if you have questions. I love talking about building and all things DIY!
Built from Plan(s)
Estimated Cost
100
Estimated Time Investment
Weekend Project (10-20 Hours)
Finish Used
Layered Simply White and Early American from Minwax.
I applied the Simply White (didn’t remove excess) and then I added the Early American on top. Let it all sit a bit and wiped off the stain.
This left a beautiful color.
I applied the Simply White (didn’t remove excess) and then I added the Early American on top. Let it all sit a bit and wiped off the stain.
This left a beautiful color.
Recommended Skill Level
Beginner
Comments
Sun, 10/06/2019 - 15:57
You are amazing! Thank you…
You are amazing! Thank you so much for adding a brag post!
Mid Century Modern Entertainment Console
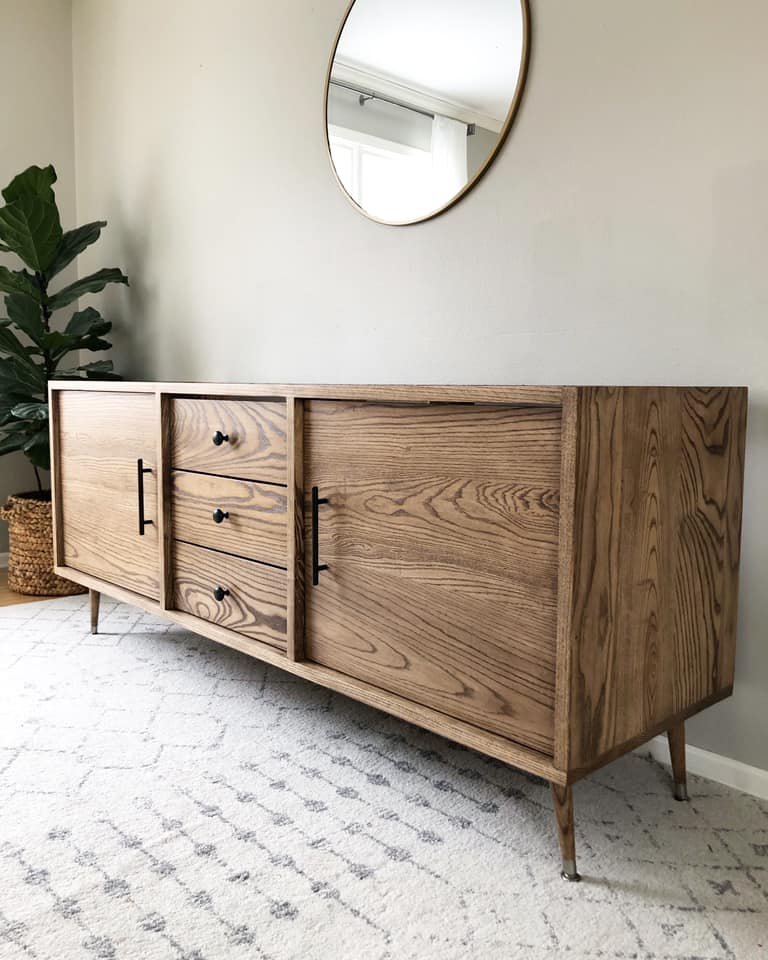
Built by Holli Peterson
Built from Plan(s)
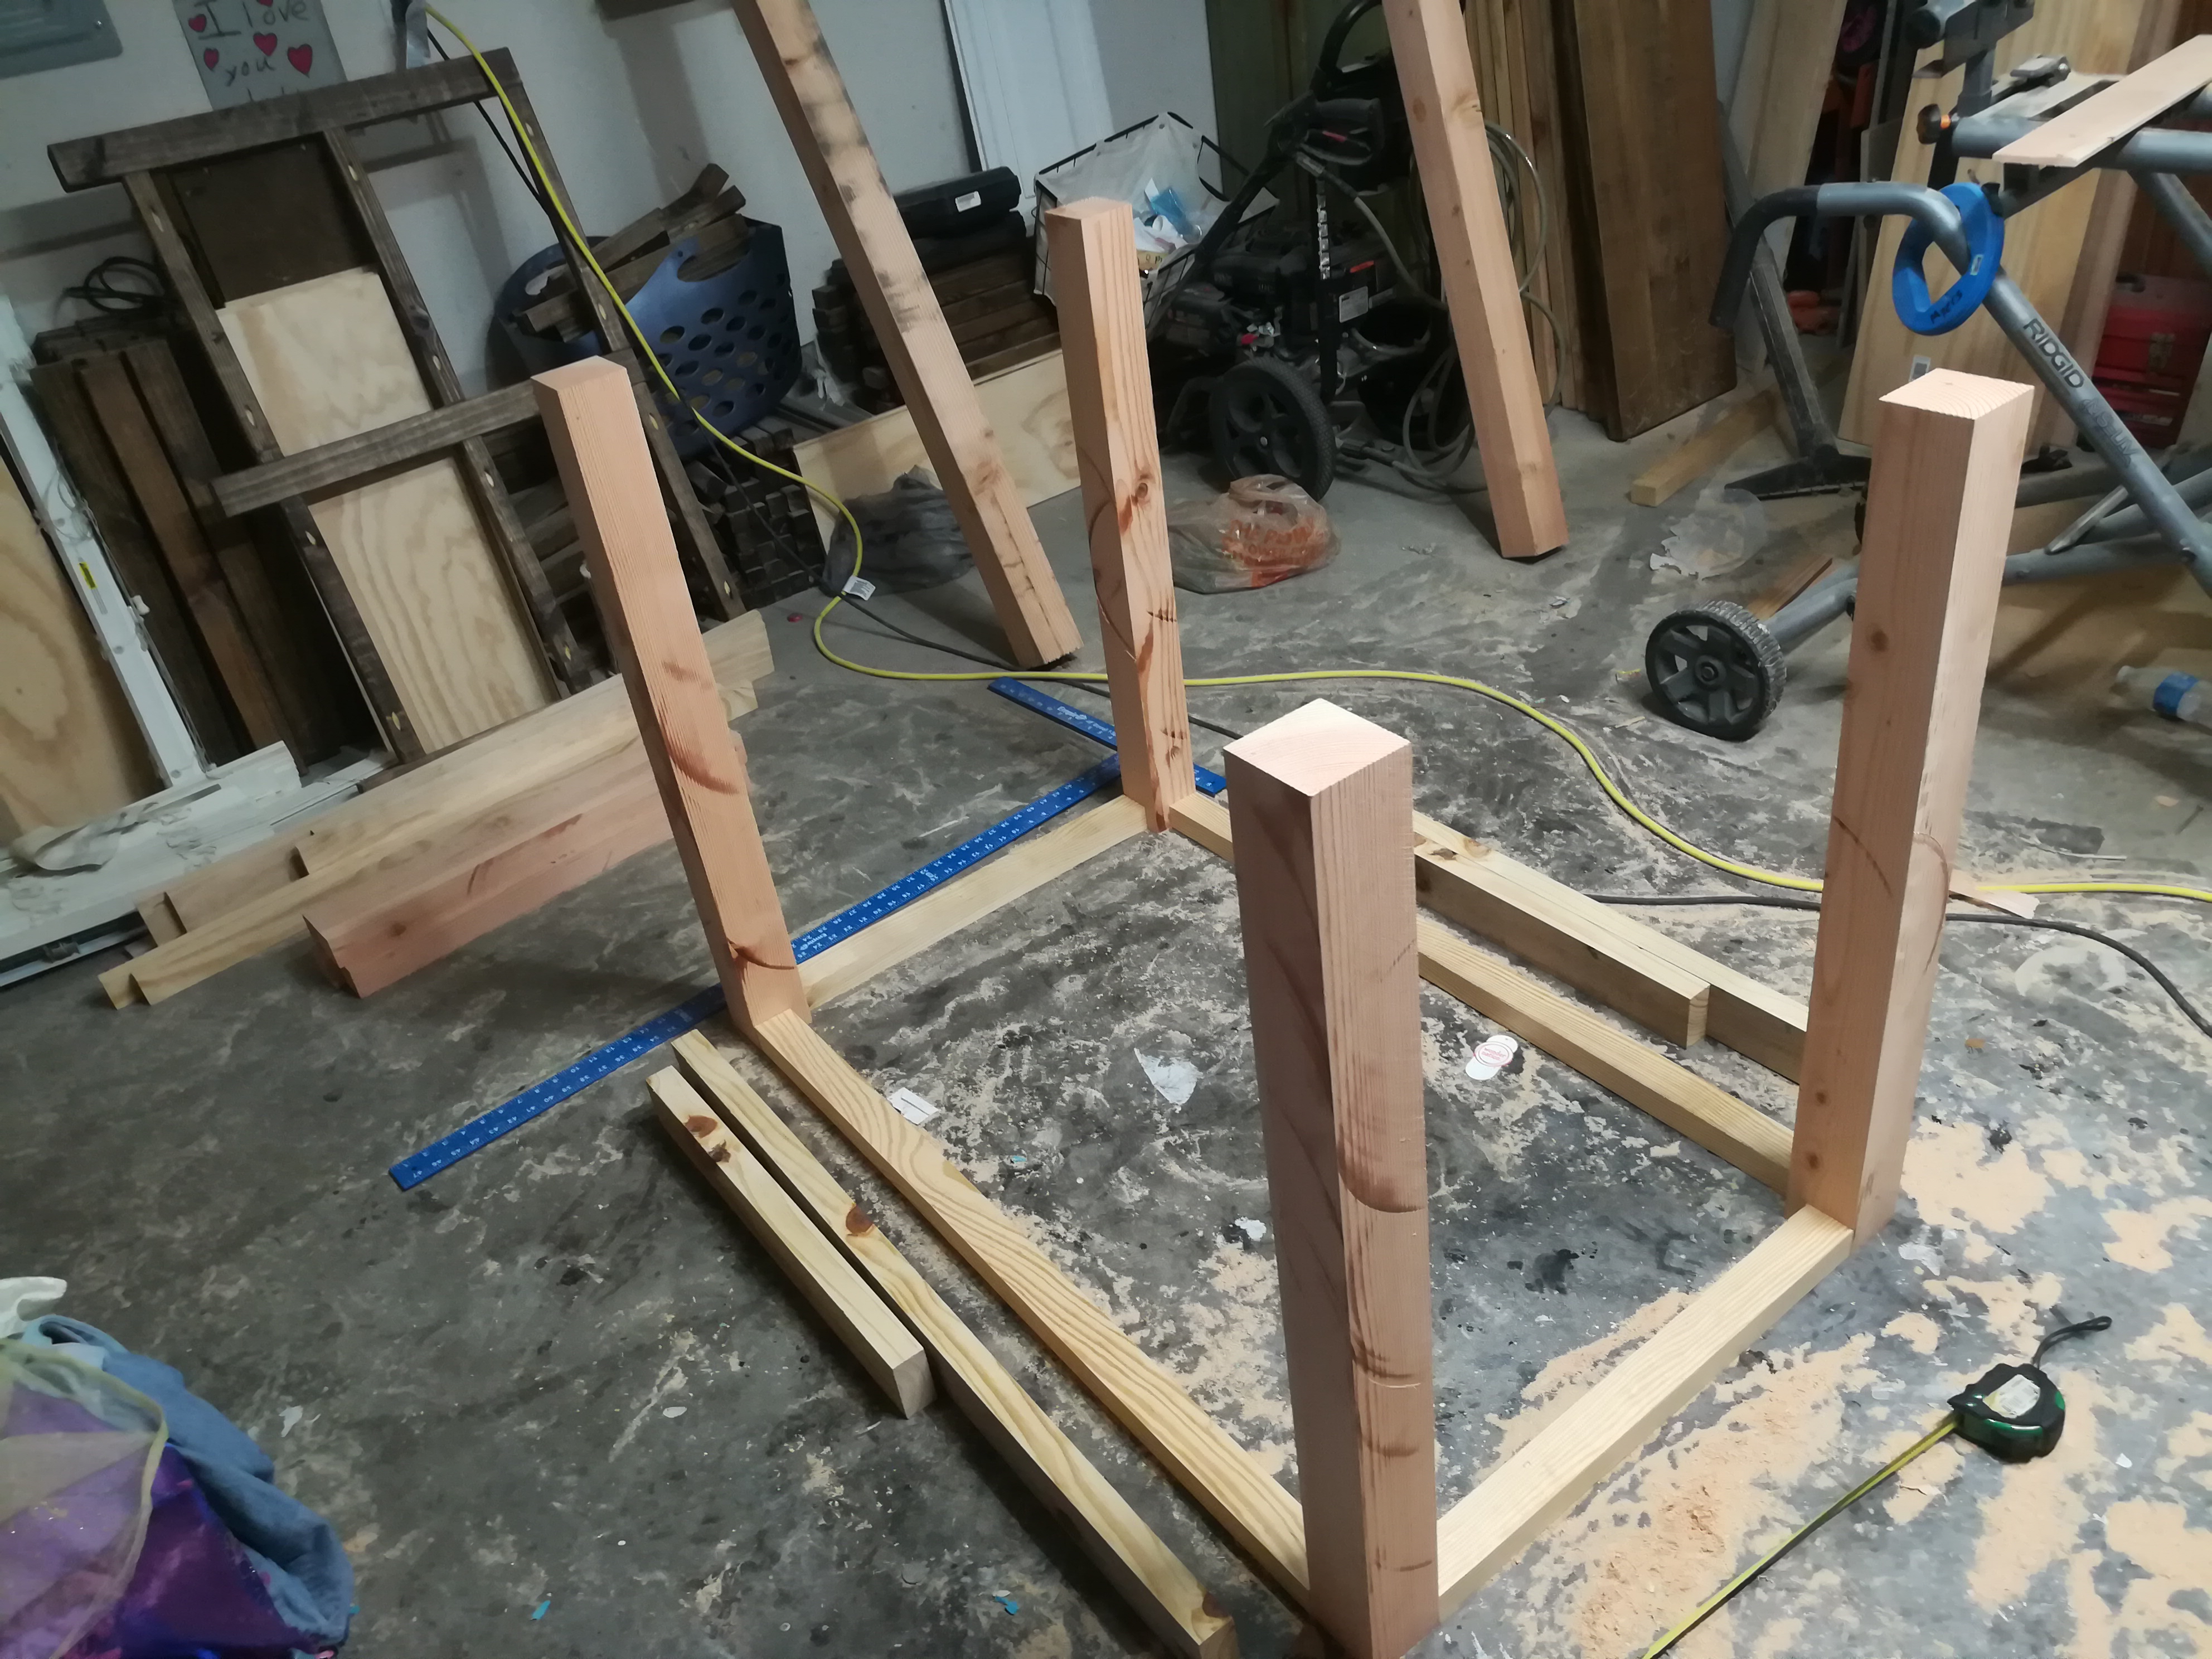
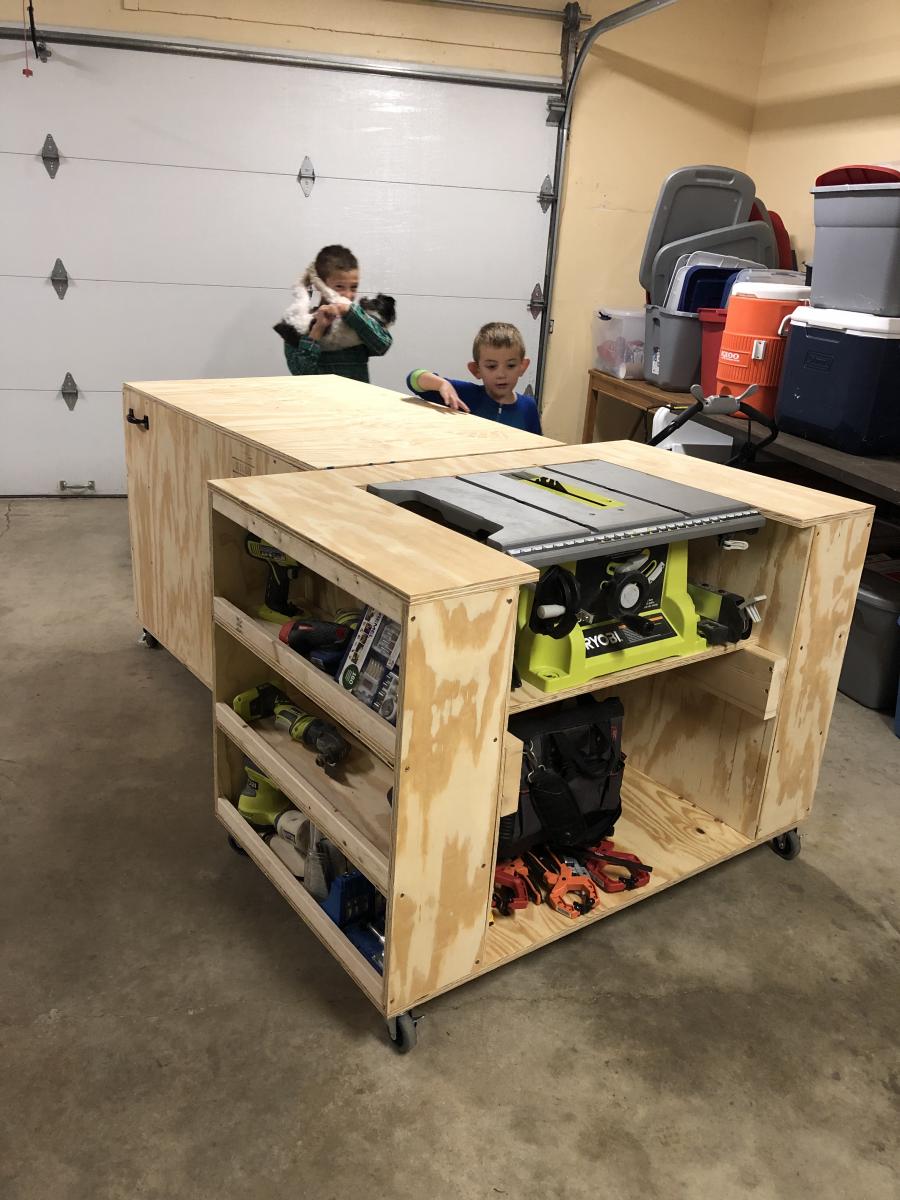
Roll Away Workbench with Miter Saw Stand
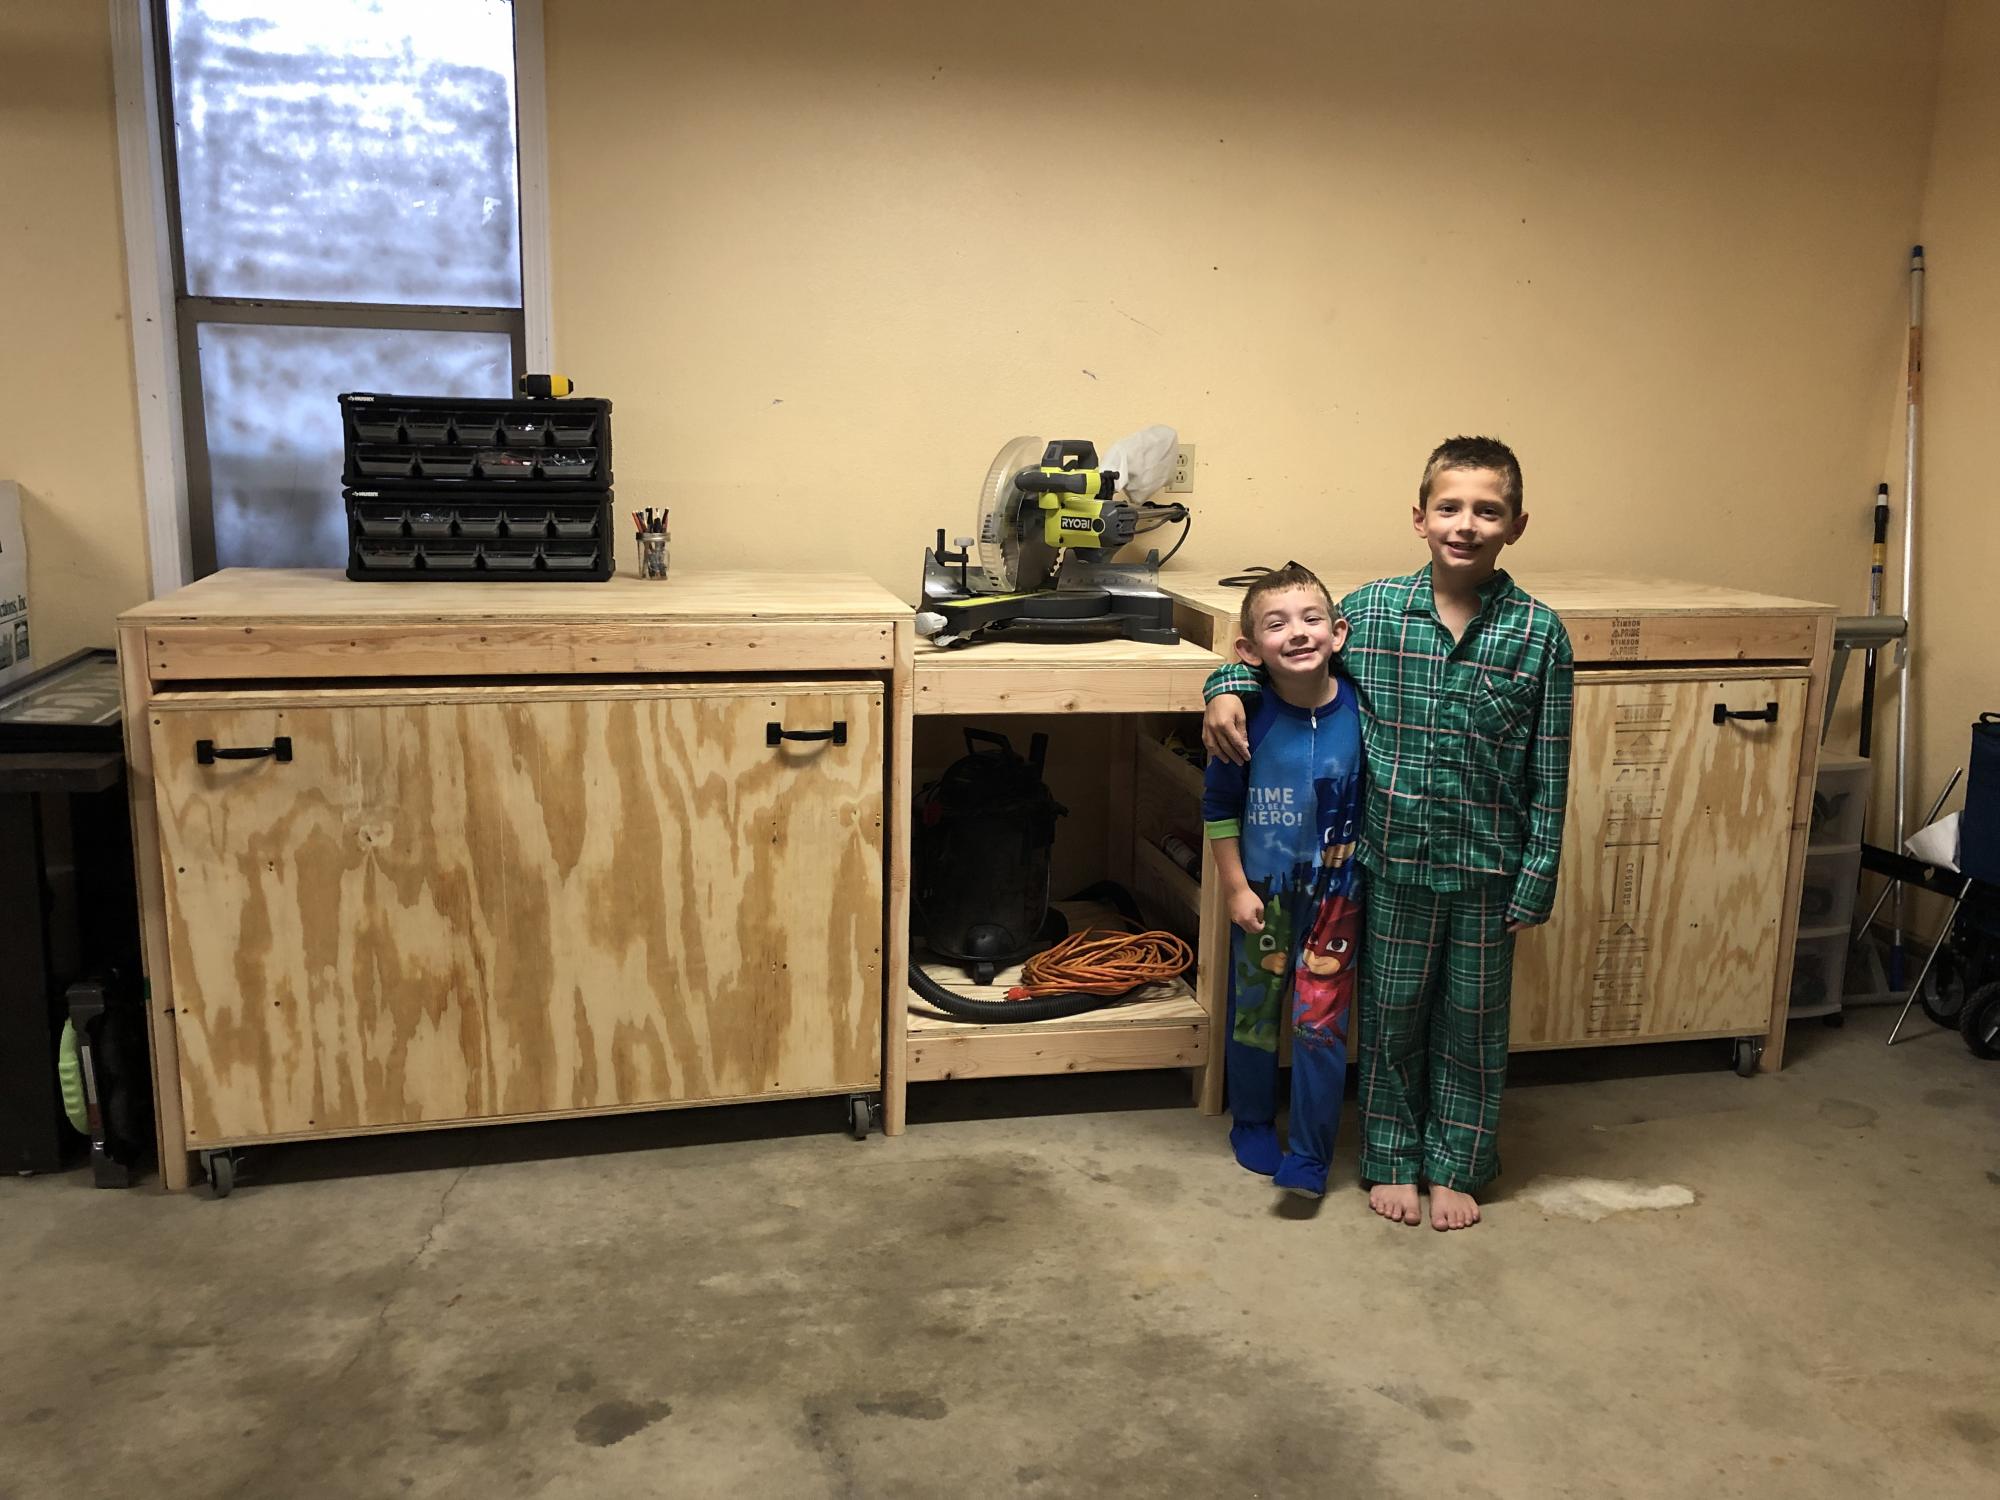
After collecting my tools, I needed a place to store them that would protect them. I had already had two jigsaws break because I was storing them in a rubbermaid tote. When I saw this plan I knew it was going to be perfect for my shop. My husband was supper happy because I would finally have a central spot for my workshop. My boys were happy to help when they could.

Built from Plan(s)
Estimated Time Investment
Week Long Project (20 Hours or More)
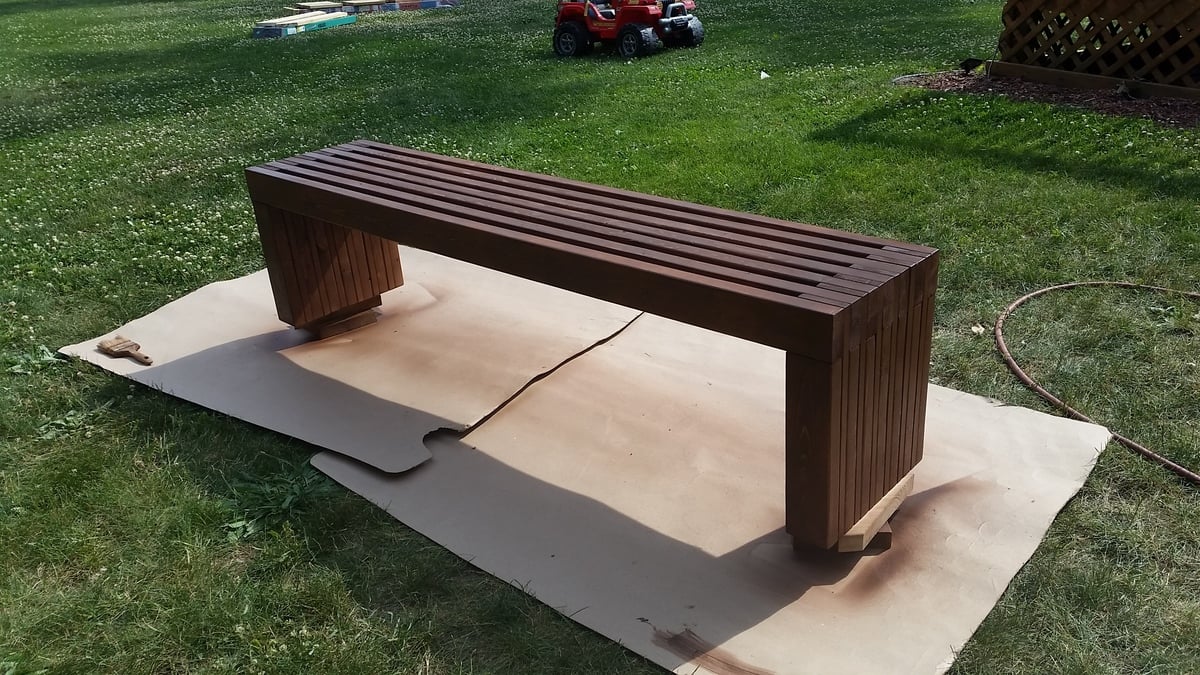
Modern slatted bench
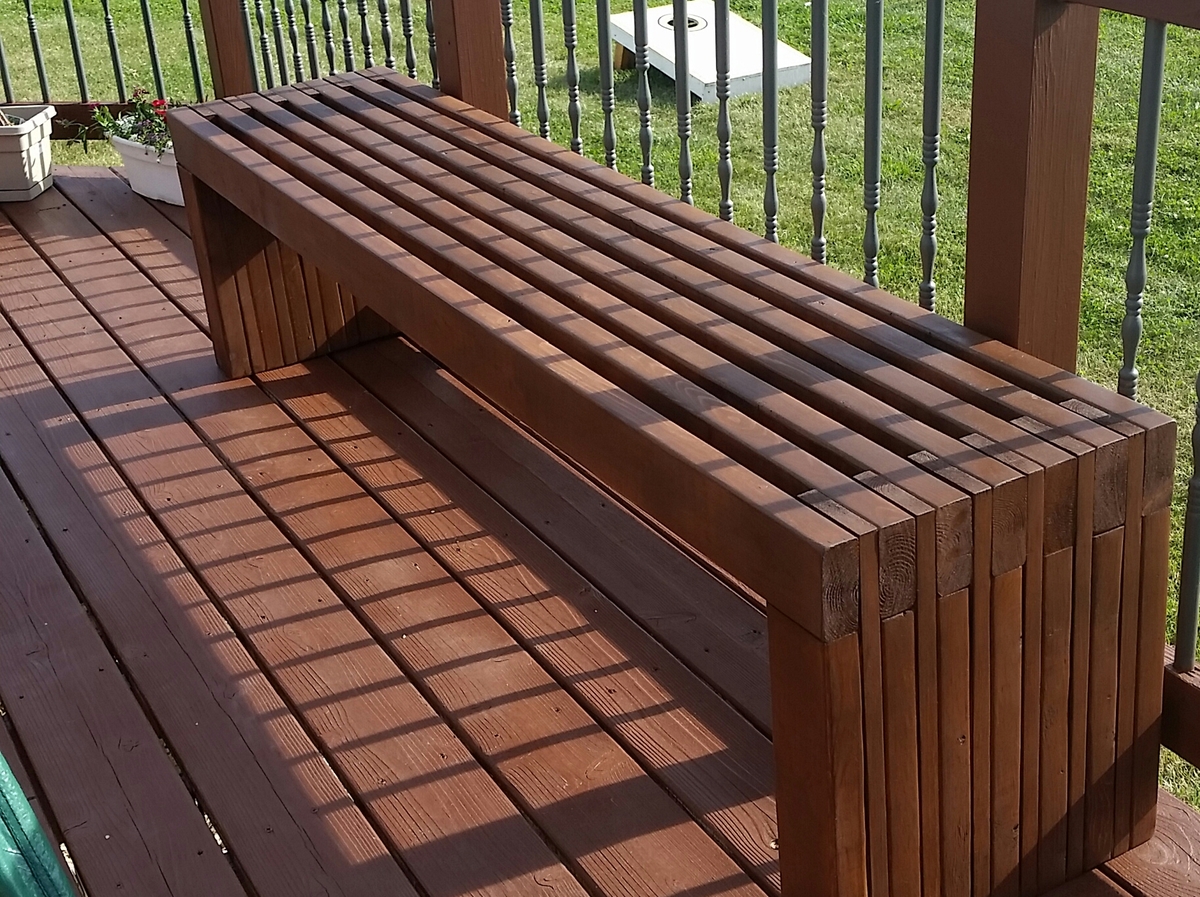
I made this for my sister the day before her house warming party. It was a pretty easy build. I used wood glue and 2" nails. Using a nail gun, this came together pretty quickly. I do wish that I had wide enough clamps to hold everything in place while it dried, because there were a few gaps due to some imperfect boards. I used 104" stud length boards, so I only need to purchase 7 instead of 9. this was enough to make the cuts for the top and both leg pieces from each board. the price was the same and we had limited space in our van for boards, so this was a better option for us. I used a sprayer hooked up to an air compressor to apply the stain and was able to get in between the slats fine with this method, brushing over it as I sprayed. Luckily I chose the same color as her deck not knowing, so it matches great. Now I need to make one for myself! :)
Built from Plan(s)
Estimated Cost
$40
Estimated Time Investment
Afternoon Project (3-6 Hours)
Recommended Skill Level
Starter Project
Providence Picnic Table by Falafel and the Bee
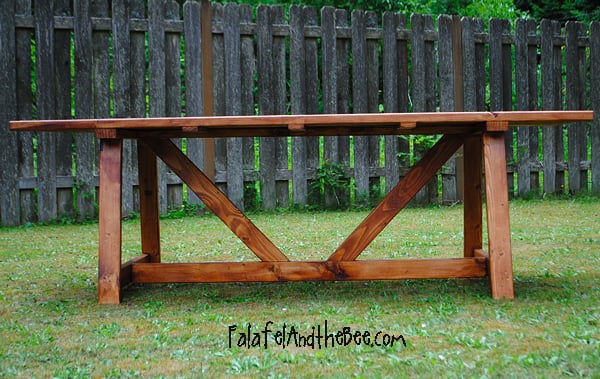
This is my second large wood project...and both from this blog! The plans were fabulously easy. This was the first time I used my miter saw, and it was a great way to break it in.
Built from Plan(s)
Estimated Cost
Under $120.00
Estimated Time Investment
Weekend Project (10-20 Hours)
Finish Used
Benjamin Moore Arborcoat Transparent Teak
Recommended Skill Level
Intermediate
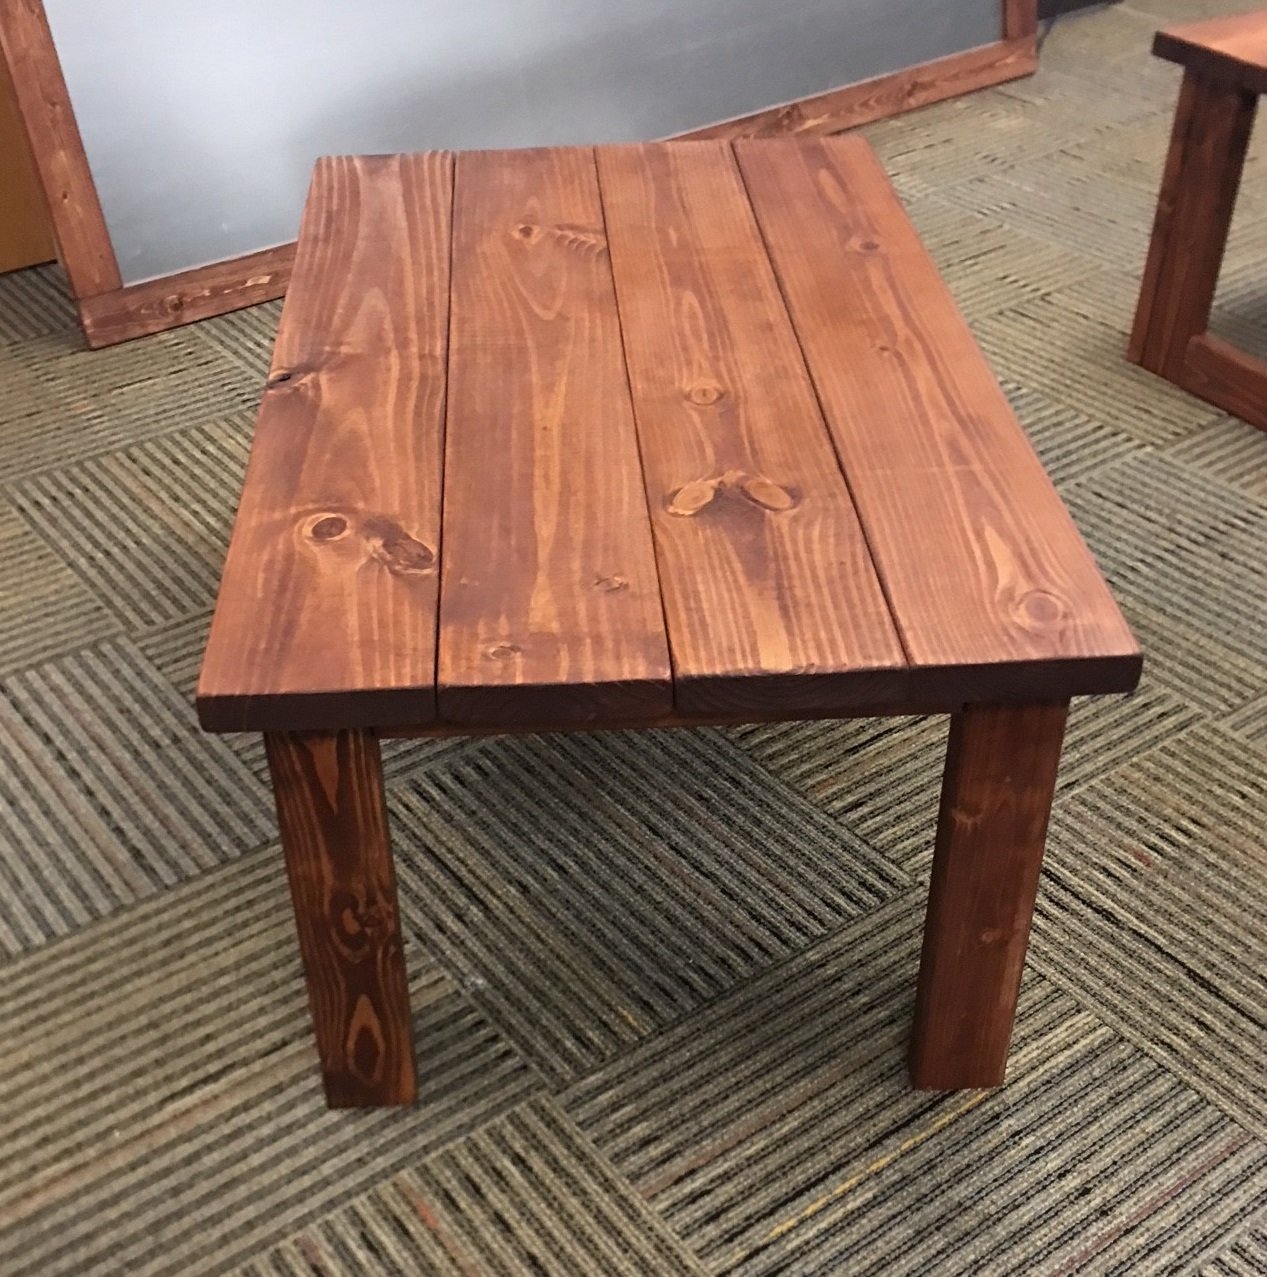
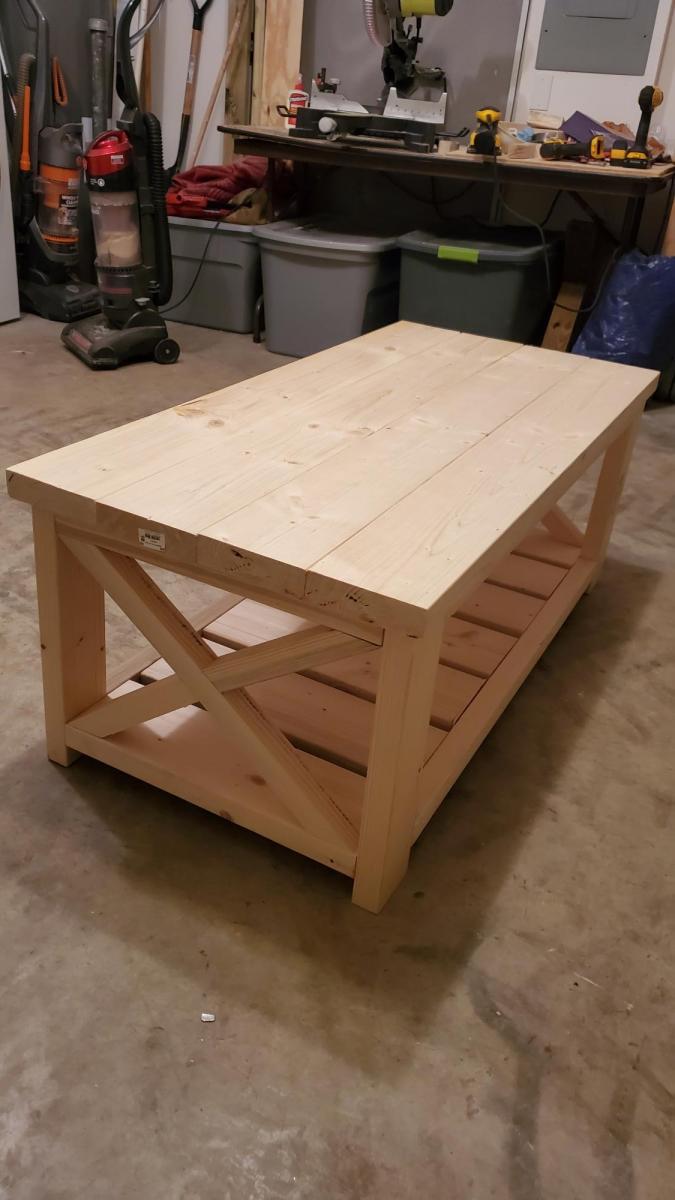
First project - Farmhouse Coffee table
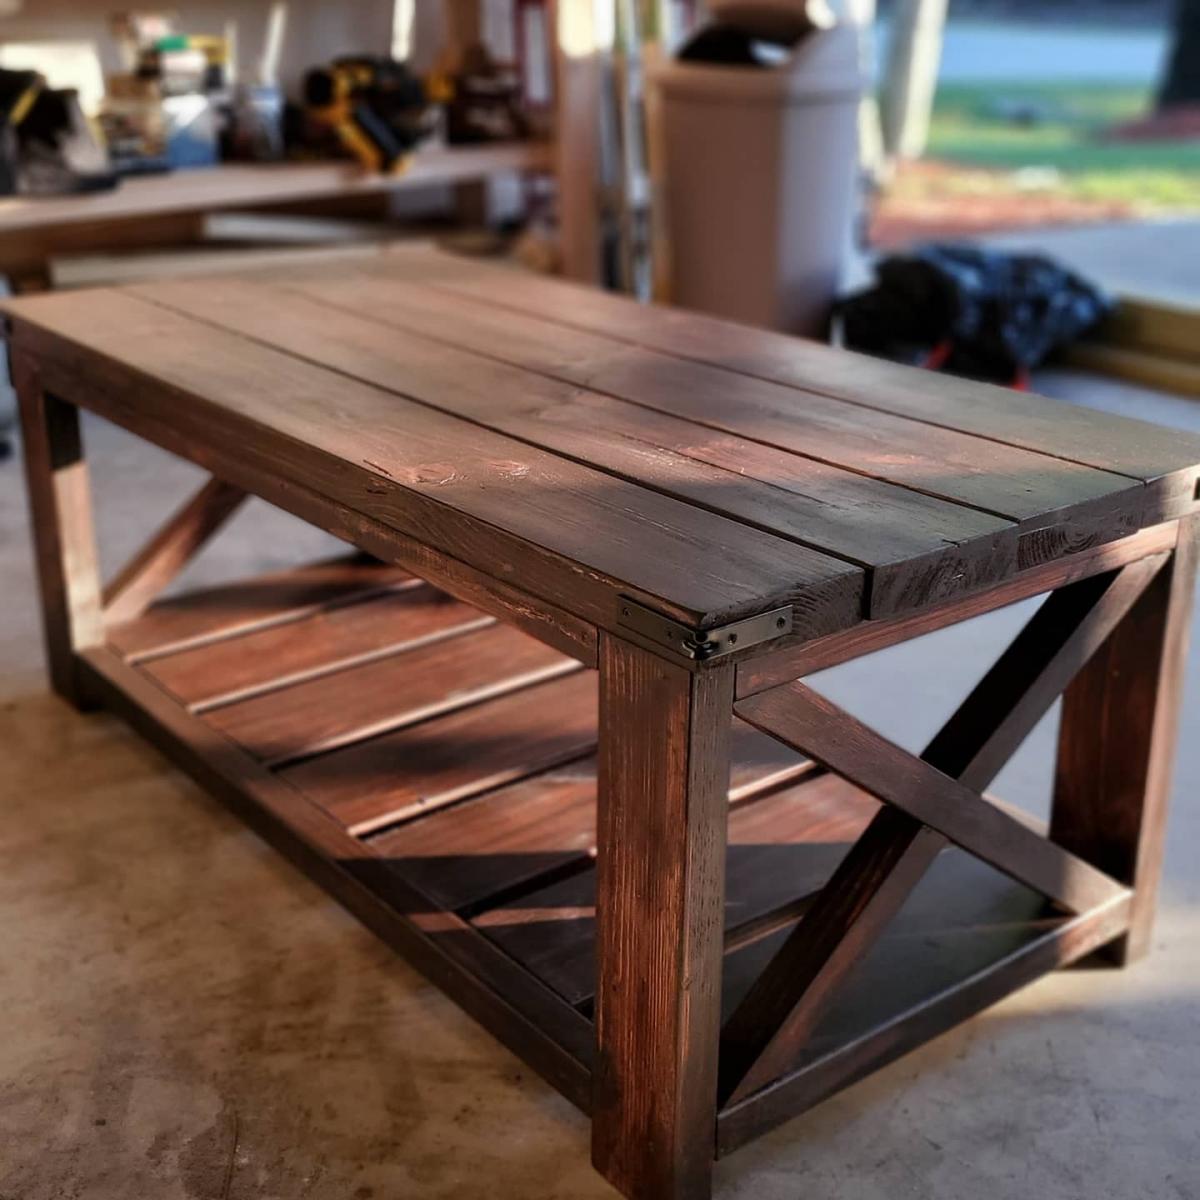
Thank you for the awesome coffee table plan. Love the finished project on it. Can't wait to do something else.

Built from Plan(s)
Estimated Cost
$60
Estimated Time Investment
Afternoon Project (3-6 Hours)
Recommended Skill Level
Beginner
3x10 Raised garden bed
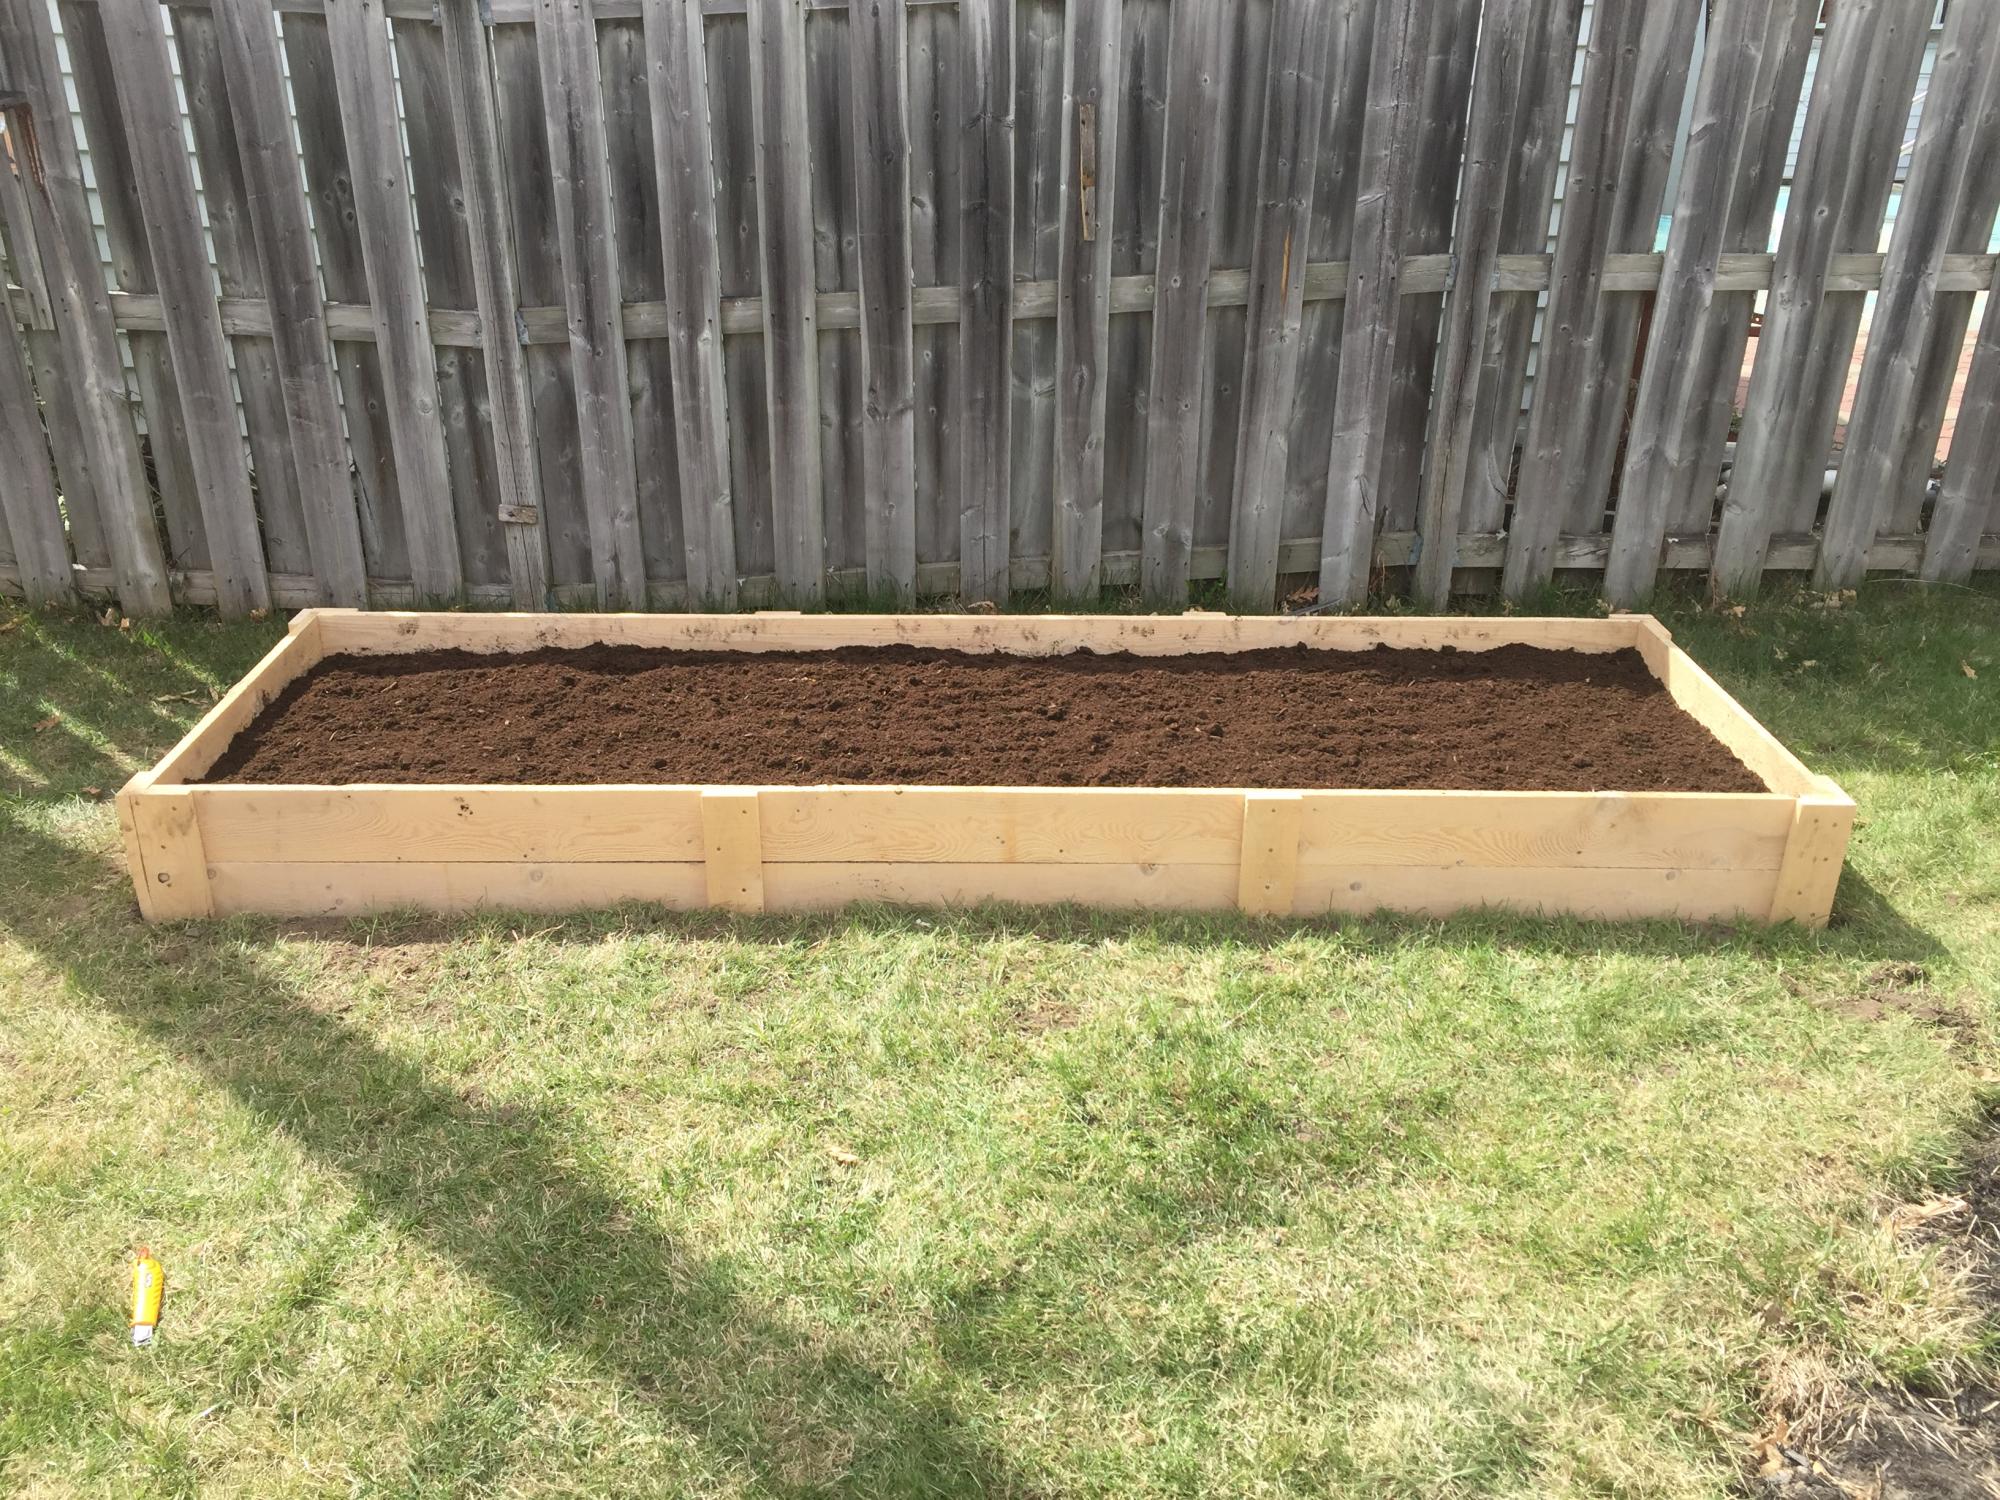
We built this 3x10 feet raised garden bed.
Built from Plan(s)
Estimated Cost
40$
Estimated Time Investment
Afternoon Project (3-6 Hours)
Finish Used
None
Recommended Skill Level
Starter Project
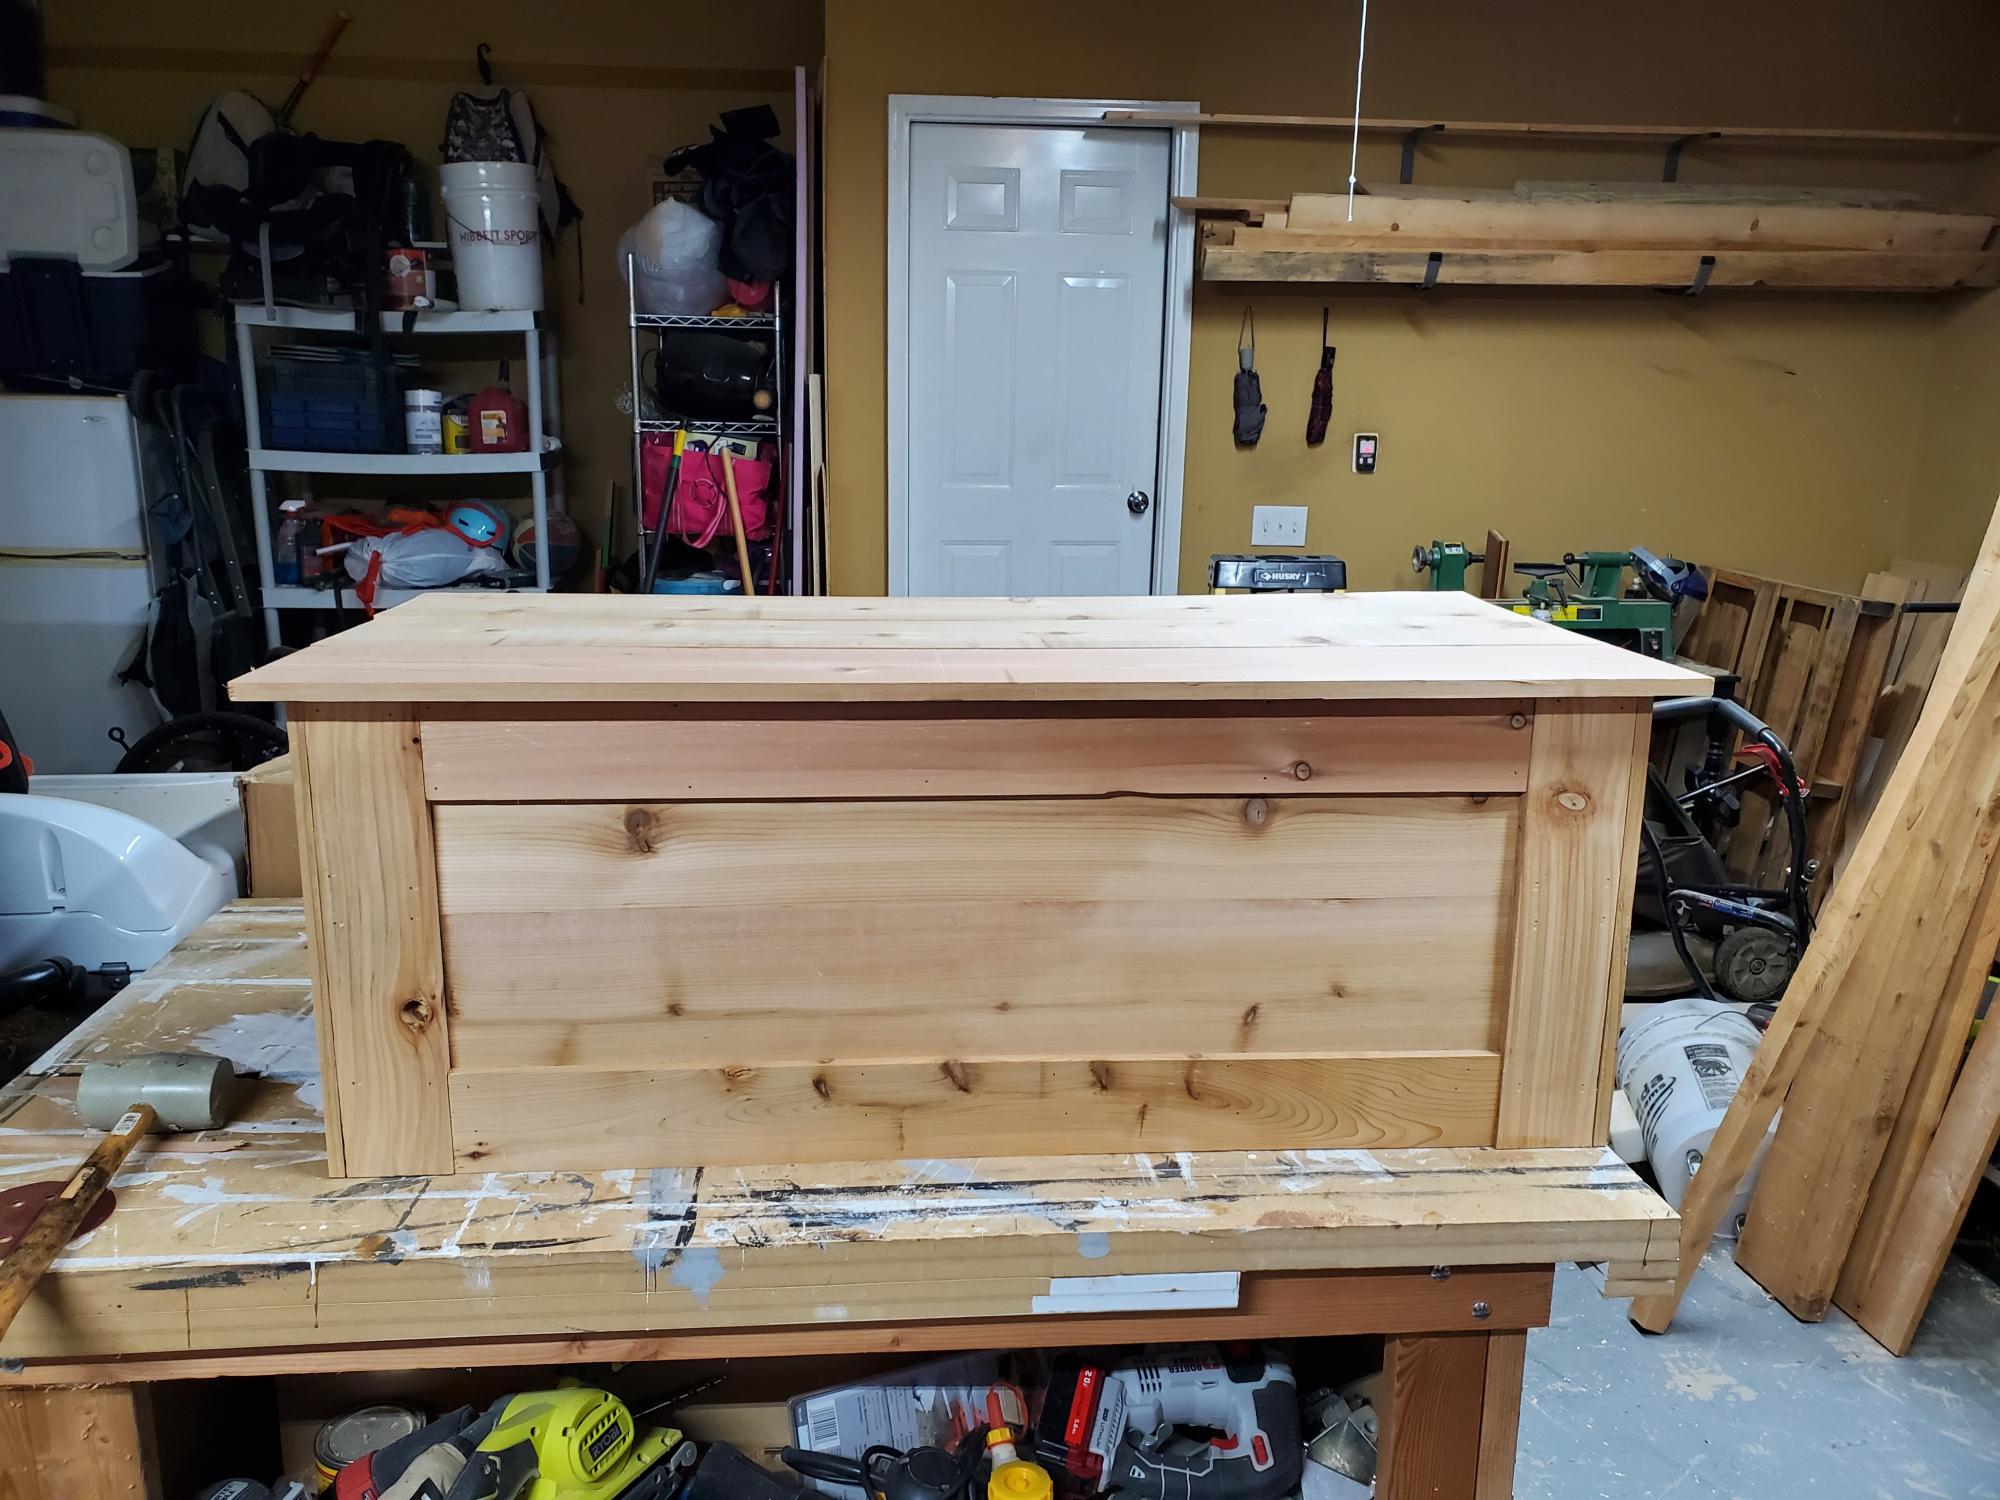
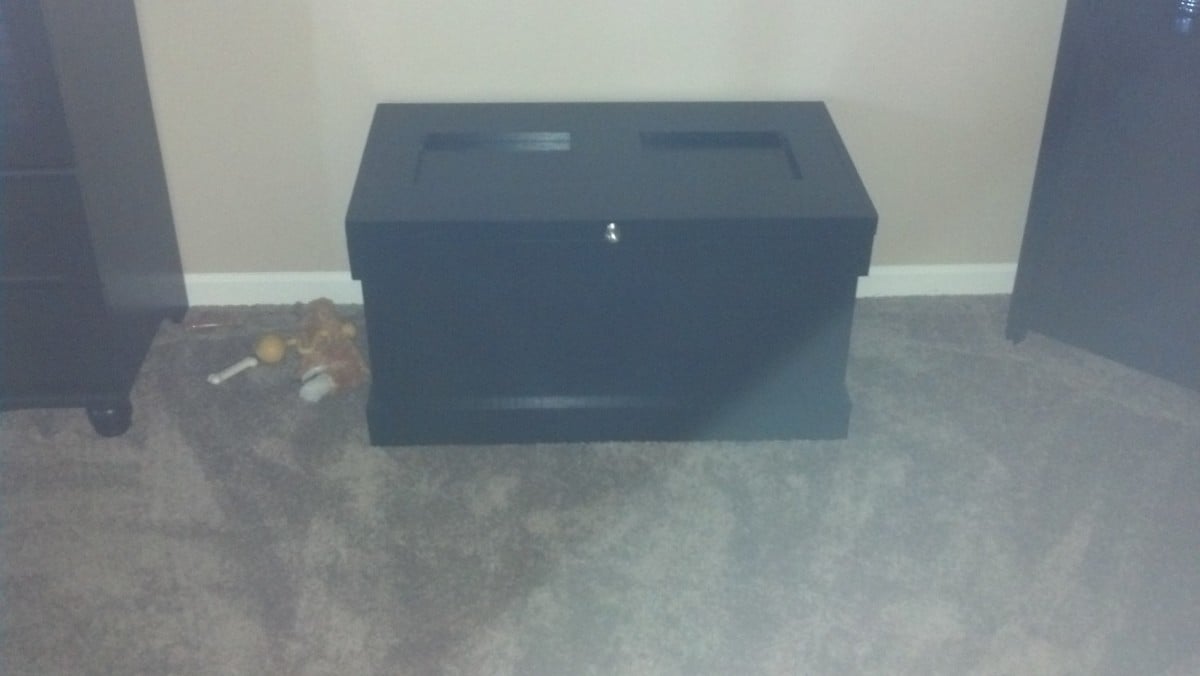
Blanket chest
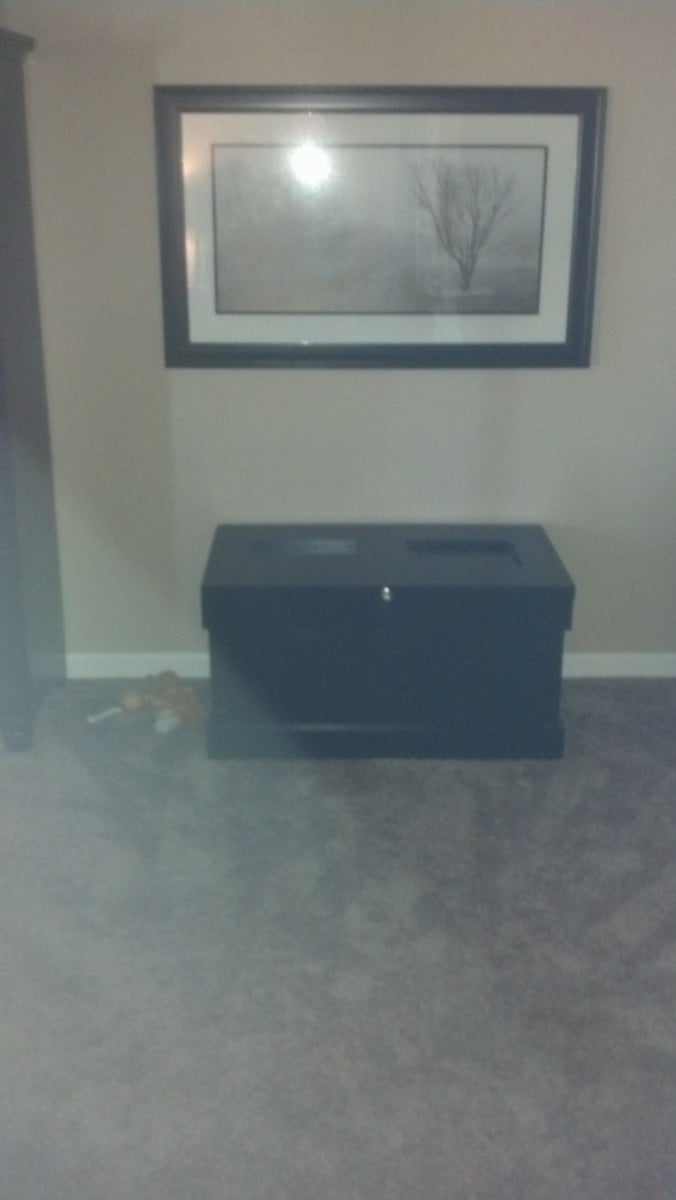
My wife wanted a new chest to store blankets in. I saw the plans for the Becca and thought it would be perfect for what we were after.
I used some regular plywood I had laying around and some select pine for the trim. I liked the look of the top in the plan but wanted some more texture to it, so I used a solid piece of plywood for the top and layer pine for the trim features. I tested my new chisels to recess the hinges to minimize gapping under the lid.
We painted it solid black to match the rest of the basement furniture. A few coats of poly finished it off for durability.
This took about 2 months for me to get around to finishing. That's probably about...12 hours of actual work, plus finishing.

Built from Plan(s)
Estimated Time Investment
Weekend Project (10-20 Hours)
Finish Used
Valspar spray primer, Rustoleum Painter's Touch Black (2 coats), Minwax Water-based Polycrillic (3 coats)
Recommended Skill Level
Intermediate
Twin Farmhouse Storage Bed with Drawers
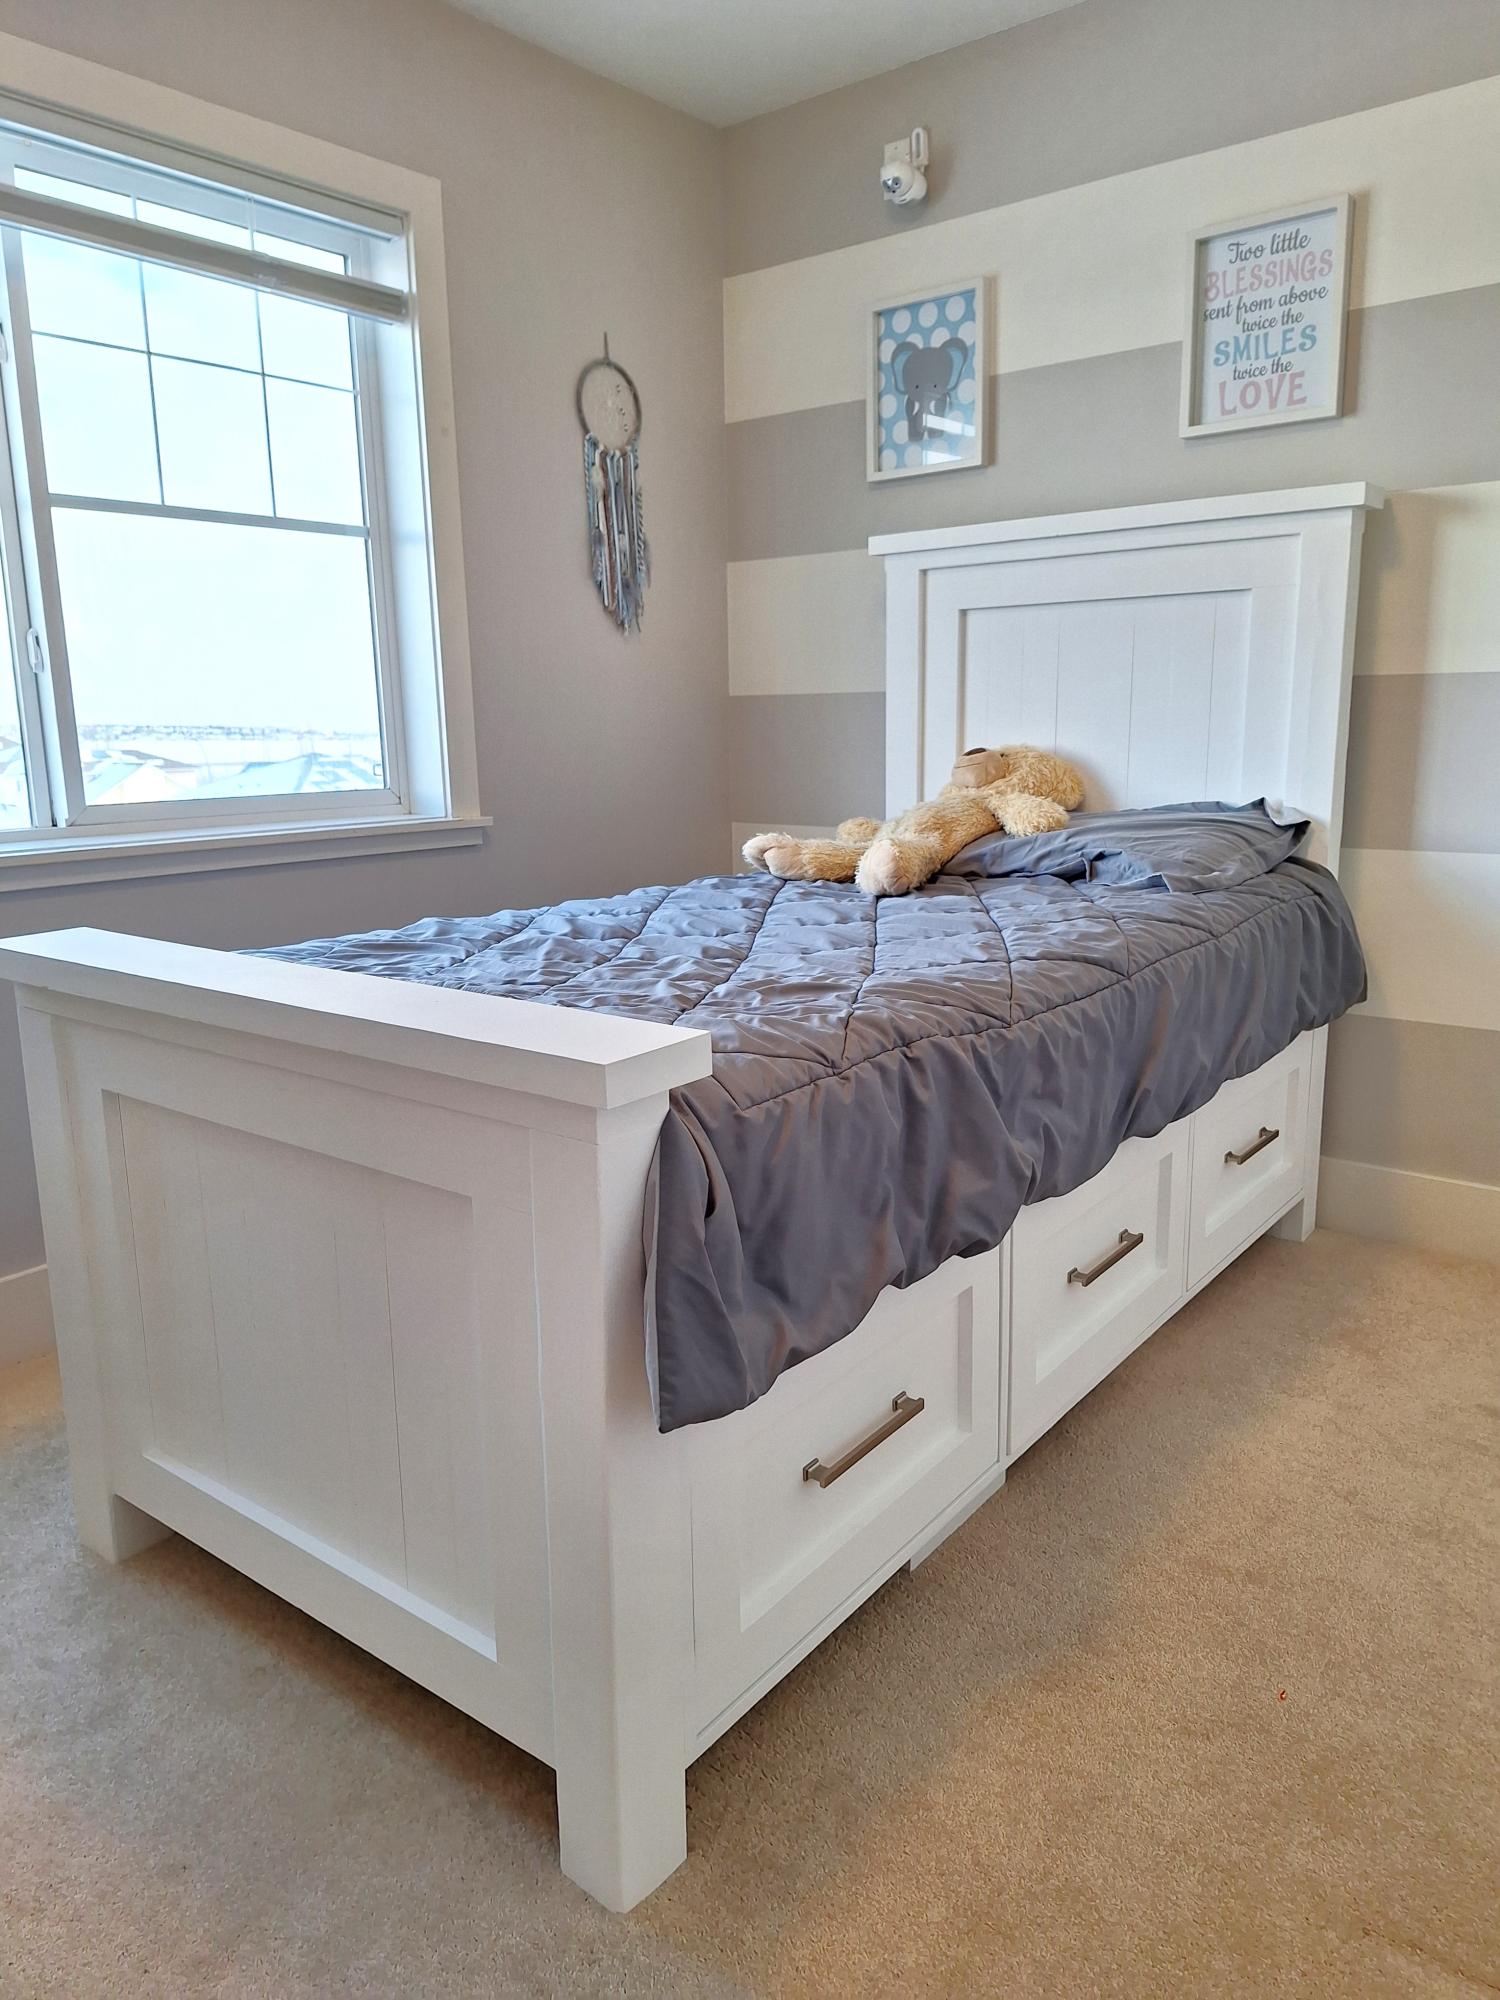
I love these plans, and my son loves his new bed!
Adam
Built from Plan(s)
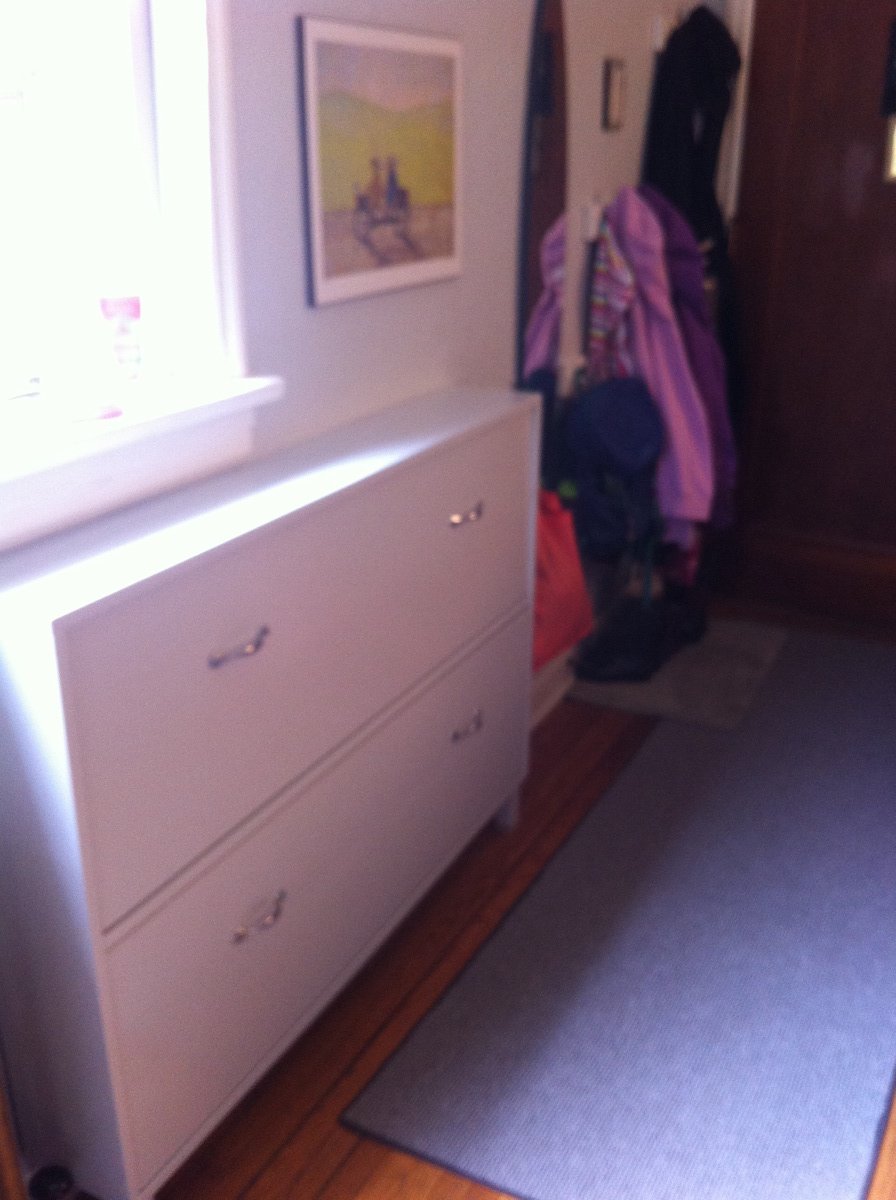
First build--shoe cabinet!!
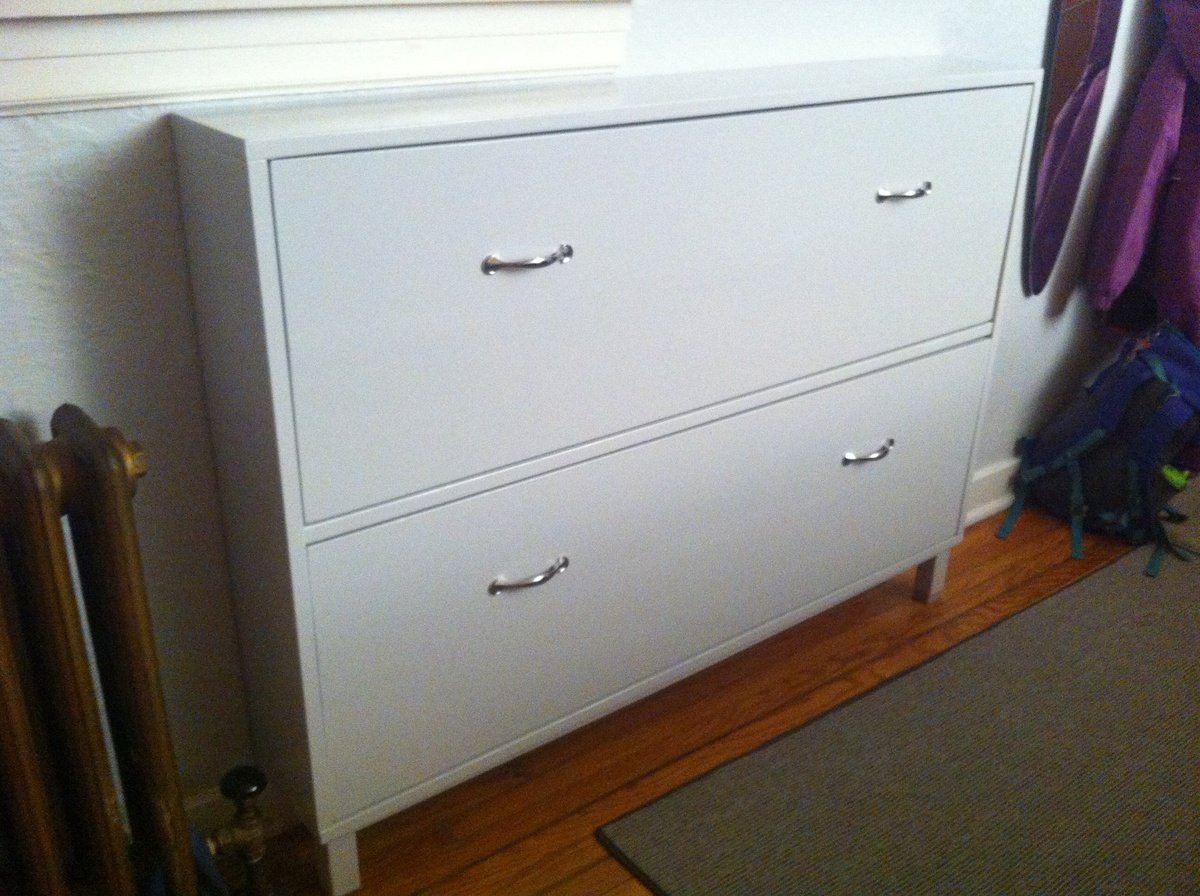
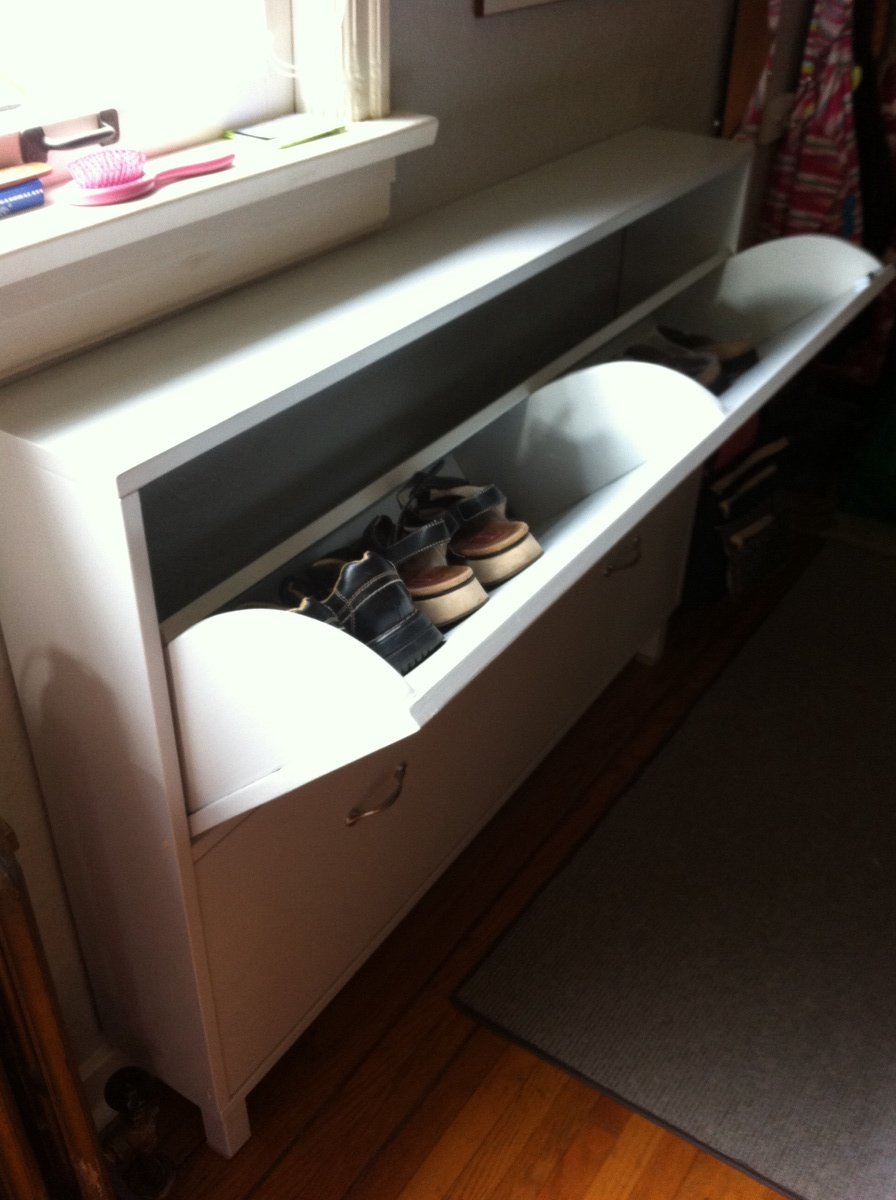
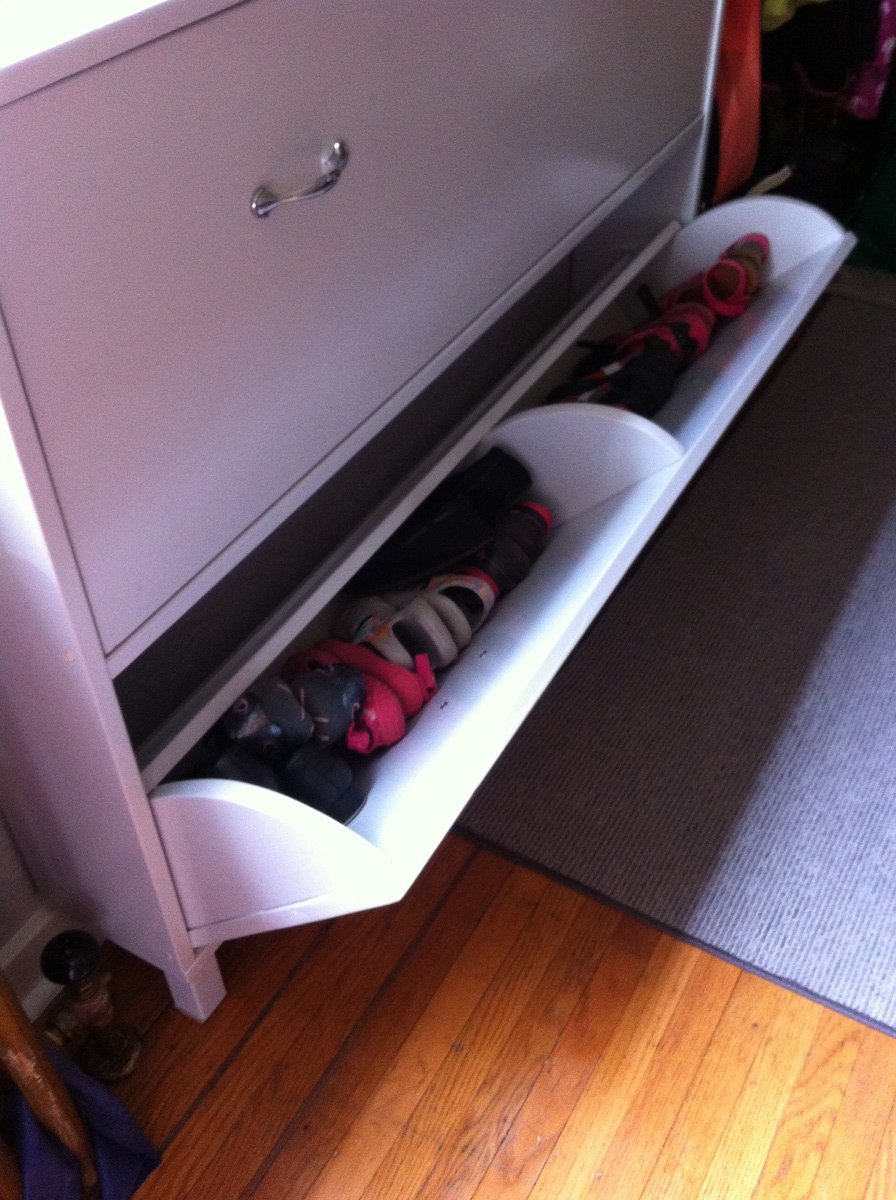
Had a horribly messy front entrance so really needed this shoe cabinet. It's dimensions suited my space better than an Ikea one, and accommodated more shoes. This being my first project, I am glad I started with this instead of a loft bed, since I made alot of mistakes (& corrections) along the way. Although some of the problems occurred because of pieces that ended up being convex. I chose to fill in the gap between the two boards on the front of each bin. It worked out really well.
Really love the Kreg Jig! So worth the investment.
Could not figure out how to properly use magnet catches. Did apply one to one side of the top drawer but it doesn't work too well--pulls the bin too far in.
Built from Plan(s)
Estimated Cost
$80
Estimated Time Investment
Week Long Project (20 Hours or More)
Finish Used
Used latex primer (which I hated because it behaved like an alkyd & destroyed a couple of brushes) & high gloss paint for high durability.
Recommended Skill Level
Beginner
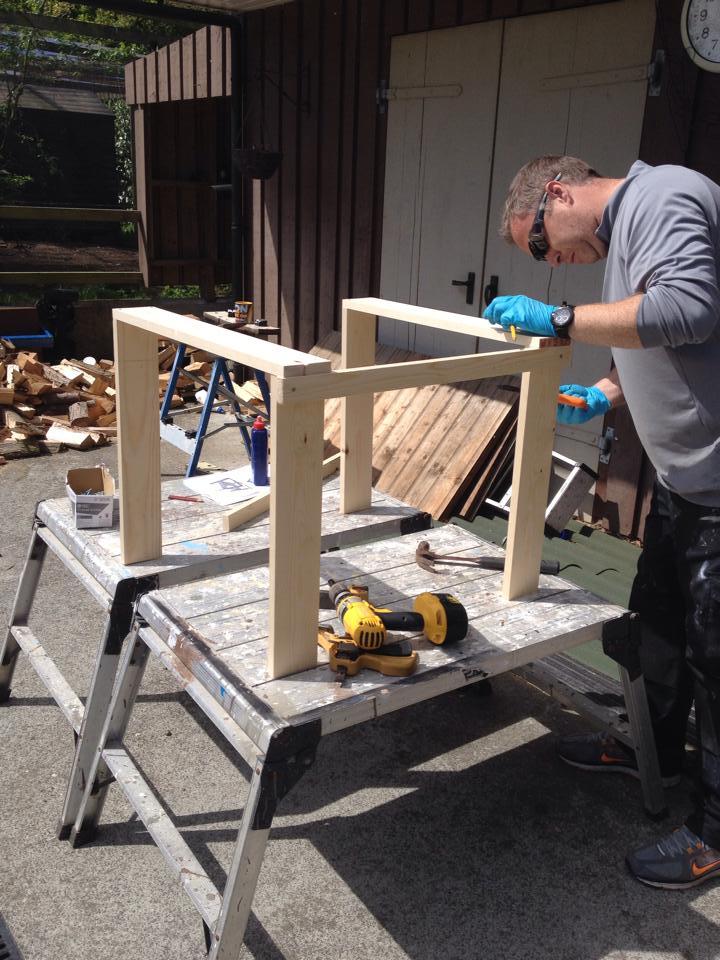
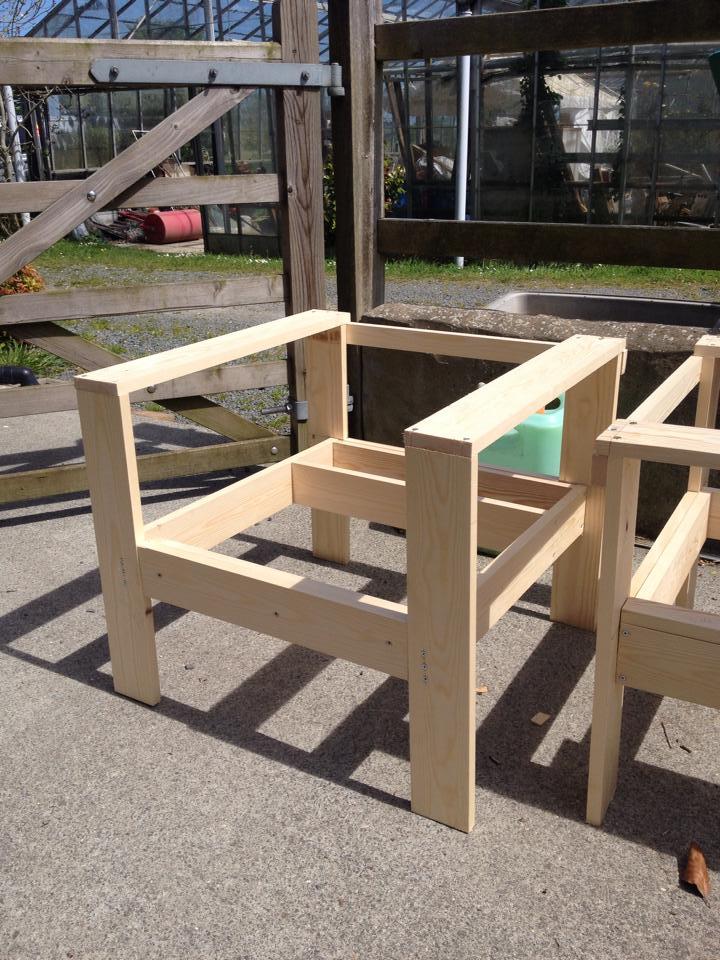
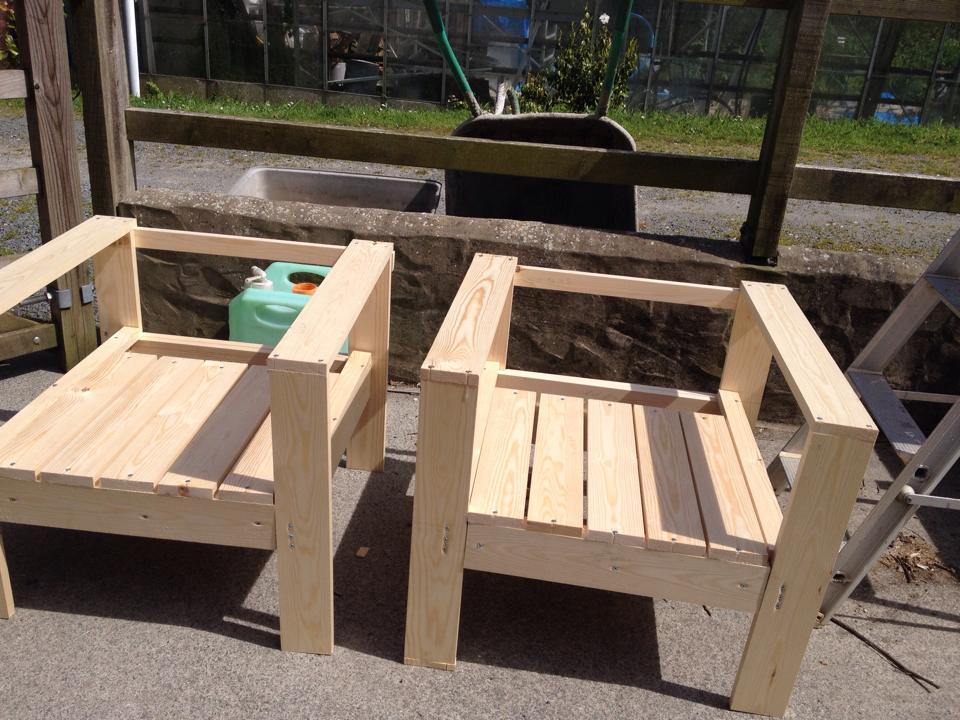
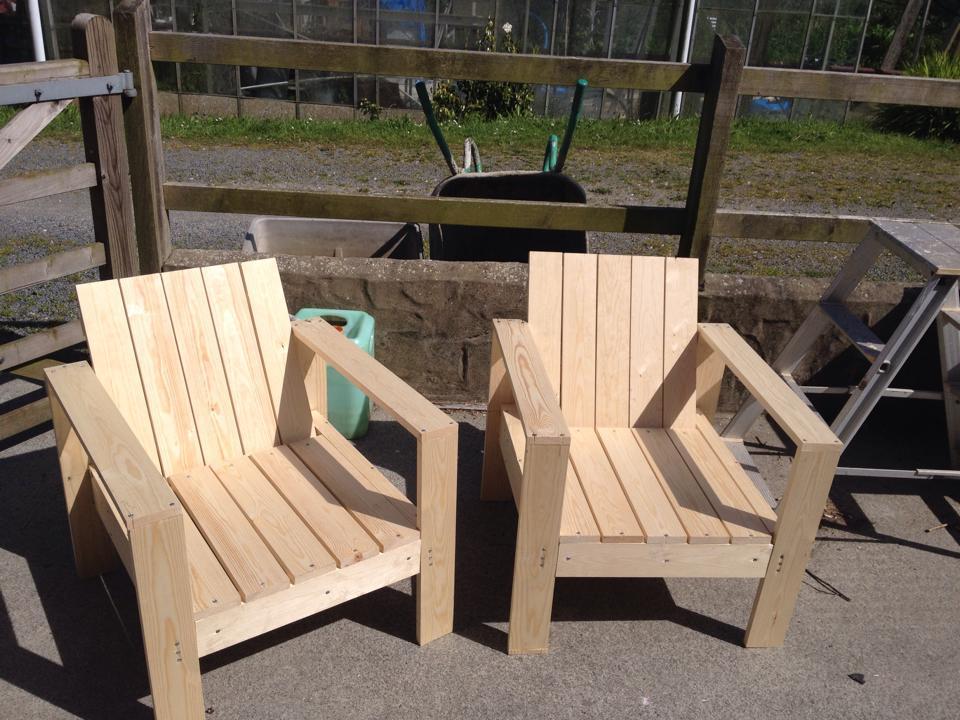
First time builder....
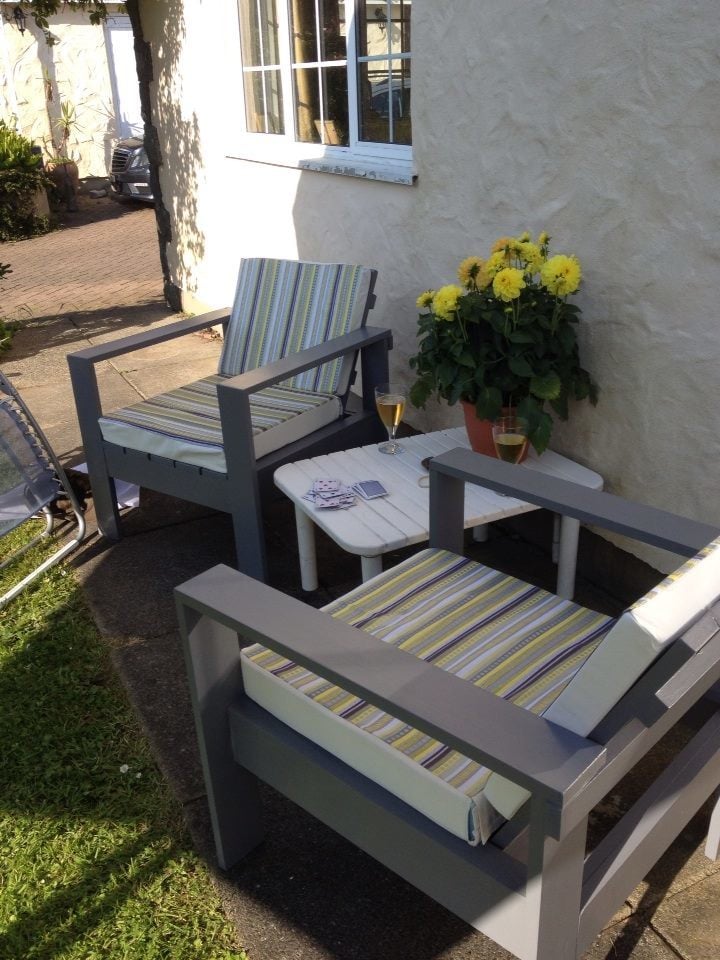
After finding Ana's plans on how to make these outdoor chairs we decided to give it ago one long weekend. The plans are easy to follow and the end result is the most comfortable chairs, we've spent hours relaxing in them. It took 4 hours to make two chairs and the rest of the weekend painting them. The only thing that I would have done differently is to paint the wood prior to assembling the chairs. My partner then decided to use the left over wood to make a matching table (not shown)
Built from Plan(s)
Estimated Time Investment
Afternoon Project (3-6 Hours)
Finish Used
We primed the chair and then used Cuprinal Silver Birch
Recommended Skill Level
Starter Project
Comments
Thu, 06/05/2014 - 09:01
Thank you
I hand made the cushions, had to dust off the sewing machine. The foam and the fabric were more expensive to buy than all the wood. We're going to make the two seater sofa next and I'm going to buy pre-made, it's not the same but we live in an isolated area with limited shopping..
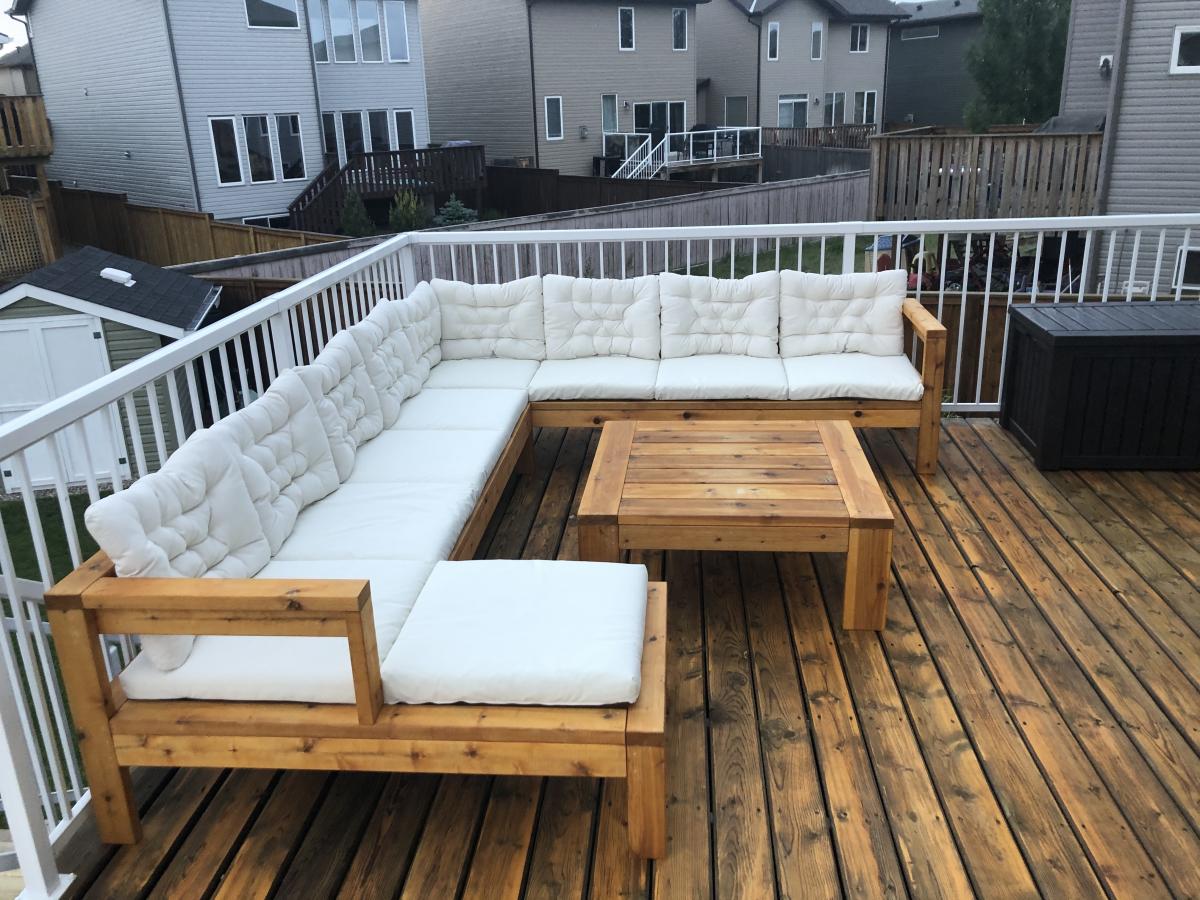
Outdoor Sectional
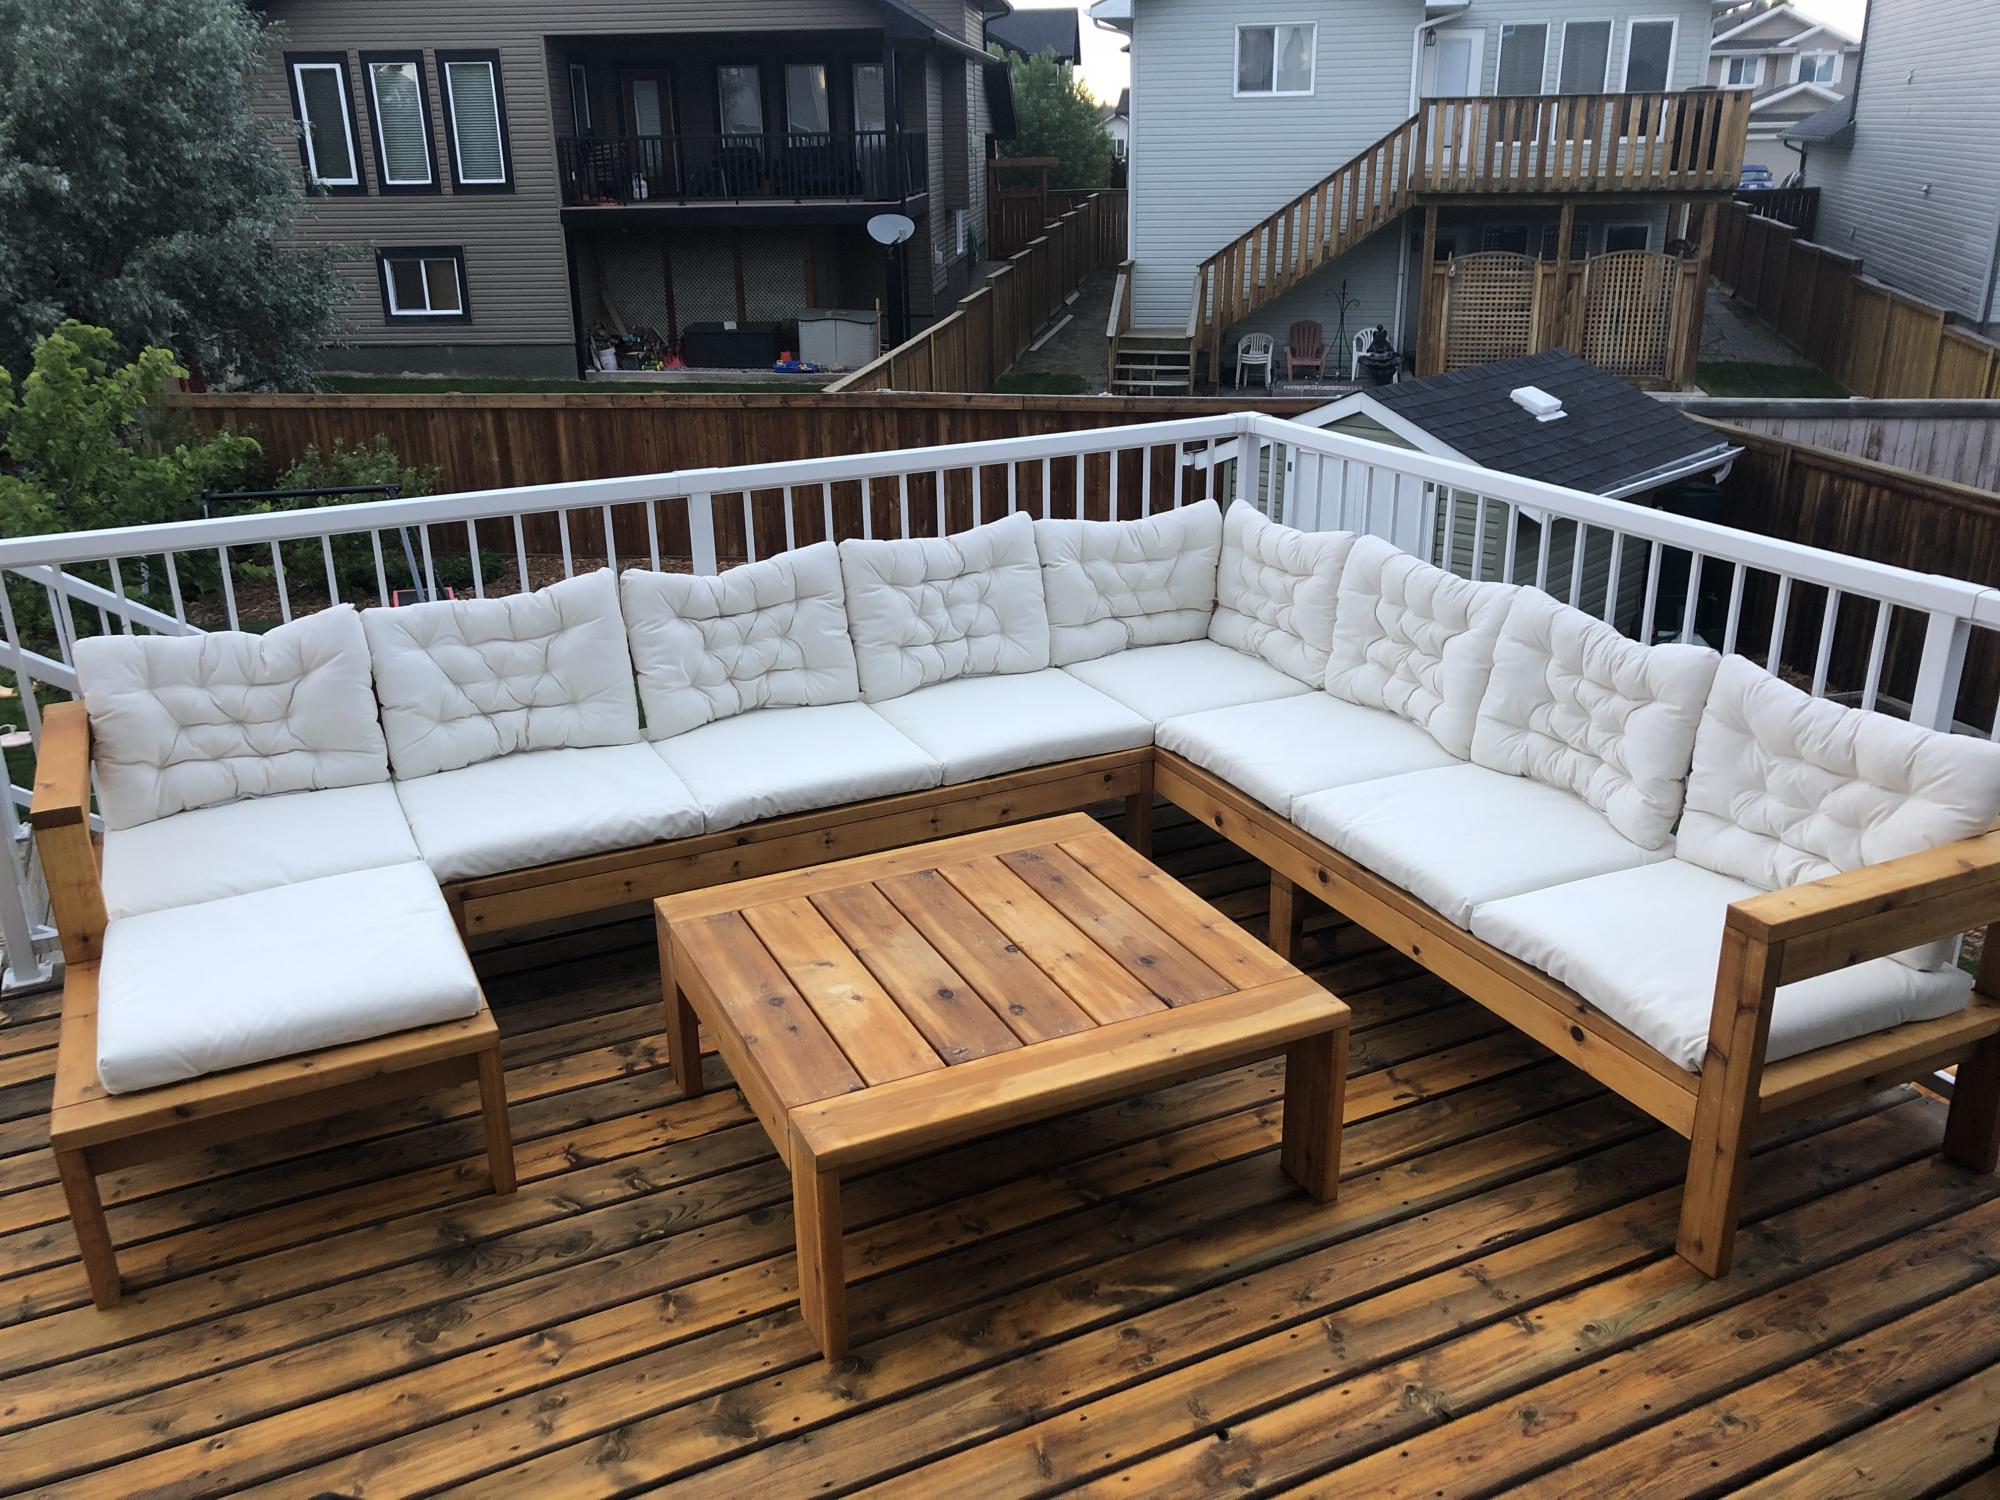
Modified the plans of the outdoor sofa and sectional piece to create this set, then added cushions from IKEA.
Built from Plan(s)
Finish Used
SuperDeck Cedar Tone Natural
Comments
Wed, 02/21/2024 - 10:27
I'm building the sectional…
I'm building the sectional this weekend, and saw your addition to the end piece and am going to steal your idea. Very nice.
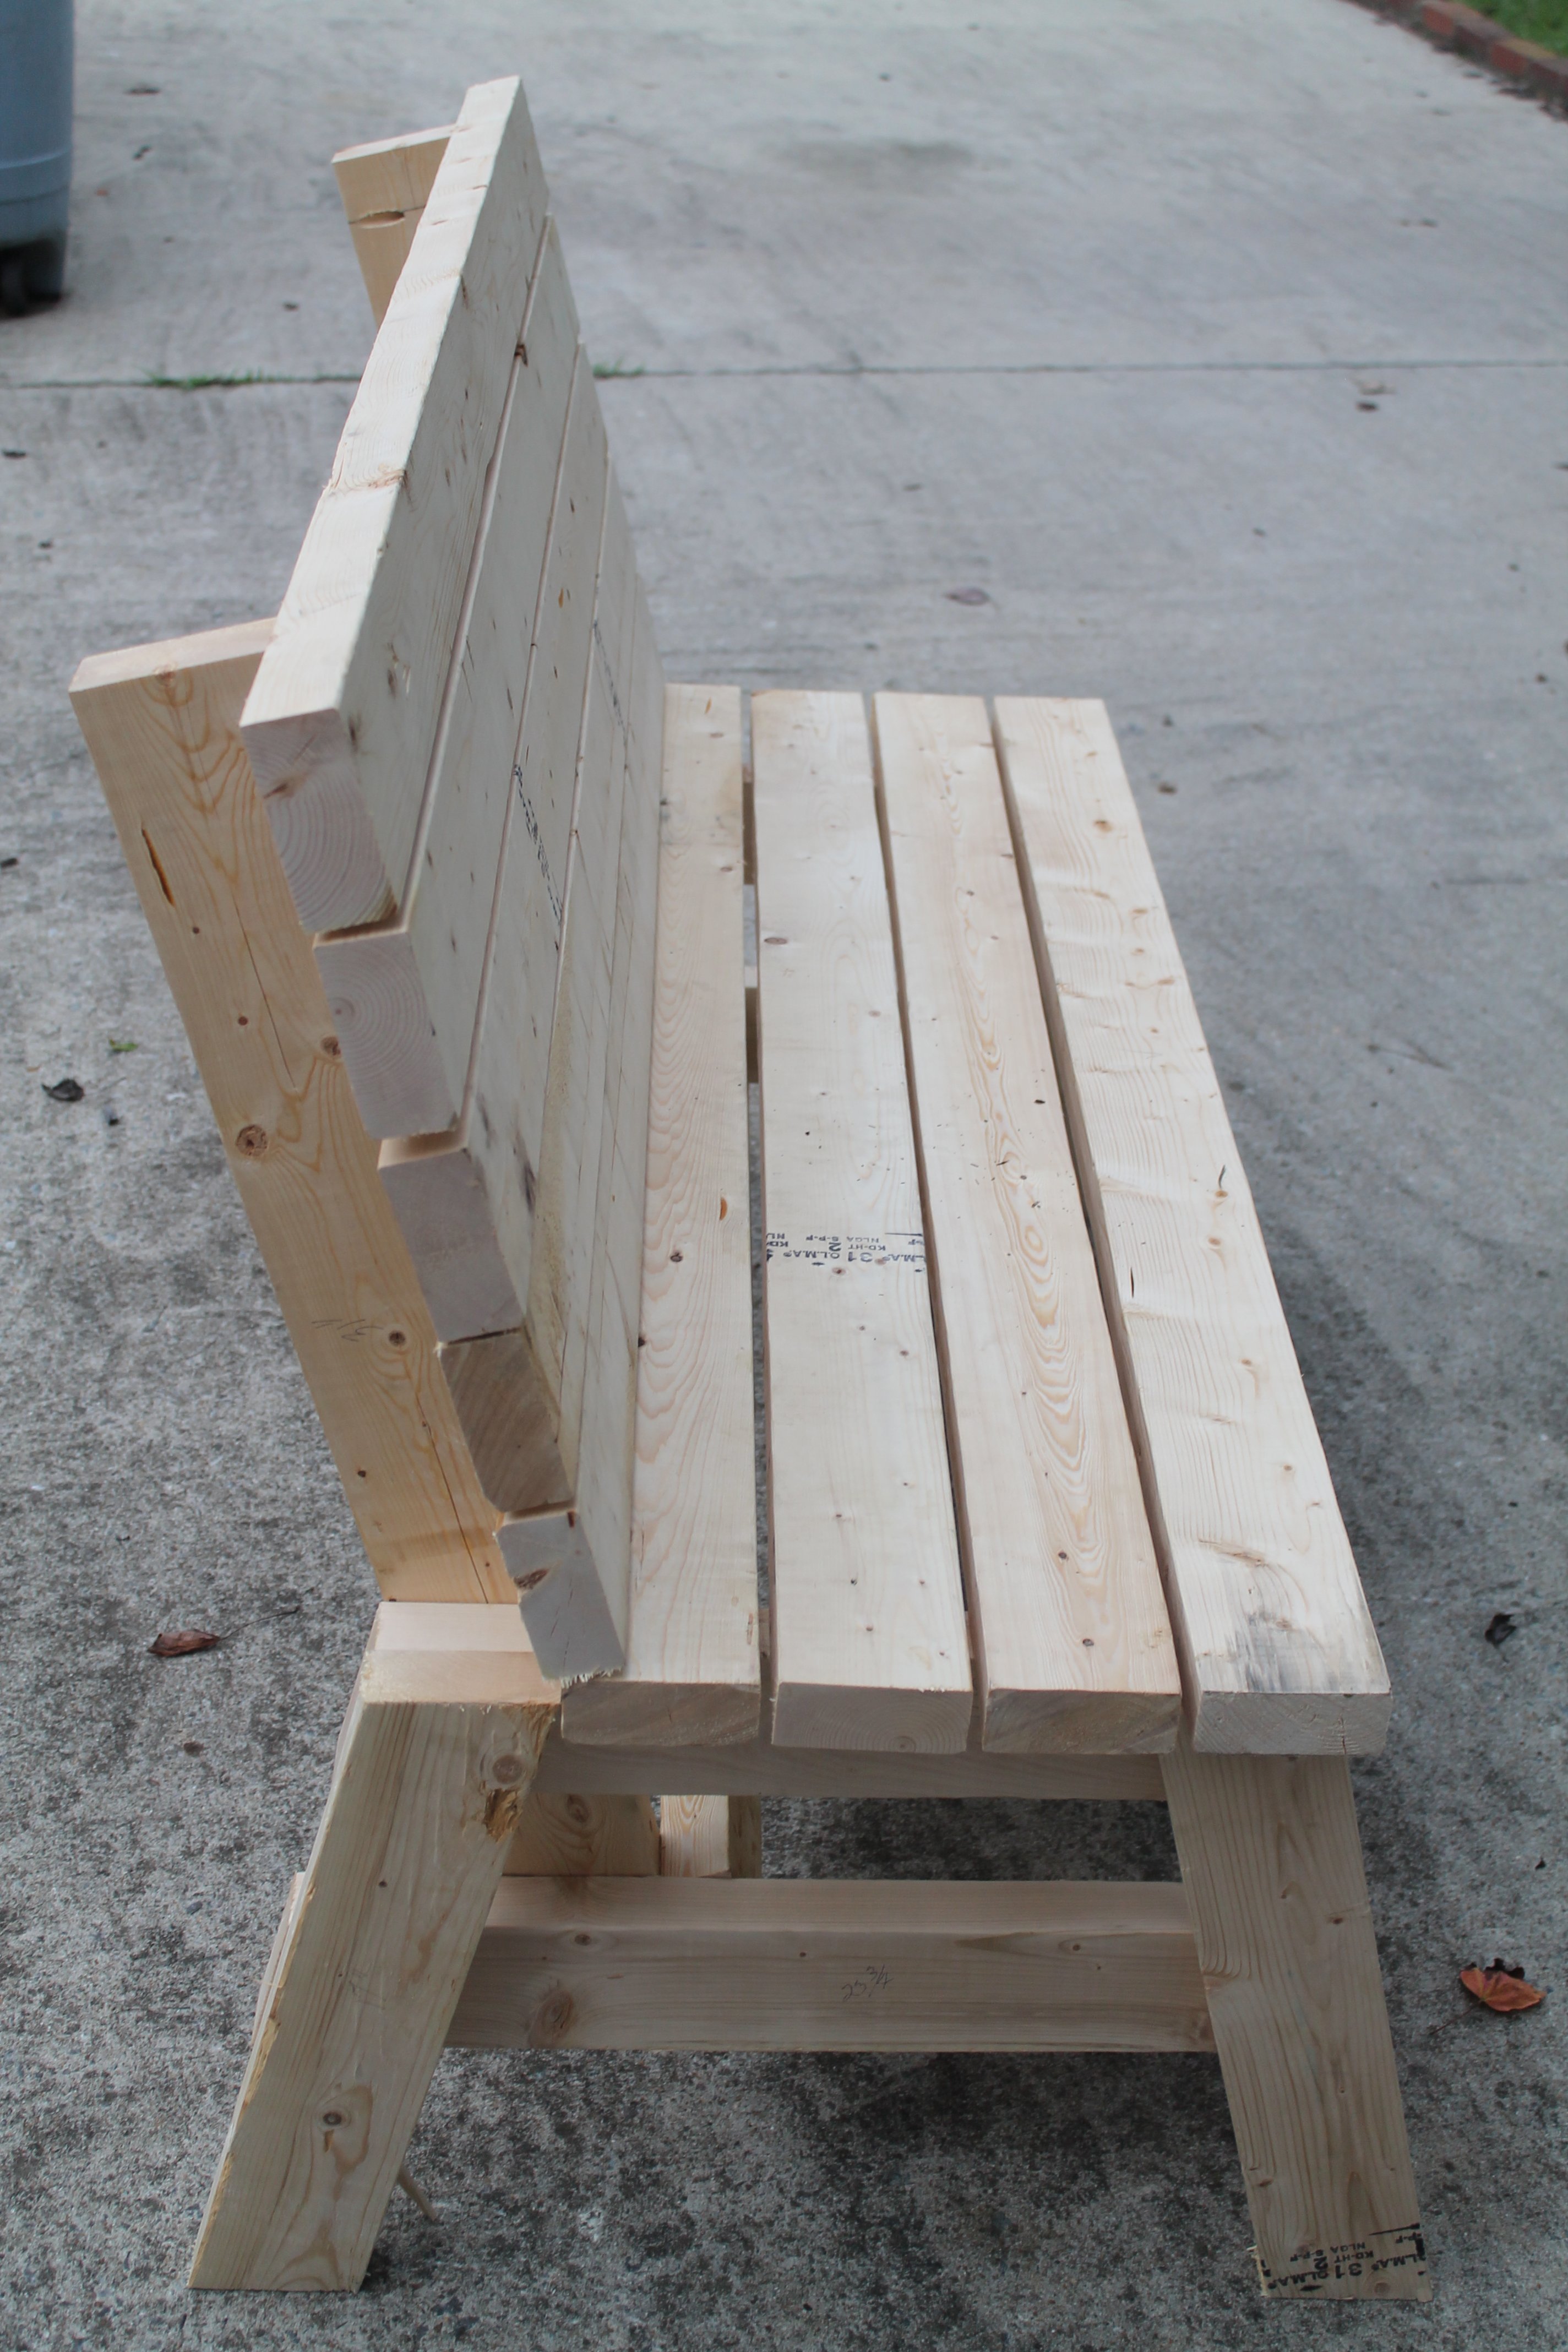
Simple 2x4 Bench

I made this in an afternoon. Loved this project. It is made with 2x4's using a Kregs Jig and mitre saw (plus additional tools like a drill and square). This was my frist time using the Kregs Jig and I am sold!!
The free plans were taken from another website. They are very detailed and there is even a video (I recommend it as he gives a great tip for making sure the back stays equal/level to each other before putting the back on). Even though you can build this by yourself, I did have help for the heavier sides once they were assembled. I plan to build the additional side table soon and finish them both with sanding and staining when the weather seems less iffy for rain.
If you are looking for a good beginner project that doesn't take forever or have complicated steps, this is your project.
Built from Plan(s)
Estimated Cost
Around $50
Estimated Time Investment
Afternoon Project (3-6 Hours)
Recommended Skill Level
Beginner
Comments
Ana White Admin
Mon, 12/27/2021 - 11:54
Nice!
That is gorgeous, she will treasure it for years to come!