Outdoor Sectional Sofa
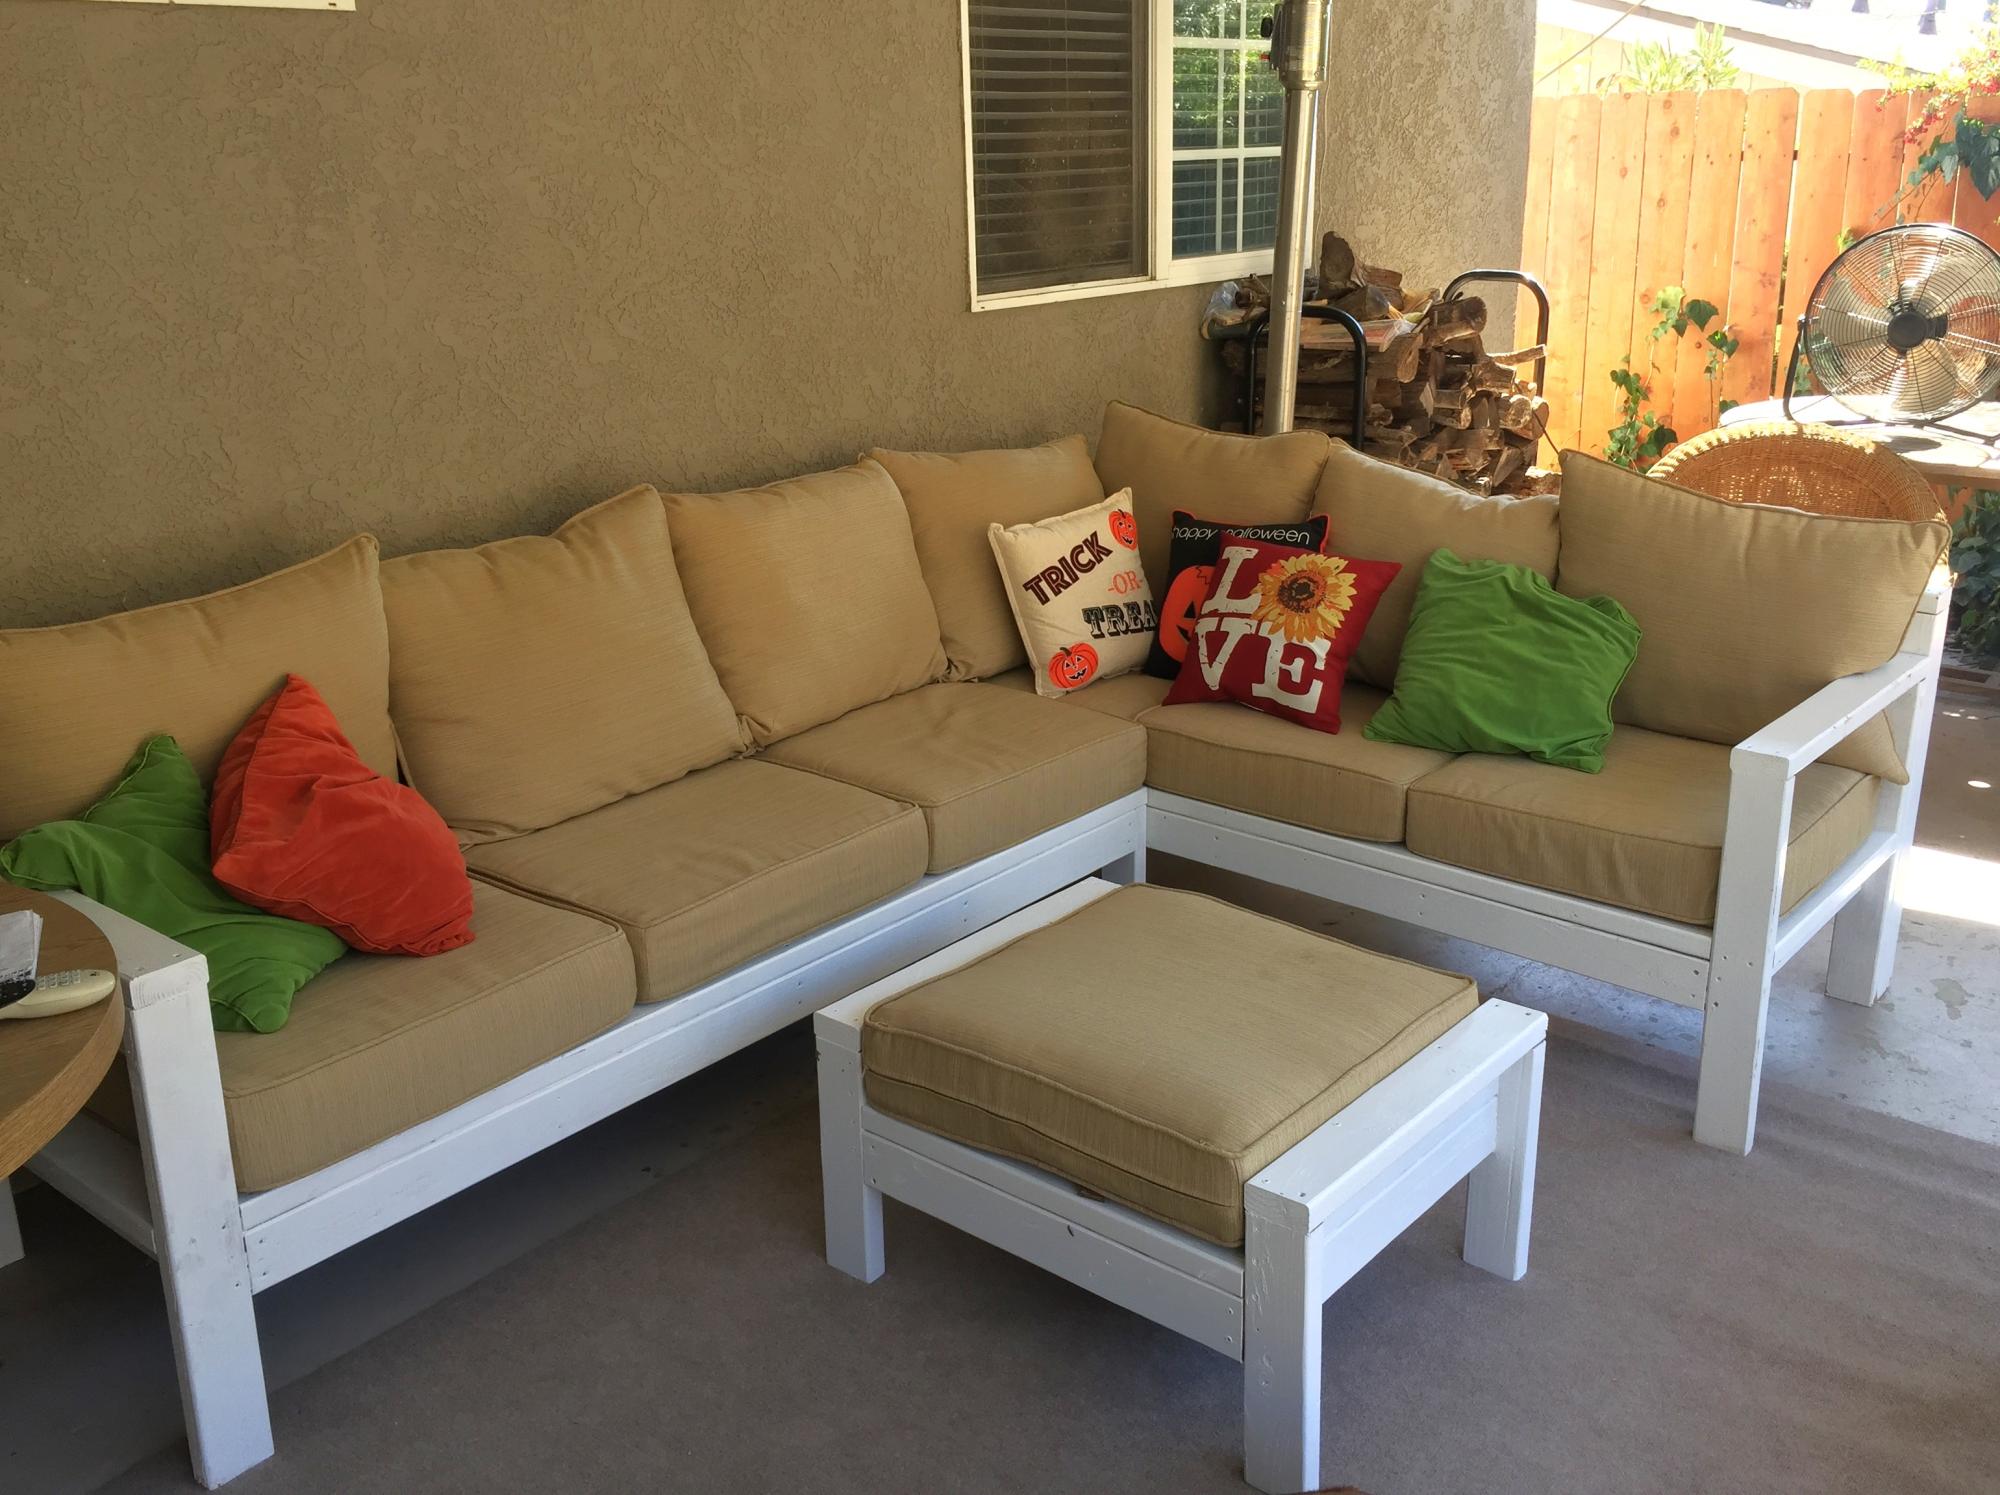
I made this a few years back for my brother, such a fun build.
Natasha M
Built from Plan(s)
I made this a few years back for my brother, such a fun build.
Natasha M
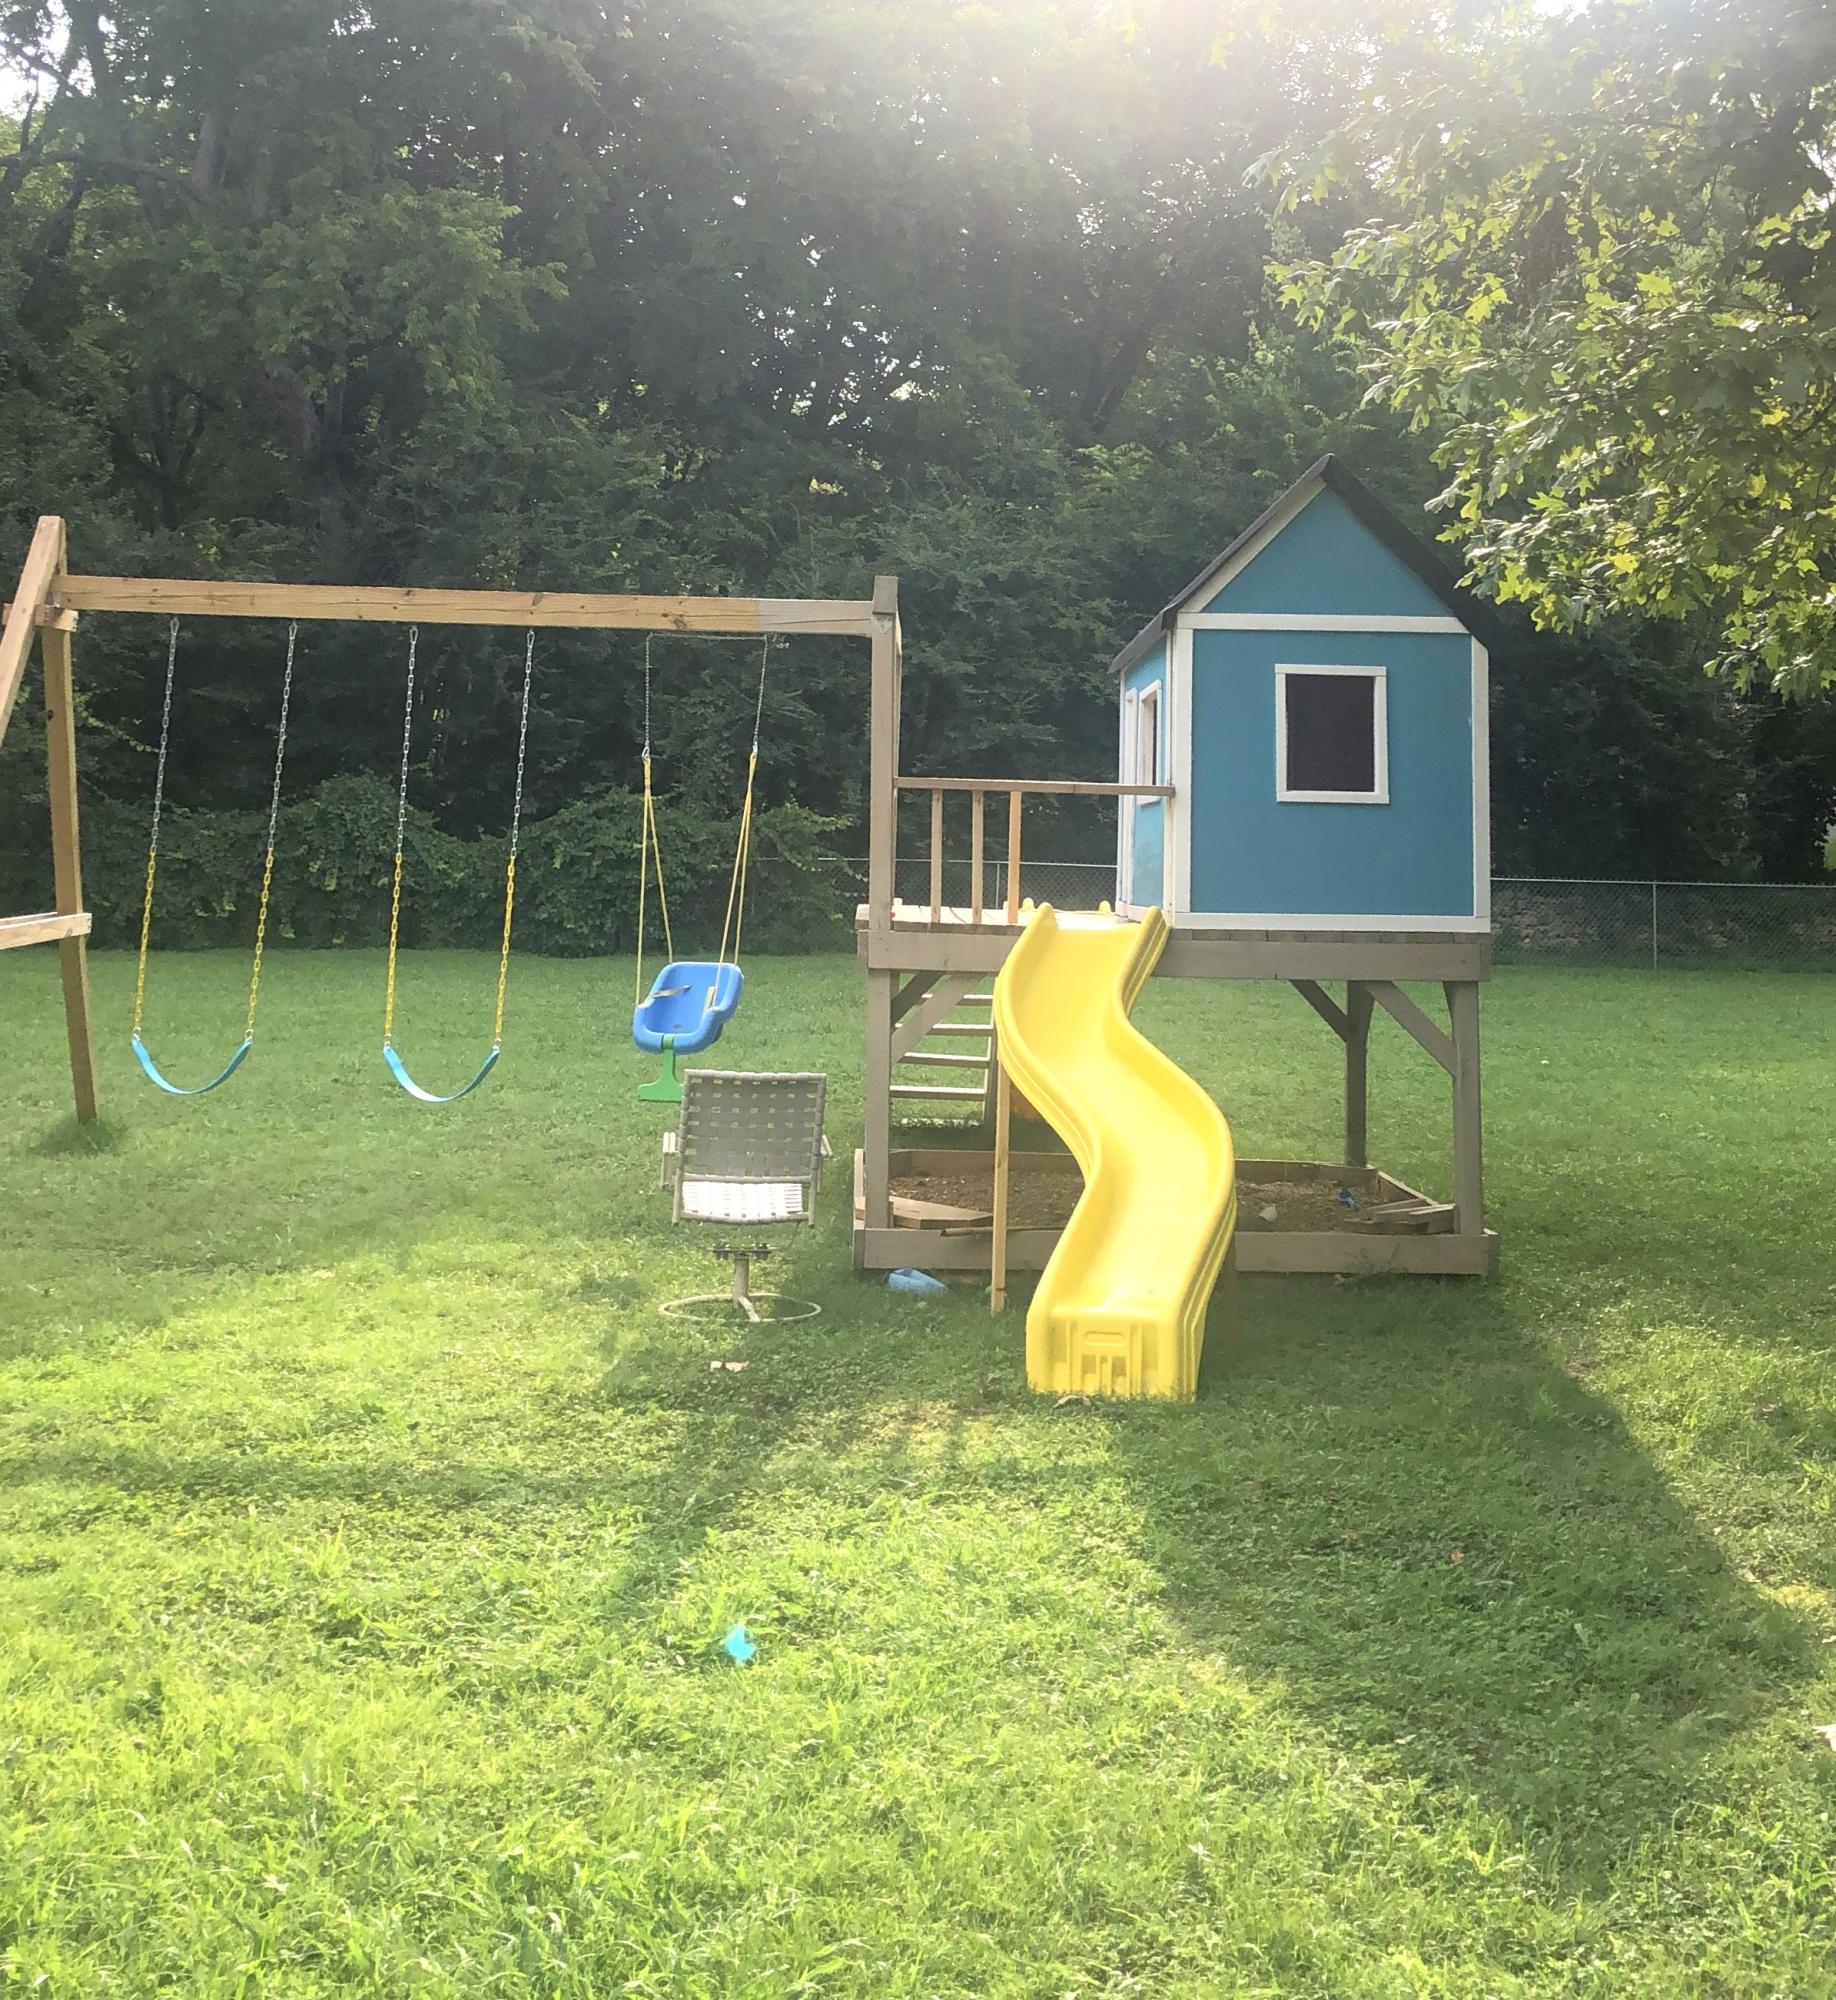
The one toy that we could not live without! Started this as a 2020 covid project and play on it everyday.
Fun project!
Hesasmoothoperator
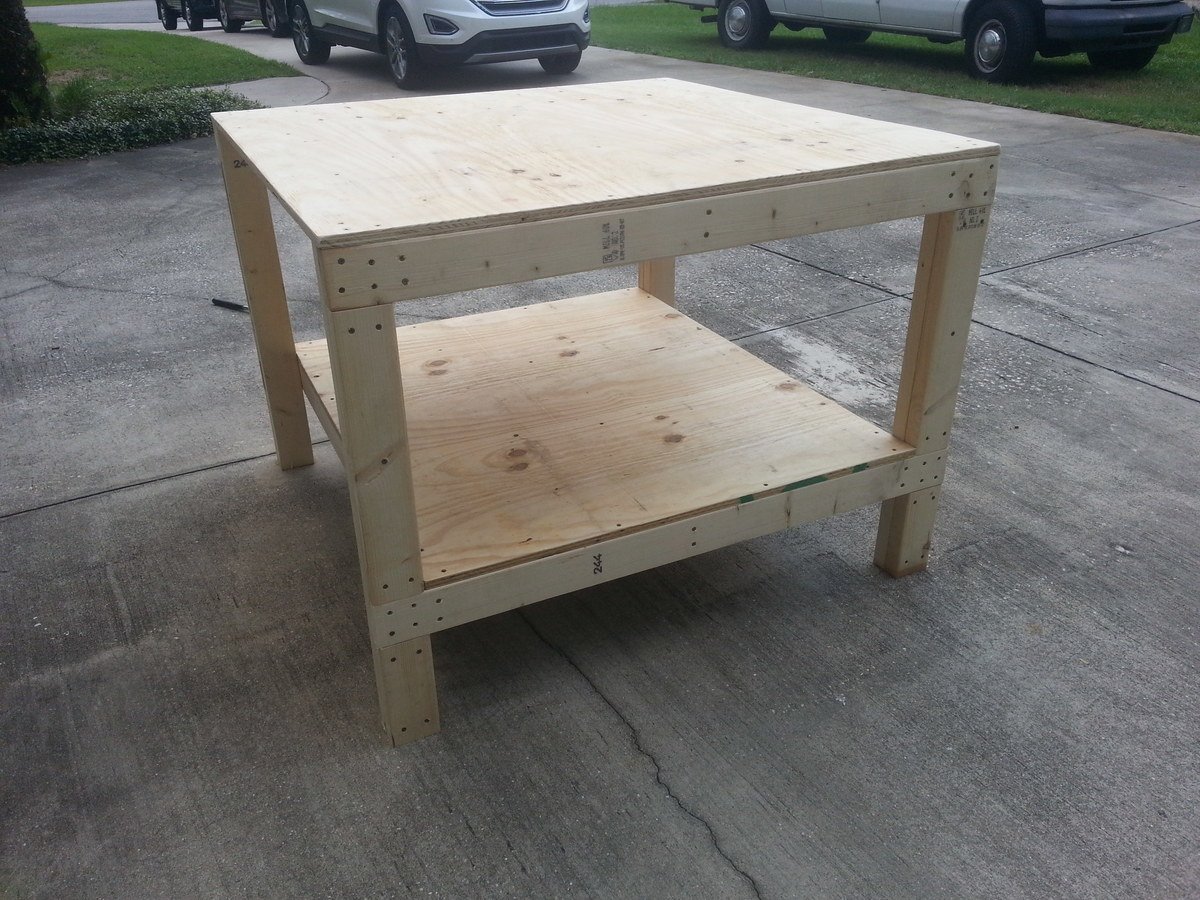
I needed more room, so I changed the dimensions to a 4 x 4 table. Used the same amount of materials. I made the side leg measurements 48" wide and the cross braces 45". My top sheet of plywood is 48" x 48" and the bottom sheet is 48" x 41". The rest of the leg measurements are the same.
A little overkill on the screws, but made it extra sturdy.
I saw this site, copied down the materials list, bought everything I needed and was finished before dinner. I did it all myself, only had my husband cut the plywood, the rest was all me! Woo hoo, so proud of myself!
I rough sanded the edges and corners to get rid of any splinters.


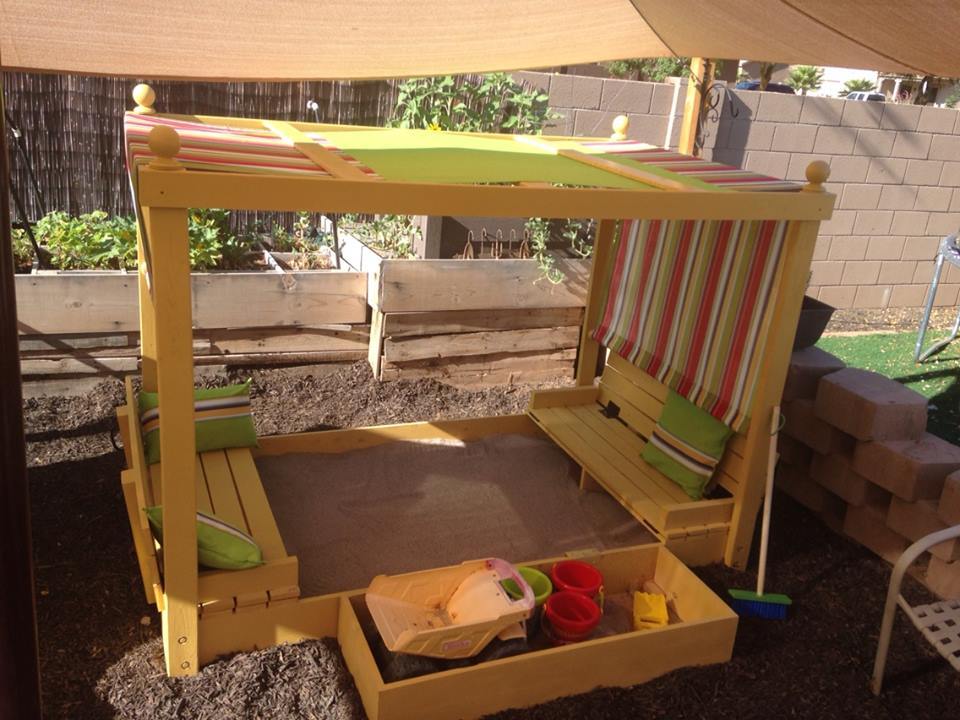
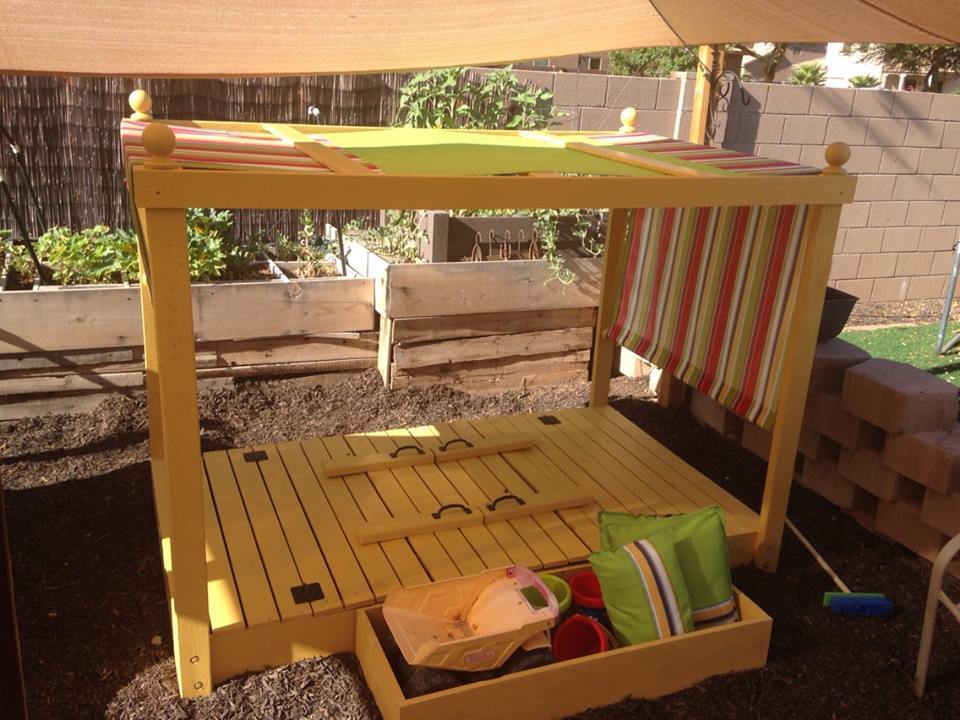
We adjusted the plan and created a 4x7 sand box with toy box and canopy. We are in love with the way this has turned out!

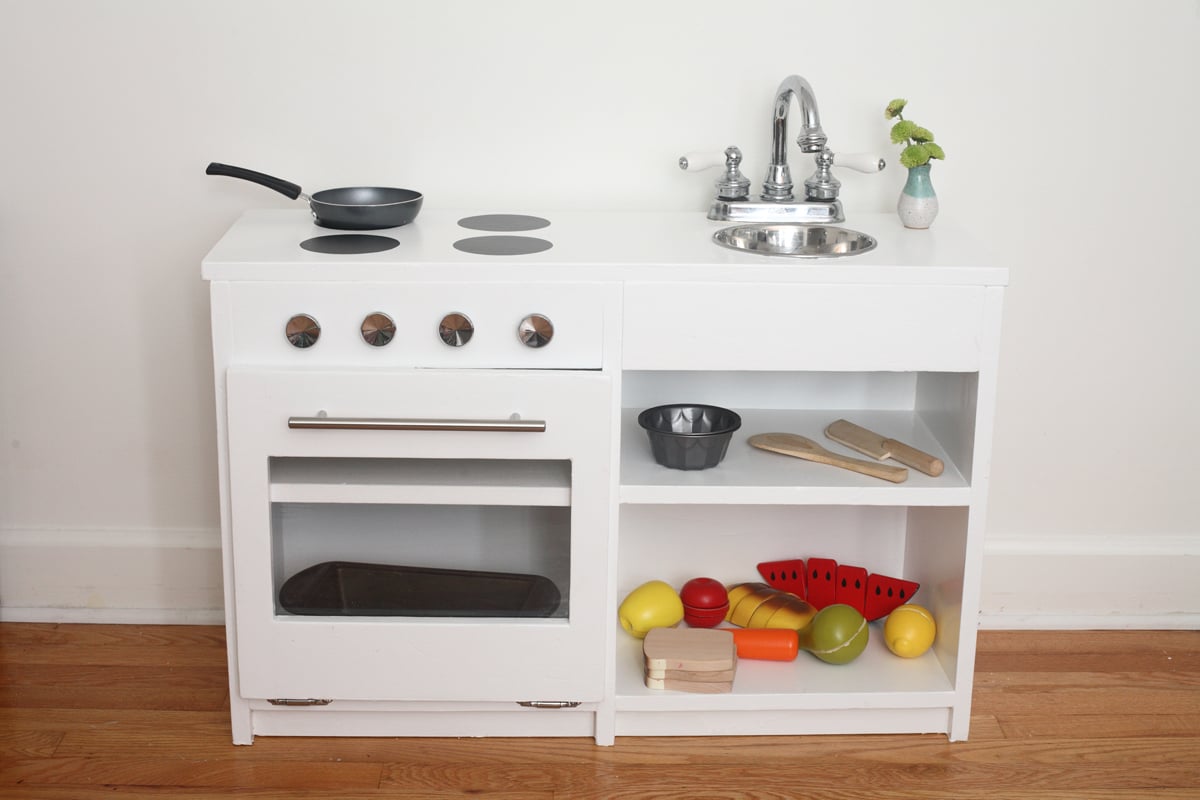
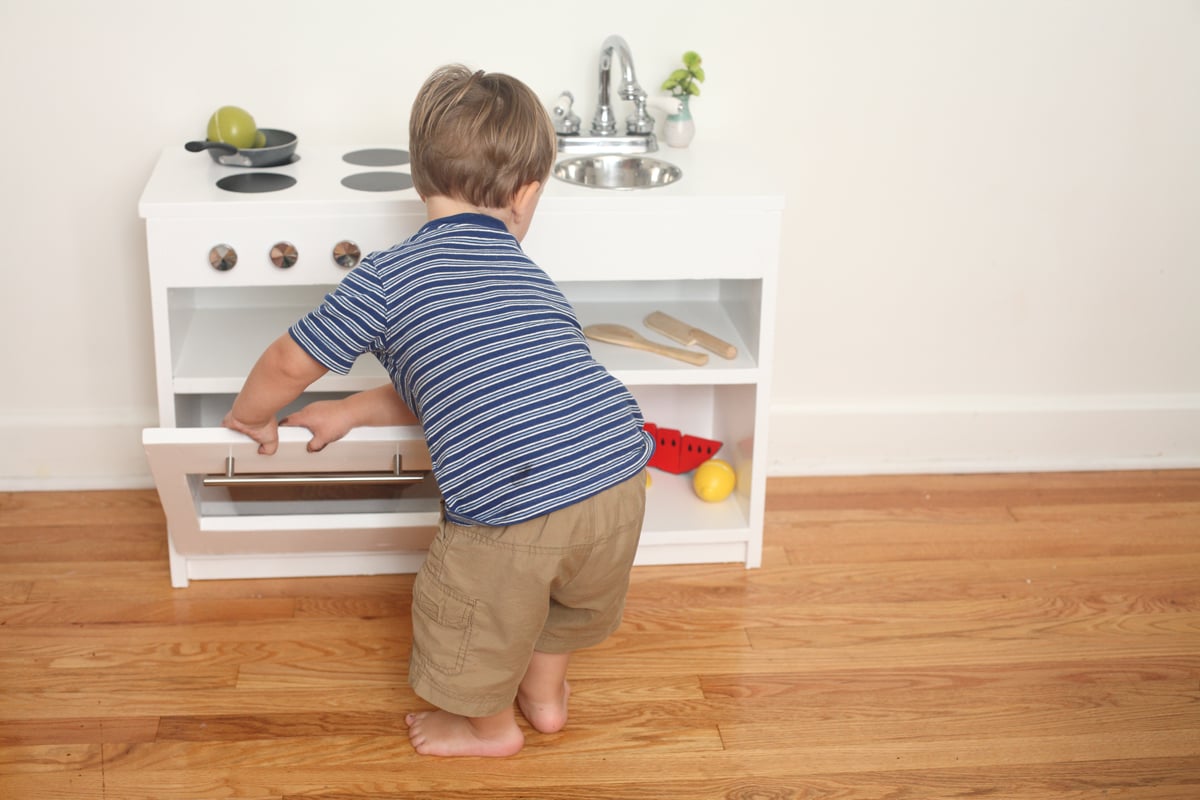
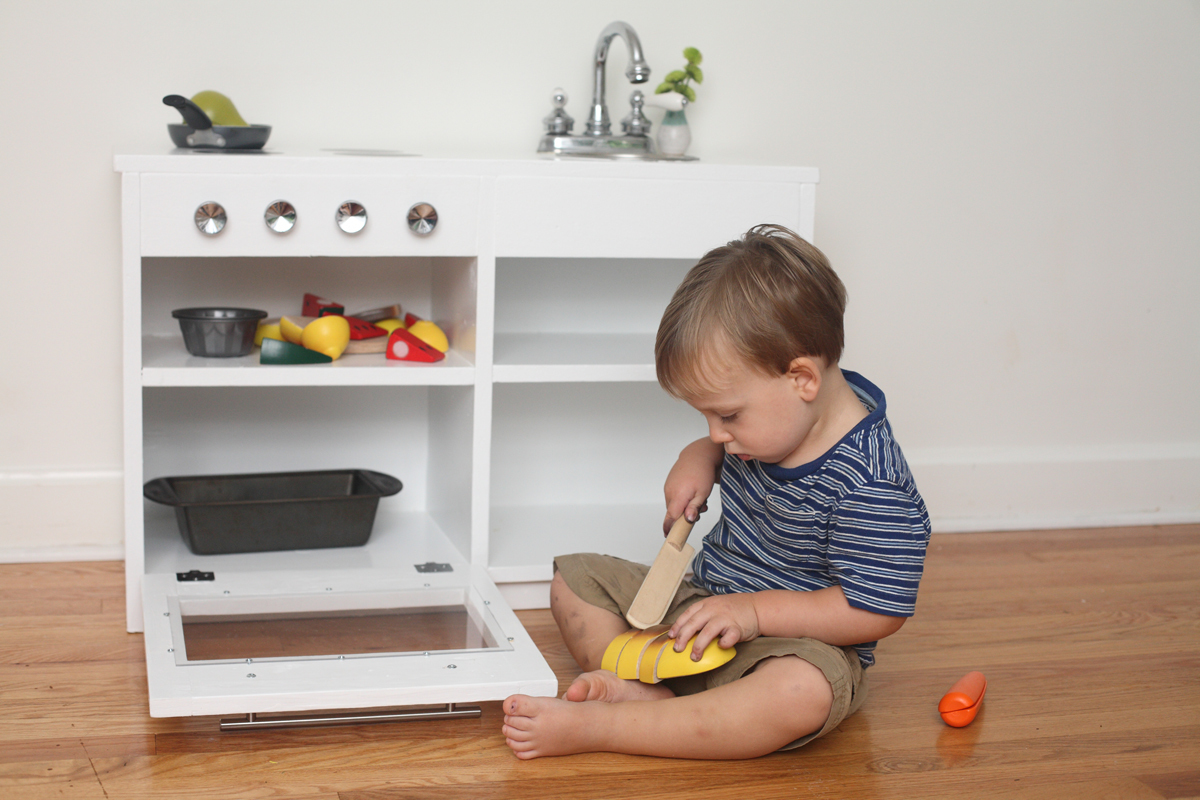
I combined the play sink and play stove into a one-piece kitchen by having them share a side. I found a bathroom faucet at my local Habitat ReStore for $15 (and that included a sink I didn't even need!). Time investment does not include painting. Here's my cost breakdown. Lumber: $25 (I used some scraps.) Faucet: $15 Dog bowl: $7 Hardware: $13 Primer and paint: $19 Screws: $4 Sandpaper: $5 Plexiglass: $3 Prepping dinner while my toddler works in his play kitchen beside me: Priceless.
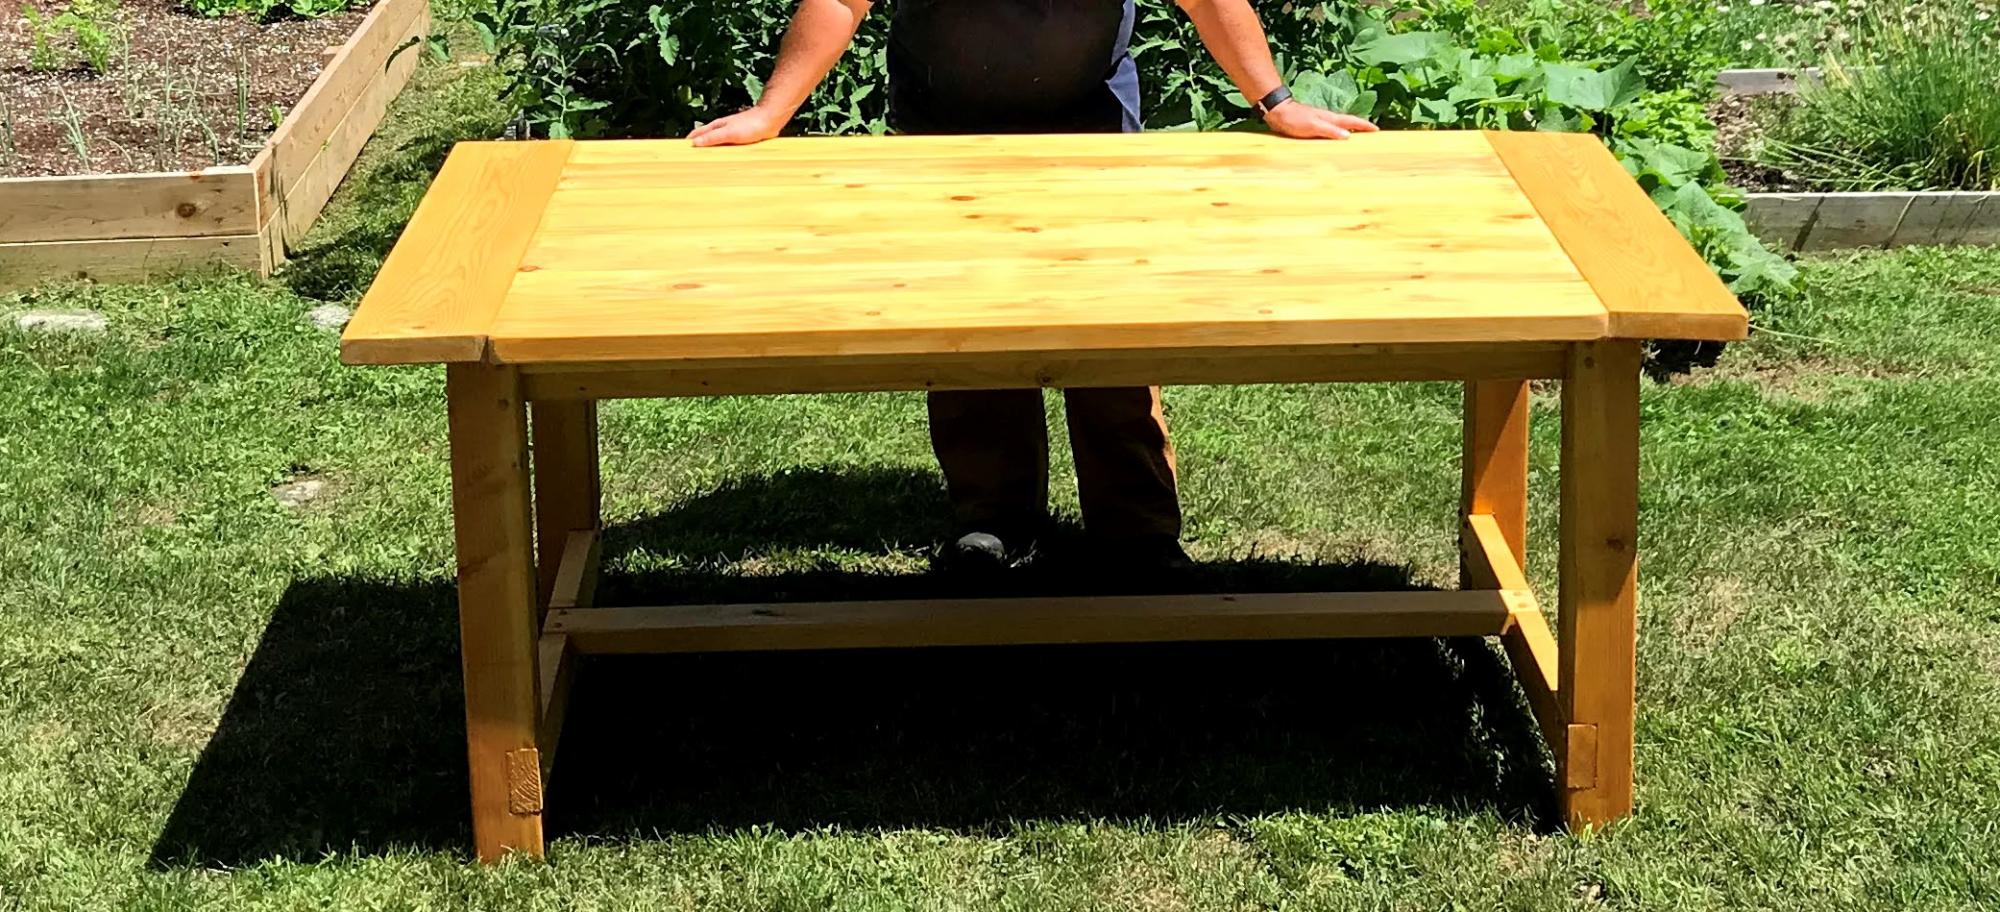
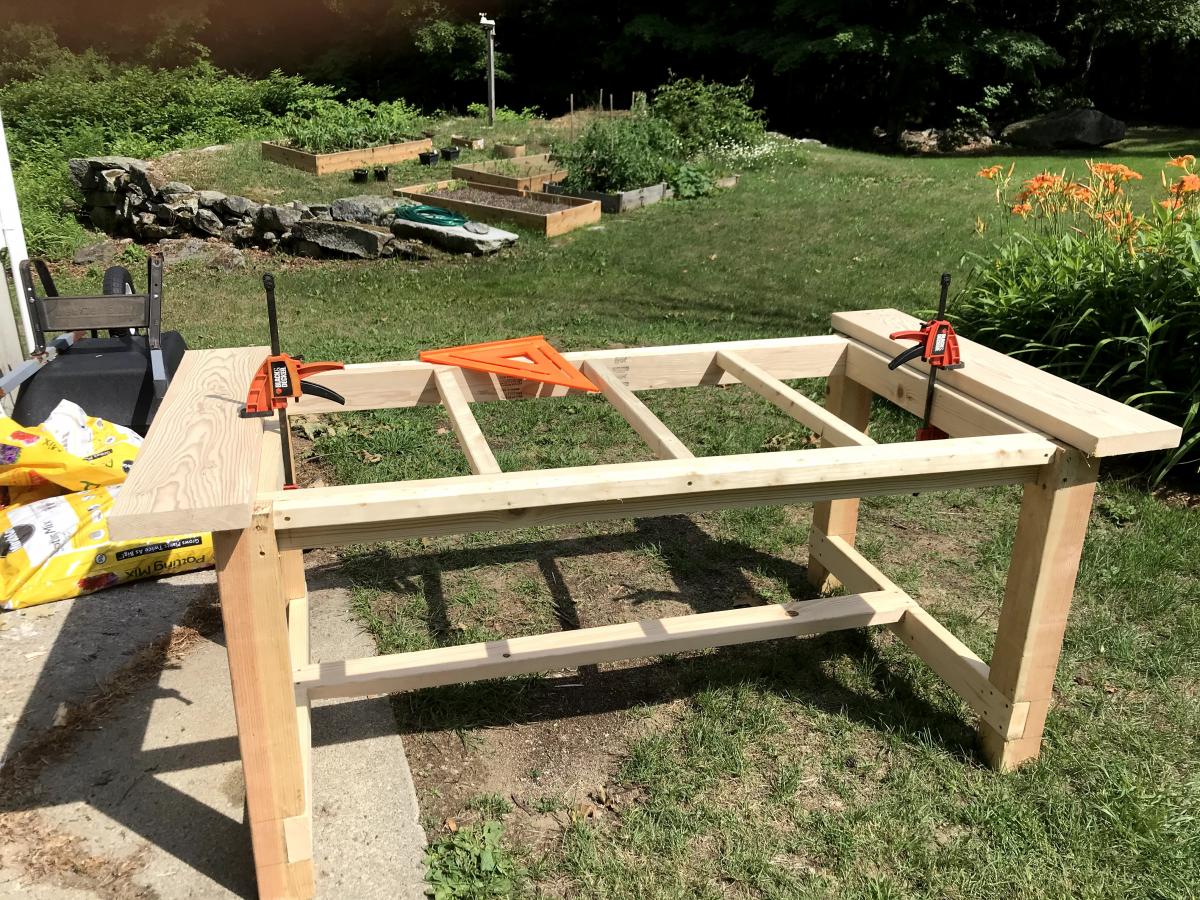
The published plans for this were great. This was my first attempt at a project like this. I have always liked the idea of dining at a large table outdoors and the farmer's style is appealing to me. I adjusted the length to fit my deck, but also made a few changes for aesthetic purposes. I notched 4x4s rather than join a pair of 2x4s for the legs. Added caps to the screw holes rather than filler and used pegs to secure the top planks in addition to screws from the bottom. The frame and top were stained/sealed with Cabot Australian Timber Oil.
This is such a great project. Easy and fast you still have time to make one for hanging Christmas stockings!
Used the Rustic X templates. Just modified a little. Thanks Ana White

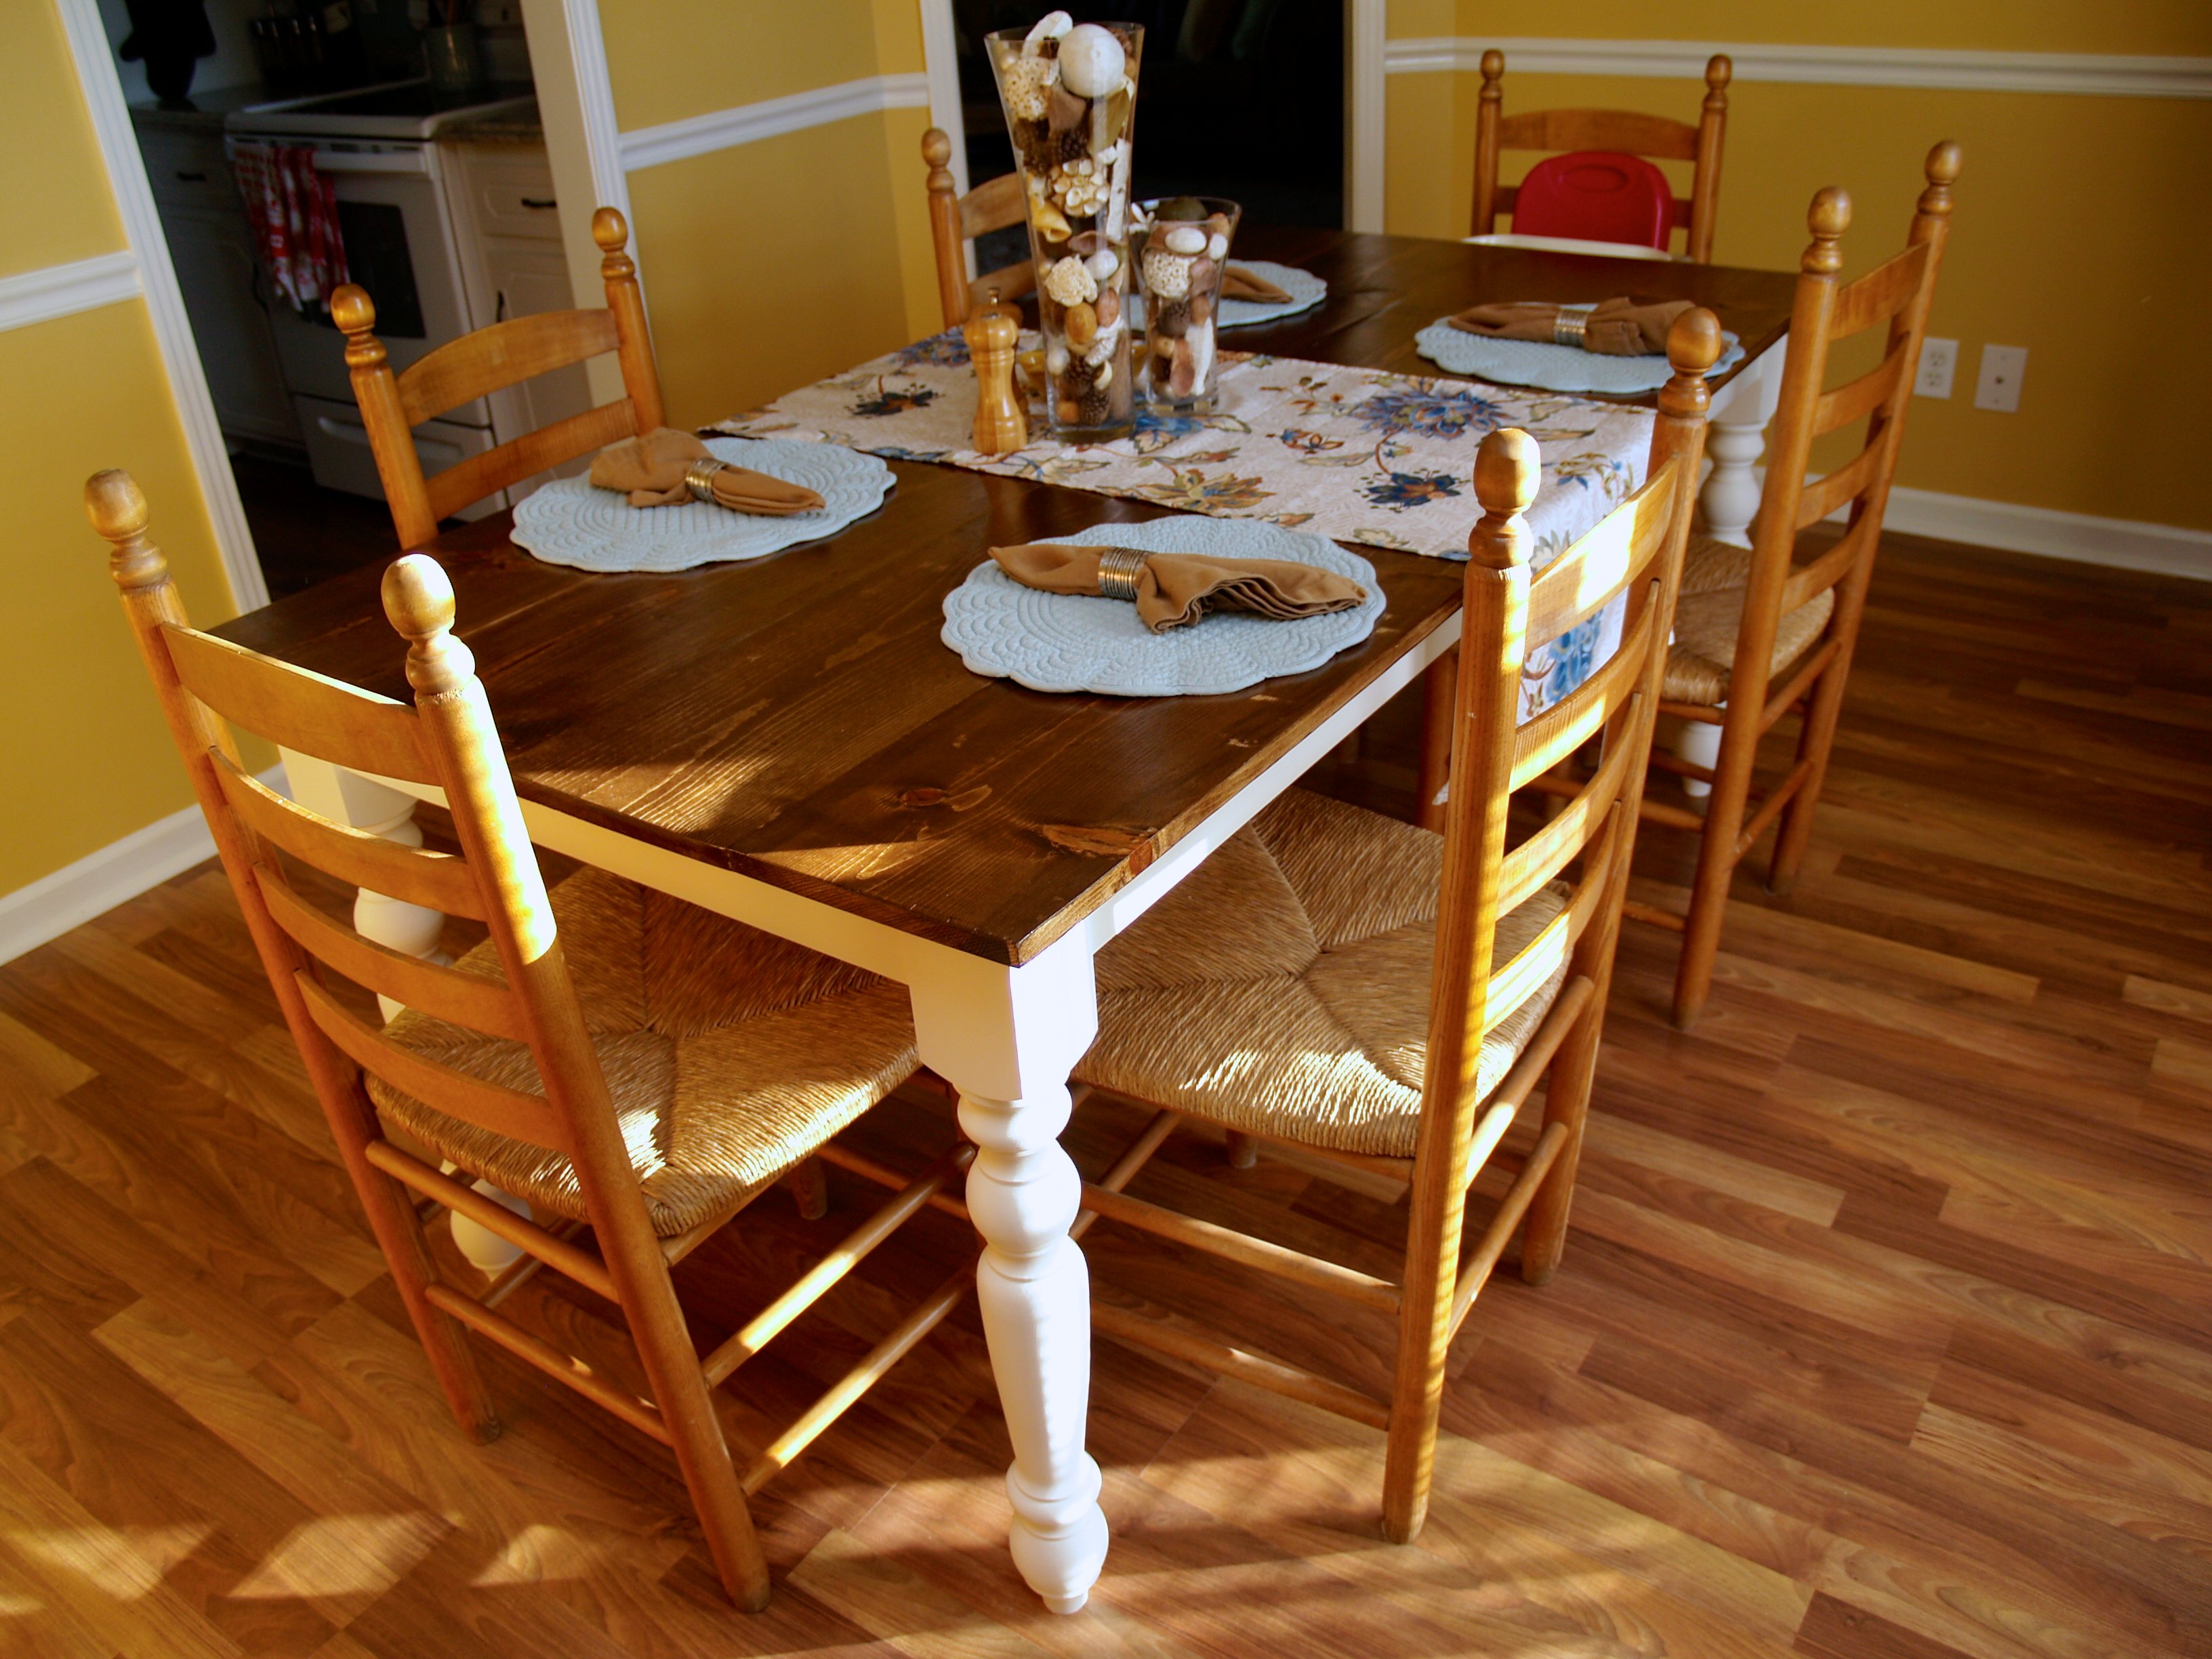
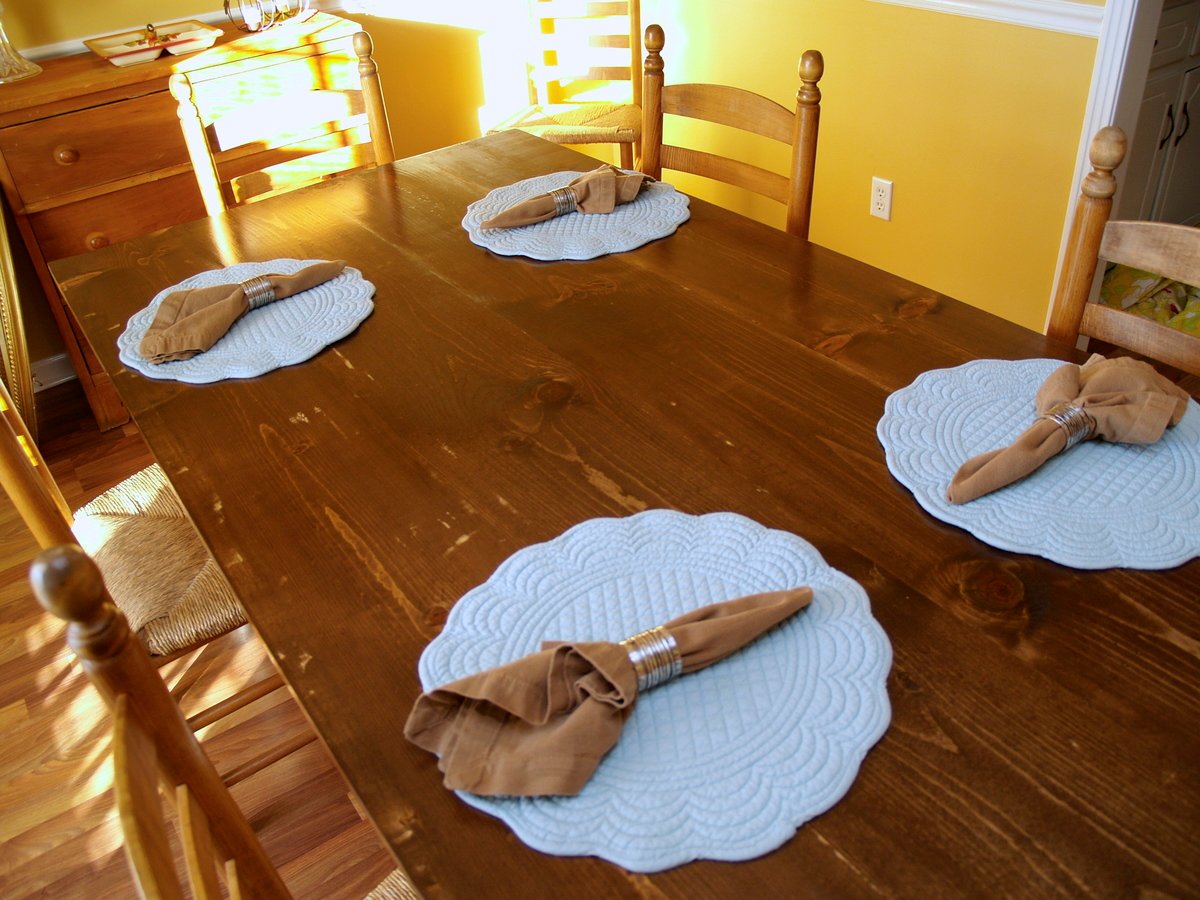
My husband and I decided to tackle this as our second woodworking project together. We have been wanting a larger dining table that would comfortably seat 6 people and easily squeeze in 8 if needed. We decided to build Ana's turned leg farmhouse table, adjusting the dimensions and choosing slightly different legs. These variations better suited our dining room space.
We purchased the "Modified English Country Dining Table Legs" in soft maple and 3 1/2" diameter from Osbourne Wood Products, which totaled $136. The rest of the lumber was made up of pine boards from Lowe's, which totaled around $40-$50. When assembling the 1 x 10 boards to make the top, we used a biscuit joiner to help our slightly bowed boards stay flat. Once the table was fully assembled, we painted the base in Lowe's Antique White (satin finish) and stained the top using Minwax's Special Walnut, then applied at least two coats of Minwax's polyurethane in satin finish.
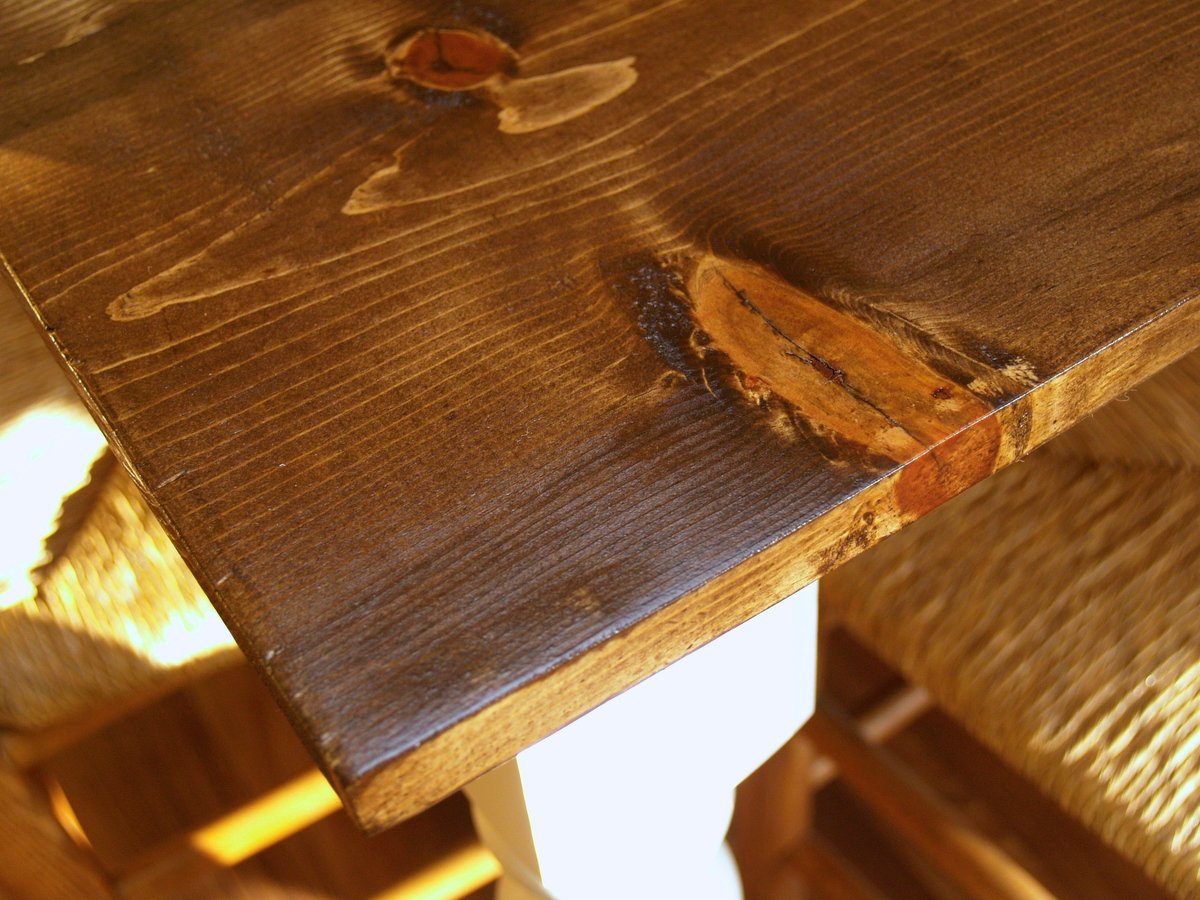
We made a couple of mistakes along the way which actually worked out for the best, giving the table some rustic character. Being relatively new to woodworking, we neglected to thoroughly wipe the 1 x 10 boards of all wood glue before the glue dried, making it difficult to remove later with sanding. Some wood glue remained, which showed up later once boards were stained. We ended up liking how this turned out to give it some charm and more of that 'handmade' look.

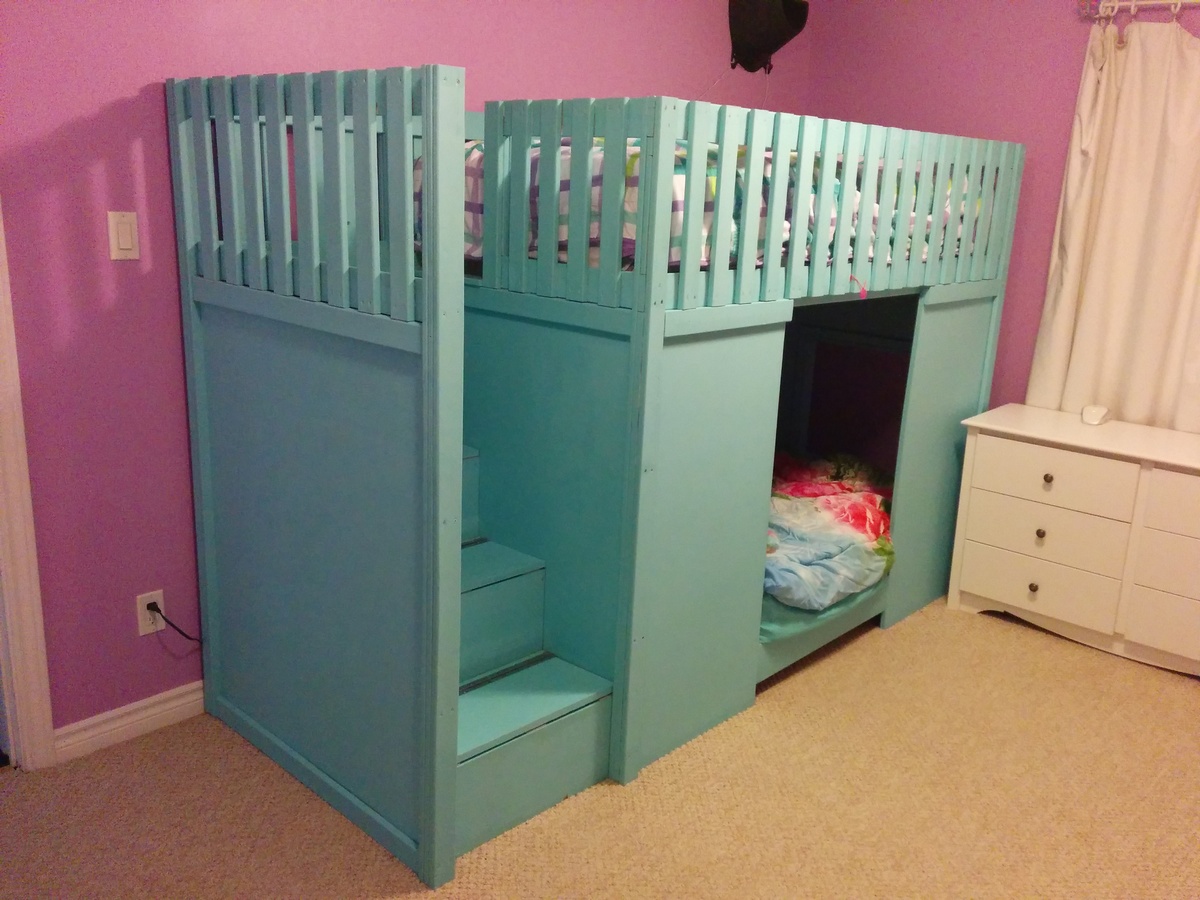
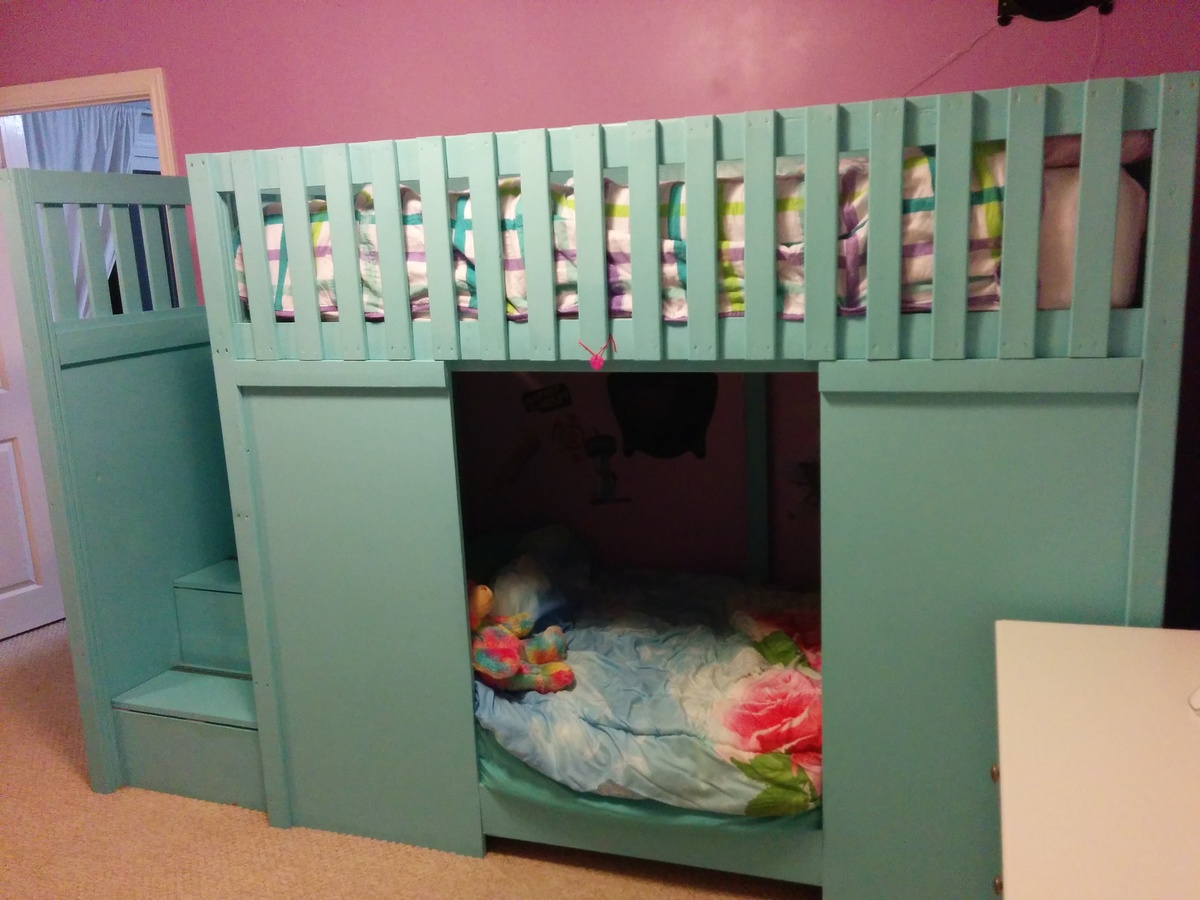
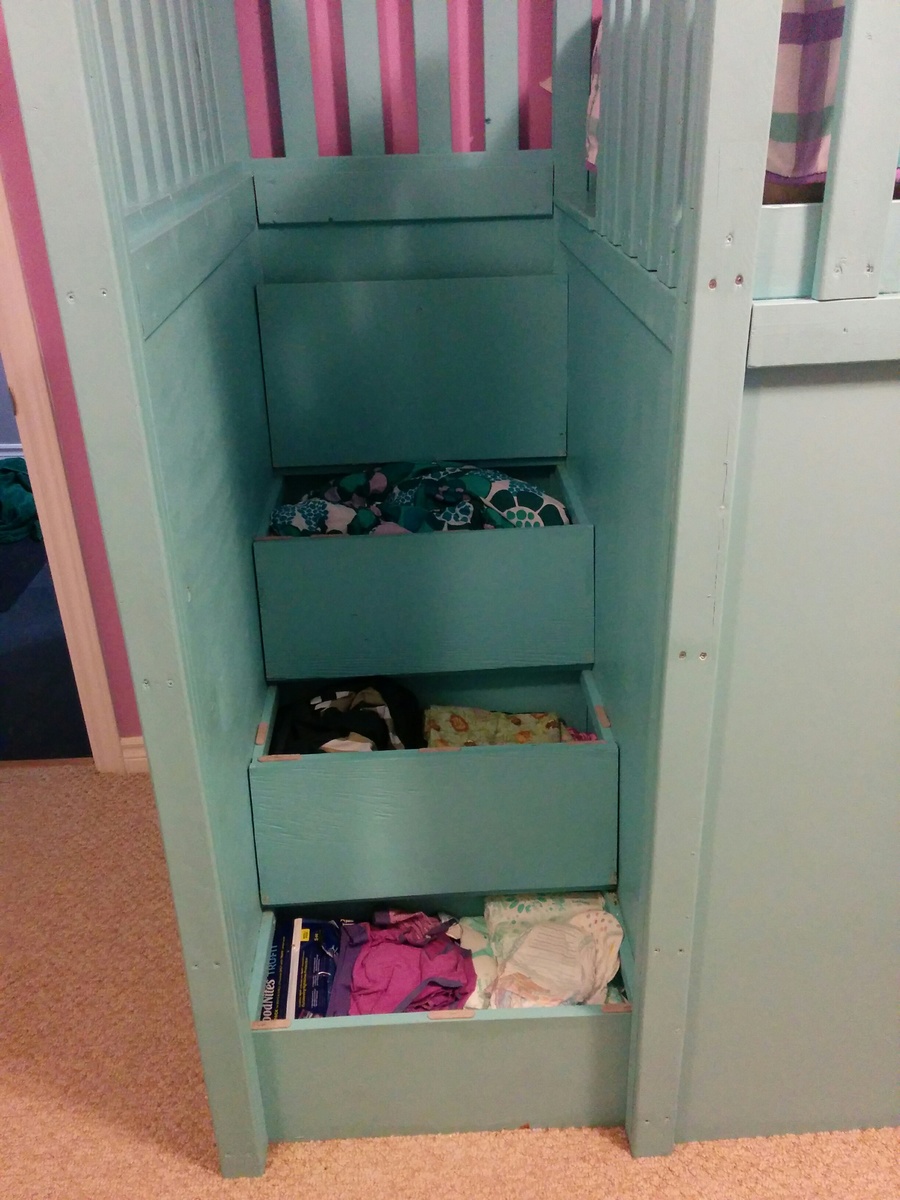
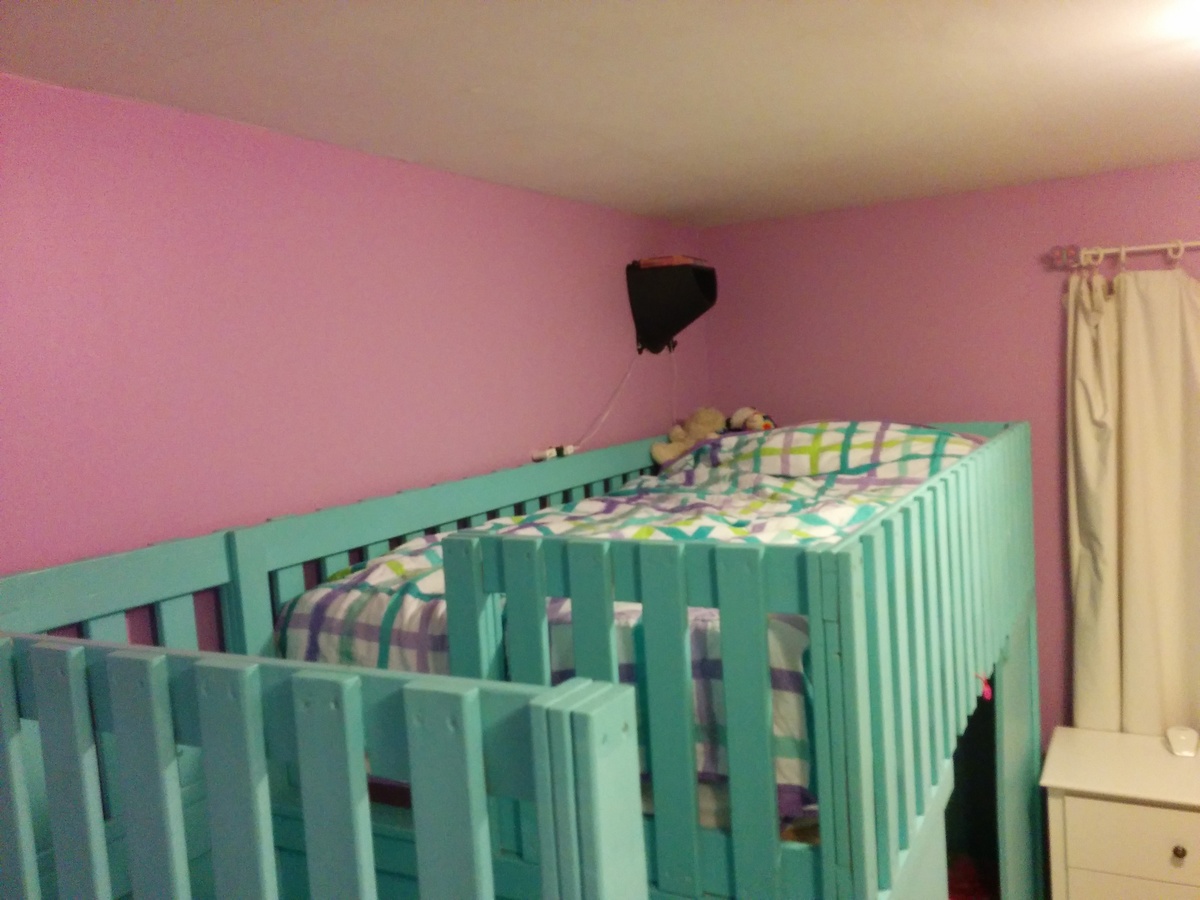
Made in 2014 from the playhouse bed plans with the storage stairs as well.

Made a few adjustments to the farmhouse toy box. Made it a little bigger and added Xs out of 1x2s around it to give it a little extra something! I'm using it as a storage coffee table and I couldn't be happier with it! So in love!
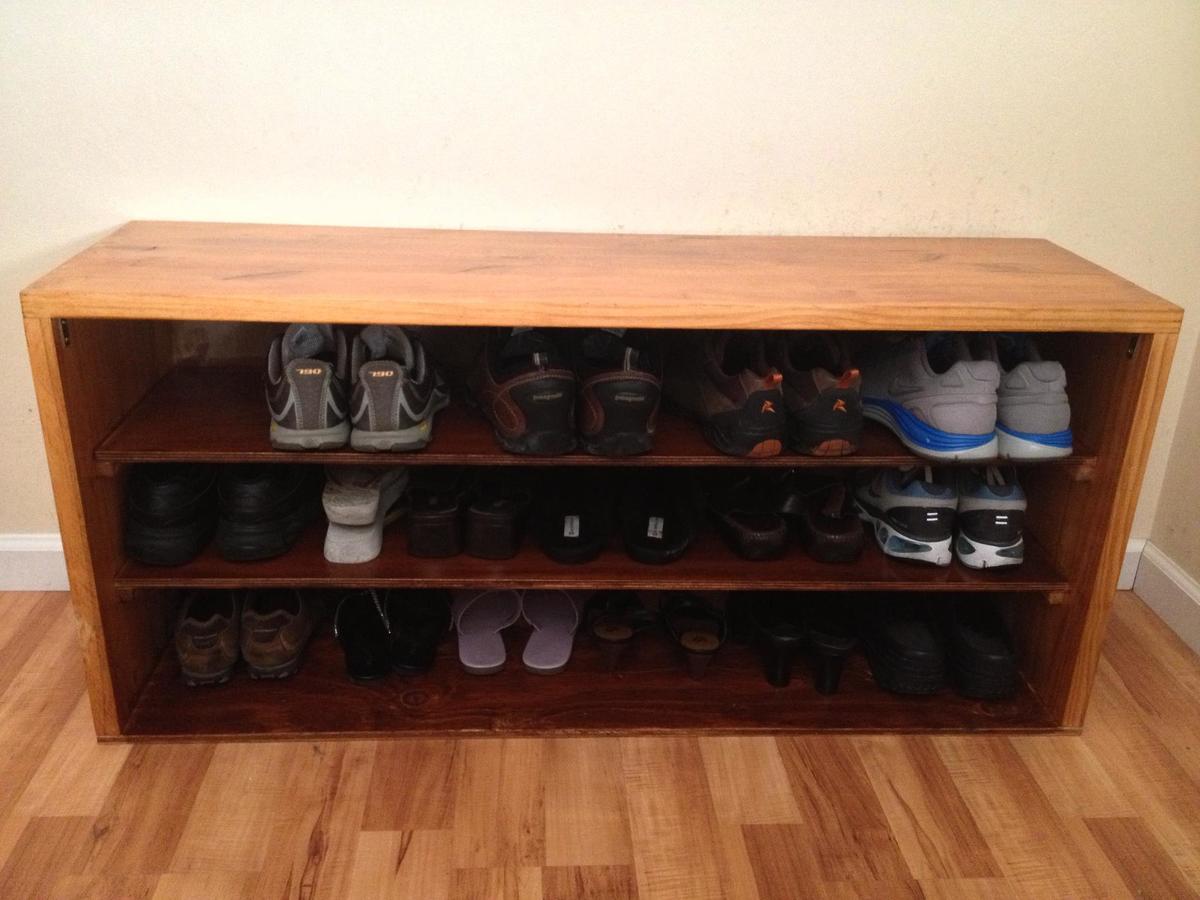
Ana's spa bench inspired me this project. My shoe rack had been screaming 'foul' for a long time and I had been on the market looking for a three-tiered shoe bench. The benches I saw online were either too small or too expensive. So when I found this plan, I said "why not?" So the rest is history.
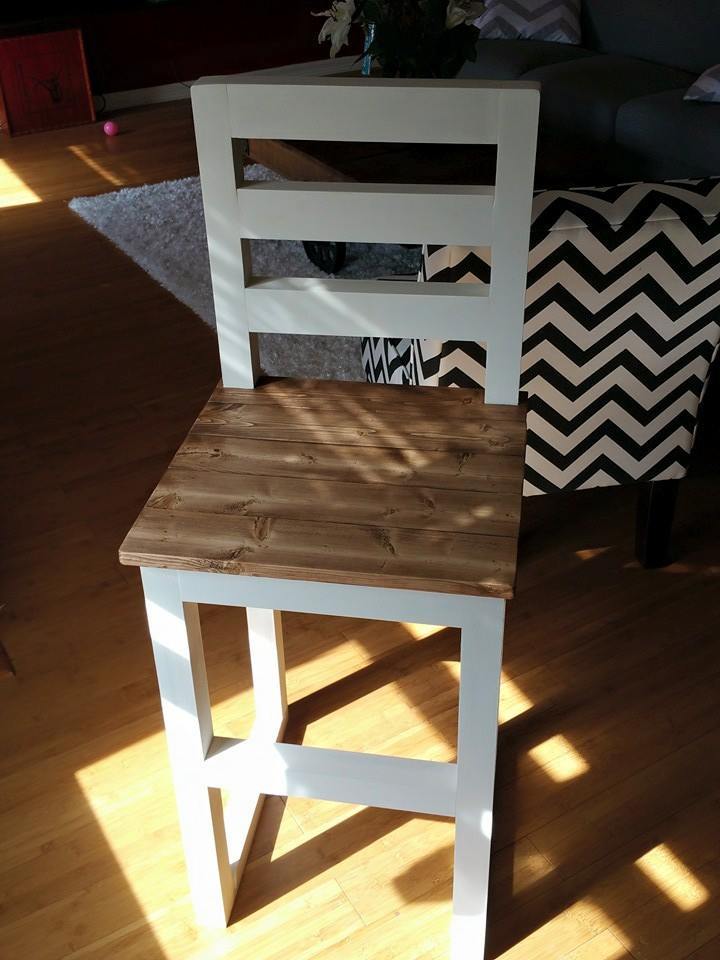
Love my new bar stool, now to build 3 more. I think it turned out great.
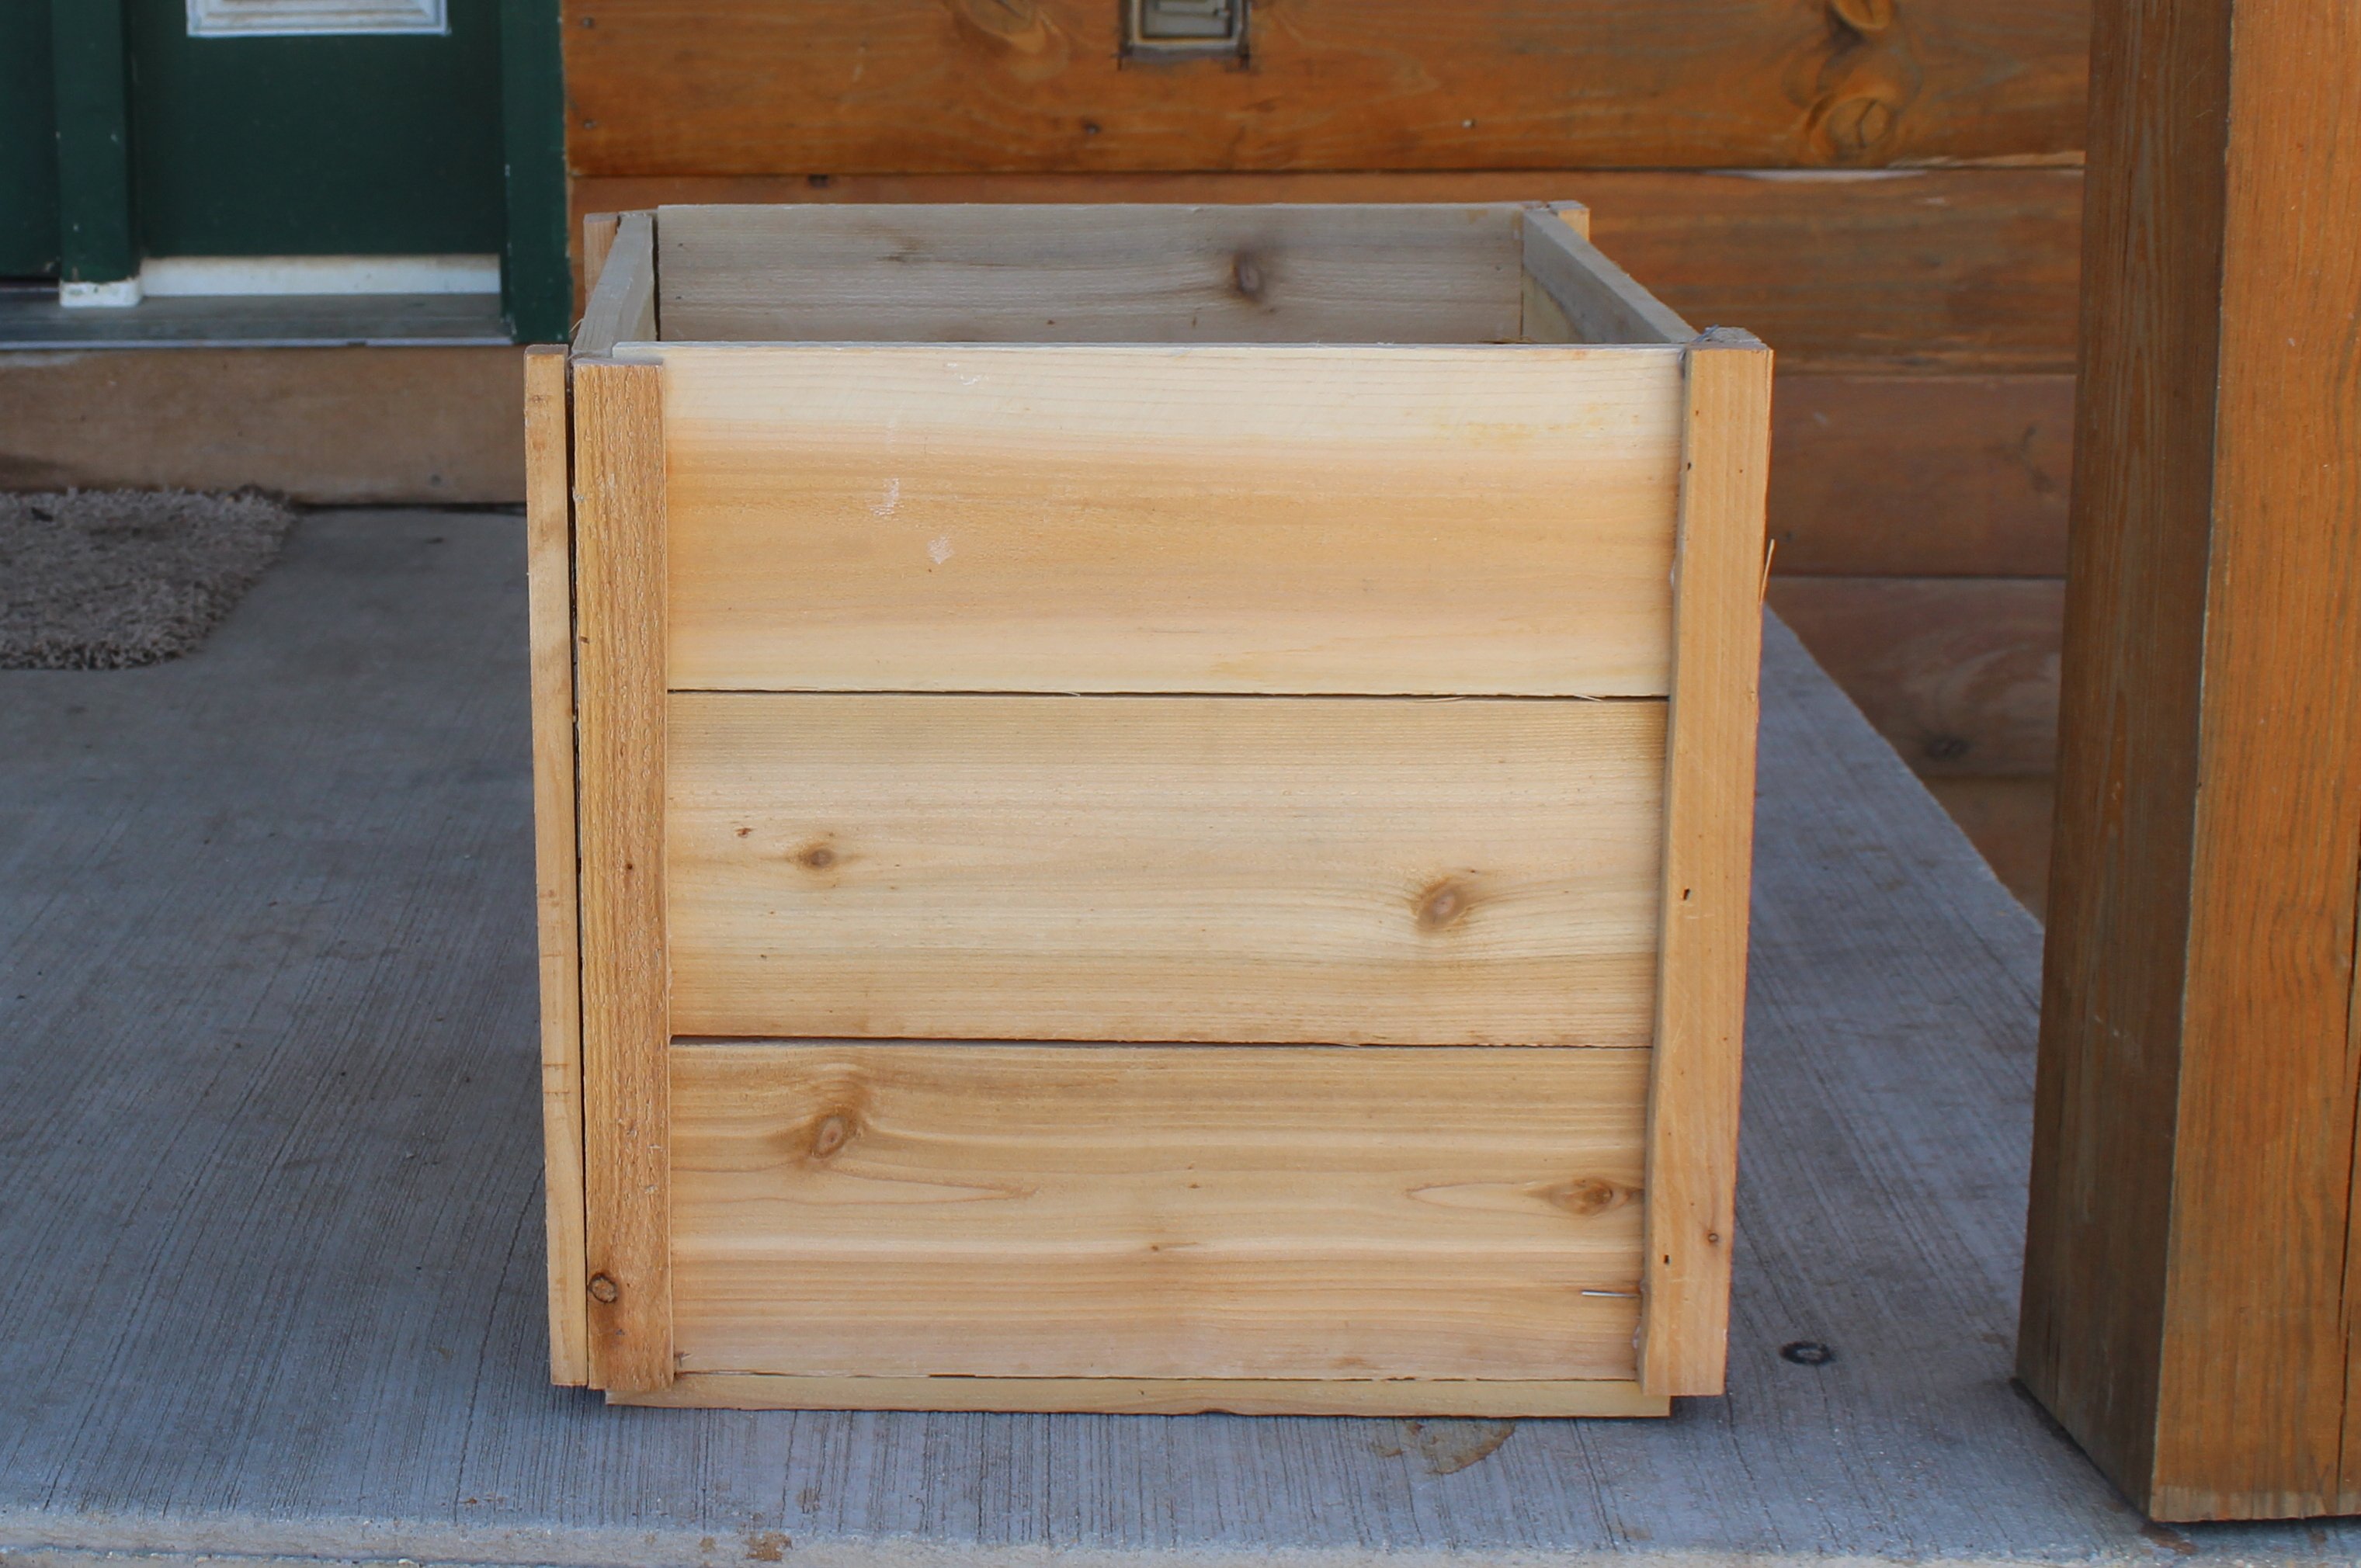
I had been looking for pretty wooden planters for the front porch and couldn't find anything affordable when I came across Ana's plans for a planter box. So I just made it a square and made it a bit taller.
I used finishing nails and glue to put the whole thing together. If you make the sides 17 1/4" then the bottom is wide enough for three pieces side by side. I added four pieces the same as the strips that were made to the bottom so that they stuck out into the center of the planter. Then I laid the bottom pieces on top of those. I left them loose so they could be replaced if needed after a few summers of water and dirt. You could also put a liner in. The width is just enough to give space for water to drain out.
Out of 5 pickets I could have made the side strips a bit longer and put a strip across the bottom. But I had a couple other projects in mind for the scraps so I didn't.
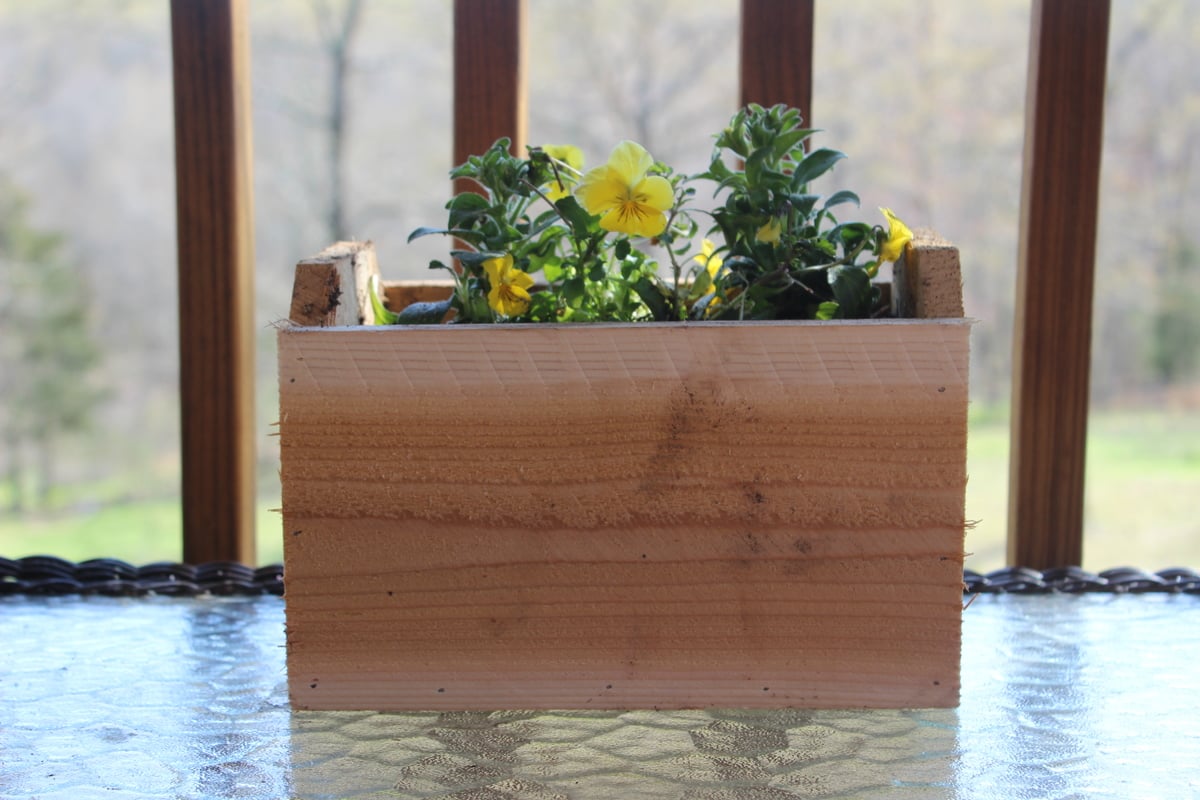
With the left over scraps I made the small flower box for a table on my deck. I glued and nailed that together too. So for less than the price of one planter box I made two and the small flower box. If I hadn't cut one piece wrong the first time I could have made a second small flower box.
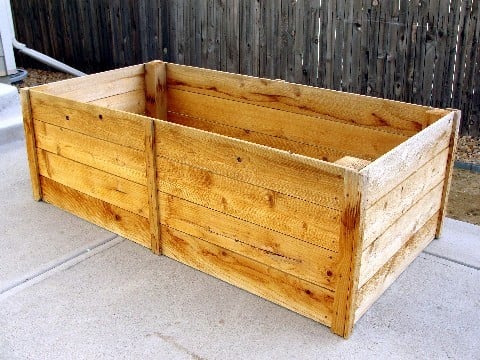
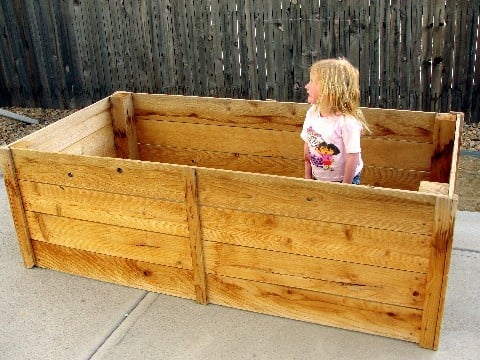
I made these last summer for my sister. And she didn't even use them yet! Very easy to make. She did want them taller, so that is the only modifacation I made. We're hoping the bunnies won't notice all the yummy veggies up this high :) I know, probably wishful thinking. Makes a great kid corral too.
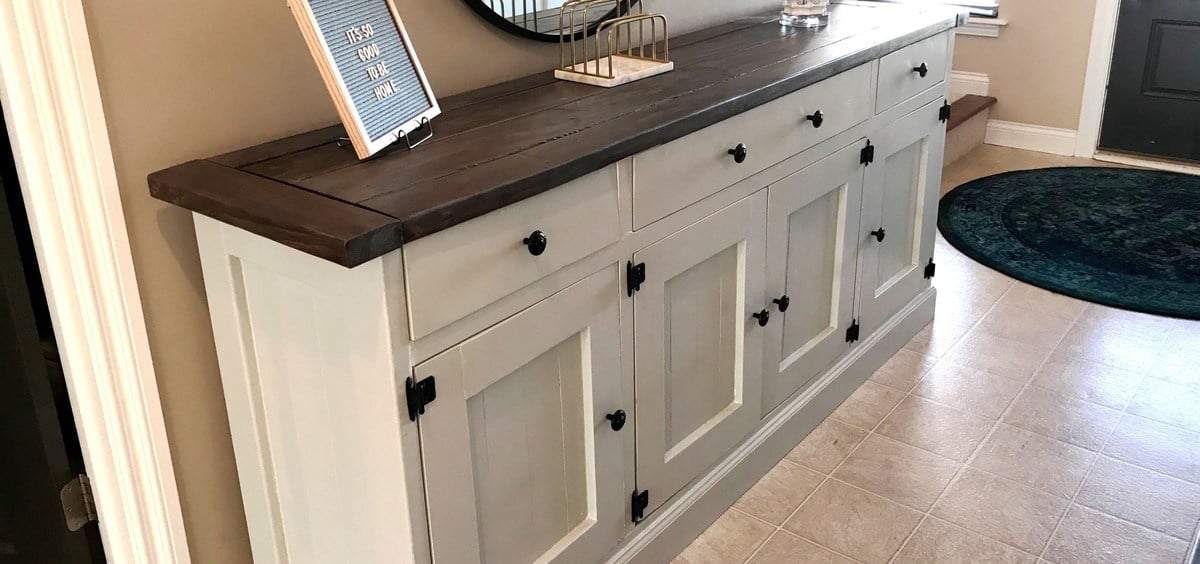
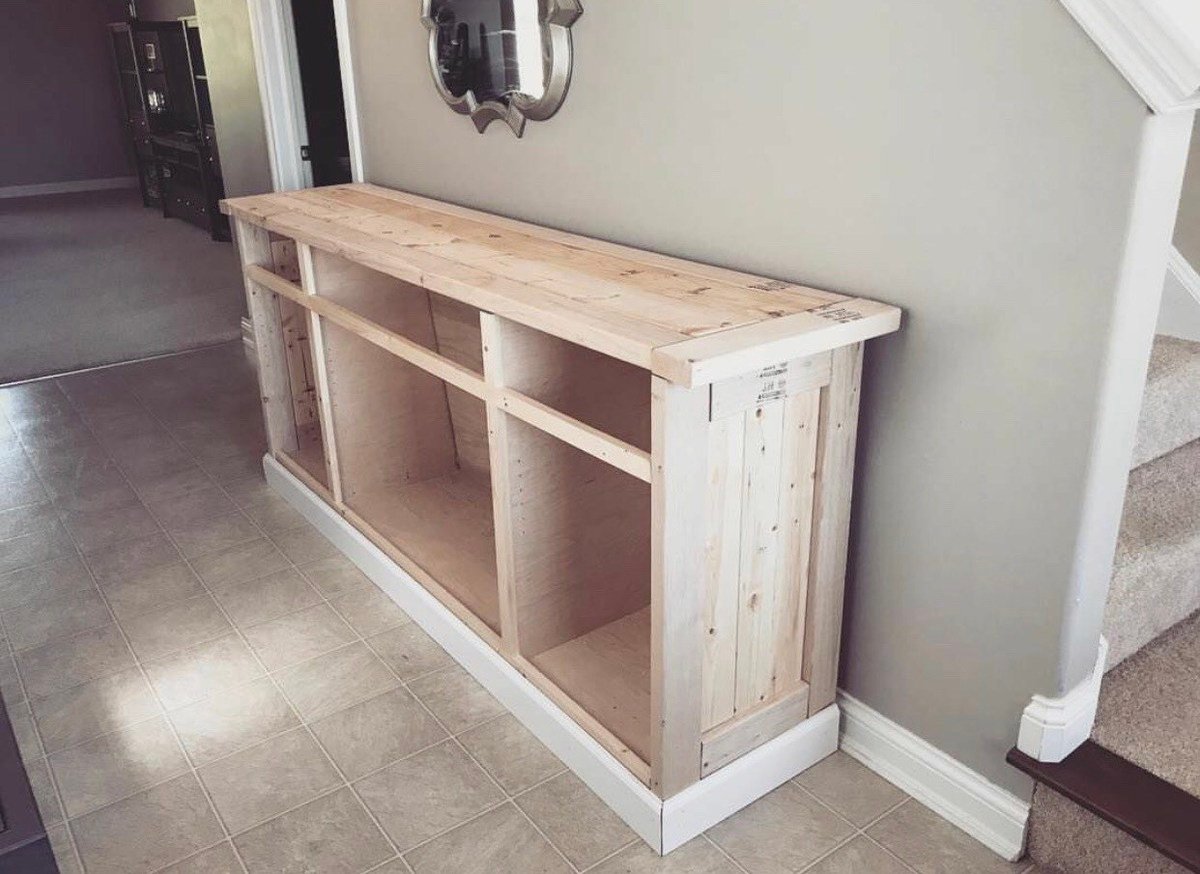
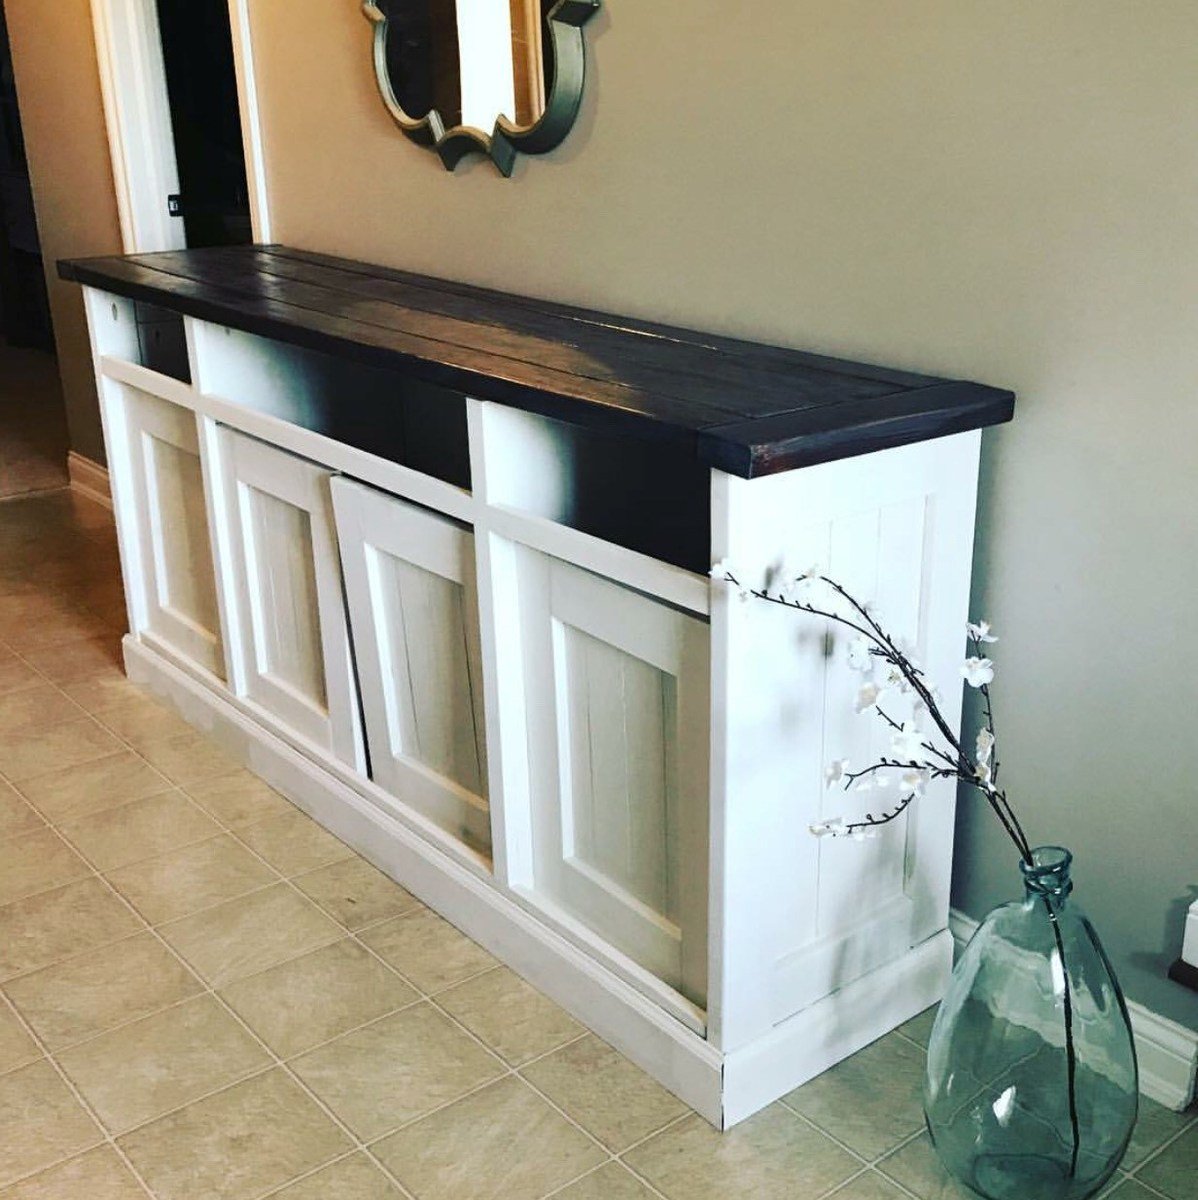
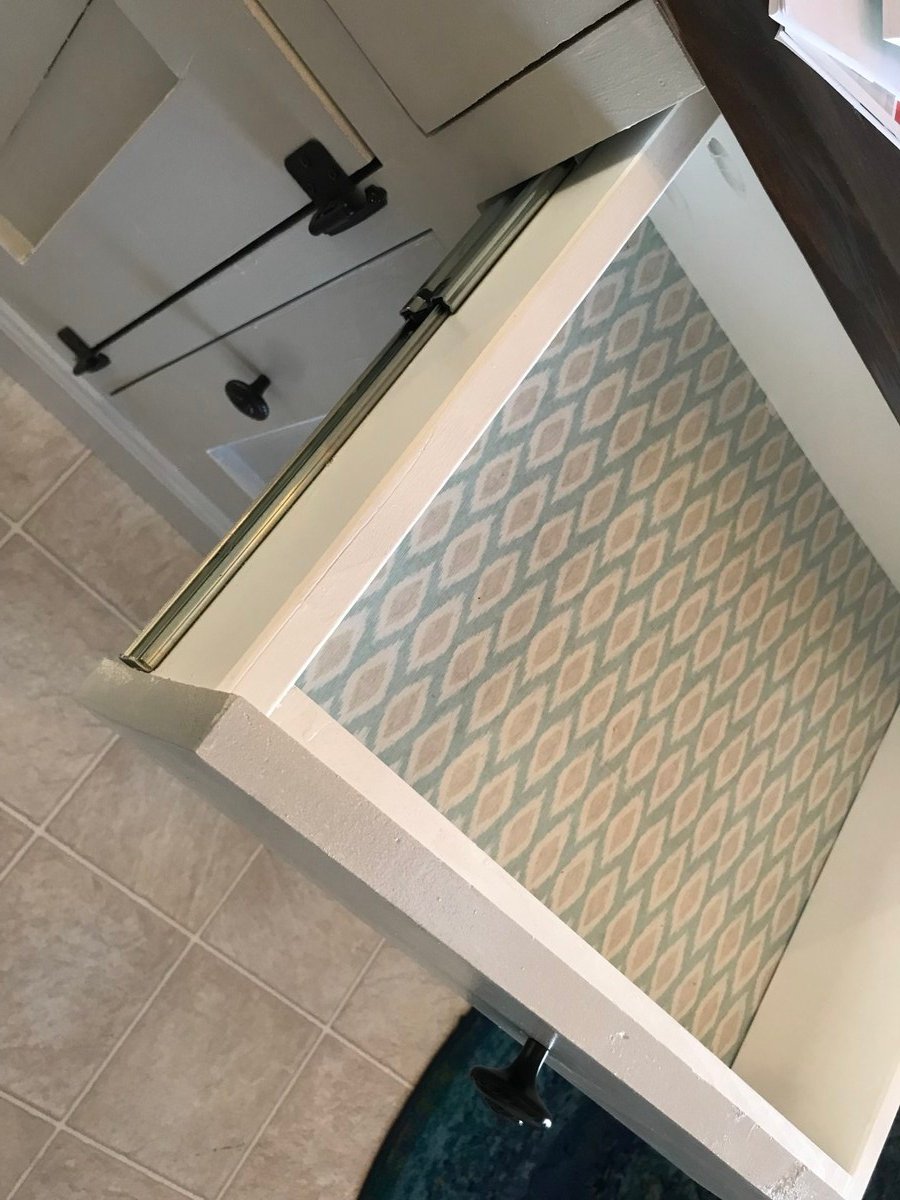
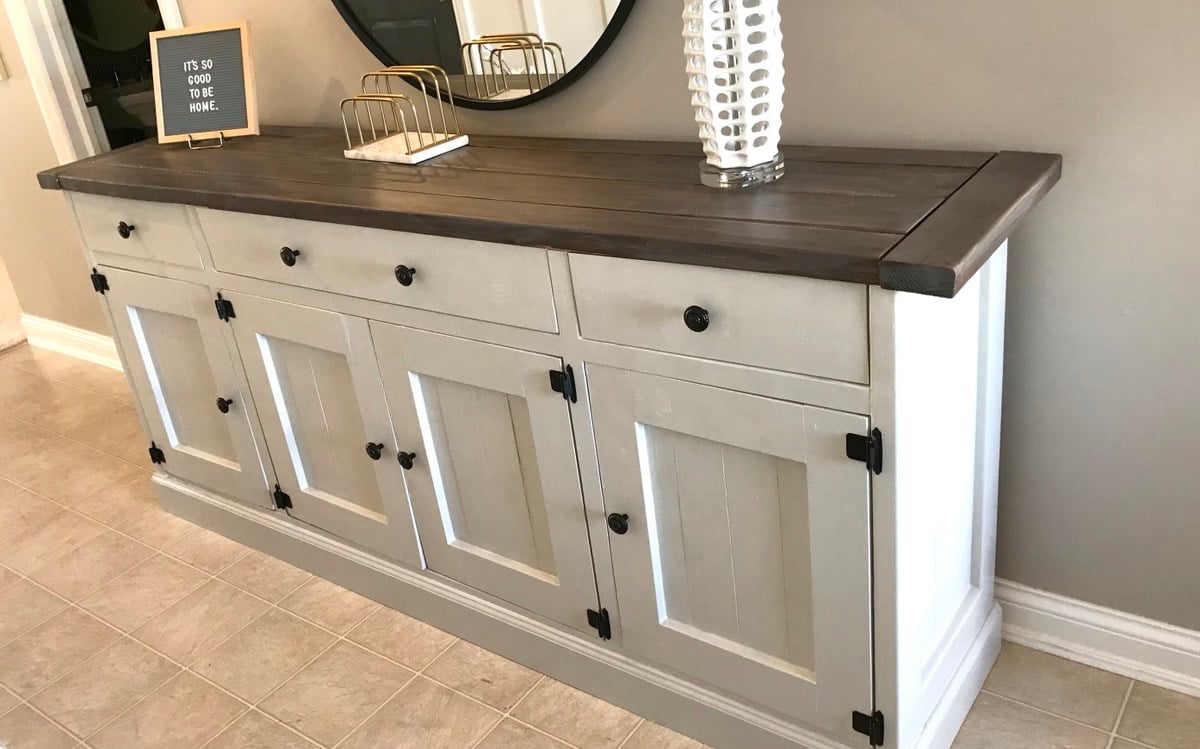
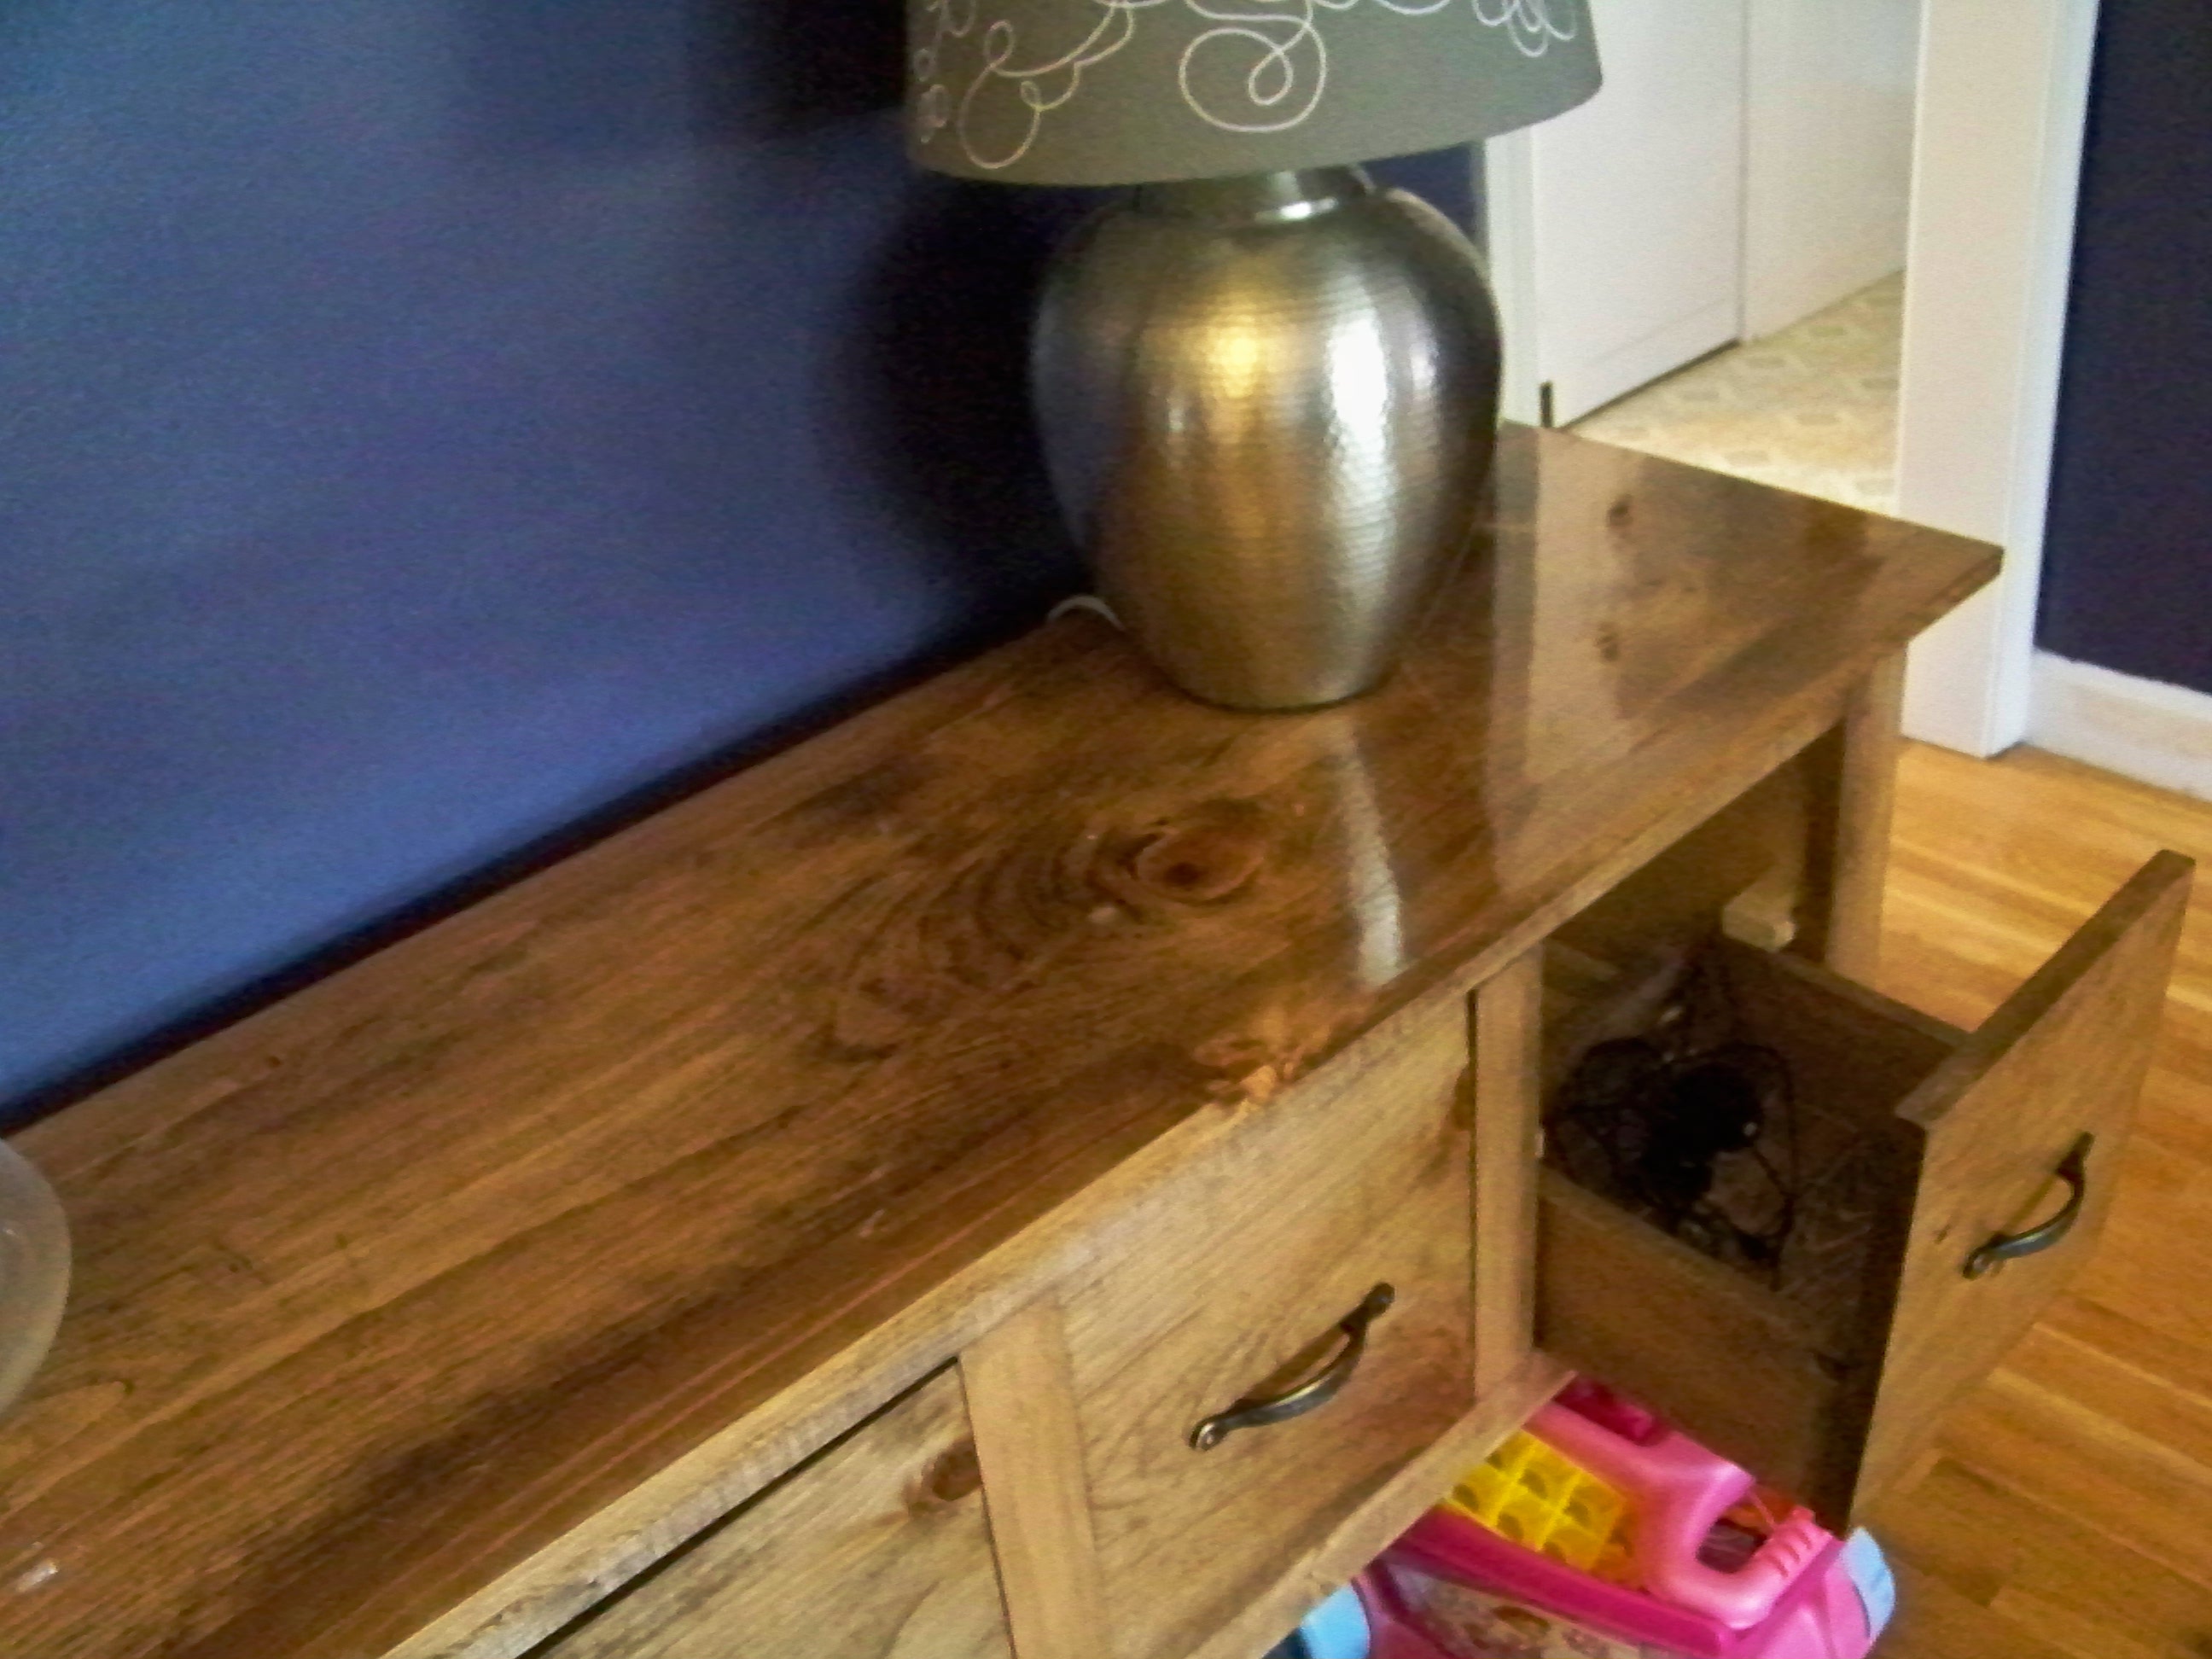
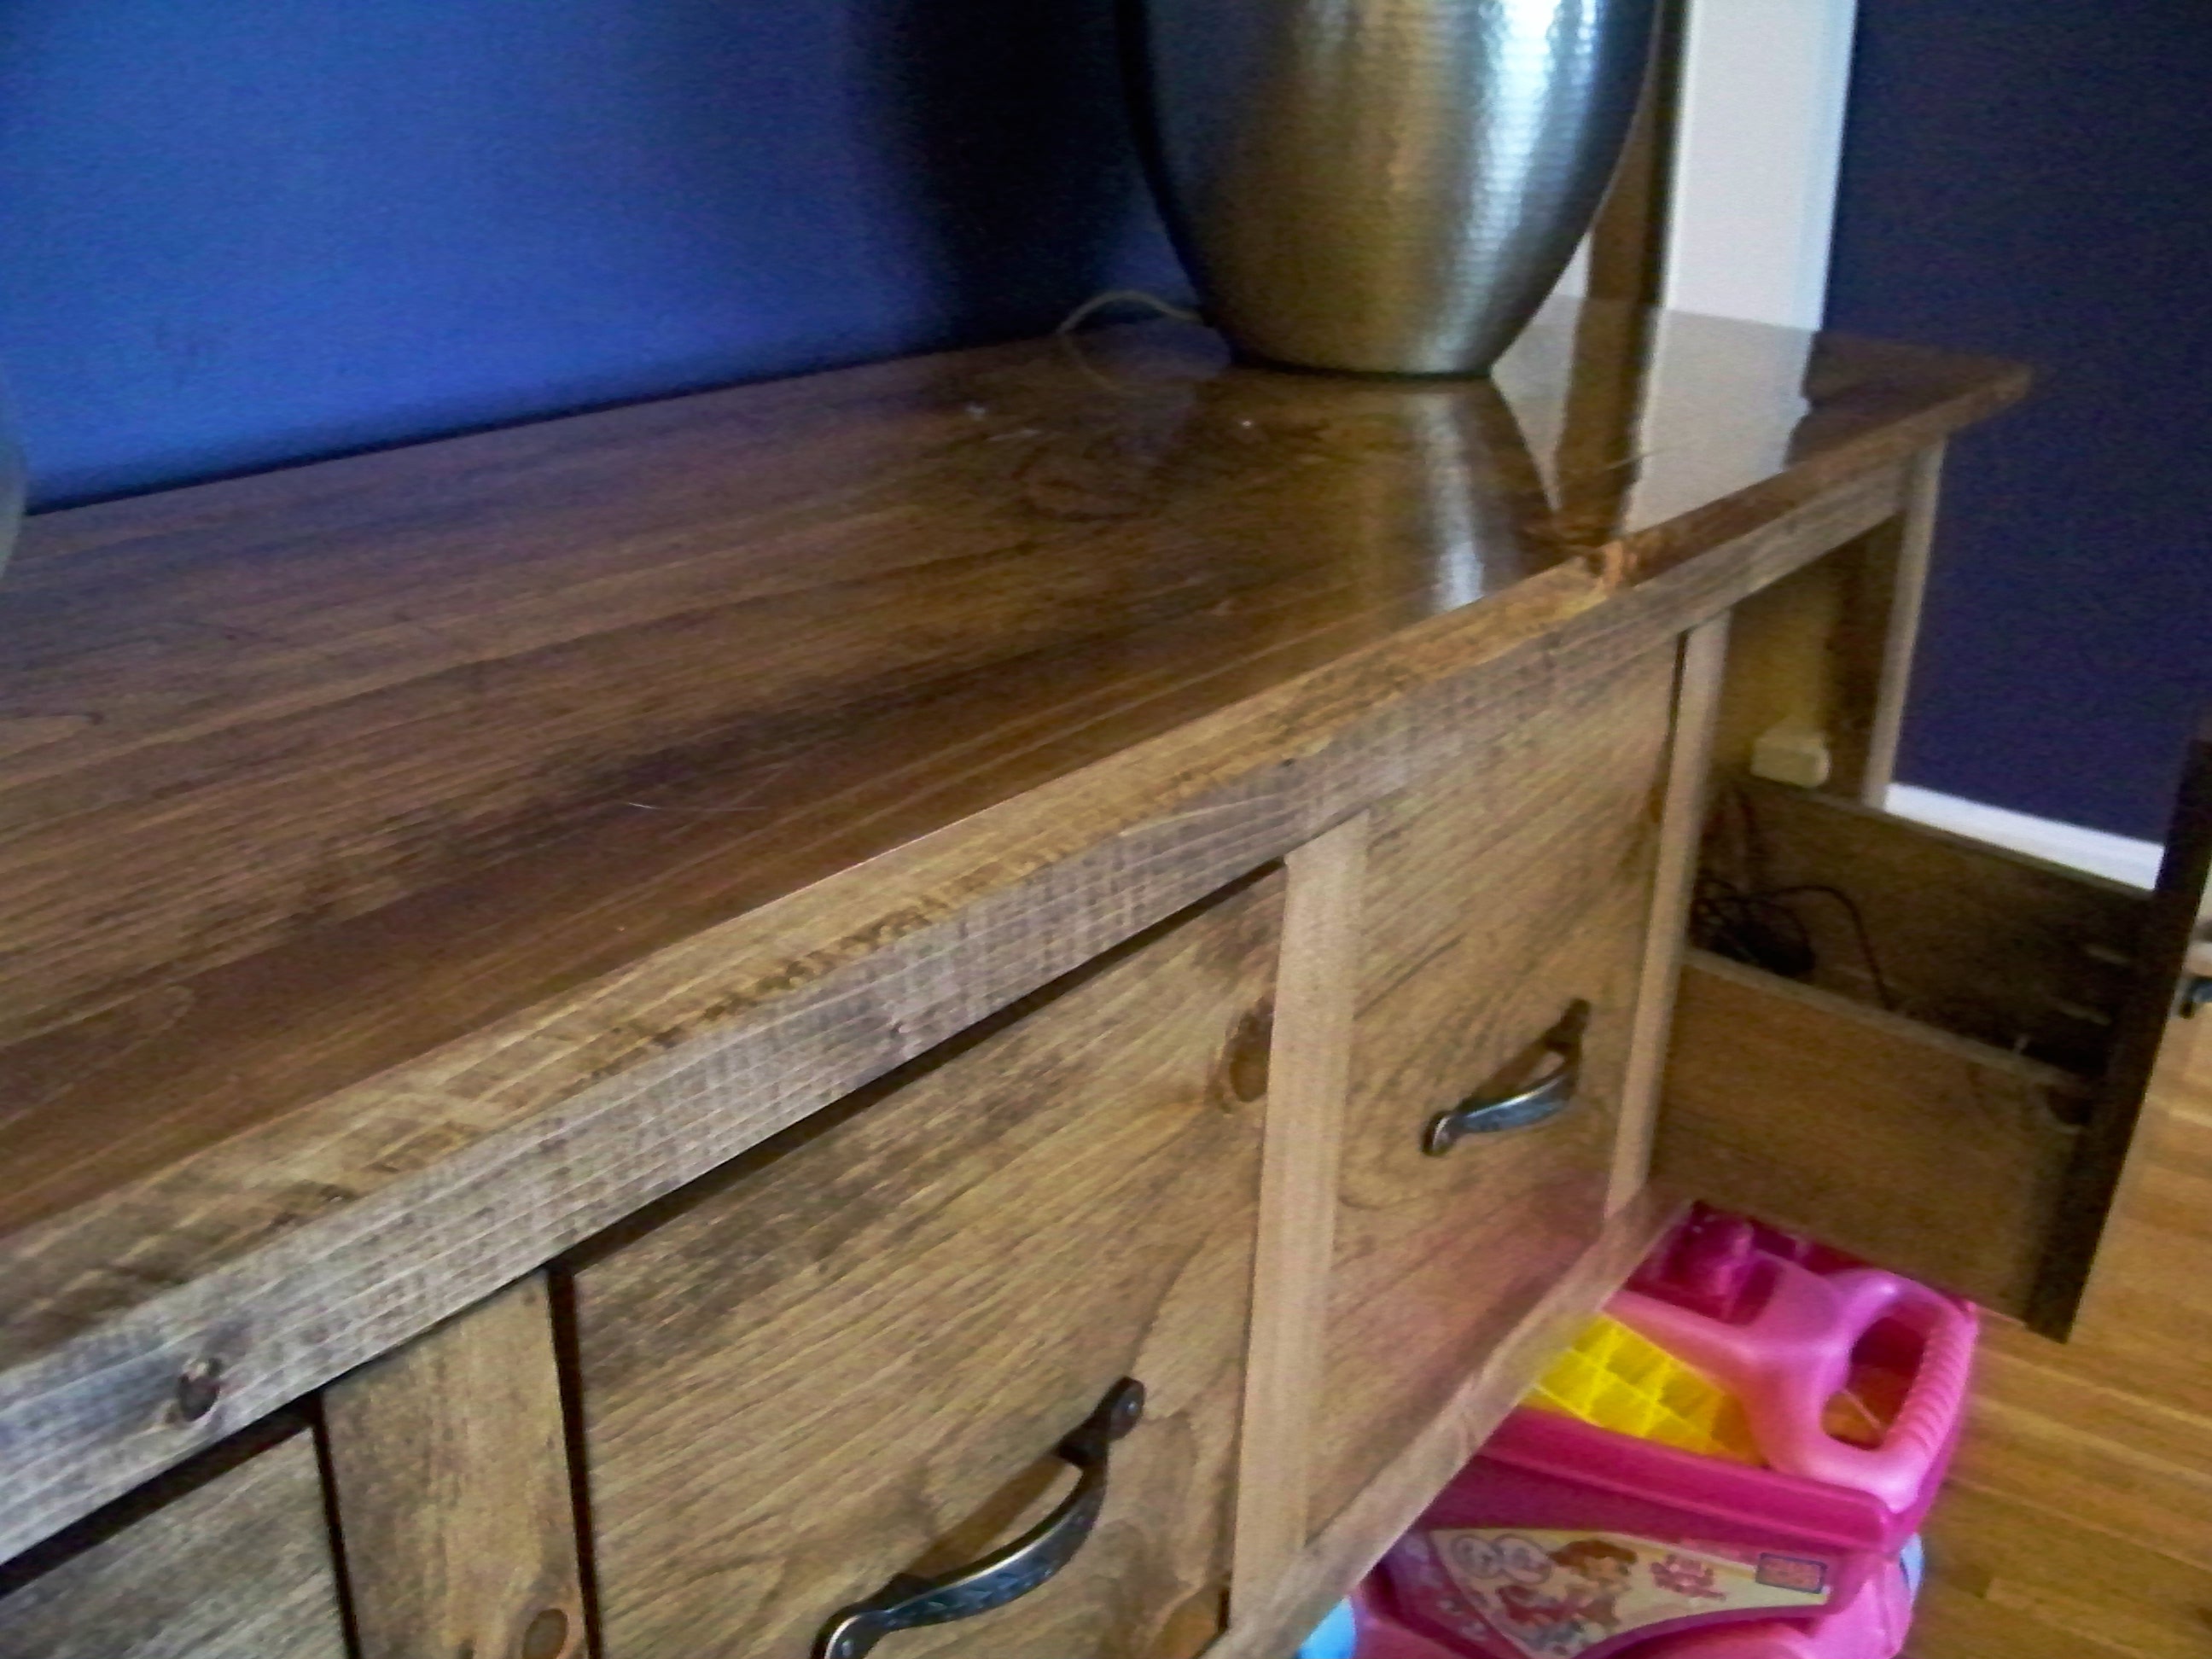
I worked on this project over the course of a few months, and I absolutely love the result! I posted all the info at my blog: http://www.designatedspacedesign.com/2017/10/01/a-rustic-sideboard/
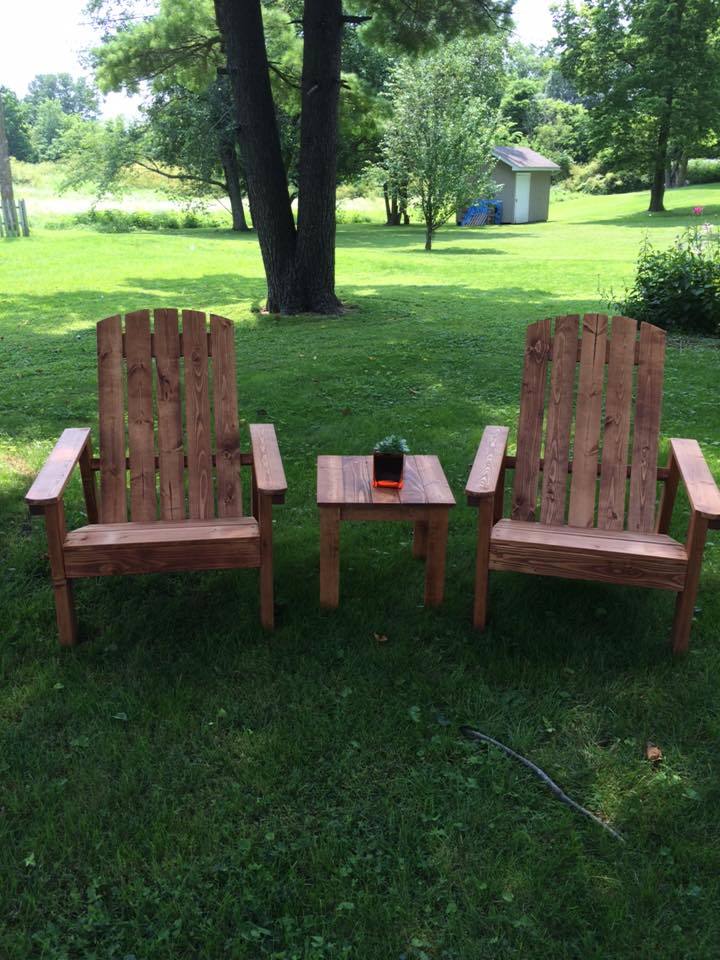
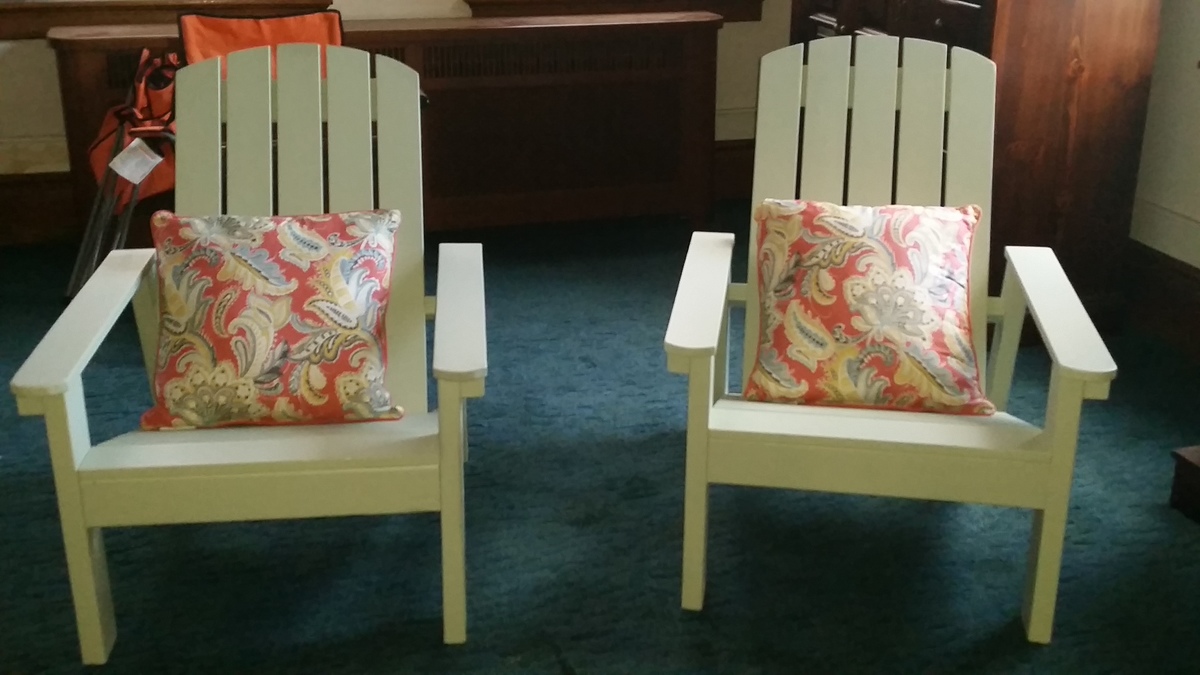
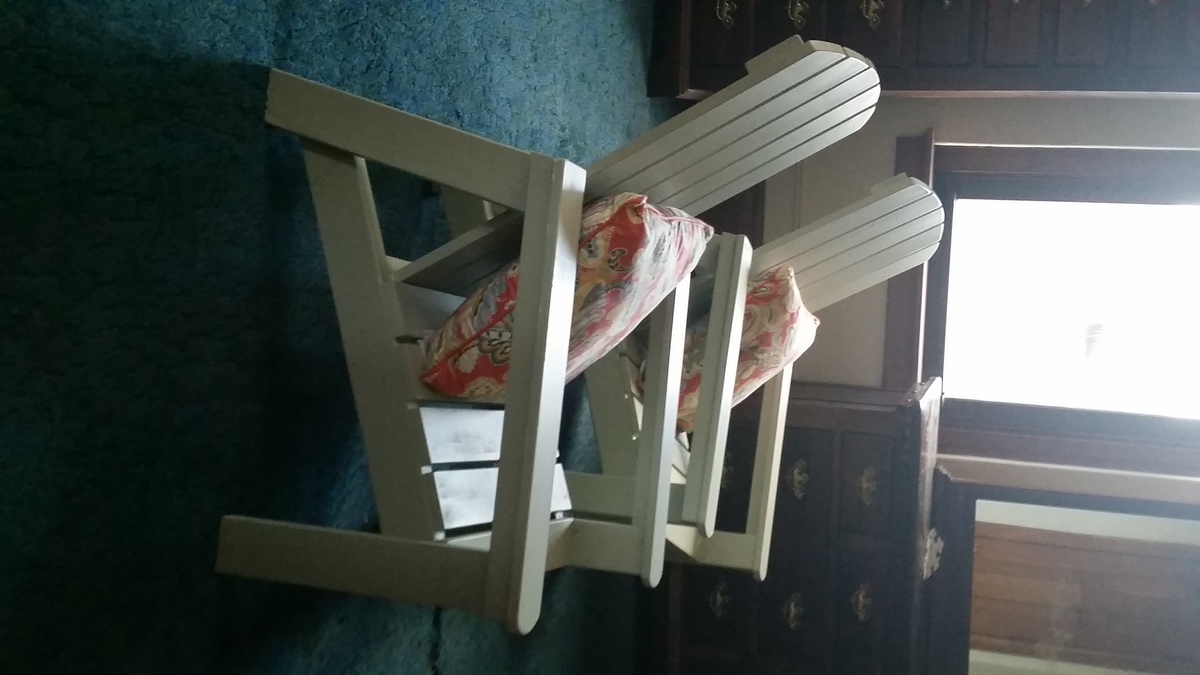
I built 4 chairs total. A set for my mother and another for my mother-in-law for Mothers Day. The first set I built are the green ones with the cushions. The second set are the stanined chairs. The second set went a little easier than the first because I learned from my mistakes. What I did differently on the second set was mainly to sand and stain before assembling. I had a hard time getting in between all of the nooks on the painted chairs. I ended up using my paint sprayer to paint them because it was just going to take forever otherwise. The side table was very easy and straightforward. No issues there. All in all a pretty easy project. Both moms were very pleased with their gift! Thank you Ana and Home Depot once again for the awesome plans!!
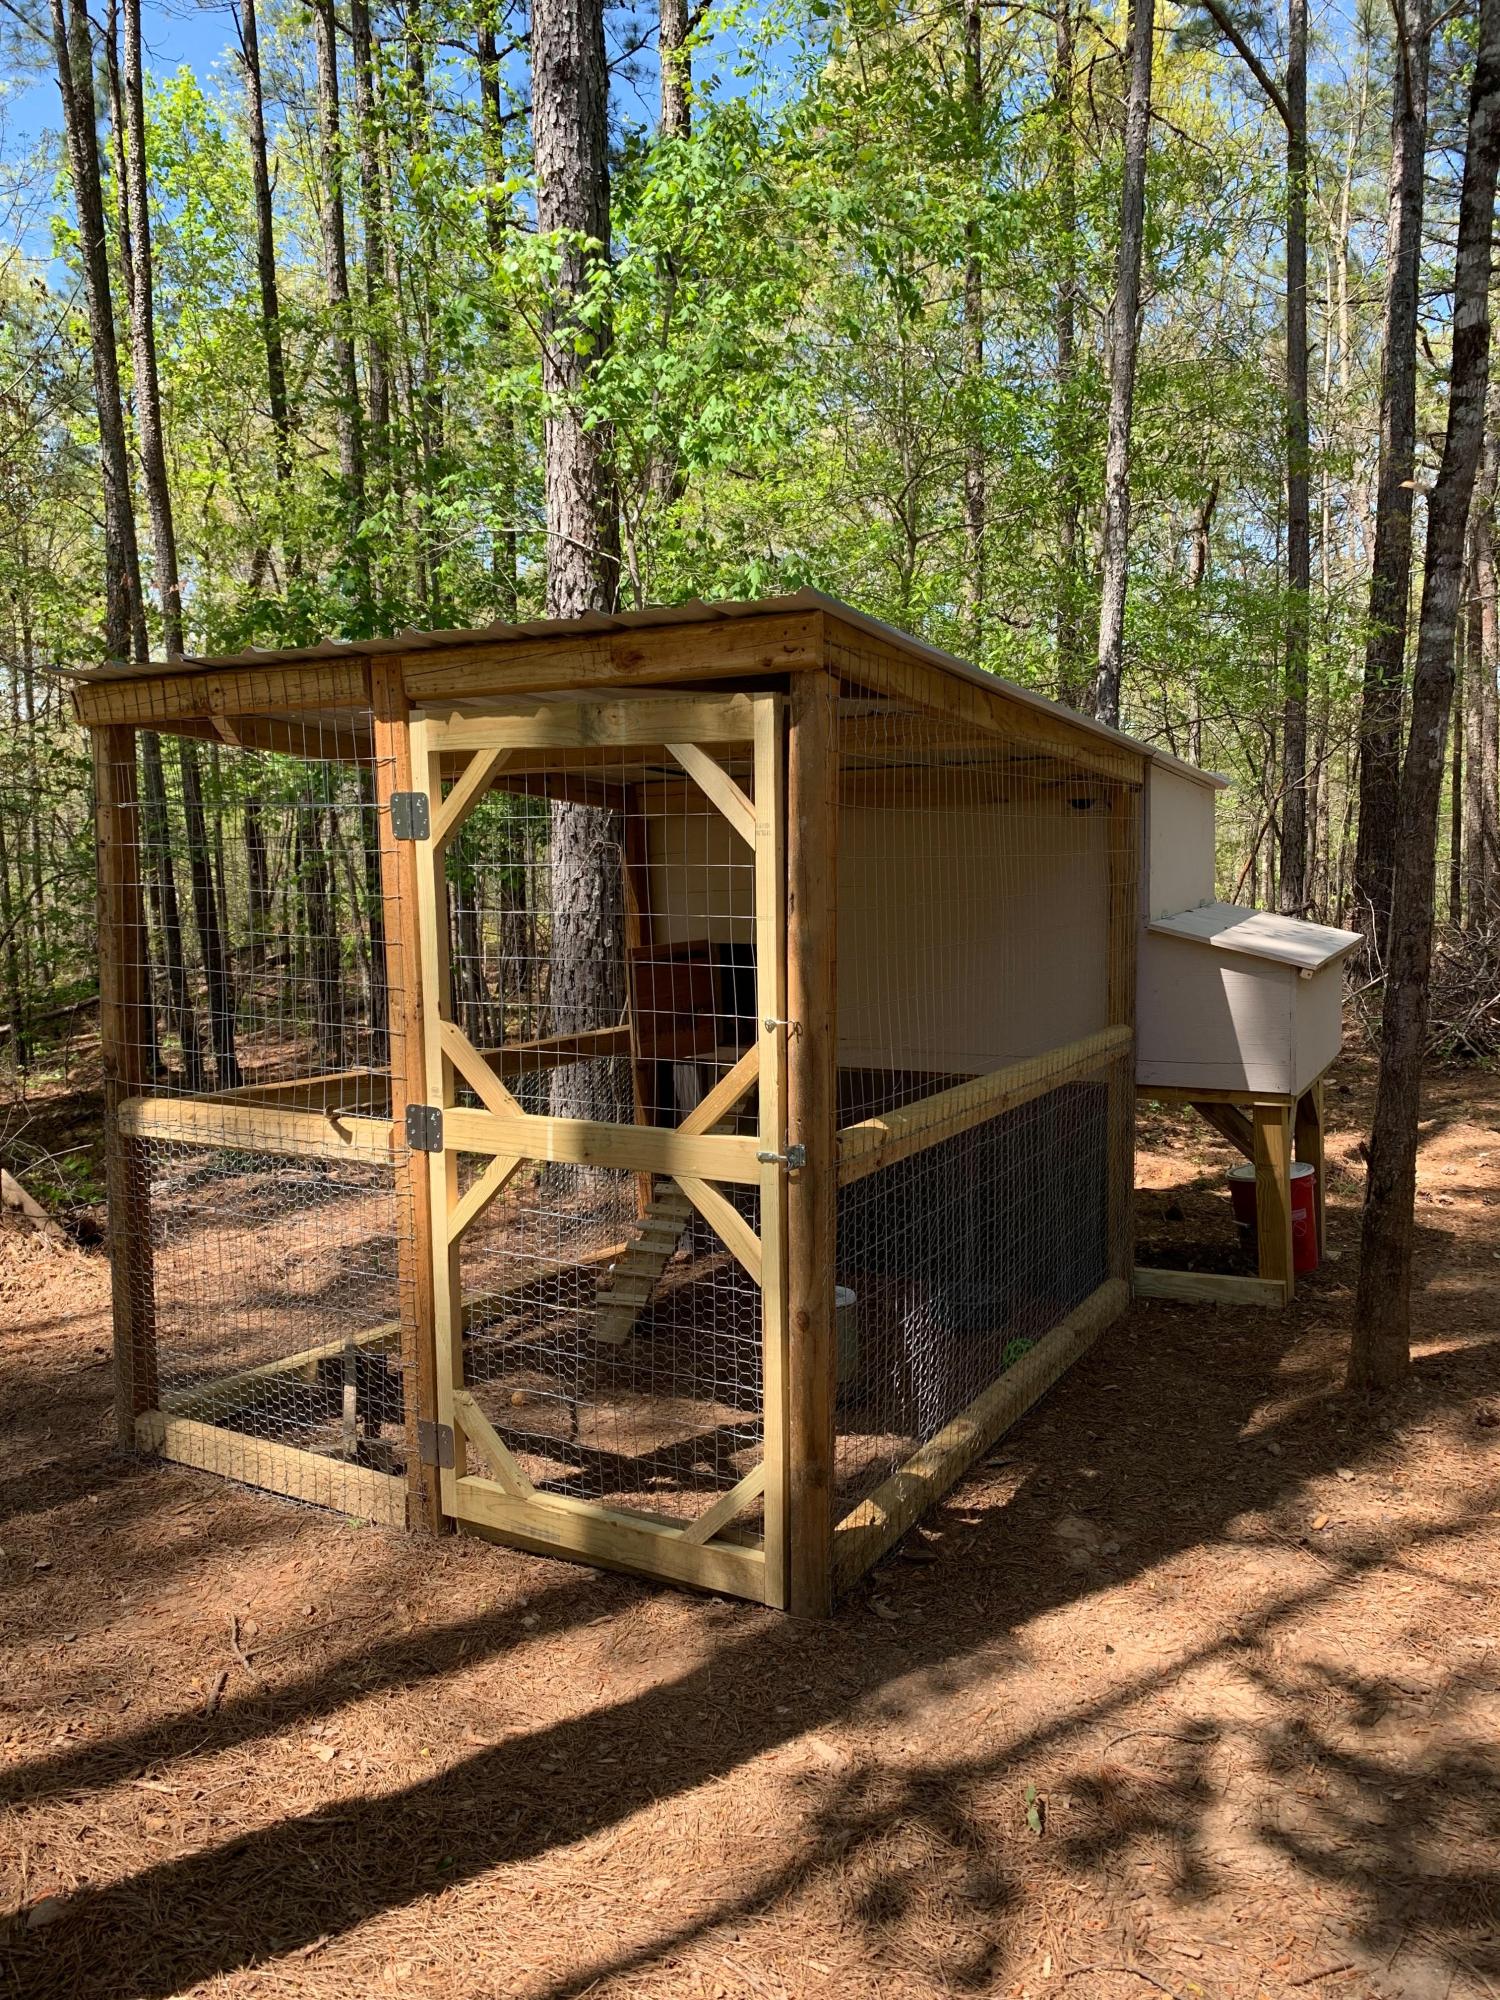
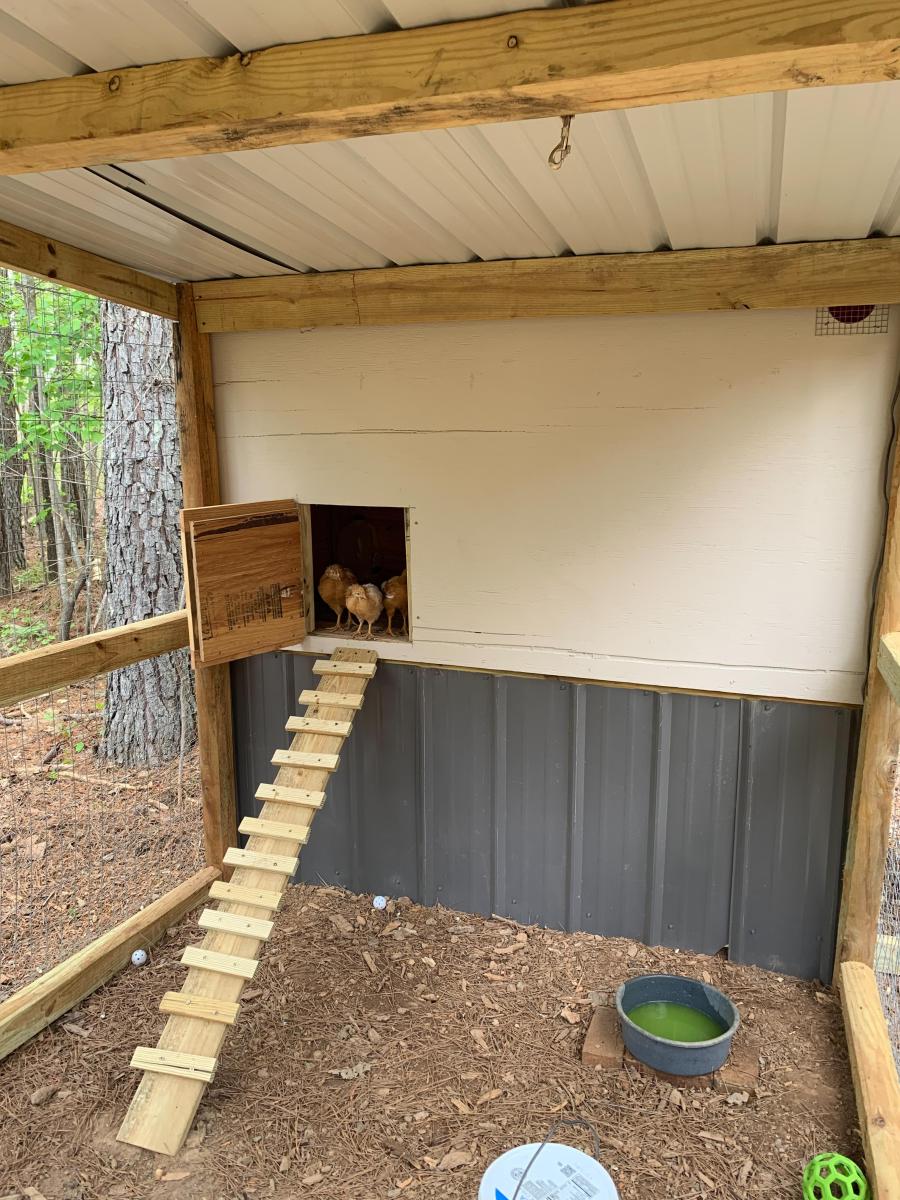
Chicken coop with run!
by Vicki
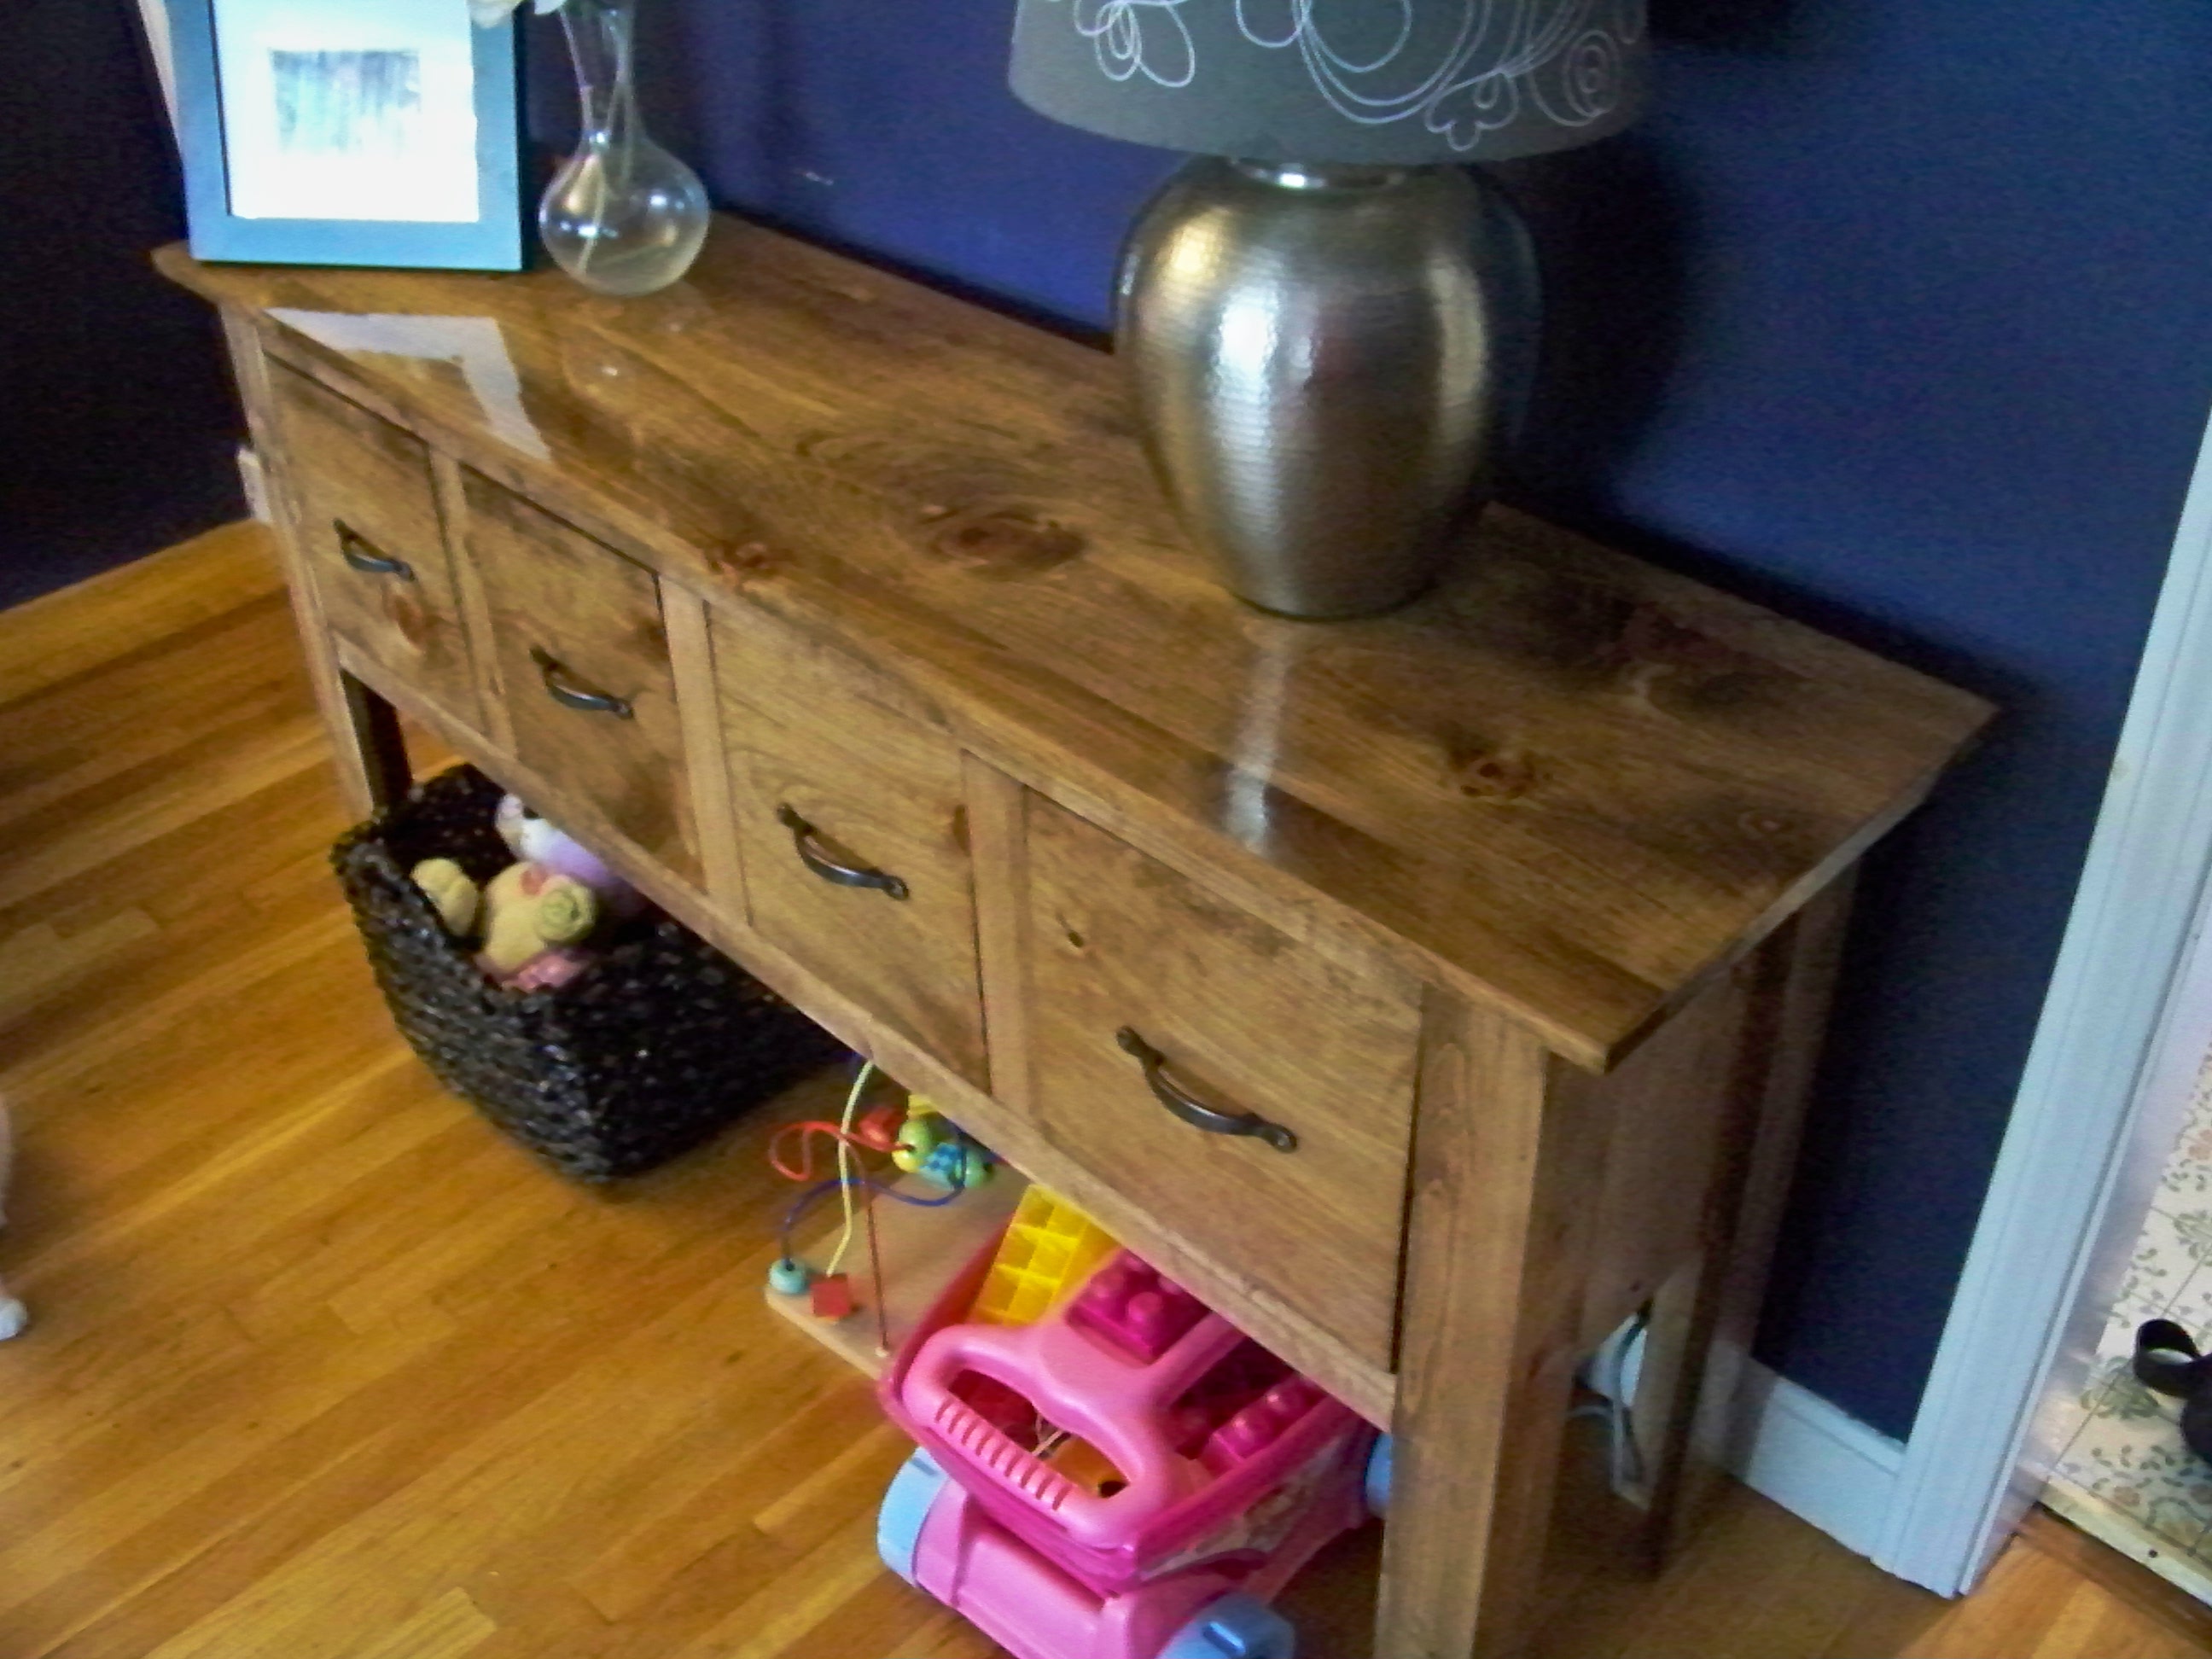
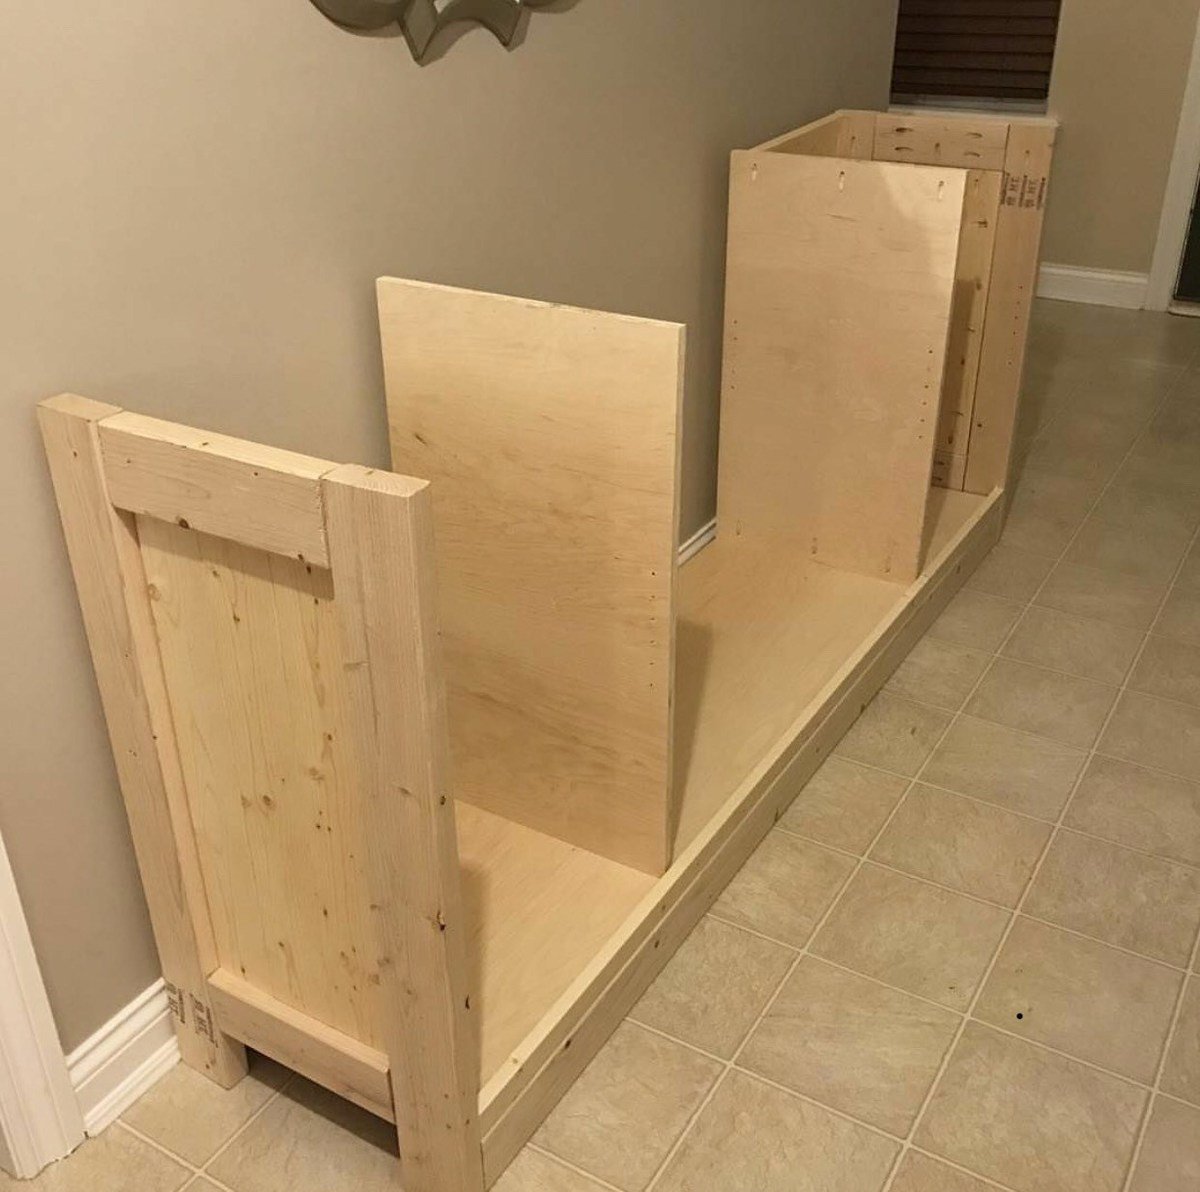
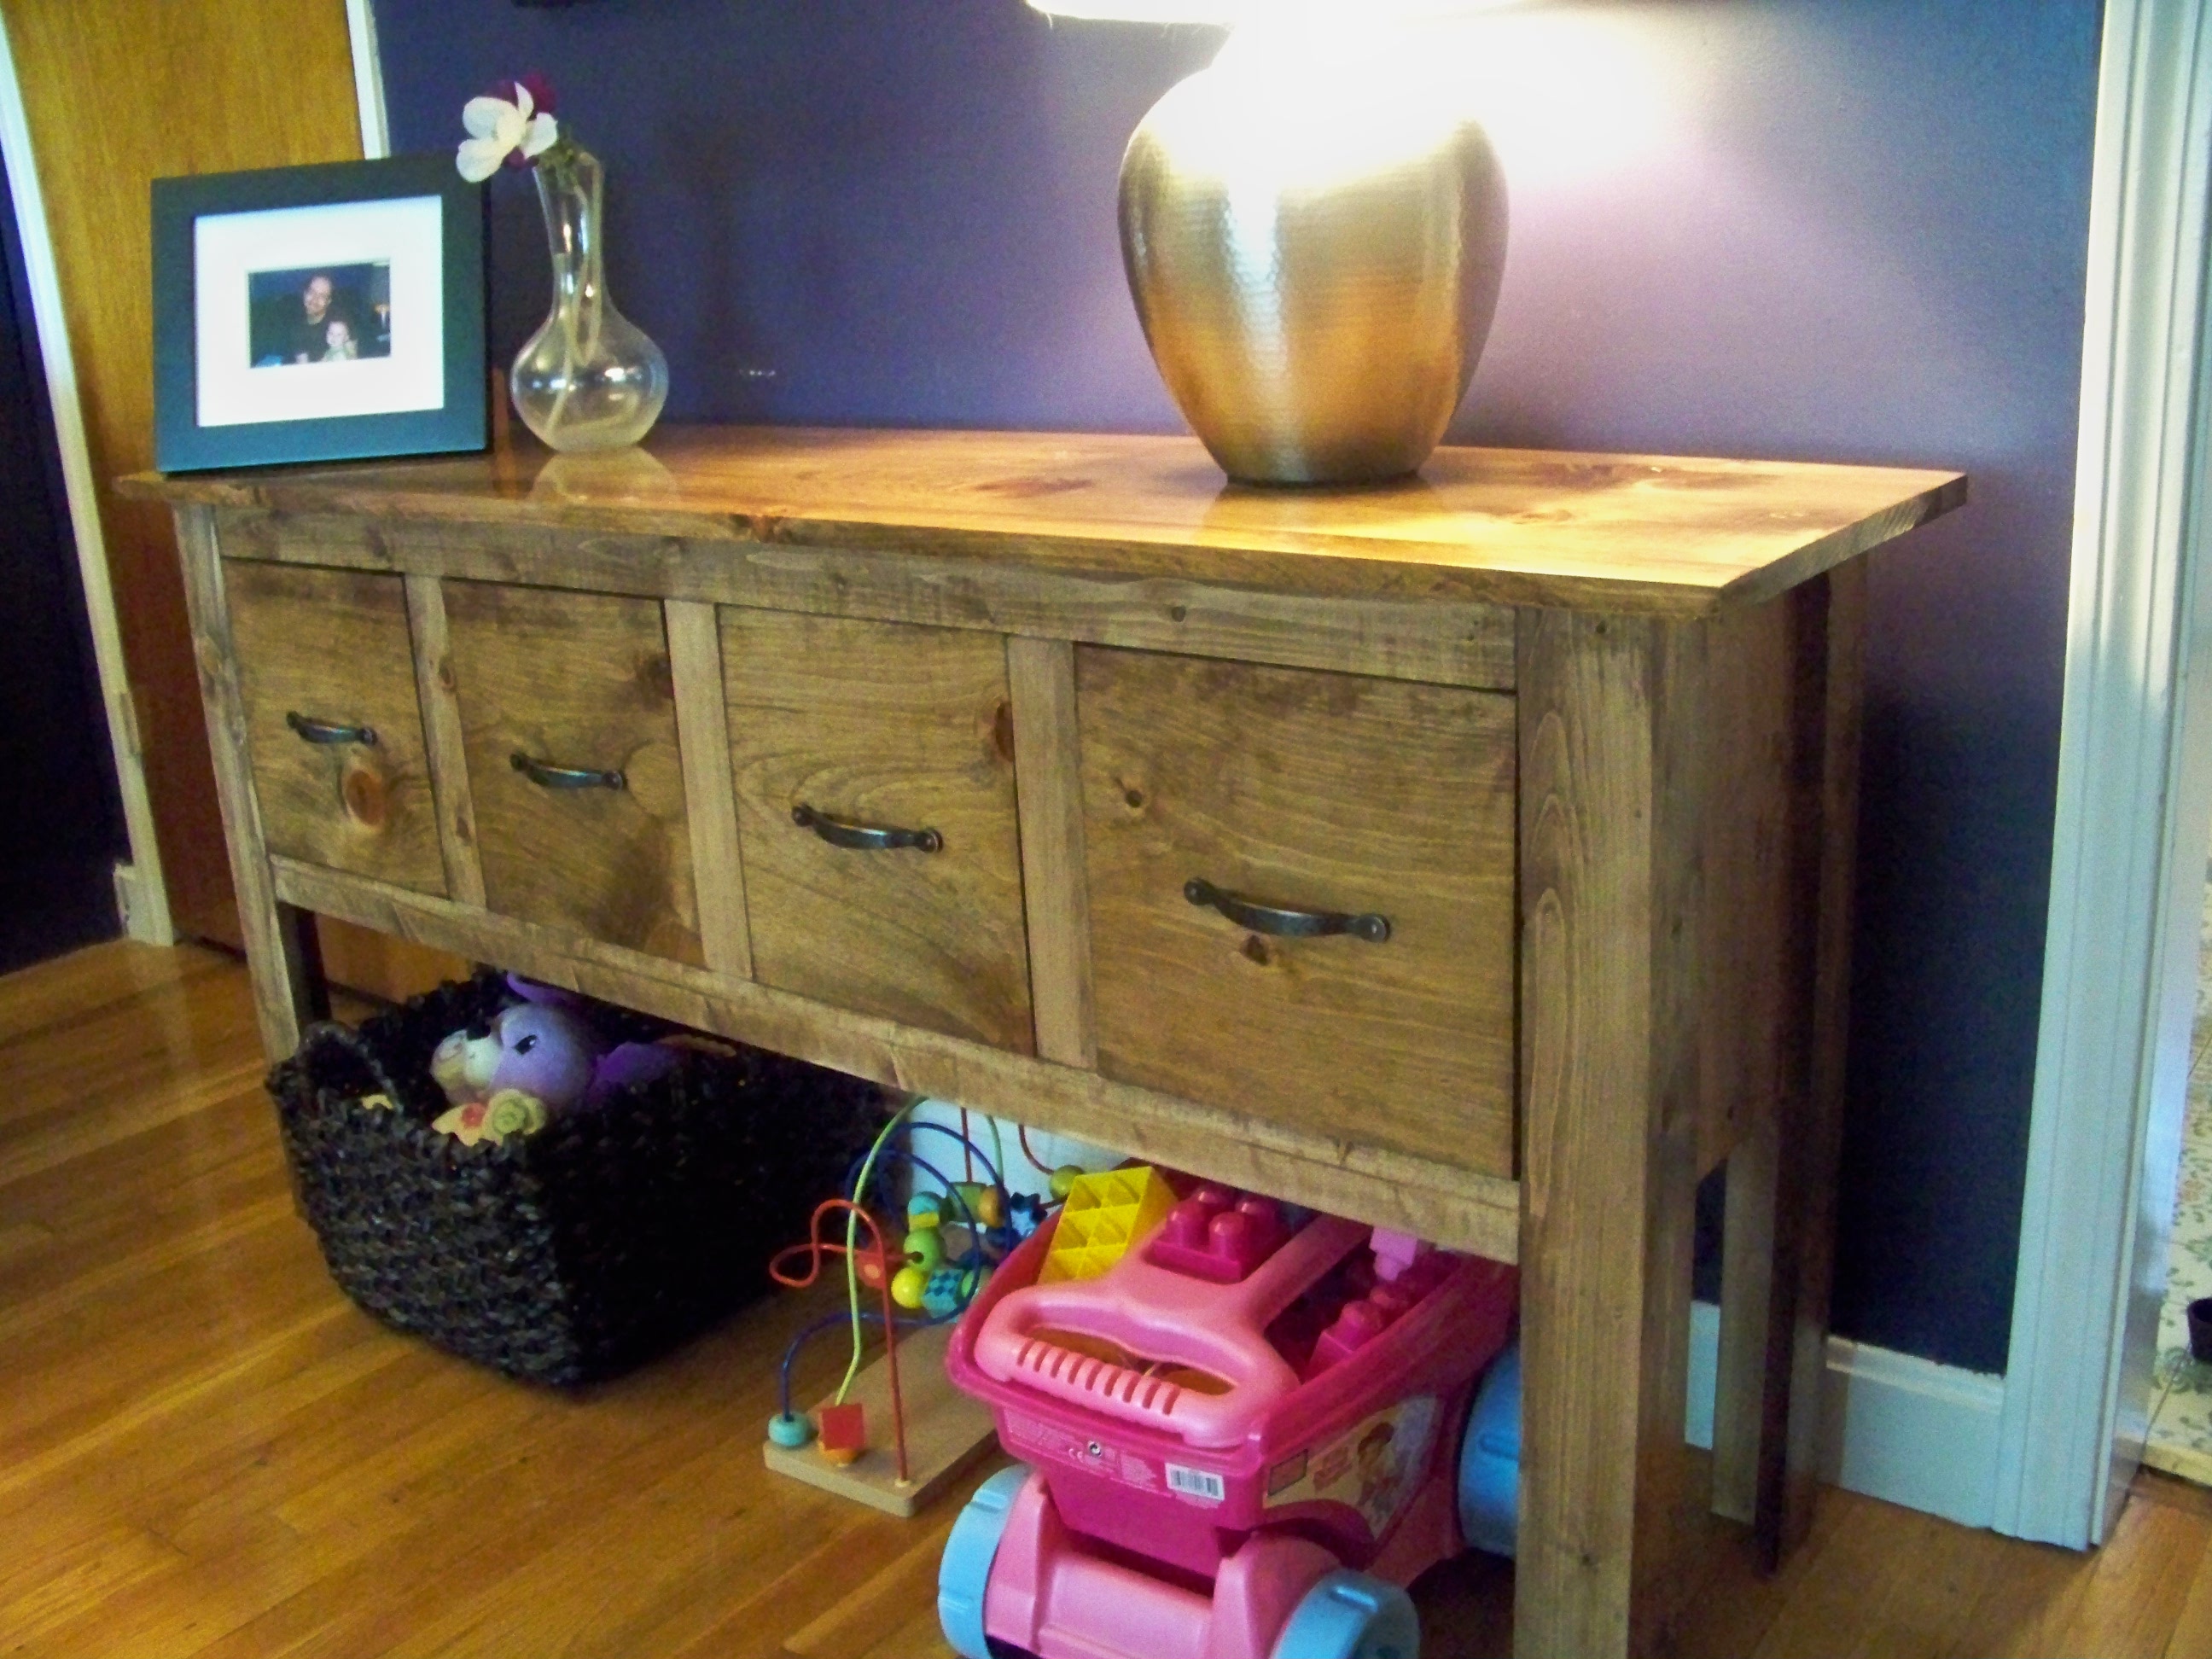
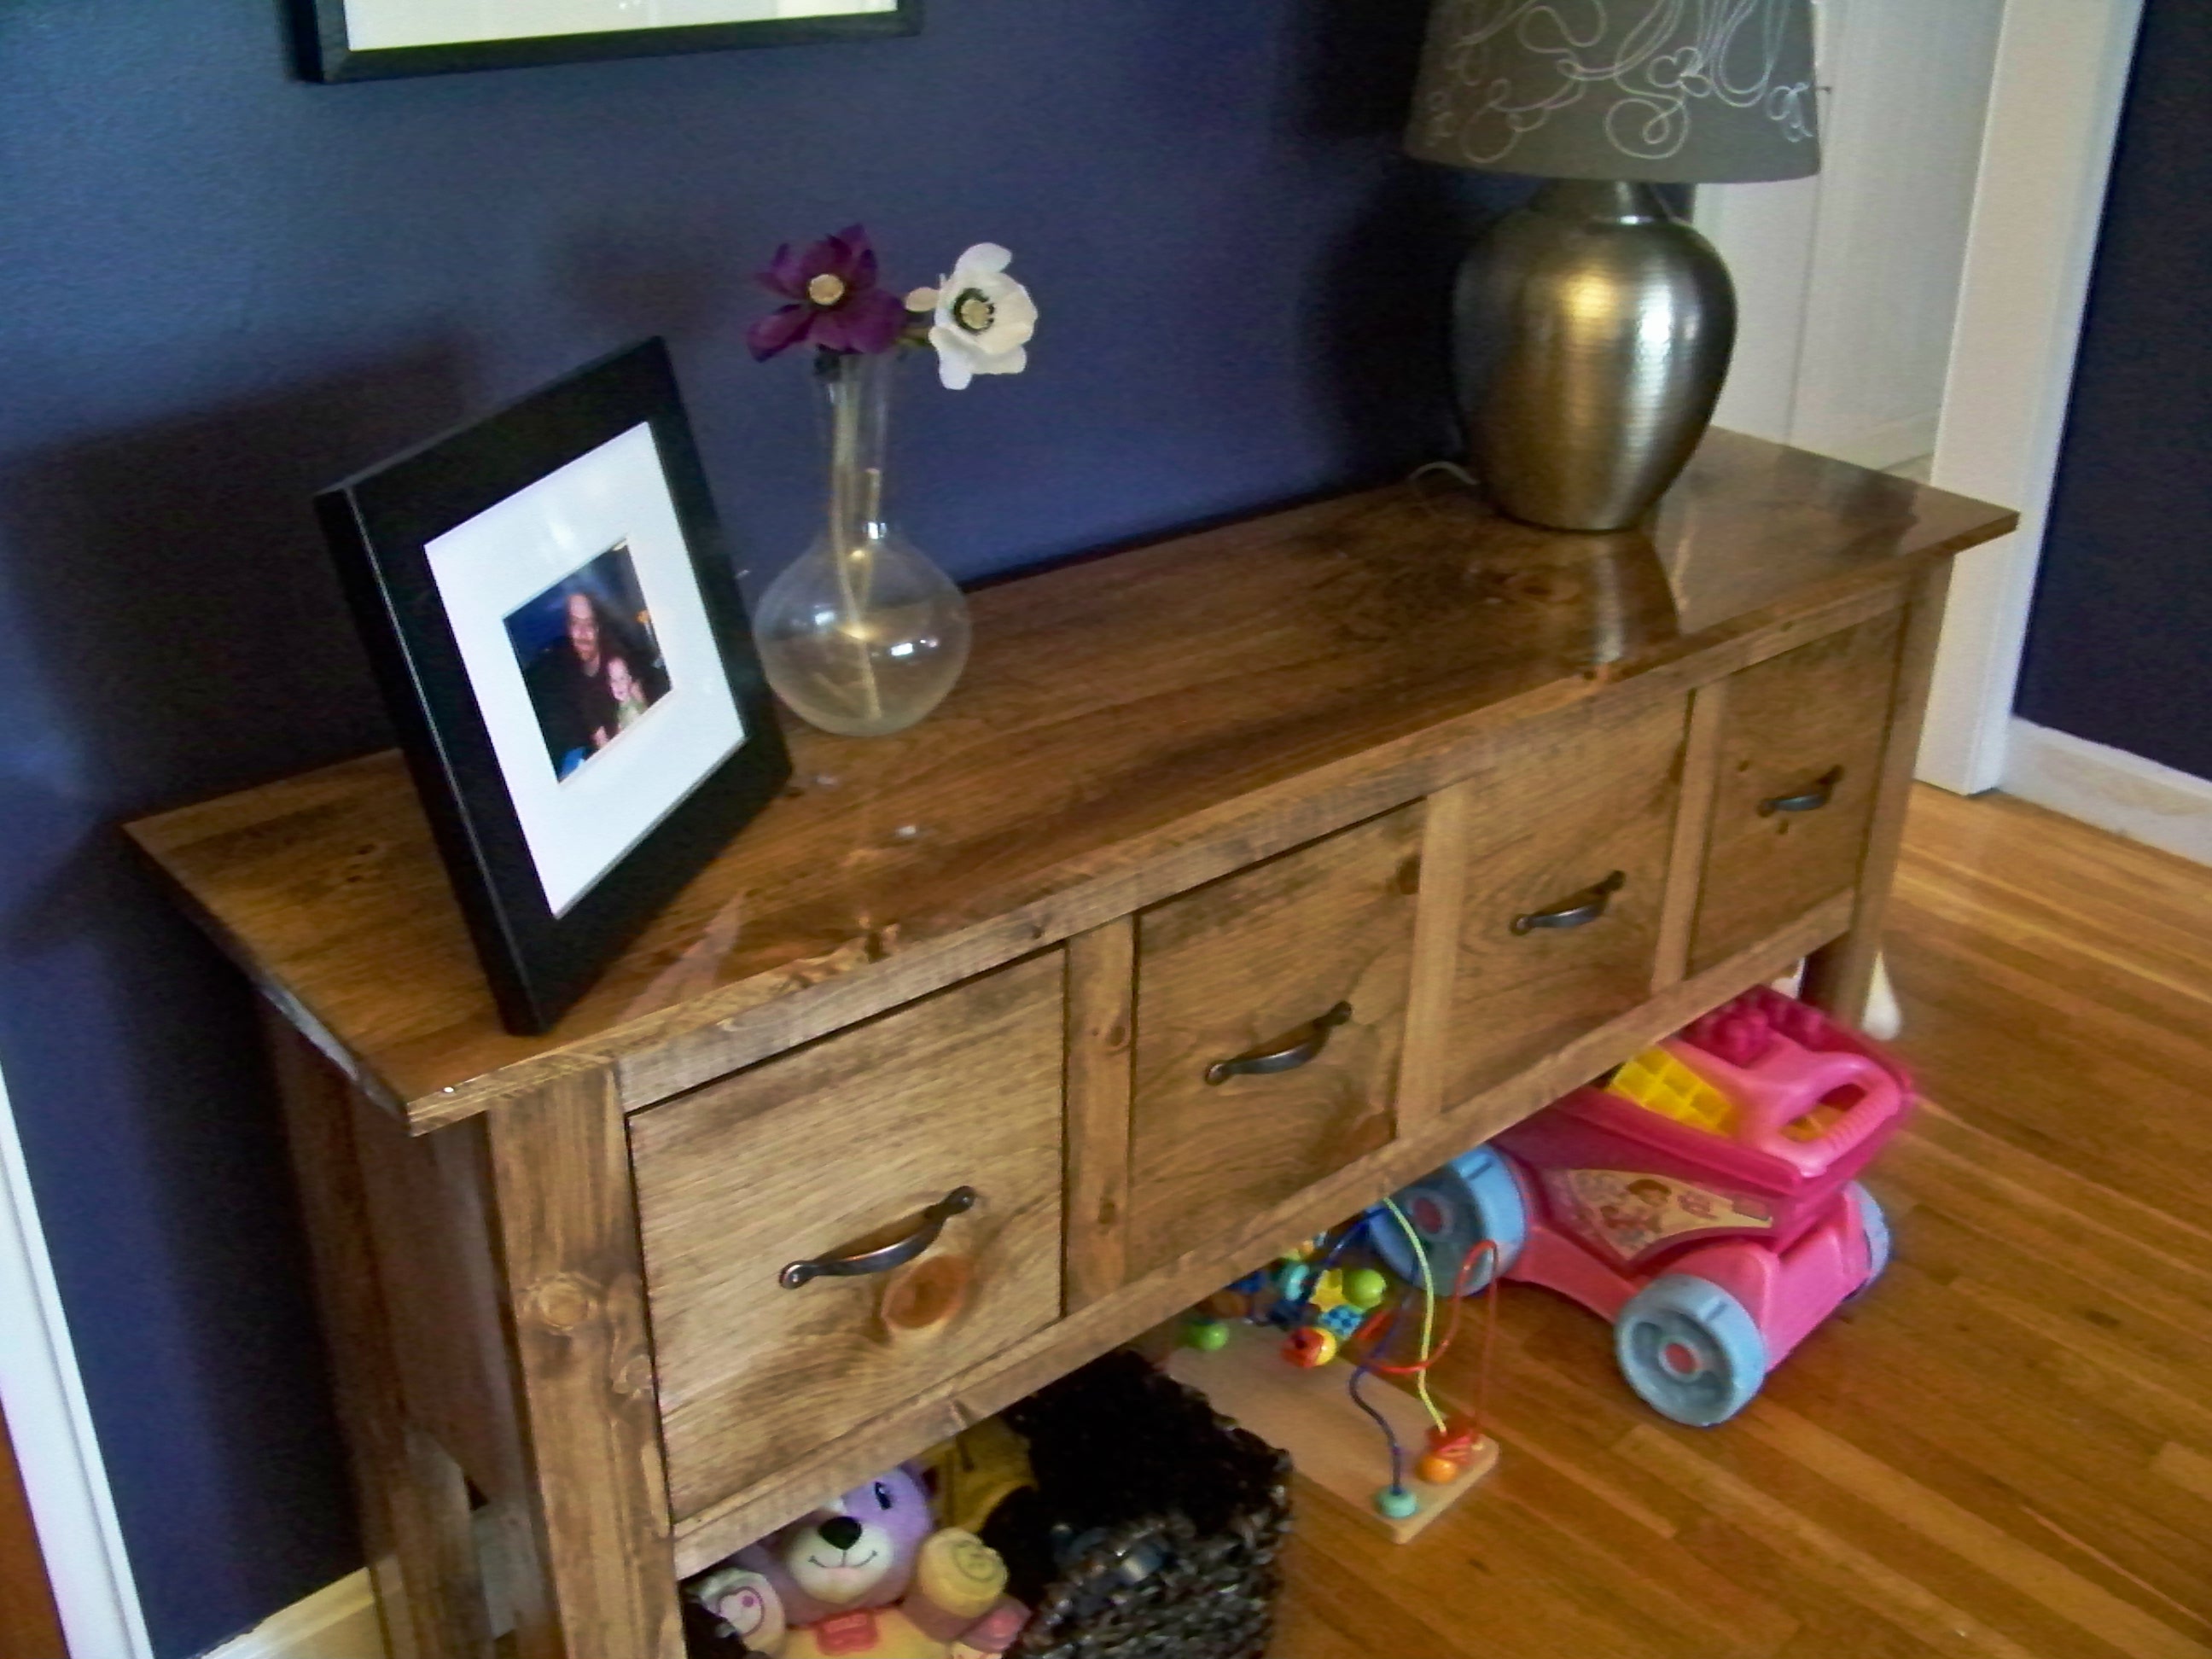
My wife and I picked this out as our first somewhat complex piece from Ana's site to make. Most of the table is made from left over 1x4s I had from a fence we made. I only needed 2 1x12s as we didn't make the drawers as deep.
Because I cut down the 1x4s for the legs (and didn't examine the plans in detail first) I made them 3 inches wide when the ones in the plan are only 2.5 inches wide. This made for a few adjustments, such as the middle two drawers being a bit narrower.
The fronts of the drawers are normal height, but the boxes are only 4 inches high inside (so they don't fill up with as much junk, lol).
The 1x12s were only 11 inches wide, so I laminated some 1x2s on the sides to make it wide enough.
I think it really turned out well and we're already planning some complimentary pieces for our living room.
Counting the left over wood from the fence it probably cost around $50 including the stain and polyurethane.

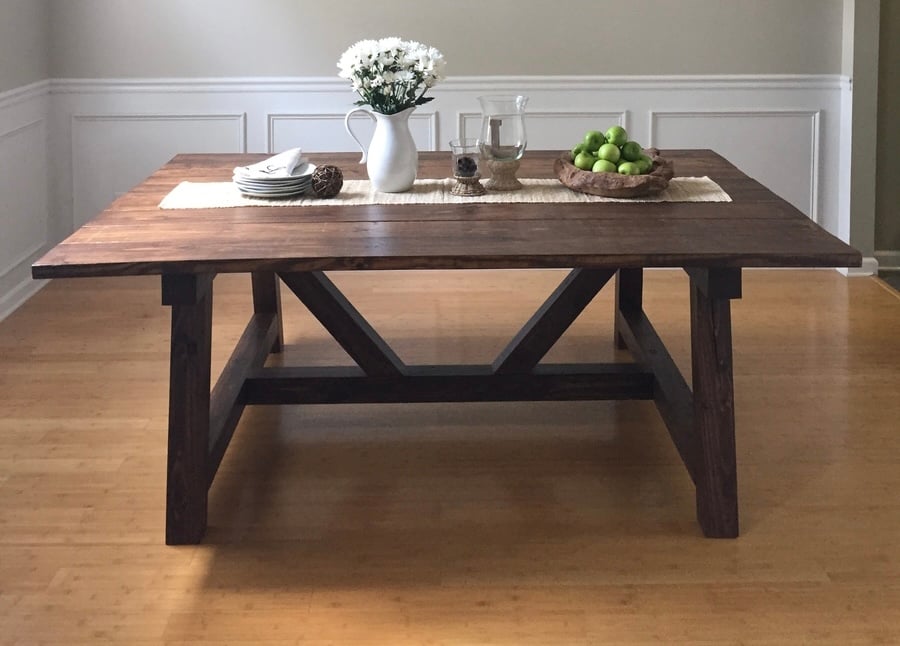
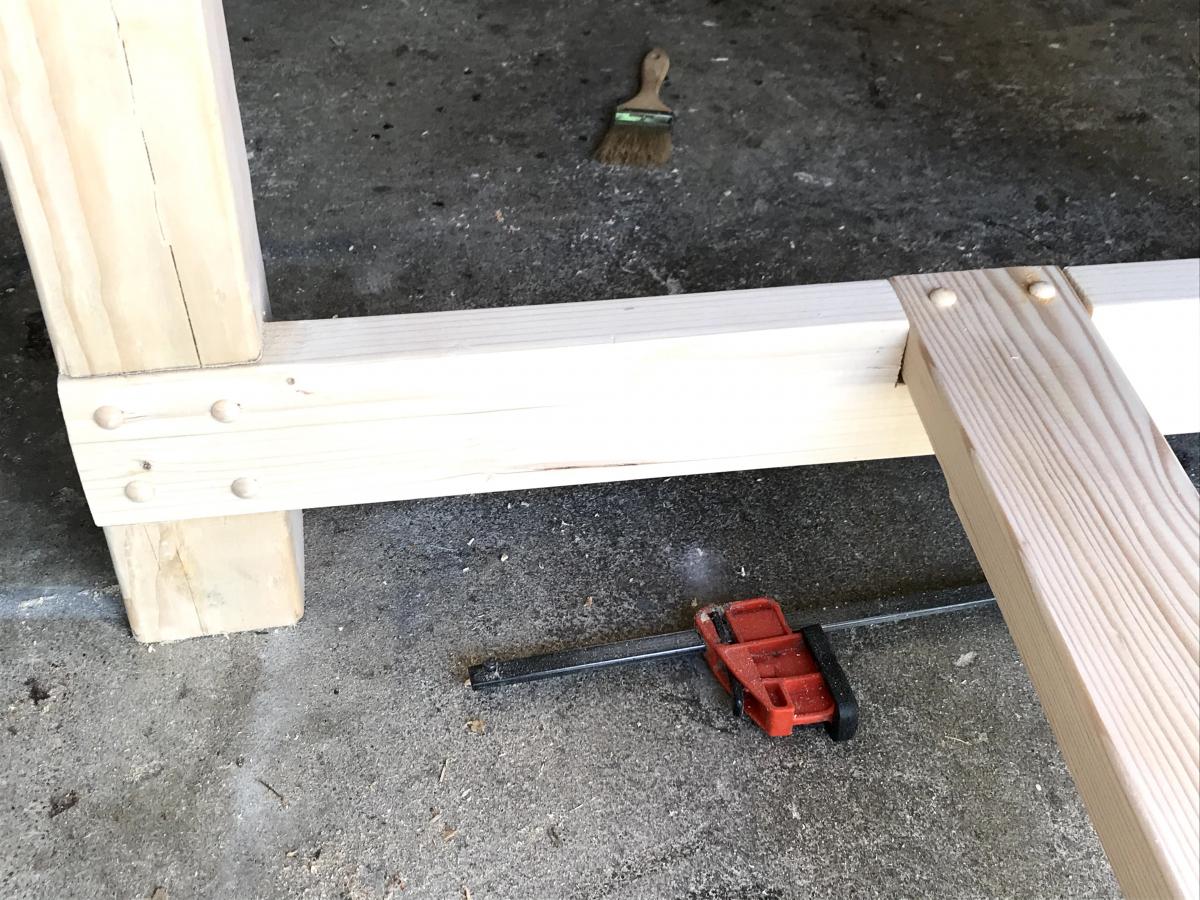
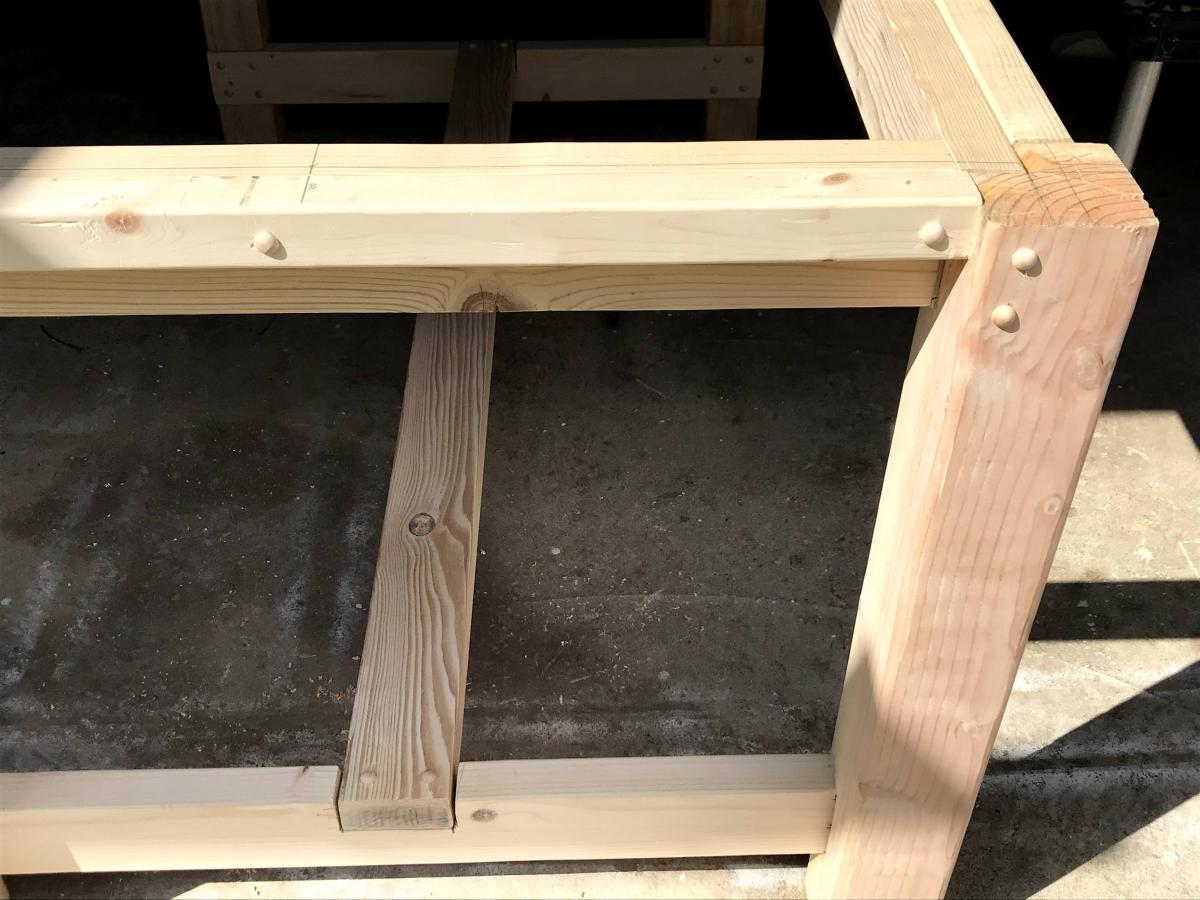
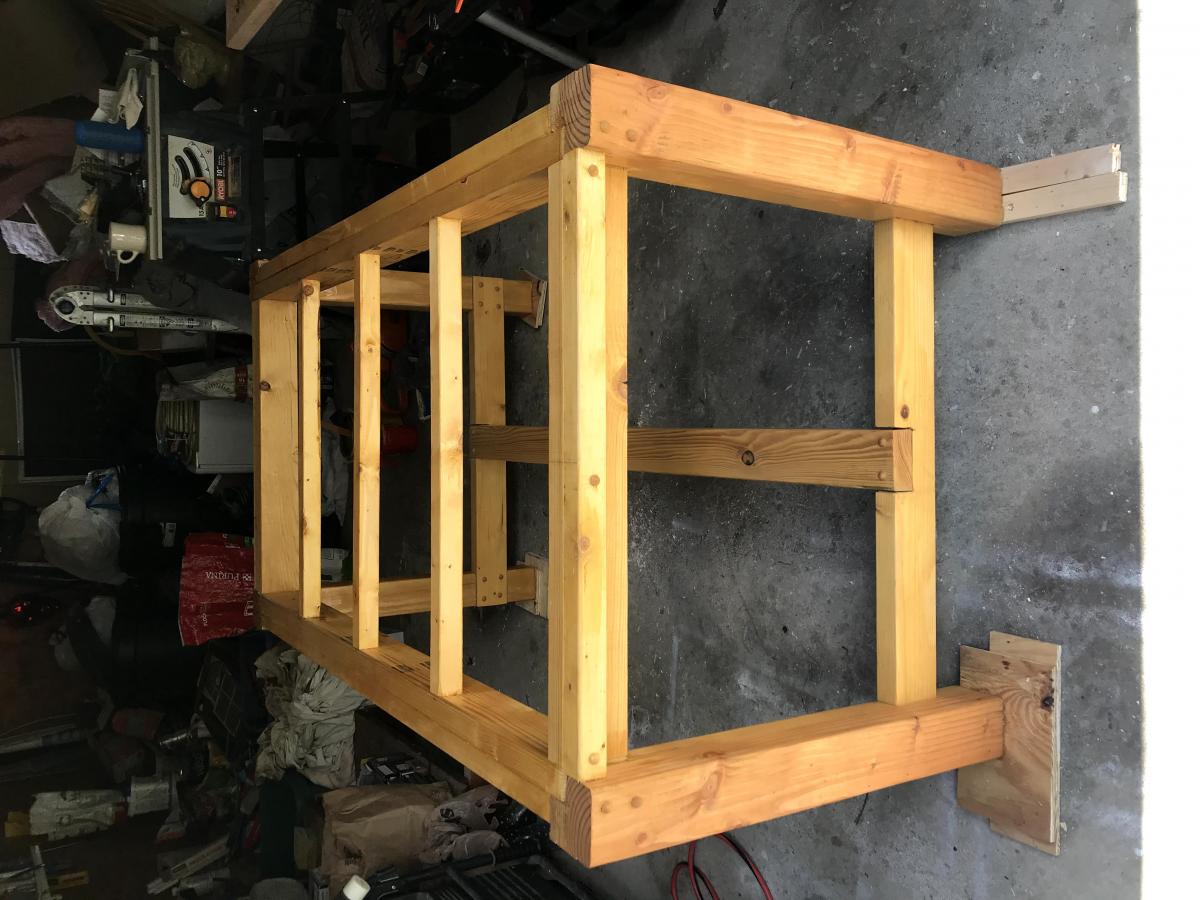
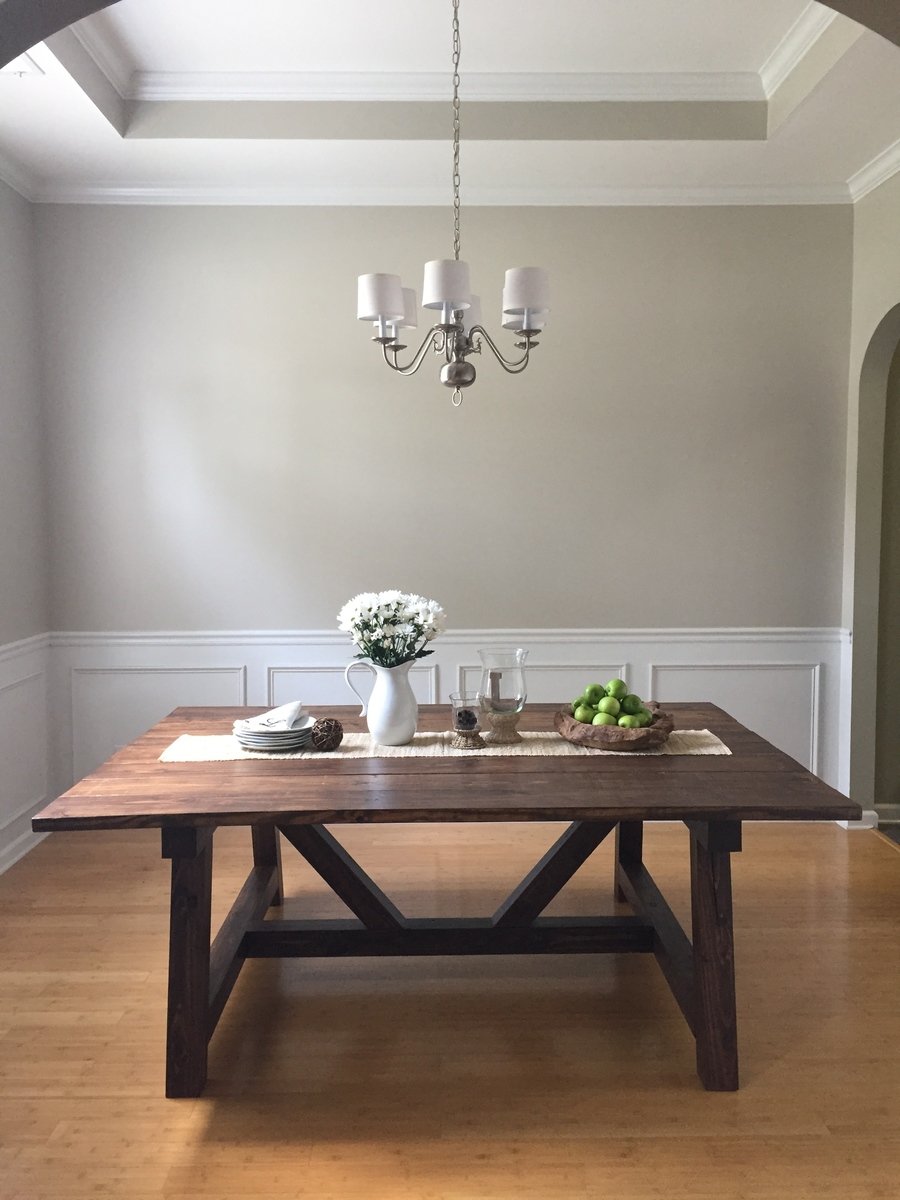
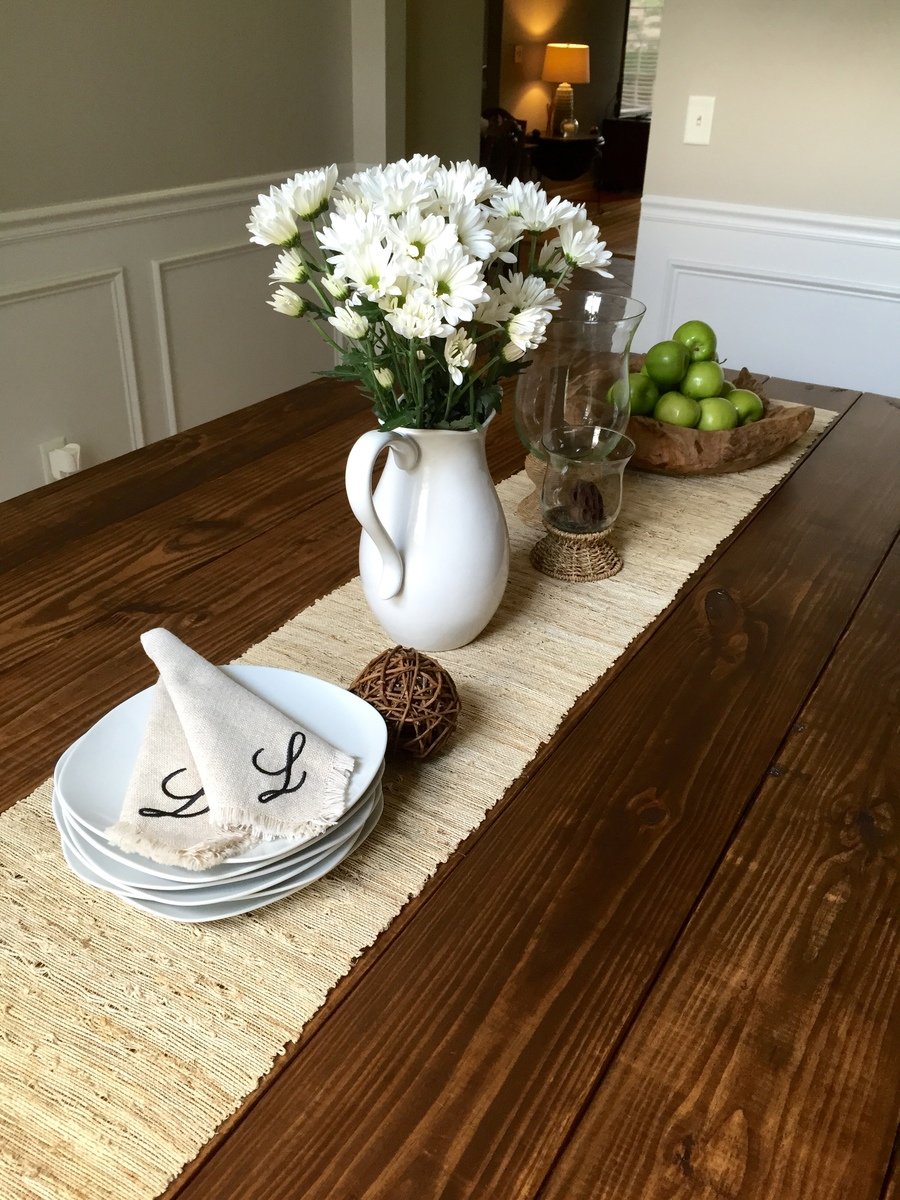
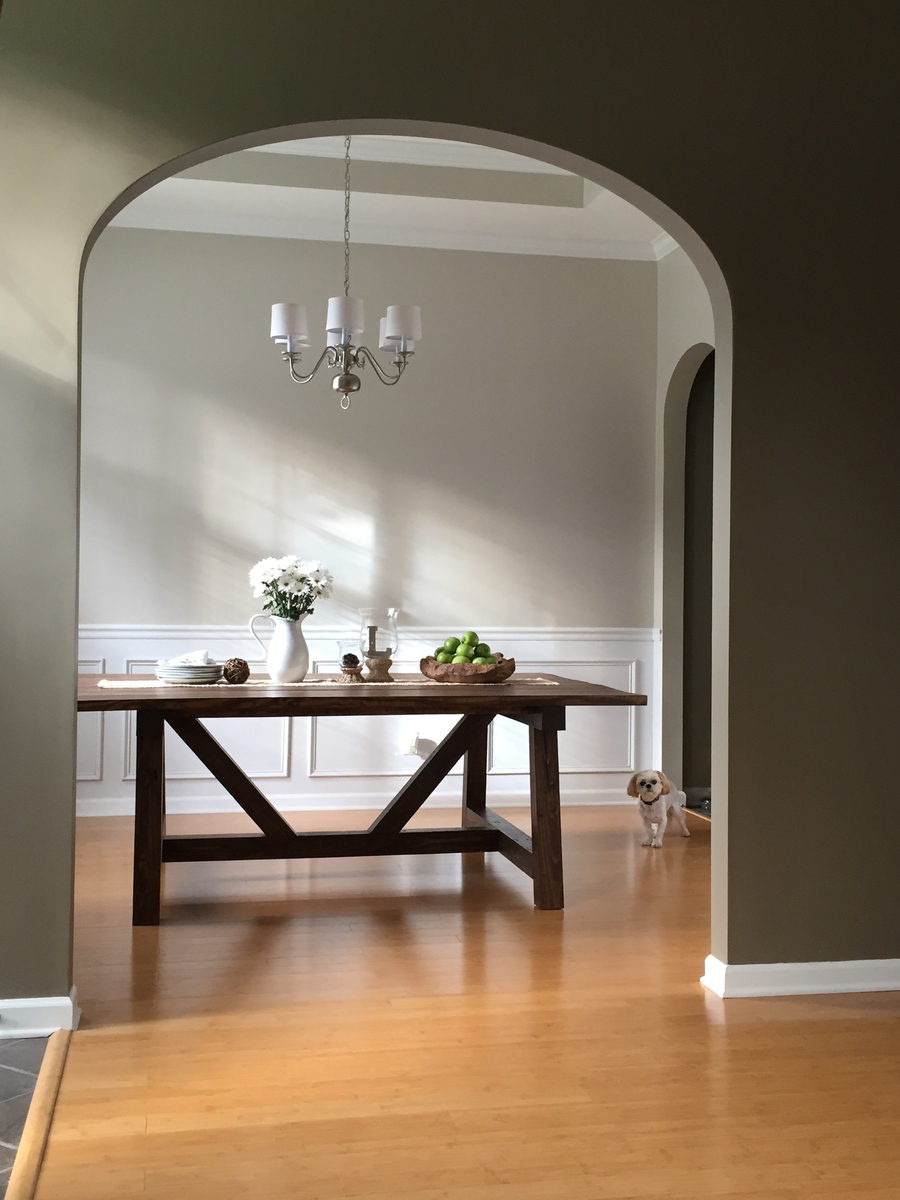
My husband and I moved in to our new house last fall and we needed a dining table that would seat at least 8. We picked this plan from Ana's site because I love the look of the 4x4 beams. I used Adobe Illustrator and my math skills to modify the size and scale to fit our dining room with exact spacing all the way around. We had difficulty finding untreated 4x4 beams but were able to special order some for a reasonable price from a local lumber company. It is more expensive than combing 2x4s but I did not like the pieced together look of the 2x4s. We stained with Rustoleum Dark Walnut and Matte Poly just like the blog post from Ana's site. We also used the Kreg Jig HD which is SO AWESOME! We love the table. Now we just need to decide: chairs vs. benches. I hate to block the beautiful truss design of the base. Its so gorgeous!
Mon, 08/31/2015 - 14:18
I love this table. The finish came out great by the looks. My wife and I are moving into a house soon and I think this is going to be the design for our table as well.
Mon, 09/07/2015 - 06:21
What a beautiful table! Is this table square? We are also looking to build a table to sit 8 and love the look of yours. Could you share your cut list or dimensions?
Mon, 08/29/2016 - 06:08
Thank you for all the kind comments! I did not know that I had gotten any and had not checked back over the past year. The jump drive with my dimensions on it got damaged last year shortly after the build and I lost all of my home decor files including the AI with my cut list and dimensions. I know it had been a while since several of your comments but I will see if my husband can help me measure the table and figure out what the dimensions are and post them on here for you. Happy Woodworking!
Tue, 11/15/2016 - 18:01
This table really looks great! I'm about to start making one and would love to know the dimensions you used. I also noticed that you didnt use the bread boards on either end. How many people does this table fit?
Thanks!
Mon, 02/27/2017 - 08:51
No, we did not use bread boards. It seats 8 with plenty of room.