Community Brag Posts

Football Lockers DIY

Submitted by Anonymous (not verified) on Mon, 09/11/2023 - 11:27

Here are a few pictures of the football lockers I built for our school. I used your mudroom locker plans and changed the dimensions to accommodate the boys' football gear. It worked great! I built 6 sets of 4 lockers, for a total of 24 lockers. I also used one of your plans to build 6 benches for the fieldhouse. Three for the home locker room and three for the visitor locker room. Each locker is 30 inches wide and 6 feet tall. 

Melinda Glenn

DIY Nursery Closet

Submitted by Anonymous (not verified) on Mon, 10/02/2023 - 10:46

This project is based on the floating closet tower build. This is the first time I’ve attempted a renovation project of this size, and I feel satisfied with the results. I did not purchase my boards from shelf help, I cut mine from a sheet and a half of plywood. Thank you for providing your plans for free. They are very helpful for beginners like me!!

Charity P

Barn Door Pet Kennel

Submitted by Ana White on Wed, 02/19/2020 - 14:19

Built by Holli Peterson

Built from Plan(s)

Comments

hodnett1984

Thu, 08/31/2023 - 21:23

I’m looking to make one similar to this but looking to make it a little bigger for two Great Danes. Do you still have the plans and or cut list for this project to help me out. I’d greatly appreciate it if so.

DIY Hand Pump Fountain

Submitted by Anonymous (not verified) on Tue, 10/17/2023 - 07:41

I had an old hand pump that I turned into a fountain.

Lynda Westbrook

Not a great plan but I managed.

Submitted by Camaro05 on Tue, 05/31/2016 - 12:06

So not all of the measurements in this plan are correct, and it doesn't include any top for the table nor does it box in the back side of the tilt out. The instructions are also very scant. The table comes out very heavy and this design probably could have been done without the heavy 2x4's. I'm used to Ana's designs and this "lady goat" is not close to Ana's work. Definitely glad I have some experience otherwise this would have been a bust. Also with a little Googling, I found that 1/2" metal conduit clamps turned upside down work great for holding the kettle and keeping the heat off of the wood.

Estimated Cost
Without Grill $150-$200
Estimated Time Investment
Day Project (6-9 Hours)
Finish Used
Exterior Paint
Recommended Skill Level
Intermediate

2 Person Adirondack

Submitted by Tony H on Sat, 11/18/2023 - 11:36

 A customer asked me to make them two singles and a double. Unfortunately, not as comfortable as the single chair.  There’s nowhere to put one of your arms.  If I do another double, I’ll add an arm rest in the center.  The middle is supported by a double 30 degree leg. 

Seasonal And Holiday

$2 Birdfeeder

Submitted by scoricha on Tue, 05/05/2020 - 11:33

I made my feeder larger and was still able to use only one cedar fence picket. Very easy and fun project!

Built from Plan(s)
Estimated Cost
$2.40
Estimated Time Investment
An Hour or Two (0-2 Hours)
Recommended Skill Level
Starter Project

Kitchen Island with Bar Stools

Submitted by thurm12 on Thu, 04/24/2014 - 09:09

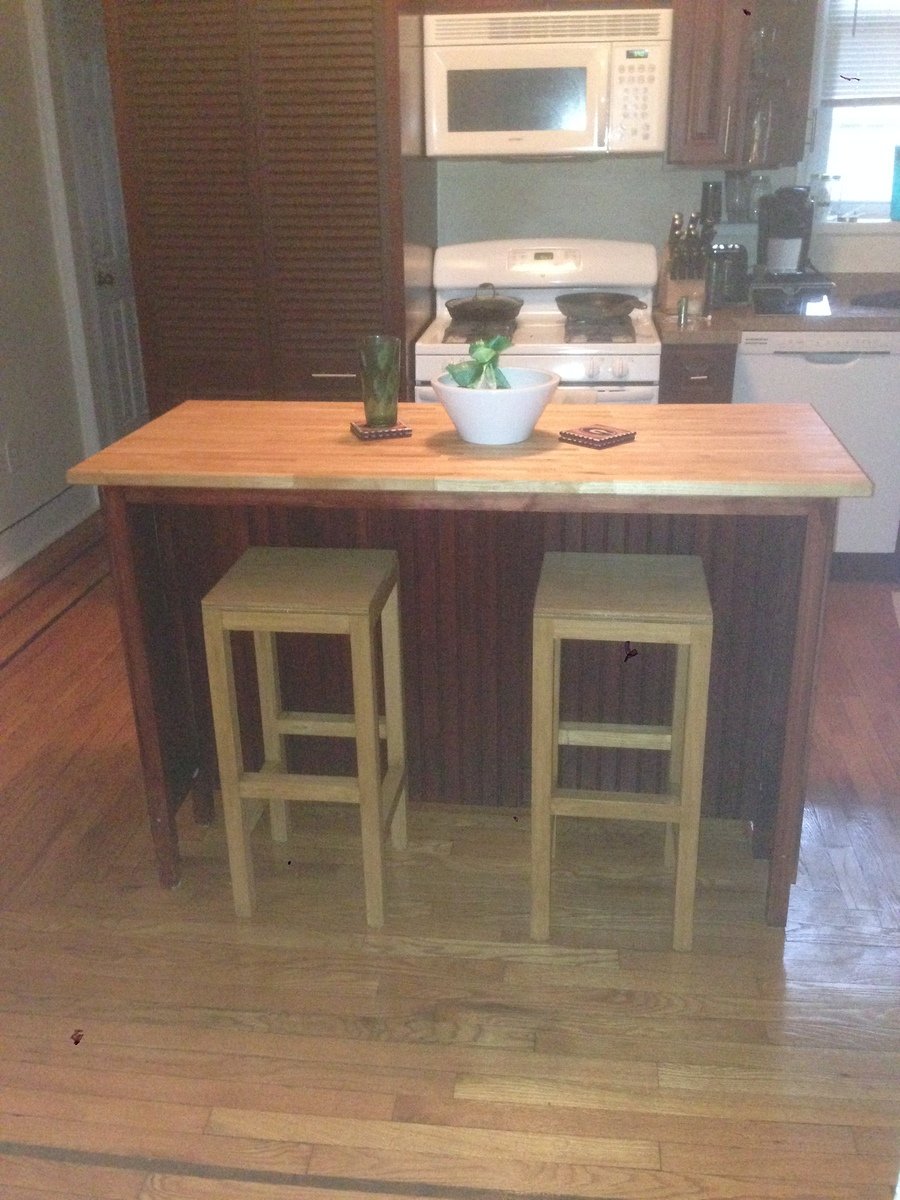
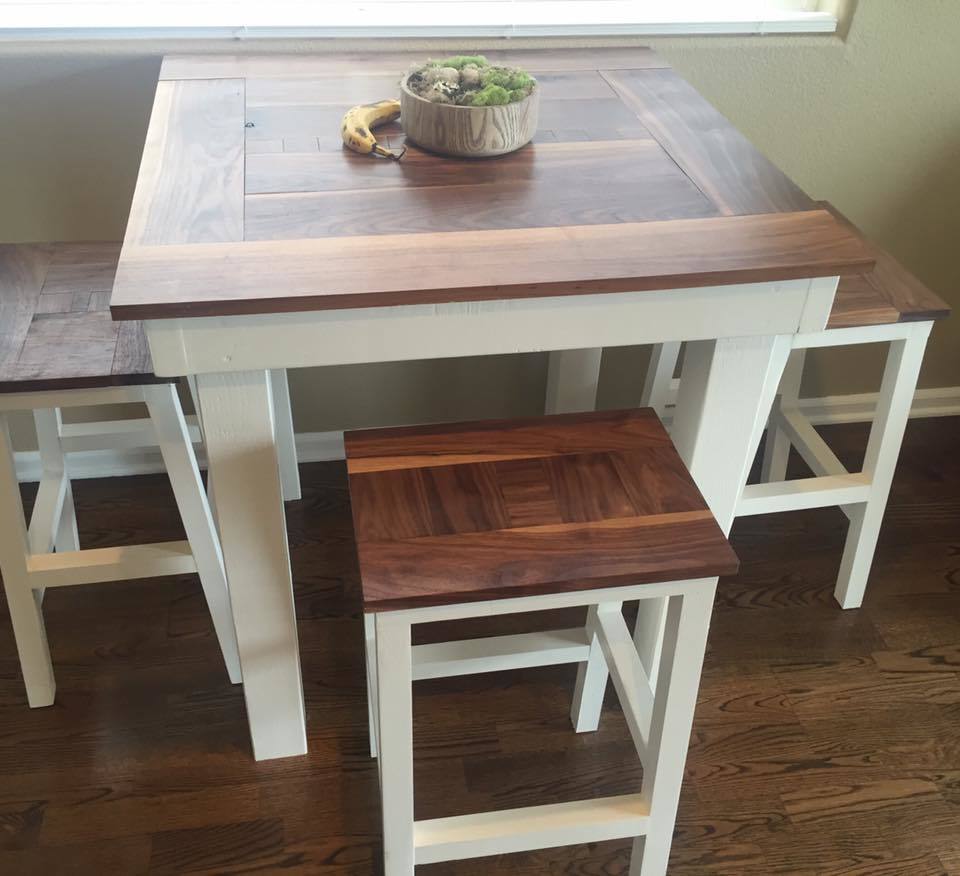
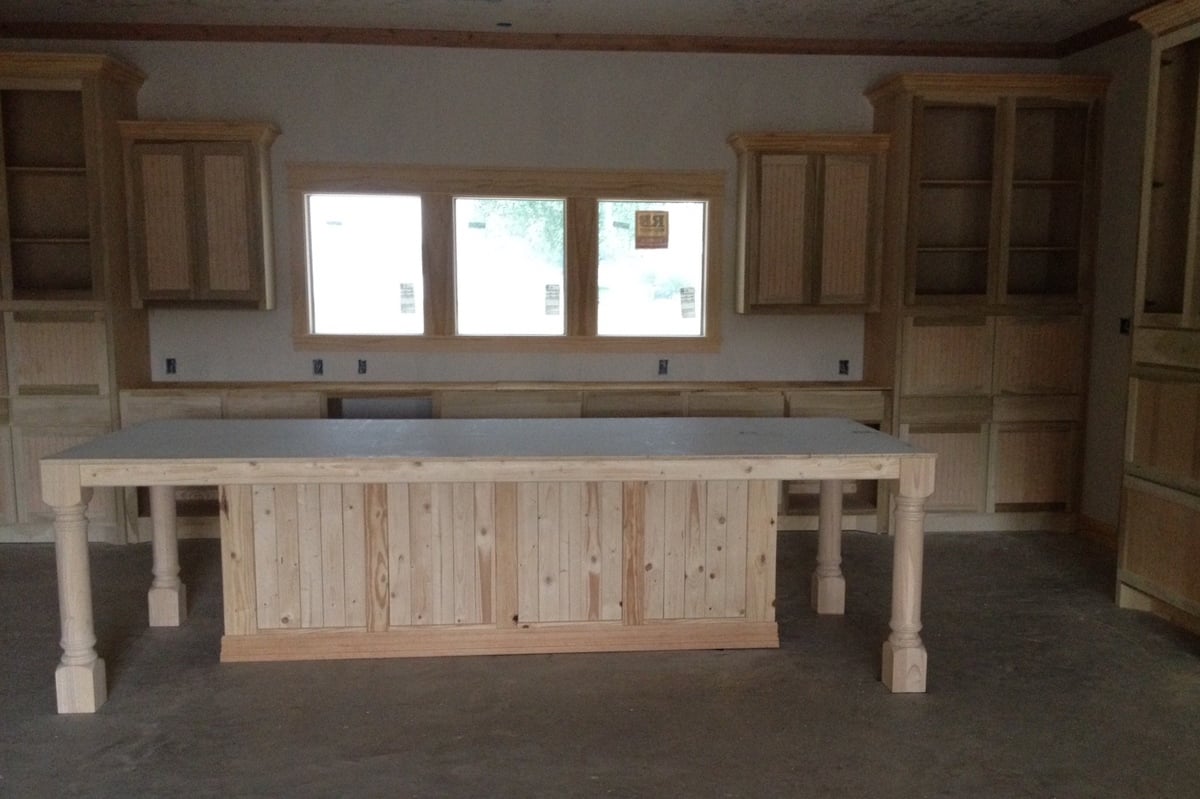
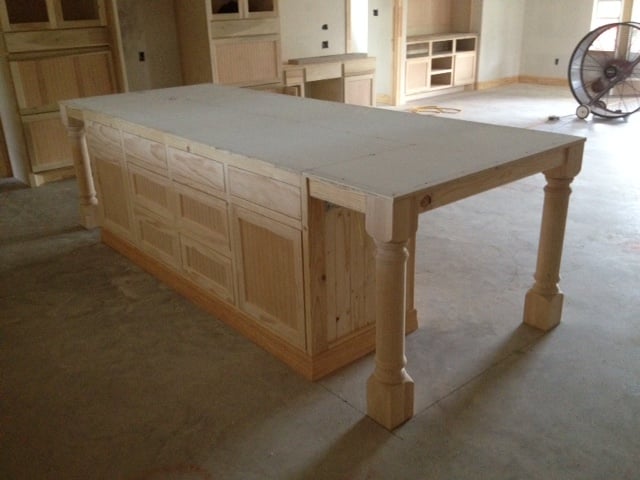
I used the Farmhouse Kitchen Island as inspiration as well as the Ikea Stenstorp Kitchen Island, but I designed the island to fit my kitchen and what I was looking for.

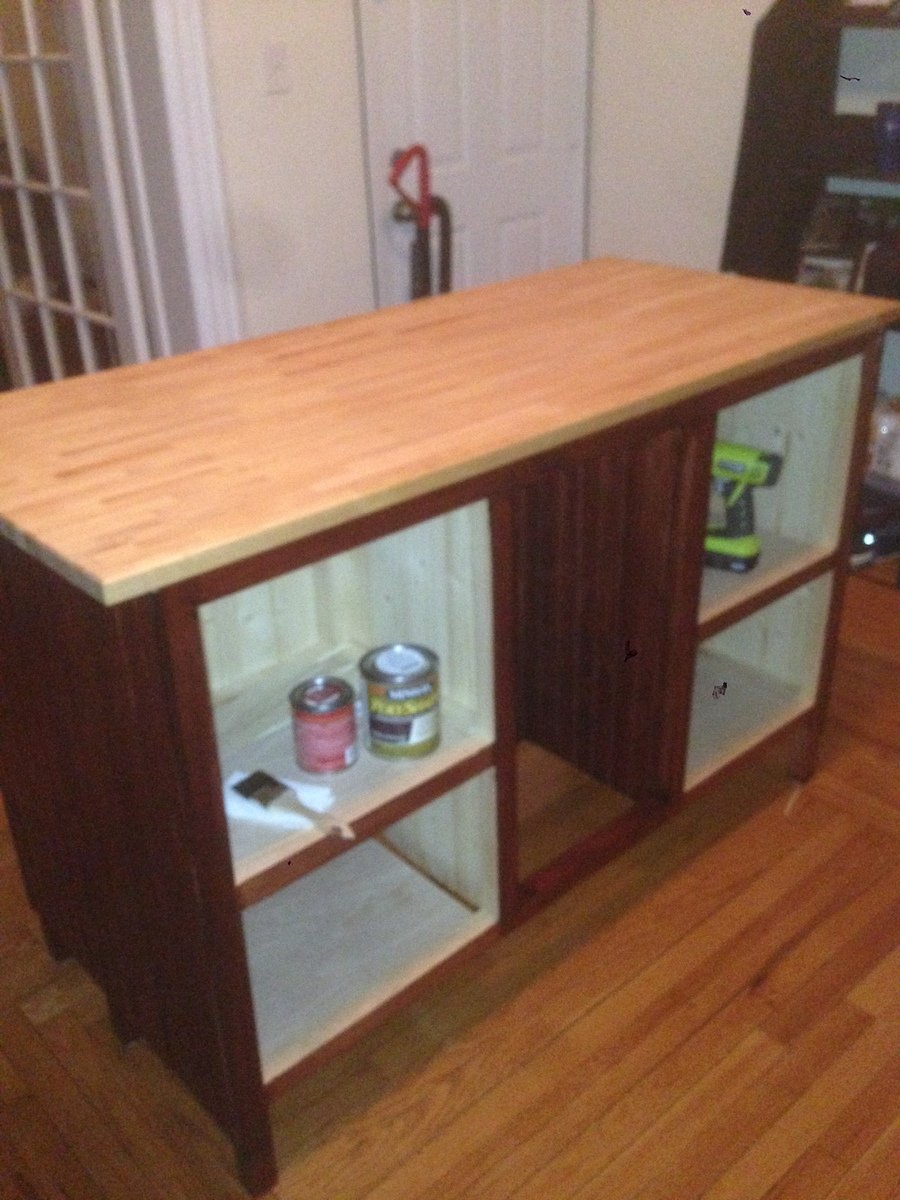
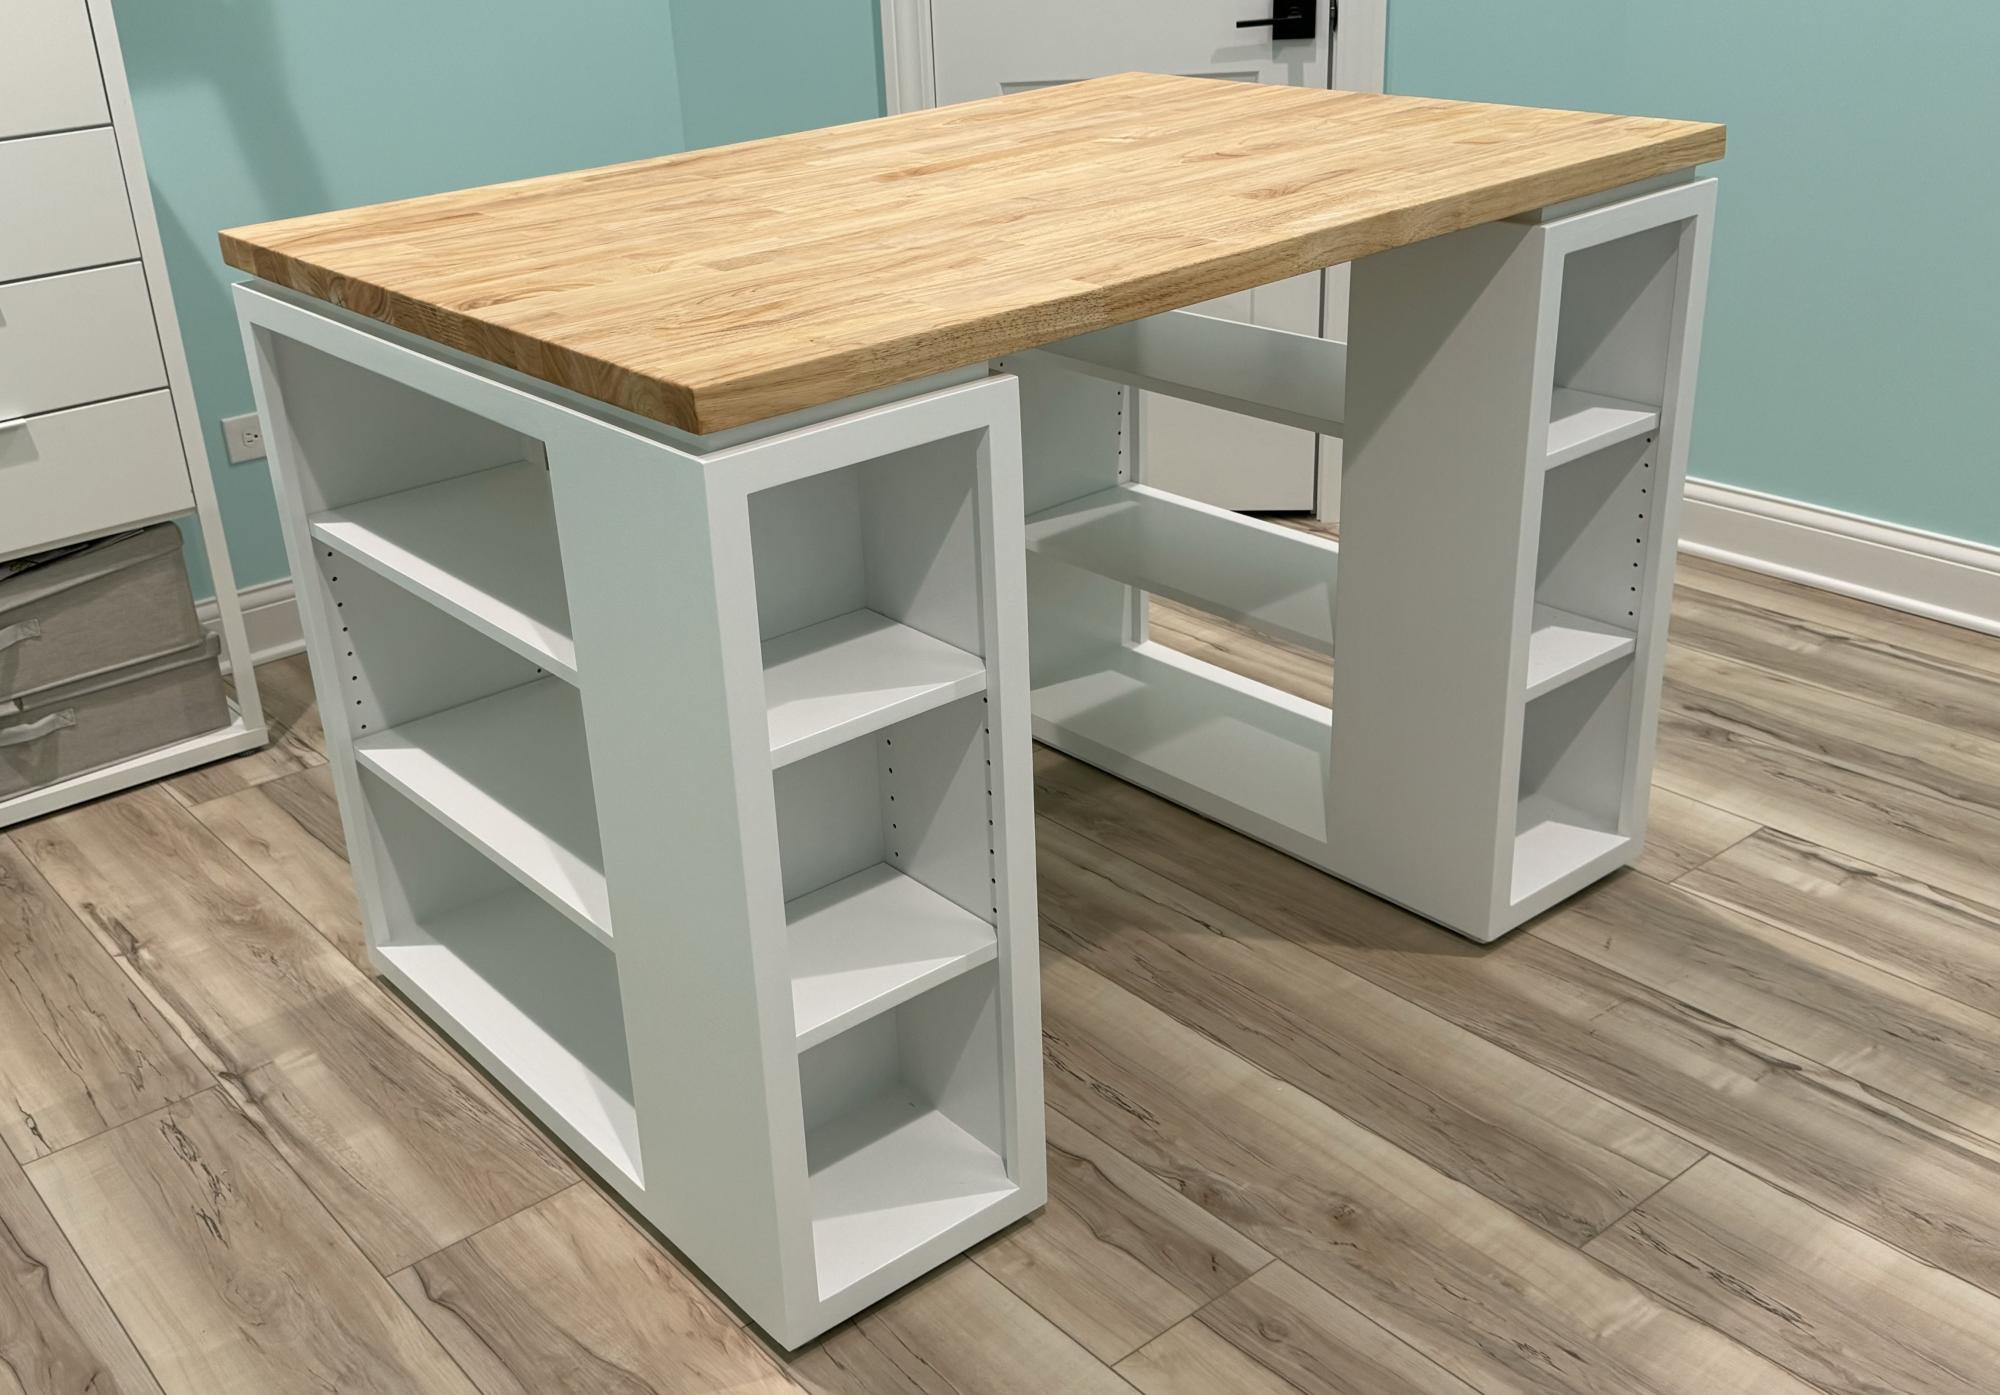
First purchase was the butcher block top from Ikea (Varde countertop, 57.5x25, birch, $80).

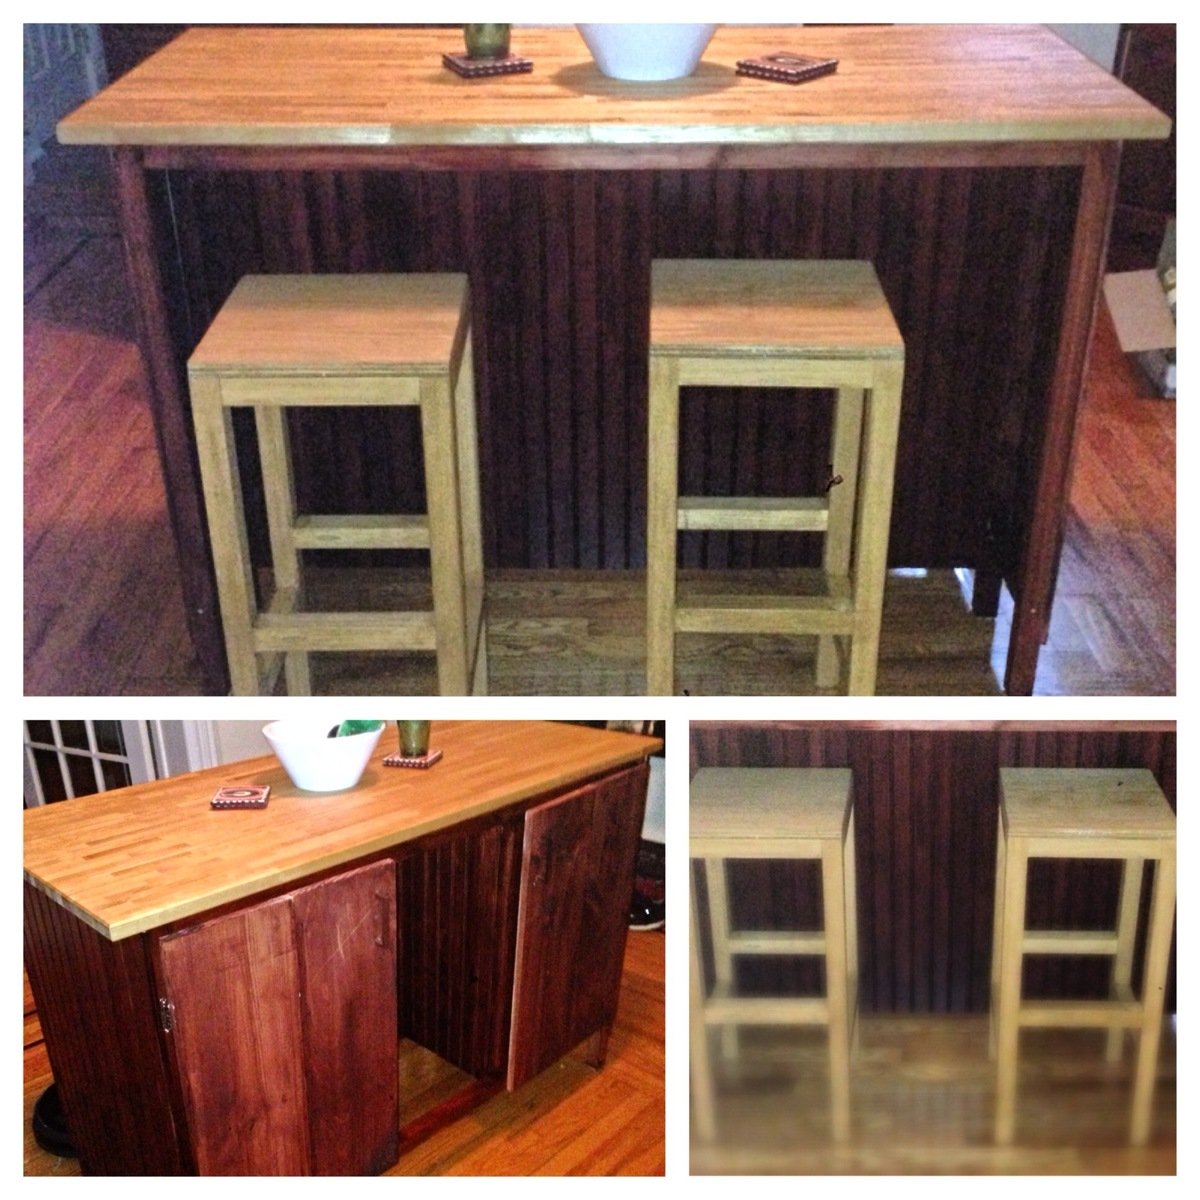
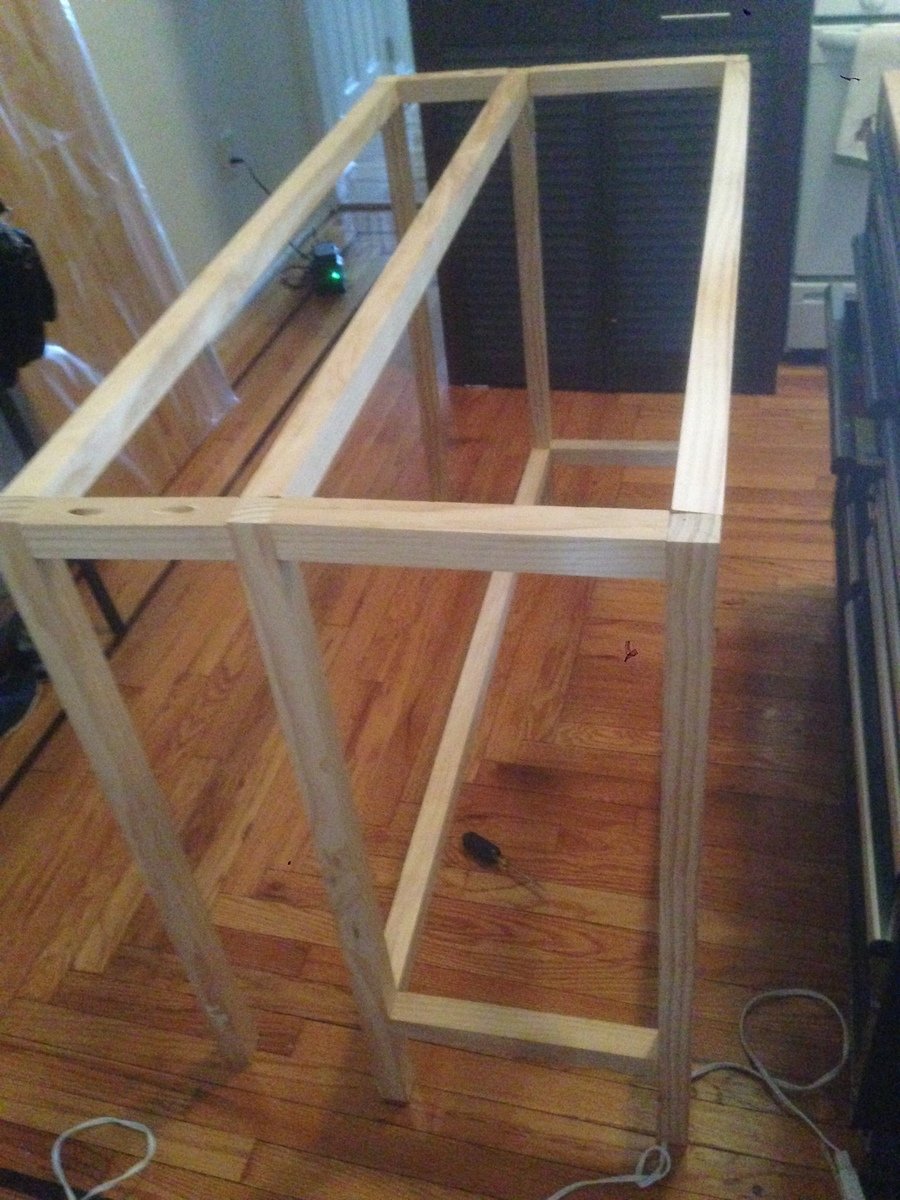
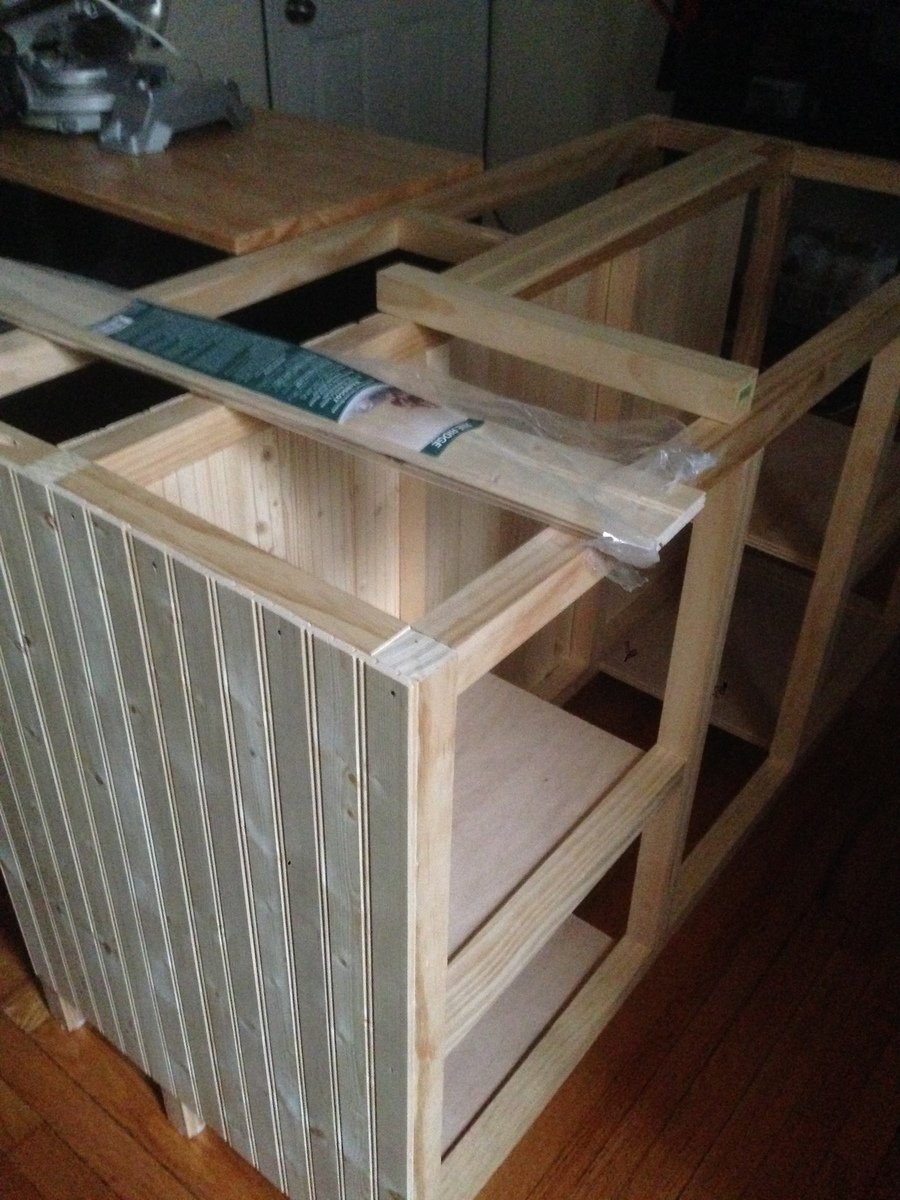
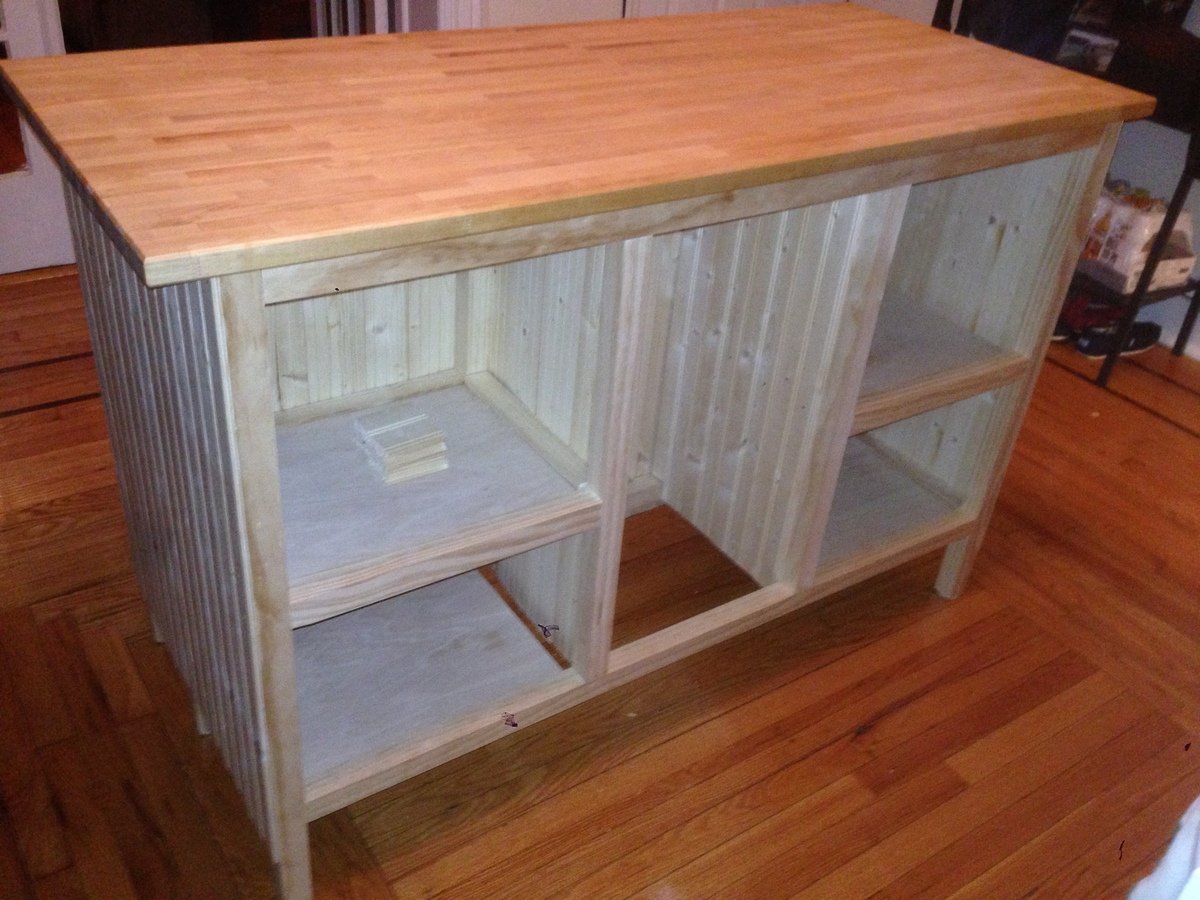
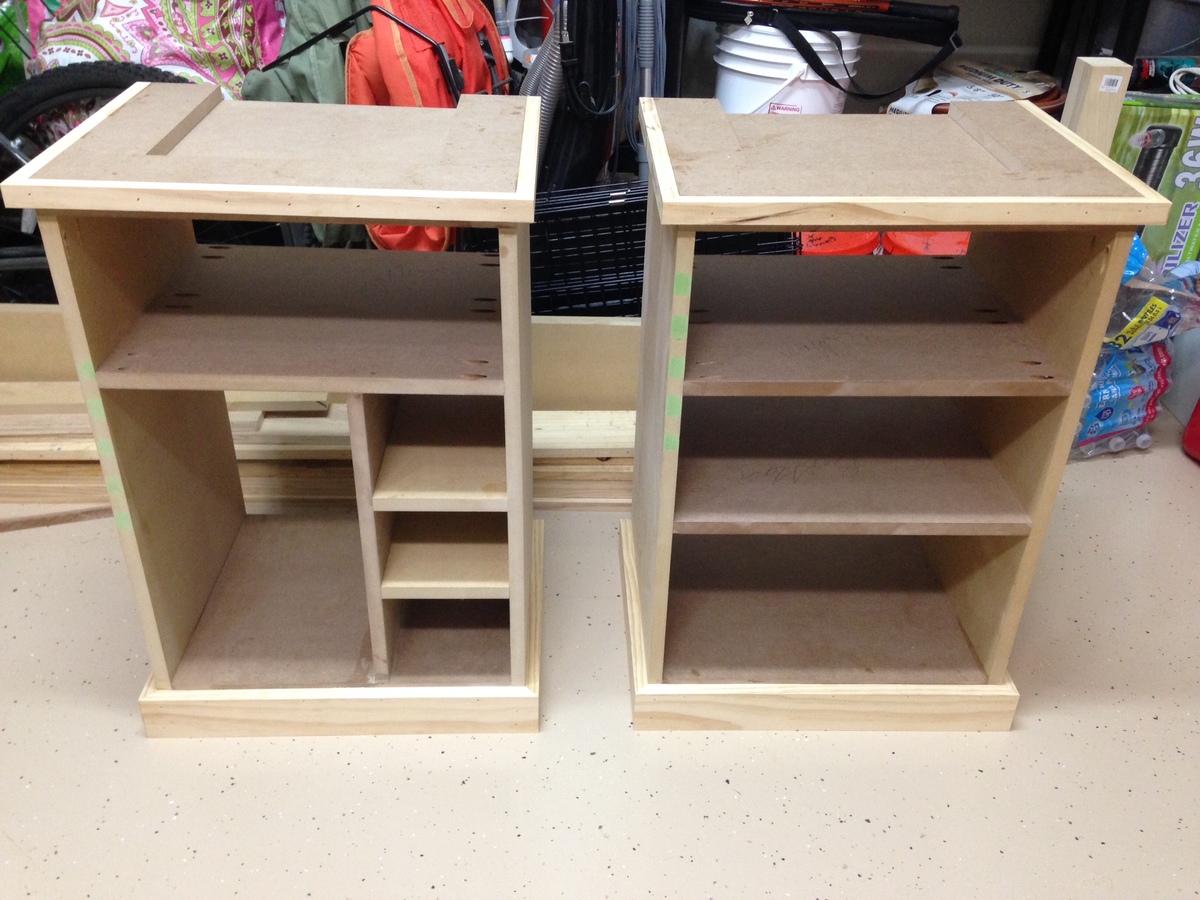
I built the frame using 2x2s, allowing for about 1/2 inch overhang of the countertop on all sides. Next installed the two shelves for each cabinet. I decided to use wood planking from Home Depot ("Knotty Pine" planking) to keep the weight of the island down. I liked the look of these planks and the ease of installation (nail to the frame, cut to fit). I built the cabinet doors using 2x12s. They are functional, but at some point I will probably make new doors using plywood.

Originally I wanted bar stools with the legs at a slight angle. I used the same 2x2s as used on the island frame. I cut the legs at a 4 degree angle but did not like the way the stools looked. Redesigned the stools to be straight and simple. The seat is a heavily sanded 2x12. The seats are slightly too tall since I forgot to account for the height of the furniture pads (the ones I use are about 1/2 inch each).

I used pocket holes for everything except for attaching the butcherblock to the island (just drilled underneath). Filled with plugs and sandable wood filler.

Built from Plan(s)
Estimated Time Investment
Weekend Project (10-20 Hours)
Finish Used
Minwax PolyShades Bombay Mahogany for island. (2 coats)

Minwax Express Color Oak for stools (1 coat) - first time using Express Color. Wanted the water-based for easy clean-up of the stools, but I would prefer brush-on stains.
Recommended Skill Level
Intermediate

Comments

2x4 Shelving Used as a Wood Storage Rack

Submitted by Ana White on Tue, 01/30/2024 - 15:31

We needed to store 16' long lumber as well as plywood and shorter lengths of lumber, but didn't have 16' feet of wall.  So we used the 2x4 garage shelving plan to create the frame for a lumber rack.  We did screw the "ladder" parts of the shelving to the wall.  This is working really good for us and was inexpensive and easy to make.

Bar height table with stools

Submitted by jsutton78 on Wed, 08/03/2016 - 09:41

This is one of my favorite pieces because the white contrasts perfectly with the walnut hardwood.  The base of the table is all standard 2x4 and 4x4s, and the tabletop is 100% walnut.  

Built from Plan(s)
Estimated Cost
$400
Estimated Time Investment
Day Project (6-9 Hours)
Finish Used
Poly Gloss, white paint
Recommended Skill Level
Beginner

Comments

Windmill

Submitted by Jason48 on Wed, 05/07/2014 - 08:56

Made from a picture on the internet and made a few changes so it would more complete

Estimated Cost
231.00
Estimated Time Investment
Week Long Project (20 Hours or More)
Recommended Skill Level
Intermediate

Comments

Ken C

Mon, 04/26/2021 - 07:34

I really like the way this windmill looks and would love to make one. Are there plans somewhere?

Podium for My Wife's Classroom

This is my first try at building furniture. I've built larger things in the past like decks and a fort for my nephews, but never furniture. Even though I used the plans to build the main box, I did change up the bottom and added some new stuff. I added wheels to the bottom my wife could easily move it around her classroom. I didn't want to put a square base on it because I thought it might hit her ankles when she was standing close to it. So I sort-of notched it out to give an opening for her feet and I used some scraps to create a short shelf at the bottom. I also added more trim that the plans call for. I cut strips of the pine plywood for the base molding and topped it with quarter round. I used corner trim for the front corners, the self inside and the bottom notched shelf. I also used screen trim for the back of it. I think it came out nice and I've very pleased with it. I used 2 coats of Minwax PolyShades American Chestnut on it.

Built from Plan(s)
Estimated Time Investment
Weekend Project (10-20 Hours)
Finish Used
Minwax PolyShades American Chestnut
Recommended Skill Level
Beginner

Pony Wall Workbench

Submitted by jboliver09 on Wed, 06/10/2020 - 19:22

Had to size the project done to fit my garage wall.
Left the sides open to use as storage for wood.
Overall Everything worked out, love it!

Built from Plan(s)
Estimated Cost
150.00
Estimated Time Investment
Weekend Project (10-20 Hours)
Recommended Skill Level
Intermediate

Comments

Modern tree house

Submitted by Anonymous (not verified) on Sun, 06/14/2020 - 11:24

I modified the modern tree house plan and added some safety features for young kids. I did a spiral up ladder enclosed with a mesh net so they can’t fall very far. I also added more siding and put cross bracing in window wells to limit opening size. Finally, a full porch style railing and the main support beams are pinned at one end and have a self designed treehouse sliding bracket to allow for tree movement in the wind.

Estimated Cost
$1500
Estimated Time Investment
Week Long Project (20 Hours or More)
Recommended Skill Level
Intermediate

Comments

kmccrac2

Sat, 10/30/2021 - 07:09

Hi! I know this post was forever ago, but this is exactly how I want the treehouse to be for the my kids! I am trying to see if there was anyway you could show me how you did the modifications! I’d be forever grateful!

Took all day but worth it!

Submitted by Anonymous (not verified) on Tue, 09/06/2016 - 03:21

Loved the simple look and convertible design. Easy to visualize, hardest part was making sure of square 

Estimated Cost
$150
Estimated Time Investment
Day Project (6-9 Hours)
Finish Used
Unfinished now, but will be sanded and polyurethane applied
Recommended Skill Level
Intermediate
Seasonal And Holiday

DIY Craft Table with Storage

Submitted by Anonymous (not verified) on Sat, 04/13/2024 - 12:39

Your plans were easy to follow. Made our DIY so much easier. Material sheet was perfect. Made a few small modifications and used a butcher block for the table. Finished product turned out great. Thank you again.

Lisa A.

Built from Plan(s)

Comments

Tool Organizer

Submitted by Anonymous (not verified) on Thu, 07/02/2020 - 07:02

I’m very happy with my tool organizer. I also used the tool organizer idea for bracket to hang our bicycle rack. We love the way it all came out. Thank you so much for sharing!

We run a fence company. The best thing about this project is that it cost me $0!! I used 2X4 cutoffs that we were going to trash!

Built from Plan(s)

Custom Kitchen Island - Is this the biggest version of an already big plan?

Submitted by Anonymous (not verified) on Thu, 10/20/2016 - 21:19

I'm building a house for a client who wanted a country farm house feel.  The kichen cabinets are custom frames with beaded board inserts.  

Custom Kitchen Island

The custom kitchen island is unusually large for this size home at 10' 6" x 4'. The base cabinet 90" x 25 1/2".   But, there is no dining room.  I wanted the island to not look like the rest of the cabinets.  Then I found Ana's design.  I reworked the design to fit my space and the buyers preferences.  Trash pullout, larger drawers ect.  My plan was so far from typical site built trim that I decided I would build it myself or it would really be a budget breaker.  I do have experience in all aspects of building but, this is my biggest trim project.  Time?  I'm sure I have 40 + hours in it.  Money?  The columns alone were $500.  I'm sure I have $1,500+ in it.  Don't even ask how many cool tools I had to add to my collection just for this project!  

I built the custom kitchen island in pieces in the shop, and assembled it in place.  Very heavy, no way to move it after assembly. The stain went on today.  I'm happy with the way it turned out.  Thanks for the inspiration Ana!    

Estimated Cost
$1500 to $2,000
Estimated Time Investment
Week Long Project (20 Hours or More)
Finish Used
Sherwin Williams, custom color.
Recommended Skill Level
Advanced

Comments

lanatorlak

Fri, 10/21/2016 - 08:13

WOW! This is absolutely breathtaking! Just think of the memories that will be created around this beauty. The cabinets are great, but the console island steals the show! Job well done! 

Outdoor sectional

I changed the plans a bit and added backs to the chairs. I've never used a saw or a drill before, but I am thrilled with how easy this was to do. I love the end result!
I found cushions to go with the furniture at Target.

Estimated Time Investment
Week Long Project (20 Hours or More)
Recommended Skill Level
Beginner
Back