Community Brag Posts

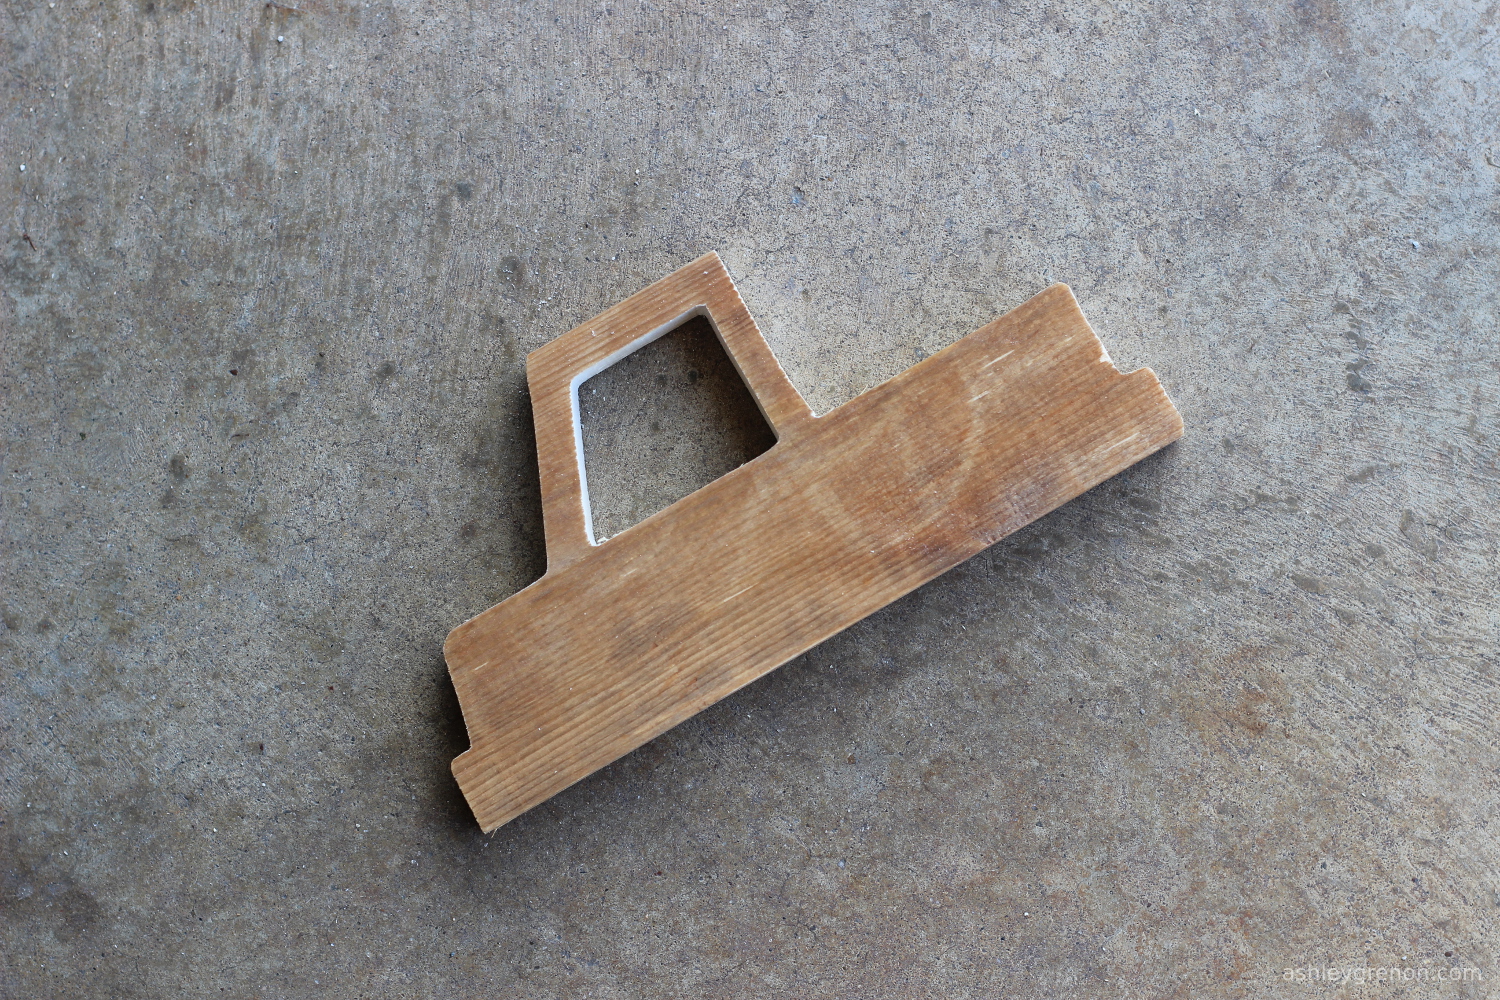
DIY Wooden Toy Truck

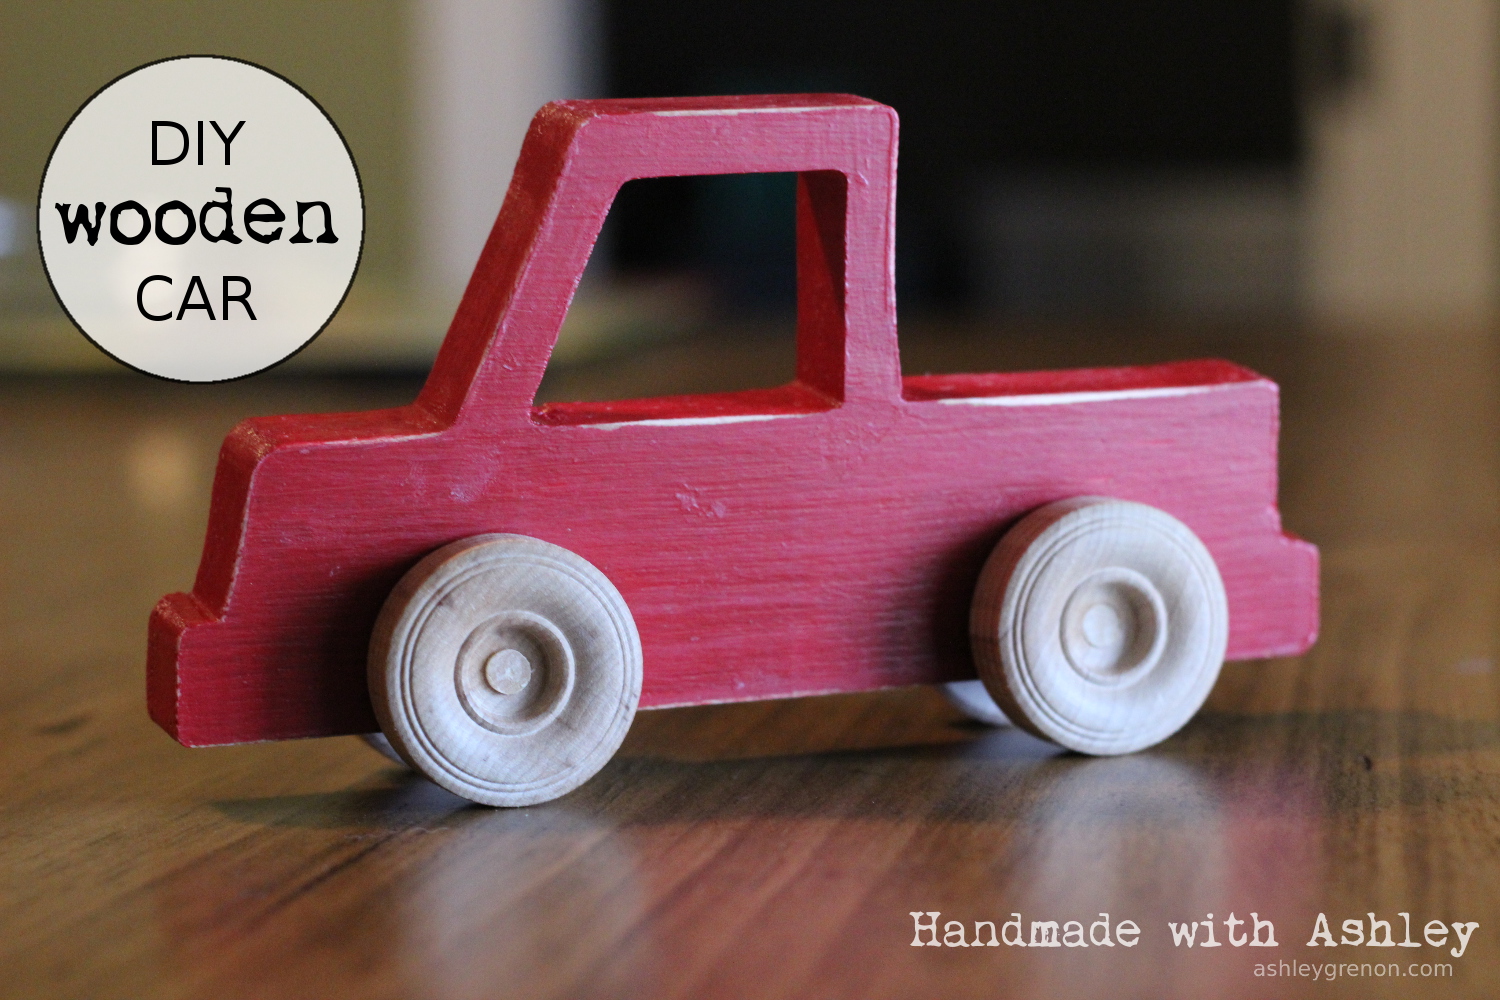
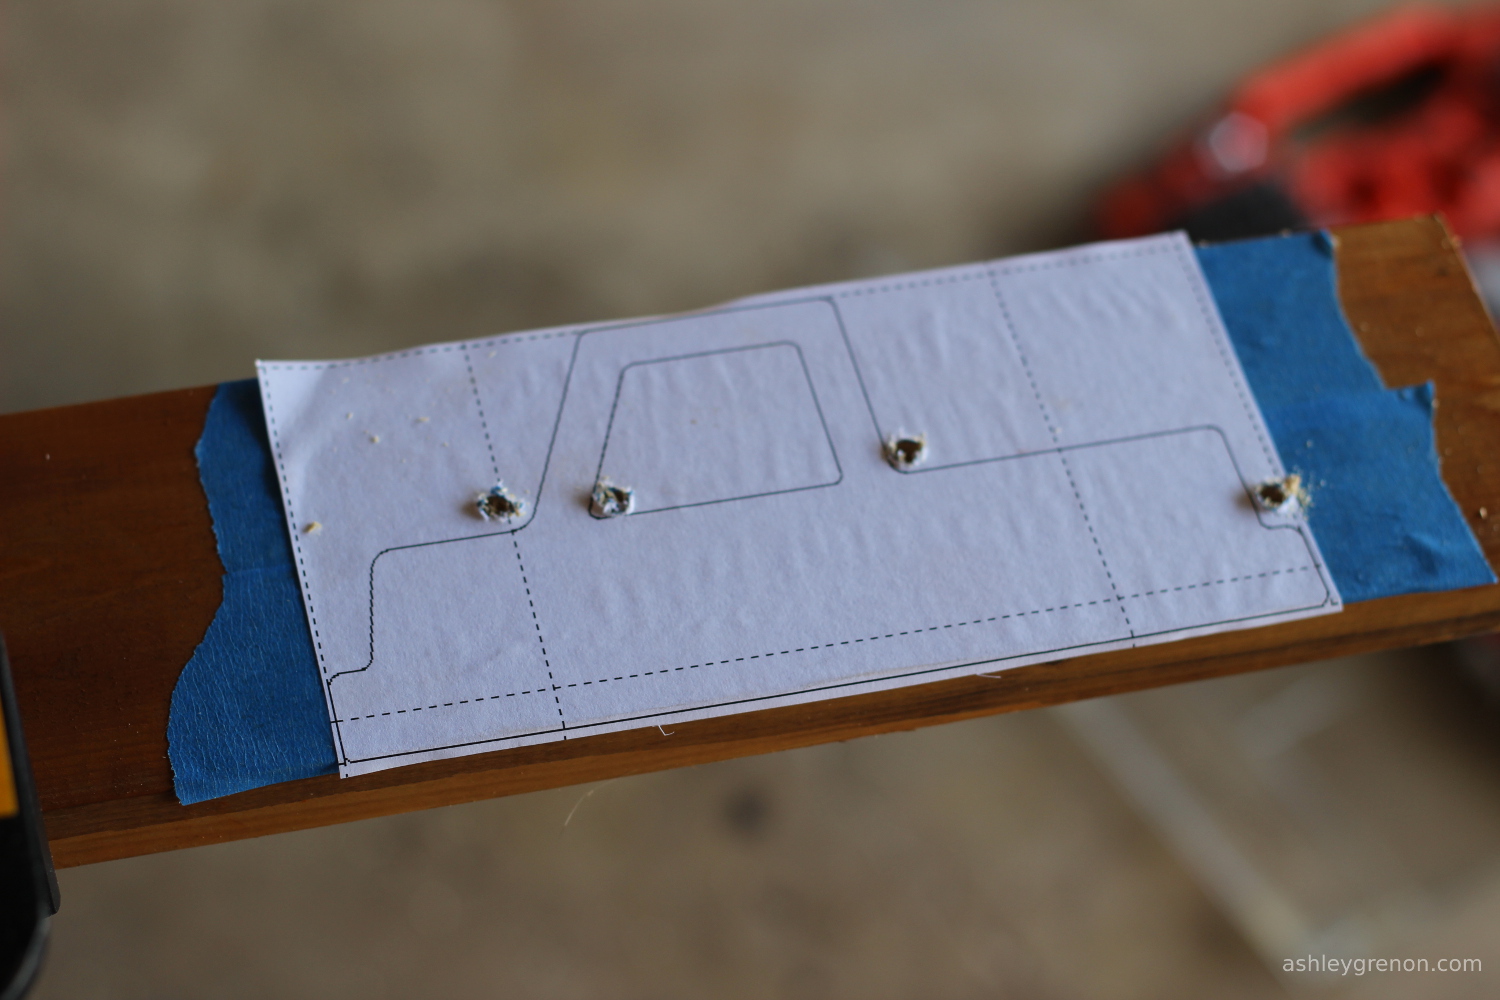
I built a wooden toy truck using a leftover 1x4 board in my garage.  For this build I used Ana White's plans for the wood wheelie cars.  This was a quick and easy project  and my first project using my scroll saw. Not too shabby for my first go at toy making.  However, I am not happy with the finished toy.  If I did it all over again, I would take my time with the finish.  Also, the driver was not perpendicular to the truck's body when I created the holes for the axles, so the truck leans slightly. My son does not seem to notice its flaws, so I will try to overlook them as well!  Check out the blog link for more project details!

Estimated Cost
I had most of the supplies on hand. I had to purchase a wood dowel and some wooden wheels, so no more than $5.
Estimated Time Investment
Afternoon Project (3-6 Hours)
Finish Used
Acrylic Craft paint sealed with Mod Podge (Matte Finish)
Recommended Skill Level
Starter Project

Mudroom Bench with Hutch

Submitted by calliher on Sun, 09/12/2021 - 18:45

This is my laundry room and it is about 12x10. It looked so bare with only the washer and dryer. So I thought making this a mudroom also. I live in the mountains and have snow 3 to 4 months a year. This will be perfect. I purchased an IKEA cabinet built it in and added the Ana White plans with two bays.

Comments

Kid's country bench

This was my first building project from scratch! I have modified some thrift store finds, but this was the first from lumber. I learned to countersink! I was amazed at how easy this was, and I'm so excited that this bench will sit by our front door for my three boys to perch on when they put on or take off their shoes. I went with 3 cubbies to hold three pairs of shoes. It also works great for a couple of kids to sit on at the table for when we have guests and need some spare seating.

Built from Plan(s)
Estimated Cost
$30
Estimated Time Investment
Afternoon Project (3-6 Hours)
Finish Used
Oak stain (one coat) and polyurethane (2 coats).
Recommended Skill Level
Starter Project

Green House

Submitted by Anonymous (not verified) on Thu, 07/13/2017 - 08:31

I built this amazing green house following your plans!  My wife and I moved our family from the city to an amazing 5 acre homestead out in the country here in Wisconsin. We are super happy that we will be able to keep our new garden going longer!  Thanks so much for the plans!

Built from Plan(s)
Estimated Cost
We spent about $800 for the frame and plastic panels. Then we spent another $250 for the reclaimed barnwood siding. We found the door at a reclamation site for $25.
Estimated Time Investment
Week Long Project (20 Hours or More)
Finish Used
I followed Ana's plan pretty closely. This was the first building I ever built from scratch. It was a little difficult to get the foundation level. But I figured it out. I used pressure treated 6x6s on top of gravel. I was able to screw the actual walls down to the 6x6s.

I'm actually building a second building from these plans to use as a chicken coop. Once it's done I will post photos.
Recommended Skill Level
Intermediate

Comments

Seasonal And Holiday

Modified Ten Dollar Floating Ledges

Submitted by Radcrafter on Thu, 04/16/2015 - 22:33

I love these shelves.  So simple to build and still make a big impact.  I built mine just a little different from the plan.  I used 1x3 furring strips for the bottom and back pieces instead of 1x4's and then ripped a 1" strip from another 1x3 for each shelf to create the front trim piece instead of a 1x2.  The shorter front trim piece gives me just enough ledge to keep the frames from slipping off the ledge, but provides maxium display area for the art work.  

For three shelves just like these you need:

  • 7 -  1 x 3 x 8' furring strips 
  • Special Walnut Stain from Minwax
  • Satin Poly for finish (I also used Minwax for this too)

They were assembled using 2" fiinishing nails and lots of wood glue.

Built from Plan(s)
Estimated Cost
$20-30 approx for 3 shelves
Estimated Time Investment
Afternoon Project (3-6 Hours)
Finish Used
Minwax Special Walnut Stain, Satin Poly
Recommended Skill Level
Starter Project

My first project

Loved how these plans were so easy to follow and certainly appreciate the accompanying video.

Comments

Floating Bench (Walnut bench Board and Batten Wall)

Submitted by Anonymous (not verified) on Thu, 12/30/2021 - 06:25

Followed the instructions in the original blog. I would like to thank Ana for the blog. It was the inspiration I needed. This project was challenging for a rookie like myself. The plan is basically the same as the original post from Ana.

Materials:
4" Vertical MDF primed boards
3" Horizontal MDF primed boards
Our wall has texture so we had to use tempered board to make it nice and smooth.
Half inch plywood for under the bench seat.
2x4 for the bench frame
I ordered furniture quality Black American Walnut from a sawmill for the floating bench (not cheap but worth it). I stained it with one coat of Watco Black Walnut just for protection (took 10 minutes to do super easy) let it dry for 24 hours at least.

Challenges:
1. The wall on the right side of the bench did not have a stud just a corner stud, I was not going to risk this bench support so I put the bench support on the one corner stud and installed a hidden strong tie: https://www.homedepot.com/p/Simpson-Strong-Tie-CF-4-15-16-in-x-6-in-Con…
This provided the support that the missing stud would've. Now the bench is structurally sound.
2. Walnut uneven cuts from the sawmill, I had to use a plane to bring the planks closer together didn't want huge gaps.
3. Outlet in the way. City code mandates to remove outlet leaving access to it. We decided to build above the outlet making the bench a bit higher than we wanted it but still worked out, now we still have an accessible outlet under the bench.

Comments

8 Foot Tall Hall Tree

Submitted by Fulton610 on Fri, 02/02/2018 - 14:23

Made the overall height 8 foot since my ceilings are 10 foot. Turned out really great and was a super cheap project compared to purchasing one. 

Built from Plan(s)
Estimated Cost
$250
Estimated Time Investment
Weekend Project (10-20 Hours)
Finish Used
Minwax Walnut
Recommended Skill Level
Intermediate

King Shiplap Headboard.

The Beauty Queen described a headboard with shiplap and sort of cottage style. I modified the Ana White plan to fit my needs and the wife’s taste. I used the preprimed shiplap and 1x material from the big box store so it was a little more expensive but still very reasonable. Then I made side tables. 

Estimated Cost
$100
Estimated Time Investment
Afternoon Project (3-6 Hours)
Finish Used
Marquee Semi-gloss enamel in antique white
Recommended Skill Level
Beginner

Ana White Greenhouse

Submitted by Anonymous (not verified) on Wed, 04/06/2022 - 12:41

We built the first one about 8 years ago, and then the wind flipped it over and scattered it all over the back part of the property. I then dug footings and anchored the second one down; I was able to save the Dutch Door I made for the first one. Thanks for the plans!!!

Built from Plan(s)

Comments

Seasonal And Holiday

DIY Outdoor Dining Table

I followed Ana's Fancy X Farmhouse Table to build my base, but switched her tabletop out for a split herribone design.  The tutorial for the tabletop is on the blog! 

Built from Plan(s)
Estimated Time Investment
Weekend Project (10-20 Hours)
Recommended Skill Level
Intermediate

Comments

rbgreene04

Wed, 04/18/2018 - 22:46

Thank you for the inspiration on the table top. I followed your plans to make mine in the Chevron pattern as well. Well done! And the bench looks great, too!

BENCHRIGHT FARMHOUSE TABLE

Submitted by lotusguy on Thu, 08/08/2013 - 20:12

This is my take on a few of these I have seen. It started out seeing the retail version of this table at a large furniture store with a $2k price tag on it. I really like the look of it so I decided to build one and searched for additional pictures and found these plans.

I used the plans as a guideline for overall dimensions for the table. I was using reclaimed oak fencing from an old Kentucky horse farm (who uses oak for fencing!!). This stock came in 5/4" x 6" x 7' boards so I had to get creative with the dimensions, etc. It was a mixture of red and white oak and this stuff was HARD!

The boards also came painted black with years and years of build-up and weathering. On a side note, if you ever work with reclaimed wood that has been painted or stained, please test it for lead. Lead based paint was banned around 1973 and you don't want to be planing or sanding on this stuff unless it is safe. Fortunately, I had this tested using a kit from the local big box. Most of my time was spent planing the boards down enough to show the oak but also leave some character as you will see in the pictures.

I like the look of knots and this wood had a few of them so i left the knots exposed on the support frame, however, on the top, I used a clear epoxy to fill the knots. This allowed the top to be smooth but you could still see the depth and character of the knot on the surface of the table. I did some mild distressing on the table top but nothing too dramatic as the wood really was cool. I also added the bolts near the tops of the legs and used threaded rod and turnbuckles for an industrial look.

The stain is a dark brown, almost ebony color. This went will with the black paint that was left in the saw marks after planing. I finished the table with 2 coats of satin polyurethane and and additional 3rd coat on the table top.

I have built furniture in the past but this has to be my favorite for both the history of the wood and the character.

Estimated Cost
$500
Estimated Time Investment
Week Long Project (20 Hours or More)
Finish Used
Minwax Polyurethane and Rustoleum Stain
Recommended Skill Level
Intermediate

Comments

Joni

Fri, 08/09/2013 - 20:21

One look at those painted boards, and I would have run screaming. What you did with that wood is unbelievable. This is such a one-of-a-kind piece now. The finish is awesome. Would you mind posting the color of stain that you used?

Altered Camp Loft Bed w/ stairs

Started with the basic loft plans. Changed out the 2x4 post for some sturdy 4x4's and added a bottom bunk to build this set for my two boys. I also deviated from the plans by using carriage bolts to connect the landing for the steps and the side rails to those post so the bed can easily be disassembled and moved in the future. Finally I placed the steps themselves on a set of hinges so I could easily access the area underneath the landing if needed. This has the added bonus of allowing me to lock the steps in the up position to restrict access to the top bunk during visits with younger family and friends. Now just need to stain it, seal it, and put inside.

Estimated Cost
200.00
Estimated Time Investment
Weekend Project (10-20 Hours)
Recommended Skill Level
Beginner

Comments

Farmhouse Toy Box

Submitted by frmoody on Thu, 08/18/2022 - 15:01

My second build from Ana's toy box plan. I had my son use his CNC machine to carve boy's name into the front. Depth of the letters is about 0.25". Looks really good.

Built from Plan(s)

Comments

rustic baby crib

Submitted by KL728MX on Tue, 01/05/2016 - 12:32

my wife and I had our first son, Mason, over the summer and I was in love with the idea of building his crib. It was a lot more work than I had anticipated but it was well worth the hard work. it came out beautifully. I made a 2X4 spacer that we can remove as he gets older to lower the mattress height. i used all pine lumber for the crib.

Estimated Cost
$250
Estimated Time Investment
Week Long Project (20 Hours or More)
Finish Used
rustoleum American walnut
Recommended Skill Level
Intermediate

Adirondack Table with modified top

Submitted by stacynabby on Mon, 12/19/2011 - 14:09

I used the design for the adirondack side table, but modified the top to have glass tiles. I just used a 12x12" sheet of glass tiles from the blue store to create the top. The wood is just clear poly. This is my Mom's Christmas present.

Built from Plan(s)
Estimated Time Investment
An Hour or Two (0-2 Hours)
Recommended Skill Level
Beginner

Comments

Kristan (not verified)

Tue, 12/20/2011 - 14:19

AWESOME!!! I'm inspired by this to take your design and turn it into a mobile chess table!!! soooo pretty!!

keyetta

Fri, 01/06/2012 - 03:30

Hey i love your rendition of this table, would like to use the same rendition, only thing i cant figure out is what you did under the tiles, did you use plywood or places the tiles on top the regular wood pieces

claydowling

Fri, 01/06/2012 - 07:05

Plywood, particle board or MDF is what should be under the tiles, not solid wood. Better yet would be a plywood bottom with a thin cement board or hardibacker over it. If you put it over solid wood, expansion and contraction of the wood will pop the tiles loose over time, and probably sooner than you like to think about.

Double Wide Cedar Fence Picket Storage Shed

Submitted by moosmani on Mon, 11/11/2013 - 03:12

I read and studied every comment and brag post about this shed. I must have read the plans a hundred times before I got up the courage to tackle it. It’s a very attractive and affordable shed design. I thought a double wide version would be perfect for our long, narrow side yard, and it is! I mostly stuck to the plans except for a few things. I made it 10” taller overall so there would be plenty of head clearance under the doorway. That was a very easy modification. I used 2x4s for the walls instead of 2x2s because we have high winds in our area. That modification was a little bit more challenging, but I planned it out and it worked! Also I used 2x6s for the headers instead of 2x4s. I also added 2x4s at the thresholds because I couldn’t image making it stay square without them. I basically made two sheds joined by a common wall in the center. I did not increase the depth, mostly because I was afraid to mess with the angles and how that would change the pitch of the roof. Joining two sheds together meant that I didn’t have to put the exterior pickets on the middle wall. But it also meant that I had to build 4 doors. Yuck. They were difficult to get lined up and level, but I was amazed it actually worked and that all the doors operate properly and smoothly. I was questioning the wisdom of my decision to do 4 doors while I was in the thick of it, but now that all the work is done, I love that I can open all 4 doors and have easy access to absolutely everything in the shed. Very convenient! I told my dad I was building a shed and he recommend that I add cross braces. It seemed sturdy enough without them but it certainly can’t hurt. My dad knows everything about building and I know nothing, so I took his recommendation. If I were to do this again, I would overlap the cedar pickets by 1” instead of ½”. My pickets were not quite wide enough. I could swear they shrunk after I applied the stain/uv protection. I used liquid nails along each lap but it didn’t hold. Where the glue DID hold tight, the wood split lengthwise. Anyway, for whatever reason, gaps appeared and I spent a fortune on clear silicon applied on the interior walls to make it water tight. I had to keep going back for “just one more tube.” So with hind sight I would have been better off just buying a few more pickets and increasing the overlap. Another thing I might do is make it deeper. I decided against it initially because I was worried that increasing the depth would make it flimsy. Now I don’t think that would be a problem. This shed is sturdy. I can’t say thank you enough. Great plans and a great website! I am completely hooked.

Built from Plan(s)
Estimated Time Investment
Week Long Project (20 Hours or More)
Recommended Skill Level
Intermediate

Comments

moosmani

Mon, 11/11/2013 - 14:56

I kept every receipt from caulking gun to stains and brushes. I just now added it up and it came to (cringe) just under $900. But I have lots of left overs for another shed and it's still a huge bargain. Other sheds that are similar to this plan are much smaller and start at $1,999 and up! I think it was well worth it to have a sturdy bargain shed that's also beautiful.

t0mpr1c3

Sat, 01/22/2022 - 23:01

It looks great with the stain. I think your Dad's advice was good. Also I like that the heavier timbers add rigidity to the frame.

Seasonal And Holiday

Rustic X Kitchen Island - DONE!

I had always wanted a kitchen island and saw this project. Seeing that the plans were well written I decided to tackle it. In addition I made a few small modifications to enhance the style of the island. These included using 4x4's on the corners and a IKEA butcher block top. The top allows for a larger surface area to work with and more space to sit under. The stools in the picture are from World Market and they were the perfect pair for the island. The island is great for family gatherings or just sitting with your morning coffee. I had family over for Thanksgiving and received lots of compliments. Thank you Ana!

Built from Plan(s)
Estimated Time Investment
Weekend Project (10-20 Hours)
Finish Used
Valspar white latex paint from Lowes on the bottom and Minwax Mission Oak stain on the top.
Recommended Skill Level
Intermediate

Comments

MaryMurray

Tue, 12/03/2013 - 17:43

I love how this looks. This is actually next on my list of projects, thanks for the inspiration!

Jcalloc

Thu, 03/05/2015 - 08:13

May I ask what kind of wood you used for this project?

Square Picnic Table using Deck Boards

Submitted by Anonymous (not verified) on Fri, 07/07/2023 - 11:32

I used deck boards instead of 2x6 for the top and seats; this lightened the table overall while negating the need to sand and finish the boards.

I also used a cedar-tone treated board so staining wasn't necessary.

Kelly S.

Built from Plan(s)
Seasonal And Holiday