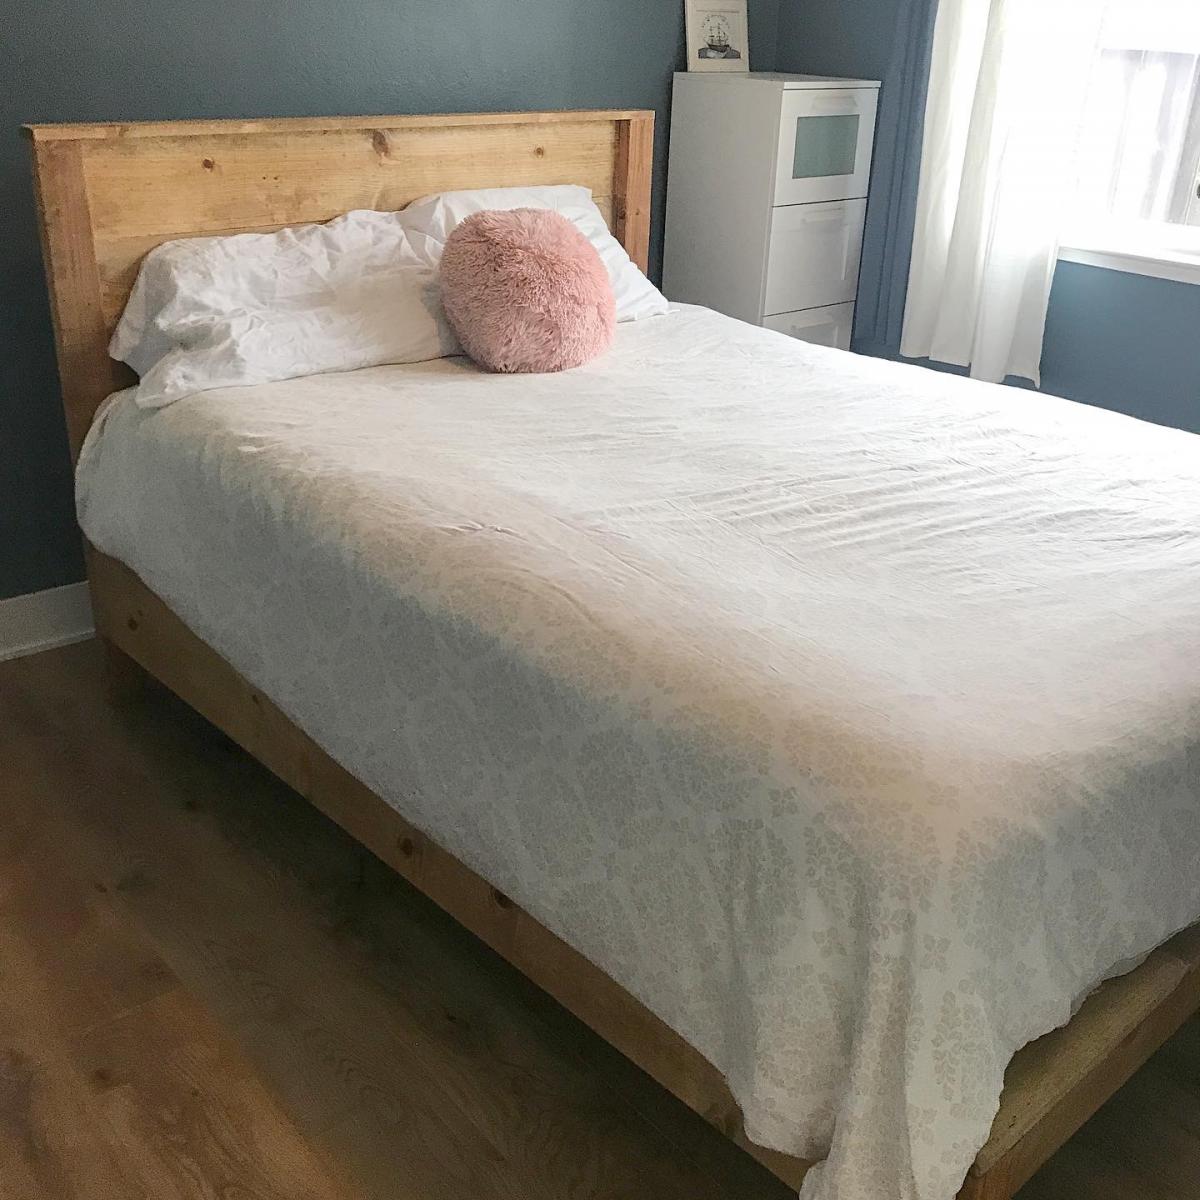
Community Brag Posts

Farmhouse Doll Beds

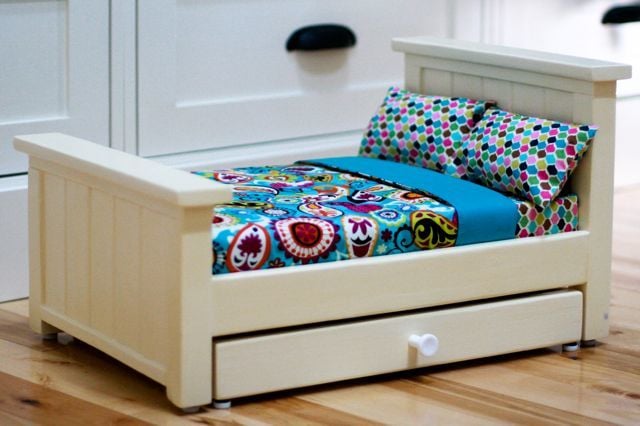
For these beds I modified the original farmhouse doll bed plans to accommodate a few more dolls. In the process, I discovered that, while doll furniture turns out SUPER cute, it takes me about the same amount of time to build a little piece as it does to build a big piece, especially when you consider the time it takes to sew the bedding.

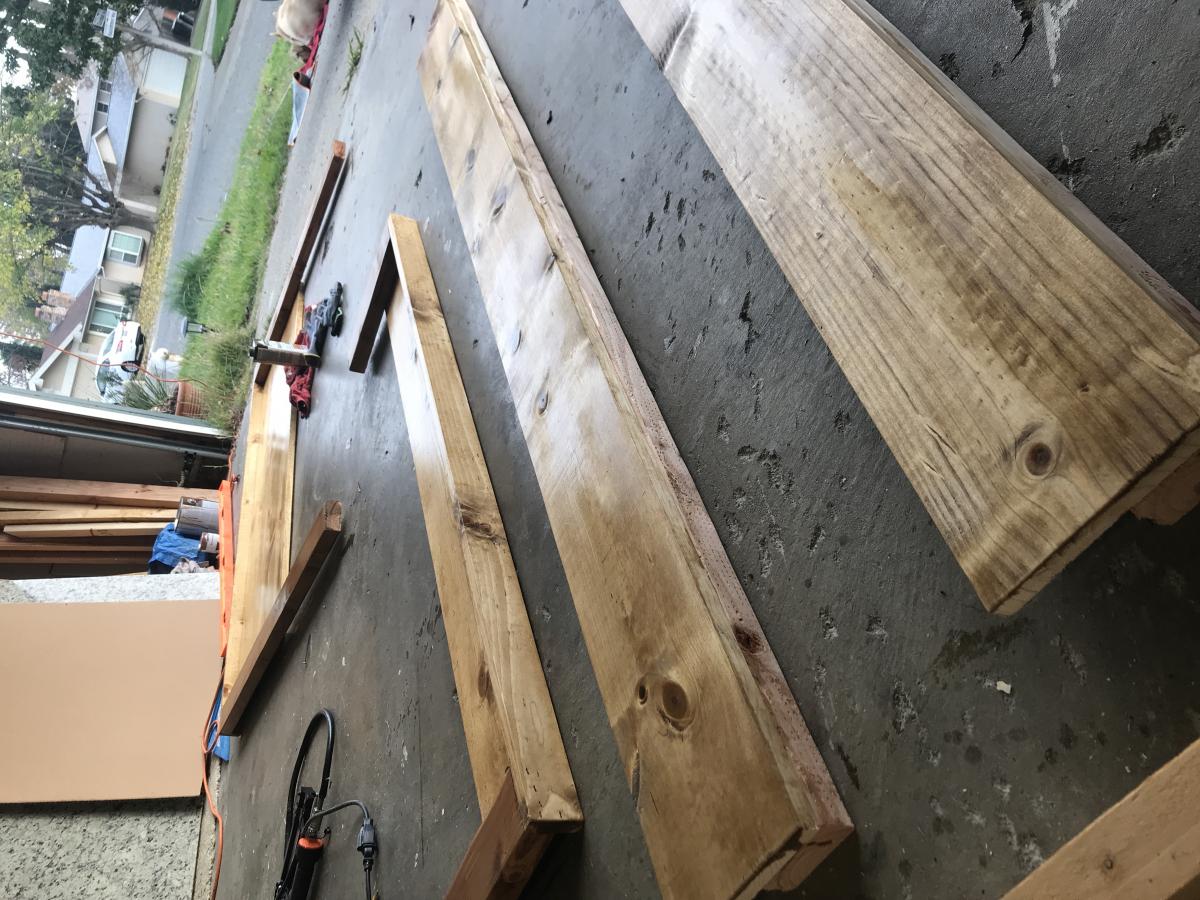
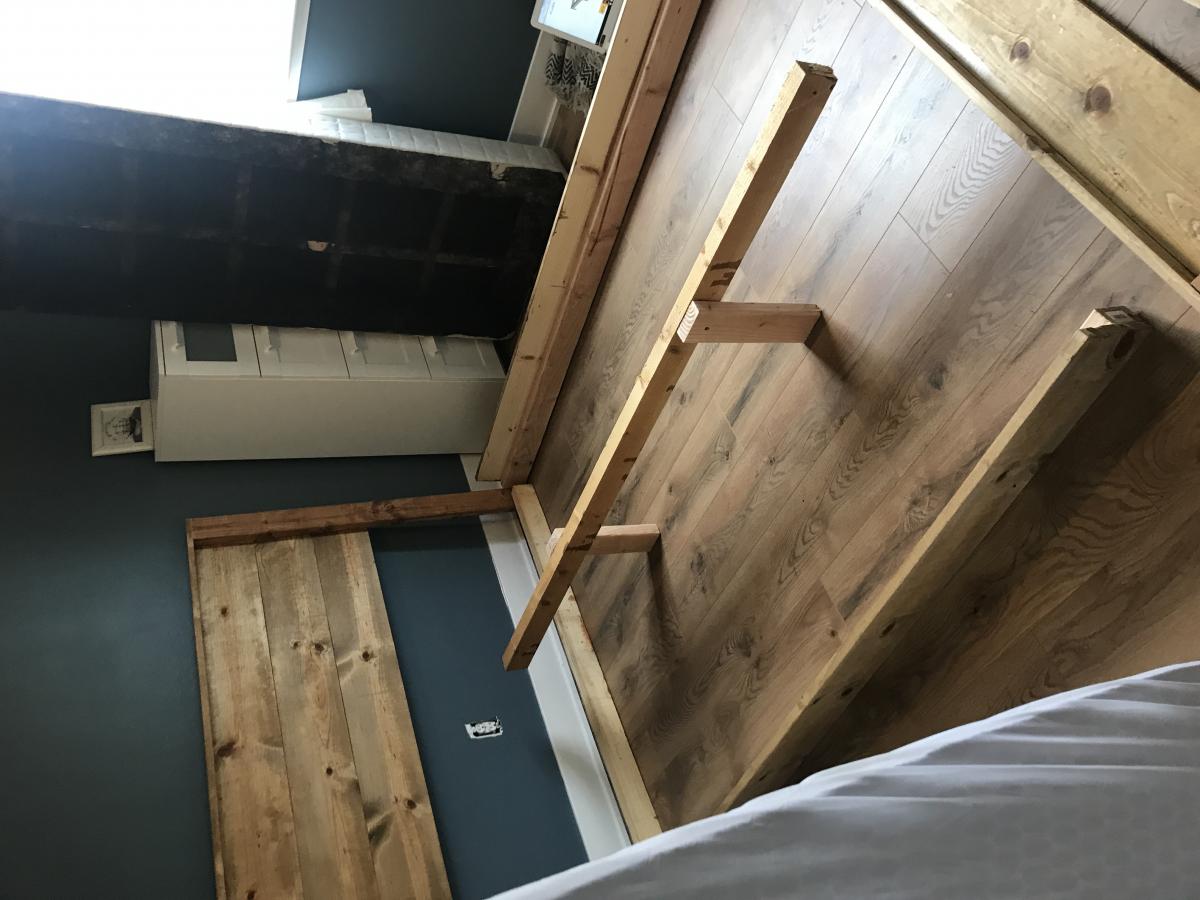
I put these together mostly with nails and glue, but used my kreg jig to join the rails to the headboards and footboards.

Estimated Cost
$20 or less per bed.
Estimated Time Investment
Weekend Project (10-20 Hours)
Finish Used
Paint and Vermont Natural Coatings PolyWhey to seal. Lots of sanding before and in between coats.
Recommended Skill Level
Beginner

Comments

spiceylg

Thu, 12/15/2011 - 06:00

I love the mods you did on these. For the farmhouse w/trundle, I know you had to raise up the bottom and it looks like you did the headboard sized boards for the footboard and made the headboard w/even longer boards? Then for the bunkbeds, are those all headboard lengths for the head and footboards and then just very long 2x2s for the posts? I am never brave enough to mod anything just yet! I also absolutely love that bedding on the top pic! So bright and cheery!

In reply to by spiceylg

hillarylouise

Thu, 12/15/2011 - 06:51

Isn't that bedding beautiful? I love it. The fabric is from Hobby Lobby. They have so many cute calicos.

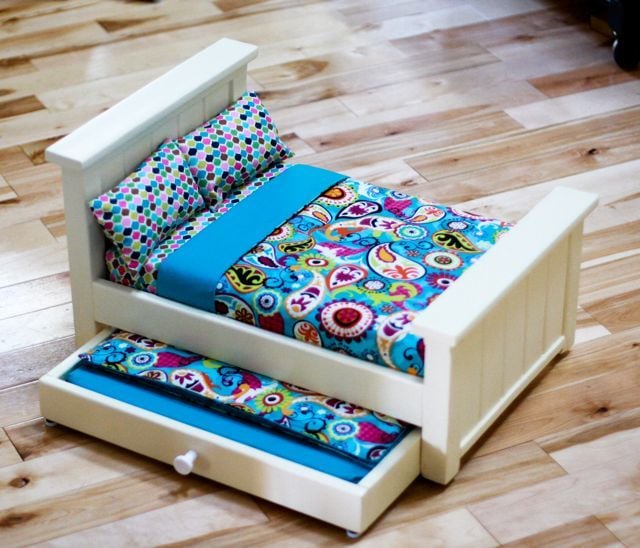
Yes, you got the mods right. If I were to do the trundle again, I'd make the headboard longer so that it goes almost to the ground like the footboard, otherwise you can see the trundle.

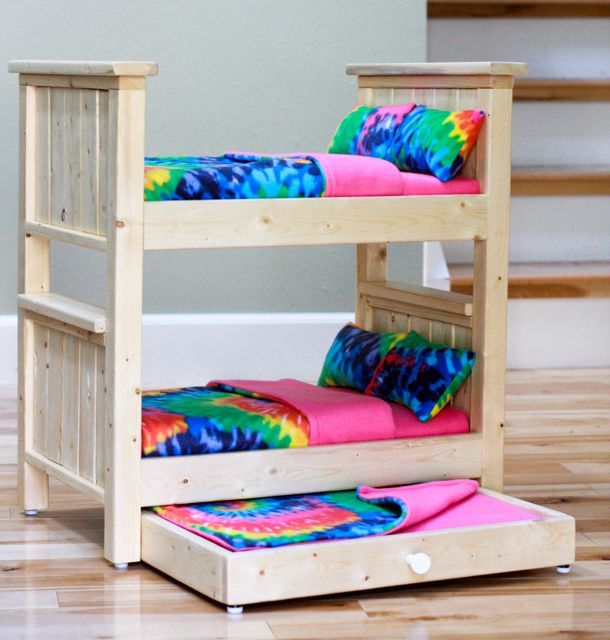
The bunk was easy -- much easier than the other bunk plans all out of 1x2s. I've made them both now and the farmhouse one just comes together a lot faster (once you figure out the measurements).

spiceylg

Thu, 12/15/2011 - 09:57

I love Hobby Lobby but never think to check out their fabric! Silly me, I'll have to do just that! Okay, thank you for the info. I just noted the additional detail of the feet, how nice! If you don't mind, I'd love the measurement of the 2x2 for the bunks, simply because I'm lazy like that, lol!

In reply to by spiceylg

hillarylouise

Thu, 12/15/2011 - 10:27

The 2x2s are 22 3/4" and the slats in the headboard are 7". I think the bottom of the bottom headboard is around 2 3/4" or 3" from the bottom of the 2x2s. All the width measurements are the same as in the original plan. Also, I used lath strips for the mattress to rest on instead of a rectangle of 1/4" ply -- it seemed easier and I think it was cheaper, too.

Tsu Dho Nimh

Fri, 12/16/2011 - 08:00

You are so right about the time it takes.

I made a stuffed doll and her clothing for a niece, and I could have made myself two complete outfits in the time it took to sew one dinky doll dress.

lmhaney (not verified)

Tue, 02/28/2012 - 07:40

Hillary how did you do the trundle for the farmhouse single bed. I read where you said you would do the headboard longer,but this is going to be my first build and I need a little more instruction to make the trundle and how long would you do the headboard. Thanks!!!

In reply to by lmhaney (not verified)

hillarylouise

Tue, 02/28/2012 - 09:05

Hey. I made the trundle using 1x3 boards just slightly shorter than the size of the overall bed (so it would fit underneath). I used two 18 1/2" 1x3s and two 14 1/2" 1x3s. I built it using pocket holes on the 14 1/2" 1x3s, screwing into the 18 1/2" 1x3s. Then I attached two 1x2 cleats to the bottom insides of the 18.5" boards so that I'd have a place to set support pieces for the mattress. I attached the cleats with glue and nails, I think, but pocket screws would work fine, too. I used pine lath for the support, attached with glue and staples.

For the headboard, I cut my panel pieces at 7", I think, but I should have cut them at 9 3/4" so that the headboard panel would extend closer to the ground like the footboard panel does. Here is an abbreviated cut list:
footboard panel -- 5 1x3s @ 6"
footboard legs -- 2 2x2s @ 7 1/4"
headboard panel -- 5 1x3s @ 9 3/4"
headboard legs -- 2 2x2s @ 11"

All of the horizontal cuts are the same as the original plan as long as you are using #1 pine. If you are using #2 pine or furring strips, your horizontal cuts will need to be slightly smaller b/c your panel board will be slightly narrower than the plans expect.

Just be sure to screw the side rails of the bed in high enough to get the trundle underneath.

Hopefully that all makes sense! Good luck! Can't wait to see photos!

In reply to by Aida (not verified)

claydowling

Sun, 08/05/2012 - 06:29

They -might- cut it for you. But based on the experience of a lot of people here, and the advice of some Home Depot employees also on here, it's a mistake to have them do that.

You can do the cuts on your own though. If you can't afford a circular saw, or you're uncomfortable with them, you can buy a hand saw for about $25. It's no good for cutting plywood or MDF, but for solid wood it's hard to beat.

Hillary (not verified)

Mon, 08/06/2012 - 19:26

Nope, I don't think they will. And if they did you won't be happy with the outcome. Too many cuts and there's no way they'll get every cut right. You'd be better off finding a friend with a miter saw you could borrow for an hour to get all the pieces cut. Good luck!

Aida (not verified)

Sun, 08/12/2012 - 08:27

Thank you........ I may have to stop been afraid of using this tools and just use it lol............love this bed and my daughter want me to make it for her........ I will post pictures

blair28

Tue, 10/29/2013 - 08:53

Just curious if you have ever thought of making these and selling them?? I have been looking for a doll bunk bed for my daughter for Christmas and love this bunk bed with trundle. So thought I would ask if you would consider making one and selling it!!

emmakayte

Sun, 12/08/2013 - 18:07

I absolutely love what you did with the trundle and the bunk bed. You are so talented! Thank you so much for sharing the measurements that you used to make the bunk bed and sharing tips. I am going to attempt to make one for my daughter. This will be my first woodworking project. I am crossing my fingers it goes well. Thank you! :)

Storage Shed

Submitted by Anonymous (not verified) on Fri, 02/05/2016 - 10:53

The plans were great! I hadn't built anything this big before but just followed the instructions step by step. I did also built a base to put it on (pavers on sand then pressure treated 2x6 frame). It took quite a while but that's just mostly because I had "helpers" and had to work on it when I had a spare minute. I was pleasantly surprised by how much we were able to pack in there. We added electricity and made a few other modifications to a larger shed we had so my husband could use that as an office. I built this to store all the tools, yard equipment, etc that we moved out of there.

Built from Plan(s)
Estimated Cost
$400-$500 (I added a base and added flashing and roofing paper to the roof)
Estimated Time Investment
Week Long Project (20 Hours or More)
Recommended Skill Level
Beginner

Modified Essential Entryway Bench

Submitted by Anonymous (not verified) on Mon, 06/05/2023 - 13:56

Worked with a client to create a boot bench with adjustable shelves. The Essential Entryway Bench was a perfect starting point! I extended the top trim to home the 4” cushion. I love Ana’s plans! Thank you!!!

Built from Plan(s)

Comments

My version

Submitted by ltgprg on Sun, 02/28/2016 - 21:00

My version of this project using so advanced joinery and under mount self closing draw guides

Estimated Cost
$350 for the Poplar and hardware plus lots of tools!
Estimated Time Investment
Week Long Project (20 Hours or More)
Finish Used
Sherman Williams Pro Classic, polycrylic, and general finishes glaze
Recommended Skill Level
Advanced

Panel bed with box springs

Submitted by Kait14 on Mon, 12/30/2019 - 12:36

I built this bed for a guest room. Easier than I expected and took 2 days! I used watco danish oil in medium walnut. I was able to save some $ by using two twin box springs that I already owned instead of adding slats. I modified the height of where the box springs sit by lowering the cleat 2” and shortening the legs on the center support by 2” as well. It worked perfectly! 

Estimated Cost
75
Estimated Time Investment
Weekend Project (10-20 Hours)
Finish Used
Watco Danish oil medium walnut
Recommended Skill Level
Beginner

End table made from pallets (plans included)

Submitted by mtairymd on Sat, 02/08/2014 - 14:58

Building an outside side table out of scrap pallets.

Video of the build:
https://www.youtube.com/watch?v=kVAYXVGiL_8

Drawing File
https://googledrive.com/host/0B21TbB8gGNQbX2dlNGdxR0NuOE0/end_table.pdf

Estimated Cost
$5 for stain and nails - free pallets
Estimated Time Investment
Day Project (6-9 Hours)
Finish Used
Red Oak
Recommended Skill Level
Starter Project

Basement Sofa Table Bar

Submitted by advanlente on Sat, 03/28/2020 - 12:04

My husband and I had been looking at many different stores to try and find a bar table for behind our new couch in our basement. We wanted something that people could eat and drink at when we entertained and/or be able to sit at and play video games. I should have known we were better off to build our own rather than look in a store. It was only $30 in lumber and took 3 hours to build. And another project in the books!

Estimated Cost
$30
Estimated Time Investment
Afternoon Project (3-6 Hours)

Comments

megs502

Fri, 04/03/2020 - 11:03

do you have the plans for this? i've been looking and looking for what i needed and this is it!!

mferrara

Sat, 04/04/2020 - 05:39

Hi - exactly what I've been searching for....do you have plans available? Please and thank you!

beckaroo

Tue, 06/02/2020 - 23:04

Hello,
I would also love to see the plans for this sofa bar table.
Thank you
Becky

Work Bench

Submitted by Anonymous (not verified) on Tue, 09/06/2016 - 17:23

I needed more room, so I changed the dimensions to a 4 x 4 table.  Used the same amount of materials.  I made the side leg measurements 48" wide and the cross braces 45".  My top sheet of plywood is 48" x 48" and the bottom sheet is 48" x 41".  The rest of the leg measurements are the same. 

A little overkill on the screws, but made it extra sturdy. 

I saw this site, copied down the materials list, bought everything I needed and was finished before dinner.  I did it all myself, only had my husband cut the plywood, the rest was all me!  Woo hoo, so proud of myself!

I rough sanded the edges and corners to get rid of any splinters.

Estimated Cost
$50
Estimated Time Investment
An Hour or Two (0-2 Hours)
Finish Used
Rough sanded the top, corners and edges.
Recommended Skill Level
Beginner

Sand Box

We adjusted the plan and created a 4x7 sand box with toy box and canopy. We are in love with the way this has turned out!

Estimated Cost
300
Estimated Time Investment
Weekend Project (10-20 Hours)
Recommended Skill Level
Intermediate

Comments

Play Kitchen

Submitted by keribeth on Tue, 09/04/2012 - 12:36

I combined the play sink and play stove into a one-piece kitchen by having them share a side. I found a bathroom faucet at my local Habitat ReStore for $15 (and that included a sink I didn't even need!). Time investment does not include painting. Here's my cost breakdown. Lumber: $25 (I used some scraps.) Faucet: $15 Dog bowl: $7 Hardware: $13 Primer and paint: $19 Screws: $4 Sandpaper: $5 Plexiglass: $3 Prepping dinner while my toddler works in his play kitchen beside me: Priceless.

Estimated Cost
~$90
Estimated Time Investment
Day Project (6-9 Hours)
Finish Used
Cheap white paint. It dripped like crazy and took forever to dry. My mantra was "It's a toy, it's a toy, it's a toy."
Recommended Skill Level
Intermediate

Comments

Farmhouse Table - No Pocket Holes Plan

Submitted by mcronin on Sun, 07/19/2020 - 07:48

The published plans for this were great. This was my first attempt at a project like this. I have always liked the idea of dining at a large table outdoors and the farmer's style is appealing to me. I adjusted the length to fit my deck, but also made a few changes for aesthetic purposes. I notched 4x4s rather than join a pair of 2x4s for the legs. Added caps to the screw holes rather than filler and used pegs to secure the top planks in addition to screws from the bottom. The frame and top were stained/sealed with Cabot Australian Timber Oil.

Estimated Cost
$200.00
Estimated Time Investment
Week Long Project (20 Hours or More)
Finish Used
Cabot Australian Timber Oil, Natural
Recommended Skill Level
Intermediate

Faux Mantle by Posh Barn

Submitted by Posh Barn on Wed, 12/05/2012 - 16:30

This is such a great project. Easy and fast you still have time to make one for hanging Christmas stockings!

Estimated Cost
90.00
Estimated Time Investment
Afternoon Project (3-6 Hours)
Finish Used
Cool Grey with some distress
Recommended Skill Level
Beginner

Comments

Seasonal And Holiday

Modified Rustic X Tables

Submitted by SuperTim69 on Fri, 10/09/2020 - 11:24

Used the Rustic X templates. Just modified a little. Thanks Ana White

Comments

Turned Leg Farmhouse Table 6' x 3'

Submitted by Mhillis on Sat, 01/12/2013 - 08:54

My husband and I decided to tackle this as our second woodworking project together. We have been wanting a larger dining table that would comfortably seat 6 people and easily squeeze in 8 if needed. We decided to build Ana's turned leg farmhouse table, adjusting the dimensions and choosing slightly different legs. These variations better suited our dining room space.

We purchased the "Modified English Country Dining Table Legs" in soft maple and 3 1/2" diameter from Osbourne Wood Products, which totaled $136. The rest of the lumber was made up of pine boards from Lowe's, which totaled around $40-$50. When assembling the 1 x 10 boards to make the top, we used a biscuit joiner to help our slightly bowed boards stay flat. Once the table was fully assembled, we painted the base in Lowe's Antique White (satin finish) and stained the top using Minwax's Special Walnut, then applied at least two coats of Minwax's polyurethane in satin finish.

We made a couple of mistakes along the way which actually worked out for the best, giving the table some rustic character. Being relatively new to woodworking, we neglected to thoroughly wipe the 1 x 10 boards of all wood glue before the glue dried, making it difficult to remove later with sanding. Some wood glue remained, which showed up later once boards were stained. We ended up liking how this turned out to give it some charm and more of that 'handmade' look.

Built from Plan(s)
Estimated Cost
$200.00
Estimated Time Investment
Weekend Project (10-20 Hours)
Finish Used
Staining top:
1. Sand top completely first using coarse 80 grit and then fine 220 grit sandpaper with electric sander (we used Porter & Cable square orbital sander from Lowe's).
2. Wipe entire surface of table thoroughly using damp cloth. Let dry completely.
3. Apply wood conditioner to entire table using brush (we were lazy and only applied to the top). Let dry completely - overnight is best.
4. Apply special walnut stain evenly to tabletop using brush. Wipe excess using old cloth. Let dry completely overnight. Repeat this process until desired depth of color is achieved (we applied two coats).
5. Lightly hand-sand top with 220 grit sandpaper to prep surface before each polyurethane coat for better adhesion. Clean surface with damp cloth after each sanding and allow to dry before poly. Repeat this process as needed for durability. (We applied only two coats).
Painting Base:
1. Apply two coats of Antique White in satin finish using angle brush. Let dry in between coats.
Recommended Skill Level
Beginner

Play house bed with storage stairs

Submitted by Anonymous (not verified) on Thu, 03/16/2017 - 17:17

Made in 2014 from the playhouse bed plans with the storage stairs as well.

Estimated Cost
$200 for materials + paint +approximately $50 for the bottom bunk we added.
Estimated Time Investment
Weekend Project (10-20 Hours)
Finish Used
Primer + paint
Recommended Skill Level
Intermediate
Back