Trestle Picnic Table and Benches
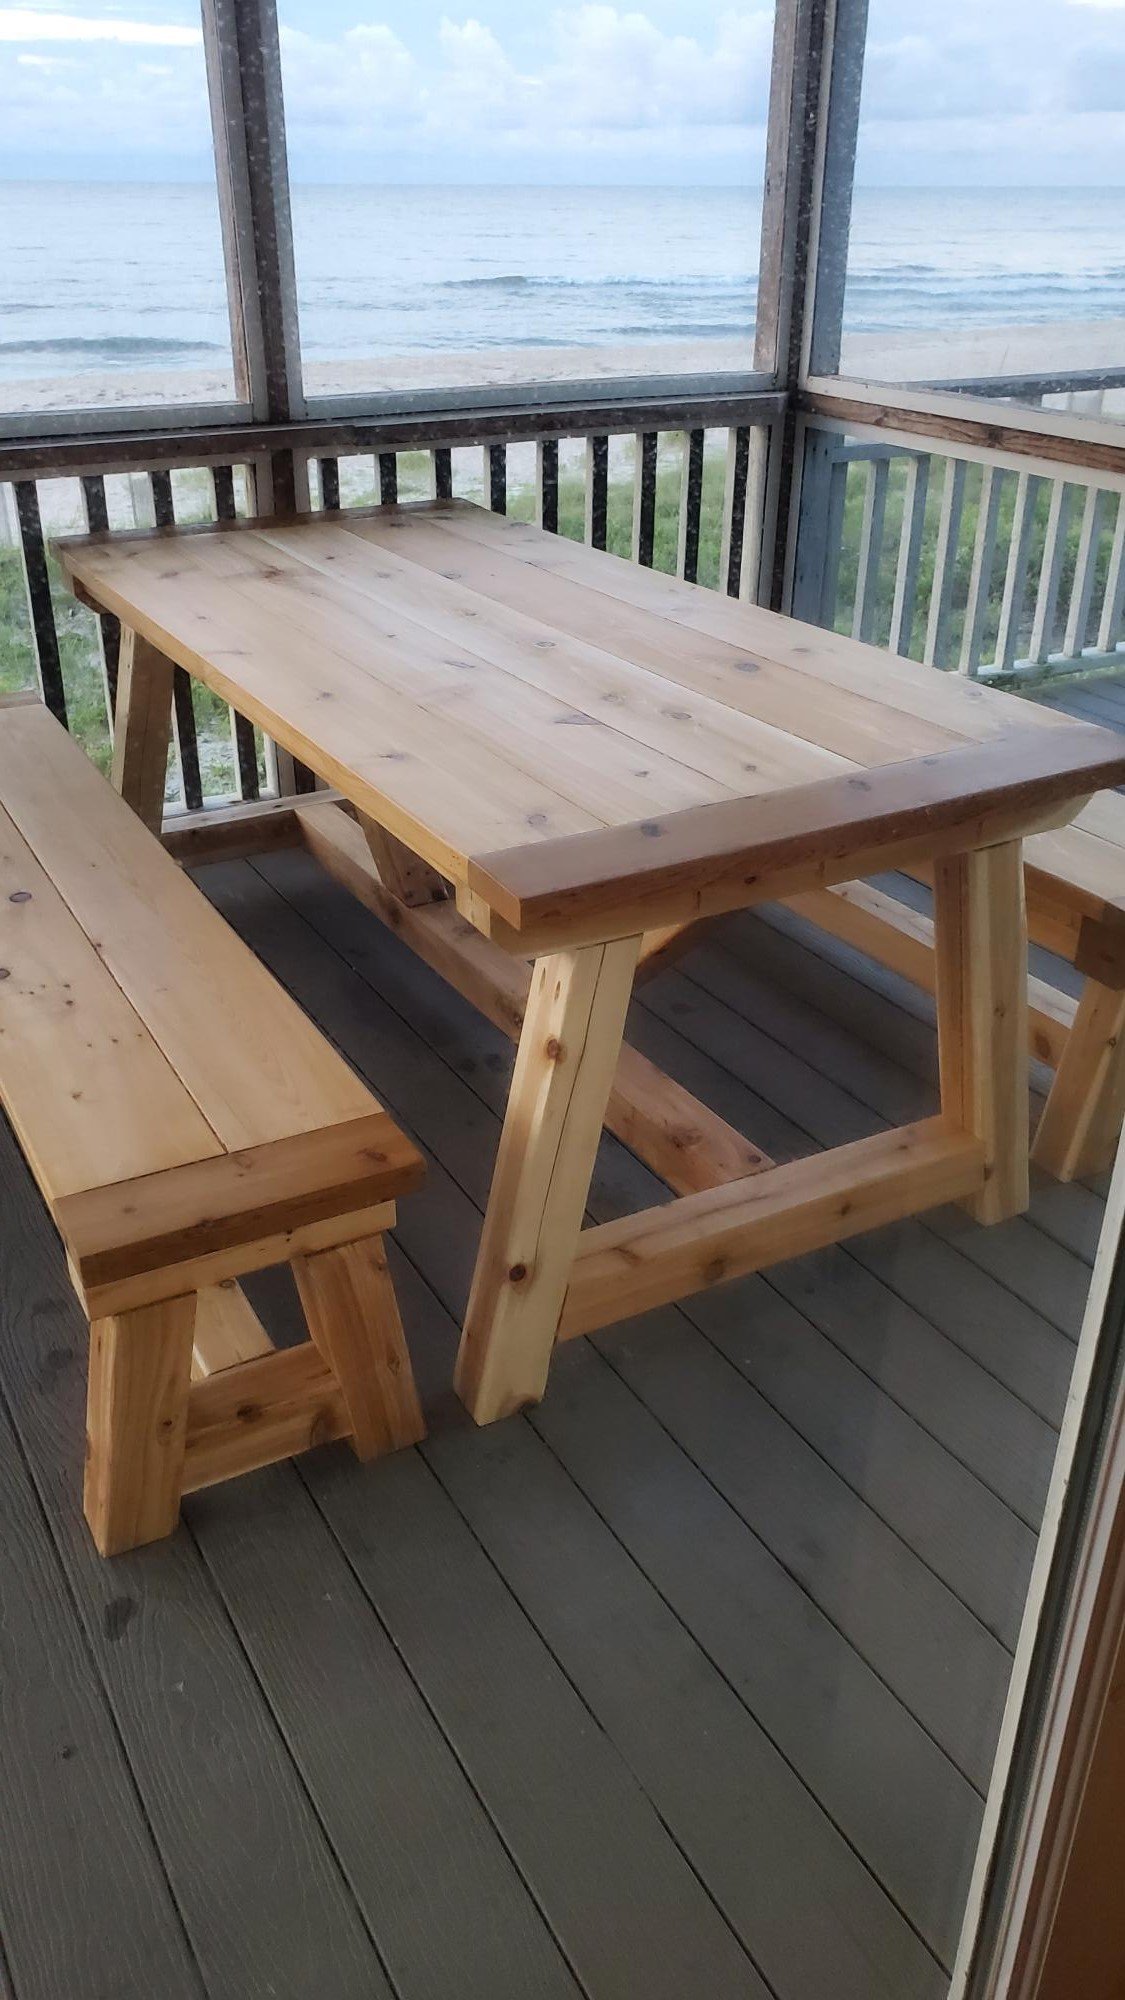
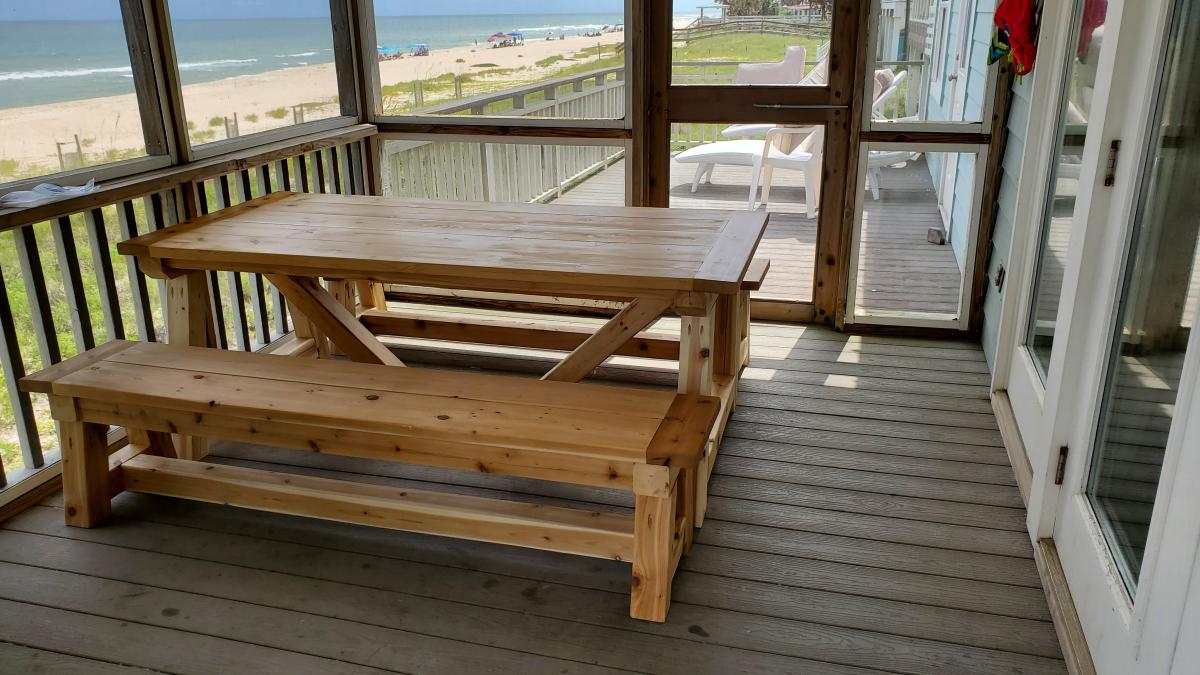
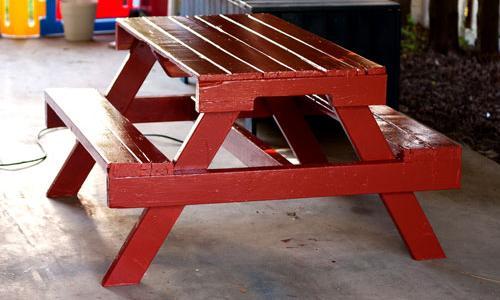
I used the trestle table and benches plans to make a cedar picnic table...
by Joe
Built from Plan(s)
I used the trestle table and benches plans to make a cedar picnic table...
by Joe
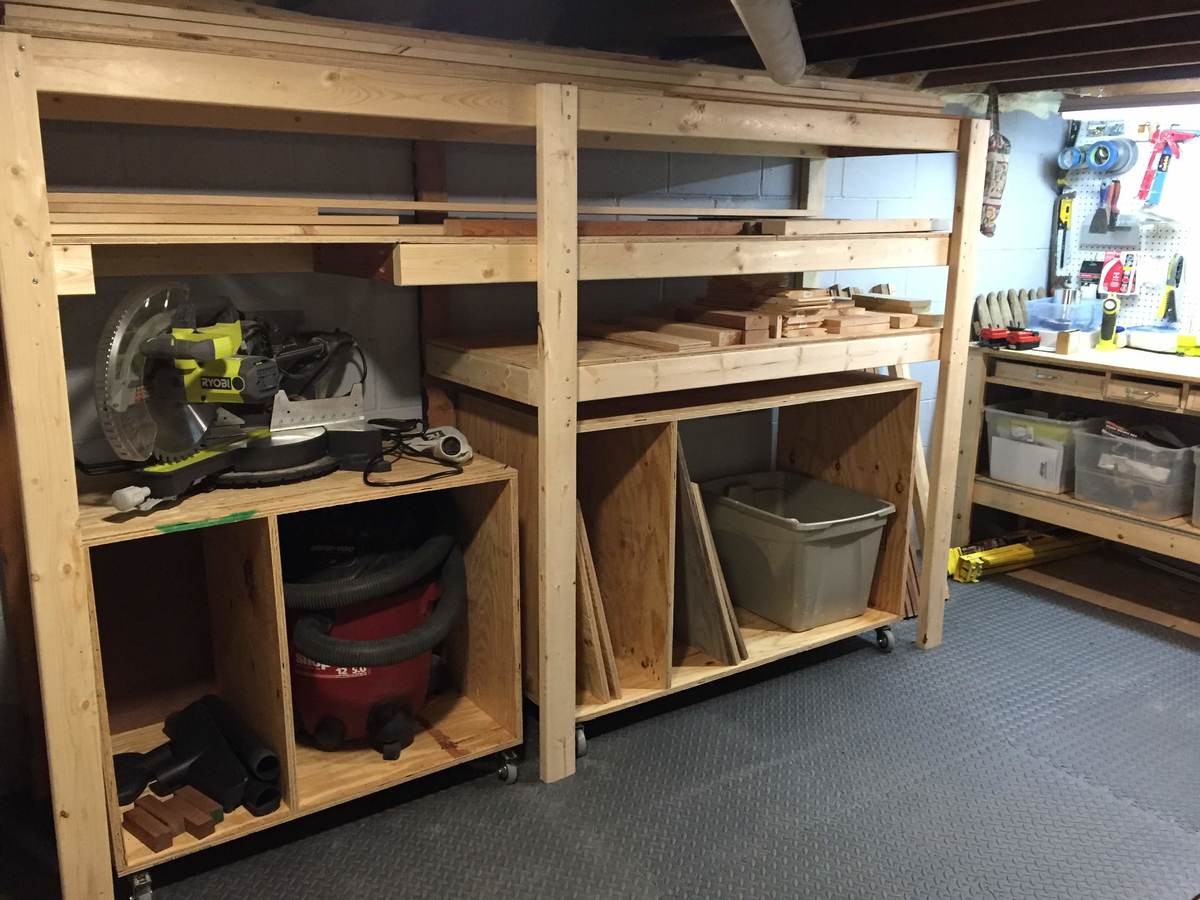
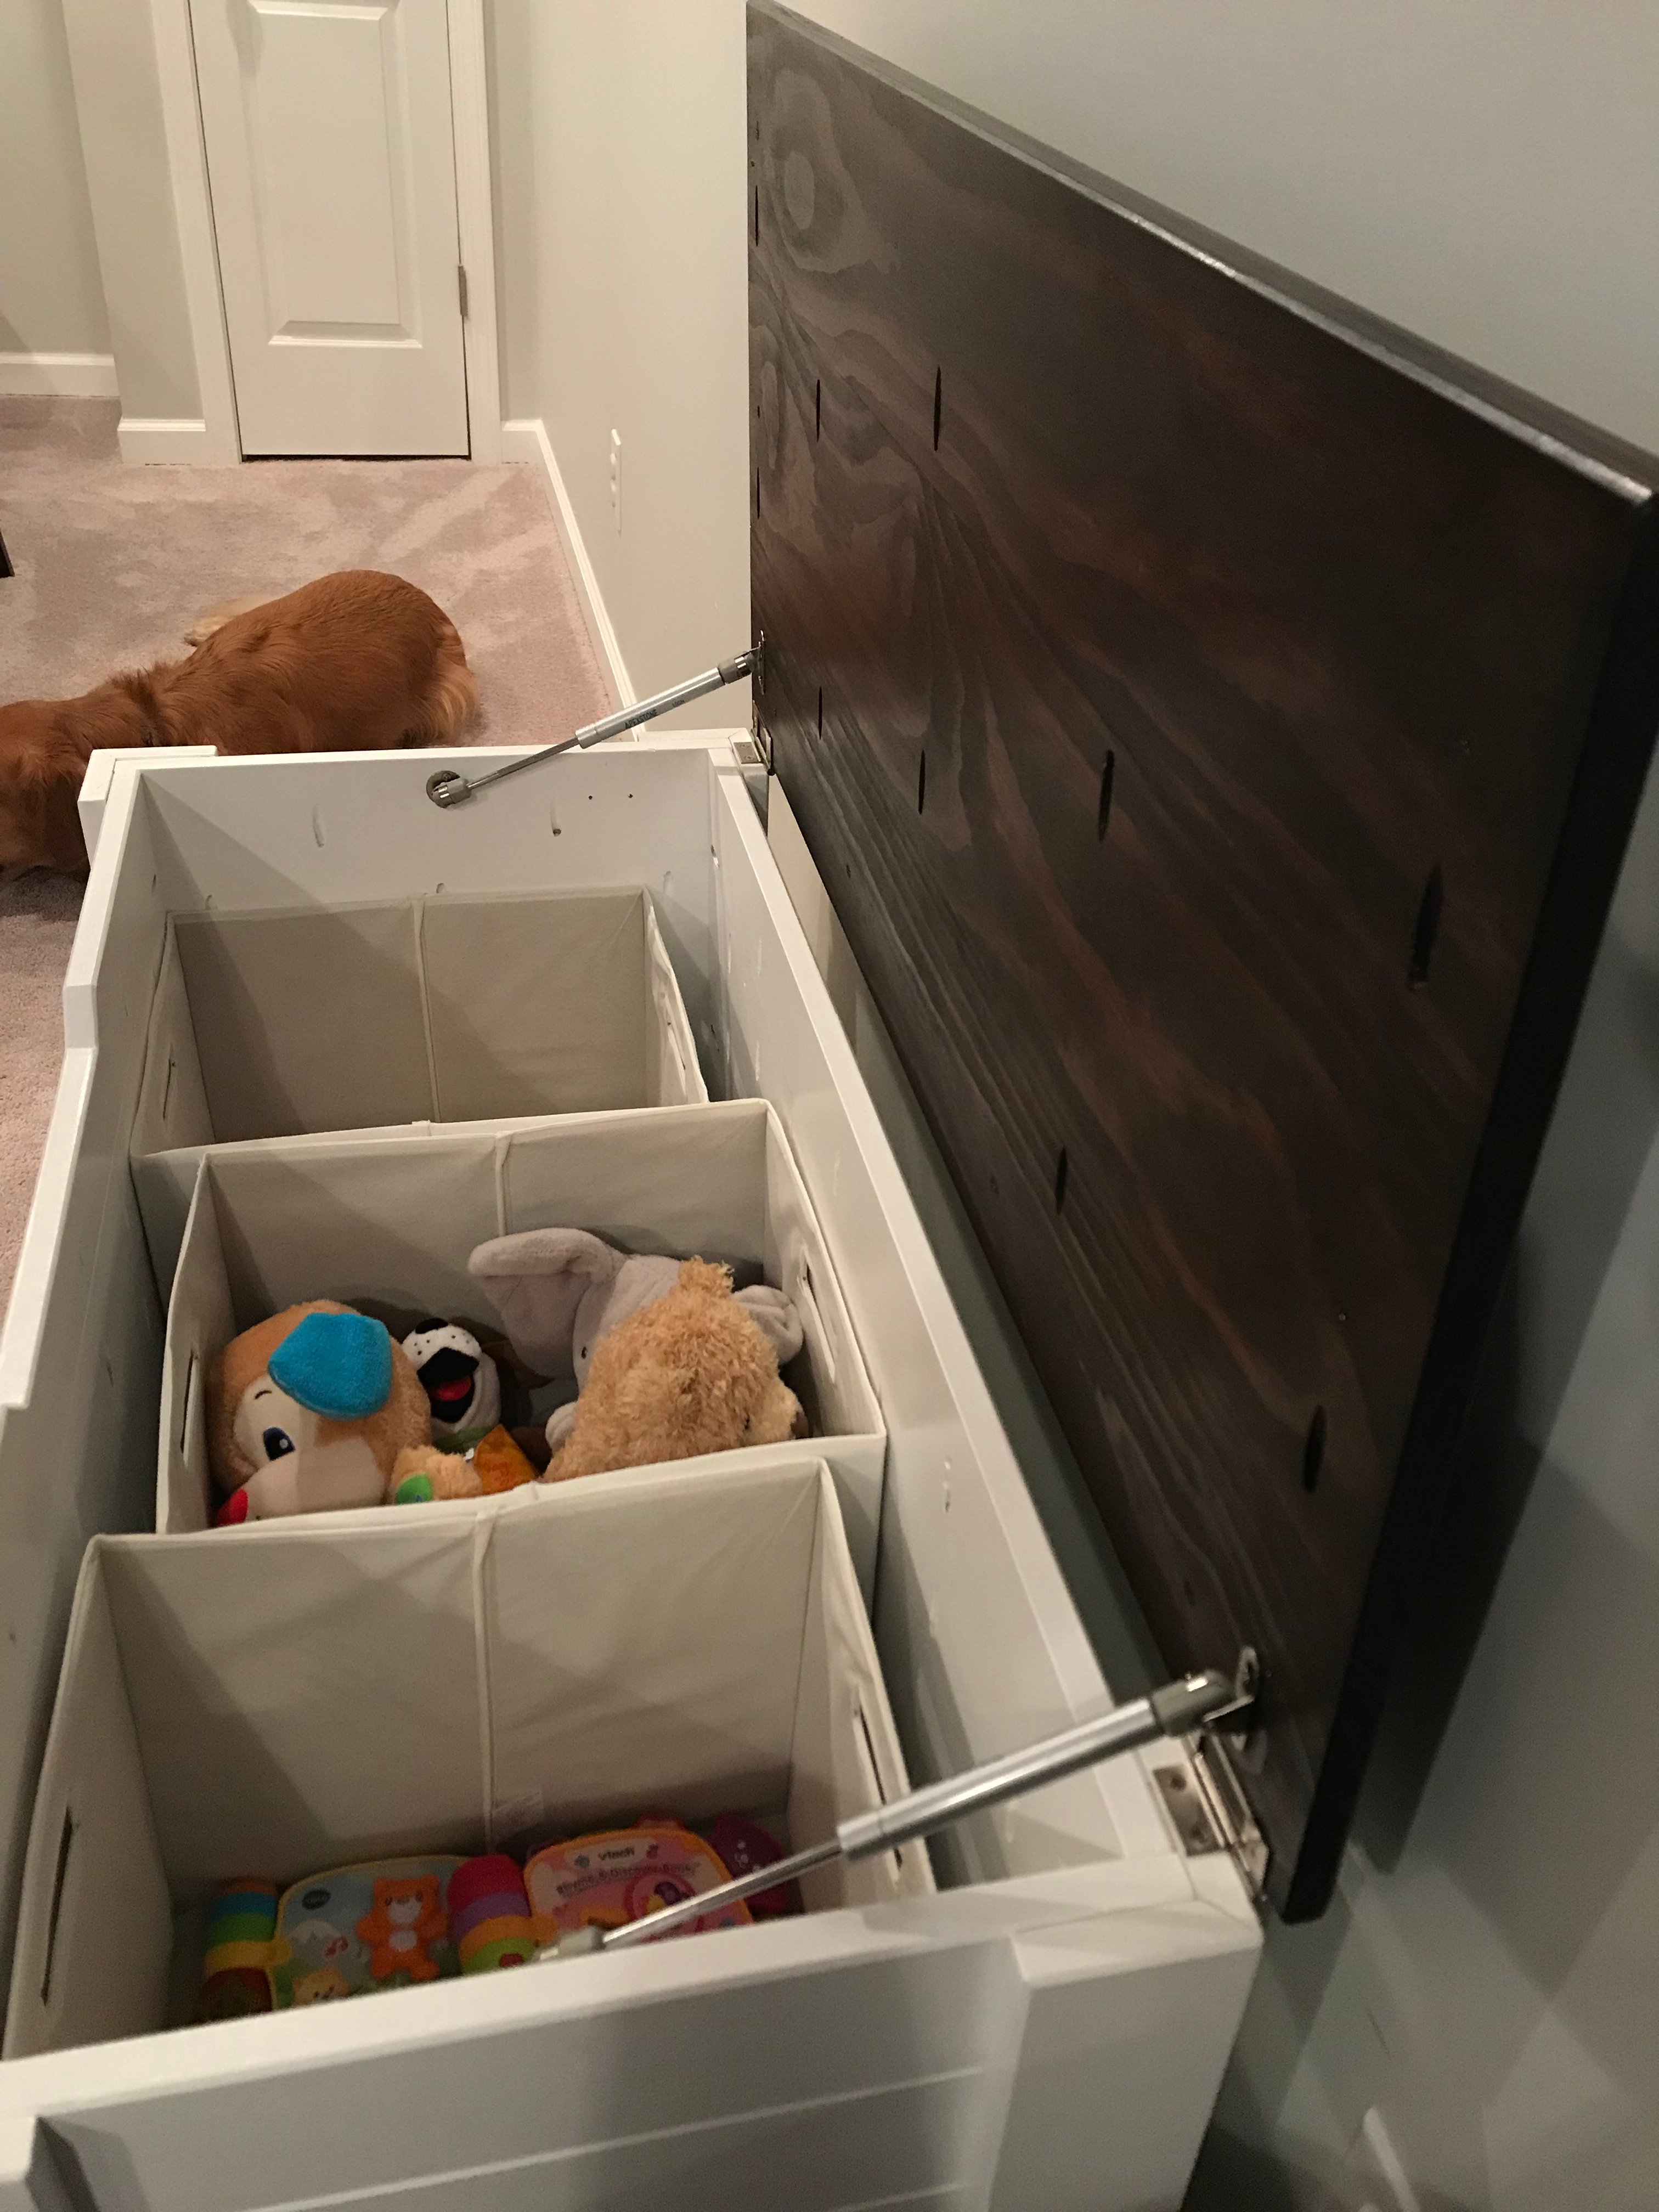
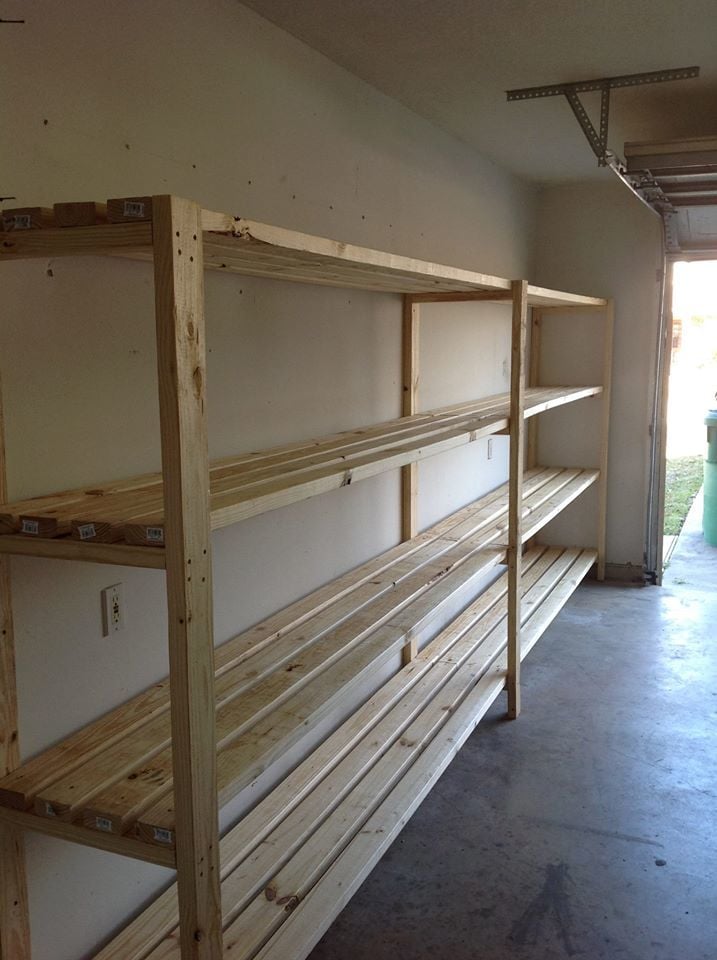
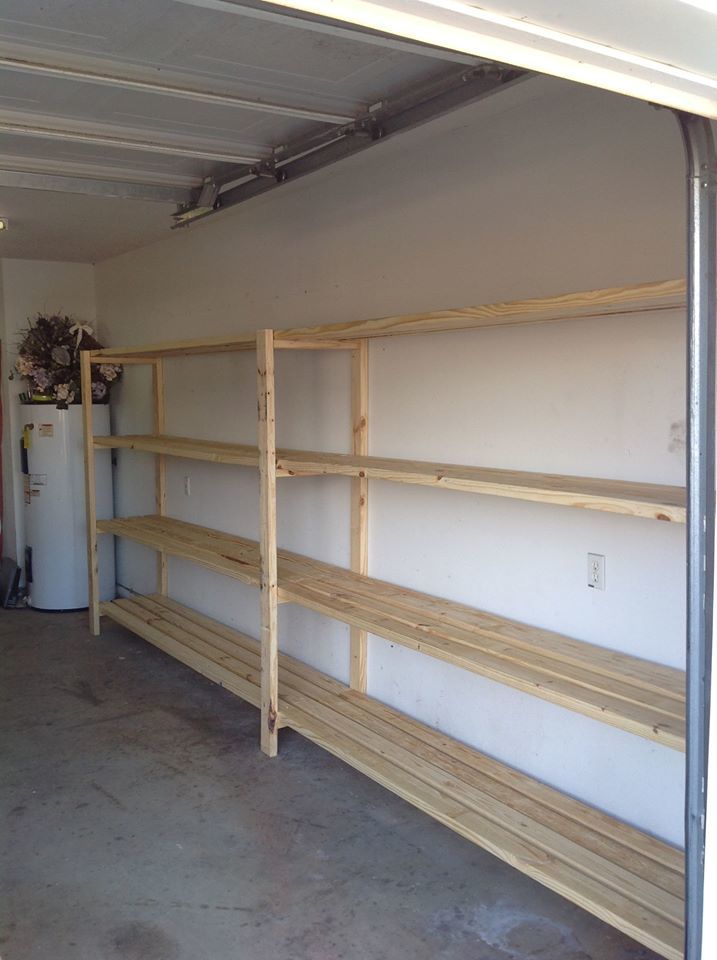
I don't have much space for a workshop in my home - just the corner of my basement. This plan was the answer! It adds so much storage and functionality. I plan to add some shelves to both units but love them already. Thank you so much!
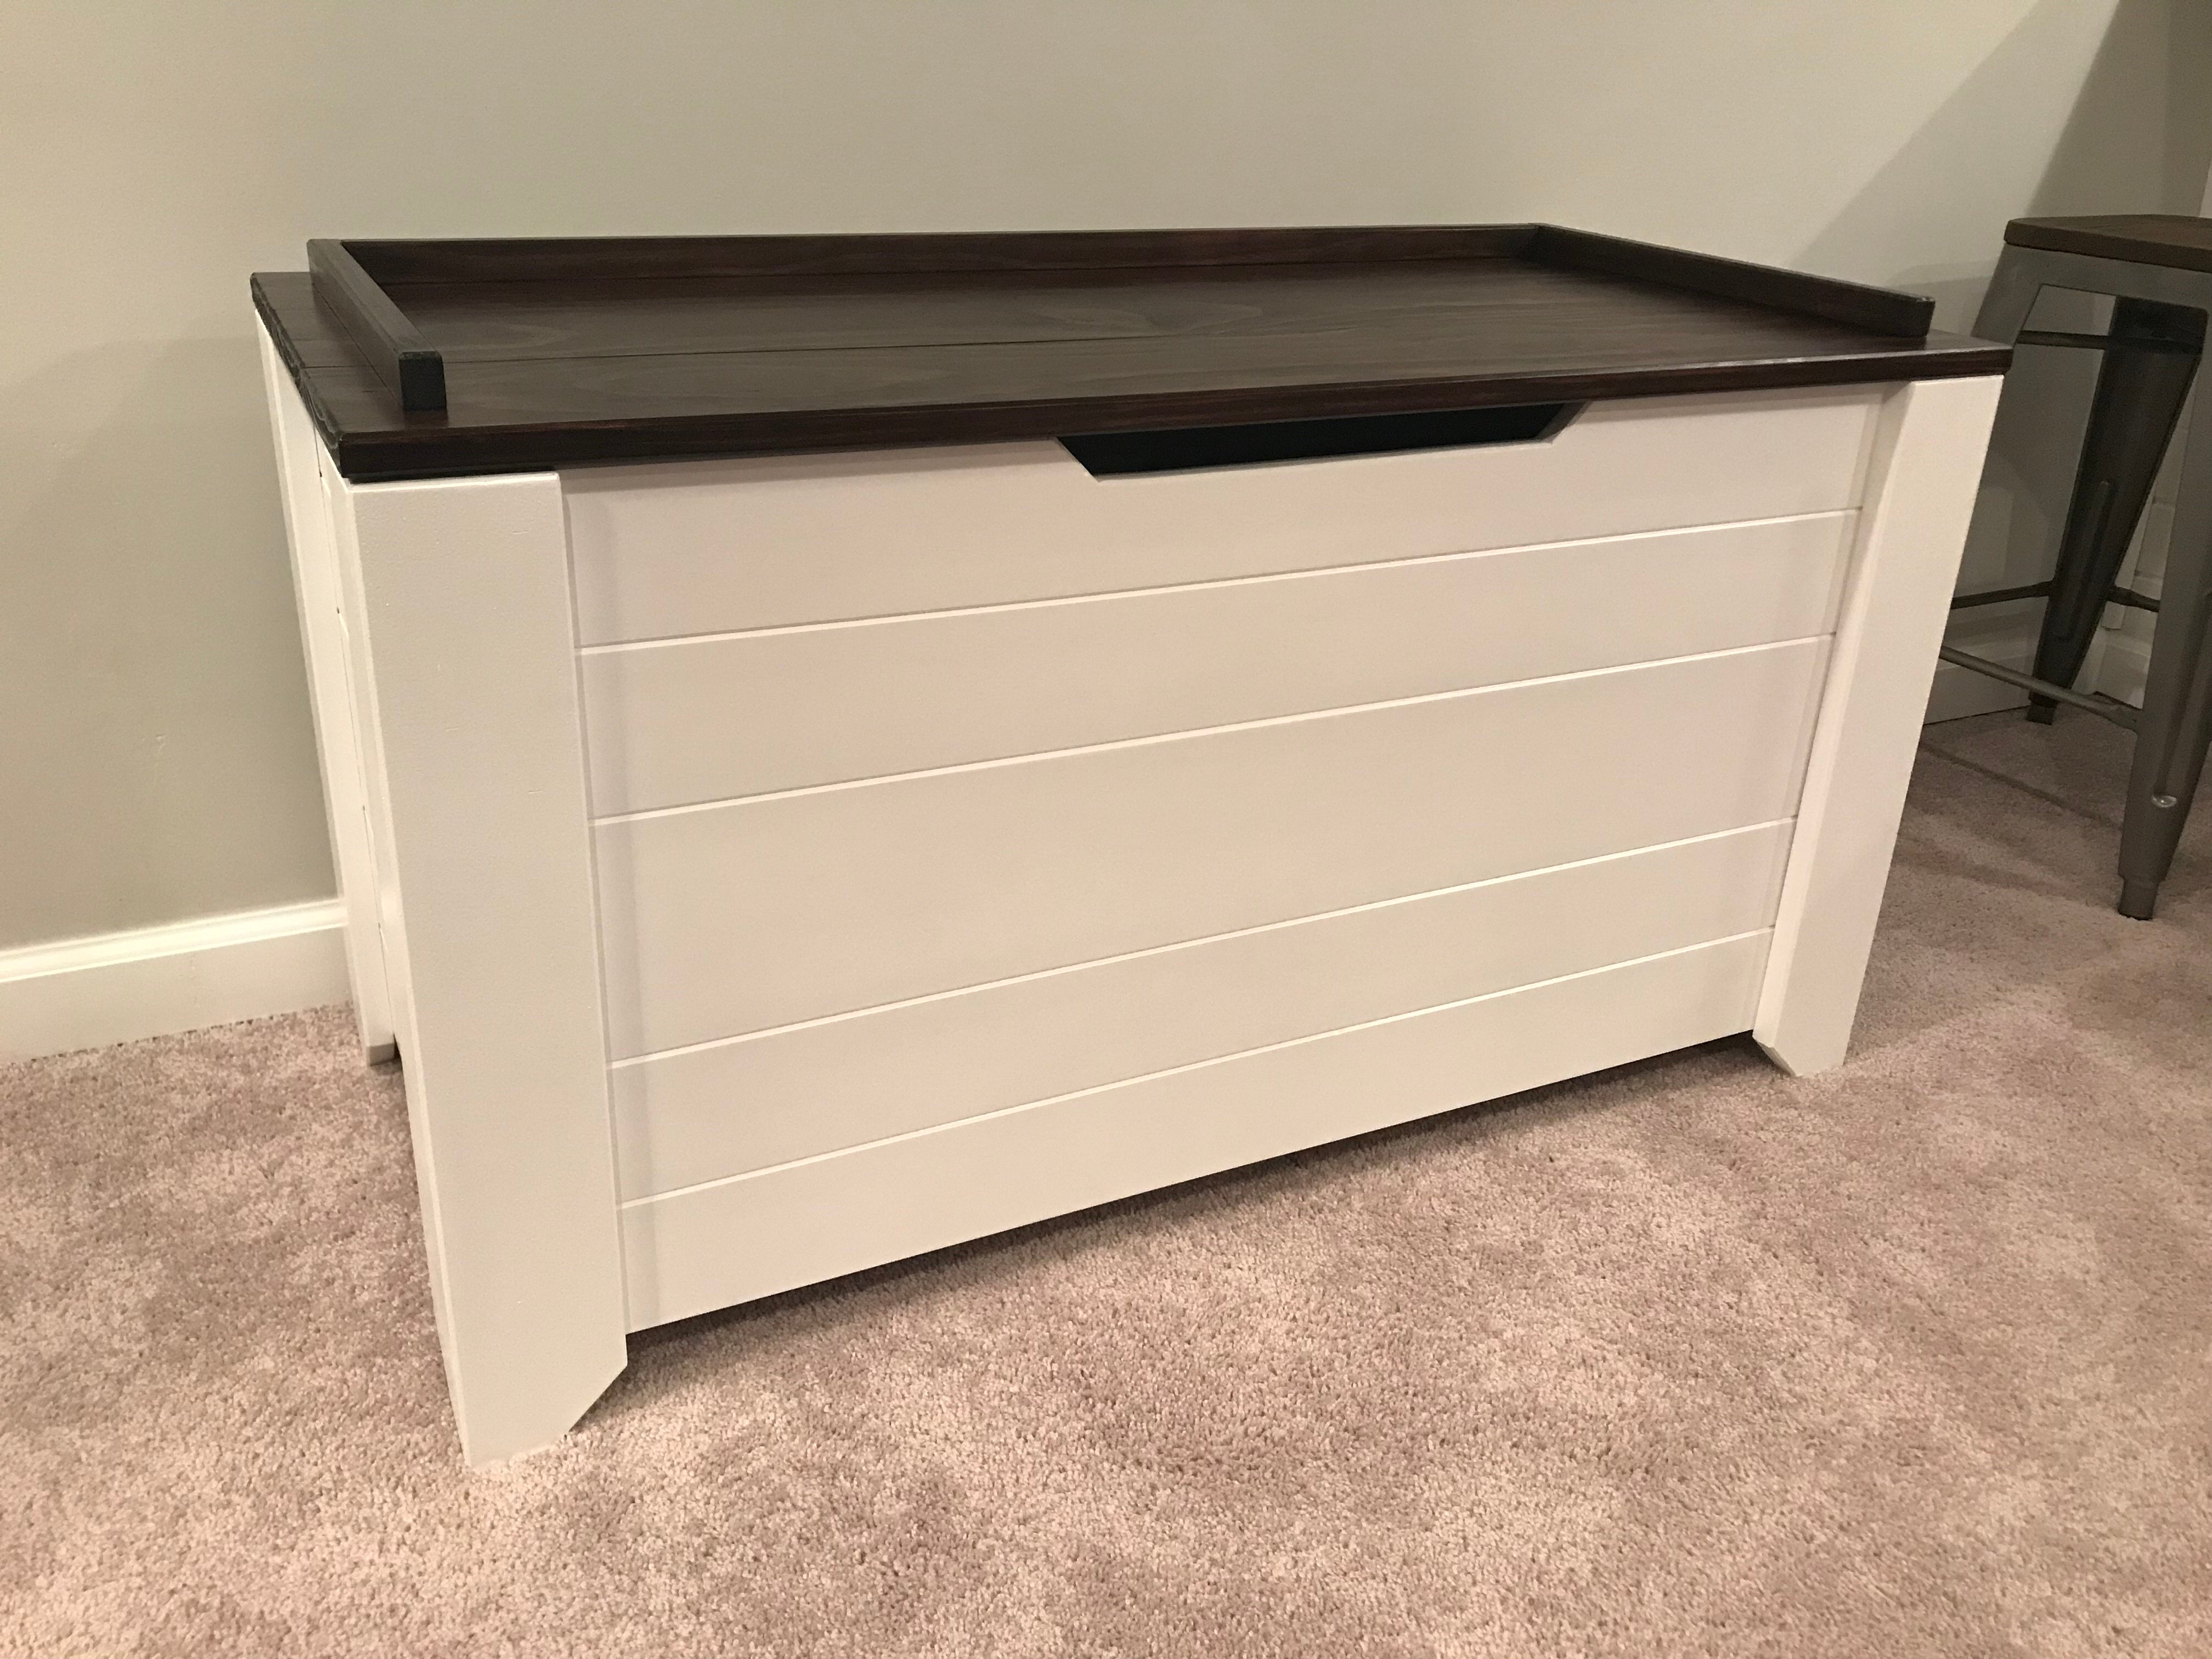
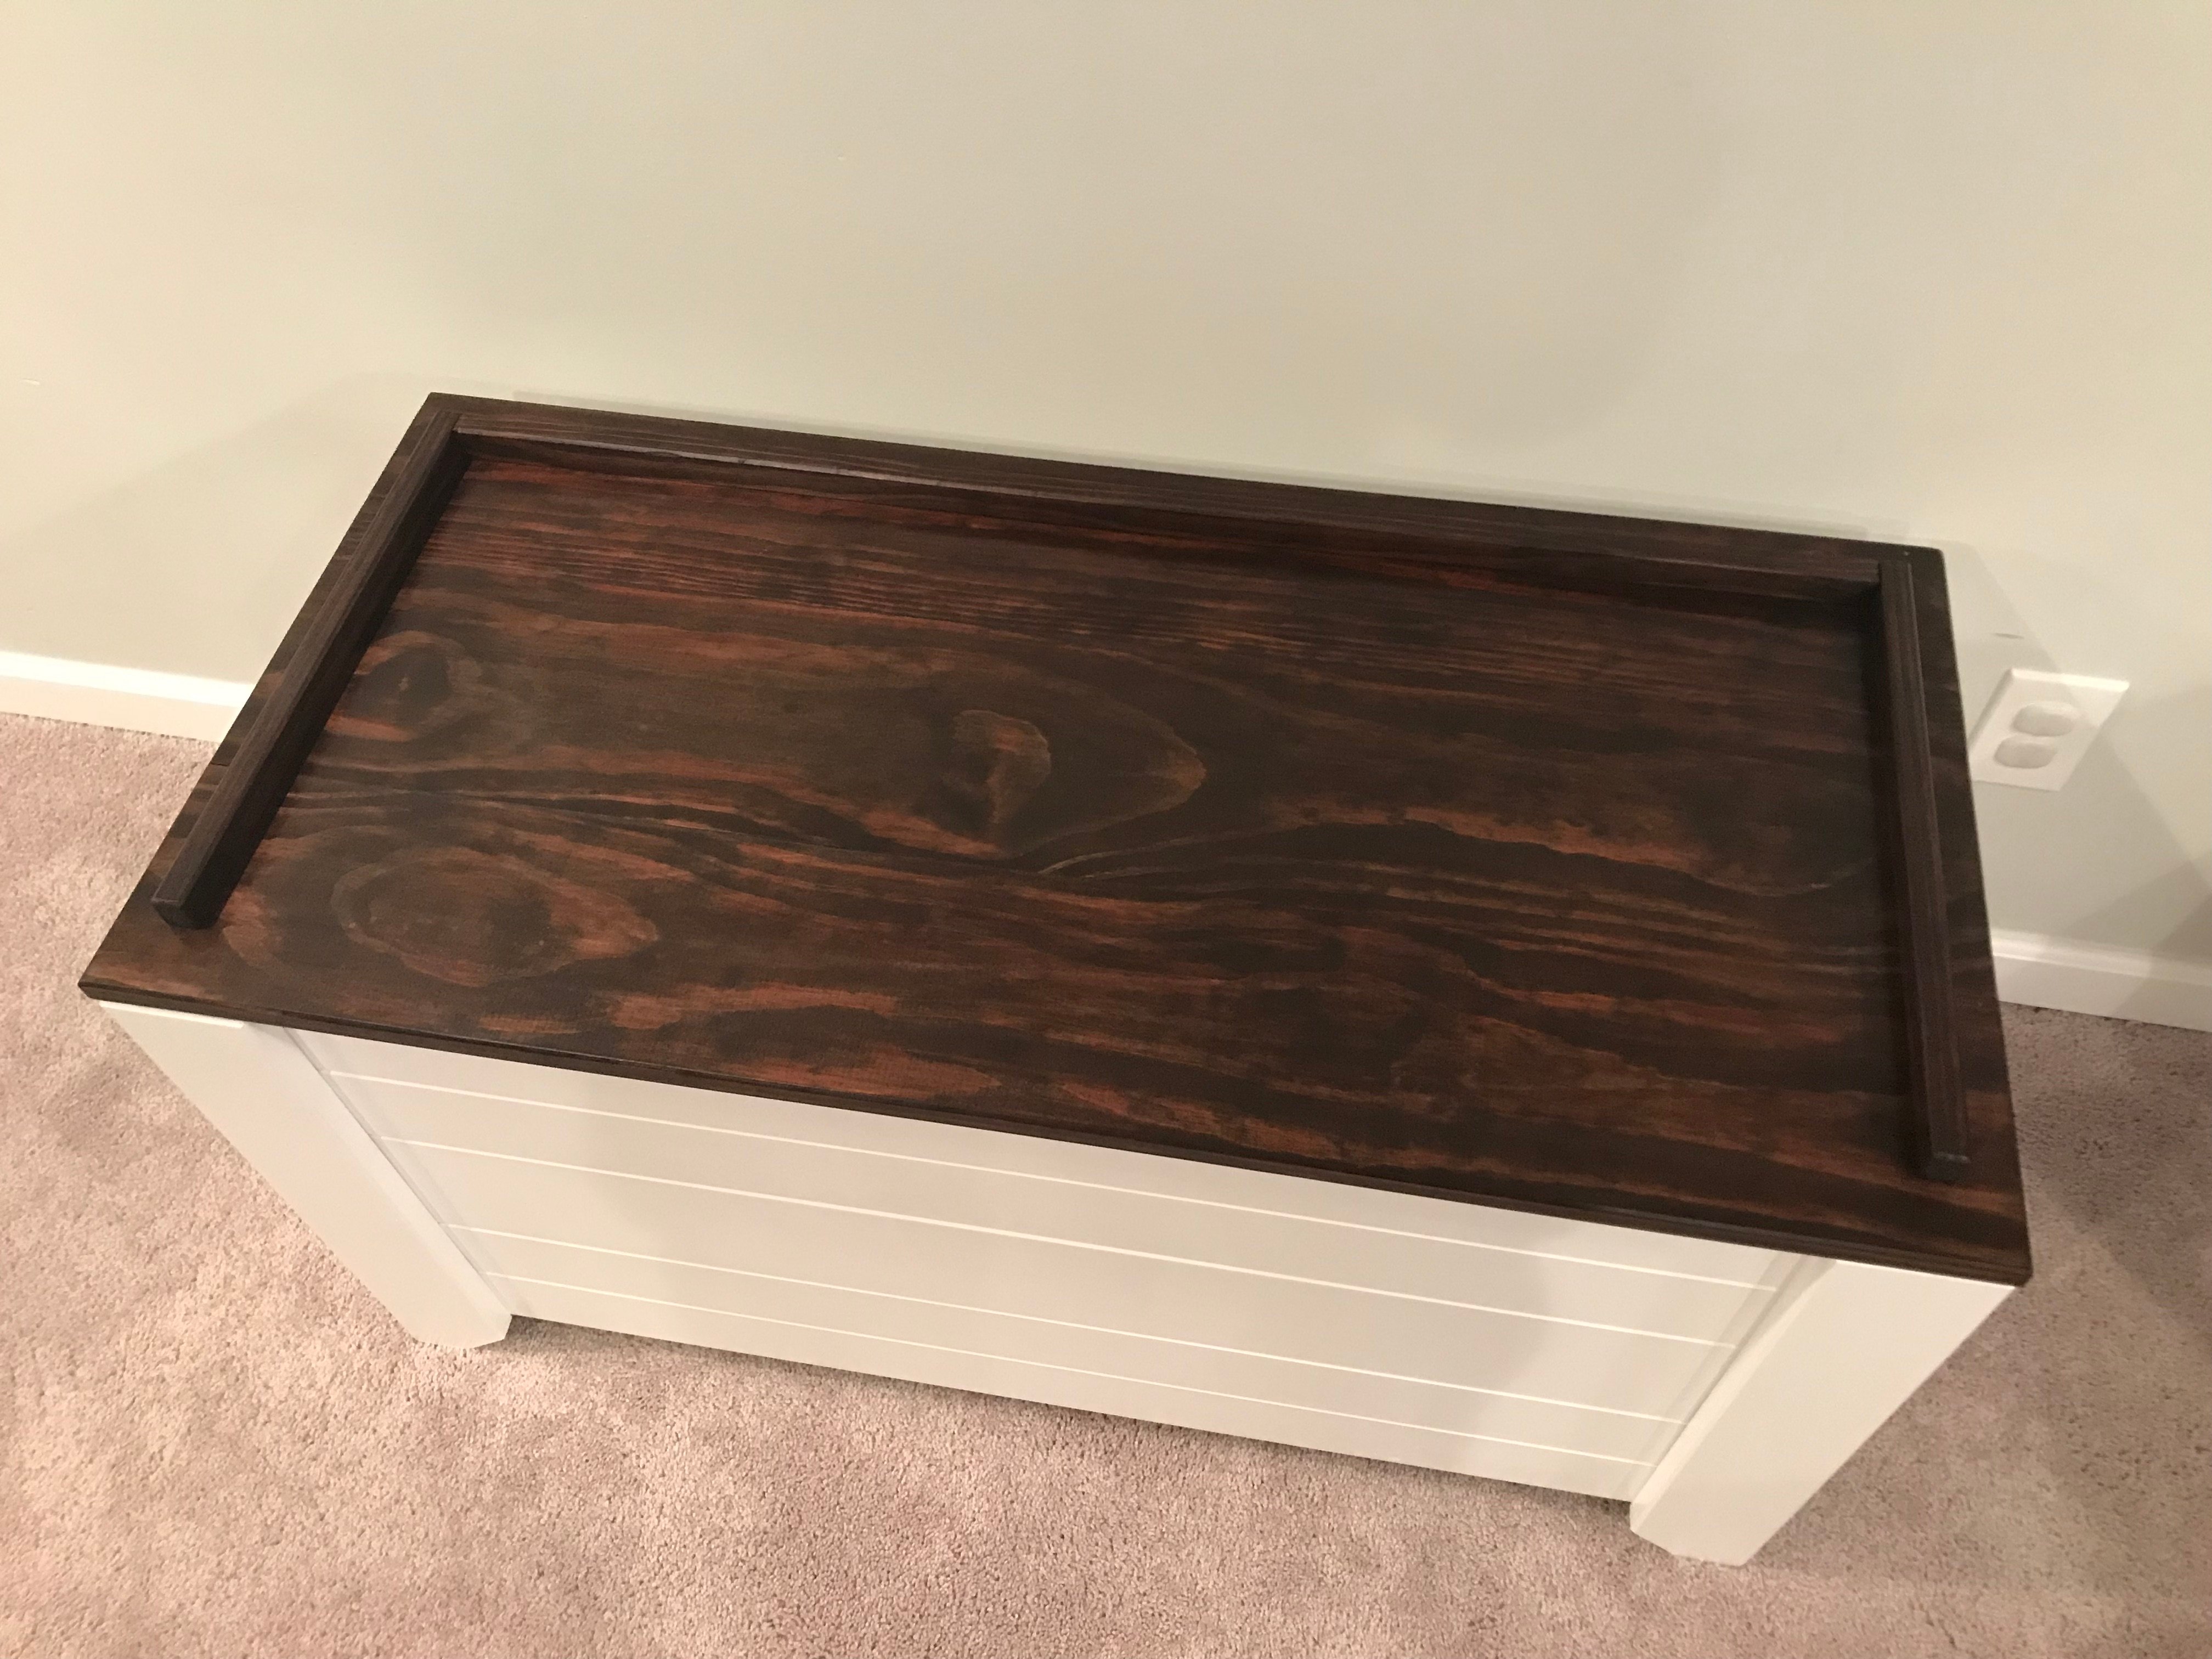
Picture of my own version of the Ana White Design linked here
http://www.ana-white.com/2017/01/DIY_furniture/farmhouse-style-toy-box-…
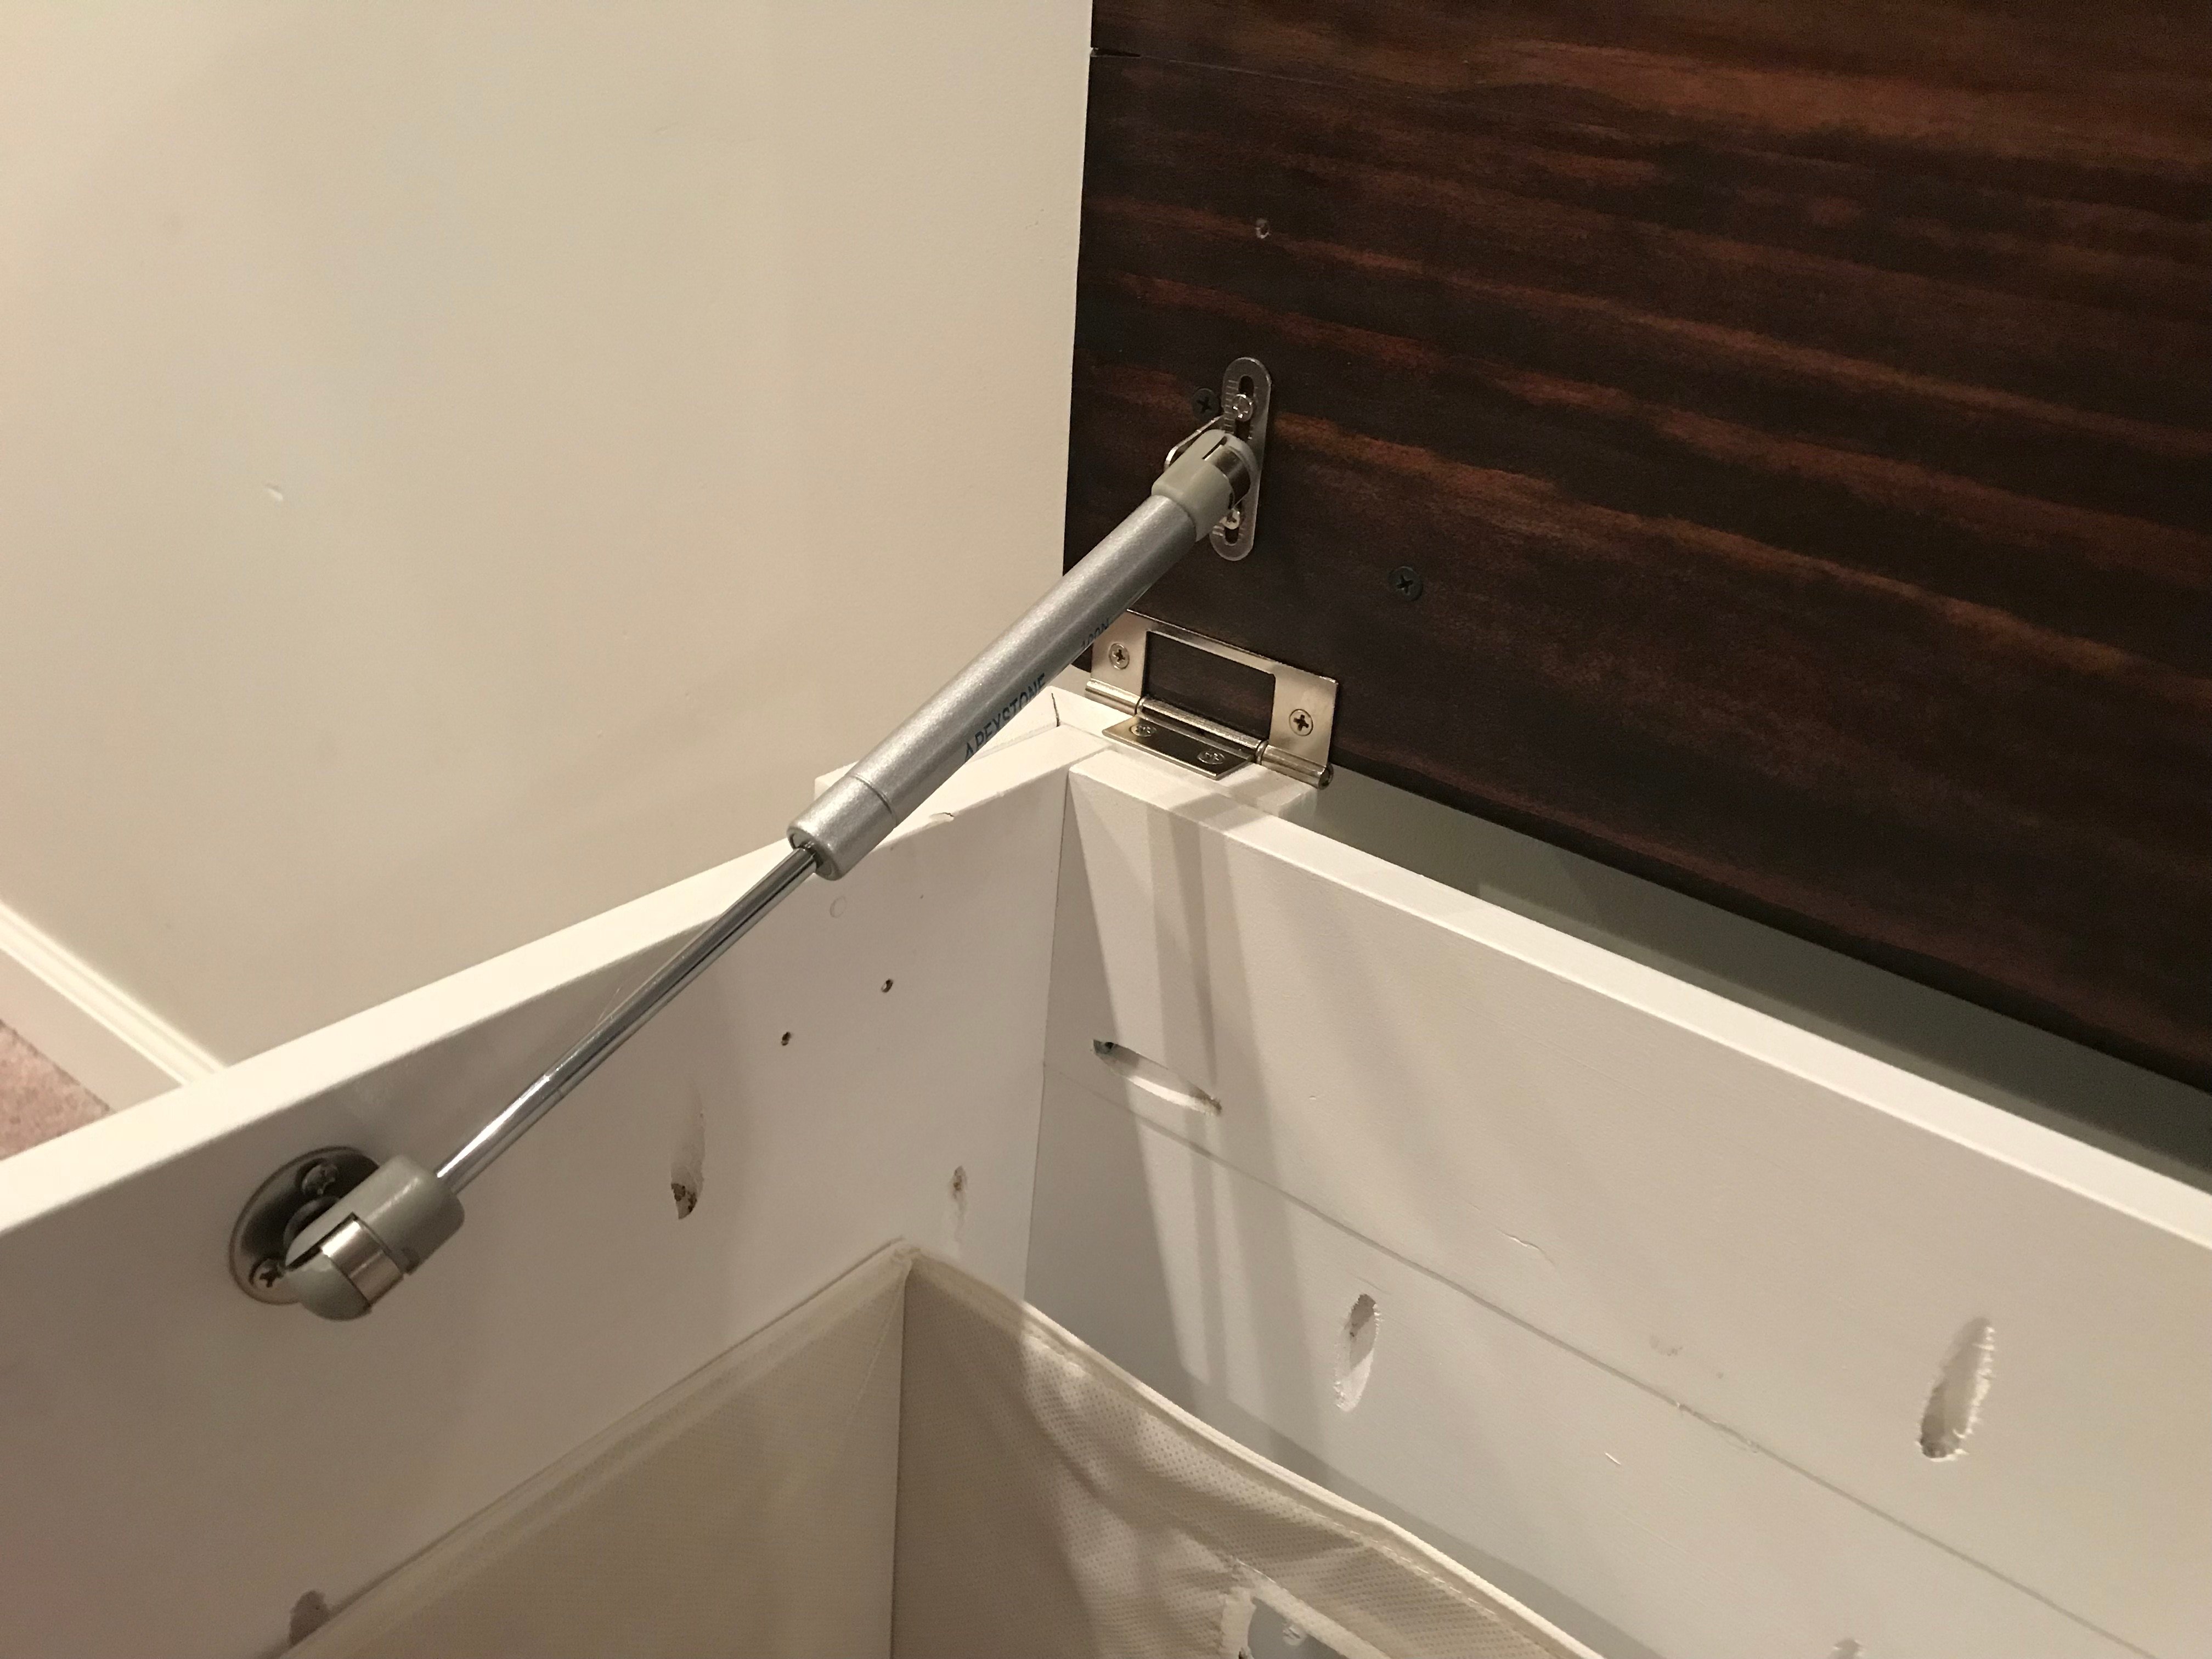
Added Gas Shocks from Amazon 100N/18lbs.

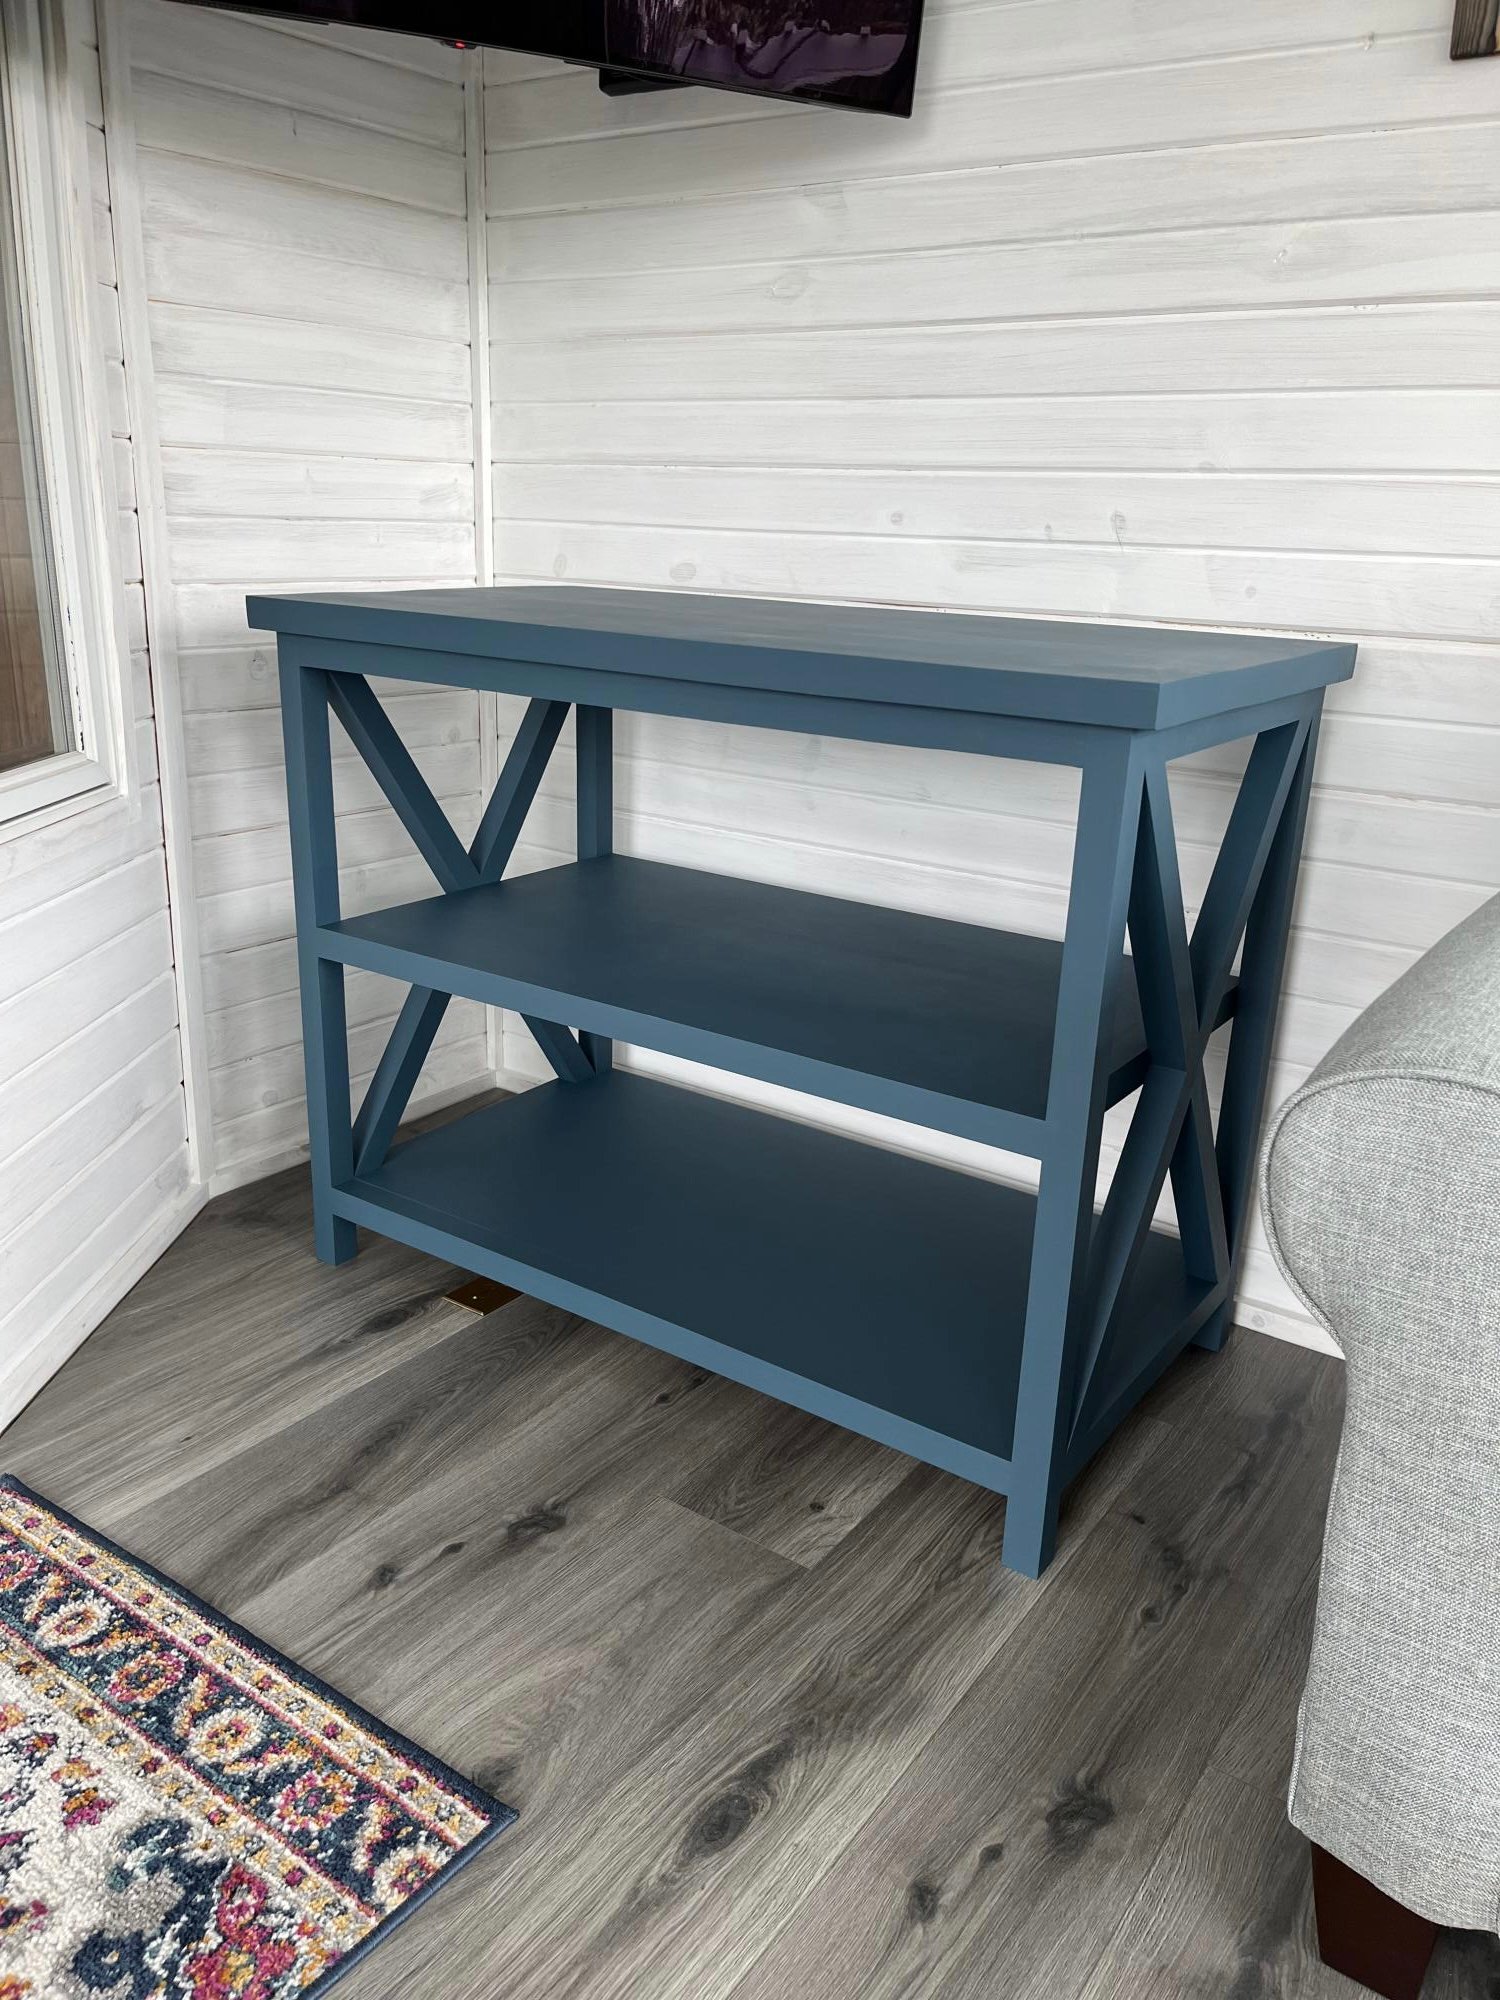
Built this from Ana White plans. Love how it looks in our four season room.

Fri, 04/21/2023 - 10:20
Gorgeous build and finish, well done! Thank you so much for sharing.
Thank you for the plans! Love the shelves!

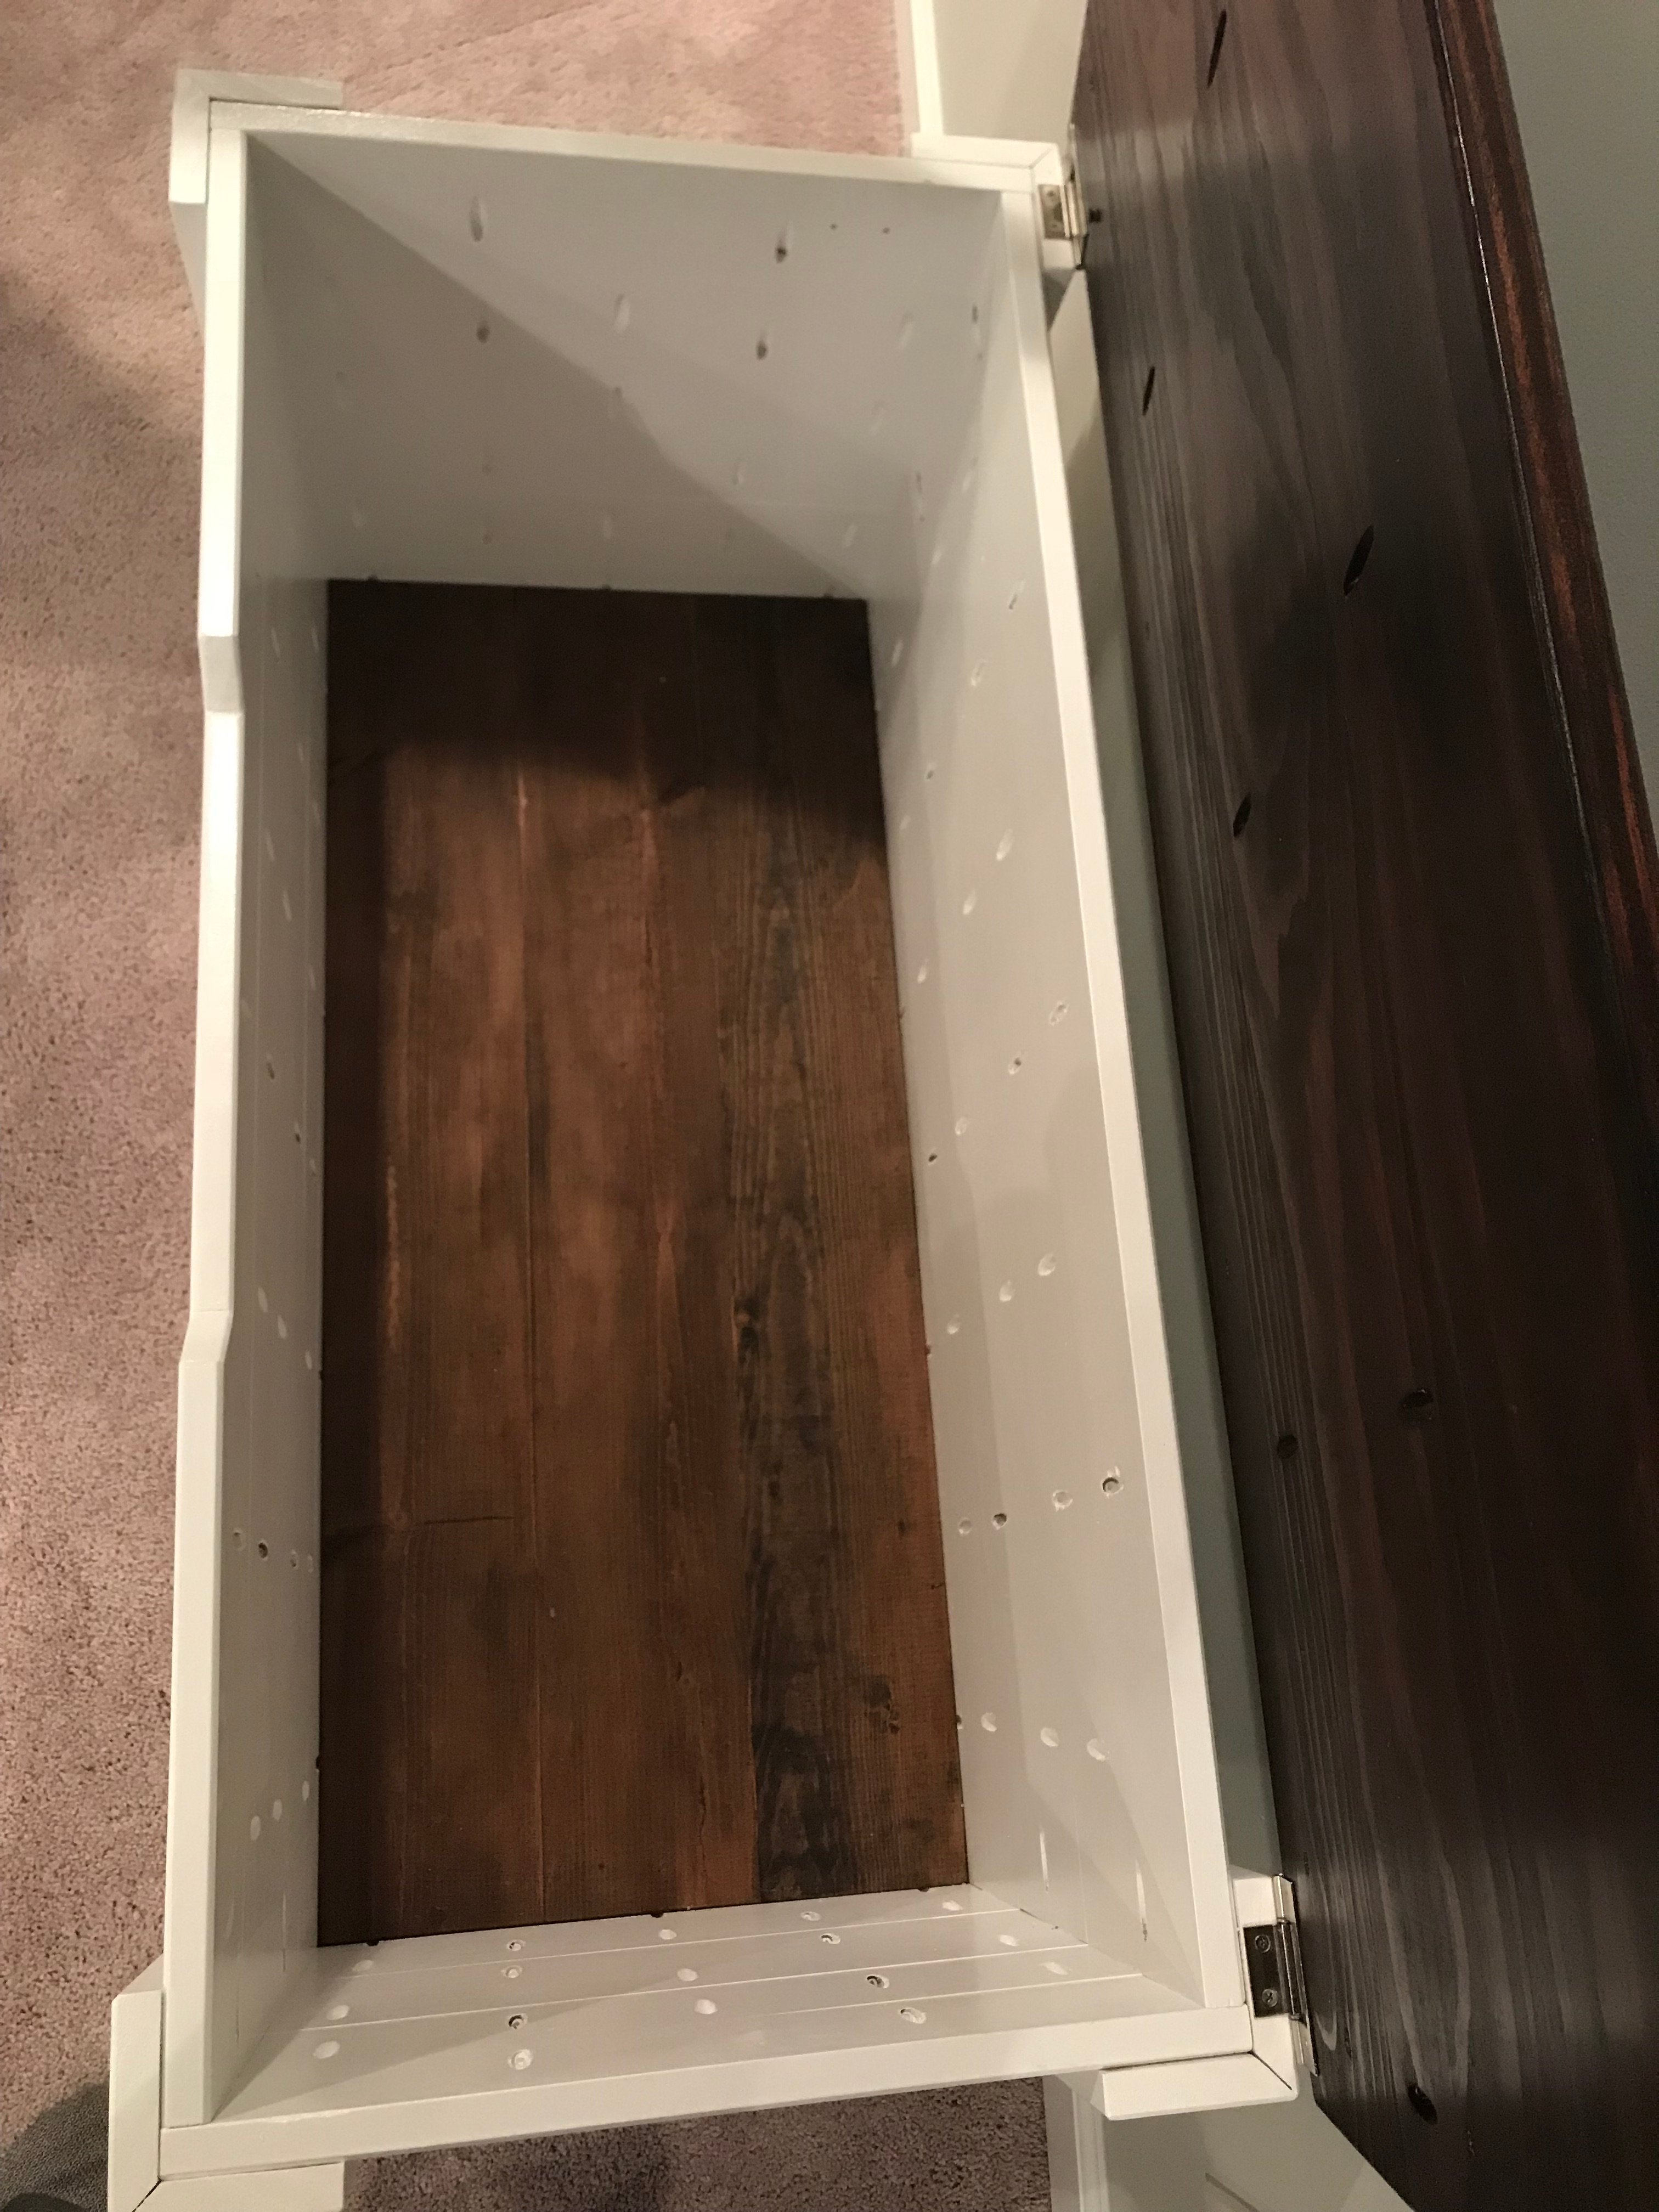
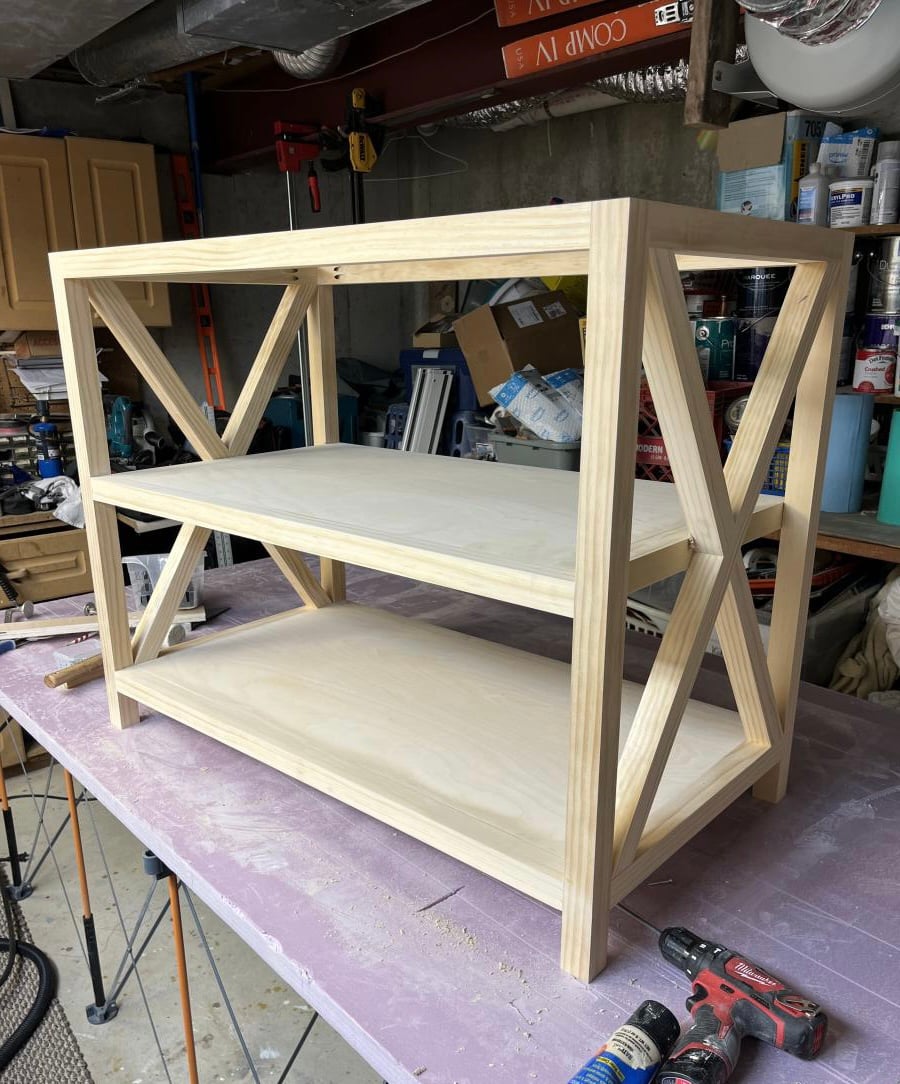
We knew we wanted to make this bookcase as soon as we saw it! I plan to put baskets and toys in it later, but for right now all books. The only difference to the original plan is that we put some plywood behind the bottom two shelves so that we could have a backing when we do use toys. My three year old loves to sit and go through all the board books at the bottom and clean up is a snap!
Sat, 03/03/2012 - 05:36
Great job, I plan on putting a back on mine as well, just haven't gotten around to it. It's in the basement, cut, ready to stain...
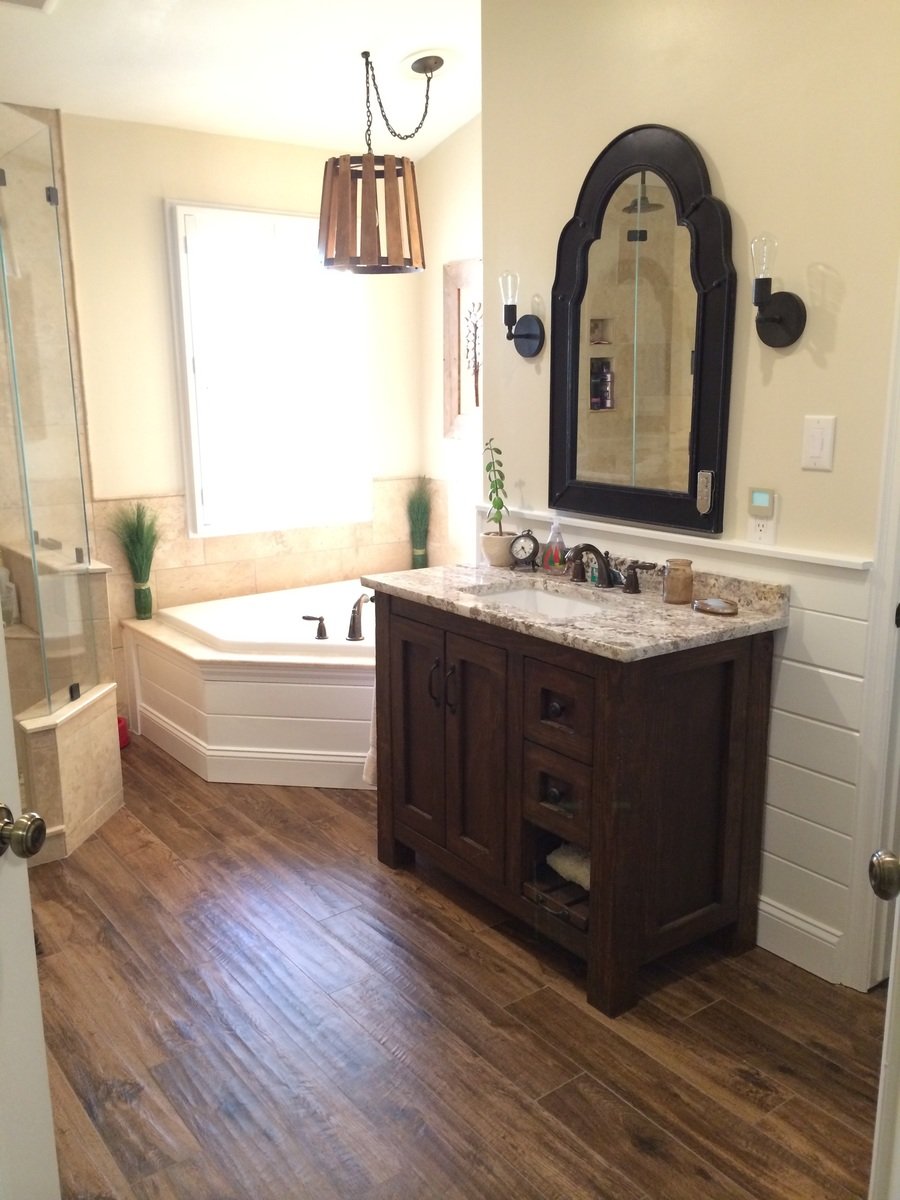
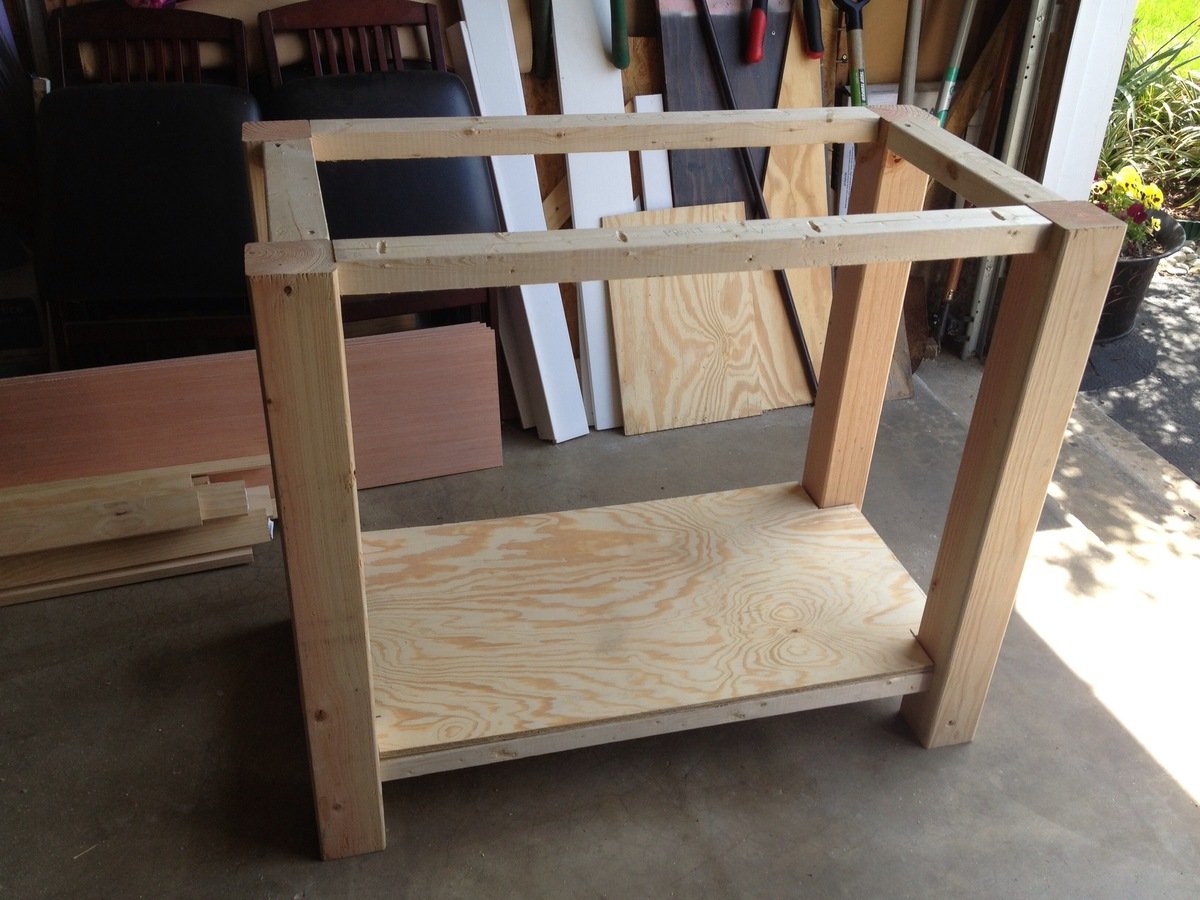
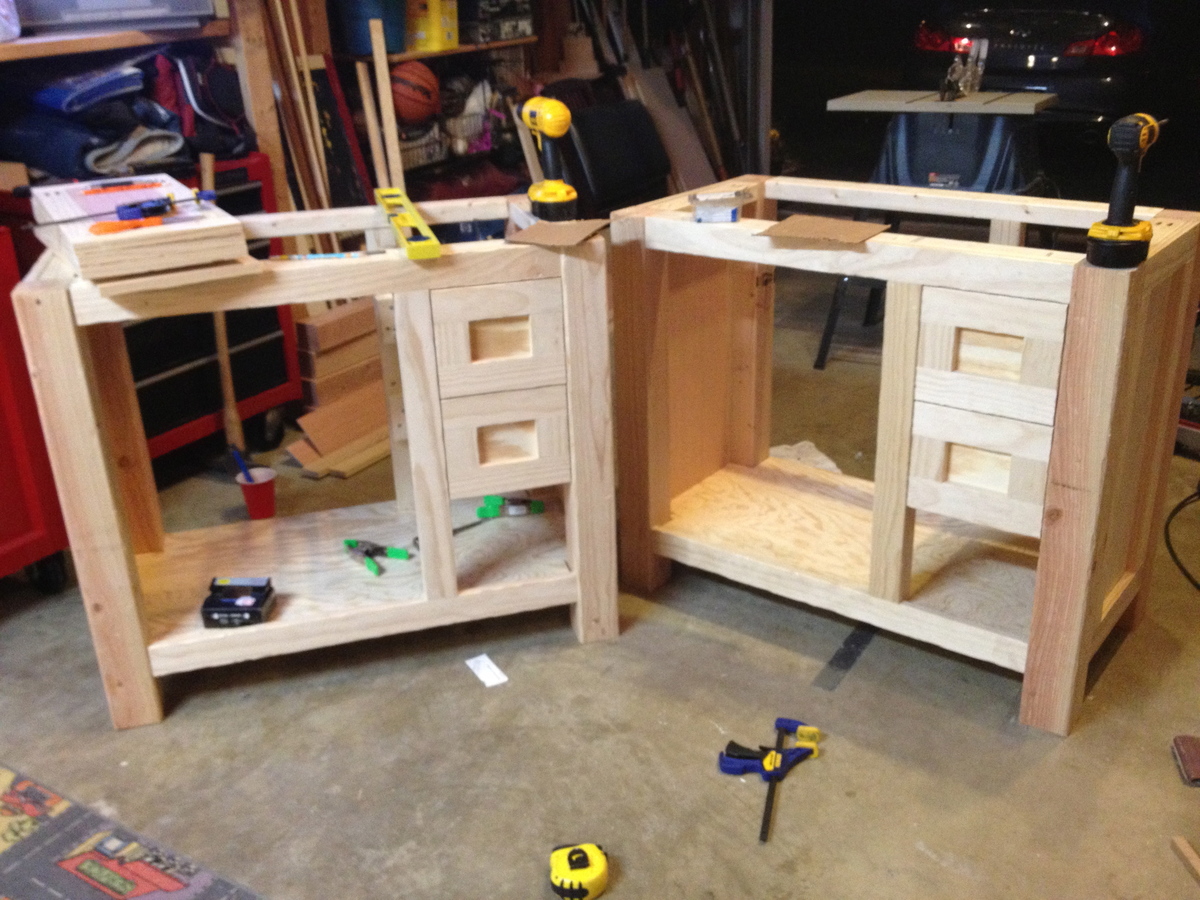
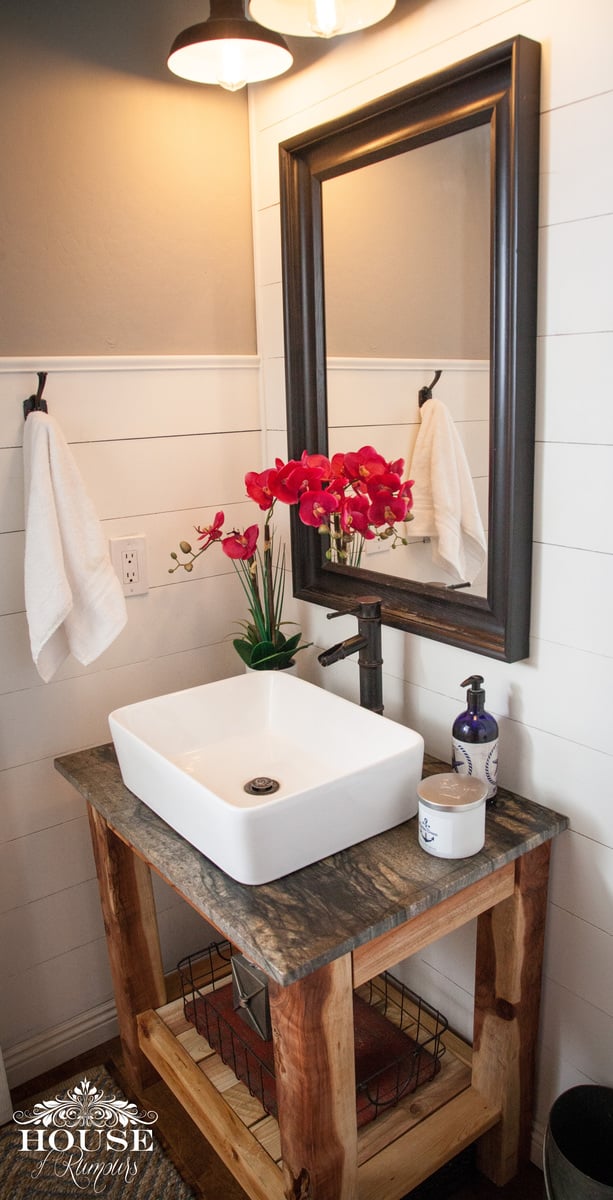
Rather than burning a few thousand on vanities for my bathroom remodel I decided to build them instead. The bottom shelf on the right slides out for a footstool so the kids can reach the sink.
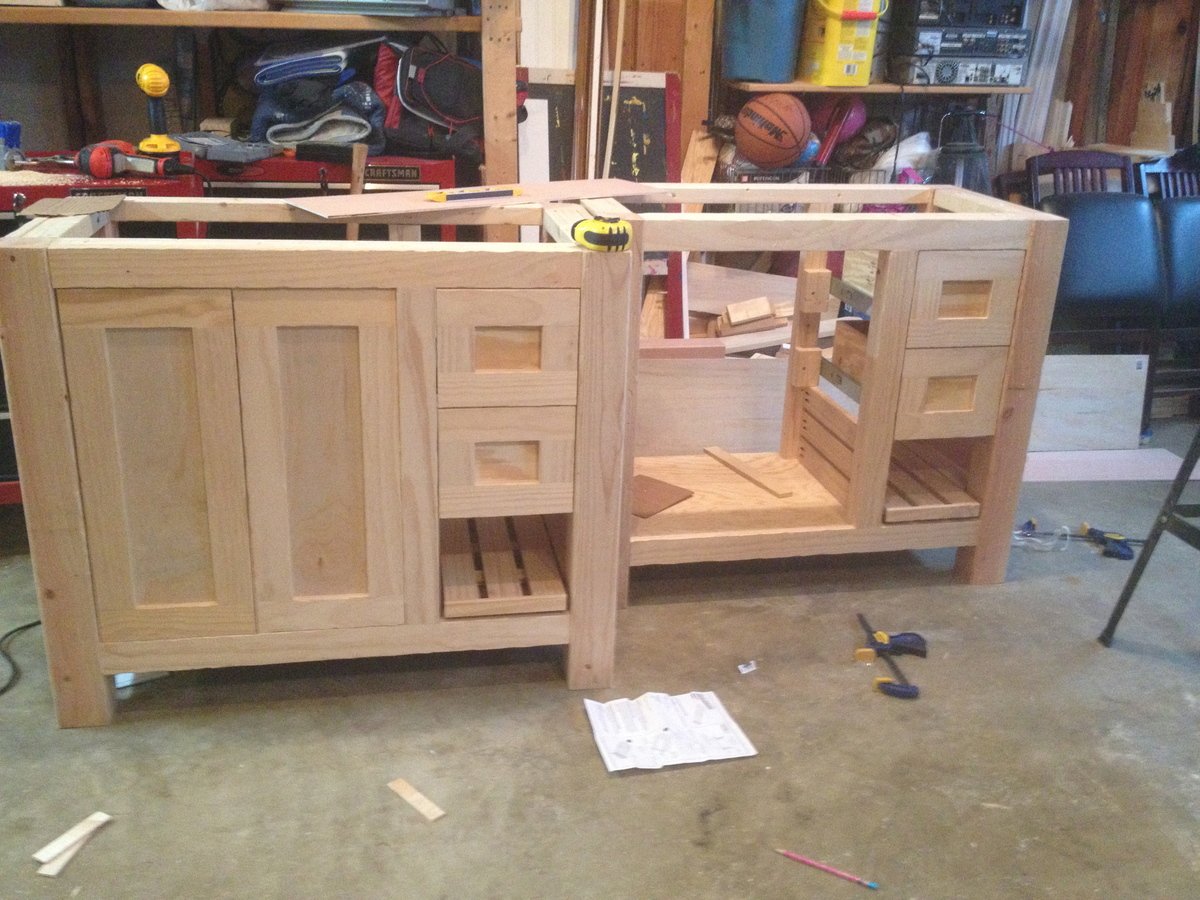

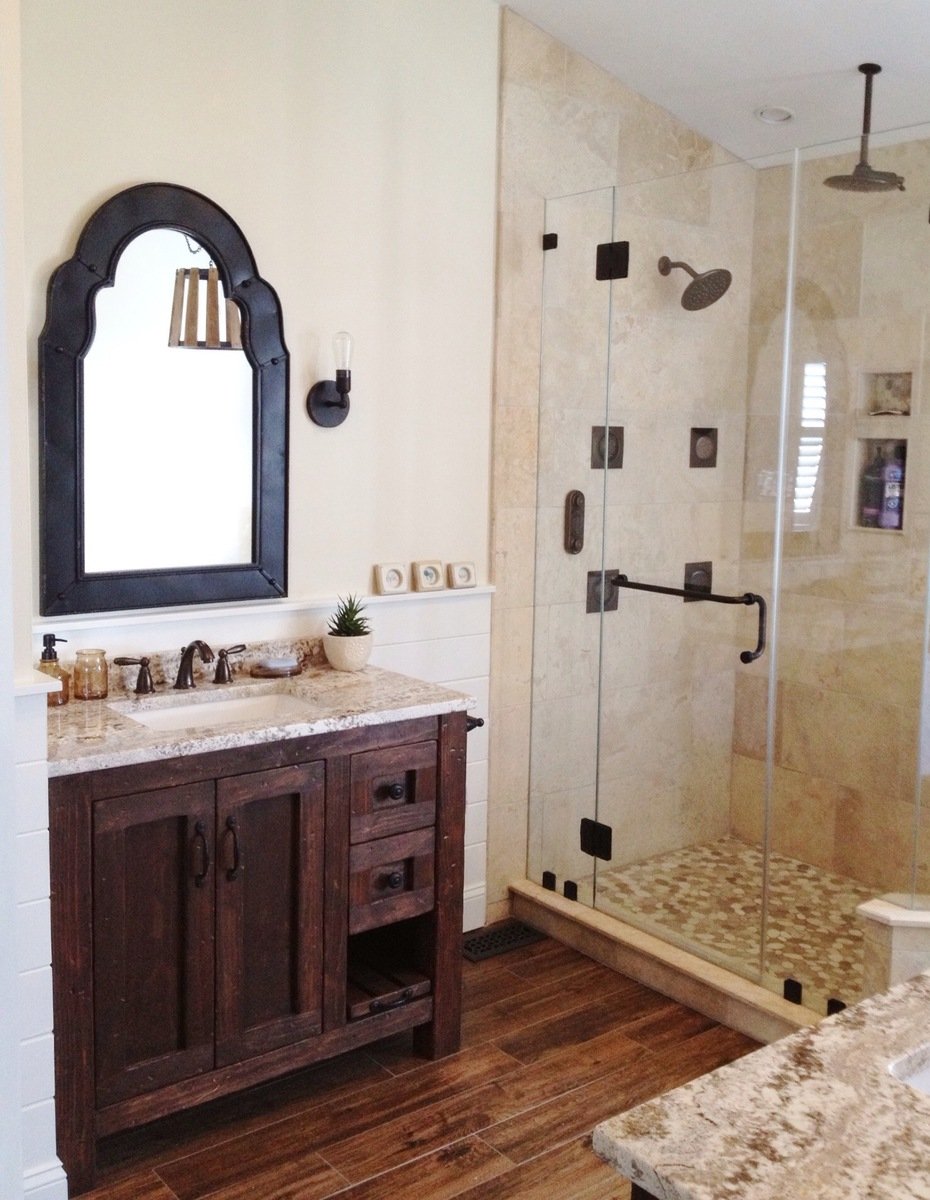

Sun, 01/05/2014 - 20:55
These are so beautiful -- they really look like high-end rustic pieces. The slide-out footstool is genius. The distressing is fantastic. I really love your pebble art as well.
Would you mind sharing the stain color?
Wed, 02/03/2016 - 17:48
I drew this up in sketchup as I was planning to build one like this, but decided to do something different. Is there a way to upload a sketchup file?
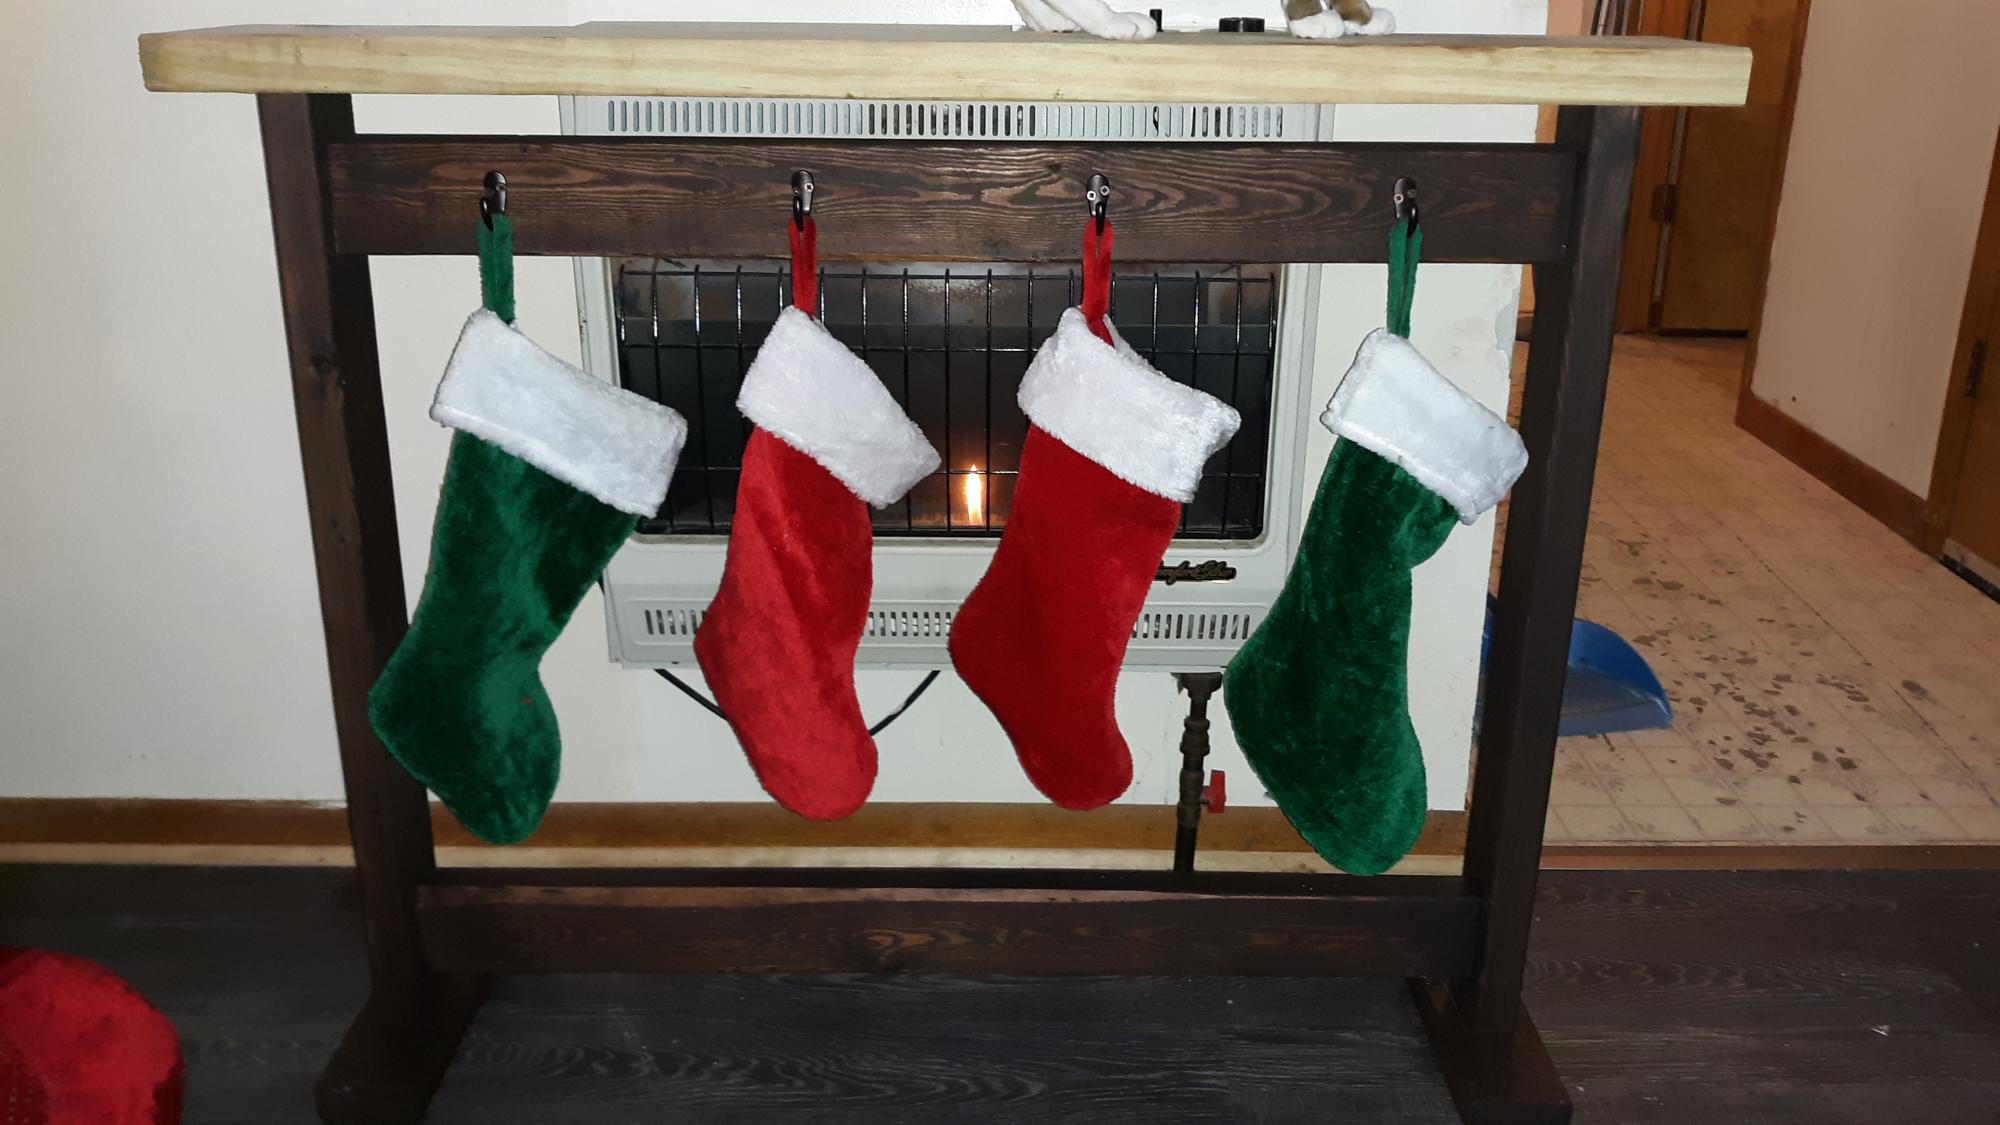
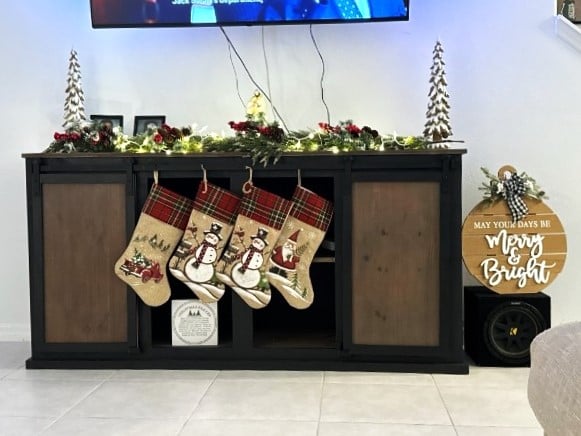
We have a vent-less gas wall heater, but had no mantel for hanging stockings. Thanks to the new plan, we have the perfect solution! We already had the 2X4s left over from the simple panel bed project, so we only purchased hooks and stains for this.
We shortened the width to accommodate 4 stockings instead of 5 (we cut the 2 cross pieces 9 inches shorter). We also decided to add a large 2X6 cap to mimic a mantel, which really seems to tie it all together much better. We love this and have ideas now on how to make slight changes so it will more easily slide "over"/around the wall heater
(yes, we are not keeping it that close while stockings are hung, so as to not risk catching fire)
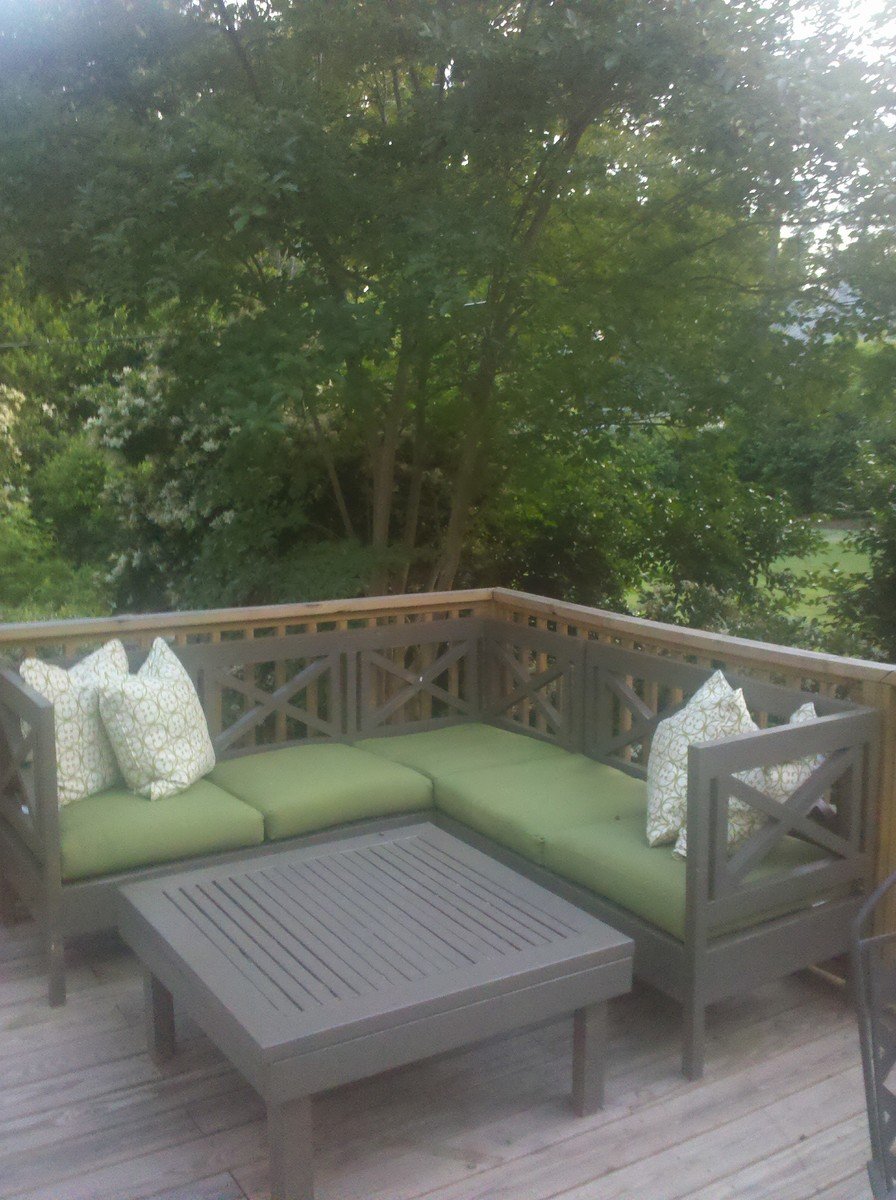
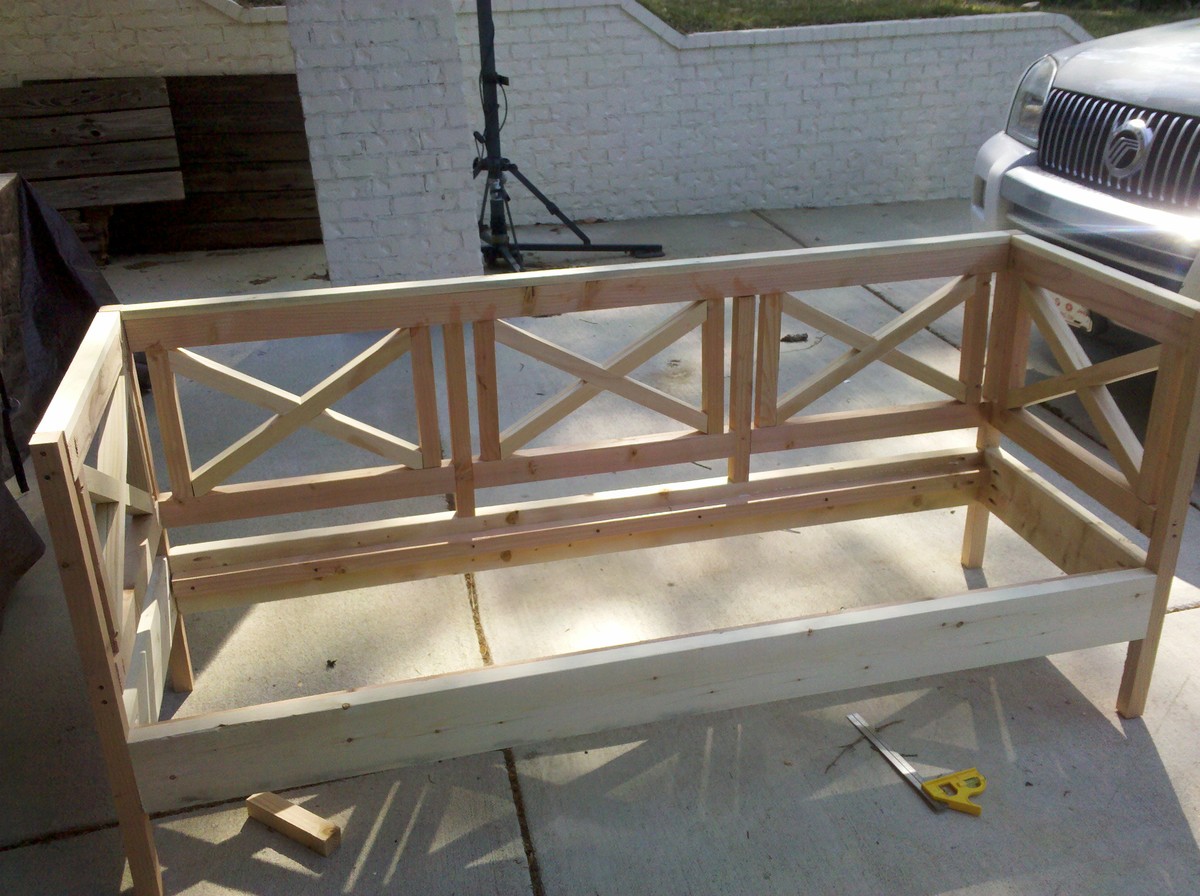
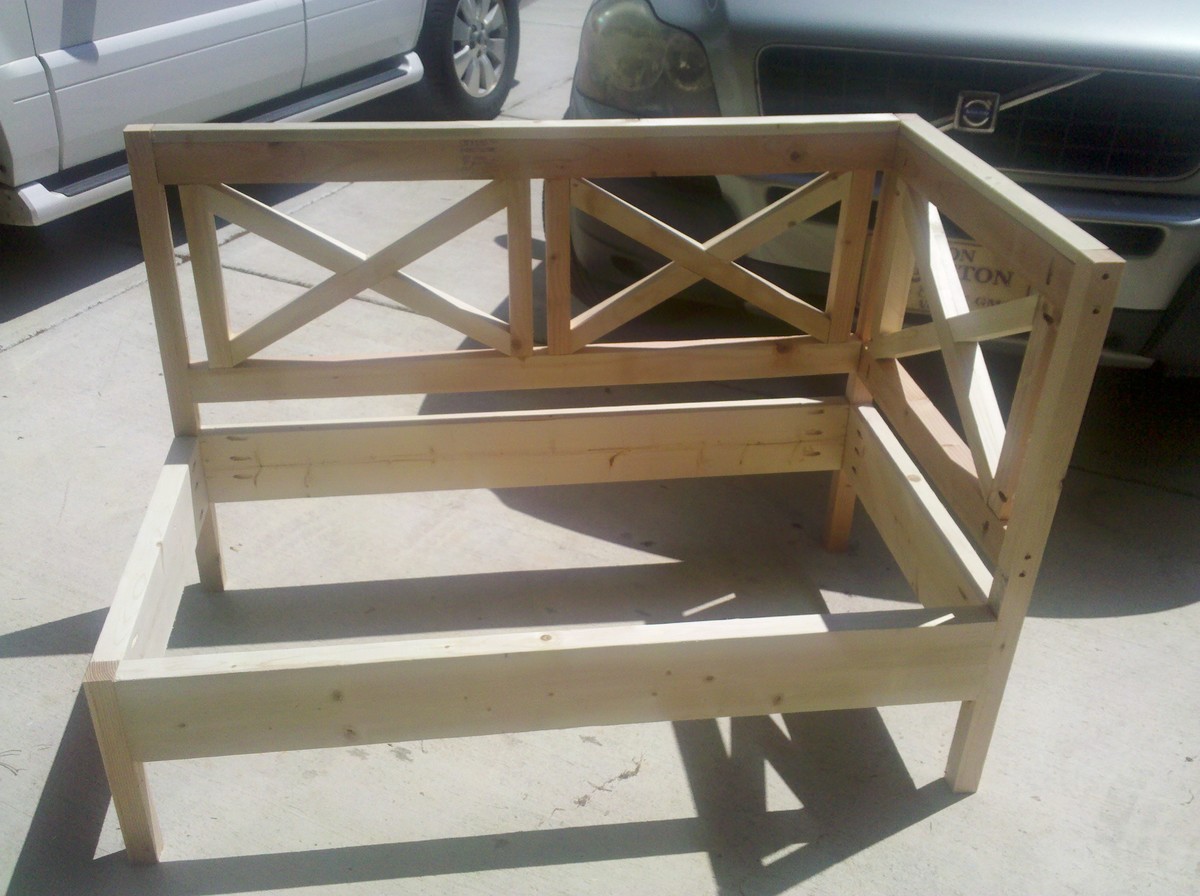
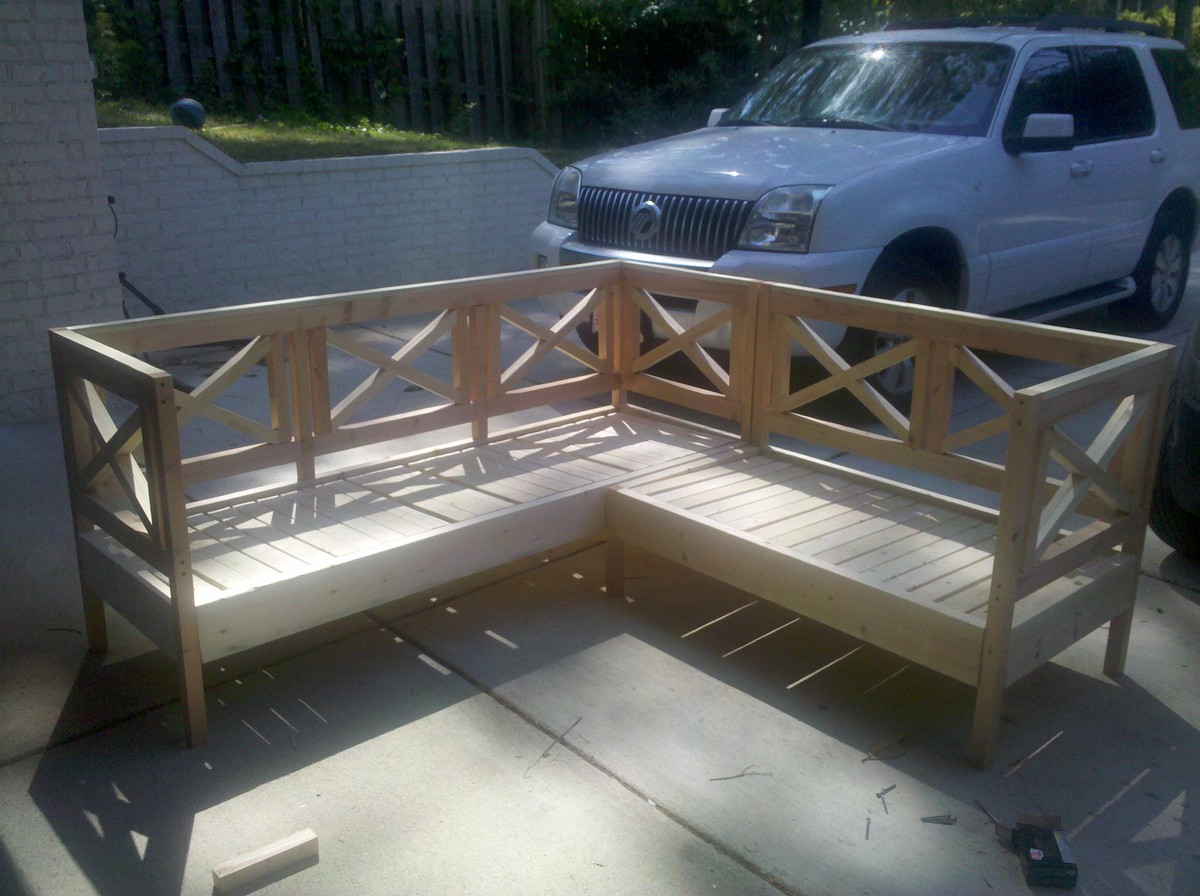
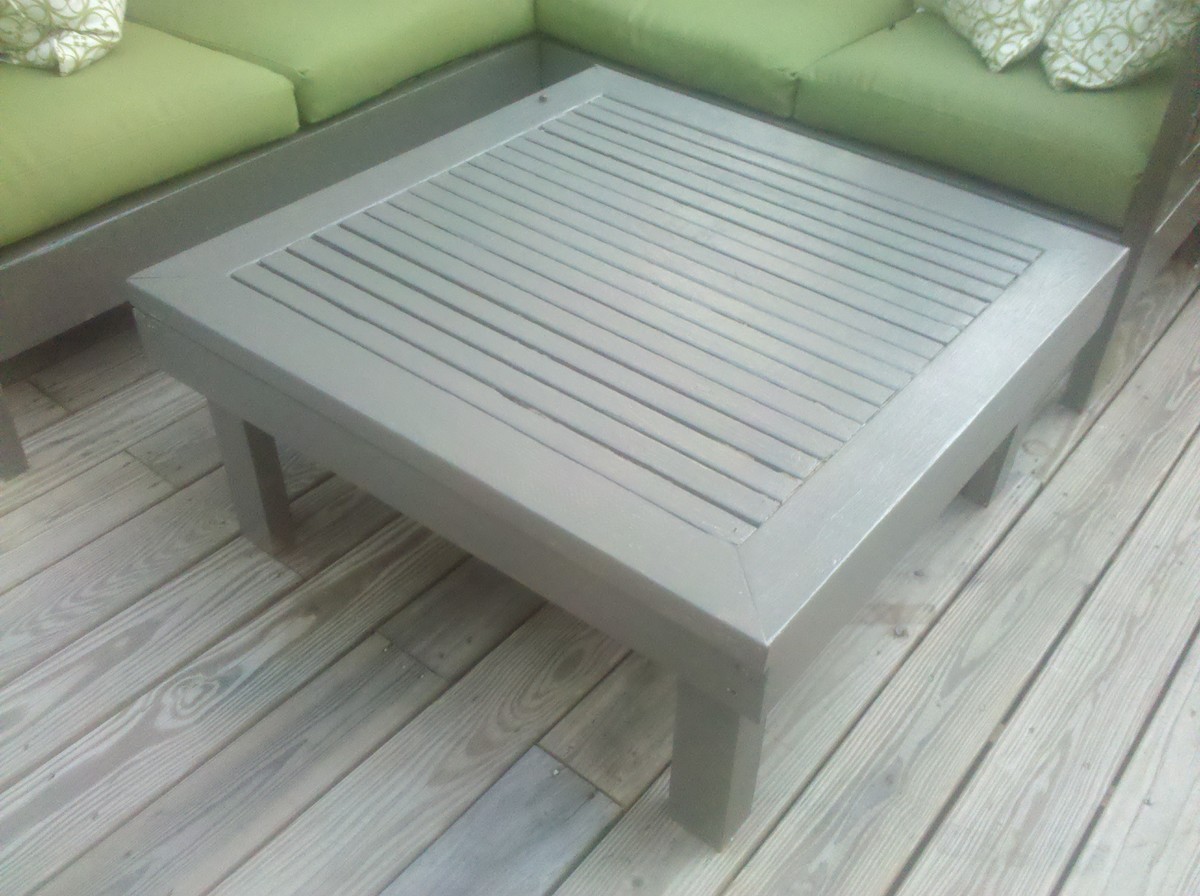
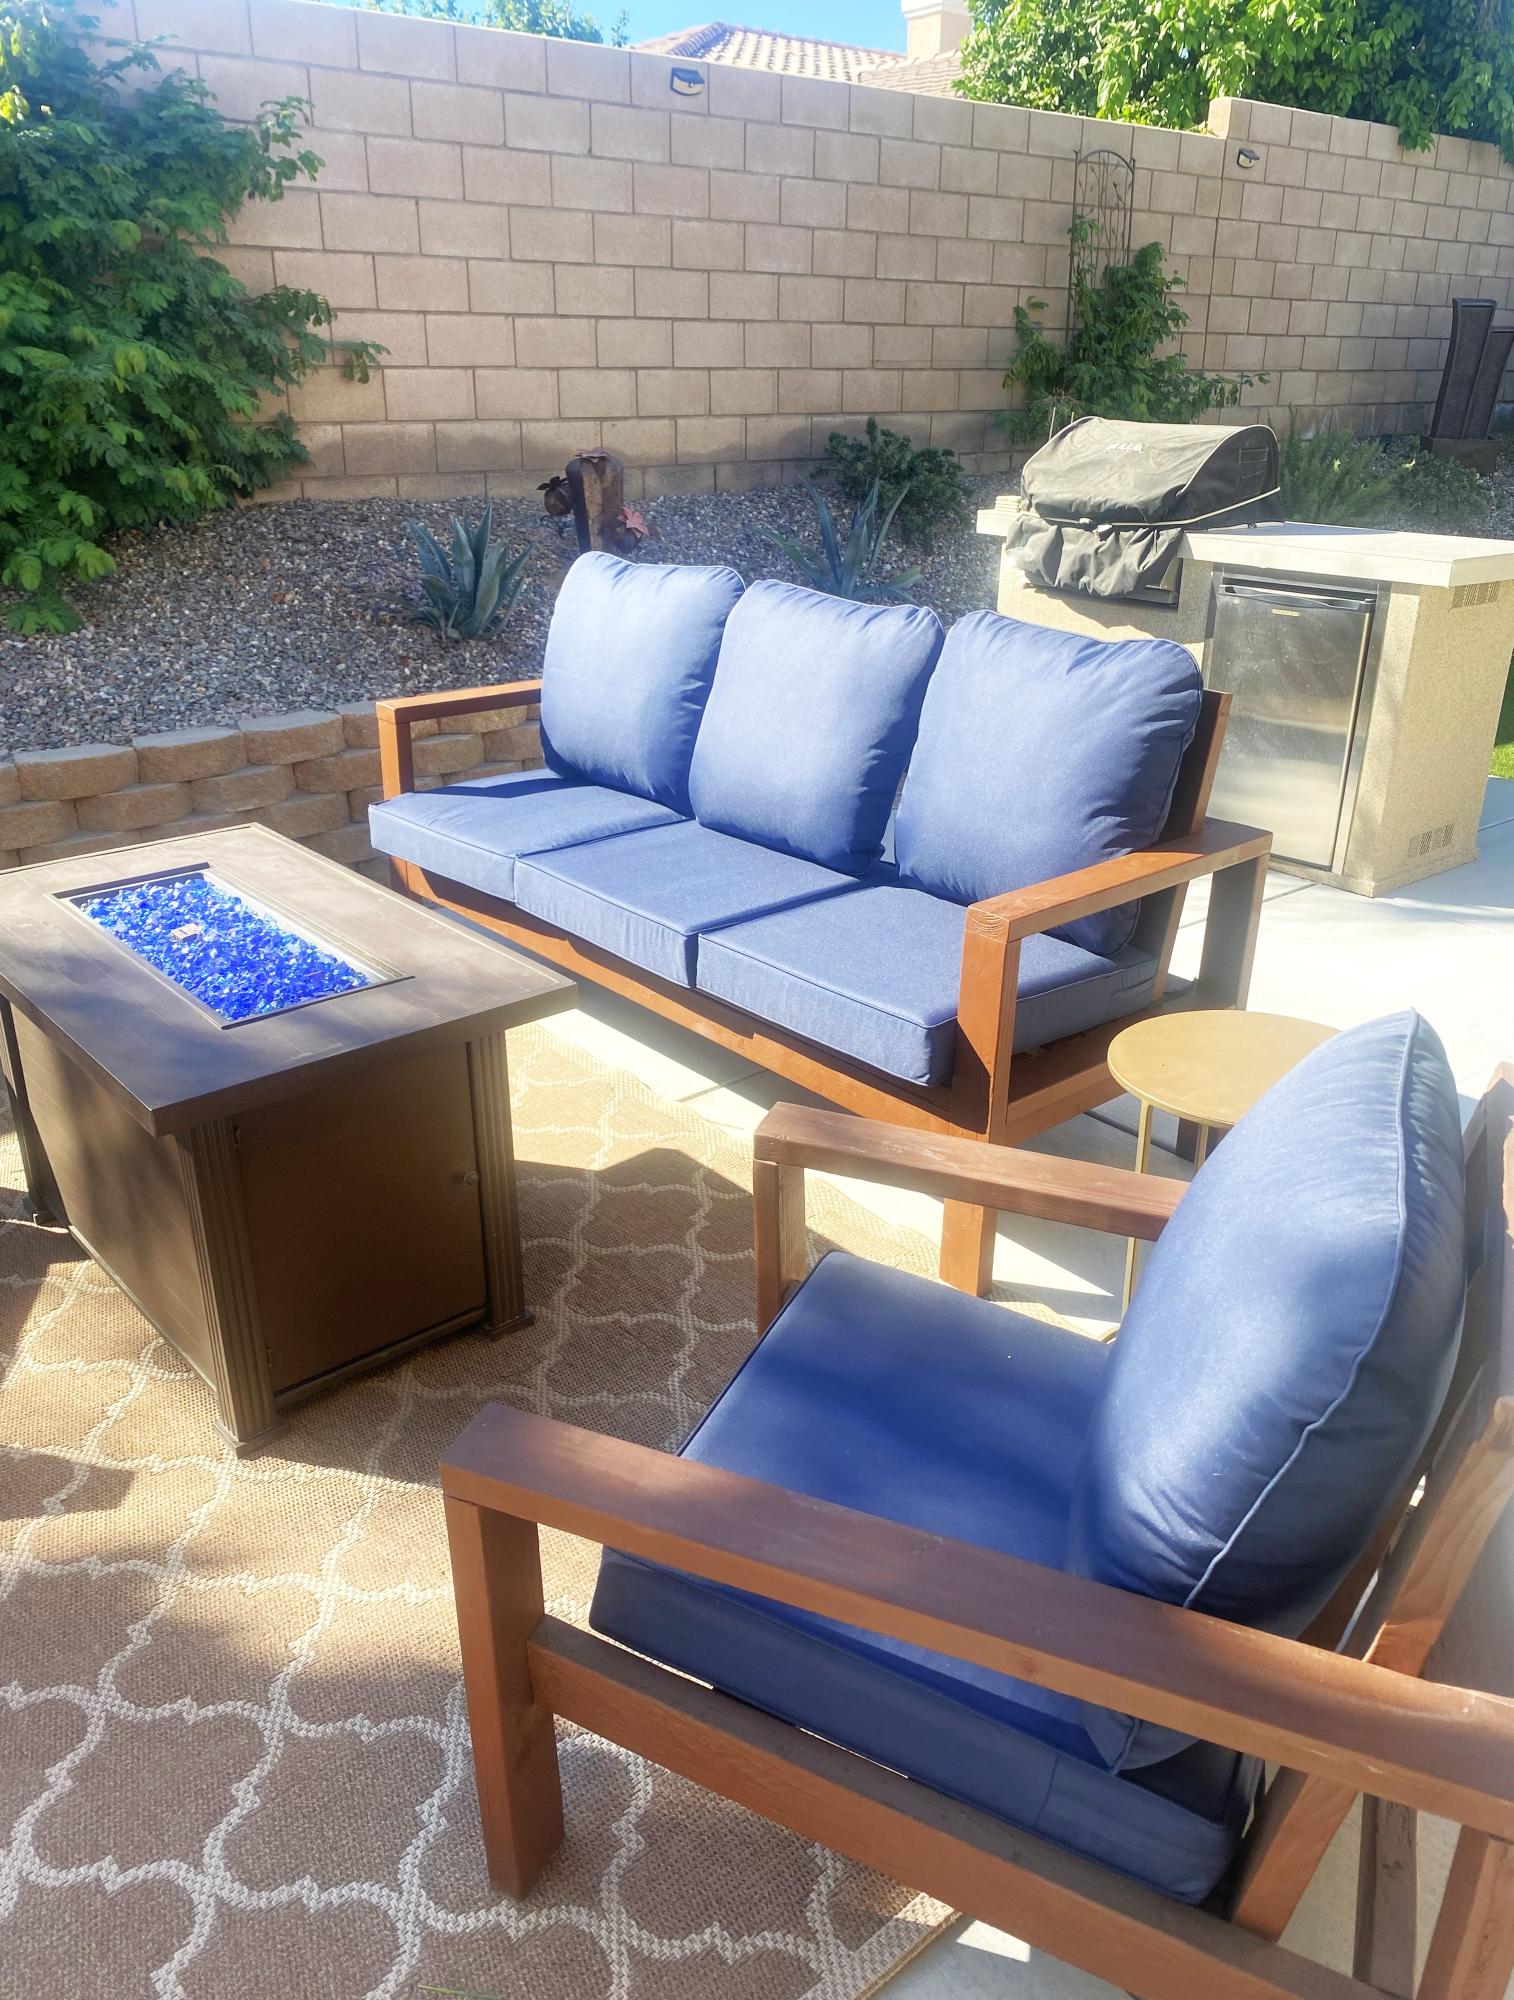
We have really been enjoying our new Weatherly Sectional that I built with Ana's fabulous plans! I love the way it fits perfectly in the little corner of our deck.
I only made a few simple modifications:
1. I added an arm to the loveseat, as we wanted an "L" configuration and not a "U"
2. I added at least twice as many 1x3's for the seat slats, as I wanted to be able to sit on the furniture when the cushions were stored inside. I put about a 3/4" space between the slats for water drainage.
I made a 36" x 36" ottoman/coffee table out of scraps & it fits perfectly.
I bought the cushions from the Improvements catalog and they fit great. They are not as nice as the ones from RH, but they were about $40 each and were 20% off with free shipping. Here is the link: http://www.improvementscatalog.com/deep-seat-chair-cushion-24-1-2f2-22x…
Thu, 08/23/2012 - 00:35
You actually make it seem really easy together with your
presentation but I to find this topic to be actually something
that I feel I'd by no means understand. It seems too complex and extremely vast for me. I am looking forward in your subsequent publish, I'll attempt to get the grasp of it!
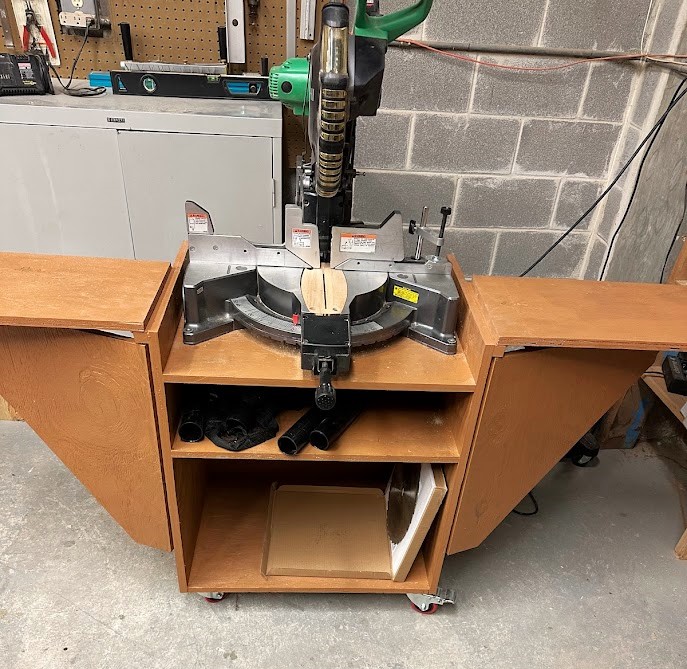
A friend and I built the mobile miter saw stand from your plans. We live in a retirement community and use the saw in our woodworking shop.
A simple design wood-stained with vinegar and steel wool and black. It's a 6ft design.
Dale Mulert
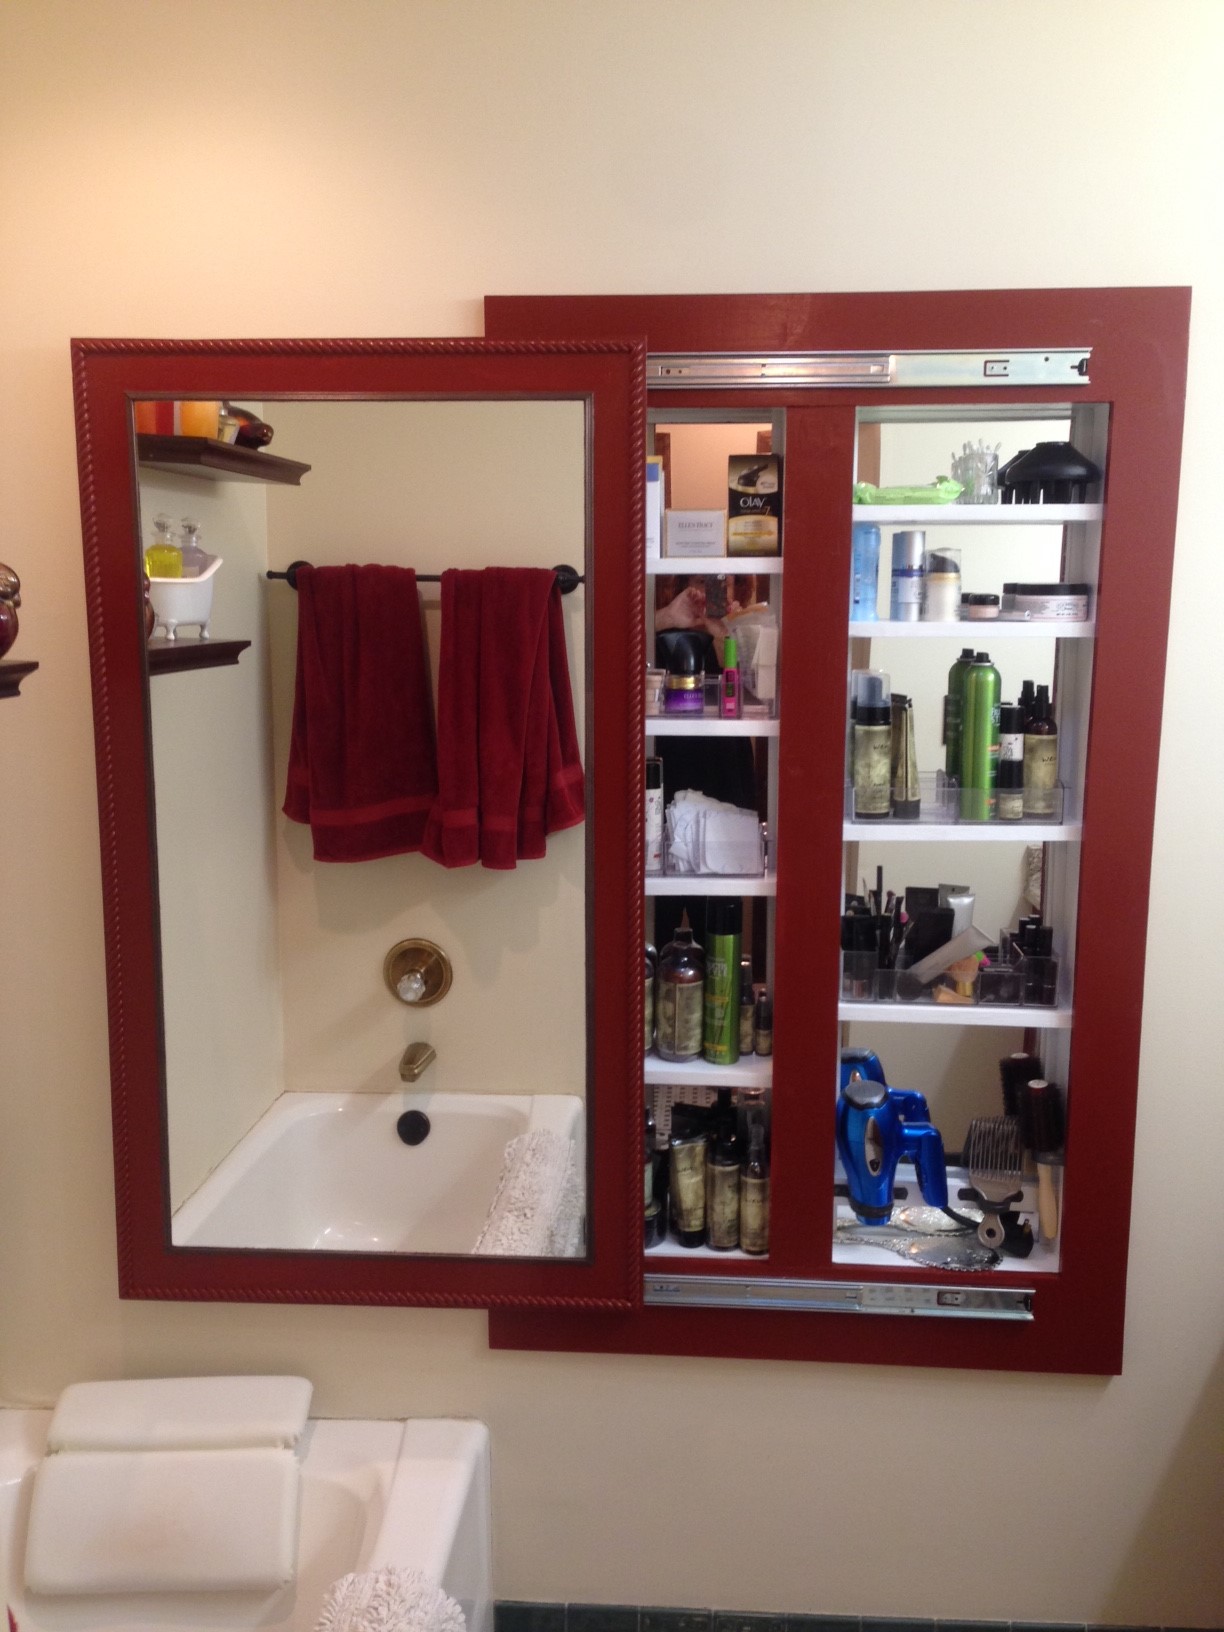
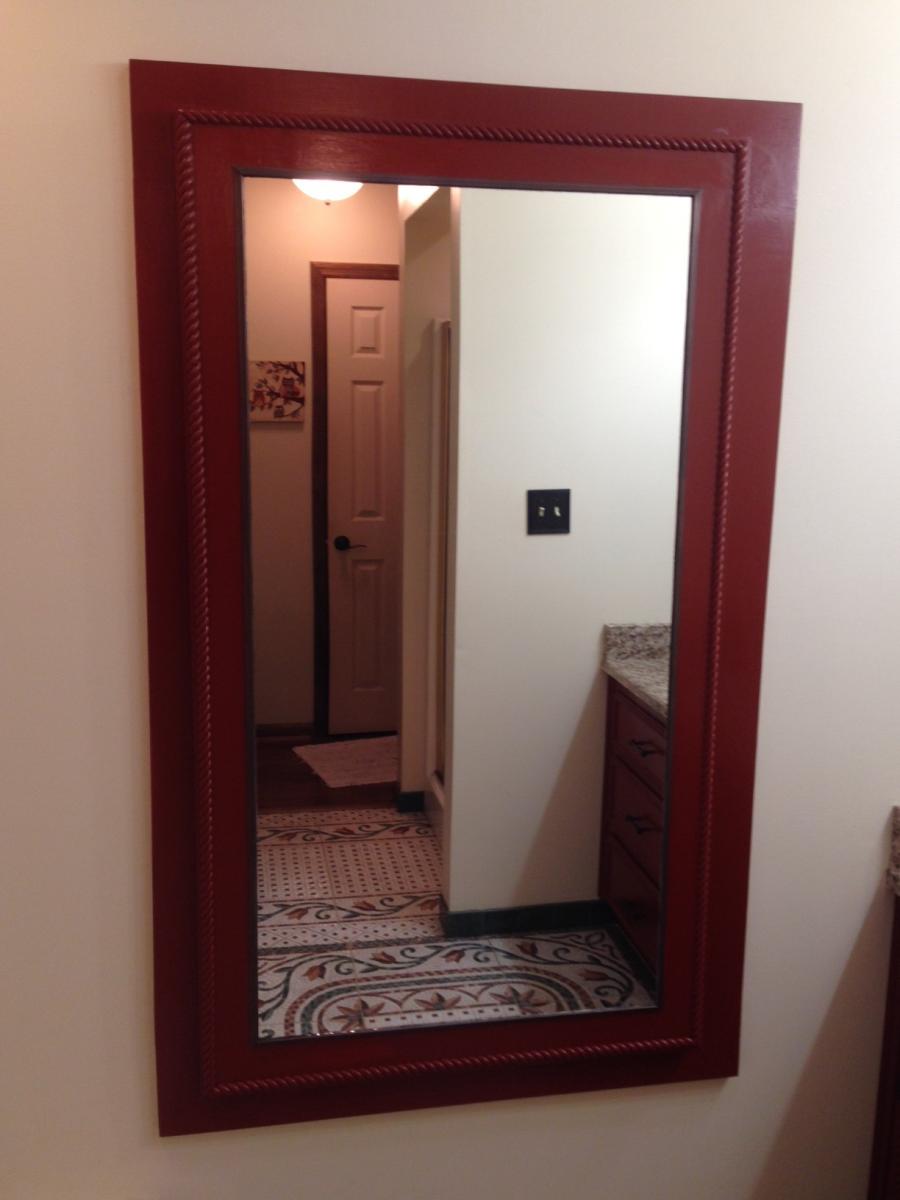
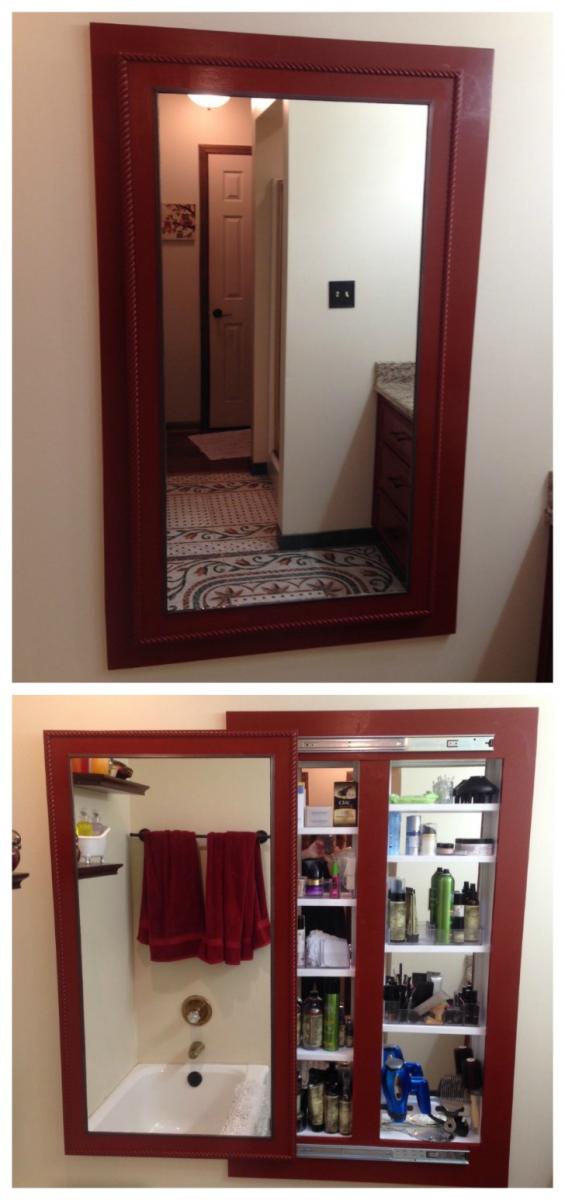
Adapted Ana's full length mirror storage idea. I needed to recess the cabinet into the stud cavity to save needed floor space. Opened two cavities and made the interior the same length as the cheap $6 behind the door mirror. Was able to just sit them on a ledger board and the shelves hold them from falling forward.
The cabinet looks wonderful and holds a TON of things. Thanks Ana for the inspiration!

Thu, 07/25/2019 - 18:20
I love this!! So smart to make it recessed. Thanks so much for sharing the photos!
Sun, 02/27/2022 - 15:58
I am wanting to build a thin or recessed cabinet for an incredibly small area in my bathroom and knew to go right to Ana White! The combination of these two projects is perfect and exactly what I was looking for! Now here’s to praying I can pull it off!! 😬
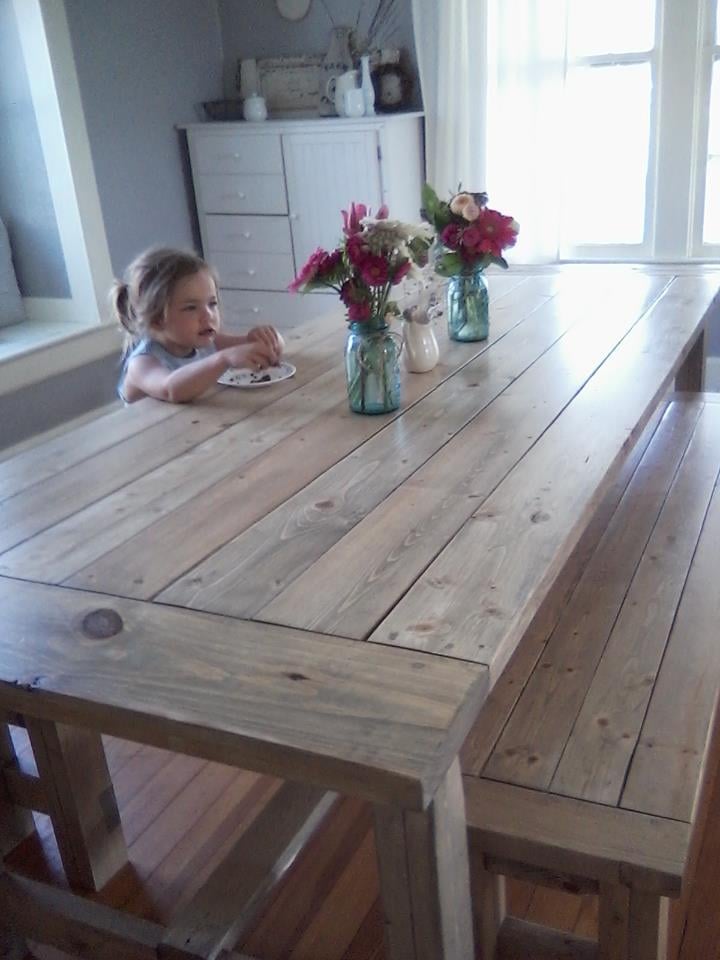
We used pine and finished with one coat of Weathered Oak by Minwax and three coats of Minwax Polycrylic.
Mon, 04/11/2016 - 19:11
I like the finish you used on the table. I built my table, but have not stained it yet. This is my first diy wood project ever so could you break down exactly how to stain the table? I have minwax weathered oak and the polycrylic. I brush the stain on? And then how long did you let the weathered oak sit on the wood before you wiped it off?
Really easy to follow instructions. Thank you!
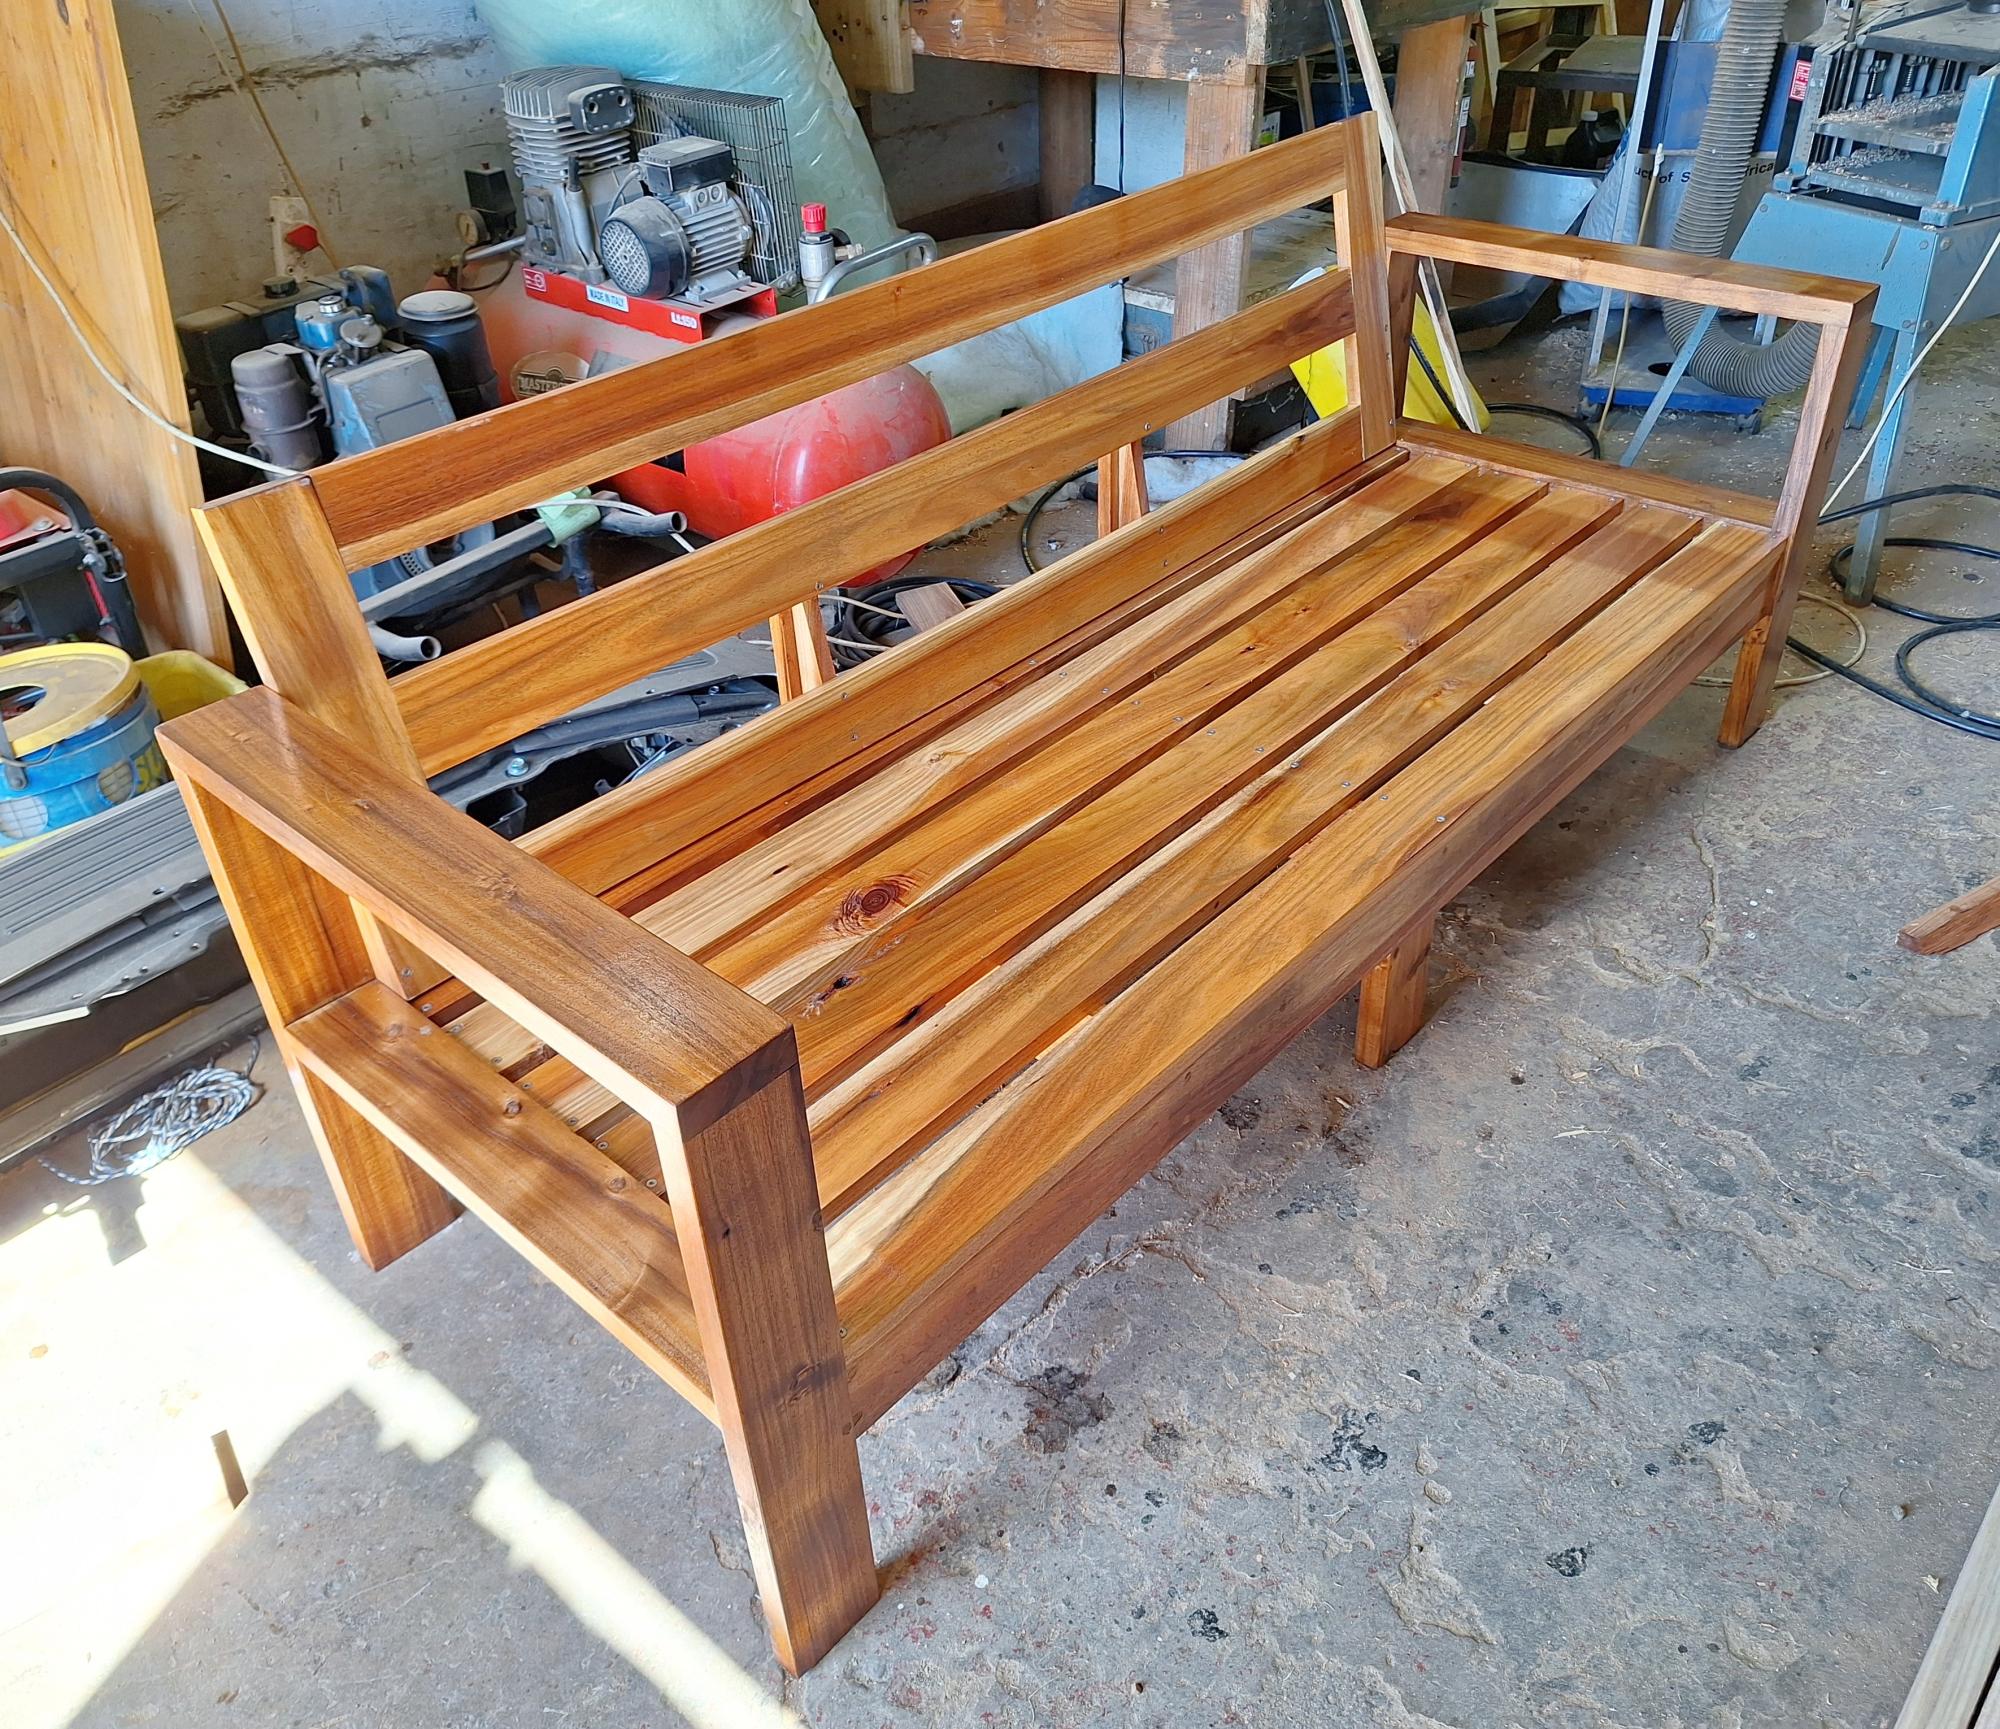
I built this outdoor sofa out of Blackwood. I tweaked Ana's plan to include a backrest and a support in the front, as my planks are only 23mm thick.
Gordon Smith
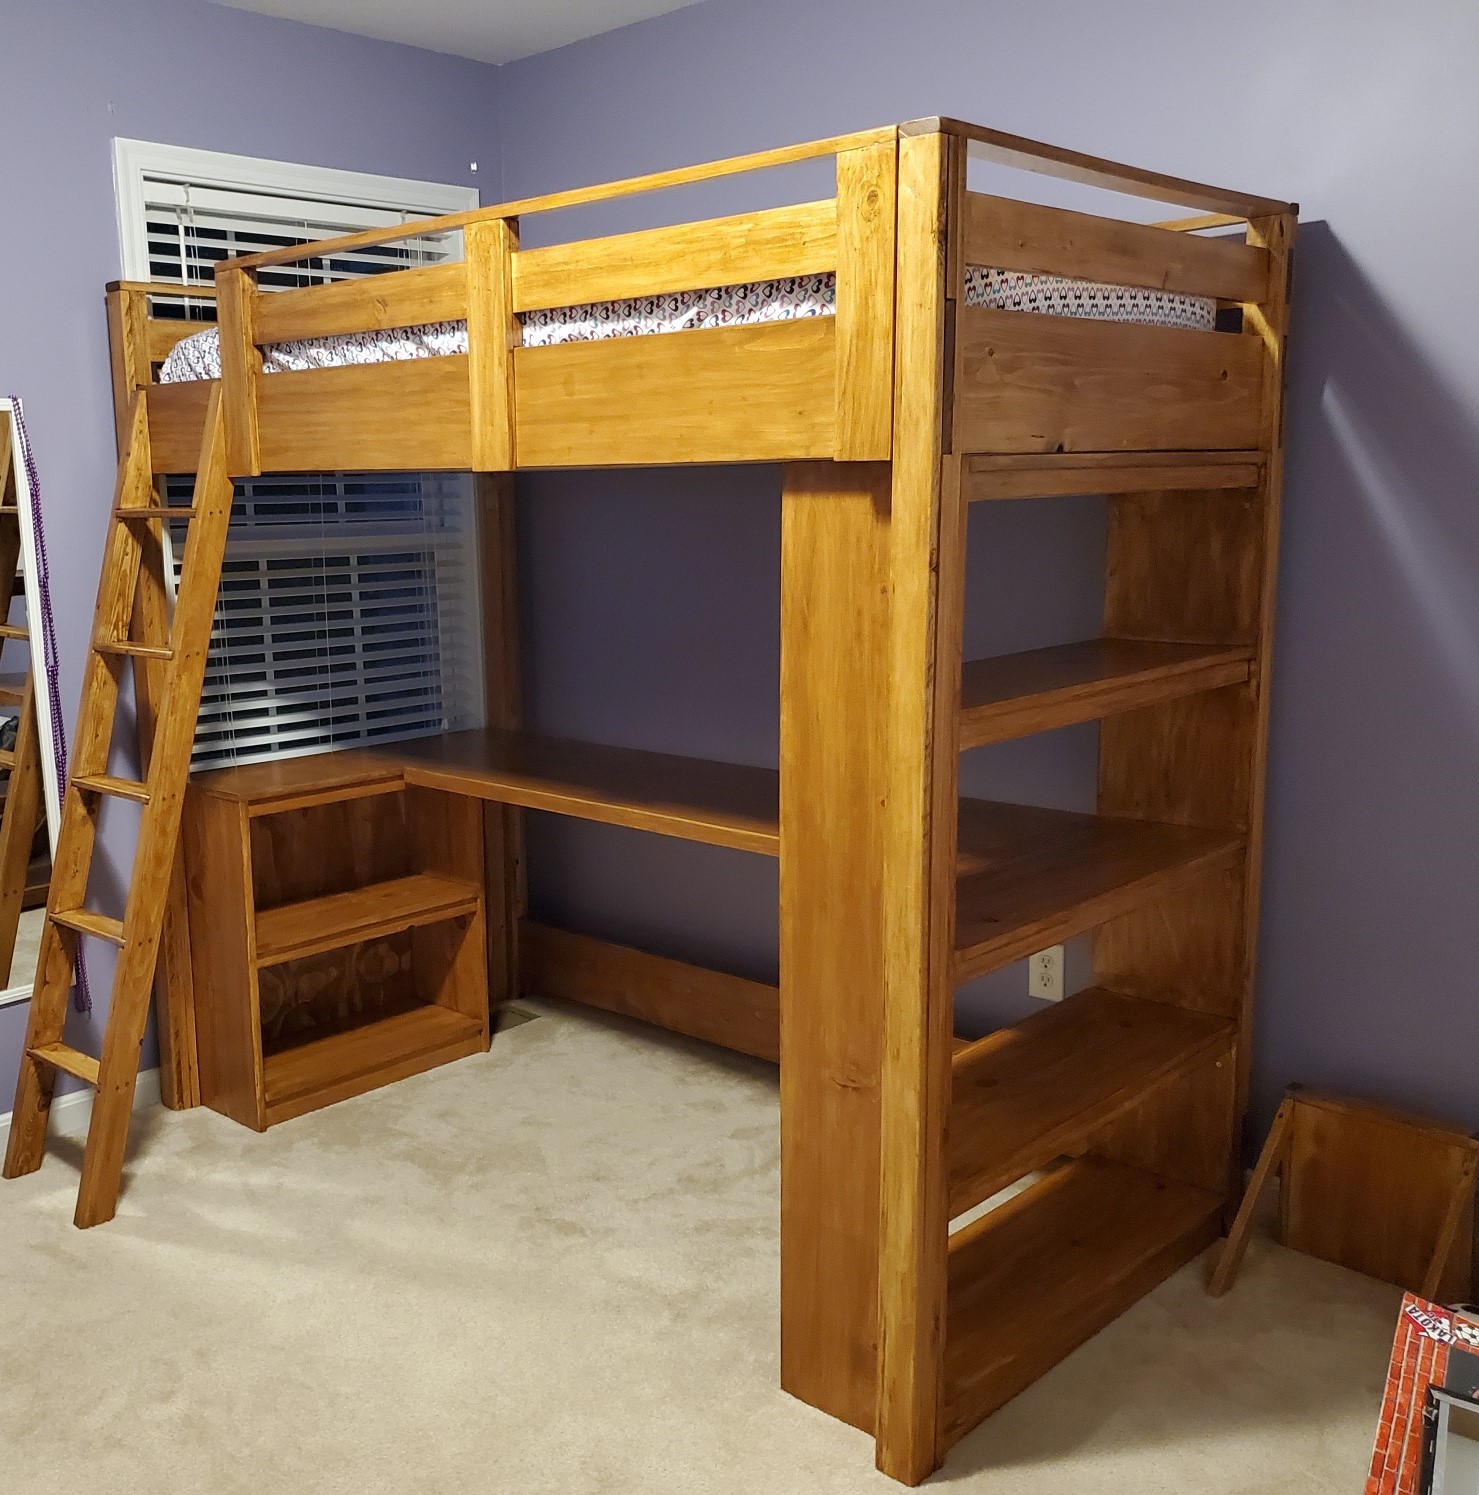
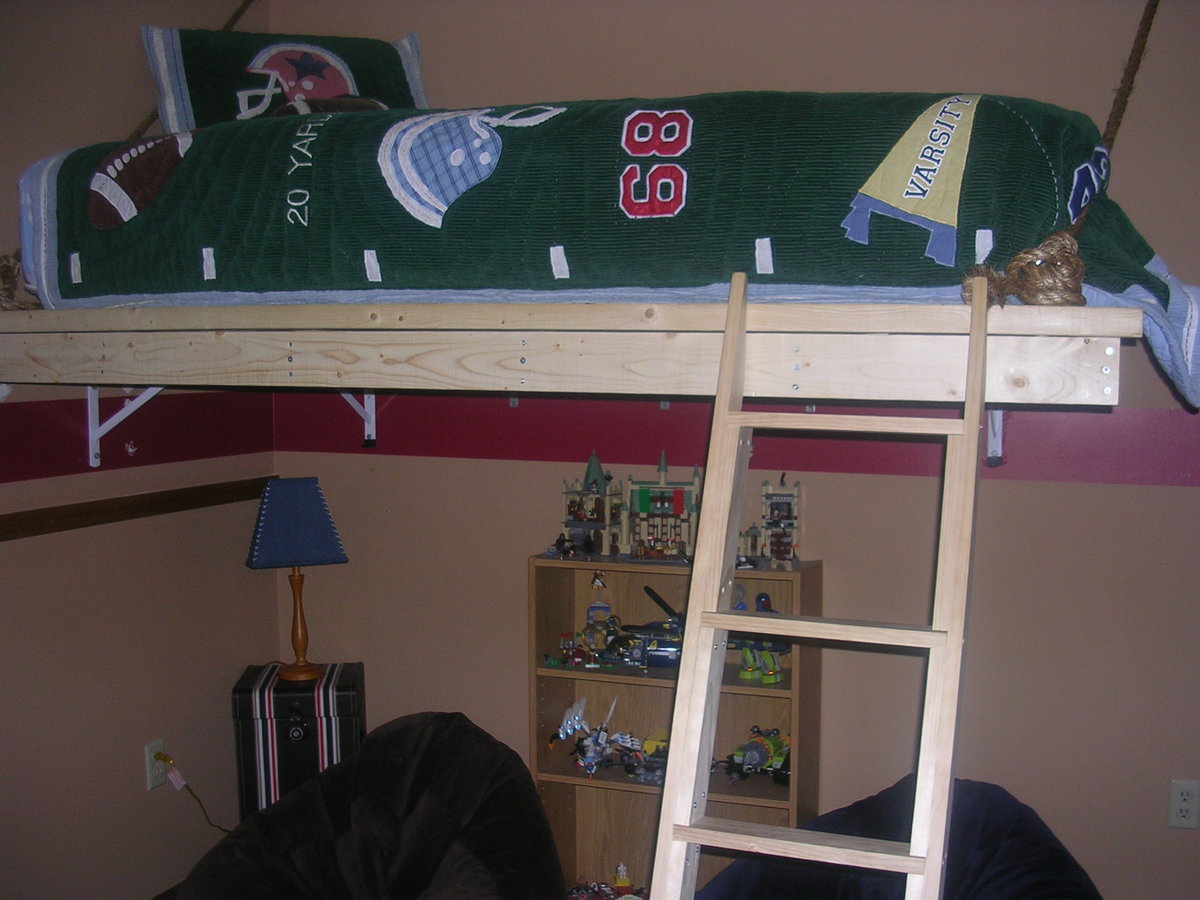
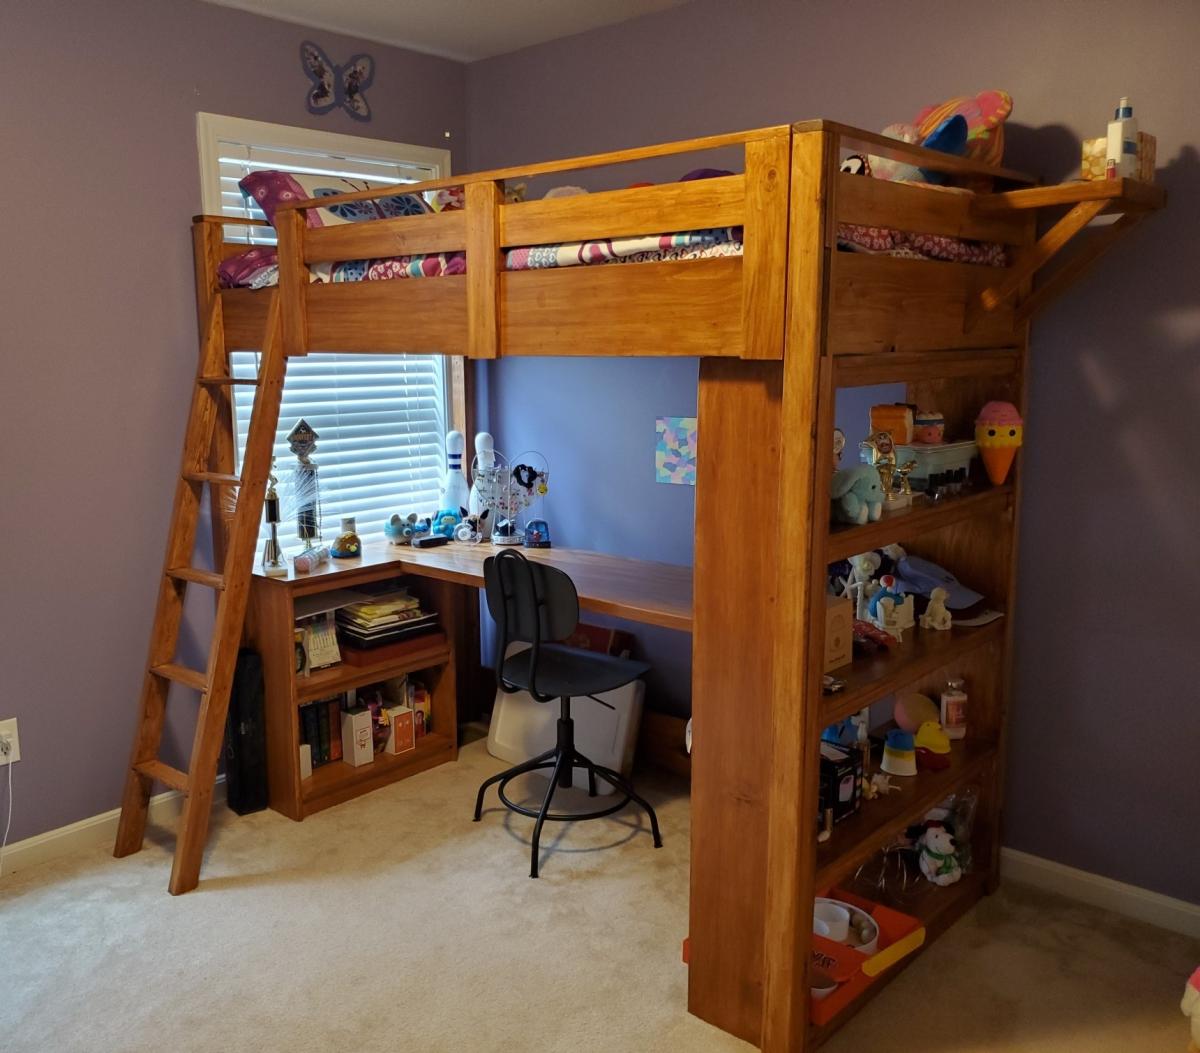
Combined two plans found on this wonderful site with our own revisions to provide a larger desk work area (20" deep). I also added a small shelf to allow for setting a book, water, whatever on it without getting out of the bed. As my first "indoor" project there were several lessons learned - one is to buy the higher grade lumber for the primary components including legs and beams. I did not do this and I had to spend more time than I should've finding good square, straight wood. Another lesson was that staining and polyurethane coating are a skill that requires a lot of practice and time. I and my daughter are thrilled with the final result but choosing to stain/poly it likely doubled the overall build time. Still no regrets, though. My 12 yo daughter just loves her new bed and thanks to this site for the spectacular ideas.

This deck furniture was made using construction grade 2 x 4's and the simple plans from Ana. The cushions were purchased at Kohls. They were on sale for just under $25.00 each. The cushions are made for chairs, but this seemed to work well. The short bench is 4ft long and the long bench is 8ft. I altered plans slightly by adding center support on long bench and adding a couple supports on the back. The back rails and end arms were raised a little higher. Made them 30". May be a little too high? My wife is going to make back pillows and a corner table is to be added later.
Mon, 09/26/2016 - 08:59
Awesome job, love all the mods! Can't wait to see the side table!
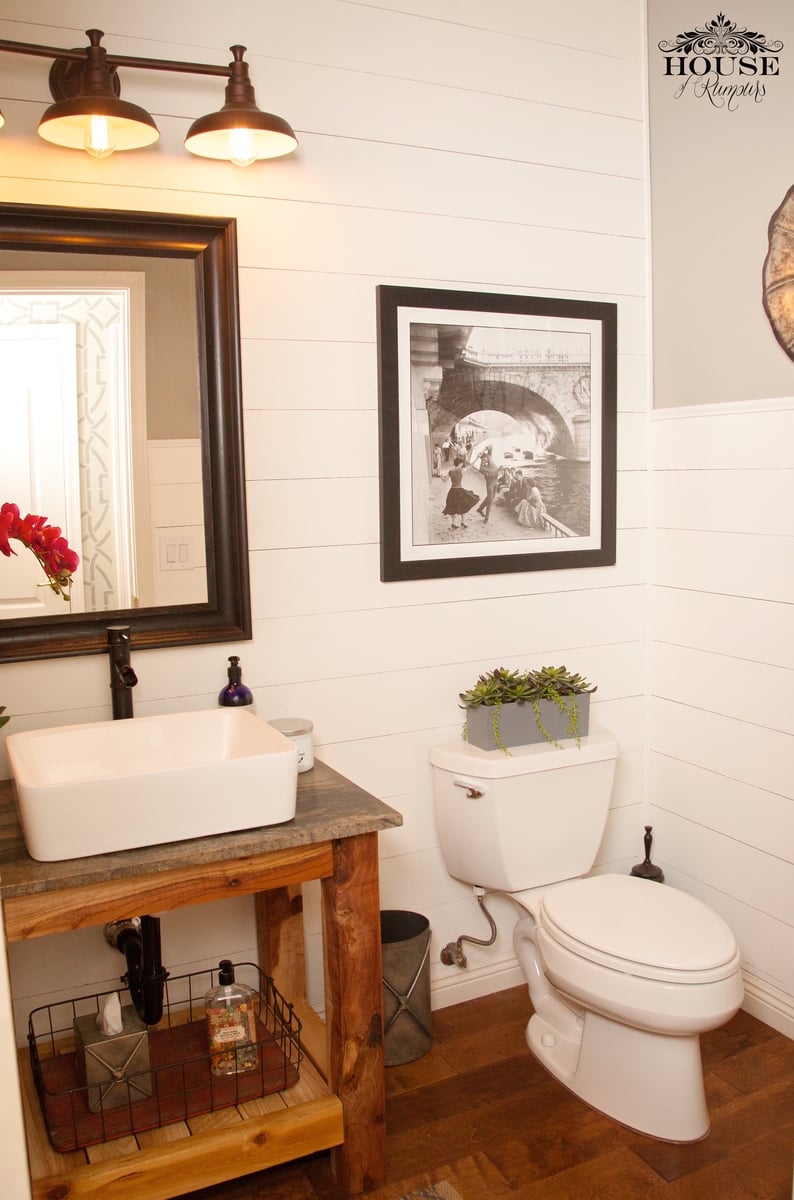
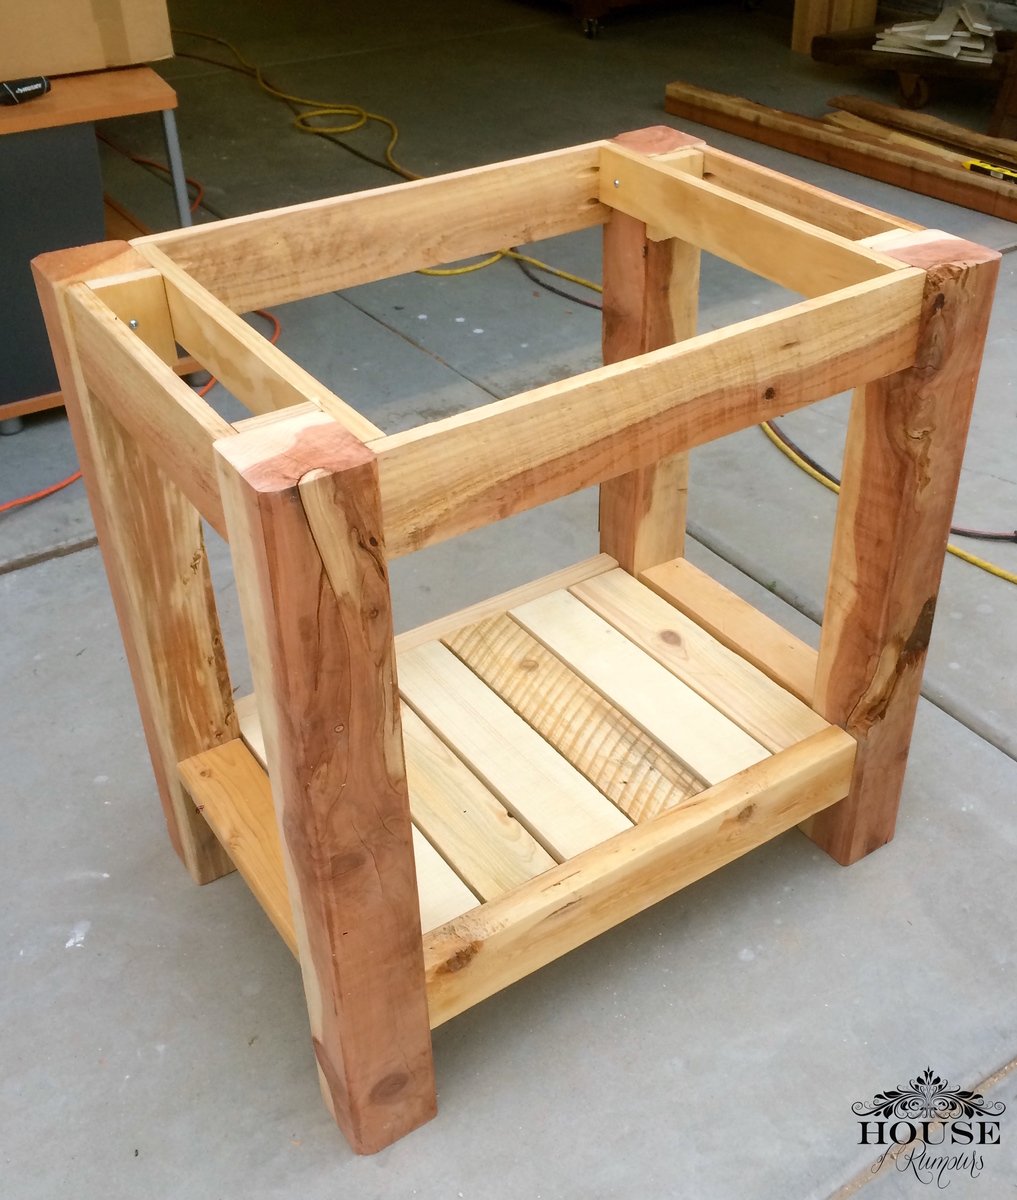
It had come time to renovate our powder room bathroom. We were on a tight budget so we decided to build our own vanity & add a little twist to it! We splurged on the granite countertop, vessel sink and faucet. Thanks to Ana White we built our vanity for less than $10! The plans were easy to follow . . . .we are so proud of our wood vanity! link to our blog: http://www.houseofrumours.com/shiplap-powder-room-diy-vanity/
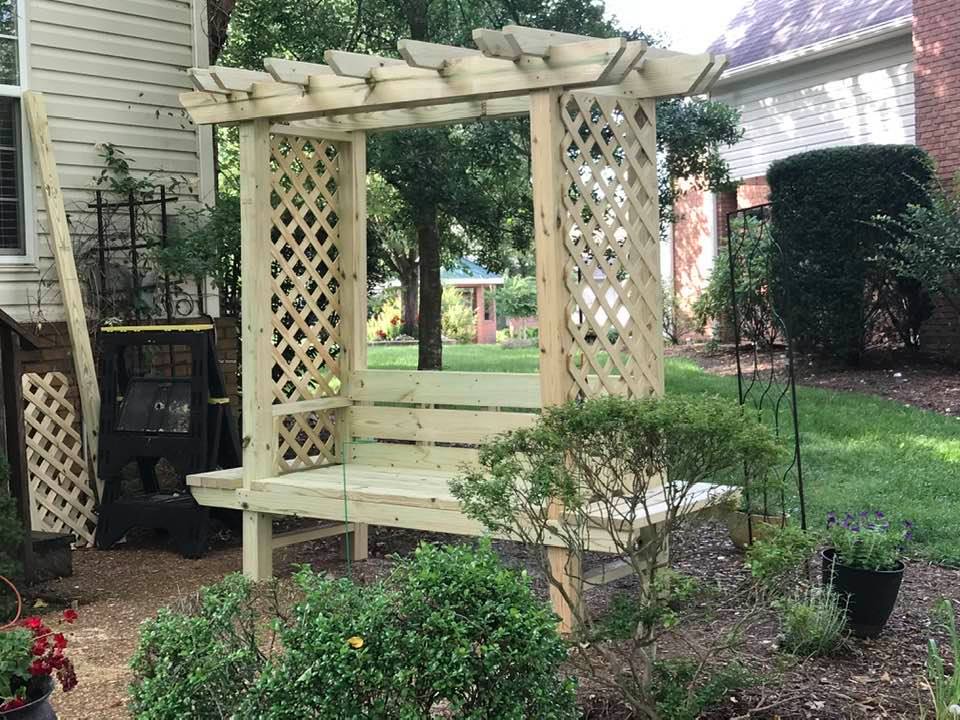
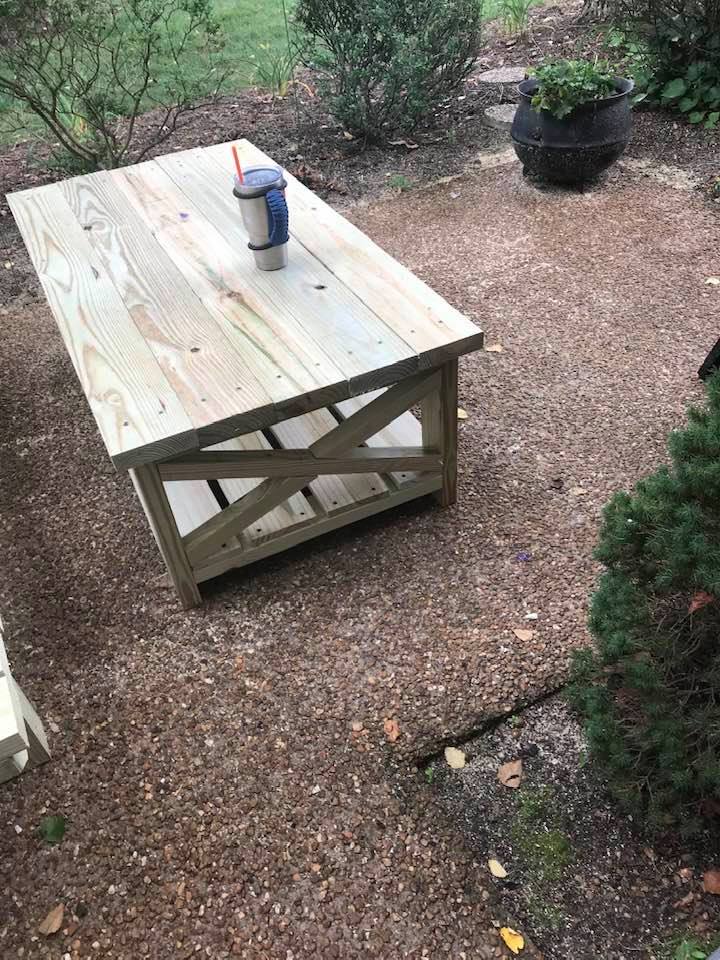
I built the arbor bench first, and was very impressed at how complete the instructions were. I enjoyed it so much, that I found the plans, and built the outdoor rustic coffee table to complement it. I ended up using pressure treated pine, and am now waiting for the wood to completely dry out enough to put a stain on both pieces. The plans for both were very comprehensive.

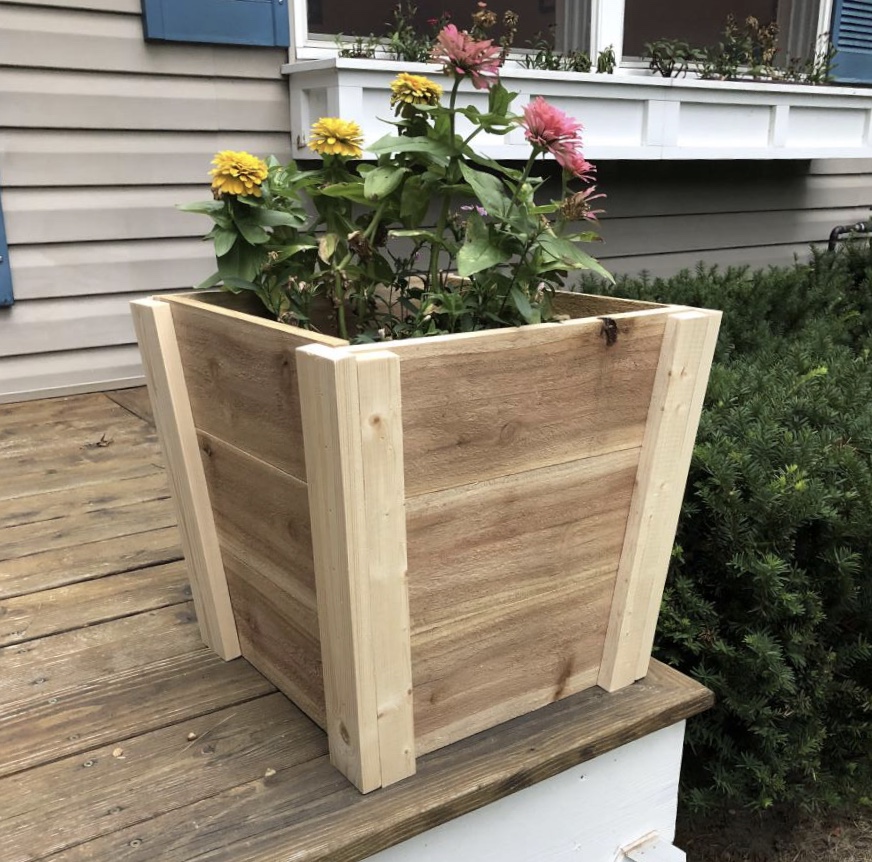
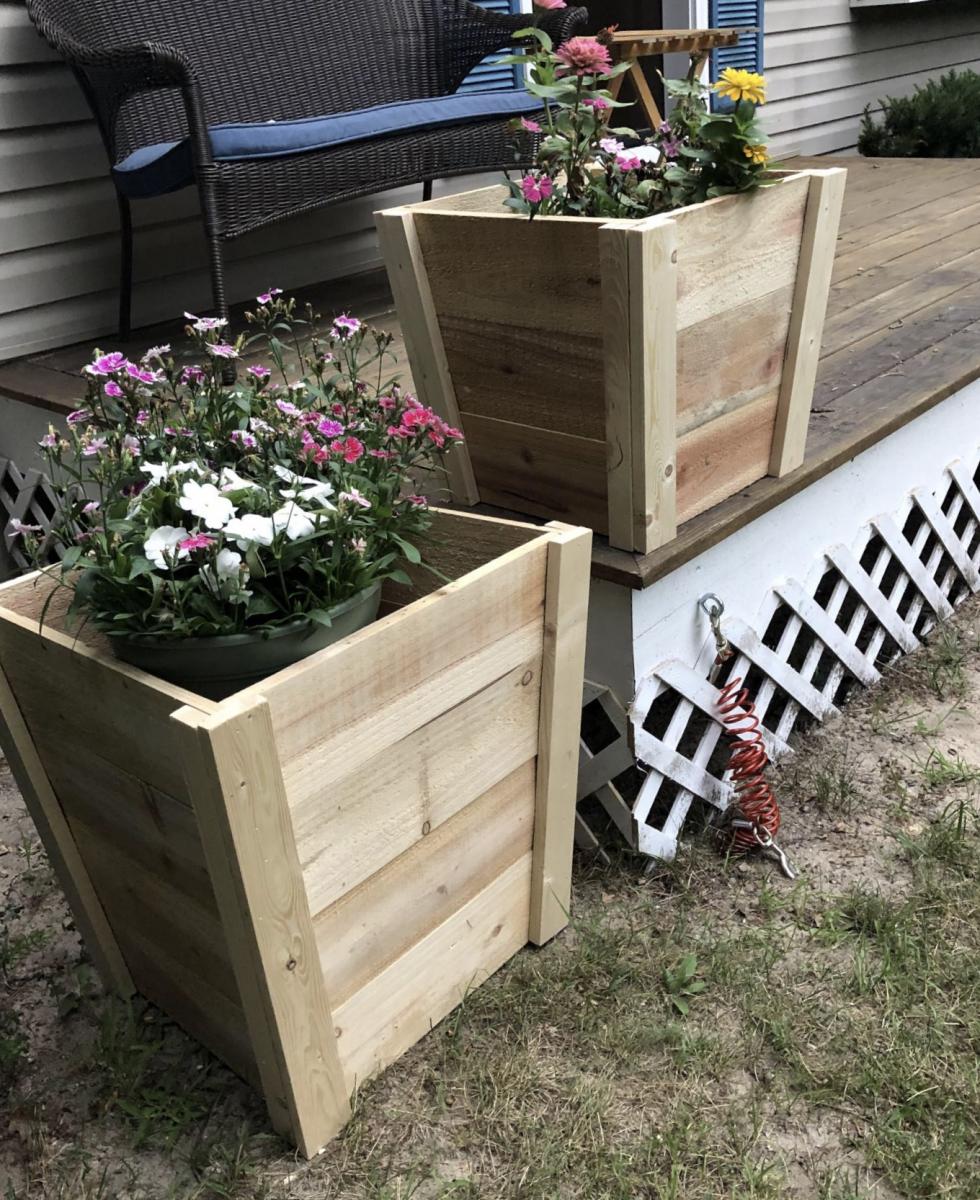
As a beginner this was a pretty fun and easy project. I did use wood screws to hold the edges together since the fence boards are typically curved and brad nails didn’t seem to hold on my first try. Ultimately I really enjoyed the results!
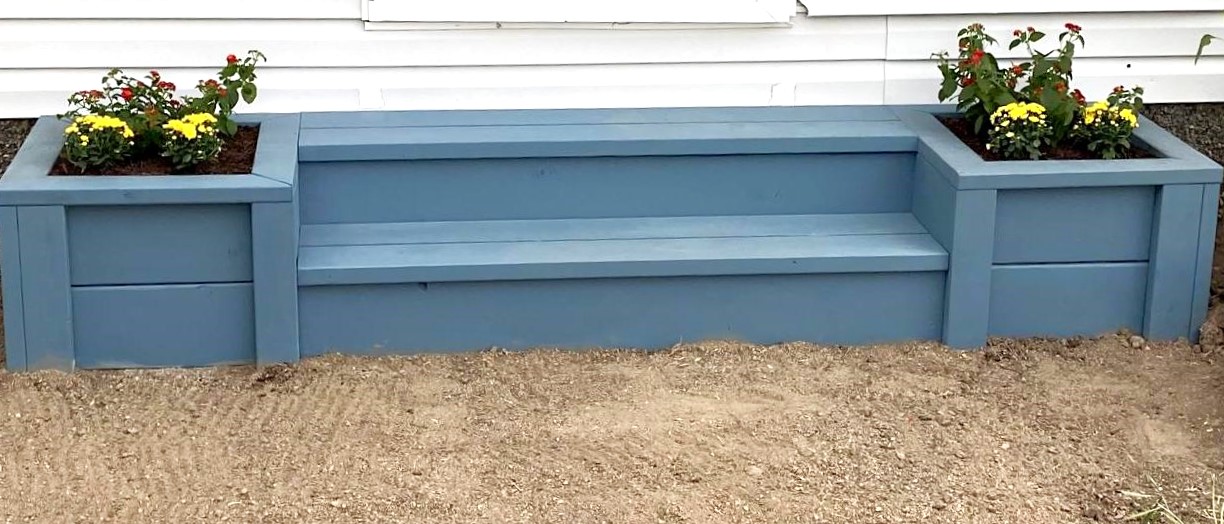
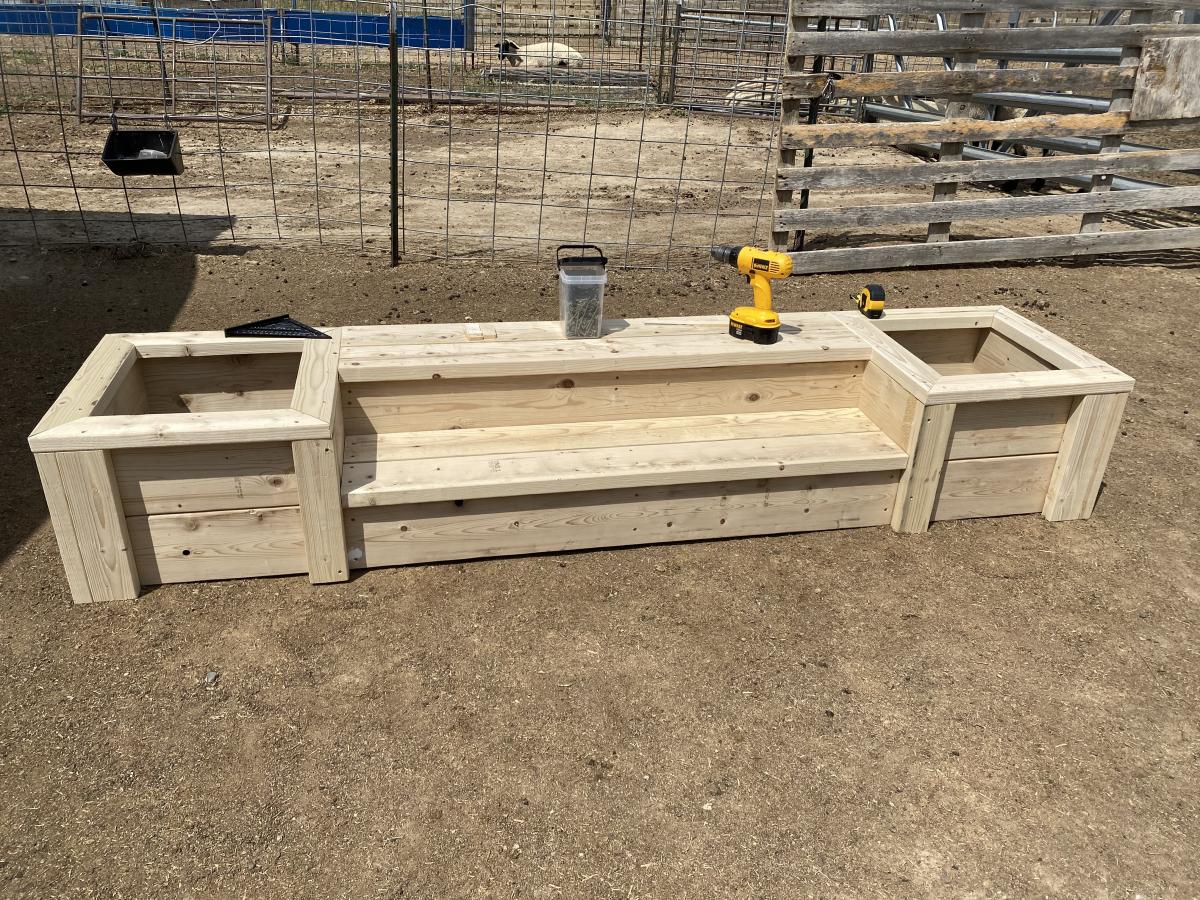
These steps turned out great!!! My in-laws were using some busted up pallets as a front porch so I knocked these out in a few hours. The blue stain looks really good and matches the other blue on various out-buildings. Very easy project and the plans available were spot on. Thanks Ana!!