Community Brag Posts

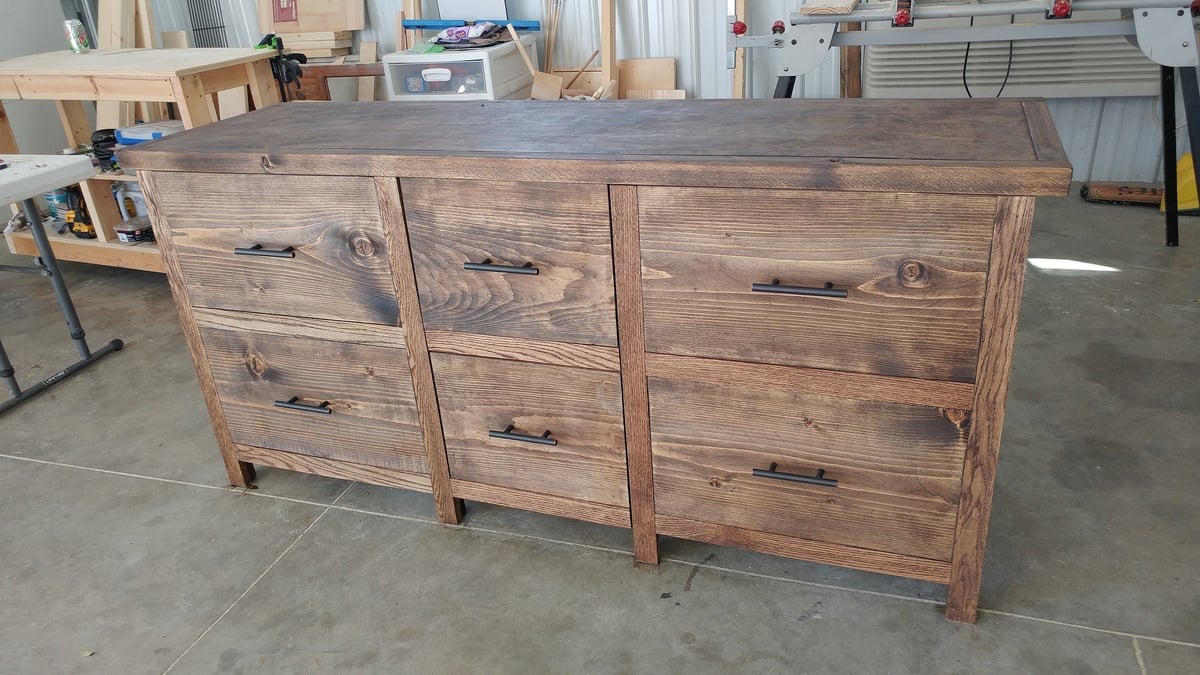
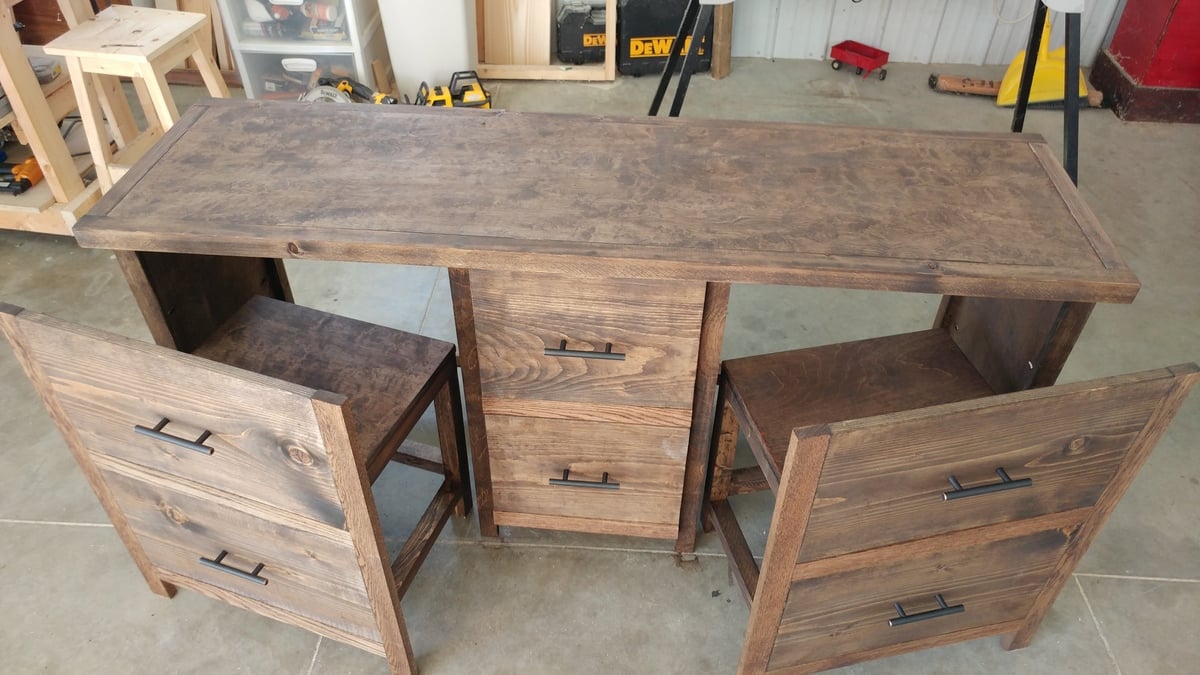
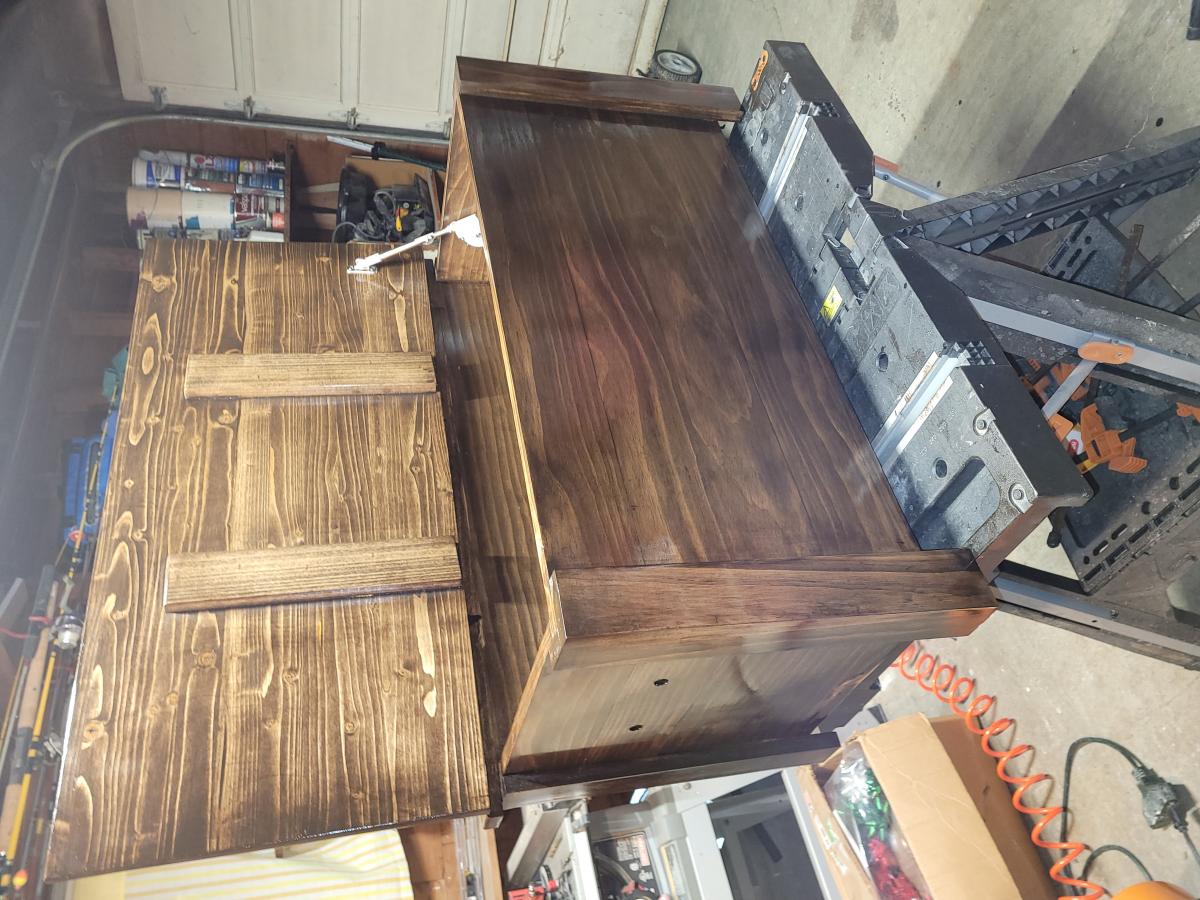
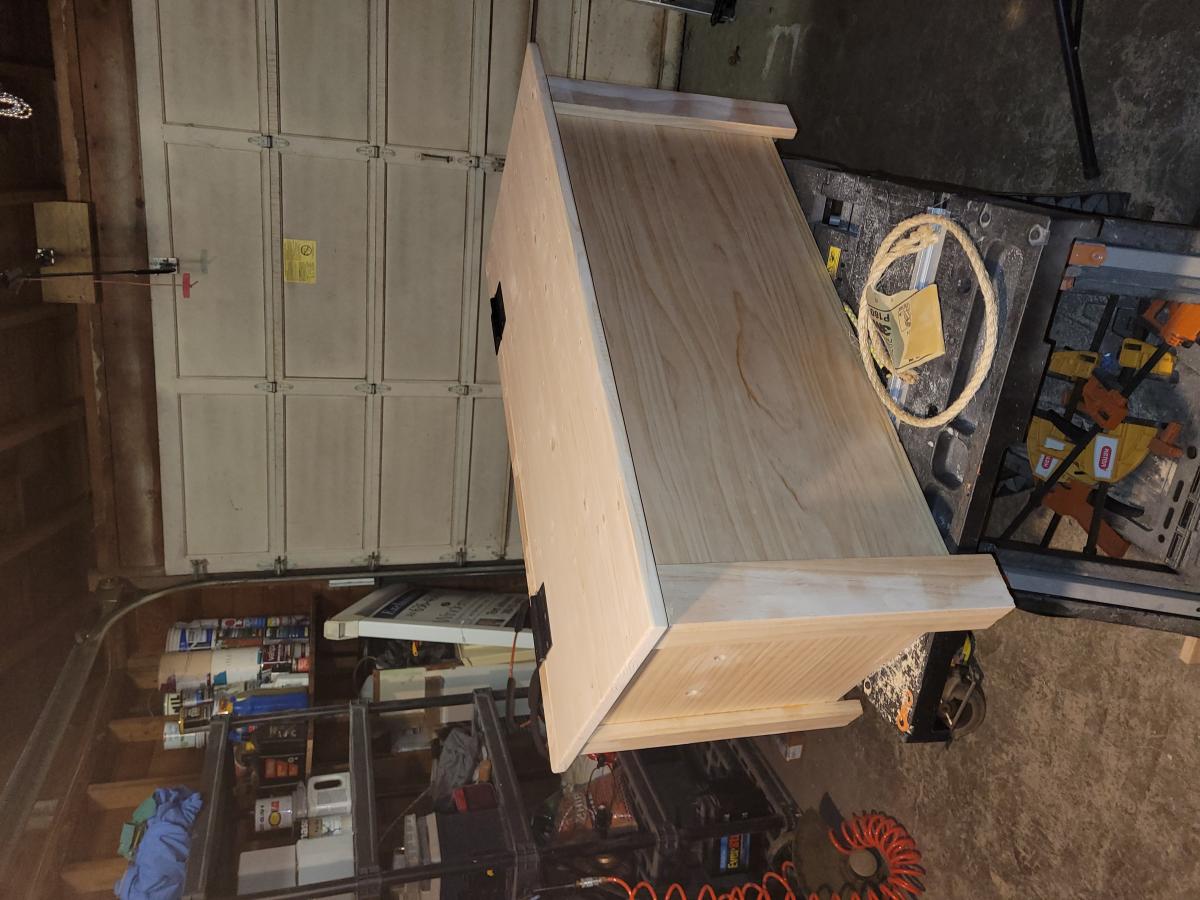
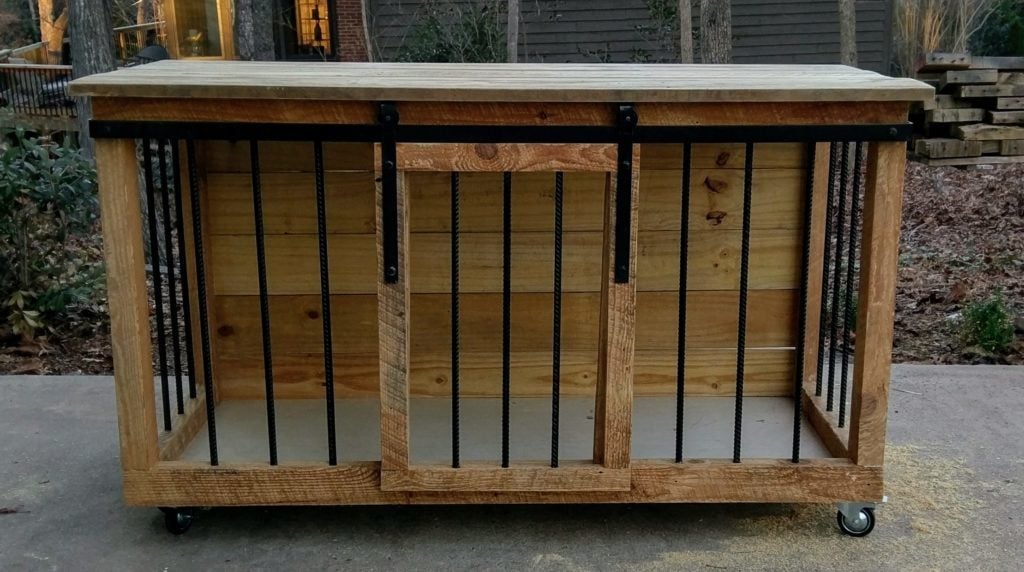
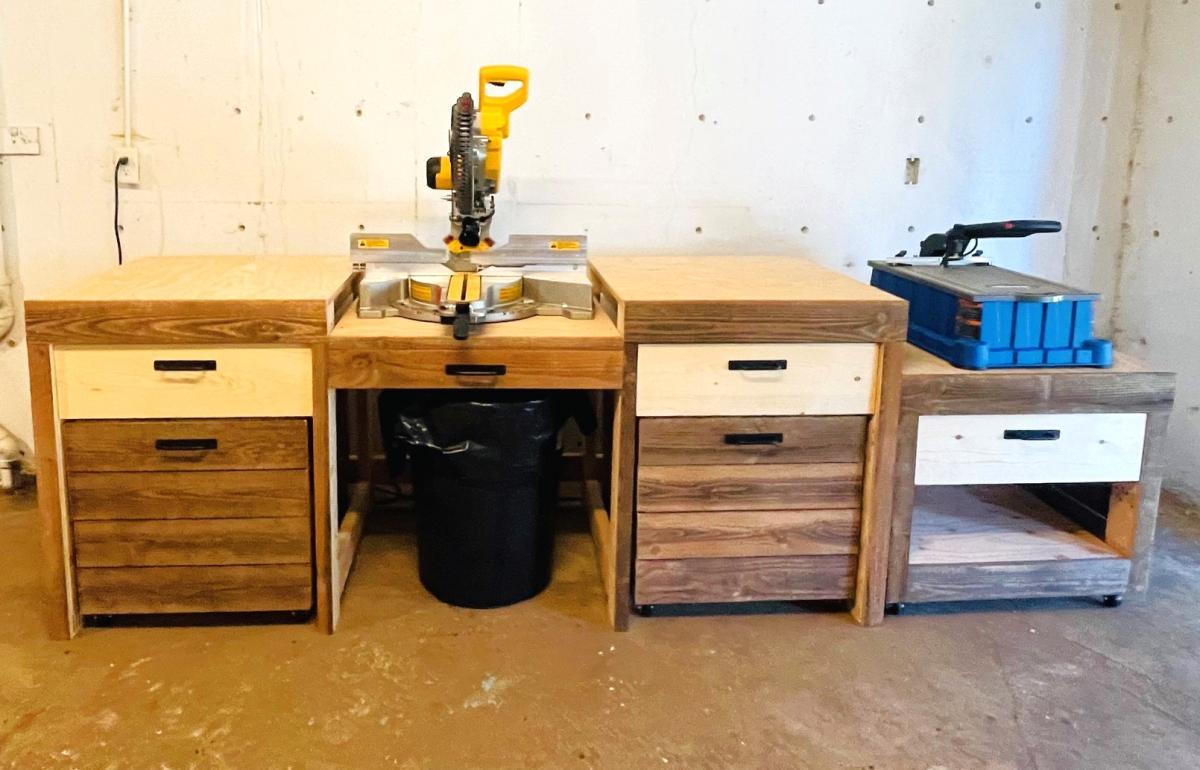
Workbench with Drawers and Carts on Casters

Submitted by vendo on Tue, 03/19/2024 - 07:38

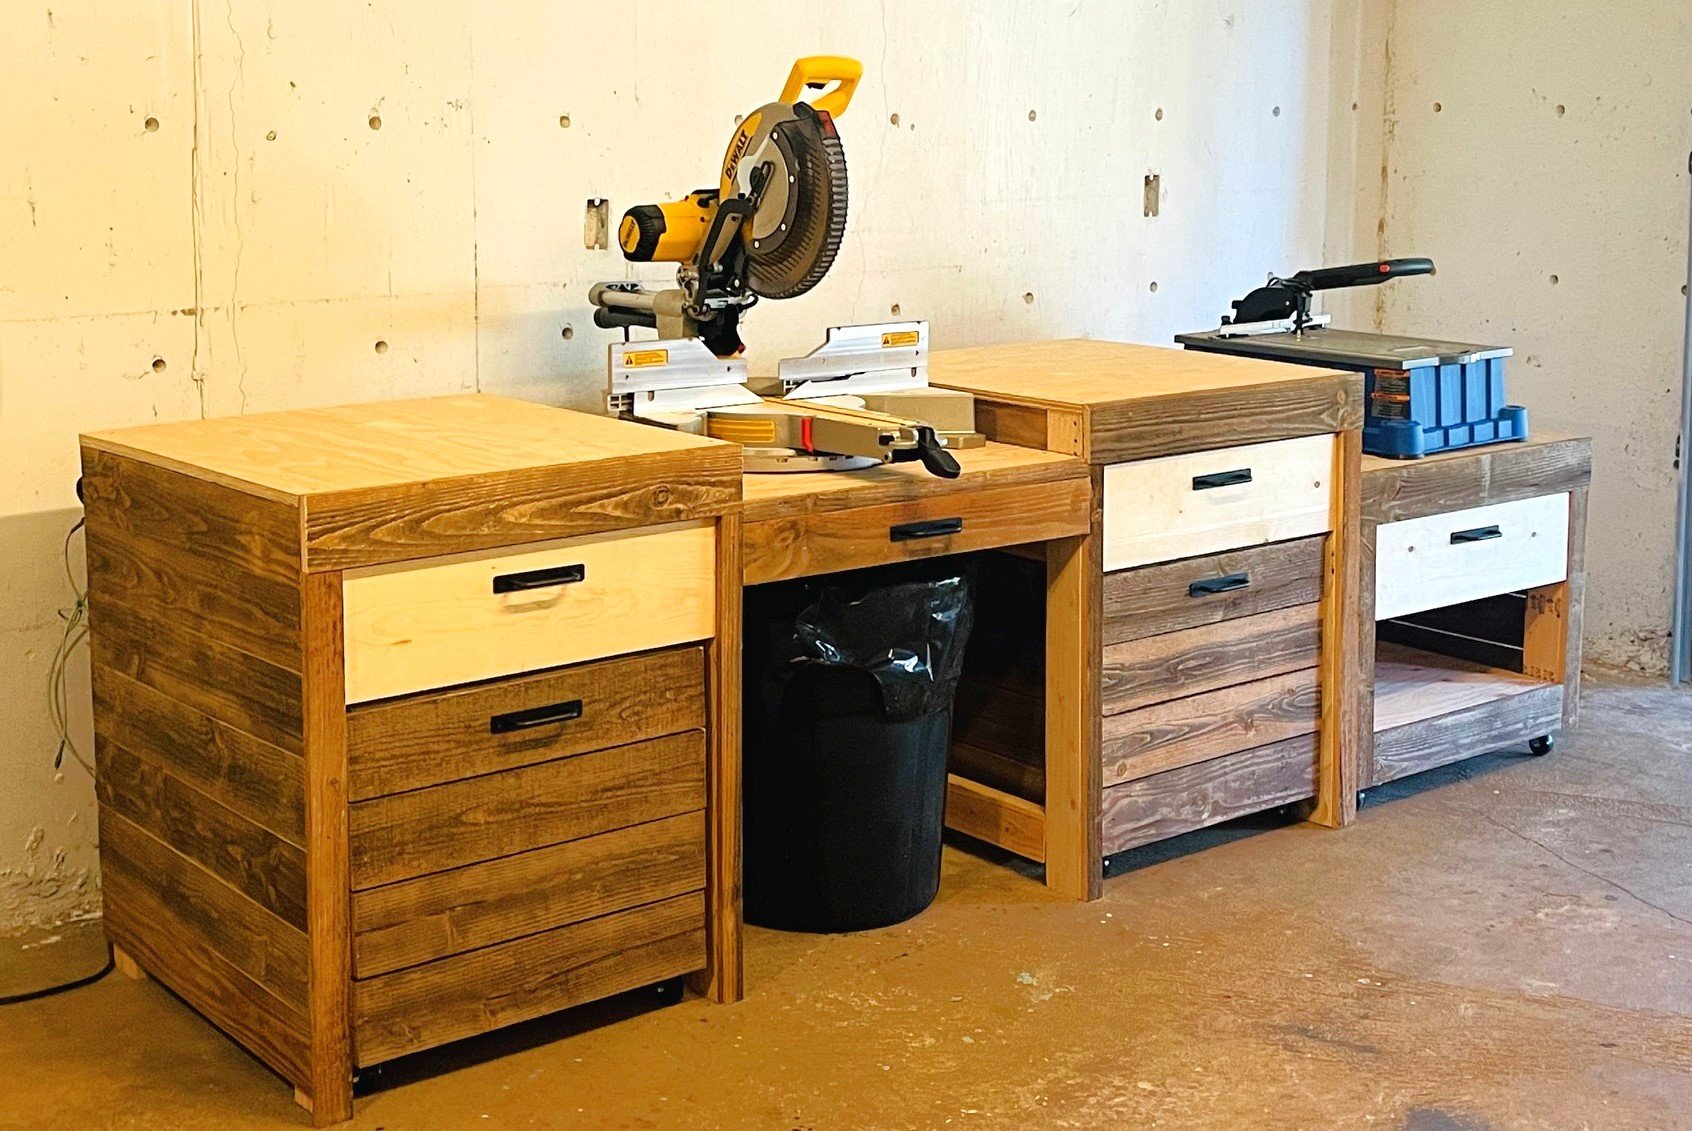
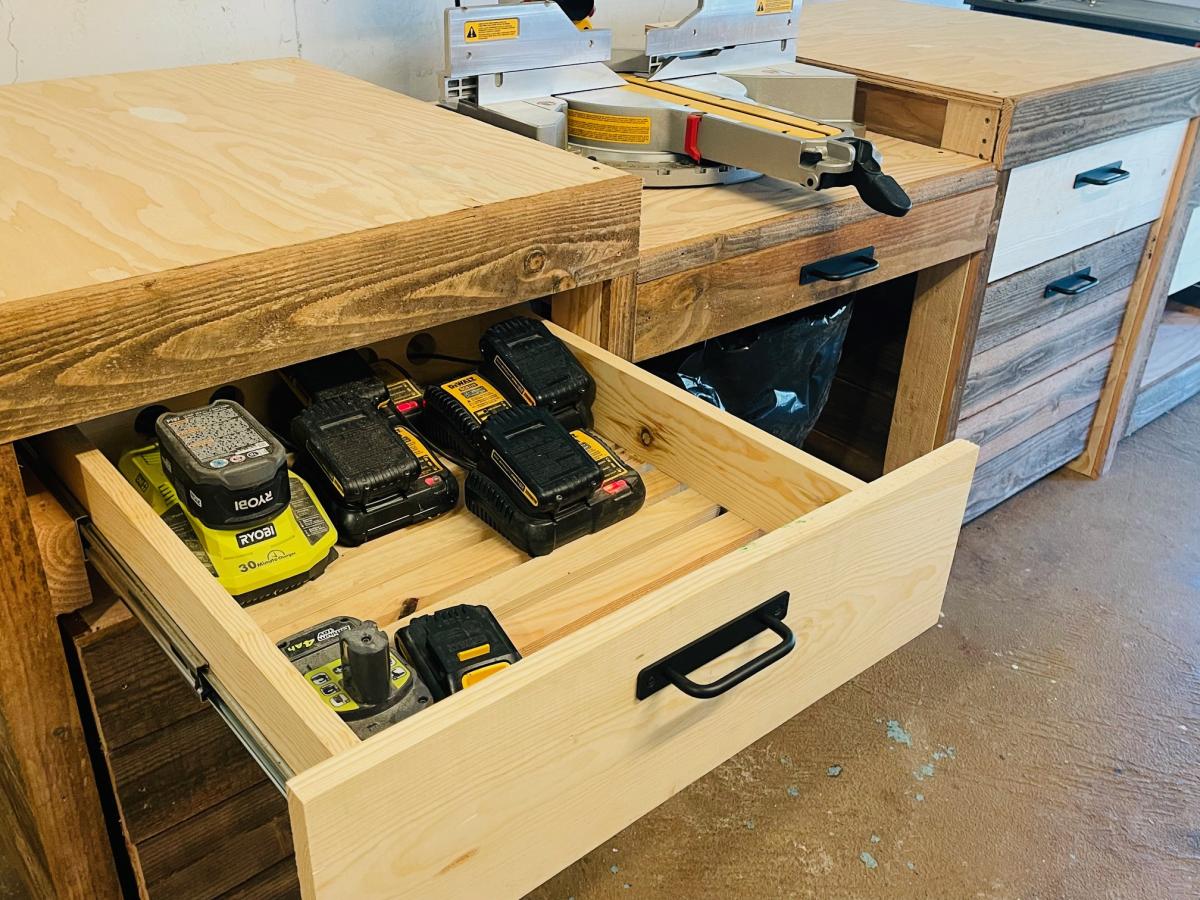
Using Ana's Ultimate Workbench Plan and her easy drawer method I built this. I decided to do storage carts that roll in and out for small scrap lumber storage. The Kreg Foreman got it's own cart, I made it so the deck of the machine was at the same height as the work surface. I added a drawer so all of my kreg bits and screws can be in one place. I had batteries and chargers laying all over my small shop, so I incorporated a battery charging drawer. I'm excited for the projects to come using my new set up!

Hidden Desk

Submitted by Anonymous (not verified) on Sat, 10/08/2016 - 12:24

I shrunk the size and dumbed down the plans to fit my skill level.

Built from Plan(s)
Estimated Cost
175
Estimated Time Investment
Weekend Project (10-20 Hours)
Finish Used
Walnut
Recommended Skill Level
Intermediate

Comments

Texastia

Mon, 10/10/2016 - 09:08

I love what you did! It looks so great! I prefer this style, which is more simplistic than the other. Great work!!


Jessi_ites

Tue, 10/11/2016 - 14:56

Thanks! I wish I would of set up an account before I posted so I could get notifications.  I honestly didn't think anyone would notice it :)

Jessi_ites

Tue, 10/11/2016 - 14:58

I am so excited that people noticed this :)  Is there any way of putting this under my account?  I didnt make an account until today and I would like to get notifications.   I have my project on my facebook page and can prove that I made it with other pictures. Thanks!

crstorm

Mon, 01/20/2020 - 07:44

I would love to see this in a farm-house (rather than rustic) aesthetic along with drawers under the seats for extra storage. Maybe on casters with a fold up extension on the other side? So many ideas running through my head with this!

Cute DIY Pallet Potting Bench

Submitted by shampbel on Wed, 09/12/2012 - 20:33

Made from 2 pallets, 2 x 6 x 8, leftover trim from my house, wood branch from my backyard. Attached shelf with pocket holes.

Accents:
-Handpainted lettering; painted prior to glazing entire piece
-Finials made from 4.25 inch spray painted and glazed clay pots and saucers coated with Valspar clear finish and attached together with epoxy; buttons attached to pots with E6000 adhesive
-Buttons attached mostly with small screws; a few with holes too small for screws were attached with epoxy
-Plastic flowers made from mayo and water bottles and lids; sanded, primed, spray painted, coated with Valspar clear coating; attached with screws
-Faucet knobs sanded, spray painted, glazed and attached with screws
-Plumbing pipe filled with plumber epoxy puttty; insert screw into putty before it hardened, then screwed into wood
-Gardening tool hooks made from pant wire hangers with a few beads attached; wire simply wrapped around tree branch

Not sure that I will use pallet wood again since difficult to pull apart pallets, uneven and some split boards could not be used, and required tons of sanding for those boards that could be used. I think I paid more for orbital sanding pads than the cost of buying new wood. Will use pallet wood for other non-furniture projects not requiring a perfect finish.

Estimated Cost
$40.00
Estimated Time Investment
Week Long Project (20 Hours or More)
Finish Used
Kids distressed with hammers, sanded with 80 grit, Kilz Primer (1 coat), Sherwin Williams Exterior White Latex Paint (1 coat), Behr Glaze tinted with Brown Latex, Spar Urethane (3 coats)
Recommended Skill Level
Beginner

ENTRYWAY bench with drawers

Submitted by Anonymous (not verified) on Fri, 10/16/2020 - 13:31

Built from scratch. First DIY build ever! Thank you for your plans. I customized it for my space 💜 instagram @onefortyfour_

Built from Plan(s)
Estimated Cost
250.00
Estimated Time Investment
Weekend Project (10-20 Hours)
Finish Used
Behr white paint. Polycrylic seal
Recommended Skill Level
Intermediate

Comments

Plate Rack

Submitted by Anonymous (not verified) on Fri, 11/13/2020 - 12:47

I was browsing Etsy for a plate rack and my Hubby said that he could just make me one. So I knew just where to go for the plans! He added crown moulding to the top, bead board to the back and painted it to match our cabinets. I love it! I use it to display his late mother’s Currier and Ives Plate collection. Thanks Ana!

Estimated Cost
$65
Estimated Time Investment
Weekend Project (10-20 Hours)
Finish Used
She twin Williams custom blended paint color
Recommended Skill Level
Beginner

Modified Camp Loft Bed *Full Size*

Submitted by Anonymous (not verified) on Sun, 11/29/2020 - 16:36

Our 10 year old daughter has a small room so we decided a loft bed would be ideal, as it would open up some needed floor space. However, spending $1000 on a loft bed from a store was inconceivable, so we were THRILLED to find this camp loft bed plan on Ana White!

My husband modified the plans to accommodate a full-size mattress, added two inches of height to the underside, and removed the stairs.

Cost of wood was just under $300 as prices are high in our area at the moment. Still far less than any store would offer a bed of this size and configuration, so still a win!

The build took two full weekends. He had to be able to disassemble the piece in the garage in order to take it upstairs to reassemble in her room.

It was painted white with Kilz Interior Sealer and Stain locker. It was a HIT and now our son wants one too! :) Great project that affords her SO much more floor space for her books and eventually a chair underneath.

Estimated Cost
$300
Estimated Time Investment
Weekend Project (10-20 Hours)
Finish Used
Kilz Interior Sealant and Stain Blocker
Recommended Skill Level
Intermediate

Comments

tfbucfan

Mon, 07/11/2022 - 23:47

How did you do the slats? I am trying to make an oversized loft bed and nervous about the supports for under the mattress

Toy Chest

Submitted by tomm3289 on Tue, 12/29/2020 - 11:48

Built this for my grandson for christmas. First woodworking project I've done.

Built from Plan(s)
Estimated Cost
$160
Estimated Time Investment
Weekend Project (10-20 Hours)
Finish Used
Polyurethane
Recommended Skill Level
Beginner

Frosty Garden Greenhouse

It was truly great for us to find a greenhouse design from a fellow Interior Alaskan blogger. We kept coming back to this design, enough times to where we decided to actually build it.

We would be the first to admit that tackling a gambrel style building was slightly intimidating and not what we had in mind for our very first self-built building! But, we faithfully followed the cut lists and directions. It turned out beautifully! If you're in the same boat, have confidence that you can build this too!

We love the options available for making it your own. We decided to stain the greenhouse lumber of ours to match our cedar sided home. We also built a semi frost-resistant foundation, since we're a little north of Ana at 65 degrees and sometimes experience frost heaving. We also added full climate controls to ours, adding both fans and louvers that keep our greenhouse at perfect temperatures.

The performance has been great! Building this greenhouse has been the single greatest thing we have done in our years of subarctic gardening. We might even consider building a second greenhouse down the road. No matter how big your greenhouse is, it's never quite enough!

Thanks for the great plans, Ana! We appreciate your work!

Built from Plan(s)
Estimated Cost
$2400
Estimated Time Investment
Week Long Project (20 Hours or More)
Finish Used
Transparent cedar stain
Recommended Skill Level
Intermediate

Comments

Toy Chest

Submitted by brittanyj on Wed, 01/21/2015 - 08:31

Made this toy chest for my niece this Christmas.  Pretty easy build.  Used some leftover wood and plywood for the top to cut down on cost.  Instead of edge banding, I used some screen moulding.  The wooden owls were purchased from Hobby Lobby and glued on to match her room, as well as the "C" on top.  Cutouts routered on both front and sides to better protect fingers, and for looks. 

Built from Plan(s)
Estimated Cost
$25
Estimated Time Investment
Day Project (6-9 Hours)
Finish Used
walnut stain, poly
Recommended Skill Level
Intermediate

Outdoor Sofa

Submitted by Anonymous (not verified) on Sun, 04/23/2017 - 15:02

Modifed slightly to make a sectional.  Used extra cushion for an Ottoman.  Added an additional board behind/beside cushions to hold them firmly in place. (2x2)
Purchased 9' boards instead from our lumberyard.  Cushions from Lowe's, throw pillows from WalMart/Canadian Tire. 
 

Estimated Cost
Approx. $700

Cushions from Lowes (7 sets at $80)
Estimated Time Investment
Weekend Project (10-20 Hours)
Finish Used
Minwax Dark Walnut / Old Master's Dark Walnut Gel Stain
Recommended Skill Level
Beginner

Flip down kids table

Submitted by EDanido on Thu, 03/21/2013 - 04:22

I saw this plan a couple of months ago, and knew right away that this is what we need for our kids - their old table was always filled with papers, crayons and they never had enough space to store whatever they did.

I made the table longer so that it would be enough for both of them, and added foldable legs to support the table top.
Since I didn't find the right hinges for the legs, I used a piece of 1x1 with wood dowels which are attached to the inner side of the legs when unfolded.

Built from Plan(s)
Estimated Cost
$ 40 - but I had to buy the wood for the table top twice...
Estimated Time Investment
Weekend Project (10-20 Hours)
Finish Used
Walnut stain
Recommended Skill Level
Beginner

Comments

sawdust

Fri, 03/22/2013 - 16:08

Well, I now know what I'm doing tomorrow! I'm going to make a small hinged one to go in our entryway because we have nowhere to put stuff while we're getting our shoes on. Yours looks great!

"Cube" storage unit

Submitted by kds199 on Fri, 10/14/2022 - 09:49

My wife and I wanted a nice way to hide more of our son's toys in the living room that didn't look tacky. We actually bought the cubby bins before even deciding what to make. (From target of course.) I made the bookcase out of wood shelving that already looked kind of beat up when I bought it knowing that the wood stain wood bring some character to it.

I only changed the plans slightly by making the legs flush with the inside so I could trim the ends and customizing the size of the cubby openings to fit the bins. (Mine aren't actually cubes.)

Built from Plan(s)
Estimated Cost
$60
Estimated Time Investment
Afternoon Project (3-6 Hours)
Finish Used
2 coats of stain...minimal sanding to keep the surface looking rough
Recommended Skill Level
Beginner

Square Picnic Table

Submitted by Anonymous (not verified) on Mon, 10/04/2021 - 15:01

This is a bit larger than Ana’s plan. I added additional support to the table top and added a braced opening for the umbrella. I also went for a more rounded finish by rounding all the corners of the table and benches with my jigsaw and then sanding to create smooth curves.

Built from Plan(s)

Comments

Adirondack Chair (Home Depot Version)

Followed the new home depot plans, only change I made was using 2x4 instead of 2x2. Getting ready to build another one, but this time will also change the arms to be wider on the ends to accommodate wine holder on one arm and cup holder on other arm. :0)

Estimated Cost
$60
Estimated Time Investment
Afternoon Project (3-6 Hours)
Finish Used
Going to use English chesnut stain and then marine spar varnish for protection
Recommended Skill Level
Beginner

Comments

acer211

Fri, 11/13/2015 - 20:36

Hi Ana,


Thanks for all your free sharing and advice.  I'd like to return the favor (hopefully)...  

Just wanted to say (as I am a painter) that it is best to avoid using any sort of "clear" varnish (such as poly, or spar, etc...) on anything that sits outdoor (such as furniture, doors, decks), because UV rays from the sun will break-down the varnish and cause them to fail.  

Instead, it is best to use a stain that is suited for decks, like Cabots Semi-Transparent, or semi-solid, etc,,

best regards,

Aaron

c3663b

Wed, 03/02/2016 - 12:21

The plans for this adirondack chair are no longer available on the Home Depot website. Where can I get them? Does anyone have them to share?

Simple Nightstands

I absolutely love the way these turned out! I drew up an example in Sketch-up using Ana's plans for the Simple Nightstand as a starting point. 

The top is made from 5 boards, 19 inches in length, joined together underneath with a kreg jig. I made two of these, identical. Each nightstand took exactly 50 kreg screws, not intentional, it just worked out that way. I used a brad nailer to attach the trim along the bottom shelf (which I could have avoided with a a little more planning in the beginning), also to attach the side panels that you see on the sides and back, and to assemble the majority of the drawer, using kreg screws to attach the front.
I'm in love with the drawer pulls, a metal twig shape bought at blue! I'm debating whether or not I want to paint them with some brown paint and distress them a little bit, but not sure if it would just end up looking hokey since they are obviously not real twigs.
It took me several hours to build these, mostly because I had to kind of work out a few details as I went, but I'm confident I could do it quicker if I had to do it again. The finishing is what takes the longest!
Built from Plan(s)
Estimated Cost
$110 includes enough Select Pine, kreg jig screws, and drawer pulls to make two nightstands
Estimated Time Investment
Day Project (6-9 Hours)
Finish Used
Two coats of Cabot stain, Pecan color. Three coats of satin polyurethane, with a light sanding between each coat.
Recommended Skill Level
Intermediate

Outdoor Sectional

I scaled back the length of the sofa by a few inches and I made the sectional only one seat to fit my space on the deck. This was my first woodworking project that I did by myself. I got the cushions for more than 1/2 off at Ikea so the whole project cost about $150 ($80 for the cushions). It took me about a week to complete but the total time was less than 10 hours to build and stain. I'm pretty happy with how it turned out.

Estimated Cost
$150
Estimated Time Investment
Weekend Project (10-20 Hours)
Finish Used
Pittsburgh Paints Stain & Sealant in One for Decks, Fences, & Siding in Walnut. I brushed on the exterior stain just like a paint. I did the top part of the sofa first, then flipped it over and stained the bottom. Read instructions on the label.
Recommended Skill Level
Beginner

Comments

She Shed - Guest Room, Craft Room, Office

Submitted by Chriss45 on Tue, 01/23/2018 - 08:18

I needed an office and also a guest room so i built a she shed and all the furniture.

Recommended Skill Level
Advanced

Comments

junesummer21

Thu, 01/25/2018 - 06:27

I love your murphy bed idea and would love to have plans for it. I too am looking for a guest bedroom and craft area and I know this would work in my space.

Chriss45

Mon, 02/05/2018 - 16:20

I didnt really have a plan when I was building my Murphy bed, I can do a sketchup plan for you if you would like. I used boat chair swivels instead of hinges and there is a YouTube video on how to do this. 

Chris

Nurserene62

Thu, 06/24/2021 - 23:11

Hi Chris! I would love to have a copy of the sketch up of this. I have a small she shed/guest cottage I would live to duplicate this in. Thanks in advance.

cgself12

Mon, 11/08/2021 - 14:18

Hi Chris!
I know I'm coming late to this party but I just found your shed and I adore it. You did an amazing job and I cannot express how impressed I am! I would also like a sketchup plan of both the murphy bed and the adjoining side cabinets. Great job!

Kim Daigle

Thu, 06/06/2019 - 10:59

I absolutely love everything about this she shed!!  I would be interested in a sketch up of the murphy bed as well as the cabinets next to it.  I would at least like to know what the dimensions of it all is.  You did an amazing job!  It's so beautiful!

mcocooper11

Tue, 06/25/2019 - 15:14

Me too!! I built a horizontal Murphy bed so I have that part done but I would like to see the plans for the cabinets on either side with the pull out desk!

so very cute!

Custom Reclaimed Barn Wood Dog Crate

Here is a custom rustic barn wood dog crate we built for our friends – with the majority of the barn wood reclaimed from their own barn.  The piece is approximately 36″ high, 60″ wide, and 29″ deep; with interior dimensions of 30″ x 56″ x 26″ – plenty of room for a large dog to move around and stretch out.  Of course, it is on locking casters too so it can be easily moved around.

The frame of this piece is made from the reclaimed barn wood, which was 2 x 6 stock resawn down to 2 x 3.  The sliding barn door also started as 2 x 6 material which we cut down to 1 x 2 stock.  The barn door was the only piece of this where we used a Kreg jig and pocket hole screws.  The rest of this custom rustic barn wood dog crate used miter joints for the front corner, while the back and bottom were attached in rabbets we cut in the outer frame.

The spindles are standard 1/2″ rebar, cut to the appropriate length and painted with a hammered black spray paint.  They are are recessed about 1″ into the wooden frame to ensure the dog can’t push them out or crack the wood while leaning on them.

This custom rustic barn wood dog crate also includes custom, hand made barn door hardware we made ourselves.  Yes, we do some metal work too!  We made this barn door hardware from standard flat bar steel and pulley wheels.  We even made custom clevis pins from 5/8″ steel rod to hold the wheels in place.  

There are more pictures here.

Estimated Time Investment
Weekend Project (10-20 Hours)
Finish Used
none. it's all natural
Recommended Skill Level
Intermediate

Beadboard Cabinet

Submitted by jamie_C on Sun, 08/28/2011 - 20:26

Since we don't have a garage or any really good place to keep our tools, they end up all over the house while we're working on a project. So, we decided to build a cabinet that would look nice in our house, and also house our tools. We chose the armoire plan because it has plenty of space.

This project took us forever, so it's hard to really estimate the actual working time. We began working on it back in June, then we were evacuated because of a forest fire.... By the time we got back into our house and we were organized again it was the end of July.... and now finally the end of August it's finished. It took us a while, but it's a great addition to our house!

We modified this cabinet by using 1/4 inch beadboard backed with 1/4 plywood for the doors. We also modified the size of the armoire to make it deeper.

Built from Plan(s)
Estimated Cost
$125 approximately?
Estimated Time Investment
Weekend Project (10-20 Hours)
Finish Used
Sanded, then painted the outside with a quart of "creamed coffee" oops paint, and painted the inside with a sage green paint from Habitat for Humanity Restore.
Recommended Skill Level
Beginner

Comments

Maple Bookcase with Fluted Trim

Submitted by NeoMoses on Wed, 02/06/2019 - 20:57

Just finished this maple bookcase with fluted trim for my daughter's room.  I chose all maple trim even though it's painted because I wanted a good hardwood with low grain that would look good for decades to come.  Full build details are on my website.  Router bits used were a roman ogee and a core box bit.

Estimated Cost
100
Estimated Time Investment
Weekend Project (10-20 Hours)
Finish Used
White Paint - Behr Premium Plus Semi-gloss
Recommended Skill Level
Intermediate

Comments

Coffee Bar with Built-In Beer Fridge and Wine Storage

Submitted by Chuck1979 on Mon, 07/08/2019 - 10:39

We made a beverage station for the corner of the kitchen!

Estimated Cost
$250
Estimated Time Investment
Day Project (6-9 Hours)
Finish Used
Semi-gloss white paint and Dark Walnut stain
Recommended Skill Level
Intermediate

Comments

gunnare57

Fri, 07/31/2020 - 09:43

Hello! Was looking to see if this is something you would be interested in building for us? We are in love with this project but don't have the tools or means to do it ourself..

Can talk about pricing / size etc.
Thanks!