Laundry Basket Cabinet
Laundry Basket Cabinet!
by Bob
Built from Plan(s)
Laundry Basket Cabinet!
by Bob

I’ve been working on building up to this playhouse for a while. Just got the doors on and am pretty pleased with what’s my first project of any size. Built on top of a modified version of the playhouse deck with a to be added (hopefully) swing in front. Color selection by the end customer (who’s 8). Modified to add 12 inches for a 5’ doorway. Thankfully I caught that at the last minute for the kiddo. Still a menace if I forget to duck. But super roomy once inside.
Sun, 06/12/2022 - 09:04
Love the shades of blue, thank you for sharing your awesome creation!
To date this has been my favorite and fullfilling DIY project!! Skills were learned, $$ was saved and it looks fabulous!!! It wasnt easy but it wasn't impossible. April WIlkerson provides a detailed tutorial on her website along with a fantastic youtube video on her channell. I hope this inspires someone else to take on this challenge!! If you have any any questions please feel free to ask me!! Enjoy.
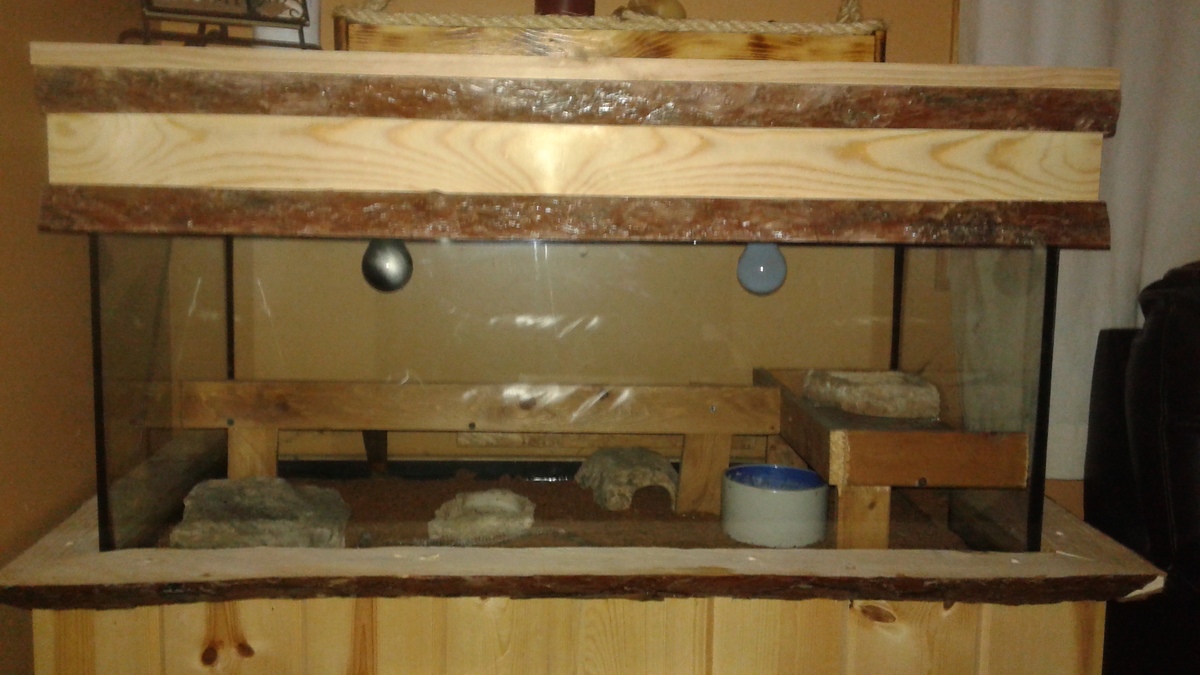
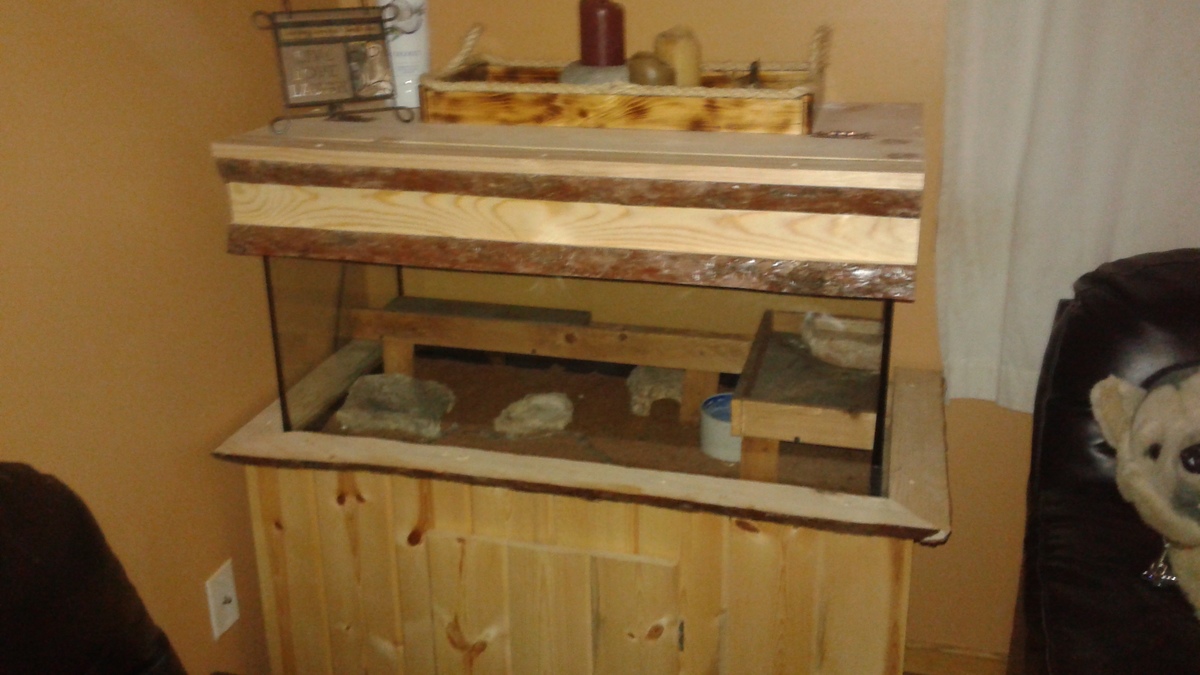
My husband and I bought a milk snake a few years ago. We had the cage sitting on our kitchen table. My husband was up north visiting his family and it irritated me. So I went out to the garage to see what we had. We had some tongue and groove and some misc. Pcs of scrap pallet wood. I slapped the stand itself together in a day. 3 years later, I completed it with the live edge shelf trim and the canapy, again using live edge. The pine log Pcs are left over from our basement knee wall ledge.
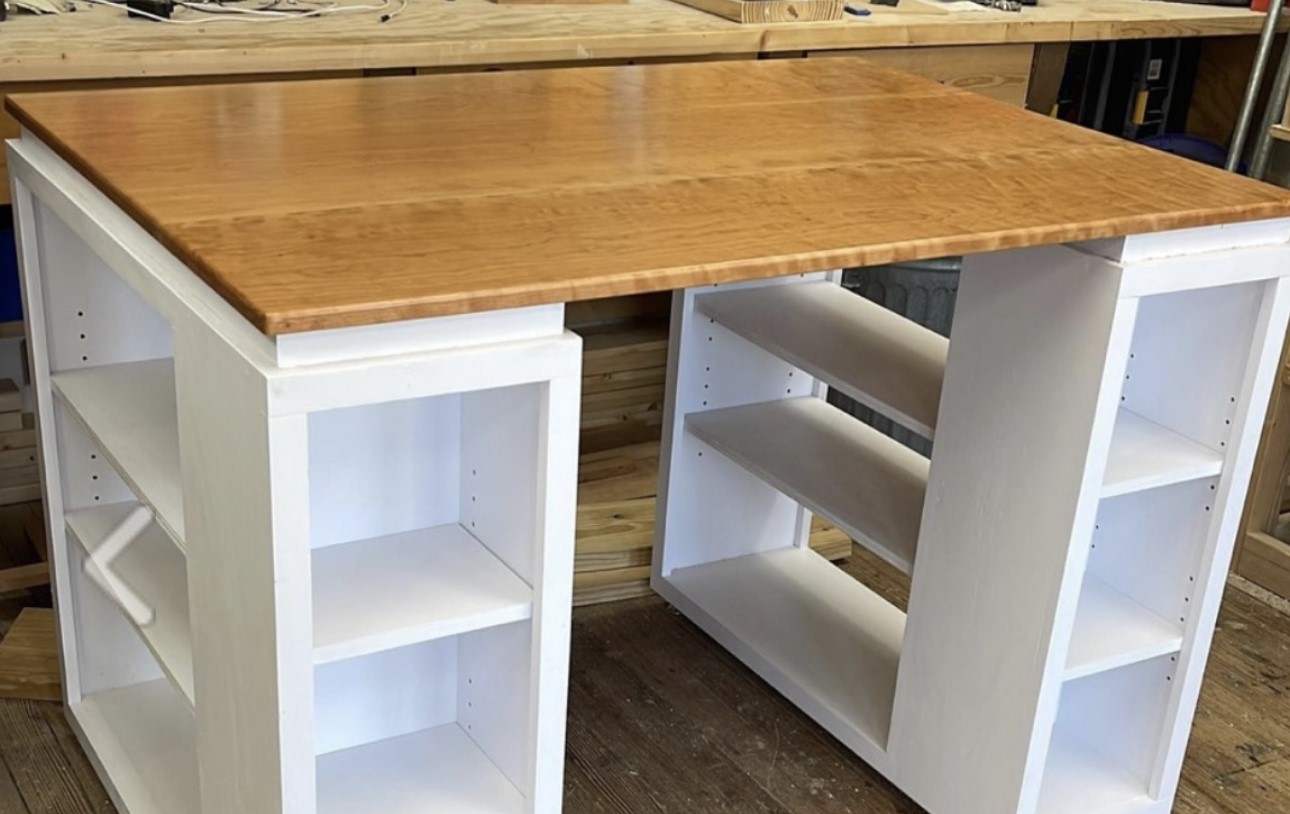
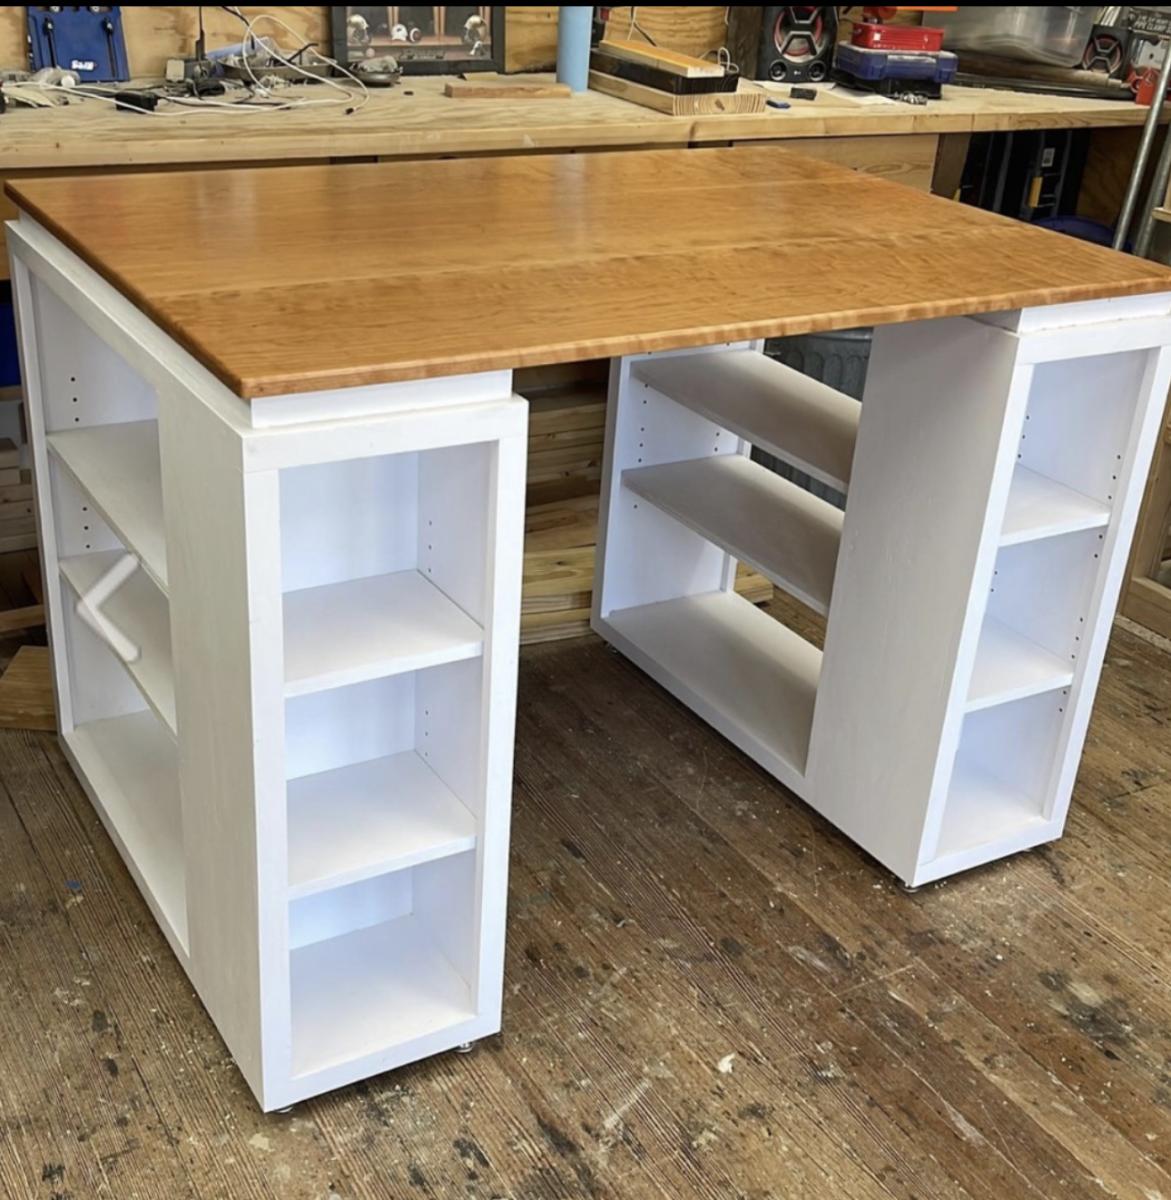
I used the plans for the modern craft table for this build and I had some curly cherry laying around begging to be use so I used that for the top.
Sun, 11/20/2022 - 12:32
This is delightful, love the white base and stunning wood top! Thanks for sharing.
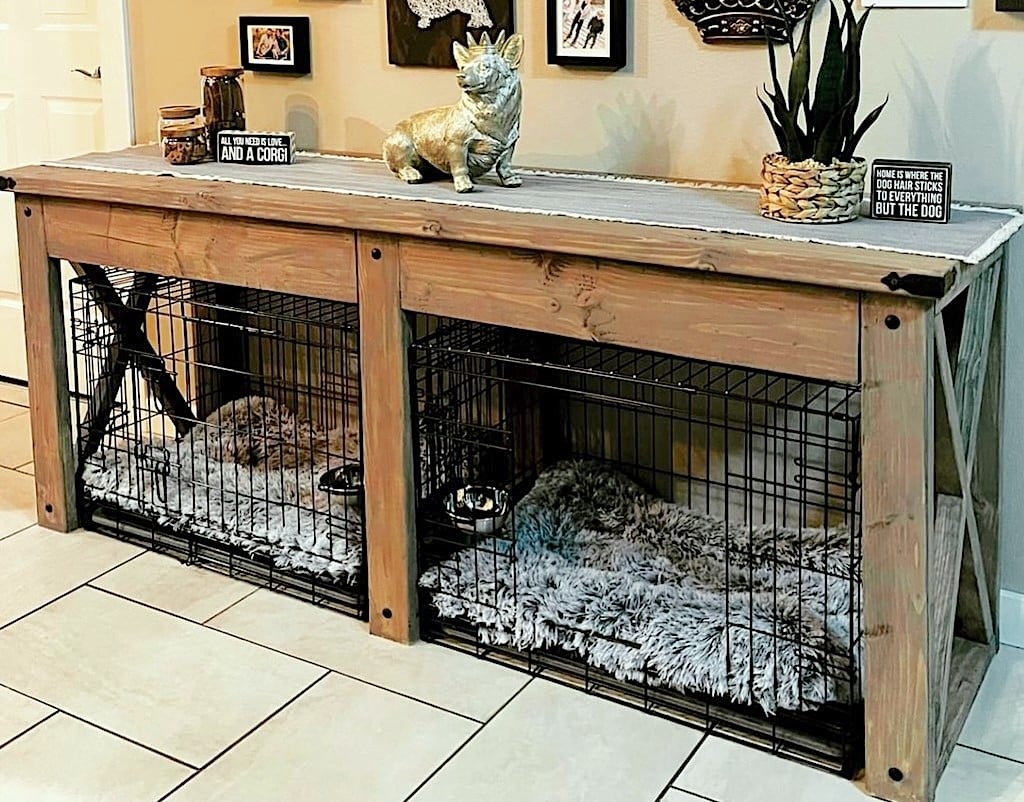
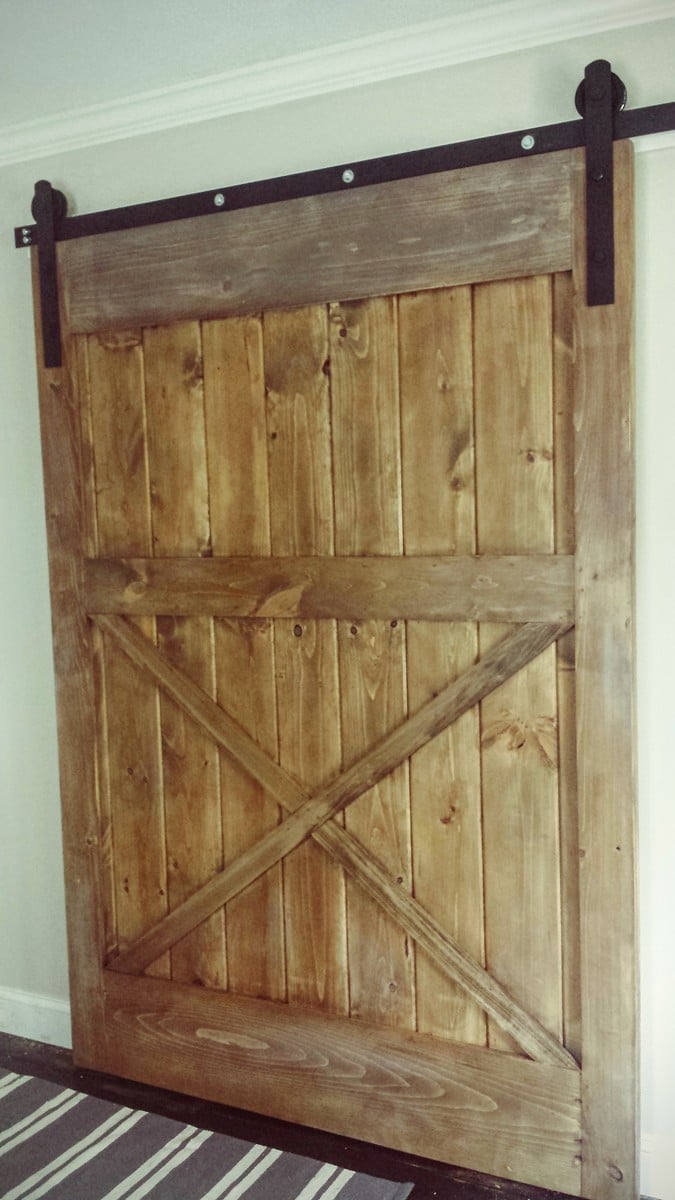
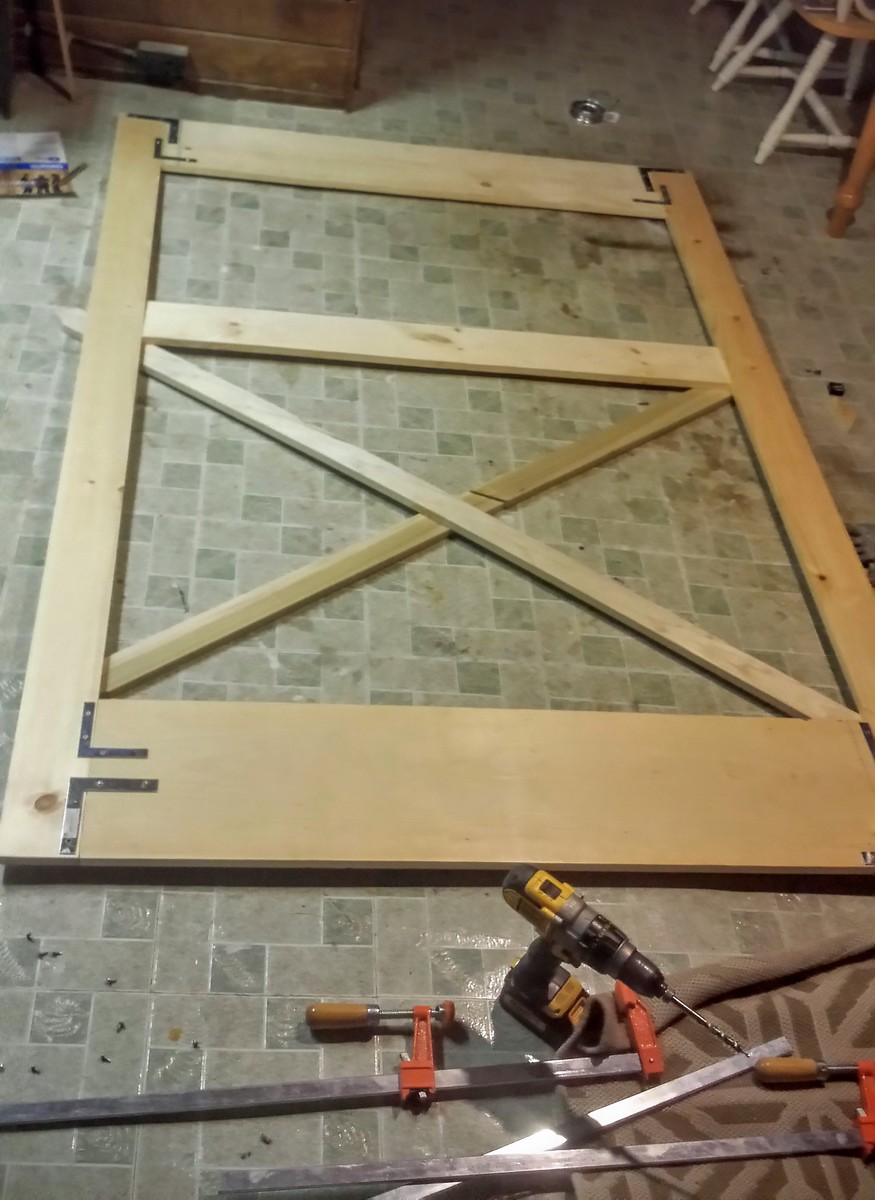
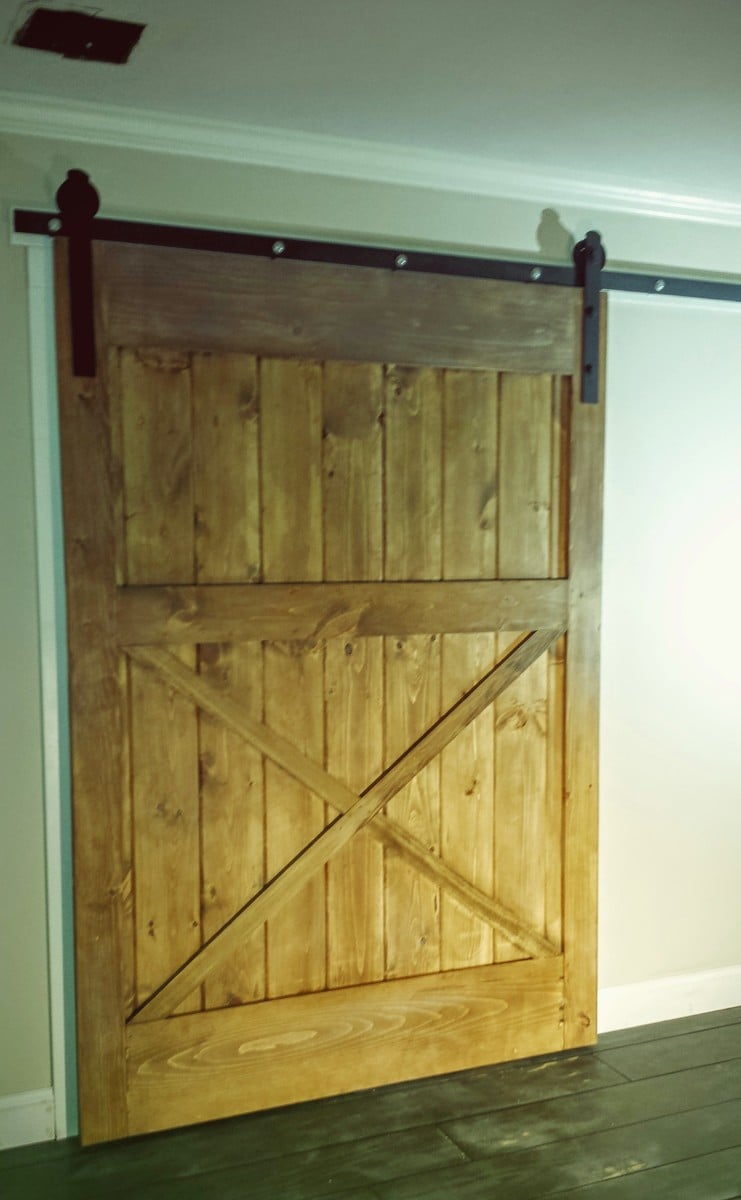
"I modified the Farmhouse X Console to become a surround for my dog crates. Thanks for the project plan!"
Sheena
Thank you so much for the plans. We enjoyed building it. We love it!!!
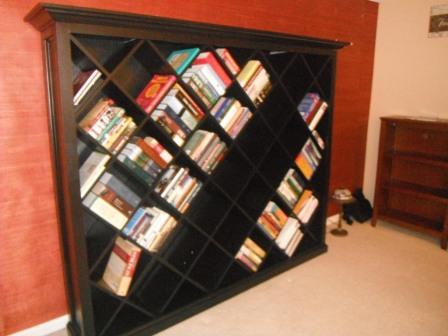
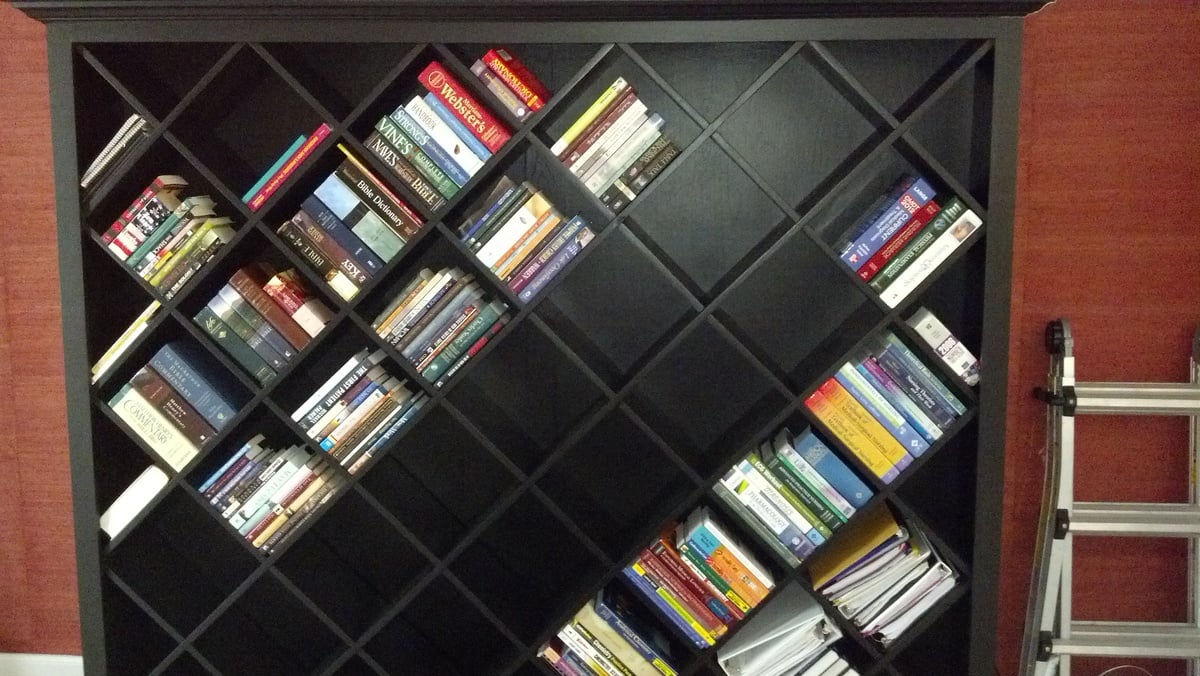
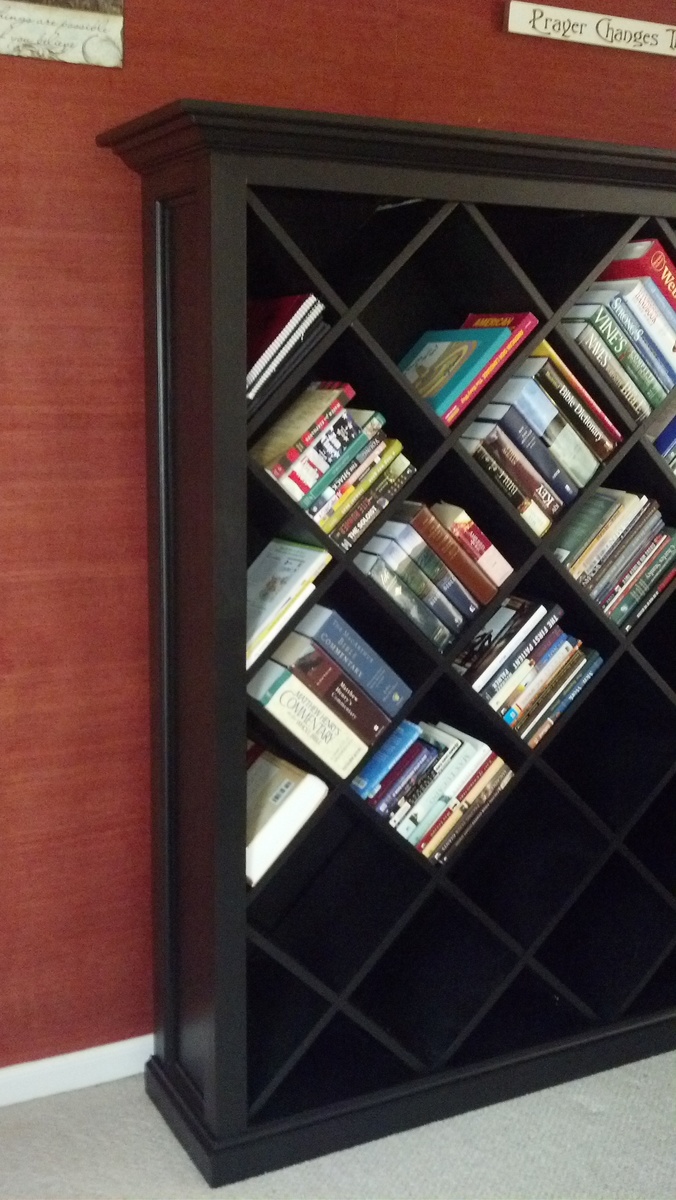
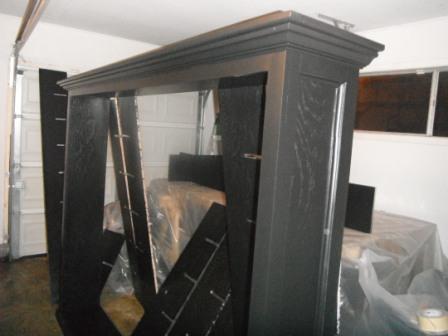
My wife was watching TV and she saw a Bookshelf on a Home Depot commercial with diagonal shelving. She kept telling me how much she wanted a bookshelf like that. So, for my first wood project ever, I decided to try and tackle it for her. It is slightly over 7 feet wide and a little over 6 feet tall. I am currently trying to learn sketchup8 to create plans for this project.
Unfortunately I didn't use a certain plan from Ana's site for this project, but you can find any bookcase plan and place the diagonal shelves in place of the horizontal ones.
Tue, 01/31/2012 - 21:02
So you totally just solved my no fireplace dilemma! I think I'm going to take your design here and leave an open space for some electric logs. Thank you so much for sharing, it is really stunning!
In reply to Very cool by nicwolford
Wed, 02/01/2012 - 06:10
Those were challenging because, as I stated before I am not even a beginner. I was going to try and use my little trim router to cut them but I learned quickly routers cause much saw dust. I don't have a router table and my router is small. I decided to use my miter saw. I measured out where the slots should go and Cut the outside boarders of the slots with my miter saw. I don't have a jig saw either so I chiseled the the remaining piece to form the slot. I then used my small trim router to smooth out the slots. After I got in a groove it went pretty fast. It was a lot of Slots. Like I said before, I am very new and I know there are easier ways to do this lol. Just a hint..If you ever use interlocking slots and plan on painting the project, I wouldn't make the slots exact to the bare wood. The primer and paint add to the thickness of the wood so it is important to take this into consideration before cutting the slots. Again, very new to this.
Wed, 02/01/2012 - 06:28
I don't think that you can say that your "new to this" any more. You cut your teeth on quite an ambitious project. You did a fantastic job! And just wait till you learn sketchup, the FUN you will have! Keep up the great work and keep posting! Can't wait to see your next project!
Wed, 02/01/2012 - 12:32
I've never seen a diagonal bookcase before, but I like this one. You'll never have to worry about straightening books that have fallen on their sides either.

Sat, 02/04/2012 - 15:22
This book case looks truly expensive! My excuse is always a lack of tools, but look what you did with what you had! Everything is square and precisely done.
In reply to So impressed! by Debi G
Sat, 02/04/2012 - 19:26
Thank you for your kind words. I appreciate all the input I have been getting. I look forward to posting more projects and getting more ideas.
Tue, 02/07/2012 - 12:16
I really hope you post your plans! You did a nice job. I'd like to use a very scaled down version of this to make a wine rack in an open cupboard we have over our sink. Might have to pick your brain later. ;)
Tue, 02/07/2012 - 20:25
I saw the same commercial your wife saw, and kept trying to describe the bookshelf to my husband. Now I can show him. Thanks for posting,and I hope you figure out Sketch Up so we can see your plans!
In reply to Great Job!! by mrs2tone
Wed, 02/22/2012 - 20:33
I have started to figure it out a little bit. I thank you for the comments and am close to finishing the plans. Again thank you for your comments
Thu, 05/10/2012 - 17:29
Wow! That is wonderful...I have a similar one that I LOVE and wanted for years. It was in the Pottery Barn Catalog and OUTRAGEOUSLY priced...I don't remember exactly the $$. When "Hold Everything", a subsidiary of PB, went out of business, I got the second to last one they had in stock for $200. AND...When I saw the HD commercial I realized I might be able to make a more custom version someday. Your story inspired me to plan something, and also to perhaps even open up and learn SketchUp which I downloaded months ago...Look forward to more projects!
Mon, 10/15/2012 - 20:33
Well it's crooked. LOL Jk I think it is insanely awesome! I hope my first project is even half as good!
Mon, 07/15/2013 - 10:09
Great beautiful first build! Thank you for this great idea that triggered an idea for myself. Going take this format, and adjust the dimensions to fit as a wine shelf.
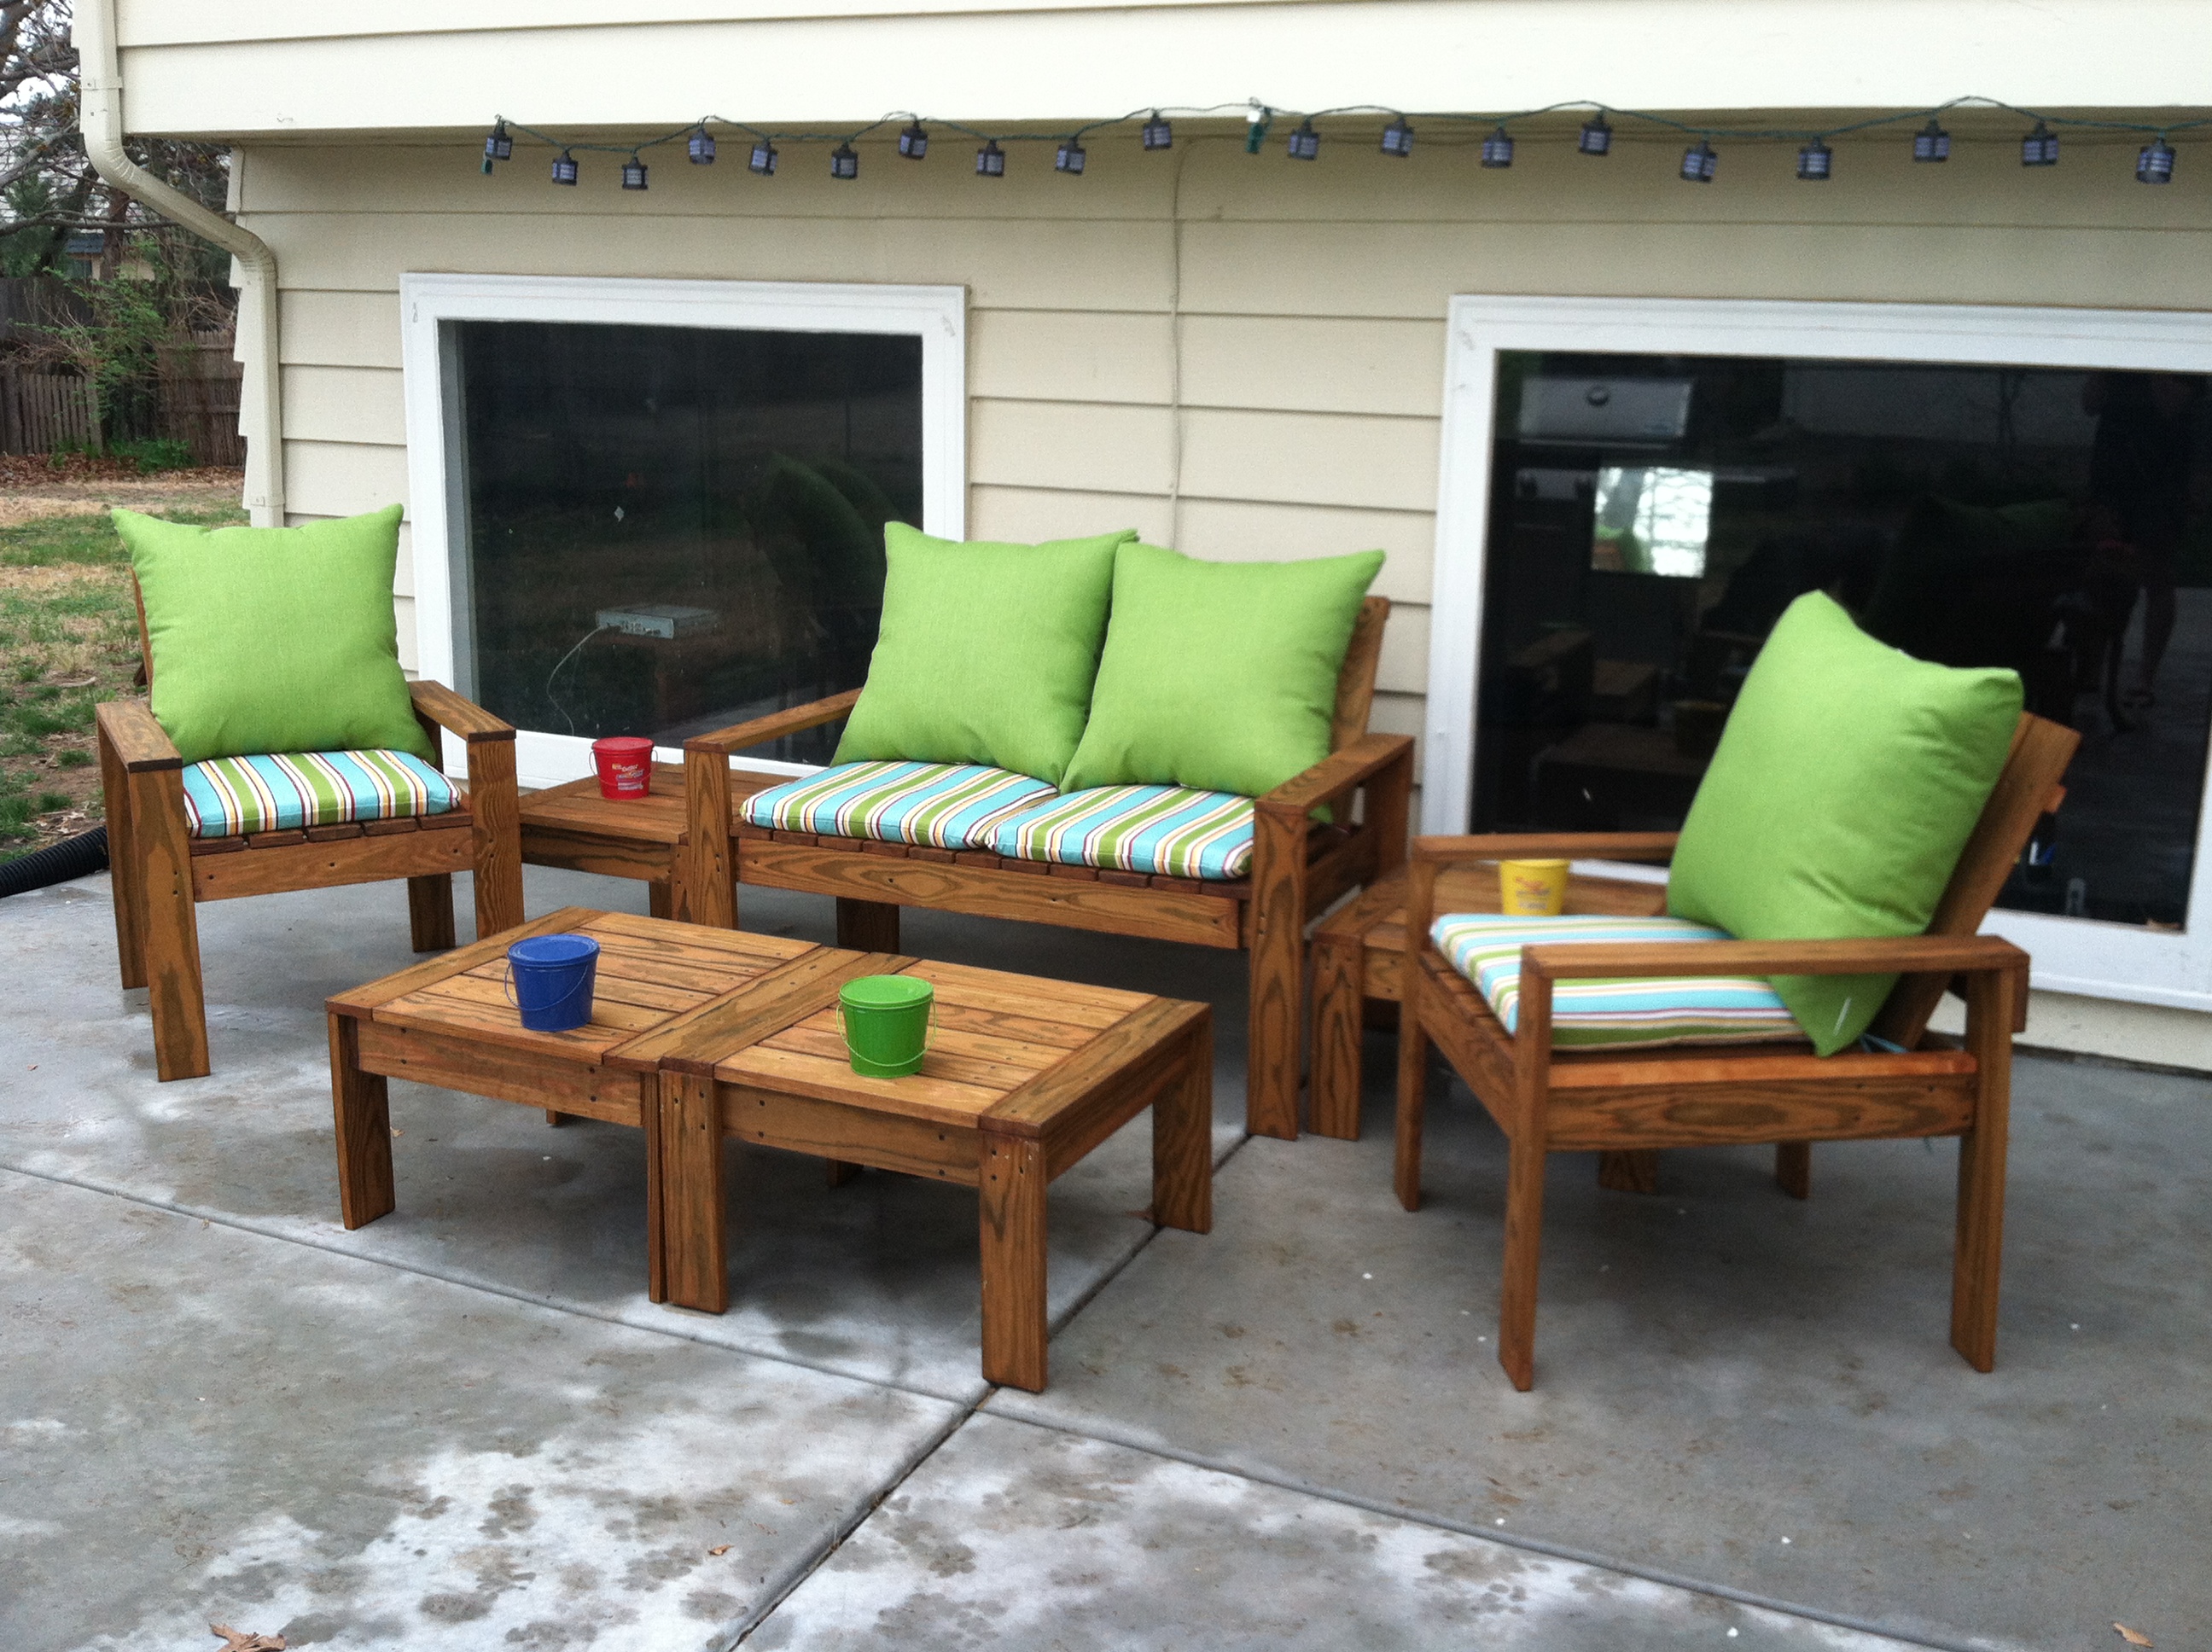
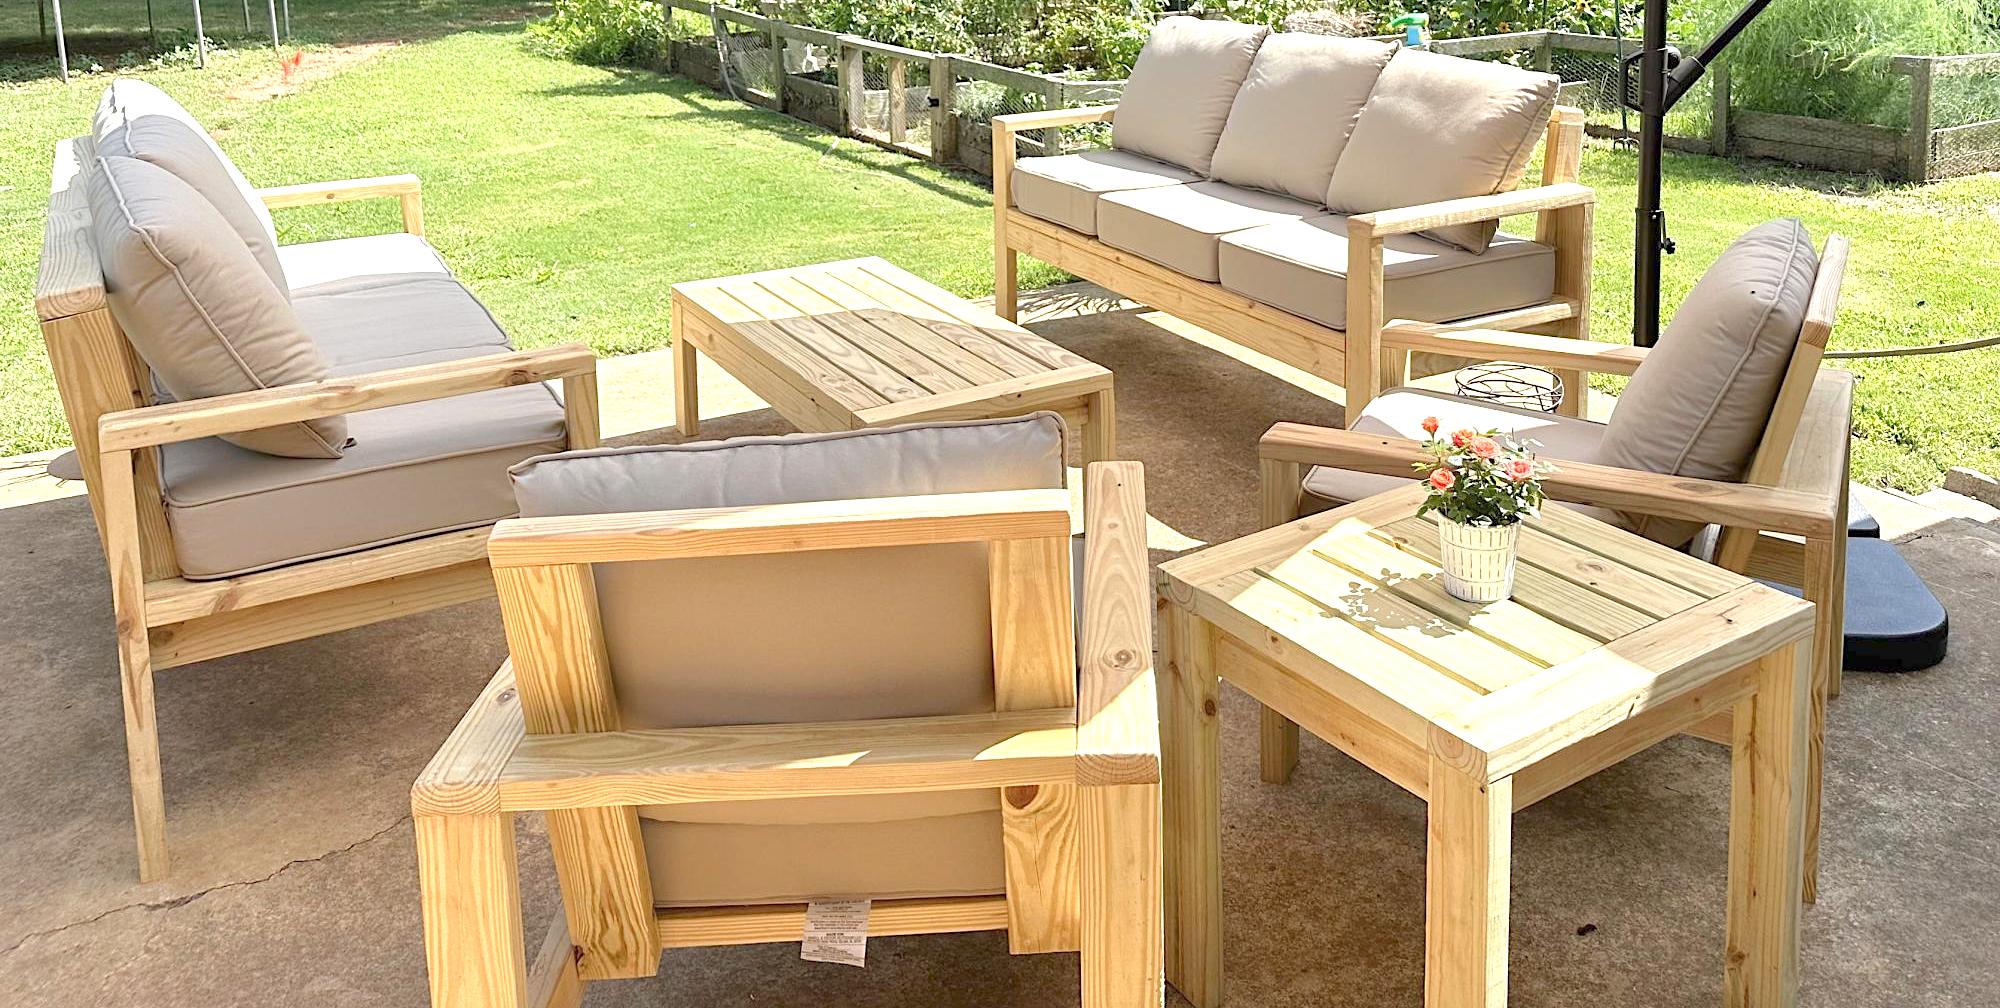
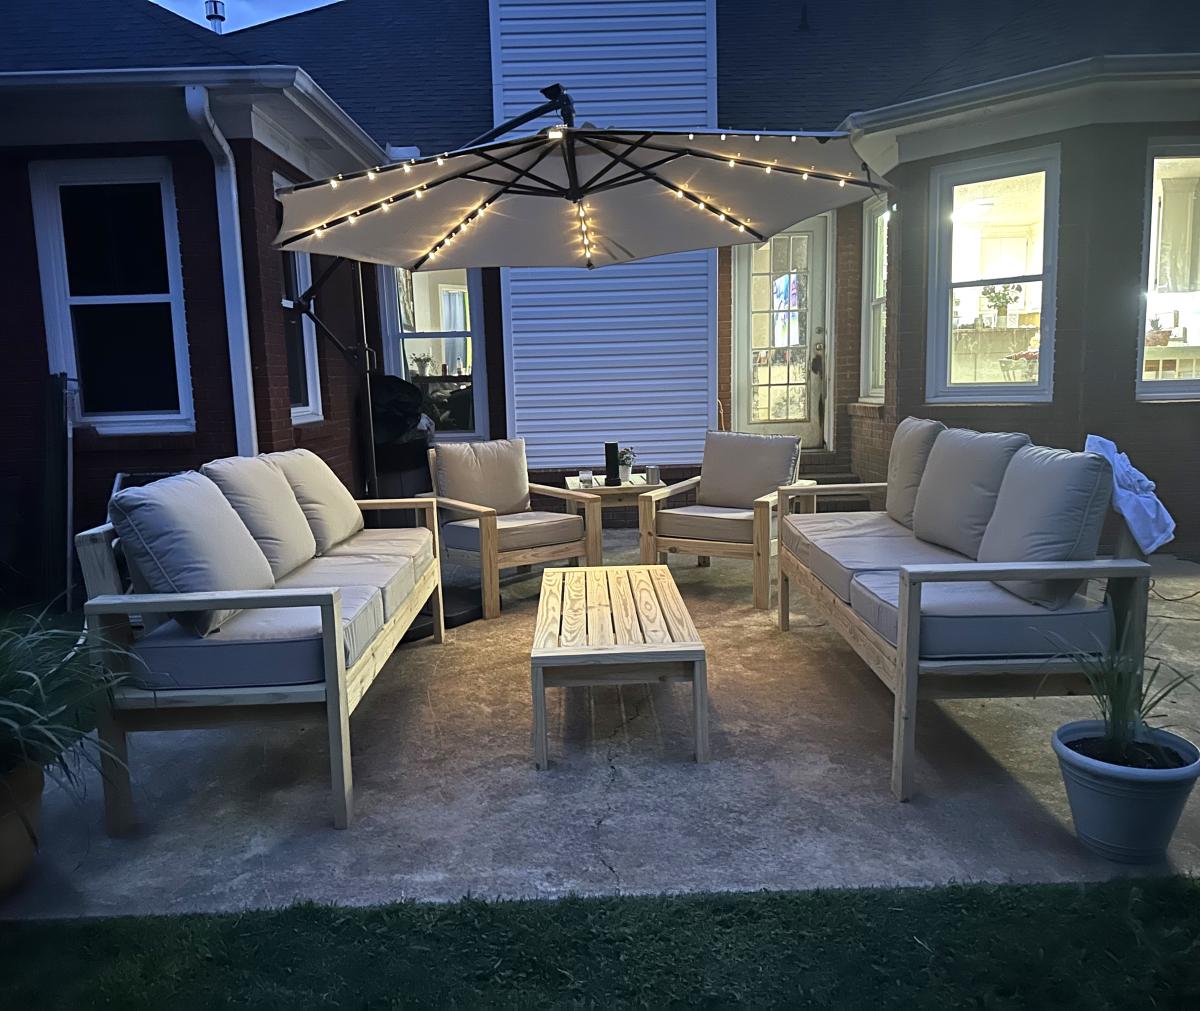
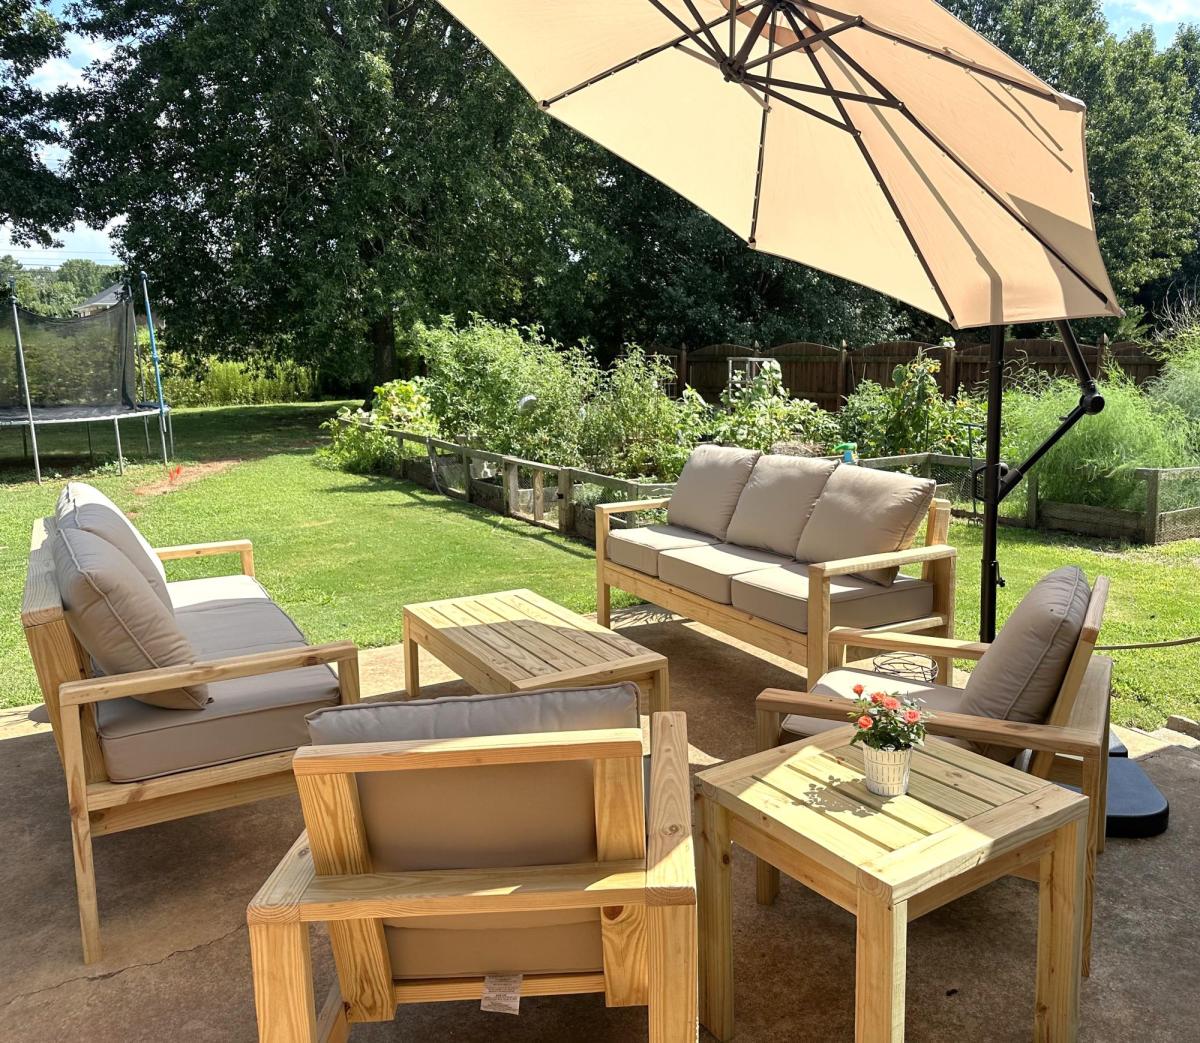
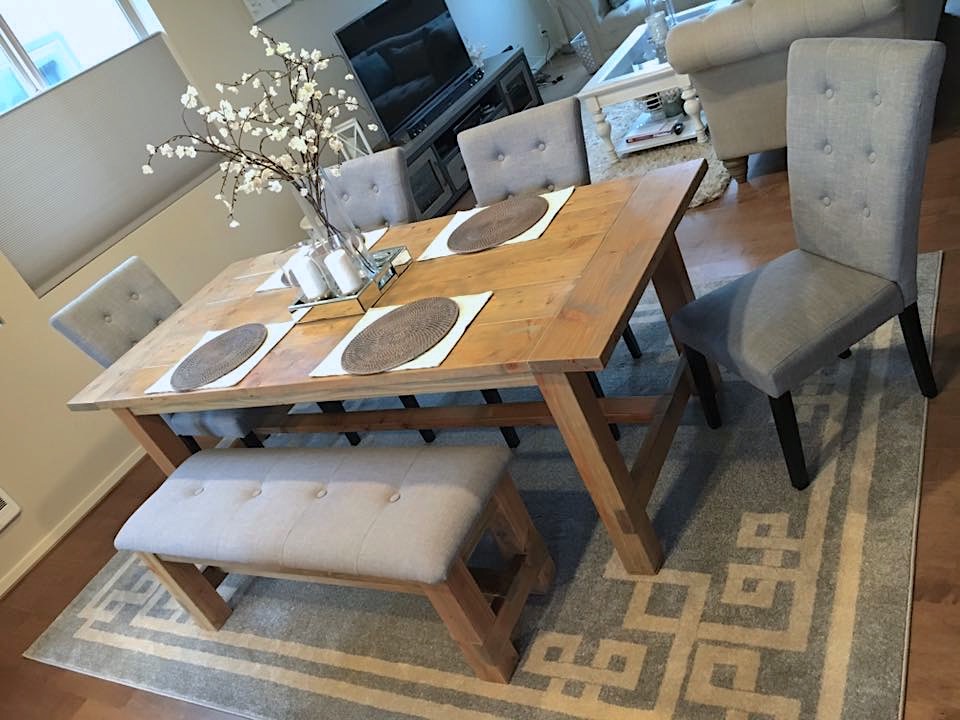
Spring is around the corner and I had no outdoor furniture. My boyfriend had just talked me into a new weber grill, which did not leave much budget for new outdoor furniture. That's when I came across this web site and thought 'I can do that'. So I talked me boyfriend into helping build this Simple Outdoor Conversation Set. We used plans for the Simple Outdoor Lounge Chair and Simple Outdoor Ottoman and then followed the alterations by post for 'My Modern Outdoor Patio Collection' to make the loveseat.
The whole project came together over 5 days.
Day 1: Cut all boards (5 hrs)
Day 2: Sand all boards (5 hrs)
Day 3: Stain all boards (6 hrs)
Day 4 & 5: Assemble furniture (9 - 10 hrs)
The total project took about 25 hrs and cost about $350. Here's the breakdown wood and supplies $204 from Lowe's for pretreated wood. $145 on cushions (NOT ON SALE); $60 for the seat cushions from Home Depot and $80 for the back cushions from Wal-Mart. We were originally planning on only having the seat cushions, but the seats were long when you set in them with your back against the bear wood (I was setting so far back, my feet couldn't reach the floor) so we opted for thick back cushions to make it more comfortable. The project finished up just in time for our first BBQ party! (March 2012)

Sun, 03/18/2012 - 13:16
Oh I love this!!! Love the cushions and the colors too!
Loving this furniture! We modified it slightly by raising the height of the couches. Added some height and a slight tilt in the back. The chairs are super comfortable as the plans are done. We used 6” 25x25 cushions. We plan on staining soon.
Jaime Sallis
This was made for a friend. I looked up Ana's original plan and modified it a little. The end result was something she was very happy with.
Mon, 07/09/2012 - 20:39
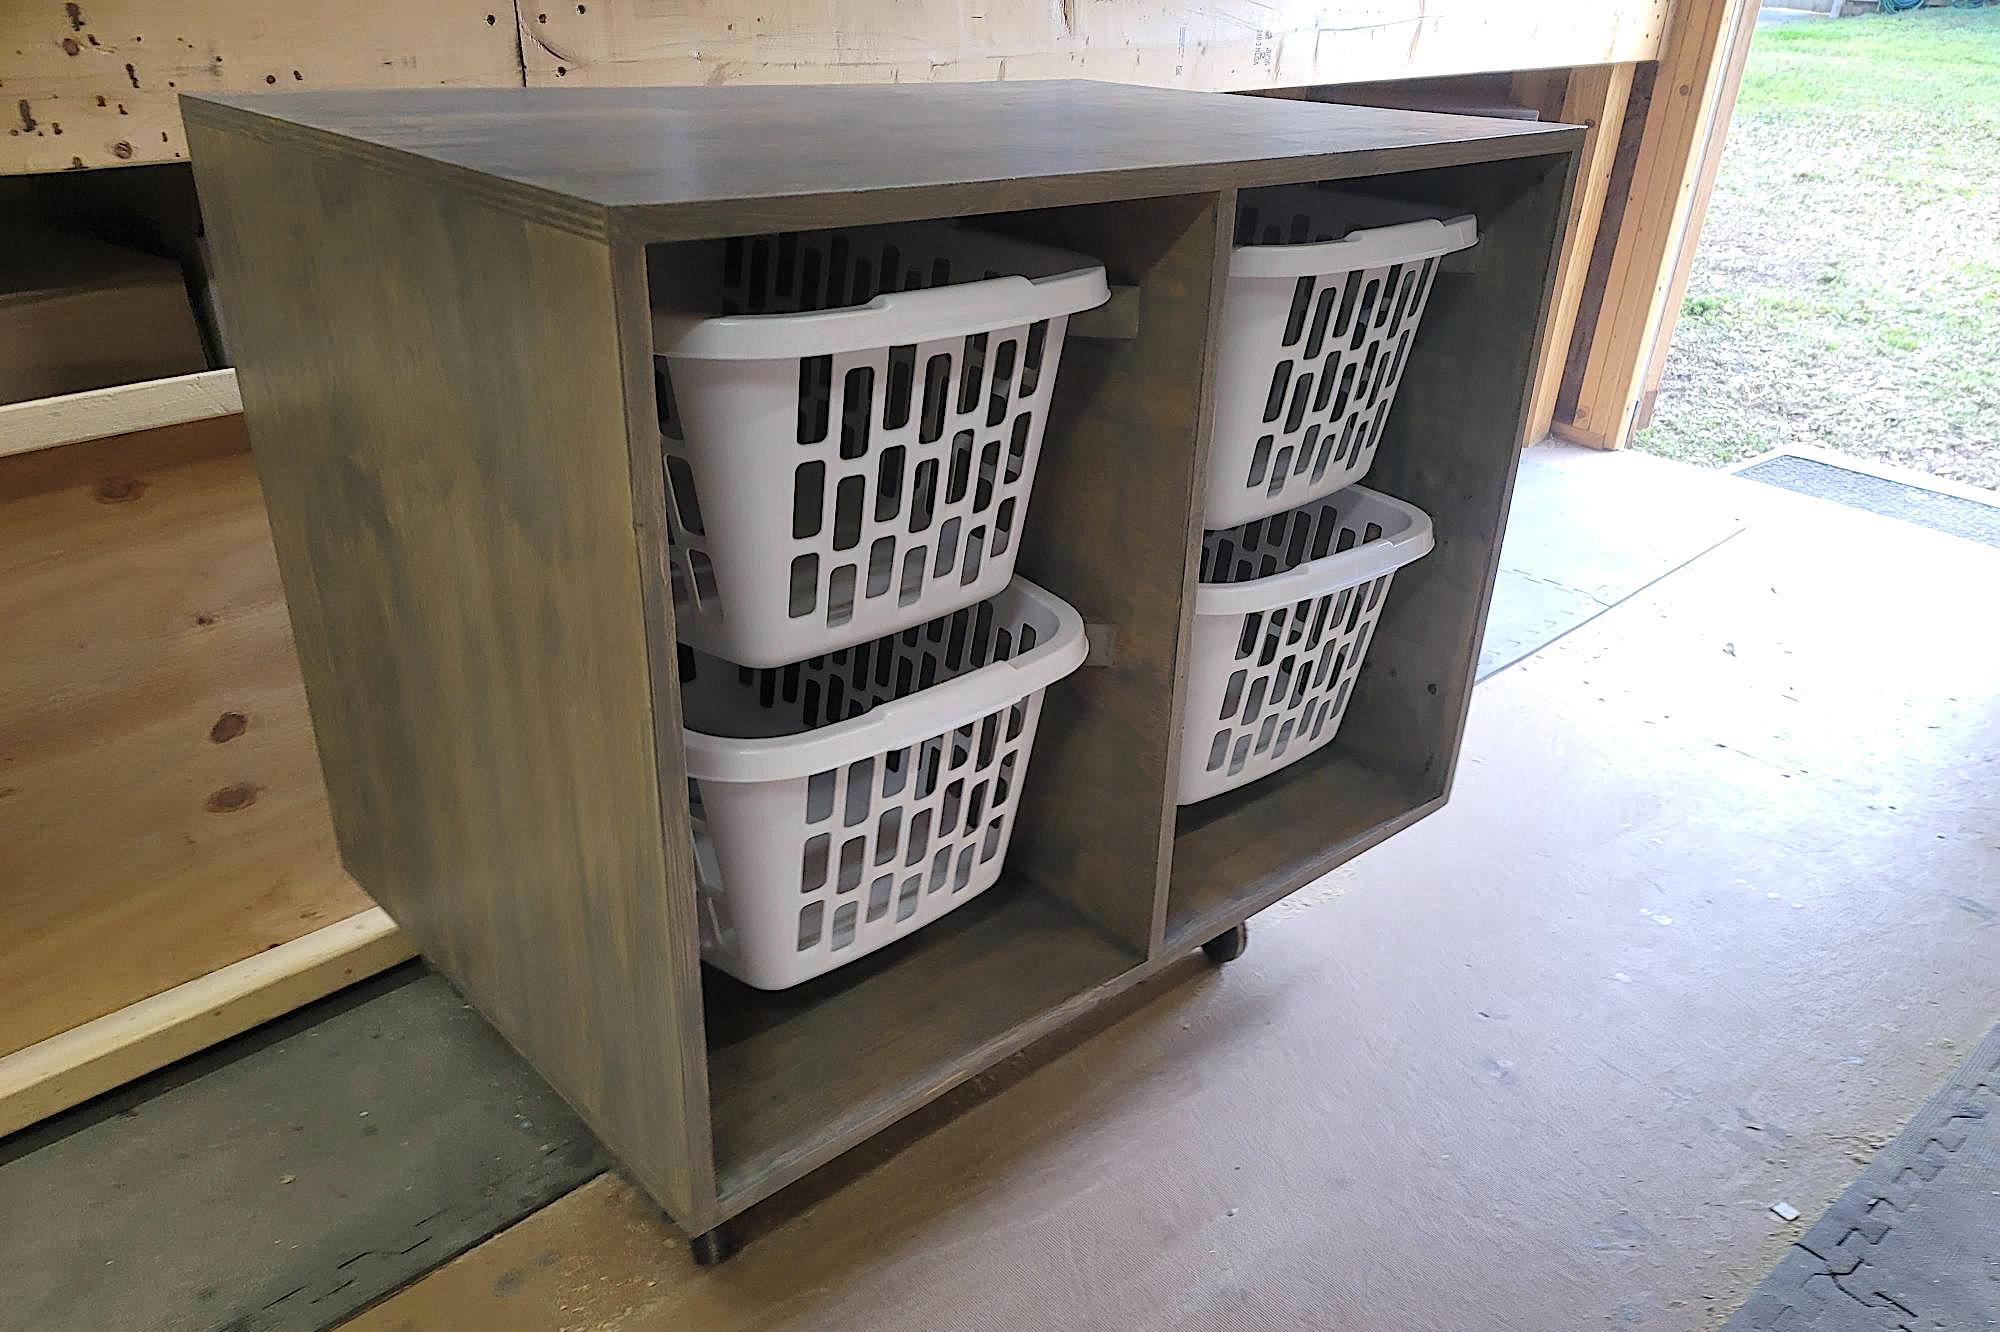
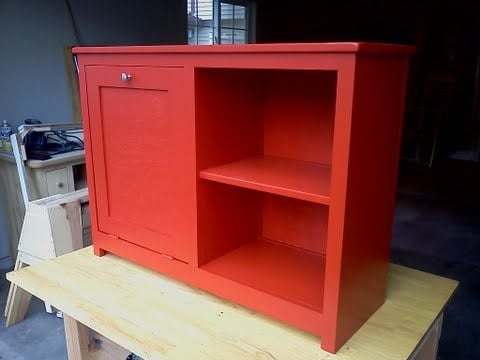
I love your modifications.. Think I'll take it bit further and add another pullout on the other side of the shelf. This way I can put one hamper in each, and my whites and darks will already be separate.
Fri, 11/02/2012 - 05:54
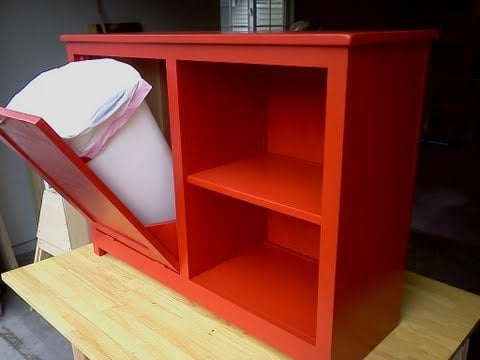
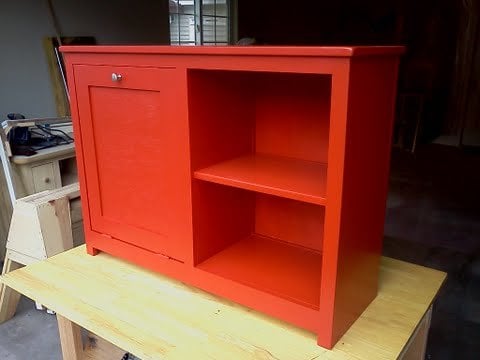
What were the completed dimensions for the tilt out trash bin with side shelves

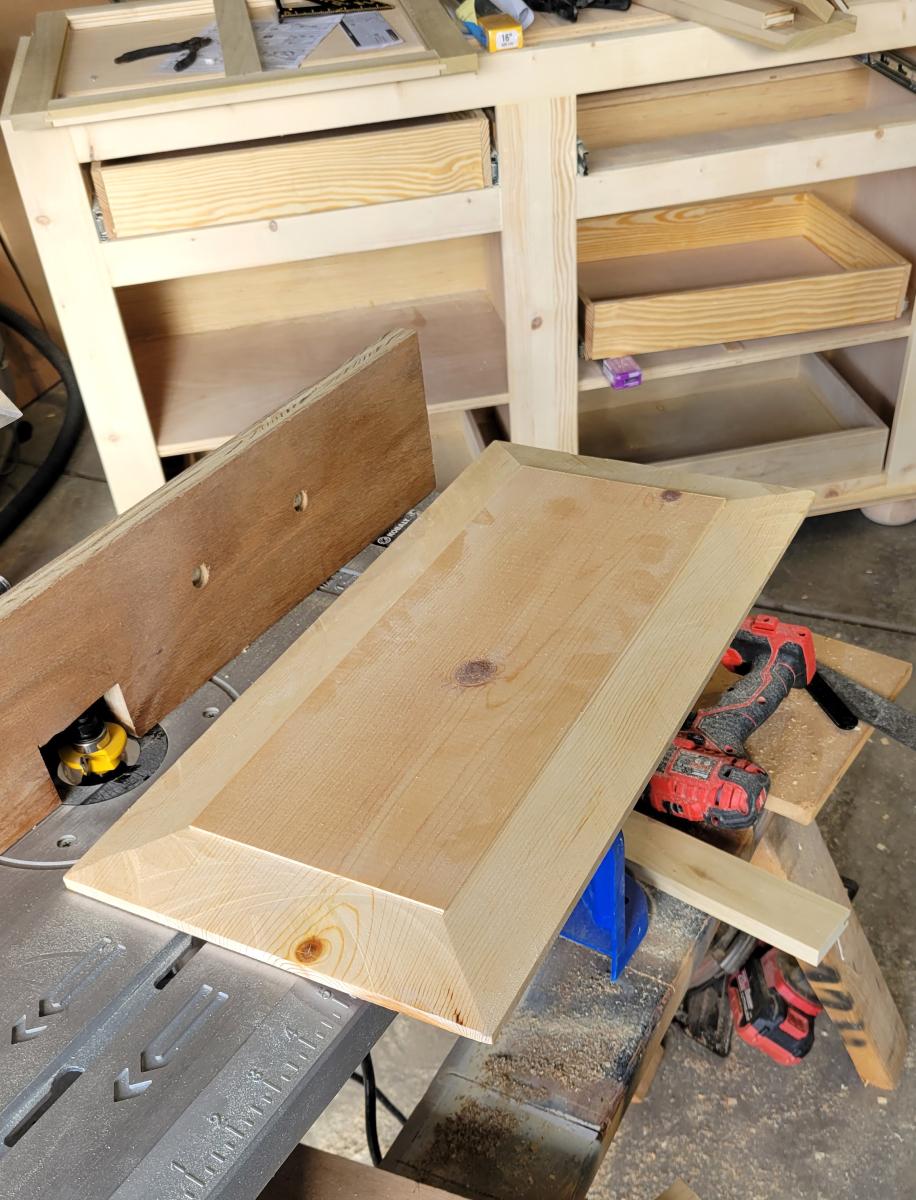
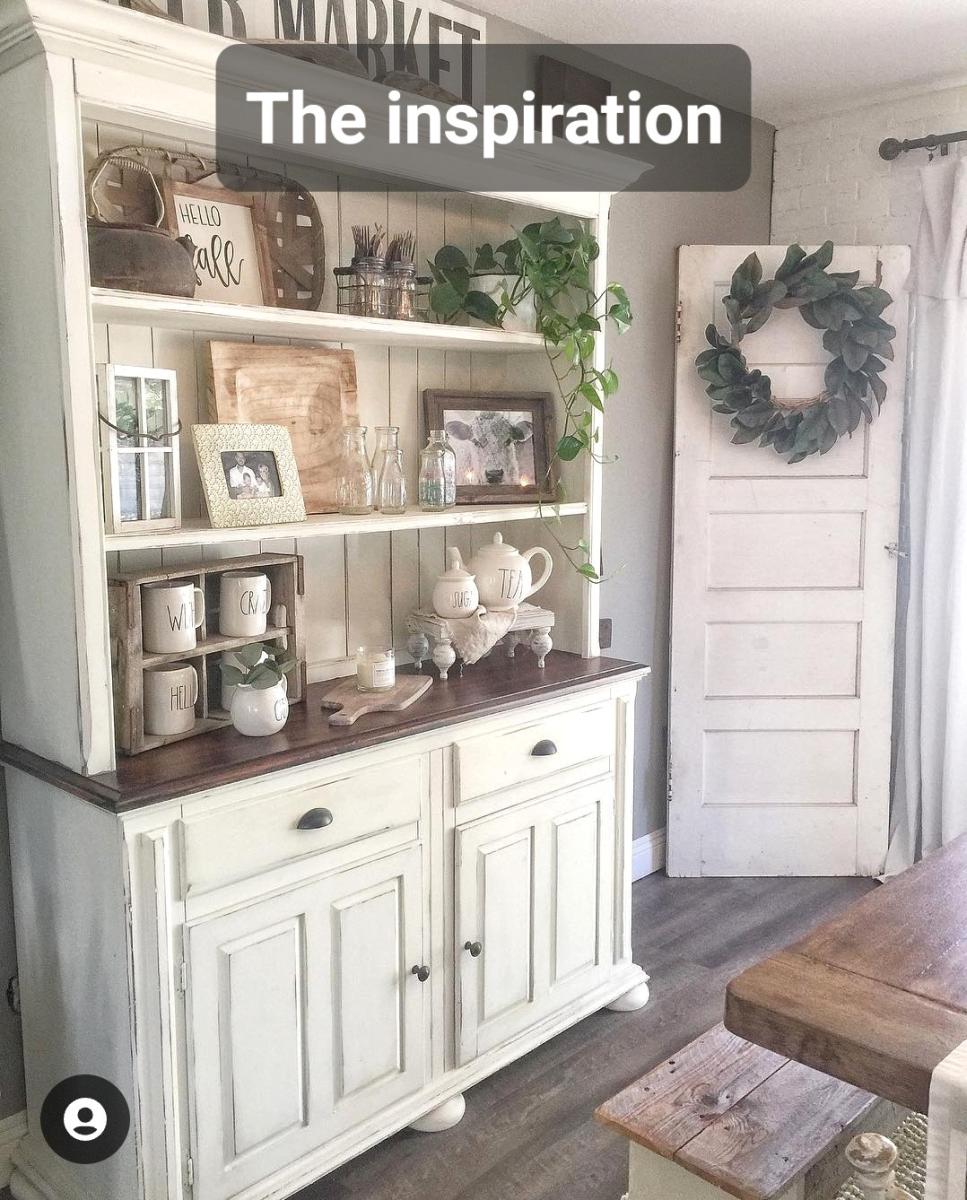
The inspiration for this piece came from an Instagram post. We decided on our overall dimensions (36" tall, 18" deep and 60" long), then more or less guessed what the size of the pieces for the face frame would be. We recreated it as best we could and I think it came out incredible. It has soft close drawers on top and the hand-made sliding shelves are also soft close. The raised panels for the doors were made on a table saw. The doors have soft close hinges. The cabinet is made from maple plywood, oak plywood, yellow pine and poplar. The top is made of cypress and stained with Minwax "fruitwood" color and semi-gloss urethane. Next step is to make the shelves which will be 48" tall overall.
Dave Patterson

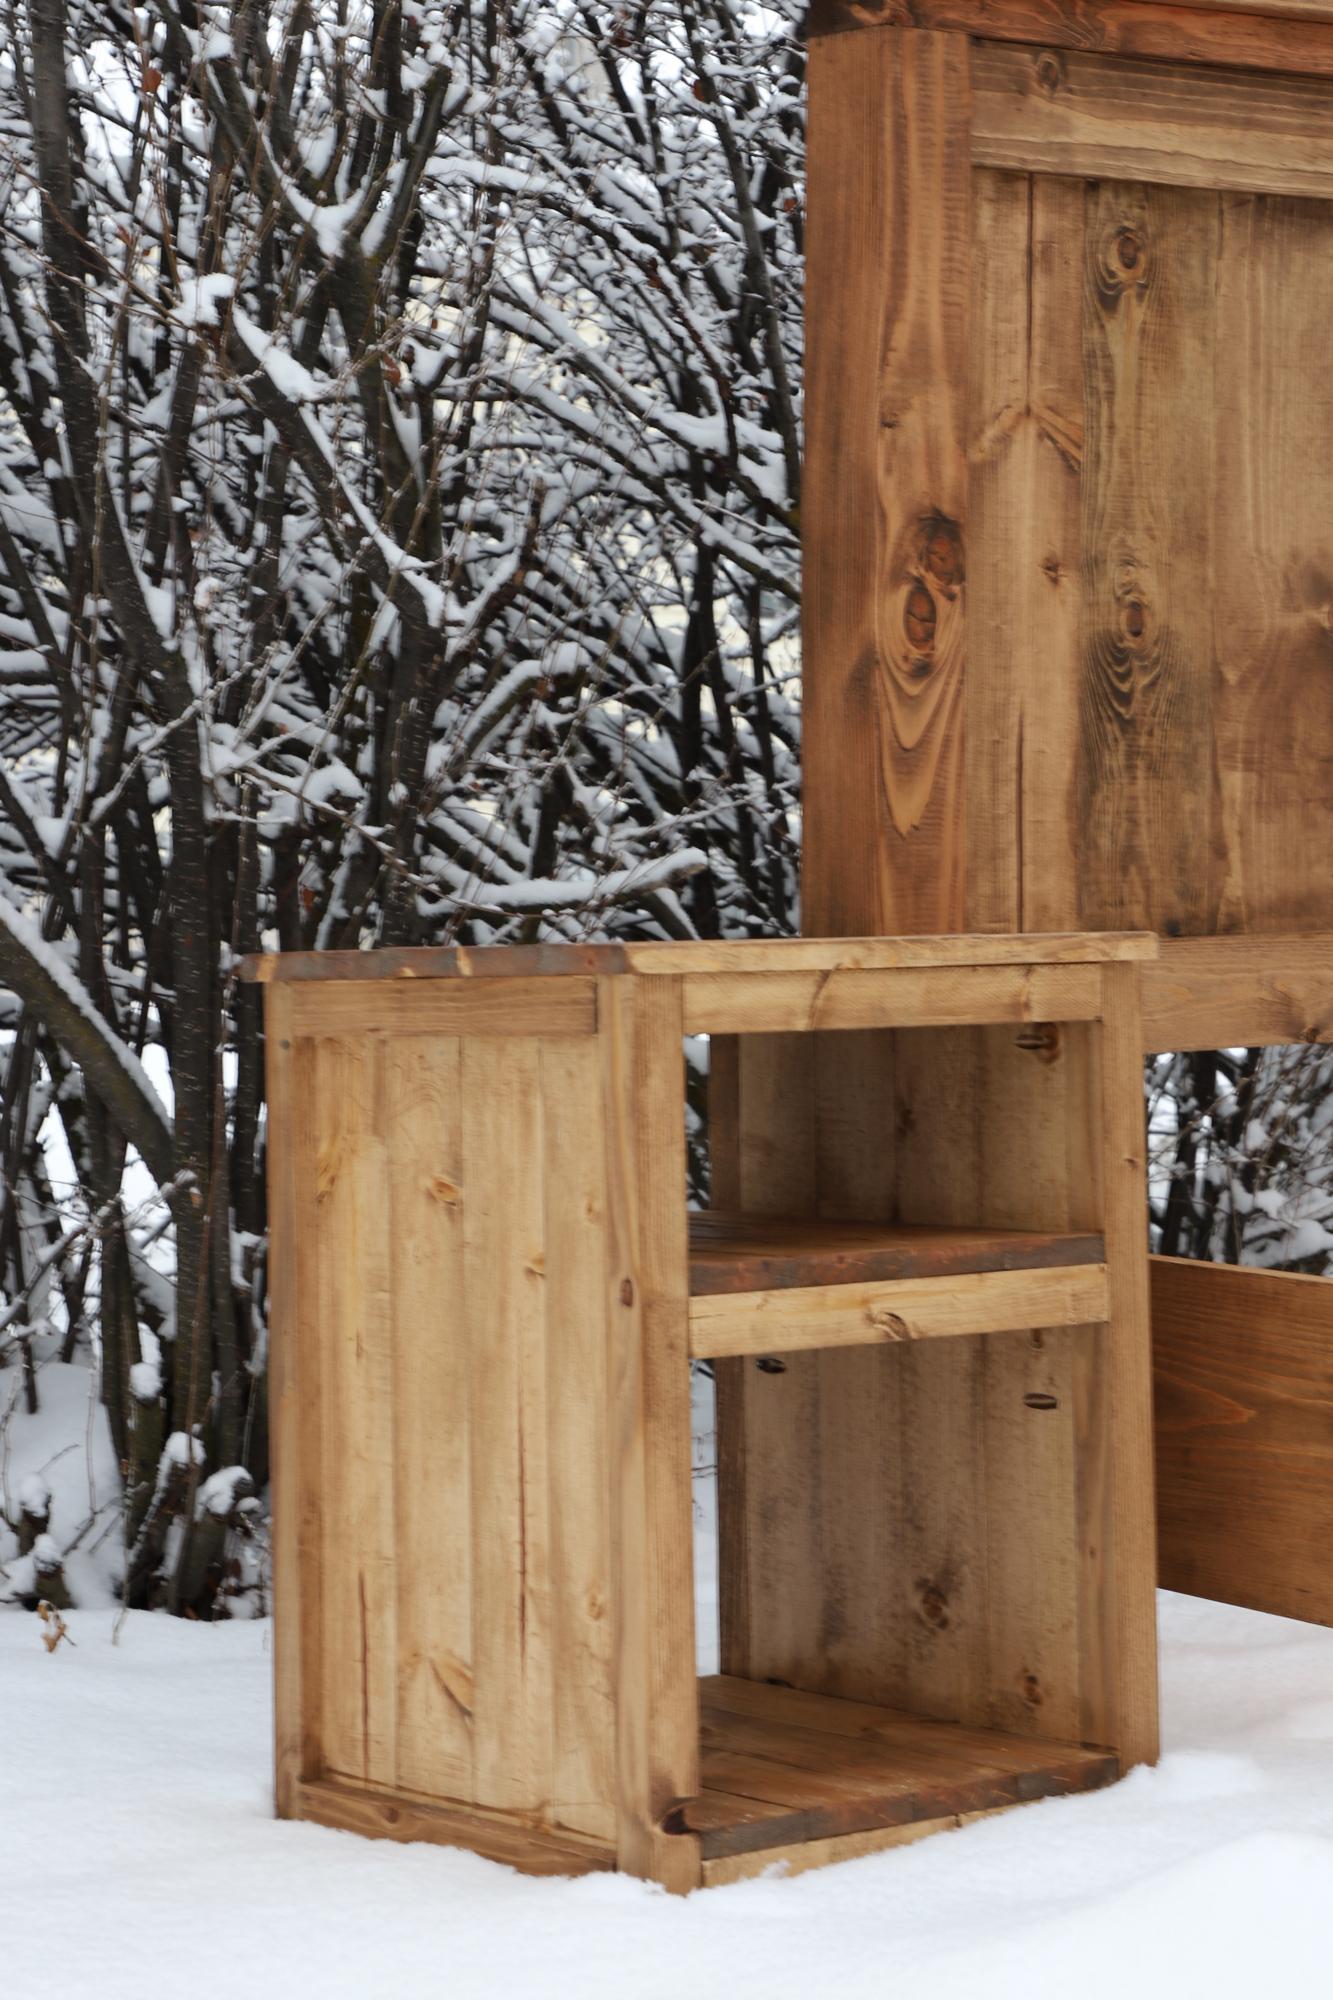
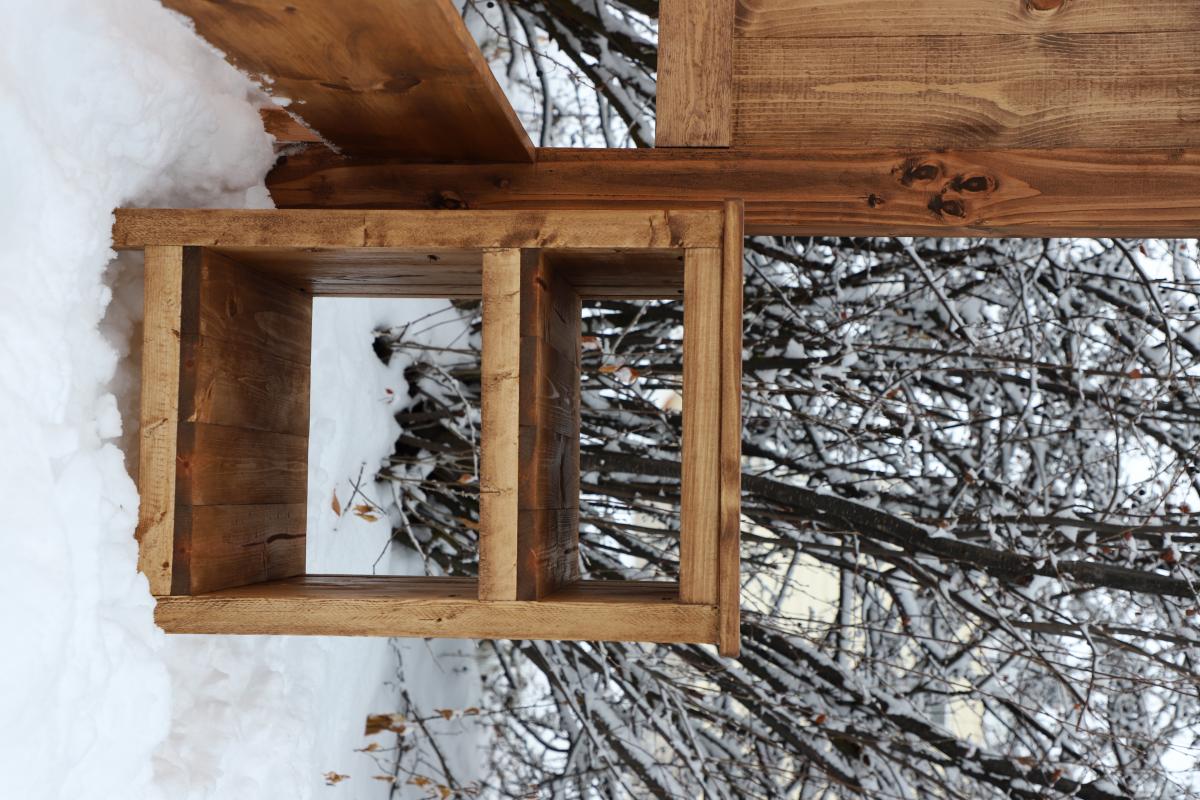
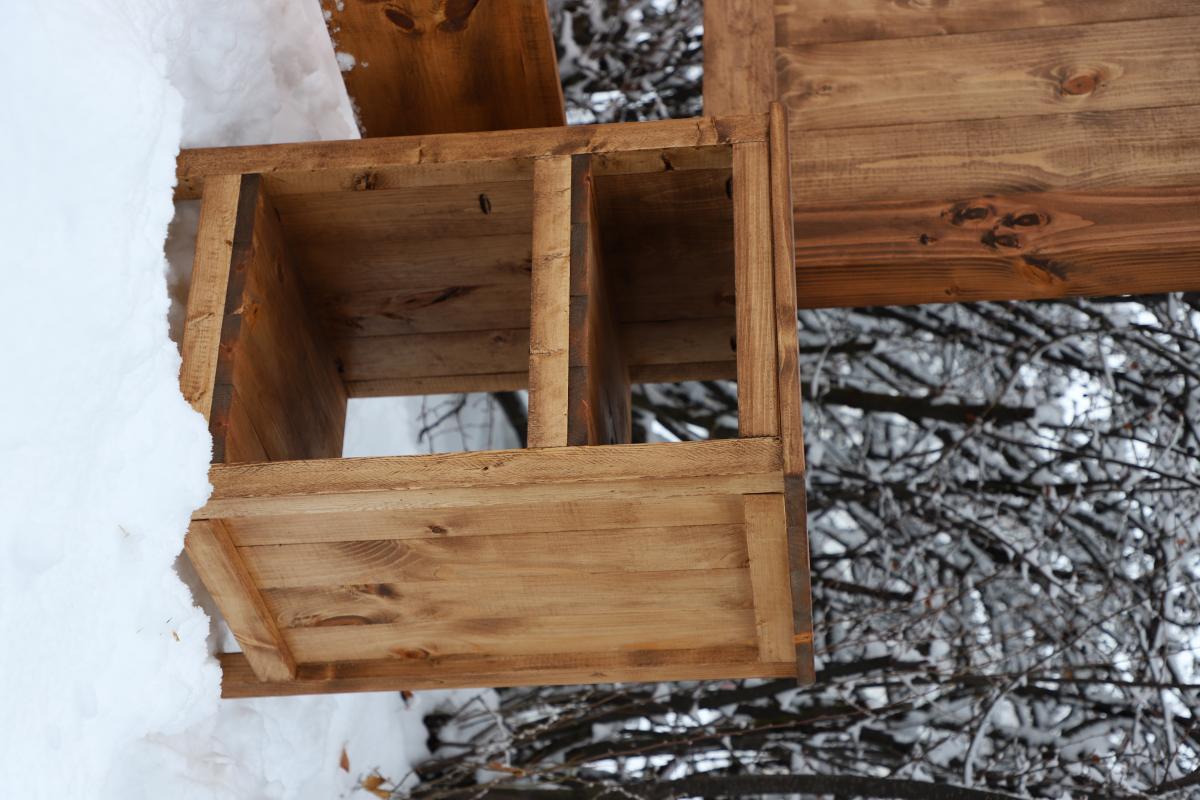
I built these matching nightstands to go with a king bed frame I built for a couple whose rebuilding their home that burned down. They were pretty simple to put together, but despite their simplicity, they are gorgeous.
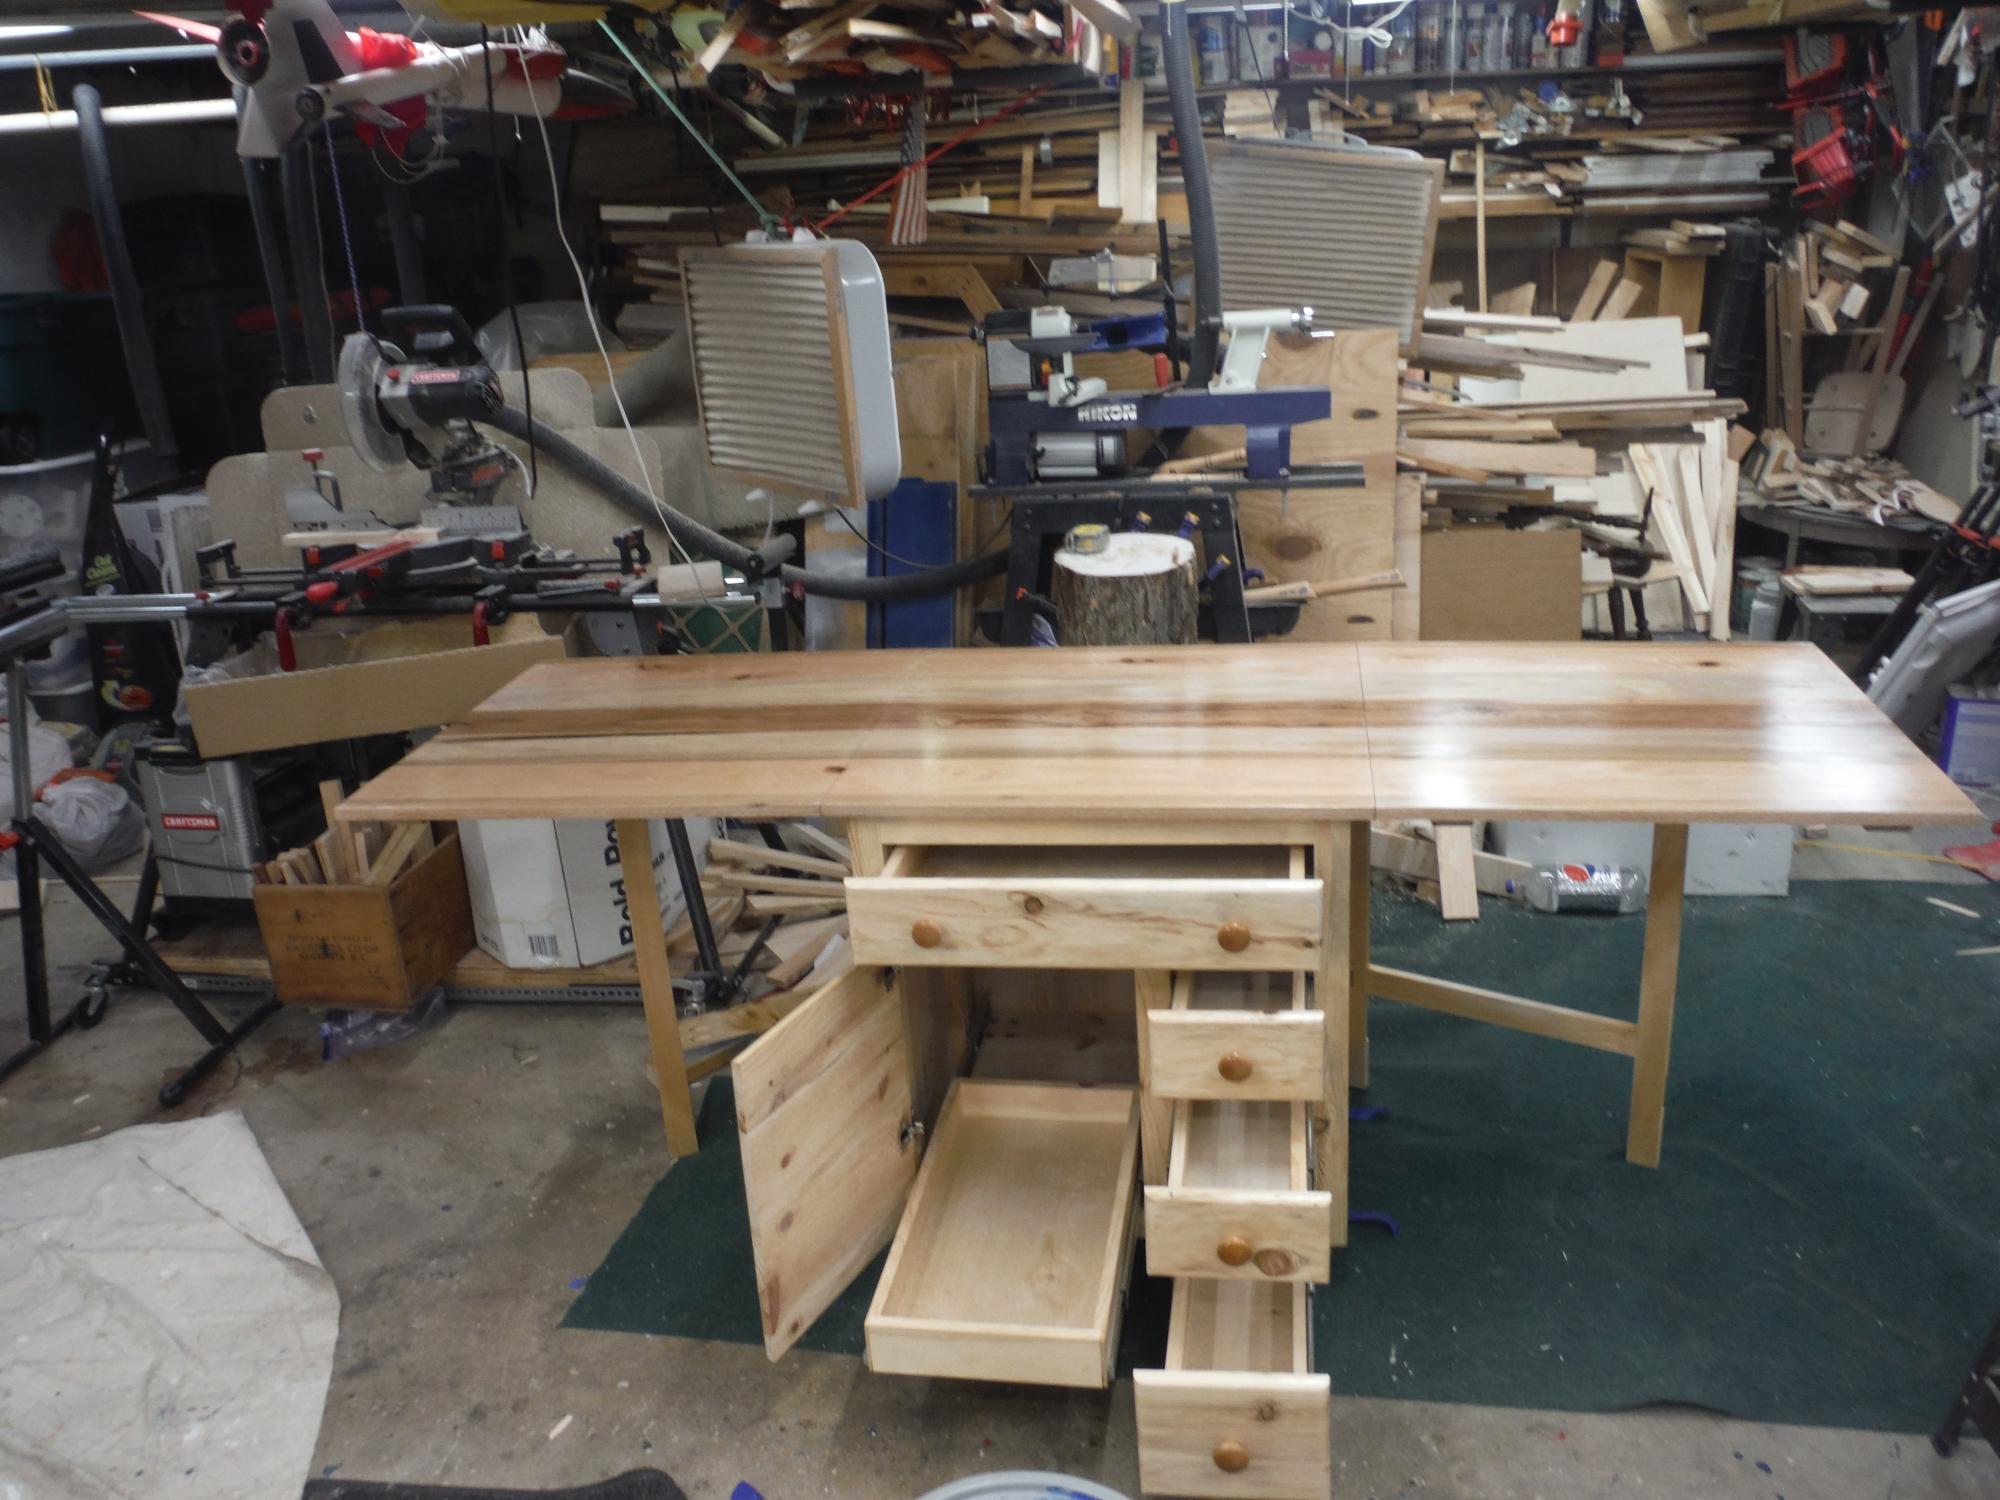
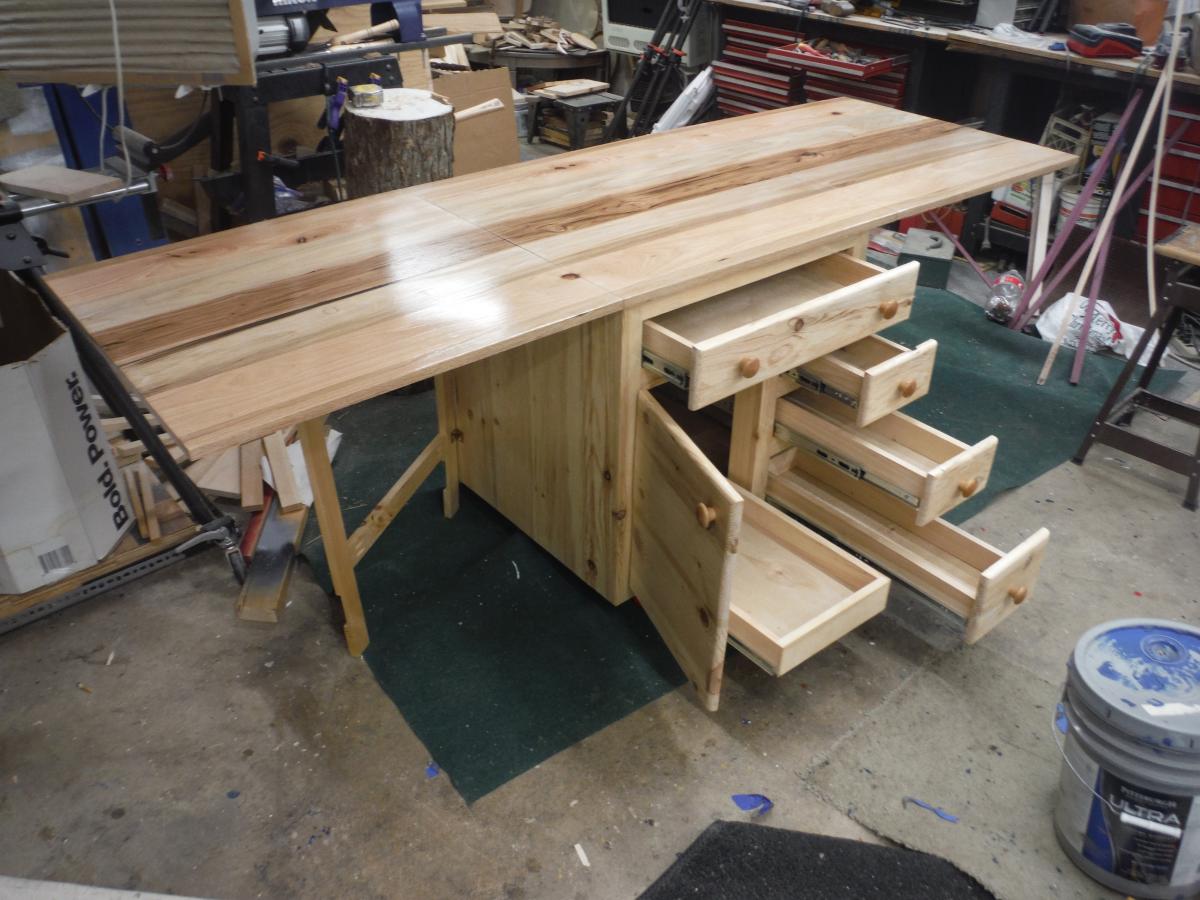
Built using your sewing table as the base idea. Pine cabinet, drawers and drawer fronts. The top is Hickory, poplar and red oak. base top dimension is 30x30 and folds out to 30x90. Mary will get this as a surprise on Christmas day. Cabinet and to is Varathane 3x. Casters are from Woodcraft and drawer slides are Hickory Hardware.
Mon, 12/28/2020 - 07:05
build the size of cutting mat. Add roller for fabric.
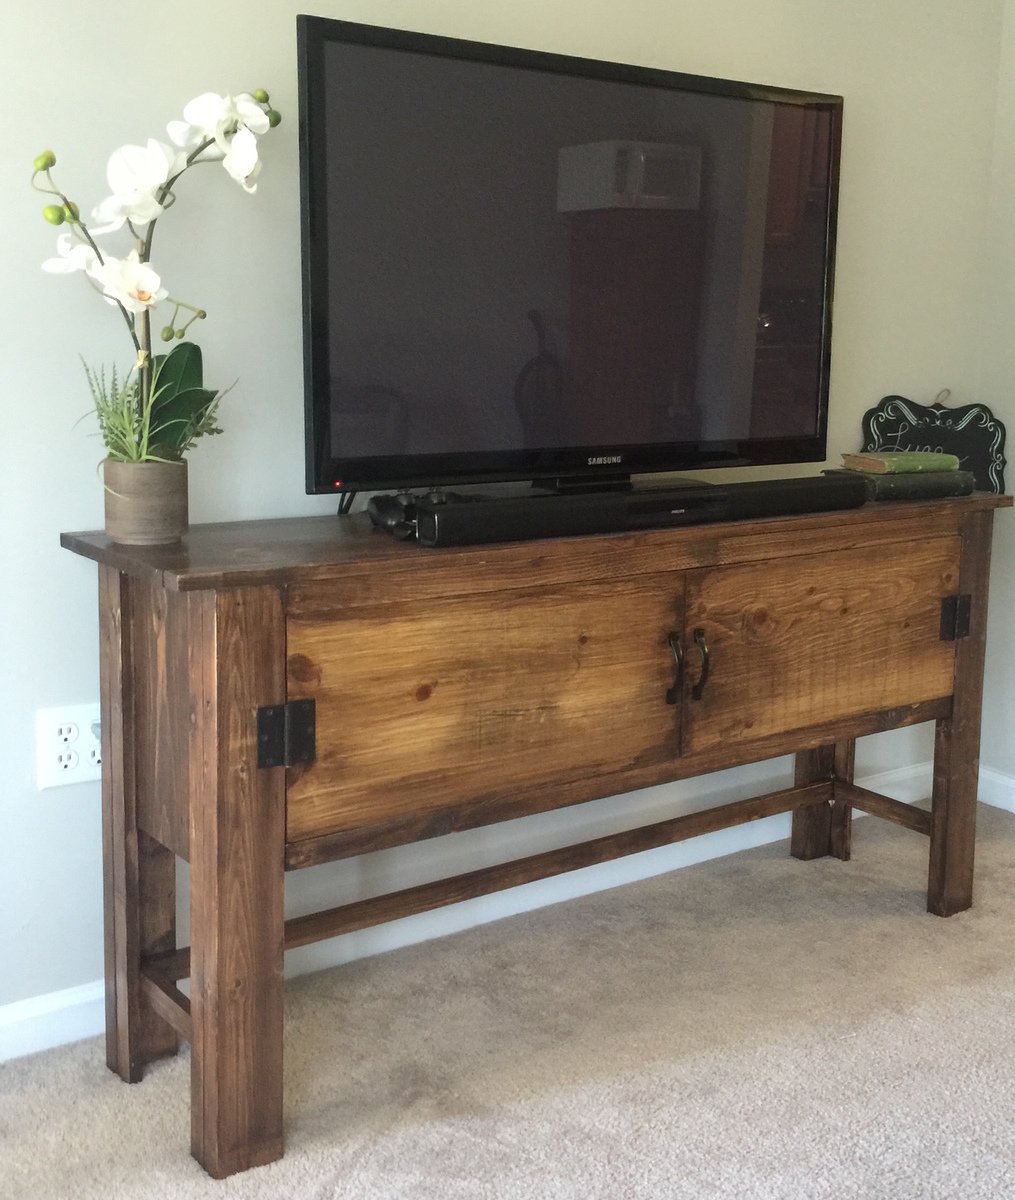
This was my first furniture project and I simply wanted to hide all of the cords for my TV. My husband and I opted out of the drawers since we wanted a big area to store all of the other items (DVDs, playstation, etc.). We also did not put a back on the table so the electronics stored inside could properly ventilate without overheating.

I always wanted a raised planter box, but never took the time to try building 1 and certainly didn't want to buy 1. My hubbie saw these plans and decided to make it for me. He used wood from our deck that we just pulled up, so the only cost was for the 4x4s and the plywood used for the bottom shelf.
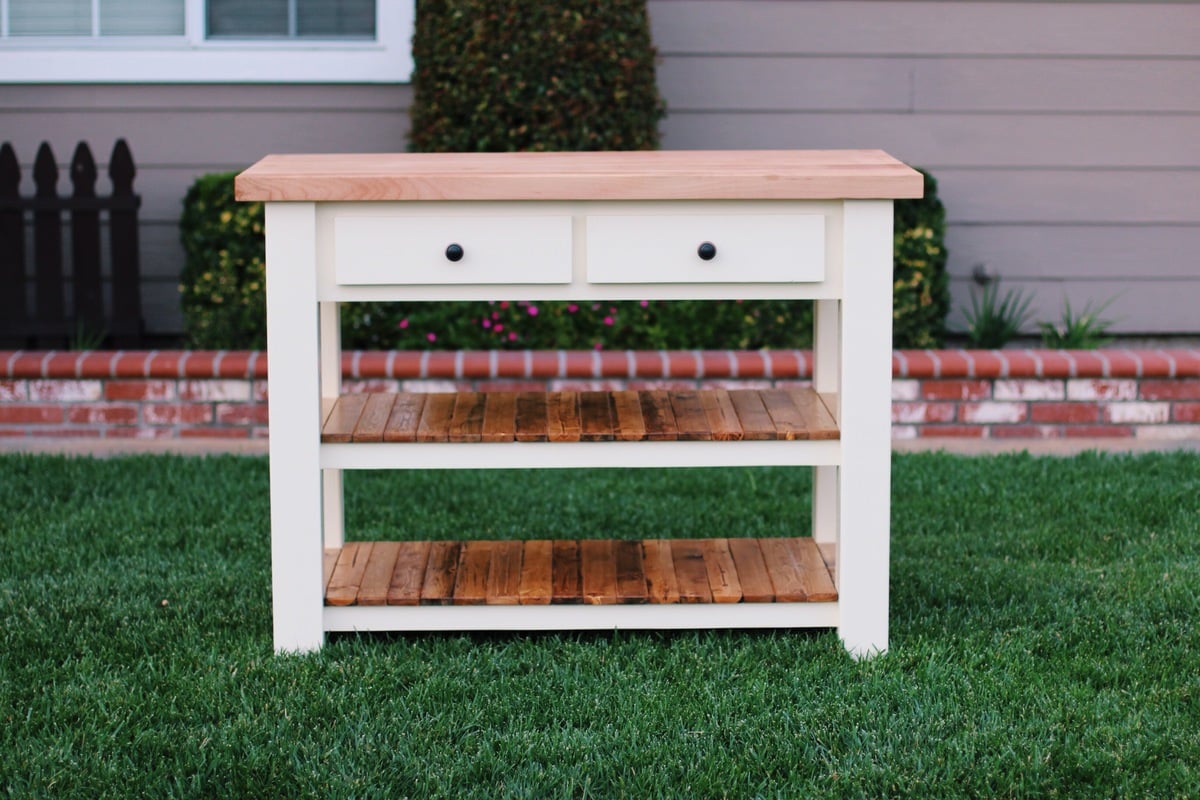
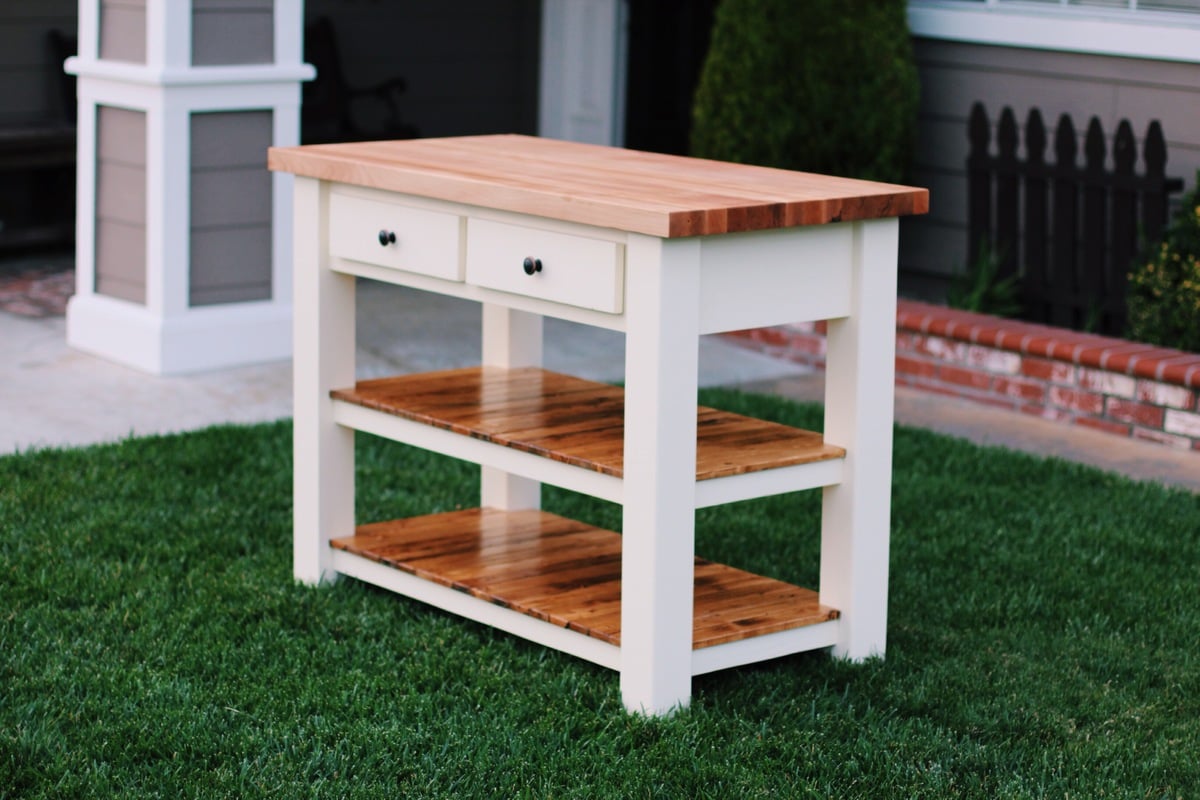
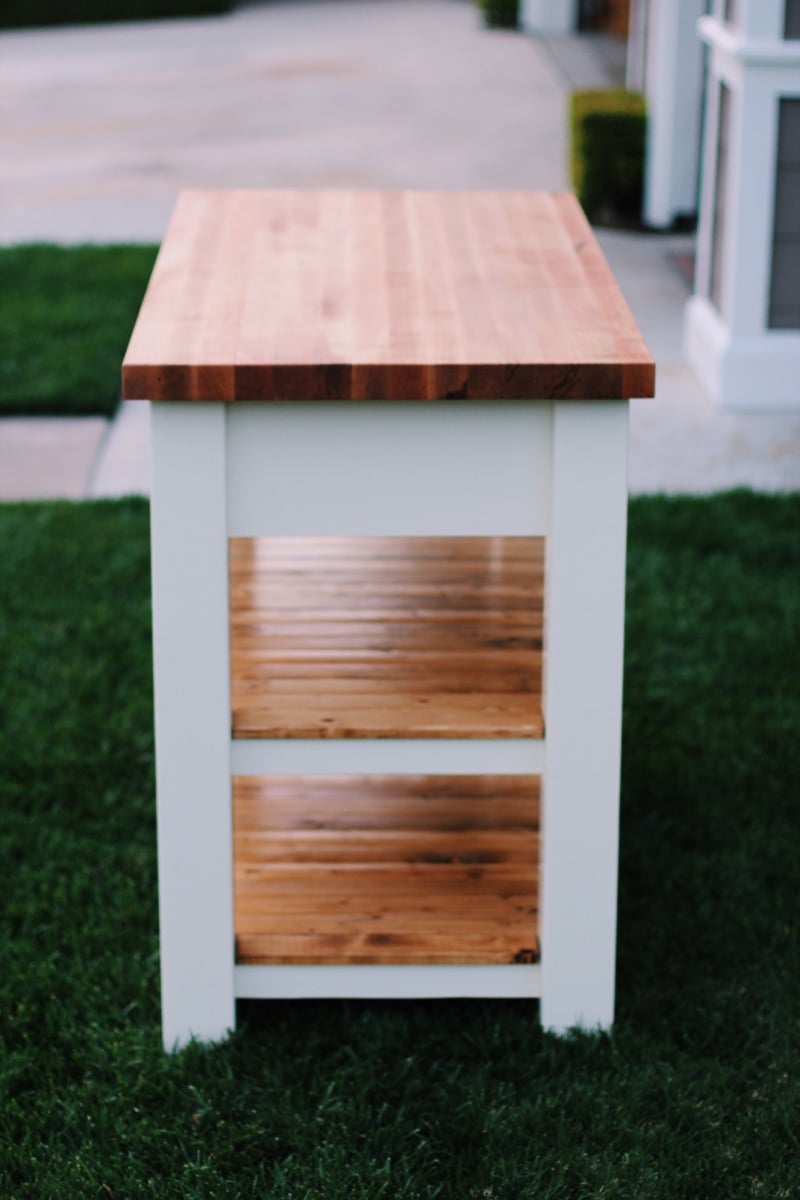
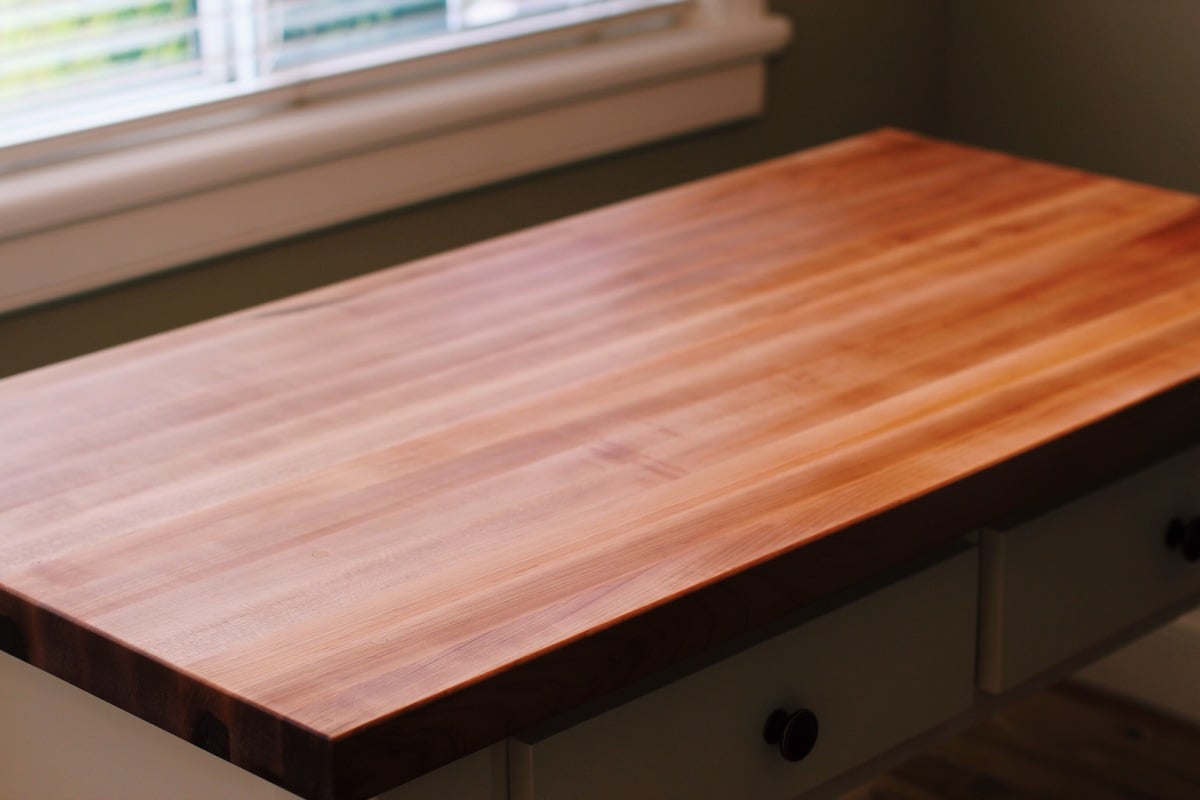
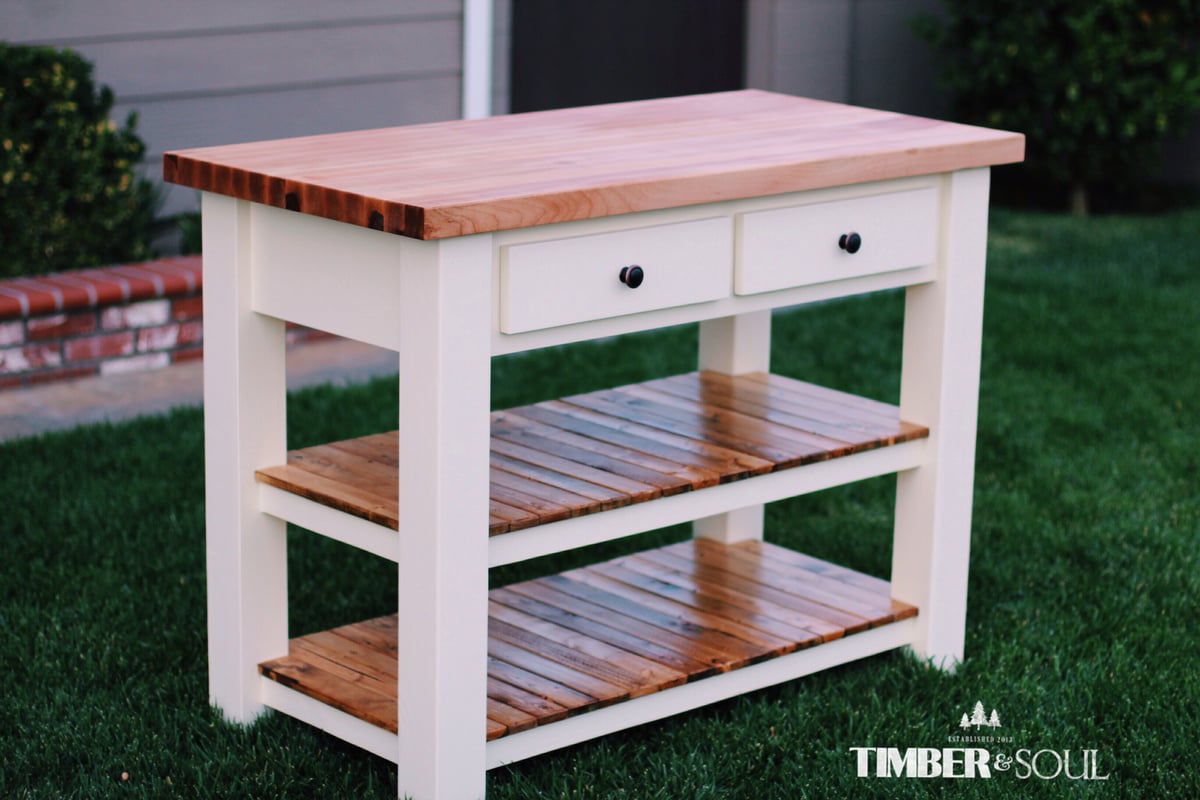
I built this piece from ana white's plans. I modified the shelf design and also the dimensions to meet my needs. Instead of using 2x6 douglas fir for the top, I built the top out of hard maple. The top is built by ripping down several strips of hard maple 1.75 inches wide, turn the strips on there edge and gluing all the strip together. This is what is known as a edge grain cutting board. I finished the top with mineral oil and bees wax. The top is food safe and knife friendly. If you have any questions please don't hesitate to ask. - Brad

Tue, 01/28/2014 - 18:42
Did you use a planer to level your top and bottom surfaces here, or just lots of sanding? I've been told not to attempt butcher block construction without a planer...but I'm thinking of maybe going for it!
In reply to Butcher block question by romanweel
Fri, 01/31/2014 - 23:01
I did use a planer for this top. But because my planer is only 12 inches wide I had to glue three individual boards together leaving two seams that I could not plane but instead had to sand out. Just sanding those two seams took a long time, I cannot imagine sanding 20 seams. I would not suggest attempting without a planer.
Mon, 04/10/2017 - 18:45
is it possible for you to share your measurements. I need a smaller island. Thank you.
Wed, 02/05/2014 - 17:25
I'm curious how you joined the stretchers to the legs. The construction appears different from the plans. Did you use pocket screws or something more advanced like mortise and tenon?
In reply to stretcher joinery by Biff Loman
Fri, 02/07/2014 - 16:58
I am not sure exactly what you mean by stretchers. If you are referring to the shelf frame, yes it is different than the plans, I modified it. I felt the shelf design on the plans was not enough for the weigh that was going to be place on top. I used simple pocket holes to joint the frame to the legs. Hope this helps, have a great day.
Fri, 08/12/2016 - 10:41
Thank you Brad. This is a really nice piece. I recently picked up an old table from a college. I discarded the base and plan to use the heavy butcher-block-style top to build something similar to this. Do you have plans you could share? Thanks again, Brian

At Sunridge Middle School, we design and build our own projects at the end of second semester. As class sizes have grown ( the class is quite popular) helping design up to 60 projects becomes quite difficult. That’s where you come in! You have designed some awesome projects and the kids are able to find a perfect fit, with your variety. Some doubt the ability of 14 year olds, but given the space, opportunity, support, and your plans, we can do anything!
Mon, 01/27/2020 - 13:22
Thank you so much for sharing - you made my day!
I'm so glad to see the Farmhouse toy box, that is one of my favorite plans!

Tue, 10/20/2020 - 17:29
Talent always manifests itself in childhood, so do not underestimate the capabilities of 14 year olds, especially if they love what they do. Such creative activities in the workshop seem to me very interesting and can lay the foundation for the work of a lifetime. This is a much more rewarding activity than the constant essay writing. Such tasks should be delegated to specialists. For example https://www.nursingpaper.com/ a very useful rewrite service. And working with your hands is interesting and promising.
This was my first table, so there were a few hiccups, but I was pretty content with it.
I recently made the bench that you see in the picture as well. I made it to match the table, so I pretended I was making a mini table. Used plywood for the top, padding, and wrapped it with fabric. I was trying to match the charis as much as possible. Finished it by making the buttons and tufting it.


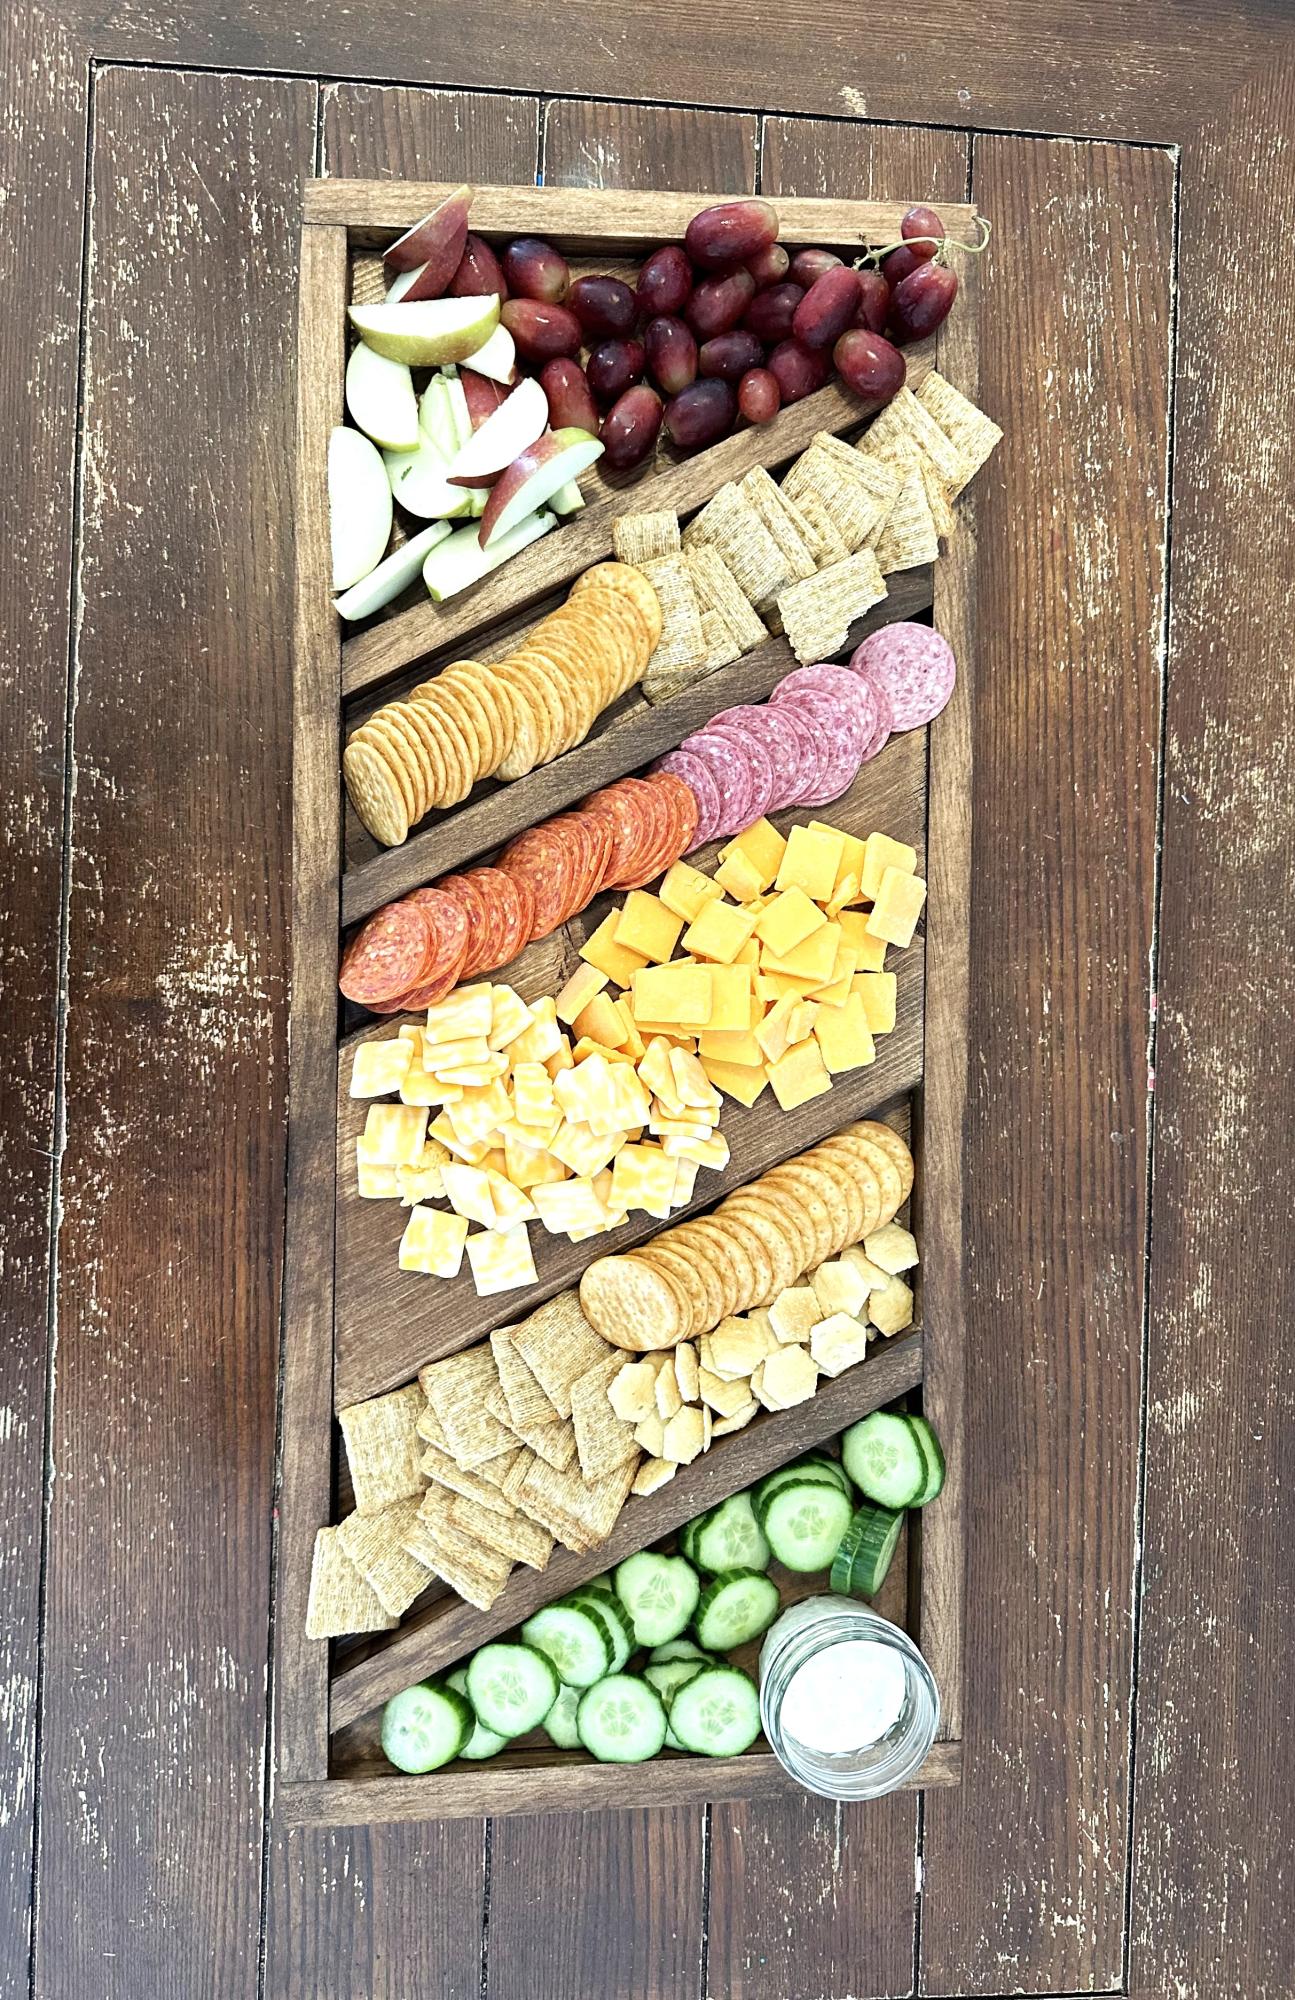
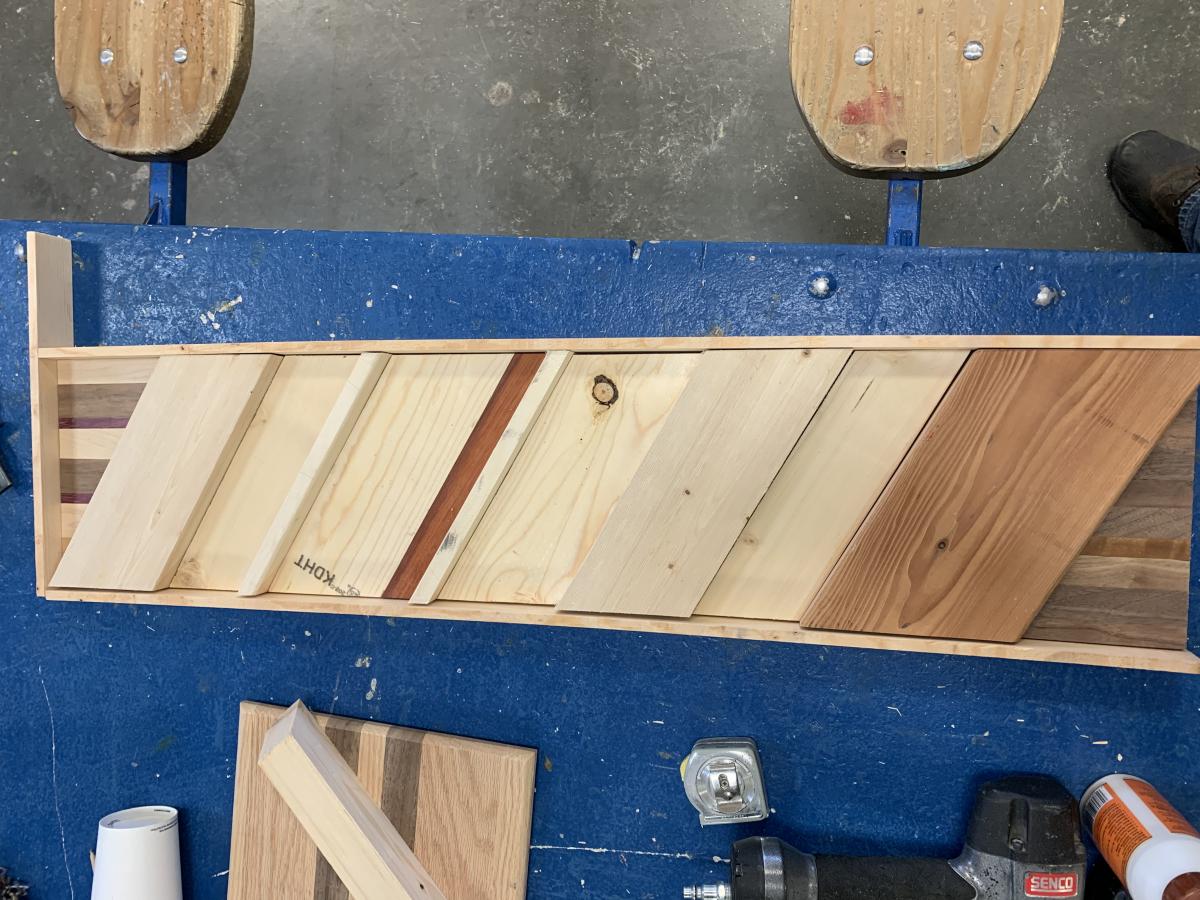
I made this charcuterie board for my niece and her family as a thank you for giving me an old miter saw they were not using… I have made a few now as gifts, and realize ….
Something “ made” means so much more to the recipient,
Because in the making we give our heartfelt generosity…
The stain is Watco food safe finish in hazelnut.
Ltr08