Community Brag Posts
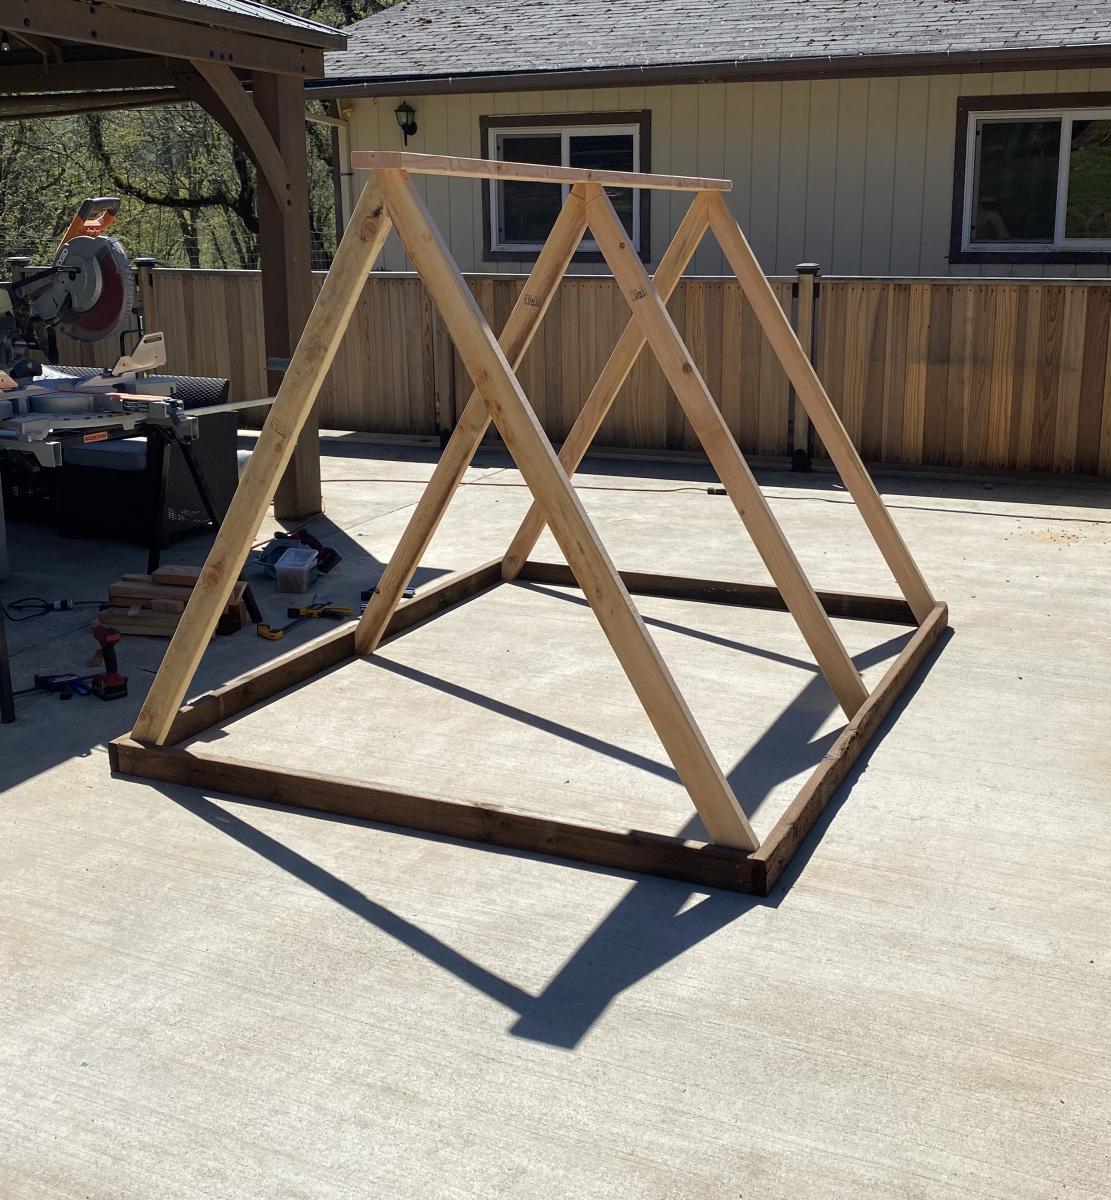
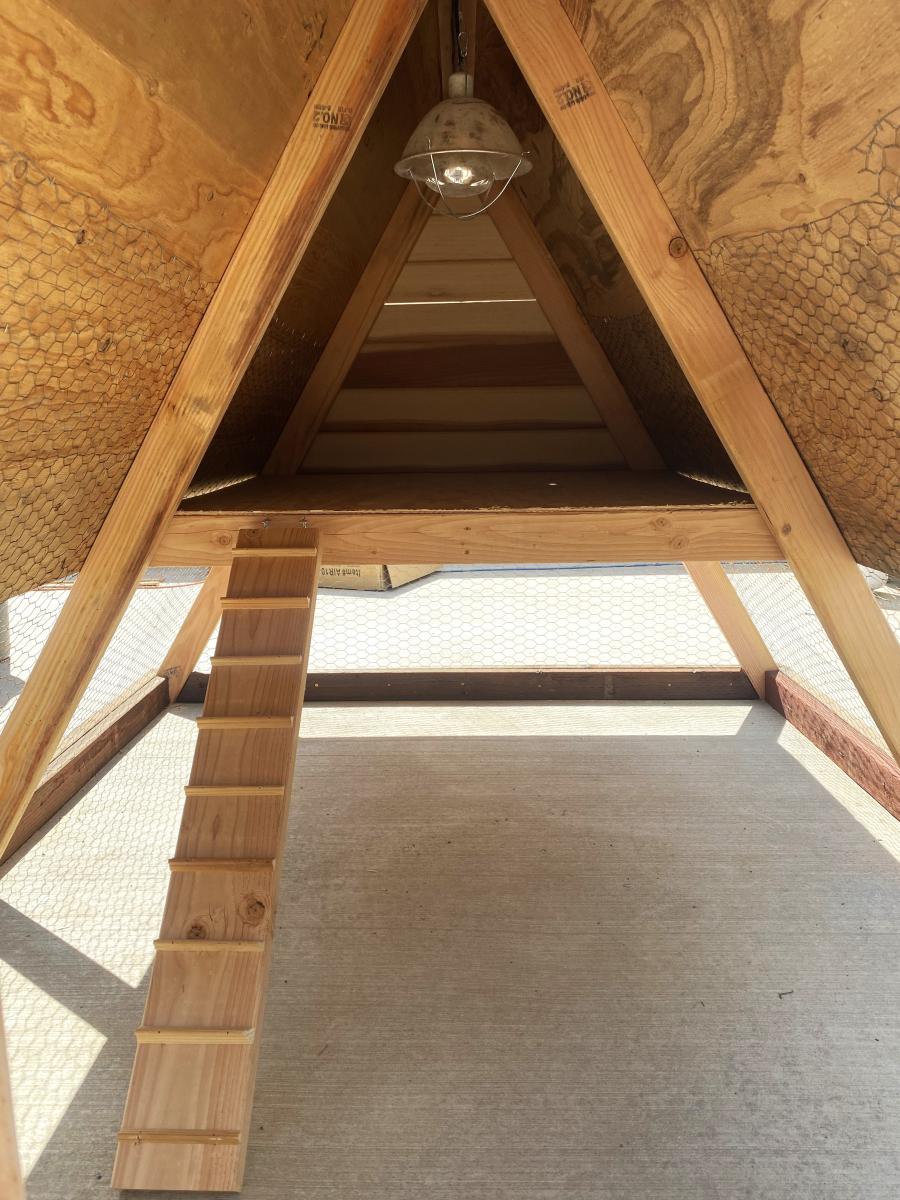
A-Frame Hen House
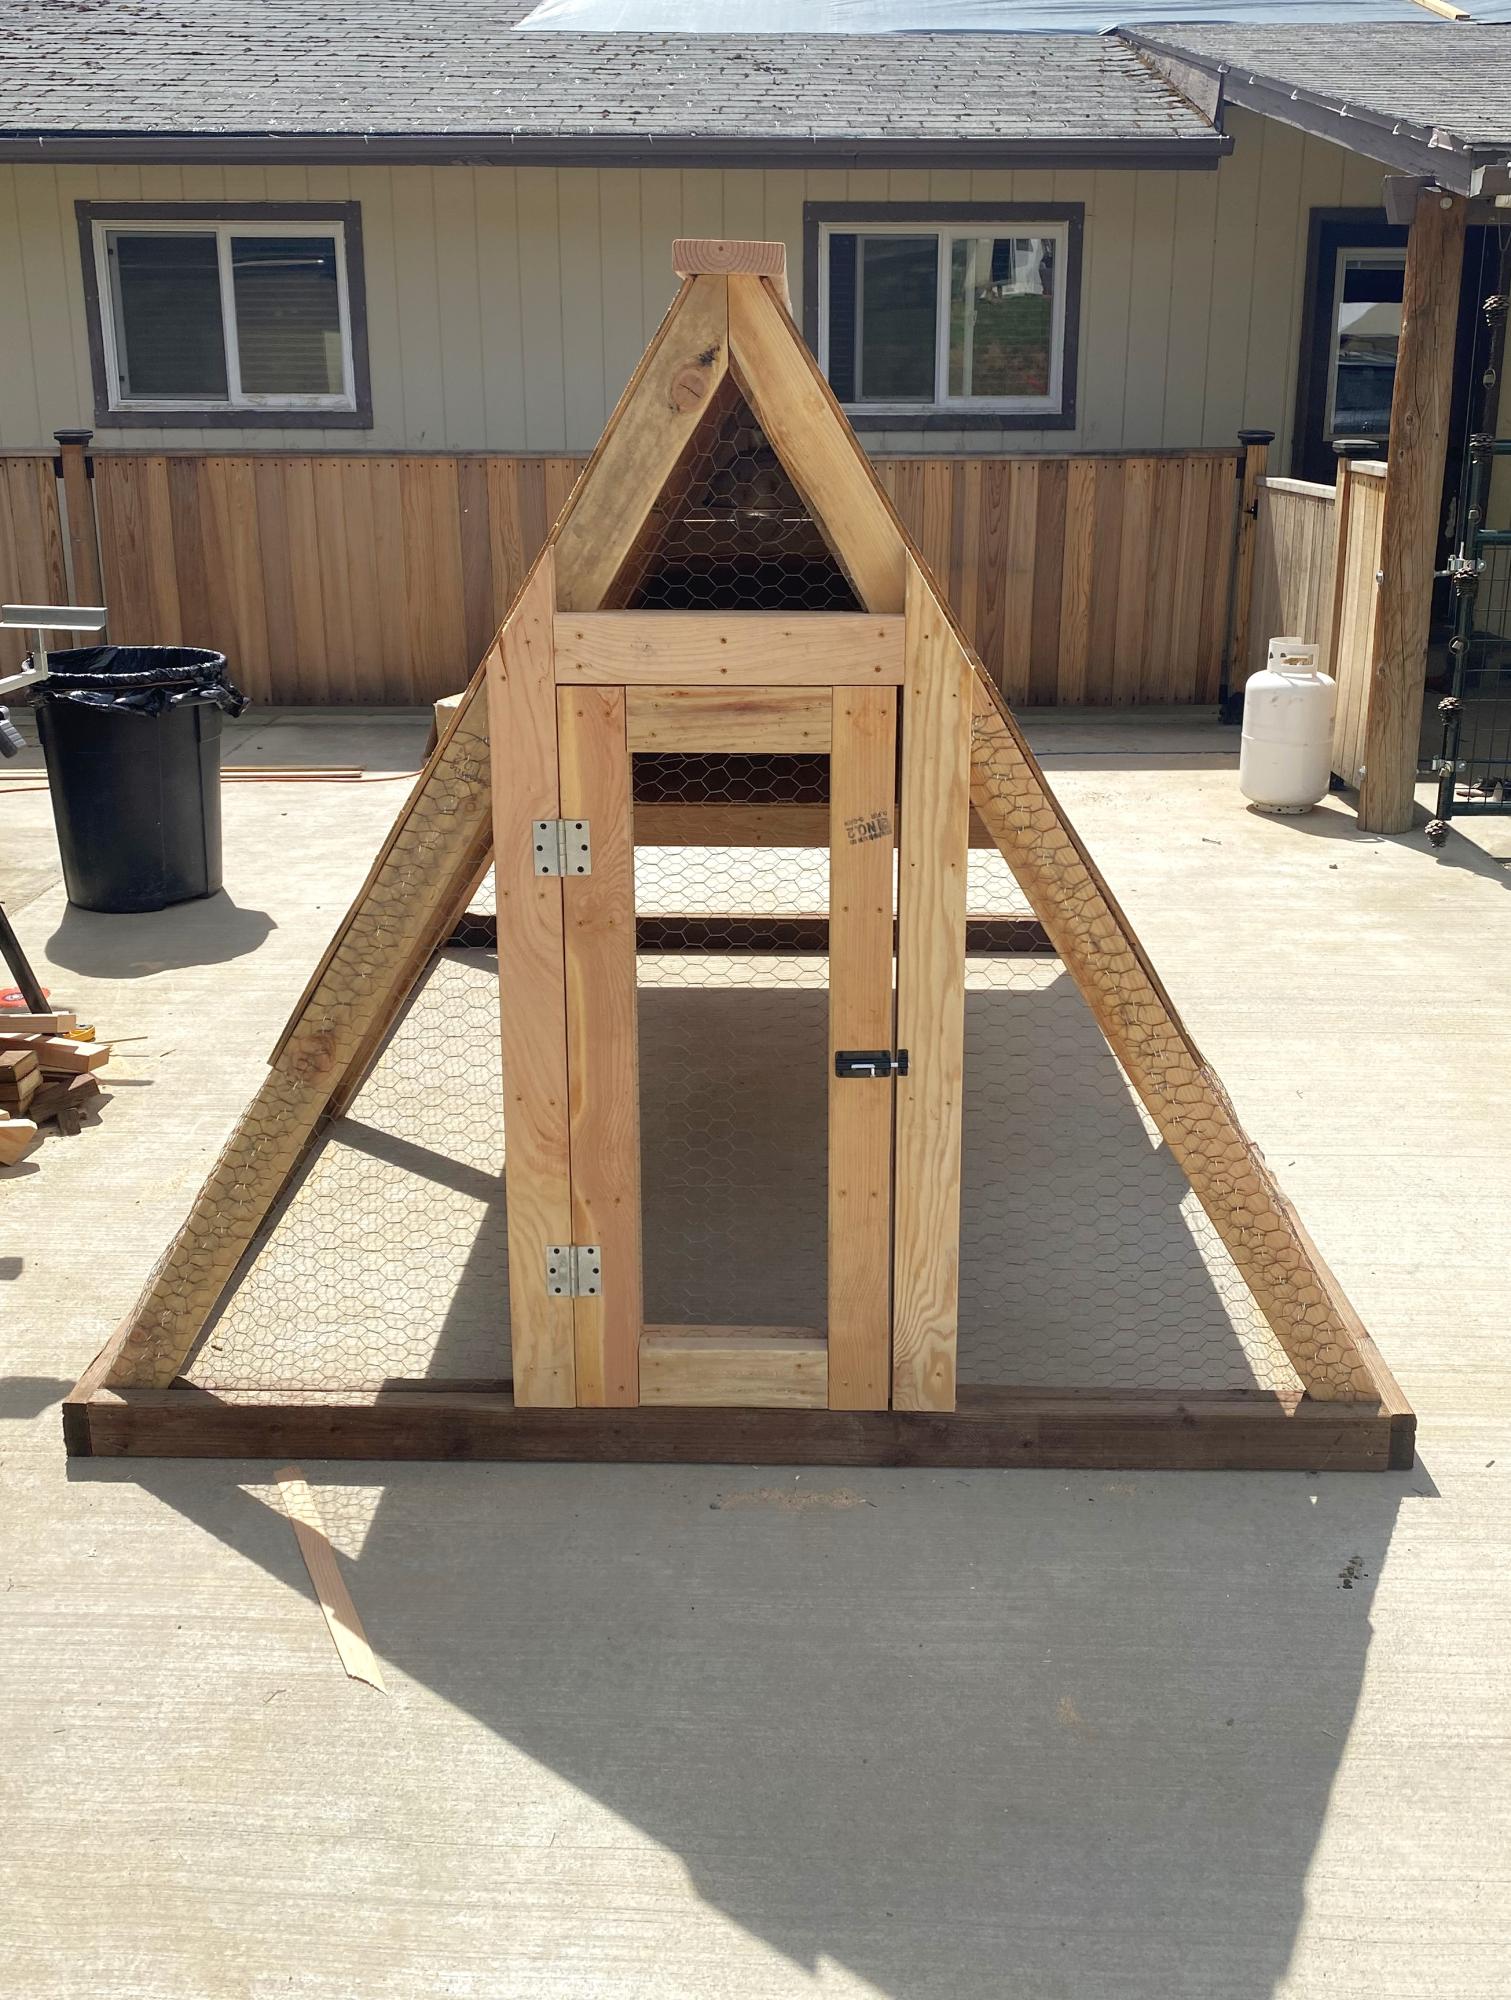
Great easy project to get the bigger chicks out of the garage to integrate with the older hens. Made some modifications because we have a lot of critters trying to kill the chickens/chicks.

Built from Plan(s)
Fully Functional Arcade Cabinet
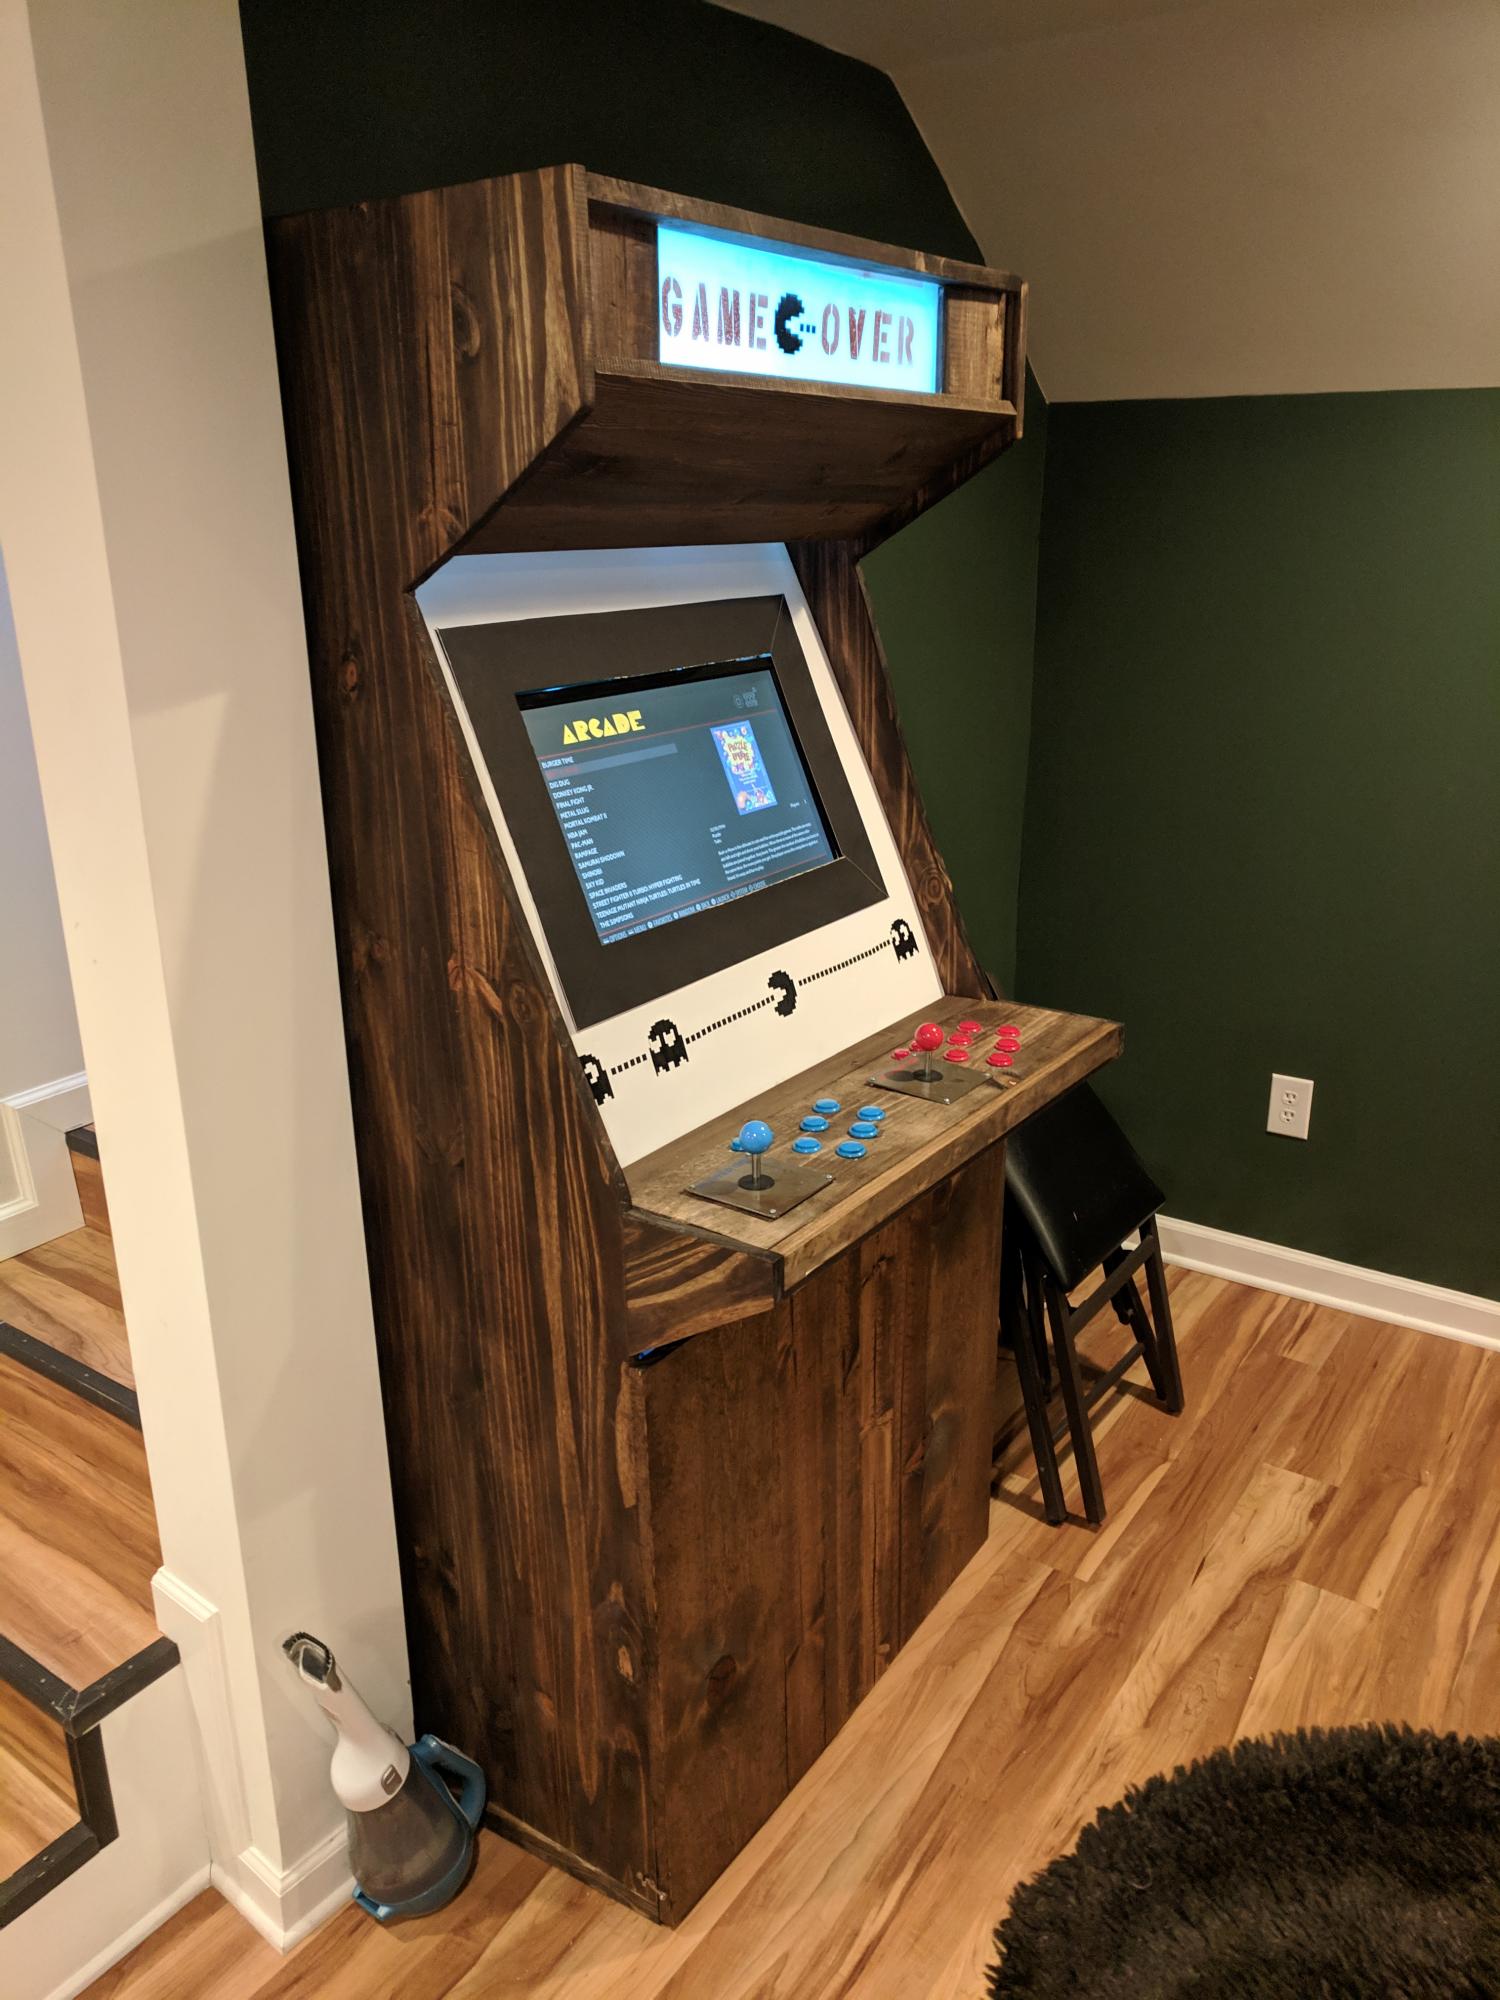
Didn't use plans for this, so I eyeballed basically everything. Certainly made for a more frustrating build, but I have to say I'm happy with the end result!
Estimated Cost
$300
Estimated Time Investment
Week Long Project (20 Hours or More)
Finish Used
Minwax Walnut
Recommended Skill Level
Intermediate
Comments
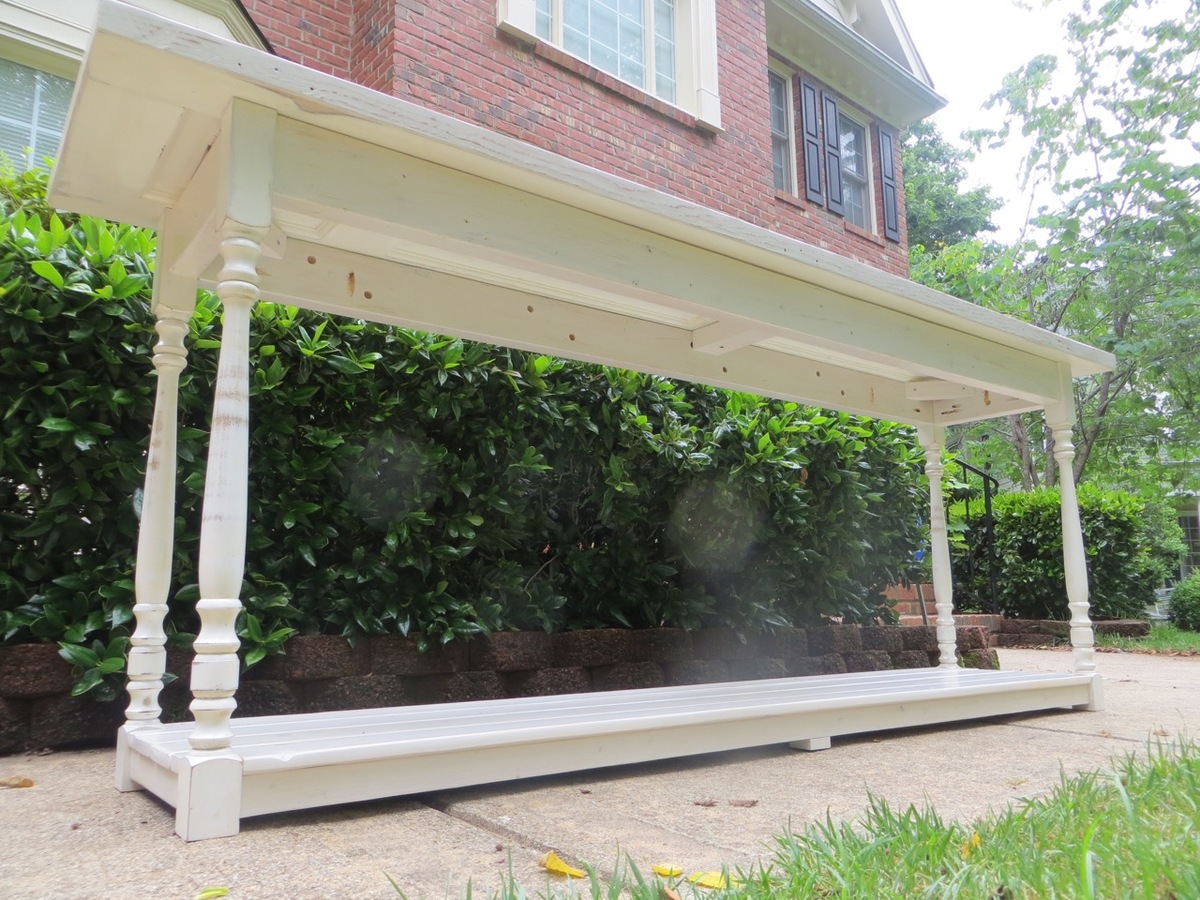
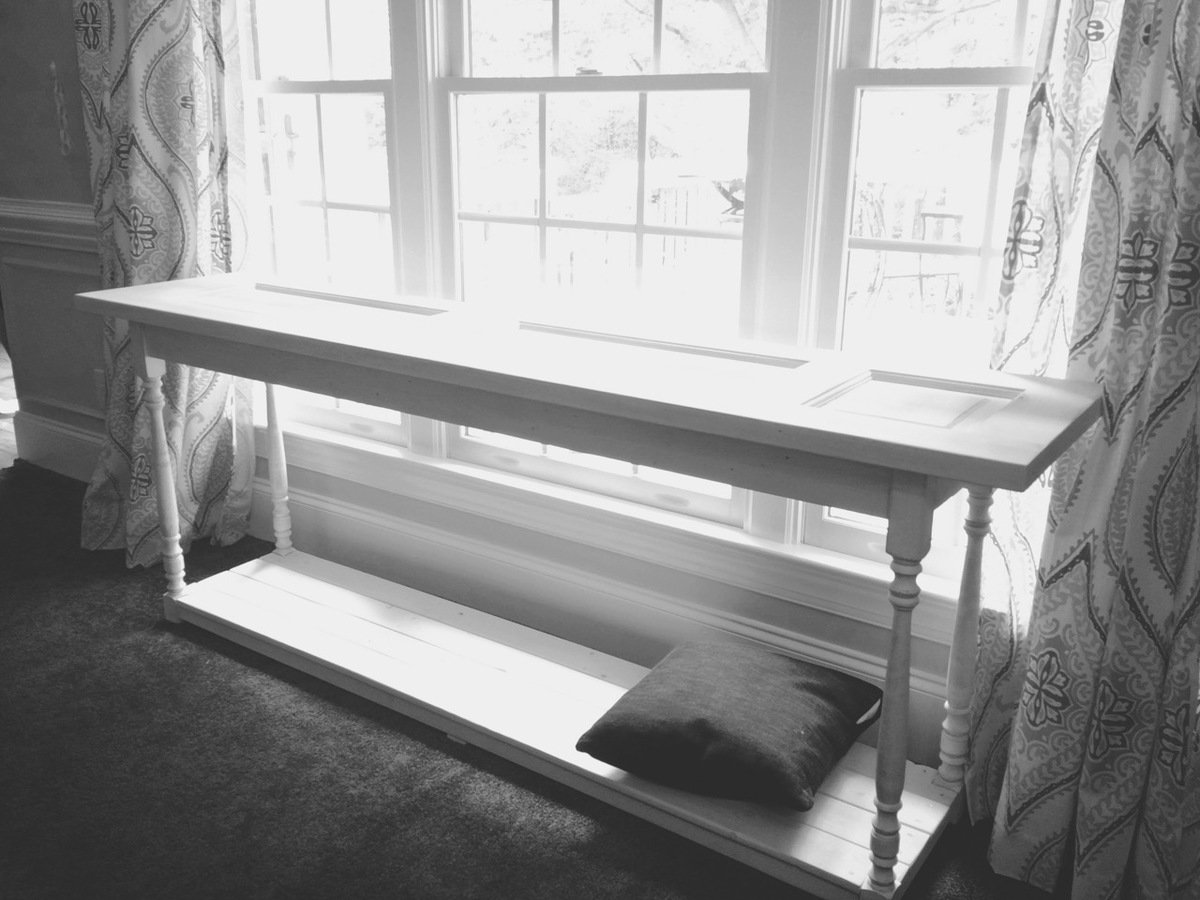
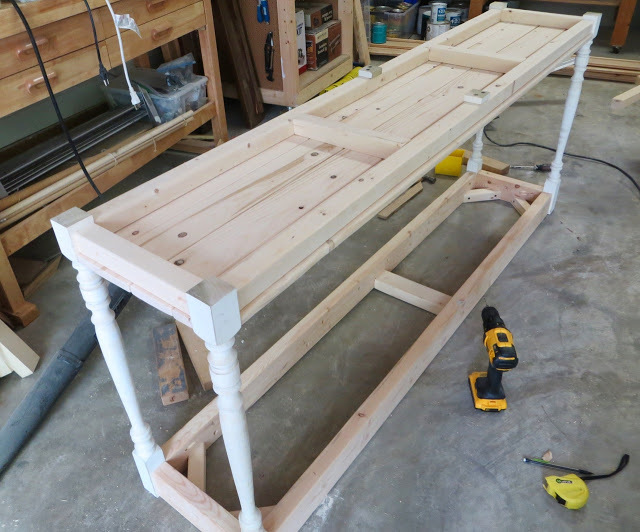
Farmhouse Inspired Sofa Table
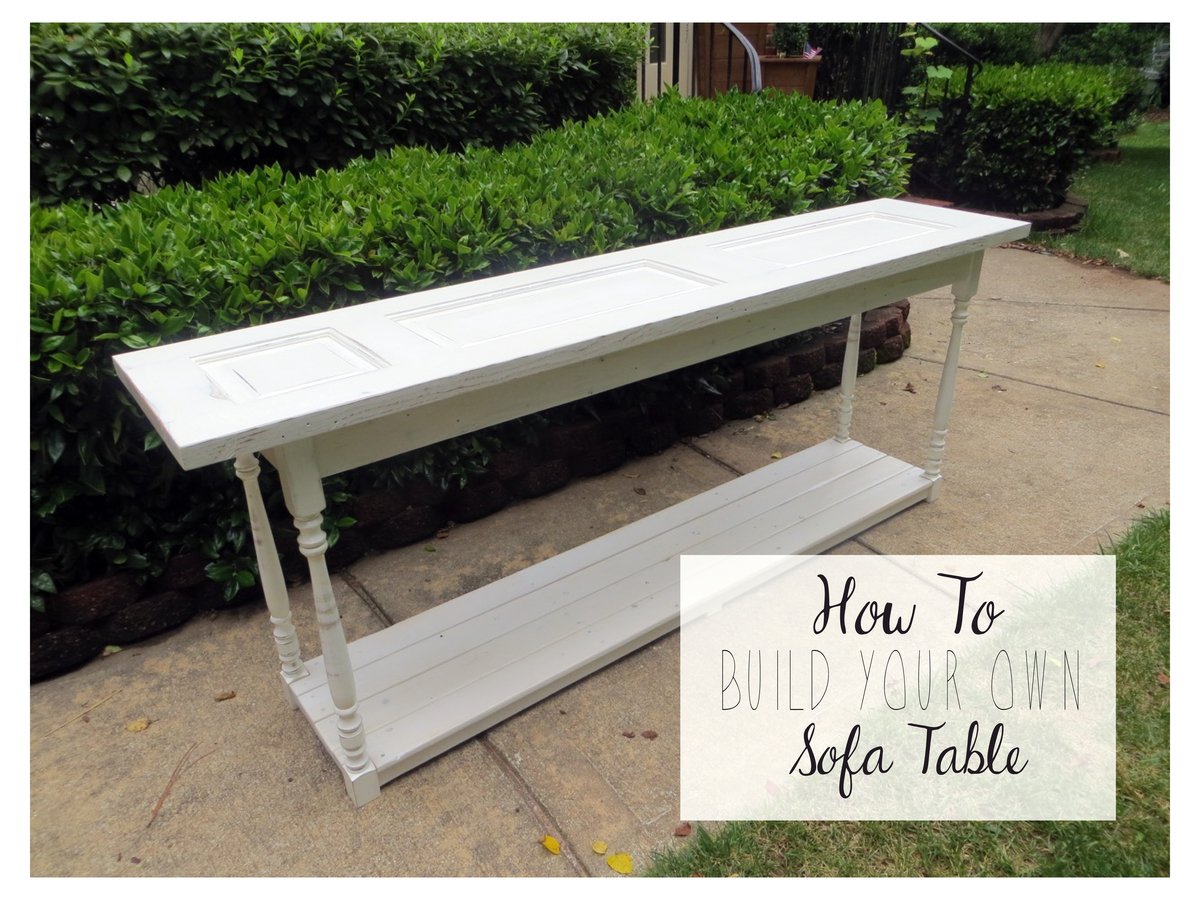
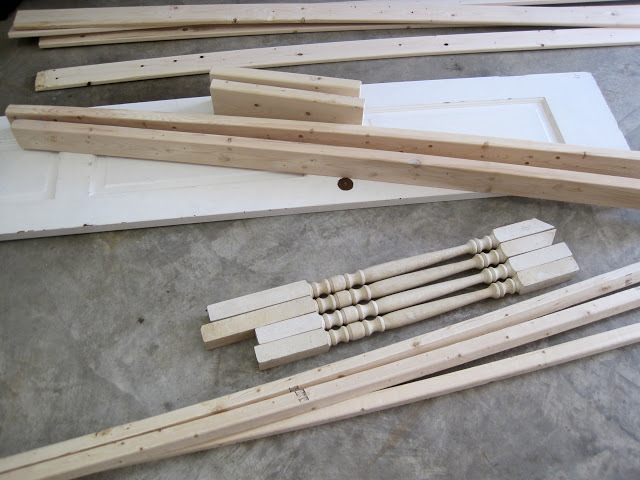
This was a very fun project for me! I love turning unwanted-old things into something beautiful and usuable! I built thit table using a reclaimed door and old railing spindles but you could easily improvise by using dimensional lumber for the top and buying new spindles or using 2x2's if necessary! This took me a few days because I built as I went and made sure it was just right.
Guess what? I built it for $37!! The door and spindles were a great find at my local Habitat for Humanity store - check yours out!
I have a building tutorial on my blog so you can make one too!

Estimated Cost
$37 - plan for around $50 if reclaimed materials aren't being used
Estimated Time Investment
Weekend Project (10-20 Hours)
Finish Used
White Washed Latex Paint and Polycrylic Protective Finish
Recommended Skill Level
Beginner
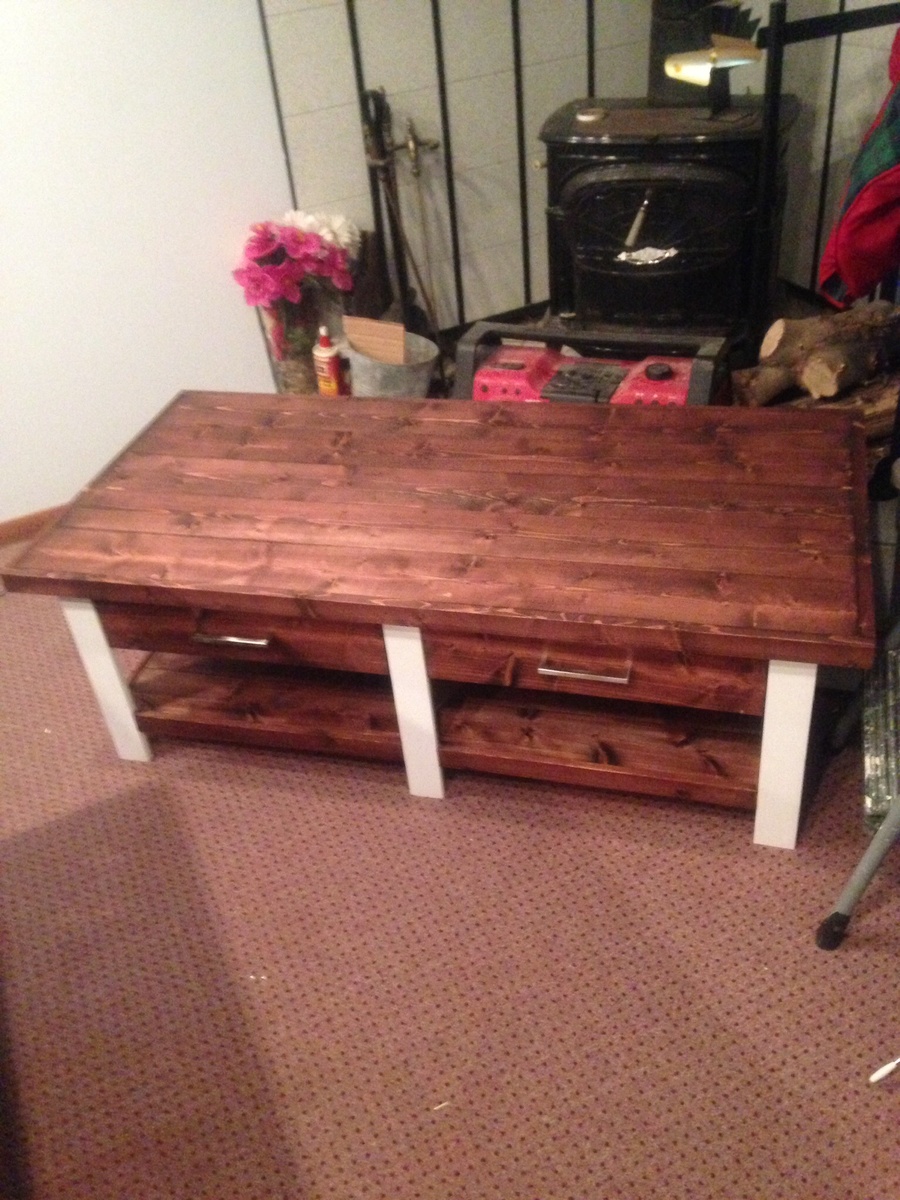
Coffee table
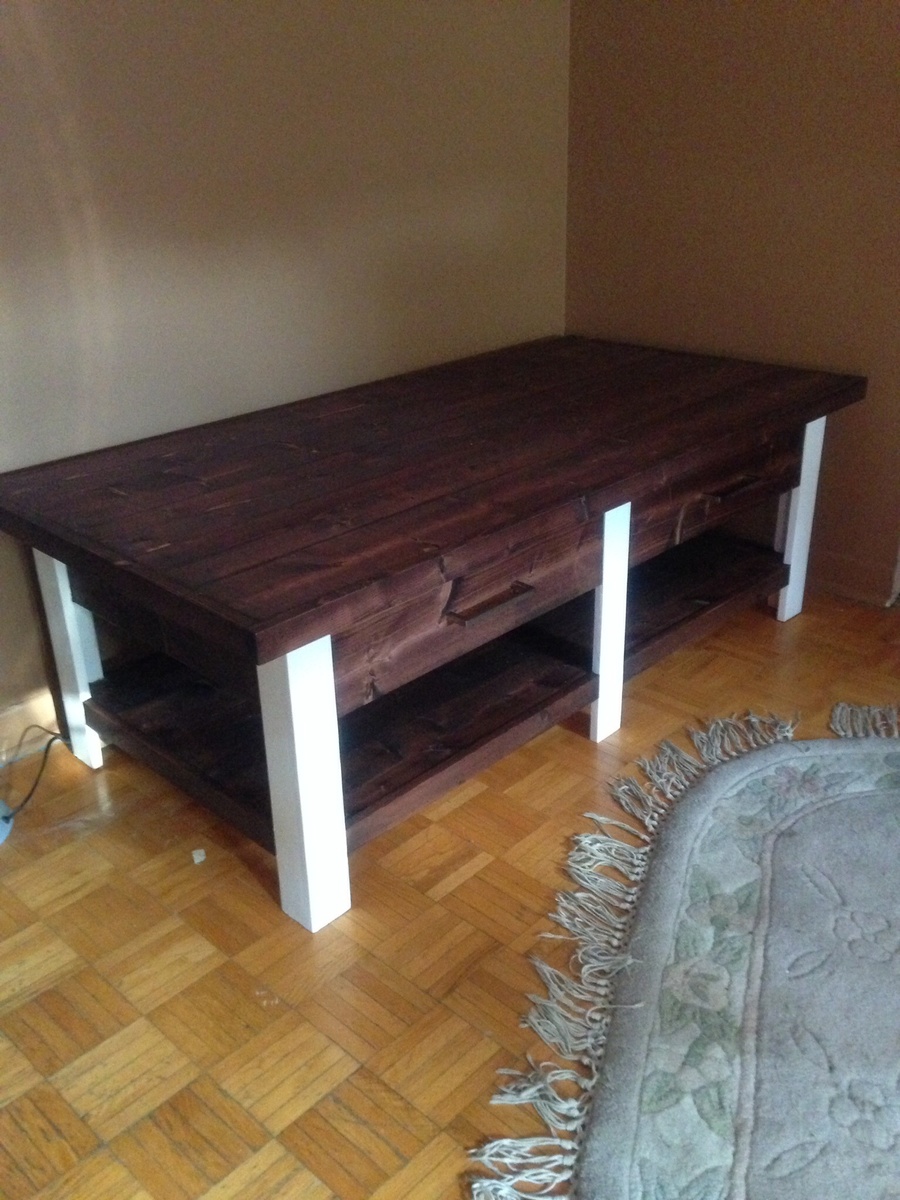
Really simple project, modified the plans a bit but kept the same concept. Had a lot of bun building.

Built from Plan(s)
Estimated Cost
130$
Estimated Time Investment
Weekend Project (10-20 Hours)
Finish Used
Mahogany stain.
Recommended Skill Level
Beginner
Comments
Mon, 09/01/2014 - 16:24
Why isn't anyone commenting
Why isn't anyone commenting on my table. Does no one like my table.
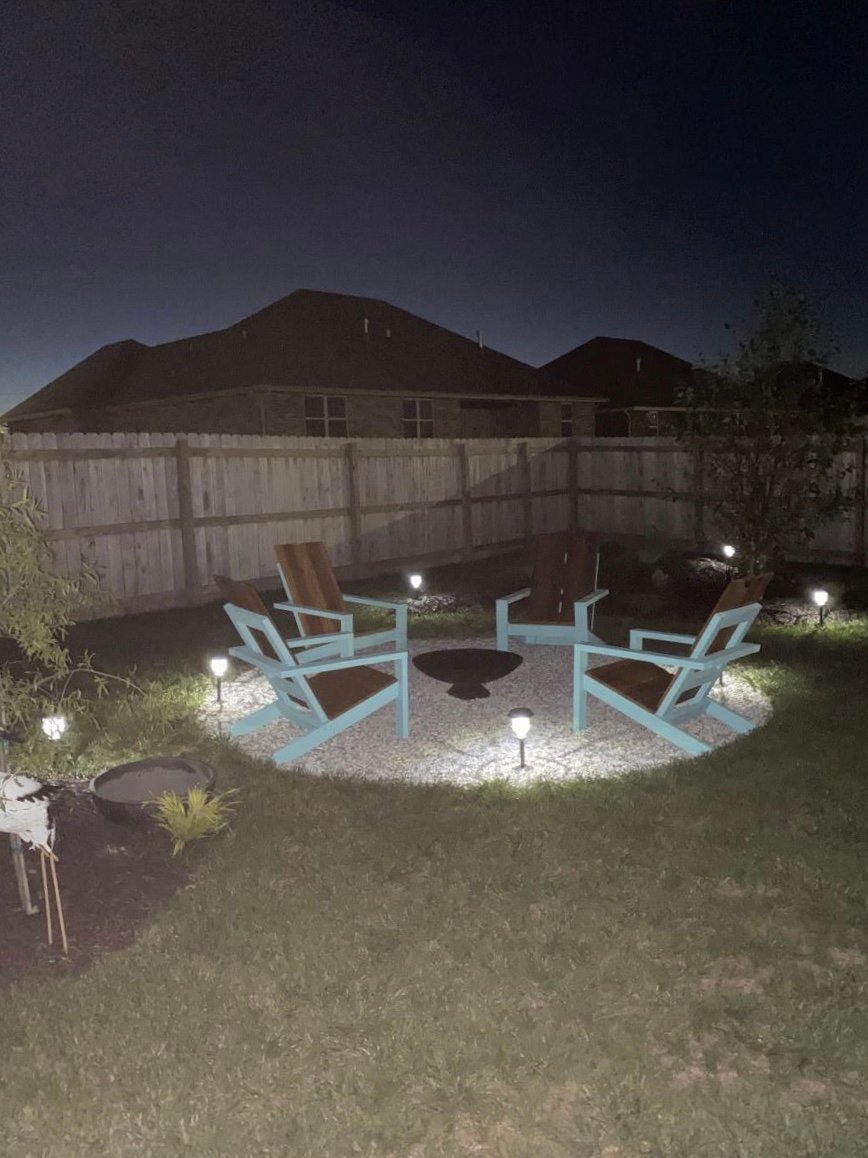
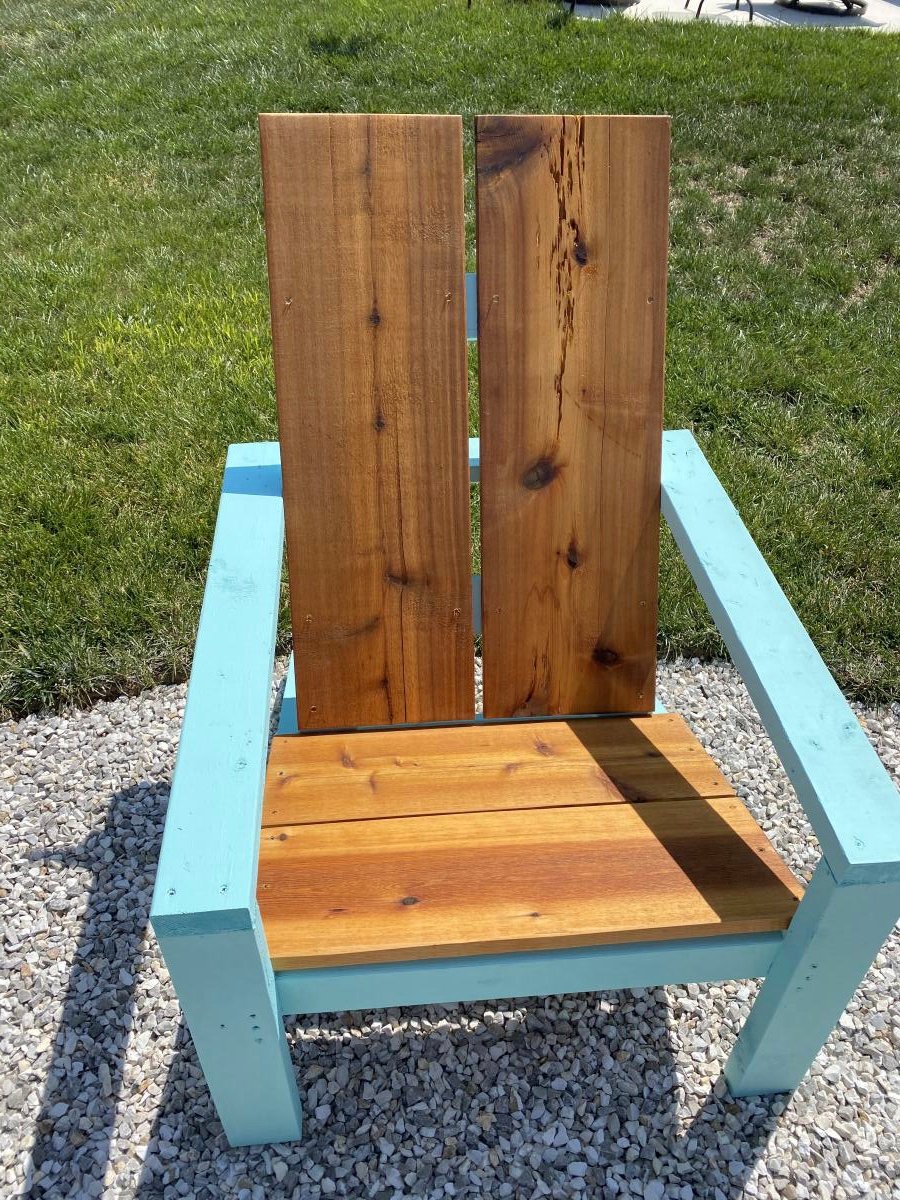
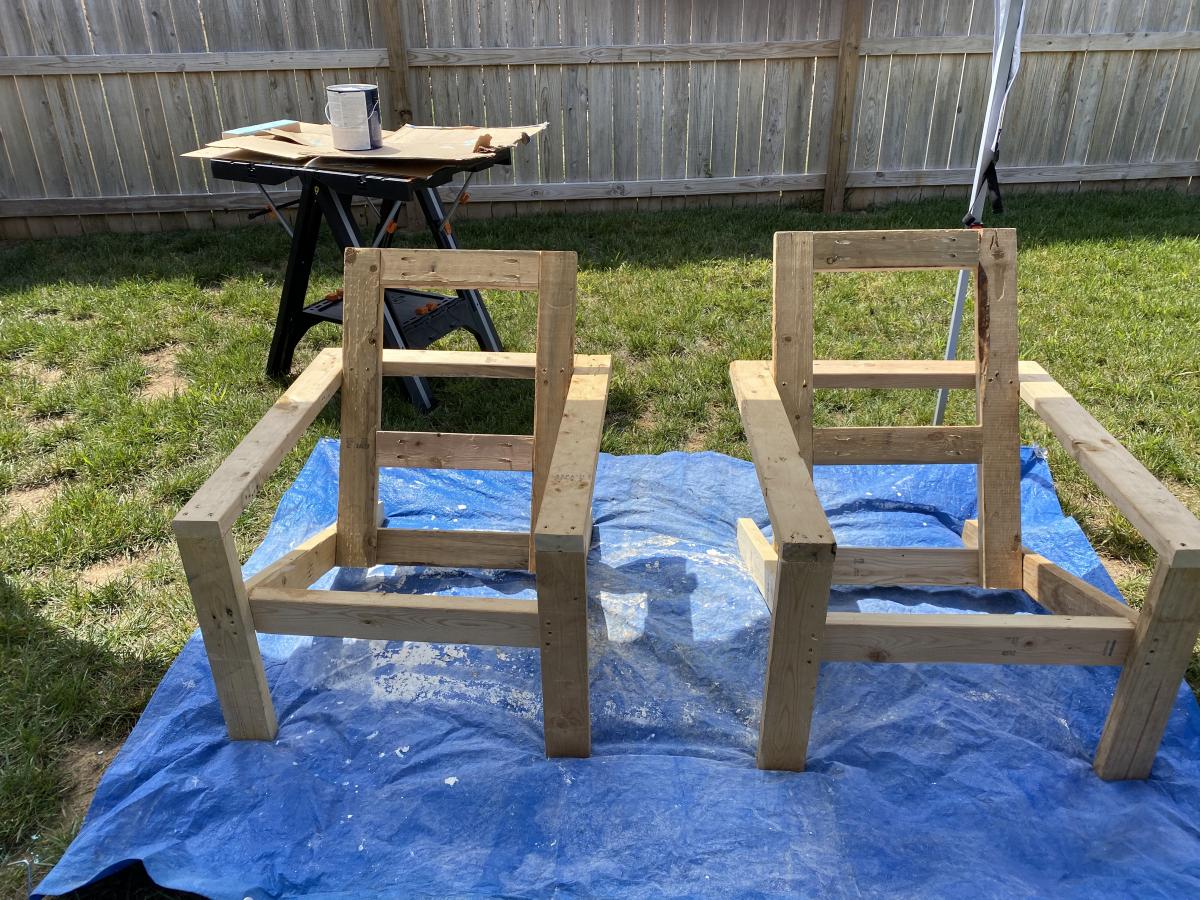
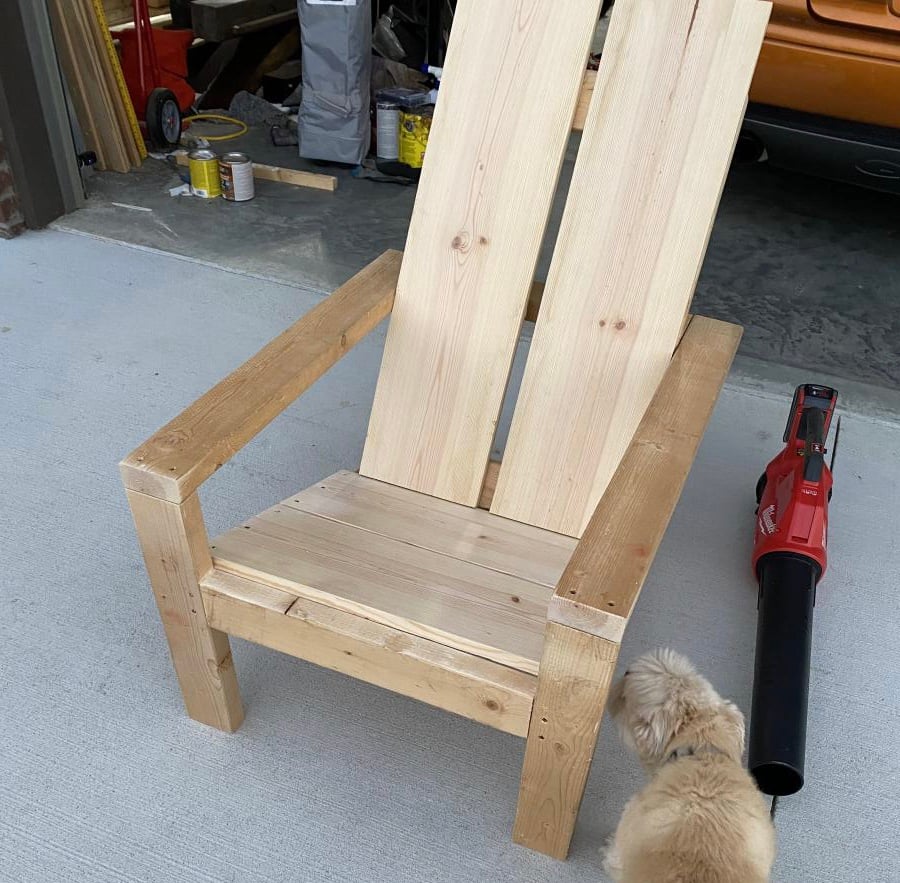
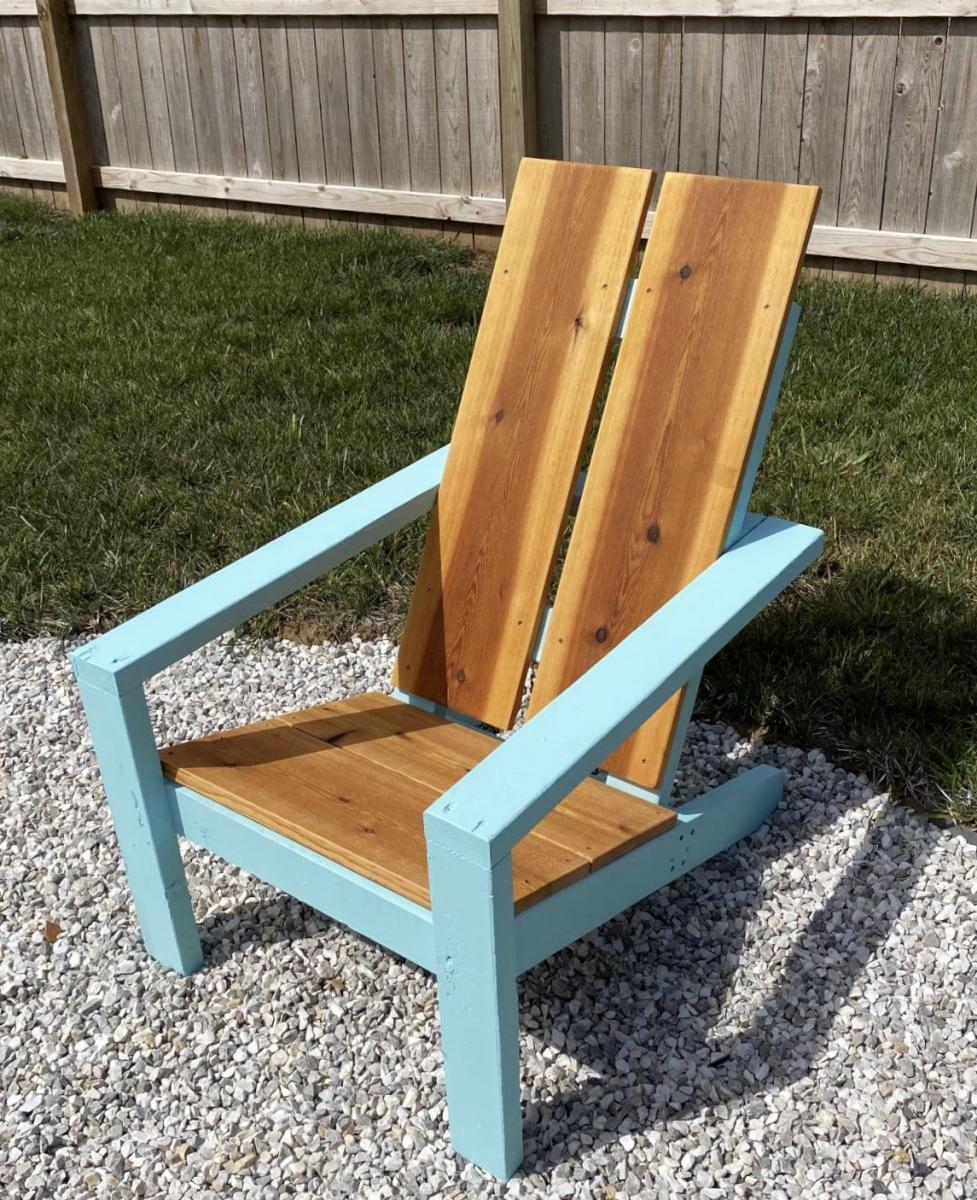
Modern Adirondack Chair, Super Sized
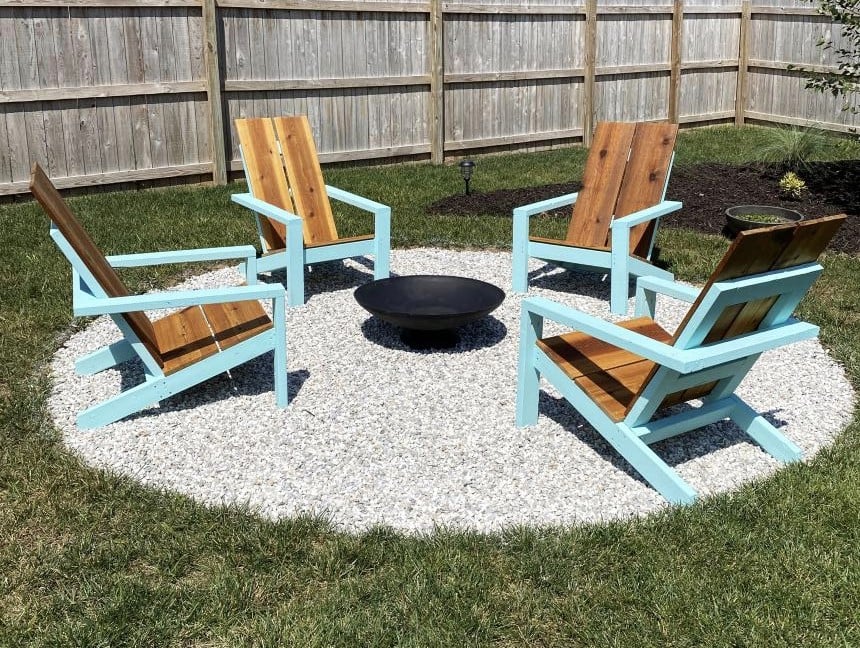
Am a big fan of Ana's work, and have used several of her plans in prior builds including the more traditional Adirondack chairs. Those stayed with my old house, and I wanted something different for my new house. Really liked her Modern Adirondack design with the floating arm rest. However, plans are like recipes to me--a guideline. I wanted the back boards to run up and down, and I am a bit more robust than the lovely and petite Ms. White, so they would need to be wider after I built the first one at 19 1/2" wide per plan. The next three I made 22" wide and that worked well without throwing off the geometry and angles of the other parts. Since I ran the backboards up and down, I needed some cross beams for stability and to give an attachment point for the middle of the boards. Cut some 2x4s at 15" wide, drilled pocket holes in both ends, and attached in between the back supports with the pockets facing up to be hidden by the back boards. All of the 2x4s were leftover cut-offs from the houses being built in my neighborhood. Since the frames were free, I splurged and went with cedar boards for the backs and bottoms. With the wider frames, I had to use 1x12s ripped down to 10 3/4" to get the right look (about a board's width in between). Needed some color, so I painted the frames Teal Seaglass from Menards. Cedar was stained with a natural deck stain from Sherwin Williams. I experimented with salt paint (mixing unsanded grout with the paint) to give a heavily textured and weathered finish but this was unecessary--the wood was distressed enough and I am a terrible painter. It also toned down the color so I skipped that step and just went with 2 coats of plain paint. It looks like outdoor furniture should up close. As always, am pleased with Ana's plans. Thank you for doing all the hard work!
Built from Plan(s)
Estimated Cost
about $200 for all 4 chairs due to cedar and paint
Estimated Time Investment
Weekend Project (10-20 Hours)
Finish Used
Paint - Pittsburgh matte exterior with Dutch Boy coloring Teal Seaglass
Stain - Sherwin Williams Superdeck stain, Natural finish
Stain - Sherwin Williams Superdeck stain, Natural finish
Recommended Skill Level
Starter Project
Comments

Fri, 08/21/2020 - 16:59
I absolutely love how the…
I absolutely love how the back was done!! Thank you so much for sharing!
Catio heaven

Ana doesn’t have a plan for a catio but she does for a playhouse and a cedar shed made from 2x2’s. I sort of combined my knowledge from making her plans over the last 10 years and came up with this for my cats. It was fun to make!! My baby kitten is loving it. I used garden fencing and stapled it to the outside and pocket holes for the walls. I made each wall individually like the playhouse then connected them once in place.


Built from Plan(s)
Estimated Cost
$250
Estimated Time Investment
Week Long Project (20 Hours or More)
Finish Used
Cabot semi transparent outdoor deck and fence stain. ($9 oops section)
Recommended Skill Level
Intermediate
Comments
Wed, 06/09/2021 - 12:36
Thank you for sharing! My…
Thank you for sharing! My daughter wants a cat for her birthday but it can't be inside due to our son's allergies. Roaming outside isn't really an option because we have coyotes. We are going to use one of these in combination with an underground electric fence.
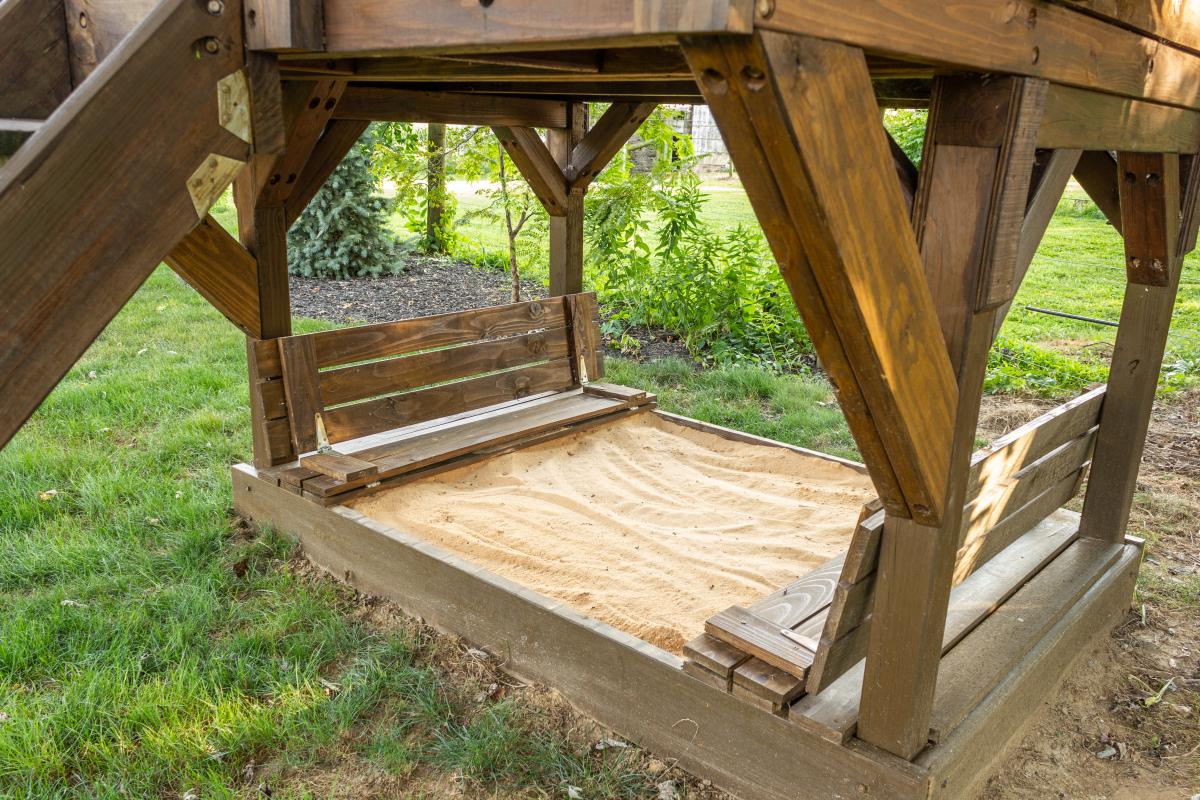
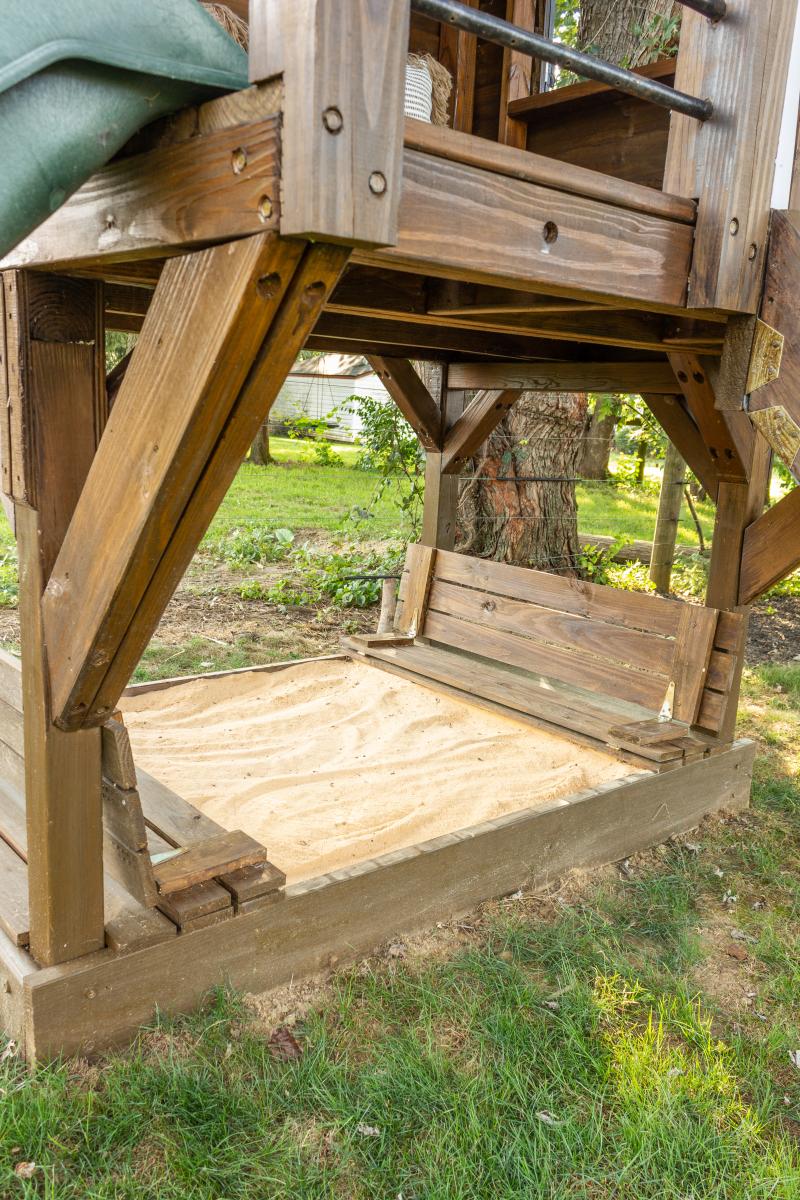
Sandbox with built-in seats in our playhouse
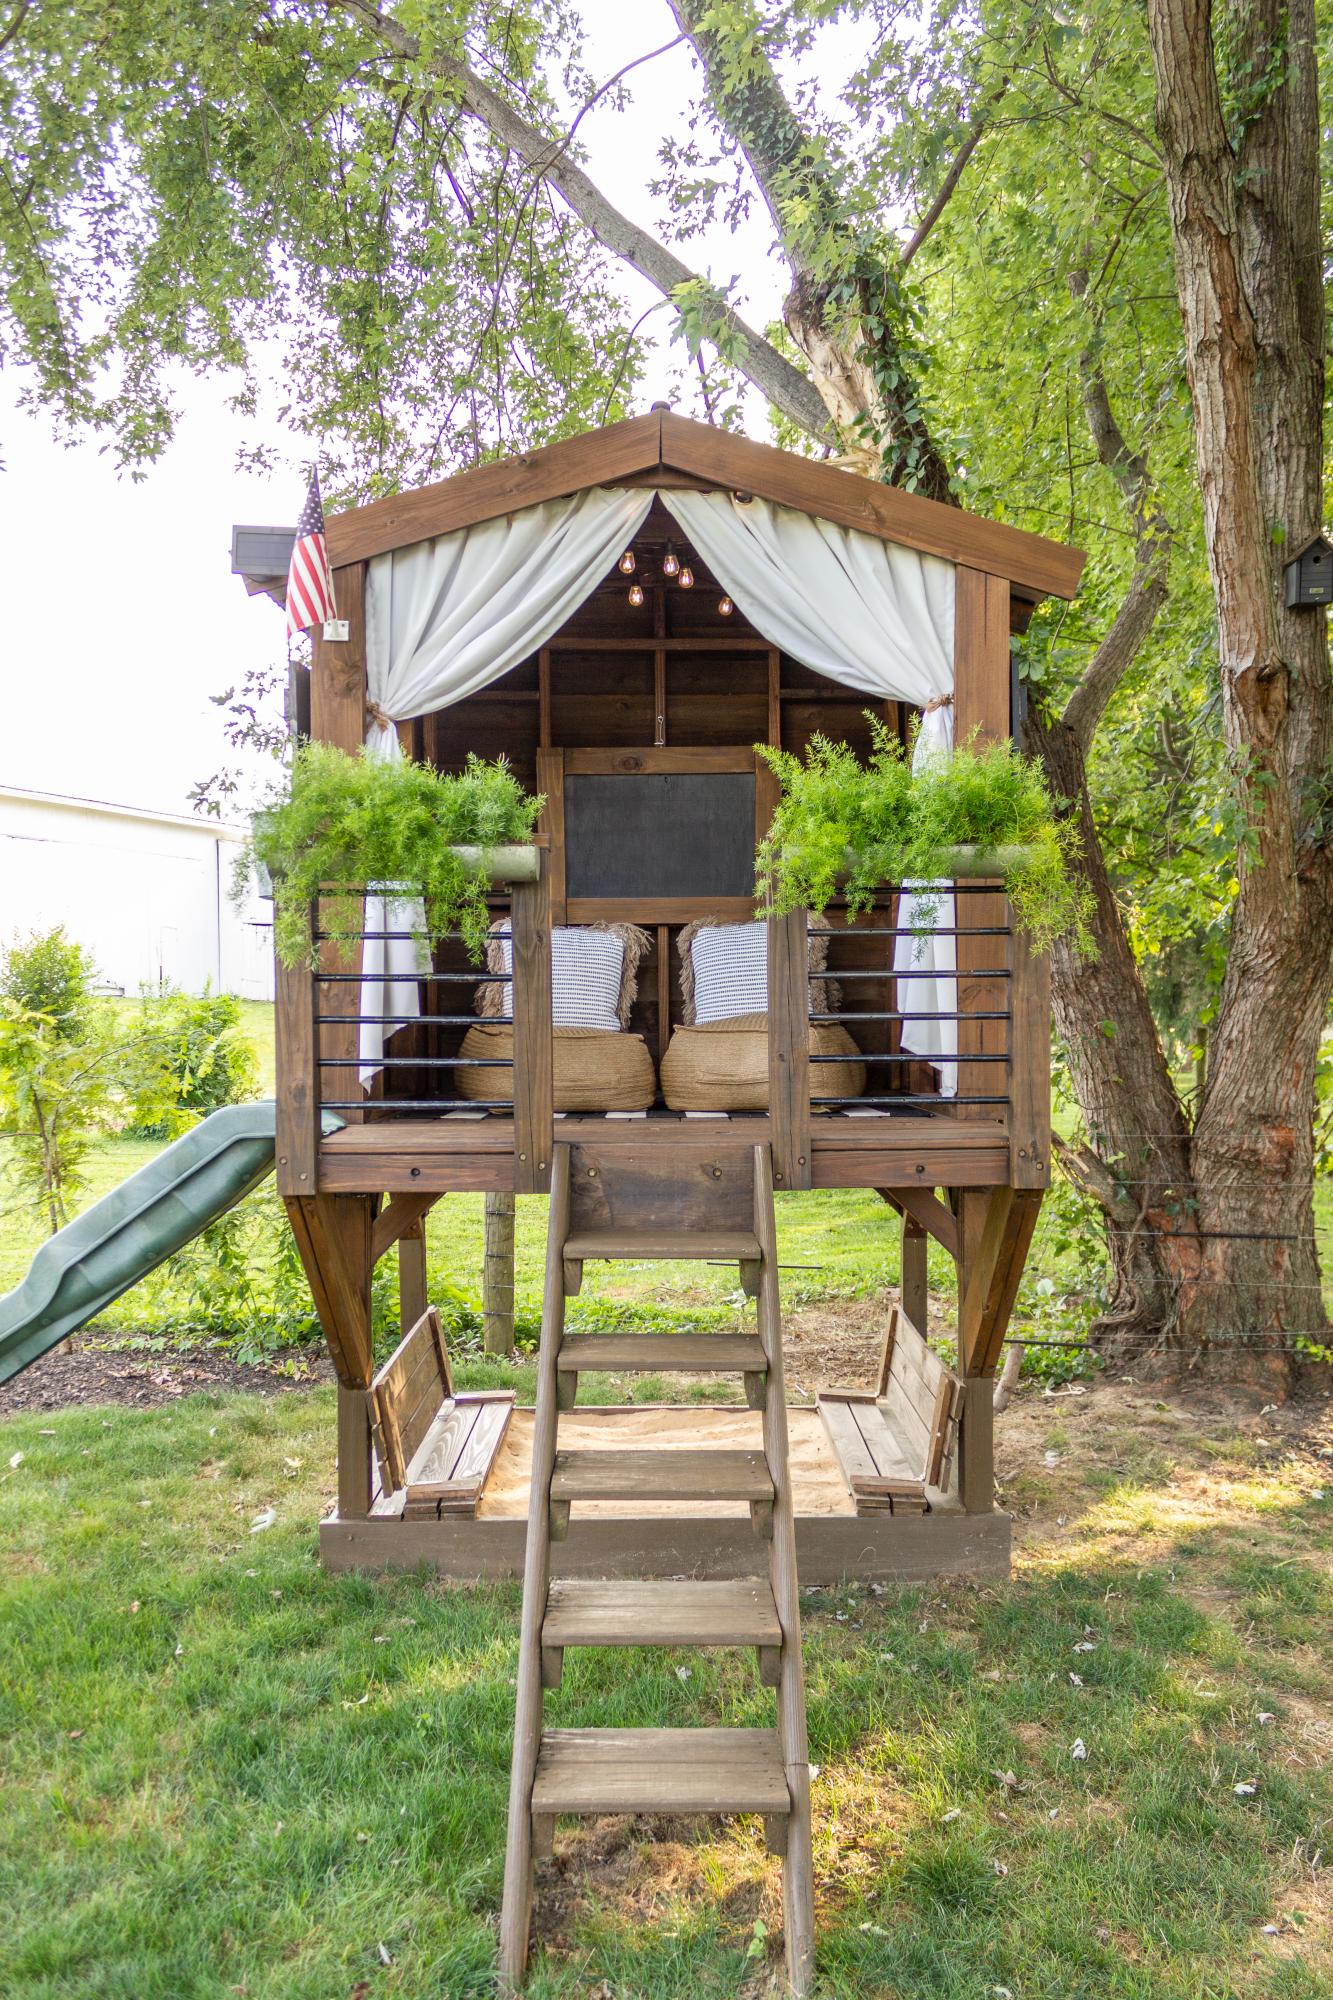
The base of our playhouse felt like the perfect spot to use the sandbox plan with built-in seats. The bench seats actually fold flat to create a lid for the sandbox when it’s not in use. I followed Ana’s plans exactly and used the list of materials she provided. The only modification I made was eliminating the back supports. It was not necessary for me to add the back supports since we have the playhouse posts to support the back of the bench.
Built from Plan(s)
Estimated Cost
$60
Estimated Time Investment
Afternoon Project (3-6 Hours)
Finish Used
Stain
Recommended Skill Level
Beginner
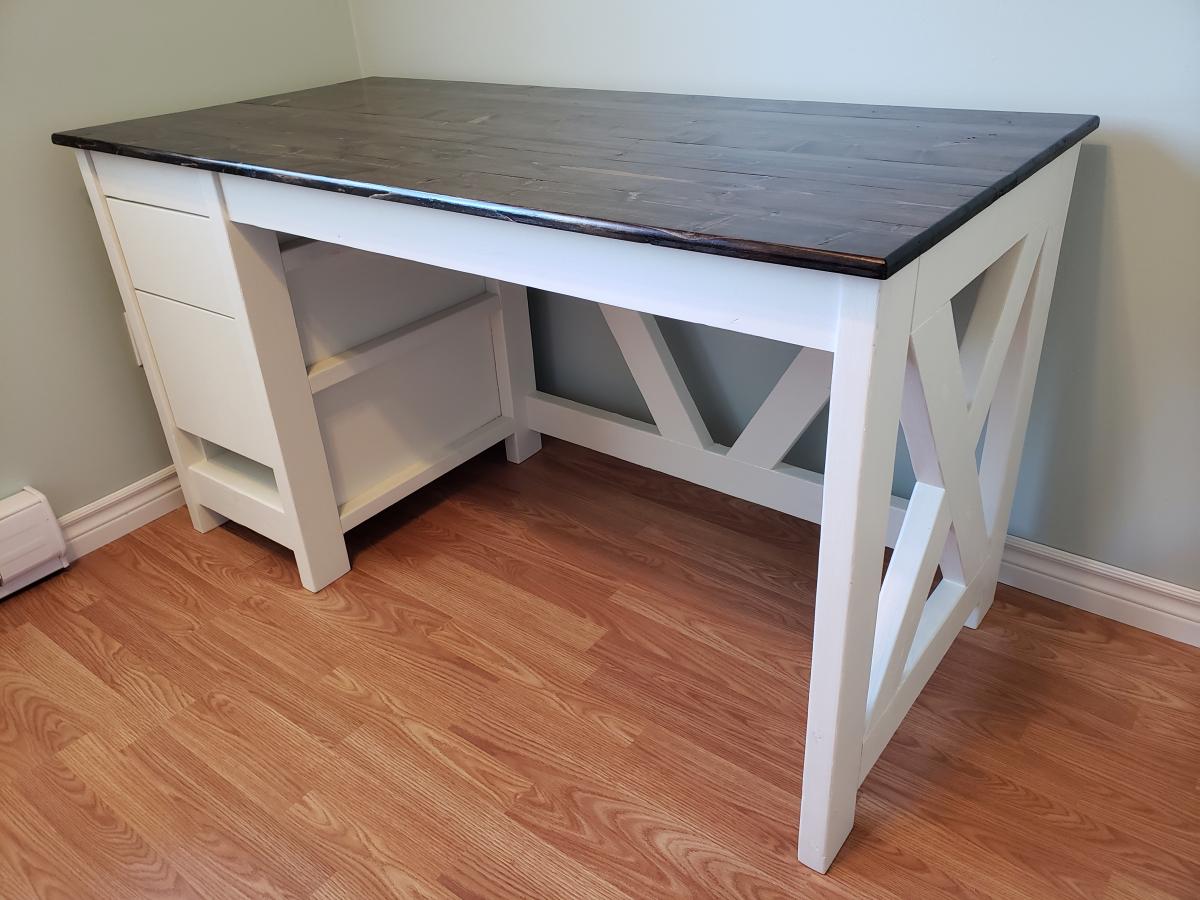
Farmhouse X Desk
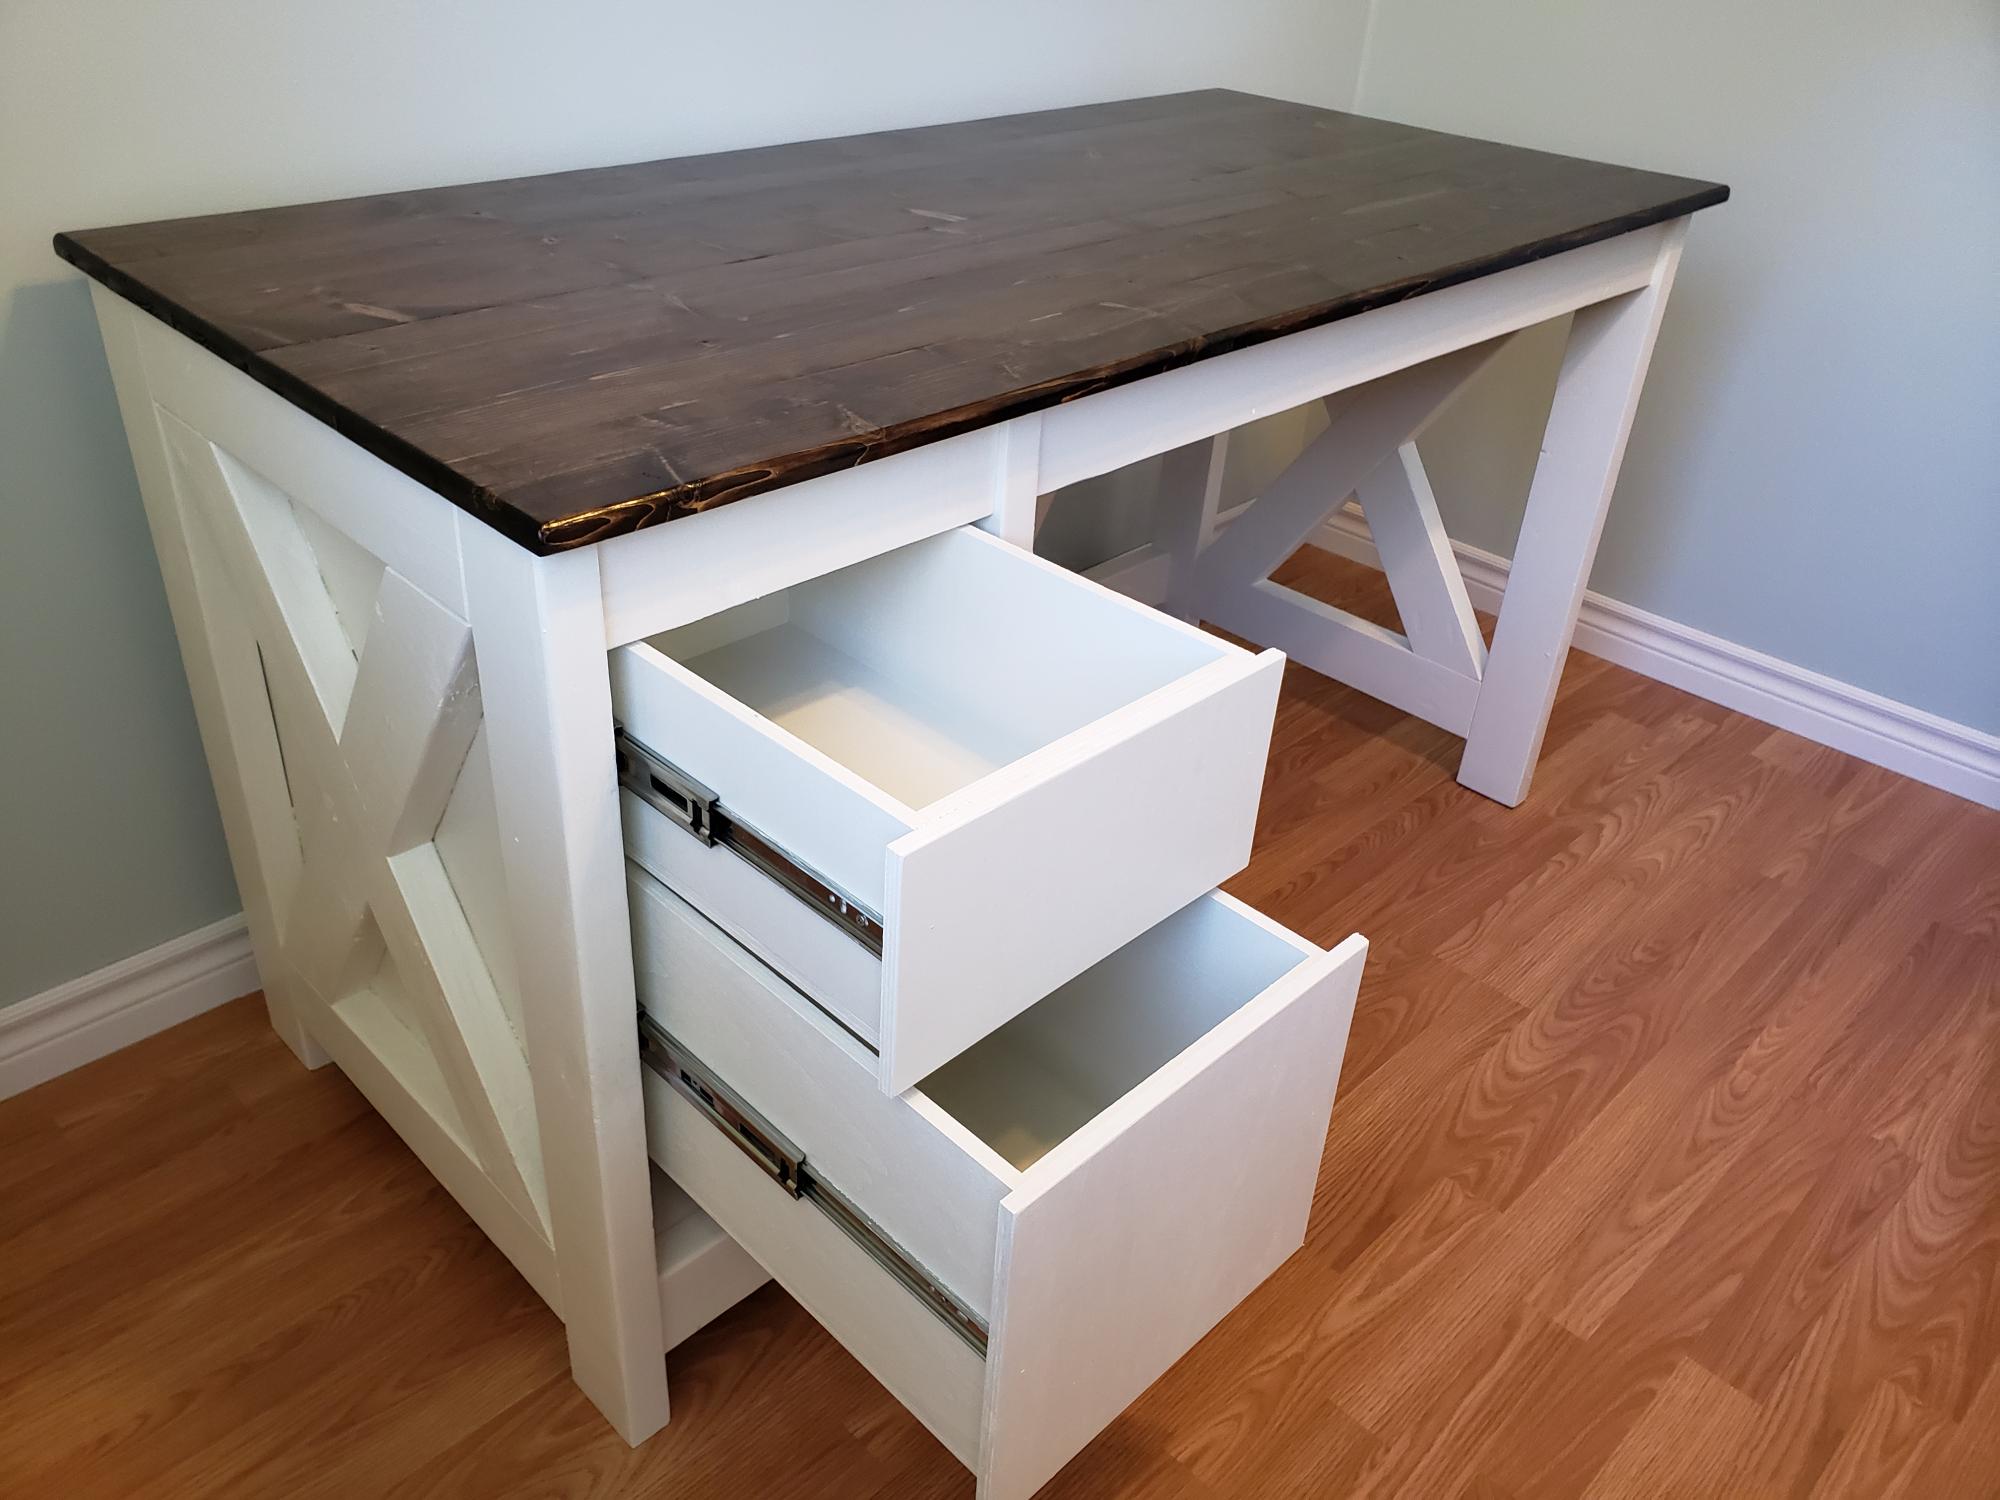
I built the Farmhouse X Desk with full extension drawers instead of shelves.
Built from Plan(s)
Estimated Cost
$125
Estimated Time Investment
Weekend Project (10-20 Hours)
Finish Used
White cabinet & furniture paint and dark walnut stain for the top. Finished the top with several coats of Minwax polycrylic.
Recommended Skill Level
Intermediate
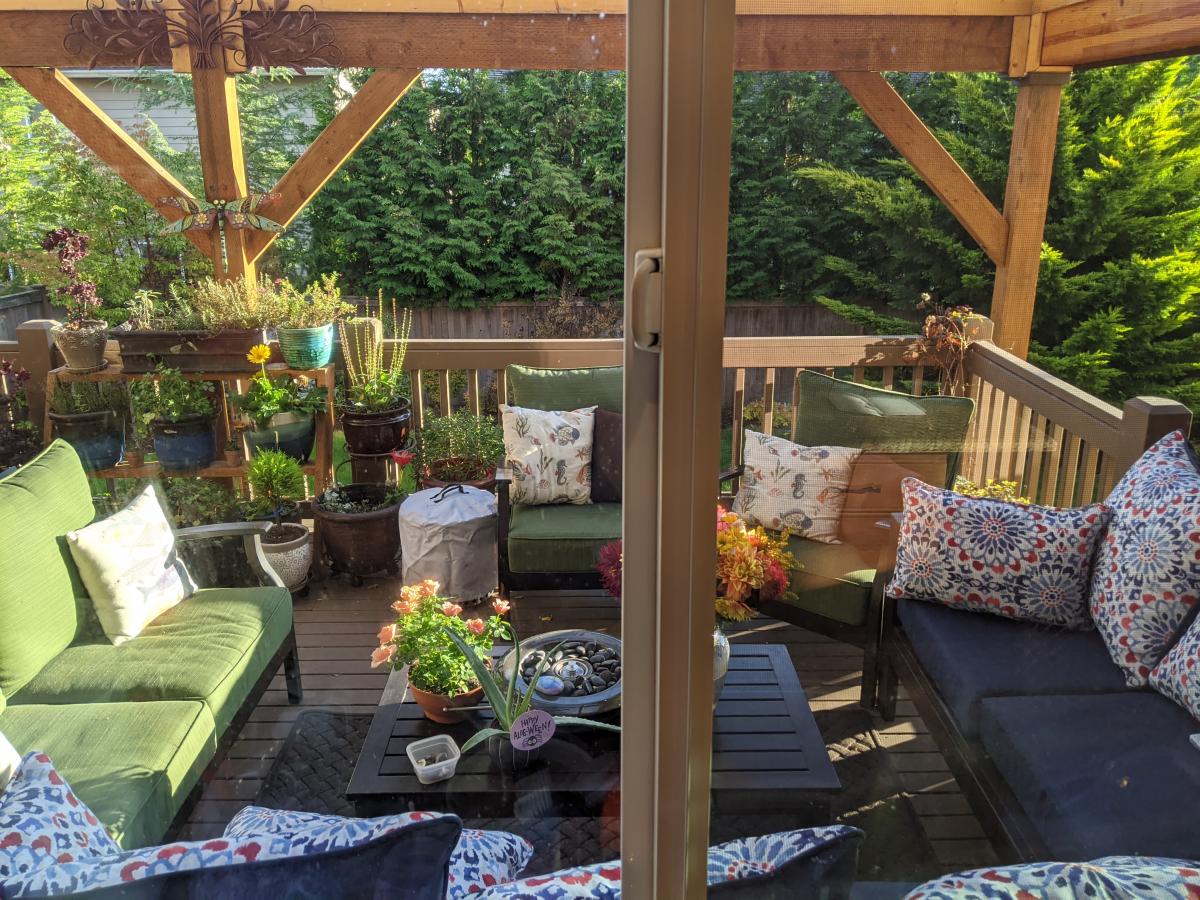
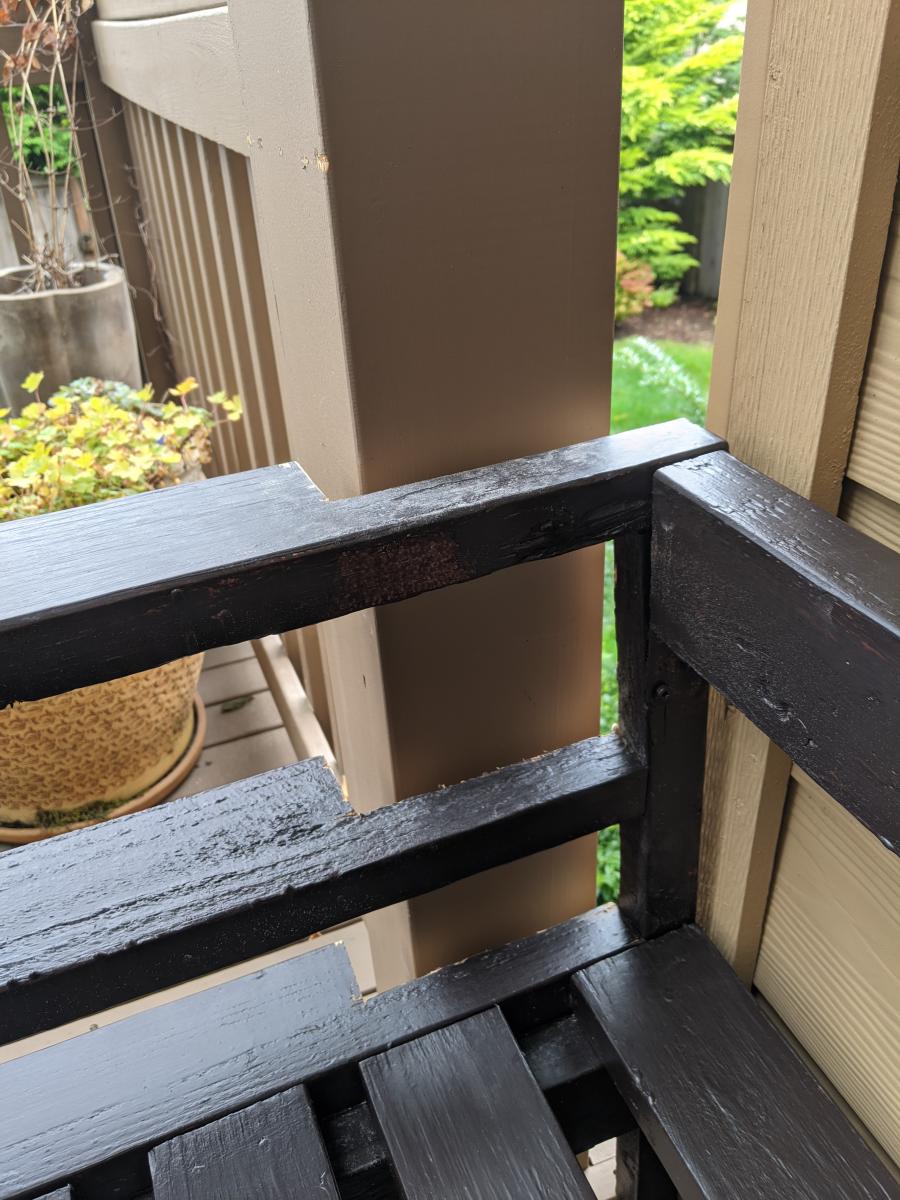
Outdoor Sectional - Love It !
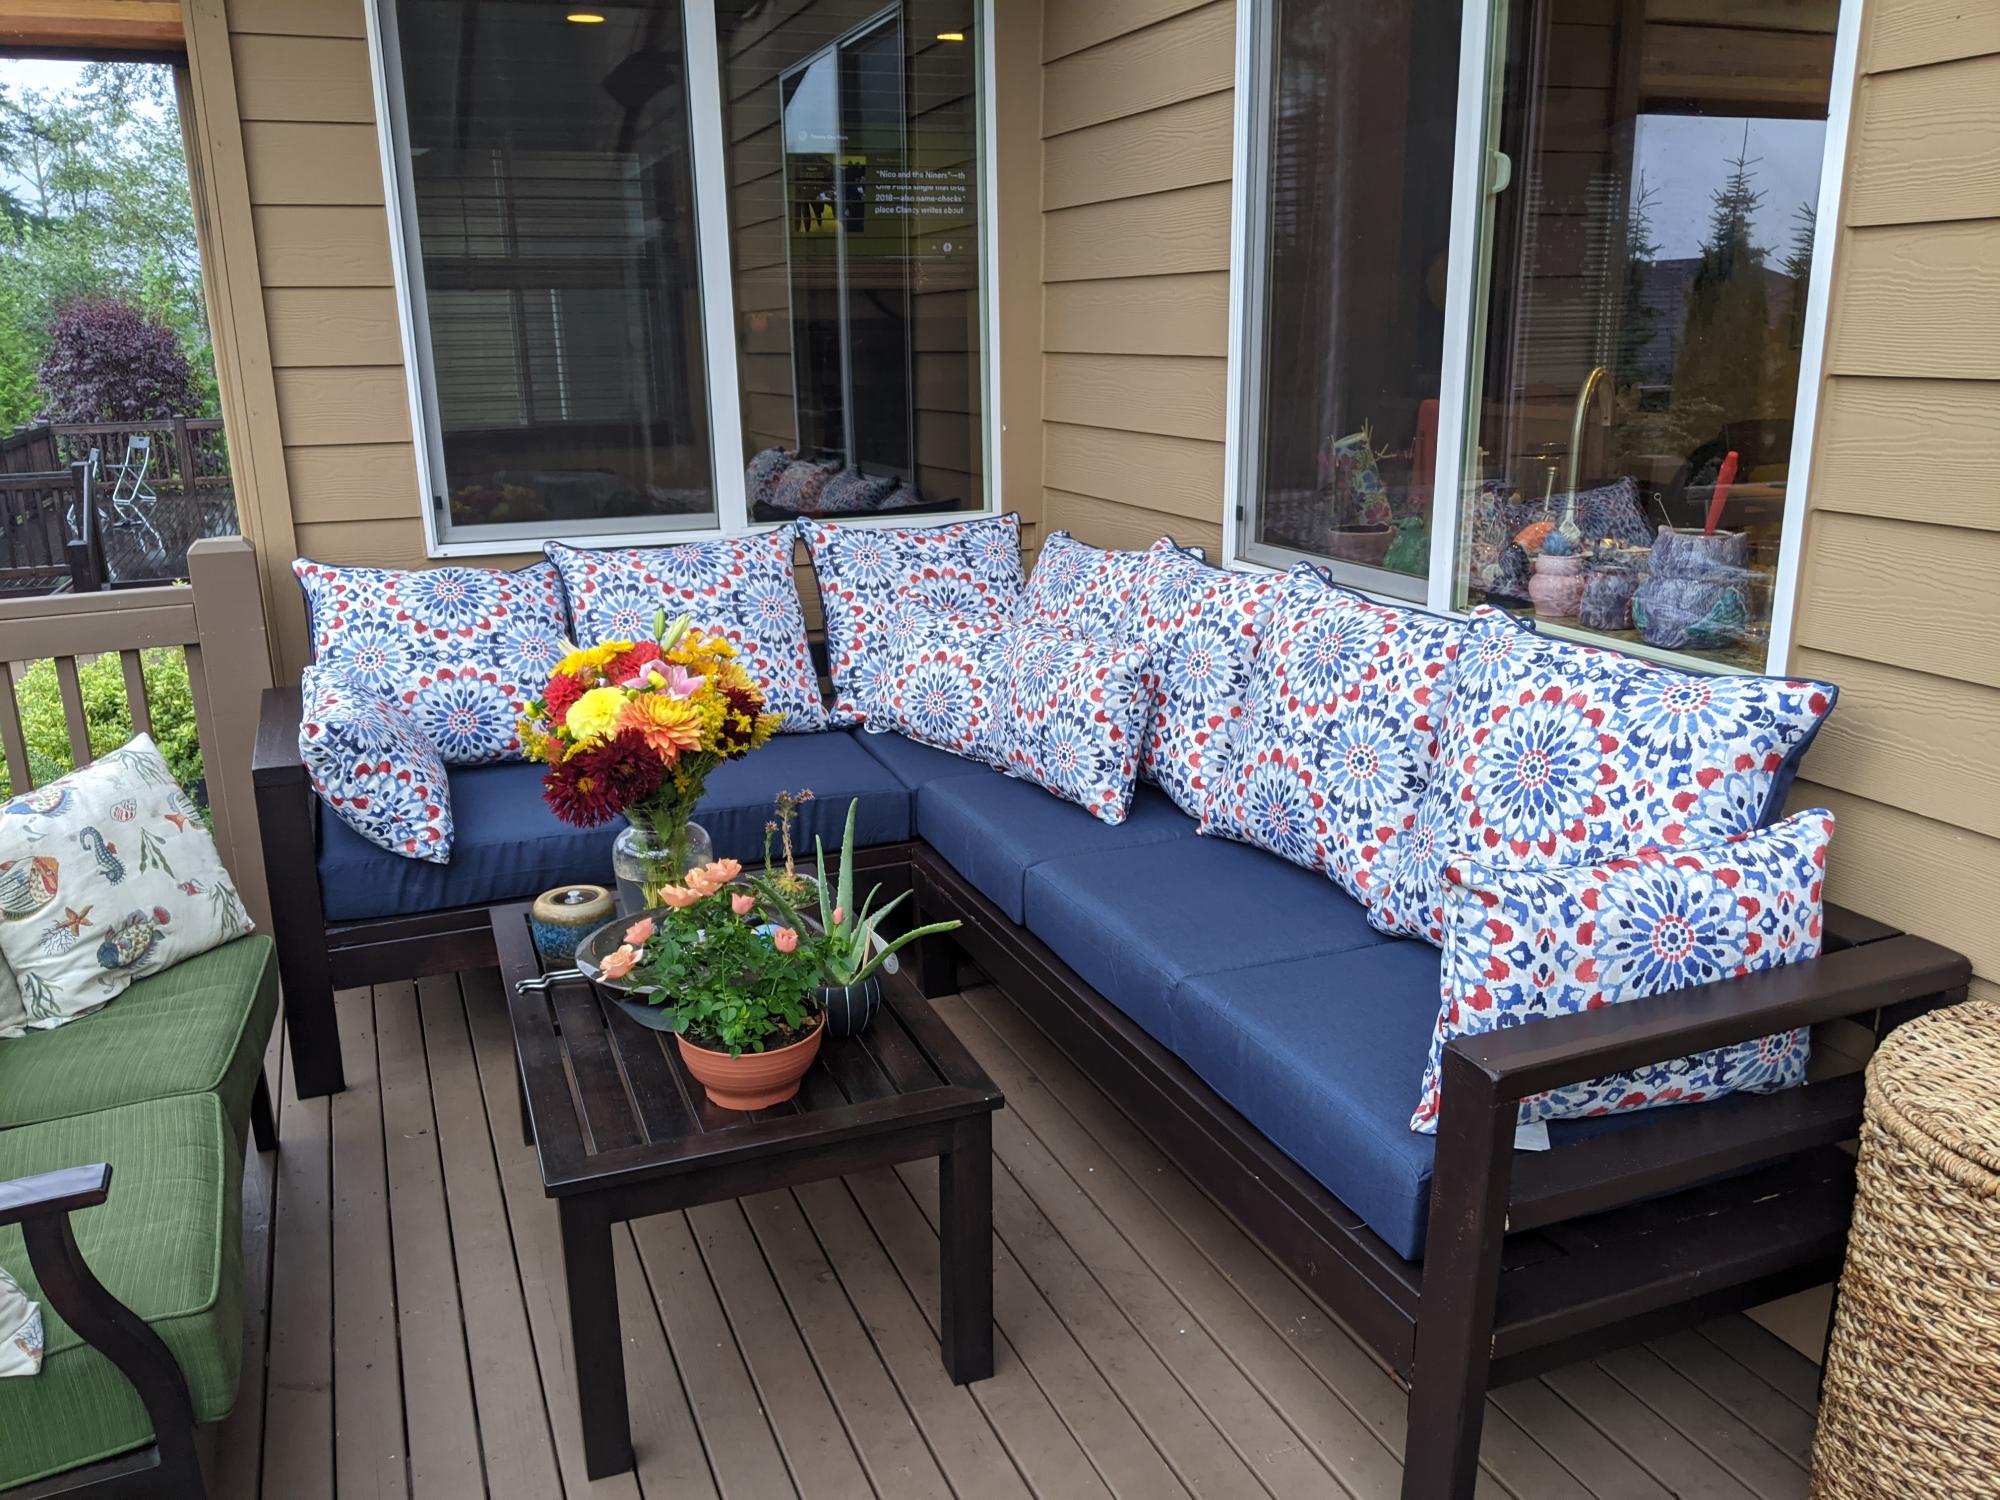
Great experience building this sectional, although would recommend pre-drilling the holes where practical to avoid splitting. It only happened to me a few times on #2 douglas fir, but I would have preferred to avoid it. As you can see from the picture, I didn't account for the siding taking up the space, and was expecting a perfect fit. Easily fixed with a bit of saw work, and now it's really custom fit for the space. :-)
I've added the details of the finish we used, and really happy with how it turned out, with the exception of my garage workshop lighting not revealing the spots I need to touch up now that it is in the natural light.
And of course, this is a terrific time to purchase couch cushions at the end of the season. Lots of great sales, and we found these at Target for $47 per top/bottom set.

Built from Plan(s)
Estimated Cost
$600
Estimated Time Investment
Week Long Project (20 Hours or More)
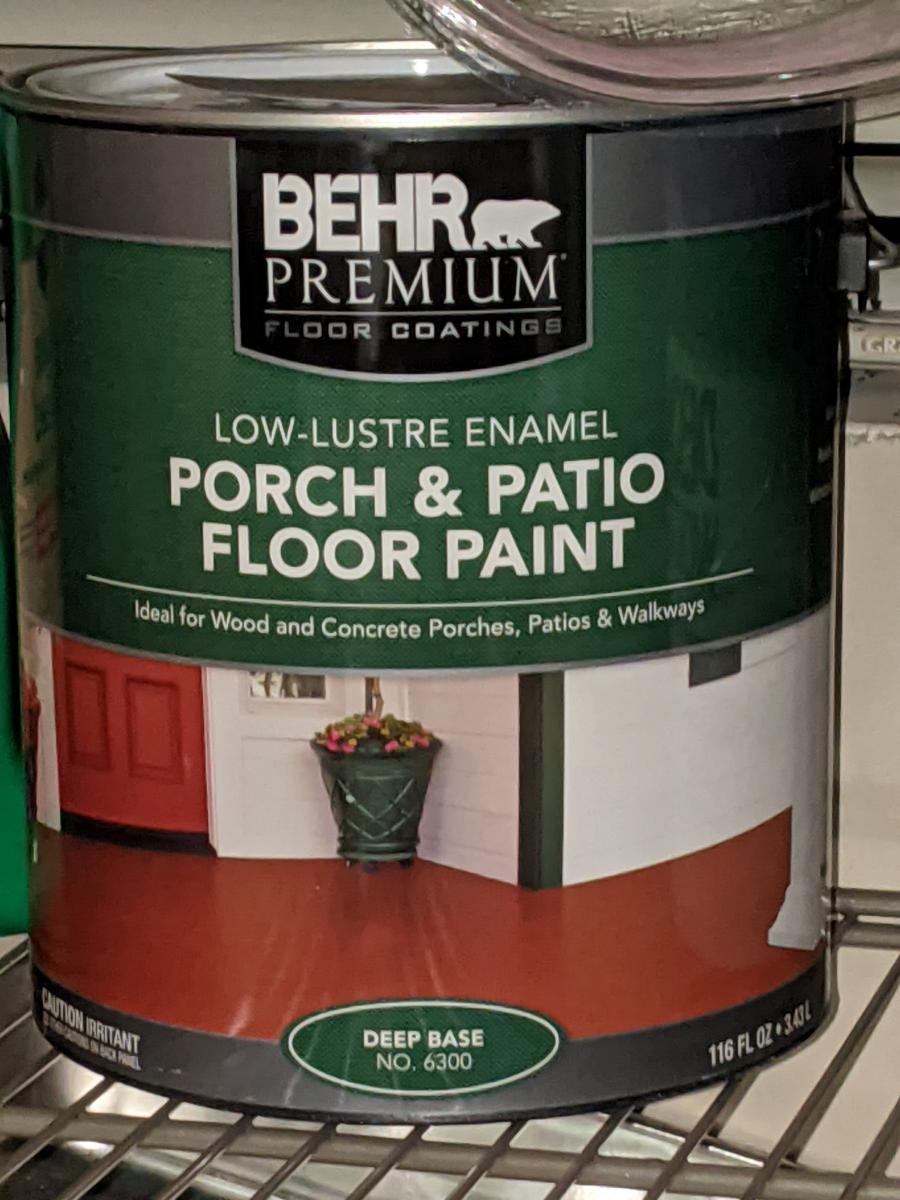
Finish Used
Rustoleum Rock Solid Deck Start Wood Primer followed by Behr Premium Porch and Patio Floor Paint. This gave a really matte finish that looks a lot like the metal patio furniture we will have next to it, and Home Depot was able to tint this for us. We also added a mildew and moss inhibitor to the paint at the store for a couple extra bucks since we live in the PNW. The extra time needed to get multiple coats on for full coverage was totally worth it.
Recommended Skill Level
Beginner
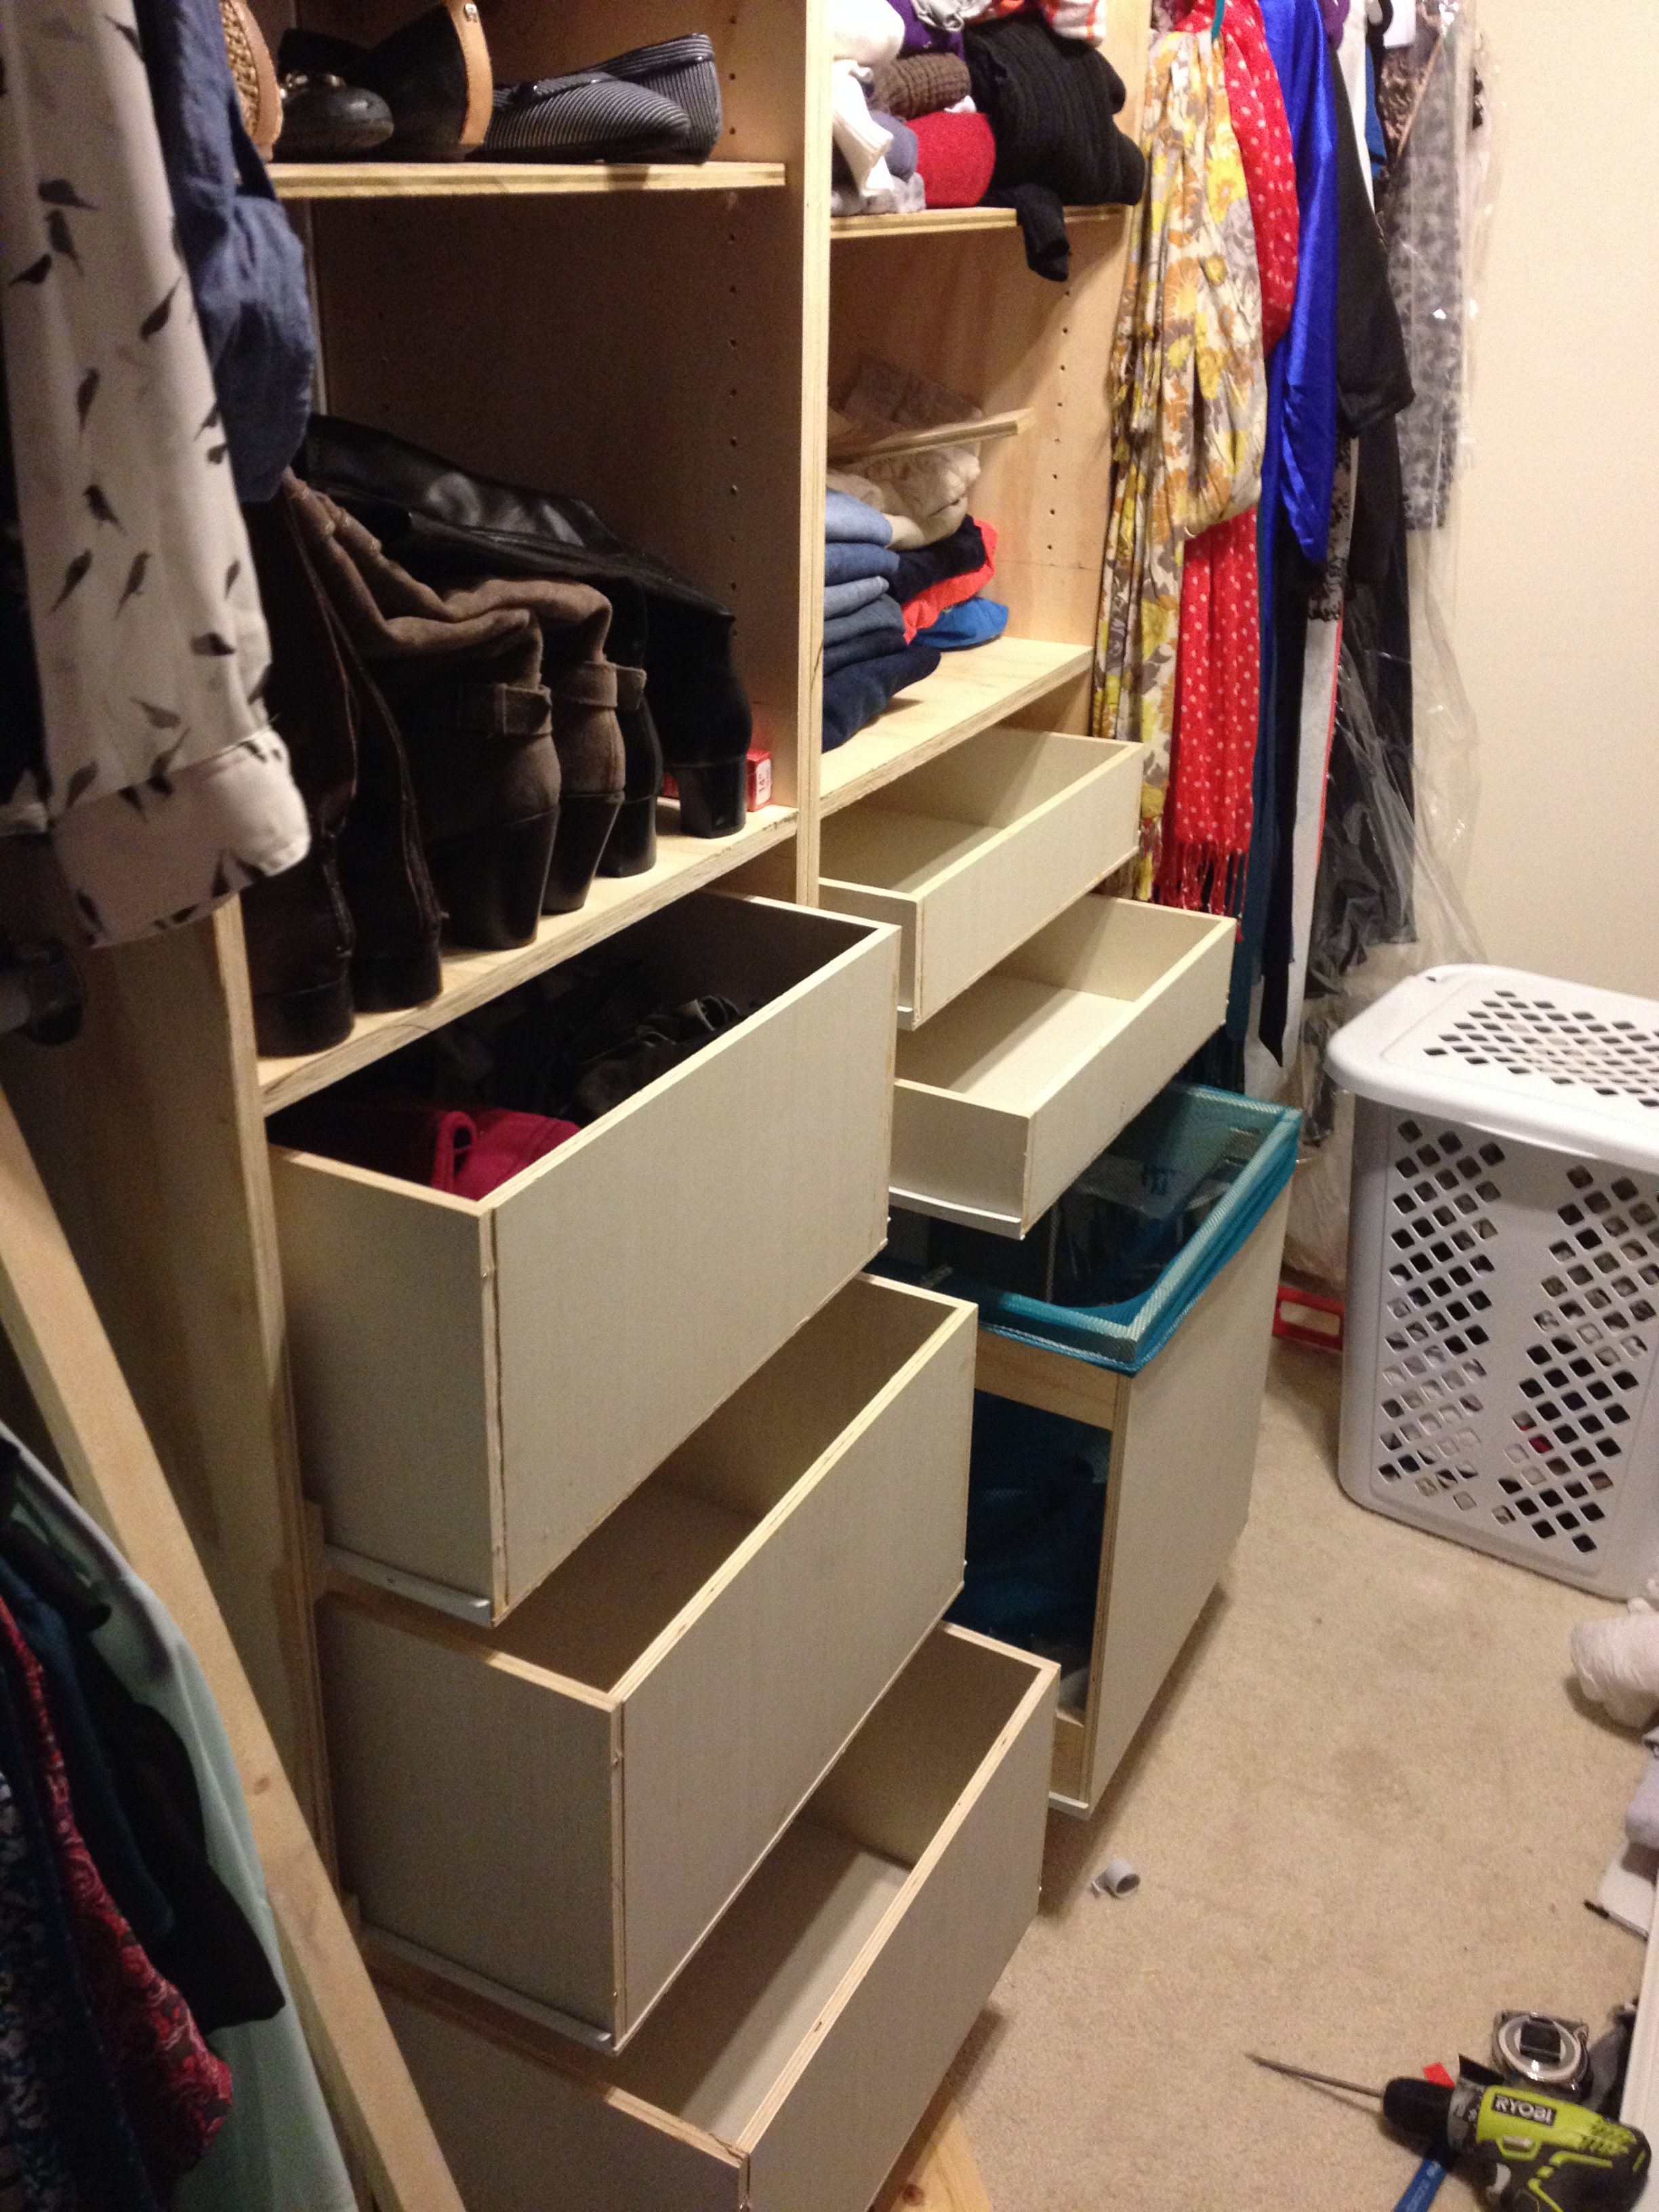
Master Closet Renovation
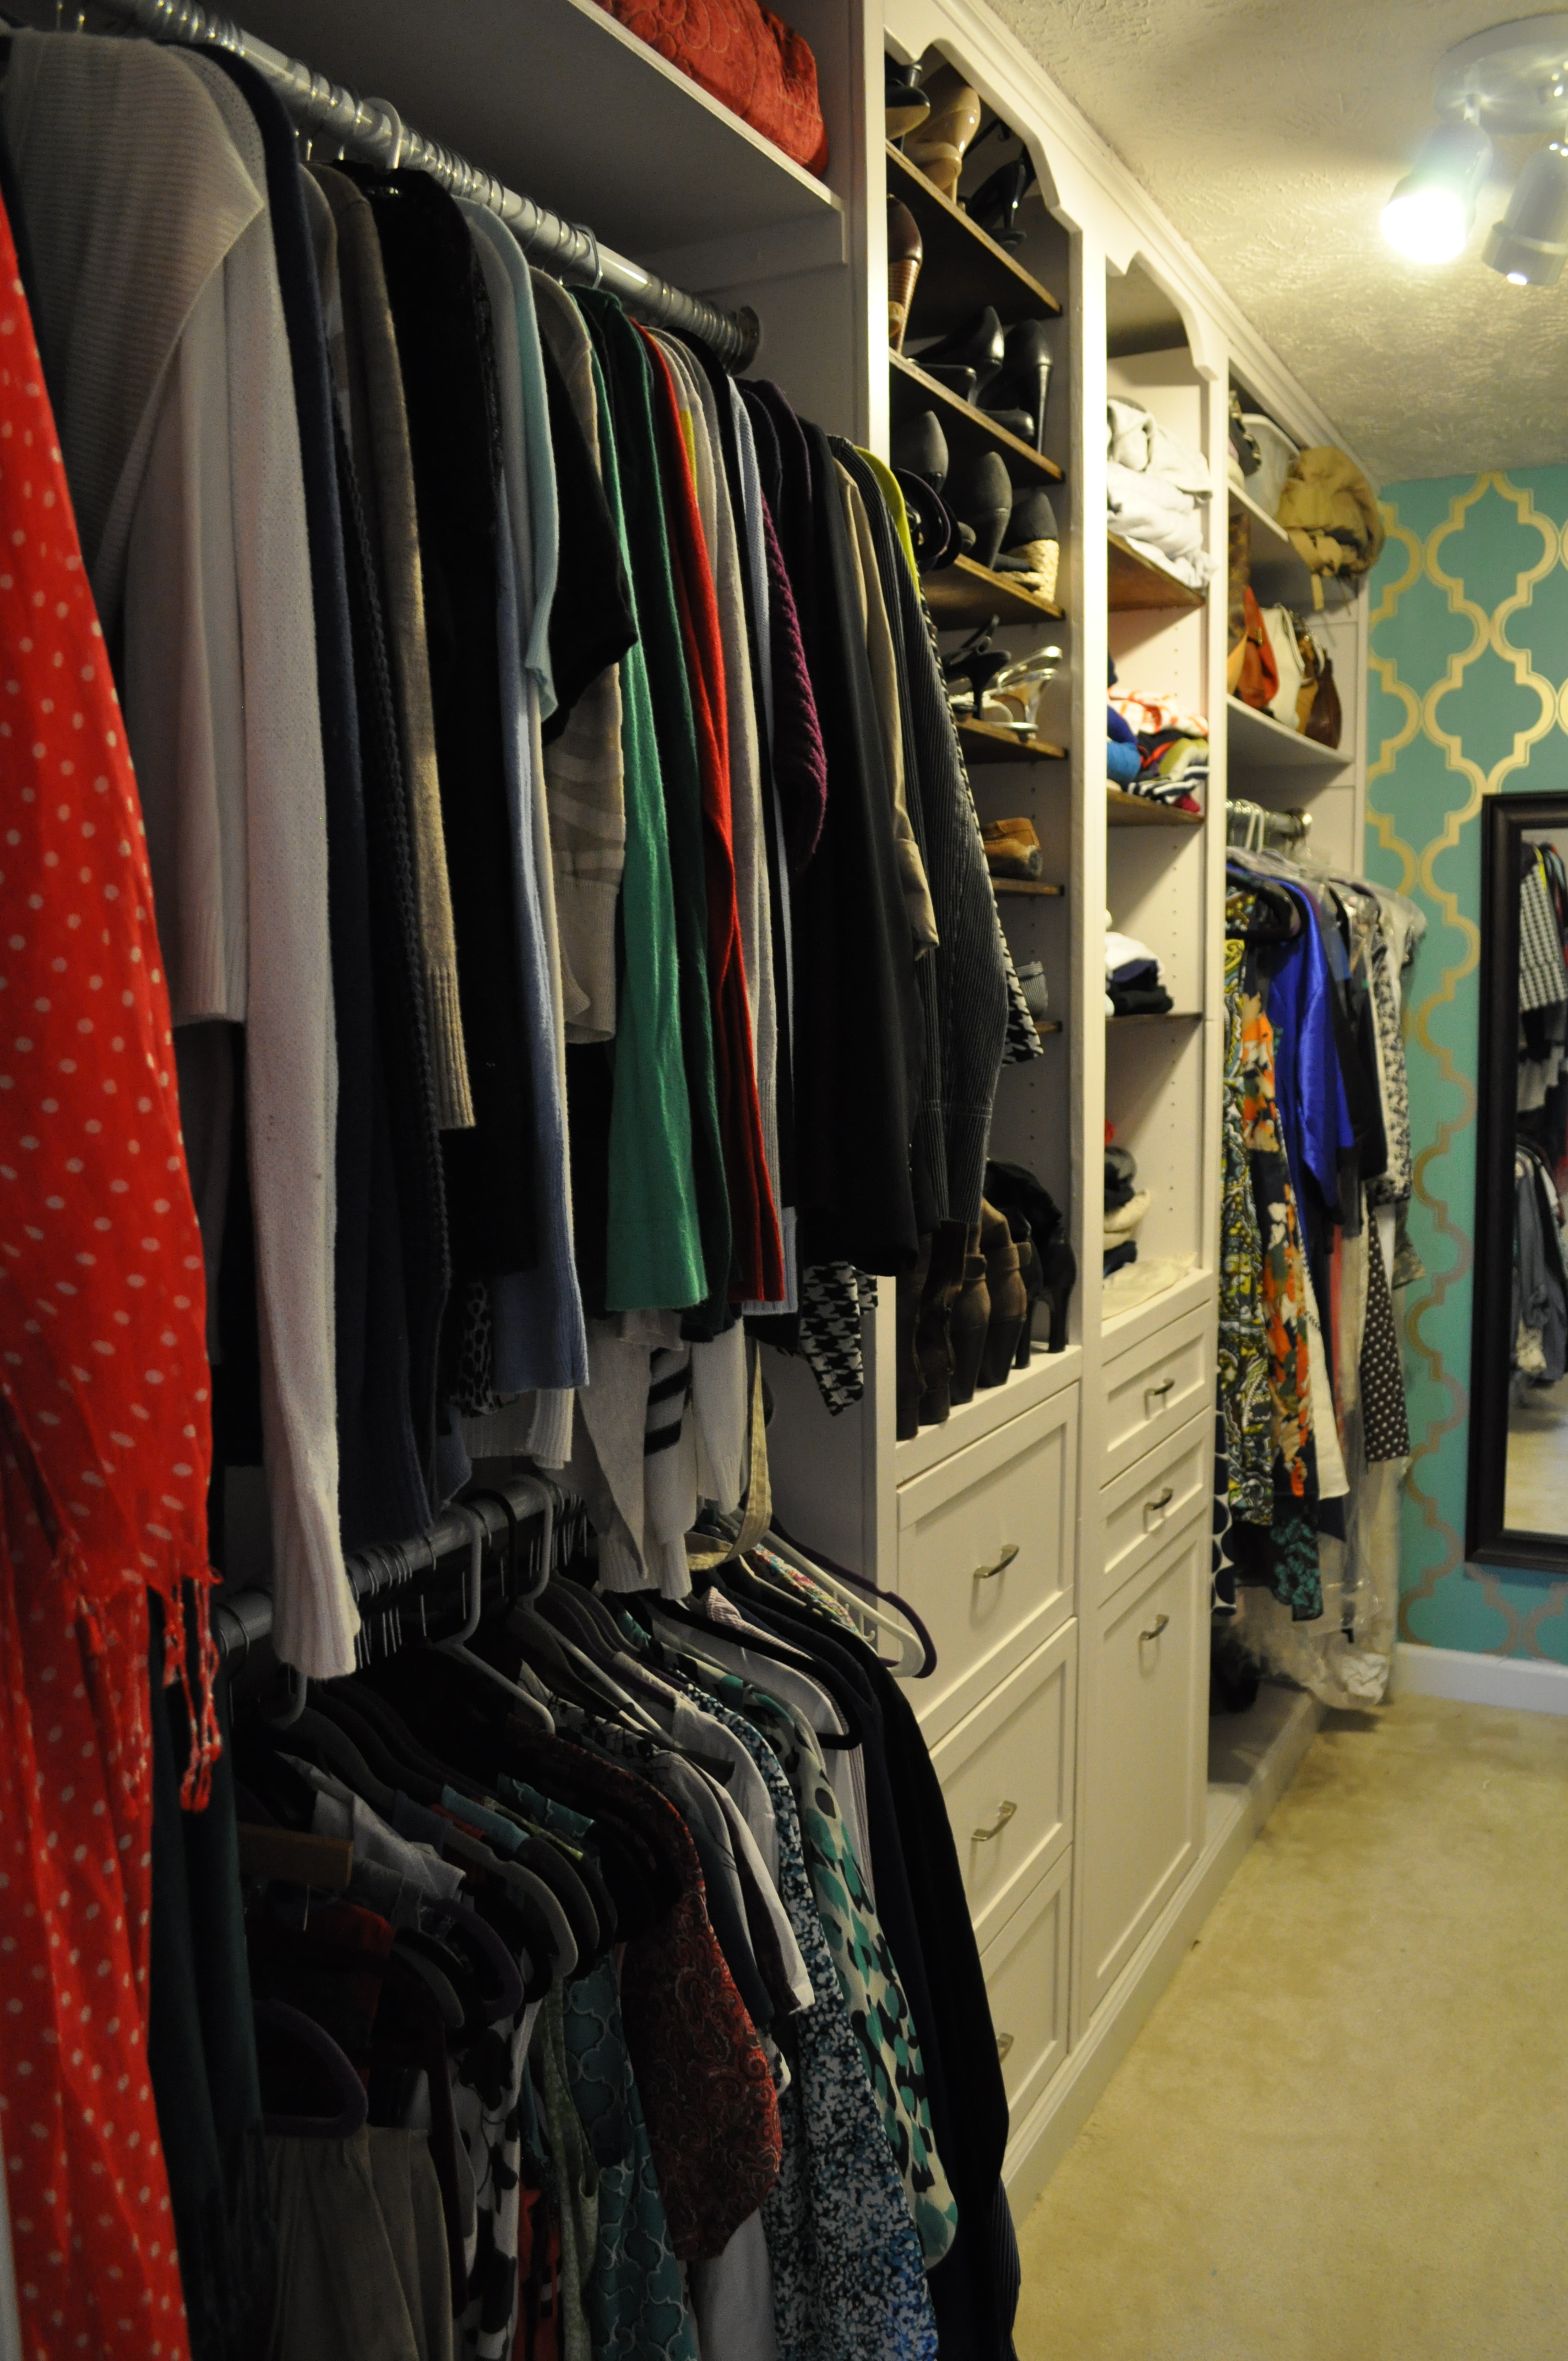
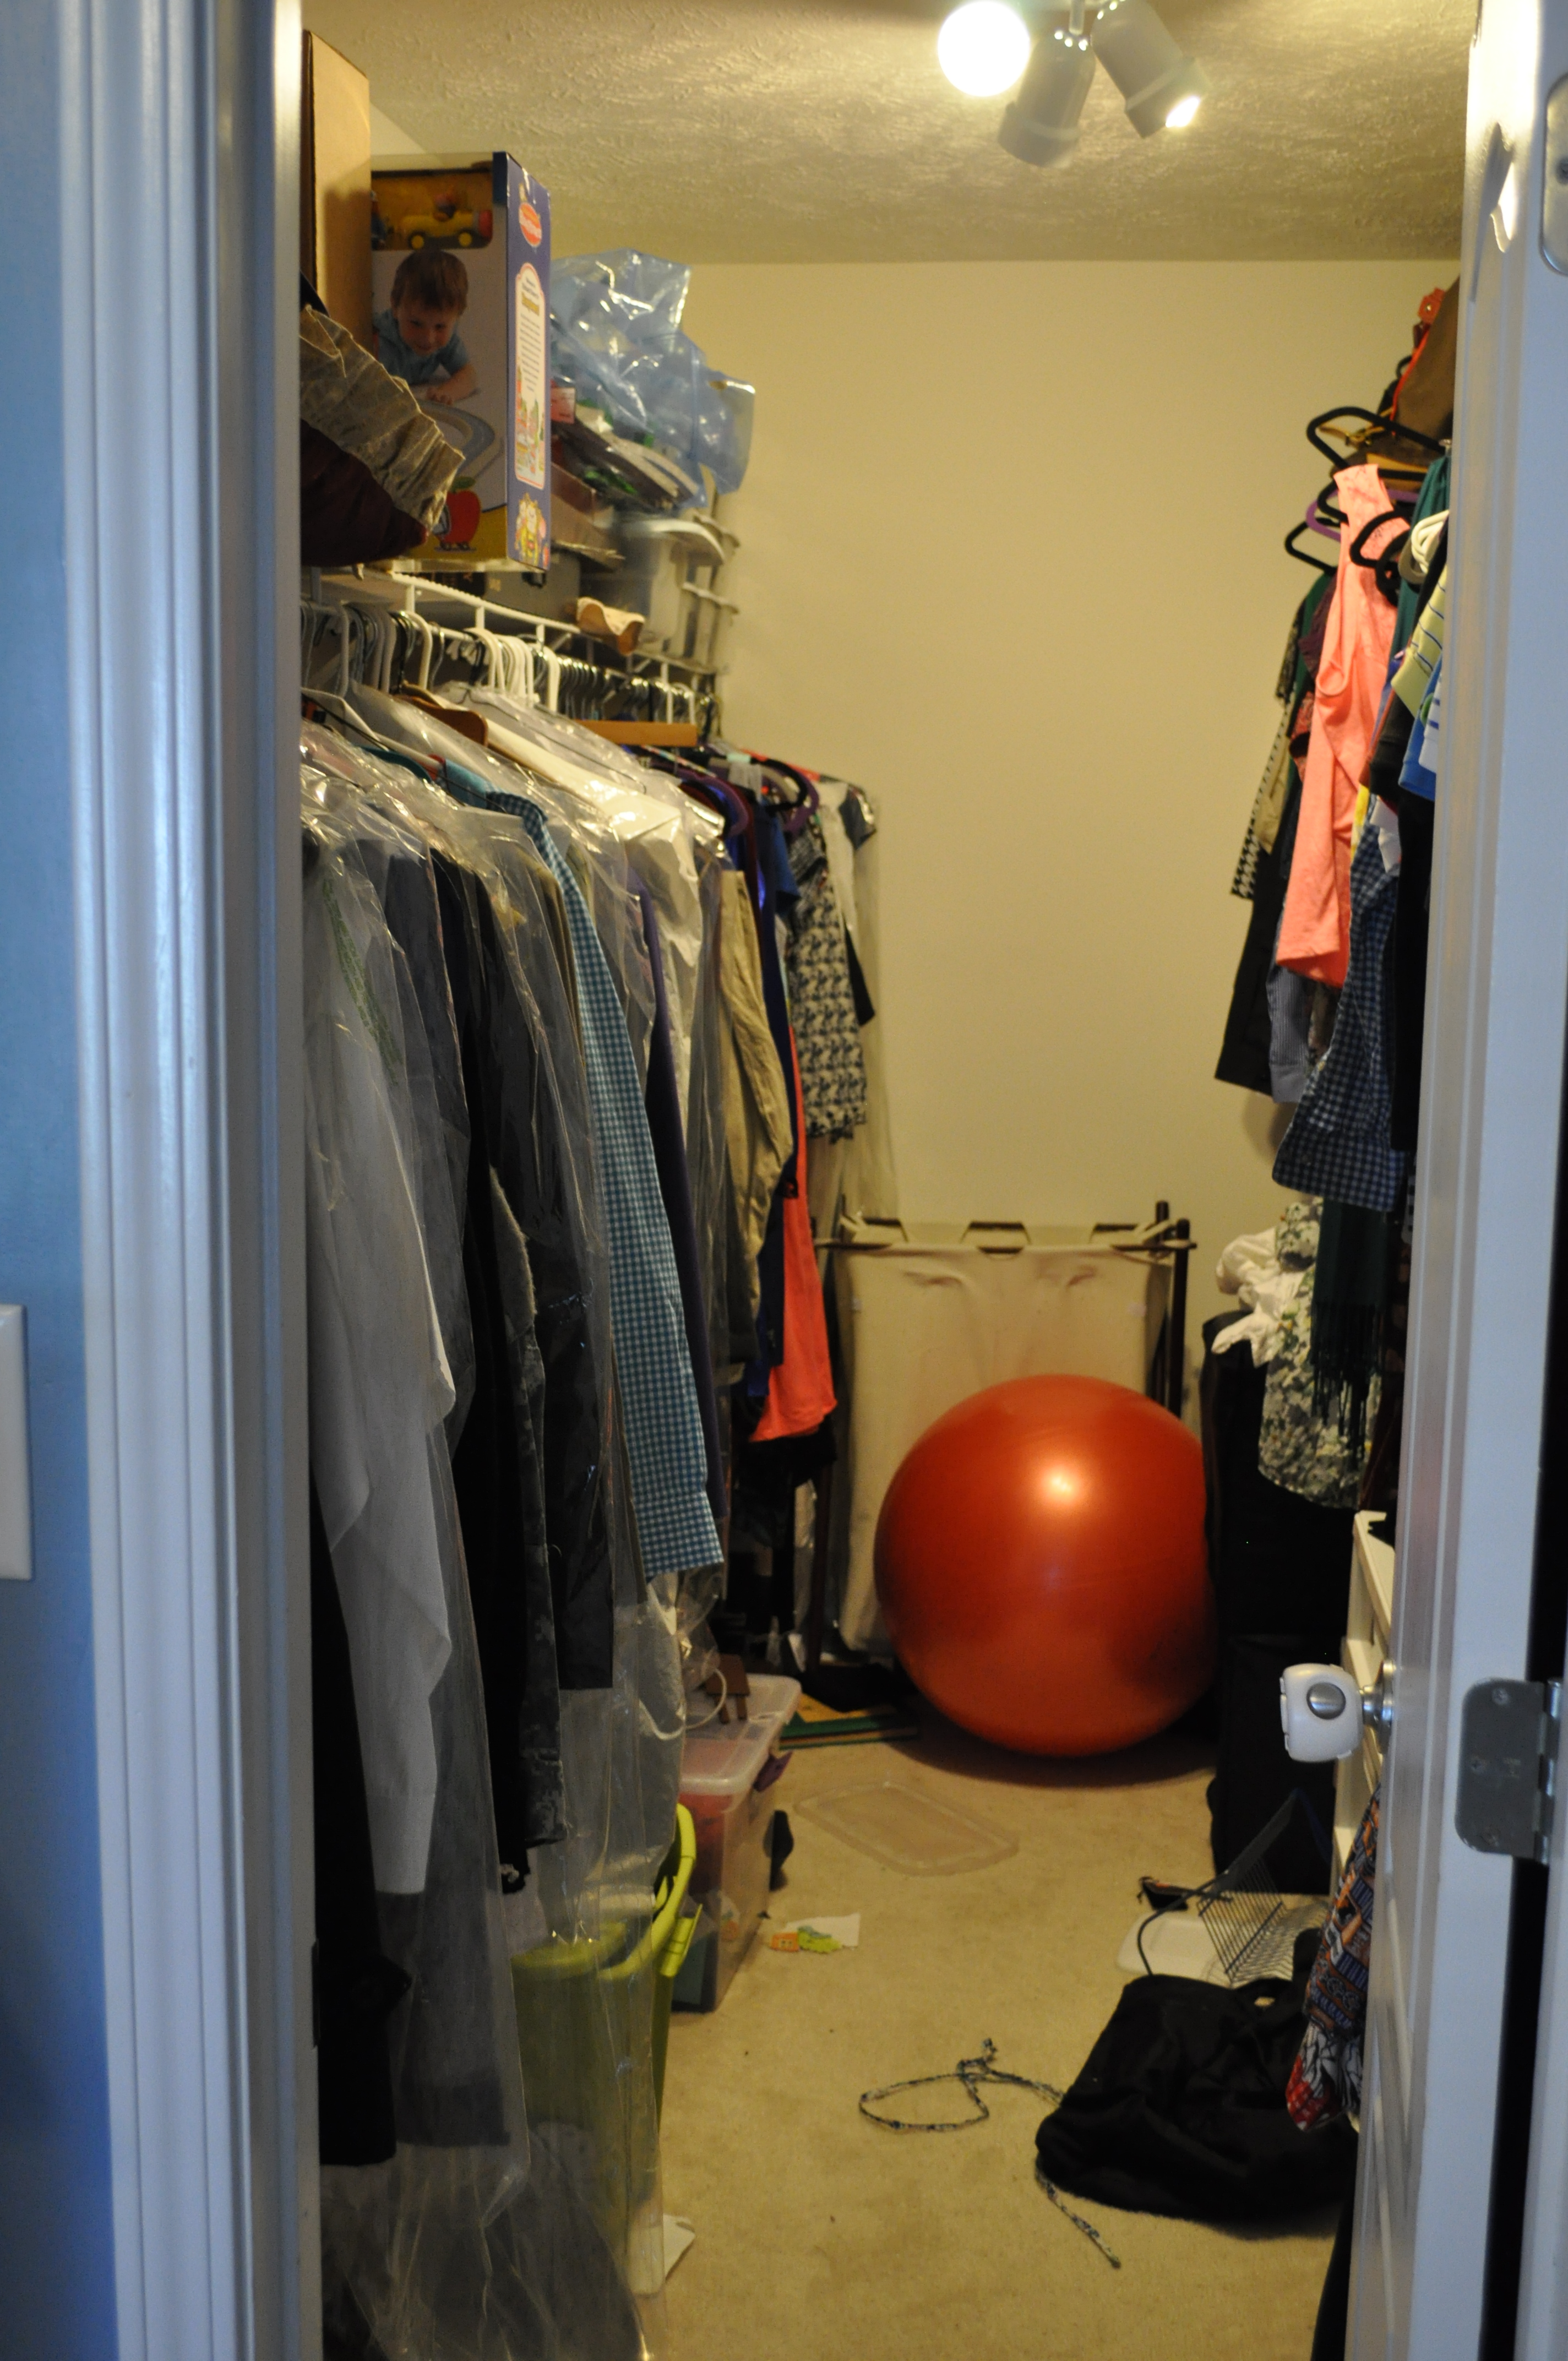
Our master closet in our home was HUGE- but pretty horrible design wise prior to this DIY. 1 light bulb fixture in a 12 foot deep closet, horrible wire shelving running the whole wall, and a pretty much horrible use of space. As a surprise for my husband who was away for his job, I decided to create a dream closet for both of us!
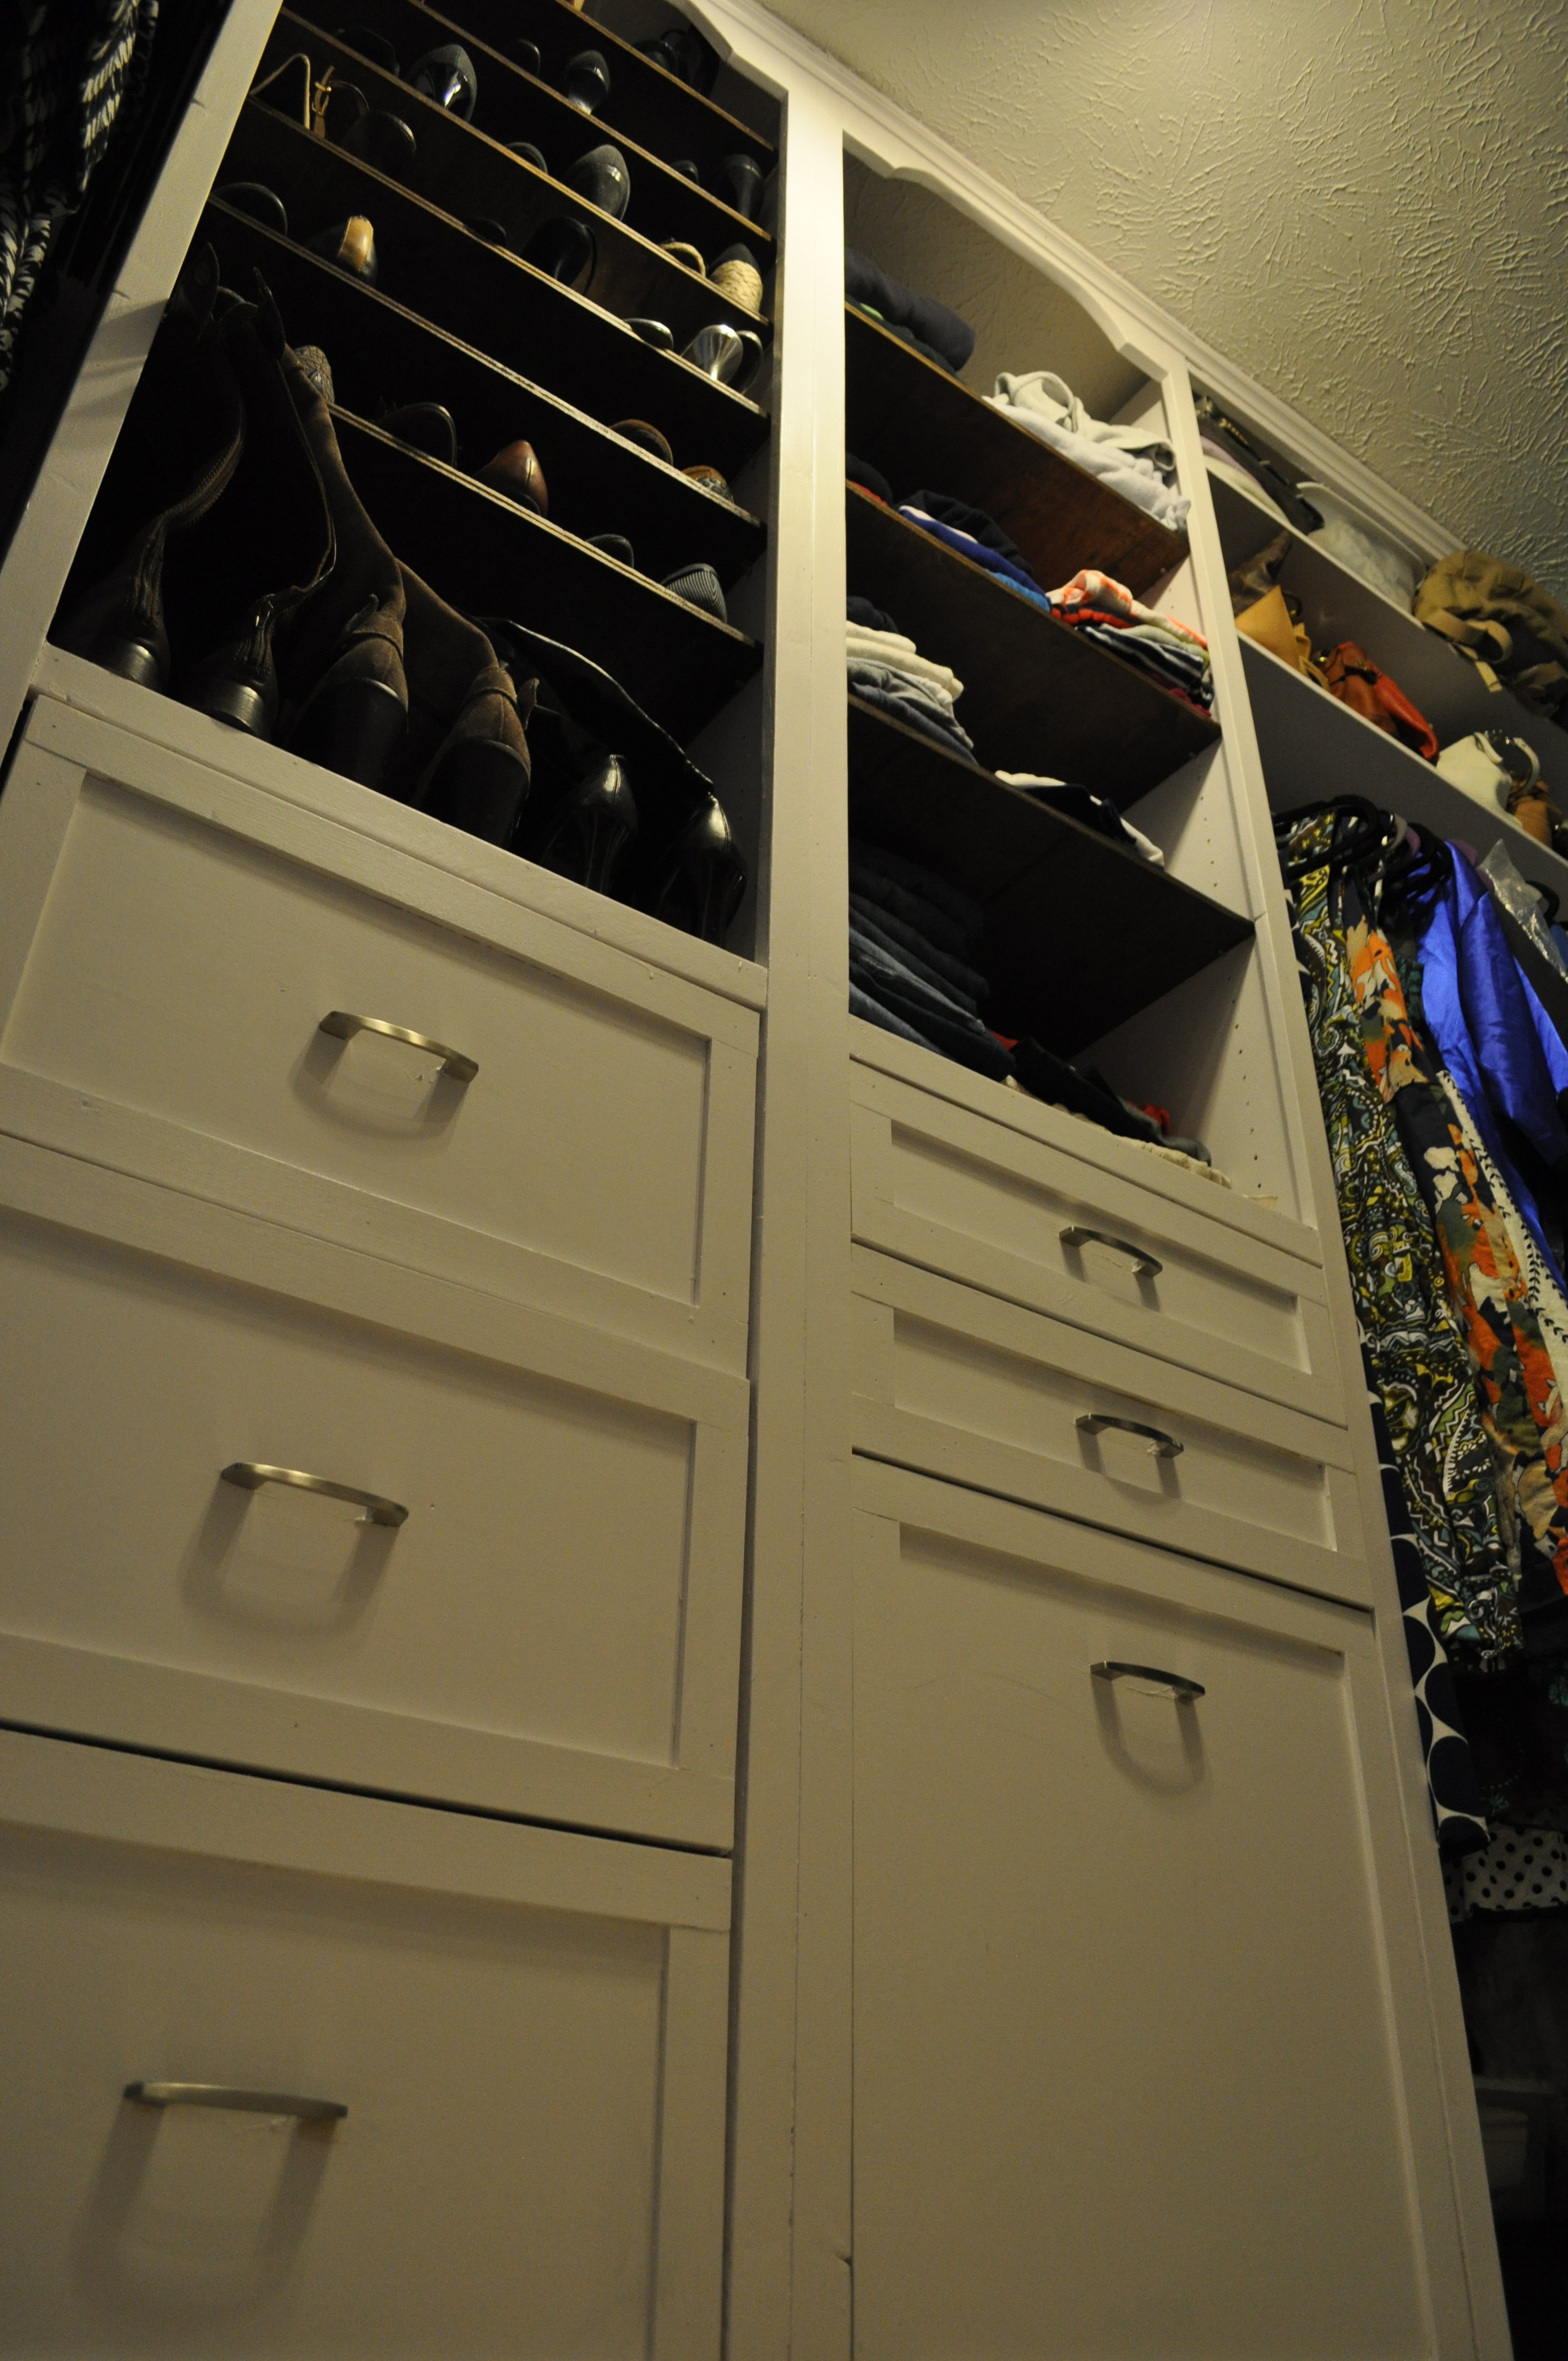
I used Ana's master closet tower plans as a starting point and went from there. I modified the towers to be wider (24" wide each) and also taller so that they would go completely to the ceiling of the closet. I also modified the plans to allow for drawers and a pull out laundry bin on both sides of the closet, as well as shoe and clothing storage above said drawers.
For the project I used Home Depot cabinet grade plywood for the tower carcasses and then purebond 1/2 plywood for the drawer boxes, shelves, and drawer fronts. I purchased the Kreg Shelf Jig and Rip Cut guide for this project and both proved themselves invaluable until I get a table saw (HINT HINT Hubby).
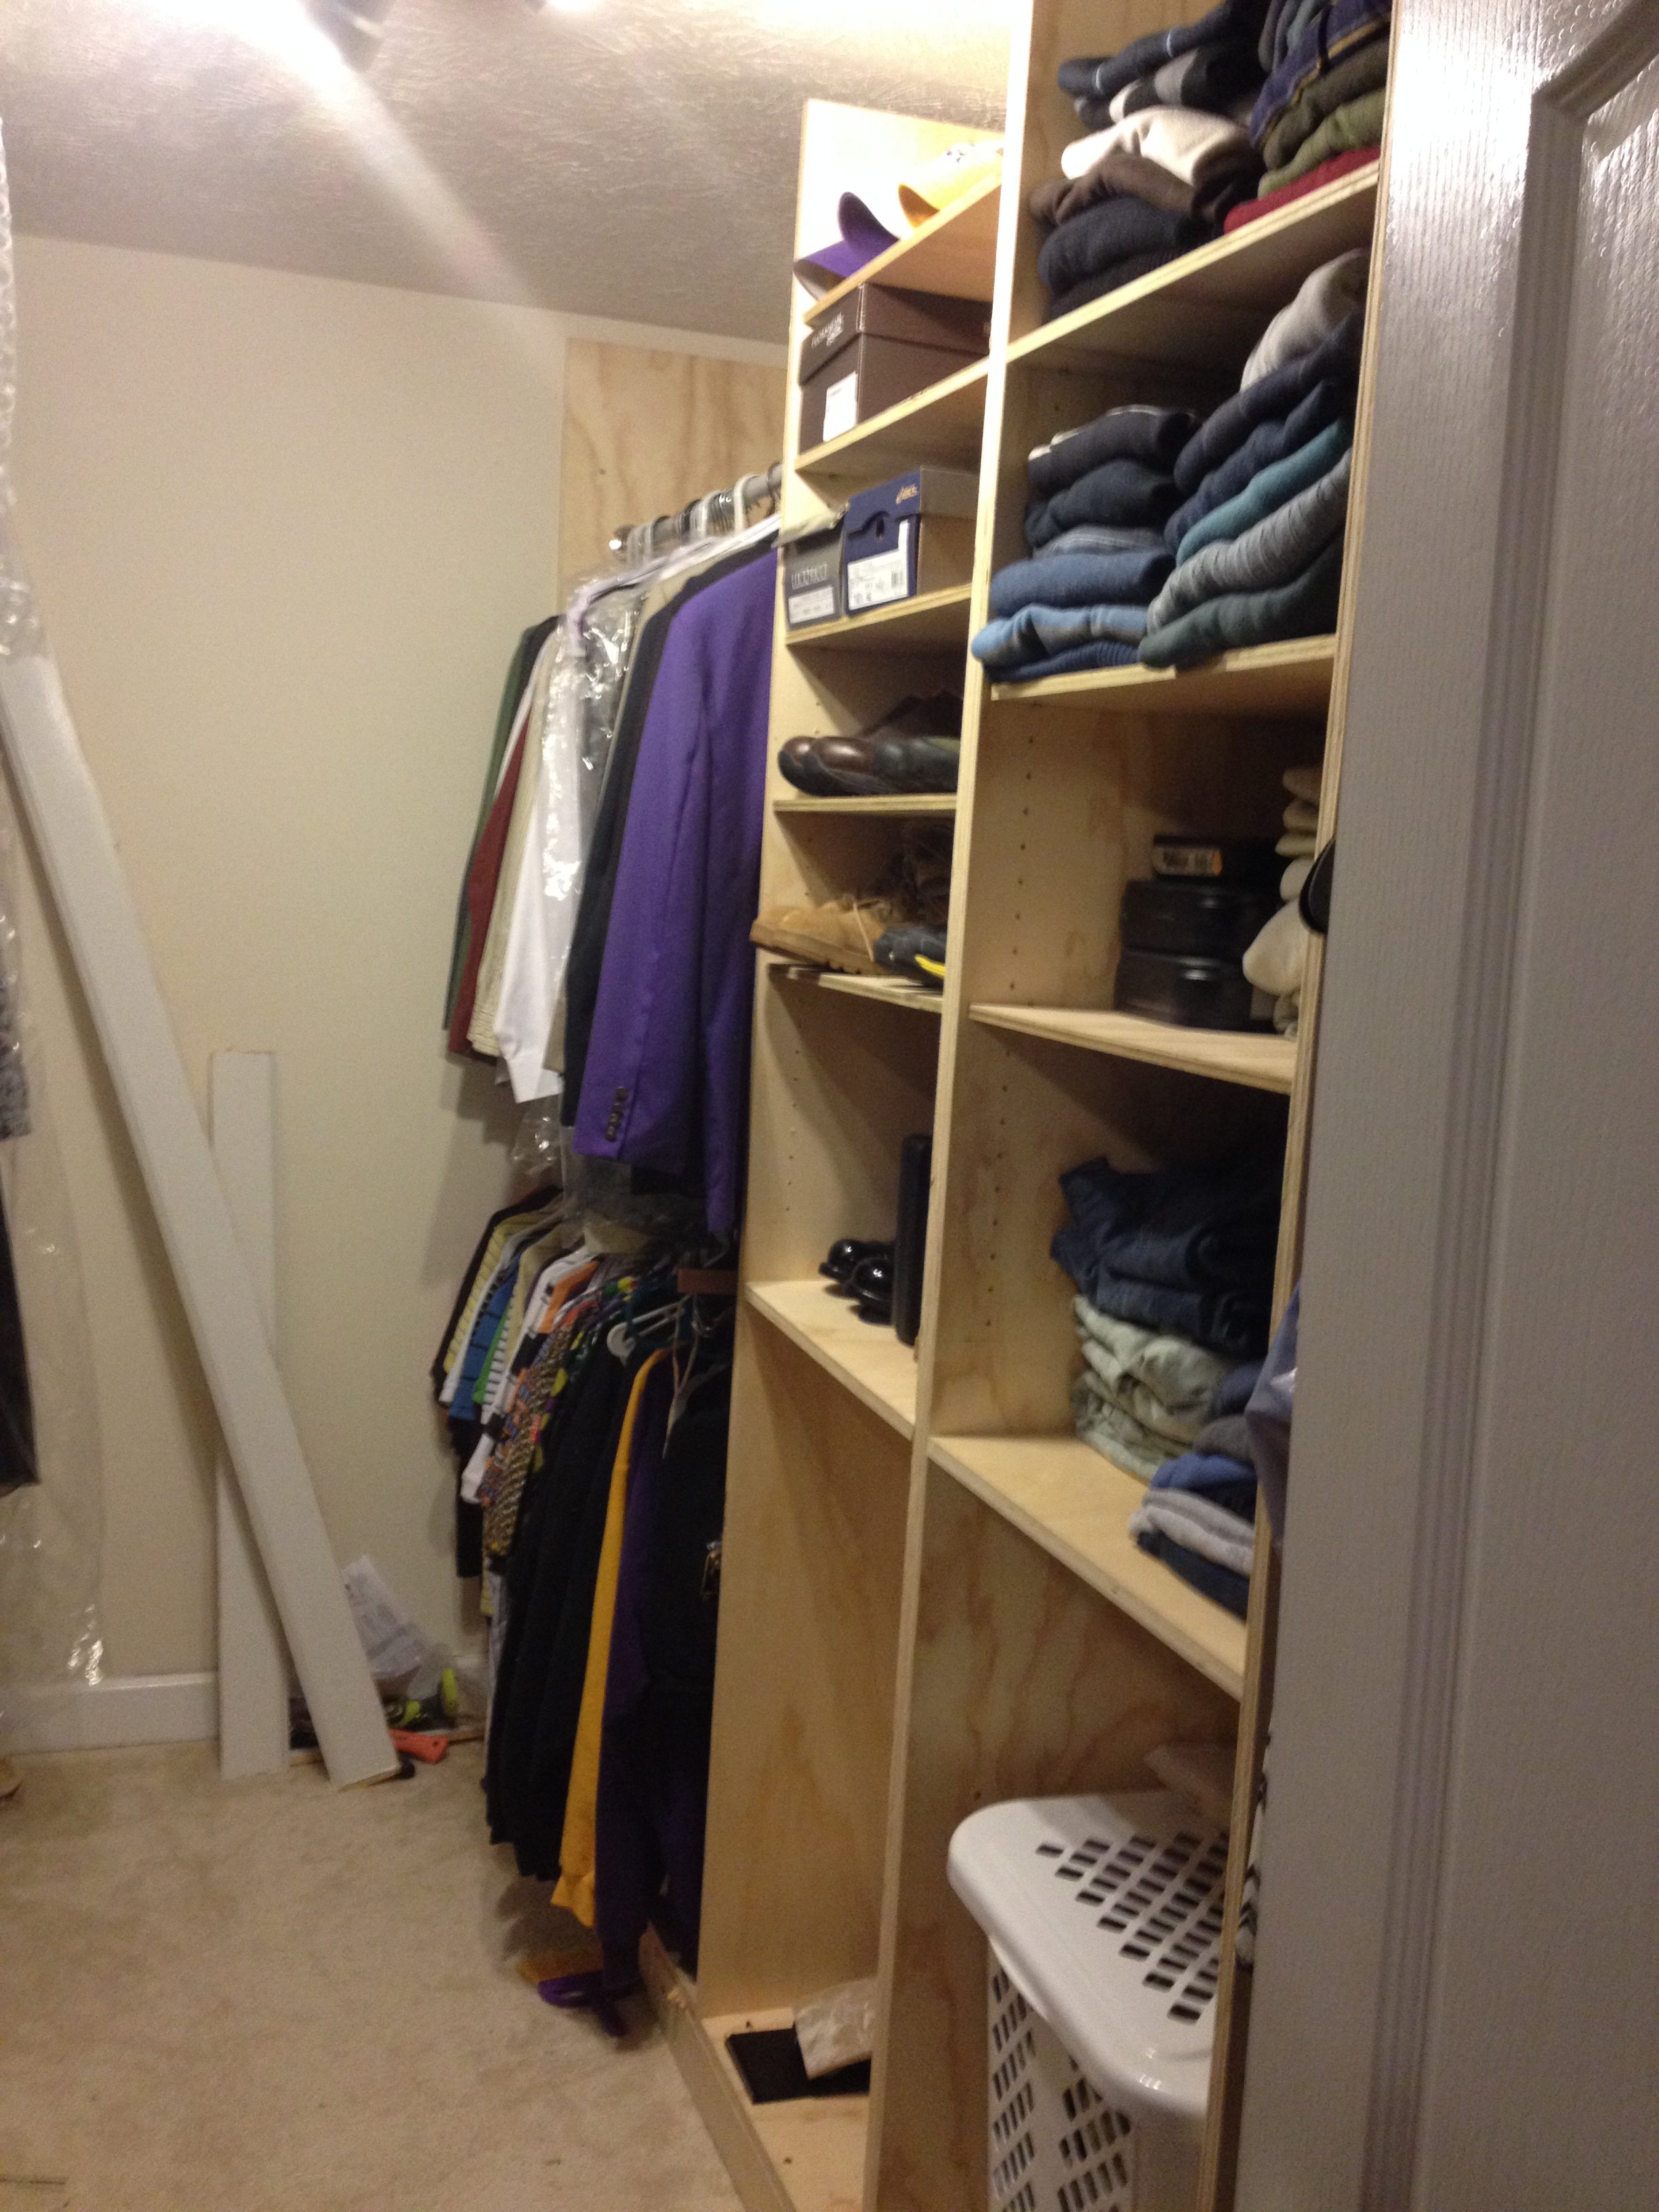
For the trim I used 1 x 2 furring strips and 1 x 4 lumber for the decorative cut outs above the 4 tower units. I also used cove moulding to tie in all the sections of the closet with one another.
I painted the main towers white (as well as the wall to encourage the appearance of "built in) and then stained the shoe and clothing shelves dark walnut with a few coats of satin POLY to finish.
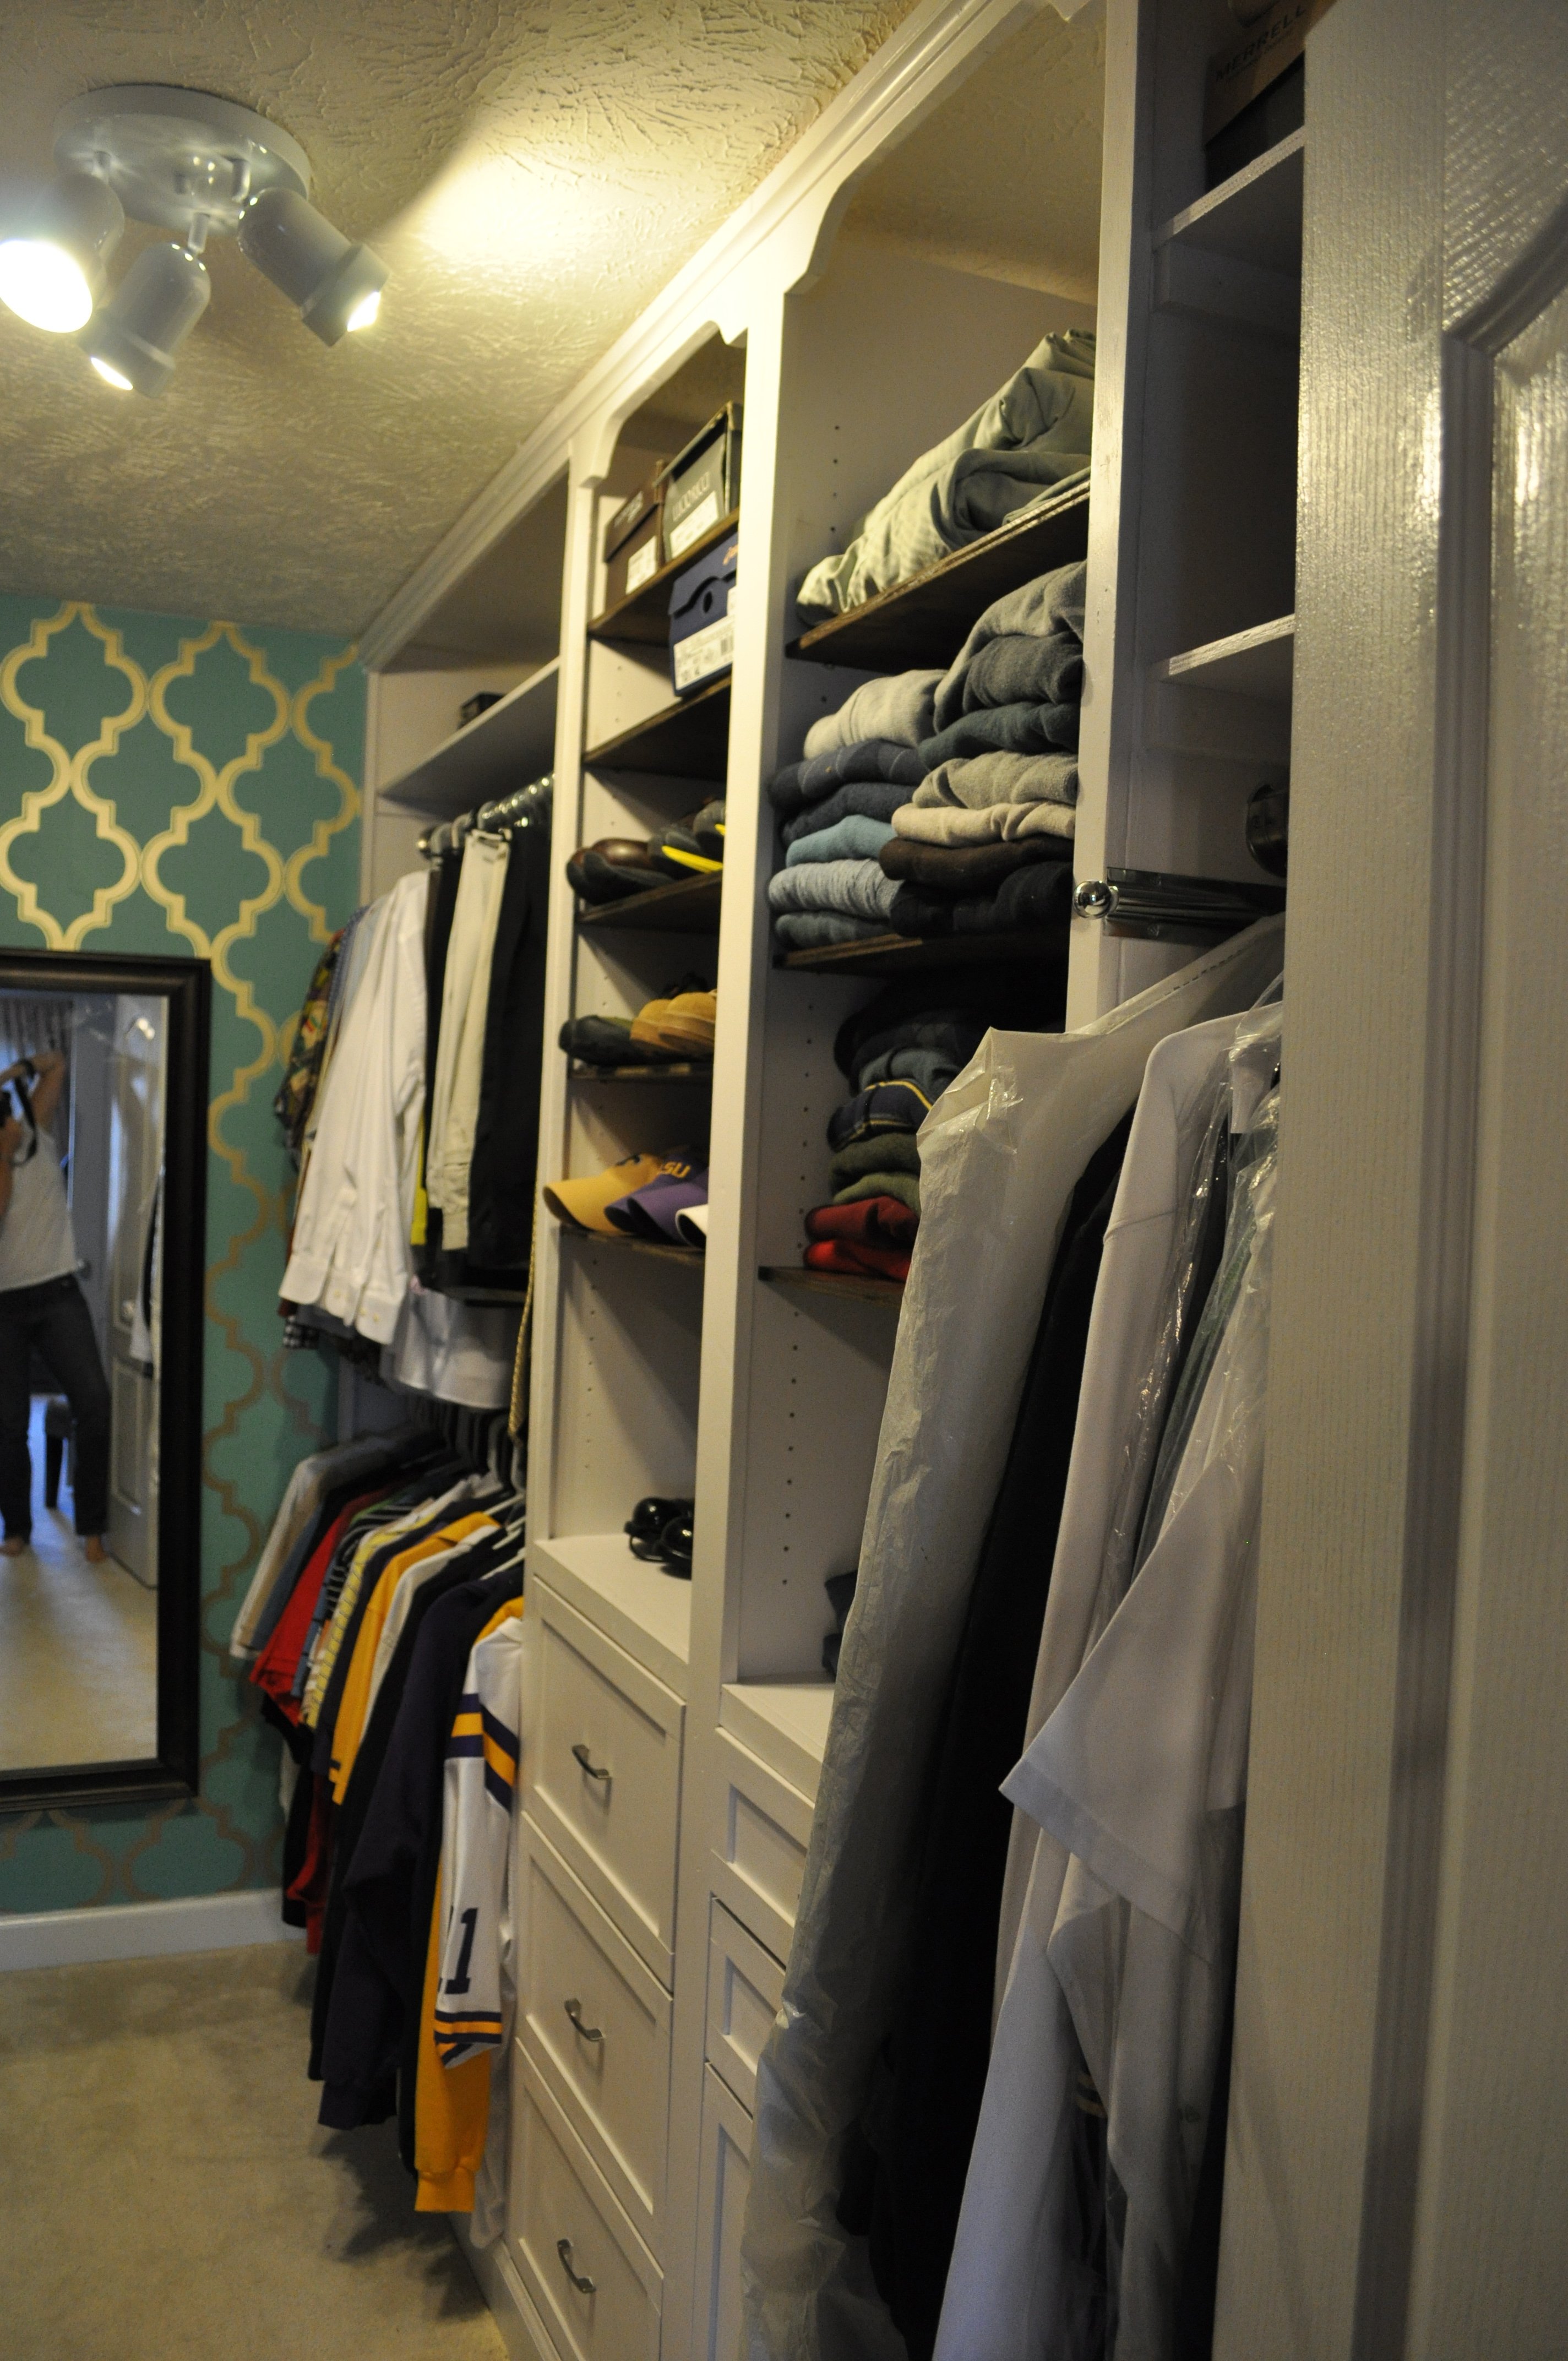
For the back wall I purchased target contact wallpaper and installed that- as well as a wall mirror so I don't have to balance dangerously on my bathroom tub to see if my shoes match my outfit anymore.
All in all, the project took about 3 weeks to finish. I was lucky that my mother was around the first few days of the project so that I could do the demo work and at least get the one side of the closet framed in, as the rest of the project was completed during "nap time" for my (NOSY) toddler.
In the end, we are both estatic with how this project turned out - I installed a valet bar and a pull out tie/belt rack for the husband and that add an even more "custom" touch to the closet...
I've posted many more photos to my blog detailing this closet reno- www.thesewchicmommy.com if you want to see a more "step by step" build.
Project cost: $750-800 ( including paint, mirror, wall paper, all hardware, lumber etc)
Time: 3-4 weeks
Built from Plan(s)
Estimated Cost
$750- 800
Estimated Time Investment
Week Long Project (20 Hours or More)
Finish Used
Satin valspar paint, dark walnut stain with rustoleum satin POLY finish
Recommended Skill Level
Intermediate
Comments

Wed, 11/12/2014 - 14:53
Marvelous!
Love your closet, you did a beautiful job! Your blog link had some great pictures too. All the neat touches like the laundry pull-outs, decorative trim at the top, and the pull-out tie rack are brilliant!
Fri, 11/14/2014 - 13:53
Wow you did this RIGHT! Love
Wow you did this RIGHT! Love the pattern on the far wall too!
Extra tall bar stool

I built a breakfast bar into an existing wall shared between our kitchen and living room. I built it on the taller side of average since I wanted to have room to install new electrical outlets above the counter on the kitchen side. After the project was done we went to buy bar stools to use with the new bar and found that even the "tall" stools were too short to work. Research into extra tall stools showed that what we needed was going to $400-600 each! Luckily my wife found these stools on your site and we were able to make three of them for around $115. Also, they are much sturdier than anything we looked at to buy.
Built from Plan(s)
Estimated Cost
$115
Estimated Time Investment
Day Project (6-9 Hours)
Finish Used
Painted frames with Valspar paint + primer (black). Padded and covered seats with a canvas material.
Recommended Skill Level
Beginner
Comments


Mon, 01/28/2013 - 20:40
I really like the crisp black
I really like the crisp black and white. Looks great!
Firewood shed
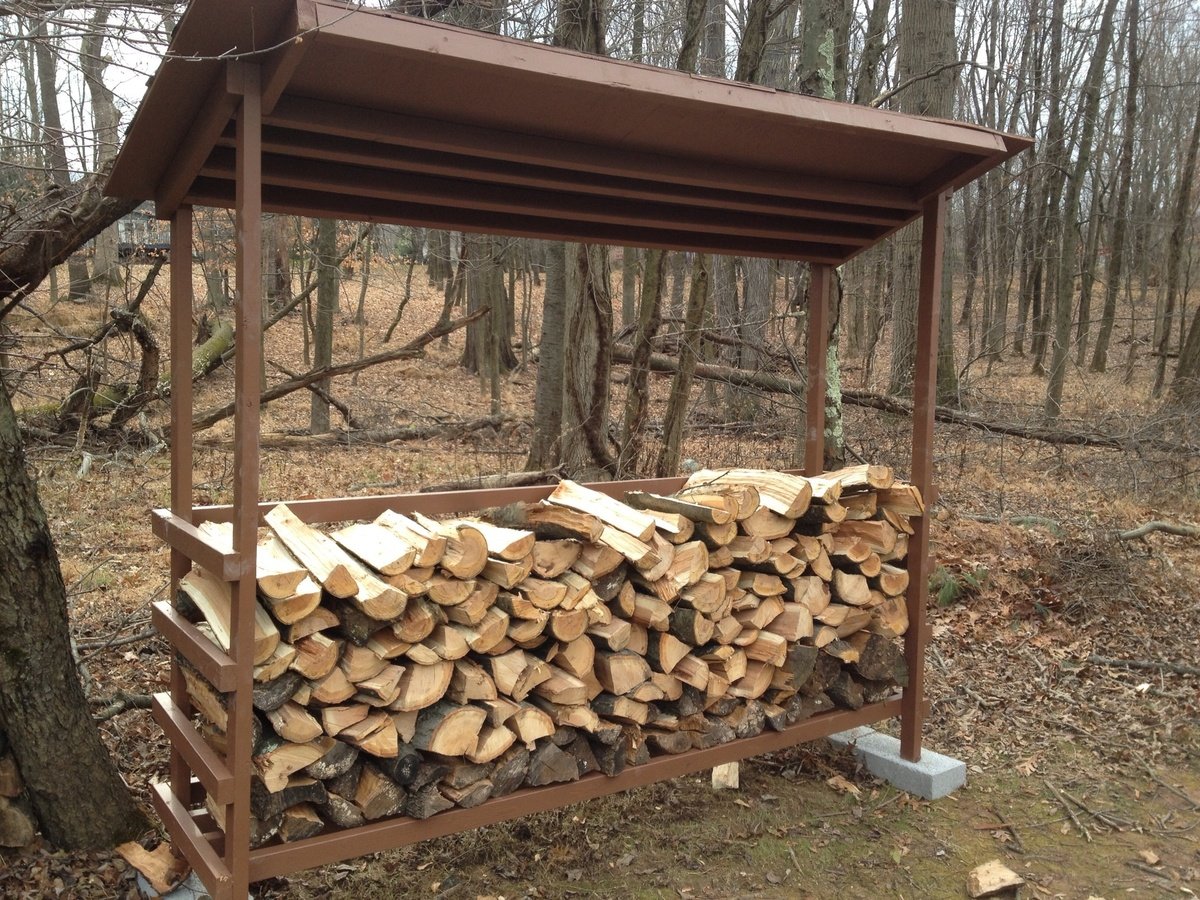
Build this firewood shed over one weekend and stained it the following weekend. This was my first project and I only received a little help from my boyfriend. Can't wait to start my next project.
Built from Plan(s)
Estimated Time Investment
Weekend Project (10-20 Hours)
Recommended Skill Level
Beginner
Arched Bridge
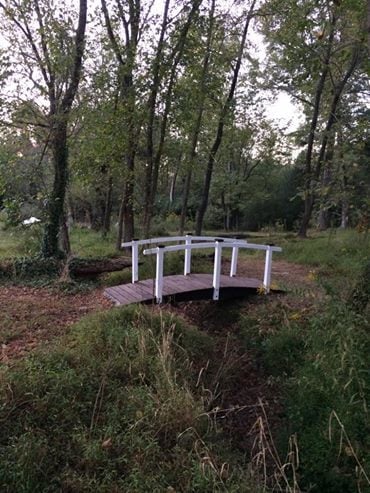
Used some basic tips found online to draw out the cut lines. The runners are 2x12x12. Regular ole decking for the platform and 4x4 for the posts. Anchored in concrete. Lag bolts and hex bolts to secure to the posts.
Estimated Time Investment
Weekend Project (10-20 Hours)
Finish Used
After letting the treated lumber dry for a month or so in the summer heat I used an exterior latex for the white and Minwax Red Mohogany on the decking.
Recommended Skill Level
Intermediate
Comments
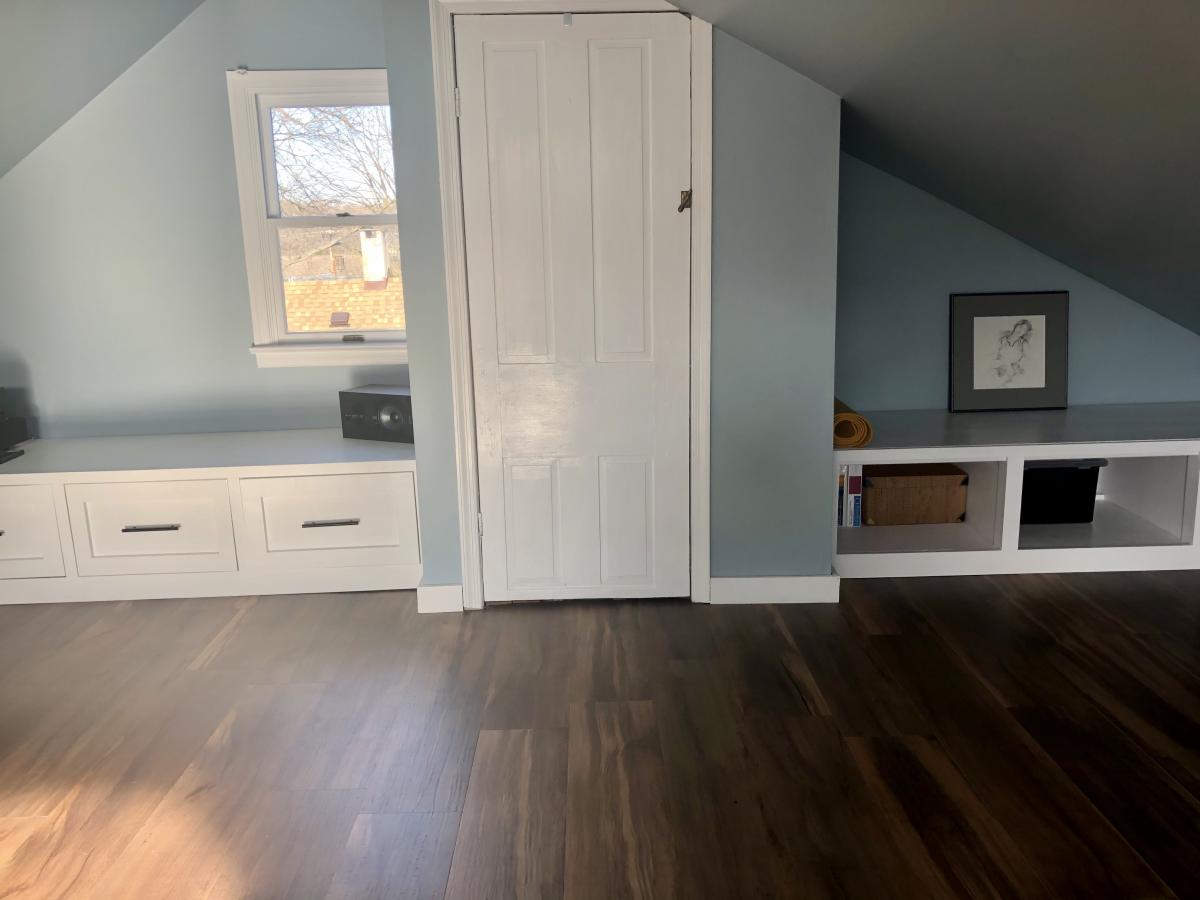
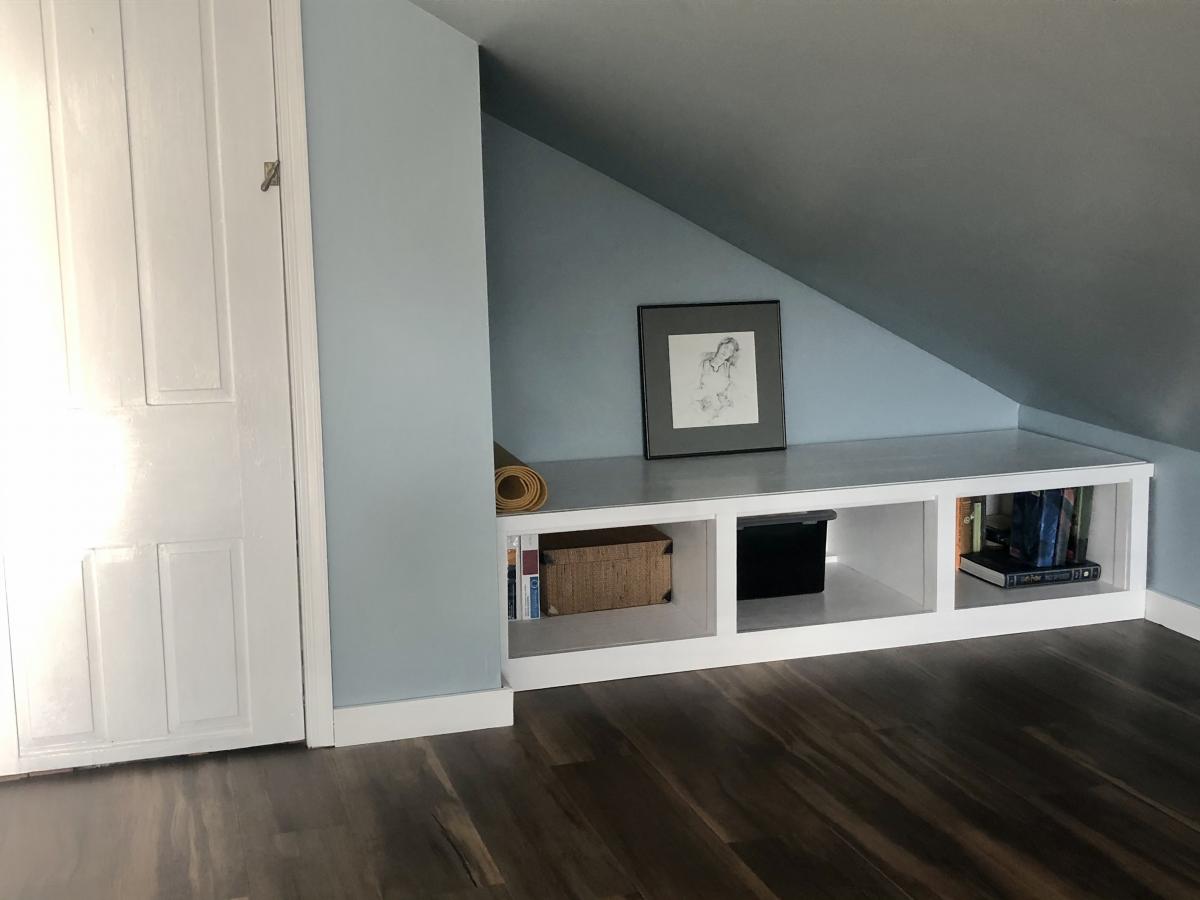
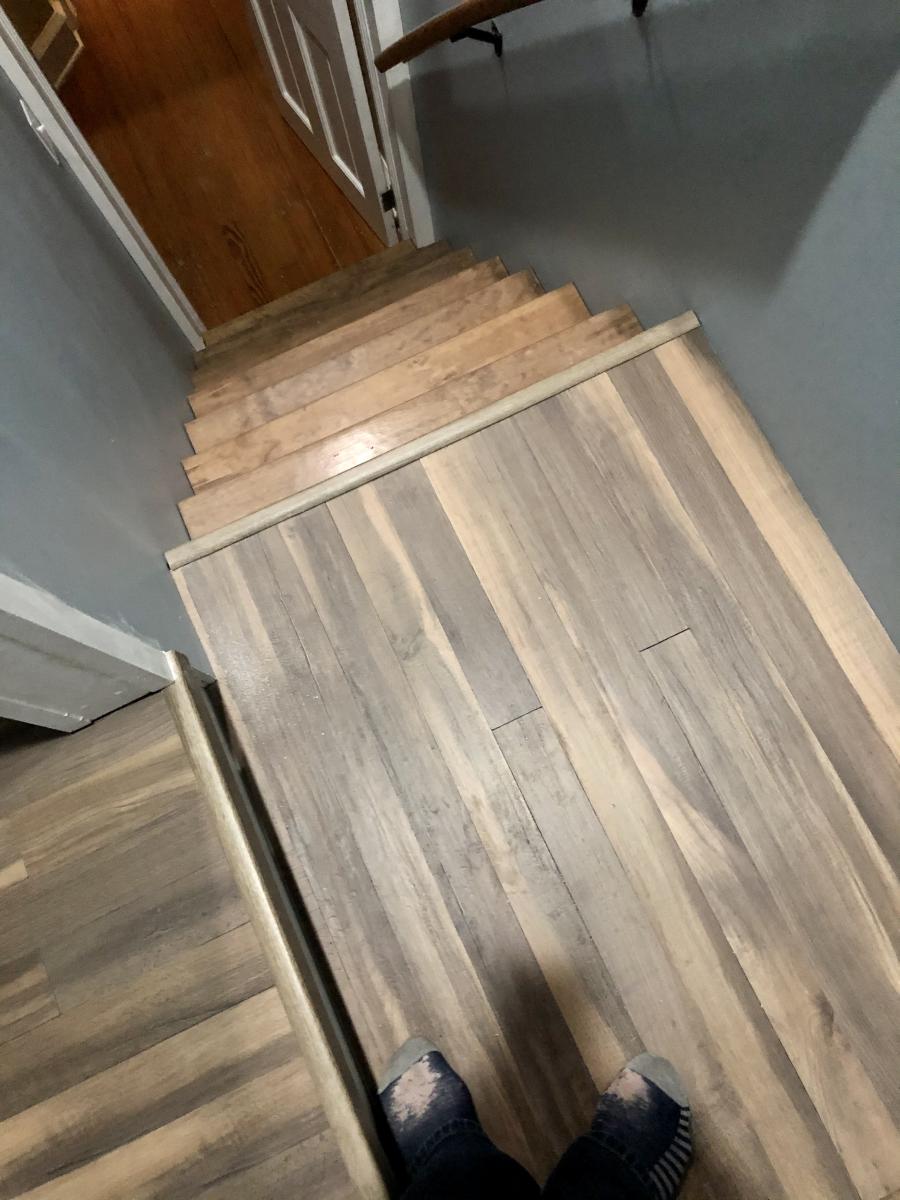
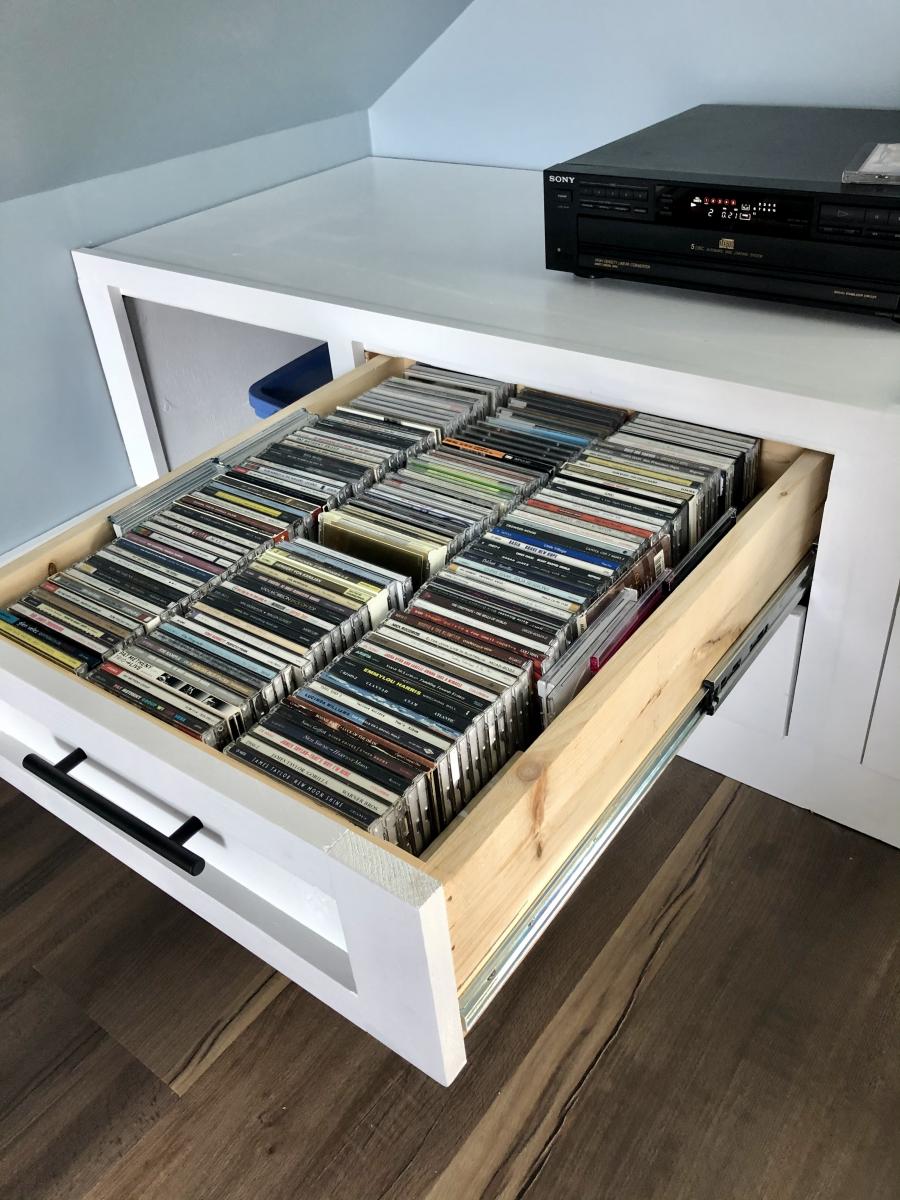
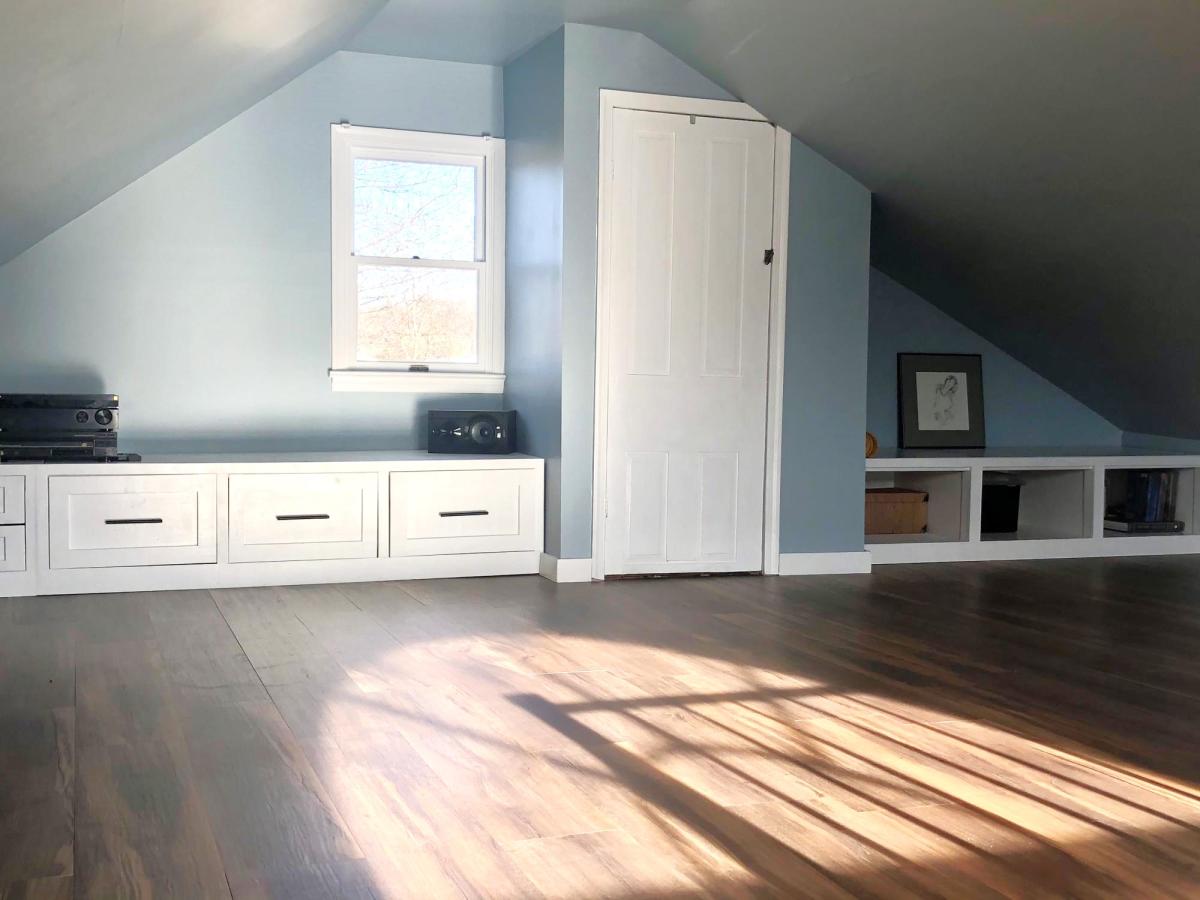
Attic Reno and Built-ins
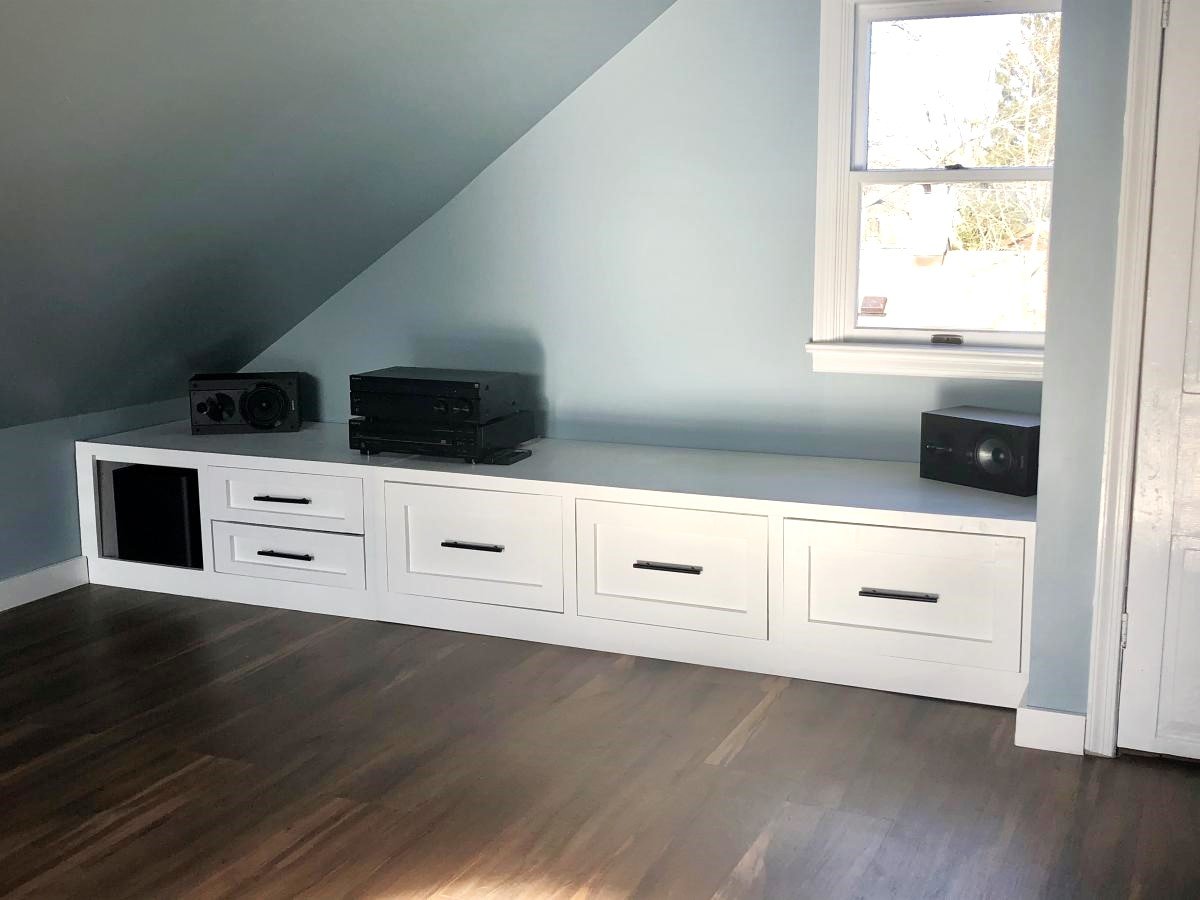
This was my first-ever woodworking project, which followed a pretty significant renovation of my attic. The built-ins were inspired by the plans and videos from this site. The renovation started with removal of the wall-to-wall carpeting (including 20k nails and staples), repairing the subfloor, replacing the stairs and landings, including the drywall. I used Home Depot’s Lifeproof floating vinyl flooring, which I’m really pleased with.
Built from Plan(s)
Estimated Cost
$3500
Estimated Time Investment
Week Long Project (20 Hours or More)
Finish Used
White paint
Recommended Skill Level
Beginner
Comments
Mon, 03/15/2021 - 21:33
You knocked it out of the park!
Wonderful choices, love the flooring and built-ins!
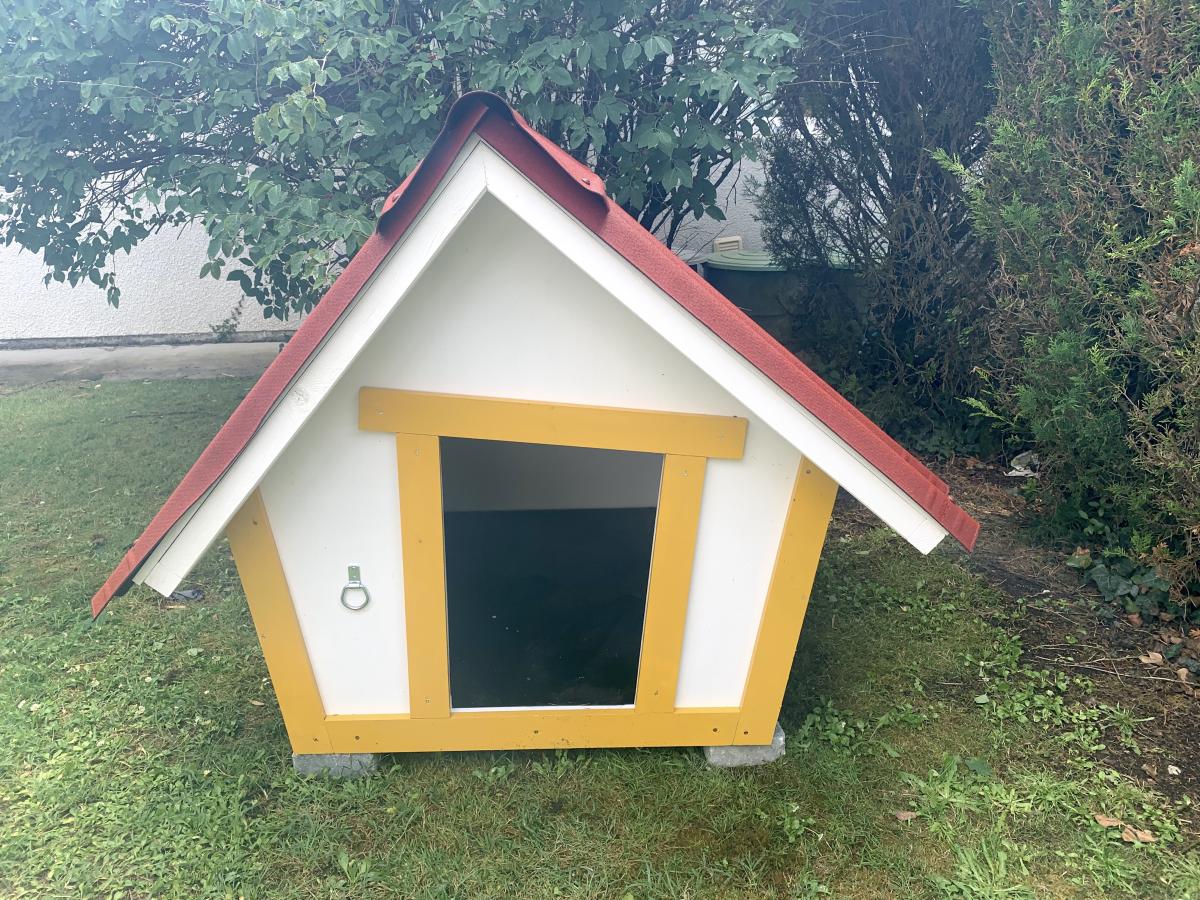
Crooked dog house
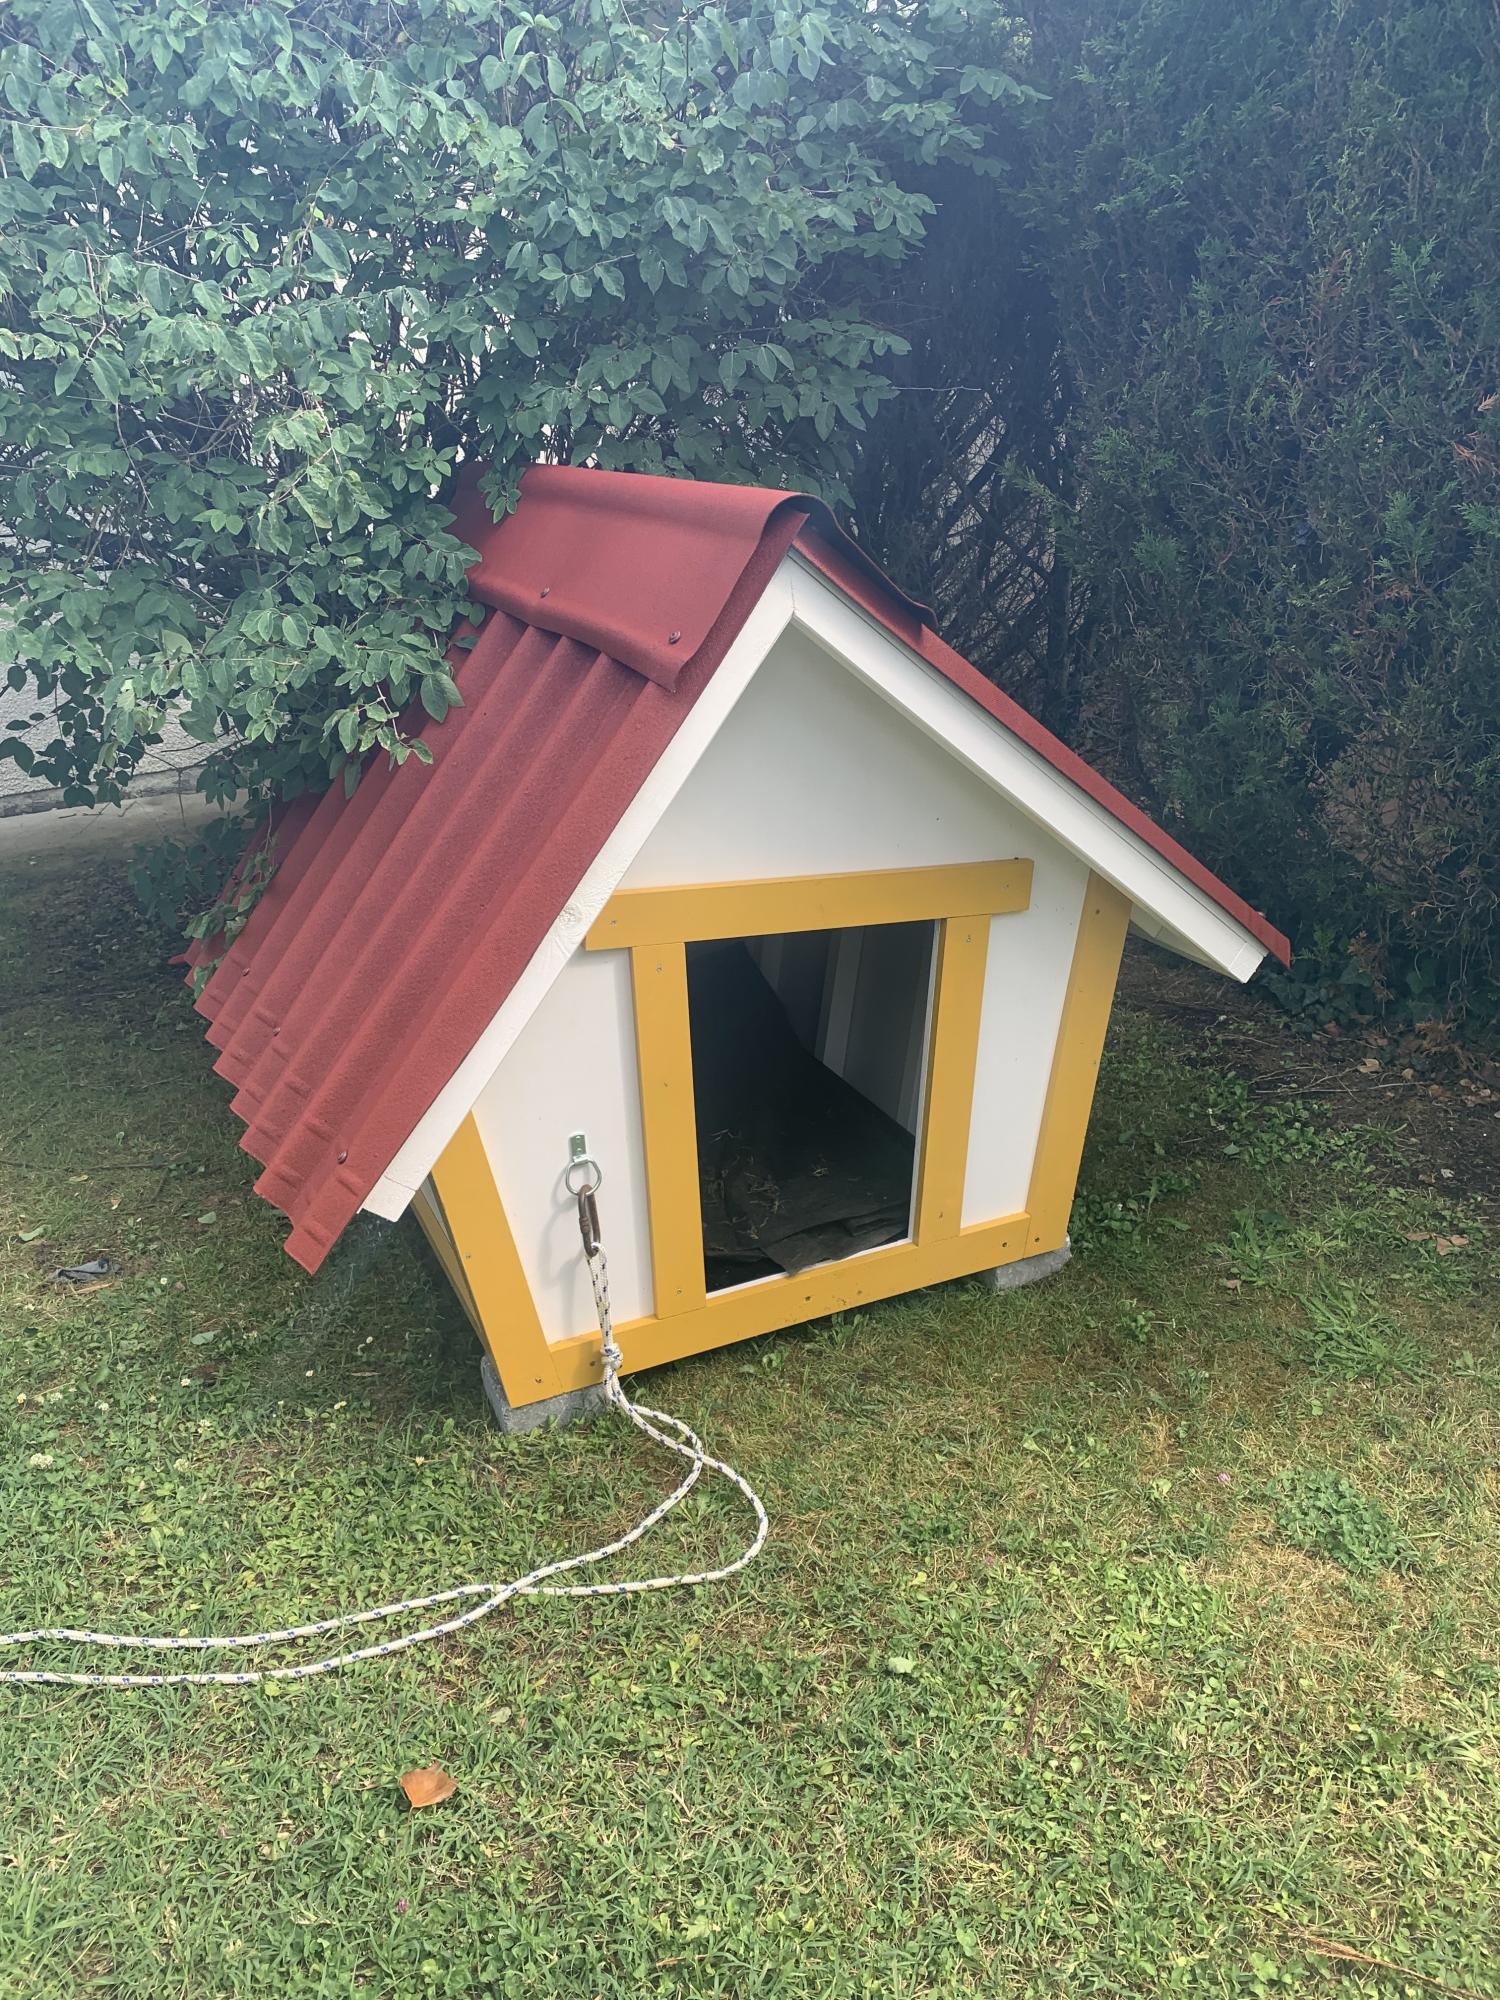
Thanks for the plan!
Built from Plan(s)
Estimated Time Investment
Week Long Project (20 Hours or More)
Recommended Skill Level
Intermediate
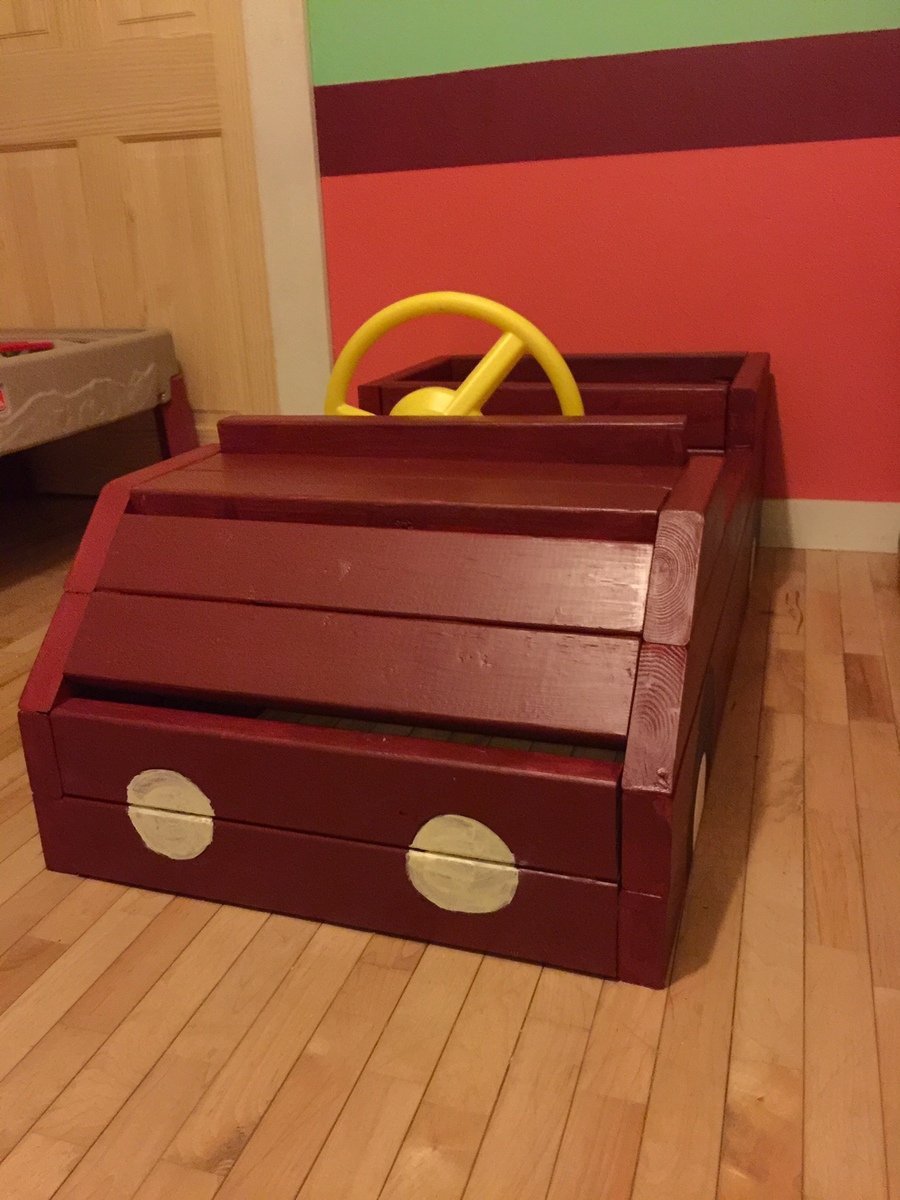
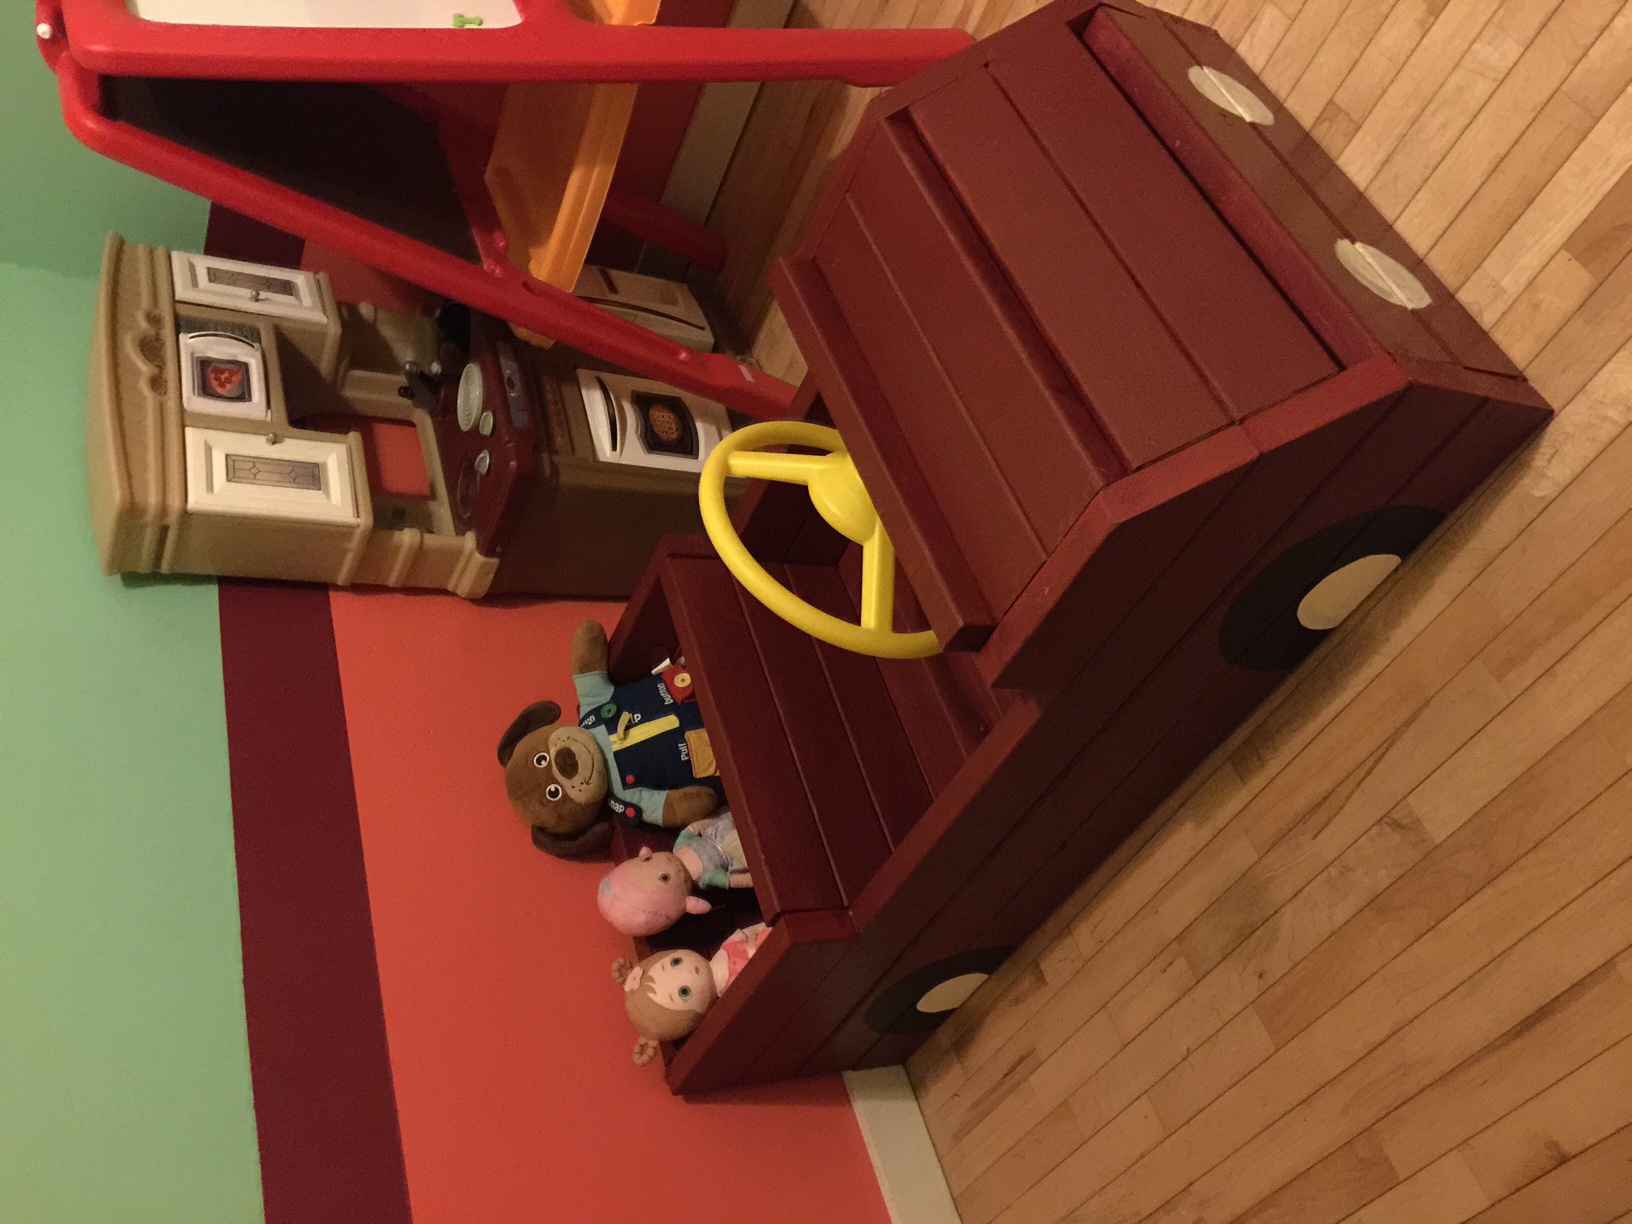
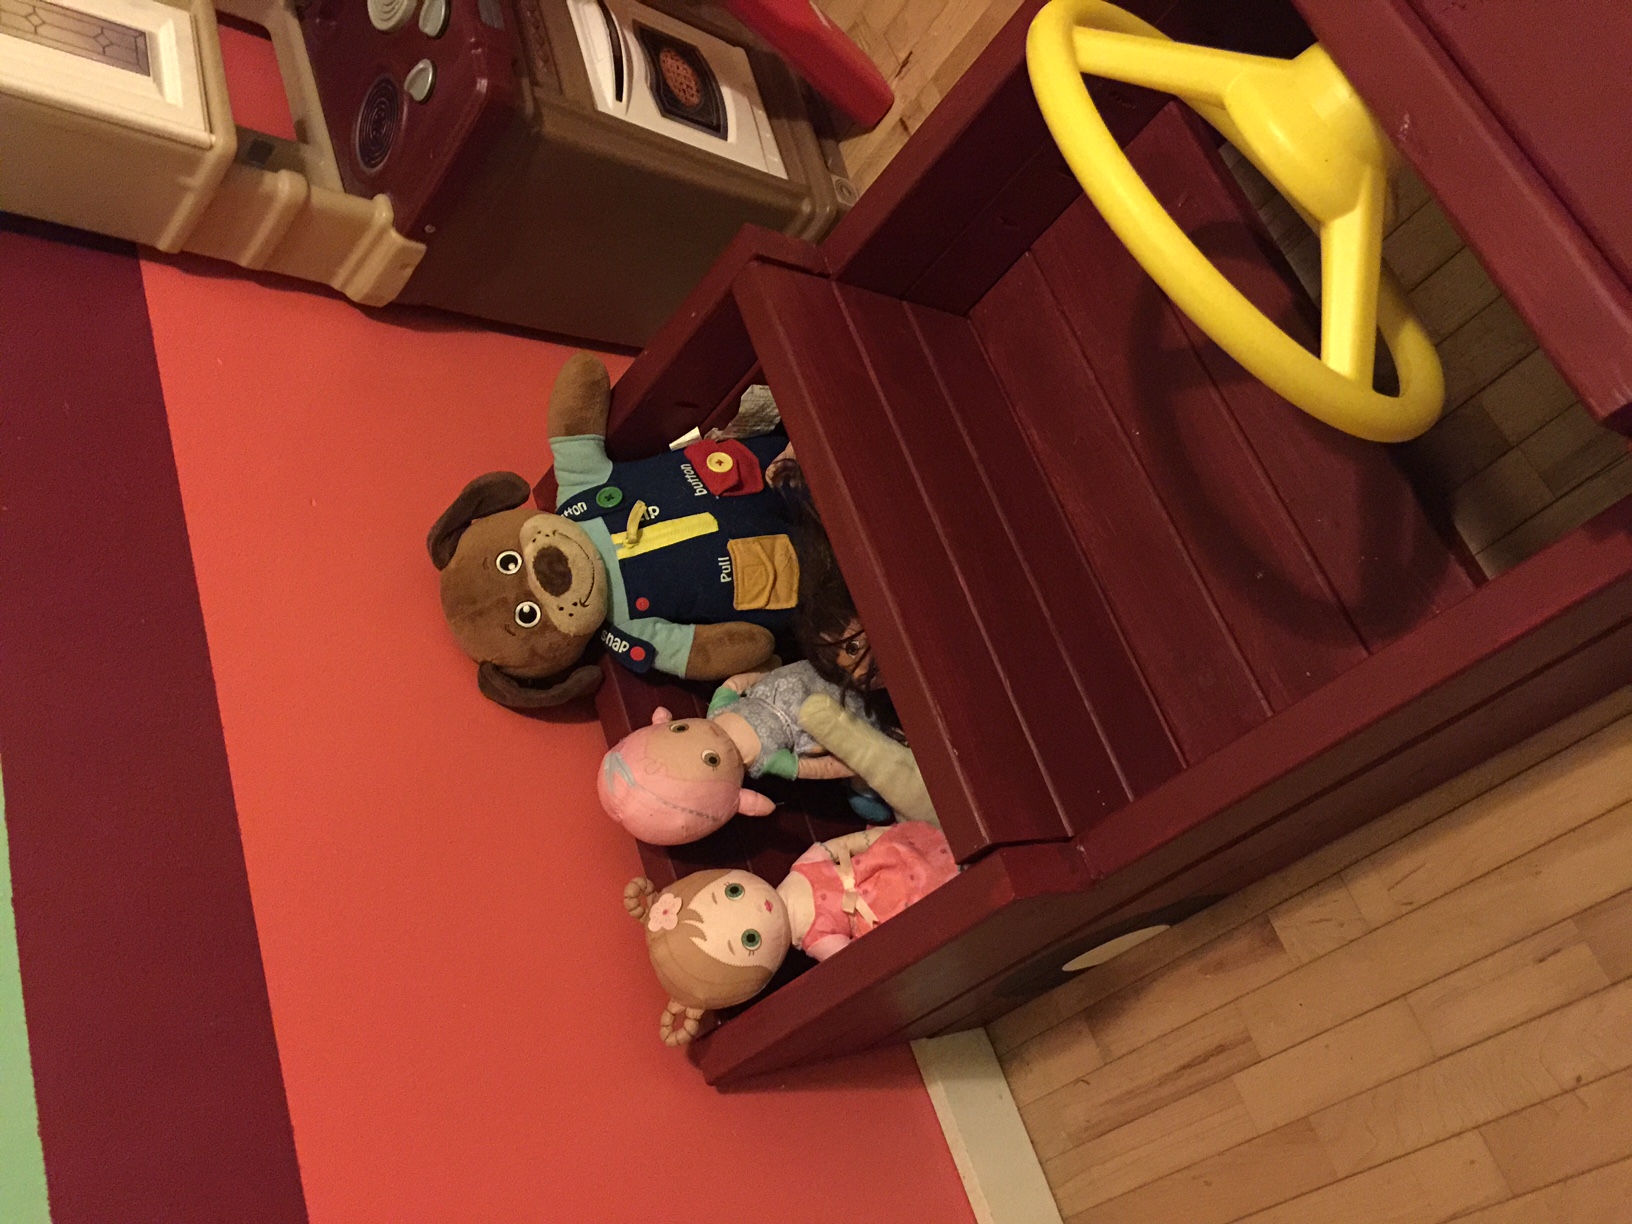
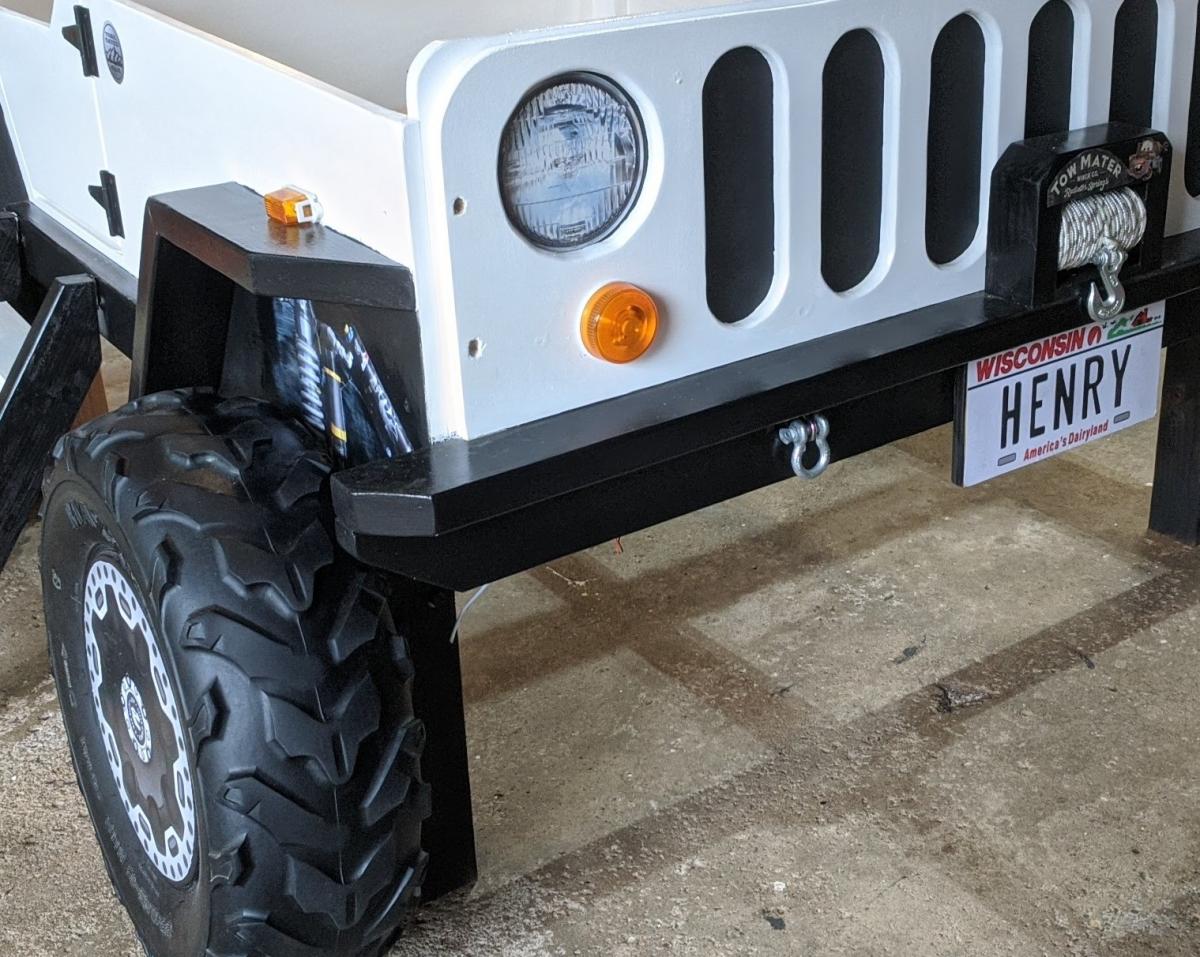
Jeep Bed
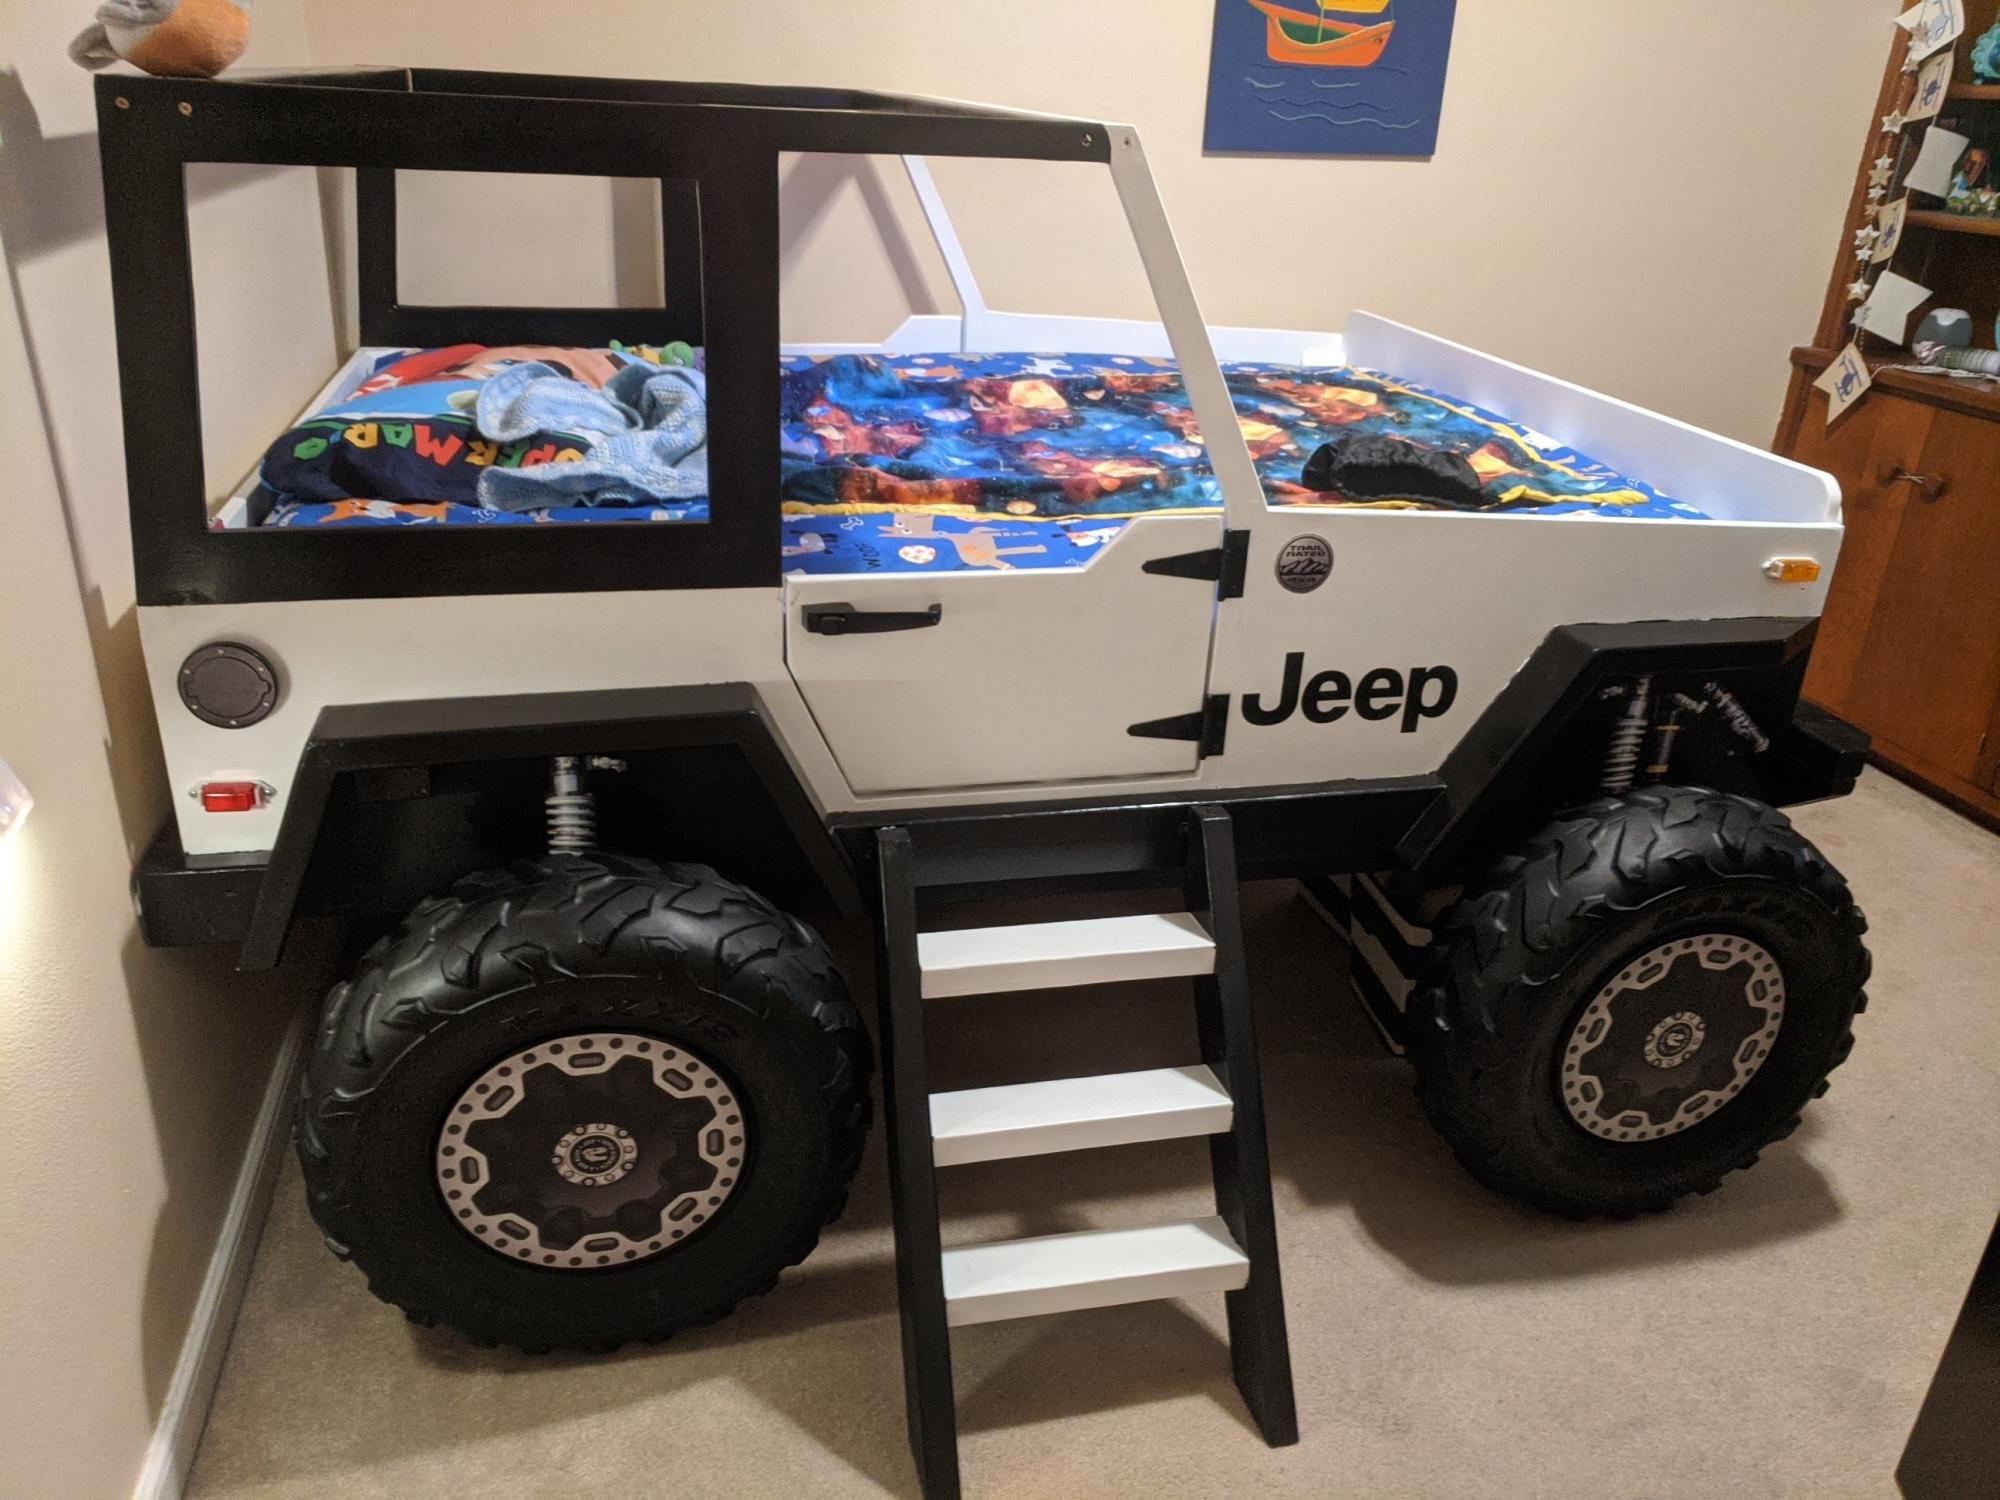
I hope this is OK to add here. It's not an Ana White plan, so moderator please delete if it is not allowed. I made this bed for my grandson. I bought a plan online and modified it from a twin to a full size bed. The dome light and running lights work as night lights. A motion sensor light activates if he crosses the door to illuminate the ladder. Front tire is made as a step so his parents can climb in and read to him. The whole thing is on EZ Sliders so they can move it away from the wall to make the bed.
Estimated Cost
$150.00
Estimated Time Investment
Weekend Project (10-20 Hours)
Finish Used
Latex paint.
Recommended Skill Level
Beginner
Comments
Mon, 07/05/2021 - 21:59
AH-MAZING!!!
Wonderful job, thank you for sharing! The details are spot on:)
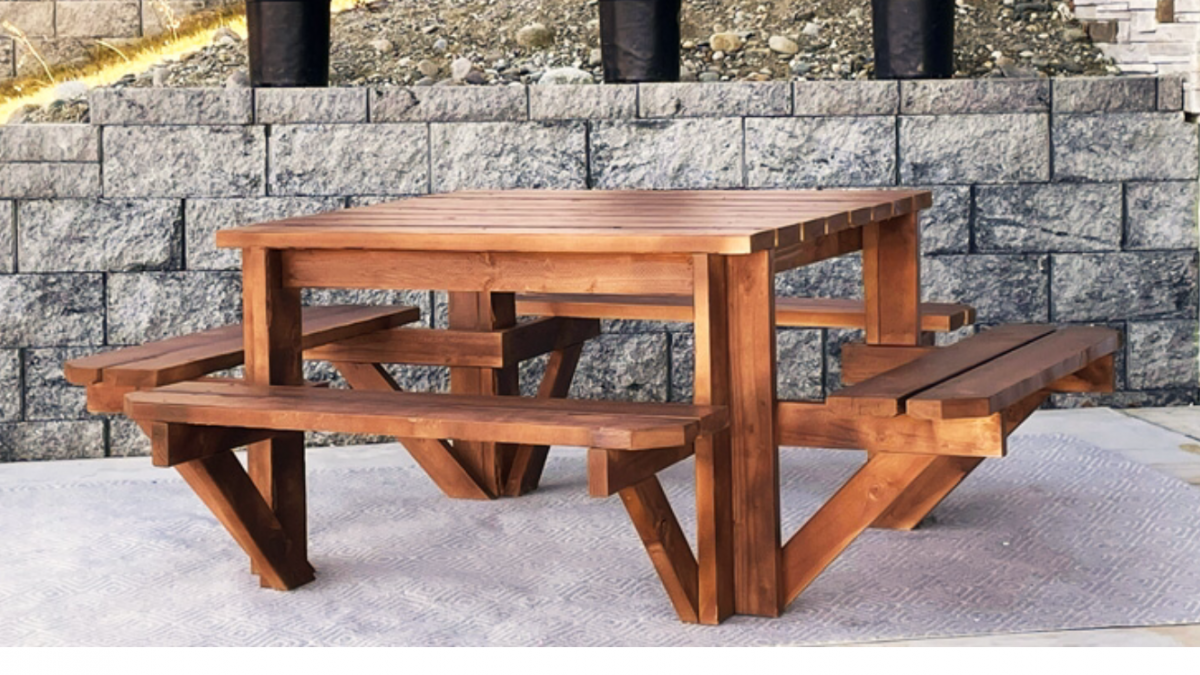
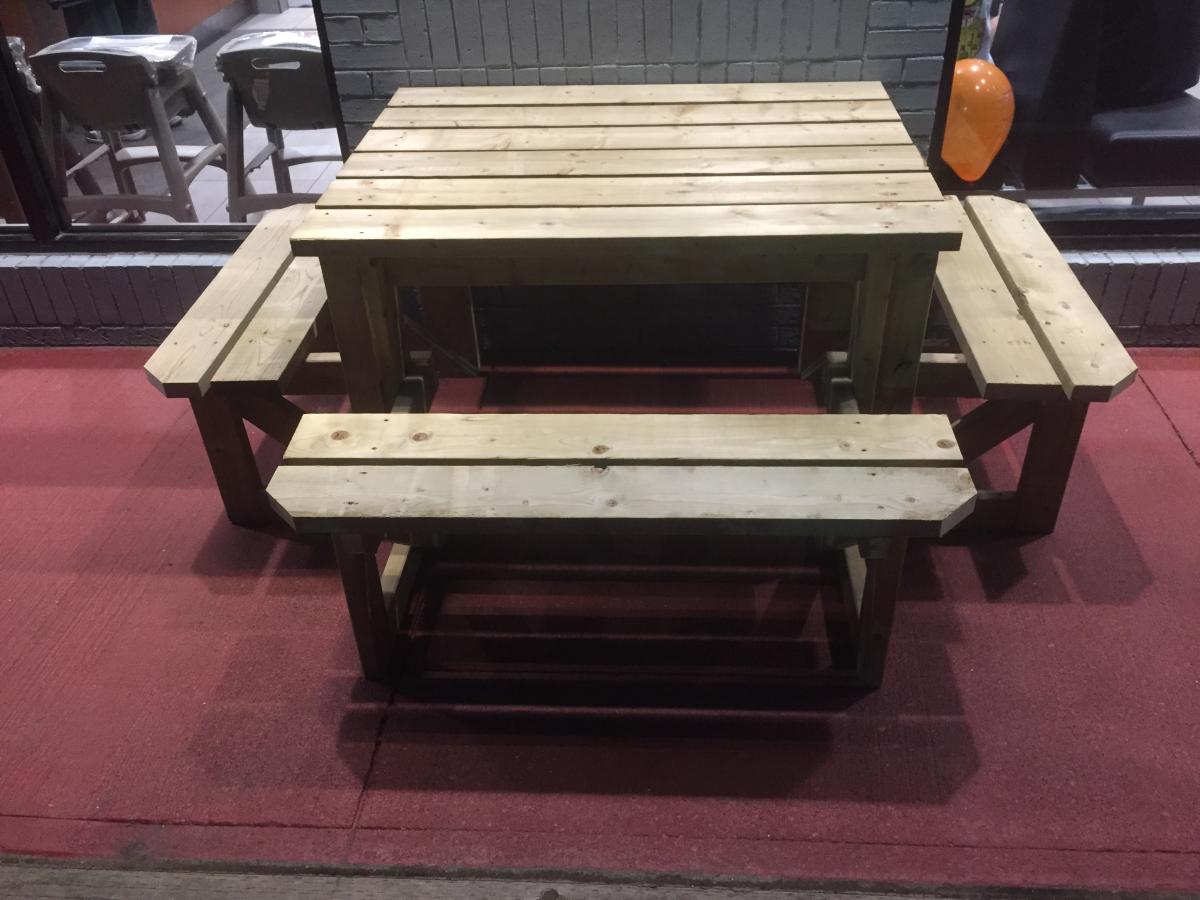
3 sided square picnic table
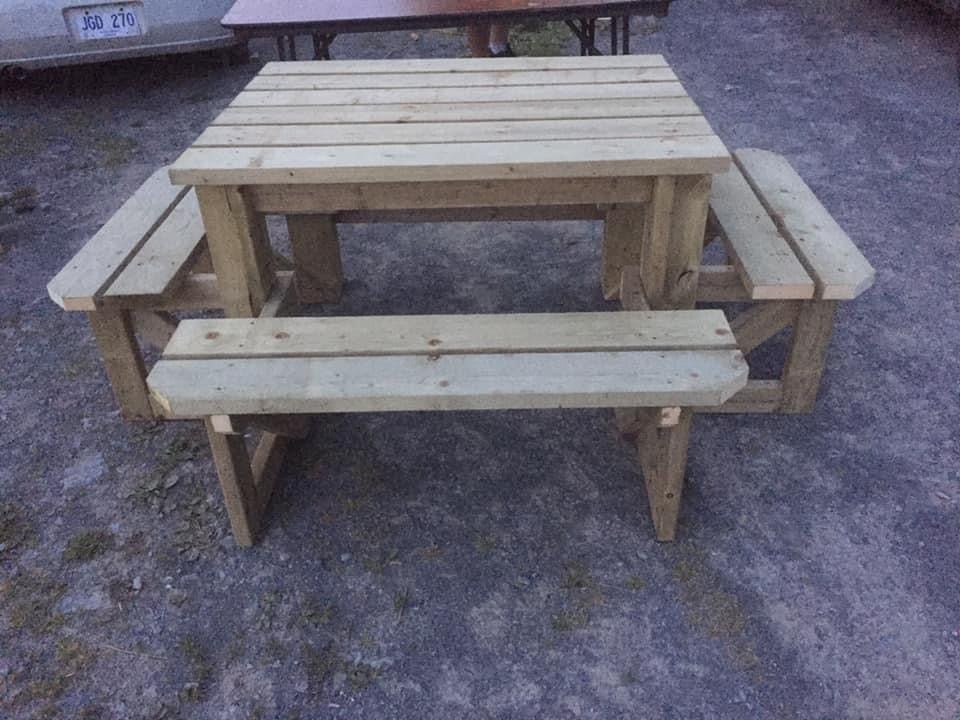
We built 2 of these tables for the McDonald’s in our area for the front of their building. With a few modifications to fit the space. We made the top of the table a foot smaller so it’s 3 x 4 feet. We also put extra bracing on the legs so the table would not tip over if one person was to sit on it. I love this table and will be making one for myself
Built from Plan(s)
Comments
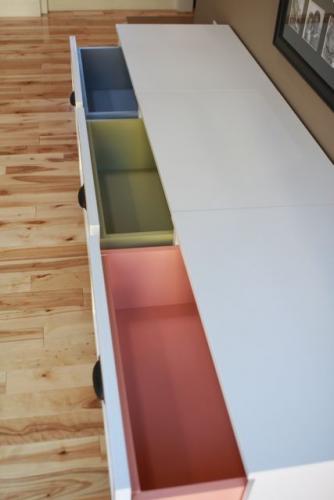
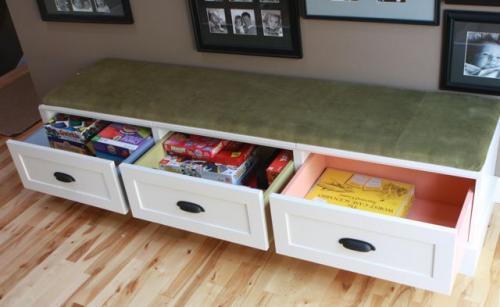
Drawer bases turned banquette
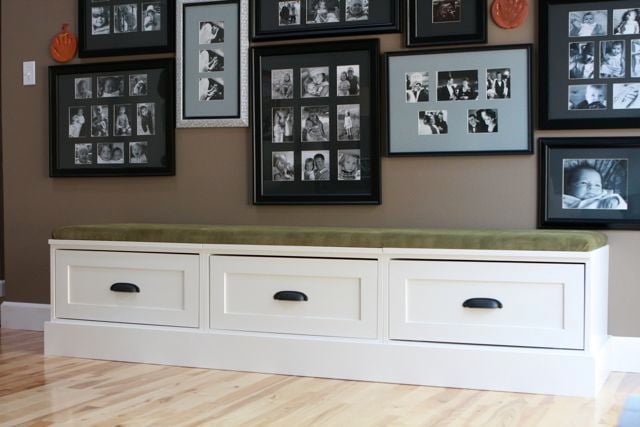
I took Ana's open base and drawer plans, added a few inches to the height (so that the base trim on the storage units would clear the base trim on our walls), and put them together to create a banquette-style bench with tons of storage underneath. We use the drawers for our family board games and photo albums.
Built from Plan(s)
Estimated Cost
$100-$150
Estimated Time Investment
Weekend Project (10-20 Hours)
Finish Used
Sherwin-Williams Pro-Classic in semi-gloss followed by Minwax Polycrylic.
Recommended Skill Level
Beginner
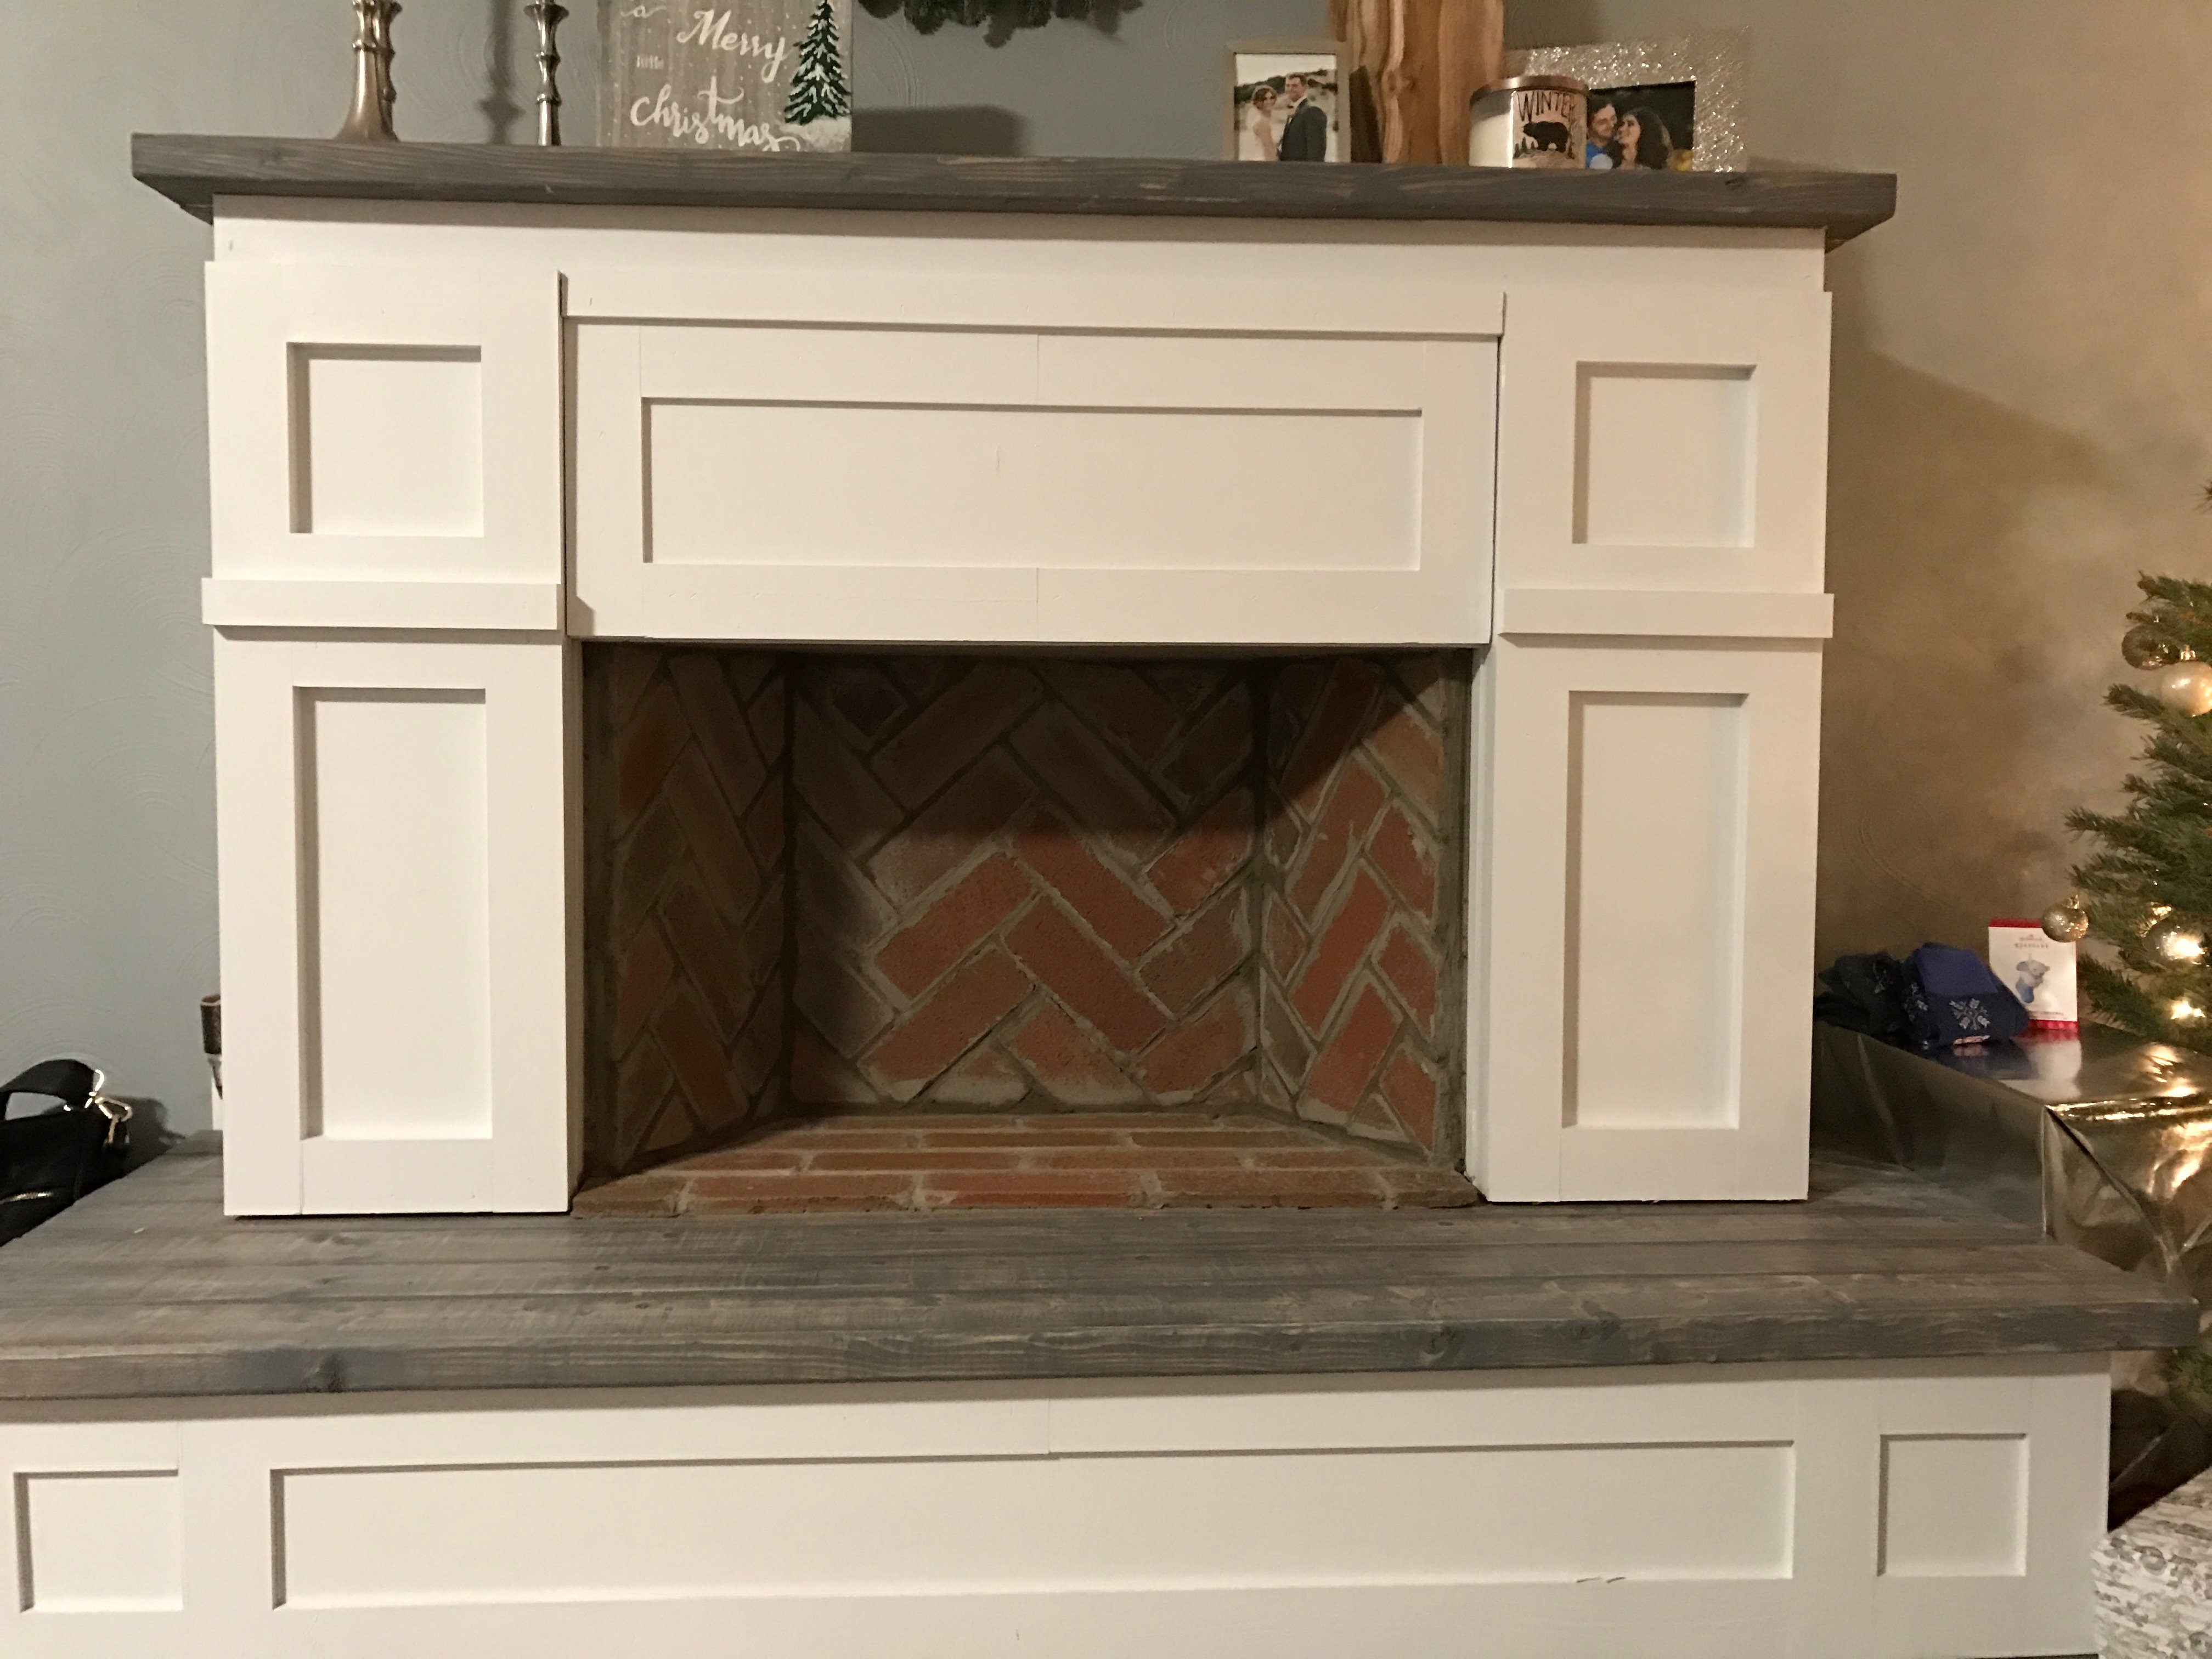
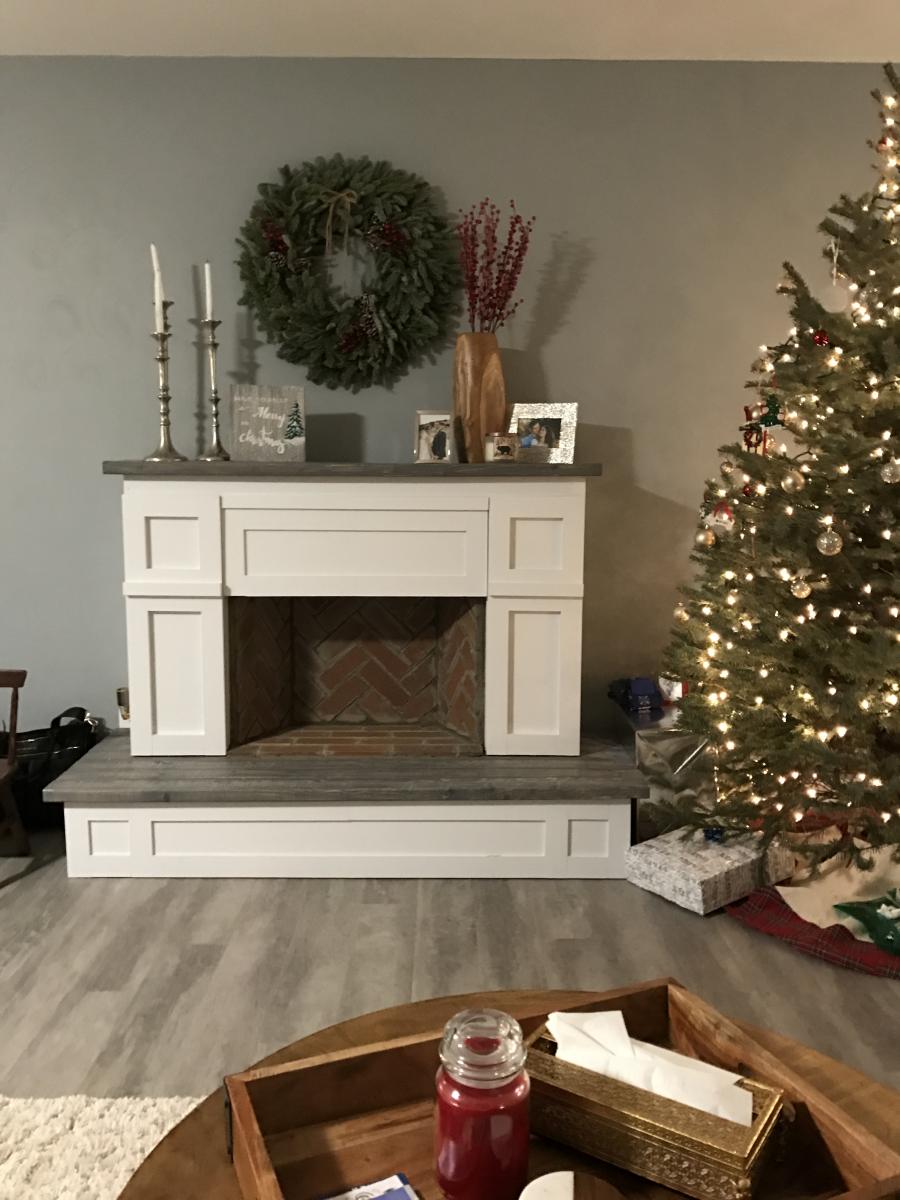
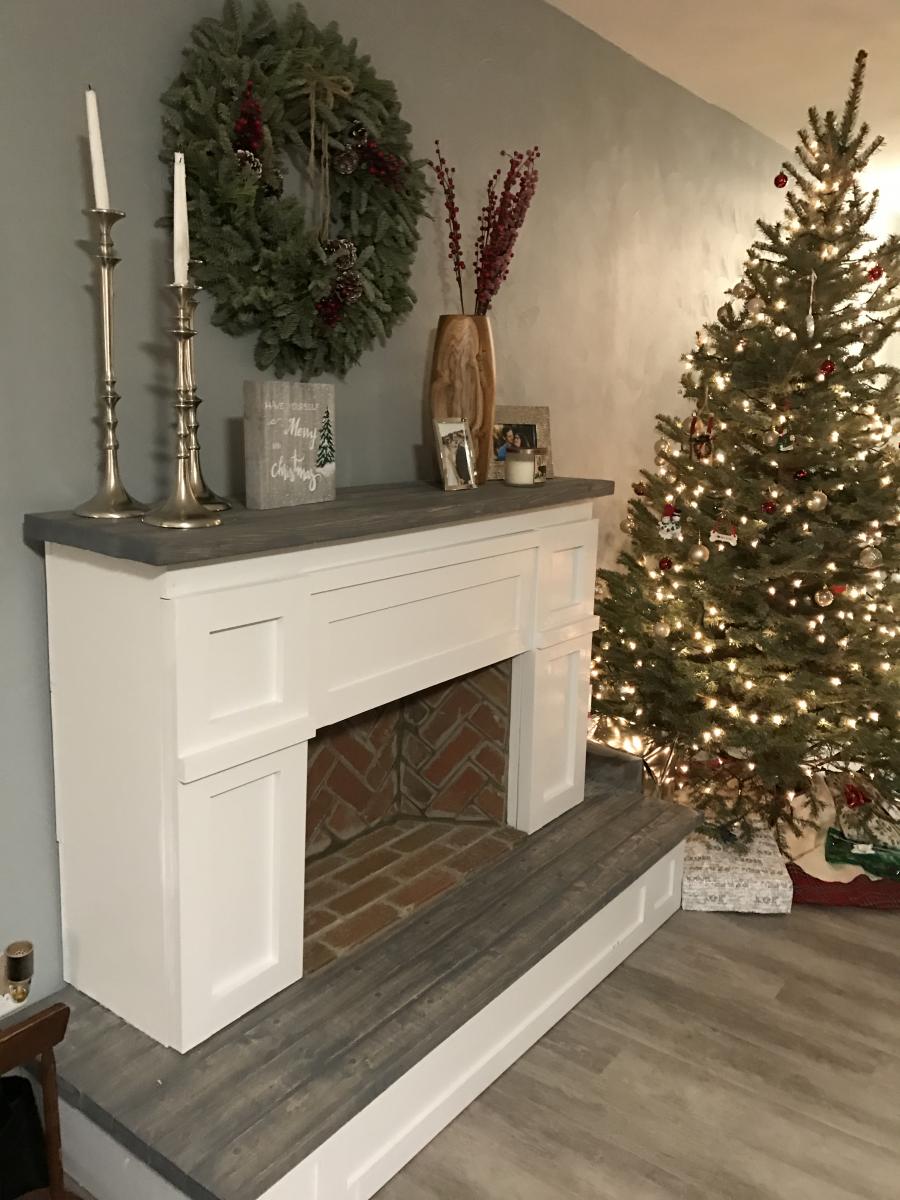
Faux Fireplace with Hearth

We made some modifications by adding a hearth for additional height (the room we have it in is very large and open) and joining 2x4s for the mantel and base which I stained grey for contrast. We decided to use thin brick for in the "firebox" to make it look more realistic. We also have a newborn and spent over two months putting it together a little at a time in our free moments so I'm not sure how long it would actually take to do at once, but cutting and putting up the brick was very time consuming.
Built from Plan(s)
Estimated Cost
$250
Estimated Time Investment
Week Long Project (20 Hours or More)
Finish Used
White paint, Minwax "Classic Grey" stain
Recommended Skill Level
Beginner
Comments
Thu, 08/27/2020 - 11:16
more info on this build
This looks great! I'm actually in the middle of this build with the hearth as well. Couple questions....
How did you connect the two pieces? Also, did you connect to the wall? I'm assuming you didn't leave the 5 1/2 inch gap on the bottom of the fireplace and connected direct to the hearth. Let me know, thanks!
Mon, 10/26/2020 - 06:55
More info PLEASE!
Absolutely beautiful and what i have been searching for!! Can you send me the plans for this?
Sat, 11/14/2020 - 21:06
Did you receive the plans?…
Did you receive the plans? If so, can you please share!
Sat, 11/14/2020 - 21:06
Do you have the plans for…
Do you have the plans for creating this fireplace with a hearth? Would love to build over thanksgiving break!
Sat, 11/21/2020 - 21:16
Very nice fireplace would…
Very nice fireplace would you happen to have the plans for it?
Thu, 04/01/2021 - 21:27
Faux fireplace plans
Would it be possible to send the plans for this beautiful faux fireplace?
Seasonal And Holiday