Community Brag Posts

Outdoor Living Space - Inspired by Ana's Plans

Submitted by Anonymous (not verified) on Thu, 05/07/2020 - 10:25

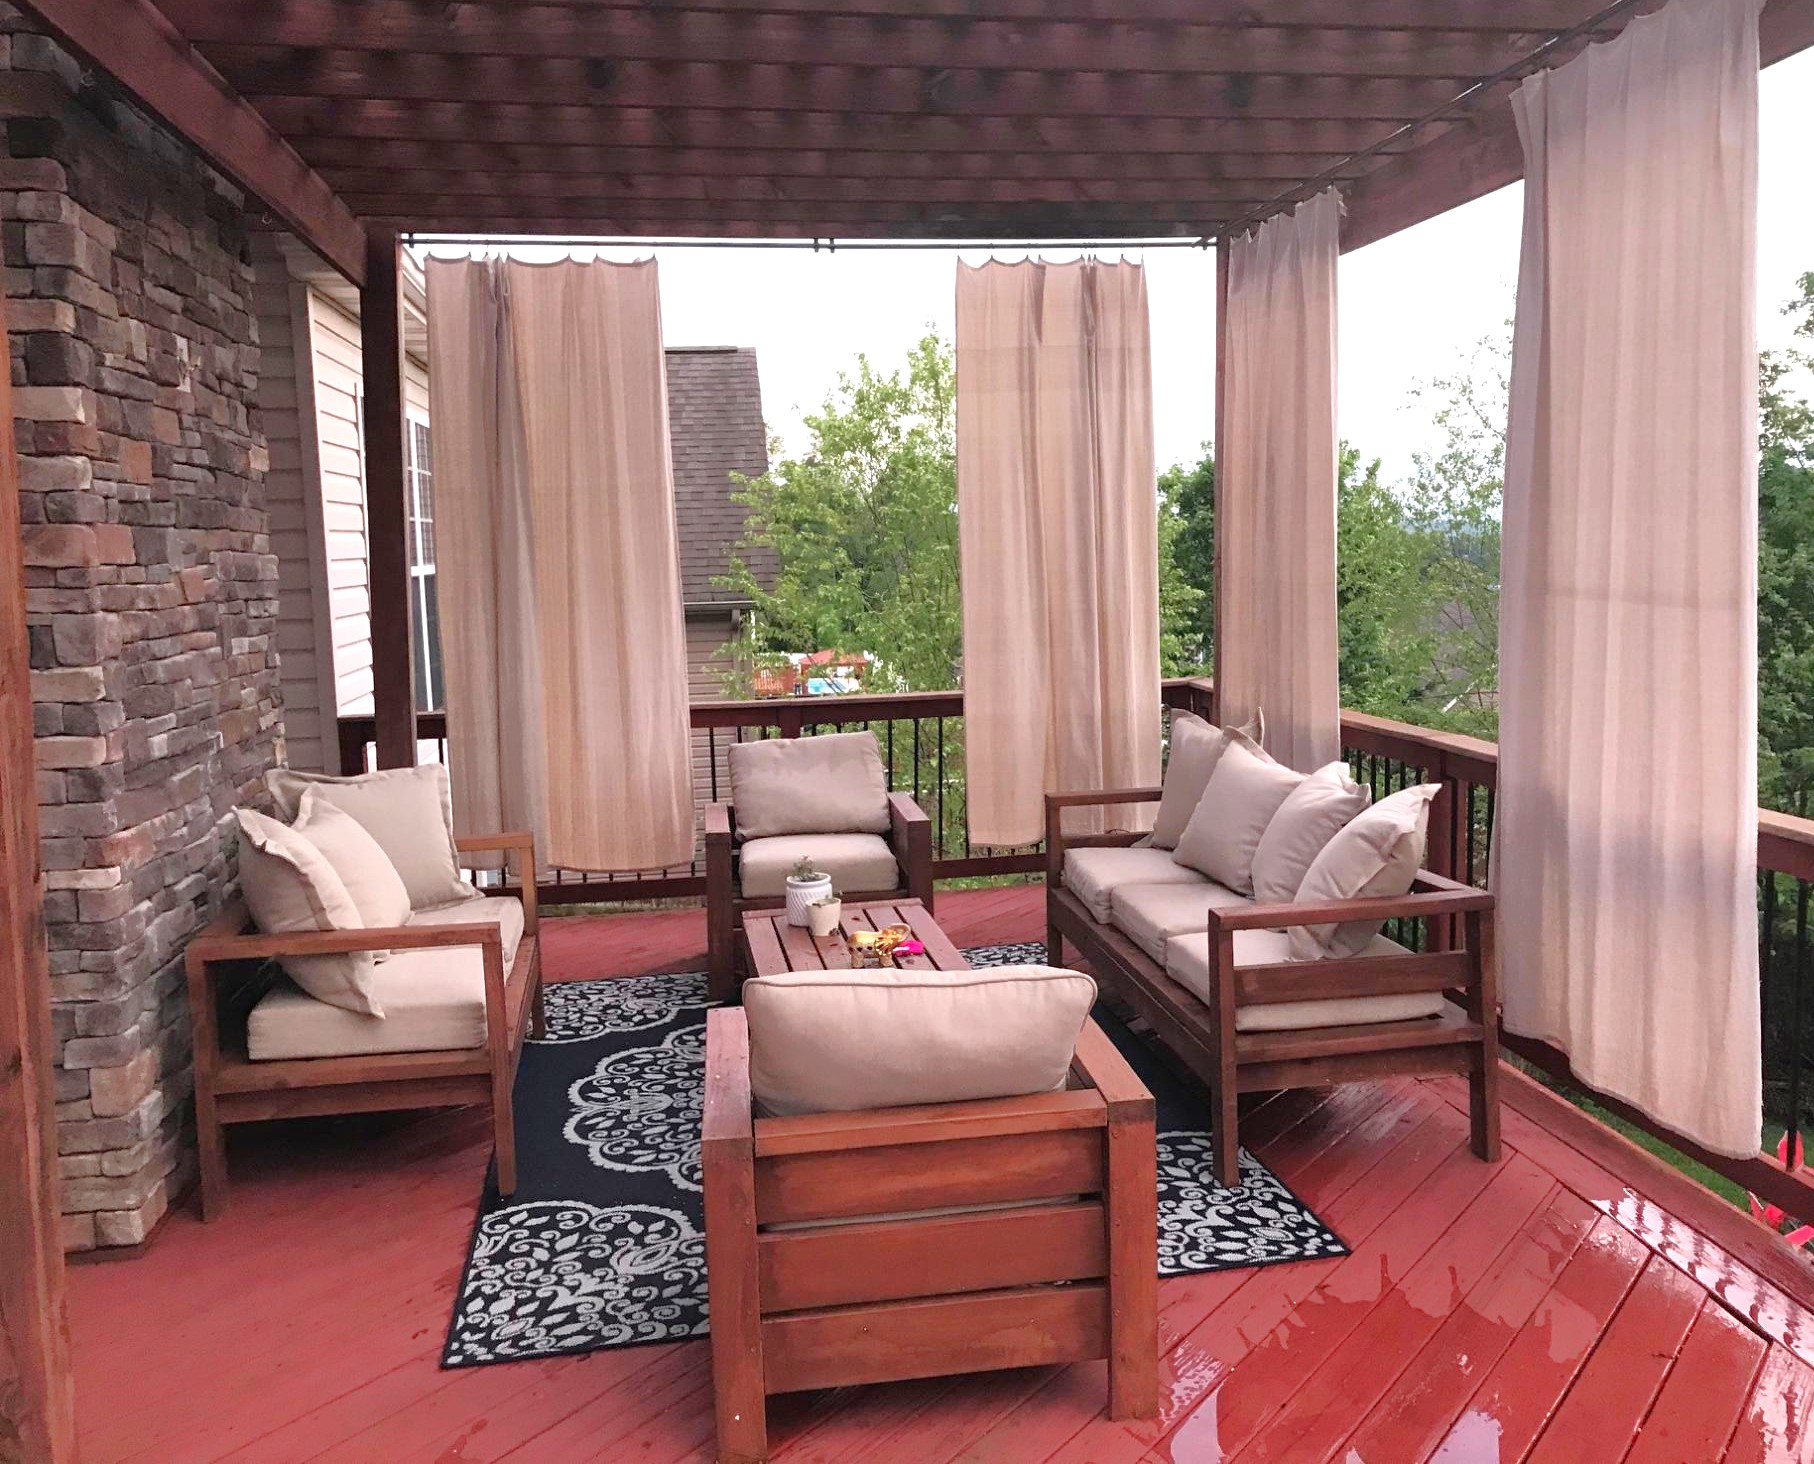
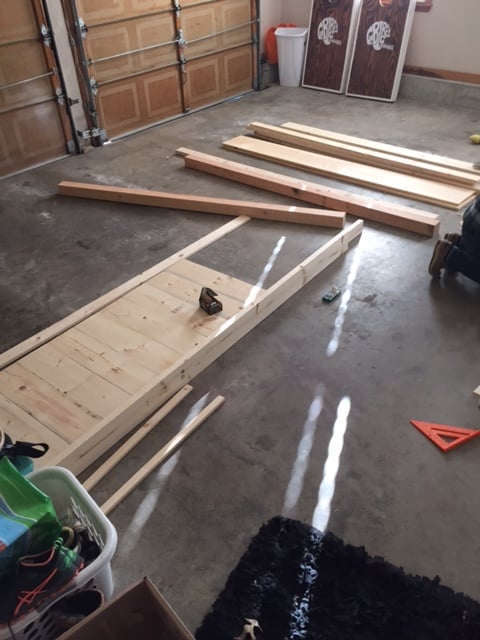
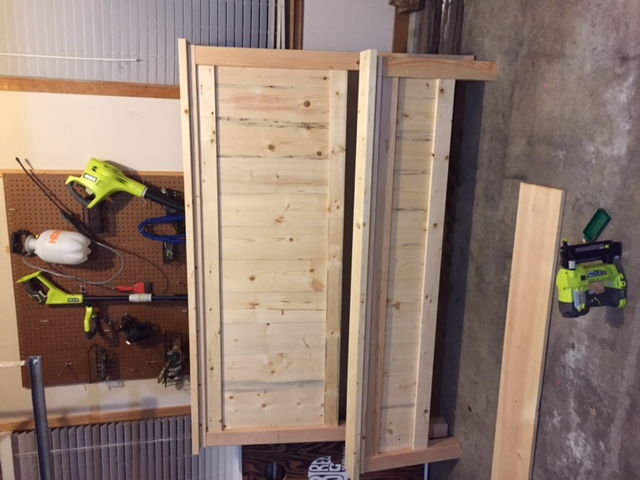
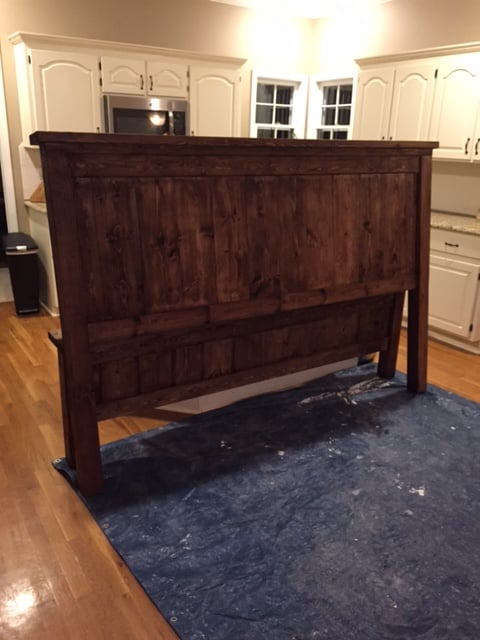
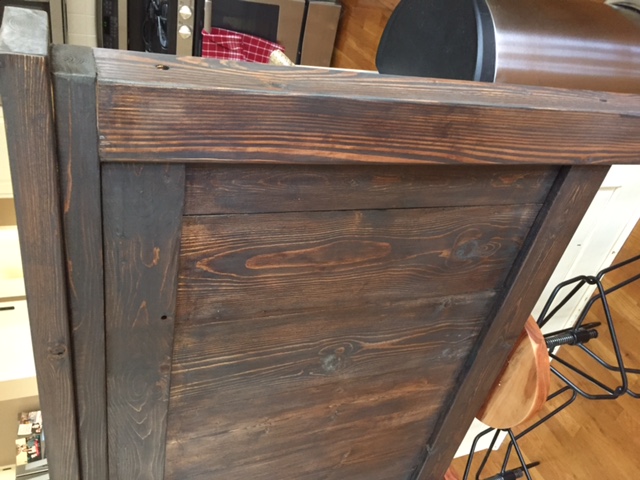
My wife and I were looking for a way to make our deck more enjoyable. I came across Ana's plans a year or so ago, and after building the couch and chairs, I decided to make a loveseat, add a rug and outdoor curtains. Hopefully one day I'll add some lights and an outdoor fan to complete the look.

Estimated Time Investment
Weekend Project (10-20 Hours)
Recommended Skill Level
Beginner

Comments

Seasonal And Holiday

Pallet Wood Planters

Submitted by Anonymous (not verified) on Mon, 04/01/2024 - 09:40

Did them for a friend that owns a bakery.
I don't have access to new lumber unfortunately.
The bulk of what I make is pallet. That's why there are four instead of 3 slats.
Same plan though. Pretty easy to follow.
I did add some handles to make it easier to move
since they will be brought in and out daily.

Yun

Laundry Room Table

Submitted by TX Shaun on Wed, 07/01/2020 - 21:05

I modified the plans for the farmhouse console table to create a laundry room table. I changed the shelf height and used 2x4s running the entire length for the shelf.

Built from Plan(s)
Estimated Cost
$50
Estimated Time Investment
Afternoon Project (3-6 Hours)
Finish Used
Minwax grey stain and white paint.
Recommended Skill Level
Beginner

Tapered Wood Planter

Submitted by Anonymous (not verified) on Wed, 04/24/2024 - 10:53

Made this for our patio area very fun build, my wife loves it so of course she wants another one! Back to the wood stove.

Blair K

Built from Plan(s)

playhouse loft bed

I started with the castle bed idea and it eventually evolved into this. It was very simple construction. I basically built 3 wall panels and screwed them together. I used 1x8 for the wall paneling. Then I attached 2x4 horizontally to the studs on the wall and the wall panels to support the plywood I put down to hold their mattresses. It's been a big hit. I added a doorbell and a mailbox, too.

Estimated Cost
$600
Estimated Time Investment
Week Long Project (20 Hours or More)
Finish Used
satin finish paint
Recommended Skill Level
Intermediate

Comments

abbpim

Sun, 09/16/2012 - 08:37

I've showed my kids every single bed plan and brag on here and yours is the only one they both agree on! So it looks like I'll be busy for a while!

adamdbrown

Sun, 07/12/2015 - 15:26

I am looking to build a modified version of your awesome bed/playhouse! I have 2 kids, and will essentially be making a duplex. Is there any chance you have schematics? Thank you!

Rustic X Bookshelf

Submitted by boneill on Thu, 07/09/2020 - 04:31

Added a 2x6 stained top to the bookshelf to add accent .

Built from Plan(s)
Estimated Cost
$110
Estimated Time Investment
Day Project (6-9 Hours)
Finish Used
Minwax dark walnut , satin poly Minwax quick dry, satin white paint
Recommended Skill Level
Intermediate

A-Frame Chicken Coop

We took Ana's original coop plans and diva'd it up a bit to suit our needs and our climate. We added a pop door and decided to split the roof panels into four, three of which open up. We put the hinges on the top of the roof panels so we could easily prop them open. We also added a brace across the bottom of our ladder for support. Since we added a door I believe our ladder is a bit more steep than in the original plans.

Because we put our hinges on top we added lattice strips inside on the top of the door panels that go just under the 2x4 of the roof peak to keep the rain out. We also used a roof cap for the same reason. We went back and added silicone to the strategic places to prevent water leaking into the nesting box while also being careful not to affect the necessary ventilation.

We used OSB for our roof panels instead of T111 because it's what we had on hand and also because we were going to be painting it.

Finally I added handles to each of the hinged panels to make opening easy. And cute!

Built from Plan(s)
Estimated Time Investment
Weekend Project (10-20 Hours)
Finish Used
I used a no VOC exterior paint from Valspar (green) that I found in the mistinted section at Lowe's. The pink (ladder) is Very Berry by Valspar and is not an exterior paint.
Recommended Skill Level
Intermediate

Comments

anniejw17

Wed, 02/27/2013 - 11:11

Love your coop! It's so cute! I need to find a weather vane. We ended up adding a roof cap of sorts - just aluminum flashing really. It does still leak in the nest box, though, which just encourages me to change out the bedding for fresh straw, which is a good thing I guess!

Southern Revivals

Wed, 02/27/2013 - 13:24

Yes mine leaked, too. We added the roof cap and some silicone but that still didn't stop it. So I finally went in and added some screen molding behind the panels in the nesting box. It still isn't quite "leak proof" but it is better. I will share if I figure out how to make it leak proof! Thank You!

billd333

Mon, 01/13/2014 - 09:45

These were great plans, thanks for sharing!
I'm new to having chickens so since it's cold now is Massachusetts I'm holding off on getting a couple of hens. The 2 main questions I have are where did you end up mounting the roost? And where did you end up putting the nesting box? I only put a floor on half so was thinking the roost board could be suspended above the ground on the open side. That leaves the 1/2 floor to hold the nest box?? Please any comments on the roost, nest box, watering and feeding systems are welcome.
thx..Bill

Southern Revivals

Mon, 01/13/2014 - 10:03

Hi Bill,

I am actually in the process of writing another blog post about this coop. I have gotten so many questions about the modifications we did and have lived with it long enough to know what I would have done differently. You doing the 1/2 is great and is one of the things I would do differently if we had it to do over again.

I will post an update here as soon as that post is live. In the meantime, feel free to contact me directly at Jamie @ Southern Revivals.com

Thanks!
Jamie

Farmhouse Table

Submitted by ssshindler on Fri, 11/07/2014 - 05:39

This is my first project and I am thrilled with how it turned out. Thank you Ana, you have empowered this stay at home mom! 

Finish Used
minwax dark walnut stain, polyvore wax varnish
Recommended Skill Level
Starter Project

Comments

sagey

Sun, 11/09/2014 - 18:41

I  love this table sooooooo much .

please explain exactly how you achieved the finish on it > is the wood reclaimed!!!!

sagey

Sun, 11/09/2014 - 18:42

I  love this table sooooooo much .

please explain exactly how you achieved the finish on it > is the wood reclaimed!!!!

Mudroom Bench

Submitted by BeingHome on Sat, 02/23/2013 - 22:26

With much needed seating in the mudroom, an unused space (nook) was used to build a mudroom bench and shelf. No plans were used. I basically looked on-line and mentally drew up an idea of how I wanted the final product to look.  


There were some setbacks such as not like the knock down textured walls (after partially painting the bench). I ended up covering the textured walls with hardboard and repainted.


A bench cushion was made for added comfort and style.


Complete tutorial for the bench is here and the bench cushion tutorial is here.


Thank you.


Julie

Estimated Time Investment
Weekend Project (10-20 Hours)
Finish Used
Behr Ultra (paint and primer in one) in ultra white finish.
Recommended Skill Level
Beginner

Comments

Cleverly6

Thu, 05/16/2013 - 13:48

Thank you so much for the idea and plan. I used it to turn an extra laundry room that we have off of our garage into a much needed mudroom. The most challenging project I have ever done before is hanging blinds. But with your help and some from the Home Depot employees, I did it! Our family is more than happy with it. Thanks!!!

BeingHome

Sun, 08/25/2013 - 22:28

Thank YOU so much! I would love to see a picture of your new mudroom area. :) I am happy the plans helped and of course Home Depot. ;)

Sorry for my delayed response. :(

BeingHome

Sun, 08/25/2013 - 22:28

Thank YOU so much! I would love to see a picture of your new mudroom area. :) I am happy the plans helped and of course Home Depot. ;)

Sorry for my delayed response. :(

Closet Storage

Submitted by erik99703 on Thu, 03/07/2013 - 21:14

My daughter has a small walk-in closet, so I wanted to make some storage bases. I had a full sheet and half sheet of plywood each ripped into 4 pieces, with each piece 11 3/4" wide. I then built the sides and corner shelves separately and connected them with connector bolts. I have since added doors to the shelf on the left.

Estimated Cost
$75
Estimated Time Investment
Weekend Project (10-20 Hours)
Finish Used
Rustoleum flat white primer and flat white paint
Recommended Skill Level
Beginner

Comments

In reply to by Lady Goats

erik99703

Fri, 03/08/2013 - 14:53

Good catch Gina - it's actually a sheet and a half of 3/4" ply, with some to spare. I forgot that I had to make another trip to get the extra half sheet (I made this a month ago). The corner unit also has 1/2" ply for the back, and since I was painting it, I bought the cheapest plywood I could. The vertical dividers are also made with scrap pieces of 1x pine I had lying around.

Ukrainian Sand box with built-in seats

Submitted by Anonymous (not verified) on Tue, 05/30/2017 - 05:28

 I live in Lviv Ukraine and painted it in he national colors of Ukraine.

The wood came from a old pallet.

Built from Plan(s)
Estimated Time Investment
Weekend Project (10-20 Hours)
Finish Used
Outdoor enamel paint
Recommended Skill Level
Intermediate

Three Story American Girl or 18" Dollhouse

This was a blast to make, we added 2 roooms and a swing but every thing else was the same!

Finish Used
Paint/Primer
Recommended Skill Level
Beginner

Comments

Gardener's ladder shelf

I built this for my sister-in-law who loves growing vegetables and herb - in her small apartment porch. She wanted something that she can put her plant pots (and she has so many of them!), so I modified the Painter's Ladder Shelf by:
1. Made the shelves with slats, with added support underneath
2. Beefed up the legs with 2X3s instead of 1X2s.

Dad helped with angled cuts and other things, and borrowing his workshop, this was a breeze to build.

Estimated Cost
$50
Estimated Time Investment
Afternoon Project (3-6 Hours)
Finish Used
Flat paint in "Soothing Lavender", since it's her favourite colour.
Recommended Skill Level
Beginner

Farmhouse King size bed frame

Submitted by Anonymous (not verified) on Wed, 01/19/2022 - 08:00

Found the plans on your site for Farmhouse bed frame, thank you!

Made a spectacular Christmas gift for Hubby!
I ended up buying a few more pieces of 1x6 as I opted not to waste the 4x4 posts, and added 14” height to the headboard and 7” height to the footboard.

I actually forgot about my lights on the wall, so what to do? Drilled holes in the headboard and wired them through! Love opportunity solving! 😂👍🏼

I should’ve moved the Hopechest for the photo, but you get the idea. Next project, matching side tables!

Comments

My First Project: Spinning DVD Rack

Submitted by Dan Y. on Sat, 07/13/2013 - 20:19

I was looking online for a spinning DVD rack to buy when I stumbled across a picture of a custom built rack. I decided to give it a try and this is the result. This is the first project I've done outside of basic shelves and it was a great learning experience. The overall fit and finish isn't quite where I'd like it to be but overall I think it turned out pretty well. I was able to find a 12" lazy Susan at a hardware store that supports over 300lbs and worked perfectly for this project.

I used pocket holes for the shelves, finishing nails for the top and screws for the bottom and lazy Susan. I also used pocket holes to attach the shelf backs and hid them behind the shelves. One thing I definitely won't use next time is spray paint/enamel. The finish isn't nearly as nice as I wanted and it cost far more than I was expecting.

This is also my first time using SketchUp and I'm really impressed with it. I've uploaded a copy of the plans.

Criticism and suggestions are appreciated.

-Dan

Estimated Cost
$170
Estimated Time Investment
Weekend Project (10-20 Hours)
Finish Used
Rust-Oleum Universal Satin Spray Paint - Espresso Brown
Rust-Oleum Crystal Clear Enamel
Recommended Skill Level
Starter Project

Comments

Val Manchuk

Sun, 07/14/2013 - 11:35

I like this spinning DVD unit! Coincidentally, I just finished using spray enamel to redo some cupboard door handles. It's horrible stuff! I ended up sanding it off, and doing it over in flat black. I roughed up the edges with 180 grit to antique them a bit. Looks much better!

My First Project!

My husband and I just moved from an apartment to a house, the first place we've ever lived with a dining room! I knew I wanted to build a really special table for us and I LOVED this plan. It seemed straightforward enough, and my stepdad had all the tools in his workshop. So my stepdad, mom, and I built the table over the course of a weekend. It was SO fun and it looks perfect in our first little house!

Estimated Cost
It cost me about $100 to buy all the lumber, screws, turnbuckles and hardware, stain and polyurethane. I didn't have any of those things on hand before starting. If I had, it would have been less! I also didn't have to purchase any tools.
Estimated Time Investment
Weekend Project (10-20 Hours)
Finish Used
Wood was finished with Varathane Light Walnut wood stain and 4 coats (on the top) of Varathane Water-Based Polyurethane.
Recommended Skill Level
Beginner

Garage shelves

Submitted by Joy on Sat, 09/08/2018 - 18:12

Designed to store 56 qt clear sterilite totes. Spaced 17” apart and used 5 2x4s so 23” deep. We have a lip of our foundation that sticks out so we had to adjust for the difference in leg heights. 

Estimated Cost
Lumber was $8.25 per board (2x4x16) and we used 32. 3 boxes of screws. 2 1/2 for the frame, 2” for screwing down the shelves and 3 1/2 to screw into the wall studs.
Estimated Time Investment
Afternoon Project (3-6 Hours)
Finish Used
None
Recommended Skill Level
Beginner

Garage / Basement Shelving + Bonus Wine/Liquor Under Stairs Storage

Submitted by MJC2DIY on Wed, 10/12/2022 - 21:35

Using the guidelines for the “BEST DIY Garage Shelves (Attached to Walls), I added this to our unfinished basement area for additional storage. I plan to replicate it in our actual garage as well and build the freestanding shelves also!

As a bonus, I used this plan as inspiration and built directly beside it, which is an unused space under stairs, a wine/liquor storage shelving replacing the plywood with cut 2x4s for added weight capacity/stability.

Couldn’t have been easier!

Comments

MJC2DIY

Wed, 10/19/2022 - 09:14

Thank you!! I am so thankful for Ana White and team! These projects are helping me build a lot of confidence to continue endeavoring more challenging projects each step of the way :-)

Mud Room - Inspired by Braden Entryway Collection

Submitted by flicker237 on Thu, 10/13/2011 - 09:19

We had a small mud room off our back door that was in need of serious help! We started from scratch in this room - framing, drywall, floor, molding, etc. To complete the room, we modified the Braden Entryway Hutch and shoe bench plans to fit the dimensions of our space, and add a third cubby. It has worked wonderfully!

Estimated Time Investment
Weekend Project (10-20 Hours)
Finish Used
White paint (2 coats)
Recommended Skill Level
Beginner

Comments

Farmhouse King Bed

Submitted by gahan22 on Tue, 02/02/2016 - 10:36

This was our first ana white build. Bed build took one Saturday - to finish up took another week or so working nights - most of our time spent on getting the color we wanted and sanding and finishing. Building the 2x4 frame took more time than anticipated as well. We are super happy with how it turned out.

Estimated Cost
$250 for lumber, stain and lumber for bed frame. We used lag screws on the side and 2x4 hangers for the frame which increased costs.
Estimated Time Investment
Week Long Project (20 Hours or More)
Finish Used
Stain is two coats minwax dark mahogany plus classic grey over the top - wiped off and finished with minwax satin poly.
Recommended Skill Level
Starter Project
Back