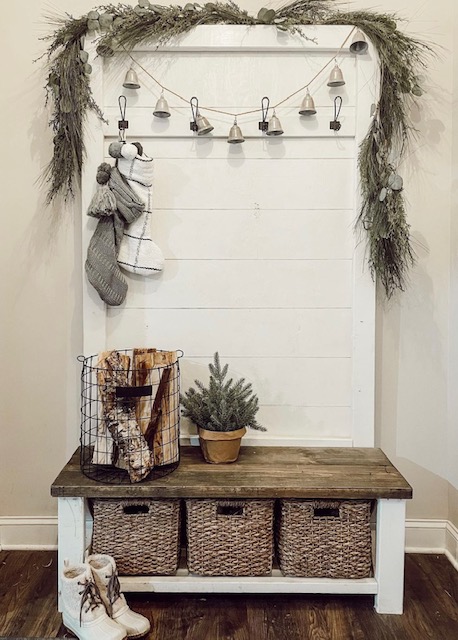
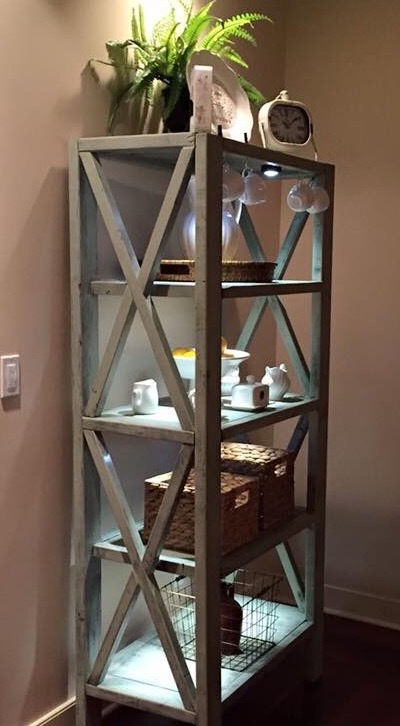
Rustic X Hall Tree
Same Beautiful Hall Tree - Different Seasons by Iron and Lace Design
Built from Plan(s)
Seasonal And Holiday
Same Beautiful Hall Tree - Different Seasons by Iron and Lace Design
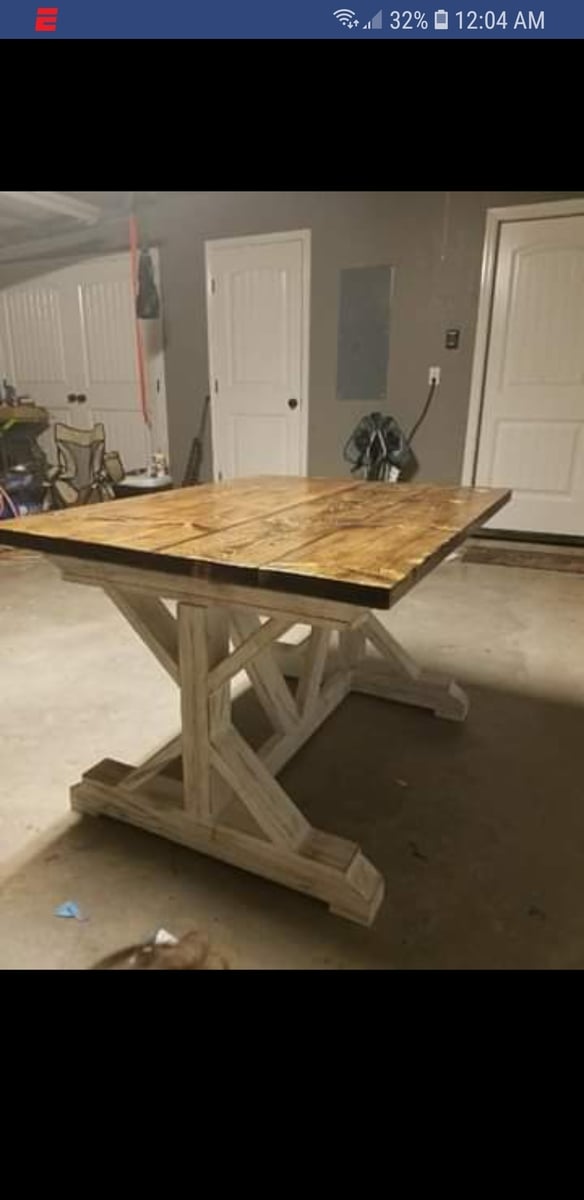
Great project and fun to do. I've actually made 6 tables off this same plan, all different sizes,from 4ft. To 8ft..

Sun, 01/06/2019 - 16:46
Six! That's awesome!
Thanks for sharing a photo, love it! Ana
Thanks for the plans!

I followed the plans except for the top, I used a 2x12, 2x4 and 2x12 pocket holes together.
Burnt the wood with a torch and stained over.
Thanks for the plans!
Questions? [email protected]
I used my router and router Ed the edges. Love this!!
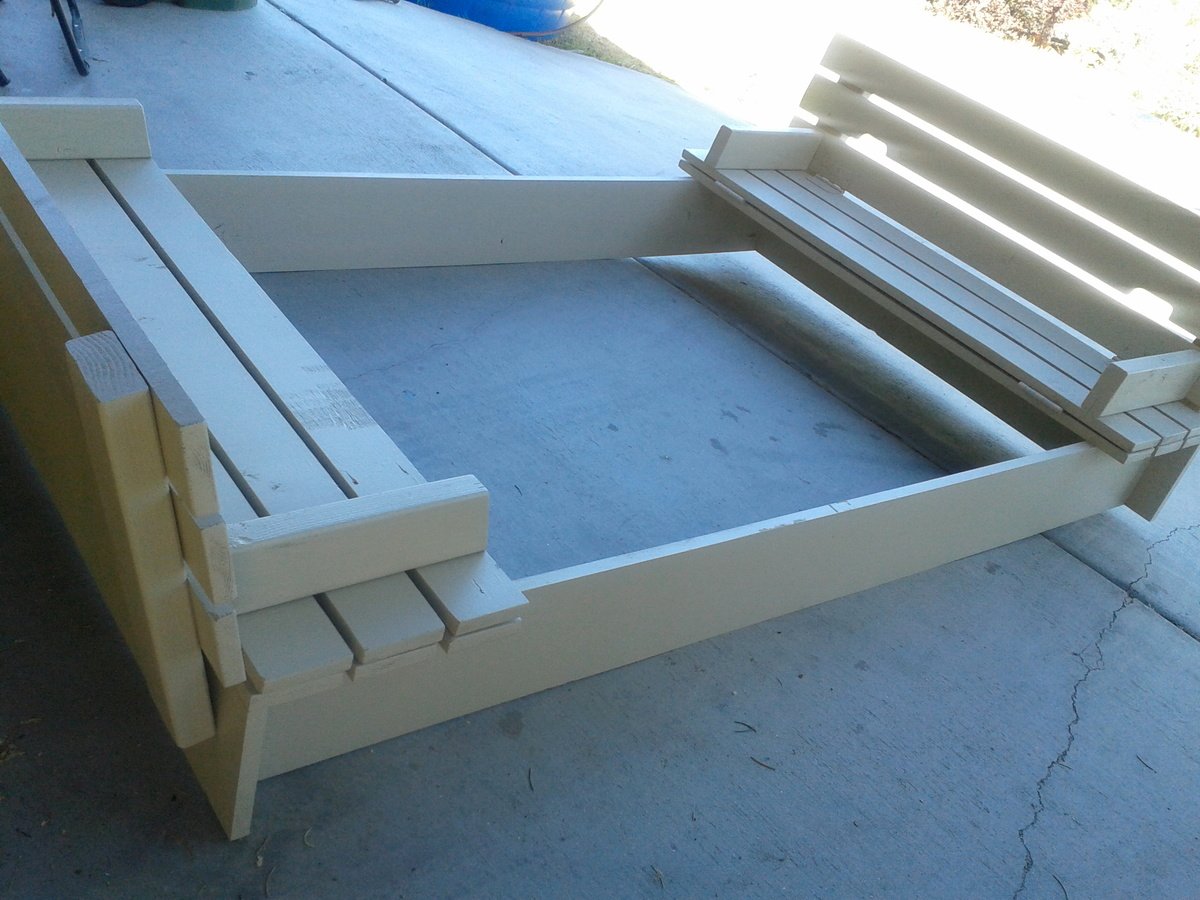
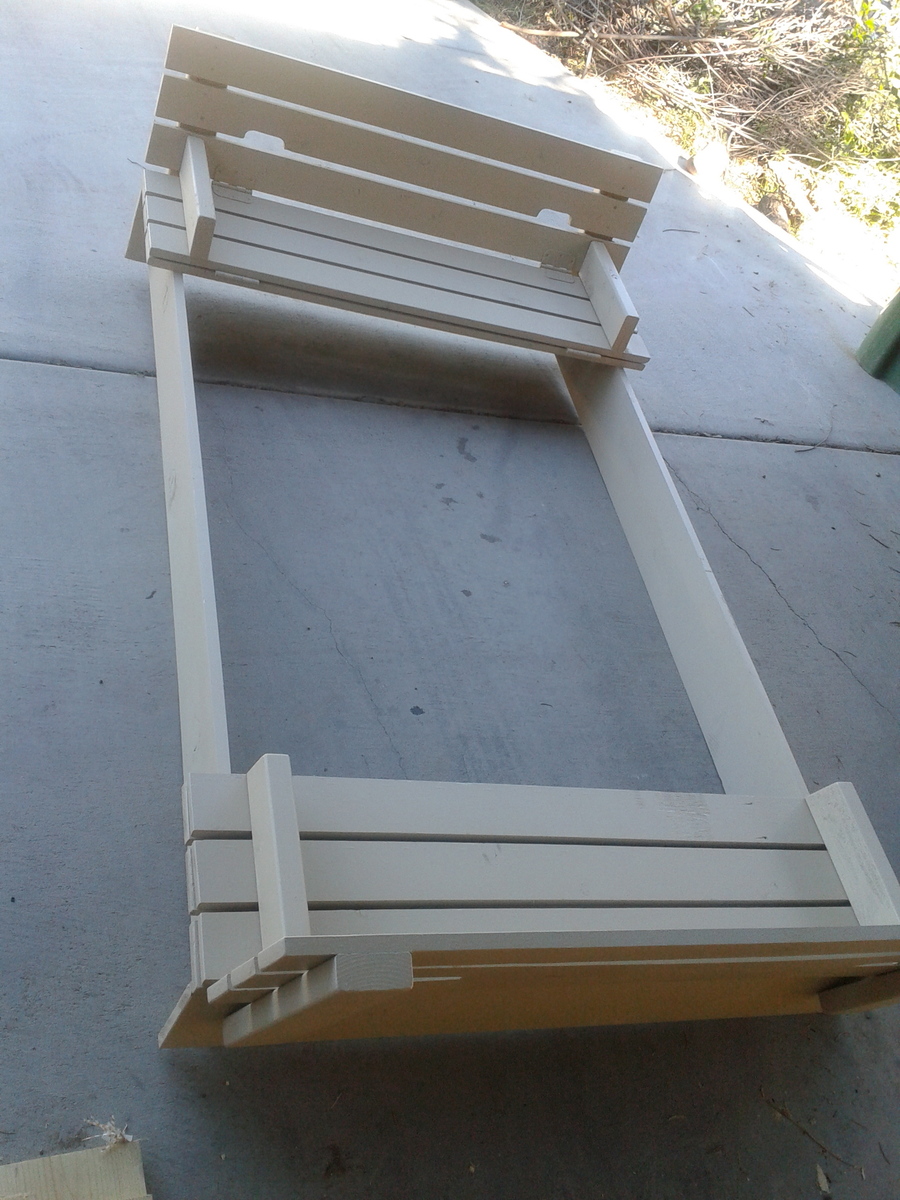
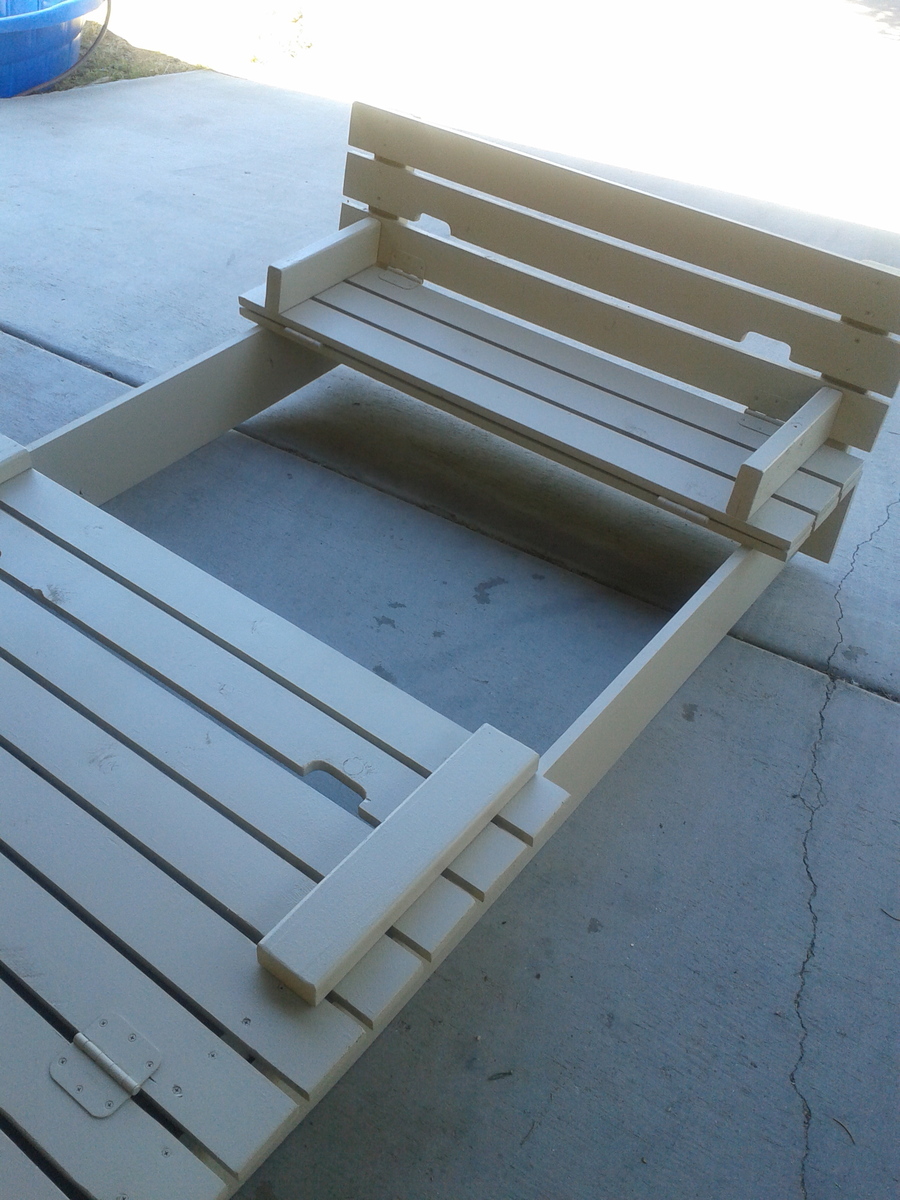
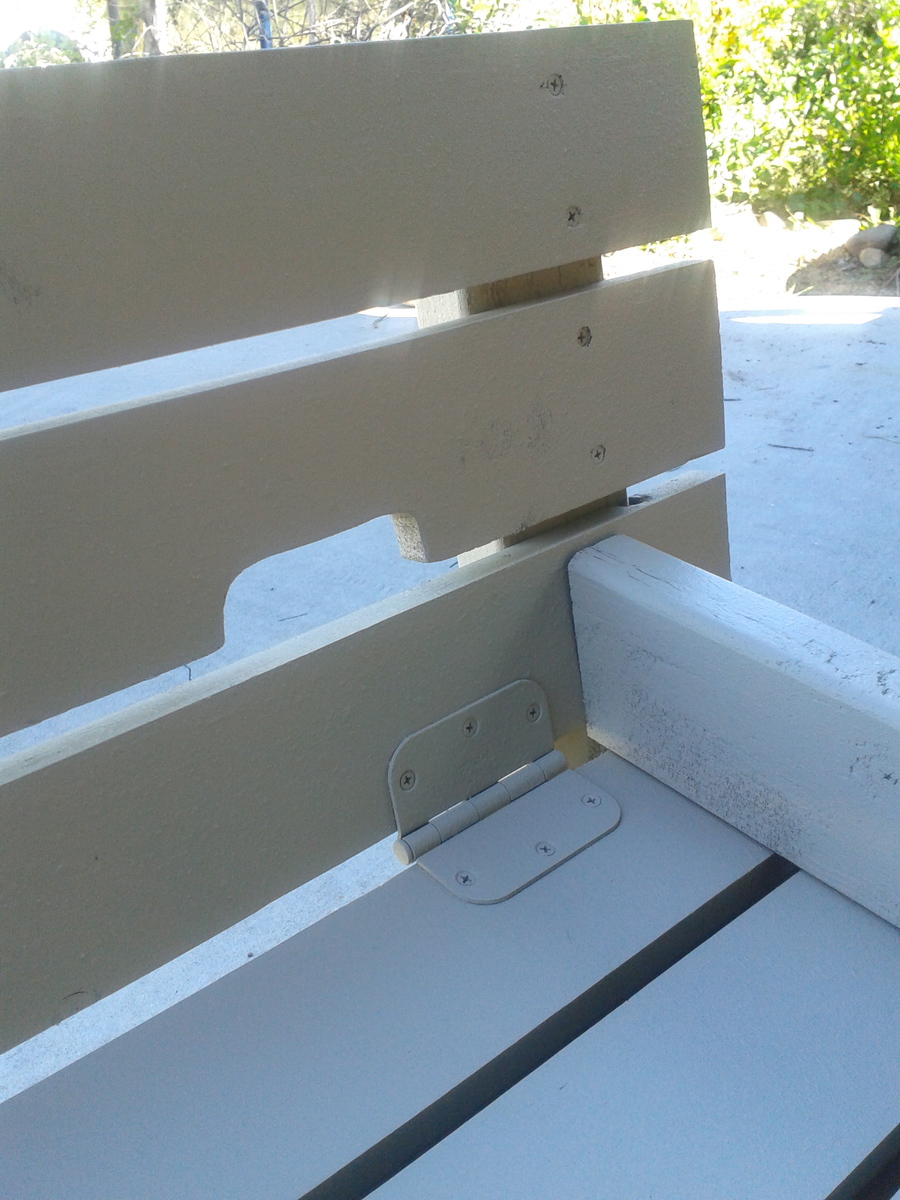
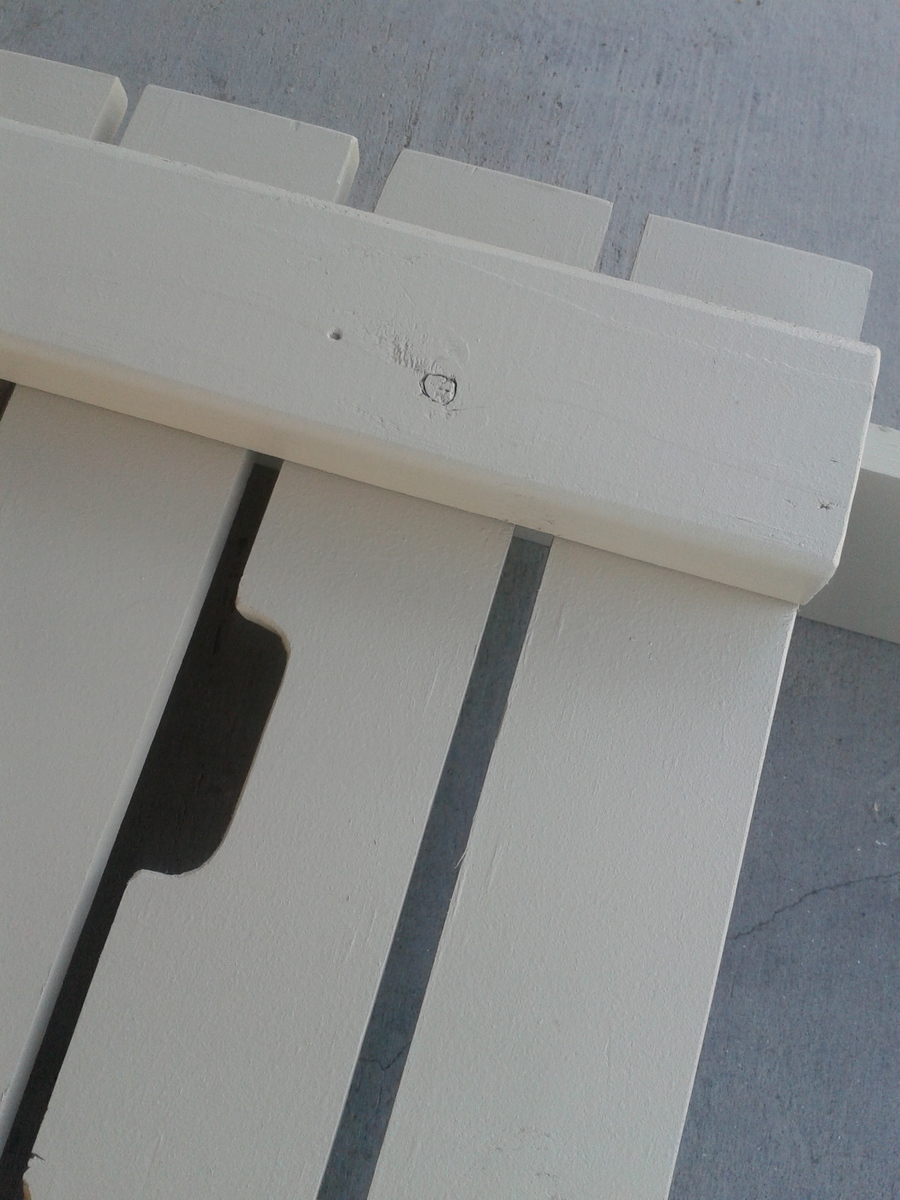
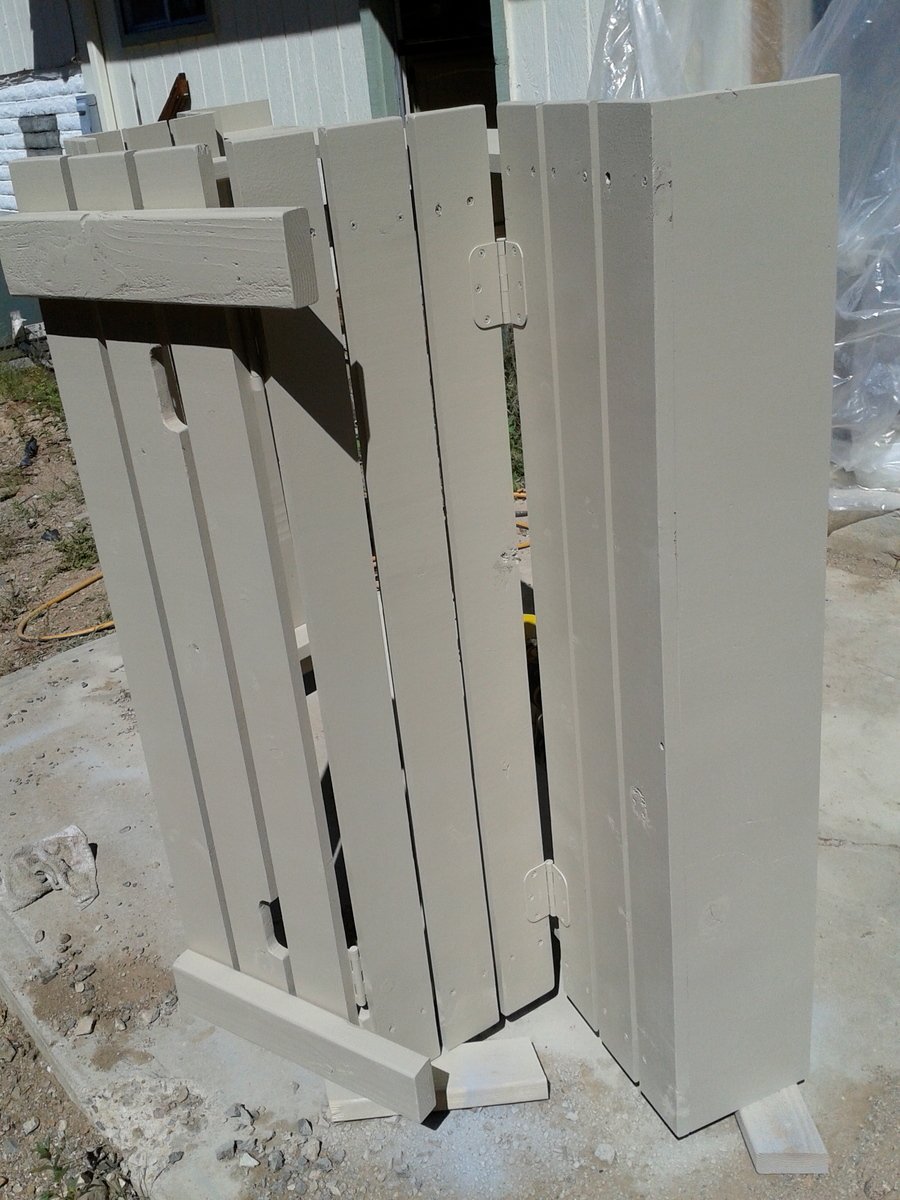
On this project we modified a few things like the arm rests which we cut at an angle to keep kids from pinching fingers in there if someone decided to move the bench back on them. We also modified the size which we made 6'x4' to maximize play sand space and kid space. Therefore this made our benches bigger so that big kids (my husband) could sit on the benches and play in the sandbox. Yes there was talk about putting cup holders but I won the conversation by mentioning sand in his drink and we would have to do a sippy cup. We notched out the handles instead of installing handles which made it look sleek. We used the template from the hinge so it matched the shape....clever huh? We decided to primer and paint this one sandstone in the brick and mortar sample book by Behr and had them put it in an exterior paint color for us. We used a wagner paint sprayer which made the project fast at the end. Overall still an easy project for anyone. I do suggest pre drilling all holes first before screwing in screws so the wood doesn't split when doing the slats on the top.
Wed, 04/08/2015 - 12:41
I was wanting to make a big one like a 6ft by 6 ft and was wondering how long you made everything.
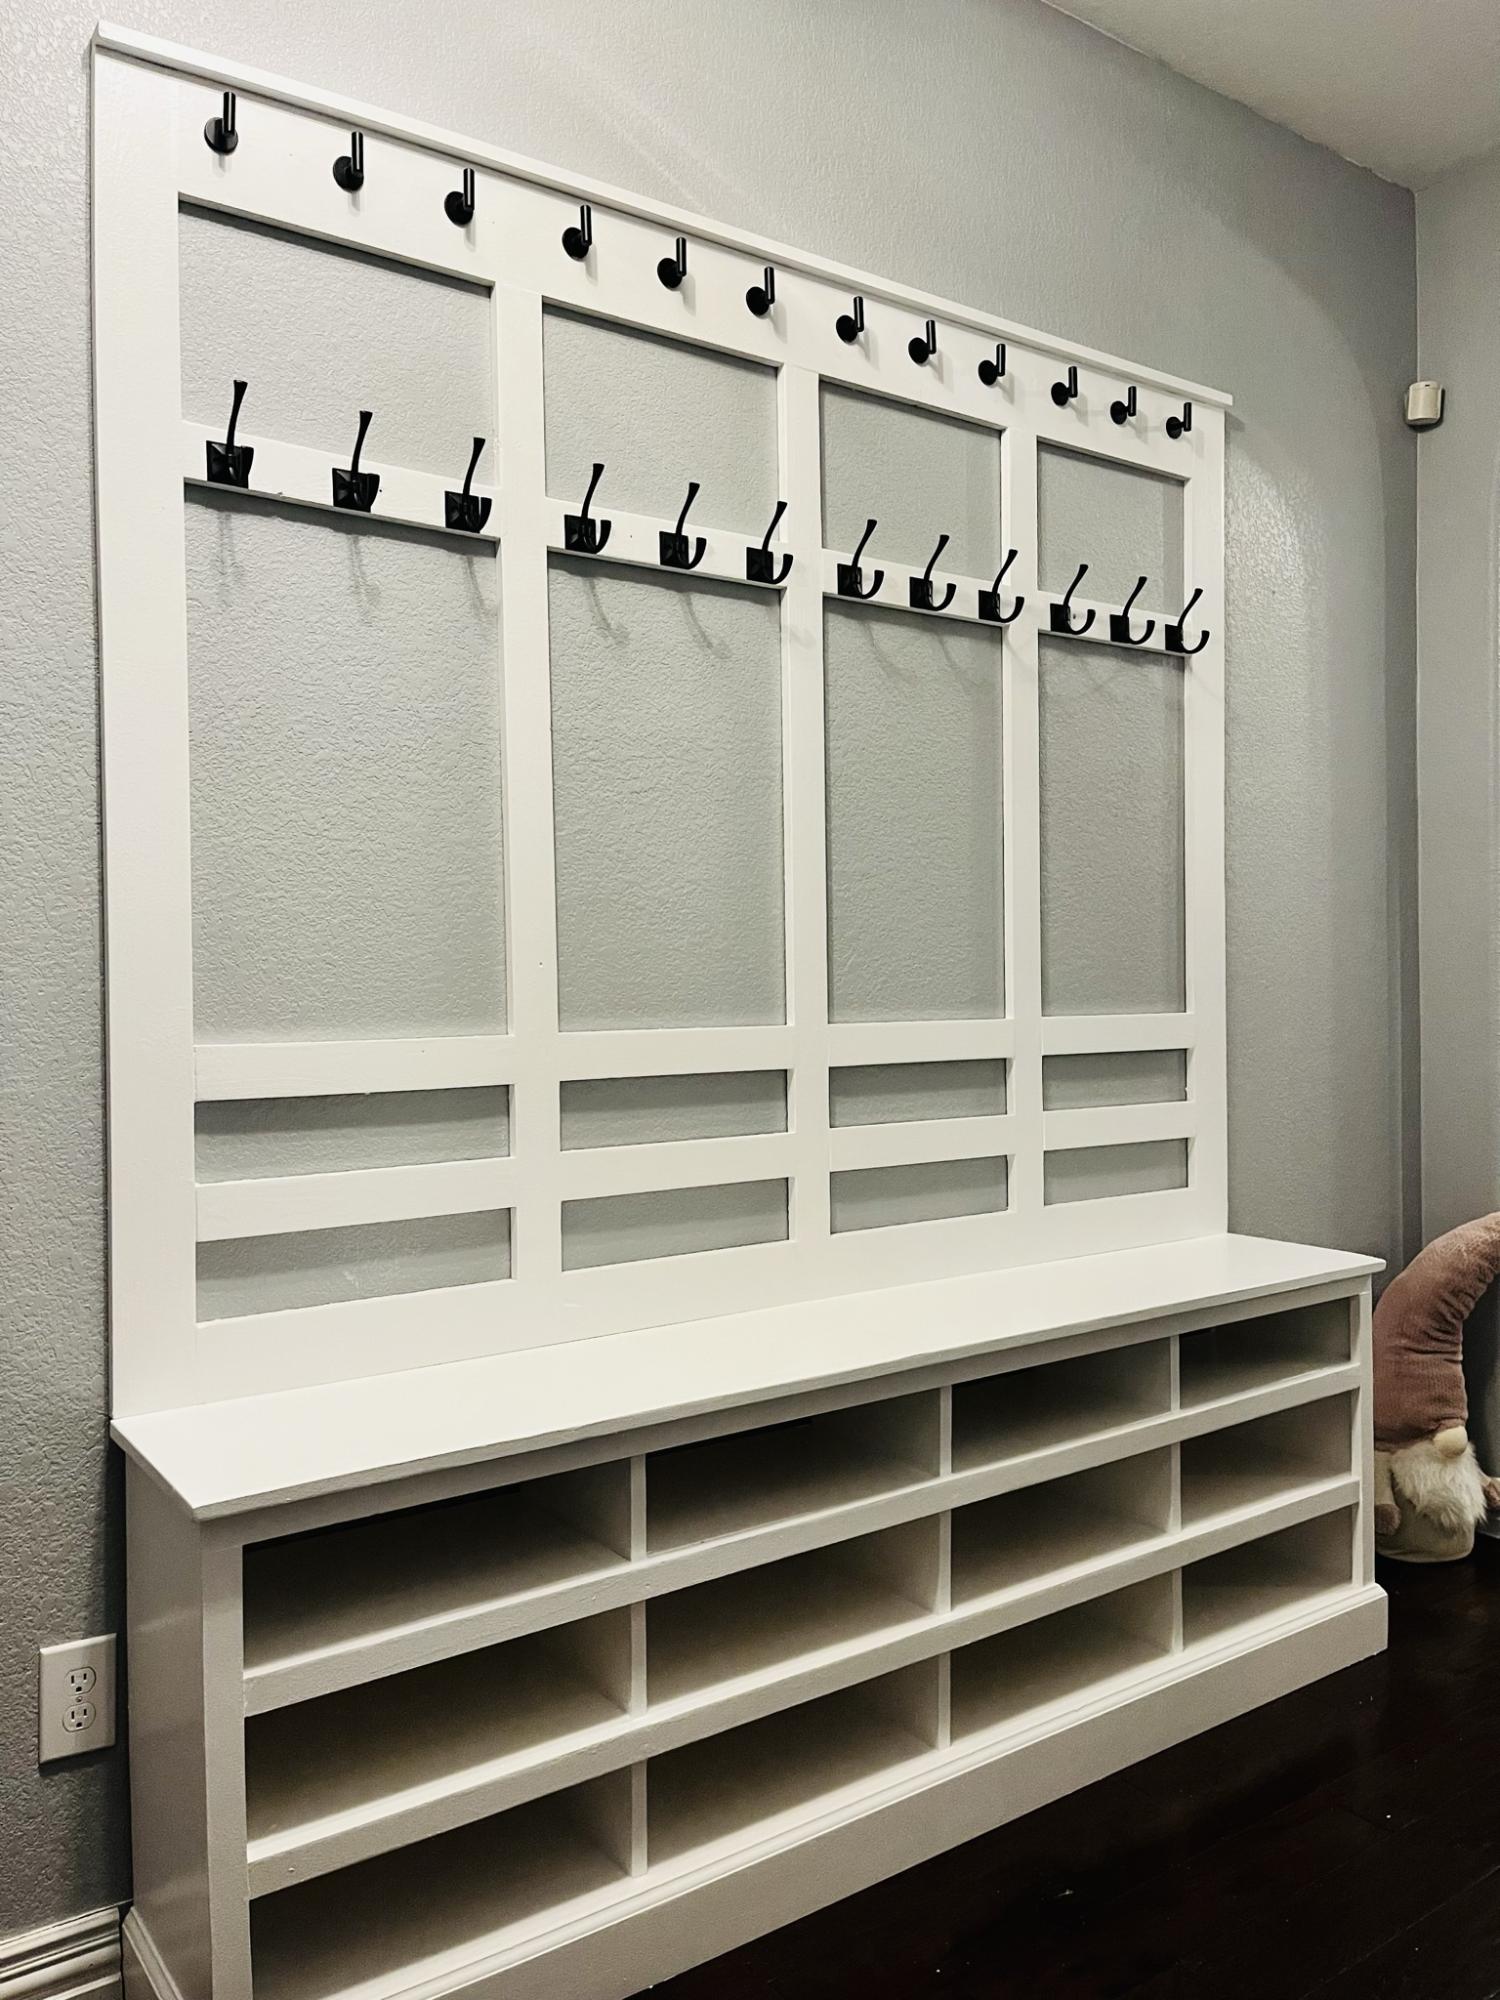
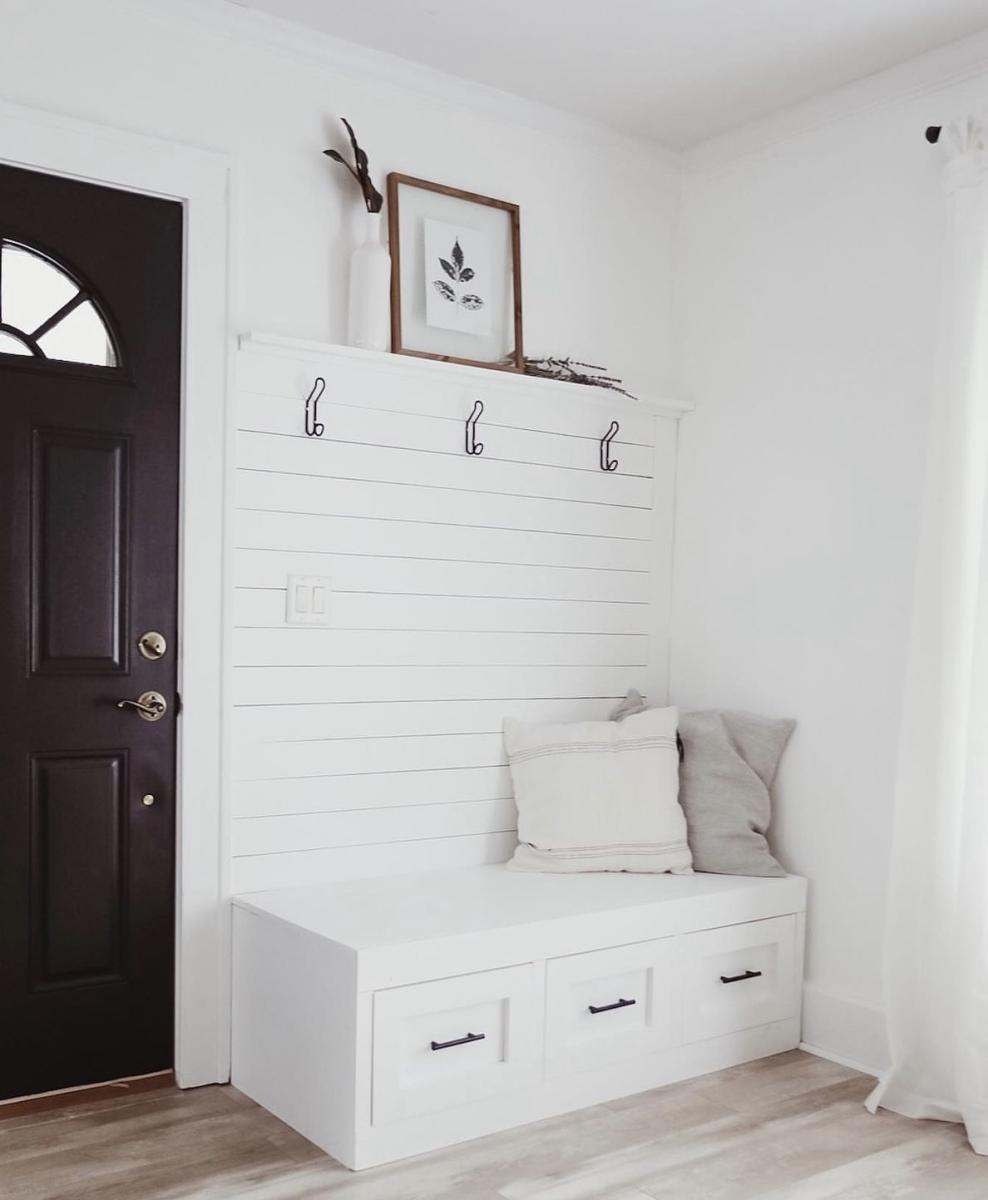
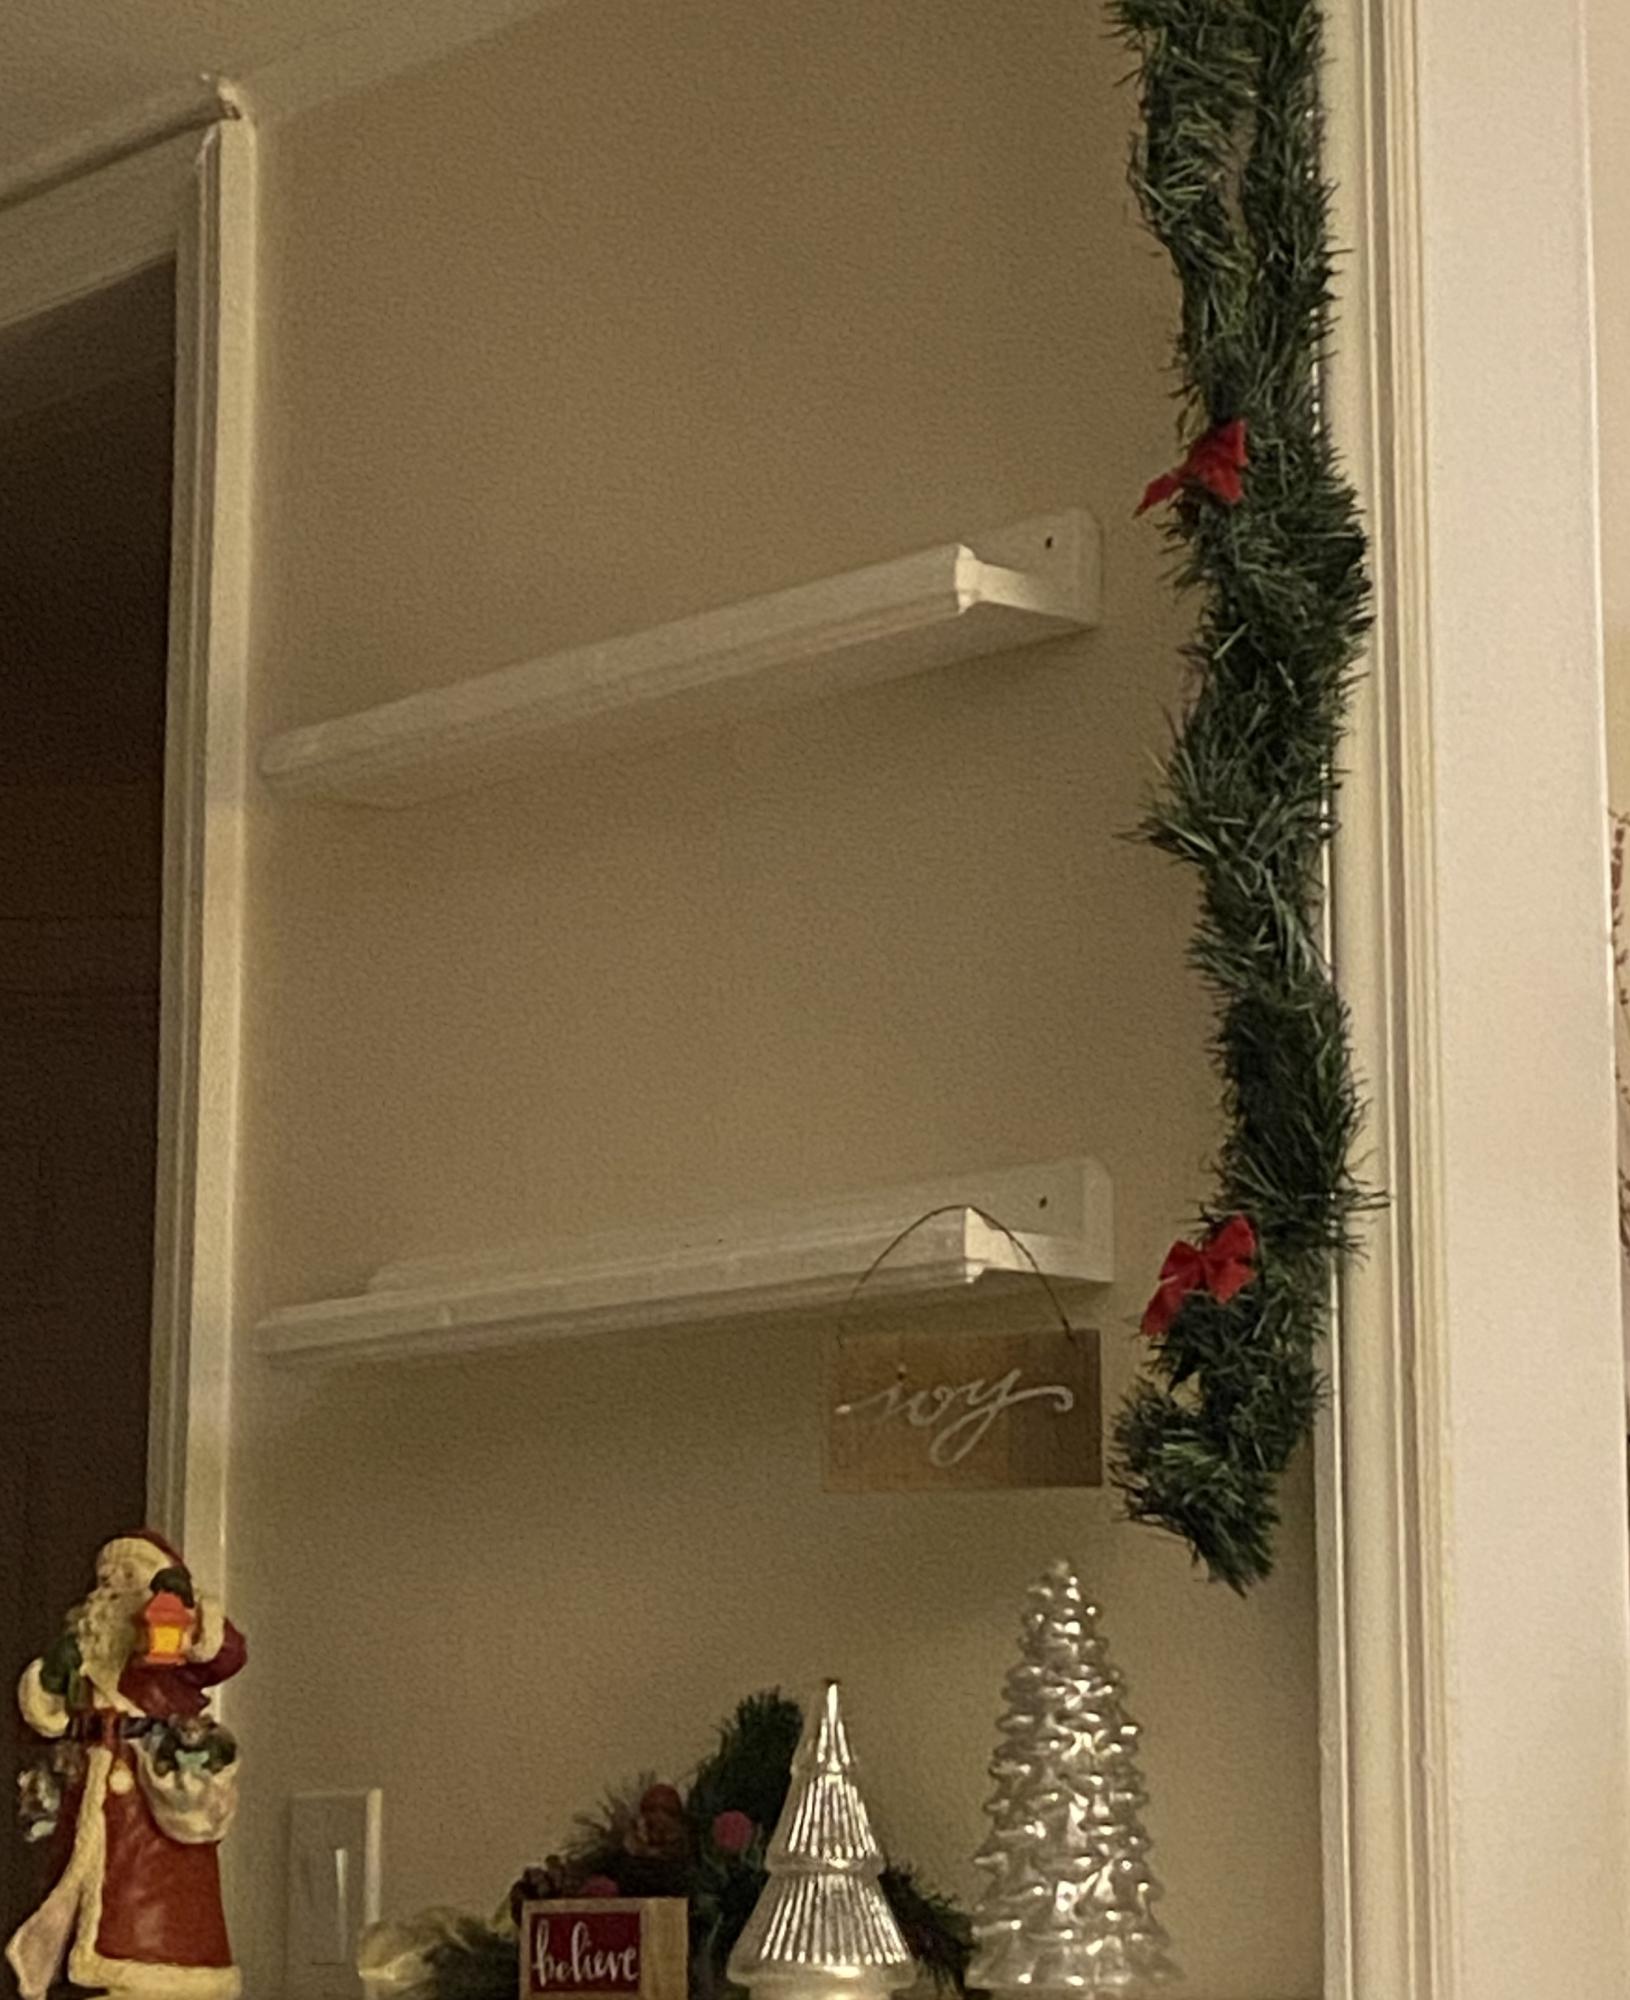
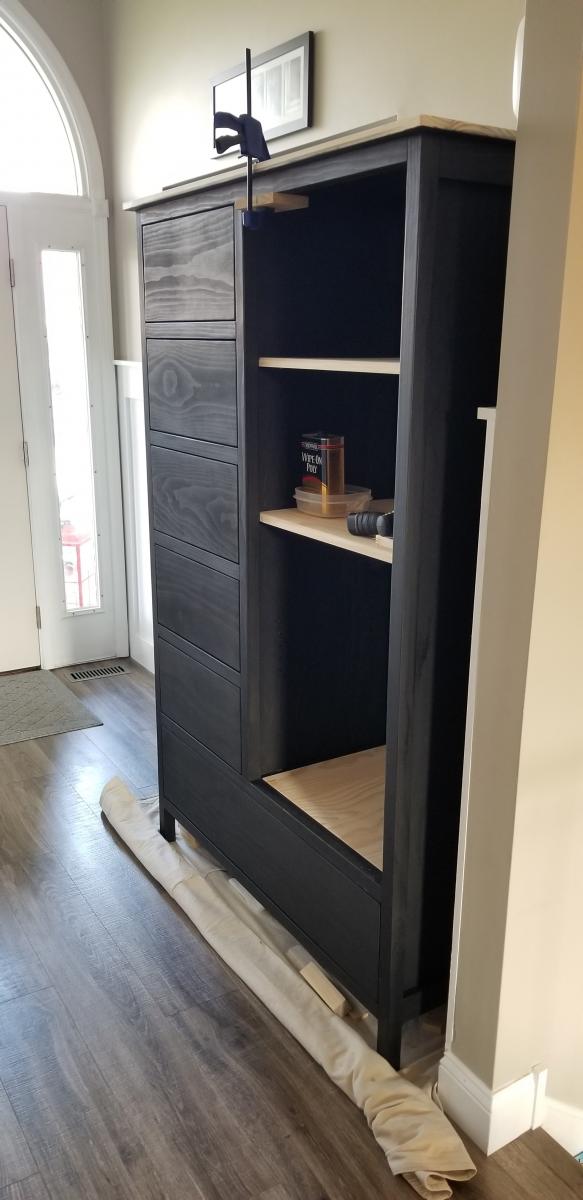
I modified the plans for the farmhouse hall tree to build this for our entryway. The farmhouse hall tree was a perfect base plan for this project! We went from a mess of jammed in jackets and piles of shoes to a clean and organized entrance! Thank you so much for providing the original plans! We love this!
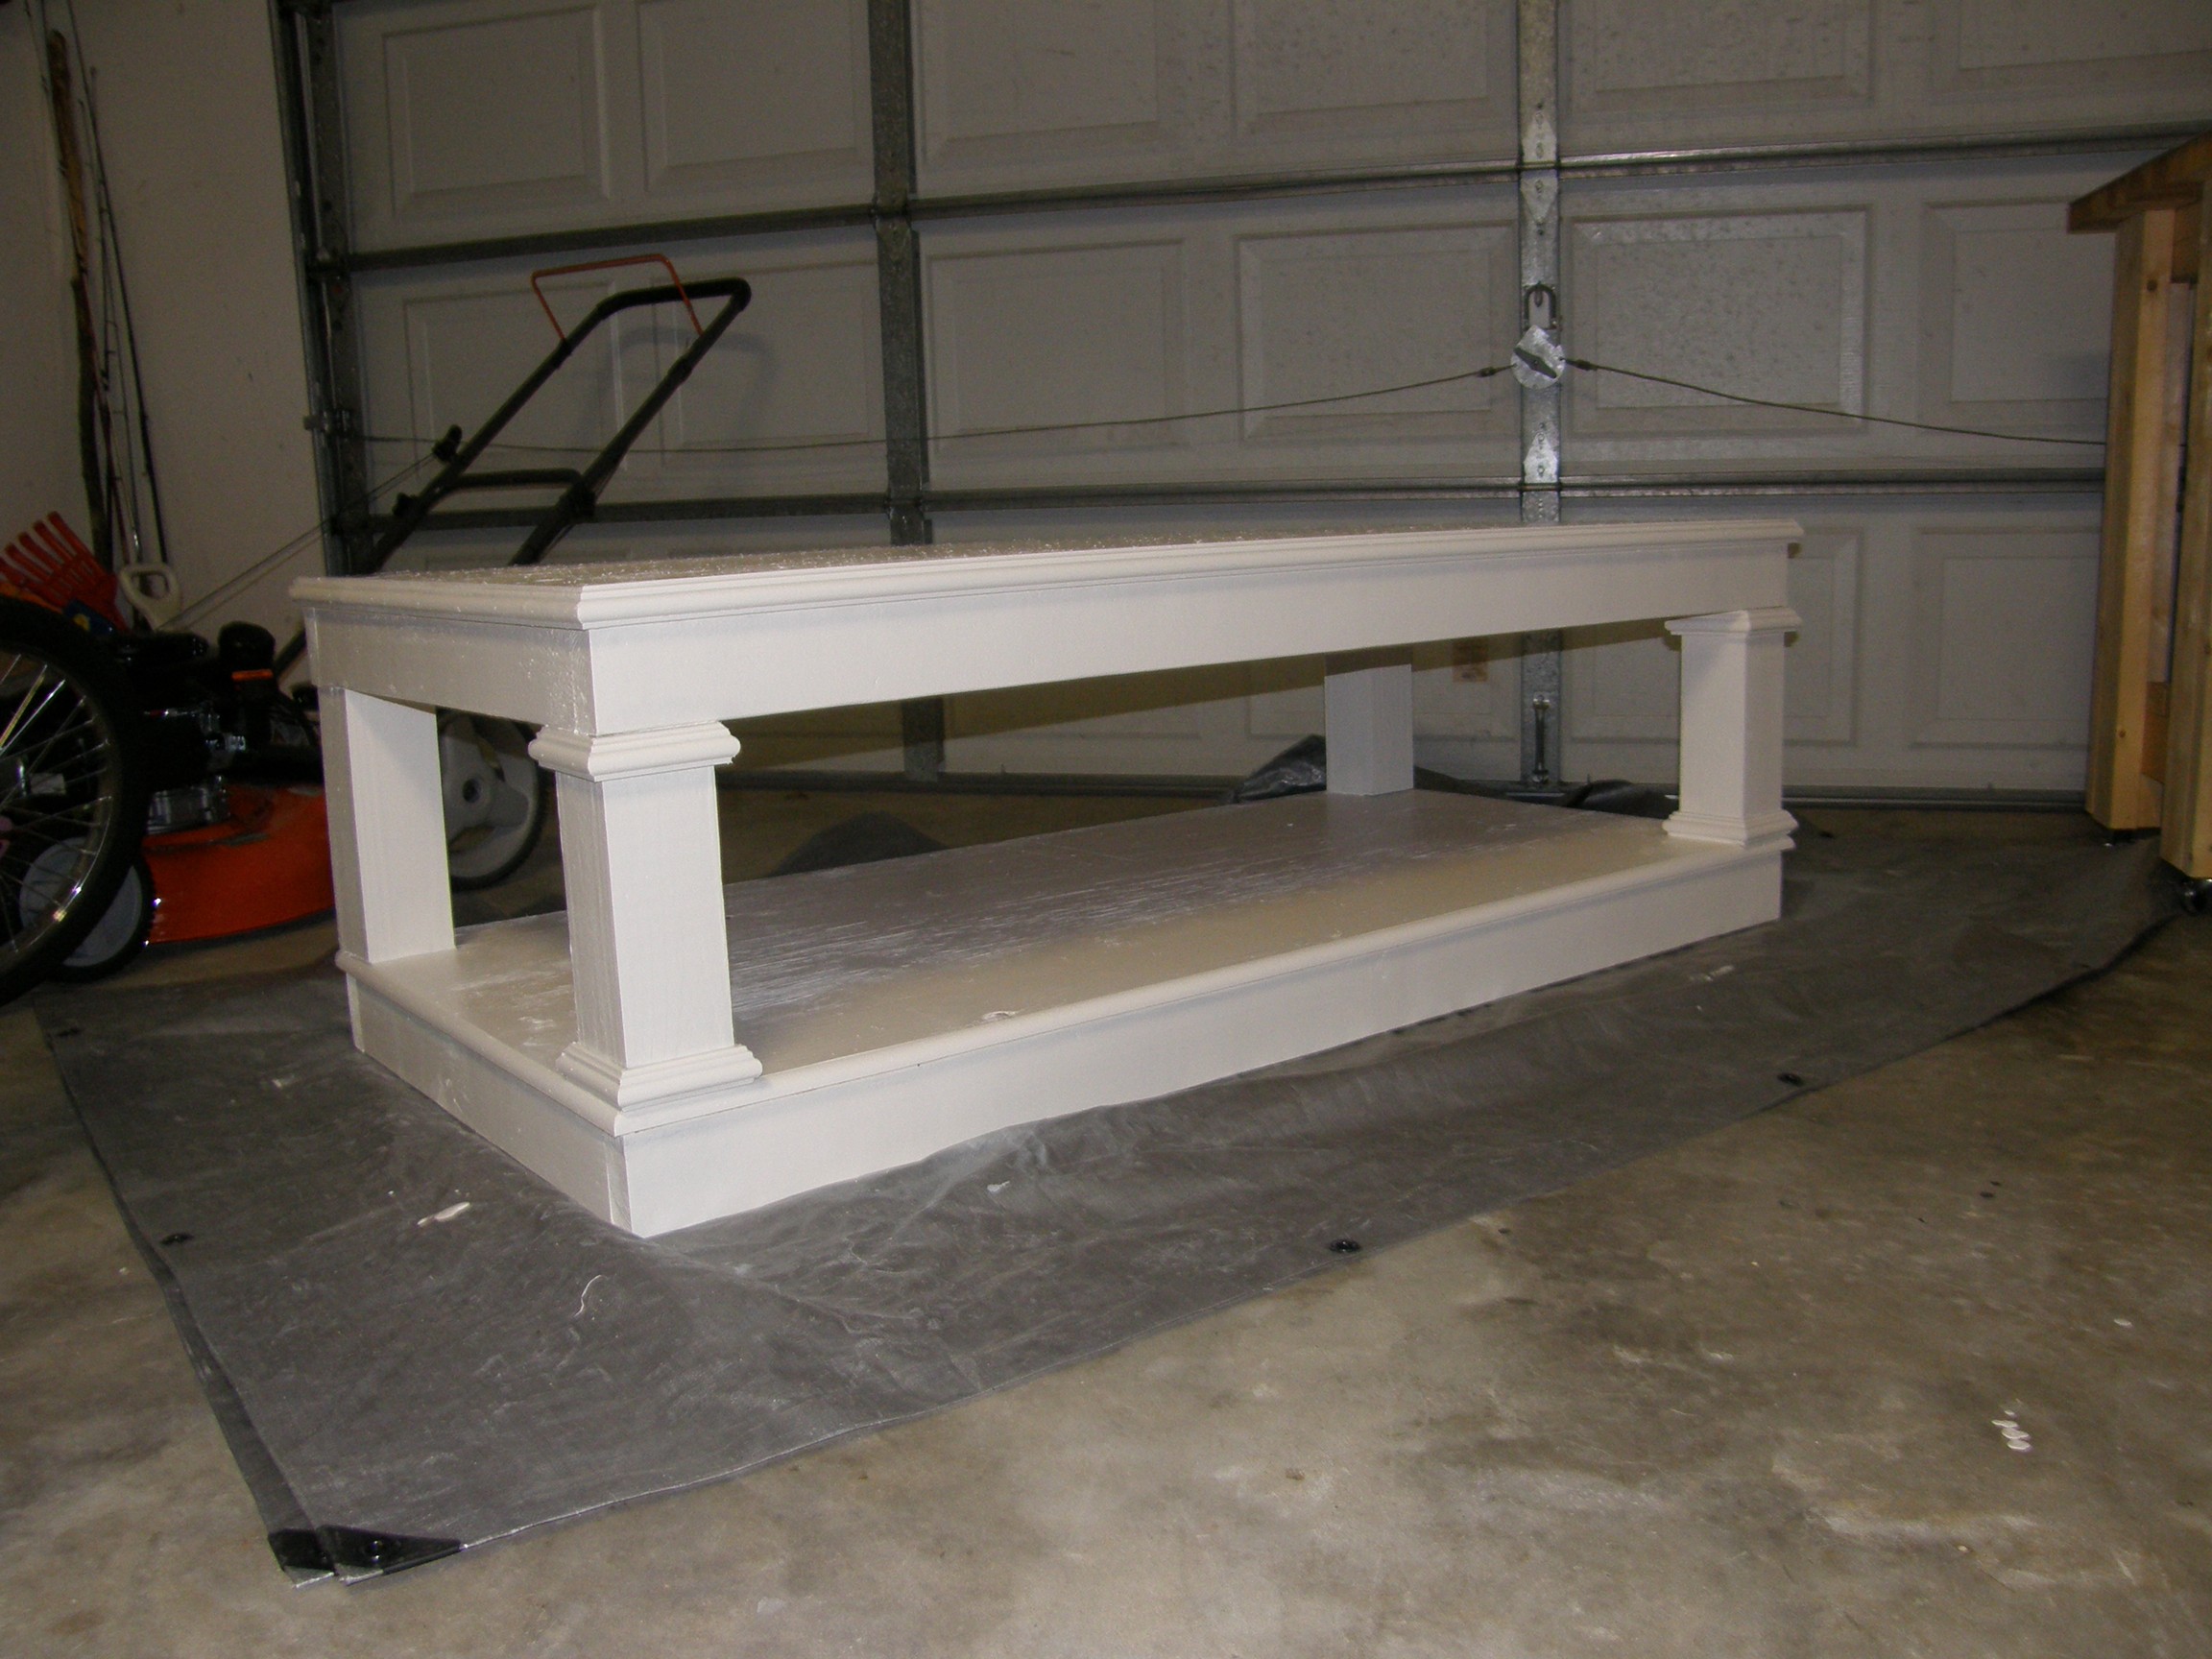
I liked Sausha's original design of the washer and dryer pedestals, but I wanted to add a few little personalized touches to it.
First, rather than using MDF, I went with plywood because of cost and weight. Also, I chose not to fill in the imperfections of the surface of the plywood. The top piece will be covered by the washer and dryer, and the bottom piece will be covered by baskets, etc. I like the look of the imperfections, as well.
Lastly, I spent an extra $10 on some additional cap molding for the base and the top, just to give it a more finished look. My wife chose white over black to fit the room better.
This was my first project and I am excited to build more!

My 2 year old daughter played in a playhouse at a farm and was just amazed by the "little house" every time we would see them at the store or driving down the road she would just scream "mom, its a little house, little house!" I knew I wanted to get her one and started to search. Couldn't believe the price of playhouse kits so I figured I could build it. This playhouse took about 2 weeks to finish but I only worked on it a couple of hours at a time just a couple times a week. Total cost for me for just the playhouse not including paint was $343.90. Thanks Ana for posting the plans and showing everyone that anyone can build!
easy to follow steps. Good weekend project for a beginner. I just got tools for Christmas and I tackled this without prior building experience. Excited for more projects
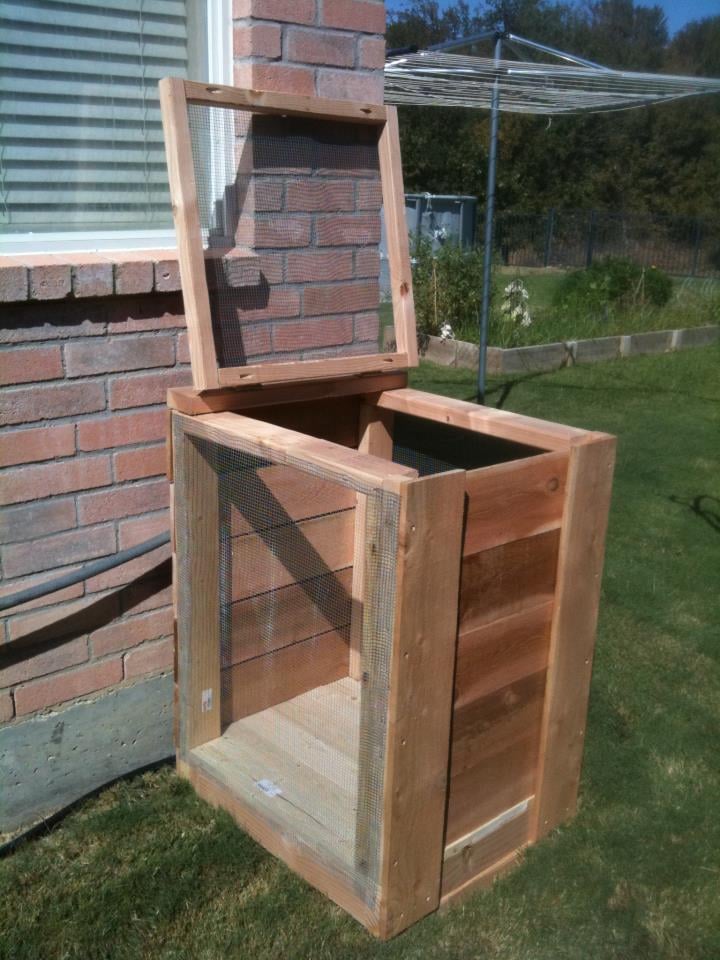
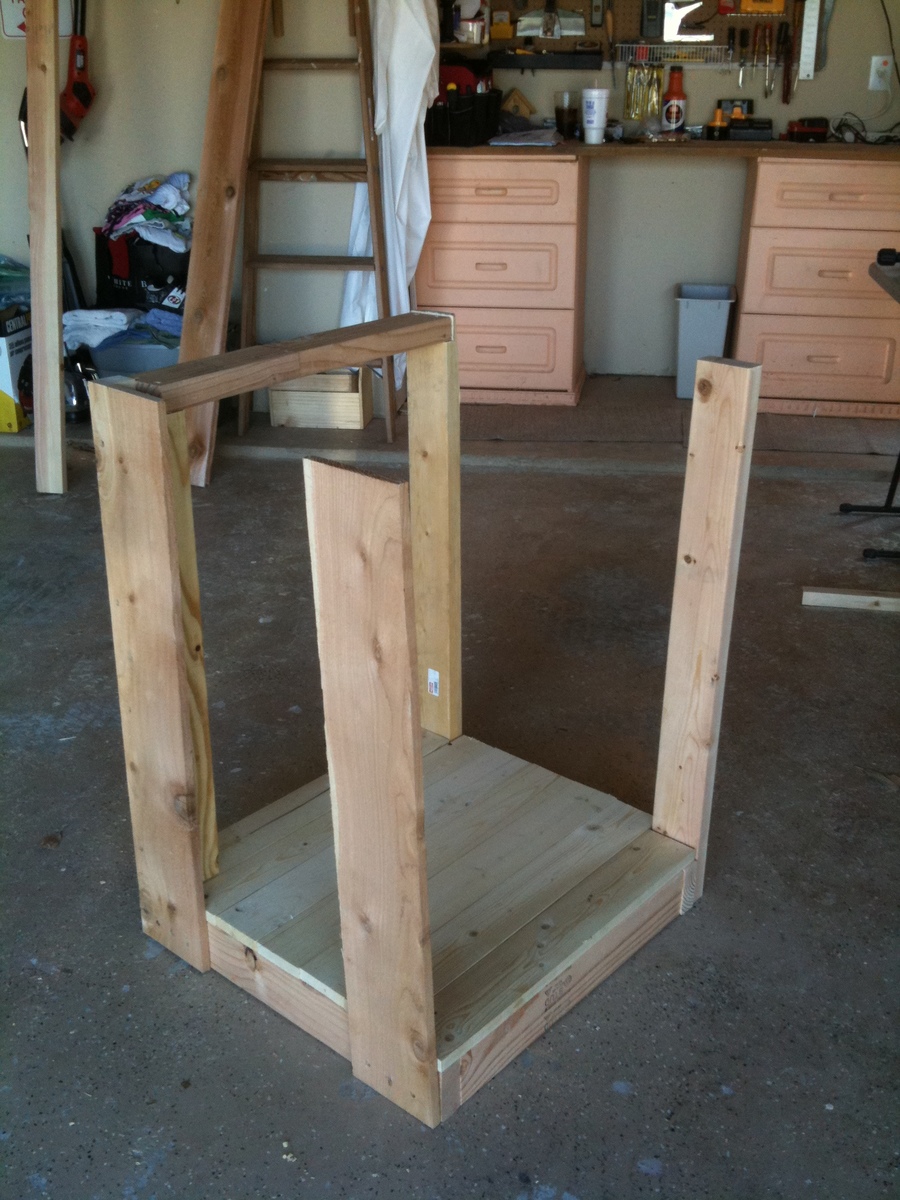
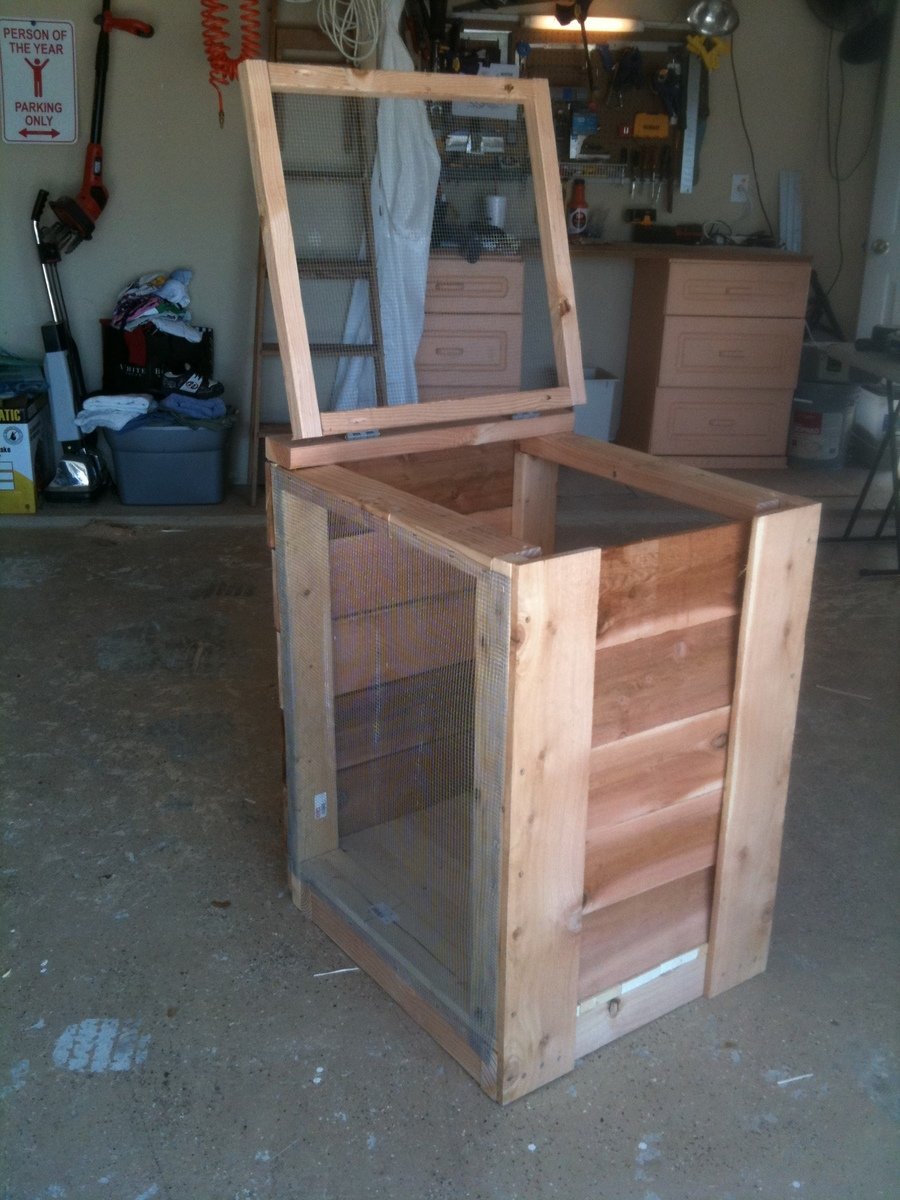
In my endeavor to be more green and self-providing, I started a backyard garden this past Spring. Thanks to the Texas heat, it was not as fruitful as I would have liked. I won't just blame the weather, but my novice status. I kept thinking I should have done more to amend the soil. So, I have been tossing around idea of composting to make my own nutrient rich soil and have a better experience with my garden next year. So, I found these plans online and I modified them down to a single 2'x2' sized bin. It also had to be mobile in that I could move it around my yard if I need to find a better place for it.
From Plan: Build A Compost Bin www.lowescreativeideas.com
http://lowescreativeideas.com/idea-library/projects/Building-a-Compost-…
Estimated Cost: $20 for Lumber $13 for Hardware Cloth $14 for Galvanized Hinges
Estimated Time Investment: 3 hours
Required Skill Level: Intermediate
Type of Wood: Cedar and Pine
Finish Used: Natural/Matt Finish
I was able to use some left over wood for my project, but the estimate above would represent all wood being purchased. I was not really happy on the price of the galvanized hinges and I used two of them at $7 each.
The plans also called for 2x6's for the bottom, but that sized plank would have made it very very heavy and to me the whole point of having a bottom to your compost is so that you can move it if need be... so I use 1x4's
Since I didn't want my compost to come into contact with pre-treating chemicals, I did not use pretreated wood. Instead, I put a light coating of a matte finish on only the wood that would stay in contact with moisture. Otherwise, I want the cedar to mellow and age.
My final cost was about $40 using some left over wood. In one case, I actually used my Kreg Jig to create a 2x4 of appropriate length with some of my scraps. Worked beautifully. Also used it on the lid, as you can see in the picture.
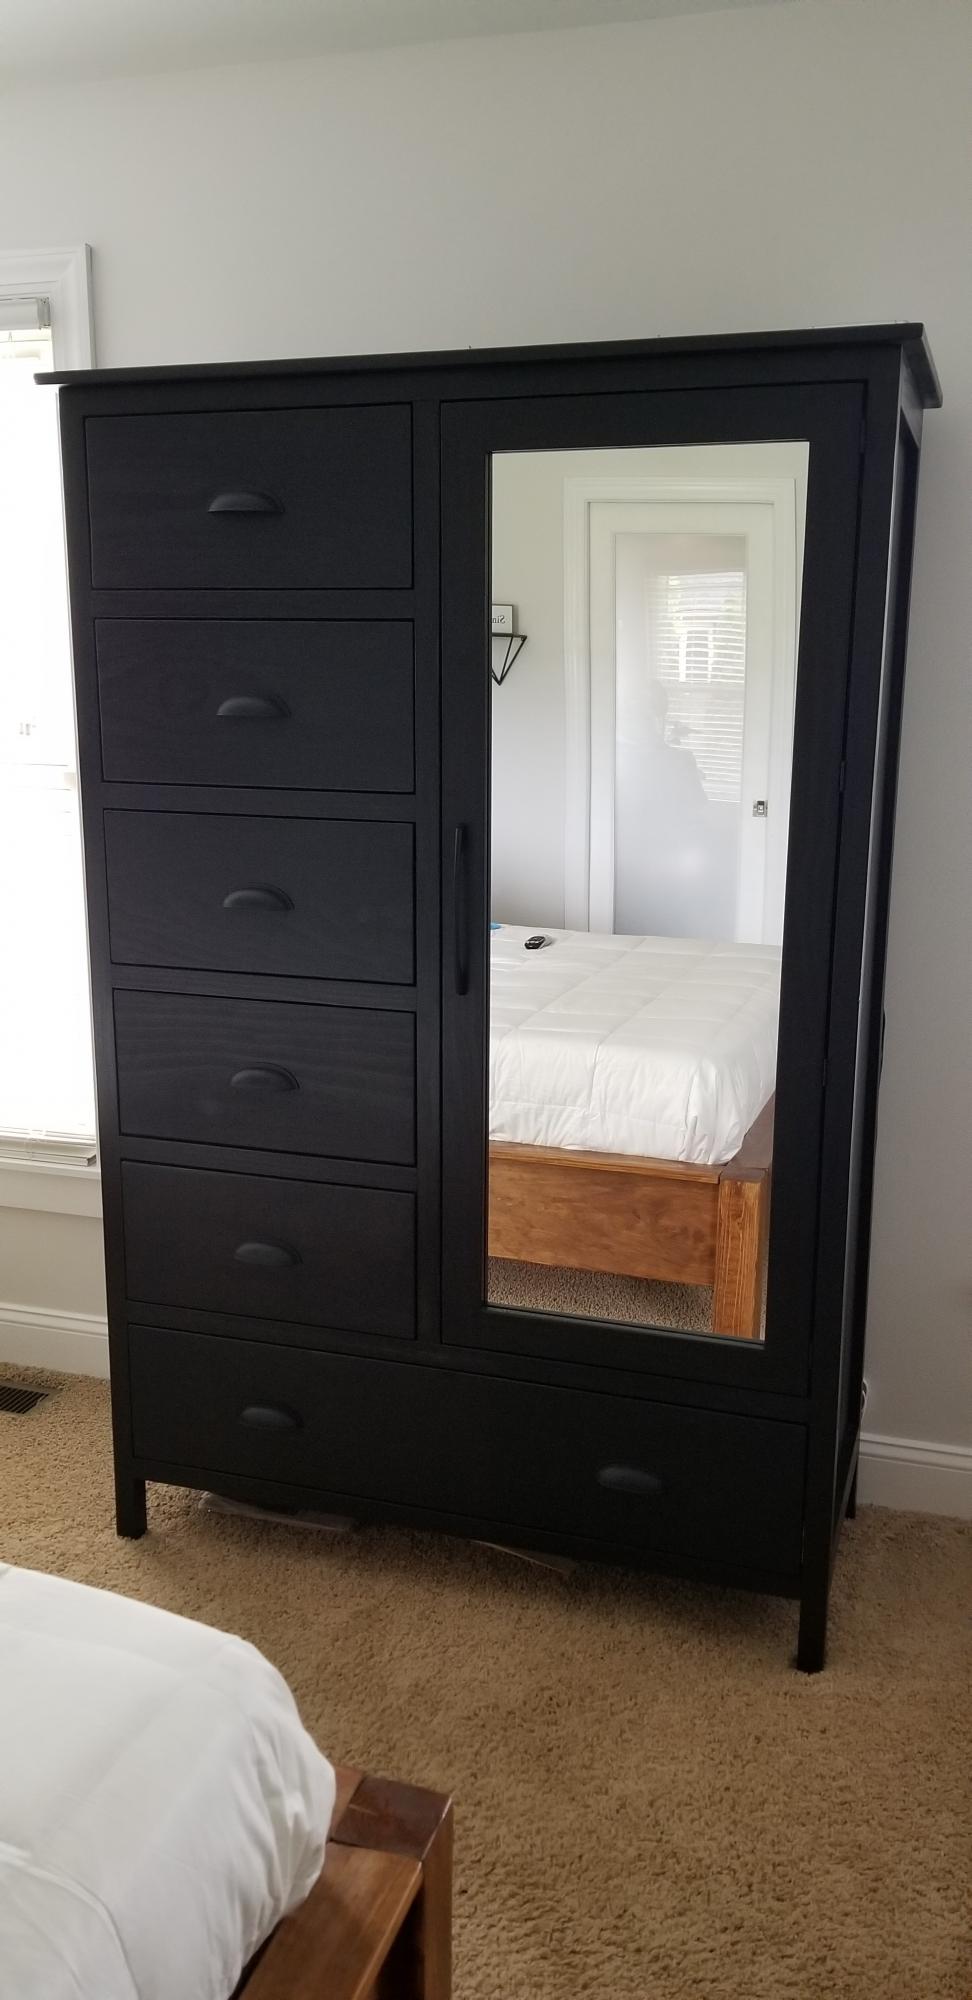
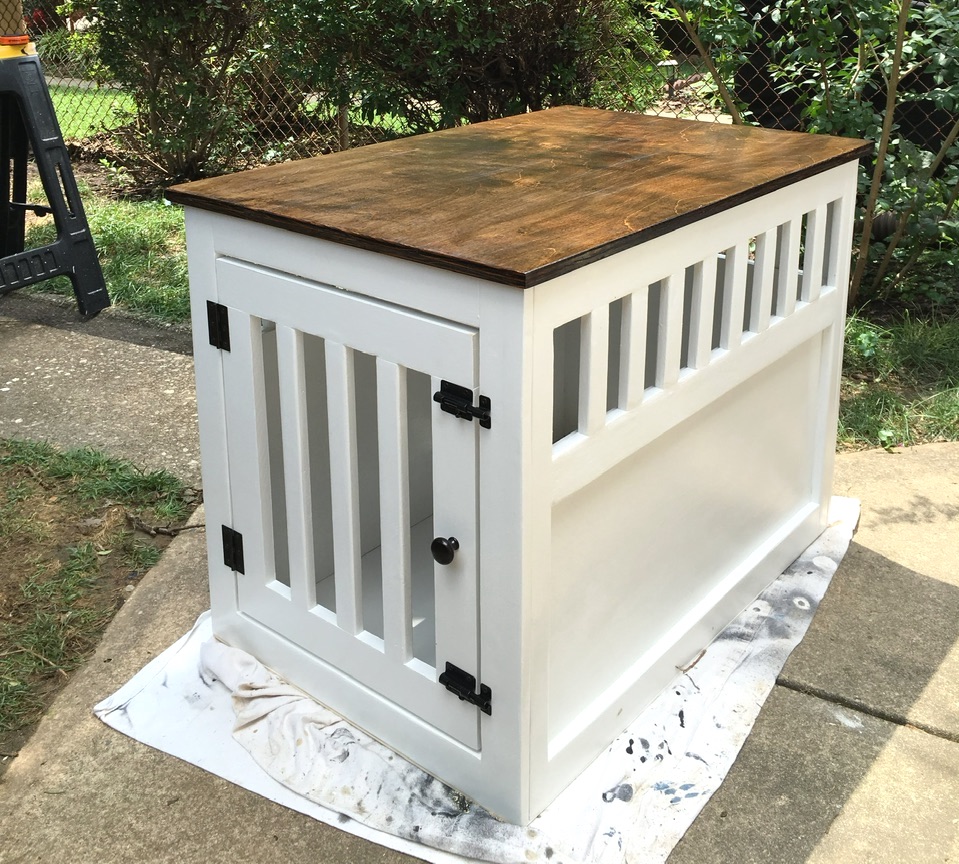
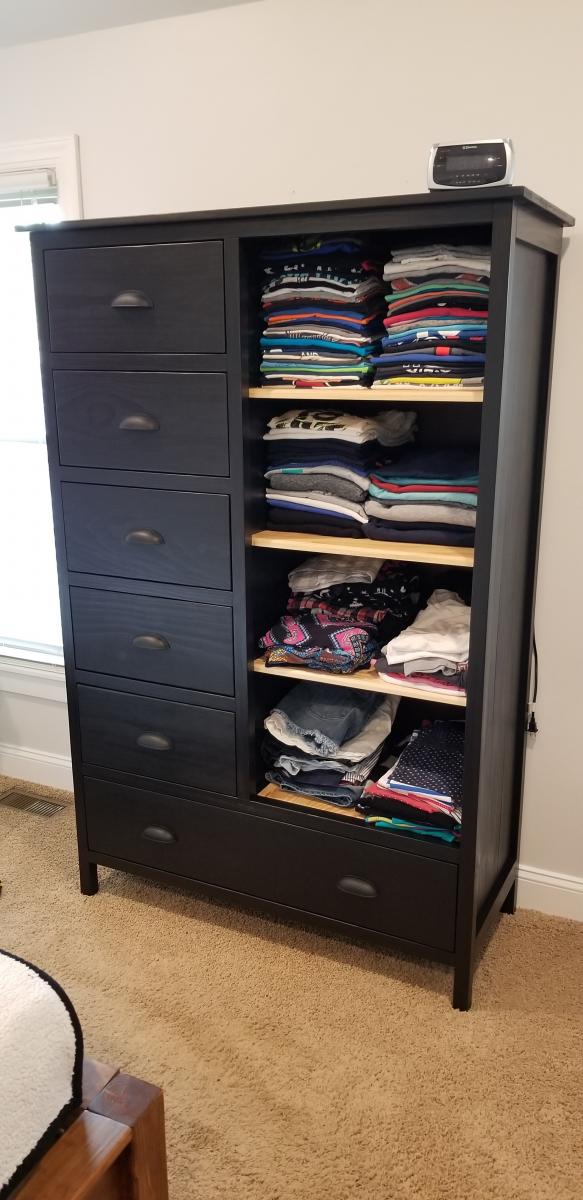
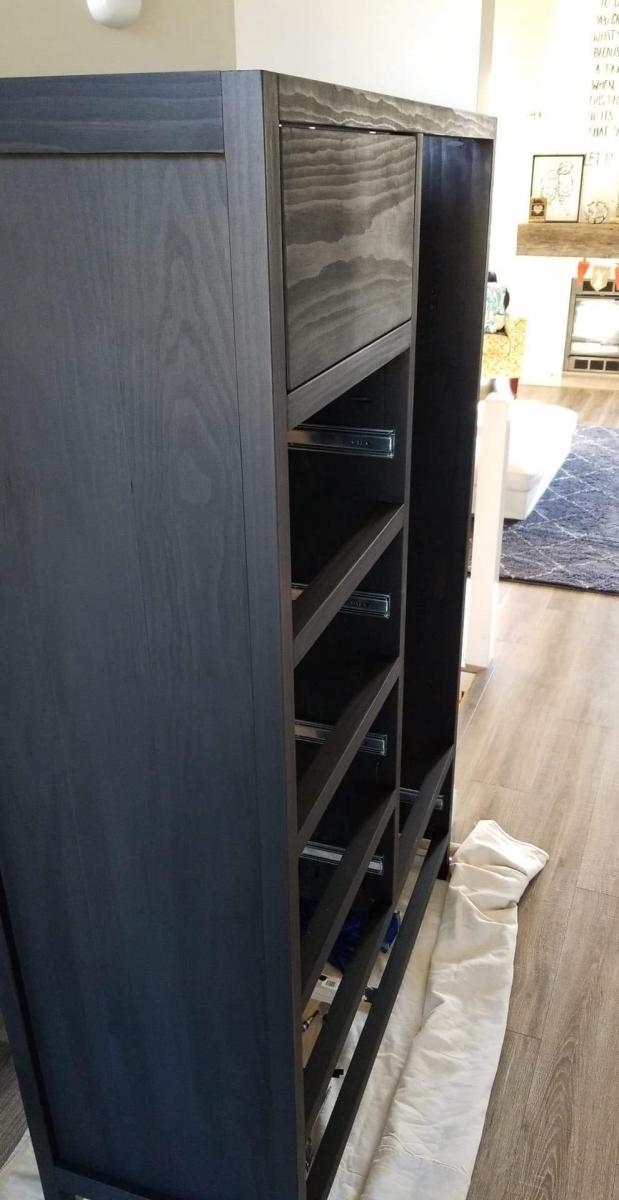
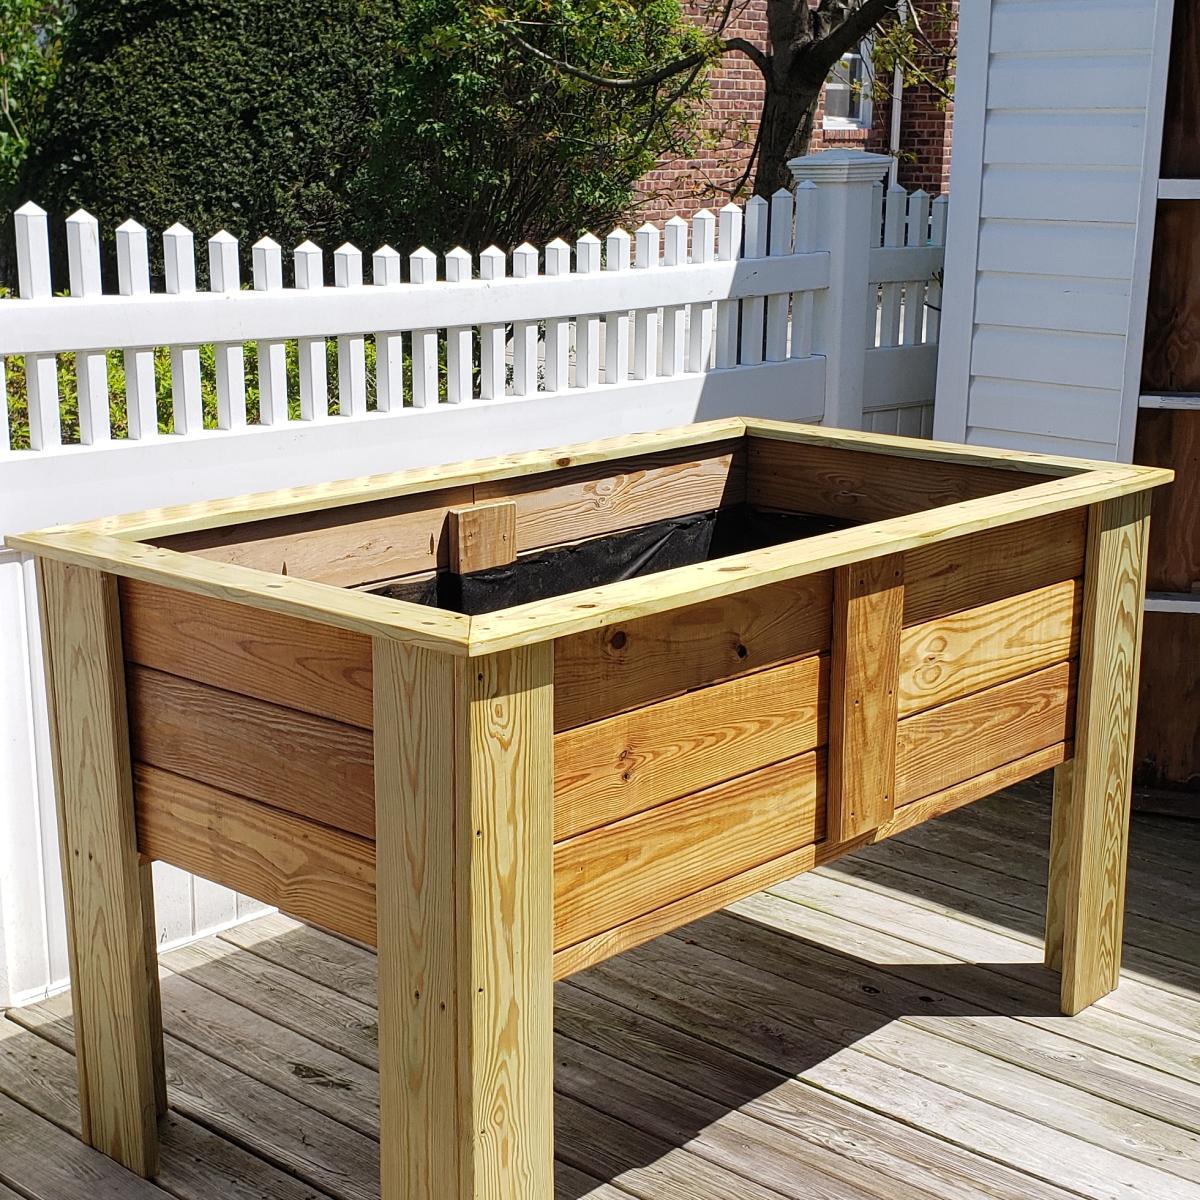
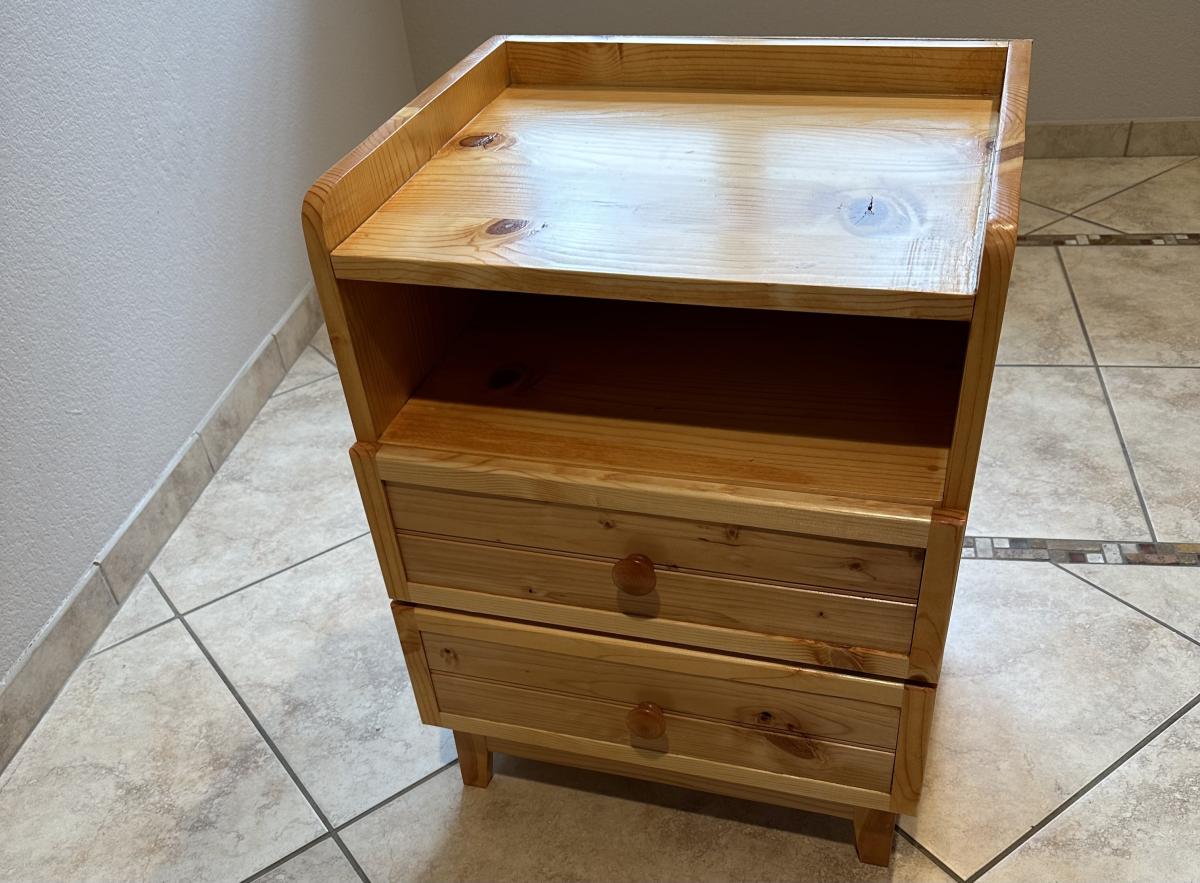
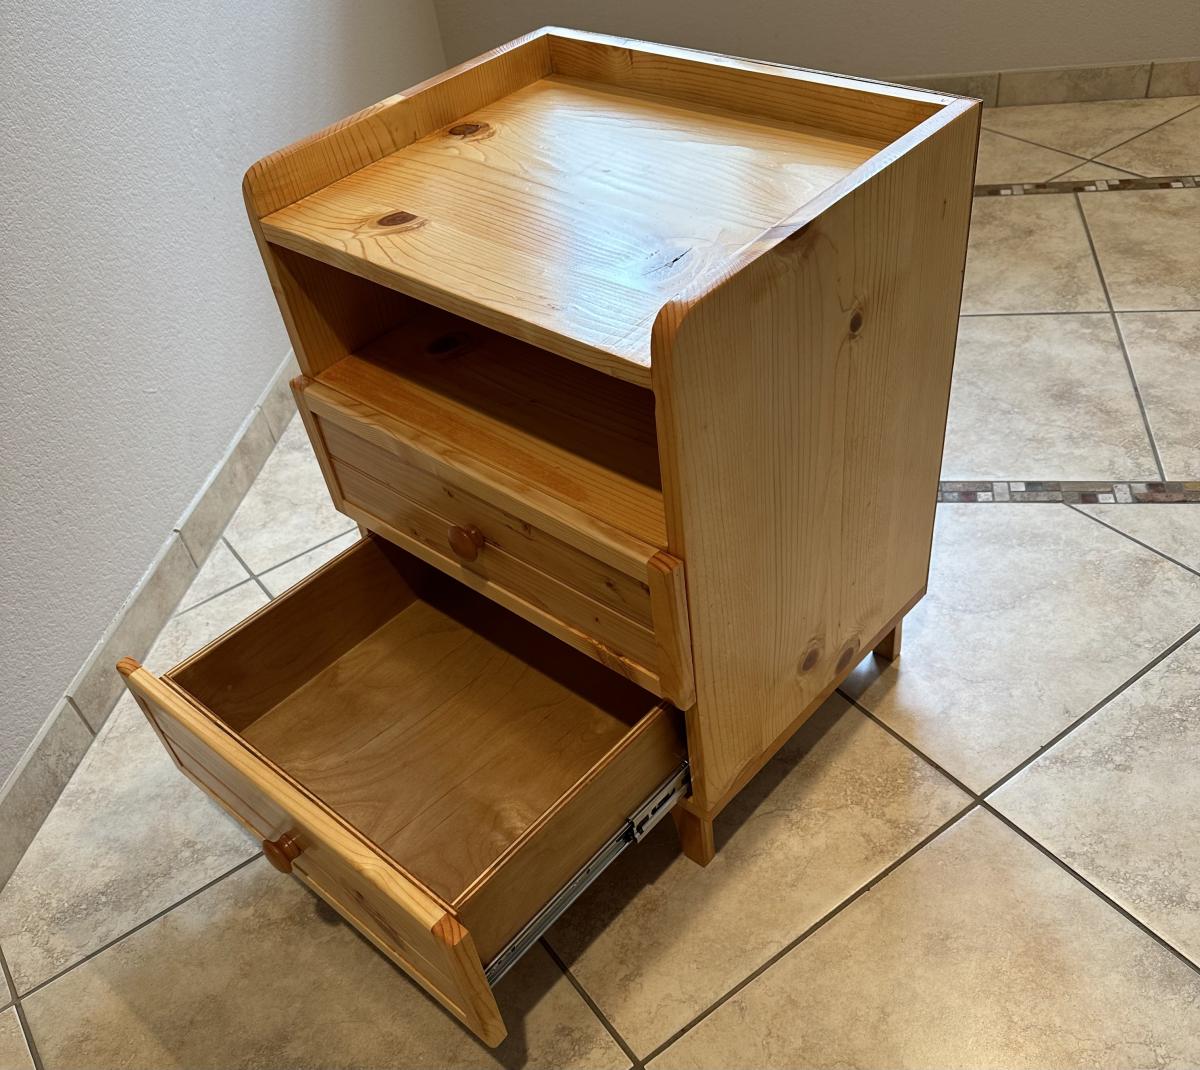
I didn't find plans that I liked on this site but I took what we had and modified it to be taller and wider. Drawers are also a lot deeper. This was a really tough one for me as there was so much going on but in the end, this came out absolutely amazing!
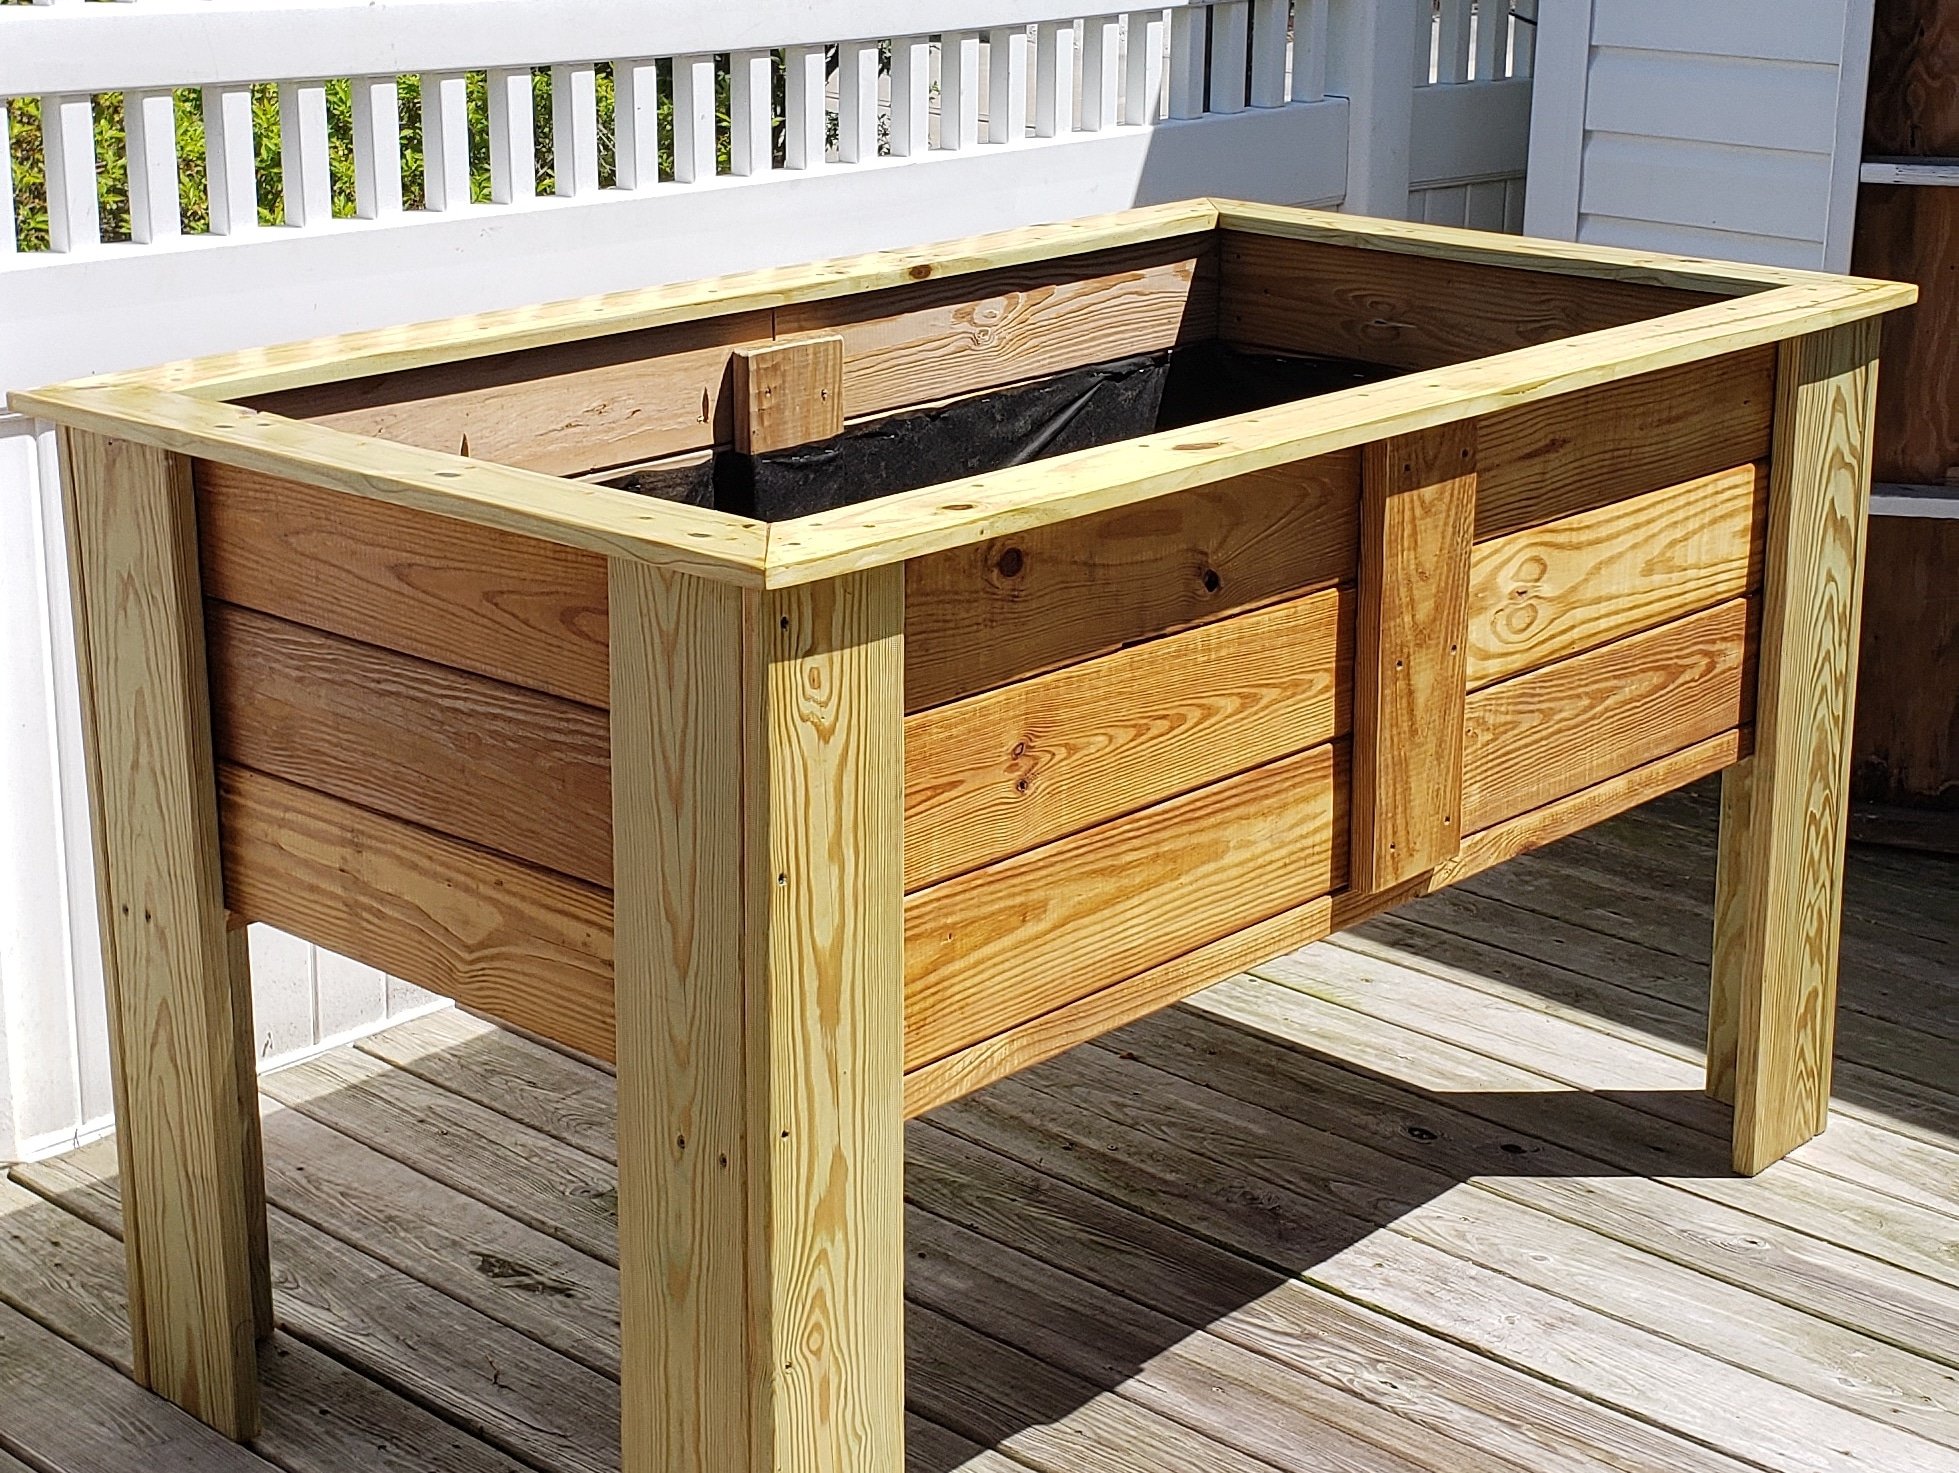
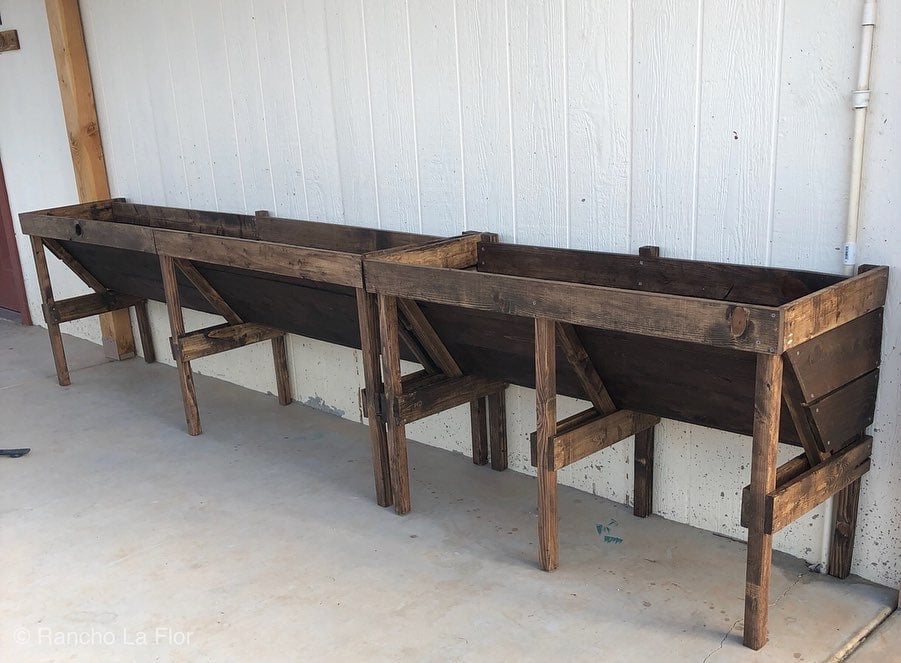
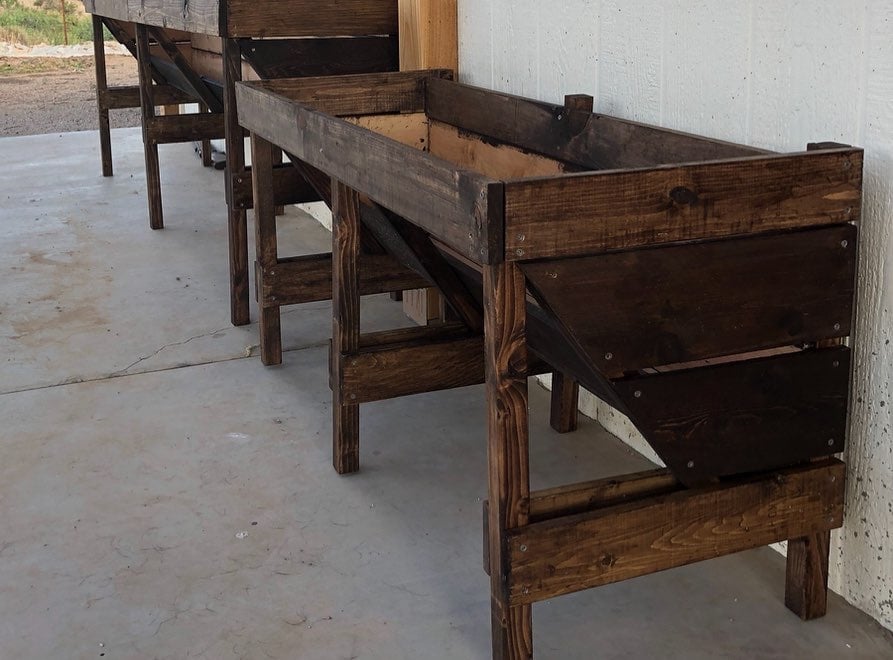
A friend of mine has issues with her knees but loves gardening so I built this to allow her to continue gardening. She loved it.
I didnt follow any particular set of plans I watched several you tube videos and combined different ideas from the videos to develop my own plan.
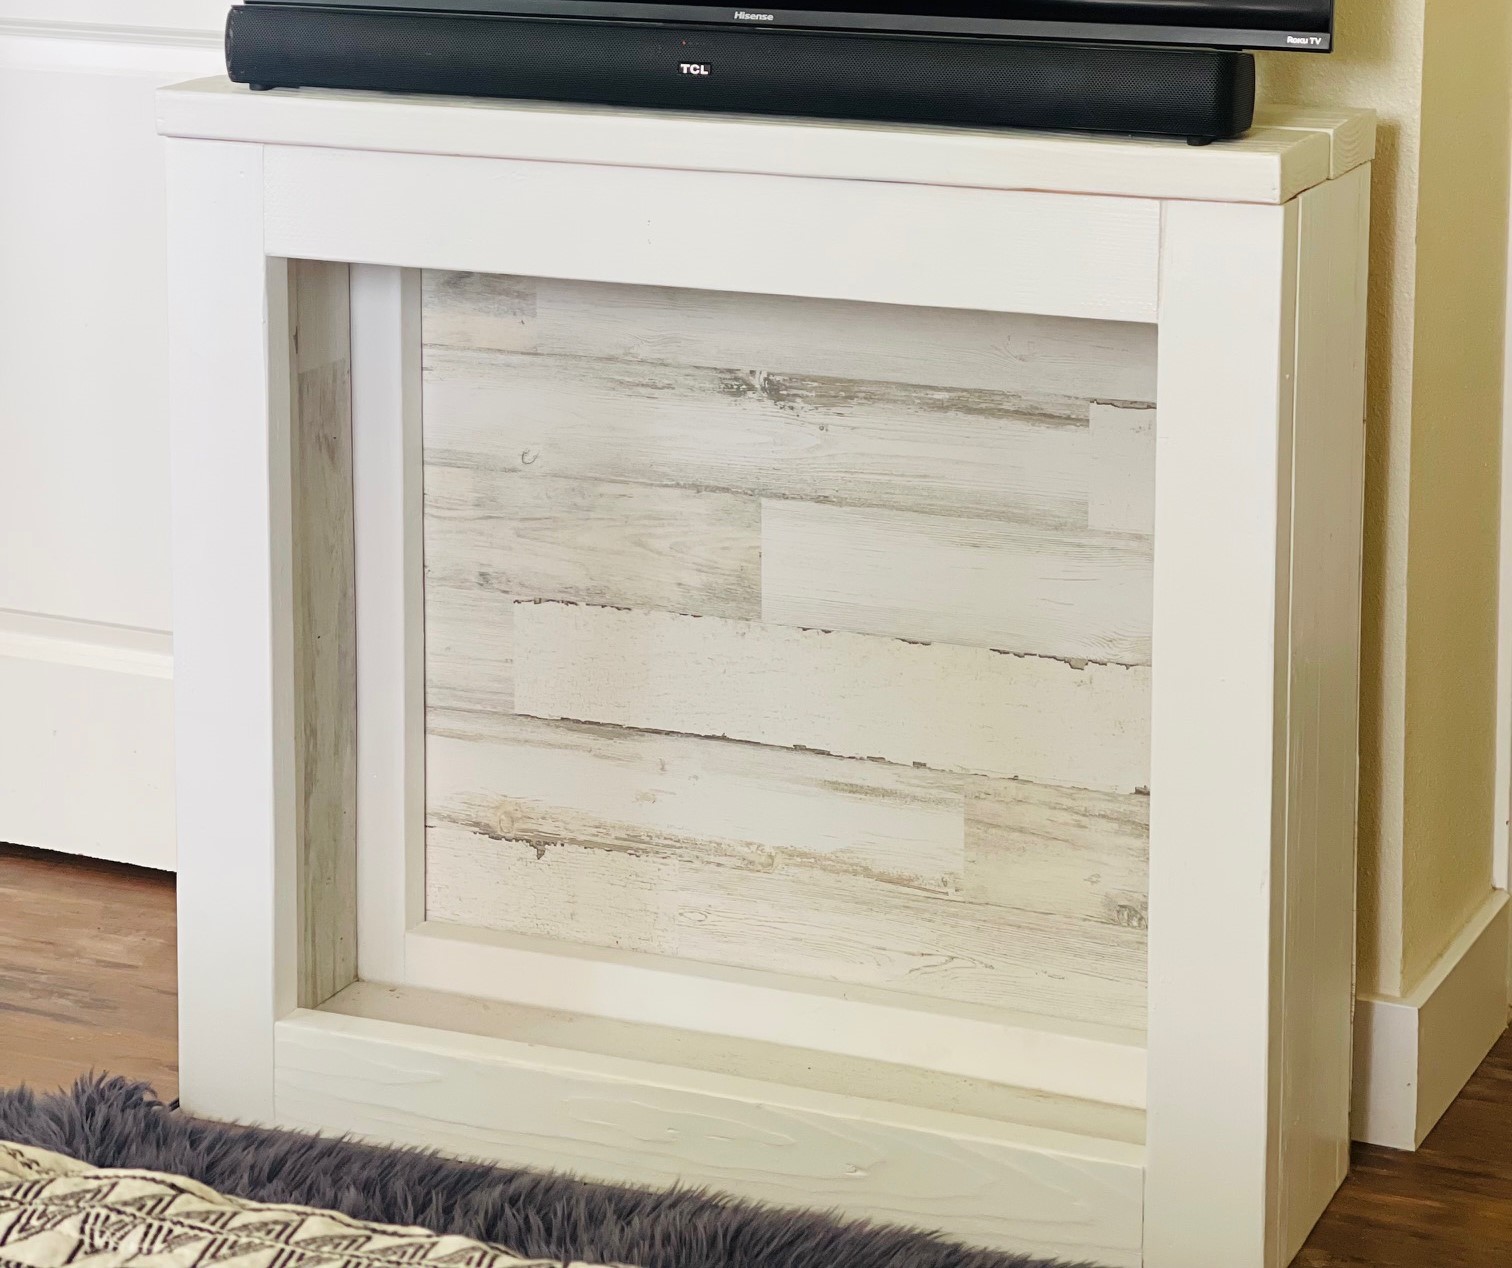
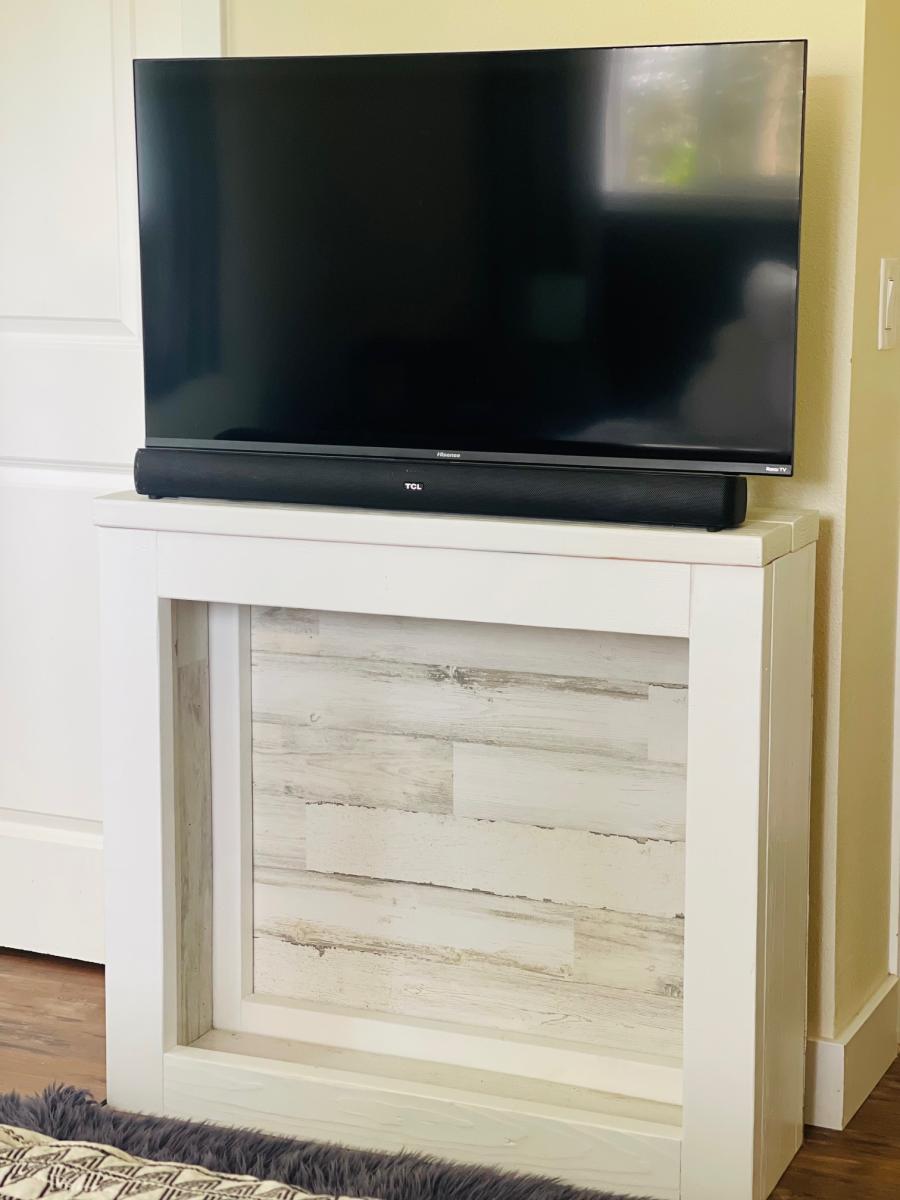
I had an idea to stack 2x4's for the main frame and then just use a piece of decorative paneling for the back and inside. I needed a place to set my tv against the wall in my room, so I built it to fit. Simple project that got the job done - more projects at Family_DIYnamic.

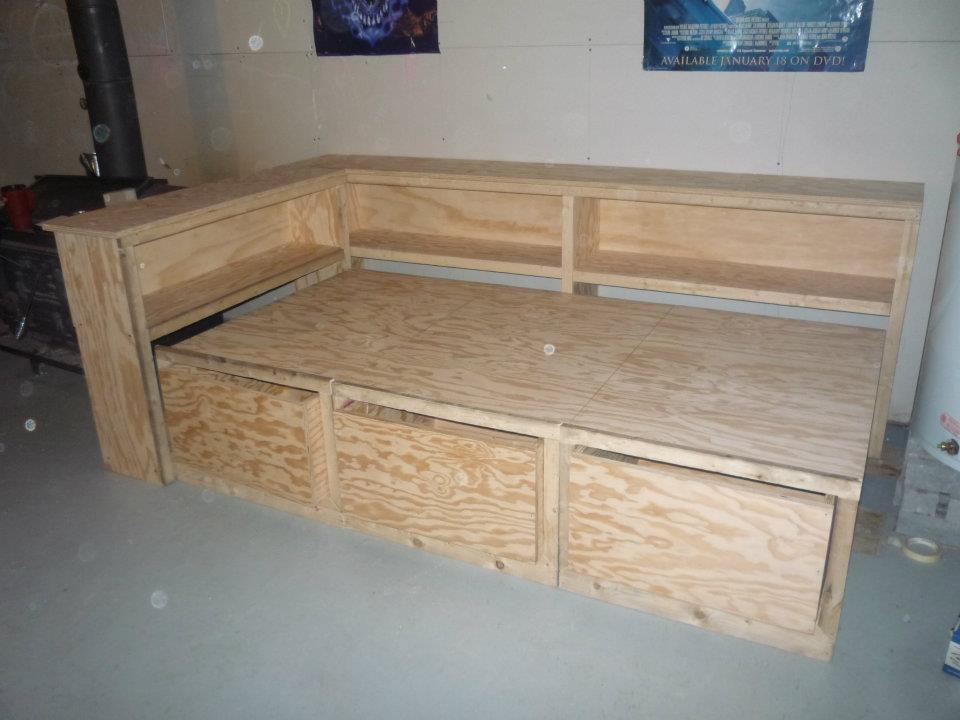
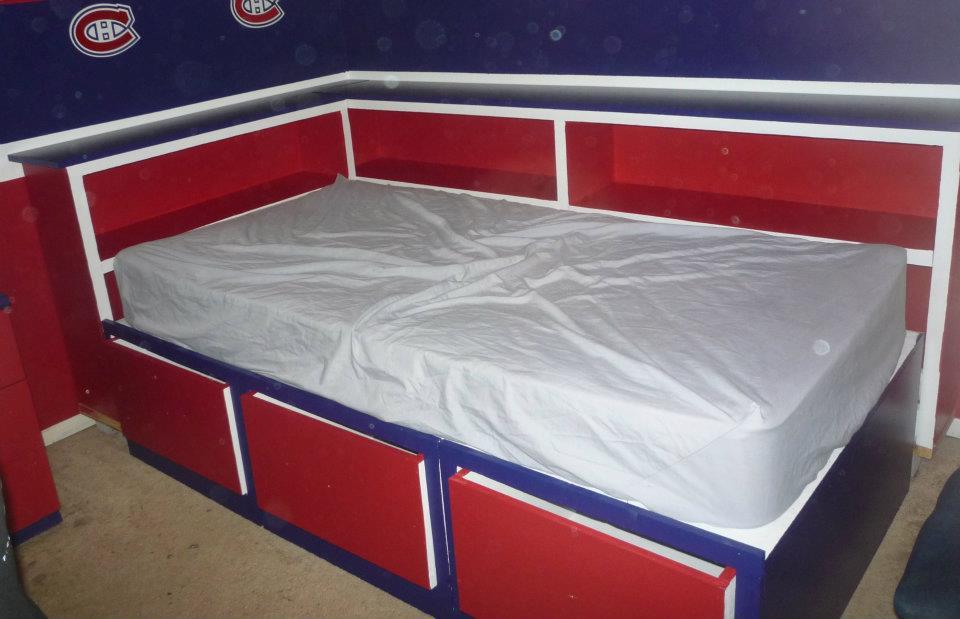
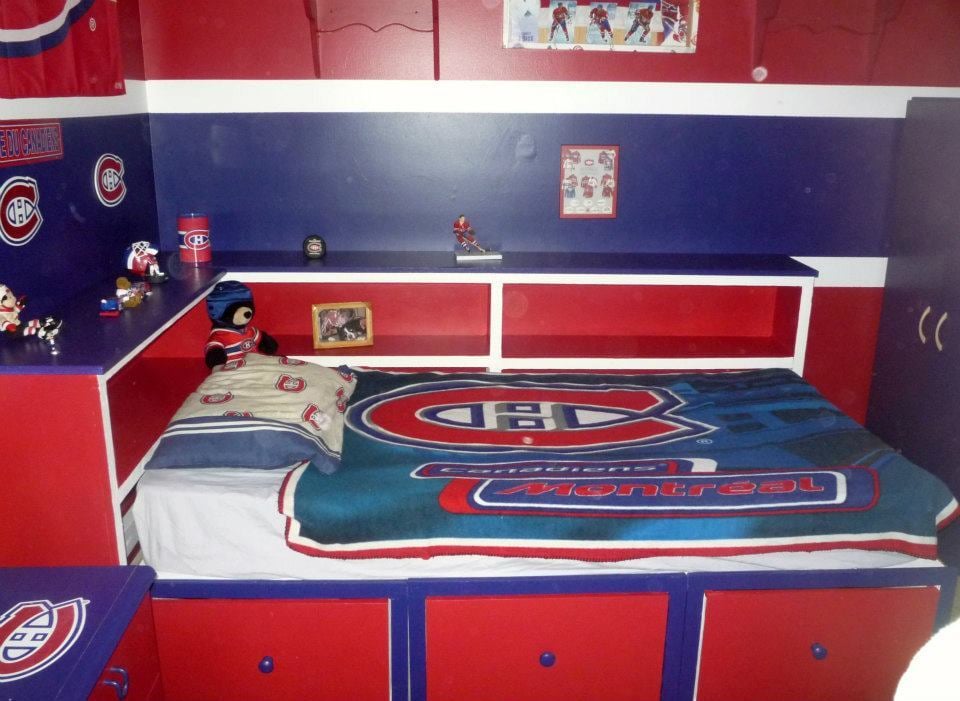
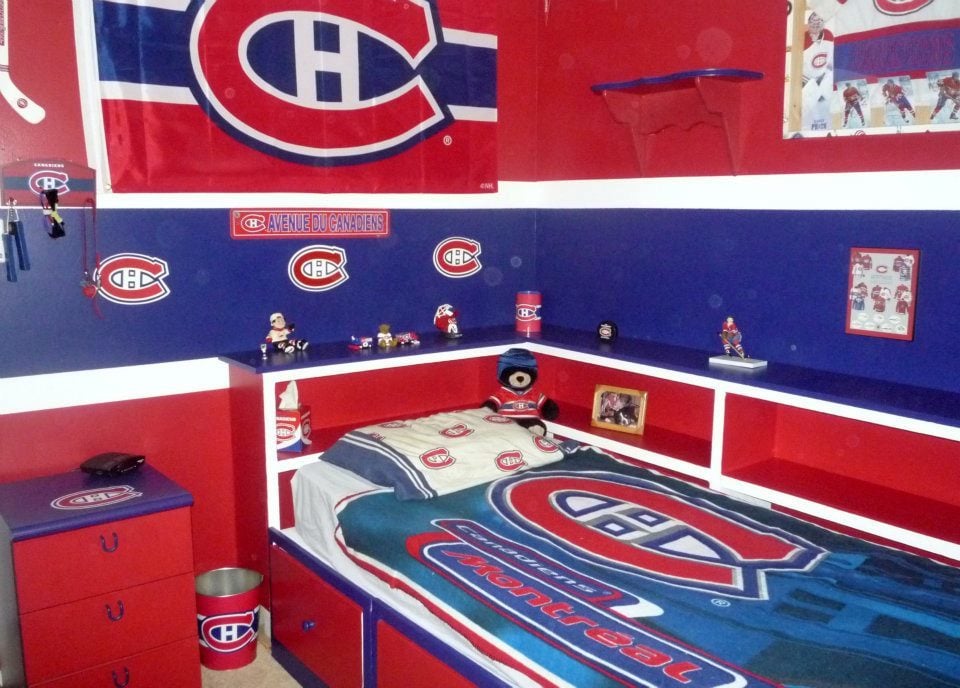
Our nephew Nathan really wanted a captain's bed like his friend. We built him one even better for Christmas this year. I couldn't find one plan with everything we wanted to I used the plans for the Storage Daybed for the base, and used the plans for the Cozy Corner twin bed collection wide bookcase unit. We combined both the headboard and sideboard into one unit (by extending the top to the short end) giving him an L shaped headboard for all his hockey stuff :) The only thing we messed up on was the height of the bookcase. He wanted it higher so it's on blocks for now to raise it. My sister did all the final painting to match his room and it looks AWESOME!!!
Steve had everything cut at work and we put it together in one 12 hour day! Nathan LOVES his new bed. Thank you Ana!

Fri, 01/06/2012 - 16:52
That is one nice, cool looking bed. Interesting colors, is it his school colors? I've never thought of painting plywood, you've given me some ideas.
Fri, 01/06/2012 - 21:24
The colors are the official Montreal Canadiens hockey team's colors, My son is a HUGE fan! Nathan LOVES his bed. and it is very solid.
Fri, 01/06/2012 - 20:29
Ummm... The bookcases were too short because you didn't take the mattress height into account. Looks really good though.
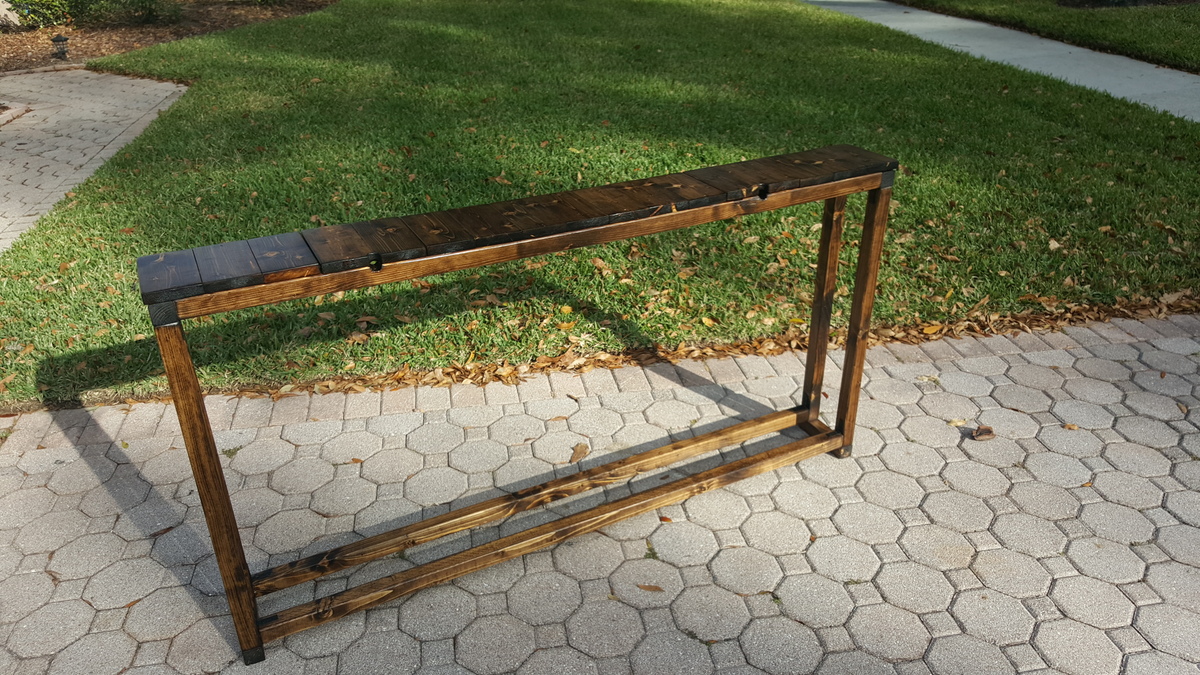
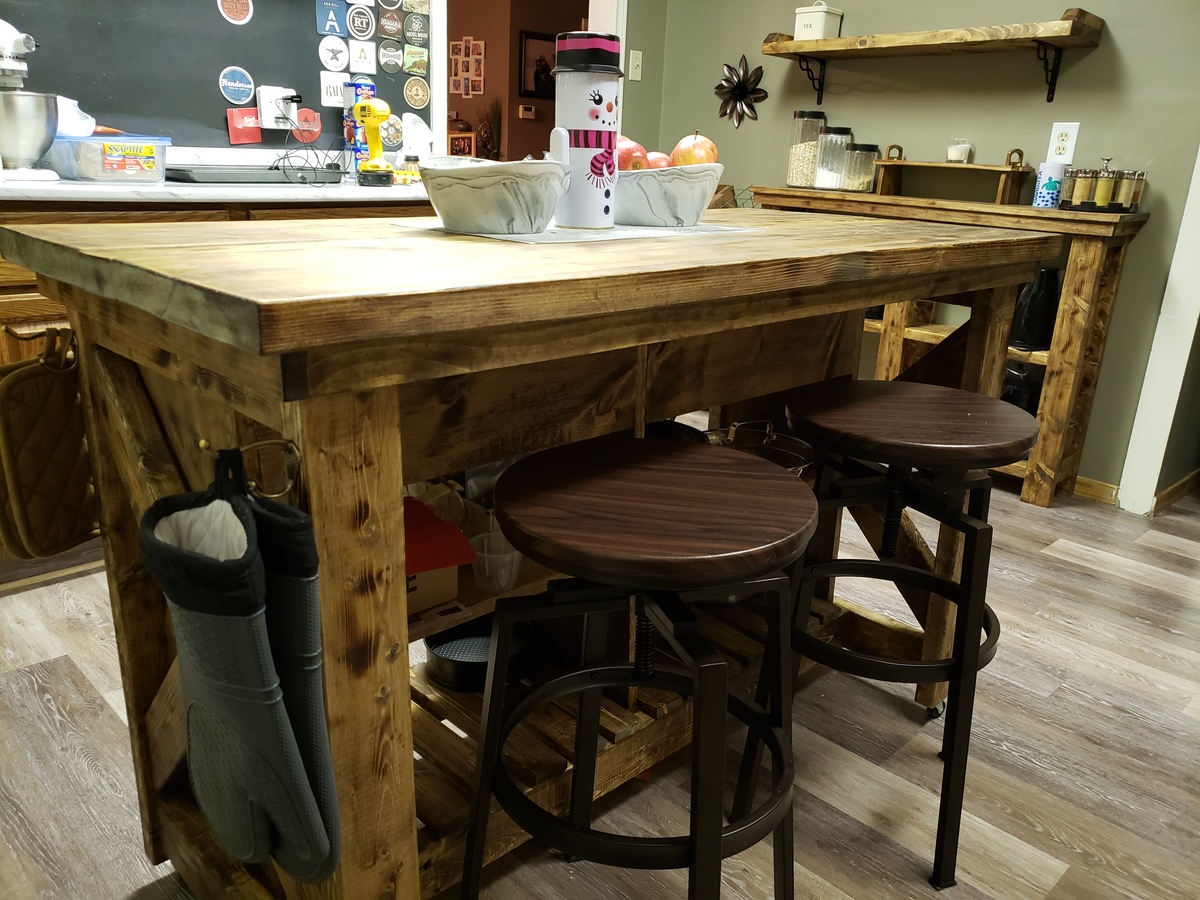
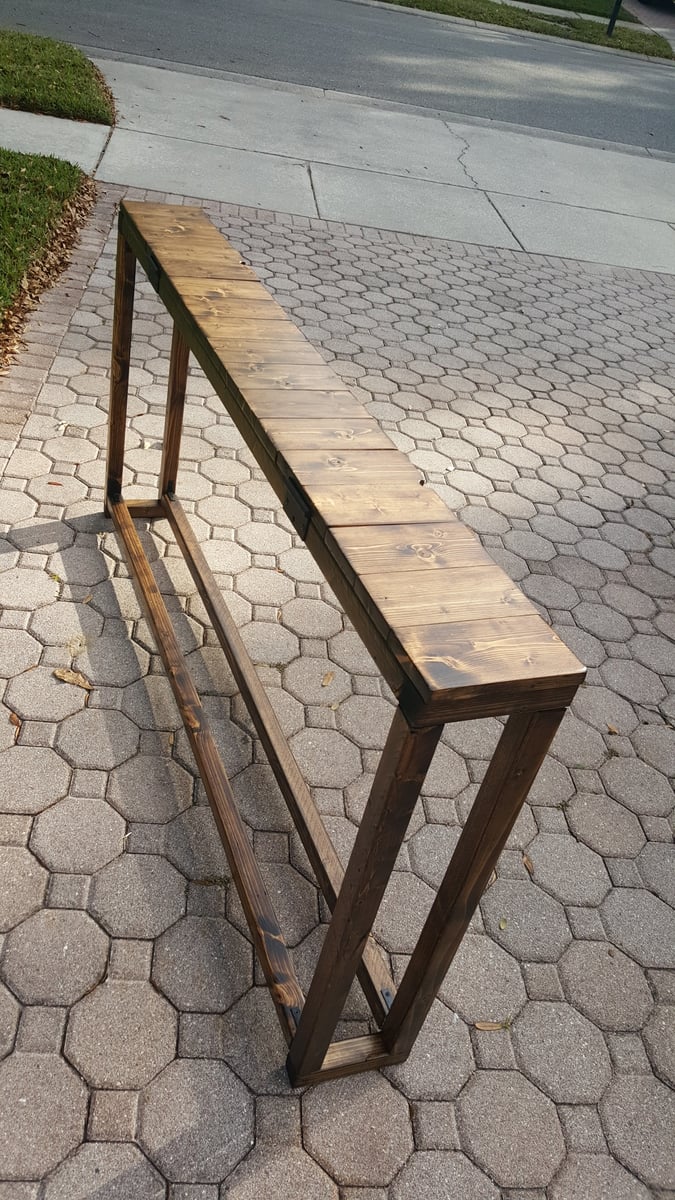
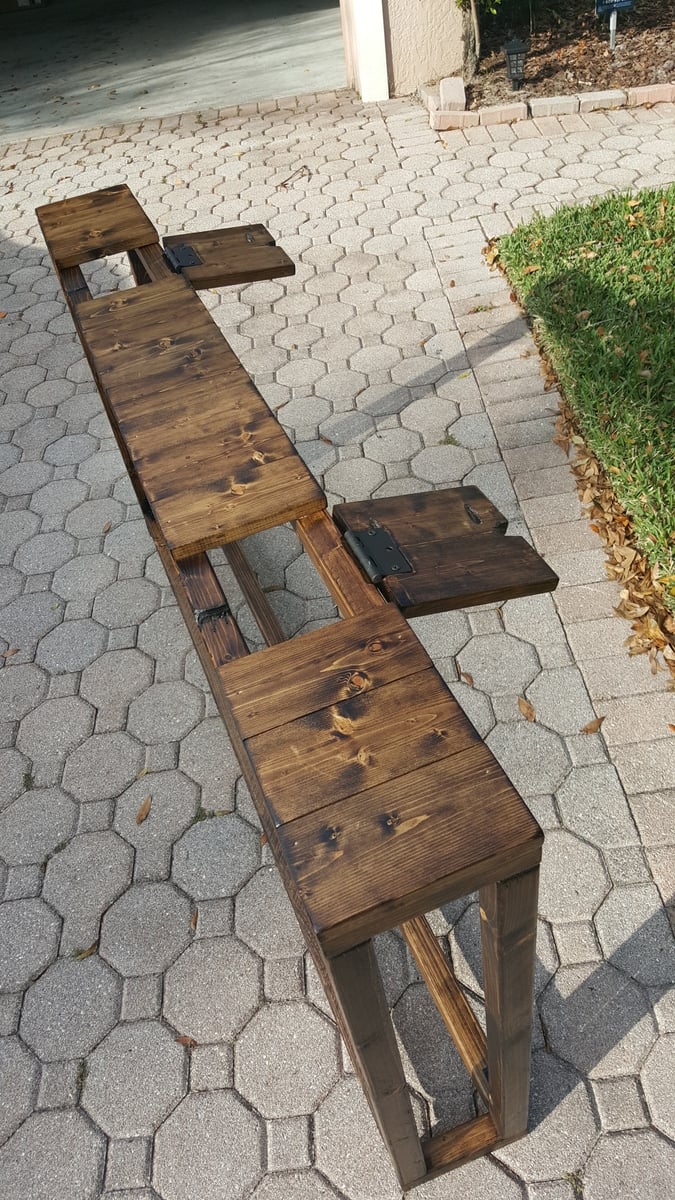
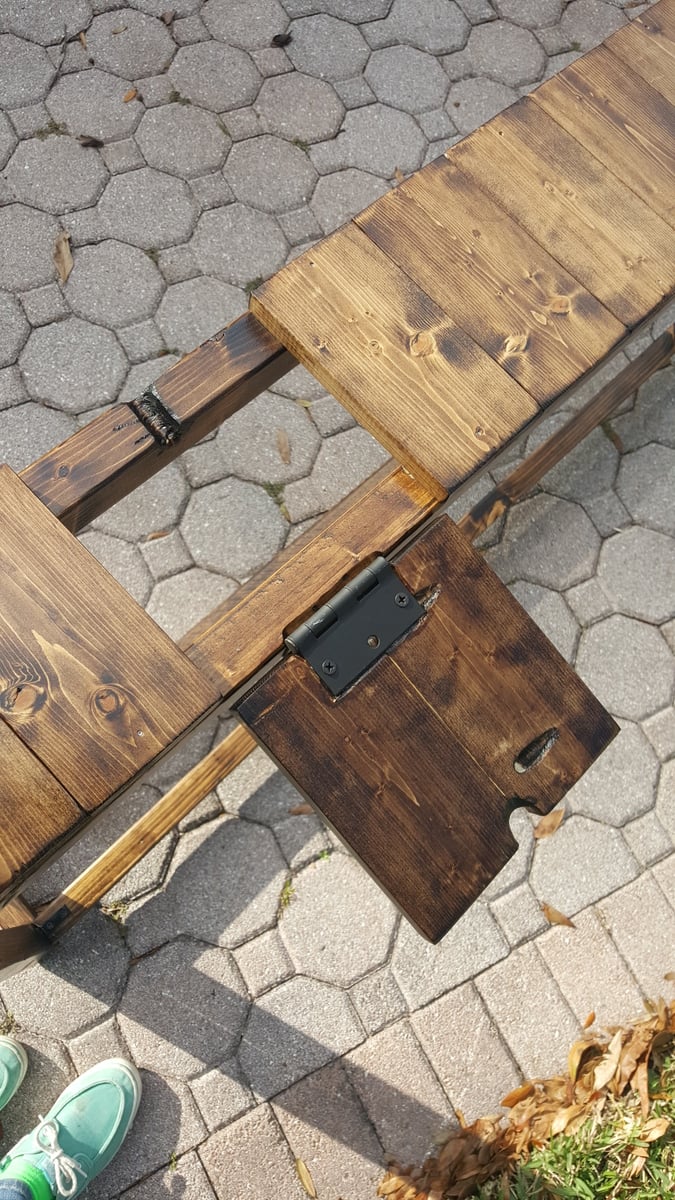
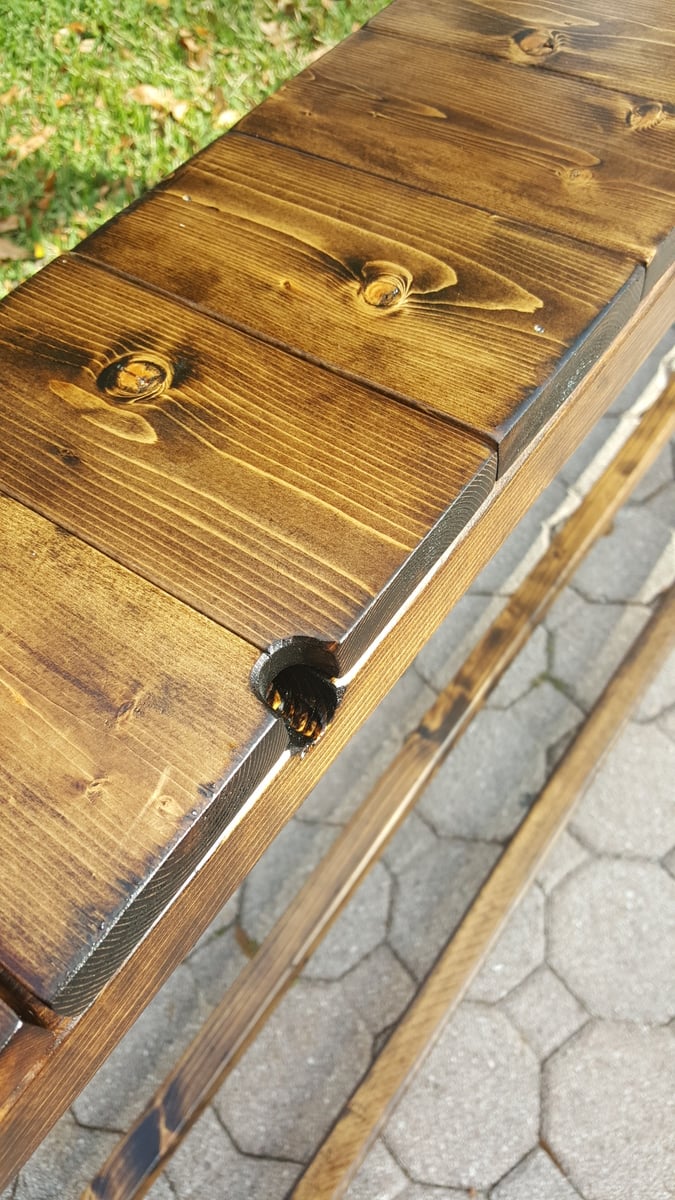
I based this design of the simple Sofa Table by Jenna Sue. Instead of a 2x8 across the top, I opted to use 1x4s side by side. This slatted look matched some of the other items in the house and to allowed me to create two hinged sections. These sections allow for easy access to wall plugs and include small notch for the cables to come through.

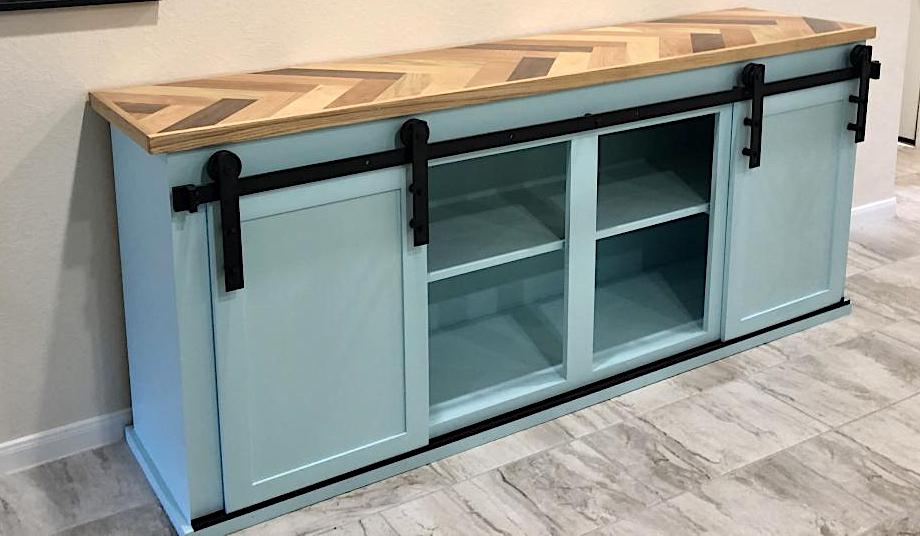
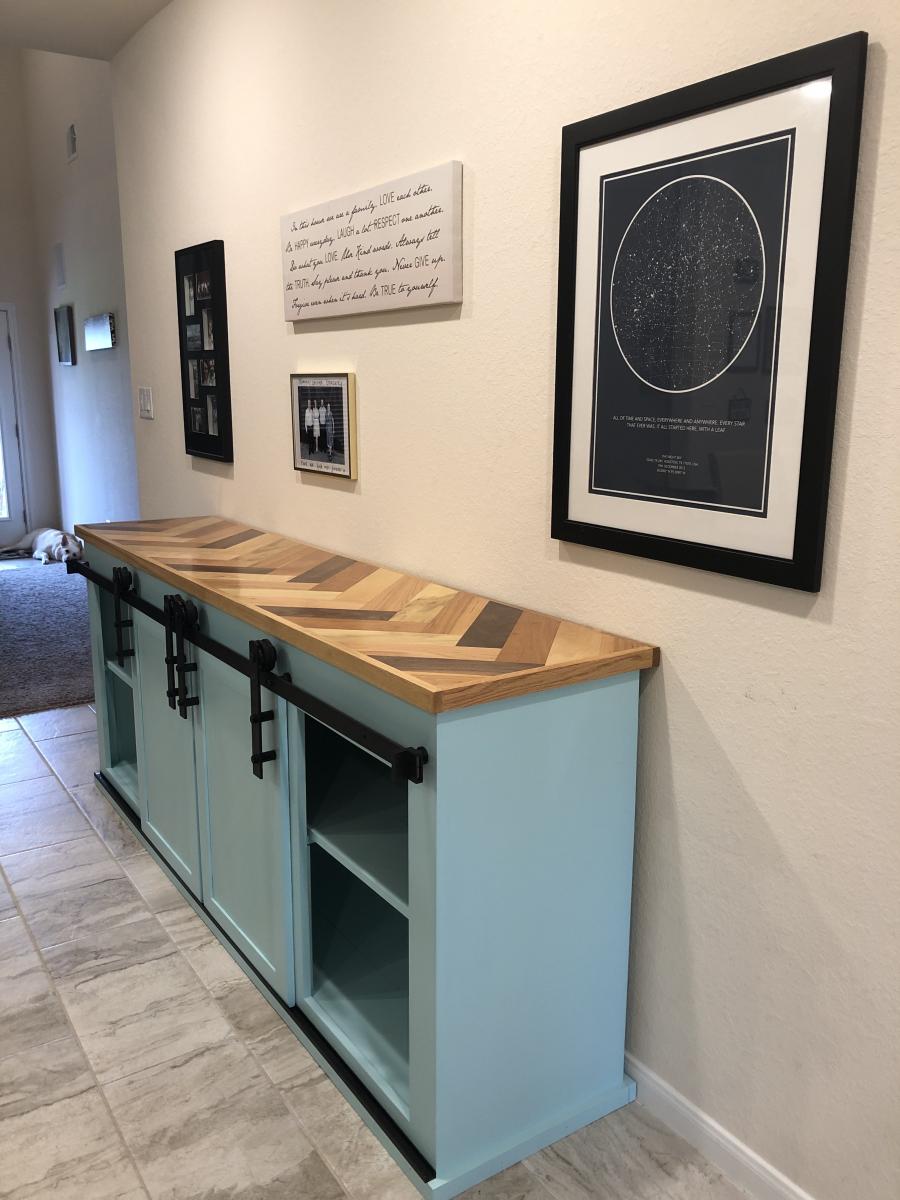
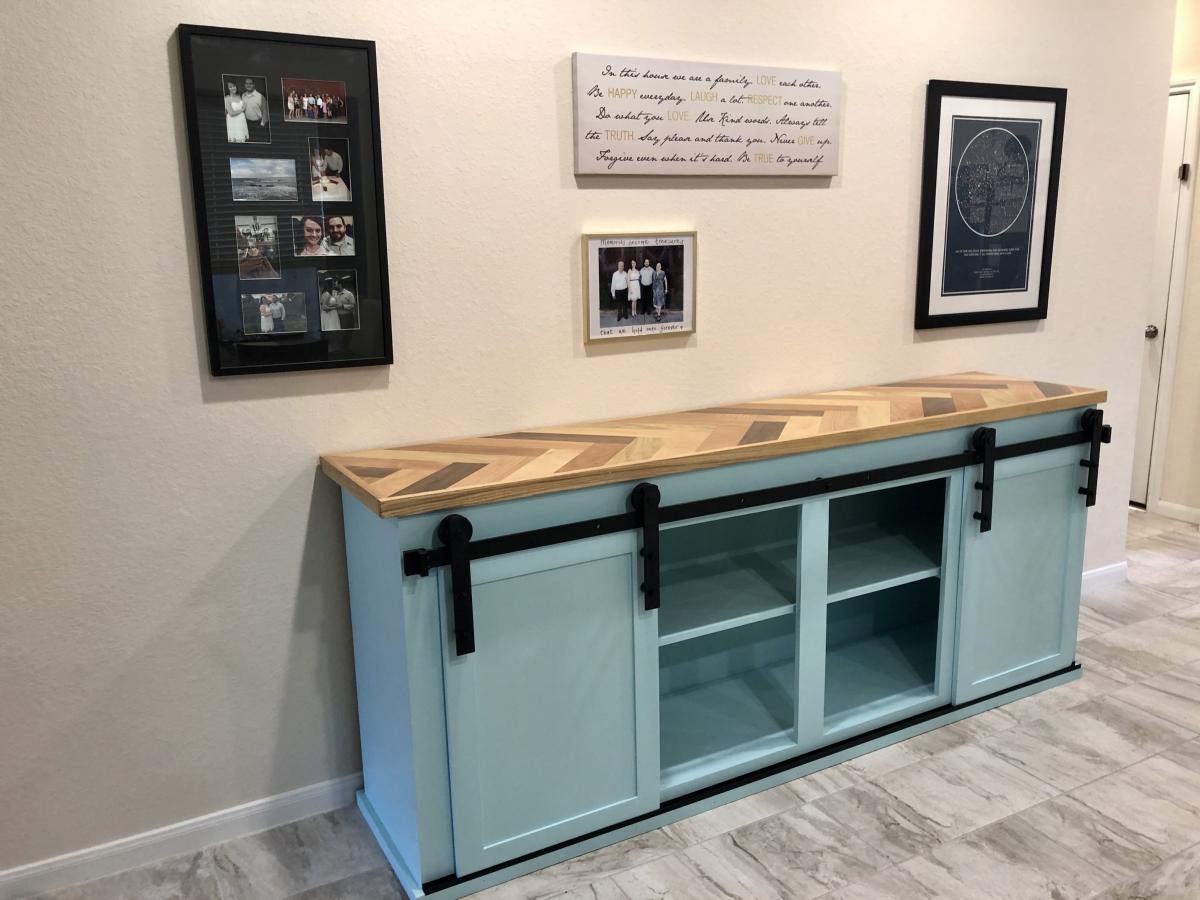
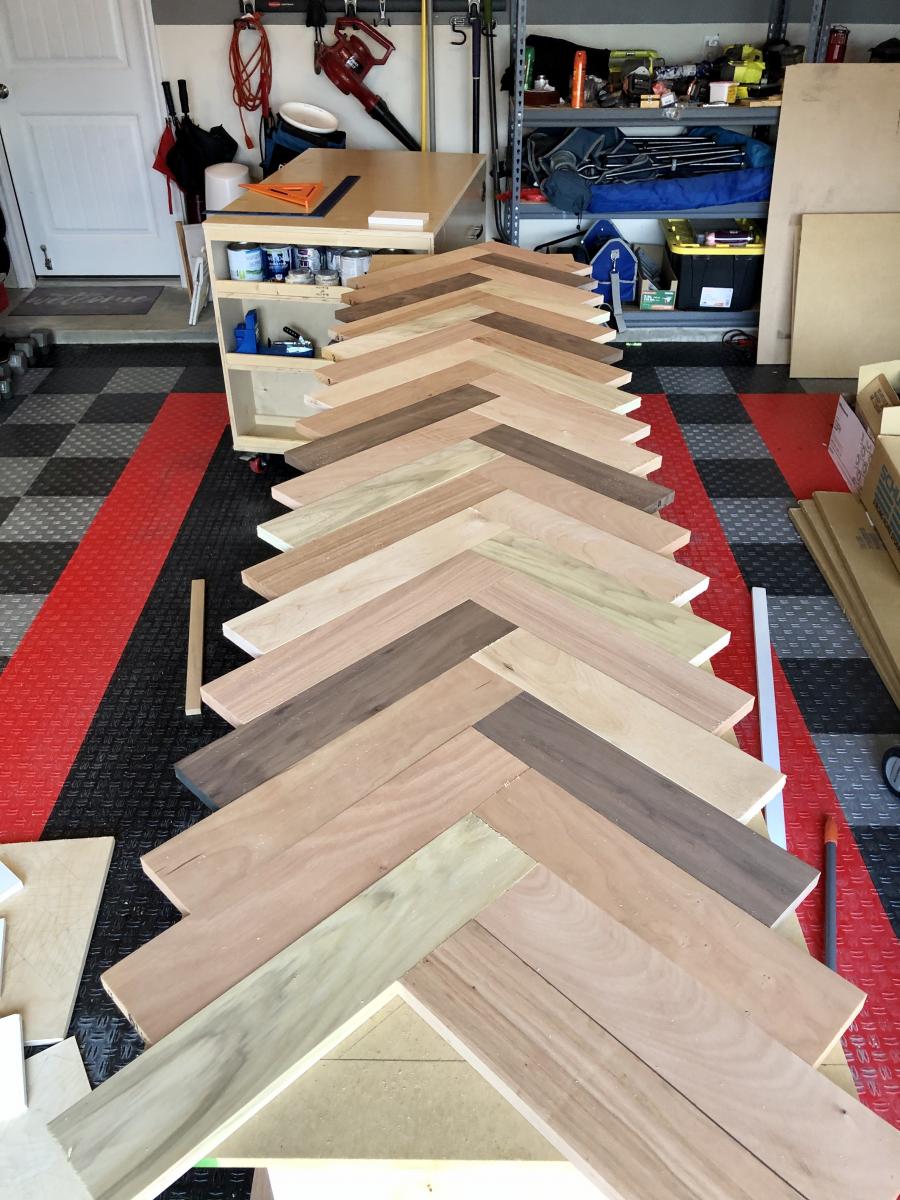
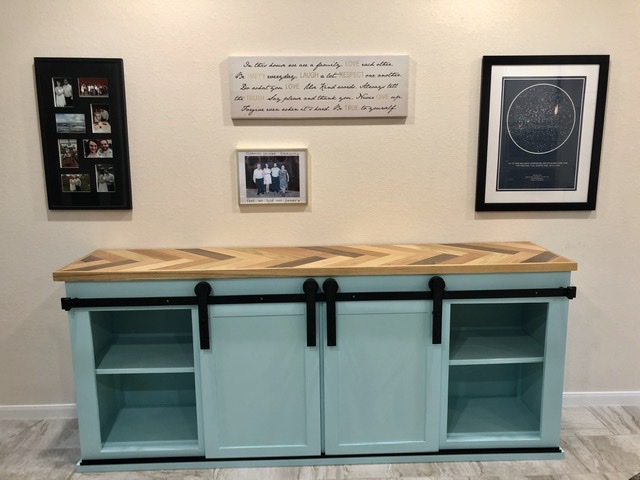
We wanted a large buffet for our hall and these plans were perfect. We modified the design to fit our needs, and painted the buffet a wonderful pop color that matched some accents throughout the house.
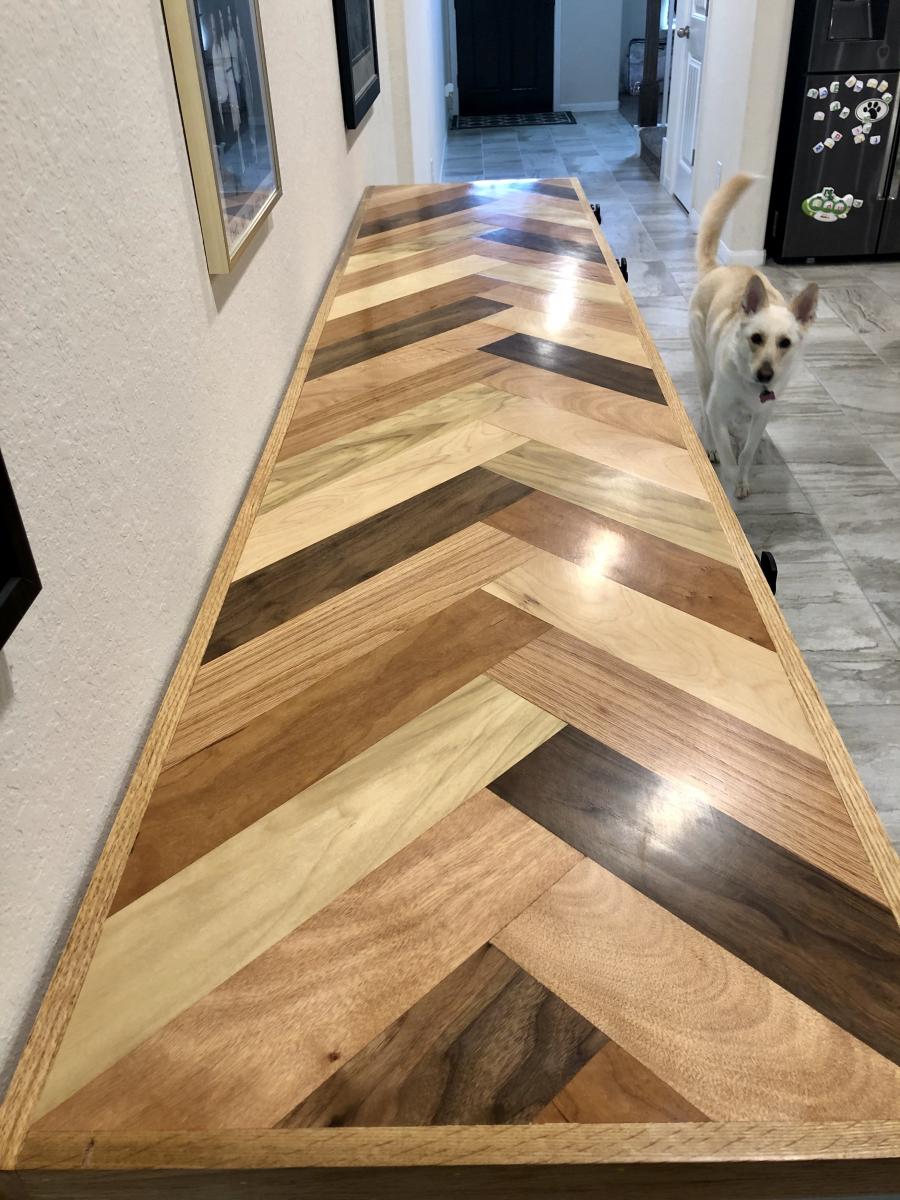
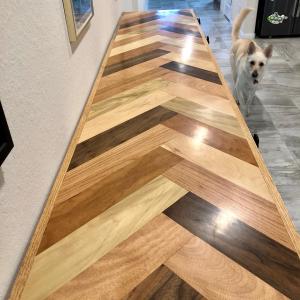
What really brought the project together was the herringbone top. We used 7 different species of wood sealed with poly and then finished with wax.
Wed, 10/02/2019 - 09:44
This piece is one of the most stunning I've ever seen! Thanks so much for sharing a brag post!
Sat, 10/05/2019 - 20:19
Thanks and thank you for always sharing incredible plans! Ever since I saw your miter station with carts I’ve been obsessed.
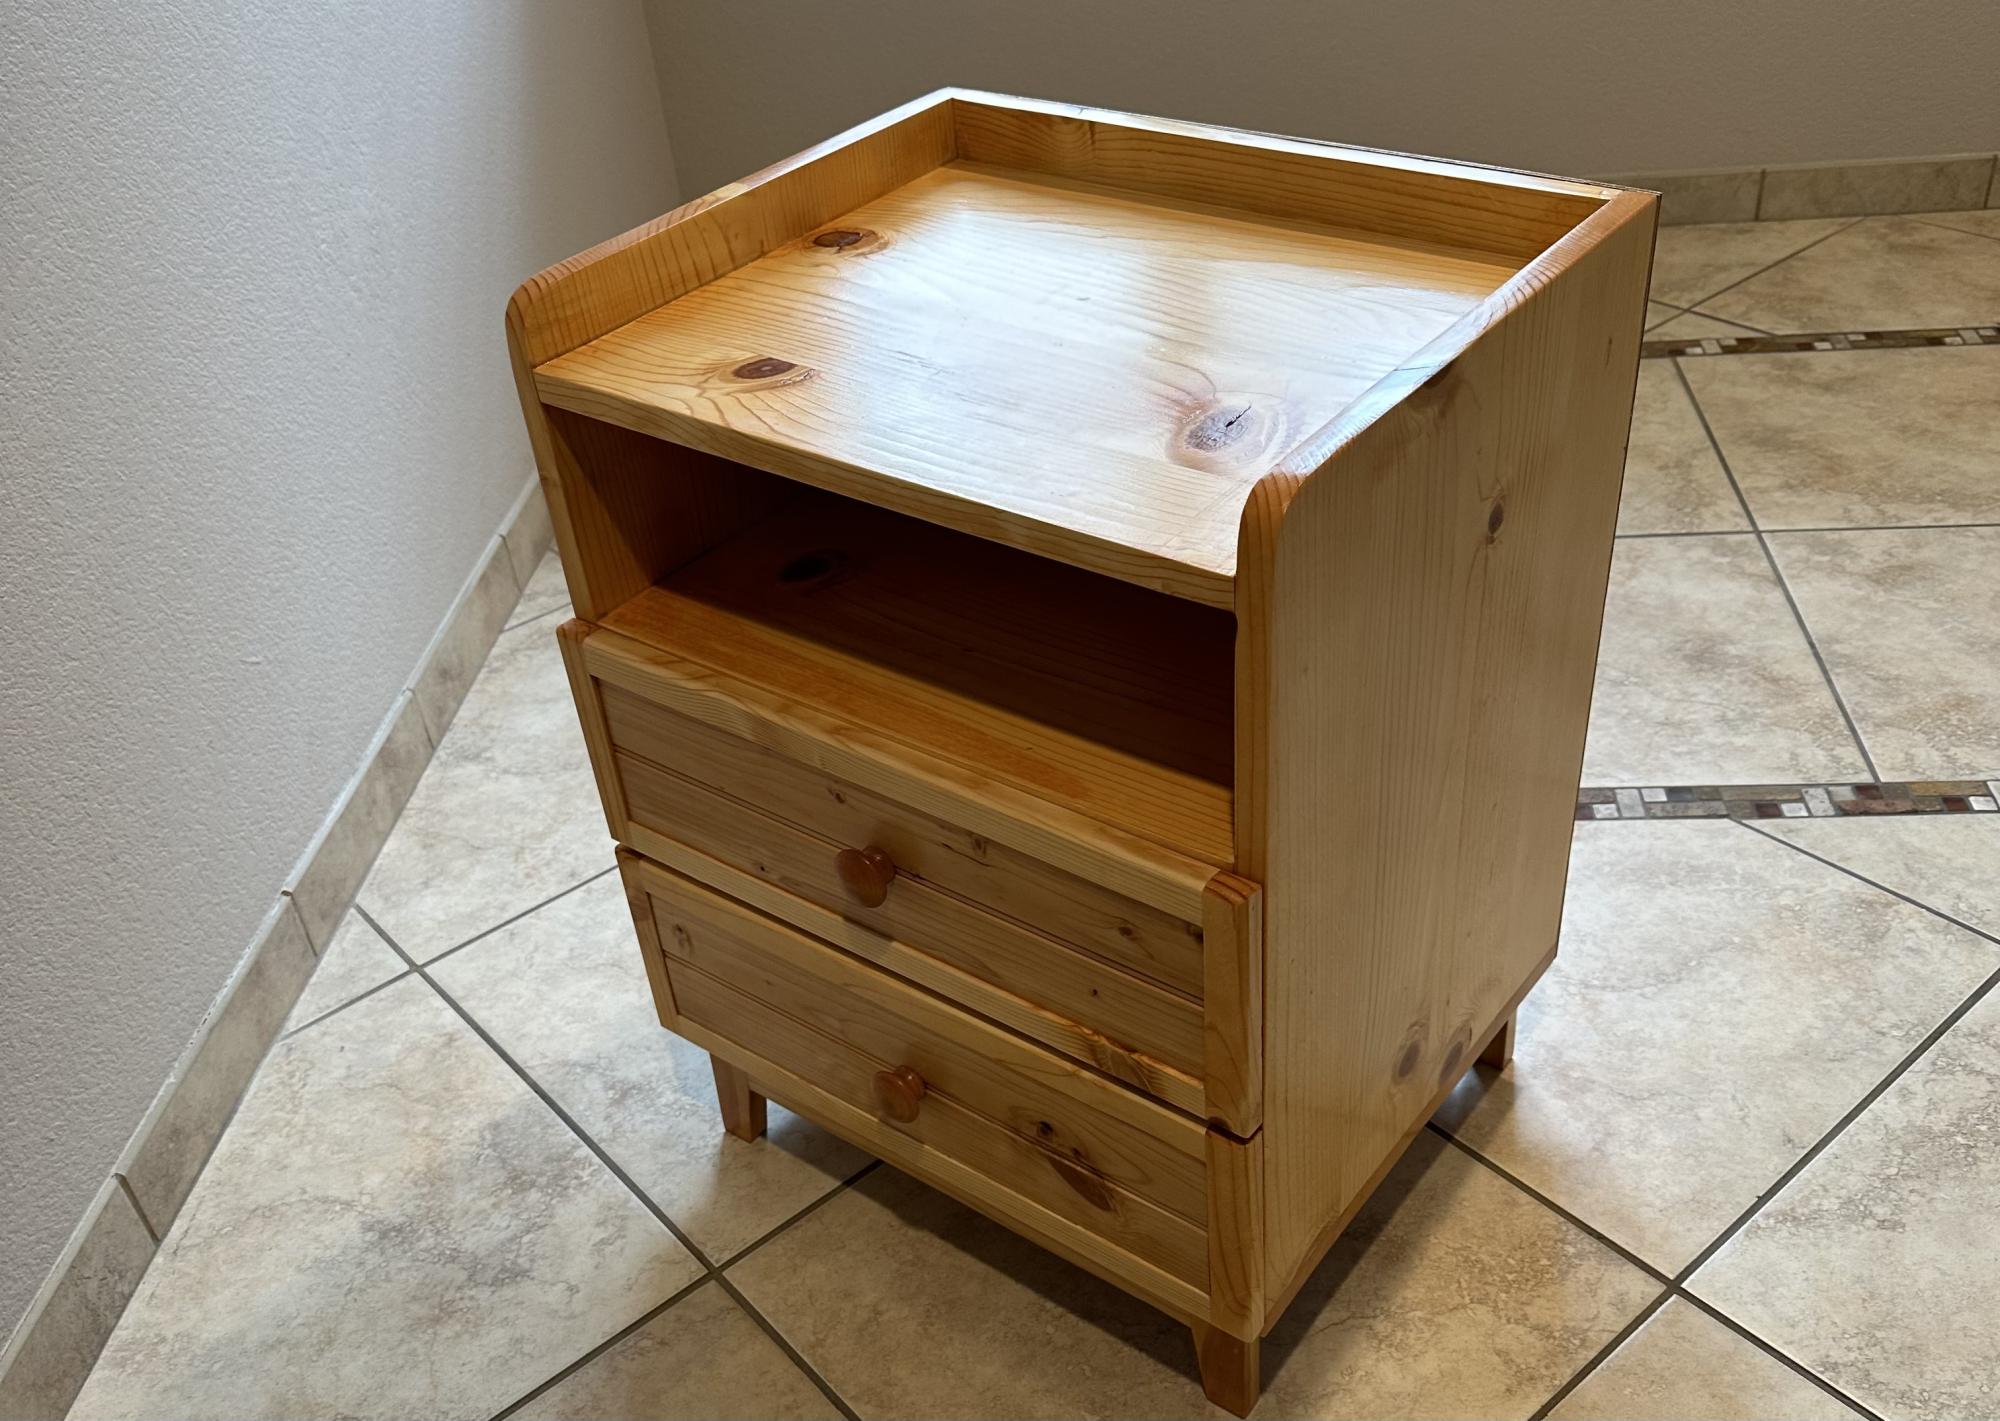
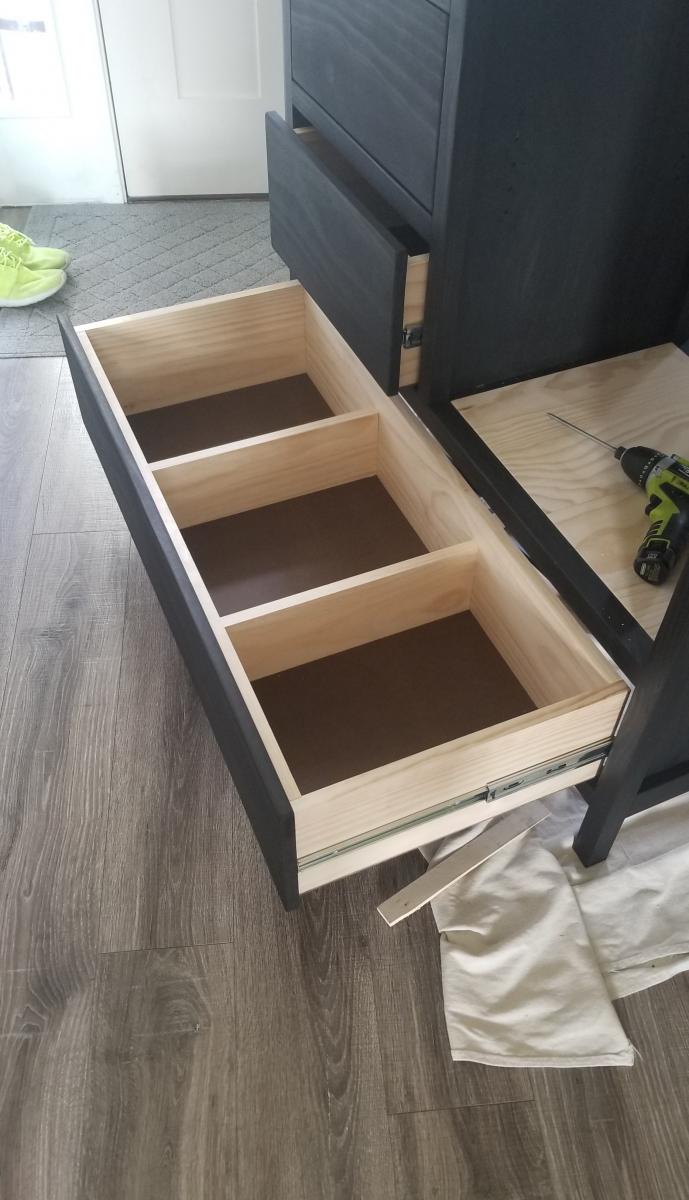
Thank you so much for your plan. I made some small changes. I used pine wood for the box sides and dividers, I moved the drawer faces to the outside and used 1/2 inch plywood for the drawer boxes to add some more space. The drawer faces have an inlaid to match my farmhouse bedroom I am currently building. The final product was stained with Minwax Golden Pecan and clear coated with warm semi-gloss.
Thu, 06/01/2023 - 09:15
Great job on this build, love the finish choice! Thank you for sharing.
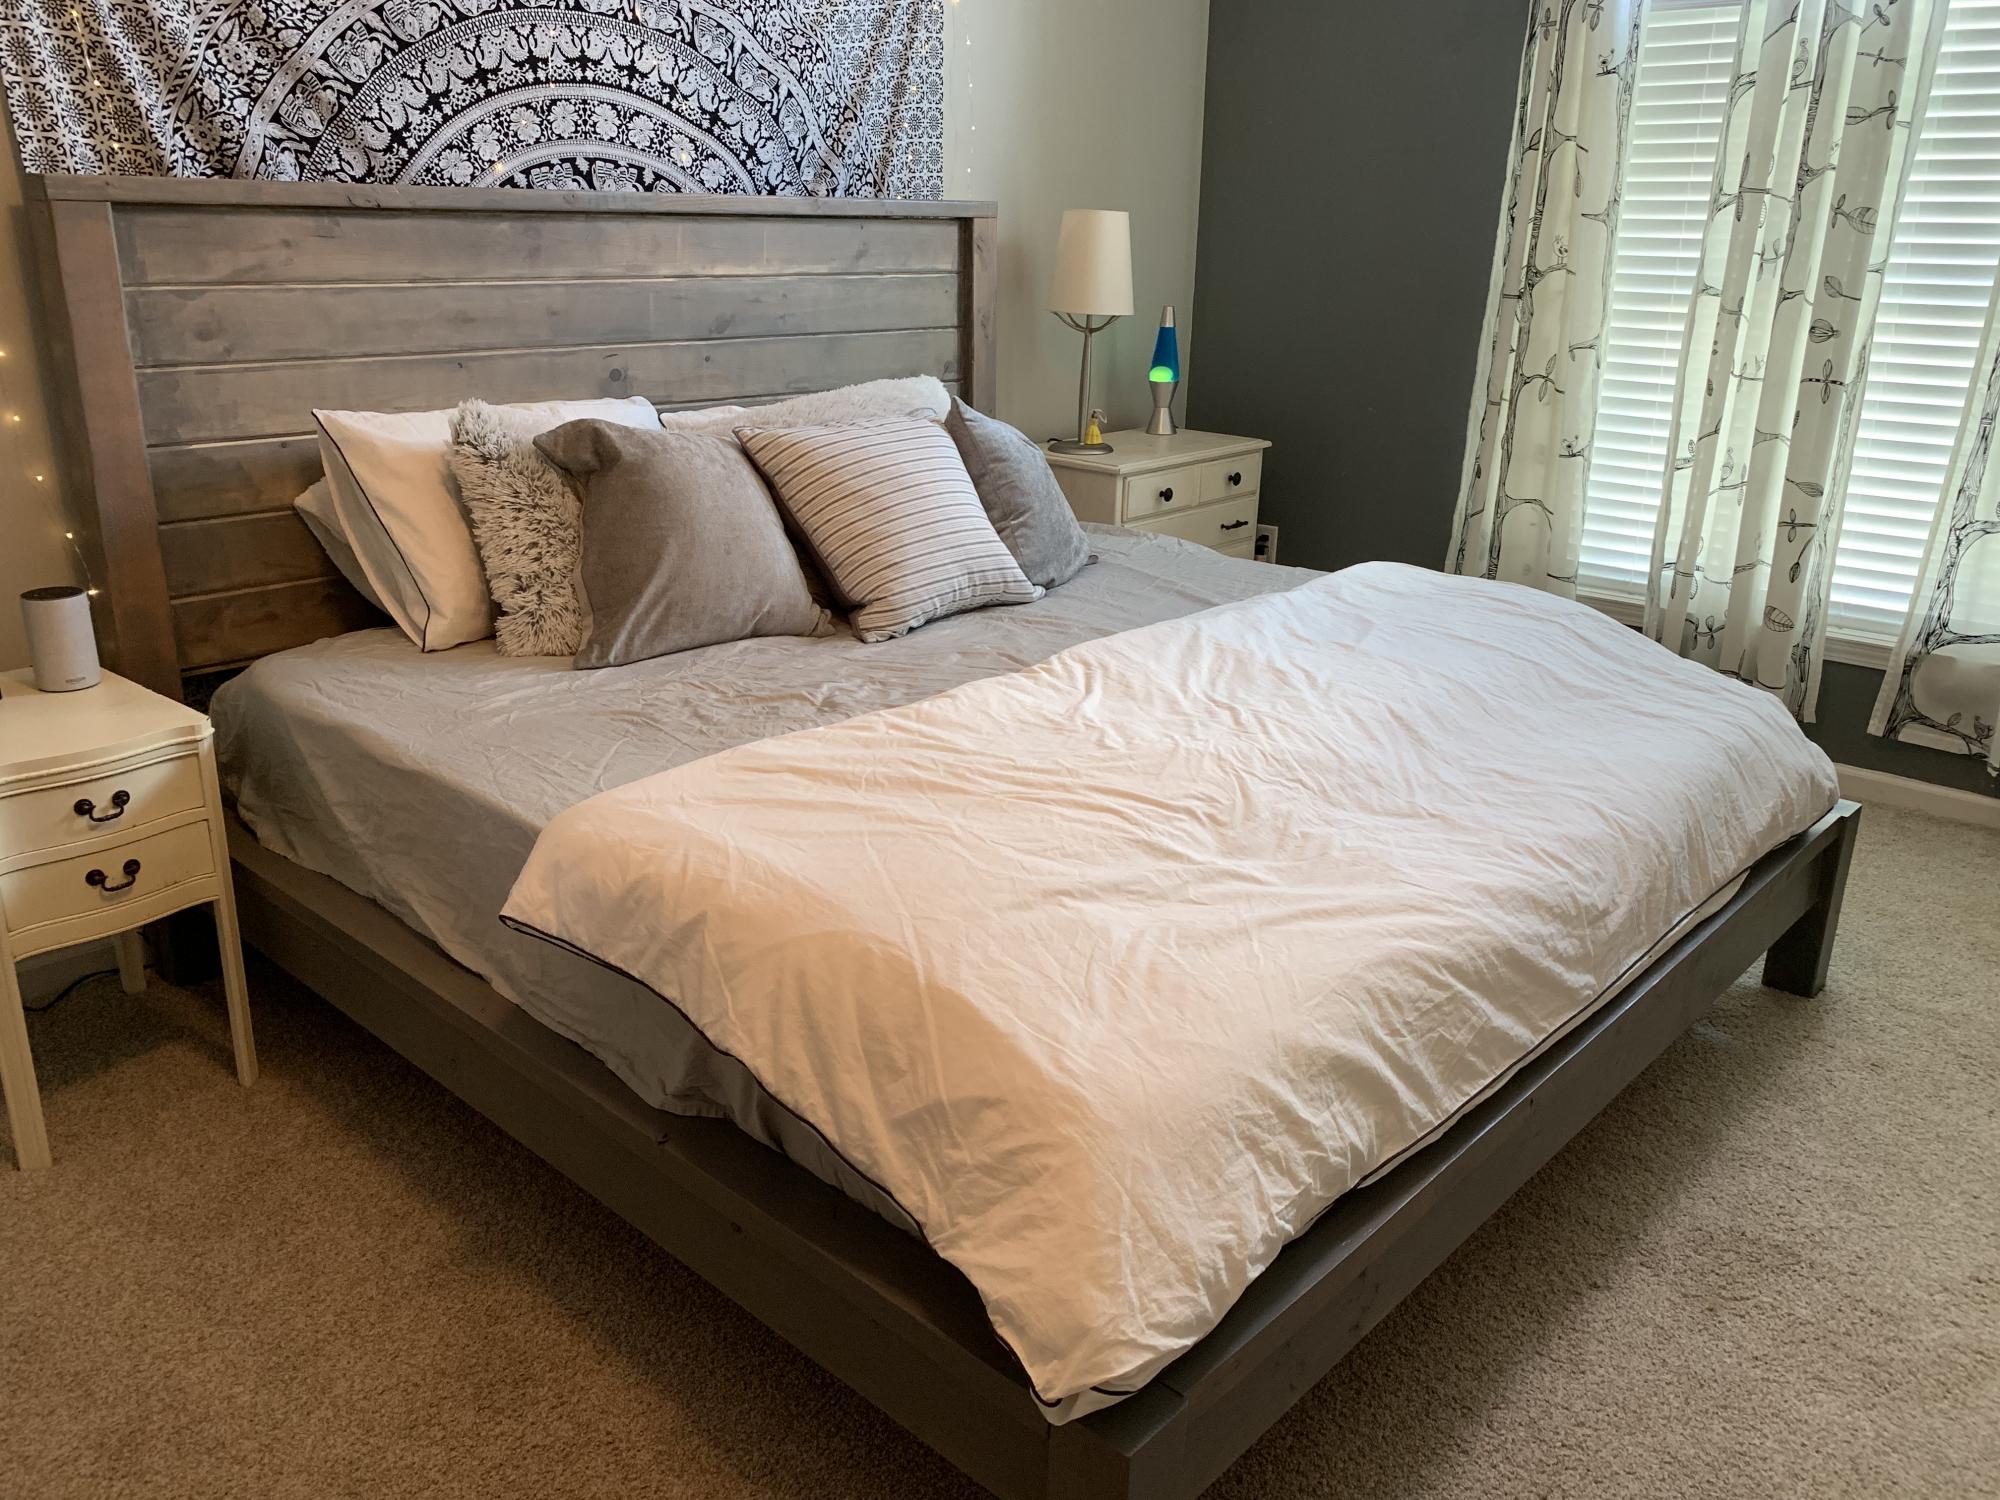
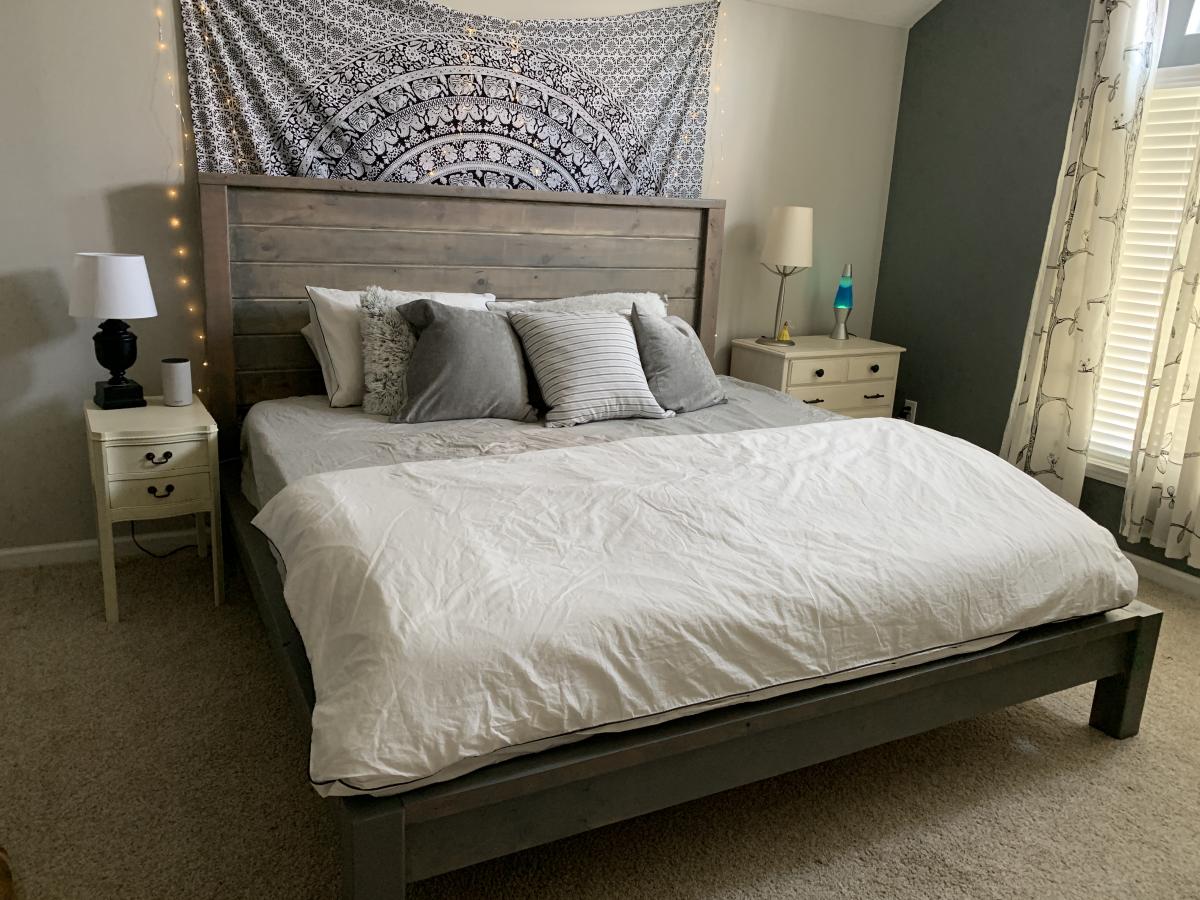
I built this bed for my daughters new “teen” room!! She loves it and I loved the cost and look if it ;)...
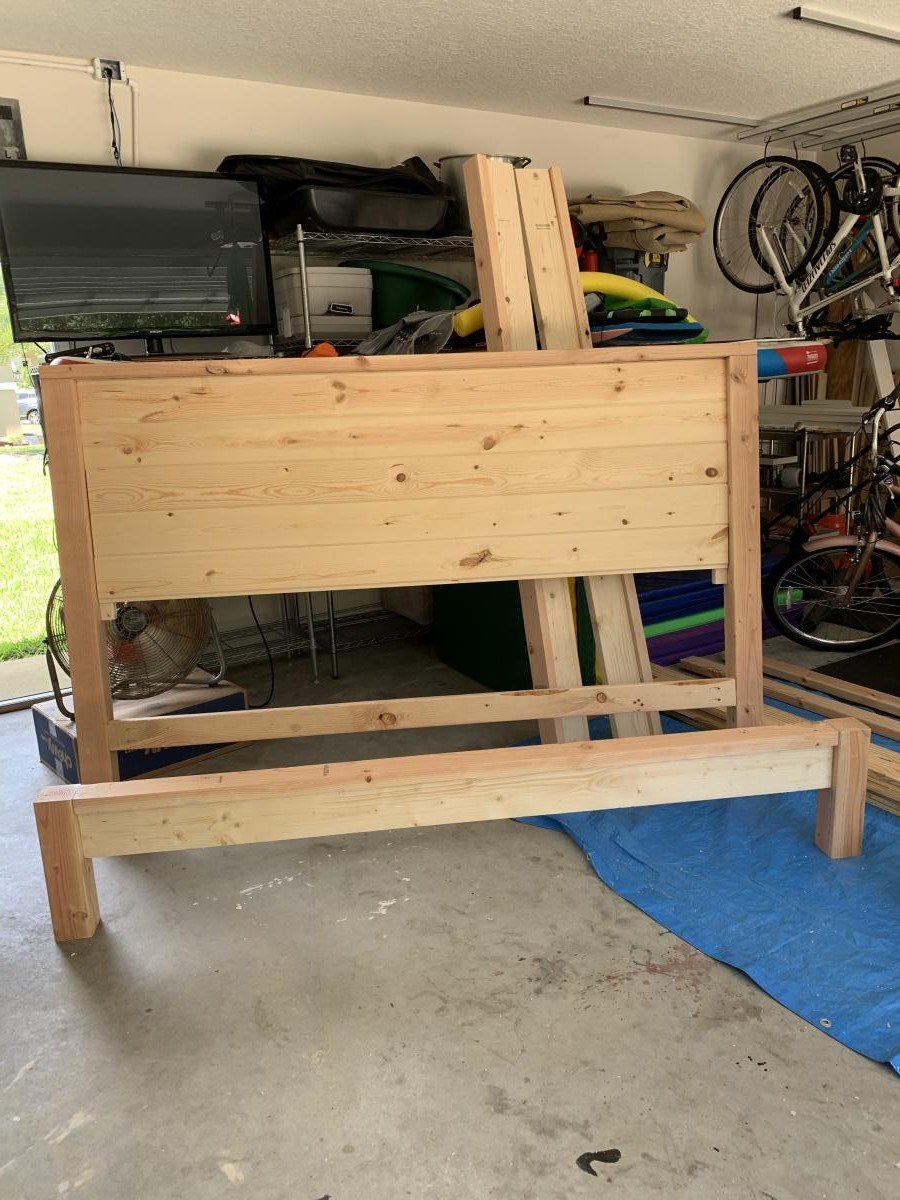
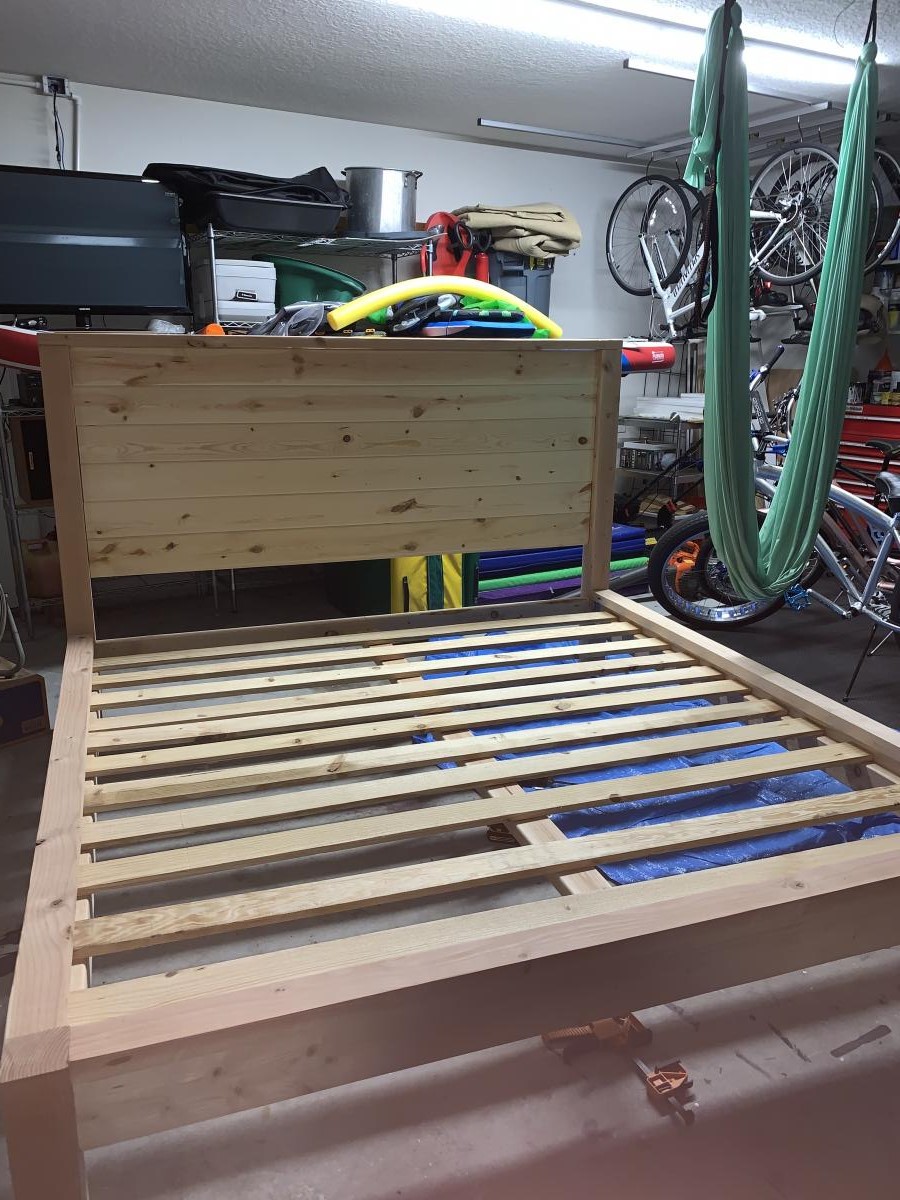
Wed, 10/02/2019 - 10:37
This bed is beautiful!!! Great job! It's perfect in your teen's room!
Thu, 10/17/2019 - 04:10
The bed looks great! What type of stain did you use?
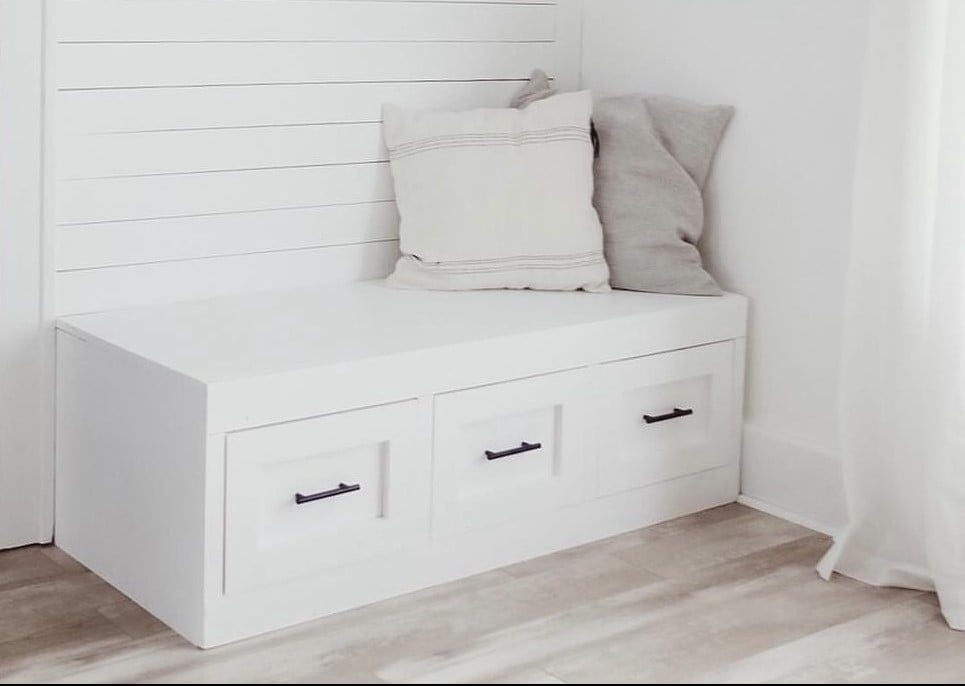
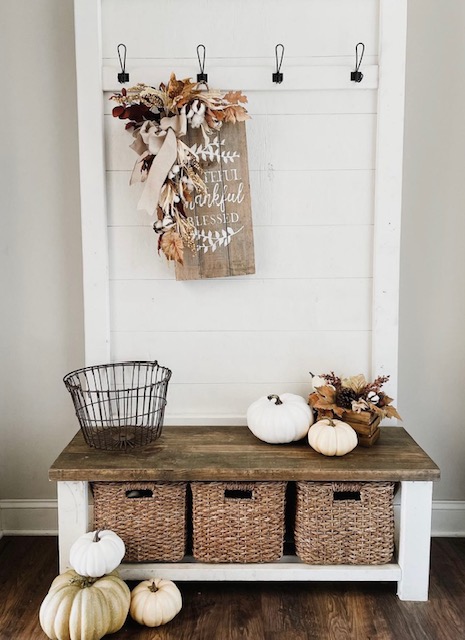
Second wood-working project to go with our shiplap wall. Pretty happy with how it turned out!