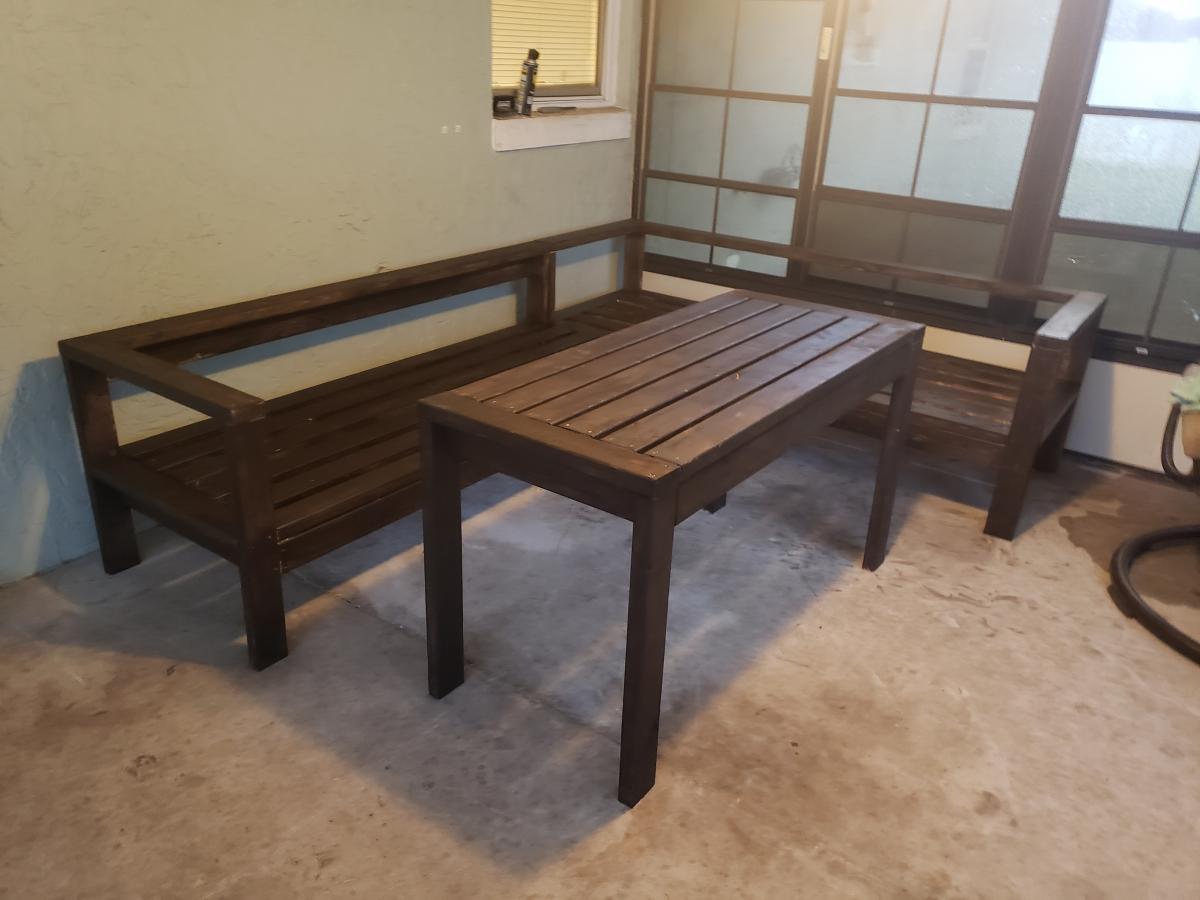
Modern Outdoor Loveseat
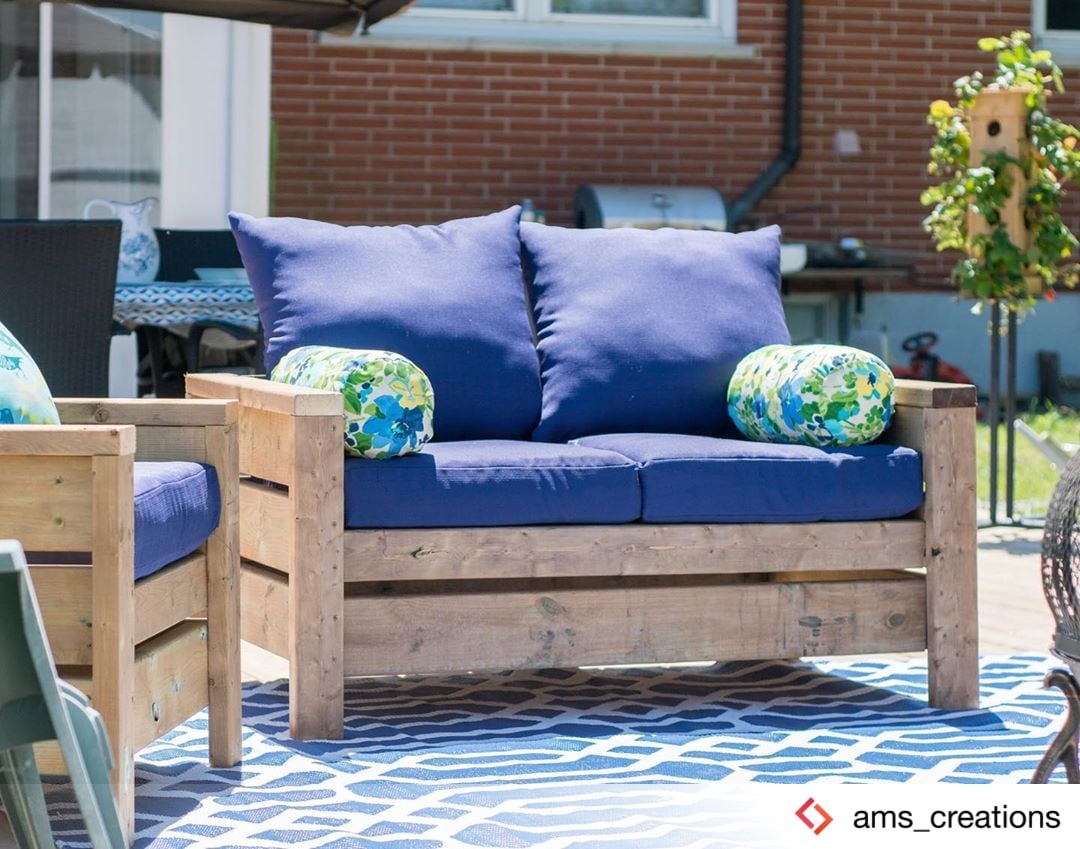
Modern outdoor loveseat to match the chairs! See more photos and comments here.
Built from Plan(s)
Recommended Skill Level
Intermediate
Modern outdoor loveseat to match the chairs! See more photos and comments here.

I built this picnic table from pallets and 2/4 it’s my first one nothing fantastic but I’m still learning.
Karen
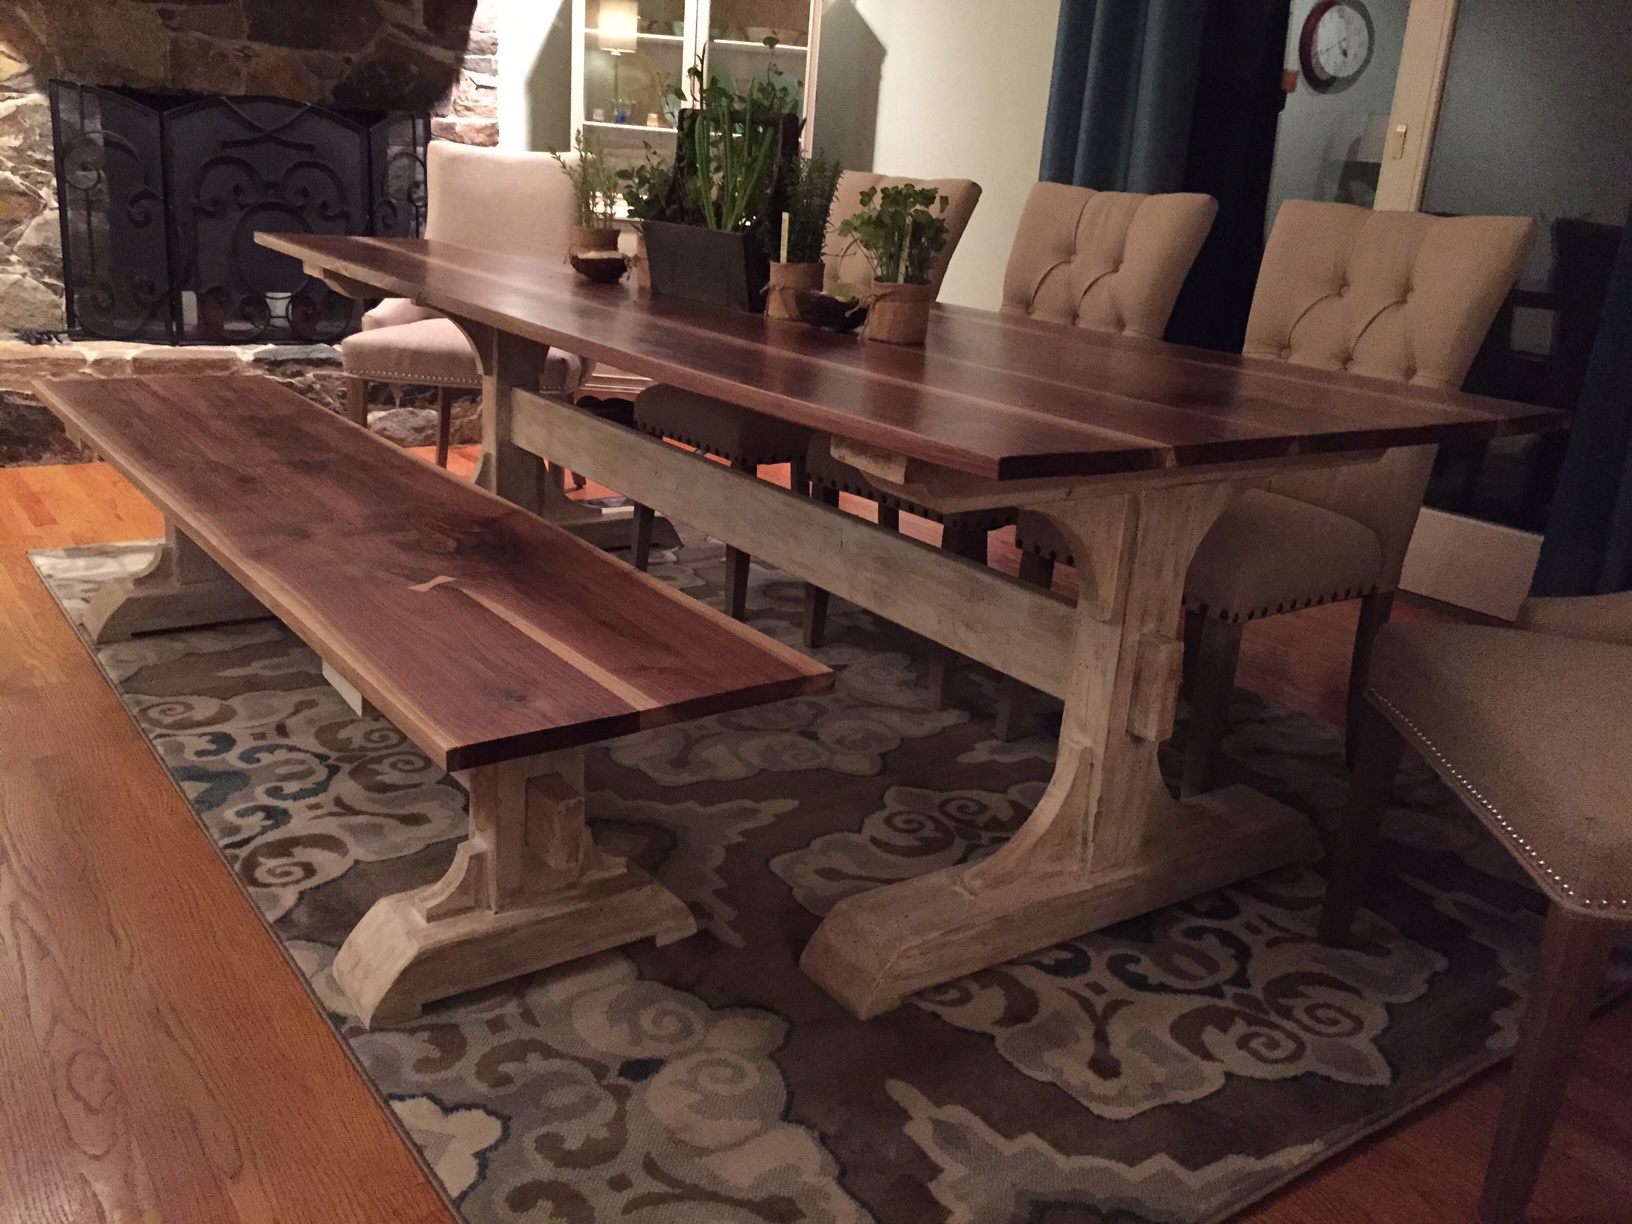
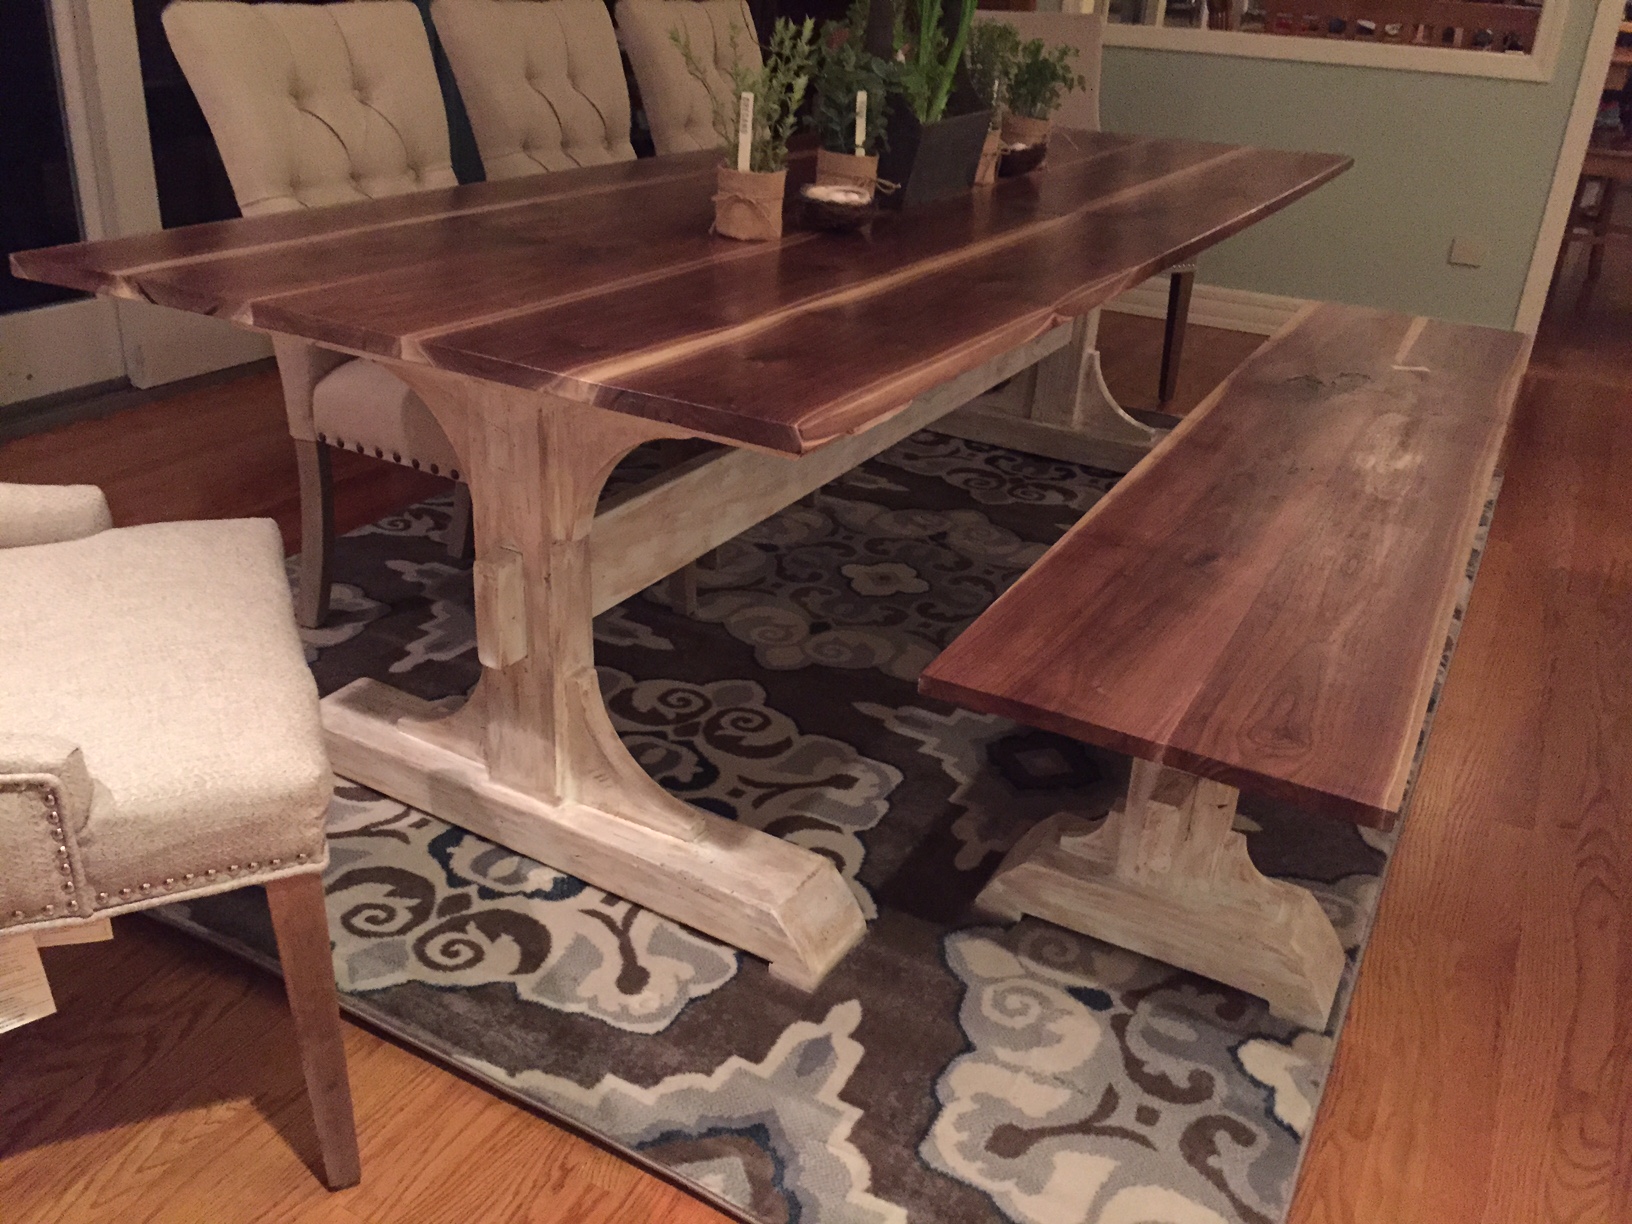
I modified the plans for only 2 pedestals, and a solid 100 inch walnut top. I used auto body filler to fill the gaps of the legs, sanded and distressed. It appears to be solid barn board wood, and there is NO way to tell that it's stock 2 x 4 and 2 x 6.

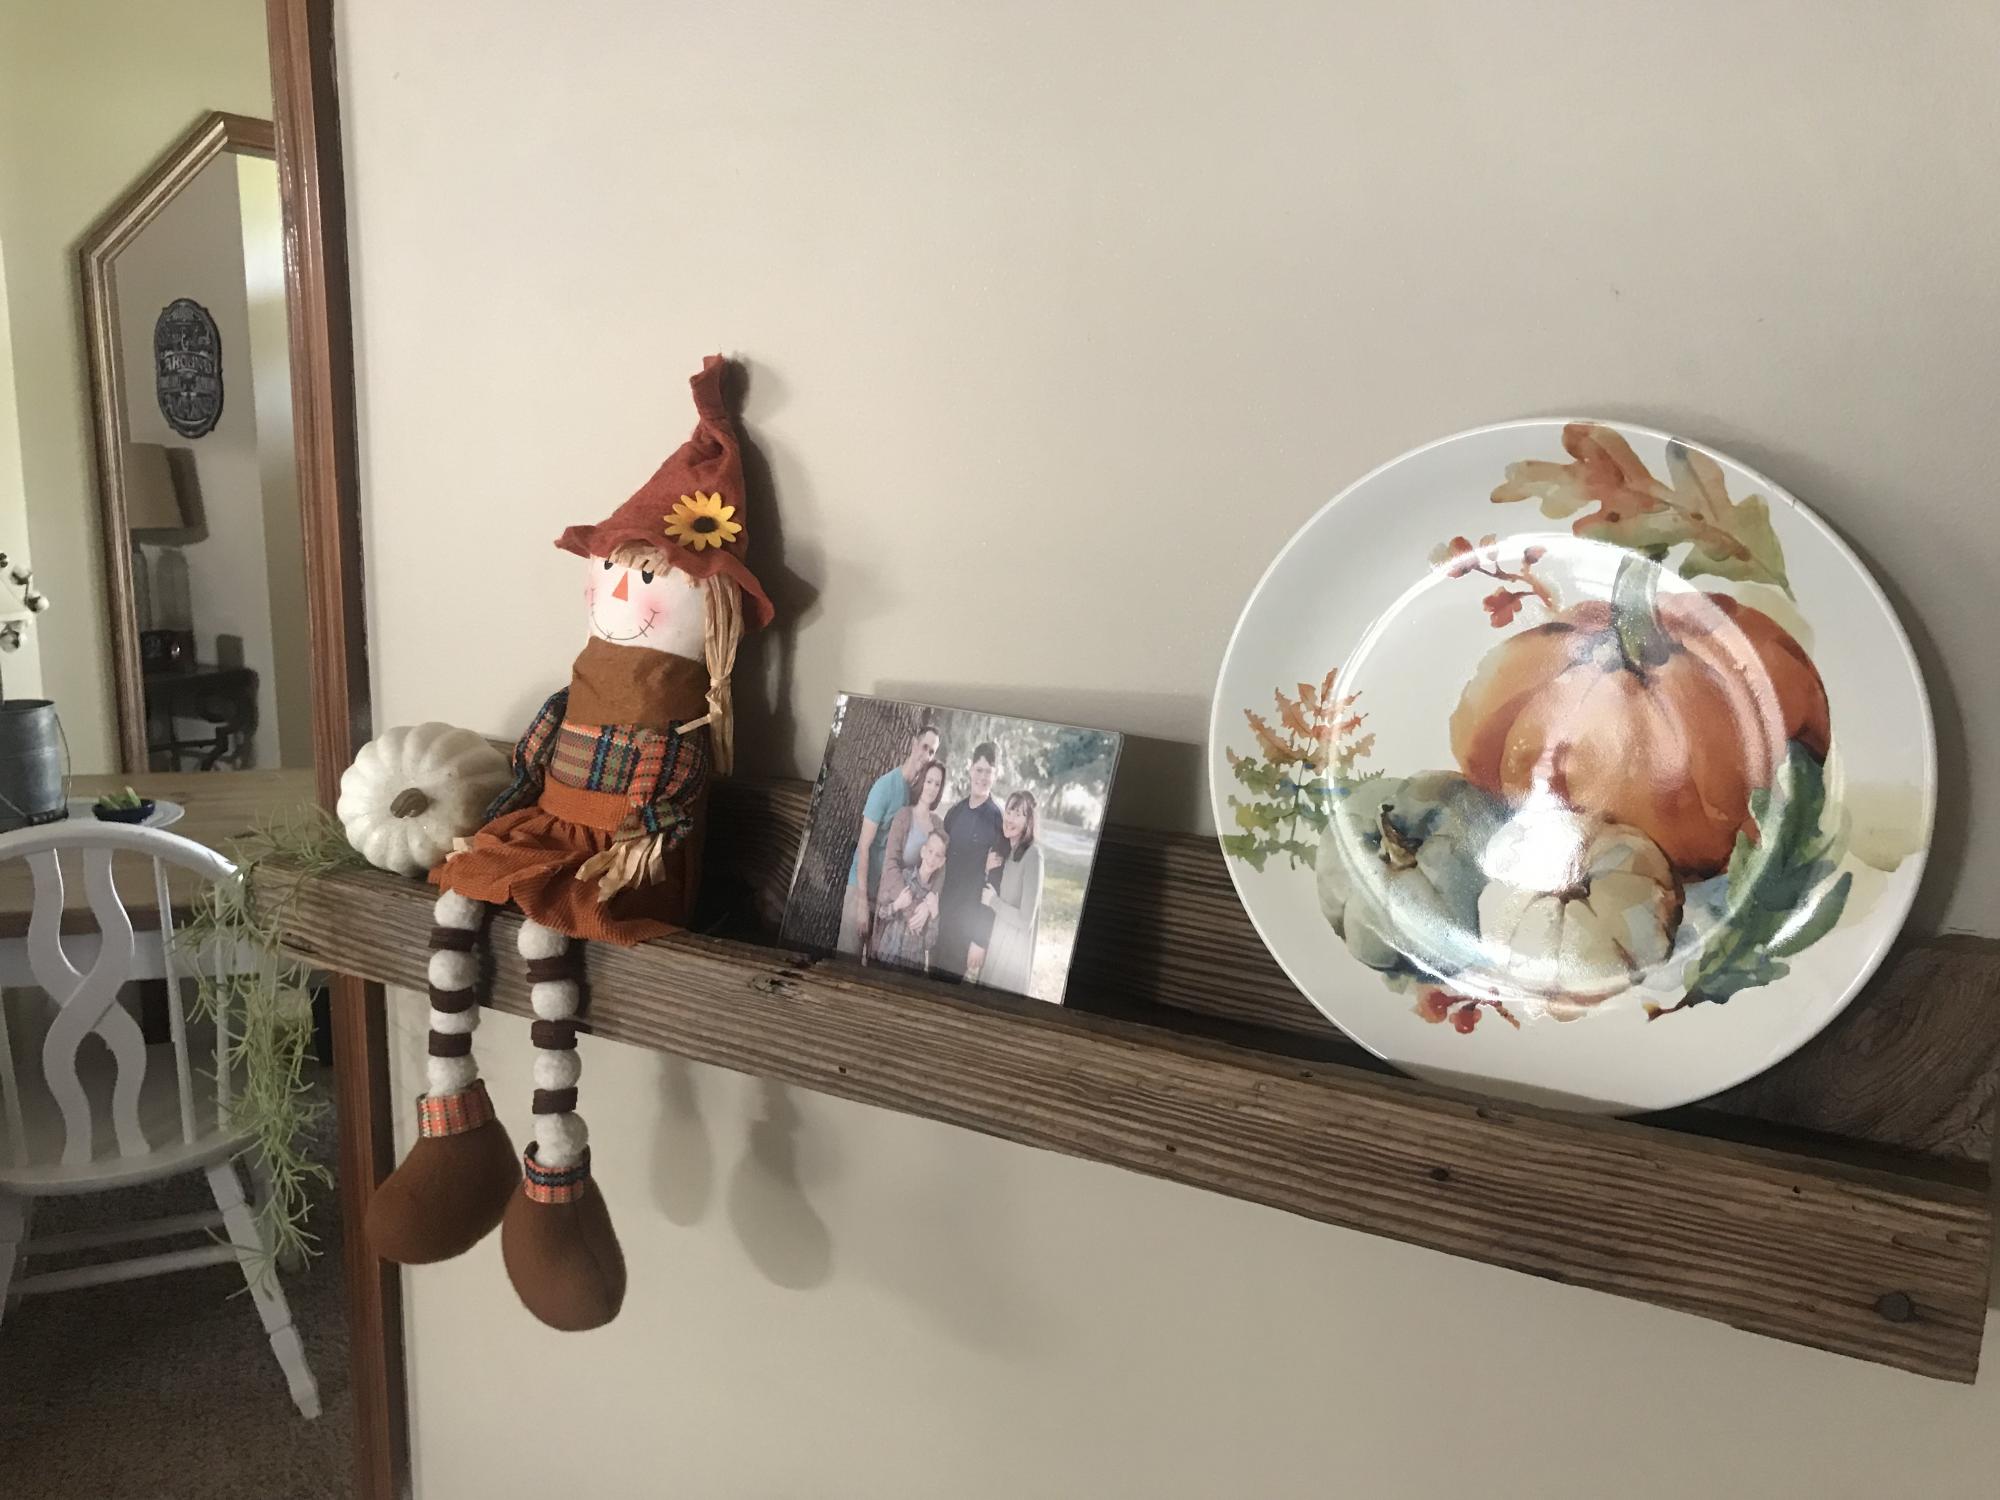
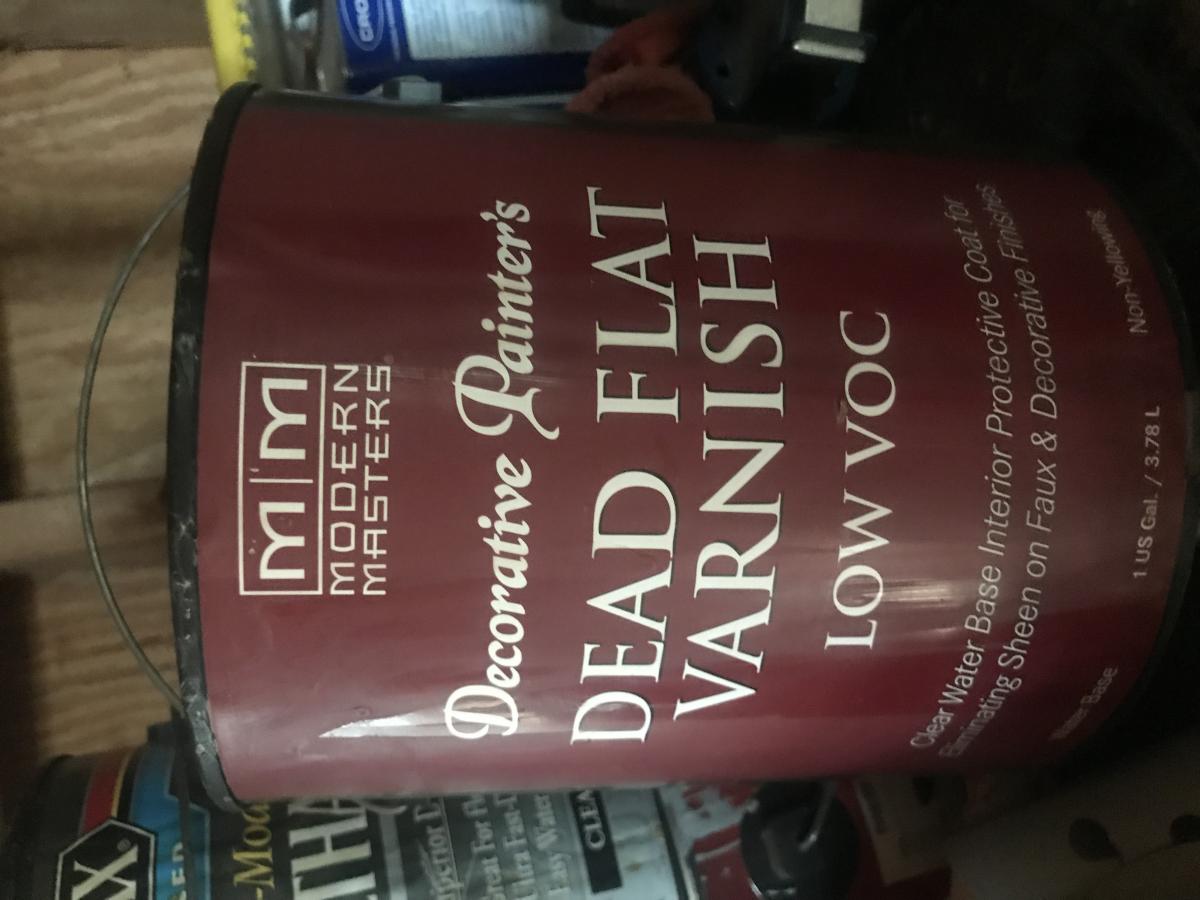
These were made from 50+ year old pine that we had from my husband’s late father’s shed. We used one coat of the dead flat poly. In total we made 6 shelves. 3 are 48” long and 3 are 32” long. This was a fun project and a great way to use my photos.
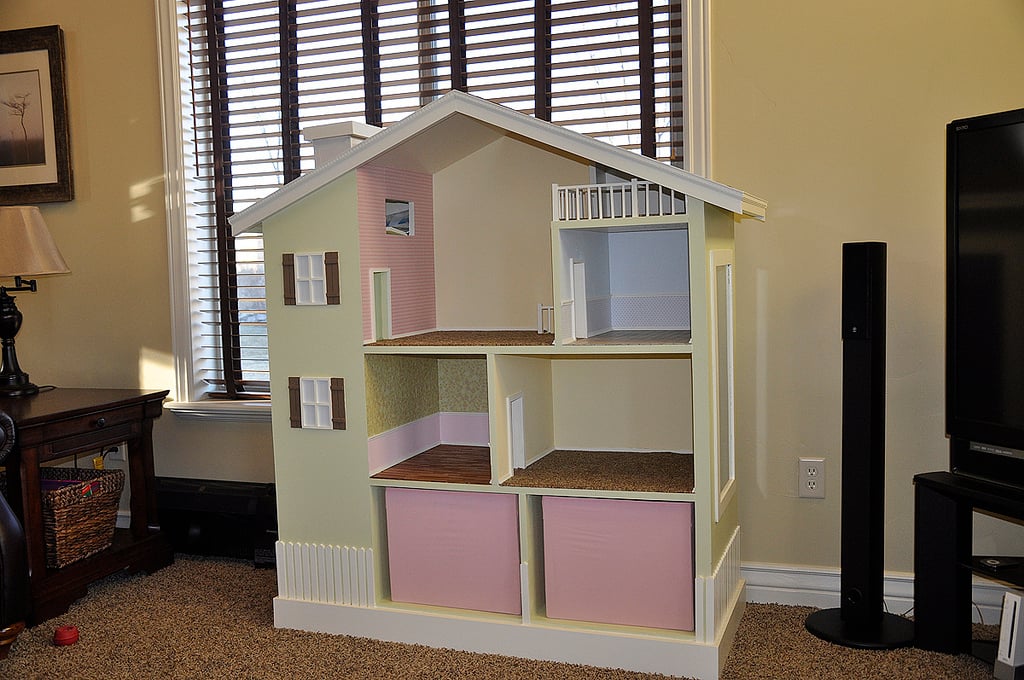
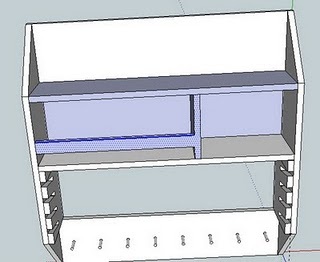
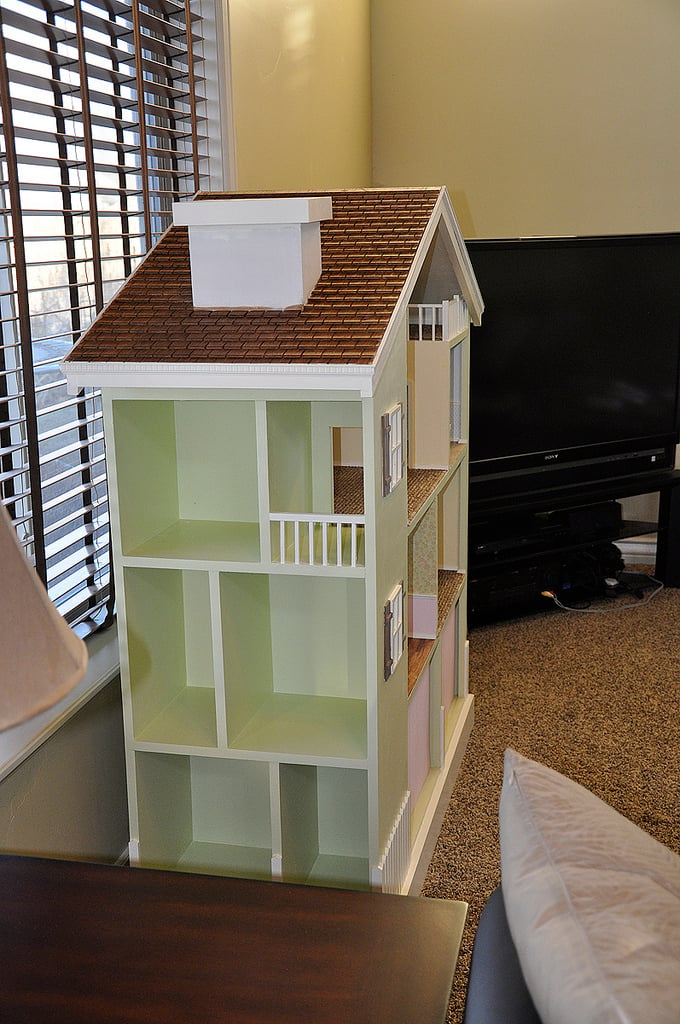
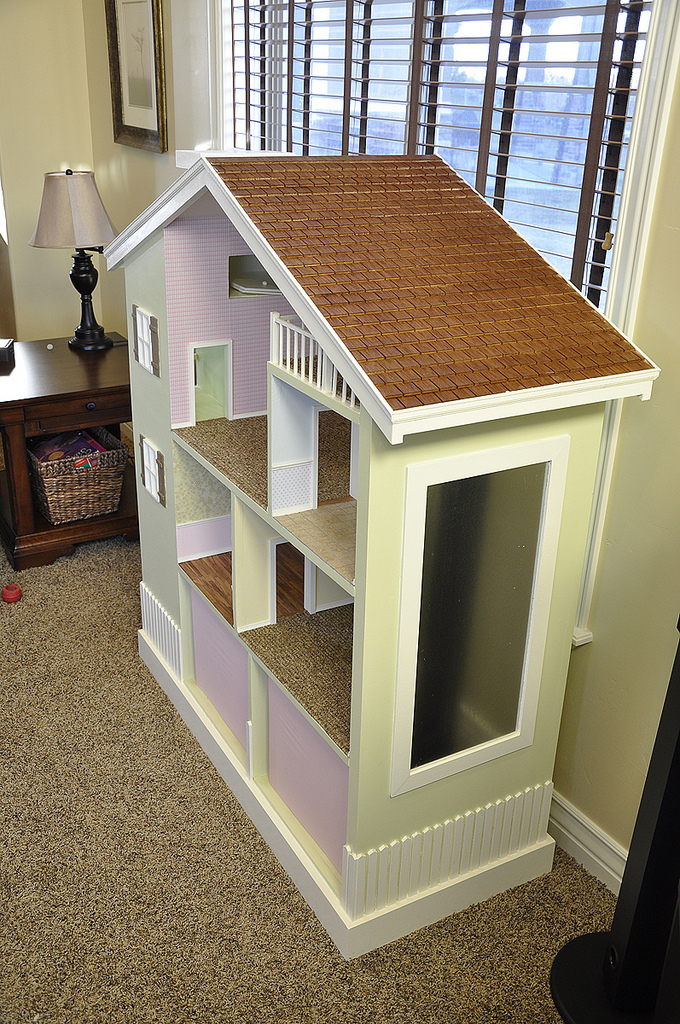
After much deliberation, I decided to make a dollhouse for my daughters Christmas gift. The aesthetics of the bookshelf-style dollhouse appealed to me over the more intricate and fancy designs. I took the literal meaning of the style and incorporated an actual bookshelf/DVD rack into the dollhouse. On the apposing side I built a magnet board for my daughters given that my refrigerator is not magnetic. About the project: I knew my design would end up being heavy so I started by building a basic frame out of construction grade 2x4's. The frame is placed on four casters and is concealed by the baseboard. When on carpet, the casters are not visible and have come in handy. Working upward, the majority of the construction consists of 3/4" cabinet grade plywood which you can find at Home Depot. The "carpet" I chose was an inexpensive bathroom rug that I purchased at Walmart. The scale & thickness of the berber seemed appropriate for the dollhouse and I attached it using carpet glue. For added security I tacked the perimeter with some staples. For the bathroom tiles, I cut some groutable adhesive tiles into squares on the table saw (use a cross cut sled if you have one) and attached them to the bathroom floor. Make sure your surface is free of dust, and a heat gun or a propane heater will accelerate the drying process and create a better bond. Make sure to use unsanded grout for the joints. To make the shingles, I cut a 4'x8' (used about 2/3 of the sheet) piece of 1/4" mahogany veneer into 2.5"x4' strips. The cuts were made perpendicular to the wood grain to give the desired aesthetic. This gave me a robust shingle construction with the look of shake shingles. I then cut about 3/4 of the way through the strips with approximately 1 1/4" separation between each shingle. Attaching the shingles was easy. I didn't want to wait for glue to dry so in addition to some wood glue, I also tacked the row of shingles in place with 3/8" brad nails. When placing the shingles, make sure to start at the bottom and work your way up to the pitch of the roof. This will allow you to overlap the shingles about 3/4" to cover the uncut portion to give it the appearance of individual shingles. You will also want to offset your rows to change the vertical alignment of the shingle spaces. I marked each row with a pencil prior to cutting the final width. You may also consider which side of the shingles you want facing up. I opted for the rough side to give it a more weathered look. With some of the extra shingle material I made hardwood floors for the kitchen.The veneer I purchased was mahogany on one side, and oak on the other which allowed me to alternated sides and give it a unique look. Attach the floor using wood glue and allow 24hrs before sanding. Place weights on the floor to secure it while drying. I applied both a stain (Minwax Golden Oak) and some wipe-op polyurethane for the finish. The storage bins are Ikea boxes that can be easily removed to allow for additional play areas. The piece of sheet metal I used for the magnet board was already cut to the desired size at Home Depot. I attached it using some 3M spray adhesive, then secured it with some poplar strips. I also used the 3M construction adhesive to attach the craft paper/wallpaper. With all of the chaos surrounding Christmas I wasn't able to quite finish it. Here is still what's in progress: - Painted white ladder to loft - Stained mahogany stairs to family room - Kitchen cabinets - Cobblestone chimney - Closet doors

Thu, 04/12/2012 - 02:56
Your attention to detail is amazing! What a beautiful build! Blessed daughters!
Fri, 04/13/2012 - 15:18
How did you make the railing? It looks great, but wouldn't it be fragile? What did you use for trim and molding throughout the house? Did you use a dremel to work with the small details? This is an amazing looking doll house that my daughter would love. I just may need to do this sometime before Christmas.
Mon, 04/16/2012 - 17:32
It gives the appearance of individual shingles, but I actually just cut strips with grooves in them. I have seen several dollhouses with shingles that have fallen off so I wanted to avoid that :)

Sat, 04/14/2012 - 04:00
Those are the coolest bookshelves I've seen in a while. Love it.
Fri, 06/08/2012 - 20:32
Super duper good job on it :) Wish I had time to make one like that for my 4 yo. She's so particular, can't let her see the pictures ah ah. Lucky girls! Talented mama!
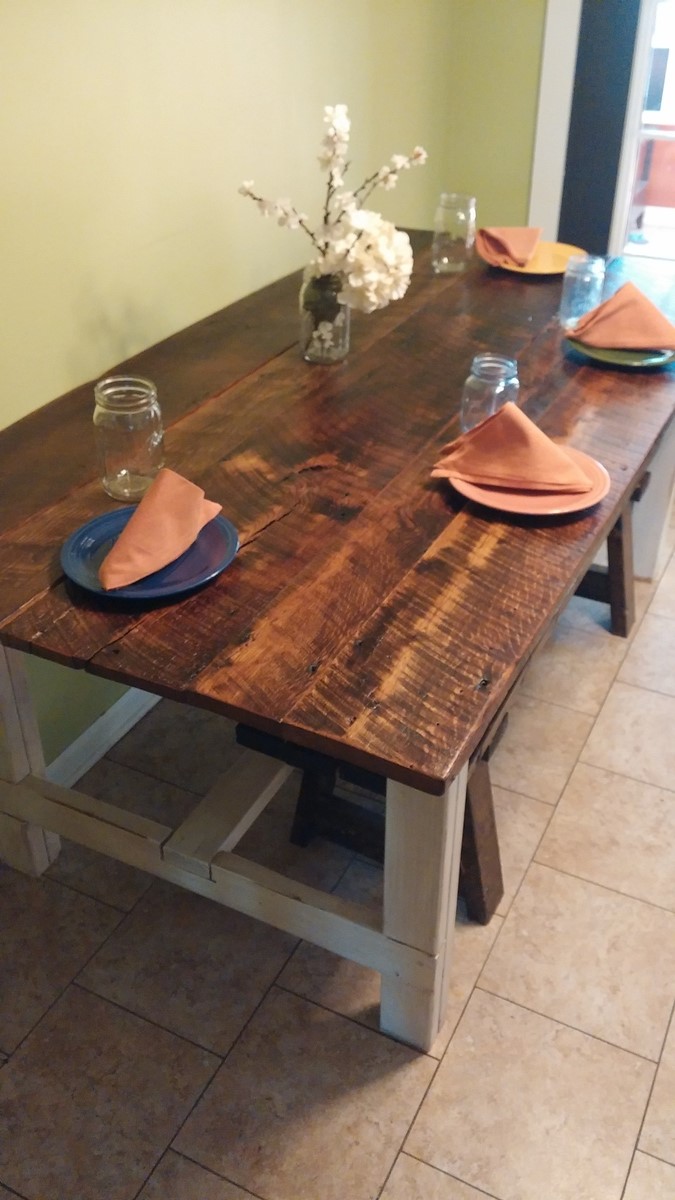
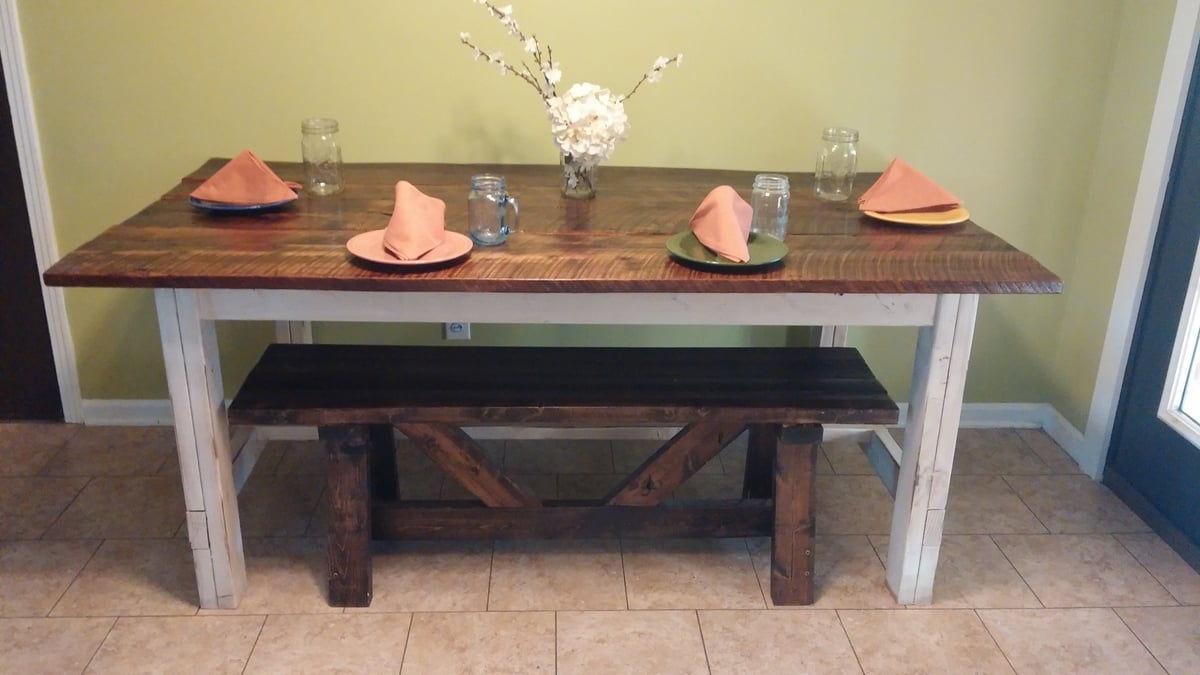
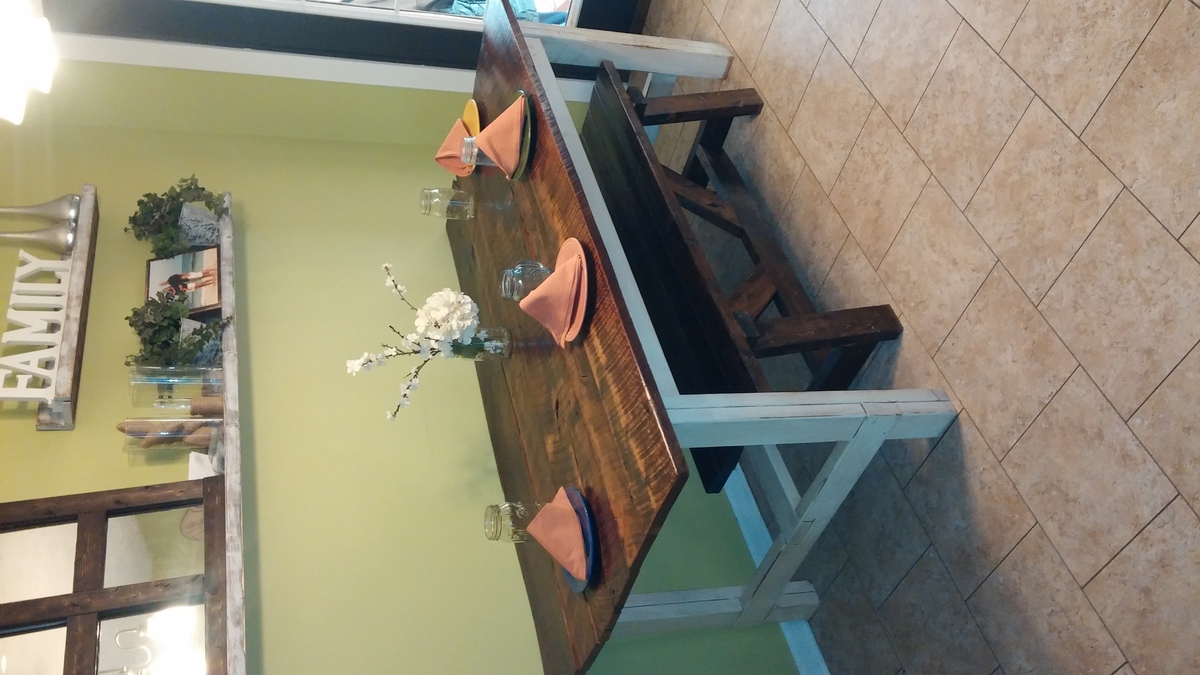
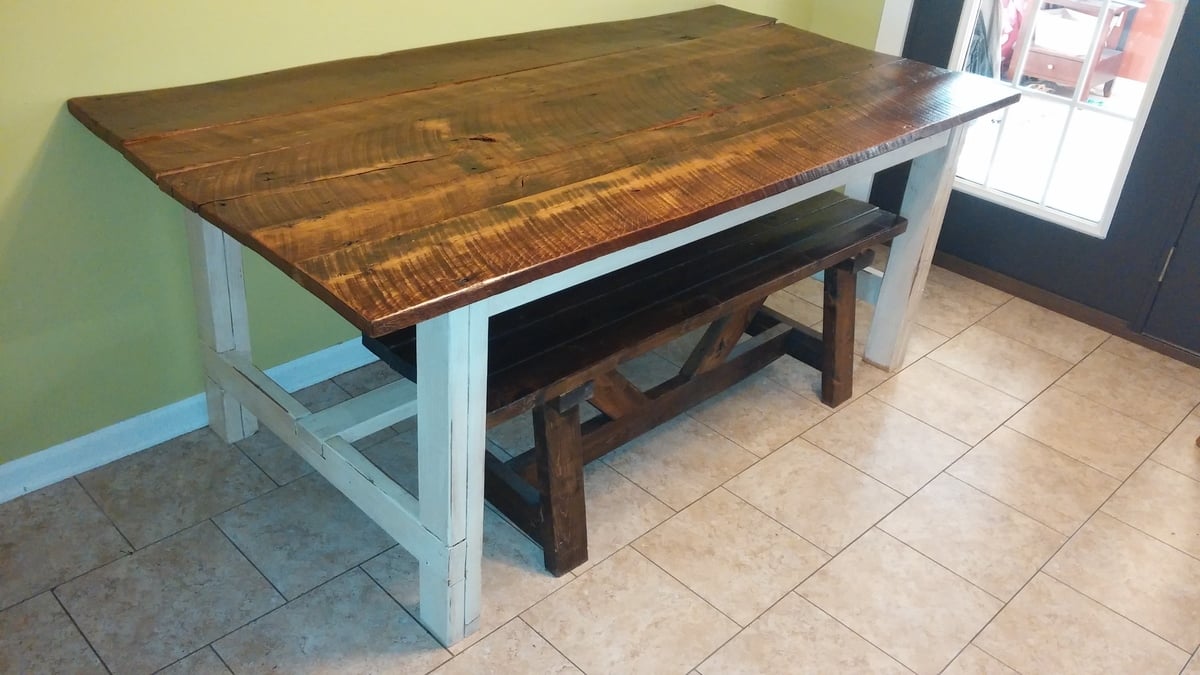
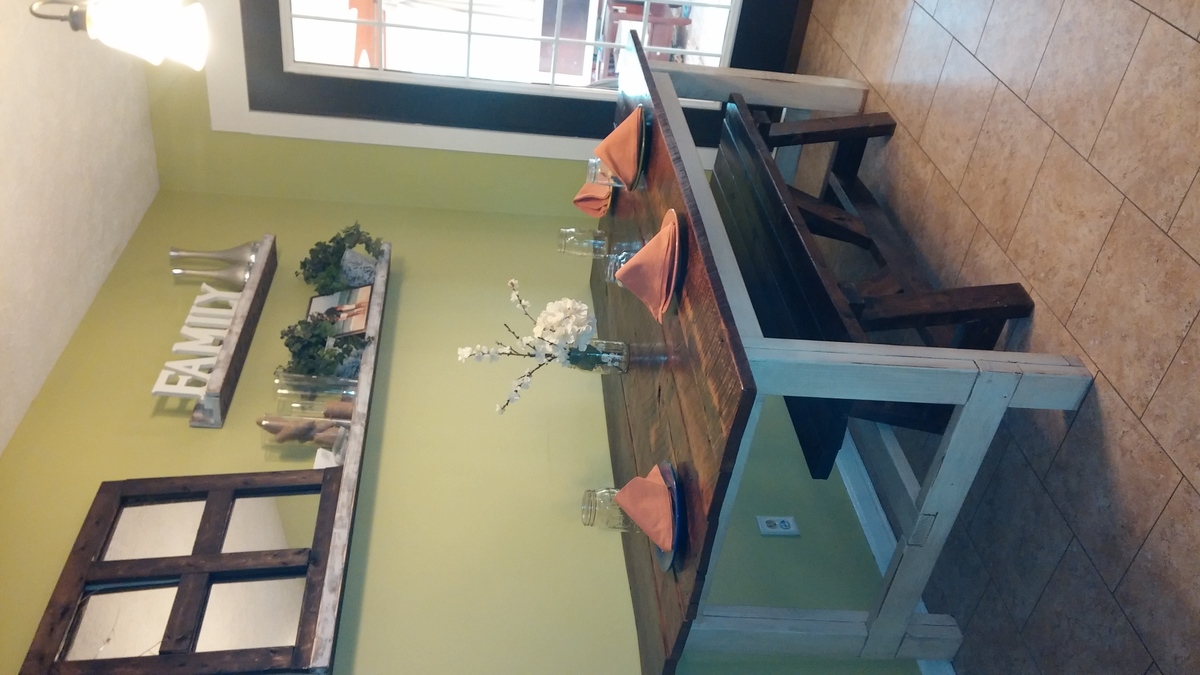
I was super duper lucky and i had someone give me....yes give me 100 year old barn wood. I had been wanting a farmhouse table but couldn't afford the ones I had seen in PB or other stores. After i was given the barn wood, I came immediatly to Ana's site and found the plans. I could have made the table entirely out of the barnwood, but i wanted an old looking white base, so i bought pine 2x4's. It's all i ever wanted an then some!


Changed the top and some dimensions but love how it turned out
First time building a piece of furniture. Definitely get a small Kreg Jig for the project. Built it for my wife for Christmas. She loves it. A lot of imperfections, but not too bad and very sturdy.
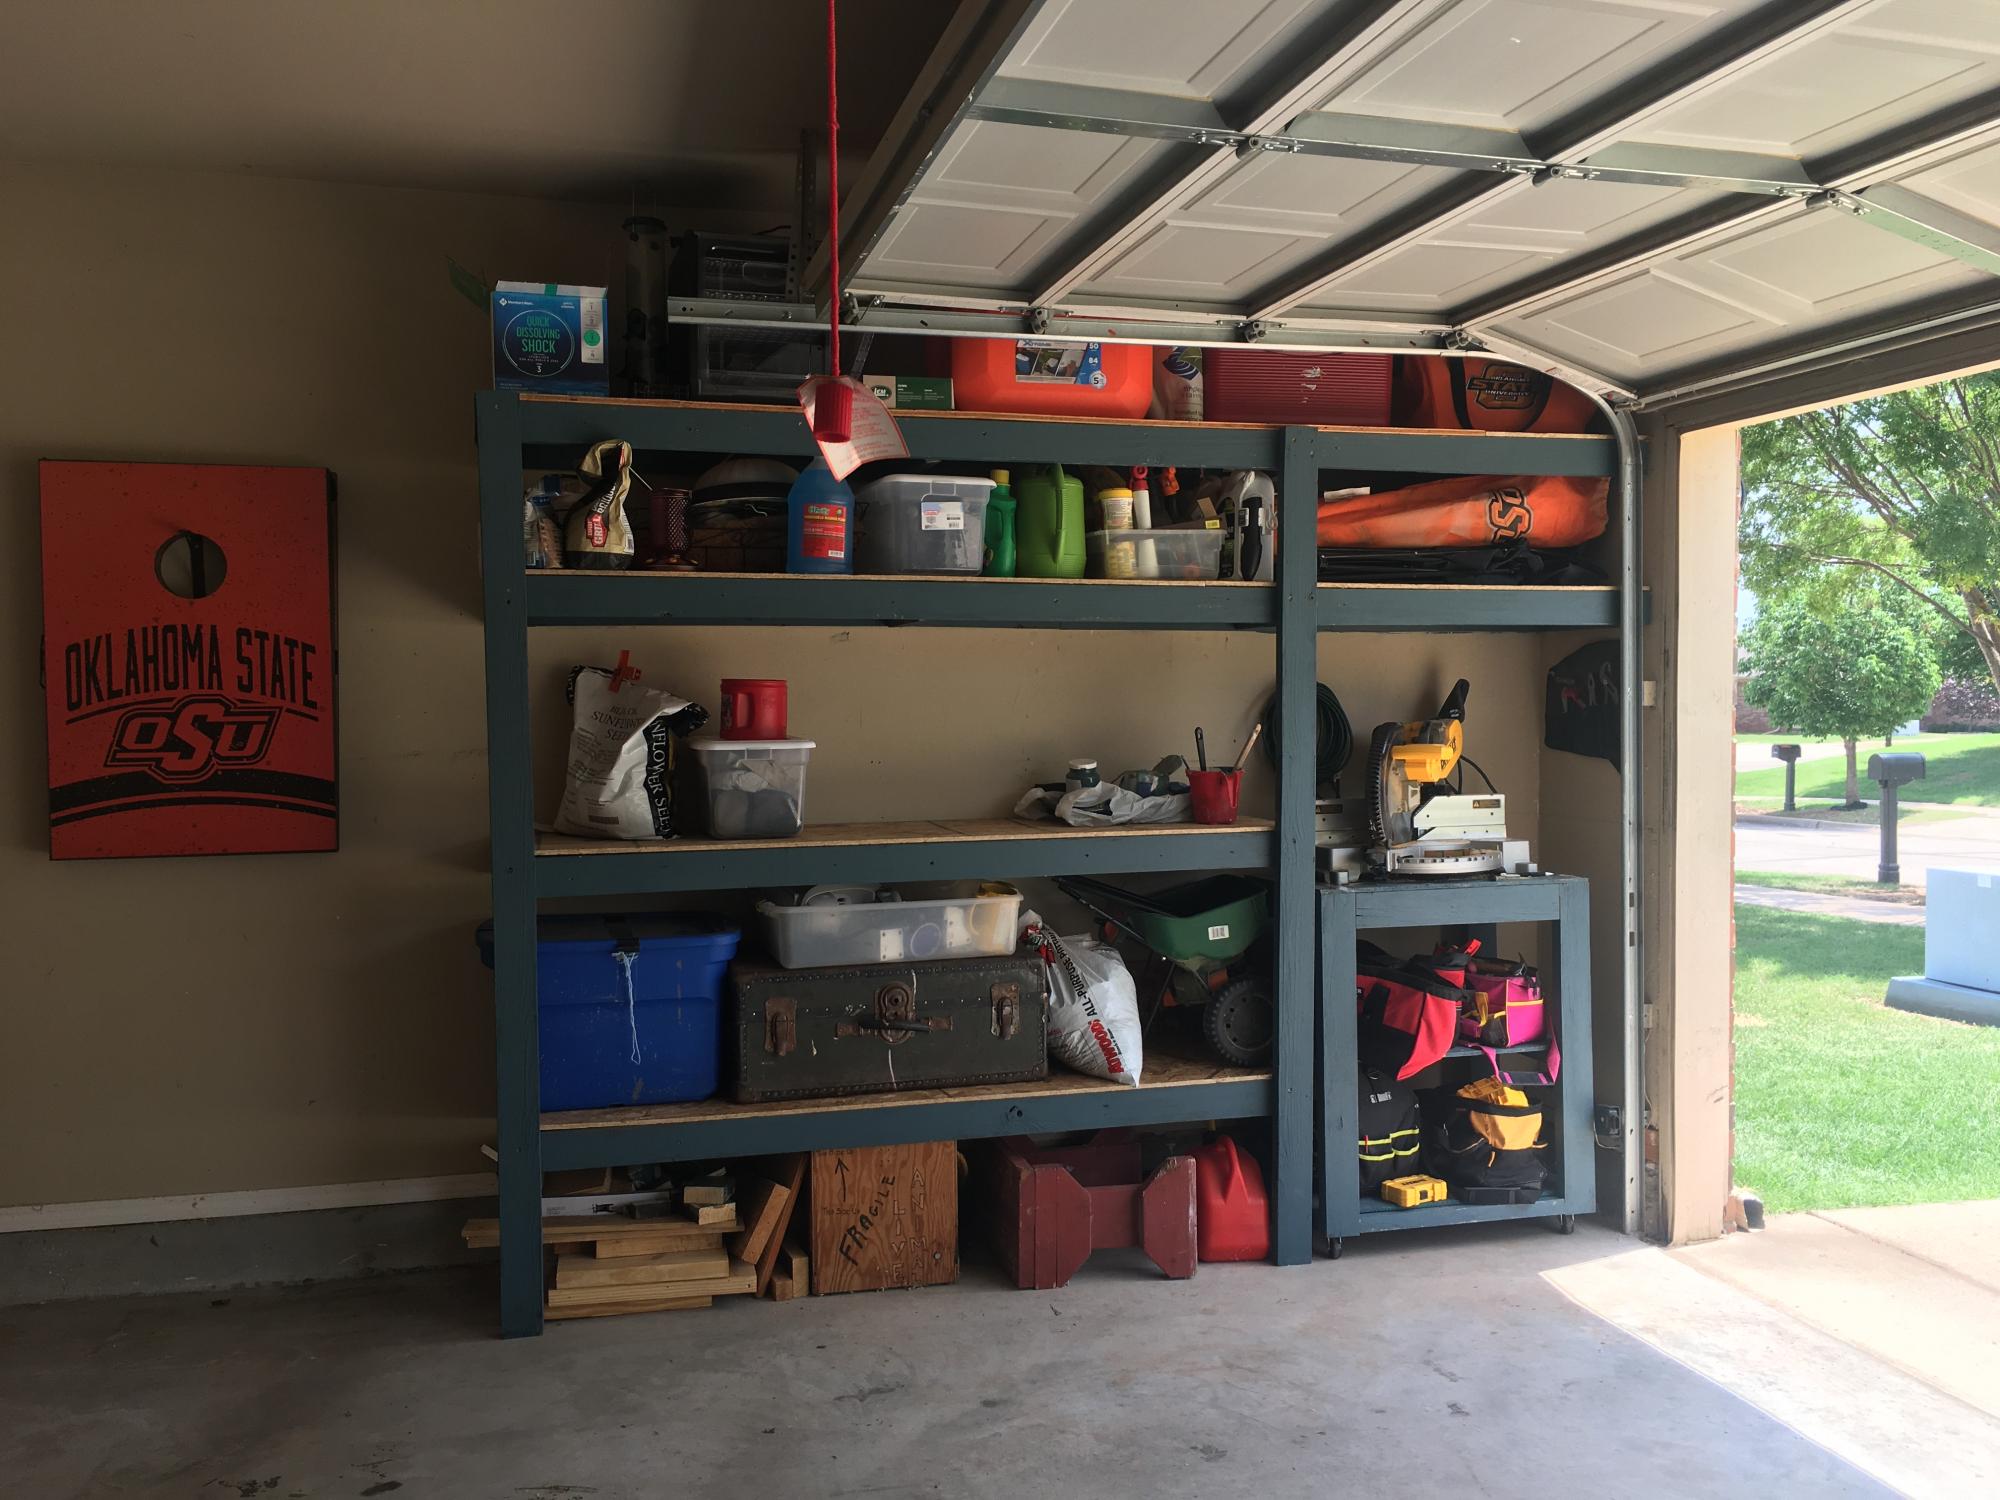
I based these plans off of the garage storage shelf plans and built a cart for my miter saw that is on wheels.
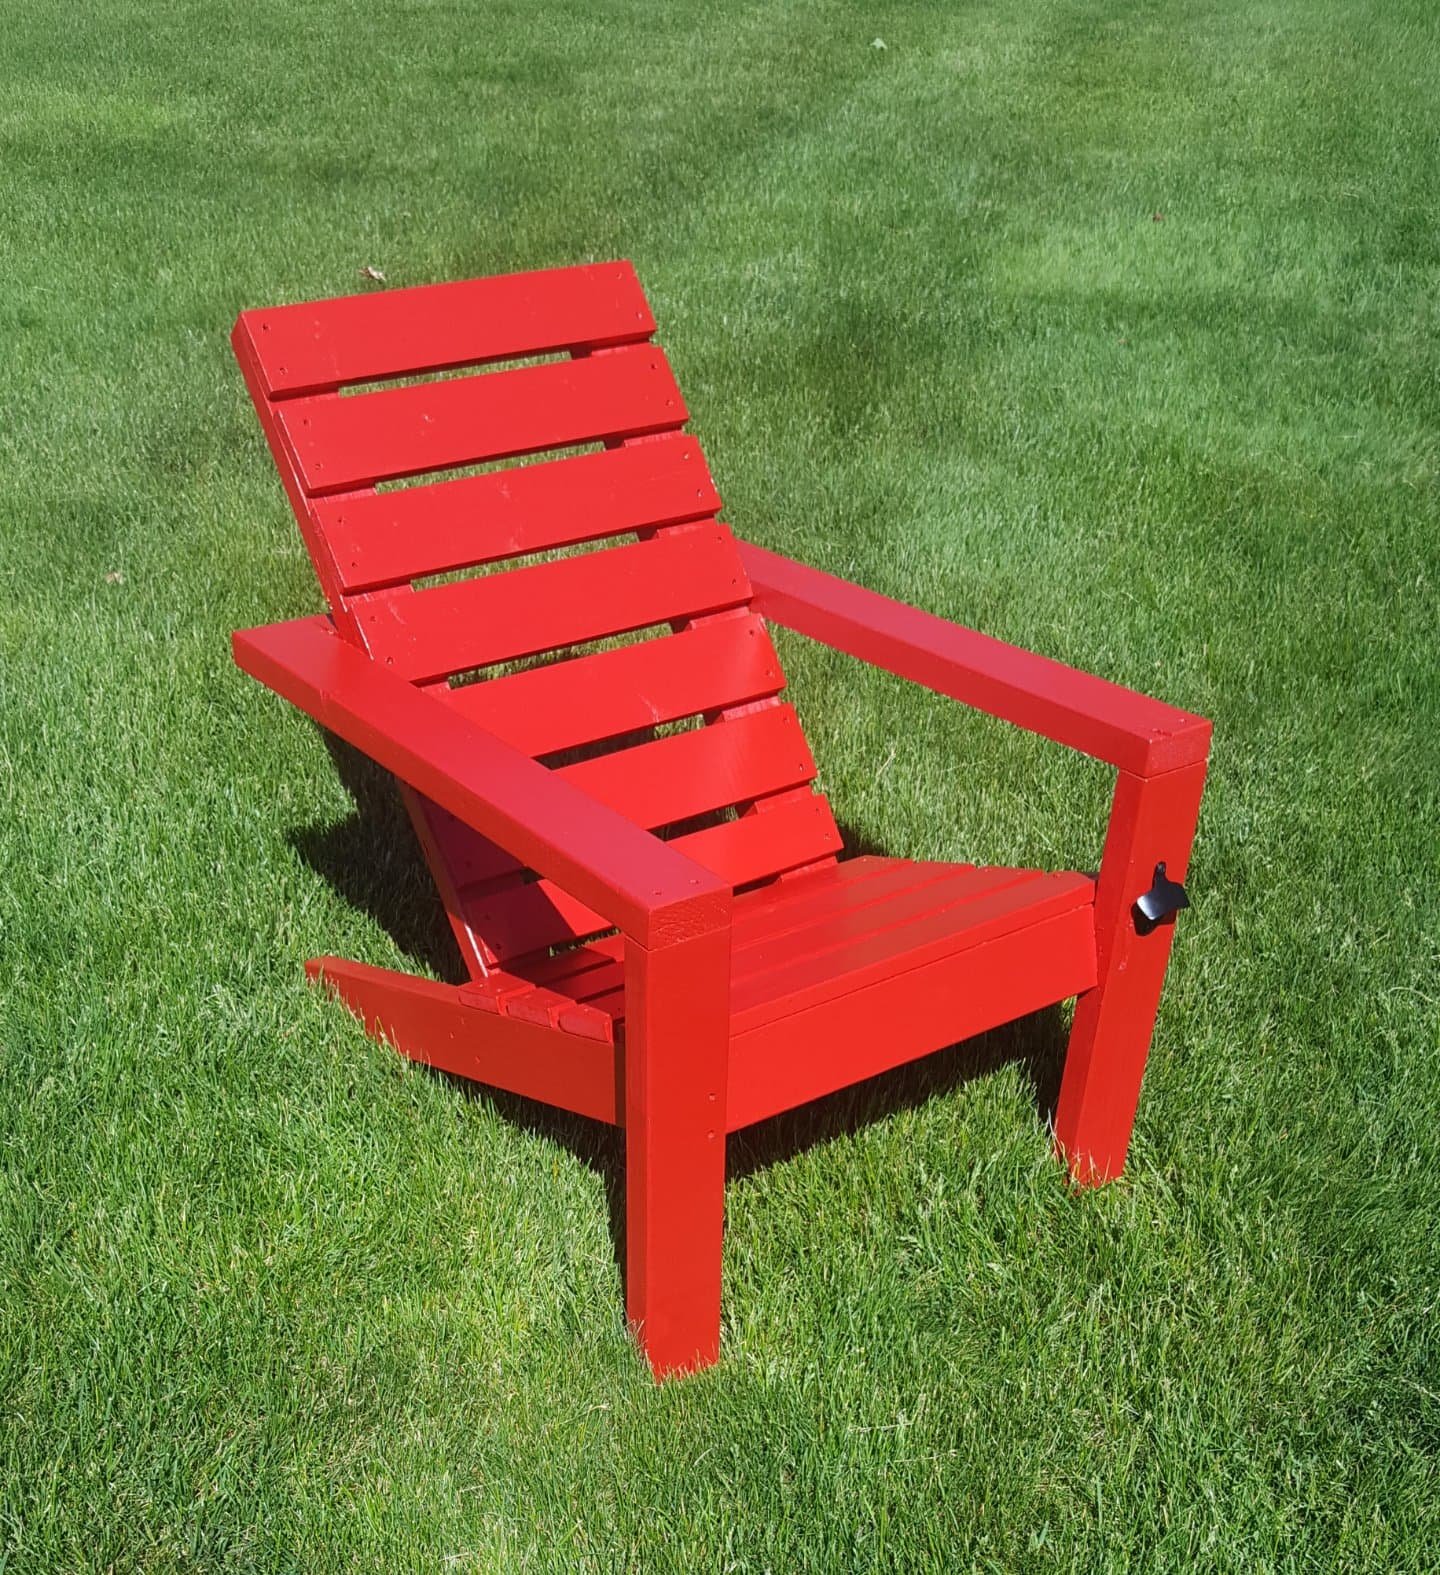
Went with the horizontal slats and added a bottle opener on the left leg.
I stumbled upon this page and instantly fell in love. I made the 2x4 outdoor sectional this week with a few tweeks to make it work for us. My husband does a lot of computer work on our patio so we did the tall table to make it work. I plan to add a shelf at the bottom and touch up on my staining but for my first project I'm impressed. With the instructions and lists given this was a breeze of a project!
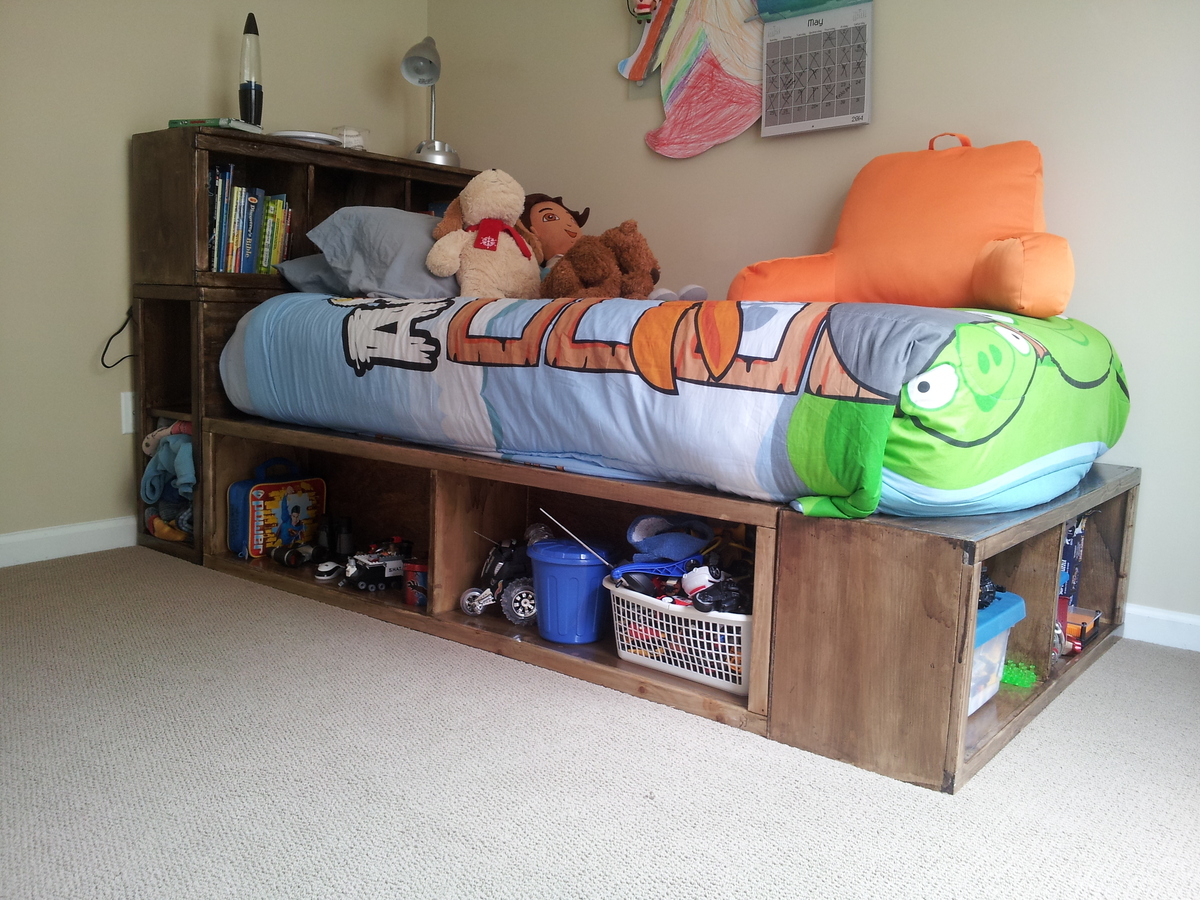
Son's bed (age 9) first build and he loves it! I'm pretty psyched too!
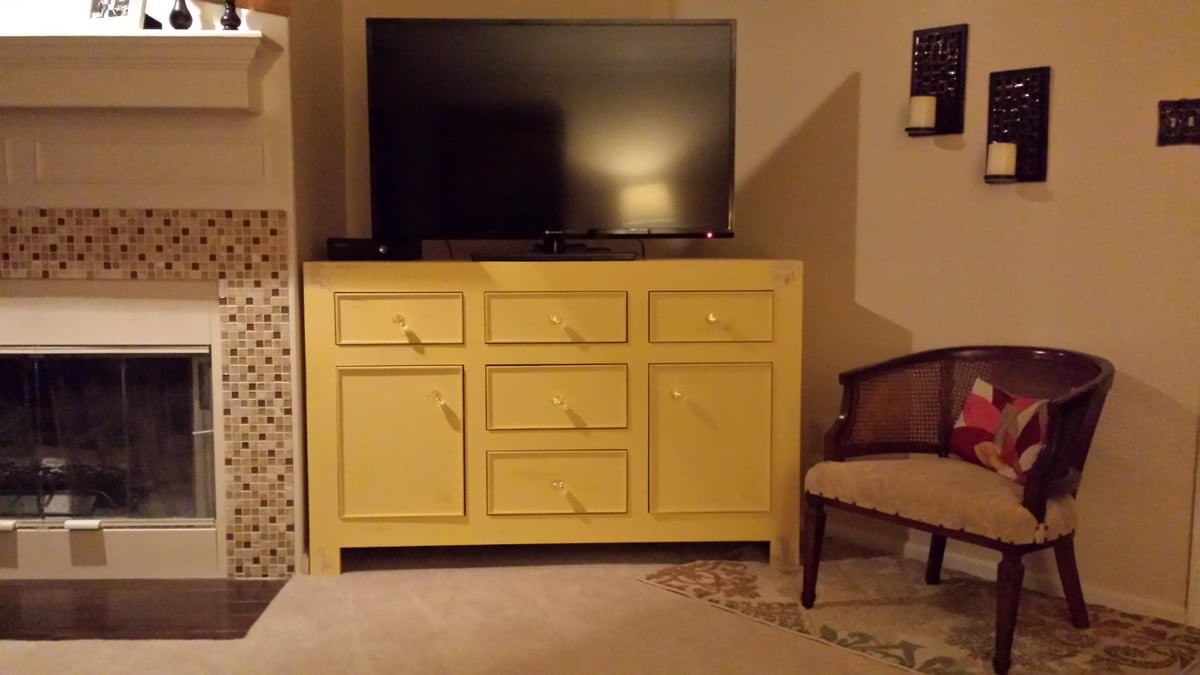
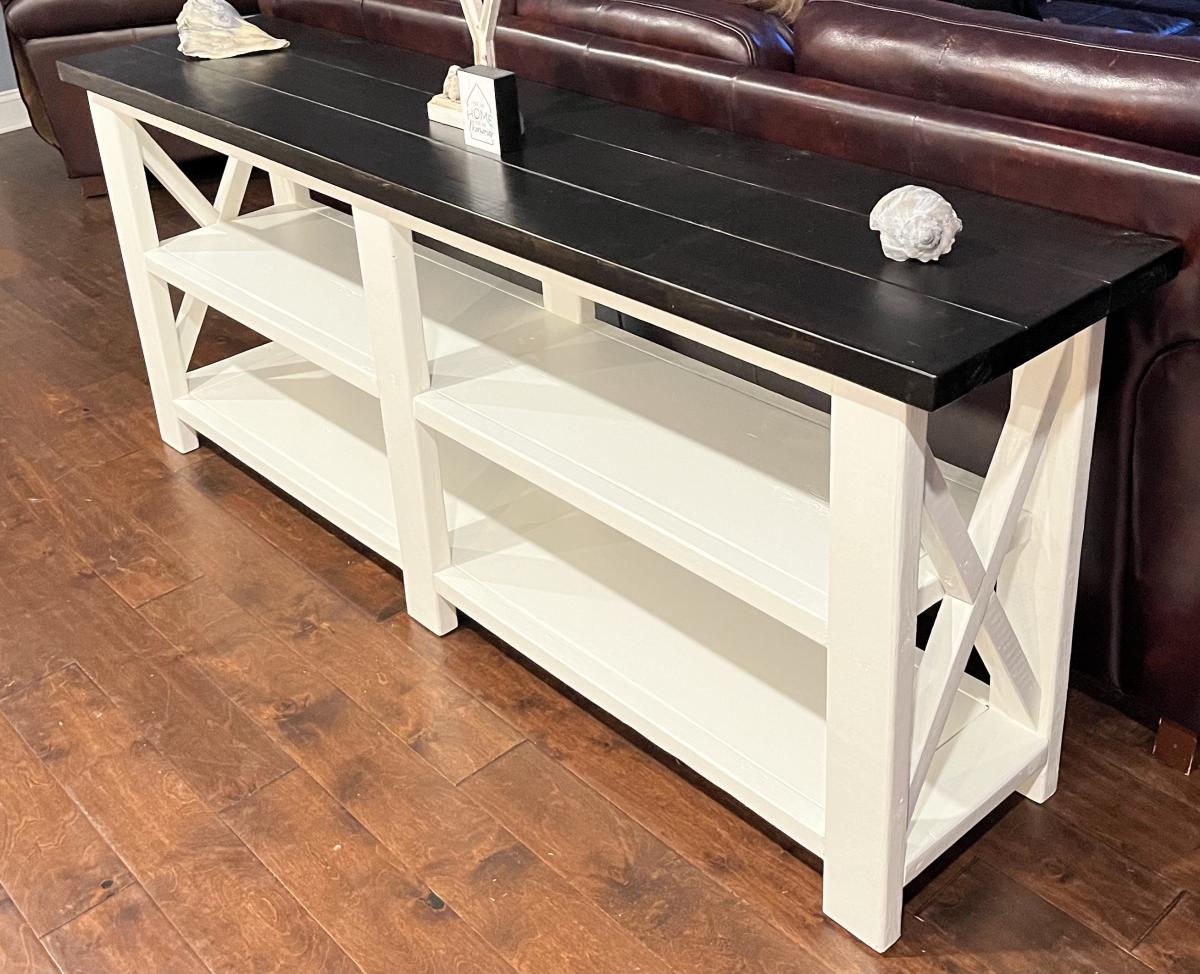
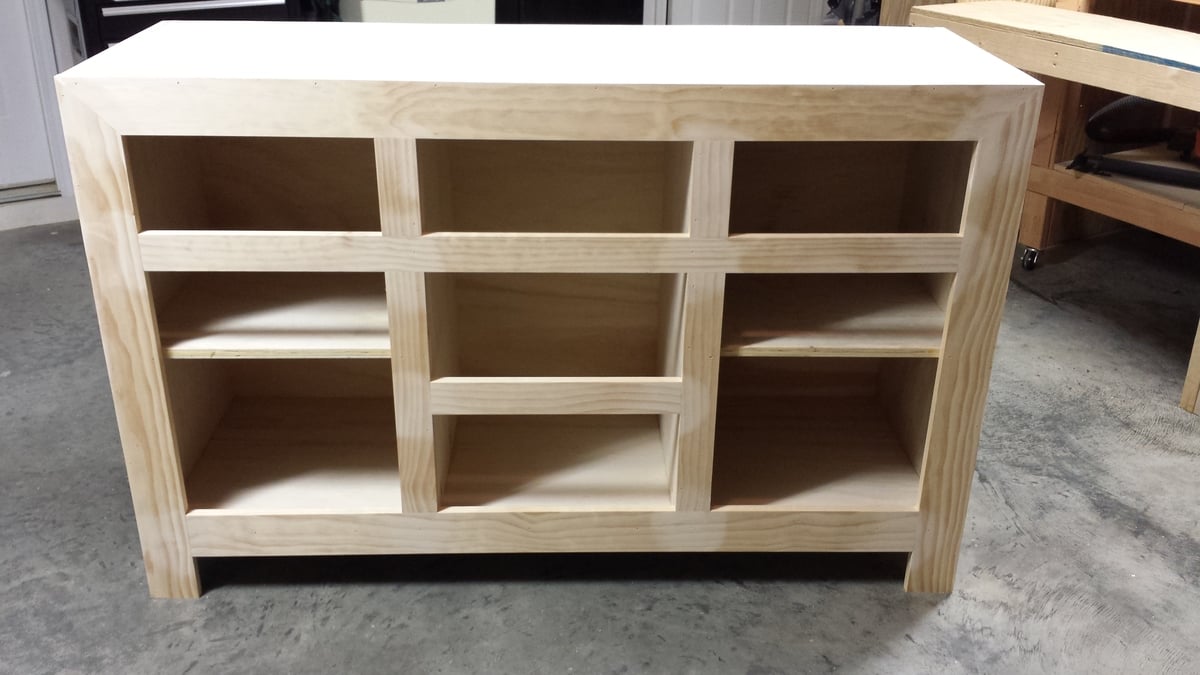
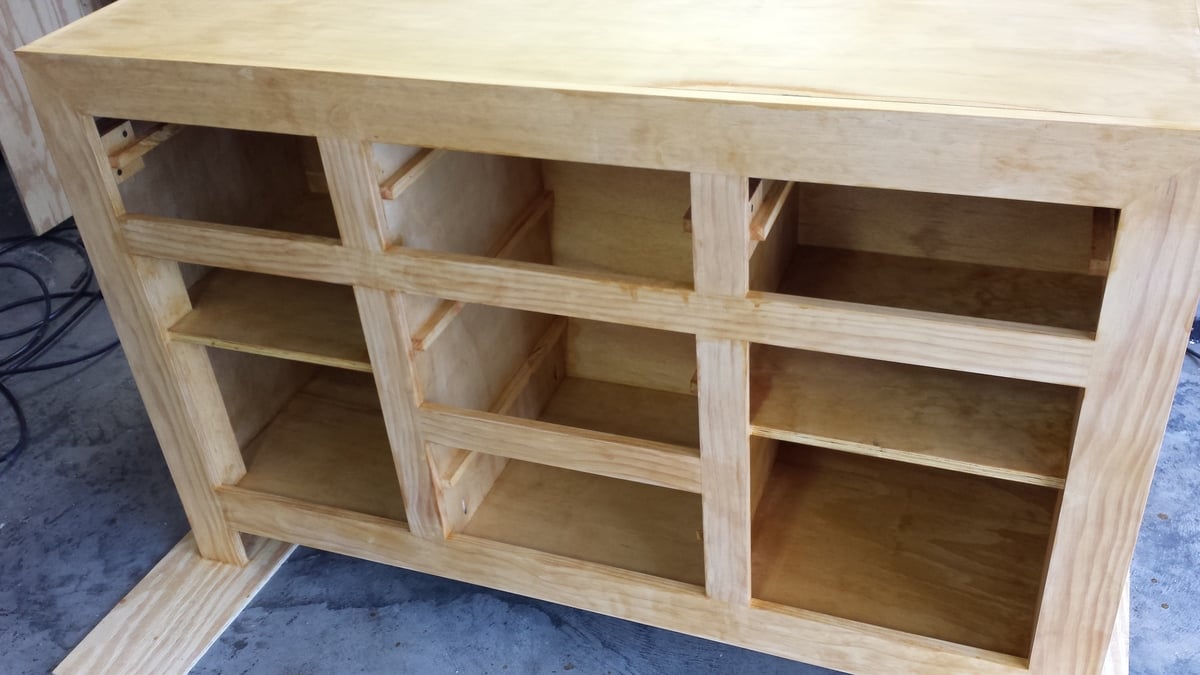
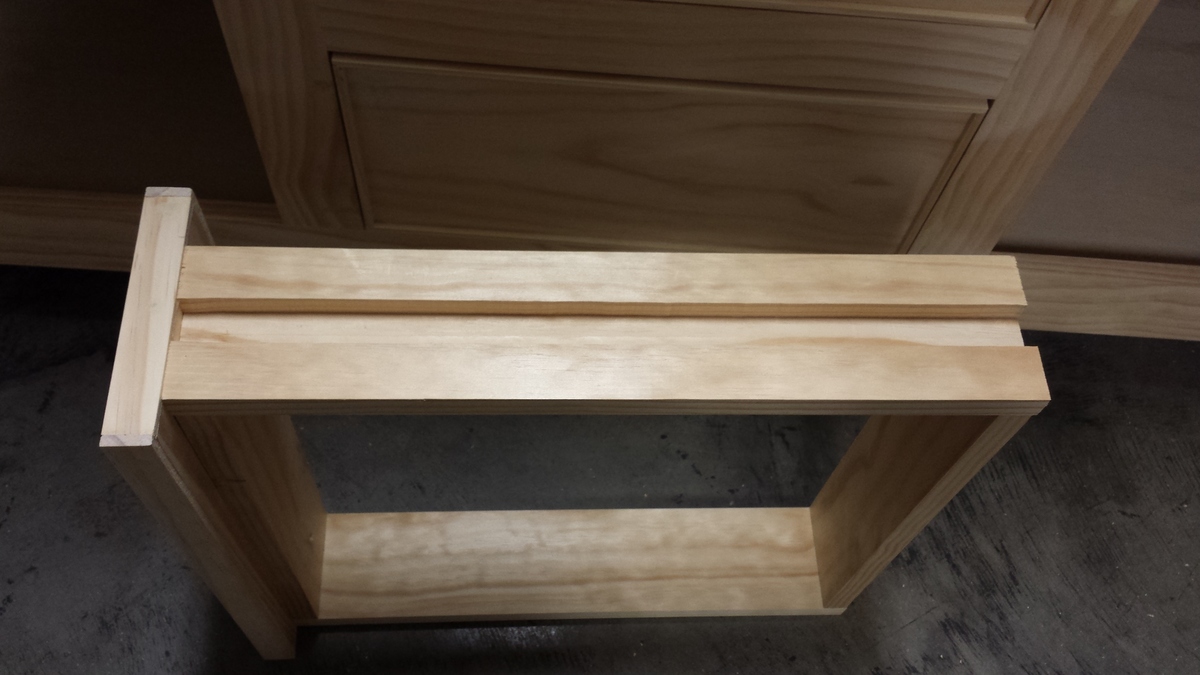
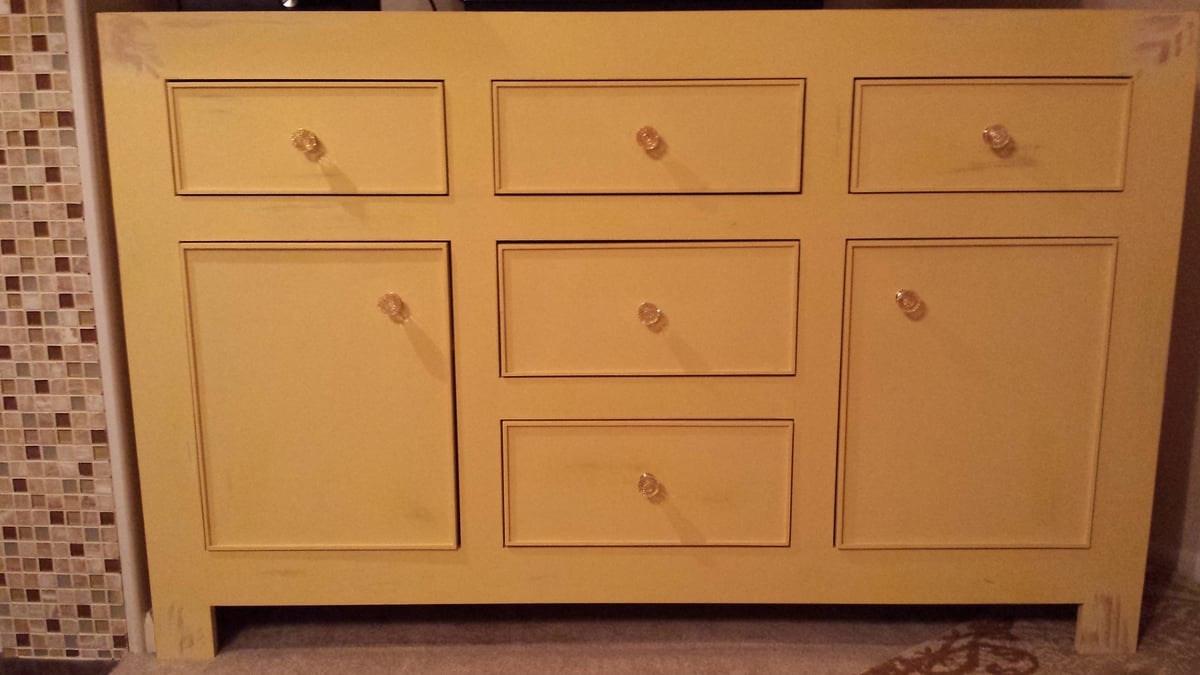
This is the first piece that I have built from your website. The plans were easy to follow. I had to change the dimensions to fit the console where we wanted so it made the parts list a little more time consuming to figure out with a few mishaps in the original plans. After that it was smooth sailing.
I tried to save money where I could so I created my own slides for the drawers rather than spending $100 for the slides. They turned out great. I also made the chalk paint with plaster of Paris since the cost of chalk paint is pretty high.
My wife and i were very pleased with the outcome. Thank you Ana for the great plans. With a little basic wood working knowledge and the proper tools, just about anyone could make this piece.
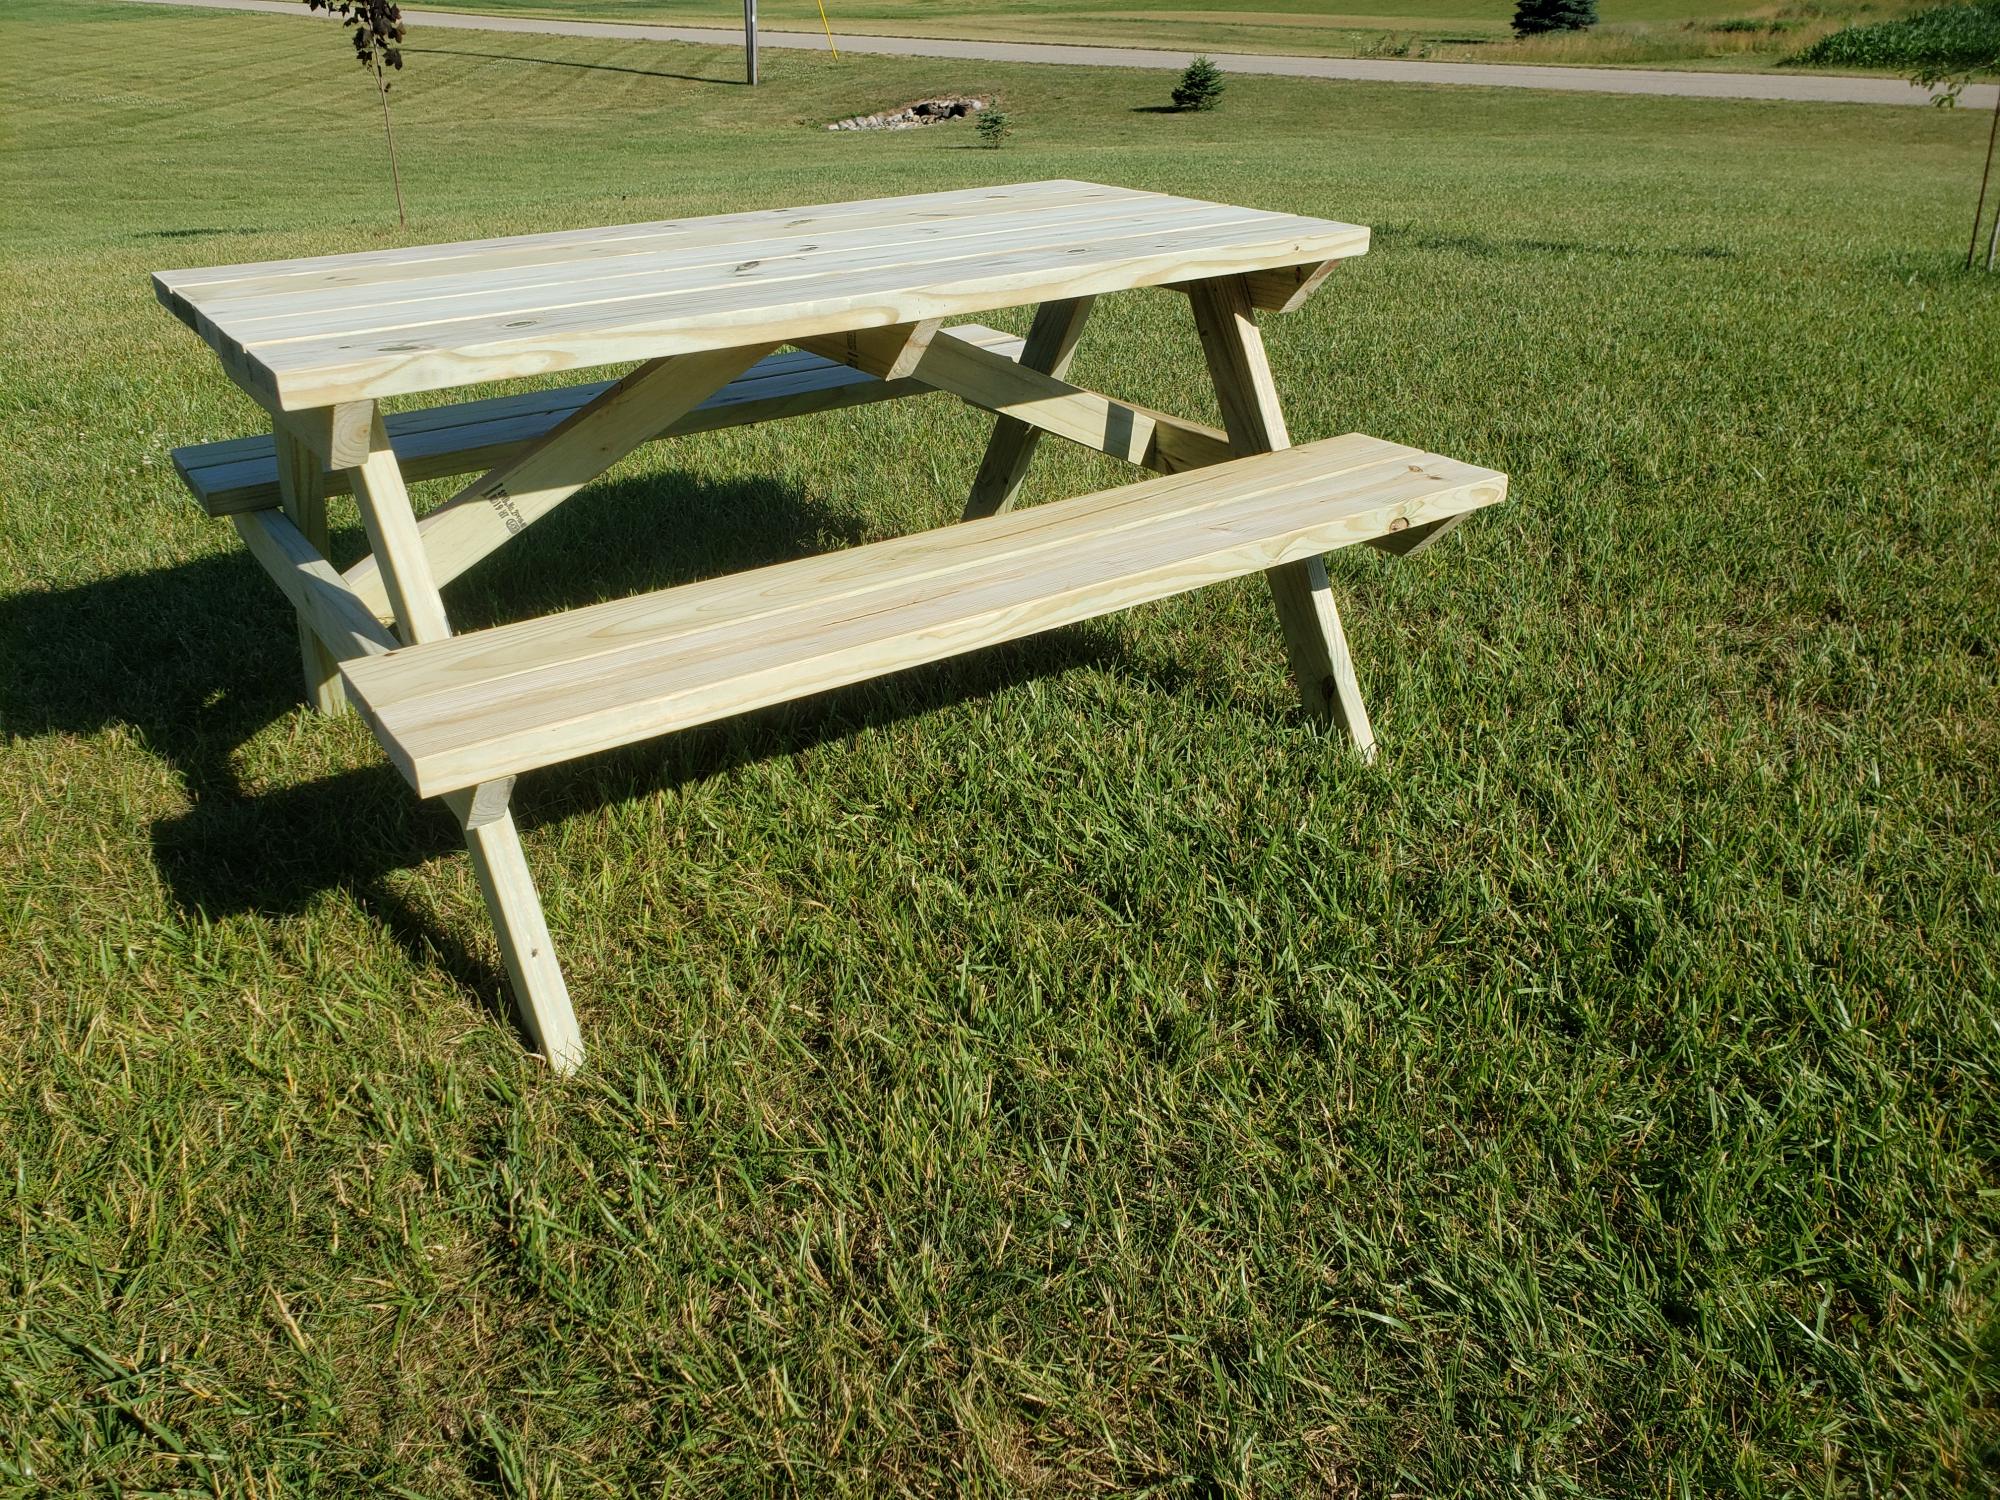
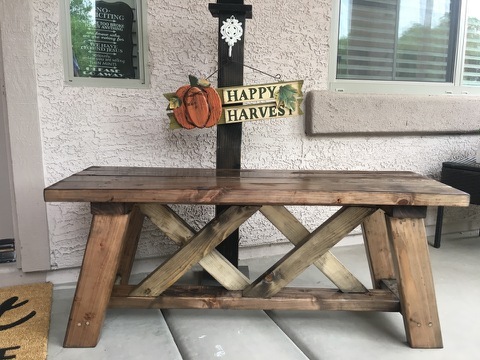
We built from the plan with green treated lumber. We also joined the top and the seat with pocket holes and outdoor blue Kreg screws so there are no screw holes exposed on the tops. Easy build. Great compact picnic table.
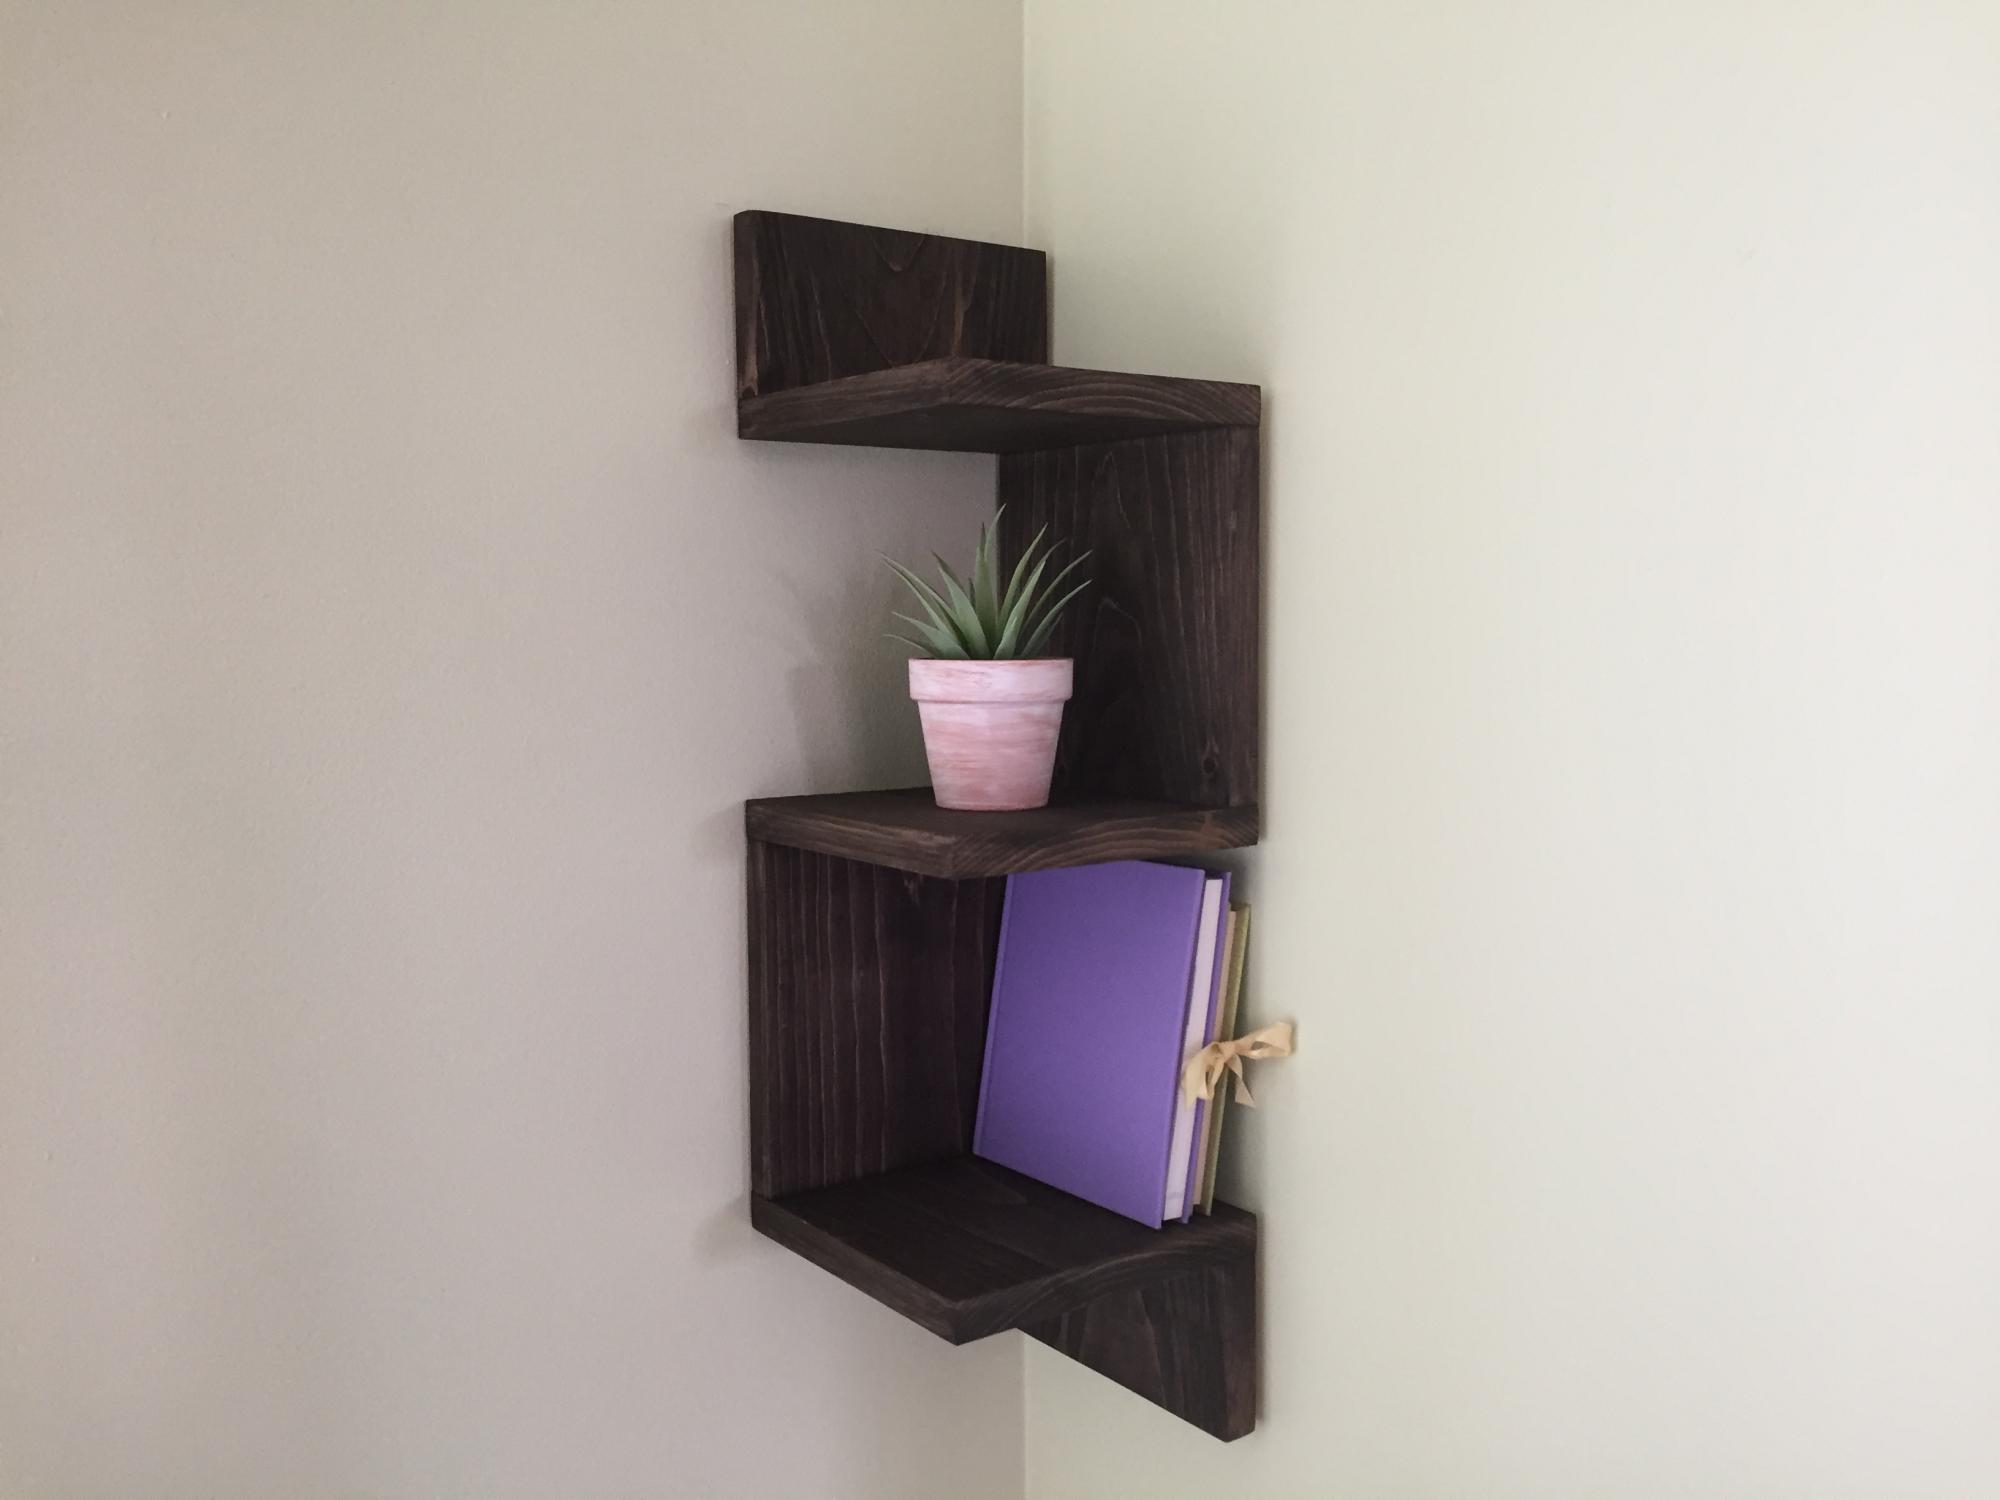
I built these beautiful corner shelves for a friend. It is a great beginner project. I used a 1x8 board but you could also use a 1x10 board. You could also build 5 shelves instead of 3. I used pocket hole joinery.

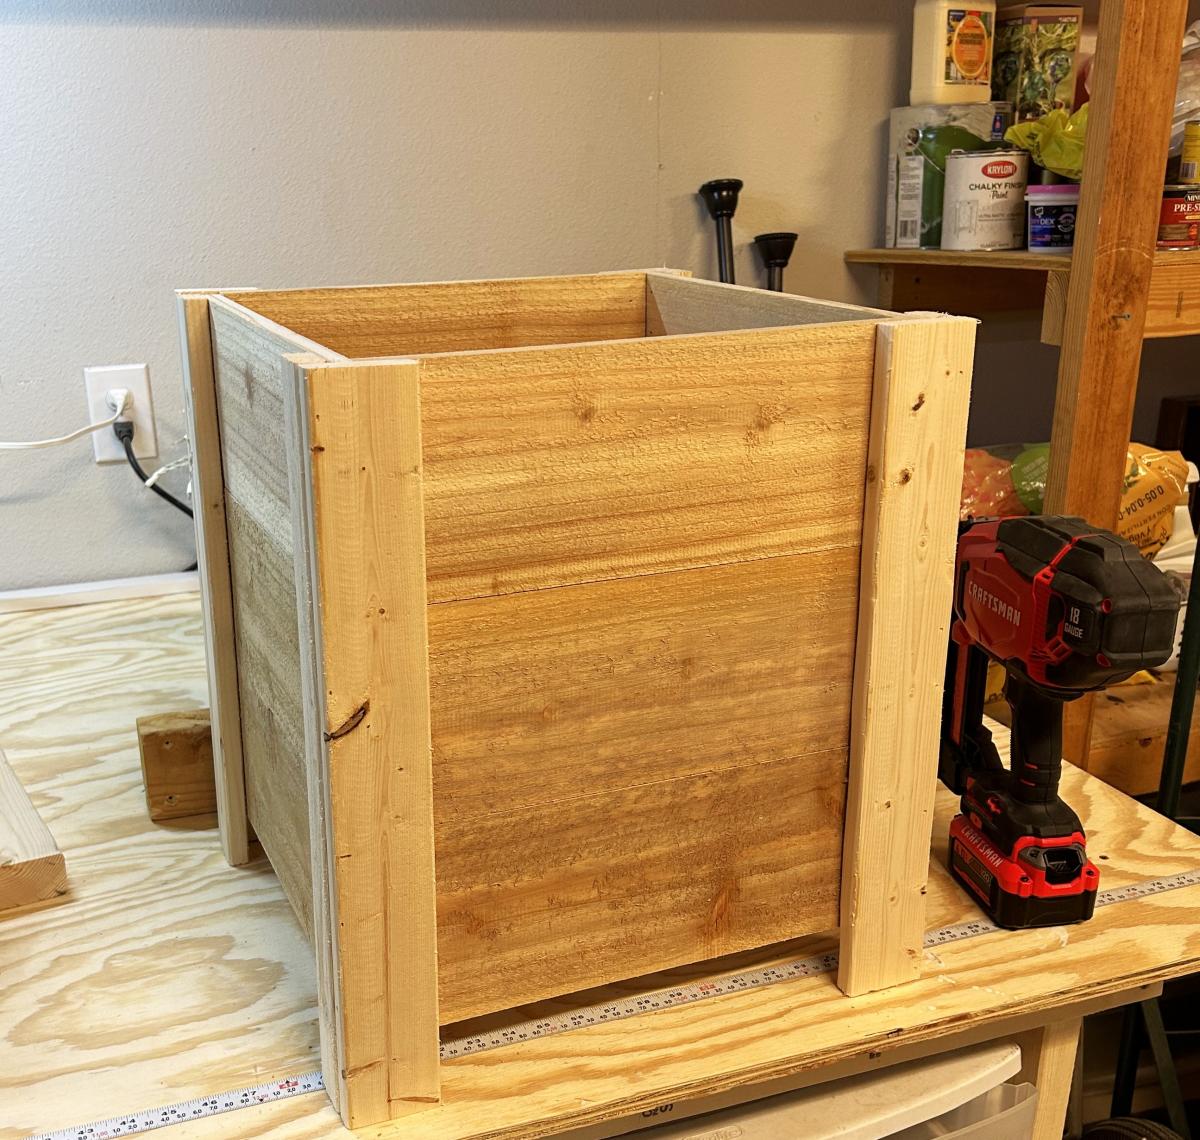
Easy Build DIY Planter Box with Cedar Fence Pickets
Followed these plans and made these planter boxes for the front porch! I couldn’t believe I was able to complete a project like this so quickly! Instead of paint, I opted to use some grey stain I had leftover from another project. Thanks! I love them!
Beth

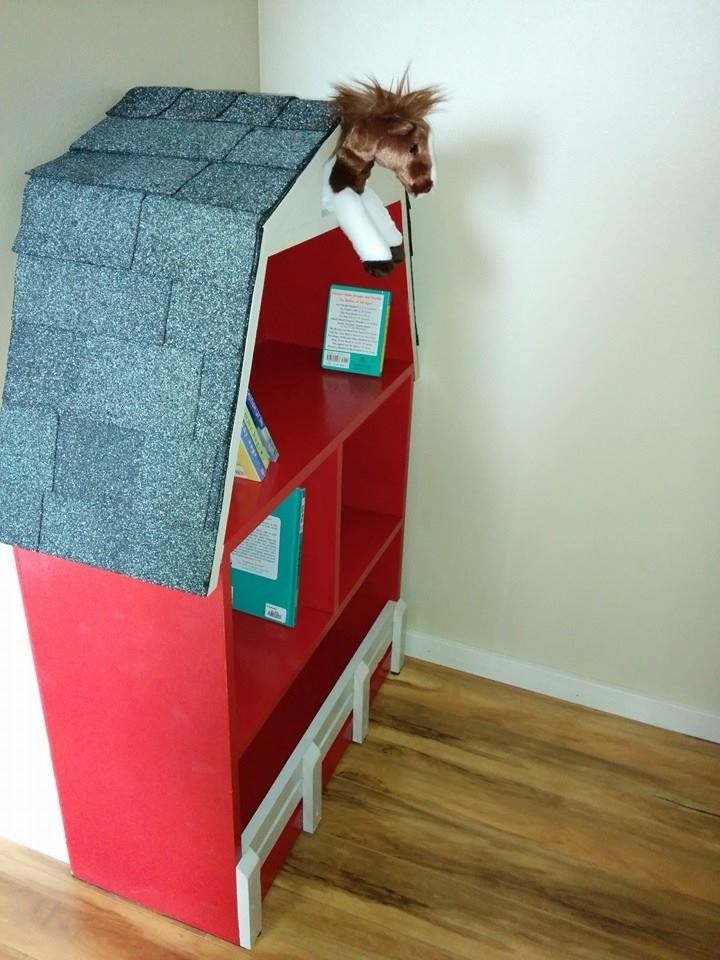
For our baby girl's cowgirl nursery, my husband and I wanted to build all the furniture. Only the crib and night stand to go.
We built the barn bookshelf for the fact that it was a perfect addition to any cowgirl room. It was a relatively simple build with the finishing taking the longest amount of time.

Sun, 06/29/2014 - 20:53
What a beautiful bookshelf! I'm a couple weeks away from completing my 1 & 3 year olds' John Deere themed bedroom and have been looking for a shelf for their tractors. This is the perfect! Thank you for your awesome idea and good luck with the the rest of your nursery builds!
In reply to So creative and an amazing job! by Veronica P
Tue, 07/01/2014 - 17:42
Thanks for the encouragement! We have enjoyed building but sometimes feel like we bit off more than we can chew with all the nursery and the closing deadline. :-) hearing positive feedback is encouraging.
Tue, 07/01/2014 - 19:06
I'm due in August with baby boy #3 and promised his big brothers a John Deere themed room including a tractor bunk bed, toy storage, closet and stepstool before the little guy arrives. What was I thinking? But I'm just a week or so away from completion. I'm sure you'll make it in time as well and if your finished pieces are any indication of what her nursery will be like, Teyla will be a lucky little girl!

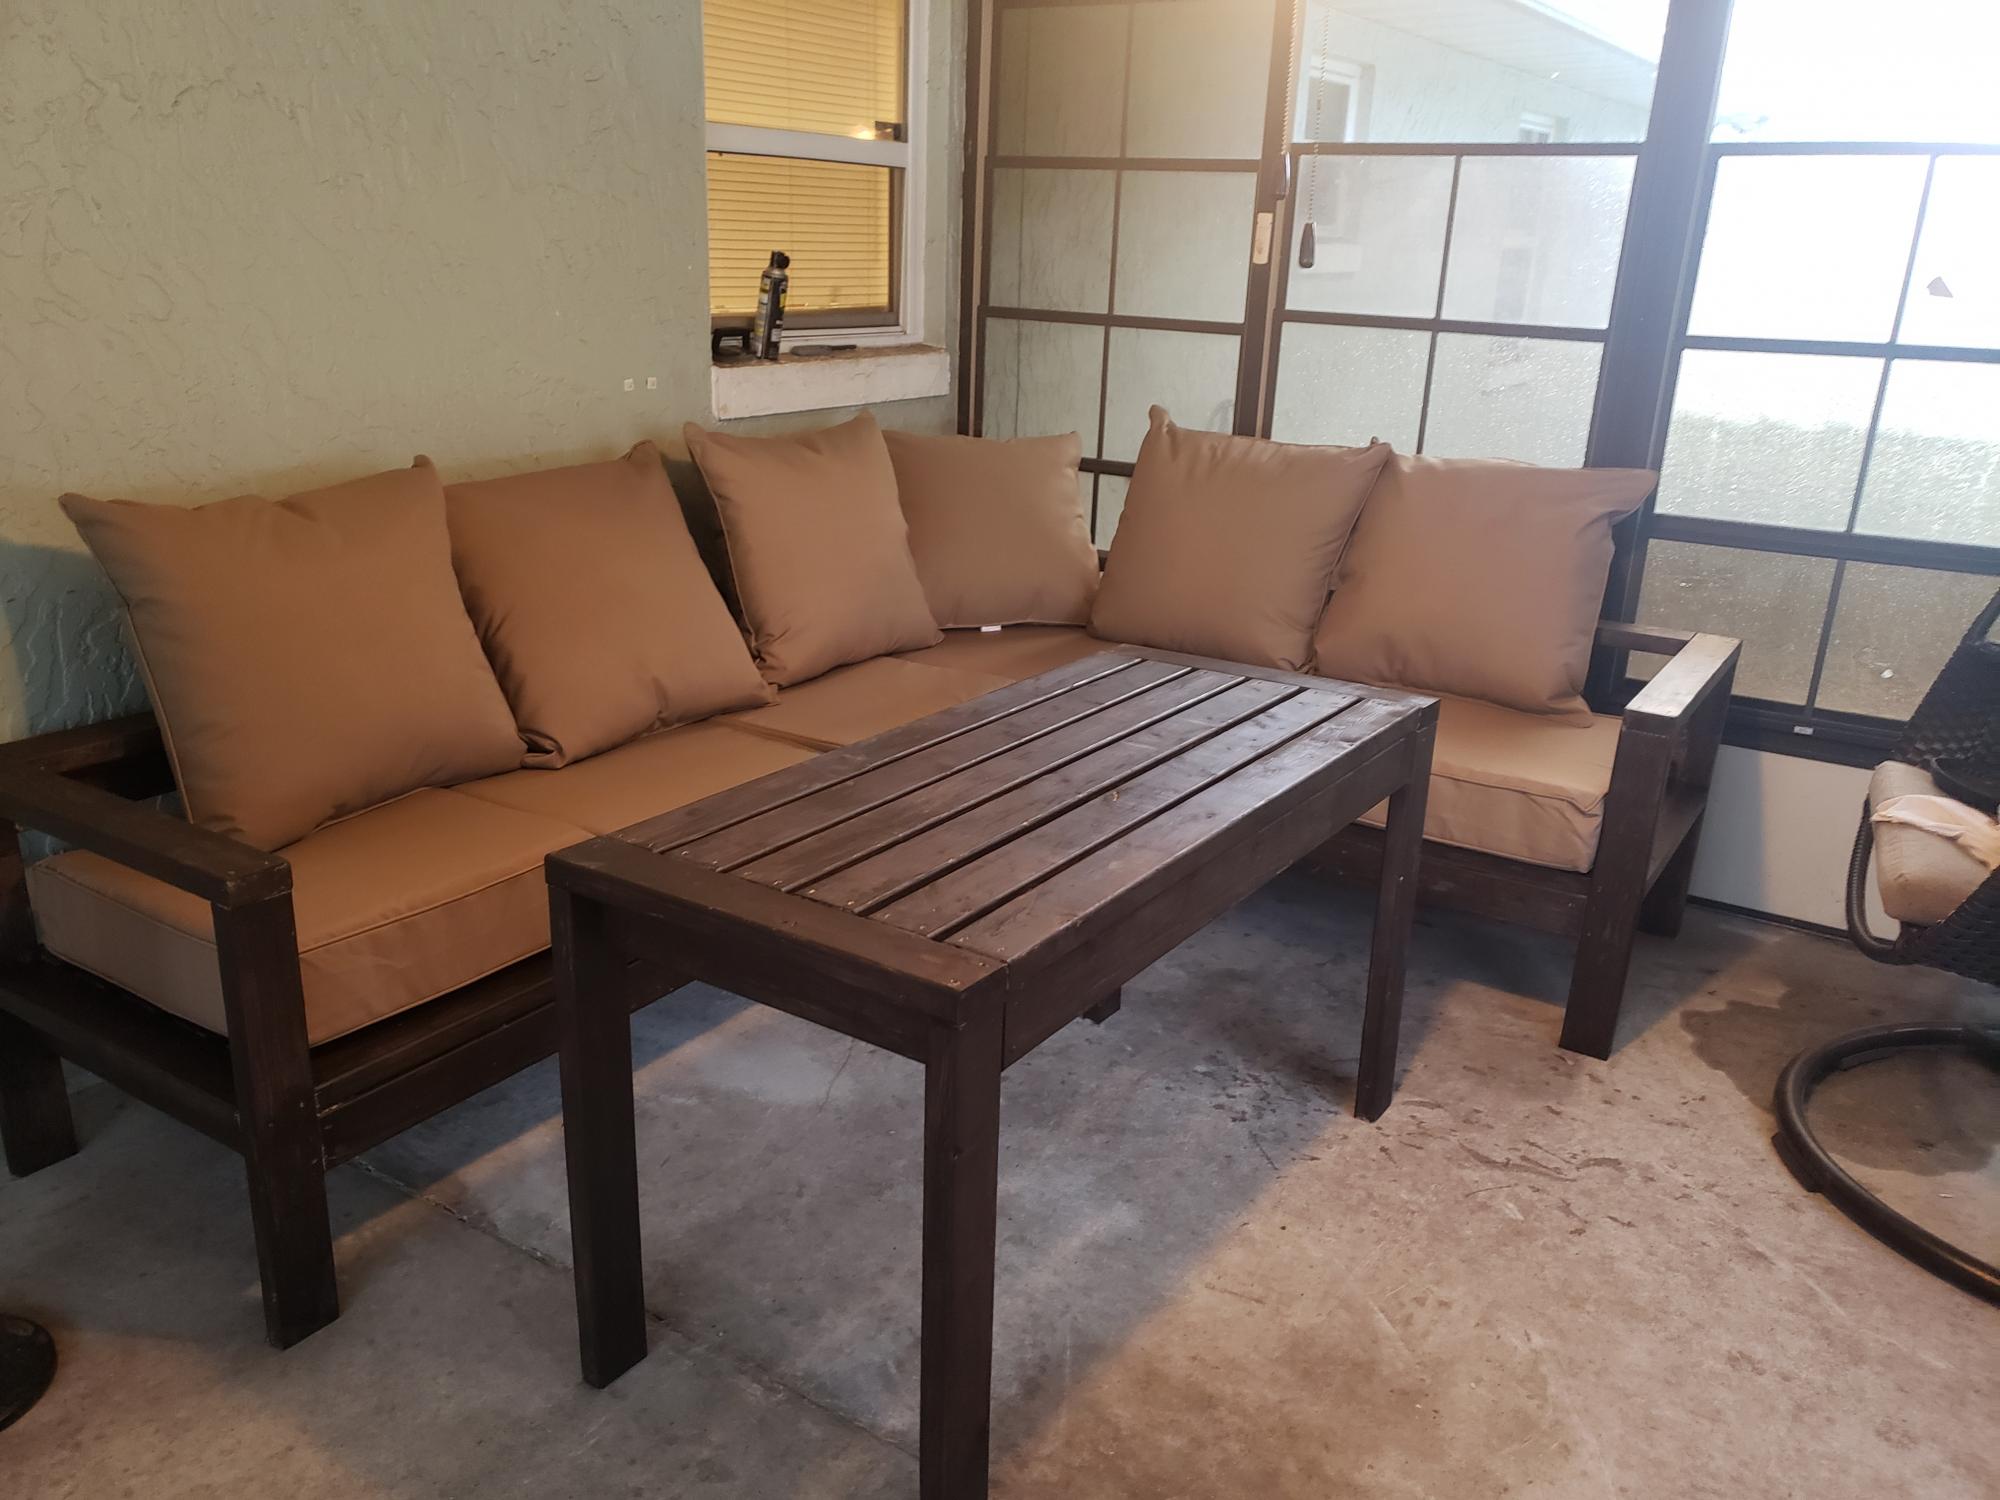
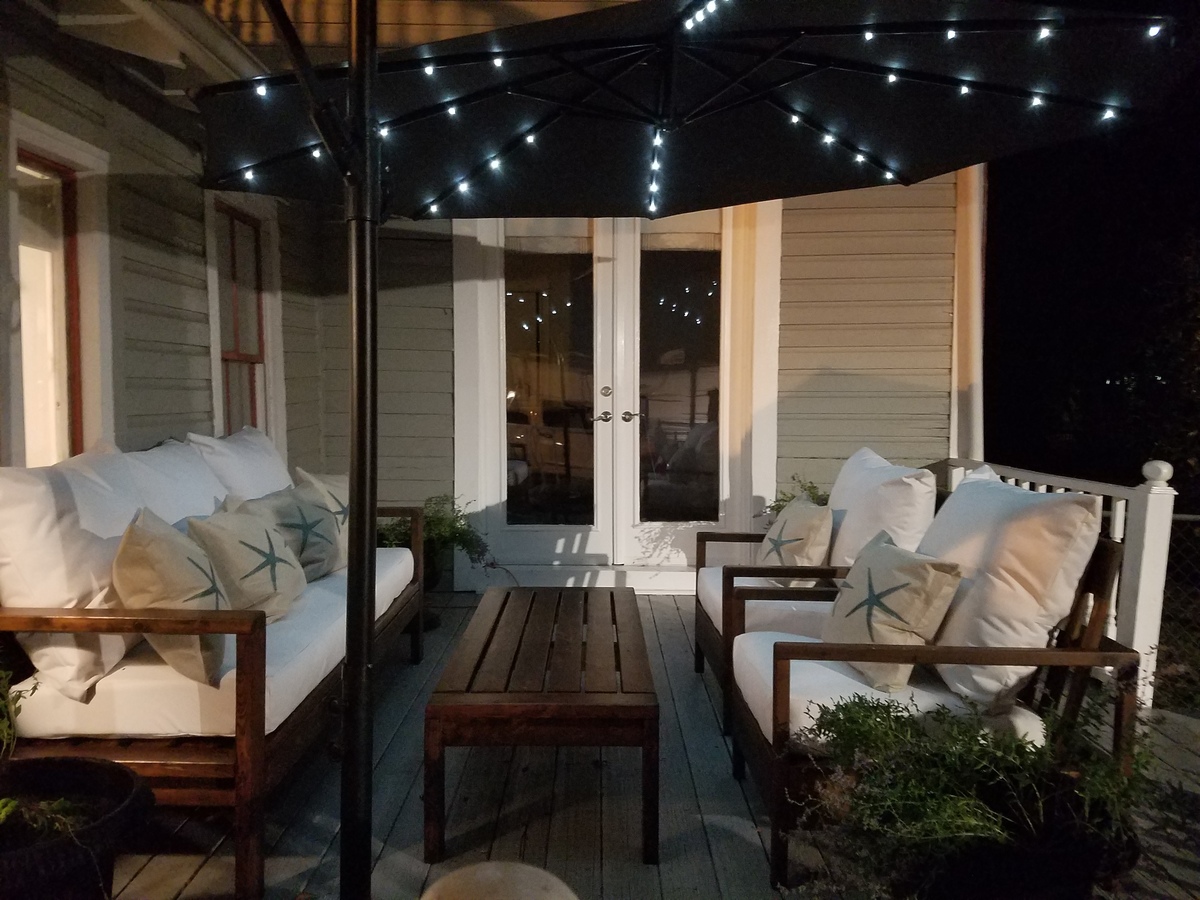
Between my day job and daily chores I somehow managed to build this, make the stain with the vinegar/steel wool, and sew all the cushions in about a week and a half. The hardest part for me was lifting the sofa onto the deck by myself after I built it.
I also made the chairs from this site (simple white outdoor chair) and the coffee table.
Thanks Ana and everyone for contributing your plans and for everyone posting their projects. It helps me do it to.
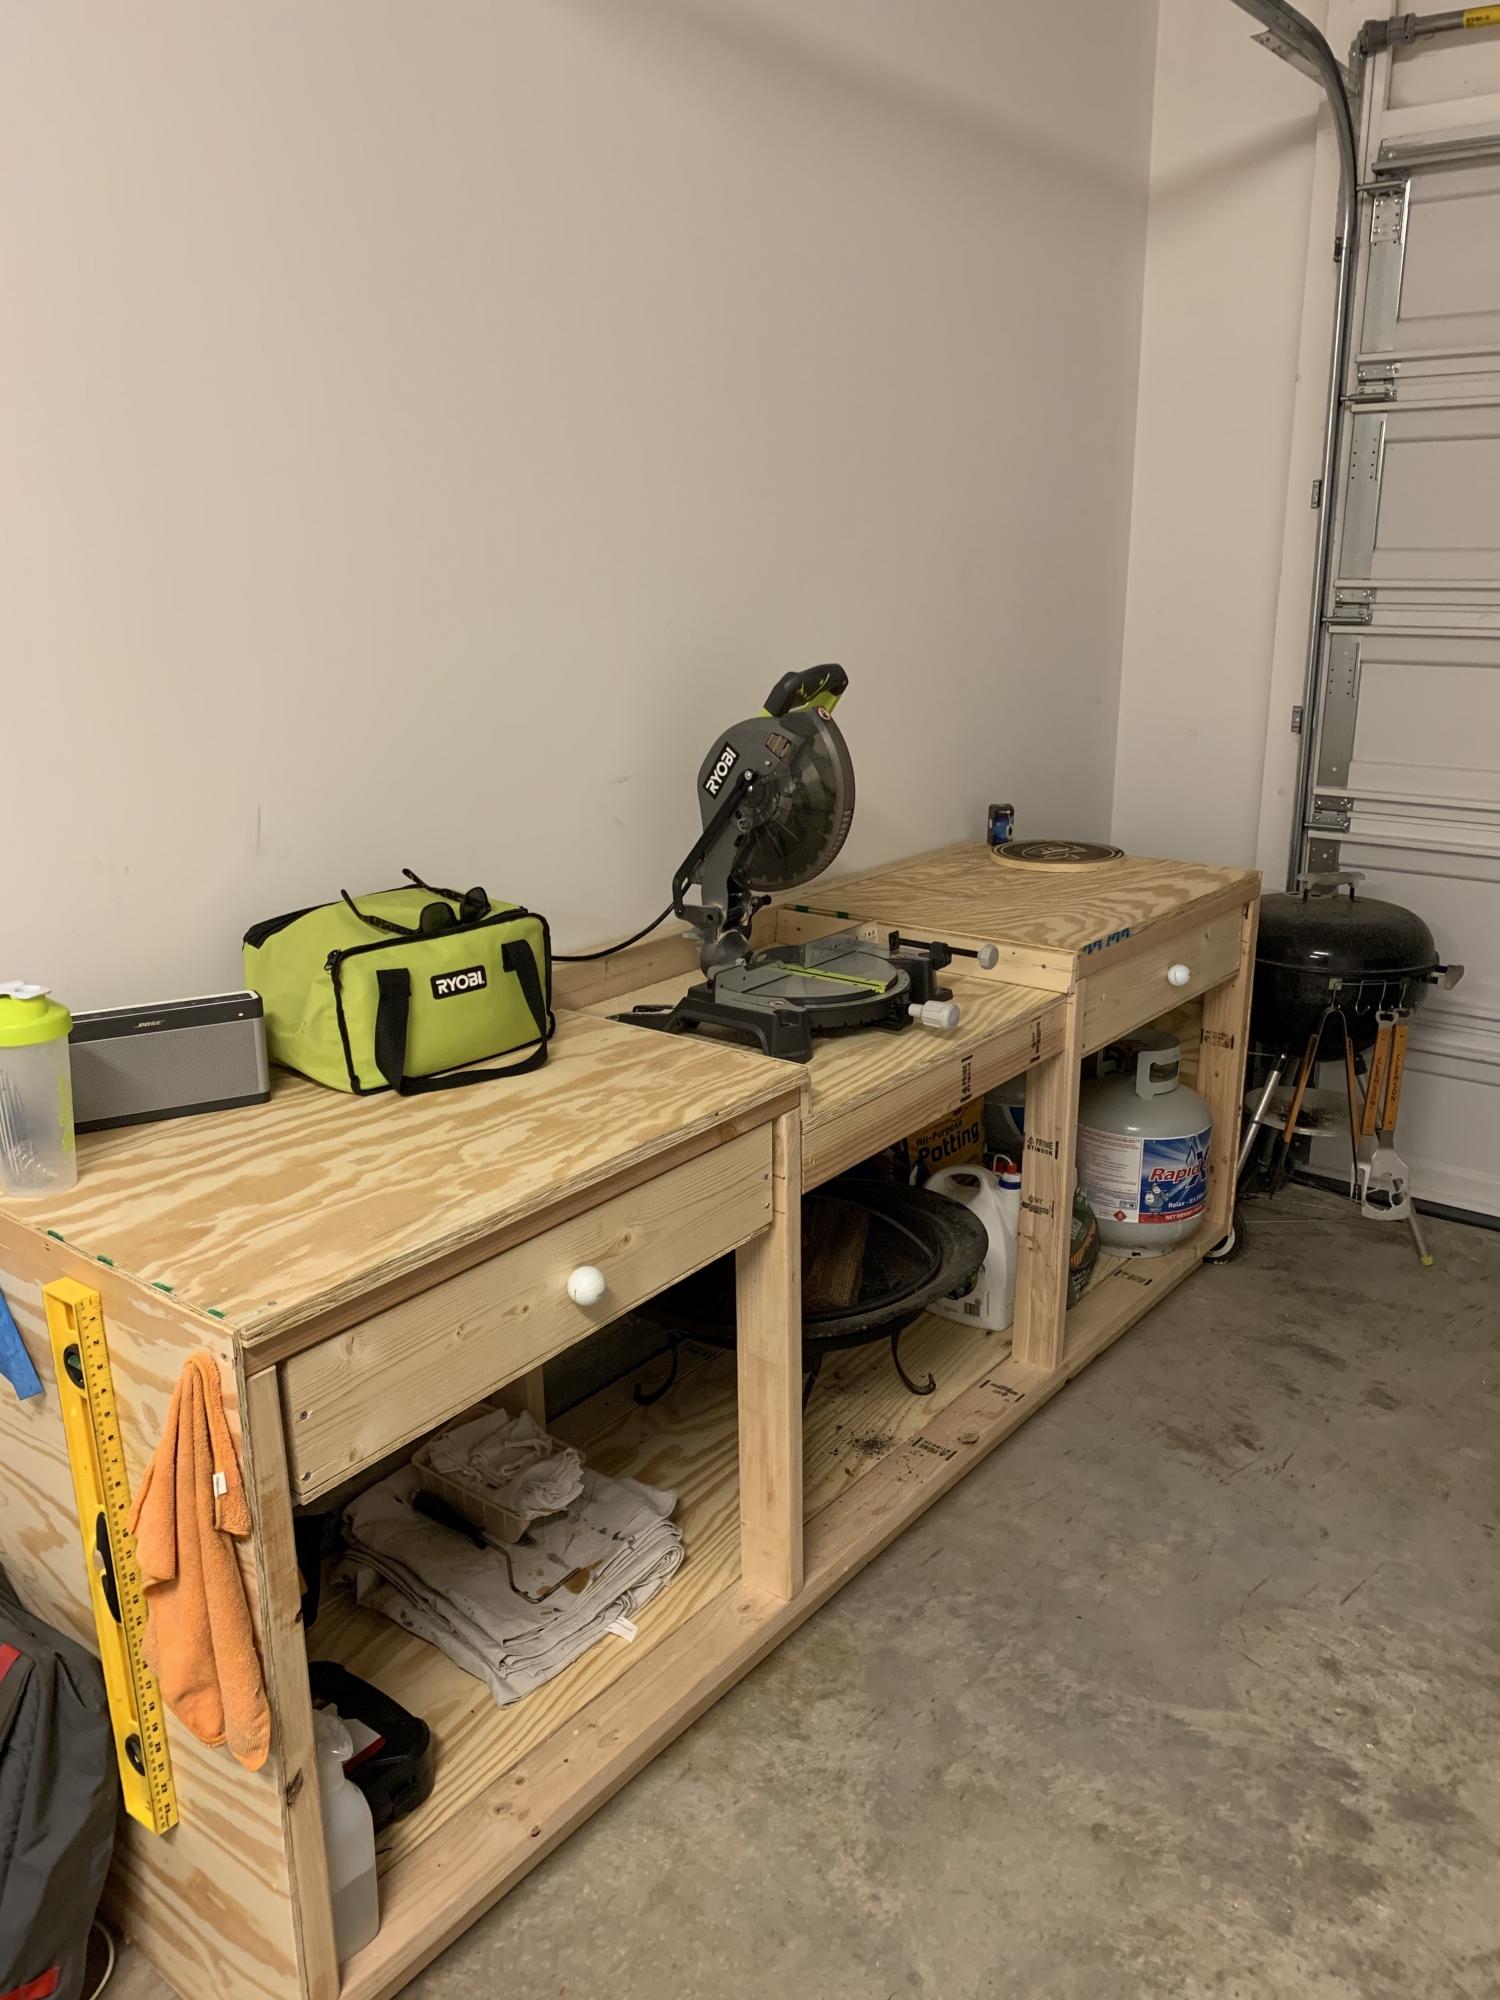
I picked up wood working as an indoor hobby during the Coronavirus and working from home. I was doing everything on the floor in my garage until I saw these plans for the Pony Wall Workbench. I'm 6'4 so having a bench to work at is such a savor for my back. I didn't have as much room, so I just used the 8 foot section and dropped the miter saw into the middle, two drawers on either side. I'm a big golf fan as well, so I spiced it up with some old golf balls I had laying around for drawer knobs!
I really appreciate this site and all the plans. I'm looking forward to many new builds, not on the ground haha!
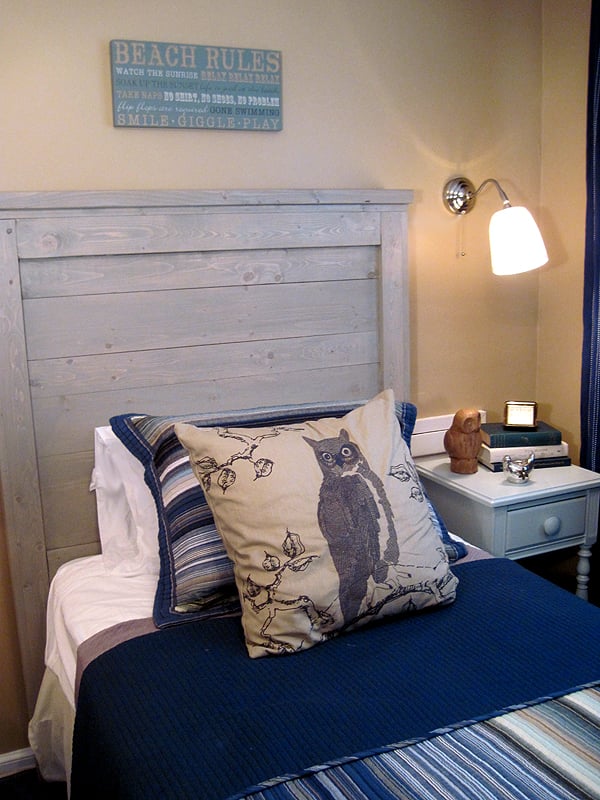
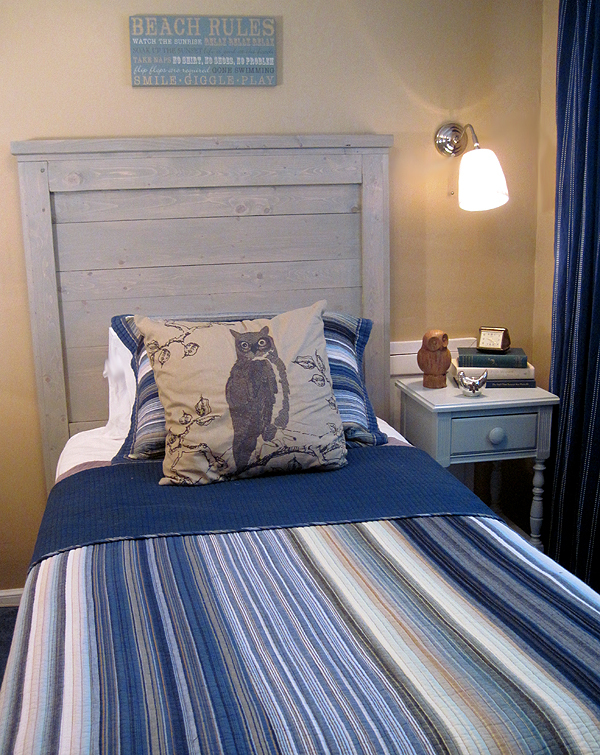
A fun project we did with my 12 y/o niece and husband. It was fun and fairly easy. We distressed the wood by using a copper brushalong the grain and used nails to make holes. We chose rustoleum sunbleached stain hoping to create and washed out gray driftwood look. It took about an hour to put together. The next day I sanded and stained , left it dry for the rest of the day then sealed it with polycrylic spray. The hardest part was getting up 2 flights of stairs, solid wood, it was heavy. The headboard was a little tall we thought. Plans are originally for Full so as bed gets more narrow the height becomes more noticeable. I thought about cutting down the legs a bit but after we got it in the room we thought it looked fanastic. We love love love it.

Wed, 10/24/2012 - 12:42
So beautiful! I love the height - what a nice project! Love the finish too!