Community Brag Posts

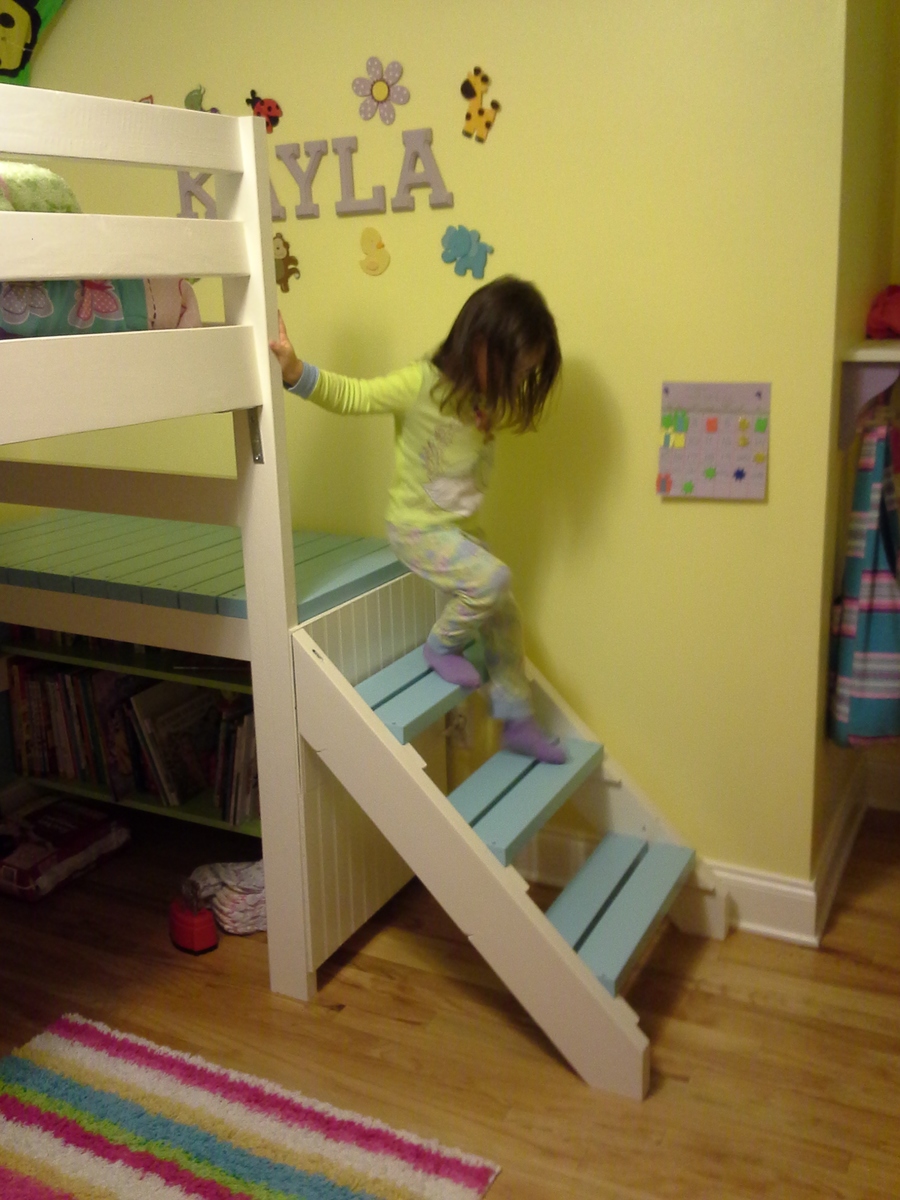
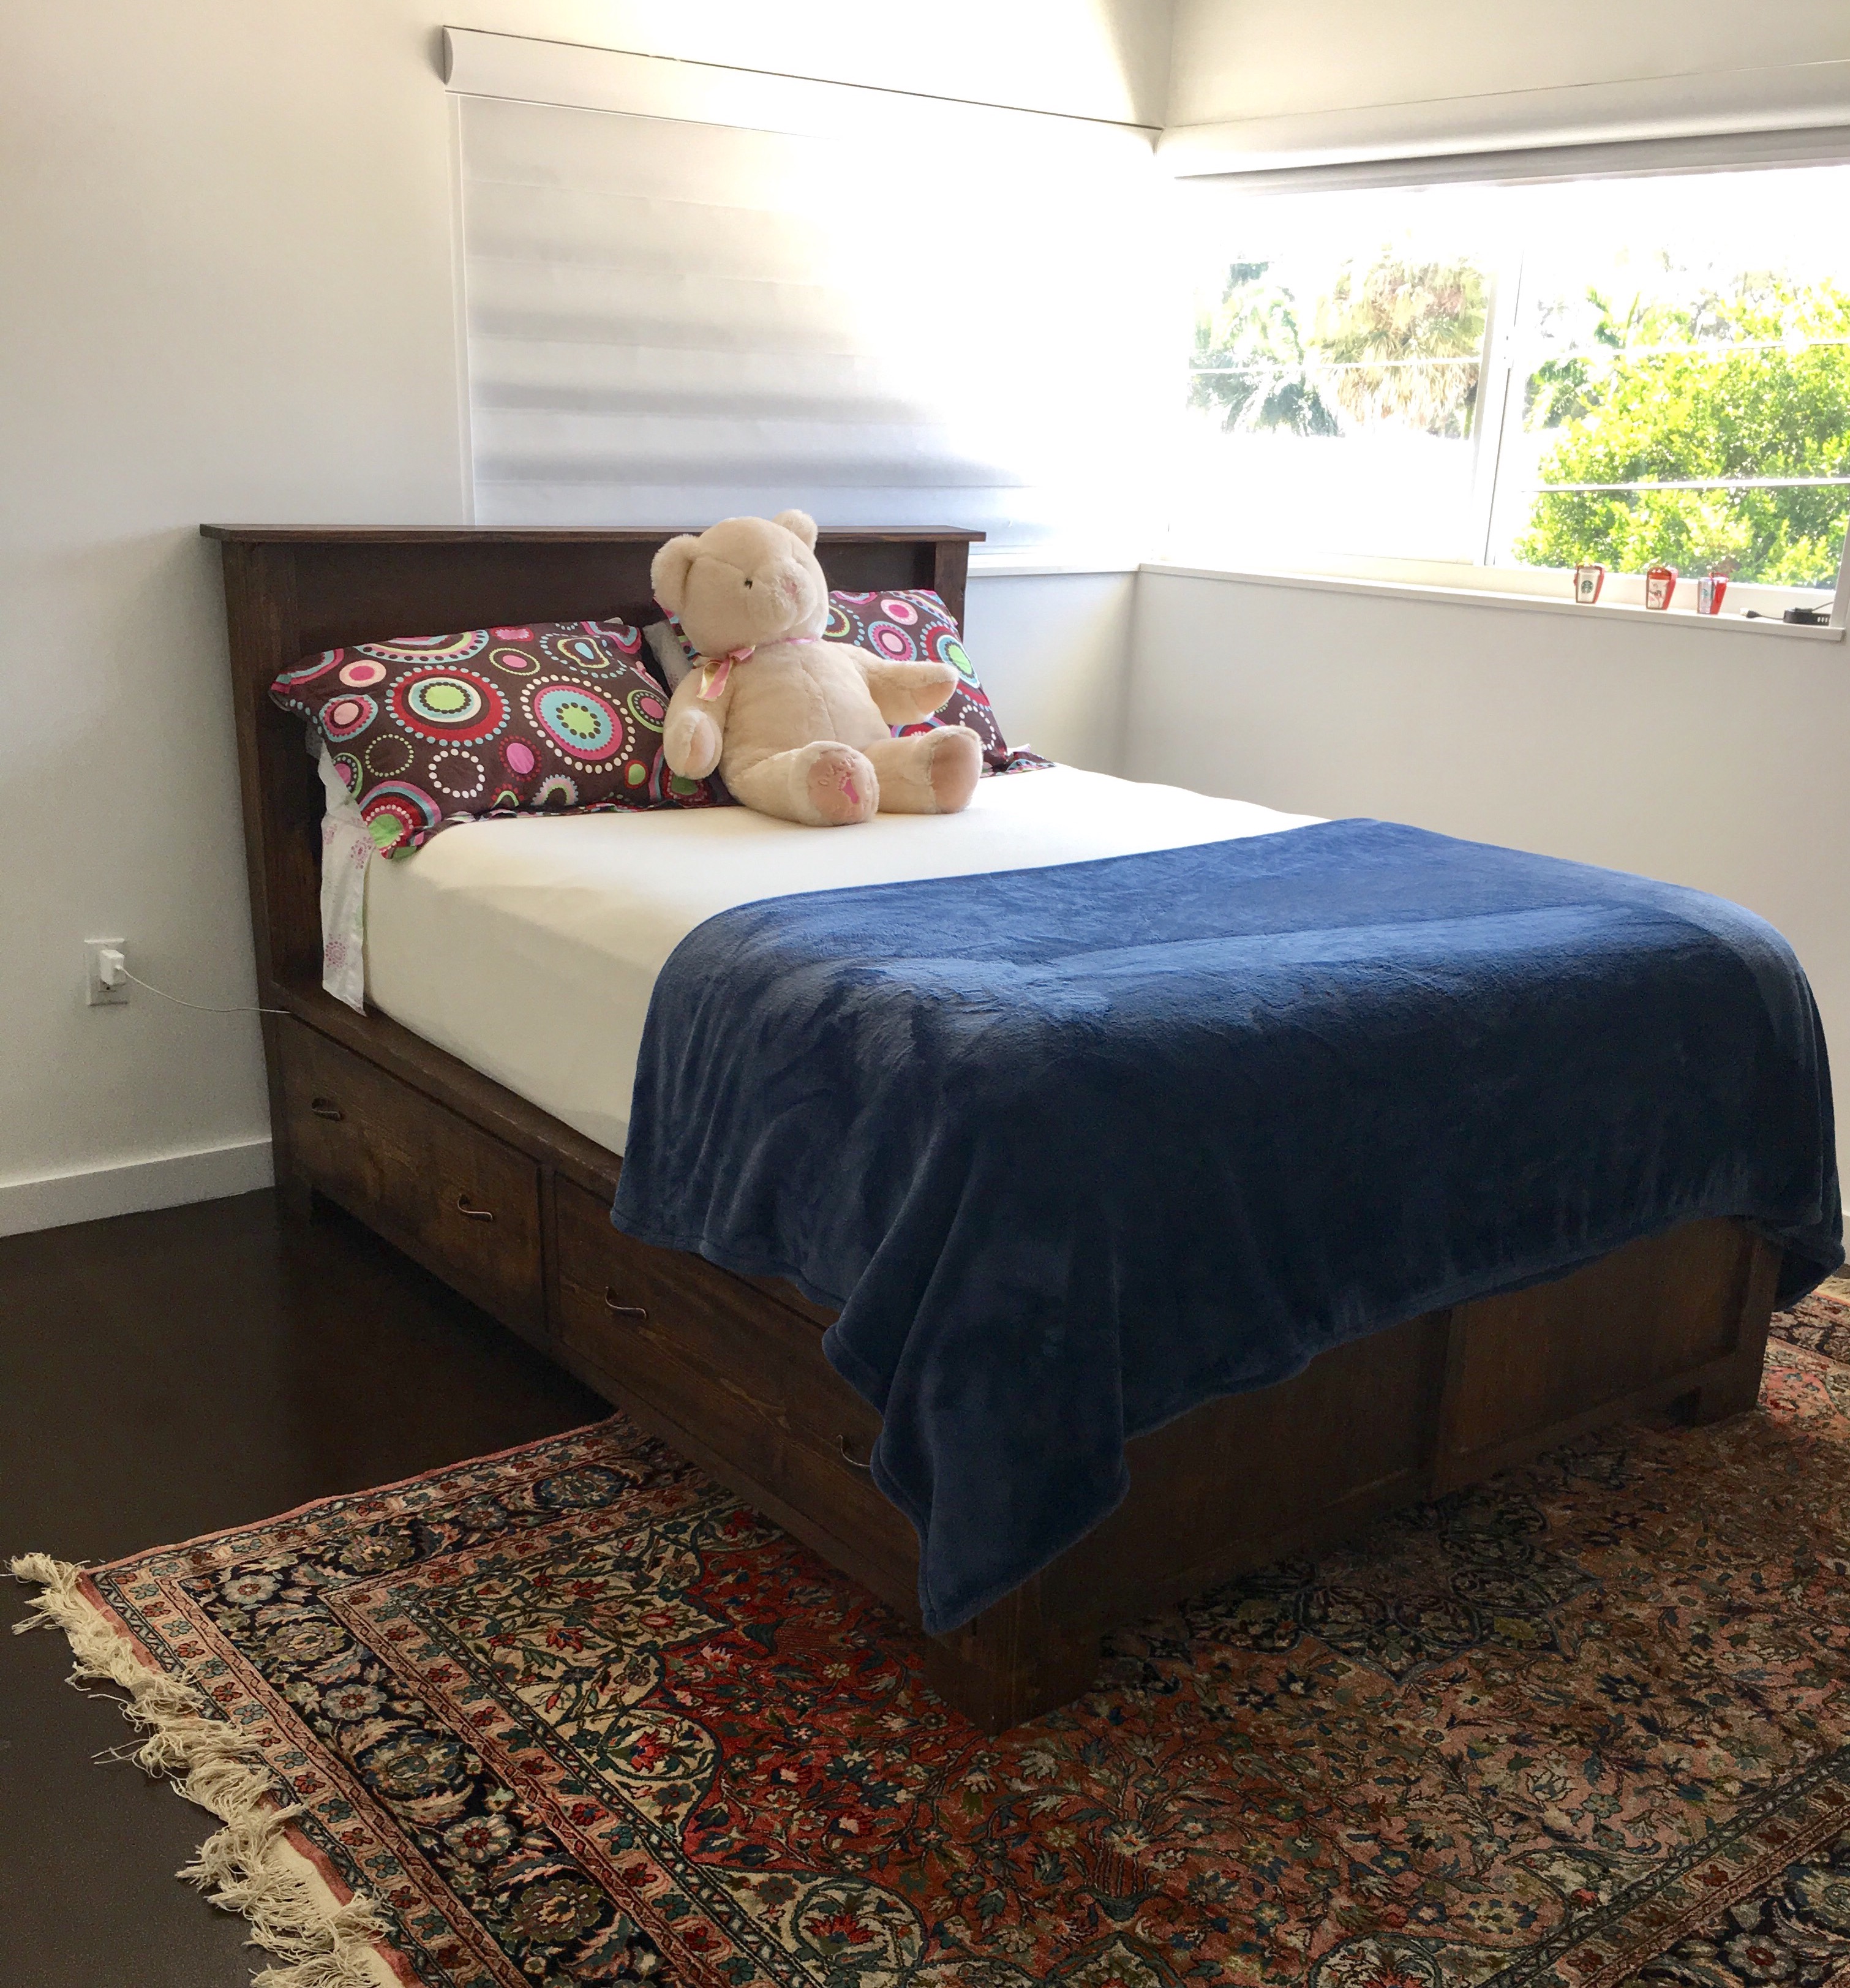
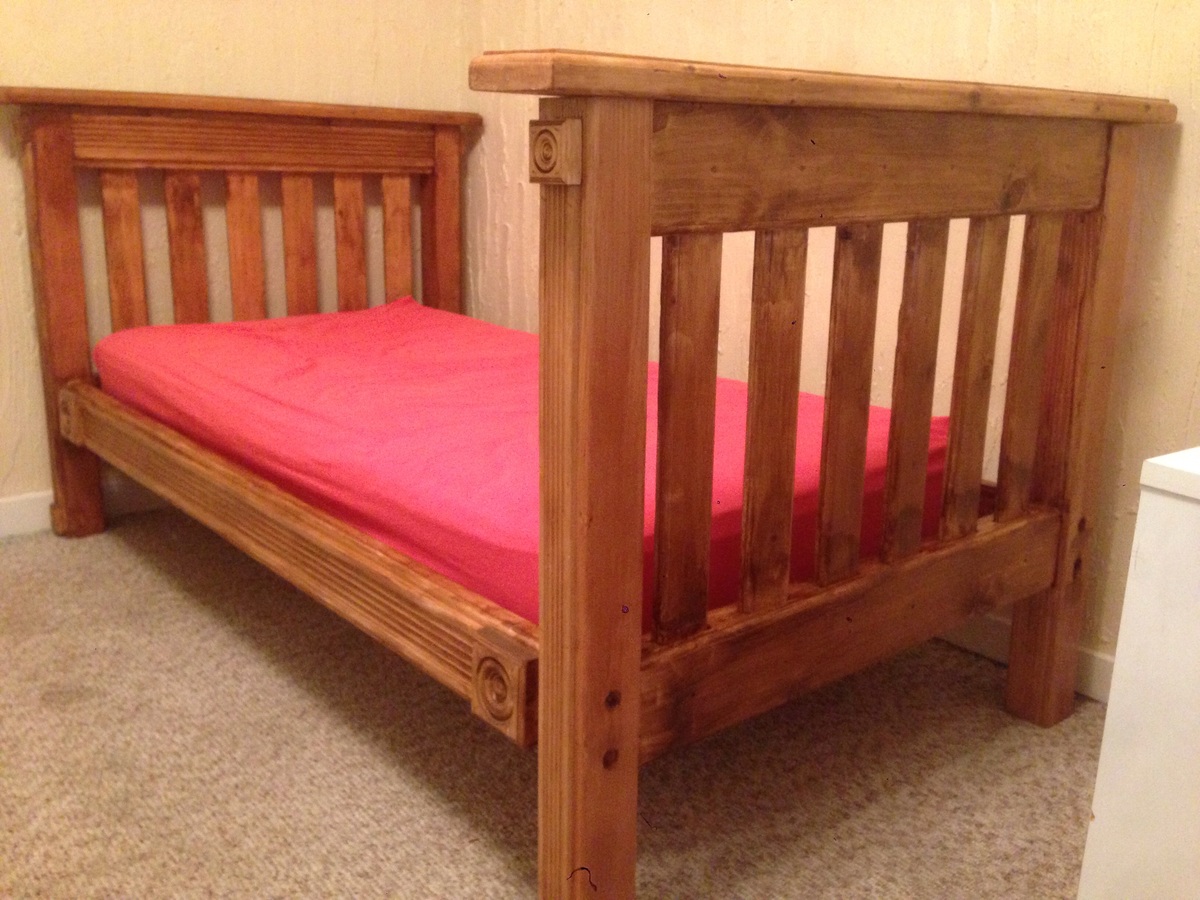
Camp Loft Bed with Added Book Shelf and Curtain.

Submitted by rparker on Wed, 09/12/2012 - 12:40

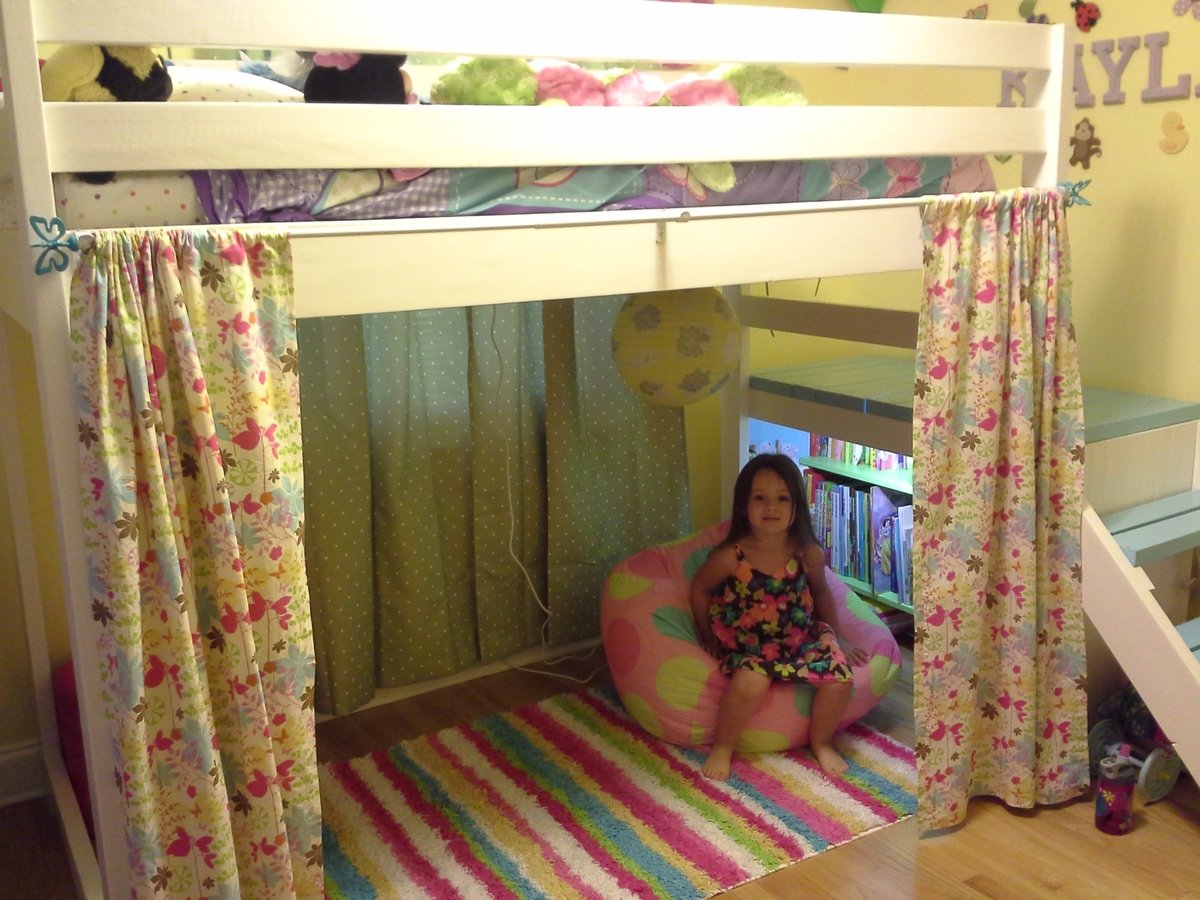
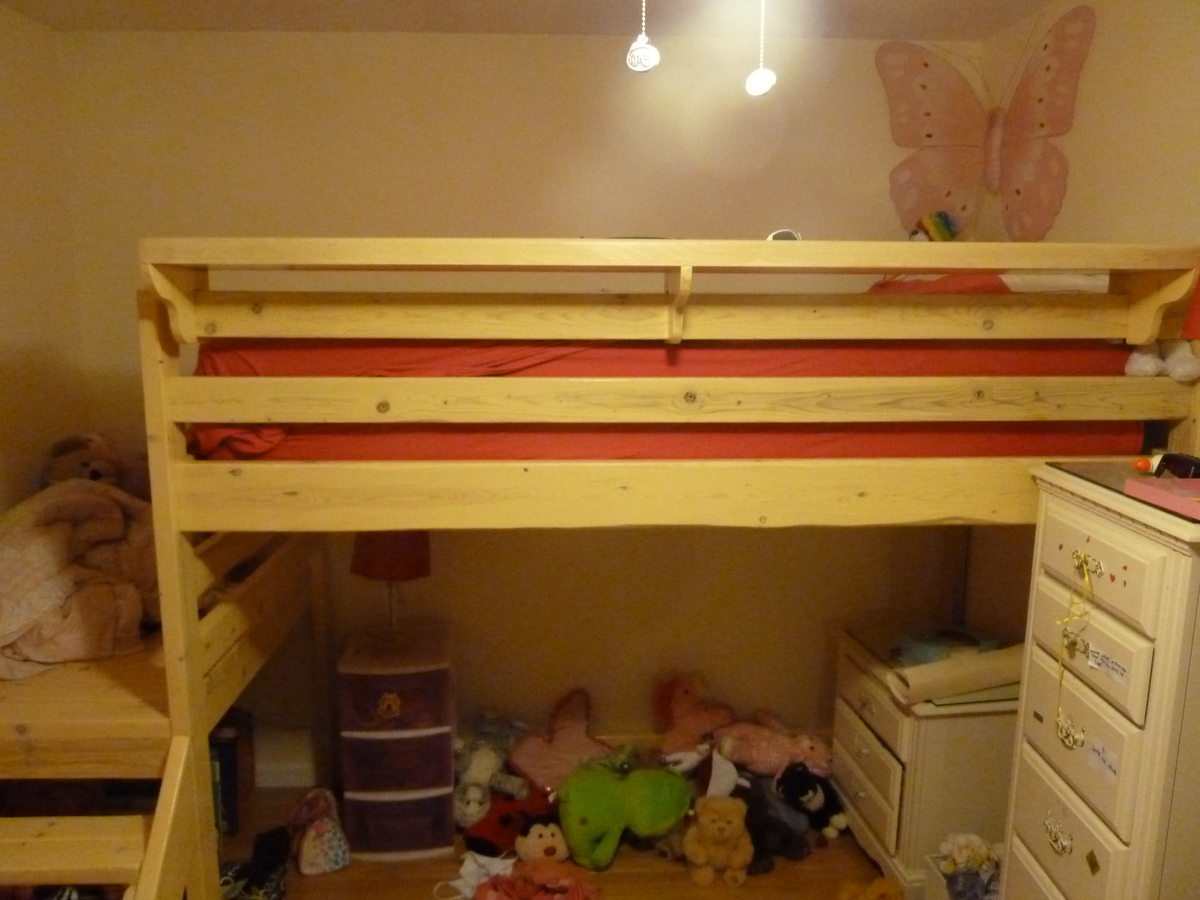
My daughter is 3 and though her room isn't terribly small, I thought this project would be awesome all the same. I wanted to do the doll house bed, but I figured this bed would grow with her more and I liked the platform at the end so I just added a curtain and called it good.

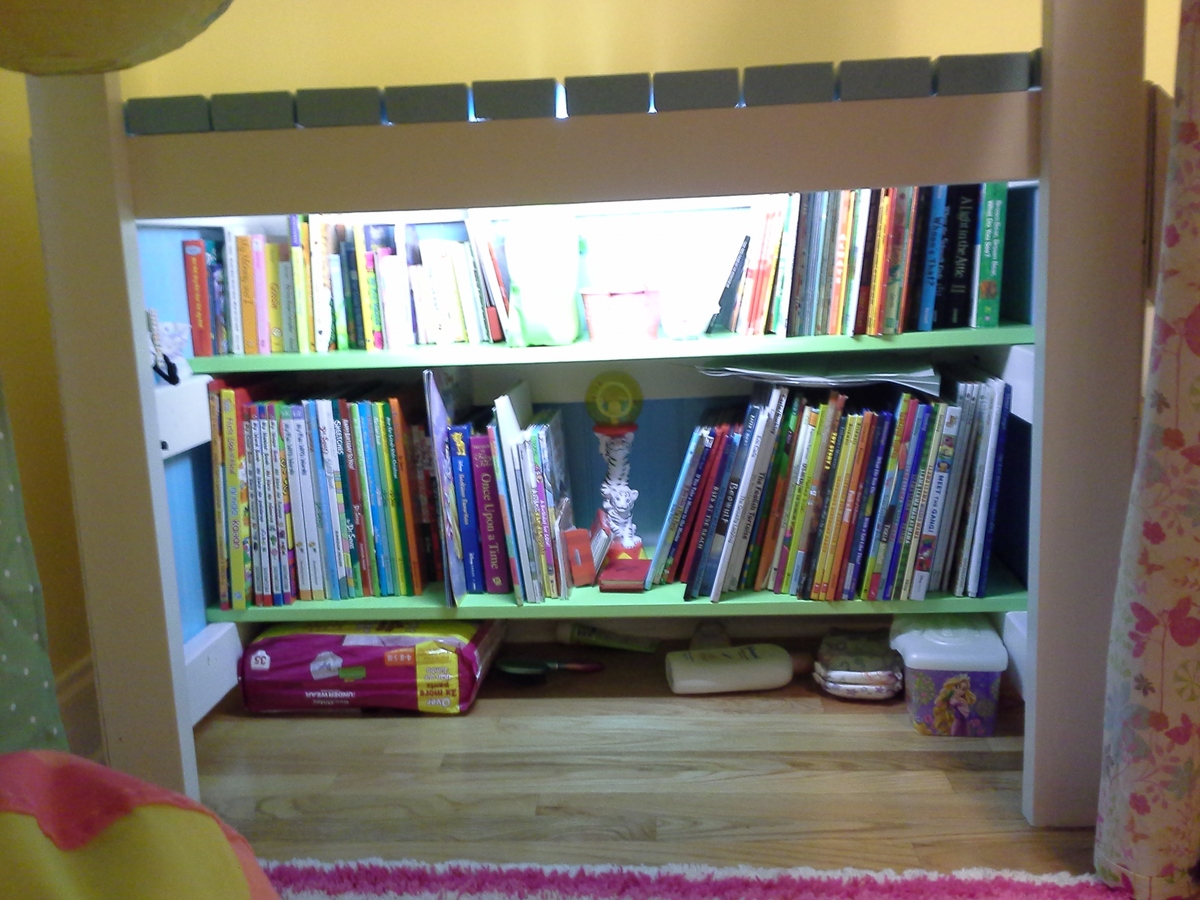
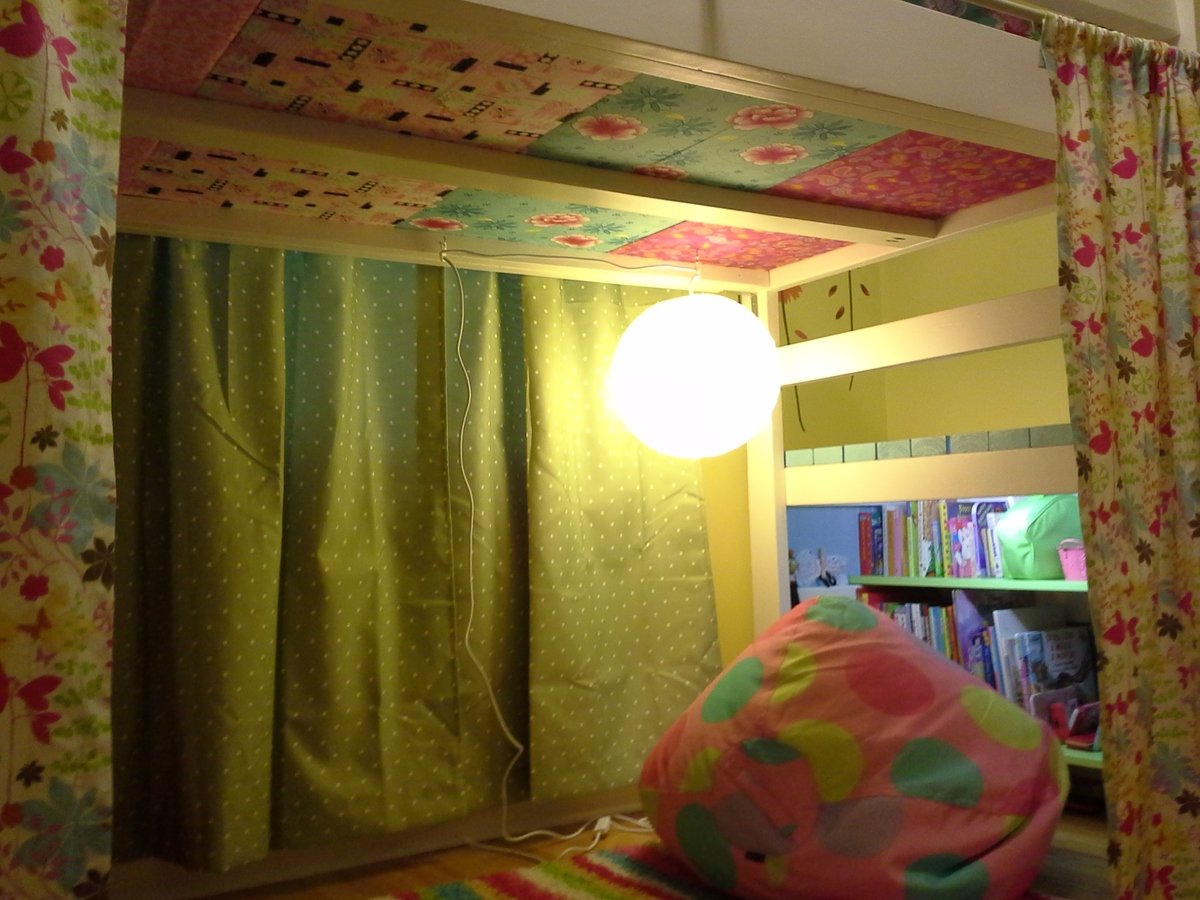
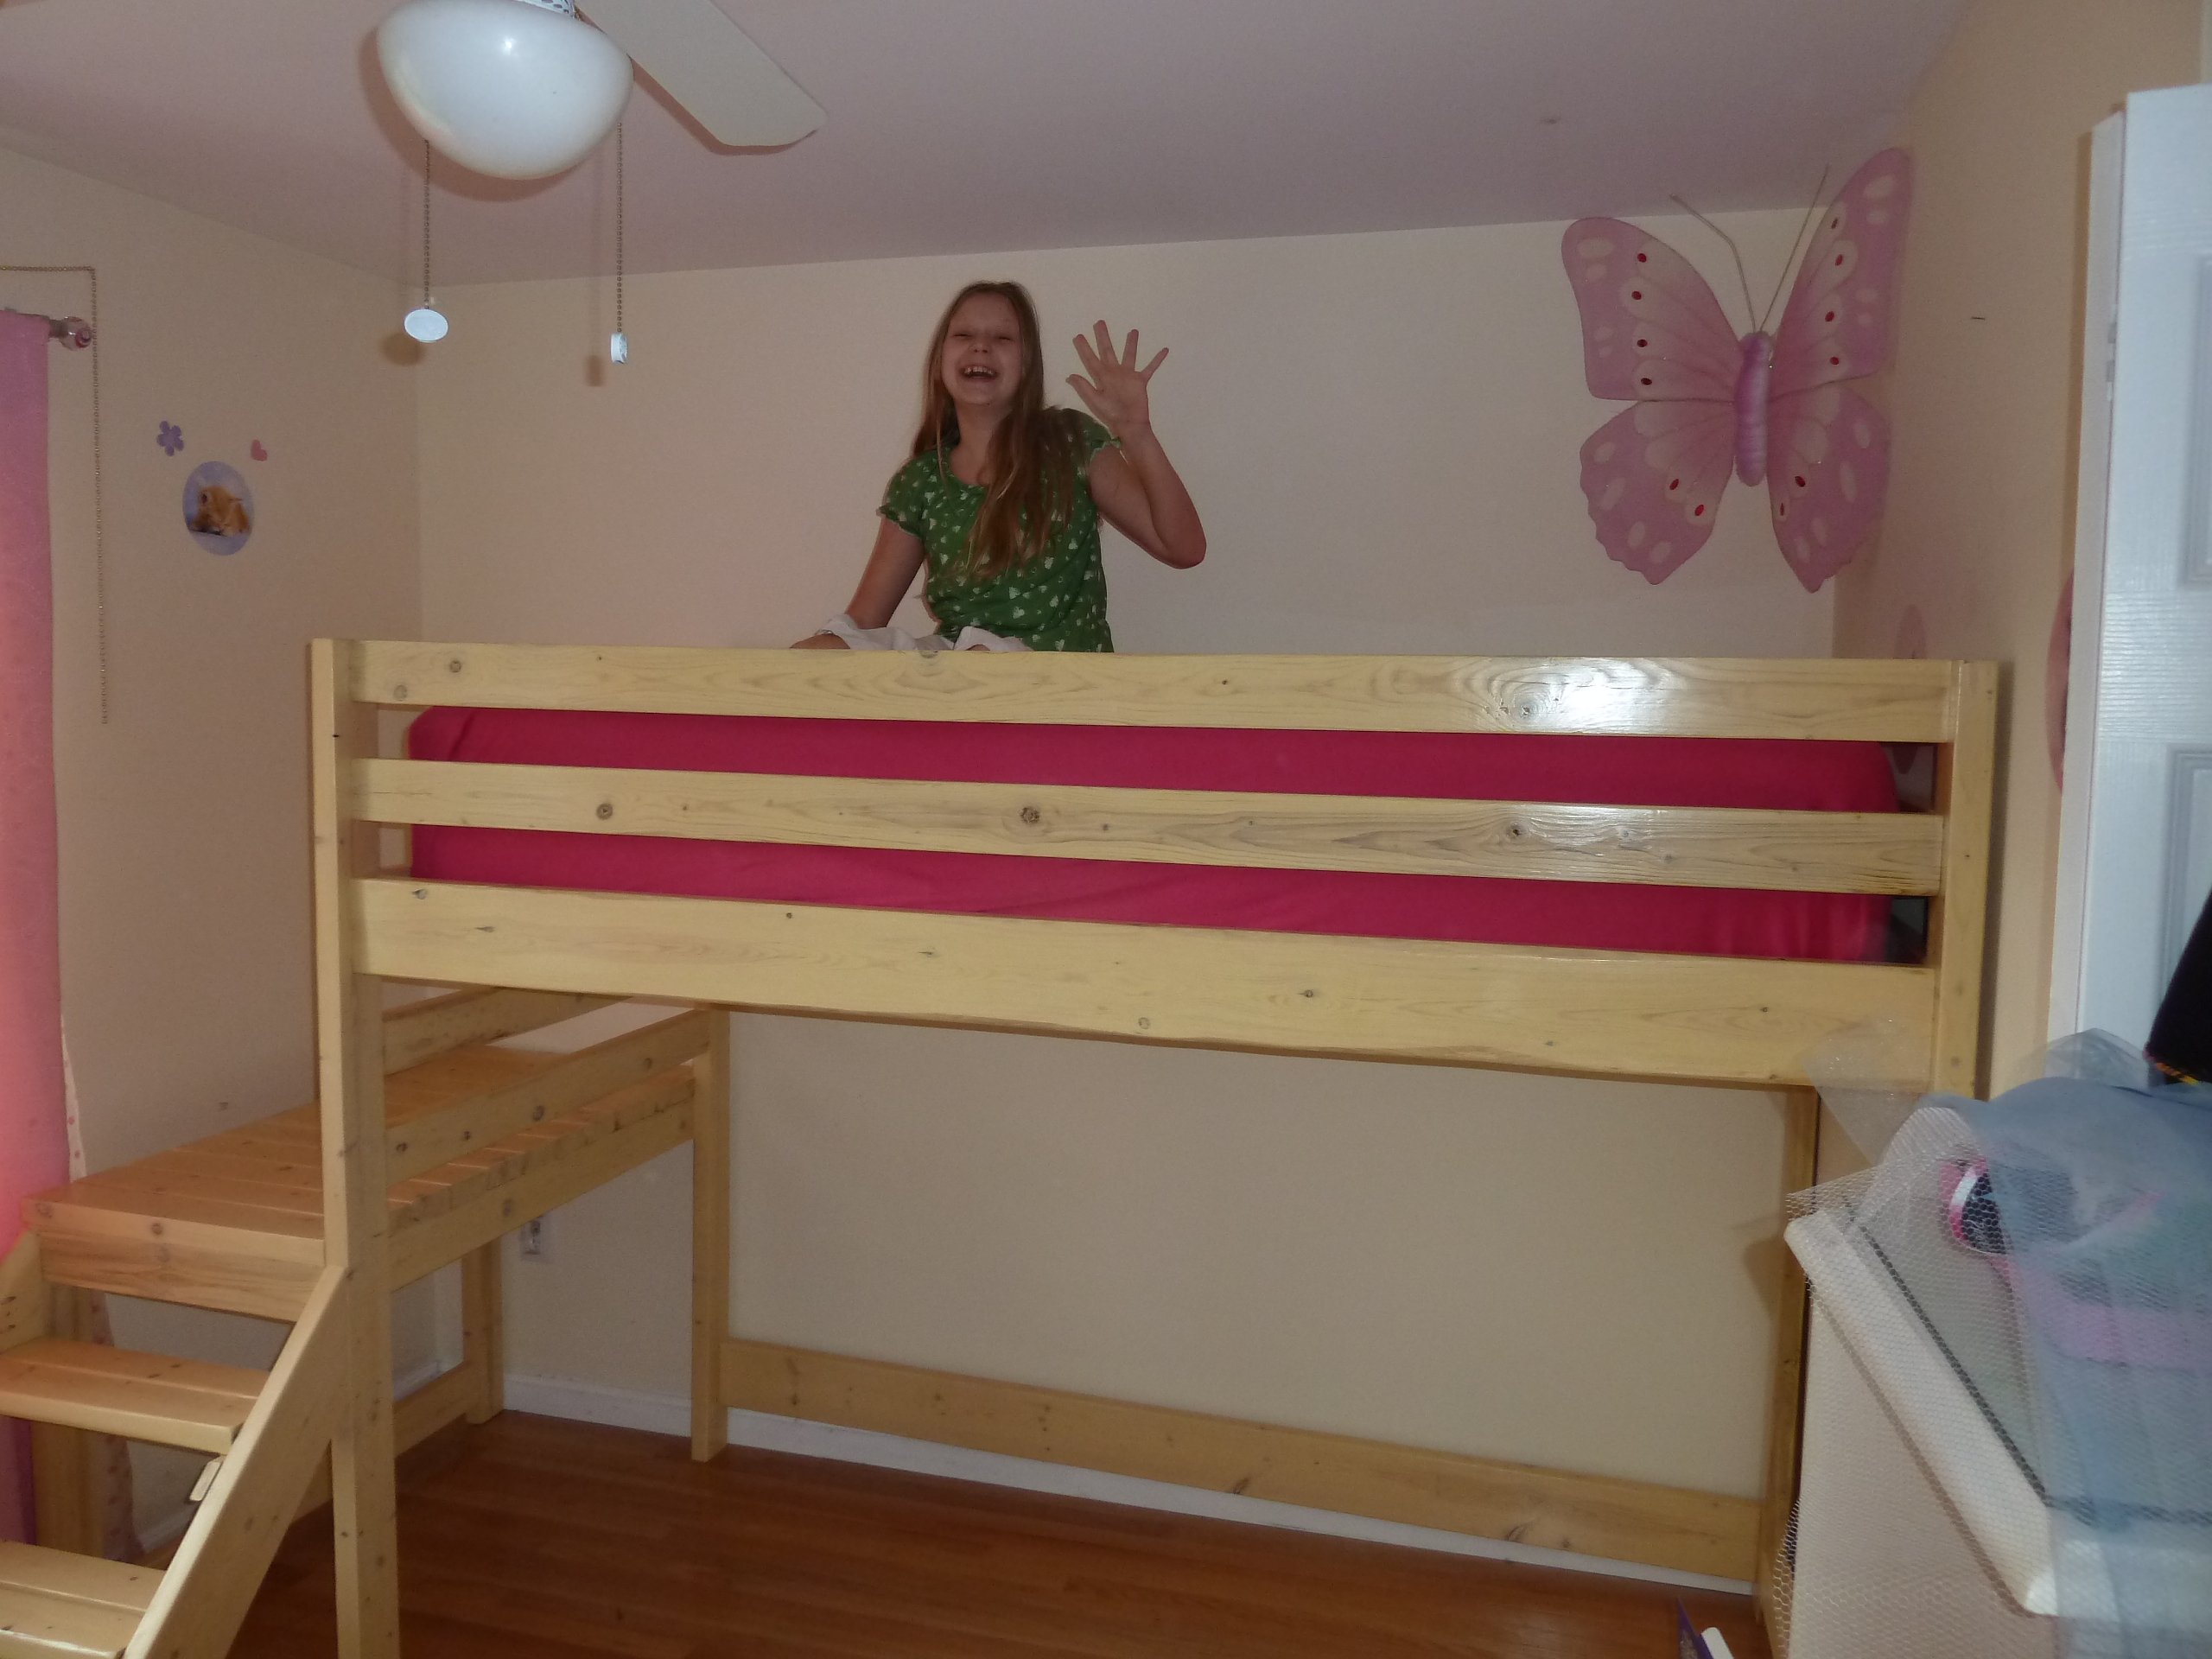
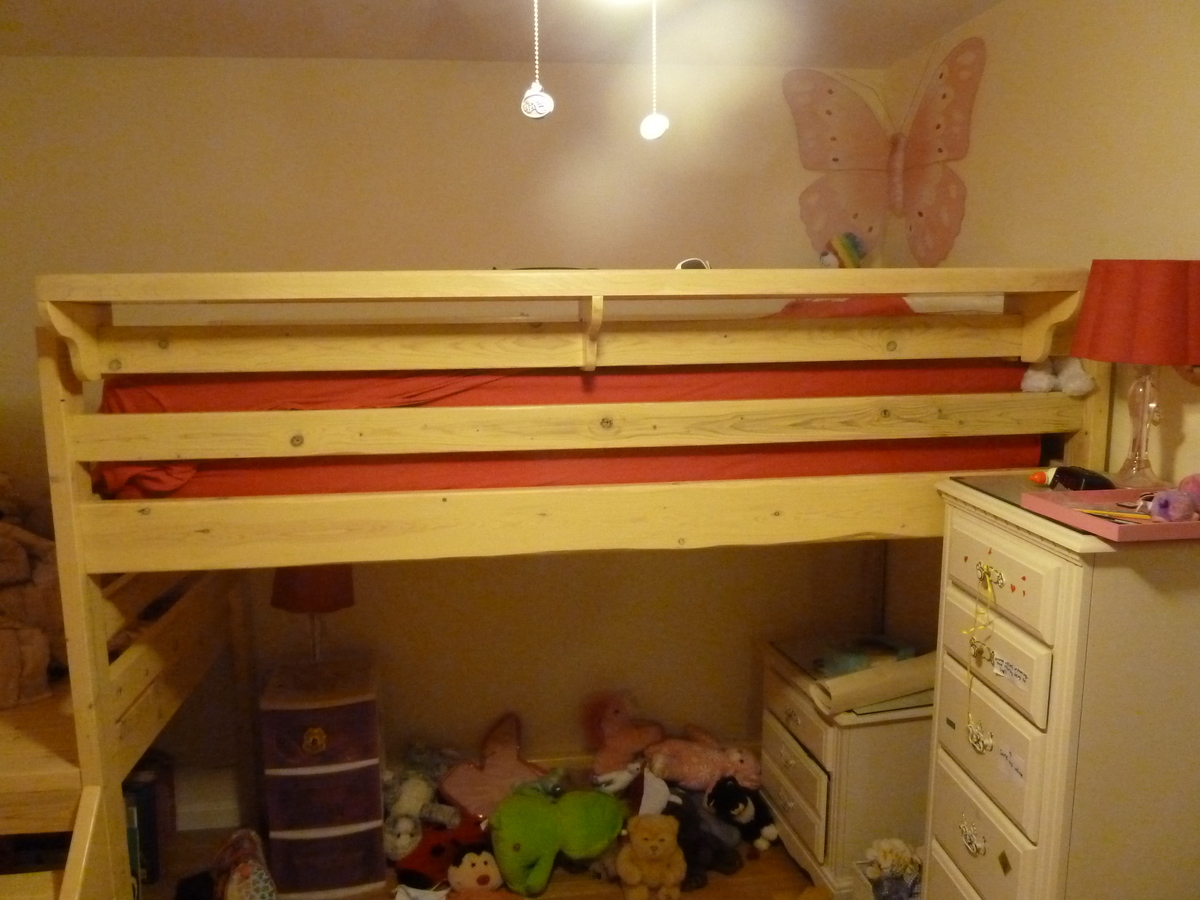
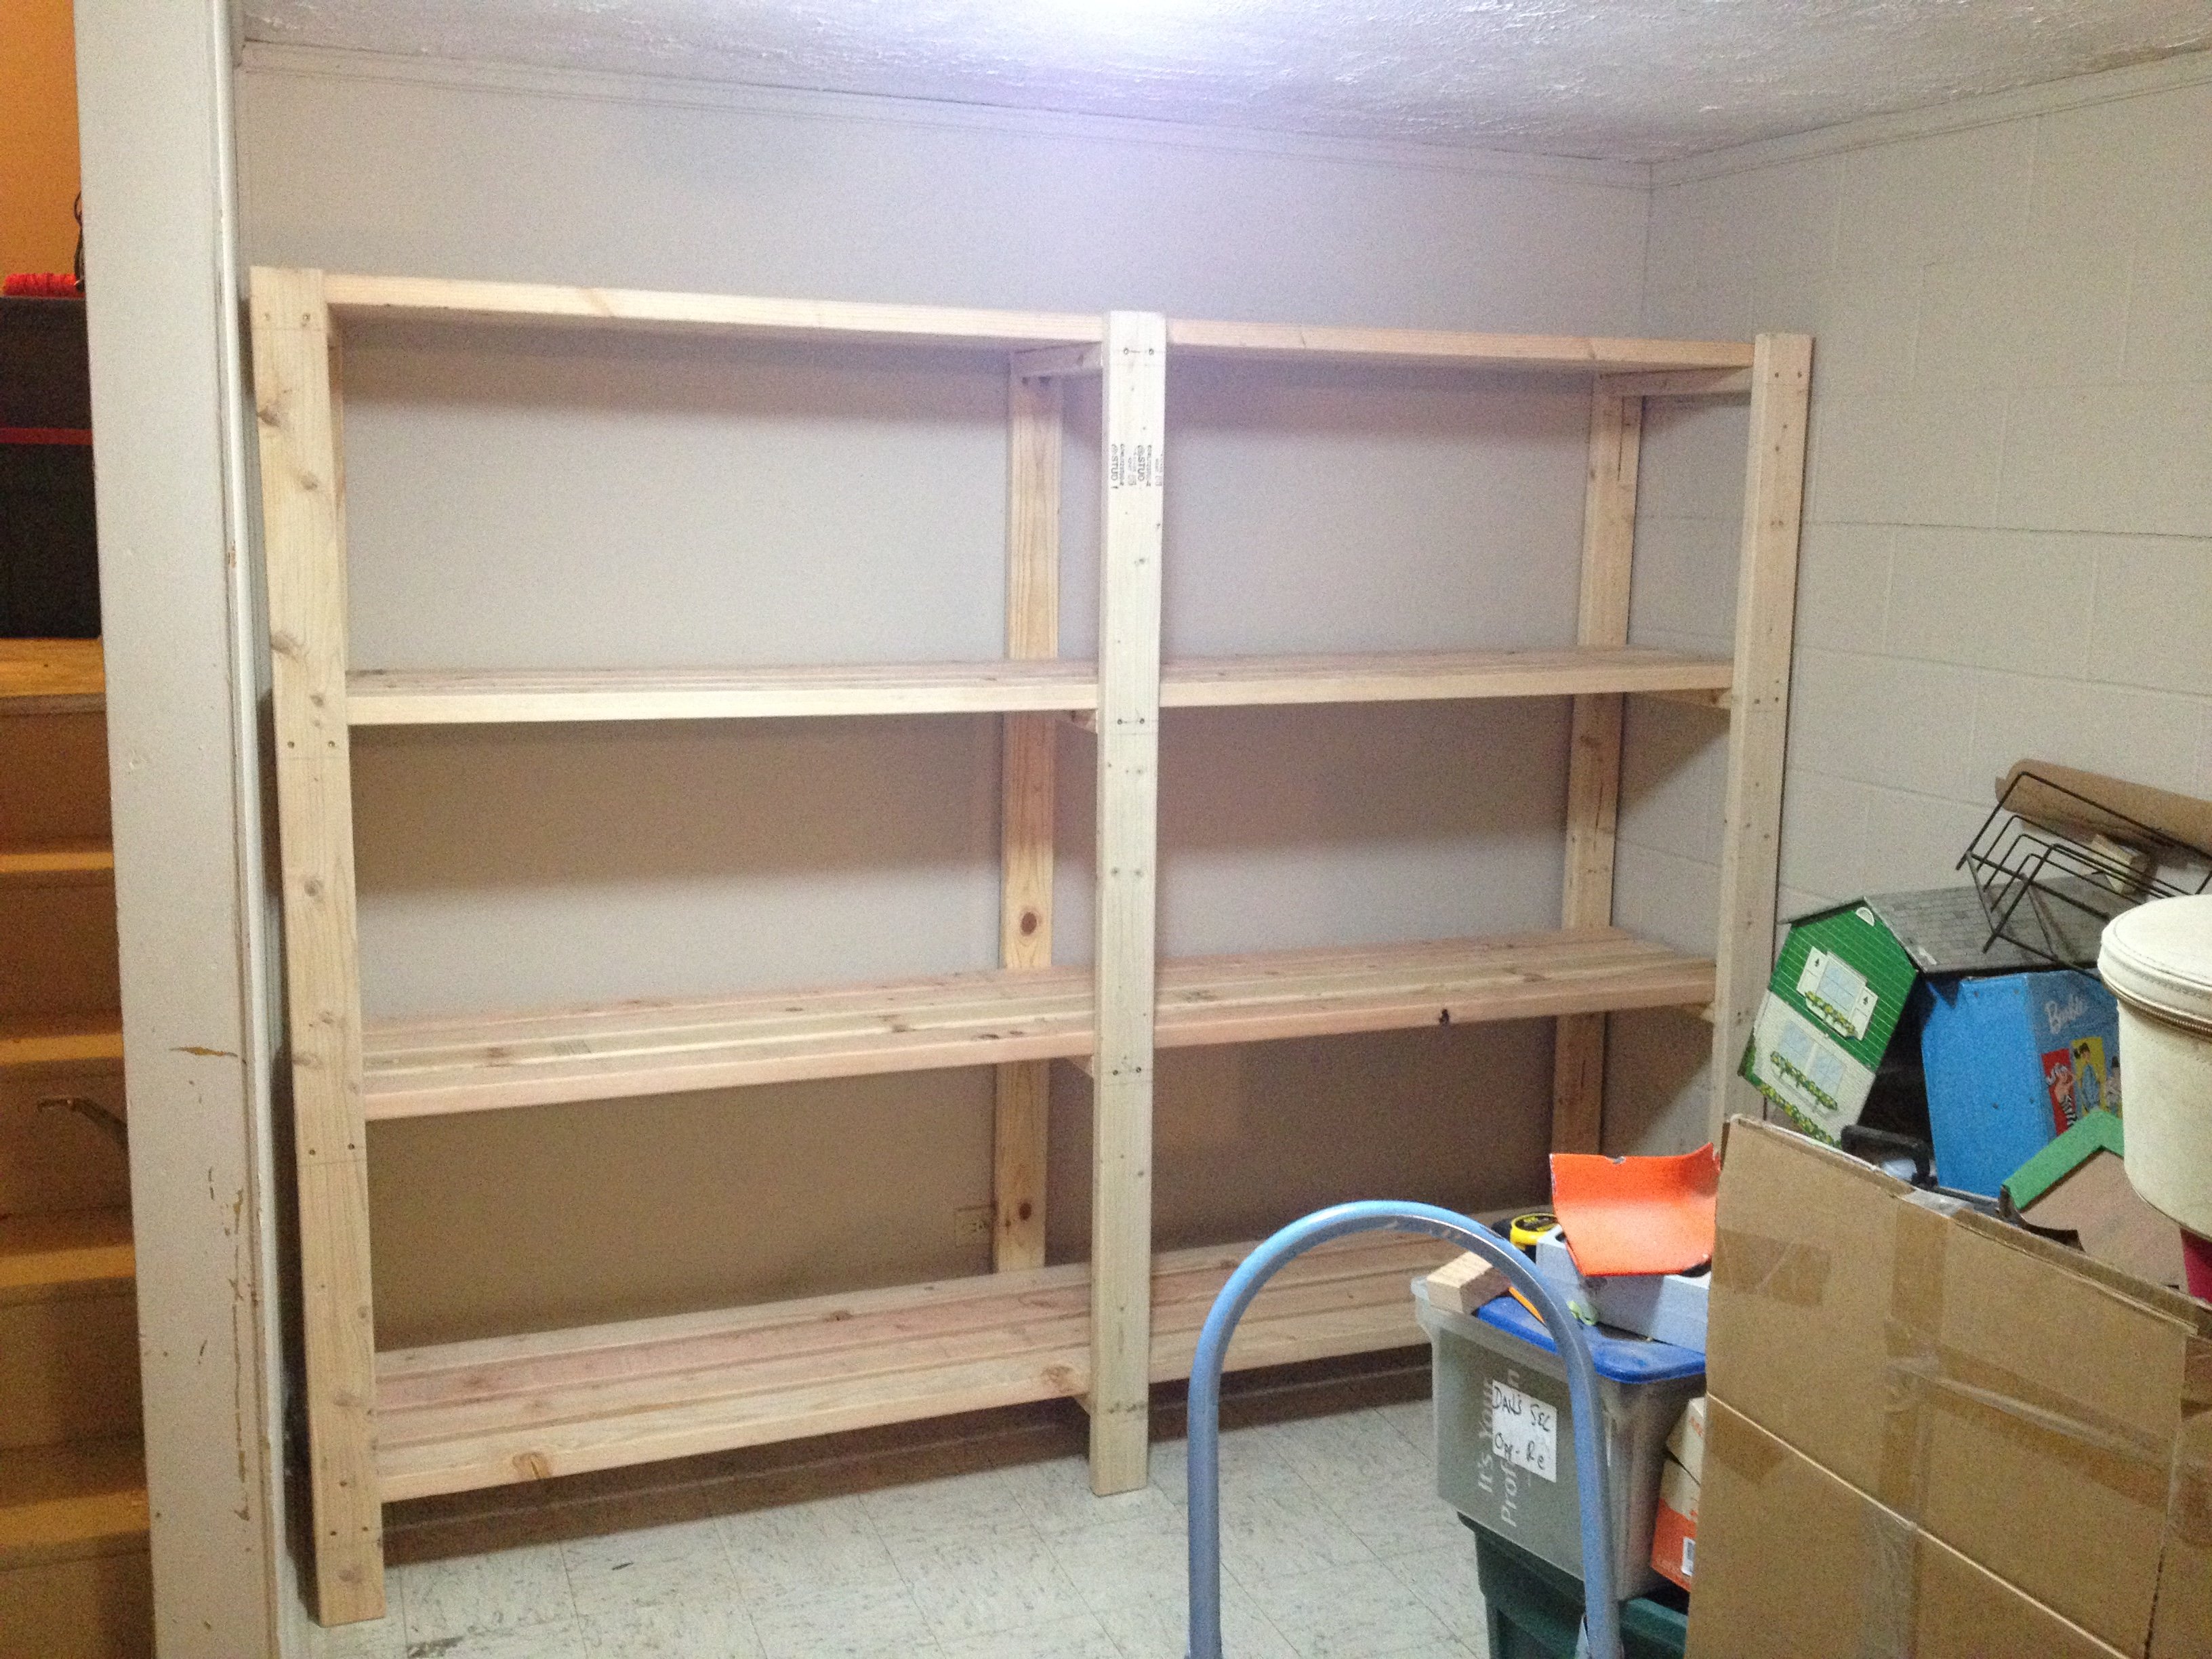
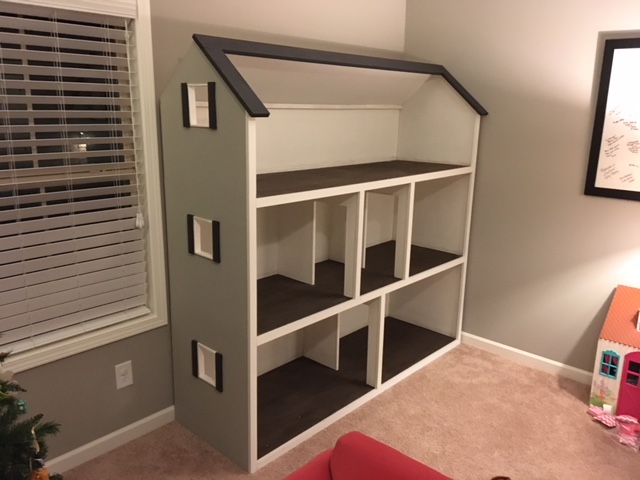
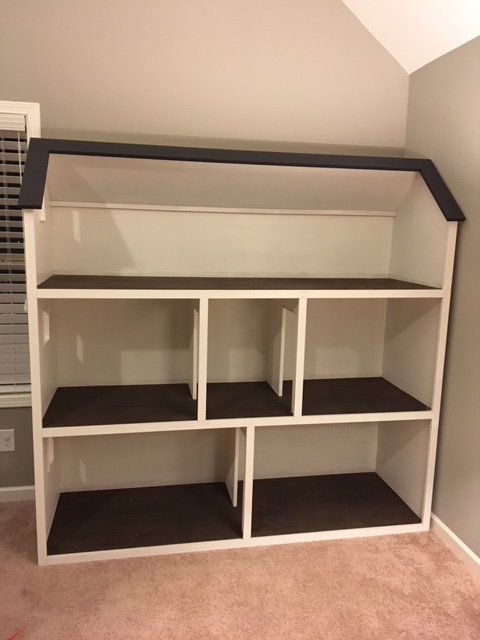
The book shelf is by and large my favorite part of the project. I just added some more 2x4's, a sheet of 1x10 and some left over bead board paneling that I had and used left over paint from her play kitchen that I had previously repurposed from an old entertainment stand. I added an inexpensive, small fluorescent light to the book shelf, out of sight, and found this great, inexpensive paper lantern.

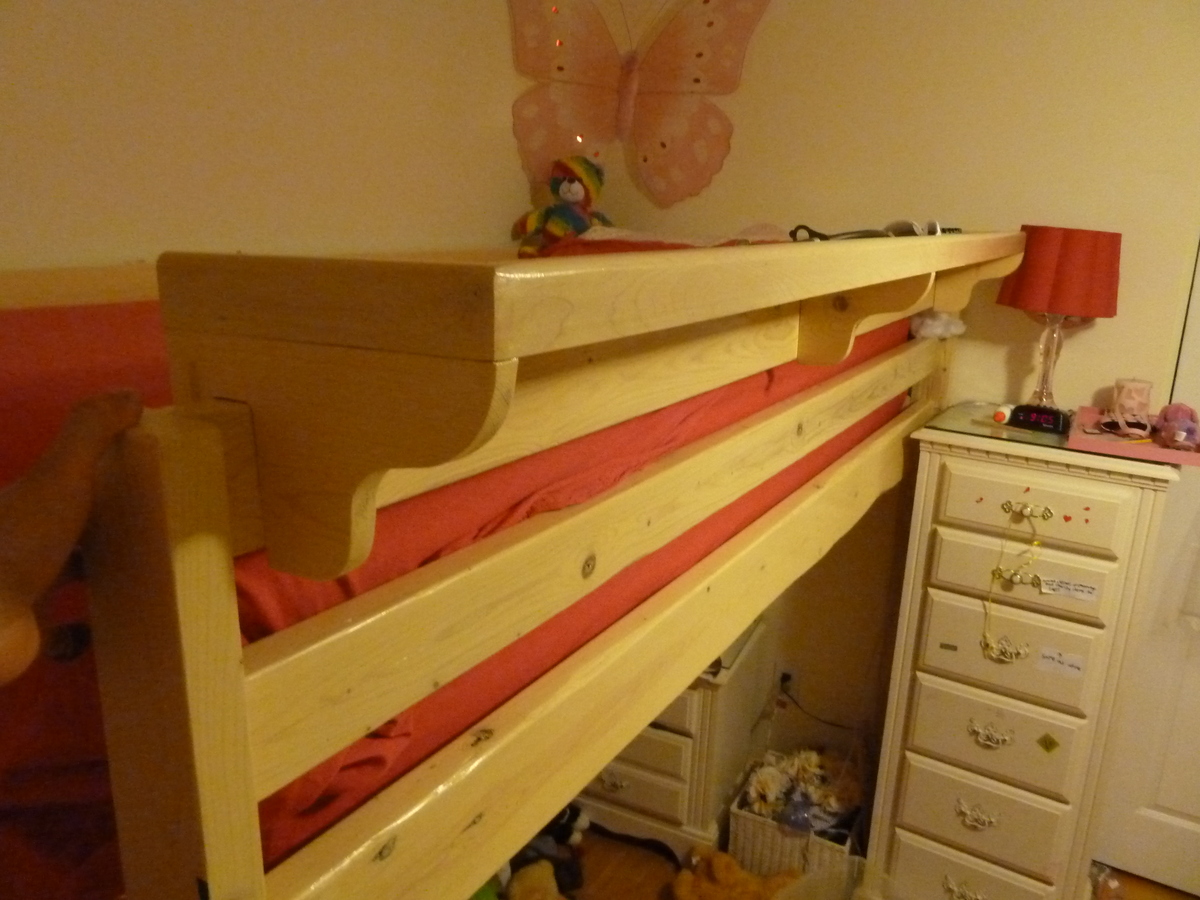
I also added a support beam down the middle of the mattress area and used some 1 in MDF board that I had from another bed and wrapped it in fabric (which ended up being a little pricey, but she loves her ceiling)

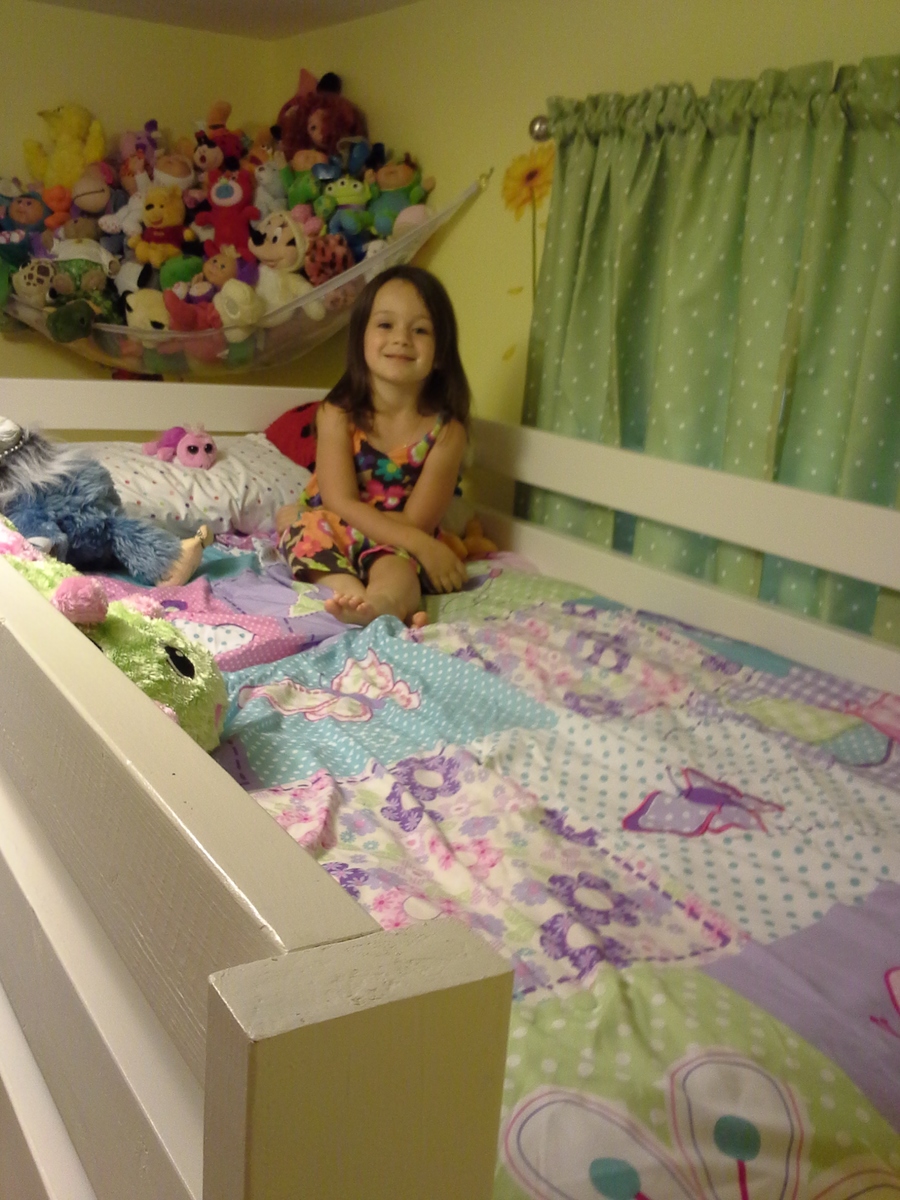
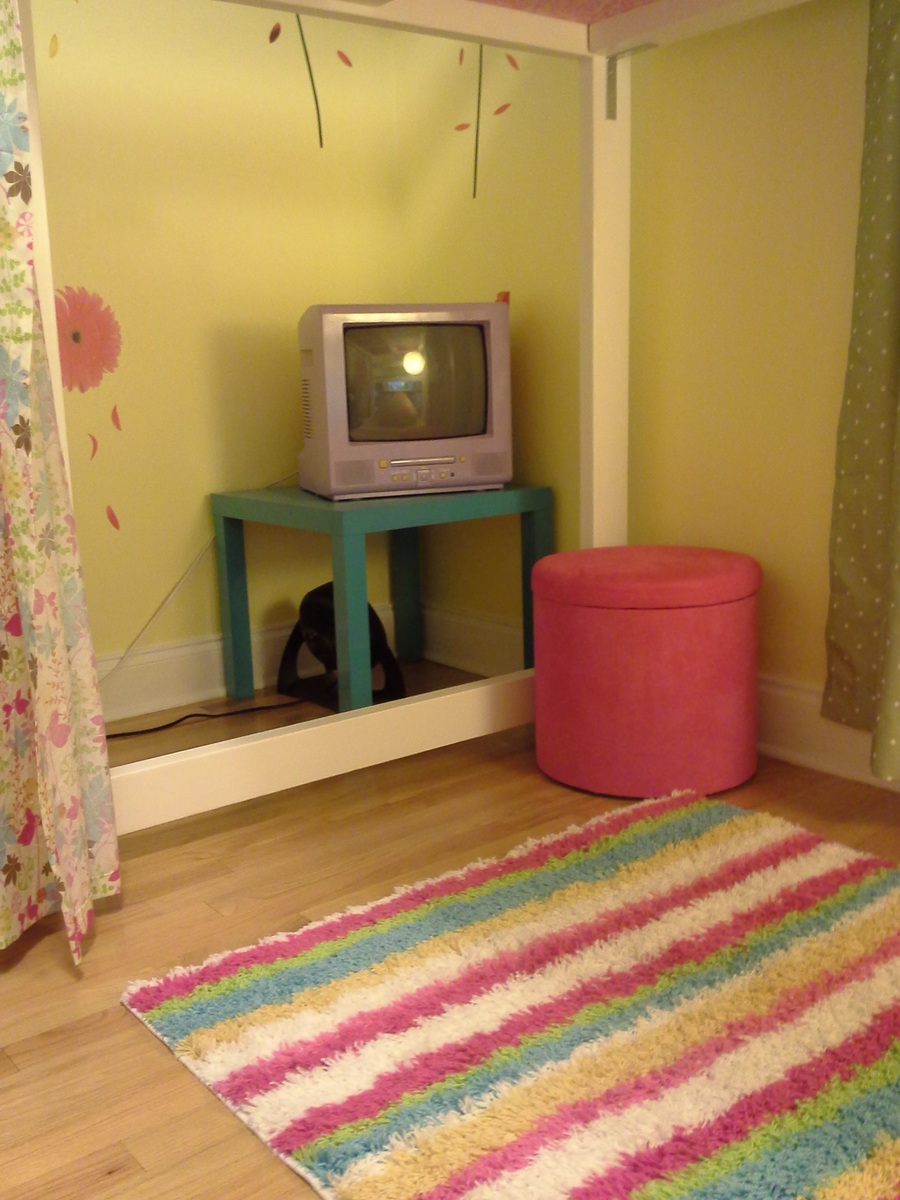
Because she is so young, I pushed the bottom of the bed against the wall instead of building a railing off the platform because I was afraid she would fall as she still gets up in the middle of the night. This worked out because the space that was left at the head of the board fit her TV stand and laundry basket without leaving a foot print on the actual area under her bed. With the curtain up (and almost always closed, as insisted on by the primary tenant) it really is like a clubhouse under there. I can't even begin to go into the hours she spends under there with her books; who doesn't love that?!

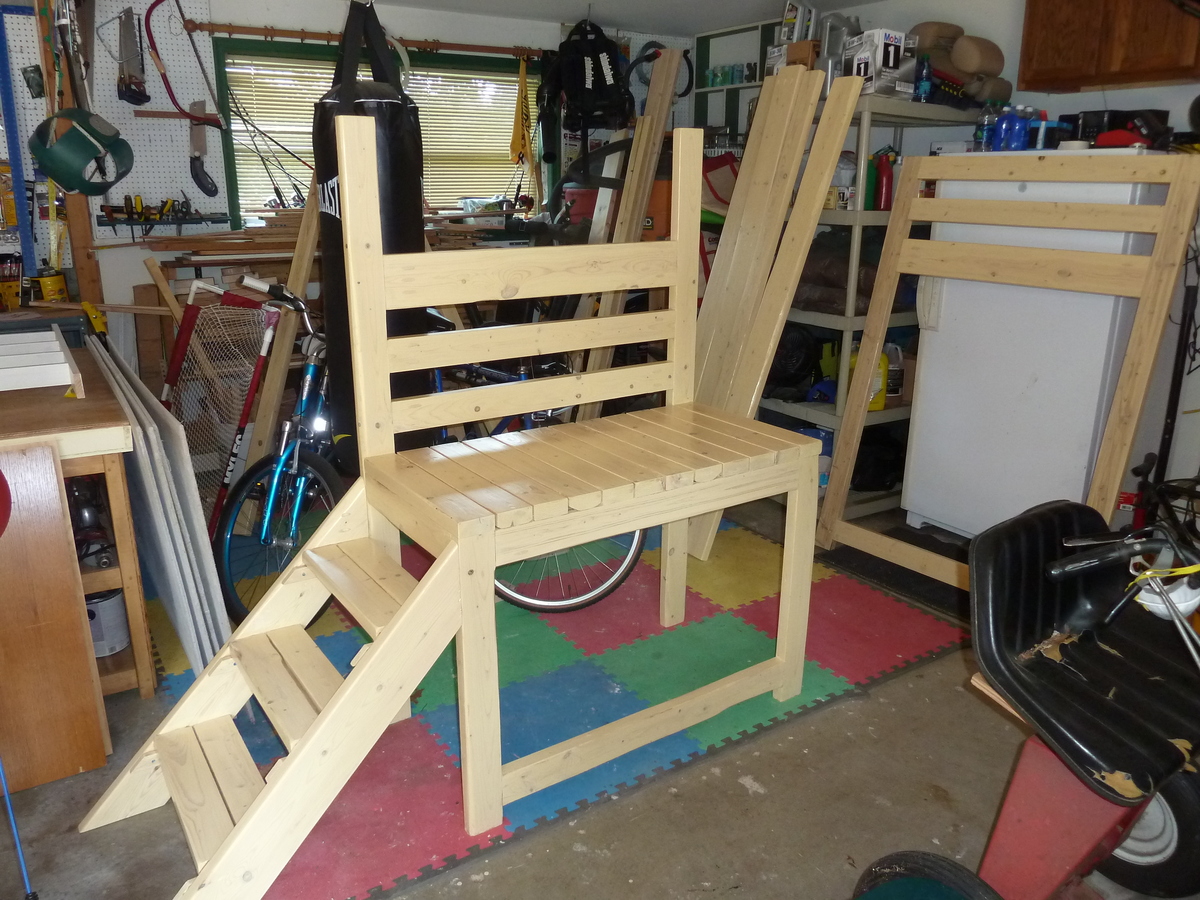
This was my first "from scratch" projects and I learned a few things. 1. Don't strip screws inside of pocket holes. 2. Sand more than you think you need to, especially if you plan to paint. 3. Staining might be a faster way to go, 2 coats of primer and 2 coats of paint takes a lot of time if you want to avoid runs. I would say painting took twice or three times longer than the building! 4. I may avoid lumber from the big box stores from now on, or be much much more careful in picking it out, but I had a 3 year old running circles around me as I was picking it out, so I guess I can cut myself a little break.

Finally, price wise I would say I spent more than I thought I would at first. Lumber was more expensive than a lot of posters mentioned, which is strange, because I thought NC was supposed to have cheap wood. But just for the lumber, I would say I was at or a little over $100. I would say all together I spent between $150 and $200, but I added a good bit, and honestly, fabric isn't cheap either, and I bought about 9 yards all together. With that being said, I think this bed was well worth the investment. I couldn't have gotten something like this for anywhere near that price in a store.

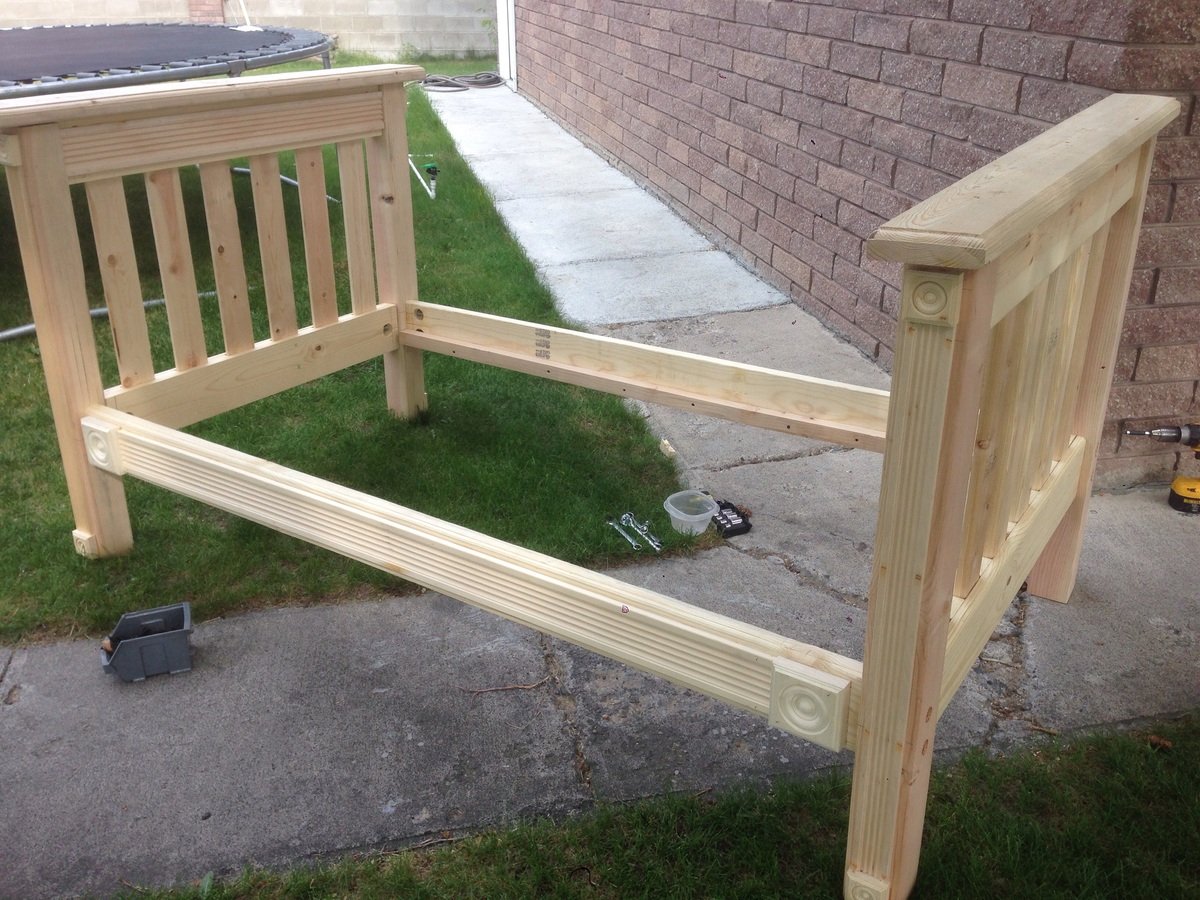
Oh, and I built the entire thing completely alone as my husband was out of town when I got the bug to do this. It didn't come out perfect, but every project I do is an improvement from the last and it's for a kids room! As long as it is sturdy and safe, and it definitely is, and is still attractive, then that's all that matters. My daughter loves it!

Estimated Cost
$150-$200
Estimated Time Investment
Week Long Project (20 Hours or More)
Recommended Skill Level
Starter Project

Comments

tommirhea

Wed, 09/12/2012 - 13:11

This is wonderful!!! I kind-of wish i would of seen this before I made my daughter her farmhouse bed-but I love that too. I can only imagine how special your daughter feels :) I bet your husband was pretty impressed as well!

I also want to say I appreciated you points. I too have found that painting is tedious and I too have stripped my screws before!!!!

Robohead

Wed, 09/12/2012 - 23:03

You did a great job with this bed. I really like how you did the "ceiling". And yep, no matter how much you spent to build it, there is no way you could buy a bed like this for that amount of money. I also built this bed (with a 2nd bed below it) and when all was said and done, it came in at around $200. More than I had planned, but far, far less than if I had went to a furniture store (which I will probably never do again thanks to this site).

angip (not verified)

Thu, 09/13/2012 - 09:01

I love your loft bed. As much as I love the white with the blue steps. I may just stain mine! This will be my first big wood working project, I will be more comfortable with my husband or friend helping me on this one.

nickonchuks

Sun, 01/27/2013 - 20:14

I want to make this bed and paint it similarly to you (white with some colour on the platform) but I am pretty sure I could not build this bed and then move it into my daughter's room after the fact. I am pretty sure I will have to do all the final assembly in her room, but I don't want to paint it in her room, either. At what stage did you paint? Would it be wise to paint all your pieces before assembly?

Raised planter boxes

Submitted by SandraVee on Thu, 07/23/2020 - 06:55

My first ever build! I made two of these planters for my deck. They were easy and the cucumbers and runner beans I grew from seed loved the deep soil in them! They make my little space feel like an oasis.

Built from Plan(s)

Camp Loft Bed twin XL w/ shelf

My daughter needed a loft bed to give her more floor and storage space in her bedroom. I modified the original plans to fit her twin XL bed, which is 5 inches longer than a regular bed. I also added an extra 2x6 across the back two posts for extra support.

Cutting and assembly was relatively easy; I glued every joint and used pocket holes per the instructions. I sanded using 80, 120 and 220 grit. The finish is a Minwax "parchment" water-based stain, with 3 coats of Polycrylic. All pocket holes were pre-drilled prior to finishing.

I assembled the platform and footboard in the garage and brought it into the house as a single unit; same with the headboard. I brought in the rails separately. To assemble, I marked 1 1/4 inches from the outside post edges, and used wood scraps/clamps to align and hold the rails while securing them with pocket hole screws.

My daughter's mattress is very high; it rises only about an inch below the top of the top rail. So I build a bed-length shelf which also had the added benefit of providing a little more height/protection against her rolling out of bed in the middle of the night (see pics).

In all, I was surprised at how long this took me. Probably because I'm a novice and this was only my 2nd project. The totals are:
- Cut and assembly: 14 hours
- Sanding: 25 hours
- Finishing: 2 days

After finishing, I left all pieces in the garage for 5 days to air-out before bringing into the house.

Total cost the lumber was $125, 1 qt stain @ $13, 1/2 gal Polycrylic @ $50 per gal, and $20 hardware for a total of just over $200.

Estimated Cost
$210
Estimated Time Investment
Week Long Project (20 Hours or More)
Finish Used
Minwax water-based stain, "parchment" (single coat)
Minwax Polycrylic (three coates)
Recommended Skill Level
Beginner

Comments

mariad444

Tue, 03/15/2016 - 22:17

I am curious what your mattress size was here, please educate me as I think I will have a similar issue. I liked the shelf idea you did! 

Barn Door Console

Submitted by Anonymous (not verified) on Mon, 01/23/2017 - 19:01

made from poplar and pine.  Painted with a coat of black paint then painted with 3 coats of valspar furniture paint in white.  I then sanded all the edges to bring the black thru.  The hardware is made from a metal bar and wheels made with pulleys from home depot.  I even weaved the baskets myself! 


Just kidding about that last part.

Built from Plan(s)
Estimated Cost
275-300
Estimated Time Investment
Day Project (6-9 Hours)
Finish Used
valspar furniture paint
Recommended Skill Level
Beginner

Comments

Love our new greenhouse!

With the help of friends and family, we managed to build this greenhouse rather easily. We had to start with the foundation since the spot we chose was not an even grade. We did this by filling sono tubes with cement and leveling each off so the greenhouse would have a solid place to sit. We then built out a frame around the outside of the cement tubes with some reclaimed 6x6's. After that, we filled the space with 5 tons of river rock and then got to work! After the foundation was ready putting the rest of the house together was a piece of cake. The frame was so easy to put together. We had a few minor kinks to work out here and there, I won't say this house came out 100% perfectly, BUT I am so happy with the end results. We chose to paint it a deep green color as a final touch. So far we just moved a few potted plants from our deck to the greenhouse for the winter. It has been working very well to keep the plants cozy during the colder days we've had. Eventually, I plan to build a potting station, shelving, and most likely a garden bed for winter harvests.

Built from Plan(s)
Estimated Cost
$2000
Estimated Time Investment
Weekend Project (10-20 Hours)
Recommended Skill Level
Intermediate

Comments

Ana White Admin

Mon, 11/09/2020 - 09:52

The foundation looks great the greenhouse looks amazing! I'm sure fun was had building it too:) Thanks for sharing.

Seasonal And Holiday

American Girl Doll House-tweeked

Submitted by Anonymous (not verified) on Thu, 11/19/2020 - 21:09

I loved the AG Doll House plans you designed and when my granddaughters asked me to make one for them.... how could I resist. Unfortunately my 7' basement ceiling and steps created a challenge. As a 72 year old female, there was no way I could man-handle a 6' x 4' x 2' - 3/4" plywood project in addition to the challenges of my work space. I was not going to disappoint my granddaughters so I had to come up with a plan. Instead of making the doll house in one piece, I decided to make it as 3 individual boxes (the floors) and stack them on top of each other. Not only would I be able to handle them mostly by myself, but I would be able to work around the low ceiling and transport them up the steps. With only a few modifications to the original plans, I believe I came up with a workable solution.

Instead of the sides resting on top of the doll house floor, I extended the sides 3/4" longer to run past the floor for more stability. I also used 1x 2s to frame the inside at the top of each unit for more support and to help in keeping the box square. This may not have been necessary, but I just wanted to make sure it would be sturdy. The main change to the original plan was to add 1" x 3" routed trim to the outside top of each box having it extend 3/4" above the sides. This created a pocket that allowed the next floor to nestle in place and protect it from sliding off in case any little ones decided to climb on it. I also made a 2 car (30" x 30" x 24") detached garage for the AG vehicles. I did fill the holes, plugs, and errors with wood putty, sand numerous times, prime and paint. It was a real help to add some of the paint to the primer because plywood really soaks it up. I think this kept us from having to paint a 3rd coat. The floor was painted a med dark brown, but wiped with the grain before it dried to give a wood grain look.

I finished it in time for the birthday party even though it took 3 vehicles to transport it to the destination. It was a joy to see their faces when it was unveiled and to watch them climb on it of course.

Estimated Cost
$200 (+/-)
Estimated Time Investment
Week Long Project (20 Hours or More)
Finish Used
PPG Acri-Shield (Exterior Semi-Gloss 100% Acrylic Paint and Primer in one.
Recommended Skill Level
Beginner

Balin Console Table

My husband built this in his spare time and I stained it, makes a great addition to my foyer!


Built from Plan(s)
Estimated Cost
About $150
Estimated Time Investment
Week Long Project (20 Hours or More)
Finish Used
General Finishes Java, applied wood conditioner 15 minutes before staining. One coat of stain on table top and 3 on bottom. This gel stain really does a better job on pine than other stains.
Recommended Skill Level
Beginner

Comments

Outdoor To Indoor Wine Caddy

Submitted by calcowoods on Tue, 12/29/2020 - 08:30

Built a number of wine caddies with/without the stake. Stake useful for an outdoor environment, yet not useful for an indoor table top setting. Provided a simple alteration by inserting a t-nut into the bottom of the caddy & a hanger bolt screwed into top of stake. Simply screw in stake as needed.

Estimated Cost
$4
Estimated Time Investment
Afternoon Project (3-6 Hours)
Finish Used
Minwax Cherry and Minwax Satin Polyurethane
Recommended Skill Level
Beginner

Tapered Crate

Submitted by dmcarwin on Sat, 02/16/2013 - 08:06

I was so excited when I saw the plan for this! I love making crates out of wood. It was quick and easy and I already had a cedar fence post! It was less than 30 minutes start to finish! For more pictures check out my blog post. Thanks Ana!

Estimated Cost
Free!
Estimated Time Investment
An Hour or Two (0-2 Hours)
Finish Used
It was naturally finished for me!
Recommended Skill Level
Starter Project

Comments

sarahwilley2

Sat, 02/16/2013 - 10:45

Great job! This looks awesome. I can't wait to make some of these babies!

DIY Greenhouse

Submitted by aww92 on Mon, 05/31/2021 - 17:42

i followed the instructions for the DIY Greenhouse and even though there are a few warts and freckles neither the wife nor the flowers are complaining

Built from Plan(s)
Estimated Cost
$1200.00
Estimated Time Investment
Week Long Project (20 Hours or More)

Comments

2 x 4 Garage Shelves Built into Basement Storage!

Hello Everyone! This is my FIRST brag post here on Ana-White.com - but not the first project that we've built from her awesome plans. :) 

We have an unfinished basement that desperately needed some shelving because 1. It's our workshop in the Winter and 2. We don't have an official 'storage' room in the basement of our split level home. When I saw these plans I immediately thought they could be modified to fit our space and get my stuff off the floor! 

I modified the plans just enough to fit our space. After reading through them completely, I realized for an 8 ft wide space (beside the stairs) I only needed three supports for the shelves. Easy! The only trick was fitting the shelf into the space AFTER installing the shelves. Because I had walls on two sides (unlike the tutorial) I couldn't do the shelves as the last step. 

I LOVE how these turned out! They are a strong as a ladder (we tested them... :)) and they hold everything I need them to, and a little bit more. It's a definite improvement on my previously messy, cluttered, saw-dust covered space ... :) 

Estimated Cost
Our space was 8ft tall by 8ft wide, so we ended up purchasing about $60 worth of 2x4s to complete the project. We also used 2.5" screws, which are around $4 per box of 75.
Estimated Time Investment
Afternoon Project (3-6 Hours)
Finish Used
None - we left the wood bare and natural because it's just for storage - not for looks. :)
Recommended Skill Level
Beginner

PB Inspired Queen Storage Bed

 A local South Floridian found me through Pine+Main. She needed two beds for her older kids. Client hired me to build two queen size storage beds based on the Sumatra Storage Beds from Pottery Barn. These beds took over eight weeks to build. My first time making drawers boy was that a challenge. I installed full extension drawer glides to access all the content in the drawers. Bed comes together in 3 pieces. It is stained Varathane's Dark Walnut. And the top coat is the Rust-Oleum Triple Thick Polyurethane in a matte finish. Built with Purebond plywood. These beds are super heavy and super strong.  

Estimated Cost
$900
Estimated Time Investment
Week Long Project (20 Hours or More)
Finish Used
Varathane Dark Walnut and Rust-oleum Triple Thick Poly
Recommended Skill Level
Intermediate

Rolling Kitchen Cart

Submitted by Anonymous (not verified) on Fri, 08/13/2021 - 16:17

Lots of fun but, make sure the base frame is fully square. This is such a joy to look at in the kitchen and we're already looking forward to using the additional space come the holidays and the extra cooking and baking planned.

Estimated Cost
$70
Estimated Time Investment
Weekend Project (10-20 Hours)
Finish Used
Additional counter and storage space in the kitchen. The drop down top opens up to give a large working surface. The shelves and wheels make it easy for rolling between rooms for clearing the table after a large meal without making multiple trips. We used a cherry gel stain.
Recommended Skill Level
Intermediate

Comments

Triangular Rabbit Hutch

Submitted by Medeek on Fri, 05/03/2013 - 18:14

This is a rabbit hutch I created for my kids 5 rabbits. The thing that makes this hutch really nice is if you have a large lawn you can just move the hutch a little bit every day and the lawn gets mowed, fertilized and you don't have to worry about cleaning up all the rabbit droppings. I also mounted a rabbit feeder on the inside of the house door to keep the food dry, which has worked really well.

Here is a short blog of all the steps in its construction:
http://design.medeek.com/gallery/RH3080_COPALIS_2013/RH3080_COPALIS_201…

Estimated Cost
150
Estimated Time Investment
Day Project (6-9 Hours)
Finish Used
Exterior Paint brush or spray. Choose your color.
Recommended Skill Level
Beginner

Comments

Medeek

Sun, 05/05/2013 - 01:52

I apologize I haven't got the completed planset up for this project yet but I will try to get it up in the next couple of weeks as well as a very complete materials list. You will need to go to a farm/feed store to get the correct 1"x2" wire and 1/2"x1" wire for the floor. Do not go to Home Depot and use the cow wire they have or the hardware cloth for the floor, neither of which are the correct choice. Home Depot has the lumber but not the wire. If you have any questions or even improvements to my design I would be interested in hearing from you.

Medeek

Sun, 09/13/2015 - 19:18

Finally got around to uploading the plans.  I still need to create a material list for this plan but the basics are there now.   We've had rabbits in it for about a year but recently we've tried some guinea pigs and it works great for that as well.  The guinea pigs can pretty much live off just the grass and dandelions but you do need to move it daily to give them plenty to eat.

1st time project!

Submitted by The_big_al on Wed, 06/24/2015 - 19:10

This was a pretty easy build. This was my first project and this looked like a pretty straightforward plan. I read over it several times before deciding what to do. I didn't like that it was held together using only screws. I anticipated that these beds will be moved several times over their lifetime and I did want to hassle with the screws stripping out the wood. Instead I used a 3/8 bolt and washer/nut set up so I could take the bed apart without worrying about stripping out the wood with screws. This necessitated drilling several large unsightly holes at the connection points. To help disguise this I trimmed it out using door casing and finished it out by staining the whole bed. The result was a classic look that will last my daughter's lifetime.

I will note that I changed a few parameters. I routed and the edges including the slats with a rounded corner edge. I used a 2x6 for the top cap of the head/footboards. With the addition of the trim work and bolt hardware, this did change the overall cost of the project. Total cost was probably close to $200. Had I stuck strictly to the plans I would have been closer to $100.

Built from Plan(s)
Estimated Cost
Because I changed a few parameters total cost was a bit higher. I think it was about $200 including hardware and stain.
Estimated Time Investment
Weekend Project (10-20 Hours)
Finish Used
The Simple Bed plans work great. They were easy to follow. They were also simple enough I could make modifications without too much issue.

To make the bed I made, I made two headboards (in anticipation of making a bunk bed). Instead of using screws to hold the bed together I used a 3/8 4" bolt and nut combo. 4 bolts to hold the 4x4 posts to the head/footboard and 8 (2 on each end) to hold the side rails. I countersunk the bolts into the posts to hide the bolt head. I drilled 1 1/2 inch holes on the inside of the side rails and headboards to access the bolts and attache a washer and nut. Once tightened,the bolts holding the posts to the headboard will never have to come apart. Only the bolts for the rails have to be left accessible to take the bed apart for moving. However I was then left with huge unsightly holes in the outsides of the side rails and the insides of the head/footboards. I was going to leave it thinking it wouldn't look that bad but after assembling the bed I realized how unfinished it would look. That is when I decided to add the trim work which not only really made the bed look finished it hid all holes I had to drill. I did leave the holes in the backs of the posts uncovered since access to them is needed for assembly and dis-assembly.

Dimensions for the holes were calculated based on using the 1x6's in the headboard and the 2x6's in the side rails. If you want exact dimensions I can give you those. Just email me, however it was simple enough to figure out where to place them. The trickiest part is getting the holes drilled in the posts to line up with the headboards and rails.
Recommended Skill Level
Intermediate

Changing Table

My wife liked the PB Larking High/Low table, but I didn't like the price. Took about 3 weeks of evenings and weekends.

Used 3/4" MDF Panels for sides, bottom, and top
used 3/4" select Pine for face frame
used 3/4" smooth plywood for drawer faces.
cut additional pine strips at 15/16" and then routed one edge for trim work around drawer face.
same process for right side door, but added 1 1/2" pine to trim along sides and bottom
Attached 2x4's to bottom of table and then covered with MDF panel for skirt.
Skirt is an 1/8" raised from floor to give space for carpet and not cause stress on skirt
used a jig saw on front of skirt for cutout
used decorative molding for under the table top lip, you'll need to figure out your overhang for whatever molding you use.
Used MDF for the changing pad holder. about 3 inches tall and then cut to dimensions of pad.
Topper on the right is just a miniature of the full table, from a contraction perspective.

My dimensions are slightly customized from the below.

Changing Table
Overall: 55" wide x 21" deep x 44" high
Dresser Cabinet: 15" wide x 19" deep x 23" high
Dresser Drawer (3): 31" wide x 18" deep x 7" high
Small Top Drawer (1): 11.5" wide x 15" deep x 5" high

Topper
Overall: 34" wide x 17.5" deep x 3" high
Topper drawer inside small cabinet: 16.5" wide x 11.5" deep x 5" high

Estimated Time Investment
Week Long Project (20 Hours or More)
Finish Used
sprayed Sherwin Williams Extra White Pro Classic.
Recommended Skill Level
Starter Project

Comments

bluesboy5

Tue, 07/09/2013 - 20:15

if you have a plan or at least dimensions and material list for this project, i believe many people including myself would love to try this one. My wife is due in Oct and would love me to build this for out nursery.

Thanks and great job

numba1vennda

Fri, 07/12/2013 - 14:40

Glad she likes it. I have a ton of pics, but only able to post a few here. I tried to add some more detail on my post as well. Basically I looked at the Pottery Barn Kids Larkin High/low Table. When to the store and took some pics, then sat down, drew it out and started building it. I wish I would have done the skirt out of a solid piece of wood instead of MDF, because I'm pretty sure it's gonna get banged around and not hold up as well.

Babylove

Mon, 09/16/2013 - 15:57

OMG! Amazing! I've been looking at this changing table the last 2 months at pottery barn but so expensive.

Would you be kind enough and email me the plan? My husband said if I can get the plan for him he will make it for me!

Thank you! ❤

theblade88

Mon, 01/20/2014 - 08:25

Awesome job!!! My wife is in love with this changing table and we just found out PBkids is discontinuing this line of furniture. She's due in August so this may be a good project for me between now and then. If you have plans or more pics I'd absolutely love it if you'd share them

Thanks

rdsport

Thu, 01/30/2014 - 21:26

If possible please email me the plans for your version of the Larkin PB hi low dressing table. My wife loves it but I don't want to spend that much money. Any help you can provide will be appreciated. Thanks!!

Outdoor Patio Deck Chairs

Submitted by nlindauer on Tue, 05/24/2011 - 06:42

Made these chairs from plans found on the Kerig Jig website. I added the cup holders for convenience and lowered the seats by 2 inches to account for our short legs. Chairs were stained with an outdoor fence treatment that was tinted with a light grey color.

Estimated Time Investment
Day Project (6-9 Hours)
Finish Used
Olympic Maximum Solid - Grey Base
Recommended Skill Level
Beginner

American Girl Dollhouse with Farmhouse Bed, Bunk Bed, and Furniture

Submitted by Anonymous (not verified) on Tue, 01/08/2019 - 08:46

I've been building Ana White American Girl doll furniture for my two daughters for the last three years, culminating with my biggest build of all - a modified version of Ana's dollhouse.

My wife kept telling me it would end up being huge, and she was right.  The great news is that it doubles as storage when the girls aren't playing!  2 Bedrooms, kitchen, living room, bathroom, and upstairs bonus room for dance and gymnastics.  78" tall x 76" wide, mounted to the wall studs for safety.   Lots of joy in our home on Christmas day.  Thanks Ana!

Estimated Cost
$300
Estimated Time Investment
Week Long Project (20 Hours or More)
Recommended Skill Level
Intermediate

Comments

Double laudry table

I combined the features I liked from both of these. I was able to snag some wood table tops at auction ($5.00 ea) that I painted to look like stone.

Comments

Fire Pit Bench

Submitted by docfin02 on Mon, 02/15/2016 - 09:18

Modified the plans slightly to make a bigger bench, especially on one end. Added rope lights underneath for a cool effect.

Estimated Cost
$225, including rope lighting underneath and having to buy screws and glue
Estimated Time Investment
Weekend Project (10-20 Hours)
Recommended Skill Level
Intermediate

Comments